
 Digital photography for you may be an opportunity to take plenty of pictures of the people in your life: individuals and groups—family members, friends, neighbors, co-workers, etc. In many cases, these are candid photos or snapshots that are usually spontaneous, catching people “in the moment,” at family gatherings, parties and other events. The spontaneity of snapshots means that you, as the photographer, must have control of your digital camera’s readiness to shoot, with the correct exposure, focus and possible flash pre-set; but you probably don’t have much control of how your subject looks, where he or she is standing, angle to the camera, etc.
You can also photograph those same people in a “formal” portrait form, revealing their personalities and character differently than snapshots. A candid digital photo, or snapshot, captures people as they are, while a portrait is a planned photography session.
- First, you have control of the composition: indoors or outdoors, subject sitting or standing, background, surroundings, secondary objects, color or black and white, focal length, depth of field, angles, exposure bracketing, etc.
- Second, you and the subject have control of how he or she is dressed, hair, jewelry, make-up, etc.
- Third, and maybe most importantly, you have control of the light. You take the best digital photos, including portraits, when you compose with light.
This two-part PhotographyTalk.com article presents a number of tips that will begin to teach you how to compose portrait photos with light—and make your subjects very happy they sat for you.
Light is just as much an essential element of your digital photography as it is for professional photographers, videographers, filmmakers and TV directors. Most of them successfully compose with light because they understand how light strikes a person in the frame and affects our view of him or her.
Think like a photographer and look for the sources of light and their directions whenever you walk into a room. If someone is sitting reading at a window or with a lamp to one side, then take a moment to study how the light falls on the person’s face, revealing some features and hiding others. Although sunlight may seem to come from all directions, you can also manipulate it to create beautiful outdoor portraits. Again, you want to spend some time observing how the sunlight changes during the day. Do the same at night with streetlights, building lights, vehicular lights, the moon, etc.
If you are paying attention, then you should notice that there are three basic angles from which a light source can strike a subject or object.
1. From the front: Virtually all of your candid digital photos or snapshots are taken with the light source on your camera. The light is directed at the subject, illuminating the front of their bodies and faces and a certain amount of space in from of them. This creates shadows behind your subject because he or she blocks the light.
If you look closely at your photos lit from the front, then you should notice that your subject’s face and all its features appear to be flat. The frontal light source has struck the subject’s face evenly, so there are no shadows, which would give the picture more of a three-dimensional look. The results of a single, frontal light source can also be unflattering to your subject.
2. From the side: This is the light you should have observed when studying a person reading beside a lamp. The angled light now gives facial features that three-dimensional look because shadows are created and you can distinguish the contrast of those shadows compared to the highlights. Suddenly, the subject appears to be more alive, with more personality. Moving the light to the side eliminates that flat effect, and is often more flattering to your subject.
Do some more observing of side lighting or do some experimentation with a friend as your “guinea pig.” Set your camera on a tripod and frame your friend’s face, so it fills most of the viewfinder. Then, place a light source to the side of his or her face at various angles. Take some practice shots, so you can see the effect of side lighting. You’ll discover that a light 90 degrees to your subject creates the deepest shadows and often causes the opposite side of his or her face to disappear completely. As you move the light source toward the camera on an arc, you’ll find that a 45-degree angle is the best. This creates just enough contrast to light the person’s face in a pleasing manner. Outdoors, this 45-degree side lighting angle is when the sun is near the horizon. You may also want to do this experiment outdoors.
3. From the back: This is the opposite of a frontal light source. Now the light illuminates the back of your subject, which casts a shadow toward the camera. Your subject is then in partial or complete silhouette. Placed at the proper angle, a backlight will give the appearance of space between the subject and the background. This technique helps to make your subject more prominent.
Part 2 of this two-part PhotographyTalk.com article explains how to combine these three basic lighting angles to create the best-looking digital photo portraits.
Recommended Reading:
- Portrait Photographer's Handbook
- 500 Poses for Photographing Women
- 500 Poses for Photographing Men
- Posing for Portrait Photography: A Head-to-Toe Guide for Digital Photographers
- Doug Box's Guide to Posing for Portrait Photographers
- Master Lighting Guide for Portrait Photographers
- Light It, Shoot It, Retouch It: Learn Step by Step How to Go from Empty Studio to Finished Image
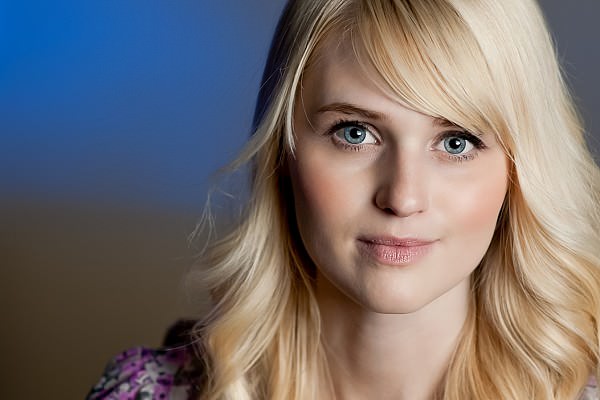
Photo by PhotographyTalk member Mark Shaiken