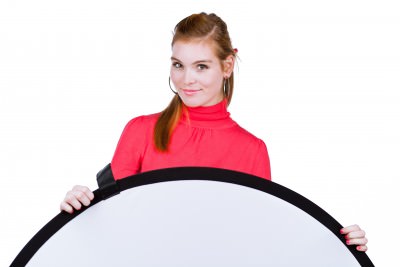
 A portable, collapsible reflector is one photography accessory that you might want to place high on your list of necessities, especially if you like to shoot outdoor portraits. Let’s say you want to create a nice, blurred background for your portrait, which requires you to set your fast lens at its widest aperture. Using a flash to fill the shadows, particularly under your subject’s chin or in their eye sockets, may be impossible because of the limited sync speed of your DSLR. A reflector allows you to bounce sunlight or any available light directly onto those shadowy areas and create a beautifully lit and balanced image…and control bokeh, or the background blur.
In addition, portable reflectors are available in various sizes and colors, so you can match the exact reflector to the type of photography you are shooting. Most of these reflectors are round, but some are oval, square, a square with rounded corners and triangular with rounded corners.
- A large, rectangular reflector, 48” x 72”, for example, is ideal for reflecting light for a full-body portrait.
-
A round, 12” reflector allows you to reflect light onto a narrow area of a subject. It’s also very useful for macro work or product photography in the studio.
-
Lastolite makes a triangular-shaped, 30” reflector with a handgrip at one of the three corners, which makes it easy to use if you have no assistant or light stand.
Not only are reflectors available in many shapes and sizes, but also many surface colors and fabrics, which create different effects in your photos.
- White – This is the most common surface, as it reflects the ambient light to produce a soft, neutral glow on your subject.
-
Silver – This is also a well-used option that has essentially the same effect as white; however, silver will hike the contrast.
-
Gold – Give your images a slight golden fill with a gold surface, enhancing indoor portraits and some products, especially jewelry.
-
Translucent – This material doesn’t reflect the light as much as it diffuses it, reducing the sharpness or power of sunlight and creating a wide area of soft light.
-
Black – Basic physics tells us that a black surface doesn’t reflect light, but absorbs it. A black “reflector” can be used to reduce color saturation, so a subject looks more natural.
-
Green or Blue – Some reflector kits include a green or blue surface, which gives you a chroma-key background, as used in TV studios. You can place the subject or object in front of the green or blue background and add a different background during post-production.
-
Neutral Panels – Photovision makes a 14” reflector with a silver surface on one side and a neutral, 3-tone panel on the reverse side. With the use of your camera’s histogram, you can set a custom white balance, precisely meter your shot and achieve spot-on exposure without shooting multiple images.
Although you can buy individual reflectors, there are many kits in various sizes with an interchangeable choice of surfaces. Many reflectors will fold to one-third of their open size and come with a carrying bag. It’s also easy to put a reflector kit near the top of your accessory wish list because many cost less than $50. Those of a smaller size are often priced less than $20.
General Guidelines for Using a Reflector
A reflector is a great tool, but to use it correctly, you must still think about what you are shooting. That starts with having a clear vision of the image you want to create, plus spending a few minutes studying the available light (if you’re outdoors). Because the light rays must travel farther when bounced from a reflector, you want to move as close to your subject as possible. For the best control, you want the help of an assistant to hold and move the reflector precisely where you need it. A tripod or light stand is your fallback option, although that means carrying additional equipment with you. You could also mount your camera to a tripod and hold and move the reflector yourself.
A reflector is used a bit differently outdoors compared to indoors. Placing the sun behind a subject is usually considered a portrait photography no-no. When you are working with a reflector, however, you want to break this “rule” and position the reflector in front of your subject, so the sunlight from behind is reflected onto the front of their body and/or face. For indoor shoots, a reflector is typically used in combination with flash units or constant light sources. The artificial light is bounced to illuminate the subject. Multiple reflectors in the studio provides you with even more lighting control.
A non-photographic use of a reflector to add your bag of tricks is to create a bit of shade for yourself and your subject during a break if you’re shooting on a hot day under direct sunlight.
People who read this PhotographyTalk.com article also liked:
Your feedback is important to thousands of PhotographyTalk.com fans and us. If this article is helpful, then please click the Like and Re-Tweet buttons at the top left of this article.
Image credit: lightpoet / 123RF Stock Photo
