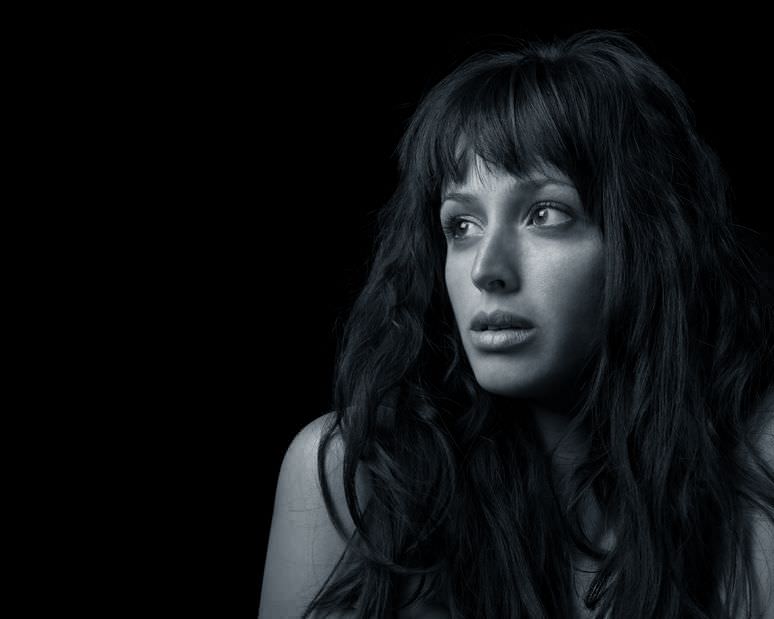
Taking portraits in a studio setup requires precise and excellent lighting. Lighting changes the form of your subject’s face. You job is to get the best lighting that compliments your subject’s features. Here are some common setups to better understand which one is the most flattering for your subject:
# 1 Play with Side Lighting
Using one light source, place your main light on the side of your subject’s face. Make sure the light is on the same level as the face. This lighting brightens one side of the subject’s face, leaving the other half shadowed. As you can see, this gives a very dramatic and low-key photo.
#2 Experiment with Butterfly Lighting
The main goal of this lighting is to create a symmetrical shadow similar to the shape of a butterfly right beneath the subject’s nose. This lighting is fondly used for glamour and beauty shots due to its flattering effect. To do this, place your main light above your subject’s face, placed on an angle facing down.
#3 Try to Achieve Rembrandt Lighting
This style mixes light with shadows, creating a triangular light, on one side of the face imitating the portrait paintings of the artist Rembrandt. To achieve this effect, place your main light on the side of your subject with a downward angle. This lighting is best accompanied with a reflector, on the other side of the subject to slightly illuminate the other side of the face.
TIP:
Knowing how to pose and giving instructions to the subject are as important as directing the light in finding the most flattering angle. Remember that you can always move your subject around instead of always adjusting your main light.
# Try out different lighting rations
Lighting ratio is the comparison between the light that falls on your subject’s face coming from the main light and from the fill light. This adds character to the photo and can very much improve a flat photo through simple adjustments. You can either measure this through your camera’s meter or a light meter.
Measuring ratios boils down to mastering your aperture and shutter speeds with a little bit of mathematics.
The aperture’s full stops are as follows: f/2.8, f/4, f/5.6, f/8, f/11, f/16 and f/22 and so on. Shutter speeds also have full stops of 1 second, ½ sec, ¼ sec, 1/8th sec, 1/15th sec, 1/30th sec, 1/60th sec, 1/125th sec, 1/500th sec, 1/1000th sec and so on.
One full stop is equal to double the quantity of light compared to the last one. So if for example you are shooting at f/2.8 and you want to shoot at f/4, then you will double the light in order to get to one stop.
1:1 Ratio
This ratio is basically means that your lighting is even on both sides of the face by using a fill light to attain the same amount of light on the other side, or a reflector. A 1:1 ratio has no shadows on the face, making it look a little flat, with no dimension whatsoever. Notice that the bridge of the subject’s nose is not defined by any shadow, making it look non-existent at a full frontal angle.
2:1 Ratio
The 2:1 ratio simply means that the light on one side of the face is twice as strong as the other side. This can be achieved by first measuring the available light with a light meter.
To make it easy to comprehend, try using natural light from a window and have your subject sit beside it. With your light meter, measure the light on the side of the face near the window. Let’s use f5.6 as an example. Now get your reflector and measure the light falling on the other side of the face. Adjust your fill light or reflector until in reaches an aperture of f4 on your meter.
To better understand this, if for example the meter initially measures the darker side at f8, it is telling you that there is not enough light and that you should use a wider opening. At f8, you will need to go two stops to get to f4 and achieve the 2:1 ratio.
4:1 Ratio
Using the same concept, a 4:1 ratio means that the light is 4 times stronger on the highlight side. Using the same measurement for consistency at f5.6 for the window side, what measurement should you be getting on your meter to get a 4:1 ratio? You should be getting a reading of f2.8.
TIP:
Practicing with natural light is the best way to master your lighting ratios. Once you are comfortable calculating the stops, you can then use the studio lights to up your game. Using a 2:1 to 4:1 ratio is ideal for portraits; as it gives a more dramatic feel to the photo, highlighting the subject’s features as well.
Helpful links: Sell your old camera gear. OR See the best way to market your images.
Article by Tabitha Fernan


