
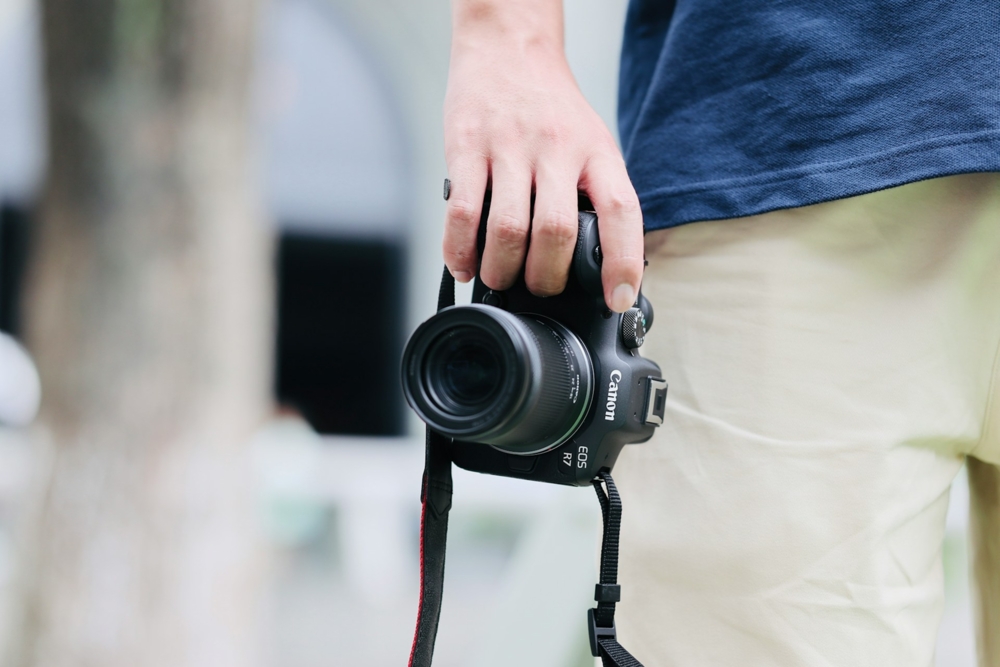
The Canon EOS R7 is one of those cameras that immediately feels capable the moment you pick it up. Canon built it for speed, clarity, and versatility, and even though it’s packed with advanced technology, beginners won’t need weeks of testing to feel comfortable behind it. With a thoughtful approach to your Canon EOS R7 setup, you can walk out the door on day one and start capturing images you’re truly proud of.
What makes the R7 especially appealing for new photographers is its balance of performance and portability. The 32.5MP APS-C sensor delivers crisp detail, the Dual Pixel CMOS AF II system locks onto subjects with surprising intelligence, and the DIGIC X processor keeps everything fast and responsive. Whether you’re shooting pets racing around the backyard or learning your way around landscapes, this camera gives you room to grow without overwhelming you in the process.
This guide walks you through a complete Canon EOS R7 setup designed specifically for your first day shooting. Think of it as a friendly companion—one that explains what matters, skips the fluff, and helps you experience what the camera can really do right away. By the end, you’ll have a camera that feels familiar in your hands and a workflow that encourages confidence every time you press the shutter.
Table of Contents
- Canon EOS R7 Setup: Essential Photo Settings for Day One
- Canon EOS R7 Setup: Getting Ready for 4K Video
- Using the EVF and Touchscreen Effectively
- Saving and Organizing Your Files
- Connectivity Setup for Sharing and Remote Shooting
- Helpful Accessories for Your First Day
- Why the Canon EOS R7 Offers Exceptional Value, Especially When Buying Used<
- Getting Confident Behind the Camera
- FAQ
What Makes the Canon EOS R7 Ideal for Beginners?
As Tech Through The Lens discusses in the video above, the Canon EOS R7 manages to pack high-end features into a body that remains unintimidating to new shooters. At the heart of the camera is a 32.5MP APS-C sensor that balances resolution and low-light capability remarkably well. When paired with the DIGIC X processor—borrowed from Canon’s professional R3—you immediately feel the responsiveness in every menu action and shutter press.
One of the biggest strengths for beginners is how much the camera helps you without making decisions for you. Dual Pixel CMOS AF II is a prime example. It picks up subjects the moment they enter the frame, tracks eyes, detects animals, and follows fast-moving action in a way that makes photography feel fun rather than frustrating. You don’t have to fight the camera; it works with you.
Another reason the R7 shines for newcomers is its overall handling. It’s lightweight but doesn’t feel toy-like. It’s fast but not overly complicated. Canon’s menu system remains one of the most intuitive in the industry, and the vari-angle touchscreen makes the learning curve even gentler. Whether you’re transitioning from a smartphone or your first DSLR, your Canon EOS R7 setup will feel familiar faster than you expect.
Canon EOS R7 Setup: Unboxing and Basic Setup
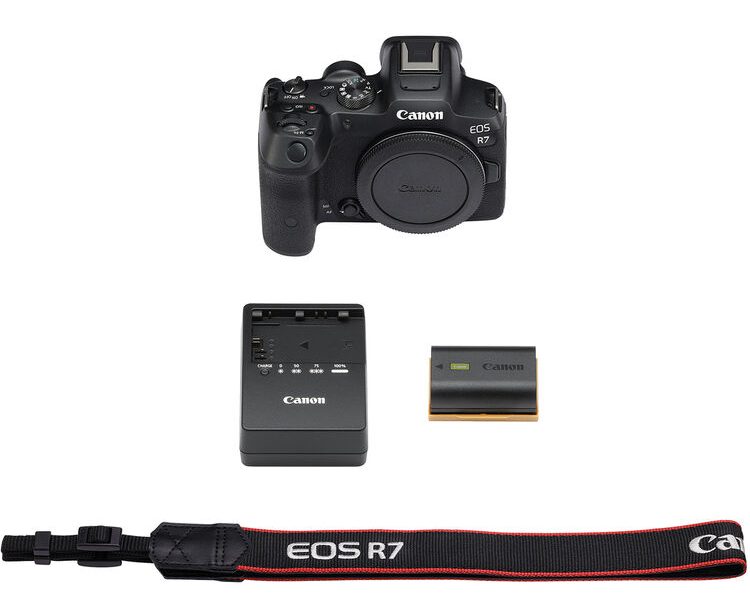
Your Canon EOS R7 setup begins the moment you open the box. Inside, you’ll find the camera body, LP-E6NH battery, battery charger, camera strap, and documentation. If this is your first mirrorless camera, take a moment to handle the body before attaching anything—it gives you a sense of the grip and control layout.
Start by inserting a fully charged battery and a UHS-II SD card. The R7’s 4K recording and 30 fps burst capabilities benefit from high-speed cards, and investing in a good one prevents buffering issues. Attach your lens—whether it’s the RF-S 18-150mm kit or something faster—by aligning the white dots and twisting until it clicks.
Power on the camera and set your date, time, and language. Before continuing, check for firmware updates in the menu under the wrench icon. Canon occasionally releases improvements for autofocus, lens compatibility, and stability. Installing firmware now ensures the rest of your Canon EOS R7 setup starts on the best possible foundation.
Canon EOS R7 Setup: Understanding the Essential Controls
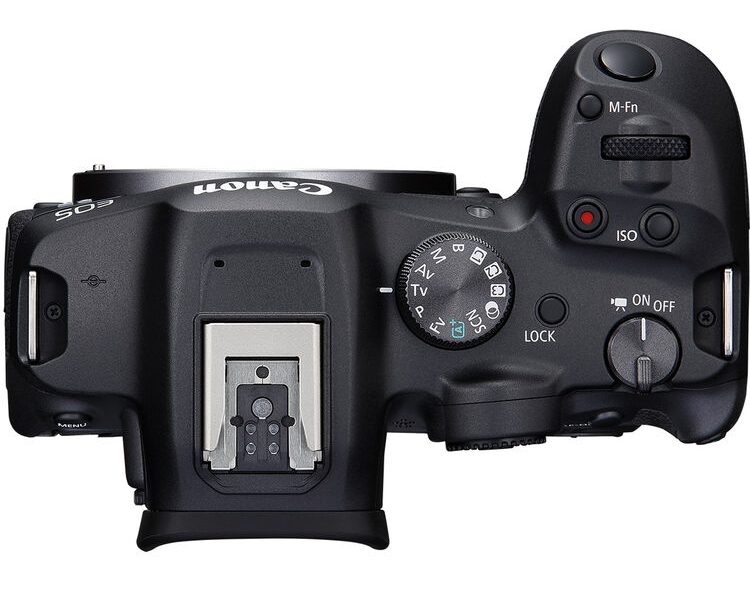
The Canon EOS R7 introduces a redesigned control layout that blends familiarity with efficiency. One of the standout touches is the combined rear control wheel and AF joystick. It places two heavily used functions—changing settings and moving focus points—right under your thumb. There’s no guessing; the camera feels like it was designed around how your hands actually move while shooting.
The top dials control shutter speed and aperture depending on your shooting mode. The M-Fn button near the shutter allows quick access to ISO, drive modes, white balance, and more. If you’re coming from a DSLR, you’ll feel right at home with this button—it serves the same customizable purpose.
Spend a few minutes clicking through the Menu and Q (Quick Menu) button. These become your navigation anchors during your Canon EOS R7 setup. The Q Menu is particularly useful because it displays core settings in one place without diving into deeper menu pages. It’s the fastest way to get comfortable with exposure adjustments and image controls.
Canon EOS R7 Setup: Setting Up Autofocus for Success
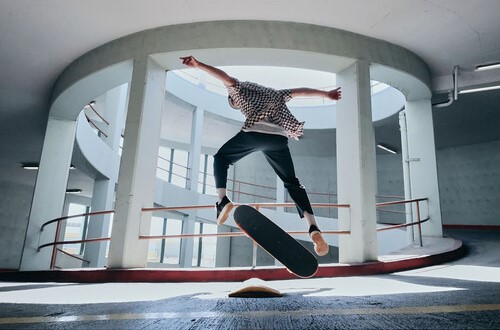
The autofocus system is where the R7 truly shows its power. Dual Pixel CMOS AF II features 651 autofocus zones that cover almost the entire sensor. It recognizes eyes, faces, animals, and vehicles automatically, making your Canon EOS R7 setup for AF surprisingly easy.
Start by setting AF Operation to Servo. This tells the camera to continuously track moving subjects, which is helpful for almost every type of shooting—kids running around, dogs sprinting in the yard, or sports action. Next, set your AF Area to Whole Area Tracking. This allows the camera to decide the best points to use and follow your subject across the frame.
Enable Eye Detection to ensure accurate portraits. Subject tracking works extremely well on the R7, even in dim light thanks to its -5 EV focusing capability. Once active, the camera takes over the task of keeping your subject sharp, freeing you to concentrate on composition. This is the part of your Canon EOS R7 setup that you’ll appreciate most as you shoot more often.
Canon EOS R7 Setup: Turning On Image Stabilization Benefits
The R7’s In-Body Image Stabilization (IBIS) is one of the more impressive features in the APS-C world. Capable of providing up to seven stops of shake correction on its own—and up to eight stops when paired with certain RF lenses—it dramatically expands what you can do handheld. Whether you’re shooting indoors or outside at dusk, IBIS helps keep images sharp without relying on a tripod.
In your Canon EOS R7 setup, make sure stabilization is turned on in the menu. It works automatically in both stills and video, and you’ll feel the difference immediately. Try shooting a handheld image at 1/10 second—you’ll be surprised at how usable the result is compared to cameras without stabilization.
IBIS also works wonders for video. Walking shots feel smoother, handheld panning is more controlled, and micro-jitters are reduced. Pair that with lens IS and optional digital stabilization, and you get footage that looks more polished right out of the camera.
Canon EOS R7 Setup: Essential Photo Settings for Day One
For your first outing, stick to Aperture Priority (Av) or Shutter Priority (Tv). These modes give you creative control while letting the camera handle exposure. Aperture Priority is ideal for portraits and general scenes, letting you adjust how much of your image stays in focus. Shutter Priority is better for action or wildlife, where freezing motion matters.
If you’re photographing people outdoors, start with f/4, Auto ISO, and a shutter speed around 1/250s. For sports and wildlife, push your shutter speed to 1/1000s or higher. Landscapes benefit from f/8 to f/11 with ISO 100 for maximum detail.
One thing you’ll quickly appreciate in your Canon EOS R7 setup is the 30 fps electronic shutter. It’s lightning fast and great for capturing decisive moments. For scenes with fast horizontal motion, however, consider the 15 fps mechanical shutter to avoid rolling shutter distortion.
Canon EOS R7 Setup: Getting Ready for 4K Video
The R7 is a powerful video tool, and your Canon EOS R7 setup should take advantage of its capabilities. It records 4K60 using the full sensor width and offers oversampled 4K30 using a 7K capture area. This oversampled mode produces exceptionally crisp footage with reduced noise and moiré. Beginners can start with 4K30 to get the best image quality without dealing with overly large file sizes.
Turn on IBIS and, if available, lens IS. For smoother motion, you can also enable digital stabilization, though it applies a slight crop. The vari-angle screen makes filming yourself simple, and the camera’s mic and headphone ports give you proper audio control. If you’re planning to vlog, consider connecting an external microphone to boost sound quality.
Full HD 120p is available for slow-motion clips. It’s a fun tool for creative shots—think falling water, fast-moving pets, or action sequences. With unlimited recording times, the R7 lets you film without worrying about arbitrary limits.
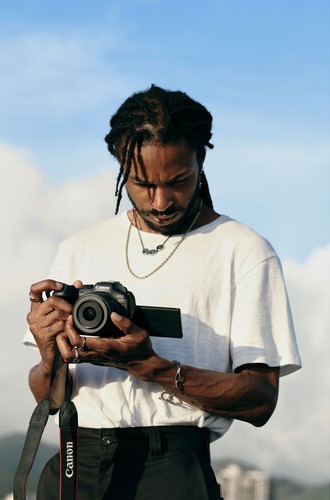
Using the EVF and Touchscreen Effectively
The electronic viewfinder on the R7 is bright, clear, and features a 120 fps refresh option that makes motion appear lifelike. For beginners, using the EVF helps tremendously with exposure because it shows a real-time preview of how your settings will affect the final image. It removes the guesswork that’s often associated with early shooting attempts.
The touchscreen adds convenience that can speed up your Canon EOS R7 setup. You can tap to focus, navigate menus, and swipe through photos just like on your phone. When shooting at difficult angles, the vari-angle design lets you tilt and rotate the screen to maintain control without contorting your body.
As you grow more comfortable, you’ll likely switch between the EVF and LCD depending on the situation. Both offer real advantages, and learning when to use each becomes second nature with time.
Saving and Organizing Your Files
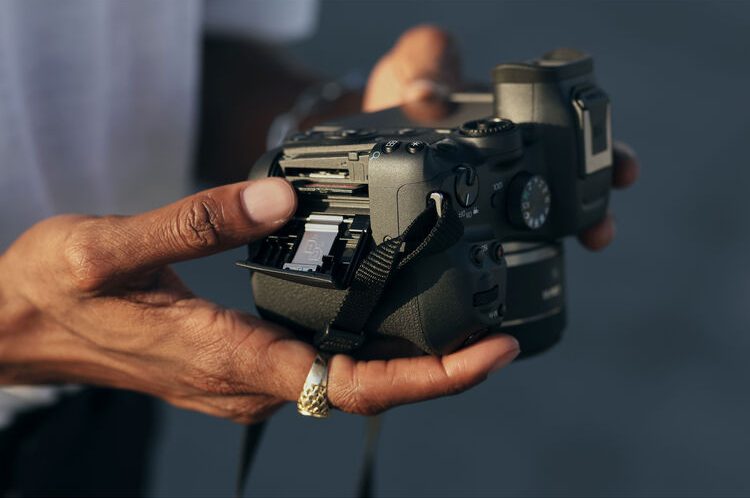
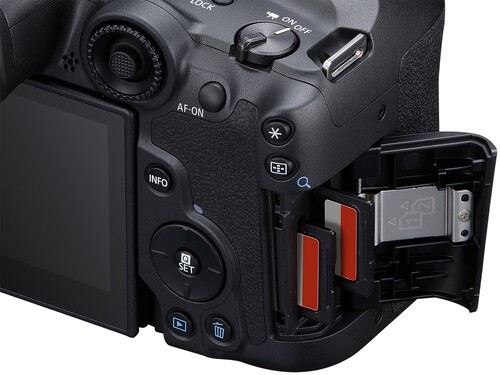
The dual SD card slots on the R7 offer impressive flexibility for managing files. During your Canon EOS R7 setup, decide how you want the camera to write images. You can save identical files to both cards for backup, split RAW and JPEG files, or assign photos to one card and video to the other. This kind of organization helps tremendously during editing.
Use consistent file naming and regularly create new folders on your cards to separate shoots. It’s a small step that avoids future headaches. After your session, transfer your files using a high-speed card reader or the camera’s USB-C port. Some beginners overlook backup procedures, but establishing a routine early makes your entire workflow smoother.
Connectivity Setup for Sharing and Remote Shooting
The R7 includes Wi-Fi and Bluetooth, making life easier if you like to copy images directly to your phone. Download the Canon Camera Connect app and pair your camera. Once connected, you can trigger the shutter remotely, transfer photos, and even adjust settings from your phone.
This is especially convenient for group photos, self-portraits, or shooting from awkward positions. If you prefer a wired workflow, the USB-C port supports fast transfers, and the micro-HDMI output gives you a clean feed for external monitors.
Helpful Accessories for Your First Day
A solid Canon EOS R7 setup includes a few simple accessories that improve your first outings. Extra LP-E6NH batteries are essential if you plan to shoot a lot of video or bursts. UHS-II SD cards ensure your camera performs at its best during high-speed shooting. A lightweight tripod can help with landscapes, long exposures, or self-filming.
The Multi-Function Shoe on the R7 allows connection to advanced accessories like the ST-E10 flash transmitter, DM-E1D digital microphone, and the AD-P1 smartphone adapter. These tools expand what the camera can do without cluttering your setup. A weather-resistant bag and microfiber cloth round out a solid beginner kit.
Why the Canon EOS R7 Offers Exceptional Value, Especially When Buying Used

The Canon EOS R7 setup offers tremendous value for beginners because it packs advanced features into a body and price point that remain approachable. You get professional-level autofocus, dependable low-light performance, and excellent image stabilization without stepping into full-frame territory or full-frame pricing. For new photographers, it hits that sweet spot where performance and affordability connect in a meaningful way.
One of the most effective ways to maximize that value is by considering a used Canon EOS R7 from a trusted retailer like MPB. Buying used often stretches your budget further without compromising quality. MPB grades every item based on condition, photographs the actual product you’ll receive, and offers a transparent, no-nonsense buying experience. For a camera like the R7—built with durability in mind—shopping used can feel almost identical to buying new, just without the new-camera premium.
MPB’s seven-day return window gives you enough time to evaluate your Canon EOS R7 setup in real shooting conditions rather than just unboxing it and hoping for the best. Their six-month warranty also adds peace of mind that general online marketplaces simply can’t match. As someone who buys and sells gear often, I’ve found that the consistency of MPB’s inspection process makes the experience stress-free. You know exactly what you’re getting, and if something isn’t quite right, they stand behind the purchase.
Another overlooked benefit is MPB’s constantly changing inventory. If the exact Canon EOS R7 kit configuration you want isn’t available today, it may be tomorrow. That rolling stock makes it easier to piece together a complete system over time—camera body, lenses, accessories—while keeping your budget intact. For beginners building their first real kit, that flexibility matters. It lets you focus more on growing your skills and less on stretching your wallet.
Getting Confident Behind the Camera

Your first day with the R7 should feel exciting rather than overwhelming. Once your Canon EOS R7 setup is complete, take the camera someplace familiar—a park, your backyard, or a favorite street. Practical experience builds confidence quickly, and the R7 rewards experimentation. Try the fast burst modes, explore 4K recording, photograph moving subjects, and adjust settings to see how they affect your images.
Because the R7 is designed to grow with you, it’s a camera that will continue to reveal new strengths as your skills develop. The more you shoot, the more you’ll appreciate the way Canon engineered this model with both beginners and advanced users in mind. Your early steps with the camera are just the beginning of a rewarding journey.
If you want to build on this guide, explore settings like custom modes, picture styles, and advanced autofocus cases. For now, though, enjoy your first day shooting with a camera built to keep up with your creativity.
FAQ
Is the Canon EOS R7 good for beginners?
Yes. It offers excellent autofocus, strong stabilization, intuitive menus, and fast performance, all of which help beginners get better results faster.
What lens should I start with on the Canon EOS R7?
The RF-S 18-150mm is a versatile all-around lens. If you prefer portraits, an affordable RF 50mm or RF 85mm is a great next step.
Do I need a UHS-II memory card?
For 4K recording and 30 fps bursts, yes. UHS-II cards ensure the camera writes files quickly without buffering delays.
Is the electronic shutter okay to use?
Yes, especially for fast bursts. For subjects with horizontal movement, use mechanical shutter to reduce distortion.
How long does the R7 battery last?
Expect 350–550 shots depending on EVF usage and settings. Video drains the battery faster, so carry extras.
Does the R7 overheat while recording?
The R7 rarely overheats. It offers unlimited recording, but very hot environments or long 4K60 sessions can raise temps.
Just so you know, some of the cool stuff we mention comes with affiliate links, meaning we earn a commission if you buy (no extra charge to you!). Plus, we occasionally feature sponsored content, but rest assured, we only shout out products we genuinely stand behind.