Day 19 Lesson: Photograph Something at Night
Images taken at night can be incredibly stunning. But night photography can also be incredibly difficult to master. The challenge for today is to take the steps you need to start taking better night shots.
We’ve already challenged you to take low-light shots, but now it’s time to go dark! Let’s explore some quick and easy night photography tips and tricks to help you make inroads toward mastering night photography.
Use a Tripod
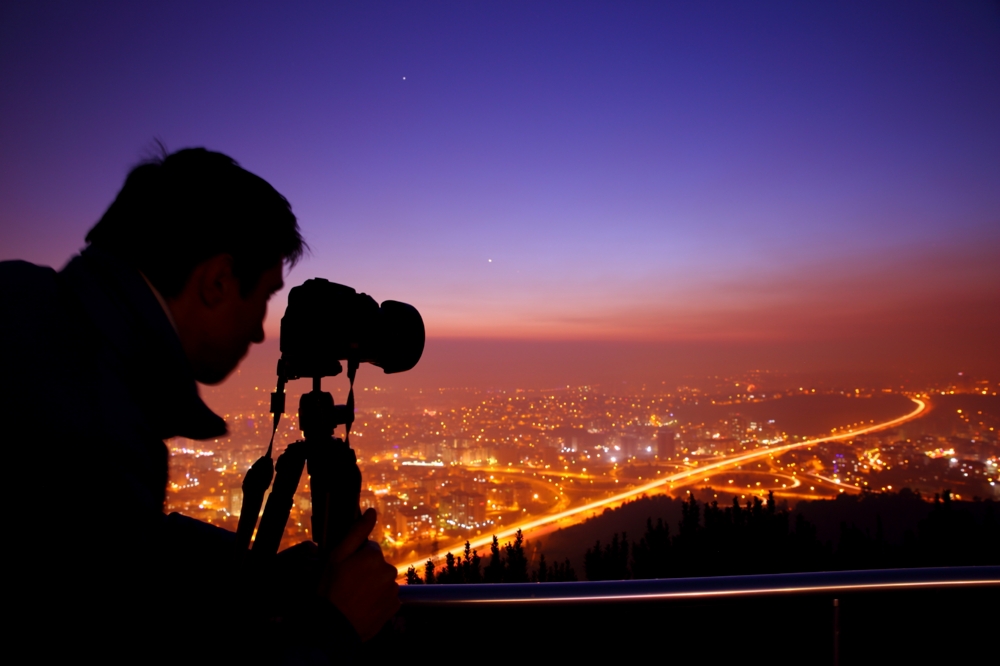
One of the easiest tricks you can use to get better night shots is to use a tripod. You will be shooting with a slow shutter speed and a wide-open aperture because of a lack of light, so the potential for severe camera shake is there if you were to hold your camera in your hand. Using a tripod (and a remote shutter release while we’re at it) will help ensure your camera is steady while the shutter is open. A tripod also allows you to keep your ISO low (because of the slow shutter speed and larger aperture), so there’s a reduced chance of noise as well. It’s a win-win!
Find the Aperture Sweet Spot

Even the most expensive professional-grade lenses don’t produce the most amazing results at their widest aperture, so you’ll need to find the sweet spot of your lens. Simply take a few test shots at various apertures and examine each image for sharpness and clarity. If, for example, f/8 gives you the sharpest image, that’s the aperture at which you need to shoot. Just make adjustments to your shutter speed (and ISO if necessary) to maintain proper exposure.
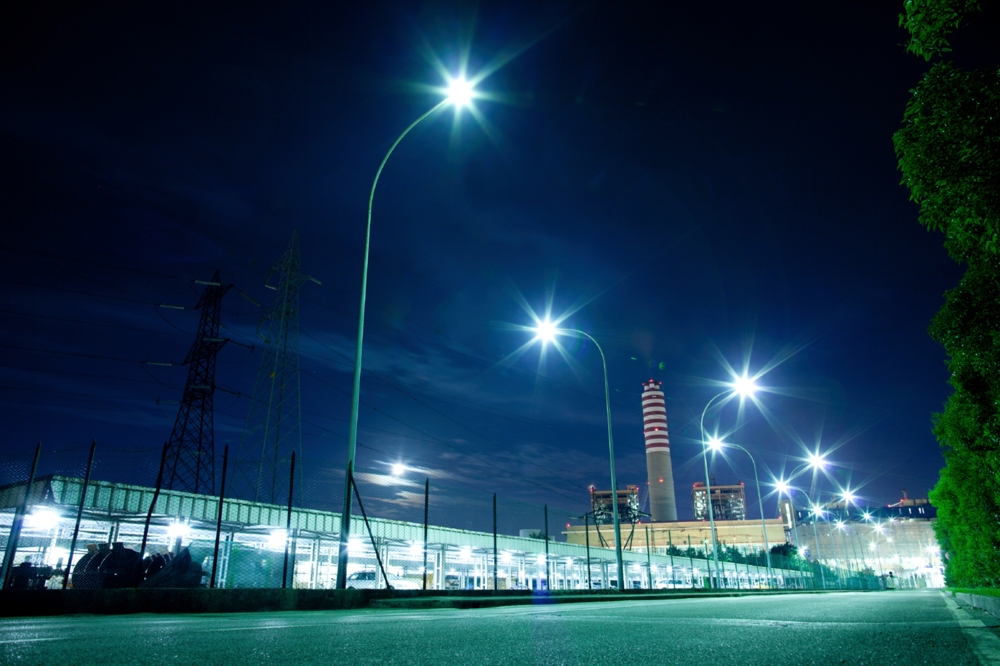
Try a Narrow Aperture
Speaking of aperture, our natural inclination is to use a wide-open aperture at night, but this isn’t necessarily required. In fact, a smaller aperture, like f/16 can be used to your benefit when shooting night shots. Remember, the smaller the aperture, the greater the depth of field and the greater the range of focus from foreground to background. A small aperture also allows you to get those fun starburst effects from streetlights, as pictured below.
 Just set your camera to manual mode, choose a smallish aperture, and adjust your shutter speed accordingly such that your exposure level meter is in the middle. If you find the image to be too bright or too dark, adjust the exposure meter one or two stops and take another image, making further adjustments until you’ve got the level of exposure that you want.
Use the Wrong White Balance on Purpose
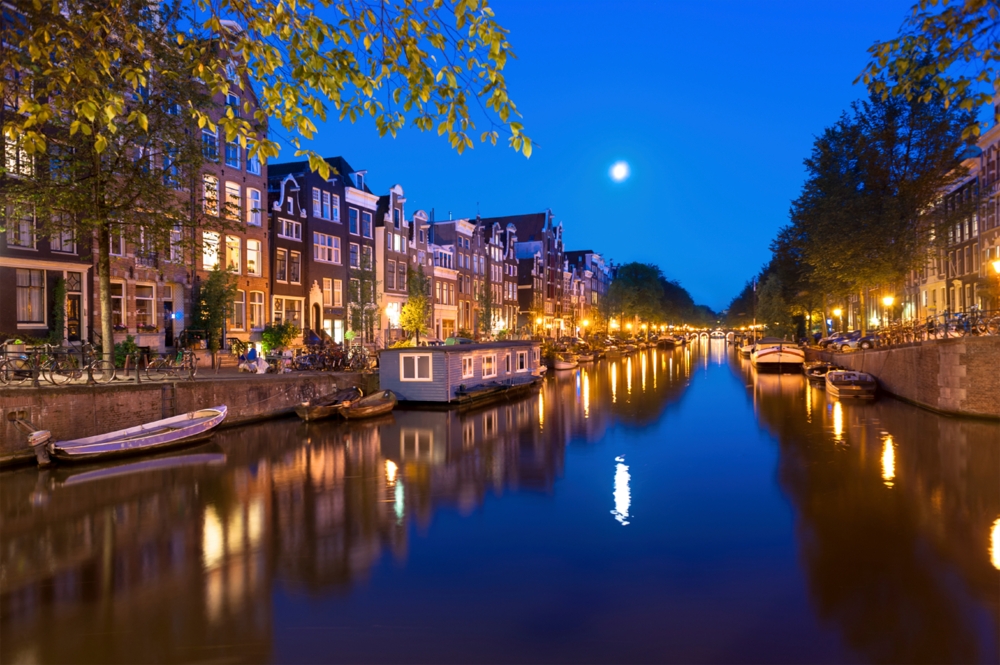
Images taken at night can tend toward the warm side because of all the artificial lights that are present. To counteract this, switch your camera to the tungsten white balance setting. This will give the image a bit of a bluish hue, giving it a cool, crisp feel. This is especially beneficial if there’s a full moon because the blue hue accentuates the mood of the moonlit shot.
Shoot for the Stars
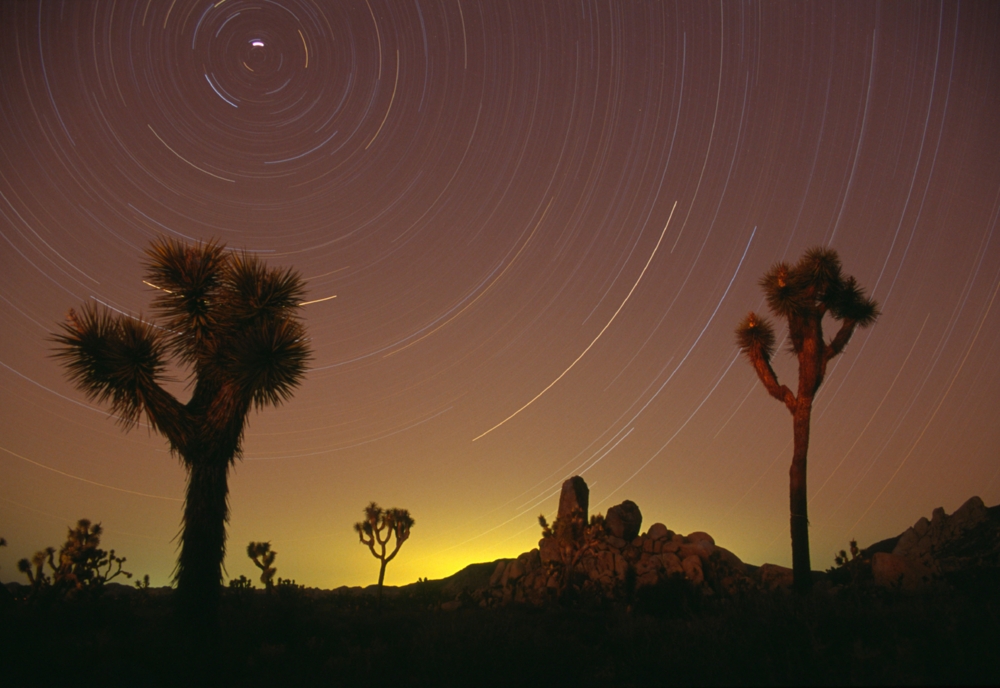
One of the most popular iterations of night photography is astrophotography. Getting those awesome star trails is relatively simple, but does require an abundance of patience!
First and foremost, you will need a tripod and a lockable shutter release for star trail shots. Exposures for these kinds of images can last into the hours, so having the right equipment is absolutely necessary!
The camera settings for astrophotography are pretty straightforward. Set your camera to manual mode and focus your lens at infinity. Keep the ISO as low as possible to reduce noise, and maximize the aperture to let as much light as possible. Also set your camera to bulb mode. These steps will help keep your exposure times to a minimum (but it will still take awhile!).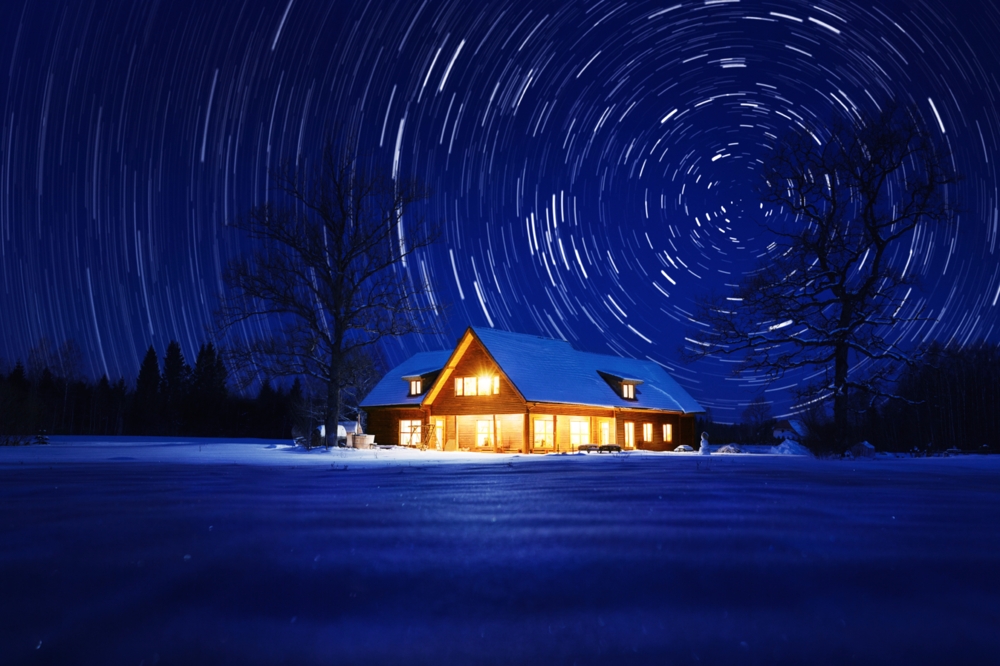
Once you’ve got your camera and tripod set up, set your remote shutter release to remain open for several minutes. There will be some trial-and-error here as you try to find the sweet spot regarding the length of exposure. Just be aware that the sweet spot might very well be 30 minutes to an hour or more to get even the smallest of star trails.
Practice and Participate!
Today’s challenge is a tough one, but with these tips and techniques you have a strong foundation on which to learn how to master night photography. Use the photos we’ve included in this article as inspiration for your night shots, and then show us just how creative you can be by adding your night photography shots to the forum for this challenge. We’re excited to see what new and interesting ideas you come up to inspire other members of the Photography Talk community!