Day 21 Lesson: Photograph a Landscape
Landscapes are by far one of the most popular genres of photography and with good reason. We live in a world filled with beauty and endless possibilities for striking photographs. This challenge is meant to get you outside and taking a measured look at your surroundings to see just what possibilities there are for your images.
We’ve put together three tips and techniques that you can utilize to improve your landscape photography, and we’ve thrown in some stunning example images for good measure too! Let’s begin!
Play With the Horizon
Where you place the horizon line of the landscape in your image will determine, to some degree, how viewers experience the photo.

For example, if you place the horizon in the bottom third of the frame, you will create a greater sense of space. A perfect candidate for a low horizon shot is a sunrise or sunset, like the one in the image above. The added height at the top of the frame also allows viewers to get the full view of the spectacular sky.
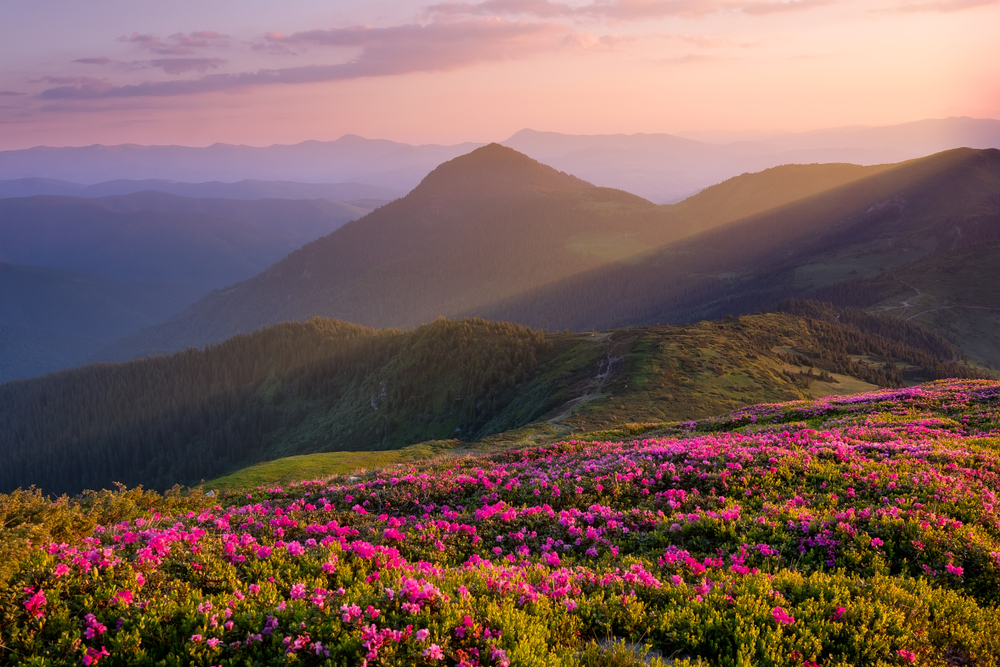
There are certain times when a high horizon is the best choice. Placing the horizon line in the top one-third of the image emphasizes depth from foreground to background. Likewise, a high-horizon composition gives you the ability to incorporate interesting foreground elements, as was done in the image above, that would otherwise be lost with a low horizon composition.
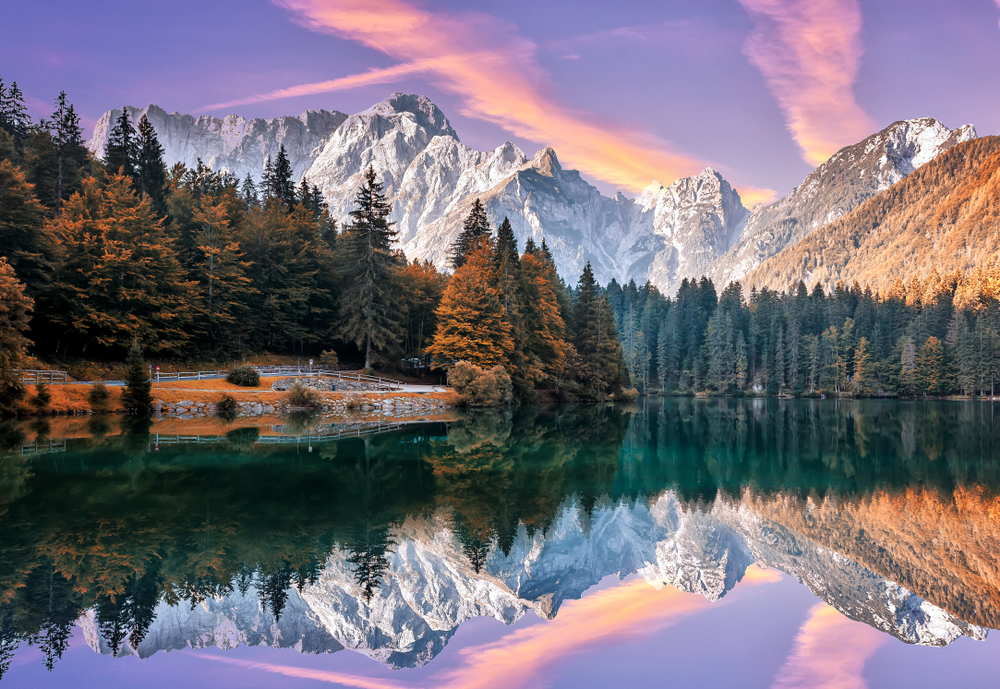
Placing the horizon line in the middle of the frame is generally not advised because it results in a relatively boring composition. However, there are times when a 50/50 horizon works very well, like when there is a reflection involved. In images like the one above, placing the horizon line in the middle of the shot lends to the symmetry of the scene.
Look for Lines and Layers
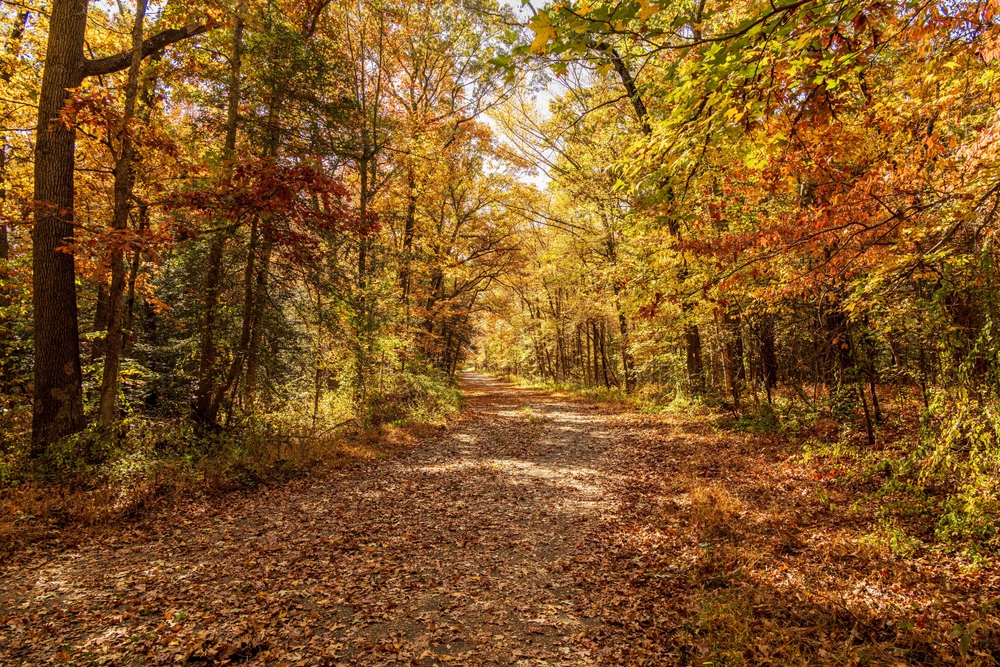
In landscape photography, there is often a strong central focal point, such as a mountain peak, that immediately catches a viewer’s eye. However, you can enhance the visual interest in a landscape image by looking for lines and layers as well.
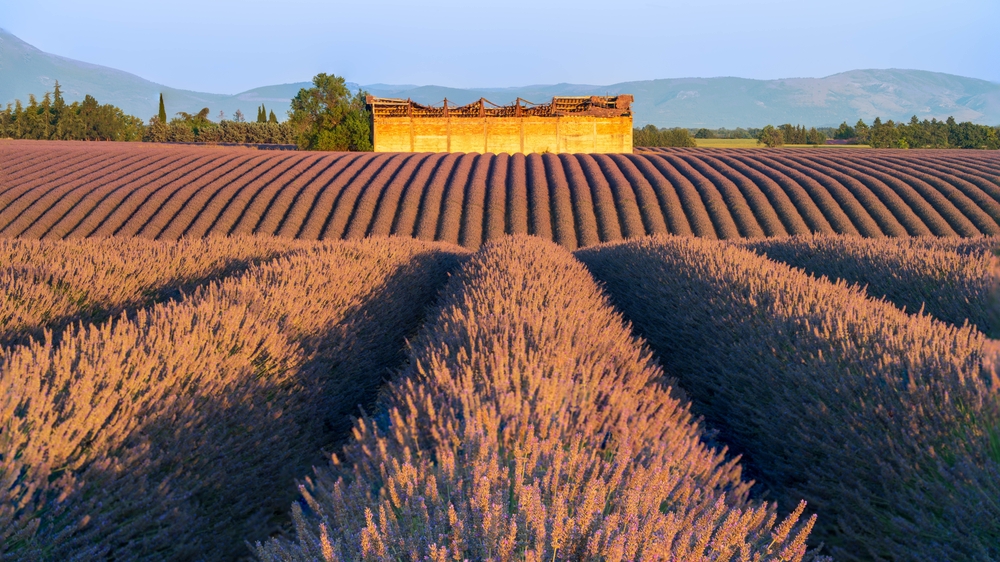
Leading lines give our eyes something to follow deeper into the frame. They may just add some interest to a shot that might otherwise lack much variation of color, texture, or depth, or, as was done in the image above, leading lines draw attention to the focal point of the shot.
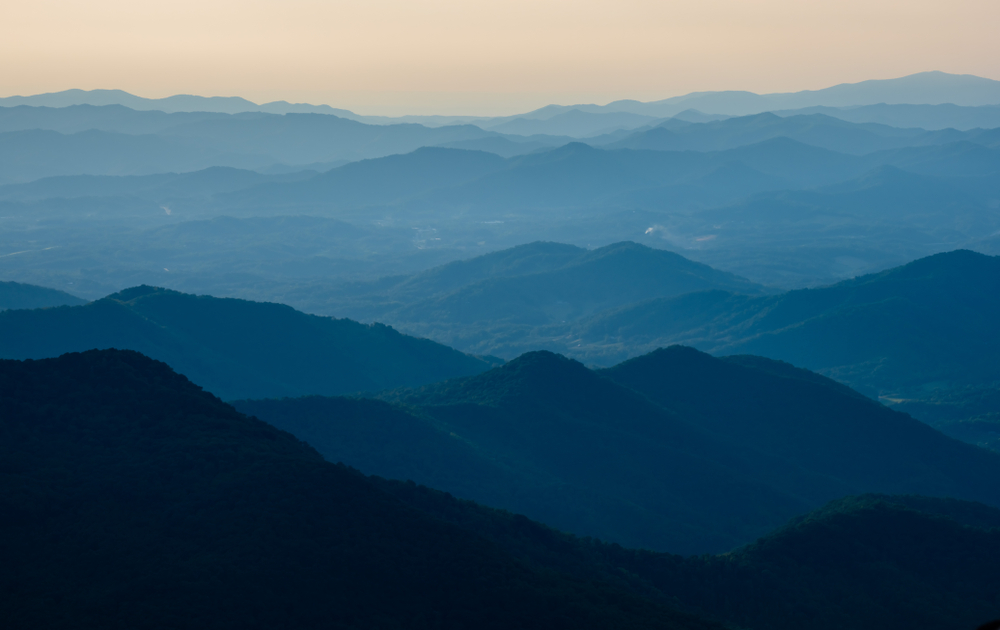
Layering is a highly effective tool for increasing visual interest in a landscape photo as well. Layers also give the eye some clues as to the depth of the scene that was captured. In looking at the image above, we can see how this concept works. The repeating levels of mountain ridges offer us a better understanding of the breadth and depth of the mountainous terrain in the image.
Explore the Right Aperture
Depth of field is extremely important for landscape work. You will want to have the sharpest image, of course, and having as much of the scene in focus as possible will require a small aperture.
However, immediately going to your camera’s smallest aperture may not yield the best results. Even high-end lenses don’t produce the sharpest results at their smallest aperture. And sometimes, the smallest aperture can actually cause a photo to appear soft, an issue that is a result of diffraction.
So, a good rule of thumb for landscape photography is to start somewhere in the middle of your camera’s aperture range. Try a shot at f/11 and see how things look. If the depth of field isn’t there, move to f/16. The point is, using apertures in the mid-range will help you avoid diffraction, which results in a sharper image. You might lose a little in terms of depth of field, but it’s worth it if the rest of the image is nice and sharp. A smaller aperture also allows you greater latitude when shooting images in lower light situations, like the one pictured above, because the larger aperture will allow in more light to prevent underexposure.
Practice and Participate!
It’s your turn to get out there and snap some images of a landscape. Remember to play around with how you place the horizon in your shot to see whether a high horizon, low horizon, or 50/50 composition is the best. Examine your surroundings to find lines that can lead viewers’ eyes deeper into the shot, or for layers of elements that will help develop a sense of depth. And don’t forget to work with your camera’s aperture to find the best balance between depth of field and sharpness of the image.
We’ve got the forum for today’s challenge up and ready, so be sure to add your landscape image! Share in the fun, build your landscape photography skills, and see what other Photography Talk members have photographed.