Day 6 Lesson: ISO Demystified

If you’re new to photography, it can be a challenge to remember all the camera settings. Even if you’ve got some experience under your belt, some of your camera settings can remain a bit mysterious, as can their function and their relationship to other settings as well.
In this lesson, we focus solely on ISO and provide examples of its use and recommended settings, so you’re sure to use it to your advantage.
ISO in a Nutshell
ISO is often mistakenly believed to be an acronym for “International Standards Organization.” In fact, this is a misconception. Instead, ISO is an acronym for nothing; it is the designation chosen by the International Organization for Standardization to refer to its organization. Quite simply, the term ISO translates well into multiple languages, whereas IOS does not. Thus, the term ISO was born.
ISO harkens back to the days of film photography. Essentially, the ISO value was used back then to communicate to photographers how sensitive the film was to light. Today, the ISO number indicates how sensitive a digital camera’s sensor is to light. Back then, as it is today, the lower the ISO number, the less sensitive the sensor is to light.
So, for example, ISO 100 indicates a very low level of sensitivity to light, and as a result, is often used in bright lighting situations, such as shooting during midday on a sunny day. As the ISO number increases, so too does the sensitivity. If shooting during dusk, an ISO of 200 or 400 might be needed to help the sensor collect enough light to retain detail in the image. If shooting at night, the ISO might need to be pushed to 1600 or higher, depending on the conditions.

This, then, is the purpose of ISO: Even in low-light conditions, it allows you to adjust your camera’s sensor so you can still get a well-exposed image. We will discuss the concept of exposure in a later lesson in much greater detail, but for now, associating ISO with your sensor’s sensitivity to light is enough.
Note as well that ISO values double each time, and with each doubling of the ISO number, the camera’s sensor sensitivity to light increases. Therefore, ISO 200 is twice as sensitive as ISO 100, where ISO 800 is twice as sensitive as ISO 400. Common ISO values range from 100-3200, although many modern cameras have ISOs that extend into the millions. However, for most landscape photography applications, staying within the typical range of 100-3200 is usually the best choice.
The ISO is part of the Exposure Triangle, along with shutter speed (time of exposure), lens aperture (f-stop, or volume of light passing through the lens), and ISO (the sensitivity of the recording medium, whether film or a digital sensor). The doubling and halving of the ISO in the previous paragraph correspond exactly to one stop of exposure value (EV). For any given scene brightness level, if you change one of the 3 corners of the Exposure Triangle, you must compensate one or both of the other two to maintain the same exposure value.
So if your exposure calculation yields the settings of ISO 100, 1/250th second, and f/11 for the exposure value you want, changing the ISO to 50 requires you to either change the shutter speed to 1/125th, or the aperture to f/8, or an incremental change of both, if you want to keep the same exposure value. Changing that original from 100 to 200 will have you changing the other settings in the opposite direction, from 1/500th to f/16. Each halving or doubling of any setting changes the Exposure Triangle by 1 full stop. You will all of this in more detail in later lessons of this course.
The Problem With ISO
The primary issue with ISO is that as its value increases, the likelihood of your images containing digital noise also increases. Digital noise appears as image distortions and often resembles grain that appeared in film images when the ISO was pushed too high. The image’s appearance is therefore altered, losing the crispness of an image shot at a lower ISO.
For example, the image above was taken at a low ISO. As you can see, the image is very clear and sharp, with no indication of distortion as a result of digital noise. Compare that image to the one below, and you can plainly see the difference: the image below has significant noise, so it is not nearly as sharp.
Think of ISO like the volume control on a stereo – the more you turn it up, the better you can hear it, but as the volume continues to rise, the sound becomes distorted. This same principle applies to noise – as the ISO is pushed higher, you’re able to capture more details of a low-light scene, but those details become more and more distorted.
The amount of noise in an image and the ISO at which it becomes a problem are also dependent on the size of the sensor in your camera. If you shoot with a mobile phone, noise will become an issue at a much lower ISO than with a DSLR or mirrorless camera. Additionally, a full-frame camera will perform better at high ISO than a DSLR because full-frame cameras have larger sensors, meaning each individual pixel is physically larger.

There is no specific amount of noise that marks the boundary into too much. In fact, it will depend on a variety of factors to determine if an image is too noisy:
- The image’s purpose must be considered. In some instances, a great deal of noise can be overlooked, such as in a nighttime sports shot. However, other images, like a macro shot of a butterfly, would suffer significantly from the same level of noise, as the shot’s detail would be diminished.
- The image’s size must be considered as well. The larger the print, the more that noise will show, so some images might look fine when printed as a 5×7, but as a 10×20 on your wall, they might look absolutely terrible.
- The photographer’s creative perspective has to be considered as well. Some photographers embrace digital noise and use it as an innovative tool to get more visually interesting images. Other photographers strongly dislike digital noise and strive to avoid it in their photographs.
Your stance on noise will evolve as you explore landscape photography in greater depth. For now, simply knowing that noise is a function of the ISO value you select will help you use it or avoid it more purposefully.
How to Use ISO in Landscape Photography
There is some difficulty in recommending the best ISO settings for landscape photography because the setting you choose will be dependent upon several factors, including:
- The time of day.
- The presence or absence of clouds that impact the brightness of the scene.
- The aperture you’re using.
- The shutter speed you’re using.
- Whether your camera is handheld or mounted to a tripod.
- The subject matter, that is, if you’re trying to maximize depth of field or trying to freeze or blur movement.
With that in mind, consider the following rules of thumb for determining a starting point for ISO:
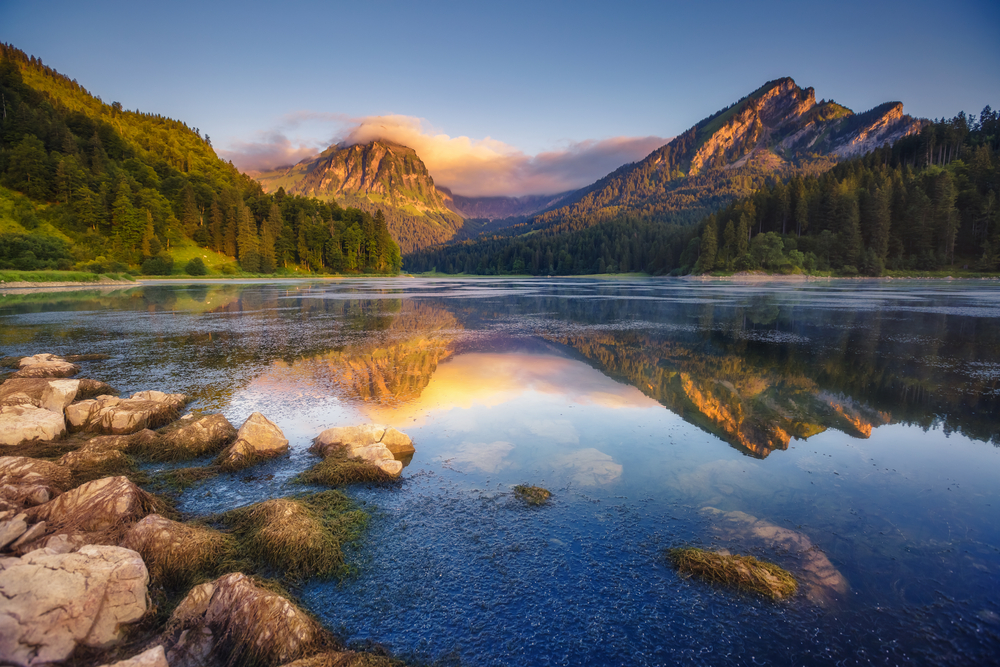
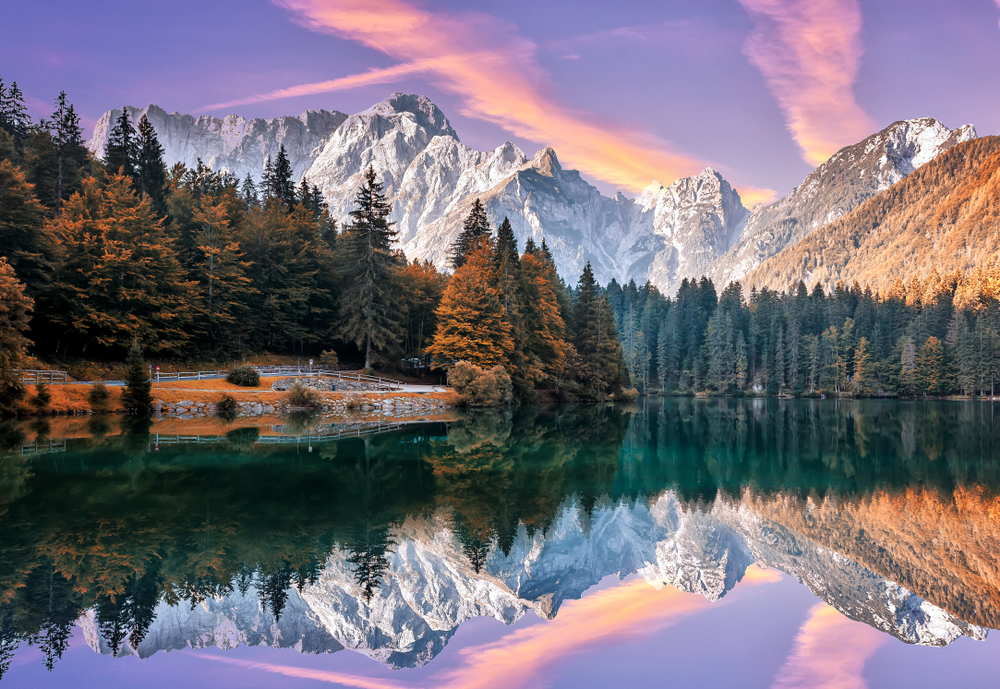
Vast Landscapes During Daytime

When photographing a vast landscape like the one above, maximizing your depth of field will be a priority. To do so, you’ll need to minimize your aperture, which means using a longer shutter speed and a higher ISO to ensure the camera can collect enough light for a well-exposed image. Since there is plenty of light available during the daytime, set your ISO to its lowest value – 100 or 200 – to minimize noise.
Golden Hour
If you’re shooting a sunrise or sunset, it is still prudent to start with your ISO at its lowest possible setting to avoid introducing noise. However, if you can’t get a well-exposed image at your desired aperture and/or shutter speed, try increasing the ISO to 200 or 400.
Freezing Movement

When freezing subject movement, such as the movement of waves in the sea, you’ll need a fast shutter speed. But because of that fast shutter speed, you will greatly limit the amount of light your sensor can collect. As a result, under normal lighting conditions, an ISO of 200 or 400 is a good place to start. But if it’s overcast or cloudy, or if you’re shooting at dawn or dusk when the available light is lessened, you might need to go even higher with your ISO.
Blurring Movement
Because a much slower shutter speed is necessary to blur movement, your camera shouldn’t have any difficulty collecting the light it needs for a well-exposed image, even at ISO 100 or 200.
Other Situations
If a large depth of field isn’t an issue, such as when taking a close-up of a flower, you will use a larger aperture, which lets in much more light and therefore lets you minimize your ISO to 100 or 200. Likewise, if you mount your camera on a tripod, you can slow the shutter speed and use ISO 100 or 200. Conversely, if you want to use digital noise in an artistic way, such as in a black-and-white landscape with a vintage feel, push the ISO to 1600 or higher to deliberately introduce noise into the image.
Final Thoughts
The appropriate use of ISO will come to you the more you practice. As you take more images, you’ll develop a feel for where to start with ISO, and it will become second nature to understand the adjustments you need to make to ISO to get a landscape image that is properly exposed and that meets your artistic vision. However, as a rule of thumb, keep the ISO low to minimize noise, but don’t be afraid to push it to improve your chances of getting low-light shots like the one above.
Coming up in PhotographyTalk’s Landscape Photography Master Course, you will learn how to use ISO in conjunction with other camera settings, namely aperture and shutter speed, to create a well-exposed landscape image.
Actionable Steps
- Become familiar with adjusting the ISO setting on your camera. Some cameras have an ISO button that, when pressed, opens a menu to change the ISO value. Other cameras make this change in different ways, so familiarizing yourself with the process is essential to your success.
- Learn your camera’s specific ISO capabilities, noting the lowest and highest ISO values it can shoot at. Remember, the higher the ISO, the more sensitive the camera’s sensor is to light, so if your camera has a very high maximum ISO, you might be able to use that to your advantage for low-light landscape shooting.
Homework
Under normal lighting conditions, such as early morning or late afternoon, take a series of shots of a landscape. The subject matter isn’t important here; what matters is learning how changes to ISO affect the images you create.
Place your camera in manual mode, set the aperture to f/16, the shutter speed to 1/250th of a second, and set the ISO to the lowest setting, usually 100 or 200. Then take a shot. Don’t worry if it isn’t well composed or well exposed.
Then, adjust your ISO to 200 and take another shot, keeping all other settings the same. Repeat the process, taking one shot at each ISO setting: 400, 800, and 1600. Then review the images, noting how they look. You should see that as you increase the ISO, the image becomes much brighter. That’s ISO at work!