Advanced Videography Techniques
- Video Composition Tip: What Angles to Shoot at and Why
- How to Make the Move from Photography to Videography
- Why Videography is Important for Every Photographer
- How to Create Professional-Looking Videos (Without Being a Pro)

Photo by Steven Van on Unsplash
Are you ready to step things up and create videos that have more impact and more drama?
Then you’re in the right place…
Making the move from beginner videography techniques to more advanced techniques doesn’t have to be confusing or complicated.
In fact, in this tutorial, you’ll learn four tips that are easy to implement, yet can have a profound impact on the quality of your videos.
Editor's Tip: To create the best videos, you need high-quality sound to go along with your footage. For my videos, I source sound effects and music from the industry leader - Epidemic Sound. You can find just about any kind of audio for any kind of video, and for the right price. Don't let your videos flop with terrible audio. Get Epidemic Sound today!
Advanced Videography Technique #1: Avoid Too Many Wide Shots

photo by 10174593_258 via iStock
When creating a video, it’s important to vary the type of shot sequences to give the final version a more dynamic look and feel.
There are three primary types of shots - wide, medium, and close-up - though each has many different variations.
Wide shots are typically used to set the stage and establish an idea of the location for the viewers while medium shots are intended to show action or movement, and to give the viewers a more intimate look at the subject. Naturally, close-up shots are designed to introduce the character in a very intimate way, and typically focus on feelings, emotions, and so forth.

photo by Sujay_Govindaraj via iStock
Since wide shots are create for setting the stage of the video, they really should be used sparingly.
Once you’ve given viewers an idea of where the story is taking place, focus on creating medium and close-up sequences to keep them engaged with the story.
Learn More:
Advanced Videography Technique #2: Use Backlighting Sparingly

photo by AzmanJaka via iStock
Though backlighting can be quite dramatic when viewed with our own eyes, when you record a backlit scene, it’s often a bit of a mess.
That’s because it’s difficult for the camera to accommodate the wide dynamic range, or range of values from light to dark, in a single shot.
So, though you can see a person’s face when the scene is backlit, on video, it’s usually rendered as a bright halo effect around a dark figure. If that’s the look you want, great. If not, you’ll need to avoid backlighting when possible.
Quick Tip: The easiest way you can improve a backlit situation is by moving your shooting position to the left or right of the subject. Doing so removes the light source from the shot.
Advanced Videography Technique #3: Incorporate Foreground and Background Elements

photo by think4photop via iStock
When you take a photo of a landscape, it’s often recommended to have foreground and background elements in the shot to give it depth.
The same tip works well for shooting video.
The issue, of course, is that when you shoot video, it can appear quite flat if there aren’t interesting things at varying distances from the lens.
You don’t have to go overboard here, either…

photo by bombuscreative via iStock
Just like with a still photo, shooting through something like foliage in the foreground will frame the subject will providing the depth you’re looking for.
Likewise, ensuring there’s a pleasing background behind the subject as you roll video will add some dimension to the shot while also giving it more visual appeal.
Learn More:
Editor's Tip: One of the best accessories you can buy for your camera for shooting video is a field monitor. Having a high-quality field monitor enables you to get a better picture of what you're filming, even in bright sunlight. And if you're vlogging and need to see yourself on screen, you can't beat the larger display that a field monitor provides. I use the Andycine A6 Lite, and appreciate the bright, color-neutral display. When shopping for a field monitor, look for one that has a multi-angle tilting arm, that way you have a good view of the screen regardless of the shooting angle. The Andycine model I use has this feature and can be used in vertical or horizontal aspect as well. It makes shooting high-quality video so much easier!
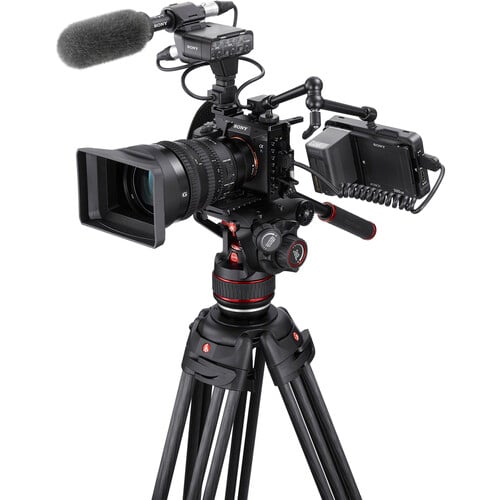
Advanced Videography Technique #4: Equip Yourself With an Awe-Inspiring Camera

One of the best things about being a video creator is that there are so many ways to create a unique video.
One such way is to expand your cache of cameras to include something like the Insta360 One X, which can completely change how you approach filmmaking.
I know what you're thinking - 360-degree cameras have terrible video quality and even worse image quality. And while that's been true in the past, the Insta360 One X changes that.

Not only is this thing stuffed full of handy features like Bluetooth, Wi-Fi, a standard tripod mount, and a companion smartphone app, but it also has two really good f/2 fisheye lenses. Each one has a 200-degree field of view, and since they overlap, they combine to get you a true 360-degree image or video footage.
Aside from being super small (just .25 pounds!) and easy to use, this camera has a major trick up its sleeve that makes it the best 360-degree camera to date: FlowState Image Stabilization.
I'm not smart enough to understand how it works, but the fact of the matter is that it uses a six-axis gyro stabilizer to give you buttery smooth footage, even if you and the camera are bouncing around all over the place.
It's truly an innovative and incredibly useful feature. See for yourself in the video below!
With more traditional footage from your phone, DSLR, or mirrorless camera combined with the fantastic 360-degree view from the Insta360 One X, there is no limit to what you can create.
Video content is all about engaging viewers, piquing their interest, and commanding their attention. And with the Insta360 One X, you can do just that!
Advanced Videography Technique #5: Harness the Power of a High-Quality Video Editor

You can shoot all the video sequences you want, but if you don’t have a high-quality video editor to put them all together, you won’t have a compelling final product.
While many video editors are complicated to use, expensive to buy, or both, there are options out there that offer tons of upside without being difficult to use or expensive.
One of my favorite video editors that fits that description is Kizoa.

What I like about Kizoa is that it’s both a cloud-based editor you can use on your computer and a free iOS app you can use on your iPhone.
That’s handy because you won’t always be at home or in your office when your creativity strikes, so having the option to put videos together on your phone is invaluable.
Something else I appreciate about Kizoa is that it’s so easy to use.

For example, you can get the editing process started by using one of Kizoa’s beautiful pre-made templates.
Just start plugging in your videos (and photos too), and you can have a professional-looking video in a matter of minutes.
There are tons of options and features as well, so it’s both easy to use and extremely productive.
You can add different fonts and text effects, transitions and fades, music, special effects, and more.

Best of all, unlike so many other video editors, Kizoa is budget-friendly.
The free account offers a ton of features, but if you want to remove the Kizoa watermark from your videos, you’ll need to upgrade to a premium package.
Since premium packages start at just $29.99 - which is a one-time fee, by the way - you won’t be out hardly any money to get lifetime access to a truly excellent editor.
If you’re ready to take your videos from so-so to spectacular, use these tips for your next video. I trust you’ll see a significant difference in quality!