Day 25 Lesson: Photograph a Droplet
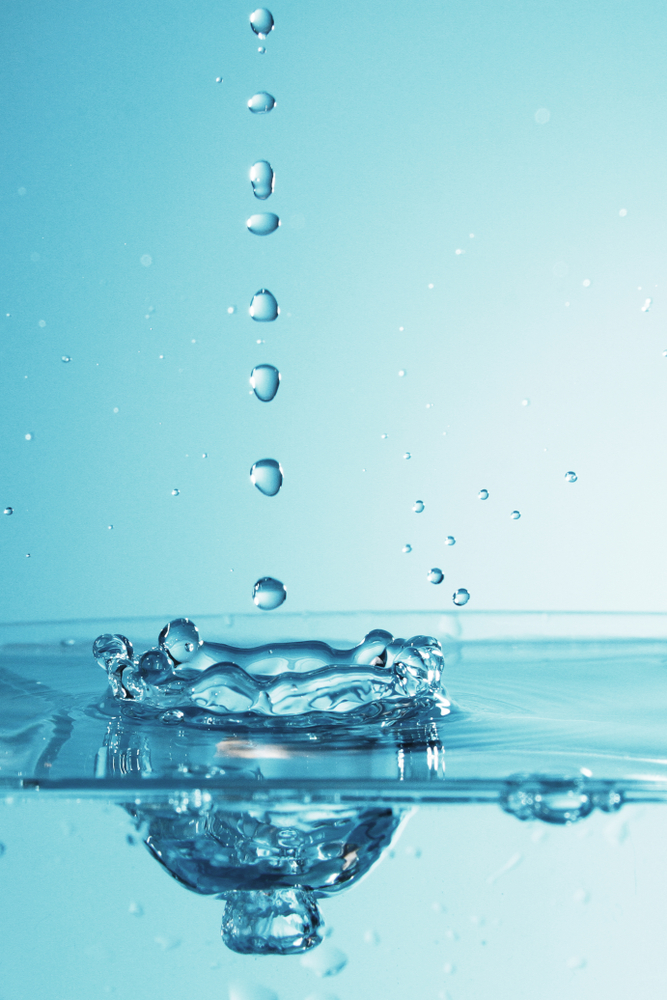
Those surreal droplet photos like the one above look complicated, but they really aren’t! Today’s challenge is to capture a photo of one such droplet. We’ve got a couple of hints for effectively capturing droplet images, and a few ideas for you to make a more impactful photo as well. Let’s get to it!
Create a Simple Droplet Setup

Getting awesome droplet shots doesn’t require a huge equipment setup. Really all you need is a syringe to create the drops, a reservoir of some kind for the droplets to fall into, lighting, and your camera gear.
Fill the syringe with water (or whatever liquid you choose). Fill a cake pan with liquid as well and place it on a dark sheet of fabric or paper. Place some kind of barrier behind the reservoir, such that the droplet is on a neutral background. A piece of frosted glass would work well.
To help highlight the droplet, backlight the scene with a light source. You can do something as simple as placing a single light bulb behind the frosted glass or whatever barrier you’ve chosen. If available, use an off-camera flash that you can trigger remotely so you can illuminate the scene when you fire the shutter.
As for camera settings, put your camera on a tripod and switch to manual focus and exposure. A macro lens or macro extension tubes will work best. Do a few test drops to ensure you’ve got the focus correct. In your test images, try using a tape measure as the focusing point. If the numbers on the tape are sharp, your droplet will be too.
At last, turn off the lights in the room and start firing your shutter! It will likely take several tries to perfect the shutter speed, aperture, and ISO, but with some trial and error, you can get a really nice droplet shot.
Idea #1: Alter Your Perspective
The great part of photographing droplets is that you can easily change your perspective and create wide variations in the photos you produce.
For example, you can go in with a low shot to highlight what’s happening under the surface when the droplet hits.

Or, you can take the shot from a higher perspective to give viewers a better window into the droplet’s impact once it hits.
Idea #2: Snap the Image Before the Splash

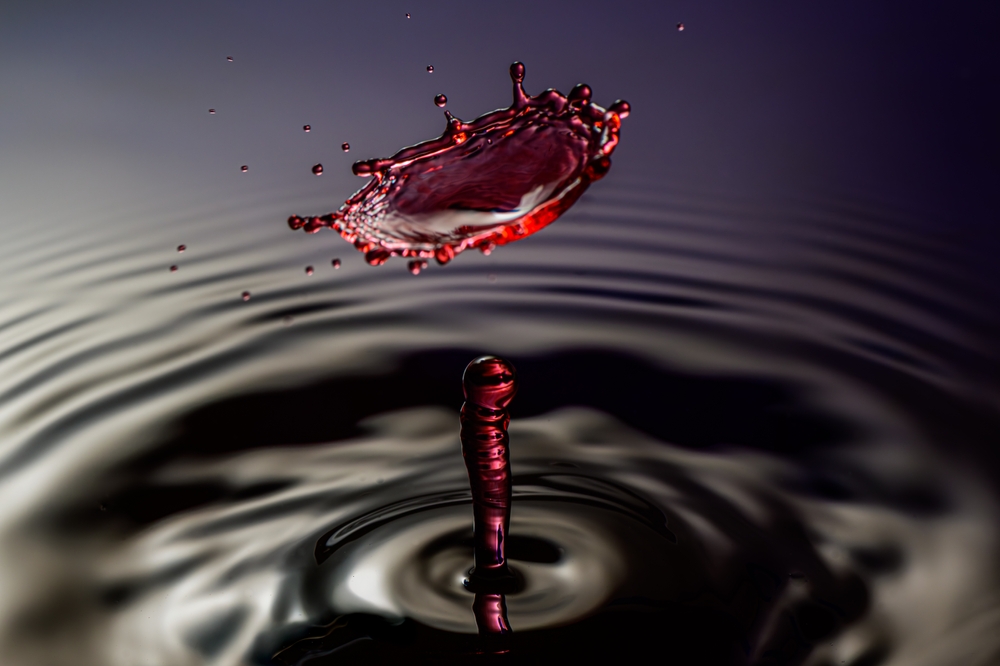
Most droplet photos you find will be of the aftermath of the droplet exploding. However, snapping the image right before or just as the droplet makes impact can result in a really awesome shot as well. As you can see in this image, the elongated, linear droplet contrasts nicely with the smooth rings of waves and gives the shot an incredible sense of action and motion.
Idea #3: Use Other Substances
You don’t need to restrict yourself to plain, old water for your droplet photo. For a little interest, inject the water with food coloring. Or, if you’re really feeling adventurous, use a liquid other than water. Milk and paint are great choices because their characteristics lend to a much softer droplet shape.
Practice and Participate!
We’ve given you some tips for snapping great droplet photos and have offered up some fine ideas for turning up the interest in your images. So now it’s your turn to try your hand at capturing the movement and interest of a droplet.
Whether you take an image of a droplet in flight, just touching down, or after it has exploded, be sure to use proper lighting behind a neutral background so the droplet will stand out. Get your camera on a tripod and use a remote to trigger the shutter and flash. This will give you a well-exposed, sharp droplet image. Try working with water to perfect your skills, but if available, try using food coloring, milk, paint, or another liquid to create even more unusual shots.
We’re excited to see just how creative you can be with your droplet photos! Get your best image up on the forum to share with us and the other challenge participants. Don’t forget to check out what your fellow Photography Talk members have done as well!