Day 5 Lesson: Accessories to Help You Create Gorgeous Landscape Images

The dial on your camera has a variety of shooting modes. These modes exist on a continuum of control from full auto, which might be denoted as “Auto” or a green rectangle, to full manual, which is usually indicated as M on your camera’s dial. In full auto mode, the camera makes all the decisions regarding exposure on your behalf – you have no control over settings like aperture, shutter speed, or ISO. On the other end of the spectrum, in full manual mode, all of these settings are the photographer’s responsibility.
In between full auto and full manual are a variety of shooting modes that give you some measure of control. These include aperture priority, shutter priority, and program modes.
In this lesson, we explore each of these modes, discuss why they are beneficial for landscape photography, and present example images taken in each mode.
Aperture Priority Mode

In short, aperture priority mode, which is commonly marked as an A or AV on your camera’s dial, is a semi-automatic shooting mode in which you control two of the three essential components of exposure: aperture and ISO. The third component, shutter speed, is controlled by the camera.
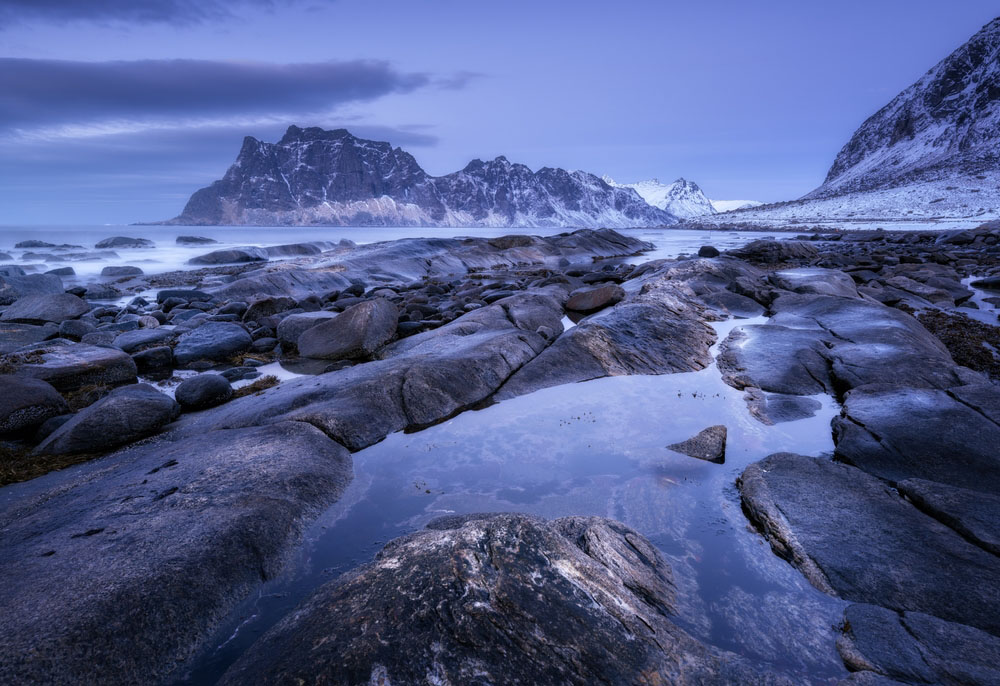
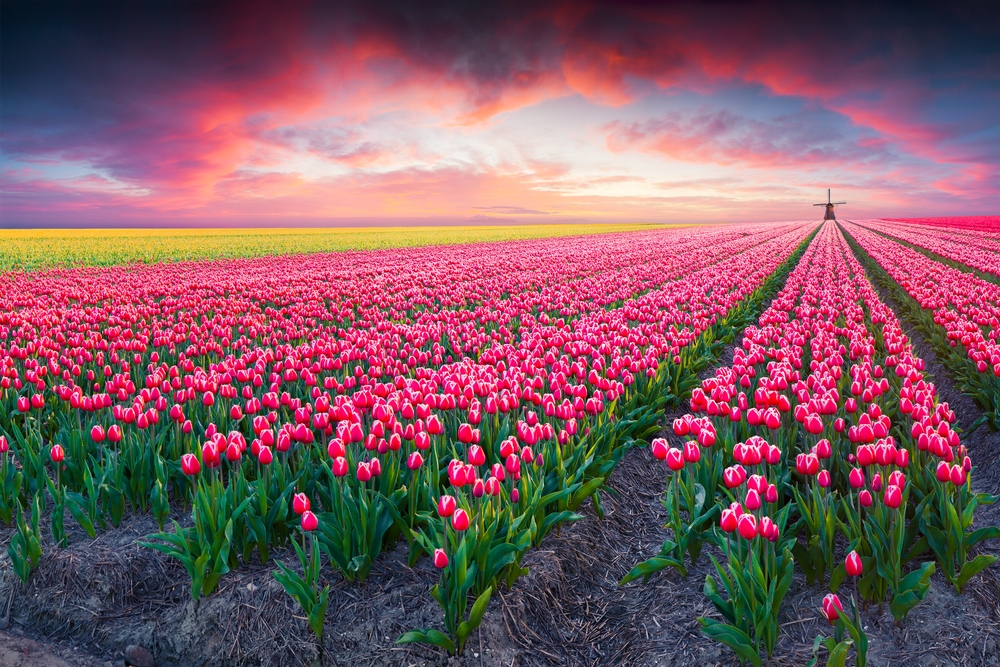
Aperture priority is most applicable when you want to control depth of field. As noted in earlier lessons, depth of field refers to the area of an image that’s in sharp focus. A large depth of field is thereby often desired by landscape photographers to ensure everything in the landscape, from foreground to background, is in focus, as was achieved in the image below.

As this applies to landscape photography, you might select a small aperture, such as f/11 or f/16, to maximize depth of field. When doing so in aperture priority mode, the camera will automatically select a shutter speed that will give you a well-exposed image for the aperture you select, assuming, of course, that the lighting conditions are appropriate for the aperture you’ve chosen.
For example, if you’re shooting a landscape in a low-light situation with a small aperture, your camera may not be able to select a sufficient shutter speed on its own to get a well-exposed image. This is because there is little available light in the environment, and the lens’s small aperture further restricts that light. As a result, there will be times when the camera just cannot get a well-exposed image, given the aperture you select.
BEWARE! The shutter speed your camera chooses might be incredibly slow if you’re shooting in low-light situations. As a result, it’s important to check your shutter speed to determine if you can hold the camera or if it needs to be mounted to a tripod. As a rule of thumb, use your lens’s focal length to determine a suitable shutter speed. For example, if shooting with a 50mm lens, your minimum shutter speed should be 1/50th of a second or faster. Likewise, if shooting with a 250mm lens, your shutter speed should be no slower than 1/250th of a second.
However, as noted above, in aperture priority mode, you are in control of ISO, which determines the sensitivity of the camera’s sensor to light. This is handy in low-light situations because if your camera is struggling to match your selected aperture with an appropriate shutter speed, you can boost the ISO to make the sensor more sensitive to light, which, in turn, allows the camera to select a faster shutter speed.
It is for this reason that when shooting in aperture priority mode, it’s a good idea to set your ISO first. Select the ISO based on the lighting conditions. If you’re shooting during the middle of the day under bright sunlight, an ISO of 100 is most prudent. Conversely, if you’re shooting at or near dusk, you might need to increase the ISO to 400, 800, or above to give the camera enough light with which to work.
Aperture priority mode is best for controlling depth of field. Aperture priority mode is also a good way to start taking manual control over some settings while letting the camera control others. This is especially helpful for beginners who need some experience with manual controls without being overwhelmed by all the manual controls at once.
Shutter Priority Mode

Like aperture priority mode, shutter priority mode, which is usually indicated by an S or TV on your camera’s dial, is a semi-automatic shooting mode that gives you control over some camera controls and not others. In this case, you have power over the shutter speed and ISO, while the camera controls aperture.
When having control over the effect of motion in your images is needed, such as blurring or freezing the movement of water, shutter priority mode is the most helpful shooting mode. For example, if you wanted to freeze the movement of a river, you might select a fast shutter speed, say, 1/250 seconds. At this speed, the shutter is open for such a short period of time that the motion of the water in that split second is frozen in time. To blur the motion of water, you would select a much slower shutter speed, say, a full second or longer, so the shutter is open long enough to let the water pass, thus getting a nice blurred effect as shown below.

Just like when you shoot in aperture priority mode, you are in control of ISO when shooting in shutter priority mode. Again, it’s important to set your ISO first, based on the lighting conditions that are present, then make your decision regarding the shutter speed you’d like to use. Generally speaking, if you are shooting with a fast shutter speed in normal lighting conditions, an ISO of 100 or 200 should be more than adequate. However, if the light begins to fade and you want to freeze movement, a higher ISO might be necessary in order for your camera to maintain a fast shutter speed and a good exposure.
BEWARE! The opposite is true when you’re using a slow shutter speed to blur movement. In this situation, because the shutter is open for such a long period of time, you will likely need the lowest ISO setting possible, which is 100 or 200, depending on the type of camera. This is because there is so much light coming into the lens (unless it’s fitted with one or more neutral density filters, as discussed in a previous lesson) that there is no need to increase the sensitivity of the camera’s sensor.
Remember as well that the slower the shutter speed, the more likely you are to introduce camera shake into the image. Use the guidelines discussed above regarding focal length and shutter speed to determine when you’ll need a tripod.
Shutter priority mode is best for freezing or blurring the movement of water or other environmental effects. And, like aperture priority, shutter priority gives beginner photographers some practice making some manual changes without being responsible for them all.
Program Mode

Program mode is a more advanced semi-automatic shooting mode than aperture priority or shutter priority. When in program mode, the camera sets the aperture and shutter speed on your behalf, while leaving you in control of ISO. Initially, program mode might be thought of as ISO priority mode, because whatever ISO you choose will remain unchanged while the camera adjusts the aperture and shutter speed to get a good exposure. This is an obvious benefit if you’re shooting in harsh lighting conditions and need to prioritize a low ISO, or in low-light conditions when you need to prioritize a higher ISO.
However, program mode is much more powerful than that. Although it initially sets the aperture and shutter speed, you can override them. For example, if you’re photographing a landscape and the camera selects a fairly small aperture, thus maximizing the depth of field, you can change the aperture, making it larger, in order to minimize the depth of field, as was done in the image below. Once you do that, the camera will automatically adjust the shutter speed to maintain proper exposure given the aperture value and ISO that you’ve chosen.

The same occurs when you elect to choose a new shutter speed – the camera will adjust the aperture accordingly to get a good exposure. Thus, the greatest benefit of program mode is revealed – you’re given the convenience of having the camera select the aperture and shutter speed, but, as you gain confidence in your abilities to make those choices on your own, you can override one, and the camera will make the necessary adjustments to the other. In this regard, it’s like the thinking man’s full auto mode.
BEWARE! Just like in aperture priority and shutter priority modes, there might be instances in which the new settings you choose are beyond the scope of what the camera can do to get a good exposure. If, for example, you select a very small aperture and maintain a very low ISO, the camera might struggle to select a shutter speed that’s slow enough to avoid underexposing the image.
Though the value of program mode is clear – your camera helps you out initially by choosing aperture and shutter speed, but you have the ability to override them – it remains the least used of the three modes discussed thus far. Since more control is possible, it is often reserved for intermediate photographers who understand how aperture, shutter speed, and ISO work together to get a good exposure.
Program mode also gives you control – should you want it – over other camera settings like white balance, whether or not to fire the flash, the active focus point, and the type of metering mode to use. However, if you’re an advanced enough photographer who knows how to manipulate those settings, it’s probably more useful to shoot in full manual mode.
Program mode is best for situations in which you want the ability to override what your camera thinks are the best settings, without having the responsibility of shooting in full manual mode. Use program mode for any kind of landscape, including those in which depth of field is important and those in which freezing or blurring movement is important.
Manual Mode

For many beginner and intermediate photographers, manual mode, or M on your camera dial, is a scary prospect. After all, manual mode gives you full control over the camera’s settings. Without the camera to back you up, it’s up to you to make the right decisions regarding the settings used if you’re to get a quality image.
But this is the advantage of shooting in manual mode – you have complete control. You can make changes to aperture, shutter speed, and ISO independently of one another. That is, unlike in aperture priority, shutter priority, or program modes, in which a change in one setting results in changes in the other, in manual mode, you can make adjustments as you see fit without them impacting other adjustments that you’ve made. This gives you much more creative freedom in terms of the look of your images.
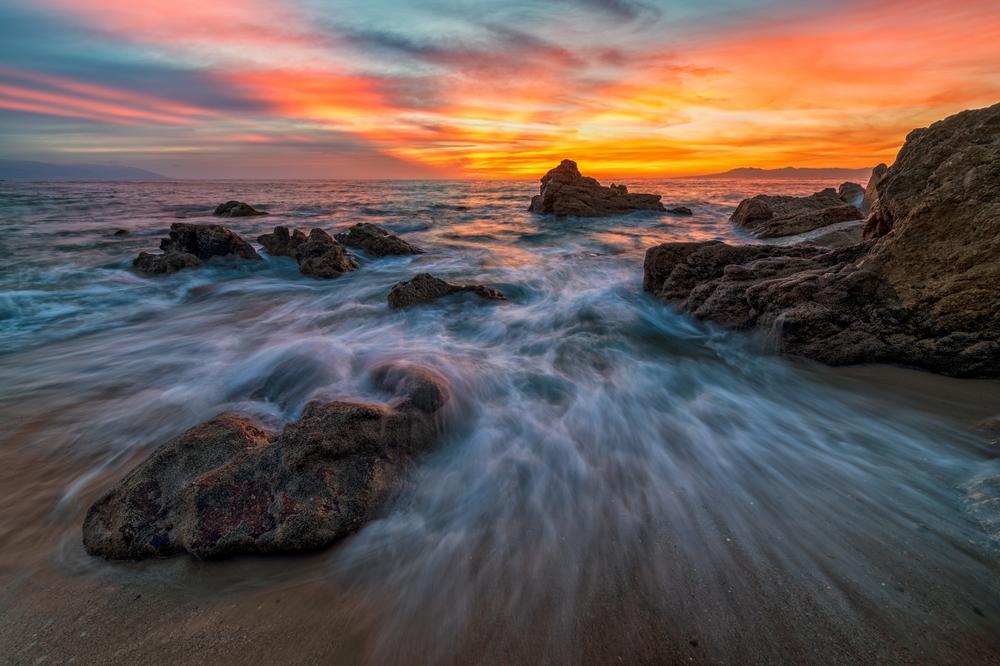
For example, if photographing the landscape above in manual mode, you can set the aperture to be quite small to get a good depth of field while also setting a slower shutter speed to blur the movement of the waves coming ashore. This type of shot would be difficult to achieve in aperture priority because the shutter speed that the camera selects to match your aperture wouldn’t be slow enough to blur movement. Conversely, in shutter priority, the aperture the camera selects to match your chosen shutter speed would be too large to get the depth of field needed to keep everything from foreground to background in sharp focus. As a result, manual mode is necessary such that you can get the best of both worlds.
BEWARE! Shooting in manual mode takes time – both in terms of the time to learn how to use it and in terms of the time needed at the photo shoot itself to dial in the appropriate settings. If time is of the essence, it would be most prudent to utilize aperture priority, shutter priority, or program mode so you don’t miss the shot. Only when it becomes second nature to make the necessary changes to your camera settings should you shoot in manual mode.
Here are a few rules of thumb for navigating the process of choosing the right settings in manual mode:
- For shots in which you want to blur or freeze movement, set your shutter speed first. Then, set your iso, and lastly, determine the aperture.
- When depth of field is most important, set the aperture first, then the ISO, and determine your shutter speed last.
- In low-light situations, give ISO first priority. Set your shutter speed next, then set the aperture.

Note that these are merely rules of thumb and that you might find that your workflow is a little different. For example, if you notice a lot of digital noise when you push the ISO on your camera to higher values, you might set the ISO first in all situations, simply to avoid noise. Alternatively, since landscapes are often shot with a large depth of field, you may find that setting your aperture to the appropriate value is the best first step.
Manual mode is best for more experienced photographers who understand how to make proper camera adjustments to get a well-exposed image. It’s also well-suited to any type of landscape shot, unless there isn’t enough time to make all the needed adjustments.
Actionable Steps
- Spend some time working in aperture priority mode. Get a feel for how changing the aperture impacts the shutter speed. Work through various apertures, from very small (f/2.8) to very large (f/22), taking an image at each aperture to see how the image changes with each adjustment you make.
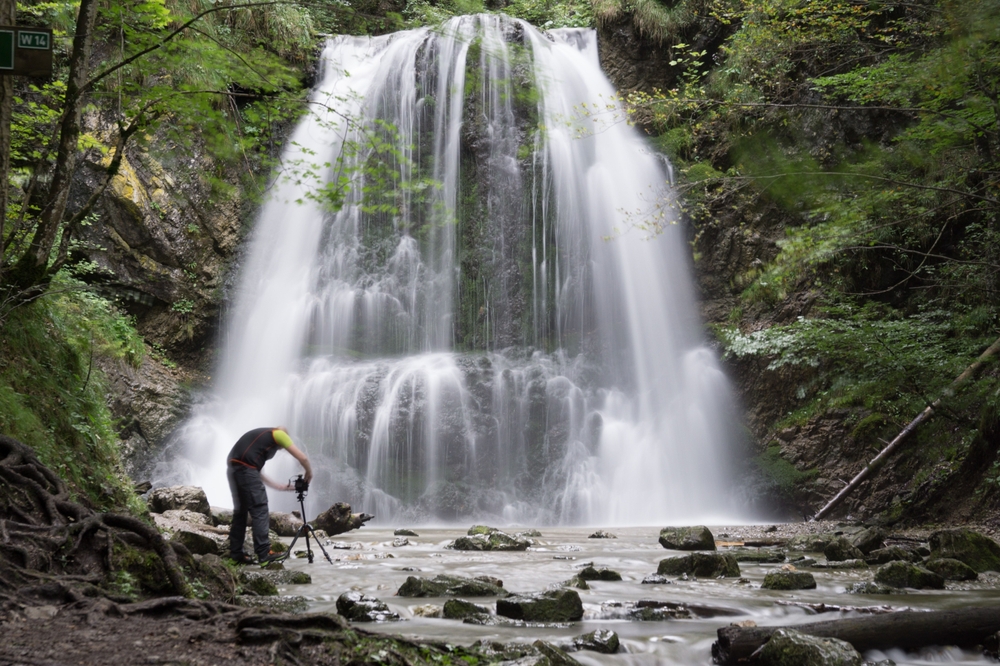
- Do the same as above in shutter priority mode, noting specifically how slower shutter speeds change the look of the landscape when compared to a fast shutter speed. Find a creek, river, waterfall, or another water source to explore this concept in more detail.
- Practice using program mode by first dialing in an ISO and shooting an image with the camera’s recommended settings. Then, take another image after adjusting the aperture, another after adjusting the shutter speed, and so on, again, taking a number of images so you can see how the adjustments you make impact the photos you take.
Homework
Explore your camera’s manual mode by familiarizing yourself with all the settings that are required of you to make, including aperture, shutter speed, and ISO. Don’t worry if the images you take aren’t all that great – the purpose here is to familiarize yourself with the process of making multiple critical adjustments. With time and practice, you’ll be able to master these settings and take breathtaking landscape photos in full manual mode.