Day 7 Lesson: The Ins and Outs of Shutter Speed
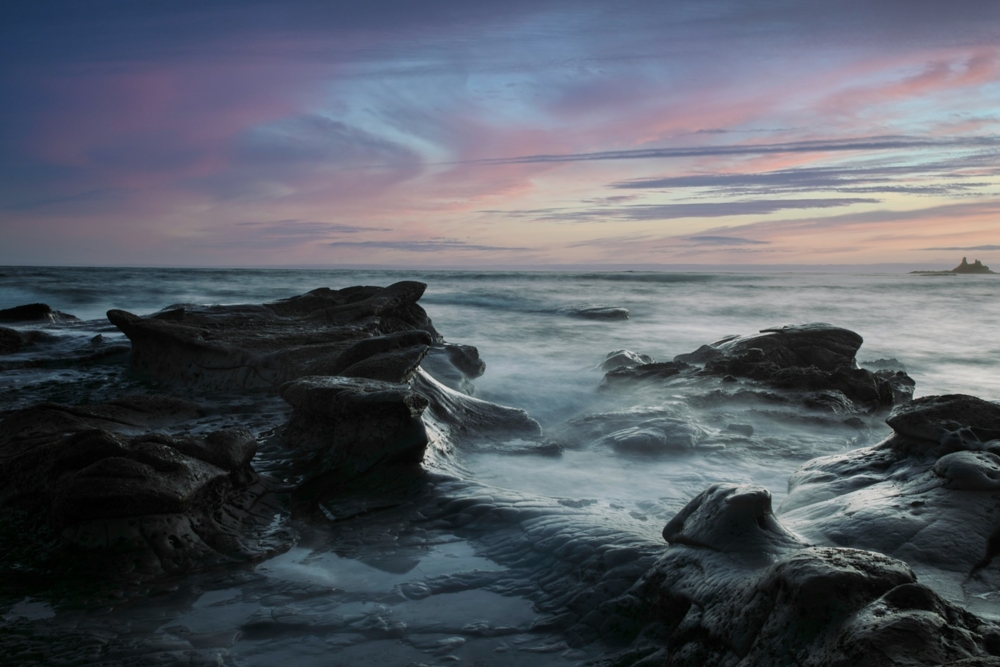
Shutter speed is one of the most important camera settings to master, both because it’s an essential component of a well-exposed image and because changing the shutter speed gives you creative freedom to freeze or blur movement, as was done in the featured image above.
If you want to capture landscapes creatively, you will need to master manipulating shutter speed. In this lesson, you will learn how the shutter in your camera works, as well as how shutter speed impacts the perception of movement in your landscape images.
What is the Shutter?
The shutter is the device in your camera that controls how much light reaches the camera’s sensor. Most cameras use a focal-plane shutter, which employs two independent curtains or a set of blades in front of the sensor. When you press the shutter button, these curtains work together to create a window through which light can pass. The faster these curtains or blades move, the quicker the shutter speed, and the less light that reaches the sensor. The slower these curtains move, the slower the shutter speed, and the more light that reaches the sensor.
The purpose of the shutter is to control the amount of time your camera’s sensor is exposed to light.
How is Shutter Speed Measured?
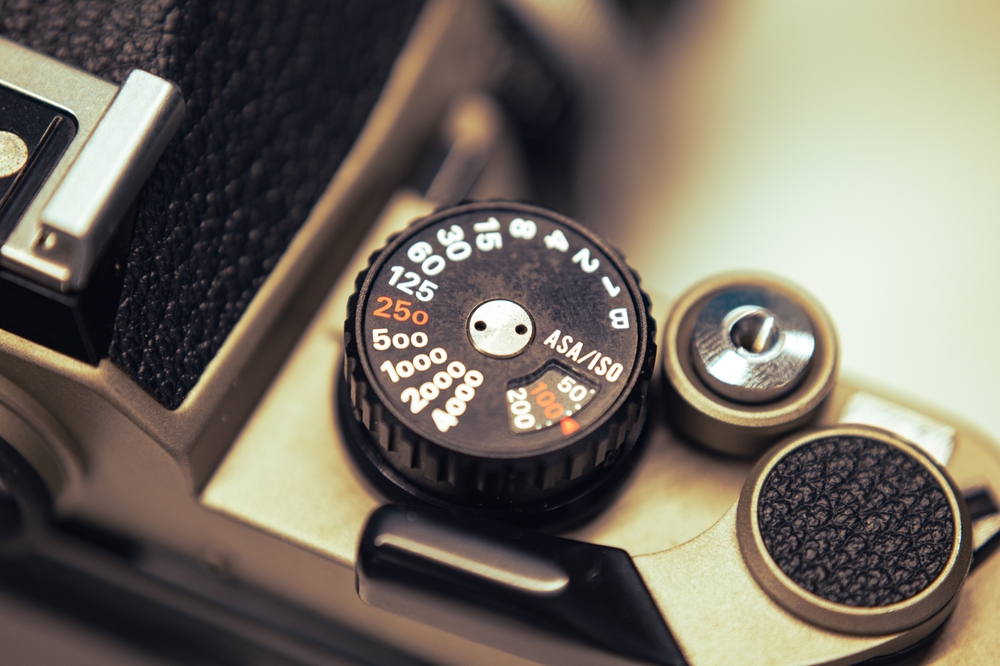
Shutter speed is most often measured in fractions of a second or whole seconds, although in some cases the shutter might be open for minutes or even hours. Most of today’s cameras can operate over a range of 1/8000th of a second to 30 seconds, although the shutter’s exposure time can be extended with remote shutter releases. The vintage camera dial pictured above ranges from 1 second to 1/4000.
Creative Use of Shutter Speed in Landscapes
As it pertains to landscape photography, the shutter speed gives you three primary options for creative compositions: you can freeze the scene by selecting a fast shutter speed, you can blur any movement in the scene by choosing a much slower shutter speed, and you can shoot landscapes at night with an extended shutter speed.
Freezing Movement
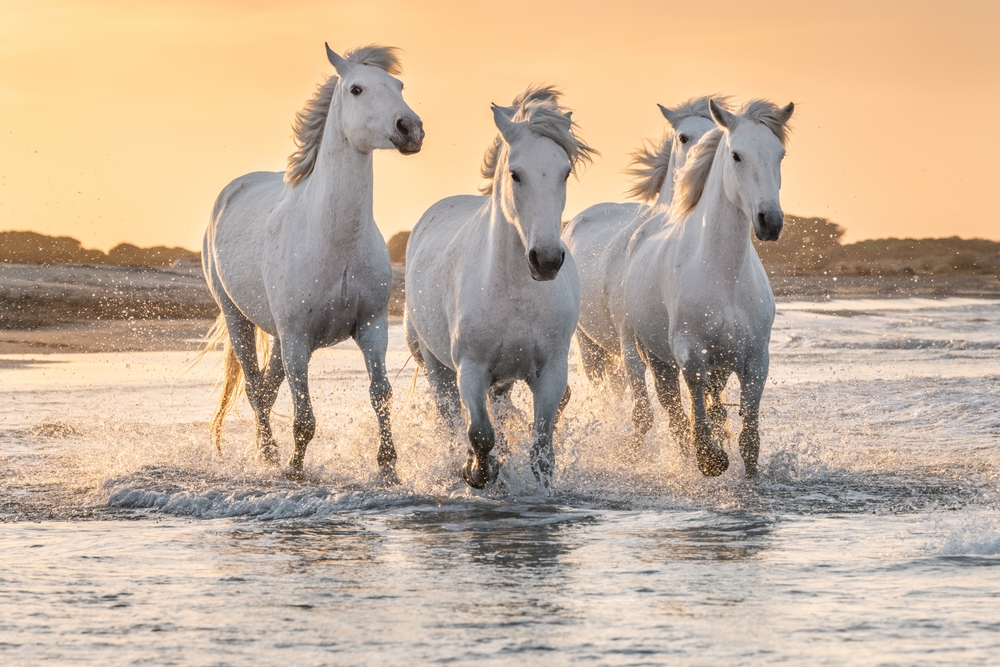
On the one hand, setting a fast shutter speed allows you to freeze the landscape in that instant. No matter what’s going on in the scene, you can most likely select a shutter speed that is fast enough to freeze any movement, whether that’s wildlife running across the prairie or water flowing in a river.
Naturally, the faster the subject is moving, the faster your shutter speed will need to be to freeze the action. For example, the horses running in the image above might require a shutter speed between 1/1000 and 1/500. A slow-moving river, on the other hand, requires 1/100 of a second to freeze movement.
Shutter Speed Quick Tip: When freezing movement, set your camera to shutter priority and dial in a fast shutter speed. As noted above, the shutter speed you select will depend on the subject matter. A good rule of thumb is to start with a shutter speed of 1/250 seconds. If the action is frozen, you’ve got a fast enough shutter speed. If there is still blurred movement in the resulting image, step up to a faster shutter speed, like 1/500, and keep increasing it until you’ve successfully frozen movement.
Blurring Movement

Conversely, when blurring movement is the goal, you might need to select a shutter speed that’s seconds long to achieve the desired effect. Whereas 1/30 seconds might be sufficient to begin blurring the movement of a river, you might need an even slower speed, like 1-2 full seconds or more, to get a result like that pictured above. Much like when determining shutter speed to freeze movement, there will be a certain level of trial and error when deciding what shutter speed you need to use to get the level of blur you’d like to achieve.
Shutter Speed Quick Tip: When freezing movement, it’s easiest to blur it by shooting in shutter-priority mode. Select an appropriately slow shutter speed to start – 1/30 second is a good place to begin. Even if the motion in the image appears appropriately blurred, take a few more test shots at successively slower shutter speeds. Then compare the images to determine which one has the most pleasing look. You might find that while the first image at 1/30 second looks nice, the image at 1/8 second is spectacular.
Night Photography

A slow shutter speed is also necessary for taking nighttime landscape photos. In this case, any movement in the scene, such as the stars migrating across the sky, will be blurred by the slow shutter speed. However, a slow shutter speed will also make it more likely that you capture the details of a nighttime scene and get a properly exposed image.
When seeking to blur the movement of water or another landscape feature, the longer the shutter speed, the more pronounced the effect. What this means for night photography is that the longer you keep the shutter open, the brighter the image will be and the more details that will be visible in the shot.
For example, the image above used a shutter speed in the range of 180 minutes. As a result of that incredibly long shutter speed, the movement of the stars is nicely blurred. The camera also captured enough light that the foreground details are quite obvious, even though the landscape was bathed in darkness.
Shutter Speed Quick Tip: As noted above, nighttime use of a slow shutter can extend to hours-long exposures. The key to nighttime photography is to use a larger aperture, like f/2.8 or the sweet spot, which is usually about 2 or 3 stops down from wide open. A low ISO, such as 100 or 200, will minimize noise. When selecting a shutter speed, a good place to start is to use the 500 Rule. This will require a tripod and a remote shutter release. Place your camera in bulb mode, press the button on your remote shutter, and let the camera remain in exposure for the duration. At that point, depress the remote shutter again to stop the exposure.
Problems With Using Shutter Speed Creatively
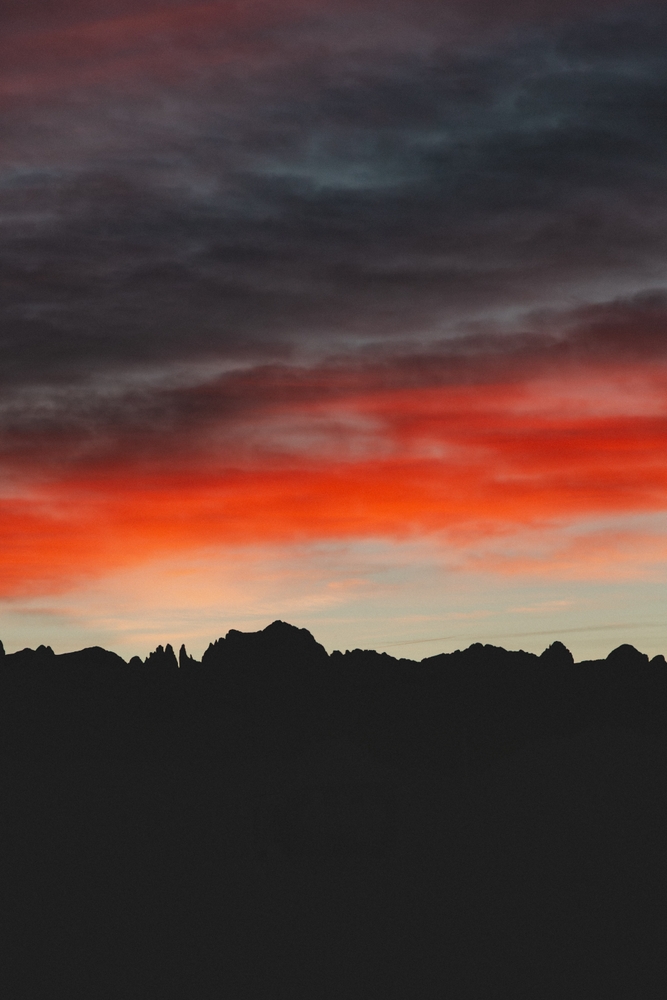
Likely the greatest issue you will encounter when attempting to use shutter speed creatively is getting images that are either overexposed or too bright, or underexposed or too dark. In the image above, all detail in the image is lost in part because the shutter speed that was selected was far too fast – there just wasn’t enough time for the camera to collect the light it needed to reveal the details of the scene.
Since shutter speed is one of the three major components of exposure, along with ISO and aperture, any changes you make to shutter speed will require adjustments to the other two elements if you are to get a well-exposed image. This is known as the Exposure Triangle.
As noted in an earlier lesson, when you shoot in shutter priority mode, the camera will automatically select an aperture to achieve a well-exposed image. Of course, this doesn’t always work. For example, if the shutter speed you choose is too fast for the lighting conditions, the camera will not be able to select an appropriately large aperture to compensate for the lack of light.
Exposure will be covered in great detail in a later lesson, but for now, it’s important to understand that shutter speed, aperture, and ISO all work together to determine exposure. Therefore, if you dial in a fast shutter speed to freeze movement, but the image is still underexposed, try boosting your ISO. As noted in the ISO lesson, this makes the camera’s sensor more sensitive to light and can help you compensate for underexposure caused by the fast shutter speed.
Conversely, a slow shutter speed might result in a poor exposure. This could take the form of a wildly overexposed image when using a slow shutter during the daytime, or an underexposed image during a nighttime shoot due to insufficient lighting. In the former situation, using a neutral density filter will allow you to use a slower shutter speed during the daytime because it limits the amount of light entering the lens. In the latter situation, boosting your ISO will allow your camera to collect more light and produce a better-exposed image.
Shutter Speed Quick Tip: Slow shutter speeds require a tripod. If the shutter speed dips below the reciprocal of the lens focal length (e.g., 1/250th for a 250mm lens, 1/15th for a 15mm lens), you will need to mount your camera on a tripod to provide a stable base from which to work.
If you try to handhold a camera at slow shutter speeds, the resulting images will be blurry due to movement introduced by shaky hands or general body movement while the shutter is open. Image stabilization in modern cameras and lenses can compensate a lot, but it’s a good idea to follow these guidelines even with that feature.
Final Thoughts

As noted in this lesson, shutter speed isn’t just a factor in getting a well-exposed image. It is also a critical component of your ability to capture landscapes creatively. As with many things in photography, mastering shutter speed will require a good measure of time, patience, and practice.
Use the tips outlined in this lesson, become familiar with adjusting shutter speed, and practice taking many images. As you do, you will become increasingly familiar with how shutter speed works and how it affects your images. From there, you can take more creative photos by adjusting the shutter speed.
Actionable Steps
- Become intimately familiar with the shutter speeds that are required to freeze and blur movement. Understanding the relationship between the subject’s speed and the shutter speeds required for the desired effect will make field adjustments much simpler.
- Select a moving subject to photograph with the intent of freezing action. Select something that will give you many opportunities to take photos, such as a creek or river. As noted in the lesson, use shutter priority mode, set the shutter speed to 1/250 seconds, and adjust it as needed to capture frozen action.
- Using the same subject, adjust your shutter speed to blur movement. Start in the 1/30-second range and take multiple images at slower and slower shutter speeds to see which speed gives you the best long exposure.
Homework

Shutter speed and ISO go hand in hand. Using what you’ve learned about ISO and shutter speed, learn how to use the two settings together to get a well-exposed image. Select a subject to either freeze movement or blur it. Dial in the appropriate shutter speed, ensuring you’re shooting in shutter-priority mode. Then select an ISO appropriate for typical lighting conditions, such as 400. Take several shots of the scene, each at a slightly different shutter speed.
For example, you might start at 1/30 second to blur movement, then move to 1/15, 1/8, and so on. Examine each image to see how the movement and exposure are affected by each change in shutter speed. You should notice that as the shutter speed increases, the image becomes brighter and the motion blur becomes more pronounced.
To maintain the same exposure level, try repeating the process, only this time making adjustments to ISO as well. Shoot one image at 1/30 second and 400 ISO, then another at 1/15 second and 200 ISO. While the motion blur will be more pronounced, the exposures should be quite similar, given that you’ve made adjustments to both shutter speed and ISO. The inverse relationship between shutter speed and ISO should be evident. As the shutter speed increases and the ISO decreases, or as the shutter speed decreases and the ISO increases, the exposure level should remain the same.