

Golden hour and blue hour represent the most coveted lighting conditions in landscape photography, transforming ordinary locations into extraordinary images through the quality and direction of natural light. Understanding when and how to use each lighting condition separates professional-quality landscapes from snapshot photography.
Golden hour occurs twice daily when the sun sits between 6 degrees above and 6 degrees below the horizon, typically lasting 20-60 minutes depending on latitude and season. Blue hour follows, when the sun drops 4-8 degrees below the horizon, creating even, diffused light with rich blue skies. These brief windows offer dramatically different creative opportunities, each requiring specific technical approaches and compositional strategies.
The key distinction lies not just in color temperature and timing, but in the completely different emotional responses each lighting condition evokes. Golden hour creates warmth, energy, and optimism through its directional, warm-toned light, while blue hour provides calm, mystery, and sophistication through its even, cool illumination. Professional landscape photographers plan shoots around these conditions because no amount of post-processing can replicate the natural beauty of high-quality light.
Table of Contents
- Golden Hour Characteristics and Timing
- Blue Hour Timing and Characteristics
- Camera Settings for Golden Hour Success
- Blue Hour Technical Mastery
- Creative Applications: When to Choose Golden Hour
- Blue Hour Creative Opportunities
- Advanced Lighting Techniques
- Planning and Preparation Strategies
- Common Mistakes and Solutions
Golden Hour Characteristics and Timing
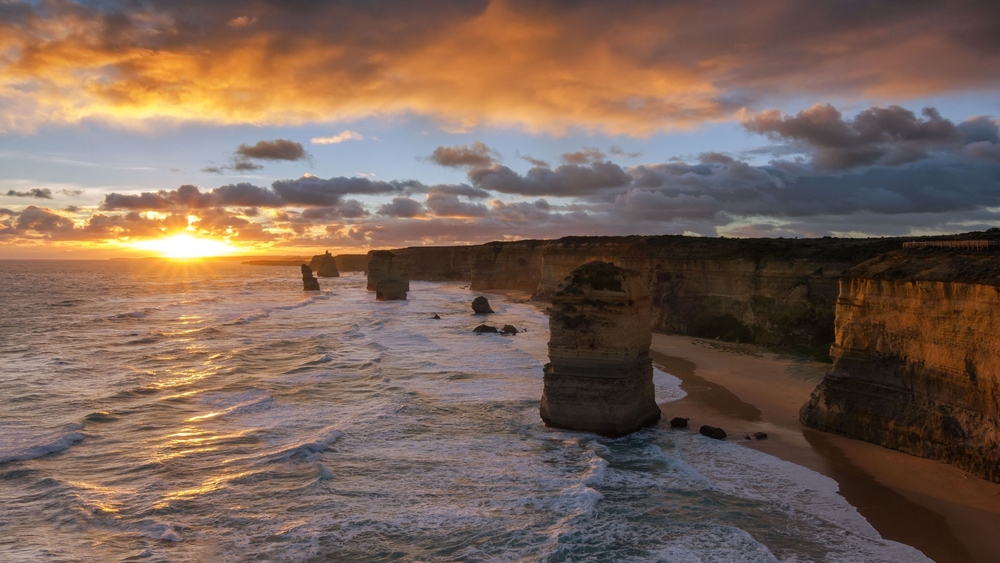
Photo by thanhmt2 via Shutterstock
Golden hour specifications vary significantly by location and season. In northern latitudes during summer, golden hour can last over an hour, while tropical locations near the equator experience brief 20-30 minute windows year-round. The sun angle creates long shadows that add depth and dimension to landscapes while reducing overall contrast compared to harsh midday lighting.
Color temperature during golden hour ranges from 2000-3000K, significantly warmer than standard daylight (5500K). This warm light enhances autumn foliage, makes skin tones flattering in portraits, and creates appealing color contrasts with blue water and green foliage. The directional quality of golden hour light reveals texture and form through shadow play that disappears in diffused lighting conditions.
Duration calculations depend on several factors: latitude (longer golden hours farther from the equator), season (extended duration in winter), weather conditions (clouds can extend apparent golden hour), and topography (mountains and hills affect sun angles). Apps like PhotoPills and The Photographer’s Ephemeris provide precise timing calculations for any location and date.
Seasonal variations dramatically affect golden hour characteristics. Summer golden hours occur very early and late (5:30 AM and 8:30 PM in many locations), while winter golden hours happen during comfortable midday hours. Winter golden hour often provides the most comfortable shooting conditions with extended duration and moderate temperatures.
Blue Hour Timing and Characteristics
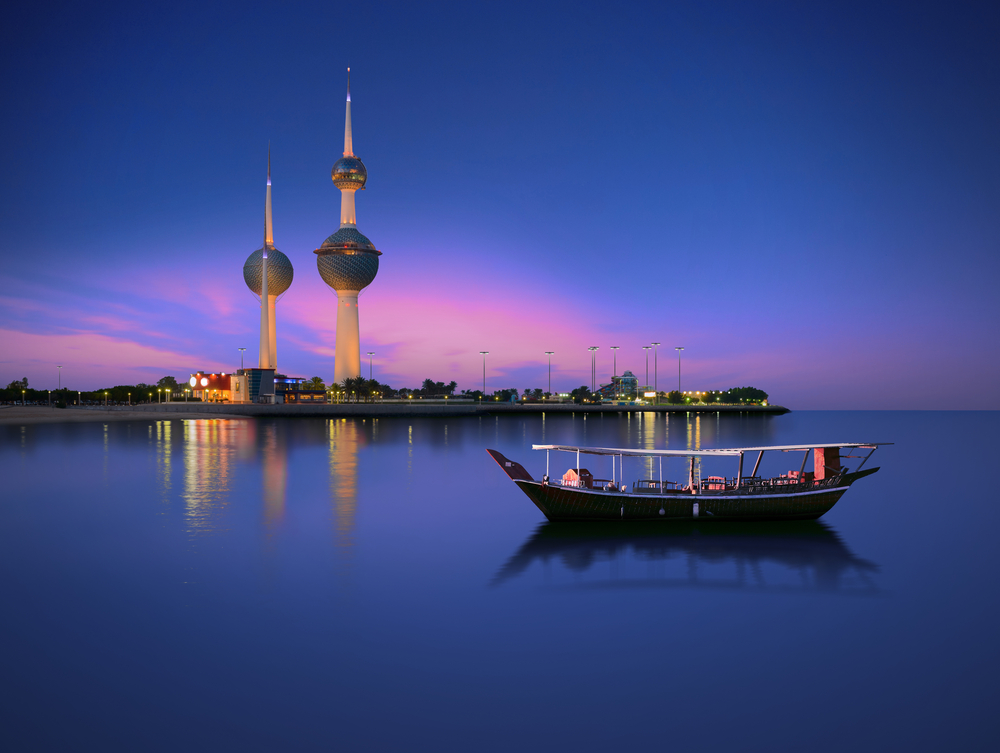
Photo by Arlo Magicman via Shutterstock
Blue hour occurs when the sun sits 4-8 degrees below the horizon, creating indirect illumination from sunlight scattered through the atmosphere. This brief window typically lasts 20-40 minutes and occurs twice daily—once before sunrise and once after sunset. The exact timing varies by latitude, with longer blue hours at higher latitudes.
Color temperature during blue hour ranges from 9000-12000K, creating rich blue tones in the sky that balance beautifully with artificial lighting from cities, buildings, and vehicles. This natural color balance eliminates the need for complex white balance corrections when combining natural and artificial light sources.
Light quality characteristics include even illumination without harsh shadows, rich color saturation in skies, and perfect balance between ambient and artificial lighting. Blue hour provides the ideal conditions for architectural photography, cityscapes, and any scenes combining natural and artificial elements.
Planning considerations require more precision than blue hour because of the shorter duration and rapidly changing light. Compositions should be finalized before blue hour begins, with camera settings predetermined to maximize the brief shooting window. The best blue hour images often require multiple exposures to capture the full tonal range from bright artificial lights to deep blue skies.
Camera Settings for Golden Hour Success

Photo by Sergej Onyshko via Shutterstock
Exposure settings for golden hour depend on your creative intent. For silhouette effects, meter for the bright sky and let subjects go dark. For balanced exposures, use graduated neutral density filters or HDR techniques to manage contrast. Typical settings range from f/5.6-f/11 for optimal sharpness, with shutter speeds from 1/250s to several seconds depending on desired effects.
White balance optimization enhances golden hour’s natural warmth. Set white balance to “Cloudy” or “Shade” to amplify warm tones, or use manual settings around 2500-3000K. Avoid auto white balance during golden hour because cameras often overcorrect, removing the beautiful warm color cast that makes golden hour special.
ISO considerations favor lower settings (64-200) to maximize image quality, but don’t hesitate to increase ISO for handheld shots or when using telephoto lenses. Modern cameras handle ISO 400-800 excellently, and slight noise is preferable to motion blur from camera shake in the relatively dim golden hour lighting.
Focusing techniques become critical as light levels drop. Use single-point autofocus on high-contrast edges, or switch to manual focus with live view magnification for precise control. Back-button focus prevents unwanted refocusing when recomposing shots during the changing light conditions of golden hour.
Blue Hour Technical Mastery
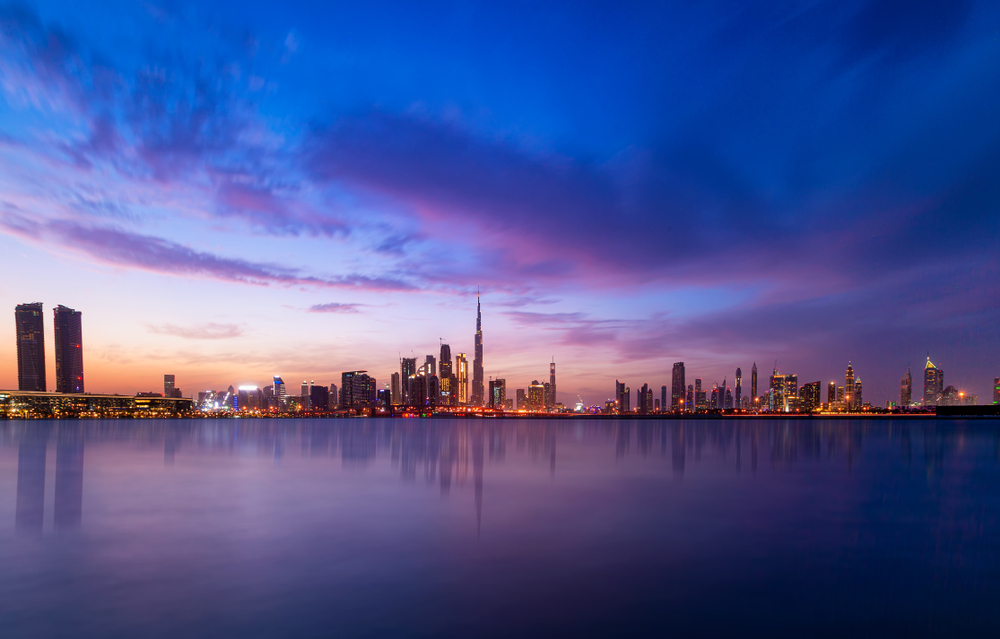
Photo by Asifgraphy via Shutterstock
Camera stability becomes essential during blue hour because longer exposures are often necessary to balance ambient and artificial lighting. Use a sturdy tripod and remote release or self-timer to eliminate camera shake. Even minor vibrations can ruin the sharp details that make blue hour images compelling.
Exposure balancing requires careful metering to preserve detail in both bright artificial lights and deep blue skies. Use spot metering on mid-tone areas, or take multiple exposures for HDR processing. Manual exposure mode provides consistency as light levels change rapidly during blue hour.
White balance strategies work best with fixed settings rather than auto white balance. Tungsten (3200K) enhances blue tones in skies while keeping artificial lighting natural. Daylight white balance (5500K) creates more neutral results if you prefer less dramatic color separation between natural and artificial light.
Focus stacking techniques may be necessary for scenes with close foreground elements and distant backgrounds. Take multiple images with different focus points, then blend in post-processing for ultimate sharpness throughout the frame. This technique works particularly well for blue hour cityscapes with foreground elements.
Creative Applications: When to Choose Golden Hour

Photo by Henri Fitriadi via Shutterstock
Portrait and people photography benefits enormously from golden hour’s flattering light quality. The warm color temperature complements skin tones, while the directional light creates attractive rim lighting and natural fill from reflected light. Golden hour eliminates the need for complex lighting setups while providing professional-quality illumination.
Autumn and fall landscapes reach their peak impact during golden hour when warm light enhances the natural colors of changing leaves. The combination of warm light on warm-toned foliage creates stunning color harmony that works beautifully in both color and black-and-white photography.
Silhouette opportunities abound during golden hour, when subjects can be positioned between the camera and the light source. Strong, recognizable shapes work best for silhouettes—tree branches, mountain ridges, architectural elements, or people in dynamic poses against bright golden skies.
Texture and detail emphasis comes naturally with golden hour’s directional lighting. Rock formations, sand dunes, tree bark, and architectural details all benefit from the shadow play that reveals three-dimensional form and surface texture impossible to achieve in flat, diffused lighting.
Blue Hour Creative Opportunities
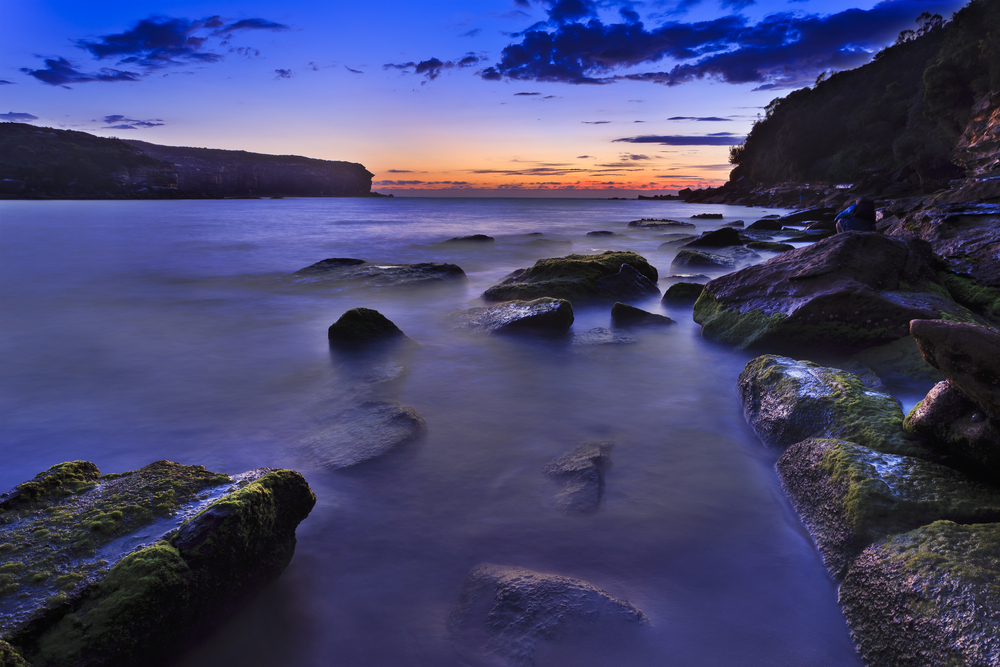
Photo by Taras Vyshnya via Shutterstock
Urban landscapes and cityscapes reach their peak during blue hour when artificial lighting balances perfectly with twilight skies. Office building windows, street lights, car trails, and architectural lighting all become compositional elements that work harmoniously with natural light.
Architectural photography benefits from blue hour’s even illumination that reveals building details without harsh shadows while providing rich, colorful skies as backgrounds. The balance between interior and exterior lighting creates depth and visual interest that’s impossible to achieve during daylight hours.
Long exposure techniques work exceptionally well during blue hour when light levels require extended shutter speeds naturally. Smooth water surfaces, cloud movement, and light trails from vehicles all benefit from the 2-30 second exposures that blue hour lighting conditions naturally require.
Seascapes and water photography often look their best during blue hour when the even lighting eliminates harsh reflections while rich blue skies complement the natural colors of water. Wet sand and rocks reflect blue hour colors beautifully, creating natural color harmony throughout coastal compositions.
Advanced Lighting Techniques
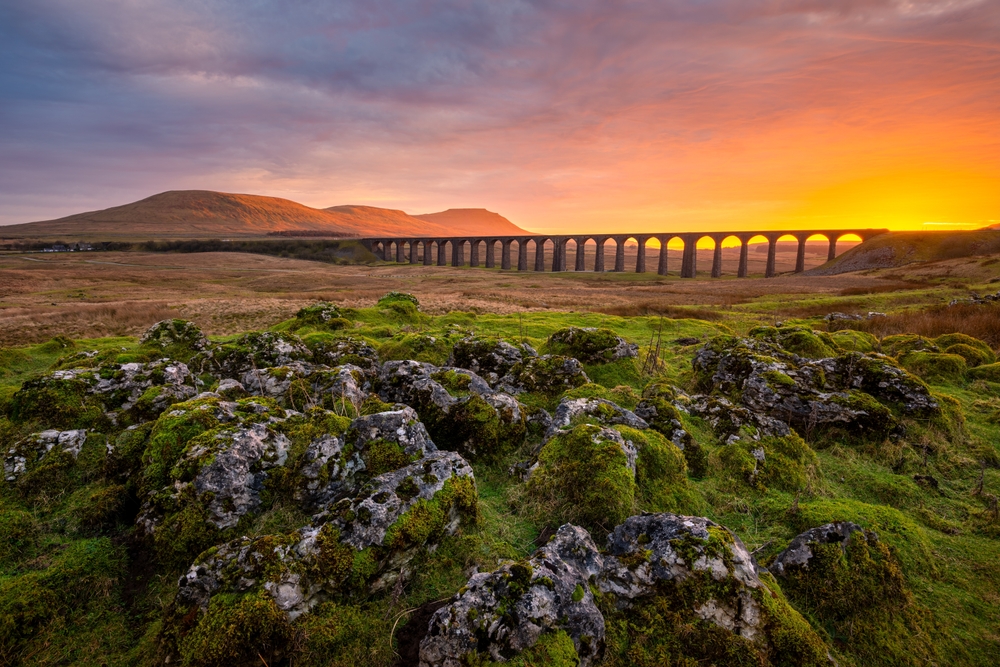
Photo by Daniel_Kay via Shutterstock
Graduated neutral density filters help balance exposure differences between bright skies and darker landscapes during both golden hour vs blue hour shooting. A 2-3 stop graduated ND filter often provides perfect exposure balance without the need for HDR processing or complex post-production work.
Bracketing strategies involve taking multiple exposures to capture the full dynamic range of challenging lighting situations. During golden hour, bracket for foreground and sky exposure. During blue hour, bracket to capture both artificial light details and deep blue sky colors that single exposures often cannot record simultaneously.
Focus techniques require different approaches for each lighting condition. Golden hour’s directional light creates strong contrast edges perfect for autofocus, while blue hour’s even lighting may require manual focus assistance through live view magnification or focus peaking features.
Exposure blending methods work differently for each lighting condition. Golden hour often requires simple 2-3 image blends to balance shadows and highlights, while blue hour may need 5+ exposures to capture the full range from bright artificial lights to deep twilight skies without losing detail in either.
Planning and Preparation Strategies
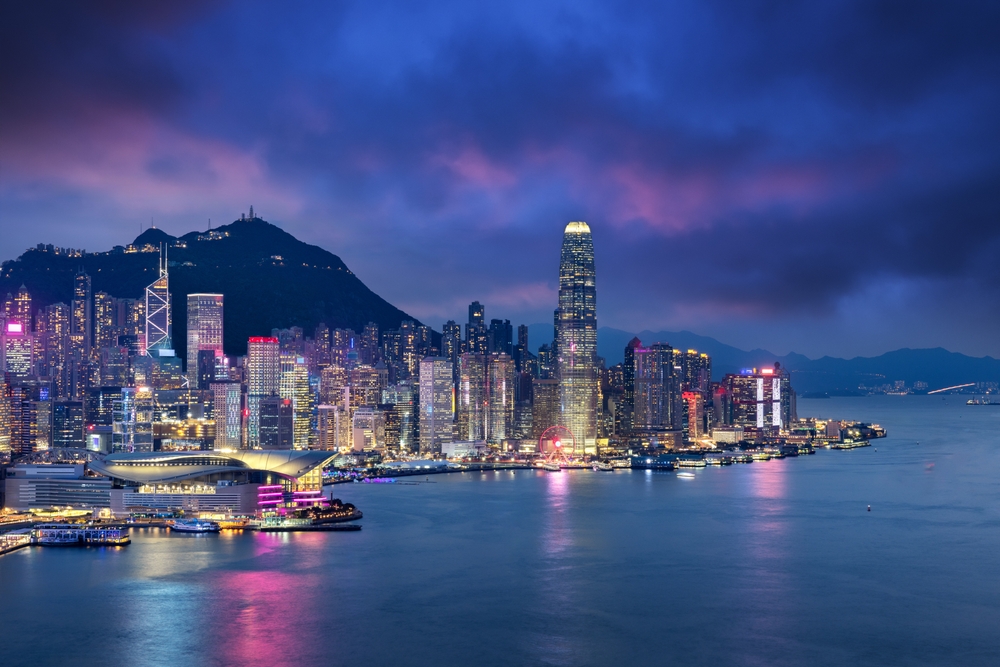
Photo by Dr_Flash via Shutterstock
Location scouting should account for sun direction and timing specific to each shooting location. Apps like PhotoPills show exactly where the sun will be during golden hour vs blue hour, allowing precise planning for backlit subjects, reflected light, and optimal viewpoints.
Weather monitoring becomes crucial because cloud cover dramatically affects both lighting conditions. Light cloud cover can enhance golden hour by diffusing and extending the warm light, while clear skies often provide the richest blue hour colors. Heavy overcast eliminates both conditions entirely.
Equipment preparation differs for each lighting condition. Golden hour often allows handheld shooting with faster shutter speeds, while blue hour typically requires tripods and longer exposures. Plan your gear selection based on intended shooting conditions and creative goals.
Backup planning should include alternative compositions and nearby locations because lighting conditions change rapidly and may not develop as expected. Having multiple composition options prepared allows quick adaptation when conditions differ from predictions.
Common Mistakes and Solutions
Photo by Daisy Dee via Shutterstock
Rushing between locations during the brief window of optimal light wastes precious shooting time. Choose one or two nearby locations and work them thoroughly rather than attempting to cover multiple distant spots during limited golden hour vs blue hour timing.
Over-relying on HDR processing can create unnatural results that diminish the natural beauty of golden hour vs blue hour light. Use graduated ND filters and careful exposure techniques to maintain natural-looking results that preserve the mood and atmosphere of special lighting conditions.
Ignoring white balance impact on the final image mood. Auto white balance often neutralizes the color temperature that makes these lighting conditions special. Manual white balance control allows you to enhance or modify the natural color cast for stronger creative impact.
Packing up too early misses the complete transition of changing light conditions. Both golden hour vs blue hour transitions occur gradually, and some of the most dramatic light occurs during the transition periods rather than at the theoretical peak timing.
Frequently Asked Questions
Photo by Dmitry Rukhlenko via Shutterstock
What Is the Main Difference Between Golden Hour vs Blue Hour?
Golden hour occurs when the sun is near the horizon (6 degrees above to 6 degrees below), producing warm, directional light with color temperatures around 2000-3000K. Blue hour happens after sunset when the sun is 4-8 degrees below the horizon, creating cool, even light with color temperatures of 9000-12000K. Golden hour is ideal for portraits and landscapes with texture, while blue hour excels for cityscapes and architectural photography.
How Long Does Golden Hour vs Blue Hour Last?
Golden hour typically lasts 20-60 minutes, depending on your latitude and season, with longer durations at higher latitudes and during winter months. Blue hour is shorter, lasting only 20-40 minutes. Both occur twice daily—around sunrise and sunset. Tropical locations near the equator experience the shortest durations for both lighting conditions.
Can I Shoot During Both Golden Hour and Blue Hour in One Session?
Yes, golden hour transitions directly into blue hour after sunset (or blue hour transitions into golden hour before sunrise). Many photographers plan extended sessions to capture both lighting conditions. The key is to have compositions pre-planned and be ready to work quickly as conditions change rapidly during the transition between the two periods.
What Camera Settings Should I Use for Golden Hour vs Blue Hour?
For golden hour, use apertures of f/5.6-f/11, ISO 64-400, and shutter speeds from 1/250s to several seconds. Set white balance to Cloudy or 2500-3000K. For blue hour, use a tripod with longer exposures (2-30 seconds), ISO 64-200, apertures of f/8-f/16, and white balance set to Tungsten (3200K) or Daylight (5500K), depending on your desired color balance.
Do I Need Special Equipment for Golden Hour vs Blue Hour Photography?
Golden hour can often be shot handheld with basic equipment. Blue hour typically requires a sturdy tripod, remote shutter release, and possibly graduated neutral density filters. Both lighting conditions benefit from apps like PhotoPills for precise timing calculations. Wide-angle lenses work well for both, though blue hour cityscapes may benefit from longer focal lengths.
Which Is Better for Beginners: Golden Hour or Blue Hour?
Golden hour is generally more forgiving for beginners because it allows faster shutter speeds for handheld shooting and provides a longer duration to practice and experiment. Blue hour requires more technical precision with tripod use, longer exposures, and faster work due to the shorter window. Start with golden hour to learn light quality and timing before advancing to blue hour challenges.
How Do Weather Conditions Affect Golden Hour vs Blue Hour?
Light cloud cover can enhance both conditions—extending and diffusing golden hour warmth while adding texture to blue hour skies. Clear skies provide the most vibrant blue hour colors, but can create harsh contrasts during golden hour. Heavy overcast eliminates both lighting conditions by blocking direct and indirect sunlight. Check weather forecasts before planning shoots around these special lighting windows.
Just so you know, some of the cool stuff we mention comes with affiliate links, meaning we earn a commission if you buy (no extra charge to you!). Plus, we occasionally feature sponsored content, but rest assured, we only shout out products we genuinely stand behind.
Learn More:
- Best Cameras for Landscape Photography in 2025
- 8 Essential Tips for Capturing Stunning Sunrise and Sunset Photos
Hero photo by Kailashgandait07 via Shutterstock