How to Recapture Details in Blown-Out Highlights

photo by jacoblund via iStock
Blown-out highlights are just part of photography, right?
Wrong!
There are measures you can take to protect against blown-out highlights. When shooting landscapes, you can expose for the highlights in the first place, shoot in HDR, or use a graduated neutral density filter.
When taking portraits, you can use a fill flash or reflector to reduce the dynamic range in the scene. You can also shoot in the shade or on an overcast day to help minimize the chances that blown-out highlights will occur.
But sometimes, despite your best efforts, you end up with a photo with blown-out highlights. Then what?
In this short tutorial, I’ll explain how you can recapture details in blown-out highlights using Exposure X5. If you don’t already own Exposure, you can test it out for free by downloading the trial version here.
Step 1: Identify the Blown-Out Highlights
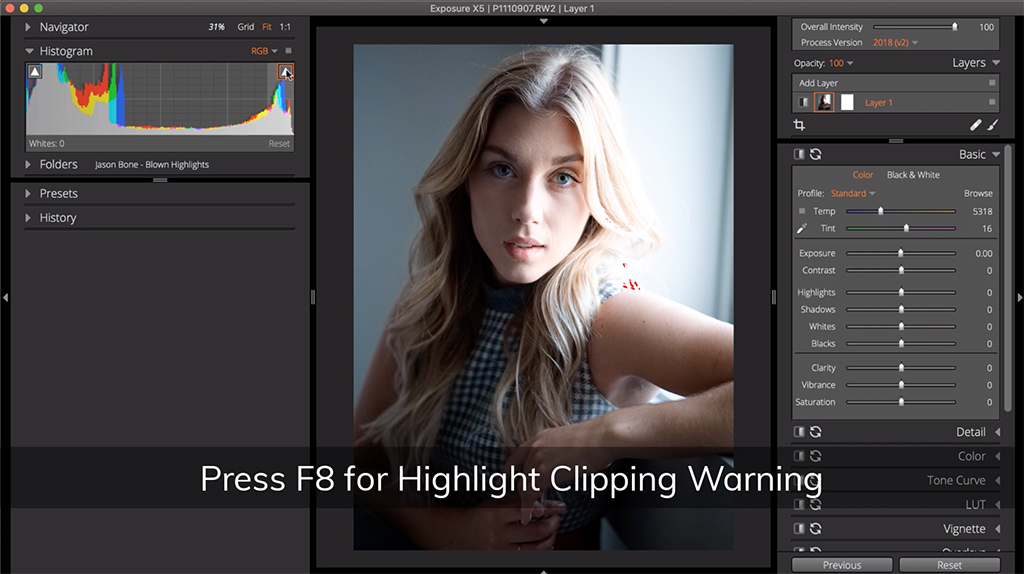
YouTube Screenshot/Exposure Software
The first step in reducing blown-out highlights is simply identifying where they’ve occurred in the image.
Exposure has a clipping warnings tool that highlight the areas of the shot that have lost detail due to overexposure. Just toggle the clipping warnings on by pressing F8 or by clicking the highlights arrow in Exposure’s histogram, as shown above.
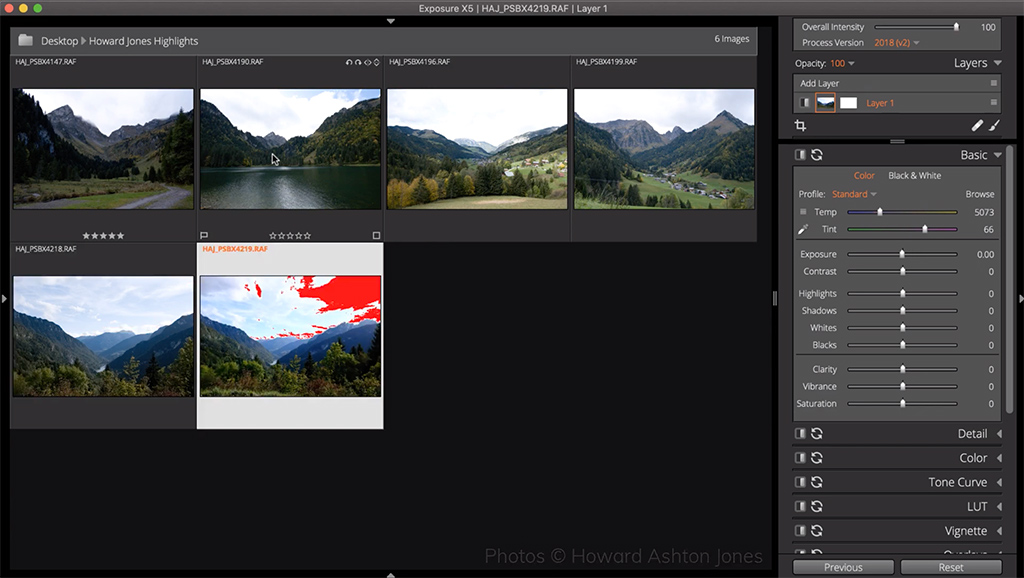
YouTube Screenshot/Exposure Software
When this feature is enabled, the blown-out areas are highlighted in red. The redder an area is, the less likely you will be able to recover all of the missing information in that area.
However, if an area is sporadically highlighted in red, there is a lot of information that you can recover in Exposure.
Learn More:
Step 2: Reduce Blown-Out Highlights

YouTube Screenshot/Exposure Software
Learning how to reduce blown-out highlights is simpler than you might think.
Using Exposure X5, just manipulate the appropriate sliders in the Basic Panel.
When making adjustments to these sliders, it’s important to begin at the top of the panel and work your way down. This is because the order in which you make changes can influence how other controls work.
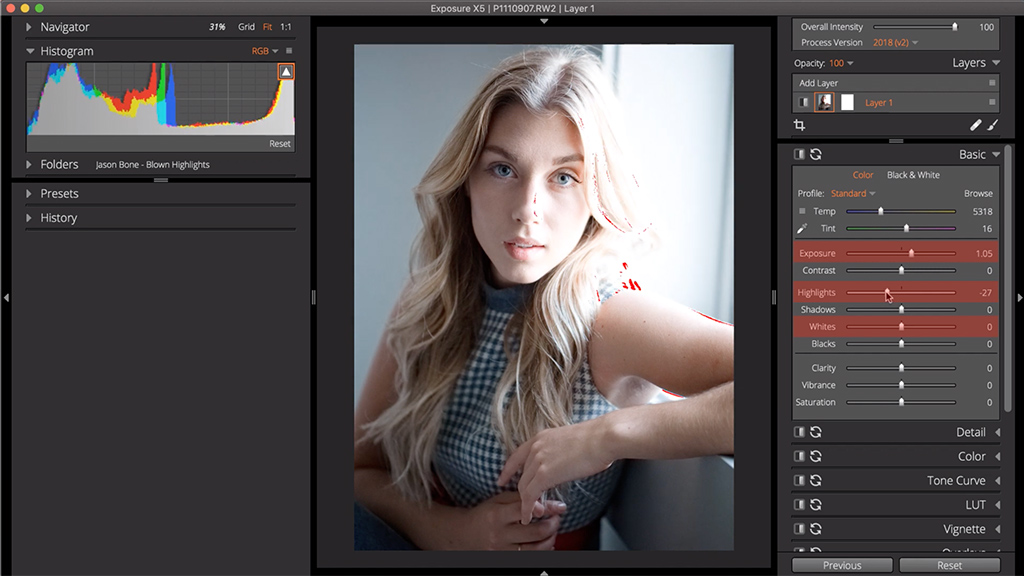
YouTube Screenshot/Exposure Software
As an example, manipulating the Exposure slider will affect the whites in the shot as well as the highlights. So, if you were to adjust the highlights and whites using their independent sliders, and then adjusted the Exposure slider, you’d have to go back and adjust the highlights and whites again.
YouTube Screenshot/Exposure Software
Speaking of the Exposure slider, it controls the tones that appear in the middle of the histogram, highlighted in red above. So, as you move the slider left or right, you will see a change in the levels of the highlights and whites in the middle of the histogram.
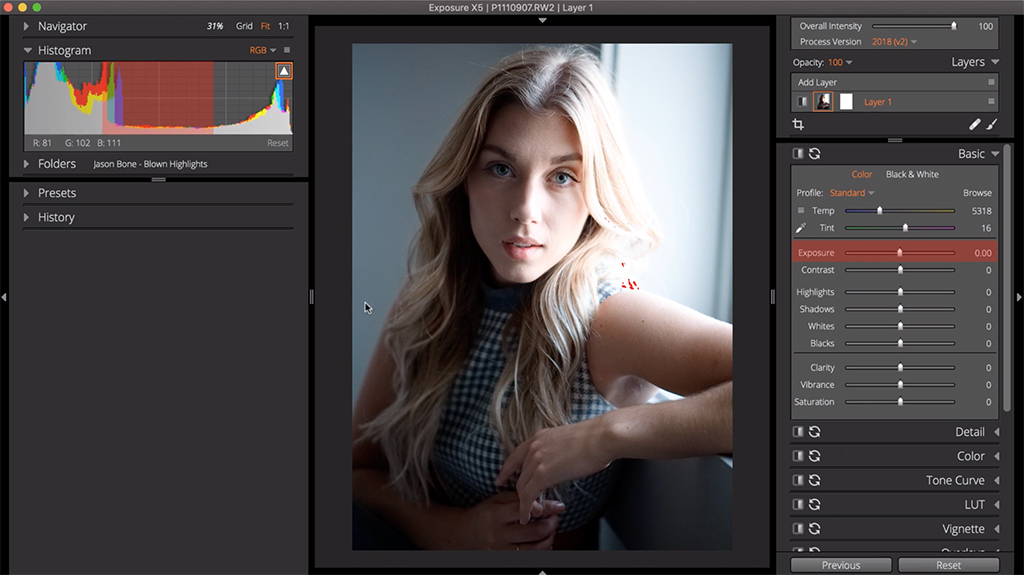
YouTube Screenshot/Exposure Software
The independent sliders for highlights and whites work on the areas on the right side of the histogram. You use the Whites slider to determine what is considered true white in the photo. The Highlights slider, meanwhile, is what you use to diminish blown-out highlights. Simply move the highlights slider left or right as necessary until you recover as much detail as possible in blown-out areas.
This method of recovering blown-out highlights requires some finesse - small and incremental adjustments to the Exposure, Highlights, and Whites sliders will get you the best results. Just remember to work your way down from the top of the Basic Panel.
Step 3: Balance Detail Recovery
It is possible to get overzealous and reduce the highlights and whites in an image too much, so, again, take care to make precise adjustments without making the image look flat.
In the video above by Exposure Software, you can see how to avoid going overboard with detail recovery. The previous steps in the process of recapturing blown-out highlights are also reviewed.
The whole process of recovering blown-out highlights using Exposure X5 takes just a few minutes, but its impact can be profound. Use these steps to reduce blown-out highlights in your images for photos that have much more visual appeal.
Learn More: