
Snowstorms offer a kind of magic that’s hard to replicate in any other weather. Thick flakes, softened light, and drifting haze can transform even an ordinary street into something cinematic. It’s no surprise that photographers, from beginners to seasoned shooters, are drawn outside the moment the snow starts falling. But the challenge is real: cold hands, fogged lenses, and unpredictable visibility can make every shot feel like a battle. That’s exactly why understanding how to shoot in snowstorms is such a valuable skill.
If you’ve tried photographing in heavy snow before, you already know how quickly conditions can shift. One minute the wind is calm, and the next you’re shielding your camera from sideways flakes. I’ve had shoots where the back of my jacket was soaked within minutes, yet the images were absolutely worth it. With the right combination of technique, preparation, and reliable gear protection, shooting in a storm becomes genuinely fun.
This guide breaks down everything you need to know about how to shoot in snowstorms, from exposure tweaks to keeping your lens clean to staying steady on icy ground. Whether you’re heading out for the first time or want to finally get shots you’re proud of, the following tips will give you the confidence to step into the storm and keep clicking.
Table of Contents
- Understanding Snowstorm Light and Visibility
- Dialing In Exposure in a Snowstorm
- Keeping Your Lens Clear for Clean Shots
- Protecting Your Camera From Moisture and Cold
- Practical Gear Choices for Shooting in Snow
- Composition Tips for Snowstorm Conditions
- What to Do After Your Snowstorm Shoot
- FAQ
Understanding Snowstorm Light and Visibility

Photo by Irina WS via Shutterstock
One of the best parts of learning how to shoot in snowstorms is discovering how beautifully diffused the light becomes. A thick layer of falling snow acts like a natural softbox, scattering light evenly and eliminating harsh shadows. You’ll notice the world starts to look quieter and more balanced, almost as if the contrast dial has been turned down. This gives you a clean slate to work with, especially when photographing people or landscapes.
Reduced visibility might sound like a problem, but in many cases, it adds incredible atmosphere. When the background fades into hazy white, your subjects naturally pop. I often position people closer to the foreground because even a bit of separation makes them visually strong against the snowy distance. For beginners, this is one of the easiest ways to create depth in storm conditions.
Timing also matters. The beginning of a snowstorm tends to offer the most dramatic flakes, while the middle portion usually gives you the softest light. After the storm clears, you’ll get bright reflections from the fresh snow. As you figure out how to shoot in snowstorms, try experimenting during all three phases. Each one has its own visual personality.
Dialing In Exposure in a Snowstorm
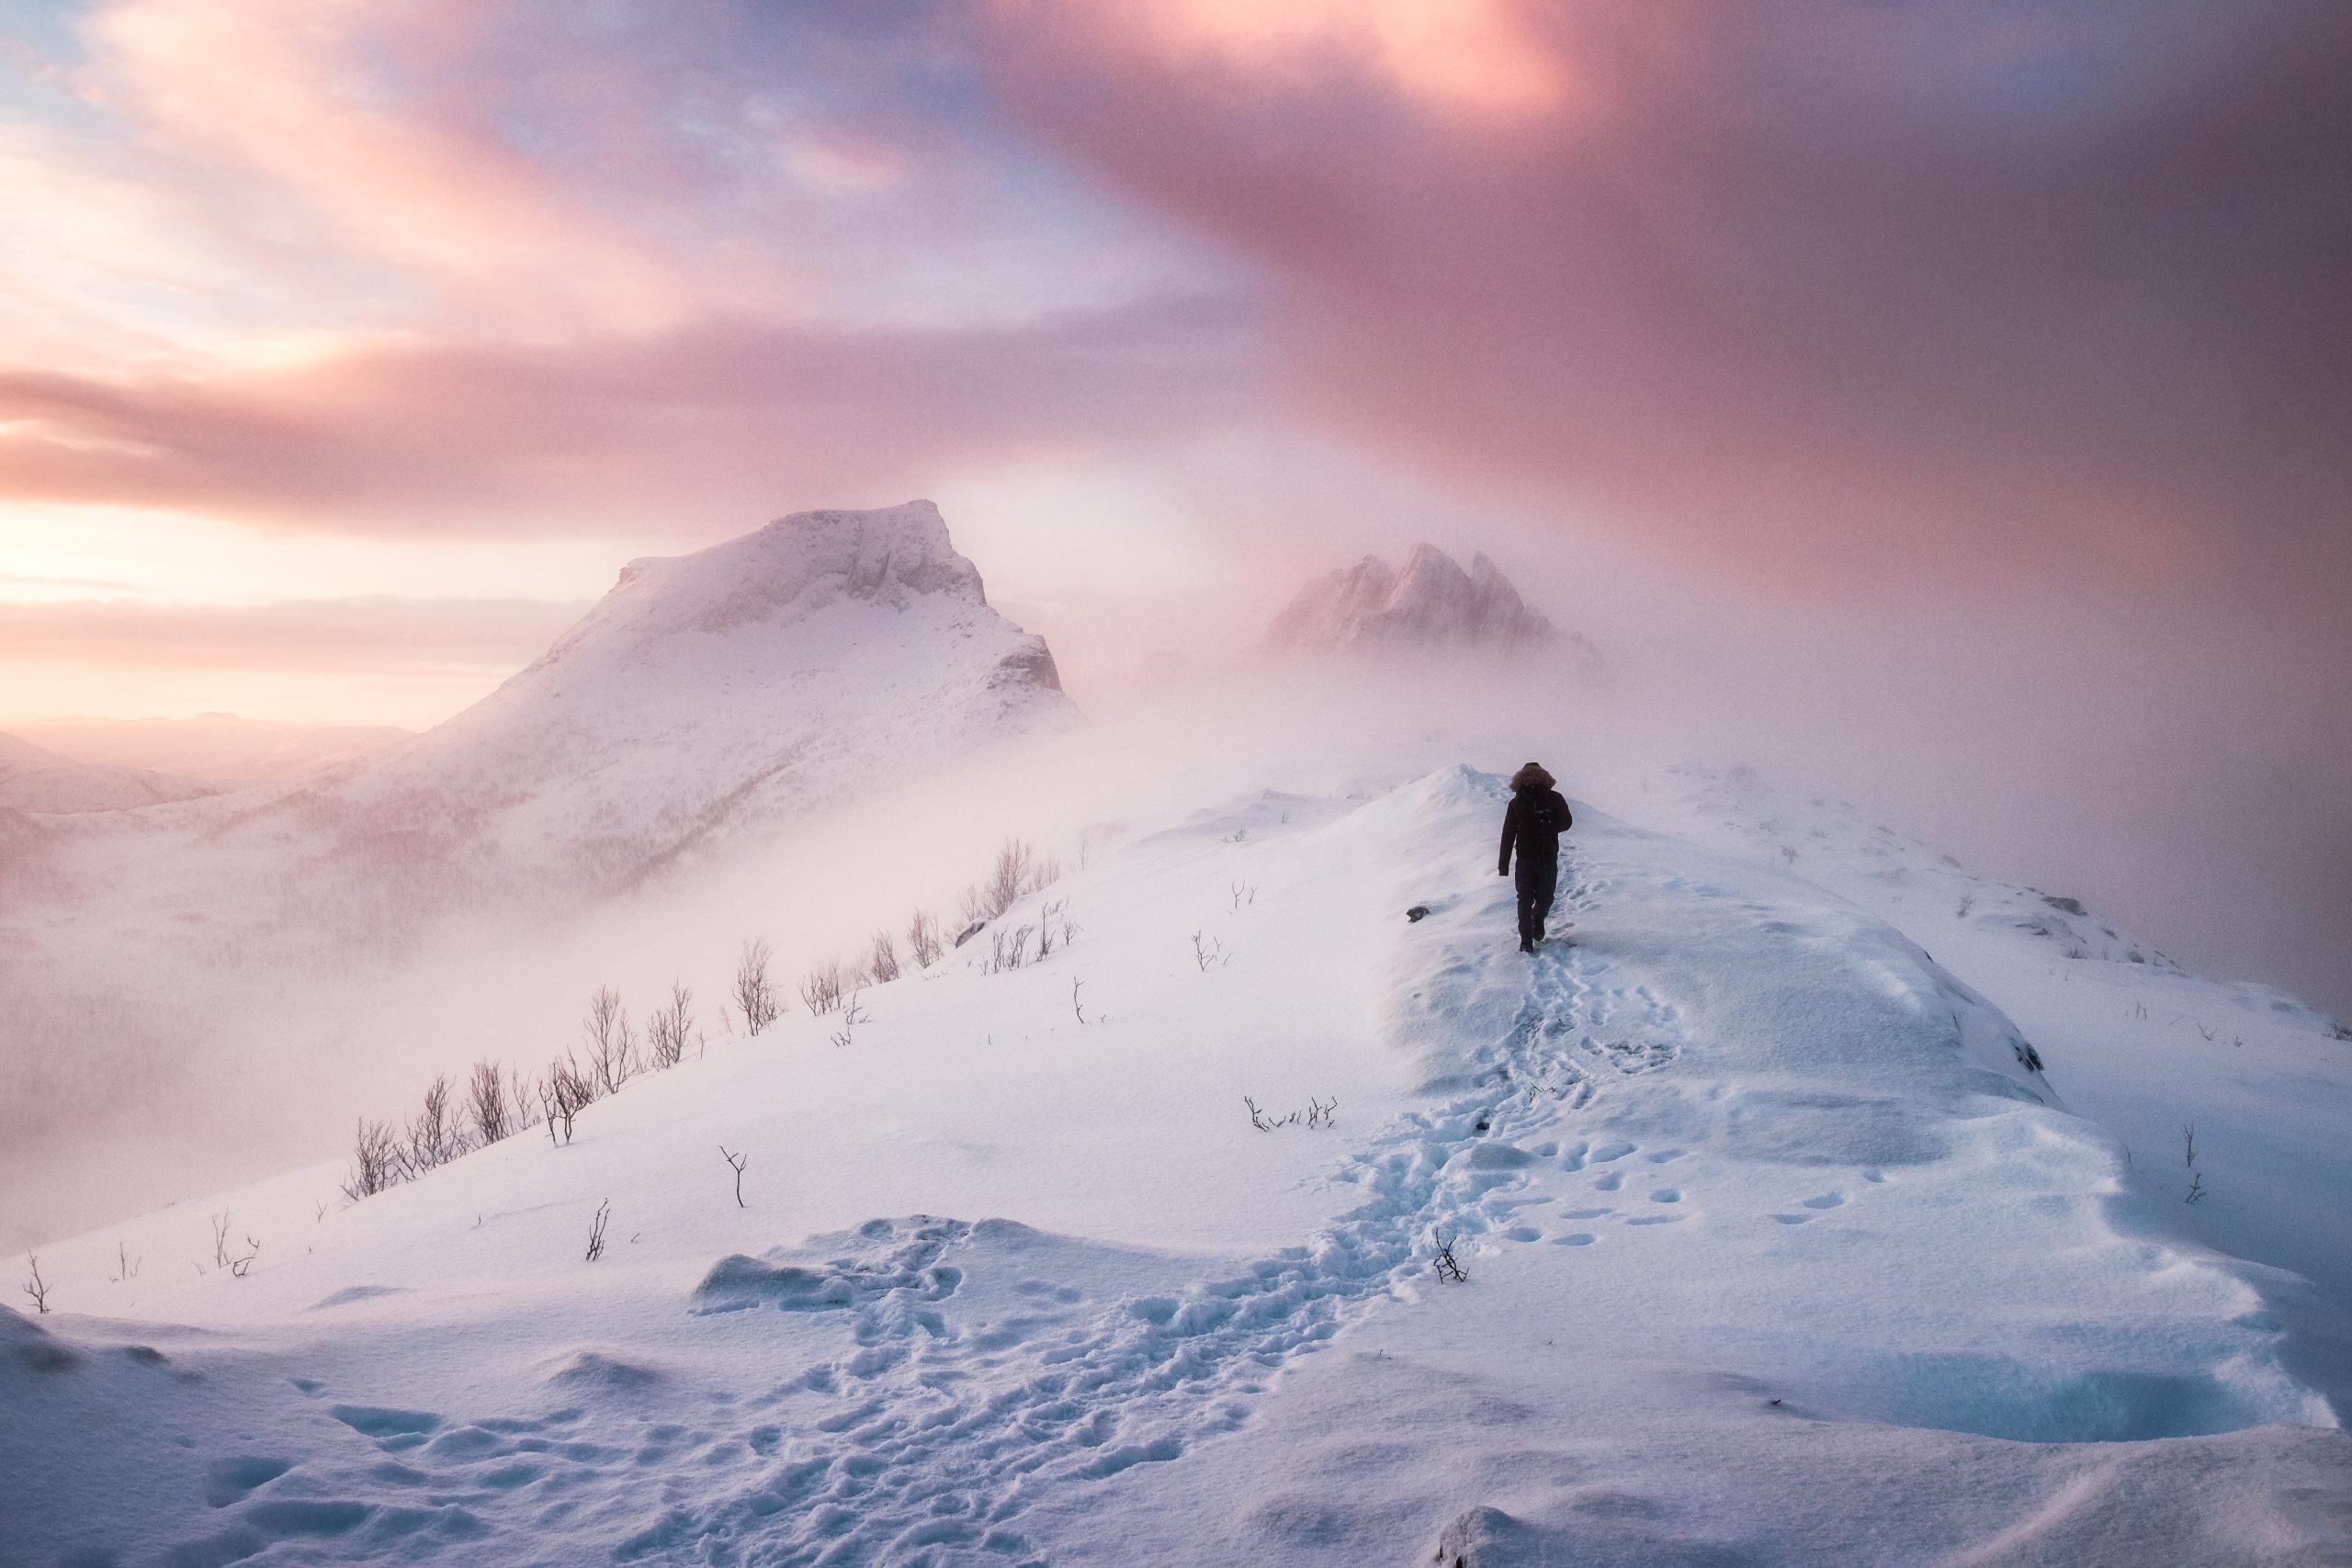
Photo by Mumemories via Shutterstock
Bright, reflective snow will trick your camera into underexposing the scene. When you look back at your files, you may notice grayish snow instead of the clean white you saw in person. The fix is simple: add exposure compensation. A boost of +1 to +2 EV is a great starting point, and you can adjust as necessary. This one habit makes a huge difference when you’re learning how to shoot in snowstorms.
Your shutter speed determines how snowflakes appear in the final image. A fast shutter—1/500 or more—will freeze individual flakes, giving the shot crisp detail. A slower shutter, like 1/60 or even 1/30, turns falling flakes into gentle streaks. I switch between both depending on the mood I want. Freezing the motion of flakes feels energetic; streaks feel dreamy.
Autofocus can struggle in heavy snowfall because flakes move unpredictably in front of your lens. Using continuous AF helps your camera track subjects instead of locking onto every passing snowflake. If you’re photographing people walking toward or away from you, this setting is essential. It also frees you to compose more creatively without worrying about missed focus.
Keeping Your Lens Clear for Clean Shots
Even a few flakes hitting your lens can soften your entire image. Sometimes you won’t even realize the problem until you zoom in later and notice a slight foggy patch. This is one of the most frustrating parts of figuring out how to shoot in snowstorms, but it’s easy to manage once you get into a rhythm. Stop occasionally, check the front element, and wipe it gently with a dry microfiber cloth.
Your shooting angle can help reduce build-up. Tilting the lens slightly downward makes it harder for flakes to land directly on the glass. A lens hood is also helpful for shielding the front edge. If the wind is shifting, using your body as a blocker works surprisingly well. I sometimes turn sideways for a moment just to give the lens a break.
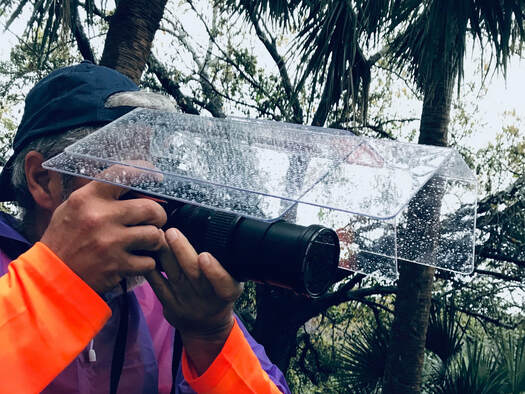
This is also where the Camera Canopy becomes incredibly useful. It mounts to your hot shoe and extends over your lens, giving you an unobstructed view of your settings while keeping the falling snow off your equipment. Unlike traditional rain sleeves, it doesn’t limit your hand movement or fog up from your breath. When showing people how to shoot in snowstorms, I almost always recommend it because it significantly reduces the amount of time you spend wiping your lens instead of shooting.
Protecting Your Camera From Moisture and Cold
Snowstorms bring a mix of falling snow, melting slush, and wind-driven moisture. Even weather-sealed gear isn’t invincible, especially around buttons and ports. Keeping your camera as dry as possible helps avoid long-term issues and saves you from worrying about damage while shooting.
Avoid repeatedly placing your camera inside and outside warm pockets or vehicles. Rapid temperature changes cause condensation, which can form inside the camera itself. Instead, keep your camera at a steady outdoor temperature for as long as you’re shooting. If it needs to warm up later, let the process happen slowly inside a closed bag.
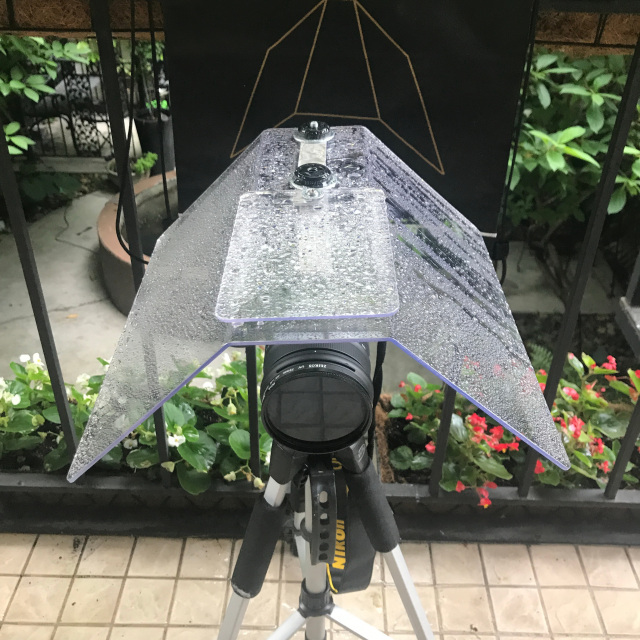
The Camera Canopy provides a simple, reliable shield against falling snow while still giving you full control over the camera. I’ve used it in wet, windy conditions where traditional covers failed miserably. For tripod setups, the optional rear shield adds an extra layer of protection—useful when you’re learning how to shoot in snowstorms in more stationary compositions.
Practical Gear Choices for Shooting in Snow

Not all gear is created equal when it comes to winter weather. While weather-sealed bodies offer peace of mind, non-sealed cameras can still handle snowstorms if you take the right precautions. A mid-range zoom, such as a 24–70mm or 24–105mm, gives you flexibility when you’re not able to change lenses outdoors.
Your clothing matters just as much as your camera setup. Gloves with partial finger access allow you to adjust settings without exposing your hands too long. Traction spikes transform icy sidewalks from dangerous to manageable. When talking to beginners about how to shoot in snowstorms, I often emphasize that staying warm keeps your creativity sharp.
Pack essentials, too: extra batteries (cold drains them quickly), multiple microfiber cloths, a small dry bag, and the Camera Canopy. It’s lightweight, easy to pack, and makes shooting in winter weather feel far more relaxed. It’s one of those items you’re glad to have the moment flakes start flying sideways.
Composition Tips for Snowstorm Conditions

Photo by Rachynska Nataliia via Shutterstock
Snowstorms simplify the world by reducing clutter. This makes it a great environment for beginners learning how to shoot in snowstorms. You can lean into the minimalism by letting blank spaces draw attention to your subject. A lone tree, a bench, or a person in a bright jacket instantly becomes the focus against all that white.
Look for strong shapes, clean lines, or bold colors. Snow-covered streets create natural leading lines, and snowfall adds texture without overpowering the scene. If you can position your subject slightly off-center or along a curve, you’ll often get a more dynamic image.
Don’t overlook candid human moments. People walking through a storm create natural storytelling opportunities. Kids playing, dogs bounding through the snow, or couples sharing an umbrella all add life to the environment. These small moments often become your favorite images from the day.
What to Do After Your Snowstorm Shoot
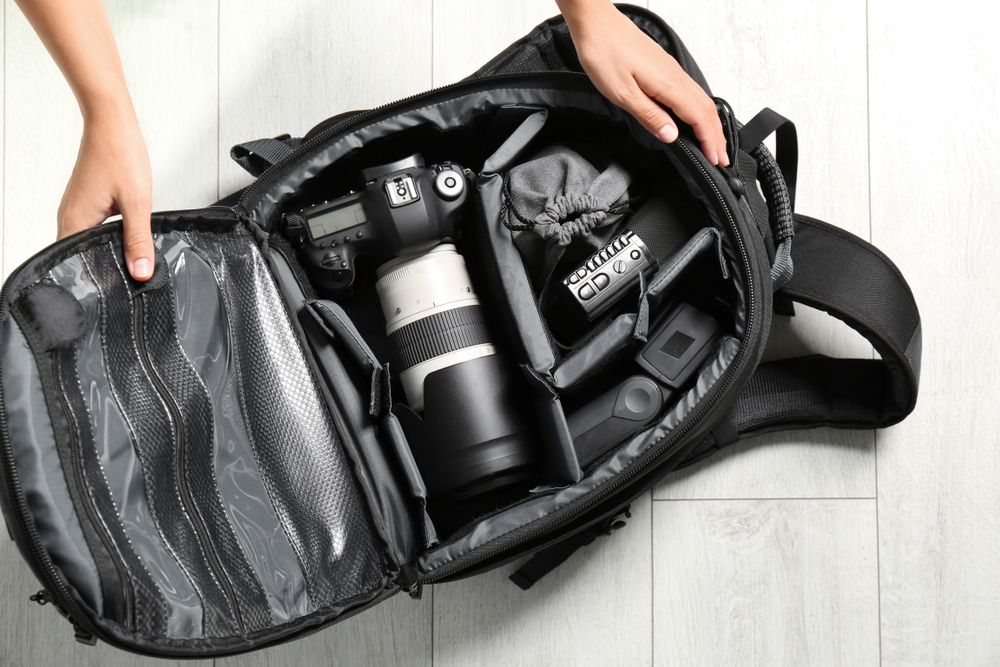
Photo by New Africa via Shutterstock
Once you’re back indoors, resist the temptation to open your camera bag immediately. Leave it closed so your gear can slowly warm up and avoid internal condensation. After about 30 minutes, open the bag and gently dry everything with a clean cloth. Let the equipment air-dry fully before sealing it back in the case.
Remove your battery and memory card so they can come back to room temperature safely. Batteries will regain some of their lost charge once they warm up, and cards will be less prone to condensation issues if handled gently.
While editing snowstorm images, boost the contrast slightly to counter the natural softness of the scene. Adjust white balance to correct blue tints caused by heavy clouds. You can also enhance clarity carefully. Too much, and the snow will start to look harsh rather than atmospheric.
Final Thoughts on Embracing Stormy Conditions
Photo by Jay Styles via Shutterstock
Shooting in a snowstorm is unpredictable, messy, and sometimes a little chaotic—but it’s also incredibly rewarding. Once you understand how to shoot in snowstorms with confidence, you’ll start to see opportunities everywhere: glowing streetlights, drifting flakes, and quiet scenes transformed by the weather. With the right mix of preparation, protective gear, and creative intent, you’ll come home with images that feel alive and authentic. Instead of avoiding harsh weather, you may find yourself hoping for the next big storm.
FAQ
How do I keep snow off my lens while shooting?
Keep the lens pointed slightly downward, use a hood, and wipe it with a microfiber cloth regularly. A Camera Canopy provides reliable coverage during active snowfall.
Is it safe to use non-weather-sealed cameras in snowstorms?
Yes, as long as you protect them from moisture. Keep the camera at a steady temperature and use a cover like the Camera Canopy to prevent snow from landing on the body and controls.
What’s the best shutter speed for photographing snowflakes?
Use faster shutter speeds (1/500 or above) for crisp flakes and slower speeds (1/60 or below) to create motion streaks. Experiment based on the look you prefer.
How can I prevent my camera from fogging up?
Avoid moving between warm and cold environments too quickly. Keep your camera outside for the duration of the shoot to maintain a stable temperature.
Why do my snow photos look gray instead of white?
Your camera is underexposing the scene. Add +1 to +2 exposure compensation to maintain clean, bright snow that reflects what you saw in person.
Our articles might have affiliate links and the occasional sponsored content, but don’t sweat it – if you buy something, we get a little kickback at no extra cost to you, and we only hype products we truly believe in!’
Learn More:
Hero photo by Luis Rojas Estudio via Shutterstock