
Lofoten Islands Norway: Photographic and Travel Guide
I recently had the opportunity of a lifetime to travel to Norway to photograph the northern lights (and many other Nordic wonders).
It's a place I've been dying to visit for years and years, and it certainly didn't disappoint.
More specifically, I explored the Lofoten Islands, a mecca for photographers that has beautiful sights everywhere you look.
Since it was my first trip to Norway, I wanted to create a short series of articles that act as a Lofoten Islands photography and travel guide.
In this installment, I want to give a broad overview of the trip, from the travel arrangements and accommodations to the areas I visited.
In future parts of this series, I'll take a deep dive into these topics so when it's time for you to head to Norway with your camera, you'll know where to go, what to do, where to stay, and so forth.
Let's get started!
Norway Travel Tips: My Travel Arrangements
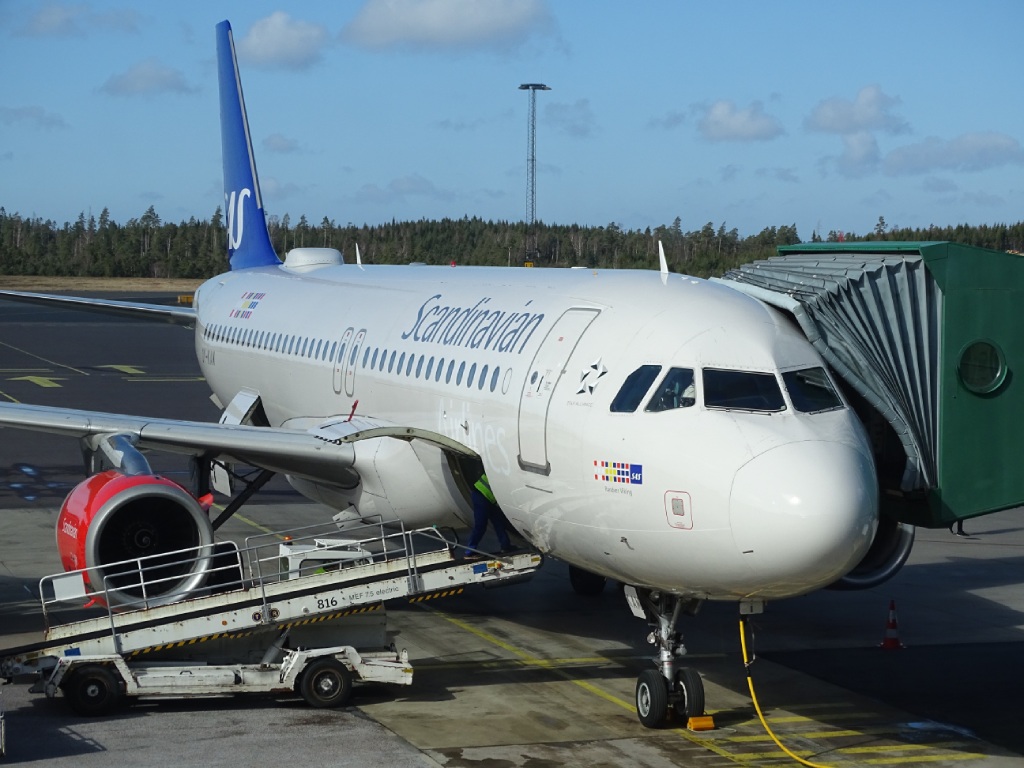 Photo by Miguel Ángel Sanz on Unsplash
My journey from Los Angeles to Norway began at LAX on SAS Airlines.
I flew non-stop from LAX to Stockholm, Sweden, and then from there to Oslo and on to Bodø.
Bodø has a very small airport, and was the final leg that SAS flies. At that point, I flew from Bodø to Svolvær on Wideroe Airlines, which, as you can see above, was on a much smaller plane. I didn't mind, though, being that I'm a trained pilot.
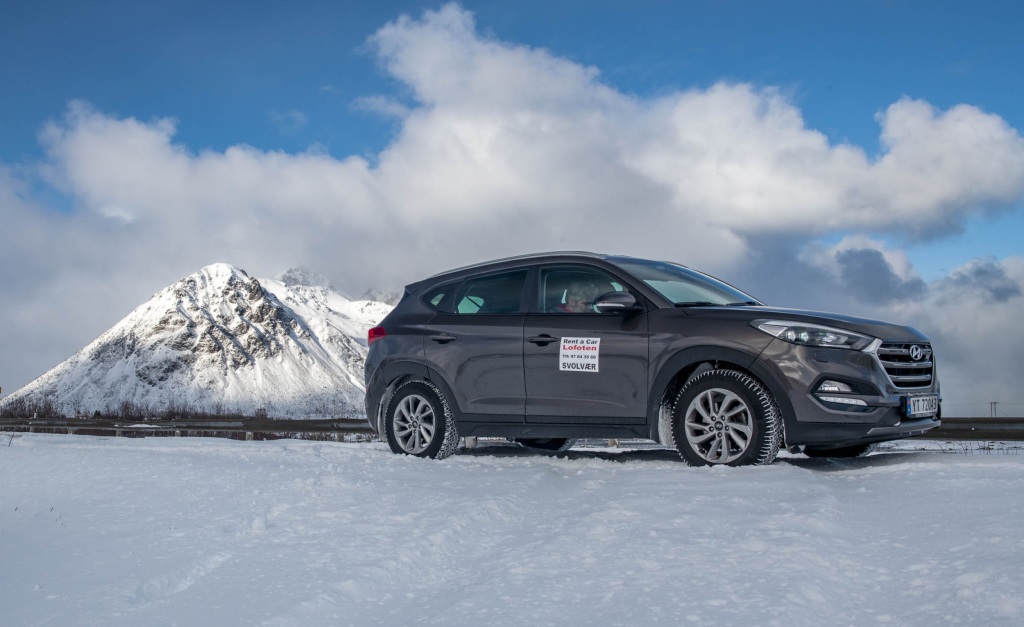
I made arrangements for a car before I left Los Angeles with a company called Rent a Car Lofoten.
Rather than renting from a big, multi-national company, I wanted to keep my money local, and I'm glad I did.
Upon arriving in Svolvær, I was met at the curb with my car, which was already on and warmed up for me.
That was just the start of the four-star service I got with Rent a Car Lofoten. Their representatives were knowledgeable, friendly, and ready to go the extra mile.
That was true on the tail end of the trip, too. I was able to drop off the car and be on my way in mere minutes - something that is not so easy to do over here in the U.S.
In fact, everywhere I went in Lofoten, the people were friendly, warm, welcoming, and most spoke English, which I greatly appreciated since I definitely cannot speak Norwegian.
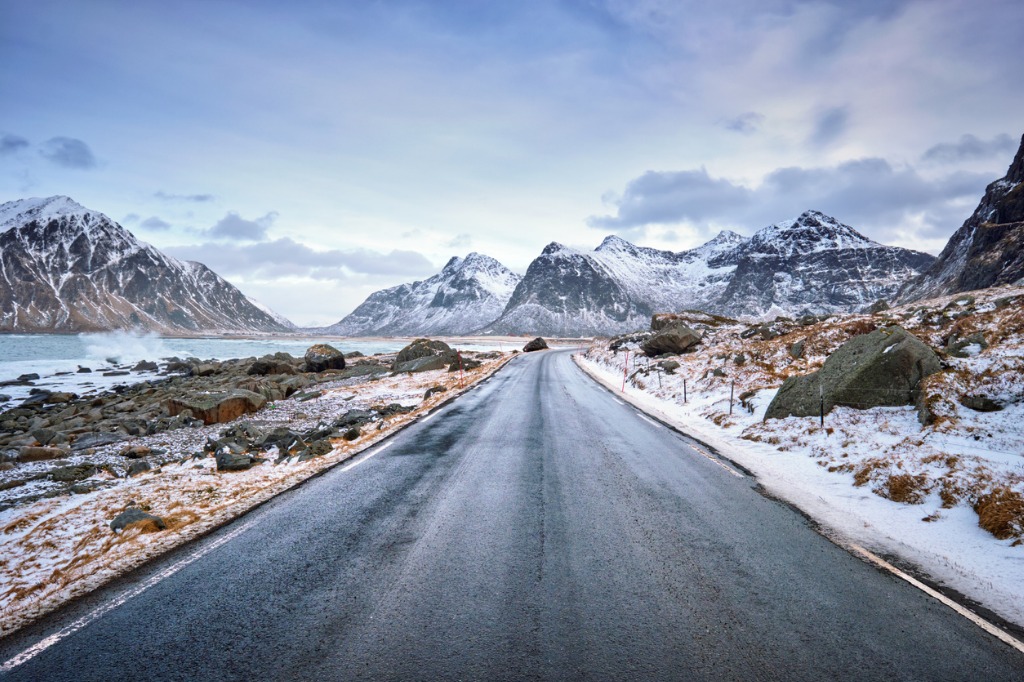 Photo by f9photos via iStock
As an American used to driving a big car on big roads, it took a little getting used to the very narrow roads in Lofoten. Not only that, but Norway in the winter means slippery roads with black ice. Living in Southern California as I do, that's something else I had to get used to, and fast.
The roads in Lofoten are also very curvy. Curves come up faster than you think, so it's important to slow things down and take it easy. I saw many cars getting towed out of ditches while I was there, and fortunately for me, being road aware prevented me from suffering the same fate.
I'd also recommend that you gas up your rental car at every chance you get. There are long stretches of road without filling stations, and about the last thing you want to do in Norway in the winter is sit on the side of the road with no gas!
Where to Stay in Norway: Svinøya in Svolvær
Svolvær was the ideal place to stay because it was smack in the middle of everything.
Aside from its central location, this quaint fishing village is absolutely drop-dead gorgeous.
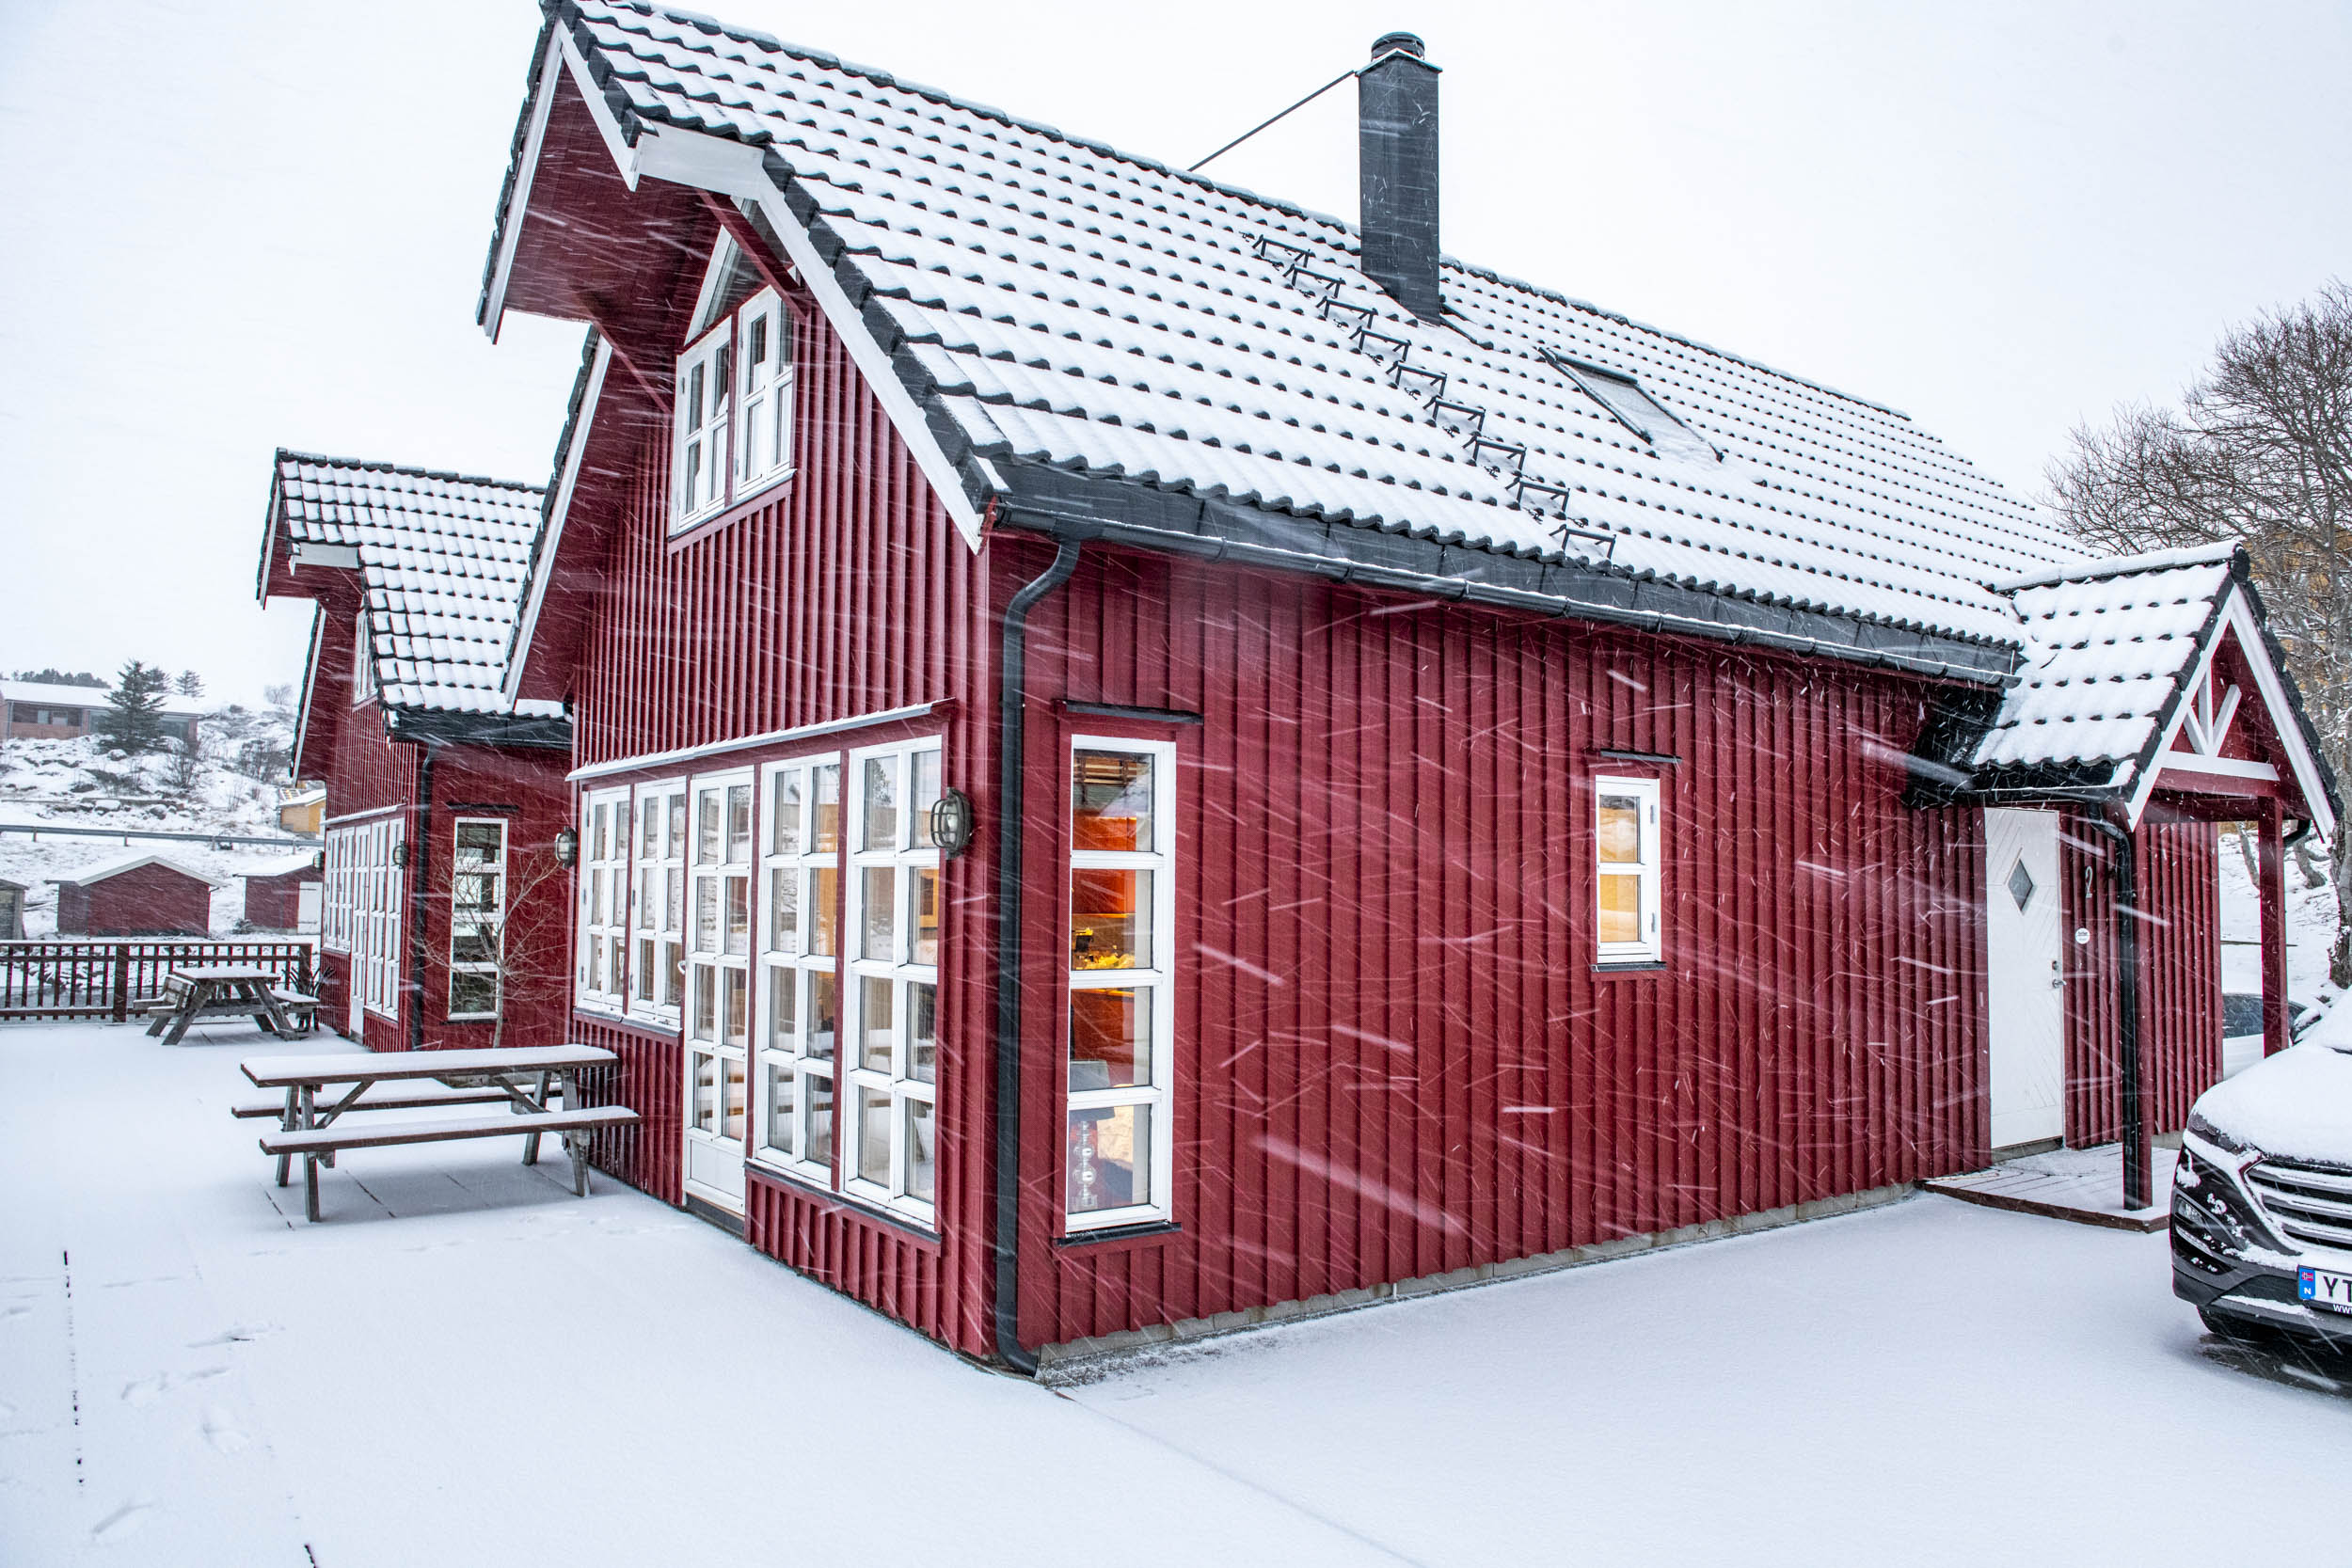
We stayed in a traditional Norwegian hut, which we rented through Svinøya.
Sure, there are hotels in the area, but why come all this way to stay in a cookie-cutter hotel when you can stay in a beautiful cabin right on the water's edge?!
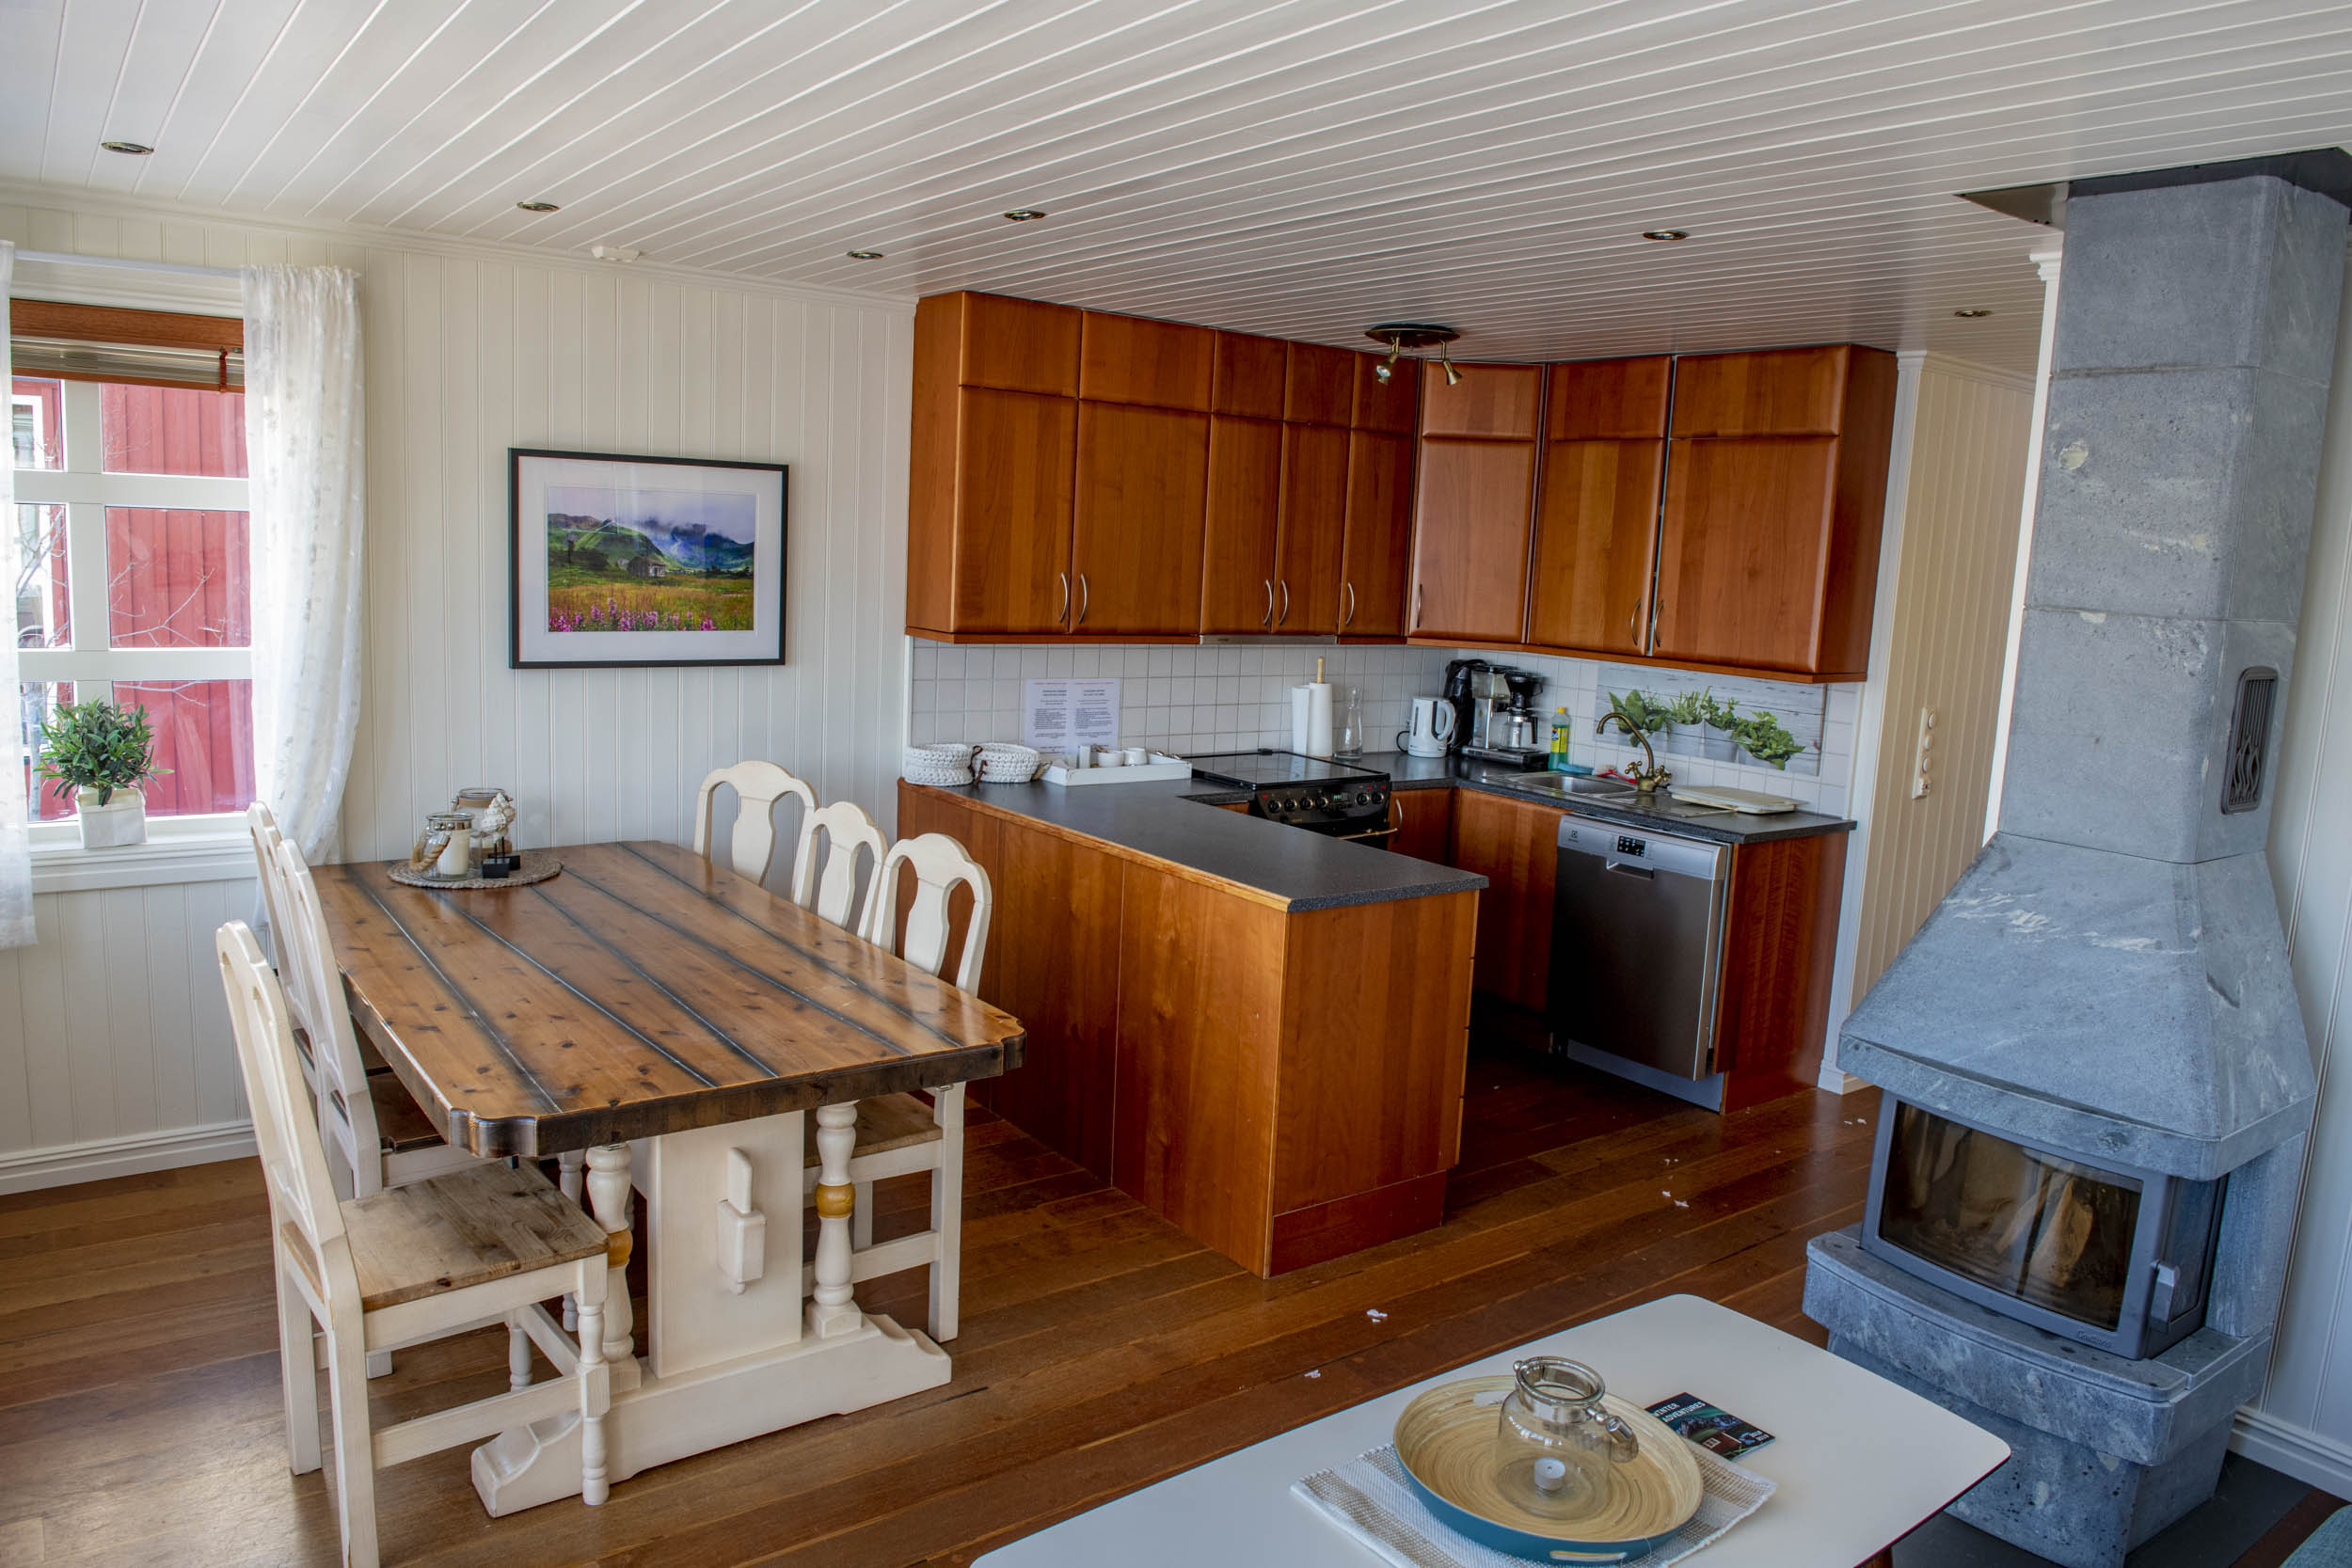
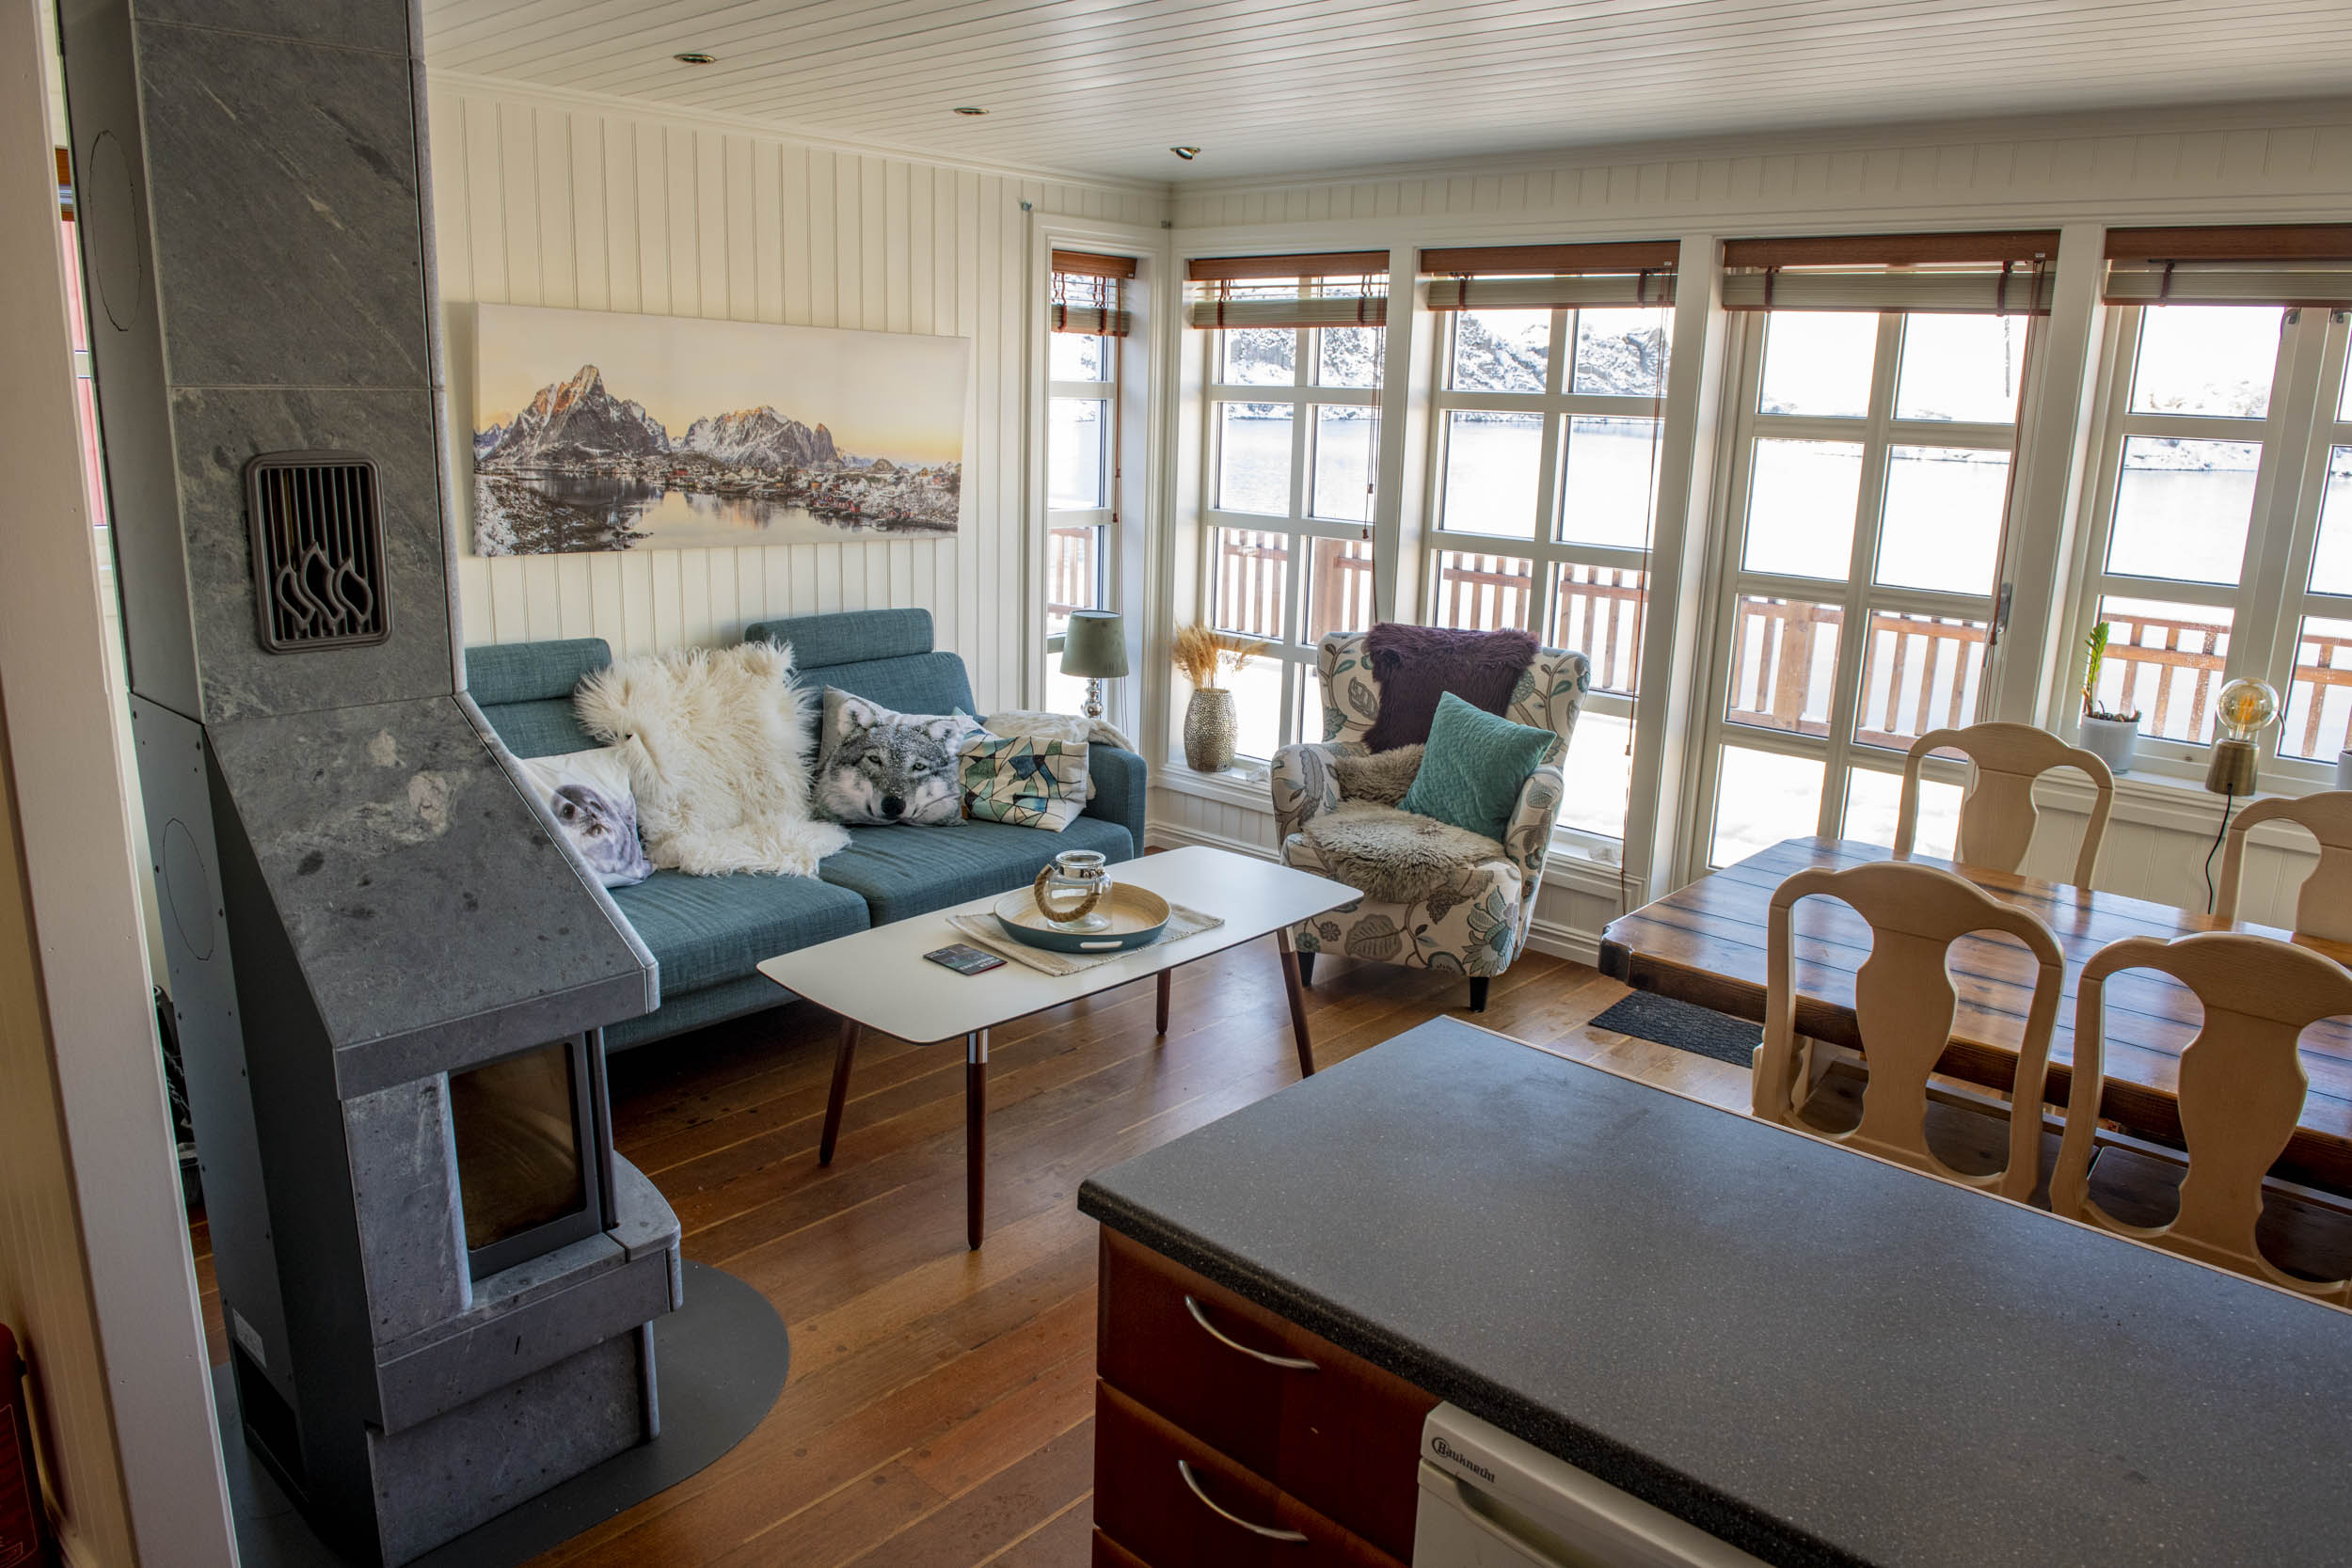
Our cabin was well-appointed with everything we might need during our stay.
Thankfully, there were large windows so we could take in the breathtaking views, even if we weren't out exploring.
Speaking of views, as you can see above, the view from our deck wasn't bad at all.
It was a gorgeous sight to see each morning when we woke up, and one that inspired us to get ourselves together and into the car so we could get out there and see more of what Norway had to offer.
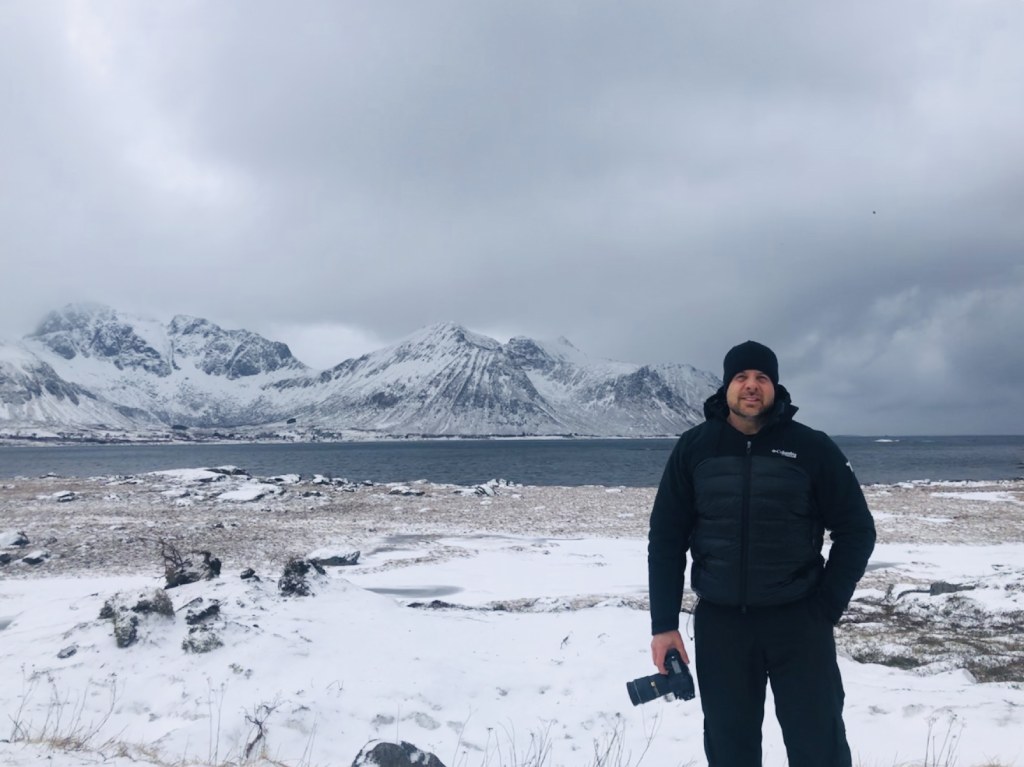
What to Wear in Norway in the Winter
Naturally, visiting Norway in the winter meant I needed to be prepared to keep myself warm for the long days and nights out shooting.
I want to give a shout out to Columbia for making some truly killer winter clothes.
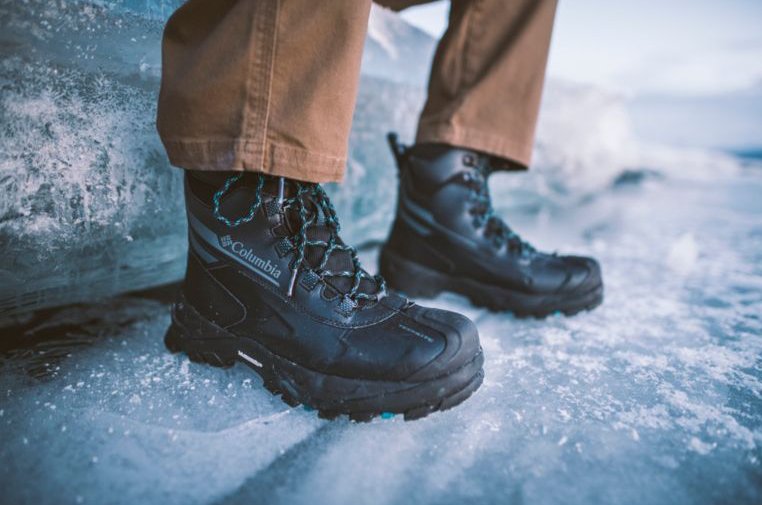
I picked up their Bugaboot Plus IV boots a couple of months before I left, and man, was that a good investment!
Those suckers are waterproof, seam-sealed, and insulated, in addition to having soles made by Michelin. Yes, that Michelin.
Needless to say, my feet were warm and dry and I didn't slip or fall one time with these babies on!
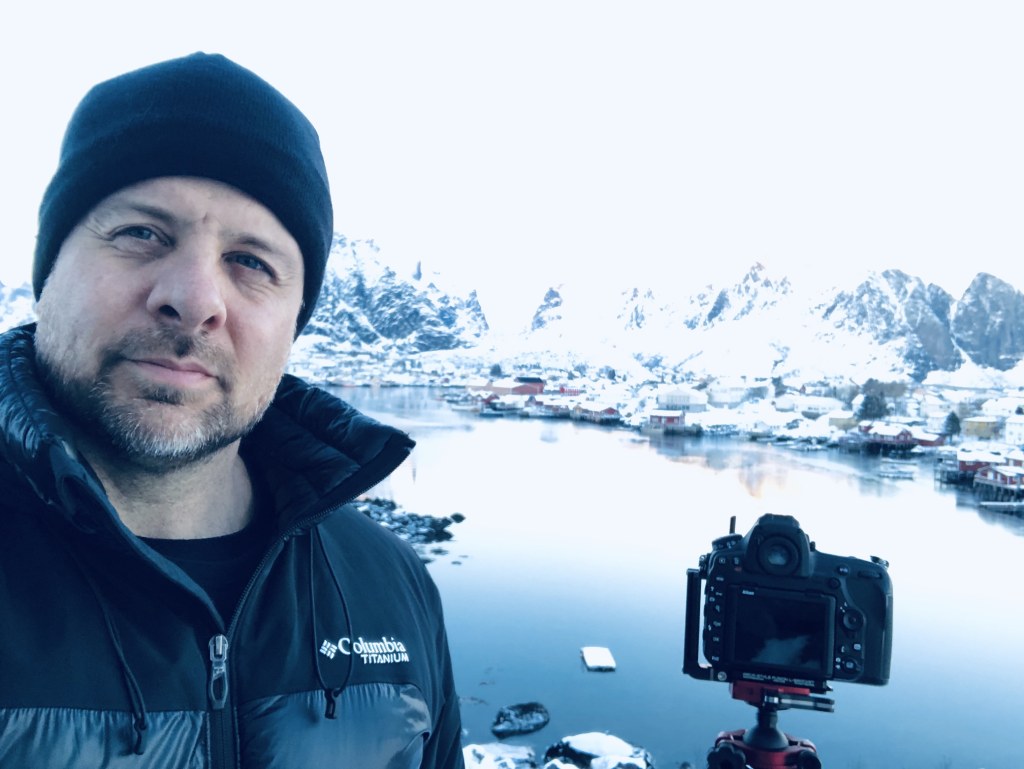
In the photo above, you can see my Columbia Heatzone TurboDown II jacket.
If you're a warm-weather kind of guy or gal and you head up north to a place like Norway, this jacket is exactly what you need.
The reflective heat technology on the inside of the jacket is no gimmick - it works extremely well. It's called 3D Thermal Reflective Omni-Heat, and it kept me toasty warm, even though it was obviously very cold while I was in Norway.
The shell is waterproof and breathable as well, so I was warm but not overly warm. It was perfect!
Underneath my jacket and pants was more Columbia gear - Titanium Omni-Heat 3D crew shirt and knit pants.
Again, Columbia's Omni-Heat 3D technology kept me perfectly warm, even as the temperatures dropped while I was out shooting late into the day.
But what I like even more about this top and these pants is that they are super soft. There's no itchiness to constantly bother you. Instead, they feel great against the skin while keeping you warm. It's a win-win!
My Ridge 2 Run III Pants - which themselves are waterproof and breathable and have the heat-reflective technology described above - also feature pockets all over the place for keeping cash, keys, lens caps and other items, internal gaiters to keep the snow out, and leg vents in case things get a little too toasty.
In other words, from head to toe, I had the ideal winter-weather outfit for exploring Norway!
Quick Tip: When you go to Norway in the winter, you need to bring a TON of clothes. That means having the right luggage to bring everything you need. To do so in comfort, I highly recommend the Nomatic Check-In roller bag. With space for 78 liters of gear (yes...78 liters!!) there is no shortage of space for your warm winter clothes. For items you don't want to check, the Nomatic Carry-On Pro is a rock star bag with TSA locking zippers, a removable tech compartment, and the same polycarbonate construction of the Check-In.
Filters to Bring to Norway
I often get asked what filters you should have with you when you visit a place like Norway. For me, there are two filters you need above all others.
First, as you can see from my photos above and below, the Lofoten Islands are surrounded by beautiful blue waters. All that surface area of water is a prime spot for glare from the sun, and to combat that, you need a polarizing filter.
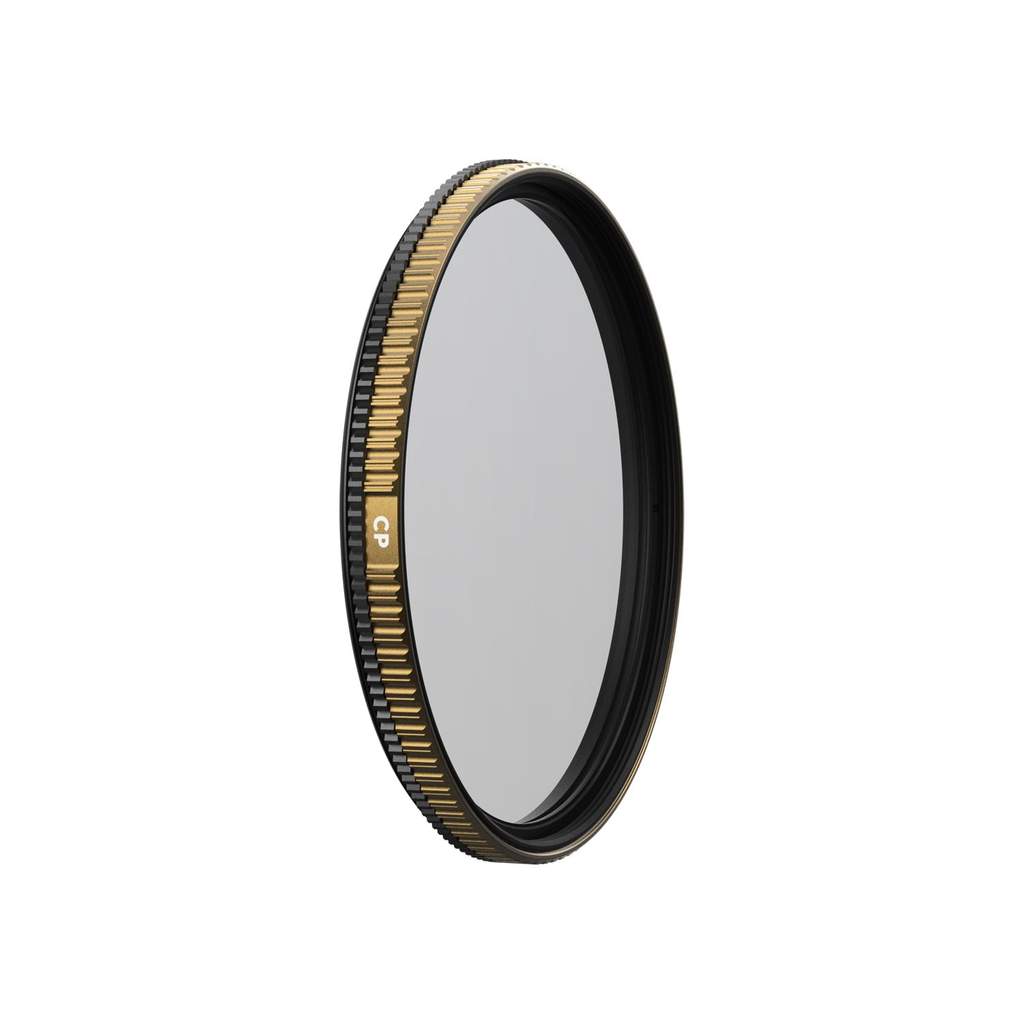
I used my PolarPro Quartzline circular polarizer while traveling around Lofoten to help fight sun glare, to boost the contrast in the sky, and to help minimize atmospheric haze that made distant land formations look a little soft.

Additionally, I had ND64 and ND1000 filters on hand to tackle daytime long exposure photography.
This set of three filters is all I needed to capture the shots I wanted, and with PolarPro quality, getting my shots was a simpler task!
I have been a fan of PolarPro for some time because their filters are simply spectacular.
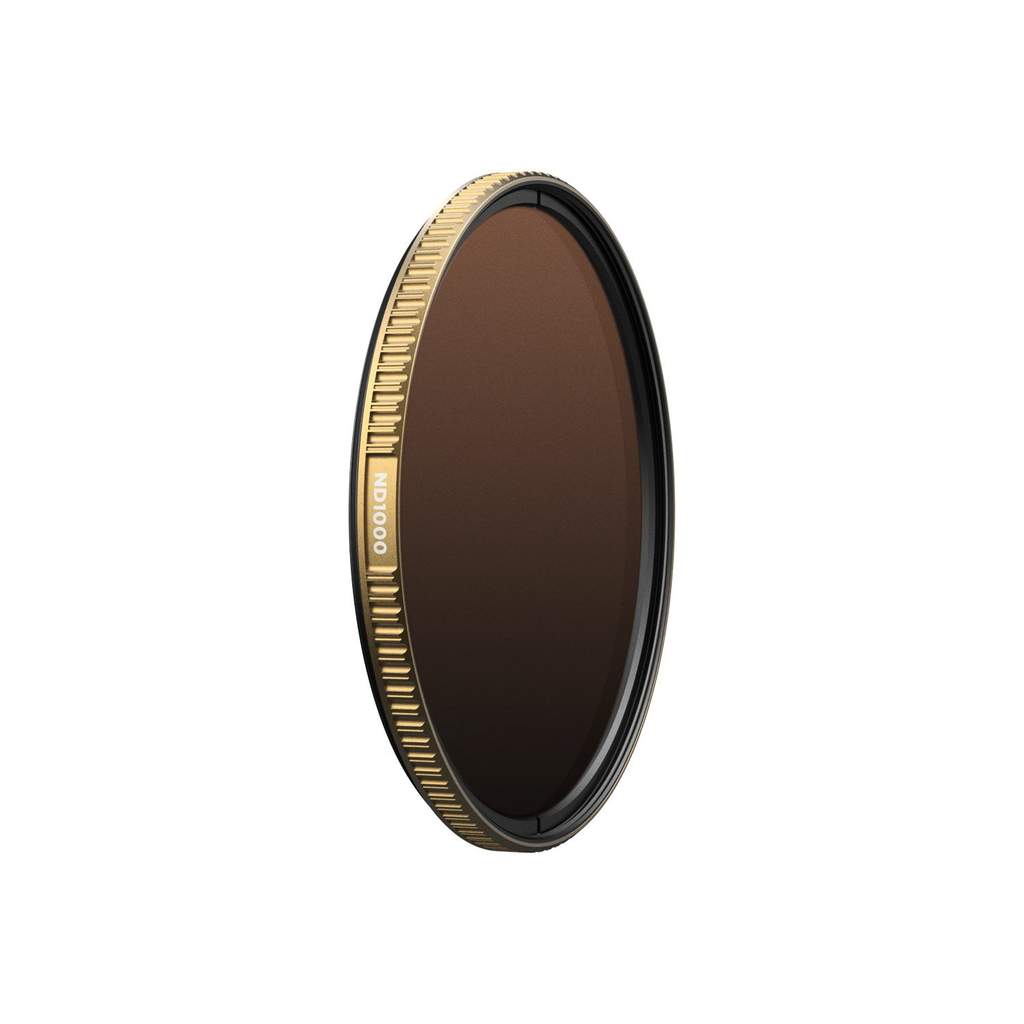
Not only are these filters made of 99.9 percent pure fused-quartz glass (which gives them impeccable clarity and durability), but they also have superb temperature stability. That's certainly a bonus when you're that far north in the winter!
The brass frames of these filters are super rugged, thread on smoothly, and are extremely durable. Even the harsh Norway winter was no match for these things!
I love how color neutral these filters are too. PolarPro has implemented a new coating process that results in zero color shift. Add to that a 16-layer coating that prevents scratches and repels water and oils, and I had the makings of a pretty remarkable set of filters for my trip.
So, what filters should you take with you to Norway?
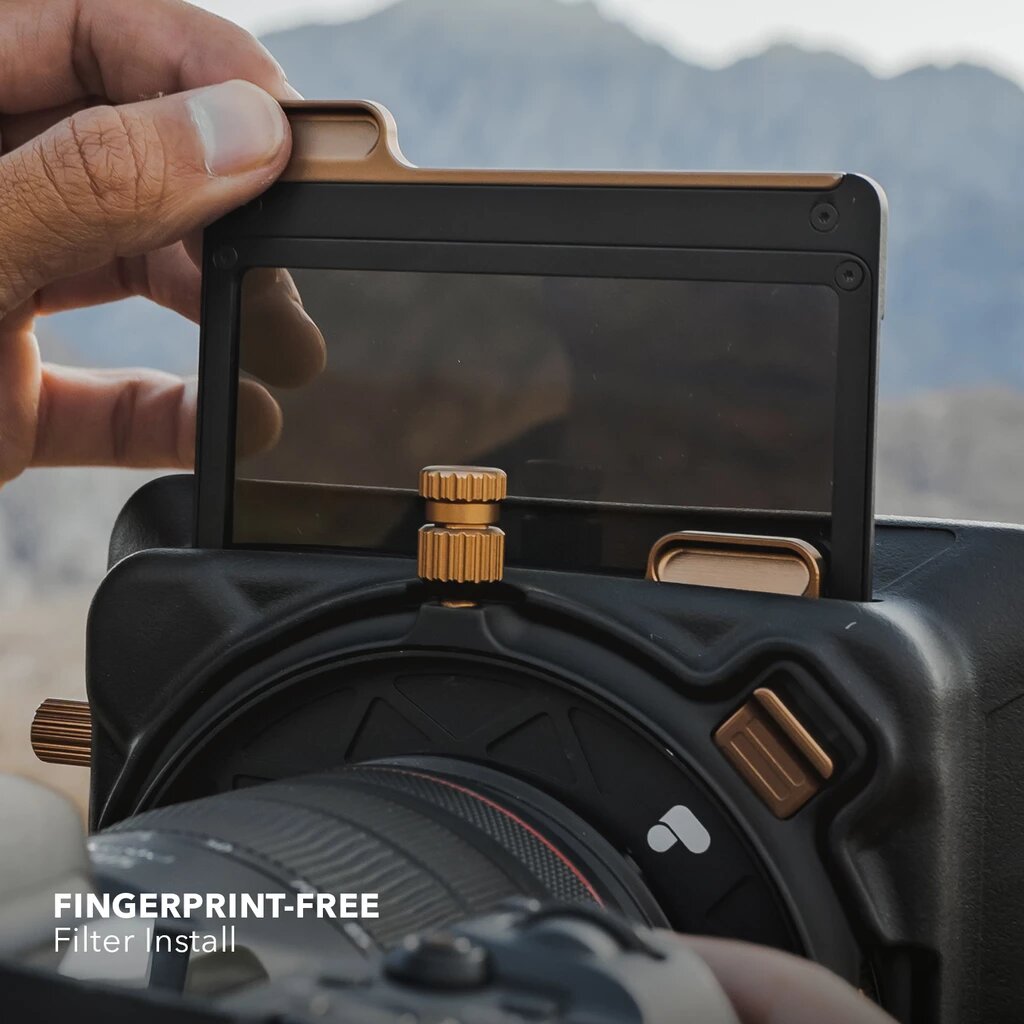
You can't go wrong with the Quartzline filters I used, but PolarPro has a newer line of filters - the Summit series - that's even more impressive than the Quartzline filters I took on my trip.
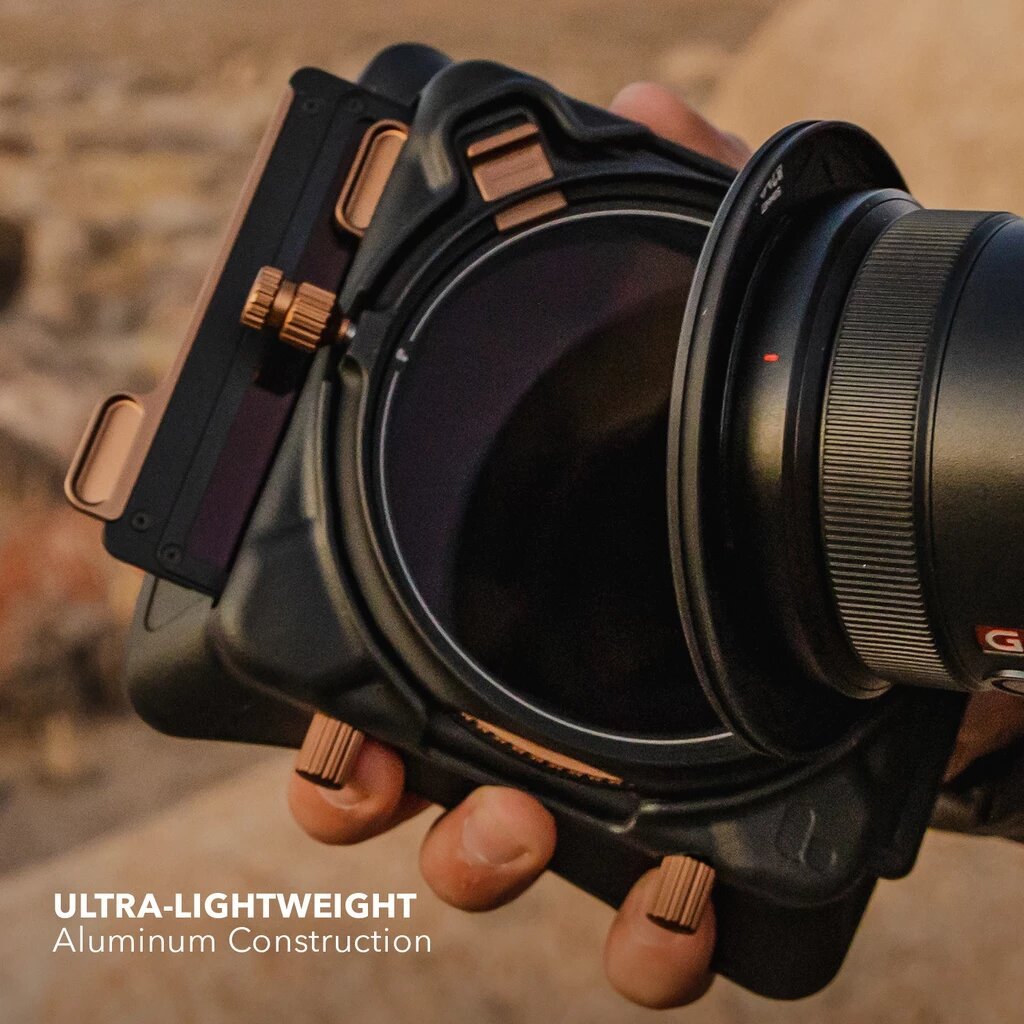
One of the best updates PolarPro implemented with these filters is the fingerprint-free install. Each filter has an aluminum frame that enables you to install the filters without the worry of smudging the filter glass.
What's more, the frames are crafted from super lightweight aluminum, so you get the durability you want without the added weight to carry around.
The Summit Core has an integrated slot for a circular polarizer, which offers you easy access for controlling the polarizer. It's also a fully light-sealed system, so you don't have to worry about light leaks messing up your shot.
The Summit Core also offers tool-free mounting, a snap-on hood attachment, and a filter lock for your convenience.
The Summit filters carry on the tradition of impeccable build and image quality with fused Quartz glass and multi-layer coatings. With a user experience that makes them a breeze to use, the PolarPro Summit series would be my choice for a return trip to Norway!
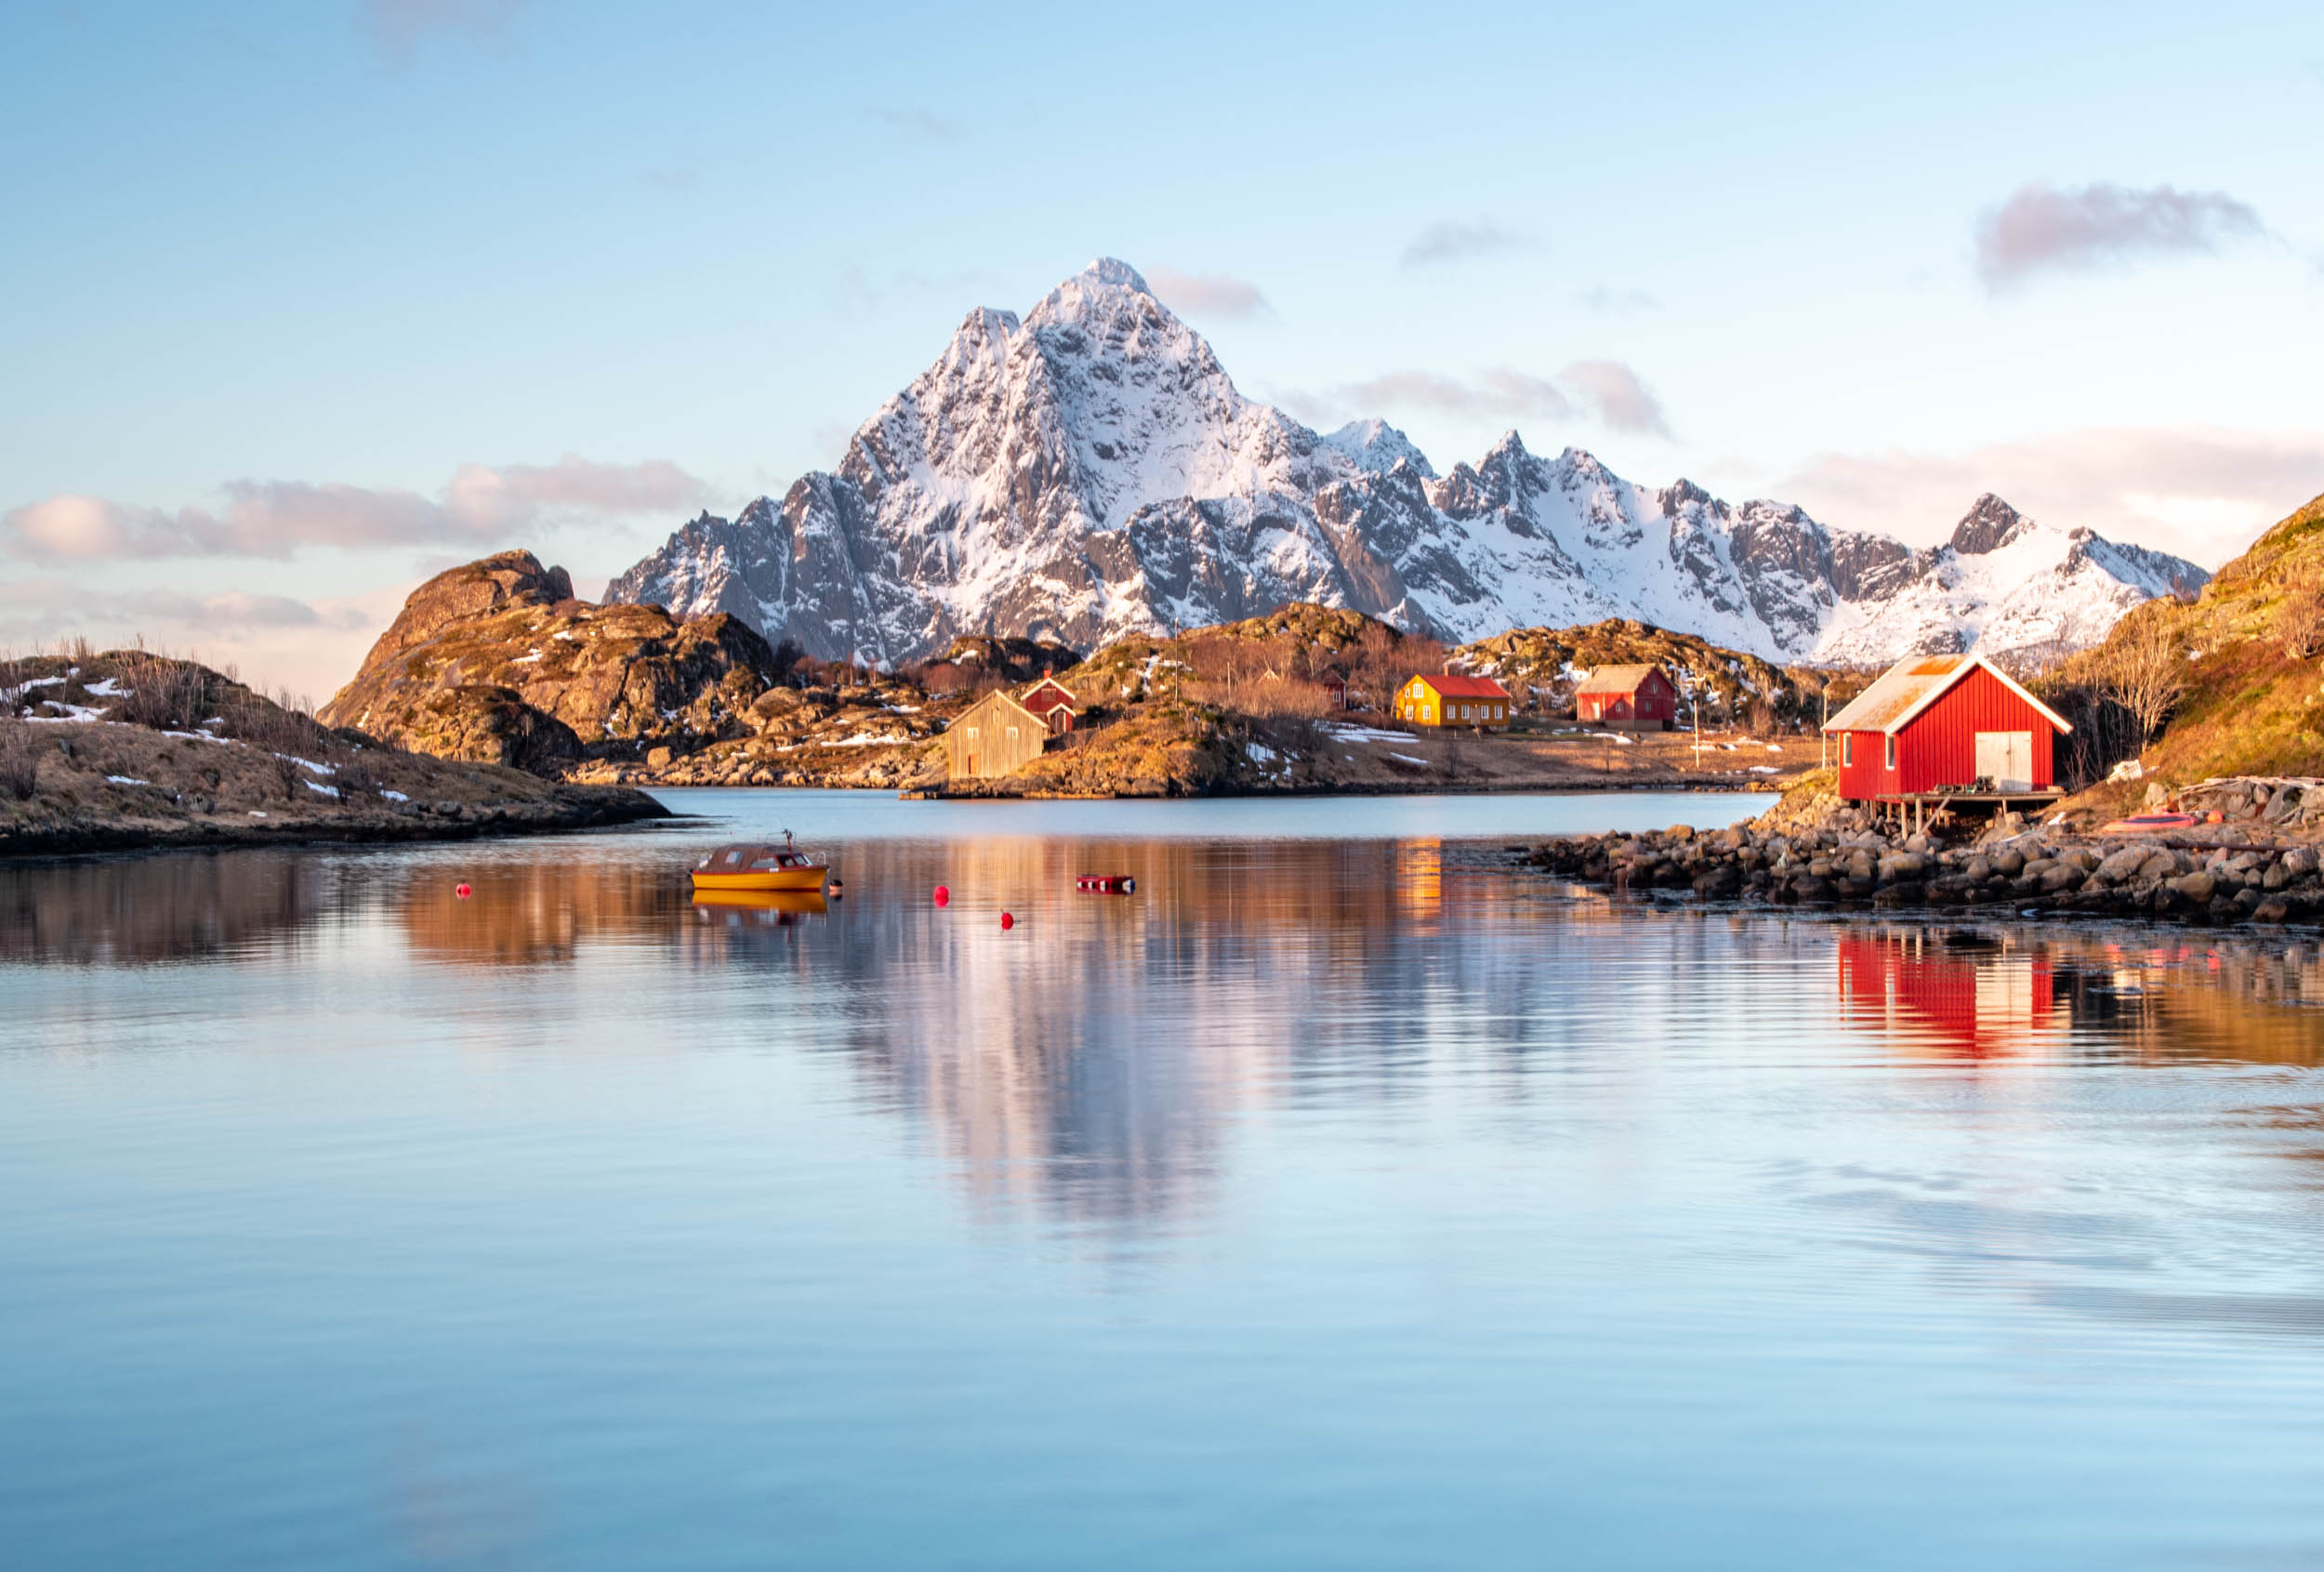
What to Photograph in the Lofoten Islands
Norway is a huge country full of breathtaking landscapes, but if you're like me, one location - the Lofoten Islands - stands out among the rest as a must-visit location for photography.
I'll just say that seeing these islands in photos on a computer screen does no justice to the unbridled beauty of this area.
Its location in far northern Norway means it's far enough off the beaten path that it remains a relatively unspoiled area.
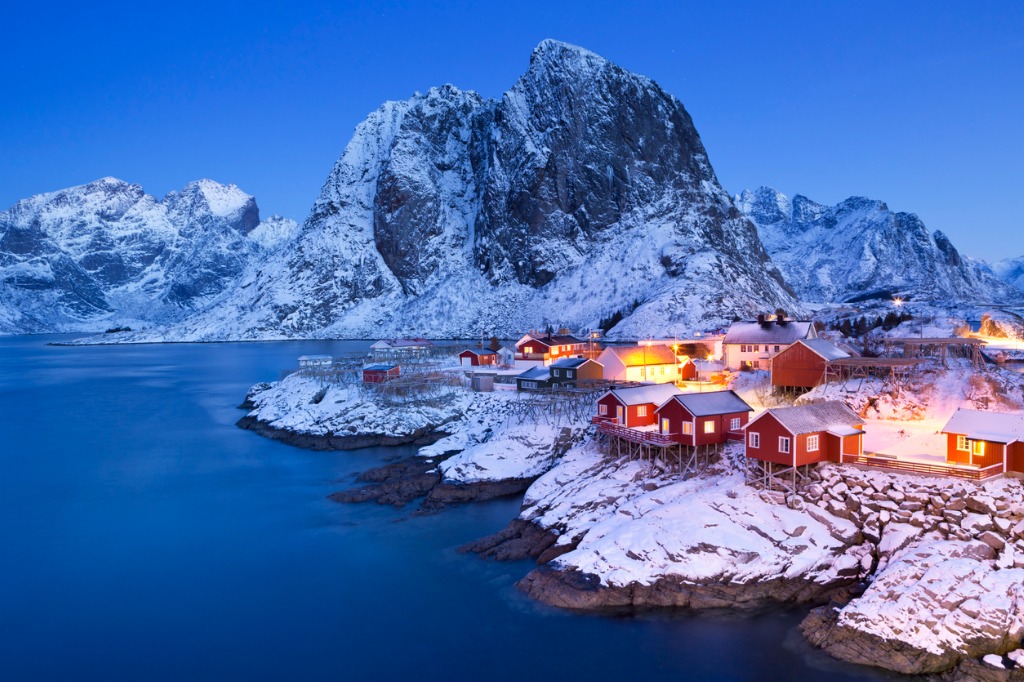 Photo by sara_winter via iStock
Surrounded by the churning waters of the Norwegian Sea, the islands are closely intertwined with the fishing industry.
The soaring mountains that dot the landscape are truly impressive, as are the majestic fjords with cool blue waters.
Naturally, many photographers like myself trek to Lofoten, so tourism has become a primary industry in this area.
Fortunately, Loften's residents are working to keep their lands accessible and unspoiled while also striving to preserve their culture and traditions.
In fact, Lofoten is pursuing a Sustainable Destination designation. This certification signifies a dedication to providing visitors like me with the experience of a lifetime while focusing on reducing the negative impacts of the tourism industry.
It's a truly humbling experience to be amongst such incredible beauty, and the fact that the residents of Lofoten are working hard to preserve that beauty for future generations is quite inspiring.
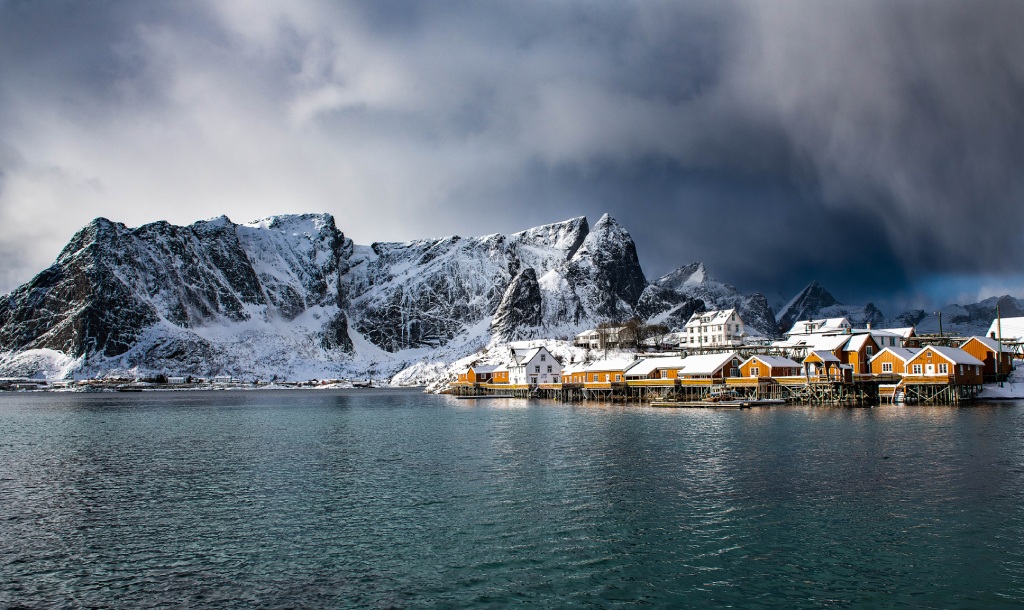
I'll get into the specifics of the locations we spent most of our time in future articles in this series, but to give a broad overview, Hamnøy, Reine, and Svolvær are must-see locations when you're in this neck of the woods.
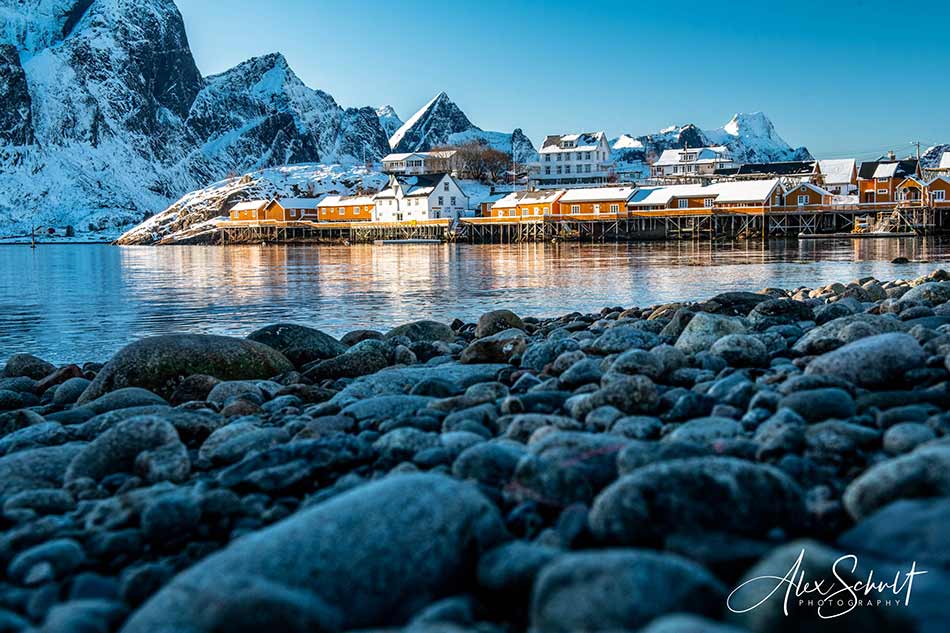
Reine, shown above, was one of my favorite spots because of the gold-colored huts.
As you can see, there is the potential for some truly dramatic skies during the afternoons there!
Hamnøy is the "it" spot in the Lofoten Islands. It's a tiny island and fishing village with the iconic red fishing huts dotting the rugged coastline.
But now that I think about it, there are tons of "it" photography spots in Lofoten. It's just incredible how much beauty there is to see.
Like I said above, I'll be writing more detailed Norway photographic and travel guides in the coming weeks, so stayed tuned for those so you can get more specific details on this magical place.