
How to Take Gorgeous Interior Real Estate Photos
- Basic Camera Settings for Real Estate Photography Exteriors
- Basic Camera Settings for Real Estate Photography Interiors
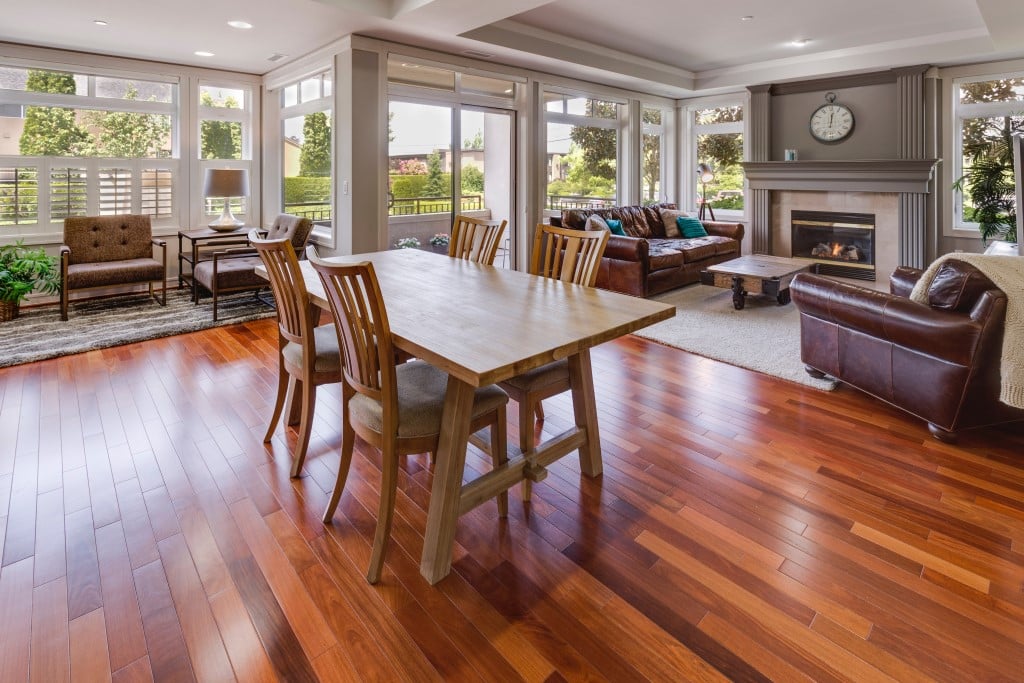
Photo by Francesca Tosolini on Unsplash
Interior real estate photography doesn’t need to be daunting. In fact, any photographer can do it with the right tools.
But, that doesn’t mean it isn’t technical. You need different camera settings while learning how to photograph interiors vs. exteriors. You need the right equipment. But most of all, you need to sift through a lot of disinformation, and a lot of competing opinions.
After all, real estate photography is still an artform, and art is subjective.
So, I’ve put together a list of real estate photography tips that just about everyone agrees on.
Rely on Natural Light
Photo by Francesca Tosolini on Unsplash
A lot of real estate photographers take the time to bring in artificial lighting to take interior photos.
While this doesn’t always completely throw off a photograph, sometimes these artificial lights can throw bad shadows on walls, ceilings and the floor. These are bad shadows that you will later need to fix.
Instead of relying on the use of artificial light, instead focus on using as much natural light as humanly possible. Map out the layout of a house before a shoot to ensure you’ll be able to photograph each room right when the most sunlight is streaming through the windows.
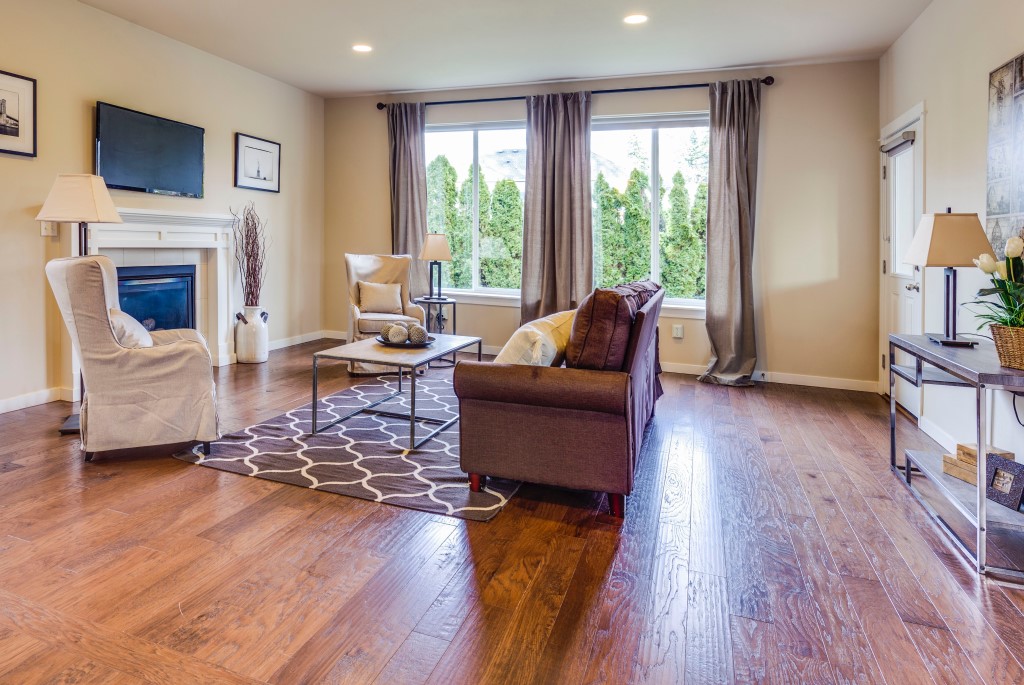
Photo by Francesca Tosolini on Unsplash
Natural light lends an openness to interior spaces that cannot be replicated with artificial light and can make even the dreariest of rooms come to life.
If you try to photograph an interior room, exposing the image for the room will result in windows that are completely blown out. Conversely, if you expose for the windows, the room will be far too dark.
The question is, how do you capture images like the one above, in which both the room and the view out the windows are well exposed?
The solution to this is simple - bracket your exposures and merge them together.
As explained in the video above, bracketing exposures is a simple process of using your camera's auto exposure bracketing feature to capture multiple images, each of which is taken at a different exposure level.
Then, simply merge the images together in a post-processing program like Photomatix to create a final image that is well exposed throughout. It’s as simple as that!
Create Images With Depth
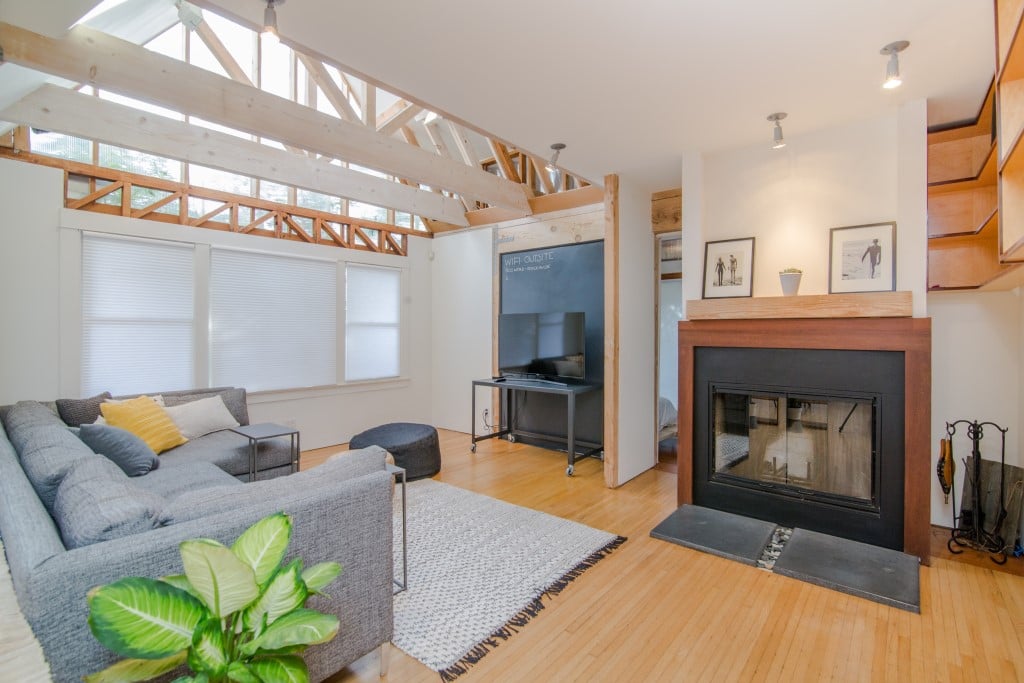
Photo by Outsite Co on Unsplash
Just because you’re shooting real estate photography now doesn’t mean all of your old rules of photography fly out the window.
You need to draw the viewer into your photos through depth. You’ll want at least three distinct layers to each photo.
In the case of the photo above there are many more - the plant in the foreground, the couch and the fireplace in the midground, the TV area and window in the background, and so forth.
Notice how everything in this shot is beautifully sharp - when creating images with depth, this is of the utmost importance.
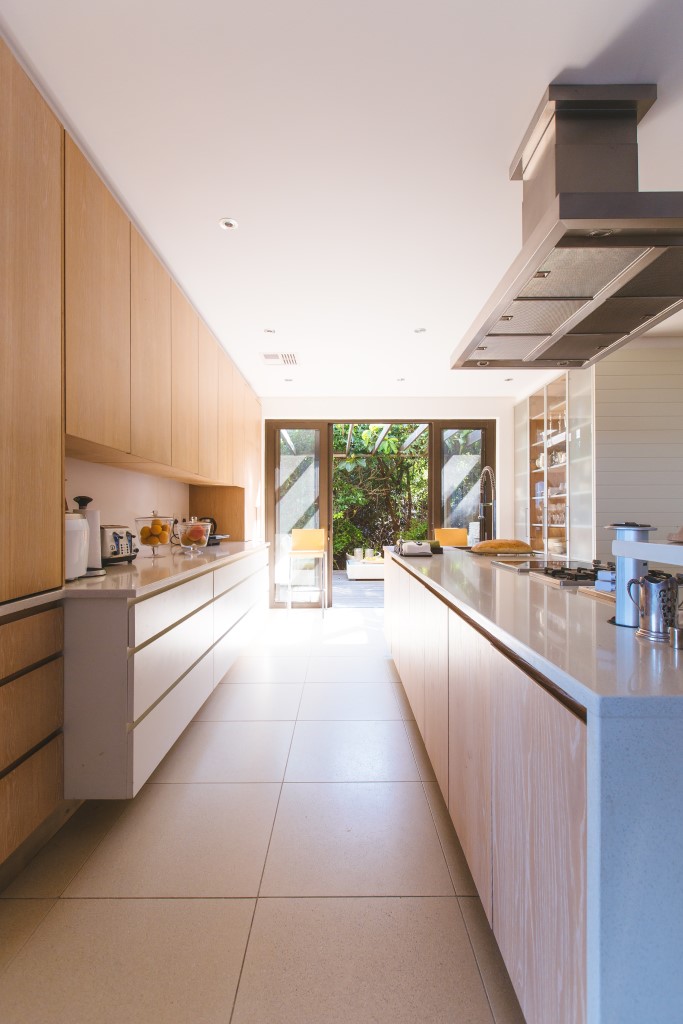
Photo by Jason Briscoe on Unsplash
Think of what items you can place in the foreground, middle and background of your photos to lead the viewer’s eye into the entire photograph. This can be a strategically placed plant, a chair you moved just so, or a rug.
Or in the case of the photo above, the lines created by the kitchen cabinets (and the grout lines on the floor) help drive your eyes from the foreground to the background of the image.
This is particularly important for this space because of the garden area in the background. All of these lines leading your eyes toward the doors and to the outside help connect these spaces.
>
Learn More:
Think Purposefully About Composition
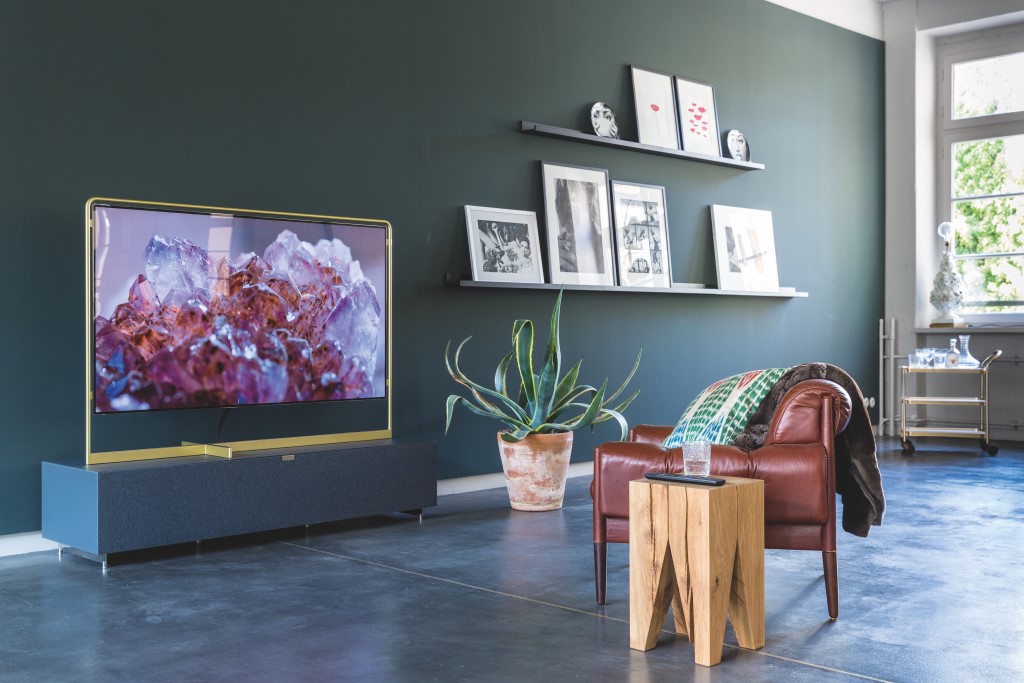
Photo by Loewe Technologies on Unsplash
The photos you take of interior spaces will often be the first opportunity a potential buyer has to inspect the home. As a result, your images need to be composed in a way that makes the space look inviting.
Relying on the old standard rules like leading lines and the rule of thirds will get you improved interior real estate photos.
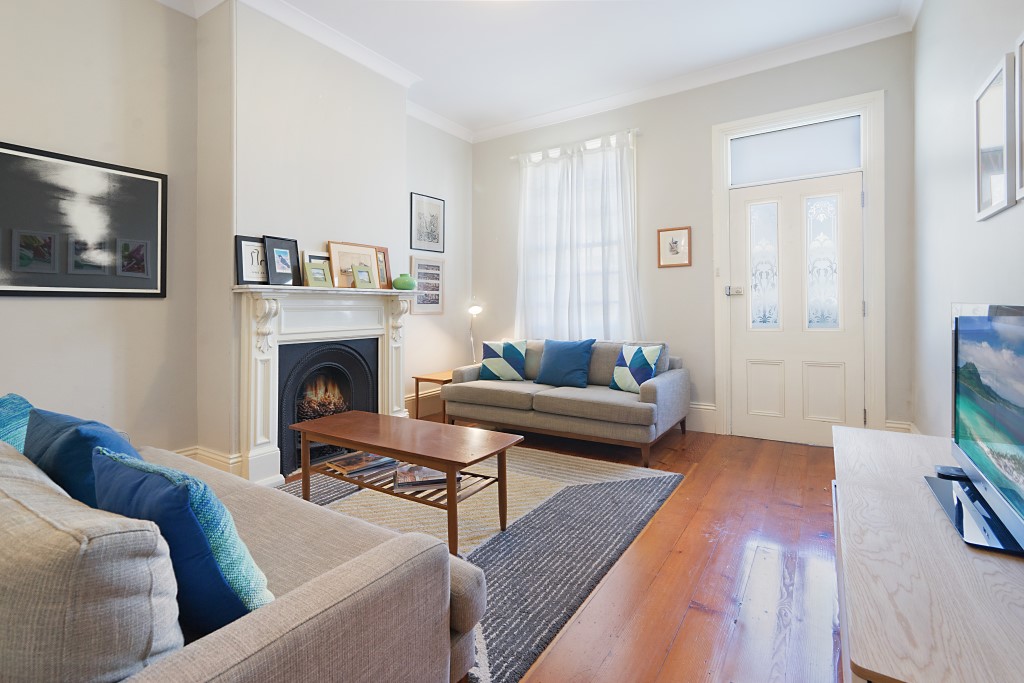
Photo by Greg Rivers on Unsplash
In this example, you can see both of these rules at work - the lines created by the arm of the couch, the desk, and the wood flooring help move our eyes from foreground to background.
Likewise, notice how elements of interest are placed along the imaginary rule of thirds grid - the door, for example, is positioned at the right-most one-third like while the fireplace is placed at the leftmost one-third line.
Photo by Ostap Senyuk on Unsplash
When composing your shots, try to find ways to photograph the room at an angle as well.
Where a room can look flat when photographing it straight on, doing so at an angle - even a slight angle as shown above - can help improve the feeling of depth in the room.
Remember, you only get one chance to give a home a good first impression on buyers. The more you concentrate on composing eye-catching photos, the better the chances that your photos will capture the attention of a potential buyer.
Learn More:
Learn Skills to Aid You in Taking High-Quality Shots
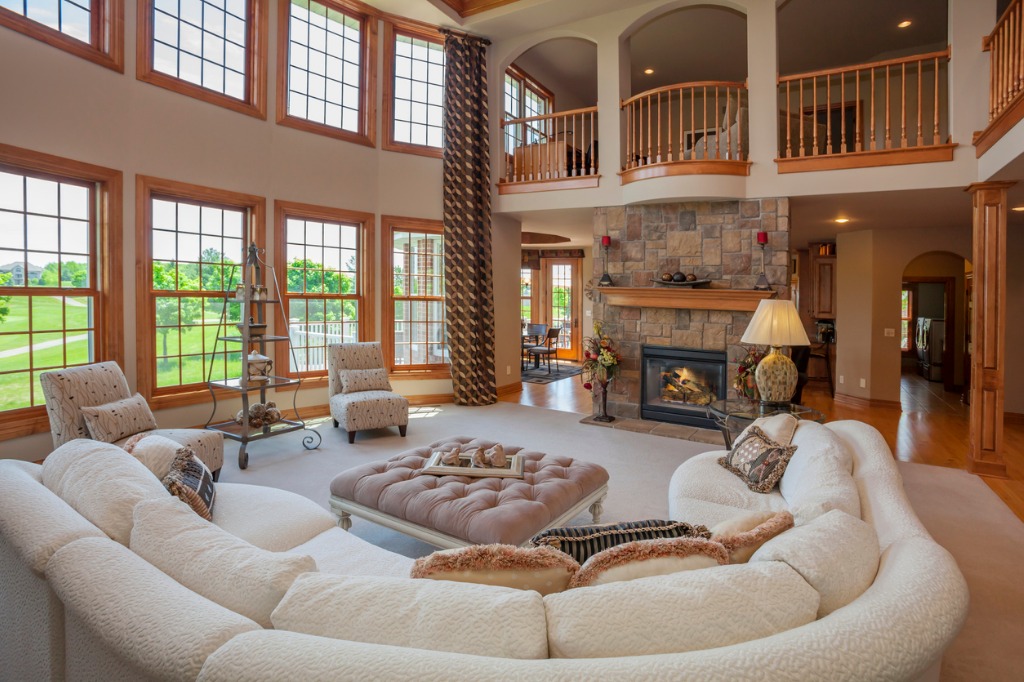
Photo by JamesBrey via iStock
Of course, there is no substitute for preparing yourself to take gorgeous real estate photos than actually learning the skills needed to do so.
They say practice makes perfect, but if you don't have the proper instruction in what to practice, how can perfection be achieved?
I don't know about you, but when I learn a new skill, I want to (a) learn it from an expert and (b) want to have the flexibility to learn at my own pace.
If you want to expand your real estate photography skills, Real Estate Photographer Pro has expert instruction that you can learn as quickly or as slowly as you need!

What has impressed me with Real Estate Photographer Pro is that it isn't just a course about camera settings and composition.
Instead, you get expert instruction in all sorts of topics, from editing your photos to making sales to tips on customer service and everything in between.
This isn't just some one-off course with a few tidbits of knowledge you can get in any YouTube video...
Instead, it is as comprehensive a real estate photography course that you'll find, and it will help set you up for success as a real estate photographer.
You get tons of downloadable materials and you get lifetime access to the course, so it truly is a resource that you can rely on for the entirety of your career.
Being a success in this business is about much more than taking great shots. If you want to rise to the top of your game, invest your time and energy in acquiring the total business skills you need. To do that, check out Real Estate Photographer Pro!


