
Shooting Product Shots on the Beach
- Using the LiteRoom shooting enclosure
- Using a LitePanel reflector to add highlights
- 2013 Photographer's Market: The Most Trusted Guide to Selling Your Photography
- How to Create Stunning D igital Photography
- Best Business Practices for Photographers
- The Fast Track Photographer Business Plan: Build a Successful Photography Venture from the Ground Up
- Group Portrait Photography Handbook
- 500 Poses for Photographing Women
- The Best of Family Portrait Photography: Professional Techniques and Images
- 500 Poses for Photographing Group Portraits
- Selling Your Photography: Ho w to Make Money in New and Traditional Markets
- Starting Your Career as a Freelance Photograp her
- Photographer's Survival Manual: A Legal Guide for Artists in the Digital Age
- Legal Handbook for Photographers: The Rights and Liab ilities of Making Images
- Taking Stock: Make money in microstock creating photos that sell
- Going Pro: How to Make the Leap from Aspiring to Professional Photographer
Take advantage of the most cost-effective (free) light source there is - the sun.
In the following lesson, we show how simple it is to go anywhere and shoot products with the look, quality and control the studio offers, but without all the equipment. Our LiteRoom shooting enclosure can be used in your yard, at the park, or even at the beach.
Topics Covered:
Other than the camera and tripod, we used three items for this lighting solution, a shooting enclosure, a reflector, and a light stand. Keep in mind that good results can be achieved using just the shooting enclosure. Even better results are possible when adding a reflector.
The LiteRoom shooting enclosure is simply a framework with translucent fabric attached, much like a tent. The translucent fabric softens the sunlight for softer shadows and lower contrast. Two sizes (large and medium) are available and are generally used for table-top shooting.
Certain features make some enclosures more versatile and easier to use than others. The LiteRoom is unlike most enclosures on the market in that it is floorless. This allows the shooter to place the enclosure just about anywhere and have a nice set top, as we have done here at the beach.
The floorless design also allows you to place oversized props (i.e. a walking cane) that would not fit inside a more traditional enclosure. Also, items on the set top are easily accessed by simply lifting the LiteRoom, then replacing when ready to shoot again.
The LiteRoom also has an opening on the top so that you can shoot directly above the item being shot.
We set up our LiteRoom on a beach for a sandy set top (figure 1). The sand was smoothed out and a piece of driftwood was positioned as a prop.

Figure 1
The LiteRoom is easily assembled. Four steel rods are inserted into a hub (connector) at the top of the enclosure. Set up takes about a minute.
In figure 2, we see the placement of the LiteRoom we chose for our shot. Shooting in the morning or late afternoon when the sun is low in the sky is preferable. The result can be a nice side lighting.
We chose to use side lighting from the left. Our enclosure's position is apparent from the shadow cast on the sand.

Figure 2
The camera was set low to the ground on a tripod (figure 3).

Figure 3
The camera and tripod were placed into position (figure 4). The camera lens fits inside the front of the enclosure box.

Figure 4
With the set and camera ready, we fired off our first shot. In our result image (figure 5), we see how the LiteRoom has softened the hard sunlight and given us a diffused light quality. We have the wrapping highlights, soft rich shadow detail, and complete control of the overall contrast of the image.

Figure 5
To take this shot to the next level we set up a Photoflex 39X39 inch LitePanel and attached a soft gold/white cover with the soft gold side out. We then attached a Photoflex Main and T clamp to a LS-2212 LiteStand and placed this assembly on the right side of the LiteRoom. The reflector will bounce the sun back into our shot adding a warm highlight to the shadow side of our shot (figure 6).

Figure 6
With our reflector in place we framed up our shot and made another exposure (figure 7).

Figure 7
Below is a comparison of the first shot (figure 8) taken without a reflector and the second shot (figure 9) taken with reflected light from the right side.

Figure 8

Figure 9
Figure 10 below is a close up of these two images to better show the highlights resulting from using a reflector in our lighting solution.

Figure 10
Replacing items on the set is easy. The enclosure lifts up for easy access to the set top, the items are replaced and posed, and the enclosure is then put back in position.
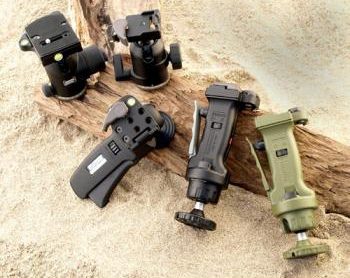
Figures 11 and 12 show some other product shots of a camera and underwater camera housing we made in the same set up.

Figure 11

Figure 12
Lighting Equipment
Also Read: 41 REASONS WHY YOU SHOULDN’T DATE A PHOTOGRAPHER
Recommended Reading: