
A How-To Guide for Photographing Bathrooms
- Best Camera Settings for Real Estate Photography Interiors
- What You Need to Do Before Taking a Single Real Estate Photo
- Composition Tips for Photographing Real Estate Interiors
- Professional Real Estate Photography Kit: What’s in the Camera Bag?
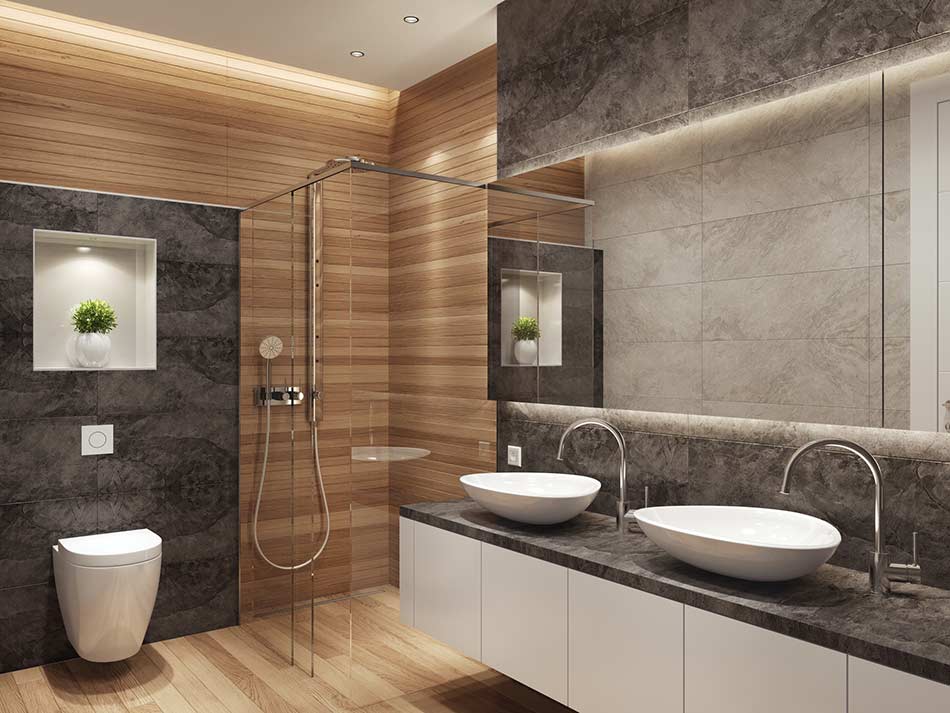
photo by tucarion via iStock
Bathroom Photos
One of the most challenging rooms in a home to photograph is the bathroom. This is thanks to small room sizes and the presence of mirrors that can capture your reflection in the shot.
On top of that, there are often other reflective surfaces like glass, metal, and polished stone that can pose problems both from a reflection standpoint and a glare standpoint as well.
There are ways to get around these issues, though.
In this how-to guide for photographing bathrooms, learn a few insider secrets that will help you improve the quality of your bathroom photography.
How to Photograph Bathrooms: Ensure the Space is Spotless
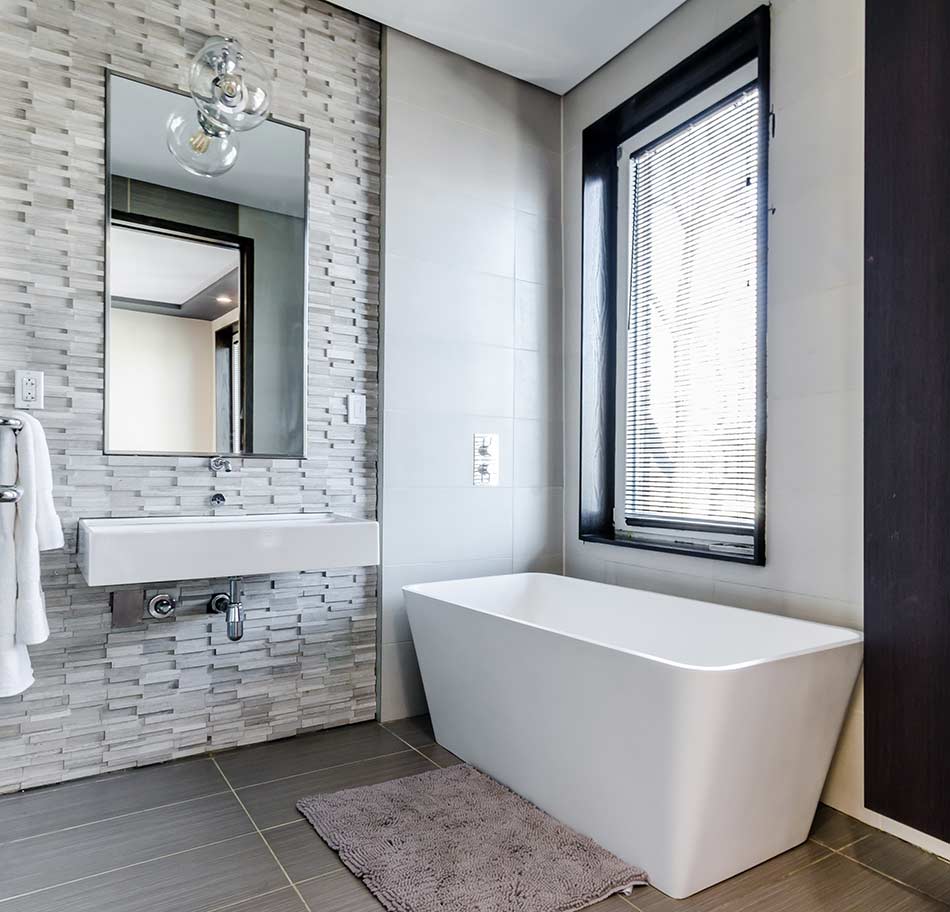
Photo by Chastity Cortijo on Unsplash
Before you take a single photo of a bathroom, give the space a good once over to see if there is anything that needs to be cleaned.
Just like a kitchen, a bathroom must be completely spotless and in pristine condition if you’re going to get the best shots.
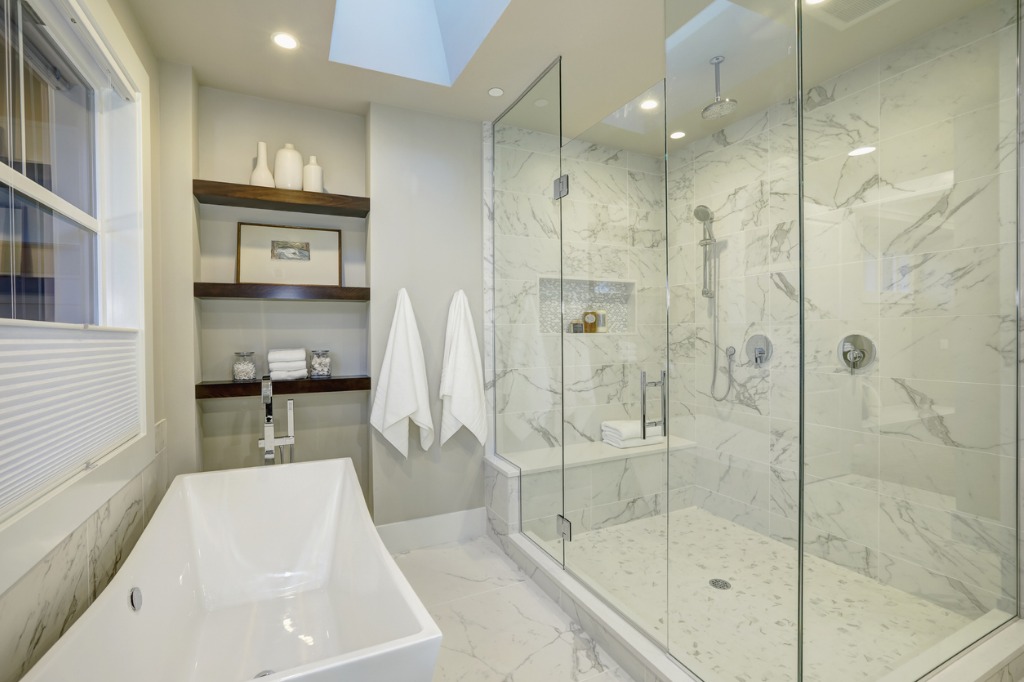
photo by irina88w via iStock
While cleaning is likely not within the realm of your job duties, you might have to roll up your sleeves and do some fine-tuning to the space if no one else is available to ensure it is looking its best.
Naturally, solid surfaces like the bathtub and surround, the toilet, mirrors, and the vanity counter and sink should be clean and dry. Don’t forget the floor, either. Look at hardware as well - faucets, in particular, can have water spots that will be unsightly in a high-resolution photograph.
Learn More:
Bathroom Photography Style Tips
photo by contrastaddict via iStock
Building off the previous point, a bathroom shouldn’t just be clean, it needs to be nicely staged as well.
Staging doesn’t have to be over the top, either. Just make sure that towels are nicely folded, the toilet seat is down, and the toilet paper roll doesn’t have a jagged end.
A couple of well-placed bath mats can add a pop of color or texture to the shot without being overwhelming. A small vase of flowers or a small plant on the vanity can have the same effect.
That’s really all you need to do to a well-appointed bathroom. The fixtures, tile work, lighting, and other features can do most of the talking.
Photographing Bathrooms: How to Overcome Bright Windows
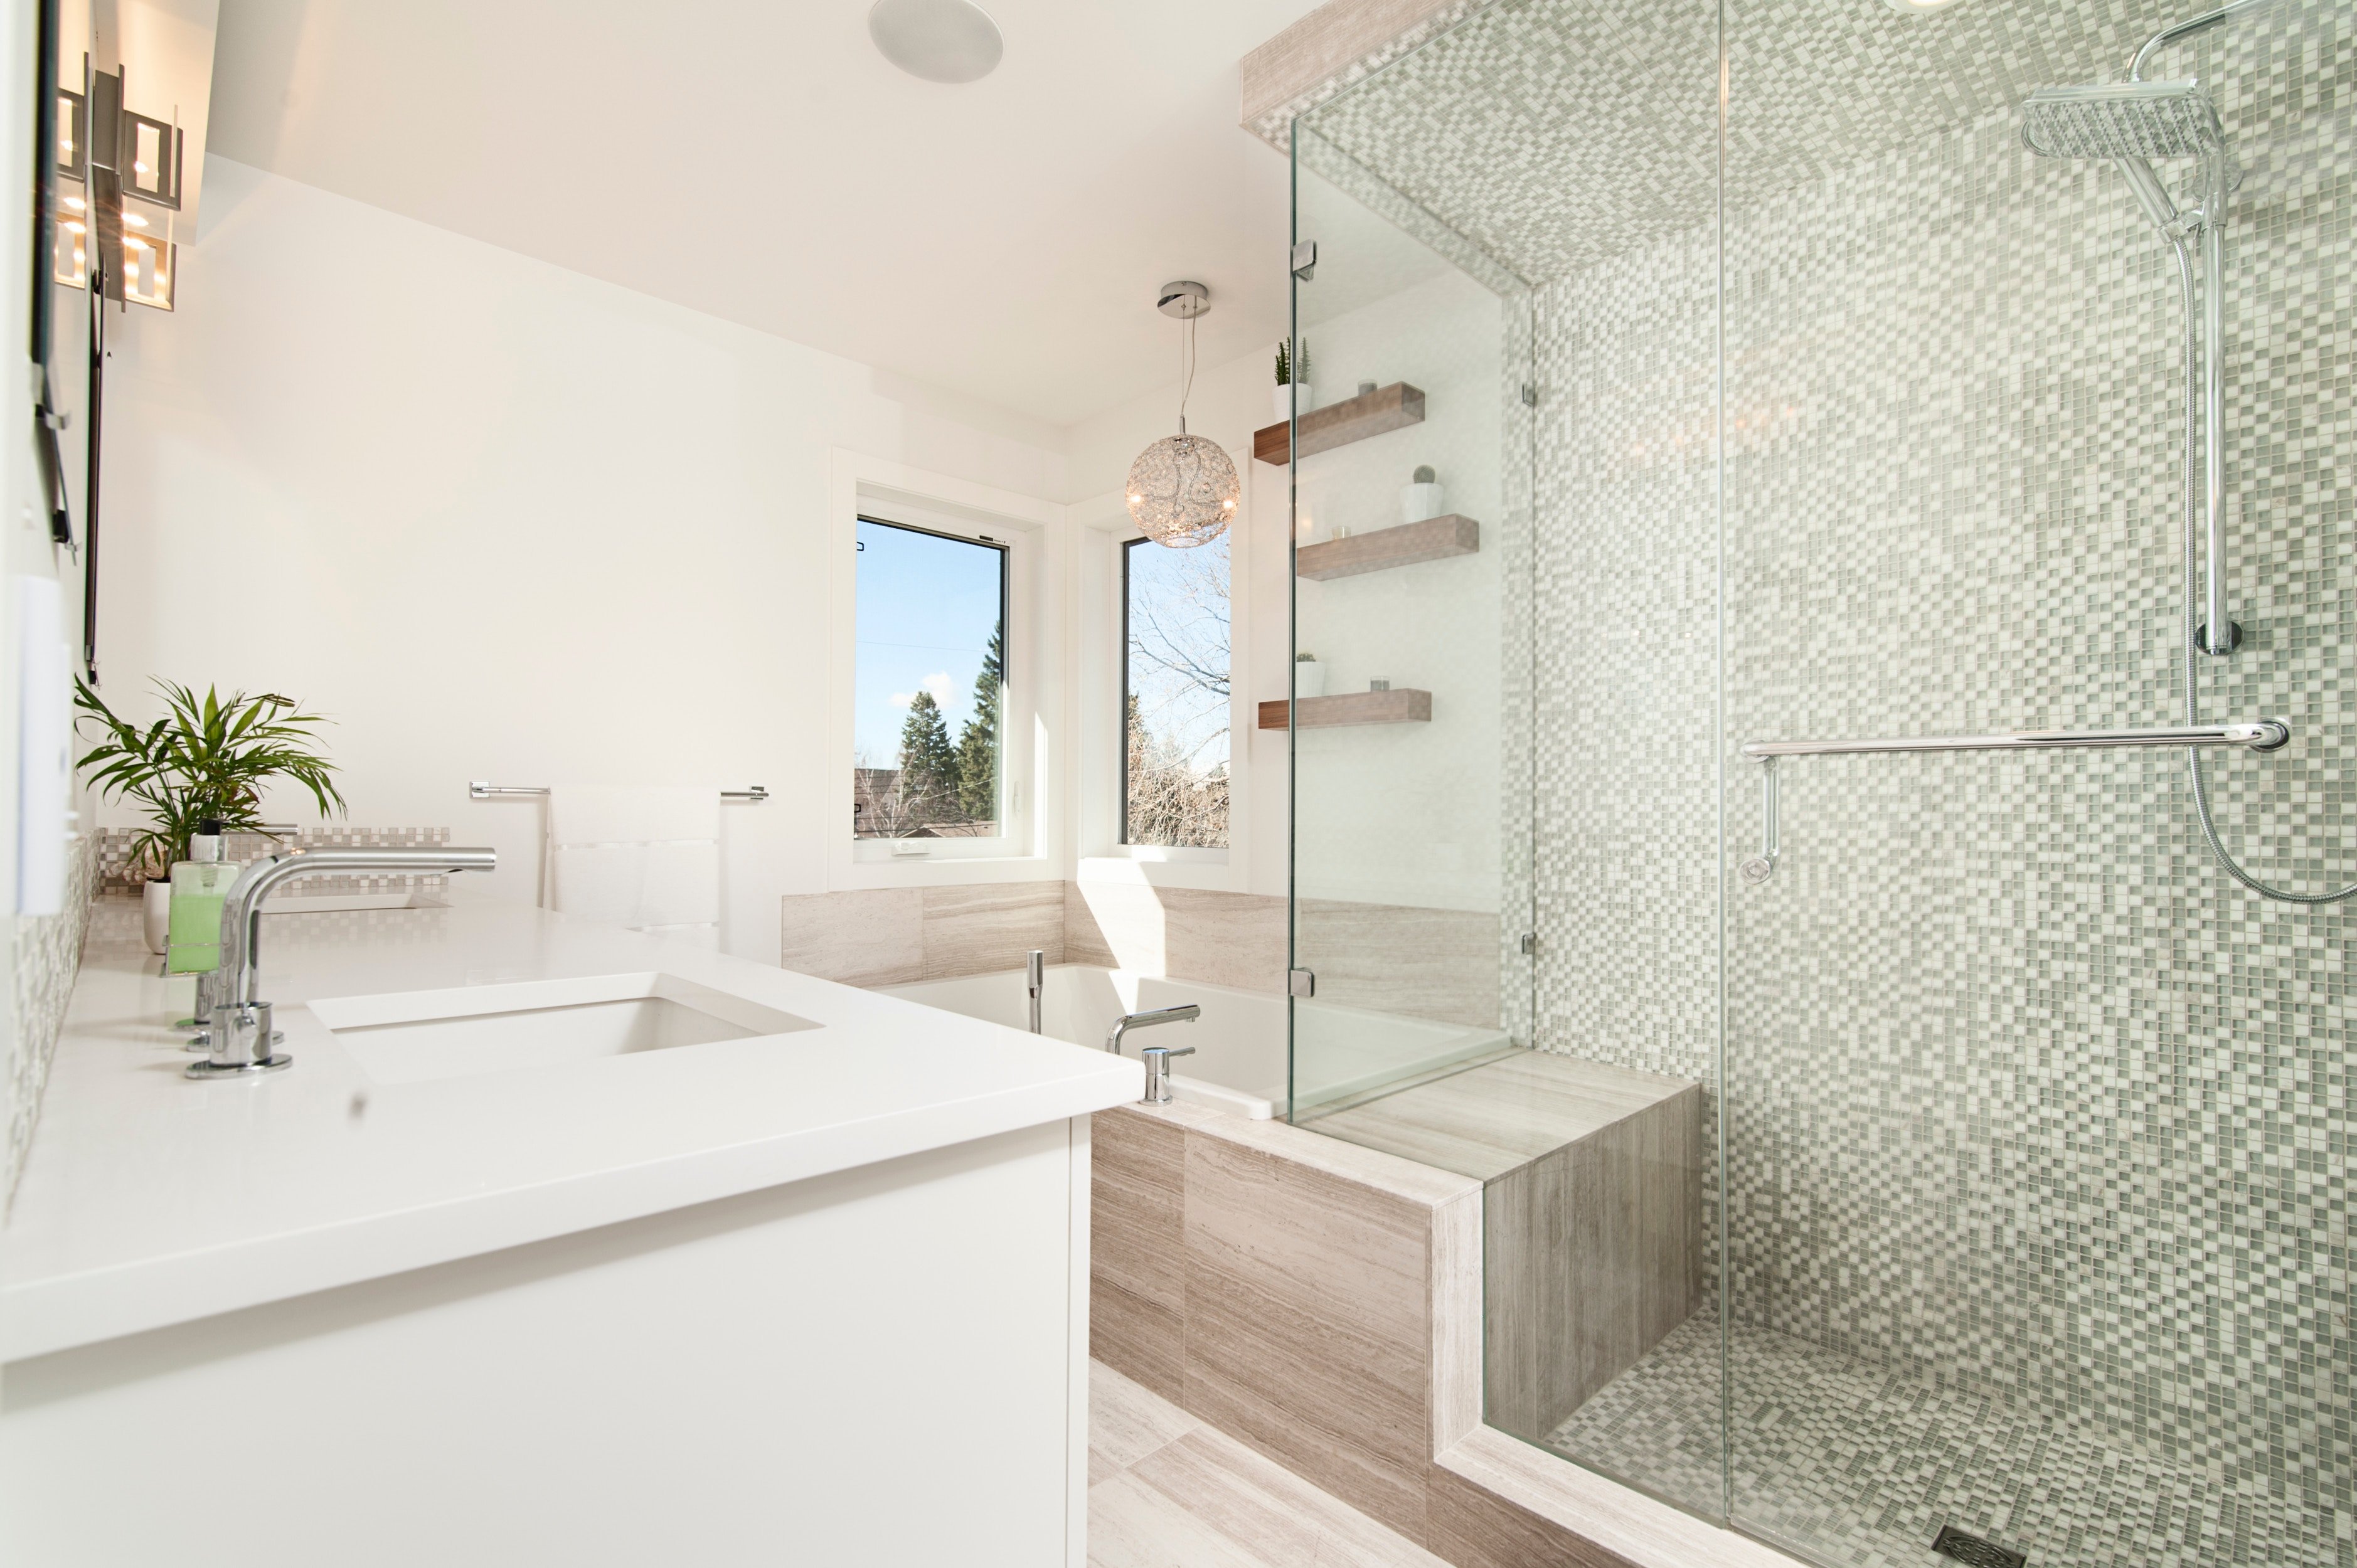
Photo by Jose Soriano on Unsplash
One of the biggest challenges of photographing a bathroom when a window is present is getting the exposure right for the interior space as well as the view through the window.
This is particularly difficult if the bathroom is dark and the windows are small - the result is often a photo that’s well-exposed for the dark bathroom or a photo that’s well-exposed for the bright window, but not both.
To get around this problem, you can bracket your exposures - take three to five photos of the space that are exactly the same, except for the exposure settings - and merge them together to create a final image that’s well-exposed throughout, like the one shown above.
It’s a simple process, especially if you use HDR software such as Photomatix Pro to merge the bracketed exposures together. Additionally, if you use this technique, you don’t have to invest in expensive lighting gear because you can rely on natural light and the bracket and merge process to get high-quality images.
Learn More:
>
Bathroom Photography Tip: Have a Strong Subject
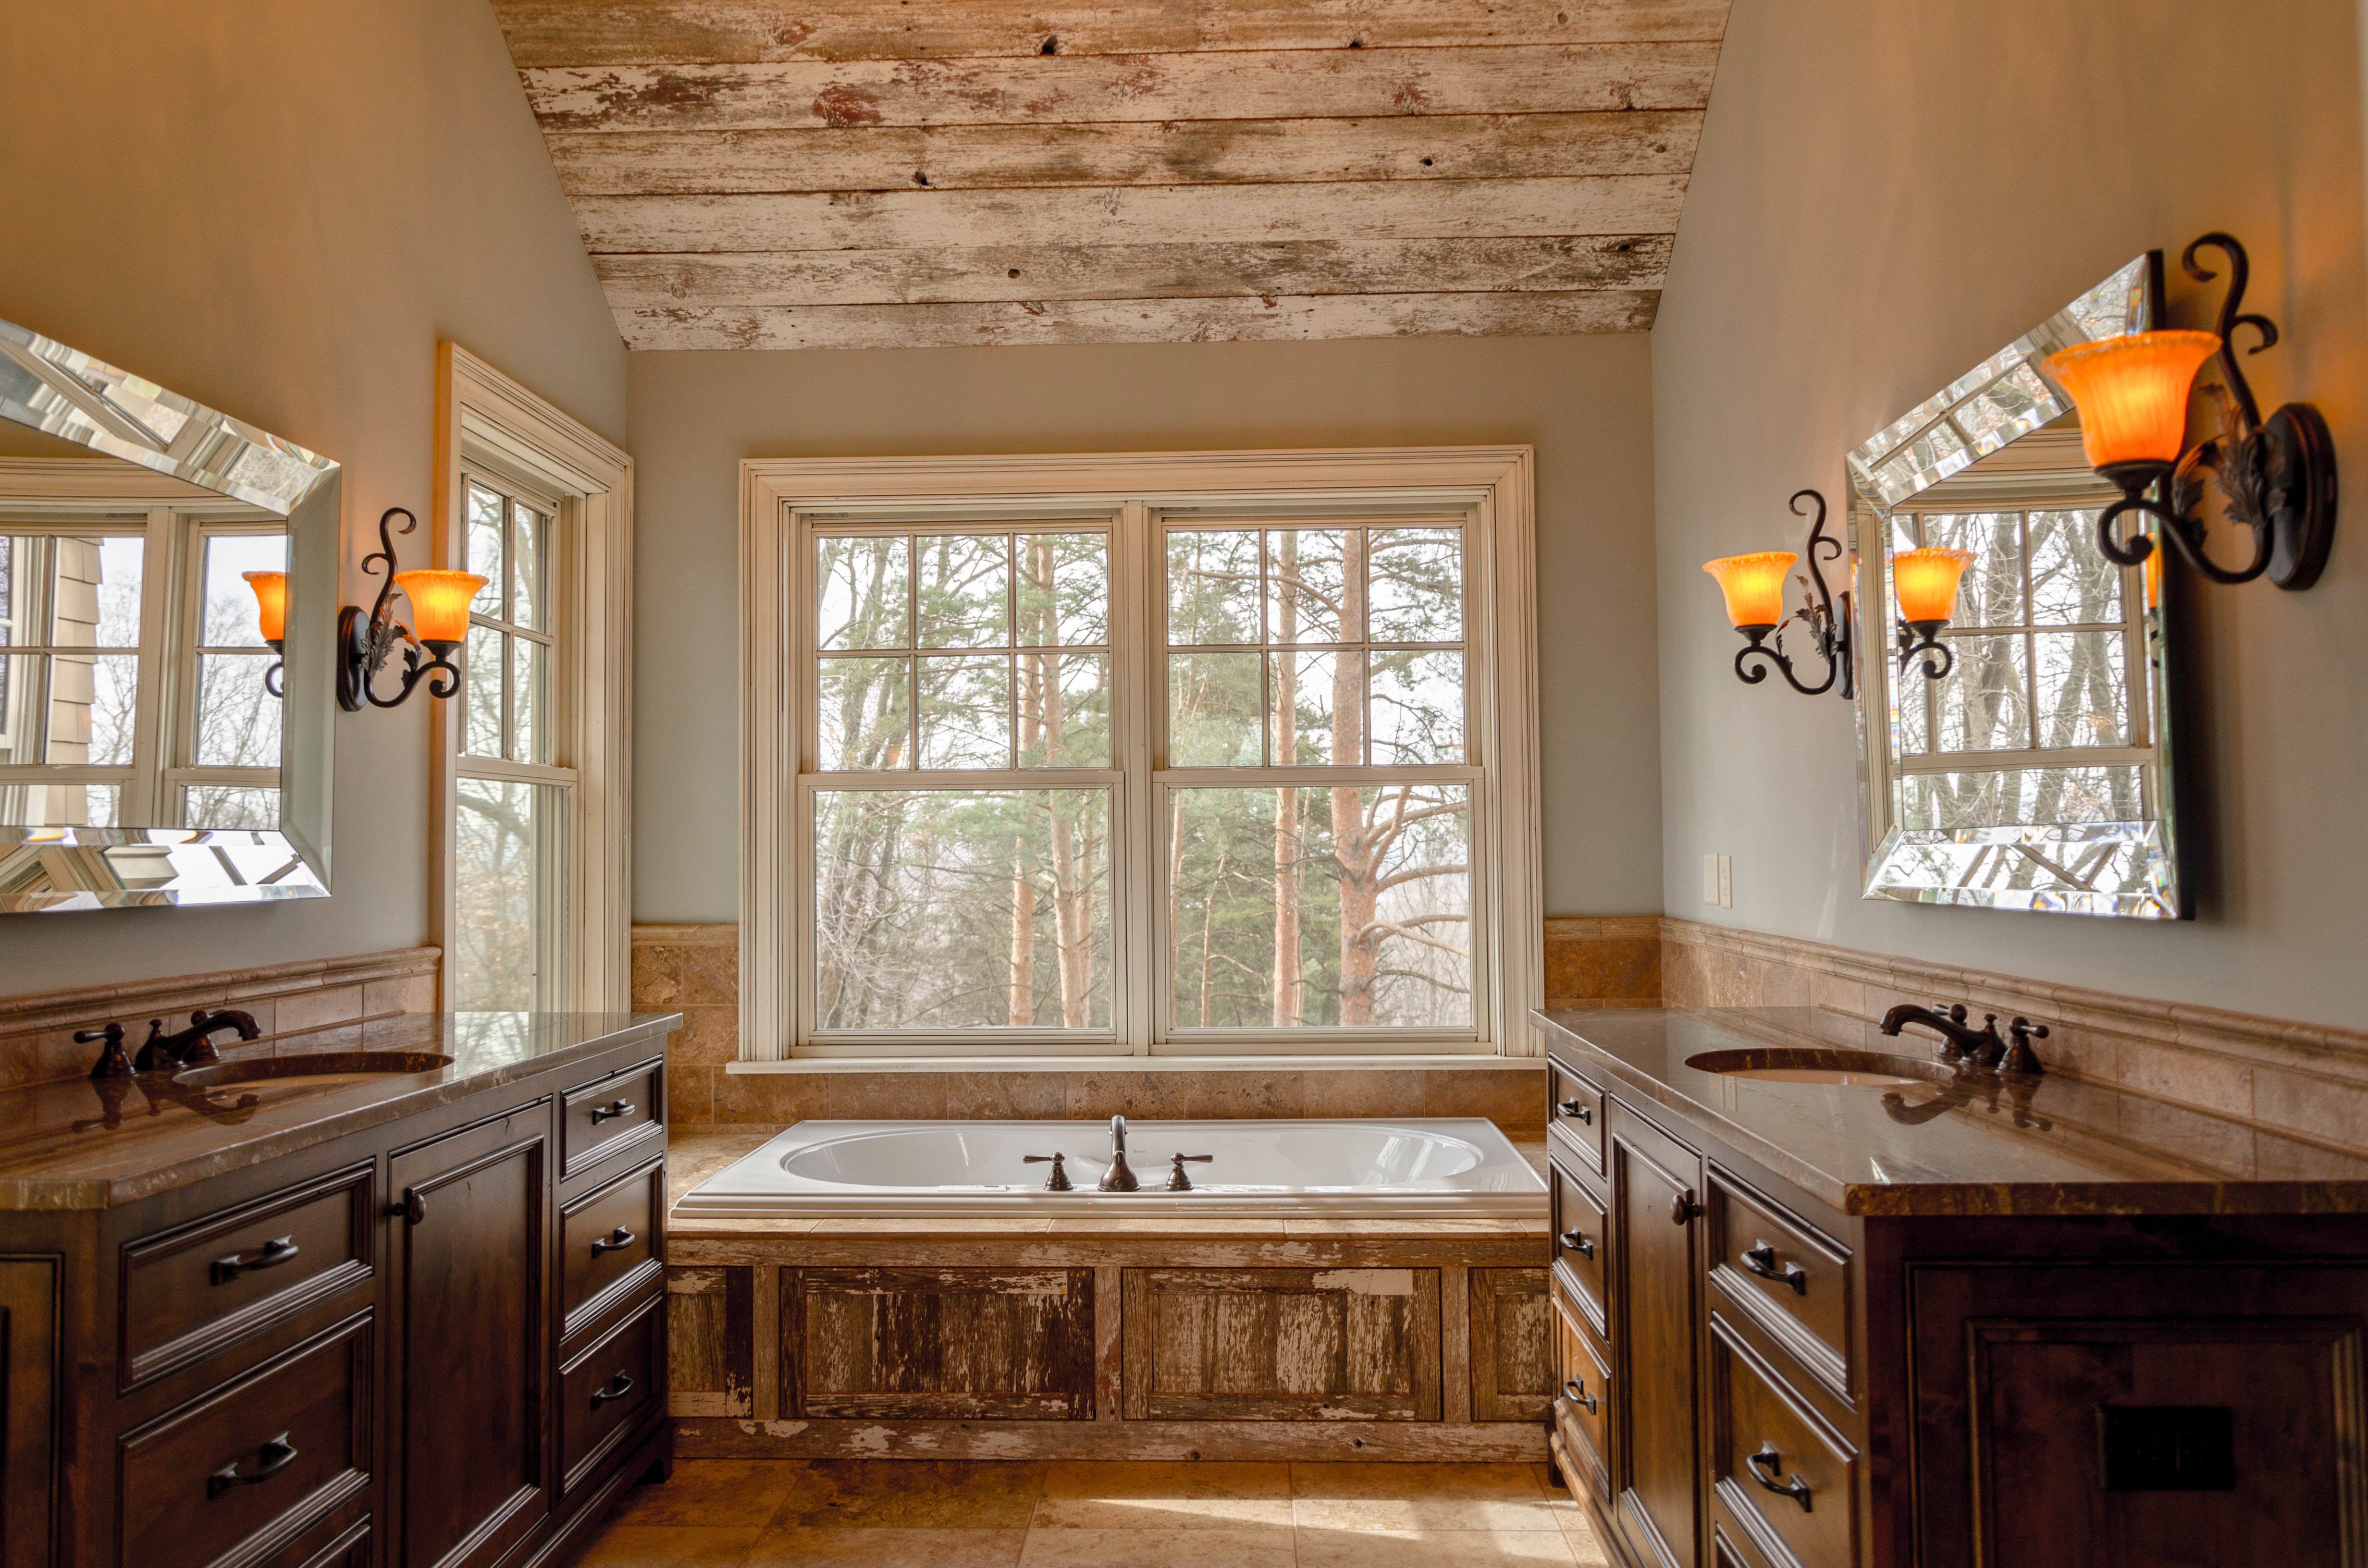
Photo by Aaron Huber on Unsplash
Though finding room in a bathroom to set up your gear and get a shot can be tricky (more on that in a bit), it’s important to strive for a shot that has a strong subject.
Bathrooms usually have all sorts of eye-grabbing items, be that a beautiful bathtub surround, a unique vanity cabinet, or interesting details like high-end faucets and other fixtures.
When photographing a bathroom, you’ll want some wide shots that show the lay of the land, but to keep them from feeling bland and boring, find your strong subject and center it in the frame for a more compelling shot.
In the example above, the bathtub, the windows, and the view out the windows serve as an ideal focal point for the photo. Notice how the perspective and point of view of the shot invite you into the space. That’s just what you want!
Bathroom Photography Mistakes: Be Careful of Sharp Angles
Photo by Thomas Young on Unsplash
One mistake that some real estate agents and real estate photographers make is trying to photograph bathrooms at sharp angles to offer a creative or unique view of the bathroom.
This is a mistake because the result of that can be wonky lines that make the bathroom look as though it isn’t square or as though you were falling over as you took the photo (as shown above).
Granted, this perspective distortion can be mitigated in post-processing, but it’s much easier to fix the issue in-camera by taking the shot with the camera level to the floor.
Learn More:
Bathroom Photography Tricks How to Avoid Reflections
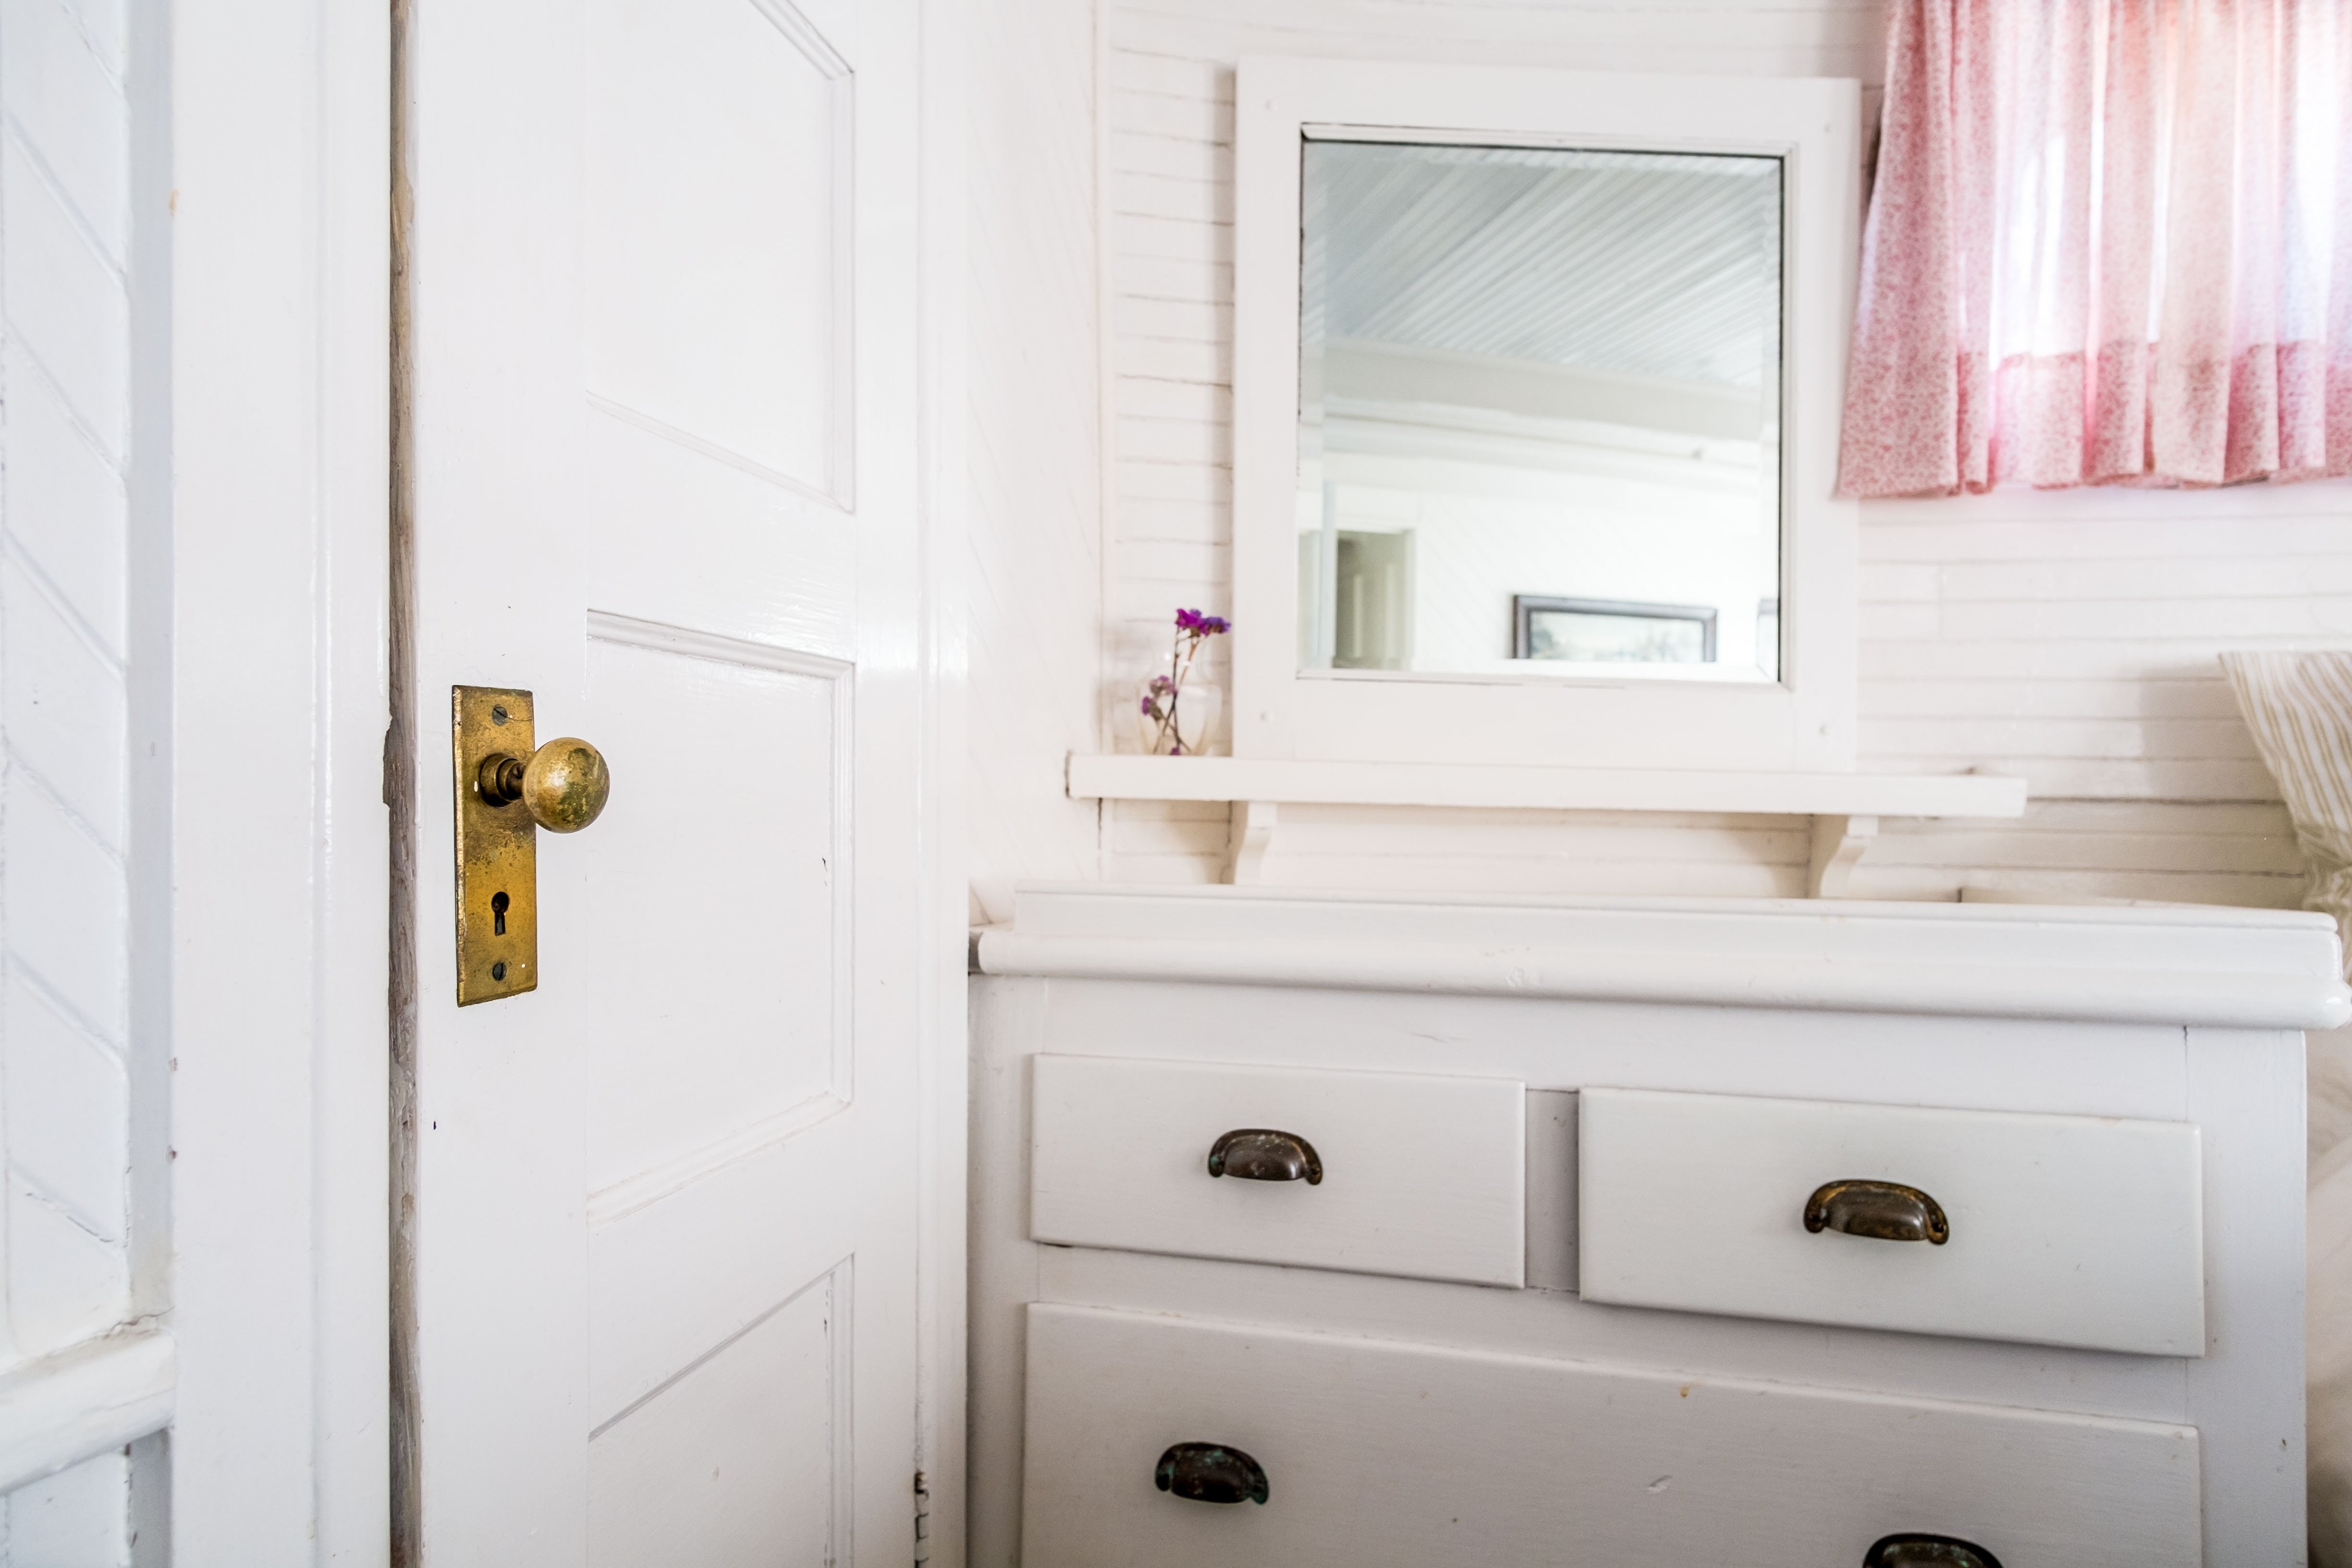
Photo by Logan Ripley on Unsplash
As noted earlier, one of the most challenging aspects of bathroom photography is finding ways to photograph the space without catching your reflection in the shot.
One of the easiest tricks to avoid this is to change the height from which you take the photo.
For example, in the image above, the photographer dropped the elevation of the camera to avoid the mirror above the sink. And while this perspective isn’t typical, it still works because there details that give the photo tons of interest - the door knob and the drawer pulls among them.
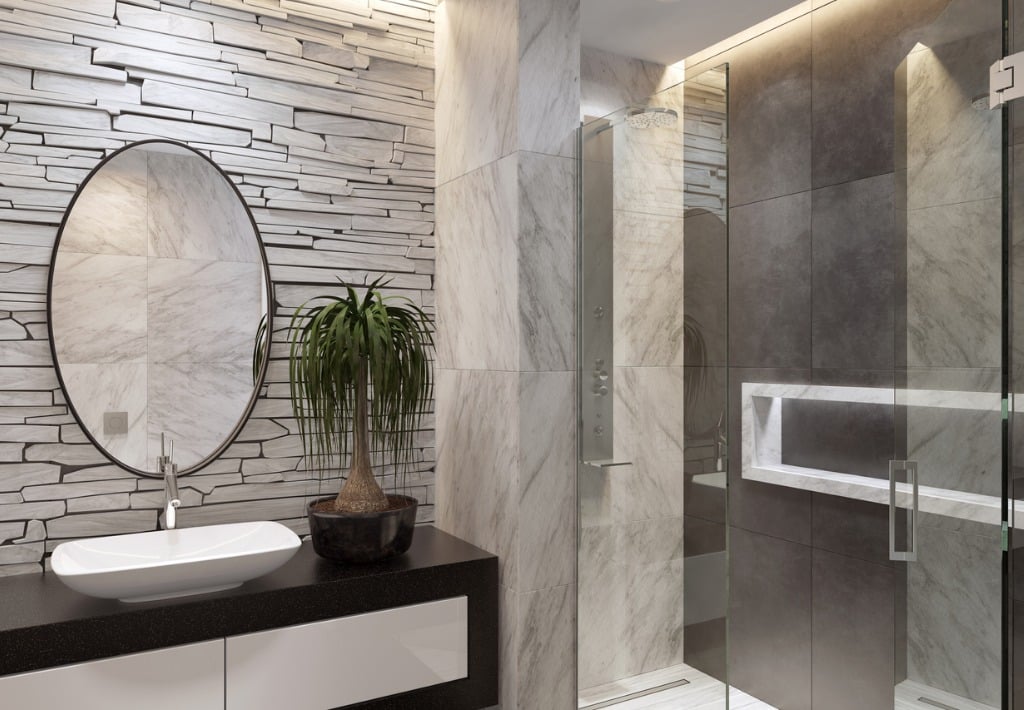
photo by tucarion via iStock
Another trick you can employ is to choose your shooting angles very carefully.
Using the image above as an example, note how the photographer positioned themselves just right to avoid being in the reflection of the vanity mirror. Likewise, their positioning is such that their reflection is avoided in the glass-enclosed shower.
In this case, just a step or two to the left or right could have ruined the shot. When composing your photos of bathrooms, take extra care to check for reflections so you can take action to avoid them.
Of course, there will be times when your reflection cannot be avoided. In those situations, you might need to rely on your post-processing skills to remove your reflection from the photo.
If you’re not quite sure how to do that, consult the video above by Houston Brown.
With that, you have a few critical tips for how to photograph bathrooms to get the best possible results.


