
Composition Tips for Photographing Real Estate Interiors
- Best Lenses for Real Estate Photography
- What You Need to do Before Taking a Single Real Estate Photo
- Professional Real Estate Photography Kit: What’s in the Camera Bag?
- Real Estate Photography Tips for Consistently Great Photos

photo by hikesterson via iStock
Photographing the interior spaces of a property can be a challenge for a variety of reasons.
In some cases, you might find very difficult lighting conditions in which the room itself is rather dark but the windows are very bright.
In other cases, space might be at a premium, which might force you to get creative with how you take the shot.
In addition to these potential hardships, you also have to think about things like the angle from which you shoot, the eye level, and perspective.
In this real estate photography guide, you'll learn how to address these issues in order to create beautiful interior photos.
Consistent Lighting is Key
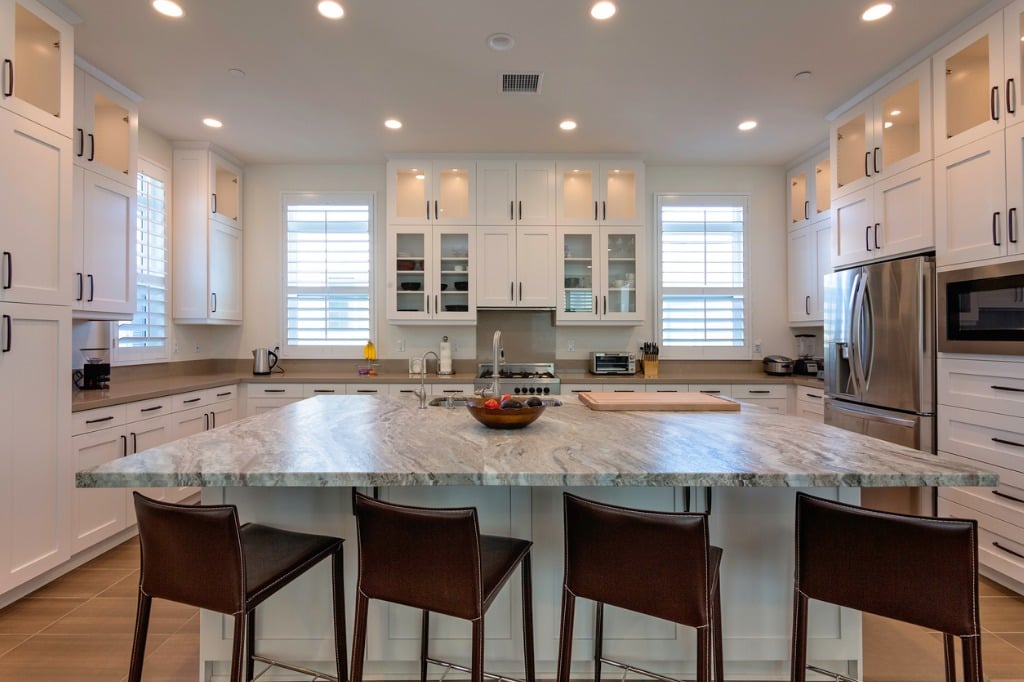
photo by Jennifer_Sharp via iStock
A primary challenge for indoor real estate photography is lighting.
It’s important that the lighting in each room is consistent. That is, if you photograph the kitchen with the lights on, you might find that the image has a yellowish color cast due to the color temperature of the light bulbs.
photo by KatarzynaBialasiewicz via iStock
If you then photograph the living room with no lights on at all and instead rely on natural light, the two images will look disjointed.
To get around this issue, you can either turn all the lights on or off as you photograph each space so you have a consistent color temperature.
Perhaps a better solution is to fix white balance issues in post-processing.
You can fix white balance in Photoshop, Lightroom, and other programs in a matter of moments, and it will give each room in the home that consistent color temperature that’s so important for creating a cohesive collection of images.If you aren’t sure how to correct white balance, consult the video above by Nathan Cool.
Learn More:
Bracket Your Exposures to Overcome Difficult Lighting
photo by MilianEXPO via iStock
As mentioned earlier, you will often encounter rooms in which there is a very wide dynamic range - the windows will be very bright and the room itself will be very dark.
In this situation, it’s best to bracket the exposures and blend them together to get one well-exposed image throughout.
Doing so is a simple matter of utilizing your camera’s Auto Exposure Bracketing (AEB) feature to take several images of the room, each at a different exposure level.
Quick Tip: If you’re unfamiliar with bracketing exposures, view our in-depth tutorial on camera settings for interior real estate photography.

photo by asbe via iStock
The advantage of using this technique is that it’s very fast - there’s no need to set up lighting equipment on location. Instead, it takes just a few moments to bracket the exposures, and a few moments again in post-processing to blend the exposures together.
Likewise, this technique is also much more budget-friendly because there’s no need to buy artificial lighting gear in the first place. Instead, you can rely on natural lighting, which often generates a more pleasing look anyway.
Quick Tip: It’s best to use a tripod and a remote shutter release for interior photography. Doing so will minimize camera shake and help you get sharp images.
>
Pay Attention to the Height of the Camera and the Shooting Angle
photo by JamesBrey via iStock
In most situations, photographing the interior spaces of a property is best done at a normal eye level.
After all, the point of photographing these spaces is to give potential buyers an idea of what the property looks and feels like, and you can do that most effectively by shooting from an average eye level.
There are exceptions to the rule, however.
For example, if the property you’re photographing has an interesting view from the living room windows, you might need to raise the level of the camera in order to capitalize on the view.

photo by ShutterWorx via iStock
Another thing to bear in mind when taking interior photos is the angle from which you shoot.
Again, it’s best to compose your images with the camera as level as possible, as this will ensure that vertical and horizontal lines in the space appear straight.
If you tilt the camera up or down to a degree that’s too great, those straight lines will appear to be bowed and the room will look off balance.
Learn More:
Don’t Take Photos From Just One Spot in the Room
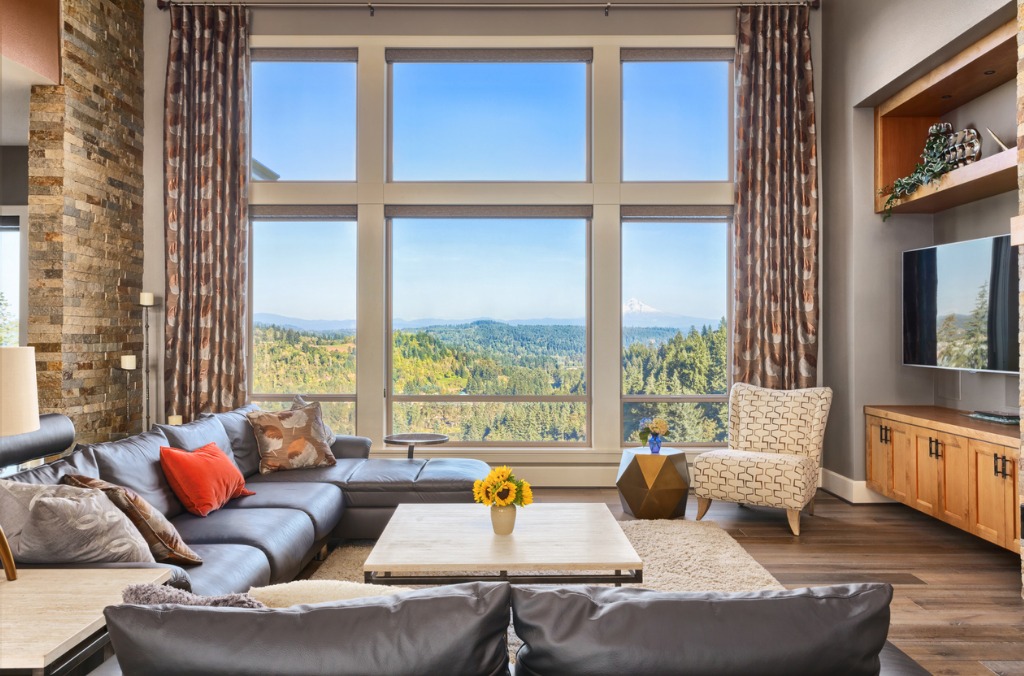
photo by hikesterson via iStock
While it’s important to have consistent lighting, camera height, and angles, it’s also important to vary the positions from which you take photos of each room.
In smaller rooms, this might be a challenge - often the only spot with enough room for your tripod is in the doorway.
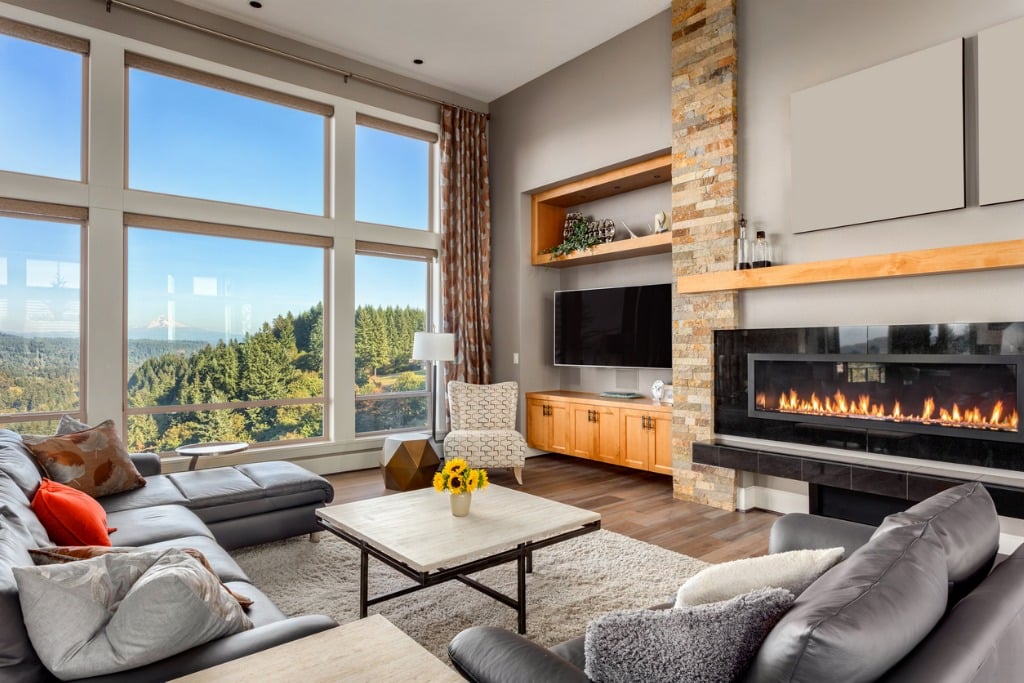
photo by hikesterson via iStock
But to the extent possible, move around the room so you can provide potential buyers with multiple viewpoints.
It’s also important to vary the look in the shots. That is, don’t rely on only wide-angle views.
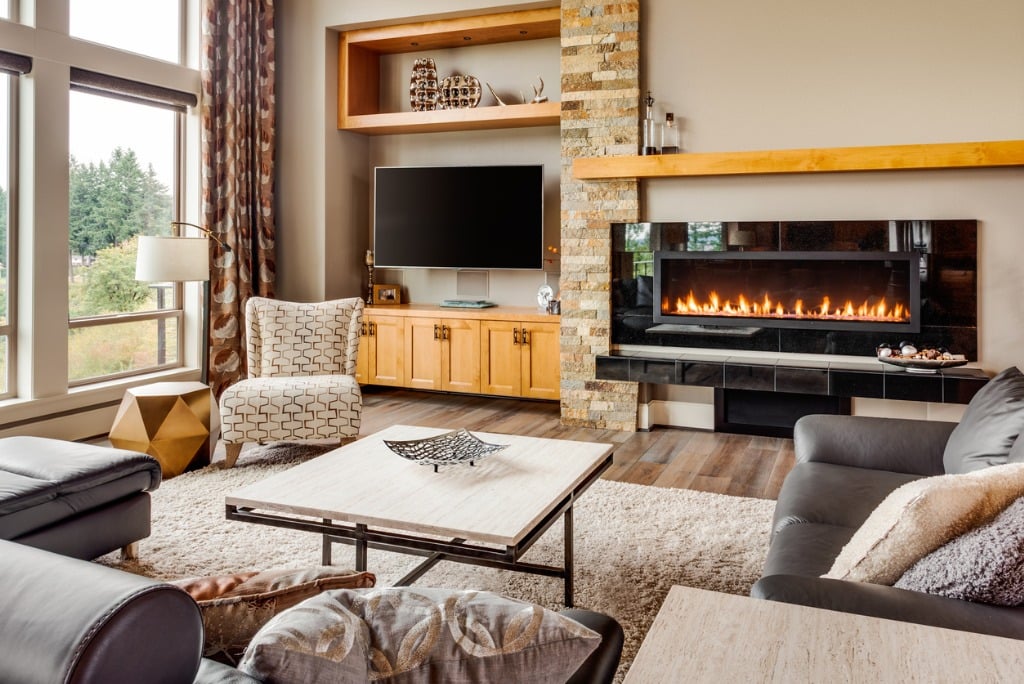
photo by hikesterson via iStock
Instead, get some close-up shots of interesting architectural details and features like fireplaces.
Quick Tip: By combining more intimate images of a room’s details with the wider views of the room, you will give potential buyers a more detailed understanding of what the room looks like and feels like.
How to Take High-Quality Interior Photos
When photographing the interior of a home, your job is to help potential buyers envision themselves living in the space.
To do so, it’s best practice to have consistency between the photos you take in each room, both from a lighting standpoint and a composition standpoint.
As noted earlier, it’s also important to give potential buyers both micro and macro views - the small details that show off the personality of the home as well as the larger views of entire rooms.
Doing so not only helps you highlight the uniqueness of the property, but it also proves invaluable for helping buyers see themselves in the space. The more they can do that, the more likely they will be to put in an offer.


