11 Things You Need to Know When Considering the Nikon Z7

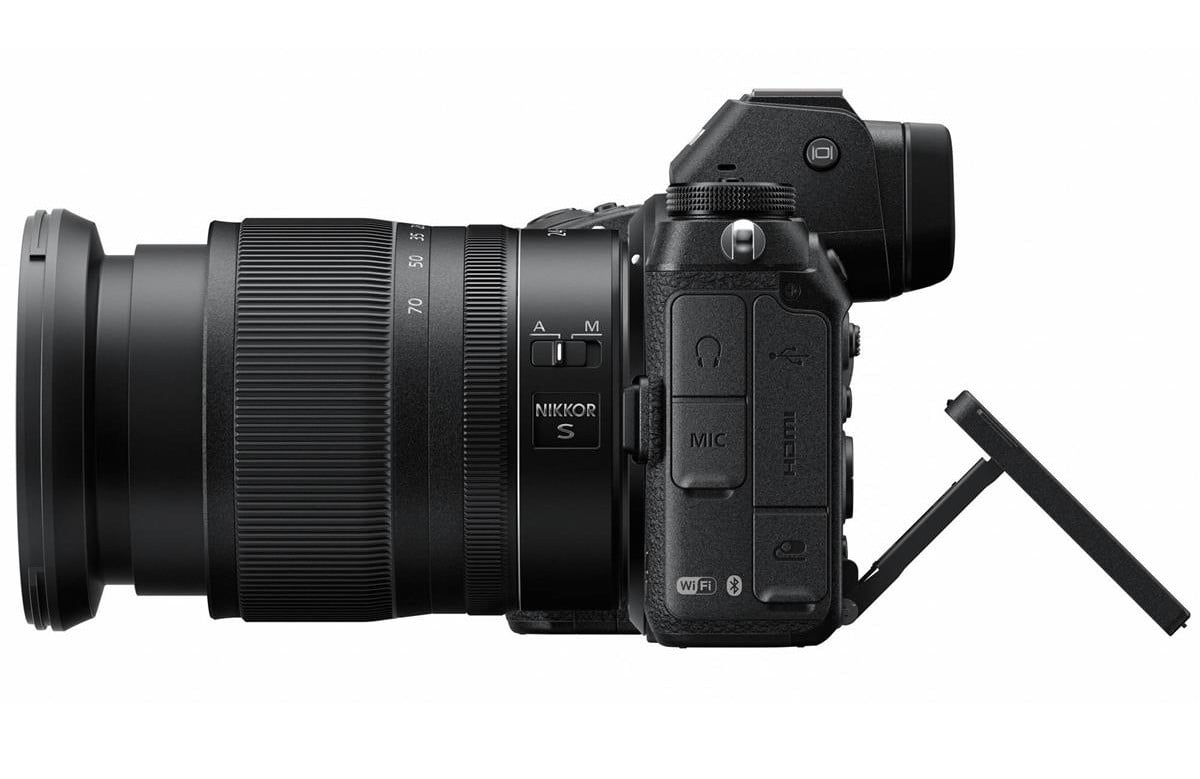
Nikon Z7 Camera
By most accounts, the Nikon Z7 has been a smash hit with Nikon shooters (and plenty of others, too).
It’s packed full of incredible features and has racked up some excellent performances on crucial indicators like image quality, ISO performance, and sharpness.
But, like any camera, the Z7 is not perfect.
That being the case, if you’re considering adding a Z7 to your camera bag, here’s a few things you should know before you buy.
What You Should Know About the Nikon Z7: It’s Has Essentially the Same Sensor as the Nikon D850

If you look under the hood of the Z7, you’ll find the same 45.7-megapixel full frame backside-illuminated sensor as you do in the Nikon D850. You’ll also find no anti-aliasing filter for improved image capture.
This means that the Z7 performs nearly identically as the Nikon D850. The small differences in dynamic range, color depth, and ISO performance are likely attributed to the presence of phase-detect autofocus pixels on the Z7’s imaging sensor.
Sharing the same sensor as the D850 is a good thing given that it is so utterly good (it was the first to receive a perfect score by DXOMark).
What You Should Know About the Nikon Z7: It Produces Huge Files

In its default settings, the Nikon Z7’s maximum resolution output is 8256 x 5504. Each image, depending on the subject, camera settings, and so forth, is in the neighborhood of 17-31MB.
After opening the image in a program like Photoshop or Lightroom, the file size measures a whopping 130MB.
What You Should Know About the Nikon Z7: The Buffer is Small

One of the biggest complaints about the Z7 is the size of its buffer.
When shooting JPEGs, you’re limited to 25 frames. In 12-bit NEF format, that drops to about 23 frames. It falls further to 20 frames when shooting RAW + JPEG.
Once the buffer is full, it takes roughly 4-7 seconds to clear. Though you can’t shoot more images while the buffer is clearing, you can at least adjust camera settings so your time isn’t lost.
What You Should Know About the Nikon Z7: There’s Tons of Lenses Coming
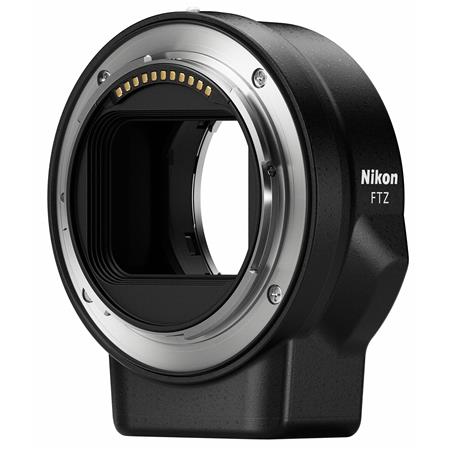
Though the Z-series of cameras launched with just three lenses, many more are on the way.
Additionally, Z-series cameras can use F-mount lenses using Nikon’s FTZ adapter, shown above.
What You Should Know About the Nikon Z7: The Z6 is the Better Option for Video
I wrote an article that compares the filmmaking abilities of Nikon Z6 and Nikon Z7, and the conclusion was clear: the Nikon Z6 is the superior camera for video.
You can check out the full comparison for more details, but of particular note is that the Z7 doesn’t have full sensor readout when shooting in 4K UHD. Instead, you have to shoot with a 1.5x crop factor to get full sensor readout.
As a result, full frame footage is soft and noisy when compared to what the Z6 is capable of capturing.
Get more details on the differences between the Z7 and Z6 in the video above by Nice Lady Productions.
What You Should Know About the Nikon Z7: The EVF is One of the Best in the Business

The Z7 has garnered lots of love for many of its features, but perhaps none more than its impressive EVF.
With 3.69-million-dots of resolution, the EVF is beautifully bright, crisp, and clear.
Additionally, it boasts a magnification of 0.8x (the same as the Z6), which bests the D850’s 0.75x magnification. That makes the EVF in the Z7 and Z6 the largest Nikon has ever made.
What You Should Know About the Nikon Z7: The Grip Isn’t Quite Big Enough

I have big hands, and though the Z7 has a nice, large grip for a mirrorless camera, my pinky dangles alone below the grip.
This isn’t a problem for smaller-handed folks, but for us bigger people, it’s a little uncomfortable.
Having said that, at least Nikon worked to get as big a grip as possible on this camera. Aside from not having enough room for my pinky finger, the grip is spot on.
What You Should Know About the Nikon Z7: Connectivity Isn’t an Issue

The Nikon Z7 offers a range of connection options, including Bluetooth and 802.11ac Wi-Fi.
Additionally, the camera features the newest iteration of Nikon’s SnapBridge wireless system.
SnapBridge allows you to transfer RAW and JPEG files wirelessly to your computer. You can also use it to control the camera from a smartphone.
What You Should Know About the Nikon Z7: Image Quality is Spectacular
One of the claims to fame for the Z7 is its superb image quality.
As noted earlier, the backside-illuminated sensor without an anti-aliasing filter sure helps in the image quality department.
The new EXPEED 6 processor also helps by reducing noise. Having 5-axis image stabilization doesn’t hurt, either.
The Z7 also ranks near the top of the food chain in dynamic range.
See some sample Nikon Z7 images in the video above by The Big Picture.
What You Should Know About the Nikon Z7: The Controls are Laid Out Perfectly
If you’re a Nikon shooter, the Z7 will feel like an old friend.
The power control button is positioned around the shutter release, which makes it super easy (and intuitive) to turn the camera on when you pick it up.
Likewise, the exposure compensation, ISO, and video record buttons can be reach with your index finger without issue.
The only caveat is that when moving from ISO to Auto ISO, you have to use your middle finger to manipulate the command dial on the front. This is a little difficult, to say the least.
What You Should Know About the Nikon Z7: Its Hybrid AF System is Fantastic
For a first go at hybrid AF, Nikon seems to have gotten it just right.
The system boasts 493 hybrid phase detect and contrast detect autofocus points that cover approximately 90 percent of the frame.
In addition to excellent coverage, the Z7’s autofocus system is quick to focus and performs well in challenging lighting conditions. When shooting in extremely low light, you need to engage the camera’s low-light AF mode to maximize its performance.
Nikon Z7 Price
Clearly, Nikon got it right with the Z7.
Though it was a long, hard wait for its release, the extra time Nikon spent developing this camera has definitely paid off.
Currently, you can purchase a Z7 body for $3,396.95. A Nikon Z7 kit with a 24-70mm f/4 S lens runs $3,996.95.
We Recommend
2019 Cyber Monday Deals for Photographers
 Photo by Jevgeni_Tr via iStock
If you missed out on the smokin' Black Friday deals for photographers, no worries!
Cyber Monday holds many huge discounts and awesome deals on cameras, lenses, bags, and other gear.
Check out some of the best Cyber Monday deals for photographers below!
Hazard 4 is Offering Up to 35% Off on Select Products

Adorama Has Up to 50% Off on Cyber Monday

Adorama's Cyber Monday sale offers up to 45% off on cameras, up to 30% off on lenses, up to 30% off lighting, and up to 40% off on computers.
There are savings of up to 50% on items site wide, including exclusive doorbusters on popular brands like Canon, Nikon, Sony, Fujifilm, Panasonic, and Apple.
Shop Adorama's Cyber Monday deals
Skylum is Offering Almost $400 Off
Are you tired of getting hundreds of Black Friday offers for something you will never use? Ugh, we are too!
Skylum’s Black Friday offer is different. It’s about Creativity, Freedom, and Choice.
Instead of getting a slightly bigger TV this Black Friday, how about giving an enormous boost to your artistic powers (and saving almost $400)?
You can build your very special bundle that will include Luminar 4 to create mind-blowing images with unique features not available anywhere else. And you have the freedom to choose what bonuses you like (your options are wide, for example the highly acclaimed PDF Expert, Envira Gallery, ViewBug, Xpozer and more). Pick only those that bring a real benefit to you.
Offers:
- Bundle #1 - $79 - Luminar 4 + 2 bonuses of your choice
- Bundle #2 - $99 - Luminar 4 + 5 bonuses of your choice
- Bundle #3 - $129 - Luminar 4 + All bonuses
Bonuses:
- PDF Expert - free app - $80 value
- Envira Gallery - free plan + 30% off of other plans - $29 value (+up to $90 discount)
- ViewBug - free 1 year of Pro plan - $118 value
- Xpozer - discount - $75 value
- Clipchamp - 3 months free of Clipchamp’s Create account - $30
- Rocky Nook - free book of a choice - ~$44.99 value
- Look Pack (Skylum) - free presets - $25 value
- Look Pack (Skylum) - free presets - $25 value
The sale starts November 27, 2019. Your creativity will not expire on December 2, but this offer will! Make sure you don’t miss out.
Get more details on Skylum’s Black Friday 2019 deals
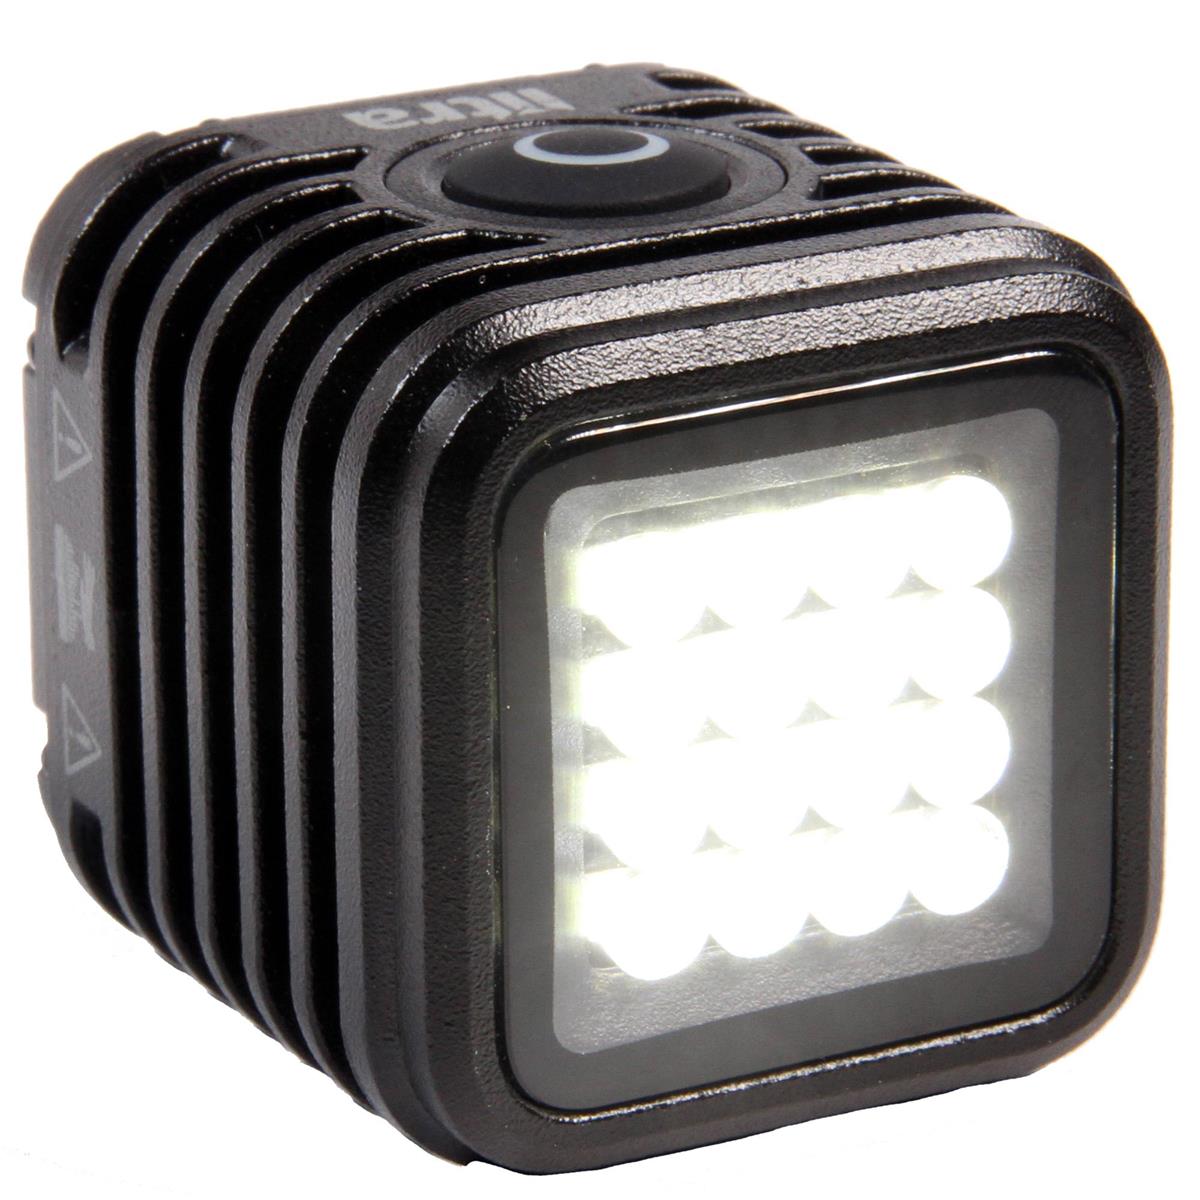
Get 20% Off Site-Wide at Litra

I have several Litra lights in my arsenal, and they are among the best photography lights I’ve ever used. They’re durable, have excellent battery life, and emit beautiful, flicker-free light.
Litra’s Black Friday sale runs November 25-December 2, 2019.
Get a Litra light (or two!) for Black Friday
Get 10% Off Popular Products at MPB
This Black Friday, MPB is offering 10 percent off a wide selection of cameras and lenses from Sony, Canon, Nikon, Olympus, Fujifilm, Panasonic, and even Hasselblad.
Their curated selection of used gear is already discounted, so the extra 10 percent off is just an added bonus!
Shop MPB for Black Friday discounts
Save Up to $350 on f-stop Bags
Makers of some incredible bags, f-stop has already kicked off their Black Friday event.
This year, they’re offering up to $350 off bundles, which are full modular setups used by the pros. If you live in the U.S.A. or the EU, you get free shipping, too! International shipping is just $49.
Shop f-stop Black Friday deals while supplies last
We Recommend
2021 Top Cameras for Vlogging
photo bymartin-dm via iStock
If you’re like me and you’re getting more and more into creating videos, and, in particular, vlogs, then this is the place to source recommended cameras for vlogging.
Getting a camera for this type of work requires that you hone in on some very specific features.
In fact, buying a camera for vlogging is a much different animal than buying a camera for landscape photography or portraiture. This article has Nikon D5600 review pertaining to vlogging only, basically its an all rounder camera.
Let’s first look at the best camera features for vlogging and then dive into a few of the top cameras for vlogging.
Best Cameras for Vlogging: What to Look For
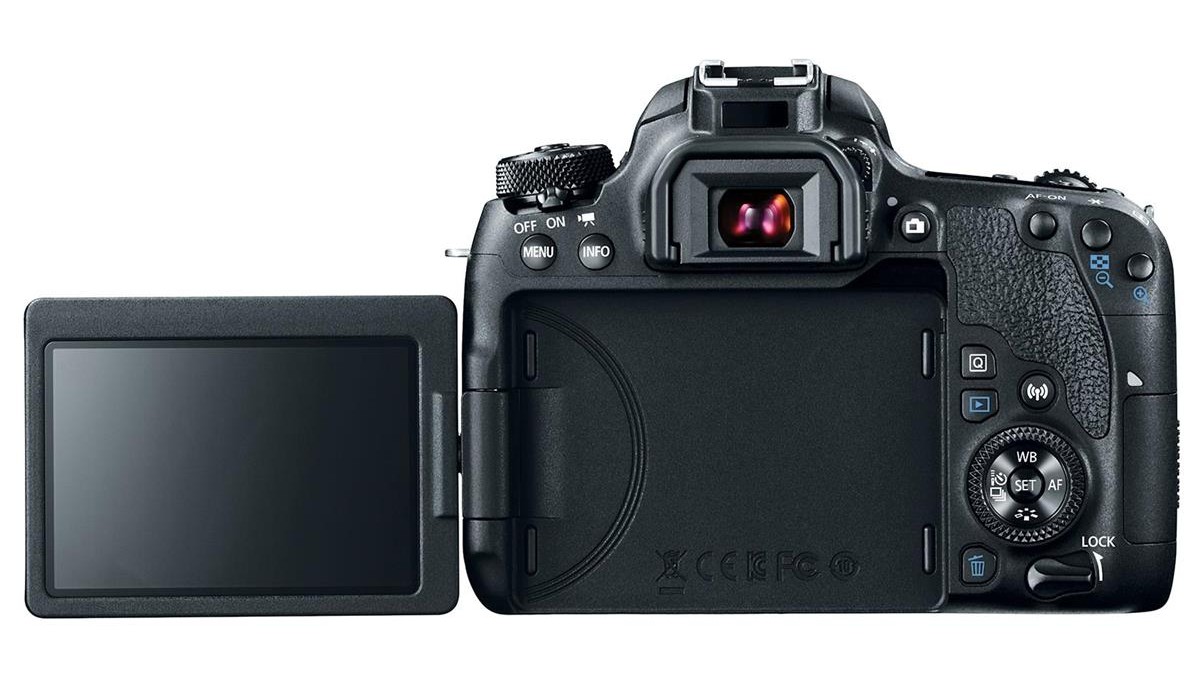
 The Canon 77D has a large LCD screen that's articulating, so you can see yourself as you film.
Far and away, the most important of camera features for vlogging is the LCD.
Not only do you want a large, bright, and resolute LCD that allows you to get a clear, crisp view of what you’re doing, but having an articulating LCD is also of the utmost importance.
After all, if you can’t see yourself while you’re filming, you’ll have a much more difficult time creating good vlogging content.
 The Panasonic G85 has an all-important external microphone port for improved audio.
Second, the best vlogging cameras have an external microphone port.
DSLRs and mirrorless cameras are not known for having built-in mics that produce excellent audio, so having the ability to attach a better, external microphone is a must.
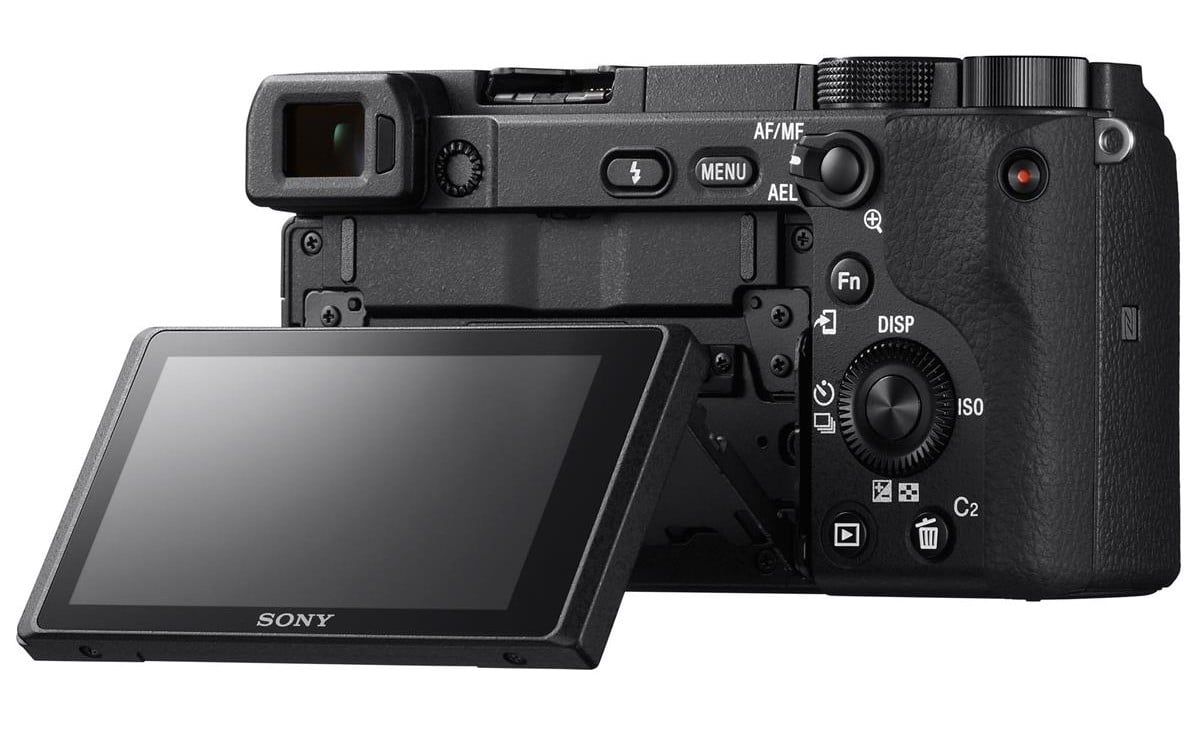
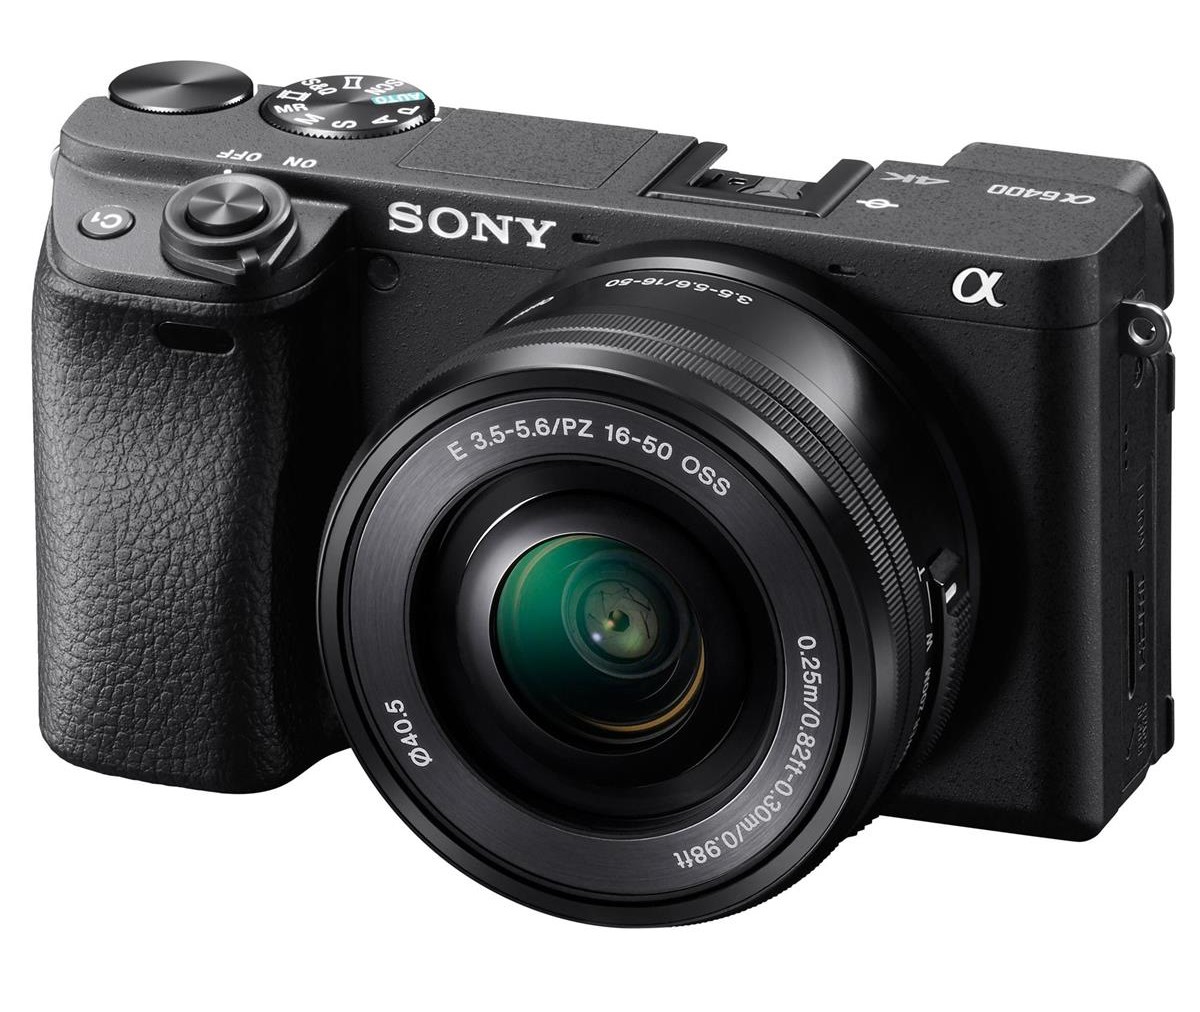 The Sony a6400 has an excellent autofocus system that can track moving subjects with ease.
Third, top vlogging cameras have good autofocus systems that can track your movements as you’re recording.
Not only is this an important feature from the standpoint of getting sharp video, but since you’re in front of the camera, you can’t adjust the autofocus when needed. The camera must be able to do this on its own!
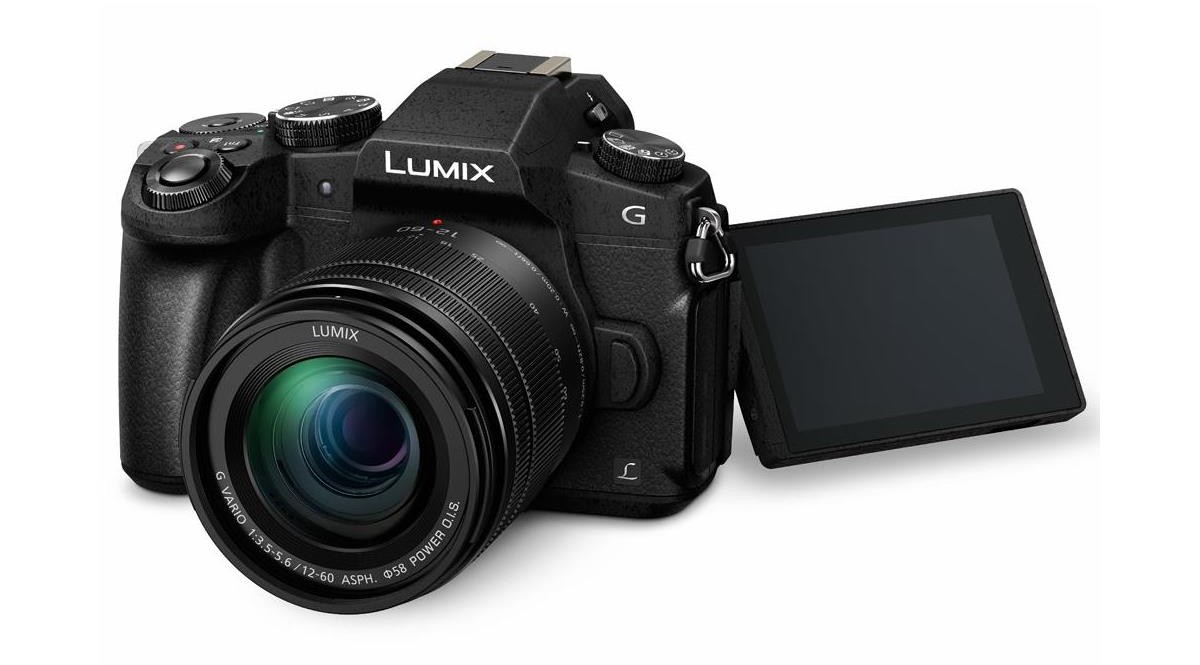 The Panasonic G85 shoots 4K UHD video at 30 fps.
Lastly, though shooting your vlogs in 4K isn’t a requirement, it’s definitely a good choice. Viewers appreciate the highest-quality video, and 4K is only going to become more and more popular, so having a 4k vlogging camera is a good investment to make.
So, all that being said, what are the top cameras for vlogging?
Top Mirrorless Cameras for Vlogging: Sony a6400
If you want a mirrorless camera for vlogging, it’s tough to beat the Sony a6400.
Armed with a superb 24.2-megapixel APS-C CMOS sensor, this camera offers excellent image and video quality (in 4K!) that maximizes resolution.
The 3-inch articulating LCD can be positioned to face the front - exactly what you want for vlogging - and it offers 921k dots of resolution, so it’s bright and resolute as well.
The only problem, though, is that if you have an external microphone mounted to the camera, it blocks the front-facing LCD.
That's why I use an external field monitor (the Andycine A6 Lite) mounted to my Ikan Stratus Cage.
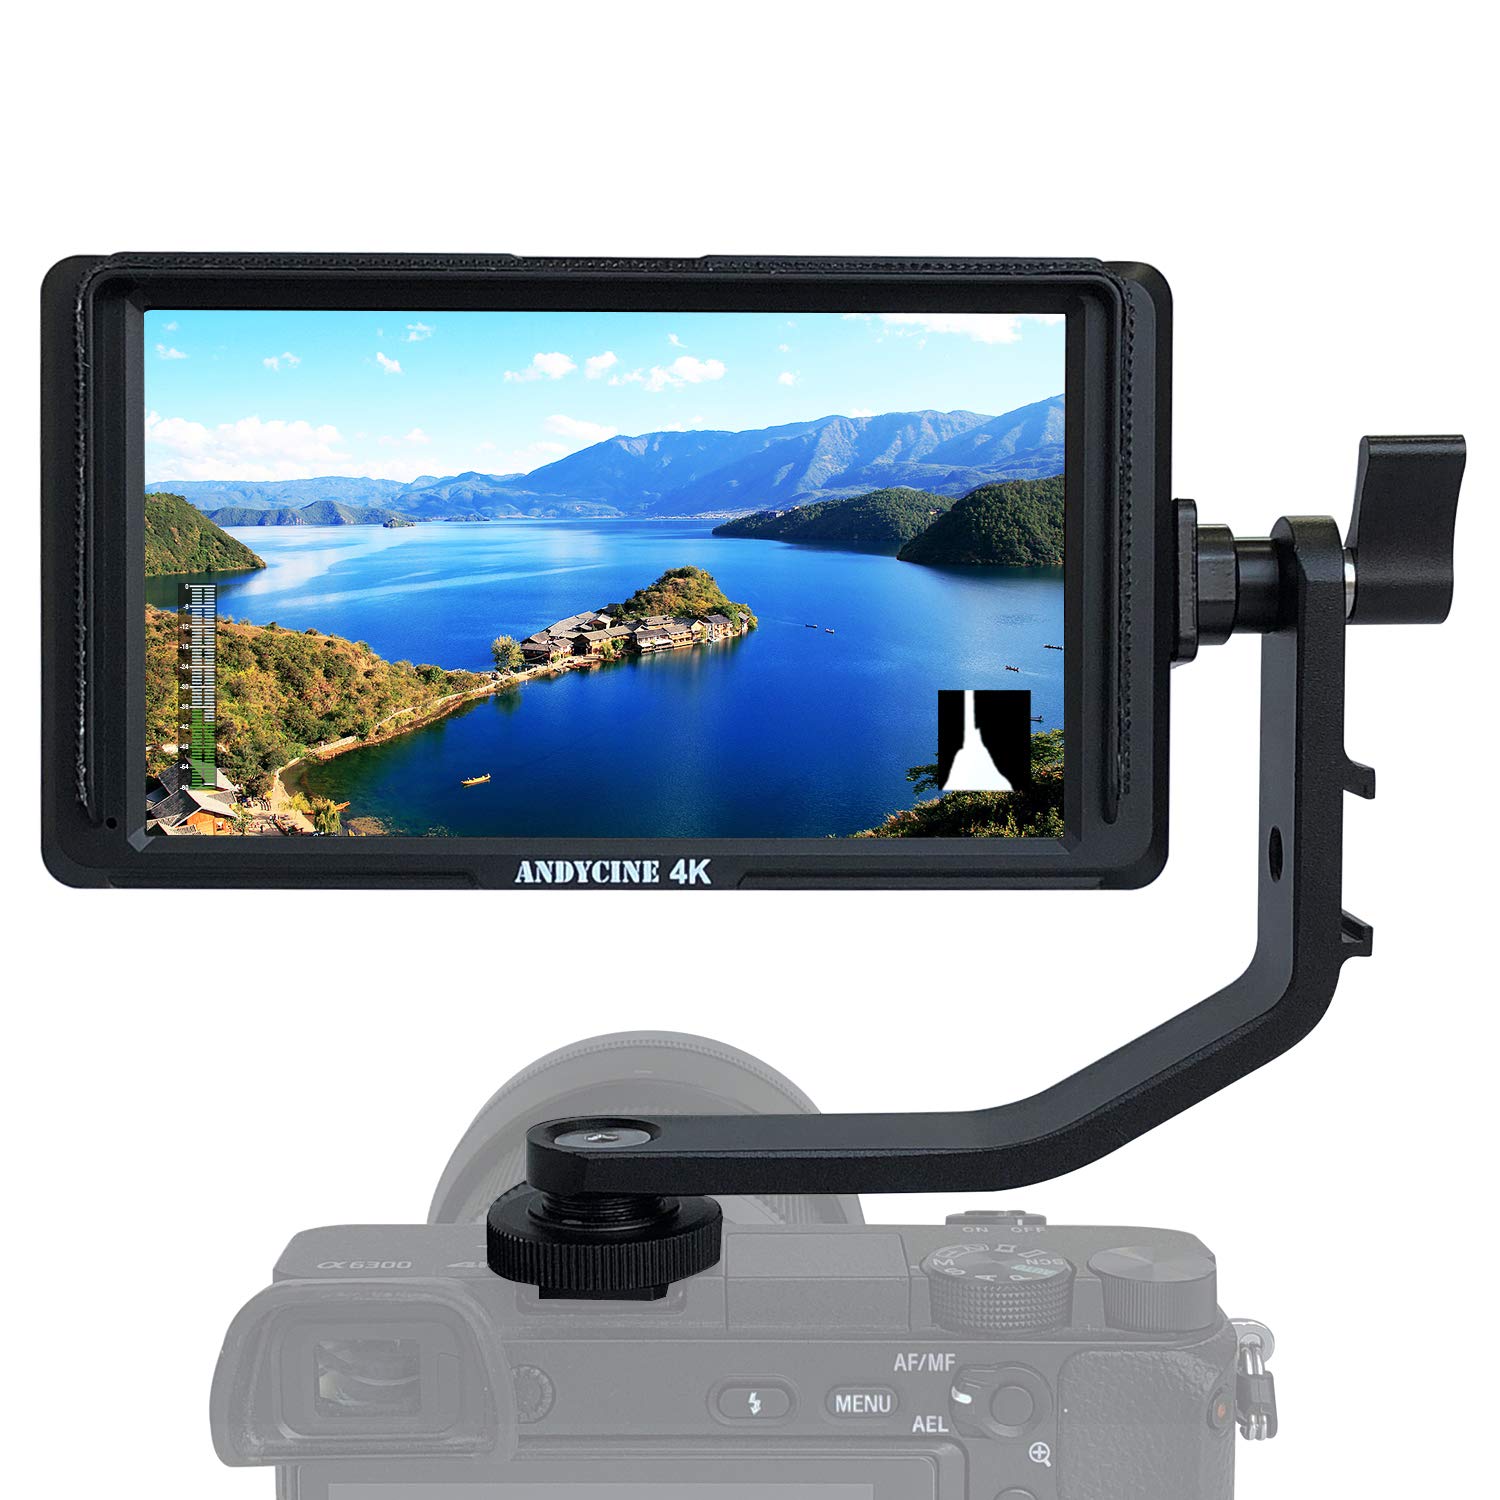
What I most appreciate about this field monitor is that it is incredibly bright and has a tilting arm that enables you to view it from multiple viewing angles.
And since it's about two inches larger than the a6400's screen, there's also a larger picture to view as I'm filming, which is incredibly helpful in ensuring that I'm getting the shots I want.
This thing also has a ton of features for making improved videos, including audio level controls, focus peaking, a histogram, zebra exposure, and both vertical and horizontal screen orientations. I highly recommend it!

If you don't need all the accessory attachments a cage provides, you can alternatively use an L-bracket (I use the Really Right Stuff BA6300-L). With a quarter-inch mount on the side, this bracket enables you to mount your external mic out of the way of the a6400's flip-up LCD.
Getting back to the a6400, perhaps most impressive feature is the its autofocus system with Eye-AF performance. Even though this is an entry-level camera, it has an autofocus system that can outperform even high-end full frame cameras. See Eye-AF in action in the video below by AdoramaTV:
In other words, the Sony a6400 ticks all the boxes - it’s got a top-notch LCD, a microphone port, an excellent autofocus system, and it shoots 4K video. Learn more about this excellent camera in our Sony a6400 review.
Current Price: $898.00 (body only)
Editor’s Tip: Though you can buy an a6400 with a 16-50mm f/3.5-5.6 OSS kit lens, you’ll get better quality video if you opt for a higher-end lens. Give the Sony 18-135mm f/3.5-5.6 a try instead. For shooting video, the 18-135 lens offers vastly superior optical quality, and the much greater reach of this zoom enables you to shoot wide-angle to telephoto footage.
Runner-Up Mirrorless Camera for Vlogging: Panasonic Lumix G85
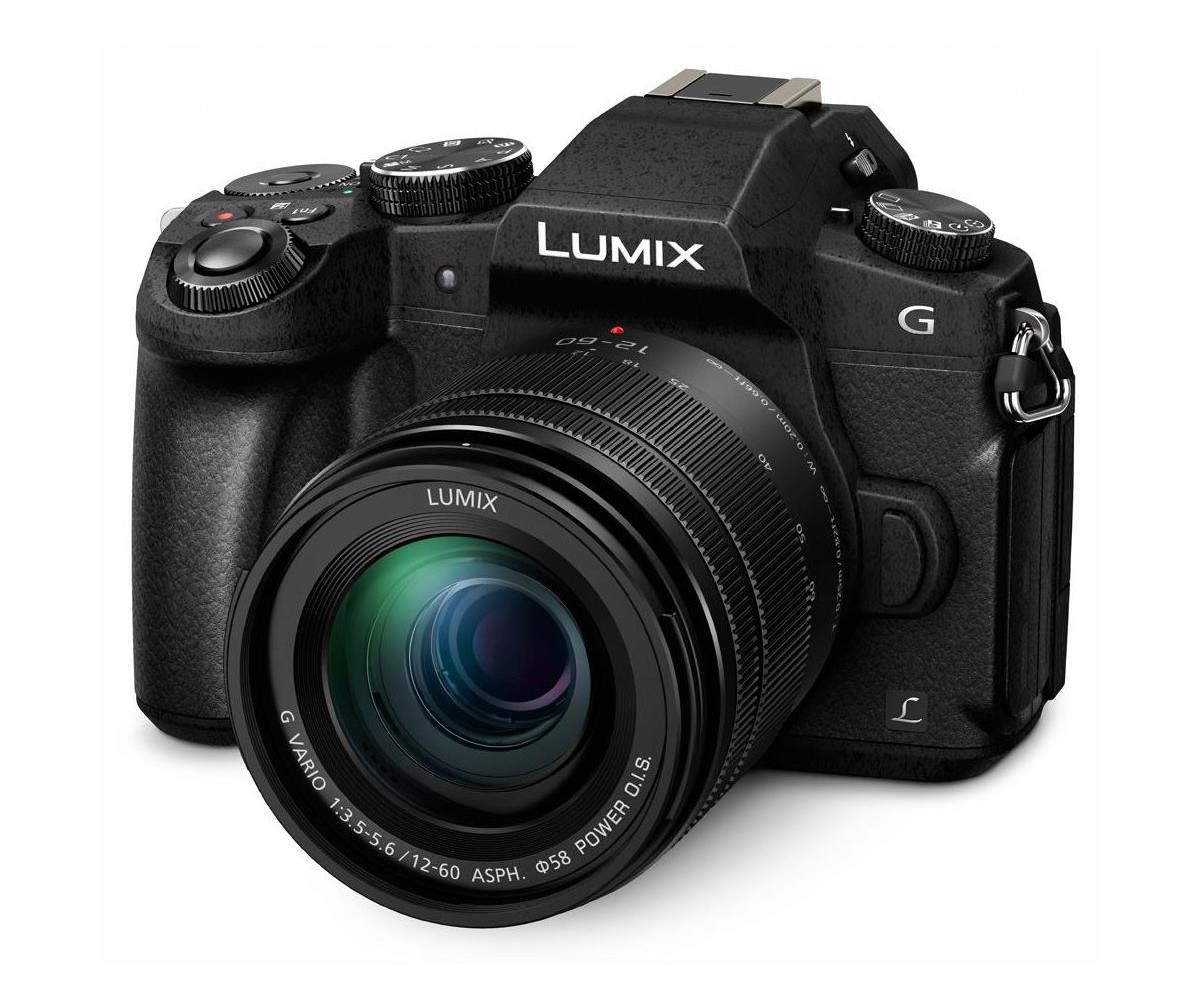
The Panasonic Lumix G85 has a 16-megapixel micro four-thirds sensor, a 1.04-million-dot touchscreen display, good continuous autofocus, and a microphone port. You can get the camera with a 12-60mm f/3.5-5.6 lens for under $700.00.
Top DSLR for Vlogging: Canon EOS 77D
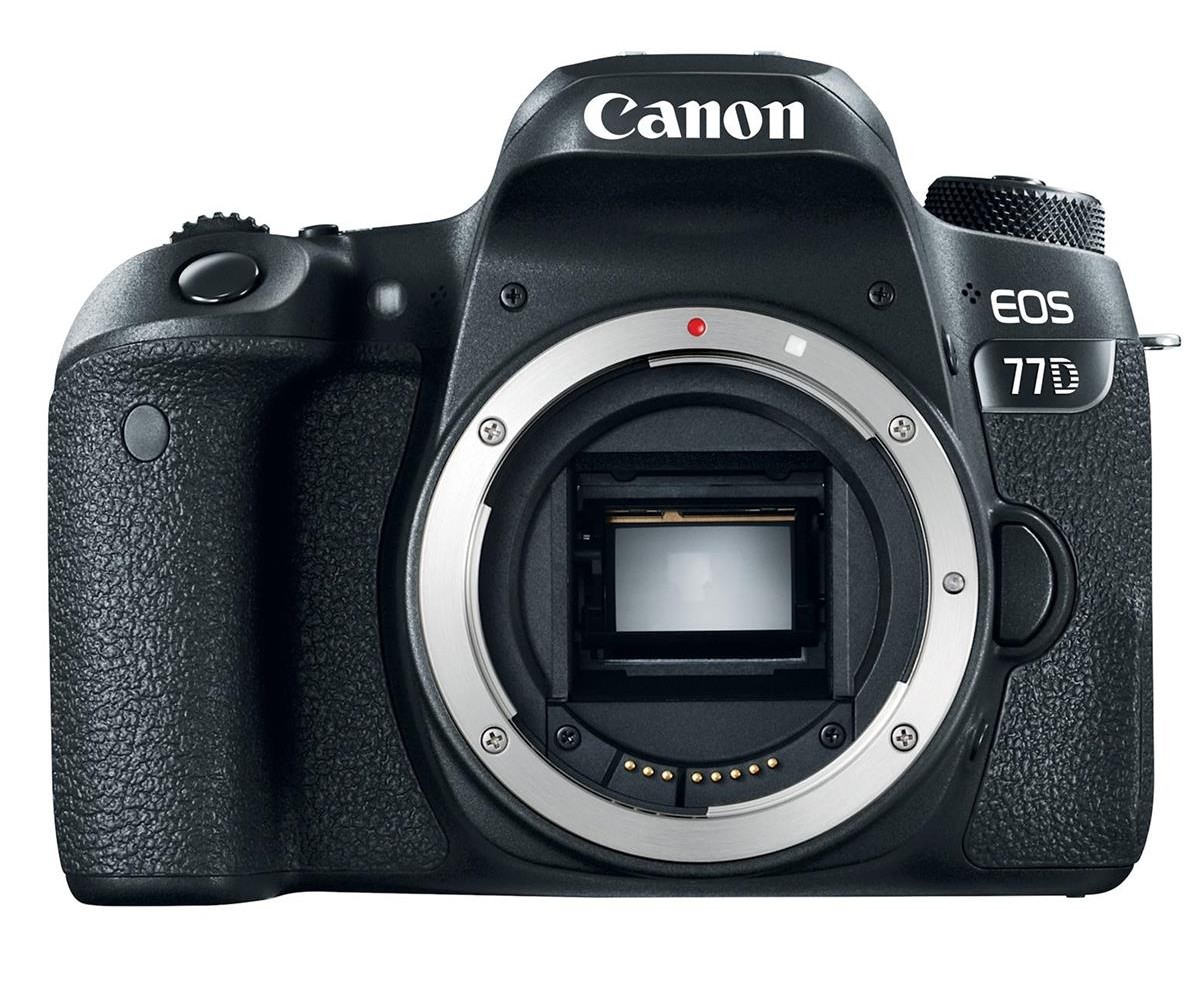
If you’d rather shoot video with a DSLR, a good alternative to the mirrorless cameras for vlogging noted above would be the Canon EOS 77D.
This camera has a 24.2-megapixel APS-C CMOS sensor that has digital five-axis image stabilization that will help you capture improved handheld video footage (and stills, too).
The EOS 77D does not capture 4K video footage, and instead maxes out at 1080 at 60p.
However, the presence of the aforementioned image stabilization along with a big 3-inch vari-angle touchscreen helps make up for it. Get a detailed review of this camera in the video below by Chris Winter:
Additionally, this camera has Dual Pixel autofocus, which gives you far better autofocus capabilities for video capture. This is especially the case when you’re filming moving subjects.
Again, though this camera lacks 4K video, it has a microphone port and its other must-have features are so good that it essentially makes up for it.
Current Price: $699.00 (body only)
Editor’s Tip: When shopping for lenses for the EOS 77D, consider investing in a Canon EF lens rather than a Canon EF-S lens. Though EF-S lenses are designed for use with APS-C cameras like this, they aren’t compatible with Canon full frame cameras. Since EF lenses are compatible with APS-C and full frame cameras, you can future-proof your kit with lenses that will work with a full frame rig, should you upgrade to one in the future.
Runner-Up DSLR for Vlogging: Nikon D5600
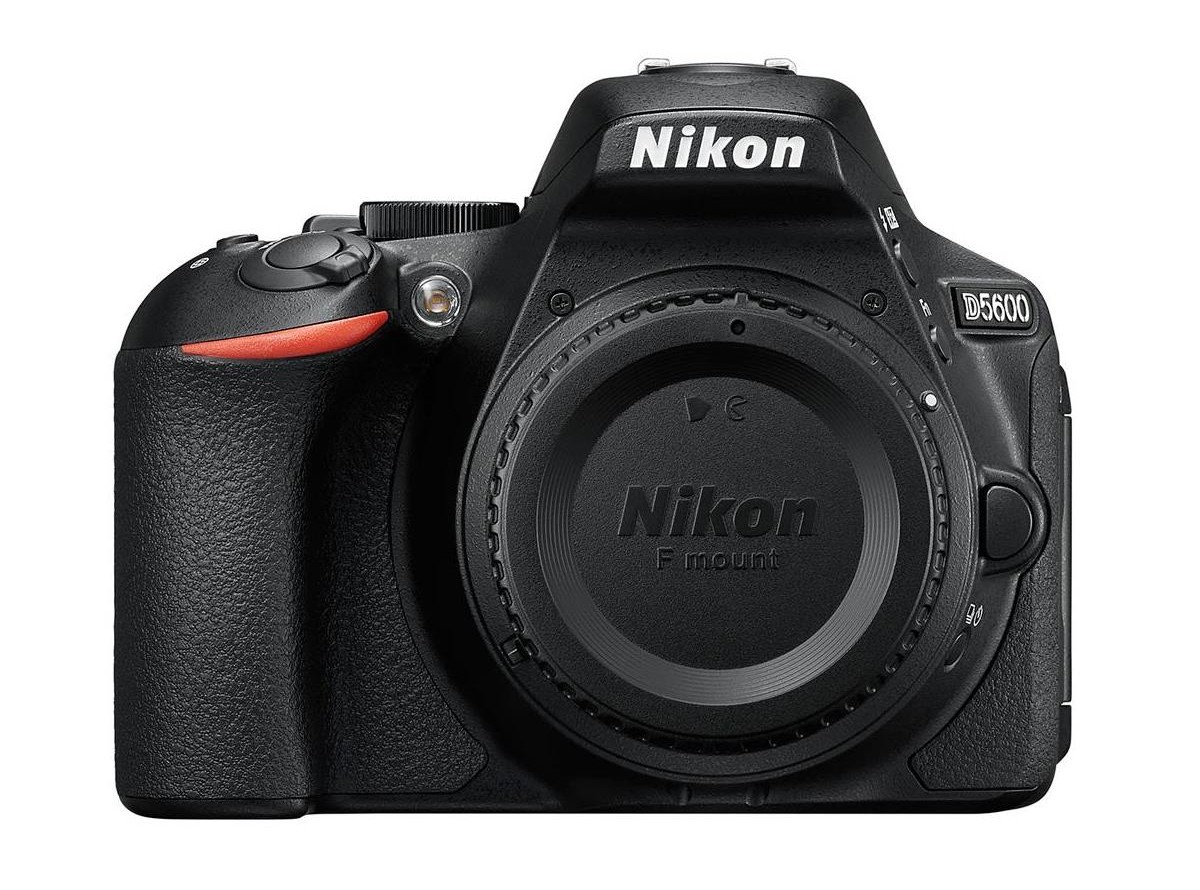
Like the EOS 77D, the D5600 does not offer 4K video capture, but it has an excellent 24.2-megapixel APS-C CMOS sensor, a 3.2-inch articulating touchscreen LCD, and a microphone port. Pick up a Nikon D5600 (body only) for $596.95.
Though there are plenty of other choices for the top cameras for vlogging, these four options are at the top of the heap if you’re looking for a camera that’s capable for stills and video, while also having a small price tag.
Editor's Tip: A must-have for any vlogger is a gimbal of some sort. We'll have more details on gimbals in an upcoming article, but I wanted to highlight the gimbal I use - the FEIYU AK2000 - because it has tons of features that make it incredibly useful for shooting video. The smart touch panel is handy for making quick camera adjustments, and it has stronger, updated motors that improve its performance. It also has 12 hours of battery life for those marathon shooting sessions!
Must-Have Vlogging Accessory: Portable Video Light
Since we're talking about vlogging, it's important to note the need for a high-quality light.
Not only do you want something that puts out great light, but you want it to be small and portable too.
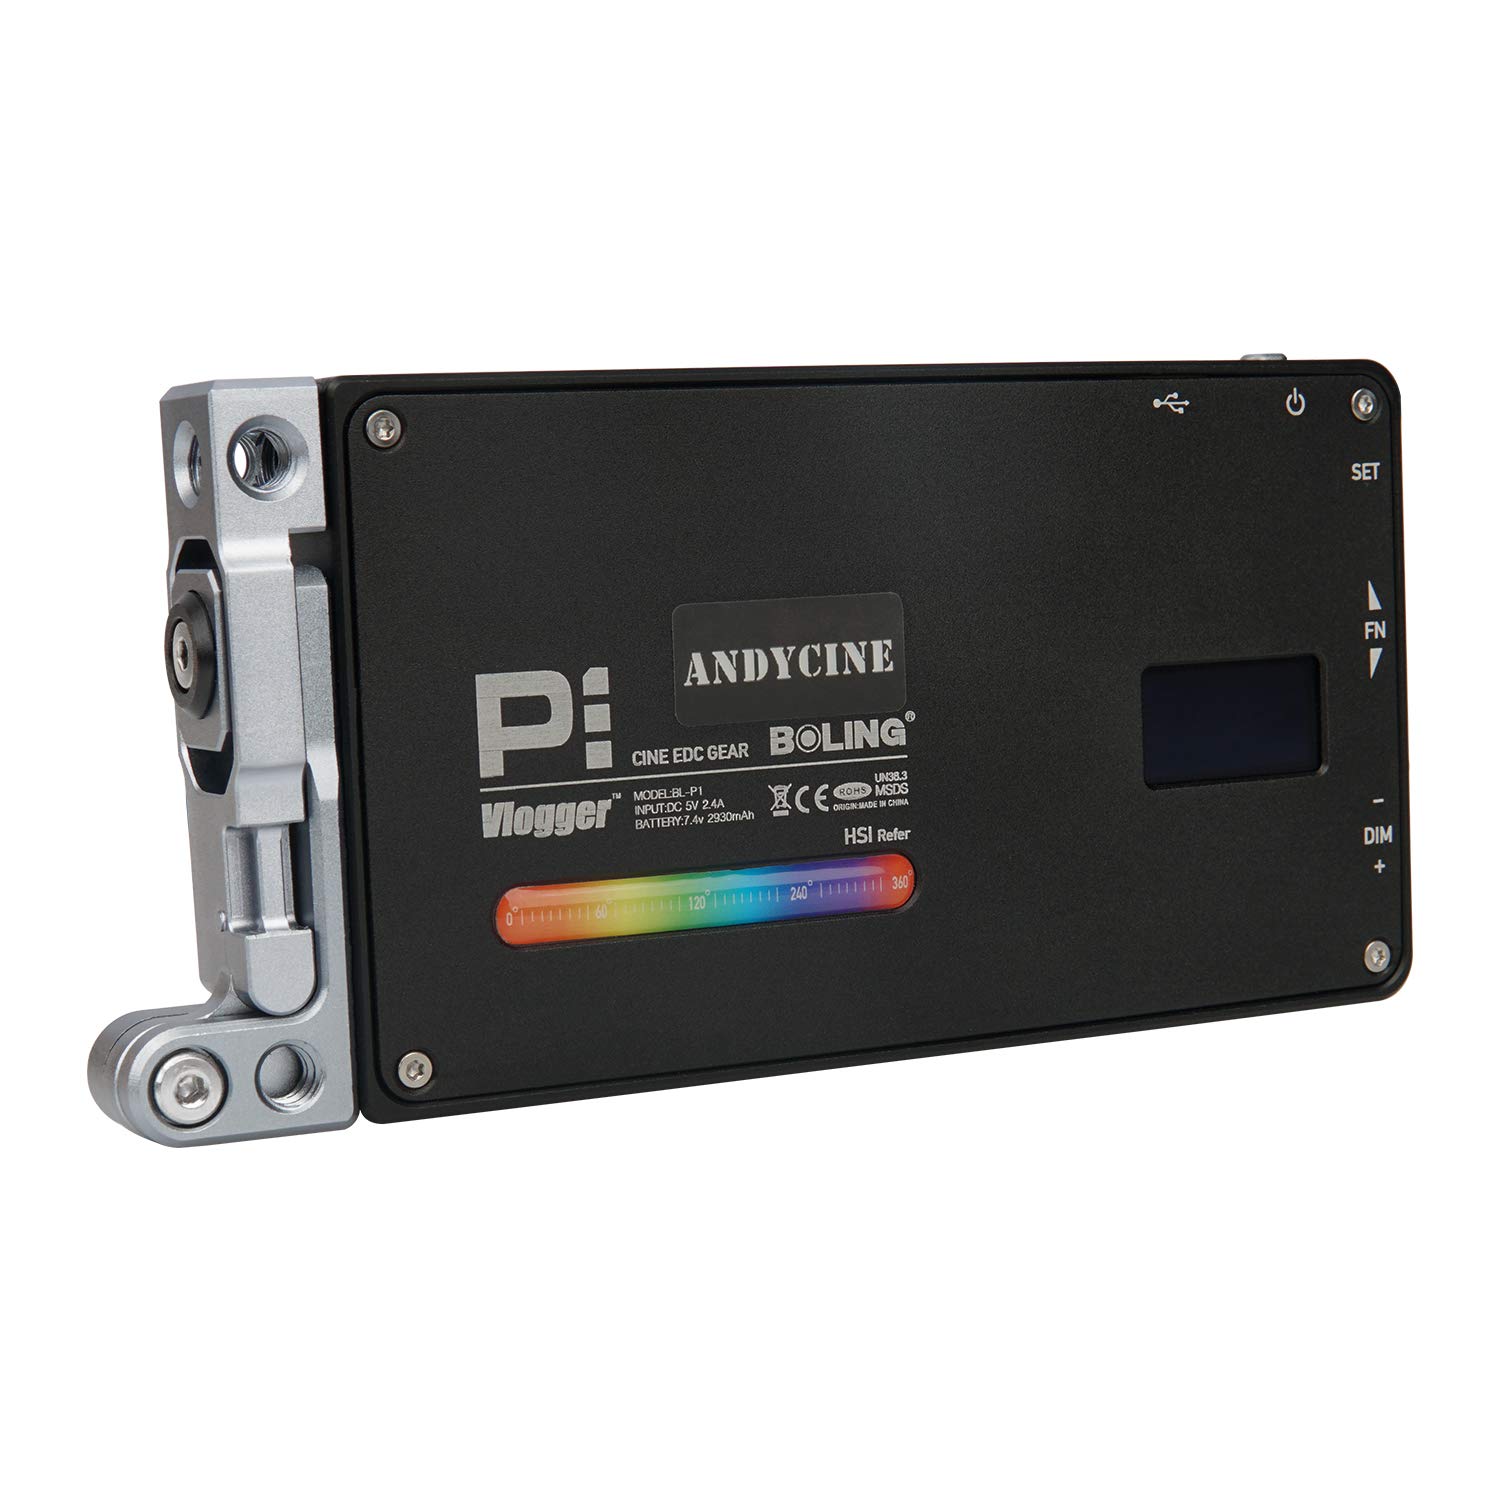
The Andycine Portable Boling Video Light certainly fits the bill.
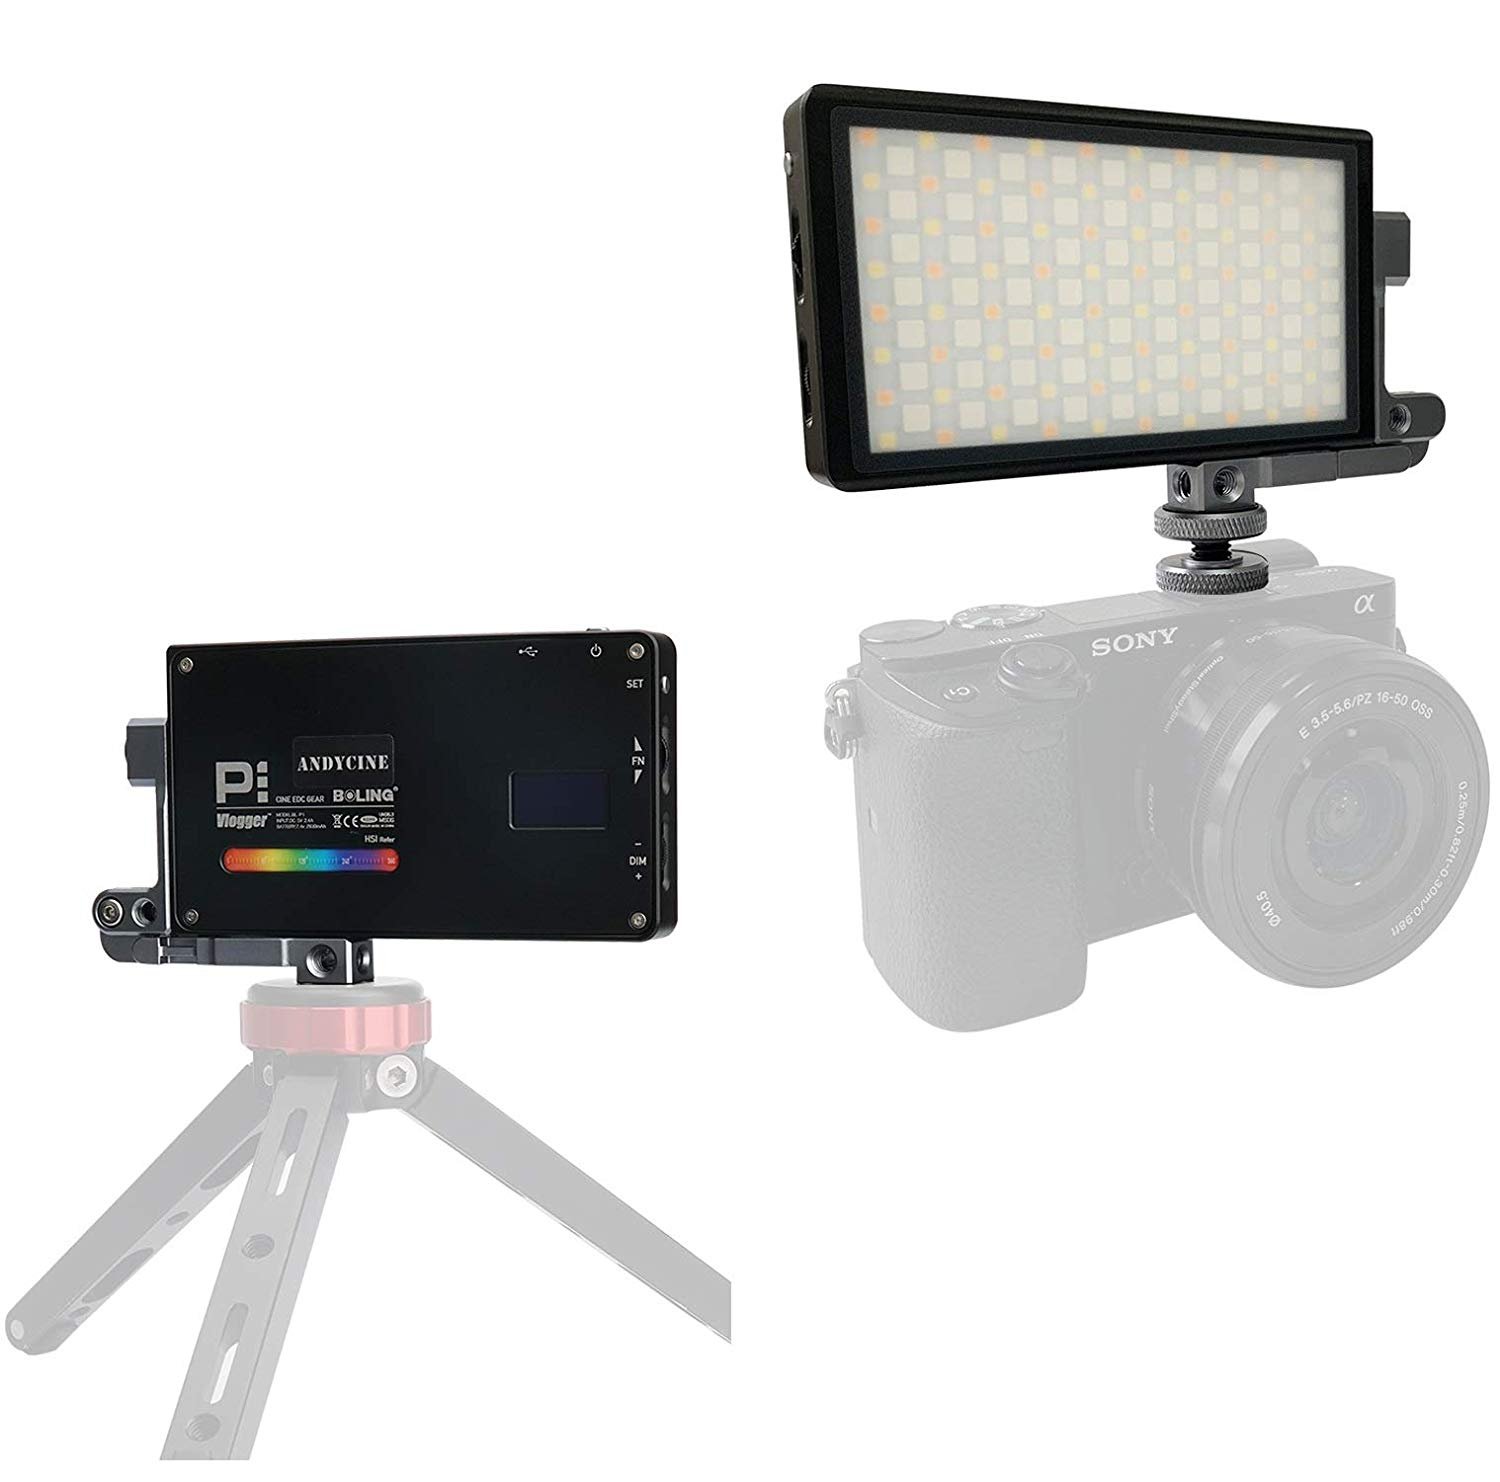
This light has a flexible design with a 360-degree arm support and an adjustable bracket arm so you can get the light shining just where you wish.
It can be mounted on a hot-shoe stand or a tripod and has a full color LCD display.
You can adjust the light from 2500k-8500k for precise customization of its light output. There's even nine built-in lighting presets to make using this light that much more efficient.
With fast charging via USB cable, this is the ideal light for vlogging applications!
We Recommend
3 Must-Have Lenses for Landscape Photography

photo byshilh via iStock
I know what you’re thinking…
How can anyone possibly narrow down all the excellent landscape lenses to a set of just three?
It’s true that there are a lot of fantastic lenses you can use to capture gorgeous landscapes, but standing above them all is the “holy trinity” of landscape photography - a wide-angle zoom, a standard zoom, and a telephoto zoom.
More specifically, something like the RF 15-35mm f/2.8L, the RF 24-70mm f/2.8L, and the RF 70-200mm f/2.8 L for the Canon EOS R is what I’m talking about.
I know, I know...there’s no prime lenses in the holy trinity.
But as I explain in my video below, there are some very good reasons why you should pursue the holy trinity of zoom lenses and forget about primes for landscapes.
Give the video a watch and find out what lenses qualify as the holy trinity for Canon EF and RF lenses, Nikon F and S lenses, and Sony E-mount lenses.
Below, I’ve offered up a quick overview of why the holy trinity is your best bet as a landscape photographer.
Recommended Landscape Photography Books:
- The Landscape Photography Book: The Step-by-Step Techniques You Need to Capture Breathtaking Landscape Photos Like the Pros
- National Geographic Greatest Landscapes: Stunning Photographs That Inspire and Astonish
- The Art, Science, and Craft of Great Landscape Photography
The Holy Trinity
Photo by Jason Wong on Unsplash
As I mentioned earlier, the holy trinity for the full frame EOS R includes the RF 15-35mm f/2.8L, the RF 24-70mm f/2.8L, and the RF 70-200mm f/2.8 L.
I’ve talked about my love for Canon’s RF lenses before, and I’ll do it again here - each of these lenses is simply spectacular.
The crazy part is that they’re spectacular on the EOS R, which can’t come close to maximizing the quality that these lenses are capable of. That’s something that the EOS R5 will certainly be able to do, and boy am I excited to get my hands on one of those cameras later this year!
As I explain in my video, there are some minor differences in focal length and aperture in the holy trinity depending on what camera you have and what mount the camera uses.
But, by and large, you’re looking at something in the 14-24mm range, as well as a 24-70 and a 70-200mm. This is most likely your best bet for the best lens for landscape photography combination.
Best Lens for Landscape Photography: Should You Get f/2.8 or f/4 Lenses?
Photo by 2 Bro’s Media on Unsplash
There are very few situations in which you need to shoot at f/2.8 in landscape photography. Low-light situations like astrophotography are a prime exception.
That being the case, if landscapes are all you shoot, an f/4 lens will be plenty fast for your needs. In fact, you’ll likely not even shoot at f/4 all that often!
I personally like having f/2.8 lenses over f/4 lenses because of their low-light capabilities. I’m not out every night photographing the stars by any means, but when I do, an f/2.8 lens is much more capable than an f/4 lens.
But, budget is the ultimate factor for most people, and since f/2.8 lenses are usually much more expensive, it makes sense for a lot of folks to go with f/4 lenses. I’ve shot many landscapes with a 24-70mm f/4 and they turned out great, so I’m not poo-pooing f/4 lenses by any means.
I suppose the advice I’m trying to give here is that you need to buy the best lens for landscape photography you can afford. Your lenses will last you for decades if you care for them properly, and they have a more significant impact on image quality than your camera, so putting your money towards good glass will definitely pay dividends.
Learn More:
Benefits of Wide-Angle Zooms
photo by Oleh_Slobodeniuk via iStock
The biggest asset of a wide-angle zoom like my Canon RF 15-35mm f/2.8 is that you can take photos that look so much different than what our eyes see.
The distortion of a wide-angle lens isn’t for everyone, but I really love that distortion in a landscape - it looks unique and interesting, and that’s precisely what you want in a photo.
Besides, wide-angle lenses allow you to include a ton of foreground interest. Doing so gives your shots more depth and makes the photo seem more immersive too because you can create a layered shot with elements in the foreground, midground, and background. These are some of the primary reasons why a wide-angle zoom is considered a best lens for landscape photography.
Benefits of a Standard Zoom
Photo by Simon Migaj from Pexels
Having a 24-70mm lens in your kit is a must because it is such a versatile lens.
I’d say that most landscape photographers - myself included - would choose a 24-70mm lens as being the only one they could take on an epic landscape photography trip.
You can go wide at 24mm, shoot telephoto at 70mm, and have a ton variability in between.
This is an easy lens to use, too.
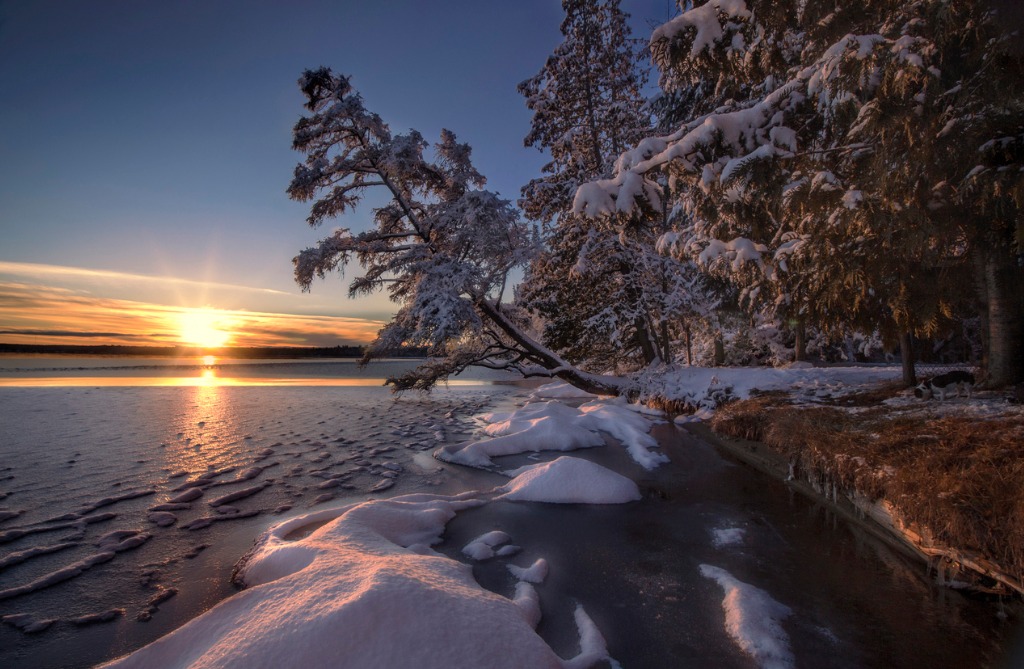
photo by Wiltser via iStock
Photos captured with a 24-70mm lens look much more natural than what you can create with a wide-angle or a telephoto lens. Without the distortion of a wide-angle and the compression of a telephoto, the images you create look more like what you see with your own eyes.
This can be helpful when framing up your shots and composing images because what you see through the viewfinder looks so much like what you see with your own eyes.
If you’re a beginner, pick up a 24-70mm zoom first - it’s an excellent learning tool and a best lens for landscape photography!
Learn More:
- Is a 24-70mm the Best Landscape Photography Lens?
- 6 Tips for Landscape Photography With a Telephoto Lens
Benefits of a Telephoto Zoom
Photo by Mads Schmidt Rasmussen on Unsplash
The biggest advantage of using a telephoto zoom like a 70-200mm lens is that you can fill the frame with individual landscape elements and create much more intimate images.
Rather than showcasing the entire landscape, you’re forced to find that one element that’s more eye-catching than the rest and find ways to capture it in a beautiful way.
Telephoto lenses also give you the greatest opportunity to show scale.
Photo by Taneli Lahtinen on Unsplash
Because of their compression, distant elements seem larger than they are, so while mountains in the background of a wide-angle shot look tiny, they are big and robust in a telephoto image.
I’d argue that using a telephoto zoom for landscapes is the most challenging of the three lenses discussed here, but also the most rewarding.
Most landscape photographers start out with a wide-angle (I know I did…), and switching to telephoto requires you to think outside the box and reimagine what landscape photography can be.
So, if you’re in the market for the best lens for landscape photography, think about investing in the holy trinity of zoom lenses.
You’ll be covered from wide-angle to telephoto with just three lenses, and if you’re cramped for space in your backpack, any of these lenses can be used effectively on their own.
We Recommend
5 Reasons Why You Need an Atomos Ninja V
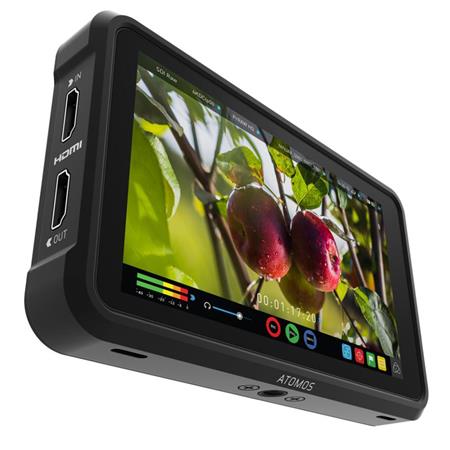
If you want to elevate the quality of the videos you create, a good way to do so is to add an external monitor and recorder.
Doing so opens up a wealth of monitoring tools, not to mention having a much larger and brighter monitor for keeping tabs on what you're shooting.
And on top of that, an external recorder allows you to get around those pesky recording limits that so many cameras have. These are but a few advantages of using an external monitor...
Let's have a deeper look at these and other reasons why a monitor and recorder like the Atomos Ninja V is a good investment for you.
Why You Need an Atomos Ninja V: No Recording Limits

One of the primary reasons why you might want to invest in an Atomos Ninja V is that it allows you to get around the video recording limits on your camera.
Many modern mirrorless cameras offer incredible video capabilities, but limit you to 30 minutes (or so) of recording time.
If you're doing an interview, 30 minutes might not be enough. Likewise, if you're shooting video at an event, that time limit might be way too short.
By using an Atomos Ninja V, you can extend that recording time - it'll keep recording so long as your camera is powered up and you have space on an SSD drive.
Video Quality is Increased by Using the Atomos Ninja V
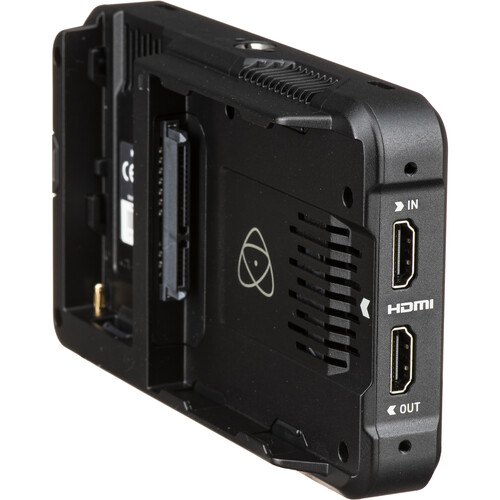
Many cameras on the market today shoot internal 4:2:0 8-bit video. But if you output that video via HDMI, the quality often increases to 4:2:2 in either 8-bit or 10-bit. While you can grade 4:2:0 8-bit Log video, the color information simply isn't that great.
So, by externally recording, you can record much more color information. Additionally, if you're shooting Log footage, external output will give you the best possible dynamic range. It's just a better setup to get the highest-quality videos.
What's more, the Ninja V can save Raw video output as ProRes Raw direct from the camera, which results in an incredible difference in the footage. It's similar to the difference between shooting Raw and JPEG still images - the RAW files have much, much more data for you to work with.
To top all that off, the Ninja V can record 12-bit Raw video from any supported camera!
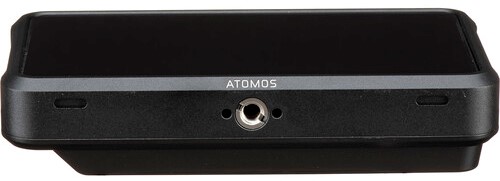
The Atomos Ninja V Has a Killer Screen

The 5-inch touchscreen on the Ninja V offers a lot more real estate for viewing the footage as you shoot. And, if your camera doesn't have an articulating screen, it'll be far easier to position the Ninja V so you have a good view (even if your camera has an articulating LCD, the Ninja V will still be easier to view).
The touchscreen is nicely responsive, and using it to adjust the settings is intuitive and user-friendly. The layout of the icons on the screen is also intuitive and makes it really easy to do what you need to do.
And while having that extra viewing space and touch capability is nice, the best feature of the screen is its brightness...
At 1000 nits, this thing is incredibly bright, even on a sunny day. Now, if you're outside shooting on a cloudless day at high noon, a sunshade might be in order to see the Ninja V's screen, but in most situations, I've had zero problems seeing the screen when shooting outdoors during the day.
You Get Focus and Exposure Tools

The large, bright screen is certainly helpful for getting the focus and exposure just right in your footage. But the Ninja V helps you perfect those qualities in other ways as well.
The unit comes with focus peaking capabilities, which is enormously helpful for ensuring your video's focus is spot-on.
On the exposure front, you get every tool imaginable - vectorscopes, RGB parade, and false color displays, among other helpful tools that will generate high-quality video.
Load Up Custom LUTs
Yet another nice feature of the Atomos Ninja V is that you can load up to eight LUTs.
Not only that, but you can either use the Ninja V to simply see what the finished look will be when the LUT is applied or you can bake the LUT in. You can even output the video from the Ninja V with the LUT applied.
If you have a specific style you like to shoot your videos in, this is a huge benefit that can save you a lot of time in post-production.
Of course, this is just one of many benefits of using a device like this for your video recording! As more and more photographers like me get more and more into shooting video (also like me!), gadgets like the Ninja V will become even more important.
While it isn't perfect - it's a little cumbersome and you have to add all kinds of accessories for it to work - the benefits you derive from it far outweigh its minor inconveniences and added output of money you might encounter. The difference in the quality of the videos I create while using the Atomos Ninja V is immediately noticeable - and it will be for you as well!
We Recommend
8 Do's and Don'ts When Flying a Drone
Just a few years ago, we were writing about how drones were becoming the next big thing in photography.
Well, as 2020 approaches, I think we can all agree that drones are here - and here to stay.
As more and more photographers (and everyone else, for that matter...) take to the skies with a drone, safety becomes a bigger and bigger issue.
Not only do you have to fly your drone safely to avoid crashes, but you also have to be mindful of other people flying drones nearby who may or may not be as careful or as good a pilot as you are.
With this in mind, let's explore eight things you can do to avoid crashing your drone.
Editor's Note: Check out the first two articles in our drone series - Getting Started in Drone Photography and Selecting the Right Drone for Your Photo and Video Needs - to get even more insights about drones and drone photography.
DO Fly in Open Areas

A nice, open area to fly your drone is ideal.
Not only do you avoid obstacles, but you can also maintain line of sight with your drone as you fly.
Be sure that the open area you choose isn't restricted airspace, like near an airport, a military base or in a national park.
Needless to say, those areas are off-limits for a reason, and breaking the no-fly rule in those areas can have serious consequence.
DON'T Fly Over People or Homes

Avoid flying over people and buildings at all costs.
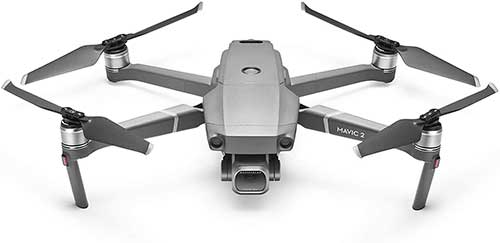
A drone falling from the sky, can cause serious injury and even death, whether it be from mechanical malfunction, weather-related issues or even sabotage (you've seen videos of people shooting down drones, right?). Drones can also cause major damage to buildings and vehicles; an experience that even seasoned pilots encounter.
Some drones, like the DJI Mavic 2 pro shown above, come with an obstacle-avoidance system that detects obstacles. You can fly forward and backward with less worry of crashing because the Mavic 2 Pro's APAS system will plan an appropriate flight to avoid any obstacles automatically. Though that's excellent peace of mind, it's still prudent to stay away from other people and their homes.
Unless you have express permission to fly over private property, avoid it altogether. If something goes wrong, it can go wrong quickly, and you could be responsible for damages. Ultimately it is best to be respectful of people's privacy - not everyone wants a drone flying over their home!
DO Defer to Other Aircraft

FAA regulations require that you keep your drone at an altitude of 400 feet or less when in uncontrolled Class G airspace.
If you go above that, you run the risk of encountering other air traffic.
When flying, maintain awareness of the airspace in your vicinity. If you see or hear other aircraft, defer to them and allow them to continue on their flight path. Unless you have permission to fly in controlled airspace (like near airports), don't even think about flying your drone!
Remember - you can much more easily see an airplane than the pilot of that aircraft can see your drone. It's your responsibility to make sure the airspace around you is safe.
DON'T Fly When the Battery is Low

Flying your drone when the battery is low is just asking for trouble.
Your drone needs battery power to stay aloft, and if you run out of juice, it could fall out of the sky, injure someone or cause property damage.
Fortunately, many drones - like the DJI Mavic 2 Pro - have intelligent batteries that trigger a "return to home" function.
This means that when the battery is at a point at which it might not have enough power to keep the drone flying much longer, it will automatically ascend to its return to home height and return if no action is taken.
If the battery is critically low, the drone will simply land itself - an action that cannot be canceled by the pilot.
Nevertheless, keep an eye out for your drone's low battery warning so you know when it's time to bring it home or to land immediately.
DO Avoid Poor Weather Conditions

Though some drones come with a self-heating system for flying in the cold, avoiding adverse weather conditions is a good rule of thumb. Inclement weather to avoid includes rain, snow, sleet, hail, lightning, and certainly strong winds.
Each of these weather events makes flying much more difficult, and negatively impacts the performance of the drone too.
Just like you have to take extra caution when driving your car in bad weather, the same caution should be exercised when deciding if it's okay to fly your drone.
DON'T Fly Under the Influence

Flying a drone under the influence of alcohol or drugs is a recipe for disaster. Under no circumstances should you attempt to fly when in an altered mental state.
Your ability to maintain line of sight with your drone - let alone pilot effectively - will be significantly reduced if you fly while impaired.
Be smart: only fly when you are physically and mentally capable of doing so in a safe manner.
DO Ensure the Compass is Calibrated and the GPS Signal is Strong
Before you take flight, make sure its compass is properly calibrated.
While in flight, avoid strong magnetic fields that emanate from certain structures, like steel-reinforced buildings.
Likewise, if you aren't picking up a strong GPS signal, don't take flight.
DJI recommends flying with a signal from at least 10 GPS satellites and at least four bars of GPS signal for optimum safety.
To see how to calibrate the compass on the DJI Mavic 2 Pro, check out the video above by Dylan Young.
DON'T Answer Your Phone While Flying

Talking or texting on the phone are illegal driving a car, and for good reason.
These activities distract you from the task at hand and increase the likelihood of an accident.
For the same reasons, you should never answer your phone while flying a drone.
Remember, flying a drone isn't just a fun activity - it's a huge responsibility that requires you to be alert, attentive, and respectful of others around you.
We Recommend
9 GoPro MAX Tips You Need to Know

As far as action cams go, it’s hard to beat the GoPro MAX for features, capabilities, and pure usefulness. It is also one of the most fun cameras to use for either photography or videography.
GoPro MAX OvervieW
What makes the GoPro MAX such an outstanding action camera? Take a new GoPro HERO 8 with all of its single lens features and functions and then add a full 360 imaging capability to it.
There really isn’t anything else quite like an immersive 360 degree video to thrill your viewers with the action or area you’re filming. Anything you could imagine doing, or have already done, with single lens HERO style action cam, just think of the WOW factor of showing that as a 360 degree video or image.
GoPro MAX can record in high-quality video, single lens or 360, has excellent audio and can dive underwater with you (or your dog) to 33 feet. It stitches in-camera for panoramic video or stills. All the other regular action features from the GoPro 8 HERO apply as well. Quite an awesome action cam!
Table of Contents
- GoPro Max Camera Settings
- Use Voice Control
- Composition Ideas for Photographs
- Make Use of HERO Mode
- Take Advantage of 360 Mode
- Get the GoPro App for Your Smartphone
- Use Horizon Leveling
- 360-Degree Sound
- Edit In-Camera or with App
GoPro MAX Tips for Photos and Video
With all that this camera can do, you find yourself asking for ideas and tips for exactly how to accomplish all of those things. Let’s examine some ideas for how to use a GoPro MAX for photography and some video tips for GoPro MAX.
GoPro MAX Camera Settings

First off, you will need to set your new action cam to make the videos or images you are imagining in your head. Almost everything in the camera is accessed by means of a menu on a touch screen. The touch screen doubles as a view screen.
From the touch screen, you select whether you are in 360 or HERO mode, what type of lens you want, switching between still imaging or video, and deeper features. Which brings us right away to the second of our GoPro MAX tips.

Editor’s Tip: Need to use your GoPro for capturing B-roll? Pair the GoPro Hero MAX with the Octopus.Camera Octopad, and you’ll have the perfect setup! Its weighted anti-slip mat keeps it right where you want it, even if you’ve got it on a smooth or uneven surface. It has a built-in ¼-20 threaded male bolt for attaching your GoPro (or any number of other GOPRO ACCESSORIES, for that matter). When you need to be hands-free, Octopad is a great helper!
How to Use A GoPro Max Voice Control

photo by metamorworks via iStock
Lots of action cams have remote control capability, and the best GoPro MAX has voice control. From the touch screen menu, choose the voice control option. Now, your action cam can start and stop video recording with simple vocal commands.
Some of the commands are start and stop video recording, take a still picture, highlighting a part of the recording for finding it easily later (tagging), switching between video, photo, burst, and time lapse mode, powering down the camera, and a few other functions.
The camera can be set to recognize English, Spanish, Japanese, Russian, and a few others. A funny thing to me was that there are separate language files for certain accents of languages, such as Australian or UK for English. So, Mad Max can easily control his GoPro MAX.
Composition Ideas for Photographs

photo by lzf via iStock
Many photographers and videographers learn the “rules” of composition early on. Action cams require a slightly different set of parameters.
Most action cams use a fairly wide angle lens, the GoPro MAX adds 360 degree filming, so those old rules are good as a starting point, but you should take into consideration the unique aspects of action cams.
If you previsualize what results you want, you pretty much have a no-brainer for how to compose your photos and videos. One video tip for GoPro MAX use is to include a reference point for viewers to know what the point of view is. In other words, sometimes it’s okay to show part of the mounting bracket or whatever your camera is attached too.
Learn More:
Make Use of GoPro HERO Max Mode

photo byOnfokus via iStock
The deciding factor for many purchasers of the GoPro MAX over the GoPro HERO is the 360 dual lens feature of the MAX. However, you don’t want to limit yourself to only 360. The HERO single lens style of action cam is a very versatile and extremely useful camera for both video and still imaging.
Play with the different lens choices available in HERO mode. The lenses are Narrow, distortion-free Linear, Wide, and Max SuperView, which is an extremely wide-angle view.
In HERO mode, you have the ability to shoot video or take still photographs.
Take Advantage of GoPro Max 360 Mode

photo by FluxFactory via iStock
One of the most amazing features of the GoPro MAX is the ability to shoot video and take pics in 360 degrees. There is also a panoramic mode that creates a special still image that covers 270 degrees of the view.
Truth be told, there are a number of modes and features that use the two superwide lenses. Some of them are accessed with the GoPro smartphone app.
Once you start filming or taking pictures in the 360 degree mode, you will wonder how you so long without that option. It adds an extra dimension that many find fascinating. Take some time to properly orient your camera and frame your view before you start filming. In fact, try out some previsualization exercises without even taking out your camera.
Editor’s Tip: Whether you’re using your GoPro Hero MAX for photos or videos, sometimes you need a little extra light, and for that, the Litratorch 2.0 is an excellent option. It has 16 LEDs that give you several different lumen settings depending on what you need. It’s rugged, waterproof, and at 3.17 ounces and barely more than 1.5 inches square, it’s an accessory you can slip in your pocket and easily take anywhere!
Get the GoPro App for Your Smartphone

photo by semenovp via iStock
So many things can be done with this app. The GoPro MAX tips above list several options available to you in regards to 360 imaging or single lens imaging. Using the smartphone app for GoPro, you can take a 360 degrees video and use the ReFrame tool in the app to adapt that footage into traditional photos and videos.
What this does is it allows you to shoot in one mode and show it in three modes. Since you are immersed in your action footage, there is no reason to get sidetracked by taking still images to show also. Just use the app!
Use Horizon Leveling

photo by cihatatceken via iStock
One of the best video tips for GoPro MAX filming is to watch that horizon. The reason is because a slightly tilted view during extreme wide angle recording can be quite annoying to viewers when played back.
Thankfully, GoPro MAX cameras have a tool to level the horizon for both still and video, in single lens or 360 mode.
Anytime you shoot with extreme wide angle lenses, regardless of camera or format, being level adds to the quality of the results. By the same token, not being level degrades the perceived quality because it exaggerates the distortion that wide angle already has.
360-Degree Sound

Photo by bruce mars on Unsplash
When using the GoPro MAX for 360 videos, you can also record sound in the full 360 degrees around you. The MAX has 6 microphones that capture a sphere of sound.
Since you can record sound all around you, you will need to stay aware of all of the sound happening around you. You have the option of turning off 360-degree sound and using stereo sound or even directional audio.
Using directional audio while recording visuals in 360 will allow you to diminish engine noise or other distracting noise. Staying aware of audio is one of the more important video tips for GoPro MAX since excess audio feed can make the video difficult to enjoy without major audio editing.
Edit In-Camera or with App

Photo by Jye B on Unsplash
A great feature of the GoPro MAX is the ability it gives you of editing your videos and images right in the camera or in the full featured smartphone app. After editing, use the smartphone app to upload your video or images directly to your social media feeds or other online applications.
That’s right! You can post your vacation or your project right there from the field. No need to wait to get to a computer for advanced editing, you’re doing it on the go.
Editing is an essential skill for videographers. While some still images may seem to look just fine straight out of the camera, it’s been my experience that few videos do. Some editing is always needed for a smooth finished product.
How Much Can You Do?

photo by kyonntra via iStock
How much can you find to do with your new GoPro MAX 360 action cam? We have barely covered the tip of the iceberg with GoPro tips for videos and still imaging. Some of the capabilities of the GoPro MAX aren’t readily apparent when you first start using it.
Take a little time before you go out with your GoPro MAX and familiarize yourself with the functions, features, and capabilities. The Instruction manual is your most valuable first tool in mastering action cam videography and photography.
Keep up with GoPro online, too. The nature of this fantastic camera allows for features to be updated without GoPro even touching your camera. An update to features can come at any time, all you have to do is download it and apply it to the camera when it comes.
The GoPro MAX is not the perfect action cam, but it’s close. Enjoy getting to know all you can accomplish with yours.
We Recommend
A Beginner's Guide to Studio Portraits

Photo by Jimmy Fermin on Unsplash
At some point in our photographic careers, we toyed with the idea of setting up for studio portraits. By careers, I’m not specifying making money, but how we approach photography. We have all gone from a person who takes pictures to a craftsperson creating art.
That’s us, that’s you, we are Photographers, capital P. This is true regardless of experience level, in my opinion. Beginner photographers are definitely a photographer, having grown from merely liking to take pictures to wanting to improve.
So, we thought about setting up our own studio, maybe for portraits, possibly for small product advertising. Well, let’s move beyond the thinking stage and actually start something. We’ll focus for now on getting geared up for studio portraits.
Table of Contents:
- How to Take Studio Portraits: Setup and Gear
- Taking the Portraits: Camera Settings and Lighting
- Keep Taking Pics, But Make Them Better
How to Take Studio Portraits: Setup and Gear

Photo by curtis powell on Unsplash
First we start looking at the basics of getting a portrait studio going with what we may already have or with gear we can pick up for lower cost. Here are some beginner studio portrait tips.
Where To Set Up

photo bysdominick via iStock
The first thing to consider is a spot for our portrait studio.
Many have started in what we could call a home studio. Some ideas are a spare bedroom in our home or apartment, rearranging our living room or dining room to use a corner or wall, space in our garage, a porch, a backyard shed, a wall of our workplace office, or an unused room in that office.
Truly, you don’t need a huge space to set up a makeshift portrait studio - just room enough for the model, your gear, and you!
Recommended Portrait Reading:
- POSE!: 1,000 Poses for Photographers and Models
- Mastering Portrait Photography
- The Dramatic Portrait: The Art of Crafting Light and Shadow
What Gear to Use

photo by AleksandarNakic via iStock
Many studio items can be found in the home or office already, other items are specific photographic and lighting gear that’s needed.
Some of the more basic items I use in my home studio include barstools and chairs, tables and nightstands, potted plants, and other things that can either be a prop or part of making the subject comfortable while posing.
Cameras and lenses are probably already covered by what we already have. An entry-level DSLR or mirrorless camera with the kit lens can take a fantastic portrait image when used properly. More on that in a bit.

Other gear that is really helpful include tripods or other mounts, and lighting equipment. Some of the most useful lighting equipment are the wonderful LED compact lights that can be mounted on camera or on stands or mounts.
A fantastic couple of items I’ve found extremely useful in a home or office studio are the Hakutatz portable LED light and the Octopad camera and accessory mount.

Using the Hakutatz LED light shown above, we can make use of various studio lighting techniques such as the Rembrandt lighting, low key portrait lighting, and other configurations.
What’s more, these lights offer a high-degree of customization, including an adjustable color temperature, brightness, and saturation.
Best of all, the light can be controlled via a smartphone app. In fact, you can operate multiple lights at the same time to create more complex lighting effects.
If using two or more lights for our studio lighting techniques, the Octopad mount comes in handy to place the light wherever we need it in our possibly tight home studio.

What’s nice about the Octopad is that it’s so small and portable. Whether you’re in your home, your backyard, or the local park, it’s easy to bring with you to support a light.
Depending on the camera you use, you can utilize the Octopad to stabilize it. Compact cameras, smartphones, and some mirrorless systems are ideal for use with this mount.

I also like that the Octopad has a non-slip surface on the bottom. I’ve put this thing on my dashboard and used it with my GoPro Hero 8 Black as a dashcam setup.
Even when I took my Volvo off-road, the Octopad held firmly in place. Just imagine how stable it’ll be for your studio lights!
Learn More:
- Basic Portrait Lighting Principles
- Essential Portrait Lighting Tips
- 2019 Best Lights For Photography
Taking the Portrait: Camera Settings and Lighting

photo by CoffeeAndMilk via iStock
To actually make the images, Here are some beginner studio portrait tips and beginner portrait techniques.
Camera Settings

Photo by ShareGrid on Unsplash
One of the most important camera settings for portraits is to capture your images in RAW format instead of JPEG. The reasons for using RAW when you can is that RAW files contain a lot more exposure information than a partially compressed file such as a JPEG.
This extra information allows for a whole lot of leeway in post processing the portraits for the best look possible. I like to use a program such as Adobe Photoshop Lightroom to take care of all the adjustments necessary for a showable or saleable portrait image.
We talked earlier about using the kit lens on our entry-level DSLRs and mirrorless cameras for portraits. Yes, you can use a kit lens for portraits. You could even sell a portrait made with a kit lens and entry level camera.

A different lens such as prime - like this Canon EF 85mm f/1.2L shown above - or a fast zoom - like the Canon EF 24-70mm f/2.8L - may give you more options for changing exposure settings to make use of selective focus techniques or bokeh. But if you haven’t picked up your next lens yet, your kit lens is likely to be very sharp and relatively distortion free.
The trick will be making use of the capabilities you actually have. A kit lens zoomed to short telephoto and with the aperture as wide as possible will still give you good options for selective focus and their bokeh is often quite nice. And if you record in RAW, you can really maximize your post processing program features.
Studio Lighting Techniques

photo by alvarez via iStock
Outside of all other options you have in front of you, your use of studio lighting techniques will be where you show the difference from merely snapping a pic to creating a portrait as a photographer.
Some lighting configurations can be made with one light, one light and a reflector, or two lights. Check the learn more links in this article for details on lighting setups.
In addition to the lighting, you can improve the portraits you’re creating by encouraging good, relaxed posing.
A big part of making the portrait subject comfortable enough to fall into natural looking poses is to have a good rapport with the subject. Especially when shooting in the smaller space of a home portrait studio do you need to be sure to have your portrait subject at ease with you and the photographic process.
As a beginner, you make the subject comfortable by being in charge of the session. Not over controlling, but giving the subject confidence in you and your art. You can do this! For practice, work on taking portraits of a friend or a family member.
Keep Taking Pics, But Make Them Better
We often speak about the difference between merely taking pictures and creating photographic images. Truth be told, there is nothing wrong with taking pictures, it’s fun! As photographers, we never really stop.
What happens is that we want to improve and then we make the improvements. Your studio portraits show off your growing talent and give your subjects images they can enjoy.
In the video above, get a thorough tour of studio portraiture by Academy of Photography.
Learn More:
- How to Use Rembrandt Lighting For Portraits
- Short Vs Broad Lighting For Portraits
- How to Create a Low Key Portrait
We Recommend
Adorama Rebrands With Fresh Logo, Website
Adorama is one of the most popular camera stores around, and for good reason.
With excellent reviews for their customer service, great prices, and an outrageously large selection of camera gear, photographers can't get enough of Adorama.
To reflect their continued commitment to bettering themselves, Adorama just unveiled a new logo and a fresh update to their website.
As you can see above, the new logo is fresh, clean, and streamlined for an updated look.

Adorama's old homepage
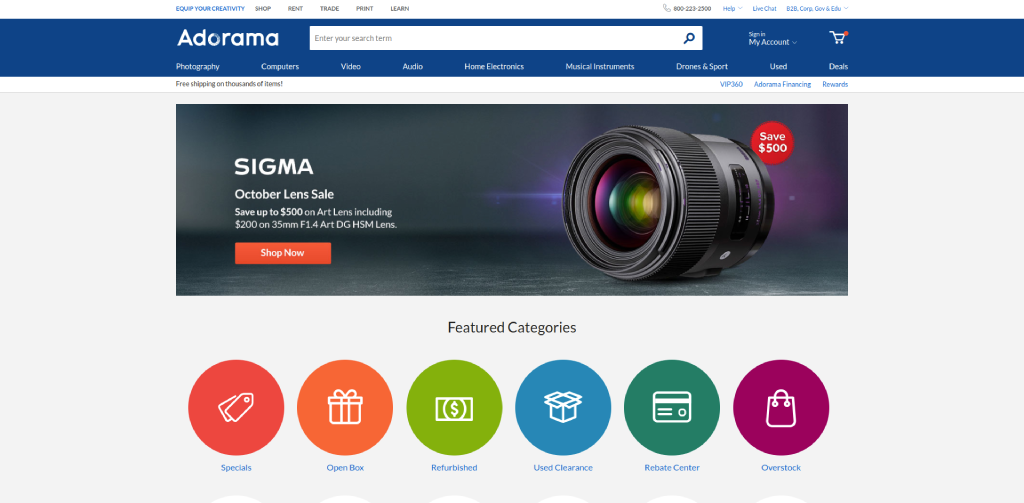
Adorama's new homepage
The biggest changes, though, are to Adorama's website.
In addition to a new, easier-to-use site taxonomy, there's a revamped homepage that makes it easier for customers to see the breadth of products offered by Adorama. Hint: they have lots of stuff.
The site also features better merchandising that results in an improved navigational experience as well as creator highlights on feature testimonials that allow working professionals to share their thoughts on some of the most popular products on the site.
All of this is in an effort to focus more on content, improve the website's catalog, and provide a better shopping experience for customers.
Adorama has a new mission statement and vision statement that expresses as much. Their mission statement reads, "We believe everyone is a creator. Our mission is to inspire, educate and equip to make dreams a reality." The company's new vision statement reads, "Be an integral part of every creator's success story."
With this new website, Adorama seems poised to fulfill these missions!
Learn More:
We Recommend
Adorama Review - Camera Store in New York City

Photo by Vasyl Dolmatov via iStock
Adorama Review
If you’re in the market for new photography gear, chances are you’ll include Adorama on your short list of places to find what you need.
It makes sense, too. For more than three decades, Adorama has been one of the top go-to establishments for photographers to get their gear. It’s built a solid reputation for having an excellent inventory of photography equipment and other gear and has solid reviews from customers the world over.
Whether you visit Adorama’s store or shop online, you’ll have access to hundreds - if not thousands - of items for all manner of photography and videography pursuits.
In this Adorama review, I outline some of the essential features of this ever-popular store.
Adorama Camera Store
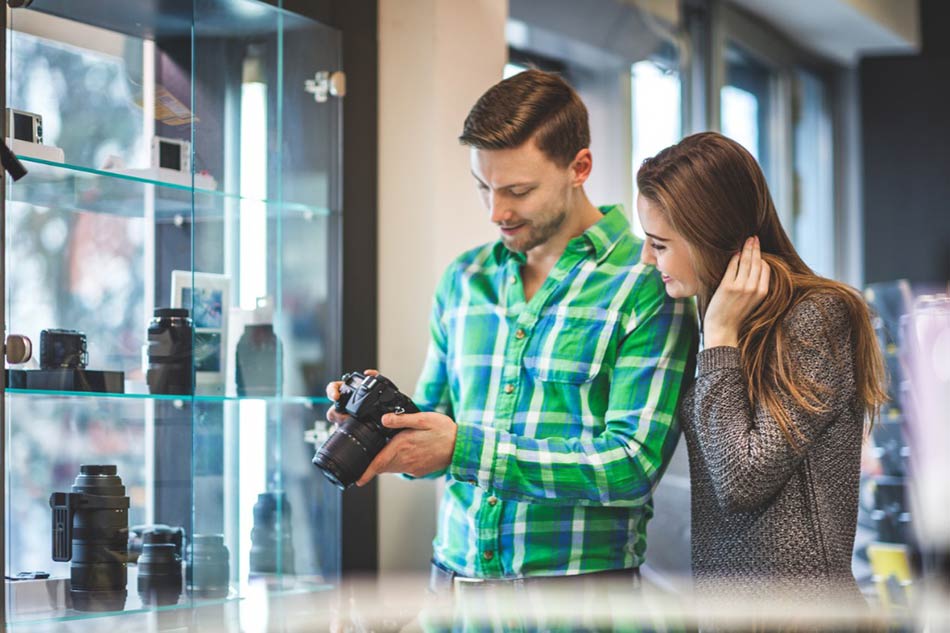
Photo by EXTREME-PHOTOGRAPHER via iStock
Though perhaps best known as a massive online retailer, Adorama operates a flagship store in New York City.
Located at 42 W 18th Street New York, the store is a full-service destination for shoppers looking for photography gear, video gear, and other electronics.
In fact, you can pick up a new DSLR or mirrorless camera, a couple of lenses, a saxophone, a home theater system, and a printer (and a lot more) at Adorama.
Adorama Store Hours

Photo by Cecilie_Arcurs via iStock
If you visit the Adorama store, the hours are Sunday 9:30 am to 5:00 pm. Monday through Thursday, the store is open 9:00 am to 8:00 pm. Fridays the store opens at 9:00 am and closes at 2:00 pm. Adorama is closed on Saturdays.
If it’s customer service you’re after, call 1-800-815-0702 Monday through Thursday 9:00 am to 7:30 pm or on Fridays from 9:00 am to 5:00 pm. Customer service is closed on the weekends.
Learn More:
Adorama Cameras, Lenses, & Other Gear
Adorama has an inventory of thousands of cameras, lenses, and other photography accessories. Carrying major brands like Nikon, Canon, Sony, Olympus, Panasonic, and others, you can find virtually any type of camera you want and lenses to go with it.
But as their slogan says, Adorama is “More than a camera store.”
You can buy musical instruments, surveillance equipment, computers, printers and ink, and drones.
They’ve got a large selection of action cameras, studio lighting equipment, professional audio gear, and scopes and other optics as well.
You can learn more about photography at an Adorama event, have your photos printed, rent gear, and buy used gear too.
Adorama Photo Coupon

You can increase your savings by keeping an eye out for an Adorama photo coupon (and coupons on other gear, for that matter.
Adorama makes it easy to get coupons with a dedicated page on their website with current coupons there for the taking.
If you give them your email address, you can get even greater access to coupons and other special deals.
Learn More:
Adorama Return Policy
Photo by PeopleImages via iStock
Adorama offers a 30-day return policy during which you can return most items for a full money-back refund, excluding any shipping charges.
Of course, returned items must be brand new and in their original packaging with all accessories, booklets, packing inserts, and so forth accounted for as well.
If you purchase an item and you receive it in defective condition (or if it’s the wrong item entirely), you can fill out an online return request and Adorama will resolve the issue, and they’ll cover shipping provided you inform them of the problem before shipping it back.
Adorama also offers what’s called a VIP360 Membership which gets you, among other things, a 60-day return policy.
Adorama Credit Card

If you’re dying to buy new gear but don’t have a pile of cash to pay for it, you can apply for the Adorama credit card and pay for your new stuff over time.
If you’re approved, you can take advantage of a host of special financing offers on all kinds of gear.
Additionally, there are often special offers like no interest for 18 months on specific items, no interest for 24 months on items priced between $750-$1,499, and no interest for 48 months on some items priced $1,500 or more.
Adorama Black Friday
You can stay on top of Adorama’s Black Friday deals year-round by visiting their dedicated Black Friday page.
Adorama Reviews
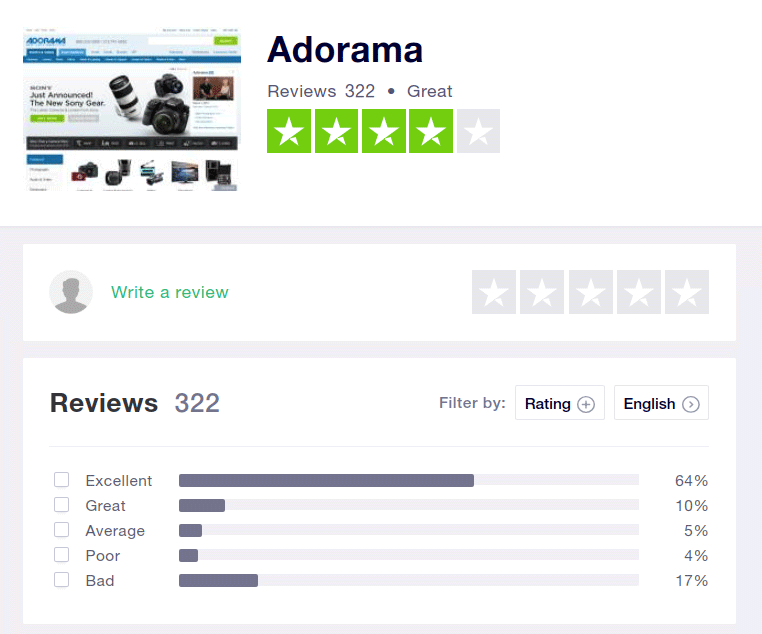
Adorama has generally good reviews, with 64% of reviews on Trustpilot giving the company an “Excellent” rating of five out of five stars and another 10% giving them a “Great” rating of four out of five stars.
Concerningly, there are many one-star reviews for Adorama on Trustpilot - 17% of their reviews, in fact.
Each one-star review has gotten a response from Adorama, though, which shows that they pay attention to customers that are not satisfied with their experience.
Adorama TV
AdoramaTV has something for any visual creator wanting to have more fun and a better experience with their camera.
From studio lighting, video, and compact cameras to Photoshop, audio gear, and photographer interviews, new product releases and gear reviews, Adorama TV provides something for any visual creator wanting the desire to explore their own creative directions with photography and video.
They seek to engage with the viewers through their passion and knowledge, helping them feel more confident when they’re taking photos or video.
With over 1,000,000 views a month, you can definitely tell they know what they are talking about, which helps build the trust, credibility, and rapport they have with their audience.
Learn More:
So is Adorama Legit and trustworthy?
Is it safe to buy from Adorama? Like any brick-and-mortar or online store, there will be a mixed bag of reviews.
Adorama has been in business for 35 years and counting, and have established themselves as one of the go-to stores for photographers the world over.
By and large, photographers trust Adorama, and all indications are that most photographers will continue to use Adorama for their gear needs for many more years to come.
Adorama Review: Photography Forum Talk
Want to learn more about Adorama? Join the conversation on our Forum! And read more reviews from our members here:
Adorama Coupon
Adorama Coupon Code
Adorama Financing
Adorama Financing Offer
Adorama Military Discount
Adorama Price Match
Adorama Price Protection
Adorama Restocking Fee
Adorama Shipping
Adorama Used Camera
Buying used lens from Adorama
What does Adorama mean
We Recommend
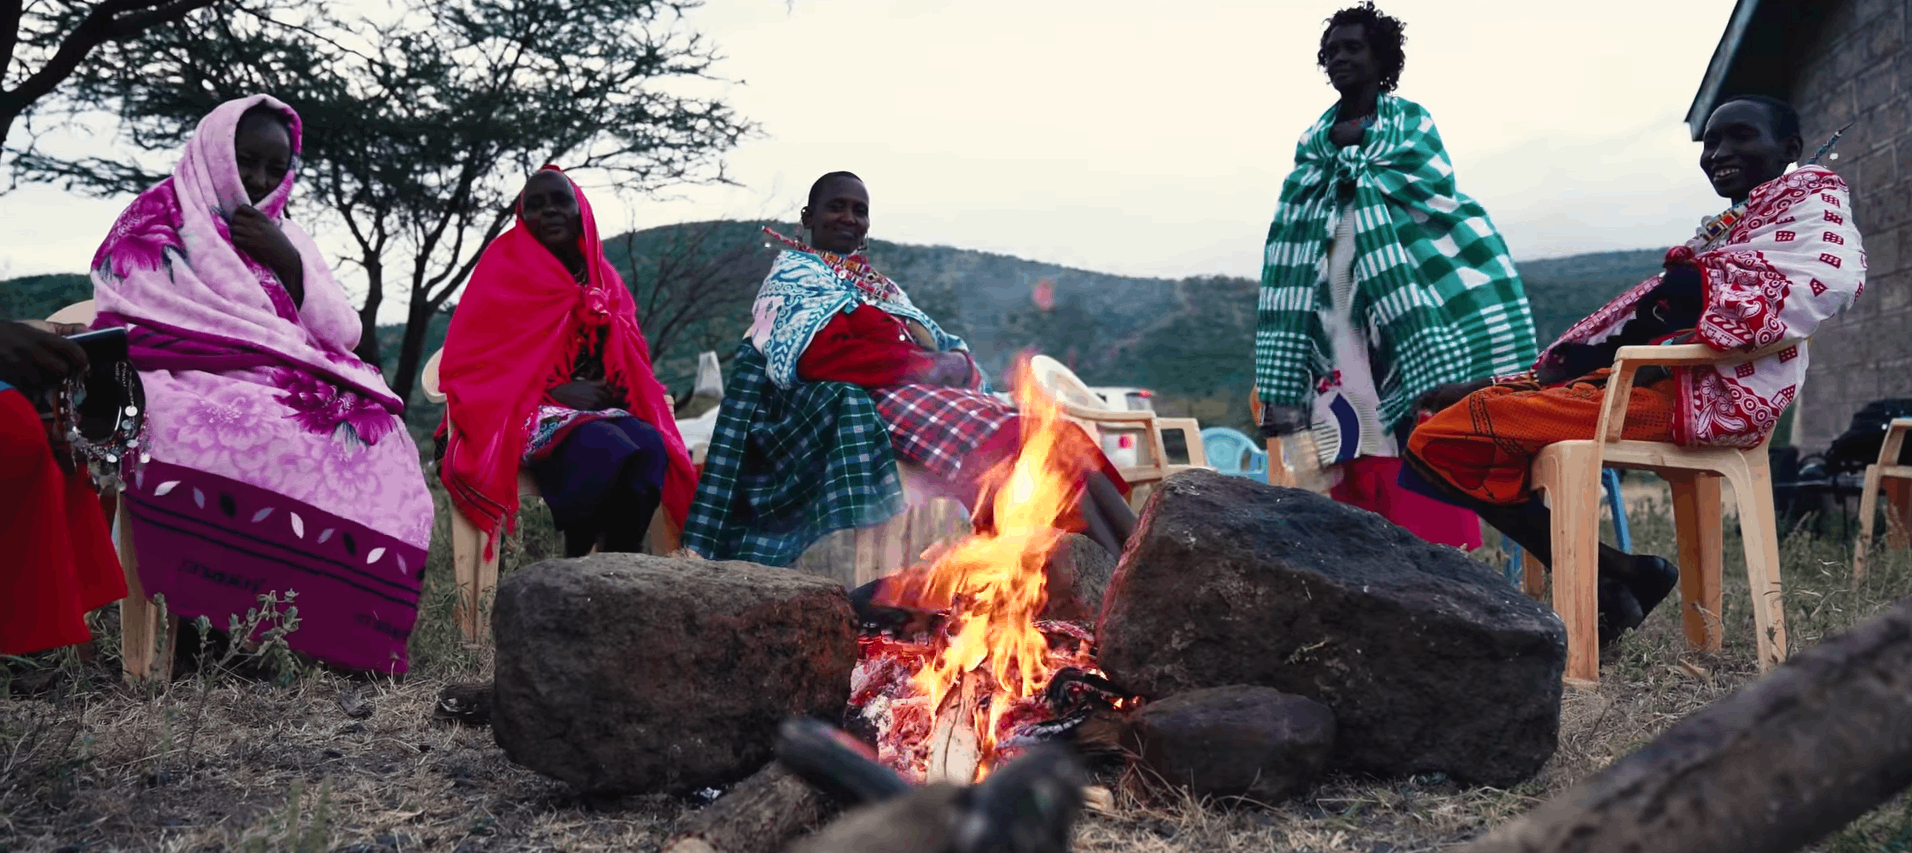
Adorama Steps Up For Kenya, Part 2: Meet the “Maker Moms” Who are Changing the World
YouTube Screenshot/AdoramaTV
Earlier this week, we introduced you to Adorama’s new web series, My Travel Diary: Kenya, which features photographer and travel guide Erin Sullivan.
As we saw in the first part of this series, Erin traveled to Kenya to explore the country with her camera and bring a different side of the country and its people to the social media forefront.
In this episode, Erin takes us to meet the “Maker Moms” who work for Ubuntu and make money to support their families by crafting beautiful products.
As Erin explains in the video, photography is such a compelling medium for telling stories because we are by nature visual beings.
“If I’m doing my job well here, then I am translating someone else’s story to the viewer in a way my subject finds true and feels to be true,” she notes in the video.
And that is precisely what photography is all about.
Kudos to Adorama for developing this show. If you want to be inspired to do good with your life (and your camera), give the video above a look!
Learn More:
We Recommend
Adorama Steps Up For Kenya, Part 3: The Kids of Maai Mahiu

YouTube Screenshot/Adorama TV
Just a few weeks ago, Adorama launched a web series entitled My Travel Diary: Kenya, featuring travel guide Erin Sullivan.
If you missed the first episode and second episode of the series, be sure to check them out as they shine a light on the purpose of the series - to demonstrate what it means to practice ethical travel photography.
In this third episode, Erin meets the kids of Maai Mahiu.
As Erin discusses in the video, photographing children is a challenge because if you don’t go about it the right way, kids can seem like just an accessory in the photo. Likewise, it’s too easy to paint kids with a broad brush, particularly if they come from marginalized or poor communities.
If you travel, rather than being a photographer first, be a human being first. Take an interest in the people you meet and the places you visit, and seek to use that knowledge and understanding to create photos with more impact that tell the story of the person in the photograph.
 YouTube Screenshot/Adorama TV
This sentiment is critical, especially for westerners that might view places like Africa with some degree of pity. But as shown in the video, the people of Maai Mahiu want no one’s pity; they simply want what the rest of us want - a means to live, provide for our families, and be happy.
The work that Adorama, Erin, and the Ubuntu Life crew are doing is truly inspiring. Check the video out to see what I mean...it’s well worth five minutes to watch!
Learn More:
We Recommend
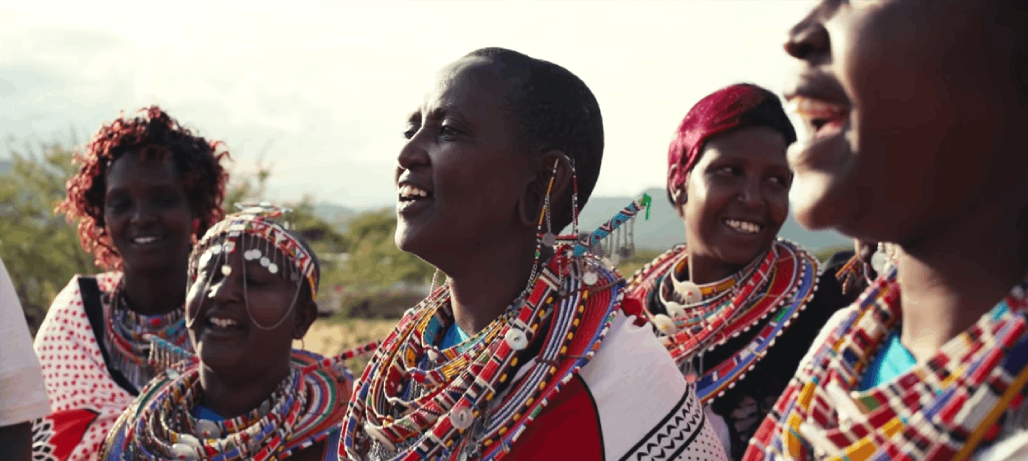
Adorama Steps Up For Kenya, Part 4: Meet the Maasai Tribe
YouTube Screenshot/AdoramaTV
One of the reasons why Adorama launched their web series My Travel Diary: Kenya, was to educate photographers about ethical photographic practices.
This is especially important when photographers interact with indigenous peoples, as sometimes these people can be treated more like a museum exhibit than a human being.
This topic was touched on in the first episode, episode two, and the third installment as well.
In this episode of Adorama’s show, Erin Sullivan and the staff from Ubuntu Life introduce us to the Maasai people of Kenya.
As Erin and the Ubuntu team discuss, it’s important not to oversimplify the story of the people you’re photographing.
Instead, strive to focus on ways that you can portray your subject such that their story is told in a modern way, not an archaic manner that is so prevalent when photographing indigenous people.
YouTube Screenshot/AdoramaTV
Erin makes the point that she wants to “convey a rich, deep, complicated story of human life” in her photos.
That might sound like a lofty goal, but as you can see in the video, it’s definitely one worth pursuing.
Learn More:
We Recommend
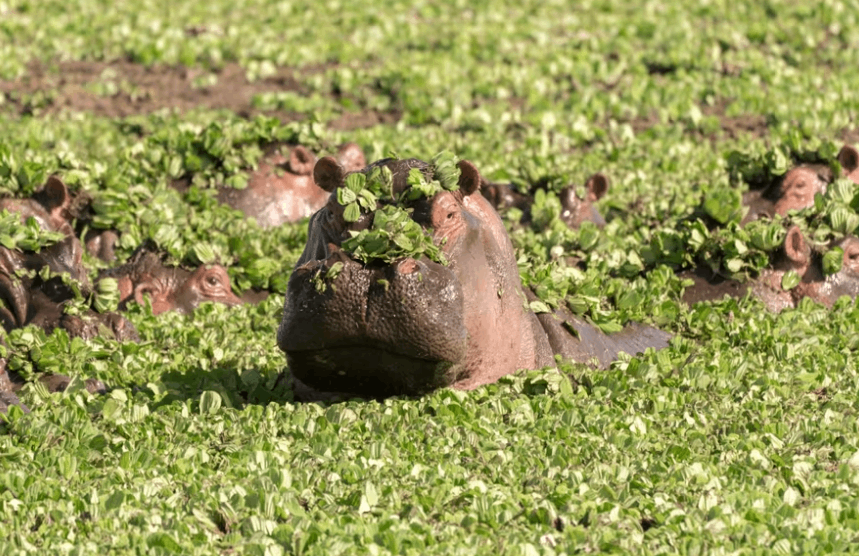
Adorama Steps Up for Kenya, Part 5 - Kenyan Wildlife
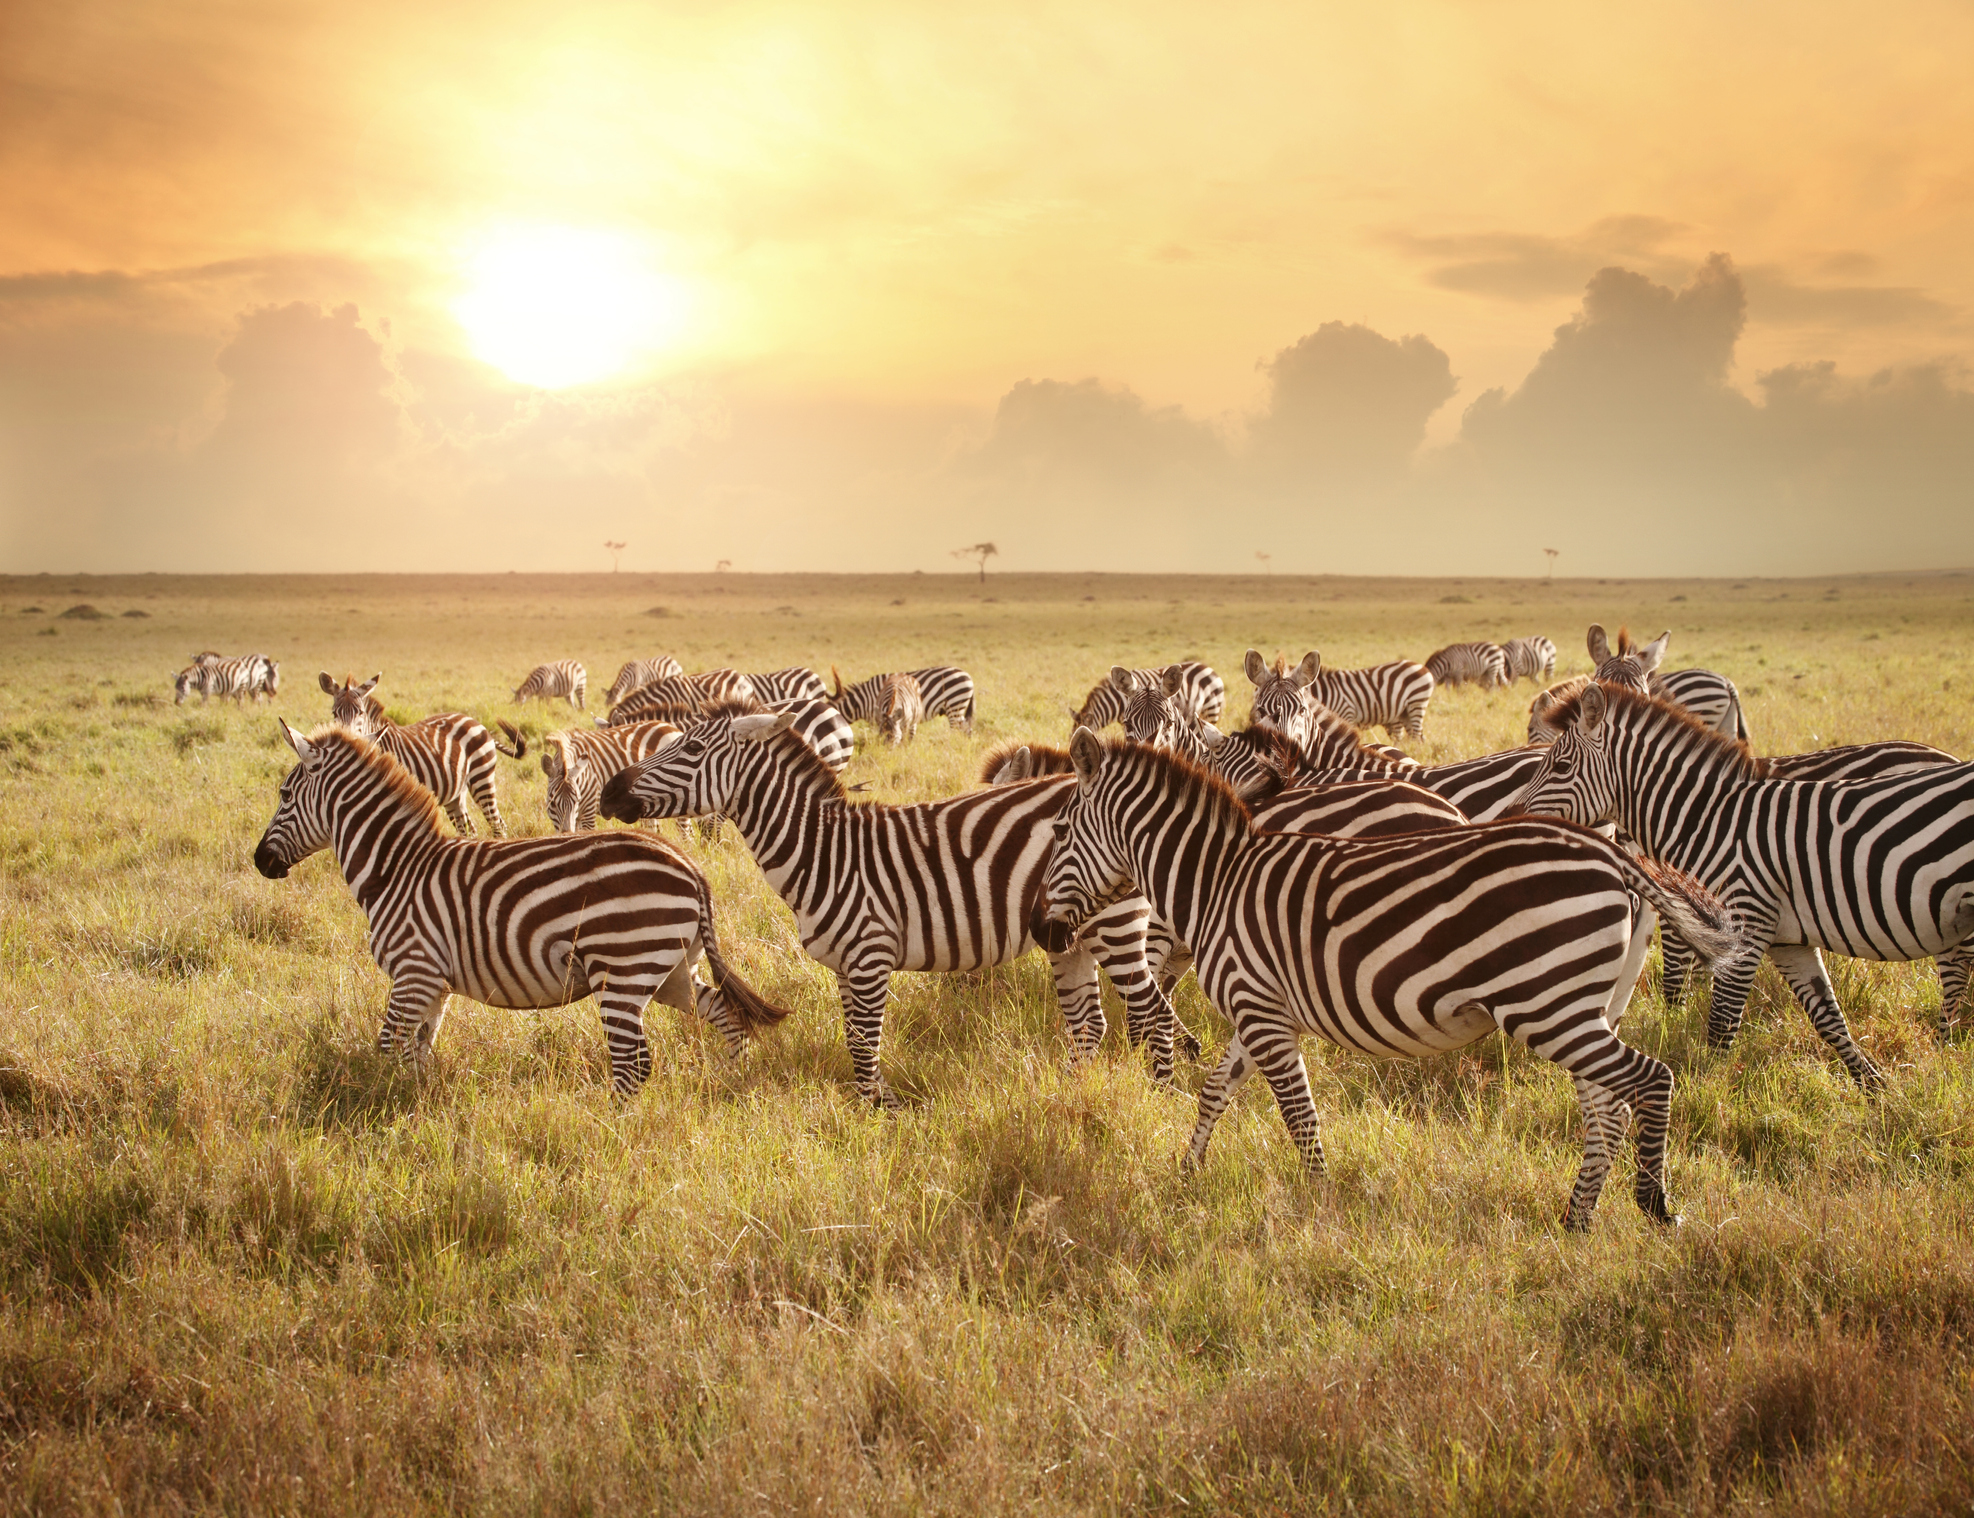
photo bynarvikk via iStock
For a couple of weeks now, we’ve been featuring Adorama’s new web series, My Travel Diary: Kenya.
So far, we’ve been introduced to the purpose of the show, the “maker moms” who are learning skills to support their families, the kids of Maai Mahiu, and met members of the Maasai tribe.
Each episode offers a glimpse at what life is really like in Kenya, and what photographers can do to create images that tell that story accurately and compassionately.
In the final installment of the series, shown above, the focus shifts from the people of Kenya to the incredible wildlife found there.
YouTube Screenshot/AdoramaTV
As Erin Sullivan shares in the video, wildlife photography is all about showing the personality of the animals, their interactions with one another, and their relationship with their environment.
YouTube Screenshot/AdoramaTV
One tip that Erin shares is to approach wildlife photography with more of a film mentality. That is, don’t fire off dozens of photos simply because you can. Instead, focus your attention on being patient and waiting for the very best shots to take.
Check out the full video above to see the beauty and magic of Kenya and its wildlife through Erin’s lens.
Learn More:
We Recommend
Adorama Steps Up For Kenya, Seeks to Break Barriers With New Web Series
 Photo by Tucker Tangeman on Unsplash
When you hop on Instagram and other social media sites, you don't often see photos - let alone photo stories and videos - about places like Kenya.
Yet, Adorama is seeking to change that.
The photography giant recently launched a YouTube series entitled My Travel Diary that serves as a "passport to countries and cultures we don't often see shared on social media."
As you can see in the video above, the first series features travel guide, Erin Sullivan.
In this first episode, Erin travels to Kenya to work with Ubuntu Life, a non-profit that seeks to harness the power of global commerce to create social impact for mothers and their children in Kenya.
As Erin discusses in the video, her purpose is to show her subjects as they are (she does not pose people she photographs) while also opening people's eyes to the struggles and successes of the Kenyan people.
It's a truly inspiring video that will make you want to grab your photography gear, head to Kenya, and change the world one shutter click at a time.
Check out the full video above and see the good work that's being done!
Learn More:
We Recommend
Advanced Drone Flying School
Photo by Roman Koval from Pexels
I love digital photography and videography with a drone. Although I was already an advanced and experienced filmmaker and photographer, I had to go to my own personal drone pilot school before I felt expert enough as a drone operator and pilot.
Thankfully, the learning curve is not steep, and anyone who is already used to learning new technology for digital photography can step up from beginner level with just a little instruction and practice.
So, if you upgraded from posting JPEGs to using Lightroom plugins, or upgraded from the built-in flash to an advanced speedlight, you can do this. Here are some useful drone flying tips to help you get past the beginner stages.
Practice Flying
Arthur Dent (Hitchhiker’s Guide to the Galaxy) learned how to fly accidentally. We, however, will need to make a conscious effort to become a good drone pilot. The newest drones, such as the DJI Mavic 2 Pro, make this step easier than earlier generations of drones.
DJI Mavic 2 Pro has an amazingly high quality Hasselblad camera and advanced flying controls. To get the most benefit from those features and high quality, taking some time to practice is as important as becoming familiar with your other high quality photographic gear.
Many drone makers have helpful drone flying tips on their own websites. I still haven’t finished all that DJI has on theirs.
Recommended Drone Photography Reading:
- Drone Photography Basics: Your Guide to the Camera in the Sky
- Drone Photography Explored: Beautiful Drone Photography
Storyboard Your Drone Videos

Storyboard template by Happy_vector
An essential advanced video tip doubles as one of our advanced drone tips. Storyboards are used by videographers to plan out shots for an efficient workflow and to tell a good story.
Here’s how it works. You come up with an outline of the video footage you want. It could be all drone footage or you could be using your drone to add B-Roll to another video. Using that outline, I like to actually draw out a series of shots.
This helps get your ideas from your mind to the screen. You can simply fly and film by the seat of your pants, but planning will result in less wasted footage during editing.
Take It Slow

Photo by Ahe from Pexels
By taking it slow, I’m not simply speaking metaphorically. I mean this literally. Though advanced drones such as the DJI Mavic 2 Pro can fly at speeds approaching 50 MPH, there are very few times during filming that we will need to use that capability.
An advanced drone tip I learned is to quickly fly to where you will begin shooting, but then slow down for the taping itself. While the motion effect filming can be used judiciously, indiscriminate motion shots can detract from the video.
Unless you’re aiming for a specific, that is. It’s just like videography with your mirrorless or DSLR. If you zoom in and out quickly, or pan rapidly across the field of view, that looks jarring and is often uncomfortable to view.
Use Flight Modes

photo by urbazon via iStock
The DJI Mavic 2 Pro and other DJI drones have a set of features labeled Intelligent Flight Modes. Similar functions are also found in the various drone brands in the field. Learning these flight modes will allow you to concentrate on the camera work, while letting the drone fly itself.
Once I figured out this advanced drone flying tip, it helped smooth my filming a great deal. Picture it as having an assistant as a dolly mover or a focus puller on a ground based cinemagraphic set.
Some of the flight modes will automatically do for you what you already put on your storyboard. DJI Mavic 2 Pro has some great modes that will enhance your videos.

photo by SimonSkafar via iStock
Dronie mode is a basic mode that slowly flies the drone upward and backing away from the subject. You can reverse it in flight or editing to also be an approach shot.
Circle and Helix modes circle or spiral around your subject, keeping the subject centered in the field of view. By the way, one of my own advanced drone tips is that you can be relatively close to ground level for these drone flying tips, it doesn't always have to be an obviously overhead view.
Boomerang mode is super useful. In this mode, the DJI Mavic 2 Pro flies around your subject in an oval pattern, slowly rising and backing away, then it smoothly reverses to descend and approach the subject. See Boomerang mode and other intelligent flight modes in action in the video below by Drone Supremacy:
Perhaps the Intelligent Mode I appreciate the most is the Dolly Zoom mode. In videography and cinematography, dolly zoom is used to change the apparent perspective while keeping the subject the same size in the field of view.
The dolly zoom effect changes the background appearance significantly, though the subject remains the same. You zoom in or out while changing camera position from closer to further away or vice versa.
A difficult trick when filming on the ground, I’m extremely grateful for having this intelligent mode available to me in the air. Again, don’t get stuck in the thought that all drone shots need to be from way overhead. Set this up near ground level for amazing footage to add to your video project.
Use That Gimbal

The 3-Axis gimbal is another extremely useful tool for drone videography. Practice ahead of time to move beyond the intelligent modes. Adjusting the camera position while flying adds interest to your shots while allowing you to increase your average shot time and scene time.
Using your storyboard as a guide, you will decide that some shots are going to look great from directly overhead. It’s a drone, it flies, might as well use that feature to good affect when it fits your creative vision.
Use Photographic and Cinematographic Techniques
photo by kurmyshov via iStock
In the beginning stages, we were thrilled to have our drone because it let us fly. That thrill never really goes away, but we do learn to view our drones as a real camera after a while. Drones are one of the most useful cameras for videography yet invented.
All of the advanced techniques and methods you learned for creating outstanding still images and video footage also apply to your drone use. Use your drone as a real camera, you will be amazed by what you can accomplish.
We Recommend
Advanced Drone Photography Tips: Planning and Strategy
Photo by Tom Fisk from Pexels
The best results often come about due to good planning. Same is true in photography, videography, and advanced drone photography. Strategy and planning are essential steps for how to plan a drone photo shoot.
For our examination of landscape photography with a drone, we’ll consider overall strategy and how to plan to reach the goal of your strategy.
Table of Contents
- Choose a Strategy First
- Planning Details - The Beginning Stage
- Plan Your Flight Around the Shots
- Storyboard Your Shots
- Check and Monitor Conditions
- Pre-Flight Check
- Fly Through / Shoot Though
- Shoot Extra and Edit
- Make It Fun
Choose Strategy First

Photo by Retha Ferguson from Pexels
Every stage of planning will depend on deciding on a basic strategy. Early on in our planning stage, we will choose if we are shooting video, still images, or a combination of both. If we are shooting video only, that will cause us to choose smoother flight modes. If we are shooting still images, we can fly quickly to get into position then stabilize for the shots.
We can also decide ahead of time if we are shooting A-Roll or B-Roll for video, or what type of landscape still image we are wishing to capture. Do we want a high level scenic view? A point of view closer to ground level and the subject? Or something in between?
Once the basic overall strategy is determined, then we can start working on how to plan a drone photo shoot. The planning is where the details are.
Planning Details - The Beginning Stage
A good place to start with drone photography planning tips is to remind yourself of the capabilities and limitations of your drone photography gear. Thankfully, the newest drones have a lot of capabilities that we can incorporate into our overall strategy.
As a good example of this, if we look at the DJI Mavic line of drones, it’s more a matter of certain models adding extra features and capabilities than anything else.

The DJI Mavic Miniis a modest budget option drone that is also below the weight limit for certain restrictions and regulations concerning drone photography and flying. Yet, within its extremely light weight, it boasts features and capabilities that can capture high resolution still images and high quality video.
It also has advanced flight modes for specialty images and video, plus a 30 minute battery range. Controlled from your own iPhone, this is a powerful choice either as your first drone or as a nice lower cost upgrade from an earlier generation drone.

Their mid-range option, the DJI Mavic Air 2, upgrades your capabilities with a larger sensor camera for even more resolution and higher quality video recording. It adds a faster top flight speed and slightly longer battery life, as well as even more sophisticated flight modes to give you more shooting or filming options.

For professionals or anyone else requiring the highest quality imaging and video, it’s hard to beat the DJI Mavic 2 Prowith the best in class 20MP Hasselblad L1D-20c gimbal camera, improved flight performance, and live video remote feed from over 5 miles away. Just think of all you could do with that.
Plan Your Flight Around the Shots

Photo by Max Ravier from Pexels
When shooting landscape photography with a drone, the primary goal is to come back with great images or video footage.
Some variables will need to be factored in. You can take these advanced drone photography tips in any order you desire, find a method or routine that works for you.
Storyboard Your Shots

photo by Erdark via iStock
Whether still imaging or shooting video, an important step is the storyboard. You could label it as a flight plan or a mapping out of your drone photography trek. It’s very close to our standard photo and video methodology of visualizing the results ahead of time and then finding a way to get to that desired end.
In landscape photography with a drone, sometimes the mapping out is quite literal. You need to know where you’re going, what flight issues change and where that might happen, and what will show from your position at certain times of the day.
Check and Monitor Weather Conditions

photo by Ralph W. lambrecht via Pexels
Weather forecasts are a good resource. Another option is to monitor in real time with a smartphone app. If you’re going to rely on a phone app, you should check coverage in the shooting area.
Some beautiful areas for drone photography are out of range of some networks. Besides the drone flight conditions, this is also a safety tip, especially if inclement weather may be a possibility.
Pre-Flight Check

Photo by Kyle Loftus from Pexels
You should have all of your gear clean, charged up, with imaging cards ready before you get to the location for your landscape drone photography. Before powering up to start flying and shooting, check it all again.
Few things are more disappointing than coming back with bad images or nothing at all. A pre-flight check as part of your regular routine will help minimise the danger of that happening.
A pre-flight checklist is also part of the regulations for certain categories of drones, which you already know because of passing the certification for those drones.
Fly Through / Shoot Through

Photo by Nick Kwan from Pexels
Especially if your landscape drone photography includes video footage, you will benefit from this tip. Begin filming before your storyboard start point and keep filming after your scene. This gives you some extra video to work with in editing.
It can make the transitions go smoothly and you don’t accidentally miss anything you planned on capturing. “Lights, Camera, Action” is in that order for good reason. Set exposure and flight mode, start recording, and then fly your drone through the shoot.
Shoot Extra and Edit

photo byHuseyin Bostanci via iStock
Another of the advanced drone photography tips that doubles as a drone video tip is to shoot more and edit it down. This is not a Spray and Pray style of shooting, where you just keep filming and hope you get to capture something good.
Each of your drone photography shots or video scenes can have the potential of being the game winner. Giving ourselves more to work with allows for a possibly more discerning editing session.
Having good editing habits will increase our capabilities and consistency a lot more than most equipment upgrades will give us. We have a lot of options for tutorials and training, plus experience will teach us as well.
Make It Fun

photo by DisobeyArt via iStock
Even pro baseball players tell me they have fun doing their job. Drone photography is very enjoyable. Just look at all the articles we write about it.
Learn what you need, then get out and shoot. Develop a strategy, plan it out, and enjoy the ride.
We Recommend
Advanced Landscape Photography Tips
Photo by Luca Bravo on Unsplash
The old standard landscape photography tips - use leading lines, have a solid tripod, get the horizon straight, use filters - are great tips and wonderful to learn landscape photography, but they’re pretty basic.
What about advanced landscape photography tips you can use to enhance your images?
In this article, I’ve got three such tips that go beyond the basics and help you get your photos dialed in.
Advanced Landscape Photography Tip #1: Use Focus Stacking
photo by RichLegg via iStock
Though you often hear about how important good light is for landscape photography, getting tack-sharp photos is right up there for capturing high-quality images.
Originally a macro photography technique, focus stacking involves taking multiple images - each focused at a different distance - and then blending those images together in post-processing.
What this does is enable you to get a crisp, sharp image from the nearest object in the foreground to the furthest object in the background. See what I mean in the video below by Thomas Heaton.
To incorporate this advanced landscape photography tip, you must have your camera on a tripod and use a remote shutter release. The slightest movement of the camera from frame to the next can be detrimental to the sharpness of the photos.
Likewise, each camera setting should be the same from one frame to the next. The only thing that should vary is the distance at which the lens is focused. Begin the process by focusing on the nearest object in the frame, and then adjust the focus deeper in the scene, step by step taking an image, until your lens reaches infinity.
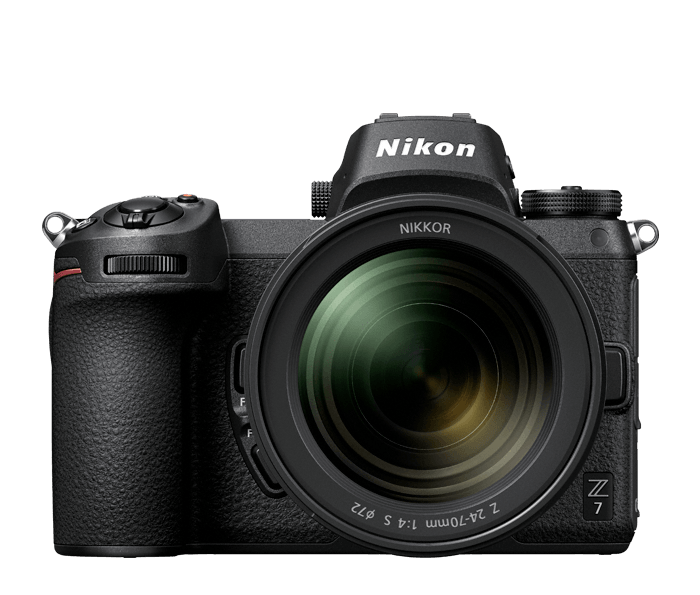
As you may or may not know from reading some of my other posts, I’ve been using the Nikon Z7 as my primary camera the last couple of months.
In my Nikon Z7 review, I discuss many of its incredible attributes, but something I wanted to mention that’s pertinent to this discussion is that it has a feature called Focus Shift.
Focus Shift is essentially focus stacking built into the camera. The Z7 will take multiple photos, each focused at a different distance, which you can then blend together in post-processing.
This feature makes it easier to get the shots you need, though it doesn’t output the final image itself - you’ll still need to do that yourself.
The Z7 lets you choose everything from the maximum number of shots to the focus depth width to the interval between shots, and much more. If you’ve used a Nikon D850, this feature will look familiar as it’s exactly the same in the Z7. Learn all about it in the video above by Mark Smith.
Learn More:
Advanced Landscape Photography Tip #2: Look for the Shot

photo by cassiohabib via iStock
I’m sure this tip seems like a “duh” moment, but hear me out…
How often do we get out of our cars, stand by the side of the road, take a few photos of something pretty, and then move on?
I do it far too often, and the result of that laziness is photos that often look lazy.

photo by MariuszBlach via iStock
Don’t get me wrong - there are lots of roadside spots that give you a view of a spectacular landscape. But often, if you go even just a few yards one way or the other, venture off-road a little bit, or find a higher or lower point of view, you’ll end up with a better shot.
So, that being the case, don’t just settle for the typical shot that everyone else takes. Inquire about hiking trails you can take to find a different perspective. If you have a drone, get a shot from above (if it’s legal, of course!). Try using a different lens than you normally do. At the very least, see how dropping your camera below the typical eye level changes the scene.
photo by DieterMeyrl via iStock
The point is that the best photos are often those that are planned in advance with a lot of effort to find new and unique perspectives on the subject. If you do the same, you’ll end up with much better photos.
Learn More:
Advanced Landscape Photography Tip #3: Have a Vision for Your Photos

photo by Umkehrer via iStock
A final tip I want to offer for improving your landscape photography is to have a vision for what you want your photos to say.
This is part of the planning process. When you decide where you want to go take photos, think about what you need to do to make your photos say what you want them to say.
If you’re after a bright, cheerful vibe, going out shooting at blue hour isn’t going to fulfill that vision.
Likewise, if the vision for your photos is to convey a sense of solitude, going to Yosemite in the middle of the summer probably isn’t the best choice.
photo by Scott Cressman via iStock
Fulfilling the vision for your photos requires thinking not just about the location and the timing of your shoot, but also about your gear.
A 24mm lens has a much different look than a 200mm lens, so you must consider how your gear conveys the scene and how that does or does not jive with your vision.
photo by Alan_Lagadu via iStock
How you frame the shot also influences how it fulfills your vision. If you’re going for a feeling of wide-open grandeur, avoid having elements immediately in the foreground. If you want to showcase the vastness of space, find a high perspective from which you can shoot down toward the primary subject.
The common theme here is that quick snapshots of landscapes are fine, but they often fall short of being spectacular.
You need to plan, try different techniques, and have a vision beforehand in order to create great landscape photography and for taking landscape photography to the next level.
Learn More:
- Best Entry-Level DSLR and Mirrorless Cameras of 2019
- 11 Things You Need to Know When Considering the Nikon Z7
We Recommend
Basic Drone Flying School

Photo by Dose Media on Unsplash
You’ve unpacked your new drone and now you’re chomping at the bit to get it up in the air, to get your drone flying. Assemble the blades, charge the battery, install the app, you’re ready to go… But wait! There’s more!
For first-time users to learn how to fly a drone, attending a drone flying school may be a good idea. You can get the education you need either by video courses or by taking in as many drone photography tips from experienced users as you can find that are relevant to you and your drone.
First Step - RTM!

photo by knape via iStock
Things are different than when many of us first started in photography or videography. One of the biggest advances I’ve seen in recent times is the advent of flying drones used by everyday people for photography and videography.
If you want to use basic cameras in automatic modes, you may be able to simply turn it on and start taking pics. With a more complicated tool, or one with advanced features, it isn’t necessarily that simple.
RTM is a term used online to give a very good piece of advice to new drone users before you try to get that drone flying. It means Read The Manual. Even though we could simply turn it on and learn by trial and error, gathering basic knowledge ahead of your first use will result in immediate benefits.
Recommended Drone Photography Books:
- Drone Photography Basics: Your Guide to the Camera in the Sky
- Drone Photography Explored: Beautiful Drone Photography
Satisfy the Legal Requirements

photo by sefa ozel via iStock
It doesn’t matter if you are just practicing, there are laws and regulations controlling drone flying in the United States and in many countries worldwide. It’s easy to find the requirements and satisfy them, many things can be done online.
Do not neglect this step, it is for your protection as well as others. Drone flying is regulated differently depending on the drone’s weight and also according to their intended usage.
Check the learn more links below for more details about the legalities of flying a drone in the U.S.
Do a Dry Run

You may not even need to turn on the drone in order to get some practice flying and using your drone. Many drone manufacturers have smartphone and tablet apps that work like a flight simulator.
For instance, DJI drone operation can be learned by using their DJI GO app in flight simulator mode. This lets you get very familiar with the features and operations of your new drone.
Why is this an important step? It’s important because you really need to practice with the capabilities and features of your particular drone. This is true for your drone regardless of whether you’ve used another drone before because of the differences among drones and the drone flying characteristics.

As an example, if you were used to flying a small, relatively simple drone such as the DJI Mavic Mini (shown above), and have upgraded to a more capable imaging machine like the DJI Mavic 2 Zoom (shown below), you have more features and different capabilities to learn.

For instance, the DJI Mavic Mini is an ultra light drone, under the 250 gram threshold. It has a top speed of about 30 mph and a very capable camera with a 12MP still camera and 2.7K video recording. So, it’s very full featured and capable of capturing fantastic stills and video.
If you are now stepping up to the DJI Mavic 2 Zoom, you now have a larger format camera with a zoom lens, which is another control to take care of, by the way. The Mavic 2 Zoom is over 250 grams which requires different registration than the Mini for non-commercial use. It also has a top speed of 45 mph, quite a bit faster than the Mini’s 30 mph.
So, familiarity with the camera and flying controls is a vital early step in getting your new drone into the air.
Follow a Pre-Flight Drone Checklist

photo by golubovy via iStock
Okay, you’ve finished all your registration and you are familiar with the features and capabilities of your new drone, now let’s go outside and fly!
As a drone operator, you are more than merely a photographer, you are also a pilot. All pilots do a pre-flight check, and so should you. What is included in a drone flying pre-flight checklist?
Charge up your batteries. Flight times are advertised as being long, and compared to early drones they are long. Still, 30 minutes will go by before you know it when having fun while drone flying.
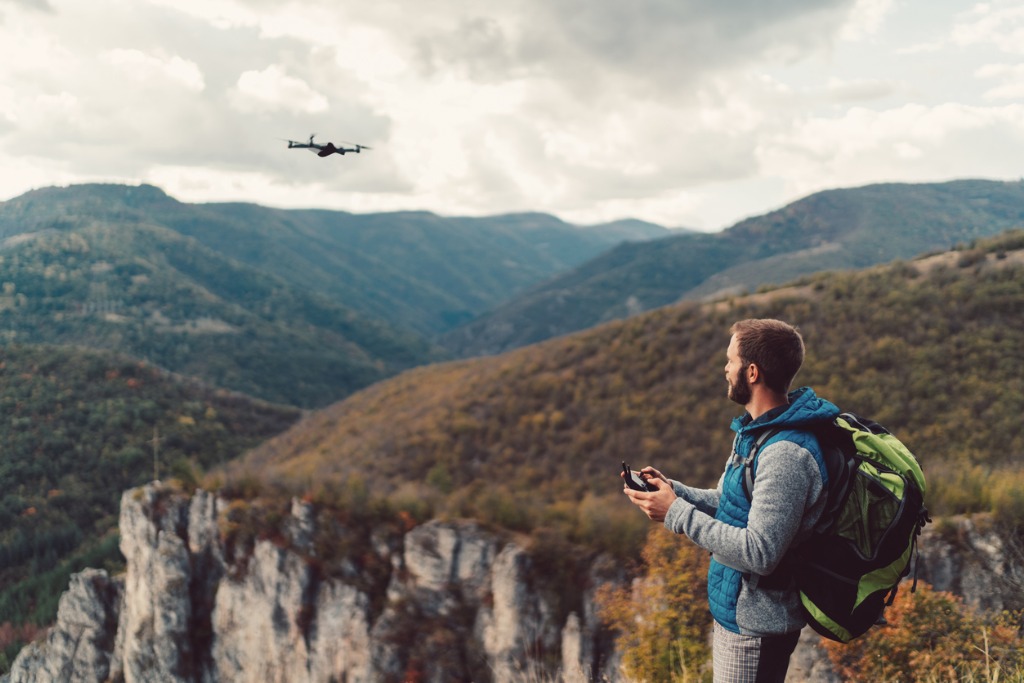
photo by martin-dm via iStock
Check the weather. Every place in the entire USA that I’ve ever been has a quaint ‘local’ saying: “If you don’t like the weather, with 15 minutes!” In other words, weather changs, sometimes rather quickly. Just because it is sunny and calm now, that’s no guarantee it that wind may pick up and thunderstorms form. I use a weather alert app on my smartphone. Each locality has TV stations with free alerts, national services exist, too.
Set your altitude and range limits, as well as your return to home settings. We sure don’t want to lose our drone on our first day of drone flying school.
Double check your propellers are mounted properly and make sure you have a strong GPS signal.
First Flight Safe Practices

Photo by YURI MANEI from Pexels
Now that you are ready to fly, let’s get the drone flying. As you lift up the drone above you, pause for a little while and hover. This lets you check the drone’s stability.
As you’re hovering, go through some camera and lens functions.
Snap a couple of pictures and shoot a few seconds of video. Make some adjustments to the drone’s orientation. Fly around a bit right around your home base, get used to how quickly the drone reacts to your flight controller.
Get a few tips on flight modes for DJI drones in the video above by Adorama.
Now It’s Time To Fly
Photo by The Lazy Artist Gallery from Pexels
“I believe it’s time for me to fly!” from REO Speedwagon is the theme song for drone flying. Well, actually it isn’t, but it should be.
Taking a little time to familiarize yourself with your drone by reading the manual, playing with flight simulator, doing a pre-flight check, and hovering when first taking off will pay off in a safe, productive, and fun drone flying session.
We Recommend
Best Budget Camera of 2022: The Sony ZV-1
It's been about two months since I picked up the Sony ZV-1 from Adorama.
Admittedly, when I first got the camera, I really didn't expect much. After all, I have a Canon EOS R5 and an EOS R6, both of which are much more fully-featured (and more expensive) than the ZV-1.
If I'm honest, I figured I'd test it out and get rid of it, but I've been so impressed by this little camera that it's going to remain a permanent fixture in my kit for the foreseeable future.
As I explain in the video above, there is a lot to love about this camera.
Is it perfect? No. But for the price, you get an awful lot of features, benefits, and utility.
So, check out the video above to see the 60-day review of the Sony ZV-1. For convenience's sake, I've outlined some of the highlights about this camera below.
Table of Contents
- Sony ZV-1 Basic Specs
- Best Budget Camera of 2022: The Sony ZV-1 is Loaded With Features
- Pros of the Sony ZV-1
- Best Budget Camera of 2022: There are a Few Cons...
- Is This the Best Budget Camera of 2022 for You?
Sony ZV-1 Basic Specs
As I just mentioned, even though this is a budget camera, it comes loaded with some really great features:
- 20.1MP 1-inch Exmor RS CMOS sensor
- Bionz X image processor
- 4K video at 30p or 1080 at 120p
- Built-in ZEISS lens with a focal range of 9.4mm to 25.7mm (which is equivalent to 24-70mm)
- Optical lens stabilization
- ISO range of 100-51,200 (expandable up to 1,640,000
- 3-inch articulating touchscreen LCD with 921,600 dots of resolution
- 260 still images per charge (or around 75 minutes of video)
- Just 4.3 x 2.4 x 1.8 inches (and the body weighs only 9.5 ounces)
So, that's not a bad list of basic specs, right? I've been really impressed by the quality of the 1-inch sensor and the speed that the Bionz X processor provides.
The built-in lens has been impressive as well (it is a ZEISS, after all...). The focal range is nice and wide and allows me to change up the framing of my still images and videos quickly and easily.
The flip-out touchscreen LCD is a nice feature, too. I've found it to be nicely sized, bright, and the menu system is easy to navigate. These basic specs add to making Sony ZV-1, the best budget camera of 2022.
But there are other features that I've really enjoyed about this camera as well...
Best Budget Camera of 2022: The Sony ZV-1 is Loaded With Features
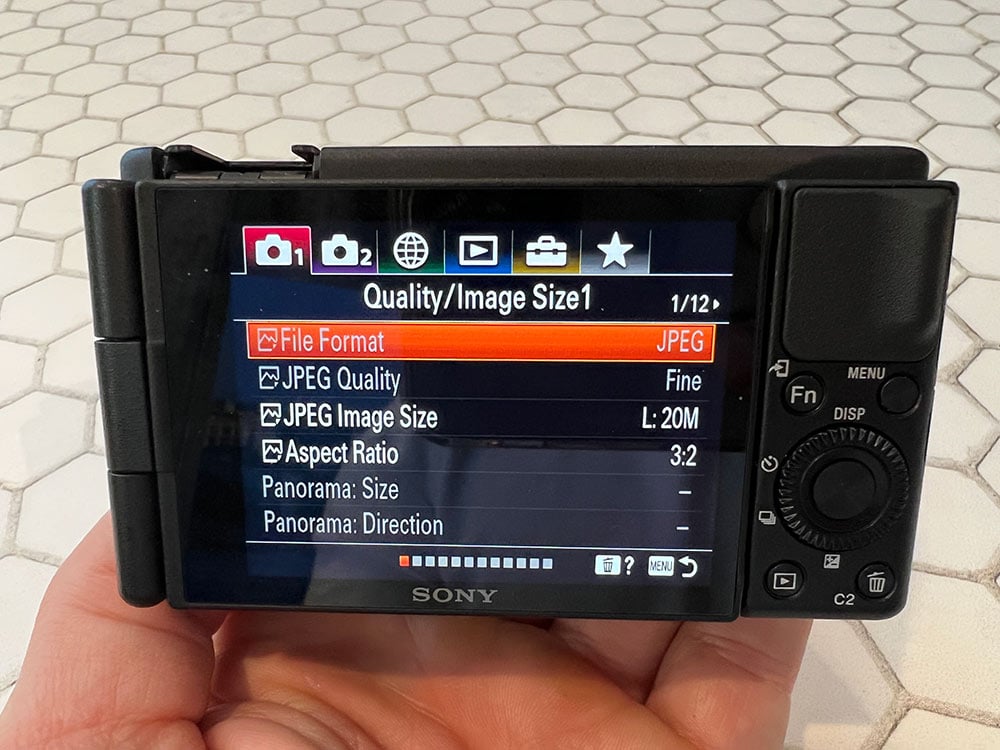
It's worth mentioning that in addition to 4K video, this little camera has the ability to shoot in Log and HLG. There are high-speed modes that record at up to 960fps.
I've found that the ZV-1 has a great autofocus system that's both fast and accurate. The accuracy comes from it being a hybrid system with both phase-detect and contrast-detect autofocus points. Eye AF for animals and humans is also included.
The lens has built-in ND filters, which are handy for both still imaging and video recording. The ND filters can be used in either auto mode or three different levels that are determined by the user.
Another handy feature is the connectivity that this camera offers: a microphone jack, Wi-Fi, and Bluetooth, in addition to a Micro HDMI port, a USB terminal, a high-speed USB port, and a multi-interface shoe. There's a built-in directional 3-capsule microphone with a windscreen included as well.
All this is in a tiny package that is small enough to fit in a purse, fanny bag, or around your neck with a neck strap. And at 9.5 ounces, it won't weigh you down, either!
Learn More:
Pros of the Sony ZV-1
In addition to the features I've already mentioned, I want to mention that I'm really impressed with the battery life.
Now, as I discuss in my video, I'm using a third-party battery in this camera, and I was able to get almost 54 minutes of 4K 60 video out of a single charge. That's not bad!
Another feature I really like that makes this the best budget camera of 2022 is that it has a fantastic color profile.
Having a good stock color profile helps save me time in terms of editing video footage - the less time I have to fiddle with that, the more time I have to get my other work done!
As I mentioned earlier, this camera has a touchscreen LCD that flips out to the side. I really like this feature.
On some of my old Sony cameras, the screen either flipped up or down, which is pointless if you have a microphone or other accessory on top of the camera or the camera is mounted to a tripod or other mount - you can't see the screen!
But in this case, the screen isn't obstructed, so you get a clear view of yourself as you film. Nice!
Best Budget Camera of 2022: There are a Few Cons...
As I said earlier, this camera is awesome, but there are a few things that I don't especially like.
For starters, the factory 5-minute timer is a pain in the butt. Fortunately, this is an easy fix to make, so consult my video above to learn about that process.
Secondly, I like to be able to check my audio when I'm filming, but this camera lacks a headphone jack. Granted, there are tons of other ports and jacks, so kudos to Sony for cramming all the other stuff in there. But, a headphone jack would have been awesome.
Lastly, the built-in 24-70mm equivalent lens just isn't wide enough for what I need this camera to do. So, I've added the Ulanzi WL-1 lens adapter, which converts the 24-70mm lens to the equivalent of an 18mm lens, which is ideal for shooting handheld video in selfie mode.
So, while there are several things I don't especially like about the Sony ZV-1, two of them are easily fixed. In my book, that's a win!
Is this the Best Budget Camera of 2022 for You?
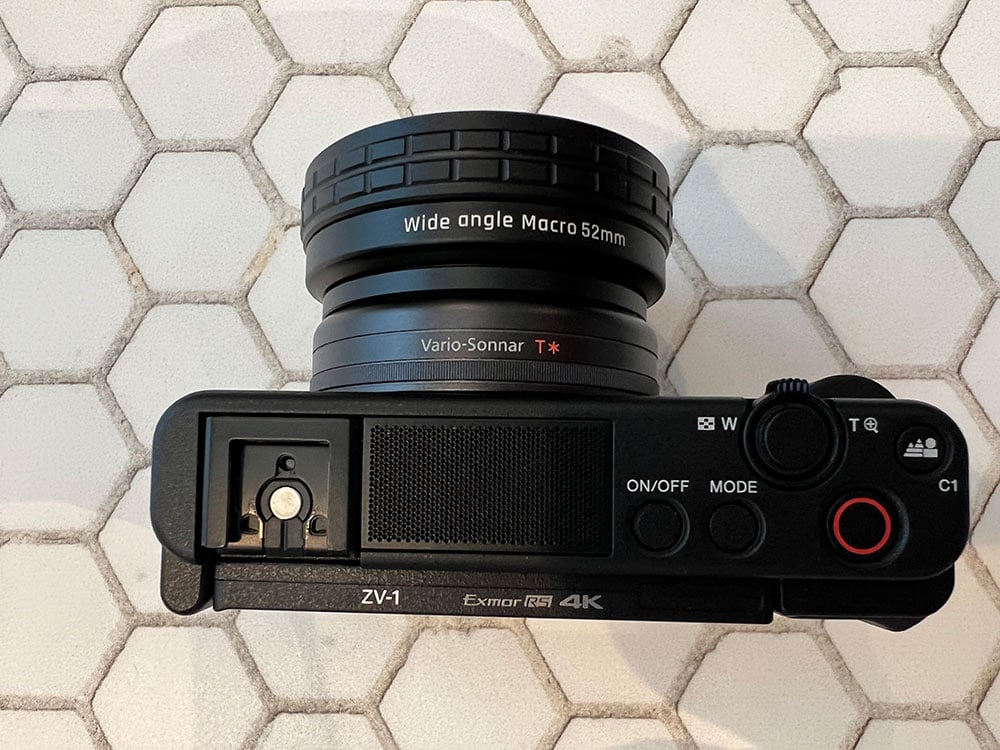
If you're looking for a feature-rich and capable camera on a budget, the Sony ZV-1 is a great pick.
Just bear in mind that it fulfills many of my specific needs - your needs might be a little different.
But, if after reading this quick review and watching my videos about the ZV-1 you've decided it's a great fit for your needs, then by all means, snag one today!
At the time of this writing, the Sony ZV-1 is $748.00. Again, for all the features you get with this camera, that's a great price!
Learn More:
We Recommend
Best Camera Stores: 15 Best Places to Buy a Camera

photo by sergeyryzhov via iStock
"Camera store near me"...
Raise your hand if you have Googled this exact phrase. While looking for the closest camera store near you, you might notice that many smaller camera stores have closed during the last 10 years.
Heck, even a few larger stores who have been around for a very long time have packed their bags and turned off the lights!
So, what camera stores are still here, and which ones are the best?
This list is meant to shine a light on a number of camera stores that are standing tall and adapting to changing markets. The next time you feel the urge to search for the camera store nearest you, we hope this list will be of help.
Table of Contents
- Adorama
- B&H Photo Video
- Paul's Photo
- Roberts Camera
- KEH Camera
- MPB
- Unique Photo
- Samy's Camera
- Amazon
- Abe's of Maine
- Best Buy
- Hunt's Photo
- National Camera Exchange
- Mike's Camera
- Precision Camera & Video
“Camera Store Near Me”: Things to Consider

photo by Vasyl Dolmatov via iStock
When you Google “camera store near me,” you shouldn’t necessarily go to the one that’s at the top of the list.
Instead, there’s a few things you should consider when comparing the results when you make this all-important search:
- Return policy. Scope out the returns information on each store’s website before you buy. You’ll be surprised how much variation there is.
- Consider the location. I live in California, so Samy’s, which is based here, can probably get gear to me faster than MPB, which is based in New York City. If you find similarly priced items at multiple stores, the speed with which you get your order could be the determining factor for which “camera store near me” is your best bet.
- Beware of taxes. If I buy from a retailer in California, I have to pay sales tax. That can add up to a pretty penny if you’re buying something like a Nikon Z7. In some cases, you can avoid paying sales tax, depending on where the store is based.
- Study up on selection. While most of the camera stores on this list have substantial inventories, some have better than others. What’s more, if you’re looking for something specific, the best camera store near you might be the only one that has what you need!
- You get what you pay for. If a deal seems too good to be true, it probably is. Many camera stores sell gray market gear - cameras, lenses, and the like that are for another market. So, that super cheap full frame camera you find at your favorite camera store might have a French owners manual and battery charger with a European plug. Worse still, gray market gear does not come with a manufacturer’s warranty. The retailers below are good about identifying gray market goods, so just keep your eyes peeled.
There's also a number of things to consider about the camera itself.
In the video above, I go over some of the most common mistakes people make when buying a camera.
Without further ado, here’s our picks for the best camera stores, in no particular order.
Learn More:
Adorama
Adorama is one of the most popular camera stores both in New York City (where their brick-and-mortar store is located) but also online.
That’s due in part to their enormous selection of camera gear, TVs, computers, and all sorts of other electronics.
For nearly 40 years, Adorama has been serving the photography community and doing so with excellent customer service. It’s no wonder that Adorama gets such rave reviews from their customers and from publications like Consumer Reports.
photo byEXTREME-PHOTOGRAPHER via iStock
If you aren’t quite ready to pull the trigger and buy brand-new gear, Adorama also has used gear for sale (you can sell or trade in your old gear, too). There’s also a rental program so you can test drive a particular camera or lens before you buy.
Adorama often has coupons that make your purchase a little easier on the wallet, a 30-day money-back guarantee on most items, and they even have their own credit card that gets you perks like no interest on large purchases.
Our Adorama review gives you a deeper picture of whether it should be the best “camera store near me.”
Recommended Photography Books:
- Picture Perfect Lighting: An Innovative Lighting System for Photographing People
- The Dramatic Portrait: The Art of Crafting Light and Shadow
- The Landscape Photography Book: The Step-by-Step Techniques You Need to Capture Breathtaking Landscape Photos Like the Pros
- The Art, Science, and Craft of Great Landscape Photography
B&H Photo Video
Another top choice for the best camera store is B&H Photo Video.
Opened way back in 1973 by Blime and Herman (thus, the B&H), the store had humble beginnings in Tribeca, New York. Today, though, it’s one of the top camera stores in the country and has its massive home base in Midtown Manhattan.
Like Adorama, B&H has a huge selection of camera gear as well as all kinds of other electronics. Whether you need a camera body, a video camera, a computer or computer software, or something in between, chances are B&H will have it in stock.
For those of us in the United States, B&H has free 7-10 day shipping on the bulk of their inventory. If you place an order over $49, you can get free expedited shipping that cuts delivery time to 3-7 days.
Learn More:

photo by EXTREME-PHOTOGRAPHER via iStock
If you desire, you can become a B&H rewards member and earn points on purchases. Those points can be redeemed later for discounts, though points expire after six months.
Purchases that don’t work out can be returned within 30 days, provided the item is still in brand-new condition in its new, unaltered box.
B&H prides itself on education, and has an Explora section where you can read free articles, watch videos, and listen to podcasts on all things photography. If you’re in the New York area, you can also go to the store and participate in photography presentations, often free of charge.
Paul’s Photo
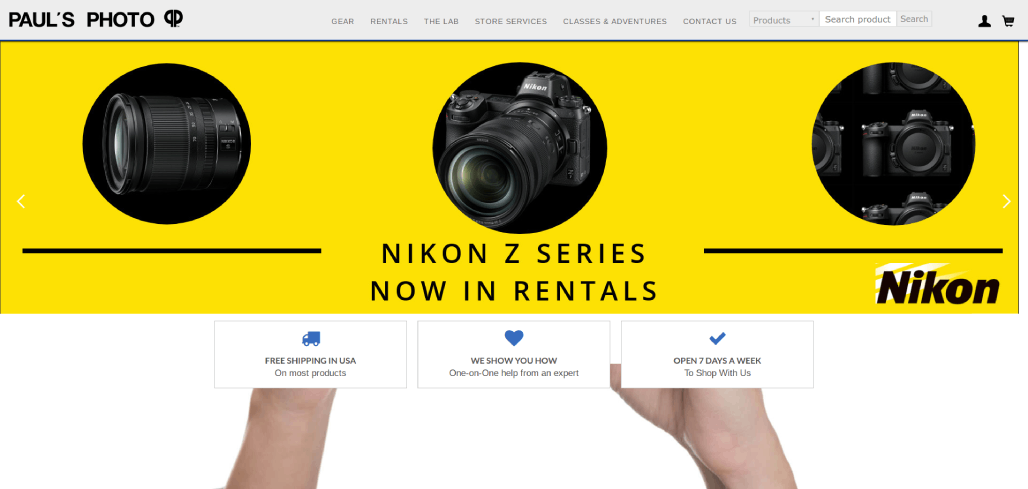
If you’re on the west coast like me, and in particular, in the Los Angeles area, Paul’s Photo is a top choice for the best “camera store near me.”
Unlike some of the other options on this list, Paul’s Photo is a small, family-run business. That means that they actually get to know you as a customer rather than you just being another dude in line.
But don’t think that because they’re a small outfit that they can’t deliver the photography goods you need. You can shop online or at their store, where they have a great selection of the latest gear and gizmos you might need for creating photos and videos.
Something else worth mentioning is that Paul’s Photos is basically a one-stop shop for photographers.
photo by EXTREME-PHOTOGRAPHER via iStock
You can buy or rent gear, have your photos printed, take a photography class, or sign up for a photography adventure to places like Vietnam, Tuscany, and Africa.
I also really appreciate how much Paul’s Photo focuses on education. They aren’t just there to sell you stuff; instead, they genuinely want to help you better understand your gear and how to use it to take great photos.
I recently wrote an in-depth Paul’s Photo review. Check it out to learn more about one of the best camera stores in L.A.!
Roberts Camera
Like Paul’s Photo, Roberts Camera is a small, family-owned business that started out as a little mom and pop shop that sold everything from fishing gear to jewelry. In the late 1960s, owners Robert and Rose Pallman decided to start selling cameras as well.
Based in Indiana, Roberts Camera has since grown into an excellent source of photography gear both for locals and those of us far and wide that need to buy gear online.
From cameras and lenses to video equipment to TVs and other electronics, Roberts Camera has just about anything you could want or need for your photo and video adventures.
If you just need a particular lens or camera body for a few days, you can rent one, or if you’re a new photographer and you want to learn some new skills, you can head over to Roberts Camera and participate in their educational events.
And since it’s a smaller operation, you get that down-home, friendly customer service you’d expect. In fact, they consistently have some of the best-reviewed customer service in the industry!
Learn More:
- KEH Camera Review: What You Need to Know
- Types of Photography: 19 Popular Photography Genres You Can Try
KEH Camera
It’s been about four decades since KEH opened their doors, and in that time they’ve become the largest pre-owned camera store in the world.
In some cases, you can find deals up to 40 percent off the retail price when you buy used cameras, lenses, and other gear. That obviously represents a significant savings over buying brand-new stuff.
What’s nice about KEH is the process by which they rate their inventory. It’s not a matter of a simple visual inspection - instead, they have an industry-leading 10-point rating system that ensures each item they list for sale is accurately described.
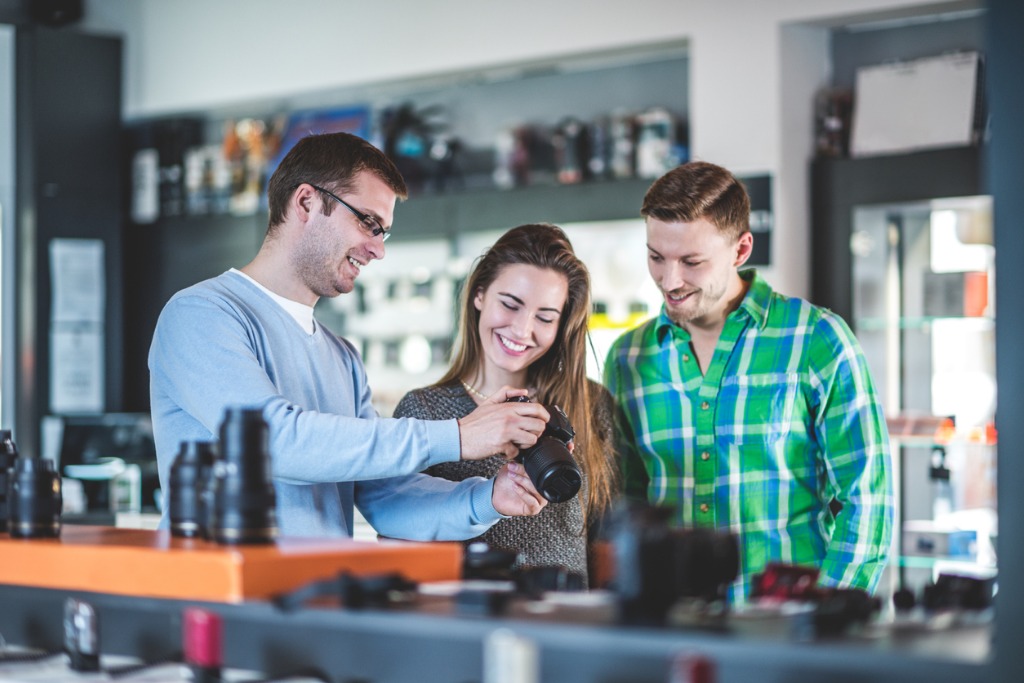
photo by EXTREME-PHOTOGRAPHER via iStock
Items are graded on a wide scale, from new at the top to “as-is” at the bottom. In between, there are highly specified grades such as “like new” and “like new minus” so you get a pinpoint idea of just how good of shape the item is in.
There’s a 180-day warranty on the used items you purchase, and a 14-day return policy for peace of mind as well.
Of course, if you have gear you aren’t using anymore, KEH will buy it from you. You can go online and get an instant quote to see what it’s worth and start the process of unloading some of your old, unused gear.
MPB
Another worthwhile option for the best “camera store near me,” particularly for used gear, is MPB.
What started as one of the largest used retailers in Europe, MPB expanded over here to the U.S. several years ago with operations based in the New York City area.
Since then, their inventory has grown by leaps and bounds, and you can find just about any type of camera, lens or other photography accessory you might need in their collection of used gear.
Like KEH, MPB grades the used gear they buy based on several factors, including its level of functionality, cosmetic appearance, and its physical condition. Furthermore, items are valued based on their current market value and the level of demand for the item.
photo by ArisSu via iStock
If you decide to sell or trade your old gear to MPB, they’ll even pick up the tab for shipping!
If you’re a buyer, you can rely on the grading system MPB has developed to determine the exact condition of the item before you buy. Their product specialists painstakingly inspect every single item in their inventory, that way you’re assured that the condition of the item you look at online is the condition of the item that arrives at your doorstep.
When you buy an item, you can choose from all kinds of shipping options, from next-day priority for situations in which you need your gear fast to No Hurry Deliver that takes up to a week in the lower 48 states.
Items you purchase have a six-month warranty, and there’s a seven-day return policy on most items.
Be sure to learn more about MPB by reading our detailed MPB review.
Unique Photo
Based in New Jersey, Unique Photo might not have the name recognition of Adorama or B&H, but they’re still one of the top options for the “best camera store near me.”
Unique Photo was founded more than 50 years ago in Brooklyn, and while it’s become a worldwide leader in photographic equipment, the company’s workers haven’t forgotten what it means to have humble beginnings.
As such, this family-owned business provides incredible customer service that gets high marks from customers far and wide.
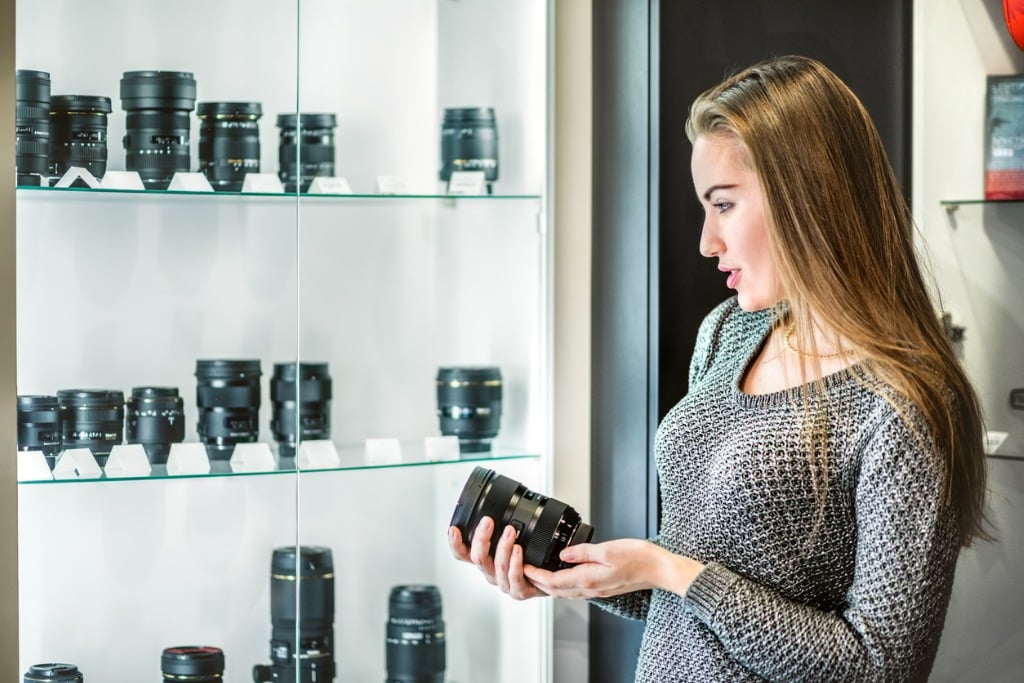
photo by EXTREME-PHOTOGRAPHER via iStock
Like many of the other options on this list, Unique Photo isn’t just a camera store. You can buy and sell all kinds of gear, rent photography equipment, have your photos printed, and even buy darkroom supplies.
Unique Photo also has a Unique University, where you can participate in classes and workshops to refine your photography skills.
Additionally, Unique Photo has gear repair services, 0% financing for 12-months, and a VIP rewards program that allows you to earn points towards money you can spend in the store.
Samy’s Camera
Samy’s CameraSamy’s Camera is a California-based company that I’ve personally used before to buy a couple of different rigs.
The first was a Nikon D800 back in the day. I actually drove across L.A. specifically to go to Samy’s to get that camera. The drive was awful, but the experience of working with the fine folks at Samy’s made it worth it.
I was so happy with my experience there that I returned a few years later to pick up a Sony a6300, which I still use to this day. Again, their customer service experience was top-notch.
Of course, Samy’s is a full-service store with all kinds of photography goodies, gear for video making, studio supplies, drones, and much more.
photo by electravk via iStock
Over the last four decades, Samy’s has developed a reputation as having a friendly, knowledgeable staff that helps walk you through your purchase so you feel comfortable with what you’re buying. There’s even educational programs to help you develop your skills even further!
Samy’s has a used and trade-in program as well, so if you’re a little short on cash for that new camera you’ve been eyeing, you can sell or trade in your old stuff to help offset the cost.
Add in guaranteed 1-3 day shipping on purchases of $49 or more, leasing options, a rewards program, and more, and you have the makings of one of the best camera stores around!
Amazon

Obviously, Amazon needs no introduction given that it’s the largest company on the planet.
And while it isn’t exactly your local mom-and-pop camera store that you can run to and handle the gear before you buy, it would be silly not to include Amazon on a list of places where you can get photography gear.
Since Jeff Bezos has a hunger for market dominance, Amazon is honestly the most likely candidate for the closest “camera store near me” for most people in the world.
As noted earlier in this article, some retailers on this list sell gray market items. And while most of these companies clearly identify their gray market goods, sometimes Amazon isn’t so great about it.
This isn’t to say that you shouldn’t shop at Amazon for photography gear. Quite the contrary - it’d be hard to match their inventory of cameras, lenses, and other photo gear. Just be careful when placing an order that you’re not getting gray market equipment if you don’t want it.
Abe’s of Maine

Like numerous other camera stores on this list, Abe’s of Maine started as a small mom-and-pop shop.
Founded in 1979 in Old Orchard Beach, Maine, Abe’s has since grown to be one of the most popular camera stores in the United States and is one of the best places to buy a camera online.
In addition to a state-of-the-art showroom and warehouse in New Jersey, Abe’s of Maine has a huge online inventory of photography gear and other necessities.
Unsurprisingly, Abe’s humble beginnings mean that its commitment to customer service is second-to-none. In fact, the company’s mantra is to meet your needs and exceed your expectations every day.
Abe’s is known for having great sales on its merchandise, so consistently checking in with them to see what’s on sale could be hugely beneficial for you. They offer 12 months no interest financing, too.
When you buy online, you can typically get free ground shipping in the United States. Once you get the item, if it doesn’t quite work out, you can return it within a 14-day period.
Best Buy

Perhaps aside from Amazon, Best Buy likely has the best name recognition among the greater public than any other camera store on this list.
What Best Buy brings to the table that none of these other companies does is that they have hundreds of brick-and-mortar stores across the country. Chances are there’s one in your town, or at least within a couple of hours of where you live.
That’s nice from an “I need to see it and touch it before I buy it” perspective.
photo by Sakkawokkie via iStock
Of course, you can also buy camera gear from Best Buy online, which is a much better option if you’re looking for a greater selection of gear. To be honest, Best Buy’s stores do not have a good selection of cameras and lenses at all, so before you hop in the car and drive to one, you better check that store’s inventory online.
Another potential issue is that most of what Best Buy has in stock in their stores is geared towards beginner photographers. If you’re an enthusiast, and certainly if you’re a professional, this is not your best option.
However, with a 15-day return policy, free shipping on many items, and door-busting sales throughout the year, Best Buy is one of the best online camera stores for beginner photographers.
Hunt’s Photo

Hunt’s PhotoHunt’s Photo is based in New England and has been doing business there for about 70 years.
In that time, the fine folks at Hunt’s have garnered a reputation as being some of the most friendly, knowledgeable folks in the industry.
Today, Hunt’s is still family-owned, but they’ve expanded their footprint well beyond New England with a robust online retail store.
You’ll find excellent prices at Hunt’s, and with a 30-day return policy, you have ample time to test-drive your purchases to determine whether they’re the right fit for you.

photo by EXTREME-PHOTOGRAPHER via iStock
If you live in New England, you can join the Hunt’s team for educational courses, photo walks, and the like, where you can learn new skills and meet other photography enthusiasts.
From audio and video gear to used gear to binoculars, lighting, and gear rentals, Hunt’s is definitely a full-service photography store that’s worth checking out. Particularly if you’re in New England, Hunt’s is one of the top “camera stores near me” for sure!
National Camera Exchange
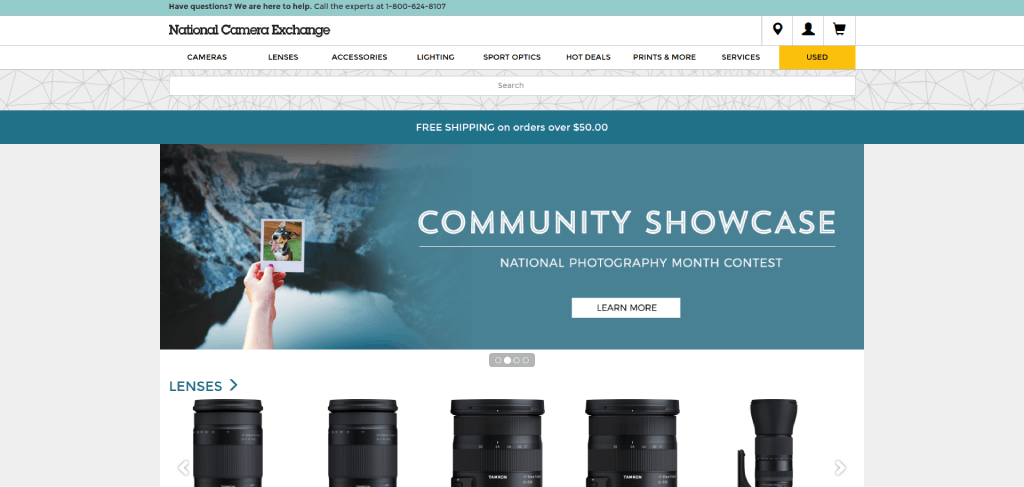
Yet another option for the “best camera store near me” started as a regional business. National Camera Exchange has been in business in the Minneapolis area since 1914, and has been going strong ever since.
With both new and used gear for sale, you can likely find precisely what you need at National Camera Exchange. If your order is over $50, you get free shipping, and there’s a 30-day return policy to go along with that (though a restocking fee applies on purchases over $1,500).
In addition to a wide selection of DSLRs, mirrorless, and point-and-shoot cameras, National Camera Exchange also has a nice selection of lenses, video equipment, lighting gear, camera bags, tripods, memory cards, and just about any other goodie you might need for your kit.
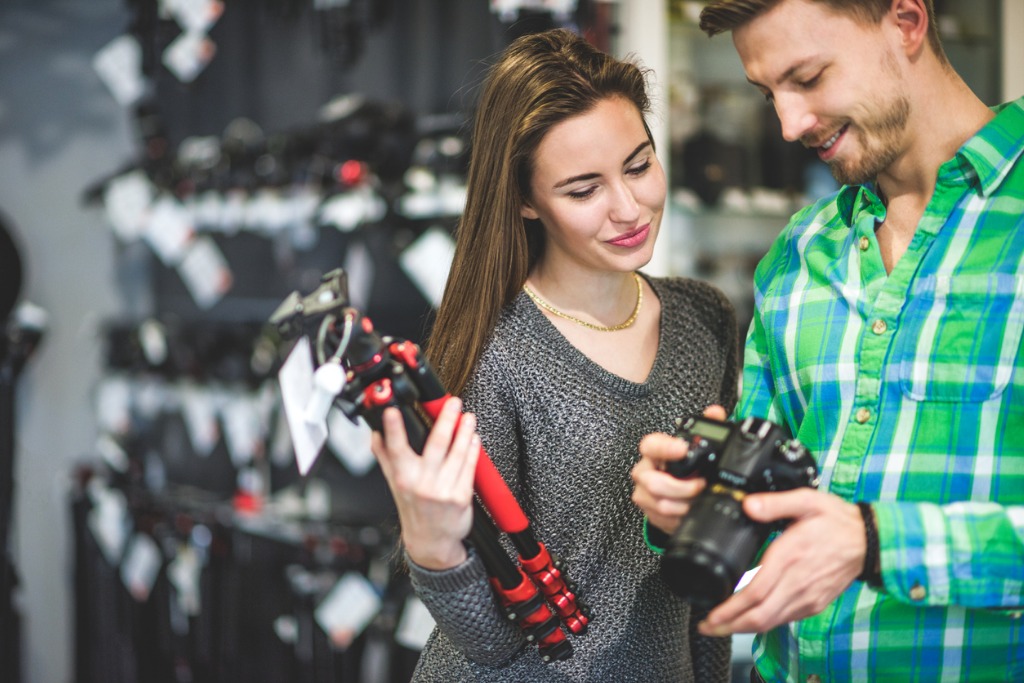
photo by EXTREME-PHOTOGRAPHER via iStock
You’d do well to keep tabs on their sale items and clearance items, as you can save quite a bit of money on new gear. National Camera Exchange also has deep discounts on refurbished and outlet items.
There’s printing services, a cleaning and repair department, archiving services, and much, much more, too. There’s a reason why people in the upper midwest turn to National Camera Exchange - they have excellent services, good prices, and a knowledgeable staff.
Mike’s Camera
Mike’s CameraMike’s Camera is a regional photography supplier based in Colorado and Northern California. If you’ve never heard of them, you’re missing out!
Not only is Mike’s a great place to buy a new camera or other new photography gear, but it’s also a prime choice for having your photos printed. And that’s not just paper prints - you can get all sorts of items from metal prints to custom frames to mugs to calendars when you work with Mike’s.
Mike’s also has a gear rental service and an extensive repair shop as well. And no matter what you need Mike’s to do for you, you’ll get excellent customer service throughout the process.
In fact, Mike’s has won tons of photography industry awards thanks to their commitment to the customer. That includes the Best Camera Store Award by Photo Trade News.
Precision Camera & Video
Austin, Texas-based Precision Camera & Video is yet another regional camera store that has deep roots locally, but a wide net thanks to a robust online store.
Specializing in both new and used equipment, Precision Camera likely has just what you’re looking for no matter your budget.
In addition to selling photo gear, they also have rental and repair services, an on-site photo lab, and they offer educational courses for folks that live in the Austin area.
Interestingly, Precision camera uses their classroom space as a studio as well, so if you’re in Austin and need a studio, Precision can accommodate!
If you’re not in Texas, you benefit from not having to pay sales tax, and with free ground shipping on orders of more than $200, you can end up saving a pretty penny.
We Recommend
Best Entry-Level DSLR and Mirrorless Cameras of 2021
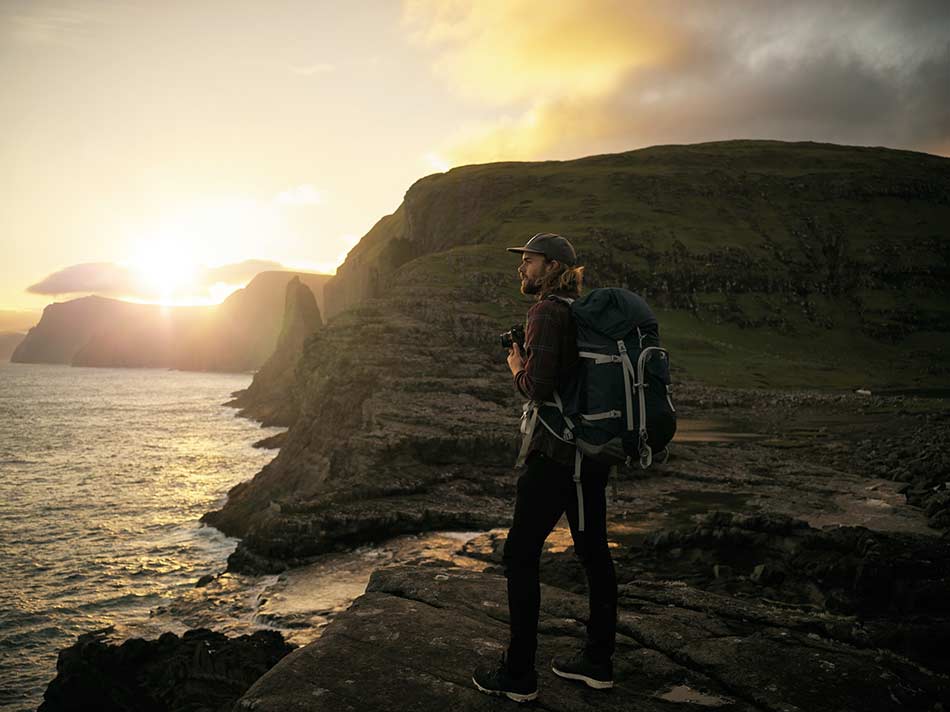 Photo by pixdeluxe via iStock
Best Mirrorless Camera and DSLR Camera
What is the best camera for beginners who are just getting started?
That's a great question, and lucky for you, finding the best entry-level DSLR won't be that difficult. We have made it even easier for you in this article about Nikon D3500 which is the best entry level DSLR camera.
After all, camera manufacturers have been stuffing more and more features into their cameras regardless of price point.
The same is true of mirrorless cameras as well.
In fact, the best mirrorless camera for beginners offers perhaps even more features and functionalities than their DSLR counterparts.
Best Entry-Level DSLR: Canon EOS Rebel SL2

The Canon EOS Rebel SL2 has a ton of features for its price point, which makes it the best DSLR camera for beginners.
Canon EOS Rebel SL2 at a glance:
- Type: DSLR
- 24.2-megapixel APS-C CMOS Sensor
- 3-inch vari-angle touchscreen LCD with 1.040 million dots
- 1080p Full HD video
- 5 fps burst shooting speed
- Canon EF-S lens mount
Pros: Built-in guide helps you learn, good sensor, highly resolute articulating LCD
Cons: Autofocus system has just 9 autofocus points
One of the best features of this camera is its articulated LCD.
Not only is the LCD bright and resolute, but with touchscreen capability and a flip-out and tilting design, you can take photos and videos from awkward angles with much greater ease.
And since this is a review of the best camera for beginners, the fact that the Rebel SL2 has a guided user interface to help you figure out how to best use the camera is a nice touch.
Canon has outfitted this beginner camera with tons of other features as well, including NFC and Wi-Fi. The DIGIC 7 image processor means excellent performance, even when maxing out the burst shooting speed of 5 fps.
Beginner photographers will also appreciate the Dual Pixel autofocus system which aids in tracking moving subjects, that way you get sharp, focused still photos. It works great in live view and helps you shoot improved video as well.
The SL2 is also one of the smallest DSLRs available right now, so if you're making the jump from a compact camera or a smartphone, this little guy won't feel like a bulky, heavy camera in your hand.
Get an in-depth look at this camera in the video above by AdoramaTV.
Current Price: $599.00 with 18-55mm f/4-5.6 IS STM lens
Editor's Tip: Saving money when you're starting out in photography is paramount. Now that the SL3 has been announced, the SL2 is an even more affordable entry-level camera. With that extra money in your pocket, consider buying an upgraded lens for your SL2. A good first choice is the CanonEF 50MM F/1.8 STM. A 50mm lens is incredibly versatile for stills and video, is small and lightweight, and with its big f/1.8 aperture, it's great for low-light shooting as well.
Top DSLR Camera for Beginners: Nikon D3500
If the Nikon environment better suits your needs and wants than Canon, a top choice for a best camera for photography beginners should be the Nikon D3500.
Nikon D3500 at a glance:
- Type: DSLR
- 24.2-megapixel APS-C CMOS Sensor
- 3-inch fixed LCD with 921k dots
- 1080p Full HD video
- 5 fps burst shooting speed
- Nikon F-Mount
Pros: Simple to use, excellent sensor, superb image quality
Cons: Lacks touchscreen, LCD doesn't articulate, no Wi-Fi
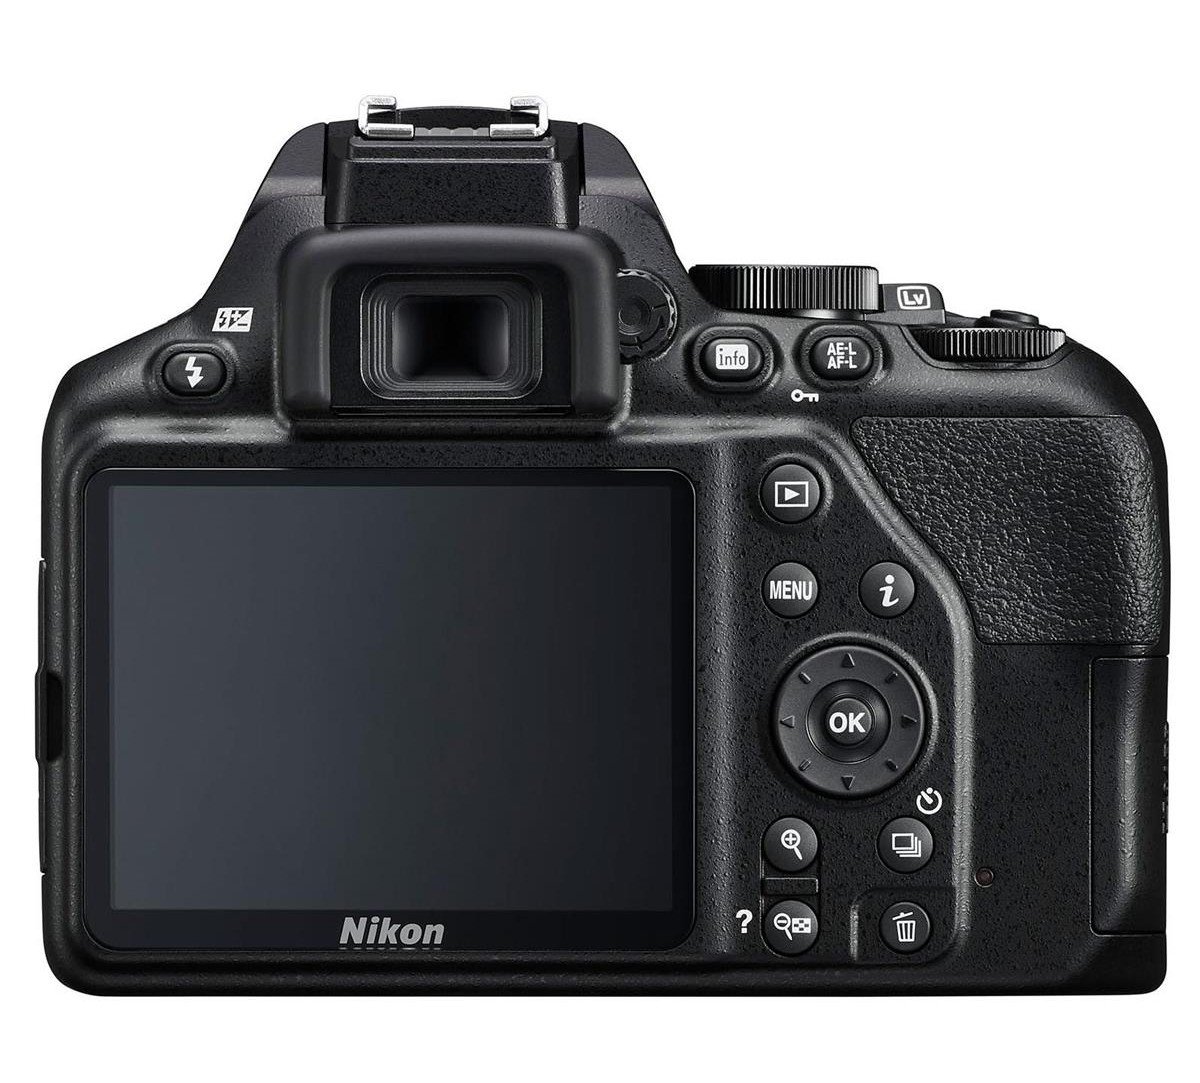
Looking at the specs above, the Nikon D3500 looks like the Canon EOS Rebel SL2 under different badging.
And while there are many similarities between these cameras - the sensor resolution, burst shooting speed, and 1080p video among them - there is one important difference that makes the Nikon not quite as good as the Canon.
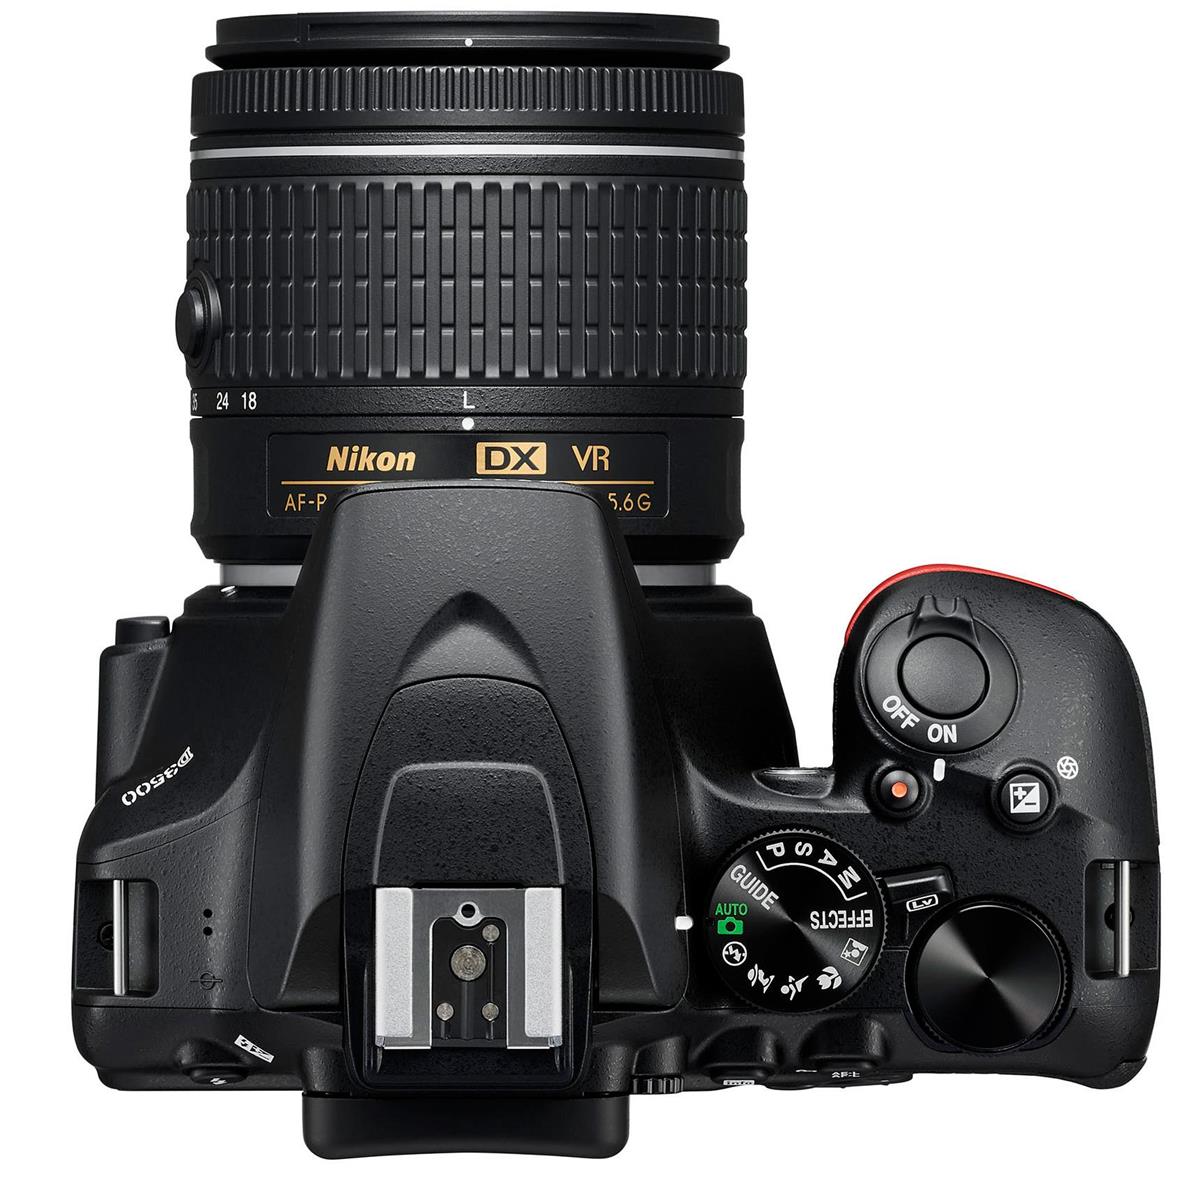
The Nikon's LCD does not articulate or even tilt. It also does not have touchscreen capabilities like the SL2.
Though this might not seem like a big deal, having touchscreen capabilities is extremely helpful for beginners, as most likely you're coming from a smartphone camera that has touchscreen controls.
Having a tilting LCD is also advantageous for low-angle and high-angle shots, and an articulating screen is even better for taking selfies, group photos, and vlogging.
Aside from the lack of LCD features, the D3500 offers superb performance for beginners.
Its sensor is widely regarded as one of the best of the entry-level bunch. It has a guide shooting mode that is basically a built-in camera assistant to help you capture the best shots by explaining different camera settings.
This camera also has simple, easy-to-use controls that are easy to learn, which makes it one of the best DSLR cameras for beginners. See what I mean in the video above by Jared Polin.
Current Price:$446.95 with 18-55mm f/3.5-5.6G VR Lens
Good Camera for Beginners: Nikon D5600
Though not as simplified as the Nikon D3500, the Nikon D5600 is a more capable camera that can grow with you as you develop more skills as a photographer.
Nikon D5600 at a glance:
- Type: DSLR
- 24.2-megapixel APS-C CMOS Sensor
- 3.2-inch vari-angle touchscreen LCD with 1.037 million dots
- 1080p Full HD video
- 5 fps burst shooting speed
- Nikon F-Mount
Pros: Large touchscreen LCD, excellent sensor, advanced autofocus system
Cons: No guided learning mode, expensive
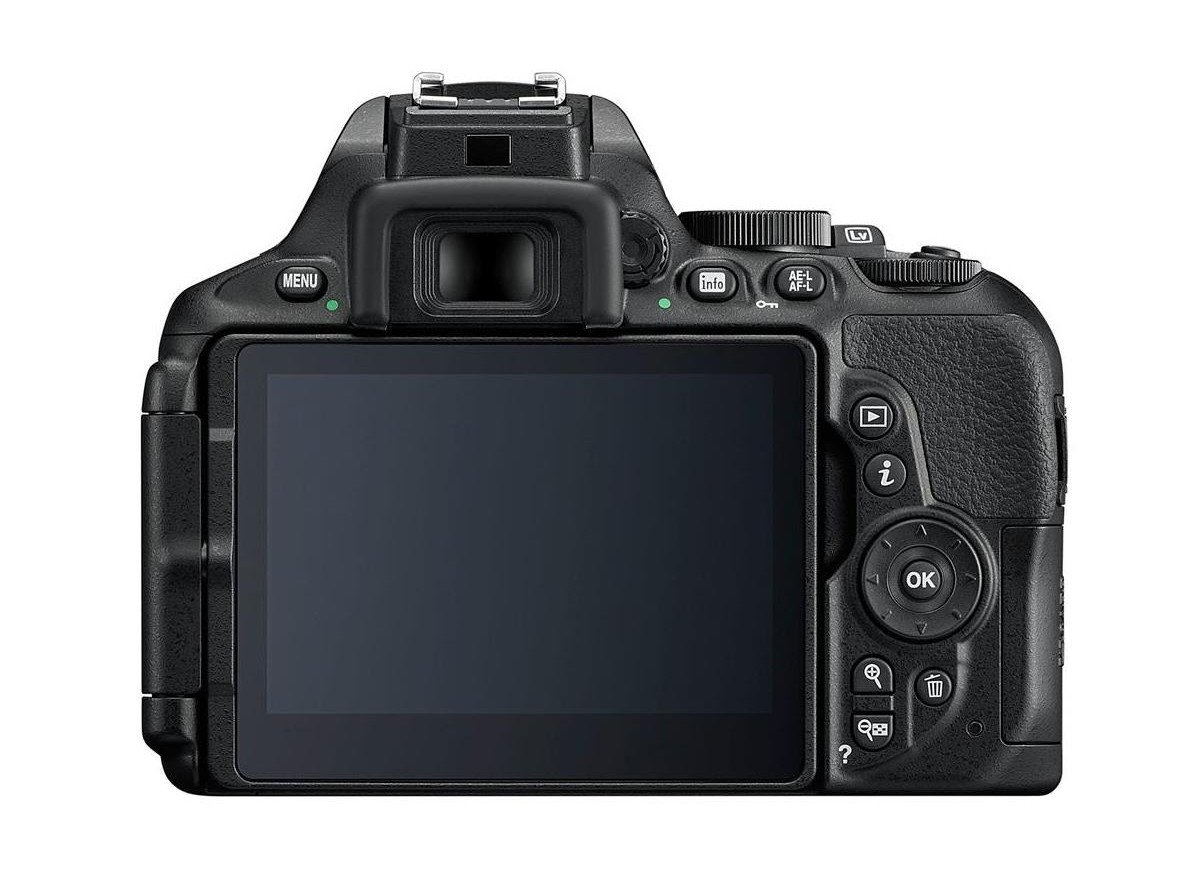
If you're a brand-new photographer, the Nikon D5600 might be a bit much for you, both in terms of usability and price.
Unlike the D3500, there is no guided interface to help you learn the ropes, so you're left to your own devices to figure things out. This isn't a terribly difficult task, but certainly more so than if you have a built-in guide to help you.
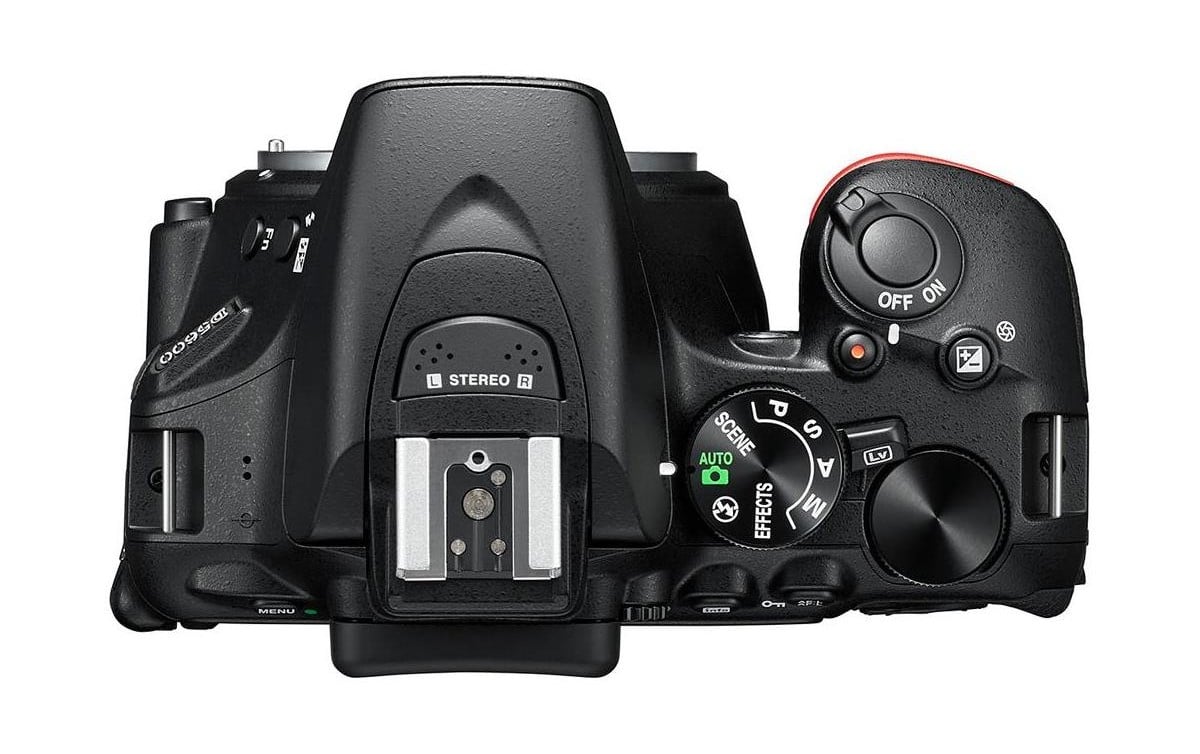
Perhaps this D5600's best feature (aside from its sensor) is its 39-point autofocus system.
With so many more AF points, you get much-improved coverage over the D3500 and EOS Rebel SL2, which means you get more precise control over focusing.
Another feature to appreciate on this camera is the 3.2-inch articulating touchscreen LCD, which is bigger and more resolute than the D3500's LCD.
As noted above, the D5600 is perhaps the best option if you want to future-proof your kit for a few years.
With the D3500 and the Rebel SL2, you might find that in a couple of years your skills are beyond what those cameras can handle. The D5600, though, can grow with you and provide you all the photo-taking power you need for years to come.
Learn more about this camera in the video above by RealWorld.
Current Price: $596.95 (body only)
Editor's Tip: When looking for the best entry-level DSLR, price should be one of the primary factors you use to determine which camera to buy. The more you spend on your camera, the less you have to buy lenses, and lenses are the more important of the two. In fact, after you get a good camera for beginners, start thinking about adding a good prime lens to your bag. If you shoot landscapes, a 24MM F/2.8 is a great option. If you shoot portraits, think about an 85MM F/1.8.
Other DSLR Cameras for Beginners
Other options for the best DSLR camera for beginners include the models listed below.
Nikon D3400
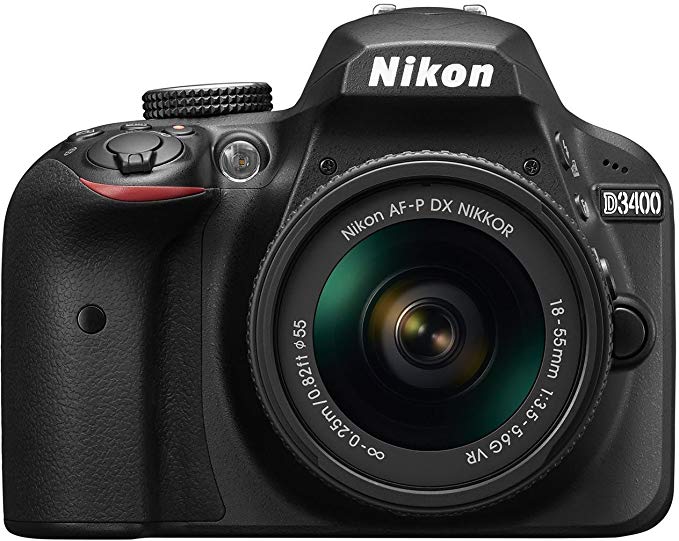
- Type: DSLR
- 24.2-megapixel APS-C CMOS Sensor
- 3-inch LCD with 921k dots
- 1080p Full HD video
- 5 fps burst shooting speed
- Nikon F-Mount
Pros: Cheap ($417.00 with 18/55mm AF-P DX Nikkor f/3.5-5.6G VR lens), excellent battery life, same great sensor as the D3500
Cons: No articulating LCD, no touchscreen capabilities
Canon EOS Rebel T7i
- Type: DSLR
- 24.2-megapixel APS-C CMOS Sensor
- 3-inch articulating touchscreen LCD with 1.040 million dots
- 1080p Full HD video
- 6 fps burst shooting speed
- Canon EF-S mount
Pros: Superb imaging sensor, great touchscreen LCD, features for enthusiast-level photography
Cons: Expensive ($699.00 for the body only), no 4K video, plasticy materials feel cheap
Obviously, mirrorless cameras are much different from DSLRs since they lack a mirror inside, and because of that, offer much smaller form factors outside.
Mirrorless cameras otherwise offer similar features and benefits for new photographers as their DSLR counterparts, including many options with excellent sensors, autofocus systems, and big LCD panels.
Here's a few suggestions for beginner mirrorless cameras if DSLRs aren't quite your style.
BEST ENTRY-LEVEL MIRRORLESS CAMERA: FUJIFILM X-T100
This little camera packs a punch, and is the best mirrorless camera for beginners who want a capable, yet small camera.
Fujifilm X-T100 at a glance:
- Type: Mirrorless
- 24.2-megapixel APS-C CMOS Sensor
- 3-inch tilting touchscreen LCD with 1.04 million dots
- 4K video
- 6 fps burst shooting speed
- Fujifilm X-mount
Pros: Gorgeous electronic viewfinder, small and lightweight, 4K video
Cons: CMOS sensor isn't as advanced as Fuji's X-Trans sensor found in higher-end cameras, 4K video limited to 15 fps
Not all mirrorless cameras at this price point have an electronic viewfinder, so the fact that the X-T100 has a stellar viewfinder is a big deal.
What's more, it has a gorgeous tilting touchscreen LCD to help you get those low-angle and high-angle shots that a fixed LCD just can't accommodate.
The design of this camera is worth mentioning as well. It's small and lightweight, and it looks great with a vintage vibe.
Don't let its little body fool you, though. This camera is on the edge of a beginner and intermediate body, so it has the chops to work hard for you as your skills grow. That's why I've listed it as one of the best mirrorless cameras for beginners!
Get a detailed review of the X-T100 in the video above by The Art of Photography.
Current Price: $499.95 (body only)
Editor's Tip: One thing to bear in mind with mirrorless cameras is that they have much smaller bodies than DSLRs. Though that's great for saving weight and room in your camera bag, if you have large hands, you might find the smaller grips on mirrorless cameras to be less comfortable than those on DSLRs. Not sure what else to consider when shopping for a good mirrorless camera for beginners? Consult this DSLR vs mirrorless guide.
Best Mirrorless Camera for Beginners: Sony a6400
A more advanced camera than others on this list, the Sony a6400 isn't just a great camera for still photography, but is also one of the best vlogging cameras around.
Sony a6400 at a glance:
- Type: Mirrorless
- 24.2-megapixel APS-C CMOS Sensor
- 3-inch 180-degree tilting touchscreen LCD with 921k dots
- 4K video
- 11 fps burst shooting speed
- Sony E-Mount
Pros: Excellent sensor with superb image quality, 180-degree tilting LCD, outstanding autofocus system
Cons: Expensive, more difficult to learn how to use than other cameras on this list
If shooting video is at all an interest of yours, the Sony a6400 is an excellent choice because of its screen that flips around so you can see yourself as you film. It also helps that the camera shoots 4K UHD video, too.
Aside from that, the newest member of the Sony Alpha lineup boasts a beautifully resolute 24.2-megapixel sensor and a fantastic autofocus system that has a whopping 425 autofocus points.
Of course, those fancy features means that this is more of mid-range camera for enthusiasts, but a beginner with some gusto and time to learn how to use this camera will find it to be well-equipped and ready to tackle all kinds of tasks.
It has a moisture-resistant body and is rated to 200,000 shutter clicks, so it's a camera that should last you a good, long while as well.
See the Sony a6400 in action in the video above by Dan Watson.
Current Price: $1,158.35 (with a 16-50mm f/3.5-5.6 OSS lens)
Good Mirrorless Camera for Beginners: Olympus OM-D E-M10 III

Don't let the retro look of Olympus OM-D E-M10 III fool you - under the hood is a high-powered, high-tech camera.
Olympus OM-D E-M10 III at a glance:
- Type: Mirrorless
- 16.1-megapixel micro four thirds sensor
- 3-inch tilting touchscreen LCD with 1.04 million dots
- 4K video
- 8.6 fps burst shooting speed
- Micro Four Thirds lens mount
Pros: Beautiful high-resolution viewfinder, touchscreen LCD, easy to use
Cons: Only 16.1-megapixel sensor, expensive compared to other options
Though this is one of the smaller mirrorless cameras currently available, Olympus has managed to pack it full of features that make it one of the best digital cameras for beginners.
The electronic viewfinder is bright and crisp, and displays important image information that can help you improve the quality of your photos.
Paired with that is a beautiful tilting touchscreen LCD for making easy adjustments to the camera settings and for reviewing your images.
This camera also has built-in 5-axis image stabilization.
Add to that 4K UHD video shooting and 8.6 fps burst shooting, and you have the makings of a great little camera.
See how the Olympus OM-D E-M10 III works in the real world in the video above by AdoramaTV.
Current Price: $649.00 (body only)
Other Mirrorless Cameras for Beginners
If the above mirrorless cameras aren't quite what you're looking for, consider the following as good mirrorless cameras for beginners.
Sony a6000
- Type: Mirrorless
- 24.3-megapixel APS-C CMOS Sensor
- 3-inch tilting LCD with 921k dots
- 1080p Full HD video
- 11 fps burst shooting speed
- Sony E-Mount
Pros: Cheap ($398.00 body only ), electronic viewfinder, blazing-fast 11 fps burst shooting speed
Cons: Old model that's a little long in the tooth, electronic viewfinder lacks resolution by today's standards
Canon EOS M100
- Type: Mirrorless
- 24.2-megapixel APS-C CMOS Sensor
- 3-inch 180-degree tilting LCD with 1.04 million dots
- 1080p Full HD video
- 6.1 fps burst shooting speed
- Canon EF-M Mount
Pros: Cheap ($449.00 with EF-M 15-45mm f/3.5-6.3 IS STM Lens), easy to use
Cons: Limited features, no viewfinder
With that, you have a solid list of choices for the best entry-level DSLR and the best entry-level mirrorless cameras.
Any of these options would be great for a beginner, but keep in mind that if you have some experience, one of the more advanced cameras on this list will be the better bet for you.
We Recommend
Best Still Cameras for Dynamic Range
 Photo by Joseph Pearson on Unsplash
Though dynamic range isn't the only factor that determines the quality of a photo, it's certainly an important one.
If you aren't familiar with dynamic range, here's a quick definition:
"In the simplest of terms, dynamic range refers to the balance between the white and black intensities in a photo. In other words, it's the ratio of the maximum (white) and minimum (black) values of light." You can get a detailed look at dynamic range here.
So, dynamic range is the range of light values present in a scene. Some cameras do a better job of recording this range of light values than others.
The cameras listed here are among the best, and provide the most number of stops of dynamic range currently available. Note that this is not a complete list, nor does it include medium format cameras.
Note: The dynamic range values listed for each camera are based on DXOMark's testing.
Nikon D850 Dynamic Range

- 14.8 stops EV at ISO 64
- Price: $3,296.95 (body only)
- Read our Nikon D850 Review
Nikon D810 Dynamic Range
- 14.8 stops EV at ISO 64
- Price: $2.796.95 (body only)
- Read our Nikon D850 vs Nikon D810 Comparison
Sony a7 III Dynamic Range
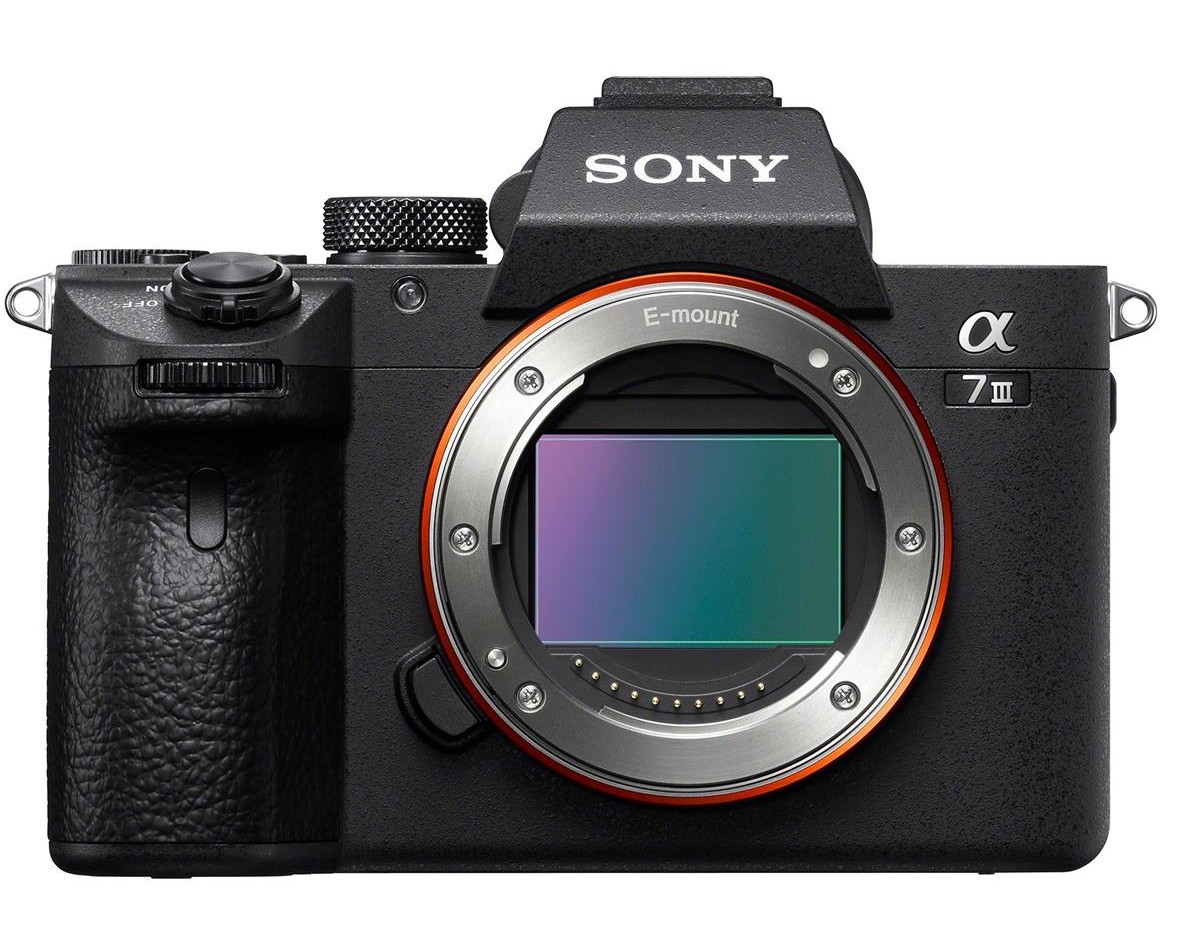
- 14.7 stops EV at ISO 50
- Price: $1,998.00 (body only)
- Read our Sony a7 III Review
Sony a7R III Dynamic Range

- 14.7 stops EV at ISO 100
- Price: $2,798.00 (body only)
- Read our Nikon D850 vs Sony a7R III Comparison
Nikon Z7 Dynamic Range

- 14.6 stops EV at ISO 64
- Price: $3,396.95 (body only)
- Read our Nikon Z7 Review
Panasonic Lumix DC-S1 Dynamic Range
- 14.5 stops EV at ISO 100
- Price: $2,497.99 (body only)
Nikon Z6 Dynamic Range
- 14.3 stops EV at ISO 100
- Price: $1,996.95 (body only)
- Read our Nikon Z6 Review
Sony a6400 Dynamic Range
- 13.7 stops EV at ISO 100
- Price: $898.00 (body only)
- Read our Sony a6400 Review
Sony a6500 Dynamic Range
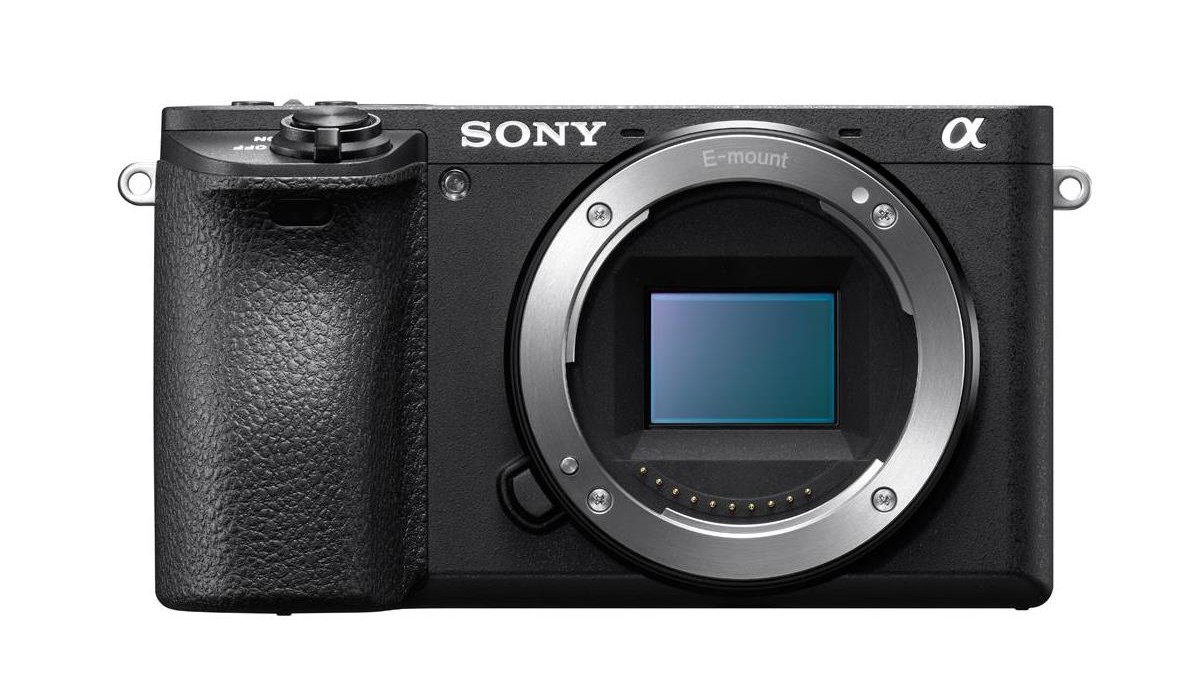
- 13.7 stops EV at ISO 100
- Price: $1,198.00 (body only)
- Read our Sony a6400 vs Sony a6500 vs Sony a6300 Comparison
Sony a6300 Dynamic Range
- 13.7 stops EV at ISO 100
- Price: $748.00 (body only)
- Read our Sony a6400 vs Sony a6500 vs Sony a6300 Comparison
Canon EOS 5D Mark IV Dynamic Range
- 13.6 stops EV at ISO 100
- Price: $2,999.00 (body only)
- Read our Canon EOS 5D Mark IV Review
Canon EOS R Dynamic Range
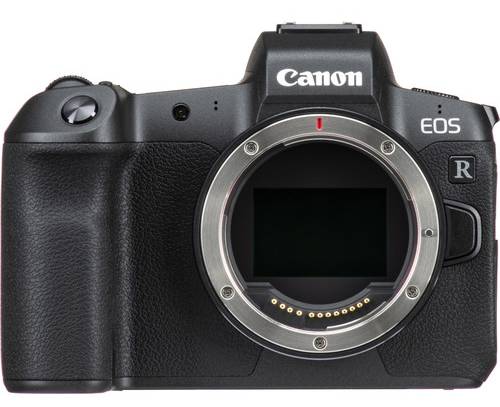
- 13.5 stops EV at ISO 100
- Price: $2,299.00 (body only)
- Read our Canon EOS R Review
Leica SL Dynamic Range
- 13.4 stops EV at ISO 50
- Price: $5,995.00 (body only)
Sony a9 Dynamic Range
- 13.3 stops EV at ISO 50
- Price: $3,498.00 (body only)
- Read our Sony a9 Review
Panasonic Lumix DC-GH5 Dynamic Range
- 13 stops EV at ISO 200
- Price: $1,497.99 (body only)
- Read our comparison of the Sony a9, Panasonic GH5, and Olympus OM-D E-M1 Mark II
Olympus OM-D E-M1 Mark II Dynamic Range
- 12.8 stops EV at ISO 64
- Price: $1,599.00 (body only)
- Read our comparison of the Sony a9, Panasonic GH5, and Olympus OM-D E-M1 Mark II
OLYMPUS OM-D E-M10 MARK II Dynamic Range
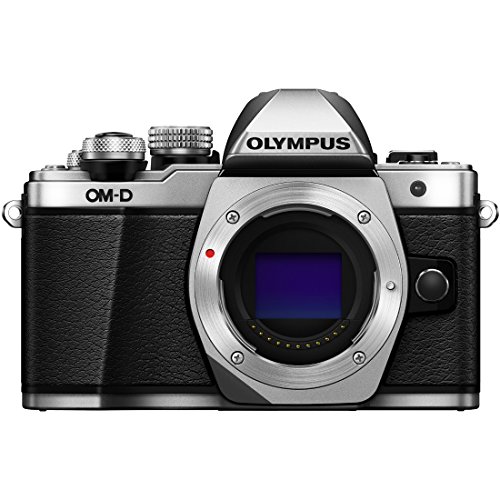
- 12.5 stops EV at ISO 100
- Price: $499.00 (body only)
- Read our Olympus OM-D E-M10 Mark II review
Canon EOS M50 Dynamic Range
- 12.5 stops EV at ISO 100
- Price: $629.00 (body only)
- Read our Canon EOS M50 Review
Canon 6D Mark II Dynamic Range
- 11.9 stops EV at ISO 100
- Price: $1,499.00 (body only)
- Read our Canon 6D Mark II Review
We Recommend
Black Friday 2023 Photography Deals

Photo by MicroStockHub via iStock
Black Friday is coming in hot, and a lot of photography companies have smokin' hot deals.
Of course, we can't preview ALL of the Black Friday 2023 photography deals, but what we can do is give you a head's up on some of our favorite items on sale this year.
So, without further ado, let's dive in and see what deep discounts await you this holiday season!
Table of Contents
Skylum Luminar Neo - Up to 85% off
Luminar Neo is one of my favorite photo editors thanks to its impressive (and easy-to-use) AI-based tools. If you haven't tried it yet, you should - and you'll be hooked!
Now is the time to give Luminar Neo a try, too as, Skylum is offering incredible deals on this fantastic photo editor:
- New users get a 12-month Pro subscription plus the Creative Assets Collection for $79 (normally $479), a 24-month Pro subscription plus the Creative Assets Collection for $119 (normally $659), or a Lifetime subscription with Extentions, the Creative Journey Pass, and the Creative Assets Collection for $149 (normally $998)
- Luminar Neo Lifetime owners can get the Extentions Pack and the Creative Journey Pass for $99 (normally $411) or a 24-month Pro subscription plus Creative Assets Collection for $99 (normally $479)
This Black Friday deal is good until 7:00 am EST on November 27th.
Learn more about Luminar Neo's Black Friday deals
Saal Digital

Saal Digital has won high praise from me this year for their high-quality products, their extensive selection of prints, and their superb customer service. In a space that's full of excellent options, Saal Digital stands with the best of them, and this year during their Black Week event, you can get your very own Saal Digital products and save some green stuff, too:
- $15 voucher for purchases over $30: WgxCheh4kb-JVG
- $30 voucher for purchases over $60: bm9zUkeFCQ-JVG
- $45 voucher for purchases over $120: PU9Ce2sXJe-JVG
- $60 voucher for purchases over $150: 3UJFTcX3NJ-JVG
Choose which of the Black Week coupons suits you best and redeem it to purchase anything in their range of products. These deals are valid until November 24, 2023, and cannot be combined with other promotions.
Learn more about Saal Digital's Black Friday deals
Vanguard

I've used Vanguard tripods, bags, and other gear for years, and appreciate the build quality, ease of use, and affordable price point - you will too! That's especially true with these Holiday Sale photography deals (which are good through December 31st):
- Alta Sky 68 Large Camera Backpack - $239.99 (normally $369.99)
- VEO 3T+ 264AB Aluminum Travel Tripod - $249.99 (normally $379.99)
- Alta Pro 2+ 263AP Aluminum Tripod with 3-Way Video Pan Head - $199.99 (normally $299.99)
- Alta Fly 58T Rolling Camera Bag - $269.99 (normally $399.99)
Learn more about Vanguard's Holiday Sale deals
Sigma

Sigma has made a name for itself for exceptional lenses at affordable prices. But, as is the case this time of year, those affordable prices are even more affordable with savings of up to $200 now through December 10th:
- 105mm F2.8 DG DN MACRO Art for Sony E-Mount and L-Mount - $699 (normally $799)
- 24-70mm F2.8 DG DN Art for Sony E-mount and L-Mount - $1,049 (normally $1,099)
- 150-600mm F5-6.3 DG DN OS Sports for Sony E-mount and L-Mount - $1,299 (normally $1,499)
Learn more about Sigma's Black Friday deals
Adorama

Adorama is one of the biggest photography retailers in the nation, and their selection of photography gear (and other goodies) is second to none. This Black Friday, Adorama has tons of incredible deals, including a variety of big sales on Panasonic Lumix gear:
- Lumix DC-S5 Mirrorless Digital Camera with Lumix S 20-60mm L-Mount Lens Bundle - $1,597.99 (normally $2,097.99)
- LUMIX S5 II Mirrorless Digital Camera Body - $1,697.99 (normally $1,997.99)
- LUMIX S5 II Mirrorless Digital Camera with Lumix S 20-60mm f/3.5-5.6 Lens - $1,997.99 (normally $2,297.99)
Adorama has great deals on other brands, too, like $400 off the OM SYSTEM OM-1 Mirrorless Digital Camera w/ M.Zuiko ED 12-40mm PRO II Lens Kit, $300 off the Nikon D7500 DSLR with 18-140mm VR Lens, and $200 off the Canon EOS R8 Mirrorless Digital Camera with RF 24-50mm f/4.5-6.3 IS STM Lens, to name a few.
Learn more about Adorama's Black Friday deals
Insta360

Insta360 is one of the most innovative action camera companies, and this Black Friday, they're bringing the heat with deals on many of their top sellers:
- Insta360 X3 - 10% off plus a FREE T-shirt and 20% off Insta360 Care and Extended Warranty when purchased with select products (available in select countries and regions) You can also choose from a FREE 114cm Invisible Selfie Stick, Sticky Lens Guards or Battery.
- Insta360 GO 3 - 5% off plus a FREE T-shirt and 20% off Insta360 Care and Extended Warranty when purchased with select products (available in select countries and regions). You can get a FREE extra Lens Guard or Carry Case, too!
- Insta360 Flow - 12% off plus a FREE T-shirt and 20% off Insta360 Care and Extended Warranty when purchased with select products (available in select countries and regions). You can also choose a FREE All-Purpose Tripod or Spotlight.
- Insta360 ONE RS - 25% off Twin Edition, 20% off 4K Edition and 10% off Core Bundle plus a FREE T-shirtand 20% off Insta360 Careand Extended Warranty when purchased with select products (available in select countries and regions). You also get a FREE ONE RS Battery Base.
Learn more about Insta360's Black Friday deals
Disclaimer: Our articles might have affiliate links and the occasional sponsored content, but don't sweat it – if you buy something, we get a little kickback at no extra cost to you, and we only hype products we truly believe in!
We Recommend
Camera Gear Upgrades With a Lot of Bang for the Buck
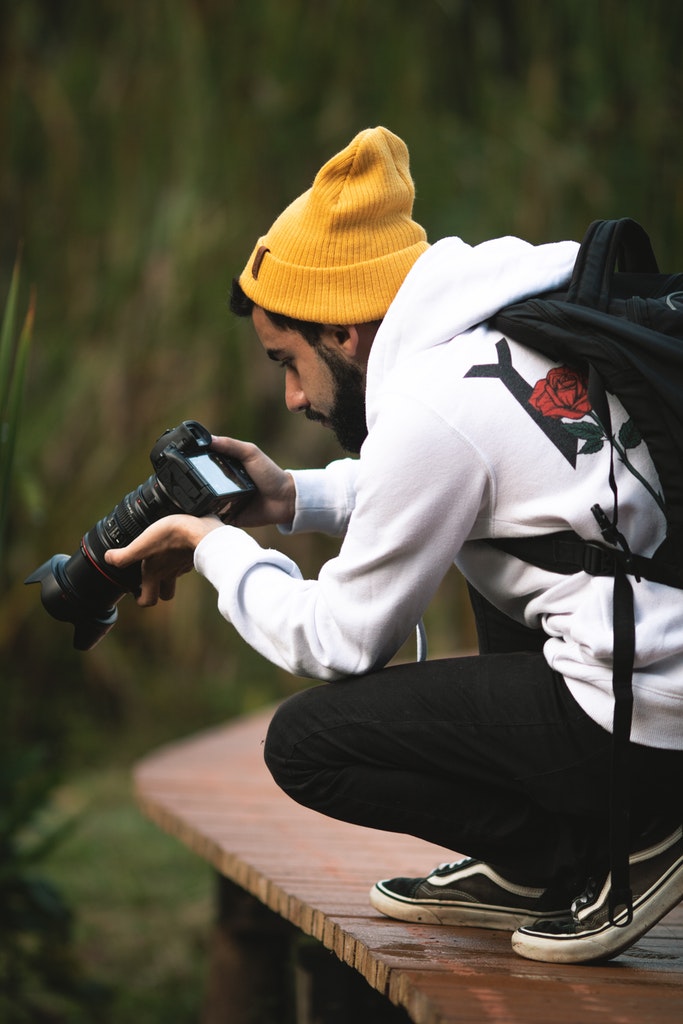
Photo by Pedro Sandrini from Pexels
While you’re sitting at home with nothing better to do, why not start researching for your next camera gear upgrades?
Online shopping quickly passes the time, and there are so many camera gear upgrades available for under $100, so you don’t need to totally break the bank.
While the camera gear upgrades on this list are going to be a little more expensive, they’re going to save you a ton of money in the long run because once you make these camera gear upgrades, you’ll never need to make them again.
An Upgraded Camera Strap
The Holdfast Classic Strap is the perfect example of how camera gear upgrades don’t need to break the bank.
This camera strap is made of high-quality leather in a variety of colors to make you look like a professional while remaining comfortable during long shoots.
You can tell that the Holdfast Classic Strap was made by a photographer from the details. All of the rings are made of stainless steel so they will never rust, and your camera is protected from the steel by an additional strip of leather to keep it protected.
My favorite part about this camera strap is that it is fully customizable. You can choose the color, the width of the leather and the length of your strap so your camera falls precisely where you want it to.
The Holdfast Classic Strap is available for just $95, which I’ll consider inexpensive camera gear because you’ll only ever need to buy it once. Holdfast features a lifetime guarantee on all of their products.
Recommended Photography Reading
- National Geographic Photo Basics: The Ultimate Beginner's Guide to Great Photography
- Photography: The Definitive Visual History
- Read This if You Want to Take Great Photographs
A Tripod Built Like a Tank
When you start to think about camera gear upgrades, you’re probably thinking about buying new lenses, new filters or additional batteries. Tripods never get any love.
But, once you try Ikan’s E-Image EK50AAM Tripod, you’ll wish you had purchased it years ago.

This tripod can carry up to 13.2 lbs of equipment while remaining fluid. It features 360-degree panning and can tilt 90-degrees down and 75-degrees up.
It has a working range of 31” to 64”, folds down to 32” and comes with foot spikes so you’ll never need to purchase them separately.
For $180, the Ikan E-Image Tripod is definitely one of the best camera upgrades you can make in 2020.
Learn More:
A Nifty Fifty Lens
Is it time for you to upgrade from your kit lens? If I had to guess, I’d say yes.
Canon EF 50mm f/1.8 STM Lens
The Canon EF 50mm f/1.8 STM lens is one of the most lightweight nifty fifty lenses on the market at just 5.5 oz.
It features an impressively low minimum focusing distance of just over 13”, and will ensure your photos are bright and sharp, with beautiful bokeh-filled backgrounds.
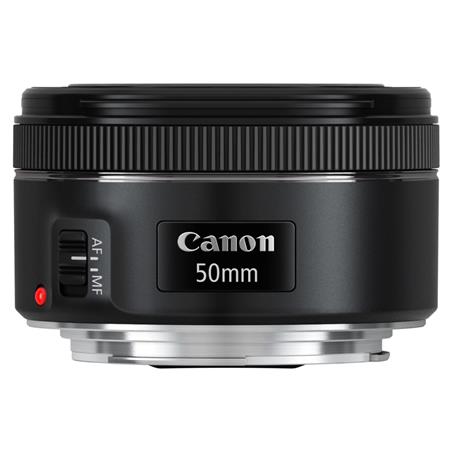
Plus, you can use this lens for still portraits or video because it is optimized for both.
For $125,this lens will pay for itself in no time. Besides, what’s the point in making camera gear upgrades without ensuring you have the basics.
Nikon NIKKOR Z 50mm f/1.8 S Lens
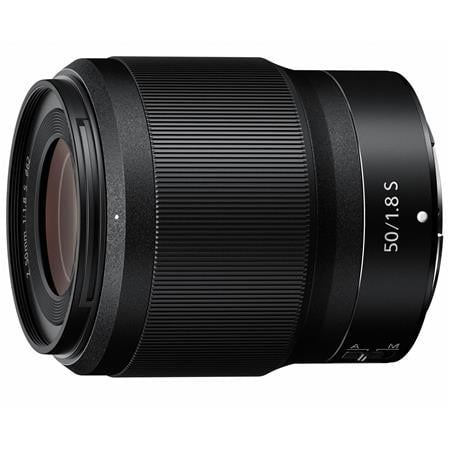
If you prefer Nikons to Canons, we have the perfect nifty fifty lens for you as well.
The Nikon NIKKOR Z 50mm f/1.8 S lens is definitely not beginner camera gear, but it is a lens you will keep for a lifetime.
It features an incredibly quiet stepping motor, to ensure your autofocus is unwavering, and a 9-blade rounded diaphragm to create incredible bokeh. This lens will also work just as well for video as it does for stills and works best when paired with Nikon cameras that are optimized for low-light shooting.
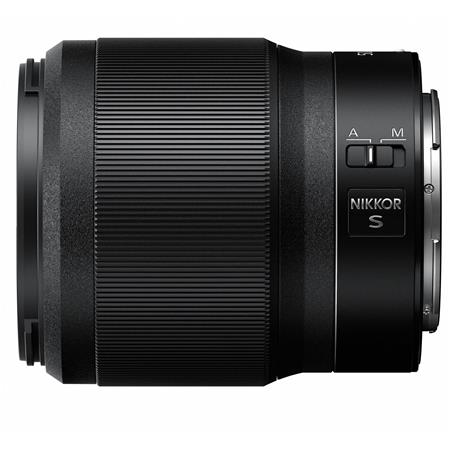
The Nikon NIKKOR Z 50mm f/1.8 S lens also features a fluorine coat which repels dust, water droplets and grease and will help you maintain the quality of the lens for decades to come.
At $600, the Nikon NIKKOR Z 50mm f/1.8 S lens isn’t inexpensive camera gear, but it is a wise investment in your future.
Learn More:
We Recommend
Canon 5D Mark IV: Just How Good is It?
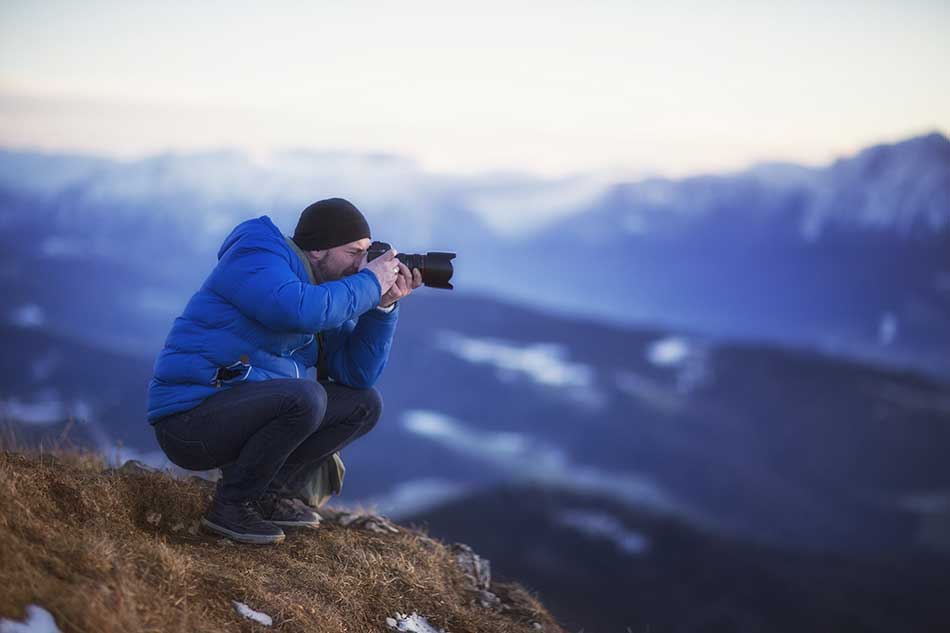 Image Credit: DieterMeyrl via iStock
I know, I know...
Why buy a Canon 5D Mark III when you could buy a 5D Mark IV? Or perhaps even better, a Canon EOS R?
I'll tell you why - the Canon 5D Mark III is still a really good camera. Oh, and you can get it for much less money, too.
That's a win-win if you ask me!
Aside from bargain-basement prices when compared to newer cameras, there's still a lot to love about the 5D Mark III.
A Little History on the Canon 5D Mark III
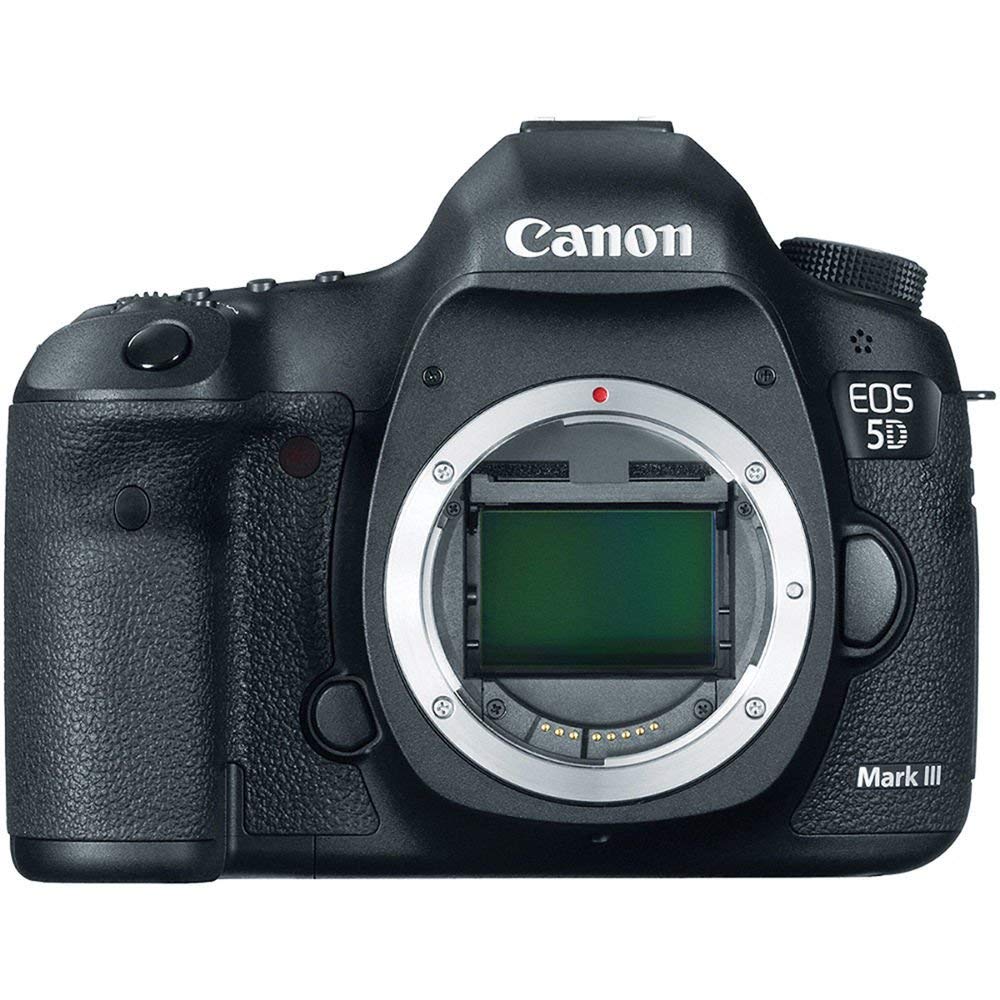
Released in the spring of 2012, the 5D Mark III was a giant step forward from its predecessor, the Mark II (shown above).
Not only does the Mark III offer increased sensor resolution (22 megapixels versus 21 megapixels in the Mark II), but it also has a much-improved ISO range. The Mark II's native ISO range is 100-6400 while the Mark III boasts a 100-25600 range.
At three years newer, the Mark III also offers some technological upgrades that make it a much more capable camera.
That includes an improved autofocus system that has 61 AF points compared to just 9 AF points on the Mark II.
 Image Credit: AlenaPaulus via iStock
When the Mark III was released, it was an instant hit among professional photographers.
In fact, many professional photographers that are in the Canon ecosystem rave about the Mark III and still use it as their primary camera.
Six years after its release, the loyalty that photographers have for this particular camera is quite impressive.
If that doesn't tell you that this is still a great camera, I don't know what will!
Canon 5D Mark III Specs
In addition to the improvements noted above, the Mark III boasts plenty of other specs that make it a solid camera, even in 2018:
- 3.2-inch LCD with 1.04 million dots
- 100-percent viewfinder coverage
- AE bracketing range of +/-3
- 6fps continuous shooting
- Dual memory card storage slots
- Headphone and microphone ports
- 950-shot battery life
- Weather-sealed body
- 150,000 shutter cycle life expectancy
Sure, there's no touchscreen LCD, no Wi-Fi, and no 4K video.
But if you can get past the modern-day amenities it lacks and look at how good the list of specifications is, you realize that the Mark III still has plenty to offer. That's especially true if you're a portrait or wedding photographer.
 Image Credit: Erstudiostok via iStock
The Mark III has excellent low-light shooting capabilities, so if you're in a situation in which an external flash isn't an option (like at a wedding) or you're shooting indoors under dim lighting, the Mark III will perform very well.
That's thanks in large part to the aforementioned ISO range that extends to 25600. Even when pushing the ISO upward, the Mark III produces clean images with little indication of digital noise.
Additionally, the Mark III has a maximum shutter speed of 1/8000 seconds, which is a great asset to have for wildlife, sports, and action photography.
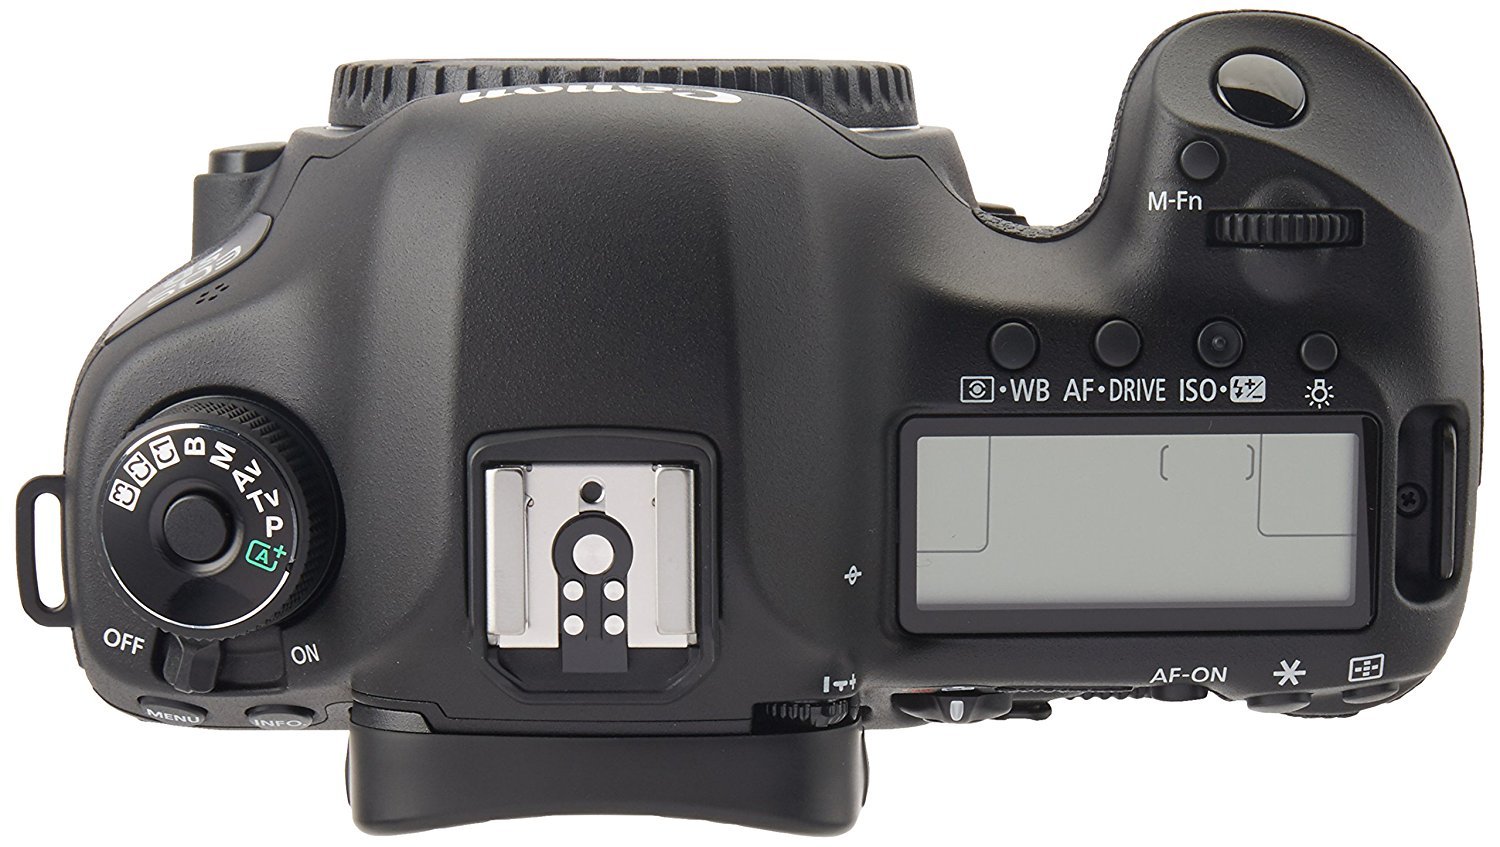
Like just about all full frame cameras, the Mark III is a big rig, weighing in at nearly 2.1 pounds (body only). That means you likely wouldn't use it for something like street photography or travel photography, when smaller, lighter cameras provide much more value.
Nevertheless, the Mark III has plenty of versatility for photographers that focus on portraiture and weddings, as well as for photographers that need a rugged, weather-sealed body, like wildlife photographers and landscape photographers.
The Canon 5D Mark III is a Great Bargain
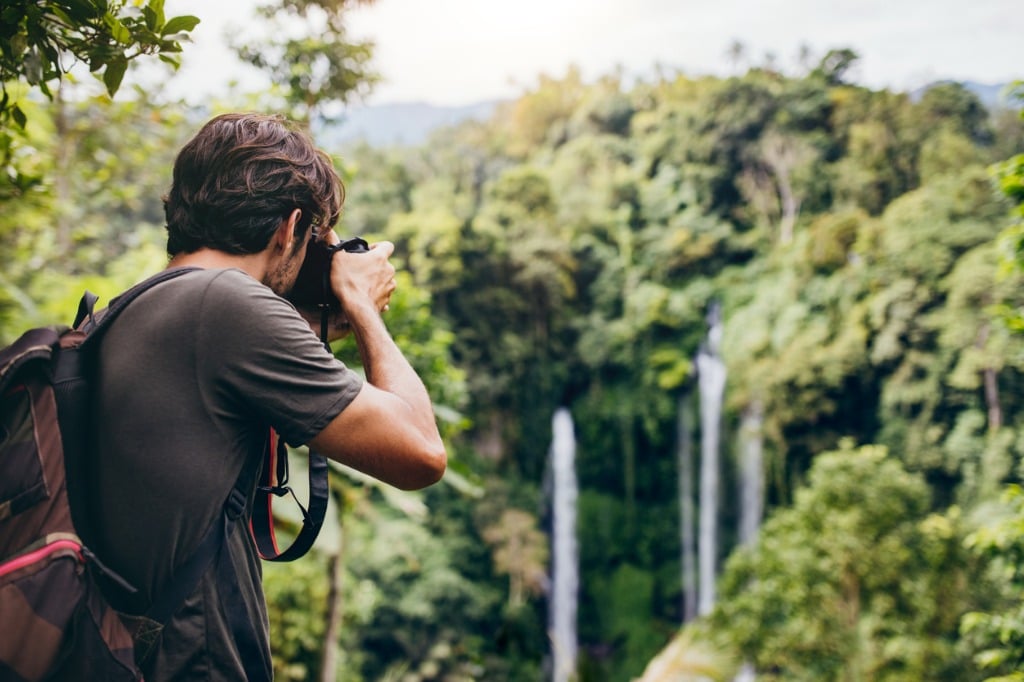 Image Credit: jacoblund via iStock
When the Mark III was released, it had a price tag of around $3,500. That's typical for professional-grade camera bodies.
But as noted above, you can now get a used 5D Mark III for much less - about $1,300, in fact.
Buying an older, yet still highly capable camera means you save hundreds of dollars. All that money can either stay in the bank or you can put it towards upgrading other gear, like buying a new lens or a new tripod.
That price point makes it easier for enthusiast photographers that want to upgrade to a full frame camera to do so.
With that kind of accessibility, I imagine that the 5D Mark III will continue to be a favorite camera for photographers for a good, long while.
We Recommend
Canon Has Some Crazy Rebates on Popular Cameras Right Now
Photo by ShareGrid on Unsplash
If you thought you missed the boat on a new camera on Black Friday or Cyber Monday, think again...
Canon has an incredible promo going right now on EOS R and 5D Mark IV camera bundles that get you up to $1,300 off. Yeah - $1,300!!
It's part of Canon's big holiday blowout with some of the best deals of the season.
So, if you're in the market for a new 5D Mark IV or EOS R, you might give strong consideration to one of the bundles listed below.
EOS 5D Mark IV with Flashpoint Zoom Li-On X TTL Speedlight - $1,100 Off
This bundle would normally set you back $3,099, but it's on sale right now for just $1,999.
Get more details on this Canon 5D Mark IV bundle
EOS 5D Mark IV with ED 24-105mm Lens and Flashpoint Zoom Li-on X TTL Speedlight - $1,300 Off
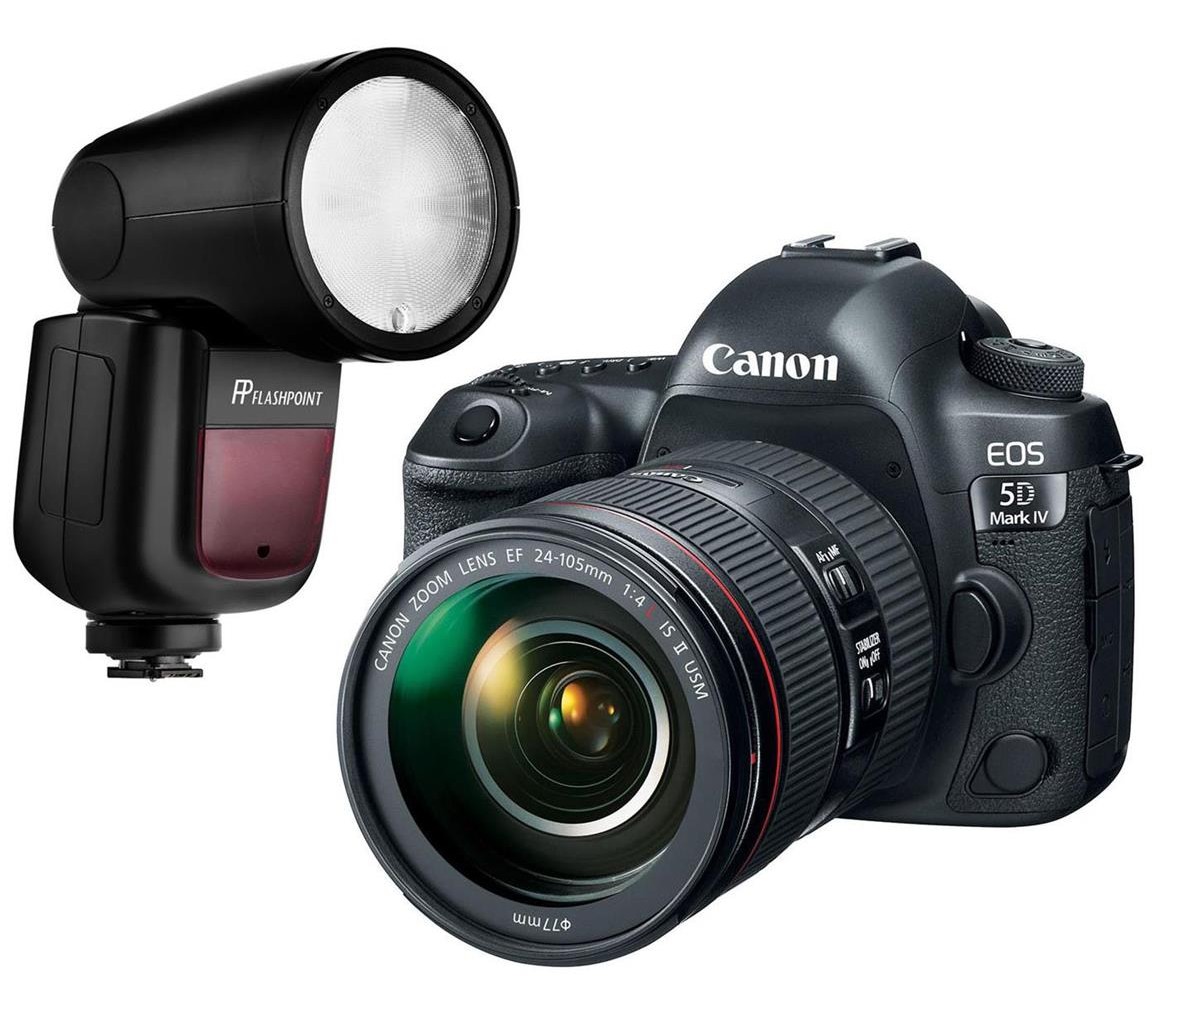
Normally you'd spend $4,199 for this setup, but right now it's just $2,899.
Get more details on this Canon 5D Mark IV bundle
EOS 5D Mark IV with EF 24-70mm f/4L IS Lens and PC Accessory Bundle - $1,250 Off
This bundle is priced at just $2,749 but is usually $3,999. The bundle includes a huge list of goodies:
- SanDisk 32GB Extreme PRO UHS-I U3 V30 SDHC Memory Card
- Lowepro Format 160 II Camera Bag
- Adorama Slinger Digital Memory Card Wallet - Holds 12 Cards
- Green Extreme USB 2.0 Multi Card Reader, SD, Mini SD, microSD, Memory Stick (MS)
- ProOPTIC Glass Screen Protector for Canon 5D Mark 4 Camera
- 3Pod Small Portable Table Top Mini Tripod
- Corel Photo Video Art Suite Software Kit
- ProOPTIC Complete Optics Care and Cleaning Kit
- ProOPTIC 77mm Digital Essentials Filter Kit
Get more details on this Canon 5D Mark IV bundle
Canon EOS 5D Mark IV with Canon Log and Free Accessory Bundle - $1,100 Off
You'd normally have to plunk down $3,199 for this 5D Mark IV bundle, but right now you can snag it for just $2,099!
This kit includes the following:
- SanDisk 32GB Extreme PRO UHS-I U3 V30 SDHC Memory Card
- Lowepro Format 160 II Camera Bag
- Adorama Slinger Digital Memory Card Wallet - Holds 12 Cards
- Green Extreme USB 2.0 Multi Card Reader, SD, Mini SD, microSD, Memory Stick (MS)
- ProOPTIC Glass Screen Protector for Canon 5D Mark 4 Camera
- 3Pod Small Portable Table Top Mini Tripod
- Corel Photo Video Art Suite Software Kit
- ProOPTIC Complete Optics Care and Cleaning Kit
Get more details on this Canon 5D Mark IV bundle
Canon EOS R with Flashpoint Zoom Li-On X TTL Speedlight - $800 Off
This bundle is usually $2,299, but it's on sale now for just $1,499.
Get more details on this Canon EOS R bundle
Canon EOS R with RF 24-105mm Lens and Flashpoint Zoom Li-On X TTL Speedlight - $1,000 Off
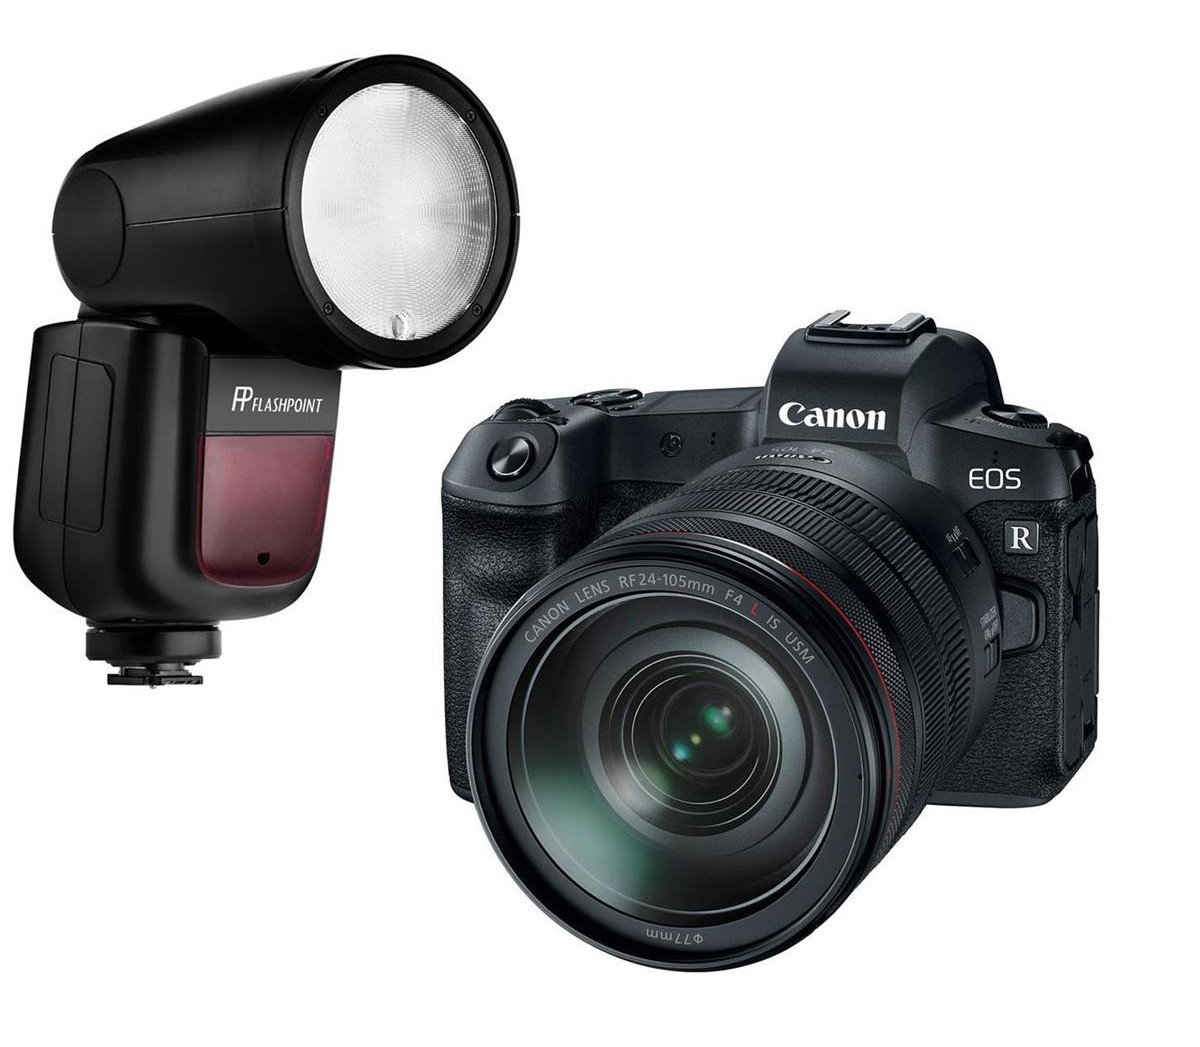
This EOS R bundle would normally set you back a cool $3,399, but you can get it for $2,399 right now!
Get more details on this Canon EOS R bundle
We Recommend
Canon Officially Announces EOS R5 and EOS R6 Full Frame Mirrorless Cameras
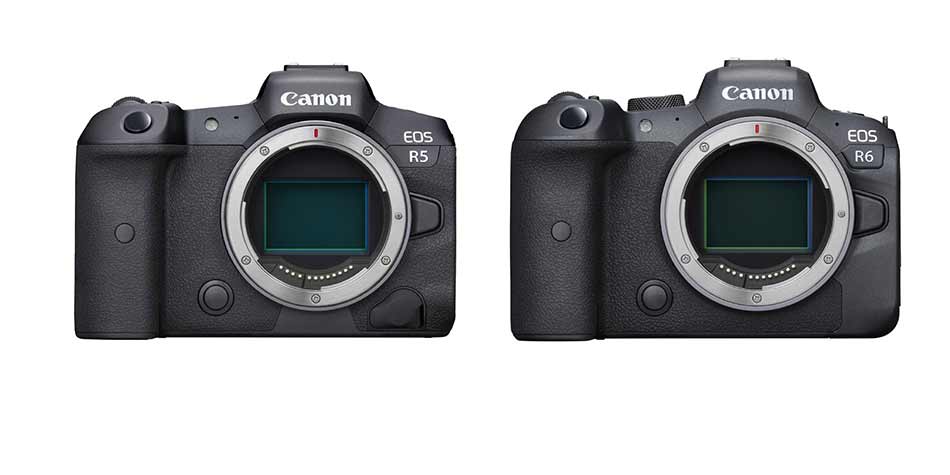
I got up extra early this morning to watch Canon's announcement of the R5 and R6.
It's been a long time coming, and I wanted to see the official specs with my own eyes and get my R5 pre-ordered as fast as possible!
The EOS R5 specs and features weren't really anything new. But there were lots of new details on the EOS R6, which Canon has kept under wraps pretty well for months.
Let's talk about the R5 first.
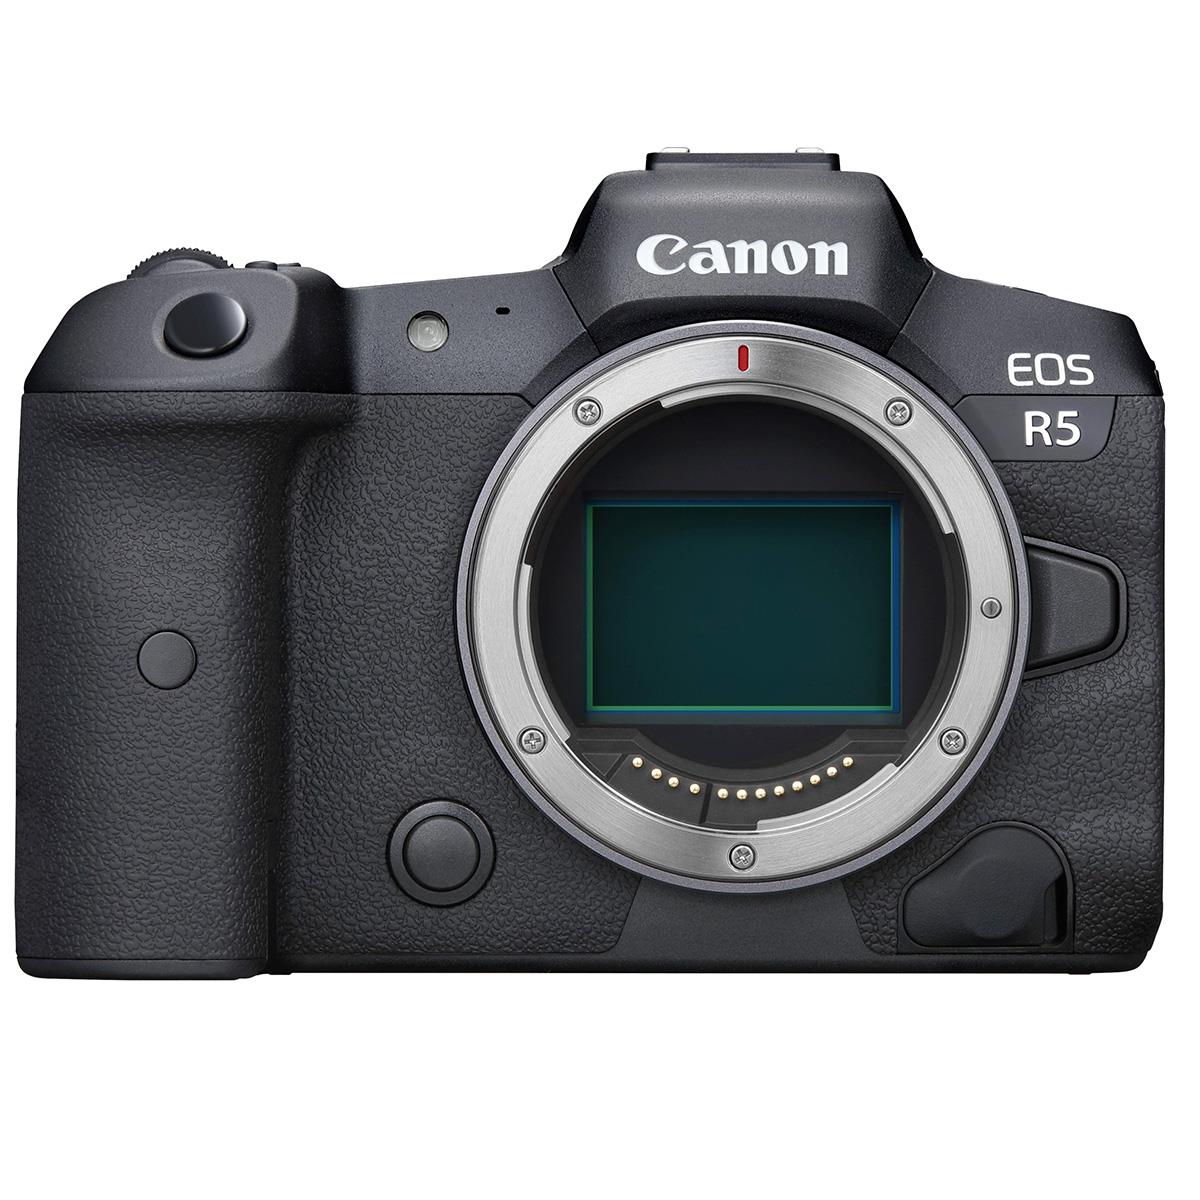
As expected, the EOS R5 sensor is a 45-megapixel unit. It isn't as beefy as Sony's 61-megapixel sensor in the a7R VI, but 45-megapixels will certainly get the job done.
And as rumored, the R5 will be capable of shooting at 12fps with the mechanical shutter and 20fps with the electronic shutter. This is true with both auto-exposure and continuous AF engaged.
Pre-order your Canon EOS R5 now while supplies last!
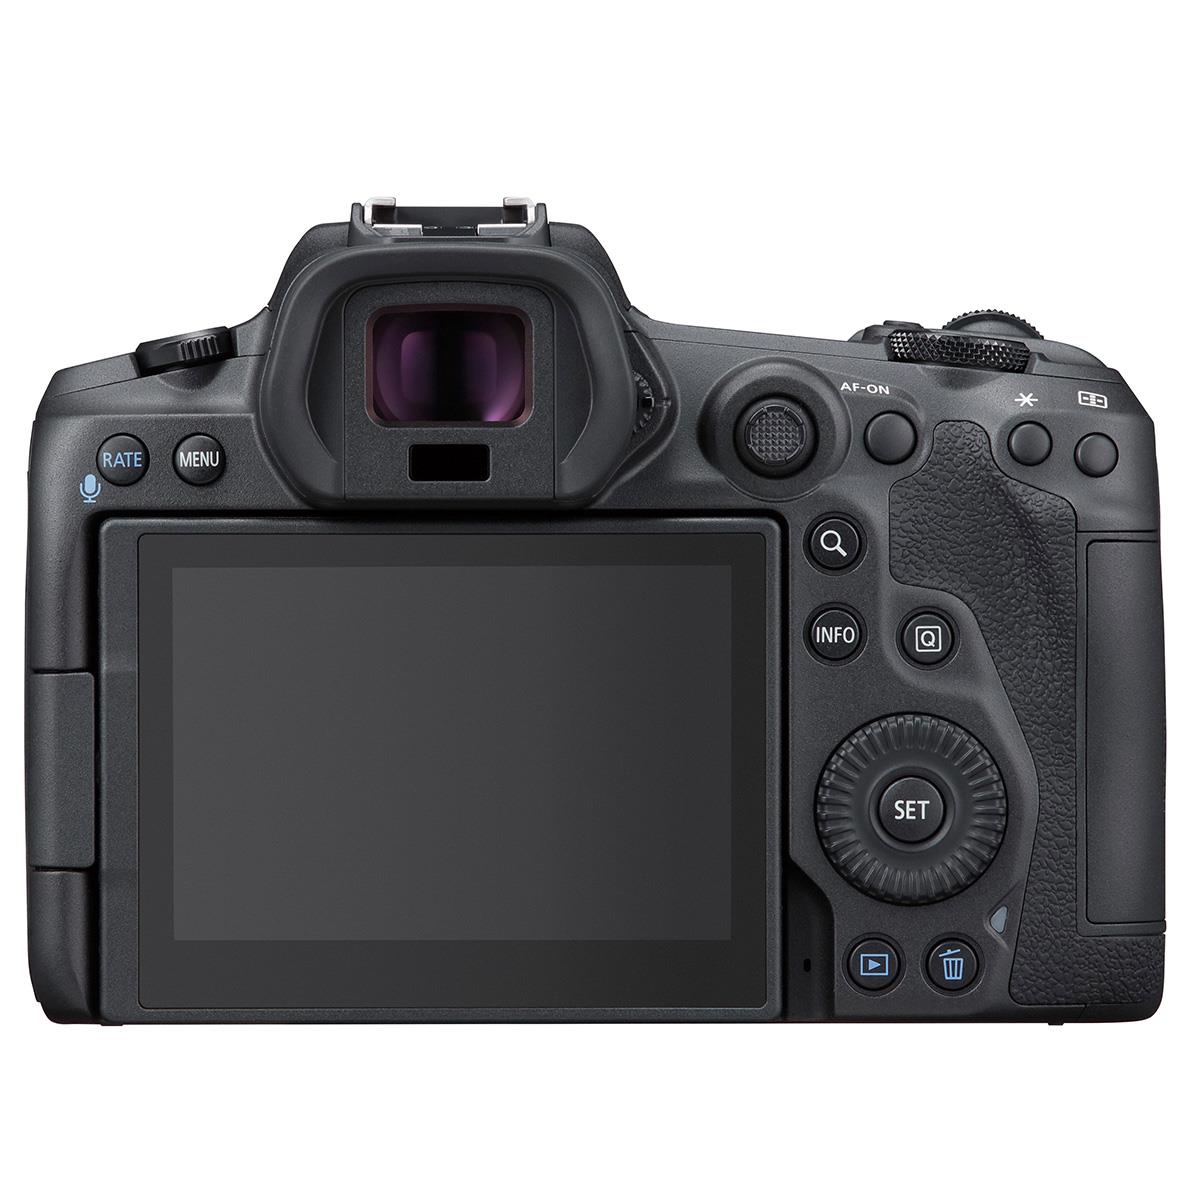
The autofocus system is the all-new Dual Pixel CMOS AF II that has 1,053 autofocus points and offers 100 percent coverage.
Since the R5 sports a DIGIC X image processor, it enables the camera's autofocus system to be more accurate and provide faster continuous shooting speeds.
Additionally, the autofocus system offers improved eye detection over the EOS R, especially if the subject's eyes are small or the subject is further away from the camera. The autofocus system also has face, eye, and head-detection support. Canon claims the autofocus system will work in low light situations down to -6 EV.
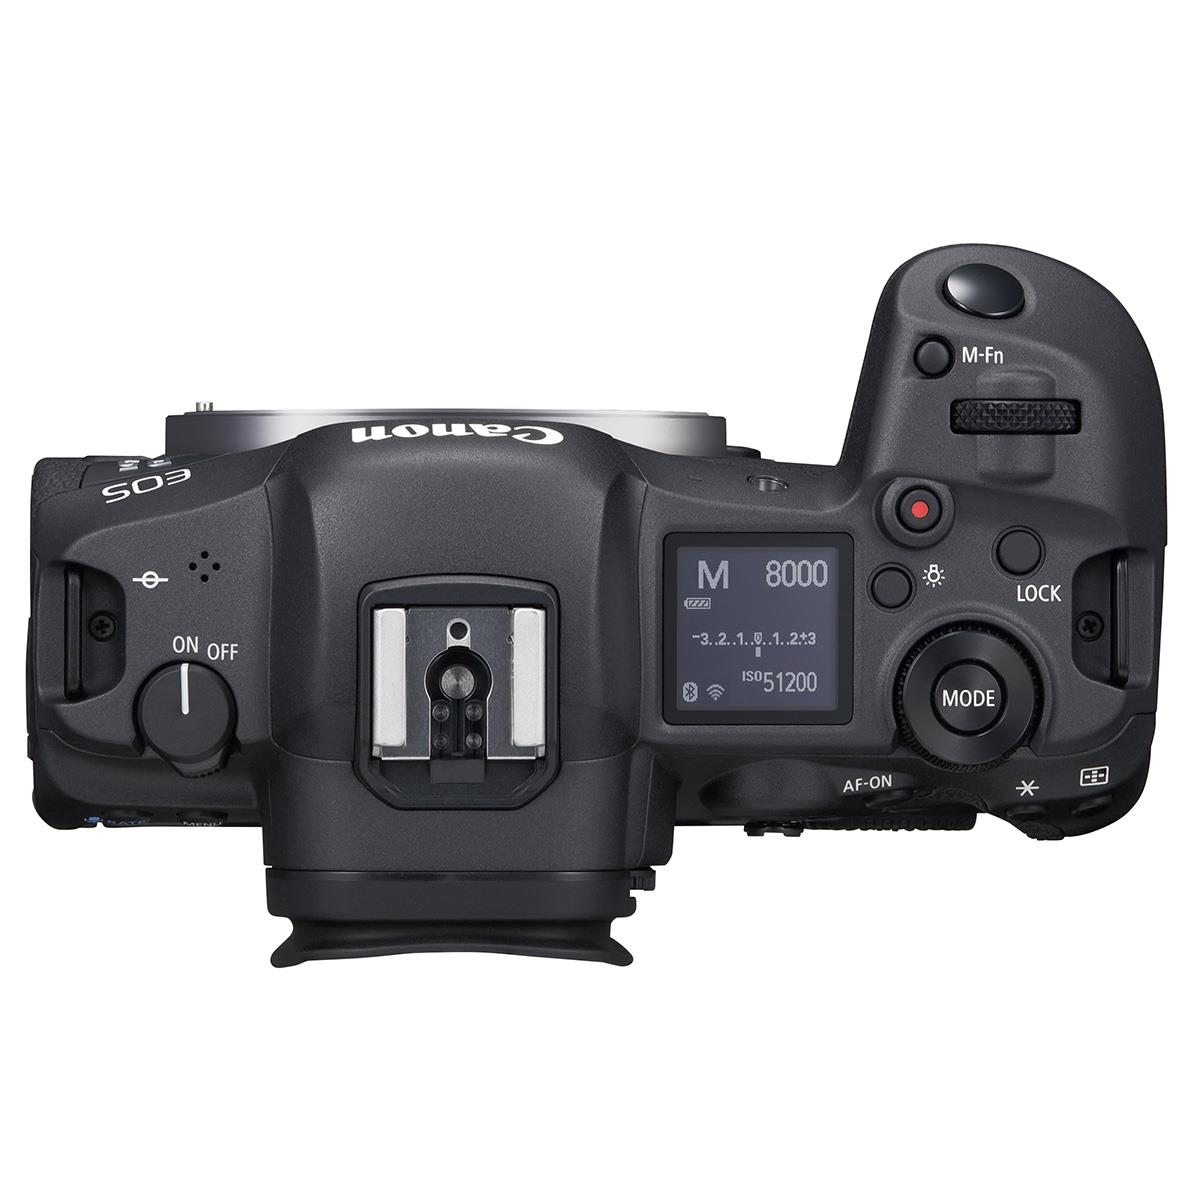
The R5 has a native ISO range of 100-51,200. It's expandable to 102,400.
This indicates good low-light performance, but since the R5 has smaller pixels than the R6, it's safe to assume the R6 will be the better of the two in low-light situations.
Shooting in low-light situations will be aided by the first-ever in-camera stabilization system for a Canon camera. Canon claims the system will give you five stops of stabilization on its own or eight stops when paired with an optical image stabilized lens.
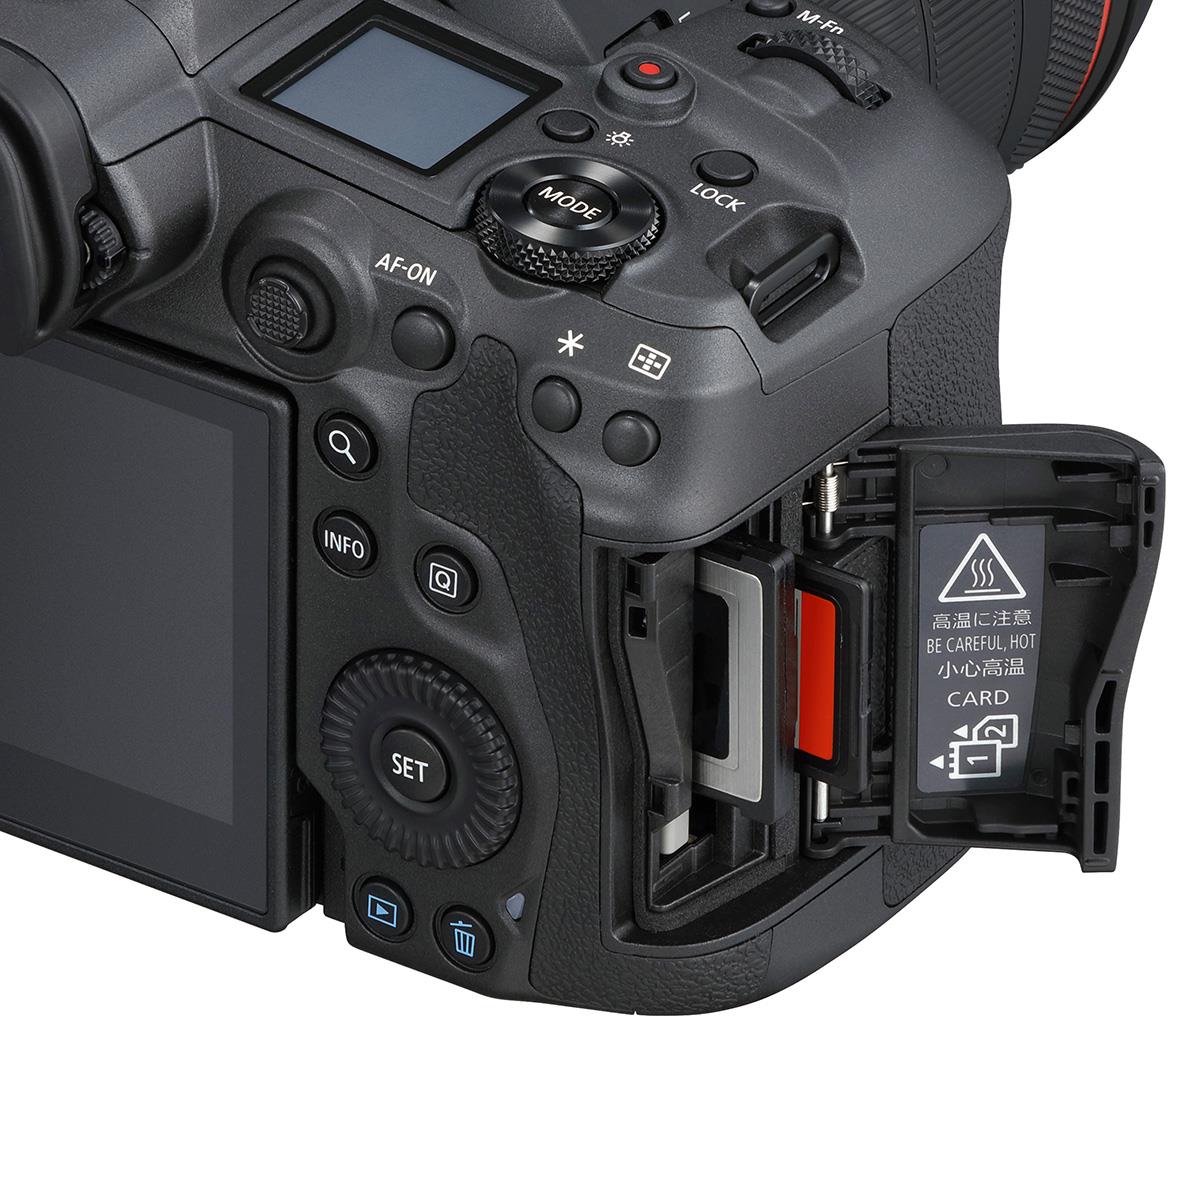
Just like the EOS R, the R5 sports a fully-articulating LCD, though the R5's LCD is higher resolution at 2.1-million dots. The R5's EVF also gets an upgrade with 5.76-million dots of resolution and a 120fps refresh rate.
You'll find two card slots on the R5 (one CF Express and one UHS-II), a microphone jack, a headphone port, and many other goodies wrapped in a weather-sealed, water-resistant, and dust-resistant body that looks more like a DSLR than a mirrorless camera.
The EOS R5 is available for pre-order right now for $3,899 (body only) or $4,999 (paired with an RF 24-105mm f/4L lens).
Editor's Tip: Need a new memory card to harness the power of the R5? I use ProGrade UHS-II memory cards in my Canon EOS R and Canon M6 Mark II, and they have proven to be reliable, blazing-fast cards that get the job done each and every time. When I get my R5, you can bet I'll buy a ProGrade CF Express card to really tap into the blazing speed of the EOS R5!
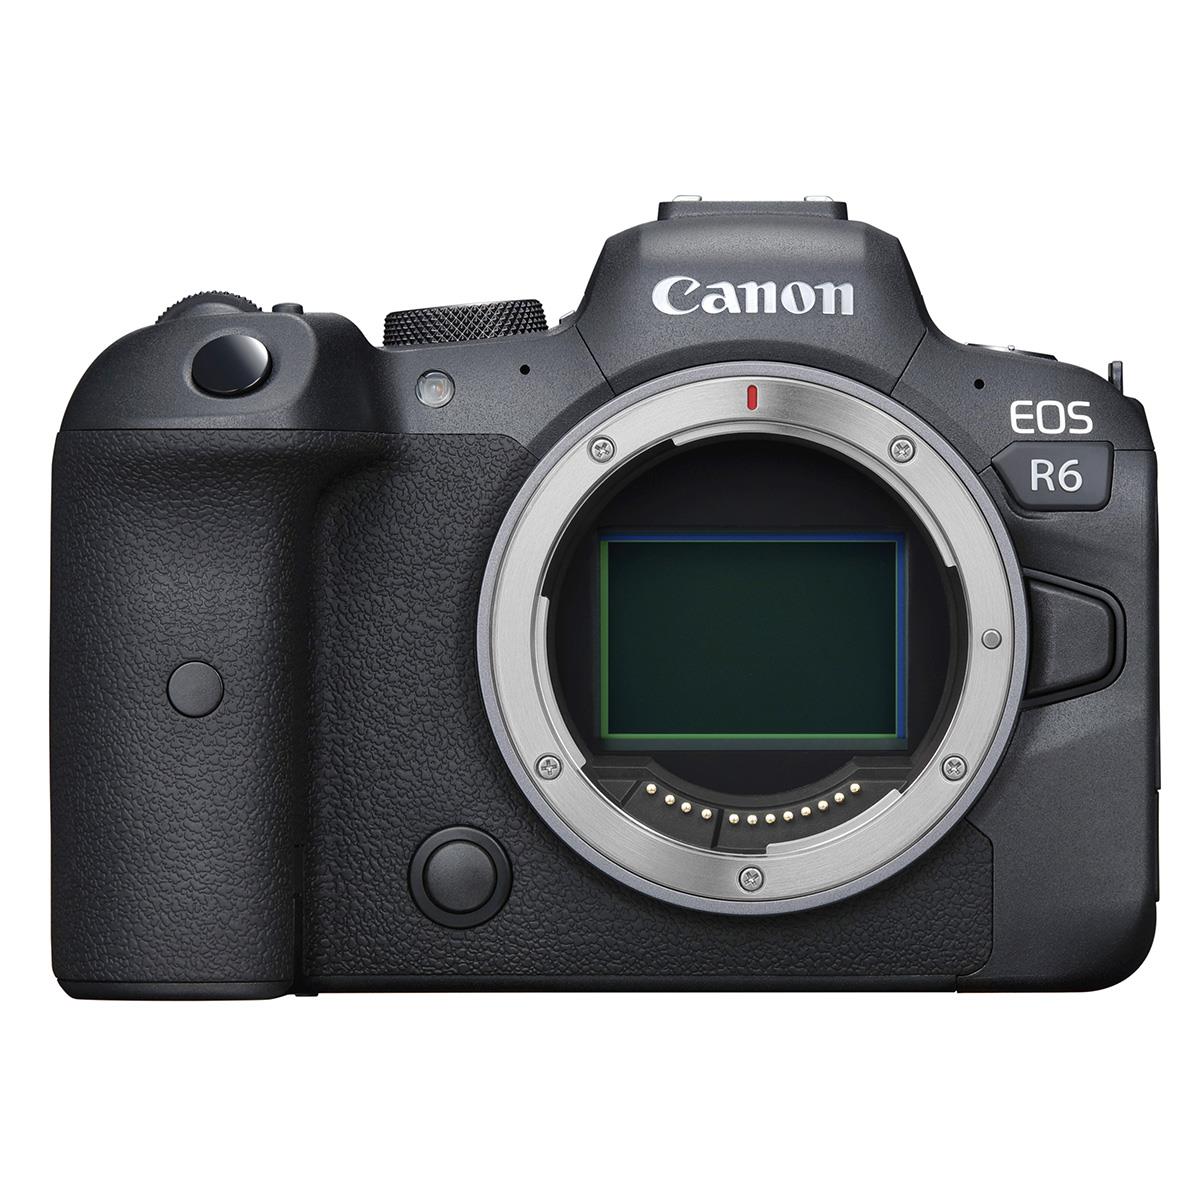
As I noted in the introduction, there were many new details revealed this morning about the EOS R6.
It had been speculated that the R6 would inherit the 20.1-megapixel full frame sensor from the 1D X Mark III, and Canon confirmed as much today.
Supplies are limited...pre-order your Canon EOS R6 today!
The R6 does not offer 8K shooting like the R5, but it does have uncropped 10-bit 4:2:2 4K videos at 60fps as well as 1080p at 120fps.
Since this is a lower price point model, you'll find a lower resolution EVF than the R5, though it still has a very respectable 3.69-million dot resolution. The 3.2-inch articulating LCD has 1.62-million dots of resolution. The other main difference is that the R6 does not have a top LCD panel like the R5 does.
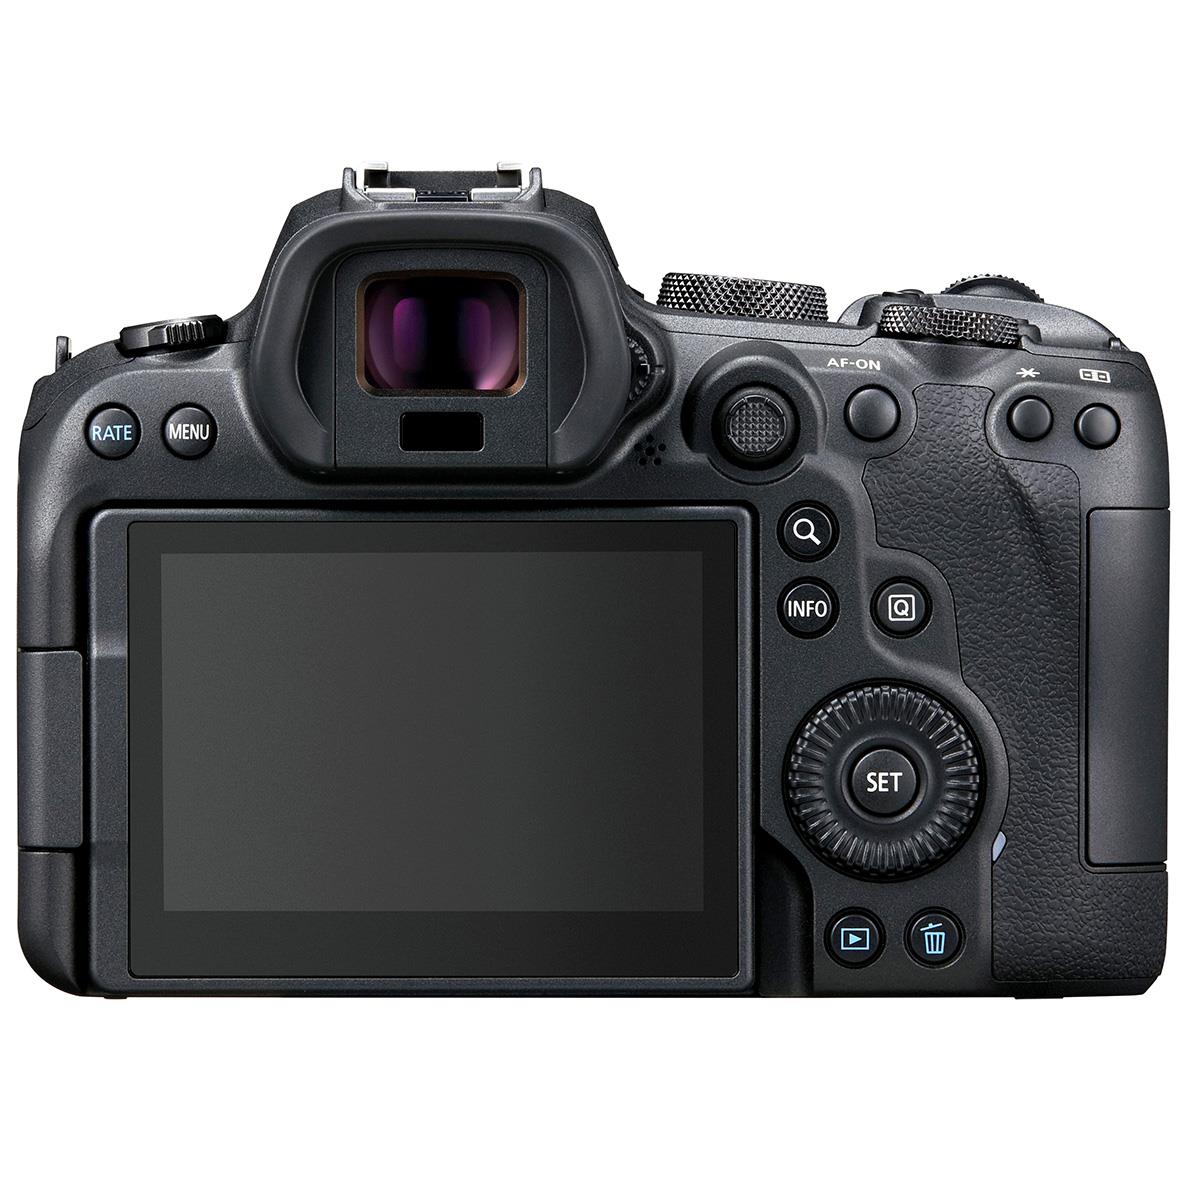
But there are many similarities between these cameras...
The R6 has the same IBIS system and the same DIGIC X processor. You get 12fps shooting with the mechanical shutter and 20fps with the electronic shutter, just like with the R5. There's also WiFi, Bluetooth, microphone and headphone ports, and dual card slots, though the R6's are both UHS-II.
The R6 is also weather-sealed with water and dust resistance.
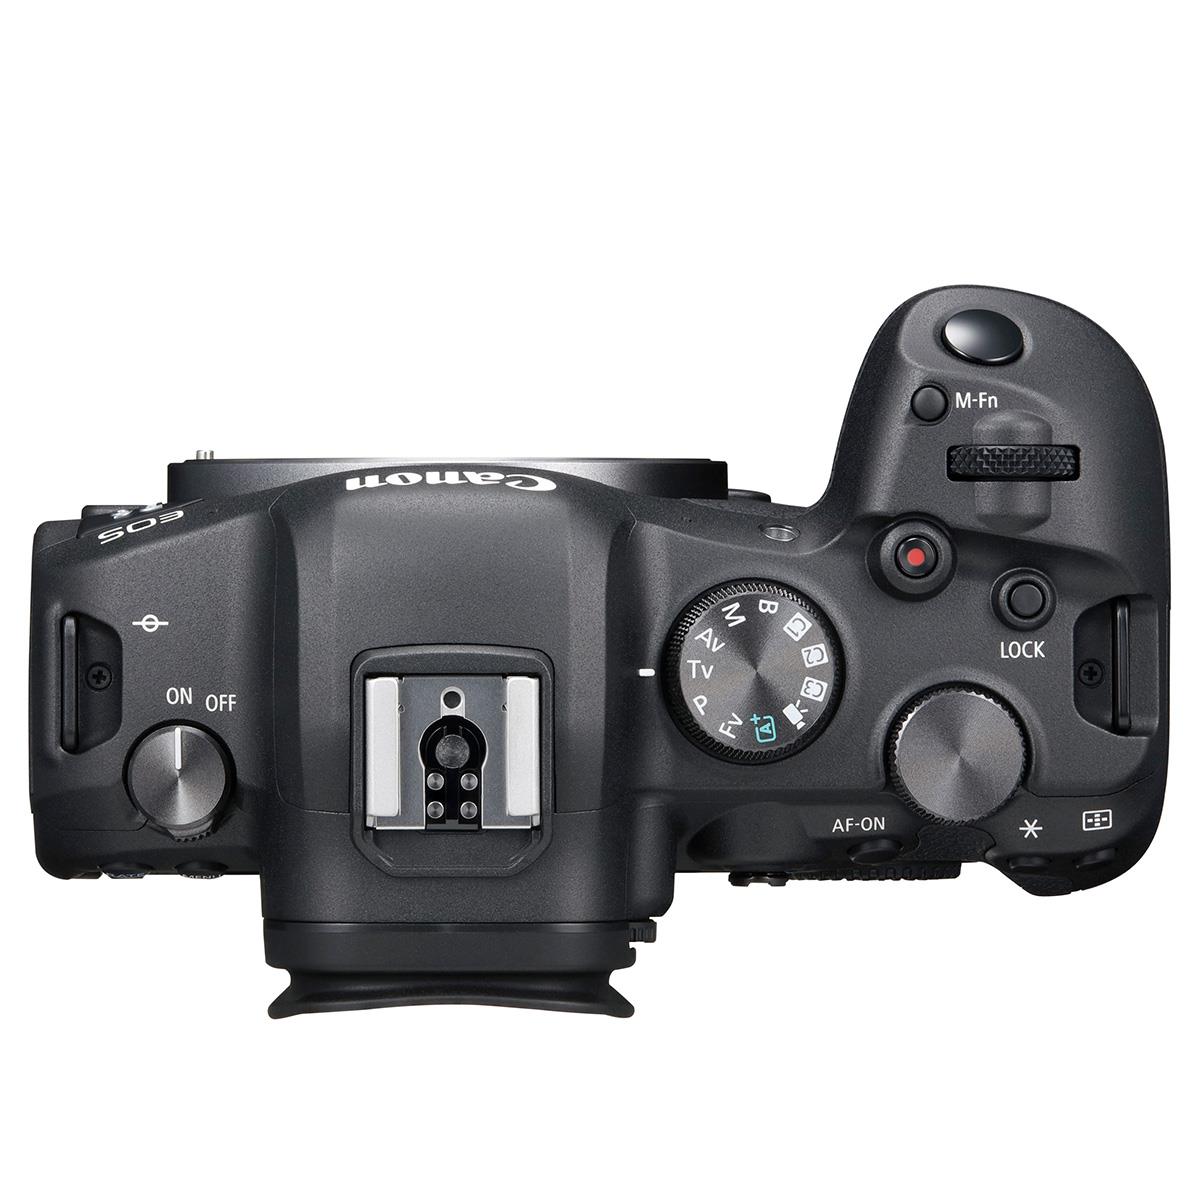
The EOS R6 is very well priced (if you ask me) at $2,500 for the body. You can get a kit with a 24-105mm f/4-7.1 IS STM lens for $2,900 or a kit with a 24-105mm f/4L IS USM lens for $3,600. The R6 will not ship until late August, though.
I don't know about you, but I'm extremely impressed with the specs and features of both of these cameras.
As I said before, I've got my R5 on pre-order, and I can't wait to get my hands on it.
Stay tuned for some detailed, hands-on reviews of the R5 in the next few months!
We Recommend
Canon Rebel SL3 Review
Canon SL3 - EOS Rebel
Canon has just announced the release of the EOS Rebel SL3 and it is advertised as the lightest and smallest model in the EOS series.
The Canon EOS SL3 is aimed at photo enthusiasts who are looking for a compact and relatively cheap camera with all the features one would expect from a DSLR model. Note that this camera has got better image quality than Canon T6 which is a good beginner camera.
In this review, we will focus on the capabilities of this camera, and we’ll start with its primary specifications.
Canon Rebel SL3 - Specs
First of all, the Canon EOS Rebel SL3 offers high image quality because of its 24.1 Megapixel CMOS (APS-C) sensor and DIGIC 8 Image Processor.
This combination of sensor and processor allows a native ISO range of 100 to 25600, which means the camera can make good pictures in different light environments.
Additionally, the camera provides a continuous shooting speed of 5 frames per second, Dual Pixel CMOS autofocus system and 4K video capabilities.
The camera’s specs are not mind-blowing. Although it has a good autofocus system with eye detection, it has only 9 phase-detection autofocus points. Also, Dual Pixel AF is not available in the movie mode and there is a huge 2.64x crop in 4K videos.
However, the Canon Rebel SL3 was not designed as a professional camera and its features are quite decent for an average consumer. After all, the biggest advantage of this camera is a compact design and usability.
Why is this camera great for beginners in photography? Get an answer to this question in the video above by CanonUSA.
Canon EOS Rebel SL3 – Design and Connectivity
The Canon Rebel SL3 weighs only 15.84 ounces which makes it one of the lightest DSLR models ever made. It will feel like a feather in your hand and because of its compact size (4.82 x 3.65 x 2.75 inches), it can follow you everywhere you go.
The camera incorporates an optical viewfinder with 0.87x magnification and a 3.0 inch vari-angle LCD screen (1.04 million dots). It also has a pop-up flash that can be handy if you want to take photos during nighttime. For vlogging, Canon T7i is better because it has got a fully articulated touchscreen convenient for creating vlogs.
Although it is very compact, the camera has a deep grip which allows very comfortable handling.

It is worth mentioning that you should be careful when using the Rebel SL3 in harsh weather conditions. The working temperature range of the camera is 32-104°F, while you should not use it if the humidity is over 85%.
If you are in need of a camera with good connectivity options, you will be satisfied with what the Rebel SL3 has to offer. You can easily share files via Wi-Fi, NFC, and Bluetooth. Also, the camera can be remotely controlled by smart devices.
Canon Rebel SL3 – Price
The Canon Rebel SL3 is expected to reach the stores by the end of April.
At the moment, you can preorder the EOS Rebel SL3 with EF-S 18-55mm f/4-5.6 IS STM Lens Kit for $649.99 ($100 off).
It is available in black or white color.
We Recommend
Check Out These Awesome Rebates From Canon and Nikon

Photo by EXTREME-PHOTOGRAPHER via iStock
Adorama has some smokin' deals right now on Canon and Nikon products.
We're talking savings on dozens of items, of anywhere from $20 up to several hundred dollars off normal prices. PhotographyTalk has done an extensive Canon Vs Nikon camera debate, check it out!
In fact, there are some deals that you can save up to $700!
Here's a sampling of some of the biggest savings...
Canon EOS 80D Bundle - $700 Off

This bundle includes a treasure trove of stuff, including a camera cover, a camera strap, a battery charger, a Rode VideoMic Go, a memory card, and a cleaning kit, among many other goodies.
Normally, this bundle is $1,949, but you can get it for $1,249 through May 31, 2020.
Nikon 24-70mm f/2.8E ED-IF AF-S VR NIKKOR Lens Bundle - $200 Off
If you need to round out your collection of lenses with a fast 24-70mm zoom, this Nikkor lens bundle is a great option. In addition to the lens, you get a lens hood, a soft case, an 82mm filter ket, a lens wrap, a cleaning kit, and more!
Normally $2,096.95, this lens is on sale for $1,896.95 through May 31, 2020.
Canon EOS 6D Mark II DSLR Bundle - $600 Off
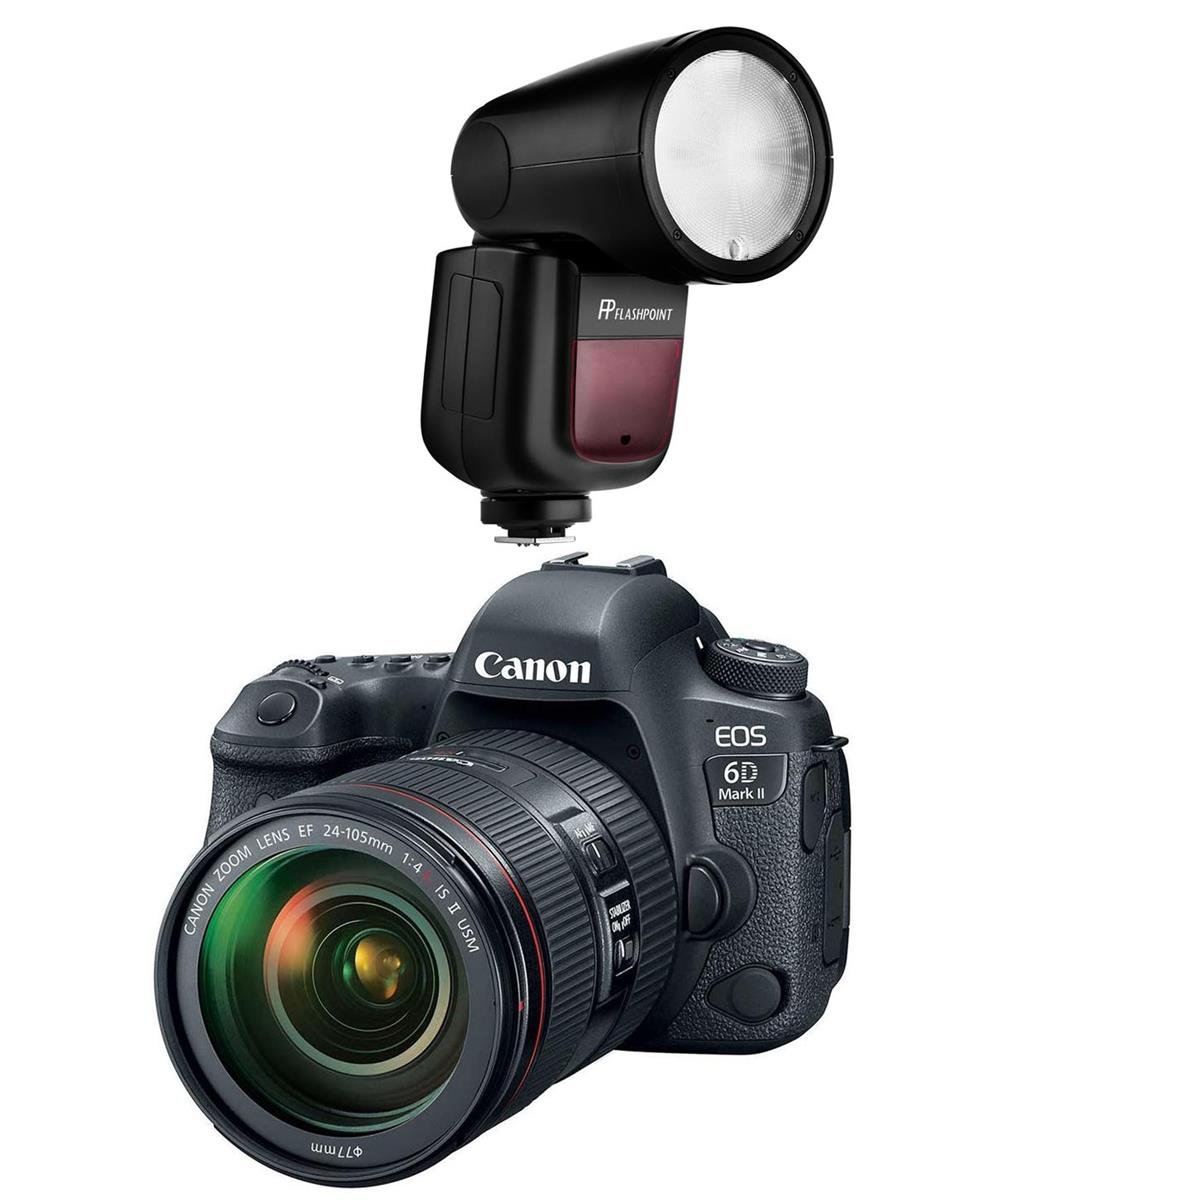
Looking to upgrade to a full frame camera? The Canon EOS 6D Mark II is a great option that's also much more affordable at the moment!
This bundle includes the 6D Mark II body, an EF 24-105mm f/4L lens, and Flashpoint Zoom Li-on X R2 TTL On-Camera Round Flash Speedlight, as well as several other items.
This bundle is normally priced at $2,699, but through May 31, 2020, you can pick one up for $2,099.
Be sure to head over to Adorama to check out all the other Canon and Nikon rebates that are currently available.
We Recommend
Check Out These Smokin' Black Friday Photography Deals

photo byGrafikactiva via iStock
I think we can all agree that 2020 has not been the best of years…
But at least we have what’s looking like an excellent Black Friday for photographers to look forward to.
I’ve put together a quick list of some of the best photography Black Friday deals at the moment. Keep in mind that this is not a comprehensive list and that many retailers have limited stock. In other words, if you see something you like, it’s best to jump on it now rather than later!
Adorama Black Friday Deals
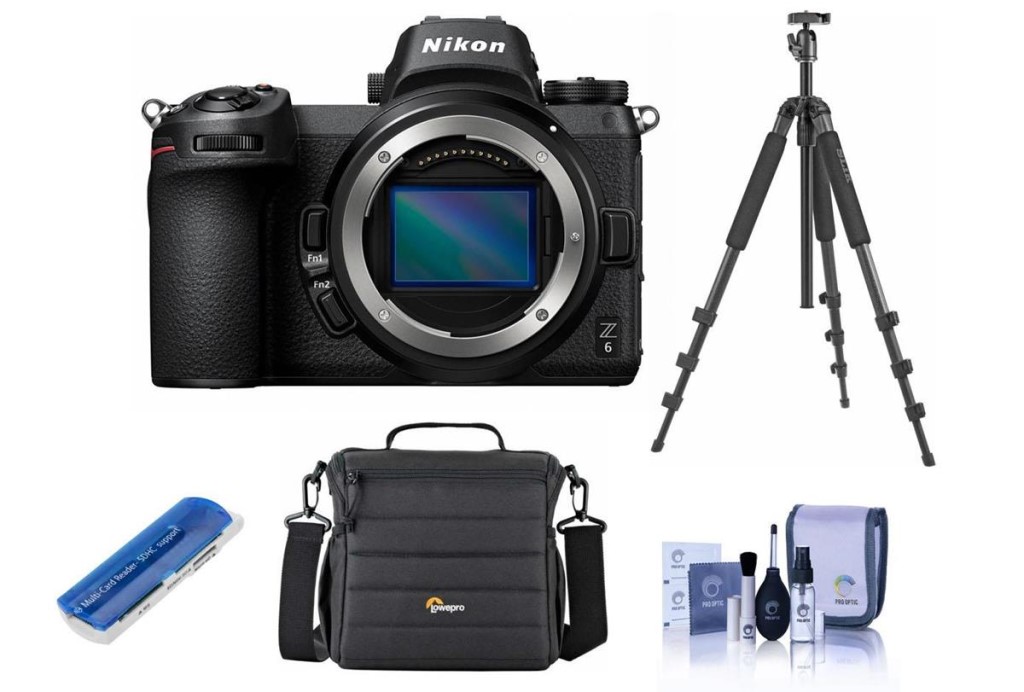
- $600 off Nikon Z6 (this deal, shown above, includes an FTZ lens adapter, a Vanguard Tripod, a Slinger Alpine Shoulder Bag, a ProOPTIC Cleaning Kit, and a Green Extreme USB Memory Stick)
- $500 off Panasonic Lumix G9 (this deal includes a huge accessory bundle, including a Joby GorillaPod 3K kit, a SanDisk 32GB UHS-I memory card, a Peak Design Everyday Sling bag, and more)
- $300 off Sony a7III (this deal includes a Flashpoint Speedlight too)
- $200 off Canon EOS R (this includes a Flashpoint Speedlight)
- $50 off GoPro Hero 9 Black
- $200 off Sigma 35mm f/1.4 DG HSM Art lens for Sony E-Mount
- $500 off Nikon 24-70mm f/2.8E ED-IF AF-S VR NIKKOR Lens (this includes an accessory bundle with a filter kit, a cleaning kit, a lens wrap, and more)
Amazon Black Friday Deals
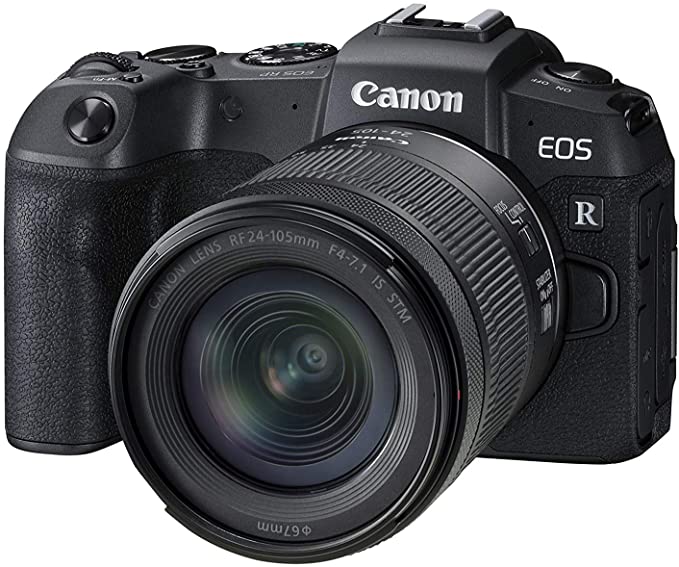
- Up to 34% off Canon cameras and lenses
- Up to 41% off Sony cameras
- Up to 41% off Panasonic Lumix cameras and lenses
- Up to 23% off Nikon cameras and lenses
- Up to 11% off DJI drones
- $60 off ViewSonic VP3881 38-inch UltraWide Curved Monitor
- $70 off ViewSonic VP3481 34-inch Curved Monitor
Nikon Black Friday Deals
Nikon has a wealth of deals on mirrorless cameras, DSLRs, and lenses for both systems. This includes:
- $250 off Z50 two-lens kit
- $400 off Z6 24-70mm kit
- $400 off Z6 body only
- $300 off Z7 body only
- $150 off Nikkor Z 35mm f/1.8 S
- $200 off Nikkor Z 14-30mm f/4 S
- $300 off D7500 18-140mm kit
- $570 off D500 16-80mm kit
- $400 off AF-S Nikkor 14-24mm f/2.8G ED
- $500 off AF-S Nikkor 24-70mm f/2.8E ED VR
Nikon is also offering their online courses for free through the end of the year.
Holdfast Gear Black Friday Deals

Our friends over at Holdfast Gear are kicking off Black Friday with an Early Bird Sale that gets you 20% off straps and other accessories.
Holdfast makes all sorts of high-end gear, including bags, single and dual camera straps, and a host of leather accessories like shoes, wallets, and pen holders, just to name a few.
To score the 20% discount, simply use the promo code EARLYBIRD2020 when you check out.
This is a short, time-limited discount, so hurry over to Holdfast Gear to do some early Black Friday shopping!
MPB Black Friday Deals

You can get an extra 10% off select camera bodies, lenses, gimbals, and stabilizers at MPB through November 30th. MPB has also partnered with One Tree Planted to plant a tree each time someone buys, sells, or trades gear at MPB.com as an added bonus!
Additionally, U.S. residents can score 10% off these camera bodies:
- Nikon D610
- Canon EOS 70D
- Sony Alpha A5000
- Fujifilm X-T1
The sale on these cameras runs from Black Friday through Cyber Monday. Head over to MPB to check out these deals and much more!
HEX Brand Black Friday Deals
Black Friday through Cyber Monday, HEX Brand is offering 20% off, which includes their brand-new Ranger Crossbody Bag shown above.
Like all HEX Brand gear, this new Crossbody bag represents the ideal mix of style and substance.
The exterior of the bag is crafted of Genuine Cordura® and ballistic nylon. Inside is EVA foam padding to protect your camera and accessories. There's also an adjustable padded divider to keep your gear organized.
But don't think that this is a bulky bag. Quite the opposite. Its small form factor hugs your body as you move so it stays out of your way. In fact, it's just 1.3 pounds yet can hold up to 1.5 liters of gear.
Check it out at HEX Brand and see if it's the right bag for you this holiday season!
Other Photography Black Friday Deals
There are TONS of other awesome Black Friday deals for photographers. Here’s a few:
- Up to 46% off at DJI.com
- Up to 40% off paper prints at Artbeat Studios
- 25% off Adobe Creative Cloud for individual subscriptions through November 27th (which includes more than 20 apps, including Photoshop, Illustrator, Premiere Pro, After Effects, and InDesign)
- 70% off Adobe Creative Cloud for students and teachers through November 27th (the discount makes it just $15.99 per month)
- Up to 20% off on Peak Design gear through December 1st (this includes 20% off on Everyday Bags and 10% off on tripods)
- 20% off site wide on orders over $50 at Printique (use promo code BLACKFRIDAY20 at checkout)
Like I said earlier, some of these deals might disappear, and other killer deals might pop up, so keep your eyes peeled and your credit card ready!
We Recommend
Commercial Real Estate Photography 101

Photo by Valeriia Bugaiova on Unsplash
I worked in the real estate photography space for years before I got my first commercial real estate photography gig, and I was nervous.
I wrongly imagined that commercial real estate photography would be similar to other real estate photography, just with a bigger paycheck.
Unfortunately, I had to create a new contract, buy a new lens, and finally contact a lawyer friend to make sure I hadn’t messed anything up along the way.
When I started my commercial real estate photography career I wish I would have known these things.
Table of Contents
- Types of Commercial Properties
- Commercial Real Estate Photography Paperwork
- How to Market a Commercial Real Estate Photography Business
- Commercial Real Estate Photography With a Drone
- Processing Real Estate Images
Types of Commercial Properties

Photo by Orlova Maria on Unsplash
First things first. You need to understand the different types of commercial real estate photography properties, like:
- Restaurants
- Hotels
- Spas or salons
- Office spaces
- Shops or malls
- Public spaces

Photo by Dane Deaner on Unsplash
While there are a lot of physical differences between these types of properties, there isn’t very much you need to change in your routine to shoot them, so long as you keep these two things in mind: showcase the amenities and the entrance.
Potential buyers want to know what this space offers them, and their clients, that other spaces don’t, hence the amenities. They also want to get a feel for the space as quickly as possible, which is where the entrance shot comes in.
Recommended Real Estate Photography Books:
- The Business of Real Estate Photography: A Comprehensive Guide to Starting your own Real Estate Photography Business
- Photographing Real Estate Interiors and Architecture: A Comprehensive Guide to Equipment, Technique and Workflow for Real Estate Photography
Commercial Real Estate Photography Paperwork
photo by Cytonn Photography via Pexels
This is the part of the process that nobody wants to talk about but is most important.
You are going to need a new contract, a commercial model release, a license for use, and a formal quote.
Let’s start with the formal quote, which will be the first document you use in the commercial real estate photography process.
You will have already negotiated your pricing before you get to the formal quote because the formal quote will be what your client will show to his or her boss when trying to decide if they want to go with your business. So, it needs to look professional and be worded professionally.
If you aren’t great with programs like Adobe InDesign, you may want to hire someone to create this contract template for you.
Photo by Kelly Sikkema on Unsplash
You will also need a commercial model release form, which allows your client to share your images with different members of the press for public relations purposes and should be factored into your overall formal quote since your photos very well may end up being used in national publications.
Finally, you will need a license for use, which outlines the ways your client may use your photos, and a contract, which should include information about all of these documents combined in one easy to read document.
Learn More:
- What You Need to Do Before Taking a Single Real Estate Photo
- 3 Real Estate Photography Cameras to Consider for 2020
How to Market a Commercial Real Estate Photography Business

Photo by Christian Lambert on Unsplash
Just like with our real estate photography tips list we made, the number one best way to market yourself as a commercial real estate photographer is to make sure your portfolio is perfect.
However, creating the perfect portfolio should never be an endeavor you face alone because it’s important to get second and third opinions from friends and strangers alike.
Who is your target audience for your portfolio? Do you have enough photographs to break your portfolio down into a few separate portfolios, like a portfolio for hotels and a portfolio for office spaces?
Your portfolio should highlight the ways your photography is unique.

Photo by Domenico Loia on Unsplash
Additionally, if you’re serious about commercial real estate photography you will want to start investing your time online.
You will need a simple, intuitive website that showcases your portfolio and allows clients to contact you, hopefully from multiple pages on the website. You should also include a page where you explain your business and another page where you give some background about yourself.
Your blog should also be housed on your website so that you can draw more people to your website, but in order for this marketing tactic to work, you must be writing a new blog around three times every week to build a readership base.

Photo by Evangeline Shaw on Unsplash
Finally, you will want to start networking with professionals in your area, and if you don’t already happen to know anyone in the commercial real estate space then you can join one of the tens of thousands of real estate networking groups in the world.

Bonus tip: If you’re serious about learning how to market your commercial real estate photography business, you need to do more than read a few articles about it. Real Estate Photographer Pro is an online group of professional photographers who have already learned all of these tips before and can walk you through it.
There’s no point in reinventing the wheel, and nobody understands that like Real Estate Photographer Pro. They have easy to understand videos on all types of marketing, videos on editing, and a Facebook group where you can ask any question you have!
You can also take part in weekly Q&A sessions and learn even more tips and tricks for honing your real estate photography skills. It’s simply a great way to connect, learn, and network !
Commercial Real Estate Photography With a Drone

Photo by Paolo Nicolello on Unsplash
If you’re just entering the commercial real estate photography industry, and I’m assuming you are since you’re reading a 100-level article about the industry, get yourself a drone and learn how to use it.
No other subsection of photography has embraced drone photography like commercial real estate photography has.
Let’s face it, most commercial buildings are just too small to capture from the ground.

Photo by Caleb Semeri on Unsplash
You’ll need to do a few things before you set out for your first drone shoot, though. First, you’ll need to ensure you can make it out to the property on a day and time where the weather will be clear because it would suck to get there and be unable to send up your drone.
You’ll also want to plan the exact shots you want, since camera drones have very limited flight times.
If you’re looking for a recommendation of a great drone that will last you the course of your career, DJI’s Mavic 2 Pro Drone is perfect for you.
This drone features a 20MP Hasselblad camera that shoots 4K video, can handle low light shooting, and can be up in the air for up to 31 minutes at a time, which will give you plenty of time to capture all the footage your clients need.
It’s an investment at $1,729, but what would you expect of a camera drone that can transmit full HD video at distances of up to 5 miles? It’s an impressive price for an impressive camera that is sure to impress your clients.
Learn More:
- Selecting the Right Drone for Your Photo and Video Needs
- Drone Photography Tip: Understanding FAA Rules and Regulations
Processing Real Estate Images

Photo by Zakaria Zayane on Unsplash
Whether you take photos of commercial properties from the ground or the air, you’ll need to process those images for maximum impact.
One of my favorite real estate-specific processing programs is Photomatix.
It works as a standalone program or as a plugin for Lightroom (or Capture One, if that’s your program of choice).
It comes with 6 HDR styles, over 70 HDR settings, and 40 HDR presets, all of which enable you to create beautifully exposed images of commercial properties inside and out.
There’s even a batch processing feature to speed up the process and a variety of tools - like advanced ghost removal - that help you clean up your images and put the best foot forward for each commercial property you photograph.
Processing your images is not an option here - it’s a must if you want to impress potential buyers!
Learn More:
We Recommend
Drone Photography Tip: The Best Settings for Taking Incredible Photos

Photo by Iewek Gnos on Unsplash
Drones are amazing photographic tools capable of creating outstanding images and videos.
At the heart of a drone is a camera, so users will want to think about what are the proper camera settings for drone photography to get the most pleasing shots. PhotographyTalk.com has a great article about real estate drone photography showing good tips about using drone for real estate photos.
Let’s have a look at some essential settings with which you need to be familiar.
Table of Contents
- Two Types of Drone Uses
- Drone Photography Settings - Pro
- Drone Photography Settings - Fun
- Videography Settings - Pro and Fun
- Most Valuable Drone Accessory - ND Filters
- Pro or Fun, It’s All Fun!
Two Types of Drone Uses
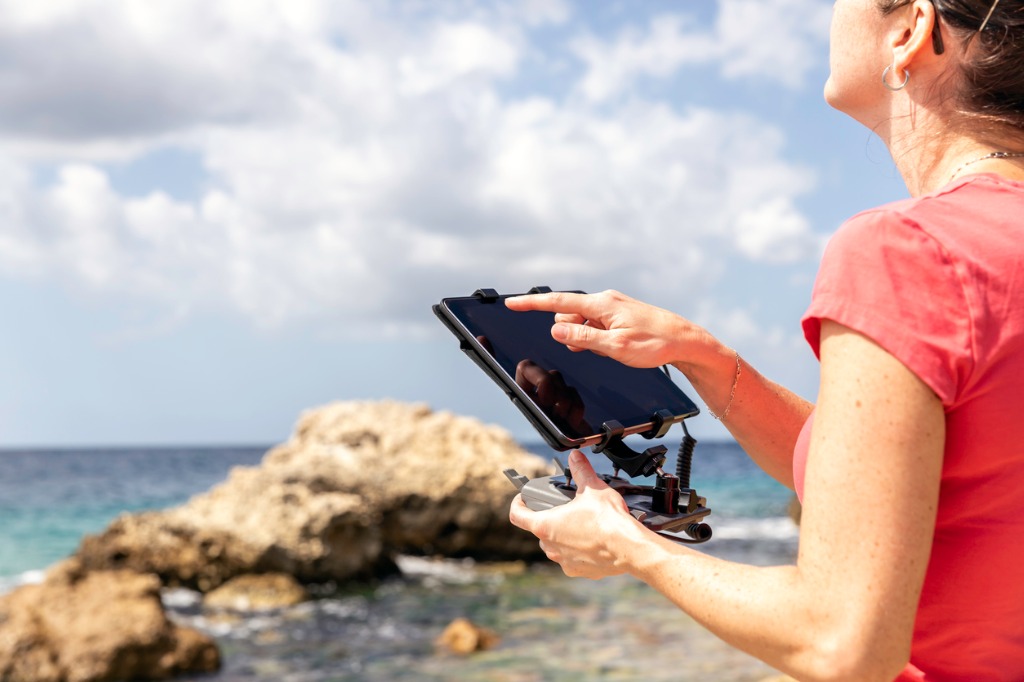
photo byOnfokus via iStock
There are two types of people who are using drones. One is an advanced photographer or videographer using the drone for all sorts of photos and videos including paid gigs. Another is any level of photographer who wants to use the drone for fun and is looking for drone photography tips.
Either of these two types of drone photographers can be further categorized into those primarily desiring still images and others more into video than still pics.
Obviously, there will likely be a lot of overlap among these types. An advanced still photographer can just be playing around with drone video or an amatuer videographer can use their drone for paid still photography jobs. And any mix in between. Drone photography settings will change depending on which type of drone you are on any given day.
Recommended Photography Books
- National Geographic Photo Basics: The Ultimate Beginner's Guide to Great Photography
- Photography: The Definitive Visual History
- Read This if You Want to Take Great Photographs
Drone Photography Settings - Pro

Photo by Tyler Casey on Unsplash
First up, we’ll examine some pro level still photography drone camera settings. For the purposes of these drone photography tips, we’ll standardize on one current and very popular drone, the DJI Mavic 2 Pro. We got ours from Adorama, so we’re sure it’s got a legit USA warranty and all the items that are supposed to come in the box.
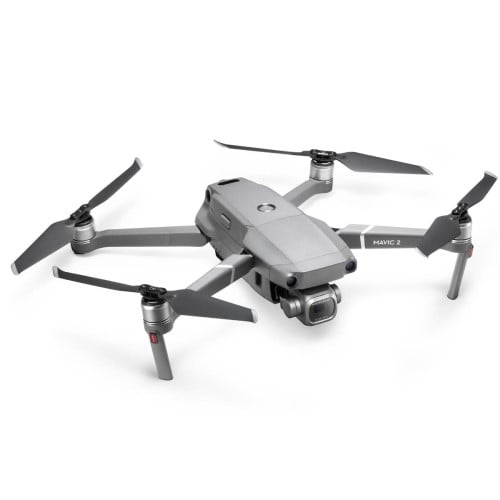
The DJI Mavic 2 Pro is one of the better drones on the market that still is pretty friendly for most serious photography budgets. It has a 20MP 1” type sensor Hasselblad camera with a moderately wide angle lens. Video capability is 4K 10-bit HDR plus some lower resolutions. Maximum flying speed is about 45 MPH and battery life is up to 31 minutes.
You could allow the camera to set everything automatically. Many pro level DSLRs and mirrorless cameras have full auto modes that are capable of figuring nearly exposures, but the realities of drone photography pretty much require exposing manually.
A good place to start is with the image file setting. For pro or advanced levels, record in the RAW/DNG file mode. As with all our other cameras, the amount of exposure information in a RAW file far surpasses other file types found in most cameras. This gives you a whole lot of leeway to enhance in post processing. Get more details about camera settings on the Mavic Pro 2 in the video above by Tom’s Tech Time.
Keep the white balance in auto. Since you’re shooting RAW, your imaging program will let you set the proper color profile for the scene.
Shutter speed, lens aperture, and ISO, the exposure triangle, are pretty easy to figure out for most daylight conditions. A good place to start is ISO 100, shutter speed of 1/60th, and an f-stop of f/4.0. Even with the most stable of drones, you will want to keep your shutter speed fairly high.

Photo by Juan N. Gomez from Pexels
Then, review your photos. Some regular photography tutorials will preach against “chimping” or viewing the exposed image on camera (or live monitor), but it is a valid method to use in certain situations. This is definitely one of those situations.
If the exposure is too light or dark, adjust the exposure appropriately. Start with adjusting the lens aperture, then ISO if the exposure is still out of range, lastly adjust the shutter speed. If the image is still too dark, it may not be a good day for drone imagery. Or really make use of the RAW data to pull out shadow detail. If the image stays too bright, add on an neutral density (ND) filter to compensate.
Since this is a flying machine, one of your camera settings for drone photography will be flight mode. You want the most stability possible out of any drone. On the Mavic 2 Pro, that mode is labeled “T” for tripod. One of the best drone photography tips you can learn is to use the “S” or sports mode to fly into position, but always switch to a stability mode like “T” when actually taking pictures or shooting video.
Drone Photography Settings - Fun

Photo by The Lazy Artist Gallery from Pexels
Almost everything listed above still works, simply adjust a couple of key settings. Set your image file recording to JPG (Jpeg). A JPG file is a compressed file, processed by the camera, that can be used straight out of the camera if desired. So, that eases up any work to be done for casual or fun style imaging.
The other setting to change is white balance. Since you’re shooting in JPEG, you should assign one. Leaving it on auto could give you settings all over the map for a lot of drone uses. Daylight or cloudy are two common options if auto isn’t giving good results.
Keep using the manual exposure triangle settings and ND filters as listed above. It’s easy enough to do since you are reviewing your shots to check exposure.
Videography Settings - Pro and Fun

Photo by Rayyu Maldives photographer on Unsplash
When shooting video, start out staying with the same exposure triangle settings as with still imaging. Adjust up or down as needed, first with f-stop, then with ISO.
For video recording mode, use the highest quality available for your particular camera. On the Mavic 2 Pro, that’s 4K HQ. No need to go lower for extended recording times since the drone flight time is limited. Use 30 FPS instead of 24 FPS to help smooth out flying irregularities.
Pro users may want to synch FPS if using drone footage for B-roll, but 30 FPS will edit in smoothly for most applications. Get more pointers on camera settings for video in the video below by Drone Film Guide.
White balance should be set to something besides auto. Auto white balance and extended video footage will give you annoying and unexpected shifts in colors. Custom is a good option for pro users. Fun users can choose daylight or cloudy.
The color profile setting works best as either Normal or DLog-M. DLog-M lets you adjust color profile in editing, so that would be the setting most common for pro uses, but there’s nothing wrong with the normal setting.
Video encoding should be the newest available, style setting can be adjusted as you see fit. The one style setting I foresee most drone users changing would be contrast. Adjust incrementally until it suits your own personal style or brand.
Most Valuable Drone Accessory - ND Filters

Since the exposure triangle options are a little bit limited for drone photography and videography, having a good set of high quality ND filters will let you shoot or film in a wide variety of brightness situations.
The Polar Pro Mavic 2 Cinema Series from Adorama for the DJI Mavic 2 Pro cameras is an outstandingly good choice for drone ND filters.
Obviously, the ND filters will bring down levels that are too bright. If the levels are still too dark after making all the adjustments you could, maybe it’s time to invent a usable LED light for drones. Any inventors and investors out there?
Pro or Fun, It’s All Fun!

Now that you have some experience flying, know the do’s and don’ts of drone flying, are properly registered, and have a good idea of what settings to use, you are all set to capture high quality images and video footage.
Remember, even pros can have fun when using a great drone for photography. Likewise, even amatuer photgraphers can capture professional level results from the fantastic drones available now.
We Recommend
Drone Photography Tip: Understanding FAA Rules and Regulations

Photo by Marin Tulard on Unsplash
How are you liking your new drone? Or perhaps you’re considering either upgrading your current drone or getting into drones as a beginner. Whichever describes your situation, you will need to know the FAA rules for drones as well as how to fly a drone safely.
We have some drone photography tips explaining some of what you need to know to stay within regulations and restrictions concerning FAA rules for drones.
What Is Required?

Photo by Harry Cunningham on Unsplash
The FAA requires that drones should be registered and also that they are operated within certain restrictions and guidelines. This is true regardless of whether you will be using your drone for profit or not.
Recreational fliers are registered under the guidelines covered by what was formerly called Section 336 and is for fliers now labeled Recreational Flyers and Modeler Community-Based Organizations.
A separate registration is called Part 107 and is required for anyone making money off of their drone use. These users are labeled Certified Remote Pilots, including Commercial Operators. There are some very important distinctions between these two types of users. To make sure you operating legally, be sure to know what type of registration applies to your drone flying.
How To Register Drones

Photo by Helloquence on Unsplash
hear two questions come up most frequently about the FAA and drones. One is “do I have to register my drone?” The answer for that query is yes. You can cause yourself all sorts of problems if you decide to skip this step.
The next question is about how to register my drone with the FAA. There are two ways to register. You may submit a paper application or you can choose to register online. If you are filing under Part 107, you will also have to pass a test administered by the FAA. There will soon be basic testing for recreational users as well according to the FAA website about drones.
Besides the initial testing and registration, there will be periodic renewing of certificates and perhaps more training and testing required. Flying a drone has all these guidelines and requirements because of the hazards involved and because of the potential for abuse.
What Drones Need Registration?

Any drone that is over 0.55 pounds but less than 55 pounds and are flown recreationally or for certain commercial activities must be registered. It’s a good idea to keep up to date with government rules, nationally and locally, so you are within the bounds of what is acceptable.
As a drone photography tip, let’s look at two different drones you may have in mind and see which registration, if any, applies to them.

The DJI Mavic 2 Zoom drone (shown above) is a full featured but relatively lightweight drone with a zoom lens and video recording built in. It weighs in at just a few grams under 2 pounds. That makes it over 0.55 pounds but nowhere near 55 pounds. Does it need to be registered? Absolutely yes.

Another DJI drone, the DJI Mavic 2 Pro (shown above), is marketed towards advanced users and professional photographers and videographers. It has a Hasselblad camera and lens for ultra high resolution imaging and video. It weighs about 2 pounds too, so it definitely needs to be registered.

So, which registration applies? Does the DJI Mavic 2 Pro have to be filed under Part 107 since it’s considered a pro camera drone? Should my new DJI Mavic 2 Zoom be listed under former Section 336 since it’s not labeled a pro tool?
Well, both of those questions are actually misleading. It isn’t the drone that determines what type of registration it’s the intended use of the drone. If you are using your Mavic 2 Pro merely for your own personal enjoyment, it would be a recreational license. If you use your Mavic 2 Zoom to create B-roll video for a project that makes you money, it’s a commercial license.
If you get confused over the distinctions, check the FAA drone website. Basic rule of thumb is if it makes you money or you intend for it make you money, file as a commercial operator.
How To Fly a Drone Safely

Photo by Kaleb Kendall on Unsplash
There are a lot of do’s and don’ts concerning safety and privacy with drone operation. Check our other drone articles listed under the Learn More heading for some specifics.
The main thing is, operate your drone safely and within the law. If you do that, you have a greater chance of having a pleasant outing and getting nice photos and videos!
We Recommend
Drone Safety: What You Need to Know

Photo by The Lazy Artist Gallery from Pexels
Drones are one of the best new things to come to amatuer and pro photography in recent years. If you have been enjoying drone photography for a while or have just started to use your new drone, some drone safety tips may be helpful for you.
Before You Start

Your new drone is an amazing tool. Looking at two of the current drones from DJI, the DJI Mavic 2 Zoom and the DJI Mavic 2 Pro, you find several incredible capabilities and features.
The DJI Mavic 2 Zoom has a 12MP camera for video or still imaging with a 4X optical zoom lens, a top speed of over 45mph, a range of transmission and control from 5 miles away, and can fly for over 30 minutes on one charge.
If you picked up the new DJI Mavic 2 Pro, you will enjoy one of the best cameras on any drone, the 20MP Hasselblad L1D-20c gimbal camera, with a 1-inch CMOS sensor, Hasselblad’s Natural Color Solution technology, an aperture range of f/2.9 to f/11, and an ISO from 3200 to 12,800. The Mavic 2 Pro boasts similar range, speed, and flight times as the Mavic 2 Zoom.

With those features and capabilities, you want to be able to safely operate your new drone for a long time. First steps include proper training, licensing, and registration. After those basics are taken care of, the next step is to learn how to fly a drone safely.
Recommended Drone Photography Reading:
- Drone Photography Basics: Your Guide to the Camera in the Sky
- Drone Photography Explored: Beautiful Drone Photography
Learn to Operate Your New Drone
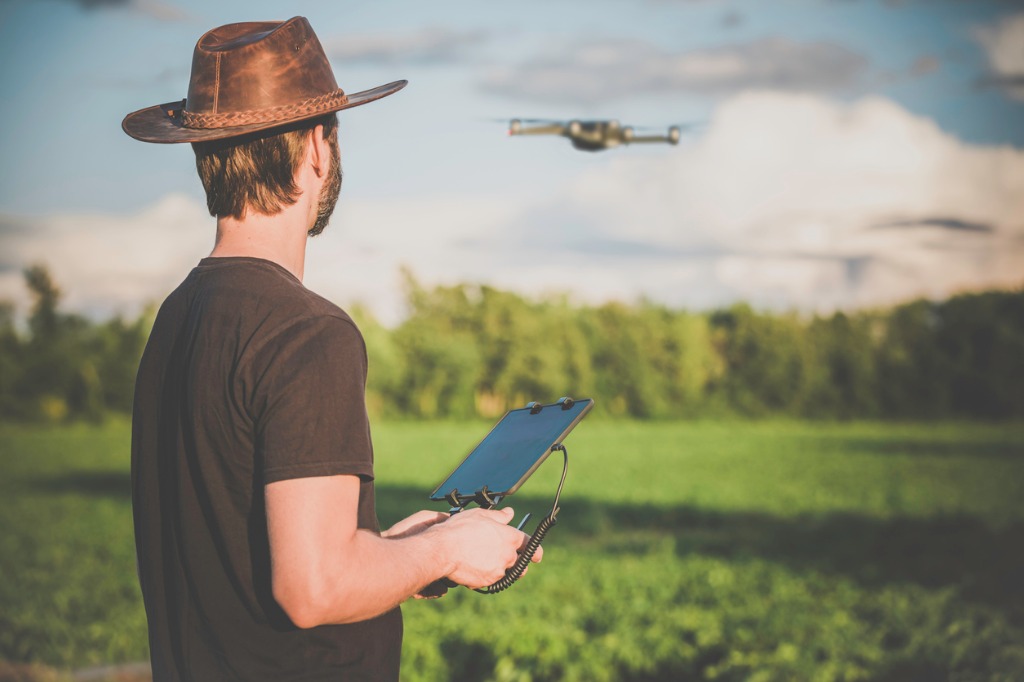
photo by Onfokus via iStock
DJI has an excellent page of video tutorials and guides. In addition to the video guides, DJI has a forum for questions and feedback. Many of the better drone makers have similar support.
We also have a number of tutorials for beginner drone pilots. See the Learn More links below for some introductory tips for flying your drone safely.
Check the Battery

photo by Scharfsinn86 via iStock
Now you’re ready for your first actual flight. Proper drone safety includes all the preflight prep. You want to ensure the battery is fully charged. You will be testing out your new drone for a while, so having a full charge is important to get used to the drone.
Though 30 minutes is a great flight time for a drone. That ½ hour will fly by very quickly as you examine all the controls and functions.
Of course, when actually flying for a project, you also want a full battery charge to maximize how much video or how many images you can gather. You’ll also want to have a spare battery or two on hand that are fully charged, that way you can extend the time you can actually have the drone in the air.
Check all the Pieces

Drone safety can be thought of in two ways. Protecting yourself and others from harm and protecting your drone. Protecting yourself from harm mostly involves not letting the swiftly moving propellers impact you. They really do spin quite fast.
Most drones have removable propellers. They are removed either for storage or for replacement. Drone safety suggests you should double check that the propellers are properly attached. Besides injury to you, if the propellers come off in flight, you could lose or break your drone.
Set the Return Home Feature

Photo by Peter Fazekas from Pexels
At the start of each drone flying session, check that the return home function is properly set and that the built-in compass and GPS are calibrated.
Then give it a flick of the switch or toggle the button, and see if it does what the tutorial says it should. If not, you’ll need to consult the owner’s manual for your specific drone.
Practice in an Open Area

Photo by Stephan Müller from Pexels
For your first outdoor test flight, or for testing out new techniques or features any time thereafter, it’s good practice to choose an open area without obstructions that could get in the way. An open field is preferable to an apartment courtyard, for example.
The more obstructions there are, the more likely you could fly your new drone into them as you test out its features and your skills. Plus, it gives you the opportunity to observe exactly how you’re affecting the drone with the controller.
Post Flight Drone Safety Tips

photo by golubovy via iStock
Drone safety doesn’t end when the flight ends. Some things need to be taken care of properly afterwards, too.
It may sound too obvious to be a real drone safety tip, but you want to definitely turn off your drone after flying. In fact, best drone safety practice is to turn it off before you shut off the remote controller. If you turn off the remote before switching off the drone, there is a chance of accidental uncontrolled flight.
Right after the flight, the rechargeable battery is going to be very hot. Instead of charging the battery after flight, you might want to develop the habit of waiting for recharging until you need to use the drone again. If nothing else, allow sufficient time for the batteries to cool before charging.
Store Your Drone Properly

photo by gorodenkoff via iStock
Our final drone safety tip concerns storage. Some people keep the box it came in for as long as it lasts, using it for storage and transport. A better solution is a dedicated bag or case optimized for carrying a drone. I like to keep mine in a protective bag designed for photographic equipment.
By observing these drone safety tips, you help ensure that your new drone will perform optimally each time you take it out for flight and imaging.
We Recommend
Filmmaking With the Nikon Z6 and Nikon Z7
 Photo by Patrick Donnelly on Unsplash
It’s hard to believe that not all that long ago, digital cameras were just digital cameras with no video capabilities.
I remember being blown away when HD video was added to many DSLRs. And now, here we are discussing the 4K UHD video features of two very capable Nikon cameras. If you missed it, I have a complete Nikon Z7 review that dives deep into the features, performance, image quality, and other important factors of this camera. If you want a broader view of the Z7’s capabilities, have a look at that.
You can learn more about the Z6's other features in my Nikon Z6 review.
I’ve said it before, and I’ll say it again - videography is the new still photography. I’m not saying that video has usurped the importance of photography, but it is certainly a more important skill now than ever before, especially for professional photographers.
With that in mind, here’s a quick overview of filmmaking with the Nikon Z6 and Nikon Z7.
Nikon Z7 and Nikon Z6 Common Video Features
 Nikon Z7
There are a few things these cameras share in common on the video front.
For starters, both the Z7 and Z6 have the exact same body and the exact same grip. From a handheld shooting point of view, they are evenly matched in terms of comfort and usability.
Nikon seems to have prioritized easy handheld recording given the button layout of both cameras.
More specifically, the video record button is placed at the top of the grip so you can easily start and stop recording with your pointer finger.
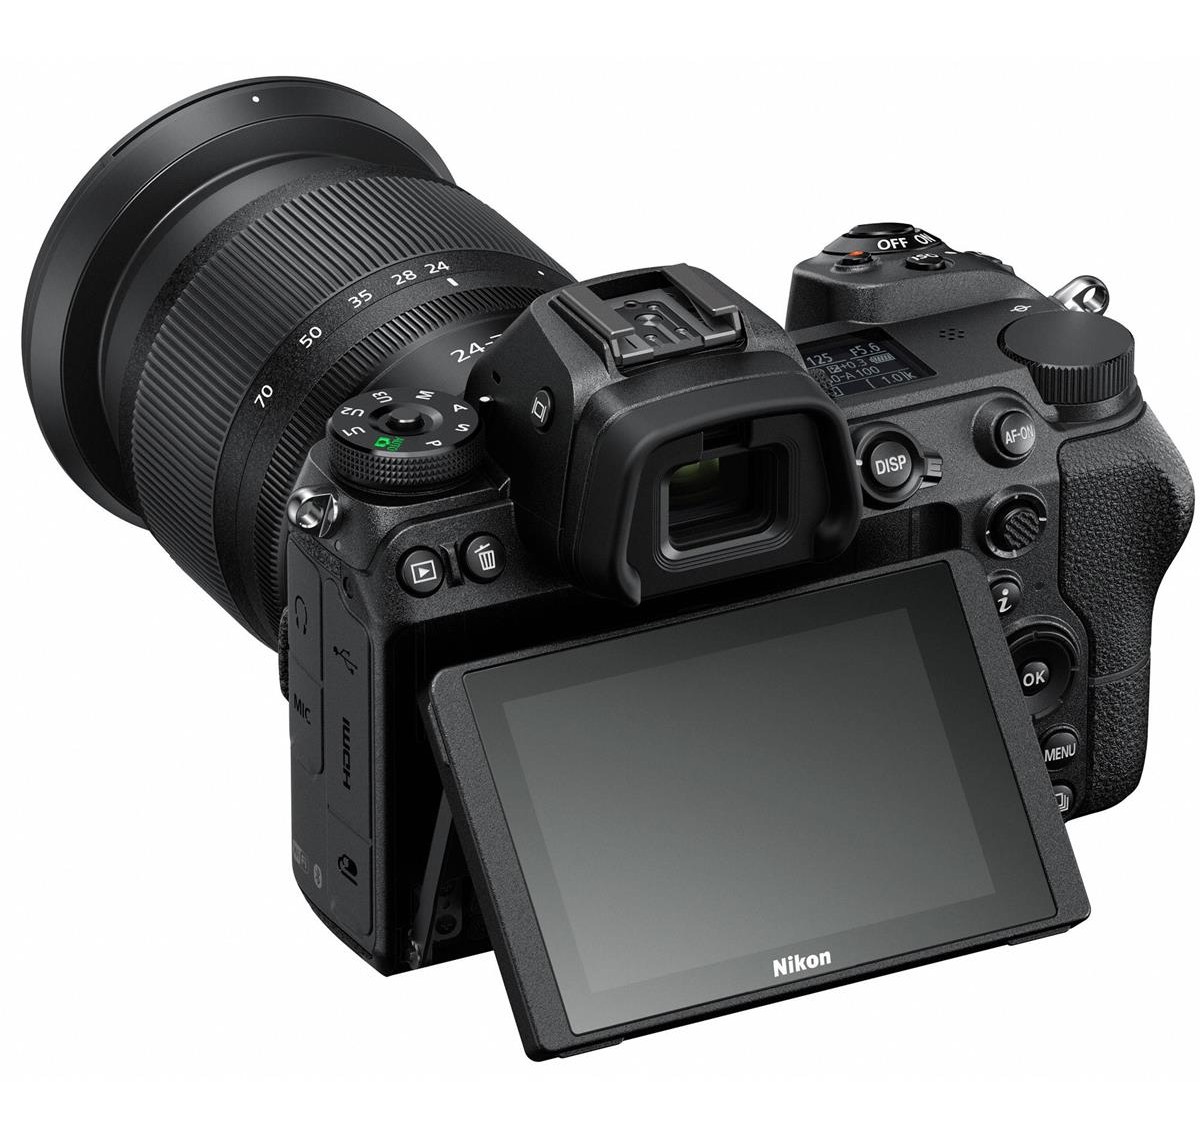 Nikon Z6
Another common trait of these cameras is the big, bright, 3.2-inch touchscreen LCD. With 2.1-million-dots of resolution, you don’t miss any details when you’re shooting. Its tilting action is nice for keeping an eye on low-angle and high-angle footage, though a fully articulating screen would have been nice.
The EVFs in these cameras are even better, if you ask me. Granted, I don’t shoot much video with my eye to the viewfinder, but the fact that the EVF doesn’t get soft when shooting video (an issue I’ve found in my Sony a6300) is definitely a bonus.
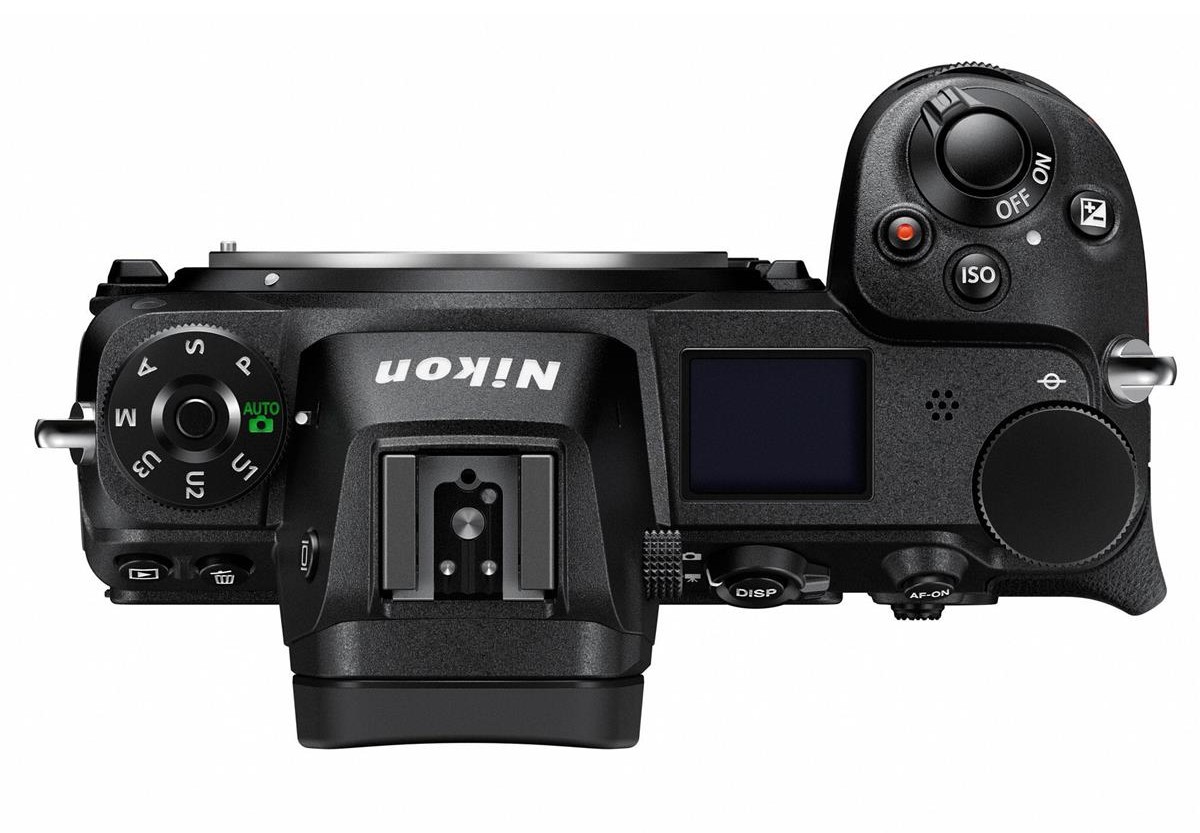 Nikon Z6
Of course, both the Z7 and the Z6 feature 5-axis in-body image stabilization, which is a Godsend when shooting handheld video.
This is especially true when you’re panning or tilting while handheld. The image stabilization helps you get buttery smooth motion, though it should be noted that it isn’t as effective when walking and shooting video at the same time.
Something else of note is that both of these cameras have good continuous autofocus performance when shooting video in good lighting. Even if the subject is moving quite fast toward the camera, the Z7 and Z6 do a good job of tracking the subject. In low-light, the autofocus obviously struggles, but that’s to be expected of any camera.
These cameras can shoot up to 30p in 4K, so there's no 60p option for slow-motion recording, though you can record in 1080 120p if slow-motion footage is needed.
One last note - neither camera has a good built-in audio pre-amp. For Nikon shooters, this is nothing new, so just be aware that if you use a mic that has poor output levels, the audio will be very noisy.
Nikon Z7 Video Capabilities

Let's focus on the Nikon Z7 video specs.
The primary thing you should know about filmmaking with the Nikon Z7 is that even though it offers 4K UHD video recording, it does not offer full sensor readout in full frame mode. For full sensor readout, you have to shoot with a 1.5x crop factor.
As a result, full frame video footage is quite soft compared to the Nikon Z6 and quite noisy as well. Banding and pixelation can also be an issue.
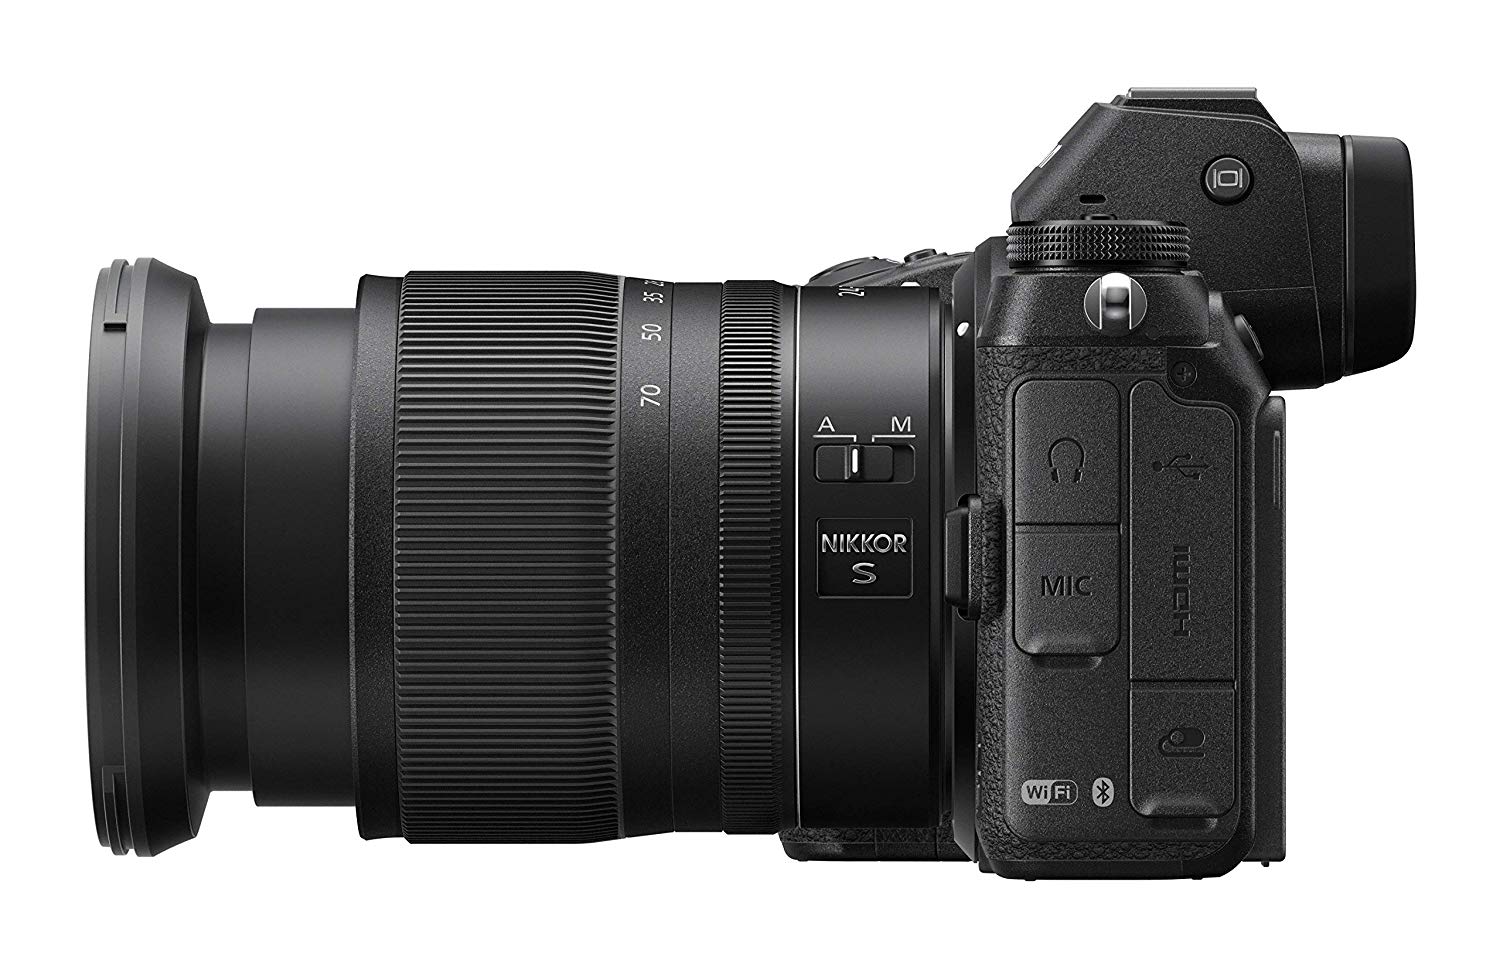
On the plus side, the camera has 10-bit N-log video via the HDMI output. This gives you improved dynamic range and much more color depth with which to work in post-processing. See the Z7 in action in the video below by AdoramaTV.
Make no mistake, the Z7 is a still camera with video capabilities. As noted in the previous section, it has a lot of features to help you capture excellent video. However, the Z7 is not intended to be a go-to camera for video footage. That distinction goes to the Z6.
Nikon Z6 Video Capabilities
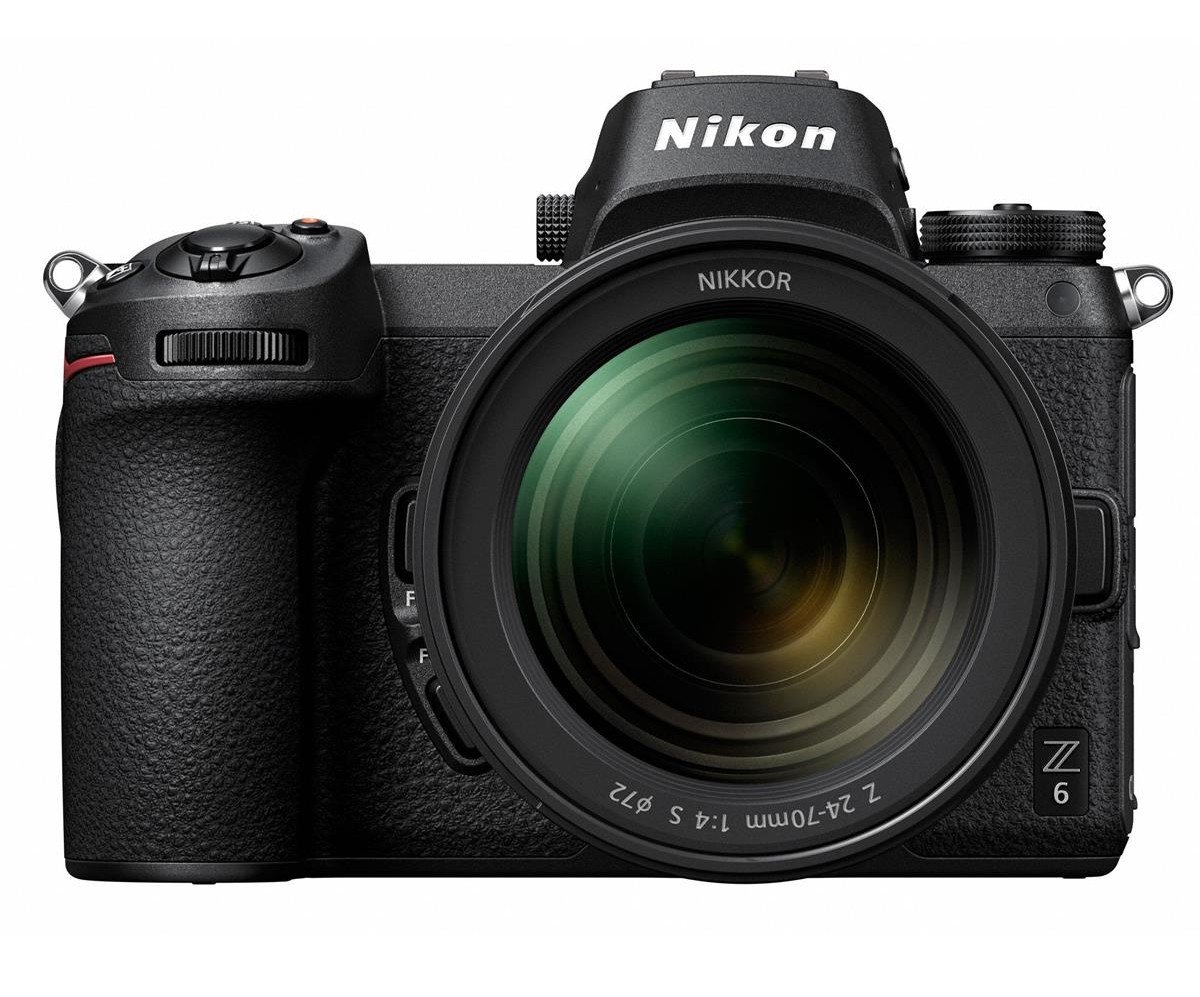
Nikon definitely developed the Z6 to be the video king of its mirrorless lineup.
Not only does it offer super-sampled full frame recording and better shallow depth of field than the Z7, but it also performs beautifully in low-light situations.
That's advantageous for situations in which you don't have a ton of light (or don't want to lug around lighting).
Its pixel-to-pixel readout of the sensor means there's no pixel binning to get to full 4K video. As a result, video is clean, sharp, and detailed, and dynamic range is outstanding, particularly if you're recording externally. Read more about Nikon D750 camera on our website PhotographyTalk.com.
Speaking of external recording, the Z6 offers 10-bit N-log video output just like the Z7. The result of this is improved dynamic range, as noted above, as well as better colors, particularly if the video footage was shot in challenging lighting.
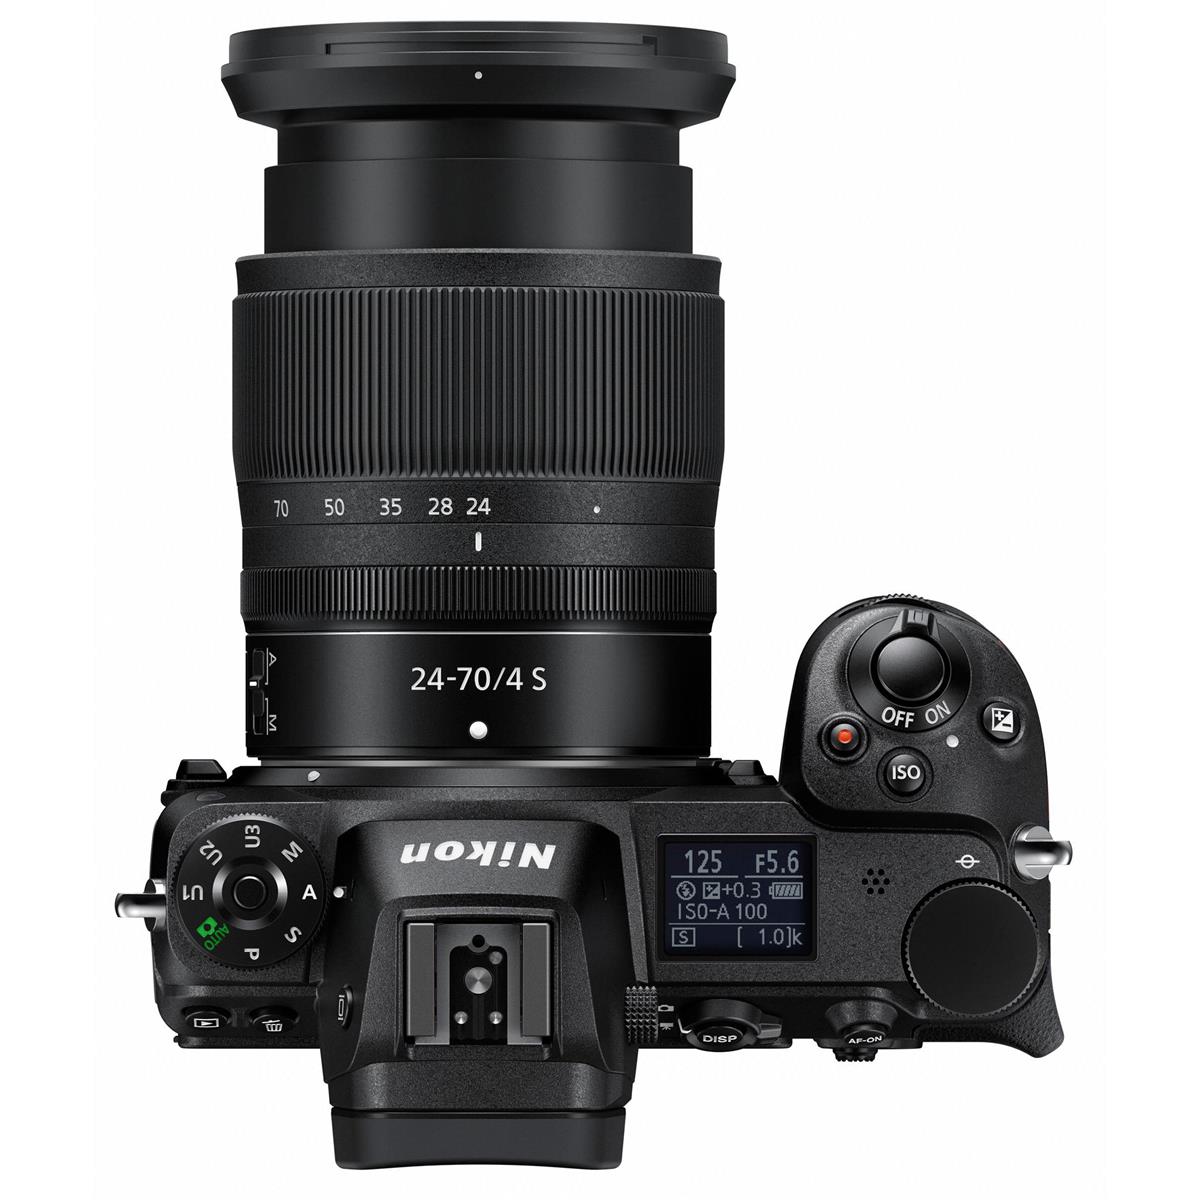
Something to be aware of is that the Z6 has a focus-by-wire system. This means that you can't set lens marks based on where your subject is located and pull focus to follow their movements.
The camera does have focus peaking when shooting in manual mode, so you can at least see what's sharp and what isn't.
For some reason, though, Nikon doesn't let you use focus peaking and highlight peaking at the same time.
Despite these minor issues, the Z6 is a very, very good camera for filmmaking - perhaps one of the best on the market right now. Get more details on this camera in the video above by AdoramaTV.
When comparing the Z6 to the Z7 for video purposes, the Z6 is a clear winner. If video is the most important factor when you buy a new camera, the Nikon Z6 video specs make it a prime choice.
And since the Z6 is $2,000.00 (body only), it's far cheaper than its big brother, which comes in at $3,400.00 for the body only.
We Recommend
Getting Started in Vlogging - What You Need and Best Practices

photo byjacoblund via iStock
So, you’re thinking about vlogging and you’re wondering if you really need to spend hundreds and hundreds of dollars on your equipment.
No. You don’t. You just need the basics. But, you’ll want to make sure your vlogging gear will still last you a long time.
Here’s a list of everything a vlogger can’t live without.
Camera: GoPro

Photo by Arindam Raha from Pexels
You’re definitely not going to get very far as a vlogger without the most basic of vlogging gear: a good camera.
I think the most important thing when purchasing a camera is to remember that it’s 2020 and most cameras are going to be more than enough for your new vlog. Don’t overspend here and not be able to purchase the other vlogging gear essentials.

While you can use just about any DSLR or mirrorless camera out there, I’d recommend purchasing a GoPro because GoPros are definitely the easiest vlogging camera for traveling and shooting outside of a studio.
They’re rugged, easily portable, and packed with features that make them a well-rounded camera. Besides, you can get a GoPro Hero 8 Black for $400, which is a great price for all the functionalities you get:
- 12MP sensor
- 4K video at 60p or 1080p video at 240p
- 8x Slo-Mo video
- HyperSmooth 2.0
- TimeWarp 2.0
- Live Streaming
- LiveBurst
- SuperPhoto + HDR
You may not be planning to shoot anywhere other than your house, but if the need arises, you’ll have wished you went with a GoPro!
Quick Tip: You’ll want to invest in a quality external microphone to go with your GoPro. I’ve used the RODE VideoMicro and loved its sound quality and compact size. It’s a perfect addition to a GoPro because it’s rugged and portable, just like the GoPro! And at just $59, it’s budget-friendly too!
Recommended Videography Books:
- How to Shoot Video That Doesn't Suck: Advice to Make Any Amateur Look Like a Pro
- The DSLR Filmmaker's Handbook: Real-World Production Techniques
Light: LitraPro

You’ll want to use natural lighting for your vlog as often as possible, but sometimes it’s not. In these times, you’ll want a natural-looking light to ensure your face doesn’t have any awkward shadows.
I use the LitraPro because it is 100% dimmable, has adjustable color temperature, can run for up to 10 hours on one charge and is waterproof up to 90 feet.
You can use it in your studio, on that epic surfing trip you’ve been planning, or on your trip to Machu Picchu and points in between.
It’s hard to find a light that is this bright, this rugged, and this portable. You can purchase a Litra Torch LitraPro on Adorama for $220.
Learn More:
Tripod: Octopad

People who write about vlogging best practices will always recommend getting a tripod, but I’ve found something just a little bit better.
The Octopad does everything a tripod can’t through its patent-pending technology. It doesn’t slip or slide, it doesn’t cave under weight and it never loses suction - because it doesn’t use suction!
It’s weighted bottom keeps your GoPro, LitraPro, microphone, and other vlogging accessories perfectly stable, even on uneven surfaces. Heck, I often use my GoPro and Octopad as a dashcam setup - I set the Octopad on the dash, hit record on the GoPro, and we’re off.
As soon as you buy this, you’ll have wished you had it in your camera bag over the years because it makes taking video and photos so much easier.
The Octopad is available for only $27 on Adorama.
Handheld Mount: HandlePod

Finally, before getting started in vlogging you’ll need a handheld mount.
I chose the HandlePod because it works with GoPros, and you can use it in a variety of ways.
I typically use it as a handheld mount, but you can also use it as a tabletop mount or even mount it to a stable object, like a tree or a fencepost.
Plus, it comes with a lifetime warranty and weighs just 4 oz so you can take it everywhere.
This camera stabilizer is available for less than $30 on Adorama.
Pro Vlogging Tips

photo by NoSystem images via iStock
Now that you’ve got all the equipment you might need, you’ll need some information about getting started in vlogging.
The first thing you’ll need to do is establish the “why” behind your vlog. Are you getting started in vlogging to educate your audience? Do you want to entertain them? Are you just looking to make some extra cash to take your family on vacation every year?
Once you have your “why,” other parts of your vlog will come more easily, like your story outlines, your purpose, and your filming dates.
Next, you’ll need to get really good at editing, like Matti Haapoja.
Most people stop watching videos within the first two minutes, so you need to prove to your audience that your material is worth sticking around for. That means editing the crap out of your vlogs.
Anything that isn’t 100% necessary to fulfill the purpose of the vlog needs to get cut. As a beginner vlogger, you should be aiming for videos that are no longer than 5 minutes.
Finally, you should be doing a ton of market research. Watch other vlogs, both those who you consider your competitors and those who aren’t. Figure out what you love about watching vlogs and then try and emulate that.
Learn More:
We Recommend
Getting the Most From Your 360-Degree Camera

photo byMorgan Somers via iStock
You’re the proud owner of a new GoPro MAX. Congratulations! The GoPro MAX is a fantastic action cam with 360-degree camera capability in video and still imaging modes. With all that this camera can do, you want to be sure that you know how to get the most out of it.
We’ve put together some tips for GoPro MAX and some ideas of situations, techniques, and even some accessories that can assist you to do just that.
Get Used to 360-Degree Shooting

Photo by Don Stone on Unsplash
One of the hardest things for us to think about when we start using a 360-degree camera is just how much shows in the camera’s point of view (POV). You, your boat, your motorcycle, your trained monkey, your drone, whatever you have yo attached to will be in the action camera’s POV, showing up in the viewed video.

Regular action cameras tend to have very wide angle lens options, but you can get behind even a 180-degree fish-eye lens. Not so with 360-degree cameras. You, or the item you mounted it on are going to be seen. So make sure to take that into account as you set up for filming.
Viewers of 360-degree camera video and still images are used to this already. It’s us photographers and videographers that need this advice. It’s not really a technique, more like a mindset.
Recommended Videography Books:
- How to Shoot Video That Doesn't Suck: Advice to Make Any Amateur Look Like a Pro
- The DSLR Filmmaker's Handbook: Real-World Production Techniques
Get a Good Handheld Mount

Photo by li xianan on Unsplash
One way or the other, you will most likely be mounting your GoPro MAX to something. The two basic options are hands-free and handheld.
If you are going to try to hold the camera with your hands alone, you quickly find out that it’s not really a practical alternative for action cams or a 360-degree camera. The cameras are small and your hands will take up way too much of the view when in 360-degree camera mode.

One of the better grips I’ve found for the GoPro MAX is the HandlePod 3-Axis Action Camera Mount from Adorama. It is a multi-use tool that can operate as a tabletop base, be lashed to a pole, post, or arm, or be gripped like a pistol grip.
It really comes in handy as a handheld grip for these small cameras. It’s lightweight but sturdy, and it is a comfortable way to hold the GoPro MAX plus an accessory or two like a light or a microphone.
Learn More:
Hit the Action Hard With a Hands-Free Mount

If you are really hitting the action hard, then holding the GoPro MAX in your hands, even with a great grip like the HandlePod, simply isn’t a desirable option. You will want to use a hands-free mount of some sort.
There are a lot of methods that can be employed for mounting. Suction cups are a valid method to attach to a windshield of a vehicle, strap mounts can allow you to put the camera on your head, arm, or leg for interesting views.
A traditional tripod can be used, but that is actually a bit of an overkill for most action cams. Another usable style of mount is a weighted stabilizer mount such as the OctoPod camera mount.

The OctoPod is a small camera mount that features a non-slip bottom coupled with a weighted, flexible pad that can stabilize on virtually any type of surface including angled surfaces up to 45 degrees. It can hold your GoPro Max stable in all but the most extreme of uses.

Photo by Kamil Pietrzak on Unsplash
Making use of a stabilizer mount such as the OctoPod really helps open up your shooting style for action, both in HERO mode and in 360-degree camera mode.
You’re still probably going to show up in the final image or video, but you won’t be as noticeable. Handheld and hands-free are both great for action cams.
Light It Up

One of the best tips for GoPro MAX users is not to neglect the HERO mode. HERO mode is a great way to get the most out of your GoPro MAX 360-degree camera. In HERO mode, adding a light source can sometimes turn a difficult exposure situation into an amazing video or photo shoot.
Of course, with the compactness of action cams being one of their best features, any light you do add will need to be small as well. The Litra Torch 2.0 becomes an excellent choice for many GoPro MAX users.
A battery powered LED continuous light, the Litra Torch 2.0 matches well with the GoPro MAX. Small enough that you can add it to the HandlePod for a lightweight all in one videography rig, it adds very little weight to the package.

A high CRI (color rendition index) means you will get natural looking colors of your subject and surroundings. Since the light is small, it can’t be too powerful, but you will be surprised at how bright it is.
If you want to shoot with a light in 360-degree camera mode, you will either have to deal with only about half of your view being lit up, or use multiple lights. Since the Litra Torch 2.0 is very small and quite budget friendly, having two lights on at once becomes a viable alternative. Try it out for yourself.
Learn More:
Choose the Right Settings

Photo by Artem Beliaikin from Pexels
Whenever you start using a new camera, a learning session before going out into the field is a good idea. There are some excellent videos on YouTube that can be used as a GoPro MAX tutorial.
Here is one short tutorial from The 360 Guy that you might find interesting:
Avoid shooting with the idea that you will “fix it in post.” I like to recommend avoiding that train of thought in general in all of my photography and videography.
Post processing and editing should be used to enhance footage and images, not save them. Unless that poor footage is all you have of a special event, only use your best raw footage for editing into a finished product.
The Rule Is: There are No Rules!
Photo by Brett Sayles from Pexels
Break free from any thoughts or habits that hold back creativity. Action cameras such as the GoPro MAX with 360-degree camera capability are meant to push the limits.
I’m sure you had some amazing things in mind when you first thought about getting an action cam. Now that you have yours, find a way to do those things! And share the results.
We Recommend
Getting to Know the Nikon Z-Mount Lens Lineup

Though it took Nikon forever to get into the mirrorless camera game, if you ask me, the wait was worth it.
I have a Nikon Z7 in my camera bag, and I’ve had the opportunity to shoot with a Z6 as well. They are superb cameras in their own right (read my Nikon Z7 review and my Nikon Z6 review for more details).
What gets lost in the excitement over these cameras are the lenses Nikon has developed for them, which is a shame, because they deserve a little love as well.
Let’s get to know the Nikon Z-mount lens lineup.
Nikon Z-Mount Lenses Overview
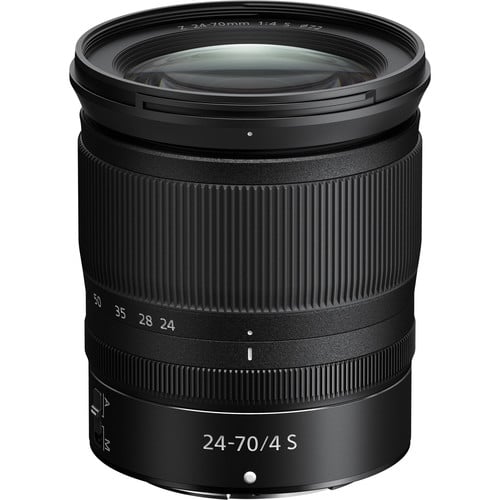
The lenses built for the Z-series camera actually have the S-series moniker.
When the Z7 and Z6 were introduced last year, three S-series lenses were introduced as well: a 24-70mm f/4 S, a 35mm f/1.8 S, and a 50mm f/1.8 S.
Though at first glance one might think that these lenses are more geared towards enthusiasts rather than professionals (mainly because of a lack of f/1.4 and f/1.2 apertures), a deeper dive reveals that these are definitely pro-grade-worthy lenses.
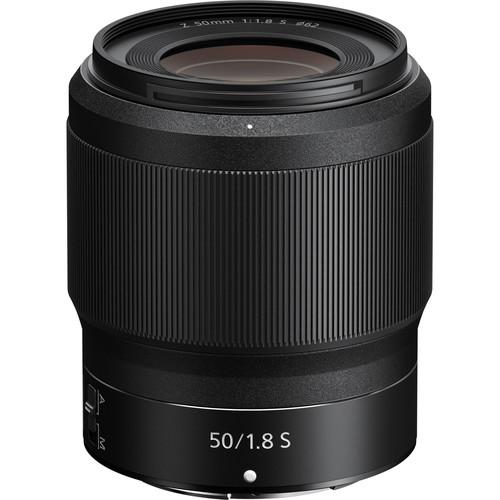
For starters, each of these lenses is totally weather-sealed. Additionally, they have a nano crystal coating to improve their performance.
When these lenses were in development, Nikon put them through more stringent testing than any of their other lenses ever (even more so than their gold-ring F-mount professional lenses), so no matter where you look under the hood of these things, you find delightful surprises.
One example of this is the control ring. Not only is it impeccably made and ultra quiet, but it also provides superb feedback and beautifully smooth strokes to change the focus and aperture.
Also on the goodie list for these lenses is a quieter autofocus drive (which is great for videography), improved low-light performance for the 24-70mm f/4 lens, and two autofocus drive units and a brand-new multi-focusing system in the 35mm f/1.8 that make it an excellent choice for high-speed shots.
Furthermore, the 50mm f/1.8 has a brand-new stepping motor, which enables much more accurate autofocus control that is also super quiet at the same time.
I can attest from using each of these lenses that they have less ghosting, less flare, less chromatic aberration, and less distortion than comparable F-mount lenses.
There are new additions to the S-series lineup as well - the 14-30 f/4 S and the 24-70 f/2.8 S.
These lenses are currently on pre-order, so I haven’t had the opportunity to test either lens. However, considering they have the same build quality and features of the original Z-mount lenses, I imagine they are every bit as capable of helping you capture stunning photos.
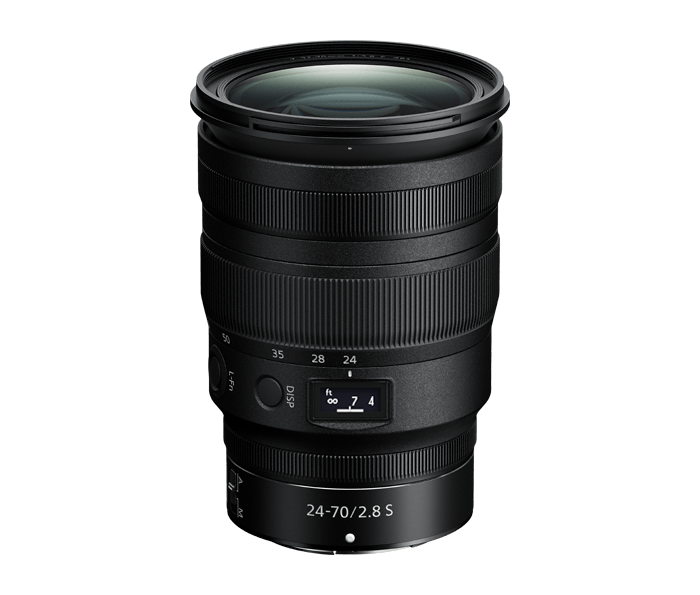
In fact, in the case of the 24-70mm f/2.8, Nikon has incorporated what’s called an ARNEO coat. Used with the nano crystal coat that’s found on the other Z-mount lenses, this ARNEO coat is designed to substantially reduce ghosting and flare.
Additionally, the 24-70mm sports a dedicated manual focus ring as well as a customizable function button and OLED display
Nikon Z-Mount Lens Features
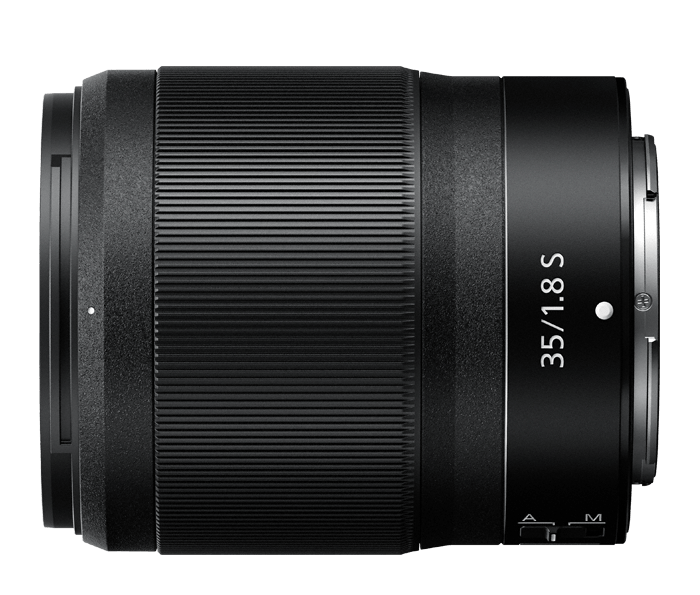
In addition to the features discussed above, the Z-mount lenses have plenty of other things to get excited about.
Each S-series lens has a focus-by-wire system in which all focusing is done electronically (rather than the mechanical focus control seen on all F-mount lenses).
Though some photographers are averse to focus-by-wire systems - and rightfully so given that many such systems are frustratingly imprecise - I have had no such issues in shooting with these lenses. In fact, focusing is buttery smooth with excellent accuracy and the ability to hold the focus position when the camera is turned on and off.
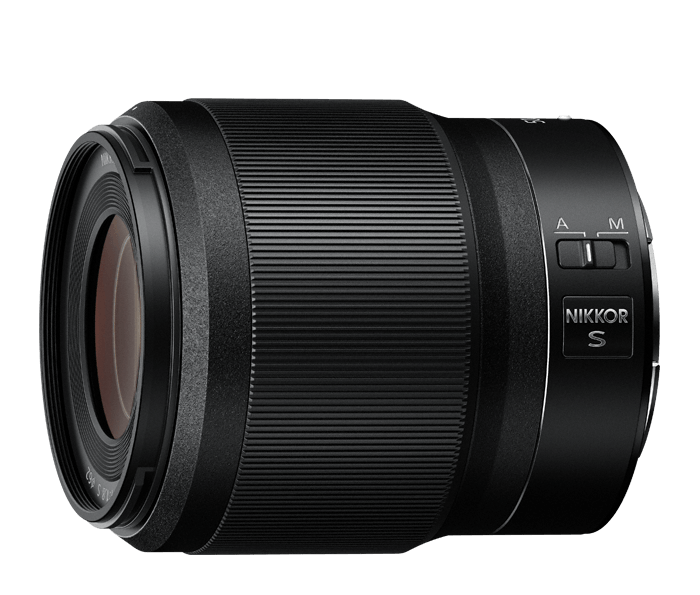
Another spec that’s worthy of a shout out is the increased number of camera contacts.
F-mount lenses have eight contacts while the Z-mount lenses have 11. The result of this is improved performance all the way around, and, more specifically, much more refined control over the lens.
That more refined control is especially evident when shooting video. Paired with the new stepping motor system in these lenses, you get ultra-smooth aperture transitions and focus transitions. Both can be configured using the camera’s menu so you can fine-tune these transitions when shooting video.
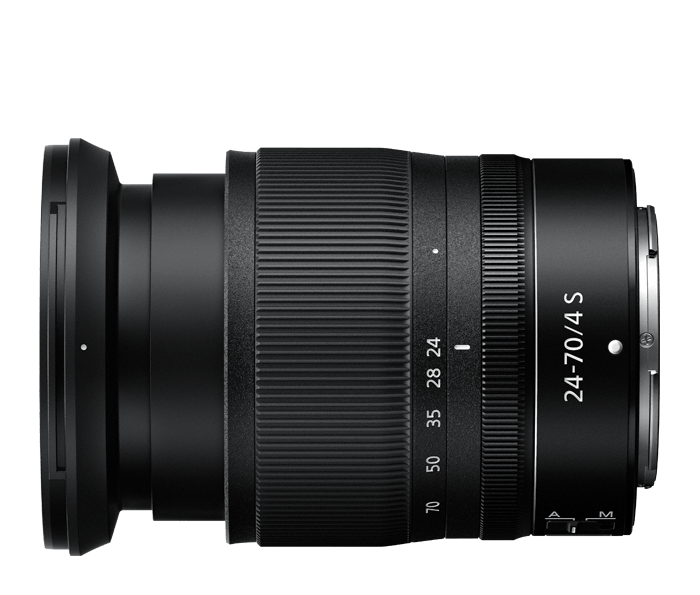
But perhaps my favorite feature of the Z-mount lenses is that you can customize the focusing ring from the camera.
In other words, you can determine whether the focus ring adjusts focus, aperture, or exposure compensation. You can also elect to have it control nothing if you so wish.
Future Nikon Z-Mount Lens Features
As more Z-mount lenses are released, we’ll start to see even more features that enable improved performance.
For example, some forthcoming Z-mount lenses will include an electronic OLED screen (like the 24-70mm f/2.8 mentioned earlier). The screen will display important information like focusing distance, lens aperture, and hyperfocal distance.
Future lenses will also incorporate two customizable buttons to give you even more refined control over the behavior of the lens.
Upcoming Nikon Z-Mount Lenses
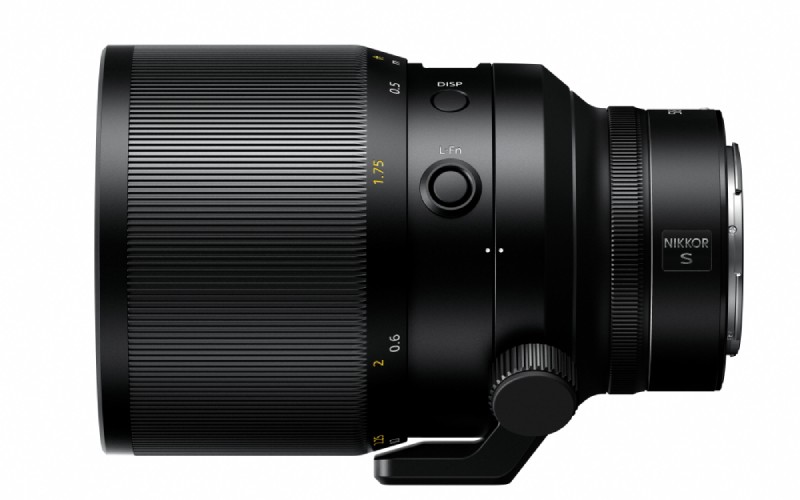
Nikon laid out their Z-mount lens roadmap a while back, and it has an impressive list of lenses.
Later this year, Nikon will release the following:
- 58mm f/0.95 S Noct
- 20mm f/1.8 S
- 85mm f/1.8 S
- 70-200 f/2.8 S
Clearly, the 58mm f/0.95 S Noct will be the one that everyone wants to get their hands on. That makes sense given that it will be the fastest Nikkor lens ever made.
In 2020, Nikon will release the following:
- 50mm f/1.2 S
- 24mm f/1.8 S
- 14-24mm f/2.8 S
I think it goes without saying that Nikon has a solid plan for their Z-system cameras and lenses. If I wasn’t already a Nikon shooter, I’d be looking at this list of forthcoming glass and seriously think about switching!
We Recommend
Gifts for Photographers Under $100 - 2021 Edition

photo byTom Merton via iStock
I know what you’re thinking…you can’t get a truly awesome gift for a photographer with just $100.
But you’re wrong!
Not only are there plenty of gifts for photographers with a price less than $100, but there are also lots of amazing gifts for that price.
While a lot of photography gear is admittedly expensive, these gift ideas will keep you on budget - and impress the photographer on your list, too.
Gifts for Photographers Under $100: Artbeat Studios HD Metal Print

If you ask me, one of the best gifts for photographers is a print of one of their favorite photos. It's a great way to honor their craft while also giving them a gift that truly keeps on giving!
And I know what you're thinking...metal prints for under $100 must be pretty low quality. Happily, though, that's just not the case!
Artbeat Studios is known as an industry leader for high-quality metal prints. One of the reasons for this is because Artbeat Studios’ HD metal prints have the image heat infused directly into the metal. The result is unsurpassed resolution and color vibrancy.
Metal is a gorgeous substrate for all manner and type of photos, too. The crisp, clean detail and modern look is just what the doctor ordered for highlighting a beautiful image.

What’s more, Artbeat Studios uses Chromaluxe® brand aluminum sheets. This brand of aluminum has a 3x better permanence than Kodak Silver Halide Prints and resists fading for more than 65 years. So not only is an HD metal print a great gift for this holiday season, but it’s a gift that will keep on giving for decades!
You can also customize the look of the print by choosing different finishes, surfaces, and mounts. One of the newest additions to the options list is the textured matte surface for a true fine art look.
Whatever options you choose, the result is a breathtaking and custom print that your favorite photographer is sure to love that won't bust your budget! And since Artbeat Studios won our 2020 Metal Print Shootout, you know you’re getting a high-quality product!
Learn more about Artbeat Studios’ HD Metal Prints
Gifts for Photographers Under $100: An SD Card (or Several!)

Photo by nicolas_ via iStock
Is the photographer on your holiday shopping list difficult to shop for? Then a great gift idea is something that offers utility now and in the future, like an SD card.
All photographers need memory cards, so giving the gift of a memory card or two will be much appreciated.
Memory cards can be expensive, though, so you’ll want to maximize your budget by finding the best deals on top brands.

I use SD Card Express to find great deals on memory cards, and I think you’ll find that their selection is just right for finding the photographer on your list the cards they need.
From microSD cards to Class 10 cards, TF Cards to U3 cards, SD Card Express has you covered.
There’s a huge selection of different brands, too, so if the photographer you’re shopping for likes Lexar, SanDisk, Western Digital, or something in between, you should be able to find what you need.
For example, you can get a SanDisk Ultra 512GB MicroSD Memory Card for $86.64. As another example, you can get a Lexar Professional 633x 256GB SD Memory Card for $48.13. You can mix and match types and brands to give your favorite photographer a nice collection of cards while staying under your $100 budget.
Learn more about SD Card Express
Gifts for Photographers Under $100: CanvasHQ Print

It's tough to beat a large-format canvas print as a holiday gift...
Canvas prints offer a classic look with an interesting texture that helps bring the image to life.
What's more, when it's a well-made canvas, like those from CanvasHQ, the print can become a family heirloom - something that you cherish for decades to come. What a powerful gift!
I have tons of canvases in my home, the vast majority of which are from CanvasHQ.
What appeals to me about these prints is the impeccable quality. There is a great level of detail and sharpness, beautiful color accuracy, and the frames on which the print is stretched are handmade with kiln-dried wood to ensure the frame stays square and true for years to come.
Additionally, these guys use archival-grade canvas and commercial-grade inks to ensure long-lasting durability.

They also have a new product - a variety of floating frames - that add a touch of elegance and depth to canvas prints.
The floating frames extend along the sides of the print and don't obscure the front of the print, that way you can see 100 percent of the image. It's a clean, dynamic finish that looks great!

But CanvasHQ isn't just tops in the quality department...
They have excellent customer service that makes you feel heard and as though you're the only customer they have to worry about at that moment.
These guys are committed to getting it right, so if something doesn’t go as planned, you won’t be hung out to dry.
If you have questions, they’ll answer them. If you have a problem, they’ll fix it. If you need assistance with uploading your photo or even picking the best finishes for your canvas, they’ve got your back! That’s just a few reasons why CanvasHQ was a repeat winner of our 2019and 2020Canvas Print Shootouts!
Learn more about CanvasHQ Prints
Gifts for Photographers Under $100: RODE VideoMicro

This tiny shotgun microphone is perfect for a GoPro (or DSLRs or mirrorless cameras, for that matter).
It's compact and lightweight, but audio quality isn't sacrificed. In fact, it has a high-quality cardioid condenser mic capsule so you can get clear, crisp audio.
And since it's a directional mic, it minimizes sounds from the periphery so your video has focused audio from the subject. That’s just the kind of audio performance you want to match the high-quality video footage that you can capture with modern cameras.
Add to that a thermoplastic suspension structure for minimizing vibrations as you adventure around with your GoPro, and you have the ideal audio companion for the best adventura camera on the market!
If the photographer on your list is an adventurer and utilizes a GoPro, this is the perfect gift idea!
Learn more about the RODE VideoMicro
Gifts for Photographers Under $100: Holdfast Mini EDC Fieldbook

If you’re shopping for a photographer that was alive in the 1990s or earlier, they probably have a habit of carrying a notebook with them to write down camera settings, site information, and other details about the shots they take. I know I do that…
And while some folks have transitioned to taking notes on their phones or other devices, there’s something about having handwritten notes about your photos that is so satisfying.
With the Mini EDC Fieldbook from Holdfast, your favorite photographer can take all the notes they want and protect them in style.

This leather journal cover is beautifully made of leather and is sized perfectly to fit the Rite in the Rain spiral-top 3x5 notebook.
This gorgeous fieldbook also has room to fit pens or pencils, your ID, business cards, and other small items that photographers might need on a photo shoot. In fact, there are six pockets and two hand slots for carrying the essentials.
Not only is this fieldbook supremely useful, it’s also impeccably made right here in the U.S. Talk about a wonderful gift idea!
Learn more about the Holdfast Mini EDC Fieldbook
Gifts for Photographers Under $100 - Ikan ILED 120 Daylight Flood LED Light

As modern cameras become more and more about photography and videography, and as more and more photographers add videography to their list of services, it makes sense to get the photographer on your list a quality light for video work.
The Ikan ILED 120 Daylight Flood LED light is a perfect option, given its performance and its price tag.
At just 3¾” x 3⅓”, this tiny light won’t burden photographers with extra size and weight. But don’t think that it doesn’t pack a punch despite its small size…

There’s a 60-degree beam pattern and 5300K-5900K LEDs that put out clean, beautiful light. And since it’s an Ikan product, you can trust that this light is solidly built, packed with features, and field tested to ensure long-term reliability.
This light comes with an on-board rechargeable lithium battery, a battery charger, a camera bracket, a shoe mount, and a diffuser, so it’ll be ready to go right out of the box!
Learn more about the Ikan ILED 120 Daylight Flood LED Light
Gifts for Photographers Under $100: PhotoRepairPro

I've said it before, and I'll say it again...
The best gifts are the ones that offer long-lasting joy and utility. For the photographer on your list, a way to provide that is by restoring one of their favorite photos.
We all have printed photos that have seen better days, but fortunately there is a way to bring those photos back to life - PhotoRepairPro.
For $34.99 - which is obviously way under the $100 limit - you can give your favorite photographer a repaired photo.
Not only that, but PhotoRepairPro also throws in an online proof, a JPEG download, and two 5x7 prints of the image. It's five gifts in one!
And don't worry if the source image has water damage or is faded, or if it has cracks or creases. PhotoRepairPro can bring it back to its original beauty.
You can get the process started now online. In a few days' time, you'll have the perfect gift for your favorite photographer!
Learn more about PhotoRepairPro
Gifts for Photographers Under $100:Hex Ranger DSLR Sling Bag

One of the best gifts you can give the photographer on your list is a new camera bag.
But not all camera bags are made alike...
Honestly, I’m a bit of a camera bag snob, so I look for things that others might skim over.

For instance, I check the stitching inside and out to see how well put together it is, and with this bag, it’s very well put together.
It’s part of the thoughtful construction and design processes that also make this bag an excellent choice for a gift for the photographer on your holiday shopping list.
One of the things I like most about the bag is the collapsible interior dividers - including the bottom divider. This gives you a bag that can not only be customized to your gear for each photoshoot, but you can also fold up or remove the dividers to allow the bag to be packed totally flat for travel inside another bag.
Speaking of customizations, this bag has side adjustable load straps and adjustable bottom carry straps so you can carry even more gear when needed.
This bag is also packed full of pockets to help you keep track of your stuff. There’s a front access organizer for small items, a faux fur lined pocket on the front for your phone or a pair of shades, a faux fur lined pocket for your table, and multiple hidden velcro stash pockets. And the bag sits very well when worn. It’s comfortable and easy to access your gear and really hugs your body.

With genuine Cordura material and YKK zippers with metal pulls, this bag will stand up to use and abuse, too. And since it’s so compact (just 1.3 pounds and 14.5"L x 7.25"W x 4.75"H), you can rock it in the urban jungle without worrying that it’ll be knocking into people as you move from shot to shot.
Something that really stood out to me was that, although the bag is listed at 8 liters, there is no wasted or negative space. In fact, I easily transferred all the gear I would normally carry in my Peak Design 10L Sling into the HEX Ranger Sling. I have to say that I am a big fan of the efficient use of space in this bag and the collapsible potential of the HEX bag certainly gives it a leg up.
With eight liters of storage space, a streamlined design, and looks that don’t quit, this is definitely a gift for photographers that will put a smile on their face!
And there’s also an updated Version 2 of this bag that offers tons of upgrades, like like a hideaway rain fly, upgraded padding, and a double buckle strap for additional sizing options. It’s under $100 too!
Learn more about the Hex Ranger DSLR Sling Bag
Gifts for Photographers Under $100: Camera Canopy

I don’t know about you, but I’m all about giving gifts that are functional, and functional is a perfect word to describe Camera Canopy.
If the photographer on your list spends any time outdoors, they need something to help protect their camera gear. As a photographer that falls into that category, I understand that when it rains, my day of shooting could be over if I don’t have the protection I need. That’s because even weather-sealed gear isn’t completely water-tight.
There are all kinds of rain guards for cameras, but most of them are plastic bags that make using your camera a huge pain. It’s hard to adjust your lens. It’s hard to see the rear LCD. It’s hard to use the viewfinder too! That’s why Camera Canopy is a much better alternative.

Camera canopy attaches to a camera via its hot-shoe mount. Once attached - which takes just seconds to do - it shields the camera and lens from rain. It even protects the glass on the end of the lens so there’s no worry that good shots will be ruined by water droplets on the glass.
Better still, it’s adjustable for lenses up to 500mm in length, and there’s even a smaller version for mirrorless setups (shown above). Add in a 30-day money-back guarantee, and you’ve got the perfect gift for this holiday season!
Learn more about Camera Canopy and Mini Camera Canopy
Gifts for Photographers Under $100: Pre-Owned Canon EF 50mm f/1.8

Photographers can never have too many lenses, right?
Okay, so maybe there’s a limit, but one of the best lenses a photographer can have in their camera bag is a good Nifty Fifty.
What makes Nifty Fifties so great is that they’re versatile - they can be used for portraits, landscapes, and video work.
Plus, Nifty Fifties like the Canon EF 50mm f/1.8 have a nice, big aperture for getting beautiful background blur and for shooting in low-light conditions.

And since you can get a pre-owned 50mm lens for under $100, they’re also an economical gift idea!
Don’t be scared off by the word “pre-owned,” either…
You can buy with confidence from MPB because each item in their inventory is thoroughly reviewed and tested before it’s put up for sale.
That means that if you find a 50mm lens listed in good condition, that lens will be in good condition! There are no surprises, no scams...just a quality used product that comes with a six-month warranty.
So, this holiday season, help your favorite photographer fill out their kit with a new-to-them lens!
Learn more about the Canon EF 50mm f/1.8
We Recommend
Gifts for Photographers Under $2,500 - 2021 Edition

photo byPekic via iStock
We're getting down to the wire with the holiday shopping season...
If you're in a rush to find the perfect gift for the photographer on your list, don't fret - we've got some great ideas!
With a budget of $2,500, you can find all sorts of epic gifts for photographers including cameras, lighting, office equipment, and much more.
Let's get to the list!
Gifts for Photographers Under $2,500: iMovR Lander Standing Desk
One of the great things about the holiday season is that you have an opportunity to really change a loved one’s life for the better.
And this isn’t hyperbole - with a gift like the iMovR Lander Standing Desk, you can help your favorite photographer be more comfortable, healthier, and more productive.
Think about it…
Sitting at a desk editing photos all day isn’t good for your neck, shoulders, or back. You need to move your positioning as you work, varying from sitting to standing, to ward off the negative effects of sitting for hours and hours on end. The iMovR Lander desk lets you do that with ease. So, how is this accomplished?
The Lander desk has electric motors that can lift up to 365 pounds and do so with whisper-quiet operation. The motors are engaged in one of two ways: the height-control paddle on the underside of the desktop or the companion smartphone app. With a simple double-tap of the paddle or a tap of your finger on your smartphone screen, you can move the desk up and down as you please.
And unlike many desks, the iMovR Lander doesn’t require a ton of time or tools to assemble.
In fact, this desk arrives 98-percent assembled, so you’re not only giving an incredible gift, but one that comes without a huge investment of time required to put it together. In about three minutes the legs can be attached to the desk (with no tools!) and the photographer on your list can go about setting up their workspace.
iMovR gives you peace of mind with the desk, too. There’s a five-year warranty on the desktop and a 10-year warranty on the base components. On top of that, the desk is beautifully engineered and constructed, so you can give the gift of something that will be durable and functional for the long term.
The desktop is made of 3D laminate material that is highly durable. There are also hundreds of color and size combinations to choose from, so you can truly design the perfect desk for your loved one (or yourself!).
Best of all, this desk starts at just over $1,000, so with a $2,500 budget, you’ll have a lot of money left over. Perhaps you can buy two desks!
Learn more about the iMovR Lander Standing Desk
Gifts for Photographers Under $2,500: Ikan Professional 15-Inch High Bright Beam Splitter Teleprompter With Travel Kit
If you're shopping for a photographer that wants to start a YouTube channel or is otherwise interested in producing video content, a professional teleprompter is certainly a gift that they will get a lot of use out of.
This 15-inch beam splitter teleprompter from Ikan is what I personally use in my home studio, and I couldn't be happier with it.
One of the best features of this teleprompter is its bright 1000 nit monitor. No matter if I have the studio lights on full blast with the window shades open or if I'm shooting at night with low light, I can clearly see the monitor and see the text I need to read.
Another nice feature you get with this teleprompter is its compatibility with different camera mount options. Whether you're using a small mirrorless camera or a dedicated video camera or something in between, this teleprompter can accommodate most rigs.
Setup is easy, too, with simple balancing and a quick-adjust base. The lightweight and compact design are also nice for small studios like I have, as well as for traveling. Speaking of which, this teleprompter comes with a handy travel case for easy transport.
Add in high-quality American-made 70/30 beam splitter glass, the ability to flip the image on the monitor, and the ability to read the monitor from up to 17 feet away, and you have the makings of a fantastic addition to your favorite photographer's or videographer's home studio!
Learn more about the Ikan Professional 15-Inch Bright Beam Splitter Teleprompter With Travel Kit
Gifts for Photographers Under $2,500: Canon RF 50mm f/1.2L USM Lens
Ask any photographer what the most versatile focal length is, and many will likely say it's 50mm
You can use a 50mm lens for all sorts of pursuits - portraiture, landscape photography, street photography, and videography, just to name a few.
Heck, you can even reverse-mount a 50mm and use it for macro photography!
In this case, the Canon RF 50mm f/1.2L USM goes above and beyond what a normal 50mm f/1.8 offers and gives photographers a bigger maximum aperture for light-collecting capabilities and improved bokeh.
And since this is a L-series lens, you get the advantage of improved optics for superb image quality.
That image quality is thanks in large part to the three aspherical and one UD element inside the lens. These elements help generate high image quality from center to corner with reduced aberrations and distortion.
This lens is also vibration-resistant, weather-sealed, and has fluorine coatings on the front and rear elements that help repel water and dust.
In other words, this lens was built to last to provide photographers with reliable service for years and years to come.
Learn more about the Canon RF 50mm f/1.2L USM Lens
Gifts for Photographers Under $2,500: Aputure Light Storm LC 120d II
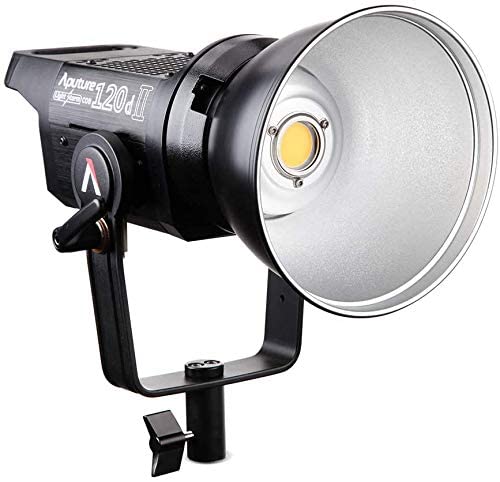
Photography (and videography, for that matter), are all about good lighting. And when it's good lighting you're after, it's tough to beat the Aputure 120d II.
I have these lights in my home studio, and as I explain in my review of this light, I couldn't be happier with their features, performance, and ease of use.
One look at the spec sheet and you can see why I've been so impressed with the Aputure 120d II:
- 1000-watt Tungsten equivalent
- Integrated power and control box
- CRI & TLCI 97+
- Dimmable from 100 percent to just 1 percent
- Built-in lighting effects, including fireworks, fire, lightning, paparazzi, and TV flicker
- 18 dB quiet fan
- DMX Capability
- Wireless remote (328-foot range)
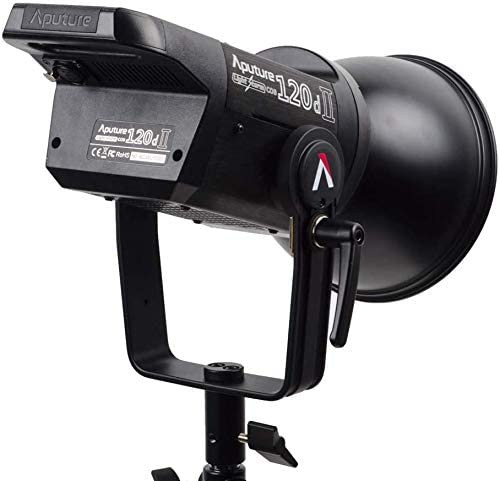
With this light, you get clean, beautiful lighting, the option to dim or brighten it from 1 to 100 percent, and you can select from a range of special effects, all in a light that offers quiet operation. Nice!
If you're shopping for a photographer or videographer that needs to upgrade their lighting setup, this is the one that should be at the top of your shopping list!
Learn more about the Aputure Light Storm LC 120d II
Gifts for Photographers Under $2,500: Pre-Owned Nikon Z6
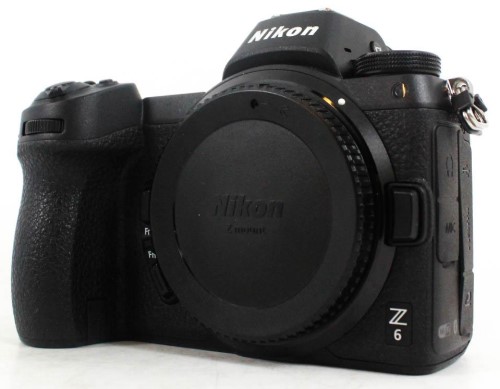
The Nikon Z6 is a fantastic mirrorless camera, and since it's been a couple of years since its release, its price has dropped - especially for pre-owned models.
Whether you're shopping for a Nikon shooter who could use an upgrade to a "new" camera or you're shopping for a photographer that wants to get into the Nikon Z ecosystem, this is a great choice.
The Z6 has a 24.5-megapixel full frame back-illuminated sensor that offers top-notch image quality with excellent detail, clarity, and sharpness.
The 12fps burst shooting speed is ideal for action photography while the 273-point autofocus system helps you keep track of moving targets.
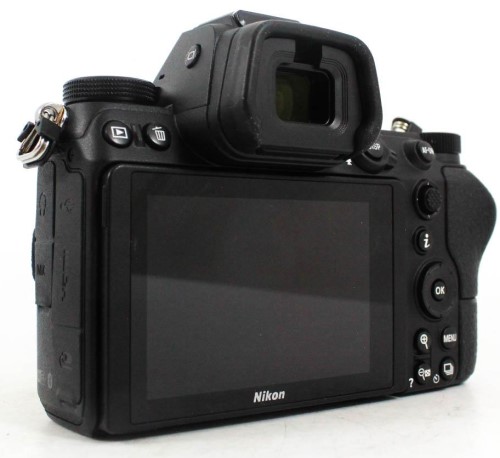
On the back is a large 3.2-inch variable-angle touchscreen LCD with 2.1 million dots of resolution, so you can easily see the camera's menu system and take a peek at images you've shot.
The Z6 has Bluetooth and Wi-Fi, shoots 4K video, and has a battery life of 310 shots.
This camera is an excellent option for photographers that want a solid rig that can tackle still photos and videos all in one package!
Gifts for Photographers Under $2,500: CanvasHQ Print
One of my favorite gifts to give (and to get, while we're at it) is a big, beautiful print.
Personally, I like canvas because of the texture the canvas gives to the print. Besides, a canvas print is something that will continue to give joy to the person that receives it for years and years to come!
Now, I know what you're thinking...canvas is so old-school.
But if you order your canvases from the right printers, you can get something that is beautiful, well-made and looks modern, even if the substrate is perhaps a bit old-school.
I have tons of canvases in my home, the vast majority of which are fromCanvasHQ.
These are some of the best canvas prints I've ever purchased. The sharpness of detail, the color accuracy, and the overall build quality of these prints is next-level good.
Part of the reason for this is the materials CanvasHQ uses. We’re talking archival-grade canvas, commercial-grade inks that are water and UV resistant, and kiln-dried pine frames to keep everything straight and true.
But CanvasHQ isn't just tops in the quality department...
They have excellent customer service that makes you feel heard and as though you're the only customer they have to worry about at that moment.
These guys are committed to getting it right, so if something doesn’t go as planned, you won’t be hung out to dry.
If you have questions, they’ll answer them. If you have a problem, they’ll fix it. If you need assistance with uploading your photo or even picking the best finishes for your canvas, they’ve got your back.
In the video above, you can see how one of my CanvasHQ prints stacks up against similar prints from other printing companies. I think you'll see why I'm so loyal to CanvasHQ!
Start shopping for your favorite photographer today on CanvasHQ.
Gifts for Photographers Under $2,500: Holdfast Roamographer Duffle Bag, Camera Bag, and MoneyMaker
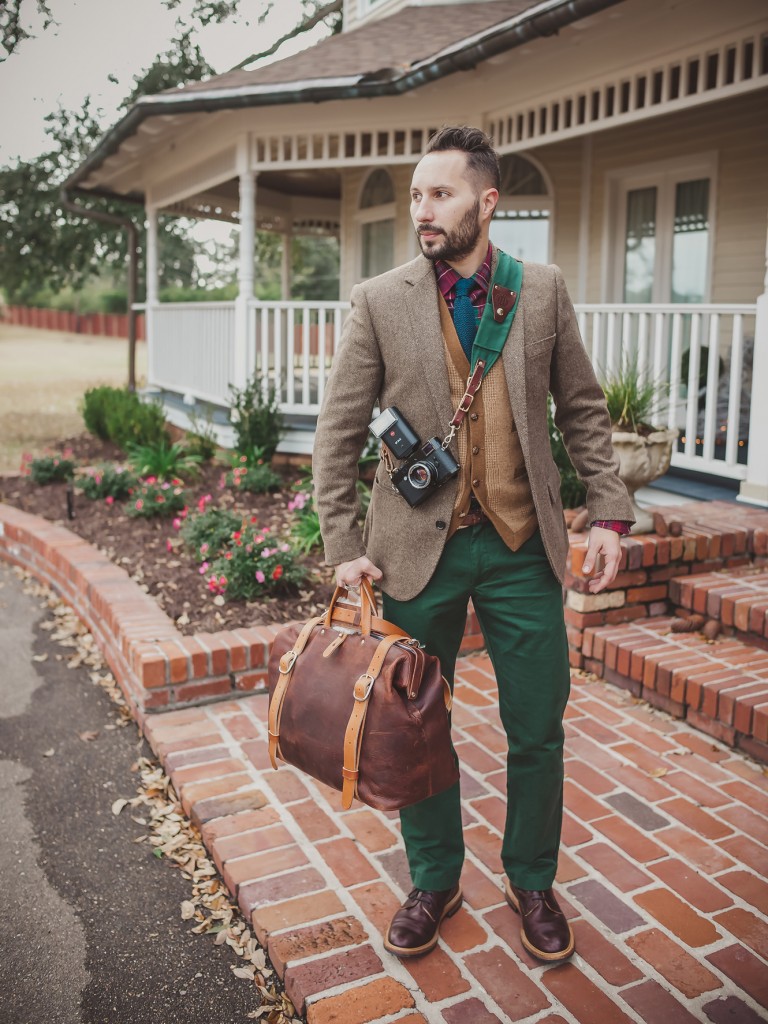
This might just be the ultimate photography setup...
If you want to impress a photographer, go ahead and give them a bundle of products from Holdfast.
Holdfast's venerable Roamographer bags not only look incredible, but they're also incredibly functional, too.
Give them the Roamographer Duffle Bag for those long weekends out taking photos.
The duffle is handcrafted out of American Bison hide and has a shearling-lined shoulder strap for easy carrying. It's the perfect bag for a quick trip, and with a metal frame that keeps the bag open during packing and unpacking, two boot bags to keep your shoes away from your clothes, and tons of pockets for small items, it'll become their favorite getaway bag.
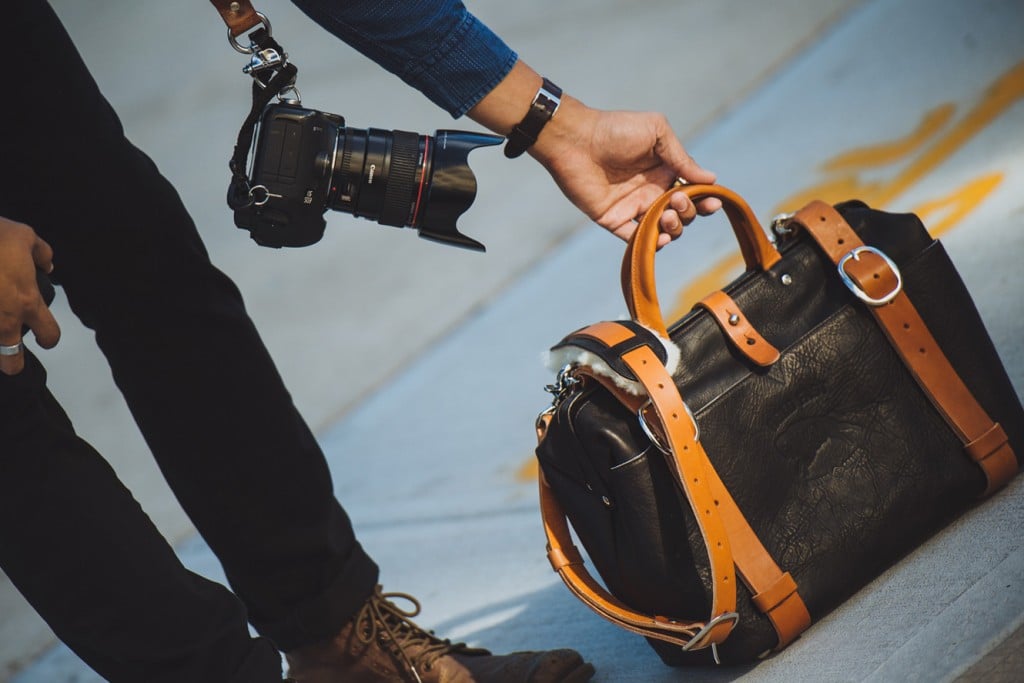
To carry their gear, you can include a Holdfast Roamographer Camera Bag as well.
Like the duffle, the camera bag has a vintage aesthetic but with modern features.
The camera insert cradles each camera item, ensuring their safety during transit.
The carrier straps accommodate a tripod for easy carrying, and the shearling-lined shoulder strap makes it easy on your favorite photographer's shoulder to carry the bag, too.
While you're at it, you can throw in a Holdfast MoneyMaker dual camera system.
The dual straps mean that a photographer can carry up to three cameras in ultimate comfort, and with their gear right at their fingertips for safe carrying.
What's more, for quick shots, their cameras are easy to reach, making the MoneyMaker just about the most functional gear you could give a photographer this holiday season.
And, like all other Holdfast products, the MoneyMaker looks like a million bucks.
You can pick up all three of these products and still have money to spare with a $2,500 budget!
Learn more about Holdfast products
Gifts for Photographers Under $2,500: Pre-Owned Canon EOS R
Back when the EOS R came out, it was groundbreaking for Canon since it was their first mirrorless camera.
It was the first Canon camera I owned, and it served me well - it will do the same for the photographer on your list!
The EOS R offers loads of features that include an ultra-resolute 30.3-megapixel full frame CMOS sensor.
Paired with a DIGIC 8 image processor, this camera is capable of shooting at 8fps and up to a native ISO range of 40000.
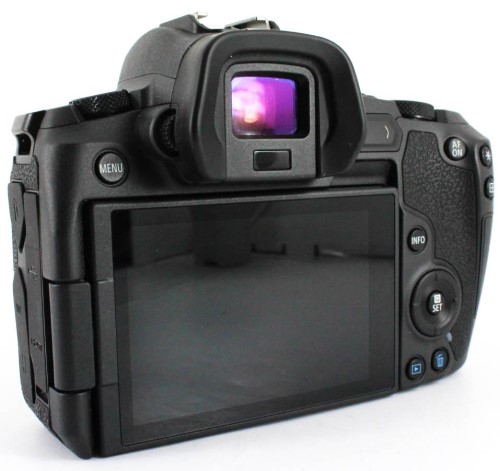
What's more, Canon gave the EOS R excellent video capabilities with UHD 4K video recording at 30fps.
One of this camera's best features, though, is the Dual Pixel CMOS autofocus system.
All told, it has 5,655 selectable autofocus points that allow photographers to quickly and accurately select where the focus of the image will be.
With a small, lightweight body, excellent build quality, great handling, and an increasingly large selection of lenses, the EOS R is definitely a fantastic gift idea this Christmas!
Learn more about the Canon EOS R
Gifts for Photographers Under $2,500: ProMediaGear Pro-Stix TR424L Carbon Fiber Tripod
ProMediaGear tripods are among the best on the market. And that’s not just lip-service, either.
I’ve used ProMediaGear tripods, including the TR424L, for quite some time, and I can assure you that they are well-made, durable, and extremely functional.
These are professional-grade tripods, without a doubt. It can hold up to 125 pounds of gear thanks to its 42mm-thick carbon tripod legs.
Even when I’m out shooting video and I have a ton of accessories, it still doesn’t come close to that 125-pound mark!
From a functionality standpoint, the legs have three-position angle locks so you can adjust the tripod to be perfectly level, no matter how uneven the terrain. The built-in bubble level helps in that regard as well.
Deploying the legs is simple, too - just a quarter-turn locks them in place.
This tripod also has huge rubber feet, which as a landscape photographer is a favorite feature. The tripod doesn’t sink into soft soil and it doesn’t slip when things are wet or frozen. The metal spikes in the bottoms of each leg offer even more stability for truly rough shooting conditions.
You get all this in a tripod that folds down to just 26.3-inches tall, which can easily fit into a camera bag.
This isn’t a lightweight tripod by any means, but if the photographer on your list needs a go-anywhere, do-anything tripod, this is definitely it!
Learn more about the ProMediaGear TR424L Carbon Fiber Tripod
Gifts for Photographers Under $2,500: Amazon Gift Card
![]()
Totally stumped regarding gift ideas for photographers on your list?
Why not go the easy route and get them an Amazon gift card?
Though a gift card isn't exactly the sexiest gift, when the photographer in your family sees that you have given them carte blanche to get what they want, they'll be stoked!
With an Amazon gift card, they can put the card amount towards whatever they want - a new lens, a second camera body, lighting gear, a laptop - you name it!
As far as flexibility goes, there's nothing better to give a photographer than a gift card.
Learn more about Amazon gift cards
We Recommend
Gifts for Photographers Under $250 - 2021 Edition

Photo by GMVozd via iStock
Shopping for a photographer can be a tough task. Heck, shopping for yourself can be a difficult task!
It's not that there aren't all kinds of gifts for photographers under $250...it's simply trying to decide which ones are the best.
In this holiday gift guide for photographers, we've got 10 great gift ideas, all of which come in at less than $250. That means you have many options for giving an awesome photography gift without blowing your budget.
Let's get to the list!
Gifts for Photographers Under $250: Colorado Tripod Company Highline Ballhead
The great thing about the Colorado Tripod Company Highline Medium Ballhead is that it's a fantastic addition to my kit whether I'm working in my home studio or I'm out in the field.
When I'm in the studio, I use this ballhead with Colorado Tripod Company's lever clamp (which is compatible with L-brackets and Arca-compatible plates) doing overhead shots. There is a distinct clicking noise that tells me that the ballhead is 100 percent locked in, that way I don't have to worry if the camera is going to crash down on my head as I'm recording.
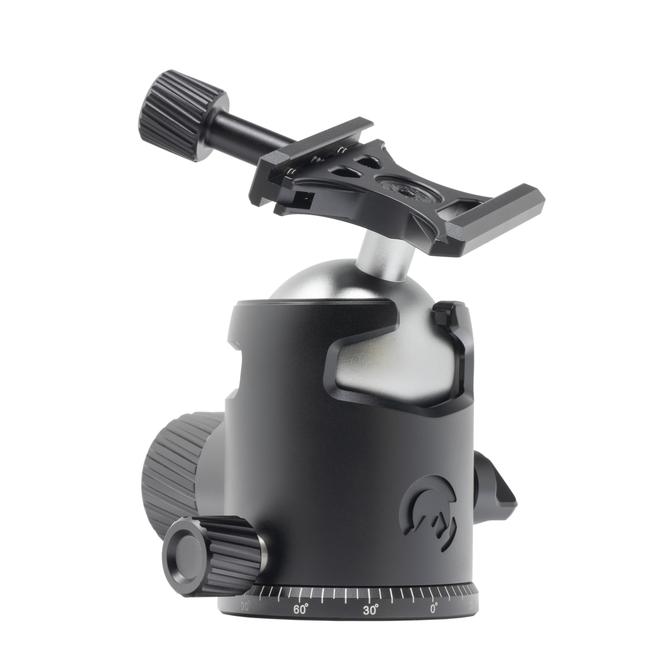
And, as you'd expect with a product from Colorado Tripod Company, the Highline Ballhead is beautifully made using high-quality materials. It's smartly designed, too, with a universal knob clamp, a drop-in window, dedicated friction control, and independent locking and panning knobs. Addin a 10-year warranty, six available colors, and two different sizes, too!
It's just an easy-to-use, go-anywhere ballhead that any photographer on your holiday shopping list would appreciate!
Learn more about the Colorado Tripod Company Highline Medium Ballhead
Gifts for Photographers Under $250: CanvasHQ Print
It's tough to beat a large-format canvas print as a holiday gift...
Canvas prints offer a classic look with an interesting texture that helps bring the image to life.
What's more, when it's a well-made canvas, like those from CanvasHQ, the print can become a family heirloom - something that you cherish for decades to come. What a powerful gift!
I have tons of canvases in my home, the vast majority of which are fromCanvasHQ.
What appeals to me about these prints is the impeccable quality. There is a great level of detail and sharpness, beautiful color accuracy, and the frames on which the print is stretched are handmade with kiln-dried wood to ensure the frame stays square and true for years to come.
Additionally, these guys use archival-grade canvas and commercial-grade inks to ensure long-lasting durability.
They also have a new product - a variety of floating frames - that add a touch of elegance and depth to canvas prints.
The floating frames extend along the sides of the print and don't obscure the front of the print, that way you can see 100 percent of the image. It's a clean, dynamic finish that looks great!
But CanvasHQ isn't just tops in the quality department...
They have excellent customer service that makes you feel heard and as though you're the only customer they have to worry about at that moment.
These guys are committed to getting it right, so if something doesn’t go as planned, you won’t be hung out to dry.
If you have questions, they’ll answer them. If you have a problem, they’ll fix it. If you need assistance with uploading your photo or even picking the best finishes for your canvas, they’ve got your back!
Start shopping for your favorite photographer today on CanvasHQ.
Best Ever Backdrops Mix and Match Backdrop
Ever since the pandemic started, many photographers have been looking for ways to supplement their income from home. For many people, that means getting involved in product photography and food photography because both are easy to do from the comfort of your own home, provided you have the necessary gear.
Of course, the photographer on your holiday shopping list already has a camera, lenses, a tripod, and so forth, but they might not have the kind of backdrops that make product photography and food photography an easier task.
That’s where Best Ever Backdrops come in!
Now, if the photographer on your list is a portrait photographer, they undoubtedly have a collection of backdrops already. The problem is that those big, bulky, heavy backdrops aren’t well-suited for small scenes like product or food photography.
But since Best Ever Backdrops are just 24 x 36 inches, they are perfect for making small subjects stand out against the non-glare matte finish. These backdrops are also waterproof and stain resistant.
In addition to being just the right size, these backdrops are double-sided which means each backdrop comes with TWO textures! You choose the color or pattern you want for both sides which maximizes the utility of the backdrop for the lucky photographer who will get them as a gift.
And if you know photographers, you know that we have tons of gear all over the place, so storage is often an issue. But since these backdrops are small, lightweight, and just 1/8th of an inch thick, they can be stored under the bed, behind a door, in the corner of a closet - you name it!
To top it all off, these backdrops are virtually indestructible, so this is a gift that will literally keep on giving for years and years to come. PLUS...the more you order, the more you save. For example, if you order two backdrops you get four textures. Each backdrop is $124.50, but if you order four, the price drops to $104.75 each.
Giving a great gift is all about being thoughtful and giving your loved one something that they will use over and over again. That’s exactly what you get with a backdrop that pulls double duty and allows the photographer on your holiday shopping list to expand the footprint of their business
Learn more about Best Ever Backdrops
Gifts for Photographers Under $250: RODE VideoMic NTG
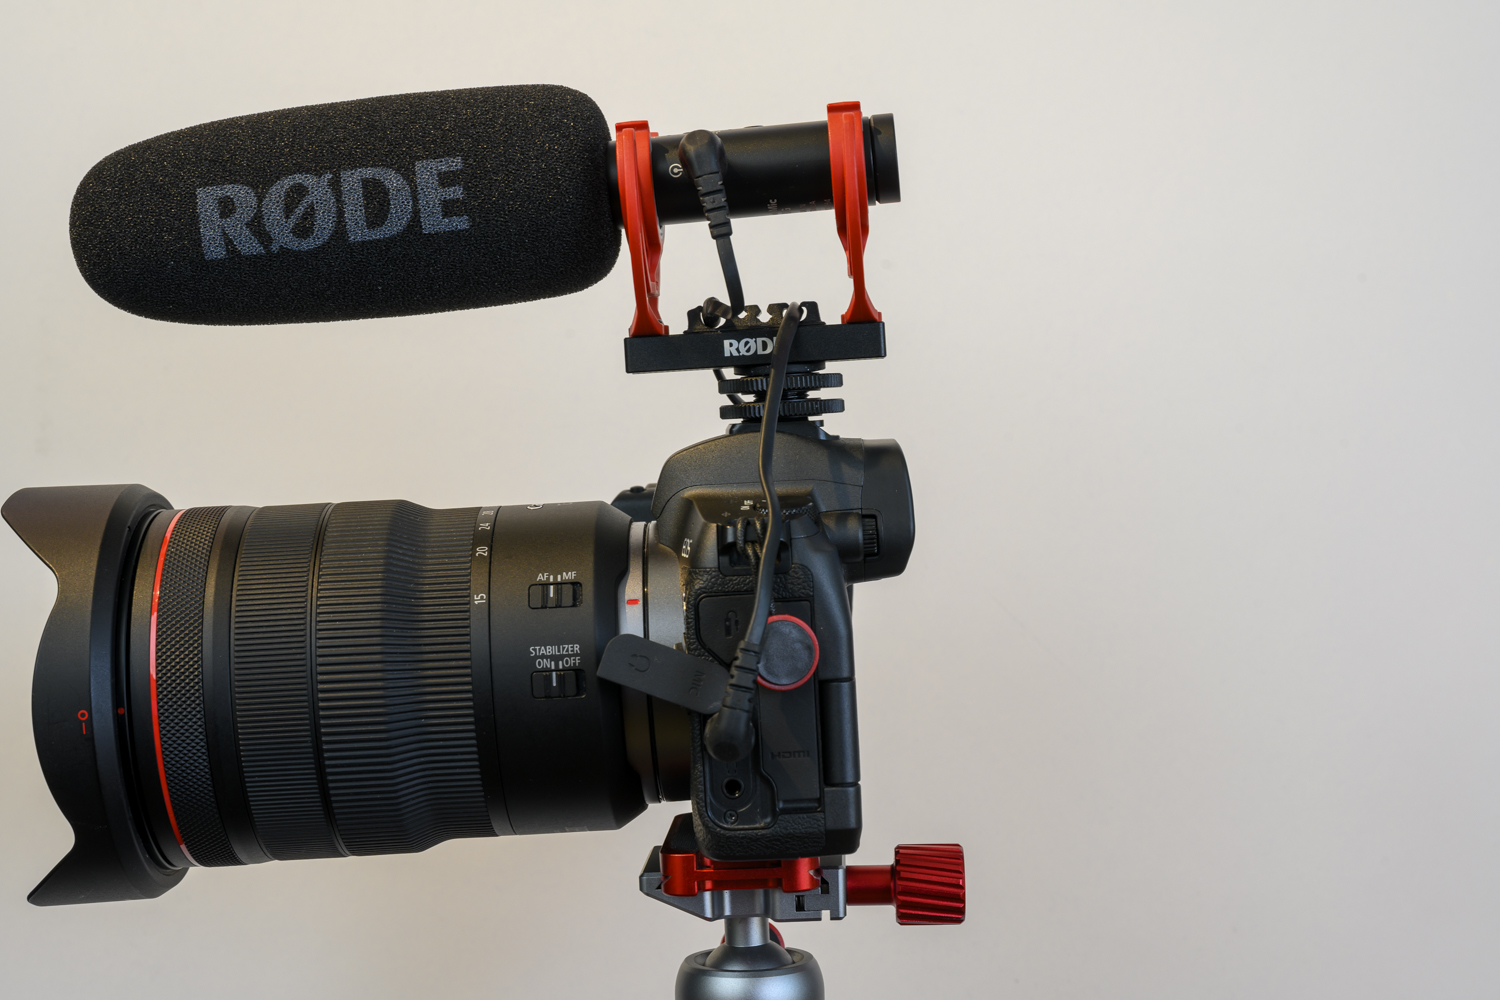
I've used the RODE VideoMic NTG for well over a year and a half now.
Needless to say, this mic has impressed!
Like the larger NTG 4 studio mic, the VideoMic NTG captures gorgeous, natural sound. There are various controls to assist you in getting beautiful sound, including:
- Infinitely variable gain control
- Digital switch for controlling high-frequency boost and the high-pass filter
- Headphone output for monitoring audio
- Peak decibel warning light to avoid distortion
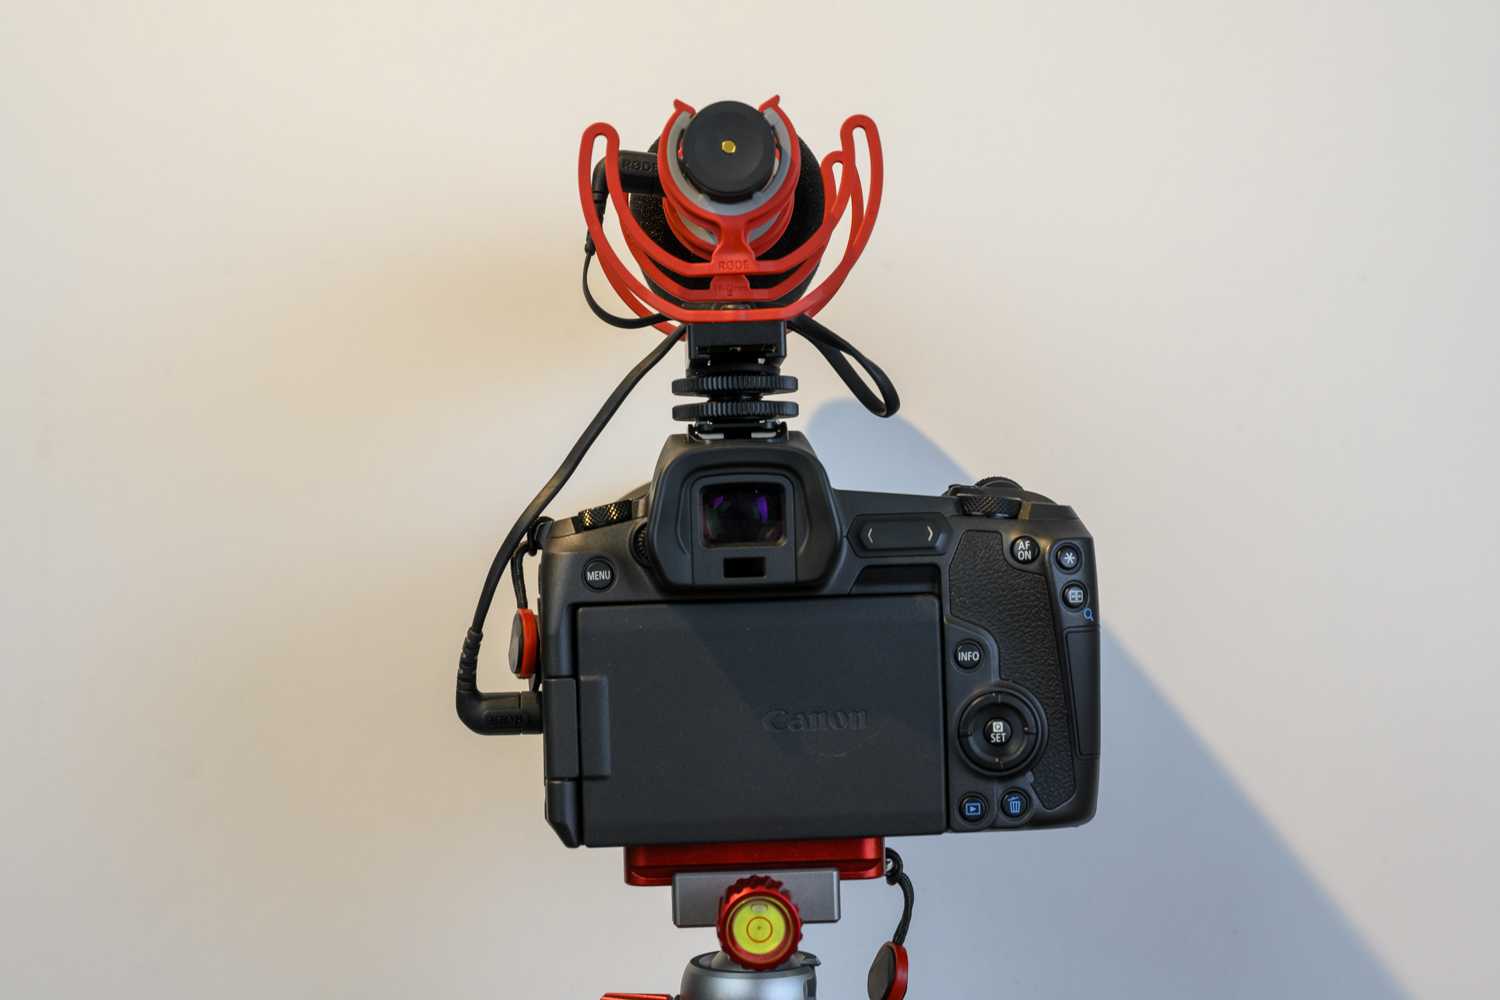
The best feature of this mic, though, is its sliding rail.
In the past, a difficulty with my RODE mics is that they stuck out so far from the camera that you might find yourself with a face full of microphone.
But the sliding rail on this mic means that problem is solved - if I'm shooting in selfie mode, I can slide the rail back and keep the microphone from hitting my face.
Add to that a battery that gives you more than 30 hours of runtime on one charge and you have a recipe for an excellent microphone for the photographer or videographer on your holiday list.
Learn more about the RODE VideoMic NTG
Gifts for Photographers Under $250: Nanlite FS-150 AC LED Monolight
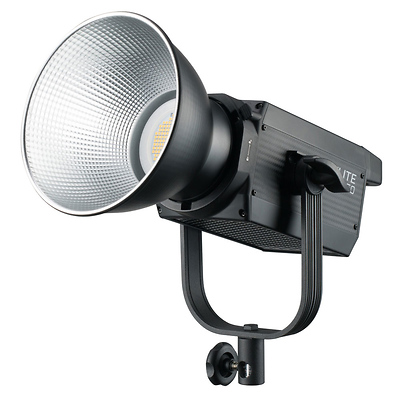
One of the most critical pieces of equipment in a portrait photographer’s arsenal is a good LED light. After all, without good lighting, the task of creating captivating images is difficult, if not impossible.
This year for the holidays, you can ensure the photographer on your shopping list has that all-important good lighting by giving them the Nanlite FS-150 AC LED Monolight.
This AC-powered light from our friends at Samy’s offers a beautifully even light spread thanks to a large LED array and a high-quality reflector. The light puts out 26380 Lux at 5600K and boasts a CRI of 96 and a TLCI of 98. What all that means is that this light emits beautiful, color-accurate light that falls evenly across the scene.
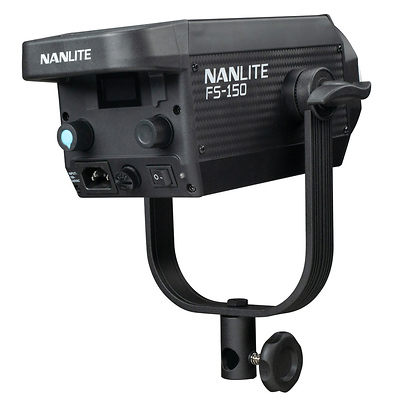
This light is an all-in-one device as well. It has a control unit, power adapter, and lamp body all in one compact unit. So, not only does this light offer beautiful lighting, but it’s also lightweight and easily portable. The in-body cooling is a further advantage because it enables easier heat dissipation for longer-lasting performance.
Since Nanlite incorporated a Bowens-style light modifier mount and an umbrella holder into the yoke, this light also gives photographers the ability to use a wide array of light modifiers. Additionally, this light offers customizable pre-programmed special effects to give photographers additional leeway in terms of how the light is used.
In other words, this is a gift that offers all sorts of functionality and utility; it’s truly something a photographer can use everyday!
Learn more about the Nanlite FS-150 AC LED Monolight
Gifts for Photographers Under $250: Refurbished SideTrak Slide Portable Monitor

One of the best gifts you can give the photographer in your life is the ability to streamline their workflow and make it more functional.
And a great way to do that is to give them a monitor that allows them to double the workspace of their laptop screen…
That’s where the SideTrak Slide Portable Monitor comes in.

At 12.5-inches, this portable monitor offers loads of additional real estate for working photographers. It simply attaches to the back of a laptop with a semi-permanent metal plate and gives photographers the ability to work with two screens or to mirror to the second screen if desired.
The Slide can be rotated 270-degrees, which means it can be used to share what’s on screen with clients. The monitor can be used on the left or right side of a laptop and can be used in portrait mode as a standalone monitor as well.
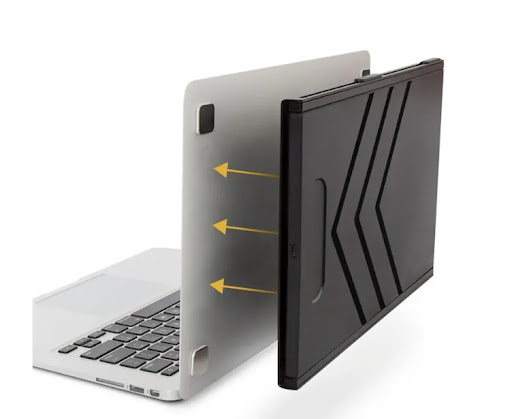
As a photographer that often travels, I know that space can often be at a premium which makes having a complex computer setup next to impossible.
But with Slide, you don’t need any extra table or desk space because it attaches directly to the back of a laptop. And since Slide is a lightweight, portable monitor, it can be brought along on field assignments with ease.
This is definitely one of those “gifts that keeps on giving” situations…
Giving gifts that can be used over the long-term gets you more bang for your buck while giving the photographer on your list tons of utility. This holiday season, make sure they have all the utility they need with the SideTrak Slide!
Learn more about the SideTrak Slide
Gifts for Photographers Under $250: Onyx 30W Bi-Color On-Camera LED Light
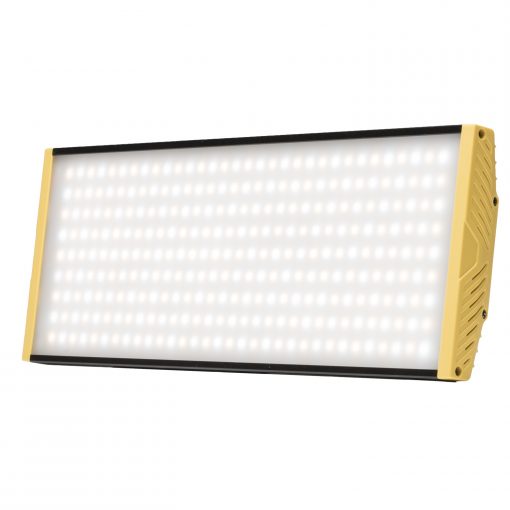
With more and more photographers getting into video production, it makes sense to get the photographer on your list a high-quality LED light for their video shoots.
The Onyx Bi-Color LED light is a great option because it features 30-watt high-quality LEDs, high brightness, and beautiful clarity for giving video sequences the light they need to stand out.
With an aluminum frame, the light is both lightweight and durable. Likewise, there is minimal heat release because the aluminum frame allows for excellent ventilation.
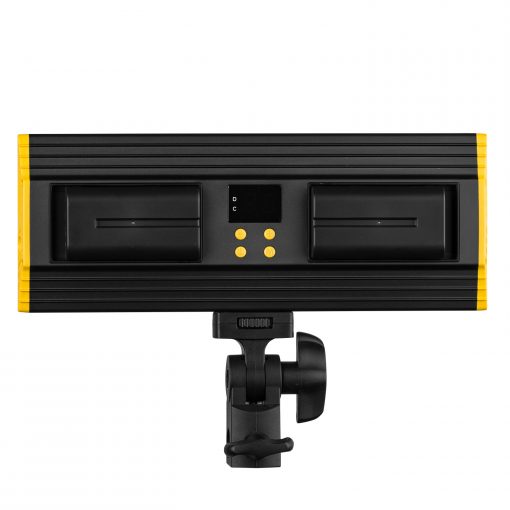
The light can be mounted on-camera or a tripod. It comes with a bracket that can attach to any light stand with a baby 5/8-inch receiver.
Best of all, the Onyx Bi-Color light has easy-to-use controls. The LED display gives you the ability to make quick and accurate adjustments of brightness from 10 percent to 99 percent and color temperature from 3200K to 5600K.
Of course, this light can also be used for photography, so it's a gift that offers multiple benefits for the person on your list!
Learn more about the Onyx 30-Watt Bi-Color On-Camera LED Light
Gifts for Photographers Under $250: PolarPro Peter McKinnon Edition II Variable ND Filter
PolarPro Signature Edition II
A variable ND filter is a crucial component of a photographer's kit because it's such a versatile piece of kit.
You can use a variable ND filter for photo and video work, and since this filter is variable, it gives you the ability to adjust from 2-5 stops or 6-9 stops depending on which version you opt to get.
What's so innovative about this filter is that it has preset stop ranges that eliminates the all-too-frequent occurrence of cross-polarization.
Likewise, this filter displays zero vignetting down to 16mm focal lengths. That means your favorite photographer can get a lot of utility out of this filter with a lot of different lenses.
PolarPro Mist Edition II
This updated version includes PolarPro's new Defender360 system, too. It's a 360-degree protection system for the filter, including a waterproof and dustproof seal.
PolarPro has also developed a new haptic feedback mechanism that gives photographers the ability to make quick and easy stop-value changes without taking their eye off the viewfinder.
On top of that, PolarPro offers Adventure Assurance, so if the photographer on your list isn't satisfied with the performance of the filter, you get your money back.
PolarPro has demonstrated a commitment to quality over the years, and this filter is no exception. With two versions (Signature II and Mist II) it's a great gift idea if you want to spend less than $250!
Learn more about the PolarPro PeterMcKinnon Edition II Variable ND Filter
Gifts for Photographers Under $250: Aputure Amaran AL-MX Bi-Color LED Mini Light
This pocket-sized light might be small, lightweight, and portable, but it packs a mighty punch with 128 LEDs, 3200lux of brightness, and a "boost mode" that increases brightness by 30 percent for bursts of 60 seconds.
Add to all that power the ability to tune the light from 2800-6500K so the photographer on your list can make fine adjustments to how the light looks to suit each and every photograph.
The quality of the light is top-notch, too - it offers a CRI of 95+ and a TLCI or 95+ as well.
This light has a wide beam angle of 120-degrees, a portable design that's about the width and height of a credit card, and a durable metal body that's crafted of aircraft-grade aluminum.
It has a 1/4 screw and a universal cold-shoe mount so it can be mounted on a camera, a tripod, a light stand, and so forth.
This unit has a built-in battery that offers about an hour of runtime at full power and four hours of runtime at minimum power. The battery is rechargeable via a USB-C cable.
This is simply a well-built, bright, easy-to-use light that any photographer would appreciate in their stocking this holiday season!
Learn more about the Aputure Amaran AL-MX Bi-Color LED Light
Gifts for Photographers Under $250: Nomatic Peter McKinnon Cube Pack
Nomatic has forged a reputation for being innovative and focused on developing high-quality, high-utility bags, and the Peter McKinnon Cube Pack is certainly no exception.
The Cube Pack holds 21 liters of gear and offers complete customization thanks to the customizable dividers inside. That customizability comes from the input of Peter McKinnon, who as a photographer and videographer understands the need to be able to customize your bag to fit the specific needs of each shoot.
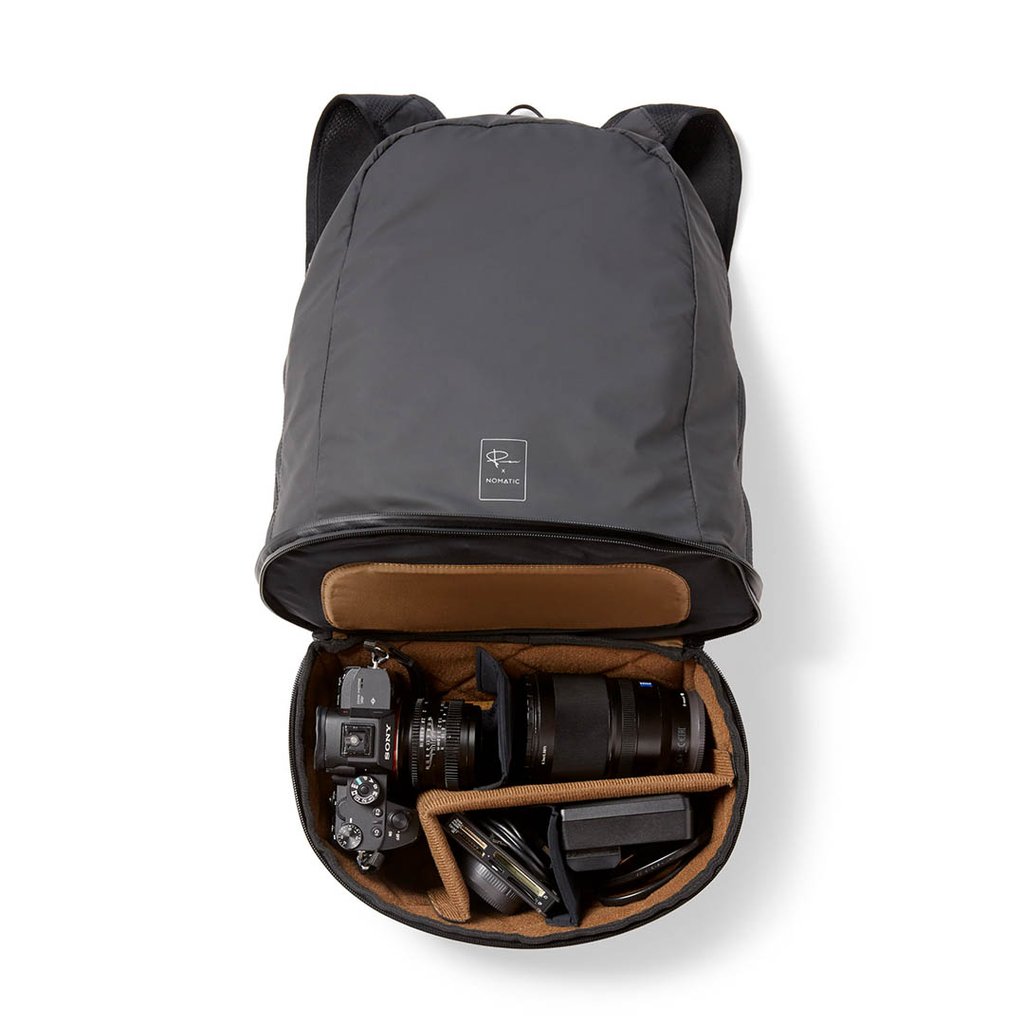
On the exterior of the bag is a durable and water-resistant finish. There are also external attachment loops for carrying additional gear.
And since this bag fits inside the Nomatic McKinnon Camera Pack, it can pull double-duty as a standalone bag or as an organizational tool for the larger Camera Pack.
Plus, at a price of $125.00, this bag is one of the least expensive items on this list! What's not to like about that?
Learn more about the Nomatic Peter McKinnon Cube Pack
Gifts for Photographers Under $250: Zoom H4n Portable Audio Recorder
As I noted earlier, since many photographers are now fully invested in also making videos, having proper video equipment is a must.
And one of the best gifts for a photographer that's shooting videos is a high-quality audio recorder like the Zoom H4n.
I've used Zoom products for years, and I can't express enough how pleased I have been with their performance.
In this case, the H4n offers four-channel recording up to 24-bit and 96 kHz. It has 2 XLR/TRS inputs with locking connectors and built-in stereo X/Y microphones that are adjustable from 90-120 degrees.
It has 4-in and 2-out USB interfaces and can record directly to SD or SDHC cards up to 32GB in size.
The H4n is portable, has professional-grade preamps, three recording modes, and many other features that make it an ideal holiday gift for the photographer on your list.
Learn more about the Zoom H4n Portable Audio Recorder
Gifts for Photographers Under $250: E-Image EK650 Tripod
A solid tripod is a must-have for any photographer, and that's exactly what you can give them in the E-Image EK650.
This professional tripod kit is ideal for photographers that shoot with DSLR or mirrorless gear.
It has a fluid head with a 75mm bowl that can support up to 11 pounds thanks to its fixed counterbalance.
The tripod's legs have plastic leg locking frames which reduce the overall weight of the tripod, making this a great option for photographers that travel a lot.
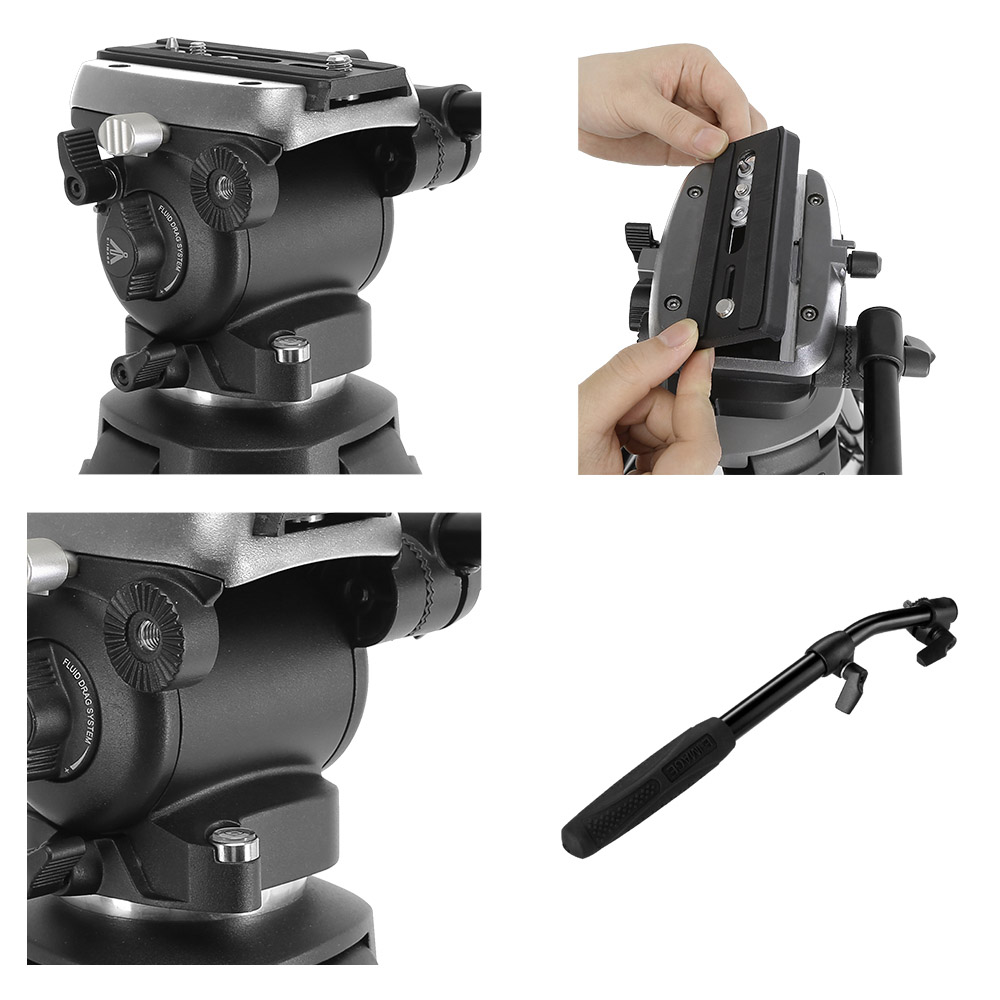
The mid-level spreader offers increased stability for shooting on uneven terrain too. The anti-skid pads and highly stable aluminum legs also help in that department. You get fixed pan drag, variable tilt drag, and continuous adjustable tilt drag options as well.
This is simply a fantastic all-in-one package (with a carrying bag included) that will bring a smile to your favorite photographer's face!
Learn more about the E-Image EK650 tripod
We Recommend
Gifts for Photographers Under $5,000 - 2020 Edition

A $5,000 budget can get you a lot of camera swag for the photographer on your list.
We're talking incredible cameras and lenses, amazing photography trips, and a whole lot of beautiful prints or gifts from Amazon.
We've considered lots of different types of gifts for this list of the best gifts for photographers under $5,000. See what your budget can get you in 2020!
Gifts for Photographers Under $5,000: CanvasHQ Print
One of my favorite gifts to give (and to get, while we're at it) is a big, beautiful print.
Personally, I like canvas because of the texture the canvas gives to the print. Besides, a canvas print is something that will continue to give joy to the person that receives it for years and years to come!
Now, I know what you're thinking...canvas is so old-school.
But if you order your canvases from the right printers, you can get something that is beautiful, well-made and looks modern, even if the substrate is perhaps a bit old-school.
I have tons of canvases in my home, the vast majority of which are fromCanvasHQ.
These are some of the best canvas prints I've ever purchased. The sharpness of detail, the color accuracy, and the overall build quality of these prints is next-level good.
Part of the reason for this is the materials CanvasHQ uses. We’re talking archival-grade canvas, commercial-grade inks that are water and UV resistant, and kiln-dried pine frames to keep everything straight and true.
But CanvasHQ isn't just tops in the quality department...
They have excellent customer service that makes you feel heard and as though you're the only customer they have to worry about at that moment.
These guys are committed to getting it right, so if something doesn’t go as planned, you won’t be hung out to dry.
If you have questions, they’ll answer them. If you have a problem, they’ll fix it. If you need assistance with uploading your photo or even picking the best finishes for your canvas, they’ve got your back.
In the video above, you can see how one of my CanvasHQ prints stacks up against similar prints from other printing companies. I think you'll see why I'm so loyal to CanvasHQ!
Start shopping for your favorite photographer today on CanvasHQ.
Gifts for Photographers Under $5,000: Canon EOS R5 and RF 24-105mm f/4L IS USM Lens
The Canon EOS R5 is one of the best cameras on the market, and the RF lineup of lenses is absolutely stellar.
That being the case, the combination of this camera and lens is a perfect gift idea for the photographer on your list.
This 45-megapixel camera is no joke - that's why I went out and got one at the first opportunity.
The new imaging sensor produces clean, sharp results with beautiful color rendition.
The Dual Pixel autofocus system is both fast and accurate, for still images and shooting video.
Speaking of video, the 8K/30p internal recording in 4:2:2 10-bit C-Log and HDR PQ is an astonishing spec. Those specs are also available in 4K/120p, in case you were wondering!
This rig has in-body image stabilization that gives you up to five stops of stabilization. When paired with a stabilized RF lens, you can get up to eight stops. If the photographer you're shopping for has stabilized EF lenses, those will work too (with an EF-RF adapter, of course).
This camera is not for the faint of heart or budget. But for a professional photographer that demands the best, I think it's one of the top options available today.
Adding a versatile and sharp 24-105mm f/4L lens to the mix is just the icing on the cake! This lens is a fantastic zoom option that can accommodate all kinds of tasks, from landscapes to portraits, wildlife to automobile photography, and many other pursuits.
If you really want to impress your favorite photographer this holiday season, this gift will do it!
Learn more about the Canon EOS R5 and RF 24-105mm f/4L IS USM
Gifts for Photographers Under $5,000:Razer Blade Studio 15
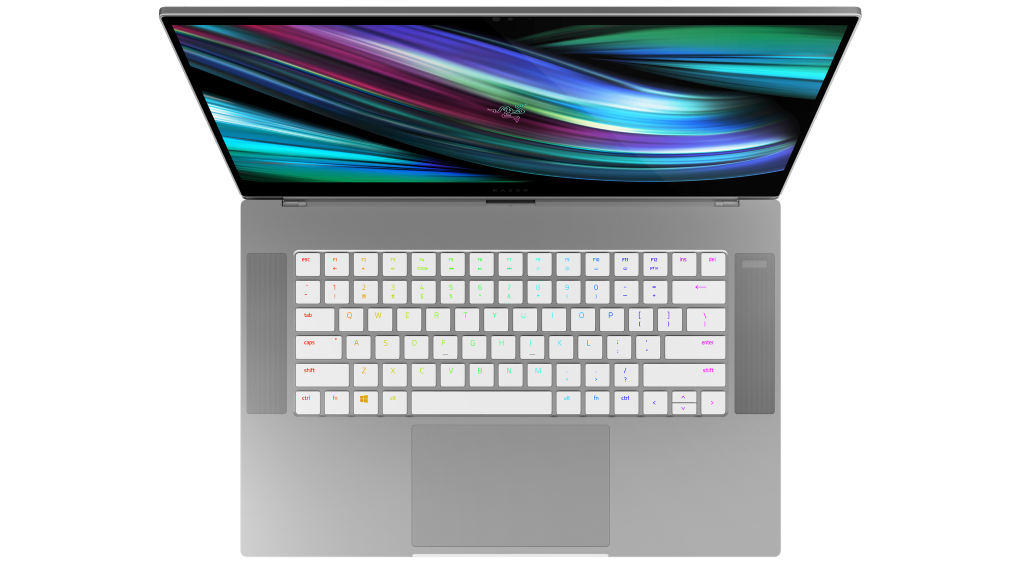
The 2020 Razer Blade 15 Studio is impressive, to say the least...
It's retained many of the best features of the 2019 version and juiced up many others.
Get a load of these specs:
- Windows 10 Pro
- 8-core 10th Generation Intel Core i7 processor with up to 5.1GHz max boost
- NVIDIA Quadro RTX 5000 GPU
- 15.6” OLED touchscreen with Corning Gorilla Glass
- Up to 4TB of SSD storage
- Up to 64GB of dual-channel DDR4 memory
- Upgraded backlit keyboard

Of course, the 2020 version kept the best thing about the 2019 version - the NVIDIA Quadro RTX 5000 GPU.
I've had a lot of laptops and desktops over the years that had a "high-end" graphics card, and I can tell you that none come close to what this Quadro GPU can do. Honestly, it's like something you'd find in a Hollywood studio! No matter if you're doing intensive photo editing or video work, this GPU will be able to handle it.
Another exciting feature about the 2020 Razer Blade 15 Studio is that it's now available with 8-core processors. Having that extra power is certainly a bonus!
The larger 15.6-inch OLED touchscreen color-calibrated display is another amenity to note. Not only is it bigger than its predecessor, but it also now has a Gorilla glass panel for added durability. Add in a UHS-III sd card reader, ports galore, and an anodized aluminum body finished in mercury white, and you have the makings of the hottest laptop of the year for photographers and videographers!
Learn more about the Razer Blade Studio 15.
Gifts for Photographers Under $5,000: Pre-Owned Canon EOS R, Canon RF 24-105mm f/4 L IS USM, and Canon RF 35mm f/1.8 IS STM Macro
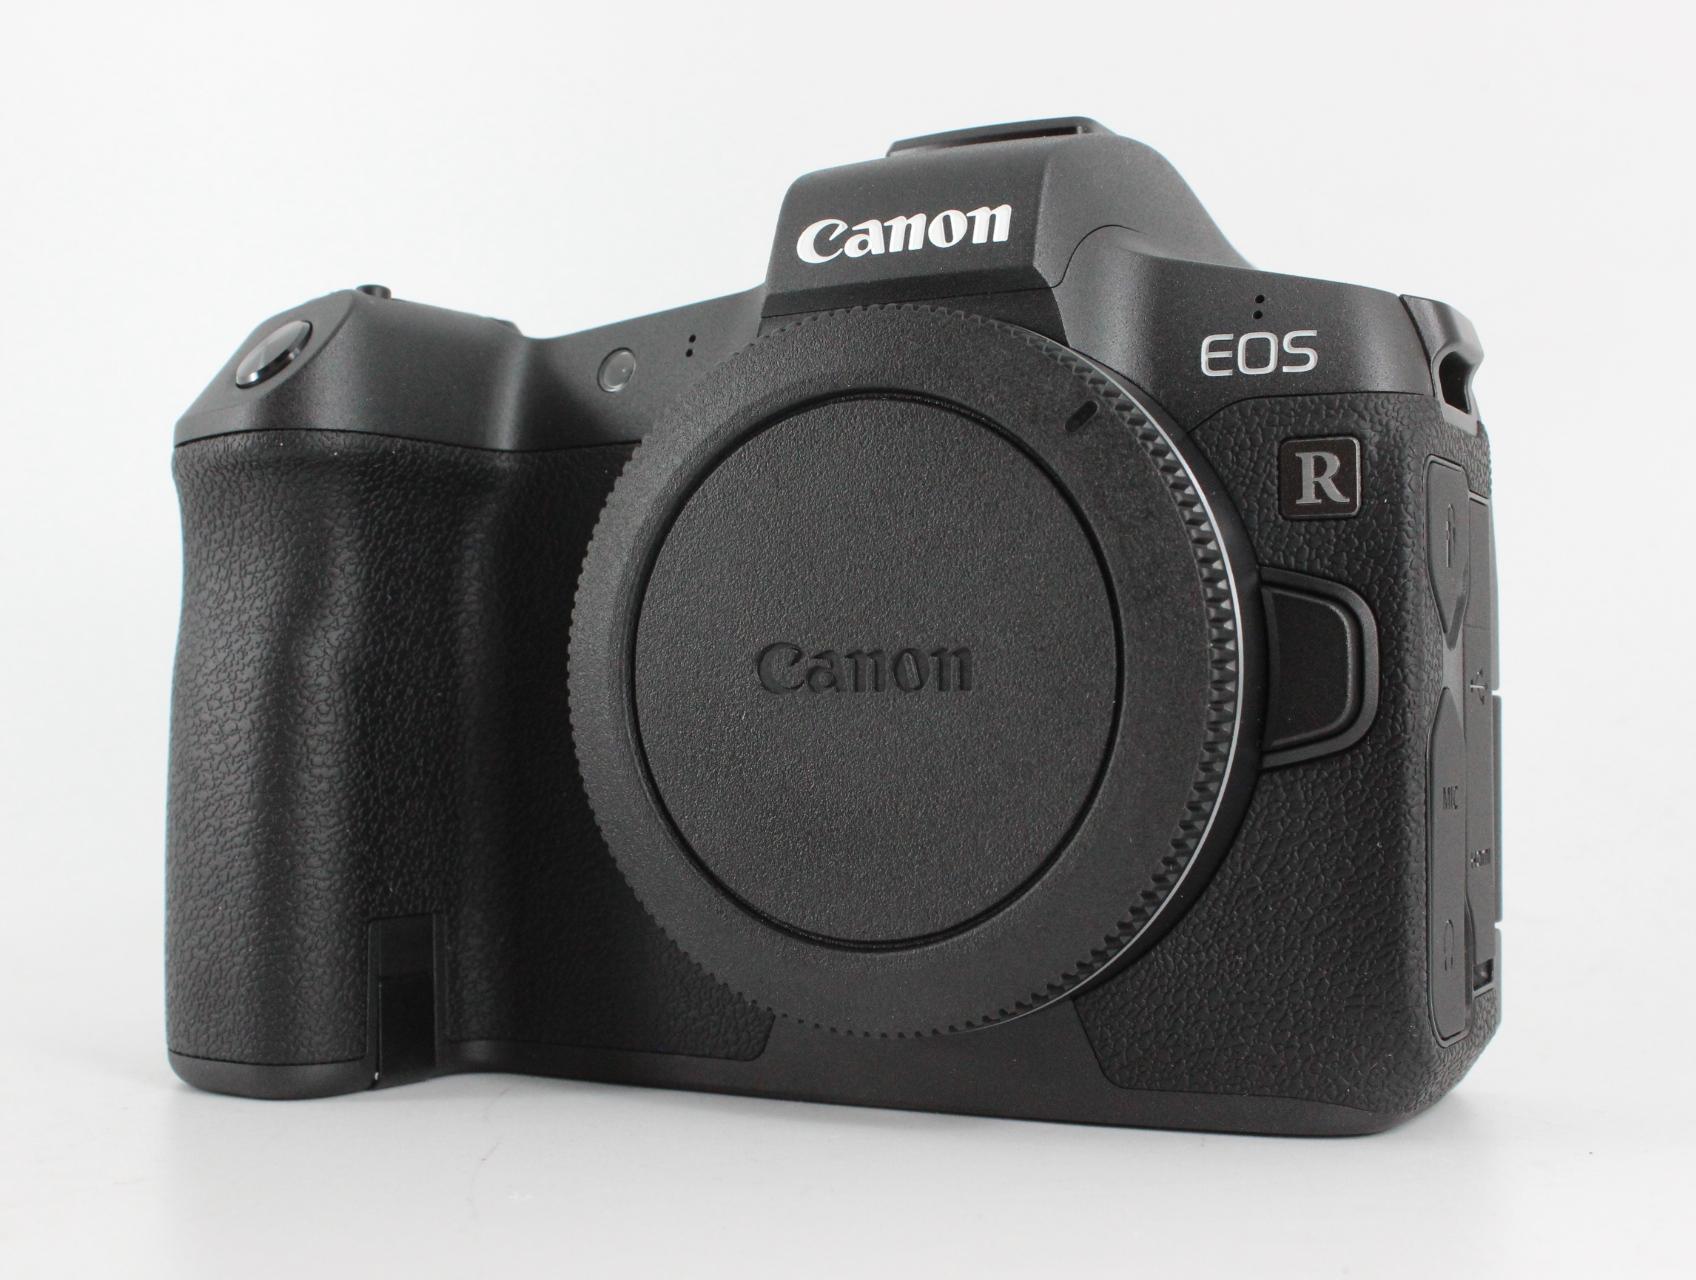
If the photographer on your list needs an upgrade in the camera department, you might consider giving the gift of a Canon EOS R this year.
The EOS R was released in October of 2018, so there's been time for prices to fall and for a good selection of used cameras to develop.
With a like-new-condition EOS R, you can save yourself quite a bit of money while still giving your loved one a capable, reliable, and virtually new camera!

The EOS R features a 30.3-megapixel full frame CMOS sensor paired with a DIGIC 8 image processor.
The result of this is superb performance, excellent image quality, and a bevy of secondary features that make it a fantastic camera for just about any photographer.
With a native ISO range up to 40,000, this camera is a good low-light performer, and with 8 fps continuous shooting, it can tackle subjects like wildlife and sports photography in which rapid movement needs to be captured.

Additionally, the EOS R has a top-of-the-line autofocus system called Dual Pixel AF, which allows users to select from 5,655 AF points to quickly and accurately acquire focus.
Add to that 4K UHD video recording at 30p, and you have the makings of a fantastic holiday gift!

The Canon RF 24-105mm f/4 L USM is a great choice for an all-around lens that accommodates wide-angle, standard, and telephoto shooting. And since pre-owned versions in like-new are under $950, you're well under the $5,000 budget threshold! That means you can add a second lens like the Canon RF 35mm f/1.8 IS STM Macro to the gift bundle!
Though the 35mm f/1.8 isn't an L-series lens, it has excellent optics, a large maximum aperture, and image stabilization. Plus, the 35mm focal length is hugely versatile, so the photographer on your list could use it for everything from architectural photography to portraits.
With this bundle, you can equip your favorite photographer quite nicely, and for well under budget.
Learn more about the Canon EOS R, the Canon RF 24-105mm f/4 L IS USM, and the Canon RF 35mm f/1.8 IS STM Macro
Gifts for Photographers Under $5,000: Colors of Costa Rica Photo Tour With ColorTexturePhotoTours

From spectacular sunsets on the coast to breathtaking waterfalls, incredible diversity of wildlife (including dozens of species of frogs) to stunning flowers, Costa Rica has no shortage of subject matter for a photographer.
And as part of ColorTexturePhotoTour's Colors of Costa Rica photo tour, the photographer on your list can explore all that and much more as part of a luxurious, all-inclusive trip!

This trip is the ideal length - six days and five nights - so it's easier to get away from work and other responsibilities to spend a relaxing time in one of the most beautiful locations on earth.
Over the course of the trip, the photographer on your list will join no more than three other participants to tour the landscapes of Costa Rica with workshop leader Scott Setterberg.
Those landscapes, which includes four national parks, will be fodder for some spectacular photography opportunities, as well as plenty of one-on-one instruction time with Scott.

In this regard, this trip isn't just about seeing gorgeous places, but it's also about developing and improving photography skills.
With stops in Tenorio Volcano National Park, La Paz Waterfall Gardens, Catarata La Fortuna, Lake Arenal, and Juan Castro Blanco National Park, the tour takes participants to varied locations, each of which offers unique beauty and challenges photographers to apply their skills to get the best shots.
Along the way, a licensed, English-speaking nature guide will offer insights into the biodiversity of Costa Rica, so tour-goers learn more about the beauty they see and photograph.
Each evening, the tour winds down and participants stay in luxurious, award-winning accommodations.
The photographer on your list can enjoy authentic Costa Rican cuisine, spa services, massages, and more.
What better way to celebrate the holidays than by giving your loved one the photography trip of a lifetime?!
Learn more about the Colors of Costa Rica Photography Tour by ColorTexturePhotoTours
Gifts for Photographers Under $5,000: Nikon Z7 with Nikon Nikkor 24-70mm f/4 S Lens
When I had a Nikon Z7, I used this very lens as well. It's an ideal combination for everyday photo-taking.
What impressed me the most about this camera is its sensor - a 45.7-megapixel full frame behemoth that offers superb image quality.
The sensor is paired with a fast and accurate 493-point autofocus system that offers 90 percent coverage. Whether the photographer on your list photographs people, places, or things, this camera will be a great companion!

Other features of note include 9 fps shooting, 4K video up to 30p (up to 120 fps in HD), an ISO range of 63-25600, and built-in image stabilization.
Additionally, Nikon gave the Z7 a beautifully resolute 3.69-million-dot electronic OLED viewfinder as well as a 3.2-inch LCD touchscreen display.
I really appreciated the design of the camera as well - it feelslike a Nikon with a deep grip and a familiar button layout.

On top of all that, the Z7 is fully weather sealed - I tested it out in Norway and can attest to its ability to stand up to really, really cold temperatures.
You get Wi-Fi, Bluetooth, USB battery charging, and Nikon's SnapBridge functionality as well.
And in this case, the Z7 comes with a killer lens, the Nikon Nikkor 24-70mm f/4 S.
This lens is the ideal walk-around lens, with wide-angle to short telephoto capabilities that allows photographers to capture all kinds of subject matter without the need for lens changes.
What's more, this S-series lens is small and lightweight, making it an ideal alternative to bigger, heavier f/2.8 models.
It has an aspherical extra-low dispersion element, three aspherical elements, and Nano Crystal and Super Integrated Coatings, all of which combine to reduce chromatic aberrations, distortions, ghosting, and flare.
The result is beautiful color rendering and improved contrast. In other words, it's a great camera-lens combination!
Learn more about the Nikon Z7 With Nikon Nikkor 24-70mm f/4 S Lens
Gifts for Photographers Under $5,000: eMotimo spectrum ST4 Run & Gun Bundle

For the photographer on your list that's itching to add videography to their repertoire, the eMotimo spectrum ST4 Run & Gun Bundlespectrum ST4 Run & Gun Bundle is a perfect gift with a $5,000 budget.
Included in this bundle are a spectrum ST4 4-axis motion control unit, a eMotimo heavy duty L-bracket for mounting a camera, an eMotimo Fz focus motor, and iFootage Shark Slider with both two-foot and four-foot lengths.
Also included is an iFootage integration kit with the motor of your choice, a uSD card with instructions, an Arca compatible quick release clamp for tilt, and an Arca compatible plate for pan axis.
In other words, this bundle is loaded for bear with all the fixings a photographer needs to create breathtaking cinematic films and time-lapse videos!
Learn more about the eMotimo spectrum ST4 Run & Gun Bundle
Gifts for Photographers Under $5,000: Sony a7R IV

The Sony a7R IV will be hot off the assembly line well in time for the holiday season, and it's a fantastic gift idea for the photographer in your life.
This camera is packed to the gills with modern features that will make any photographer smile from ear to ear.
The a7R IV has a 61-megapixel sensor that's unrivaled on the market at this point.

Along with that crazy sensor is a laundry list of jaw-dropping specs:
- a 5.76-million-dot electronic viewfinder
- 5-axis image stabilization
- 10fps burst shooting
- 15 stops of dynamic range
- A 567-point phase-detect autofocus system
- Wireless tethering
- Enhanced dust and moisture resistance.

That's not even to mention Sony's impeccable Eye AF system which tracks human and animal eyes with extreme precision.
There's also Real-Time AF for video recording, 26-megapixel resolution in APS-C crop mode, and sensor-shift multi-shot mode that creates image files that are a whopping 240-megapixels in size.
And at less than $3,500, you can give the gift of the Sony a7R IV without breaking your budget!
Learn more about the Sony a7R IV
Gifts for Photographers Under $5,000: Arca-Swiss F-Classic 4x5 View Camera

For discerning photographers that enjoy working in medium format, it’s tough to beat the Arca-Swiss 4x5.
This is a professional-grade tool that is both easily transported and produces high-quality images.
It’s made specifically for 4x5 medium format film and digital backs made to fit medium format digital camera systems.
It’s a fully modular system, too, with a wide array of accessories for everything from viewing to conversion.
Whether it’s used for film or digital prints, this camera will bring a smile to any photographer’s face!
Best of all, it's well below the $5,000 budget mark, so you can give an awesome gift and save a ton of money, too!
Learn more about the Arca-Swiss F-Classic 4x5 View Camera
Gifts for Photographers Under $5,000: Amazon Gift Card
![]()
Totally stumped regarding gift ideas for photographers on your list?
Why not go the easy route and get them an Amazon gift card?
Though a gift card isn't exactly the sexiest gift, when the photographer in your family sees that you dropped $5,000 into a few gift cards (there's a $2,000 limit per card), they'll love it just the same.
With an Amazon gift card, they can buy whatever they want - a new lens, a second camera body, lighting gear, a laptop - you name it!
As far as flexibility goes, there's nothing better to give a photographer than a gift card with some serious money loaded onto it!
Learn more about Amazon gift cards
We Recommend
GoPro Hero 9 Black Launches September 16th
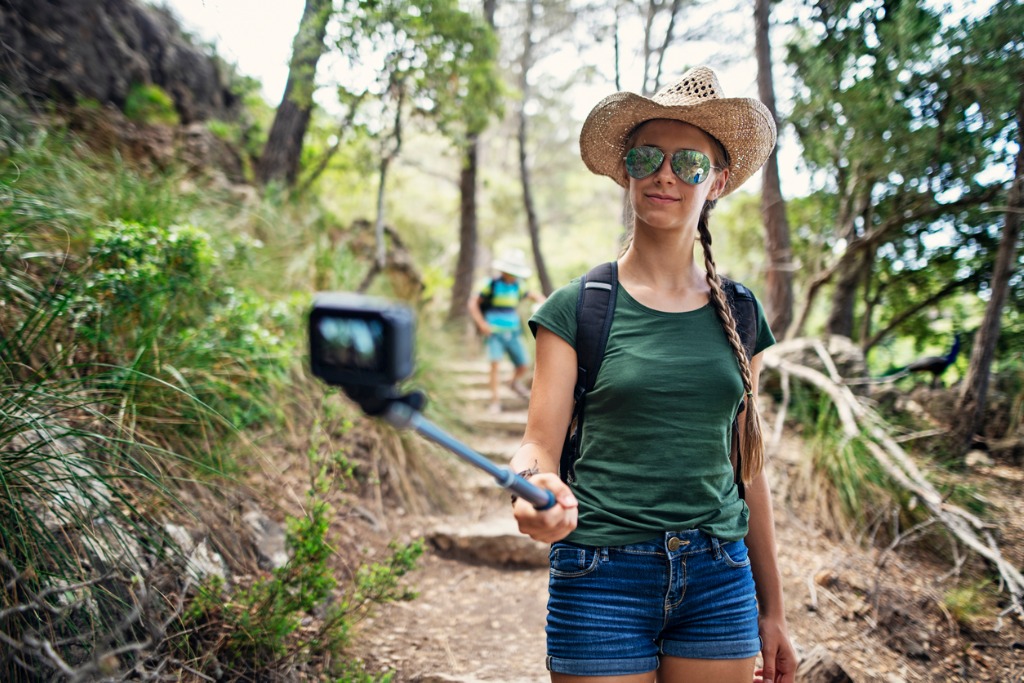
photo byImgorthandvia iStock
A series of rumors have been swirling around the GoPro Hero 9 Black for a few months now and it looks like GoPro is finally ready to unveil its newest product this week, on September 16th.
GoPro tweeted a teaser trailer early Sunday morning. In the trailer, GoPro promises that the new GoPro will include “more resolution,” and “more everything.”
09.16.20 #MoreEverything
— GoPro (@GoPro) September 13, 2020
⠀⠀⠀⠀⠀⠀⠀⠀⠀https://t.co/45sp1d7Lsg pic.twitter.com/ZLhRSVMTzP
But, what does “more everything” really mean?
Well, since the GoPro Hero 8 Black didn’t bring as many changes as a lot of avid GoPro users wish it had, it seems GoPro has decided to pack a lot of these changes into the GoPro Hero 9 Black.
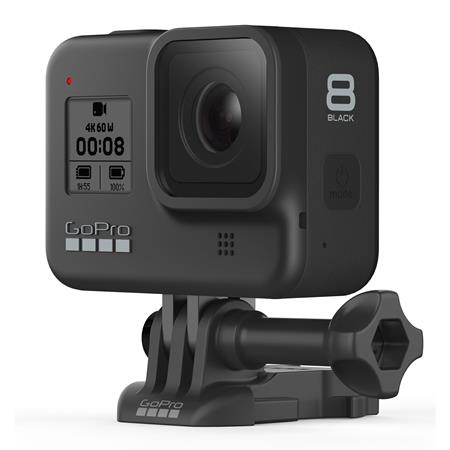
GoPro Hero 8 Black
For instance, rumors suggest that the GoPro Hero 9 Black is going to include a 20MP resolution, which makes sense with the “more resolution” promise. But, rumors also suggest that this GoPro Hero 9 will be able to shoot 5K/30p video, which will be the best video capabilities of any GoPro to date.
The addition of 5K video capabilities doesn’t mean, however, that any of the old video capabilities you love are going to be canned. Supposedly, other shooting modes, like 4K, 1080p and 240fps slow-mo will still be included.
Learn More:
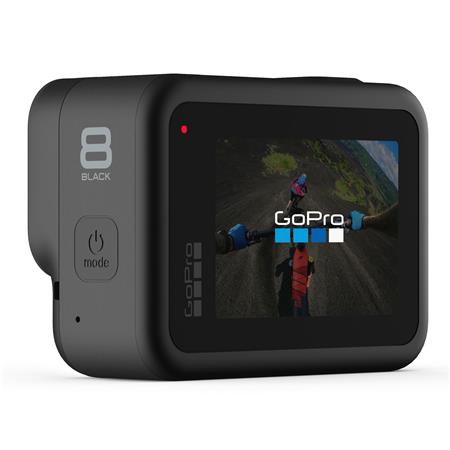
GoPro Hero 8 Black
Other rumors surrounding the GoPro Hero 9 Black include promises of a much larger battery capacity. The current model uses a 1,220 mAh battery, but the GoPro Hero 9 Black may use a battery as large as 1,720mAh, which would be a jump of 40% capacity.
However, before you get too excited about this much larger battery capacity, you may want to think about whether this version of the GoPro will need it because another rumor suggests that the monochrome front display will now be a color display, which will be helpful for vloggers or anyone shooting selfies.
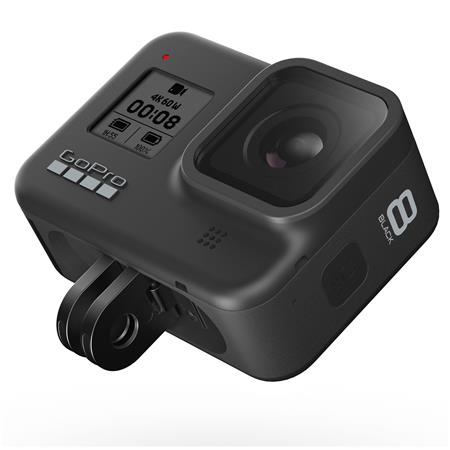
GoPro Hero 8 Black
The GoPro Hero 9 Black will also need a large software upgrade in order for me to be convinced to buy it, and it sounds like it’s going to get one. For instance, this new GoPro will likely include HyperSmooth 3.0 image stabilization, which will make all of your videos feel like they were taken with a gimbal.
Moreover, it is also supposed to come with TimeWarp 3.0, which will allow you to create really easy time-lapse footage.
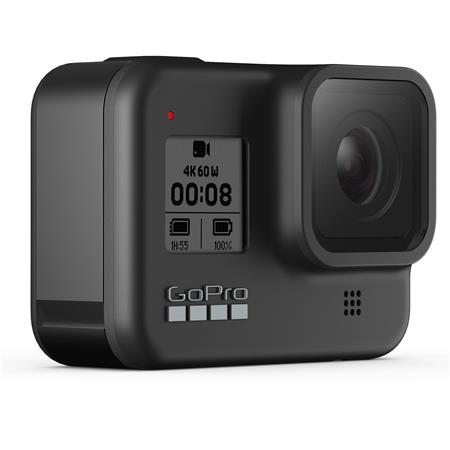
GoPro Hero 8 Black
However, all of these improvements are going to come with a large price jump, if you believe the rumors. WinFuture, the German site that has been leaking a lot of these rumors, saw one of their employees, Roland Quandt, tweet that theGoPro Hero 9 Black will cost €479 or around $570.
Keep in mind that all of these specs are rumors. We will really need to wait just a little while longer in order to get our hands on the new GoPro Hero 9 Black to test it for ourselves.
But, until then, you can pick up a GoPro Hero 8 Black for $350 on Adorama. Plus, you can expect this price to continue falling as the new edition finally rolls out.
Learn More:
We Recommend
Having the Right Filters for Drone Photography

photo byVladK213 via iStock
Drones for photography are cameras. As with all of our other cameras, there are good reasons to use filters for drone photography.
What are you using as drone photography gear? The number of choices for drone filters are going up, both from the drone manufacturers and from third party filter makers like PolarPro Filters and Tiffen Filters.
Filters for Drone Photography

Photo by Lukas Rodriguez from Pexels
Does one need drone filters? What filters should you have in your drone photography gear? What other drone photography tips are beneficial?
Just as with regular photography, two of the most useful filters for drone photography are circular polarizer (C-POL) filters and neutral density (ND) filters. The very popular graduated neutral density (GND) filters aren’t that practical for drone photography, primarily due to needing exact positioning placement for best effect.
Recommended Drone Photography Reading:
- Drone Photography Basics: Your Guide to the Camera in the Sky
- Drone Photography Explored: Beautiful Drone Photography
C-POL Filter

Photo by Tobias Bjørkli from Pexels
The circular polarizer filter is a must have filter for serious photographers. It can be used in many situations for a variety of purposes. A polarizer removes or reduces glare and reflections and also helps capture full color depth due to reducing glare.
For drone photography, polarizer filters will improve the end result of still images and video footage. Much of the subject matter a lot of drone photographers use their drone cameras for tend to include large areas of surfaces that can be reflective. Photo elements such as wet lawns, pools, lakes, and city streets and parks can be imaged better with a polarizer filter.
ND Filters

Neutral density are vital filters for drone photography and videography because of the limited range of exposure options in many high end photographic drones.
For instance, the DJI Mavic 2 Pro has one of the best cameras available in a reasonably priced drone, the 20MP Hasselblad L1D-20c gimbal camera with a rather large-for-a-drone 1-inch type sensor and 4K 10-bit HDR video capture capability.

The maximum aperture of the 28mm full frame equivalent lens is f/2.8, but it only stops down to f/11.0. Combined with an ISO range of 100-6400 and shutter speeds up to 1/8000 second, this combination is well-suited to many exposure situations, but it could sometimes use a little help in bright daylight lighting.
A neutral density filter will allow you to get back into moderate shutter speeds and apertures to take advantage of the sweet spot of the lens and for a more natural appearing video feed with a slower shutter.
PolarPro Filter Kits

Sticking with our example drone, the DJI Mavic 2 Pro, you can find a great set of filters for a very reasonable price, the PolarPro filters.
What I like about this kit is the multiple filters in very usable strengths. There are 3 separate ND strengths and 3 hybrid combination filters with polarizer and neutral density together. The ND filters provide for reducing the shutter speed or adjusting lens aperture without changing color profile.
With the ND filters you can reduce the video recording shutter speed to cinematic levels for a more natural appearance when played back.
Using the hybrid ND/POL drone filters, you also gain the benefit of reducing glare and reflections while improving color rendition.
Get a detailed review of these filters in the video above by 51 Drones.
Other Drone Photography Tips

Photo by Adil from Pexels
Besides those two basic and very important uses, your drone photography and videography can make use of slower shutter speeds and wider apertures for other techniques.
By opening up the aperture, you can limit focus to show what you want to emphasize. Since it’s all part of the Exposure Triangle, changing aperture also lets you adjust the shutter speed for your specific imaging needs.
When recording video footage, whether A-Roll or B-Roll, being able to slow down the shutter speed helps eliminate that choppy, hard feel that fast shutters in video tend to produce. Also, if you’re using the dorne for B-Roll, it lets you match what you shot for A-Roll, so the editing blends in better.
The PolarPro filters made for the DJI Mavic 2 Pro are perfectly balanced for use on the gimbal mounted camera. They do not affect any camera movement and all of the drone flight modes are workable with the filters mounted.
How To Adjust a Polarizer On a Drone

Photo by Jeremy Bishop from Pexels
One of the questions going through your mind is how to adjust the polarizer from the ground when your drone is in the air. Well, you have to adjust ahead of time. The instructions with the filters show you the best method and it works pretty well.
It’s a “best guess” scenario, but you can get it close to optimal and it will still be far superior to not using a polarizer at all. Before any paid gigs, be sure to practice!
Using filters for drone photography is a good idea. The cameras have advanced so much in a very short time. And they are generally very affordable now as well. Try out your favorite filters on your own drone and see the difference they make.
We Recommend
How to Choose the Ideal Landscape Photography Camera
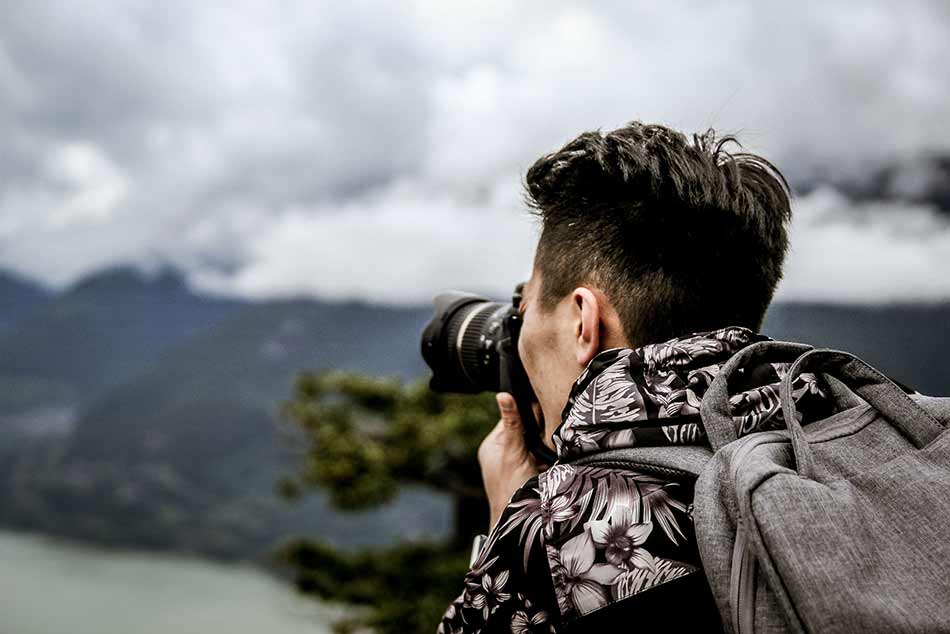 Photo by Brendan Church on Unsplash
I think we can all agree that it isn't the gear that makes a great photo, it's the person using the gear.
That said, having quality landscape photography gear certainly doesn't hurt!
The question is, when you're shopping for the best landscape photography camera, what features should you look for?
In this quick guide, I offer up a few tips that will help you make the best decision for your landscape photography.
Camera Features You Need for Landscape Photography (and Some You Don't)
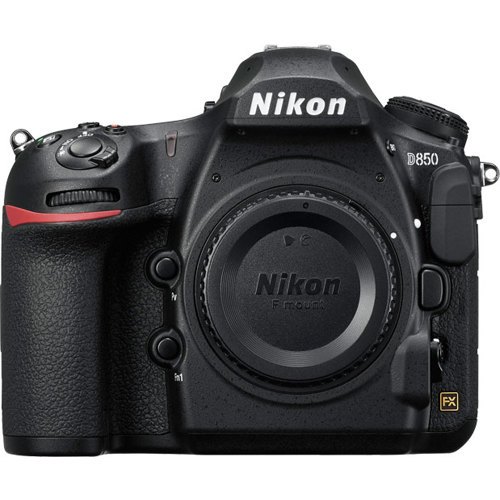
First things first...
Let's identify a few camera features that will help you take better landscape photos:
- Sensor size - Both full frame and crop sensor cameras are great for landscapes. Where full frame cameras like the Nikon D850 offer better image quality and the ability to capture more of the scene in one shot, a crop sensor camera like the Nikon D7500 is often less expensive. Additionally, since a crop sensor camera increases the effective focal length of a lens, you can take telephoto images with smaller, less expensive lenses.
- Megapixels - High megapixels means high-resolution images, and the more resolution you have, the finer the details will be. Plus, if you intend to make your images into large-format prints, more megapixels is definitely a good thing.
- Dynamic range - One of the most important features to consider is the dynamic range the camera is capable of capturing. The wider the dynamic range, the better the shadows and highlights will be and the less noise there will be in the shot.
- Construction - To protect against rain, snow, dirt, and other elements, look for a camera that is well built and has weather sealing.

What a good landscape photography camera doesn't really need are features that have to do with capturing motion.
That is, where a sports photographer will want a camera with advanced autofocus features and ultra-fast continuous shooting, since most landscapes don't involve quick motion, you can likely skip looking for those features.
Top Canon Cameras for Landscape Photography
Now that you have an idea of some of the most important features for a landscape photography camera, let's take a look at a couple of Canon cameras that could serve you well.
The first choice (in my opinion, anyway), is the Canon EOS 5D Mark IV.
This full frame camera has excellent resolution with a 30.4-megapixel full frame sensor.
It's got excellent dynamic range, is great in low-light situations for dusk and nighttime shots, and it has excellent weather sealing.
You can even use its built-in GPS system to tag your images with details about where each one was shot. Not bad, eh?
See the 5D Mark IV in action in the video above by Brendan van Son.
Price: $3,099.99 (body only) at Adorama
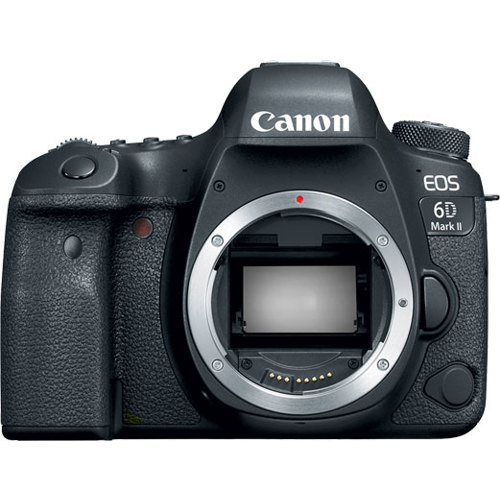
If you're on a tighter budget but still want a high-performance full frame camera, the Canon EOS 6D Mark II is a great option.
It's got a 26.2-megapixel full frame sensor, an articulating touchscreen LCD, and is smaller and lighter than the 5D Mark IV, which is handy when you've got a long hike in front of you.
The 6D Mark II also has an improved dynamic range over its predecessor, so your photos will have those deeper shadows and brighter highlights discussed earlier.
Price: $1,599.00 (body only) at Adorama
Top Nikon Cameras for Landscape Photography
In addition to the Nikon D850 and Nikon D7500 mentioned earlier, Nikon has other cameras that will do the trick for photographing landscapes.
That includes the older Nikon D750 which offers full frame performance with a 24.3-megapixel sensor, but with a much smaller price tag given that it's two models old.
Additionally, the D750's sensor has a reputation for imagery with very low noise, even when you have to push the ISO, and it has a rockstar of a battery that allows more than 1,200 shots on a single charge.
It's built like a tank, too, so it's perfectly suited for landscape photography.
Learn more about the Nikon D750 in the video above by James Popsys.
Price: $1,399.99 (body only) at Adorama
Final Thoughts
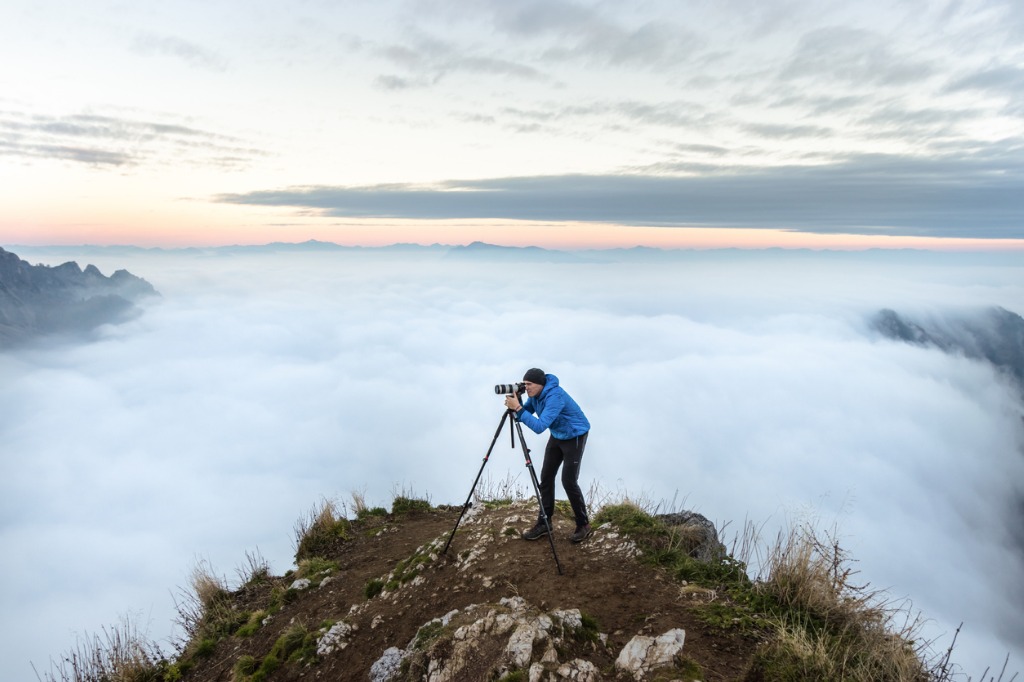 Image Credit: Matic Grmek via iStock
Like I said in the introduction, it's not the gear you use that has the greatest impact on the quality of your photos.
Instead, it's you, your capabilities, skills, and talents behind the lens.
You can take great photos with nothing but your smartphone, but having gear that has features that specifically aid in taking landscape photos will only help your situation.
Any of the cameras mentioned in this article are a great choice, but this is by no means a comprehensive list. Do your due diligence, research different cameras you like, and get one that fits your budget and your needs.
From there, all that's left to do is go shoot!
We Recommend
I Learned Something New About Adorama

Photo by filadendron via iStock
If you follow our articles here on PhotographyTalk, you might know that I recently picked up a Canon EOS M6 Mark II.
I use it as my primary B-roll camera for the videos I create for our YouTube channel.
When I bought it, I outfitted it with a Sigma 16mm f/1.4 DC DN Contemporary lens (the same model I had for my old Sony a6400), but I wanted to add a zoom lens to the mix too.
That's where the Canon EF-M 18-150mm f/3.5-6.3 IS STM lens comes in...
This is not a particularly expensive lens brand-new, but in this time of economic uncertainty, I decided to buy a used one.
So that got me thinking...
I've been buying new gear from Adorama for well over a decade, but I had never purchased any used gear from them. To be honest, I had no idea that Adorama had such a robust used department.
So, I did a blind purchase of this lens. I've outlined my experience with this purchase below.
Canon EF-M 18-150mm f/3.5-6.3 IS STM Specs
First, I want to quickly review the specs on this lens:
- 18-150mm focal length (28.8-240mm equivalent)
- Maximum aperture of f/3.5-6.3
- Image stabilization
- 0.31x maximum magnification
- 55mm filter size
- 17 elements in 13 groups
- 7 diaphragm blades
- 2.4 x 3.4 inches in size
- 10.6 ounces

The reason I wanted this lens is twofold: first, I wanted something with great versatility (and the huge focal range of this lens fits the bill), and second, I wanted something compact and lightweight, which, again, this lens ticks the boxes.
I can use this lens for video work, but when I want to run and gun with a smaller kit for landscape photography, I'll use the M6 Mark II and this lens.
Now let's review my experience buying this lens.
Buying a Used Lens From Adorama
Shown above is the listing of the actual lens I purchased. I got it for $419, which is $80 off the price of a brand-new one.
Buying this used lens was a simple and easy task, just like when you purchase new gear from Adorama.
When the box arrived in the mail, I was astonished to find that the lens came in the original box (shown below).
Having the original box isn't a huge deal, but it's certainly a nice touch.
I've bought 15-20 used lenses from various used retailers over the years, and I never got the original box until now.
On top of that, Adorama's description of the lens was spot-on.
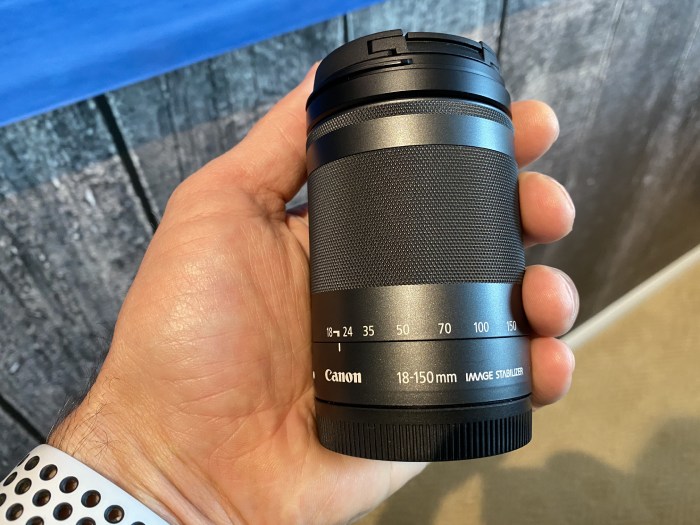
As you can see from the images above and below, the lens is in virtually flawless condition.
The body of the lens shows no signs of wear. The lens glass is perfect with no scratches.
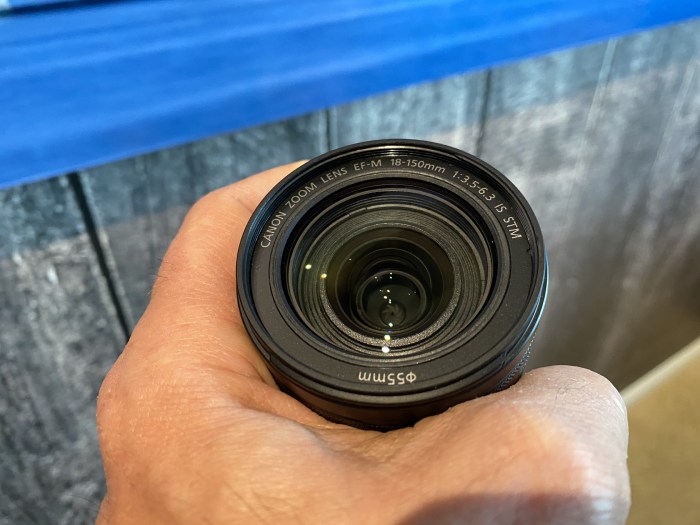
The terminals on the back are all intact and clean, too. It's just an all-around excellent lens!
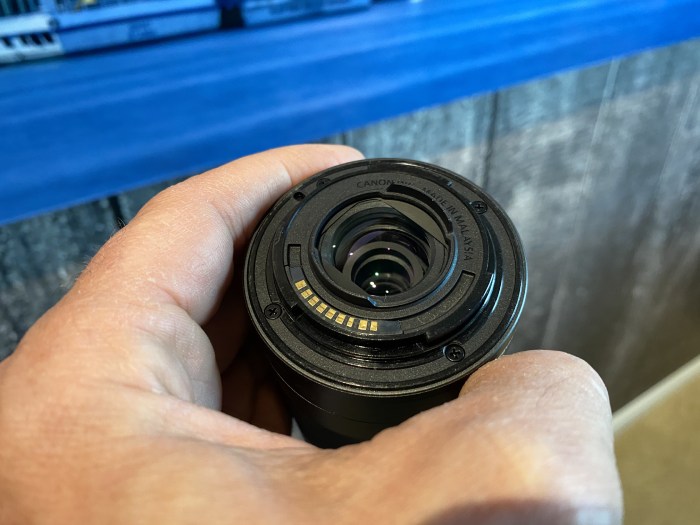
I have to say that I am more than pleasantly surprised with this purchase. It's not that I thought Adorama would send me a junk used lens, but I wasn't expecting such a high-quality lens, even though it was described as such. To say that buying used from Adorama exceeded my expectations is an understatement!
So, You Want to Buy Used Gear Too?
When buying used gear, it's imperative that you do so through a reputable retailer.
I hear horror stories all the time from people that buy cameras or lenses on eBay or Craigslist and end up paying huge fees or getting something in the mail that doesn't jive with the product description.
I've personally had these same issues in years past when I tried the eBay and Craigslist routes. Needless to say, I won't make those mistakes again.
These days, there are numerous options you can turn to for buying used gear. For me, the benefits of doing so from Adorama include excellent customer service, fast shipping, extremely accurate descriptions, and the Adorama reputation of being fair and honest.
Now that I've entered the realm of buying used from Adorama, there's no going back...I'll make my next used gear purchase from Adorama, you can bet on it!
We Recommend
Landscape Photography Myths Debunked
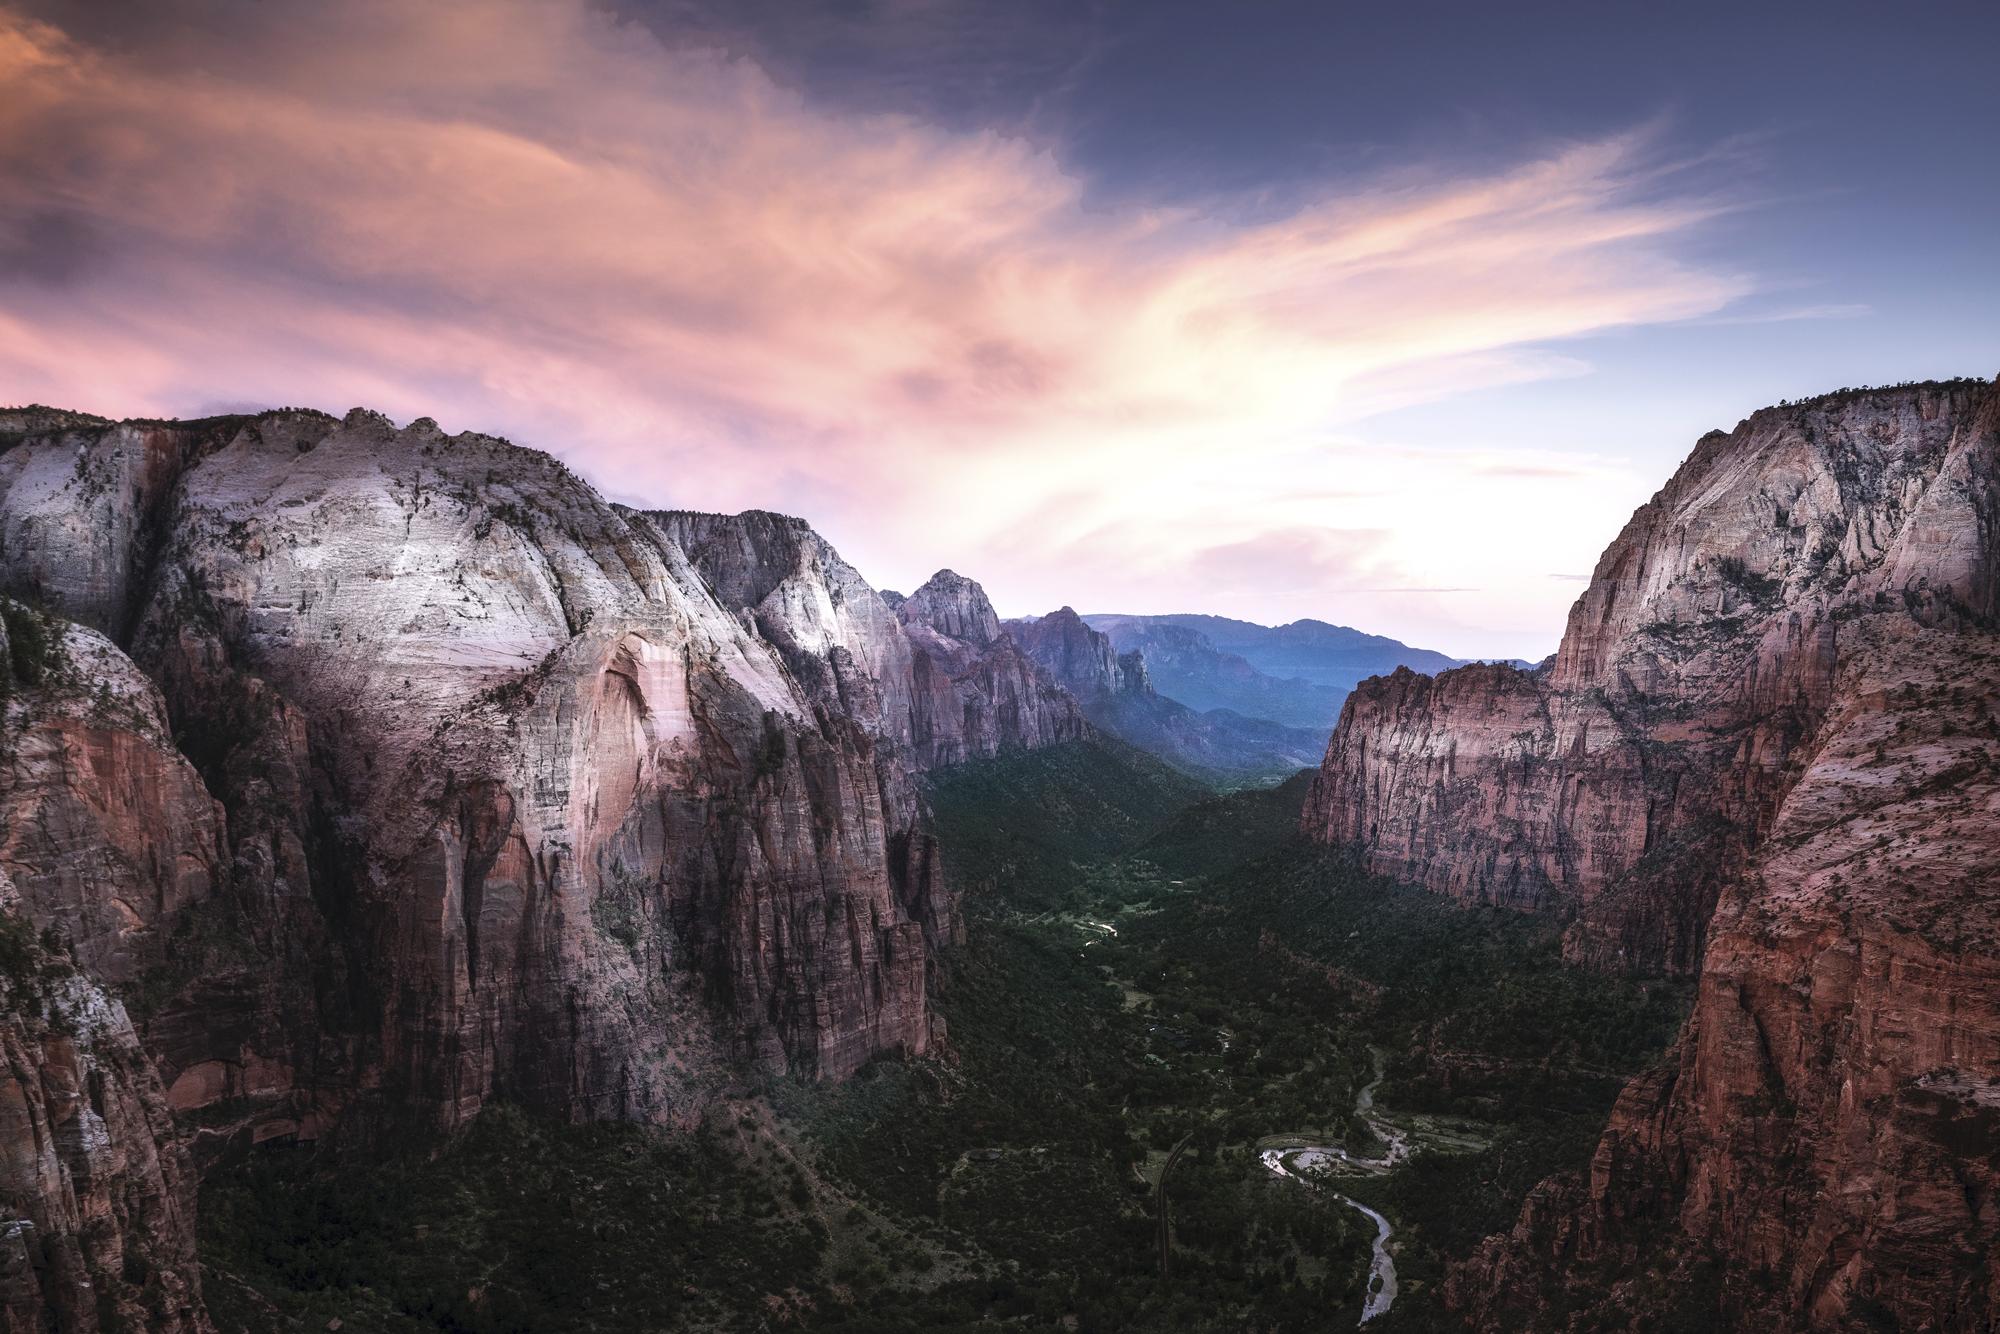
Photo by Omer Salom on Unsplash
Learning landscape photography is a lifelong process, one that never ends and always surprises with new nuggets of information that can help you enhance the quality of your photos.
Though there are many established landscape photography rules that have a demonstrated ability to help you improve your photos, there are many long-held landscape photography myths that might not offer you much in the way of assistance.
The problem is, some landscape photography misconceptions are so widely held and so blindly followed, that sometimes you might not be able to decipher landscape photography myth from reality.
Below, I outline just a few common landscape photography myths of which you should be aware.
Landscape Photography Myth #1: Mirrorless Cameras are Too Delicate for Landscape Photography
photo by hiphotos35 via iStock
When mirrorless cameras became a thing, I probably would have agreed that they had no place in landscape photography. Things have changed, though, and changed a lot.
As you might already know, I used a Nikon D850 as my primary landscape camera for a couple of years, and it proved its ruggedness and dependability over and over and over again.
At the time, I couldn’t imagine a better landscape photography camera than the D850. Then the Nikon Z7 came along.
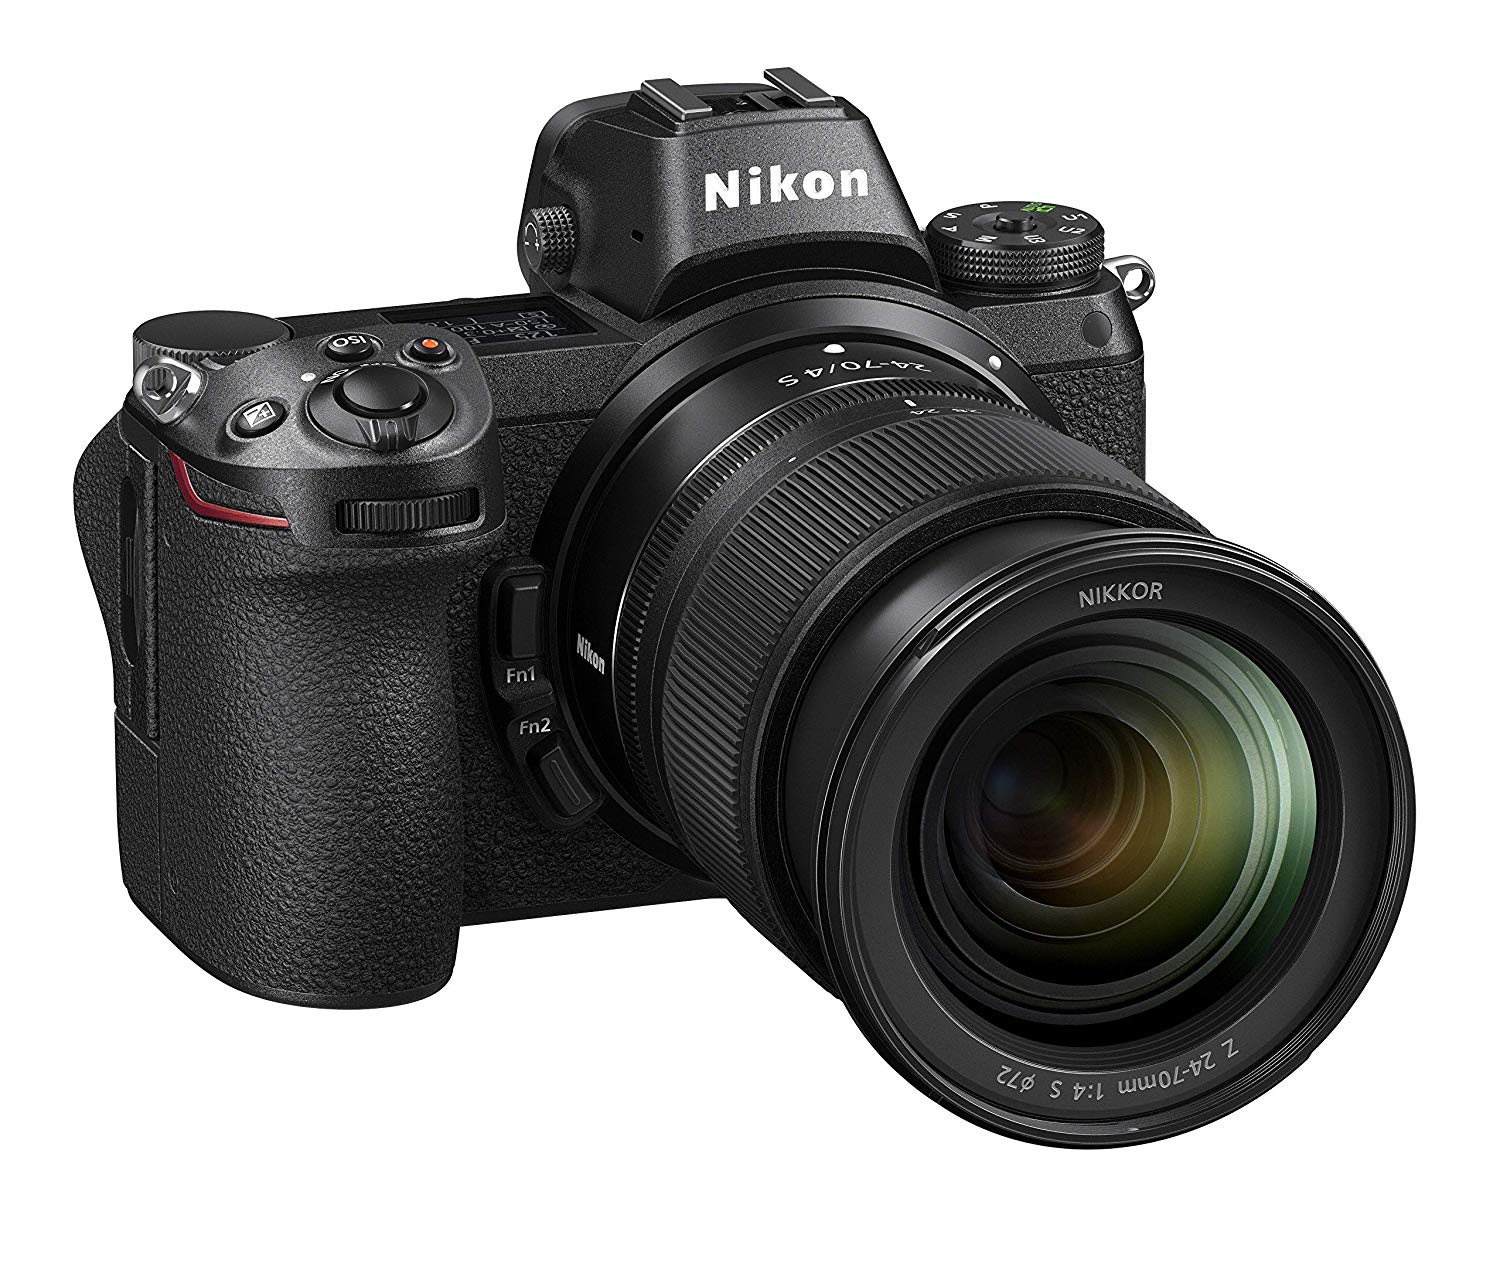
As I wrote in my Nikon Z7 review, the Z7’s ergonomics harken back to the D850. In many ways, it feels like a DSLR in your hand (except much lighter!).
But more than that, the rugged build quality of the D850 is present in the Z7 as well.
I took the Z7 on my recent trip to a wintery Norway, and it worked like a champ. I had no qualms about the freezing temperatures and the snow. The Z7 never flinched, and I used it to take some pretty decent shots, if I do say so myself.
In a phrase, the Nikon Z7 is a hard-core landscape photography workhorse. It has top-quality weather-sealing, a nice chunky grip that’s easy to hold even when your hands are freezing, and a lightweight design that doesn’t bog you down as you scour the landscape for your next shot.
So, no, mirrorless cameras are not too delicate for landscape work. That’s a myth that needs to be debunked!
Learn More:
Landscape Photography Myth #2: Always Use the Rule of Thirds
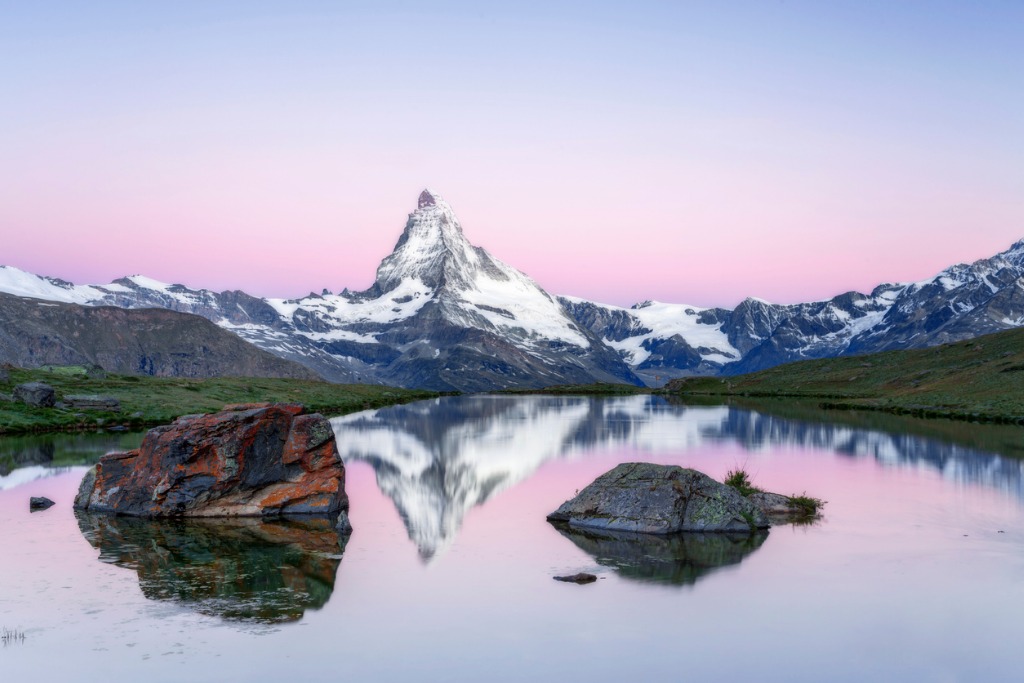
photo by DieterMeyrl via iStock
Don’t get me wrong - the rule of thirds is an essential part of landscape photography composition. But it isn’t an end-all, be-all answer for every single situation you encounter.
Sure, most of the time, moving your subject away from the center of the shot will get you a more pleasing image. There are occasions, though, when breaking the rule of thirds and placing the subject smack in the middle of the frame is the better way to go.

photo by DoctorEgg via iStock
The greatest advantage of placing the subject in the middle is that you create a photo with symmetry. That’s a good thing sometimes because our eyes love symmetrical things.
Studies have shown that people with symmetrical faces are judged as more attractive because the balance of that symmetry creates such nice harmony and proportion.
Well, the same can hold true for your landscape photos. Just be aware that a nearly symmetrical composition is not the same thing as a symmetrical one. Strive to get it as perfect as possible for the most impact.
Quick Tip: As shown above, using water in the foreground of your landscape photos can help you improve the symmetry of the scene. Additionally, water can help brighten the foregroundbecause of the light it reflects from the sky. This is beneficial if you don’t have a graduated neutral density filter to darken the sky. Instead, the sky works for you to lighten the foreground for a more balanced exposure.
Landscape Photography Myth #3: You Have to Shoot in Manual Mode
Photo by Luca Bravo on Unsplash
Though it’s important for you to learn how to shoot in manual mode, it’s a myth that you have to exclusively shoot in manual mode for every landscape photo you take.
In fact, I’d argue that for most situations, the best landscape photography settings would include shooting in aperture priority mode, not manual mode.
When moments are fleeting and you need to get the shot, the time you save with using aperture priority mode could mean the difference between successfully getting the image or not.
photo by LaserLens via iStock
Obviously, there will be occasions when you want to blur the movement of water or the clouds, so shutter priority mode would be a better choice.
But, again, it’s a time-saver that might allow you to get the shot you want rather than missing it because you’re taking too long dialing in everything in manual mode.
Some photographers will say that aperture priority mode and shutter priority mode are nothing more than cheat codes. But that’s simply a myth that you should ignore!
Learn More:
Landscape Photography Myth #4: Always Use a Tripod
photo by mustafagull via iStock
A final landscape photography myth I’d like to debunk is the notion that you have to use a tripod.
I’ll be the first to admit that using a tripod is a great idea in most situations. It is an essential piece of your landscape photography kit. But there are times when I prefer to run and gun and shoot handheld.
A decade ago, this would’ve been an issue because image stabilization systems weren’t what they are today.
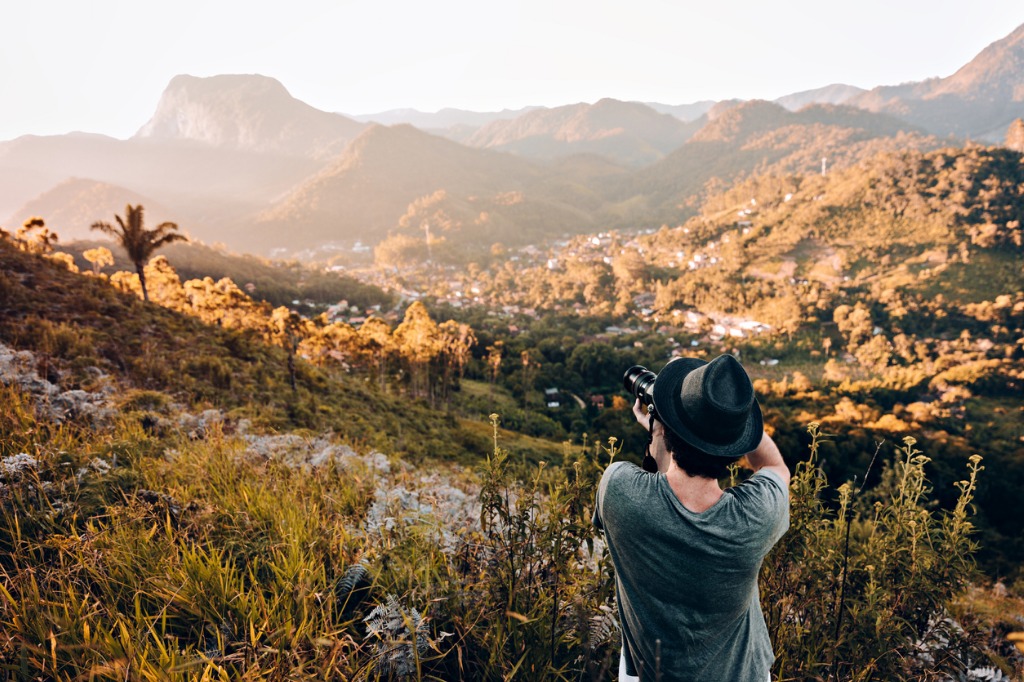
photo by cokada via iStock
But heck, the Nikon Z7 has 5-axis image stabilization that allows me to slow my shutter down and shoot handheld when I need to without the worry of blurry photos.
Shooting handheld frees you up to find interesting points of view, perspectives, and compositions. You simply have more freedom to explore than you do if you’re constantly setting up and taking down your tripod.
photo by ecep-bg via iStock
So, instead of depending on this landscape photography myth, tackle your next landscape photography outing by shooting handheld. You might find that the freedom of doing so helps you get much more interesting shots!
Quick Tip: Start your landscape photo shoot handheld, and then when you find a composition that’s pleasing, put your camera on a tripod. Doing so combines the best of both worlds - the ease of exploring without a tripod and the tack-sharp results of having your camera supported. Just remember to turn off image stabilization when you mount your camera to your tripod. If you don’t, the combination of the two could actually cause image degradation.
We Recommend
May 2020 Photography Giveaway: Eight Awesome Prizes You Can Win

Illustration by vectorplusb via iStock
If you follow our YouTube channel (and if you don't, you should), you probably already know that we have a killer giveaway happening right now.
But if you haven't yet checked out our recent videos, this will serve as notice that you have a chance to win one of eight prizes in the coming weeks.
This is our third giveaway, and it's by far our biggest and best yet - both in terms of the number of prizes and the total value of the prizes (which is more than $4,000!).
So, without further ado, let's talk shop about each of this month's prizes and what you need to do to enter to win!
38-inch ViewSonic VP3881 Ultra-Wide Curved Monitor

I have this monitor in my home office (along with the 34-inch monitor discussed next), and I can't tell you how impressed I am with it.
As I noted in my recent first impressions review of this monitor, I was an LG monitor fan for the longest time, but honestly, these ViewSonic monitors are next-level in terms of the color accuracy and sharpness they produce.
It has 60Hz SuperClear IPS technology that makes the monitor a joy to look at. The support for 4.39 trillion colors, 14-bit LUT, and 3D LUT capabilities aren't bad, either.
Truly, this is the best monitor I've ever had for photo and video editing - or any other purpose, for that matter.
That's why I'm so excited to offer one of these bad boys - which is priced at $1,019 - as part of this giveaway!
Learn more about the 38-inch ViewSonic VP3881
34-inch ViewSonic VP3481 Curved Monitor
As I mentioned above, I have this monitor in my office in addition to the 38-inch ViewSonic.
The larger of the two is my primary monitor, and this one is the secondary monitor, and is mounted directly above the other one.
It's an AWESOME setup for my needs. I do a ton of multi-tasking, so having two big monitors that offer split-screen capabilities has truly changed how I'm able to work in my home office.
This monitor has a 21:9 aspect ratio, a 100Hz refresh rate, built-in speakers, and the same support for 4.39 trillion colors as its larger cousin.
Though obviously not as large as the 38-inch monitor, at 34 inches, this monitor has nothing to be ashamed of in the size department!
Priced at $699.99, this isn't a bad prize to win at all!
Learn more about the ViewSonic VP3481
f-stop Lotus Essentials Bundle with a Medium Slope Internal Camera Unit
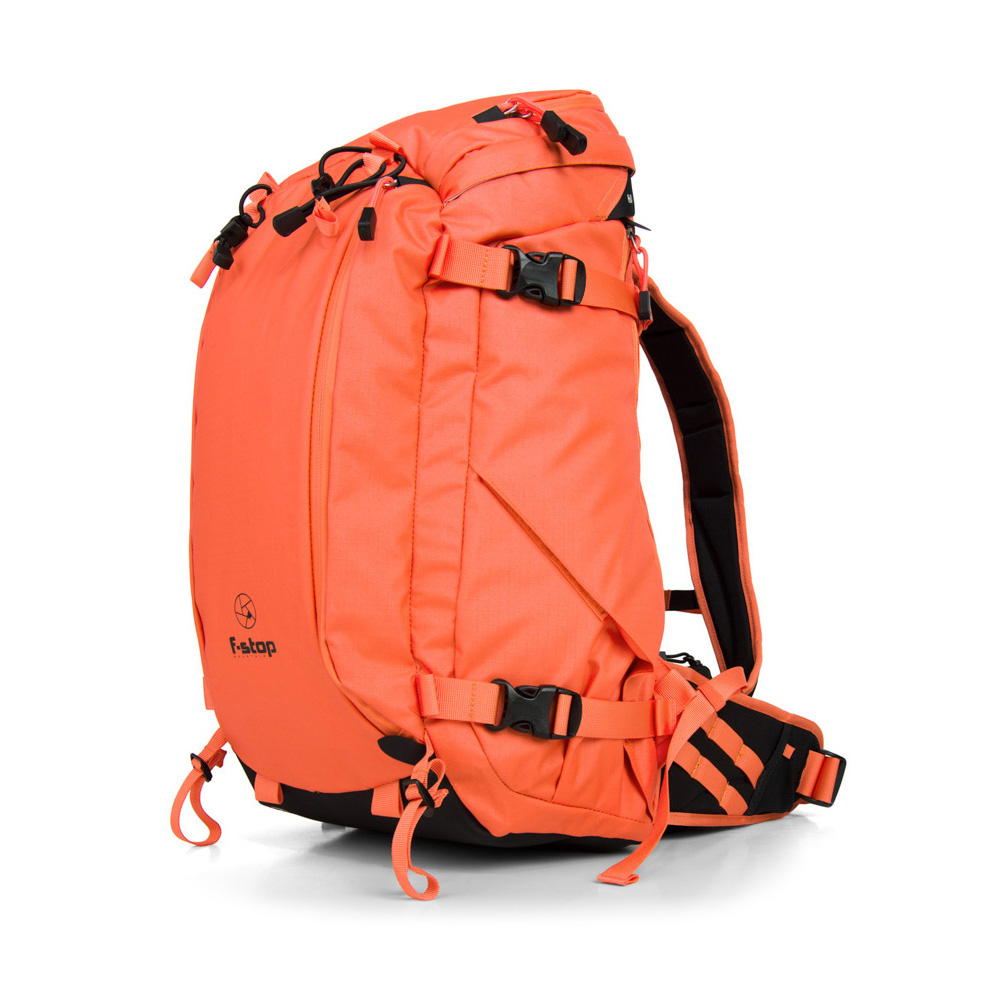
I've had a number of f-stop bags over the years, and each one has impressed me with its quality of construction, design, and functionality. The Lotus bag is certainly no exception...
I have an f-stop Sukha, which is a big 70-liter bag that I reserve for long trips, like my adventure to Norway last year.
By contrast, I like to use the smaller (yet still roomy) 32-liter Lotus bag for 2-3 day trips or even day trips in which I have a lot of gear for shooting photos and videos.
This bag is weather resistant and made of durable materials, that way it can stand up to rain, snow, mud, and so forth.
It's comfortable, too - the internal aluminum frame and adjustable support system mean you can carry a fully-loaded bag in comfort.
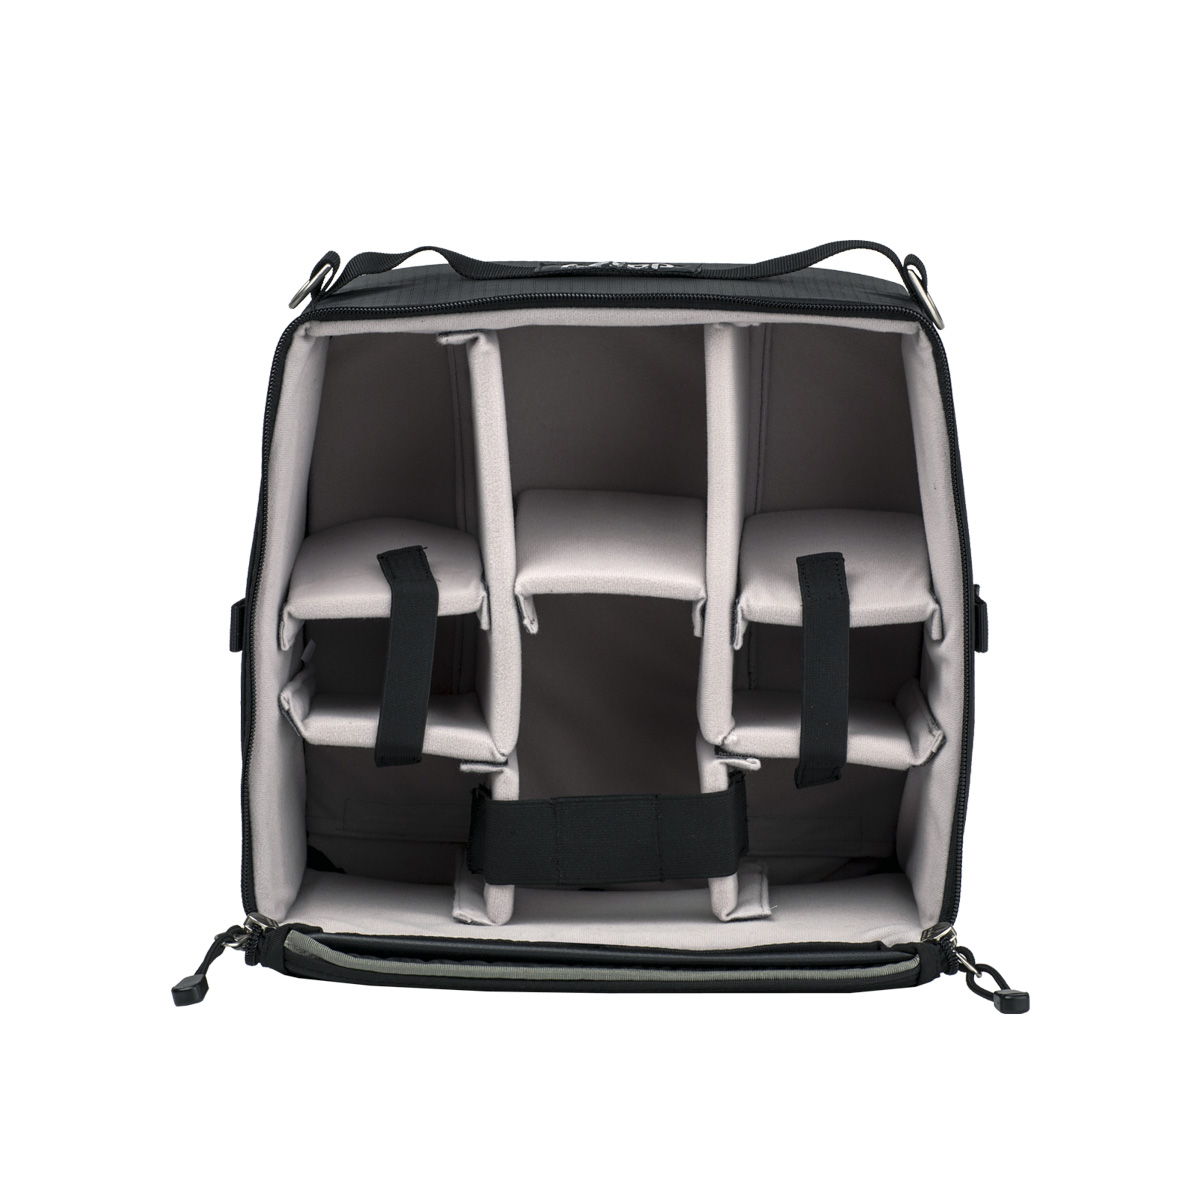
If you aren't familiar with f-stop bags, one of their best features is the Internal Camera Unit (ICU).
ICUs, like the one shown above, help you organize your gear and protect it at the same time. It's like having a removable gear drawer in your backpack!
The Lotus Essentials Bundle is priced at $329, which makes this a killer prize for a lucky contest winner!
Learn more about the f-stop Lotus Essentials Bundle
A set of Singh-Ray 77mm Filters
I've used filters from many different companies over the years, but one company that is continually at the top of my list in terms of quality is Singh-Ray.
This set of 77mm filters includes multiple ND filters and Singh-Ray's superb ColorCombo Thin-Mount Polarizer.
With these filters, you can extend your shutter speed for daytime long exposures, open up the aperture to control the depth of field in bright conditions, and in the case of the polarizer, control things like glare off of water and atmospheric haze.
ND filters and a polarizer are must-haves for landscape photographers, and I can tell you from experience using these filters that your ability to create epic photos will be greatly improved with these things in your camera bag!
All told, this set of filters retails for $1,640, so it's our biggest-ticket prize of the bunch!
Learn more about Singh-Ray filters
Two Colorado Tripod Co. Highline 48mm Aluminum Ballheads
These ballheads are identical and will be a nice addition to the camera bags of two different winners!
What I love about these ballheads is the design - it's lightweight, super strong, and has 54 pounds of locking force (which is a LOT!).
On top of that, this ballhead is optimized for left-handed shooting, so all you lefties out there can be free to operate it with your dominant hand.
Combined with the improved range of motion, a 75-pound load capacity, and plenty of other goodies, that makes this ballhead a perfect addition to your camera bag. Priced at $129 each, it's not a bad prize, either!
Learn more about the Colorado Tripod Co. Highline Ballhead
Holdfast HF Classic Camera Strap
I've been a Holdfast customer for six or seven years now, and I have to say that these guys continually impress me with the quality of their work.
The newest Holdfast product that I've gotten my hands on is the HF Classic Camera Strap.
What I love about this strap is that it's budget-friendly, yet doesn't skimp on materials or construction. This thing has true Holdfast workmanship, with the same beautiful leather and stainless steel components as the pricier MoneyMaker line.
This strap is clean, simple, and beautiful, and is an ideal companion for mirrorless camera bodies.
It might be just $95, but believe me when I say that this thing hits WAY above its weight class!
Learn more about the Holdfast HF Classic Camera Strap
$100 Adorama Gift Card

Last, but not least, is a $100 Adorama gift card.
Sure, it's not worth as much as some of the other prizes, but $100 is $100! Plus, you can obviously use it to buy whatever you want!
If I've whetted your appetite and you want to enter the contest, here's what you need to do: head over to our YouTube channel and watch the most recent video. Detailed instructions for entering the giveaway are explained at the end of the video. Be sure to check the video description for additional information about the contest as well.
Good luck!
We Recommend
Must-Have Gear for New Videographers
 Photo by Jakob Owens on Unsplash
So, you're ready to make the leap from photography to videography...
The question is, what gear do you need to get started?
Thankfully, many DSLR and mirrorless cameras have excellent video capabilities, so a new camera might not be on your list of things to purchase.
But what about other important items for video work?
Here's a few suggestions for building a functional videography kit.
Editor's Tip: Though music isn't technically gear, it's something you definitely need to make the best videos. Adding sound effects and songs to your videos enables you to create a much richer viewing experience that reaches out and grabs people. For the best deals on audio for your videos, check out Epidemic Sound. With a huge library, they have everything you might need to take your videos to the next level with awesome audio.
Don't Neglect Your Video Editor
 Photo by Christin Hume on Unsplash
Before I dive into things like cameras and lenses for video, I wanted to address the video editor you use to make your creations.
You obviously want something powerful that offers you a lot of features for making professional-looking videos.
But you likely don't want to spend an arm and a leg that some video editors cost either.
I know plenty of photographers that rely on free software for their videos, but let's be honest - free software generally lacks the tools you need to make truly epic videos.
You don't have to spend a ton of money for a professional video editor though.

I started using Kizoa a few months ago, and I'm never turning back.
It's the ideal combination of power, performance, functionality, and ease of use.

Kizoa is loaded with tons of pre-made templates (including for holidays!), so you can get a head start on making your videos straight away.
What's more, you can add music, transitions, texts, and other effects to give your videos a polished look.

From an ease of use standpoint, Kizoa has a free iOS app, so I can create and edit videos right then and there after I record the footage.
On top of that, Kizoa has made it easy to share the videos I create - I can email them, burn them to a DVD, or upload them to social media in a matter of moments.

Kizoa truly is the best of both worlds - it's powerful and affordable, with premium plans starting at just $30.00 per month.
If you're ready to take your videography to the next level, give Kizoa a try!
Learn More:
What Camera is Best for Video?
 Photo by Stephen Kennedy on Unsplash
Maybe you already have a camera that shoots video.
But if you don't, or if you want to upgrade, what camera is best for video?
The answer, of course, depends on who you ask.
Personally, I'm a huge fan of Sony cameras for video work - like the Sony a7 III, which has 4K shooting capabilities at both 24fps and 30fps.

This camera is small, lightweight, easy to maneuver, and has improved battery life over previous Sony models.
What's more, there's a wide range of lenses you can use with this camera to get different types of shots and effects for your videos.
EDITOR'S TIP: NEED A NEW CAMERA BAG FOR ALL YOUR VIDEO GEAR? SHOP FOR GREAT DEALS ON TOP BRANDS.
The key here isn't brand - I like Sony, but if you like Canon, Nikon, Panasonic, or some other brand, that's okay! Just be sure you have a camera with interchangeable lenses, and preferably, 4K video capabilities.

I'd be remiss if I didn't give a shoutout to my new favorite camera for video, the Insta360 One X.
I've only had it for a week, but I can already tell you that I have had more fun shooting video with this thing than I have with any other camera in a long time.
Obviously, the video you get from a 360-degree camera is much different than what you get from a traditional camera, and that's part of the appeal of this tiny, handheld rig.

You can hold it in your hand, put it on a tripod or grip, strap it to your dog...you name it. The possibilities for angles of view and different vantage points are endless!
This camera weighs just .25 pounds and is super easy to operate via the companion smartphone app, so there's really no excuse for not always having it with you. Better still, you can do all kinds of killer things with it like HDR, time-lapse, and Bullet Time sequences (like from The Matrix) that results in mind-bending footage.

Helping matters is the Insta360 One X's FlowState image stabilization system.
It's a six-axis (yes, six!) gyroscopic system that does an incredible job of minimizing movement for ultra-smooth video.
Add to that a bevy of accessories you can buy for it, Wi-Fi, Bluetooth, and built-in shooting modes, and you have the makings of a fun and functional camera.
Seriously, give the Insta360 One X a try - you might find like I did that it becomes your favorite new toy!
Learn More:
A Field Monitor is a Must

If you want to step up your videography game, stop relying on your camera's puny LCD and invest in a high-quality field monitor like the Ikan Saga S7H-V2.
Using a field monitor like this 7-inch rig gives you a big, bright view of what you're shooting so you can perfect the composition, framing, and focus of your video sequences.
This particular model has HDMI and 3G-SDI inputs and outputs and Ultra HD video as well as DCI 4K video.

Don't let its large screen size fool you into thinking that this monitor is cumbersome, either.
It's slim and lightweight at just half a pound.
It has a gorgeous high-resolution (1920x1200), color-accurate screen with 1200 NITS of brightness, so it's a perfect companion for outdoor video work.
With software features like 3D LUT support, a histogram, audio meters, DSLR scaling, and more, you have the makings of a must-have item for your videography gear bag!
Top Video Lenses
 Photo by Courtney Clayton on Unsplash
Again, the question of what lens is best for video depends on a lot of different factors.
If you're already invested in the Canon ecosystem, then buying a Canon-fit lens is obviously advisable.
What's more, if you already have a 24mm lens, there's no sense in buying a 28mm lens, as the difference in focal length isn't worth the added expense.
When it comes to zooms or primes, both have their merits for video.

A good video kit would include both, actually, perhaps a 24-70mm zoom and a 50mm prime.
What's important to keep in mind is that lenses are the most important gear investment for videography (and for photography, for that matter).
Unlike your camera, which you'll eventually have to replace, you might have your lenses for decades. So, while good lenses (like the Sigma 18-35mm f/1.8) can be spendy, they will more than pay for themselves over the long-haul.
Things to Consider When Buying a Video Lens
 Photo by Jakob Owens on Unsplash
- Is it designed for crop sensor or full frame cameras? Is it compatible with your camera type?
- What type of video do you intend to shoot? Shorter focal lengths - like 35mm - are better-suited for travel videos while longer focal lengths - like 135mm - are best for wildlife videos.
- What is the widest aperture of the lens? If you intend to shoot in low-light situations, getting a lens with a large aperture is best.
- How much does the lens weigh? What is its form factor? Big, bulky lenses aren't ideal for things like travel videos.
Editor's Tip: Not sure what lens to get to make awesome videos? Consult the experts and get the right lens for you.
Video Work Requires a Legit Memory Card
 Image Credit: djedzura via iStock
Given the amount of storage required to save all that 4K video footage you'll be taking, you can't pull any punches with your memory cards.
Like with lenses, it's important to invest in quality here. Resist the urge to save a few bucks on off-brand cards and go for the well-established brands like Lexar or SanDisk.
Additionally, it's important to take factors like storage space, read/write speed, and the class of the memory card into account.
If you're not sure what any of that means, give this detailed discussion of memory cards a quick read before dropping money on a card. Doing your due diligence will help save you heartache down the road by avoiding sub-par memory cards.
Learn More:
Final Thoughts
Buying new gear is a very personal experience. That is, what you need for your video work might not be what I need for mine.
Having said that, there's common items every videographer needs - an interchangeable lens camera, a good set of lenses, and high-quality memory cards among them.
For more insights into the best gear for videographers, have a look at the video above by Matti Haapoja.
He's an experienced videographer that gives some great general tips on filling out your videography kit.
We Recommend
NASA's New InSight Lander Beams Back Its First Photo of Mars
 Image Credit: NASA/JPL-Caltech
It's not like Mars hasn't gotten a lot of attention from NASA over the years - there have been four previous rover missions to the Red Planet - but there's a new kid on the block now in the form of the NASA InSight Lander.
InSight touched down yesterday after a perilous journey of 33.9 million miles.
The first clear image taken by InSight was tweeted out just hours later:
There’s a quiet beauty here. Looking forward to exploring my new home. #MarsLanding pic.twitter.com/mfClzsfJJr
— NASAInSight (@NASAInSight) November 27, 2018
As you can see, the Martian surface looks, well, inviting!
There's no dust storm at the moment, and the quiet tranquility seems worthy of exploring.
Speaking of exploring, InSight landed in the Elysium Planitia, a wide plane on the equator of Mars where the lander will explore its surroundings, listen for "Marsquakes," and try to determine how many meteors strike the Red Planet.
For a detailed description of what happens next for InSight, check out this article by CNET.
 Image courtesy of NASA/Jet Propulsion Laboratory
Even though the Mars Curiosity Rover has been sending back breathtaking images for the last six years (like the one above), it's still exciting to have a fresh set of eyes in a different area of Mars.
I, for one, can't wait to see what sort of remarkable photos InSight is able to take.
And that got me thinking...
If I were to go to Mars, what kind of gear would I take?
Learn More:
- This Breathtaking New Photo Shows the Surface of Mars Bathed in Sunlight
- 9 Breathtaking Space Photos That Will Make You Say WOW
 Image Credit: Vac1 via iStock
I'm pretty fond of my Nikon D850, though I imagine the powers that be would want lighter weight gear.
Perhaps a Sony a7R III instead??
I think the toughest choice would be what lenses to take.
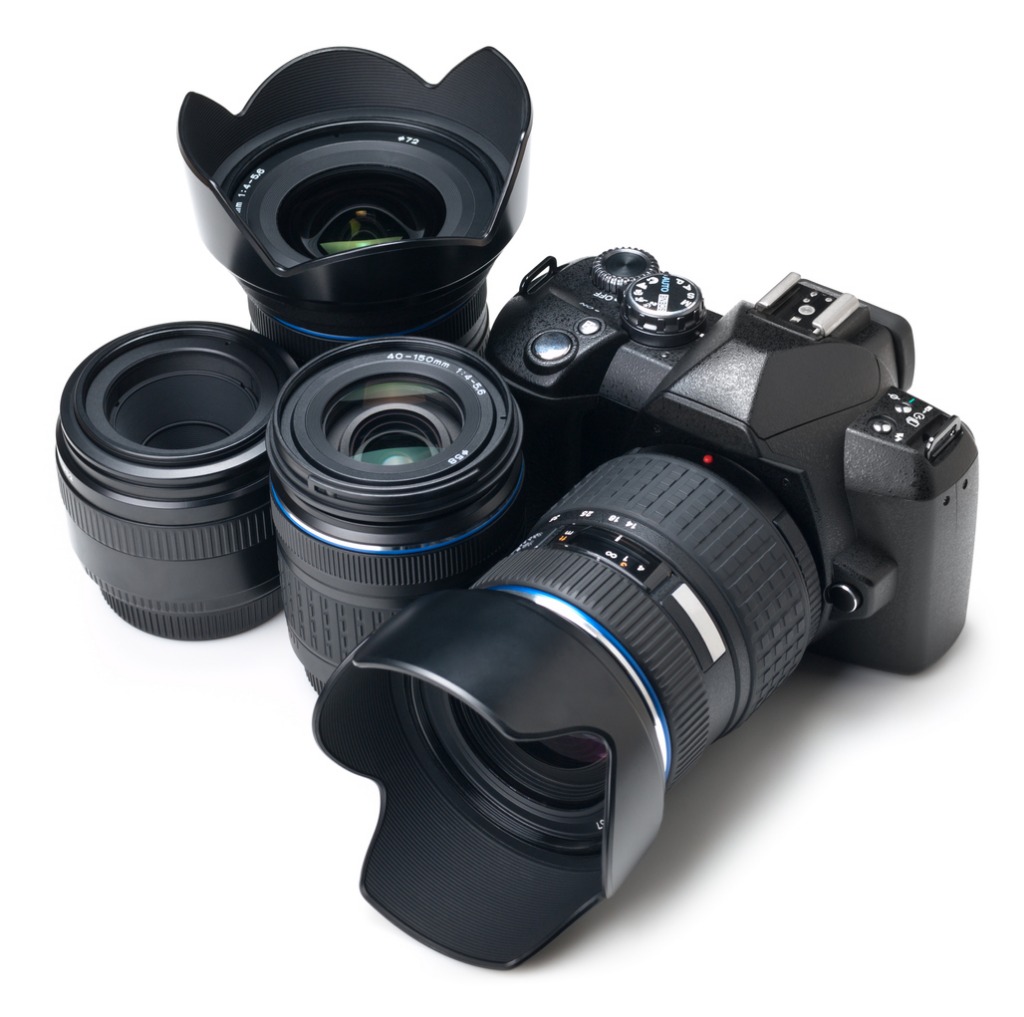 Image Credit: xxmmxx via iStock
If I rocked the Sony, a 24-70mm f/2.8 would be nice, but I'd also want a 70-200mm zoom and a couple of primes as well - maybe something like a 24mm to get sweeping shots of the Martian surface.
Whatever the gear one would use, how cool would it be to walk around Mars and take photos?!
Talk about the photography trip of a lifetime!
Stay tuned for more details about InSight's explorations and for updates about the photos NASA's new "photographer" beams back. In the meantime, be sure to visit the NASA InSight mission page to see what Insight is up to.
Learn More:
- Five Years Later, the Mars Curiosity Rover is Still Taking Some Great Photos
- How the Mars Rover Camera Has Evolved Over the Years
Via CNET
We Recommend
Nikon D850 vs Sony A7R III: Which One Wins an Epic Shootout?
Whether you prefer DSLRs or mirrorless cameras, there are plenty of choices on the market today that will serve you well.
Better still, with Canon, Nikon, Sony, and other camera manufacturers locked in an epic battle to outdo one another, we get the benefit of having some truly epic cameras to choose from.
When it comes to epic cameras, there's none better than the Nikon D850 and the Sony A7R III.
The question is, which one is best? You can check out Sony A7RIII vs Nikon D850 post done by PhotographyTalk.com.
Essential Specs: Nikon D850 vs Sony A7R III
Let's begin with the Nikon D850:
- 45.7-megapixel BSI CMOS FX sensor
- Expeed 5 image processor
- 153-point autofocus system
- ISO range 64-25,600 (expandable to 102,400)
- 7fps burst shooting speed (9fps with optional battery grip)
- 4K video at 30fps and 1080p video at 120fps
The first thing you notice is the 45.7-megapixel back-illuminated sensor.
Though it doesn't have the same resolution as, say, the Canon 5DS or 5DS R, what it does have is virtually unmatched image quality.
In fact, the sensor in the Nikon D850 was the first ever to get a perfect score from DxOMark testing.
Not only does the D850 have an excellent sensor, but paired with the Expeed 5 image processor, you get ultra-fast performance.
Speaking of fast performance, the autofocus system in the D850 has a number of upgrades from its predecessor, the Nikon D810.
Editor's Tip: Looking to upgrade your camera without breaking the bank? See how far you can stretch your dollar.
For starters, there's more autofocus points - 153 in all - and they have improved detection range, too.
Add to that the fact that this camera has 7fps shooting capabilities that expand to 9fps with an optional battery grip, a native ISO range of 100-25,600, and robust 4K video capabilities, and you have the makings of a camera that was purpose-built for photographing and filming subjects of all kinds.
And now, the Sony's basic specs:
- 42.4-megapixel BSI CMOS full frame sensor
- BIONZ X image processor
- 399-point autofocus system
- ISO range 50-32,000 (expandable to 102,400)
- 10fps burst shooting speed
- 4K video at 24fps or 30fps and 1080p at 120fps
As good as the D850's sensor is, Sony found a way to match it.
Though the megapixel count is slightly less, the Sony's sensor is also back-illuminated to produce incredible image quality.
In fact, this sensor also earned a perfect score from DxOMark, so at least on the image quality front, these cameras couldn't be better matched.
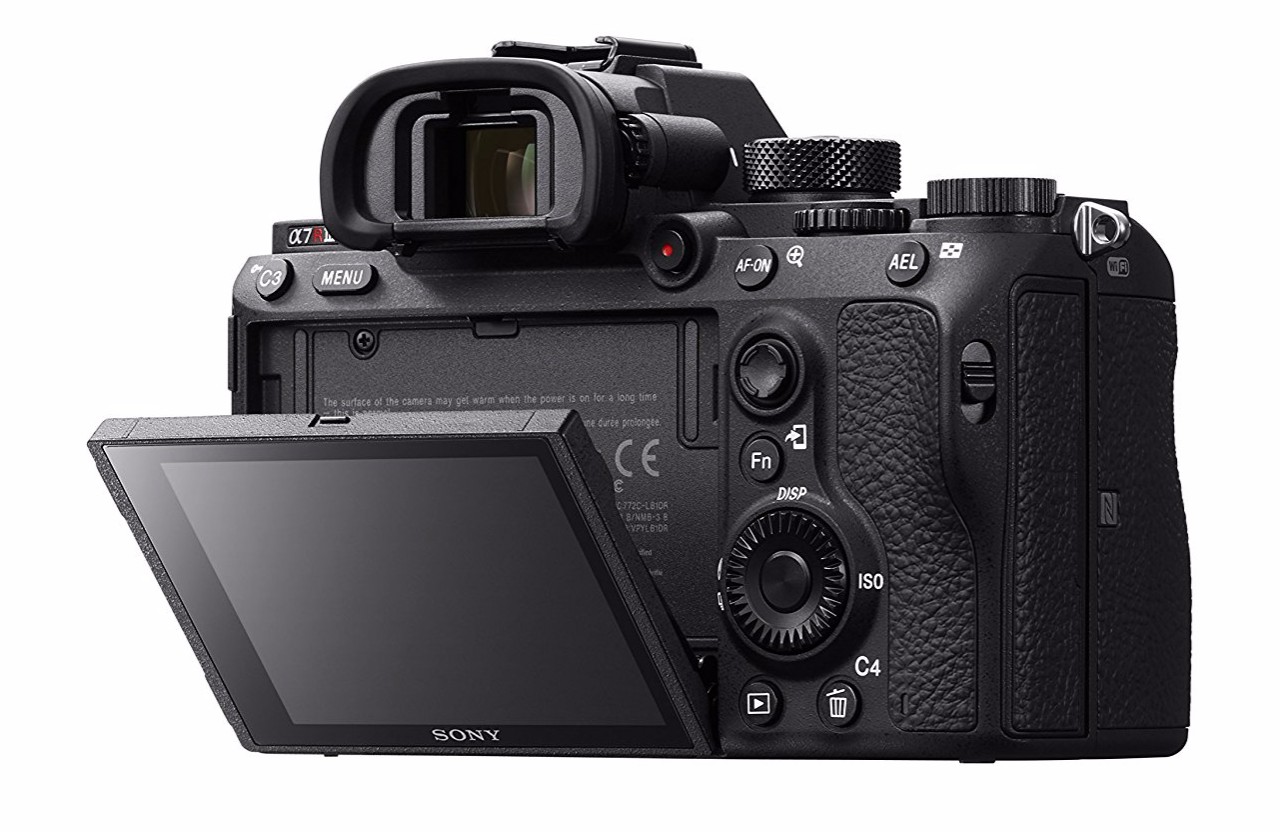
The Sony more than matches up with the D850 in other areas as well.
In fact, the Sony's 399-point autofocus system is even more capable, with more than twice the AF points.
It actually has 399 phase-detect points and 425 contrast-detect points, which, according to Sony, makes it twice as fast as the A7R II when shooting in low-light situations. The ISO range of 50-32,000 (expandable to 102,400) certainly helps in that department as well.
It should also be noted that the A7R III has a ludicrously fast 10fps burst speed.
Not only that, you can shoot at 10fps in RAW or JPEG while utilizing autofocus tracking at the same time.
With similar 4K video shooting capabilities as the D850, this is an equally good camera for tackling still photography and videography.
Breaking Down the Specs
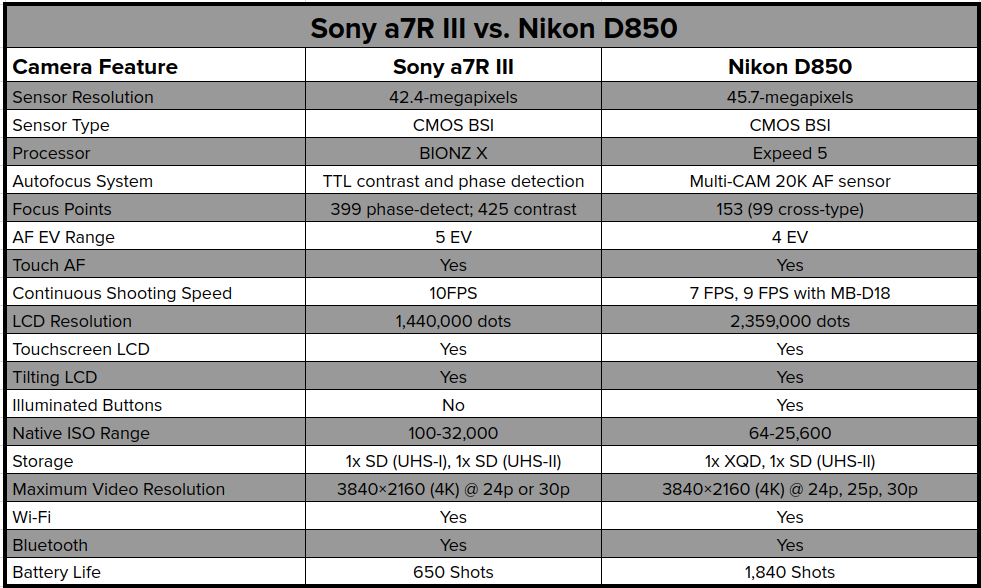
So, we know both these cameras have superb back-illuminated full frame sensors. We also know that both cameras have lightning-fast processors.
There are other similarities as well.
Both cameras offer similar autofocus EV range. Both cameras also have touch-enabled tilting LCDs with touch autofocus. Features like Wi-Fi, Bluetooth, weather-sealing, and ISO range are similar as well. And provided the D850 is equipped with an optional battery grip, the burst shooting speed is close, too.
The Sony A7R III and Nikon D850 have similar color depth and dynamic range, similar sensor pixel areas, microphone and headphone ports, NFC, and smartphone remote control capabilities.
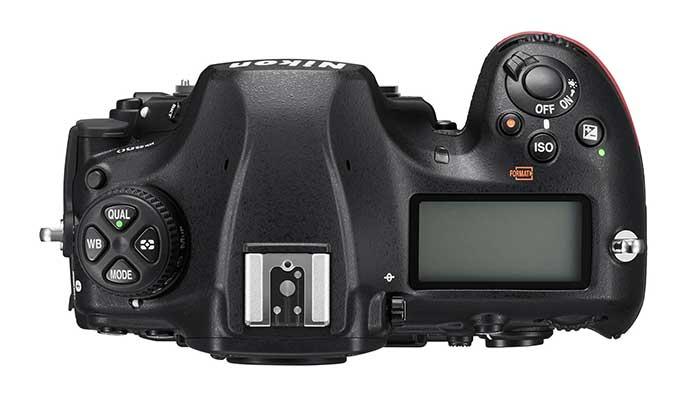
But there are plenty of differences between the cameras that might help distinguish which is best.
Most obviously, there's a massive difference in the size of these cameras.
The D850 weighs in at 2.24 pounds and measures 5.75 x 4.88 x 3.11 inches.
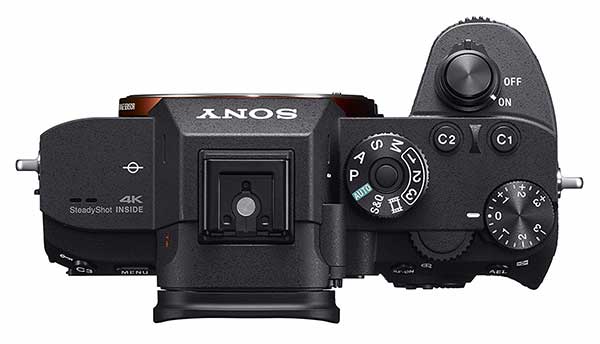
The A7R III, on the other hand, weighs just 1.45 pounds and measures 5 x 3.78 x 2.91 inches.
Clearly, as a mirrorless camera, the A7R III is going to be a smaller rig than the D850, but the difference is quite significant.
If working fast and light is a priority, the clear winner here is the A7R III.

Another major difference between these two cameras is the viewfinder.
On the D850, you'll find an optical viewfinder that affords you a bright, clear view of the subject with zero lag, a 0.75x magnification, and a 100 percent field of view.
On the A7R III, you'll find an OLED electronic viewfinder with a magnification of 0.78x and a 100 percent field of view.
Editor's Tip: Not happy with your photography skills? Taking a class or participating in a photography adventure are great ways to develop photography skills. See what you can learn.
The major difference here is that the Sony's EVF gives you a real-time preview of the image's exposure and features like white balance and color. So, rather than pulling the camera from your eye to see those features on the LCD, you get them right in the viewfinder.
Some people love EVFs; others hate them. In this case, though, I give the A7R III the advantage.

An important, albeit less exciting feature to discuss is battery life.
Sony cameras are not known for offering you a ton of shots per charge, and the A7R III is no different. You can squeeze about 650 shots out of a single charge.
By comparison, the Nikon offers 1,840 shots per charge, so there's really no competition here.
Sure, you can add additional batteries to your bag if you opt for the Sony, but for pursuits like wildlife photography or sports photography when every moment matters, swapping out your batteries three times to get the same number of shots as the Nikon can muster with one battery might be a bit of a turn-off.
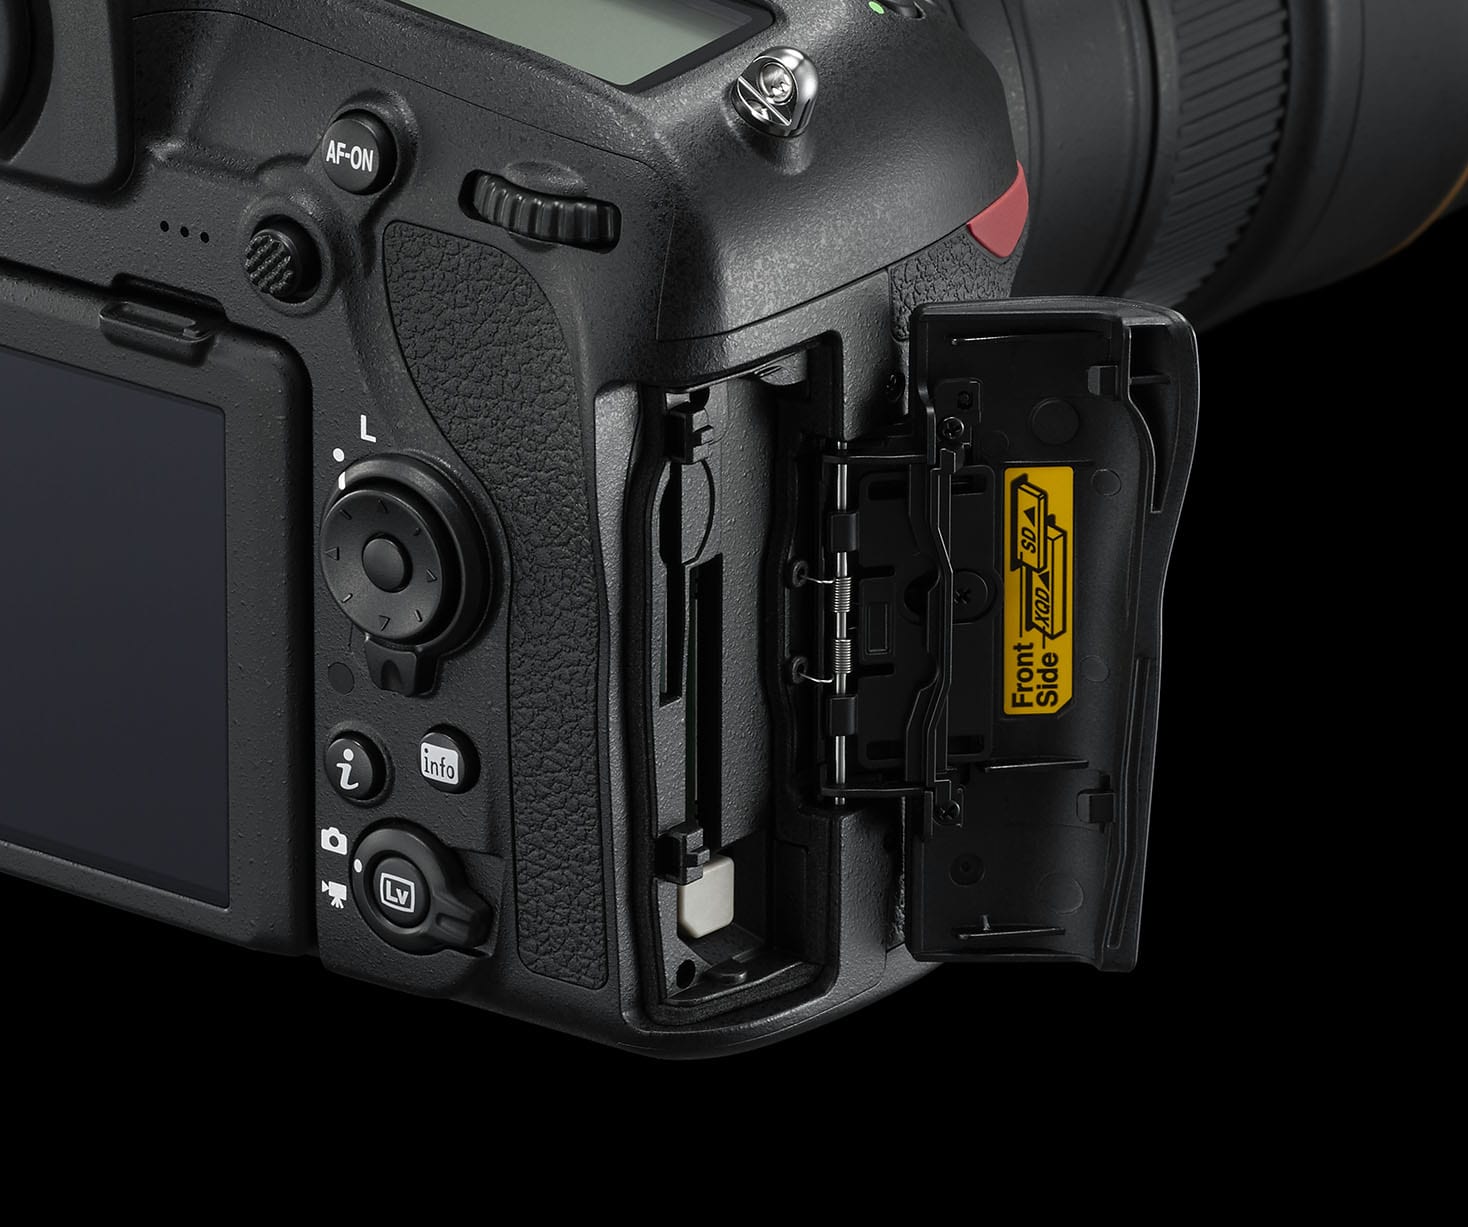
The Nikon D850 also outperforms the Sony with a couple of technological features that make taking great photos a little easier.
First, the D850 has illuminated buttons, which is obviously handy when shooting in low-light situations.
Secondly, the D850 has built-in focus stacking and built-in focus peaking as well.
And while both cameras have two storage slots, the Sony has one UHS-I and one UHS-II slot while the Nikon sports a single XQD slot and one UHS-II slot. If faster read/write speed is what you're after, the Nikon's QXD slot will certainly be appealing.
Final Thoughts
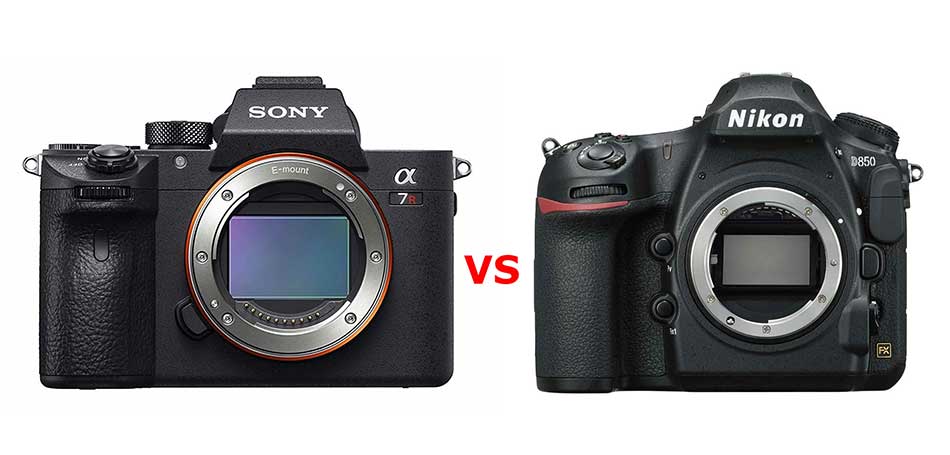
There's no mistaking that both of these cameras represent the pinnacle of modern photography technology. Either way, you're getting a fantastic, capable camera.
As with many things in photography, the decision of whether the Nikon D850 or Sony A7R III is better will likely come down to a couple of very practical factors.
First, if you're already in the Nikon or Sony environment, it makes a lot of sense to stay there.
I have a Nikon D810 (and a D800 before that, and a D750 before that...), so I bought a D850 when it was released. If I'd been in the Sony ecosystem, I'd probably have opted for the A7R III instead.
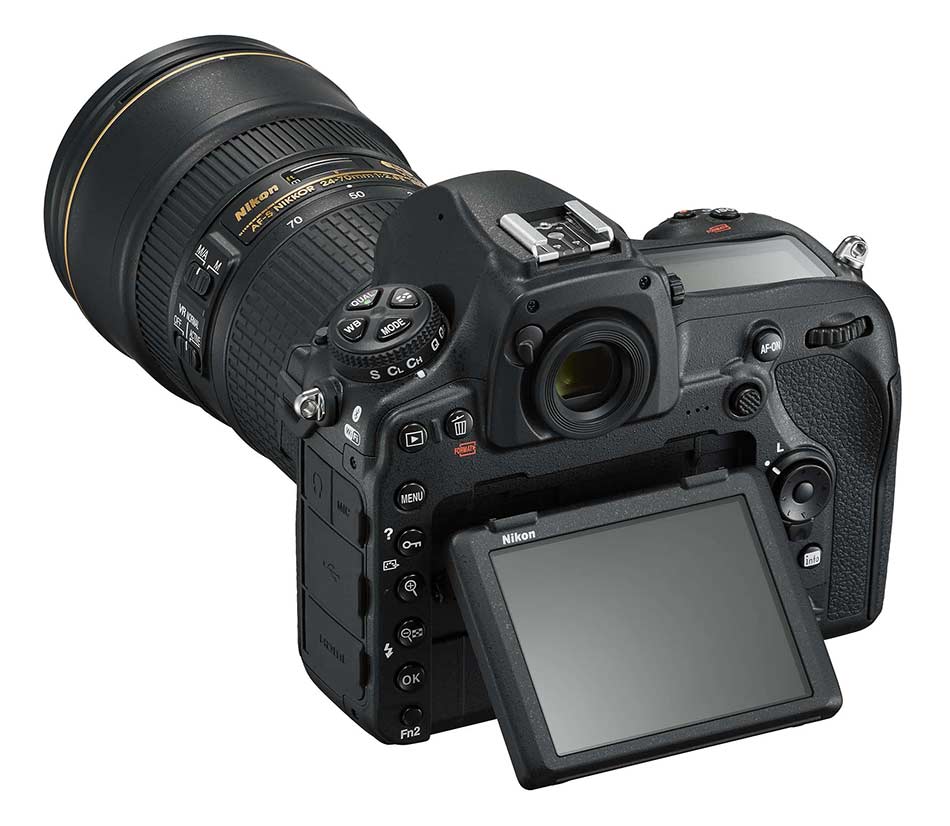
Second, I see weight and size as a factor that can sway photographers one way or the other.
If you're a studio portrait photographer, for example, and moving around a lot isn't in the cards, the bigger Nikon might be a better bet.
However, if you're a travel photographer, having the smaller A7R III could prove to be quite advantageous.
Lastly, price is always a factor. These cameras are comparably priced, with the Nikon's $3,300 price tag slightly higher than the A7R III's at $3,000.
In the end, the differences between these cameras aren't especially significant, and their shared strengths are spectacular.
My recommendation is to read up as much as you can about both cameras, watch a few YouTube reviews on each one, and ask an expert to determine what camera is best for you.
We Recommend
Nikon Z6 Review
I’ve got a Nikon D850 in my camera bag and recently added a Nikon Z7.
The other day, I had the opportunity to shoot with a Nikon Z6 - the Z7’s baby brother, if you will - and took that as a chance to see how good the more affordable mirrorless camera from Nikon really is.
In this Nikon Z6 review, I offer up details on the Z7’s essential specs and features, and explore its performance and image quality as well.
Nikon Z6 Review: Essential Specs
In reality, the Z6 and Z7 share more specifications than not. Those of you that have read my Nikon Z7 review will note that the list of essential specs below looks awfully familiar:
24.5-megapixel full frame back-illuminated sensor
- EXPEED 6 image processor
- Native ISO of 100-51200
- 5-axis Sensor-Shift image stabilization
- 12 fps continuous shooting
- 273-point hybrid autofocus system
- 3.2-inch tilting touchscreen LCD with 2.1-million-dots
- 3.69-million-dot OLED electronic viewfinder with 100% coverage
- OLED top plate display
- Full frame 4K UHD video recording up to 30p
- SnapBridge Wi-Fi with Bluetooth
- Magnesium alloy body
- Full weather sealing
- 200,000 shutter life
The biggest difference between the Z7 and the Z6 is that the latter has a less resolute sensor at 24.5-megapixels (compared to the Z7’s 46-megapixels).
The Z6 also has fewer phase-detect autofocus points (273 versus 493).
But the Z6 has some things that work in its favor over the Z7. This includes faster burst shooting (12 fps versus 9 fps in the Z7) and a higher top-end native ISO range at 51200 (compared to 25600 for the Z7).
Apart from that, these cameras are highly comparable.
Both have magnesium alloy, weather-sealed bodies. Both have in-body image stabilization. Both have the same gorgeous EVF and the same 3.2-inch touchscreen LCD as well. The list of similarities goes on and on.
Nikon Z6 Design and Build
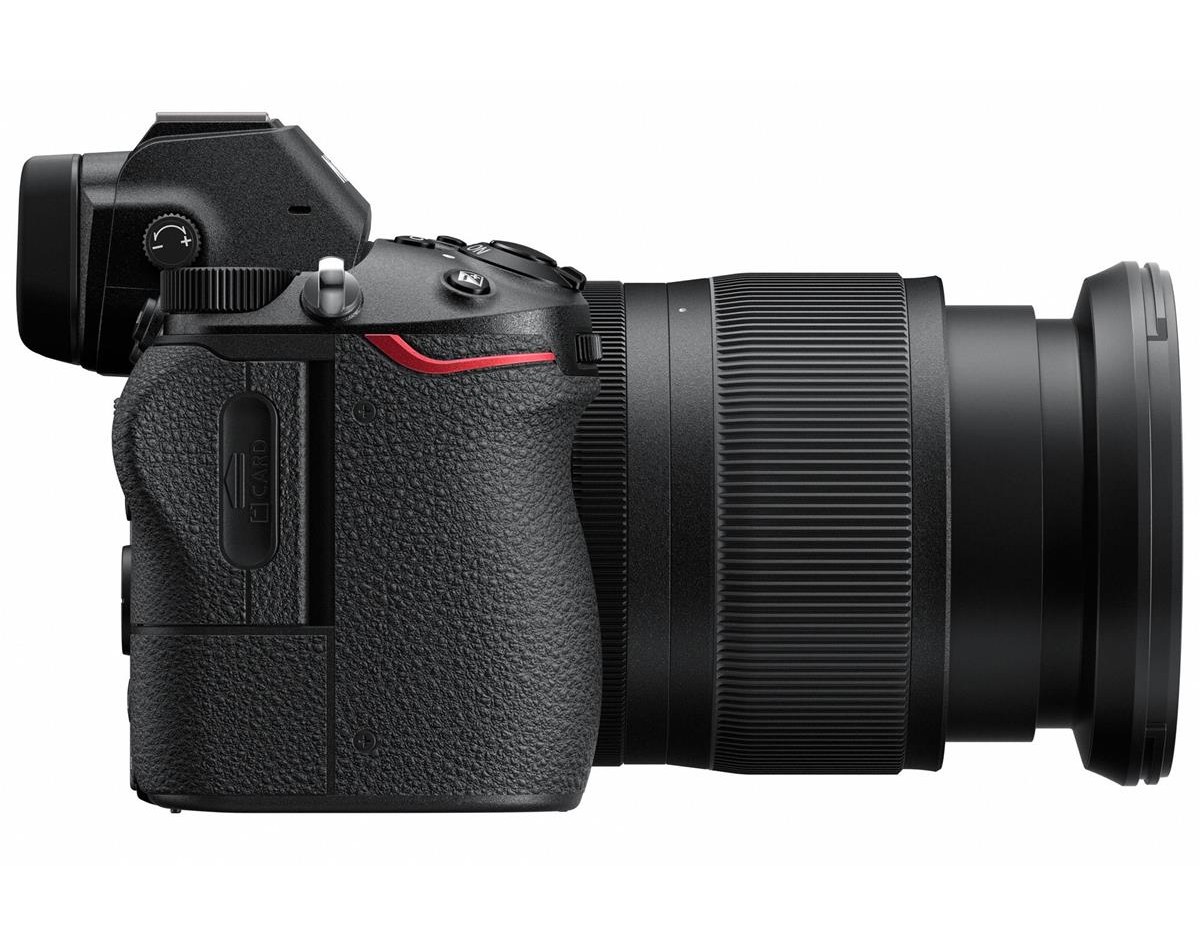
Having shot with both the Z6 and Z7, I can attest to the fact that the Z6 has the same excellent design and build quality that the more expensive Z7 enjoys.
In short, this thing is built like a tank, and I can imagine it can take a few lumps with no ill effects.
The camera feels good in your hand - even if you’ve historically shot with a bigger DSLR. It has a nice grip, that, while not the same size as the one on my D850, is still large enough for me to feel like I’ve got a good handle on the camera, even though my pinky finger was dangling a bit.
The magnesium alloy construction comes in handy to save weight, given the camera is fully weather-sealed. The camera still feels light in the hand and easy to manipulate.
The controls are easy for me to reach, though I found that I sometimes accidentally bumped the AF-point joystick, which was annoying. I imagine it will be hard for some smaller-handed shooters to easily reach the customizable buttons on the front of the camera, though I didn’t find this to be a particular problem.
The layout of the Z6’s buttons and dials is familiar for Nikon shooters. The biggest difference is that the buttons for resetting the camera and formatting a memory card that you find on many Nikon DSLRs are not on the Z6.
Like on the Z7, the Z6 has a single XQD card slot. I know many Nikon shooters lament this, but I’m not bothered by it.
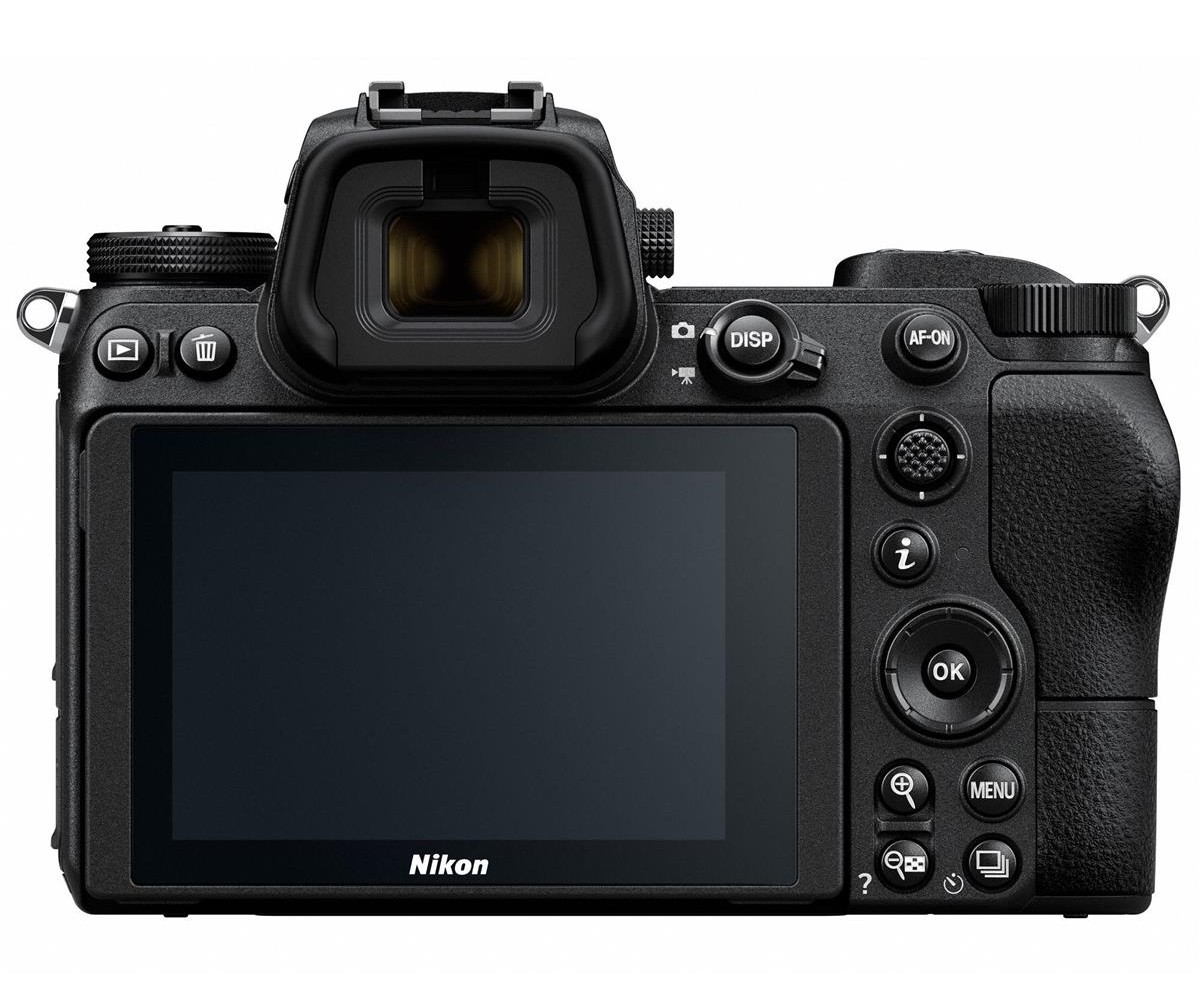
As I noted earlier, the Z6 shares the same 3.69-million-dot electronic OLED viewfinder as the Z7. The display is beautifully bright and crisp, though live view can be laggy.
The similarly high-resolution LCD is a joy to view. It tilts down by about 45-degrees and up more than 90-degrees, which is a nice feature for getting low-angle and high-angle stills and video.
As with the Z7, the LCD’s touch capabilities are much welcomed. The screen is accurate and responsive, and can be used for a variety of functions, including setting the desired autofocus point.
Nikon Z6 Image Quality
Though some will look at the Z6’s 24.5-megapixel sensor and scoff that it’s so much less resolute than the Z7’s, I found it to produce beautiful details when shooting with a Z-mount 50mm f/1.8 S lens.
Not only were the details quite pleasing, but so too was the performance at high ISOs. The shots were clean and relatively free of noise, even as I pressed higher up the ISO range. Its low-light performance is outstanding.
That’s due in part to the extra stop of native ISO range (up to 51200) as well as the 5-axis image stabilization. The result of that is that you have much more latitude when shooting in dark lighting conditions to still capture good detail.
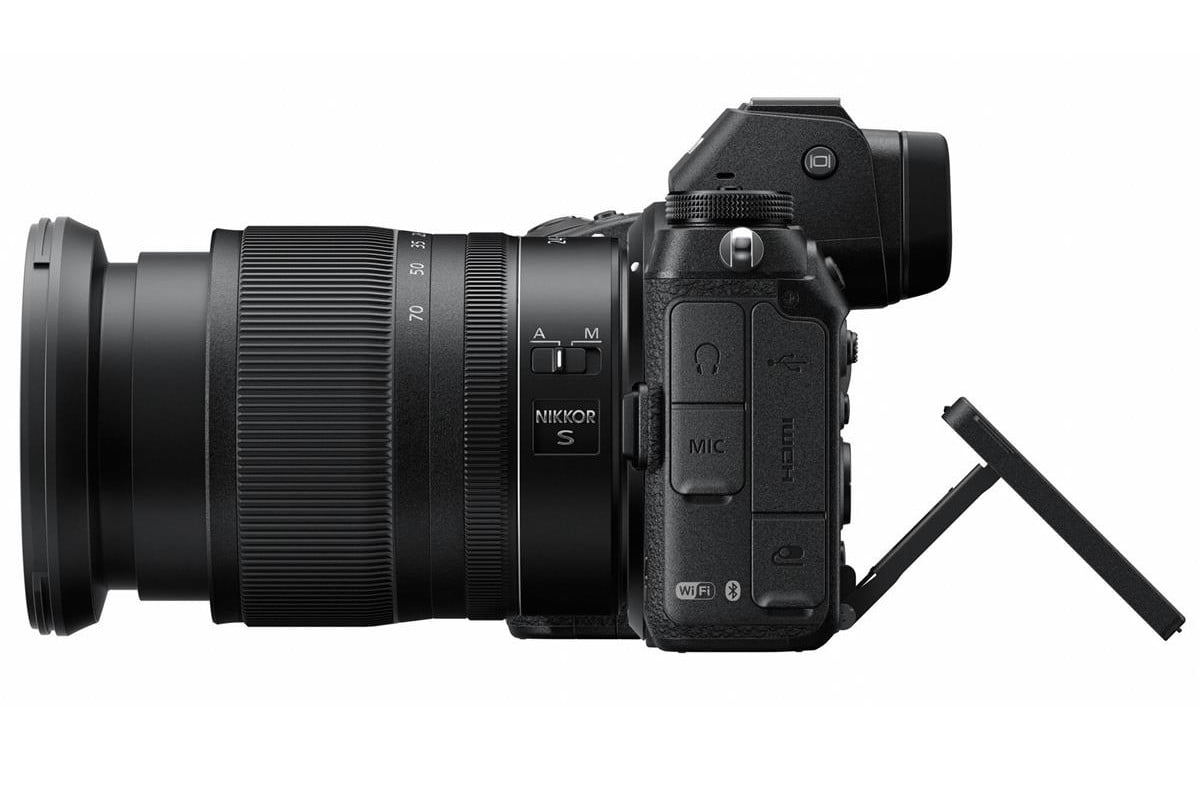
Speaking of details, the Z6 does an excellent job of capturing highlights. Where most consumer-grade cameras opt to expose for shadows, the Z6 is designed to capture detail in the highlights, which is how many professionals prefer it to be.
Beyond that, I found the Z6 to produce images that have excellent dynamic range, beautiful color, low noise, and excellent sharpness throughout the frame. Distortion and chromatic aberration were not a problem, either.
Nikon Z6 Video Capabilities
Many consumers that buy the Z6 will likely do so because of its robust video-recording capabilities.
Like the Z7, the Z6 sports 4K UHD video, but unlike its big brother, the Z6 does so in full frame. Its oversampled 4K footage is absolutely top-notch and on par with higher-end Sony cameras that I’ve tested, like the a7 III. (Nikon Z6 vs Sony a7 III)
You can shoot slow-motion video at 1080/120p, and you can utilize video settings for still shots (or utilize different settings if you wish).
The Z6’s autofocus system is a champ during video capture, as is its 5-axis image stabilization. The result of that is beautifully smooth video, even when shooting handheld of a moving subject.
External video capture is an option, too, with an HDMI out option to an external recorder for 10-bit Log footage, and internal 8-bit video capture is available up to 100Mbps.
Nikon Z6 Review: Final Verdict
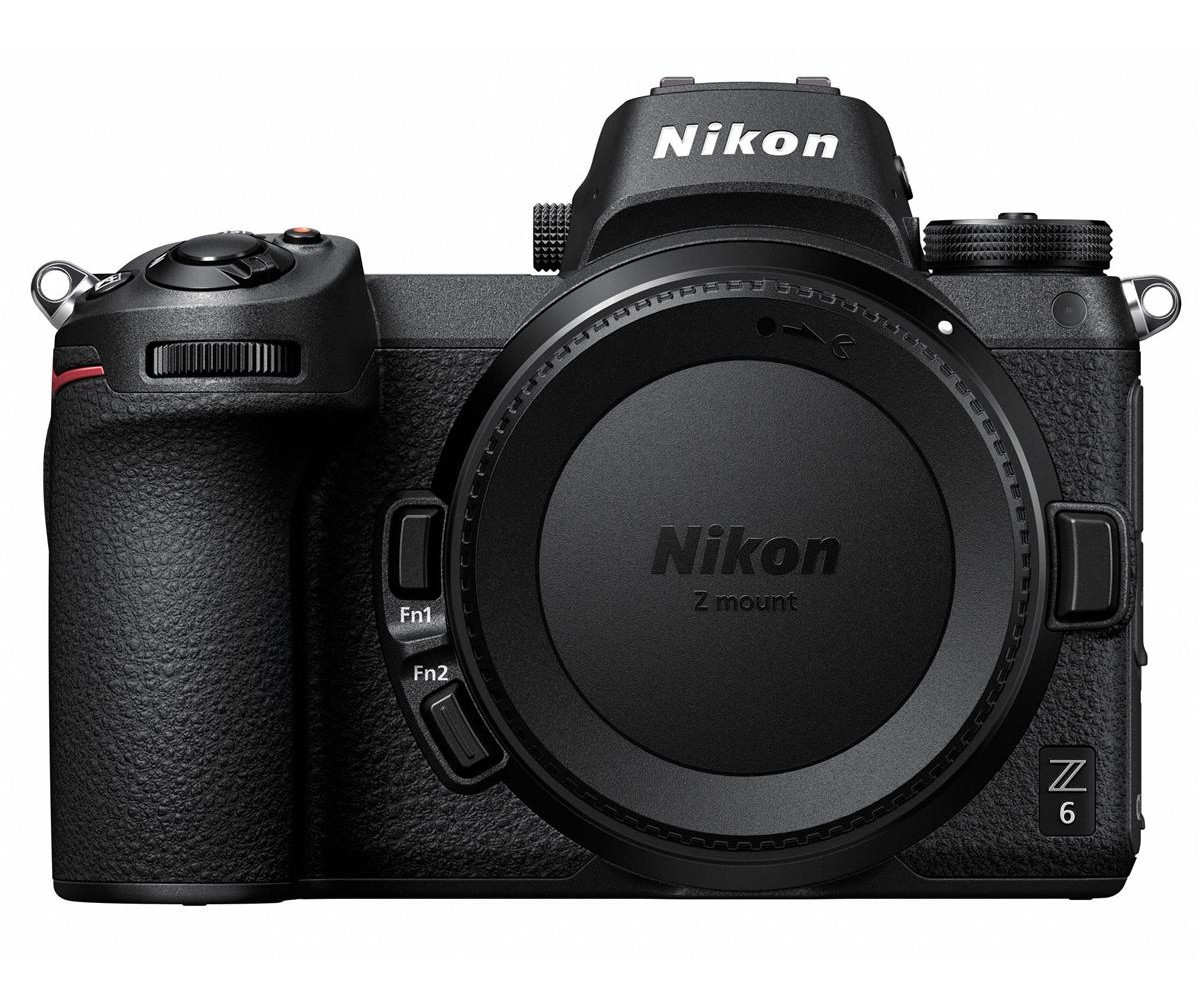
To say that the Nikon Z6 is impressive is an understatement.
Is it perfect? No. No camera is.
But it’s a really good camera, especially given its price of less than $2,000.00 for the body only. Honestly, if I didn’t want the larger sensor of the Z7 for my large-format landscape photography, the Z6 would have been my choice.
It shares many of the Z7’s best features, and since I’m getting more and more into video production, its improved video features are quite attractive.
In the end, this is a class-leading mirrorless camera if you ask me. Though it was frustrating to wait so long for Nikon to get into the mirrorless game, they hit it out of the park with the Z6.
We Recommend
Nikon Z6 vs Z7: Deciding Which is Best for Your Needs
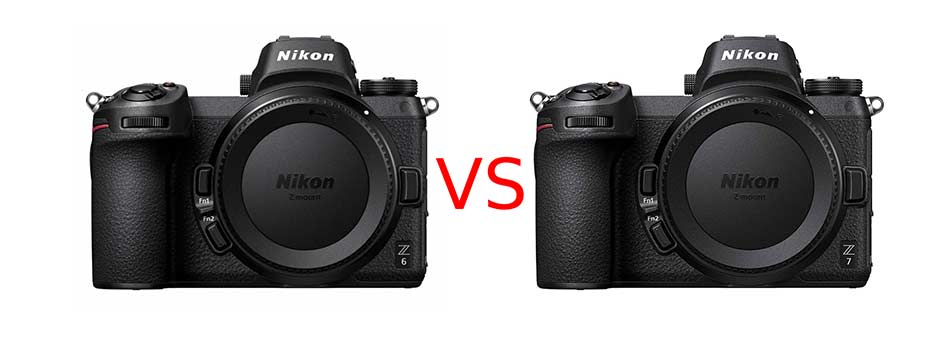
I think we can all agree that Nikon knocked it out of the park with their Z6 and Z7 cameras.
I've field tested both of these rigs and found them to have many similarities, yet enough differences that make them distinct cameras on their own with distinct advantages over the other.
You can check out my Nikon Z6 review and my Nikon Z7 review for in-depth discussions of these cameras and their individual merits.
In this article, however, I want to put these cameras head-to-head on a number of different metrics so you can make an informed decision about which one is best for your needs.
Nikon Z6 vs Nikon Z7: Essential Specs
In looking at the primary specifications of these cameras, you'll note a lot of similarities. In fact, both cameras share the following specs:
- EXPEED 6 image processor
- 3.69-million-dot OLED electronic viewfinder with 100% coverage
- 3.2-inch tilting touchscreen LCD with 2.1-million-dots
- OLED top plate display
- 5-axis Sensor-Shift image stabilization
- Bluetooth & Wi-Fi
- Magnesium alloy body
- Full weather sealing
- Smartphone remote control
- One XQD memory card slot
- 200,000 shutter life
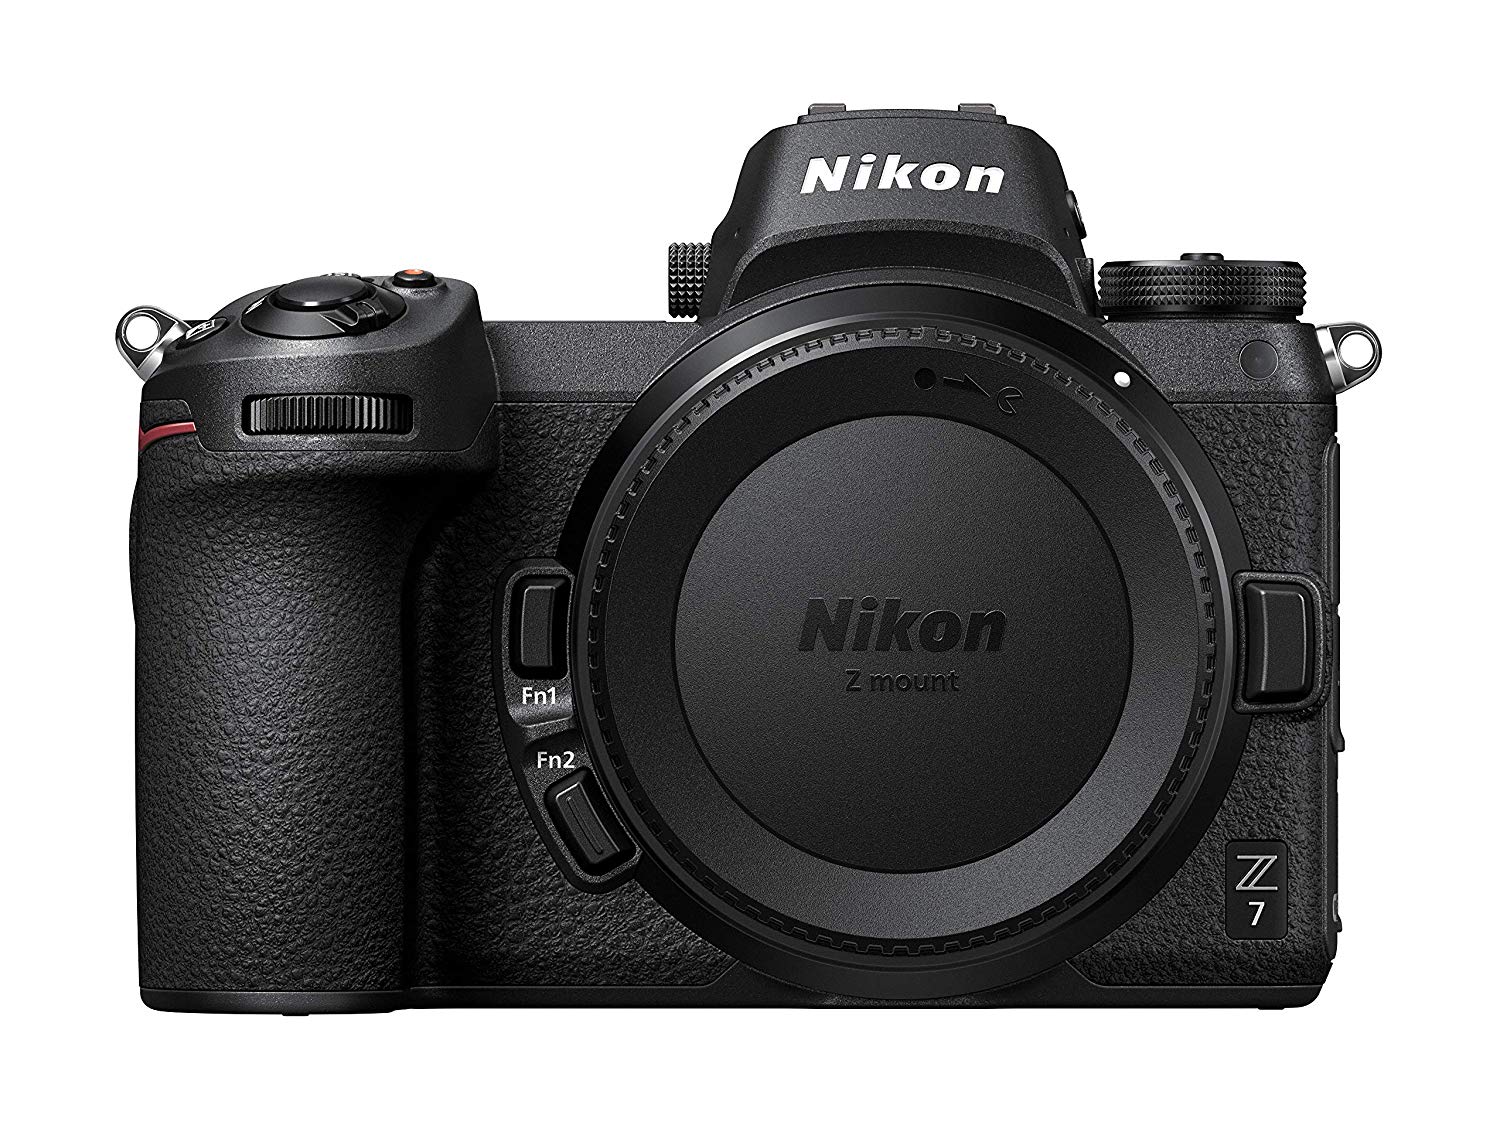
Additionally, the Nikon Z6 and Z7 are the same size and weight with the same dimensions, the same grip, the same button layout, and offer the same functionality in terms of ease of use and handling.
Both cameras use the new Z-mount lenses from Nikon as well.
So, at least from these perspectives, these cameras are all but indistinguishable.
There are, however, some significant differences.
Nikon Z6 vs Nikon Z7 Sensor
Though both of these cameras have 35mm high-resolution backside-illuminated sensors, the Z6 has "only" 24.5-megapixels while the Z7 has 45.7-megapixels.
It's important to note that the Z6's sensor has a low-pass filter and the Z7's does not.
This is important because the lack of a low-pass in the Z7 means its sensor produces images with improved details and added sharpness. See the Z7 in action in the video below by AdoramaTV:
In that regard, the Z7 is a better camera from an image quality standpoint. This isn't to say that the Z6 isn't also capable of producing beautifully detailed, sharp photos, but the Z7 is a step above.
Winner: Nikon Z7. If you intend to create large prints, its sensor is better equipped to create the image files needed to do so.
Nikon Z6 vs Nikon Z7: Autofocus
Nikon Z7
Both the Z6 and the Z7 sport a hybrid autofocus system that makes use of contrast-detect and phase-detect autofocus points. These autofocus systems have identical 90-percent sensor coverage, multiple settings to customize the focus area, and excellent subject-tracking performance.
Additionally, both cameras have face detection focus for both still photography and video.
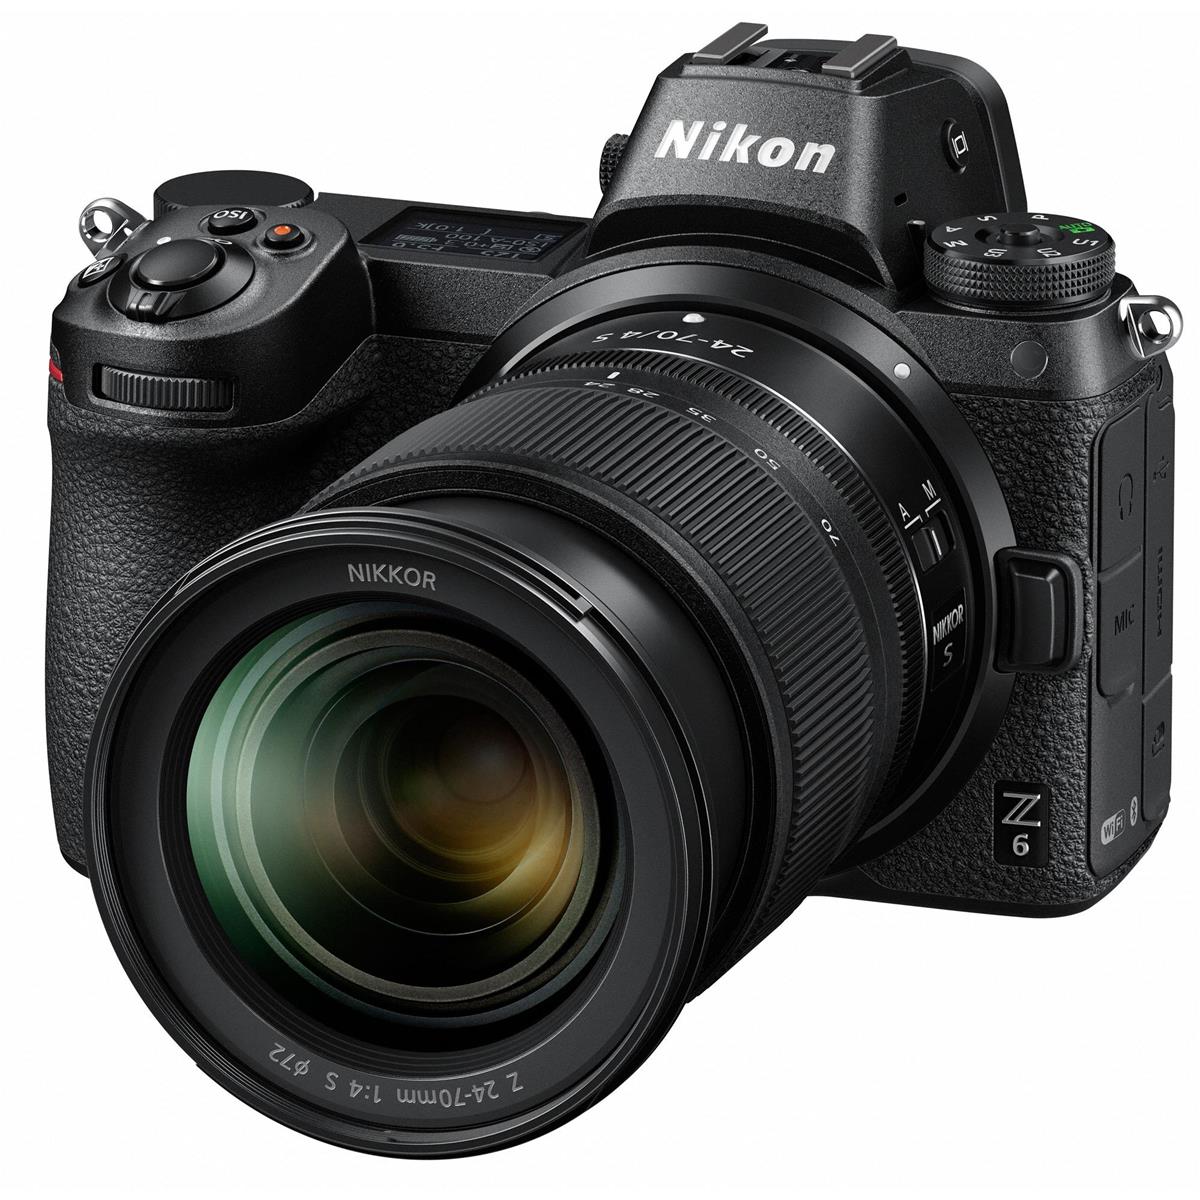 Nikon Z6
The major difference is in the number of autofocus points. The Z6 is well-equipped with 273 autofocus points, but the Z7 has 220 more for a total of 493.
So, on paper, the Z7 would be the camera to get if you're looking for premium autofocus performance.
However, most photographers won't notice a difference between these two cameras from an autofocus standpoint. After all, once you get into the hundreds of AF points, you've got plenty of capability!
Winner: Nikon Z7. The nod goes to the Z7 simply for the sheer number of AF points, but the Z6 is no slouch.
Nikon Z6 vs Nikon Z7: Continuous Shooting Speed
Nikon Z6
These cameras are both equipped with superb continuous shooting speeds - the Z6 clocks in at 12 fps while the Z7 offers a more than respectable 9 fps.
Again, most photographers won't notice a difference in performance here, but if you're a sports or wildlife photographer, that extra 3 fps can make a world of difference.
Having said that, both of these cameras have some idiosyncrasies that make their continuous shooting speeds not all that great in practice.
Nikon Z7
First, both cameras have a minuscule buffer, so neither camera can hold their maximum shooting speeds for more than a couple of seconds before significant slowdown occurs.
Second, both of these cameras lock the exposure before continuous shooting commences, meaning, if you need to reset the exposure, you'll have to wait until burst shooting ends.
Winner: Nikon Z6. That extra 3 fps wins it for the Z6.
Nikon Z6 vs Nikon Z7: Video Capabilities
Nikon Z6
Aside from their sensor resolution, perhaps the biggest difference between these cameras is in their video capabilities.
I dive deep into this topic in my article on filmmaking with the Nikon Z6 and Nikon Z7, so for a full comparison, check that out.
For our purposes, here, just know that the Z6 is a much better camera for shooting video.
Both cameras have 4K UHD recording at 30 fps and 1080p video at 120 fps.
However, the Z6 is capable of shooting full frame video and the Z7 is not. Instead, the Z7 shoots 4K UHD video with a significant crop, which means reduced video quality.
Get a detailed look at the Nikon Z6 in the video above by AdoramaTV.
Winner: Nikon Z6. It's hard to beat full frame 4K UHD!
Nikon Z6 vs Nikon Z7: Price
Nikon Z6
Since these cameras are so close on so many measures, it might come down to price as the determining factor in your decision.
Currently, Adorama has the Nikon Z6 is $1,996.95 for the body only while the Nikon Z7 is $3,396.95 for the body only.
That's obviously not a small difference...
For some shooters, the traits that make the Nikon Z7 a better camera for some photography pursuits are worth the additional $1,400.00. For many other photographers, though, the added expense cannot be justified.
Winner: Nikon Z6. It's a fantastic camera with an excellent price.
Nikon Z6 vs Nikon Z7: Which is Best for You?
As noted earlier, there are plenty of features common to both of these cameras that make them indistinguishable in many ways.
But as we've seen in this head-to-head comparison, the Z7 has a more resolute sensor that results in better image quality. This makes it a better choice for landscape photographers and portrait photographers that want superb detail and the ability to make huge prints.
However, if video or continuous shooting speed are high on your list of priorities, the Z6 is clearly the better choice with 12 fps continuous shooting and full frame video.
Ultimately, either of these cameras is well worth the investment. The one you get will most likely depend on the purpose for which you need it and/or the size of your budget.
We Recommend
Nikon Z7 Hands-On Review

Since its release in August 2018, I've wanted a Nikon Z7 in my hands.
And now, I do.
I've used a Nikon D850 as my primary camera since I picked one up in the fall of 2017. I'll have a head-to-head review of the D850 and Z7 later on.
For now, I wanted to share my experiences with the Z7. Spoiler alert - it's awesome.
Editor's Note: Be sure to check out my initial Nikon Z7 review for more details.
Nikon Z7 Overview
As a Nikon shooter, I can identify with everyone else that felt like Nikon took absolutely forever to launch their mirrorless line.
But, man, was it worth the wait.
The 46-megapixel sensor in the Z7 has the same specs as the D850, but the Z7 benefits from a newer processor that results in reduced noise compared to images captured with the D850.
The addition of 5-axis image stabilization to the Z7 makes it a more capable performer than the D850 as well.
Other features of note on the Z7 are as follows:
- EXPEED 6 image processor
- Native ISO Range: 64-25,600 (expandable to 32-102400)
- 3.69-million dot OLED electronic viewfinder with 100% coverage
- 3.2-inch tilting touchscreen LCD with 2.1-million dots
- 9 fps burst shooting (12-bit RAW)
- Hybrid PDAF autofocus system with 493 AF points
- AF Sensitivity: -1 to +19 EV
- 4K UHD video at 30 fps
- Magnesium alloy body
- Full weather sealing
- 200,000 shutter life
Nikon Z7 Ergonomics
If you're a Nikon shooter, the Z7 will feel like an old friend.
That is, the Z7 is very obviously a Nikon camera and will make you feel right at home from the first moment you shoot with it.
In fact, I'd argue that the Z7's ergonomics are a lot like the D850, despite the D850 being a much bigger, heavier rig.
The grip, in particular, reminds me of my D850. It's big, chunky, and gives you the feeling that you have a good, solid grip on the camera.
What's more, the grip offers all the space you need for your right thumb so your hand doesn't feel at all cramped.
I also like that Nikon placed the shutter button a little higher on the body. I've found that this gives me a feeling of having more control over the camera in terms of stability when I'm handholding it.
Something else that is familiar about the Z7 is the two programmable function buttons on the right side of the lens mount.
These buttons are similar to those on the D850, though different in shape, and are easily reachable when using my ring finger and middle finger to access them. Like on my D850, I've set these buttons to work in tandem with the front dial for making adjustments to my camera settings.
On the back of the camera, you'll find key buttons and a joystick that are easy to use and access.
I was afraid at first that it would be cumbersome to utilize the joystick, in particular, due to the smaller size of the Z7 body. Those fears were unfounded, however.
Nikon Z7 Build Quality

Any Nikon shooter could probably identify this as a Nikon camera, even if they were blindfolded. It just feels like a Nikon.
The camera's magnesium alloy shell is rock-solid, and with full weather sealing, I suspect it will stand up to just about any type of weather. I haven't had an opportunity to test it out in the rain or cold, but I can tell you it's working wonderfully in the warmth and sun of a California spring!
The rubber that covers the grip feels, well, grippy, and though some Nikon enthusiasts have complained about its look and durability, I have encountered no issues with it thus far.
Nikon did a wonderful job designing and building the Z7's 3.2-inch tilting touchscreen.
Aside from being incredibly bright and detailed, it tilts smoothly and the touchscreen works like a charm. Though it has lower resolution than the D850's LCD, I honestly wouldn't have noticed a difference had I not read the spec sheet prior to unboxing the Z7.
A big difference between the LCDs on the D850 and Z7 is that the former is in 3x4 format while the latter is in 2x3 format, so it matches the dimension of your photos.
As a result, the LCD on the Z7 seems bigger than it actually is.
Nikon Z7 Performance
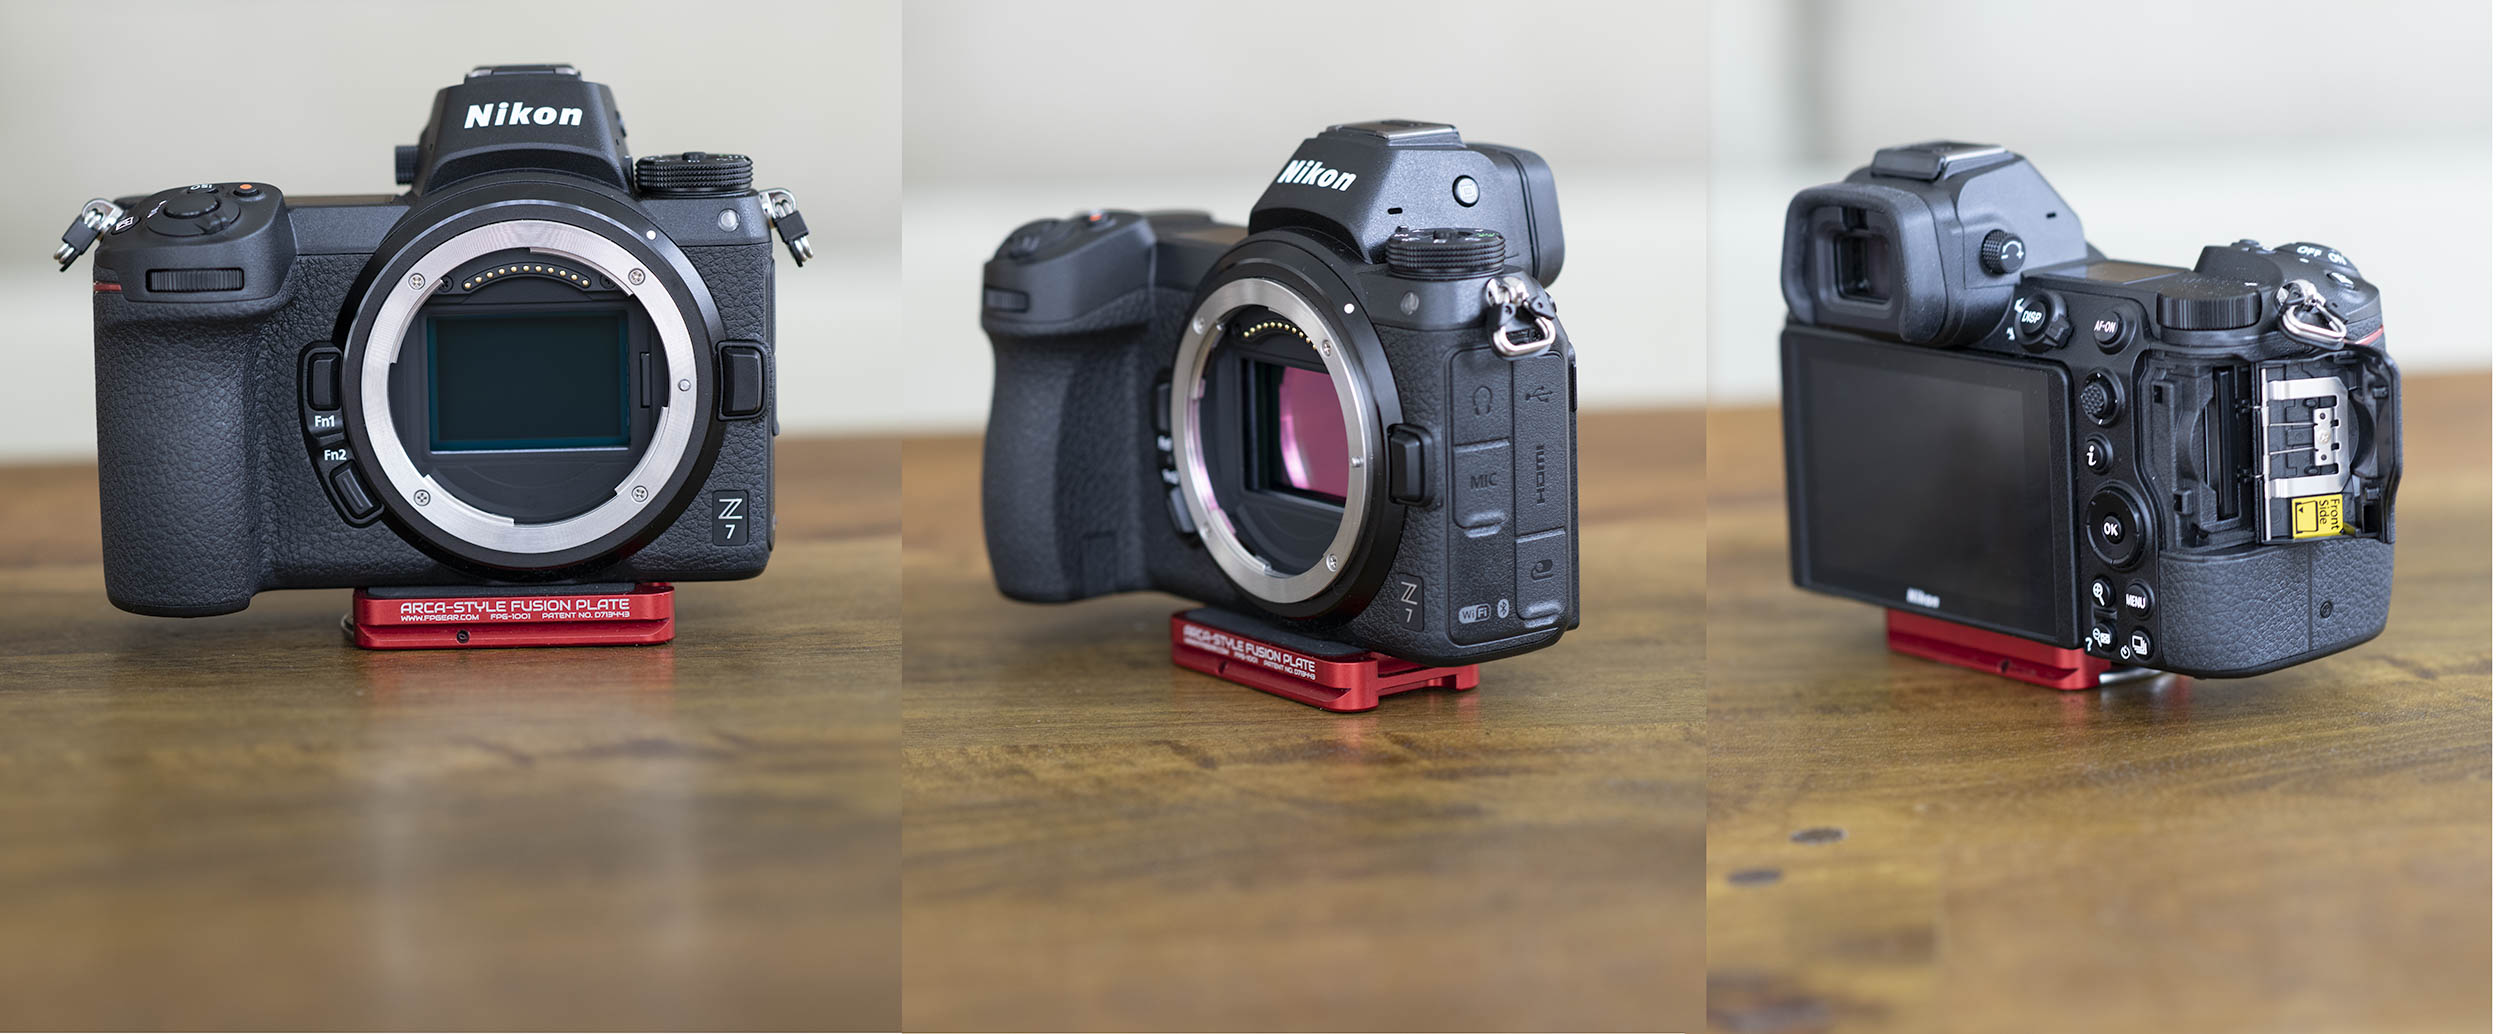
One of the best performance features of the Z7 is, in my opinion, the 5-axis image stabilization.
Unlike its DSLR cousins, the Z7 has built-in image stabilization, which is effective up to five stops.
As someone that has a good number of legacy Nikon lenses that are not stabilized, it's nice to be able to mount them to the Z7 body with the FTZ adapter and benefit from the Z7's stabilization.
The camera's autofocus system is worth a mention as well.
You can switch it between single-focus and continuous-focus as well as full-time autofocus when recording movies. The system utilizes both contrast-detect and phase-detect AF points, which render accurate focusing, even in less-than-desirable lighting.
It has predictive focus tracking, which I've found to be highly effective when taking photos of my son running around in the yard. Predictive focus tracking is precisely what you would think - it focuses on the subject and locks on so that focus is maintained, even as the subject moves.
There are multiple AF patterns from which to choose, including single-point and pinpoint options as well as dynamic patterns and wide-area focusing. The Z7 is equipped with focus peaking and manual focus, too.
Unlike other mirrorless cameras, the Z7 doesn't seem to suffer from the initial lag when first powering it up.
There is definitely a longer wake up time with the Z7 than my D850, but it's nothing major. Instead, the camera wakes up with the autofocus system read to go and the viewfinder active so you can take quick shots.
Speaking of taking shots, the Z7's image quality is outstanding, as expected.
Dynamic range is excellent, noise is well controlled (and really not even noticeable below 6400), and the color output is both accurate and pleasing.
Nikon Z7 Price
You can pick up a Z7 (body only) for just a shade under $3,400.
A bundle that includes the Nikkor Z 24-70mm f/4 S lens is just under $4,000.
Should You Buy a Nikon Z7?
Clearly, not everyone can afford a Z7, but if you can, it's a great investment.
Usually you find a variety of issues with first-generation cameras, but Nikon took its sweet time designing and developing this rig, and it shows.
There's truly nothing about this camera that annoys me, nor are there any deal-breaking features (or lack thereof) that would make me think twice about having gotten one.
For some, the lack of two card slots might be a problem, but for me it's a non-issue.
Instead, the good features of this camera are what really shine - an excellent sensor, a superb autofocus system, excellent image quality, fantastic handling...it truly is a magnificent camera.
UPDATE: In the video above, I offer my long-term hands-on review of the Z7. Check it out!
We Recommend
Nikon Z7 Landscape Photography Workhorse
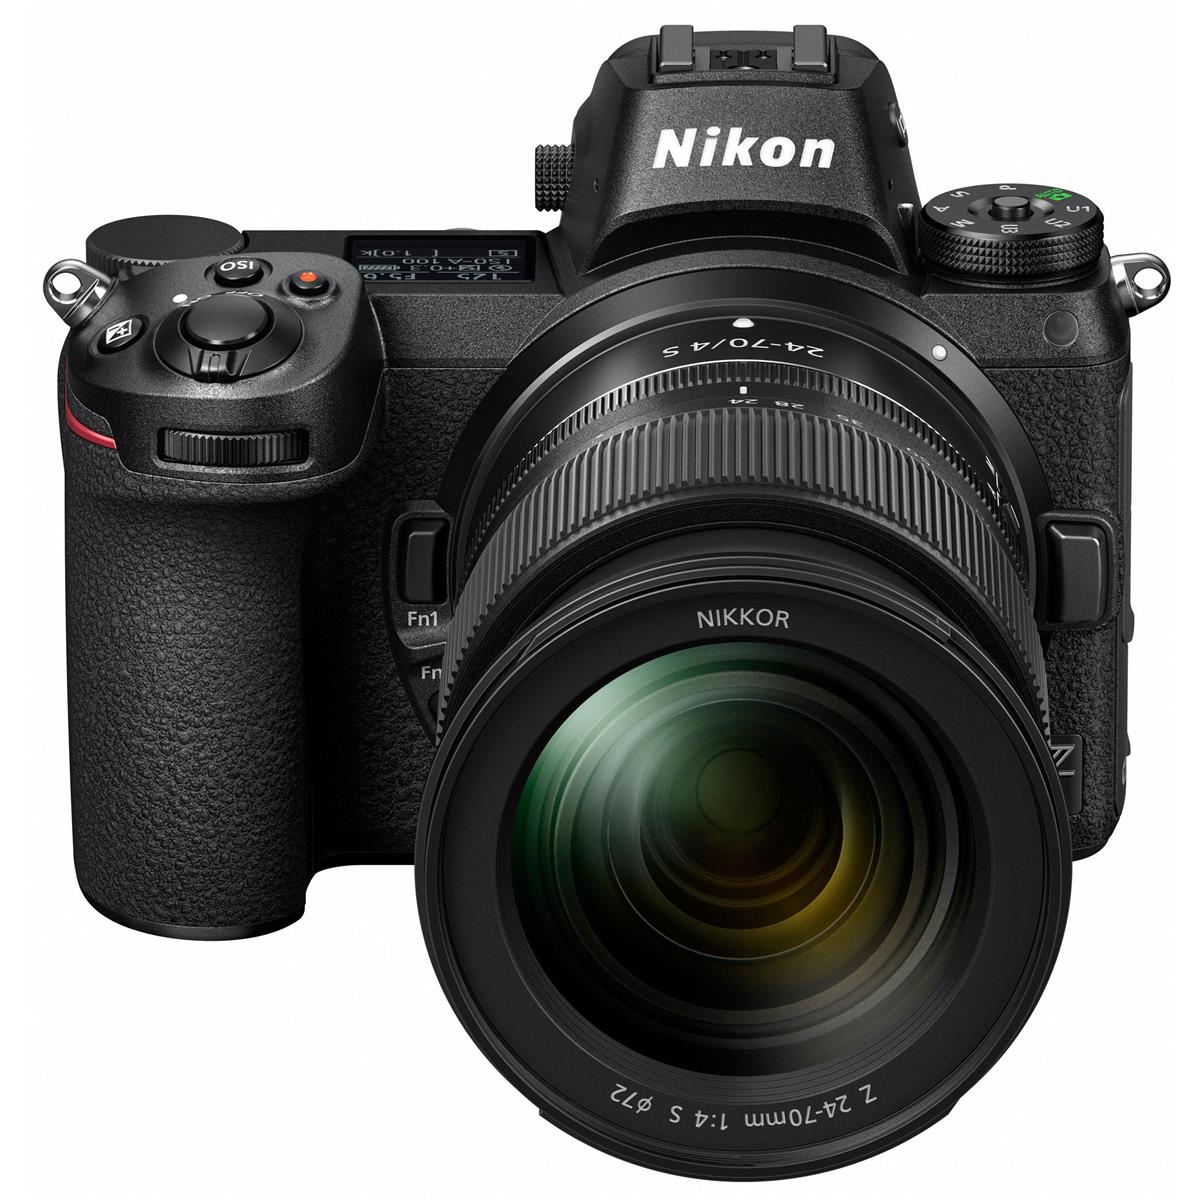
If you’ve followed our recent articles on the Nikon Z7, you know that I’ve had one for a while now and that I’ve been testing it in all sorts of situations and scenarios.
But those of you that know me know that landscapes are my first love, so more than anything, I’ve wanted to put the Nikon Z7 through its paces in the landscape realm.
Unsurprisingly, it’s been awesome.
In fact, I’ve given it the title of “Nikon Z7 landscape photography workhorse” because it truly has been a badass, hard-core camera in every single landscape photography situation I’ve been in.
Check out my real world review of the Nikon Z7 above. Below, let’s discuss some of the best Nikon Z7 features for landscape photography!
First Things First: Nikon Z7 Review
Since I’m focusing on the Nikon Z7’s performance regarding landscapes, I won’t be discussing all of its features.
For that, you can head over to my Nikon Z7 Hands-On Review to get the scoop.
Like any camera, the Z7 has its overall strengths and weaknesses.
But, in my testing of the Z7, I can tell you that - landscapes or otherwise - this camera has impressed, especially given that its Nikon’s first foray into mirrorless cameras.
The wait for the Z7 (and the Z6) to arrive was agonizing for Nikon shooters like myself, but man, it was worth the wait!
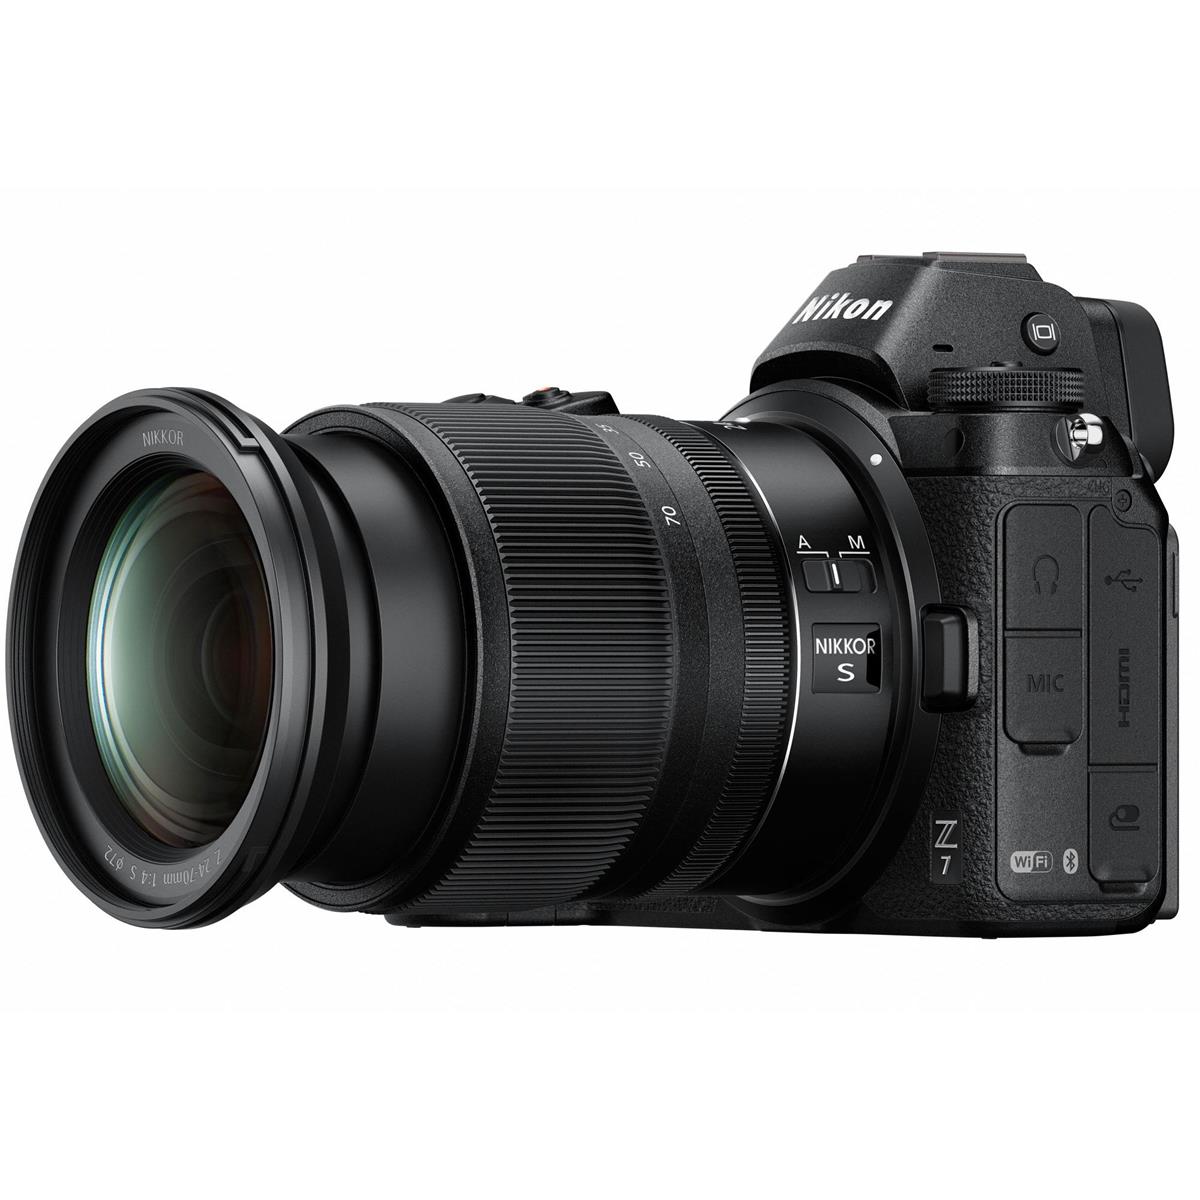
I’ve gushed over the years about my Nikon D850 and how great it is for landscape photography. But the more I use the Z7, the more I realize that it’s an even more capable landscape photography camera than the D850.
Part of the reason for this is that the Z7’s strengths - which I explain in the sections below - are particularly well-suited for landscapes. Meanwhile, its weaknesses aren’t particularly important for landscapes, so it’s really a perfect storm!
Nikon Z7 Landscape Photography Handling
The first thing I want to explore regarding the Nikon Z7 landscape photography features is simply how the camera handles.
As I mentioned above, I also have a D850, and that was my primary landscape photography camera before the Z7 came along.
Part of what makes the Z7 so great is that it borrows heavily from the D850’s design, so the handling is familiar and comfortable.
From an ergonomic standpoint, the Z7 is comfortable in the hand. Its grip is nice and chunky - just like the D850’s - and it’s easy to handhold, even when your hands are freezing (as mine were in Norway this winter).
The button layout isn’t exactly the same as the D850, but Nikon did a great job with the design of the Z7 to ensure that it has an intuitive layout that’s fresh yet is still familiar for Nikon DSLR shooters like me.
Add in the lightweight design of the Z7, and you have a scenario in which it handles better than the D850 when you’re out and about photographing landscapes.
Nikon Z7 Landscape Photography Live View
Comparing the live view capabilities of the Z7 and the D850, the Z7 wins hands-down.
That’s saying a lot because it’s not like the D850 is a slouch in that department…
What’s more, the Z7 (and the Nikon Z6, for that matter), have LCDs with a 3:2 aspect ratio rather than the more traditional 4:3 aspect ratio. Since this matches the aspect ratio of the photos you take, the LCD seems much, much larger.
This, in turn, makes using live view for composing landscape shots an absolute dream.
Nikon Z7 Landscape Photography Autofocus
Coupled with its larger-than-life view, the Z7 has fantastic live view autofocus.
In particular, with Low-Light autofocus mode, live view focusing on the Z7 is fantastic in low-light conditions, like those I encountered in Norway this winter.
The live view autofocus is both fast and accurate - faster even than the D850, and so accurate that it rivals the results I get when focusing manually. More than that, though, it is consistent from one shooting situation to the next so you can have confidence that the Z7’s live view AF will get the job done no matter the conditions.
In fact, as a Nikon shooter for many, many years, I can say with the utmost confidence that the Z7 has the best autofocus system Nikon has developed. It’s that good!
The effect of all this, is, of course, that I spend less time dialing in manual focus and more time actually taking photos - all without worry that the images I take using autofocus will have diminished sharpness.
Since most landscape photographers like me use live view anyway, these live view and autofocus features are sure to make even Canon or Sony shooters drool.
Nikon Z7 Landscape Photography Lenses
Of course, a camera is only as good as its lenses, and Nikon certainly hasn’t disappointed with its Z-mount lenses thus far.
I especially love the Z-mount 24-70mm f/4 S, which is a surprise because I also have the F-mount 24-70 f/2.8 VR, which has always been my favorite landscape lens.
However, the Z-mount version is even sharper. And that’s not just at a particular focal length, either. It’s simply sharper throughout all focal lengths. Given the quality of the F-mount 24-70mm lens, that’s saying a lot.
Sure, the Z-mount lens only has an f/4 aperture, but by and large, that isn’t an issue (Nikon has an f/2.8 version of this lens anyway).
Besides, the Z-mount 24-70mm lens weighs little more than one pound (or about half that of the F-mount version), so it’s a perfect weight and size for trekking around looking for the next great landscape shot.
I won’t ramble on about how insane these Z-mount lenses are (I do that here), so just know that they are firing on all cylinders - performance, size, weight, price - these suckers have it!
Now, some Nikon enthusiasts have bemoaned the fact that there aren’t more native Z-mount lenses yet. Additionally, I’ve heard some rumblings that the FTZ adapter Nikon developed to allow you to use F-mount lenses on a Z-mount camera isn’t all that great.
However, I’ve had no issues with the FTZ adapter. Sure, it adds bulk and weight, but not so much that I’d throw the Z7 out the window and go back to using my D850.
I’ll admit that autofocusing with the FTZ adapter isn’t what I’d call stellar, but it wasn’t so terrible that I can’t still get quality shots with the Z7 and an older F-mount lens. Besides, to think that an F-mount lens and FTZ adapter can equal the performance of the absolutely insane Z-mount lenses is a pipe dream. I didn’t expect that incredible level of performance, so when I didn’t get it, I wasn’t disappointed.
Nikon Z7 Landscape Photography Workhorse: Final Thoughts
So, let’s recap…
The Z7 handles like a Nikon DSLR, has a better LCD, has the best live view autofocus of any Nikon camera, and its native lenses offer top-shelf performance.
That’s a lot to like!
All of these features come together with the many other incredible features of the Z7 to make it an absolute beast for landscape photography.
The sensor, the ISO performance, the intuitive layout of the controls, and even the battery life have been rockstars in the field. See what I mean in the video below by Ricci Talks:
As I said before, my former landscape rig was a Nikon D850, which honestly is one of the best cameras I’ve ever owned.
But now that the Z7 has come along, at least for landscape photography, it has made the D850 look like a quaint old rig. The Z7 is simply that good.
It isn’t a camera for everyone, that’s for sure. But if you’re in the market for a new landscape-specific camera, I encourage you to give the Z7 a long, hard look.
Pick up a Nikon Z7 (body only) for $2,796.95 or get a Nikon Z7 with a 24-70mm f/4 S lens for $3,396.95.
We Recommend
Nikon Z7 vs Canon EOS R

Nikon and Canon finally got into the mirrorless game in earnest last fall, and so far, both the Z7 and EOS R have gotten rave reviews.
For most of us, these cameras represent upgrade possibilities from our current DSLRs - from a Nikon D850, for example, to the Z7, or the Canon 5D Mark IV to the EOS R.
However, jumping ship from Nikon to Canon or vice versa probably isn’t in the cards. These cameras are good, but not that good.
Still, it’s nice to know how these cameras stack up against each other. Let’s find out who winds the Nikon Z7 vs Canon EOS R battle.
Table of Contents:
- Nikon Z7 Sensor vs Canon EOS R Sensor
- Nikon Z7 Autofocus vs Canon EOS R Autofocus
- Nikon Z7 Image Stabilization vs Canon EOS R Image Stabilization
- Nikon Z7 EVF vs Canon EOS R EVF
- Nikon Z7 LCD vs Canon EOS R LCD
- Nikon Z7 Lenses vs Canon EOS R Lenses
- Nikon Z7 vs Canon EOS R: Final Thoughts
Nikon Z7 Sensor vs Canon EOS R Sensor
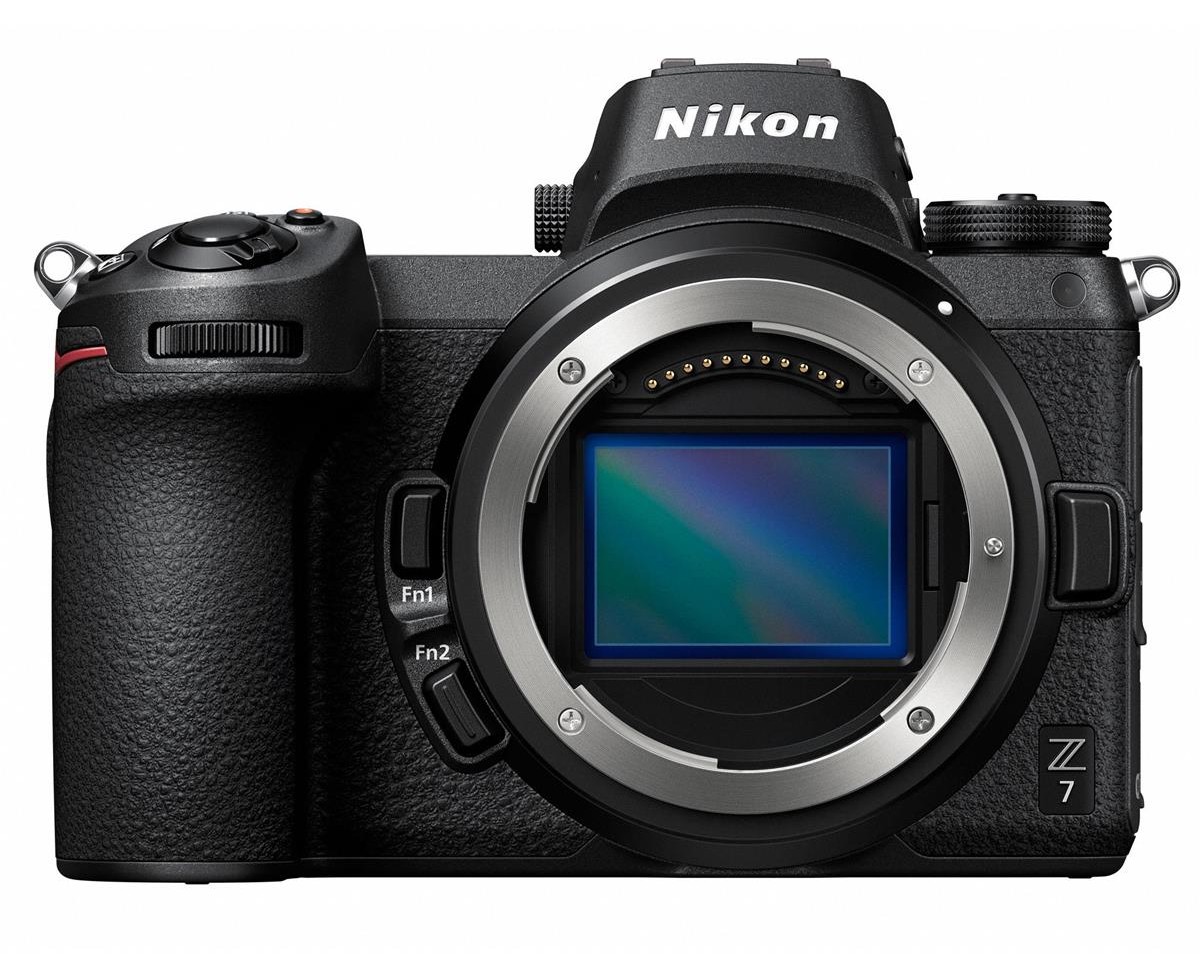
Both of these cameras feature full frame sensors - the Nikon’s has 45-megapixels of resolution while the Canon sports “only” 30.3-megapixels.
There are differences beyond resolution, though.
The Nikon’s sensor is back-illuminated, which improves low-light performance. Additionally, the Z7 does not have an optical low-pass filter, which improves image sharpness, too.
Add to that the fact that the EOS R does have an optical low-pass filter, and the winner in the sensor department is clear - it’s the Nikon.
That being said, both of these cameras produce excellent image quality. The EOS R is certainly no slouch here, but the Z7 is just a bit better.
Winner: Nikon Z7
Nikon Z7 Autofocus vs Canon EOS R Autofocus
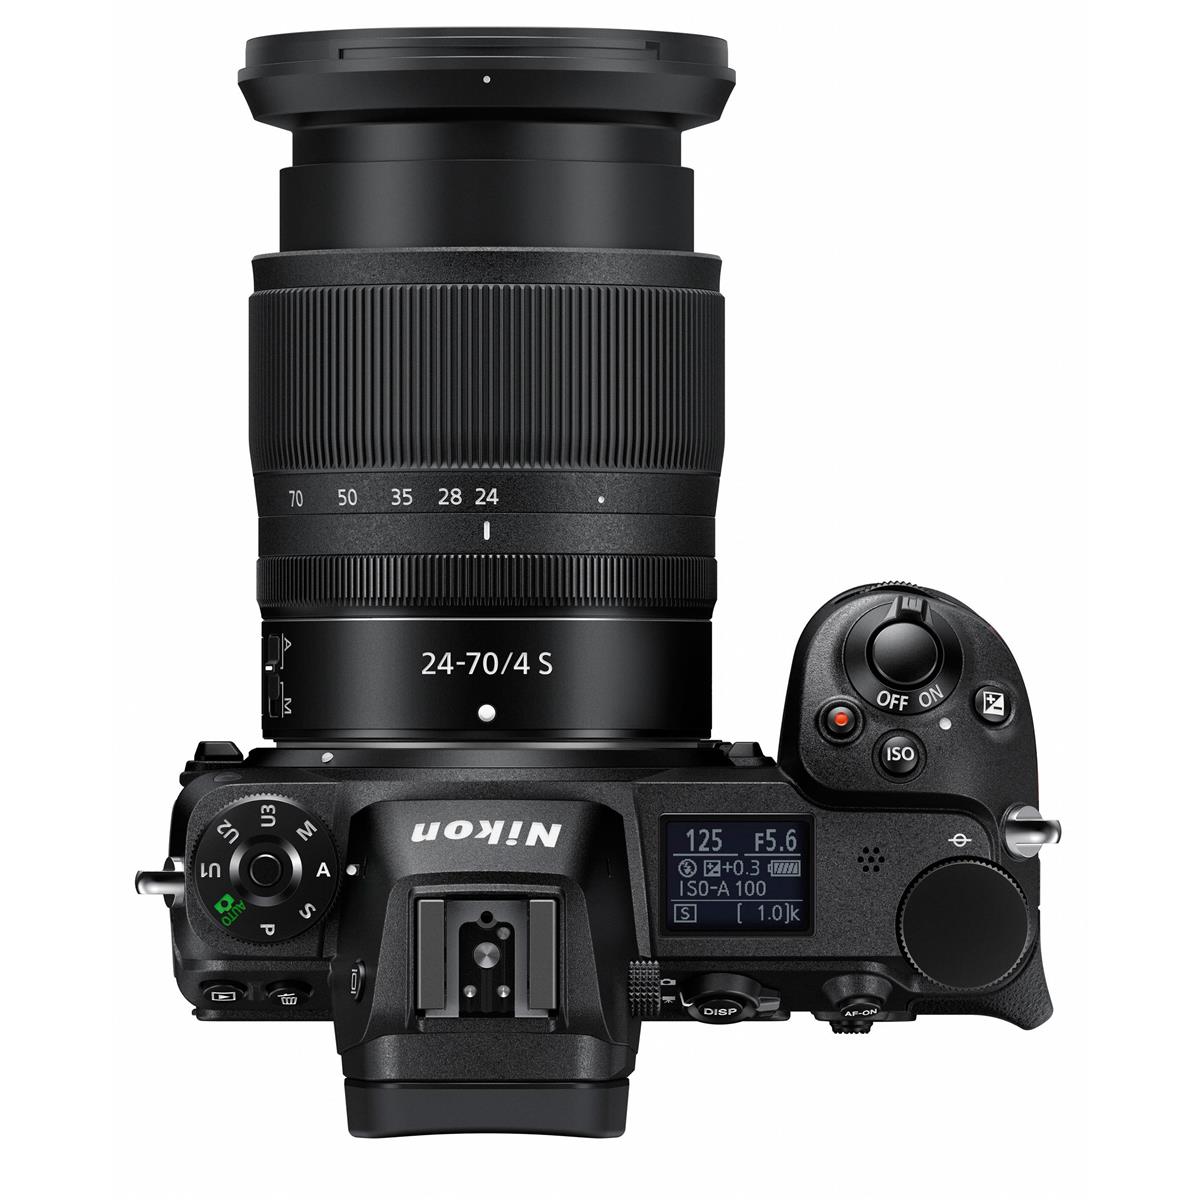
The autofocus systems on these cameras are quite different, yet both provide good performance.
The 493-point autofocus system in the Z7 is all-new, yet is built on Nikon’s lineage of autofocus systems. This is a good and a bad thing, though.
On the one hand, it uses phase-detect autofocus points that improve accuracy, particularly when using the viewfinder. The on-sensor phase-detect pixels allow the camera to focus rapidly while also giving you excellent low-light autofocus abilities and above-average subject-tracking.
However, when using autofocus in live view, it’s a different story, especially with tracking a subject.
The EOS R has a new autofocus system as well, though thankfully it includes Canon’s spectacular Dual Pixel design.
The system has 88% coverage of the frame horizontally and 100% coverage vertically. There’s also an astounding 5,655 autofocus points.
All those AF points mean the EOS R is excellent at tracking subjects from edge to edge. Additionally, the system can work all the way down to -6EV, depending on the lens being used. That’s double of the Z7.
Winner: Canon EOS R
Nikon Z7 Image Stabilization vs Canon EOS R Image Stabilization
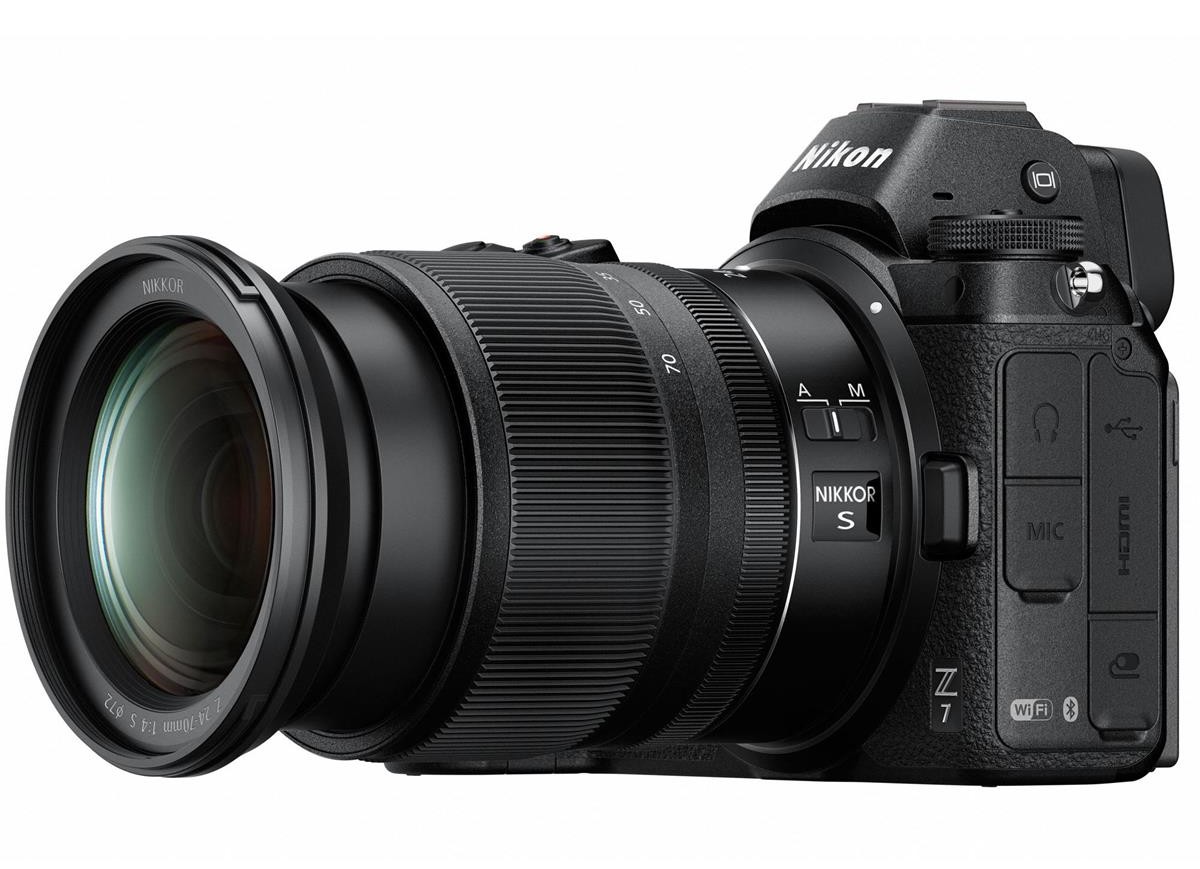
The Nikon Z7’s image stabilization system is sensor-based, so you can reap the benefits of stabilization regardless of the lens you’re using.
This is a huge benefit to Nikon shooters that have older F-mount lenses that they want to keep and use after upgrading to the Z7 (which can be done using the FTZ adapter).
Beyond that, the Nikon’s image stabilization system offers up to five stops of compensation in addition to five-axis stabilization both for the new Z-Mount lenses and older F-mount lenses, to
Canon, meanwhile, did not incorporate in-body image stabilization in the EOS R. Instead, Canon opted to include stabilization in the EOS R lenses - at least two of them, anyway.
That in-lens system works great, but the fact that it’s only offered in two lenses thus far is disappointing.
Winner: Nikon Z7
Nikon Z7 EVF vs Canon EOS R EVF

The Nikon Z7 has a 3.6-million-dot Quad-VGA OLED electronic viewfinder. It has 100% frame coverage and offers a wide 37-degree diagonal viewing angle.
There’s a fluorine coating on the eyepiece to reduce flare and repel dirt, while the EVF itself is clear, crisp, and bright.
In using the Nikon Z7, it’s evident that blackout and lag are minimal compared to other mirrorless cameras.
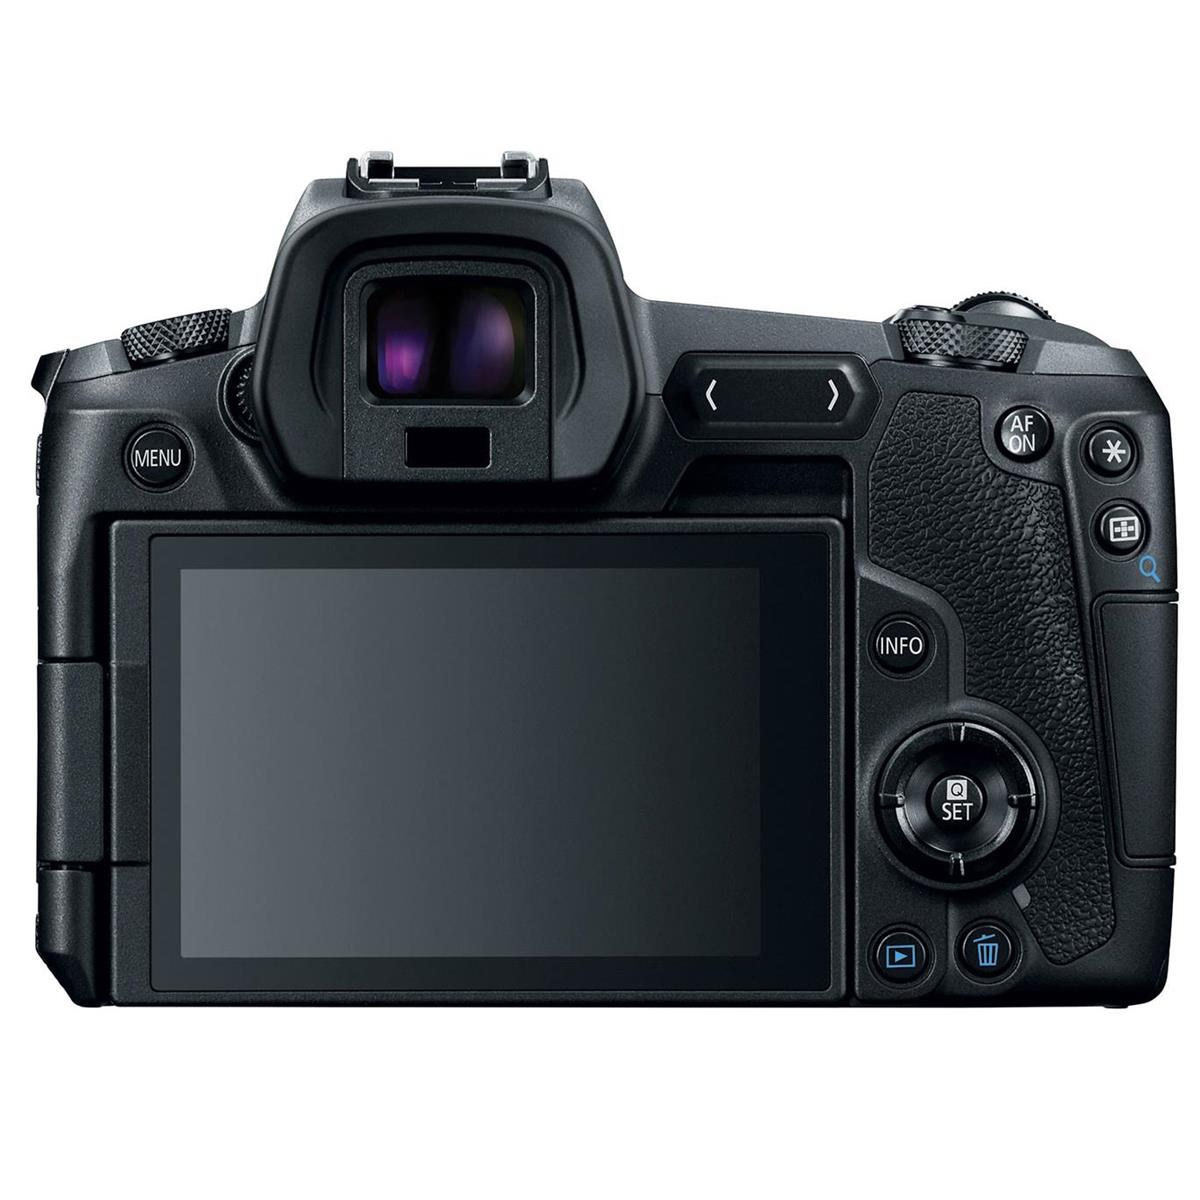
The EOS R has a similar EVF that offers similar performance as well.
It has a 3.69-million-dot OLED EVF that offers a 100% view of the subject. When used with an aspherical lens, the EVF is gorgeously crisp and vivid.
Canon has worked hard to minimize distortion and aberrations, and has developed the EVF to be bright enough to view comfortably, even when shooting in sunny conditions.
Ultimately, the EVFs on these cameras are so similar that it’s difficult to pick a winner.
Winner: Draw
Nikon Z7 LCD vs Canon EOS R LCD
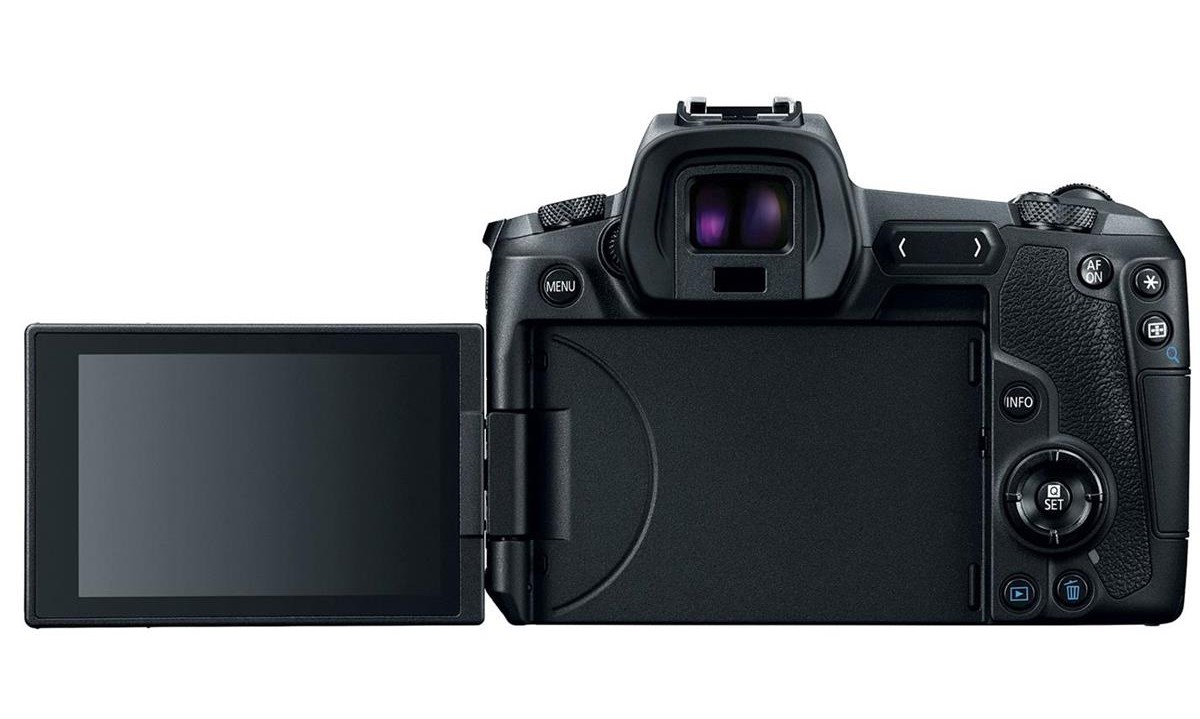
Both the Nikon Z7 and Canon EOS R come with a 2.1-million-dot LCD. Where the Nikon’s LCD is 3.2-inches, the Canon’s is 3.15-inches.
The primary difference between the two is that the Nikon’s LCD tilts up and down, where the Canon’s is fully articulating.
Having a fully articulating screen is a nice touch as it makes things like vlogging, selfies, and group photos an easier task.
Winner: Canon EOS R
Nikon Z7 Lenses vs Canon EOS R Lenses

When the Z7 was introduced, three lenses were introduced along with it: a 24-70mm f/4 S, a 35mm f/1.8 S, and a 50mm f/1.8 S. Since then, Nikon has unveiled two more lenses, the 14-30 f/4 S and the 24-70 f/2.8 S, bringing the current total to five (with more on the way).
As noted earlier, the Z7 isn’t limited to these five lenses, thanks to the FTZ adapter that allows you to use F-mount lenses with the camera.
Canon has done the same, so EF-mount lenses work with the EOS R.
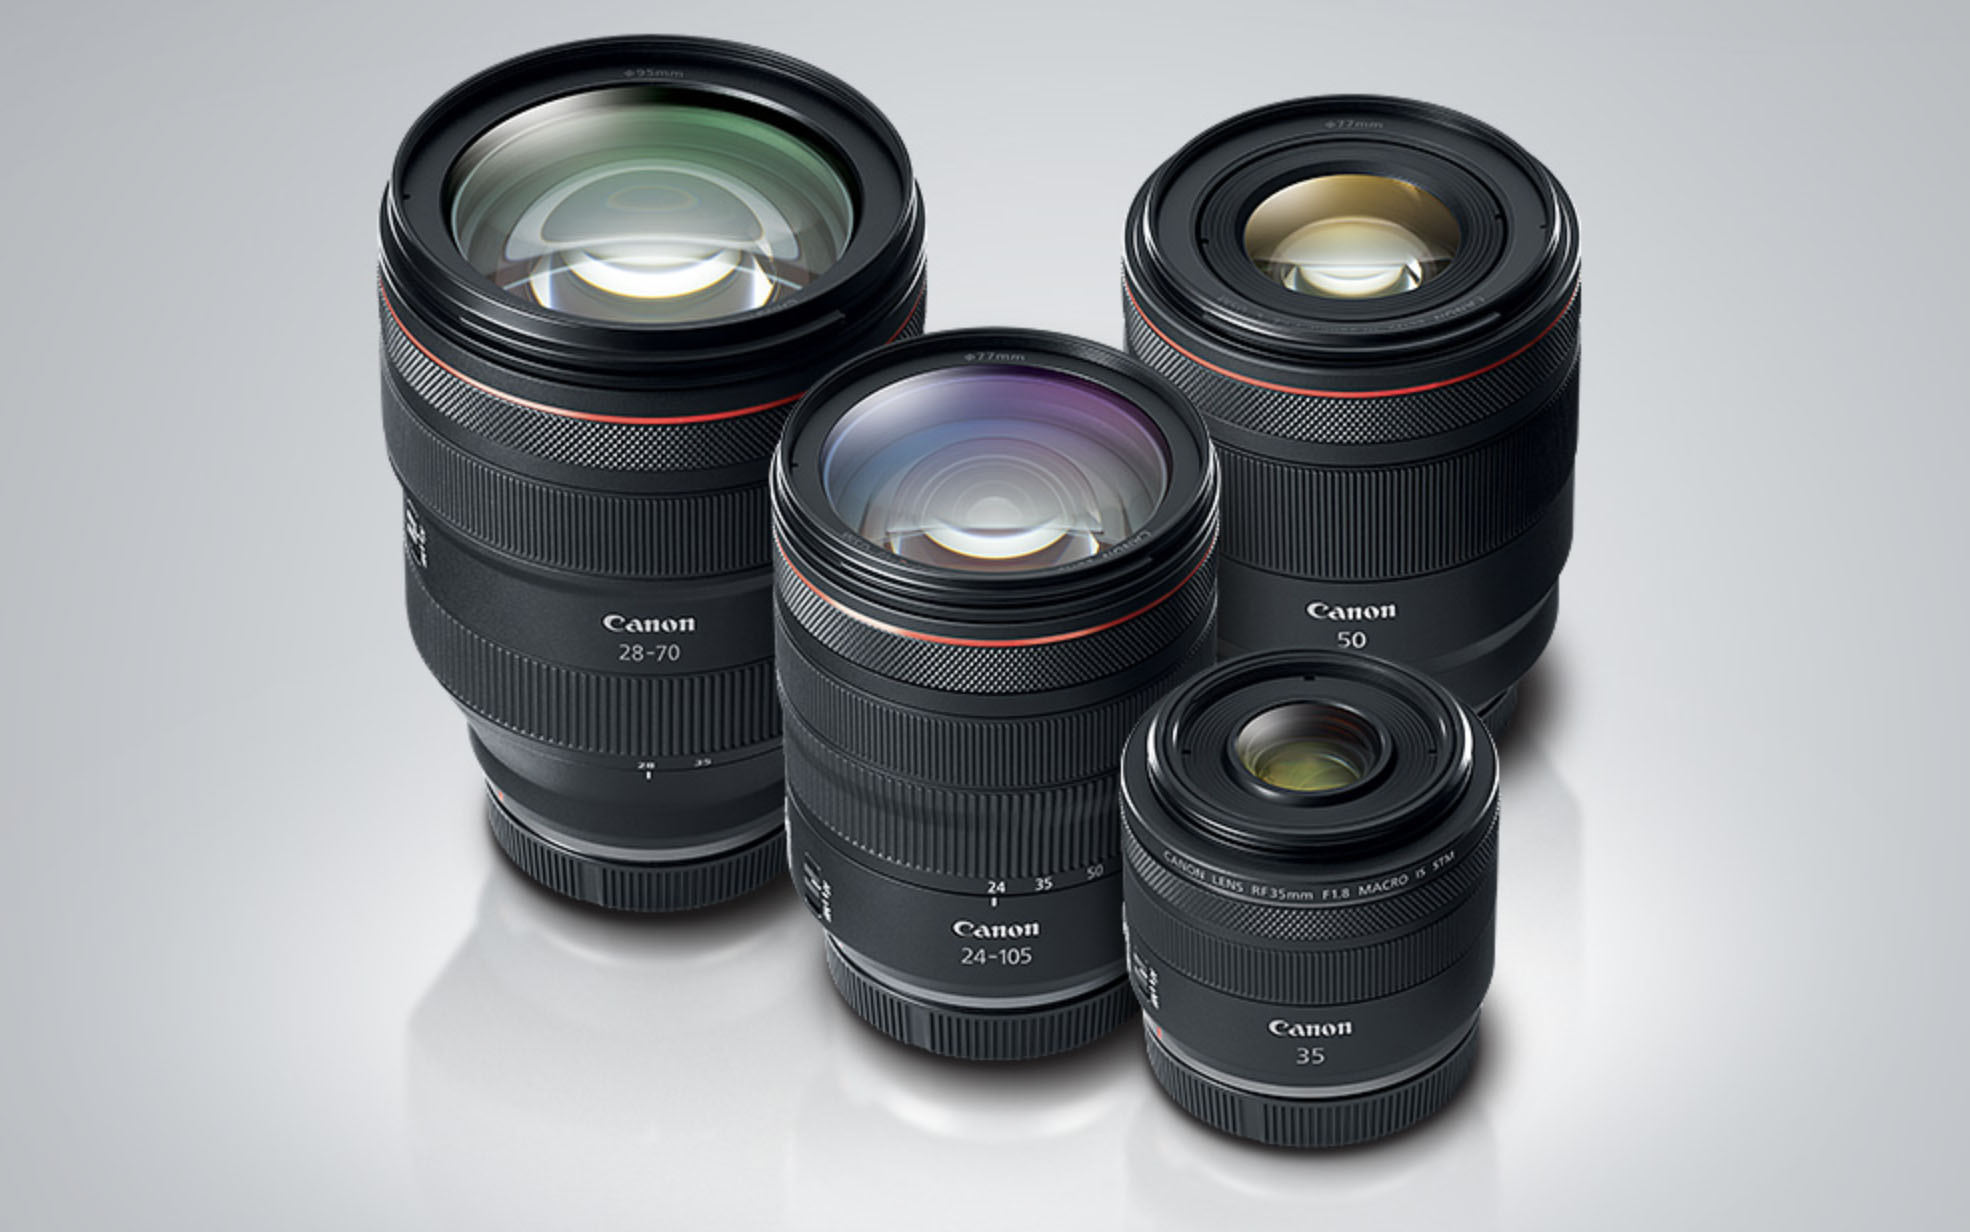
The EOS R lens lineup includes an RF 35mm f/1.8 IS STM Macro, an RF 50mm f/1.2L USM, an RF 28-70mm f/2L USM, and an RF 24-105mm f/4L IS USM, again, with more on the way.
In terms of selection, both companies have ensured that buyers have the essentials available to them from the get-go. And with the next couple of years worth of lenses already mapped out, both Nikon and Canon aim to keep mirrorless camera owners happy with an increasingly large selection of glass
Winner: Draw
Nikon Z7 vs Canon EOS R: Final Thoughts
Both of these cameras are excellent and offer top-notch performance, features, and lens options.
As I said earlier, neither one is so good that it will convince someone to jump ship from one manufacturer to the next.
Likely the biggest question is do you want to upgrade now or wait until the second generation of these mirrorless cameras is released? The video above by Brett Garamella might help you answer that question.
You can pick up a Nikon Z7 (body only) for $3,396.95 at Adorama. The Canon EOS R (body only) will set you back $2,299.00 at Adorama.
We Recommend
Nikon Z7 vs Nikon D850
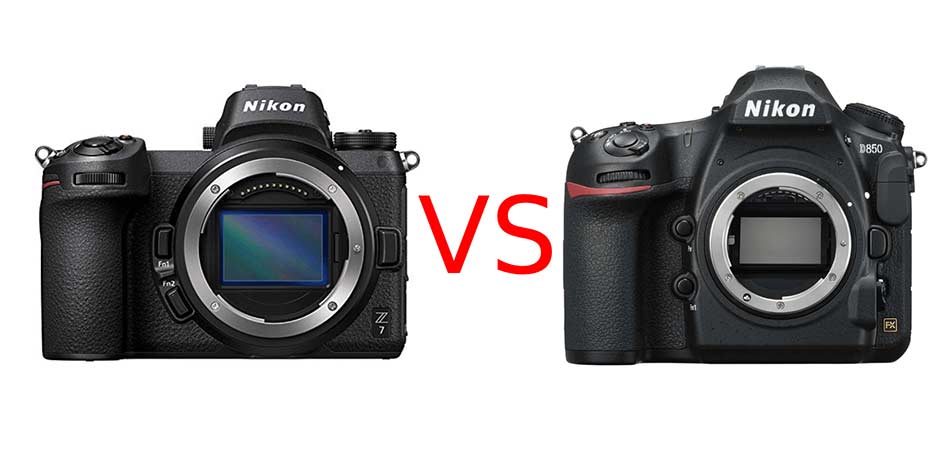
I've used a Nikon D850 as my primary camera since picking one up in late 2017.
It has been such a joy to use and such an impressive camera that I honestly didn't think anything could rival it.
That is, until I got my hands on a Nikon Z7...
Sure, there are lots of similarities between these cameras that make them unmistakable cousins in the Nikon lineup. But there are also many differences that make each camera particularly suited to specific photographic pursuits.
In this Nikon Z7 vs Nikon D850 matchup, I'll explore the essential specs, features, and performance of these mighty cameras to help you decide which one is best for you.
Nikon Z7 vs Nikon D850 Essential Specs
First things first, let's go over some of the essential specifications for these cameras.
Nikon Z7 Specs
- 46-megapixel full frame BSI CMOS sensor
- EXPEED 6 image processor
- Native ISO Range: 64-25,600 (expandable to 32-102400)
- 5-axis SensorShift image stabilization
- 3.69-million dot OLED electronic viewfinder with 100% coverage
- 3.2-inch tilting touchscreen LCD with 2.1-million dots
- 9 fps burst shooting (12-bit RAW)
- Hybrid PDAF autofocus system with 493 AF points
- AF Sensitivity: -1 to +19 EV
- 4K UHD video at 30 fps
- Magnesium alloy body
- Full weather sealing
- 200,000 shutter life
Nikon D850 Specs
- 46-megapixel full frame BSI CMOS sensor
- EXPEED 5 image processor
- Native ISO Range: 64-25,600 (expandable to 32-102400)
- Optical pentaprism viewfinder with 100% coverage
- 3.2-inch tilting touchscreen LCD with 2.36-million dots
- 7 fps burst shooting (up to 9 fps with optional battery grip)
- 153-point autofocus system with contrast-detect and phase-detect points
- AF Sensitivity: +/-5 EV
- 4K UHD video at 30, 25, and 24 fps
- Magnesium alloy body
- Full weather sealing
- 200,000 shutter life
Clearly, in comparing these lists of features, these cameras are evenly matched on paper.
Both feature a 46-megapixel back-illuminated full frame sensor, but as I point out in this Nikon Z7 Review, the Z7, armed with a newer EXPEED 6 processor, produces images with less noise.
And while both cameras sport the same native and expanded ISO ranges, the Z7 has in-body 5-axis image stabilization, which affords you a greater capability of capturing sharp images when the lighting is not ideal.

Both cameras have weather-sealed, magnesium alloy bodies that I can personally attest are ruggedly built.
I dropped my D850 while I was in Norway, and it bounced around on some jagged boulders near the sea. I'll be darned if it came away from that incident with just a couple of scratches!
Other similarities between these cameras include the expected 200,000 shutter life, 4K UHD video capabilities, and burst shooting that is identical at 9 fps, assuming you add an optional battery grip to the D850.
Let's explore some of the crucial differences between these cameras in more detail below.
Nikon Z7 vs Nikon D850 Design and Build
Nikon Z7
Clearly, there are significant differences in the manner in which these cameras were designed and built.
Since it's a full frame DSLR, the D850 is much larger and heavier than the Z7. At 2.24 pounds, the D850 outweighs the Z7 by three-quarters of a pound. Yet, despite its size, it's a joy to use, even on long days, as I note in this Nikon D850 review. Naturally, the Z7 has a smaller body since it doesn't need to accommodate a mirror.
Despite its smaller size, the Nikon Z7 still has a nice, big, chunky grip, which as a guy with big hands, I appreciate.
 Nikon D850
Both cameras have a 3.2-inch tilting touchscreen on the back, which is a welcome addition to the Z7.
When the Z7 was rumored, there was a question as to whether they could squeeze such a big LCD on the back, but they managed to do so, much to the benefit of the end-user.
I've found the LCD on the D850 to be bright, detailed, and responsive, and the same holds true on the Z7.
Nikon Z7
One of the Z7's best features, though, is its 3.69-million dot OLED electronic viewfinder.
It is, in a word, gorgeous.
One of the worries of Nikon enthusiasts is that this first foray into mirrorless cameras would mean diminished quality of the electronic viewfinder. This is simply not the case, though.
I've tested mirrorless cameras from Sony, Panasonic, and Fuji, and the Z7's EVF can more than hold its own against top-shelf models from other companies.
 Nikon D850
This isn't to say that the D850's optical viewfinder is a slouch.
It has 0.75x magnification, which is the largest ever offered by Nikon.
And while it doesn't offer the wide array of information that's available on the Z7's EVF, it still has 100 percent coverage, so what you see through the viewfinder is exactly what you'll see in your images.
Nikon Z7
Another key difference between these cameras are their autofocus systems.
The D850 has an impressive 153-point autofocus system, but the Z7 wins out with 493 points. Combined with its in-body image stabilization, the Z7 is loaded for bear for helping you get clear, sharp images.
If shooting with the D850 (which lacks in-body stabilization), you have to rely instead on the lenses you use having stabilization.
Nikon Z7 vs Nikon D850 Image Quality
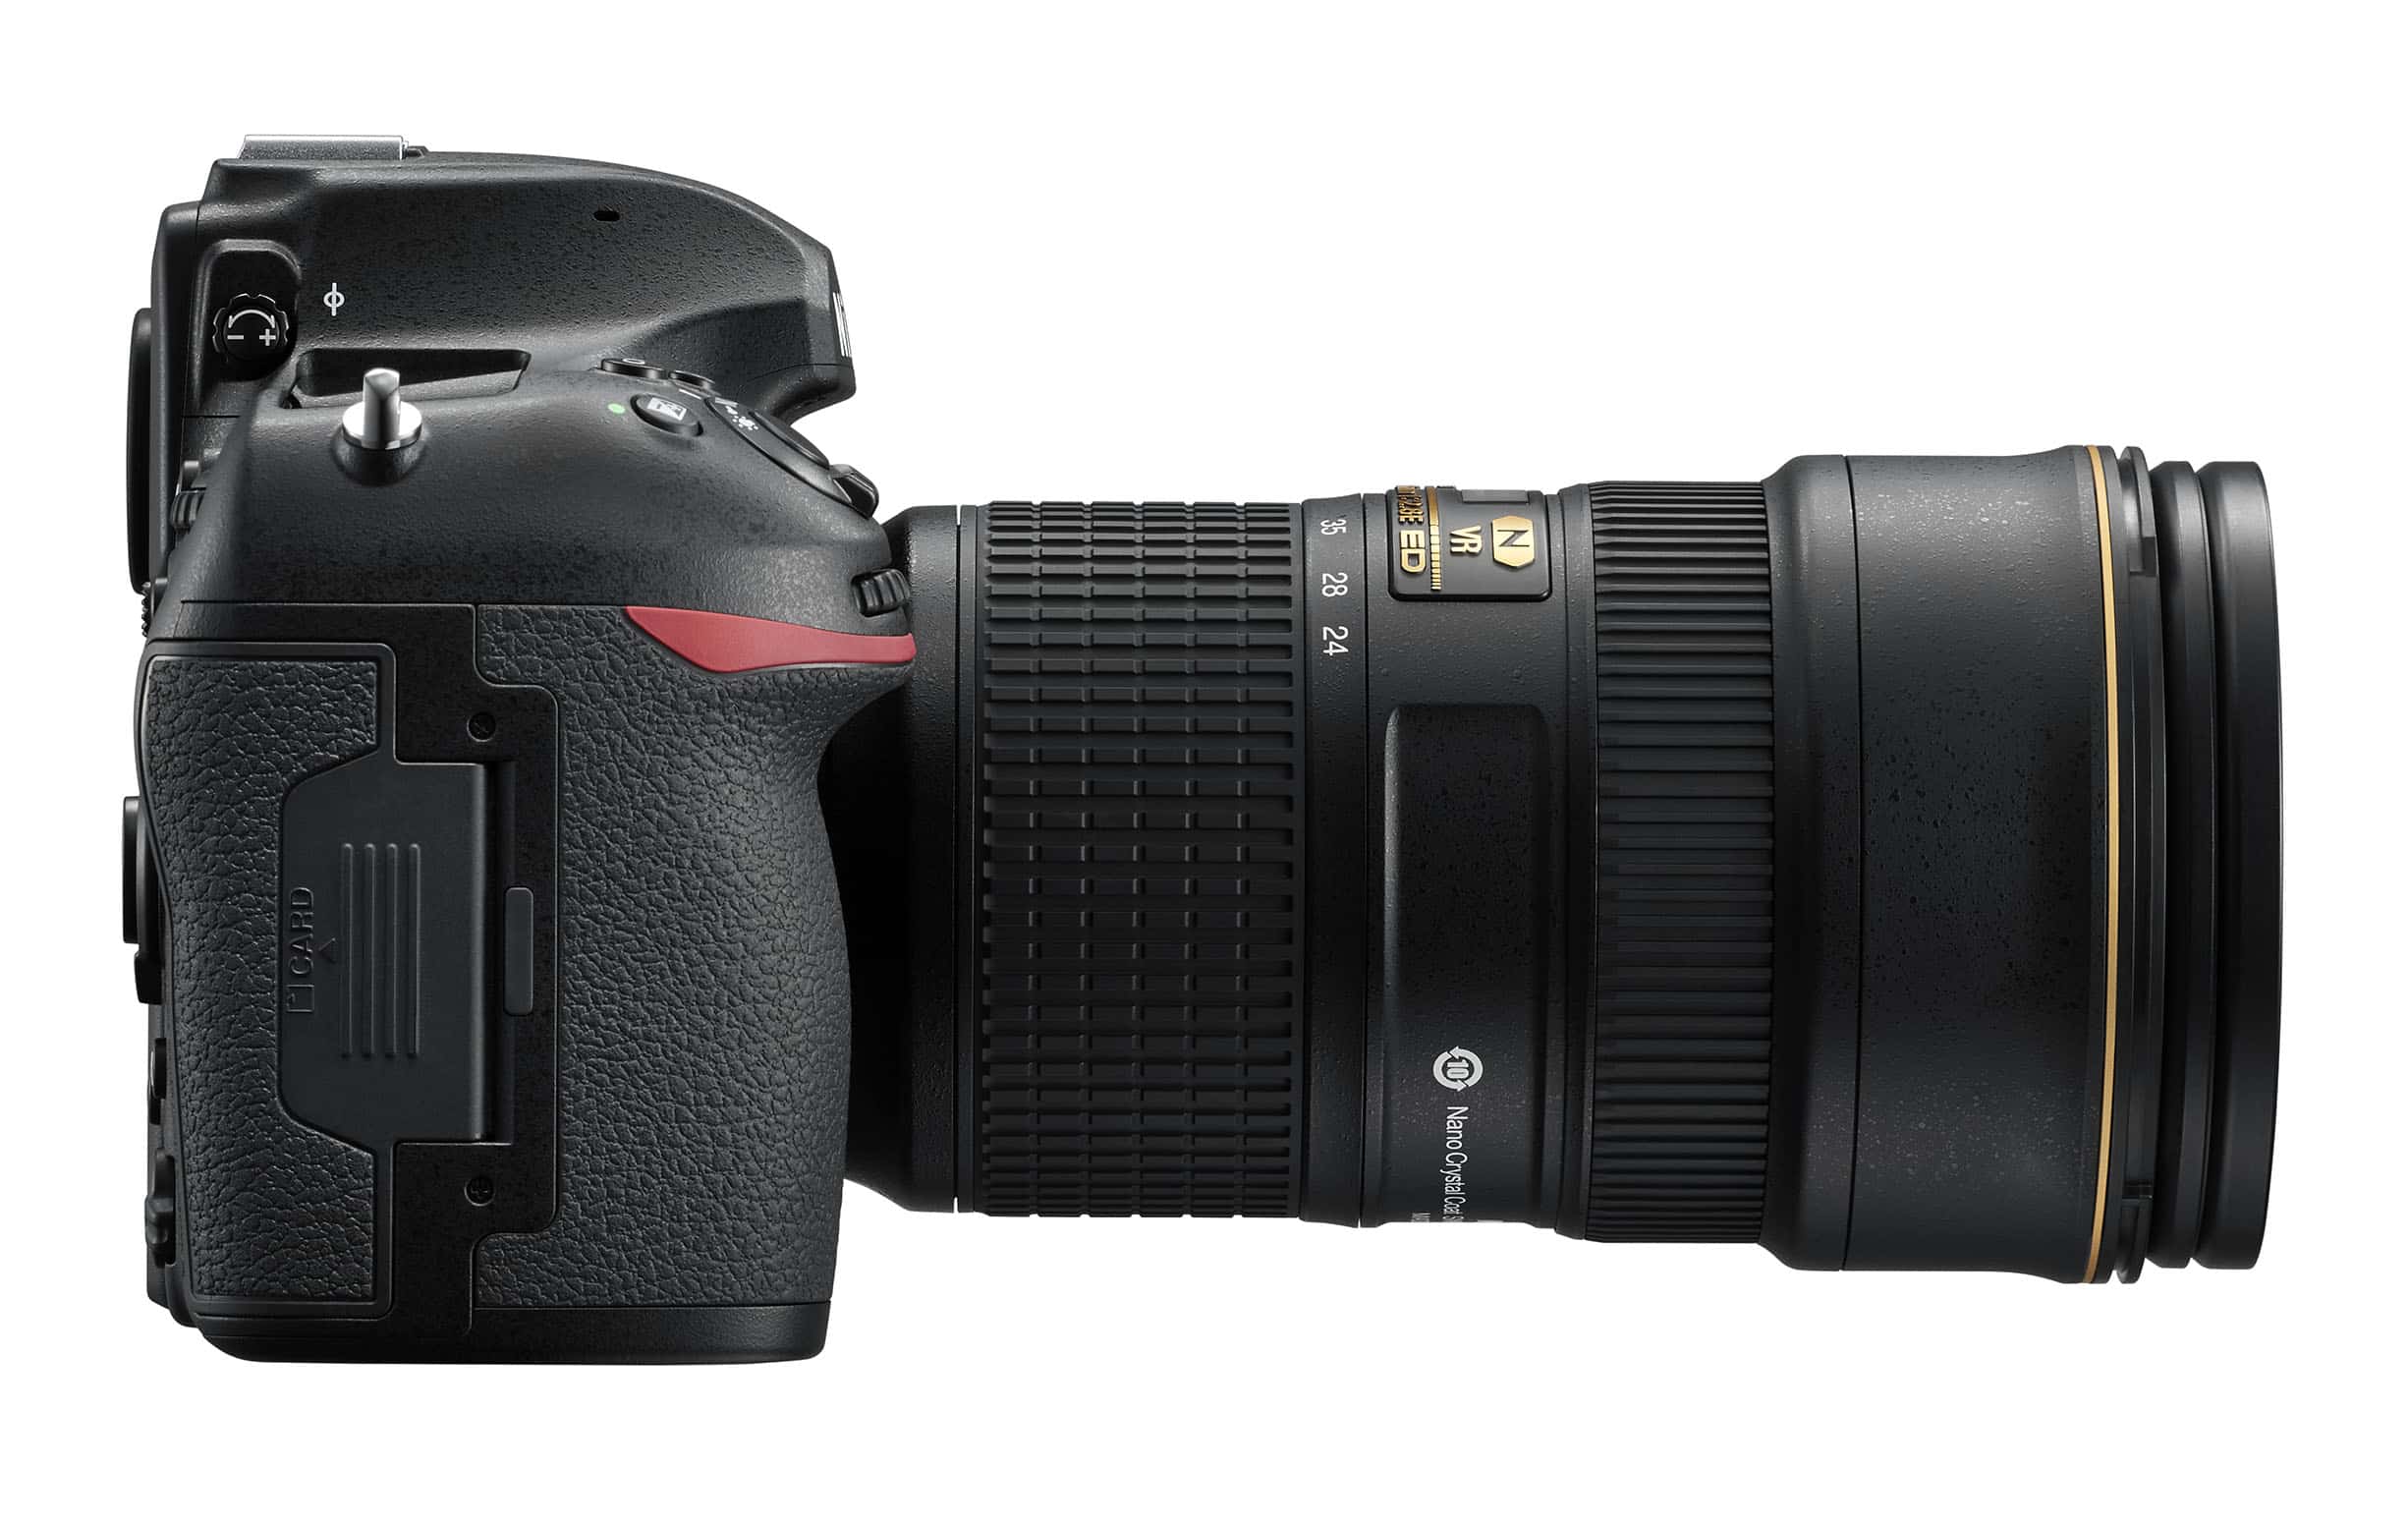
Since these cameras have the same 46-megapixel BSI CMOS sensor, their image quality is highly comparable.
As noted above, the Z7 produces images that are cleaner with less noise thanks to its updated EXPEED 6 processor.
But since both sensors produce images up to 8,256x5,504 pixels in size, either one will allow you to create very large prints, or, alternatively, heavily crop images without diminishing the quality of the photo.
I've been a Nikon shooter for a long time now, and I have a long history of owning Nikon's best cameras.
I can say without a doubt that the D850 and Z7 have the best image quality of any Nikon camera I've owned. Furthermore, these cameras can go toe-to-toe with any other camera on the market in terms of image quality, hands-down.
Nikon Z7 vs Nikon D850 Features Comparison
In addition to the primary specifications discussed above, both the Z7 and the D850 offer plenty of other features that make them top-shelf cameras.
Something I really appreciate about the D850 are its illuminated buttons, which have come in very handy as of late as I've gotten more involved in nighttime photography.
And though I don't use it often, I also really like the D850's built-in focus stacking capability.
The Z7, on the other hand, has that 5-axis image stabilization system I noted earlier, and that's proven to be invaluable as I've spent a lot of time with the Z7 running and gunning without a tripod.

I'm also shooting more video these days, and I've found the Z7 to be preferable for those pursuits simply because it's smaller and lighter than the D850.
Of course, the Z7's battery life can't compare to the D850's (1,840 shots to 330).
Ultimately, the choice between these cameras will likely come down to the type of photography you undertake. The difference between Nikon D850 price and Nikon Z7 price is very less.
Street photographers, sports photographers, and travel photographers will likely prefer the Z7 because of its size and image stabilization. Landscape photographers might prefer the D850 given its crazy-long battery life and chunky, comfortable grip.
But honestly, either way you go, you're getting a hell of a camera.
We Recommend
Nikon Z7 vs Sony a7R III
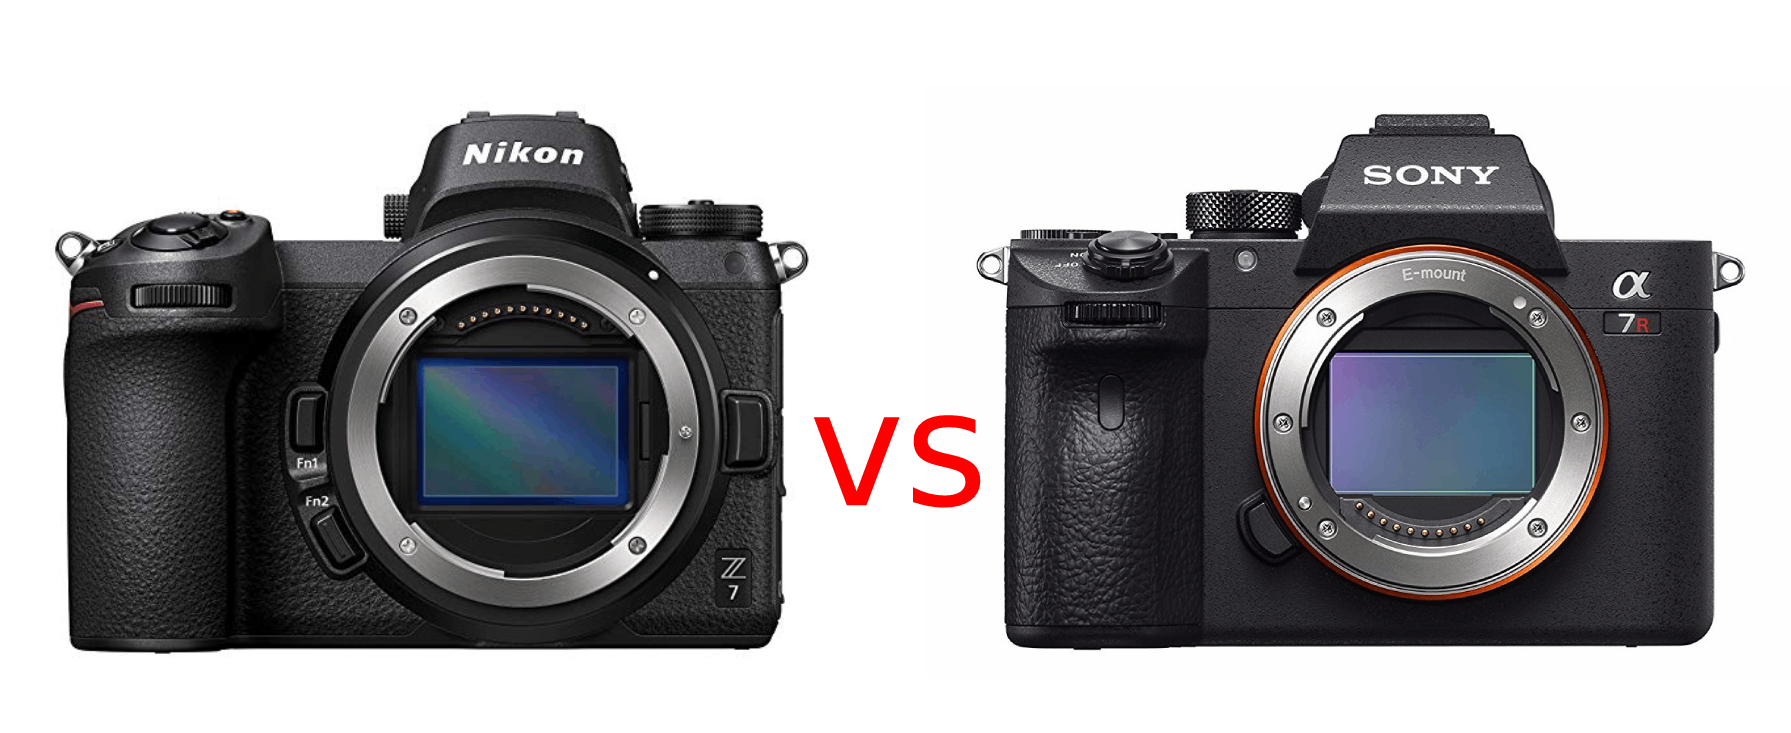
Mirrorless cameras are king right now, and for Nikon and Sony, their Z7 and a7R III cameras represent the pinnacle of performance.
These cameras have plenty in common, too…I’ve said it before in my full Nikon Z7 hands-on review that the Z7 is unmistakably a Nikon.
Both sport high-resolution sensors. Both are fully capable of still photography and 4K video. Both cameras, Sony A7 Riii and Nikon Z7, also have a similar price point.
There are numerous differences between these high-powered mirrorless cameras as well. Let’s explore how they stack up against each other.
Nikon Z7 vs Sony a7R III Specs
Here’s a quick glance at the Nikon Z7 specs:
- 45.7-megapixel full frame BSI CMOS sensor
- EXPEED 6 image processor
- Native ISO Range: 64-25,600 (expandable to 32-102400)
- 3.69-million dot OLED electronic viewfinder
- 3.2-inch tilting touchscreen LCD with 2.1-million dots
- 9 fps burst shooting (12-bit RAW)
- 493-point autofocus system
- 5-axis image stabilization
- 4K UHD video at 30 fps
- Magnesium alloy body
- Full weather sealing
And here are the Sony a7R III specs:
- 42.4-megapixel full frame BSI CMOS sensor
- BIONZ X image processor
- Native ISO range 50-32,000 (expandable to 102,400)
- 3.69-million dot OLED electronic viewfinder
- 3-inch tilting touchscreen LCD with 1.44-million dots
- 10 fps burst shooting
- 399-point autofocus system
- 5-axis image stabilization
- 4K UHD video at 30 fps
- Magnesium alloy body
- Full weather sealing
Nikon Z7 vs Sony a7R III Design & Build

Coming from a Nikon D810 and a Nikon D850, I was concerned that the Z7 would feel like a little toy in my hand, but that’s simply not the case.
The chunky grip on the Z7 is surprisingly deep and feels familiar if you’re a Nikon shooter. That familiarity is extended thanks to the buttons and joystick that are well-placed on the body and the top-plate information display Nikon shooters have grown to love on DSLRs (though this one is OLED rather than LCD).
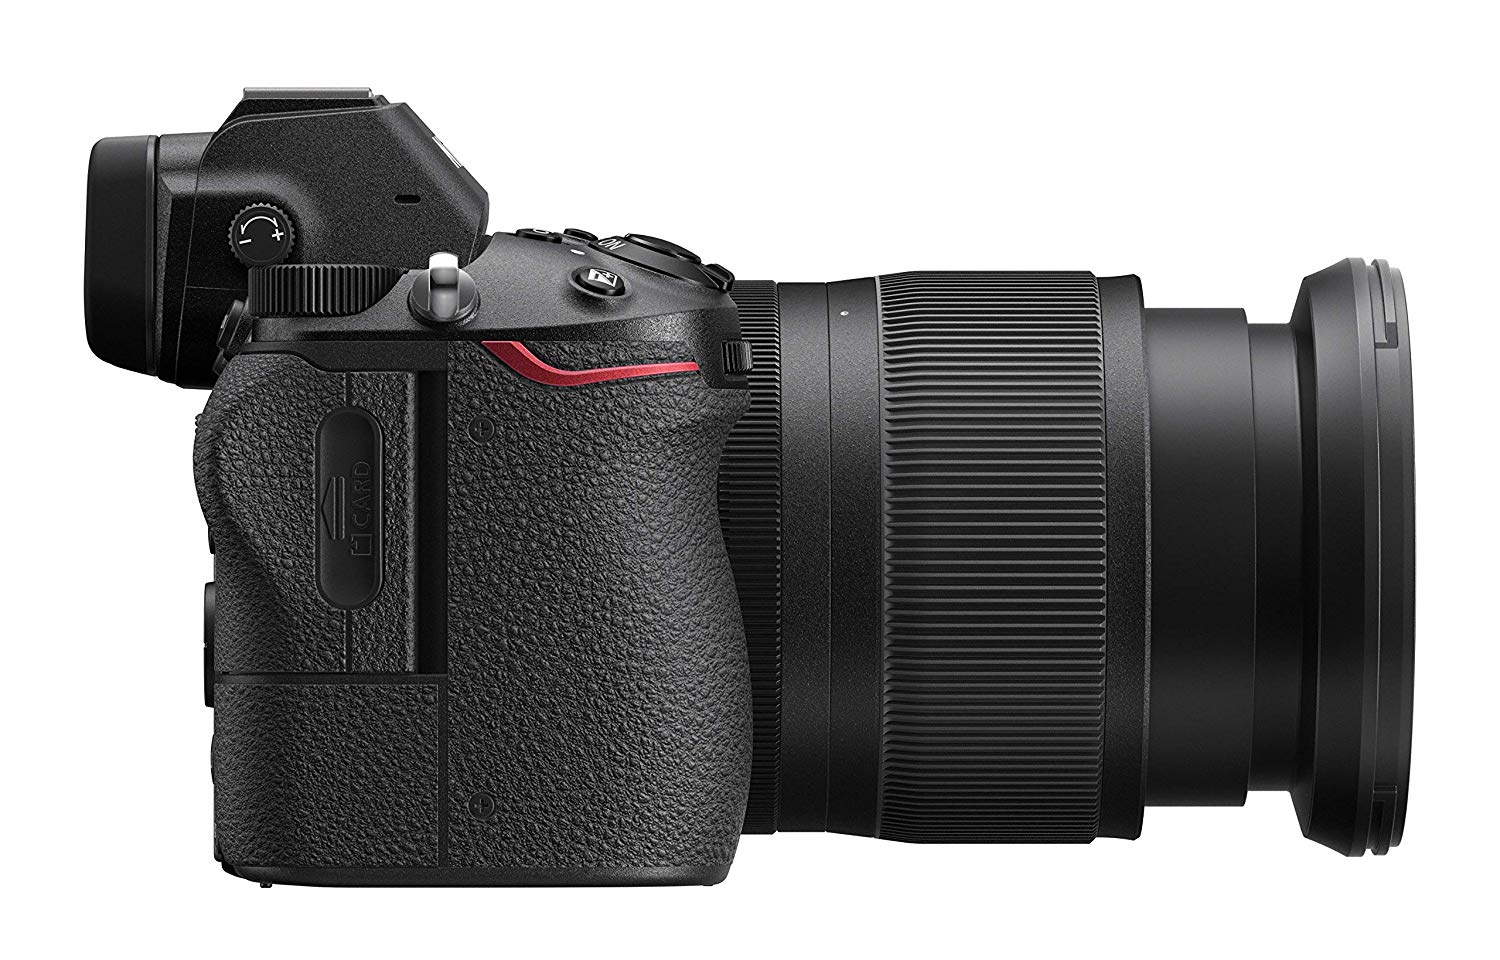
The Z7 has full weather sealing, including around the battery door. The sealing feels substantial and gives you the confidence that if you encounter rain, your camera won’t be destroyed.
The 2.1-million-dot touchscreen LCD on the Z7 is big, bright, and resolute. It lets you tackle a variety of tasks, from interacting with the menu to sorting through images to setting the autofocus point.
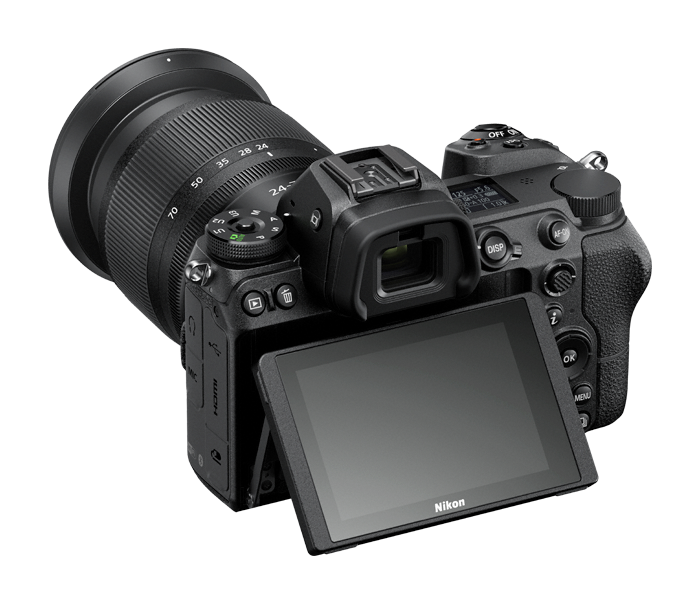
The LCD also uses Nikon’s touch-friendly i menu, which can be used to change settings by simply tapping the screen.
The Z7’s 3.68-million-dot OLED EVF is something to behold. Not only is it beautifully bright and sharp, but it maintains full resolution while shooting (which the a7R III’s EVF does not).
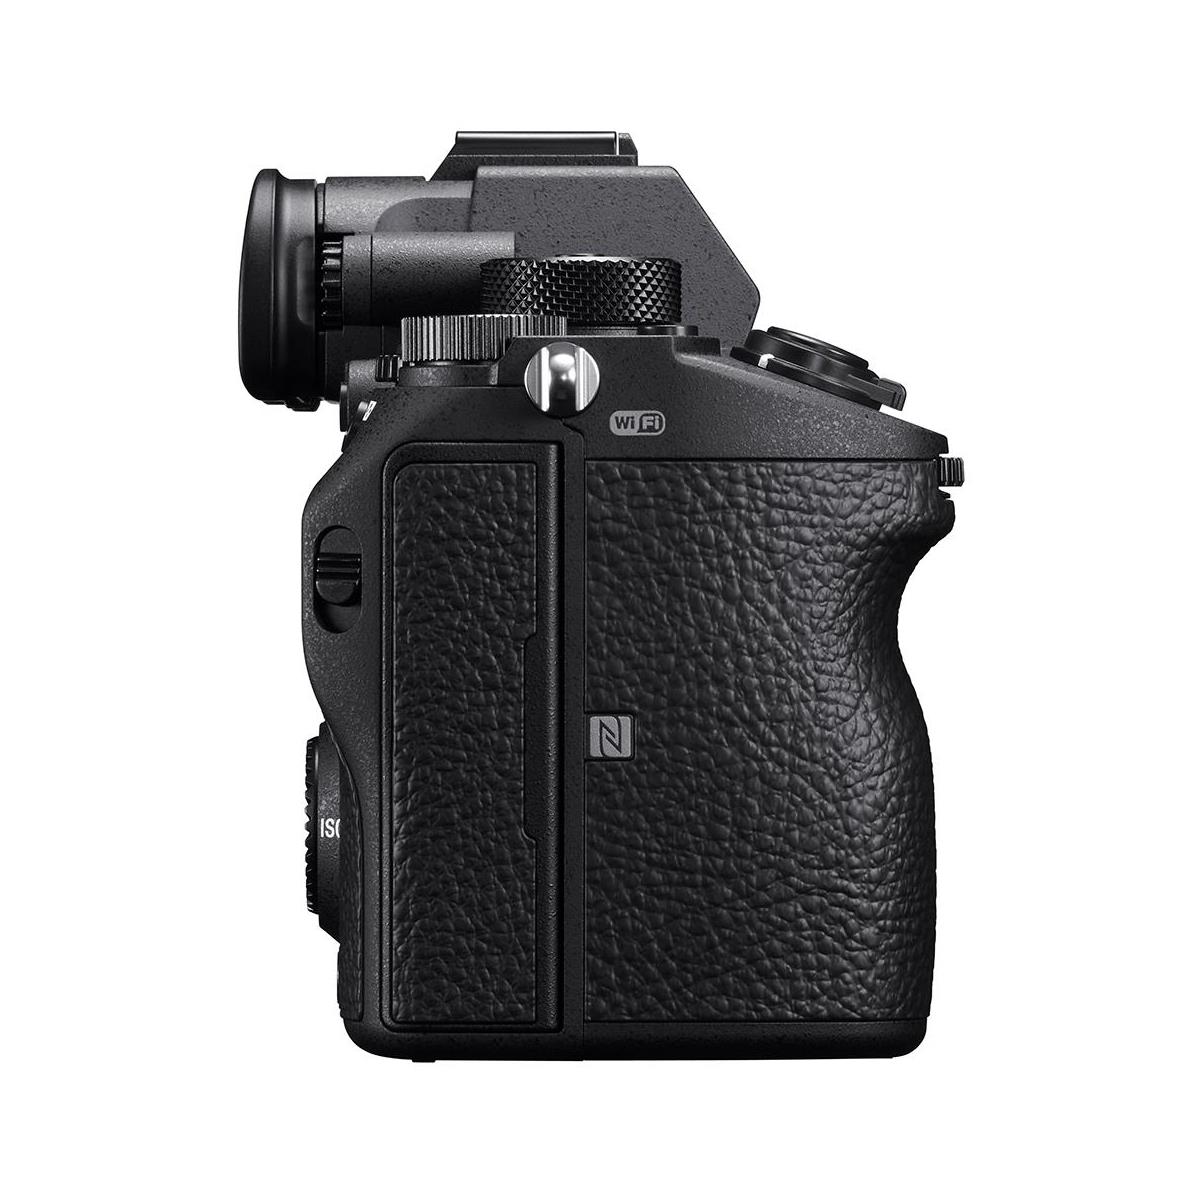
I’ve had a Sony a6300 for quite some time, so I wasn’t as worried about the design of the a7R III and how I would adapt to it.
That being the case, I wasn’t surprised to find the a7R III’s grip on the smallish side. Granted, Sony has increased the size of the grip over the years, but it’s still small, particularly on the vertical plane.
Like the Z7, the a7R III is fully weather sealed, though in comparing the two cameras, I have to say that the Nikon’s weather sealing feels more substantial, though I still wouldn’t hesitate to use the a7R III in inclement weather.
In the touchscreen department, the Sony has a tilting one like the Nikon, but it isn’t nearly as functional, and that’s not just because it has just 1.44-million-dots of resolution.

In fact, Sony shooters know that the touchscreen is disabled by default - which honestly makes zero sense - and shows that the company simply hasn’t embraced touch-enabled screens like Nikon has. Furthermore, when it is enabled, it’s easy to accidentally trigger something with the LCD, which is even more frustrating than it being off by default.
The a7R III’s EVF has 3.68-million-dots of resolution just like the Nikon. As noted above, though, the full resolution of the EVF is only available in playback mode. When shooting the resolution drops, and it drops even more when shooting in burst mode.
That being the case, from a design and build standpoint, the Nikon is the winner for me.
Nikon Z7 vs Sony a7R III Image Quality
This will be a short discussion because both of these cameras offer impeccable image quality.
Yes, there’s a slight difference in resolution, but it’s so minimal that it really doesn’t matter.
Both cameras offer superb dynamic range, excellent color rendition, and ISO performance that rivals anything on the market today. You can see these elements in action with the Z7 in the video above by AdoramaTV.
Likewise, both cameras have excellent on-sensor phase-detect autofocus systems that offer top-notch performance and image quality when tracking moving subjects. The Z7 has face detection that works quite well, though the Sony’s Eye AF system is impossible to beat from a performance standpoint. See a live demo of the Sony a7RIII in Adorama’s video above.
Honestly, the only knock I have is that the Sony’s autofocus points are grey, which can be difficult to see, while the Nikon has super bright AF points that are easily noticeable.
This is one measure in which these cameras are very, very evenly matched, so it’s difficult to determine a winner.
Nikon Z7 vs Sony a7R III Video Specs
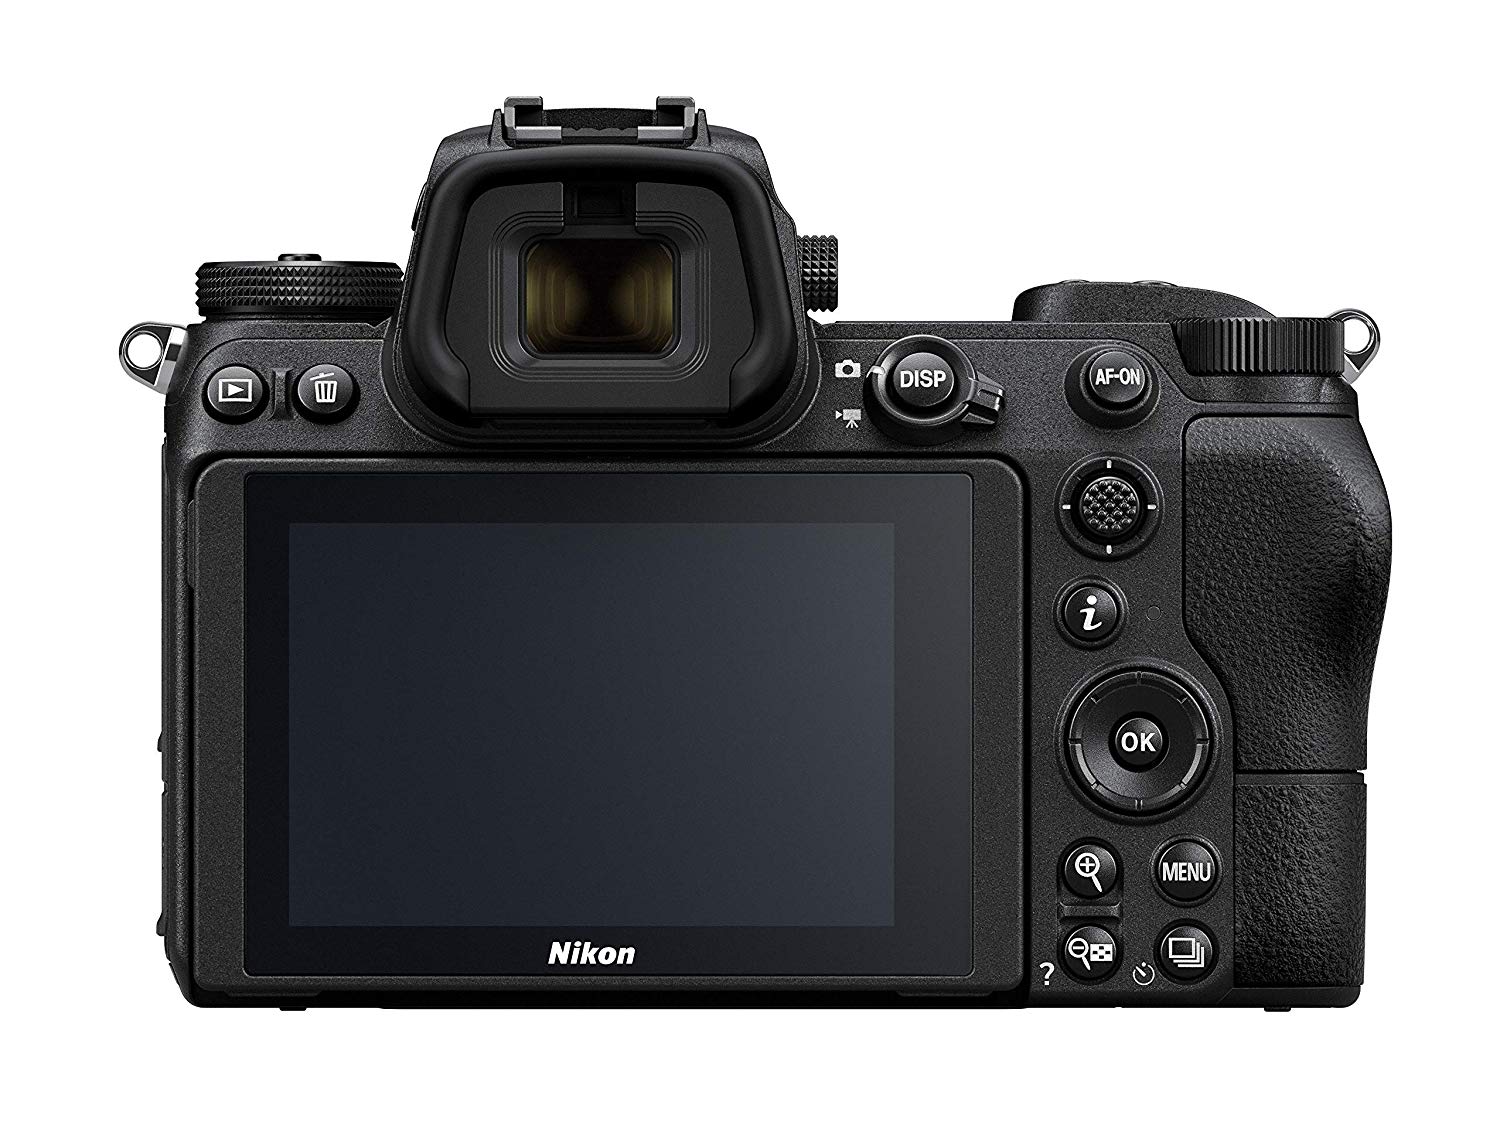
In years past, video has been an afterthought on Nikon cameras. And though the Nikon Z6 is a much better camera for video than the Z7, the Z7 can hold its own.
Both the Z7 and the a7R III are capable of 4K UHD recording at 30p. Both cameras also offer 1080/120p recording for slow motion.
Additionally, both of these cameras can capture full sensor 4K video, albeit with limited sampling. In the case of the Z7, that takes the form of line skipping while on the a7R III pixel binning is used.
In either case, to get the best-quality video, it’s better to record in APS-C format, which crops the video but gives you the highest quality results.
You’ll find further similarities between these cameras on the video front.
Both the Nikon and Sony have zebra warnings and internal LUTs, as well as focus peaking and five-axis image stabilization systems. The phase-detect autofocus systems on both cameras offer excellent autofocus when shooting video as well.
Nikon Z7 vs Sony a7R III Ease of Use

Nikon didn’t just work on making the Z7 feel right from an ergonomics standpoint. They also wanted to ensure Nikon users found the camera easy to use.
They’ve achieved that with the camera’s user interface, which comes from Nikon’s DSLR systems.
In fact, the Z7’s menu is nearly a tit-for-tat copy of the D850’s menu, which I’ve grown to love over the two years I’ve had the D850.
By comparison, the a7R III’s menu system is characteristically Sony.
I’ll give props to Sony for improving their menu systems over the years to make them easier to use, but they can still be on the confusing side.
In particular, Sony likes to bury some features deep in the menu system, which causes you to have to search and search for that one thing you need to change. That being said, you can customize the menus to your liking (you can do the same on the Nikon), so you can minimize the frustration of trying to find the hidden feature you need.
From a customization standpoint, the a7R III, though its menu is far less user-friendly, does offer far more customization options. If you’re willing to spend the time to get it just how you want it, the Sony’s menu could end up being far more functional for you than what’s offered by the Z7.
However, the Z7 is far easier to use right out of the box, and for that reason, it’s the winner in the ease of use department.
Nikon Z7 vs Sony a7R III Performance
Unsurprisingly, both of these cameras offer top-flight performance on a number of metrics.
The Z7, for example, can shoot 5.5 fps out of the box, which isn’t terribly spectacular, but live view is updated in between shots, which is a nice feature.
Besides, if you need a higher frame rate, you simply put the camera in High+ mode which gets you 8 fps image capture in 14-bit RAW. You can bump that up to 9 fps in 12-bit RAW. It’s important to note that when shooting in High+, autofocus is adjusted between shots but the exposure is locked.
The biggest performance issue with the Z7 is its buffer. It holds just 23 12-bit RAW files and 18 14-bit RAW files. I’ll be the first to admit that the XQD card makes quick work of clearing the buffer, but it’s still easy to reach the buffer’s limit.
The a7R III has an advantage in the performance department because it can shoot at 10 fps out of the box. Likewise, the Sony offers continuous AF/AE when shooting in continuous mode.
The Sony outperforms the Nikon when it comes to the buffer as well: it can accommodate 28 uncompressed RAW files or 76 compressed RAW files.
The better performance trend for the Sony continues with battery life. The a7R III is rated to 650 shots while the Z7 is rated to just 330.
While real-world testing often reveals better battery life than the rating, that’s still a mighty big difference between these cameras.
Nikon Z7 vs Sony a7R III Price

Given that these cameras are so evenly matched across the board, the determining factor for which one you purchase might well be the price.
The Nikon Z7 sells for a shade under $3,400.00 (body only). The Sony a7R III is currently on sale for $2,800.00.
Ultimately, most Nikon shooters aren’t going to switch to the a7R III to save $600. Likewise, I can’t imagine many Sony shooters spending an extra $600 for the Z7. Instead, I imagine brand loyalty will win out with folks who have already committed to one ecosystem or the other.
Regardless of which you choose, you’ll be getting a fantastic, highly capable camera.
We Recommend
Octopad - Why You Need One

If you have viewed any of my posts about GoPro cameras, vlogging ideas, or lighting options, you have seen me list the Octopad camera and accessory mount as one of my essential photography accessories.
This easy-to-use, compact tool is among the best tripod alternatives available to photographers and videographers. If you are wondering how to support a camera or photographic accessory, examine this option from Octopus Camera Company.
Perfect Support for GoPro Action Cams
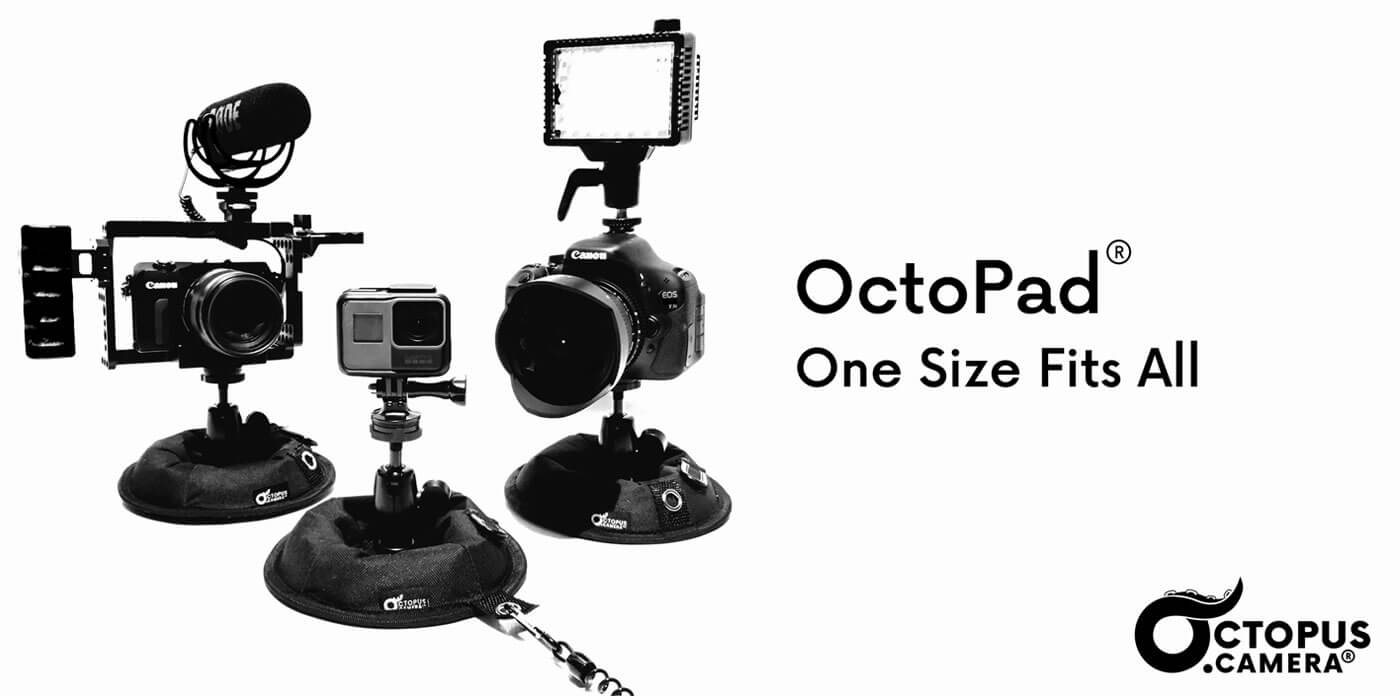
Octopad combines several features and qualities into one very useful camera mount. It is especially useful as a mount for the GoPro HERO 8 Black or GoPro MAX action cams.
The GoPro line of action cams are among the coolest new cameras available for either videography or still imaging. A top feature of action cams is their compact size. Since they are so tiny, you could place them just about anywhere.
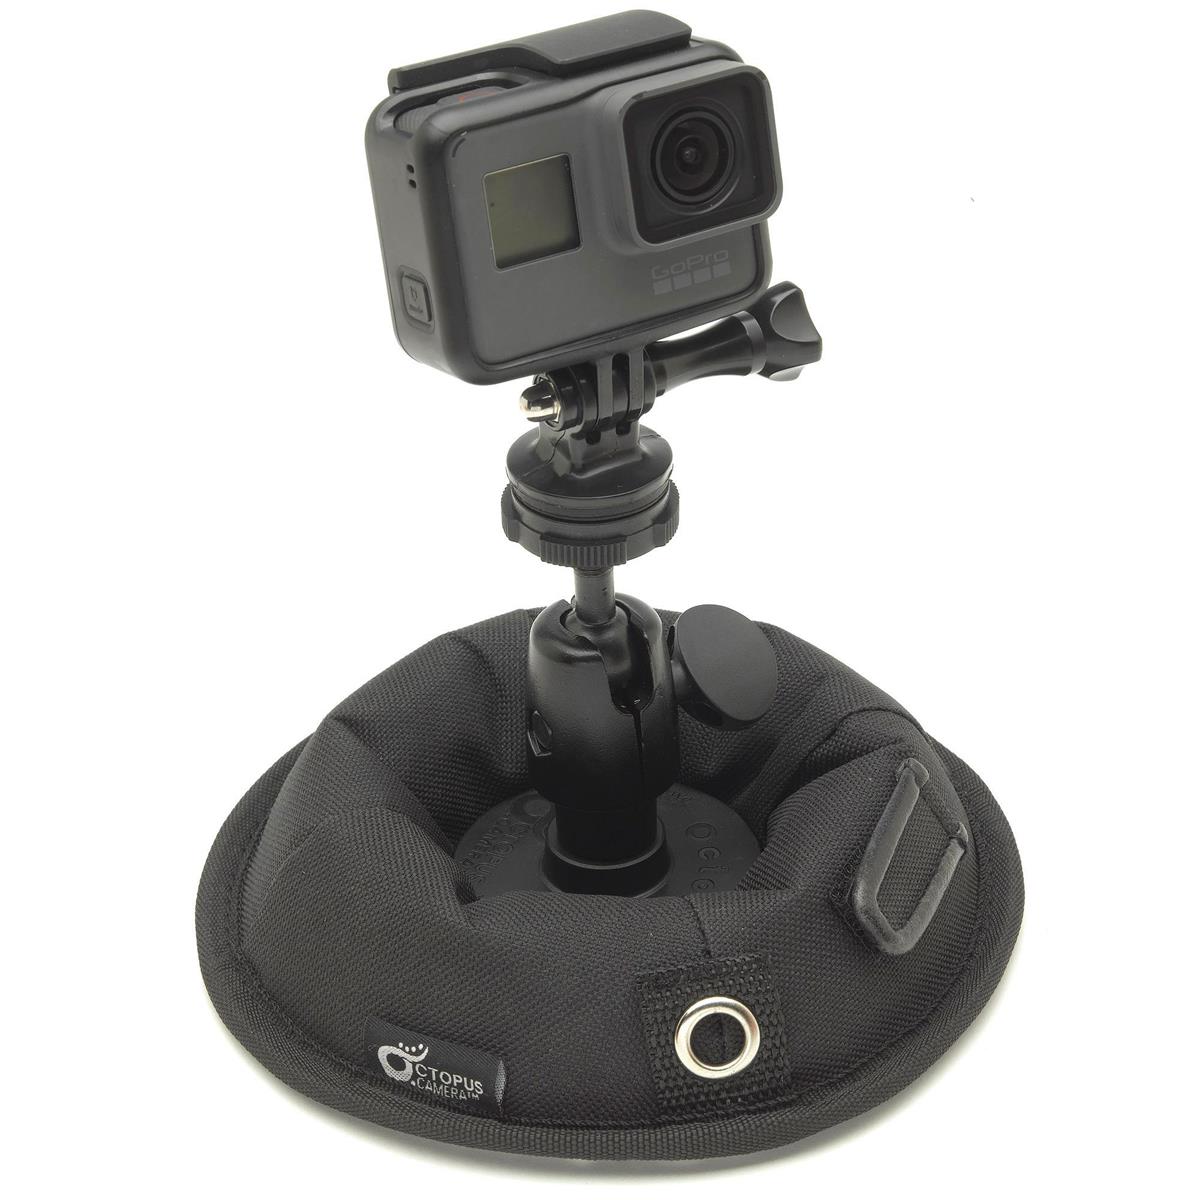
But you really don’t want to just lay it down on the ground or duct tape it to something. The Octopad is a fantastic camera and accessory holder. It has a slightly flexible pad with a non-slip bottom, is weighted for stability, and stays in place on inclines of up to 45 degrees.
Set your GoPro HERO 8 Black up for voice control, mount it on the dash of your vintage cafe racer and film yourself driving down the hills of a winding rural highway.
Recommended Photography Books
- National Geographic Photo Basics: The Ultimate Beginner's Guide to Great Photography
- Photography: The Definitive Visual History
- Read This if You Want to Take Great Photographs
Put Lights Where You Need Them
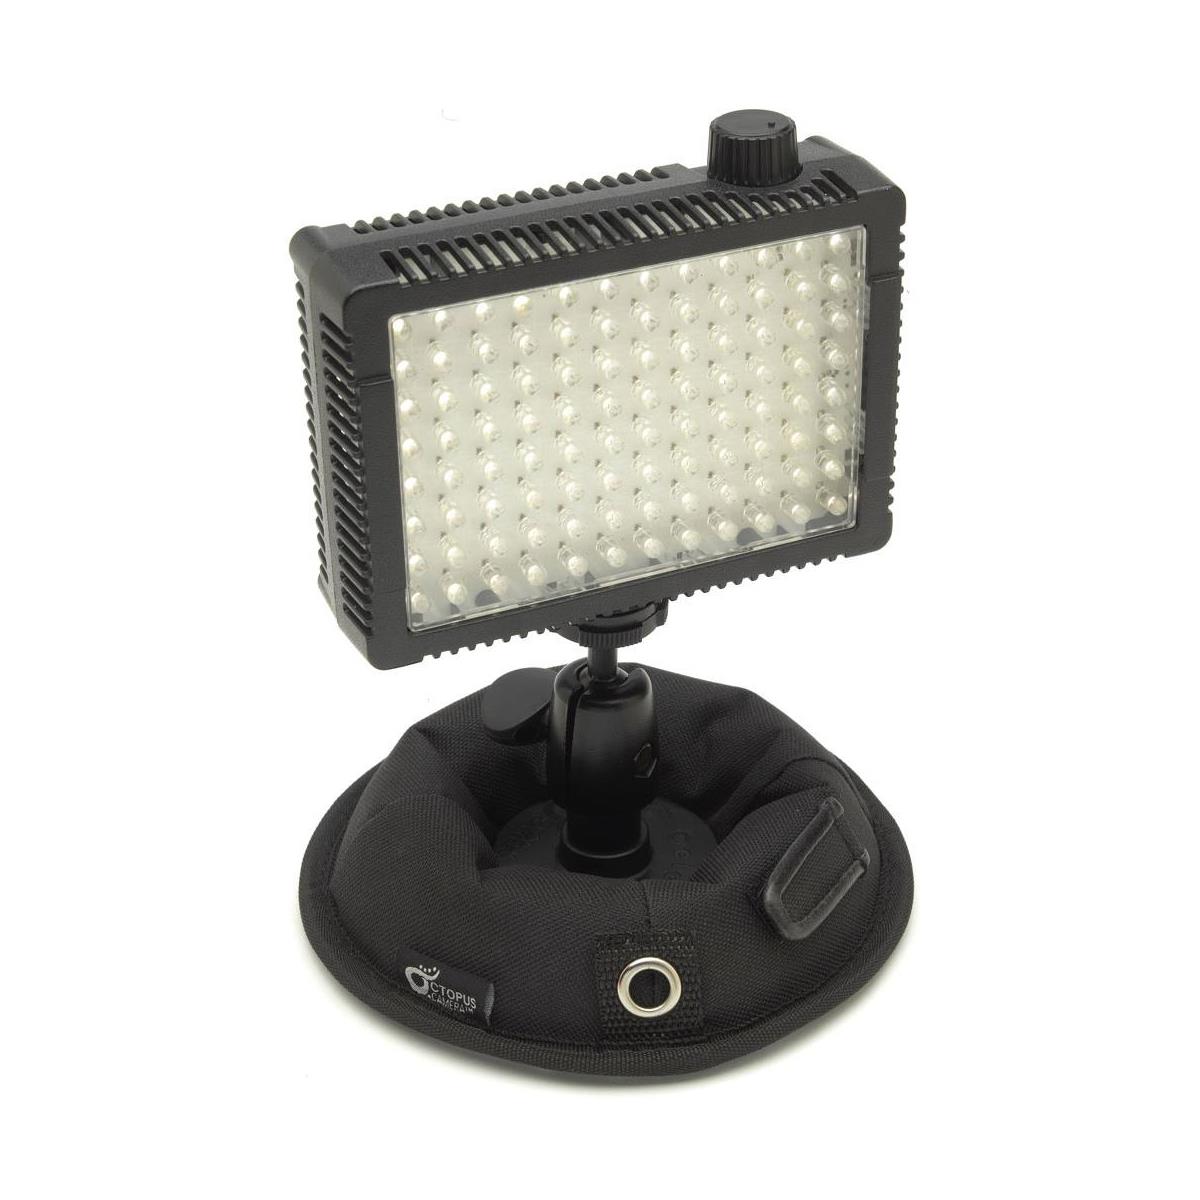
When using an action cam, compact camera, DSLR, or mirrorless camera for shooting video or taking pictures, you sometimes need an additional light source. Filming in your home, office, or studio, you likely have a light kit already set up or close by in a closet.
Shooting vlogs on location or taking environmental portraits, you may not have the plug in options that some light kits require. That’s when a battery powered LED light comes in handy. Use your Octopad to hold a compact LED light like the LitraPro from Litra Torch.
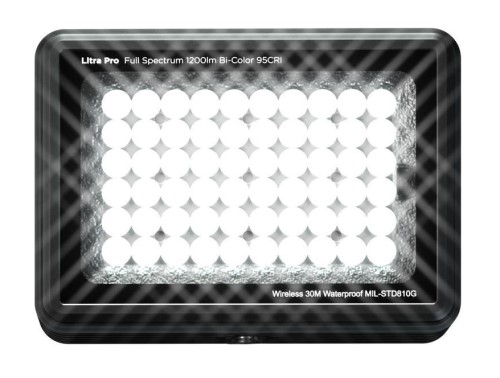
The LitraPro is a full featured, compact, battery powered, LED light that is tailor made for vlogging and videography in general, though it is also useful for all sorts of still imaging. The Octopad lets you place this small light anywhere you need it to be to provide either main or fill light.
Learn More:
It Goes Anywhere You Go
Photo by Jeremy Bishop on Unsplash
Octopad is an extremely versatile camera and accessory mount and is also very compact and easy to transport. Travel tripods are great, too, but the level of stability provided by the Octopad is generally a little better than small tripods.
In order to be any two things, often times a third thing is left out. With travel tripods, in order to be tall enough and yet also fold up compactly enough for go anywhere travel, they often sacrifice stability. There’s only so much a lightweight tripod can do.
With the Octopad, you sacrifice being able to extend for height, but it gives you superb stability in it’s super compact size. However, you can always add an extension arm to create more height if needed. As I noted earlier, you can also place the Octopad on just about any surface, even if inclined up to 45 degrees.
Octopad Doesn’t Tip Over

Photo by Michaela J on Unsplash
They don’t fall down, they don’t even wobble. Octopad is a weighted mount, very low profile. In other words, it’s bottom heavy. Just like some of us! (I kid…)
Since it has a wide base, is slightly flexible, uses a non-slip pad, and has the majority of its weight concentrated on the lower half, this makes it a very stable platform for placing your electronic equipment on something.
This one time, on a location shoot, I left a camera extended on a flimsy tripod in high wind and it blew over. Blew over! I was sure I had just eaten the cost of a nice camera and lens, but all I really lost was the cost of a rigid lens hood and protective filter. Whew! (The true value of hoods and filters goes beyond merely optical.)
Photo by Christian Bolt on Unsplash
But that experience taught me that portability and rigid stability don’t always go hand in hand. With regards to the Octopad, though, you actually can get both. Sure, you sacrifice extendable height, but you have options there, too. Just put it on a shelf, table, rock, or tree branch to get the height you need.
Cheap Enough to Get Two or Three
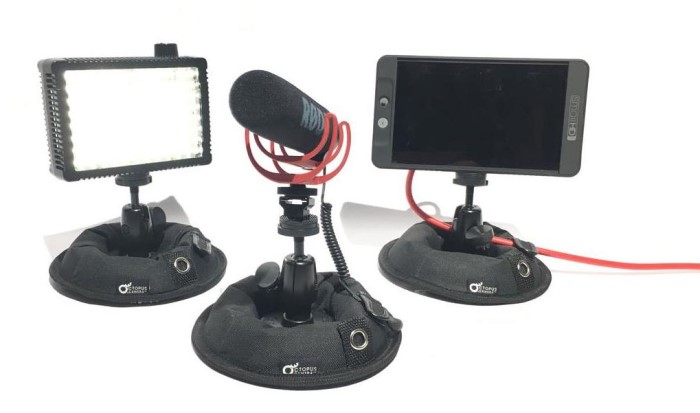
Prices fluctuate, so I won’t quote anything specific, but you can pick up an Octopad for the price of a memory card. I’m not talking about a 512GB CFExpress card either. I’m equating it price wise to SD cards.
In order to set up several lights and a camera all at the same time, you need a couple or three Octopads set up to hold them all. Since they are so budget friendly, if you need more than one, it won’t be hard to do.
Bottom line, these bottom heavy, non-slip, inexpensive camera and accessory mounts are a great addition to your essential photography gear.
Learn More:
We Recommend
Panasonic Lumix GH5S Review

phot by NataliaDeribinavia iStock
The Panasonic Lumix GH5S is a mirrorless camera specifically designed to provide astonishing video.
While it lacks features that will satisfy the needs of all types of consumers, videographers will truly enjoy what this camera is capable of.
Find out why this is the gem among mirrorless cameras for shooting video in the following review.
Compare the Panasonic GH5S' specs with the Panasonic GH5.
Why Does the GH5S Have Only 10.28 Megapixels?
The GH5S was built around Micro Four Thirds sensor that has only 10.28 megapixels.
This is way below today’s standards, but although the bigger amount of megapixels sounds attractive, we all know it is not all that matters.
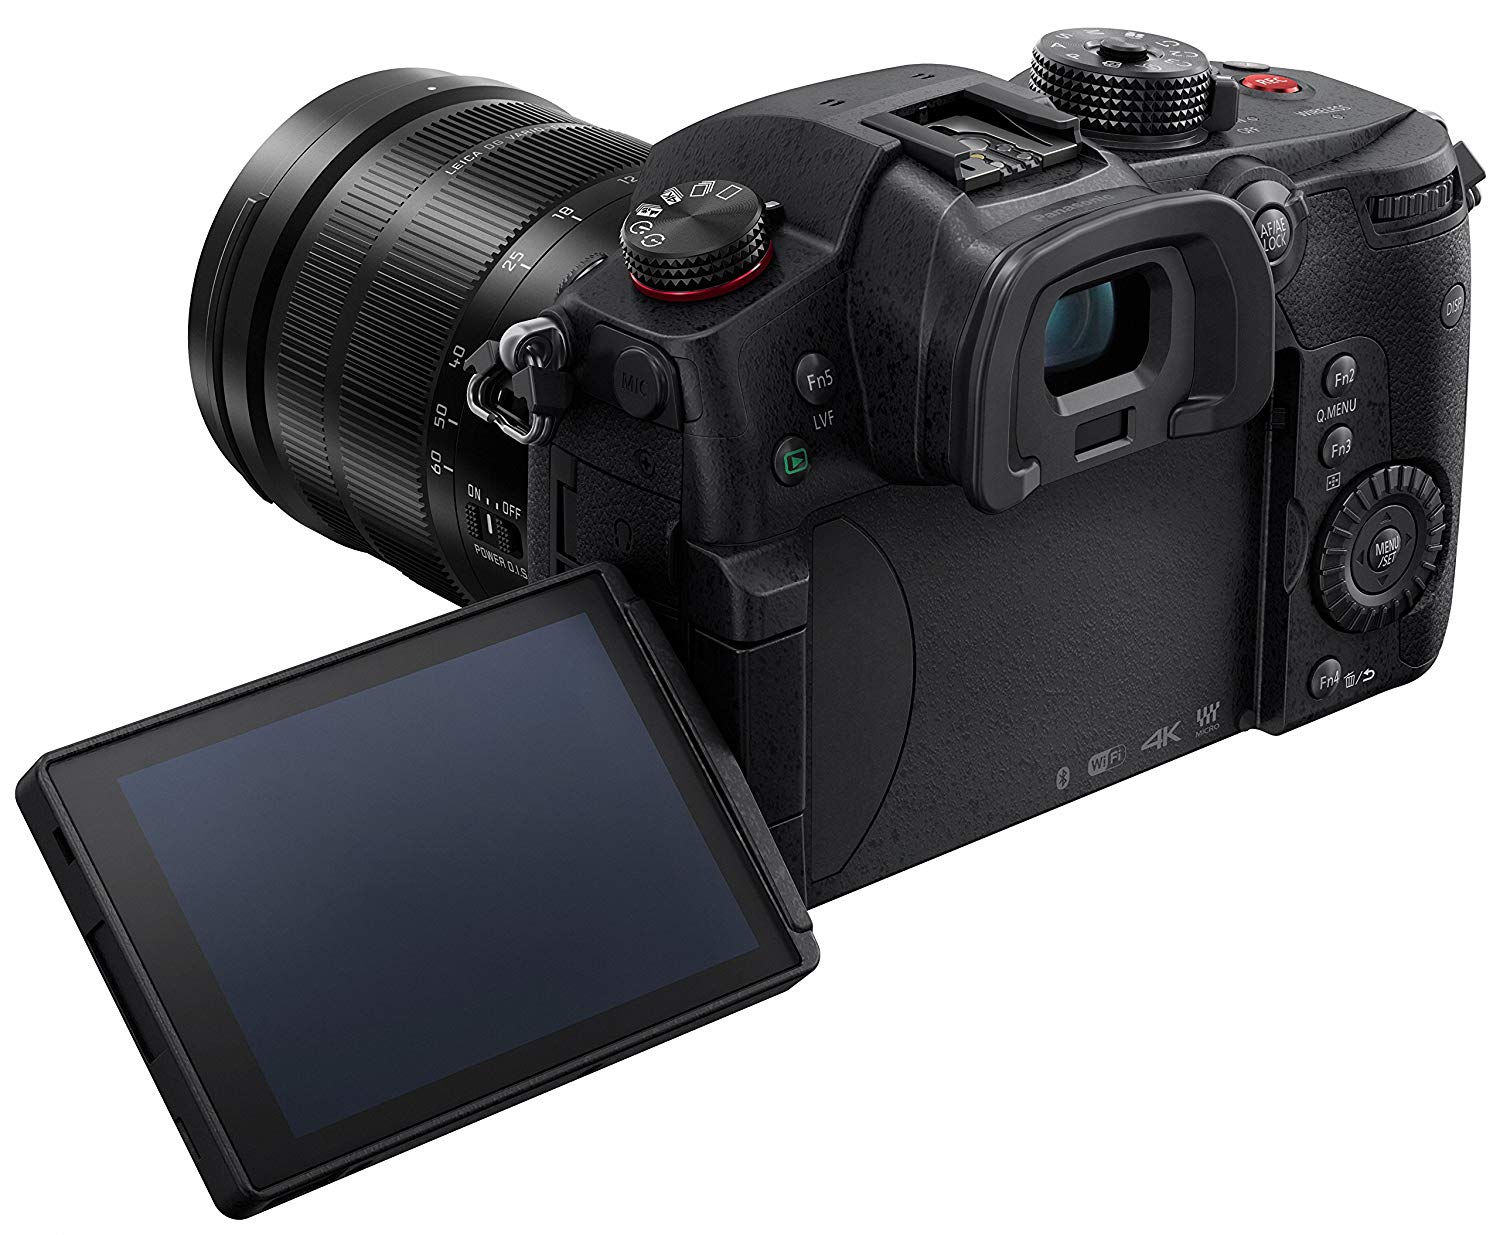
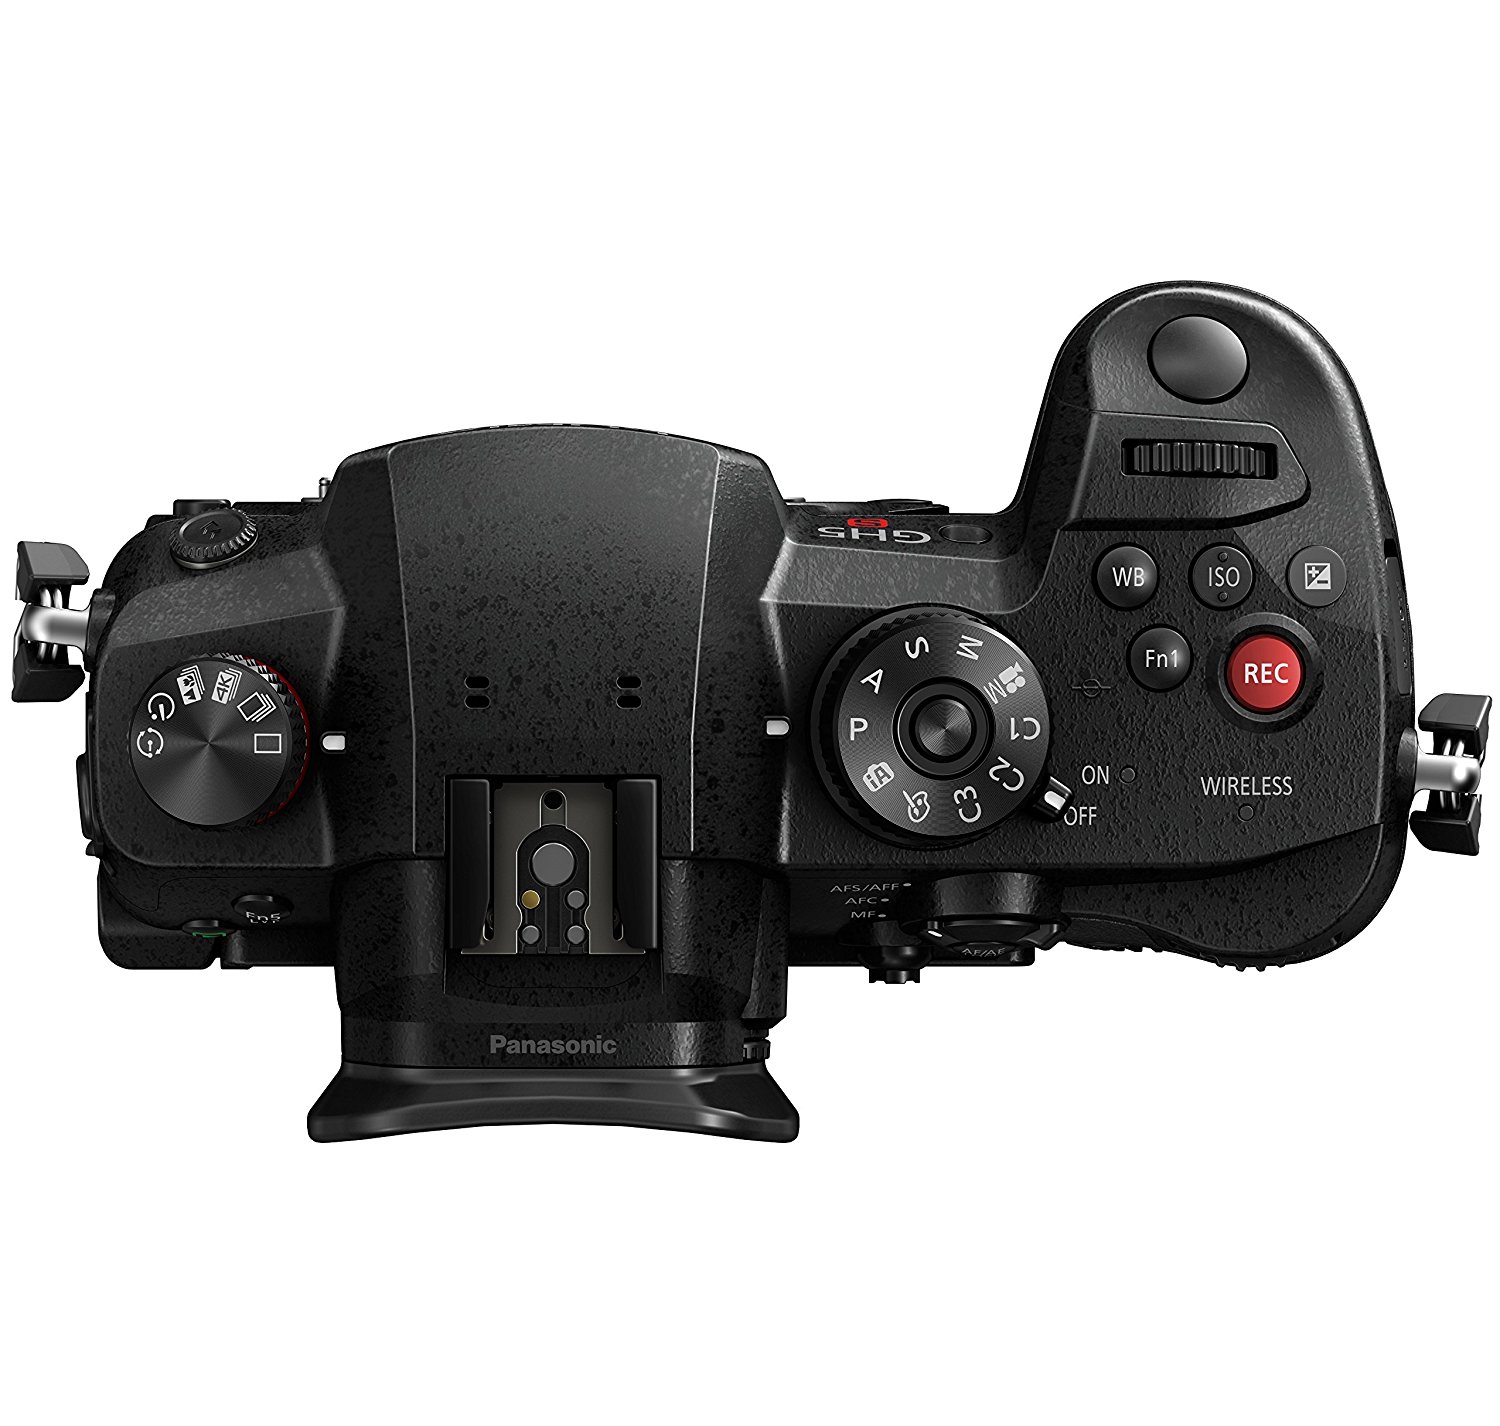
The truth is that Panasonic decided to cut resolution in the GH5S because they wanted to make pixels on this camera physically larger.
It is well known that larger pixels capture more light and less noise which improves the dynamic range of the camera and enhances its performance in low-light conditions.
In other words, fewer pixels provide better results for recordings, and this camera is all about video.
In fact, the sensor handles multiple aspect ratios (4:3, 17:9, 16:9 and 3:2) without a change in focal length and has an ISO range from 160 – 51,200, which is extendable to 80 – 204,800.
The Panasonic GH5S Has Cinematic 4K Video Features
The stand-out feature of this camera is its capability to deliver Cinema 4K (C4K: 4096 x 2160) 60p/50p 8-bit video recording with no crop and without a limit to the recording time.
In addition, the GH5S allows you to record 1080p footage at up to 240 frames per second.
There is also the possibility to extract 8MP stills from 4K video footage.
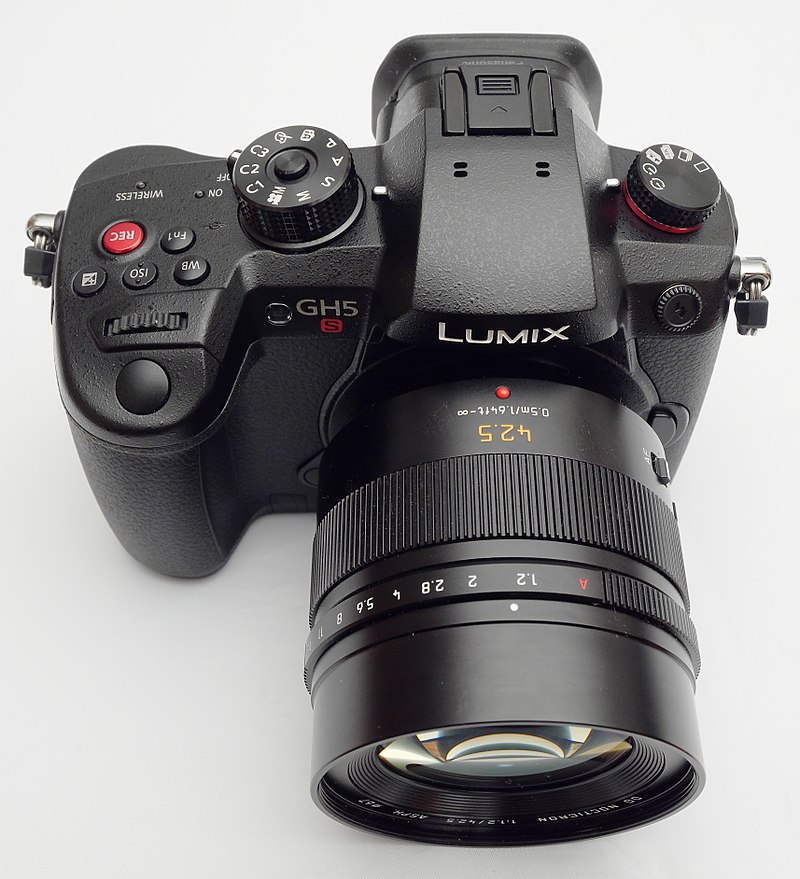
You can see the 4K recording made on this camera in the video above (don’t forget to choose 4K quality in YouTube settings).
Learn More:
The Panasonic GH5S Body is Compact and Weatherproof
With dimensions of 5.45 x 3.86 x 3.44 inches and weight of 1.45 lbs., the GH5S is one of the most compact and lightest cameras of similar capabilities.
This doesn’t mean the camera is fragile...
On the opposite, the GH5S was designed to sustain freezing temperatures as low as -10F degrees, while splashes and dust can’t do much harm either.
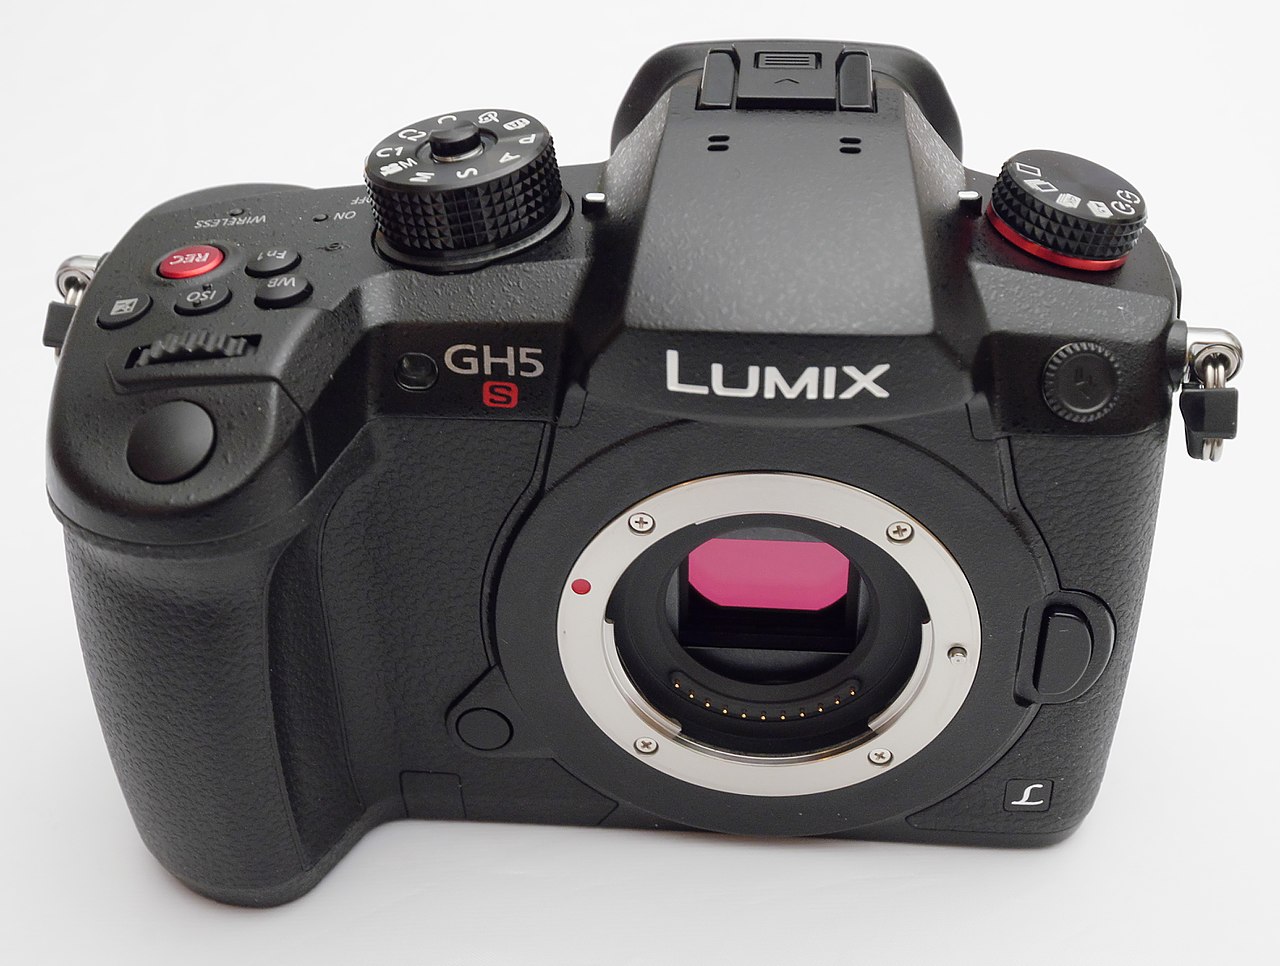
The camera incorporates 1.62M-dot (900 x 600 pixel) fully articulated LCD and 3.68M-dot (1280 x 960 pixel) OLED viewfinder with 0.76x magnification.
The LCD is tiltable which makes things easier for vloggers or selfie maniacs.
Get a detailed look at this camera in the video below by TheCameraStoreTV.
Good Connectivity Options in the GH5S
The camera has a place for 2 SD card slots so you will have enough place to store your shootings.
There is an HDMI connection which will allow you to playback or externally record videos as well.
For connectivity options, there are also headphone jacks, microphone jacks, and PC sync port.
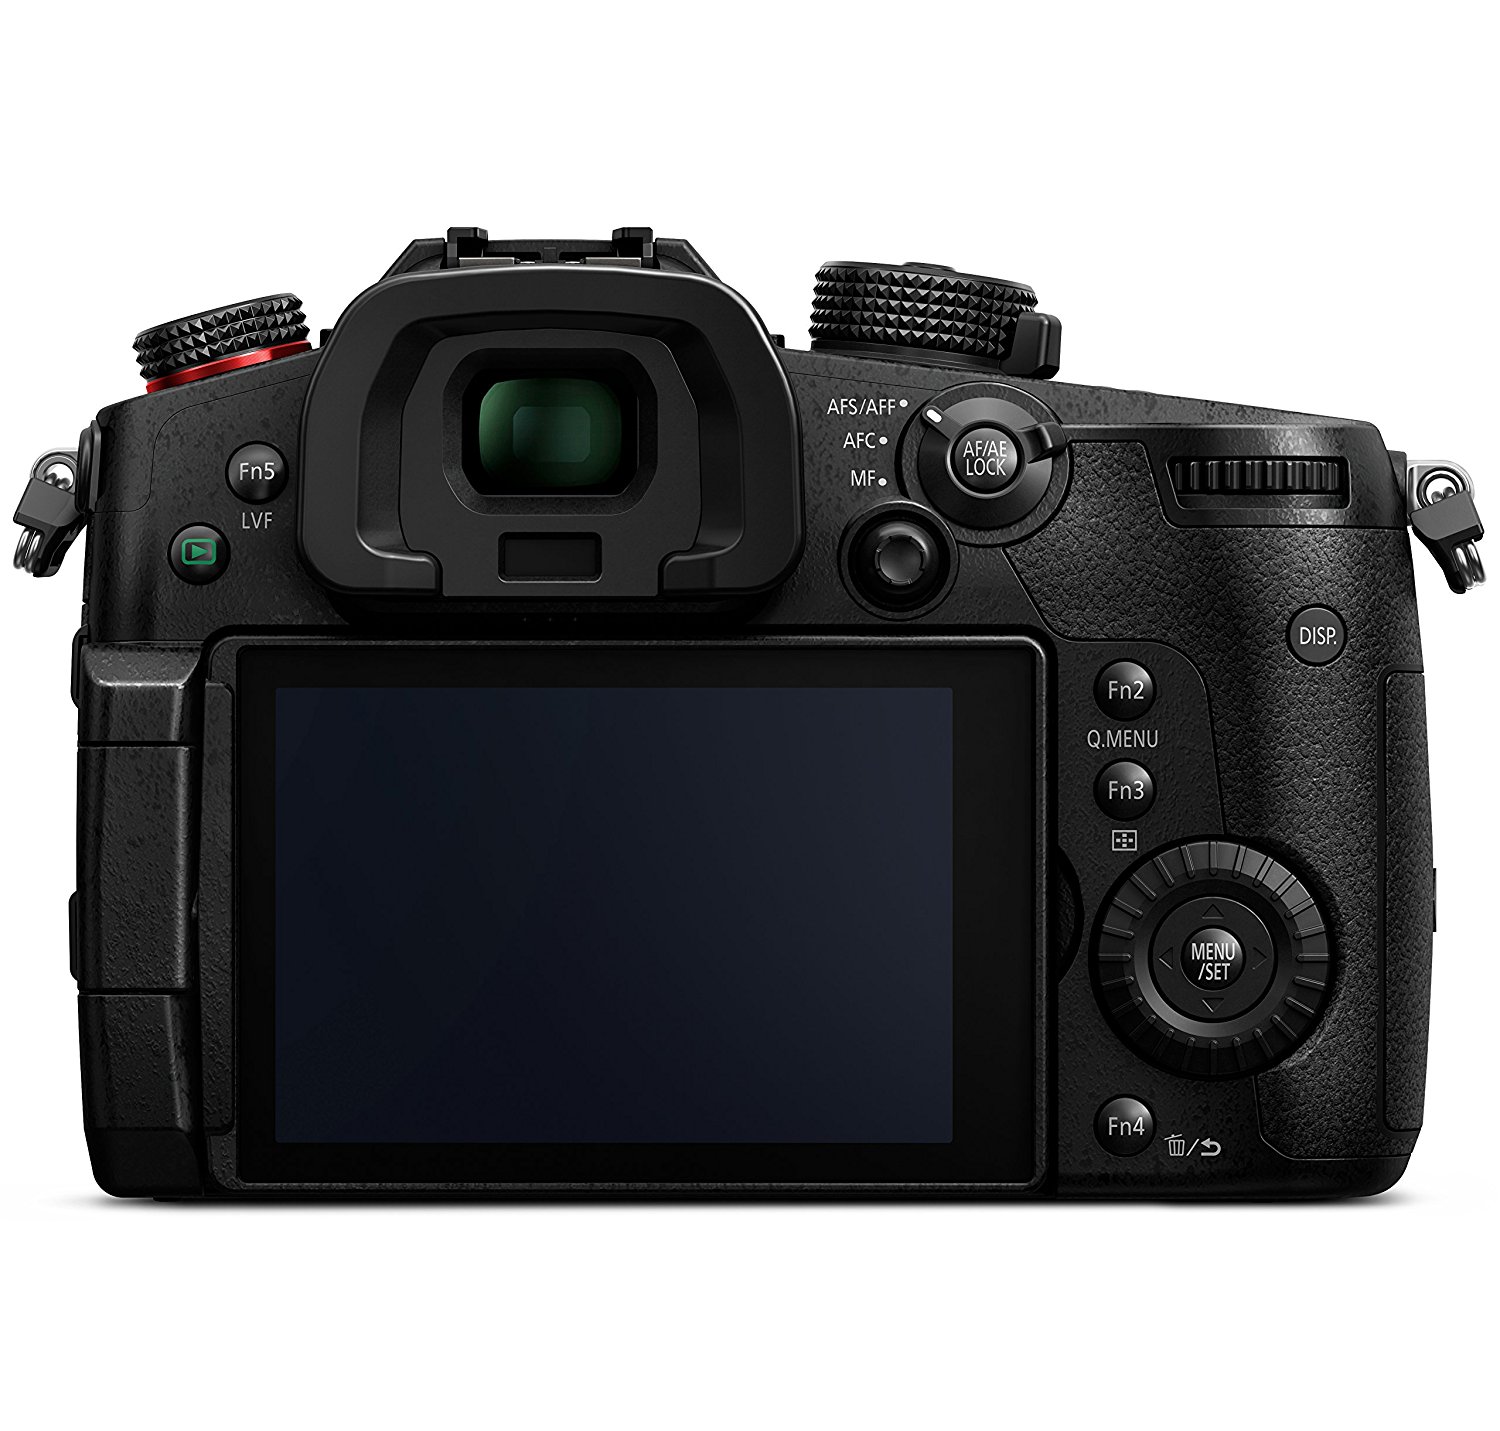
Panasonic GH5S Price
As we already pointed out, the GH5S is not aimed for everything and for everyone.
If you prefer taking stills over videos, this model is probably not the best choice. In that case, you might want to look at one of the other cameras from our review section.
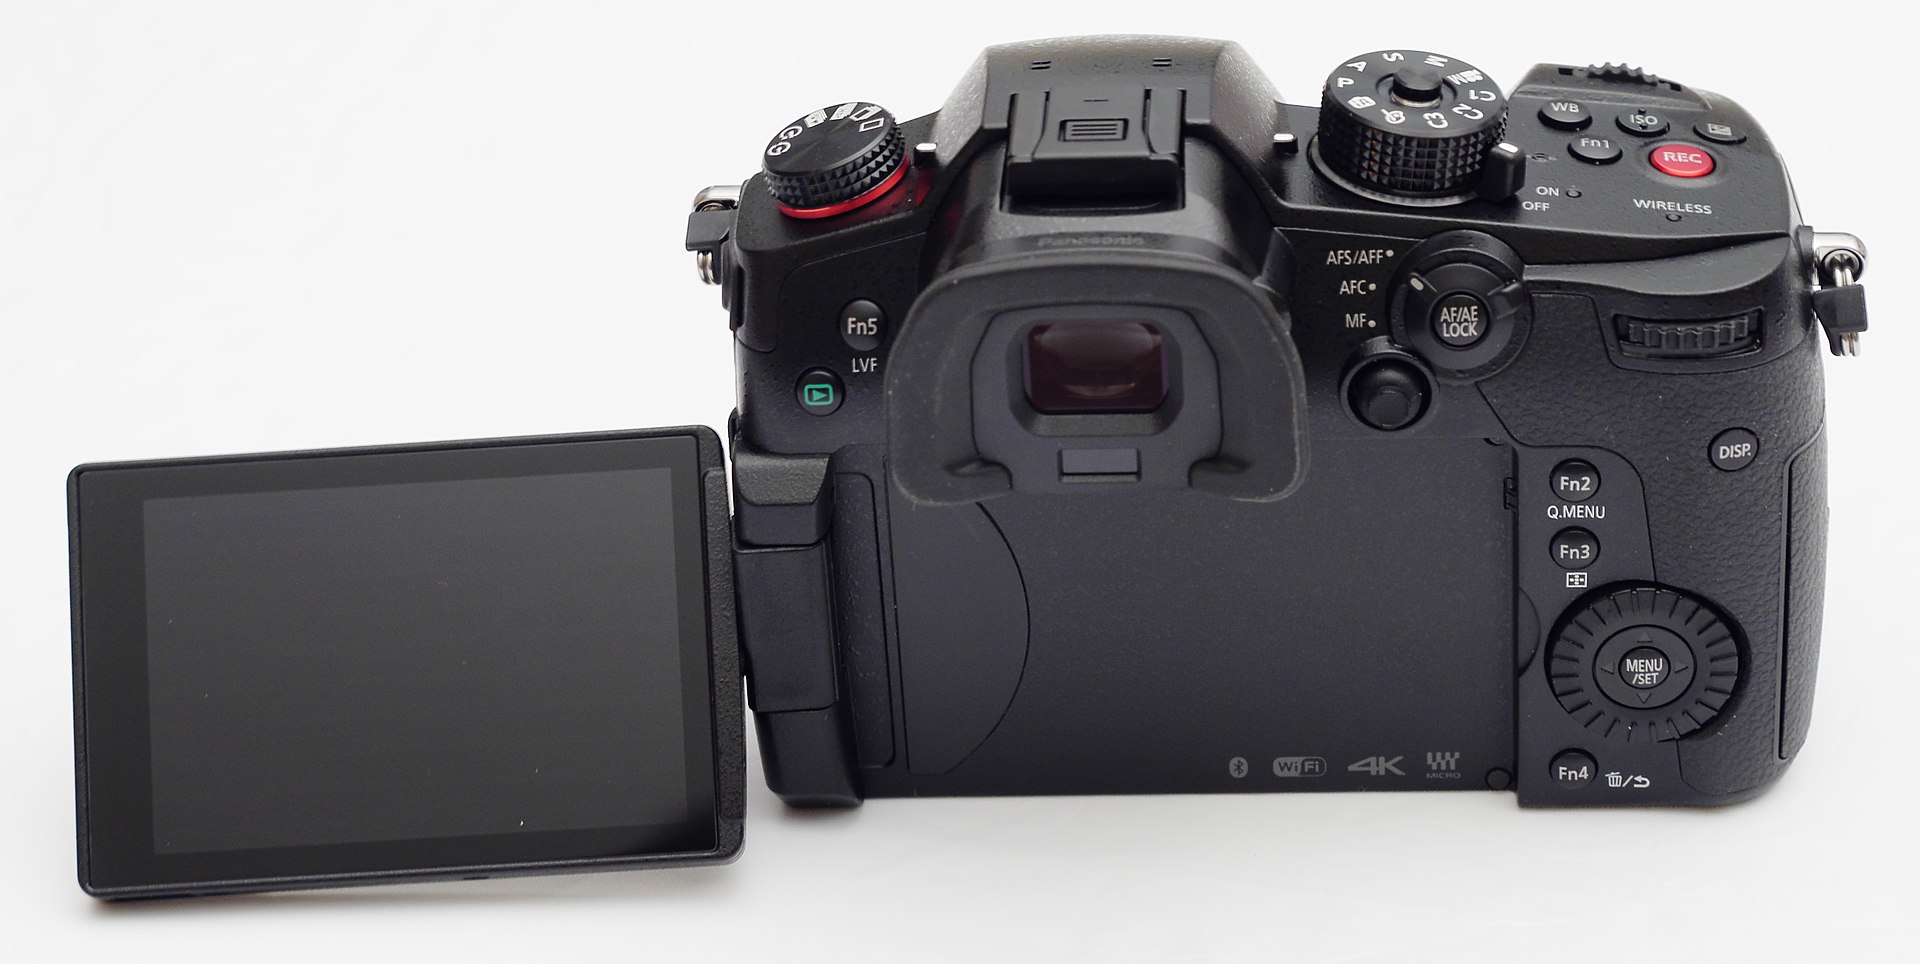
If you are looking for a compact camera that can produce great videos you should consider buying the Panasonic Lumix GH5S.
At the moment, the camera is priced at $2,500.
Have questions? Visit the Panasonic camera forum.
We Recommend
Portable Lighting Tips

Photo by Gabriela Palai from Pexels
The GoPro Hero 8 action cameras are amazing tools for regular still imaging and video in addition to their obvious usage for action endeavors. Add some of the new ultra compact portable lighting equipment and you have a complete A/V photo rig that could quite literally fit in your pocket.
Well, if the pockets are a little oversized and heavy duty...like the ones on my favorite pair of cargo shorts that I’ve been wearing so often lately. Yes, besides being a world class photographer and videographer, I am also a fashion maven.
Portable Lighting For Photography and Videography
As you start using your GoPro Hero 8 action camera for projects other than surfing, bull riding, and hang gliding, you will quickly run into a need for portable lighting to enable you to get the best quality videos and images. Or you may want to employ some advanced lighting techniques you’ve already learned to do with your regular photography lighting gear.
An issue with much of my regular photography lighting gear being used with my GoPro Hero 8 is the size of the lights and stands. Plus, the fact several of them must be plugged into a power outlet.
That simply won’t do with the reason I’m using the GoPro for some things in the first place. I take out my GoPro for those photo or video shoots where I don’t want to lug around a lot of extra gear due to their size and weight. So, truly portable photography lighting gear is in order.
Recommended Portrait Lighting Reading:
- Picture Perfect Lighting: An Innovative Lighting System for Photographing People
- The Dramatic Portrait: The Art of Crafting Light and Shadow
- Portrait Photography: From Snapshots to Great Shots
LitraPro Ultra Portable Lighting

LitraPro battery powered LED light from Litra is an ultra portable solution for your portable photography lighting needs.
The light is controllable via bluetooth on Apple or Android, so you can adjust as you need remotely, just like you already can control the GoPro Hero 8 with the GoPro smartphone app. This makes for a highly portable and versatile camera and lighting rig.
LitraPro is an LED light, very cool operating and extremely power efficient. Battery charge lasts for up to an hour on full power, and an incredible 10 hours on the lowest power setting. Recharges quickly with the supplied micro-USB power charger/adapter that can also be used as a power cord.

photo by subman via iStock
It is rugged, too, just like you want in order to pair it as portable lighting for photography with the GoPro Hero 8 action cam. Shockproof and waterproof to 27 meters or 90 feet. It meets the military specs 810G MIL SPECS for extreme use. So you can use it in conditions that you may put your GoPro Hero 8 in for photography or video.
The color temperature is adjustable from warm to cool, 3000K to 6000K. That’s a function you can control remotely, so you can balance it to the ambient lighting of the scene. It is pretty bright, too, 1200 lumen. A lot brighter than its small size would lead you to believe at first.
There are multiple mounting options to attach the LitraPro to a variety of cameras, mounts, or stands.
Learn More:
OctoPad Camera and Accessory Mounting System

Ever since I found the OctoPad camera and accessory mount, I can’t stop talking about it. Yeah, I’m that guy in the camera club. But it really is one of the neatest small and inexpensive items in my camera gear bag.
What is OctoPad? It is a weighted semi soft pad that sticks to most surfaces via friction alone. No clamps, no suction cups. It won’t slide on an angle of up to 45 degrees. A ¼-20 thread on top allows for adding a photographic gear item directly to it or you can add a ball and socket head or adjustable arm to it for more versatility.
The OctoPad is small enough and cheap enough to keep two or three on hand anywhere. I have a couple in my car as well as some in with my other GoPro gear and portable lighting.
The Ultimate Portable Video and Photography Rig

There you have it. A combined weight less than my latest DSLR camera and lens upgrade. Extremely rugged and also waterproof. Controllable remotely from smartphone apps. This is an amazingly versatile compact set up for portable lighting to accompany your GoPro Hero 8 to use for still imaging and videography.

photo by marekuliasz via iStock
Once you try out this rig, you’ll be that person in the camera club, too. As an alternative to carrying around your regular photography gear for some projects, it’s hard to beat.
Show us what you have captured with your GoPro Hero 8 and the LitraPro plus OctoPad portable lighting gear.
Learn More:
- Tricks For Shooting B-Roll Solo
- Getting The Most From 360 Degree Camera
- The Best Position For A Softbox For Portraits
We Recommend
Quick Tips for Great Self-Portraits
photo byPeopleImages via iStock
There’s never been a better time to practice self-portraits, considering many parts of the world are still at least partially shut down.
Self-portraits allow you to understand photography better. It helps you to see things from a new point of view: the model’s or client’s.
But, self-portraits are also difficult for the same reason. You’re not going to be accustomed to it and it may feel weird for a while.
Here are some quick tips to get you started on practicing your self-portraits.
Self-Portrait Gear Essentials
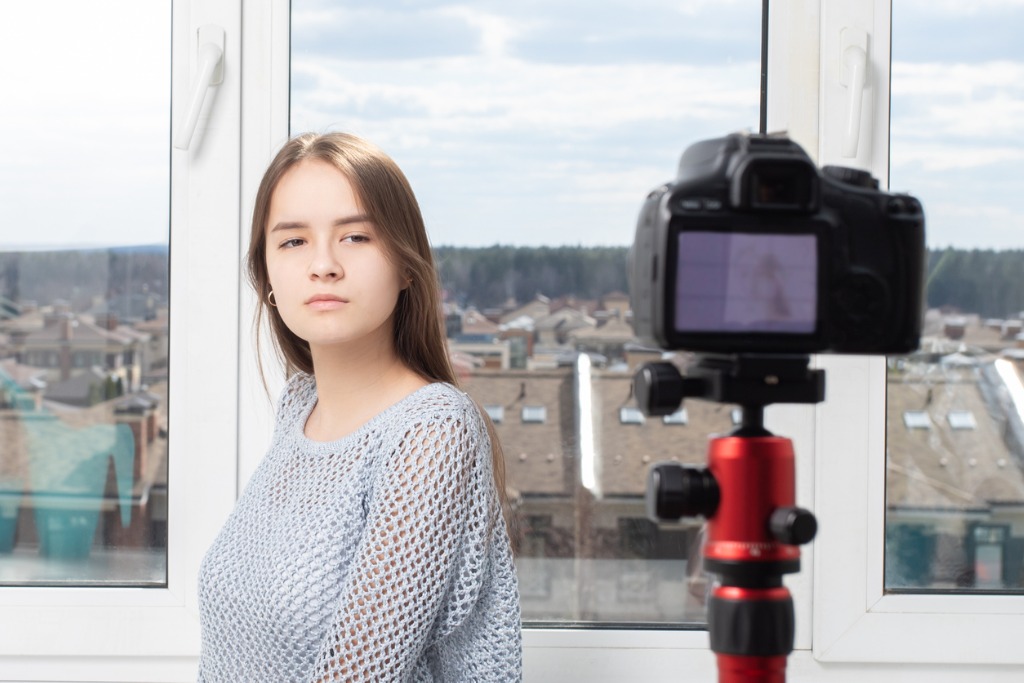
photo byYana Tikhonova via iStock
You can’t take self-portraits if you don’t have self-portrait gear. Luckily, a lot of self-portrait gear is gear you can use in many other photography niches.
The first self-portrait gear essential is obviously a good camera. Look for a camera that features a self-timer and a screen that faces forward and add to that a versatile lens like a 35mm or a nifty fifty lens.
You’ll also need some other self-portrait gear, including a tripod (or tripod alternative), a remote control for your camera, and a reflector.
I personally use a tripod alternative for my self-portraits because the OctoPad does what a tripod does but better.
The OctoPad features a weighted bottom so you can put it absolutely anywhere without fear that it will slide around. This is just not a feature you’ll find with other mini-tripods.
I’ve been using mine for at least a year and it’s allowed me to be more creative than ever before because it never slips or tips over so I’m better able to play with angles in my self-portraits.
Plus, for under $30, the Octopad is priced similarly to other mini-tripods.
Of all this self-portrait gear, if you have to leave something out you can leave the reflector out, because you can always DIY your own.
Take a look at this video by Jessica Whitaker for more information on DIY reflectors.
Suggested Camera Settings
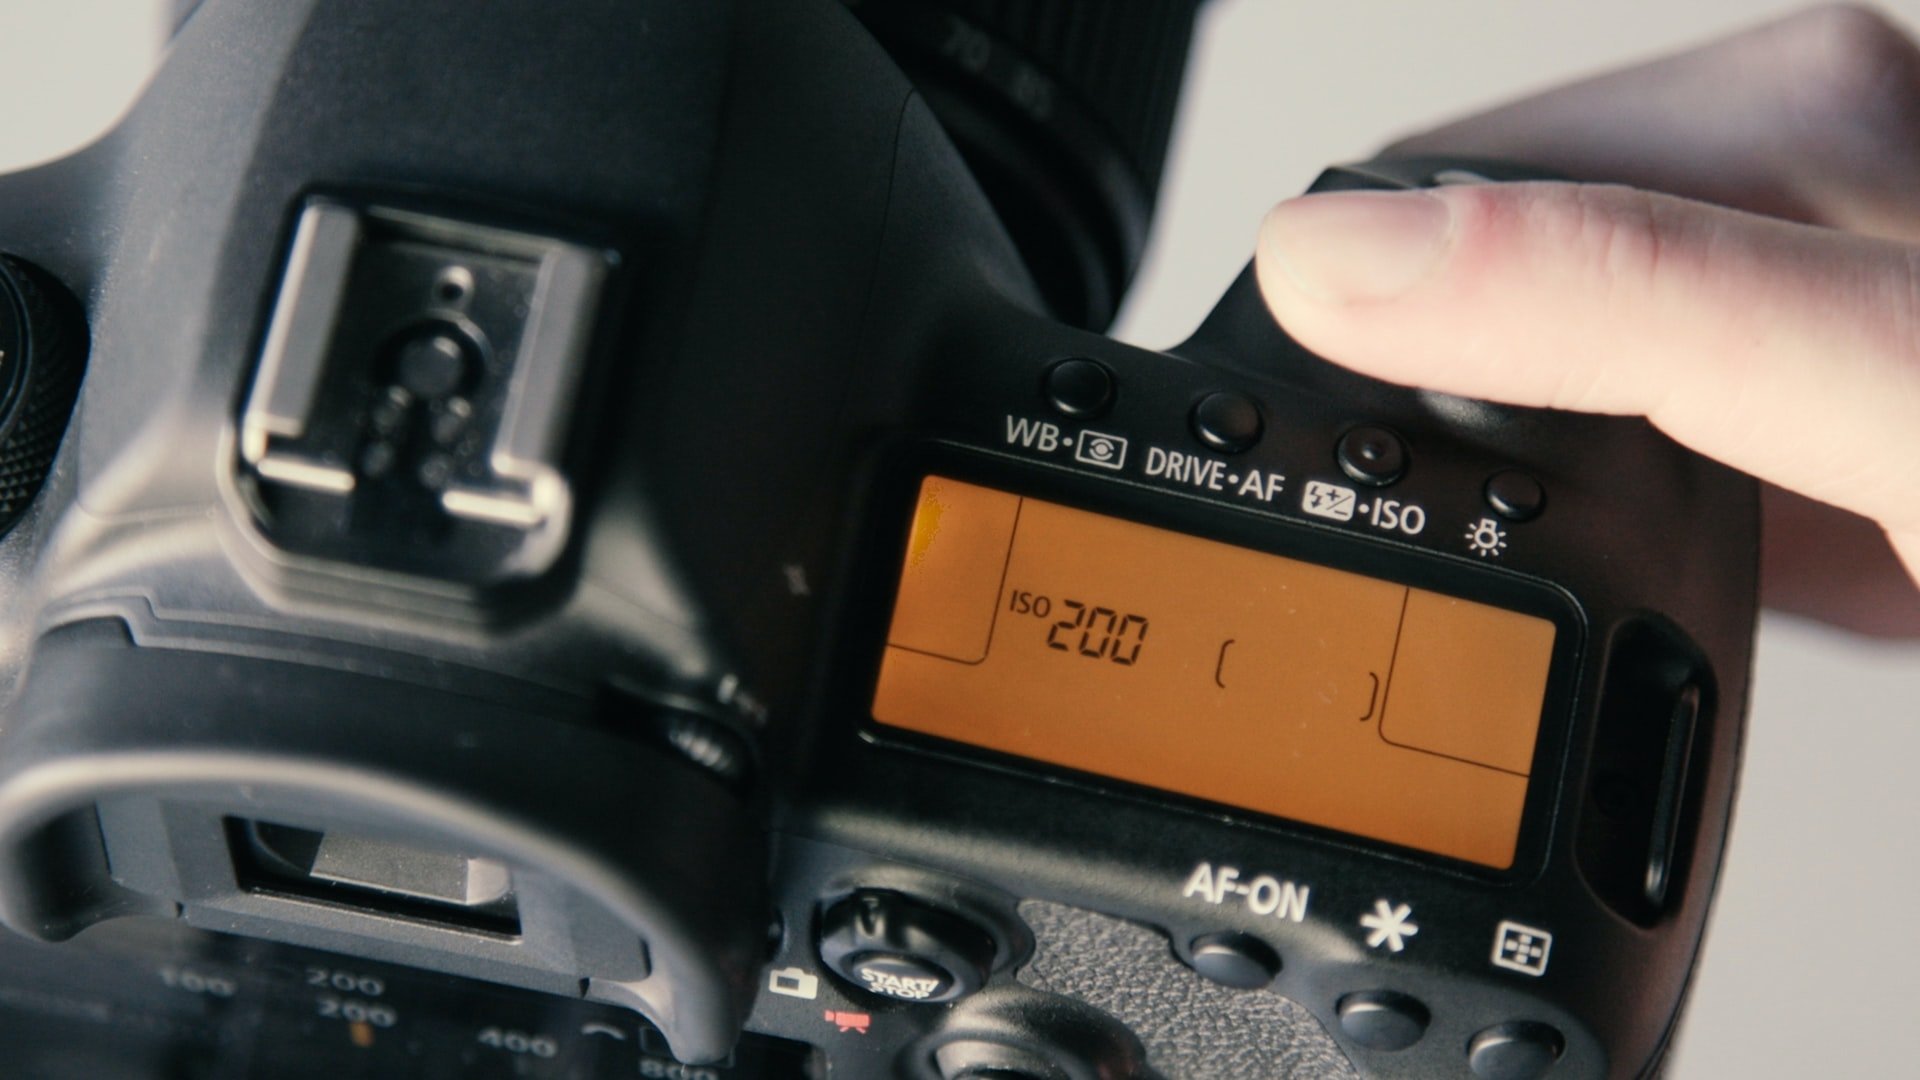
Photo by ShareGrid on Unsplash
Now that you have your self-portrait gear, you’ll need to understand the suggested camera settings for self-portraits.
Let’s start with aperture. You’ll probably want to shoot your self-portraits between f/2.8 and f/4. This will allow you to blur your background while keeping your face sharply in focus.
You’ll also want to keep your ISO as low as possible. Somewhere between 100-400 should do the trick.
Finally, if you’re working with a tripod or the Octopad, you can set your shutter speed to 1/15th of a second.
Keep in mind that these are general guidelines for portrait camera settings. If you want more direction, check out our detailed tutorial on the best camera settings for portraits.
Learn More:
Find Your Focus With a Stand-In
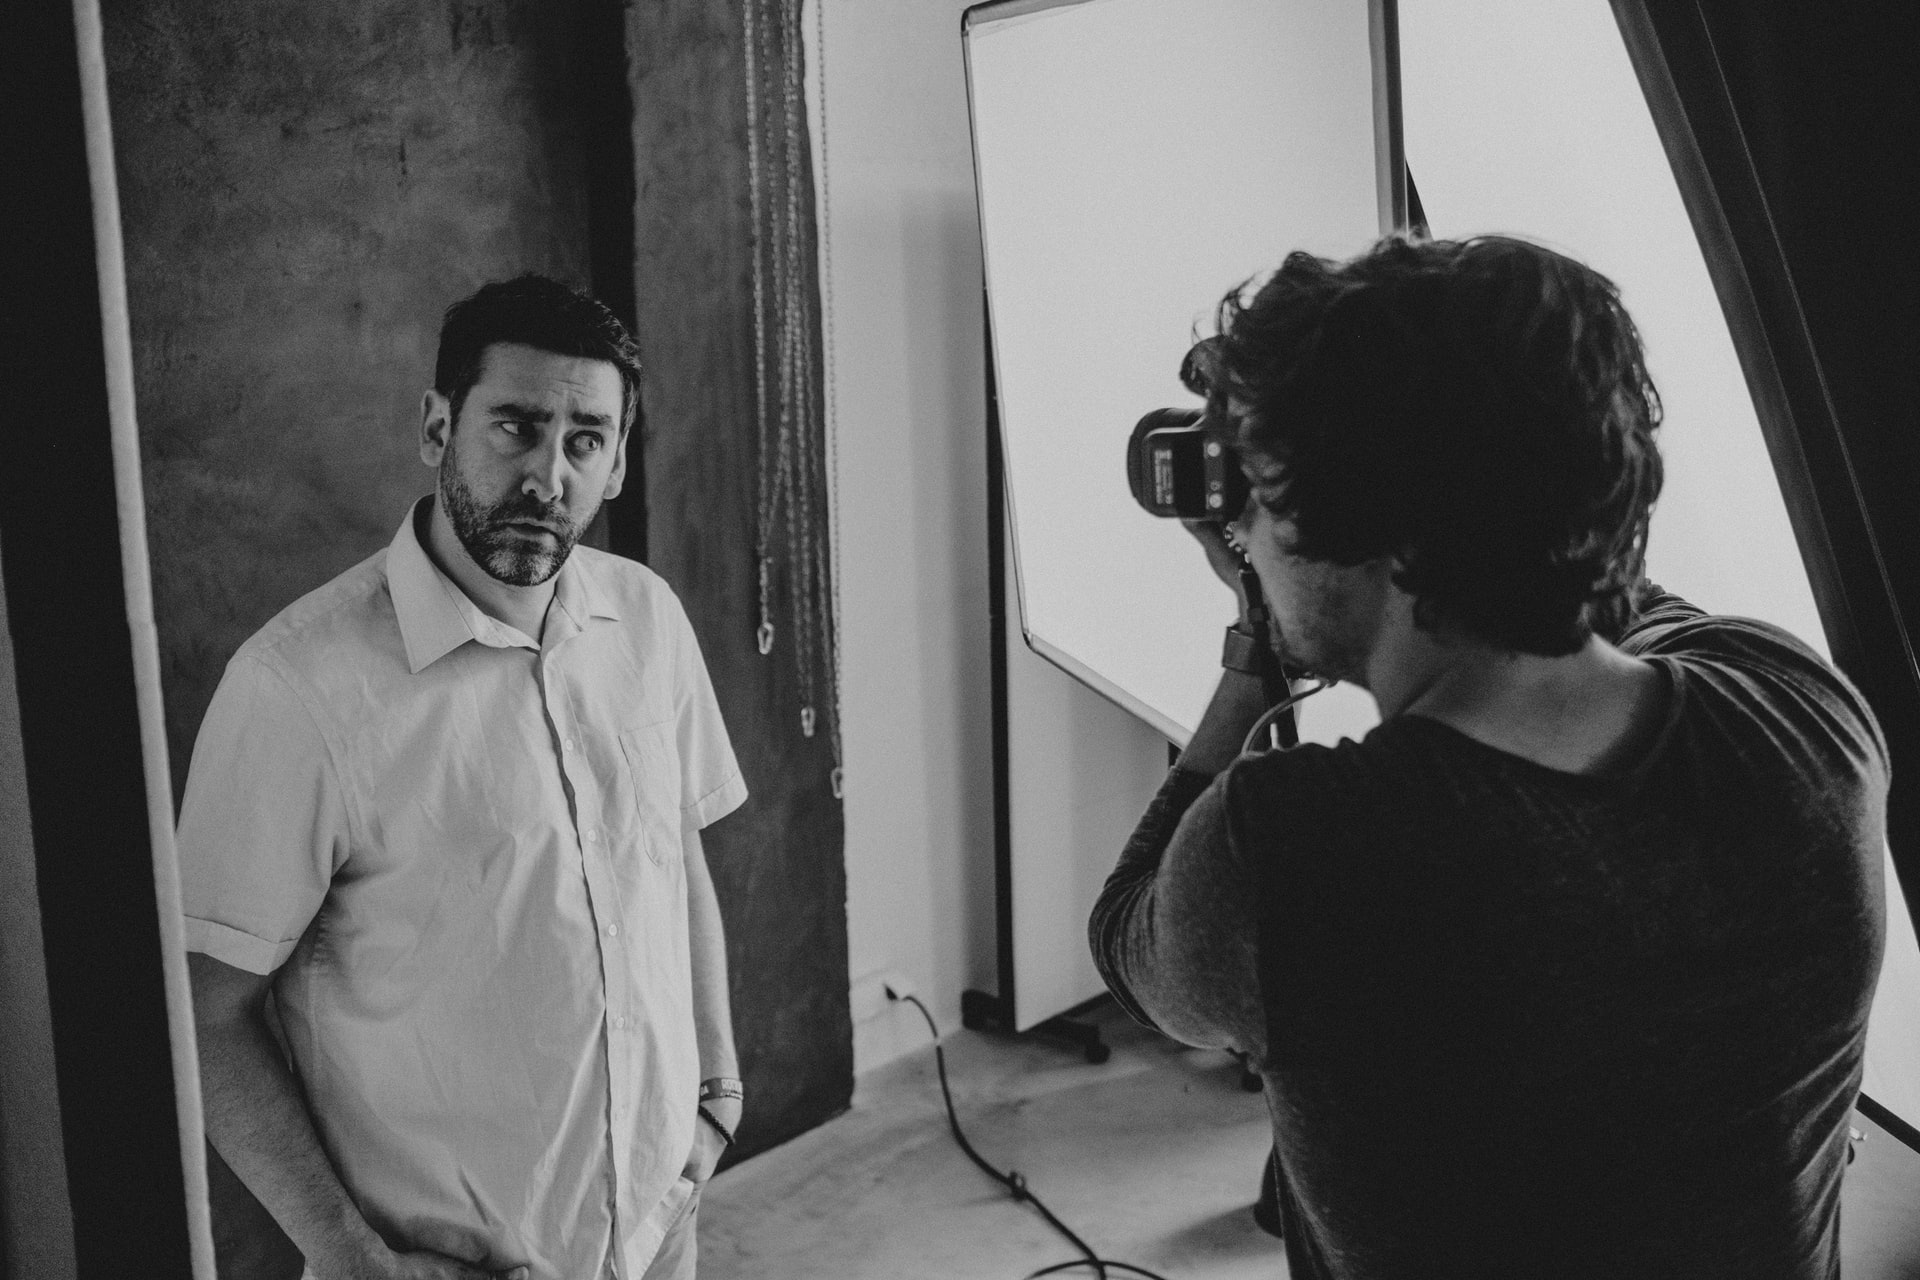
Photo by Daniel Wirtz on Unsplash
I understand that you’re reading this article about self-portraits to, you know, take a self-portrait. But, allow me to cheat for one second.
If you do have a stand-in that you can work with, be it a family friend or even an older child, use them.
Using stand-ins while taking self-portraits will allow you to adjust your camera settings to your exact liking and will prevent you from running back and forth dozens of times.
Learning how to focus for self-portraits without a stand-in will simply take up more of your time and will be a pain, so even if you need to place a random object where you’ll be standing or sitting, it’ll do!
Use Your Camera’s Timer
Photo by Michael Soledad on Unsplash
I recommended a remote as part of your essential self-portrait gear so that you aren’t always relying on your camera’s self timer, however, if you don’t have a remote you can still take self-portraits the old fashioned way.

Photo by Jose Pablo Garcia on Unsplash
Your camera’s instruction manual will give you info about how to set an interval timer. When I’m taking self-portraits, I try to set my interval timer to take the first photo 10 seconds after I press the shutter. From there, I’ll have my camera take another photo a few times with a 2 second delay.
This is a simple, easy way to get multiple shots, and with the other tips and tricks outlined above, you should be better-equipped to take improved self-portraits!
Learn More:
- Getting the Most From Your 360-Degree Camera
- Getting Started in Vlogging - What You Need and Best Practices
We Recommend
Selecting the Right Drone for Your Photo and Video Needs

photo by zsv3207 via iStock
Last week we published an article on getting started in drone photography. That article covered some of the basics of becoming a drone photographer. This second article in the series focuses more specifically on the drone itself, and what features you should look for.
There are all kinds of drones at all sorts of price points. And while price is certainly the chief factor for most buyers, there are other things you need to consider when selecting a drone for photography and videography purposes.
Price Point

photo by golubovy via iStock
As I mentioned, the price of drones is likely going to be your primary factor in deciding which drone you purchase. After all, if your budget is $500, you won't be getting a top-of-the-line professional drone.
But even if you're on a budget, there are some great options out there that provide highly capable service for photography and videography.
The DJI Mavic Mini comes immediately to mind as a great budget option at $399.

This drone has a 12-megapixel 1/2.3" CMOS sensor, a 24mm equivalent f/2.8 lens, and an ISO range of 100-3200 in manual shooting mode.
It can shoot photos in 4:3 or 16:9 format, has a maximum shutter speed of 1/8000 seconds, and offers single-shot or interval shooting for still photos.
Though it doesn't have 4K video, its 2.7K video is still nicely detailed and can be shot in either 25p or 30p.
Now, those specs aren't bad at all, especially for a $400 drone. But they don't come close to what some of the larger and more expensive drones have in terms of camera specs.
Speaking of camera specs...
The Larger the Sensor, the Better the Image Quality

As noted above the DJI Mavic Mini has a 1/2.3" sensor.
In comparison, the top-of-the-line DJI Inspire 2 with the Zenmuse X5 camera has a 4/3" sensor. So what's the difference?
Obviously, the Inspire 2's sensor is physically larger, but why is that a big deal?
Image quality...

photo by borchee via iStock
The larger the sensor, the greater its ability to include more pixels. More pixels means the sensor can collect more light, which is handy for low-light shooting, but it also means that larger sensors can capture more resolute images.
The more resolute an image is, the more details it will record. Likewise, the larger the prints you can make from the image file.
There are other benefits, too - better dynamic range, less digital noise at higher ISOs, and a smaller crop factor.
The moral of the story is that if you're buying a drone specifically for photography and videography purposes, opt for a drone that has the largest sensor you can afford. There are too many benefits to not make the size of the camera sensor a top priority.
How is the Drone's Hovering Capability?

photo by Bestgreenscreen via iStock
One of the lesser-known features you need to consider is the drone's ability to hover in place.
Its hovering ability will have a direct impact on the quality of the videos you take - if the drone is moving up and down, your video will do the same, which is hugely distracting.
At the same time, a drone that can't hover precisely will negatively impact your still images. If the camera is moving around, you might find that your still photos aren't as sharp as they could be.
With that said, look for a drone that has good hovering abilities and one that has minimal vibration, as vibrations can also diminish the photo and video quality as well.
Avoid Off-Brand Drones

photo by marrio31 via iStock
Don't get me wrong, there are tons of great drones out there that aren't named DJI or Parrot.
However, buying an off-brand drone (or worse, a no-name drone) can open up a can of worms.
Specifically, if something breaks on the drone, having an off-brand model might make it more difficult to get the drone fixed or to find replacement parts.
This isn't a guarantee, but in my experience, most of the off-brand, cheap gear I've bought over the years comes with a complicated process to get things fixed.
You might find different, and if so, that's awesome. But for my money, I'm sticking with brands that I know and recognize.
Which Drone is Right for You?

photo by Rowan Jordan via iStock
There is no single drone that's perfect for every person.
But if you consider the factors I discuss above, you'll be in a position to make an informed decision about which drone fits your needs the best.
One thing I will say is that if you simply cannot decide which drone to buy, you might think about renting a few to test them out. Doing so allows you to get a feel for their camera systems as well as how they fly - and nothing beats that kind of first-hand experience when making a purchasing decision that could reach into the thousands of dollars!
I'd also recommend talking to the experts about drones, at stores like Adorama (if you're in New York City) or consult with them online.
There's nothing wrong with asking help in making a decision, and their expertise will help point you in the right direction.
We Recommend
Shooting B-Roll With a Drone

photodima_sidelnikov by via iStock
Shooting B-Roll video is a technique that will set your videos apart from the run-of-the-mill videos that are online everywhere from blogs to YouTube.
What is B Roll footage? How will it help my video productions? Can I shoot B-Roll with a drone?
I answer these questions and more below!
What Is B-Roll?
Photo by Kyle Loftus from Pexels
Cinematographers and editors separate footage into two general categories. A-Roll and B-Roll. Both categories require excellent technique, but there are specific jobs for the two rolls to accomplish.
A-Roll video is footage that can tell a story all by itself. Shooting B-Roll video gives you extra material that would not be able to fully tell a story on its own, but it can add depth and detail to the story told in the A-Roll.
As an example of the difference, let’s think about a movie most of us have seen over and over again, The Wizard of Oz. The scene is the initial confrontation with Glenda the Good, the Wicked Witch of the West, and Dorothy all talking about the ruby slippers. That’s A-Roll. The B-Roll is the jump cut to a close-up of Dorothy’s feet wearing the shoes:
Without the close up, the scene still works, with it, it works better. A close up shot of the ruby slippers alone doesn’t tell a story. In fact, that entire 2 ½ minute scene is a great learning tool showing proper editing technique.
That’s just one example. Any TV news magazine interview also is full of the reporter and cameraman shooting B-Roll such as reaction shots.
Recommended Videography Reading:
- How to Shoot Video That Doesn't Suck: Advice to Make Any Amateur Look Like a Pro
- The DSLR Filmmaker's Handbook: Real-World Production Techniques
Drones Are Perfect For B-Roll

photo by nautiluz56 via iStock
Shooting B-Roll with a drone is a fantastic method for gathering that extra footage. Many times, filmmakers will schedule B-Roll shots with their main camera on their storyboard after the main footage is shot. But there are other methods that can be used.
One way is shooting B-Roll at the same time with a GoPro type of camera. A second method is shooting B-Roll with a drone, either before or after the A-Roll. Drone video tips can be put to use with a variety of drones, but the high-quality models made by DJI are among the better options for shooting B-Roll with a drone.
The budget friendly DJI Mavic Mini and the slightly more robust DJI Mavic Air are two excellent choices for videographers. DJI Mavic drones are good for shooting B-Roll because they have high-megapixel cameras, stabilized flying modes, and relatively long flight times.
Use Intelligent Flight Modes for Shooting B-Roll

Photo by edwin josé vega ramos from Pexels
These two DJI drones are also useful for shooting B-Roll because of the flying modes these models have. These modes allow for easily capturing certain types of B-Roll footage. Some of the flight and shoot modes may even be better for your B-Roll than using your primary camera.
Cinematographers and videographers have developed and evolved various methods and techniques in order to gain quality B-Roll video footage.
Some basic B-Roll footage and drone video tips are to use your drone for the wide establishing shot and the approach footage. The flight modes of the DJI Mavic drones make that a simple task. It’s actually easier than using your primary camera, as Jeven Dovey explains in the video below:
The intelligent flight modes can smoothly transition from the static view of the wide shot into the approach footage. Imagine your drone with its video capability is like having a 100 foot long dolly to move the camera closer.
One of the mistakes that some beginner drone videographers make is forgetting that your drone can fly at many different heights above ground, including eye level and below eye level. The DJI Mavic drones are super stable platforms for shooting video, which is a major reason why they make such good cameras for shooting B-Roll.
Special Drone Capabilities

photo by miodrag ignjatovic via iStock
Not to say that you shouldn’t use the unique overhead perspective that drones are capable of, though. Shooting B-Roll from overhead can lend an air of drama and grandeur to your edited video productions. Overuse, however, can become cliche quickly, so some caution is in order.
Other basic B-Roll with a drone can include the over the shoulder shot, close ups of action, close up of subjects and faces, and fly by shots. A neat effect that you can do with a drone that is actually difficult otherwise is fly by changing from fast to slow or vice versa. Using your drone for shooting B-Roll also allows for a much longer sweep that we may have been able to capture otherwise.
Major Motion Picture Techniques For Our Videos

The Wizard of Oz was one of the most expensive films to create up to that time. Many major motion picture studios from the past up to now have spent more money on a day of filming than our entire salary.
Many of the advanced techniques pioneered by the movie productions are available to us as modern videographers. Using a drone for shooting B-Roll video opens up the methods and techniques that can make our video productions as watchable and enjoyable for certain audiences as big budget productions.
Making good use of high-quality equipment, advanced cinematography methods and techniques, and your own creativity while shooting B-Roll with a drone will ramp up your videos.
We Recommend
Shooting Landscapes With a Drone
Photo by Josh Spires - dronenr on Unsplash
Learning to shoot landscapes with a drone definitely comes with a steep learning curve. It’s incredibly difficult at first, but it slowly becomes easier and easier once you get the hang of it(especially abstract landscape photography) - just like everything else in photography!
When you’re shooting landscapes with a drone, the landscapes completely transform into something otherworldly. Where other photographers can take beautiful landscape photographs, you can take magnificent ones.
For the purposes of this article, I’m going to be talking about the DJI Mavic 2 Pro drone because it's the version I own. It’s also on sale on Adorama for $1,599 right now as an added bonus.
What Shooting Landscapes with a Drone Looks Like
Brendan van Son also owns a DJI Mavic 2 Pro and shows you exactly what shooting landscapes with a drone looks like in the video above.
Shooting landscapes with a drone allows you to take mesmerizing video footage of scenery, but it also allows you to take beautiful panoramas.

photo by olaser via iStock
And isn’t drone photography all about a different kind of perspective?
Getting above it all and having the capability of capturing images of the landscape from a completely different point of view is invigorating and it can stoke your creativity.
Besides, it’s a fun challenge! It’s hard enough to take great shots with a camera you’re holding in your hands while you stand on the ground. Taking great photos while the camera is flying around overhead will put your photography skills (and piloting skills) to the test.
Recommended Drone Photography Reading:
- Drone Photography Basics: Your Guide to the Camera in the Sky
- Drone Photography Explored: Beautiful Drone Photography
What Drone Settings Should I Use?

photo by PhonlamaiPhoto via iStock
So, you’ve purchased your drone, watched as many tutorials as possible and have your first shoot location scouted. What settings should you use?
DJI’s Mavic 2 Pro drone features a Hasselblad camera with a 1-inch sensor that can take 20MP photos. If you are purchasing a drone specifically for landscape photography, make sure you buy one with a sensor of at least 1-inch, that way you maximize resolution without having to buy a drone that’s overly large.
The DJI Mavic 2 Pro also comes with a wide-angle 28mm lens, which allows me to shoot landscape shots that don’t look bug-eyed while also allowing me to capture a wide view of the landscape below.

Photo by Jeremy Bishop on Unsplash
Most drones will allow you to get a smartphone app that syncs to your drone and keeps everything very familiar for you, meaning you can choose your shooting modes from full auto to completely manual.
But, there are some new methods you should be aware of when it comes to shooting landscapes with a drone.
For instance, “windowing” is when your drone will crop a section of your total photo resolution for you, while “subsampling” is when your drone resamples the image signal which results in less bright colors.
In the video above by Tom’s Tech Time, you can get a thorough overview of the best camera settings for the DJI Mavic 2 Pro.
Benefits of Shooting Landscapes with a Drone
Photo by USGS on Unsplash
One of my favorite benefits of shooting landscapes with a drone is that you can create abstract photographs of the landscape. For instance, the photo above is of highly eroded plateaus rise from the desert floor in Egypt.

Photo by USGS on Unsplash
Or, the above shot, which is of fluorescent plankton in the dark waters of the Baltic Sea.
But, abstract landscapes are not the only benefit of shooting landscapes with a drone.
You can also create new composition in old areas (textures sometimes don’t present themselves from eye level), reach hard-to-photograph places, and capture scenes over water.
Just be sure you understand local drone regulations before you fly. If you’re not sure if it’s legal to fly a drone, don’t launch! Many people have gotten into serious trouble for flying drones where they shouldn’t.
We Recommend
Sony Camera Shopping Guide
The Sony camera lineup is arguably better than it has ever been.
With entry-level options like the Sony ZV-1, professional models like the Sony a1, and loads of options in between for enthusiast photographers, there truly is a Sony camera for everyone.
If you're ready to upgrade your camera and want a Sony, use this shopping guide to help you narrow down the possibilities.
Each camera on this list has distinct pros and cons, so we'll discuss those along with the essential features these cameras offer as a means of helping you make the best decision for your needs.
Let's get started and find the best Sony camera for you!
Sony Camera Shopping Guide: Sony ZV-1
One of the newest members of the Sony camera family is also one of the most affordable.
The Sony ZV-1 was designed with videographers in mind, so if you fancy yourself a videophile, this might be a nice budget-friendly camera for you.
This little guy offers 4K video at up to 30fps and if you want slow-motion video, you can do that in full HD at up to 120fps. Add in a directional microphone, a rotating LCD for seeing yourself as you film, and compatibility with all Bluetooth grips, and you have the makings of a fantastic camera for shooting video.
But, this isn't just a great camera for video.
Instead, this Sony camera has a 20MP sensor with focus tracking for eyes, faces, and other subjects, so you can capture pin-sharp images, even if the subject you're photographing is on the move.
This camera also has image stabilization, smart auto exposure, and a multi-interface shoe for connecting all sorts of accessories. And that's just the start!
Learn more about the Sony ZV-1
Sony ZV-1 Vlogger Kit
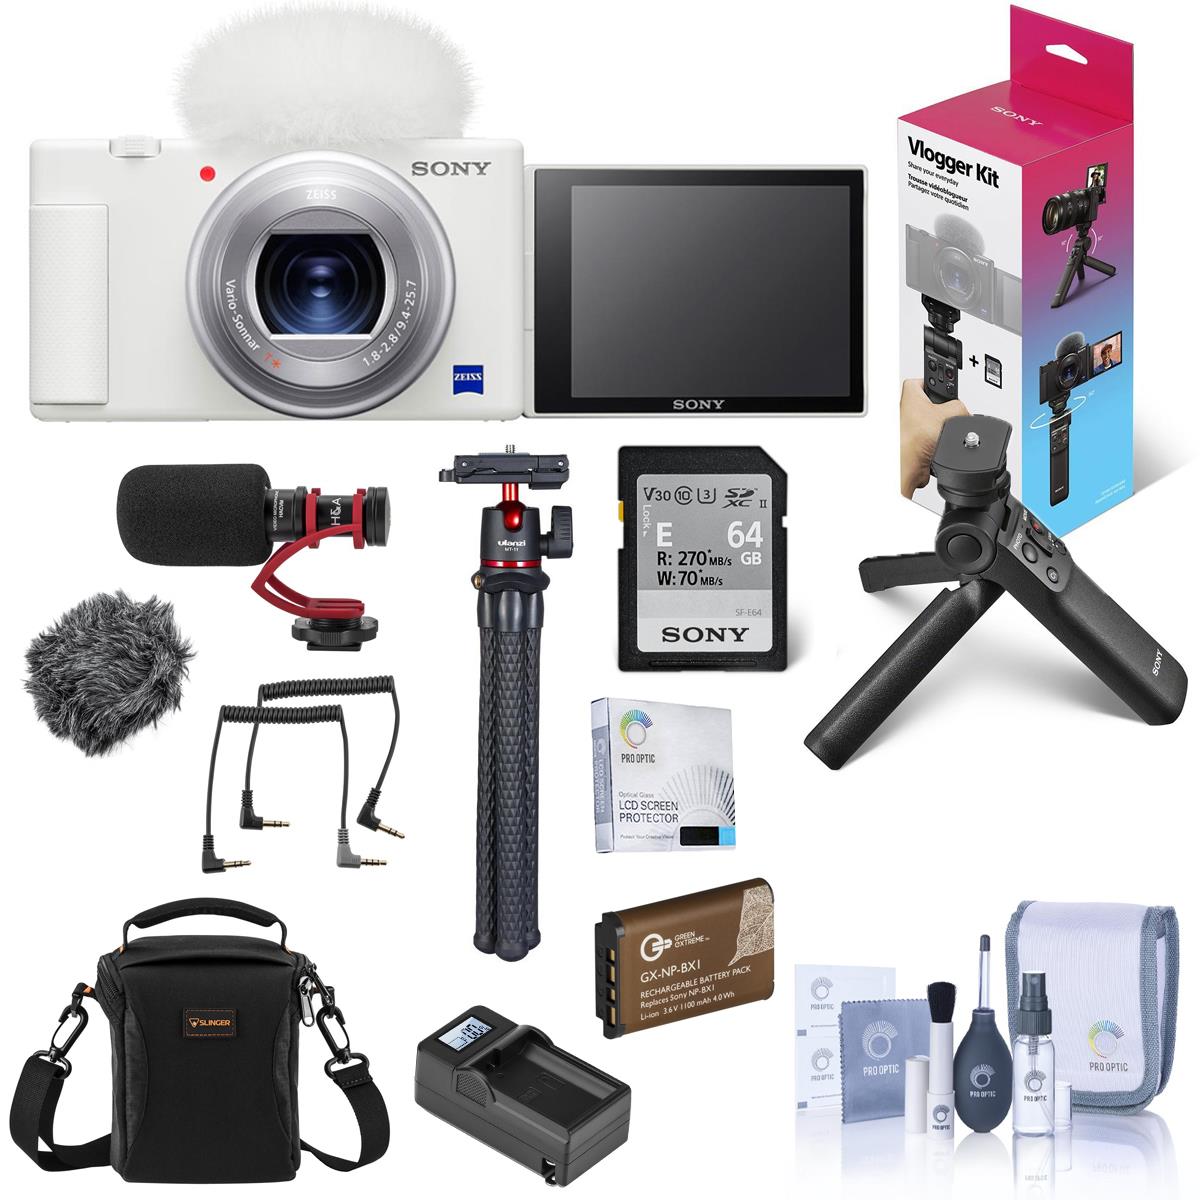
If your goal is to become a vlogger, then the ZV-1 Vlogger Kit has everything you need!
In addition to all the excellent video features that this Sony camera offers, this kit comes with a host of accessories that will make vlogging easier:
- Ulanzi Octopus Tripod with Ball Head
- Screen Protector
- Rechargeable Battery Pack (NP-BX1)
- Wind Screen Adapter
- Sony ACCVC1 Vlogger Accessory Kit with Shooting Grip and 64GB UHS-II SD Card
- Green Extreme NP-BX1 Battery
- ProOptic Cleaning Kit
- Micro USB Cable
- H&A VideoMini On-Camera Microphone
- Slinger Shoulder Bag
- Compact Charger
In other words, from audio to video to cleaning the camera, you get everything you need to kickstart your YouTube channel!
Learn more about the Sony ZV-1 Vlogger Kit
Sony Camera Shopping Guide: Sony RX100 VII
When you think of compact cameras, you might not think of something that packs as much of a punch as the Sony RX100 VII.
Despite its tiny size, this camera has a 20.1MP sensor, a 24-200mm equivalent f/2.8-4.5 lens, continuous shooting at up to 20fps, and a lightning-fast autofocus system that acquires focus on the subject in just 0.02 seconds. In fact, this little guy has one of the fastest autofocus systems on the market.
In addition to all those features, the RX VII has a touch-enabled LCD screen that folds up 180 degrees and down 90 degrees to help you get high-angle and low-angle photos and videos.
There's also a 2.36-million-dot OLED electronic viewfinder that pops up to give you another means of framing up beautiful shots.
This Sony camera weighs just 0.67 pounds and measures 4.02 x 2.28 x 1.69 inches, so it is certainly designed to be a powerful, yet easily portable camera that can slide into your pocket.
Learn more about the Sony RX100 VII
Sony a6600
If you want a camera with a compact body and a budget friendly price, but don't want something as small as the RX100 VII, the Sony a6600 is a great option.
Packing a 24.2MP sensor, a BionZ X processor, and an ISO range of 100 to 32000, this Sony camera gives you excellent image quality and low-light shooting capabilities.
When shooting in low light (or any situation in which you're holding the camera), you can get improved results because of the a6600's 5-axis image stabilization system.
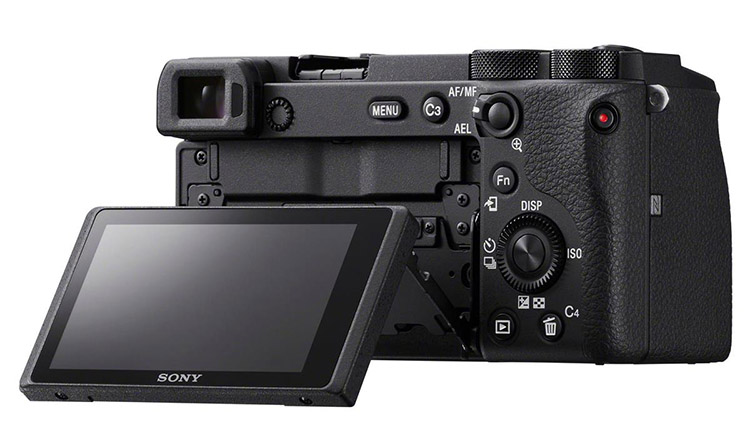
If you typically photograph fast-moving subjects, this camera can hold its own with up to 11fps burst shooting speed. Combined with an autofocus system that has 425 phase-detect and 425 contrast-detect AF points, you have a system that gives you a fast and reliable autofocus experience. In fact, it's the same autofocus system that's in the RX100 VII, so it acquires subjects in just 0.02 seconds.
At 1.11 pounds, this camera is certainly bigger than the RX100 VII, but it still only measures 4.72 x 2.64 x 2.72 inches. The small body is still portable, but with a bigger grip and larger buttons, it's better suited to photographers with larger hands.
This isn't just a good Sony camera for photographers, though - it offers 4K UHD video at up to 30p and full HD at up to 120p.
Learn more about the Sony a6600
Sony Camera Shopping Guide: Sony a7 IV
This is a full frame Sony camera with a 33MP Exmor R back-illuminated sensor.
This sensor is regarded as offering excellent image quality as well as superb speed - Sony used copper wiring that helps boost transmission speeds, including faster readout of 4K videos.
Speaking of videos, the a7 IV can accommodate 4K video at up to 60p. The footage can be edited to slow motion when rendered at 24p or 30p in post-production. You can also get 30p full pixel readout without any binning with 7K oversampling. In other words, you can shoot highly detailed, beautiful video with this camera!
The aforementioned Exmor R sensor also gives you excellent dynamic range with more than 15 stops, improved autofocus speed, and excellent color reproduction.
The BIONZ XR processing engine in this Sony camera enables incredible autofocus performance that includes Real-time Eye AF and Real-time tracking with improved face detection. This is an excellent feature if you want to pursue action photography like sports or wildlife.
Add in the ability to use this camera as a webcam, image stabilization, focus mapping, and other high-end features, and you have the makings of a highly-capable camera for photographers and videographers alike.
Learn more about the Sony a7 IV
Sony a7s III
The Sony a7S III is yet another fine Sony camera with loads of possibilities for photographers and videographers.
This is one of the newer cameras on this list and sports modern features that make it an all-around nice selection. This includes a 12MP BSI CMOS sensor, an ISO range of 80-102,400 and an EVF with 9.44 million dots of resolution.
There are many other impressive specs as well...
You get 5-axis image stabilization, a 3-inch fully articulating LCD screen, Wi-Fi, and Bluetooth, all in a 1.35-pound body.
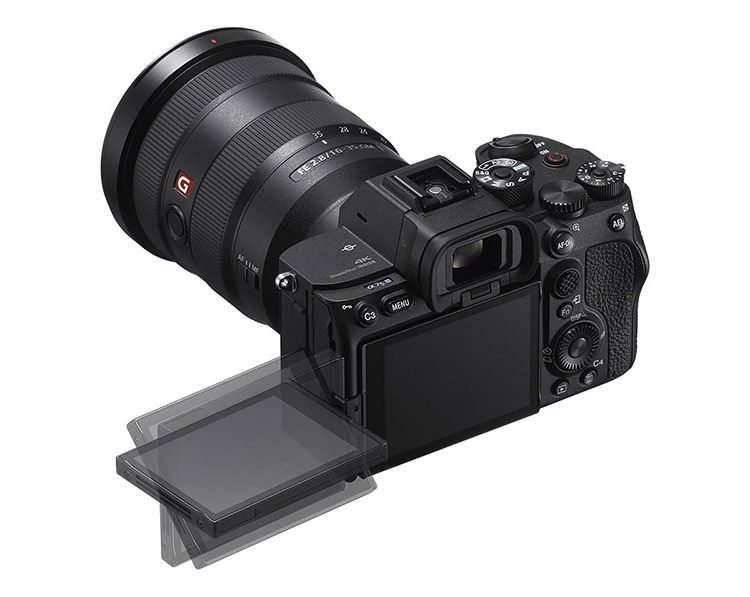
Where this camera really shines is in its video capabilities.
You can shoot 4K video at up to 120p. There is a small 1.1x crop when shooting 4K at 120p, but there is no crop in 60p.
You can also shoot slow-motion video at up to 240fps in full HD. You get the option of 16-bit Raw video output at up to 60p too.
Learn more about the Sony a7S III
Sony Camera Shopping Guide: Sony a7R IV
As one of the higher-end cameras on this list, the Sony a7R IV is probably something that only enthusiast and pro photographers should consider.
In terms of sensor resolution, this camera kills the competition with a 61MP full frame CMOS sensor.
Paired with that is a 567-point autofocus system, which is, as you'd expect, very fast.
This is a bigger camera than most on this list, but is still only the size of a small DSLR. That small body has top-shelf weather sealing to make it a great option for landscape photographers that encounter difficult weather situations.
You can shoot video at up to 30p in 4K, which isn't as good as some of the other options on this list, but is still certainly respectable.
But make no mistake - this is a camera for photographers, not videographers.
It has 5-axis image stabilization, a 3-inch touchscreen LCD, a 5.76-million-dot OLED EVF, 10fps burst shooting, Wi-Fi, and Bluetooth to make the job of capturing beautiful images that much easier.
And with a lifespan of 250,000 actuations, it's a camera that you can depend on for a very long time!
Learn more about the Sony a7R IV
Sony a9 II
Another high-end Sony camera option you might consider is the a9 II.
This camera debuted in 2019 and quickly won acclaim for its lightning-fast 20fps burst shooting capabilities. With that kind of speed, sports and wildlife photographers love this camera.
Of course, there's lots more to love about it...
It has a 24.2MP full frame sensor, 5-axis image stabilization, weatherproofing, a 693-point phase detection autofocus system, and an ISO range of 100-51,200.
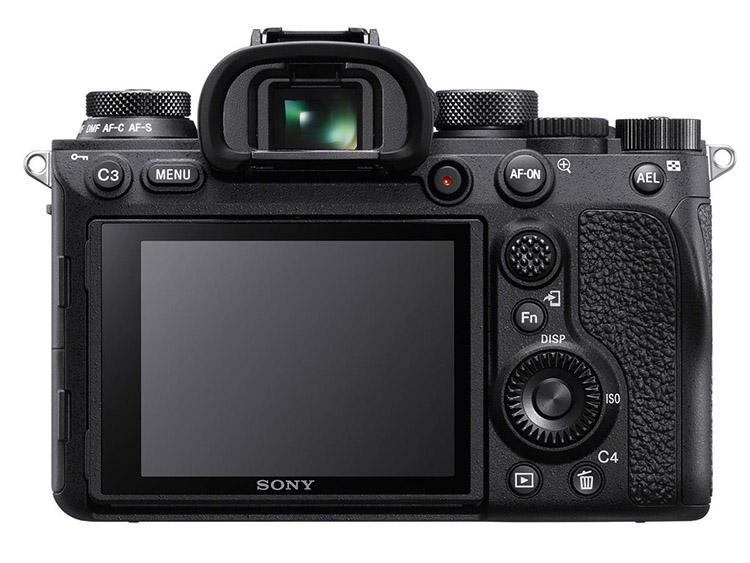
The a9 II also comes with 4K video at 30fps or 1080 HD video at 120fps.
On back is a 3-inch tilting touchscreen and a 3.69-million-dot electronic viewfinder, while under the hood is Bluetooth and Wi-Fi capability, a 500-shot battery life, and a BIONZ X Image processor.
Add in real-time tracking, anti-flicker shooting, and silent shooting for good measure as well!
Learn more about the Sony a9 II
Sony Camera Shopping Guide: Sony a1
At the top of the heap in terms of features is the Sony a1 camera - the brand's new flagship.
The list of specs and features with this camera is long and distinguished...
It has a 50.1MP full frame stacked EXMOR RS Sensor with integral memory. Paired with that is a next-generation BIONZ XR image processing engine.
All that power means that this camera can accommodate 50.1MP RAW and JPEG shooting at up to 30fps. It does so with 120 AF/AE calculations per second.
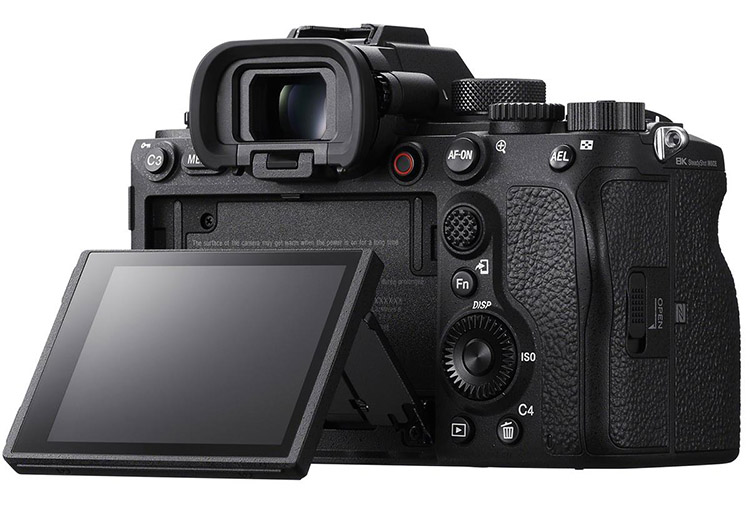
Other features include blackout-free shooting at up to 30fps, a 9.44-million-dot QXGA OLED EVF, and the world's first anti-flicker mechanical and electronic shutter.
Additionally, the a1sports a dual-drive mechanical shutter, anti-distortion electronic shutter, at 8K video at 30p in 10-bit 4:2:0 format
If you're looking for a Sony camera that pulls every punch, this is it!
What About Sony Lenses?
Of course, a camera body on its own won't do you much good, so you'll need to think about what glass you want to add to your camera.
There are obviously loads of choices here, from primes to zooms, wide-angle to telephoto.
And while it would be nice to have one of everything, very few people have an unlimited budget.
With that in mind, I've got two lens recommendations, both of which I've found to be highly functional and versatile.
Sony FE 35mm f/1.8 E-Mount Full Frame Lens
At f/1.8, this lens offers a nice, big aperture without having to pay the price of an f/.1.4 or f/1.2 lens.
The 35mm focal length is a nice standard length lens that offers good flexibility for photographing all sorts of subjects from landscapes to portraits.
It has a 9-blade aperture that gives you nice bokeh for portraits while the aspherical elements inside minimize aberration to give you beautiful, clean images.
With a compact build, dust and moisture resistance, and a low price, this lens should be on your radar whether you're a beginner, enthusiast, or professional photographer.
Learn more about the Sony FE 35mm f/1.8
Sony FE 24-240mm F/3.5-6.3 OSS E-Mount Camera Lens
If you want a lens for your Sony camera that has all kinds of versatility, it's hard to go wrong with the Sony FE 24-240mm f/3.5-5.6 OSS.
With one lens, you can shoot wide-angle to super telephoto, which makes it a perfect option for landscapes, nature and wildlife photography, sports, and travel photography, to name a few.
The lens features five aspherical elements and one ED glass element, which gives you excellent image quality. The advanced linear motor makes focusing a quick and smooth process no matter the focal length.
Since this is an OSS lens, you can worry less about low-light images and hand-holding the camera, too. With dust and weather resistance built in, this lens is ready to go wherever you do!
Learn more about the Sony FE 24-240mm f/3.5-6.3 OSS
We Recommend
The Best Drone Under $1,000: The DJI Mavic Air 2

You might have noticed that I've been doing a lot of articles and videos lately about drones. A big reason for that is having the opportunity to test the DJI Mavic Air 2 and dji mavic pro accessories.
While I've tested tons of drones over the years, my favorite is the DJI Mavic 2 Pro. For my needs, it has the best blend of photography and videography capabilities of any drone in the DJI lineup.
But...
I have to say that I have been absolutely blown away by the capabilities of the Mavic Air 2, particularly when it comes to still photography. But the most surprising part is this - I owned the original Mavic Air, and it sucked! I hated it so much that I sent it back within a couple of weeks. That should indicate to you how much time and effort that DJI put into improving the Mavic Air 2.

In fact, in the time I've had the Mavic Air 2 in my hot little hands, I've come to the conclusion that it is the best drone you can buy for less than $1,000. In many regards, this drone hits way above its weight class. And, honestly, with the exception of a couple of things, it goes toe to toe with the Mavic 2 Pro very well.
So, what specifically makes the Mavic Air 2 such a great drone? Let's take a look at some of its best features.
For more information or to buy a DJI Mavic Air 2, click here.
The 48-Megapixel Sensor
As I discuss in the video above, the Mavic Air 2 still only has a 1/2-inch sensor, but it's a 48-megapixel Quad Bayer sensor that gives the drone far better photo capabilities. In fact, if I had to choose between the Mavic Air 2 and the Mavic 2 Pro strictly for photography purposes, I'd choose the Mavic Air 2.
You can zoom in for a tighter shot without worrying about a ton of noise. Likewise, when you're processing the images, you can really appreciate the incredible detail, clarity, and colors in the photos.
It also helps that you can take 12-megapixel images or opt for using the full resolution of the camera to take 48-megapixel images when necessary!
The Battery Life

One of the absolute worst features about the original Mavic Air was its flight time. I could scarcely keep it in the air for 20 minutes...
But the mad scientists at DJI figured out how to wrestle more time out of the battery - a lot more time, in fact.
The Mavic Air 2 is rated for a flight time of 34 minutes (under ideal conditions, of course). I've been able to meet that mark on the few occasions lately when the wind wasn't ripping around.
Even with the vast improvement in battery life, I would still invest in a second (or third) battery. But the fact that the Mavic Air 2 improved so much in this department and can now stay in flight longer than the Mavic 2 Pro says a lot about how good this drone is.
Editor's Tip: Ready to upgrade to the Mavic Air 2 but don't have enough cash? Sell your old drone and use the proceeds to help finance the Mavic Air 2! By selling your old drone and other photography gear on Gear Focus, you can clean out your collection of gear while making money to buy new. Selling on Gear Focus couldn't be easier, either. Just sign up for a free account, create a free listing, and when your item sells, you pay the lowest seller fees out there - just 3.5%! Get started selling your old gear today.
Hyperlapse Options
As I explain in the video above, the Mavic Air 2 has four - yes FOUR! - hyperlapse intelligent flight modes: Free, Circle, Course Lock, and Waypoint.
Though they aren't all at the same level in terms of ease of use or intuitiveness (I'm looking at you, Waypoint...) they all provide you the opportunity to create some truly compelling footage.
On top of that, the Mavic Air 2 allows you to shoot in 8K when you're in hyperlapse mode. The detail you can get in 8K is really awesome.
I'll admit that it's weird there's no 4K hyperlapse option - just 8K and 1080p. But I'd rather have 8K than 4K!
The Remote

I fully admit that if I had to choose between the Mavic Air 2 remote and the Mavic 2 Pro remote, I'd choose the latter.
However...
That doesn't mean that the Mavic Air 2's redesigned remote isn't completely badass.
I love that DJI concealed the antennas to help give this big remote a smaller form factor. I also like that the joysticks are removable and that you can stow them away in the bottom of the remote. It makes storing the remote and removing it from my bag much easier.
I also really like the way the phone seats on top of the remote. On the original Mavic Air, I felt like I had to fight the controller to get the phone to seat properly. That's certainly not the case now.
This remote will charge your phone, and if I'm honest, I like how it looks as well.
For more information or to buy a DJI Mavic Air 2, click here.
There's Awesome Accessories

Even though the Mavic Air 2 is brand-new, there are already a host of awesome accessories you can buy to boost its functionality.
For instance, Haida makes ND/polarizer filters for the Mavic Air 2 that allow you to take long exposures and control the shutter speed as you film videos.
What's so great about these combination filters is that you don't have to mess around with multiple filters - you get the best of both worlds in one filter.
That means you can control glare with the polarizer while extending the shutter speed with the ND at the same time.
This kit comes with 3-stop, 4-stop, and 5-stop options so you have much-improved flexibility in how you use your drone for photo and video purpose.
They're inexpensive too! At less than $50, these filters are a steal for your Mavic Air 2.
Mavic Air 2 Price

All of the features I list above make the Mavic Air 2 well worth the price of admission. But when you add what I consider to be a bargain-basement price to the list, this drone becomes an even better buy.
At $799, it's half the price of a Mavic 2 Pro at the moment. But you don't get half the drone for that price. As I noted earlier, the Mavic Air 2 goes toe to toe with the Mavic 2 Pro in virtually every category.
In fact, as I see it, the only categories in which the Mavic 2 Pro beats the Mavic Air 2 is in video quality, the controller experience, stability in flight, and speed.
I'm not trying to bash the Mavic 2 Pro here. After all, it is my favorite drone of all time. But I'm trying to give context to just how good the Mavic Air 2 is. If it can play with the big boys this well at this price point, it's hard to argue against the notion that it's the best drone for under $1,000!
We Recommend
The Best Position for a Softbox for Portraits
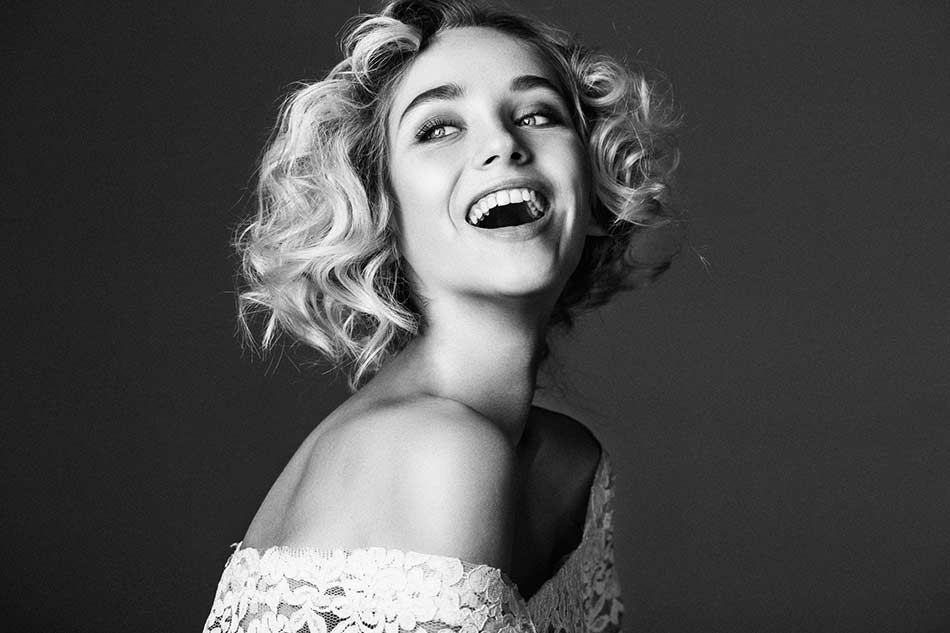 photo by CoffeeAndMilk via iStock
Softbox Position
Not to state the obvious, but photography is all about light and how it falls on the subject.
That means when you create portraits, you have to pay just as much attention to the type of lighting you use and its positioning relative to the model as you do on posing the model and making him or her feel as comfortable as possible in front of the camera.
So, that begs the question, what is the best position for a softbox for portraits?
Where to Position Softboxes for Portraits
In the video above, Gavin Hoey explains that the positioning of a softbox really depends on the look you're trying to achieve.
That is, you can place the softbox in front of the model, next to the model, and even behind the model to tailor the lighting to your specific tastes.
For example, as you can see below, by placing the softbox to the front and left of the model (as we look at him), you get a classic portrait lighting result with the model's face well-lit face and slight shadows on the side opposite the light.
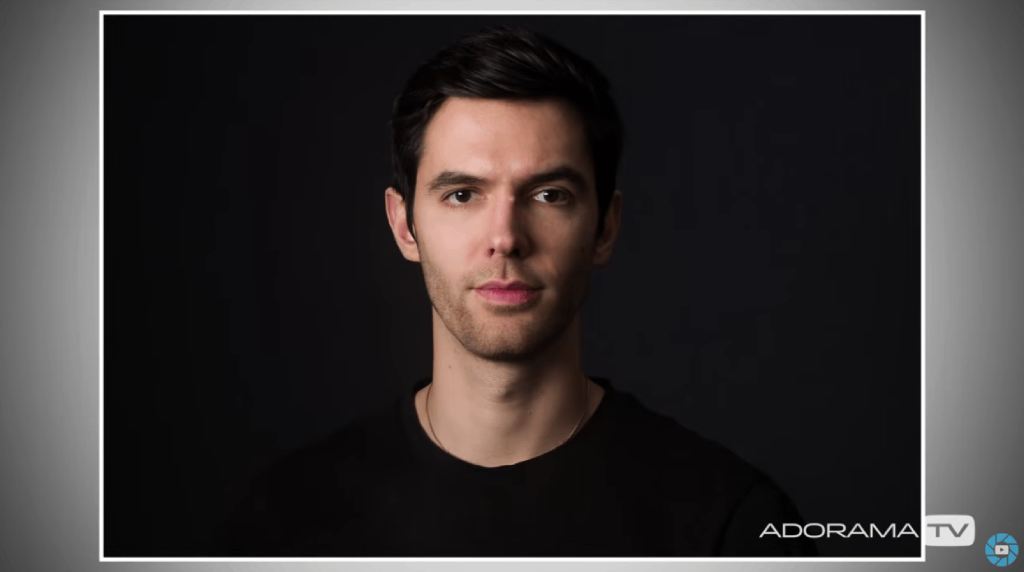
For a slightly different look, you can move the softbox back such that the edge of the softbox is more or less in line with the back of the model's head.
When using a rectangular softbox as Gavin has done, you'll get a little bit of illumination behind the subject that then extends to the front of the model.
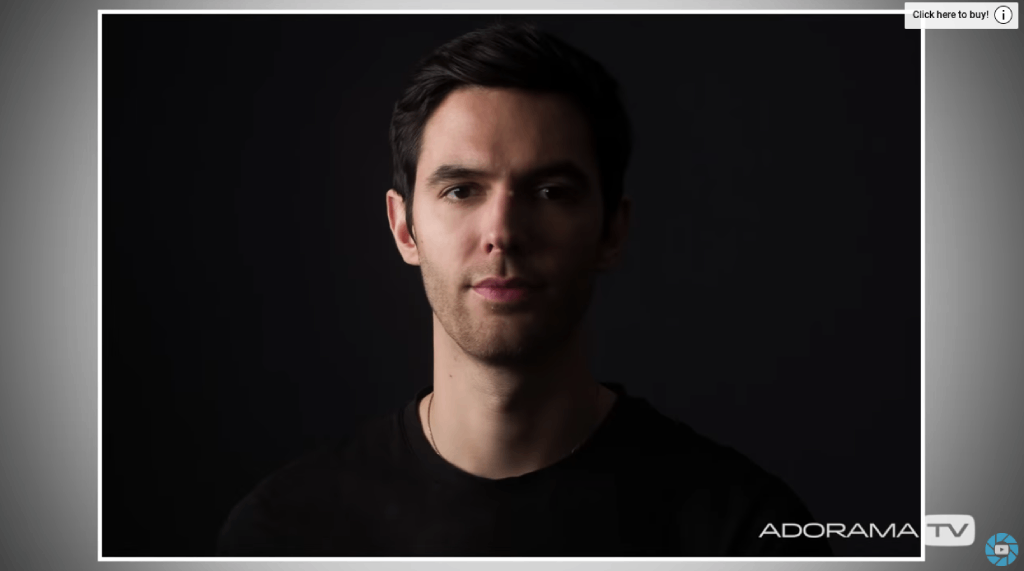
As you can see above, positioning the softbox to the side of the model yields a portrait with much more contrast than the first example.
In particular, notice how the shadowed areas on the right side of the model are much more pronounced as before.
Also notice how despite the increased contrast, there is still plenty of detail on the right side of the model's face - his eye is still visible and sharp, just as it should be.
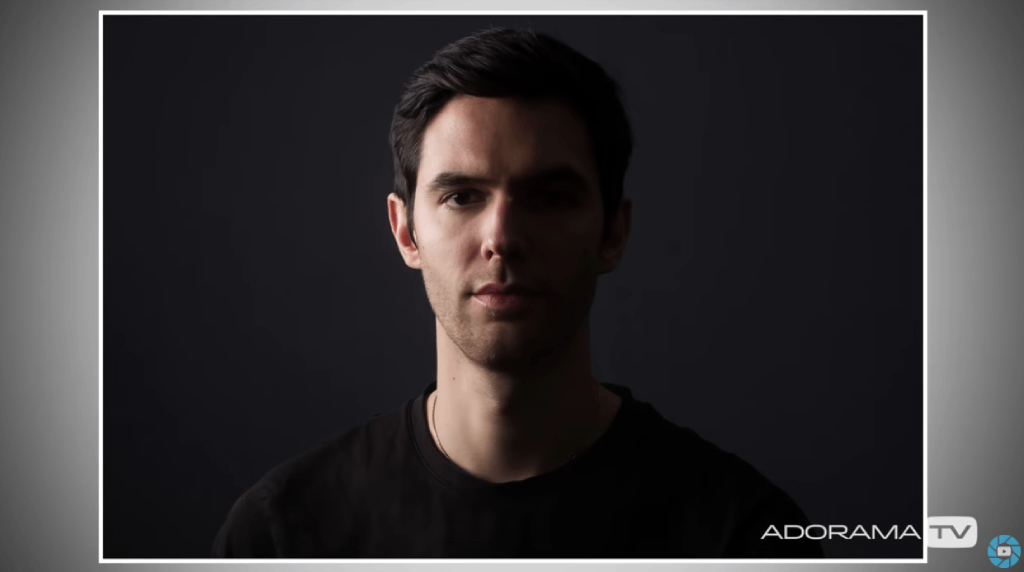
Yet another option is to split the model with lighting such that about half of the softbox extends behind them and the other half extends in front of them.
This setup is ideal for split lighting, in which the side of the model's face nearest the light is well-lit and the opposite side of the model's face is virtually in darkness.
Notice this time how there's less detail in the shadowed areas of the model's face than before. This gives the portrait a more contrasty and mysterious vibe.
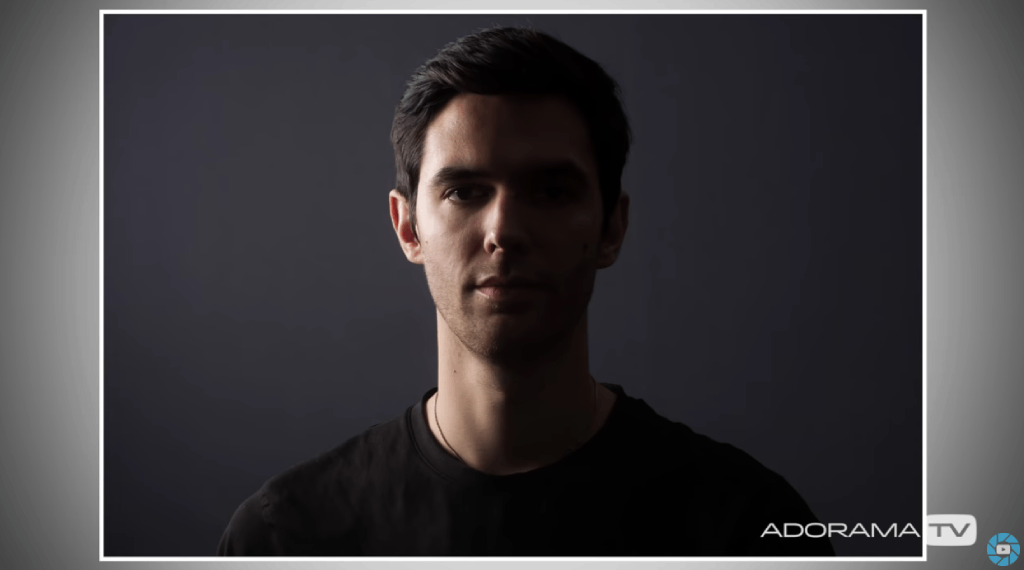
A final option regarding the positioning of the softbox is to place virtually all of the light behind the model.
As you can see above, when the model is in line with the front of the softbox, the background is much more visible.
Not only that, but the shadowed areas of his face are getting larger, with more pronounced shadows creeping onto the left side of his face as we look at the image.
The takeaway here is that there is no one perfect spot to position a softbox. Instead, the best approach is to experiment in order to find the lighting setup that works best for your creative vision.
Learn More:
What is a Softbox?
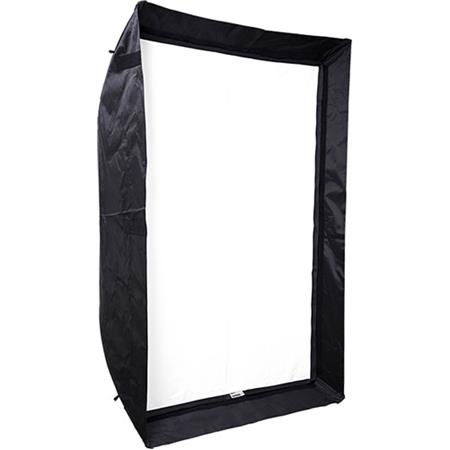
If you're new to portraiture and aren't completely sure what a softbox is, it's a pretty simple concept.
In short, a softbox helps diffuse the light from a light source, such as a speedlight or a strobe, such that the light is softer (thus the name softbox).
To modify light, softboxes usually have some sort of scattering material through which the light is transmitted. As you can see above, the Chimera Super Pro X Lightbank has a translucent cover to soften the light.
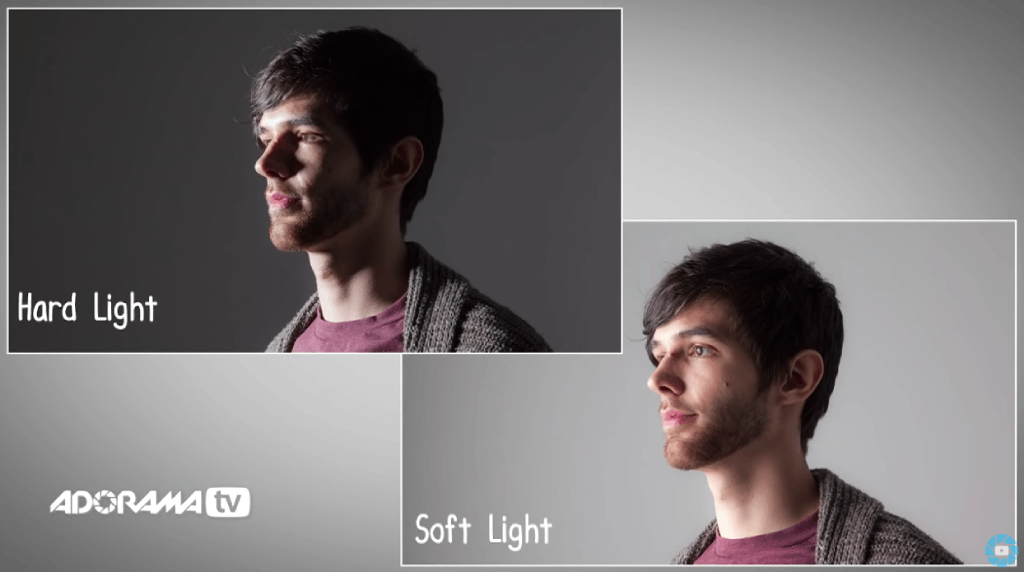
The result is beautiful, even light without the harsh shadows and highlights that often result when light sources are unmodified. You can see the difference a softbox makes in the comparison of the two images above.
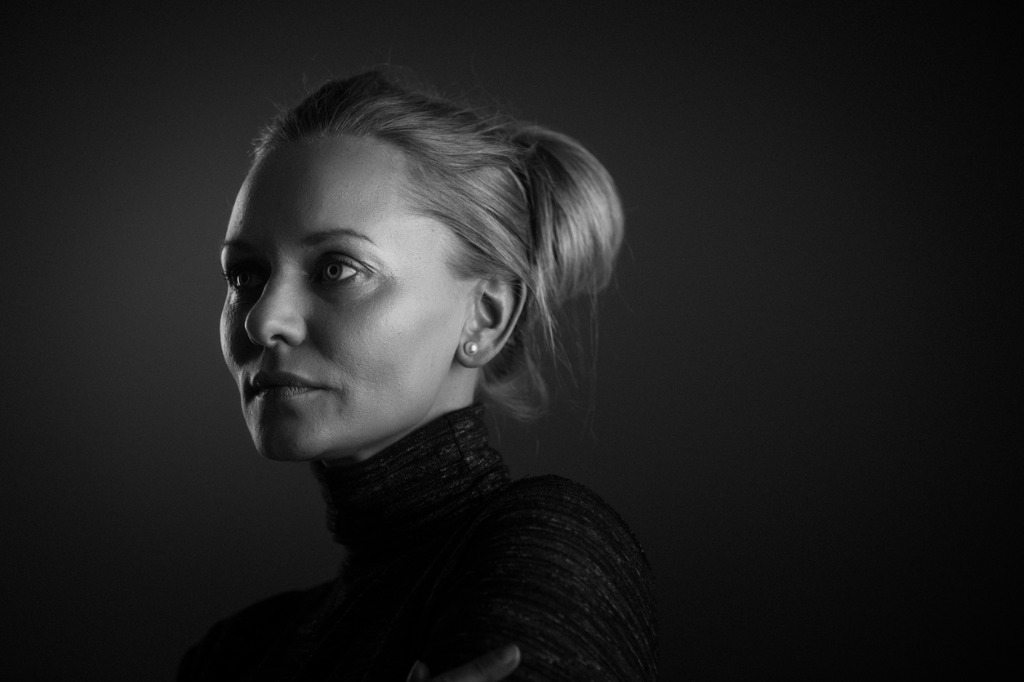 photo by druvo via iStock
Other softboxes reflect light off of a second surface and back onto the subject.
Either way, as you can see in the portrait above, using a softbox helps you create a much more pleasing portrait that has even light without harsh contrast to distract the eye.
Learn More:
- 6 Classic Portrait Photography Lighting Setups
- Advanced Portrait Photography Tips That Will Immediately Make Your Photos Better
Soft box Sizes Explained
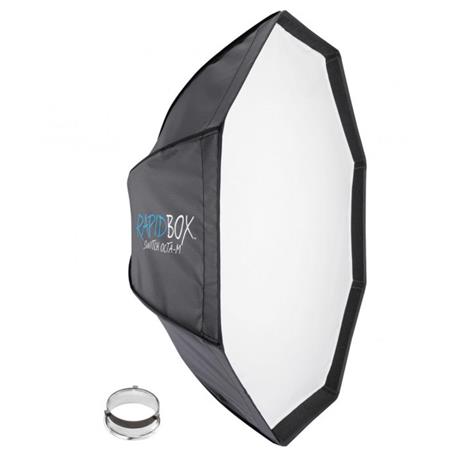
In addition to understanding what a softbox is and the purpose it serves, it's also important for beginner photographers to understand the varying sizes and shapes of softboxes.
Though most softboxes are rectangular in shape, there are also octagonal ones (like the $260.00 Westcott Rapid Box shown above). If that price point is a little too steep, there are also budget-friendly options like this one that save you money without sacrificing quality.
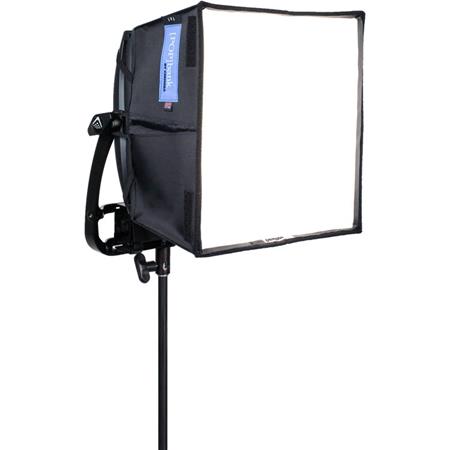
There are also square options, like the Chimera Pop Bank (shown above) for $162.36. Again, there are budget options available, like this Godox 23.6" x 23.6" square softbox.
Less commonly, there are parabolic, round, and hexagonal-shaped softboxes as well.
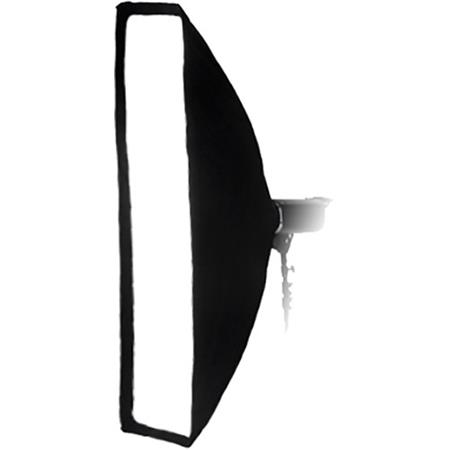
Likewise, there are a variety of sizes available. Large softboxes (say, 48-inches and larger) are ideal for group shots and full-body portraits. For example, the 12x56-inch rectangular softbox shown above is available for about $115.00 and would be an ideal choice for a full-body portrait, particularly if the model is lying down. If you're on a smaller budget, this is an ideal option.
Smaller softboxes (say, 18-24 inches wide) are more appropriate for headshots and half-body portraits. In this case, the Westcott Rapid Box 10x24" Strip softbox shown below is a solid choice at $150.00. The budget-friendly Glow EZ Lock 12x24" softbox would be a good choice as well.
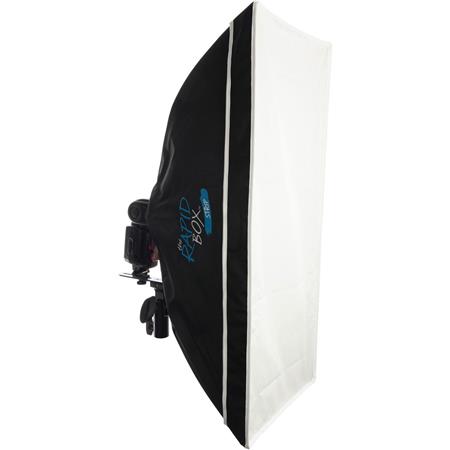
The size of the softbox alters the quality of light. That is, the larger the softbox, the softer the light.
Conversely, small softboxes produce comparatively harsher light with more defined shadows.
Additionally, the shape of the softbox alters the quality of light as well. This is especially true when you're taking close-up portraits, as the shape of the light source being used is often reflected in the model's eye (this is known as a catchlight).
 photo by CoffeeAndMilk via iStock
For example, if you use a rectangular softbox in a vertical orientation, the catchlight will mimic the look of light emanating from a window.
On the other hand, using a octagonal-shaped softbox will produce a catchlight that looks like it's coming from the sun. If you look closely at the eyes of the model in the image above, you can see a round catchlight that was created by using an octagonal softbox.
For more details on how the size and shape of softboxes affect portrait lighting, be sure to check out the video above.
In it, Gavin Hoey demonstrates how the light changes as different softboxes are used. It's a great introduction to using softboxes for portraiture!
We Recommend
The Nikon D750 is a Great Full Frame Camera for Photographers on a Budget
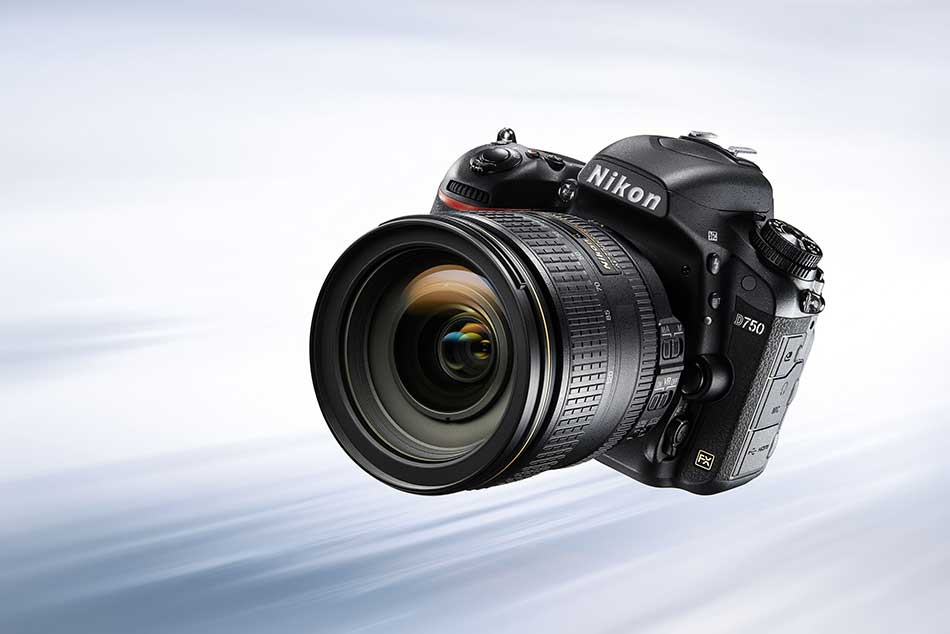
Let's face it...
Upgrading from a crop sensor camera to a full frame camera can be a spendy proposition.
For example, my Nikon D850 set me back $3,300. Not everyone has the budget (or the willingness) to spend that much money on a camera body, though.
So the question is, if you want to upgrade to a full frame camera, what's the best option?
If you ask me, there's a strong case to be made for the Nikon D750 camera being one of the best budget-friendly full frame cameras around.
Nikon D750 Specs
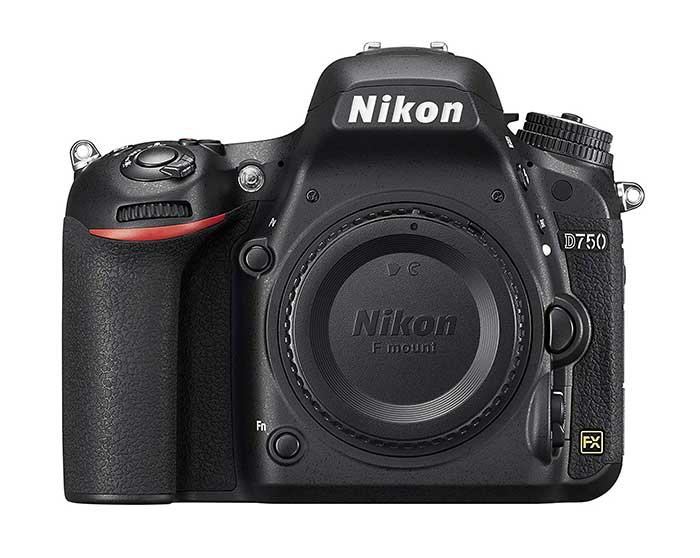
I'll frame my argument for the Nikon D750 camera by starting with its main specifications:
- 24-megapixel full frame CMOS sensor
- 6.5fps continuous shooting
- Maximum ISO 51200
- 3.2-inch tilting LCD with 1,229,000 dots
- Pentaprism optical viewfinder
- Wi-Fi
- Weather-sealed body
Obviously, the D750 doesn't exactly compete with cameras like the Nikon D850 or the Sony A7R III, but that doesn't mean that it's a slouch in the features or capabilities departments.
The D750's 24-megapixel full frame CMOS sensor is to this day one of the best Nikon ever put in a camera.
The sensor is highly capable, giving you results that have excellent color, sharpness, and detail.

With an expanded ISO that reaches 51,200, you've got plenty of options for shooting in low-light situations.
And while no camera is going to produce noise-free images at 51200, at least you have the option of getting solid results should you find yourself in a situation that warrants pushing the ISO to the max.
The 3.2-inch tilting LCD is big, bright, and offers 1.229-million dots, so you get a highly detailed view of the camera's menu systems and the images you take, even in bright shooting conditions.
Additionally, with a 6.5fps burst shooting rate, you get solid performance for action photos.
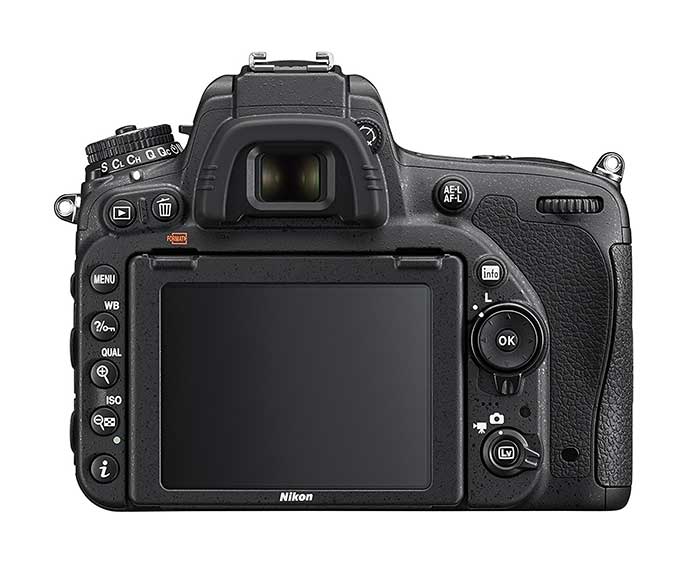
Like other Nikon full frame cameras, this one is completely weather-sealed to protect against damage from rain, sleet, dust, and so forth.
The magnesium alloy and carbon fiber body is both strong and durable, while these lightweight materials help keep the D750's weight down to 1.85 pounds.
And like my Nikon D850, the D750 feels great in your hand with an excellent grip that gives the camera a good, solid feel in your hand.
In fact, the D750 has the same weather sealing as the D810, so you know it's a camera that will be durable for the long-term.
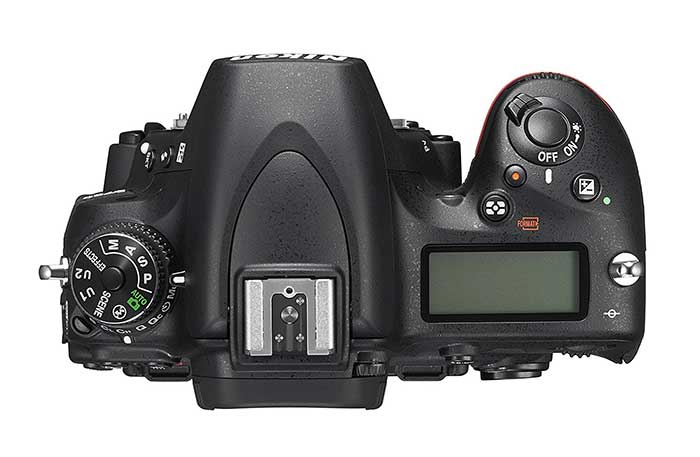
Speaking of durable, it's not just the body of the camera that's been designed to last a good, long while.
The shutter mechanism is made of a carbon fiber and Kevlar composite for the ultimate in long-lasting performance.
The shutter has been tested for 150,000 cycles, so you know that unless something catastrophic happens, the D750 will be a reliable companion for years to come.
The autofocus system on the D750 is worth noting as well.
It's got 51 autofocus points, 15 of which are cross-type for greater sensitivity.
When paired with a good lens, the D750's autofocus system is tough to beat, with subjects in sharp detail. Even better, the autofocus system performs quickly and does an excellent job of tracking moving subjects, too.
Nikon D750 Pros and Cons
Given the specifications outlined above, there's a lot to like about this camera:
- Fantastic sensor
- Lightweight construction
- Tilting LCD for easier viewing
- Great autofocus system
- Superb dynamic range at lower ISOs
- Weather-sealed
On top of that, this camera is much less expensive than other full frame cameras, so you can upgrade your kit without having to take out a second mortgage on your house.
In fact, you can get brand new Nikon D750 (body only) for under $1,700, which makes it one of the most affordable full frame cameras on the market today. You can also get a Nikon D750 kit with a 24-120mm lens for just $2,797. That's a steal, too!
Of course, not every camera is perfect, so the D750 does have a few drawbacks:
- Autofocusing is slow in live view
- Max shutter speed is only 1/4000 seconds
- Smallish buffer for 14-bit RAW images
- Anti-aliasing filter can produce moire
But, hey, if those are the biggest issues with this camera, its pros definitely outweigh the cons.
For that reason, if I were in a position to get a new full frame camera but didn't have a huge amount of money to spend, the D750 or a D750 kit would certainly be my choice.
It's a rock-solid camera with tons of features, and it's capable enough to grow with you over the years until you're ready to upgrade again.
For even more details about this camera, be sure to check out the video above from Nikon.
We Recommend
Top 10 Gifts for Photographers Under $5,000 - 2019 Edition
 photo by Hailshadow via iStock
There are TONS of possibilities for gift-giving this holiday season with a budget of $5,000.
In fact, the variety of gifts you could give the photographers on your list is quite great...
From a new computer to a new camera body, photography trips to a collection of large-format prints, this list has something for every photography enthusiast!
Gifts for Photographers Under $5,000: CanvasHQ Prints

If you’re like me, sometimes finding the perfect gift for certain loved ones is a long, drawn-out process that causes tons of stress, and often you still don’t get something that totally blows them away.
I think a lot of photographers fall into this category. We have specific likes, and many of us already have most of what we want or need gear-wise, and what we don’t have is usually too expensive to put on a Christmas wish-list anyway.
But for all those hard-to-shop-for photographers on your 2019 holiday shopping list, I have the perfect solution - a canvas print.

Think about it…
A canvas print is a gift that keeps on giving.
Not only can you immortalize one of your favorite images from your favorite photographer, but you also give them a means to showcase their work in a format that’s drop-dead gorgeous.
I have tons of canvases in my home, the vast majority of which are from CanvasHQ.

Now, I know what you’re thinking - canvas is old school.
Sure, maybe it is, but I’m telling you that these canvas prints from CanvasHQ are mind-bogglingly beautiful. In fact, they go head-to-head with any metal or acrylic print I have in my home.
The attention to detail is just amazing, and the materials they use are top-of-the-line. We’re talking archival-grade canvas, commercial-grade inks that are water and UV resistant, and kiln-dried pine frames to keep everything straight and true.
I love the personality that the canvas texture gives my images. That’s true whether it’s a portrait of my son or a landscape photo.

I’d be remiss if I didn’t mention the customer service you get with CanvasHQ.
These guys are committed to getting it right, so if something doesn’t go as planned, you won’t be hung out to dry.
If you have questions, they’ll answer them. If you have a problem, they’ll fix it. If you need assistance with uploading your photo or even picking the best finishes for your canvas, they’ve got your back.
In the video above, I explain why I highly recommend a CanvasHQ canvas print as the ideal gift for the photographer on your holiday shopping list.
Start shopping for your favorite photographer today on CanvasHQ!
Gifts for Photographers Under $5,000: Colors of Costa Rica Photo Tour With ColorTexturePhotoTours
From spectacular sunsets on the coast to breathtaking waterfalls, incredible diversity of wildlife (including dozens of species of frogs) to stunning flowers, Costa Rica has no shortage of subject matter for a photographer.
And as part of ColorTexturePhotoTour's Colors of Costa Rica photo tour, the photographer on your list can explore all that and much more as part of a luxurious, all-inclusive trip!
This trip is the ideal length - six days and five nights - so it's easier to get away from work and other responsibilities to spend a relaxing time in one of the most beautiful locations on earth.
Over the course of the trip, the photographer on your list will join no more than three other participants to tour the landscapes of Costa Rica with workshop leader Scott Setterberg.
Those landscapes, which includes four national parks, will be fodder for some spectacular photography opportunities, as well as plenty of one-on-one instruction time with Scott.
In this regard, this trip isn't just about seeing gorgeous places, but it's also about developing and improving photography skills.
With stops in Tenorio Volcano National Park, La Paz Waterfall Gardens, Catarata La Fortuna, Lake Arenal, and Juan Castro Blanco National Park, the tour takes participants to varied locations, each of which offers unique beauty and challenges photographers to apply their skills to get the best shots.
Along the way, a licensed, English-speaking nature guide will offer insights into the biodiversity of Costa Rica, so tour-goers learn more about the beauty they see and photograph.
Each evening, the tour winds down and participants stay in luxurious, award-winning accommodations.
The photographer on your list can enjoy authentic Costa Rican cuisine, spa services, massages, and more.
What better way to celebrate the holidays than by giving your loved one the photography trip of a lifetime?!
Learn more about the Colors of Costa Rica Photography Tour by ColorTexturePhotoTours
Gifts for Photographers Under $5,000: A Vietnam Photography Tour With The Art of Seeing Photography Adventures

Vietnam is a breathtaking country with countless opportunities to photograph landscapes, bustling cities, and incredible cultural and historical elements.
As part of a tour with The Art of Seeing Photography Adventures, your favorite photographer will get an immersive experience in which they will spend two weeks exploring popular as well as off-the-beaten-path locations throughout the country.
Among the highlights is an exploration of rice terraces that have been built into the steep topography of Vietnam's mountains. The trip, which is September 13-26, 2020, is timed perfectly to see the terraces in prime condition, just before harvest.

Another highlight of the trip is an overnight cruise through Halong Bay, a world-famous location that is also a UNESCO World Heritage site.
By traveling via boat through the bay, you get a unique perspective on the area and have a chance to get away from the crowds that come to the Bay and explore lesser-known areas.
Another aspect of this trip that makes it such a spectacular photography outing is the exploration of the northern part of the country, where you can interact with ethnic minority groups, including the Black Tay, Flower Hmong, and Red Dao.

This interesting subcultures are welcoming to guests, willing to pose for photographs, and even welcome strangers into their homes for rural homestays.
Of course, the trip begins and ends in Hanoi, so the hustle and bustle of the big city is also on the agenda.
With the adventure limited to 10 people, the photographer on your list will get to enjoy small group experiences in the utmost comfort.
Priced at $4,800 for single occupancy, this is an ideal gift idea when you have a $5,000 budget for the photographer in your life!
Gifts for Photographers Under $5,000: Pre-Owned Canon EOS R and Canon RF 24-105mm f/4 L IS USM
If the photographer on your list needs an upgrade in the camera department, you might consider giving the gift of a Canon EOS R this year.
The EOS R was released in October of 2018, so there's been time for prices to fall and for a good selection of used cameras to develop.
With a like-new-condition EOS R, you can save yourself quite a bit of money while still giving your loved one a capable, reliable, and virtually new camera!
The EOS R features a 30.3-megapixel full frame CMOS sensor paired with a DIGIC 8 image processor.
The result of this is superb performance, excellent image quality, and a bevy of secondary features that make it a fantastic camera for just about any photographer.
With a native ISO range up to 40,000, this camera is a good low-light performer, and with 8 fps continuous shooting, it can tackle subjects like wildlife and sports photography in which rapid movement needs to be captured.
Additionally, the EOS R has a top-of-the-line autofocus system call Dual Pixel AF, which allows users to select from 5,655 AF points to quickly and accurately acquire focus.
Add to that 4K UHD video recording at 30p, and you have the makings of a fantastic holiday gift!
Better still, since a like-new EOS R is barely more than $1,900, you can also give the photographer on your list a lens to go with it.
The Canon RF 24-105mm f/4 L USM is a great choice for an all-around lens that accommodates wide-angle, standard, and telephoto shooting. And since pre-owned versions in like-new are under $850, you're well under the $5,000 budget threshold!
Learn more about the Canon EOS R and the Canon RF 24-105mm f/4 L IS USM
Gifts for Photographers Under $5,000: Pre-Owned Nikon Z6 and Nikon Nikkor Z 50mm f/1.8 S
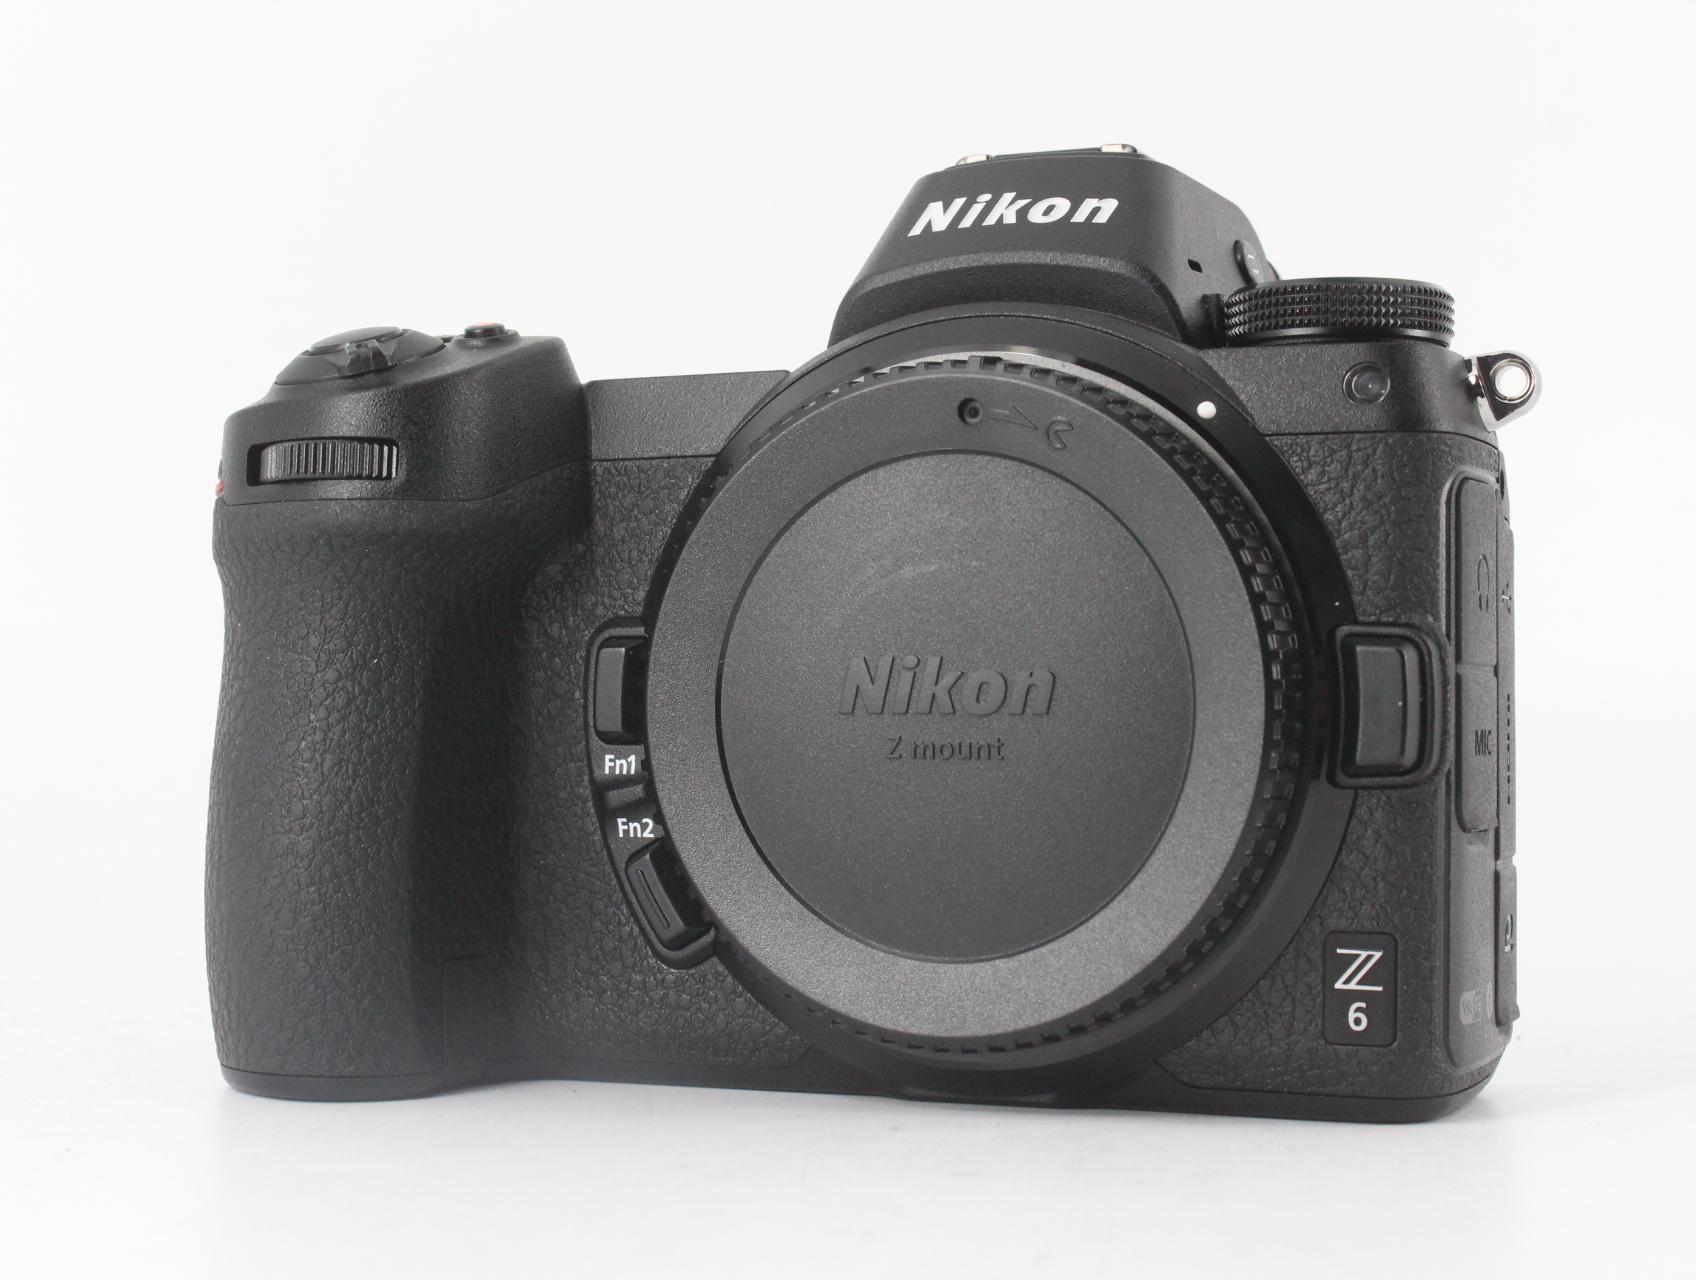
If you're shopping for a Nikon enthusiast, why not give them the ultimate gift in the form of a pre-owned Nikon Z6 in like-new condition with a pre-owned Z-series lens to match?!
Like the EOS R described earlier, the Nikon Z6 is a feature-rich camera that any photographer would love to have in their camera bag.

Armed with a 24.5-megapixel full frame back-illuminated sensor, this camera offers excellent resolution, and with an EXPEED 6 image processor, it operates lightning fast, too.
The Z6 has built-in 5-axis image stabilization that makes hand-held shooting an easier task, and its 273-point autofocus system helps shooters acquire subjects more quickly and track them with greater ease for improved photos.
This camera has a native ISO range of 100-51200, so low-light shooting isn't an issue, and a whopping 12 fps continuous shooting rating.

The Z6 has developed a solid reputation as a great video camera as well.
It has full frame 4K UHD video recording capabilities at up to 30p, and with a 3.2-inch tilting touchscreen LCD, videographers can get low-angle and high-angle footage more easily.
Add in a lightweight magnesium alloy body, full weather sealing, and a shutter life of 200,000 shots, and you have the makings of yet another excellent gift idea for the photographer on your list!

Since like-new Z6's are barely more than $1,500, there's plenty of room in your $5,000 budget to add a nice lens to the package.
The Nikon Nikkor Z 50mm f/1.8 S is a great choice, as it's a highly versatile focal length that can tackle portraits, landscapes and everything in between.
What's more, 50mm is an ideal focal length for video, so paired with the Z6, you can give a rock-solid video-making kit to your favorite photographer!
Learn more about the Nikon Z6 and the Nikon Nikkor Z 50mm f/1.8 S
Gifts for Photographers Under $5,000: Nevada Art Printers Lumachrome Acrylic Prints

If you're shopping for a photographer that needs to have a lot of prints made, and who prefers acrylic prints over canvas, there's no better choice than a selection of large-format acrylic prints from Nevada Art Printers.
I was never a huge fan of acrylic prints until I decided to give Nevada Art Printers a try a few months ago.
I had gone to Norway and captured a pretty good shot (shown above) and wanted a print that would really elevate the quality of the shot.
So, I ordered an acrylic print from these guys, and it is honestly one of the most beautiful prints I have ever laid hands on. Truly - they perform magic!
Now, I have to say that the photo above of this print simply does not do it justice. My home studio has tons of lights everywhere and I just couldn't find an angle to take a photo that didn't have a glare.
The big draw of these acrylic prints is the Lumachrome finish (you see people talking about it all the time on Facebook).
In a nutshell, Lumachrome prints are ultra-high resolution with incredible vibrancy and clarity. It honestly gives the photo a 3-dimensional feel. That’s because Nevada Art Printers created custom ICC profiles that use a tweaked tone curve to maximize that 3-dimensional effect.
Honestly, it’s hard to describe, and even more difficult to believe if you can’t see it with your own eyes - like I said, photos online just do not do the quality of these prints justice!
What’s more, the folks at Nevada Art Printers are extremely helpful and work hard to help you get the best possible print. Their customer service is truly A+!
This combination of super-high-quality products and top-notch service before, during, and after the sale makes an acrylic print from Nevada Art Printers an ideal gift for the photographer on your list this holiday season.
Learn more about Nevada Art Printers and their Lumachrome Acrylic Prints
Gifts for Photographers Under $5,000: Nikon Z7 with Nikon Nikkor 24-70mm f/4 S Lens
I shoot with a Nikon Z7 and I have this very lens as well. It's an ideal combination for everyday photo-taking.
What impresses me the most about this camera is its sensor - a 45.7-megapixel full frame behemoth that offers superb image quality.
The sensor is paired with a fast and accurate 493-point autofocus system that offers 90 percent coverage. Whether the photographer on your list photographs people, places, or things, this camera will be a great companion!
Other features of note include 9 fps shooting, 4K video up to 30p (up to 120 fps in HD), an ISO range of 63-25600, and built-in image stabilization.
Additionally, Nikon gave the Z& a beautifully resolute 3.69-million-dot electronic OLED viewfinder as well as a 3.2-inch LCD touchscreen display.
I really appreciate the design of the camera as well - it feelslike a Nikon with a deep grip and a familiar button layout.
On top of all that, the Z7 is fully weather sealed - I tested it out in Norway and can attest to its ability to stand up to really, really cold temperatures.
You get Wi-Fi, Bluetooth, USB battery charging, and Nikon's SnapBridge functionality as well.
And in this case, the Z7 comes with a killer lens, the Nikon Nikkor 24-70mm f/4 S.
This lens is the ideal walk-around lens, with wide-angle to short telephoto capabilities that allows photographers to capture all kinds of subject matter without the need for lens changes.
What's more, this S-series lens is small and lightweight, making it an ideal alternative to bigger, heavier f/2.8 models.
It has an aspherical extra-low dispersion element, three aspherical elements, and Nano Crystal and Super Integrated Coatings, all of which combine to reduce chromatic aberrations, distortions, ghosting, and flare.
The result is beautiful color rendering and improved contrast. In other words, it's a great camera-lens combination!
Learn more about the Nikon Z7 With Nikon Nikkor 24-70mm f/4 S Lens
Gifts for Photographers Under $5,000: Apple MacBook Pro

Any photographer would appreciate a souped-up laptop to use to edit photos, and there's few that are better for that task than the Apple MacBook Pro.
This particular model has an Intel i9 8-core processor at 2.4 GHz, a 4 TB SSD drive, 32 GB of RAM, and an AMD Radeon Pro Vega 20 graphics card.
In other words, this thing has all the hardware needed to power heavy-duty processing of photos and videos.

Sure, this computer is barely under the $5,000 mark, but considering all the goodies it possesses, it is well worth the price.
The processor comes with Turbo Boost, which can speed up to 5 GHz when needed. Additionally, there is 16MB of shared L3 cache for speeding up processing.
The 32 GB of memory is lightning-fast at 2400 MHz while the aforementioned graphics card has 4GB of HBM 2 memory.

The 15.4-inch retina display is LED backlit with IPS technology.
The result of that is a crystal-clear display with gorgeous colors and contrast.
The backlit keyboard is full-sized, and with Apple's touchbar technology and Force Touch trackpad, getting work done is an easier task.
This is simply a killer laptop, and it's within budget too!
Learn more about the Apple MacBook Pro
Gifts for Photographers Under $5,000: Sony a7R IV
The Sony a7R IV will be hot off the assembly line well in time for the holiday season, and it's a fantastic gift idea for the photographer in your life.
This camera is packed to the gills with modern features that will make any photographer smile from ear to ear.
The a7R IV has a 61-megapixel sensor that's unrivaled on the market at this point.
Along with that crazy sensor is a laundry list of jaw-dropping specs:
- a 5.76-million-dot electronic viewfinder
- 5-axis image stabilization
- 10fps burst shooting
- 15 stops of dynamic range
- A 567-point phase-detect autofocus system
- Wireless tethering
- Enhanced dust and moisture resistance.
That's not even to mention Sony's impeccable Eye AF system which tracks human and animal eyes with extreme precision.
There's also Real-Time AF for video recording, 26-megapixel resolution in APS-C crop mode, and sensor-shift multi-shot mode that creates image files that are a whopping 240-megapixels in size.
And at less than $3,500, you can give the gift of the Sony a7R IV without breaking your budget!
Learn more about the Sony a7R IV
Amazon Gift Card
![]()
Totally stumped regarding gift ideas for photographers on your list?
Why not go the easy route and get them an Amazon gift card?
Though a gift card isn't exactly the sexiest gift, when the photographer in your family sees that you dropped $5,000 into a few gift cards (there's a $2,000 limit per card), they'll love it just the same.
With an Amazon gift card, they can buy whatever they want - a new lens, a second camera body, lighting gear, a laptop - you name it!
As far as flexibility goes, there's nothing better to give a photographer than a gift card with some serious money loaded onto it!
Learn more about Amazon gift cards
We Recommend
Top 10 Last-Minute Gifts for Photographers - 2021 Edition
photo byVitaliy_ph via iStock
With just a few days left until Christmas, it's officially time to get your last-minute shopping done.
To help you find the perfect gift for the photographer on your list, we've put together this last-minute gift guide for photographers.
With items of all shapes, sizes, types, and prices, there's something on this list for the photographer in your life!
Best Ever Backdrops Mix and Match Backdrop
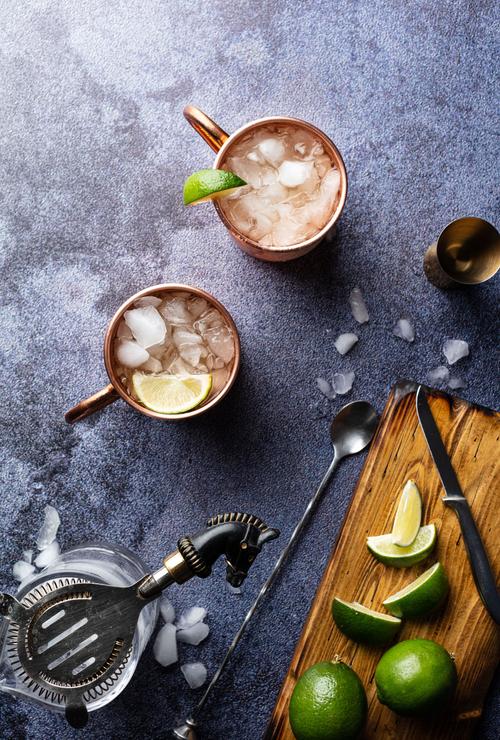
As a photographer, I want to get gifts that improve my ability to take photos. And as a photographer with a lot of gear, I also want something that I can tuck away into a drawer here or a cubby there to keep it out of the way.
I want to receive a gift that also has a lot of utility - something that’s easy to use, offers flexibility in terms of how it's used, and something that will last a long time. And that, my friends, is exactly what you get with a backdrop from Best Ever Backdrops.

Now, I’m a landscape photographer by trade, but I also love to cook. So I thought, why not give food photography a try?
To create images of food that really make people’s mouths water, I need to set up a home studio that allows me to get the perfect shots. And for that I need a good backdrop.
What I really love about these backdrops is that they tick all the boxes - they look incredible, they’re double-sided to give you two backdrops in one, and they are just 24 x 36 inches and 1/8th of an inch thick, so they’re easy to shove under my bed when I’m not using them.
Additionally, these backdrops are extremely durable, waterproof, and stainproof, so if my food photography shoots get a little out of hand, I don’t have to worry about ruining my backdrops.
Better still, there are dozens and dozens of colors, textures, and patterns to choose from, so you can truly tailor the backdrop to what you think the photographer on your shopping list would like. There’s even free shipping!
Since this is a last-minute gift guide, I’d be remiss if I didn’t mention that these backdrops arrive at your door in just a couple of days, so they truly are an ideal last-minute gift.
It’s hard to beat something that’s so useful, so beautiful, and at the end of the day, inexpensive, too. If you want to wow the photographer on your holiday list, this is the gift to do it!
Learn more about Best Ever Backdrops
Sony a7 IV
The Sony a7 IV is the newest version of the a7 line - so new, in fact, that it’s still in the pre-order phase.
However, any photographer on your holiday shopping list would surely love to have this camera, even if they have to wait a while to get it.
The a7 IV is equipped with a full frame 33-megapixel Exmor R back-illuminated sensor that offers incredible image quality, including better color reproduction and low noise.
Additionally, the sensor is capable of accommodating more than 15 stops of dynamic range, which offers photographers the ability to capture a wide range of highlights and details in the scene.
The Sony a7 IV isn’t just a photographer’s camera, though…
The fast sensor readout enables 10-bit 4:2:2 4K video recording at up to 60p. Likewise, you get full pixel readout with no binning, the option to edit footage in slow-motion at 30p or 24p, and oversampling at 7K
Of course, that’s just the start! The a7 IV offers a host of other features that includes a 3-inch free-angle tilting touchscreen LCD, an OLED EVF, up to 10fps burst shooting, Wi-Fi, Bluetooth, and 5-axis image stabilization.
In other words, this camera is loaded up with goodies that will make your favorite photographer smile from ear to ear!
Learn more about the Sony a7 IV
Atomos Ninja V
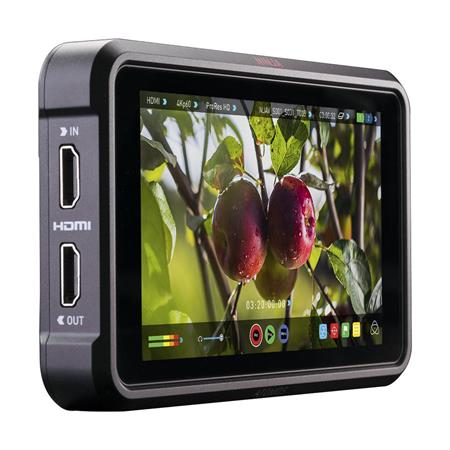
If you're shopping for a photographer that wants to try their hand at audio and video production, the 5-inch Atomos Ninja V portable monitor/recorder is a great gift idea.
The Ninja V is compatible with virtually any DSLR or mirrorless camera. Recording is done directly from the camera's sensor, but because it bypasses the camera's internal compression and record time limits, the Ninja V allows you to record for as long as you want. You get 4K 60p 10-bit recording out of the deal, too.
Files from the Ninja V are in ProRes or DNxHR format, which are ready to edit and can be easily stored on an SSD drive.
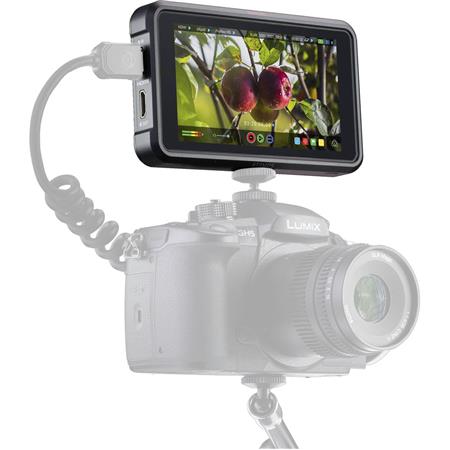
The monitor on the Ninja V is a bright 5.2-inch 10-bit HDR screen that offers 1,000 nits of brightness. The unit is wrapped in a 1-inch aluminum body that's both durable and lightweight.
Additionally, the screen is anti-reflective and offers 10+ stops of dynamic range in real-time from various signals, including Log, PQ, and HLG.
You get one-touch operation, fast playback, slow motion, and frame-by-frame analysis with AtomOS as well!
Learn more about the Atomos Ninja V
Sony ZV-1

The Sony ZV-1 is a compact, 4K camera aimed specifically at vloggers.
It has a 20.1MP sensor, a vari-angle LCD screen that faces forward, and a three-capsule mic with a windscreen as well.
These features make it much easier for videographers to see themselves as they record and capture improved audio as they do it.
But the list of features doesn't stop there...
The camera is compatible with Bluetooth grips that enable easy handheld shooting. There is also a bokeh switch and a product showcase setting that make it easier to defocus the background and highlight products that need to be singled out in a video.
The ZV-1 also comes with a 2.7x optical zoom, enhanced color science for improved skin tones, and real-time tracking that ensures the subject is always in focus.
In other words, if the photographer on your list is ready to get into shooting video, this might be the camera for them!
Learn more about the Sony ZV-1
Westcott FJ400 400Ws Strobe with AC/DC Battery

If the photographer you’re shopping for needs to upgrade or expand their lighting gear, this Westcott 400Ws strobe will be an ideal solution.
This light comes with an AC/DC battery, making it highly portable for use in the studio or in the field. The AC/DC battery offers 480+ full-power flashes with each charge, so photographers get long-lasting use out of it. And with less than a second recycle speed, work can commence quickly!
The FJ400 offers superb color accuracy, has a 9-stop output range, and a stable color temperature of 5500K (+/-150K). There’s an easy-to-use menu system with an LCD color display for making quick adjustments in addition to having both manual and TTL flash modes.
Westcott incorporated other nice features into this light as well. It offers High Speed Sync (HSS) at up to 1/8000s, Freeze Sync up to 1/19000s, Continuous Capture at up to 20fps, and automatic memory recall.
Add to the list mask function, delay function, rear curtain sync, and group and channel assignment, too!
Even better, this light is firmware upgradable via USB-C, so additional features can be added in the future. What’s not to like about that?!
Learn more about the Westcott FJ400 400Ws Strobe with AC/DC Battery
RODE Wireless GO II Microphone
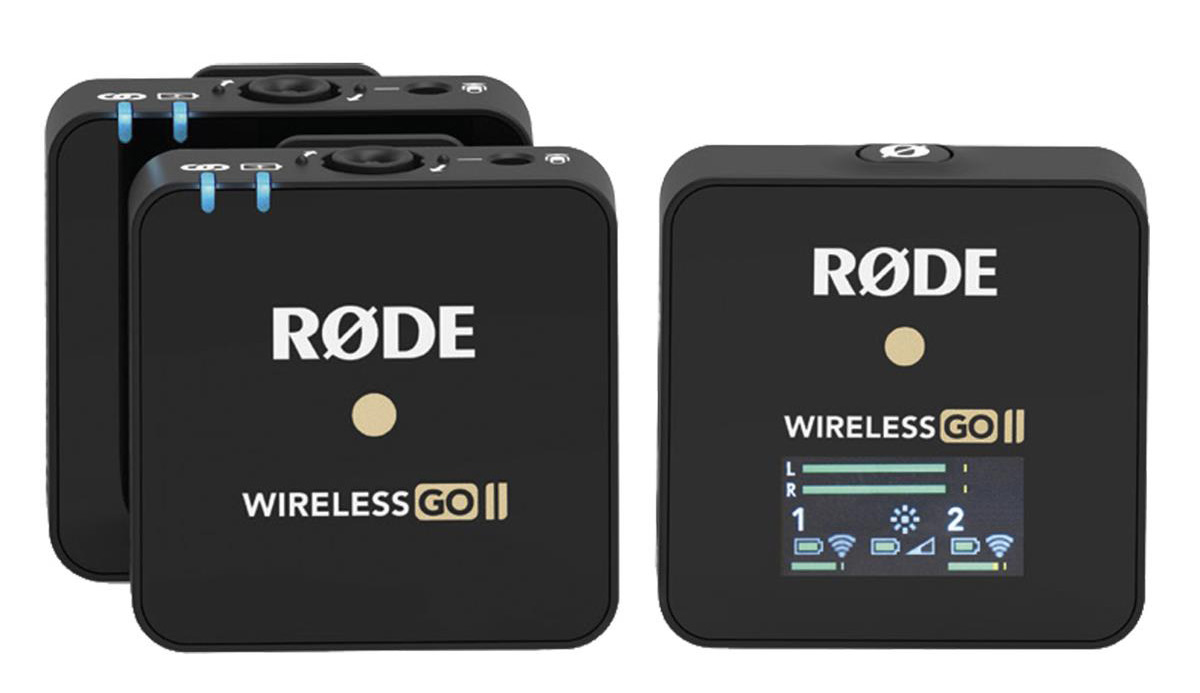
I've used RODE microphones for years, and I can attest to the quality of these mics both in terms of build and audio performance.
The Wireless GO II builds on the success of its predecessor by continuing the tradition of innovation.
It operates in the 2.4GHz spectrum and is compatible with Android and Apple products.
This kit comes with dual transmitters, each of which have an internal microphone and a receiver with a 3.5mm TRS output.
The transmitter and receiver have a USB-C port for charging. These ports can also be used to connect to a computer to get firmware updates.
With completely wireless operation, these mics give you the freedom to move around in front of the camera without worry of tripping over wires. What's more, if you're on camera, there's no wires to try to hide under your shirt.
These little guys simply give you a lot of bang for your buck with professional-quality audio in a tiny package.
Learn more about the RODE Wireless GO II
Rode Microphones RODECaster Pro Integrated Podcast Production Studio
If you're shopping for someone that wants to get into podcasting, then the RODECaster Pro is a great last-minute gift idea.
What's so great about this gadget is that it is fully integrated. That means that photographers can use this to produce podcasts whether they are an experienced podcaster or a beginner.
There are four high-quality microphone channels that can power studio condenser microphones and traditional dynamic microphones as well.
Better still, you can connect microphones to the RODECaster Pro quickly and easily. The device also offers convenient features like one-touch recording and automatic level setting.
The RODECaster Pro also allows you to have remote guests call in for an interview. Doing so is easy - just connect a smartphone via Bluetooth or a TRRS cable and the RODECaster will automatically provide mix-minus audio so the caller doesn't hear an echo.
This unit additionally provides preamps and outputs with Class A circuitry for ultra-low distortion and top-of-the-line gain structure.
There's music, jingles, applause, and other sounds that help give your podcast a more professional sound as well!
Learn more about the RODECaster Pro
RODE Lavalier GO
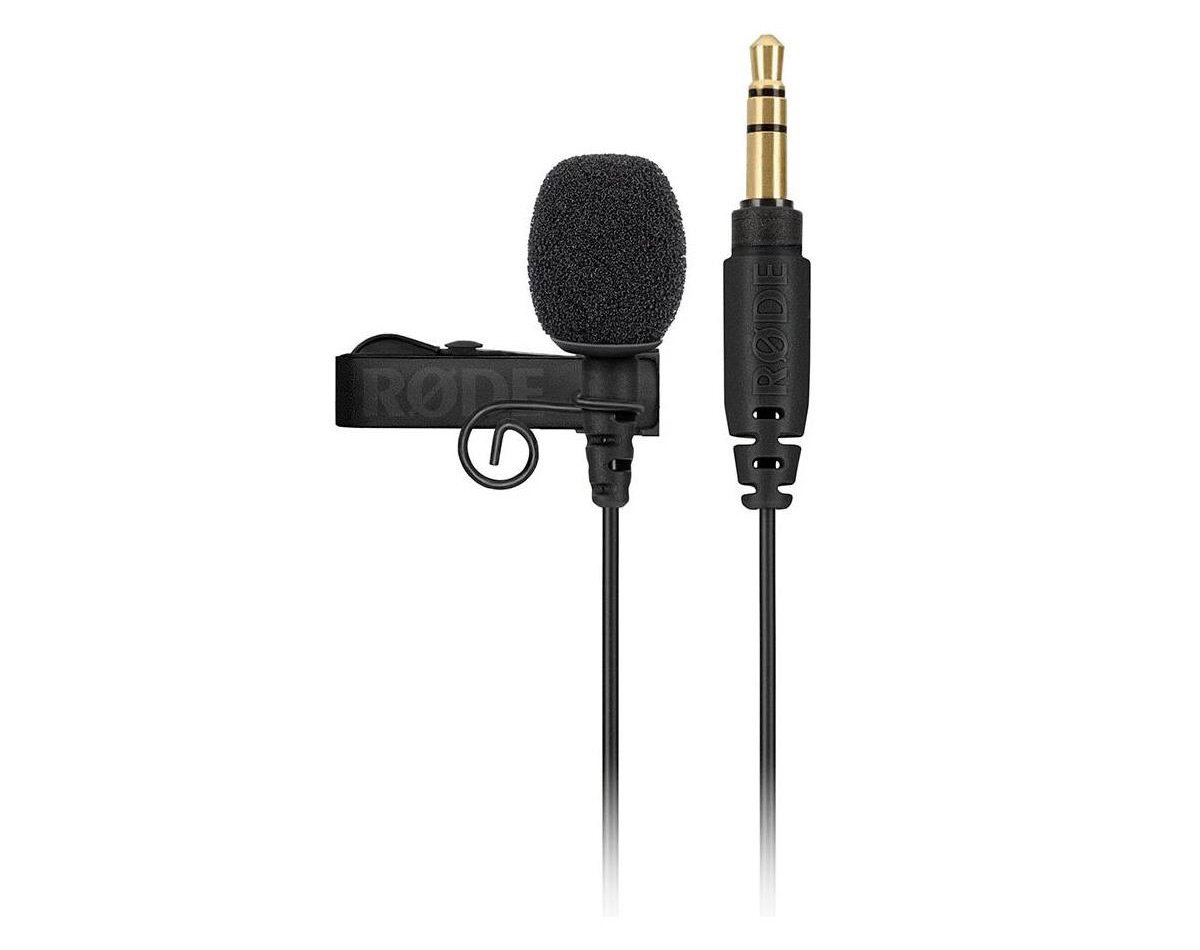
Another prime last-minute gift idea for photographers is the RODE Lavalier GO microphone.
At just $79, this is one of the least expensive items on this list. But don't let the small price fool you - this is a high-powered mic!
In fact, this is a professional-grade microphone that can be used in a variety of situations, from speaking directly to the camera in the studio to conducting interviews in the field and many points in between.
The Lavalier GO has a discreet 4.5mm omnidirectional mic that captures beautifully clear audio - even in less-than-forgiving environments.
It has a 3.5mm TRS connector and is designed to work with the RODE Wireless GO and many recording devices with a 3.5mm TRS microphone input.
The key to getting good video is capturing great audio, and with this microphone, the photographer on your shopping list can do just that!
Learn more about the RODE Lavalier GO
Manfrotto Pro Light Reloader Tough-55
Chances are that the photographer on your holiday shopping list already has a ton of gear. So why not give them a gift that helps them carry that gear safely?
The Manfrotto Pro Light Reloader Tough-55 roller case has four layers of foam on the bottom and convoluted foam on the lid to help protect sensitive photography and videography gear from bumps and bruises when traveling.
When closed, the case creates an airtight compartment. With pull release latches, the case is easy to open, and with padlock compatible points, the case can be easily secured as well. Add in a telescoping handle for making maneuvering the case through the airport a breeze!
One of the most interesting and useful features of this case is that it has optional accessories that can attach or latch onto metal attachment pins on the case.
This means that you can add a laptop bag, a tripod bag, or many other accessories to expand the usefulness of the case.
These cases are dust-resistant and moisture-resistant and are rated to IP67 standards, so they are fully capable of being a photographer's go-to travel case in all sorts of environments.
Learn more about the Manfrotto Pro Light Reloader Tough-55
Ikan Professional 15-Inch High Bright Beam Splitter Teleprompter
One of the best pieces of kit I have in my home studio is this Ikan 15-inch beam splitter teleprompter.
I do a lot of videos where I'm speaking directly to the camera, so a high-quality teleprompter is critical so I can speak naturally to my audience while maintaining eye contact with the camera.
With a large and bright 15-inch screen, the text on the screen is nice and big so I can easily read it from across the room. Now, my home studio is pretty small, so I'm no more than about eight feet away.
However, if you're shopping for someone that has a larger studio, this teleprompter can be set back much further, allowing for placement of additional cameras, lights, and other gear.
The teleprompter itself is about 25 x 20 x 16 inches and weighs about 22 pounds. These figures are just for the teleprompter, so once you add in a camera and lens, a tripod, and so forth, the entire setup is fairly large. That means it's probably more of a studio setup than something you'd want to travel with.
Still, I've been thoroughly impressed with this rig and can't recommend it enough!
Learn more about the Ikan Professional 15-Inch High Bright Beam Splitter Teleprompter
We Recommend
Top Accessories for Nikon Z7
 Photo by Beboy_ltd via iStock
I recently picked up a Nikon Z7 and have had a lot of fun shooting stills and video with it.
I offered up my Nikon Z7 hands-on review a couple of weeks ago, but today I wanted to focus less on the camera and more on some of the top accessories you can get for the Z7.
Specifically, since I'm getting more and more into video, I wanted to give an overview of some of my favorite video accessories.
Let's get to it!
Top Accessories for Nikon Z7: Peak Design SlideLITE Strap

What I like most about the Peak Design SlideLITE is that it was specifically designed for use with mirrorless cameras.
Its slimmed-down 1.25-inch strap is perfect for the small Z7, and with a patent-pending Anchor link connection system, it's super easy to attach and detach from the camera.
There are two aluminum quick-adjust handles to quickly change the length of the strap, and the strap has a smooth side if you want easy movements across your shoulder or a grippy side if you want it to stay in place.

Best of all, this is essentially three straps in one.
You can use it as a sling strap by connecting it to the tripod socket, as a neck strap by connecting it to the strap lugs on the camera, and as a shoulder strap by using the silicone grip to keep it in place.
This thing is simply one of the most versatile straps you'll find for a small camera like the Nikon Z7!
Top Accessories for Nikon Z7: Holdfast MoneyMaker Solo
 Photo by Brandon Burk
Yes, there's a second strap that I have to mention here...
I bounce between the Peak Design SlideLITE and the Holdfast MoneyMaker Solo.
That's because the MoneyMaker Solo offers a much different carrying experience and some versatility that the other strap does not.
The Solo is worn as a sling strap, and with its belt anchor to keep your camera locked in place, it's a perfect solution for protecting the camera while improving your comfort.
 Photo by Brandon Burk
I also like the fact that the MoneyMaker Solo is expandable - you can add a Holdfast Lens Pouch or a Cell Phone Pouch to the strap to increase its carrying capacity.
But even with a big lens added to the strap, this thing is ultimately comfortable thanks to its huge, contoured shoulder pad.
This strap is made of a single piece of full-grain leather, so it's not only incredibly durable, but it also looks amazing!
For more details, read my Holdfast MoneyMaker Solo review.
Top Accessories for Nikon Z7: Foolography UNLEASHED

A while back, I switched from using the Nikon D850 as my primary camera to using the Nikon Z7.
One of the things I enjoyed about my D850 was the abundance of accessories that were available for it, including a handy remote control that was small and inconspicuous.
However, after switching to the Z7, I quickly realized that not only was the same remote I used for the D850 not available for my new camera, there weren’t all that many options out there at all.
My search for a new remote is over, however, because I stumbled upon what might be the best remote I can get my hands on - the Foolography UNLEASHED.
Let’s be clear that this is no ordinary remote. It has functionalities far beyond simply triggering your camera’s shutter.
For starters, it’s about the size of my thumb nail (the one on the right in the image above is for Nikon, the one on the left is for Canon), so it’s hard to imagine getting more inconspicuous than that! Its tiny Bluetooth module plugs into your camera and blends in seamlessly with its design and build.
Secondly, it has all kinds of built-in functionalities that allow you to get far more creative with your camera.

There’s a built-in app with which you can change aperture, shutter speed, and ISO, as well as exposure compensation and white balance.
Additionally, you can shoot long exposures for star trails and light painting, timelapses (even day to night transitions!), geotag your photos in-camera, and start and stop video recording. You can do so for as many as six cameras at once.
So, yeah, the UNLEASHED is a next-level remote for the Z7 that is certainly worth a long, hard look!
Top Accessories for Nikon Z7: iKan E-IMAGE Horizon One 3-Axis Gimbal

A gimbal is a must if you want smooth, cinematic-looking video footage.
I've tested a variety of gimbals over the years, and I have to say that the iKan E-IMAGE Horizon One is one of the very best.
This thing feels super solid in the hand and is supremely sturdy. It feels right at home with the Z7 because it's capable of accommodating up to 8 pounds of gear. Spoiler alert...the Z7 doesn't weigh that much!

The brushless motors allow for extremely precise stabilization while the 12-hour runtime means you can shoot, and shoot, and shoot some more.
This unit has five built-in operational modes as well, including a "Dream Follow" mode for 360-degree spin on the roll axis.
This is just a solidly built, feature-rich gimbal that will help you take your video work with the Z7 to the next level!
Top Accessories for Nikon Z7: 8Sinn Cage

If you're going to use the Z7 for filmmaking, you have to have a cage.
I chose the 8Sinn cage for the Z6 and Z7, and it has proven to be one of the best accessories I've purchased thus far.
This thing is sturdy, yet lightweight (it's made from a single piece of high-grade aluminum) and fits the camera like a glove.

It has multiple 1/4"-20 mounts as well as a built-in cold-shoe, so you have a wide range of possibilities for adding the accessories you need to create awesome videos.
This rig has a comfortable grip and offers easy access to the camera's ports, battery, and memory card as well.
Top Accessories for Nikon Z7: RODE VideoMic Pro

The secret to a great video is great audio, and the RODE VideoMic Pro does not disappoint in that department.
This shotgun-style mic has a 1/2-inch condenser capsule, which means you get broadcast-quality audio with a minuscule level of self-noise (just 14db).
The mic's super-cardioid polar pattern means it minimizes ancillary noise, that way the audio you record is the audio you want to record.

Another feature I have to mention about this mic is its Rycote Lyre shock system.
Basically, this system separates the microphone capsule and electronics from the mic mount. This means there's a level of isolation that helps minimize unwanted vibrations in the mic.
Additionally, I appreciate how easy this thing is to use - its controls are within easy reach on the back of the unit.
Most importantly, the sound is fantastic!
Top Accessories for Nikon Z7: Peak Design 10L Sling Bag

Yep, the good folks at Peak Design have another item on my list. This time, it's their 10L Sling bag.
Frankly, this bag is absolutely perfect for this camera.
While it isn't the best for my Nikon D850, my Z7 and three lenses fit just right!

What's more, the design of the bag allows for quick access to my gear, including a side-load main compartment. Better yet, the main compartment has FlexFold dividers, so I can customize the interior space to suit the gear I need to carry.
For what it's worth, this bag looks fantastic too! Combined with impeccable, durable construction, you simply can't miss with this bag.
Top Accessories for Nikon Z7: Joby GorillaPod 5K

If you want to run-and-gun with your video making, a Joby GorillaPod 5K is a perfect tool to have in your bag.
This thing is unbelievably versatile and can be used as a tripod or wrapped around something for stability. You can even use it as a grip.
I have the 5K kit, which includes Joby's BallHead 5K, which offers 360-degree panning and 90-degree tilt so you can position it just right for the footage you need.
It's easy to use, too, thanks to the Arca-Swiss compatible quick-release plate, and since it can hold 11 pounds of gear, I can load it up with my Z7 and a bunch of accessories without worry!
Top Accessories for Nikon Z7: Nikon MC-DC2 Remote Release Cord

It's helpful to have a remote shutter release for all kinds of photography and videography.
I chose the Nikon MC-DC2 Remote Shutter Release Cord for two reasons...
First, it's over three feet long, so there's plenty of length no matter what sort of photos or videos I'm taking.
Second, it's only $14.00!
Top Accessories for Nikon Z7: NiSi V6 100mm Filter Kit
As I noted in my list of the top lens filters of 2018, the NiSi V5 filter kit is absolutely outstanding.
But I recently picked up the NiSi V6 filter kit, and it's even better!
Primarily, the V6 kit is smaller, so it fits my Z7 like a glove.
As you'd expect from NiSi, the filter holder is strong and durable due to its aviation-grade aluminum construction.
The holder supports three 100mm filters with a circular polarizer as well, all of which can be arranged in any combination.
In other words, this thing is beautifully made, fits perfectly, and gives me the flexibility I need to perfect my shots.
Top Accessories for Nikon Z7: Litra Torch LitraPro

I did a full Litra Torch LitraPro review, so you can check that out for extensive details.
For my purposes here, though, I just want to highlight a couple of primary feature of this excellent light.
First, this little guy puts out 1200 lumens, so it's bright as can be.
Second, it's the first full-spectrum bi-color compact light in the world. That means you get beautiful light with an adjustable color temperature from 3000-6000k in a small package that allows you to run and gun. Not bad, right?
Top Accessories for Nikon Z7: Ikan Delta DH5e-V2 Field Monitor

My Ikan Delta field monitor is, in a word, amazing. It's so amazing that I use it with my Z7 and with my Sony a6300 as well.
Clearly, a field monitor is a must if you're doing video work. But any old field monitor simply won't do.
Having a high-grade monitor like the Ikan Delta enables me to get the exposure just right (and the focus right, too).
This monitor is both small and lightweight, so it's easy to throw in my bag. It also has superb image quality with a bright, crisp display that's easy to see even in intense daylight.
Add in a histogram and audio meters, guides, false color, peaking, and zooming capabilities, as well as HDMI input and output (with 4K UHD support), a USB for loading 3D LUTs, and many other goodies, and you have the makings of the ideal field monitor for video work!
Top Accessories for Nikon Z7: Delkin Devices 240GB Premium XQD Memory Card

A big, fast memory card is certainly a must for video work, and the Delkin Devices 240GB Premium XQD Memory Card fits the bill for sure.
Aside from unmatched performance, this memory card was designed and built to be strong, reliable, and durable over the long term.
It's version 2.0 compliant and was designed specifically for use with high-end cameras.
As such, it boasts recording speeds over 400MB/s, including DCI 4K and full HD at 180 fps. If you're shooting stills, it can handle up burst shooting of up to 200 RAW images without delay. Talk about performance!
Top Accessories for Nikon Z7: Fusion Photo Gear FPG-1001 Quick Release Plate

Having a quick-release plate is invaluable, and the Fusion Photo Gear FPG-1001 is one that I wholeheartedly recommend.
This rig has a deployable attachment loop, which allows you to quickly connect a shoulder strap to the plate, like the Holdfast MoneyMaker Solo.
This is a feature that's on Fusion Photo Gear's L-brackets as well, which are among the best L-brackets on the market.

There's a connection point for a hand strap as well as a 1/4"-20 accessory hole too.
It's a supremely secure plate given that it has an anti-twist pad that locks it into place. There's also a captive screw for securing the plate to the camera.
In other words, it's just a beefy, reliable, and convenient plate that's a must-have if you shoot with a Nikon Z7!
Top Accessories for Nikon Z7: Stabil LNZ L-Plate

I love finding affordable, yet functional photography gear, and the Stabil LNZ L-Plate certainly fits the bill on both fronts.
With a dedicated design for the Nikon Z7 (and Z6, too), this thing fits the Z7 like a glove.

As you can see in the photos above and below, the L-Plate offers access to all the camera's connections without needing to move the vertical arm out of the way.
There's also a 1/4" 20 and a 3/8" 16 mount for adding gear to the plate if need be.

Even though this is a budget-friendly L-Plate, it is beautifully designed and well-made. The aviation aluminum alloy construction is both strong and lightweight, and the two colors - black and anodized green - look great as well!
We Recommend
Top Accessories for Sony a6300, a6400 and a6500
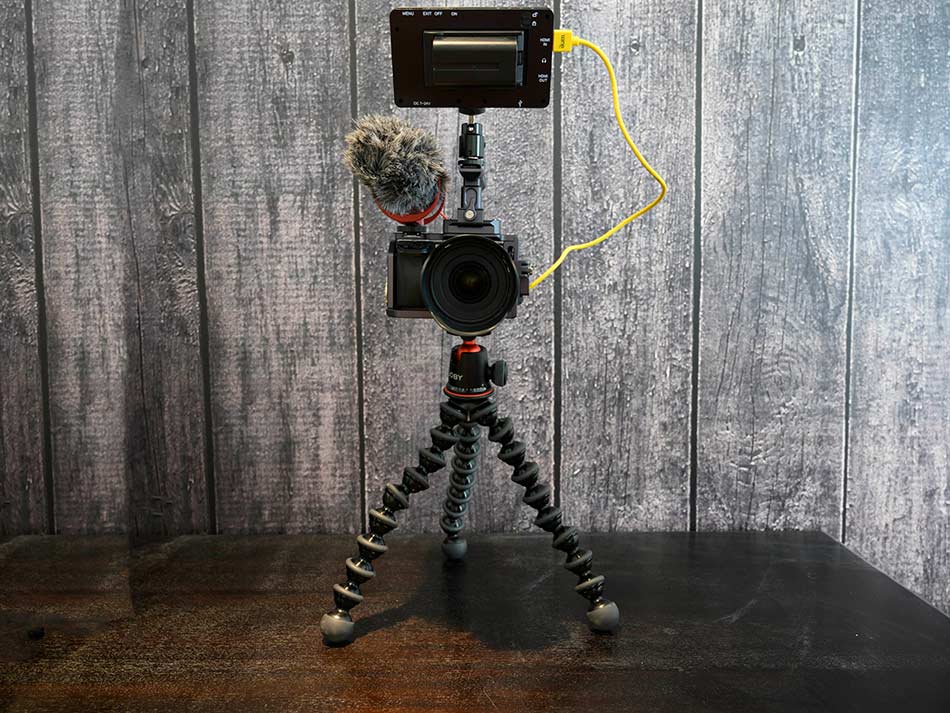
Those of you that know me know that I have been dabbling in video work lately.
I have to say that it's been exciting to use my cameras in a different way and create content that differs so much from what I've always done.
Getting started can be a bit of a bear, though. Having little to no experience in creating video content meant that I wasn't completely sure what accessories I needed to get the job done.
Now that I have slogged my way through, made a ton of mistakes, and now actually have a clue what I'm doing, I thought I'd share my thoughts on a few video accessories that I've found helpful.
I shoot with a Sony a6300, so that's where my frame of reference is coming from. If you have a Sony a6400 or a Sony a6500, these accessories will work for you as well.
Let's get started!
Top Accessories for Sony A6300, A6400 and A6500: Ikan Delta DH5e-V2 Field Monitor
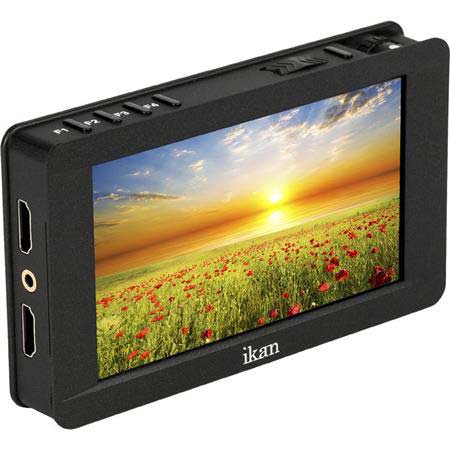
Having a field monitor is a must-have accessory for any videographer so you can actually see what you're filming.
But more than that, a field monitor like my Ikan Delta makes getting the correct focus and exposure miles easier
This rig is small, lightweight, and has stunning image quality. As you can see below, the monitor is crisp and bright, too.
The full HD screen offers 440 pixels per inch for a super clear picture, and the touch capability makes checking menu settings, exploring features, and zooming a breeze.
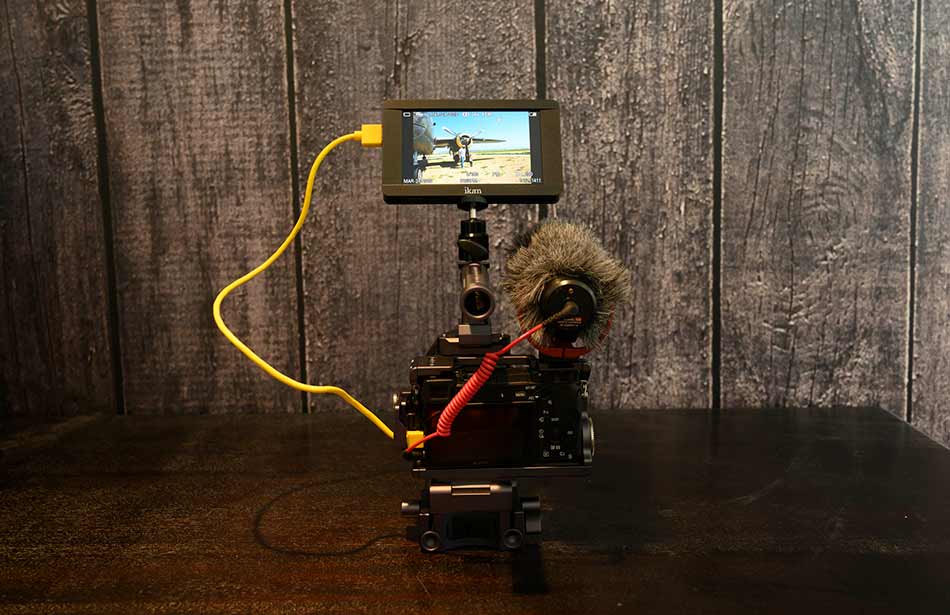
The Ikan Delta is equipped with software features that help me get better shots - guides, a histogram, and audio meters, as well as peaking, zooming, and false color.
This unit has HDMI input and output (with 4K UHD support), a USB port for loading 3D LUTs, and a 3.5mm audio jack as well.
It's the perfect companion for any videographer, but as a relative newbie, I can tell you it's one of the most valuable accessories I've bought thus far.
Top Accessories for Sony a6300, a6400 and a6500: Litra Torch LitraPro
If you want to up the production value of your videos, you need a good light source (and great audio, too...but that's another topic).
The problem with lighting for video is that so many of the options are big, bulky, hot, expensive, or some combination thereof.
That's not the case with the LitraPro LED light...
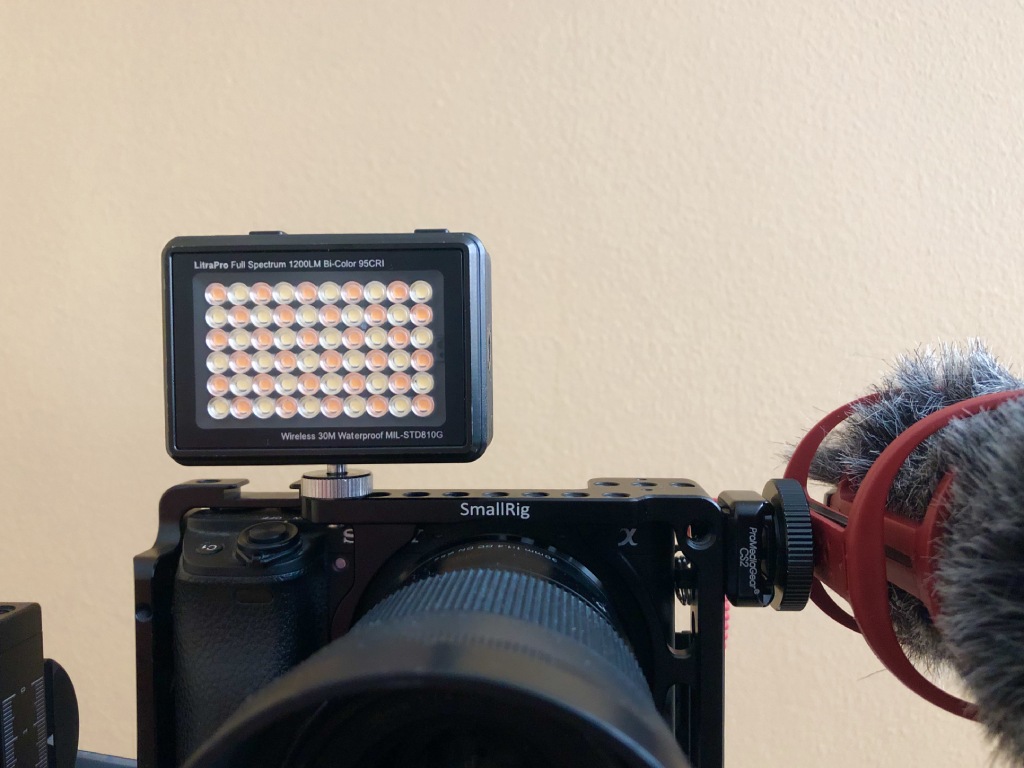
The LitraPro has a whopping 60 LEDs that put out 1200 lumens. It's fully dimmable, too, so you can max it out at 100 percent power or rock it at 1 percent - whatever you need!
This thing puts out gorgeously even and clean light with 95 CRI and a 70-degree beam angle for broad coverage. It's bi-color and has an adjustable color temperature of 3000-6000k to meet your needs.
And, as you'd expect from a Litra Torch product, it's incredibly small and lightweight - just 2.75 x 2 x 1.2 inches and 6 ounces.
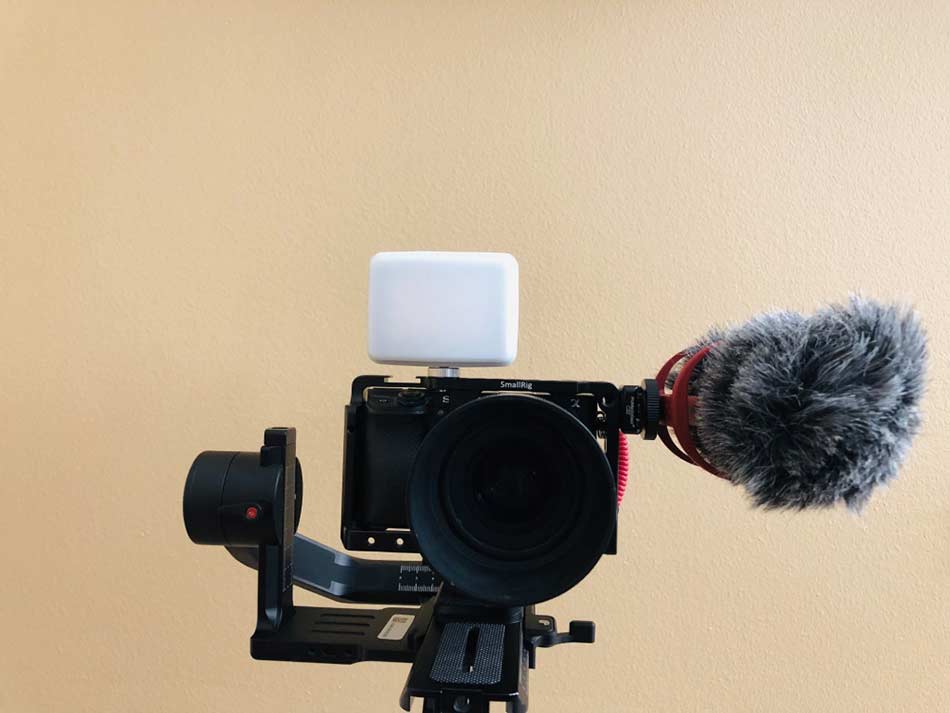
On top of all that, the LitraPro is Bluetooth compatible, waterproof up to 90 feet, and has a 10-hour battery life to boot.
If you need a high-quality light that's easy to use, rugged and reliable, and puts out beautifully crisp light, the LitraProshould be on your radar!
Check out my full LitraPro review for more details.
Top Accessories for Sony A6300, A6400 and A6500: Joby GorillaPod 5K Kit
I waffled back and forth between the Joby GorillaPod 5K and the GorillaPod 3K, and ultimately went the 5K route even because it's Arca-Swiss compatible.
This little guy has been invaluable thus far because it allows me to use it as a tripod or wrapped around an object for stability, as well as a grip when I need on-the-go footage.
It also features Joby's BallHead 5K, which has independent 360-degree panning and 90-degree tilt so you can get the precise positioning you need.
Setup is fast and easy thanks to the Arca-Swiss compatible quick release plate, and with a weight rating of up to 11 pounds, you can stack a ton of gear on it and still have all the stability you need.
Top Accessories for Sony A6300, A6400 and A6500 Ikan Stratus Cage
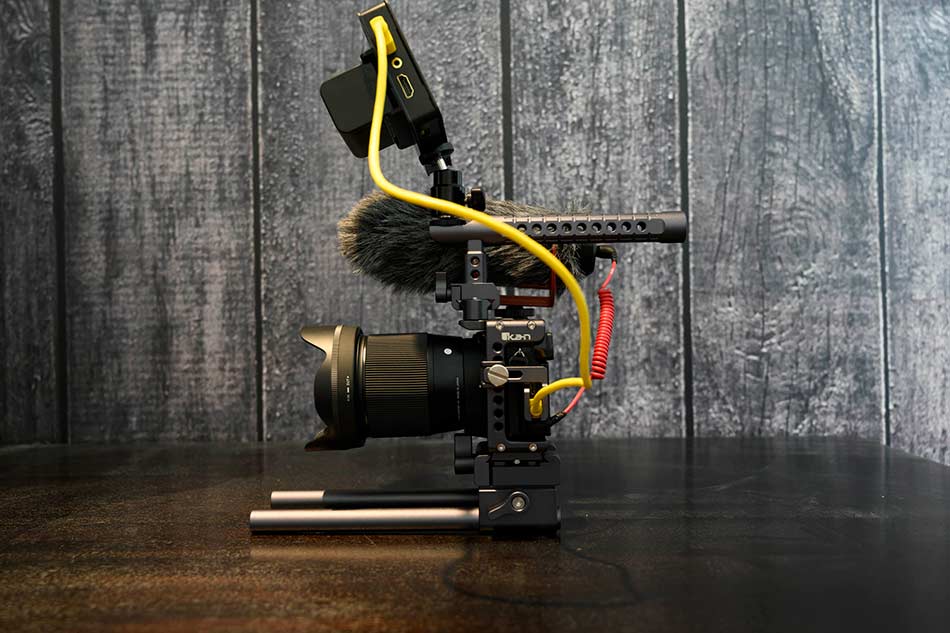
Another top accessory you need for videography is a rock-solid cage.
I chose the Ikan Stratus Cage because it's form-fitted to the a6300 (and a6400 and a6500) so you can add tons of accessories without having a big, cumbersome cage wrapped around your camera.
It's base on an Arca-Swiss plate, so you can mount it directly to an Arca-Swiss compatible tripod.
There are 1/4"-20 and 3/8"-16 threaded mounts all over the cage so you can add all the accessories you need to get the job done. There's a shoe mount and an ARRI rosette for more options for mounting gear.
As you can see above, I just have my field monitor and mic attached to the cage, so I have plenty more room for more accessories down the line.
Top Accessories for Sony A6300, A6400 and A6500: Rode VideoMic GO
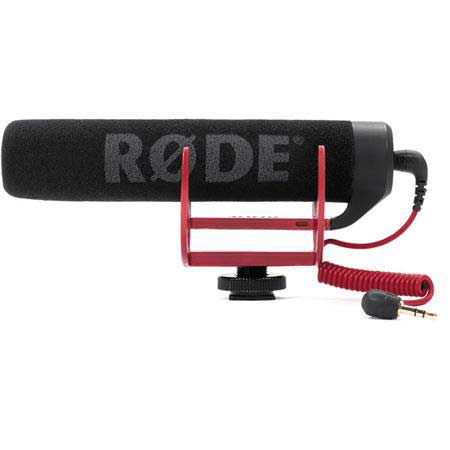
As any seasoned videographer will tell you, your videos are only as good as the audio.
That means that a high-quality mic is a must so that 4K UHD video you shoot has crystal clear audio to go with it.
I chose the Rode VideoMic GO for a few of reasons.

First, Rode has a long-standing reputation for quality and performance, so a Rode mic was a must.
Second, I didn't want to spend a giant amount of money, so I wanted a budget-friendly option that would still get me great results (this mic is $99.00 at the time of writing).
Lastly, I wanted a mic that was compact and lightweight, and the VideoMic GO certainly delivers on that front.
As you can see above, it's not obtrusive in any way, and even though it's a tiny little thing, it still gets me excellent audio that picks up my voice while minimizing surrounding sounds.
Top Accessories for Sony a6300, a6400 and a6500: Shure VP83F Lens Hopper
I know I've already recommended a microphone, but the Shure VP83F Lens Hopper is so good that it warrants inclusion on this list.
Though the Rode mic described above is a great microphone, this Shure mic is a step above.
Yes, it's more expensive, but that extra money gets you plenty of extra features...
The biggest benefit of this mic is that it can record digital audio by itself - no need to rely on the camera to do so (though that's an option if you need).

The shotgun design with electret condenser cartridge and integrated shock mounting system offers excellent audio quality with top-of-the-line isolation of unwanted noise.
Additional features include:
- Dedicated audio output so you can monitor audio in real-time
- Low self-noise and high sensitivity with a wide frequency range that results in natural audio reproduction
- Easy access to the MicroSD card for quickly swapping cards
- Highly directional supercardioid/lobar polar pattern that rejects off-axis audio
It runs on two AA batteries, mounts to the hot-shoe on your camera, and comes with a windscreen, too.
If you want to step up your audio game and have the budget to do so, I strongly suggest investing in the Shure VP83F!
Get more details on this fantastic little mic in the video above by Jason Vong.
Top Accessories for Sony A6300, A6400 and A6500: Andycine Hot-Shoe Stand
An unsung hero of the Sony accessory world is a solid hot-shoe stand that you can use to mount accessories like a flash, LED lights, a monitor, and so forth.
For my money, it doesn't get better for this purpose than the Andycine Hot-Shoe Stand shown above and below.
With 176 degrees of viewing angles and 360-degree rotation, this stand makes shooting video a much easier task.
Installation is a breeze as is making adjustments, that way you spend less time messing around with your gear and more time actually making videos.
There's an upper 1/4-inch screw for fast attachment to accessories and on the bottom is a standard shoe and 1/4-inch screw so you can quickly attach the stand to your camera's hot shoe or other rigs.
It's small and lightweight, too, so you won't feel like you're carry around a ton of extra weight by adding this little guy to your camera.
Top Accessories for Sony a6300, a6400 and a6500: Good Glass
Just like a microphone enables you to capture the audio that makes your video sing, a high-quality lens will make your camera more capable of capturing footage that makes your videos shine.
But don't confuse "high-quality" with expensive.
Sure, there's tons of really good lenses out there with giant price tags, but that's not the route I chose.
I picked up a Sigma 16mm f/1.4 DC DN Contemporary Lens and a Sigma 30mm f/1.4 version that are absolutely outstanding, and neither one was particularly expensive as lenses go (the 16mm was $400 and the 30mm was $289).
In both cases, these lenses are ultra-light, incredibly sharp, and have stepping motors that enable quick and quiet autofocusing that's so crucial to video.
Additionally, both lenses have a huge f/1.4 aperture, which is great for getting gorgeously blurred backgrounds in my videos and for shooting in low-light conditions.
I've been blown away by the ease of use of these lenses and with the quality they produce when I'm shooting video.
Combined with the other accessories I've highlighted above, I think I have a pretty darn good setup going!
We Recommend
Top Accessories for the DJI Mavic 2 Pro & Mavic 2 Zoom
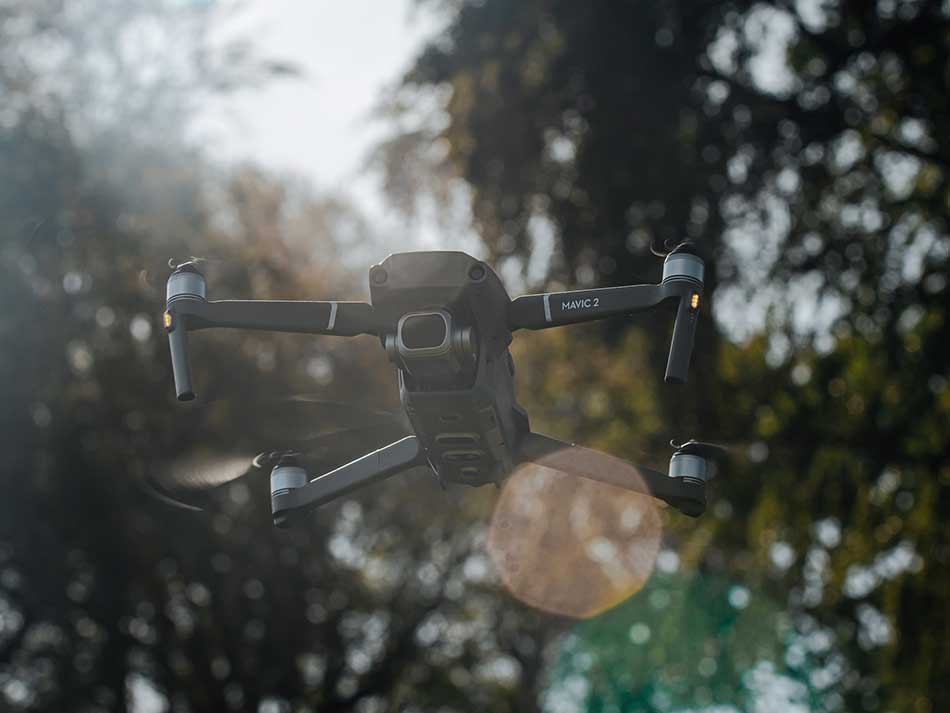
DJI Mavic 2 Pro Photo by Jacob Buchhave on Unsplash
Two of the best drones for photography and videography are the DJI Mavic 2 Pro and DJI Mavic 2 Zoom. The best DJI Mavic Pro accessories and the best accessories for the DJI Mavic 2 Zoom will expand their capabilities, make them more versatile, and ease your workflow.
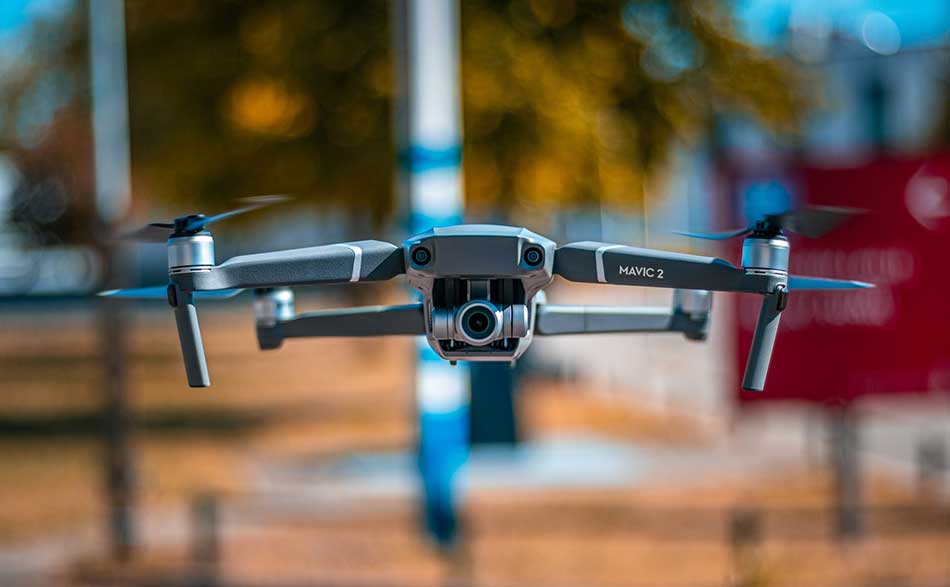
DJI Mavic 2 Zoom Photo by Tommy van Kessel ? on Unsplash
Sometimes the least thought of accessory will become the one item you now realize you can’t live without. For the DJI drones, the items listed below have been chosen as the most likely to become that item for you.
Hazard 4® Freelance™ Sling Pack

Among the best bags for active photographers is the Hazard 4® Freelance™ Sling Pack. The sling pack design combines the comfort of a backpack for hauling heavier gear with the ease of access of a belt pack or regular camera bag.

The Hazard 4® Freelance™ Sling Pack also offers a secure way to access your gear while in the field. Some other features that make it a great bag choice over all are the thermoformed panels for protection and comfort, the adjustable internal dividers, and HardPoint™ external accessory mounting points.

The DJI Mavic 2 Pro accessories fit perfectly in this bag along with the drone and even a tablet. Your drone deserves protection and you need to have everything readily available while you’re in the field. And it looks good, too.
DJI Smart Controller

Instead of using your smartphone, this controller is the best way to fly and film with your DJI Mavic 2 Pro or Mavic 2 Zoom. The DJI Smart Controller has a 5.5 inch touch screen, two joysticks, and dedicated buttons to make controlling all the advanced features of the drones easy to access.
Automatically switching frequencies allow for an extended range between drone and controller. The SkyTalk feature lets you live stream video feed to various online platforms while you’re flying.
The screen is incredibly bright, letting you clearly see things in the harshest sunlight, making this one of the best Mavic 2 Pro accessories for users filming under various weather conditions.
The DJI Smart Controller will synch to the drone from the moment you power up the drone. It’s customizable via DJI and third party apps so you can design features and capabilities based on how you will use the drone. It operates under extreme weather conditions from -20 C to 40 C, letting you fly and film virtually anywhere.
ND Filters for Mavic 2 Pro

Mavic 2 Pro accessories for controlling exposure options include ND Filters for Mavic 2 Pro. The Haida NanoPro ND Filter Kit includes neutral density filters of ND0.9 (8x), ND1.2 (16x), and ND1.8 (64x).
The DJI Mavic 2 Pro has one of the top cameras of any drone in its class, the 20MP Hasselblad L1D-20c gimbal camera with its large 1-inch CMOS sensor and f/2.8 lens that stops down to f/11.0.
On very bright days, ND filters are an exposure taming option that lets you shoot at reasonable shutter speeds and a natural appearing frame rate for video which makes them some of the best accessories for the DJI Mavic 2 Pro.
These are very high quality filters, so you won’t be losing anything by using them on the amazing camera in this drone. Optical grade glass, multi coated on both sides, and mounted in aircraft grade aluminum, these ND filters for Mavic 2 Pro match up fine.
ND & Polarizers for Mavic 2 Zoom
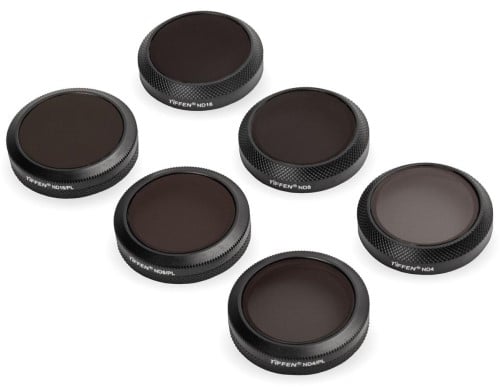
DJI Mavic 2 Zoom accessories also include a fine set of filters. The ND & Polarizers for Mavic 2 Zoom by Tiffen is a set of 6 filters to optimize your use of the zoom lens and high end camera in this drone. In addition to neutral density, you also get the option to add polarization to the neutral density.
The 6 filters in the kit are ND4, ND4PL, ND8, ND8PL, ND16 and ND16PL filters. This set gives wide ranging exposure options as well as offering control over glare and reflections. They also improve contrast and color saturation when that is a priority.
Made of high quality optical glass, these Tiffen filters feature anti glare coating and hydrophobic coating which makes the surface waterproof and also has scratch prevention technology. So these filters are tough as well as superb optically.
Propeller Guards

PGYTECH Propeller Guard for DJI Mavic 2 Pro and Zoom are essential accessories for two reasons. They protect the propellers and they protect what the propellers might come into contact with.
The propellers on drones spin at extremely high RPM rates. Even when piloting very carefully, you could accidentally impact something which could either be damaged itself or cause damage to your drone’s propeller blades. If the blades are damaged, that’s the end of that flying session.
Things that could engage the propellers are twigs, leaves, and lines outside, or furniture and cords insides. Let’s not forget fingers, hair, clothing, and curious pets either. These prevent injury and damage under regular and difficult flying conditions.
They don’t add much weight, nor do they impede any airflow characteristics, so using them all the time is a viable option.
Intelligent Flight Battery

What makes a battery intelligent? When used with the DJI GO app, the DJI Intelligent Flight Battery lets you monitor overall battery status, real-time battery cell status, circle number, temperature, and other vital information.
Other things that make the Intelligent Flight Battery smart is overcharge protection, eliminating rapid discharge in flight, and cold weather fatigue protection. Additionally, when the battery senses that it has been in storage for a while, it automatically discharges down to 50% charge to prevent damage and to optimize the overall life of the battery.
Since drone batteries have to power a lot of stuff, having an extra battery or two for your drone is the simplest way to ensure you don’t run out of juice while flying and recording.
Car Charger

Another way to ensure you don’t run short of power is use a car charger to power up the batteries for your drone. The Mavic 2 Car Charger can charge up batteries while you’re driving and it won’t overcharge the batteries either due to its advanced circuitry.
It’s safe, reliable, and it does the job, keeping your batteries charged and ready to use for extended flying and filming sessions.
To Sum Up

Some of the most useful and beneficial accessories for the DJI Mavic 2 Pro and Mavic 2 Zoom are ND and polarizer filters for controlling exposure, contrast, and reflections, propeller guards to prevent damage to the blades or to other things that get in their way, and extra batteries plus a way to charge them in the field.
Upgrade to the Smart Controller for advanced piloting and filming, and then pack it all into the Hazard 4® Freelance™ Sling Pack for the ultimate in protection and easy access. Added to the superior capabilities of these two drones, you will be ready for making great video and capturing superb images.
We Recommend
Top GoPro Accessories for Traveling

Photo by lucas Favre on Unsplash
Editor's Note: This article was written before the outbreak of the COVID-19 pandemic. Obviously, travel right now is difficult, if not impossible. Let these suggestions for GoPro gear be advice for future travels. In the meantime, stay healthy and safe.
As someone who purchased the very first GoPro ages ago, the amount of GoPro accessories currently available on the market is shocking.
And as someone who travels frequently, all of my GoPro accessories for traveling are lifesavers. They ensure my more expensive photography gear isn’t stolen, while ensuring I also put out the same quality content my followers expect.
Here are my top GoPro accessories for 2020.
Camera: GoPro HERO 8 Black

There’s no point in purchasing GoPro accessories if you don’t already have a GoPro...
I need to upgrade my GoPro every couple of years to ensure my footage is as crisp as possible, and honestly, I feel like the GoPro HERO 8 is the most improved GoPro to date.
First of all, it features 4K video, which is extremely impressive for something this small.

Second, the inclusion of digital lenses allows you to vary your looks, from narrow to SuperView and points in between.
Third, Hypersmooth is now updated with a 2.0 version that does a better job of stabilizing your footage, even if you’re recording as you ride down a bumpy mountain biking trail.
Additionally, its low-light capabilities are nearly unprecedented. Of course, you get the same go-anywhere, do-anything ruggedness you expect.
Plus, it’s only $350, which is also unheard of in the photography gear industry.
Recommended Photography Reading
- National Geographic Photo Basics: The Ultimate Beginner's Guide to Great Photography
- Photography: The Definitive Visual History
- Read This if You Want to Take Great Photographs
Light: LitraPro

When shopping for GoPro accessories, especially if you’re planning on taking them traveling, the most important thing is portability. Is this accessory going to weigh you down?
With the LitraPro, this isn’t an issue. First, the LitraPro only weighs 6oz, which is the equivalent of a hockey puck. It’s really, really tiny.
However, that doesn’t mean it can’t perform. The LitraPro lasts for up to 10 hours on a single charge, is 100% dimmable, and features 1,200 lumens. That’s enough to easily light a space of up to 10 feet.
It’s 2.8 x 2 x 1.2 inches, is drop resistant and waterproof up to 90 feet, and can mount directly to your GoPro.
Plus, I’ve used my LitraPro for everything from underwater photography to light painting to portraits and everything in between. It’s extremely versatile!
You can pick up yours for $220.
Tripod: Octopad

While the Octopad isn’t technically a tripod, it does work better than any tripod I’ve ever bought for under $30.
The Octopad, like the rest of our GoPro accessories, is incredibly lightweight at 1.6 lbs and small at 6.5” across.
You can use the Octopad as a mount for your GoPro or your lighting or your microphone because it doesn’t buckle under weight or slip on uneven surfaces due to its anti-slip technology.

When looking for travel photography accessories, you’re also looking for accessories that are cheap because the chances of getting your photography gear stolen or lost during travel is much higher.
In this case, you’ll be happy to know that the Octopad is just $27, so if someone absconds with it, you can replace it on the cheap.
Learn More:
Handheld Mount: HandlePod

While shopping for GoPro accessories, make sure you purchase a mount to keep your videography stable.
I use the HandlePod for its $35 price tag, its portability (it fits in your pocket at just 4oz!), and its lifetime warranty.

My favorite thing about the HandlePod is that it functions just like a more expensive handheld mount. It rotates 360 degrees, it doesn’t slip in your hand, and it's big enough to have a comfortable grip without being unwieldy.
Plus, it can be used as a tabletop tripod when need be, and it can be lashed to things like trees or fence posts when you’re out filming and you need to work hands-free.
GoPro Floating Grip

I’m not frequently shooting in water, but when I am, I always wish I had the necessary GoPro accessories to make that shoot as easy as possible.
The GoPro floating grip allows me to shoot in water for the low price of $30, while maintaining stability in the choppiest of waters.
It comes with a wrist strap, so you’re always sure you’re never going to lose your GoPro, and neon coloring just in case you do.
Extra Batteries

There’s no point in purchasing GoPro accessories if your actual GoPro runs out of steam.
For just $20, make sure you purchase extra GoPro batteries.
Battery Charger

Just in case you forgot to purchase your extra GoPro batteries, the GoPro Dual Battery Charger charges up to 2 GoPro batteries at once to ensure you’re always ready to shoot.
It’s only $50 and comes with a 1 year warranty. What’s not to love?
Learn More:
We Recommend
Travel Photography With the Nikon Z7

I’ve taken a number of trips in recent months - Norway, Russia, and Turkey - and each time, I took my Nikon Z7 with me (and a Sony a6400 for video purposes).
Since my normal routine with the Z7 is photographing here locally in the Los Angeles area, I wanted to explore how the Z7 performed as a primary camera for traveling. I also like Nikon Z6 which is the best full frame mirrorless camera by Nikon.
Spoiler alert...it didn’t disappoint.
Nikon Z7 Travel Photography: Size, Weight & Build
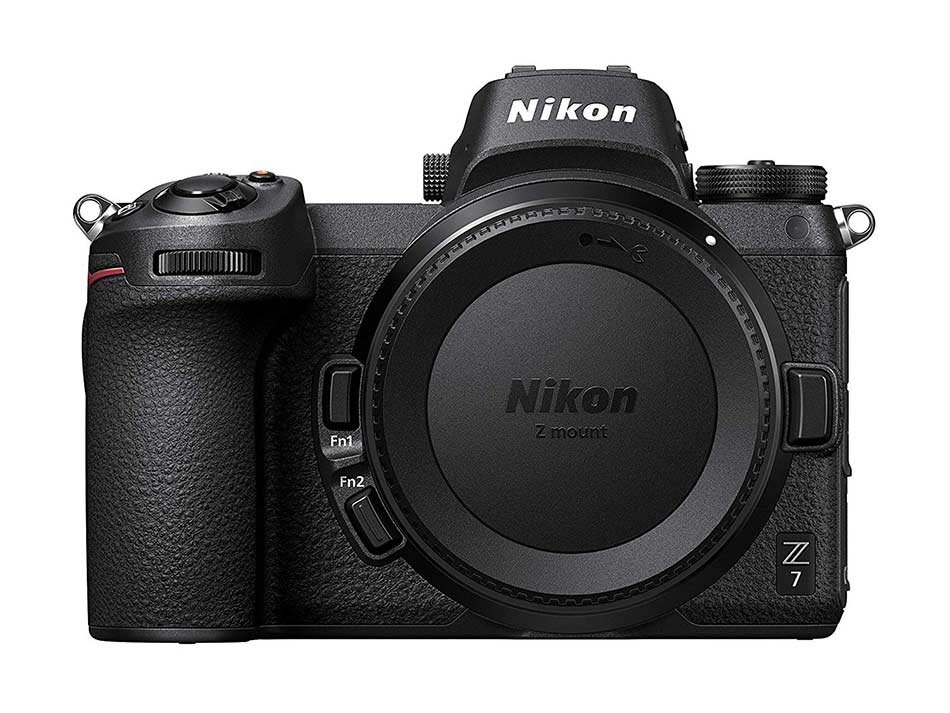
As I noted in my full Nikon Z7 hands-on review, the Z7 isn’t exactly a pocket-sized mirrorless camera.
It weighs about 1.5 pounds with the batteries installed and is 5.28 x 3.98 x 2.68 inches in size. While this pales in comparison to my Nikon D850, it’s still not a small camera to carry around.
That being said, it’s not like you’re hauling around a 10-pound camera, either. As I traveled around Norway in the freezing cold, made my way through busy Russian airports, and explored Istanbul, I found the Z7 to be easy to carry and handle without getting fatigued.
What helps ease the pain, so to speak, is the huge grip on the Z7. It’s more like the grip on my D850 than what you’d expect on a mirrorless camera, and it makes all the difference.
The grip is deep and chunky, and though there’s not enough room for my pinky finger, it’s still a nice, comfortable grip that will keep you from getting hand cramps as you spend the day photographing your travels.
The controls of the Z7 are slightly different than those on my D850, yet they feel like an old friend.
Nikon wanted their new mirrorless cameras to feel like Nikons, and they were successful in that regard. With a control dial on top, one control wheel on the front, and another on the back, you get a familiar, comfortable, and functional feel with the control layout.
The difference is that the Z7 has three buttons on the front of the body - just below your fingertips - that you can customize to engage settings of your choice without even having to take the camera away from your eye.
Likewise, there’s a joystick next to the thumbrest for moving focus points and navigating the camera’s menu system. Also on the back is an “i” button, which is used to open a control screen that allows you to change critical settings without having to navigate through the camera’s full menu system.
All told, when you’re traveling with the Z7, you’ll find that it’s intuitively setup with great handling so you can concentrate on actually traveling and taking photos instead of struggling with a camera that just doesn’t feel right in the hand.
Nikon Z7 Travel Photography: The LCD is a Dream
Something else to appreciate about travel photography with the Nikon Z7 is its big, beautiful 3.2-inch touchscreen LCD.
Obviously, the touch capabilities for changing settings, setting the focus, and taking shots is a dream for travel photography. Since I take a lot of landscape photos, shooting in Live View is a must, and this camera certainly delivers.
In fact, I seldom used the viewfinder because the LCD is so good and so easy to use.
The screen tilts up and down for taking low-angle and high-angle shots, too. I found this to be advantageous when making my way around the Lofoten Islands, as I was able to capture some interesting low-angle shots of the incredible terrain. And with the five-axis image stabilization, I was able to do so without worrying about camera shake
The Z7’s electronic viewfinder is no slouch, either.
With about 3.6-million dots of resolution, it’s clear, crisp, bright, and detailed. I found there to be virtually no lack or blackout, so this thing acted more like the optical viewfinder on my D850 than an EVF.
I love that the EVF sports nearly 100-percent frame coverage, and with a diagonal viewing angle of about 37-degrees, you get a nice, wide view of the subject as well.
Nikon even incorporated the ability to set the EVF and LCD to display the same color, contrast, and brightness. If you turn this feature off, you get a view that’s similar to an optical viewfinder, so it’s like having the best of both worlds to help you get the best travel photos.
Nikon Z7 Travel Photography: The Sensor is Sublime
The Z7 has essentially the same sensor as the D850, which isn’t a bad thing because the sensor is absolutely fantastic.
At nearly 46-megapixels, you’ve got plenty of resolution to turn your travel photos into large-format prints.
With the larger lens mount on the Z7 - which is 17-percent larger than on the D850 - you also get epic low-light performance. The native ISO up to 25600 helps out in that department as well.
What makes all that so great for travel photography is that you can be indoors where flash photography might not be permitted and still get high-quality shots.
What’s more, if you’re in Norway in the winter and want to venture out in the bitter cold to photograph the northern lights as I did, you have a beautifully resolute sensor and top-notch low-light performance to snag some pretty awesome shots.
The all-new 493-point autofocus system is worth mentioning as well.
Not only is it supremely accurate, but it’s lightning fast as well. The camera did a wonderful job of acquiring focus quickly and shooting with virtually no shutter lag.
Admittedly, there were a couple of times when the focus was off, but this was such a rare occurrence that when it did happen, I found myself in disbelief. The autofocus system on this thing is simply that good whether you’re photographing a still scene like a landscape or a bustling open-air market or something in between.
Nikon Z7 Travel Photography: My “Complaints”
It should be of no surprise that this camera produces enormous image files.
Even when shooting sample photos at the lowest resolution, the images were still in the 14MB neighborhood. That’ll fill up a memory card quite quickly.
However, it’s not like memory cards are hard to come by or difficult to carry, which is why this is a very minor “complaint.”
A bigger issue is that the Z7 doesn’t exactly wake up in a speedy fashion.
Normally, this isn’t a huge deal for me, but when traveling, you never know when an opportunity for a wonderful shot will arise. That being the case, you want your camera to fire up instantaneously so you don’t miss the shot. Unfortunately, the Z7 can’t fulfill that need.
Nikon Z7 Travel Photography: Final Verdict
Is the Nikon Z7 a perfect camera for travel photography? No. Is it one of the best cameras for travel photography? Absolutely!
On the positive side, the camera handles well, is easy to use, and has a killer combination of fantastic sensor, fast and accurate autofocus, epic low-light performance, and ultra-sharp EVF and touchscreen LCD.
I found the battery life to be even better than what Nikon claims, so that was a happy bonus while having this rig with me on long days of shooting as I traveled.
On the downside, the Z7 isn’t as small or lightweight as other mirrorless cameras, which could be of concern for some travel photographers.
Of greater concern is the point I mentioned just above - the Z7 takes too long to wake up, so you will inevitably miss some shots if it’s been off for awhile.
However, the benefits of this camera for travel photography far outweigh the detriments. If you’re looking to upgrade your kit with a capable, all-around camera for travel photography, this could be the one for you.
In fact, this camera isn’t limited to just this one type of photography. It’s great for landscapes, portraits, action photography - you name it!
UPDATE: I offer my real-world, long-term review of the Nikon Z7 in the video above. Give it a look!
We Recommend
Tricks for Shooting B-Roll Solo

Photo by Kyle Loftus from Pexels
If you’re reading this article, you must be wondering how best to capture B-roll. Especially if you are a one-man production team, shooting B-roll solo may seem to be a bit challenging.
There is a very simple method that can be used when shooting B-roll solo to ensure you have viable footage that can be edited in later to your production. Two methods, actually.
We’ll talk about the two I consider the most useful, and how to shoot B-roll with both methods.
What Is B-Roll?

Photo by Kyle Loftus from Pexels
First off, let’s quickly review what B-Roll is and why it is an important concept for video projects.
The sole purpose of shooting B-Roll is to add to the story already being told by your primary video footage. B-roll by itself isn’t capable of fully telling the story. But adding it to A-roll, whatever story you are telling is fleshed out, enhanced, and made more clear.
B-Roll makes your videos more viewable. If you were to look on YouTube right now for videos of the subject you are wanting to film yourself, you will see many videos shot from a very basic, one camera perspective. Which is fine, especially if that one camera point of view is properly lit, steady, in focus…
Shooting B-Roll footage to add in makes the final video more appealing in many cases. It’s what people are used to seeing on TV, even in short commercials, so your film having B-Roll makes an impression of being shot by a professional. In the long run, this can give your YouTube channel more subscriptions and each video more views.
Recommended Videography Reading:
- How to Shoot Video That Doesn't Suck: Advice to Make Any Amateur Look Like a Pro
- The DSLR Filmmaker's Handbook: Real-World Production Techniques
Method One - Shoot It Later

Photo by cottonbro from Pexels
The easiest way to gather B-Roll is to simply shoot your B-Roll right after you film your primary footage.
A benefit of this method is that it doesn’t require any additional gear. Disadvantages of this method include the fact that things move, people get antsy and don’t want to stick around, and lighting conditions, especially if outside, can change significantly.
This is a valid method, though. It can give you workable B-Roll many times, but you really do need to work at keeping it fresh if you're filming other people.
Learn More:
Method Two - Shooting B-Roll At the Same Time

photo by castenoid via iStock
Well, how are you going to do this with one camera? You won’t, this method requires a second camera. However, you don’t have to have a movie studio budget to shoot with two or more cameras. Many photographers already have multiple cameras, but we tend to gravitate toward using our newest or best camera for shooting video.
Think about this: you may still have the entry-level camera you started with in your gear bag. Maybe you held onto it as a backup camera. Well, this is a good opportunity to dig it out of the bottom of your bag and make use of whatever video mode it has.

photo by Dmitrii Guldin via iStock
Perhaps the perfect camera for shooting B-Roll is your action cam. Advantages of shooting B-Roll with GoPro or other brands of action cam include the already excellent video capabilities of the GoPro, the small size of action cams, and that they are usually simple to set up for remote use.
You could probably just open your gear kit and set up for shooting B-Roll right now. All the GoPro video tips you’ve already learned apply to using your action cam for shooting B-Roll video.
Simple B-Roll Video Gear

As an example of what gear you need to start shooting B-Roll with GoPro style cameras, check out this idea of a simple rig you may already own.
An excellent camera choice for anyone looking for an action cam is the GoPro HERO 8 Black. It is one of the most full-featured GoPro cameras and it is very easy to capture high-quality video remotely. If you don’t already own this action camera, it’s budget-friendly and simple to set up and use.

For your lighting, the LitraTorch LitraPro battery-powered LED continuous light is usable either on camera, paired with a GoPro on a small bracket, or used separately. It has the ability to be controlled from a smartphone app and the battery lasts from 1 hour on high to up to 10 hours on low for extended shooting.
Well, that’s the camera and lighting, now how do we use these to capture B-Roll as we’re engaged in our primary filming?
OctoPad to the rescue! The OctoPad camera and accessory mounting system is one of my favorite new tools in my gear bag. I use it for virtually all the styles of photography and videography I do.
The combination of the GoPro HERO 8, LitraTorch LitraPro, and Octopad and make it virtually effortless to get great footage when shooting B-Roll solo because these are all very small, quite easy to use, and extremely functional.
B-Roll is How We Roll

Gathering B-Roll is one of the biggest things you can do as a videographer to improve your finished video productions. Of course, you also want to learn about lighting techniques, camera supports, editing programs, and advanced camera operations.
Editing is going to be a key skill for finishing your videos in a way that results in a project that looks like a professionally made film. Shooting B-Roll with GoPro type action cams is another key factor in creating videos and vlogs that people will enjoy and will come back for more.
You don’t need to hire out for additional people - you can do it all yourself. Shooting B-Roll solo and adding that footage to your finished productions will result in fantastic videos. Try it out for yourself!
Learn More:
We Recommend
Upgrade Your Photography Lighting With Adorama's Sale on Profoto Gear
Photo by Yuliya Kosolapova on Unsplash
If you've been itching to upgrade your photography lighting but are strapped for cash, Adorama's current sale on Profoto lighting gear might just be the ticket.
Running through Friday, February 28th, this sale gives you 10 percent off any Profoto product if you use the promo code 10OFFPROFOTO at checkout.
This code was originally supposed to be exclusively for Profoto's C1 Plus portable studio light shown above, but the 10 percent off deal has been expanded.
I might pick up the C1 Plus and give it a test run because as you can see above, it's TINY. It can be controlled by your phone, too, so that makes lighting your portraits and other images super simple.
If you're looking for something for the studio, the Profoto D1 Air Studio Kit is a great choice.
It's already on closeout, but add another 10 percent off and you really start to rack up the savings!
You can customize this kit to suit your specific needs with 1-3 heads, various watt seconds, and two different kit options.
Of course, Profoto has all kinds of other lighting gear you can snag, too.
Sales like this don't come along that often, particularly on every item Profoto has. Strike while the iron is hot, get yourself some new gear, and save yourself some of the green stuff while you're at it! Remember to use the promo code 10OFFPROFOTO!
We Recommend
Want to Shoot Better Video? Get a Weebill 2 Handheld Gimbal Stabilizer
One of the ways that the photography industry has changed over the last few years is that more and more photographers like me are dedicating more and more time to video production.
Three years ago, for example, I spent next to no time working on videos for the PhotographyTalk YouTube channel. Now, it's one of my primary tasks each workday.
But adding video to your repertoire is obviously more complicated than simply switching your camera to video mode and shooting footage of whatever you please. You need certain accessories to help you be successful, and at the top of that "must-have" list should be a high-quality gimbal. For my money, it's tough to beat the Weebill 2.
With that said, let's take a deeper look at the Weebill 2 so you can see why it's such a smart investment for improving the quality of your videos.
Weebill 2 Specs and Features
Let's kick things off with a quick overview of the Weebill 2 specs and features:
- Dimensions: 12.6 x 2.4 x 8.9 inches
- Weight: 3.24 pounds
- 3-axis stabilization
- Tilt mechanical range: Max: +190 degrees; Min: -150 degrees
- Pan mechanical range: 360 degrees
- Roll mechanical range: Max: +80 degrees; Min: -260 degrees
- Battery life: 9 hours
- Modes: Locking, Vortex, Point of View, Follow, Pan Follow, Go
- Payload: About 7 pounds
- Price: $549
The Weebill 2 is outfitted with an Infineon sensor that works with an upgraded algorithm and motor to provide you with improved stabilization. Paired with the improved stabilization is a 2.88-inch vari-angle color touchscreen that can be flipped out of the horizontal part of the gimbal's body or folded back in when not in use. If you pick up Zhiyun's TransMount Video Transmission Transmitter AI, the flip-out touchscreen can be used as a monitor to view footage. You can also use the screen to keep tabs on the SmartFollow Object Tracking if you have the TransMount Video Transmitter.
The gimbal can be controlled remotely, and to provide more utility, the Weebill 2 comes with a mini tripod that attaches to the base of the grip.
If you're a solo shooter like I am, this gives you the ability to get B-roll footage while controlling the gimbal from your smartphone. As an aside, the mini tripod also folds up and can be used as a grip extension. You can add a quick-release sling grip to the Weebill 2 for getting low-angle footage as well.
Of note is that while this is considered a small gimbal, it isn't limited to use with small cameras. It's compatible with full frame rigs with big lenses. Now, obviously you probably don't want to spend hours and hours shooting video with a Canon 5D Mark IV and a big zoom lens on this thing, but I suppose you could do so if you like!
With my Canon EOS R5 and the RF 15-35mm f/2.8L on this gimbal, it's easy as pie to shoot video.
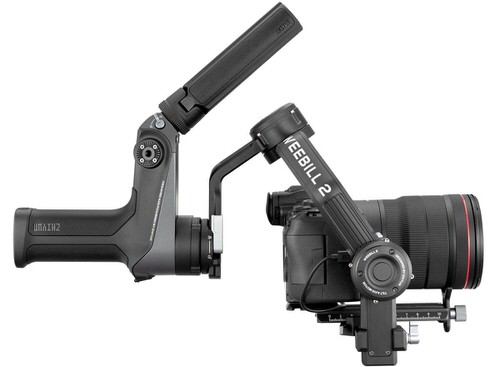
Aside from the base configuration, you can opt for two packages - the Combo or the Pro.
The Combo package includes the aforementioned sling grip (shown above) as well as a carrying case for the gimbal. The Combo package is $649.
The Pro package includes everything in the Combo set and adds the wireless video transmission kit I described earlier as well as a follow focus motor. The Pro package is $899.
General Impressions of the Weebill 2
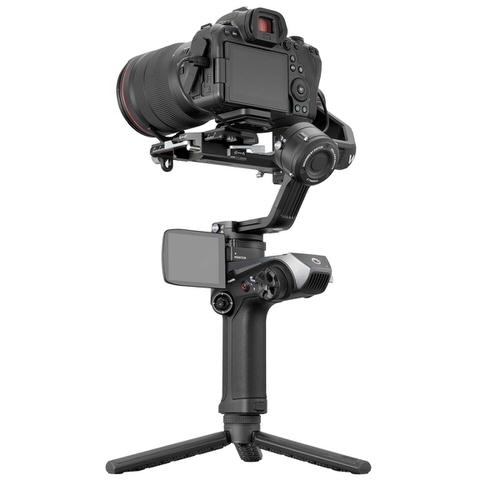
If you used the original Weebill gimbal, you'll immediately notice that the Weebill 2 feels as though it's built to a higher degree of quality. Sure, the Weebill 2 is more than a pound heavier, but I'd rather have a gimbal that feels more durable and comfortable in the hand, even if it means having to carry more weight.
The grip is fantastic. I like how there's only one button on the main grip (the trigger, which is on the front). The rest of the controls are on the horizontal section of the gimbal on the left-hand side. While some users have noted that this is a little inconvenient, I actually prefer this arrangement because it minimizes the chance that I'll accidentally press a button. Of course, since the controls are on the left side, left-handed users might not like the arrangement so much.
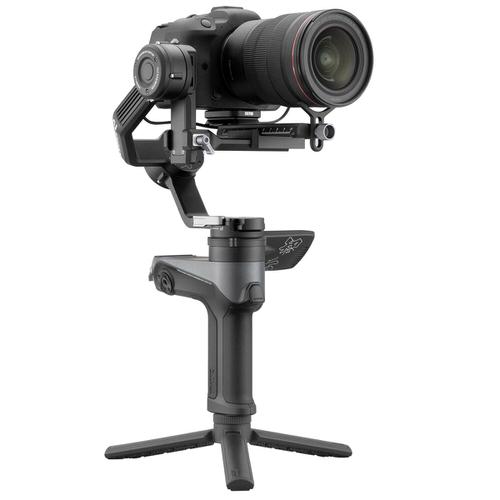
Depending on your camera and lens setup, you might only need to use mounting plates, though a long base plate might be needed if you have a long lens.
Whatever the case, the plates attach using screws and a hex tool. I'll admit that this isn't as convenient as it could be, but using a screw-mount system means the base plate is much less likely to move around.
Getting your camera balanced on the Weebill 2 was a simple, easy process. Fine-tuning the balance is incredibly easy thanks to the innovative flip-out touchscreen.
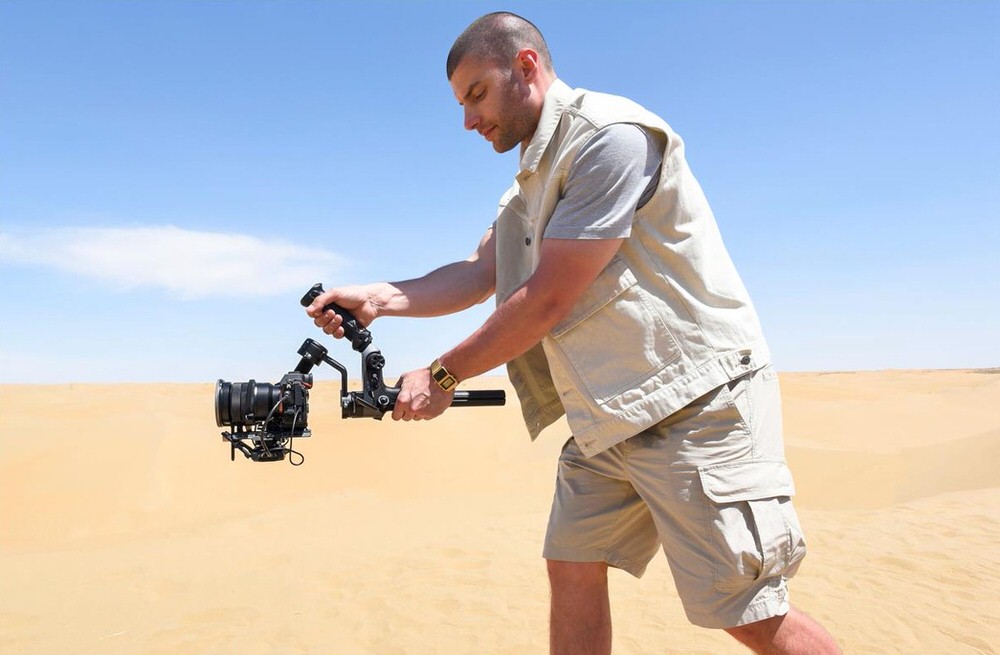
Once you begin using the Weebill 2, you'll find that it offers excellent performance. You get more than seven pounds of payload and the gimbal does a great job of keeping your camera nicely stabilized - even if you use a bigger full frame camera like I do. You'll find that the footage you get makes you look like a cinematic genius - okay, maybe that's a stretch. But you'll at least have buttery smooth footage at the end of the day. The Weebill 2 is quite skilled at smoothing out the shakes, jitters, bounces, and wobbles that occur when you're walking around with your camera.
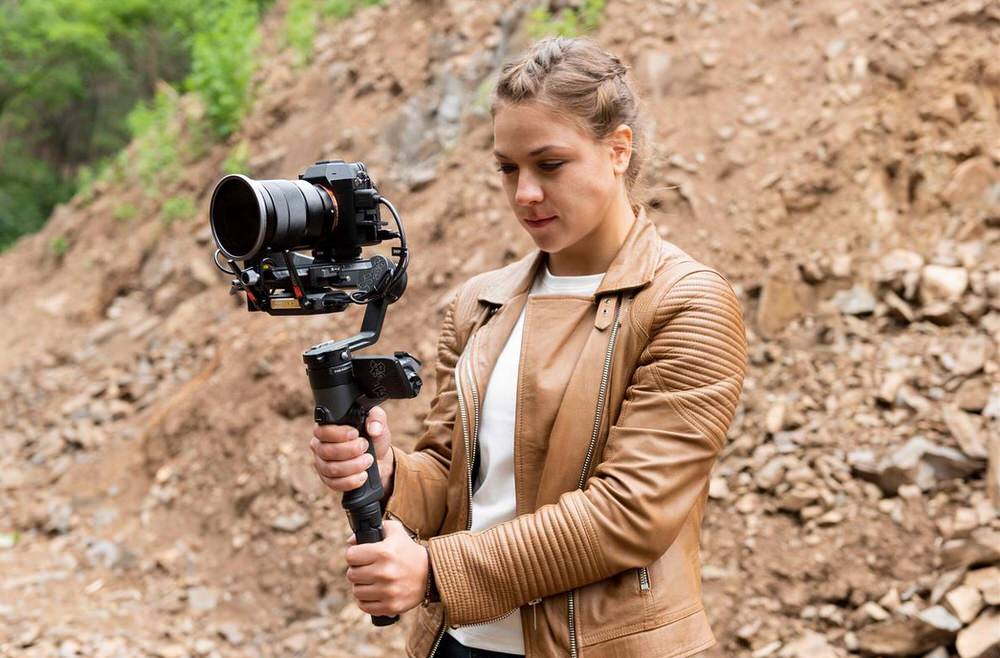
On the downside, the Weebill 2 has a built-in battery that is not replaceable. I'm not out for hours and hours on end shooting video, but if I were, it would be a downer to have to stop what I'm doing to recharge my gimbal.
Another puzzling feature is that the gimbal doesn't have an Arca-Swiss compatible plate. Since Arca-type plates are the standard, you lose compatibility with other gear and the flexibility of having a common plate system.
But, overall, the Weebill 2 is a well-designed, well-built, user-friendly gimbal that won't break the bank. For $549, you'll get a nice addition to your gear bag that will help you take your videos to the next level.
We Recommend
Why I Need a Nikon Z7 (and Why You Need One Too)
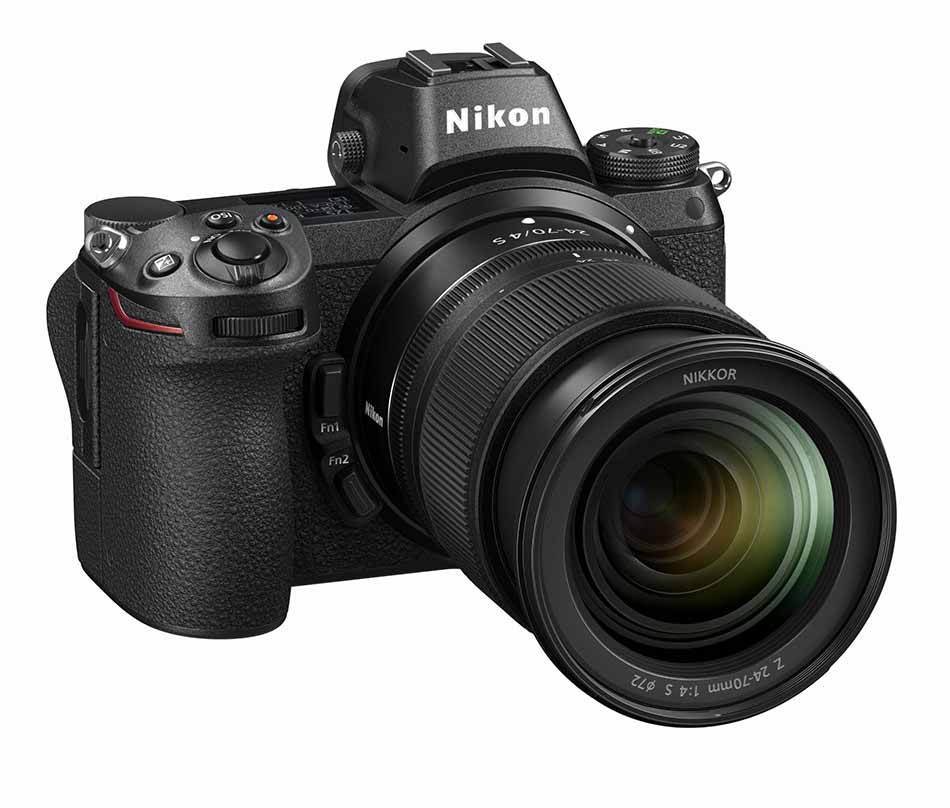
I think it's safe to say at this point that the Nikon Z7 is taking the world by storm.
And it should, too - Nikon's first mirrorless camera (along with the Z6) is exciting news. Not only that, it's a darn good camera that has the features to back up all the hype.
Looking at the Z7 and considering the excitement around its release, I have to say that even if I shot exclusively with Canon, Sony, or another brand, I'd still be impressed with the Z7.
So, that got me thinking - if the Z7 is so awesome, I should outline the reasons why I need one, and why you need one too.
The Nikon Z7 Has Impressive Specs

Check out these incredible features and tell me that this isn't one impressive camera:
- Backside-illuminated 45.7-megapixel full frame CMOS sensor
- EXPEED 6 image processing
- 9fps continuous shooting speed
- ISO range of 64-25600; expandable to 32-102400
- 493-point autofocus system
- 5-axis sensor-based image stabilization
- 3.2-inch tilting, touch-enabled LCD with 2.1 million dots
- OLED electronic viewfinder with 3.69 million dots and 0.80x magnification
Impressed yet?
For me, there's two things that stand out among the primary features of the Z7...
What Caught My Eye About the Z7
First, that sensor is something else. I shoot with a Nikon D850, so I know firsthand how good Nikon's recent high-megapixel backside-illuminated sensors are.
The second thing that jumps out at me about the Z7 is its incredible autofocus performance.
For starters, Nikon upped its game in the AF point department, giving the Z7 a ludicrous 493-point system. My D850 has "only" 153 points.
Not only that, the Z7's autofocus system has 90 percent coverage of the viewfinder. It can also acquire subjects as soon as they enter the frame and track them throughout, even when they move to the edges.
As if that's not impressive enough, consider this - the Z7's autofocusing algorithm enables it to switch between focal-plane phase-detect autofocus and contrast-detect autofocus automatically. That means it will help you get the sharpest images possible no matter the situation.
Why I Need a Z7 (and Why You Need One Too)

I'm not going to buy a Z7 to replace my D850, but what I will do it buy a Z7 to give my D850 some company in my camera bag.
And for those of you that think having both of these cameras in my bag is crazy, let me convince you otherwise.
For starters, there's times when a bigger, chunkier DSLR is better suited to what I'm doing, and times when I want something smaller and lighterweight.
When I shoot at the beach, for example, and have a 100-yard walk to the shoot location, my D850 is my go-to. But when I'm driving to Joshua Tree to do a little night photography and have to hike all over the place in the middle of the night, having a smaller, lighter camera is preferable.

Additionally, though the D850 and Z7 have similar video capabilities, when I shoot video, I prefer the smaller body of a mirrorless camera to do so.
I would also love to have a Z7 in my bag simply for that crazy-good autofocus system I outlined earlier.
I can just imagine taking photos of my son playing soccer in the park with 493-points of autofocus goodness. I visit my fair share of air shows, too, so believe me when I say that I'm salivating at the chance of firing up the Z7 for some aviation photography.
The fact that Nikon has a group of dedicated lenses for their mirrorless systems (with more on the way) and the fact that you can use older Nikon lenses with the Z7 (with an adapter) is a big selling point as well.
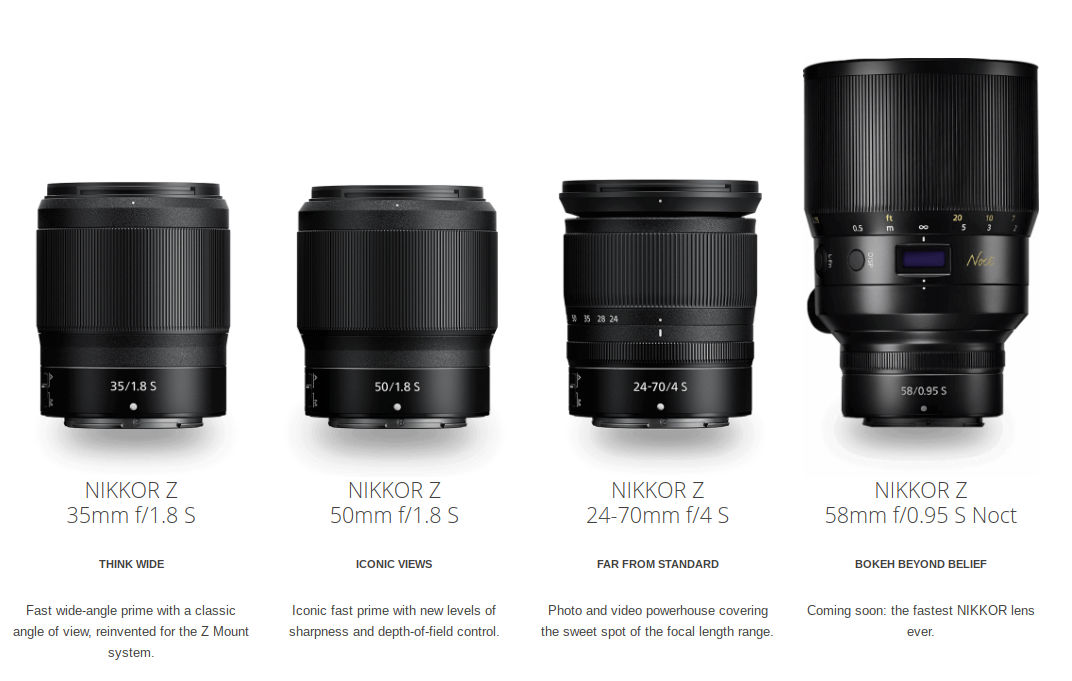
Of course, another big reason why you and I need a Z7 is because mirrorless is the wave of the future.
Though I'm not giving up my D850 anytime soon, I see the writing on the wall. In my opinion, there will be a time when DSLRs are viewed as a quaint relic of photography's past.
If mirrorless is where we're headed, I might as well get used to it now!
Pre-order your very own Nikon Z7
We Recommend
You Need These Must-Have DJI Mavic 2 Pro Accessories
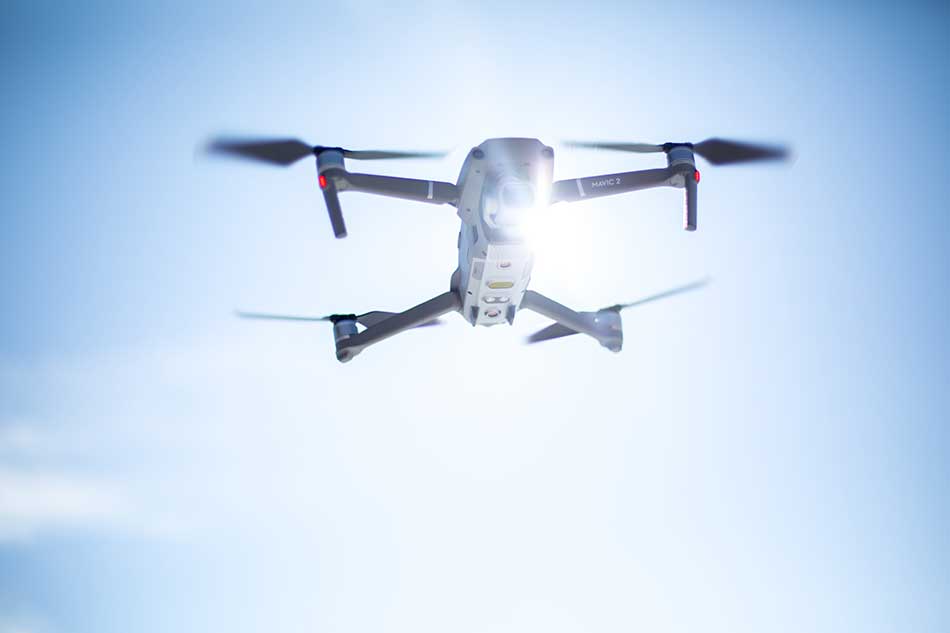
Photo by Bram Van Oost on Unsplash
If you've been following our recent articles here on PhotographyTalk and our videos over on YouTube, then you know that I've been putting the DJI Mavic Air 2 through its paces.
I've found the Mavic Air 2 to be a total joy to fly, and its photo and video capabilities are certainly an added bonus.
BUT...
I still prefer my Mavic 2 Pro.
For my money, the Mavic 2 Pro offers far better video performance. Since I primarily use my drones for video production, that's a hugely important feature.
But, like every drone, the Mavic 2 Pro benefits from having the right accessories that make it easier to fly, take photos, and create videos. Similar to DJI Mavic Mini battery which is a better accessory to have with Mavic Mini drone.
Below, I've listed some of my favorite DJI Mavic 2 Pro accessories.
Haida NanoPro ND Filter Kit

This is a fantastic little kit that gives you three ND filters for shooting long exposures and controlling shutter speed when shooting video.
The kit includes an ND 0.9, ND 1.2, ND 1.5, and ND 1.8 filter, each of which is built with an aviation-grade aluminum frame.
The frames are lightweight, yet durable and resist corrosion. Likewise, each filter features high-quality K9 optical class for the utmost clarity.
Haida has incorporated nanocoatings on both sides of each filter, too. This includes coatings that make the filters waterproof, scratch-resistant, and anti-reflective.
And with true neutral results, you don't have to worry about these filters causing color casts in your photos or videos. Add in the fact that they're less than $80, and you have the makings of the perfect DJI Mavic 2 pro accessory!
AxPower Low-Noise Quick-Release Propellers

By and large, the first accessory you'll need to replace on your Mavic 2 Pro (or any drone for that matter) will be the propellers.
Besides, having a spare set of propellers is always a good idea, just in case one gets damaged.
I prefer low-noise propellers because I'm often flying in urban areas and I want to minimize the disruption to my neighbors or other folks that are out and about.
These particular propellers are also quick-release and folding, so you can easily remove and store them.
Pick up these upgraded propellers for $15.99 at Amazon.
DJI Smart Controller

For my money, the DJI Smart Controller is the best way to fly the Mavic 2 Pro.
The gigantic 5.5-inch touchscreen is beautiful and bright, so you can clearly see it even in the brightest sunlight. The joysticks are nicely sized and responsive as well. I also like that there are dedicated buttons to make controlling the drone's many different features an easier task.
It syncs to the drone the instant you power it up, and it automatically switches frequencies so you get better range. It even has a SkyTalk feature so you can livestream video as you fly.
Pick yours up for $749 at Adorama.
Go Professional Case

It's not like the Mavic 2 Pro is a cheap investment, so a must-have accessory is definitely a hard case to protect the drone.
This case is as tough as they come. It's waterproof and dustproof, and has padlock holes so you can lock the case.
Inside is a closed cell foam insert with a spot for your drone and several accessories to stay snug and tight as you go from one location to the next.
And since this case is impact resistant, you get peace of mind that if it does hit the ground, your drone and accessories will be just fine.
Grab yours today for $129 at Adorama.
DJI Intelligent Flight Battery
While the DJI Intelligent Flight Battery is more expensive, it's worth it.
The fact that you can pair it with the DJI GO app and monitor the battery status, the circle number, temperature, and other important information makes it well worth the additional cost.
It also features overcharge protection, cold weather fatigue protection, and it eliminates rapid discharge in flight.
On top of all that, when the battery senses it's been stored for a while, it automatically discharges down to 50 percent to avoid damage and optimize the life of the battery.
If that's not intelligent, I don't know what is!
Get the DJI Intelligent Flight Battery for $95 on Adorama.