3 Reasons Why Chile Should Be Your Next Photography Destination

There is no doubt that there are a lot of stunningly beautiful places on earth. From pole to pole, continent to continent, and ocean to ocean, the variety of people, wildlife, and scenery is enough to keep a photographer busy for several lifetimes.
But few places offer as much for photographers as Chile. From coastal forests to dry, desert plateaus, bustling cities to tiny colonial villages, Chile is a patchwork of cultures, traditions, and landscapes that is sure to please just about any photographer.
That being said, consider our top three reasons why Chile should be on your list of must-see photography destinations.
Modern Cities, Colonial Villages
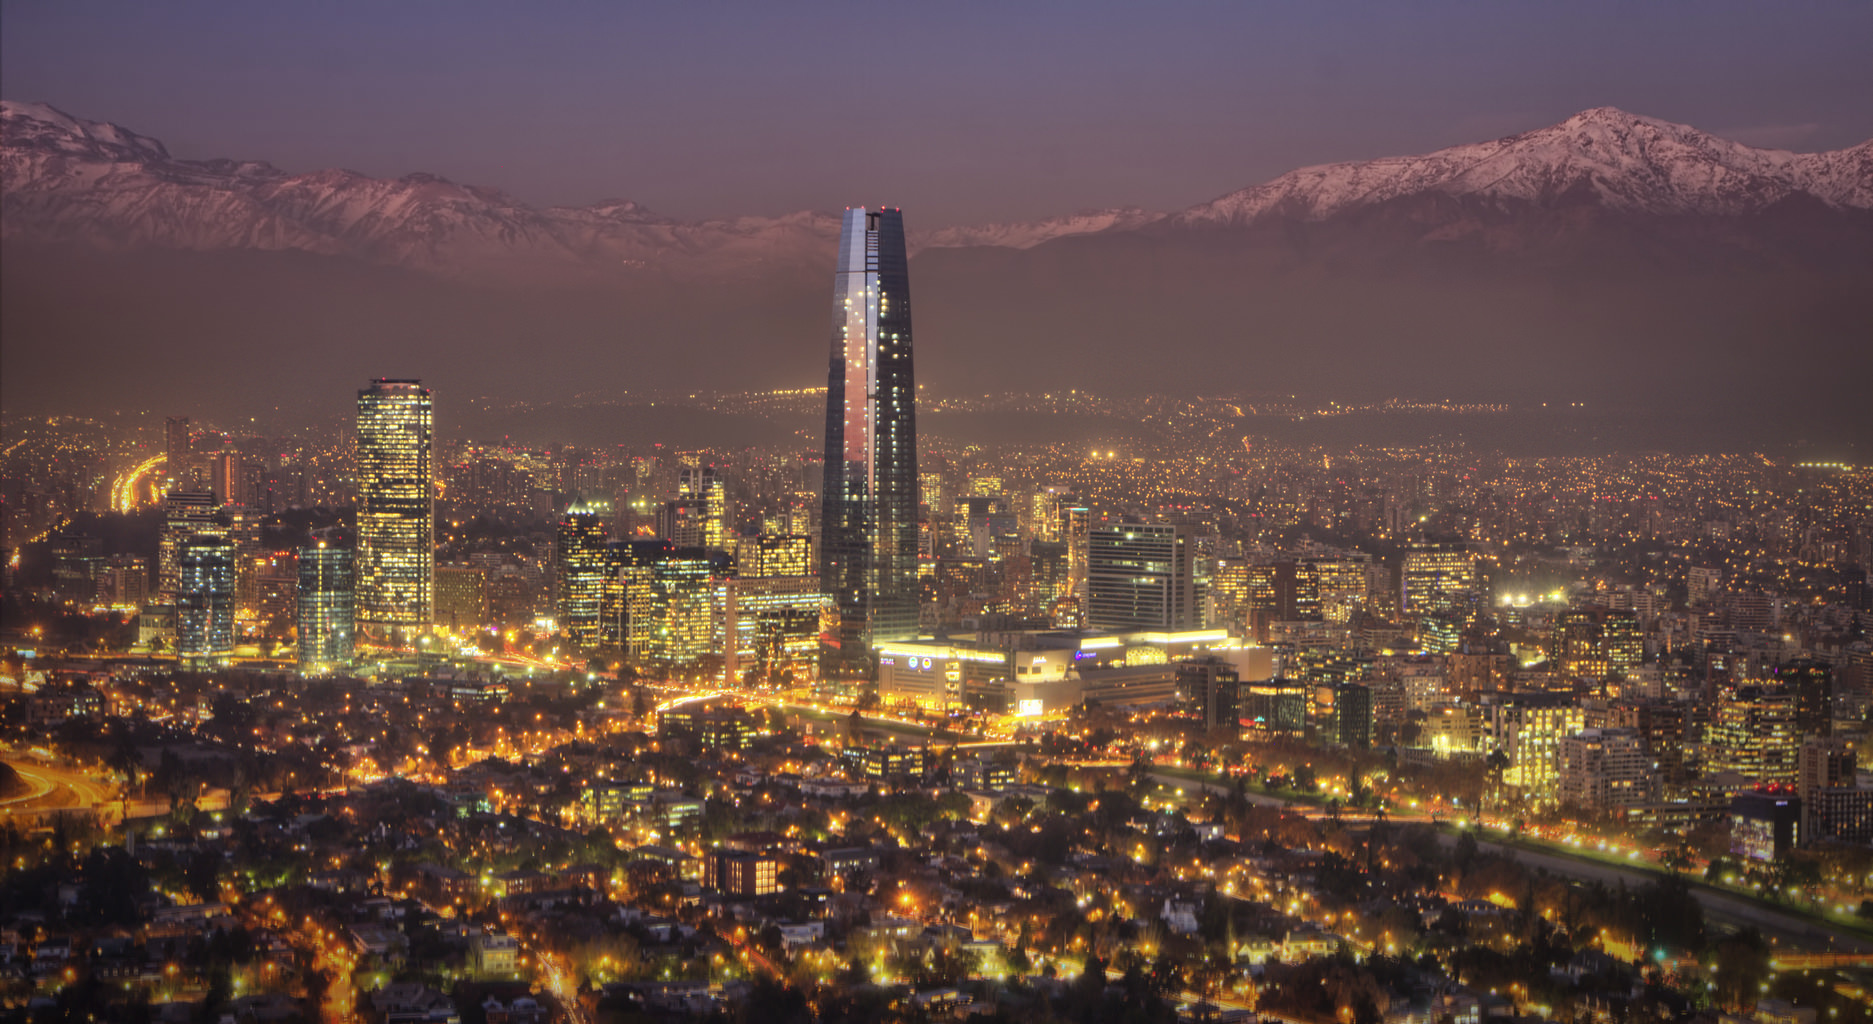
If street photography, portraiture, and architecture photography are up your alley, Chile offers unique experiences in urban and rural settings. Santiago is a city that combines modern amenities with a long history as well. The city’s skyline, shown above in front of the Andes mountains, might not be as impressive as cities like New York, but the combination of metal, steel, glass, and concrete in front of the backdrop of one of the most stunning mountain ranges in the world makes for some interesting photos. Santiago’s historical city center is worth a look as well and offers visitors an authentic Chilean experience.

Chile is dotted with tiny colonial villages too. Many of these villages are off the beaten path and seldom visited by tourists. Their small streets and picturesque village centers harken back to bygone eras. Stop and chat with locals, take photos of hundreds-year-old buildings, and bask in the warmth of the sun as you explore new areas completely different from those experienced in larger cities like Santiago.
Breathtaking Landscapes
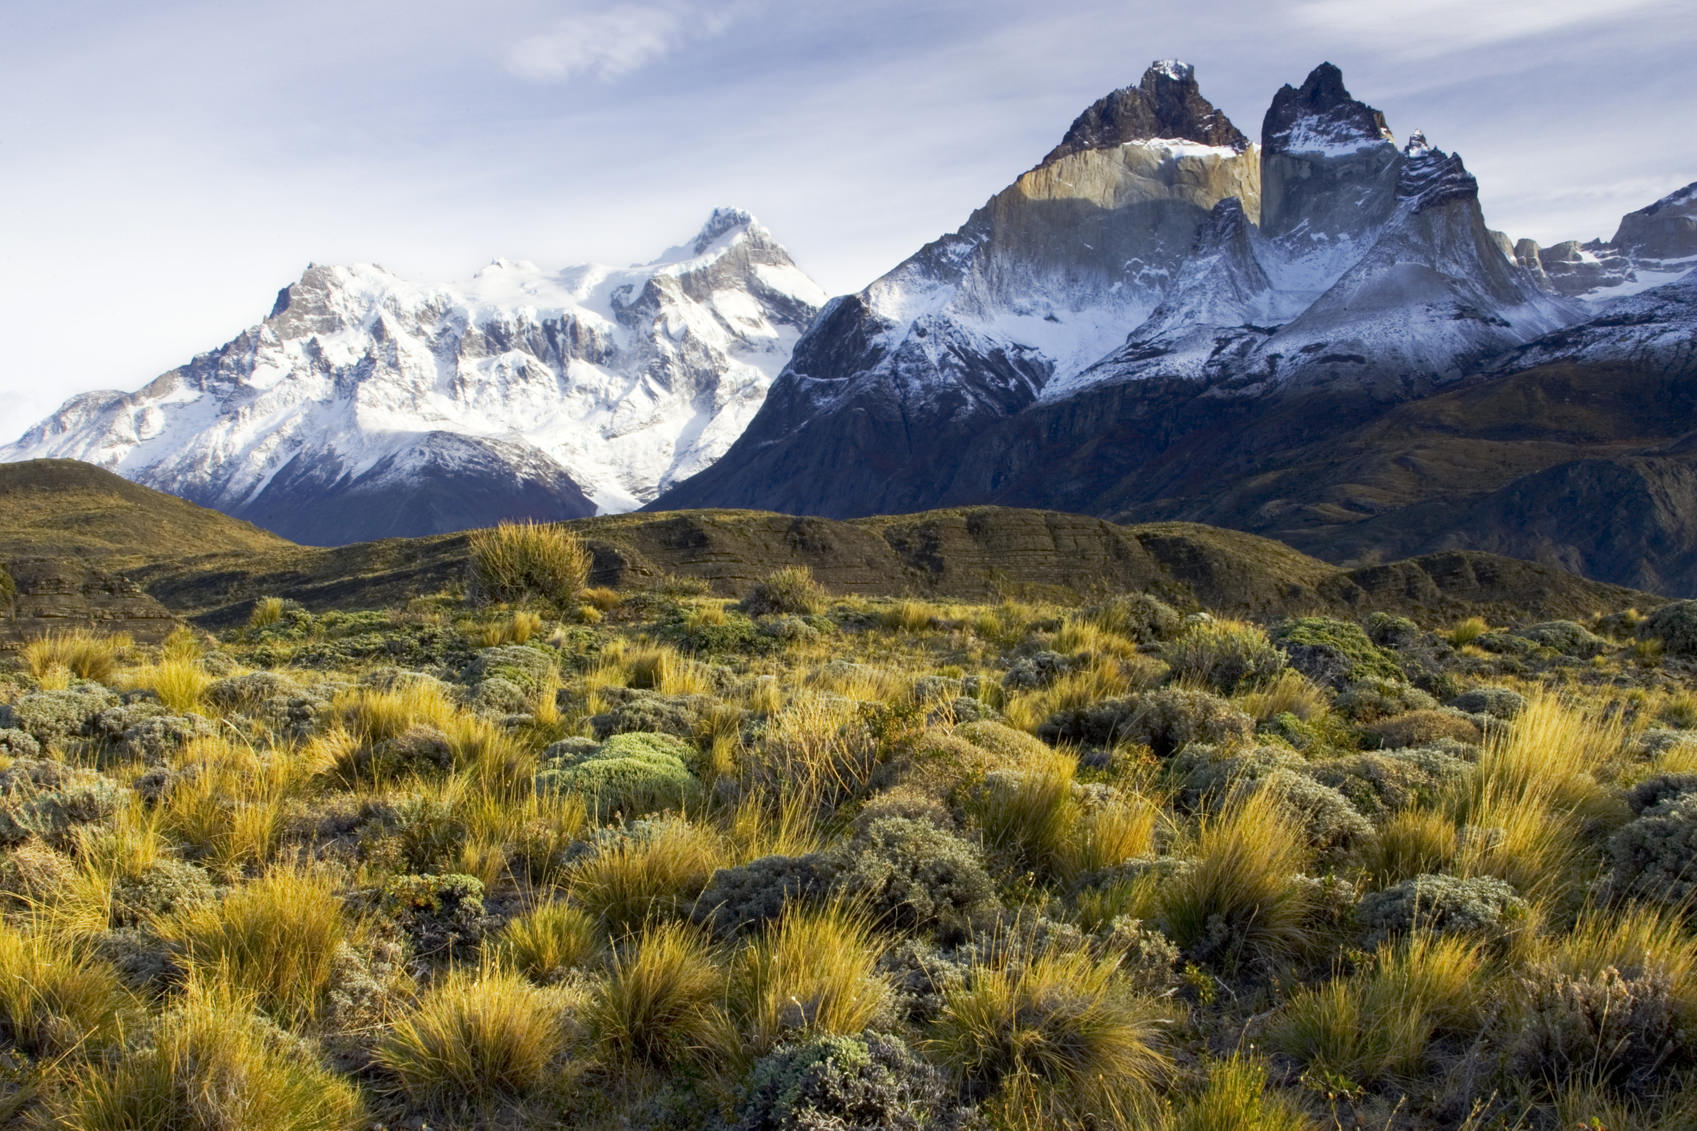
There are few places on earth that you can see such incredible landscapes as you can in Chile. The Andes Mountains, among the most famous in the world, give you plenty of opportunities for photos of snow-capped peaks, rushing rivers, and plant and wildlife that call the upper country home. Chile also has rocky islands along its coast, where animals like penguins and sea lions can be found basking in the sun in groups that number in the hundreds.
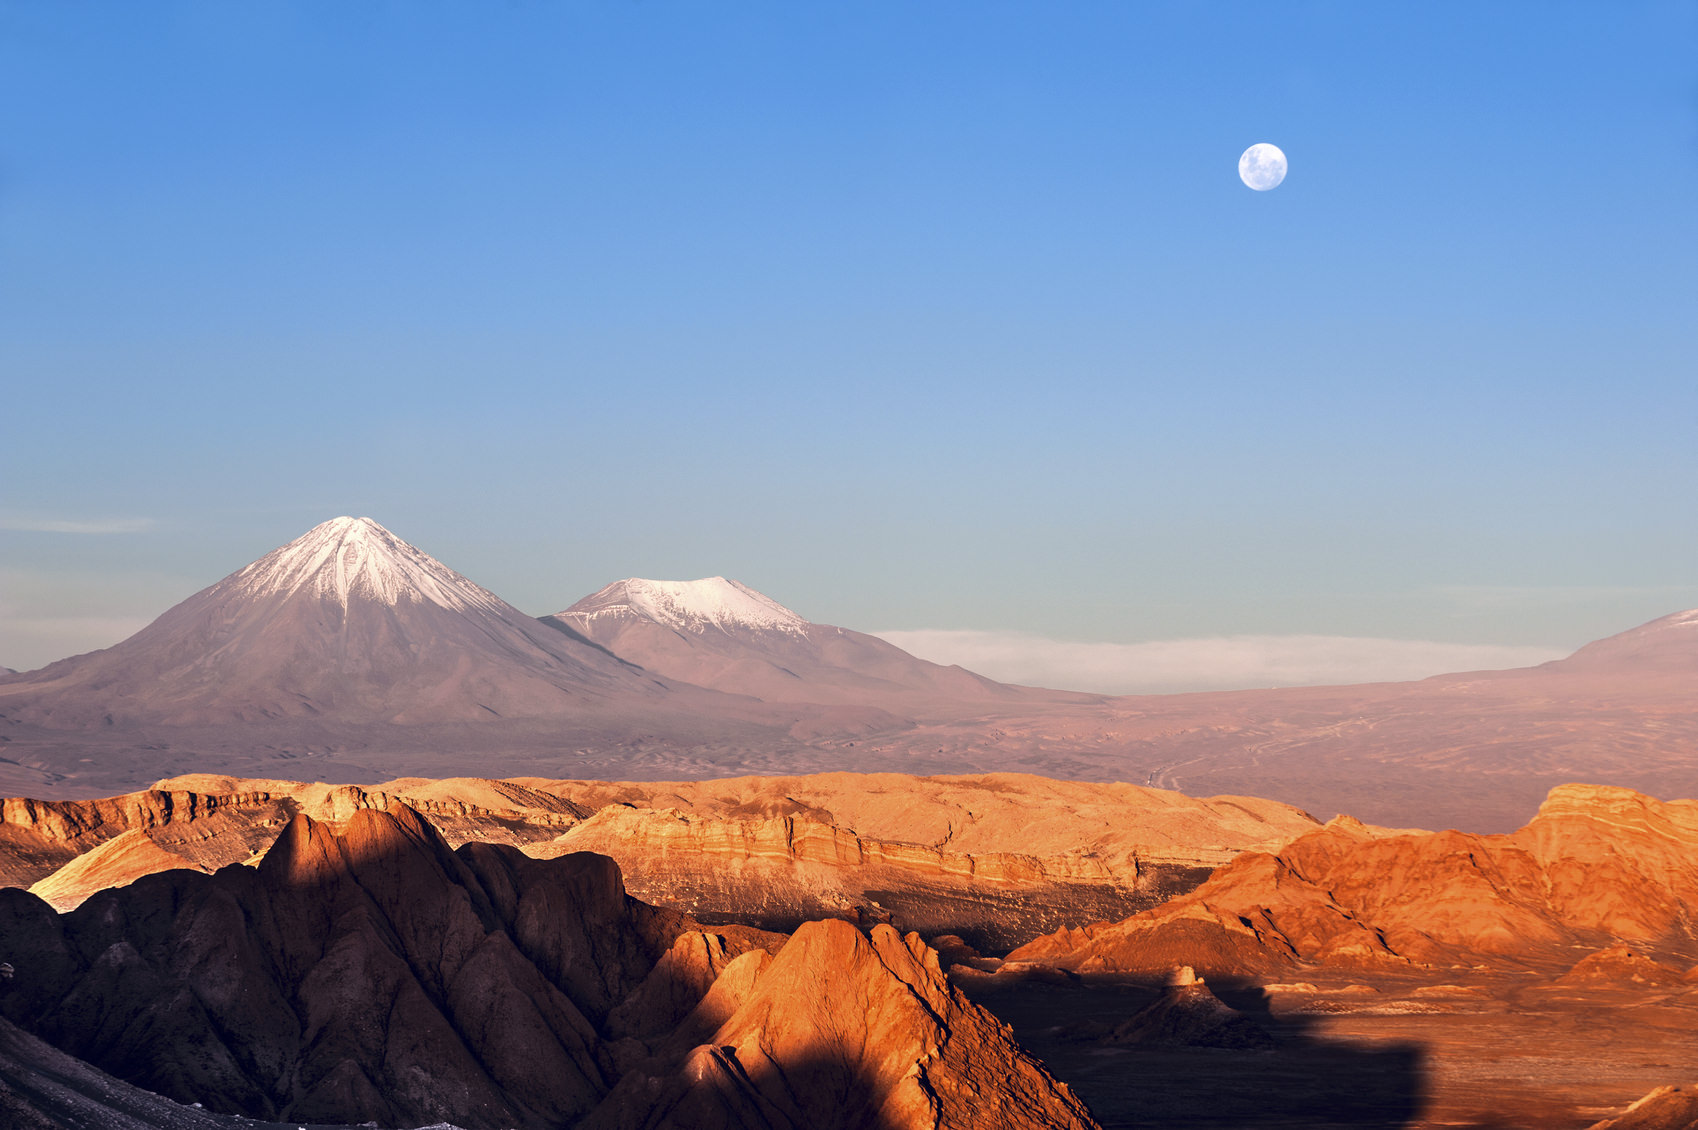
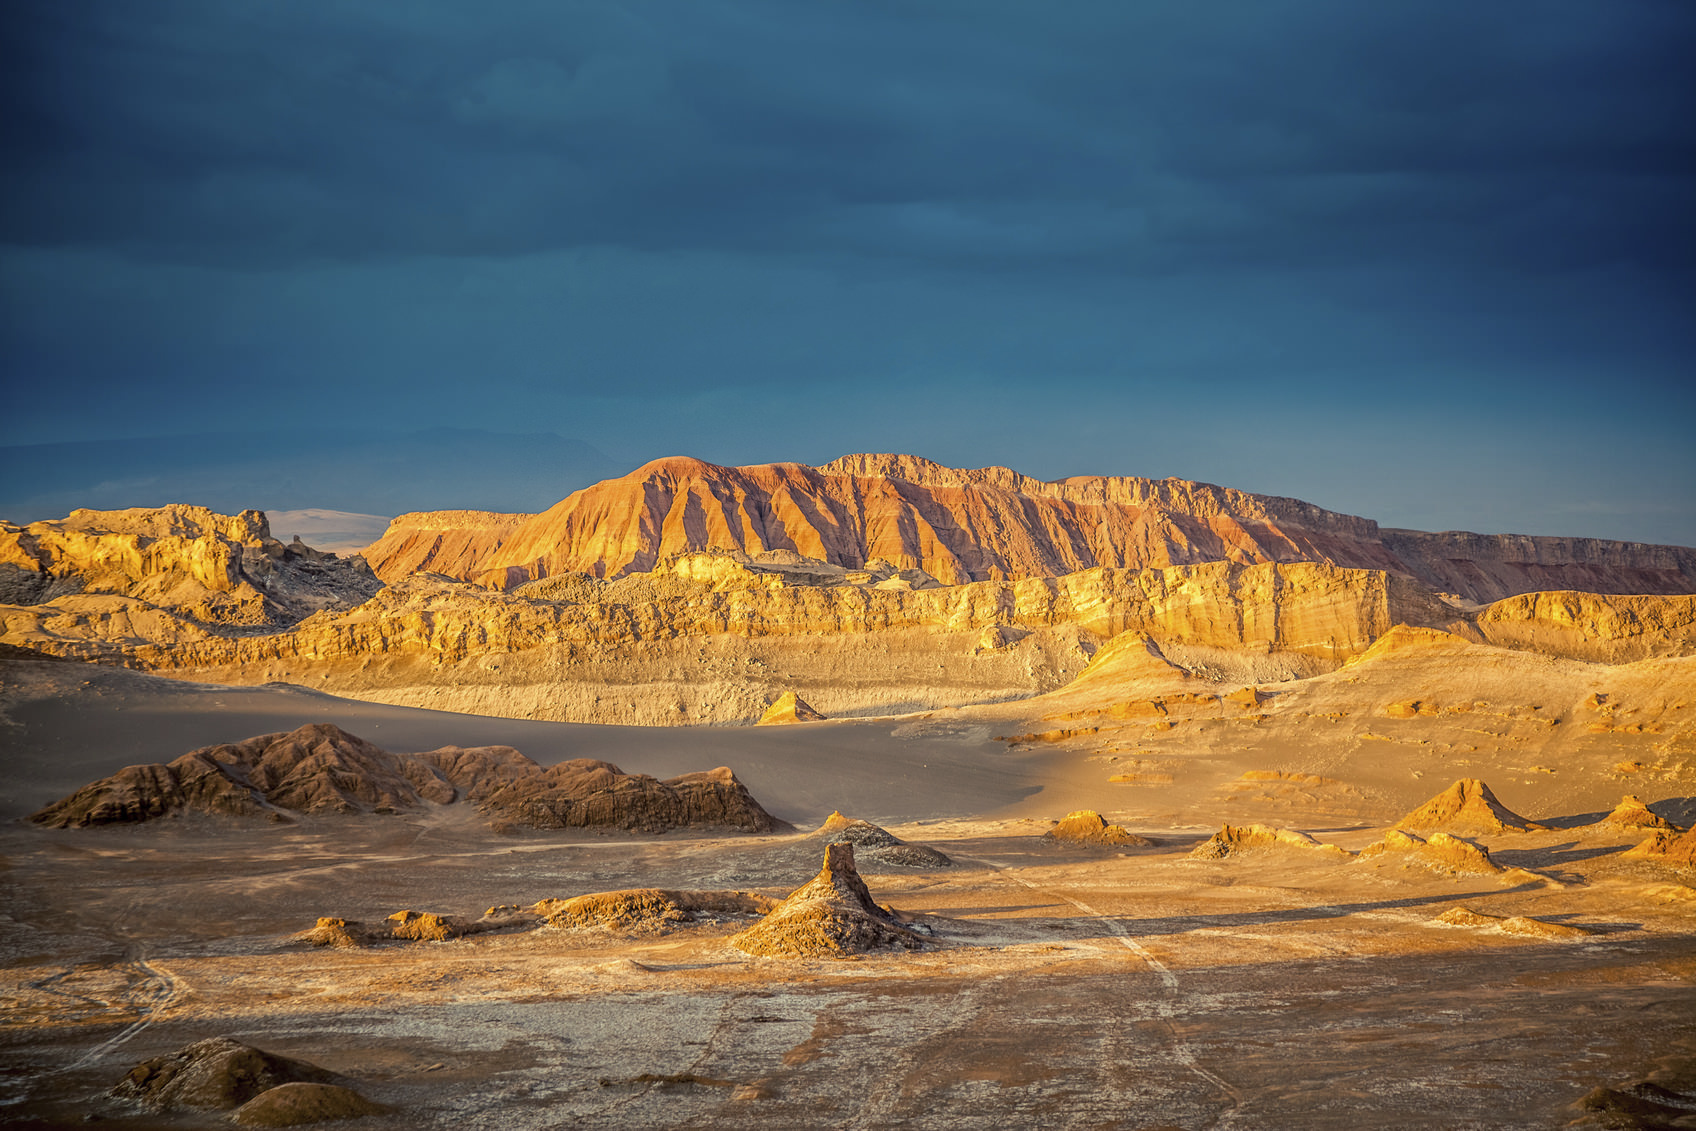
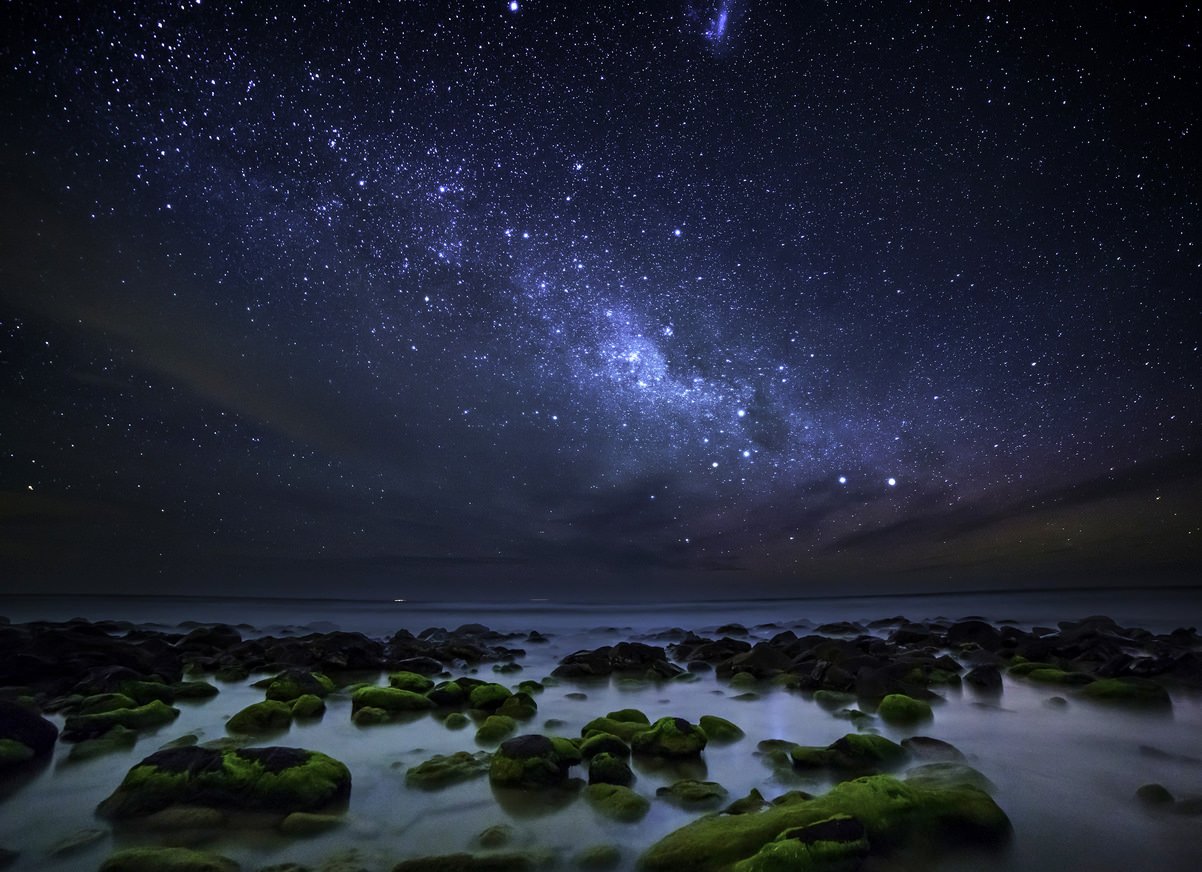
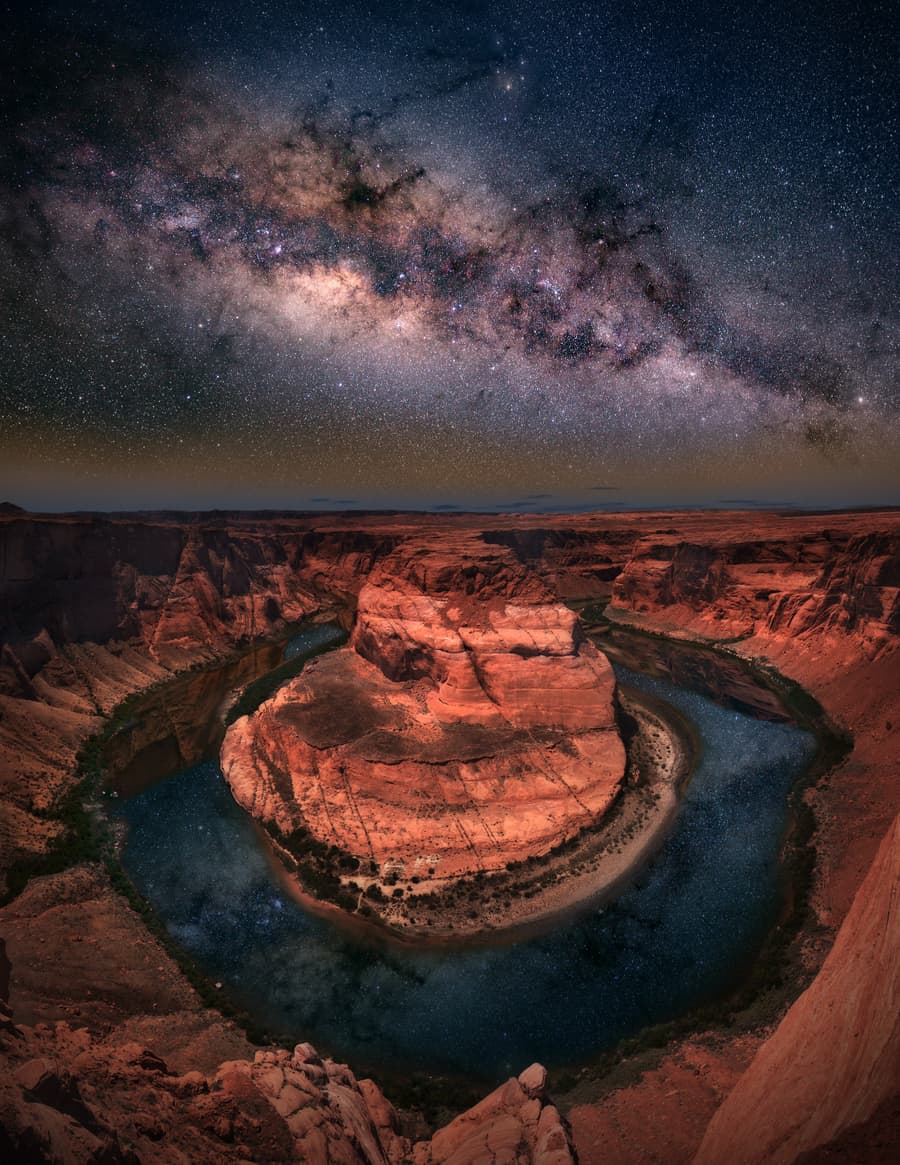
One of the most impressive landscapes in Chile is the Atacama Desert, the driest place on earth. But don’t let that title fool you - the Atacama is an unbelievably gorgeous place that is a veritable playground for landscape enthusiasts. Of course, Chile isn’t just known for what’s on the ground, but also for what’s in the skies above. Not only is Chile home to numerous observatories, but it also has plenty of off-the-beaten-path locations with very little light pollution that make for ideal spots for stargazing and astrophotography.
A Photo Tour of Chile Will Enhance Your Experience
If you want to see the beautiful destinations outlined above (and much more), your best bet for the premier Chile photography experience is to visit this beautiful country with Special Interest Tours. Now, there are a lot of photography groups out there, but none combine the diversity of scenery and experiences that Special Interest Tours does.
Consider this…
Over the course of six days and five nights, you will get to experience the Andes peaks, the Atacama desert, the busy streets of Santiago, penguin friendly islands, and colonial towns along the way that are seldom visited. And, because much of Chile is untouched by civilization, you will be blown away by the incredible night skies you’ll see each night of the trip. In fact, the skies are so good that renowned astronomer Bob Berman will be on hand for presentations, talks, and a tour of the Las Campanas Observatory high in the Andes mountains. The group will also get private access to an observatory for an entire night, where three large telescopes provide you with astonishing views of the southern sky.
If you’ve always wanted to travel and have the opportunity to test your mettle photographing everything from urban landscapes to deserts to mountains to the stars above, the Chile: Southern Skies Tour 2017 by Special Interest Tours is your chance to do so! The tour is scheduled for March 24-29, 2017, with an optional extension that takes the trip to April 1, 2017. Don’t miss this opportunity to catch a glimpse of incredible terrain, interact with locals, inspect the night sky, and travel with other star-gazing enthusiasts!
We Recommend
2020 Star Tracker Buying Guide
![]()
Photo by Smitt via iStock
Astrophotography has never been easier...
I don't mean to say that it's as simple as walking outside and pointing your camera at the sky, but astrophotography has definitely come a long way over the years.
One of the photography advancements that has made astrophotography so much easier is the development of star tracking devices.
The primary advantage of using a star tracker is that you can take photos of the night sky without worrying about the movement of the stars being captured. This means clean, crisp, and sharp stars with no star trails!
In this 2020 star tracker buying guide, we present you with some of the best star trackers currently on the market.
2020 Star Tracker Buying Guide: Move-Shoot-Move 2-in-1 Star Tracker
![]()
At the top of our 2020 star tracker buying guide is this little guy, the Move-Shoot-Move 2-In-1 Star Tracker.
And when I say little, I mean really little...
It measures just 1.7" x 3.15" x 3.9" and weighs in at less than a pound. It is truly a remarkably portable star tracking device. If you travel a lot and want a star tracker you can stuff in your backpack and not worry about carrying a ton of extra weight, this thing is the way to go!
![]()
The MSM 2-in-1 Star Tracker was designed by astrophotographers, which is why it's so small and portable.
But because photographers were behind its design, you'll also find that it's incredibly easy to set up and operate.
The integrated laser helps you polar align the unit to Polaris in a matter of seconds. You literally do that, set your exposure settings and focus, and you're ready to rock!
![]()
With this unit, you can take long exposures of the night sky that well exceed 60 seconds. In fact, you'll find many reviews of the 2-In-1 Star Tracker that sing its praises for long exposures that last up to five minutes!
Other features include:
- 6.6-pound payload capacity
- Up to a 3,000-shot battery life
- Passive motorized timelapse mode
- Worm-gear self-lock mechanism to ensure impeccable performance and long-lasting battery life
And if that's not good enough, this star tracker comes with a one-year warranty. You also get a 30-day full refund guarantee to give you peace of mind when you make your purchase.
This star tracker is even on sale at the moment, so it's an even better buy! Learn more about the MSM 2-In-1 Star Tracker.
Best Features: Tiny form factor, robust build quality, laser assist
Best For: Photographers that want a highly portable star tracker and those that don't want to sacrifice quality for budget-friendliness.
MSM 2-in-1 Star Tracker Price
- 2-in-1 Star Tracker: $199 at MSM
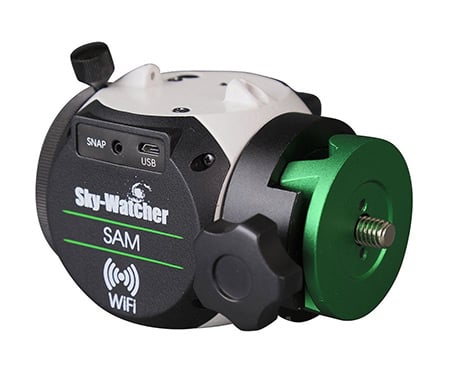
2020 Star Tracker Buying Guide: Sky-Watcher Star Adventurer
![]()
What makes the Sky-Watcher Star Adventurer a top choice for astrophotography is its robust payload.
This rig can accommodate up to 11 pounds of gear and has a clutch mechanism to lock it in place, so it's an ideal star tracker for DSLR setups with a long lens.
The Star Adventurer has an Alt-Az base, which makes polar alignment easy (and fast!) thanks to the separate azimuth adjustment and altitude adjustment knobs. There's also a built-in polar scope that makes polar alignment a breeze.
![]()
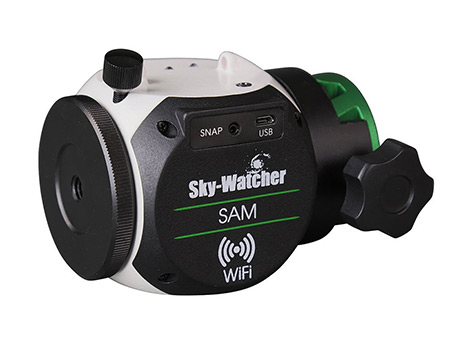
You can undertake various types of tracking with the Star Adventurer as well - solar, lunar, and sidereal - each of which has automatic DSLR shutter release control. You can even make time-lapse videos if you so choose.
The Star Adventurer has a rotary dial on the body that allows you to select the tracking speed. Likewise, its basic shooting speeds are easy to set up and literally takes just a few moments to dial in.
![]()
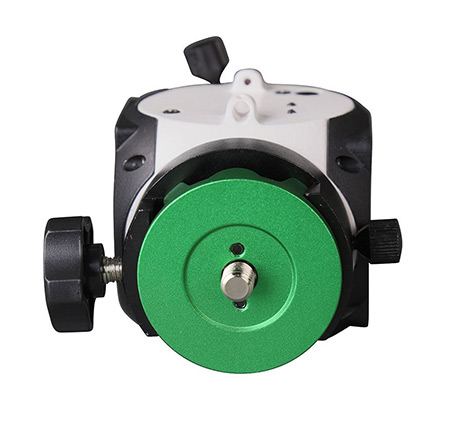
The unit has RA slew buttons and a hemisphere switch, too. The result of all this is ease of use that's off the charts. You can have the Star Adventurer set up and dialed in in a matter of moments.
It's worth noting that getting the Star Adventurer set up for time-lapses is a more involved process, but it's not complicated at all - just a bit more time-consuming.
![]()
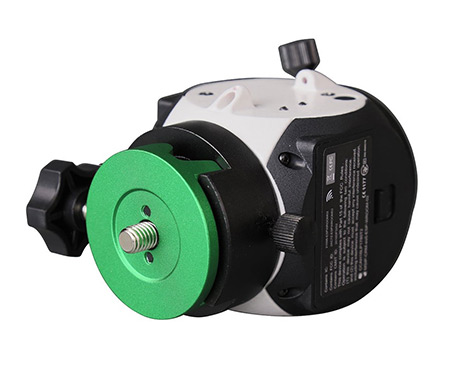
What many Star Adventurer users also appreciate is the build of the Star Adventurer.
It weighs in at 3.63 pounds (with a declination bracket attached) and when you hold it in your hands, you get a sense that it's built like a tank. This heavy-duty construction is obviously a benefit given that it'll be toted around and subjected to cold nighttime temperatures.
Yet despite its rather bulky weight, the Star Adventurer is small and extremely portable. You can carry it in virtually any camera bag without feeling like you're loaded down with gear.
The fact that the Star Adventurer uses just four AA batteries for power (which gets you approximately 72 hours of runtime) means you don't have to carry a bunch of heavy batteries around, either. And if you have a power source closeby, you can power the unit via mini-USB.
Best Features: Big payload, excellent battery life
Best For: Experienced astrophotographers with DSLR and long lens
Sky-Watcher Star Adventurer Price
- Sky-Watcher Star Adventurer Photo Package: $319.00 at Adorama
- Sky-Watcher Star Adventurer Astro Package: $329.00 at Adorama
- Sky-Watcher Star Adventurer Pro Package: $399.00 at Adorama
Learn More:
2020 Star Tracker Buying Guide: Sky-Watcher Star Adventurer Mini
If you don't need the payload capacity of the original Star Adventurer, you might consider the Star Adventurer Mini as an ideal solution.
Designed for smaller camera setups like APS-C and mirrorless bodies paired with a short lens, this Star Adventurer Mini can accommodate a payload of up to 6.6 pounds.
Given the smaller payload, the Star Adventurer Mini does not have a clutch system like its big brother. However, it does have an easy-to-use dual-screw system that gives you the friction you need to keep the camera secure and prevent the mount from rotating.
Like the original Star Adventurer, the Mini uses AA batteries for power (just two, though). That's enough juice to give you 24 hours of operation. You can also power it via a micro-USB cable for ease of use.
Speaking of easy, the Star Adventurer Mini was designed to be simple so even novices can get it set up in short order.
There is one button to turn the Mini on and off. When powered up, it uses Wi-Fi to connect to your smartphone where you can use the star tracker app (Android and iOS) to dial in settings and control the unit.
The star tracker app has tons of features that make creating astro photos a breeze.
You can control basic functions for star tracking, like the tracking speed and adjusting the hemisphere.
There is also a built-in polar finder, which is handy because the Mini does not have a built-in polar scope. Instead, you have to install it each time you shoot. There is a built-in intervalometer in the app so you can easily create time-lapses too.
In fact, the Star Adventurer Mini's app has multiple time-lapse modes built right in:
- Astro time-lapse, which tracks stars for the duration of the exposure and then repositions back to the start and repeats the process
- Regular time-lapse, which can be used to add a panning motion to daytime time-lapses
- Long exposure time-lapse, which can be used during the day (with ND filters) or at night. The Mini stays put during the duration of the exposure, and then pans to take another exposure.
Best Features: Ease of use, star tracker app
Best For: New astrophotographers with a lightweight camera setup
Sky-Watcher Star Adventurer Mini Price
- Sky-Watcher Star Adventurer Mini: $299.00 at Adorama
- Sky-Watcher Star Adventurer Mini Pro Package: $380.00 at Adorama
2020 Star Tracker Buying Guide: iOptron SkyGuider Pro
![]()
The iOptron SkyGuider Pro is a close competitor with the aforementioned Sky-Watcher Star Adventurer.
It has a payload of 11 pounds, just like the Star Adventurer, so it's another top choice for astrophotographers that have a bigger camera setup with long lenses.
The included dec mounting bracket offers stability for bigger cameras and lenses or even a small telescope if need be.
Yet, despite the big payload, the SkyGuider Pro is a compact unit that can fit in your hand. That makes transport and set up an easy task - just what you want when time is of the essence!
![]()
The SkyGuider Pro gets high marks for its silent tracking, precise controls, and a built-in rechargeable battery that gives you up to 20 hours of operation time (you can also power the unit via USB).
The built-in polar scope makes alignment an easy task, and it has a fine-engraved reticle with adjustable illumination so you can tailor its brightness to your liking.
What's more, iOptron has a companion app for iOS that makes for quick and accurate polar alignment.
![]()
When it comes to tracking the stars, you can choose from four different options: sidereal, solar, lunar, and 1/2X.
Each of these tracking options works in both the northern and southern hemispheres, and with a quick slew mode with forward and reverse options, you can quickly reframe the image without the need for changing the camera's position.
Speaking of positioning, the SkyGuider Pro has a removable alt-azimuth base that has degree markings for altitude, a built-in post for the azimuth control, and a bubble level, so you're sure to get the positioning of the camera just right.
![]()
As expected with bigger star tracker, the SkyGuider Pro is built to withstand some use and abuse.
All the mechanical components are metal for durability and the alt-azimuth bath is detachable for easier transport.
But don't think that because it's a heavy-duty mount that it's clunky or clumsy. This unit gets high marks from users for being incredibly easy to set up and use.
Best Features: Easy setup, excellent polar scope
Best For: Experienced astrophotographers
iOptron SkyGuider Pro Price
- iOptron SkyGuider Pro: $428.00 at Adorama
Learn More:
2020 Star Tracker Buying Guide: iOptron SkyTracker Pro
![]()
Another option from iOptron is the smaller, lighter-load SkyTracker Pro.
Like the Star Adventurer Mini, the SkyTracker Pro was designed for smaller gear setups weighing up to 6.6 pounds (with a counterweight kit).
As a result, the SkyTracker Pro is a light, portable star tracking option for photographers with an APS-C or mirrorless camera.
![]()
What's so great about this rig is the convenience it provides.
There's a built-in rechargeable battery with up to 24 hours of juice, an illuminated polar scope with eight different brightness levels, and four tracking rates - solar, lunar, sidereal, and 1/2X - to accommodate various needs.
Like the SkyGuider, the SkyTracker Pro can also be paired with the iOptron smartphone app to dial in the polar alignment both quickly and easily.
Also like the SkyGuider, the SkyTracker has a removable alt-azimuth base that has a bubble level, altitude degree markings, and a post for azimuth control.
Since the base is removable, you can attach the SkyTracker Pro head directly to any tripod with 1/4" or 3/8" threads. There's an included reversible mounting post for ball head mounting and a 1/4"-3/8" thread converter included.
![]()
This unit is made to last with an all-metal structure and ABS covers.
You'll get years of silent tracking, precise performance, and easy camera framing adjustment thanks to the quick slew mode.
In other words, this star tracker has everything you need to get started in astrophotography!
Best Features: Ease of use, lightweight
Best For: Beginner or enthusiast astrophotographers pursuing night sky images
iOptron SkyTracker Pro Price
- iOptron SkyTracker Pro: $299.99 at Adorama
We Recommend
3 Simple Strategies for Nailing the Focus in Night Landscape Photography
If you peruse photos in PhotographyTalk’s galleries, on Flickr, or on Instagram, it’s hard not to come across a great number of nighttime photos. These images often feature the movement of the stars or the Milky Way, they might include the Northern Lights, or show off the dazzling lights of a nighttime skyline.
Whatever the subject matter, photographing at night presents a number of challenges. Primary among them is getting the focus just right such that you have a sharp, final image. Here’s how to do that.
Use Live View
When shooting in the daytime, your viewfinder is the way to go, to be sure. But at night, it’s difficult to see all the details you need to see through the viewfinder. At night, use live view so you have a larger space to see the details you’re attempting to photograph. Look for the brightest area of the scene, then use the zoom function on live view to zoom in on that object. Use whatever that object is - a star, a streetlight, or the headlamp your friend is wearing off in the distance - as your focal point. Since you can more readily see it in live view, you can ensure that the entire photo will be in focus.

If the scene is very dark and there aren’t any bright objects upon which to focus, use a bright flashlight to illuminate the scene. Doing so allows you to select an area of focus, such as an object in the foreground, to ensure a sharp photo. You could even place your flashlight somewhere in the field of view of the camera facing toward you to serve as a bright focal point. Then turn off the flashlight, adjust the camera’s exposure settings, and take the photo.
Choose Manual Focus Over Autofocus
Autofocus is great, and with every new camera that’s rolled out each year, the power of autofocus seems to be vastly improved.
However, even today’s highly advanced autofocus systems still struggle to find a reference point on which to focus at night. As a result, manual focusing will get you better results.
With the brightest area of the photo referenced above serving as a guide, use the manual focus ring to adjust focus until the focal point is tack-sharp. You might need to adjust the focus back and forth several times to pinpoint the sharpest focus, but again, this process is made easier by using live view.
Try Focusing at Infinity
Perhaps the easiest trick you can use to obtain sharp nighttime photos is to focus at infinity. In many instances, this will get you relatively close to the sharpest point of focus and is a good starting point for sharper photos. For example, when shooting a star-filled sky, focusing at infinity will get you pretty good results.
There is a disclaimer for using this technique, though: the sharpest focus is usually slightly before infinity. As a result, go straight to infinity, and then dial back the focus just a touch. You’ll likely find that fine-tuning the focus in this manner will get you results that are nice and sharp.
This technique is a good trick to use if your camera isn’t equipped with live view. It won’t be perfect, and the results likely won’t be as sharp as those you can get with live view, but your photos should still be in greater focus than if you simply point and shoot using autofocus.
So, focusing at night is really quite simple. Stay away from autofocus, use live view, or try focusing at infinity. You’ll likely find the resulting images show a greater degree of sharpness!
We Recommend
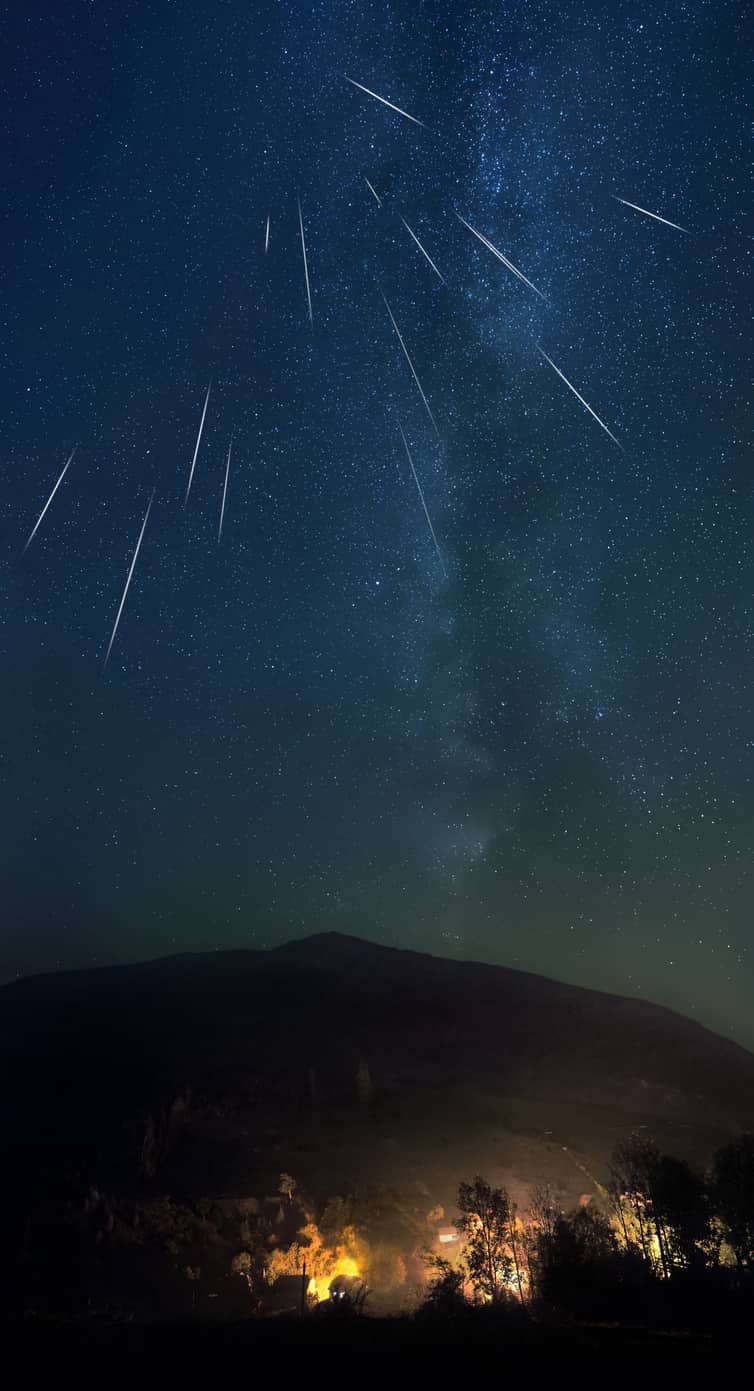
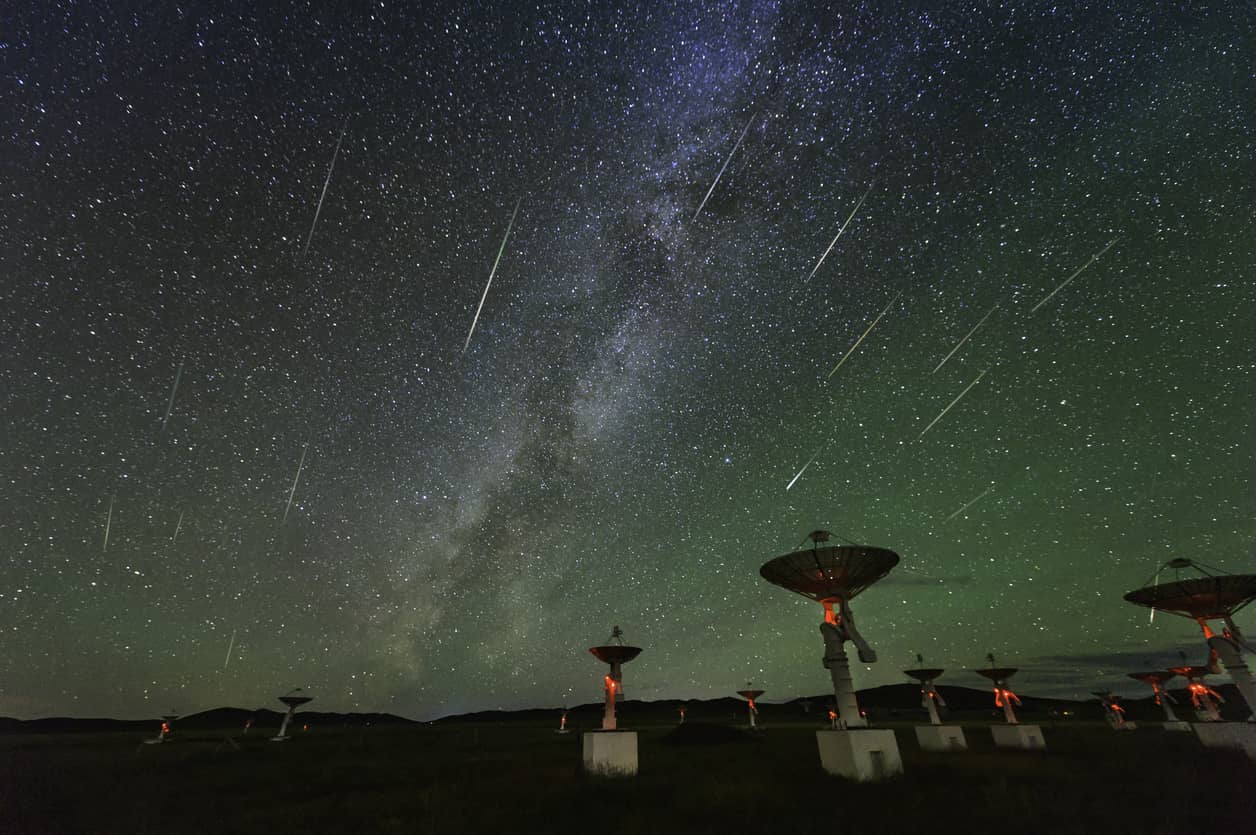
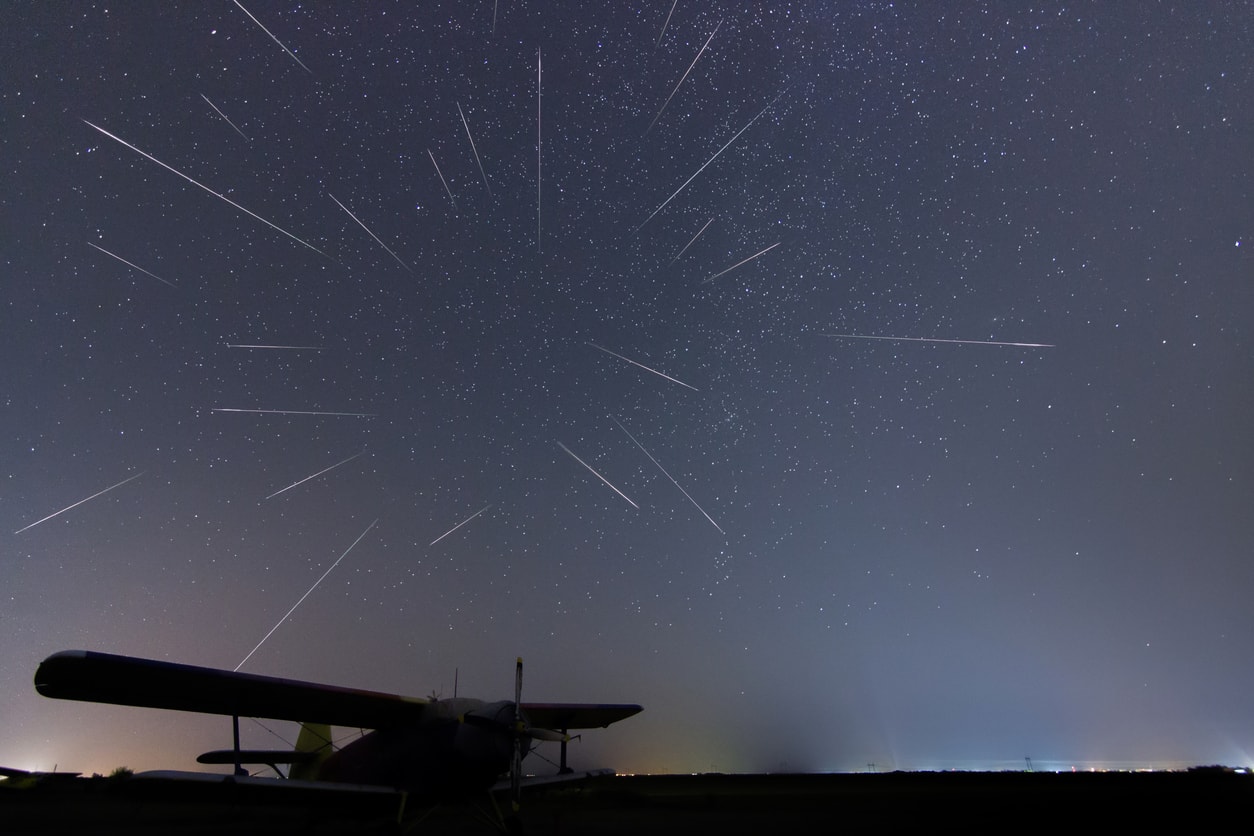
4 Simple Tips for Photographing Meteor Showers

One of the most dazzling shows in the night sky is a meteor shower.
And though there are times throughout the year when they are easy to see - including the upcoming Geminid Meteor Shower on the night of December 13 into the morning of December 14, 2017 - it can be difficult to capture them in a still photo.
That's because you have no idea when a meteor will light up in the sky, which means you have to get set up with the right gear to take as many photos as possible during the meteor shower.
There's some pressure, for sure, but with these simple tips, you can set yourself up for success.
Editor's Tip: Whether you're new to astrophotography or a seasoned veteran, you can find all the required gear you need to take photos of the night sky at MrStarGuy. That includes telescopes, astrophotography mounts and accessories, and tripods, to name a view. Learn more about their astrophotography gear at MrStarGuy.com.
Pre-Focus Your Lens
You will want your lens focused to infinity in order to get the sharpest image of the meteor shower. It's hard to manually focus a lens in the dead of night, though.
So, the day before you head out to your shoot location, head outside and set the focus on your lens by focusing on a far away object.
Once you have the object in sharp focus, tape the focus ring into place using gaffer's tape (which won't leave any sticky residue on your lens). Doing so ensures that the lens ring won't move and that you will have tack-sharp images.

If you forget to pre-focus your lens the day before, don't despair. If the moon is out, use it to focus the lens. A bright star will also do the trick.
Whatever method you use, be sure to use Live View to zoom in on the object to ensure your focus is spot on before taping the focus ring in place.
Learn More:
Use a Fast Wide-Angle Lens
The faster the lens you have, the better. Ideally, the lens will have a maximum aperture of at least f/2.8. Something along the lines of f/1.8 or f/1.4 would be even better.
Large apertures allow more light into the lens, meaning you can capture more light streaks from meteors as they streak across the sky.
That's why a wide-angle lens is an ideal choice for meteor showers as well. With a wider field of view, you'll be able to capture more of the sky, and more meteors, too.
In the video above by PhotoPills, you can see a wide-angle view of the 2015 Geminid Meteor shower.
Shooting with a wide-angle lens helps you incorporate other elements, like the landscape in the foreground, to give the shot even more visual interest and serve as an anchor to the sea of stars above it.
However, remember that the more sky you incorporate into the shot, the more likely you are to capture images of the meteors. Find a good balance between showing as much sky but while also incorporating foreground interest.
Editor's Tip: If you want to expand your ability to take photos of the night sky, consider purchasing a star tracking mount, like the Vixen Polarie Star Tracker. These mounts attach to your camera, giving you the ability to track stars as they move across the sky. The result is an elimination of star trails, so your photos have sharp, pinpoint stars. Get outfitted with a Polarie star tracking mount today.
Suggested Exposure Settings
Though the settings you use to photograph meteors will depend on the particular setting in which you shoot, you can at least start with the following:
- Aperture: As wide as possible, preferably f/1.4-f/2.8
- Shutter speed: 15-25 seconds
- ISO: 2000
Naturally, if you start with these settings and the image is either too dark or too bright, you'll need to make some adjustments to the settings to correct that problem.
Additionally, beware of noise from using a high ISO. Some cameras can handle higher ISOs better than others, so if you can get your hands on a faster lens, do so, and then use a slower ISO to control for noise.
Do a few test shots of the night sky to get the exposure settings nailed down, and once you have a good exposure, put the camera in continuous drive mode and use a remote shutter release to snap each photo.
Learn More:
- Explore More Astrophotography Tips
- Quick Tips for Photographing the Full Moon or Supermoon
- These Hubble Space Telescope Photos Will Absolutely Boggle Your Mind
Get Geared Up
In addition to your camera, a fast wide-angle lens, and a camera remote, you'll need a few other things to maximize your ability to get high-quality photos of meteors.
First and foremost, you need a tripod to give your camera a stable base for shooting. Since your shutter speed will be anywhere from 15-25 seconds long, a solid tripod is imperative for getting tack-sharp photos.
Secondly, you need additional camera batteries at the very least (a battery grip with two batteries at a minimum) or better still, an external battery pack for your camera.
All that juice is necessary because you'll be shooting photo after photo for a long period of time - maybe even all night.
The last thing you want is to get into a groove of taking photos of a meteor shower only to run out of battery power.
Lastly, you'll want extra storage capacity to store all the photos you take.
The larger the capacity and the faster the read/write speed of the card, the better.
Again, you don't want to miss out on taking epic shots because you have to swap out cards or because the card you're using spends too much time writing the images.
Editor's Tip: Get geared up for astrophotography with MrStarGuy. Find everything from headlamps and flashlights, external battery sources, tripods, and everything in between! MrStarGuy has a reputation for offering excellent products at incredible prices. Their customer service is top-notch as well. That's why we recommend MrStarGuy to our readers!
We Recommend
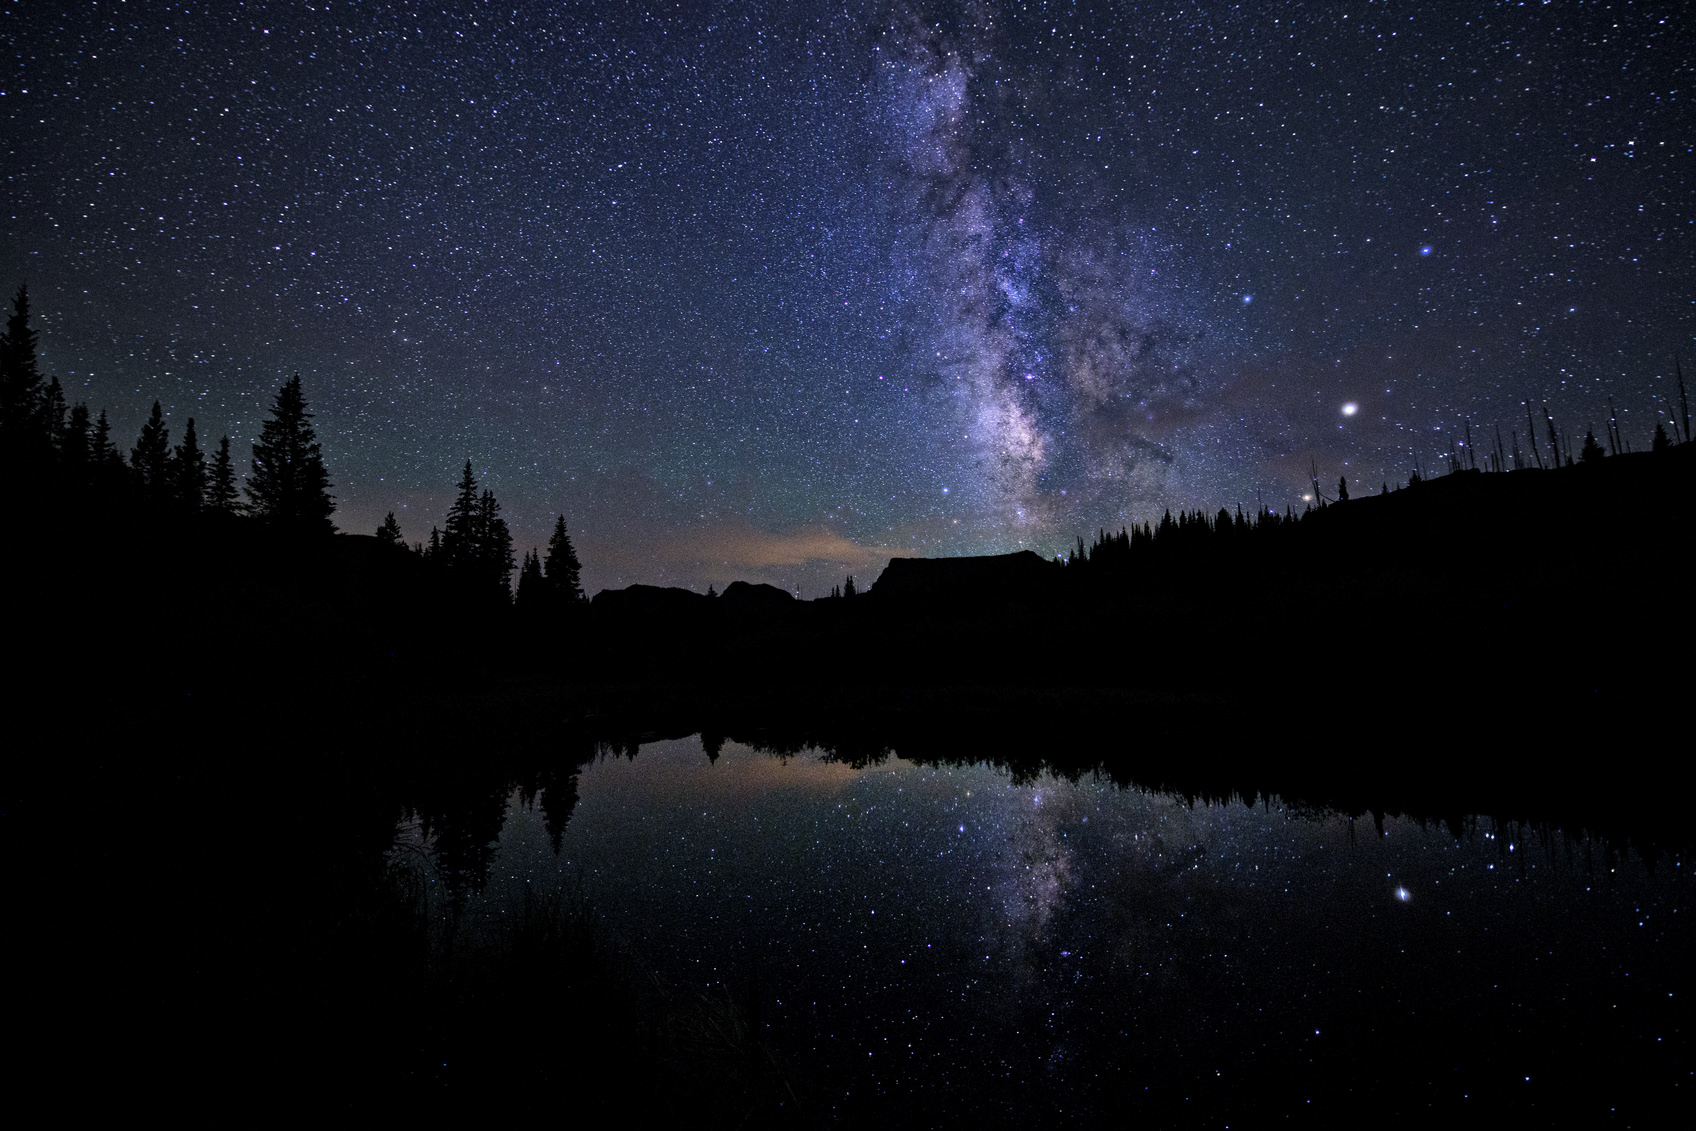
9 Things You Can Do to Take Better Photos of the Milky Way

One of my favorite memories growing up was laying out on the deck with my dad, gazing up at the stars.
Under that vast ocean of space, it was hard not to be in awe of just how small I am compared to the planet, let alone the galaxy.
I imagine for many stargazing enthusiasts, there are similar feelings of awe at the sheer scale and beauty of the sky above.
And though many folks try to capture that beauty in a photograph, I’d say more often than not it doesn’t turn out well.
But that’s the beauty of photography - if the first try is a fail, all you have to do is learn from your mistakes and try again.
With this guide, I present nine tips that will help you minimize mistakes and maximize results, that way you can create gorgeous shots of the Milky Way.
Who knows, you might create a few photos that are worthy of hanging on the wall!
Let’s find out how...
Get a Full Frame Camera

Ok, so it’s not in the cards for everyone to go buy a full frame camera right this second. But, in a perfect world, a full frame camera is the best choice for photos of the Milky Way.
The reasoning is quite simple: the more light your camera can collect, the better your image will be.
And when it comes to light-collecting power, full frame cameras are at the top of the heap. Reason being, full frame cameras have larger sensors than crop sensor cameras. That additional surface area makes collecting light an easier task.
As a result, full frame cameras produce images of the Milky Way that are more detailed and crisp than most crop sensor cameras can create. That detail and crispness can make all the difference in the world when viewing your final image.
There are a host of full frame camera options out there today. Depending on your brand preference, you could go with something like the Canon EOS 5DS is a top choice given its incredible 50.6-megapixel resolution.
Good crop sensor alternatives might be the Canon EOS 7D Mark II, like the Nikon D500, gets high praise for its rugged construction. Both are much less expensive options than the full frame variants suggested above.
What to look for: Good low light performance and RAW shooting capability. Also look for a camera that has an articulated LCD screen. You’ll need to use the LCD for live view focusing, and being able to adjust the angle of view is a handy feature.
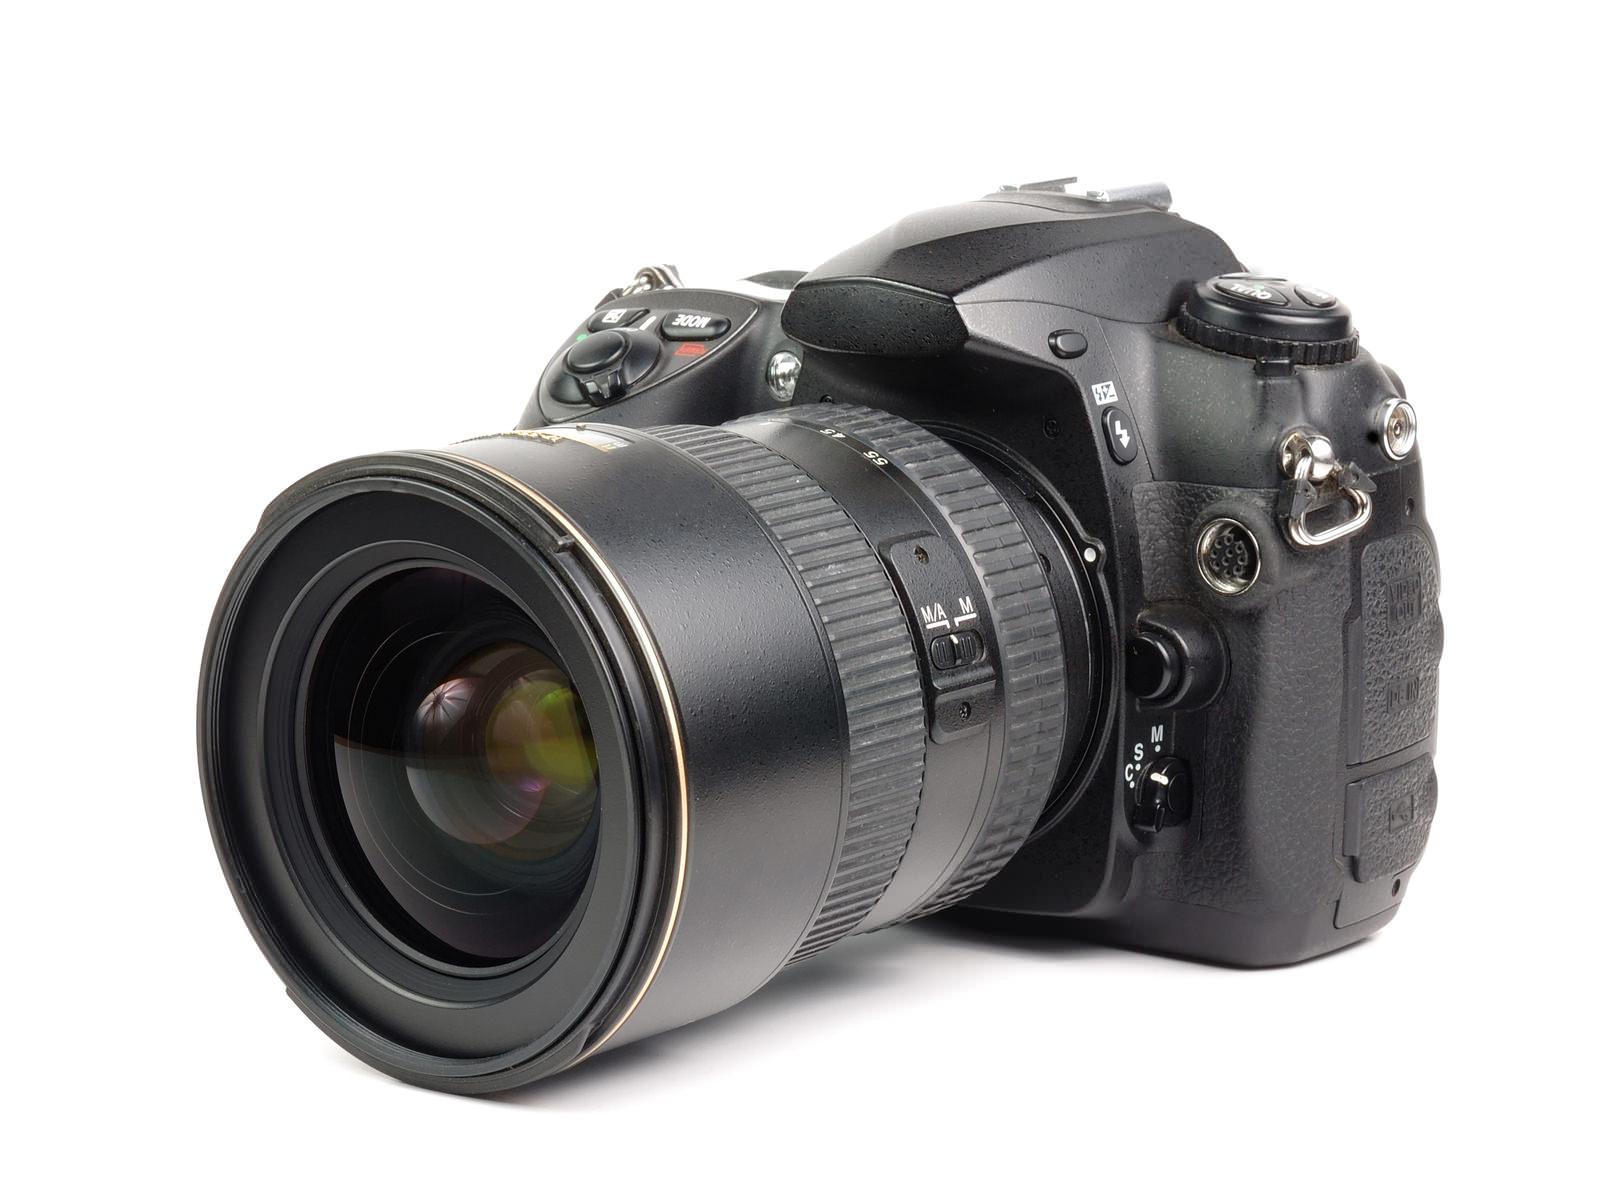
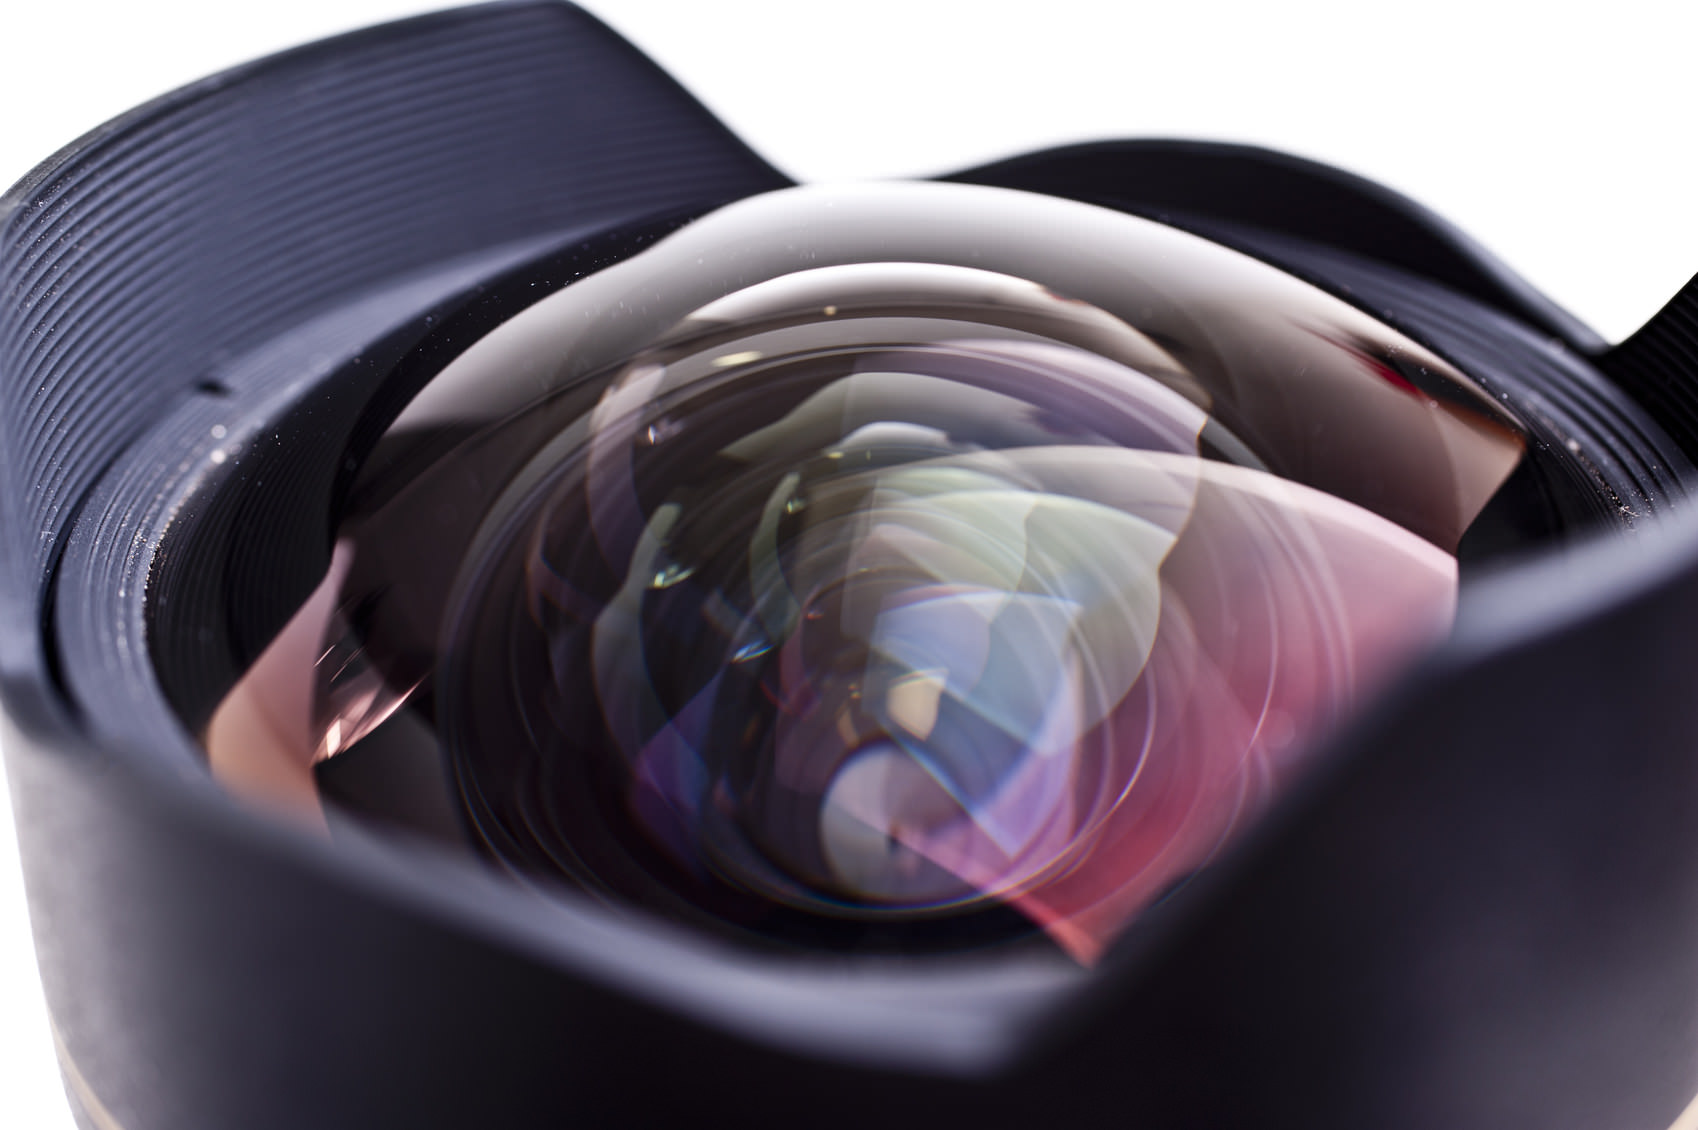
Use a Fast Wide-Angle Lens

There are two primary features that any lens you use for Milky Way photography needs to have: a large maximum aperture and a short focal length.
Let’s address the aperture first.
Naturally, since you’ll be shooting in the dead of night, the ability of the lens to capture light is a critical factor.
Because of this, you need to look specifically at the aperture range of the lens. Though a lens with a maximum aperture of at least f/2.8 would be great, they can be quite spendy. An f/4 lens can get good results as well.
To help offset costs, consider third-party lenses. The Rokinon 14mm f/2.8 IF ED UMC Ultra Wide Angle Fixed Lens is a great choice for Nikon cameras.
Better still, they are far less expensive than comparable lenses from Nikon and Canon.
In the video below, Toby from PhotoRec TV gives us a tour of the Rokinon 14mm lens, and offers up his take on why it’s one of the best budget choices for astrophotography.
The second factor to consider is the focal length. Note that the recommended lenses above are both 14mm. On a full frame camera, that puts them in the ultra-wide-angle range, and on a crop sensor camera, they are squarely in the wide-angle range.
Using a wide-angle lens is important because you want to be able to capture as much of the sky as possible, as was done in the sample images throughout this article.
Remember, the Milky Way extends from one side of the sky to the other, so having a wide-angle lens will help you incorporate as much of it into the frame as you can.
What to look for: In addition to a wide maximum aperture and a short focal length, look for a lens with manual focusing (more on that topic later).
Don’t Neglect the Tripod
Photos of the Milky Way require long exposure times, usually in the 20-40 second range.
That means that if your camera is mounted on a cheap tripod that sways in the wind, your images will be a big, blurry mess.
Instead, you need to invest in a solid, well-built tripod that has added features that allow you to improve its stability. That means looking for a rig with some or all of the following features:
- Heavy-duty construction with strong legs and easy-to-use leg locks.
- A center column hook so you can hang a heavy object (i.e. your camera bag) to help pull the tripod into the ground for a more stable base.
- Large, rubberized feet to ensure the tripod stays in place.
- Retractable metal spikes in the tripod’s feet for those occasions when you need to set up on uneven, wet, or slippery surfaces.
What to look for: After setting up your tripod, be sure to remove your camera’s strap. It can catch enough of a breeze to cause the images to be blurry, even if your camera is mounted on a solid tripod!
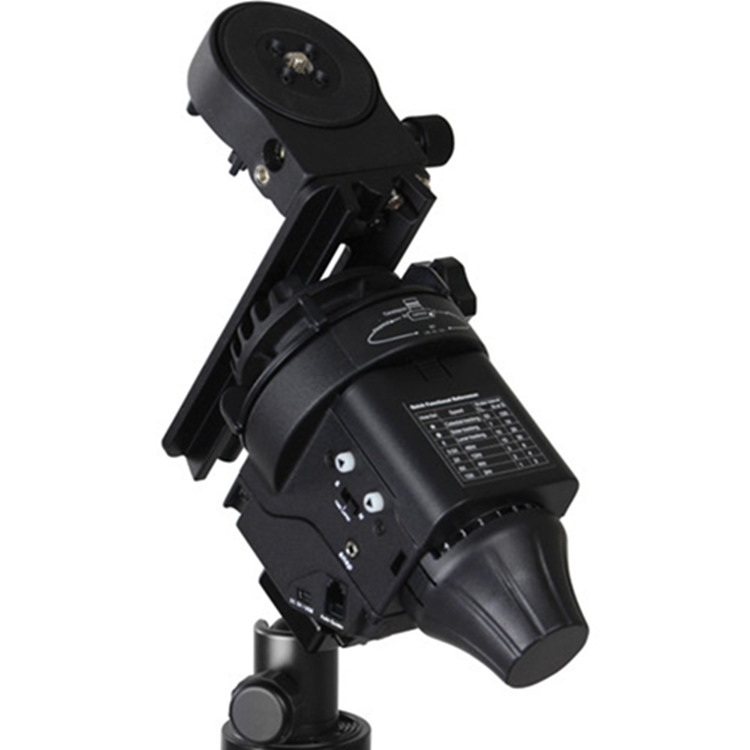
Use a Dedicated Mount
Perhaps one of the best accessories you can add to your kit for astrophotography is a specialized mount.
Something like the Sky-Watcher Star Adventurer Motorized Mount is an ideal choice for Milky Way photography. This equatorial mount that gives you the ability to track celestial bodies with great accuracy. You will find that it helps you locate the Milky Way as well as other popular bodies in the sky, such as the sun or the moon.
The Star Adventurer comes equipped with a buttery smooth DC servo motor, so it moves along its programmed path with ease. You can decide between various speed settings, including 0.5x, 2x, 6x, and 12x.
Maybe the best feature of this handy mount is that it’s compatible for usage in the northern and southern hemispheres. That means you don’t have to hunt around for your subject and waste precious time away from actually creating photos.
Use it for stills, videos, timelapses, or even as a telescope mount. It’s powerful enough to meet the needs of expert astrophotographers, but easy enough to use for novices to get into the astrophotography game.
For more details about the Sky-Watcher Star Adventurer Motorized Mount, check out the video above.
Find a Dark Spot
Obviously, finding a spot that’s away from the light pollution of cities is going to greatly impact your ability to get a clean shot of the Milky Way.
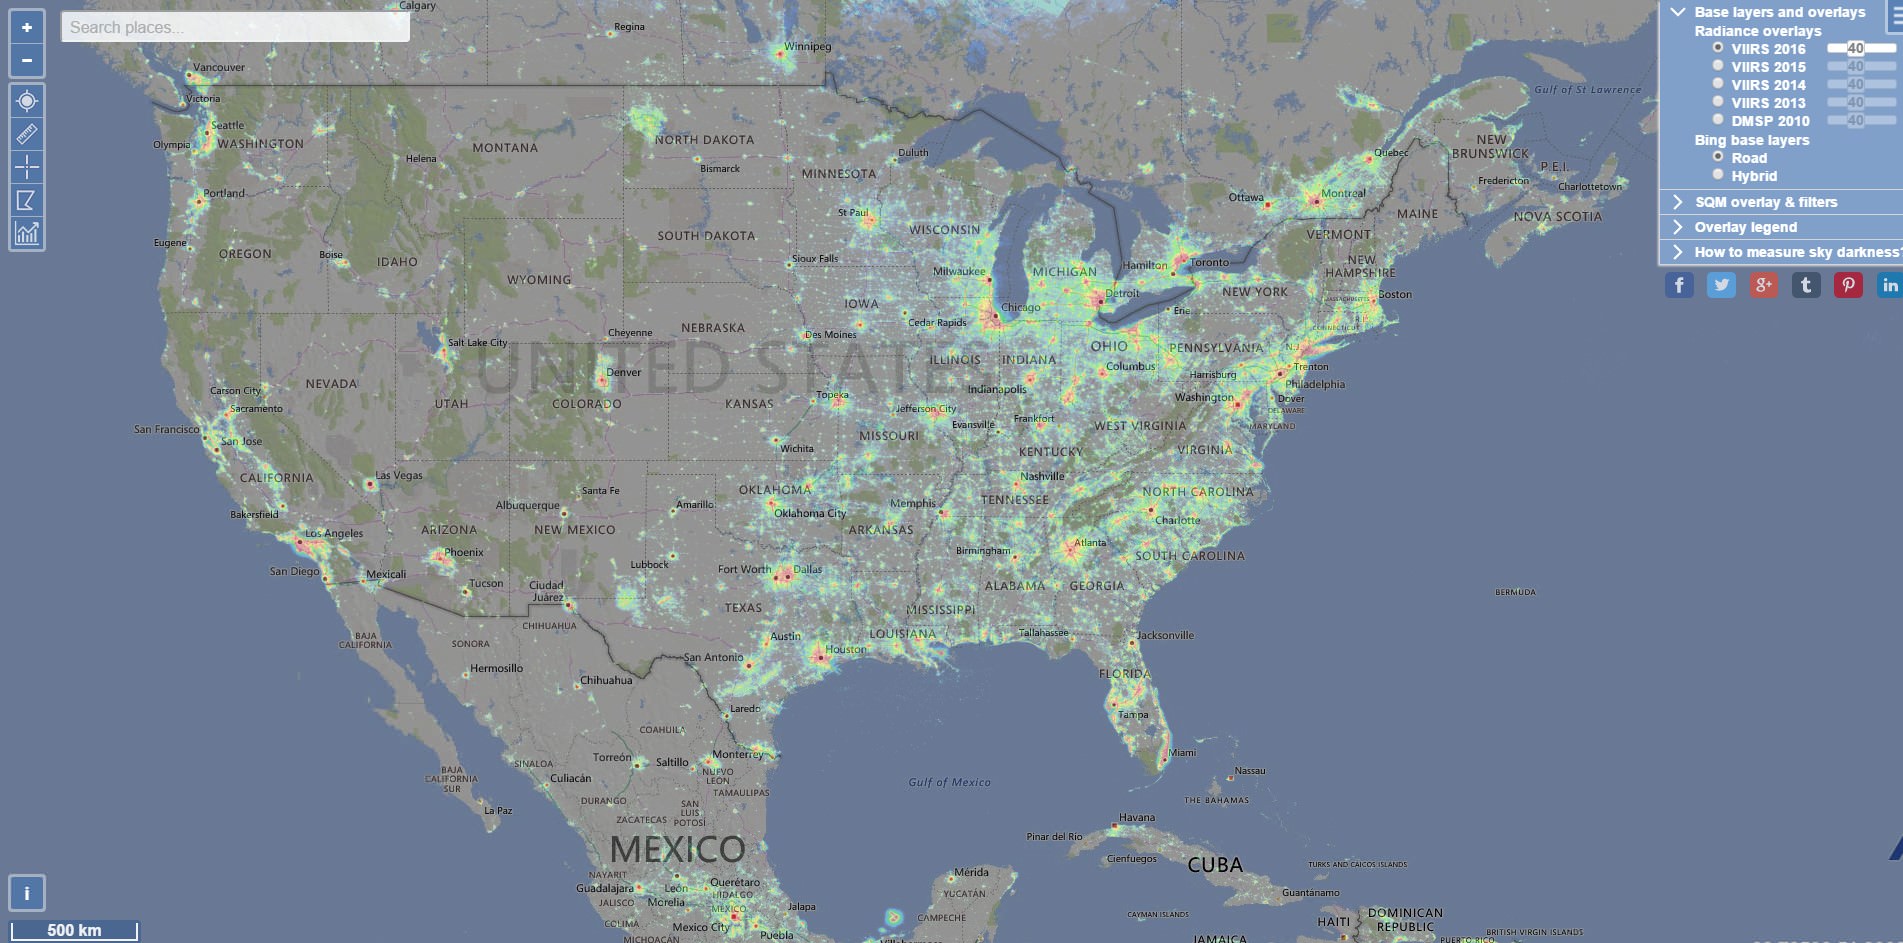
Rather than wander aimlessly around the countryside, there are a couple of fantastic websites that will help you find the best locations for nighttime photography.
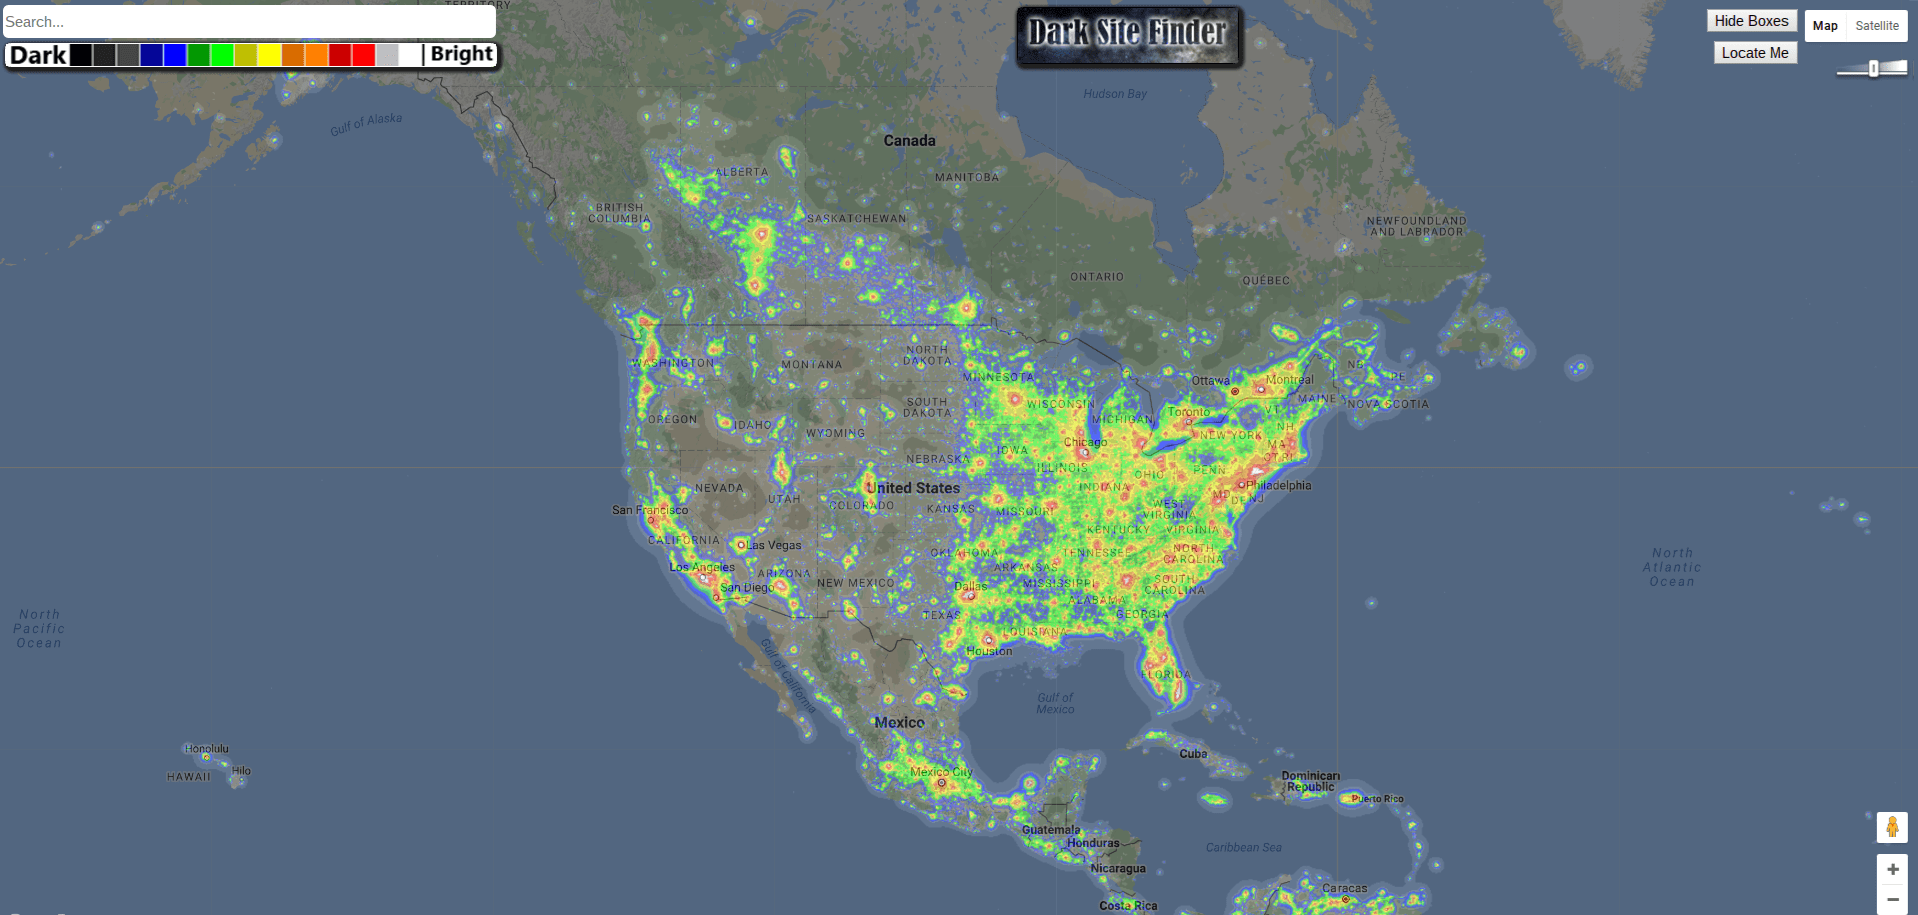
The first is the Light Pollution Map. It’s pretty self-explanatory: it maps light pollution, as seen in the screenshot above. Just zoom in on an area, see if it’s polluted with light, and map out your journey to get there. It’s pretty simple!
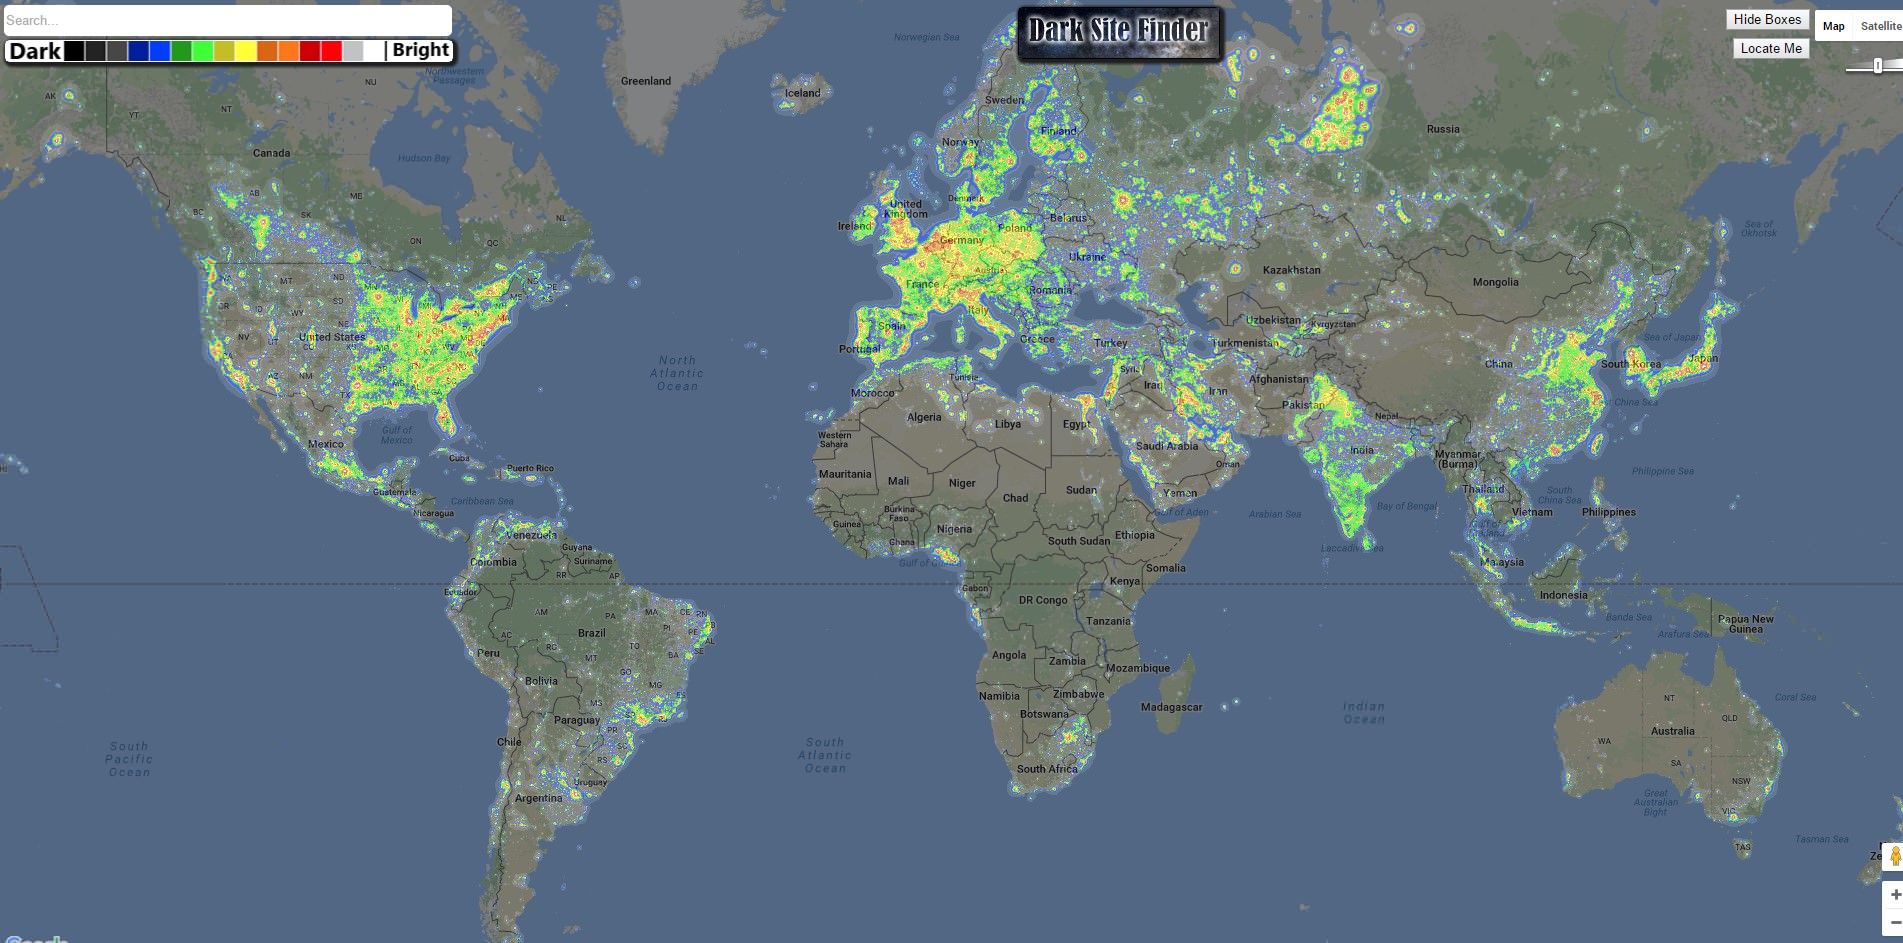
Another option is Dark Site Finder. Like the Light Pollution Map, you can zoom in on a specific area (you can also search for a location in the search bar) to examine what the light pollution levels are at virtually any spot on earth.
Either way, you’ll save tons of time and heartache by planning your photo shoots in advance and avoiding areas that have a lot of light pollution.
Get Help Locating Celestial Bodies
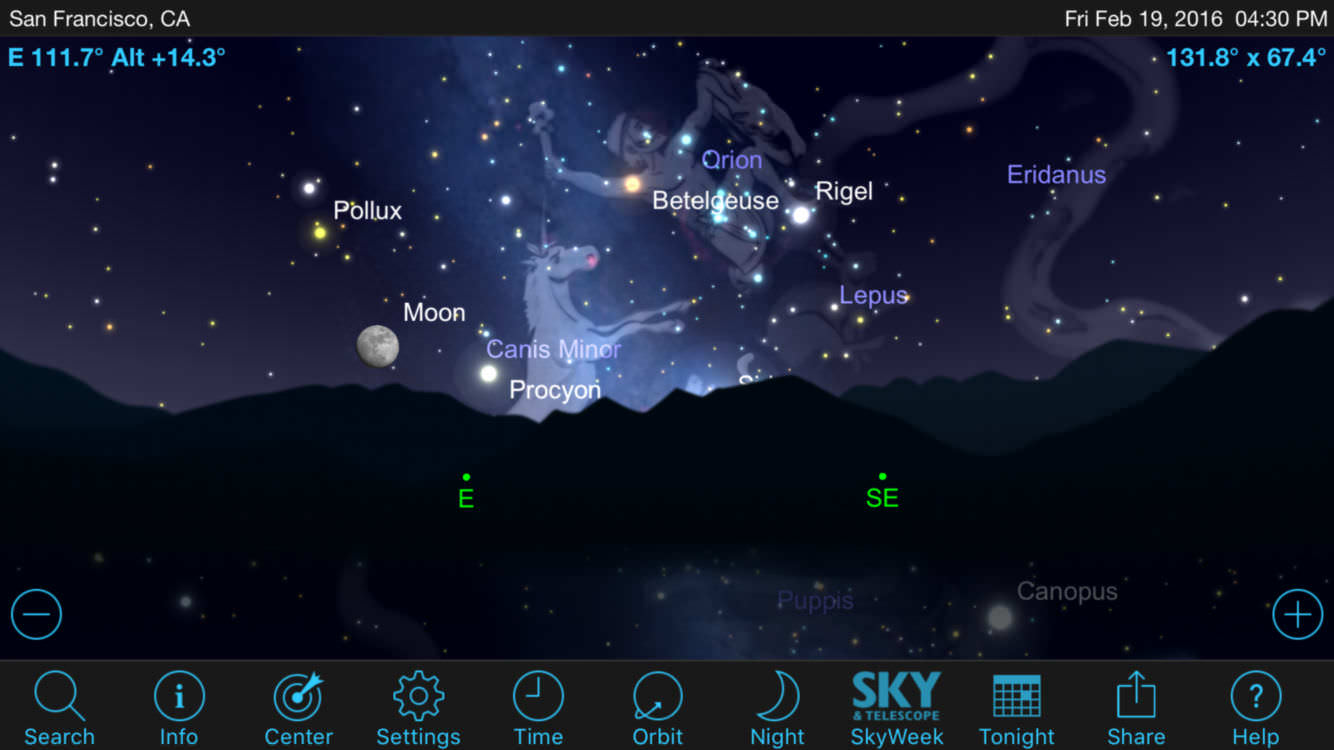
Part of planning your Milky Way photo shoots is also being able to find the darn thing in the sky. Used in combination with the light pollution maps listed above, an app like SkySafari 5 (available for iOS and Android devices) can help you pinpoint the Milky Way (and many other celestial bodies, for that matter) and get the shots you want.
The app gives you nightly information on the location and rise/set times of various planets, the sun, and the moon. You can even find out when the International Space Station will cross over your location.
Better still, SkySafari has over 200 star clusters, galaxies, and nebulae built into its library, so if you want to venture beyond the Milky Way, you can!
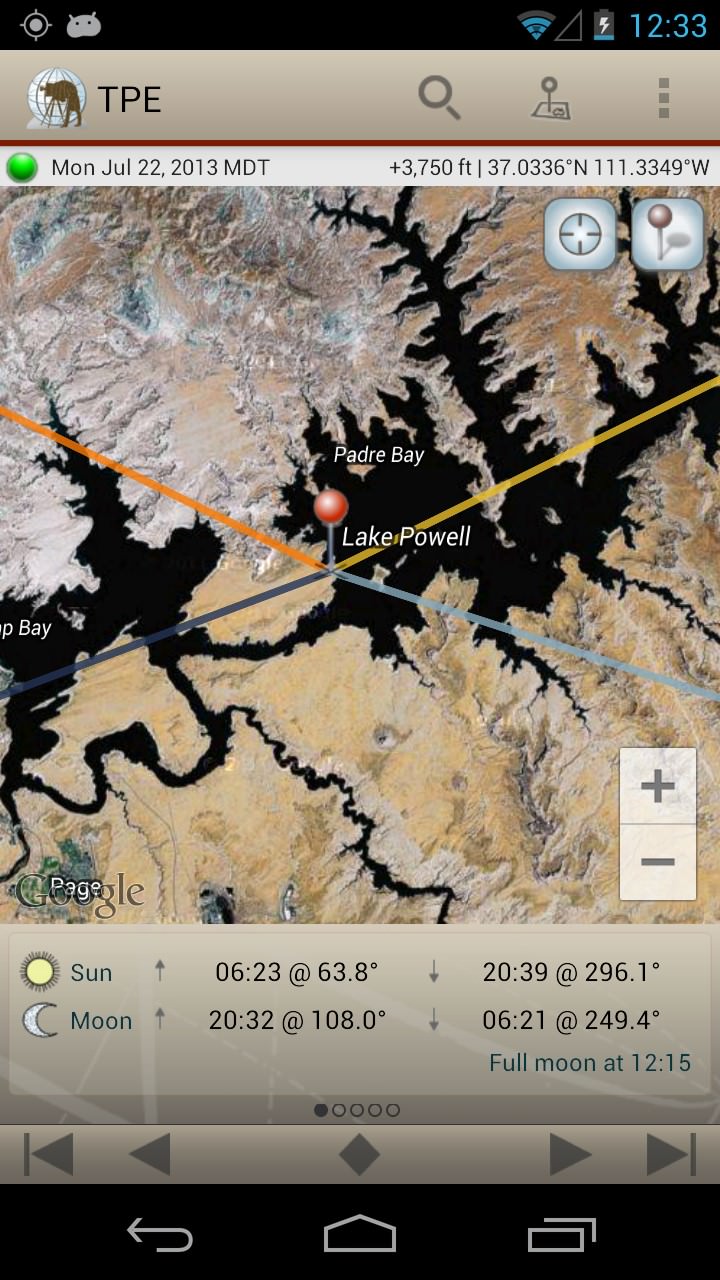
Another much-needed app is The Photographer’s Ephemeris (on iTunes for $8.99 or on Google for $4.99).
The Photographer’s Ephemeris helps you plan your shoot by giving you the lighting information for your desired location.
That means all you have to do is dial in your location, and it will tell you when the sun or moon will rise and fall in the sky and where. That’s valuable information for photographing the Milky Way so you know the best time of night to get set up to avoid light pollution from the moon.
Use Manual Focus
Though today’s cameras have excellent autofocus systems that are able to get pinpoint sharpness in many situations, they do not perform well when shooting at night.
Put simply, even the best autofocus systems will struggle to obtain focus on something that’s so small in the field of view as a star. Instead, it’s best to opt for manual focusing.
Just put your lens in manual mode, then move the focus ring to the infinity settings. Then, using live view mode, zoom in on a particular star in the Milky Way and use the focus ring to bring the star into perfect focus.
Next, take a test shot. Afterward, again use live view to zoom in on the star to examine the focus. The star should appear as a solid, white dot. If you see blurriness, you’ll need to repeat the process to try to bring the shot into focus.
As mentioned earlier, having a camera with an articulating LCD is handy for this process. Since the camera might be pointed upward at a pretty steep angle, it’s easier to be able to adjust the angle of view of the LCD than crouch down below a static LCD and crane your neck upwards to view the screen.
For another method to get tack-sharp manual focus, check out the video above. In it, Milky Way Mike offers a quick solution for finding and noting your lens’s infinity focus point.
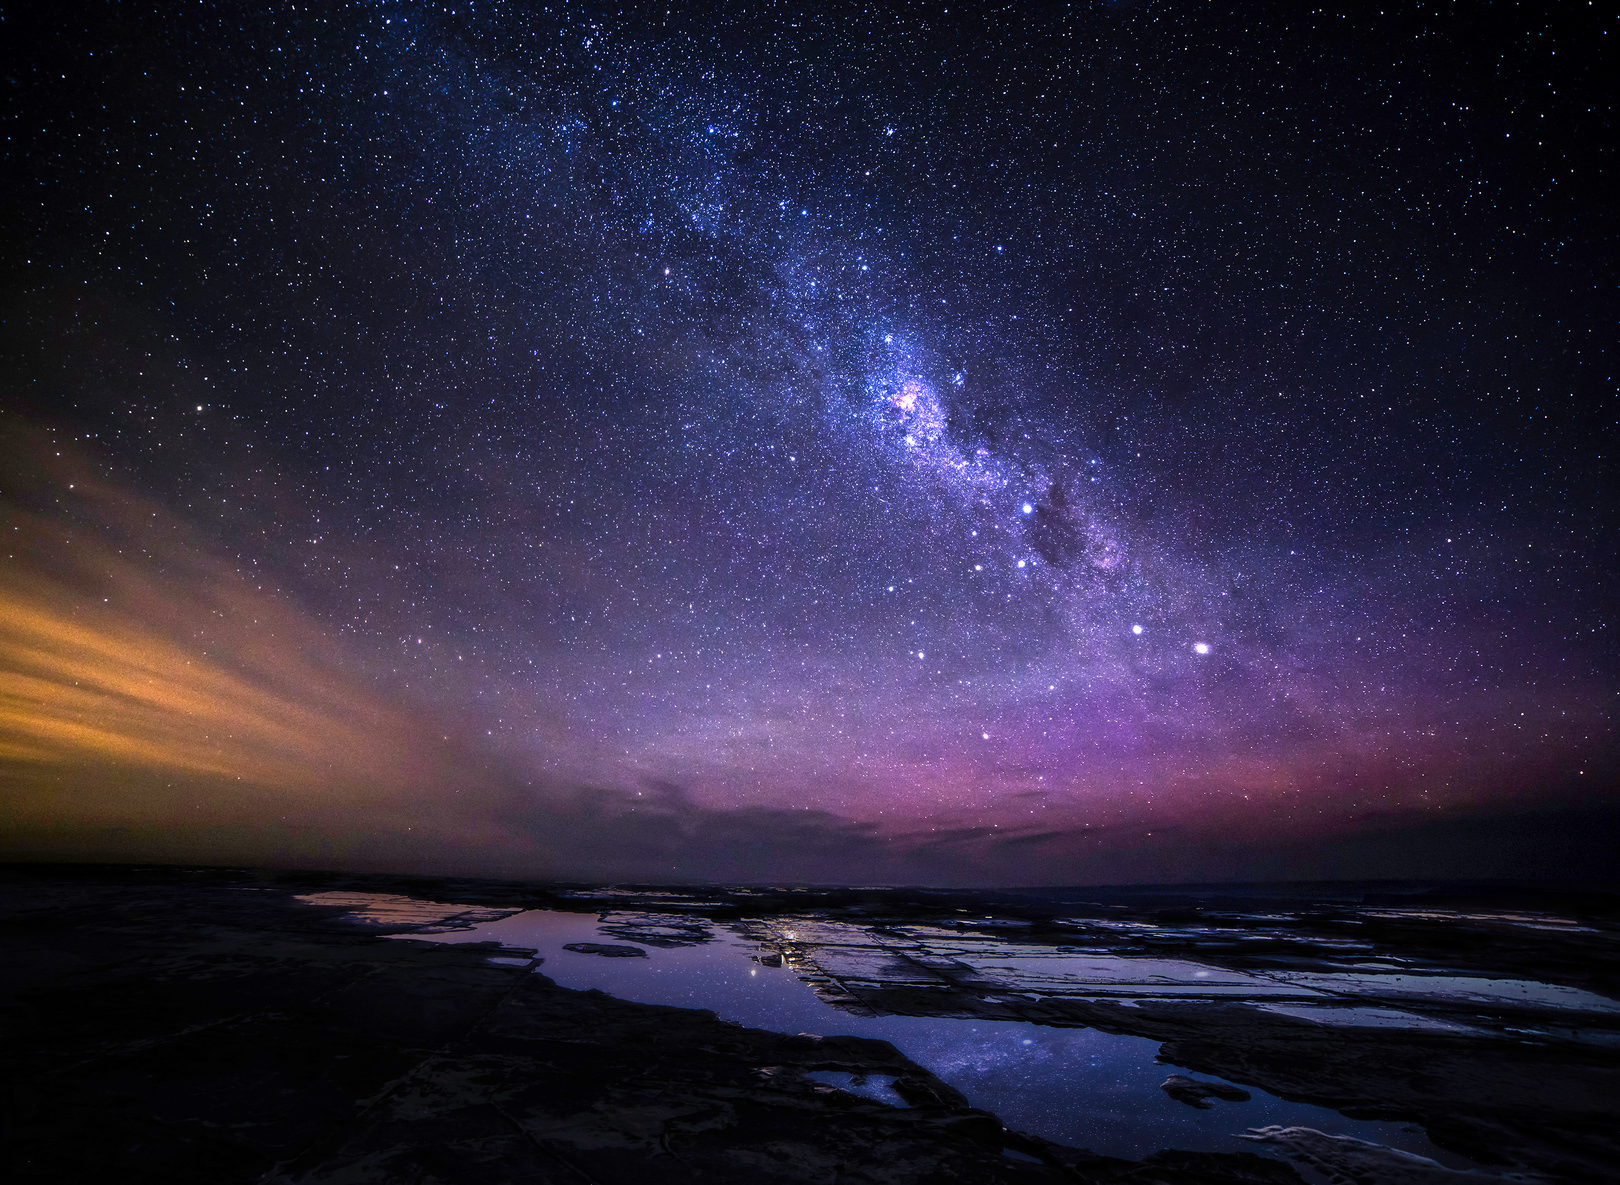
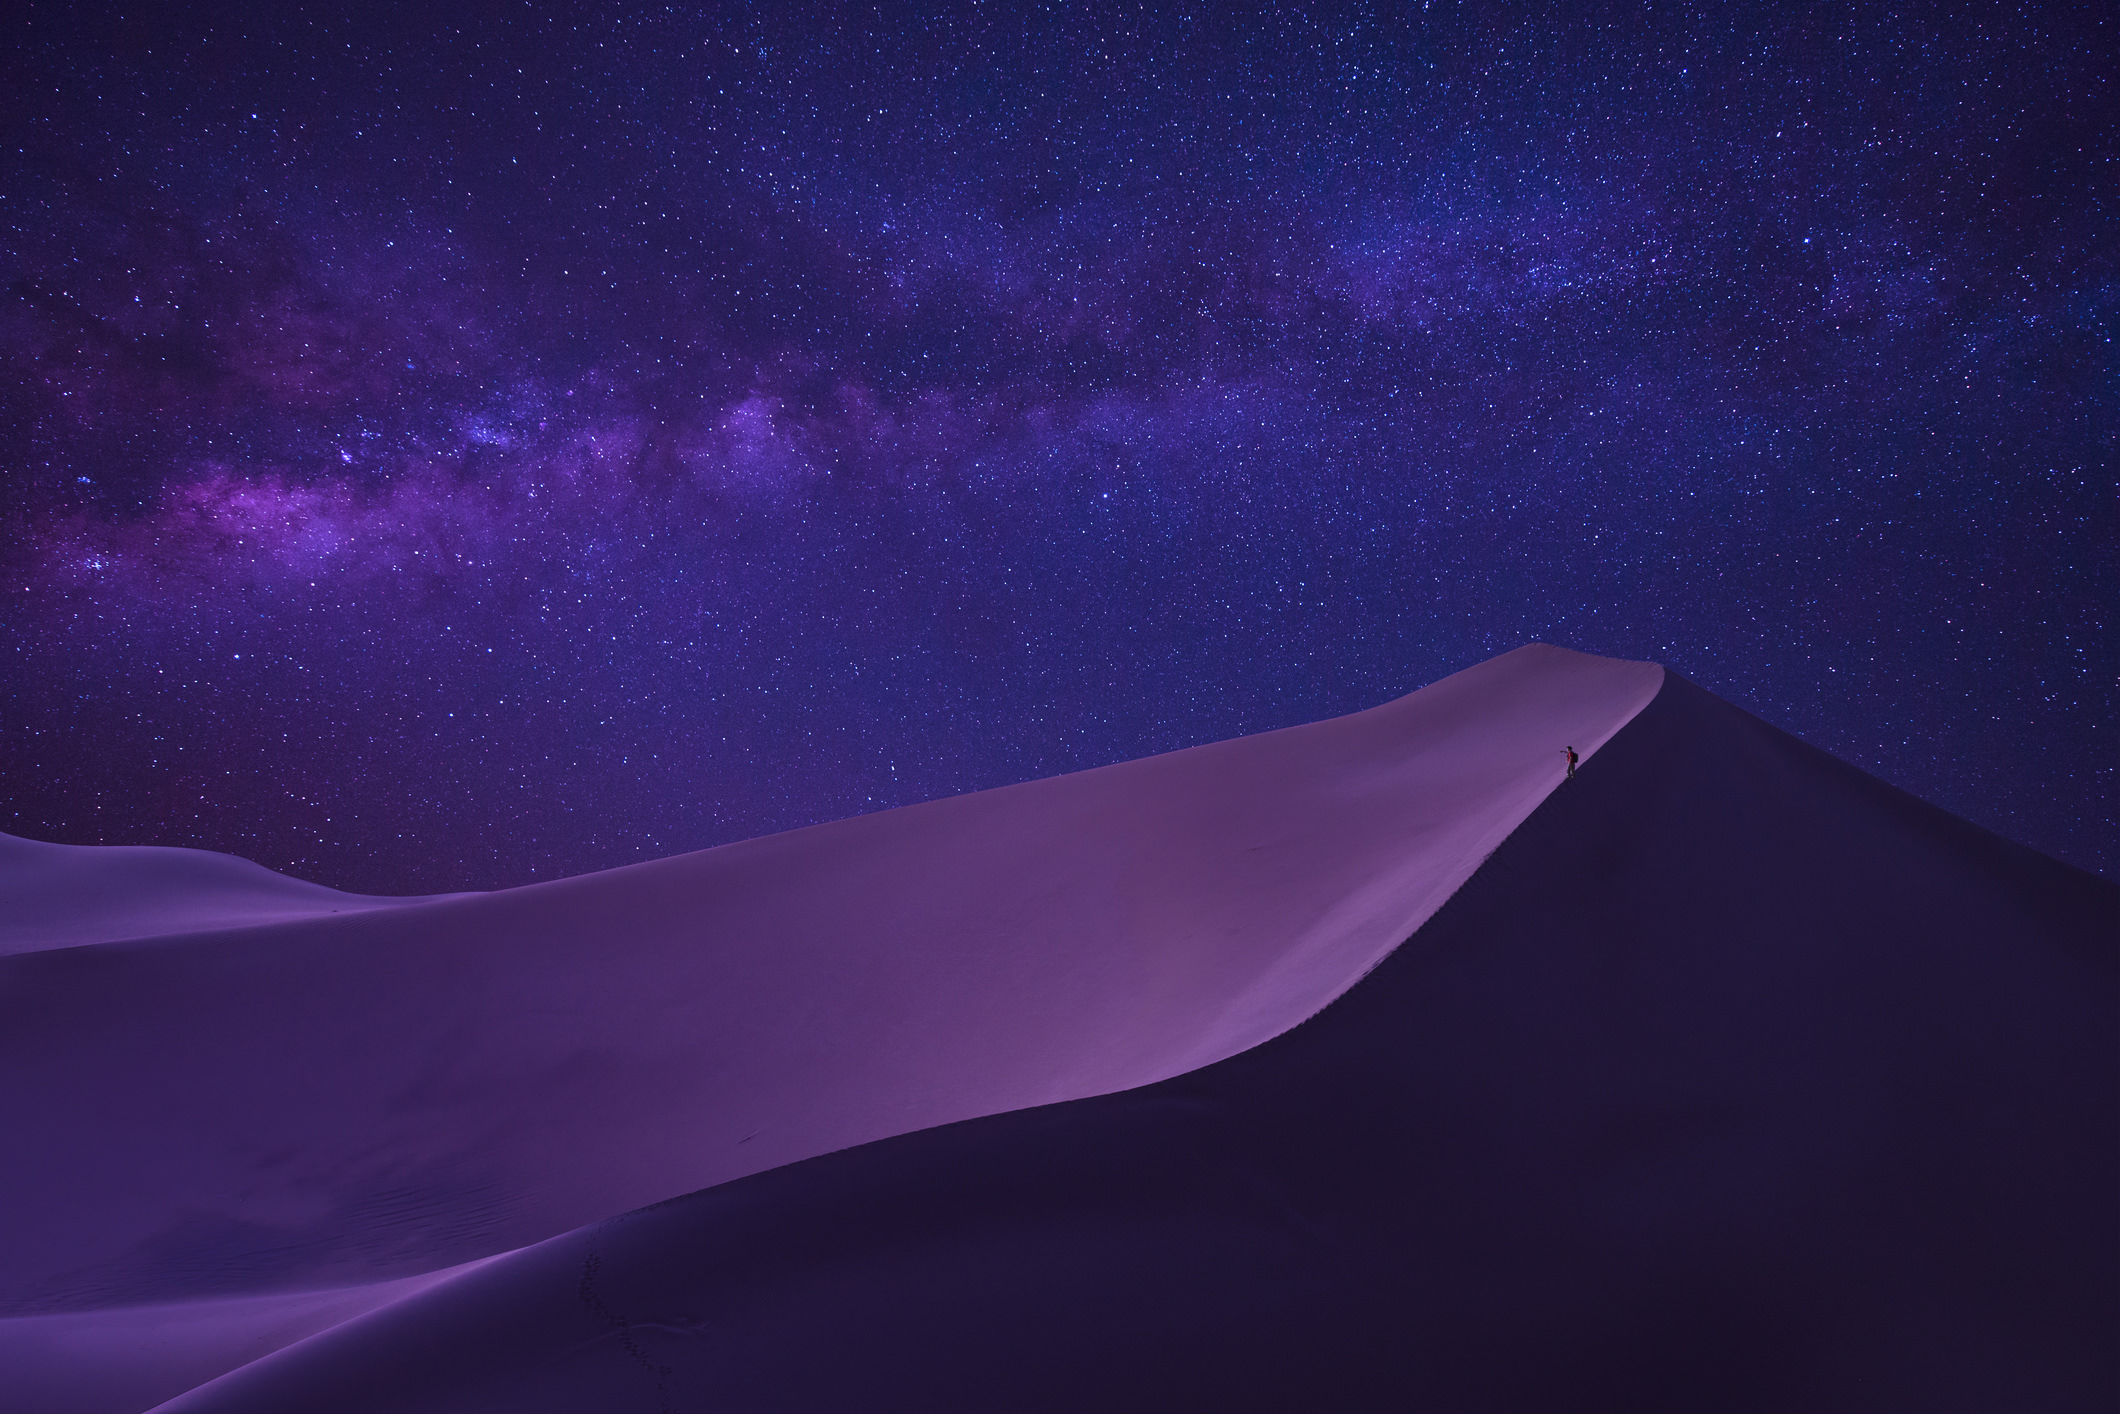
Add Foreground Interest
When you take your first photo of the Milky Way, just seeing the array of stars in the shot is going to be enough to make you say WOW.
After all, a lot has to come together to simply get to that point.
However, as time goes on, you’ll likely notice that photos of the sky alone can get a little boring. That is, they need a little bit of foreground interest to give the image some depth and a better sense of scale.
That means you’ll need to start thinking more purposefully about composing your shots.
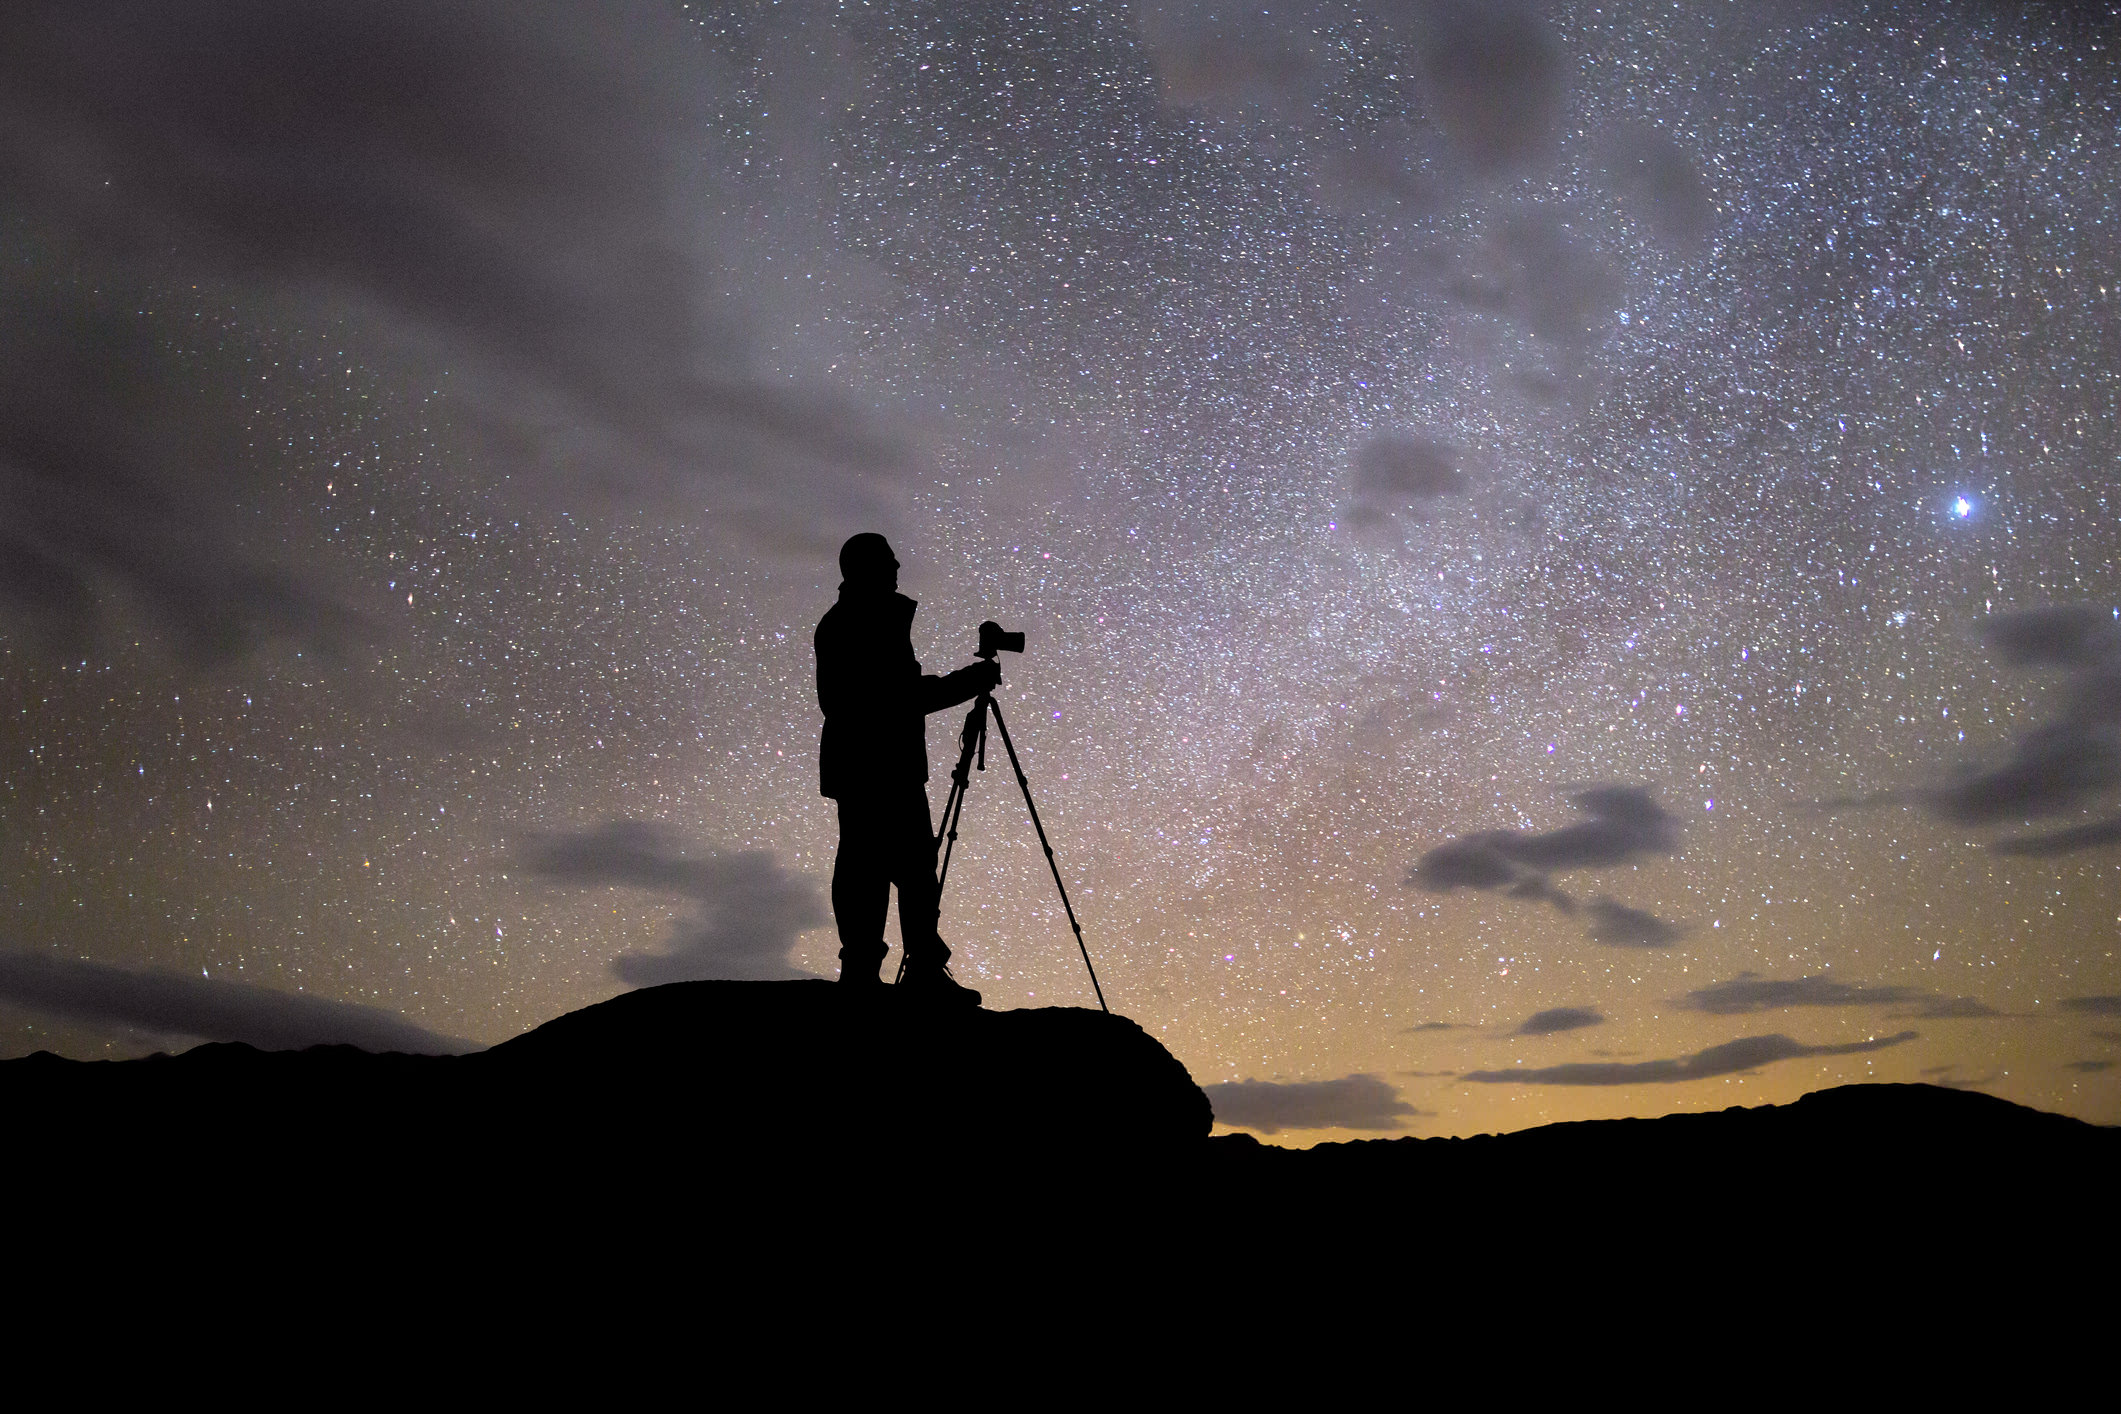
A great compositional tool for improving your Milky Way photos is to include foreground interest, like the sand dune in the image above. Note how the ridge of the sand dune acts as a leading line, first directing the eye toward the human figure climbing the dune, and then to the Milky Way above.
In that regard, the foreground interest doesn’t just add context to the scene, but it also helps the eye navigate around the photo, helping the viewer to understand the layout of the landscape and engage with the shot in a more meaningful way.
Be Prepared for Nighttime Shooting
Spoiler alert…
Photographing the Milky Way requires that you be outside, at night, for a reasonable amount of time.
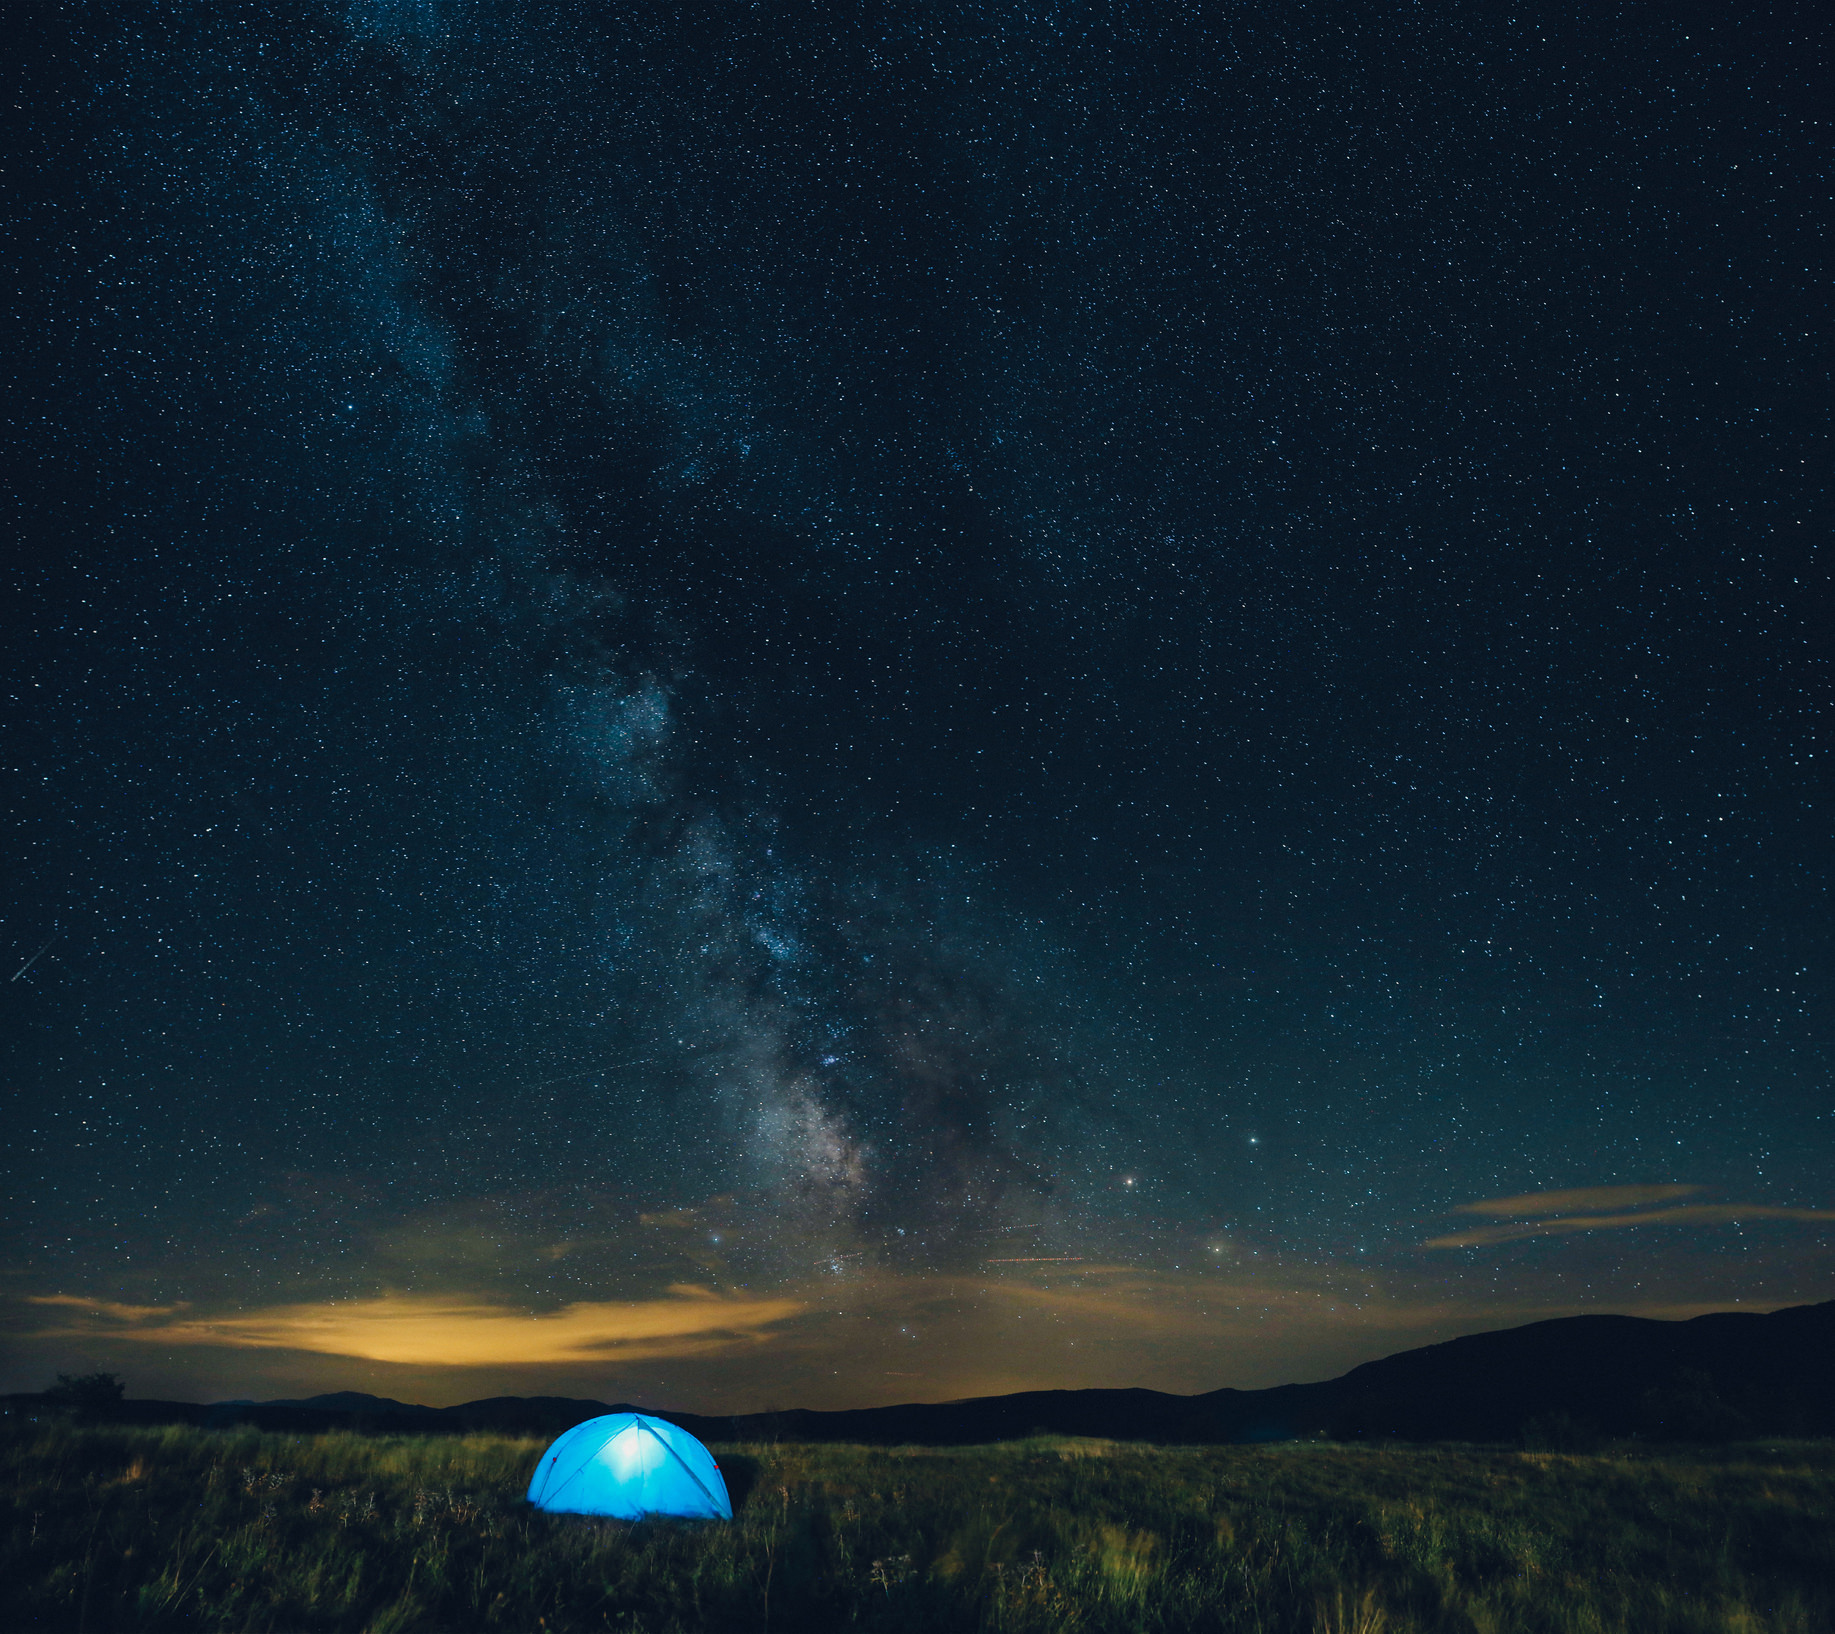
So, that means that you need to be prepared for nighttime shooting by adding a variety of accessories to your kit:
- Spare batteries (that are fully charged) for your camera. Cooler temperatures reduce battery life, so you might find you need to swap batteries.
- Spare memory cards, just in case you decide to pull an all-nighter and shoot continuously through the night.
- A headlamp or torch so you can see your camera’s controls. They’re also handy for lightpainting, should you want to add that element to your shots of the Milky Way.
- Warm clothing, even if you’re shooting in a warm climate. Even in the Sahara, nighttime can be quite chilly!
- Snacks, so you aren’t rushing the process along so you can get home and eat.
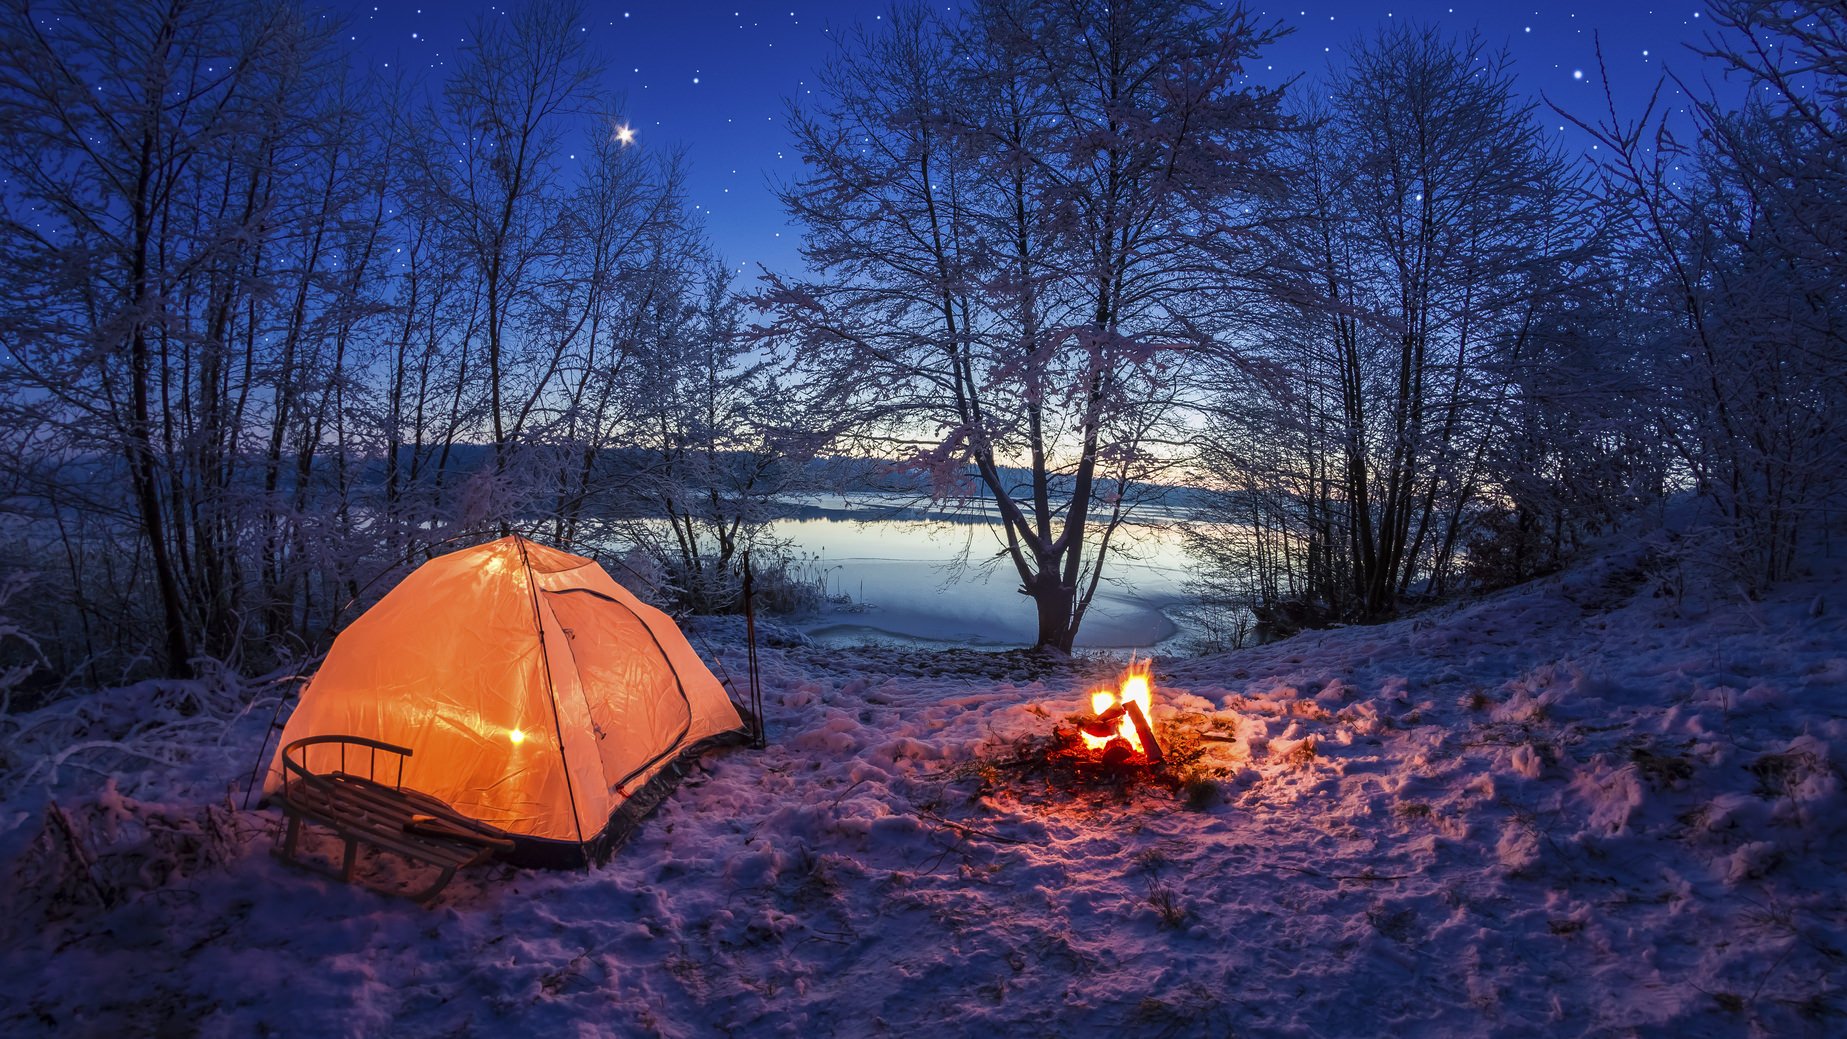
- A tent, in case you want to get some shut-eye (or it could make a neat bit of foreground interest).
- Smartphone, so you can jam to some tunes while your camera does its work (and check the various apps I recommended above as well!).
With that, you’ve got a better idea of the gear, the camera settings, and the accessories that will help you find success in photographing the Milky Way. Now it’s just a matter of putting your plan into motion, heading out, and seeing how well you can capture the beauty of the night sky!
We Recommend
A Beginner’s Guide to Photographing Stars With (or Without) Trails
How to take pictures of stars?
When you're just starting out in photography, it's easy toget yourself stuck in a rut doing things that become comfortable and familiar.
This can apply to many different things, from composition to the perspective from which you take your photos to the kinds of photos you take.
That also applies to the time of day you shoot, which, for most of us, is during the daytime.
Particularly for beginners, daytime photography is the easiest, simply because there's less worry about fiddling with exposure settings to get a well-lit photo.
But that doesn't mean that you can't or shouldn't expand your horizons into nighttime photography of the sky.
Though there is a common opinion that astrophotography is hard to do, that couldn't be further from the truth.
Let's explore two basic types of photos of the night sky: images with star trails and images without.
Shooting Star Trails
Star trails like those in the image above form for two reasons.
First, the earth is in constant motion, so the night sky is in constant motion as well.
To revisit basic science concepts, the earth rotates on its axis once a day, making the stars, moon, and other celestial bodies appear as though they are moving across the sky as the night wears on.
Second, because there is so little light for a camera to collect in the dead of night, a long exposure is required. However, using a long exposure helps accentuate the motion of the earth, resulting in the star trails you see above.
When shooting star trails, you're simply ignoring the movement of the earth.
And the best part is that you can take photos with star trails with your regular DSLR or mirrorless camera, a remote shutter release, and a tripod. That's it!
Night Sky Pictures - Breaking Down the Shot
Since you're ignoring the movement of the earth, all you have to do is mount your camera to a fixed tripod, hook up your remote shutter release, and compose the shot. Because your camera will be in a fixed position, the rotation of the earth will work its magic and star trails will be the result.
Granted, it's not quite that simple, so check our guide for astrophotography camera settings and our other guide for composing shots of the night sky for some in-depth tips.
Anyway, to collect enough light for a good image, you have to venture into the world of long exposure photography.
Though that might sound scary, it really isn't. It's just a matter of using Bulb Mode on your camera.
Usually, cameras only have a maximum shutter speed of around 30 seconds. Since you need an exposure that could be an hour long or more, you have to be able to select a much longer exposure time. Bulb mode allows you to do that.
Star Photography - Setting Up the Shot

Follow these quick and easy steps to maximize your ability to get high-quality star trail images:
- Choose a location for the photo shoot that's away from light pollution. It doesn't have to be pitch black, but the less light pollution, the easier it will be. Ensure your location has elements that add to the composition. Buildings, mountain peaks, or trees are just a few examples.
- Mount your camera to a solid tripod. Improve its stability by hanging a bag of sand or rocks from the center column hook, or, if there is no center column hook, position rocks around the tripod's feet to further stabilize it.
- Remove your camera strap from your camera. If there is a breeze, the movement of the strap could cause blurriness in your image.
- Select exposure settings to maximize the quality of the shot. A good place to start is an aperture around f/8 and an ISO of 400.
- Set your lens to manual focus and focus it at infinity.
- Using your camera remote, trigger the shutter, leaving it open for four minutes.
Granted, the length of time the shutter is open is going to depend on a variety of factors, not the least of which is how much light is present.
If you're in the country away from lights, you can extend the shutter speed without worry of overexposed areas. Conversely, if you can't escape the city lights, a shorter shutter speed might be needed.
Remember as well that as the length of the shutter speed is extended, the length of the star trails will be extended too. If you want shorter star trails, use a shorter shutter speed.
Get more in-depth instruction on shooting star trails in the tutorial video below by Tony and Chelsea Northrup:
Shooting Pinpoint Stars
Another option for nighttime photos of the sky is to get clear, sharp, and crisp stars, like those seen above.
This is a little more complicated because unlike images in which there are star trails, you can't just ignore the movement of the earth.
Instead, you have to compensate for the earth's rotation such that no star trails form.
Breaking Down the Shot
Just like with star trail images, you may well need to use Bulb Mode to get an exposure that's long enough to result in a well-exposed image.
However, since the earth rotates at a rate of about one-half a degree per minute, you have to be mindful of just how long you leave the shutter open.
For example, if you leave the shutter open for one minute, the earth will have rotated just a half a degree.
That will result in star trails, but they will be so tiny that they will be invisible to the eye.
As another example, if you leave the shutter open for 30 seconds, the earth will rotate about one-fourth of a degree. Again, the star trails that result from such a short exposure will not be visible in the image unless you zoom in and inspect the stars.
Setting Up the Shot
Follow these steps to get images with pinpoint stars:
- Again, choose a location that's as dark as possible and which has elements to add interest to the composition.
- Also be sure your tripod is sturdy and stable and that your camera strap has been removed to minimize blur due to the wind.
- Dial in an aperture of f/5.6 or f/8, and select an ISO of 400 or 800.
- Using your camera remote, fire the shutter for about 30 seconds.
Additionally, images with no star trails benefit from using an ultra-wide-angle lens. The wider the lens, the longer you can leave the shutter open without getting visible star trails.
So, a 14mm lens will allow you more time to keep the shutter open than a 22mm lens, and a 22mm lens offers more time without star trails than a 35mm lens, and so on.
Get even more tips for shooting pinpoint stars (with foreground interest too!) in the video below from AdoramaTV:
Putting It All Together
Using the steps outlined above will give you a solid basis for creating your first photos of the night sky.
It's important to remember, however, that regardless of whether you shoot photos with or without star trails, astrophotography takes plenty of practice and patience to master.
The name of the game here is to take the basic steps outlined above, and then practice taking photos of the night sky.
You might well find that your first image (or first several images) aren't perfect. If that's the case, don't get discouraged!
If your images are too dark, adjust the exposure settings to brighten them up.
If your images are blurry, work to stabilize your camera and tripod to prevent camera shake.
With time, you'll gain a better understanding of things like camera settings, exposure, and composition, and your photos of the night sky will improve as a result.
But, you have to start somewhere, so why not start with star trails and pinpoint stars?!
We Recommend
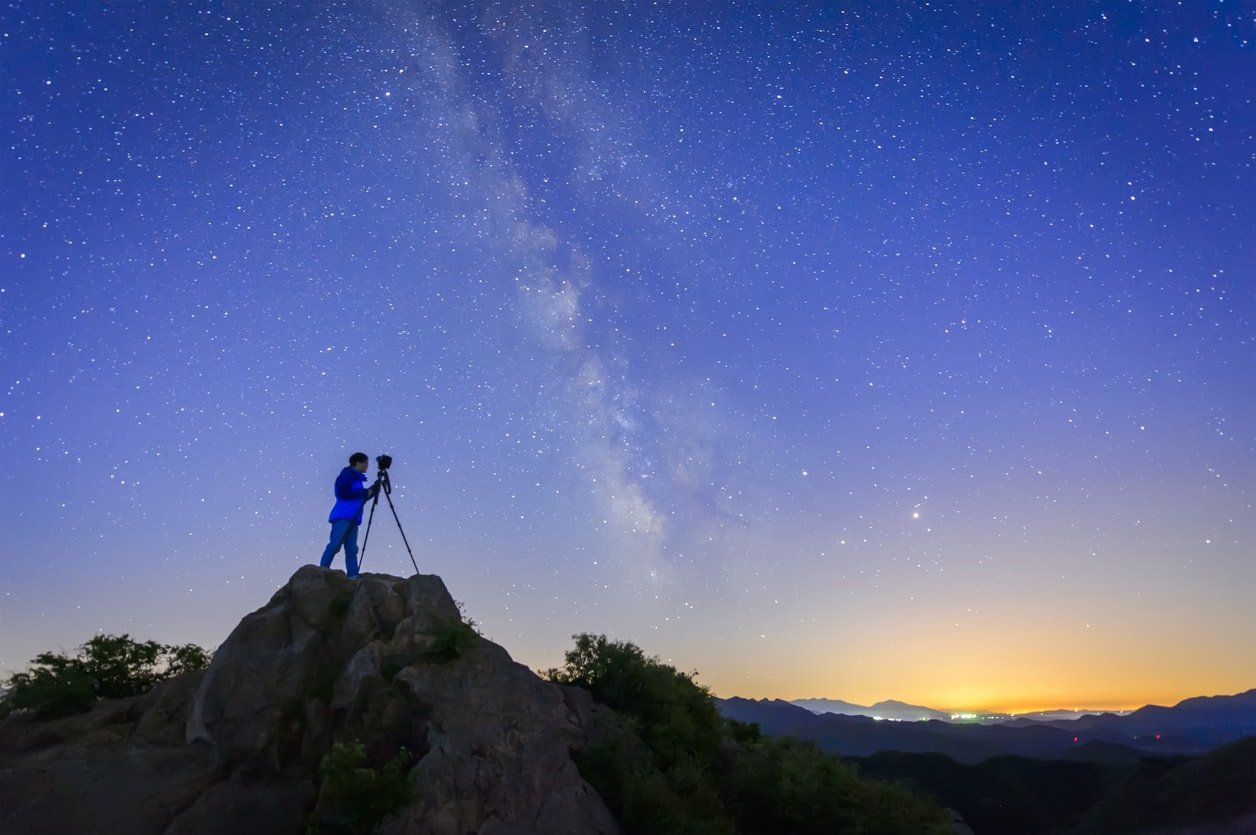
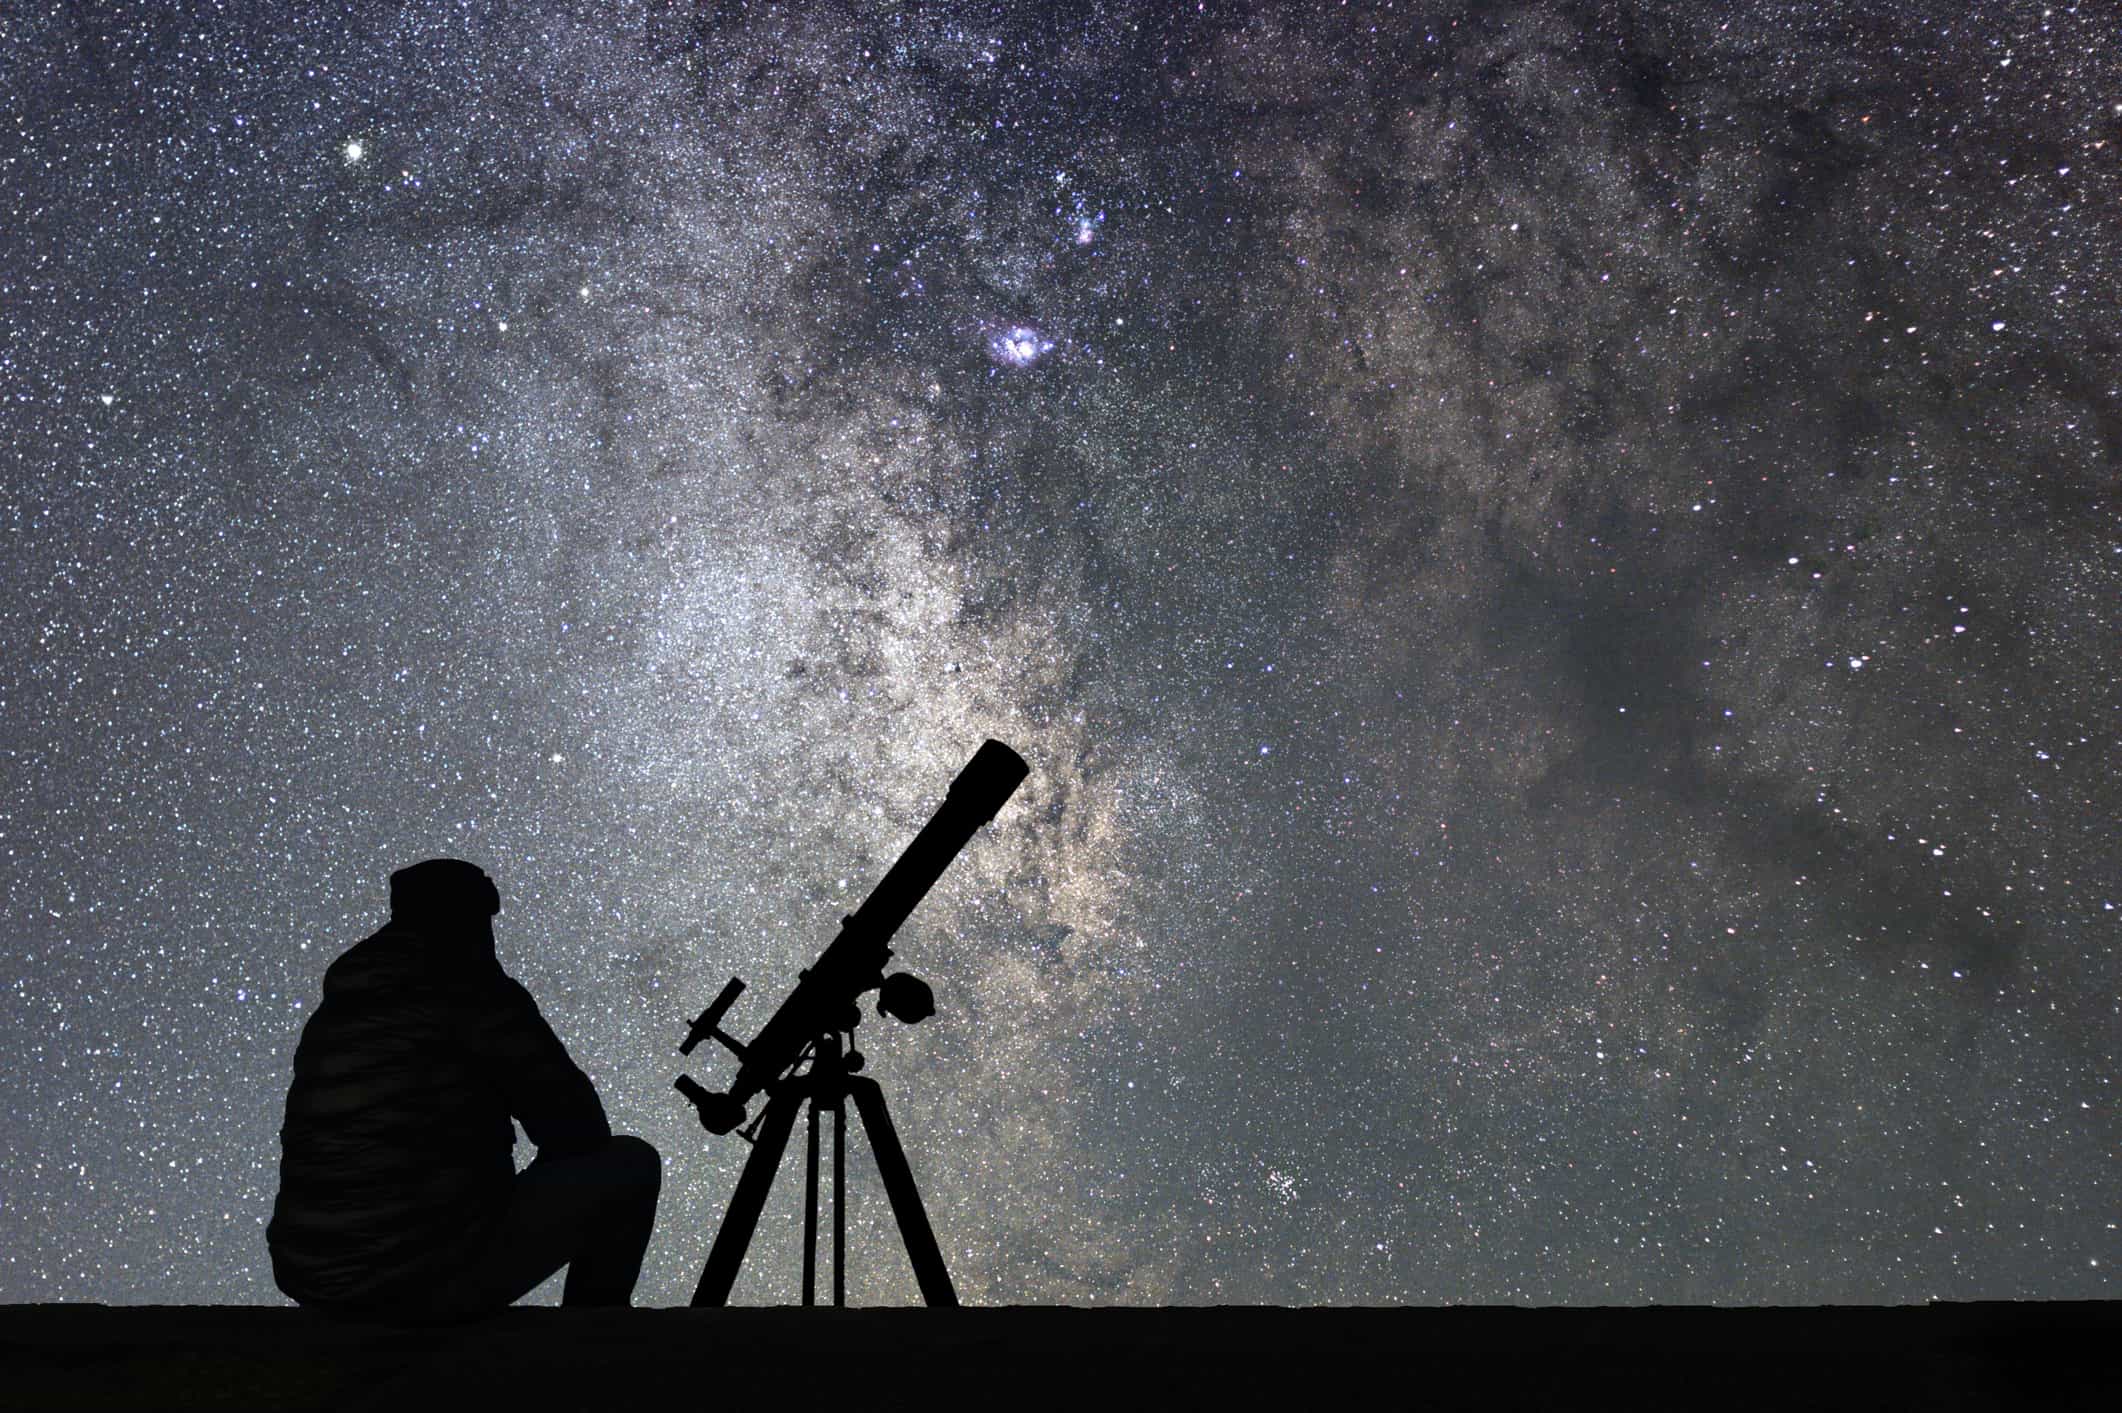
A Quick Guide to Choosing Locations for Astrophotography

Astrophotography is a lot like real estate in that it's all about location, location, location.
To pull off the very best photos of the night sky, you need to put yourself in a spot that affords you an unobstructed view and offers dark skies, among other things.
With this quick-start guide, I offer up a few tips for helping you figure out where you need to be to get breathtaking nighttime photos.
Find a Spot With a View

Obviously you need to set up your gear in a location that gives you an unobstructed view of the sky.
Whether you're photographing the Milky Way, a supermoon, a meteor shower, or some other celestial event, you won't even be able to get started if there's buildings and trees in the way.
Having said that, from a compositional standpoint, your images will be stronger if you include elements in the foreground, midground, or background of the photo.

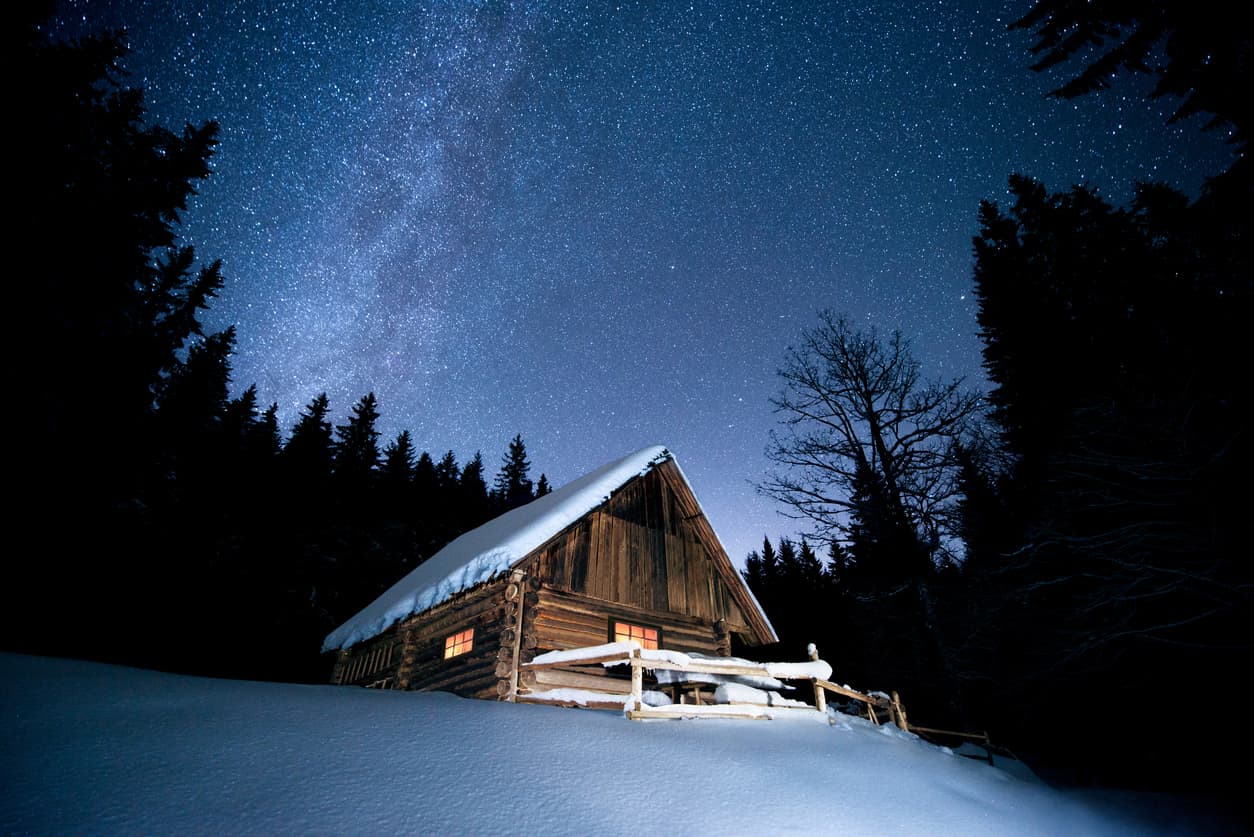
For example, when photographing the moon, framing the shot to include trees, as was done in the image above, makes the photo more interesting.
If there aren't any trees nearby, you can include a foreground element, like a person, to give the shot some interest, or you can wait for clouds to pass in front of the moon for a photo that's more appealing.

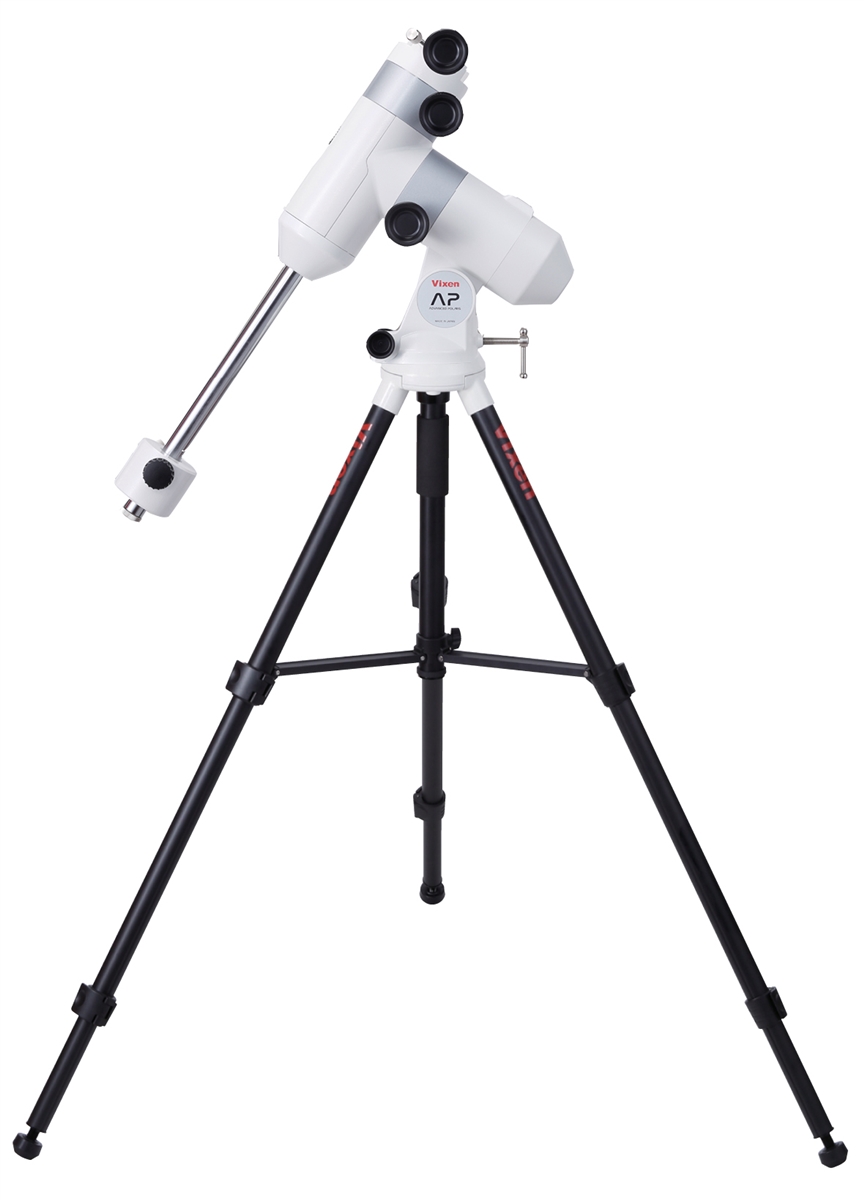
Editor's Tip: Eliminate star trails and get gorgeous photos of pinpoint stars by using a star tracking mount. The Vixen Polarie is an easy-to-use star tracker that's equipped with a compass and a polar scope for alignment. Once the mount is oriented to face north, it will track the movement of the stars to eliminate star trails. The device supports cameras up to 7 lbs., and will even work with your smartphone! Learn more about the Vixen Polarie Star Tracker Mount.
Avoid Light Pollution
Another critical factor in finding the ideal location for astrophotography is light pollution.
The darker the skies around you, the easier it will be for you to highlight the beauty of the night sky.
Years ago, finding dark sites meant that you had to get in the car and drive around until you found a suitable spot.

Today, though, there are numerous apps that tell you where to find the darkest skies, like Dark Site Finder, shown above.
Just enter the location where you'd like to shoot, and Dark Site finder will give you a heat signature map of the area. The less red, yellow, green, and blue you see on the map, the darker the site will be.
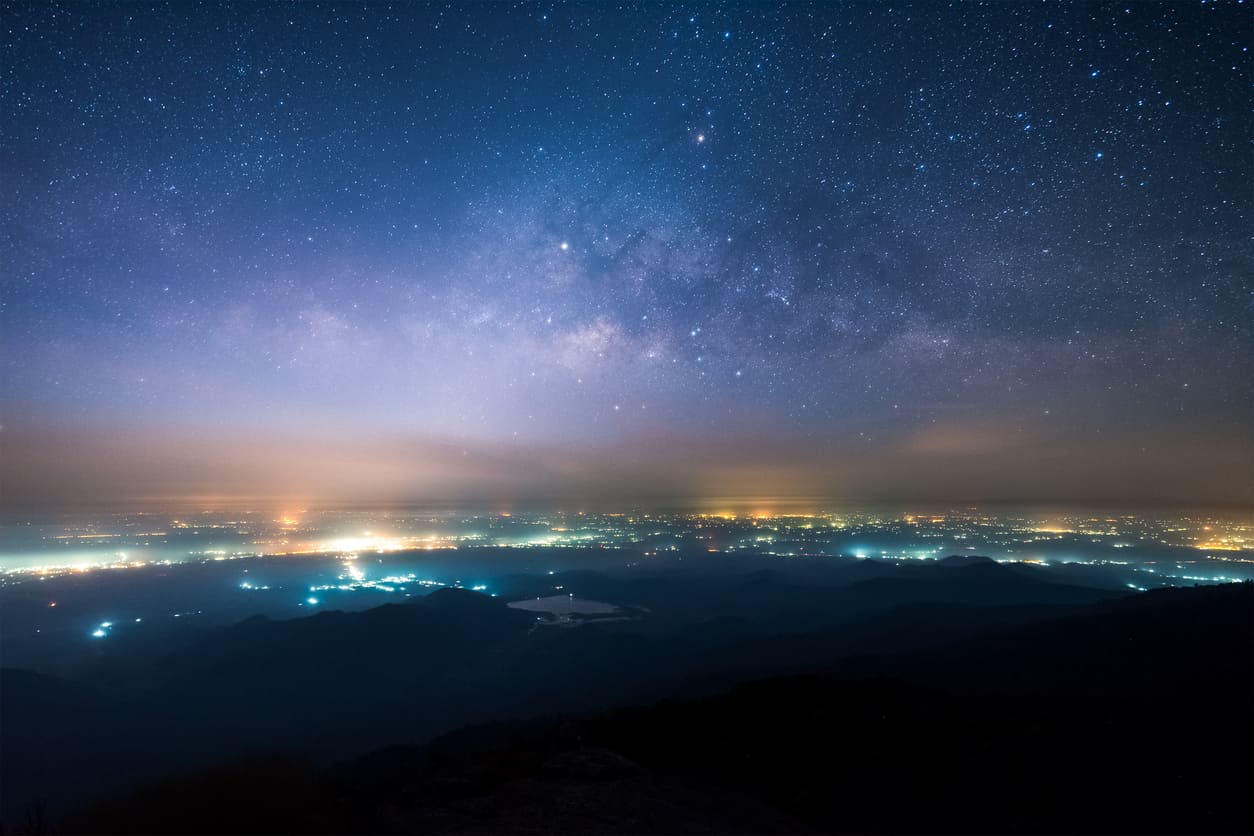
Though dark skies are ideal, they aren't completely required.
That is, you can capture a beautiful image of the night sky above a city, as shown above.
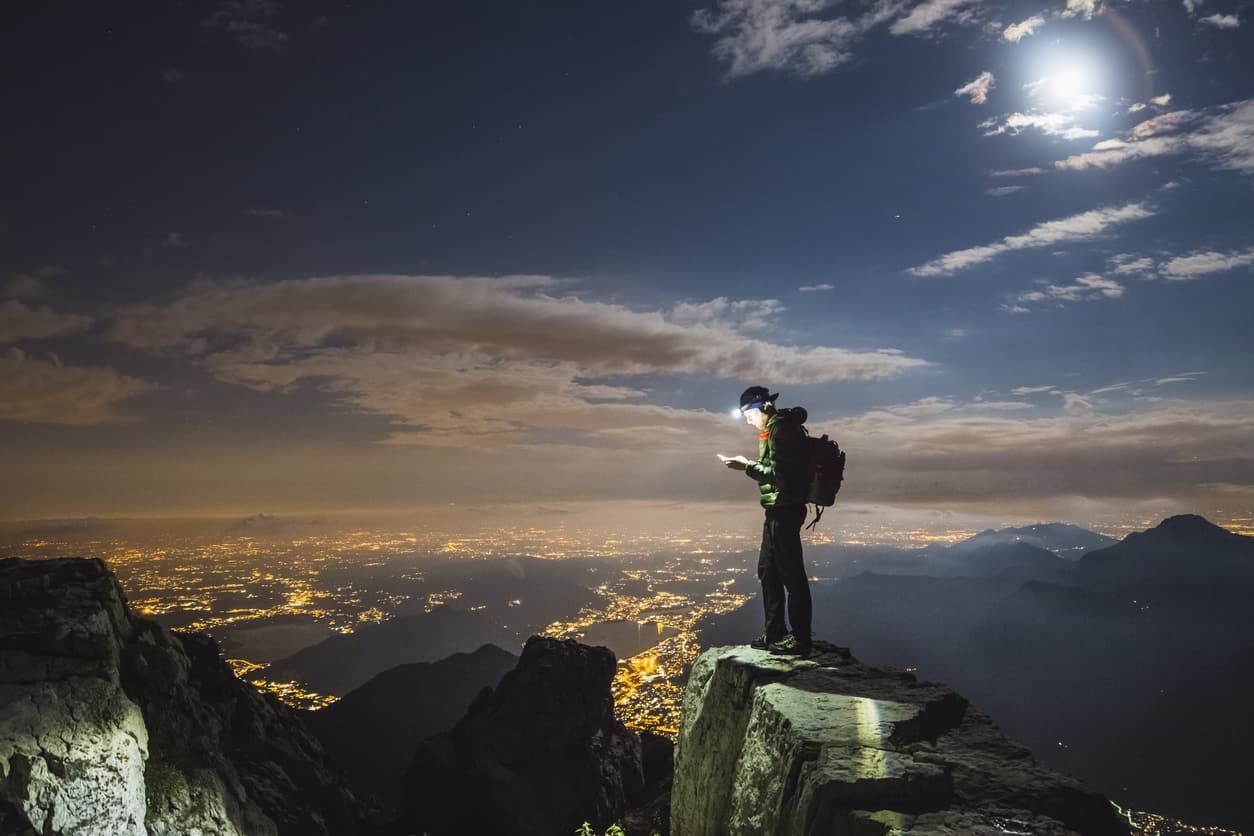
Illuminating the foreground of the shot with a flashlight or headlamp can render interesting results as well, as you can see below.
The point is that it's a good idea to begin your astrophotography pursuits in areas with as little light pollution as possible.
But as you get experience photographing the night sky and want to create more unique and varied photos, try branching out to shoot locations where light pollution can be used as an artistic element.
Learn More:
- How to Photograph the Milky Way (in Simple English)
- These Common Astrophotography Mistakes are Holding You Back
Be Considerate (and Obey the Law)
When looking for a spot to photograph the night sky, there's some practical issues to consider in addition to the view and the level of light pollution.
For starters, just because an area fits the criteria for a photo shoot doesn't mean that you're allowed to be in that area.
Be wary of wandering onto private property or setting up in an area that poses a danger to yourself or others (i.e., in the middle of a country dirt road).
If you're not sure if the spot you've chosen is private property, find another spot. It's best to be safe than sorry.
Likewise, if you select a location that's in a state park, national forest, national park, and so forth, you might be required to pay entrance fees or at the very least check in with local rangers or other authorities to let them know you're in the area.
The same goes for shooting in cities - you might need a permit to set up your gear on a sidewalk to get a shot of the stars above a busy freeway.
If you're shooting away and someone asks what you're doing, why you're there, or demands that you leave, be considerate and comply with all reasonable requests.
Though it's certainly satisfying to capture beautiful photos of the night sky, it's not worth it to risk a confrontation, a fine, or worse.
Editor's Tip: Get your astrophotography kit filled out with everything from tripods to binoculars, filters to carrying cases, and everything in between at MrStarGuy. MrStarGuy is the premier astrophotography retailer with a wide selection of products at prices that won't break the bank. Explore their inventory here.
We Recommend
A Quick How-To Guide for Astrophotography Timelapse Videos

When you see the words “astrophotography timelapse” put together, you likely get excited about the thought of creating awesome videos of celestial bodies moving about in the night sky. Then, you probably shudder at the thought of all the work and effort that must go into creating such stunning videos.
Thinking that astrophotography timelapse videos require tons of work is a bit of a misnomer. It’s not as easy as hopping out of the car and snapping a picture with your phone, but it’s also not something that requires you to be a professional photographer with tens of thousands of dollars of photography equipment either.
In this quick guide, we offer up a few tips on basic timelapse techniques and review some gear that will make your success much more likely. Let’s begin!
Subject Matter
Just pointing your camera at the sky is not a strategy that will get you the best astrophotography timelapse. Instead, when thinking about your subject, consider the following:
-
Where can you go where there is very little light pollution (and very little air pollution, for that matter)?
-
How will the moon track across the night sky? How will this impact your image?
-
Where will the Milky Way appear in the night sky?
-
What can you use as foreground interest?
With all these questions in mind, you’ll need to do your homework. For example, do a search online for the current phase of the moon, as well as where in the sky the Milky Way will appear. You can also download any number of apps for iOS and Android devices that will give you this information on the go (assuming you have cellular service). Once you’ve got an idea of the direction you’ll need to face, you can start hunting for ideal locations to set up.
Setting up is perhaps the most time-consuming part of the process. Not only will you need to give yourself time to get to your chosen shoot location, but you’ll need to get there well before dark so you can actually see what you’re doing as you set up your gear. If possible, it might be a good idea to check out the shoot location a few days in advance during the day, that way you can select a few spots that allow you to include interesting landscape elements in the foreground. Ideal foreground elements include trees, rocks, bodies of water, unique landforms, and even man-made objects like roads or bridges.
Camera Settings
There are several camera settings that are crucial to your ability to take a stunning timelapse video. Naturally, aperture, ISO, and shutter speed are chief among them.
Aperture
Set your aperture to its widest. Lenses that have maximum apertures of at least f/2.8 will get you the best results.
ISO
The ISO you use will depend on a couple of factors - the speed of your lens and the camera you use. For example, with an f/2.8 lens, you might need to use a higher ISO to get the level of light needed for a well-exposed series of images than you would if you used an f/1.4 lens. Regarding the camera, it simply depends on the model you’re using. For example, if using a Canon full frame model like the 5DS/R, ISO 3200 is about the maximum you can use. However, with a Sony A7S, which has much better high-ISO performance, you might be able to get away with an ISO as high as 12800. So, when it comes to ISO, you’ll just need to do some experimentation before commencing with your timelapse.
Shutter Speed
The shutter speed you select will depend on the aperture and ISO values you elect to use. For example, if you shoot at f/2.8 and ISO 3200, a good place to start with your shutter speed is at around 30 seconds. Again, you’ll need to experiment a bit to get the exposure settings right, as the location you’re shooting, the presence of artificial light pollution, and the brightness of the moon will all impact how dark or bright the scene is.
Additional Settings
If your camera is enabled with long-exposure noise reduction, turn it off. If you don’t, the camera’s write time to your card is greatly extended, making it much more difficult (if not impossible) for the camera to keep up with your desired shooting interval. Instead, go without in-camera noise reduction and use noise reduction in post-processing instead. Additionally, take your camera out of automatic white balance, choosing either tungsten or incandescent. This will give your images improved coloring.
Focus
The most difficult camera manipulation is getting the focus right. Though infinity is often the best focus point, it isn’t a given. The easiest method is to use your camera’s live view function so you can frame the shot and then zoom in for inspection of the details to ensure they are in focus. Locate a distant object in the scene (the brightest star in the sky is a good choice), then zoom in to inspect it for sharpness, rotating your lens’ focus ring until the object is tack-sharp.
Interval
Finally, you’ll need to put your camera in bulb mode and take a few practice shots of the scene. Start with a shutter speed of around 10 seconds, increasing or decreasing the exposure time as you see fit until you’re able to get an image that is well-exposed throughout.
Once you’re dialed in with the appropriate shutter speed, you’ll need to determine the interval between shots. The interval should account for both the shutter speed of each shot and the buffer time during which the camera writes the image to the memory card. The buffer time will depend on a couple of factors, including the speed of the card and the camera you’re using. A good rule of thumb is to add five seconds to the exposure time to account for buffering. For example, if your exposure time is 20 seconds, set your interval at 25 seconds.
Gear Up for Astrophotography Timelapses
If you want to make the process of creating incredible timelapse videos easier, we highly recommend utilizing a specialized astrophotography mount with your camera.
There are a wide range of mounts out there that make astrophotography timelapses easier to create, but we prefer those made by Sky-Watcher. Their Star Adventurer mount is multifunctional and user-friendly, so you can track sidereal, solar, and lunar activities. It’s got an automatic DSLR shutter release control so you don’t have to worry about depressing your camera’s shutter, and even better, it has preprogrammed parameters that help you in creating astrophotography timelapses featuring the best features that the night sky has to offer.
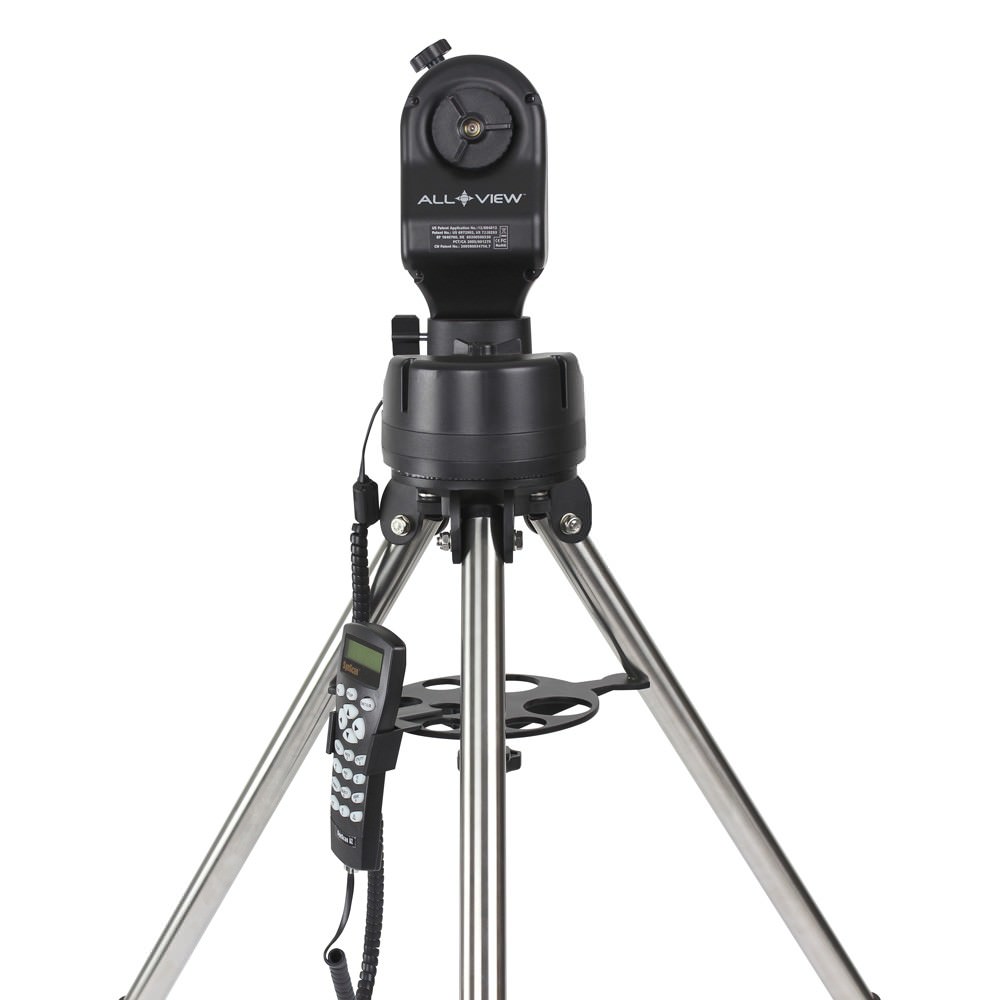
Another option is the Sky-Watcher Allview mount pictured above. The Allview is fully automatic and can be paired with a wide array of cameras. With 360-degree range, you can create timelapse videos with stunning movement, such as tracking the moon as it travels across the sky. The Allview is motorized as well, so when shooting with your DSLR, the smooth panning motion will facilitate sharp, clear pictures without any indication of blur - a must-have for top-notch timelapse videos.
There you have it! From selecting the subject matter to essential camera settings to top-notch astrophotography mounts that will make the process far easier, you’ve got all the details you need to dive into astrophotography timelapse videos. Like with anything, practice makes perfect, so get a mount from Sky-Watcher, plan out your shoot details, and start making awesome timelapses!
We Recommend
Astrophotography Gear Guide: Essential Equipment
Space has always been a bit of an intriguing place for humans. We love to look at the stars and wonder what lies beyond our own world. Beyond merely gazing, though, is a passion for photographing Earth’s neighborhood - a passion shared by an ever-growing number of photographers.
Advancements in technology have made astrophotography something that is no longer reserved for astronomers, NASA scientists, and professional photographers with a huge budget for gear. In fact, any everyday Joe with a few essentials can create stunning photos of the sky like the one above.
Without further ado, here’s our guide to the essential gear you need to create long exposures and time-lapses of the night sky.
Camera
Like any other type of photography, astrophotography is dependent upon your camera being able to gather available light. When shooting in the middle of the night, light is hard to come by, so having a camera with a large sensor - like full frame cameras do - will be advantageous. The larger the sensor, the more light the camera can collect. The more light it can collect, the more detailed and crisp the image will be.
There are several options that would make an ideal choice. The Canon EOS 5DS is considered one of the best cameras currently on the market and has the highest resolution of any full frame camera at 50.6 megapixels. The Nikon D810 is no slouch either, and though the resolution doesn’t compare to the 5DS, the D810 has a far better battery life.
Both cameras are pricey, however. If you want decent results on a smaller budget, crop sensor cameras are worth a look. The Nikon D500 gets high praise for having high-end features packed into a smaller and more rugged body for those long, cold nights photographing the stars. The Canon EOS 7D Mark II isn’t a bad choice either, with a body that’s as tough as the D500’s and plenty of features borrowed from its full frame cousin, the EOS-1D X Mark II.
Fast Lens
When you select a camera, it's light-capturing abilities are an important factor. The same holds true for the lens you select - it needs to allow as much light as possible to pass through it to the camera’s sensor. As a result, fast lenses are ideal for astrophotography. In a perfect world, you should look for a lens that’s at least an f/2.8, though decent results can be had with an f/4 lens. The problem, of course, is that the faster the lens, the larger its price tag.
Don’t be afraid to go off-brand here. Nikon and Canon make excellent lenses, but they are often pricier than those offered by third-party manufacturers. The Rokinon 14mm f/2.8 IF ED UMC Ultra Wide Angle Fixed Lens for Nikon are both solid choices for Canon and Nikon owners, respectively. These and other off-brand lenses are well-built, offer incredible sharpness, and can be found for hundreds of dollars less.
Other considerations: find a lens with manual focusing, and keep it in the ultra-wide-angle range. Many astrophotographers use a 14mm lens, though you can go up to a 24mm lens and get similar results.
Tripod & Mount
It goes without saying that you need a tripod to maximize your ability to take photos of the night sky. Whether it’s a time-lapse or a long exposure, you’ll need a solid base on which your camera can sit.
Additionally, having a specialized astrophotography mount will make your life much easier - and your photos that much better. The Sky-Watcher Star Adventurer Motorized Mount fits the bill for aspiring (and experienced!) astrophotographers. This modular tracking platform is easy to use and integrates with almost any tripod, allowing you to photograph the moon, sun (with filter), and the Milky Way with ease. The mount has a time-lapse mode with pre-programmed intervals that are automatically adjusted to fit the shooting mode you select.
What’s more, the Sky-Watcher Star Adventurer has a DC servo motor with an 86mm diameter, 144-tooth aluminum alloy wheel gear and a 13mm diameter brass Worm gear for smooth motion. There are numerous speed options, including 0.5, 2x, 6x, and 12x tracking speed as well. With northern and southern hemisphere compatibility, you can create the astrophotography images you dream of, regardless of your location on planet Earth.
That’s it! All you need is a decent camera, a good set of glass, a tripod, and an easy-to-use astrophotography mount in order to join the ranks of being an astrophotographer. There are technical and compositional considerations to be made as well, but with this gear, you’ll be set on the right path for success in photographing the wonders of the night sky.
We Recommend
Astrophotography Gear: Optional Equipment
Naturally, a camera, lens, mount, and tripod are among the essentials for astrophotography. But there are a few optional items you might want to add to your kit as well.
Let's take a look at just a few items that you might want. Keep in mind that the kind of gear you'll need is somewhat dependent on the types of astrophotography you intend to pursue.
With that in mind, here's a short list of some optional items.
A Telescope
This is probably the most obvious purchase if you're planning to reach out with your camera.
Not all scopes are intended for deep space viewing, though, so you may want to consider one even if you're just planning to stick with wide field astrophotography for now.
It's also important to remember that higher magnification means not only more cost for the scope, but more sophisticated equipment required for stabilization and tracking.
There's much to know about focal length, aperture, back focus, and other mechanisms of optics. But here are a few that we recommend for DSLR photography in the three main categories of astrophotography.

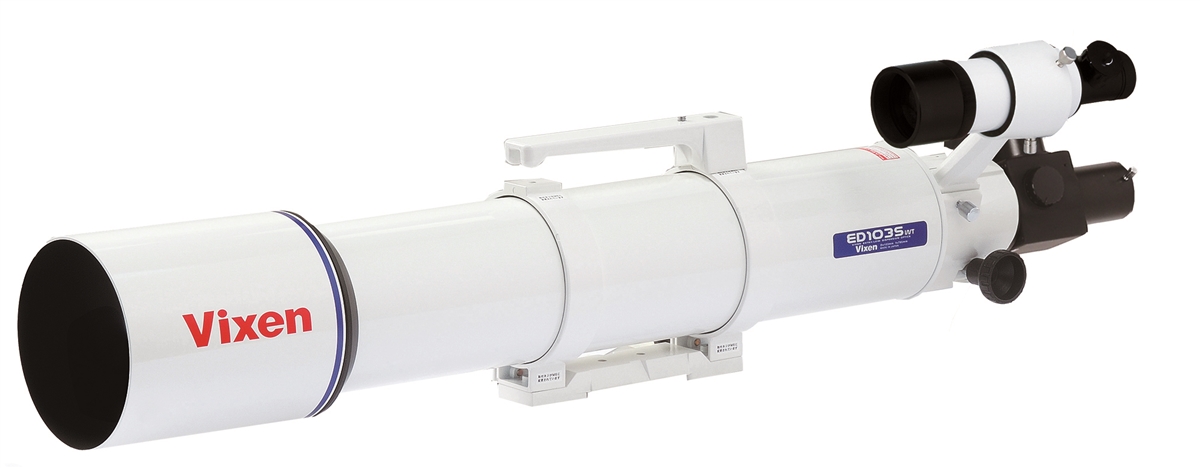
For wide field photos, the Vixen ED103S is a great choice in a refractor, especially for the novice. It's ideal for those who want to reach out a bit more with a precision instrument at a reasonable cost.
For basic deep sky imaging at a reasonable price, you might want to take a look at the Vixen R200SS Newtonian Reflector Telescope (shown above). This reflector provides a 200mm focal length with an f/4 parabolic primary mirror that gives you extremely sharp images.
With a scope of this size, you can see groups of nebula, comets, and star clusters. Add an optional coma corrector, and you'll get even sharper coma-free images.
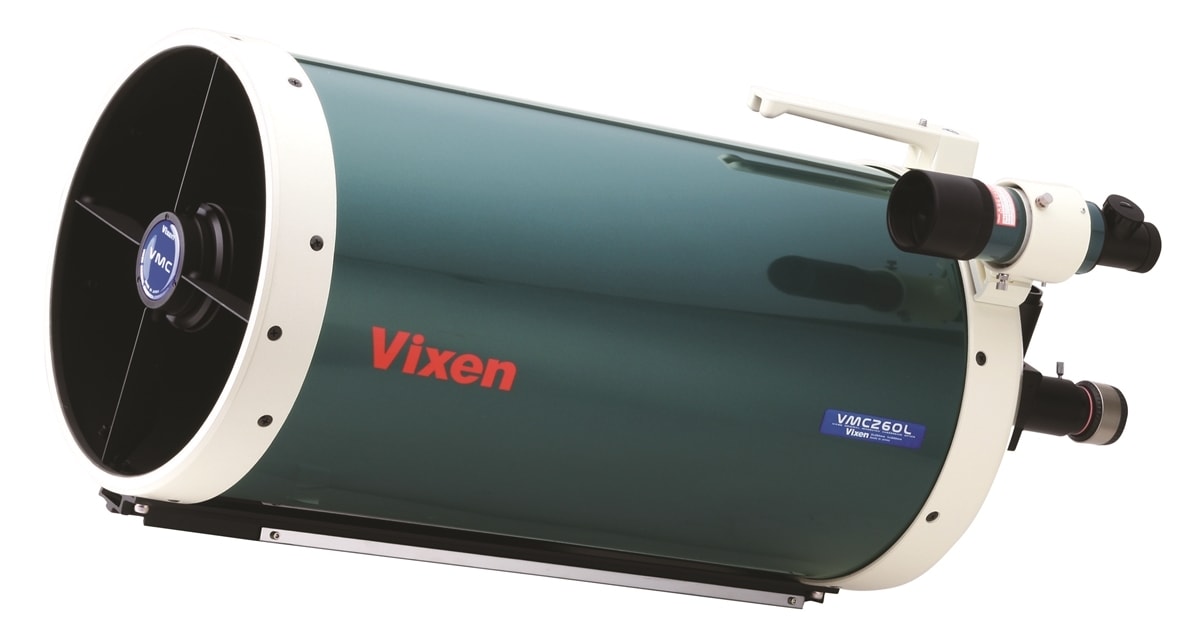
For a little more telescopic power, you can opt for something like the Vixen VMC260L Reflector Telescope that's ideal for deep sky and planetary astrophotography.
This rig is a modified Cassegrain design with a long focal length and a large 260mm aperture to collect the light needed for high-quality photos of deep space. And with a double meniscus corrector lens design, spherical aberration and field curvature are eliminated while offering superb contrast in your images.
I know the technicalities of telescopes might be confusing, so be sure to visit the links in the Learn More section below for more details.
Learn More:
- Get More Details on the Vixen ED103S
- Get More Details on the Vixen R200SS
- Get More Details on the Vixen VMC260L
A Mounting System
There are two factors that create challenges when shooting celestial objects from a terrestrial location:
-
High magnification ratios exaggerate even the smallest movement.
-
Because the earth rotates, keeping a distant object in the field of view during long exposures or over multiple exposures requires tracking or otherwise adjusting the angle of the scope. This is also a factor in initially locating celestial objects, compounded by the fact that those objects are also moving.

Obviously, the solution for the minimizing movement of the scope is to use a highly stable mount on a very rigid tripod. The second factor is much more complex and there are many solutions available, from star charts and the most basic manual tracking systems to sophisticated, computerized "go to" and tracking firmware.
There are basically two types of mounts available for telescopes, and the difference is important for astrophotographers.
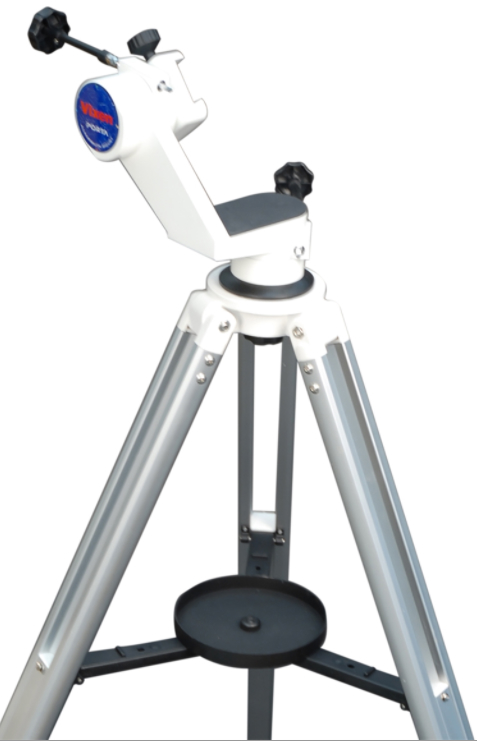
An alt-azimuth mount, like the Vixen Porta II shown above, adjusts the angle of the optics along two axes, altitude and azimuth. These two axes must be adjusted independently in order to keep an object centered over time. A mount like this requires a universal plate to attach a camera to it and is ideal for photographing bright objects like the moon or Venus.
An equatorial mount, like the Vixen Advanced Polaris Mount shown below, is also adjusted on two axes. However, one, known as the polar axis, is aligned parallel to the Earth's rotation while the other, declination, adjusts the line of sight perpendicular to the polar axis to locate objects. Once an object is located, only the polar axis needs to be rotated to keep the object centered.
The equatorial mount is generally preferable for astrophotography, but for those of you investing in an astrophotography setup now, an alt-azimuth mount is perfectly fine. Regardless of the type of mount chosen, however, it will need to matched to the scope or scopes you'll be using. Most manufacturers, like Vixen Optics, offer mount and tripod combinations dedicated to specific lines of scopes, so be sure to consider the scope you'll use before choosing a mount.
Learn More:
Software
There are a great number of accessories you may need or want, and the list will vary according to the categories of astrophotography you're involved in. There are a few items, however, that will be common to all aspects of astrophotography, and one of those is software.
Image stacking is a very common practice in astrophotography, and you'll eventually want to have image editing software that's capable of it. If you're already using a recent version of Adobe Photoshop, you've got it covered. If not, consider a subscription to the Creative Cloud version.
We Recommend
Astrophotography Gear: The Camera
Before we launch into discussions about astrophotography techniques, some time needs to be spent on the equipment you'll want to consider having on hand.
After all, if you don't have the gear that you need to practice what you're learning, what's the point?!
That being the case, I'd like to take some time to go over a few details about cameras for astrophotography.
Digital vs. Film

Film cameras are perfectly suitable for astrophotography. After all, photographers have been taking successful astronomy shots on film for decades.
That said, digital technology has given us much more versatility and convenience. Put simply, modern DSLRs are faster, easier to use, and more capable than their predecessors.
So, while I encourage the use of film cameras in all areas of photography, these discussions will be centered on DSLR camera usage.
DSLR Camera Choices
As in any form of photography, the camera doesn't make the astrophotographer. There are, however, some important considerations and limitations that are specific to this type of photography. The first one we'll discuss is a limitation in all standard DSLRs on the market.
"Where's the Red?"

Your DSLR "sees" differently than you do. Unlike our eyes, digital imaging sensors are sensitive to all colors of light in the spectrum.
In daylight conditions, the sensitivity to infrared light frequencies causes a shift in the colors we perceive in an image. To counteract this, standard DSLR cameras include a permanent IR limiting filter that corrects the color balance.
In astrophotography, this filter blocks wavelengths of light emitted by some celestial objects, such as nebulae. The reds produced by these "H-alpha" wavelengths add incredible color and detail to many areas of our universe.
While this lack of reds will go unnoticed by most viewers and a good-quality standard DSLR is suitable to use, the difference will be dramatic in many images.

If you're serious about this field, you may want to consider a DSLR that's designed specifically for astronomy shots. The most notable models from manufacturers are the Canon EOS 60Da and the Nikon D810a shown above.
Both of these come with modified IR filters that allow the H-alpha reds to pass. The 60Da was introduced in 2012, so it's possible now to find used ones fairly inexpensively, while the D810a is a newer, full-frame camera with stunning 36.3MP resolution and a much higher price tag.
It's also possible to have your standard DSLR modified by a lab that specializes in replacing the IR filters. This is a fairly pricey operation, and it will render the camera almost useless for daylight work.
Some labs also offer pre-modified versions. These models often use special filters that allow the camera to produce relatively normal daylight shots.
Learn More:
It's Noisy Out in Space!

Alright, not really, but noise is a major consideration in choosing a camera – digital noise, that is.
Astrophotography shots may require very long exposures – as much as 15 minutes – at high ISO settings. As you probably know, digital noise production increases as ISO settings increase. What you may not know is that digital sensors heat up when they're activated and the hotter they get, the more noise they produce.
That means that those deep sky shots can be completely riddled with noise and the better the noise suppression in your DSLR, the less cleanup you'll have to do in post-processing.
A camera with a good rating for low noise will make your life much easier. As a general rule, crop-sensor DSLR cameras will generate more noise than full-frame, but the difference in price may make that a tough choice. At the end of the day, just buy the best camera you can afford.
Learn More:
The Other Stuff

There are other features you're going to need, and most are built into almost any modern DSLR:
-
Full manual exposure setting
-
Bulb (B) shutter mode with a timer
-
Remote shutter operation
-
Manual Focusing
-
High ISO range
-
Live View Mode
-
Movie recording capability
You'll also want to think about features that make shooting upward easier, like a top-side LCD panel, and/or an articulated LCD viewing screen.
With a wide range of DSLRs and options available, the bells and whistles will be a matter of your preference.
Learn More:
Specialized Cameras and Mounts

You may also want to take a look at some of the more unusual cameras built for specific purposes, such as full-sky shooting.
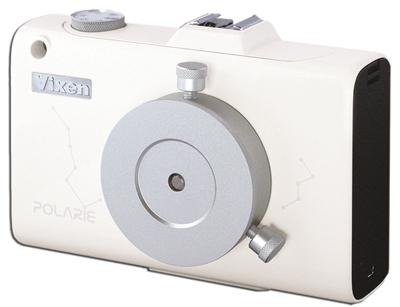
Some cameras are even designed to fit the eyepiece of a telescope. You can also get something like the Vixen Polarie Star Tracker Mount shown above, pair it with your digital camera, and use it to track the motion of the stars and other celestial bodies without star trails forming in the shot.
This information should get you on the right road to choosing the right camera for astrophotography, but if you're already the owner of a good DSLR, don't hesitate to get out there with it!
Learn More:
- Get the Specs and Pricing on Telescopes, Camera Mounts, and Other Astrophotography Gear
- Astrophotography Basics: Mounting the Scope
We Recommend
Astrophotography Gear: The Essentials

Naturally, the first piece of basic gear that you're going to need for astrophotography is a camera. We discuss that topic in depth in another article.
Aside from that, there are some essential pieces of equipment, some that are only necessary for specific types of shots, and some that just make the process easier and more fun.
In this article, we discuss the basic essentials that you'll need for a solid astrophotography kit.
The Essentials
What are the bare minimum requirements for success in astrophotography?
You'll probably get different answers to that question from different people, partly because many people focus on a specific type of astrophotography.
We're going to start this off by listing the gear required to simply set up your DSLR for great night sky shots. That's basically wide field astrophotography, but some specialized equipment can be called for even in that category. For now, let's look at a bare-bones setup.
A Manual Focus Lens
Autofocus isn't going to work with objects millions of miles away. Instead, you'll need lenses that focus manually or can be switched to manual.
Lenses with focusing scales will make the job easier. Focal lengths will depend on what you plan to shoot. Keep in mind that the longer the focal length, the more susceptible your setup will be to blurring from camera shake.
You can, of course, use a scope for a lens, too.
Learn More:
A Solid Tripod
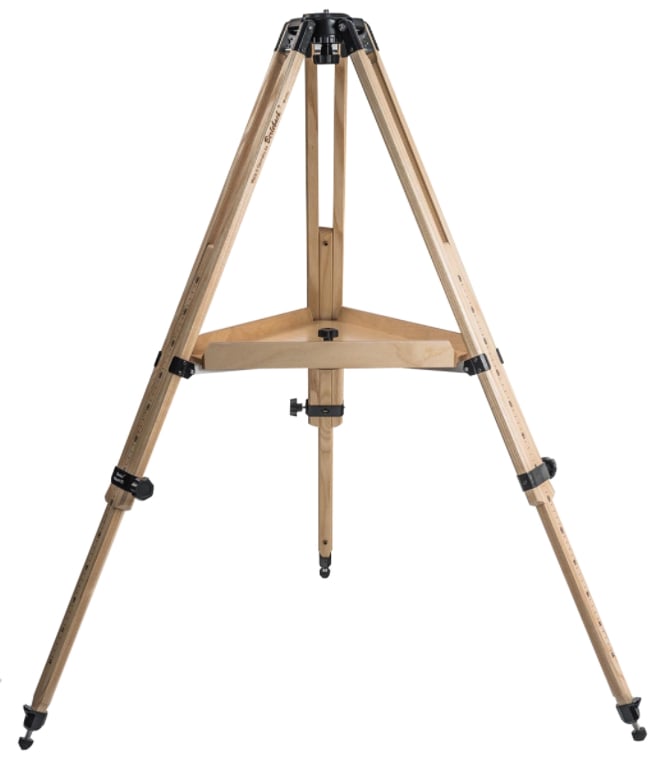
This really shouldn't require an explanation, but trying to hand-hold your camera when shooting celestial bodies is pointless.
Your exposure times are going to be in multiple seconds and often multiple minutes. You're going to need a tripod, and it needs to be sturdy.
Be prepared to add weight to it with sandbags or other means to make sure it's rooted solidly to the ground.
You can get by with a simple ball or pan and tilt head on your tripod for basic, wide field shots or star trails.
Of course, if you are out to view the stars with a telescope, a solid tripod like the one shown above is a must as well.
Learn More:
- Shop Tripods for Astrophotography and Viewing the Night Sky
- Astrophotography Gear: Optional Equipment
A Remote Shutter Release
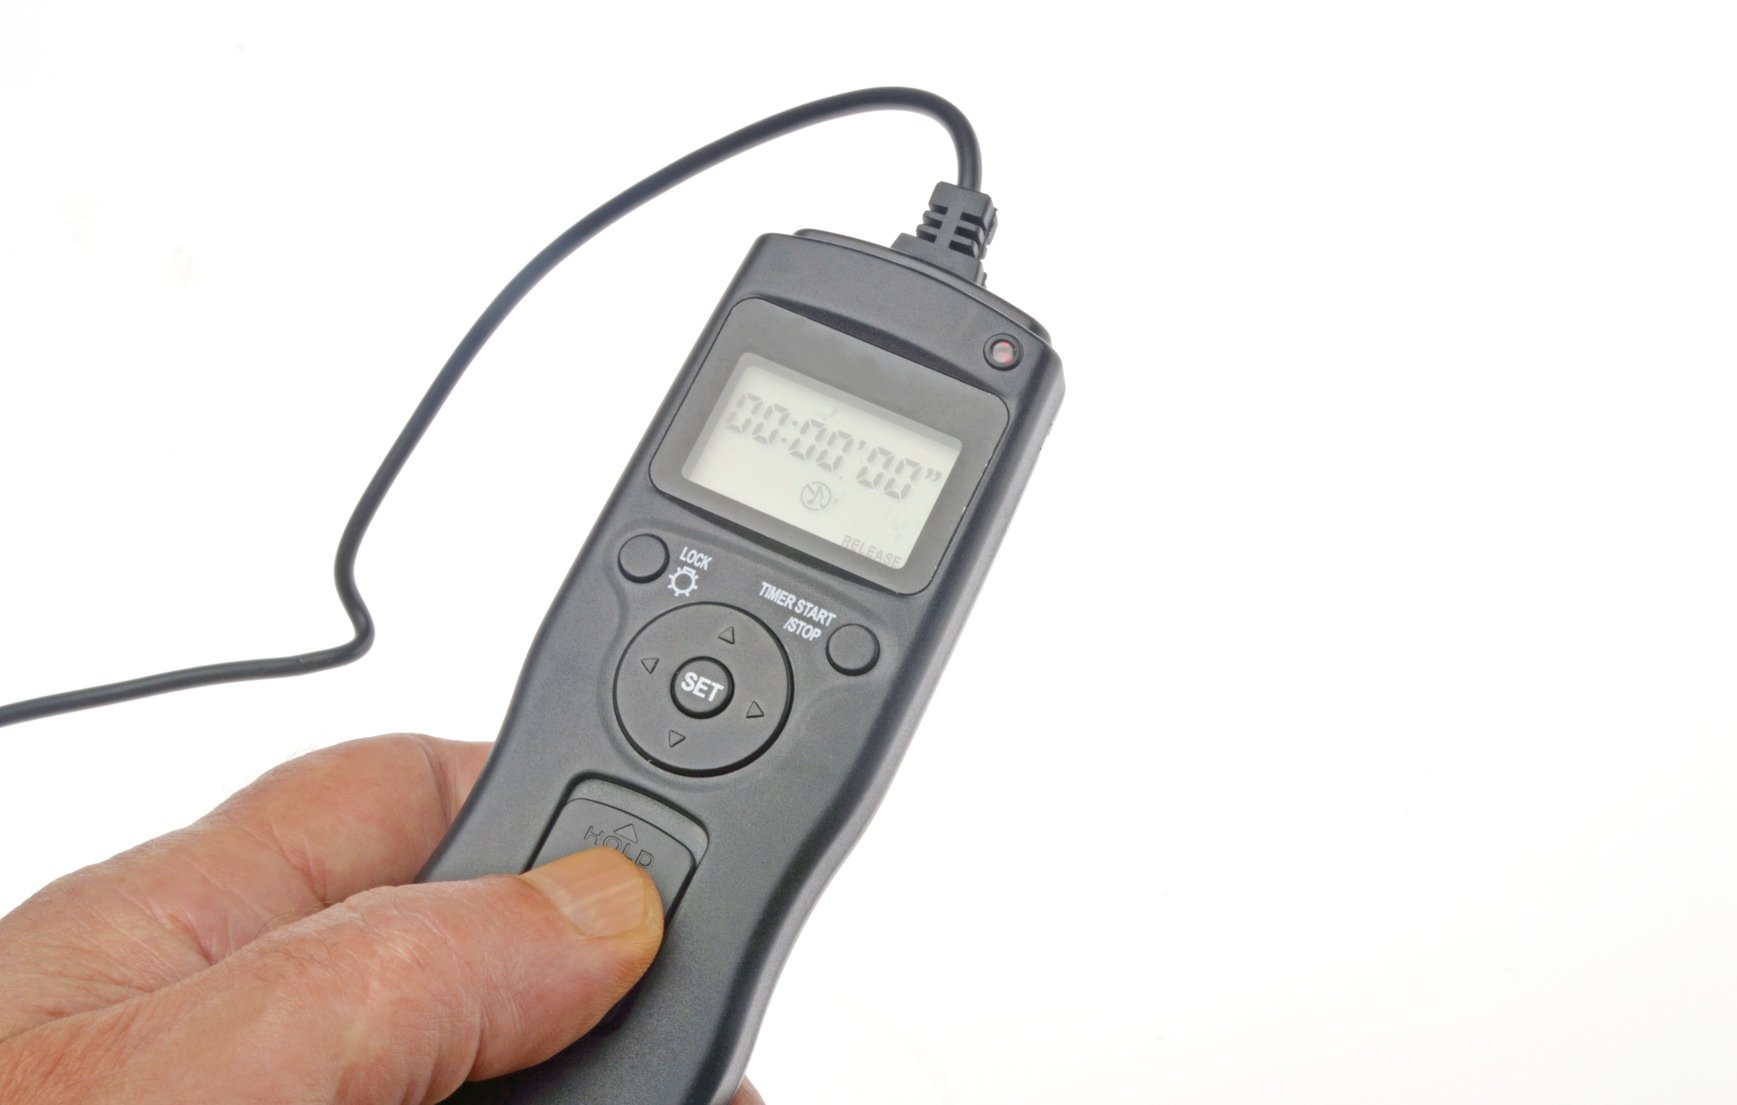
Minimizing camera shake is priority one when you're working with extreme distances and very long exposures, and your camera's shutter delay timer may not be enough since even the tiniest bit of movement will blur those distant targets.
Plunger-type cable releases are also likely to induce movement because of both their mechanical operation and their overall stiffness.
Electronic shutter releases are so inexpensive these days that there's no excuse not to have one. It doesn't matter whether it's wired or wireless, so long as it isolates your hand completely from the camera at the critical moment.
This is one item you may want to consider upgrading to a more versatile option. Intervalometers are also inexpensive now and will work just as well for individual shots. That will also provide you with the opportunity to add time lapse videos to your astrophotography portfolio.
Learn More:
A Flashlight
You're going to be shooting in the dark and preferably far away from light-polluted cities, so you need to carry a small flashlight (or even better, a headlamp) in your bag.
Not only is a flashlight handy for checking and adjusting camera settings, but you'll also need one for locating dropped batteries or memory cards.
You never know what kind of animals (or people) you'll encounter while taking night photos, either, so a headlamp is ideal for keeping an eye out for anything that might be sharing your space.
Final Thoughts

There's not much more needed for a basic astrophotography setup, beyond what you should already have with your outdoor camera gear.
This basic setup and the techniques you can learn in our other astrophotography articles will provide you with wide field images you'll be proud to share.
The real challenge isn't finding great gear to help you get the shots you want - it's finding the time to actually get outside and take the photos!
So, as you think about the gear you need to fill out your astrophotography kit, start planning your adventures and stick to those plans. After all, practice makes perfect!
We Recommend
Astrophotography Tip: How to Get Clear, Sharp Pinpoint Stars
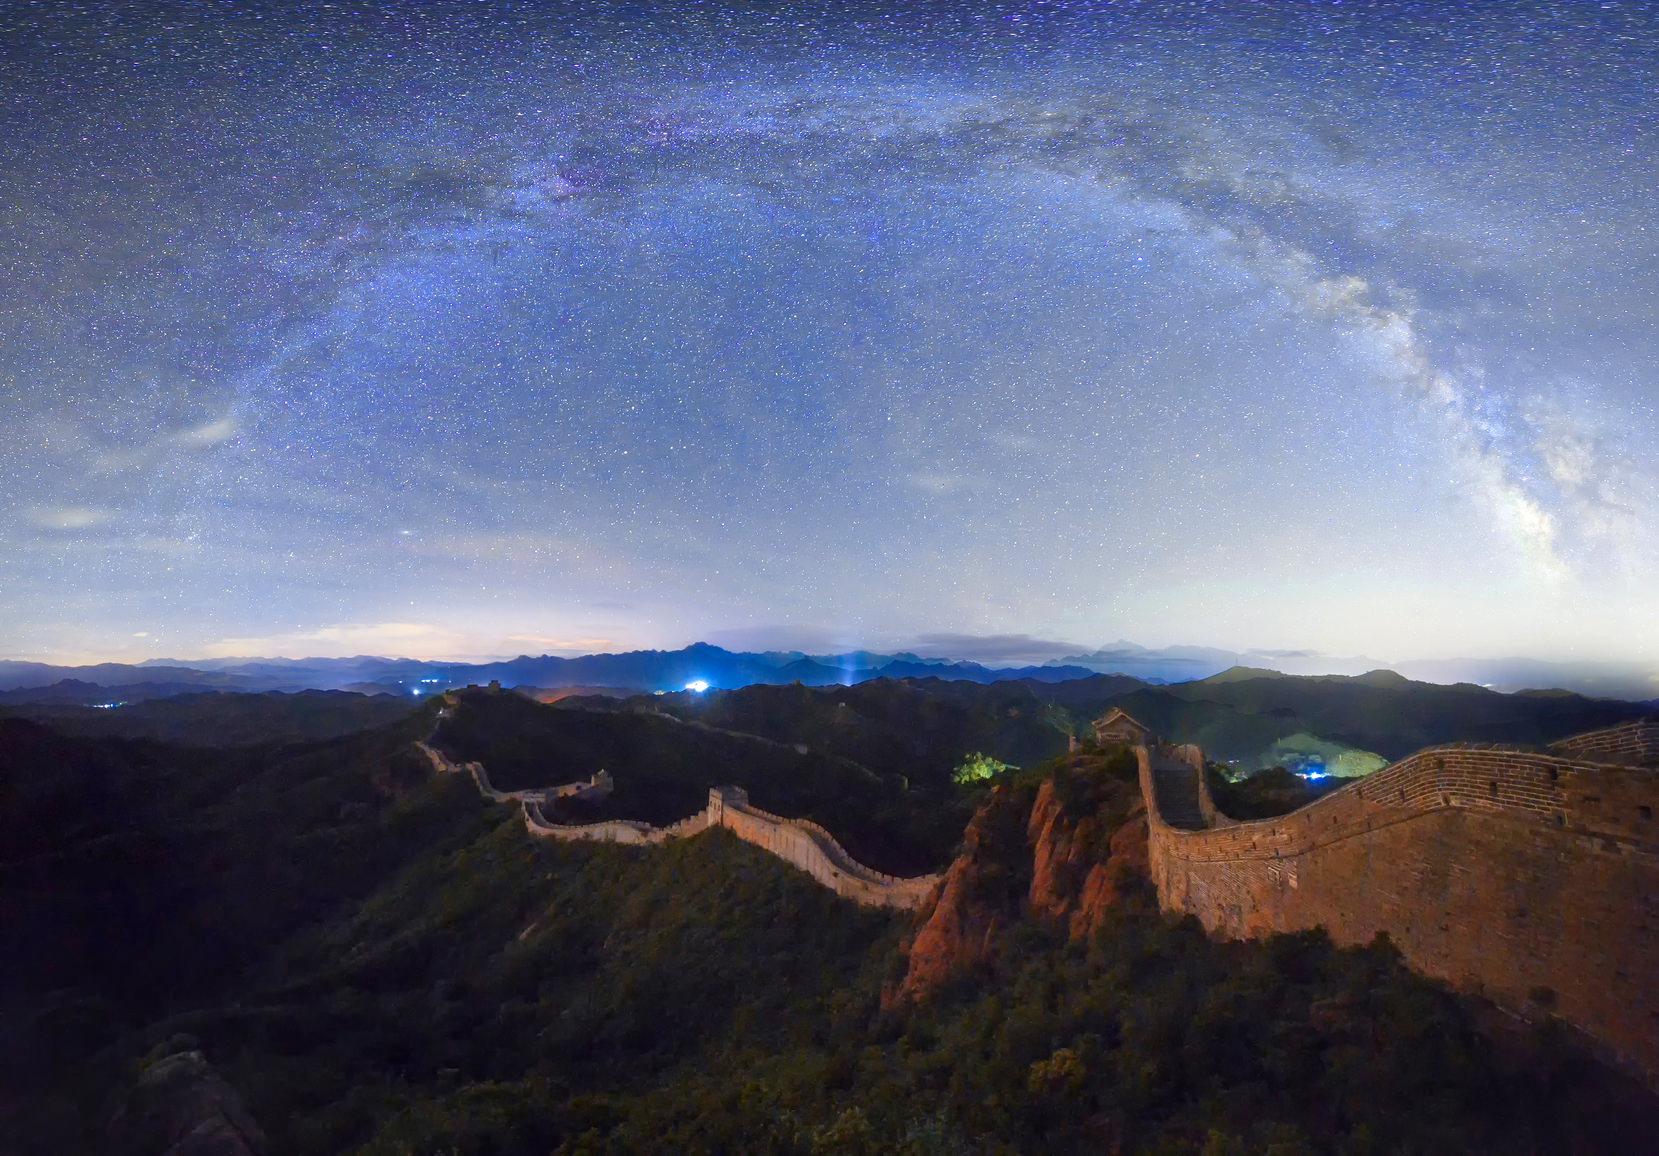
Many people that venture out into the night to dabble in astrophotography end up taking long exposures in which the stars have long trails. Those kinds of photos are breathtaking, no doubt, but sometimes it’s also a breathtaking result to get sharp, pinpoint stars in the night sky that are more representative of what we see with our own eyes.
But how do you do that?
There are a couple of different ways of going about it: The Rule of 600 or with some top-notch equipment like the Sky-Watcher Star Adventurer.
The Rule of 600
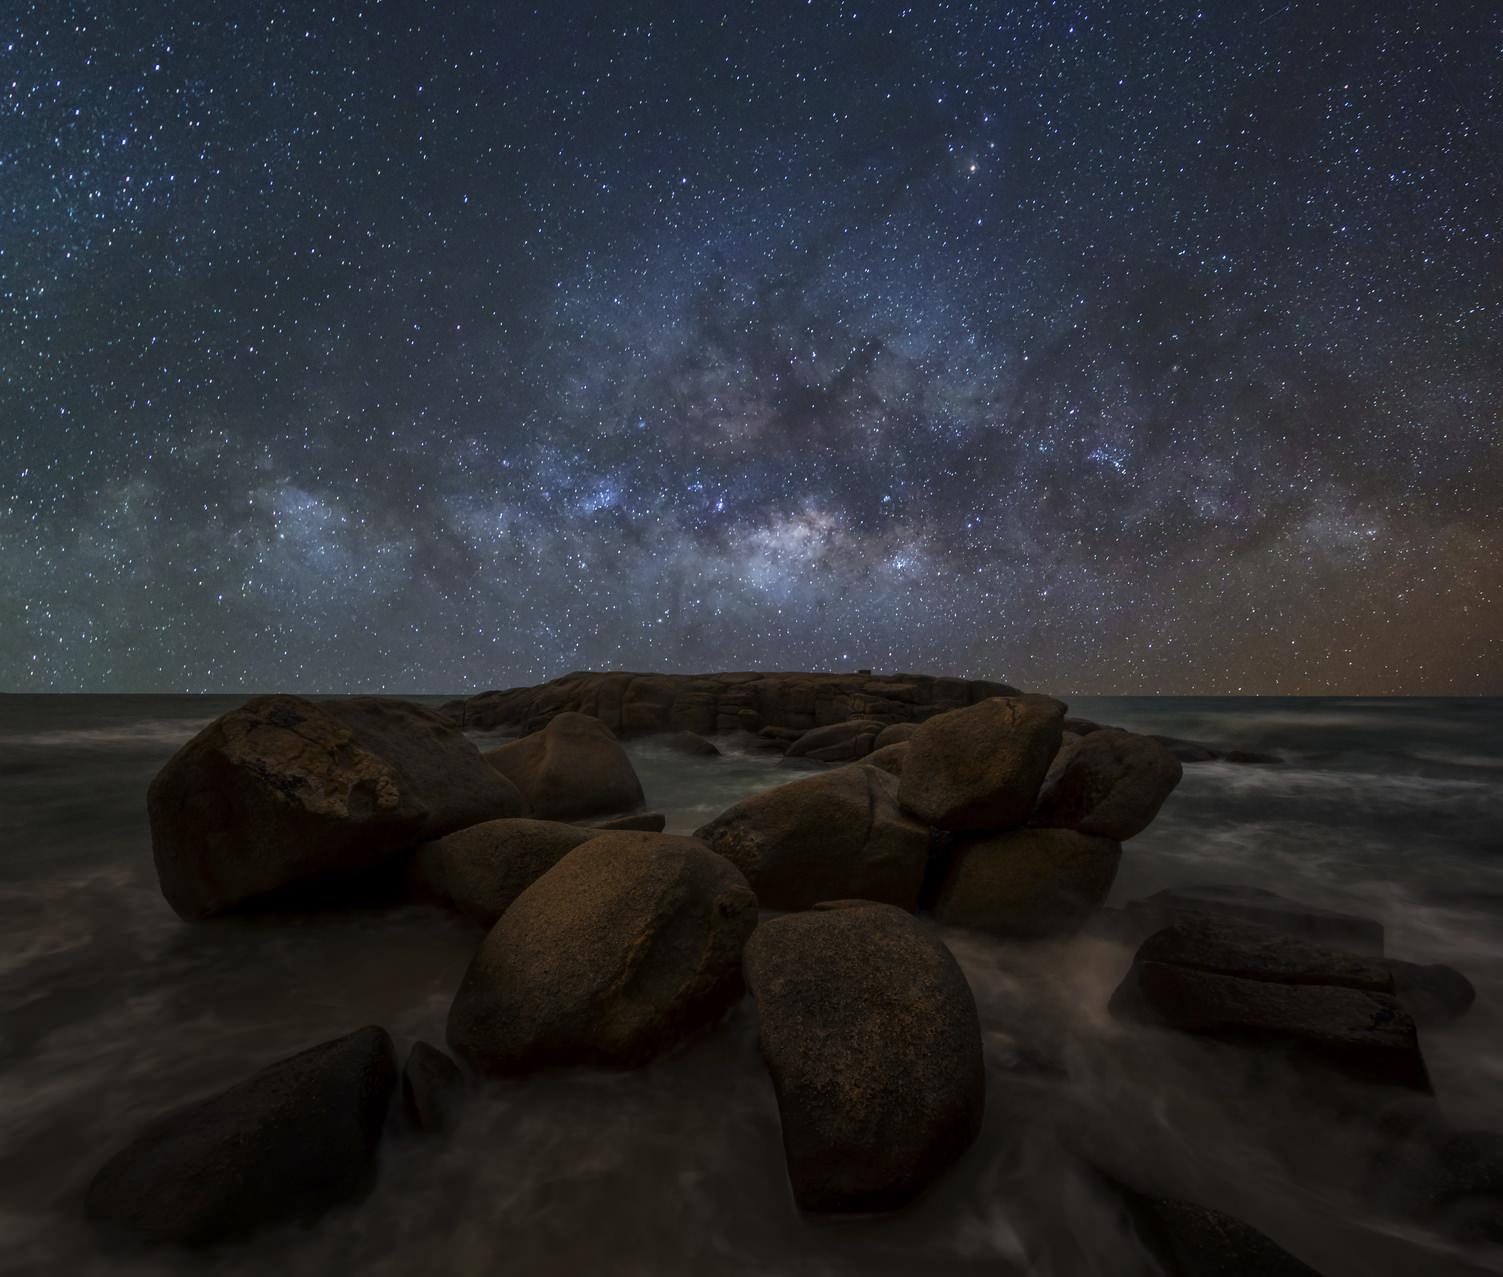
When you want to avoid star trails, you have to do a little bit of math. Because the earth is in constant motion, you have to determine just how long your shutter can remain open without inducing star trails. The method by which you calculate the shutter speed is called the Rule of 600.
To use the rule, you need to know the focal length of your lens. That number is then used to divide 600 to get the maximum exposure time for that focal length. For example, if you’re using a 14mm lens, you’d divide 600 by 14, which is approximately 43 seconds, or the longest shutter speed you can use before star trails start to emerge.
Naturally, you need a fast lens with good low-light capabilities, because even though 43 seconds sounds like a long time, in the dead of night, it isn’t! Since you’ll have to limit the shutter speed you can use, having a lens with a larger maximum aperture and better ISO performance than most will help your camera gather the light it needs to generate a well-exposed photo of the night sky.
The Sky-Watcher Star Adventurer
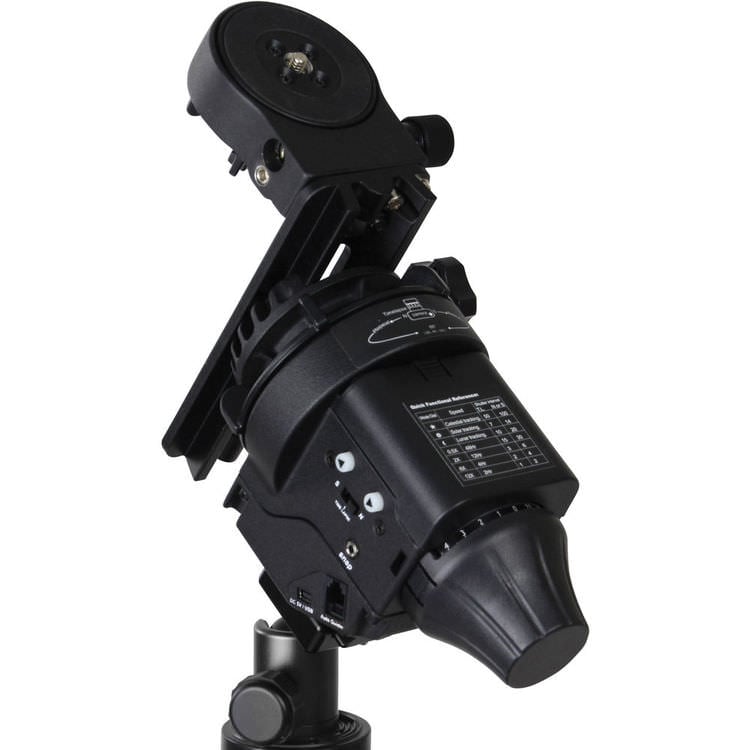
If you want to set yourself up for success with getting sharp, pinpoint star fields, equip yourself with the Sky-Watcher Star Adventurer. The Star Adventurer has built-in sidereal tracking, so once you set it up, it will track the stars for you - no Rule of 600 is necessary! Better still, the Star Adventurer has seven tracking modes, enabling long exposure photos of the stars without trails (or, if you really want them, with trails too).
Adding tracking capability and precise, controlled camera movement opens up a whole new world of possibilities in wide-field astrophotography, whether you’re a seasoned pro or a brand new beginner. Diving into astrophotography has never been so easy or convenient - the Star Adventurer is stable, highly portable, and easily compatible with 1/4 and 3/8 inch tripod threads. Just attach it to your camera, and in turn, to your tripod, and use its user-friendly controls to dial in exactly what you want.
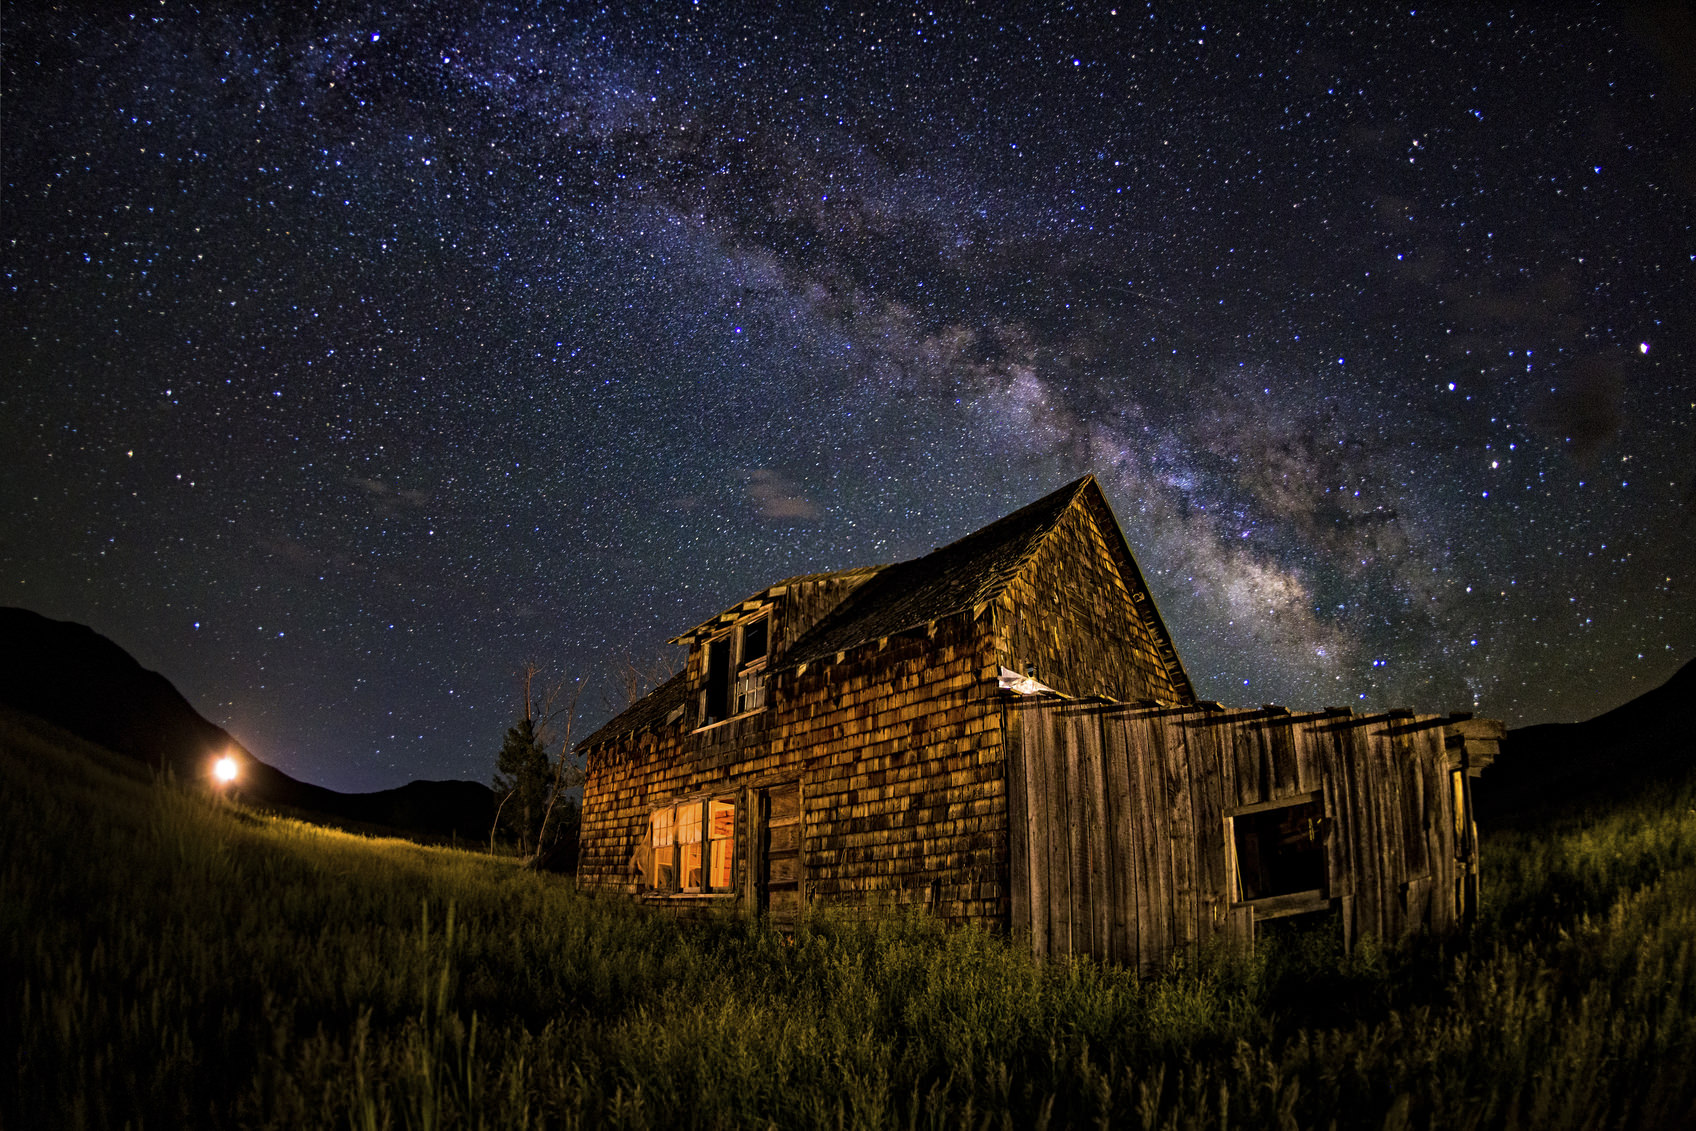
The Star Adventurer controls your DSLR shutter through a built-in interface, and there's an illuminated polar scope to facilitate easy alignment. It has a ball head adapter as well, and will run up to 72-hours on four AAA batteries. It will help you get spectacular shots of the night sky like the one above. So what are you waiting for? Get out there and see what incredible images you can take of the night sky!
We Recommend
Astrophotography Tip: How to Manually Focus Your Lens
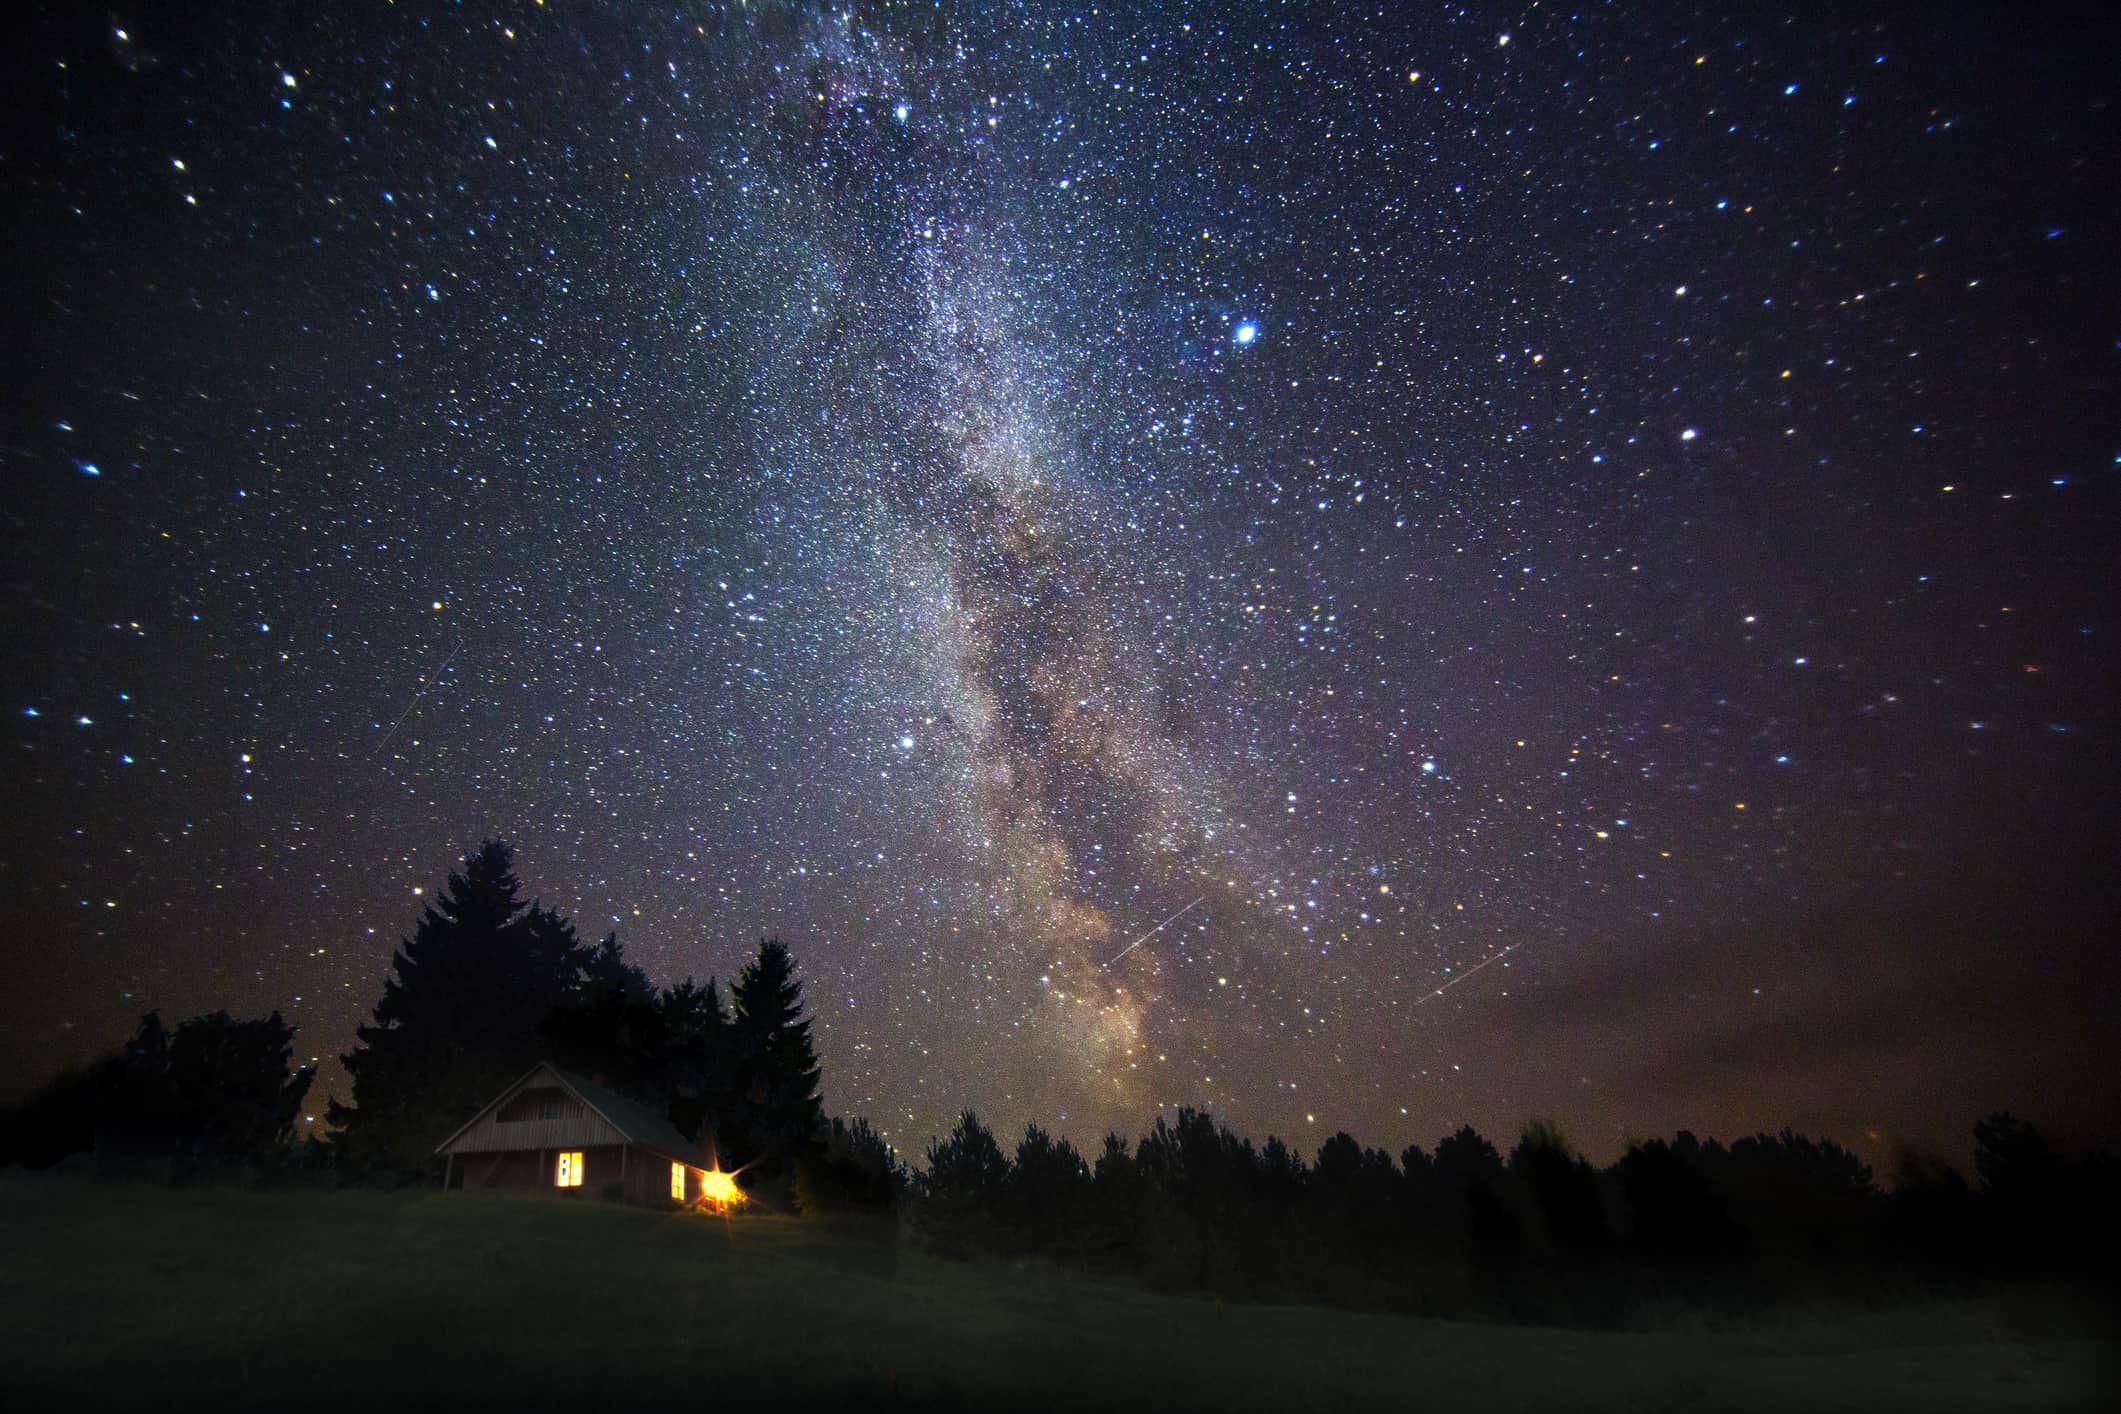
One of the challenges of capturing beautiful photos of the night sky is to get the shot perfectly in focus.
Though modern cameras have incredible autofocus systems, they rely on light to obtain their focus. That means that when you're out shooting stars at night, the camera's autofocus will constantly hunt for the contrast it needs to determine the focus of the shot.
Without being able to rely on autofocus, you'll have to take the reins and focus manually to get clear, sharp photos.
The question is, how do you do that?
Editor's Tip: Want to take improved photos of the night sky? Get outfitted with the necessary gear from MrStarGuy. MrStarGuy is a family-owned company dedicated to offering top-quality products that are affordable and backed by excellent customer service. For astrophotography mounts, tripods, telescopes, and more, visit MrStarguy.com.
Certain Gear Helps
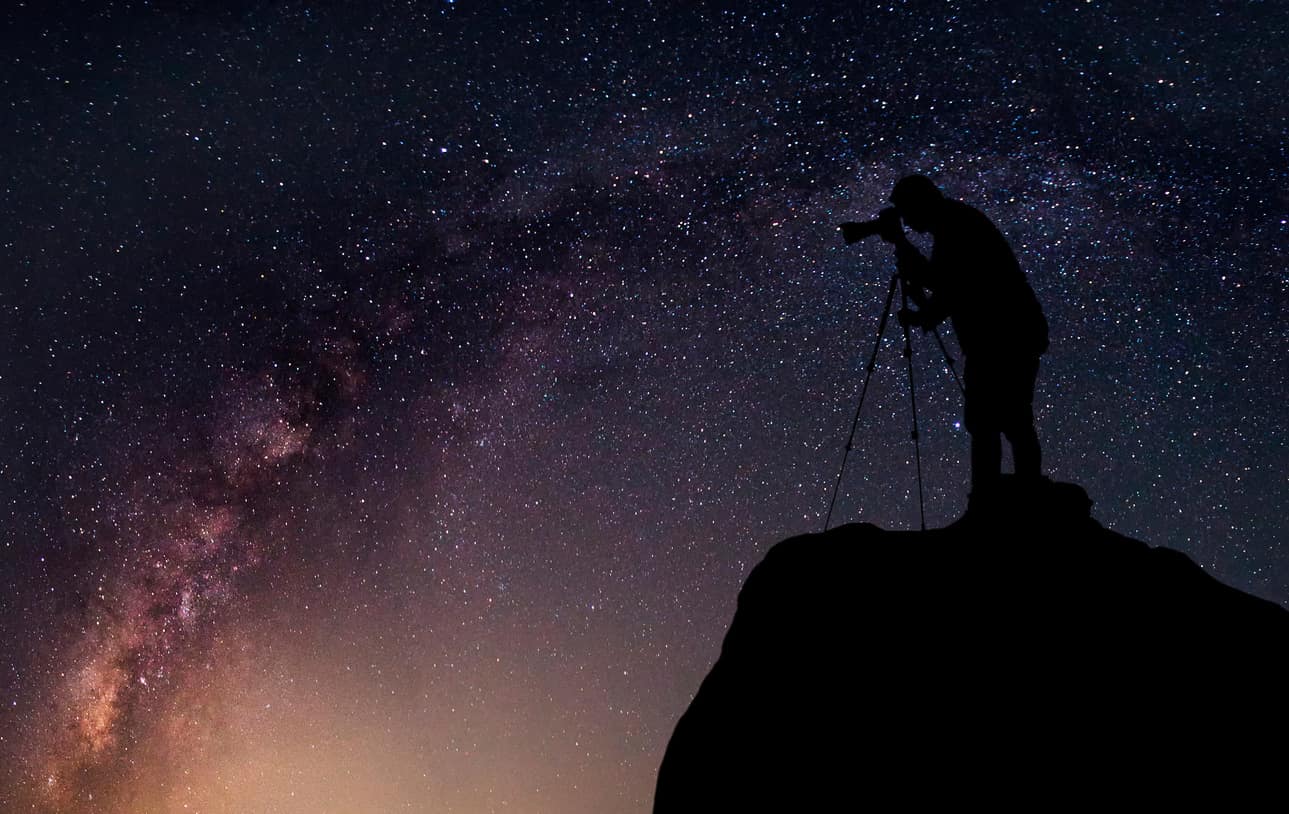
First things first, you need a lens with a large aperture.
The larger the aperture, the more light the lens can collect, and that makes focusing at night much easier.
You don't have to spring for something like an f/1.2 or f/1.4 lens (though that would be great!). If the budget is a concern, a f/1.8 a f/2 or even a f/2.8 lens should do the trick.
Additionally, you want a sturdy tripod that gives your camera a nice, stable base for shooting the photos.
After all, it won't matter how well you've focused the shot if the camera isn't stable to take the photo!
Follow This Procedure
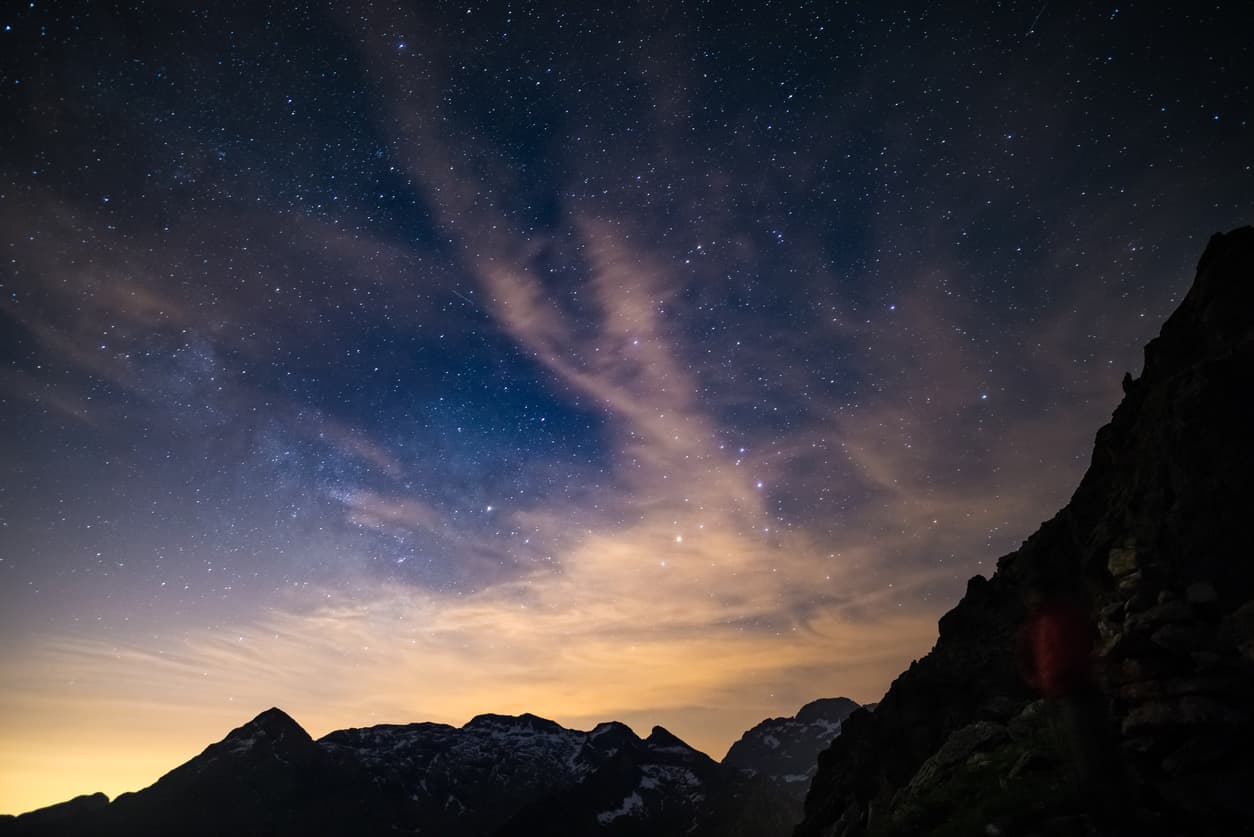
Before I outline the different ways you can focus your lens at night, it's important to note a few basic steps you'll use regardless of the focusing method.
Once you have your camera and tripod set up, you'll need to switch your camera or lens to manual focus.
Ensure you're using a large aperture - f/2.8 or lower - and set the ISO to about 3200. Again, this helps let as much light into the lens as possible and increases the sensitivity of the sensor to light as well.
Using Live View, zoom in on a bright object as closely as possible. While watching the LCD, manually adjust the focus as needed until the subject is tack-sharp.
Once you've got the image in sharp focus, lock down the focus ring with gaffer's tape. You can then adjust the camera positioning as needed to compose your shot.

Manual Focusing Method #1: Pre-Focus

Photography is all about preparation, and this method of manual focus requires some forethought.
Rather than waiting until dark to acquire focus, you can simply pre-focus your lens ahead of time.
Using this method, you can actually focus the shot using autofocus, but you have to be sure to lock the focus in place. This can be done by switching your lens or camera from autofocus to manual focus once you have the desired focus set.
It's important to note the distance marking on your lens when you're focused at infinity. This will help you reacquire the proper focus if you accidentally move the focus ring. As noted above, a better idea is to use gaffers tape to hold the focus ring in place.
Though this is perhaps the easiest method of focusing for night photography, the drawback is that you can't easily refocus the shot later on if need be.
Editor's Tip: If you want to observe the night sky in greater detail, consider adding a telescope to your kit. MrStarGuy offers a variety of astrophotography telescopes that are ideal for viewing the night sky and getting sharp, detail-rich images. Get more details on MrStarGuy's astrophotography telescopes.
Learn More:
Manual Focusing Method #2: Get Help With Artificial Light
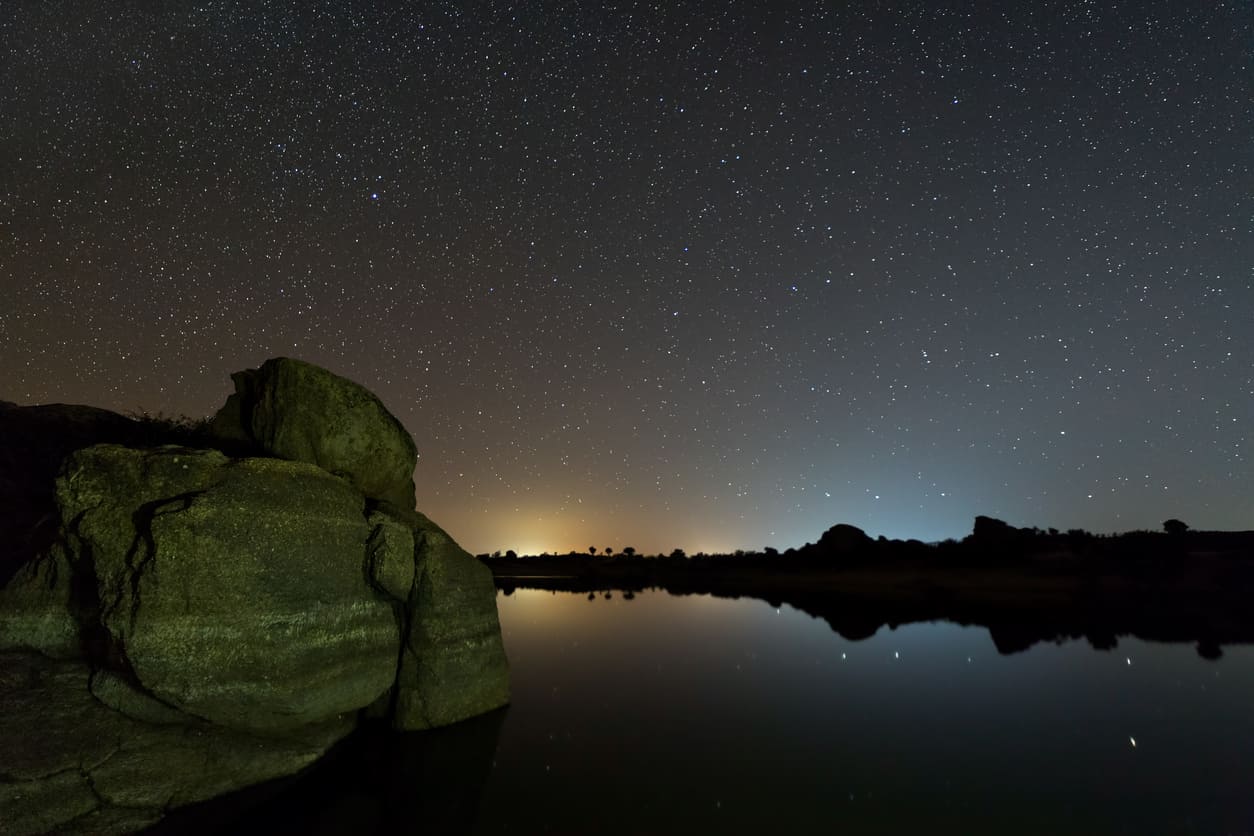
Using an artificial light source is helpful because it obviously gives your lens the light it needs to help you acquire focus.
This can occur in two different ways.
First, you can focus on a distant light source, for example, light emanating from a light pole in the background of your shot.
Assuming the light is sufficiently bright and far enough away (so that you can focus at infinity), this can be a hugely helpful method of getting the focus right in your shots of the night sky.
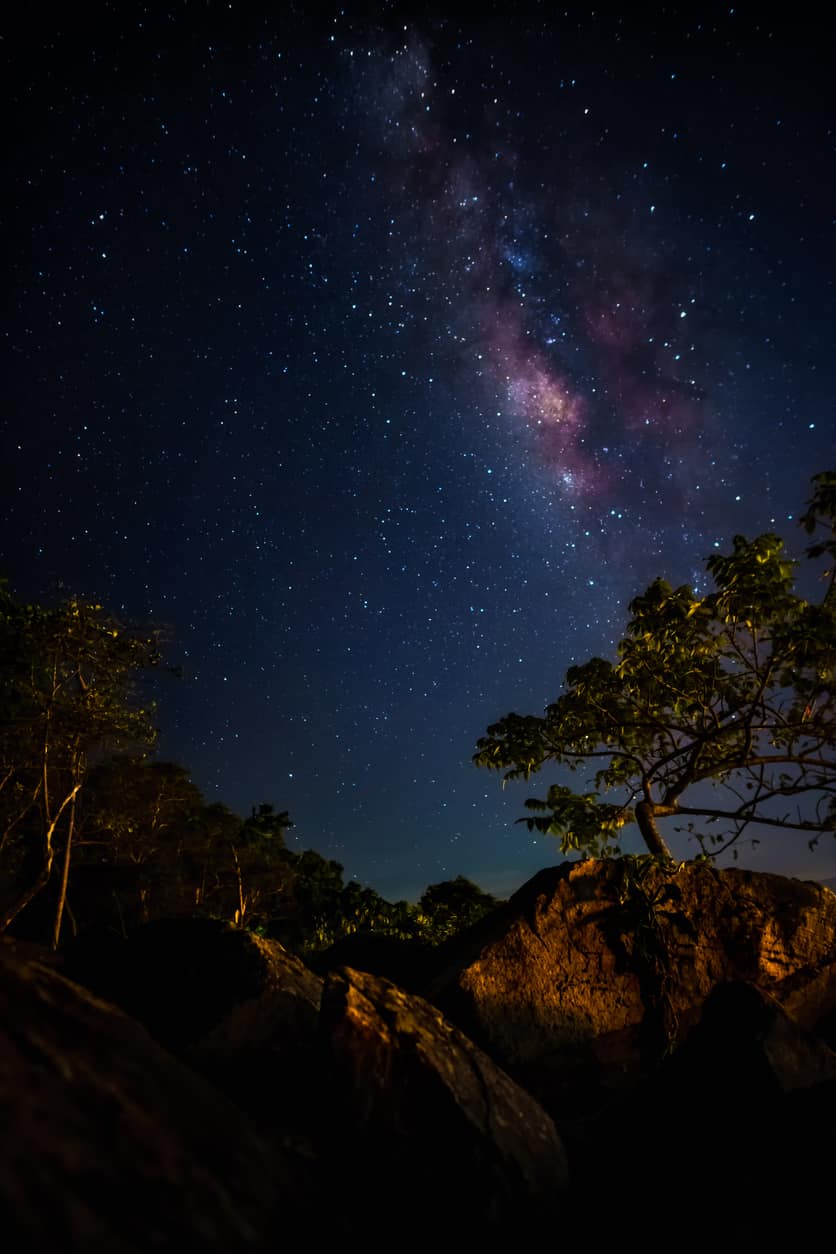
Another way you can utilize artificial light is to use it to light paint in the foreground.
This method doesn't do you much good for focusing on distant objects like stars.
However, if you focus stack your images, you can use a flashlight or a headlamp to illuminate the foreground to get a sharply focused image that you can blend with one you previously took of the sky.
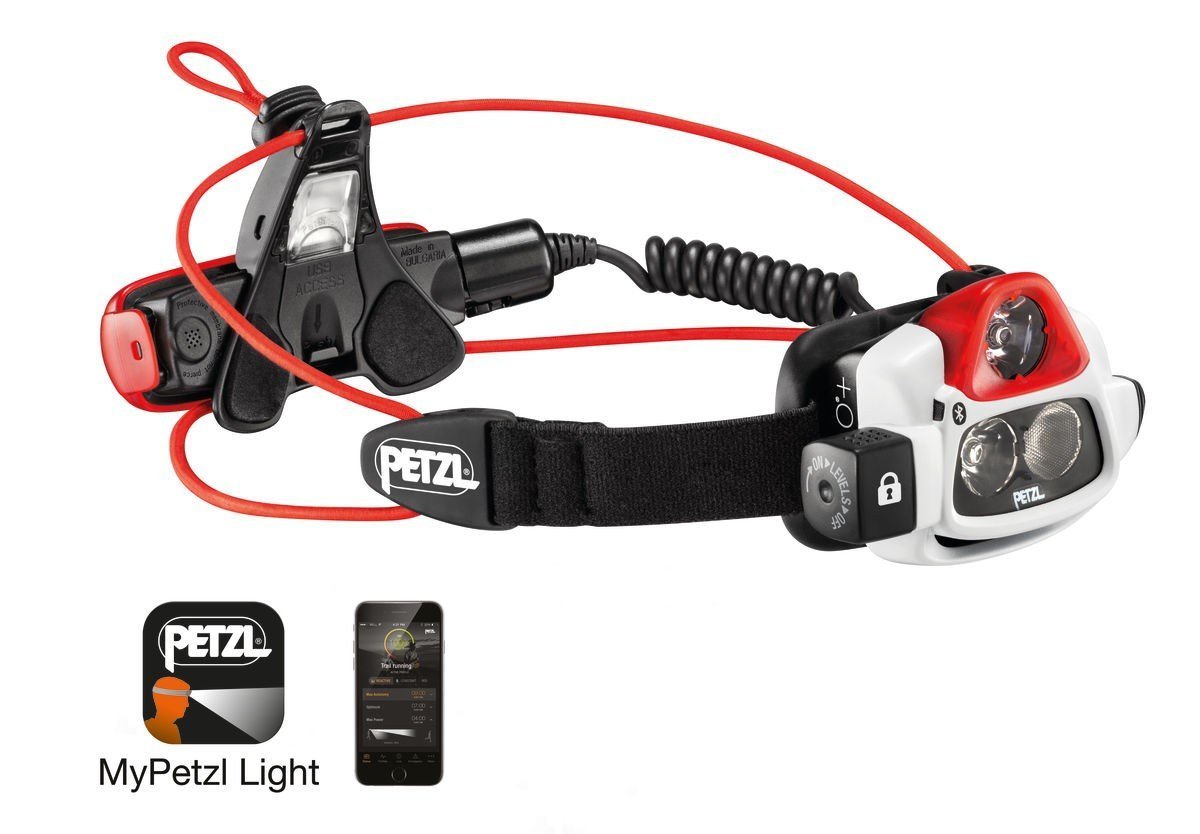
My headlamp of choice is the Petzl NAO + (shown above) because it offers tons of versatility and is a durable rig to boot.
It puts out 750 lumens - more than enough for light painting - so you can create dreamy foregrounds for your astro images.
And not only is it incredibly comfortable to wear, but it also has smart features that make it more functional, too.
In particular, the MyPetzl Light App allows you to keep track of things like battery power, and if you're running low, you can make adjustments to the performance of the headlamp to extend the battery life. Crazy, right?!
The NAO + also boasts a handy feature called Reactive Lighting, which allows the headlamp to instantaneously adjust to the ambient lighting conditions, that way you have just the right amount of light for your photography exploits.
That makes it the perfect choice for light painting and other photography adventures at night!
Either way, if you use an artificial light source to help you get the light you need to focus the shot, it's advantageous to have a lens with an aperture of at least f/2.8 to collect as much light as possible.
Learn More:
Manual Focusing Method #3: Focus on a Bright Star
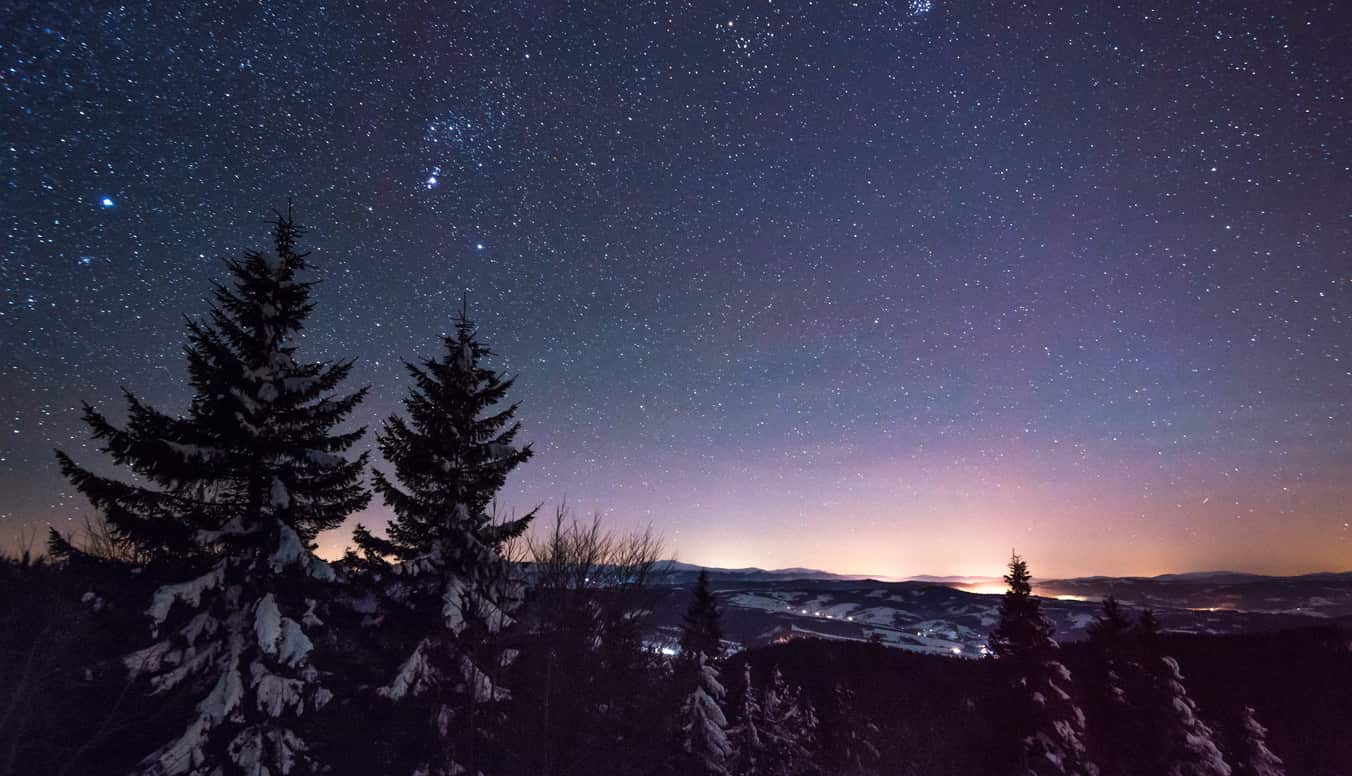
If there's no objects immediately in the foreground of the shot, you can simply use a bright star for acquiring the focus.
To make things easier, you should pre-focus the lens to infinity, as outlined in the first method above. This will at least get you in the neighborhood of having the shot in focus.
That's important because there will be a lot of noise in the shot, so making out stars can be difficult to do.
Using the camera's LCD, zoom in on the brightest star you can find, making adjustments to the focus ring as necessary to bring the stars into focus.
When you think you've got the focus down, take a photo, then review it to make any exposure adjustments. Take additional practice photos until you have a good exposure.
Be sure to zoom in on the images you take to double-check the focus of the shot, refocusing as needed.
If it seems like a complicated process, it really isn't, especially as you get some practice.
In the video above, Greg Benz offers more details about each of these focusing methods and shows you a live demo of how to manually focus at night.
Now all that's left to do is find a dark spot, set up your gear, and set about getting sharply focused images of the stars.
Editor's Tip: For more tutorials on astrophotography, check out our astrophotography section, sponsored by our friends at MrStarGuy. Learn about composition, camera settings, gear, and other essentials for capturing breathtaking photos of the stars and other celestial objects.
Learn More:
We Recommend
Composition Techniques to Take Your Astrophotography to the Next Level
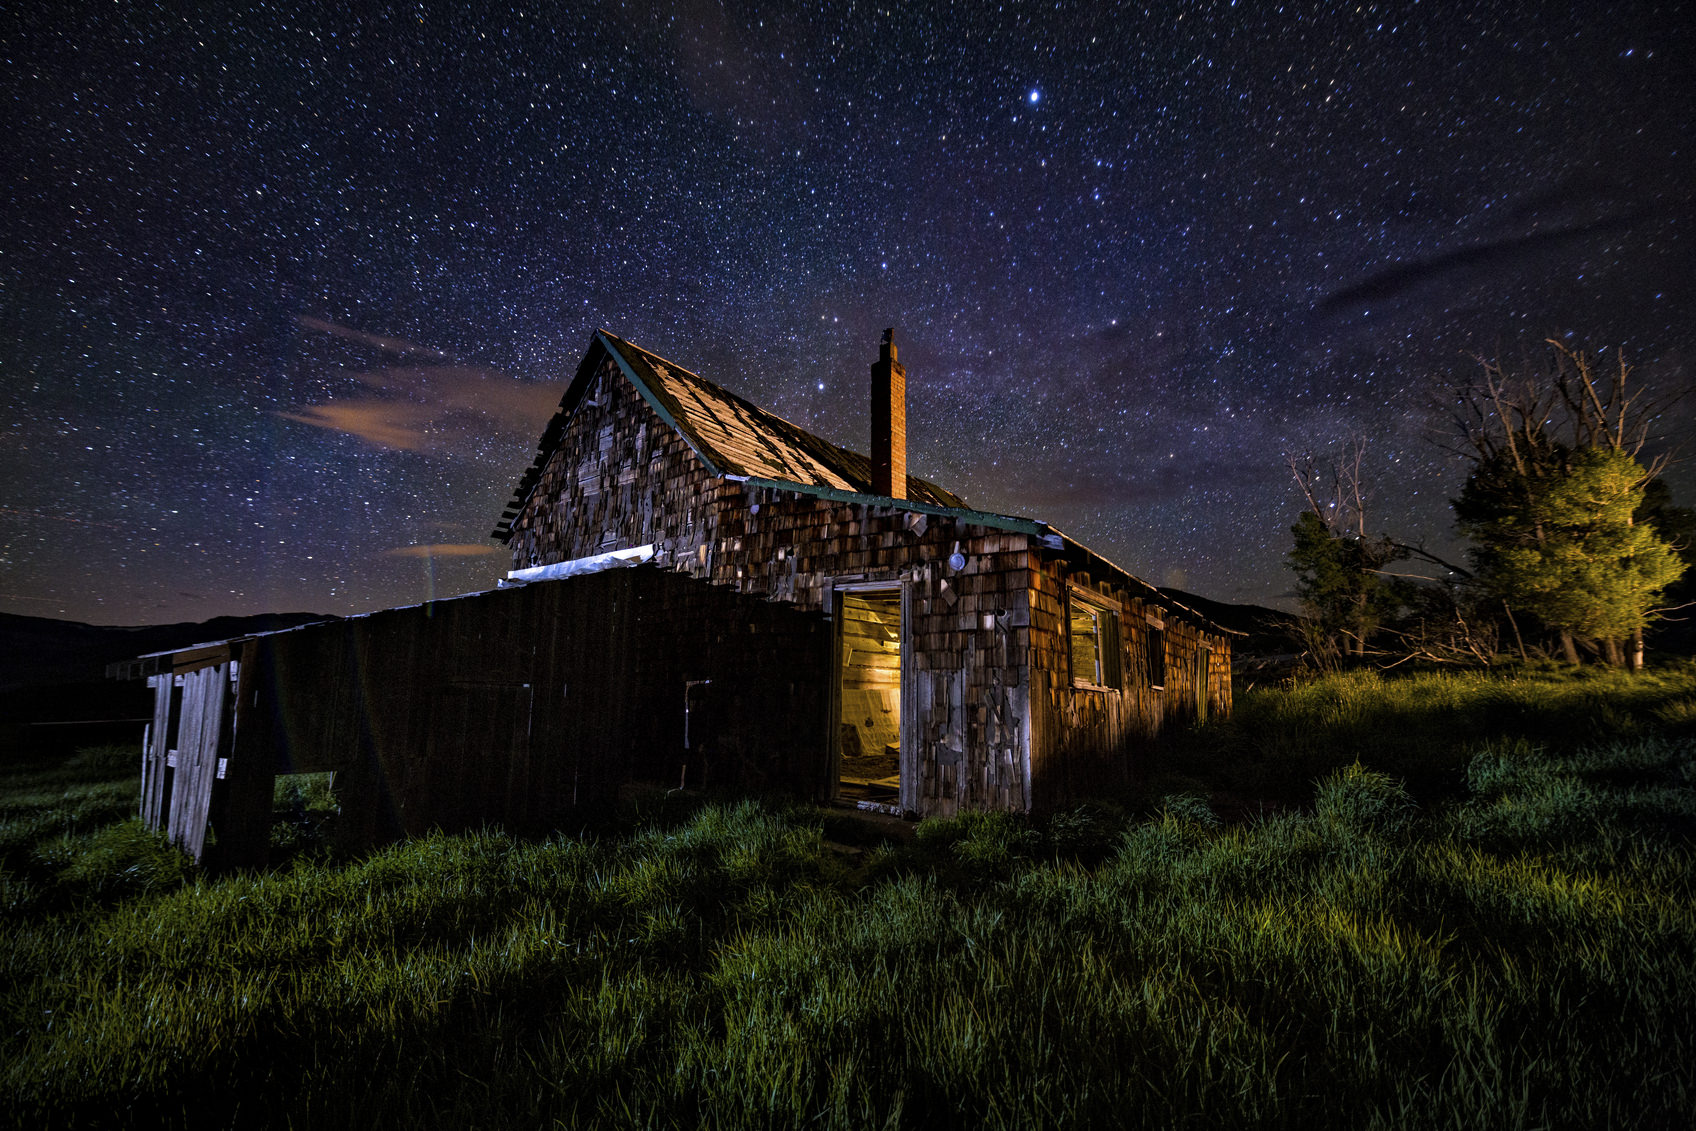
When it comes to challenging subjects, the night sky has to be right at the top of the list. Make no mistake - photos of the stars have the potential to be beautiful, but a lot of work has to go into maximizing that beauty.
Though images like the one above could stand on their own without additional elements in the frame, there are a few compositional choices that can enhance the beauty of the images you create of the night sky. With that, consider these tips the next time you head out to capture the beauty of the heavens.
Give Light Pollution Some Credit
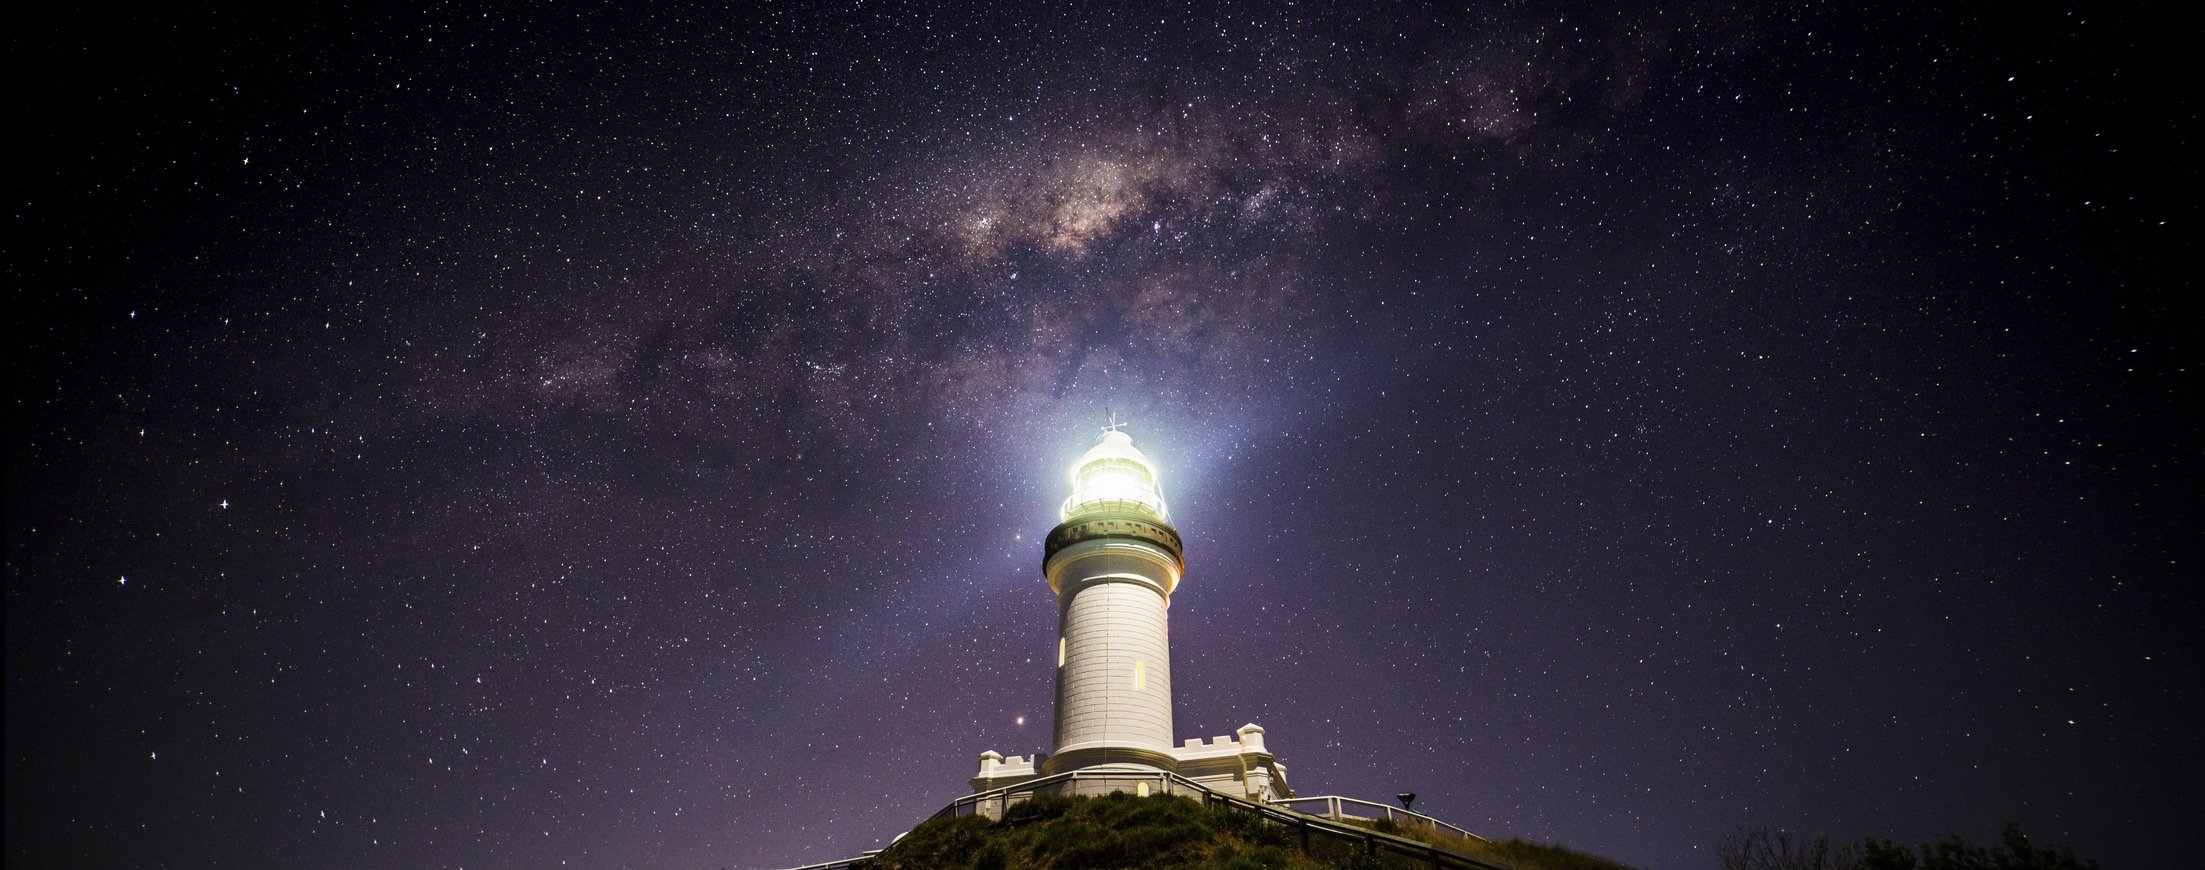
It’s often said that the best astrophotography results from dark skies far from any light pollution. And though that is certainly true in many cases, sometimes, light pollution can actually add to the drama of your astrophotography. Whether it’s city lights, the trail of a passing car’s headlights or taillights, or a simple shaft of light emanating from a flashlight or headlamp, each kind of light pollution has the ability to create interest and boost the contrast in your photos of the stars.
Add Supplemental Points of Interest
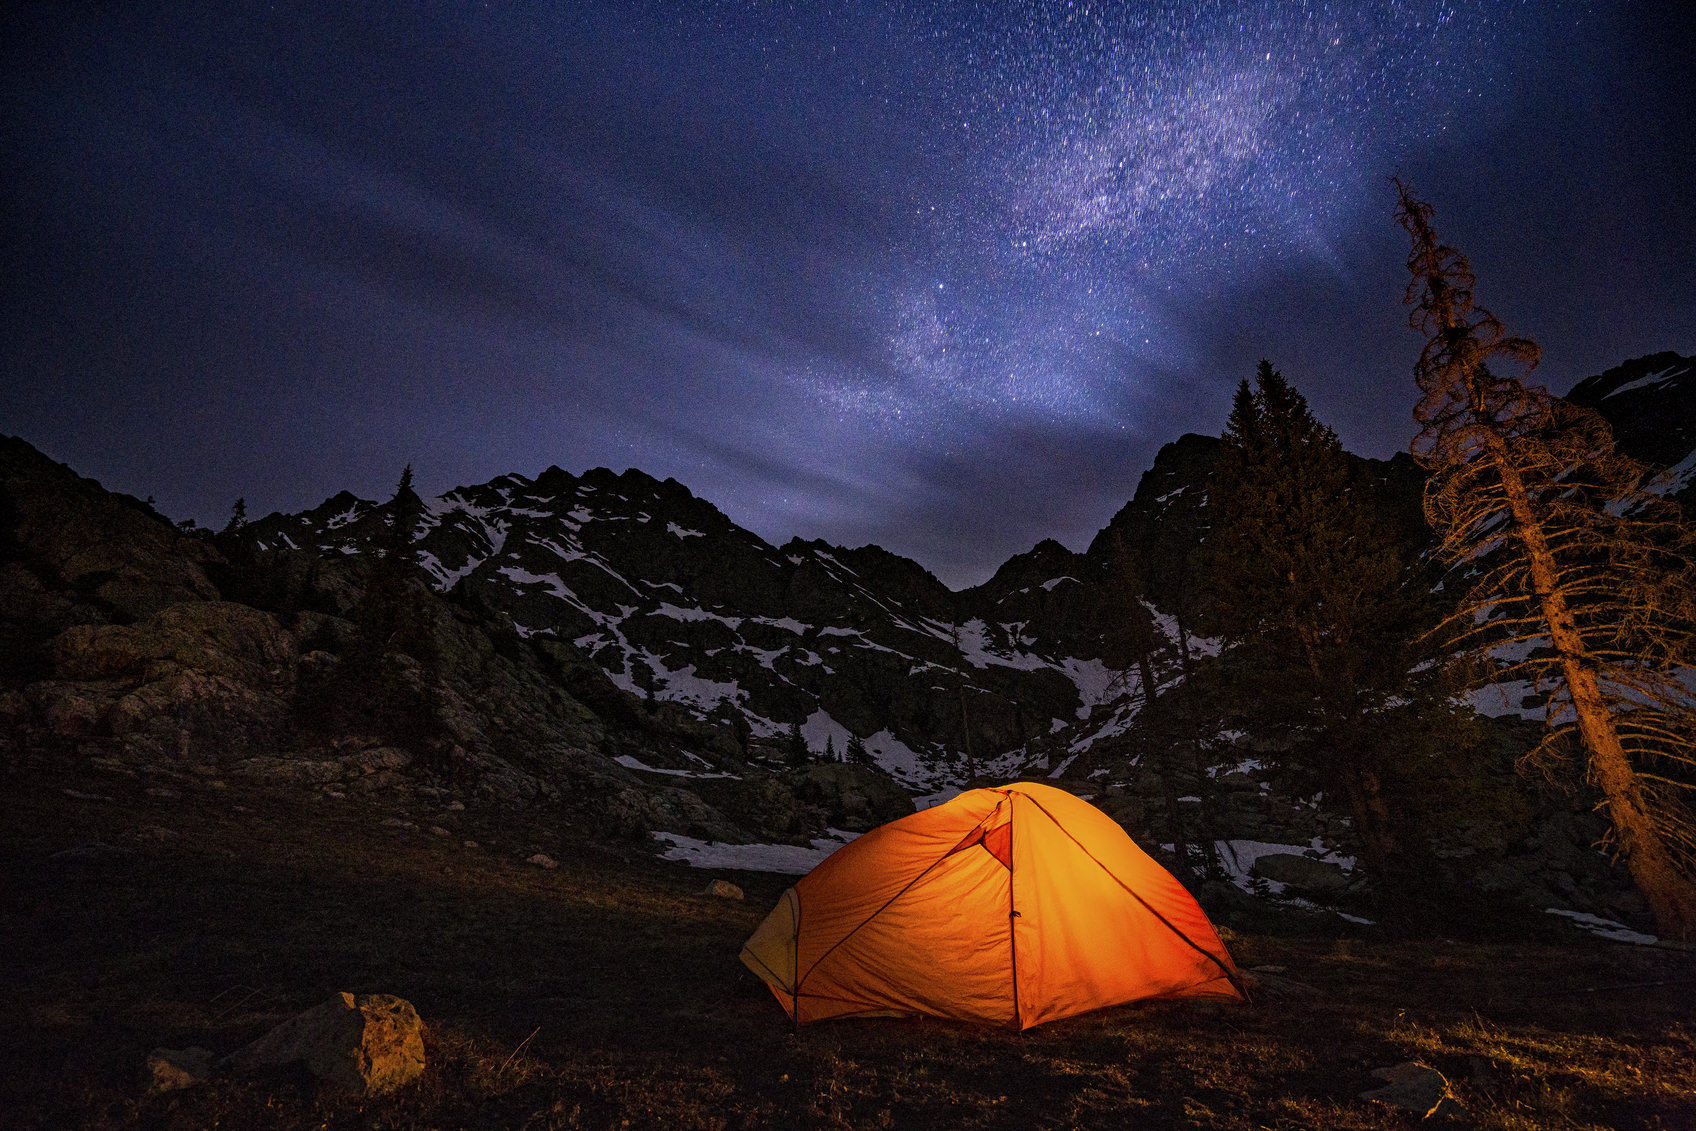
It’s not that the night sky is lacking in the interest department, but a shot of just the sky doesn’t offer viewers a whole lot of context regarding where the shot was taken. By adding supplemental points of interest into the scene, you give viewers that context. Trees, buildings, landforms, and even people give astrophotography greater depth and dimension. Rather than having to stand on its own, the night sky has other elements to play off of that creates a nice interplay between the depth, darkness, and unfamiliarity of space and the more familiar aspects of life on Earth.
Add a Punch of Color
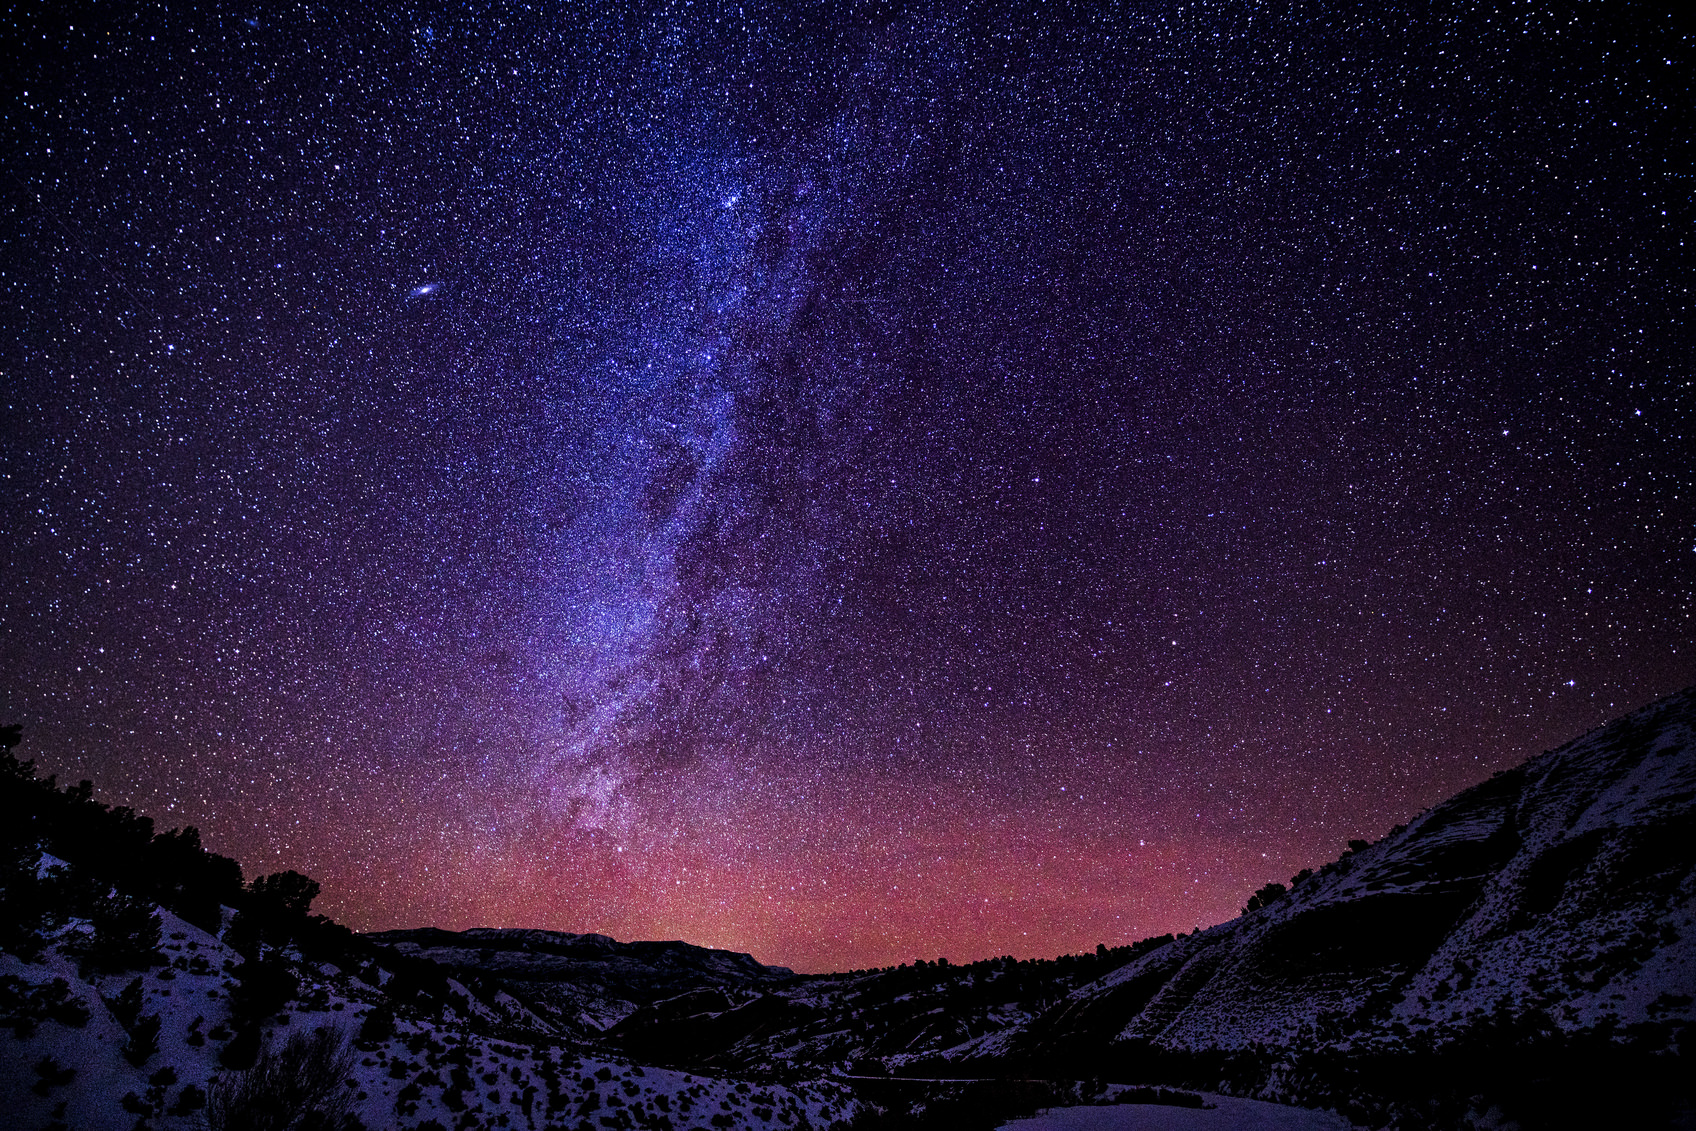
Much like adding light sources or supplemental points of interest to your nighttime shots can increase the drama, so too can adding a punch of color. Photos of the night sky are prime subjects for adding a bit of color, whether that’s playing with the saturation of colors that are already present or manipulating the hues to get an otherworldly effect. Of course, adding color is a process that should be undertaken with great care, as you don’t want the colors you add to detract from the beauty that’s naturally present in astrophotography. Use colors with caution and purpose, and if you do, you can get results like the image above.
Gear Before Composition
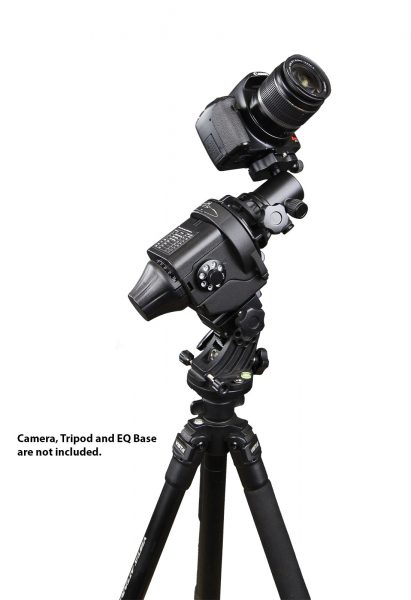
Of course, you can’t worry about how to compose your nighttime photos of the sky until you’ve got the gear that will allow you to take long exposures in the first place. One of our favorite ways to capture astrophotography images is by using products like the Star Adventurer mount from Sky-Watcher USA. The Star Adventurer is a top-quality mount that gives your camera and lens the highly stable base they need to capture perfectly sharp images. The Star Adventurer is constructed to support up to 11 pounds, so even if you have a full frame camera and a large lens, you’ll be certain that they will be supported securely.
But if you think the Star Adventurer is only a mount, you’re wrong. It allows you to program your camera for still images, long exposures, and time-lapses of the night sky. It has sidereal, lunar, and solar movement tracking as well, so you can photograph the skies with greater ease. What’s more, the Star Adventurer has a built-in auto-guiding interface, an illuminated polar scope, and a DSLR interface that gives you pinpoint control over your shutter.
What does all that mean? Well, it means that with the Star Adventurer you don’t have to worry about the technical aspects of astrophotography as much, and you can focus more on adding the compositional elements discussed in this lesson to give your images of the night sky the drama they deserve. Learn more about the Sky Adventurer and other products from Sky-Watcher USA by visiting their website.
We Recommend
Crazy Facts About the Milky Way to Think About as You Photograph It
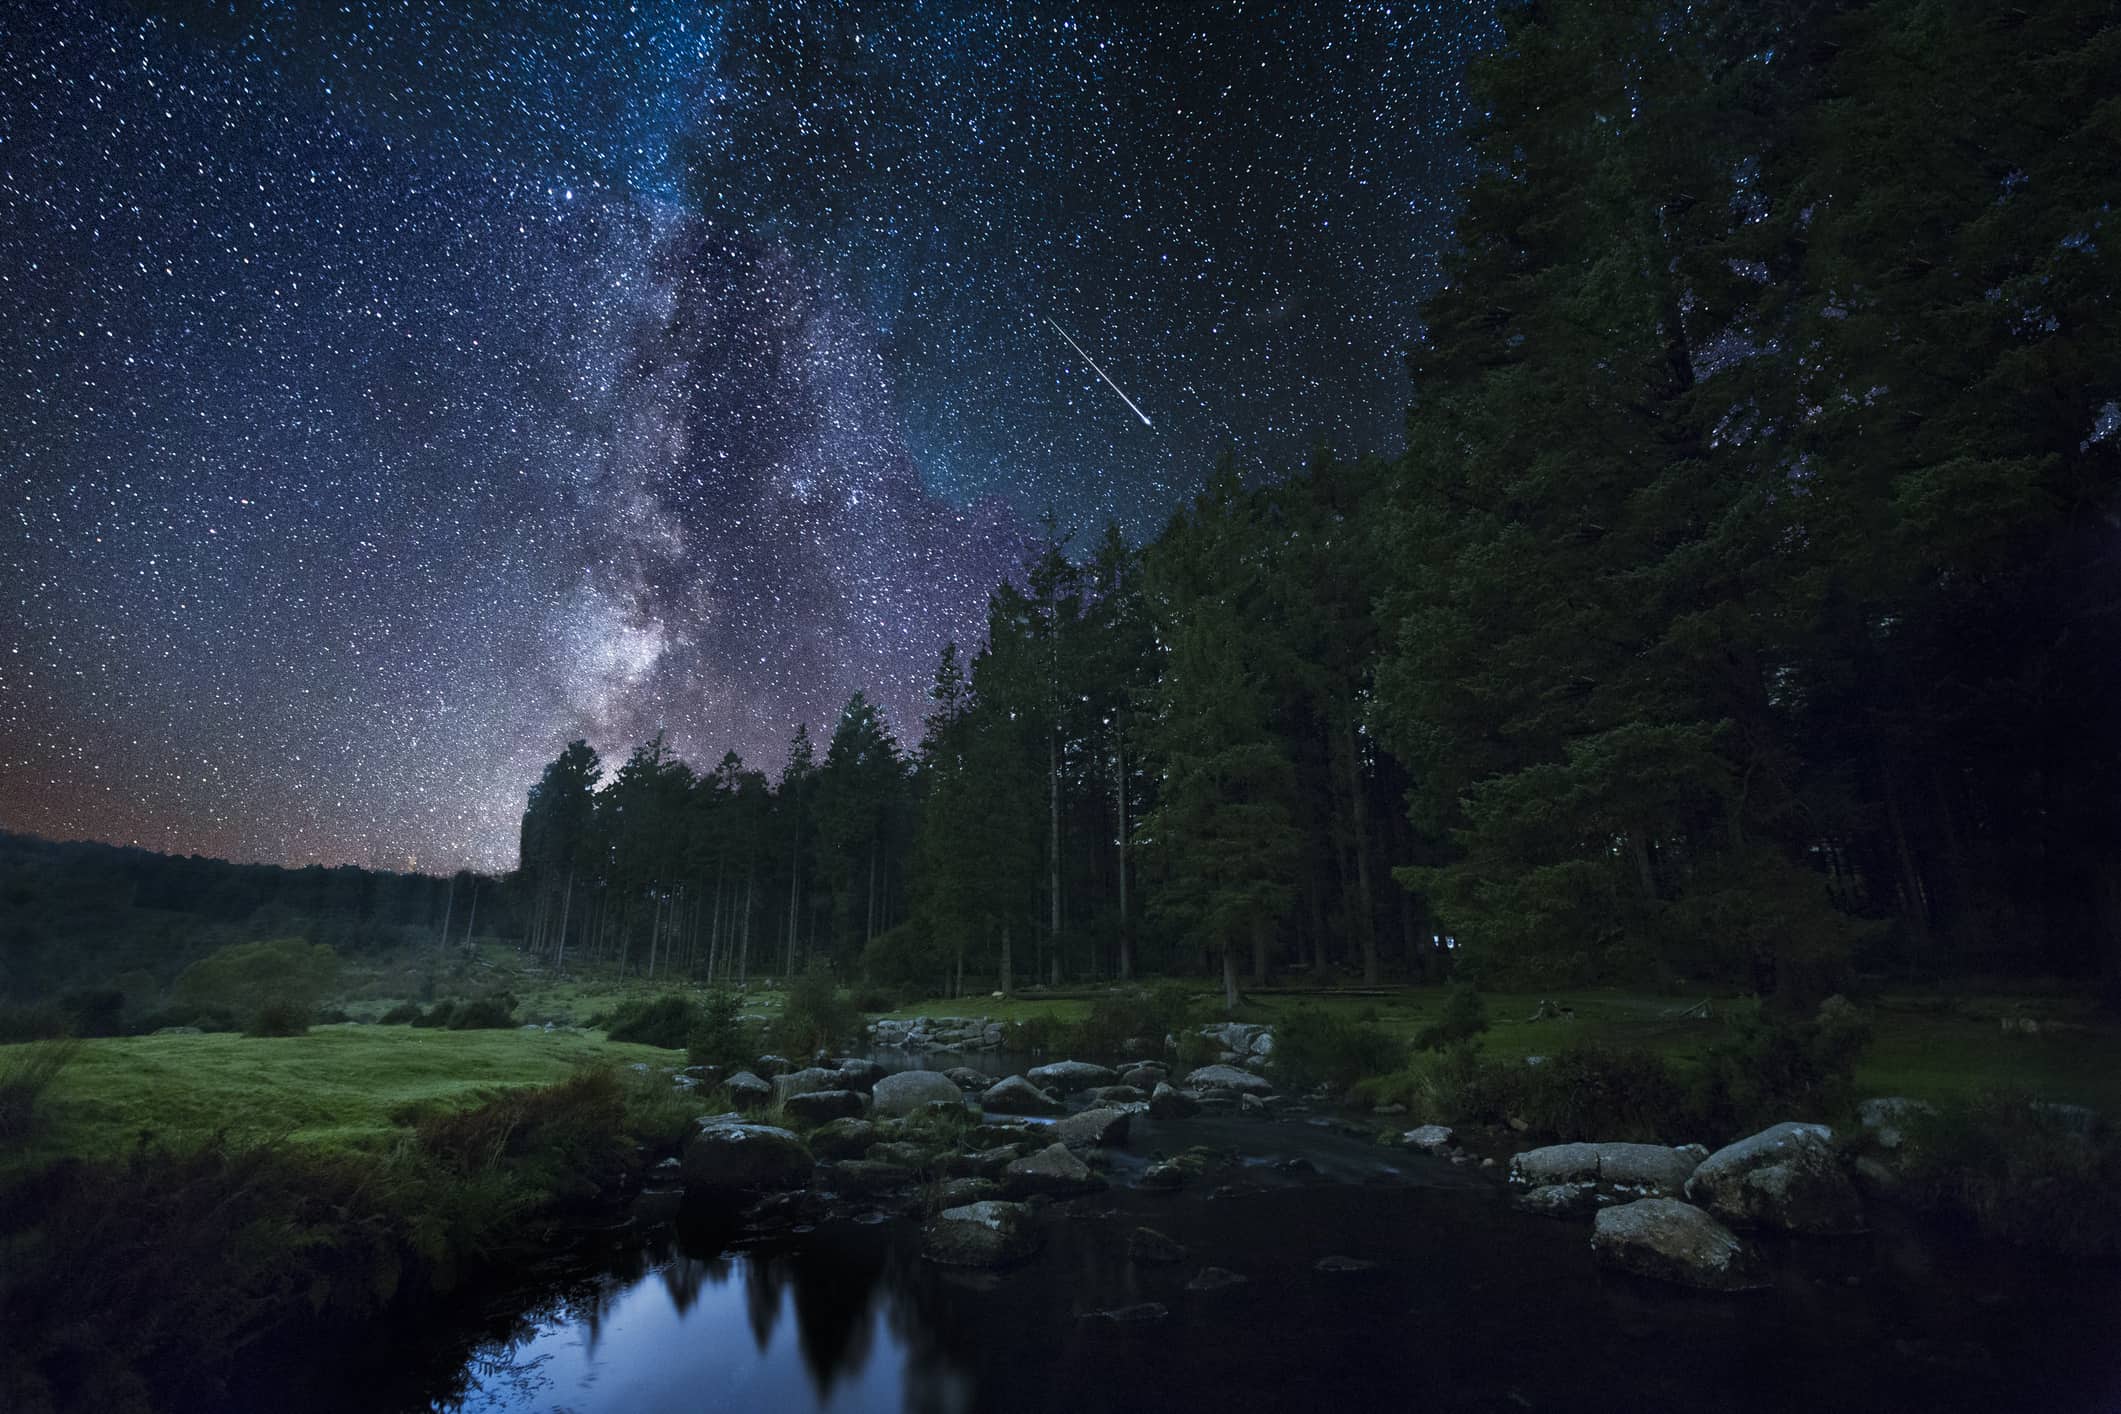
When you grab your gear and head out at night to photograph the Milky Way, you're probably thinking about photography stuff...
You know, composition, framing, camera settings, and so forth.
But have you ever stopped to think about your subject and how incredible it is?
The next time you've got a Milky Way photo shoot planned, think about the following intriguing facts about our home galaxy.
At the Center of the Milky Way is a Huge Black Hole
The black hole at the center of our galaxy isn't just big, it's supermassive.
Called Sagittarius A, it's so big that it weighs about 4 million times more than the sun.
It's never been seen before because it's shrouded in a thick cloud of gas and dust, but astronomers are working on a way to get the first glimpse of this black hole.
Most galaxies have black holes at their cores, so the Milky Way isn't unique in that regard. But the sheer size of Sagittarius A is a little unusual.
Get a look at the center of our galaxy in the video above by the Chandra X-Ray Observatory.
Learn More:
- How to Photograph the Milky Way (in Simple English)
- These Common Astrophotography Mistakes are Holding You Back
A Shroud of Dark Matter Engulfs the Milky Way
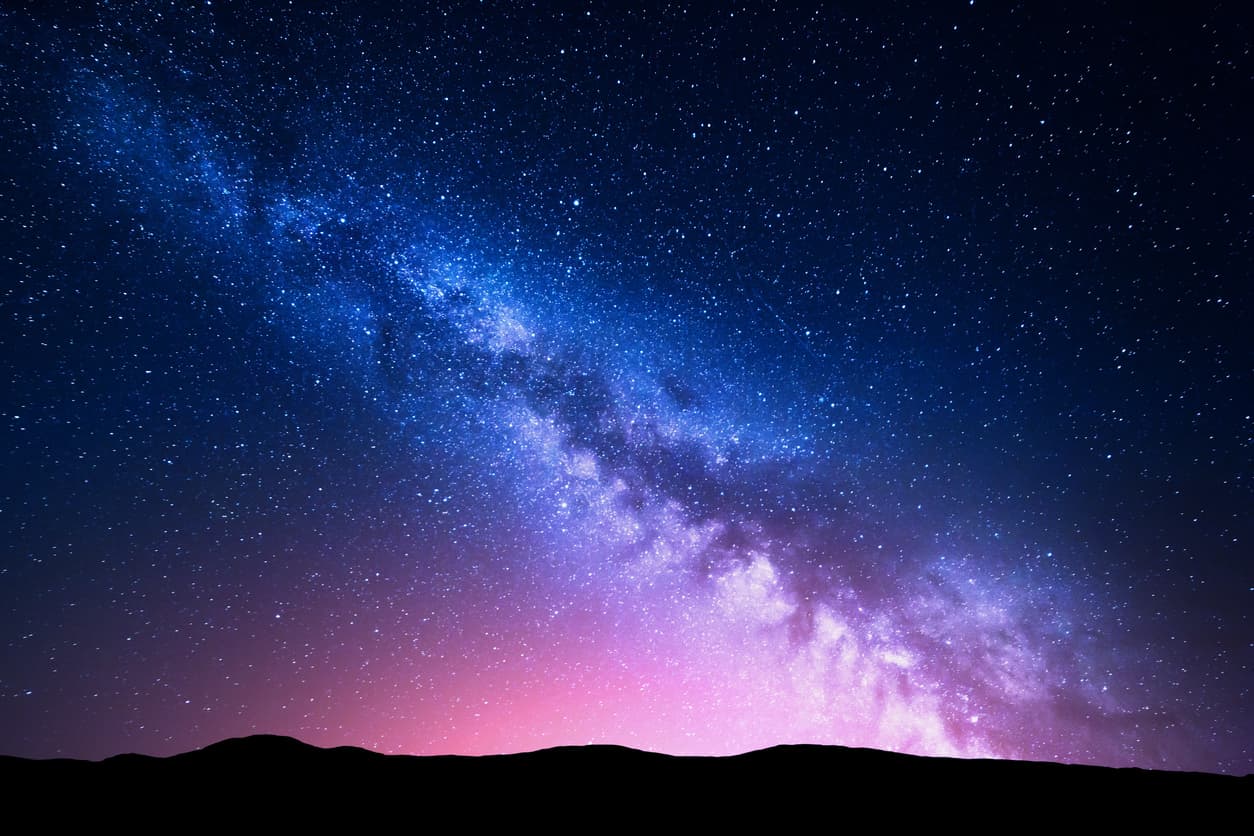
The dark matter that surrounds our galactic home is much, much larger than the galaxy itself.
It's more than a mysterious cloud, though.
Since stars in the galaxy rotate around the galaxy's center at such incredible speeds, without something there to hold them in place, the stars would simply fly outward.
Shaped like a halo, this dark matter actually prevents that from happening, keeping the galaxy together.

The Milky Way Consumes Nearby Galaxies
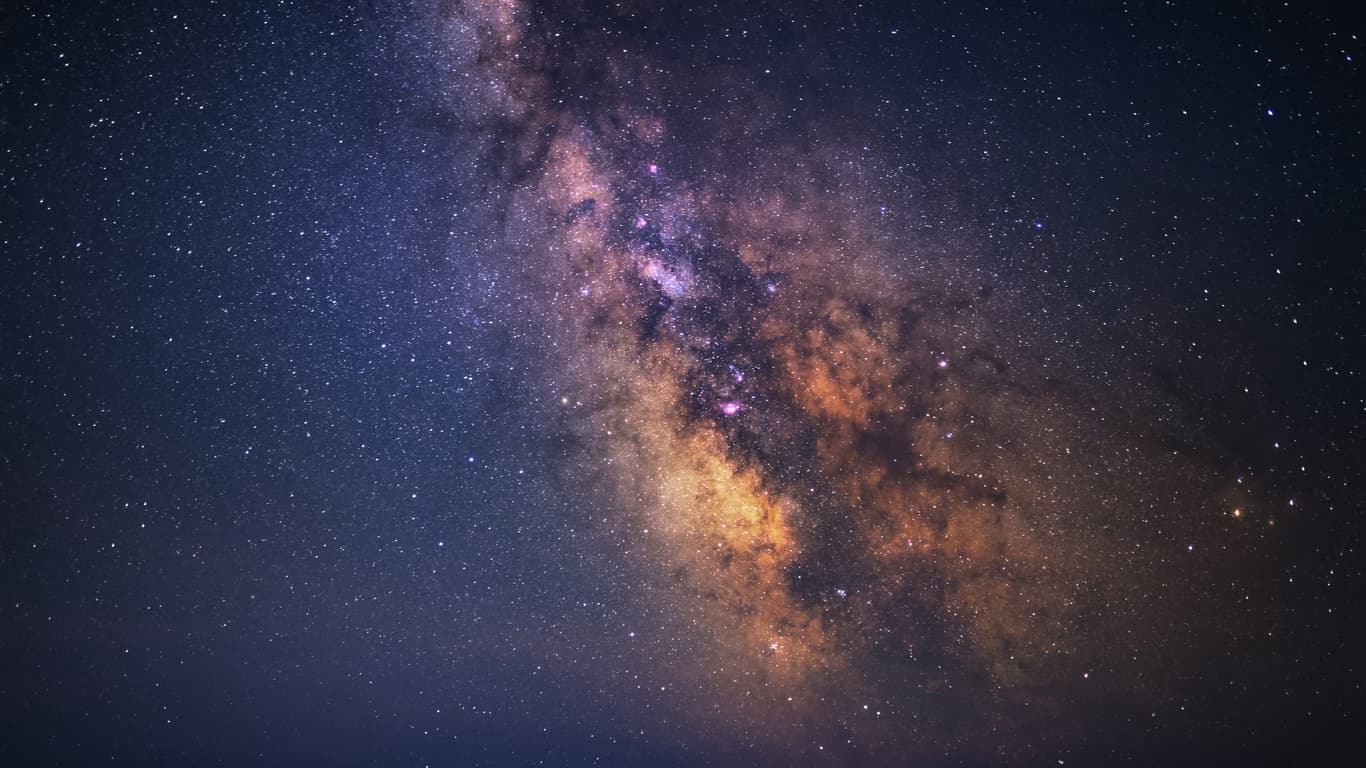
The Milky Way seems to have an appetite...
How do we know?
Decades of scientific study have revealed about 24 remnants of stars on the edges of the Milky Way.
These leftover stars are parts of galaxies that once existed, but got too close to the Milky Way.
The Milky Way was able to gobble these galaxies up because its gravitational forces were much stronger than those smaller galaxies.

Editor's Tip: Maximize your ability to get beautiful, clear, and sharp images of the Milky Way by using the Vixen Polarie Star Tracker from MrStarGuy. This device attaches to a normal tripod and accommodates cameras that weigh up to seven pounds. Using the built-in compass or North Star Alignment Window, you can orient the Polarie to face north, and once set, it will track the motion of the stars as they move across the sky. This eliminates star trails and results in tack-sharp images of the Milky Way. Visit MrStarGuy to learn more.
Our Galaxy is Mostly Flat
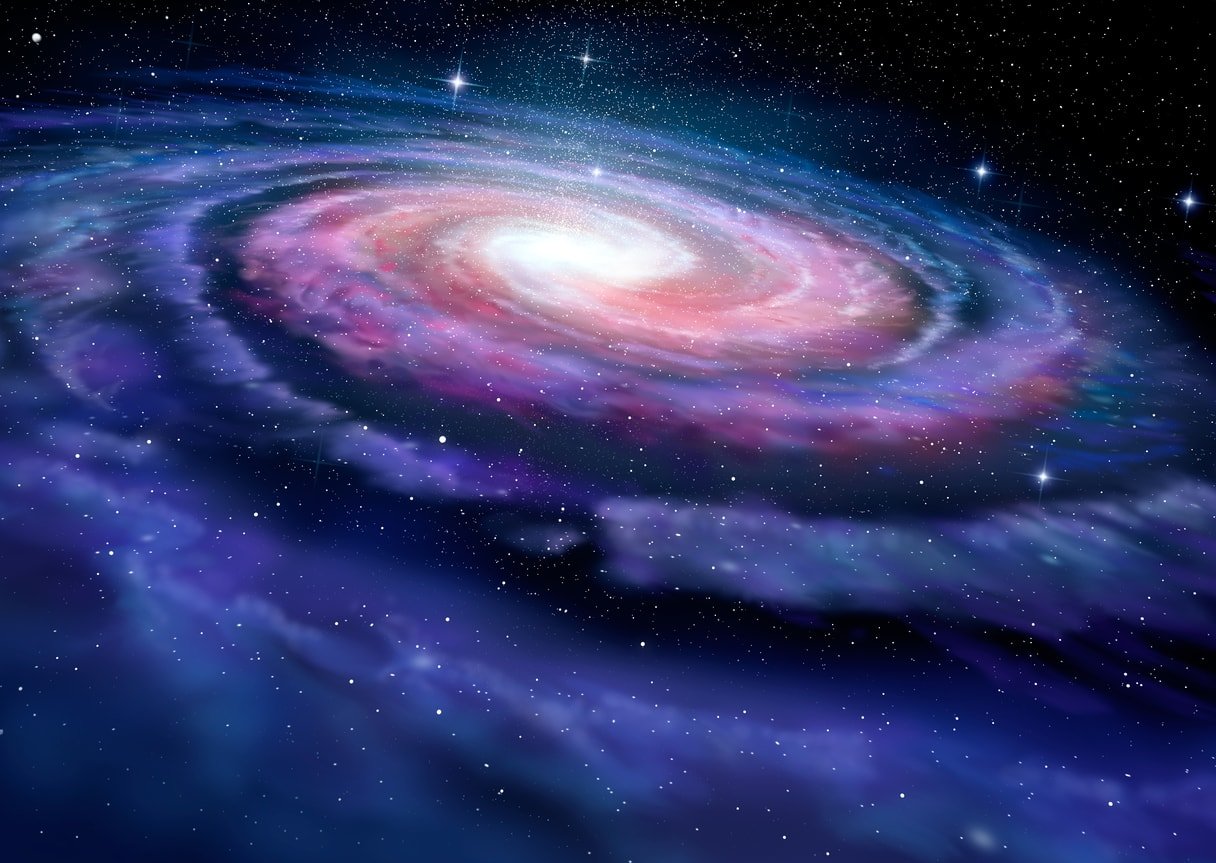
Earth might be round, but the Milky Way is virtually flat.
Scientists have measured the Milky Way at one hundred thousand light-years across, but it measures just one thousand light-years thick.
We're located in one of the galaxy's "arms," roughly 26,000 light-years away from the core of the Milky Way. At the core is a huge collection of stars and dust.
The illustration above depicts what the Milky Way might look like from afar.
Learn More:
The Milky Way Isn't Just a Band of Stars in the Sky
When you look at the Milky Way, you can clearly see it streaming across the sky like a ribbon.
But that ribbon of stars is just part of the Milky Way. In fact, every single star you see when you look up at the sky is in the Milky Way.
If you find a spot that's dark enough, you can actually see the clouds of dust and gas in deep space that prevent some of the light from stars from reaching earth.
In the video above by daveachuck, you can take a simulated tour of our galaxy, beyond the dust and gas that prevent us from seeing further into space.
The video uses images taken by the Spitzer Space Telescope's infrared view of the sky.
The Milky Way is Dying
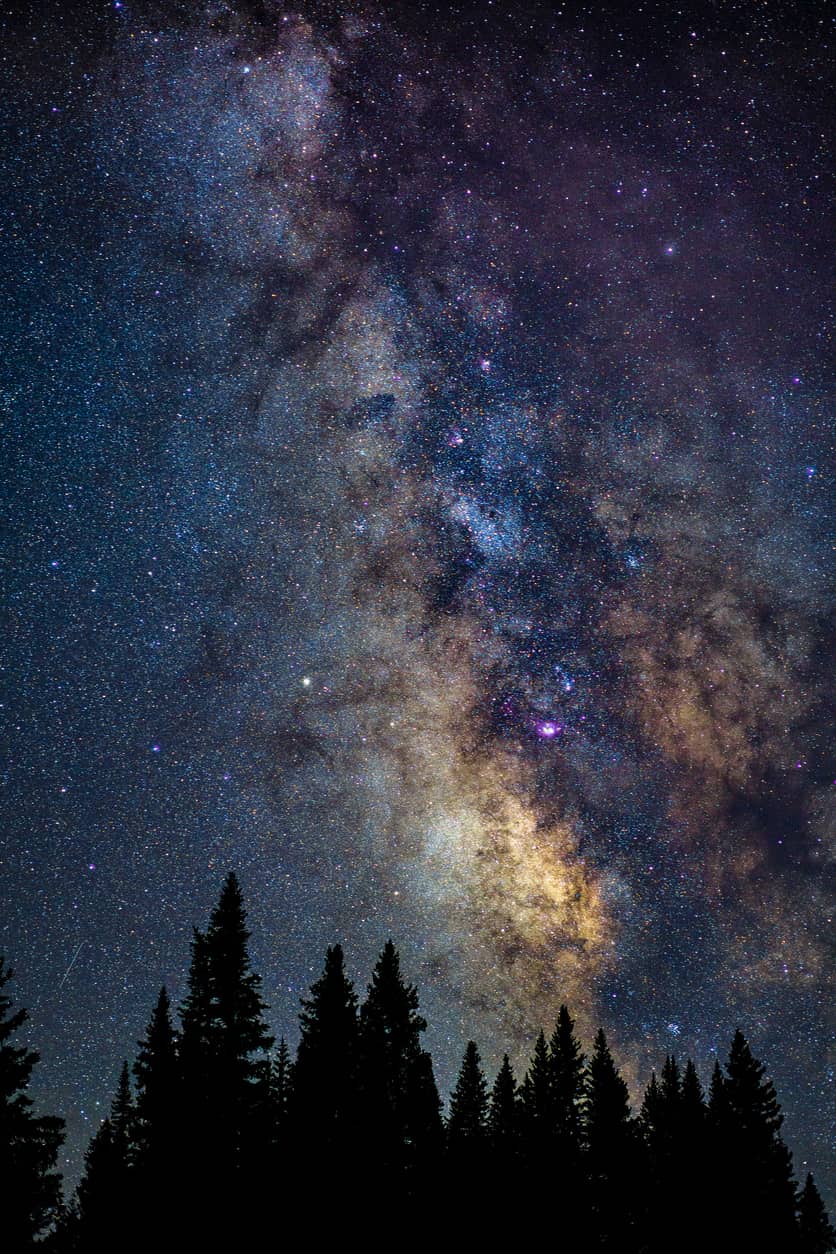
The Milky Way's nearest neighbor, the Andromeda Galaxy, is getting nearer and nearer.
At some point, likely around 4 billion years from now, the two spiral galaxies will collide.
And though that sounds like something that would likely destroy everything in the two galaxies, scientists don't think that will happen.
Instead, the theory is that the two galaxies will combine, with very little damage being done to the stars and planets in either galaxy.
In fact, scientists believe that Earth will survive, and that the newly combined galaxy will provide an even more incredible show in the sky than we already see today.
Editor's Tip: For more tutorials on astrophotography, visit our astrophotography section, sponsored by our friends at MrStarGuy.
We Recommend
Crucial Tips for Perfecting Your Astrophotography
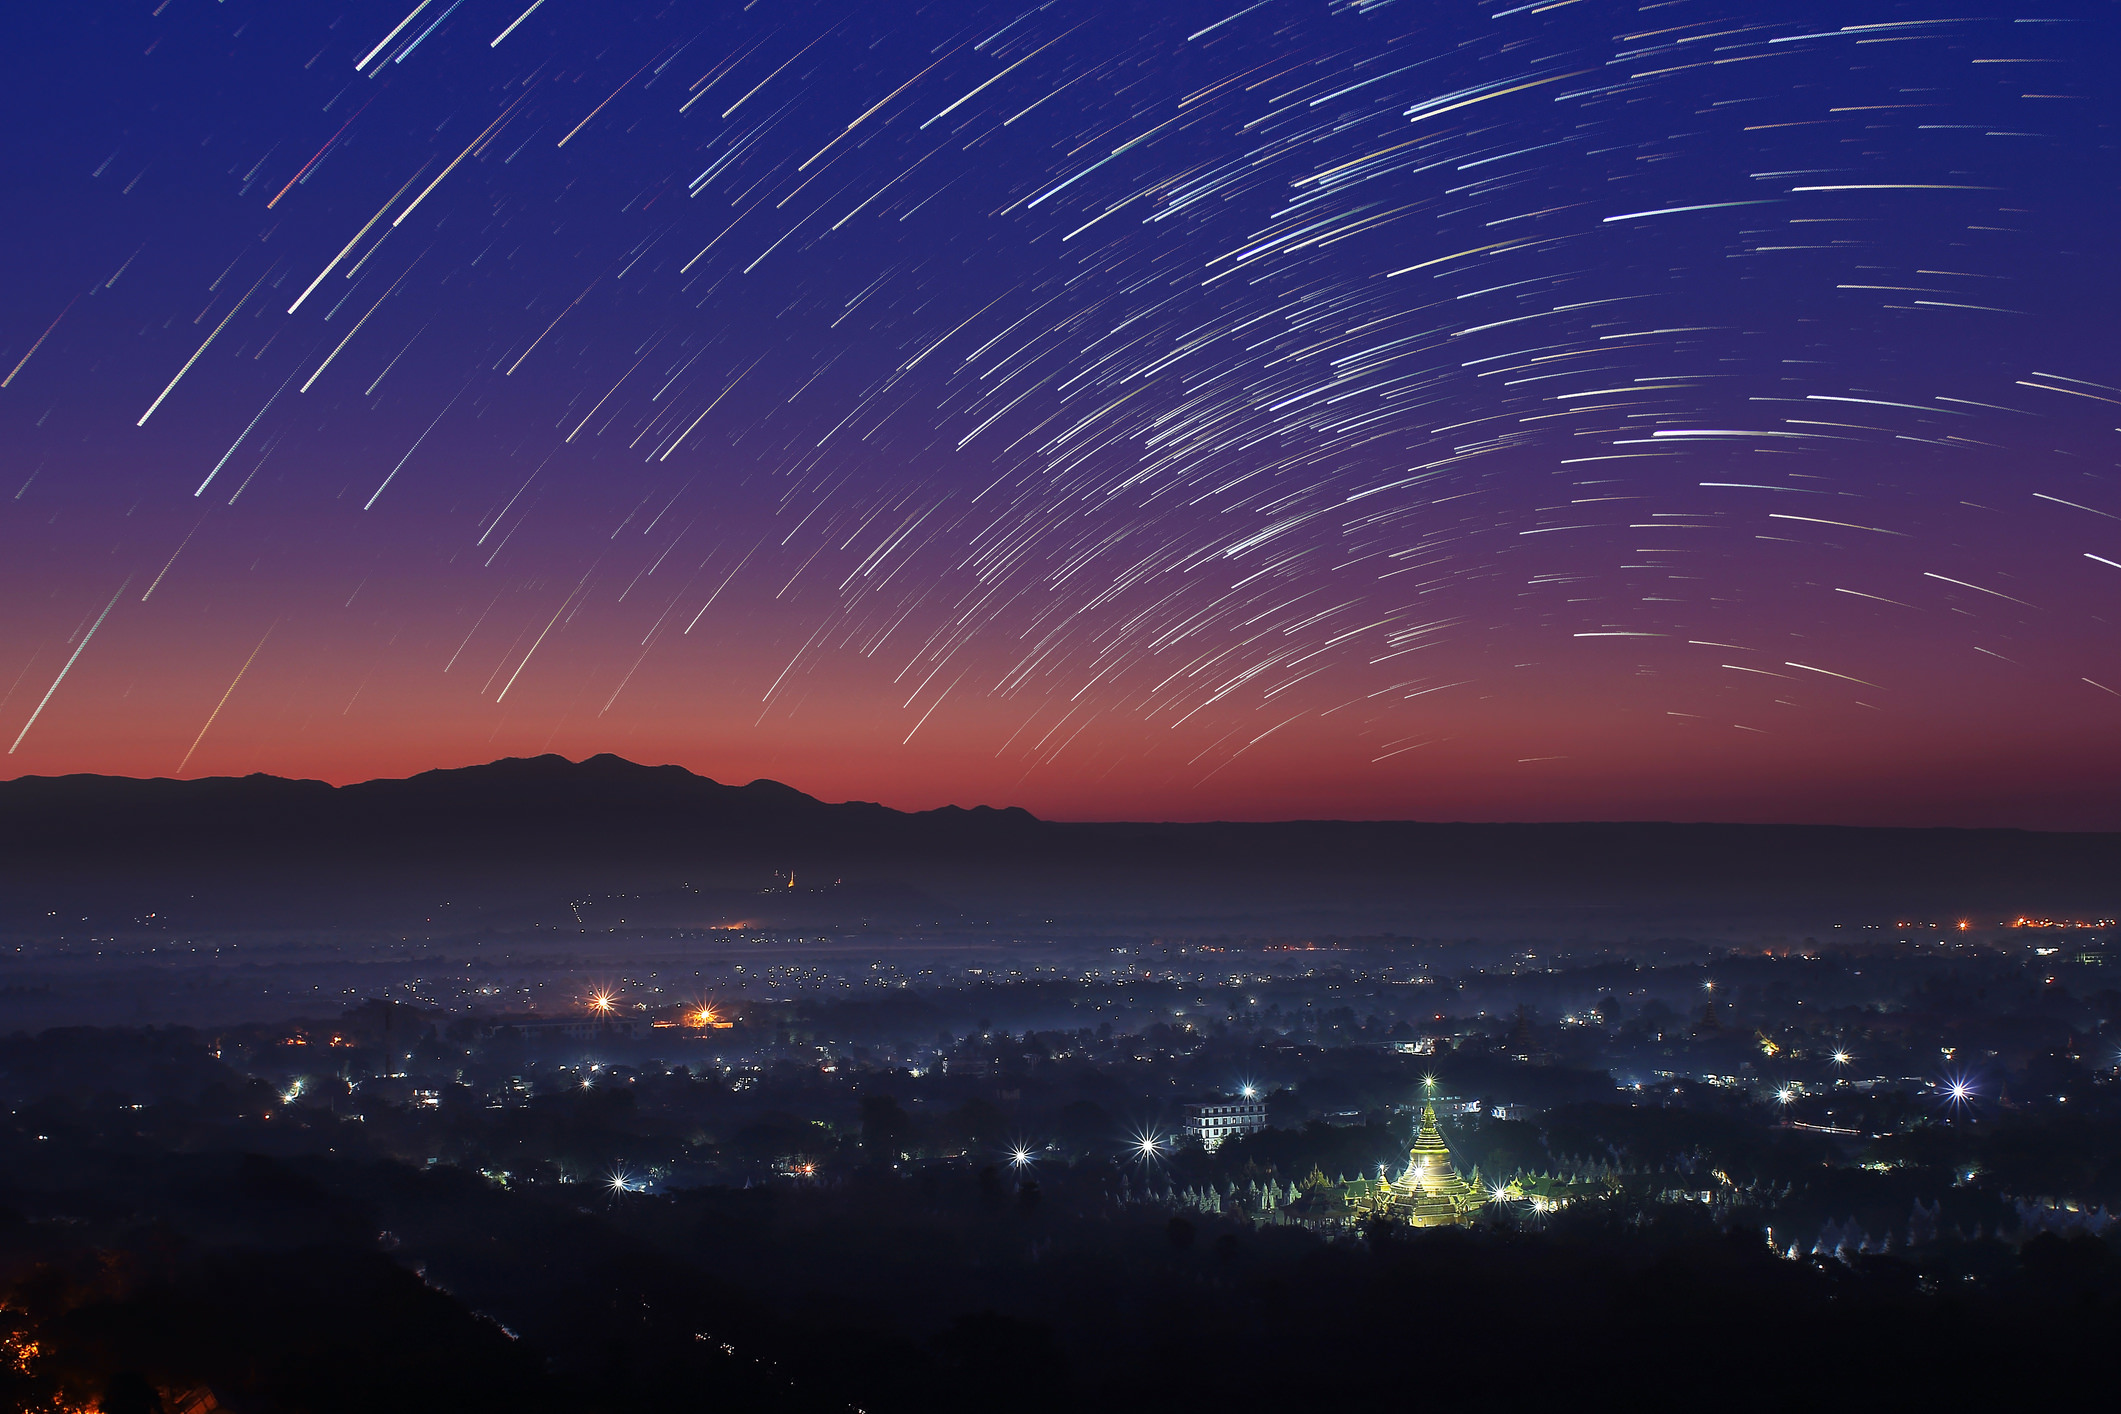
For many photographers, venturing beyond daytime shooting is something that is both intriguing and a little bit scary.
That fear makes sense, though: imagine heading out to the middle of nowhere in the dead of night, setting up your gear in near complete darkness, and working to compose a shot and nail the focus of a subject that’s millions of miles away.
Sounds difficult, right?
Not necessarily!
Just as with any other type of photography, astrophotography just requires the right gear, some compositional prowess, and an understanding of how to perfect the focus of the image such that it is tack-sharp.
Of course, it takes a little time and effort too!
In this quick guide, we offer a few crucial tips that will help you perfect your astrophotography. Along with some practice and patience, these tips will drastically improve the quality of the shots you take of the night sky.
Your Camera Needs Stability
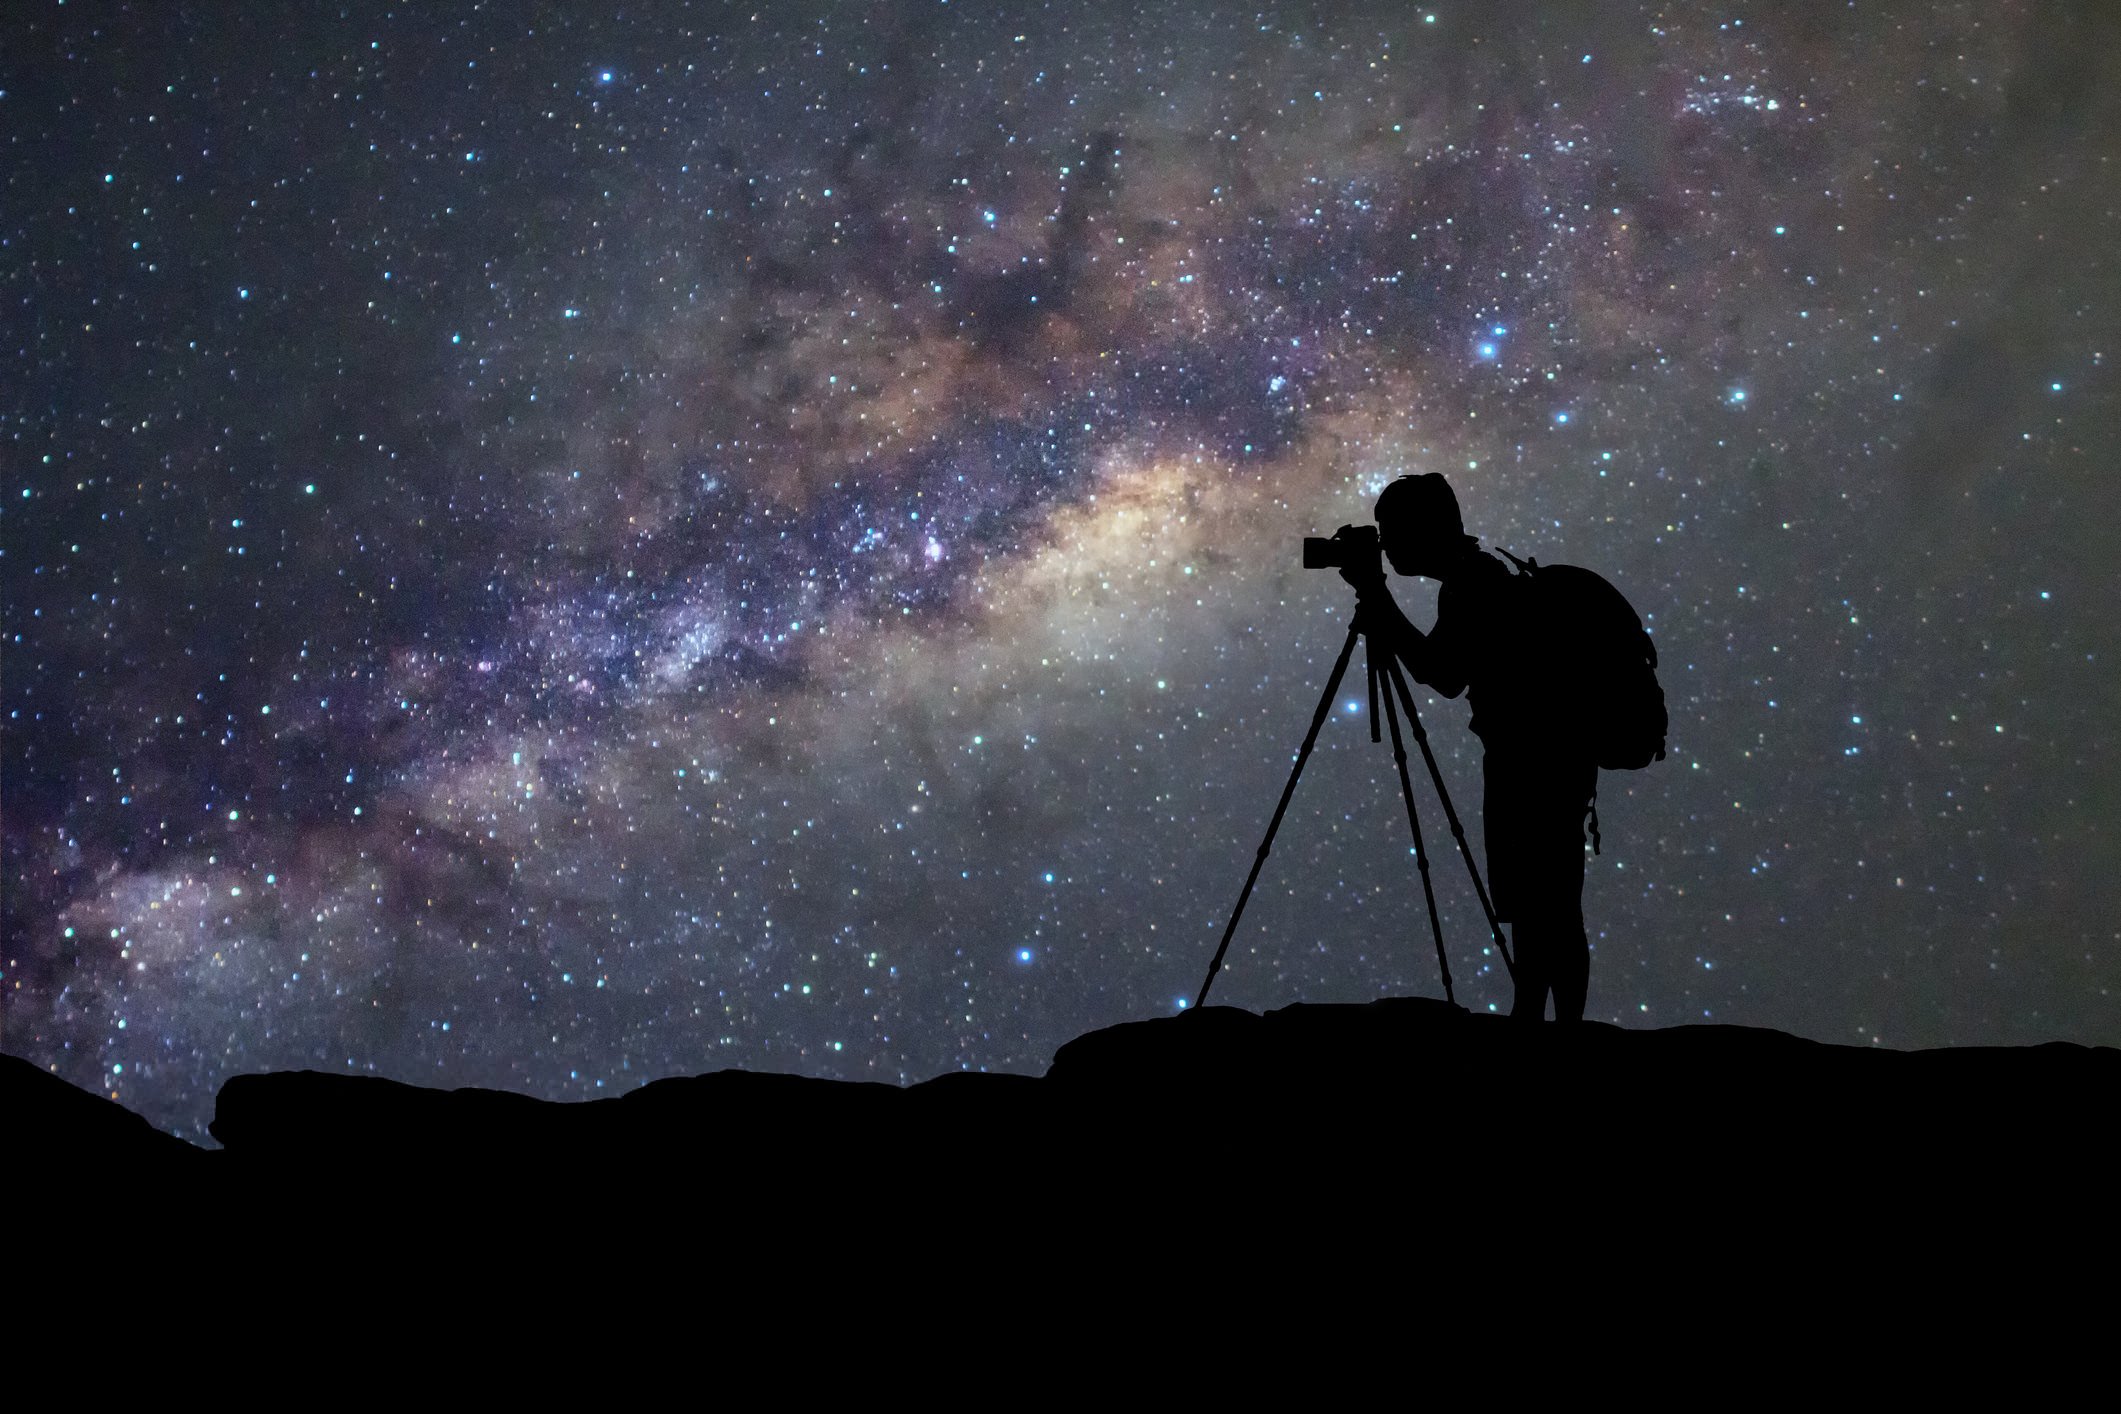
Because you’ll be working with exposures that last many seconds, if not minutes or hours, your camera needs to have an absolutely steady base to get images that are clear, sharp, and free of any blur due to camera movement.
Naturally, a solid tripod is the first component of your stability strategy. Not all tripods are made alike, so do some investigating into which tripod offers the most features to create the stable base you need. In terms of features, look for:
- A center column hook, from which you can hang your camera bag or another heavy object to add more weight and improve the tripod’s stability.
- Rubberized feet so the tripod’s feet stay in place.
- Retractable metal spikes in the tripod’s feet for additional stability on uneven or slippery surfaces.
Beyond your tripod needs, there are measures you need to take to lessen the occurrence of vibrations. Remove your camera strap such that it doesn’t flap in the wind should a breeze come up. Use your camera’s mirror lockup function to hold the mirror in place before the shutter is fired, thereby reducing vibration as a result of the mirror’s movement.
Additionally, you should avoid using the camera’s shutter button in favor of a remote to trigger the shutter, that way there’s no chance that you will inadvertently cause the camera to move.
Better still, you could get outfitted properly with a tripod mount that not only helps keep your camera stable but will also facilitate improved pictures of the night sky.
Mounts like the Star Adventurer from Sky-Watcher USA have plenty of features that aid in getting sharp photos. With automatic shutter release control, your images will be clearer because you don’t have to physically touch your camera to fire the shutter. You can even use pre-programmed parameters to help you create gorgeous time-lapse videos in which the mount directs the camera and takes care of the interval and duration of photos for you.
If that’s not enough, the Star Adventurer has multiple functions to assist you in snapping images of the desired areas of the sky. This includes a celestial tracking platform for solar, lunar, and sidereal tracking. In short, this mount won’t just help you improve your photos from a sharpness standpoint, but it will also help you create gorgeous stills, time-lapses, long exposures, and videos of the night sky with its onboard functionalities.
Composing the Shot Takes Time
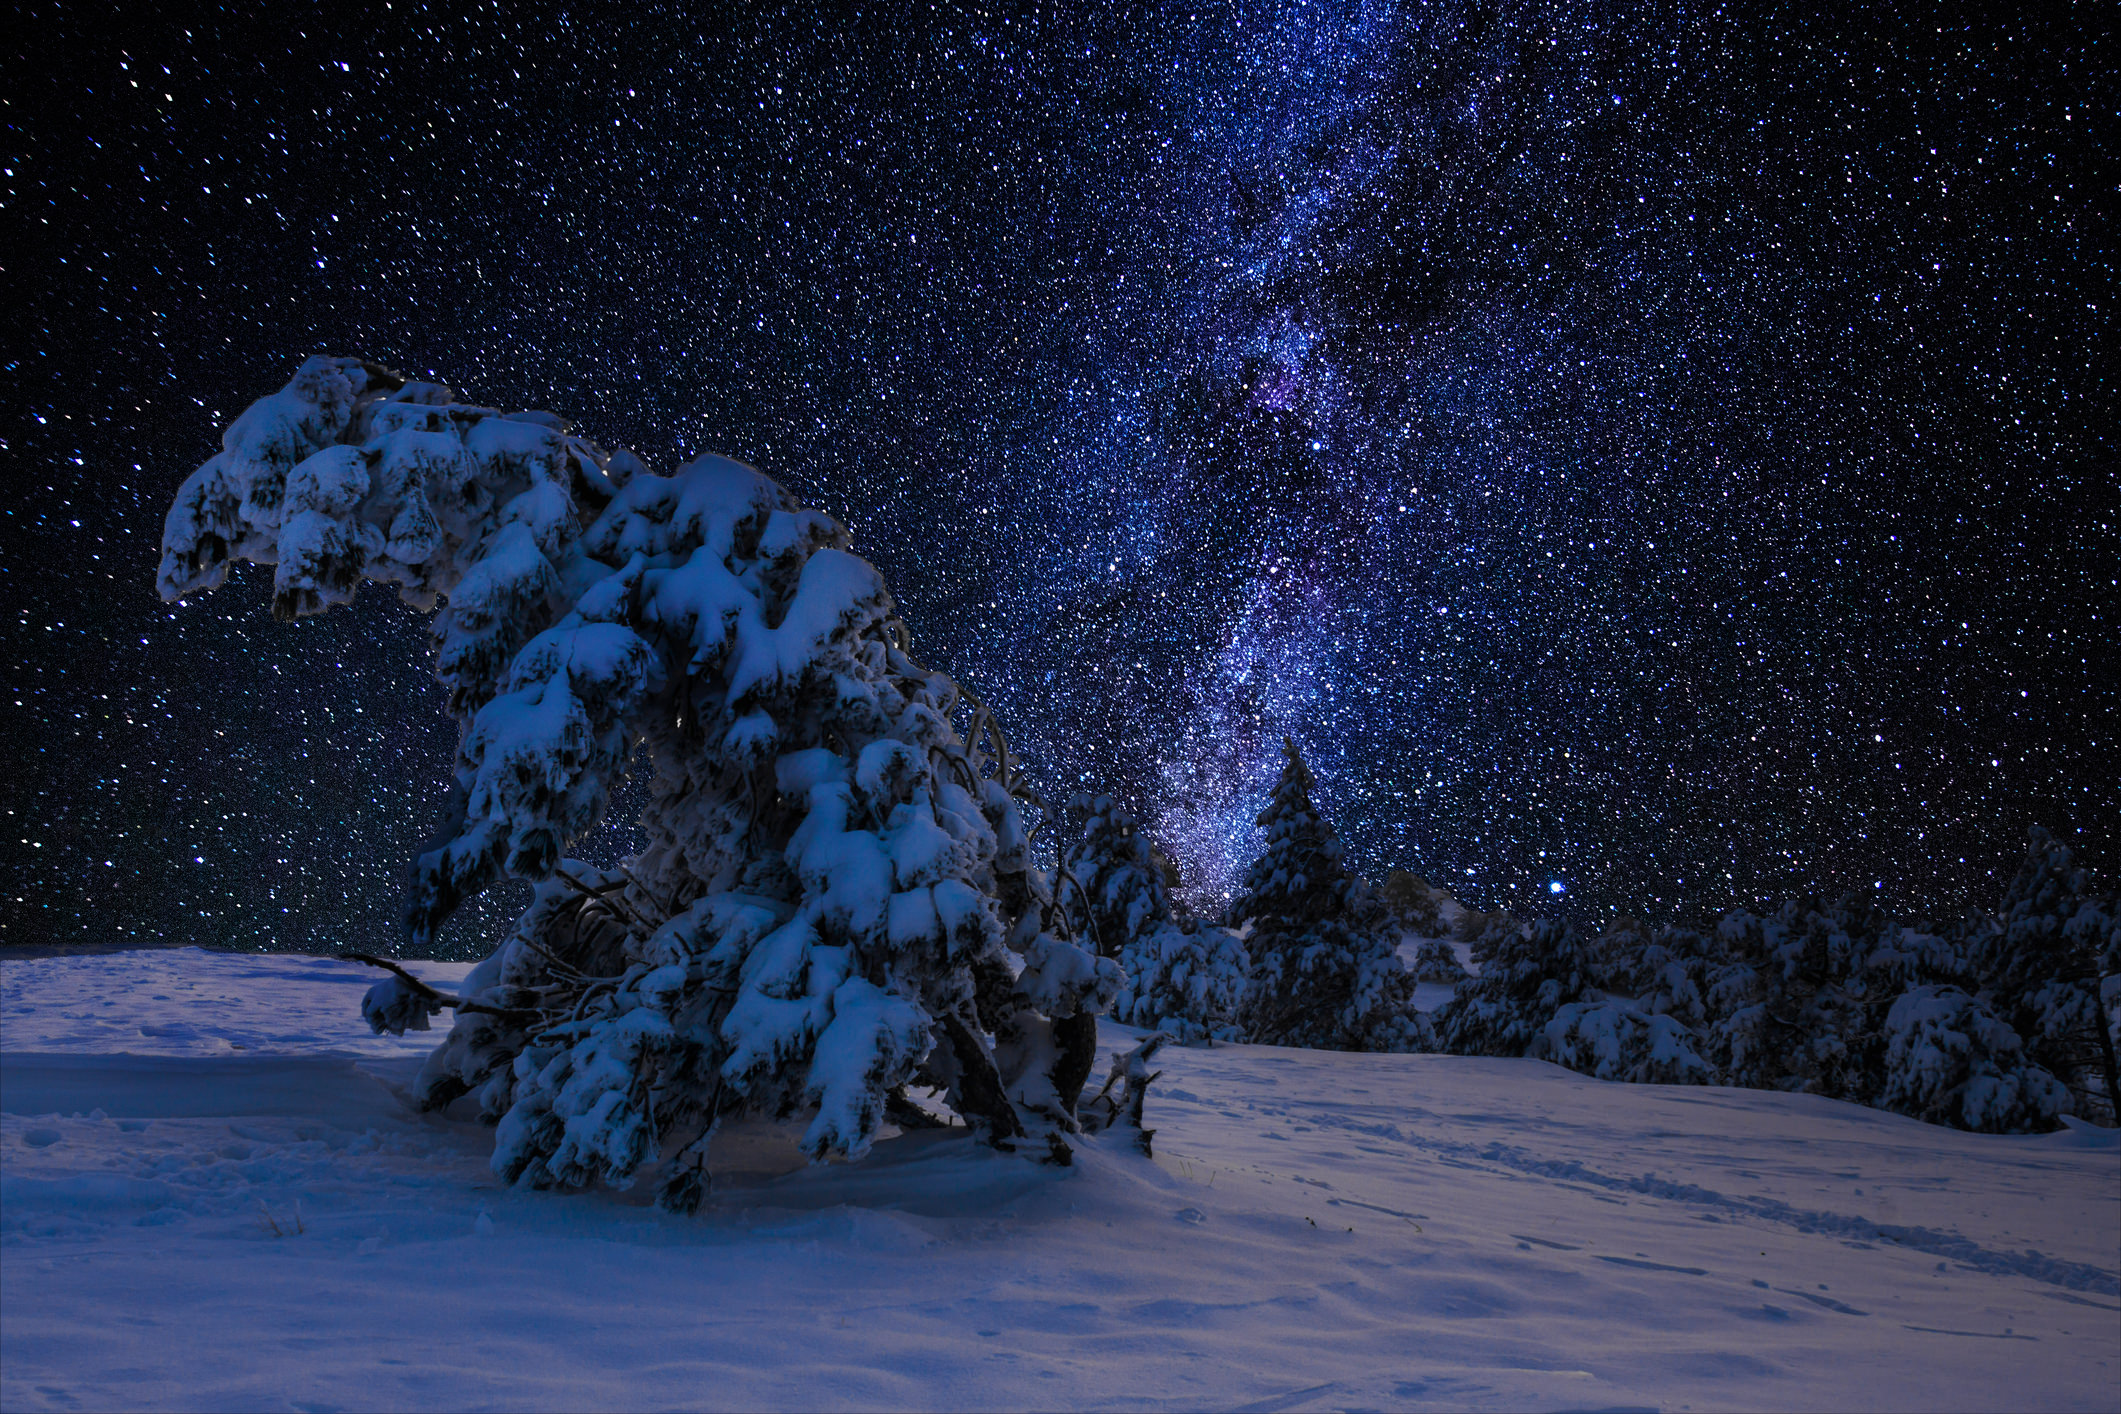
What some new astrophotographers forget is that they will likely be working in near darkness, and that poses a problem for composing the shot.
After all, if it’s pitch black outside, it’s not too easy to frame up your shot by looking through the viewfinder.
Instead, you’ll need to rely on your own two eyes and a bit of intuition to compose your shot in a direction that you think will render a pleasing photo. From there, it’s all about experimentation to perfect the framing such that you have the area of the sky you’d like to highlight, as well as some interesting foreground elements to give the shot added visual interest.
Perhaps the easiest way to experiment is to dial in settings that you think will generate a well-exposed image, then inspect each test shot on your camera’s LCD to determine what adjustments need to be made to improve the composition.
It’s a time-consuming process, to be sure. However, the final results will be far better for all the time and effort you put into it! Just remember - with all that time needed to experiment with your composition, you’ll need to give yourself plenty of lead time so you can get set up, take your test shots, and perfect your shot before the optimal time for taking night sky photos passes.
Perfecting the Focus Takes Time Too
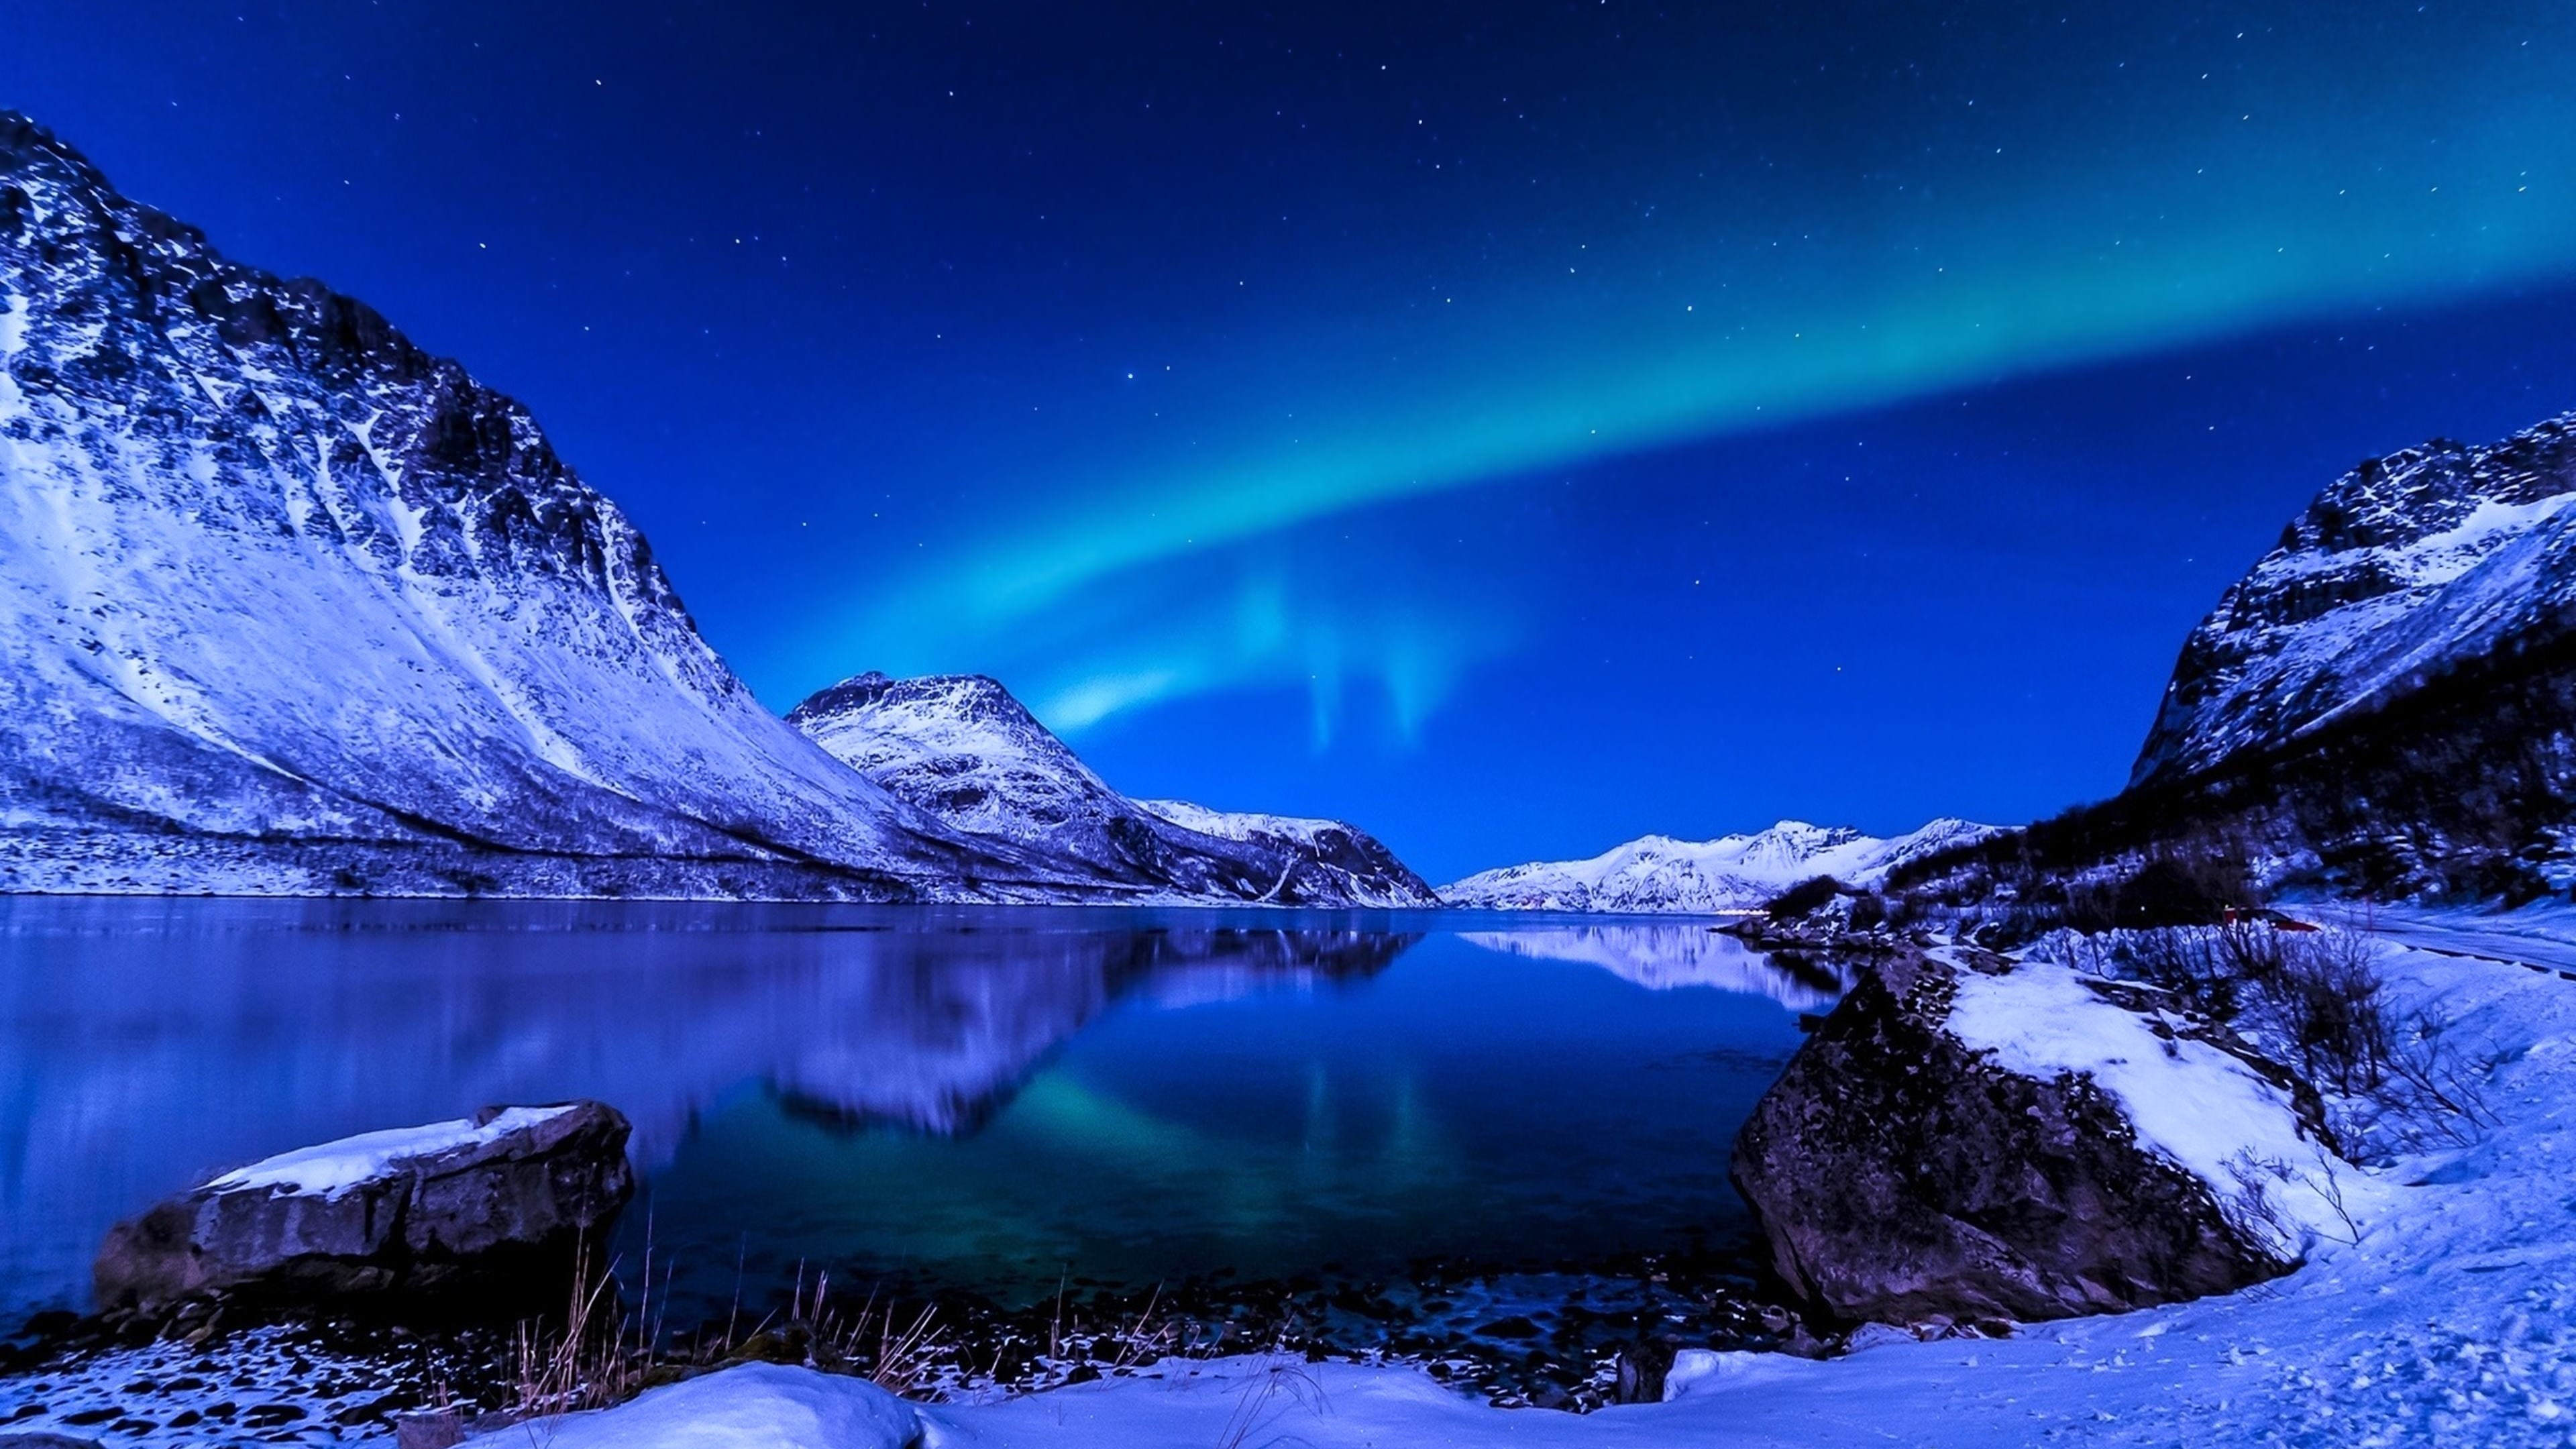
Again, the lack of light when creating images of the night sky is an obstacle you’ll need to overcome to get your images perfectly focused.
Autofocus is certainly a valuable tool in normal circumstances, but for astrophotography, it is more of a hinderance than anything. That means that you’ll have to manually focus your shots to get the sharpest results.
The question is, how does one go about doing that?
There are a couple of different options: using live view to determine your focus or setting your focus to infinity ahead of time.
Using live view to determine your focus is the easier of the two options. All you need to do is manually set your lens to infinity, engage live view, and then zoom in as far as possible on a bright object in the sky (i.e. the north star). Once zoomed in, you can make the necessary adjustments to your focus until the star is nice and sharp.
Then, it’s a matter of taking a few test shots, and again zooming in on the image to inspect the level of sharpness on your camera’s LCD.
The more complex option for perfecting the focus is to manually set the focus ahead of time. Using this method, you need to head out during the daytime and use autofocus to set your focus on a distant object. Doing so sets the focus at or near infinity.
Then, you lock that focus by switching from autofocus to manual focus. Wrap your lens’s focus ring with gaffer tape to ensure that the focus you’ve achieved doesn’t change. Once you’re out in the field at night, you can then use live view to zoom in on your test shots to ensure that everything is in sharp focus.
Though there are plenty of other steps involved in a successful astrophotography shoot, giving your camera a stable base, taking time to perfect the composition, and ensuring that you’ve got the focus 100 percent dialed in will help you create images that are of a higher quality and have improved visual impact.
Give these tips a try and see just how much your images improve!
We Recommend
Easy Astrophotography Tips for Beginners
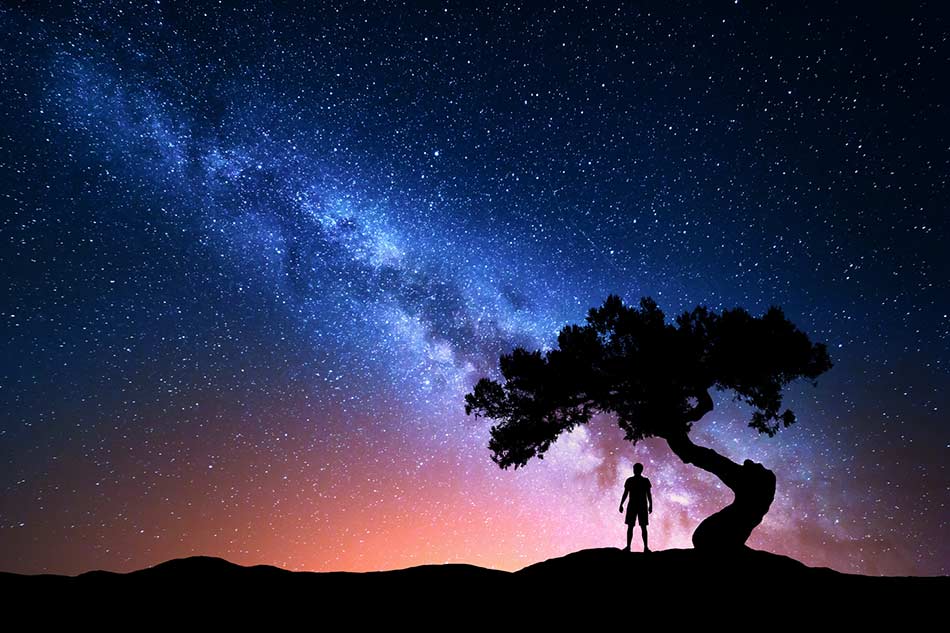
Learn Astrophotography
If you're like a lot of other photographers, when the light grows dim, you pack up your gear and head inside.
It's a natural reaction - after all, it's hard enough to take a great photo during the day and trying to get quality nighttime shots is even more difficult.
Or so it would seem...
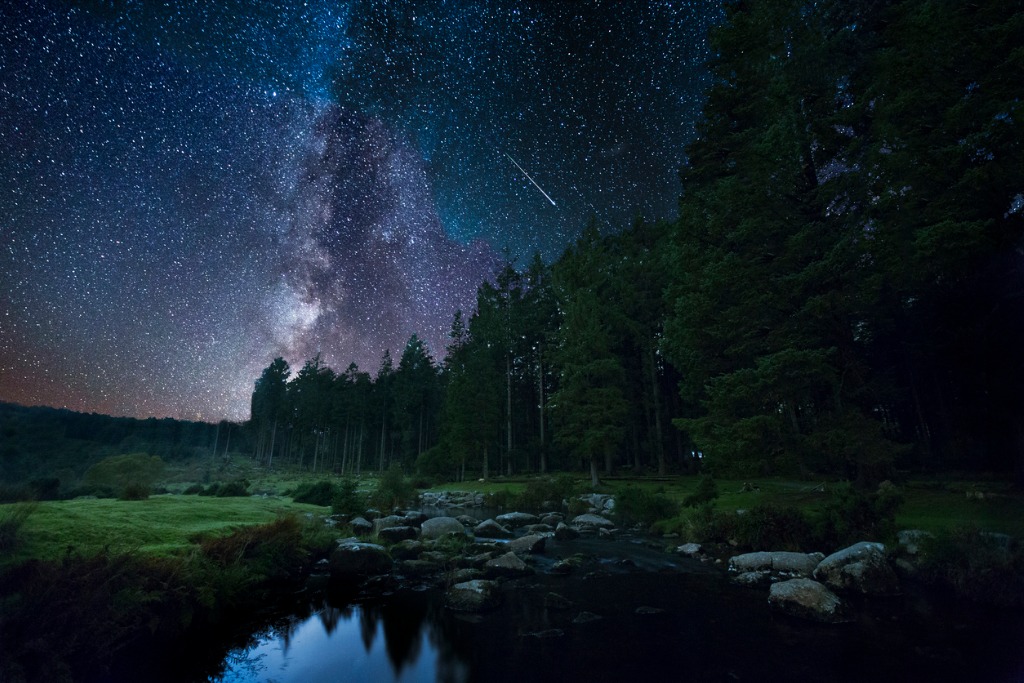
I was once scared of astrophotography, too. But once I finally bit the bullet and gave it a shot, I realized that it's not that it's more difficult, it just requires a bit of a different process.
Once you learn that process, astrophotography becomes a much more manageable beast.
So, if you've been longing to take photos of the night sky but haven't been sure where to start, let the following astrophotography tips serve as your guide.
Astrophotography Gear
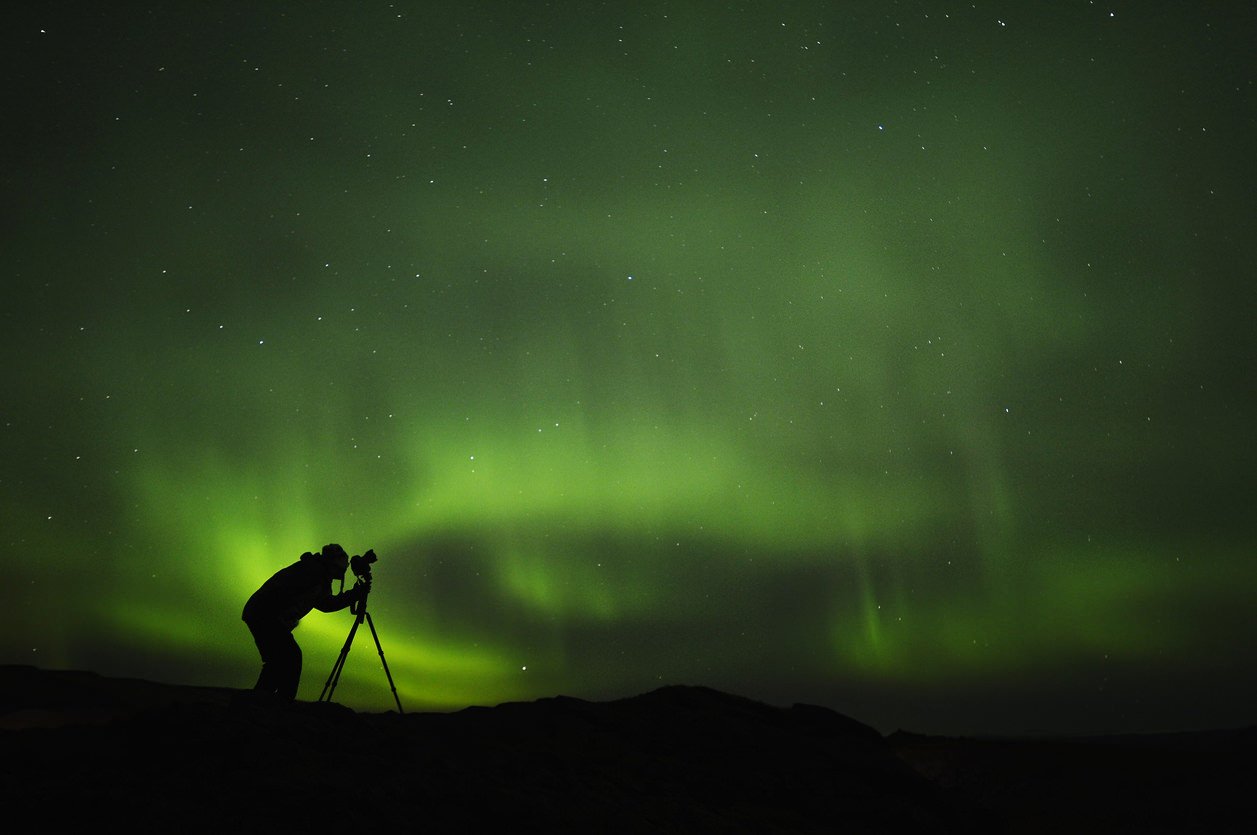
First things first, you'll need to ensure you've got the kind of gear that will help you get your best chances of getting the best shot of the night sky.
This includes the following...
Best ASTROPHOTOGRAPHY Camera
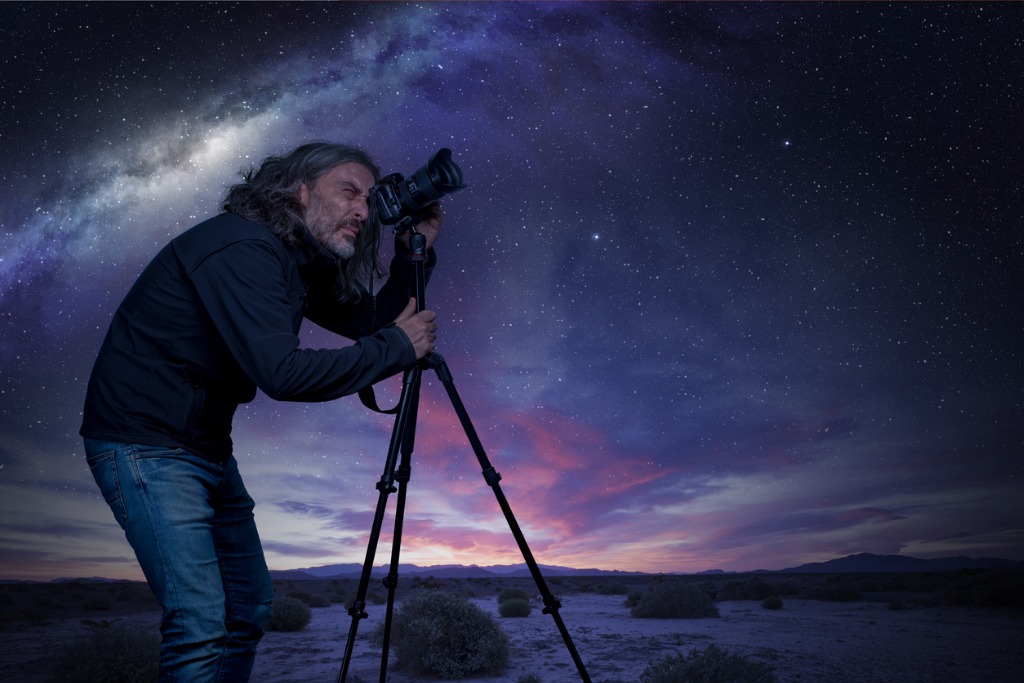
A DSLR or mirrorless camera with manual shooting controls is an ideal option for astrophotography. Since you'll be working with long exposures, having manual controls to extend the shutter speed is an absolute must.
If you're wondering whether a full frame or a crop sensor camera will work, either one will do just fine.
On the one hand, a full frame camera like a Nikon D850 is better suited to low-light photography, but crop sensor cameras like the Canon EOS Rebel t7i are typically less expensive.
If you're not sure what features to look for in the best camera for astrophotography, consult this guide to cameras for beginner astrophotographers. There, you'll find details on essential astrophotography camera features as well as a few recommended cameras for different budgets.
Best Lens for Astrophotography
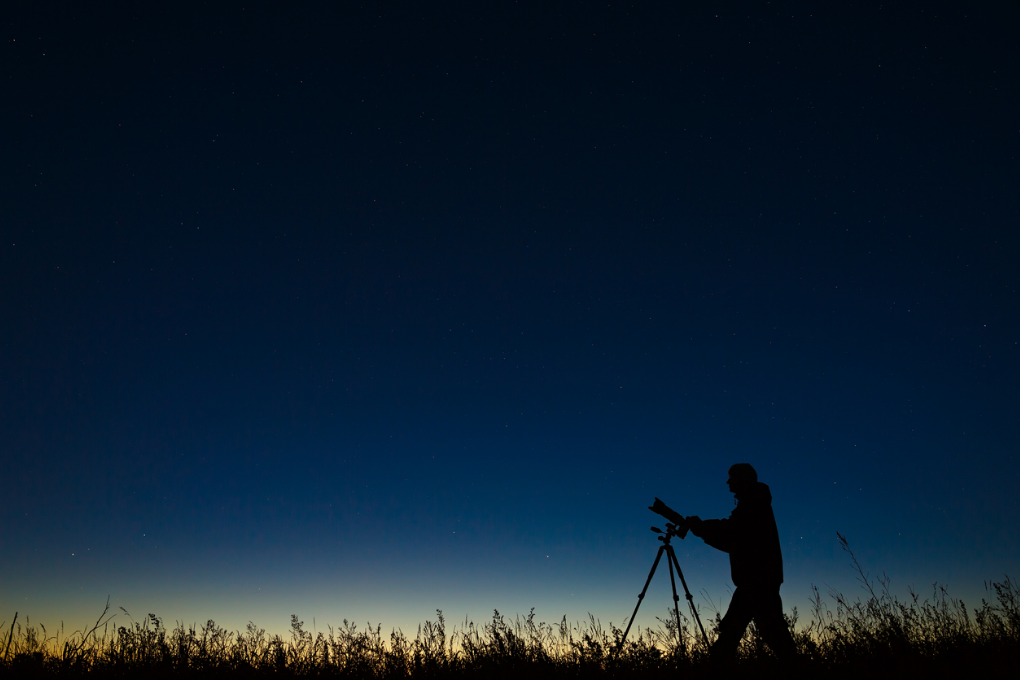
A fast lens with a maximum aperture of at least f/4 is a great start if you're looking for the best lens for astrophotography.
As noted in our astrophotography gear guide, as your budget allows, look for something with an even larger aperture like f/2.8, f/1.8, or f/1.4. The larger the aperture, the more light the lens can collect, and since you'll be shooting at night, you need a lens that can collect all the light it can.
Likewise, consider a wide-angle lens for astrophotography, something that's 35mm or wider so you can capture more of the night sky and the landscape below.

Be aware that if you have a crop sensor camera that the effective focal length of the lens you use will be extended. That is, a 24mm lens on a Canon crop sensor camera has an effective focal length of about 38mm. That being the case, you'd need to buy an even wider lens (say, a 12mm wide-angle) to get the nice, wide shots you want.
Honestly, the lens you use will have a greater impact on the quality of the photos you take than the camera you use, so put as much money as you can towards your astrophotography lens as you can.
When looking for the best astrophotography lens, pay attention to lens reviews, and in particular, the sharpness of the lens.
Getting clear, sharp photos of the stars is quite the process as it is, and you don't need an underperforming lens to get in your way of tack-sharp photos.
A great beginner tip is this: look for third-party lenses. Just because you have a Canon or a Nikon camera doesn't mean you have to buy Canon or Nikon glass. Rokinon, Tamron, and Sigma make some of the best lenses for astrophotography that can be much cheaper than lenses from major camera manufacturers.
Get more astrophotography lens tips in the video above by Apalapse.
Best Telescope for Astrophotography
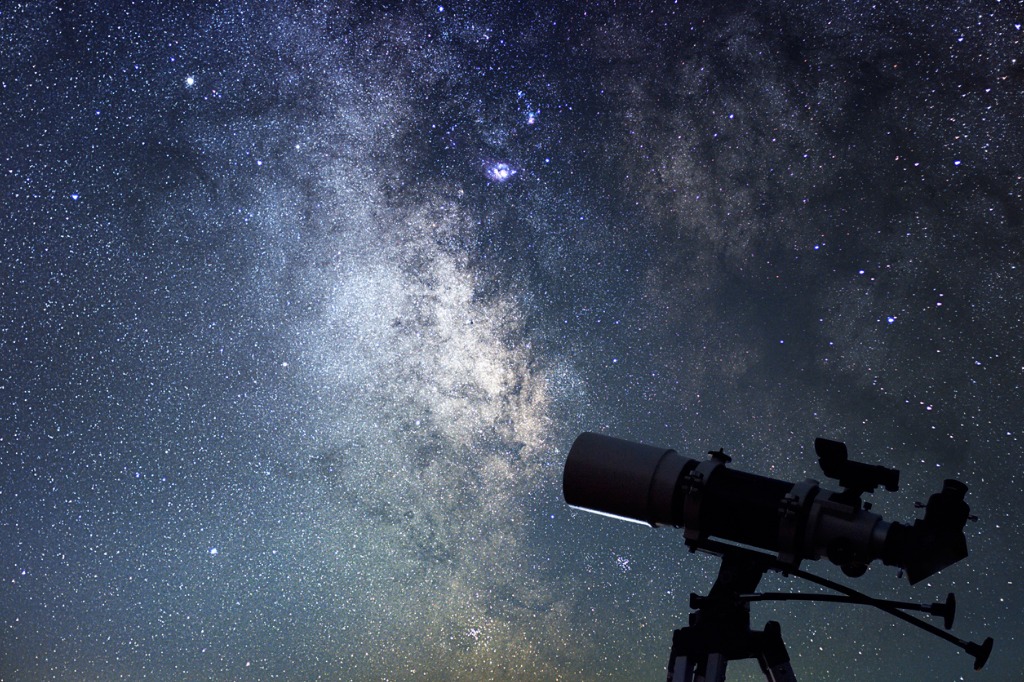
A telescope photographer I am not, but I have gotten some decent images over the years with various telescopes.
What I will say is this - the best telescope for astrophotography is the one that you get the best results with. That being the case, what works for me might not work for you and vice versa.
Like with astrophotography cameras, you don't have to blow thousands of dollars on the highest-priced telescope you can find. Instead, you can get nice shots with a modest telescope and camera setup.
When shopping for an astrophotography telescope, bear in mind its usability and durability. After all, you'll be toting it around and don't want something that's too delicate to move.
Likewise, pay attention to things like the telescope's aperture (the bigger, the better), the type of telescope (i.e., refractor, reflector, or compound), and the telescope's mounting type (i.e., alt-azimuth or equatorial). Get details on all of these features in this guide on how to choose your first telescope.
Other Recommended Astrophotography Tools
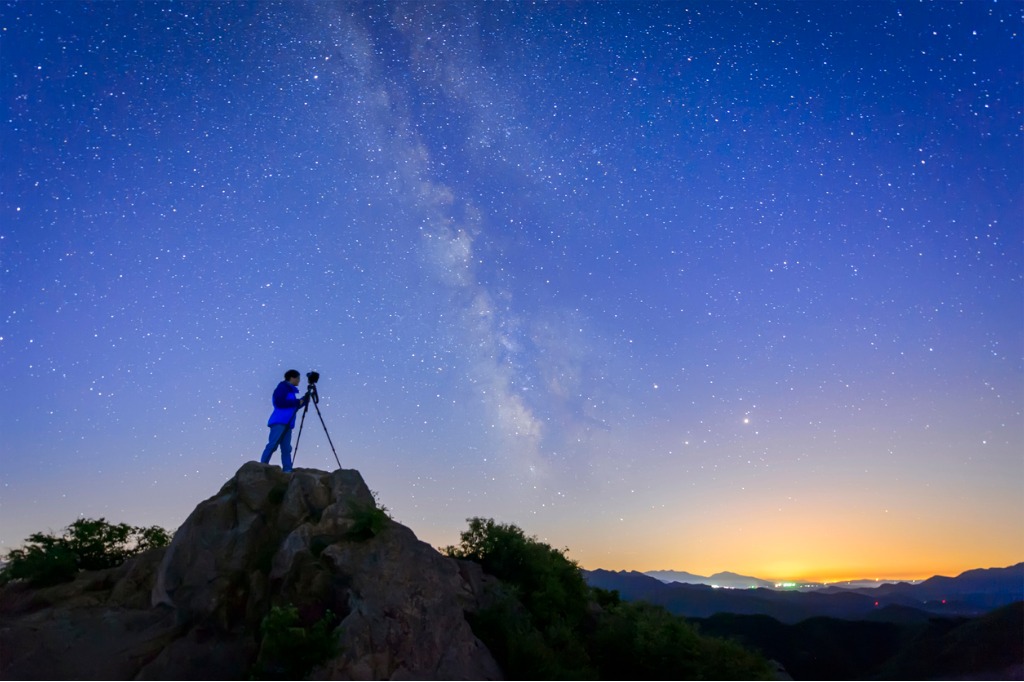
In addition to a camera and lens, there are a few other items you'll need to get great shots of the night sky:
- A solid tripod. Look for something that has features that help stabilize it, like a center column hook to weigh it down and rubberized feet with retractable metal spikes. Any movement due to wind could render your photos of the night sky a blurry mess.
- A remote shutter release, that way you can operate the camera without having to touch it, again, in the name of preventing any blur-inducing movement.
- An astrophotography mount like this, which tracks the movement of the stars and enables you to capture photos without star trails.
Beginner Astrophotography Tip: Find Dark Skies
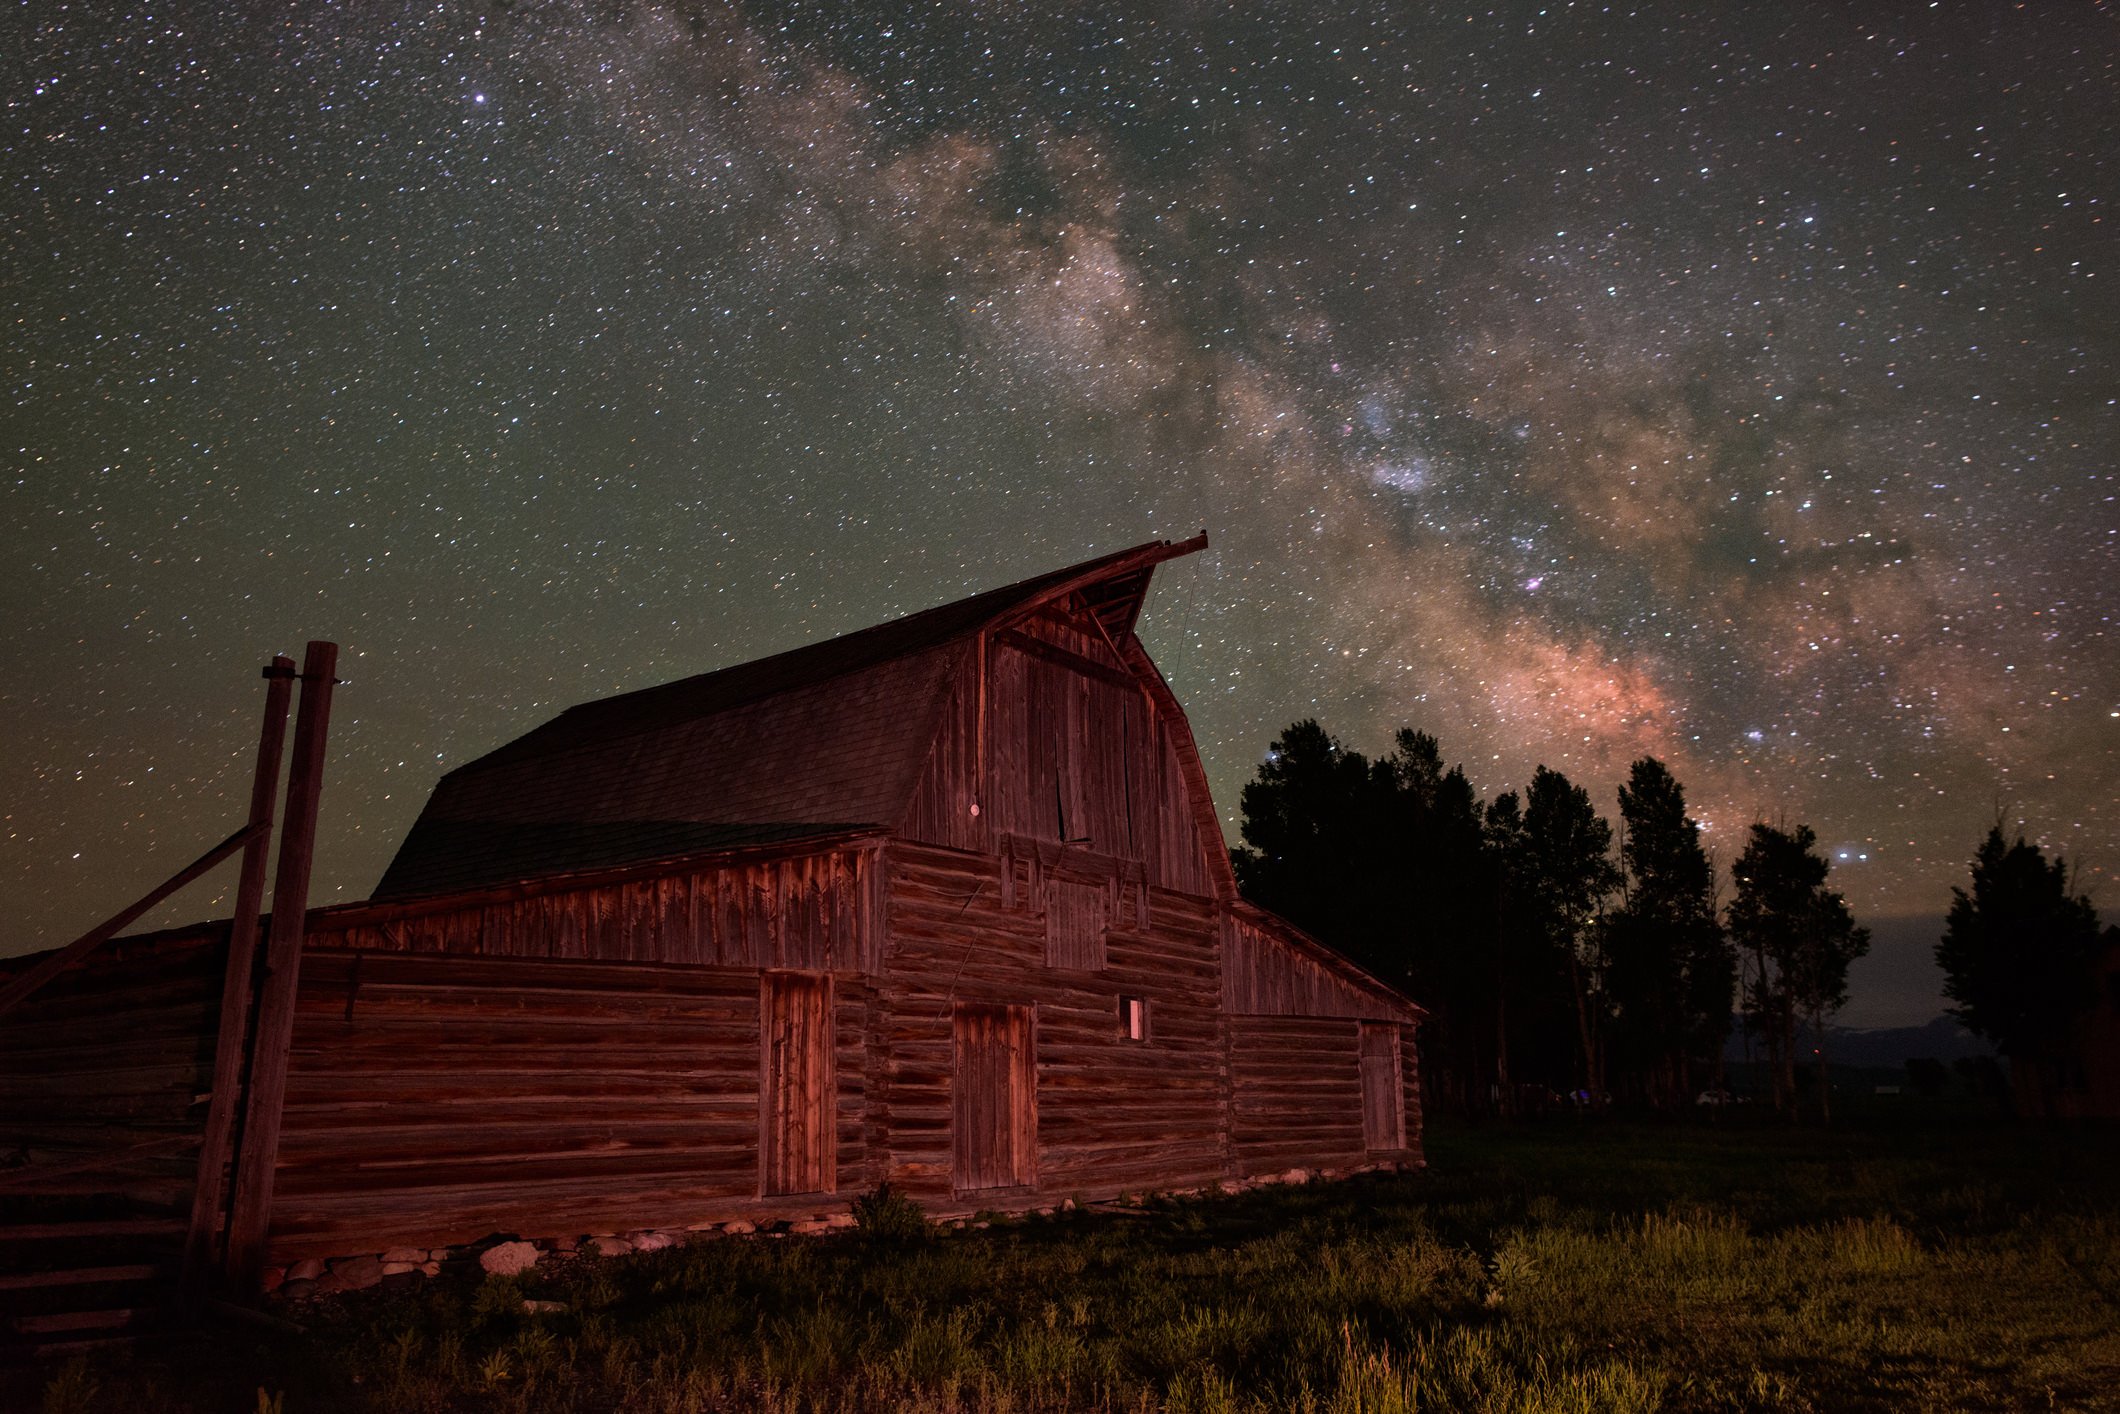
Though a pitch black spot to take your photos or videos isn't an absolute must, it's certainly easier when we're talking about astrophotography for beginners if there's not a ton of light pollution to complicate matters.
If you want the stars in your photos to shine (pun intended!) it's advisable to head away from cities and find a location that has minimal lighting.
What's more, it's important that you find a spot where you can set up your gear and safely work for a while.
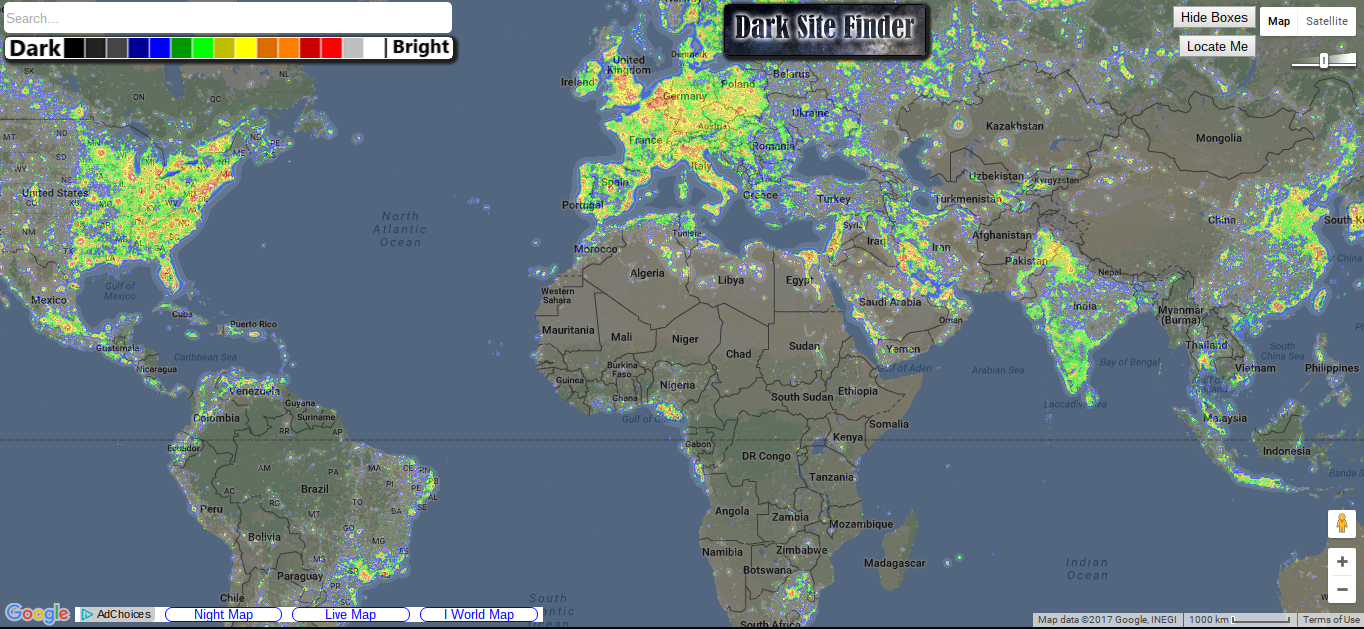
The easiest way to find a place to start your astrophotography adventures is by checking out something like Dark Site Finder, which gives you a visual overview of the light pollution in the area.
Once you identify a spot nearby that will be dark, it's recommended you explore the area during the daytime. That way you can find a safe spot to set up and identify potential compositional elements (more on that in a minute) without having to fumble around in the darkness to do so.
As a side note, make sure you have a flashlight or headlamp packed before you set out for astrophotography so you can actually see what you're doing!
Dial in the Astrophotography Settings

The astrophotography settings you use will depend on a lot of factors, not the least of which is the amount of light that's available and the effect you want to get in your final photo.
Nevertheless, to begin, try the following settings as a good base:
- Focus - Manual, at infinity.
- Aperture - Use your lens's largest aperture or one or two stops below that for better sharpness.
- ISO - Try shooting at ISO 800 or ISO 1600 initially. If the results are still too dark, try ISO 3200.
- Shutter Speed - The shutter speed you select will be determined by the look of the shot you want (i.e., do you want sharp, pinpoint stars or star trails?).
Get a detailed introduction to astrophotography in the video below by We the Curious:
If you want clear, sharp stars, you'll need to use the Rule of 600, which simply states that if you are to avoid photographing the movement of the stars as the earth rotates, you have to calculate your shutter speed by dividing 600 by the focal length of your lens.
For example, if you're using a 14mm lens, the longest shutter speed you can use without introducing star trails is 42 seconds. If you're using a 28mm lens, the longest shutter speed you can use is 21 seconds.
Naturally, if you want star trails, the inverse is true: with a 14mm lens, you'd need to exceed a shutter speed of 42 seconds by a good amount to get long star trails like those shown above.
Astrophotography Tutorial: How to Photograph the Stars
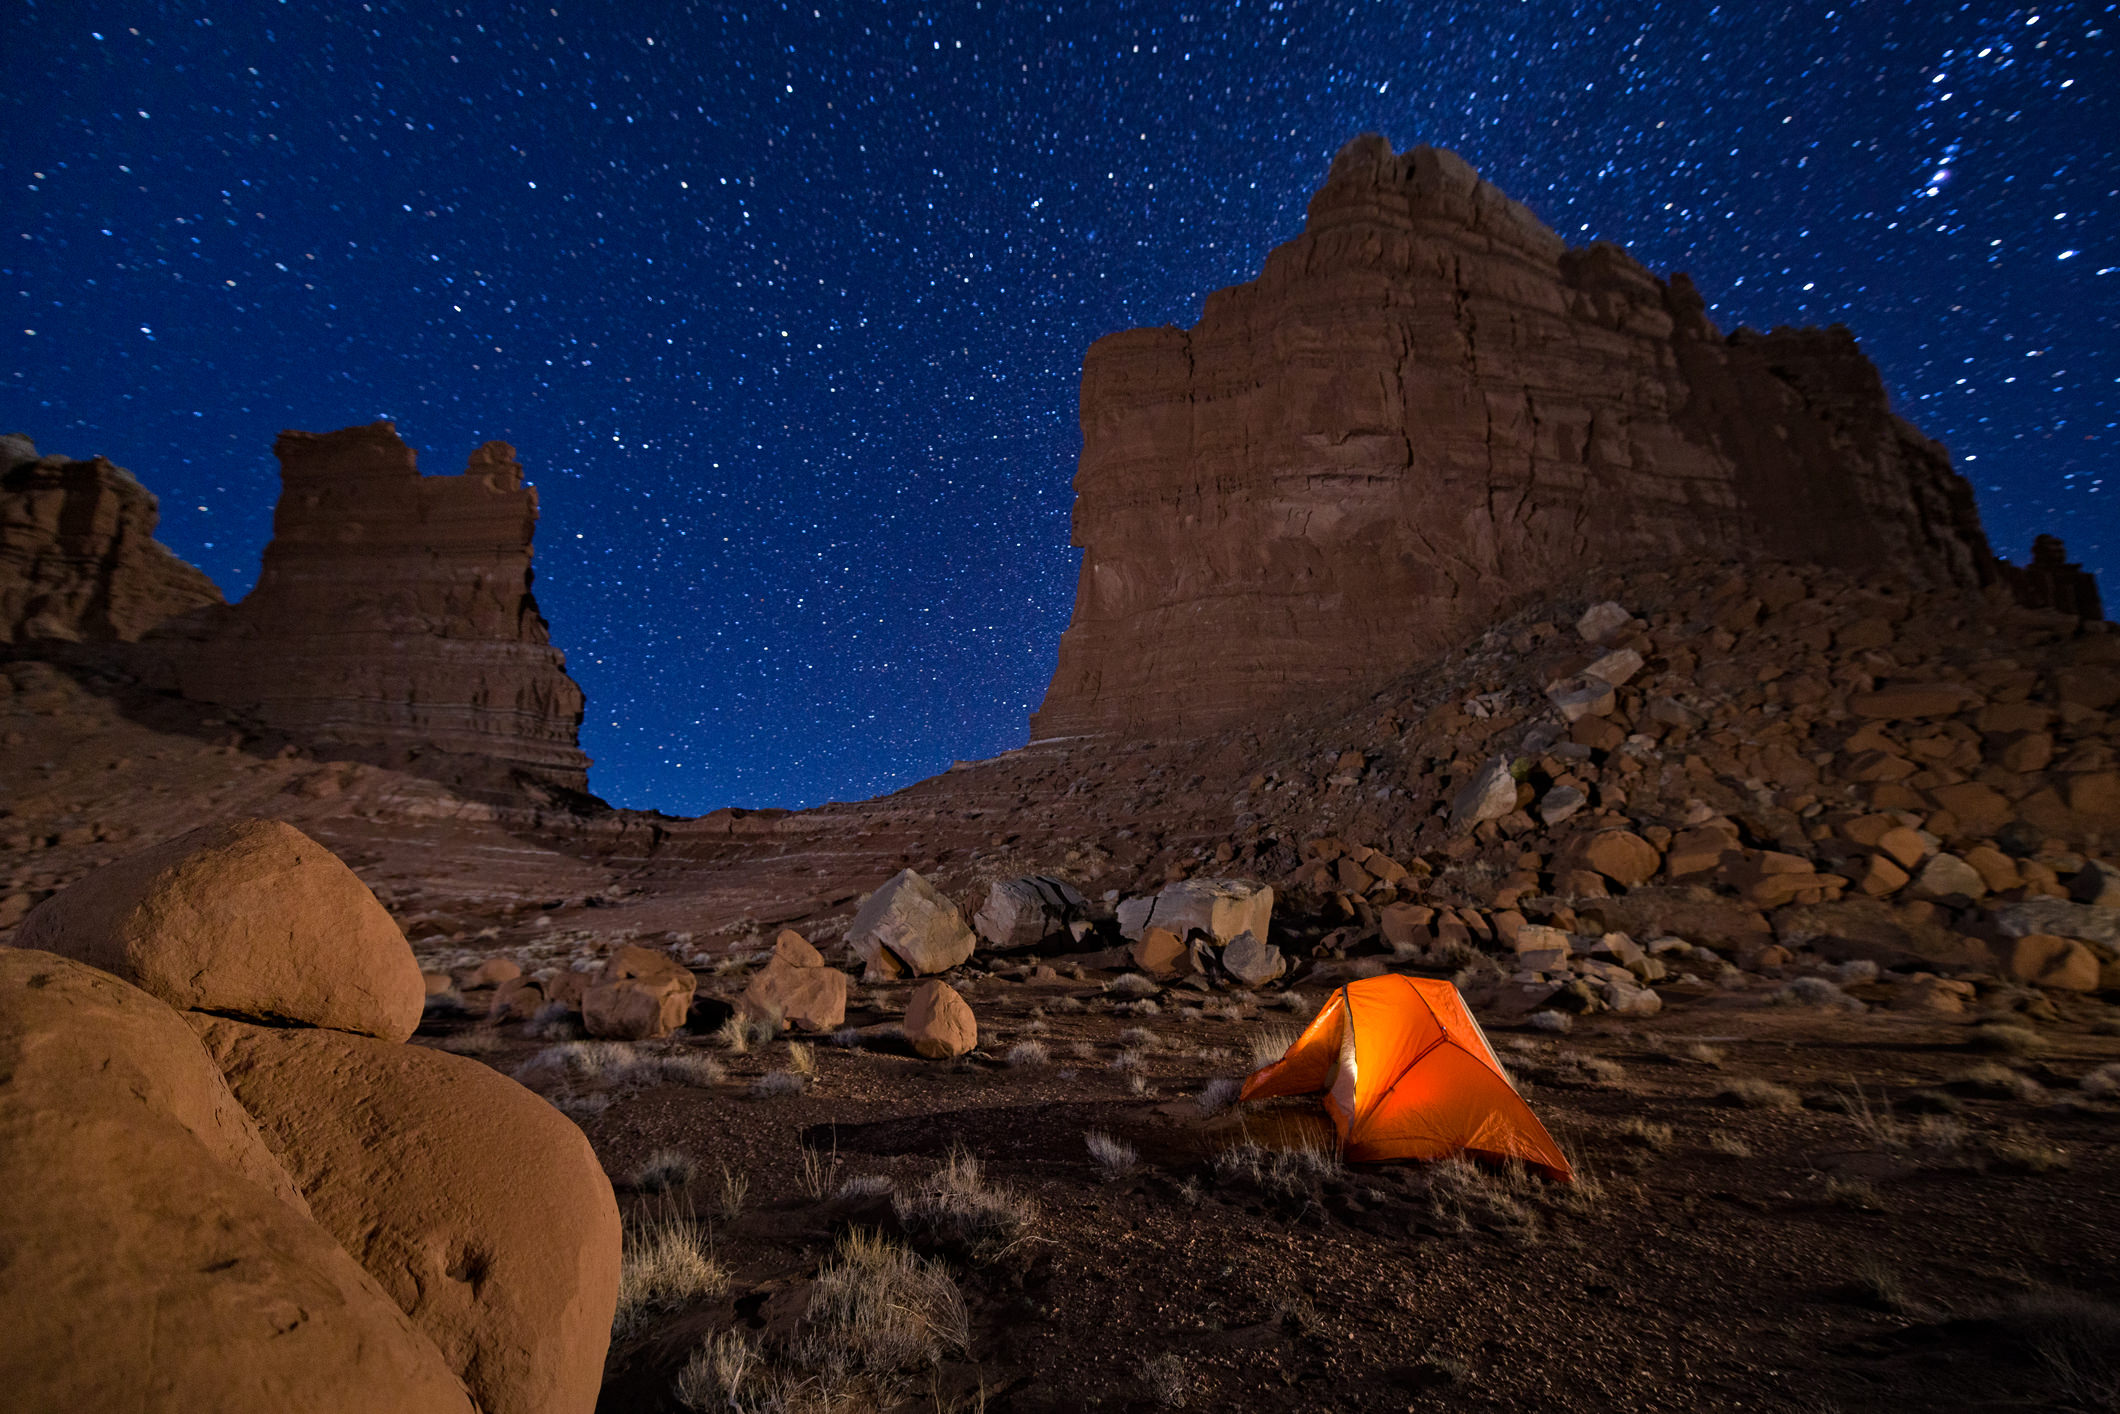
Once you've got your gear all set up and the starting camera settings dialed in, trigger the shutter using a remote shutter release. Remember not to touch the camera while the shutter is open, so you don't cause a blurry photo.
Inspect the results, looking at the exposure (is it too bright or too dark?) and making any necessary adjustments.
For example, if you find that the image is too dark, change the ISO by one stop to increase the camera's sensitivity to light. If at ISO 800 the photo is too dark, try the same shot again, but change the ISO to 1600.
Get more details on how to photograph the stars in the video below by Josh Katz:
Also look at the composition of the astro shot.
Using the rule of thirds is a simple yet effective way to add more interest to your night sky photos as well.
By placing your points of interest at the intersection of the rule of thirds grid lines, you get a balanced composition that's pleasing to the eye, as seen below.
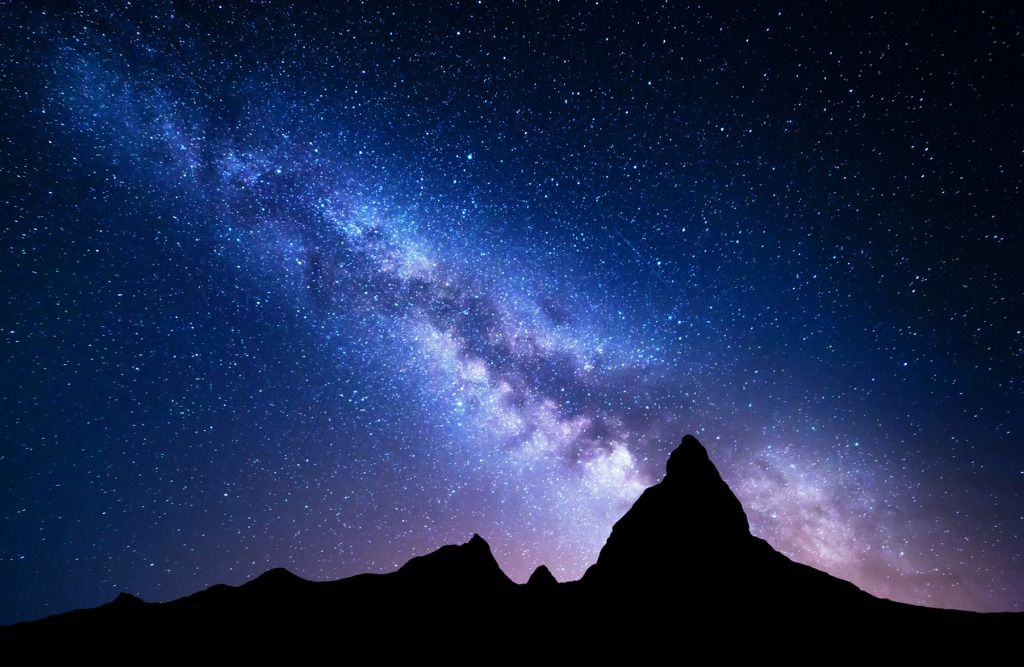
There are other very simple and basic astrophotography composition tips that will help you create the best images.
For starters, make sure that you have a stick-straight horizon line. You can have everything else perfect in the shot, but if your horizon is off, the image will be off, too.
Many tripods have built-in bubble levels that will help you get things perfectly straight. If your tripod doesn't have a bubble level, you can get one that fits into the hot-shoe mount of your camera.
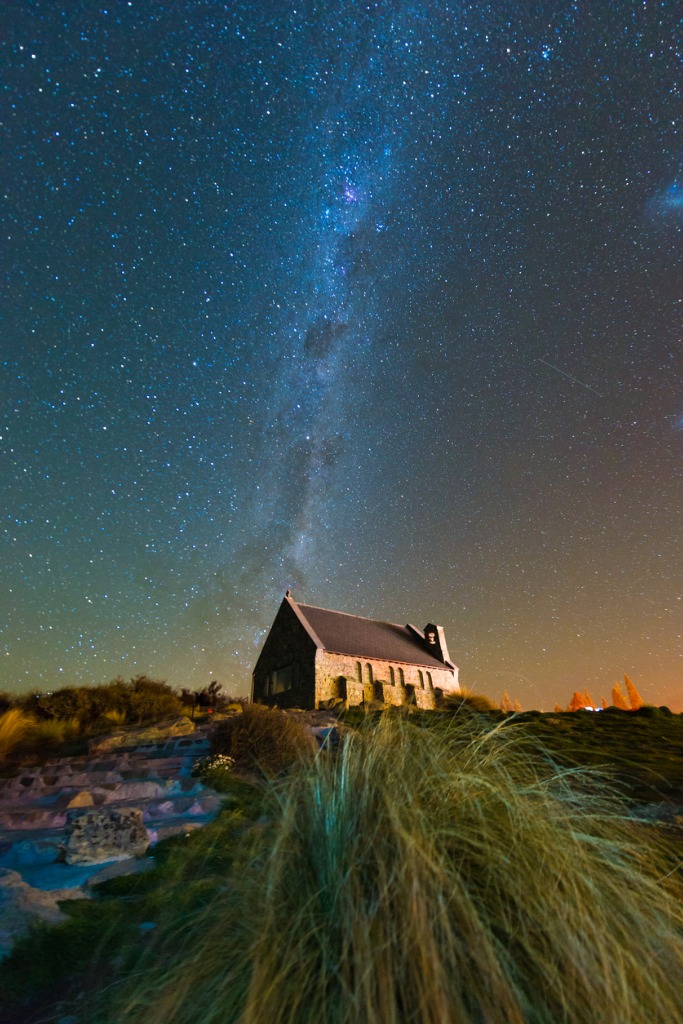
Additionally, think about how best to frame the shot - horizontally or vertically.
If you've got a scene that's got tons of foreground interest, as seen in the image above, shooting vertically is often the way to go.
Doing so allows you to highlight the interesting shapes and textures of the foreground, which makes for a more interesting photograph.
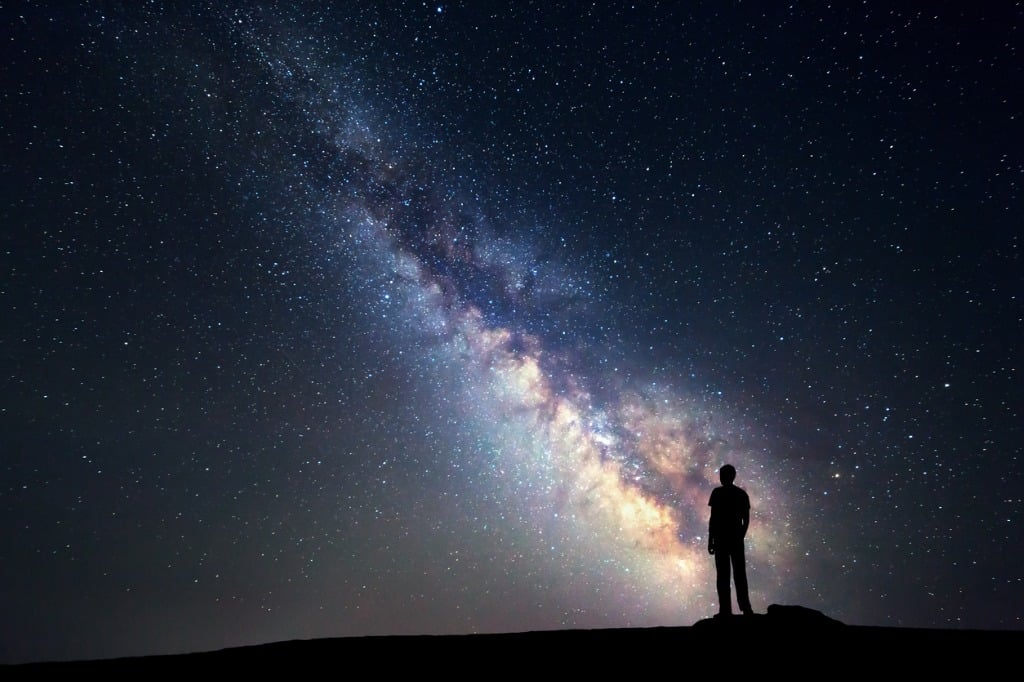
It's a good idea to include elements in the frame like buildings, trees, or even a person.
Adding these kinds of points of interest not only gives the viewer's eyes something to latch onto in the photo, but it also serves to provide a little context to the shot.
This is particularly important when photographing things like the Milky Way or the moon.
Though these celestial bodies are beautiful, they are often more beautiful if there are other elements in the image.
As seen above, following the Milky Way composition tips to include a person in the frame makes for a much more interesting photo.
Process the Photos With Astrophotography Software

Perhaps the most painstaking part of astrophotography is post-processing.
It can also be incredibly fun!
With programs like Photoshop and Lightroom, you can transform so-so images of the night sky into stunning photos that will knock your socks off.
Of course, the trick is learning how to do that, something you can do by checking out the video below. In it, Justin Majeczky gives a thorough overview of how to process an image of the Milky Way in Photoshop:
If you're into deep sky photography and need to stack your images, astrophotography stacking software is a must.
There are free options - like Deep Sky Stacker or RegiStax are viable options. Of course, you can stack astrophotography images in Photoshop or Lightroom, too.
The overarching theme here is that tackling astrophotography takes a lot of gear, a lot of time, a lot of patience, and a lot of practice.
Though you won't necessarily be ready to take magazine-worthy photos of the night sky tonight, this guide will certainly get you pointed in the right direction!
For even more tips and tricks, be sure to check out the Reddit astrophotography thread.
We Recommend
Essential Astrophotography Questions, Answered
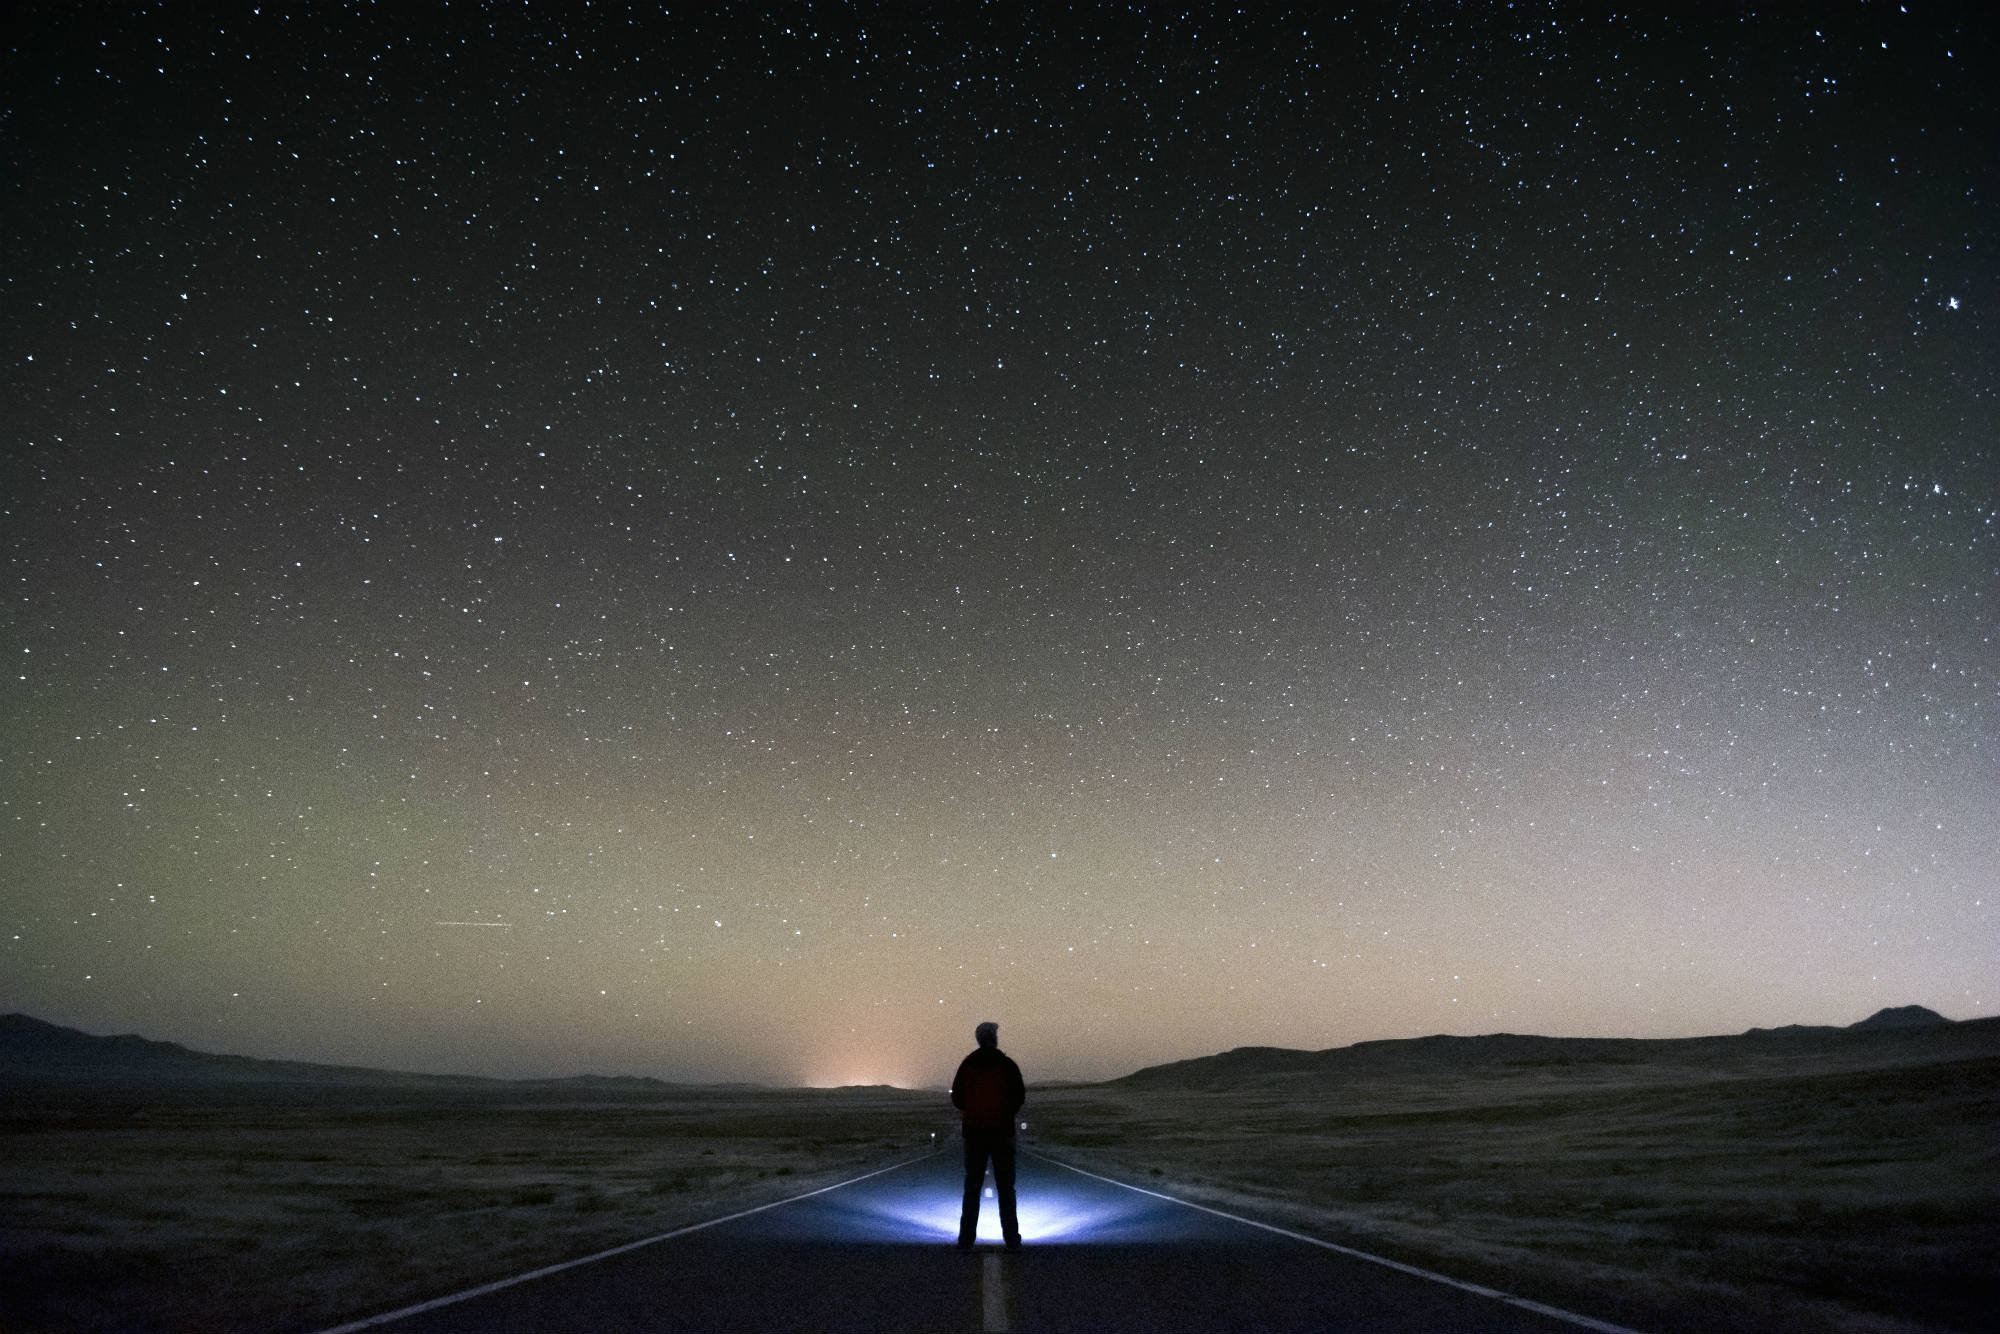
There are many challenges with astrophotography, to be sure.
But it's a mistake to think that it's not something that the average photographer can master.
In fact, if you're armed with the right gear and have a strong understanding of the fundamentals of photography, astrophotography doesn't have to be any more difficult than taking a regular photo.
In the night sky photography tutorial below, we've answered a few questions about astrophotography camera settings and other common questions.
Astrophotography Camera Settings: What White Balance Should I Use?

The nice thing about digital photography is that if the white balance is off in your images of the night sky, you can always correct it in post-processing.
Even better, shooting in RAW enables you to make white balance adjustments before you open the file in Photoshop, Lightroom or whatever program you prefer to use.
However, getting the white balance just right in-camera will save you the time required to fix it later.
In many cases, the daylight white balance will get you the best results.
Though it seems counterintuitive to use the daylight white balance setting when taking photos of the night sky, it produces the best colors of the stars.
Learn More:
What Aperture is Best for Astrophotography?
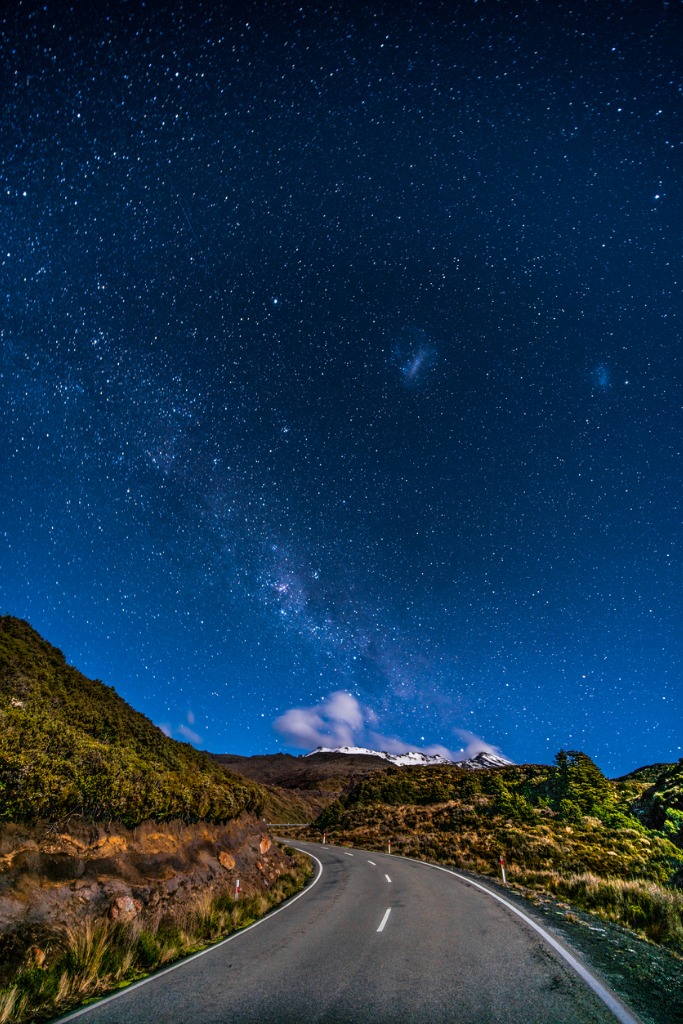
When thinking about how to do astrophotography, a primary question people have is what aperture is the best?
Well, the answer to that question is that it depends.
That's because each situation is unique and each lens performs a little differently.
So in some situations, an aperture of f/3.2 might be the best bet while in other situations an aperture of f/8 might work better with many variations in between.
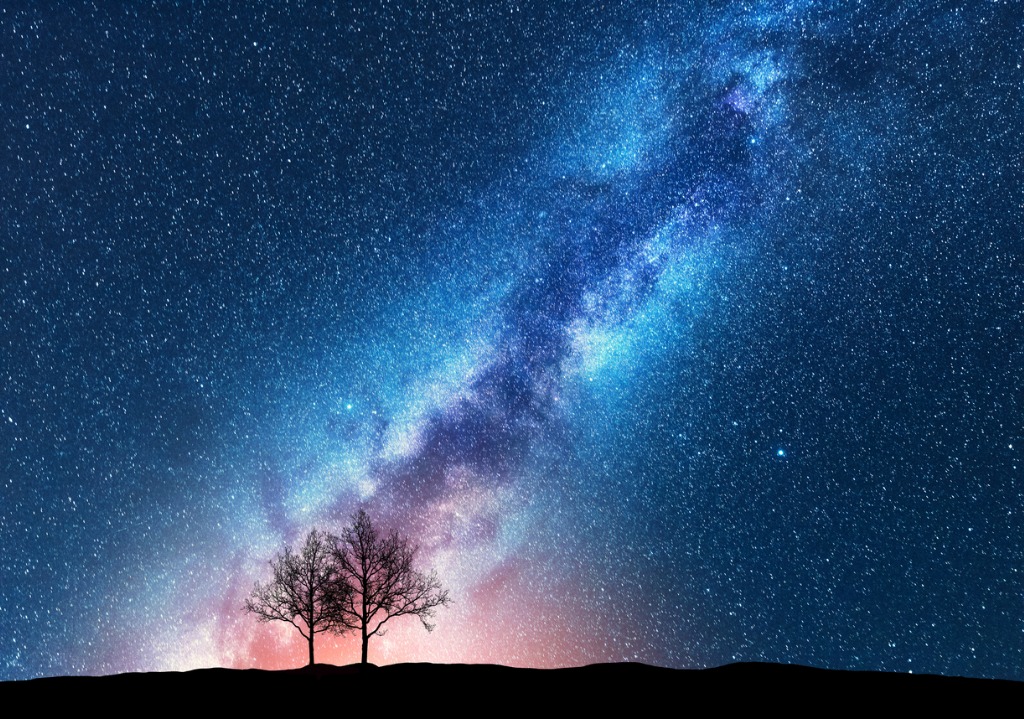
What's important to remember is this: the smaller the aperture, the lower the amount of light entering the lens.
So, if change the aperture from f/2.8 to f/5.6, you'll need to either extend the shutter speed or boost the ISO (or both) to brighten the image to account for the reduced amount of light.
But also keep in mind that while larger apertures allow more light into the lens, they also don't provide as sharp of results as shooting with an aperture closer to the lens's sweet spot.
That is, shooting at f/2.8 might be great from a light perspective, but shooting at f/8 might get you a much sharper photo.
As with many things in photography, finding the right aperture for your astrophotography will require some practice and patience.

Should I Include Foreground Interest?
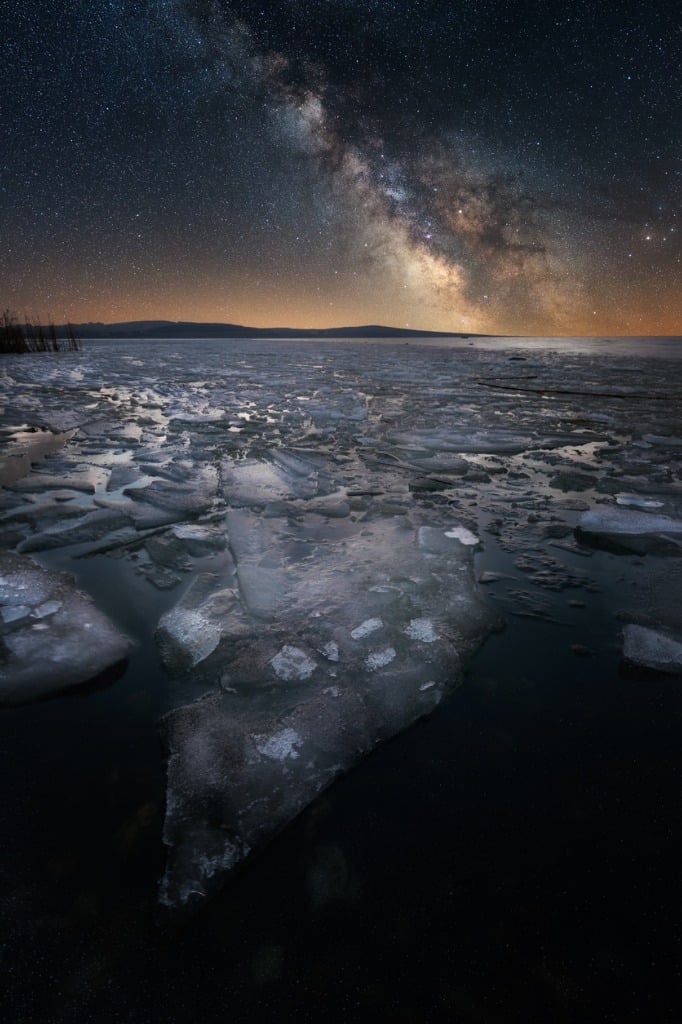
As a beginner astrophotographer, you might find yourself drawn to composing images of the night sky by itself.
And while there's nothing wrong with that, you might also find that if you include foreground interest of some sort, that the photos you create have much more visual appeal.
For example, in the image above, the Milky Way is obviously what makes this photo.
However, by taking a vertical shot and including the frozen lake in the foreground, the photo has much more interest and context, making for a far better photo.
For this tip to work, though, the foreground needs to be interesting...
In the shot above, the foreground is both uninteresting and too bright. The result is a photo that isn't all that appealing.
So, adding foreground interest isn't always a given. Instead, experiment a little, and if it works, great! If not, there's nothing wrong with taking a photo of the sky by itself.
Learn More:
- How to Photograph the Milky Way (in Simple English)
- Take Better Photos of the Stars With These Quick Tips
How Do I Avoid Star Trails?
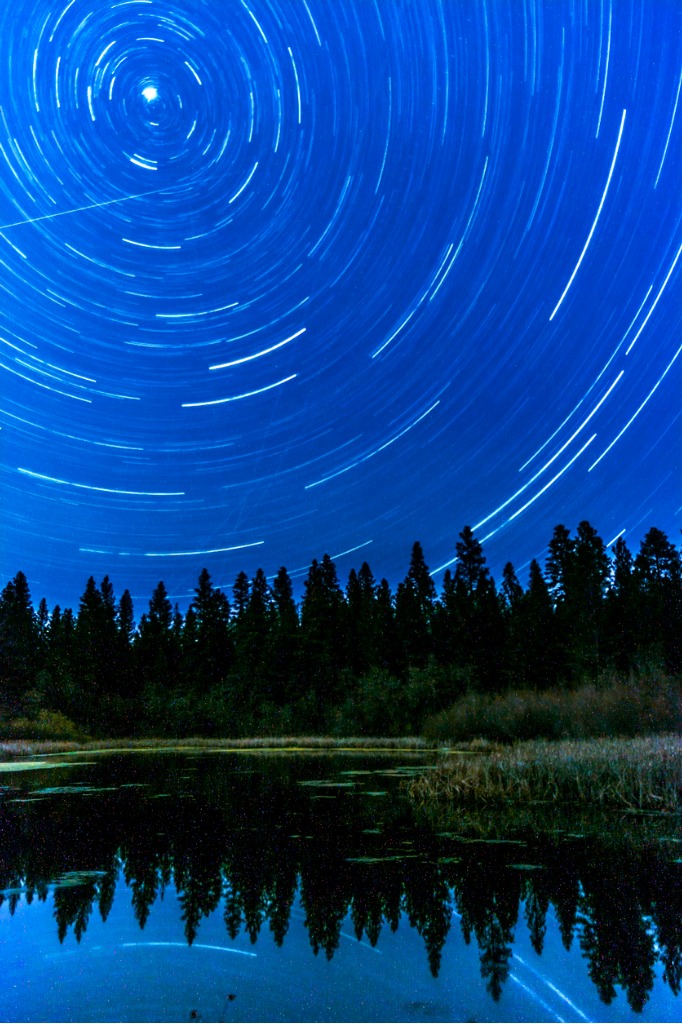
Photos like the one above that show the movement of the stars in the sky are beautiful.
But sometimes you want to capture the scene like you see it - with sharp, pinpoint stars.
There are a variety of ways to go about doing this - some easy and some more complicated.
On the complicated end is to calculate the longest shutter speed you can use and still avoid capturing the movement of the stars.
This is called the 500 Rule, which states that dividing 500 by the focal length of your lens generates the longest shutter speed you can use.
So, if you're shooting with a 50mm lens, you'd have the following formula: 500/50 = 10 seconds.
It's simple math, so it isn't overly complicated, but there is a better way.
If you use a star-tracking mount like the Vixen Polarie shown above, you don't have to worry about math at all.
In fact, all you have to do is mount the Polarie to a standard tripod, and, in turn, mount your camera to the Polarie.
Then, with the included compass on the Polarie, orient it to face north and use the North Star alignment window to point at Polaris.
Once the Polarie is all set, it will track the movement of the stars in the night sky, thereby eliminating star trails.
The result will be a beautiful, star-filled night sky like the one shown above. It's easy-to-use, easy to setup, and anyone can use it to create gorgeous photos!
Learn More:
- Get the Specs and Pricing on the Vixen Polarie Star Tracker Mount
- Quick Tips for Photographing the Full Moon or Supermoon
We Recommend
Essential Tips for Photographing the Milky Way
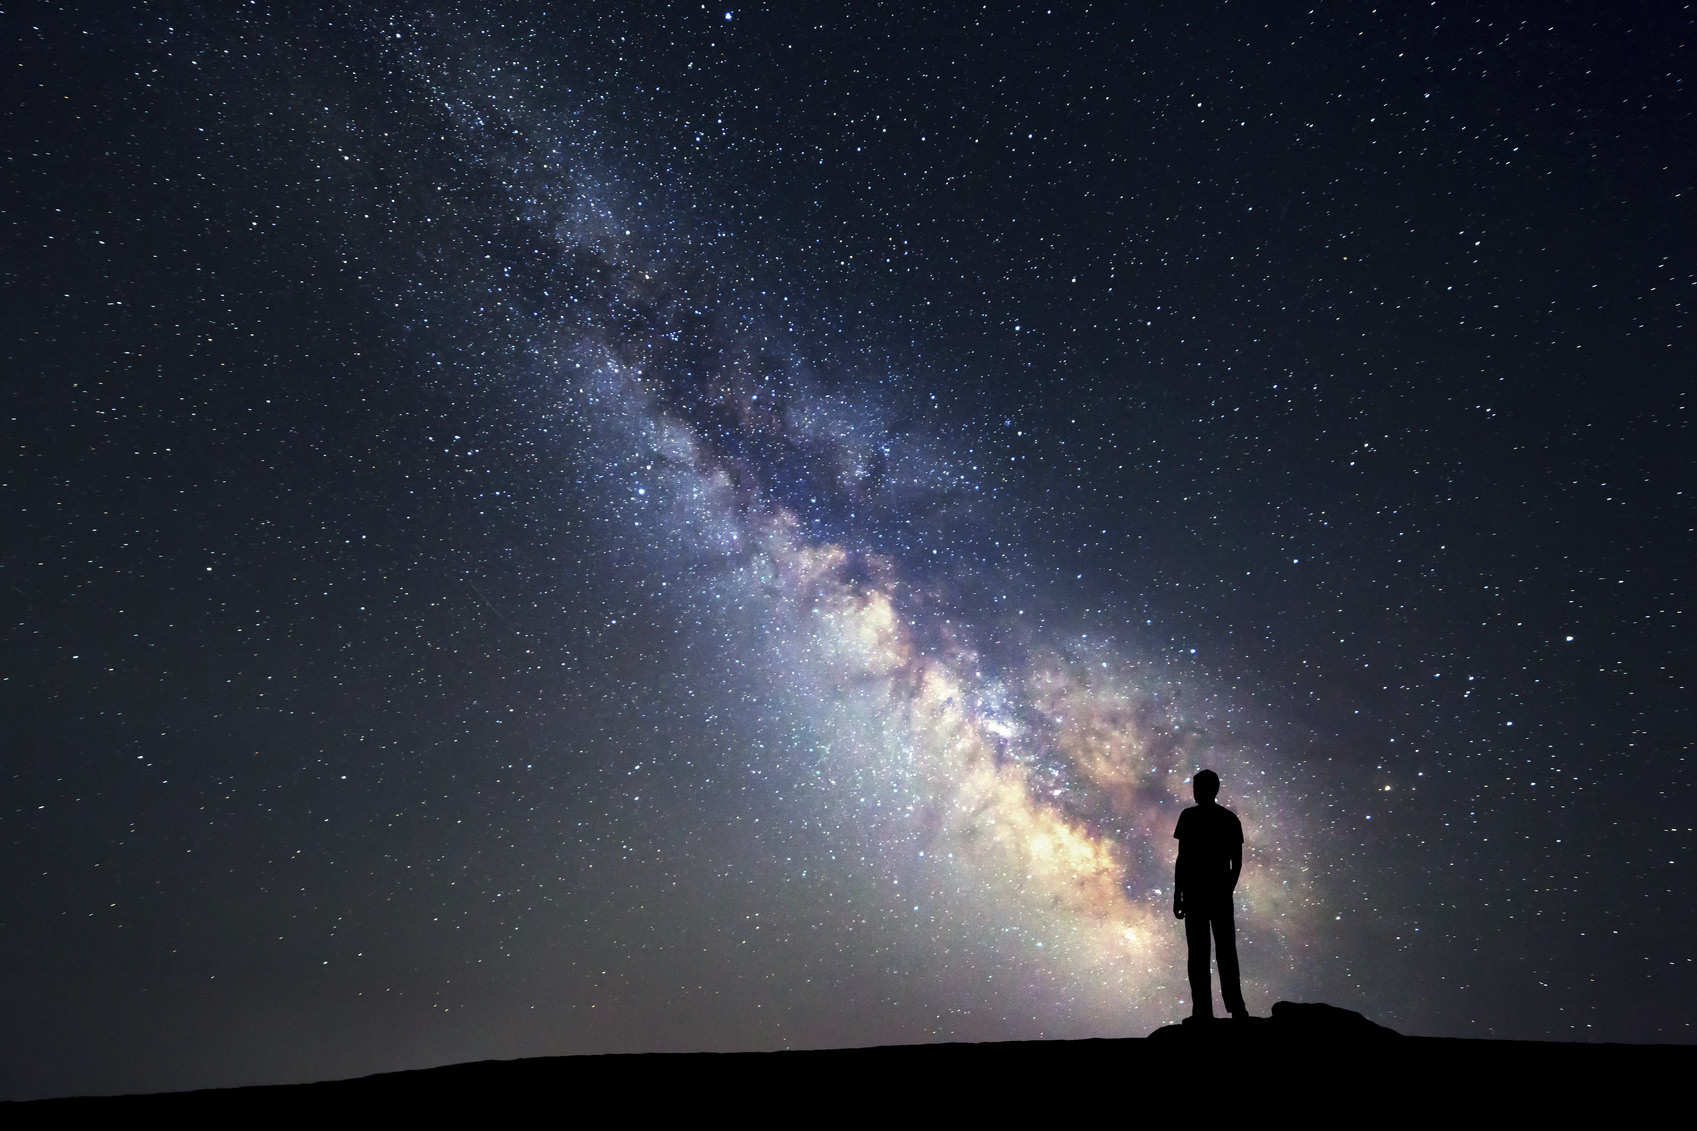
Pictures of the Milky Way like the one above are astounding, to say the least. A popular misconception is that getting photos like that is incredibly difficult. Though it does take some time and effort, astrophotography isn’t all that complex, so long as you understand the equipment you need and the camera settings to use.

In the video below, Nick Page takes us step-by-step through the process of photographing the Milky Way. From practical tips for selecting a location to insights regarding the best gear to compositional techniques and camera settings, Nick provides all the details you need to take spectacular photos of the Milky Way.
Amazon Recommendations
- Canon EF 50mm f/1.8 STM Lens
- Induro AKB1 Tripod with Ballhead 62-Inch Max Height 12.8lb Load Capacity
- Outlite A100 900 High Lumens Ultra Bright - CREE XML T6 LED Tactical Flashlight
We Recommend
Get Ready for the Perseid Meteor Shower With These Astrophotography Tips
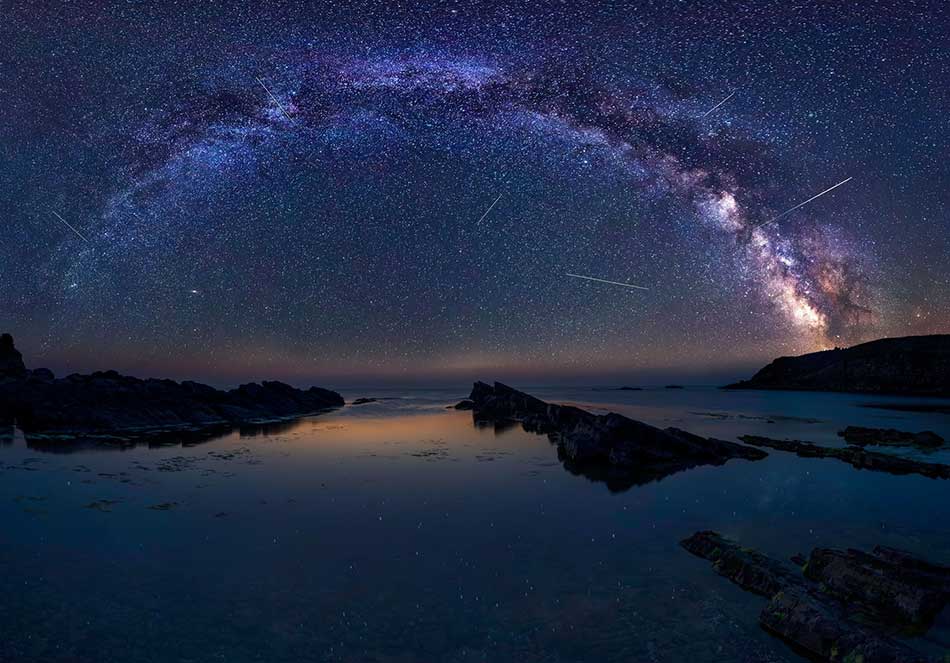 Image Credit: jk78 via iStock
The Perseid Meteor Shower is coming up quickly - it'll peak on the night of August 12-13, 2018 - so that leaves us precious little time to get ready for it.
This will be one of the most intense night-sky events this year, so planning and preparation will be key.
With these astrophotography tips for photographing meteor showers, you'll be in better shape to take great photos.
Let's get started!
What is the Perseid Meteor Shower?
First things first, it's important to understand your subject.
Meteor showers occur all the time when Earth navigates through dust streams that comets have left in their wake.
In the case of the Perseids, that debris is left from Comet 109P, which is better known as Comet Swift-Tuttle.
At the start of the meteor shower, you'll see an occasional shooting star, but the number and frequency of those sightings dramatically increases each night until the peak of the shower.
The peak of the Perseids can produce up to 100 meteors per hour - and sometimes even more than that - making for one heck of a nighttime show.
When the meteor shower occurs, it looks from our perspective as though each meteor comes from the same point in the sky, or the "shower radiant."
Though the radiant moves around the sky throughout the meteor shower, at its peak, it appears as though the meteors emanate from the constellation Perseus, thus the name Perseids.
Get more details on the Perseids in the video above by The Verge.
Planning for the Perseid Meteor Shower
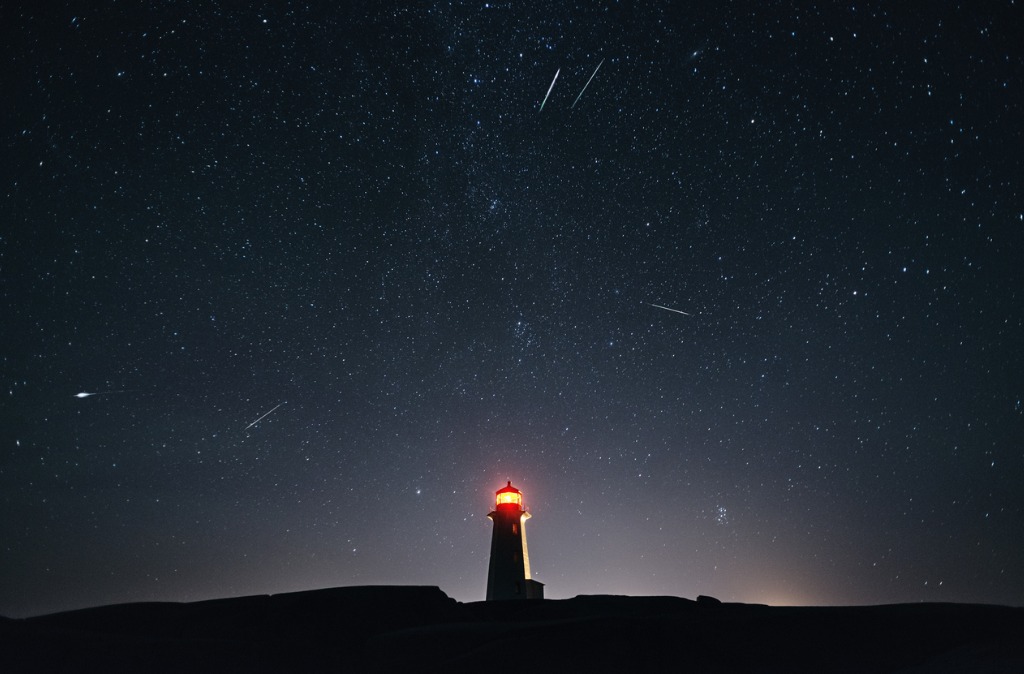 Image Credit: shaunl via iStock
First of all, the biggest hurdle to seeing the Perseids in their full glory is the moon.
In some years, the moon is full and obstructs the view of the meteor shower. Thankfully, this year, the moon will be a waxing crescent, so the night sky should be nice and dark (unless there's light pollution, of course).
After finding a nice, dark spot to view the shower, you'll want to orient yourself to the north after the sun sets.
Looking just to the right of true north, you'll see Perseus low on the horizon.
As the night progresses, Perseus will rise higher and higher in the sky. If you can't identify the constellation, you can use Sky Chart or any number of other apps to help you find it.
Granted, wherever you decide to view and photograph the Perseids from, make sure you get there in plenty of time to get your gear set up.
Speaking of gear...
Learn More:
Camera Gear for Photographing Meteor Showers
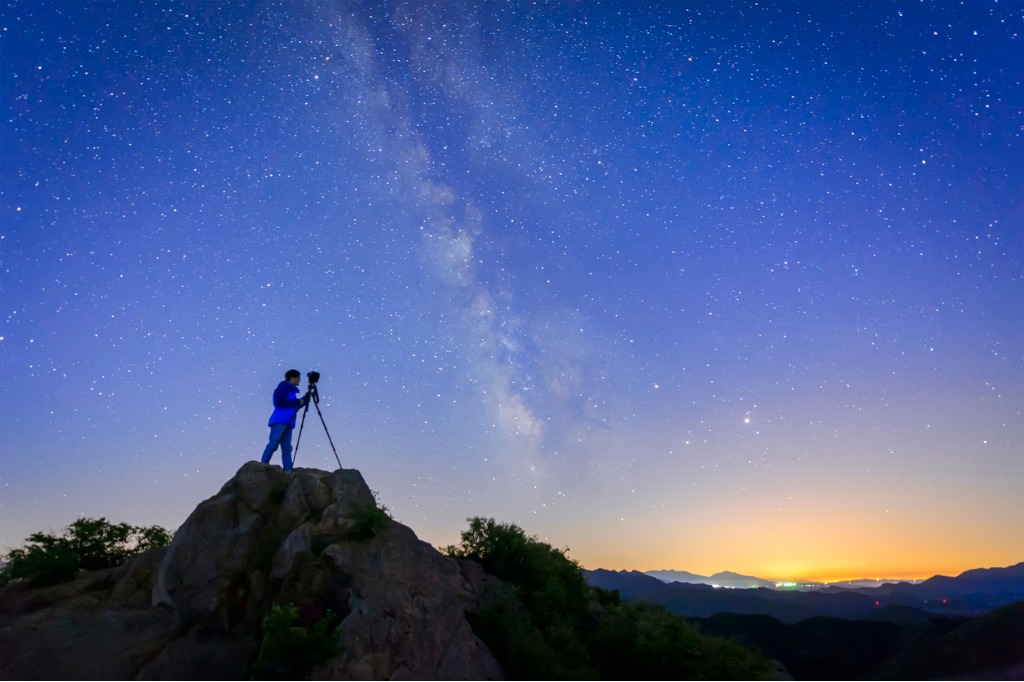 Image Credit: bjdlzx via iStock
There are a number of things you'll need to make your photos of the Perseid Meteor Shower the best they can be.
First, you'll need a camera. And while you can use virtually any kind of camera, having one with manual exposure controls will get you the best results.
Some people prefer DSLRs. Others prefer mirrorless. Either way, a full frame or even a crop sensor camera will do the trick.
On the lens front, many shooters prefer wide-angle and ultra-wide-angle lenses like fisheyes so they can incorporate more of the sky into the shot. What's more, since you can capture more of the sky in one frame, you're more likely to capture a meteor streaking across the sky.
Of course, the problem with using wide-angle lenses is that the sky looks more distant, and as a result, the meteors streaking across the sky will look small.
 Image Credit: Allexxandar via iStock
For that reason, some astrophotographers prefer a standard lens, like a 50mm f/1.4, for example, to get a tighter frame on the sky. For an even closer view, some people opt for a telephoto lens.
These longer focal lengths obviously make the sky's features look larger in the shot, but also restrict how much real estate you can cover.
If you're a beginner astrophotographer, my recommendation is to stick with a wide-angle to give yourself the most coverage.
Editor's Tip: Ready to take your photos to the next level? Learn why a better lens will help you more than a better camera.
So what do you do if all you have is the kit lens that came with your camera?
Believe it or not, you can use your kit lens to get decent shots of the night sky. Just shoot at its widest focal length (likely 18mm or so) to get the most coverage of the sky.
You can also opt to purchase a wide-angle lens...
And while many lenses are expensive - especially those with big apertures like f/1.2 and f/1.4, you can find great deals on used wide-angle lenses that allows you to stretch your budget and get a better lens for occasions like this.
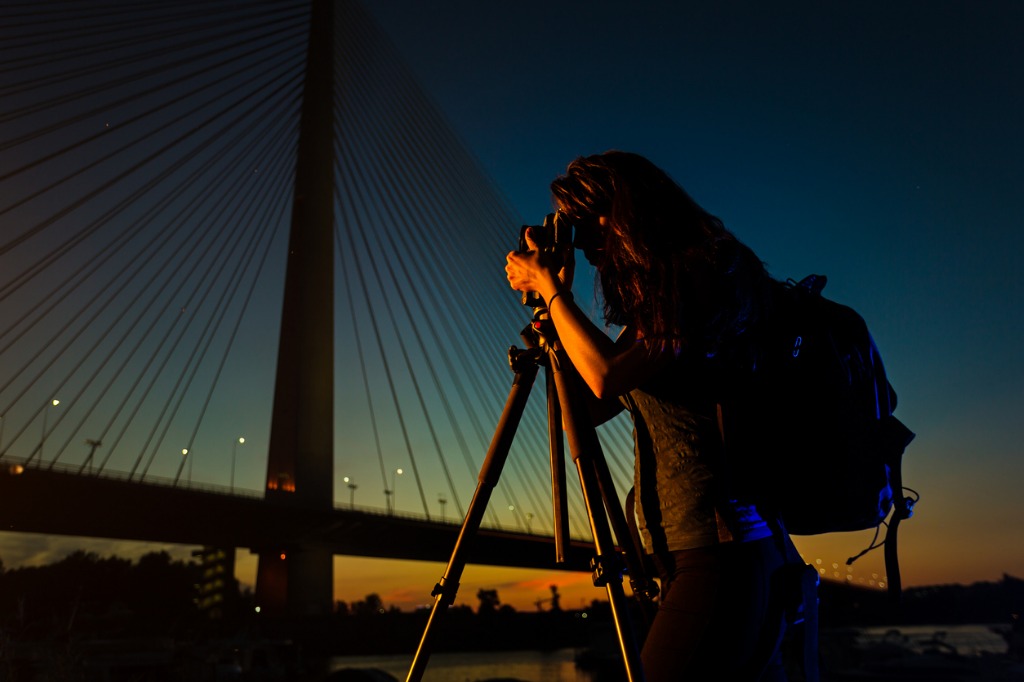 Image Credit: NoSystem images via iStock
Since astrophotography requires long exposures, you'll also need a tripod to support your camera and lens.
Tripods might seem like they're all alike, but this is a misnomer.
A cheap, flimsy tripod isn't going to do you any good, and will just be a waste of money.
Conversely, a rock-solid tripod will give your camera and lens the stability it needs to get the sharpest possible images.
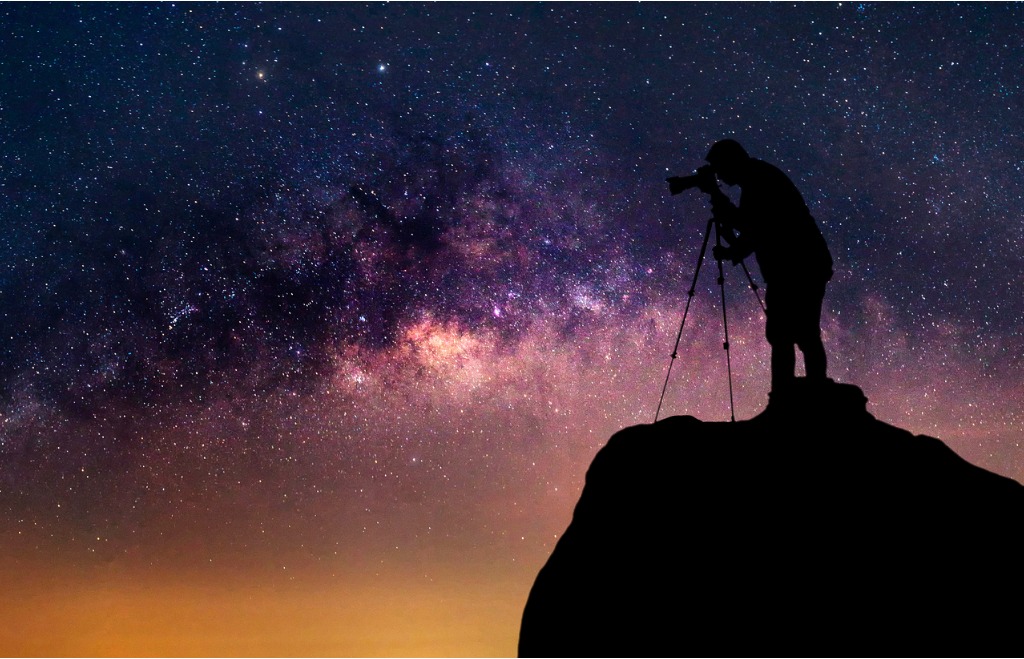 Image Credit: Narathip12 via iStock
I've used Sirui tripods for quite some time, and I've never been disappointed by them.
Sirui understands what features and functionalities that photographers demand, and they've designed their tripods with those demands in mind.
Take their T-025x tripod as a perfect example.
This thing weighs just two pounds, so it's incredibly easy to carry, yet supports loads up to 13.2 pounds - more than enough for your camera and lens.
It has twist leg locks for quick and easy setup, and each leg has an automatic leg angle locking mechanism that furthers the ease and speed with which you can get the tripod ready to go.
The removable center column gives you added height if need be, and can be inverted for low-angle shots, too.
It even includes a C-10S ball head that has separate knobs for pan and tilt, which makes it easier to create panoramic photos of the night sky.
It's budget-friendly, too, so you can get a great tripod that will last you years and years without busting your budget.
Lastly, you'll want a remote shutter release.
Remotes are a must-have because you want to be able to trigger the shutter without touching the camera so as to minimize vibrations when the shot is taken.
Since you're dealing with long exposures, an intervalometer is the way to go, that way you can program how long the shutter is open without having to depress the shutter button for the entirety of the exposure.
Editor's Tip: Bring extra batteries and memory cards with you on your meteor shower photo shoots. Long exposure photography and cooler nighttime temperatures will drain the battery, and shooting in RAW format will fill up your memory cards.
Perseid Meteor Shower Photography Tips: Camera Settings
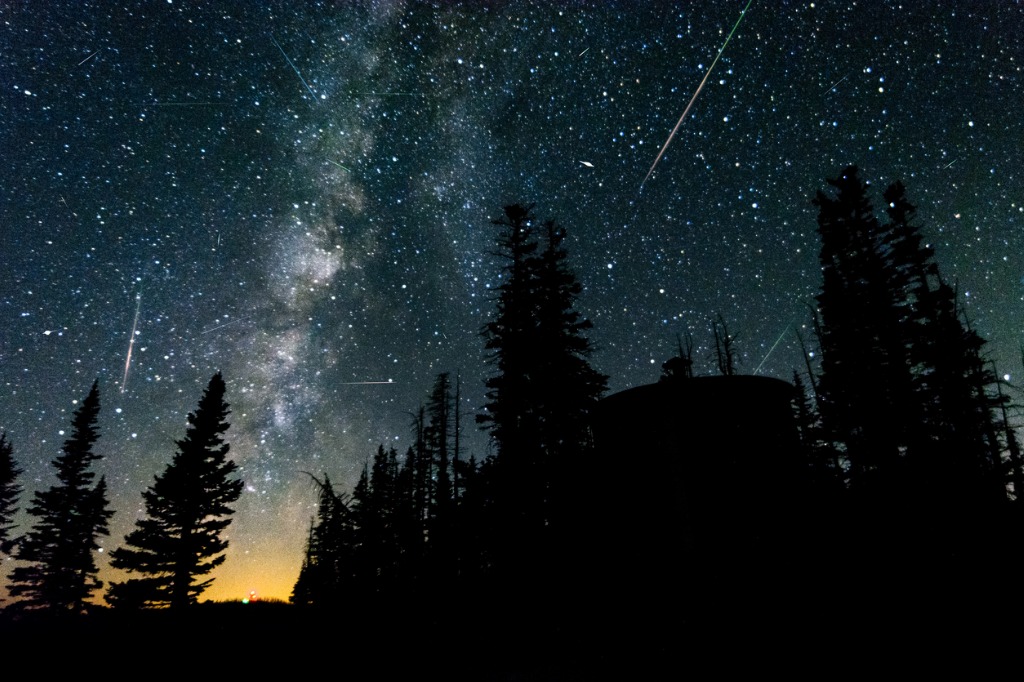 Image Credit: Benjamin Schaefer via iStock
The real question people have about how to photograph meteor showers is what camera settings to use.
That means shooting in manual mode and deciding what aperture, shutter speed, and ISO to dial in on your camera.
For aperture, you want to open it up as wide as it will go, or perhaps one or two stops below that to get better sharpness.
For example, if you're shooting with a 24mm f/1.4, perhaps you shoot at f/1.8 or f/2 to collect lots of light, but avoid the softness that occurs around the edges of the frame when shooting wide open.
You want to keep the aperture nice and big so it can collect as much light as possible. This is necessary because the meteor trails you're after are often quite faint.
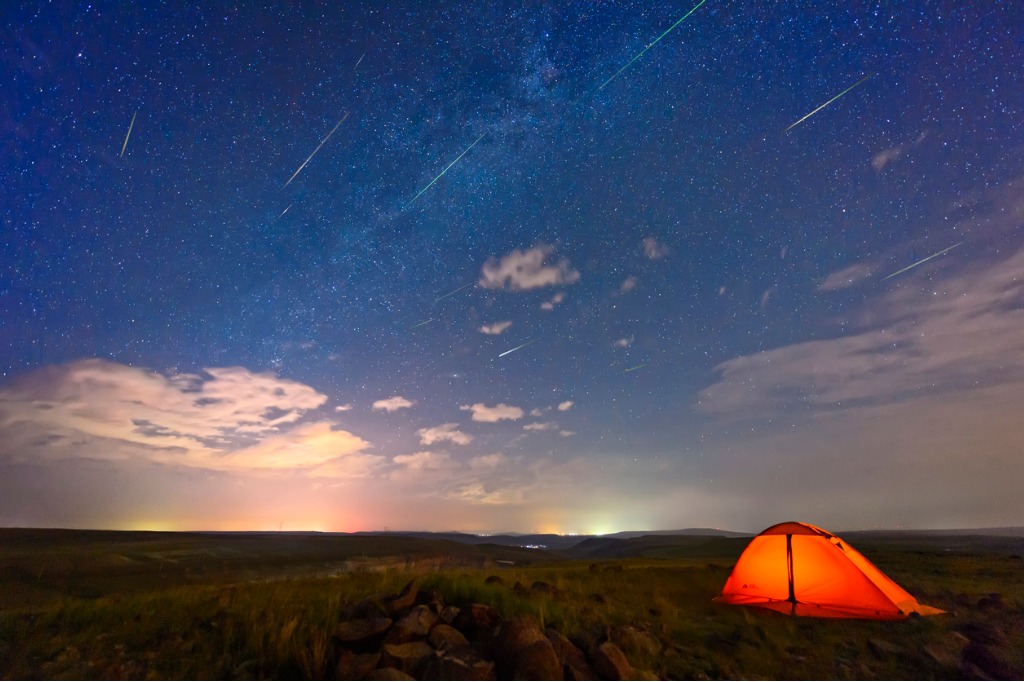 Image Credit: bjdlzx via iStock
Regarding shutter speed, you probably want to avoid star trails, which means following the 600 Rule.
The 600 Rule tells you the slowest shutter speed you can use for your particular lens without getting star trails.
On a full frame camera, that means dividing 600 by the focal length of your lens.
So, for example, if you're shooting with a 24mm lens, you can use a shutter up to 25 seconds in length (600/24 = 25).
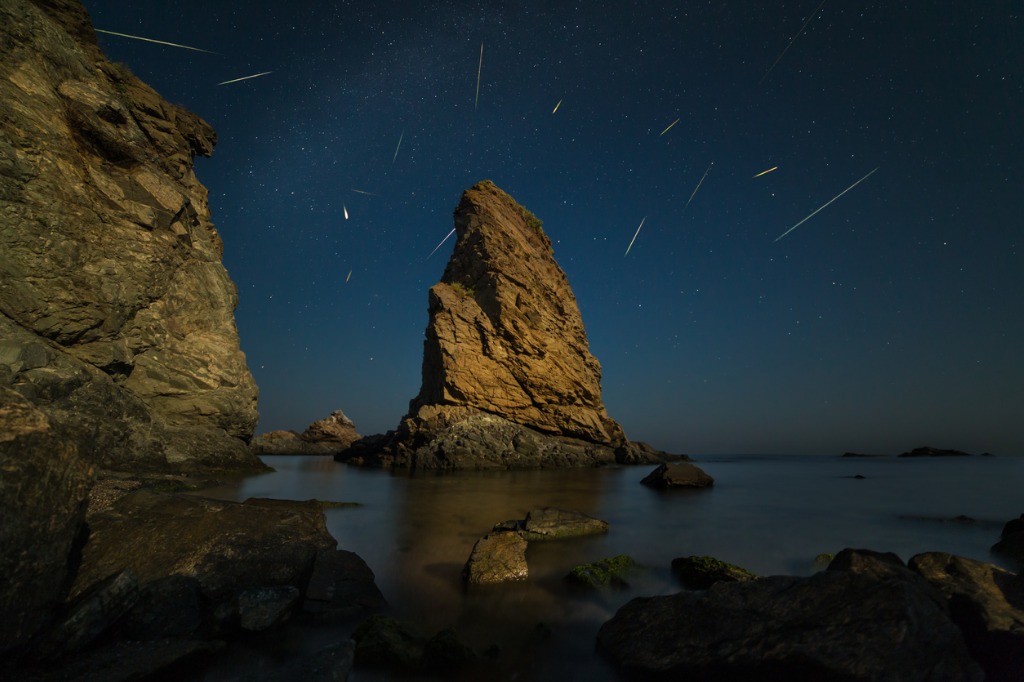 Image Credit: Hristo Svinarov - slowlight.bg via iStock
If you're using a crop sensor camera, you have to change the 600 rule a little bit.
Because crop sensors are smaller than full frame sensors, you substitute 400 for 600, and divide that by the focal length.
For example, if you're using a 24mm lens on a crop sensor camera, you can keep the shutter open for about 16 seconds (400/24 = 16.67).
 Image Credit: Allexxandar via iStock
The final component of exposure is ISO.
Since you've already dialed in the aperture and shutter speed, the ISO setting is all about getting the perfect exposure.
It's best to start from whatever the lowest ISO setting is (usually 50, 100, or 200), and work up from there, increasing the ISO as needed to brighten the image.
Remember - the higher the ISO, the more noise there will be, so minimize the ISO to the extent that you can for cleaner shots.
Learn More:
Focusing the Shot
Perhaps the most difficult part of photographing meteor showers is getting the focus dialed in.
This often requires that you go out during the daytime, manually focus on a distant object, and lock the focus in place. This is called "pre-focusing."
You can also use artificial lighting to help your lens focus, like focusing on a distant light pole to get your camera to focus at infinity.
Another option is to focus on a bright star and use live view to zoom in and perfect the focus.
Get an in-depth review of how to focus your lens at night in the video above by Milky Way Mike.
Learn More:
- Awesome Budget Lenses for 2018
- These 10 Landscape Photography Tips Will Immediately Improve Your Images
Final Thoughts
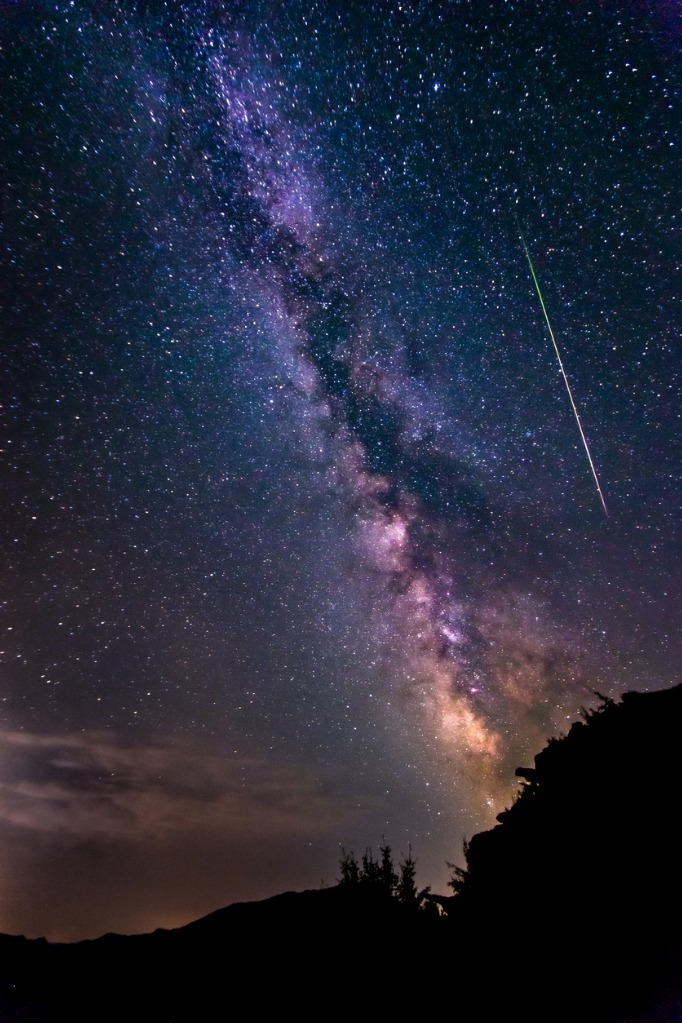 Image Credit: Nick_Pandevonium via iStock
The Perseid Meteor Shower is a gorgeous sight and a perfect subject for you to get started in astrophotography.
With these meteor shower photography tips, you'll be better equipped to get quality shots of the Perseids and other meteor showers as well.
All that's left now is to get your gear, start planning, and get ready for the height of the Perseid Meteor Shower!
We Recommend
Get Ready: The First Super Blue Blood Moon Eclipse in 150 Years is Happening Soon
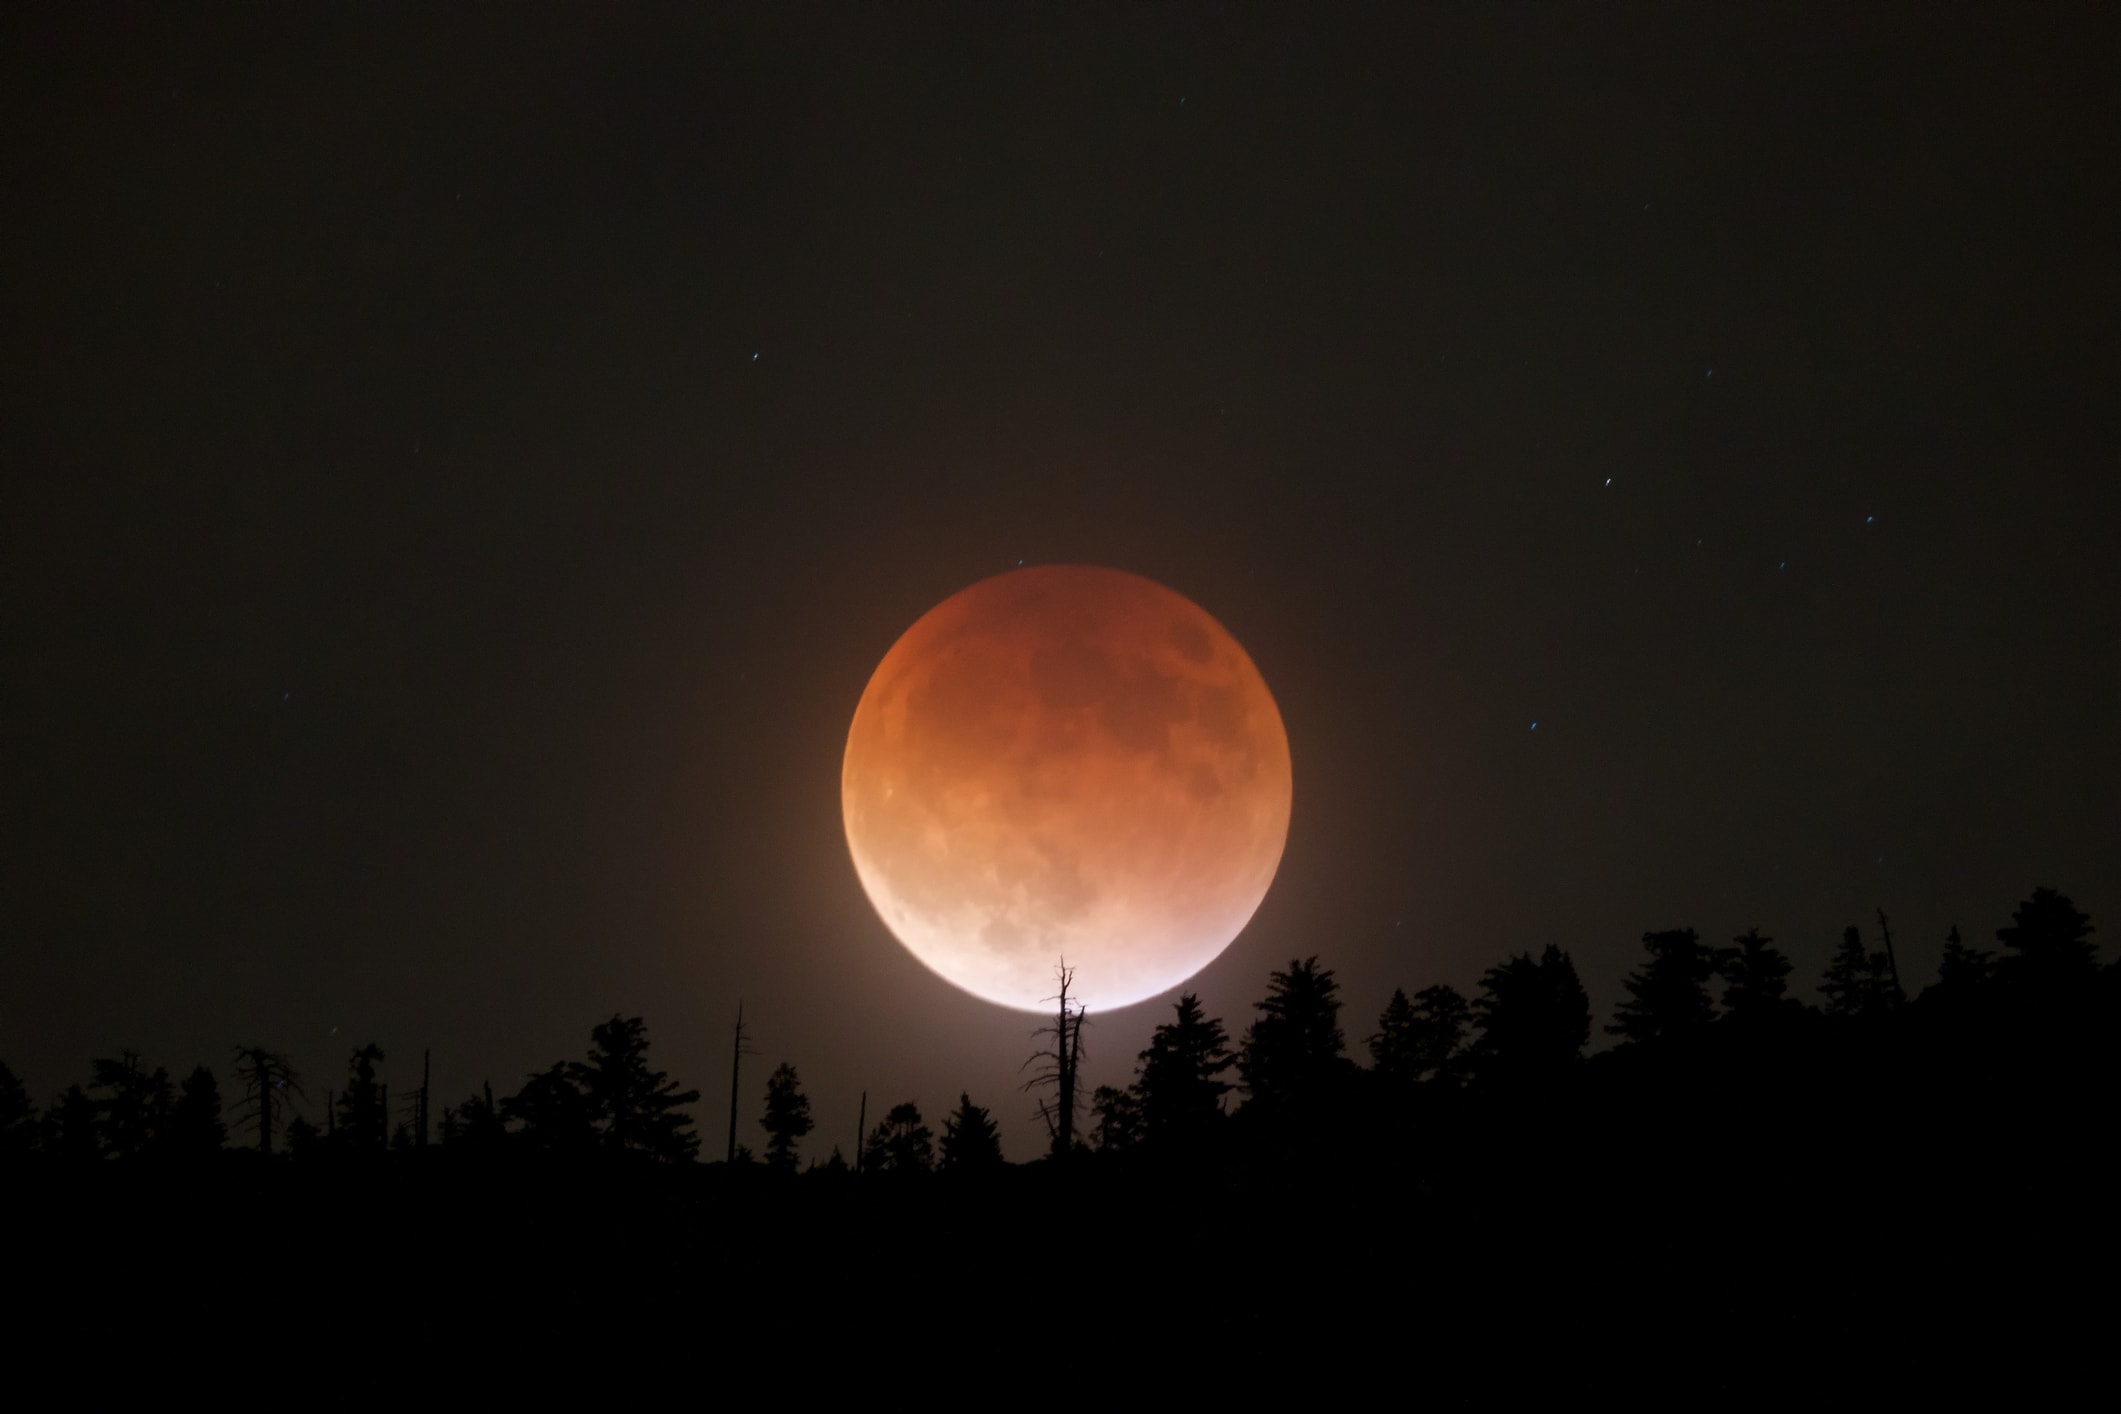
If you've never heard of a Super Blue Blood Moon Eclipse, you're not alone...
That's because for the first time in a century-and-a-half, this rare celestial event will occur on January 31, 2018, delighting stargazers with a supermoon, a blood moon, and a lunar eclipse, all at the same time.
That's a lot to absorb, right?
Here's your quick go-to guide for understanding exactly what a Super Blue Blood Moon Eclipse is.
Editor's Note: Need to get geared up for this month's Super Blue Blood Moon Eclipse? Visit MrStarGuy for all your astrophotography and astronomy gear needs. MrStarGuy has everything you need to observe and photograph the beauty of this rare event, from astro binoculars to telescopes, astrophotography mounts to tripods. Explore their inventory by clicking here.
As the video above from United News International explains, the first component is a blue moon, which occurs when there are two full moons in the same calendar month. The first one this month occurred on New Year's night.
Then, add to that a lunar eclipse, which occurs when the earth moves between the moon and the sun, casting the planet's shadow on the moon's surface.
Unlike their solar eclipse counterparts, lunar eclipses can bee seen anywhere on Earth, so long as it's night. Get more details on lunar eclipses in the video below from NASA:
The final component is a supermoon, which occurs when the moon's perigee (the point at which it's closest to earth) happens at the same time as a full moon. However, during a supermoon, casual observers might not even notice a difference in the moon's size, as it's perceived size is just 14 percent larger than normal, according to NASA.
Separately, none of these events are particularly rare. However, all three happening at the same time is definitely a rare show.
Learn More:
- Quick Tips for Photographing the Full Moon or Supermoon
- How to Compose a Killer Shot of the Night Sky
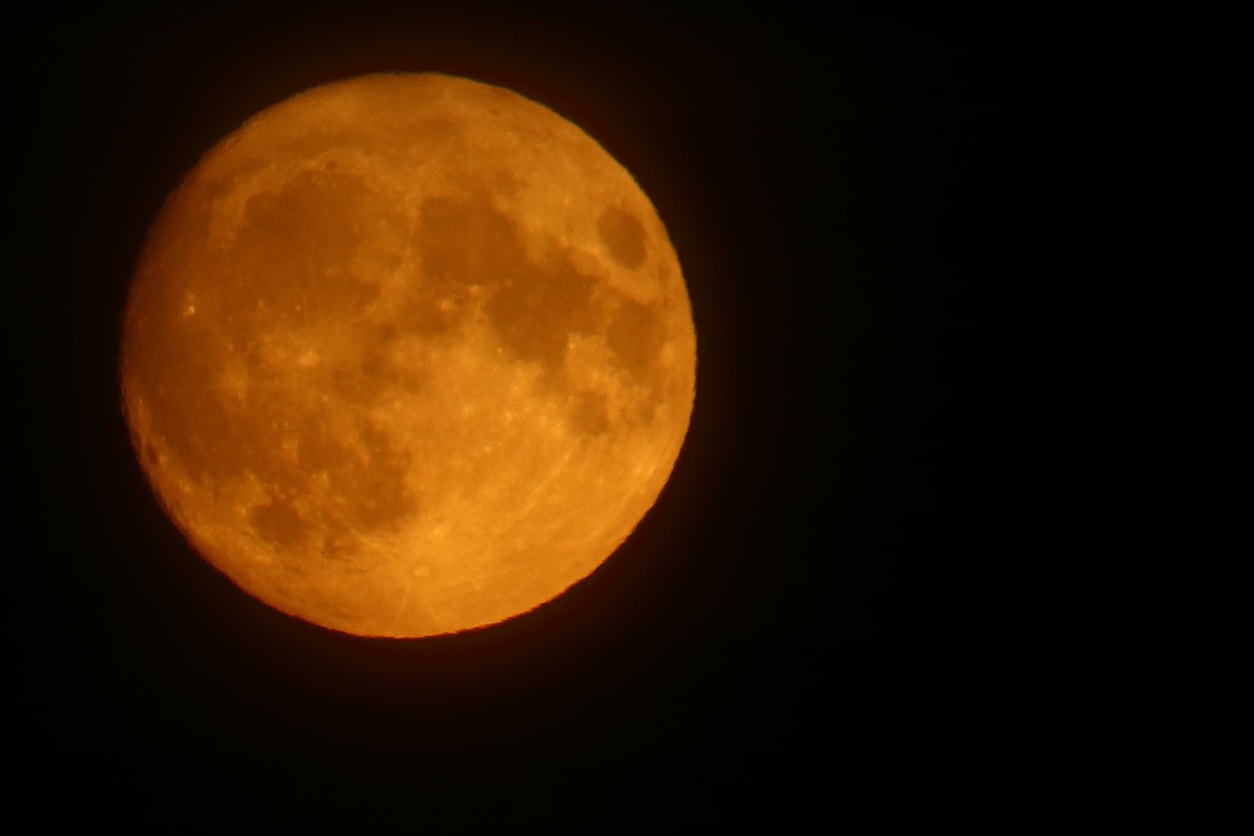
As a result of all this lunar action, the moon will appear less bright than normal, with a reddish hue, thus the name "Blood Moon."
That red color is thanks to the way that the Earth's atmosphere bends light.
And while this beautiful astronomical event can be seen in many parts of the world, some will get a better show than others.

The best locations to see it will be those in the Pacific region, especially Australia, New Zealand, Indonesia, and the central and eastern parts of Asia.
Further west in India, the Middle East, and Europe, there will be less of a show, but skywatchers that wait for the moon rise will still be able to see part of the show.
Editor's Note: If this is your first foray into astrophotography, be sure to check out our Astrophotography section for tips, tricks, and tutorials that will help you get the highest quality shots. Our astrophotography partners at MrStarGuy offer our readers an excellent selection of gear at great prices. Add to that top-notch customer service, and you have a winning combination for learning how to take photos of the night sky with the right gear at the right price.
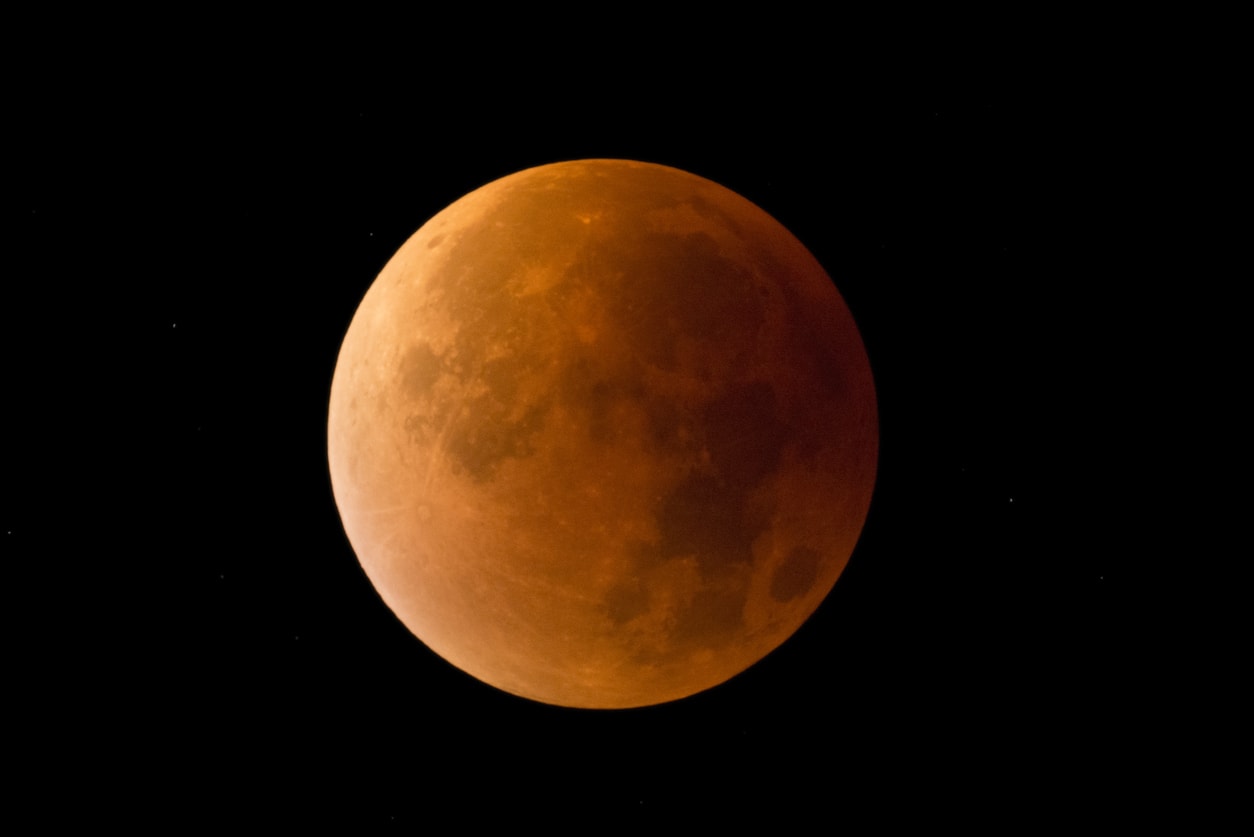
For those of us in the United States, the best viewing areas will be along the West Coast, the Rocky Mountain region, and the Midwest.
You have to be up early, though, as the best time for seeing the Super Blue Blood Moon Eclipse will be in the early morning hours.
In California, for example, the best viewing time is 4:51 am local time, at which point the total phase of the lunar eclipse will begin.
Skywatchers in the Rocky Mountain region will have to get up earlier, and be ready at 3:51 am local time when the eclipse begins.
Unfortunately, Americans living on the East Coast won't have as good a view. But that's okay - the next Super Blue Blood Moon Eclipse is less than 11 years away on December 31, 2028.
Editor's Tip: To get the best results of the Super Blue Blood Moon Eclipse, use a Vixen Polarie Star Tracking Mount to track the eclipse as it occurs. Just set up your camera to bracket the exposure and time lapse, then set the Polarie for a lunar rate. Once you have the Polarie set, it will track the entire eclipse, and all you need to do is check the exposure when it gets close to totality. Get all the details about this incredible astrophotography device right here.
Learn More:
We Recommend
How to Compose a Killer Shot of the Night Sky
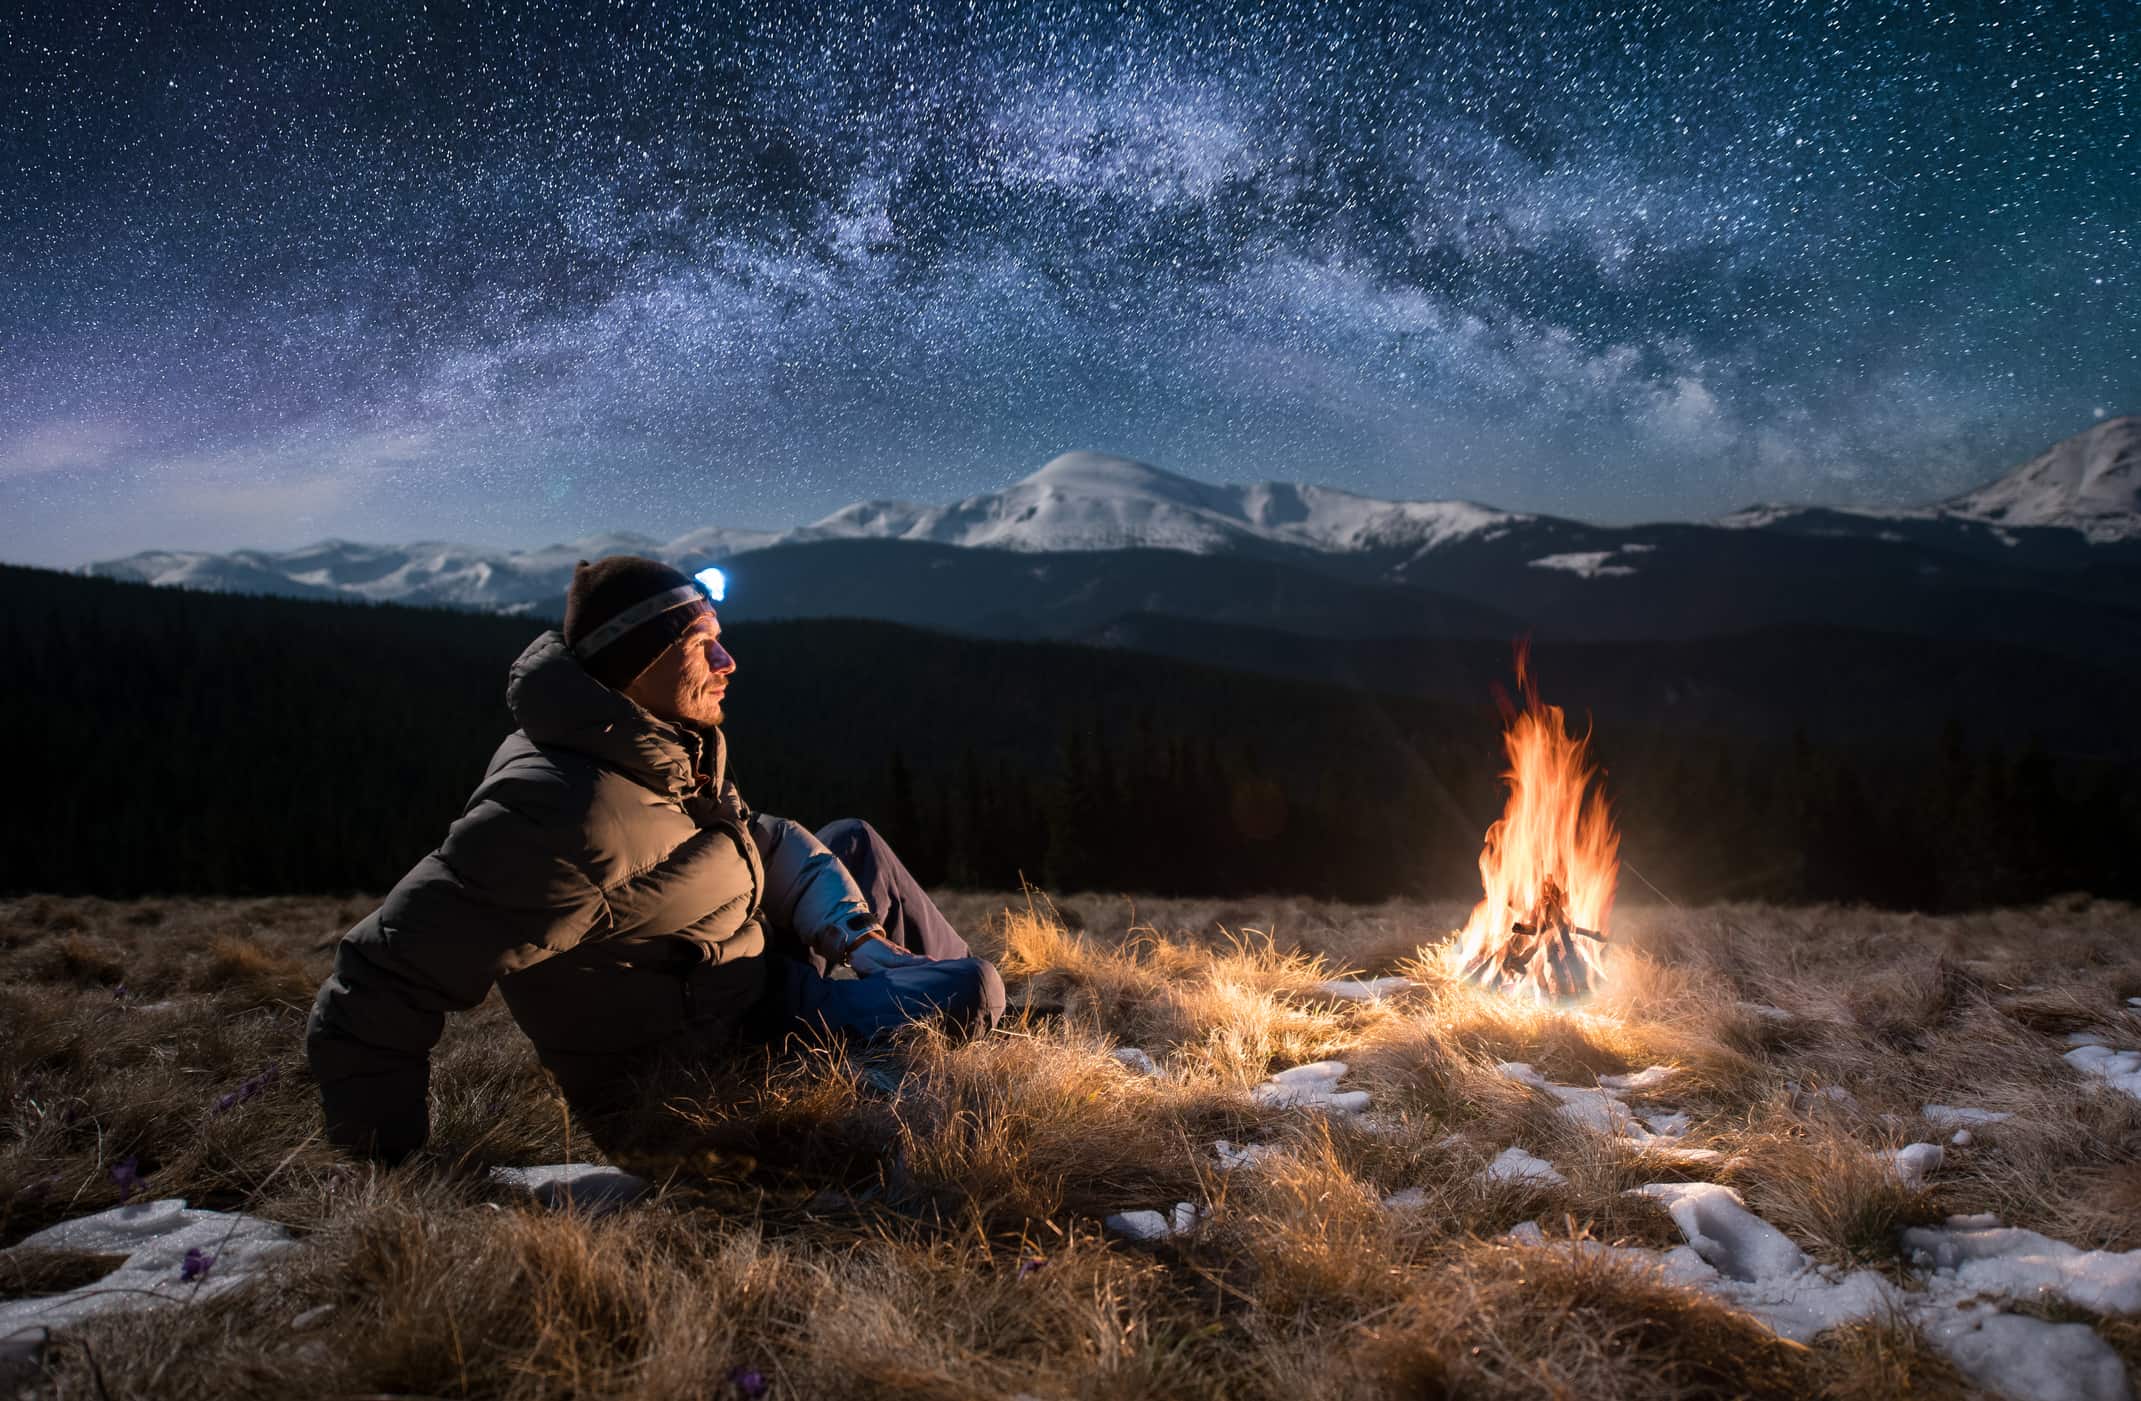
I don't think it's any secret that astrophotography can be a challenge.
I mean, on the one hand, it's a little more technical than traditional photography. But challenging yourself once in awhile is a good thing!
On the other hand, astrophotography can be challenging simply because it's hard not to be so enamored with what you see in the night sky that you forget to double-check things like camera settings, focus, and composition to ensure you get the best possible shot.
In this guideline, I'd like to offer up a few basic composition tips that will help you create better images of the night sky.
Editor's Note: Whether you're new to astrophotography or a seasoned veteran, if you need gear, MrStarGuy is the place to go. From telescopes to binoculars, astrophotography mounts to tripods, MrStarGuy has everything you need to capture the beauty of the night sky in stunning detail. Their competitive prices and commitment to customer service mean you get the gear you need without breaking the bank and with the peace of mind that you'll be supported after the purchase. Check out their complete line of products at MrStarGuy.com.
Use Leading Lines
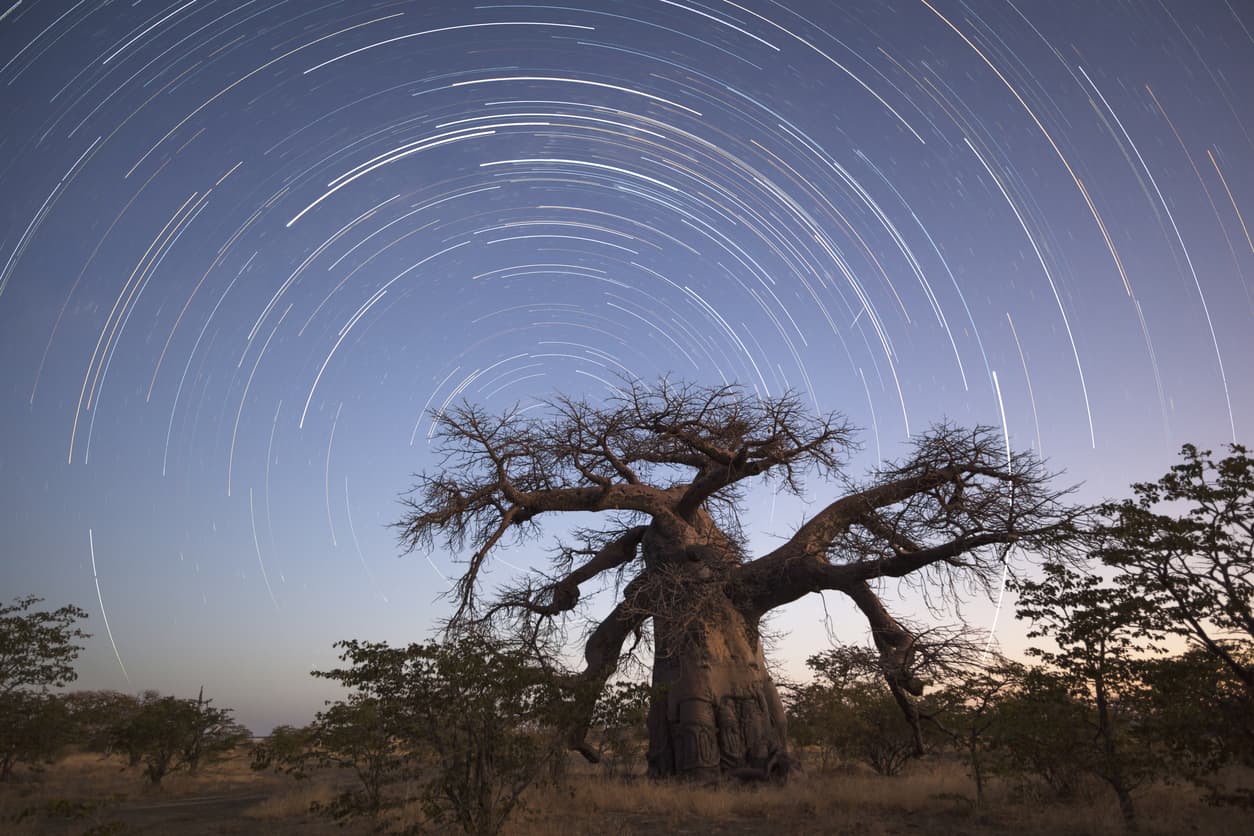
Our eyes naturally follow lines, so it follows that if you include lines in your photos of the night sky, that the viewer's eyes will follow them.
It's a great way to direct the viewer's attention where you want their eyes to go. It also helps you create images that have a greater feeling of depth.
For example, the tree in the image above is an ideal leading line because it immediately grabs your attention and points your eyes toward the sky where they can gaze upon the star trails.
But the use of leading lines needn't be so obvious, either.
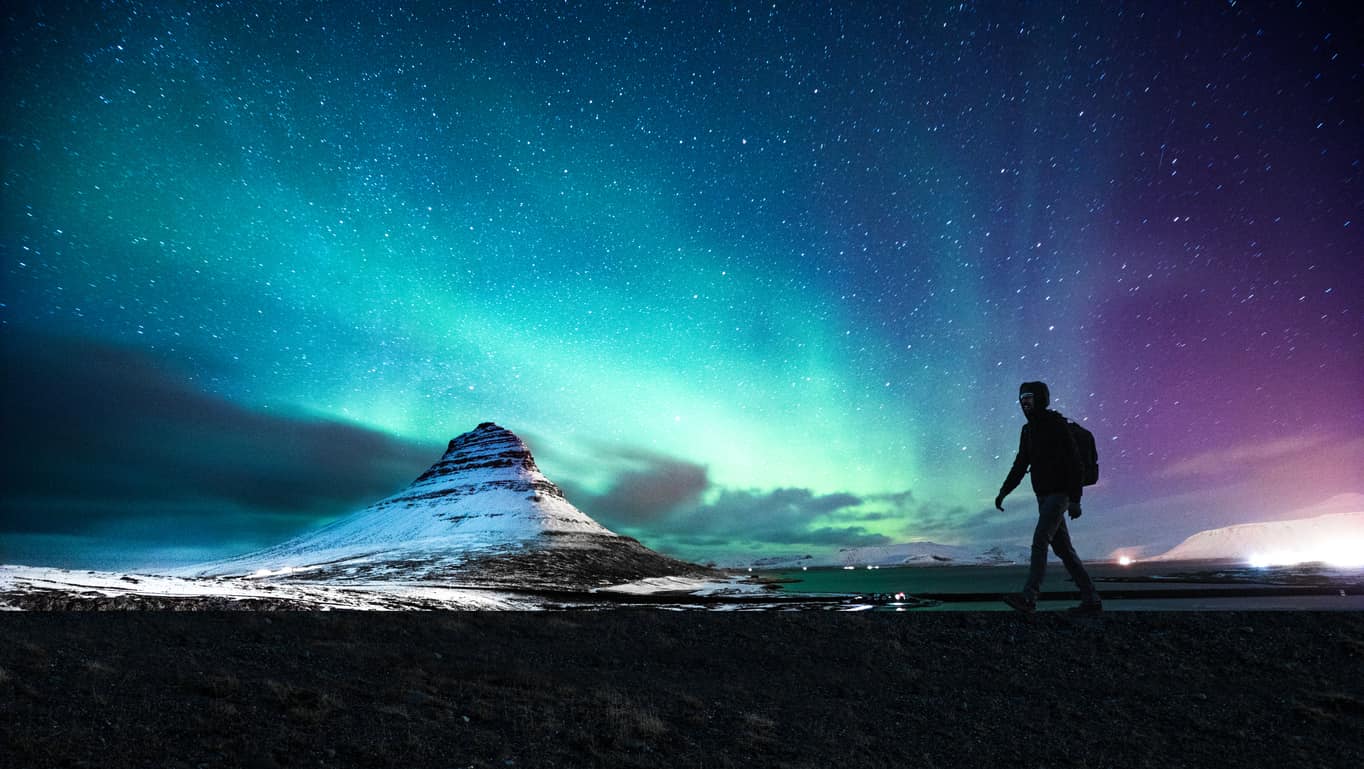
In this image, there's two leading lines that are much more subtle than in the previous photo.
One is the mountain, with its peak pointing toward the colors of the Northern Lights.
The other leading line is the man walking through the frame. Again, the verticality of his silhouette helps drive the eye upward toward the light show in the sky.
Learn More:
- Landscape Photography Composition Rules You Need to Start Using Today
- Quick Tips for Photographing the Full Moon or Supermoon

Remember the Rule of Thirds
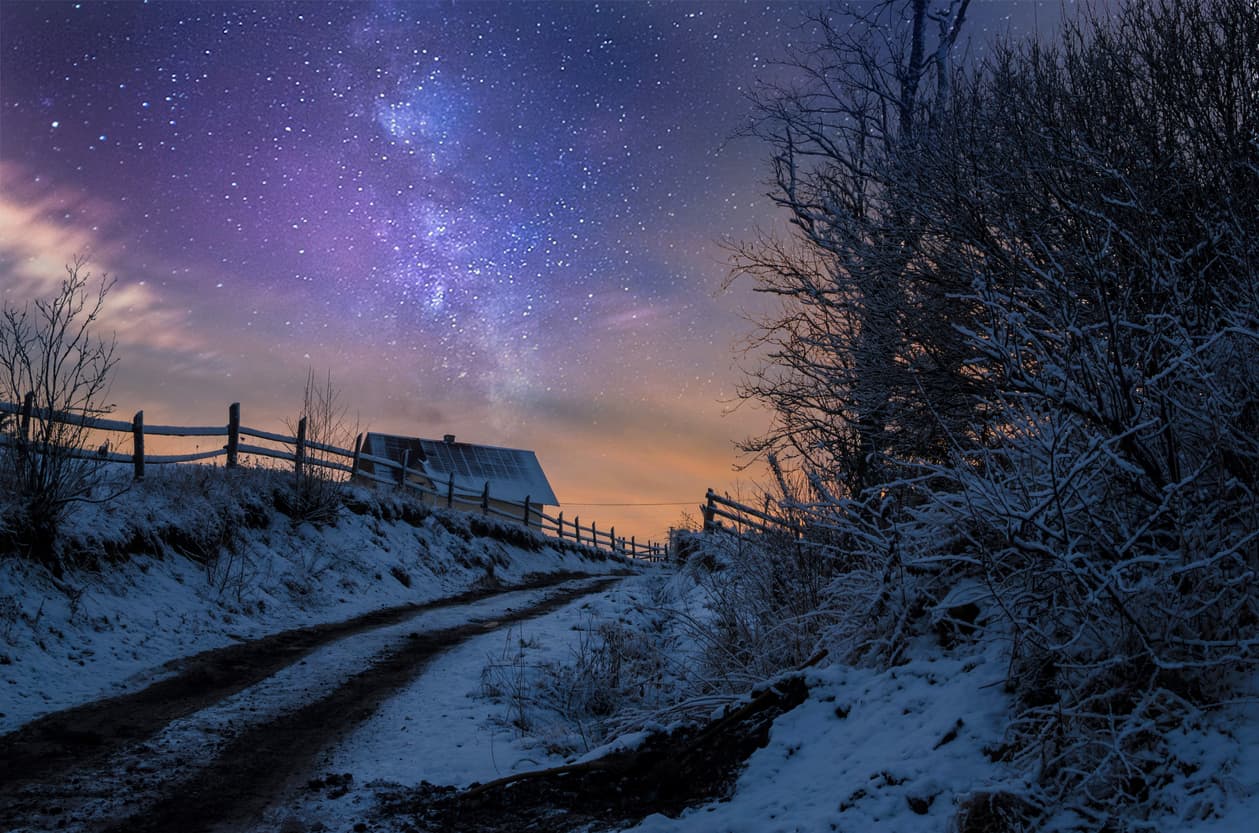
The rule of thirds is probably the most well-known photography rule.
Yet, it's surprising to see so many photos of the night sky with the featured element smack dab in the middle of the frame, precisely where the rule of thirds says not to put the subject.
Now, there's something to be said about bending or breaking photography rules now and again, but more often than not, the rule of thirds will help you create a more dynamic and balanced shot.
In the image above, notice how the Milky Way is shifted to the left of center to more closely align with the rule of thirds. That helps balance out the visual weight of the trees on the right side of the shot.
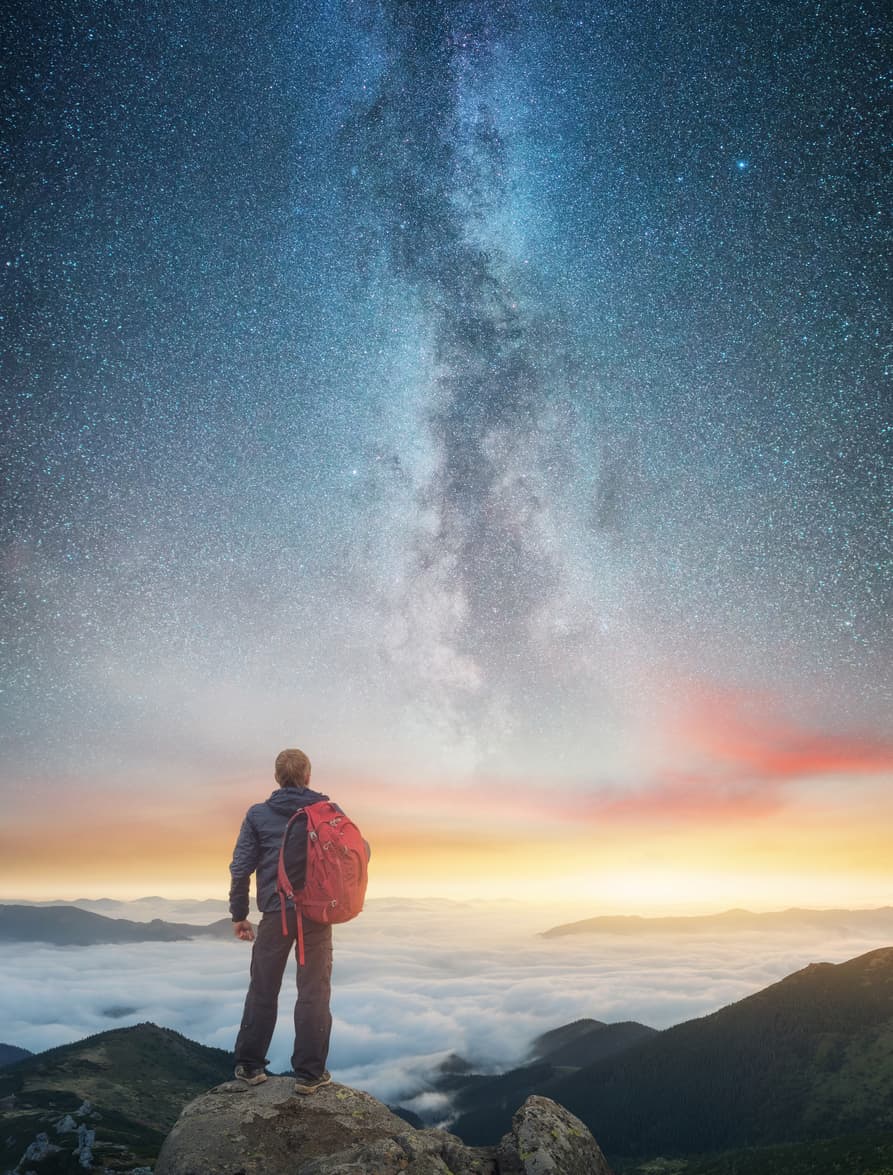
In this image, the Milky Way is positioned in the middle of the frame.
However, because the man commands so much attention in the shot, it was more important to shift him off-center.
The result is an image that feels incredibly balanced and has a lot of depth - you almost feel like you're standing there behind the man gazing at the Milky Way in the distance.
Editor's Tip: One instance in which you might not adhere to the rule of thirds is when you fill the frame with a subject. This is sometimes the case when conducting deep sky astrophotography with a telescope, like a Newtonian Reflector Telescope. In the video above, you can see some examples of deep sky astrophotography that place the subject more in the middle of the frame. Because these objects have such incredible colors and textures, filling the frame with them still results in an eye-catching photo. Click here for more details about telescopes for astrophotography.
Learn More:
Include Foreground Interest
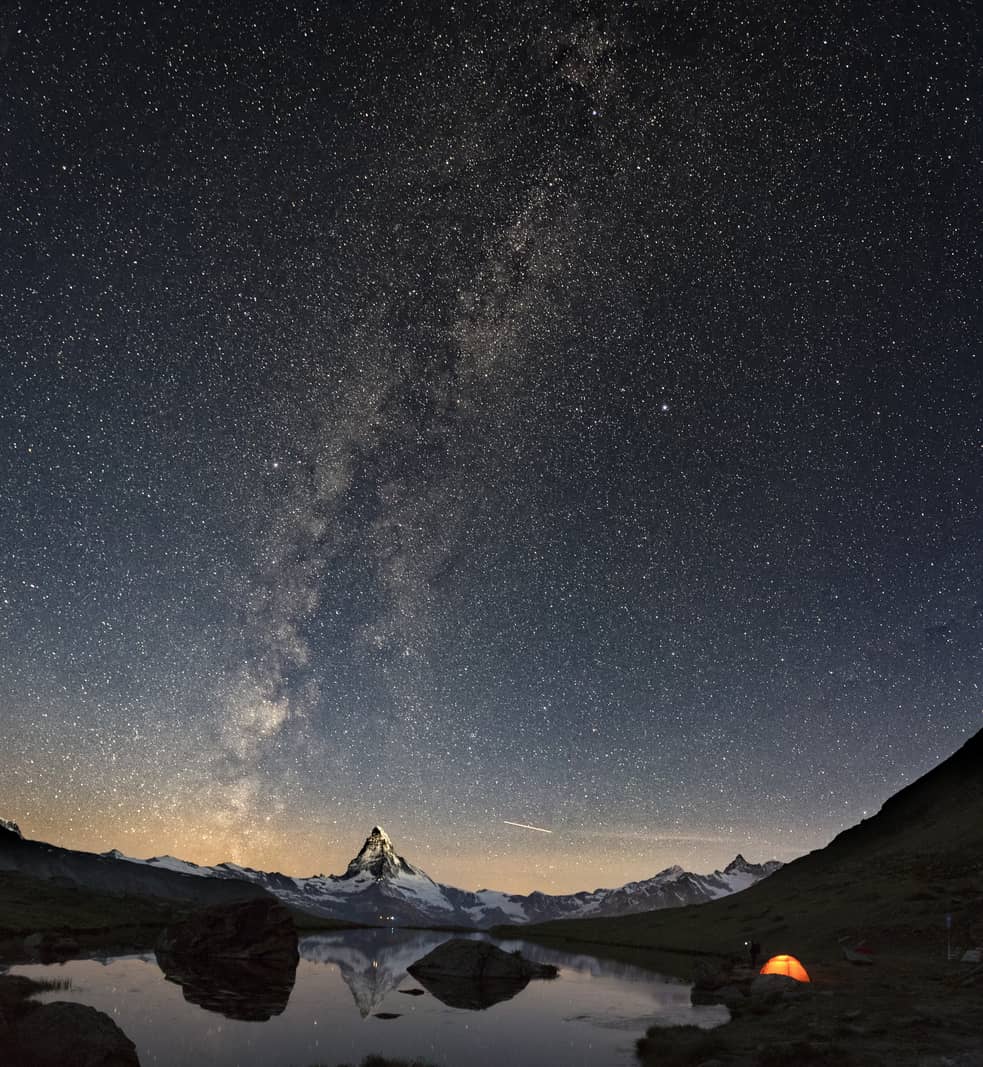
When taking photos of things like the moon or the Milky Way, it's important to include foreground interest in the shot.
Why?
Two reasons...
First, including foreground elements helps give the image some context. In the image above, for example, having the illuminated tent in the foreground sets the stage for the vastness of space above it.
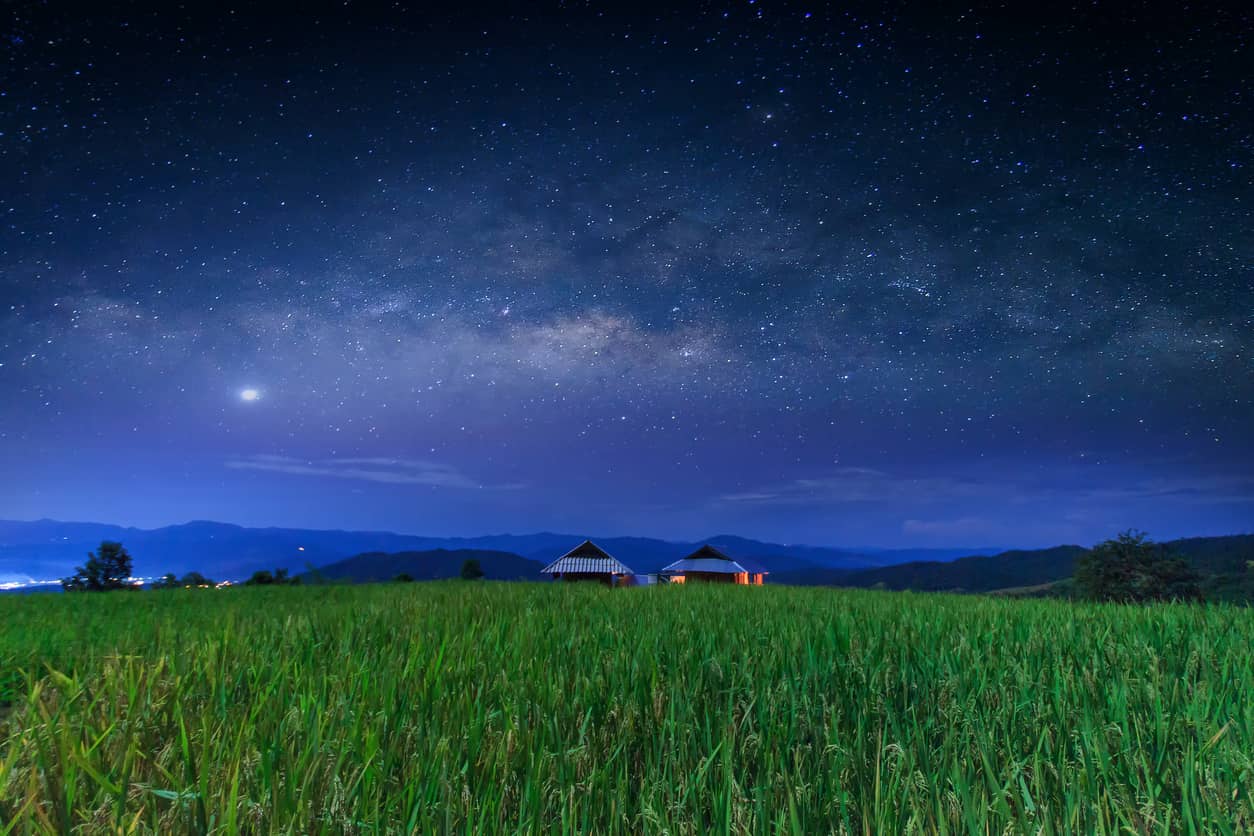
Second, elements like grass, the buildings, and the distant mountains in this shot add more interest to the photo.
This isn't to say that the stars in the sky are a boring subject; it's just that their beauty is enhanced by having other elements in the shot.
In that regard, each of these compositional tips is meant to ensure that you compose the most compelling image.
Great photos aren't great simply because they're of a beautiful subject.
Instead, you need to pay attention to the composition and framing of the shot so that you create a photo that represents that beauty to its fullest.
Editor's Tip: For more tips on improving your astrophotography and getting the right gear for your photos of the night sky, be sure to check out our astrophotography section.
Learn More:
We Recommend
How to Create Stunning Panoramas of the Night Sky
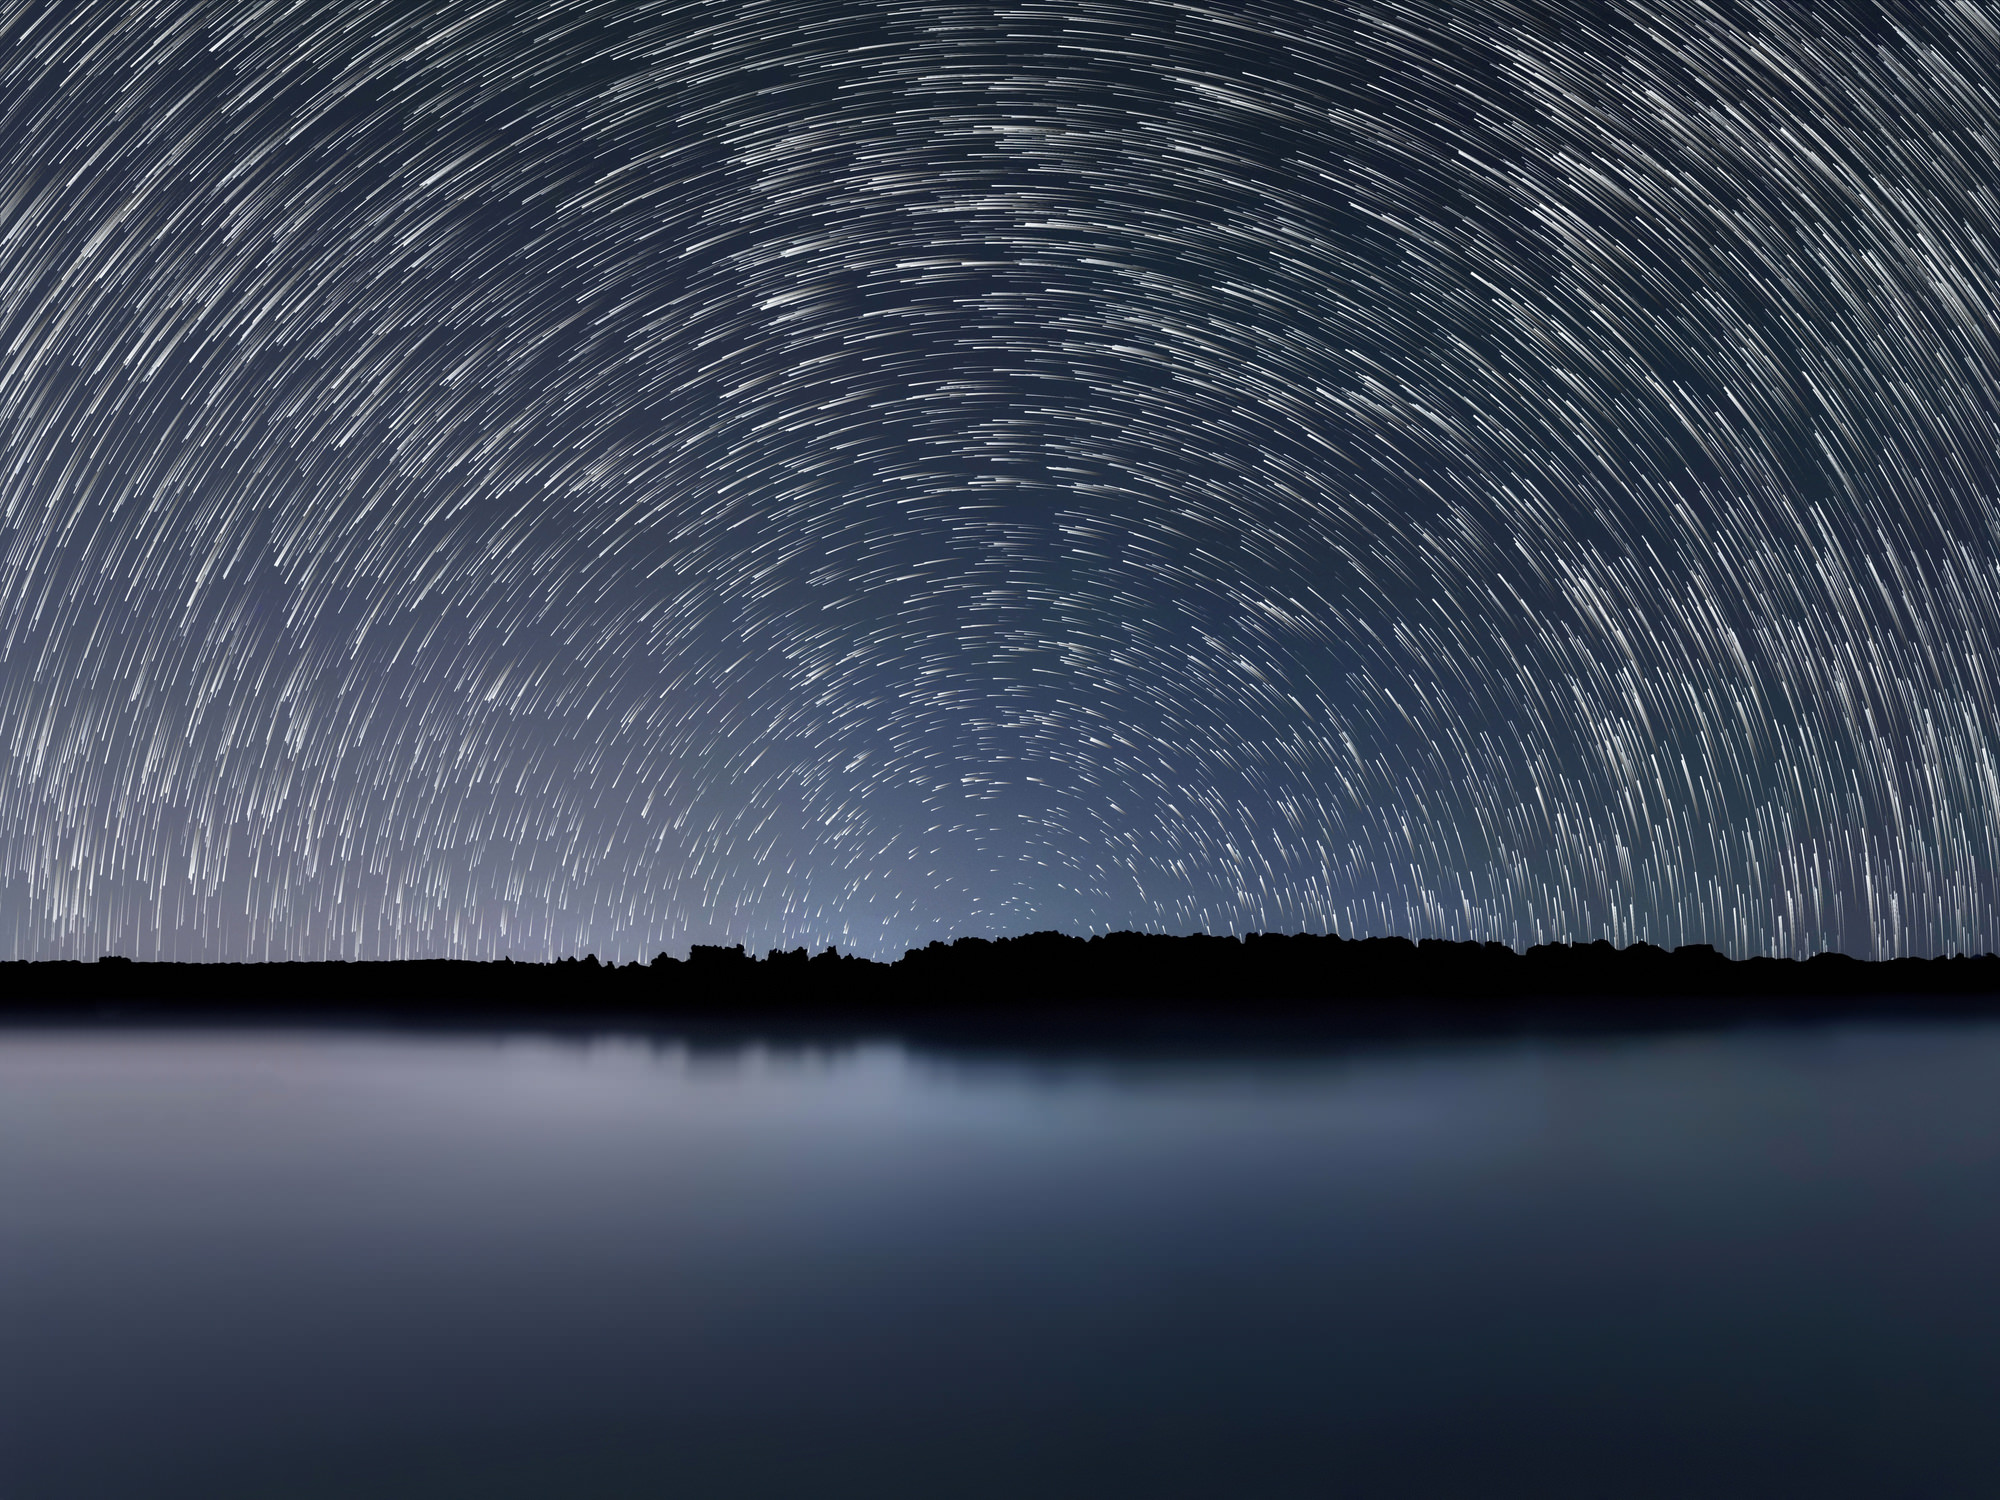
It’s a common problem for photographers that enjoy creating images of the night sky - the gorgeous celestial bodies might not be close enough to fit into one frame. What’s more, the beauty of the night sky and the beauty of the landscape below it might not be able to fit in a single frame either.
Enter the panoramic photo of the night sky!
Panoramas look complex and complicated, to be sure. And while there is a bit of extra work involved, it’s really just a few extra steps than a normal shot to get a stunning view of the night sky.
Here’s a few tips to get you started.
Get Geared Up
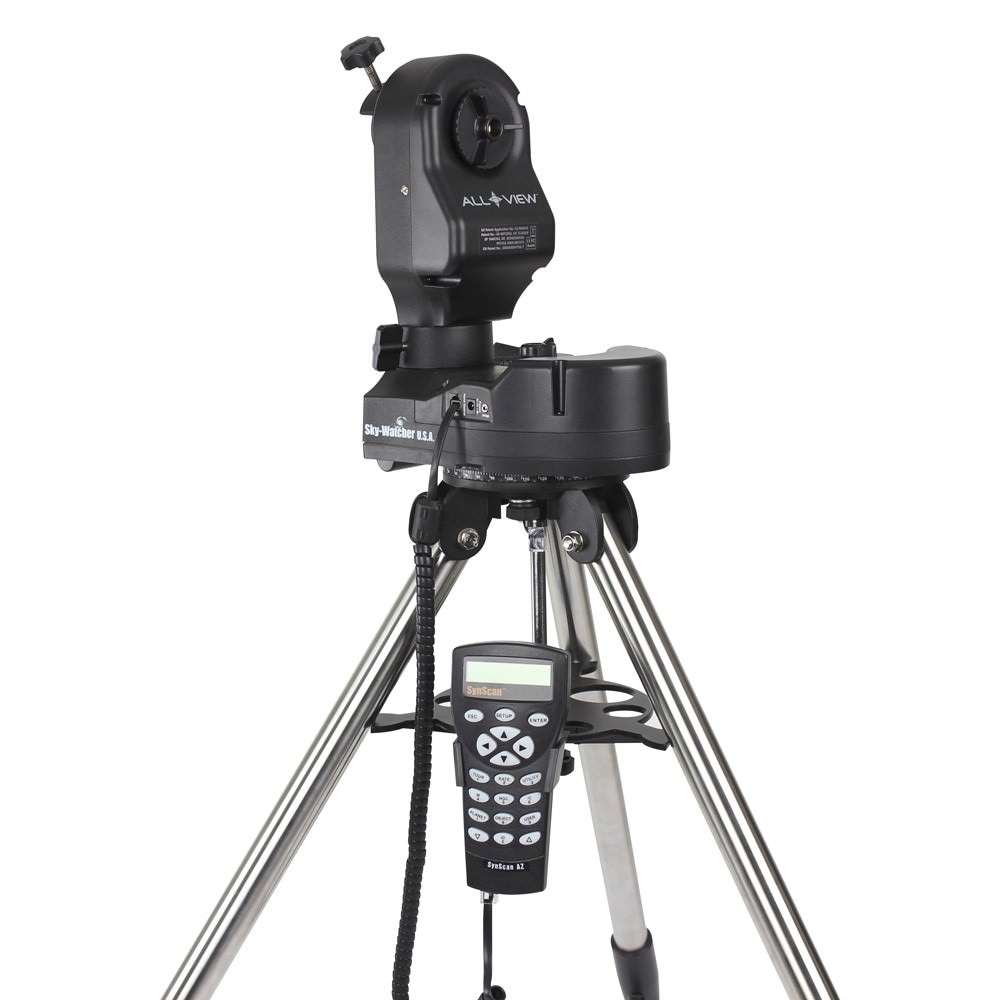
Where you can use nothing more than a camera, a good lens, and a tripod to create pretty good images of a landscape or nature scene, when taking on night sky photography, you need to add a good mount that helps you control, among other things, the shutter for long exposures and adjustments to settings for panoramas.
Though there are plenty of choices, the Sky-Watcher AllView mount is at the top of our list. The beauty of the AllView is that it is purpose-built for things like night photography and panoramas. In fact, you can capture a full 360-degree panorama for a truly breathtaking image of the night sky and the landscape below. With an electronic shutter release, the mount will automatically trigger your camera during the process of creating the panorama as well.
Better still, the AllView has Go-To electronics that will find any one of the 42,000 celestial objects in its memory, automatically. That means if you want a certain feature of the night sky in your shot, just dial it in, and the AllView will center the object in the eyepiece and track it across the sky on your behalf.
If that’s not enough, consider this: when you’re done creating your panorama of the night sky, you can use the AllView to record video, create time-lapses, or just gaze at the stars by attaching a telescope. That kind of versatility only increases the value of the Sky-Watcher AllView.
Other gear you’ll need: A fast lens (prime or zoom, though primes are often preferred), a solid tripod, a level to keep your horizons straight, and a headlamp so you can see what you’re doing.
Plan It Out
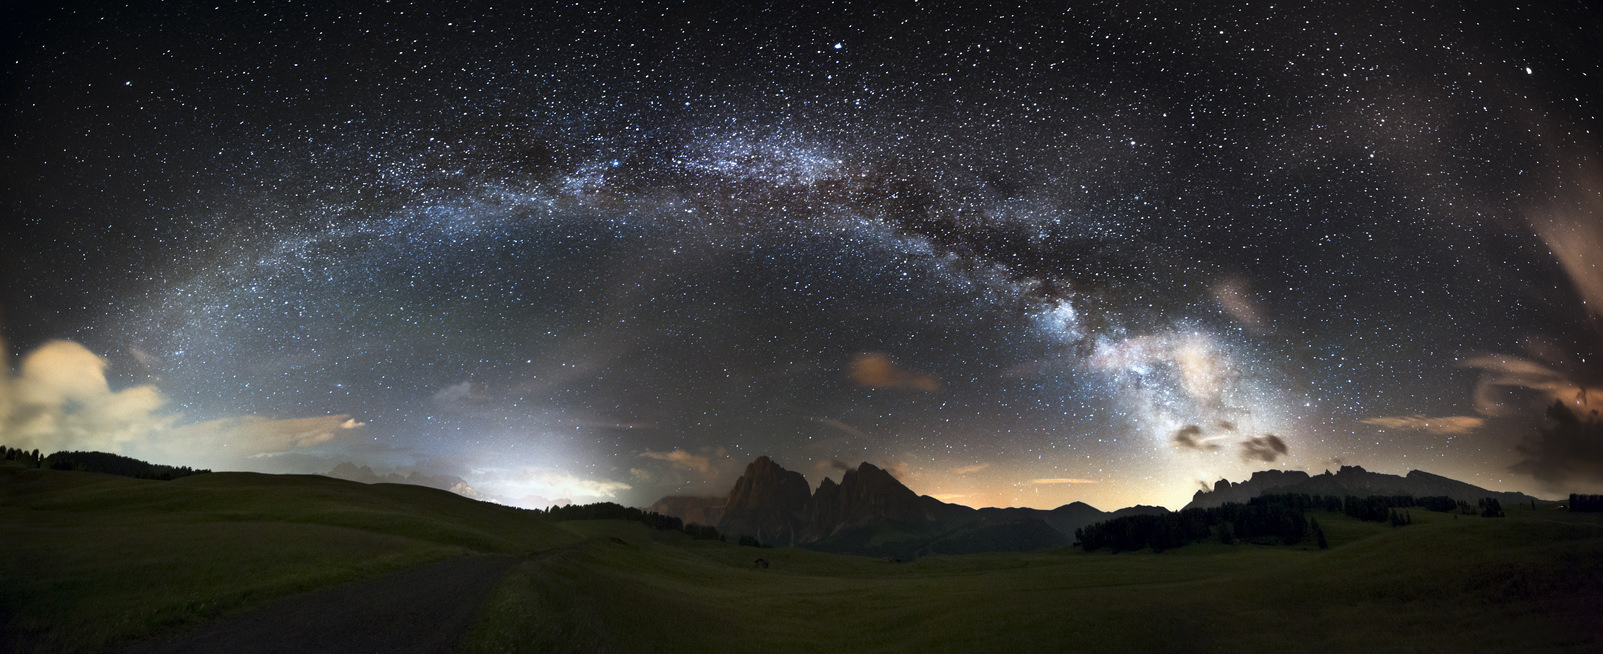
Obviously, there is a healthy dose of planning involved in creating a panorama of the night sky. Not only do you need to identify the celestial bodies you want in the shot, but you also need to consider the foreground elements in the landscape that will give additional interest to the photo. Remember, though the sky is the primary focus of the shot, if there is nothing in the foreground to draw the viewer’s eye into the photo, the image might suffer.
What’s more, it’s prudent to have stationary objects - a rock formation, trees, a mountain peak, or the like - in the foreground so that the motion captured in the sky is enhanced. In other words, having an interesting rock formation in the foreground will make the star trails in the sky look that much more active.
The weather is also of concern. Naturally, you’ll need to keep an eye on the forecast and plan your shoot for an evening when the sky is predicted to be clear. Also consider the location relative to light pollution. Though light pollution can add an interesting element to nighttime panoramas, it’s generally a good idea to try to minimize extraneous light.
Camera Settings
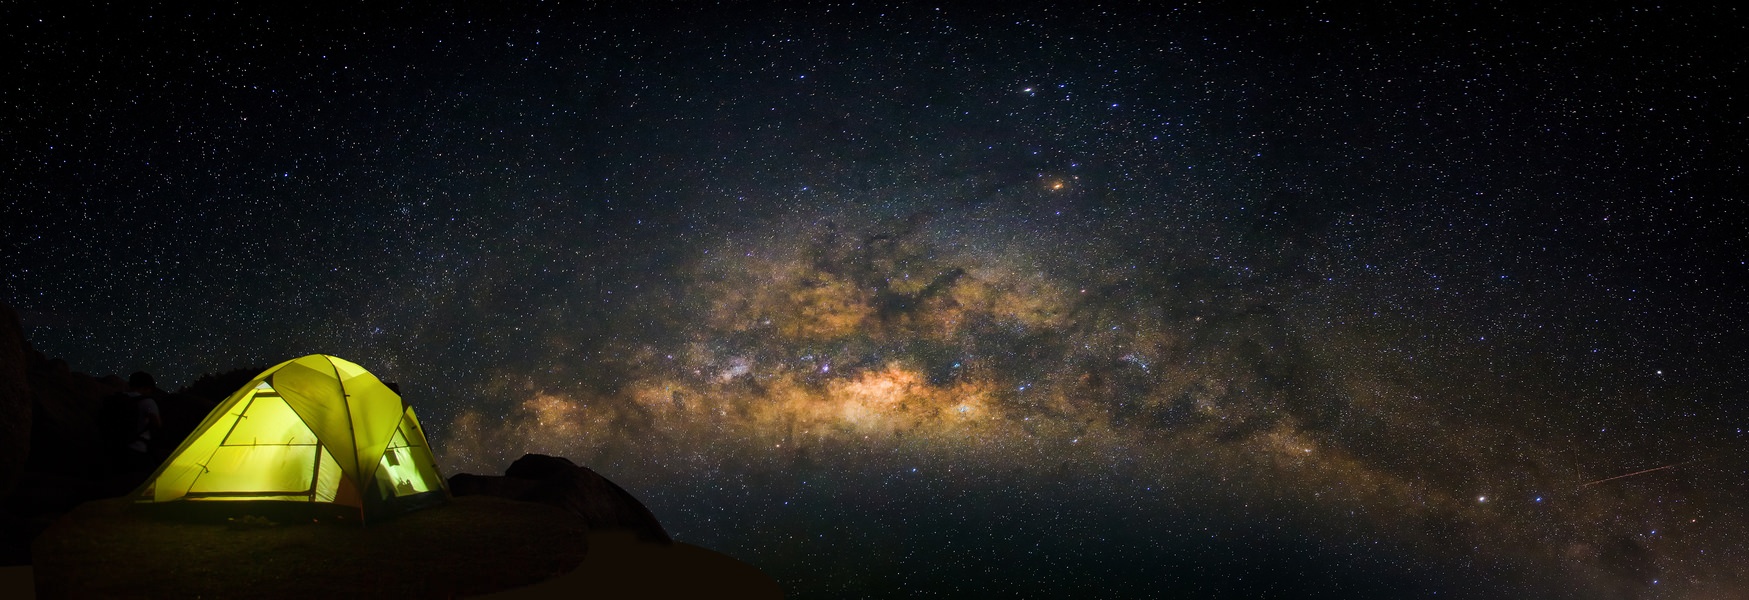
As with any photo, shooting in RAW is highly recommended because you have the greatest degree of editing flexibility. Additionally, set your camera to manual mode so you have the greatest leeway regarding exposure settings so that each image you take is equally well-exposed. Your focus should be set to manual as well - dial it in at infinity, then switch from auto to manual. Doing so means that you will have the same point of focus from one shot to the next.
When it comes to exposure settings, they will obviously depend on where you’re at, how much light pollution there is, and how much ambient light is still available (i.e. if you begin shooting as the sun is setting and end when it is completely dark). That said, it’s generally a good idea to keep the ISO low - say, at 100 or 200 to reduce noise. Of course, some cameras have better ISO performance than others, so experiment with the ISO and see what values you can use without getting too much noise.
Since you will want the foreground in focus as well as the sky, choose an aperture that allows you to do so. Bear in mind that a number of factors influence depth of field, of which aperture is just one. The distance to the nearest foreground element, the focal length of your lens, and even the size of your camera’s sensor will determine depth of field as well. Again, experiment with your settings to determine what aperture values get you the desired results.
In terms of shutter speed, there are a couple of considerations. First, if you wish to create star trails, the shutter speed will obviously be much longer than if you want to create a panorama without any indicated movement in the sky. Second, you’ll have to consider the exposure implications of the shutter speed you use. Make adjustments to ISO and aperture such that all three components work together for a well-exposed image throughout.
It’s All in the Technique
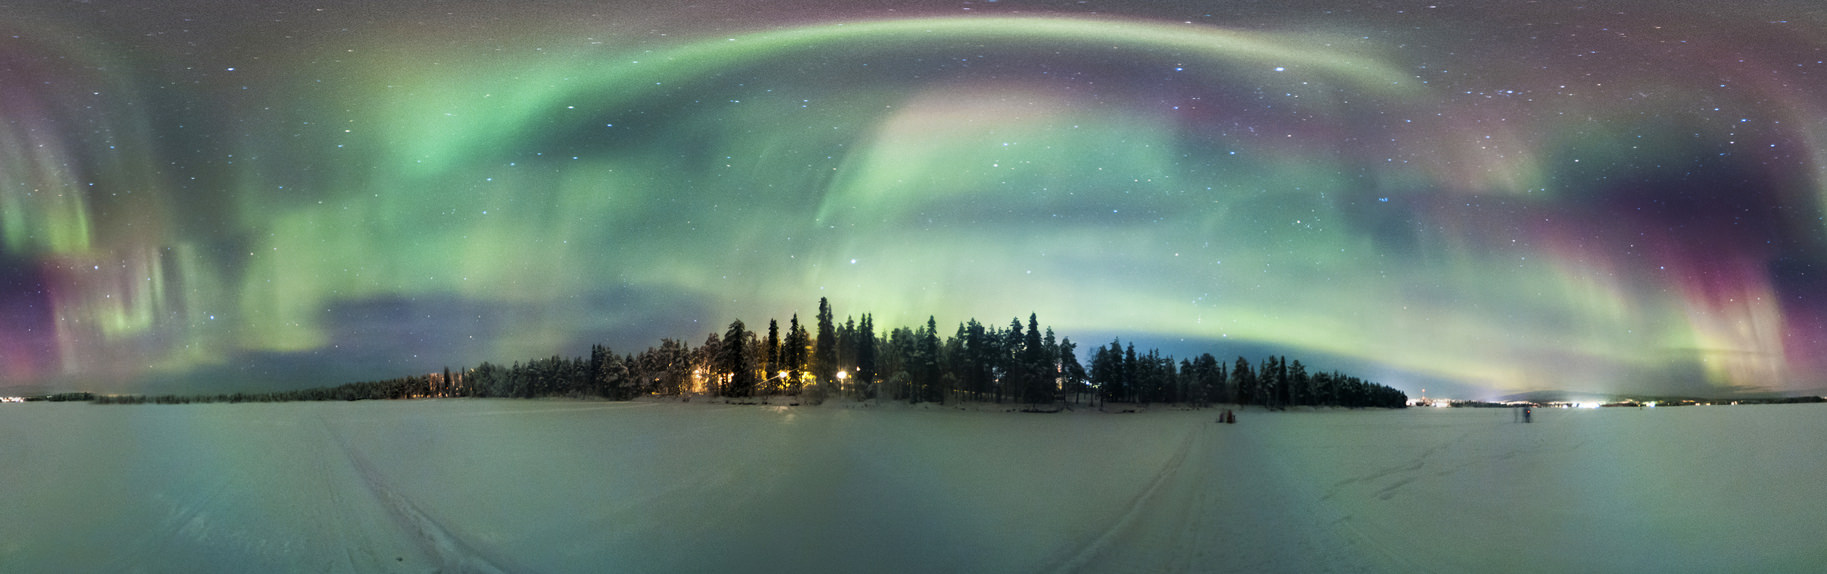
Remember, panoramas require you to stitch various images together, so ensure you’ve got good overlap from one frame to the next (usually around 30 percent overlap will suffice with 50 percent overlap being more ideal). Naturally, using a mount like the Sky-Watcher AllView will help in this endeavor.
Additionally, don’t pigeonhole yourself into creating only horizontal panoramas. Don’t be afraid to tilt your camera on its side and try some vertical panoramas as well. Doing so will allow you to incorporate that all-important foreground into the shot while also giving you a great view of the night sky.
Practice and patience are part of the technique here as well. You won’t create a magazine-worthy panorama of the night sky your first time out, and that’s okay! Keep trying, keep experimenting with your camera settings, and continue to plan your nighttime photography adventures to maximize your success. And, of course, make things easier on yourself by getting the best astrophotography gear to help you create gorgeous nighttime panoramas.
We Recommend
How to Edit Milky Way Photos in Lightroom
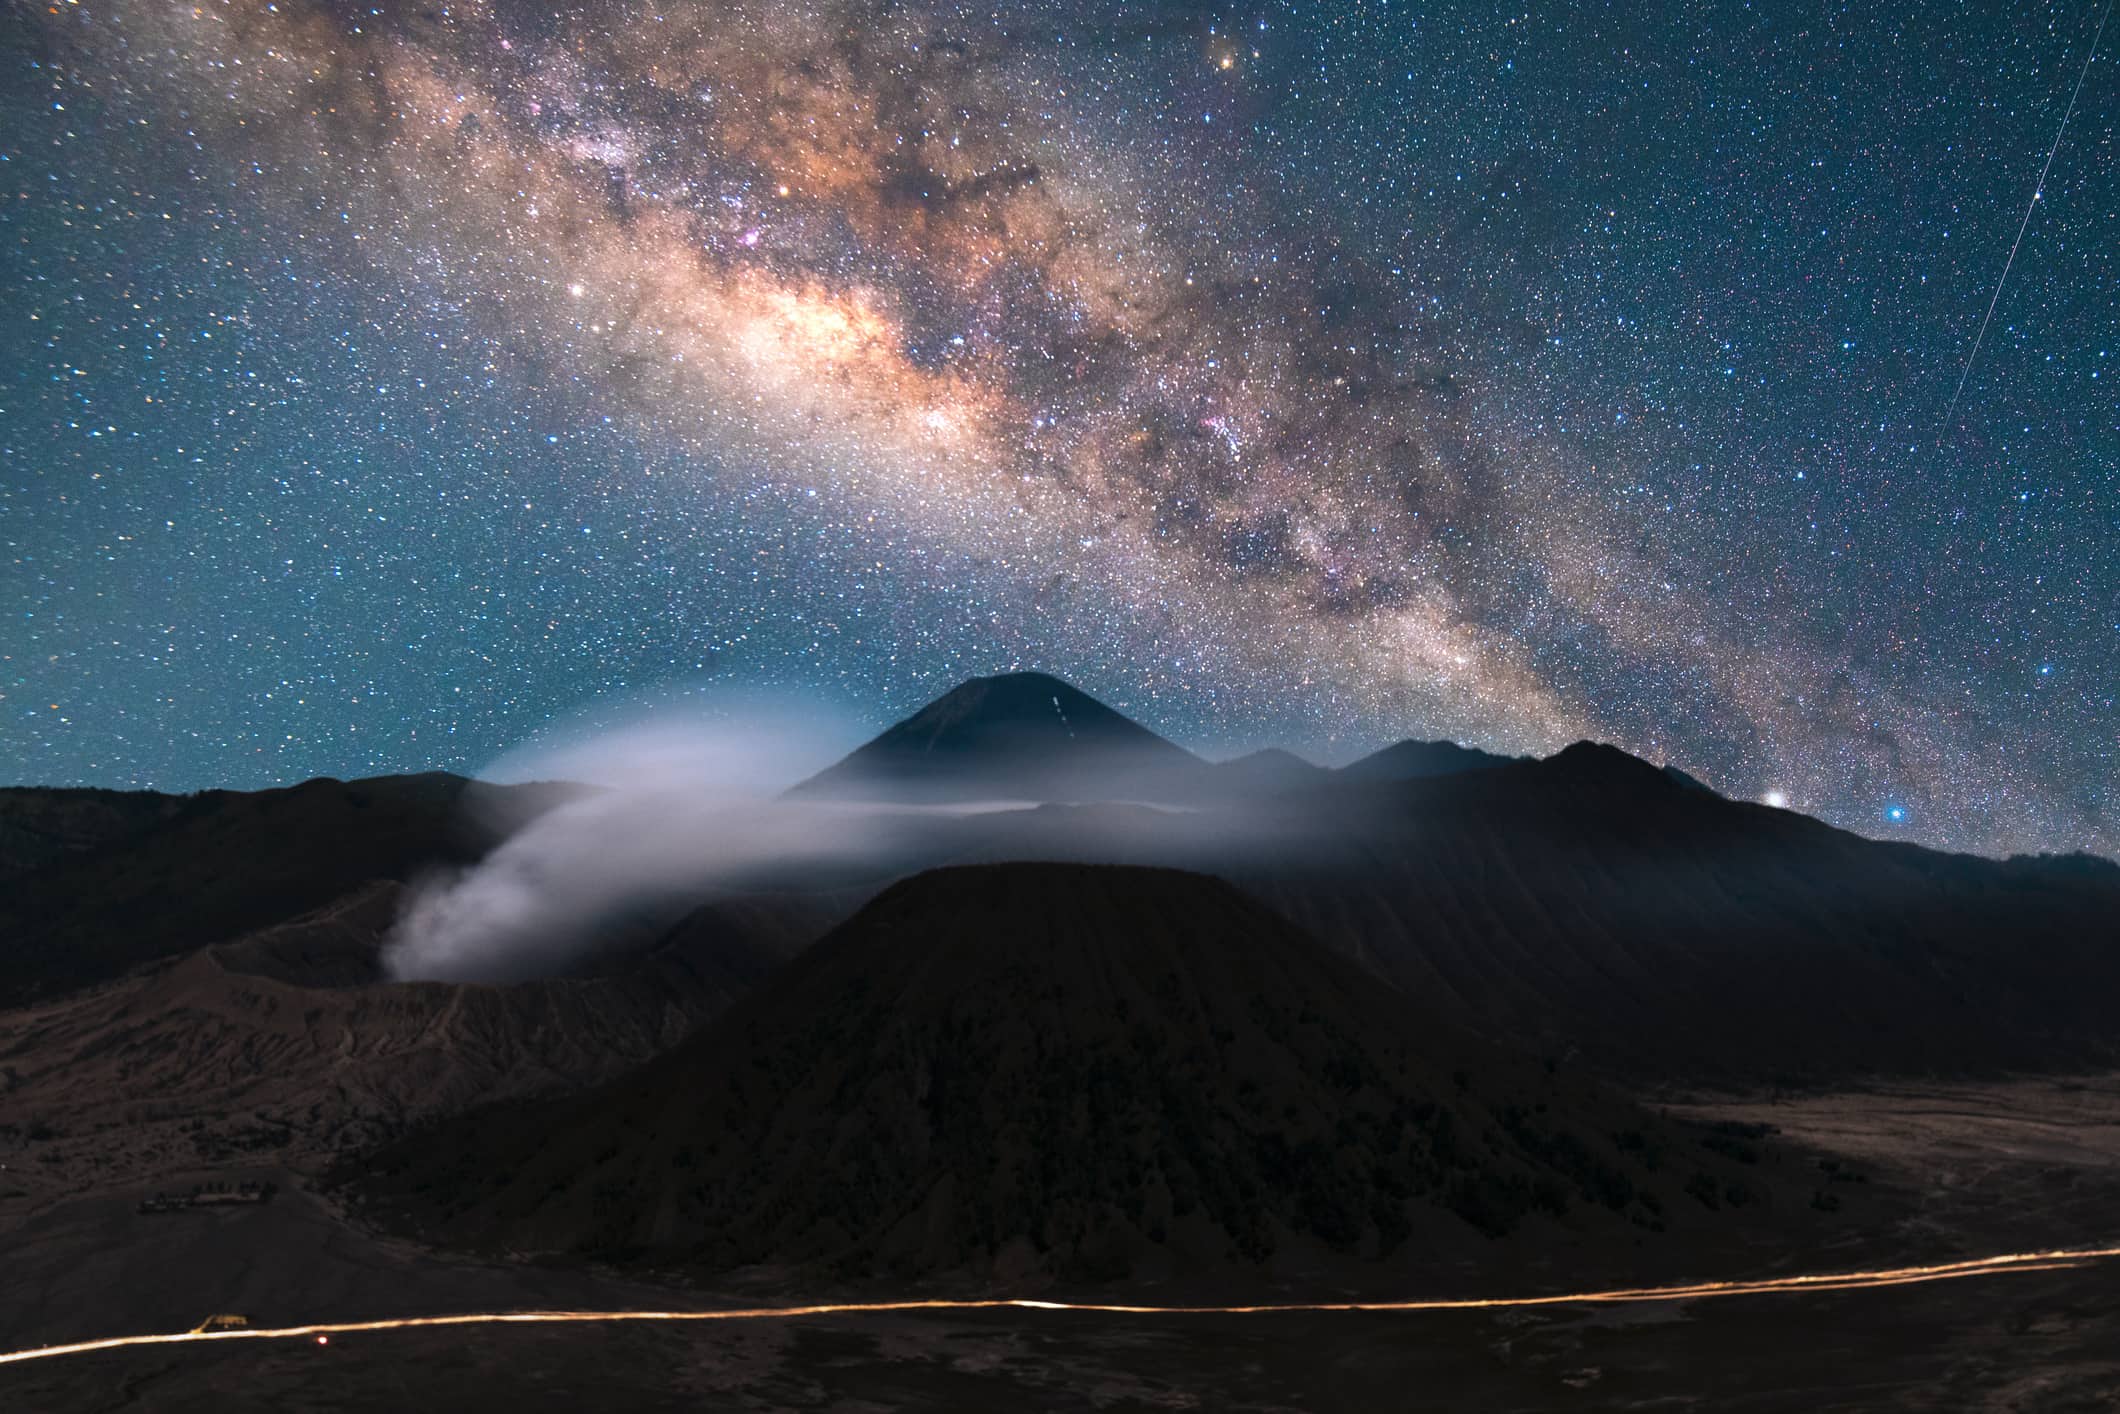
You can spend all kinds of energy planning astrophotography outings, getting the camera settings just right, gearing up with the right equipment to get the best shots, and so forth.
But if you don't know how to edit Milky Way photos and images of other celestial bodies, you're leaving a ton of possibilities on the table for improved photos.
In the video above by 52Things, a basic Lightroom workflow for editing your astrophotography is outlined.
With the quick and simple steps provided here, you can turn your so-so photos of the night sky into incredible works of art.
Follow along in the video above, and for a step-by-step overview, read on below!
Editor's Tip: Great astrophotography begins with having the right gear for the job. Get all the astrophotography gear you need.
Step 1: Begin Editing in the Develop Tab
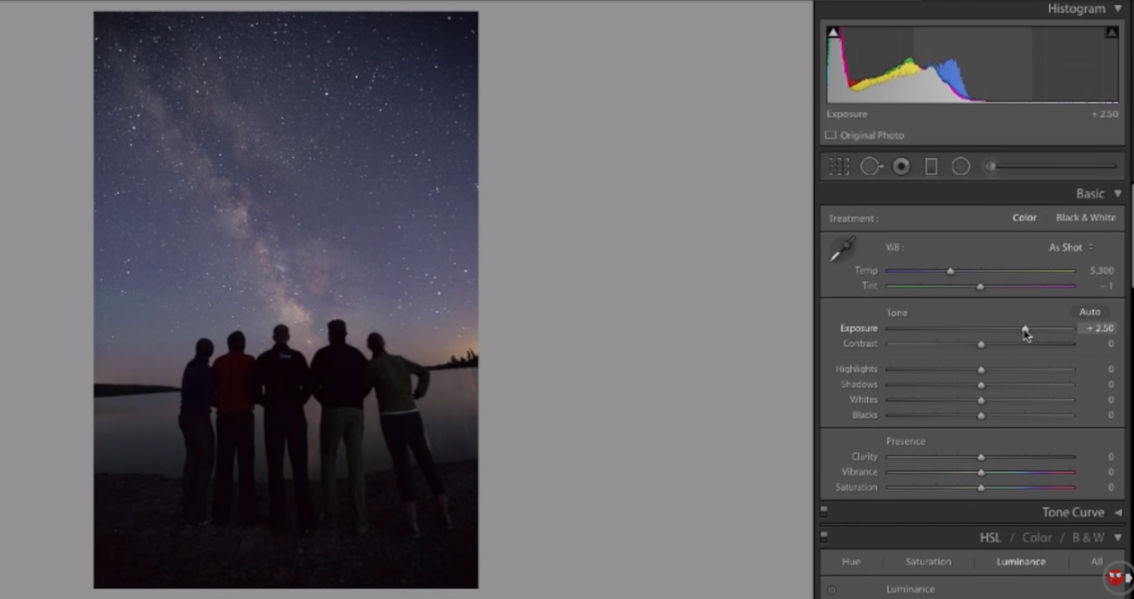 YouTube Screenshot/52 Things
After importing your image into Lightroom, the first task is to work on the image in the Develop Tab.
There are loads of tools in the Develop Tab that will help you build the image into something much more visually pleasing.
In the case of the image above, it's really dark, so increasing the exposure by shifting the exposure slider to the right is the first order of business.
As you can see in the screenshot, this one adjustment has already made the image much better.
 YouTube Screenshot/52 Things
Other tools you can use to make a dull image pop is adjust the contrast, highlights, shadows, whites, and blacks.
In this case, increasing the contrast and whites while decreasing the blacks ever so slightly brings much more contrast to this photo.
Learn More:
Step 2: Apply a Gradient, if Needed
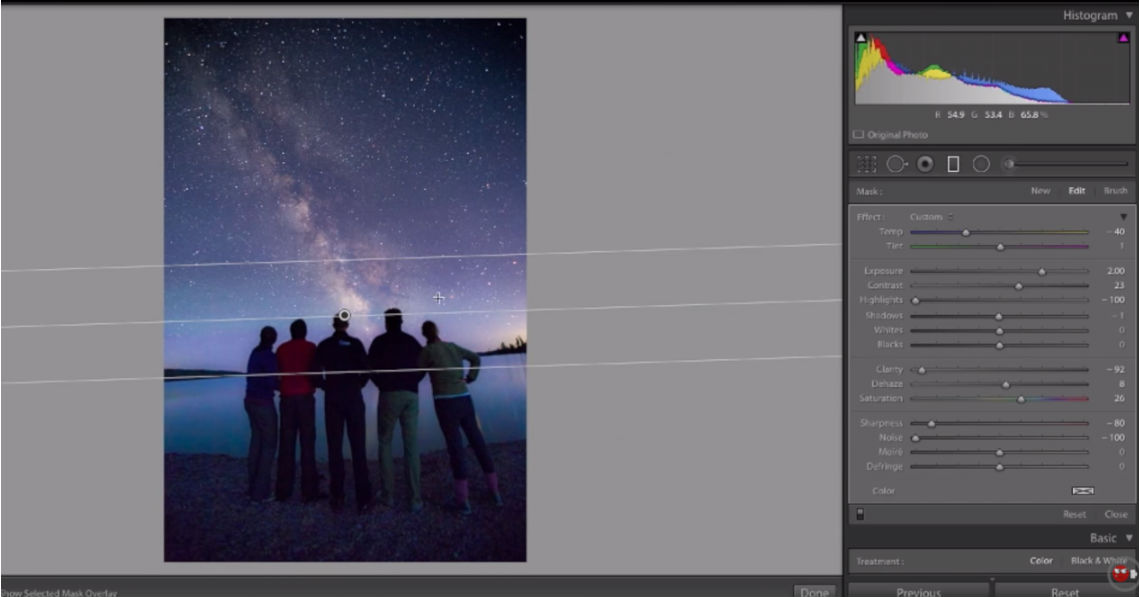 YouTube Screenshot/52 Things
Unless you paint the foreground with light, you'll often find that after the first round of astrophotography post processing that the foreground is quite dark.
The easiest and most effective way to brighten foreground subjects in Lightroom is to apply a gradient.
At the top of the Develop Tab is the Gradient Tool. Just click it, then click on the image and drag to apply the gradient, as shown in the screenshot above.
But because it's a night photo, you need to make a few adjustments to keep the noise low.
That means reducing sharpness, noise, and clarity to prevent the noise in the image from getting out of control.

Step 3: Crop the Photo
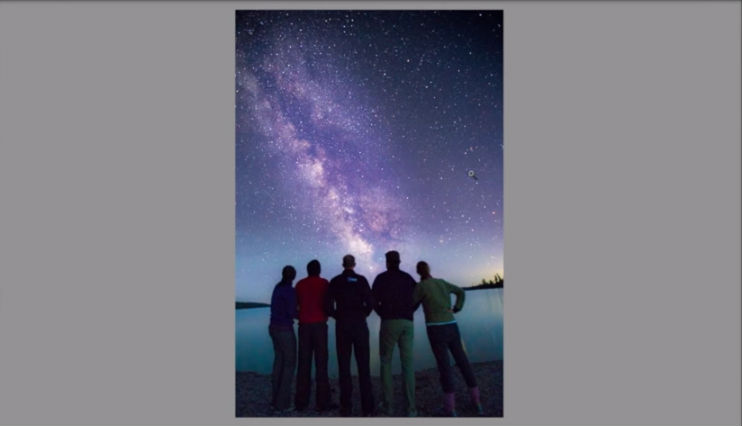 YouTube Screenshot/52 Things
Though it's nice to get the composition and framing perfect in-camera, it doesn't always happen.
Besides, when you have a chance to look at your photos on a larger screen, you might see a better composition that you want to create by cropping.
Cropping in Lightroom is dead simple - just a matter of dragging the crop box over the image, fine-tuning the size and shape of the crop, and pressing enter.
In the example above, you can see how the crop has brought the people in the photo to the vertical midline and their heads more or less align with the bottom rule of thirds grid.
The result is a much more balanced photo that's starting to take shape as a much more impressive image.
Learn More:
- How to Compose a Killer Shot of the Night Sky
- Take Better Photos at Night With These Simple Astrophotography Tips
Step 4: Tone the Highlights and Shadows
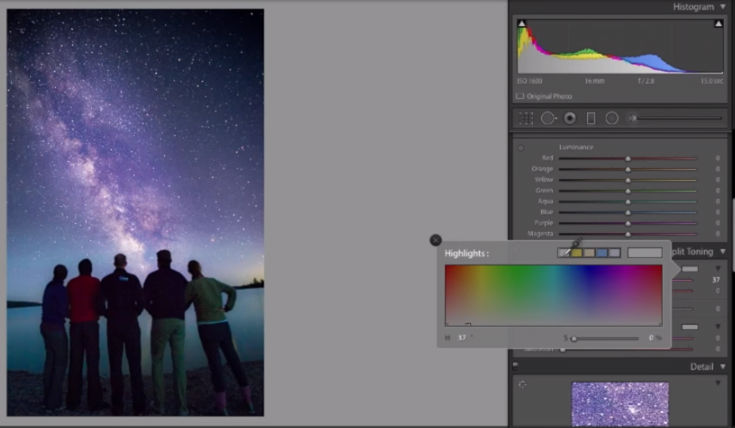 YouTube Screenshot/52 Things
You can add a little color and depth to your astrophotography by adding tones to the highlights and shadows.
This is done in the Develop Tab in the Split Toning Panel.
Just select colors using the color picker (as shown above) and Lightroom will apply those colors to the shadows and highlights, respectively.
The effect should be more subtle than anything - incorporating too many bright, saturated colors can make the image look overly processed.
Editor's Tip: To get clear, sharp stars like those seen in these example images, use a star tracking mount like the Vixen Polarie. Not only is the Polarie easy to use, but it's compatible with a wide range of cameras, from mobile phones to full frame DSLRs. Just orient the Polarie to the north, and once set, the Polarie will keep pace with the movement of the stars to eliminate star trails.
Final Thoughts
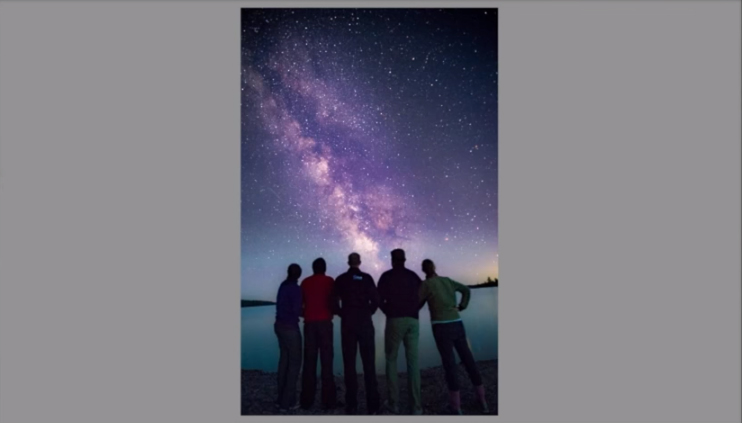 YouTube Screenshot/52 Things
As you can see in the final image above, with just a few key steps, this photo has been transformed from something that looked like a throwaway to something that's quite eye-catching.
Granted, there are plenty of other manipulations that one can make in Lightroom, but the point here is to outline the basic steps you can take to improve your astrophotography editing workflow.
Follow these guidelines the next time you're editing in Lightroom, and you will have all the tools you need to create jaw-dropping photos of the night sky!
Learn More:
We Recommend
How to Photograph the Milky Way (In Simple English)
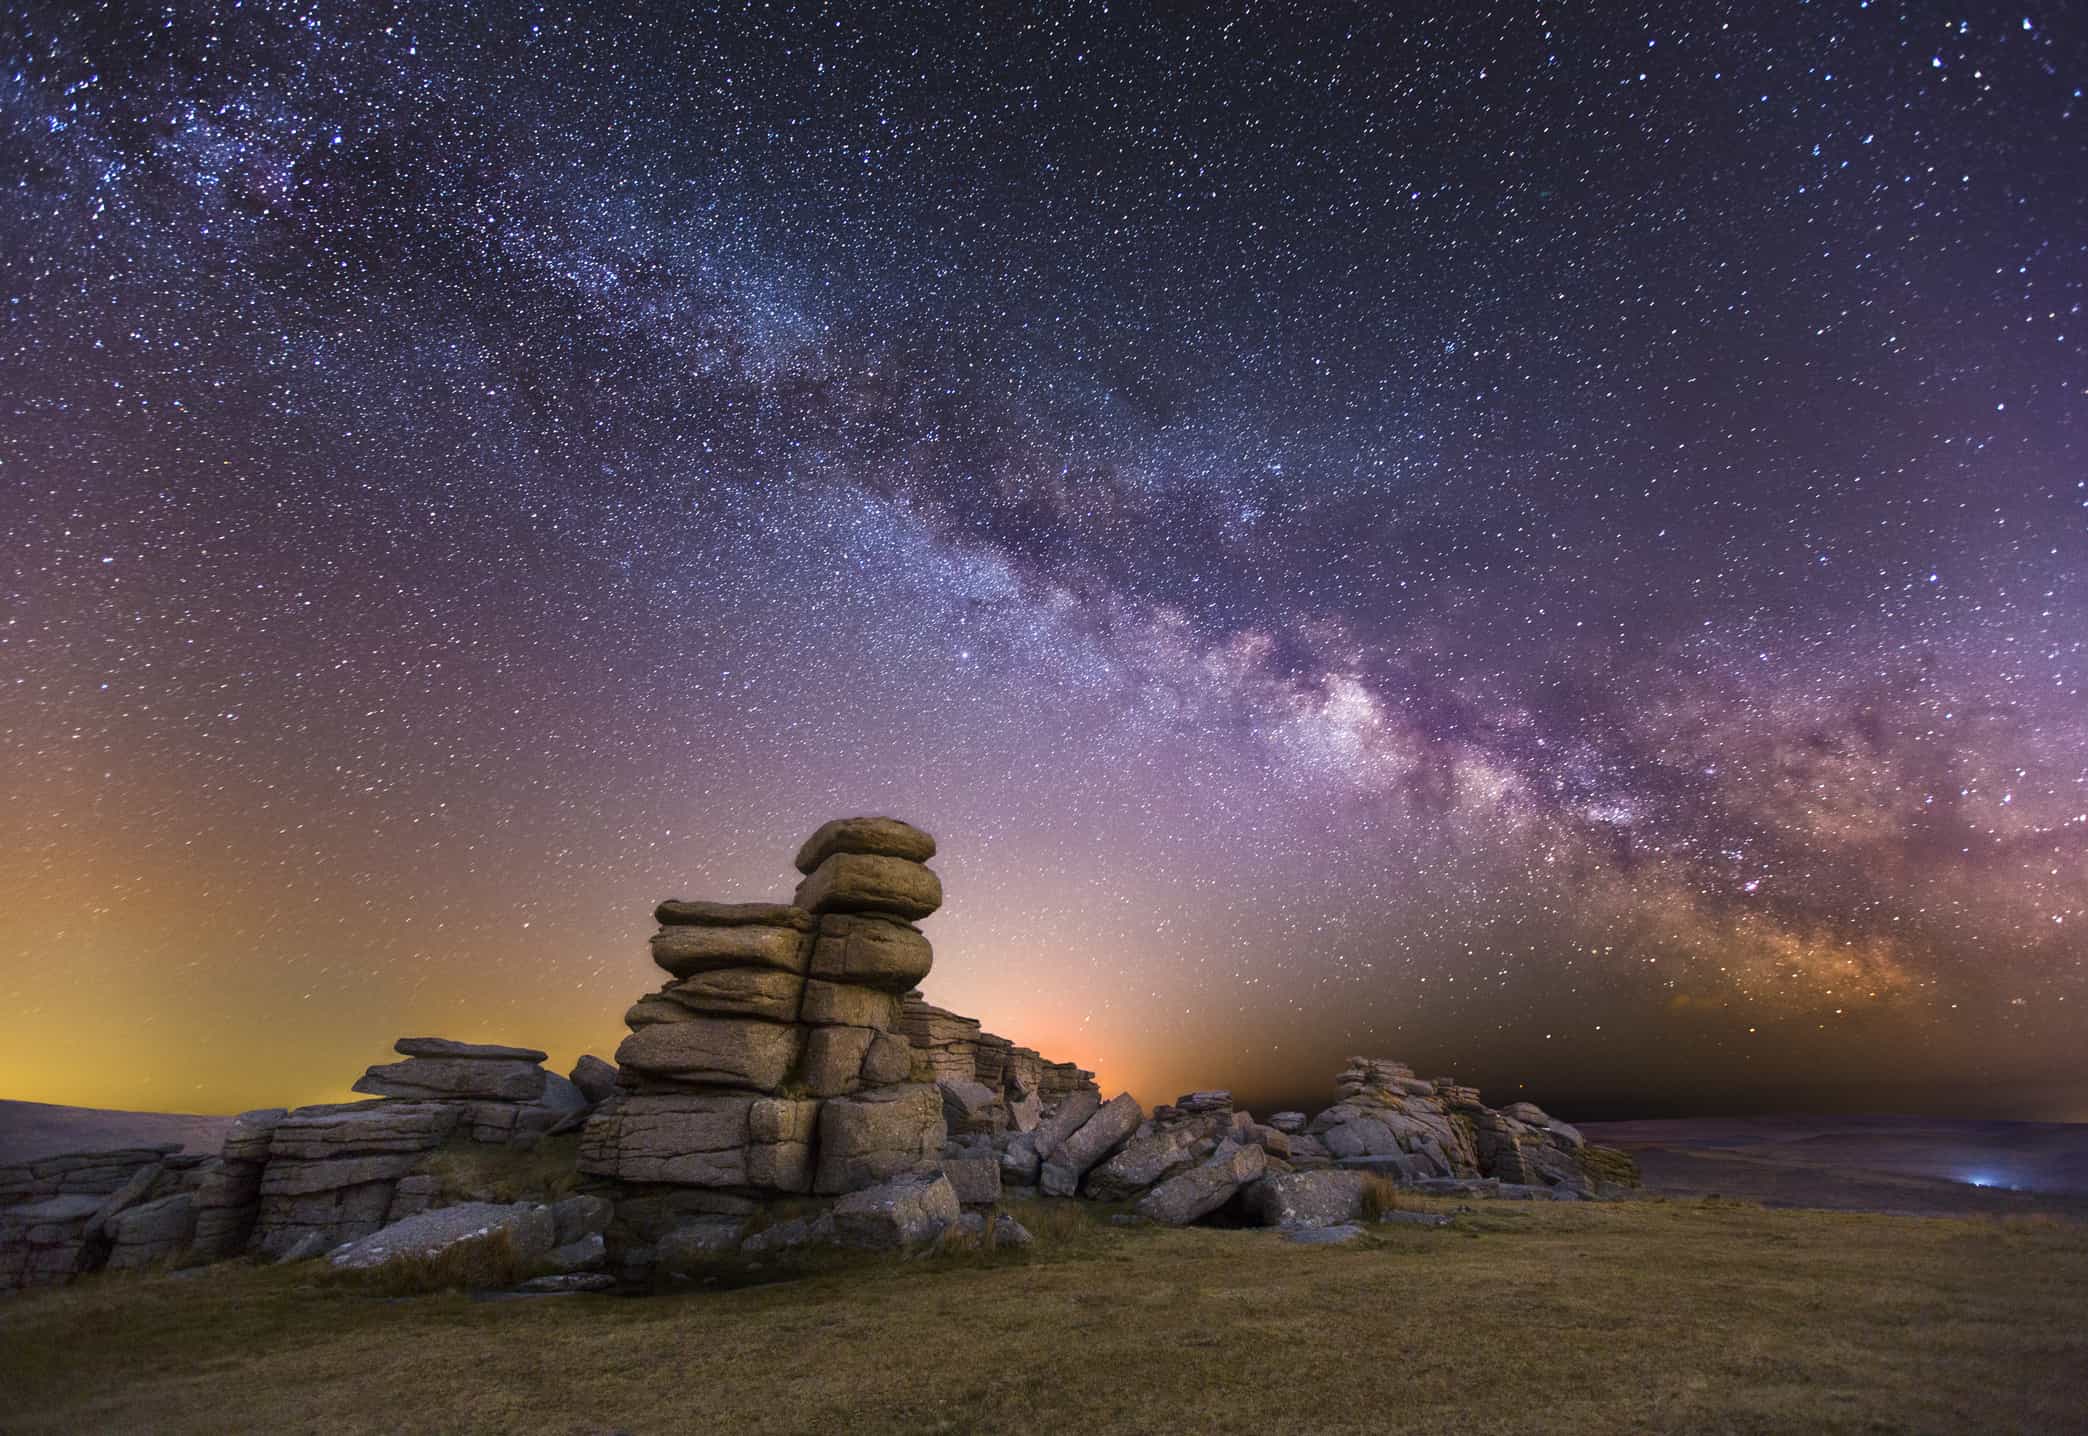
When most people see images like the one above, they likely think "gee, that looks hard to do."
And though it takes a good amount of planning and preparation, the right compositional choices, and the right gear, once you get the basic steps down, you might just be surprised at your ability to get breathtaking shots of the Milky Way.
In this tutorial, I offer up a step-by-step process for photographing the Milky Way.
Editor's Tip: To capture images of the night sky with ease, we suggest using the Vixen Polarie Star Tracker. This compact mount attaches to a standard tripod and can accept cameras that weigh up to seven pounds. You can orient the Polarie to face north using the included compass or by using a North Star Alignment window. You can use a polar scope for alignment as well. Once set, the Polarie tracks the motion of the stars which eliminates star trails. The result? Tack-sharp images of the night sky! Learn more about the Vixen Polarie Star Tracker at MrStarGuy.com.
Step 1: Plan Ahead
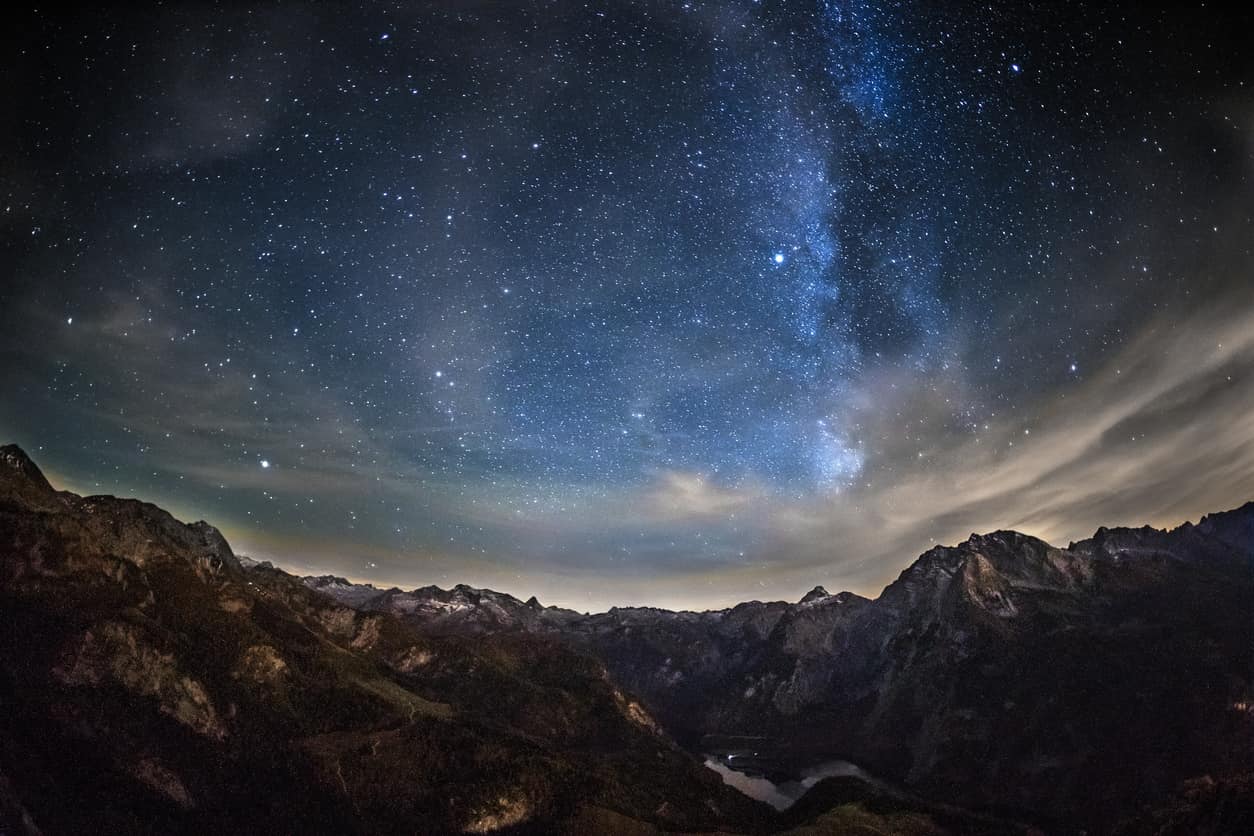
One of the factors to consider when photographing the Milky Way is the current lunar phase.
To get the clearest shots, you'll want minimal light pollution, so try to avoid shooting during a full moon.
Likewise, vantage points that are away from city light pollution will afford you the best chance of getting the clearest shots.
The Photographer's Ephemeris is a handy app for keeping tabs on the lunar cycle, and Dark Site Finder will help you find a nice, dark spot to set up your gear for your Milky Way photos.
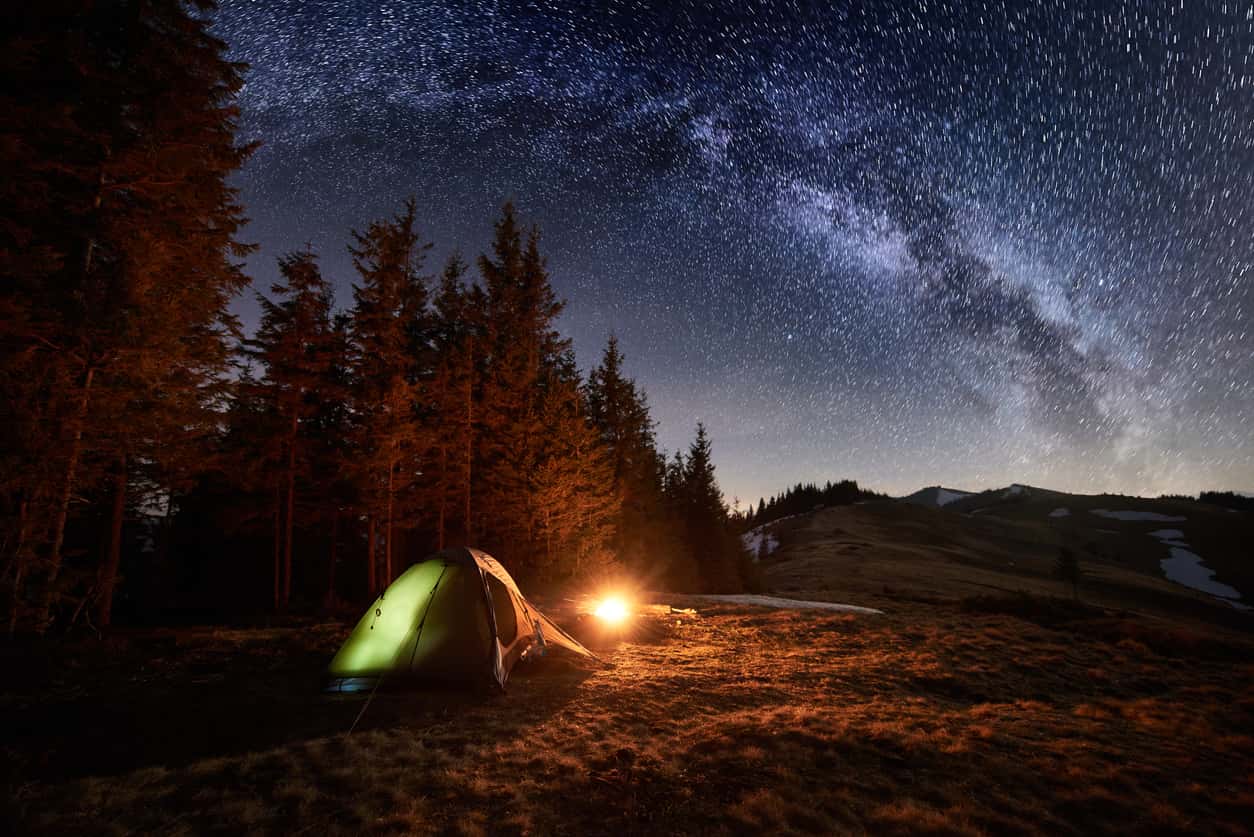
Now, this isn't to say that you absolutely must have completely dark skies to get pleasing shots of the Milky Way.
If there's distant light pollution from a city or town, don't worry about it! In fact, if you can see the Milky Way with your own two eyes, the chances are good that you can get a solid picture with your camera.
You'll also want to check the weather forecast as you plan your Milky Way photo shoot.
Naturally, you'll need clear skies to maximize your view of the Milky Way, but don't be scared off by a few clouds here and there. In fact, some stray clouds can add drama to the shot.
I use the National Weather Service's website to get up-to-the-minute and accurate forecasts for my area.
Learn More:
Step 2: Consider the Composition
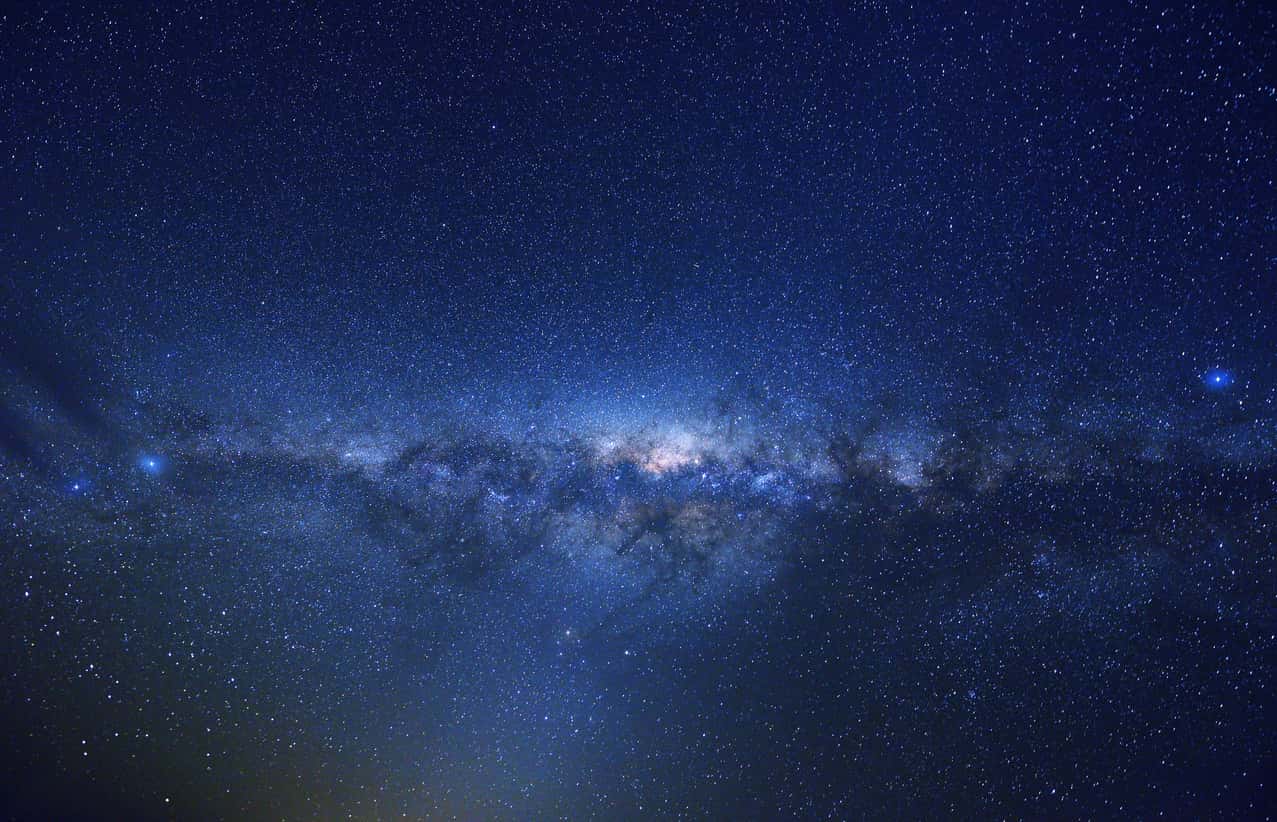
When you plan your Milky Way photo shoot, there's another factor to consider - the composition.
On the one hand, you can frame up a shot of nothing but the Milky Way, giving viewers an eyeful of the galaxy in a tightly framed shot.
As you can see in the image above, this type of Milky Way shot can be truly awe-inspiring.
On the other hand, you might also consider taking some shots in which you include some foreground interest from the landscape.
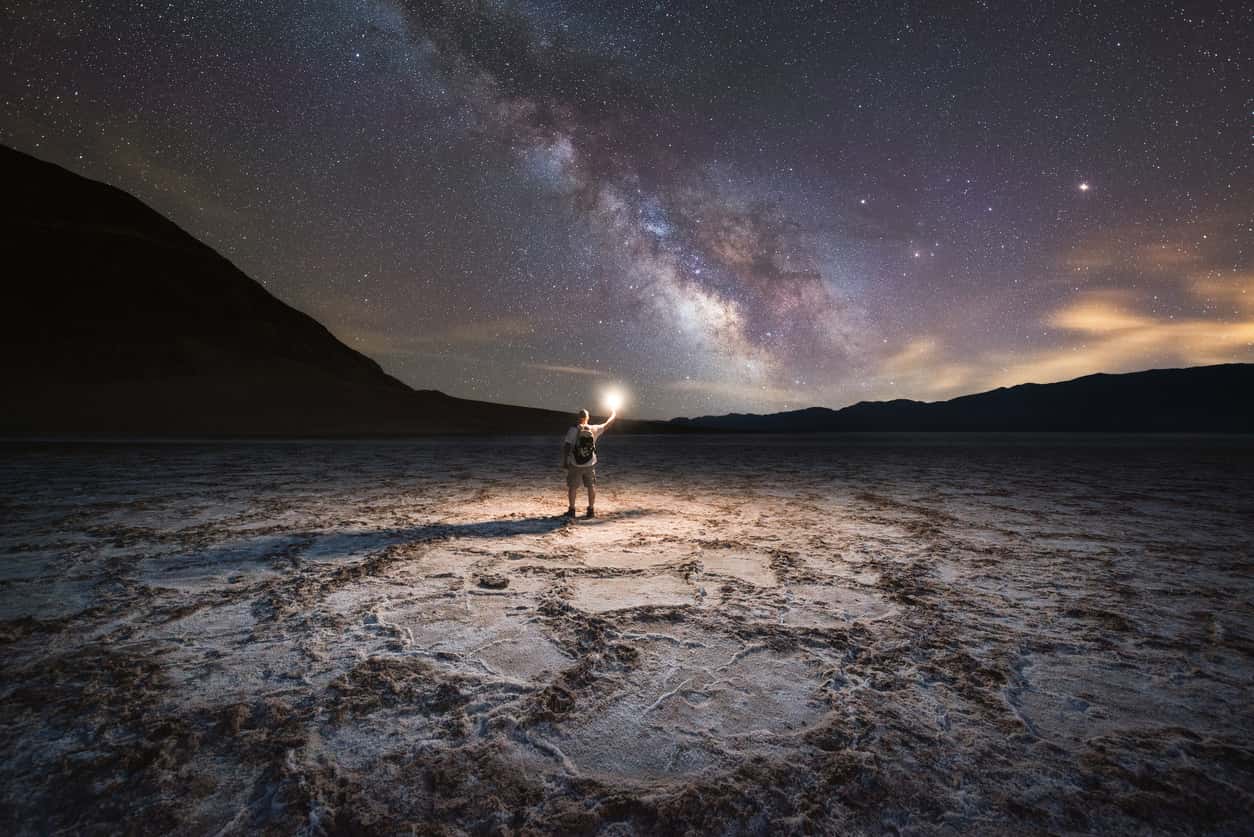
By adding foreground interest, you not only provide context to the shot, but you also provide a little bit of depth.
What's more, you can get a more dramatic shot by including foreground interest, particularly if you add a person to the frame, as seen above.
But don't just frame up the shot with foreground interest for the sake of doing it...
As with any photo, make sure that whatever is in the foreground - be that a person, a mountain peak, an interesting tree, or some other landscape feature - that it has a purpose, that it's balanced well with the Milky Way, and that it doesn't distract from the real focus of the shot, the sky above.
Step 3: Get the Gear

There are a few essentials you'll need for photos of the Milky Way.
First, you'll need a camera. Full frame cameras are most adept at nighttime photography because they have larger sensors and improved low-light shooting capabilities.
Models like the Nikon D850, the Canon 5DS, or the Sony A7S would be good choices.
However, all of those cameras are pricey, and not everyone has the budget to purchase one.
That being said, you can still capture nice images of the Milky Way with an APS-C or micro four-thirds camera.
What's essential, however, is that the camera has live view mode, manual exposure controls, a good ISO range (to at least ISO 3200), and the ability to change lenses.
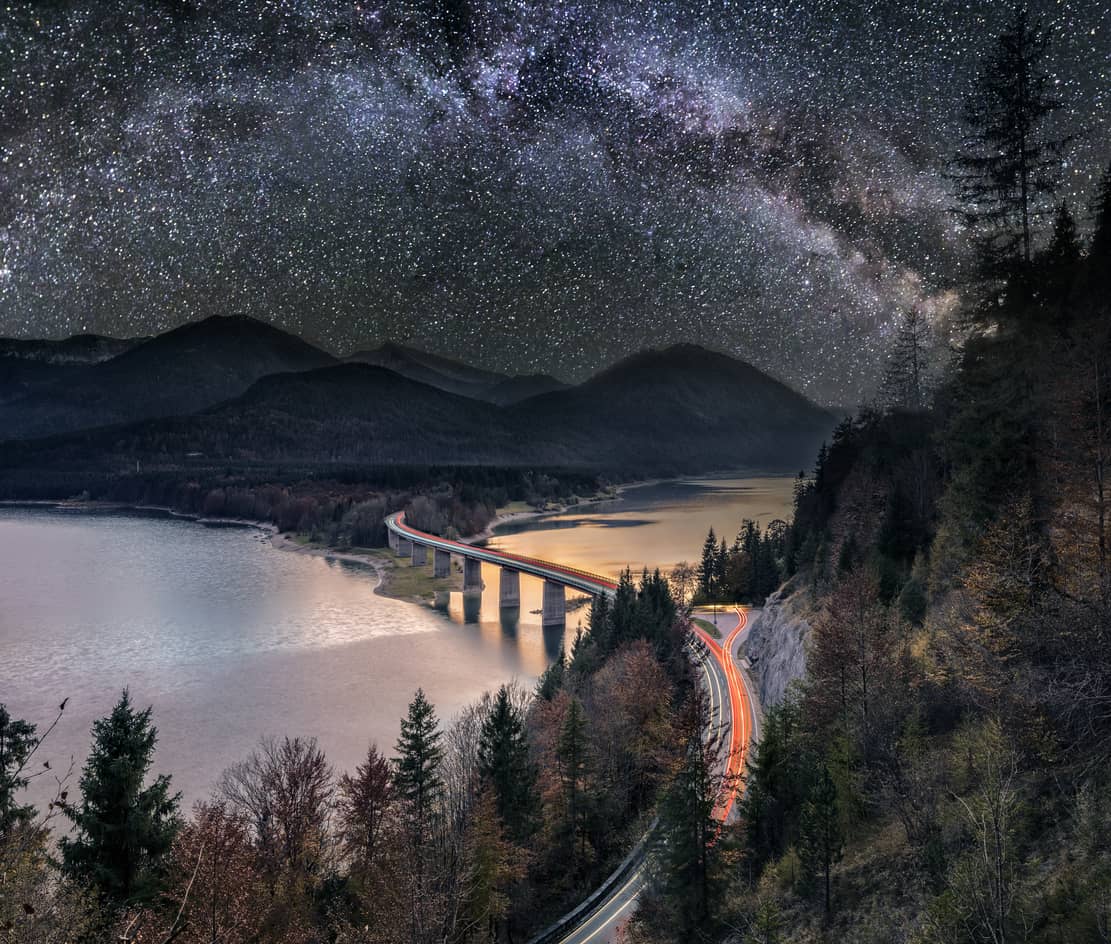
Speaking of lenses, the faster the lens, the better.
In this sense, faster refers to the size of the lens' maximum aperture - the larger the aperture, the more light the lens collects and the faster the shutter speed you can use.
Ideally, if you have the budget, a f/1.2 lens would be the way to go, though f/1.4, f/1.8, f/2, and even f/2.8 will also do the trick. Naturally, the bigger the aperture, the bigger the price tag.
The focal length of the lens is really a matter of personal preference.
If you want wide, sweeping shots of the Milky Way and foreground elements, a wide-angle lens would be best.
If you want more intimate shots like the one above, a normal lens or telephoto lens would be advisable.
Just be sure that whatever lens you use, that it has manual focus controls. You'll have to manually adjust the focus to get the clearest, sharpest photo.
Finally, as I noted in the introduction, having a star tracker mount like the Vixen Polarie shown above comes in handy for tracking the movement of the stars to eliminate star trails.
The Polarie is easy to set up and operates on two AA batteries. It's stepping motors offer incredibly accurate movement as well.
What's more, you can even get the Polaire bundled with a tripod, which is another essential piece of gear.
Having a longer tripod not only enhances the stability of your camera as it takes photos of the Milky Way, but that extra bit of height can afford you improved views as well.
And since your shutter speeds will be quite slow, having your camera on a tripod will only help you get the sharpest images possible.
Check out some examples of astrophotography taken with the help of the Vixen Polarie Star Tracker in the video above by MrStarGuy.
For more details about the Polarie and the Polarie with tripod bundle, check the Learn More links below.
Learn More:
- Get the Specs and Pricing on the Vixen Polarie Star Tracker Mount
- Get the Specs and Pricing on the Vixen Polarie Star Tracker Mount with Tripod
Step 4: Test Your Camera Settings
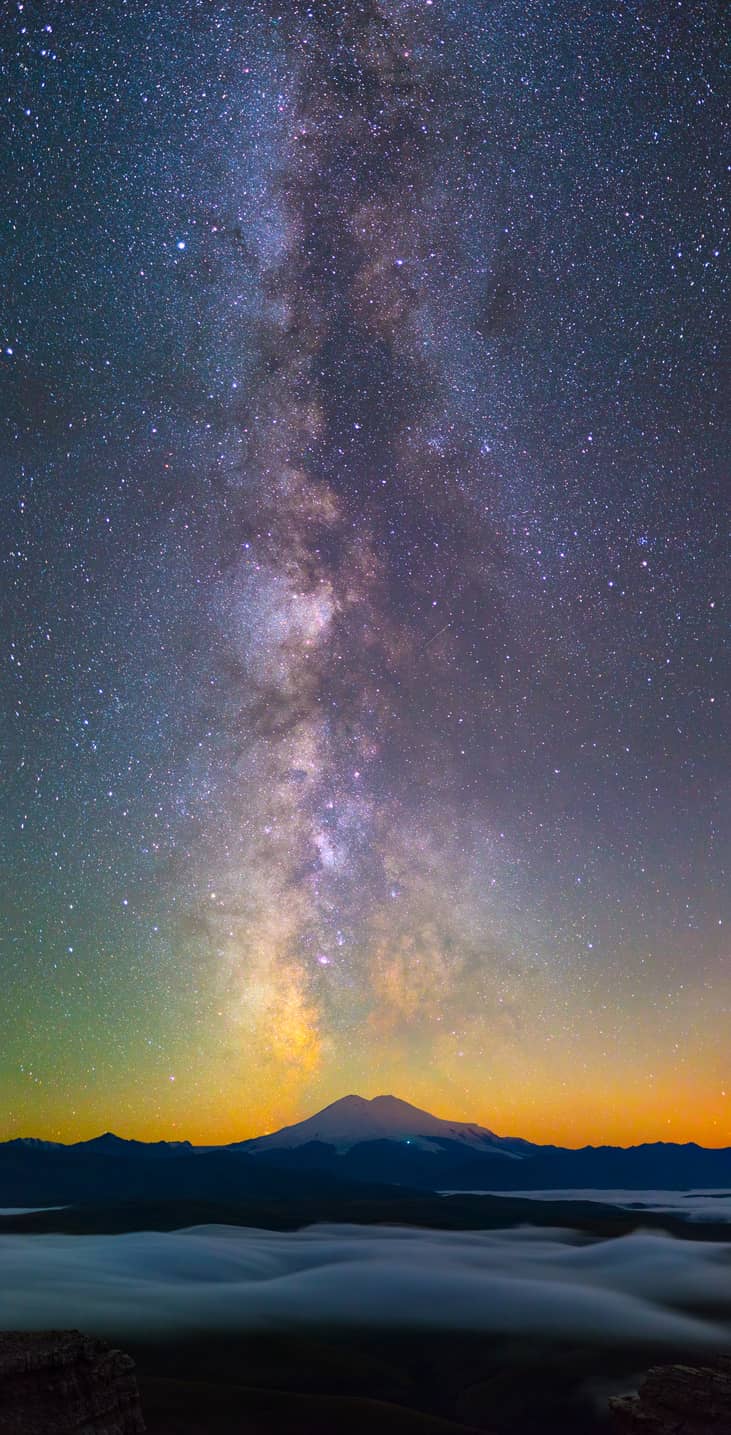
Now that you've gotten geared up and planned your shots of the Milky Way, now comes the time to execute the shot.
To begin, you'll need to turn your camera to Manual Mode (M), that way you have control over the camera's aperture, shutter speed, and ISO (you can also shoot in aperture priority, shutter priority, or program mode, should you desire). Set your aperture to the widest setting possible so you maximize its ability to collect light.
Also be sure your camera is set to record images in RAW format - not JPEG.
Set the focus to manual, crank up the ISO to 3200 or 6400 (at least to begin), and using live view (or the electronic viewfinder, if your camera is so equipped), set your focus on the Milky Way.
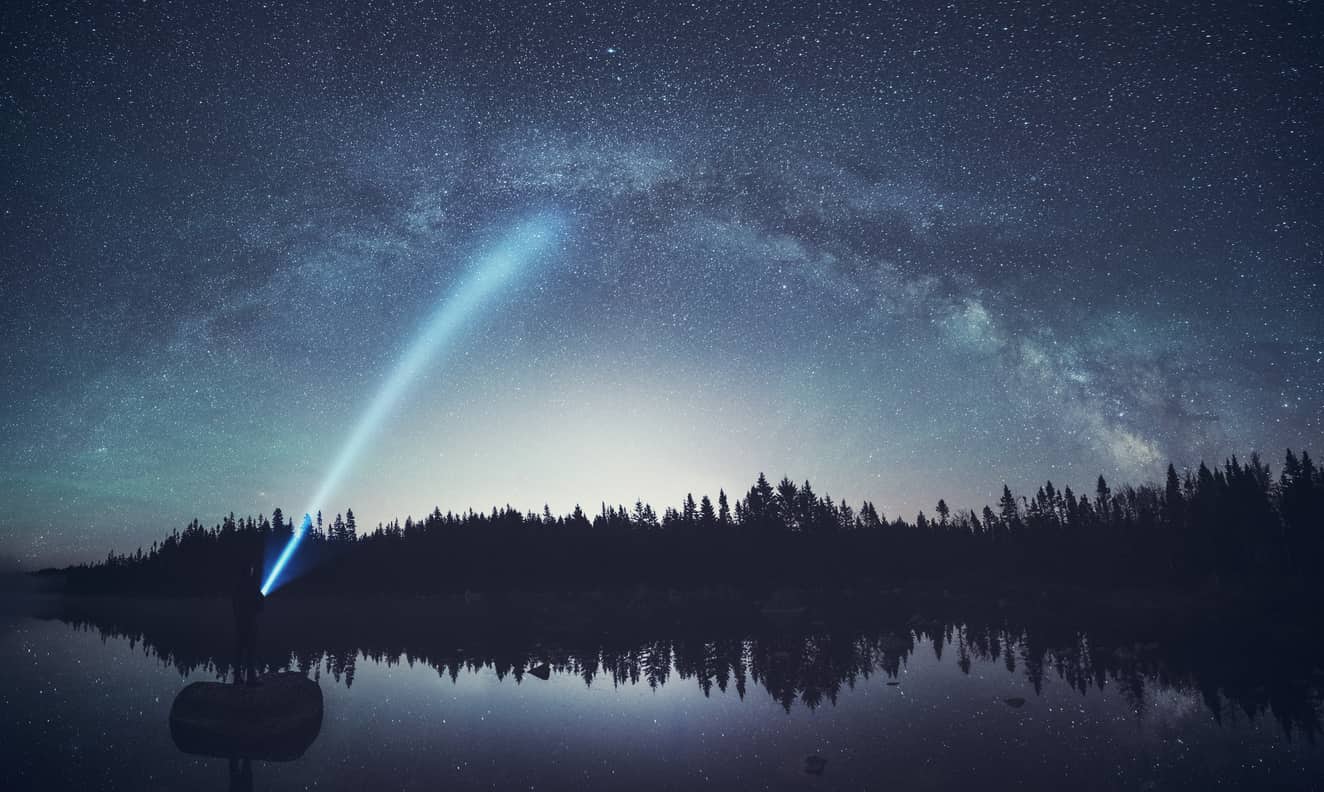
When setting your focus, choose a bright star in the Milky Way to serve as your focal point.
Using the zoom function on your LCD or viewfinder, magnify the image so you can see the star as large as possible. At that point, turn the focus ring on your lens until the star is tack-sharp.
Now that you've got the image focused, recompose the shot to include foreground elements as described earlier, if so desired.
Set your shutter speed to about 10 seconds and take a test shot. At this point, you're just trying to nail the composition, so don't worry too much about the exposure of the image.
Step 5: Finalize the Camera Settings and Take the Shot

Once the composition of the shot is to your liking, revisit your ISO setting and lower it to about 1600. The goal here is to use the lowest ISO possible so you can minimize the presence of digital noise in the shot.
Then check your shutter speed, perhaps trying a 15-second exposure first.
Check your light meter reading in your camera's viewfinder to see how you're doing with the exposure. If the meter is to the left of 0, you need to brighten the image by slowing the shutter speed or boosting the ISO. Conversely, if the light meter is to the right of 0, the image is too bright and needs a faster shutter speed or a lower ISO.
You'll need to experiment a little to get the ideal exposure. Just be sure you use your camera's LCD to zoom in on each shot to check it more closely for exposure and details. Continue to adjust as needed.
And with that, you have a step-by-step process to follow for taking tantalizing photos of the Milky Way!
Learn More:
We Recommend
How to Photograph the Moon?
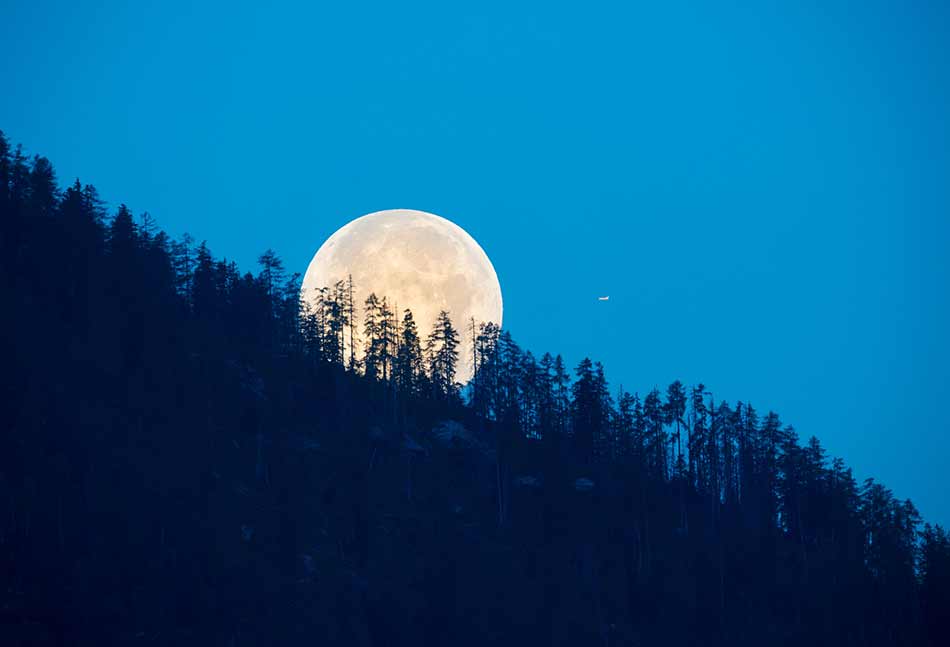
Moon Photography
The moon is 238,900 miles from earth.
In the vast majority of moon photos taken by amateurs, the moon looks like it’s that far away!
There’s plenty of obstacles to creating a beautiful image of the moon - you need an understanding of the moon’s phases and the right gear, like a telephoto lens, to get up close.
You also need to have an understanding of compositional choices that will make your photo shine. Getting the exposure just right is another challenge too.
And though that might seem like a lot to keep in mind, with a few tips, you can master these topics and create images of the moon like the one above.
I've put together a quick video tutorial on photographing the moon. Give it a watch above!
For more details, check out the article below.
Let’s get started!
Table of Contents
- How to Photograph the Moon: Get Familiar With the Moon's Behavior
- How to Photograph the Moon: Get the Appropriate Gear
- How to Photograph the Moon: Consider the Composition
How to Photograph the Moon: Get Familiar With the Moon’s Behavior

The first step in moon photography is to develop an understanding of the behavior of the moon. Naturally, this means understanding the moon’s phases so you know when the moon will be out from the earth’s shadow.
Because the earth has a counter-clockwise rotation, it’s shadow travels across the moon from right to left. That means that the best time to get photos of the moon is during its waxing stage, when the earth’s shadow is moving ever farther to the left, revealing more of the moon’s pockmarked surface.
To get a detailed understanding of the phases of the moon, watch the video below with Phil from CrashCourse:
There are plenty of apps that help you track the moon’s behavior as well. MOON - Current Moon Phase (shown below) is available on iTunes and gets very high marks from users. The app works offline, so you can be out in the wilderness without service and still know what the moon is doing and will do in the future.

This app also tells you the lunar illumination so you’re sure to capitalize on nights when it’s brightest. What’s more, the app also sends out notifications before new moons, full moons, and other lunar events, that way you can plan ahead. You can even view what the moon will look like on any day of the year by entering your desired date!
Other apps and websites you should check out are Photopills (which, among many other things, tells you the rise and set times of the moon) and Dark Site Finder, which helps you locate areas where you can photograph the moon without light pollution getting in the way.
Recommended Reading:
- Moon: Photographing the Moon 1840-Now
- The Moon: A Beginner’s Guide to Lunar Features and Photography
- Dusk to Dawn: A Guide to Landscape Photography at Night
How to Photograph the Moon: Get the Appropriate Gear
Like any other photo, getting a pleasing image of the moon requires that you have the necessary gear. Here’s a quick list of essentials you’ll need to get the best photos:
Camera

You can take photos of the moon with any camera, even your smartphone. The caveat is that for improved photos of the moon you’ll need a camera with certain features. A DSLR or mirrorless camera is typically the most advantageous because they have manual exposure controls.
What’s more, it’s best to have a camera with RAW shooting capabilities, simply because RAW files retain all the data collected by the sensor. That means that in post-processing you have more information to work with, which aids your ability to create the best-looking shot.
Lens

If you’ve ever taken a photo of the moon with your smartphone or a point-and-shoot or even a DSLR with a wide-angle lens, you know the disappointment of the moon appearing to be a small, white blob in the sky.
That’s a result of a focal length that’s too short - a wide-angle lens, for example, doesn’t get you close enough to the moon to make it appear of any significant size, nor does it allow you to capture the detail of its surface. Since wide-angle lenses make distant objects seem smaller, the moon thereby looks quite small.
This isn't to say that you can't get a nice shot of the moon with a wide-angle lens - just know that the moon will be a secondary feature in the image.
To get up close and personal with the moon as seen below, you’ll need a telephoto lens. Typically, moon photographers recommend at least 200mm. The longer the lens, the greater the magnification and the more pronounced the compression.

Where other types of astrophotography, like photographing the Milky Way, benefit from a fast lens, speed for moon photography isn’t as much of an issue.
For starters, the moon will be very bright and provide enough illumination on its own. Secondly, you’ll have your camera on a tripod, so you can utilize a longer shutter speed to compensate for the darkness of your surroundings.
So, when looking for a lens, worry less about the largest aperture available and focus on focal length. Solid options include the Nikon AF-S FX NIKKOR 200-500mm f/5.6E ED Zoom Lens. This lens is not cheap, but to get photos in which it seems the moon is very close (and large), a long lens is required, or at the very least, a teleconverter.
Tripod

Naturally, with a long lens and long shutter speeds, a sturdy tripod that will give your camera a stable base is of the utmost importance. It won’t matter how beautiful the composition is if the shot is blurry due to camera movement!
There is a mountain of tripods available with a wide array of features that can make your head spin. But the most important thing to look for is stability, quality construction, good feet that provide a stable base, and a center column hook that allows you to add weight to improve stability. Check out our camera tripod buying guide for some guidance on buying the right tripod for you.
Mount

If you really want to take your lunar photography to another level, using a dedicated mount is certainly the way to go.
The Star Adventurer Mount from Sky-Watcher USA is an ideal tool for taking photos of the moon because it tracks celestial bodies. Keep the moon (or the sun or stars) in full view by using the mount to track it across the sky. With built-in shutter release control, the Star Adventurer also gives you the power of firing your shutter remotely, thereby helping to reduce the possibility of blurriness due to camera shake.
What’s more, if you want to create a beautiful timelapse video of the moon moving across the sky, you can! The Star Adventurer has preprogrammed parameters for creating timelapses both quickly and easily.
The setup shown above is Sky-Watcher’s special photo package, which comes bundled with the Star Adventurer mount, a polar scope illuminator, and a ball head adapter.
That means that right out of the box, you’re ready to head out, get set up, and take some stunning photos of the moon! Get to know the Star Adventurer Mount in more detail by checking out the video above from Sky-Watcher USA.
Here’s what you need to get this set up:

- Camera (Nikon D810 shown)
- SkyWatcher Adventurer
- Sturdy tripod (Sirui W-2204 shown)
- Strong ball head (Acratech GP shown)
- Shutter Remote (RFN-4 Wireless shown)

How to Photograph the Moon: Consider the Composition

As beautiful as the moon is, and as awe-inspiring as it can be, photos of the moon can easily be boring. This is especially true if you take a wide-angle shot in which the moon is relatively small in the frame.
In those instances, it’s necessary to pair the moon with interesting foreground elements, just as you would with any other type of landscape shot.
There are a myriad of possibilities here. If you live in a city, incorporate a structure of some sort into the frame - a building, a bridge, or the like, that adds some scale to the shot as well as provides visual interest that makes the image more complex.
If you can head out to less populated areas, pair the moon with natural elements like mountains, trees, or even reflect the moon in a still lake or pond to make the photo more visually appealing.
You might even find that photographing the moon at sunrise or sunset is advantageous because you can incorporate Golden Hour or Blue Hour lighting into the scene, which elevates the interest of the image with the addition of the warm, bright colors of the sky.
In the video above, Bryan Peterson with Adorama TV explains why shooting near sunrise and sunset is so advantageous, and also offers some tips on how to expose the image at this time of day.
Another option is to create a composite image in which you take a wide-angle shot of the landscape, a telephoto shot of the moon, and combine them together.
This method is used quite often to create images that have the best of both worlds - a gorgeous setting and a nice view of the moon.
Learn how to create a composite image of the moon in the video above by Brendan Williams.

From planning your outing to composing the shot to processing the images, you now have a better idea of what it takes to create gorgeous photos of the moon.
Though it’s a lot to take in, just remember that all it takes is a little bit of practice. Set aside some time to work on the tips and techniques outlined in this article, and you’re sure to develop the skills needed to capture some truly stunning lunar photos.
We Recommend
How to Photograph the Night Sky
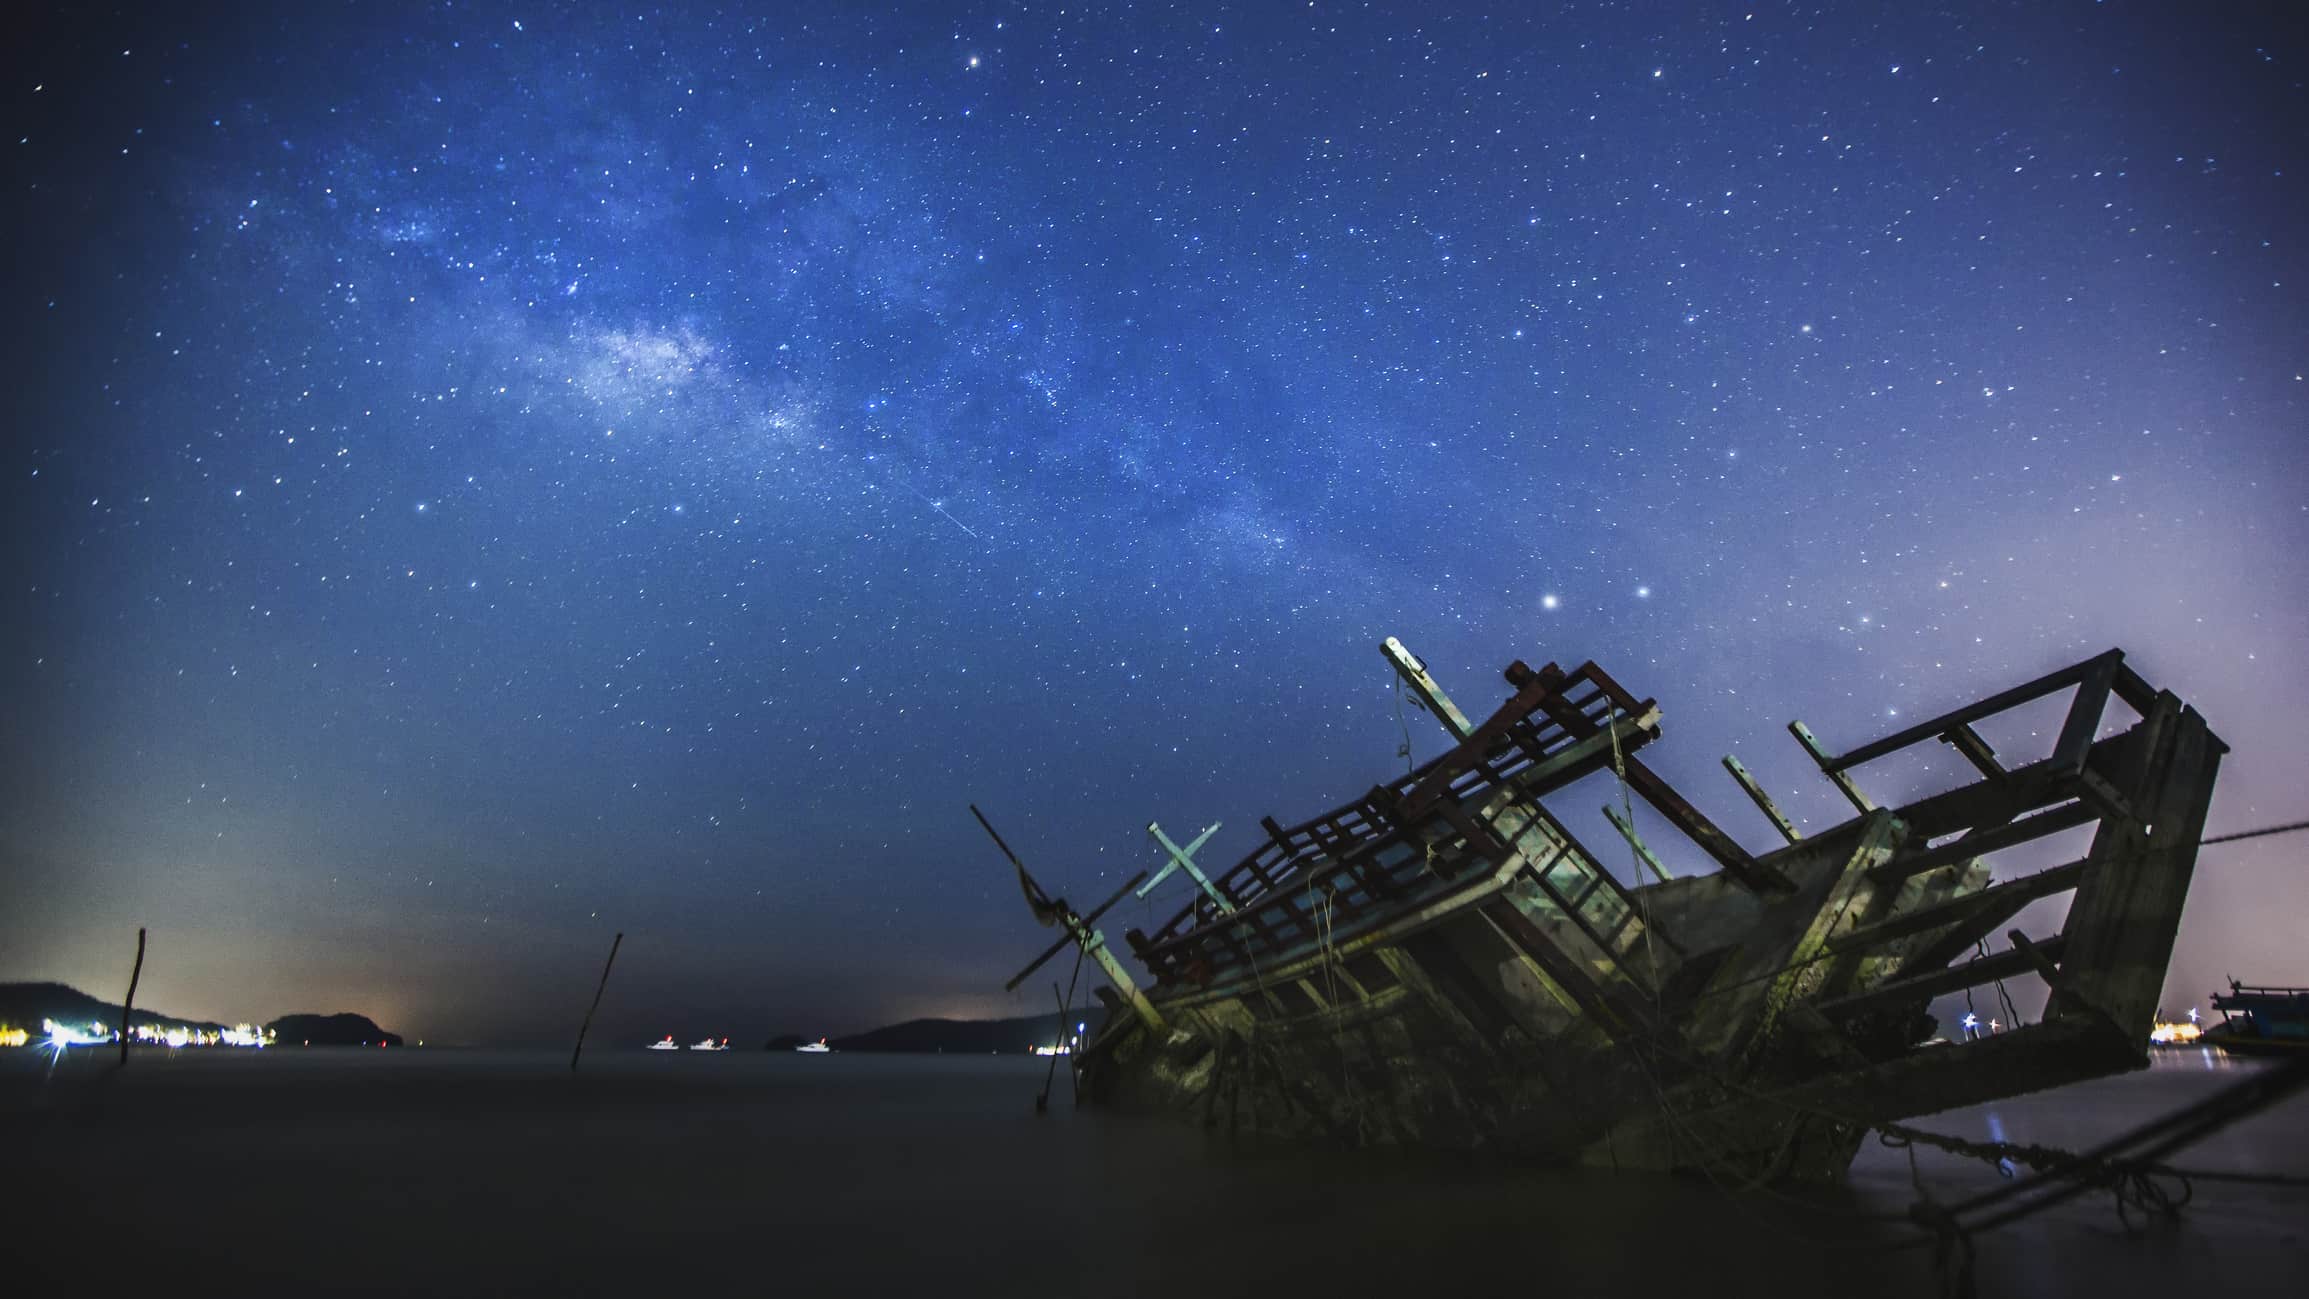
There are plenty of ways to create incredible images of the night sky.
This includes stars that appear as pinpoints, star trails, and timelapse videos, just to name a few.
In this article, we offer an overview of these and other techniques you can use to photograph the night sky.
Editor's Tip: A great way to get started in astrophotography is to use a star tracker mount like the Vixen Polarie, which is compatible with any standard tripod and can accept any digital camera that weighs up to 7 pounds. The Polarie has a compass for orienting the mount to face north, a North Star alignment window for easier alignment, and can track the motion of the stars as they move across the sky to eliminate star trails. Learn more about the Vixen Polarie Star Tracker Mount by visiting their website.
Pinpoint Stars and Star Trails

When deciding whether you will represent stars as points of light or as trails, think about what the scene offers in terms of visual interest.
For example, if there is a lot of interest in the foreground of the shot, pinpoint stars might be the way to go. That's because they offer a nice complement to the scene that doesn't overtake what's going on in the foreground.
To get pinpoint stars, you need special gear to track the stars as the earth moves, like the Vixen Polarie Star Tracker Mount I recommended above. Watch a quick tutorial on how mounts like this work in the video below:
As far as camera settings go, start with an f-stop that's nice and wide, like f/1.2 or f/1.4 (or the widest your lens allows) and a shutter speed in the neighborhood of 20 seconds. If needed, increase the ISO to get a better exposure, bearing in mind, though, that the higher the ISO, the more noise that will be evident in the shot.
For a little extra drama, consider lighting the foreground of the shot by light painting with a flashlight or a headlamp.
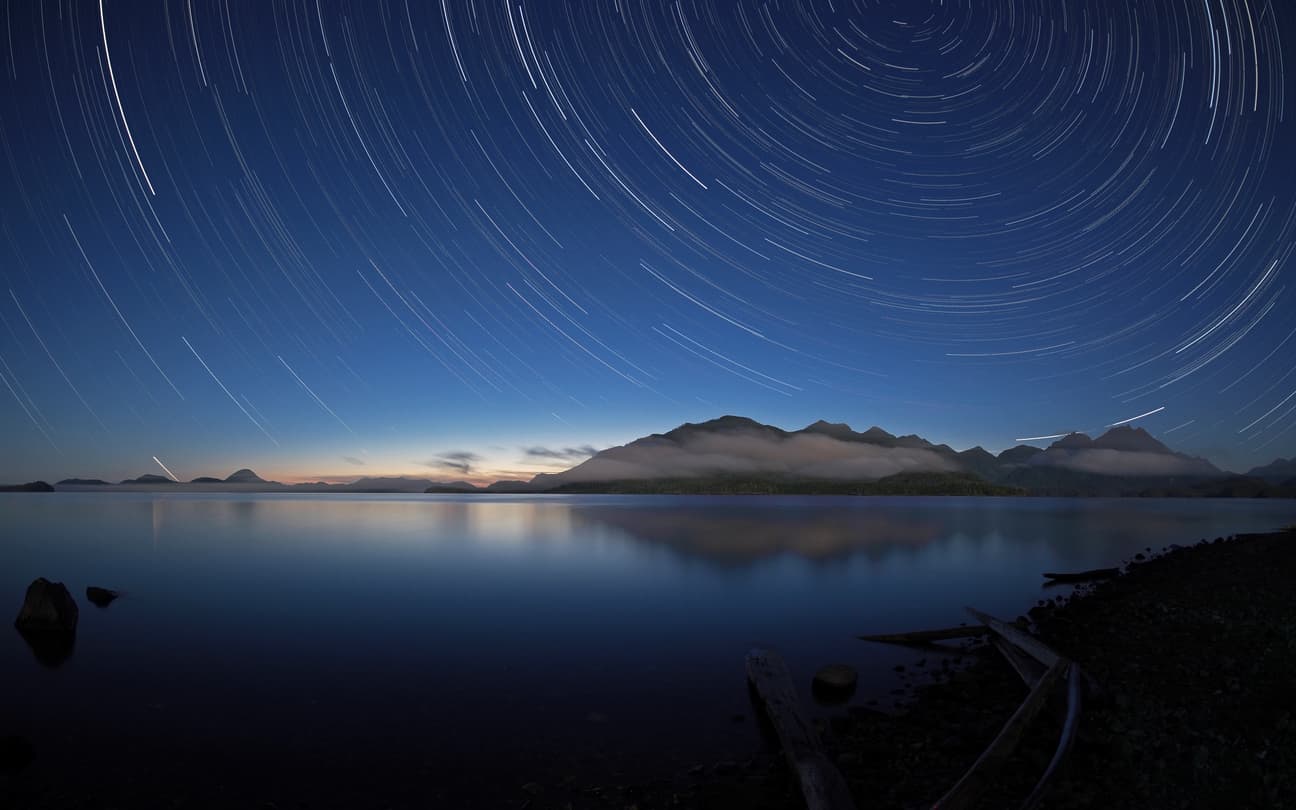
To shoot light trails, you really only need a camera, a lens, a tripod, and a remote shutter release.
The rest is left up to the earth as it rotates on its axis, making the stars and other celestial bodies appear as though they're moving across the sky.
You can capture that movement by using your camera's bulb mode to take a long exposure image.
The length of the exposure will depend on several factors, perhaps most important of which is how long you want the star trails to appear.
Get a complete rundown of taking star trails images in the video below by Tony and Chelsea Northrup:
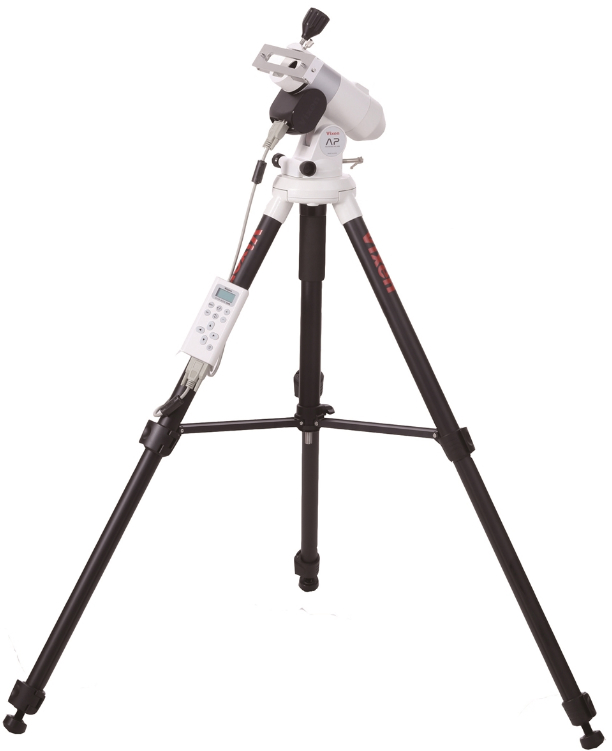
Editor’s Tip: To help facilitate long exposure astrophotography, we recommend using a photo guider for more accurate tracking. The Vixen Advanced Polaris (AP) Photo Guider is a lightweight star tracker that’s equipped with the Star Book One hand controller that gives you the ultimate in comfortable and precise operation. Using a moderate telephoto lens and the AP Photo Guider, you can snap images of Messier objects and other deep sky objects as well. Learn more about the AP Photo Guider by visiting MrStarGuy.com.
Timelapse Video of the Night Sky
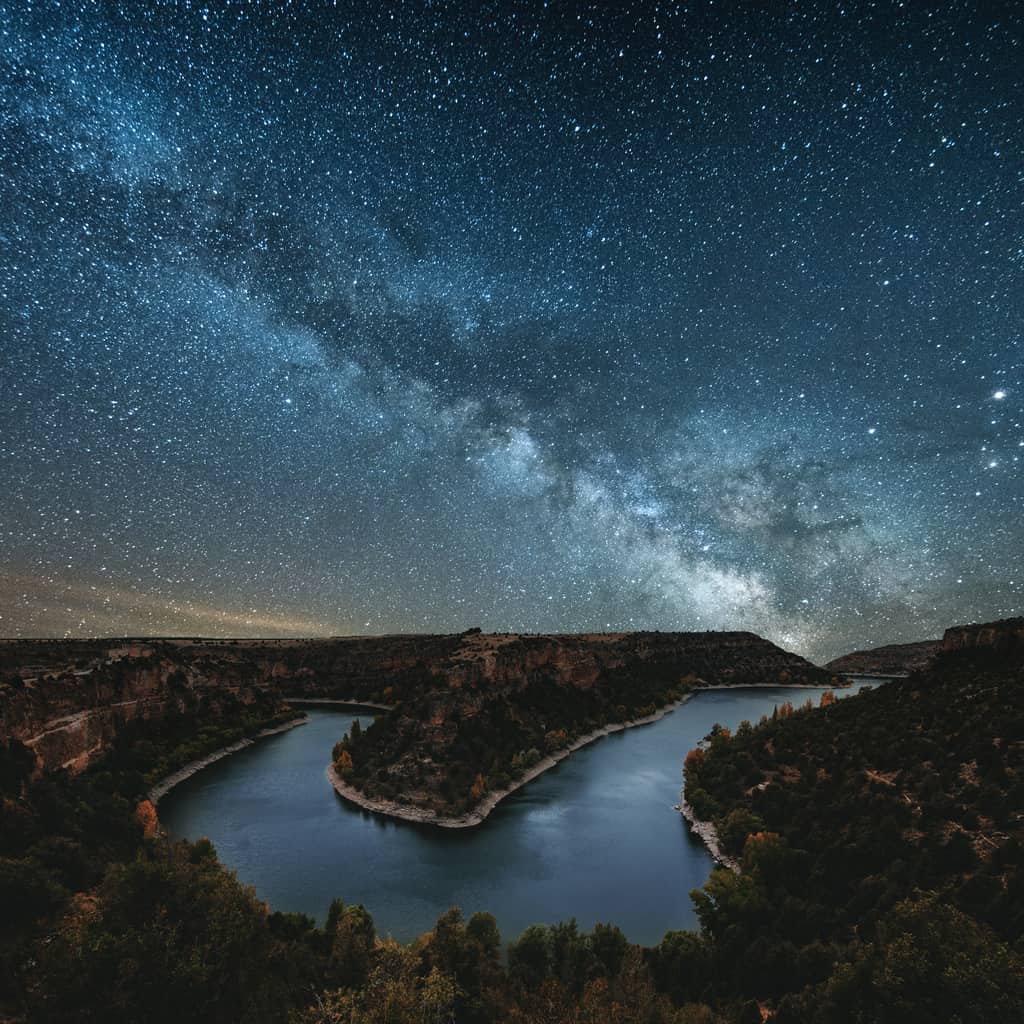
One of the great things about digital photography is that it allows you to not only shoot traditional still photos and long exposures of the night sky, but you can also make timelapse videos that show the passage of time.
Some cameras come with a built-in interval timer that controls the time between exposures as well as the total number of photos that are taken in a pre-determined period of time. If your camera doesn't have a built-in intervalometer, you can pick one up without spending a ton of money.
Either way, the settings you enter into the interval timer determines how smooth the timelapse video appears. Naturally, the shorter the interval between each image, the smoother the movement will be.
Once you have your series of images, you use post-processing software like Quicktime Pro to create a timelapse video that shows each of the individual images in motion.

To get started with a timelapse video, you need to dial in appropriate exposure settings by using your camera's manual mode.
A good place to start is with an aperture around f/5.6 if the moon is full or f/2.8 if it isn't. Take a test shot using a shutter speed of about 10 seconds. Use the camera's LCD to zoom in on the image, looking to see if there is appropriate detail in the stars and the foreground of the shot.
Adjust the aperture, shutter speed, and ISO as needed to get a good overall exposure, being wary of using a shutter speed longer than about 20 seconds. Otherwise, star trails will become evident.
Once you have a well-exposed test image, set the interval between each image (around 30 seconds is a good place to start) and the duration for the shoot using the interval timer.
When the camera is taking the images, be careful not to move the camera or change any camera settings as any such changes will be noticeable in the timelapse video.
Adding Foreground Interest
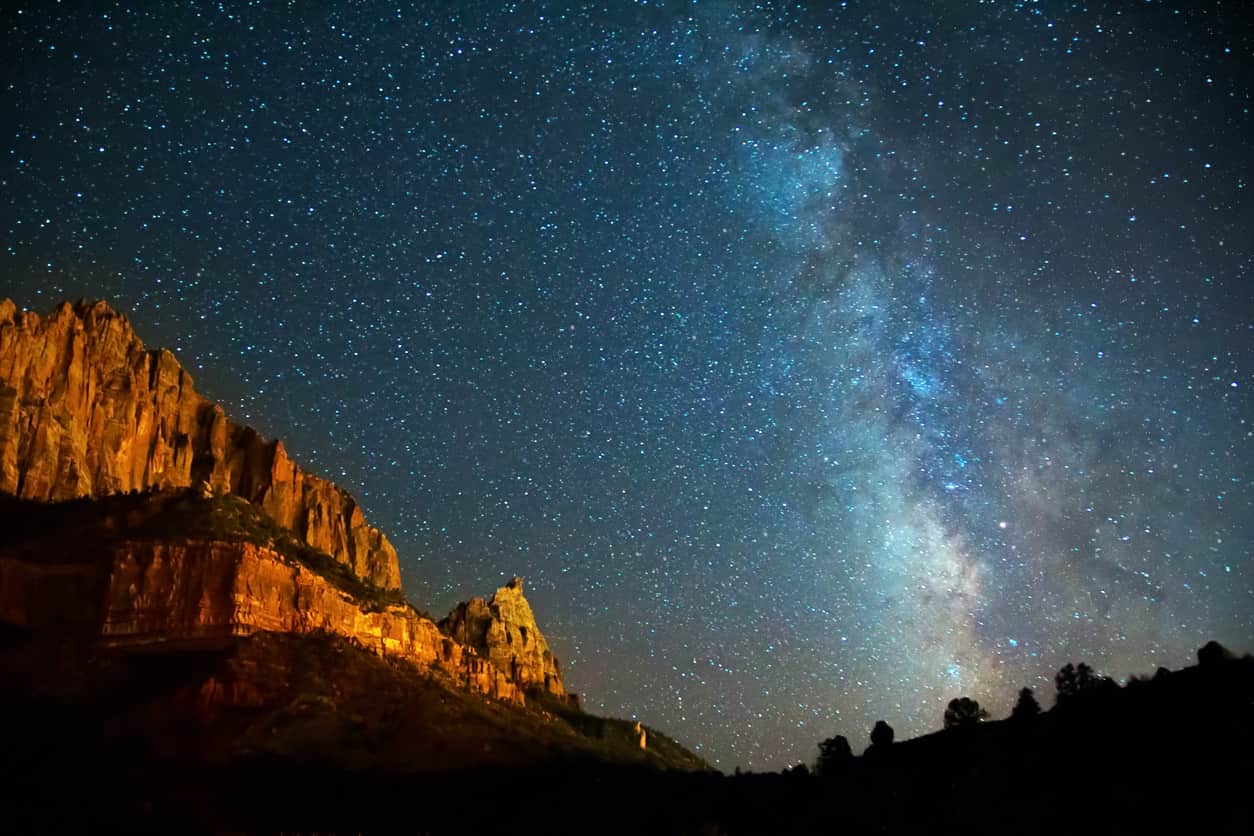
As I mentioned earlier, if there's interesting elements in the foreground of your photos or timelapses of the night sky, it's worth taking measures to ensure that the detail contained therein is visible in the shot.
Having interesting elements in the foreground helps give the image context, added visual depth, and also offers a nice contrast to the expanse of stars in the background of the image.
You can incorporate foreground interest in many ways, including using a wide-angle or a fisheye lens, or by setting up your gear in such a way that you can frame the foreground interest into the shot.
If the moon is out in full force, your lens will likely be able to collect enough light to capture the detail of the foreground elements.
But if there isn't much moonlight, you can light up the foreground using any number of techniques.

As noted earlier, you can paint with light by using a flashlight to illuminate foreground elements.
You can also use a speedlight. To do so, press the speedlight's flash button while the camera's shutter is open, and move the light from one side of the scene to the other to light up the entirety of the foreground. For a more unique look, think about painting with light using your speedlight in short pops of light. To do so, simply press the speedlight's flash button several times over the course of the exposure.
You can use a constant light source as well. Again, while the shutter is open, move the light around the scene for the duration of the exposure.
No matter what type of light source you use, be sure to keep it moving so the image doesn't have hot spots.
Final Thoughts
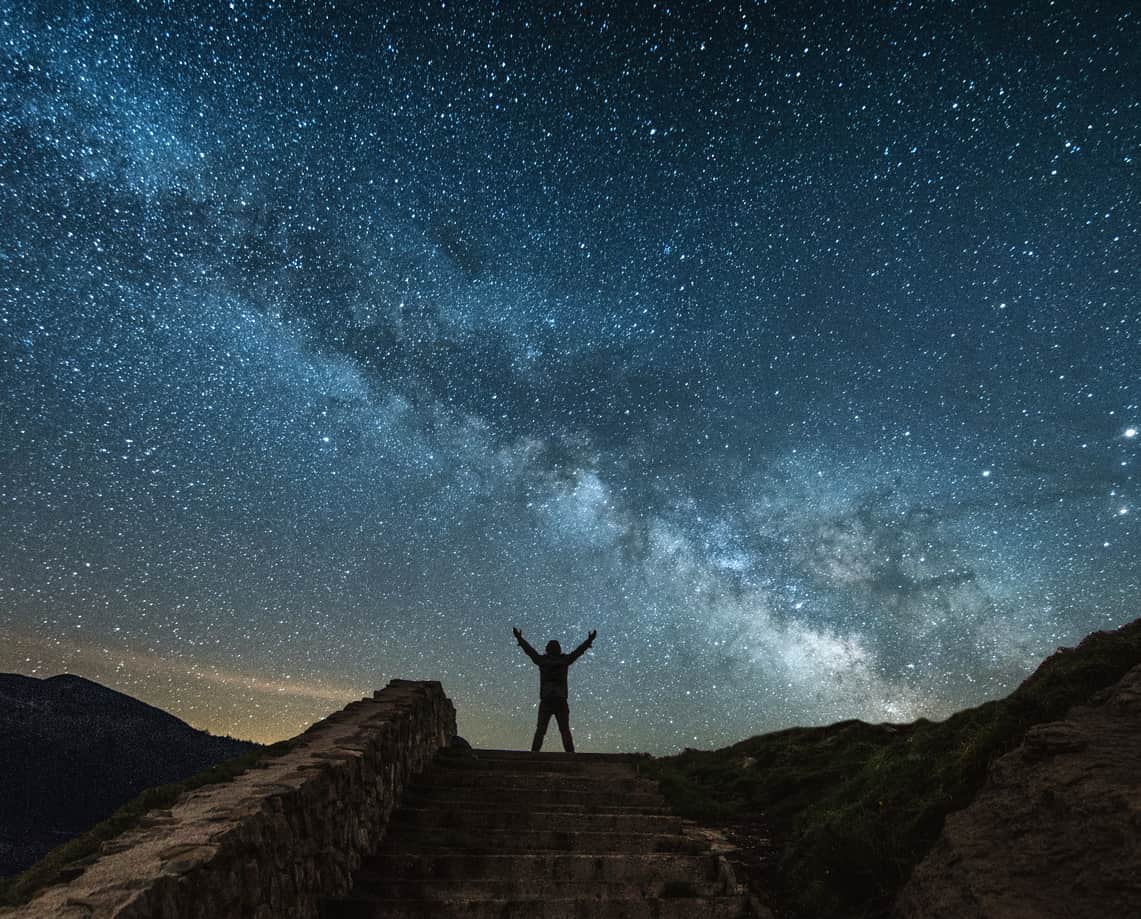
When you first venture into astrophotography, it can be a bit of a scary proposition.
However, if you dedicate yourself to learning a few fundamentals, outfit yourself with the right gear, and practice the art of night photography, before long, you'll have the knowledge and skills to create breathtaking images like those above.
To get outfitted with astrophotography gear, be sure to visit our partner, MrStarGuy, for excellent deals on everything binoculars, telescopes, mounts, tripods, and more.
We Recommend
How to Photograph the Planets with Your DSLR on a Tight Budget

Astrophotography comes in many forms, from star trails and wide-field Milky Way shots to high-resolution images of the planets in our solar system. The equipment needed to simply view distant objects can be purchased fairly inexpensively, but getting good photographs of them can cost considerably more. There are a few ways to capture objects in deep space with a fairly low-cost setup, though and I'm going to describe one in this article.
This method involves pairing your DSLR with a telescope type that's typically considered impractical for planetary photos. It's commonly called a Dobsonian telescope, in reference to the type of mount it uses.

A large-aperture (high-magnification) reflector telescope is mounted on a low platform that pivots on the azimuth axis and incorporates a yoke that allows the altitude axis to be adjusted. Both axes are adjusted by hand to align the scope with the object to be viewed. This type of mount allows amateur astronomers a great option for viewing celestial objects without the cost of mounts designed for automatic tracking.

It's that lack of tracking capability that makes most astrophotographers put the Dobsonian telescope in the “viewing only” category. Because the light from a deep space object (DSO) is dim in relation to closer objects like the moon, longer exposures are required and tracking helps keep an object centered to avoid blurring. However, there's another way, using multiple images. Since you can get your hands on a Dobsonian telescope with a 6” aperture (1200mm focal length @ f/8) for about $300, it's a great way to try your hand at DSO imaging cheaply.
There are a couple of ways to take a photo of the view through a telescope. The cheapest (and most difficult) is afocal capture, in which you simply focus the camera on the image in the eyepiece, either with a very steady hand or by mounting the camera on a tripod or a special bracket attached to the optical tube. It's important to keep the camera lens aligned with the viewing lens on the scope to avoid vignetting. Prime focus capturing involves mounting the camera body in place of the viewing lens, via an adapter and reducer. This can add considerably to the cost of the setup, however.

Bright objects, such as dense star clusters can be photographed this way, but your results will vary greatly, since the exposure time may be too long to avoid trailing and blurring. The planets, however, are comparatively quite bright and can be imaged well by taking a series of photos or recording a video as they cross the field of view, then stacking the photos or movie frames. This method of creating a high-resolution composite is known as planetary imaging, and it's easily accomplished with a free software application named Registax.
A detailed guide to the process of taking and processing the images is beyond the scope of this article, but there are several great guides available. One that I recommend is A Guide to DSLR Planetary Imaging, a very helpful guide on CD-ROM. The point of this article, which I hope you've seen, is that you don't have to invest a lot to get started in planetary astrophotography. Enjoy!
We Recommend
How to Setup a Motion Star Time-Lapse with Mark Gee
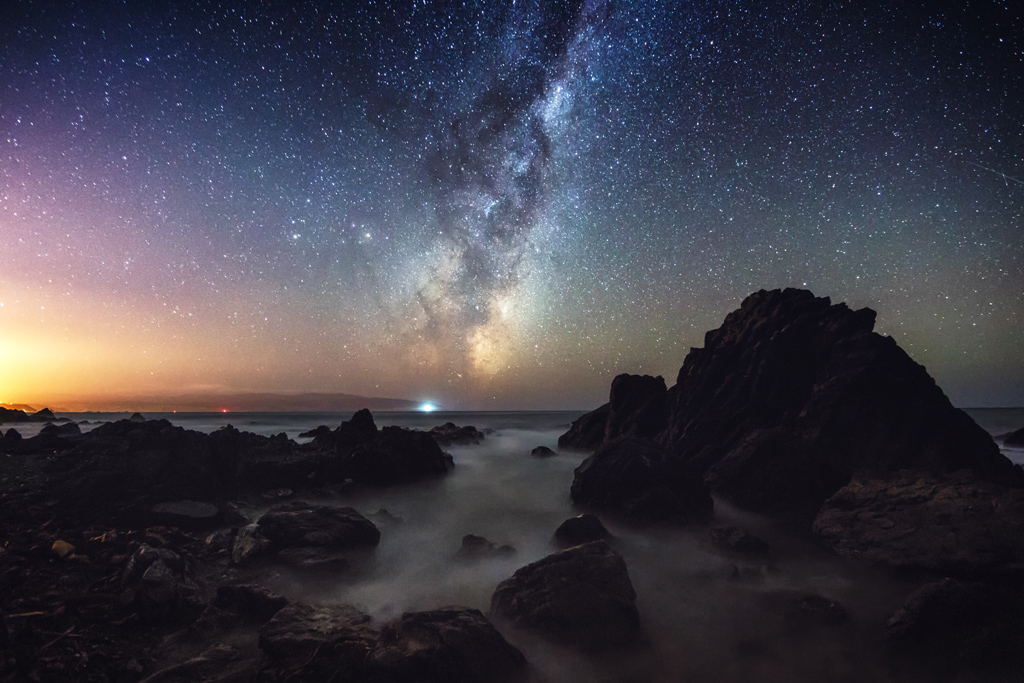
Astrophotography is one of the most spectacular forms of photography there is, and when you add motion to it by shooting time-lapse, you can capture these amazing visuals of the rotating night sky above dreamy landscapes. I use the Syrp Genie for adding camera motion to my astro time-lapses which really adds production value to your timelapse by adding smooth motion. Here’s 10 points to consider when shooting a motion controlled astro time-lapse. - Mark Gee, The Art of Night.
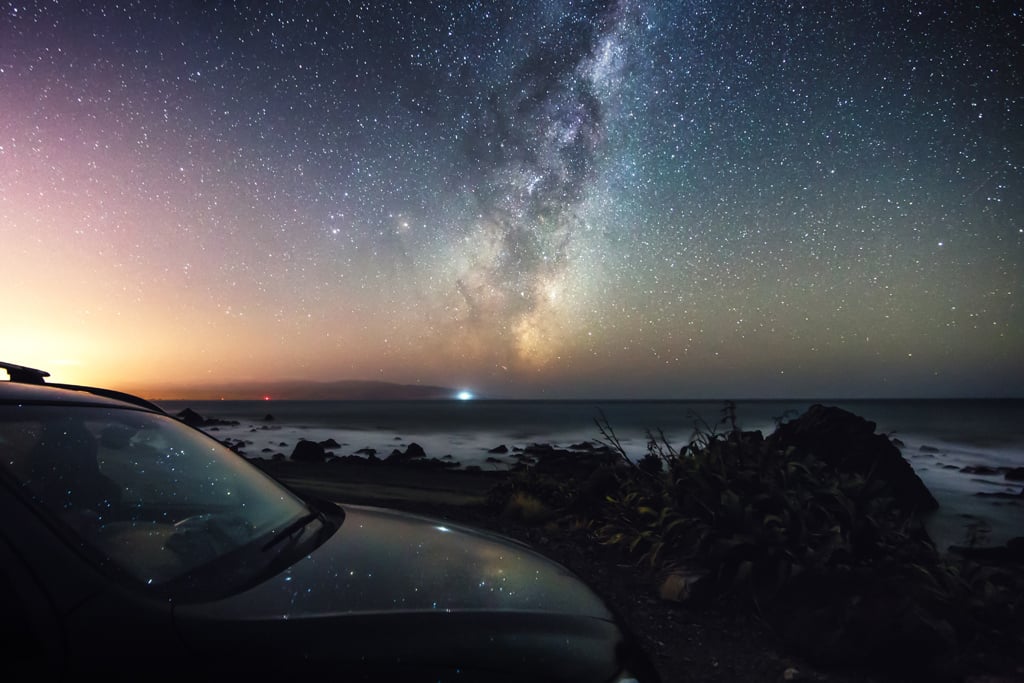
1. When scouting for a location, head out in the daytime first, and use one of the smartphone astro apps which has an augmented reality function like PhotoPills or Starwalk to plan your composition with the stars.
2. When planning to do a motion controlled camera move in your time-lapse, it’s always good to find a composition which has foreground interest like rocks or trees, for example. This way you will get some interesting parallax against the night sky as the camera moves through your shot.
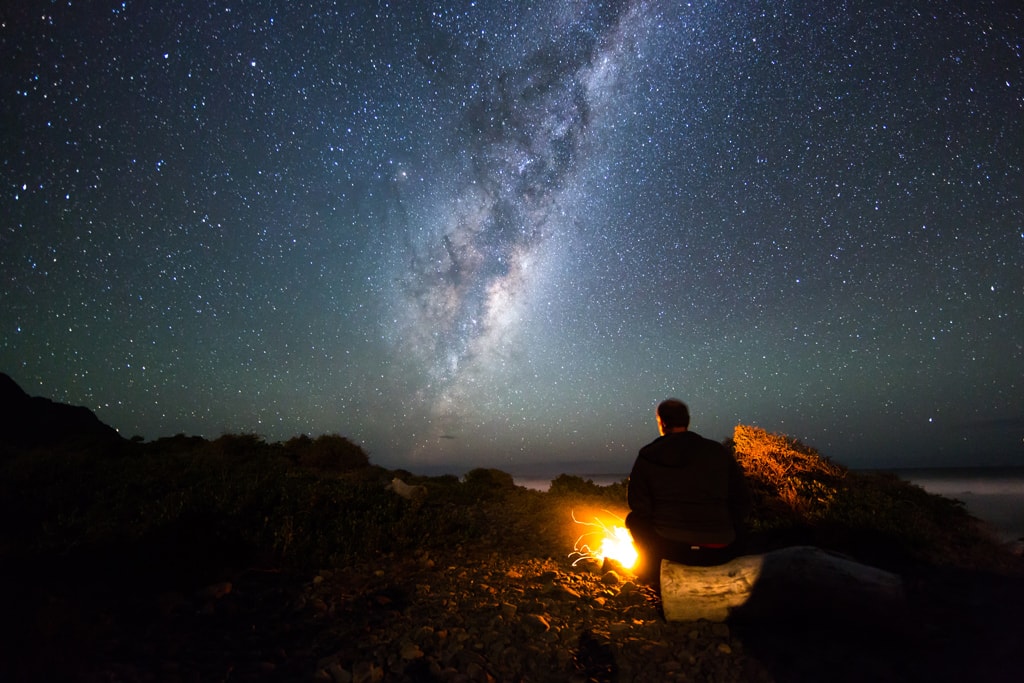
3. You will need to shoot your astro time-lapse with all your settings on manual, this includes white balance and your focus. I tend to use tungsten or incandescent mode for my white balance, which can be changed to your liking once you get it in post.
4. Make sure that the long exposure noise reduction is turned off on your camera – with this setting on, it will take twice as long as your exposure time before writing the image to your card, and that is something you don't want for a time-lapse. Instead, we will be using noise reduction in post processing.
5. Getting sharp focus is probably one of the hardest things to do in an astro time-lapse. You could autofocus on a distant object in the daytime, then set your focus to manual and tape your lens ring to keep it locked off. But personally, I find the live view method is a lot more accurate. It’s where you find the brightest star or object in the sky, and use live view on your camera to line it up close to the center of frame. Then zoom in 10x on your live view and manually adjust your focus ring on your lens until the star looks sharp.
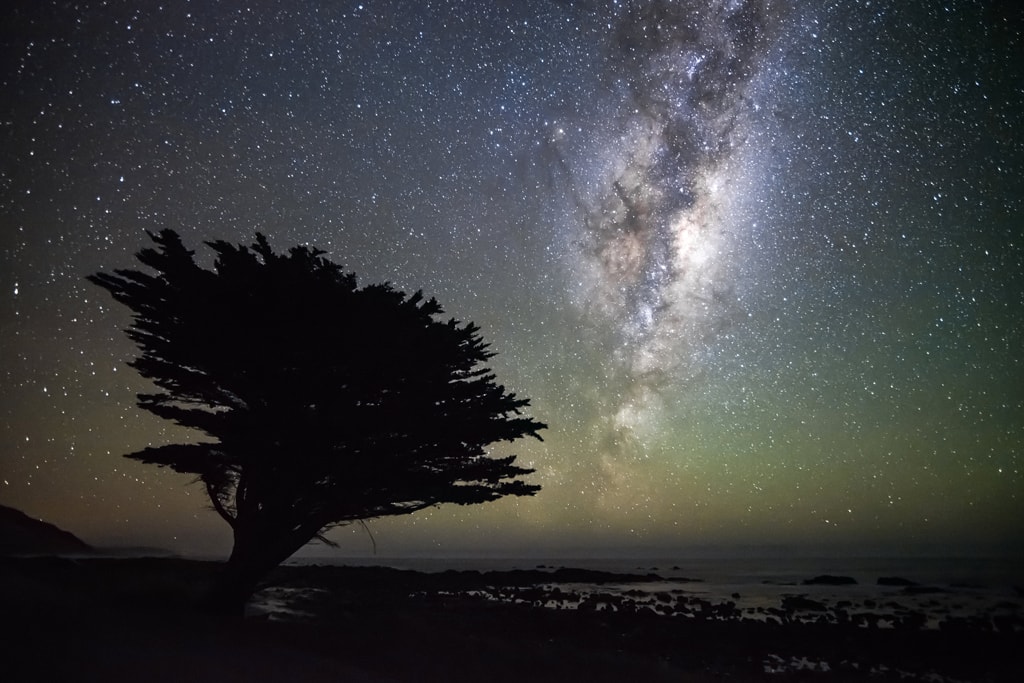
6. You will need to shoot with a long exposure and high ISO settings to capture a starry night sky time-lapse. Settings will vary depending on environmental lighting conditions and the camera you are using, but in a dark sky environment on my full frame sensor Canon 6d and a 14mm lens, I typically shoot with a 30-second shutter and an aperture of f/2.8 with a ISO of 3200.
7. Make sure you set your interval on your motion control unit so it allows enough time to write the image to the card before firing the next shot. I tend to use the 5-second rule, so if I’m shooting a 30-second exposure, my interval will be 35 seconds between shots.
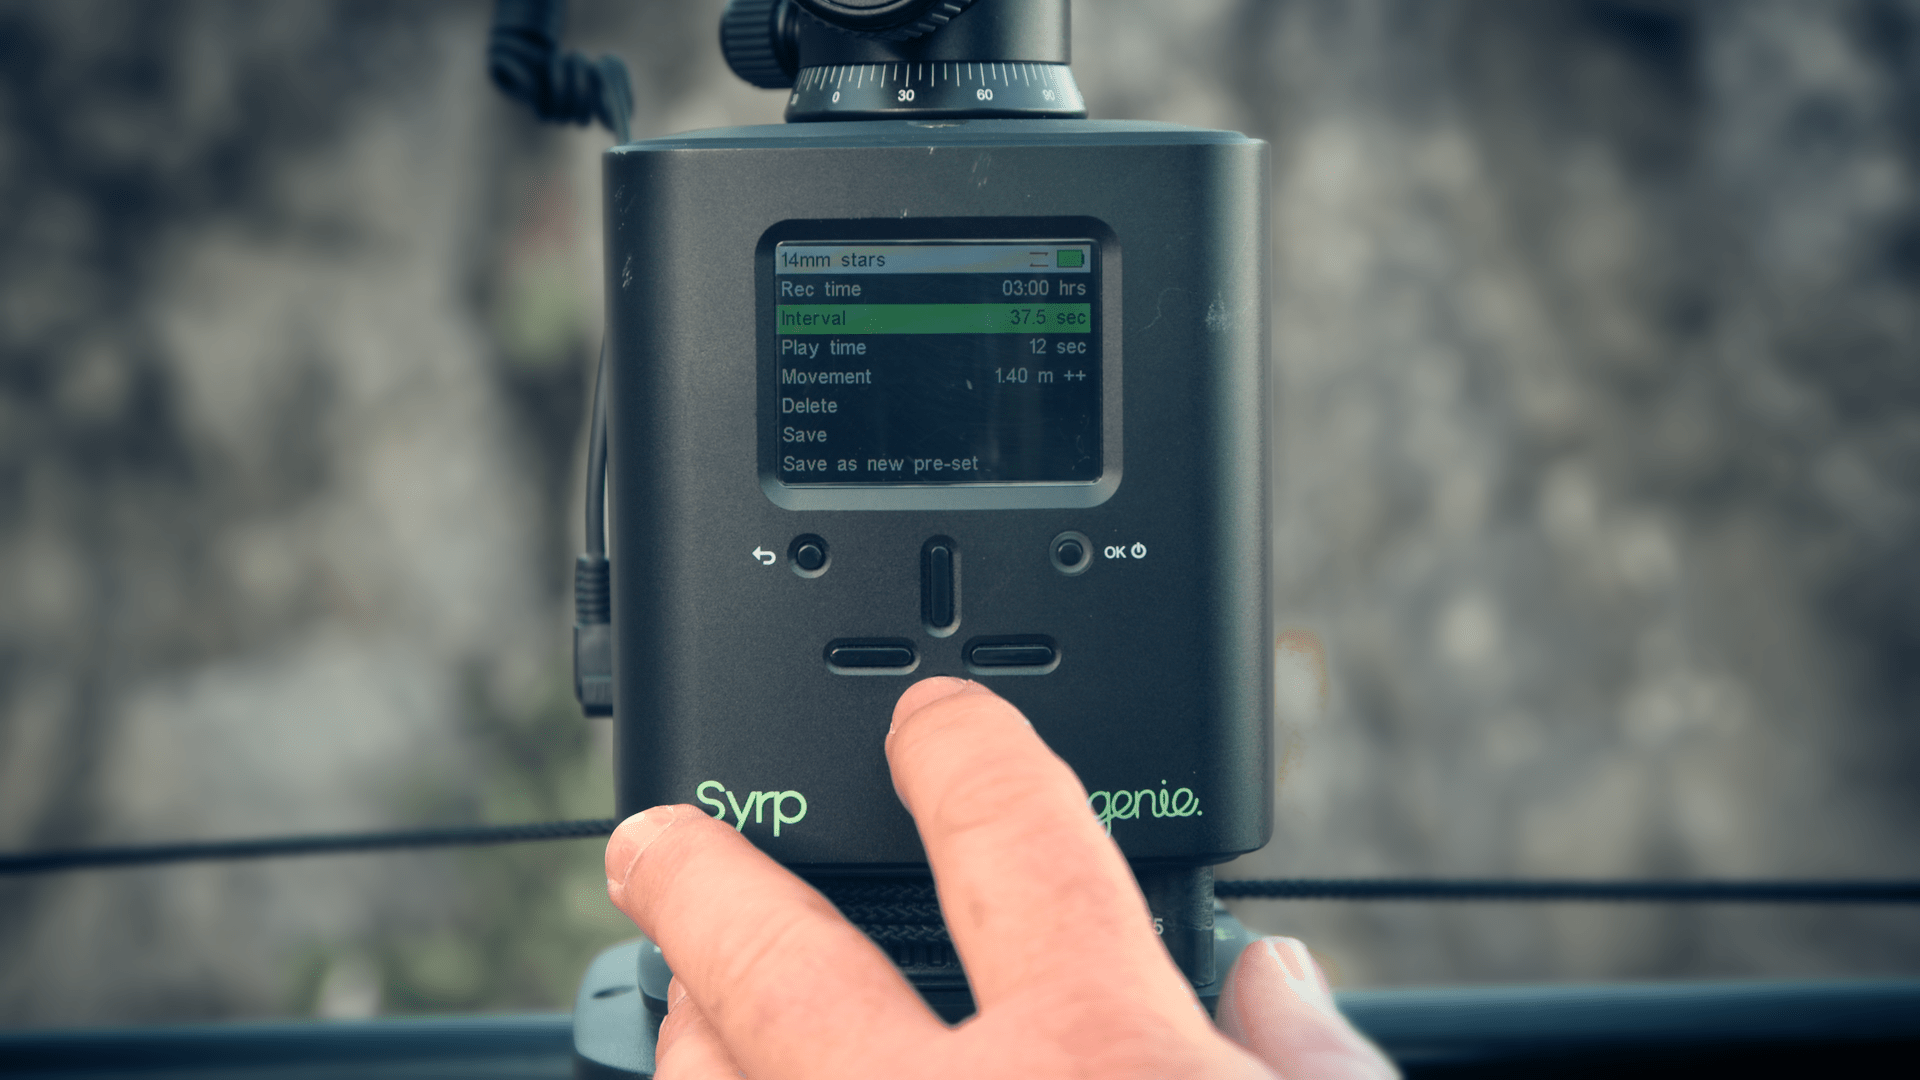
8. Once you have your camera and motion control setup, preview your time-lapse movie to make sure you’re happy with the movement and composition. You can shine a torch on your landscape in frame and preview the move with live view on your camera. I also tend to take a photo at the start and end position of the time-lapse, so I can see what I will end up with as far as the composition and exposure is concerned.
9. Before setting your time-lapse off, make sure you do a final check of everything. Make sure everything is set manually on your camera and your focus and exposure is correct. Check that your interval and general settings like direction of travel are correct on your motion control unit. And double check you don’t have your lock engaged on your slider...I’ve been bitten by this a few times in the past! Once everything is in order, set your time-lapse off and sit back to enjoy the stars!
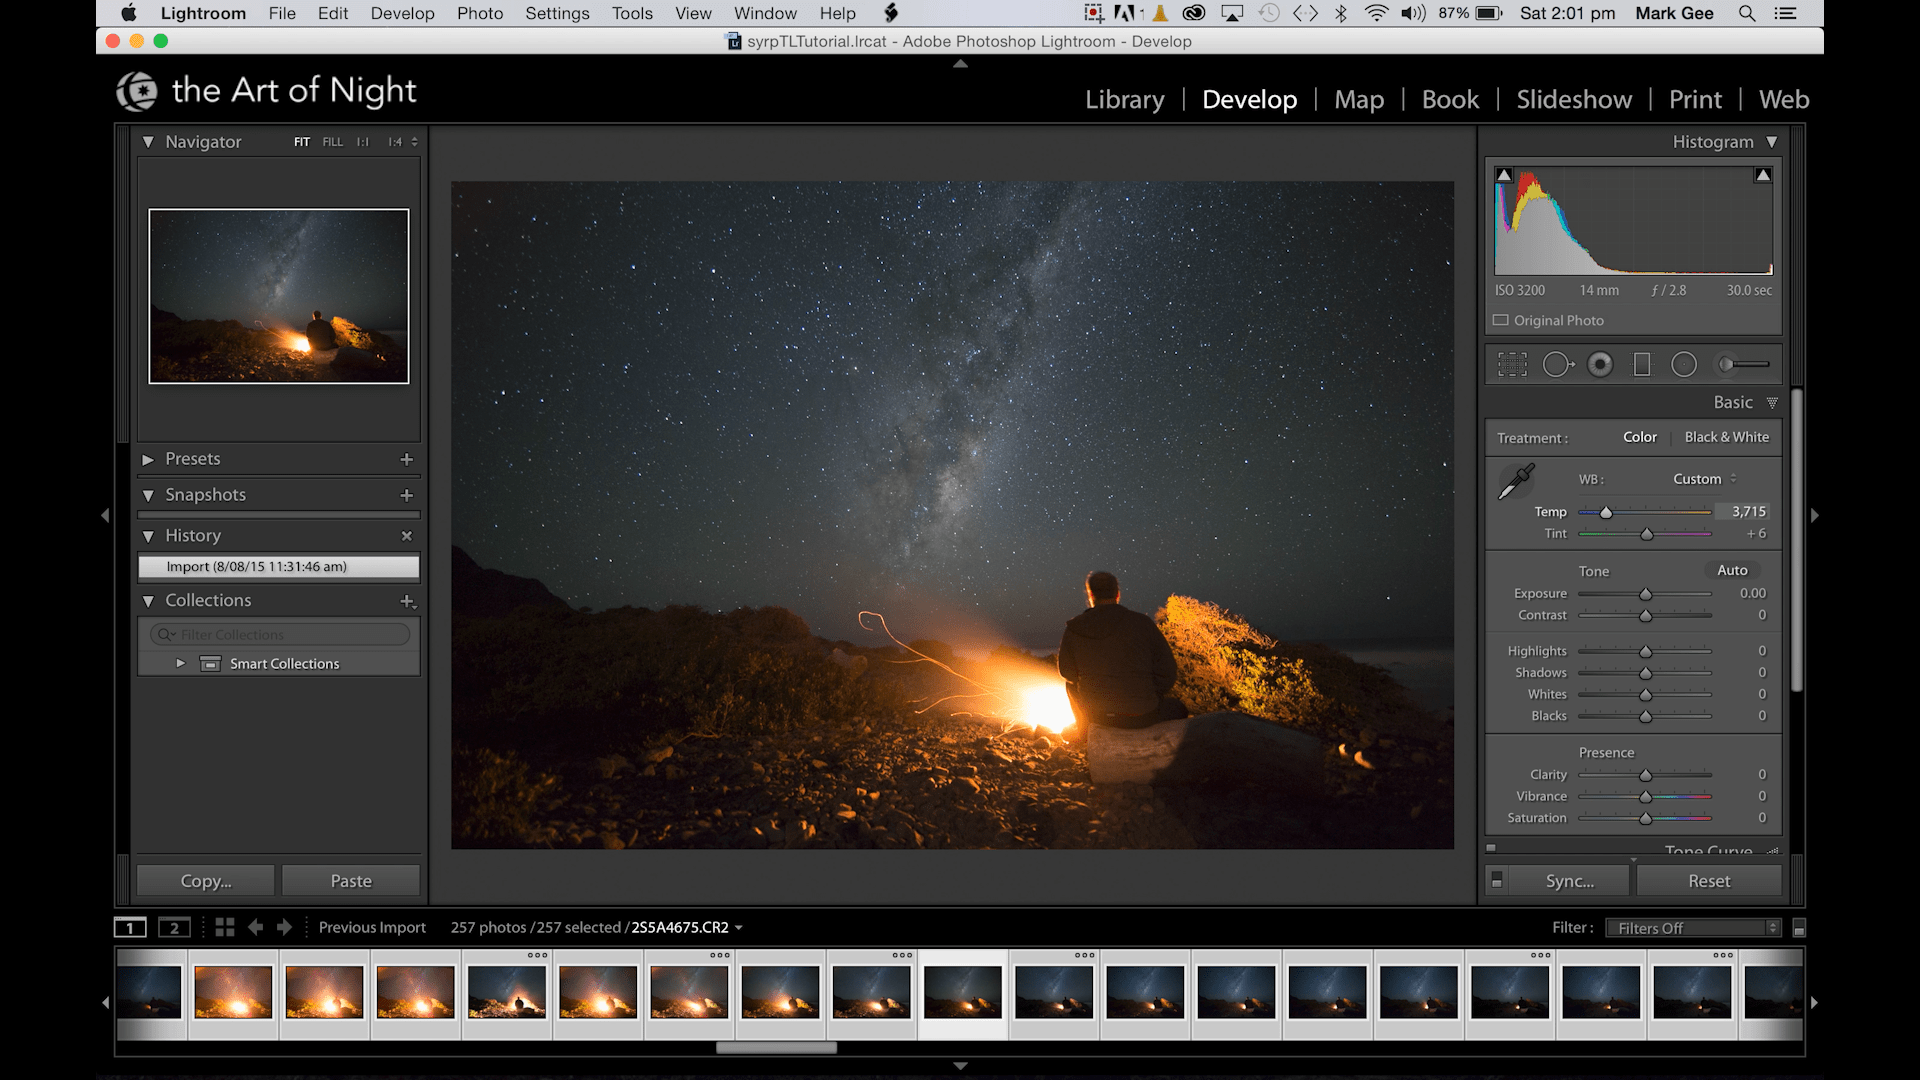
10. After you have all your images downloaded and ready for processing, as tempting as it is, make sure you don’t overcook your processing - it might look great to you on a single image, but once saved out as a movie, you will end up with a lot of noise and artifacts in your time-lapse.
I hope you’ve found these 10 points on shooting an astro time-lapse helpful - make sure you also check out the video tutorial below to see how I use the Syrp Genie for my astro time-lapses - I cover everything from setting up the Genie, to processing a time-lapse from start to finish.
Mark Gee is an award winning photographer, time-lapse filmmaker & digital visual effects supervisor based in Wellington, New Zealand. He has worked on many high profile and Oscar award winning feature films. His love of the New Zealand landscape is a big part of the inspiration for his photography. Visit his website at www.theartofnight.com.
We Recommend
How to Take Interesting Photos in the Most Boring Places

Mundane Surroundings? No Problem!
All too often we get enamored with photographing the spectacular - the Yosemites of the world, for example - and shun the everyday locations with which we are familiar.
However, this is a mistake because gorgeous photos can be created in even the “ugliest” locations. It’s just a matter of getting creative.
Consider these quick and easy tips for making the mundane magnificent.
Focus on the Details
When striving to find beauty in the mundane, it’s important to focus on the little details. Doing so opens up new avenues for portraying the subject because you can focus on fundamental elements like shape, color, texture, patterns, light and shadows, to name but a few.
The image above benefits from this approach. The detail of the wall, with areas of peeling paint and cracks, along with the shadows cast by elements unseen in the frame, gives this image all sorts of visual appeal. What’s more, including typography in the frame - the signs on the door - adds another layer of punch, both in terms of the visual interest of the lettering and in terms of the pops of color that are added to the scene.
Look for details like these in your everyday scenes, and use them to create a more compelling image.
Go For Broke With Your Composition

Often, the manner in which you frame your shot, the way you utilize depth of field, or the perspective from which you shoot will have a tremendous impact on how your image is received. For example, shooting from eye level, from a standing position, with your subject centered perfectly in the frame might not be the most compelling composition. In fact, that sort of composition might make the most spectacular scene seem a bit boring.
Just like with any photo, an image of a “boring” subject needs to benefit from how you compose the shot. As a result, do what you can to shake things up. Try shooting downward to get a top-down perspective, as was done in the image above. Play with your aperture to see how a blurry background might change the impact of your photo. Shift your subject to the extreme edges of the frame, giving viewers something totally unexpected in terms of subject placement. You might very well find that doing so makes the shot.
Don’t Be Shy

A large part of your success in making great photos of less-than-stellar subjects is in your willingness to experiment and see what you can create. It’s a difficult process to learn how to take high-quality photos. But when you combine that with subjects that maybe aren’t as grand or gorgeous as you’d like, the process becomes a little tougher to master.
Nonetheless, don’t let an increased level of difficulty dissuade you. There will be many bad photos, no doubt, and many moments of great frustration as well. But being willing to try new things and stretching your comfort zone will not only result in an expanded set of technical skills, but it will also help you grow creatively. So, don’t be shy - grab your camera and a couple of friends, and see what “boring,” everyday subjects you can find in your house, your yard, or your neighborhood to highlight in a gorgeous photo.
We Recommend
How to Take Killer Photos of the Night Sky
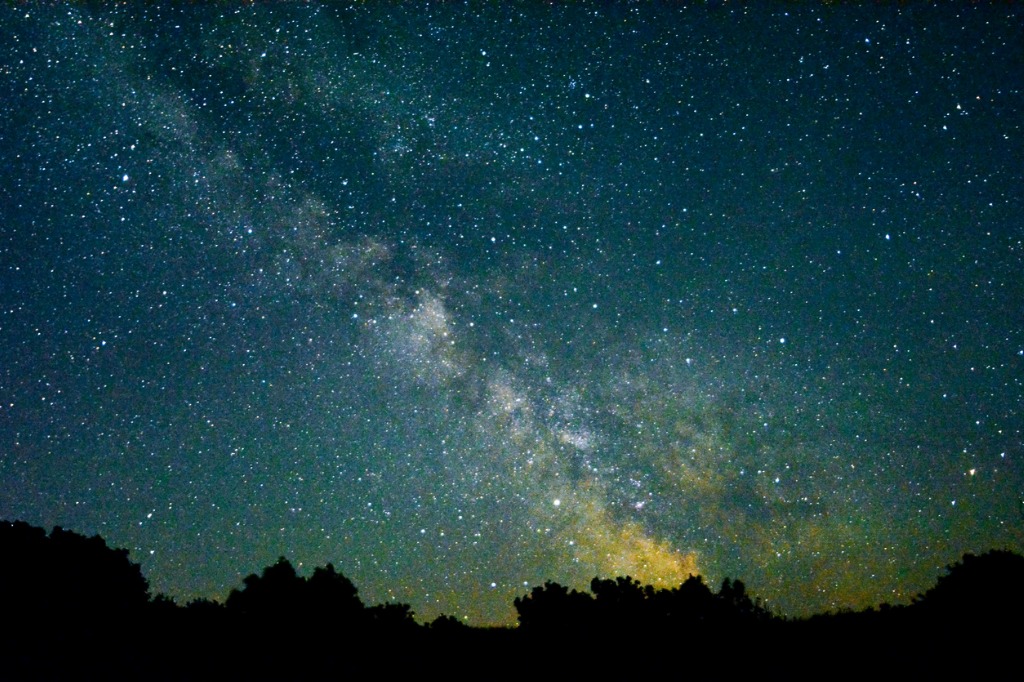
photo byInner_Vision via iStock
Photos of the night sky, also called astrophotography, are a definite challenge for any photographer, but the results can be outstanding and create a sense of awe and wonder. Some of the challenges can be met by equipment choices and proper use, other challenges are met by astrophotography techniques that have been proven over the course of time.
To be able to create your own beautiful photos of the night sky, follow this list of astrophotography tips and take a look at some of our previous astrophotography tutorials.
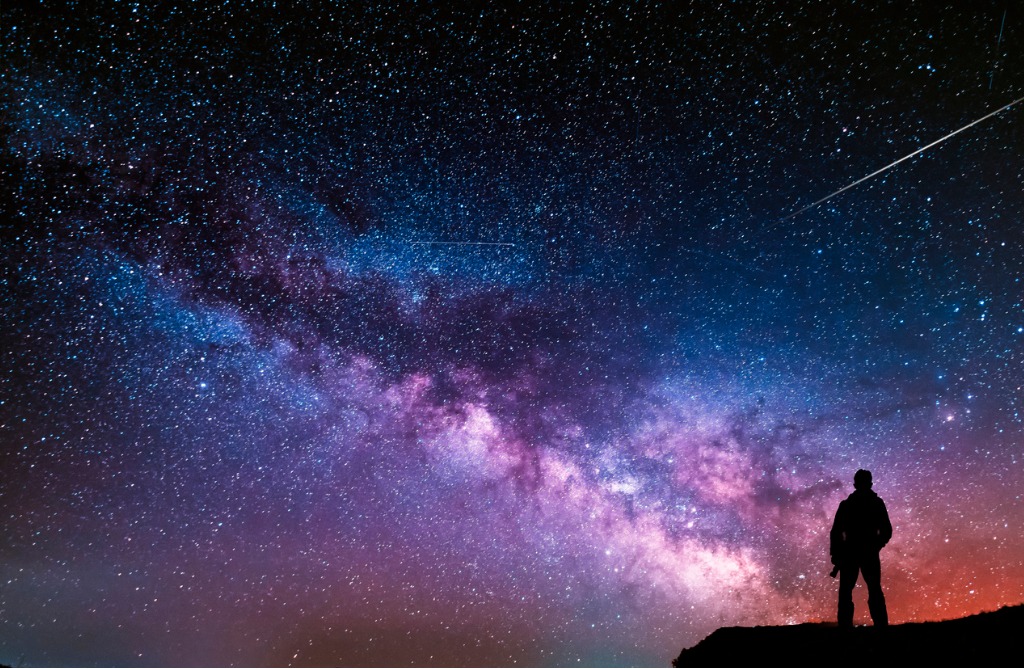
photo byInga-Av via iStock
Here is the short list of astrophotography tips for making great photos of the night sky:
- A Tripod is Essential
- You Need a Light Pollution Filter
- Grab a Remote Release
- Set Manual Focus
- Shoot RAW
- The 500 Rule
A Tripod is Essential

photo bybjdlzx via iStock
Astrophotography is almost always long exposure photography. The exposure times are commonly measured in full seconds but can stretch out to minutes or require stacking multiple exposures for certain astrophotography techniques.
Both long exposures and stacking multiple exposures requires that the camera be completely stable and unmoved. Any movement of the camera during a long exposure will degrade the image with a measure of streaking and any movement during stacking will result in registration errors.
You will want a tripod that is simple to set up and study enough to not have any chance of accidental movement. You will also want to practice good astrophotography techniques such as not touching the camera rig at all during the exposure or exposure sequence.
You Need a Light Pollution Filter
Light pollution is a very real concern for a large number of photographers when taking photos of the night sky. Just as smog pollution can obscure a view of any outdoor subject, light pollution can obscure the view of stellar and other night sky objects.
One solution that has been employed for decades of astrophotography is to travel to an area far from any city lights. Astronomers refer to these places as Dark Sky spots.
That requires a lot of time and effort for many of us, so another fine astrophotography technique is to add a filter designed to compensate for light pollution such as the Haida Clear-Night Filter that is available in a variety of sizes. I recommend buying the largest size you need and using a step ring to adapt to your other lenses.
The Haida filter targets the spectrum emitted by sodium vapor and mercury vapor lights that are common in street lights, parking lots, and stadiums, and low CRI LED lights that are found in outdoor household lighting. By blocking or attenuating these wavelengths, the Clear-Night Filter opens up more light from deep sky subjects to be seen and recorded.
Grab a Remote Release
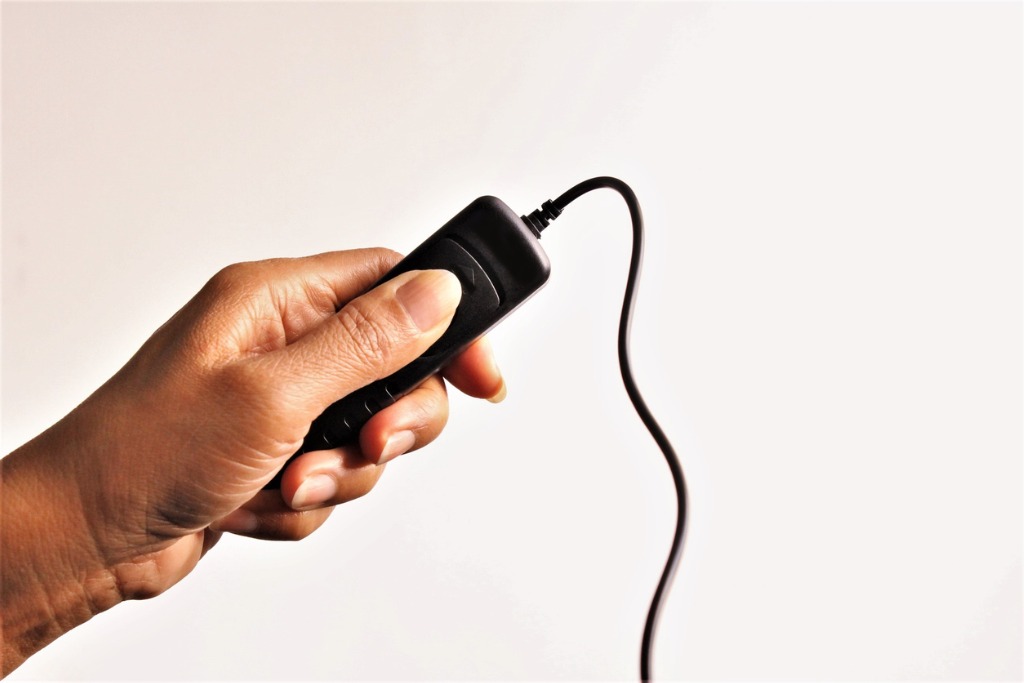
photo bySOMKHANA CHADPAKDEE via iStock
Since we are using long exposure techniques for taking photos of the night sky, an additional item to use with our tripod is a remote release. You really don’t want to touch the camera or tripod at all during these exposures, so having a long enough cord is also essential.
Many remote releases for modern digital cameras have extra features added beyond merely triggering the shutter. Some will also allow multiple exposures to be programmed or can be locked with the shutter open for extremely long shutter speeds.
Learn More:
Set Manual Focus
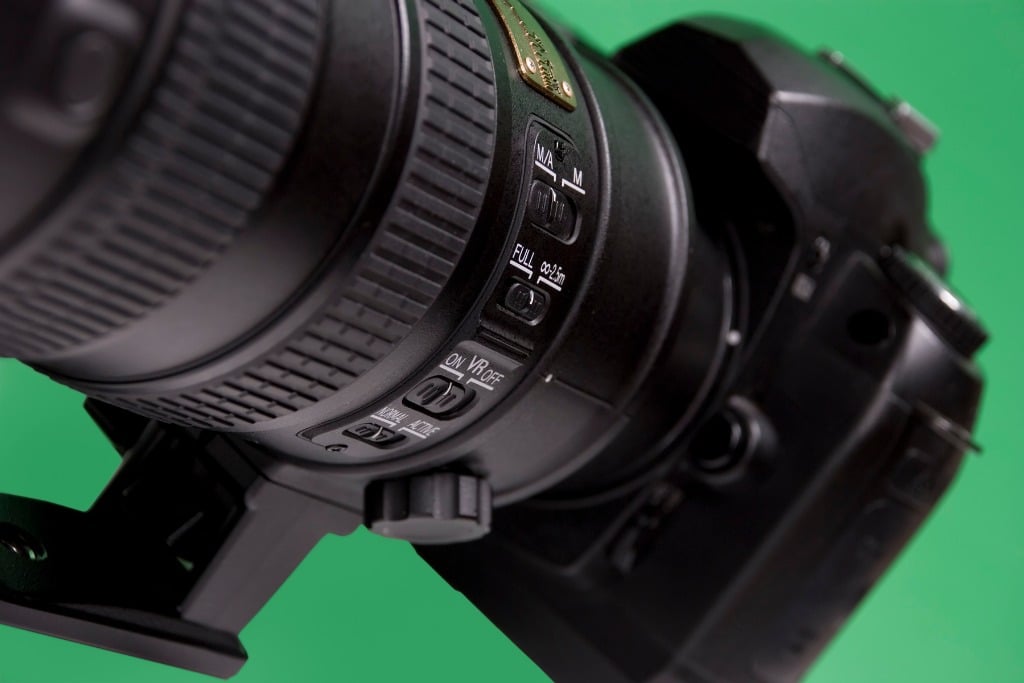
photo bystoffies via iStock
Turn off the autofocus feature of your camera. Everything in the night sky will be well beyond the furthest marked distance on your lens and will be at the lens infinity focus position.
What makes it a little more difficult than merely twisting the focus ring to the infinity position is that the infinity focus position can be a bit variable on many lenses, especially longer focal lengths. That’s why you may have noticed a little bit of play in the focus ring beyond infinity that has nothing to do with Buzz Light-Year.
Since the viewfinder may be a little hard to see for astrophotography, the rear viewscreen is a good option for confirming accurate focus. You might even use the magnify feature of the viewscreen if your camera offers that.
Shoot RAW
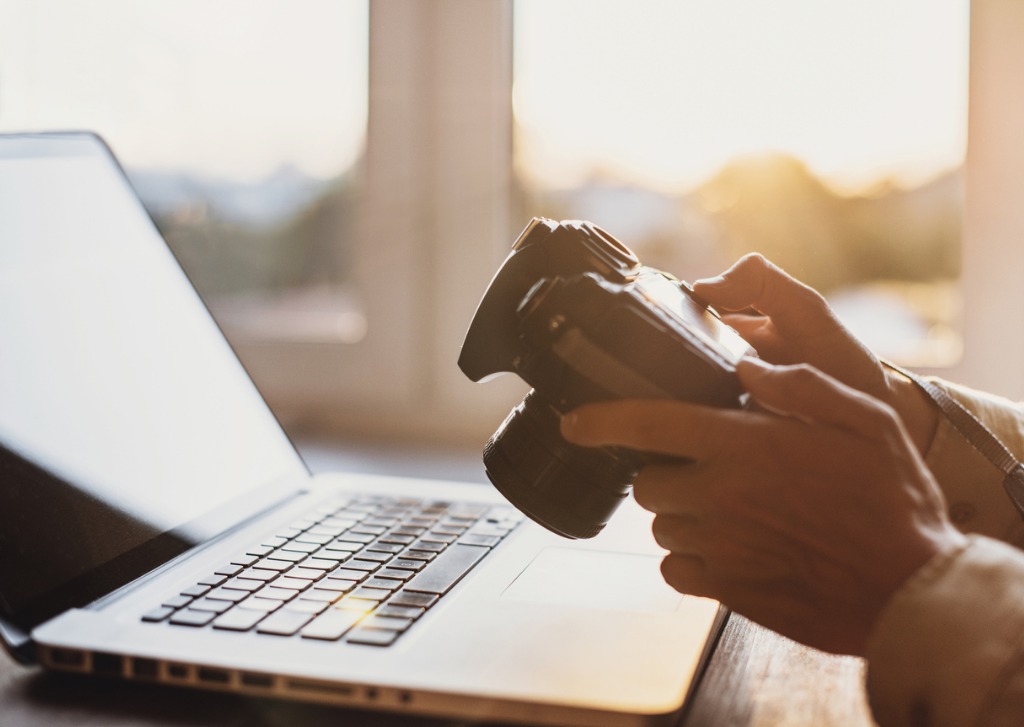
photo byPoike via iStock
Whenever we shoot in situations that have a lot of shadow detail area or unusual color temps, RAW is the preferred format for recording the files. Astrophotography certainly qualifies in both of those areas.
Shooting photos of the night sky in RAW means that we will have to post process in order to be able to view them on other devices or share them with others. An advantage of RAW is that we can assign a color temperature or a color profile that looks proper for the subject and also that we can pull out more detail from the dark areas than with a compressed file like JPEGs.
The 500 Rule
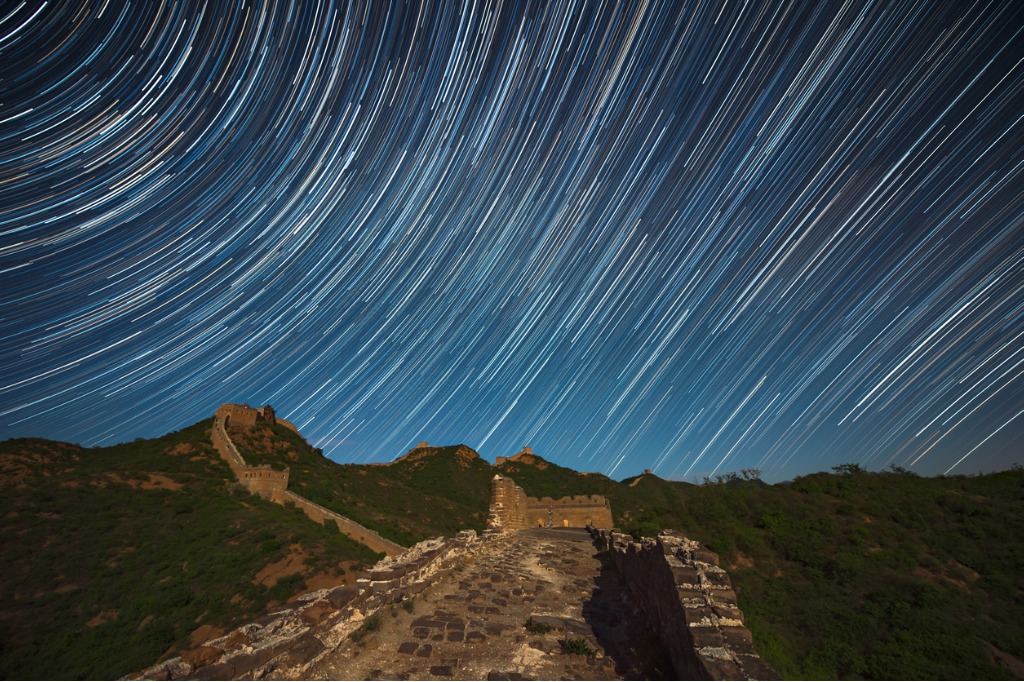
photo bybjdlzx via iStock
Subject motion is a huge issue when shooting photos of the night sky. Technically, it’s actually camera motion. Let me explain.
The deep sky objects appear fixed in the sky but they’re really not. Due to the motion of the Earth, its rotation specifically, that entire backdrop of sky is slowly moving on us. When we leave our shutter open long enough, the spots of light in the sky will eventually be streaked by this motion. How long do we have?
That’s the 500 Rule. 500 divided by the focal length of your lens equals the longest exposure time before stars start to streak, measured in seconds. So, for a 50mm lens, the longest we can expose before that dot becomes a line is 10 seconds. Our 24mm lens gives us 21 seconds and a 135mm lens reduces us to only 4 seconds.
All of this assumes Full Frame 35mm format. If using APS-C or MFT cameras, you will need to adjust the focal length by the crop factor before figuring the 500 Rule. So an 18mm lens on an APS-C camera will not be 28 seconds but rather 18 ½ seconds. Yes, it’s math, but you’re a photographer, you use math successfully all the time.
A motorized equatorial mount like you may have on your telescope is about the only way to get away from being bound by this 500 Rule.
Other Astrophotography Tips
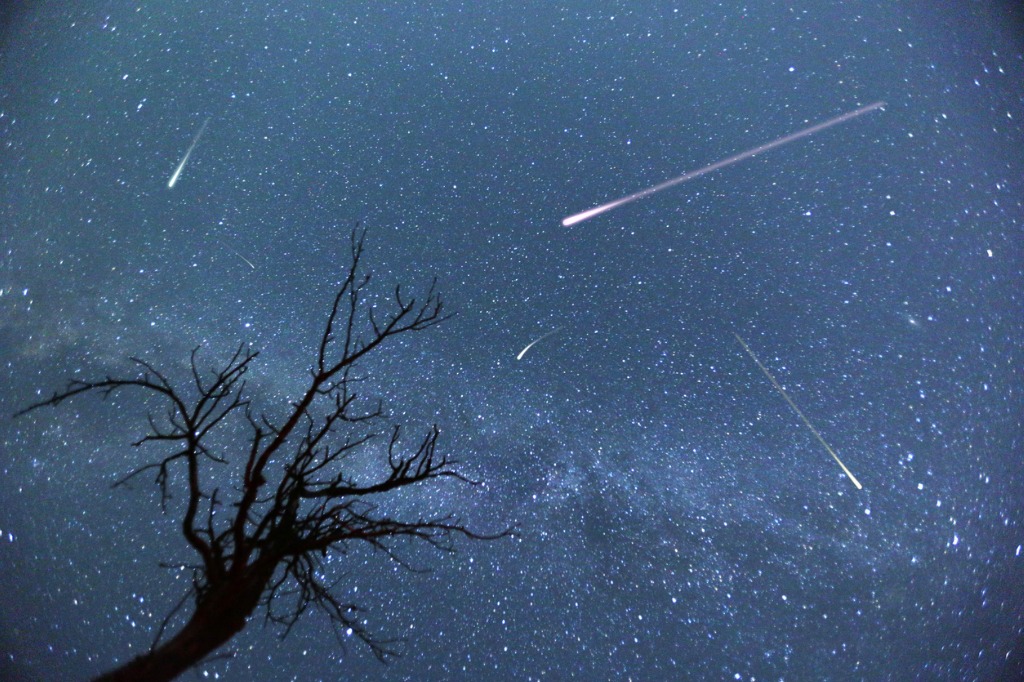
photo byCylonphoto via iStock
There are other things to consider for capturing great photos of the night sky, check out our other astrophotography tutorials.
Some additional things to consider are what ISO to use, why you don’t want to shoot with your lens aperture either wide open or stopped all the way down, but rather at the ‘sweet spot’ aperture for your lens, and what the astrophotography techniques of image stacking and dark frame subtraction accomplish.
You are up to the challenge of making amazing photos of the night sky. All you need are a few specific items and some great astrophotography techniques in order to succeed.
Learn More:
- How To Take Good Photos With a Kit Lens
- Mountain Photography Tips
- Best Aperture for Landscape Photography
We Recommend
How to Take Sharp Photos at Night
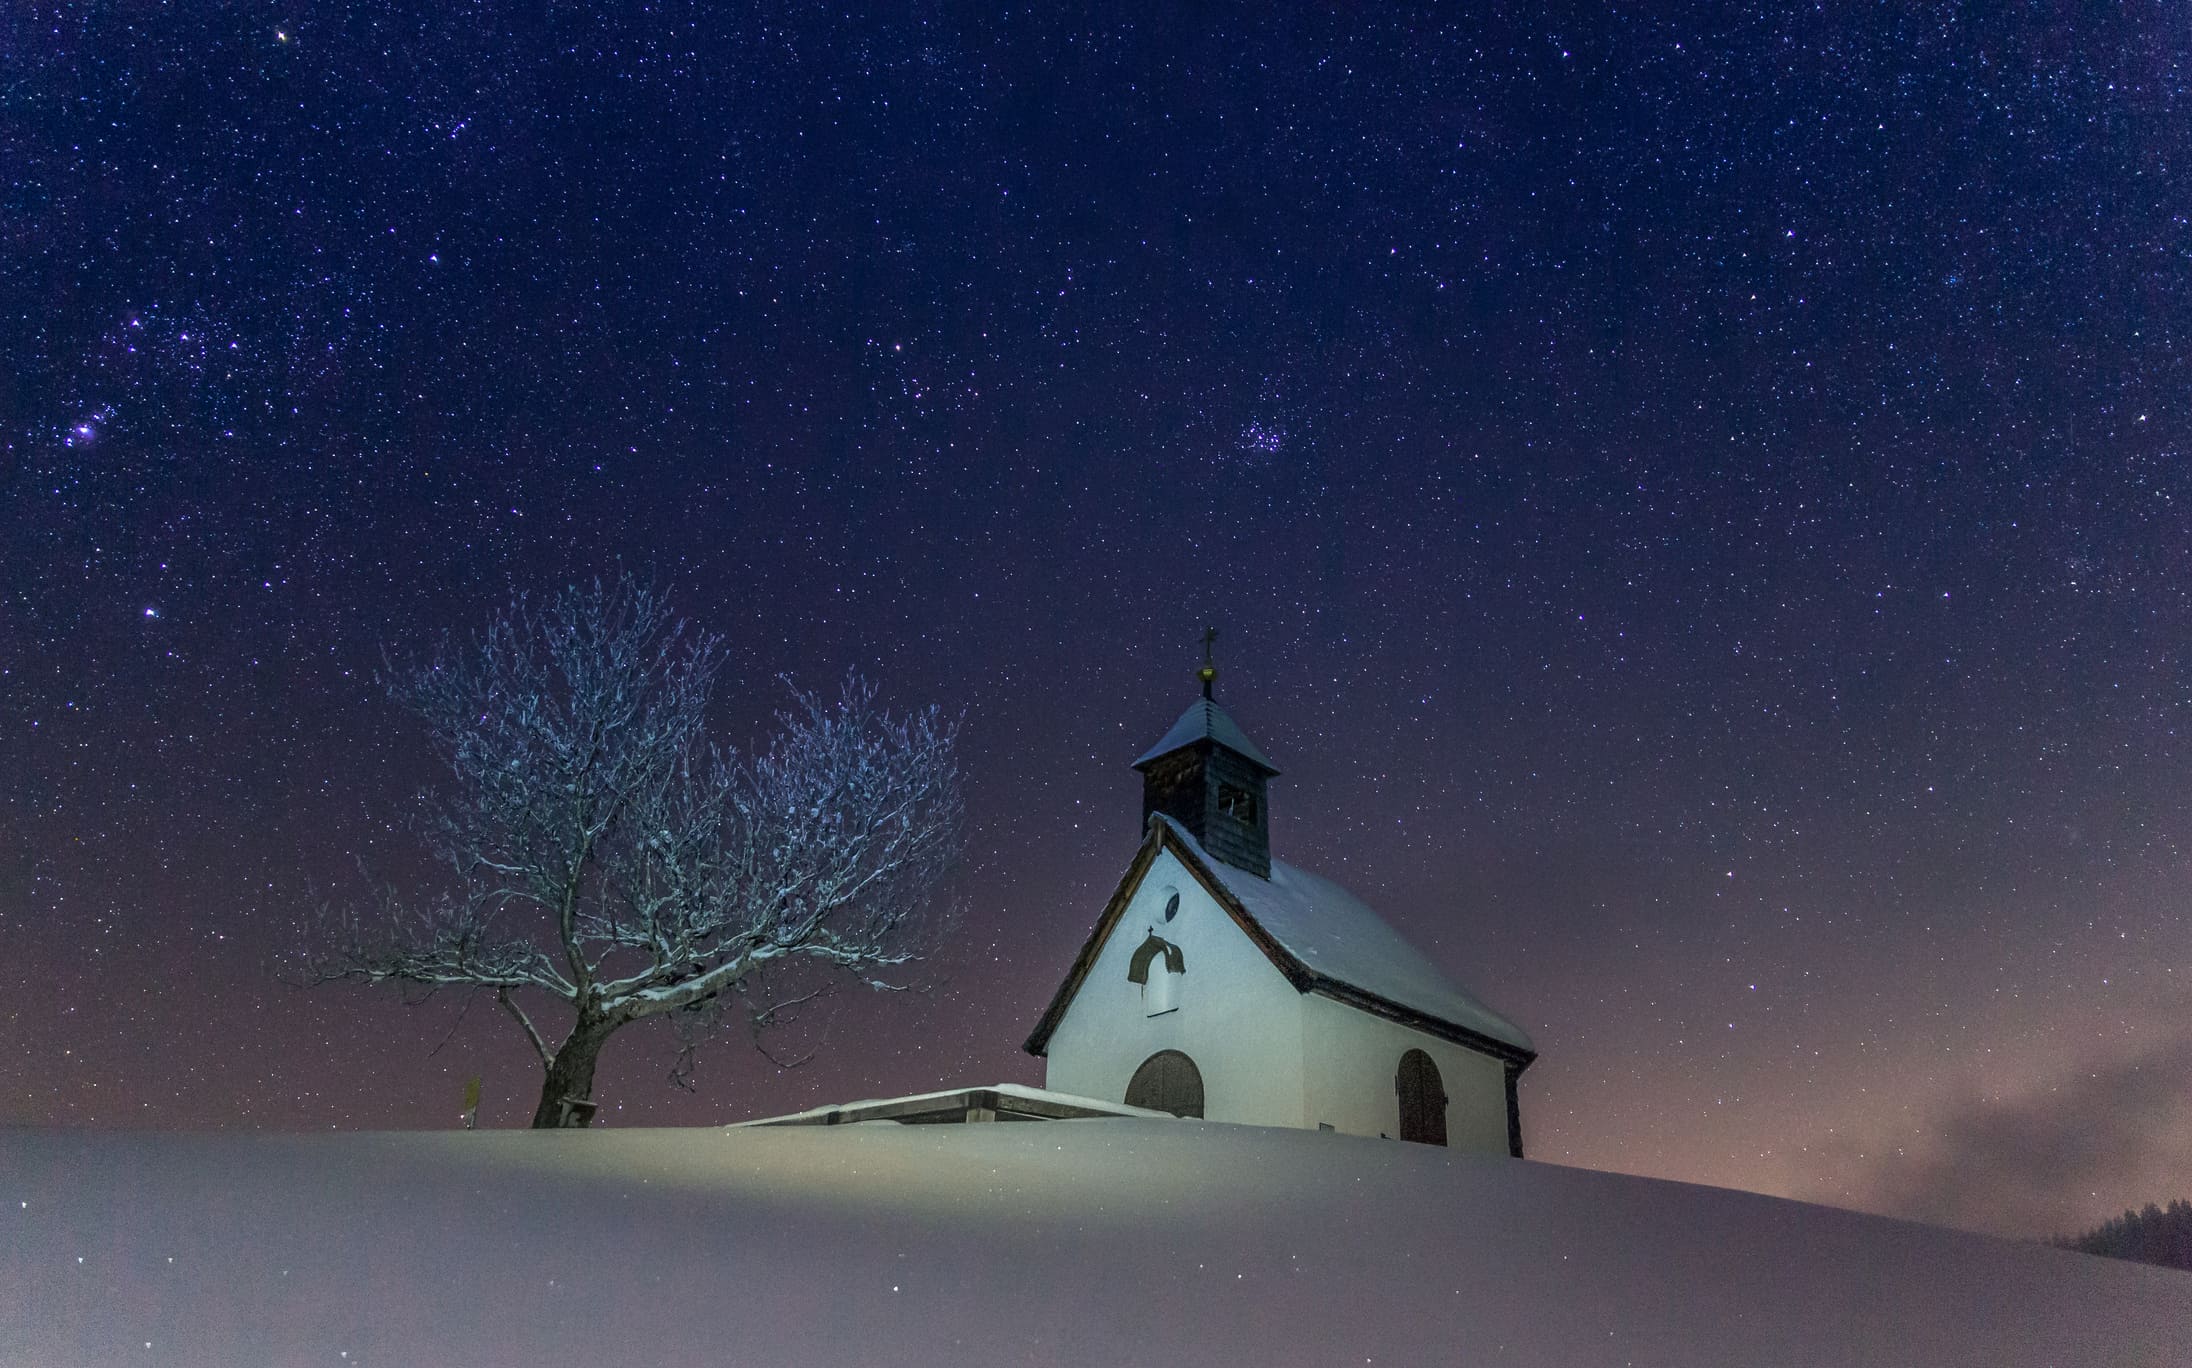
When you shoot photos during the day, the autofocus system on your camera is good enough to work like a charm in most instances.
Granted, it's not perfect, but the instances in which it isn't spot on are few and far between.
But shooting at night is another story...
Even the most sophisticated autofocus systems struggle to acquire focus at night or when shooting a dark scene. The question is how to take sharp photos at night.
Fortunately, there are quite a few things you can do to get the tack-sharp photos you're after.
Editor's Tip: New to astrophotography? Get all the latest tips and tricks in our astrophotography section, sponsored by our friends at MrStarGuy. If you need a tripod, a telescope, astro binoculars, or any other astrophotography gear, MrStarGuy - a family-owned business that treats you like a friend - is the place to do it!
How to Take Sharp Photos at Night: Manual Focus
Even if you have a camera with a superb autofocus system (like the Sony a7R III), it's still not good enough to acquire focus on its own at night.
That means that you need to take control of focusing and manually focus the lens to get the sharpest focus in your photos of the night sky.
I've explored manual focusing in detail in this post, but as a quick guideline, you simply need to do the following:
- Set your lens to manual focus
- Set the focus at infinity
- Enable live view
- Frame the shot, with the brightest object in the sky in the center of the frame
- Use live view to zoom in on the bright object
- Fine-tune the focus by manually adjusting the focus ring
- Take a test shot
- Inspect the results
- Lock the focus in place with gaffer's tape once the focus is spot on
This method might seem a little laborious, but the sharpness of the images you take certainly make all the effort worth it.
Besides, the more you practice, the faster you'll become at performing each step.
Check out a quick and simple overview of manually focusing your lens for astrophotography in the video above by Michael Coustier.
Refining Manual Focus for a Sharp Picture
As noted above, a good place to start with manual focusing is to set your lens at the infinity mark.
But there's a catch...
You can't just use the infinity mark on your lens because the marks on your cameras lens are seldom perfectly accurate.
That means you need to fine-tune the focus to get optimal results.

Zooming in using live view as described above is one way to get sharper focus.
Since you can't zoom in using the viewfinder, relying on the LCD panel on the back of your camera to get as close as possible to the target subject will help you zero in the focus with much better accuracy.
But there's another way to get a sharp picture at night...
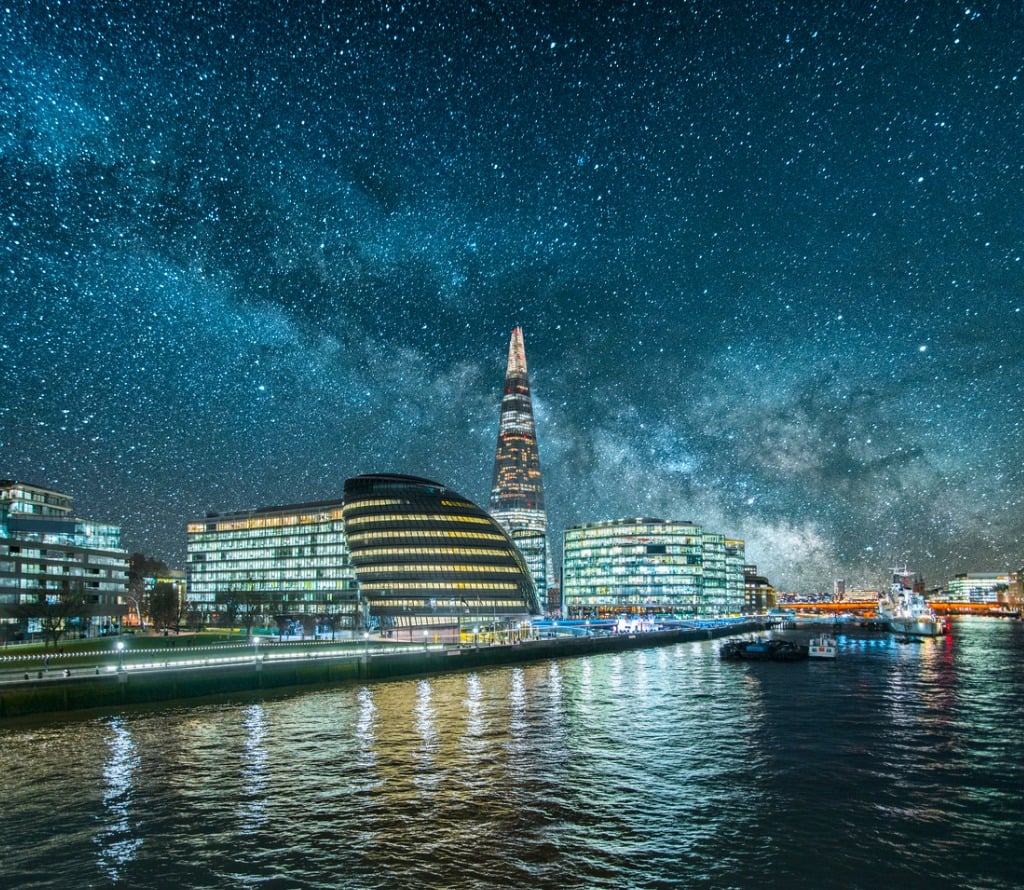
If you can't seem to acquire focus on a star or other celestial body, you can often use a bright object that's much closer to get the focus right in your shots.
Whether that's the light emanating from a town far away, the lights on a building in the distance or something else of the sort, as long as it's far enough away (at least 100 feet) for your camera to focus at infinity, it will help you get the stars in the sky above in sharp focus, too.
Learn More:
Taking Photos in Low Light: How to Tell if Your Camera is Focused
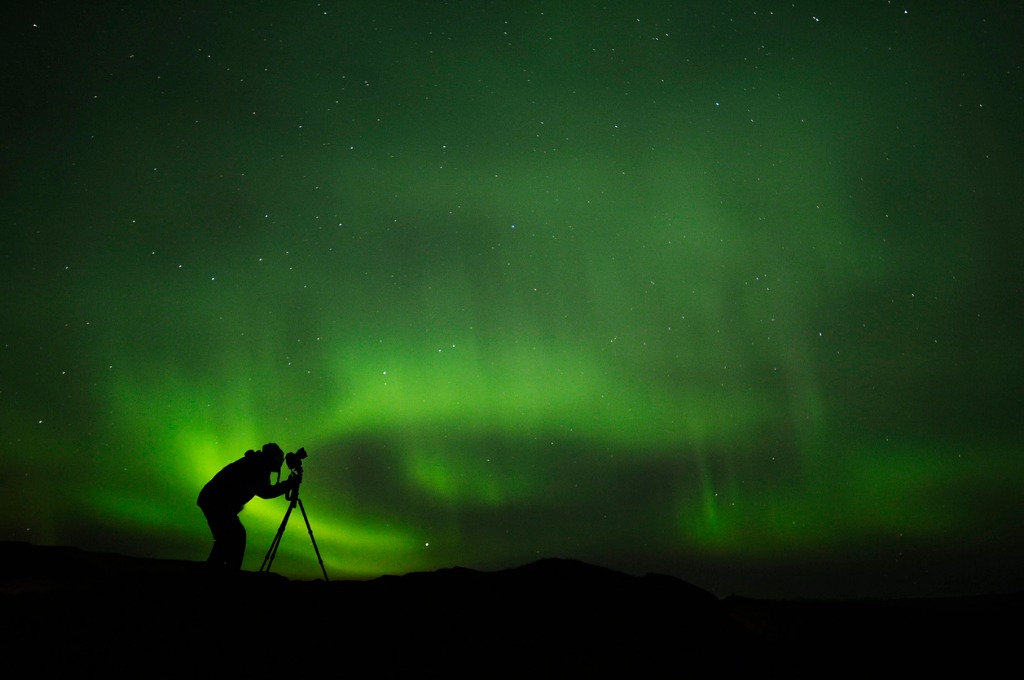
When zooming in using live view and manually adjusting the focus ring, it can still be a little tough to tell if your focus is spot on.
Perhaps the easiest way to get a sharp picture is to inspect the size of the object on which you've focused.
If you're focusing on the brightest star in the sky, it should look like the head of a pin - like a clear, crisp dot that is virtually perfectly white.
If the star isn't in focus, you can tell by its color because it will appear green if the focus is in too far and magenta if it isn't focused enough.
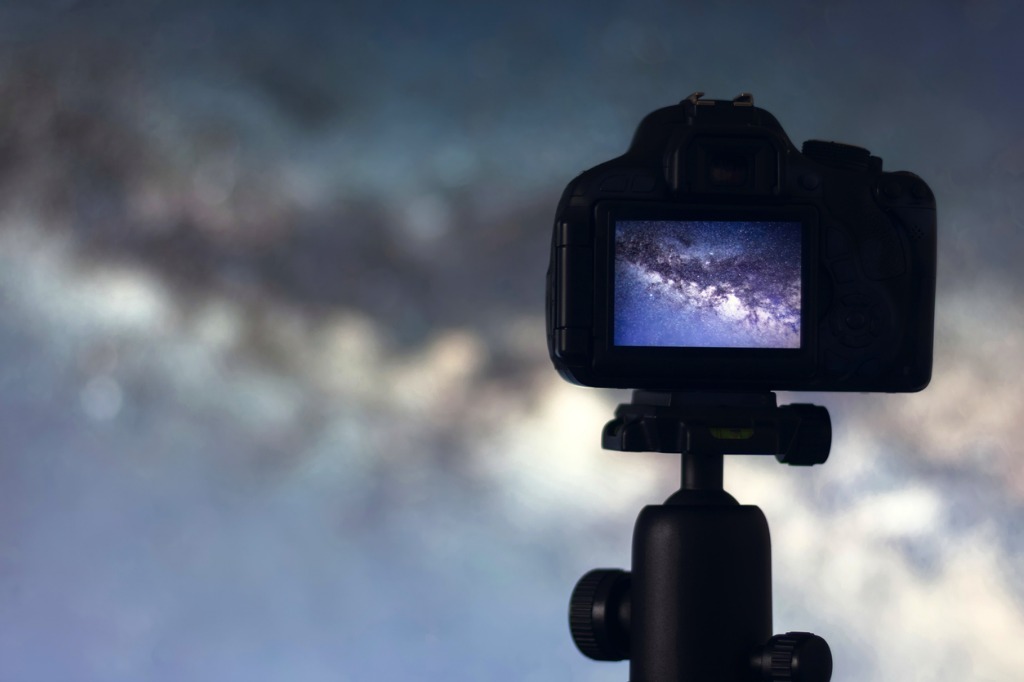
This change in the color of the stars as they go in and out of focus is due to spherical aberration that's common in lenses with very large apertures.
This aberration is called spherochromatism, which causes the colors shifts I mentioned above in very high-contrast highlights that are out-of-focus.
When using live view to zoom in and check focus, simply check for these color changes and use them as a guide to hone the focus of the shot.
If you see green, focus in more. If you see magenta, bring the focus back. If you see bright white, you've got it, and should see better results when taking photos in low light.
Bonus Tip: How to Get Pinpoint Stars

Though images like the one above can be beautiful, when you want to avoid the movement of the stars and photograph them as sharp pinpoints, using a star tracking mount is the way to go.
These mounts, like the Vixen Polarie shown below, make it easy for anyone to photograph the night sky.
Just attach the mount to a standard tripod, attach your camera to the mount, and orient the mount to face north.
Once the Polarie is set, it will track the movement of the stars for you, and eliminate star trails.
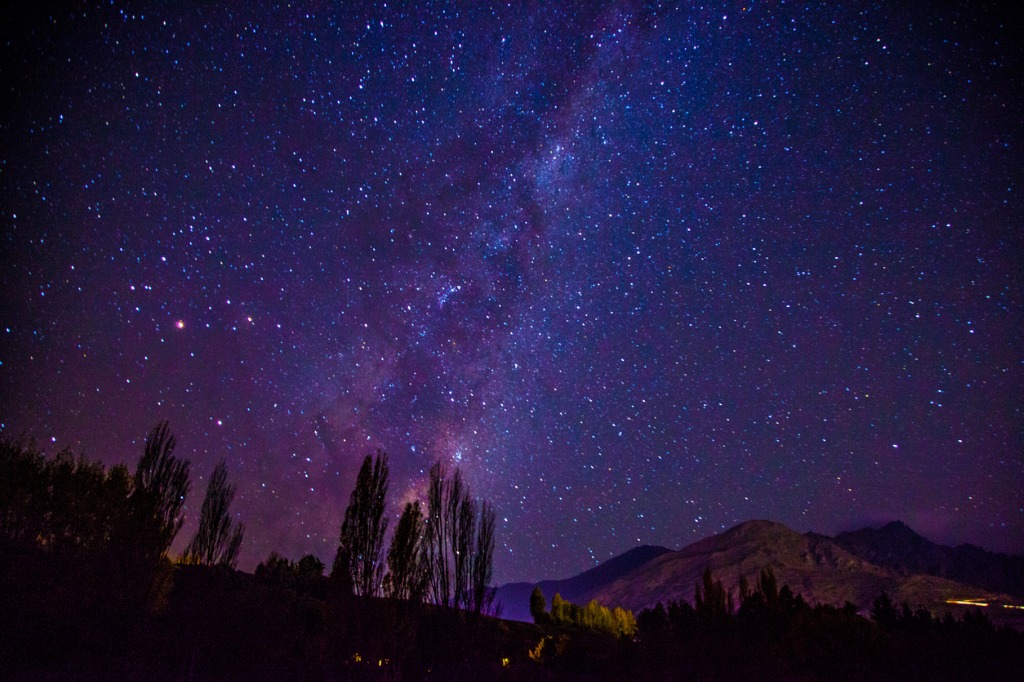
The resulting images will show the night sky just as you see it - with gorgeous, bright stars that are sharply in focus.
The Polarie is easy to setup, easy to use, and can be used with any camera that weighs up to seven pounds. You can even use it with your smartphone!
Learn More:
- Get the Specs and Pricing on the Vixen Polarie Star Tracker Mount
- Take Better Photos of the Stars With These Quick Tips
We Recommend
How to Take Sharp Photos of Stars
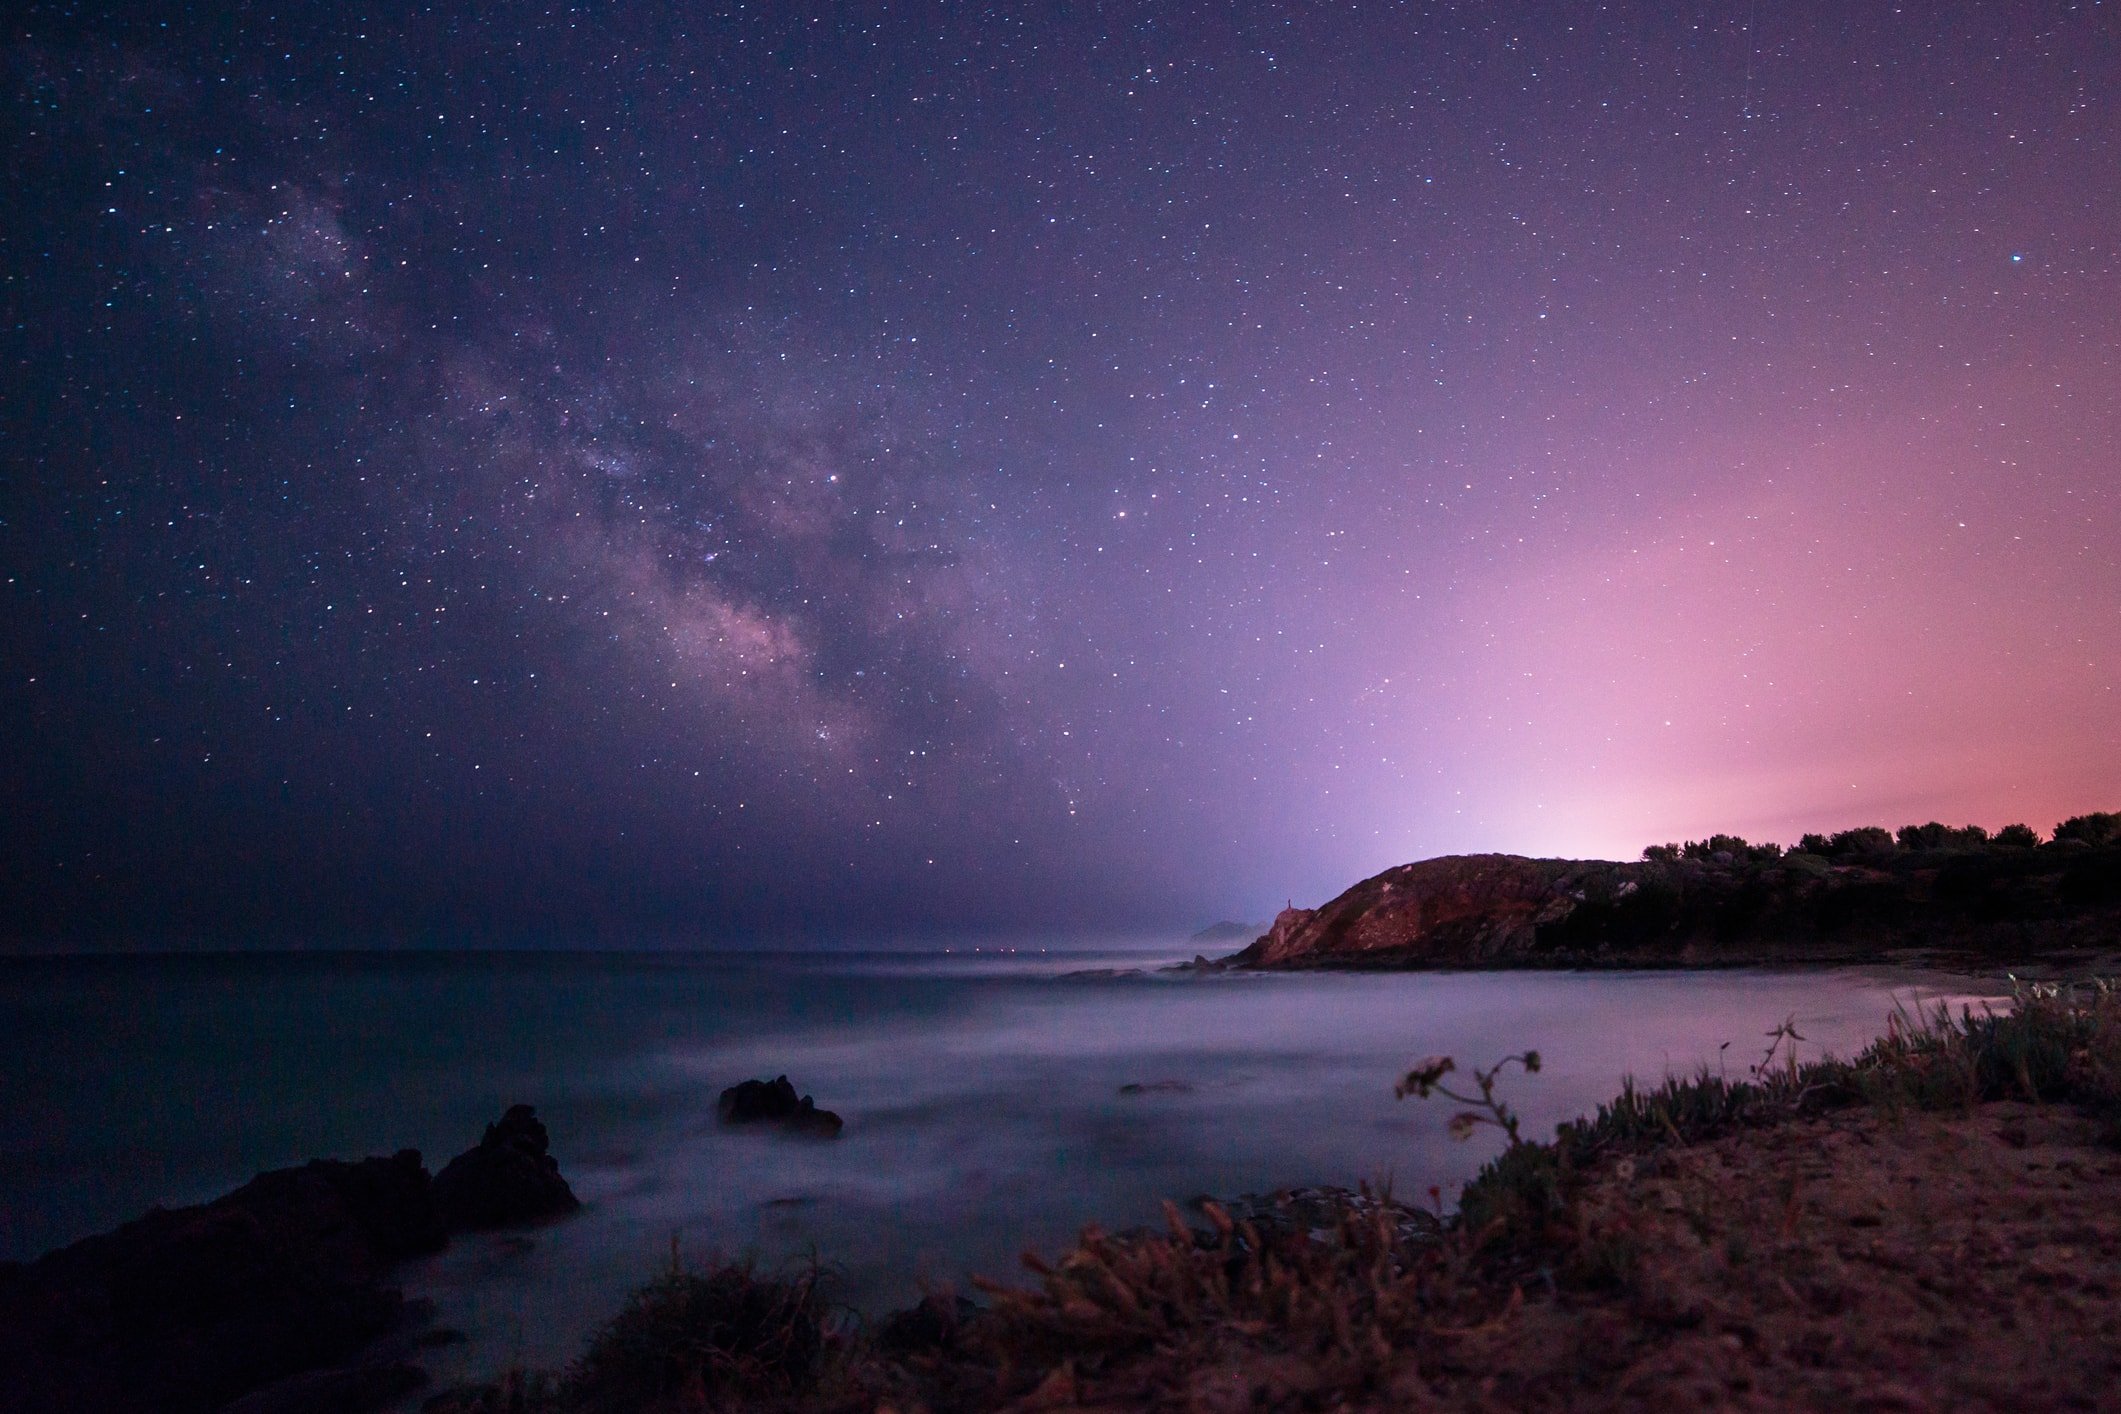
Ask just about any photographer what the most difficult kind of photography is, and my guess is that many will say astrophotography.
Though photographing the night sky can be daunting, if you break down the process step-by-step, you begin to see that it's really just a matter of mastering some basic techniques.
In this tutorial, I focus on one of the most important aspects of astrophotography: how to take sharp photos of stars.
Manual Focus is a Must
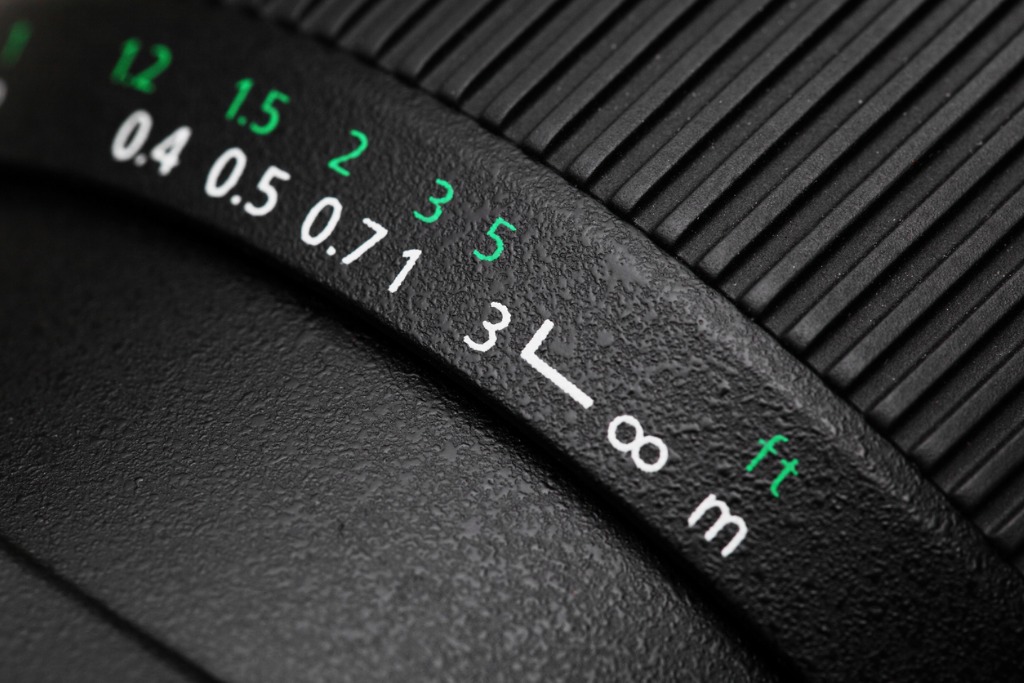
Typically, you can't rely on your camera's autofocus system to focus on stars, simply because there isn't enough light for the camera to lock its focus.
That means that you need to learn how to manually focus your lens to get the best results...
When manually focusing your lens, it's generally a good idea to focus on infinity.
The infinity mark on your lens's barrel isn't always completely accurate, though, so it will take a little bit of trial and error to find the precise spot at which the lens is focused at infinity.
That trial and error should occur well in advance of your astrophotography outing, as discussed in the video above by Milky Way Mike.
In fact, if possible, head outside during the daytime and look for distant objects (a tree, a mountain peak, a light pole etc.) on which you can manually focus.
You can use live view and zoom in to perfect the focus manually, that way you're sure that you've dialed in the focus perfectly.
Then, mark your lens so you know the precise point at which infinity focus has been achieved. Another option is to wrap the lens with gaffer tape to lock the focus in place (assuming that you won't need to use that lens between your test shots and the real deal!).
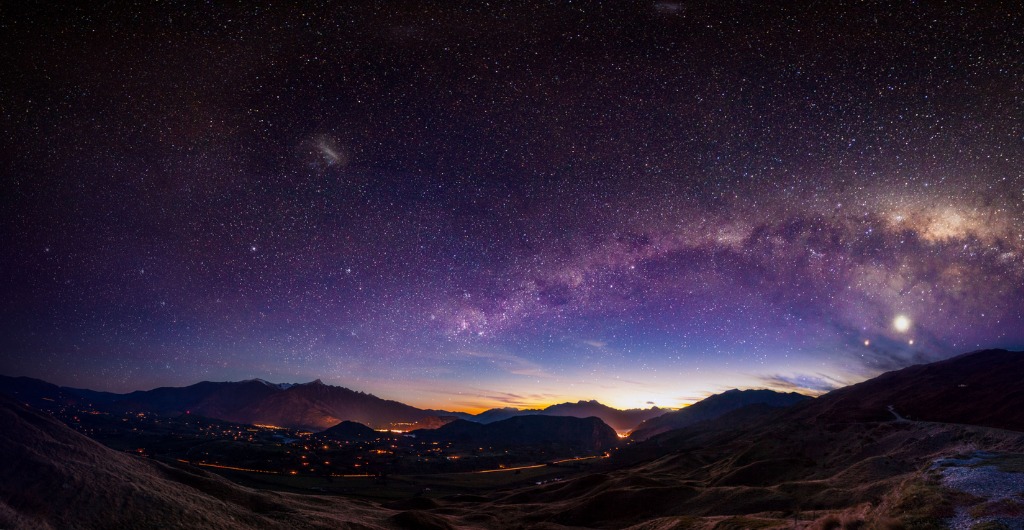
If taking time out of your day to set the manual focus just isn't possible, there are techniques you can use in the field at night to get the focus just right.
One of the best options is to use use the brightest star in the sky (or the moon) as your focal point.
Using live view, zoom in on the star and then with your lens in manual focus, adjust the focus ring back and forth until the star looks sharp.
It's important not to rush here - really pay attention to how the star looks on your camera's LCD so you're assured to get the sharpest photo.
Learn More:
Set Yourself Up for Success With Astrophotography Gear
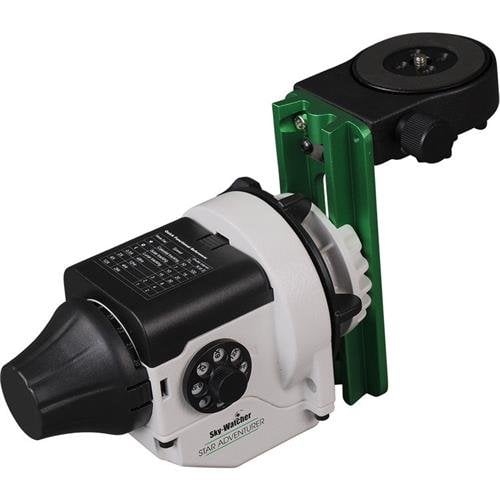
A must-have piece of astrophotography gear is a celestial tracking platform like the Star Adventurer from Sky-Watcher USA.
The advantage of having a celestial tracking mount is that it turns virtually any tripod into an equatorial mount, giving you the ability to capture breathtaking photos of the night sky.
What's more, the Star Adventurer has loads of add-ons and accessories that allow you to tackle everything from simple shots of the night sky to wide-field astrophotography to time-lapse photography of the stars.
It comes preprogrammed with seven tracking speeds, including solar, lunar, sidereal, and four additional settings from 0.5x to 12x, which comes in handy for time-lapse videos.

Additionally, the Star Adventurer is incredibly easy to use.
In fact, even if you've never taken a photo of the stars before, this rig is easy to set up.
It can also trigger your camera on its own. For example, with a 60-second exposure, the Star Adventurer can trigger your camera's shutter using the auxiliary shutter release cable.
Once the camera and mount are connected and an image is taken, the Star Adventurer will take 60-second exposures all on its own until you remove the shutter release cable.
With built-in features that make it easy to use and add-ons that allow you to customize your astrophotography setup as you learn and grow, the Star Adventurer is a perfect companion for your quest to photograph the night sky.
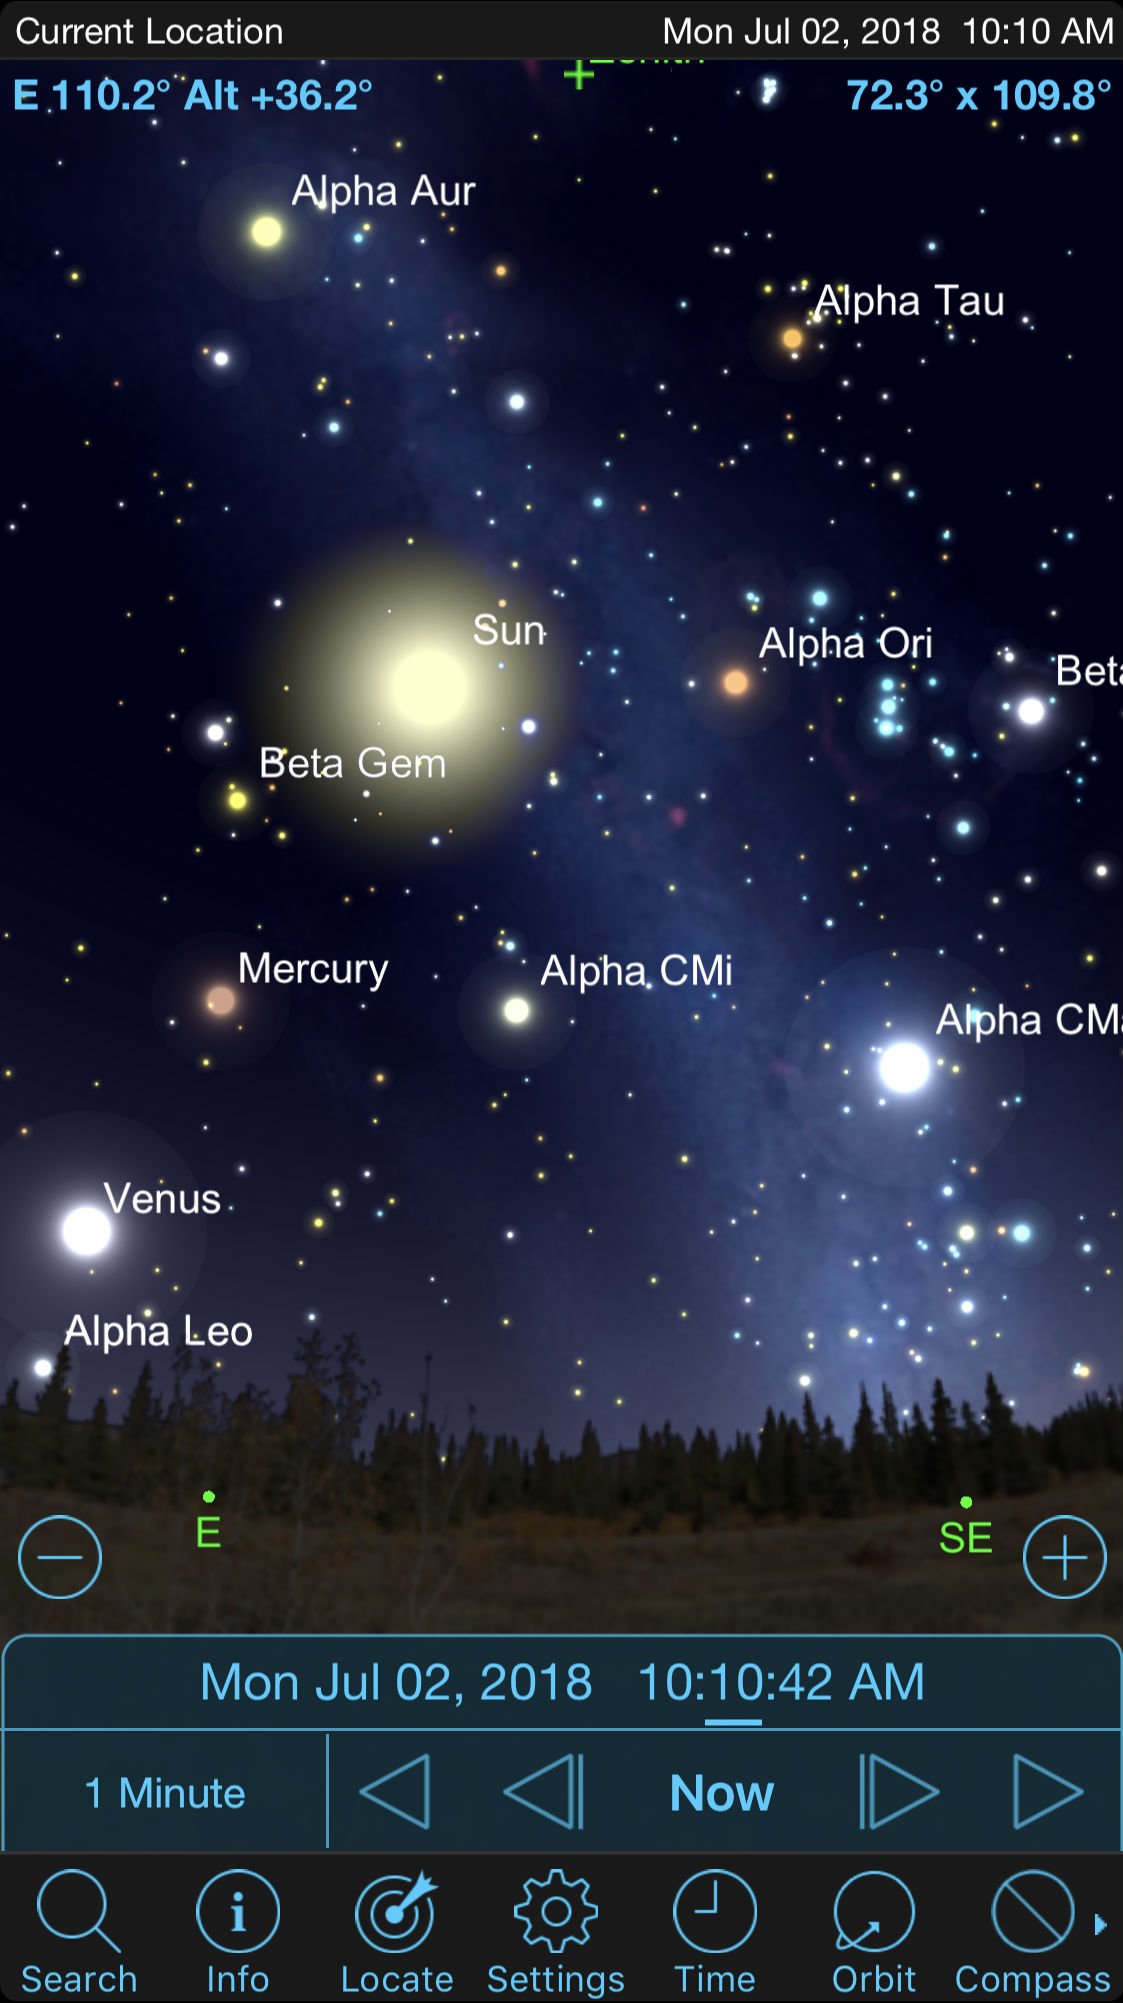
Of course, you need to be in the right place at the right time to get the best-quality photos of the night sky.
That's why popular astrophotography apps like SkySafari and PS Align Pro can prove to be so invaluable.
As shown in the screenshot above, SkySafari (iOS and Android) lets you know where major celestial bodies are in the sky.
In fact, it's like having a little planetarium right in your pocket - just hold it so your phone is pointing towards the sky, and SkySafari will locate everything from planets to satellites that you might want to highlight in your photos.
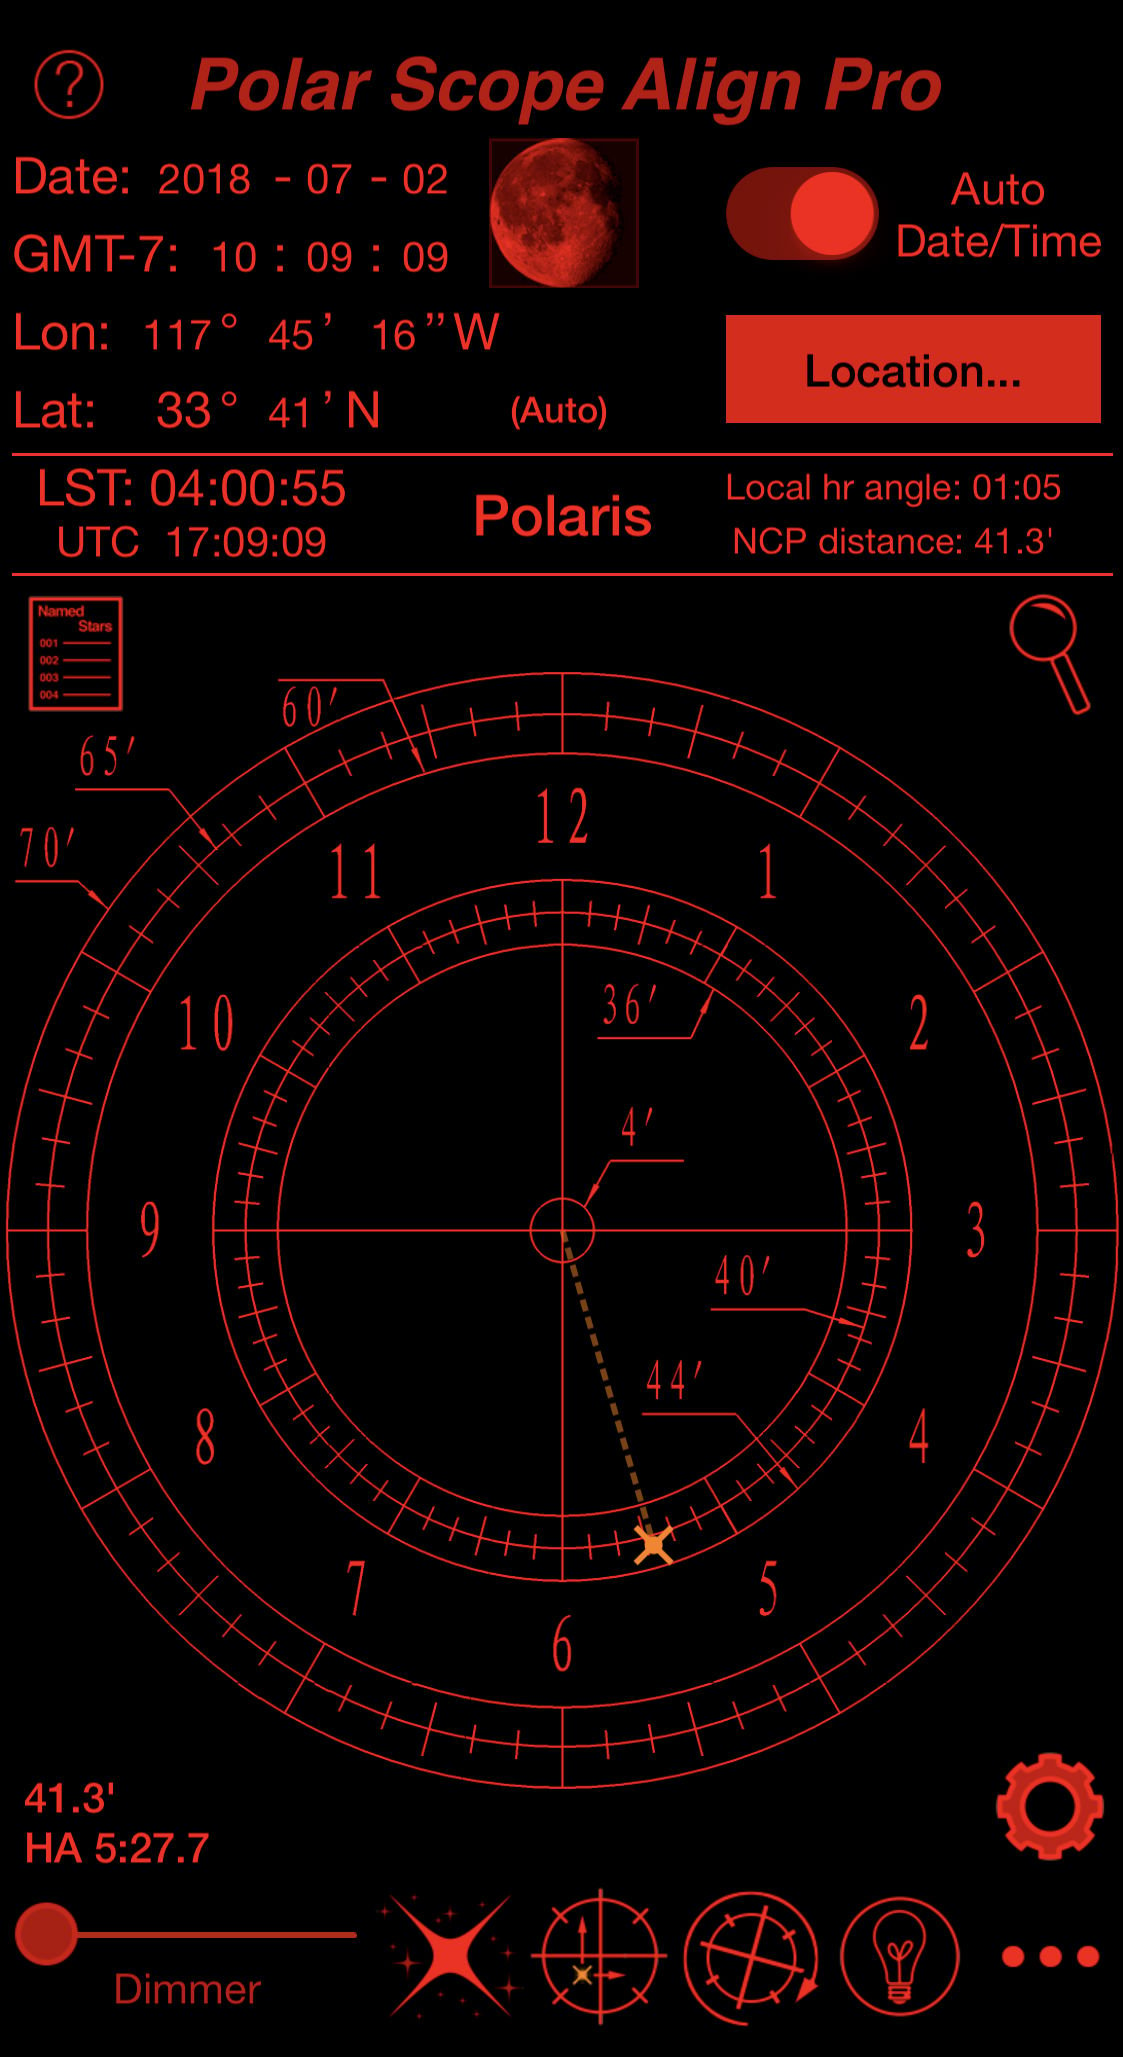
The value of the Polar Scope Align app (which is available only for iOS devices) cannot be understated because it helps you align your camera to Polaris.
By aligning your camera with Polaris, you eliminate the movement of the stars across the sky as the earth rotates, thus allowing you to get images of pinpoint stars.
This app will calculate where Polaris is in relation to your current position, allowing you to compose your shot with precision in your polar scope reticle.
Learn More:
- Composition Techniques to Take Your Astrophotography to the Next Level
- Astrophotography Gear Guide: Essential Equipment
Astrophotography Tip: Use a Good Tripod
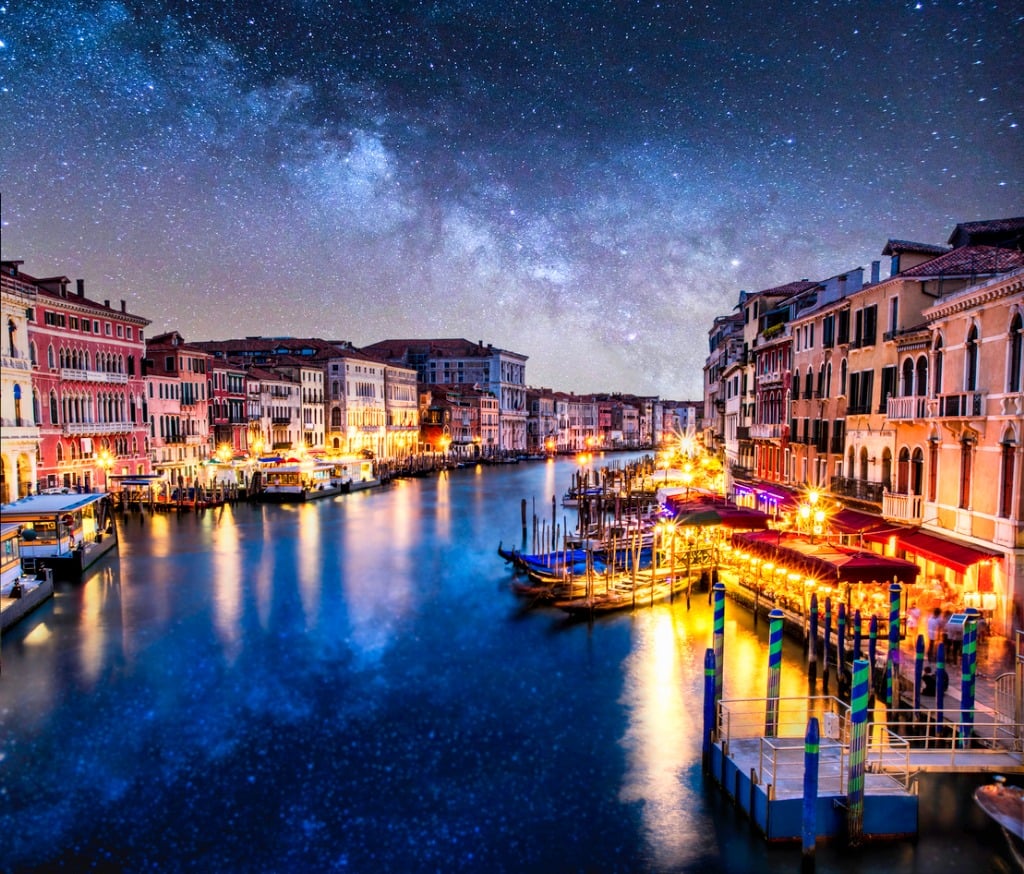
Perfecting the focus of your lens and using apps and gear that enable you to get the highest-quality shots won't mean anything if you don't have a good, solid tripod as a base for your camera.
If you have a cheap, flimsy tripod, the chances are much greater that it won't provide absolute stability for your camera due to thin or weak legs, inadequate leg logs, a wobbly head, or the lack of a center column hook to add weight as ballast against wind.
Of course, that doesn't mean that you need to spend $400 on a professional tripod.
But what you should do is look for a tripod that has some weight to it (say, around 4-5 pounds), a center column hook, and big rubber feet to grip the ground.
With these features, you'll be able to support your camera in a way that makes nice, sharp photos of the stars a greater possibility.
Sharpen Your Astro Images in Post-Processing
It's also a good idea to sharpen your photos of stars in post-processing.
For example, in Lightroom, sharpening is as simple as going to the details panel and setting the amount to about 50, the radius to 1 or 2, and the detail to 30.
Of course, that's just one example - there are many different settings you can use in post-processing to sharpen and edit your photos.
For a complete tutorial on editing your photos of the night sky, check out the video above by YuriFineArt.
And with that, you have a few critical tips that will help you take sharp photos of stars!
We Recommend
If You Want to Photograph the Milky Way, Try These Top Spots
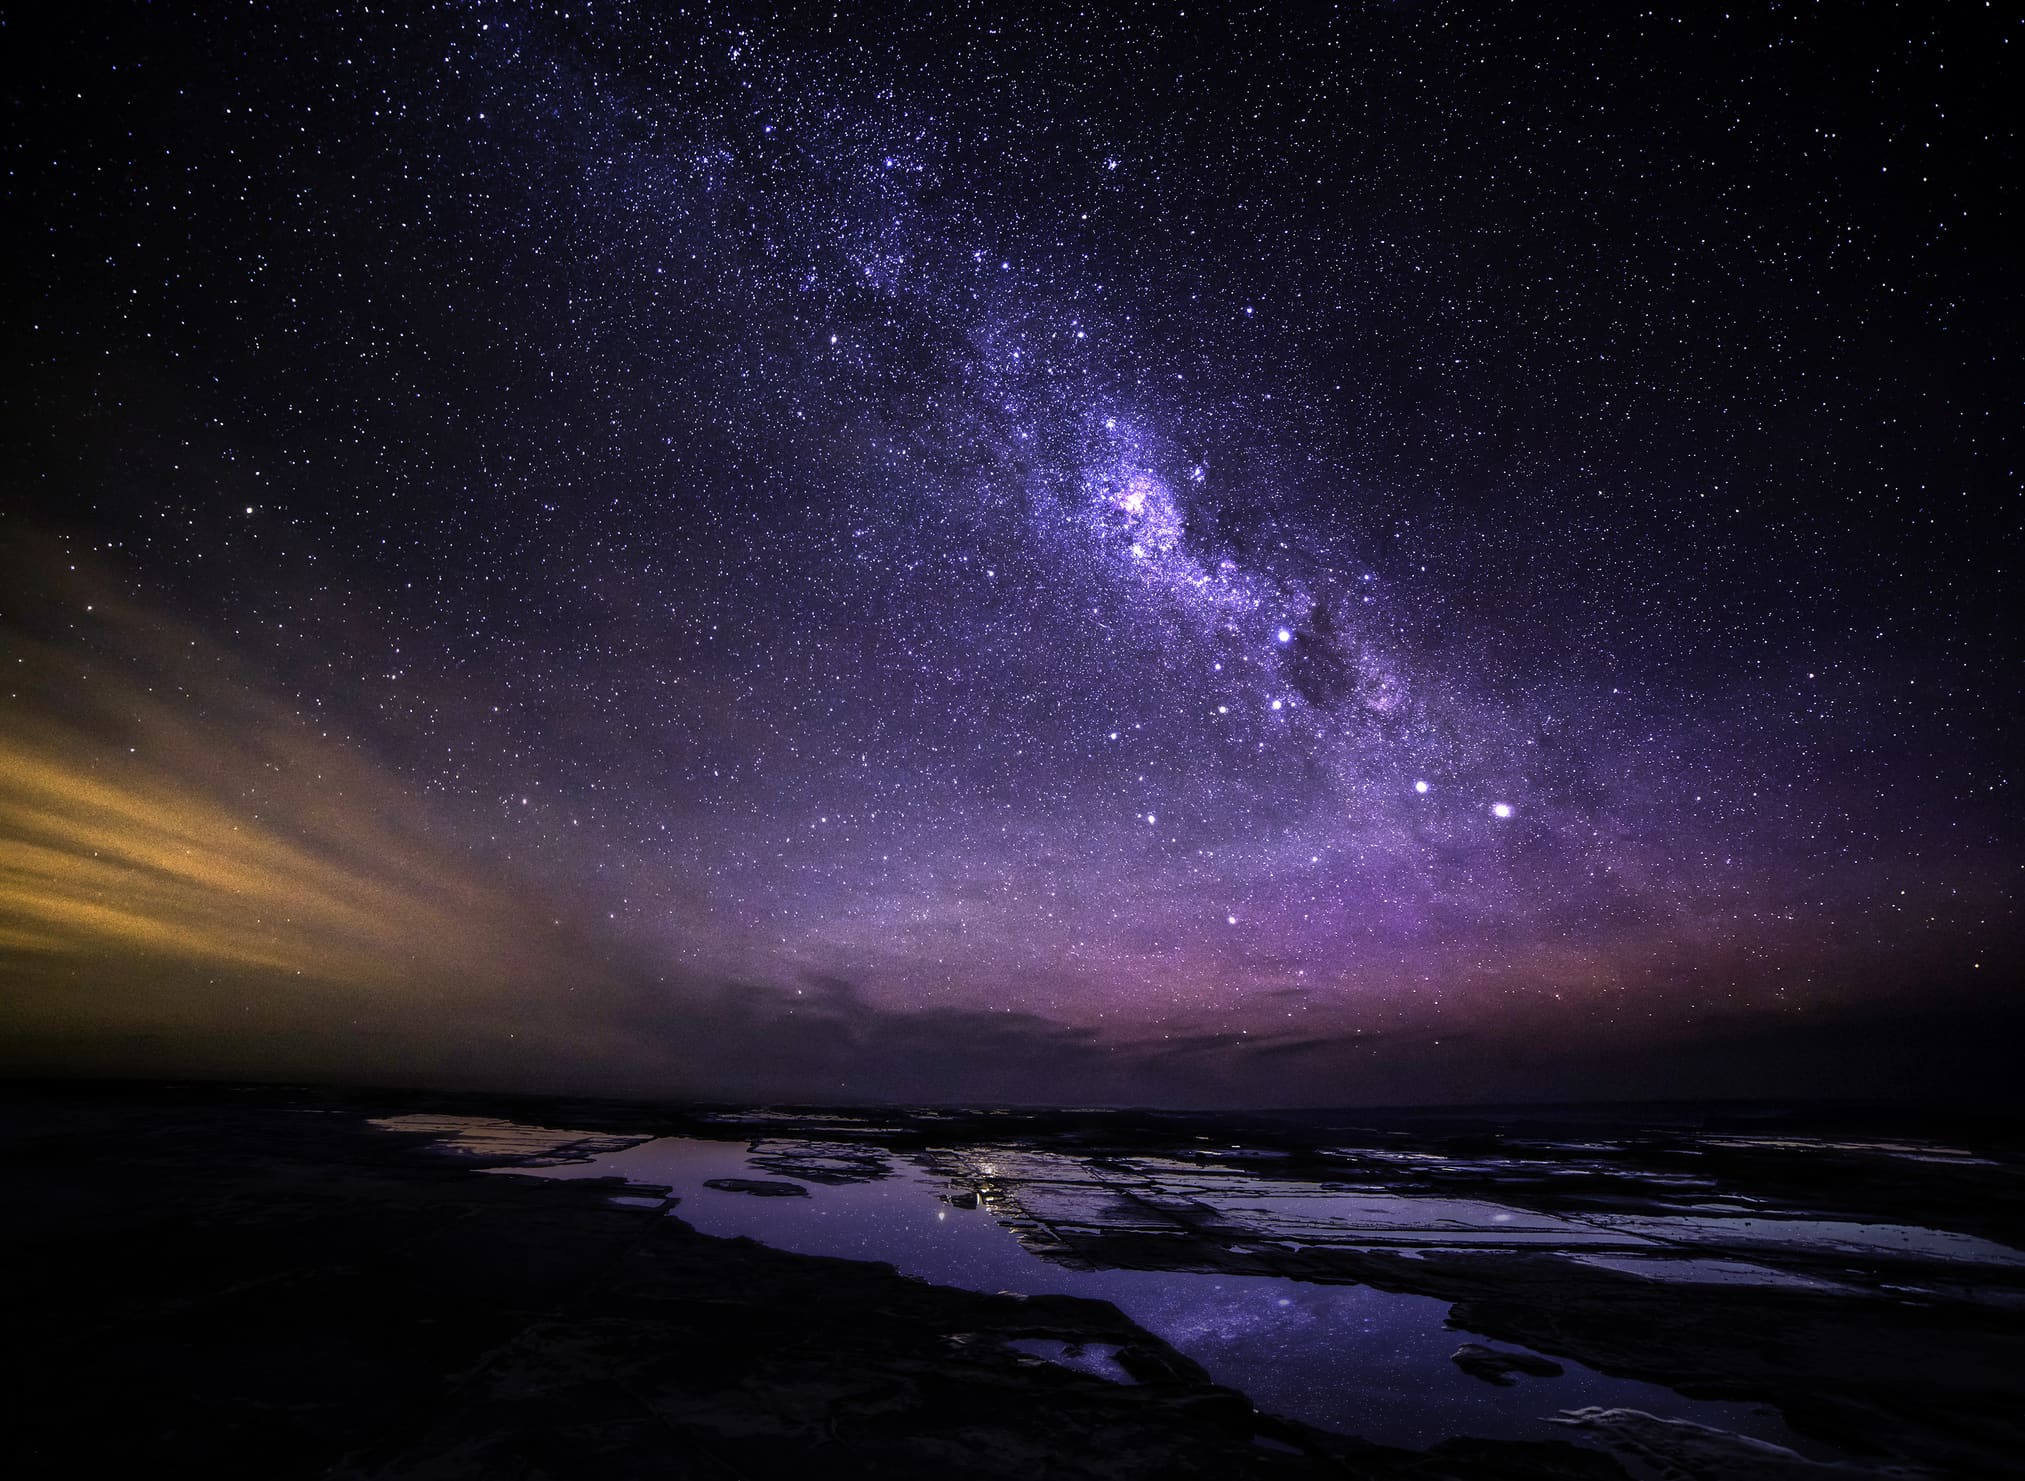 Image Credit: idizimage via iStock
When I was a kid, we took a trip to Yellowstone National Park in Wyoming.
I remember being astonished by all the crazy features in the park - geysers, mud pots, and hot springs among them.
But I left Yellowstone all those years ago more impressed by the view of the night sky...
I'd never been in a place so dark before, and as a result, I'd never seen that many stars, nor had I seen the Milky Way so clearly.
And now that I live in the Los Angeles area, seeing the stars and the Milky Way isn't exactly something I get to do a lot.
So, that got me thinking, where are the best spots to see and photograph the Milky Way?
AURA Gemini South Observatory
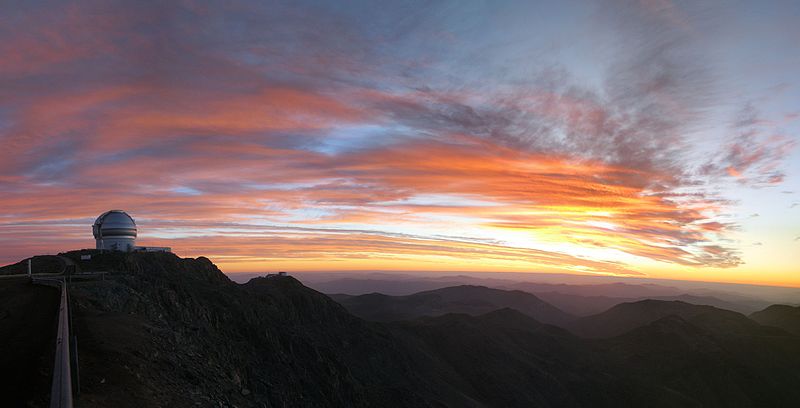 By Astronomy additions [CC BY-SA 4.0 (https://creativecommons.org/licenses/by-sa/4.0)], from Wikimedia Commons
The next time you're in Chile, a visit to the AURA Gemini South Observatory is an absolute must.
Its remote location means that the skies are ultra dark. So, dark, in fact, that it's a Dark Sky Sanctuary - one of just a handful on the planet.
The Gemini South Observatory is located on the summit of Cerro Pachón while its twin facility - Gemini North - is located in Hawaii at the summit of Mauna Kea.
Together, they can actually see the entire night sky. Talk about a view!
Editor's Tip: Ready to upgrade your kit to photograph the night skies? Learn why a new lens is a better choice than a new camera.
NamibRand Nature Reserve
Located in Namibia, the NamibRand Nature Reserve is Africa's only designated Dark Sky Reserve.
Since it got its designation in 2012, it has become a favorite spot of night photographers and astronomers alike.
But more than that, the protections of the Dark Sky Reserve help protect the wildlife and ecology of this area of the Namib Desert.
See this beautiful area for yourself (and the views of the night sky) in the video above by Framepool.
Brecon Beacons National Park
Located in Wales, Brecon Beacons National Park is a Dark Sky Reserve - meaning, it's protected from light pollution.
What's interesting about this location, though, is that unlike other spots on this list, there are a large number of villages and towns in and around the park.
To avoid light pollution, people living in the area follow strict measures to reduce their light footprint to keep the skies as dark as possible.
The video above by Michael Sinclair offers a gorgeous view of the night sky from this location.
Learn More:
- Astrophotography Tip: How to Manually Focus Your Lens
- Suggested Camera Settings for Astrophotography
Aoraki MacKenzie
Deep in the heart of New Zealand is Aoraki MacKenzie, another Dark Sky Reserve that offers superb views of the night sky.
Though it isn't quite as dark as the aforementioned AURA Observatory in Chile, this spot is nonetheless a stunning place to take in the view of the Milky Way and the incredible landscape below.
As noted above, as a Dark Sky Reserve, the area is actually protected from light pollution.
Those protections aren't just for the enjoyment of the night sky, either. There are significant cultural considerations for the native Maori people as well, who have used the stars to navigate for centuries.
The video above by Ngai Tahu Tourism shows just how incredible the night sky views are in this area.
Mont-Megantic, Quebec
In 2007, Mont-Megantic was designated as the world's first Dark Sky Reserve.
In the more than decade since, it has become a favorite location for astronomers, photographers, and other dark sky enthusiasts.
The area covers over 2,000 square miles and includes Mont-Megantic National Park, a world-class observatory, and a visitor's center.
Editor's Tip: Confused about what effective focal length means? Learn how to find the effective focal length of a lens.
Big Bend National Park
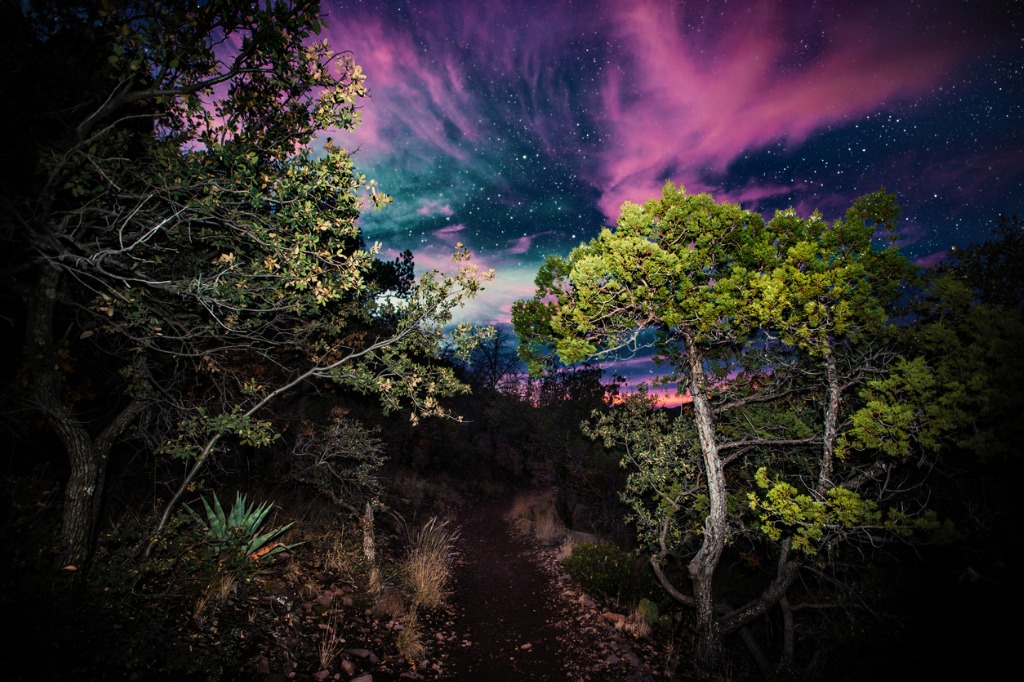 Image Credit: va103 via iStock
Located in southwest Texas, Big Bend National Park isn't just one of the least-visited national parks in the United States, but it also offers some of the darkest skies you'll find in the continental U.S.
There are no large towns or cities for hundreds of miles, so light pollution will be far from your mind in this desolate area.
With tons of areas to hike and backpack, you can find a secluded spot to setup your camera and capture breathtaking shots of the Milky Way.
Final Thoughts
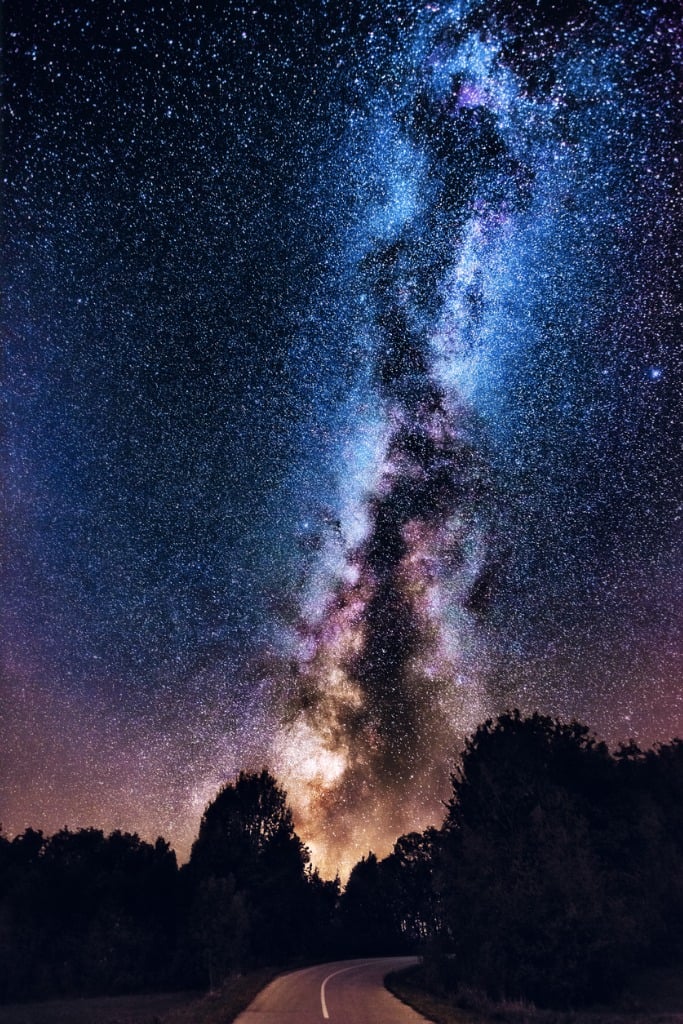 Image Credit: Vlajko611 via iStock
Though this is by no means a complete list of the best places to see and photograph the Milky Way, it'll surely get you started on developing your travel list!
And as you're preparing to head out to photograph the night sky, remember that astrophotography is a bit of a different animal than other types of photography.
Not only does it require a little more planning and patience, but you also have to have the right gear for the job.
What some beginner astrophotographers mistakenly believe is that they need to invest in a big, expensive camera to get the job done.
And while a professional full-frame DSLR or mirrorless camera would certainly be great, a top-shelf lens will actually help you out more.
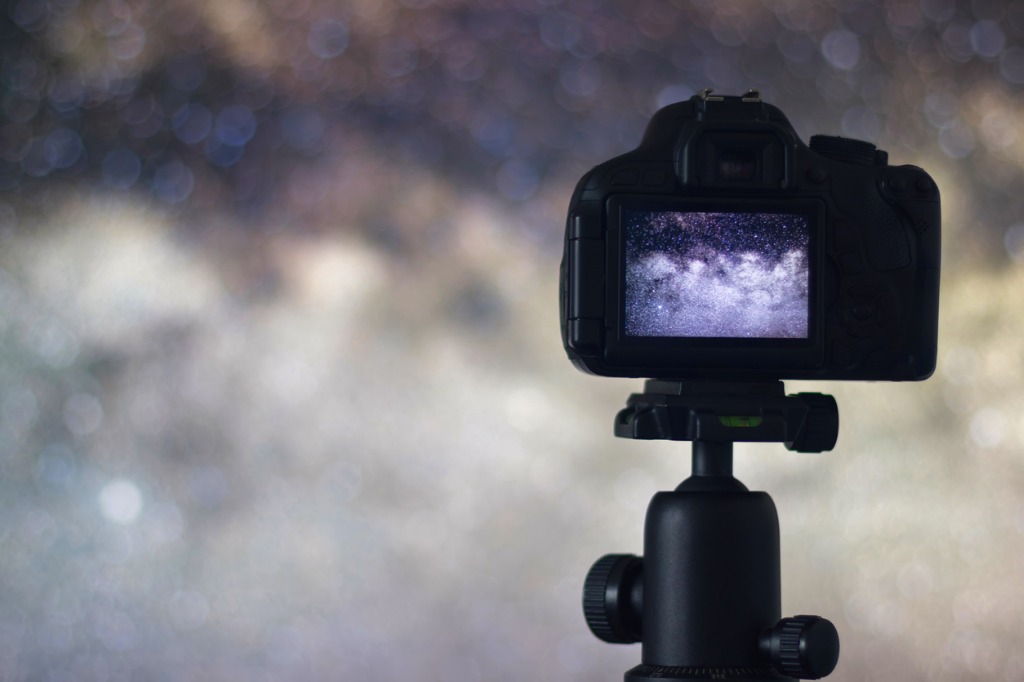 Image Credit: Allexxandar via iStock
The better the build-quality of the lens and the faster the lens is - that is, the larger its maximum aperture - the better your images of the night sky will be.
For example, if you shoot night sky photos with your 18-55mm f/3.5-5.6 kit lens, they simply won't hold a candle to ones that you shoot with a 24mm f/1.4.
Of course, the better the build-quality and the larger the aperture, the more expensive the lens.
But there are many ways you can get a great lens for a reduced price, like buying a pre-owned lens.
I know some people poo-poo the idea of buying pre-owned gear, but I've done it for years, and as long as you work with a reputable outfit, you can get excellent lenses while saving some money.
What's not to like about that?!
Learn More:
Via Easy Voyage
We Recommend
Introduction to Astrophotography
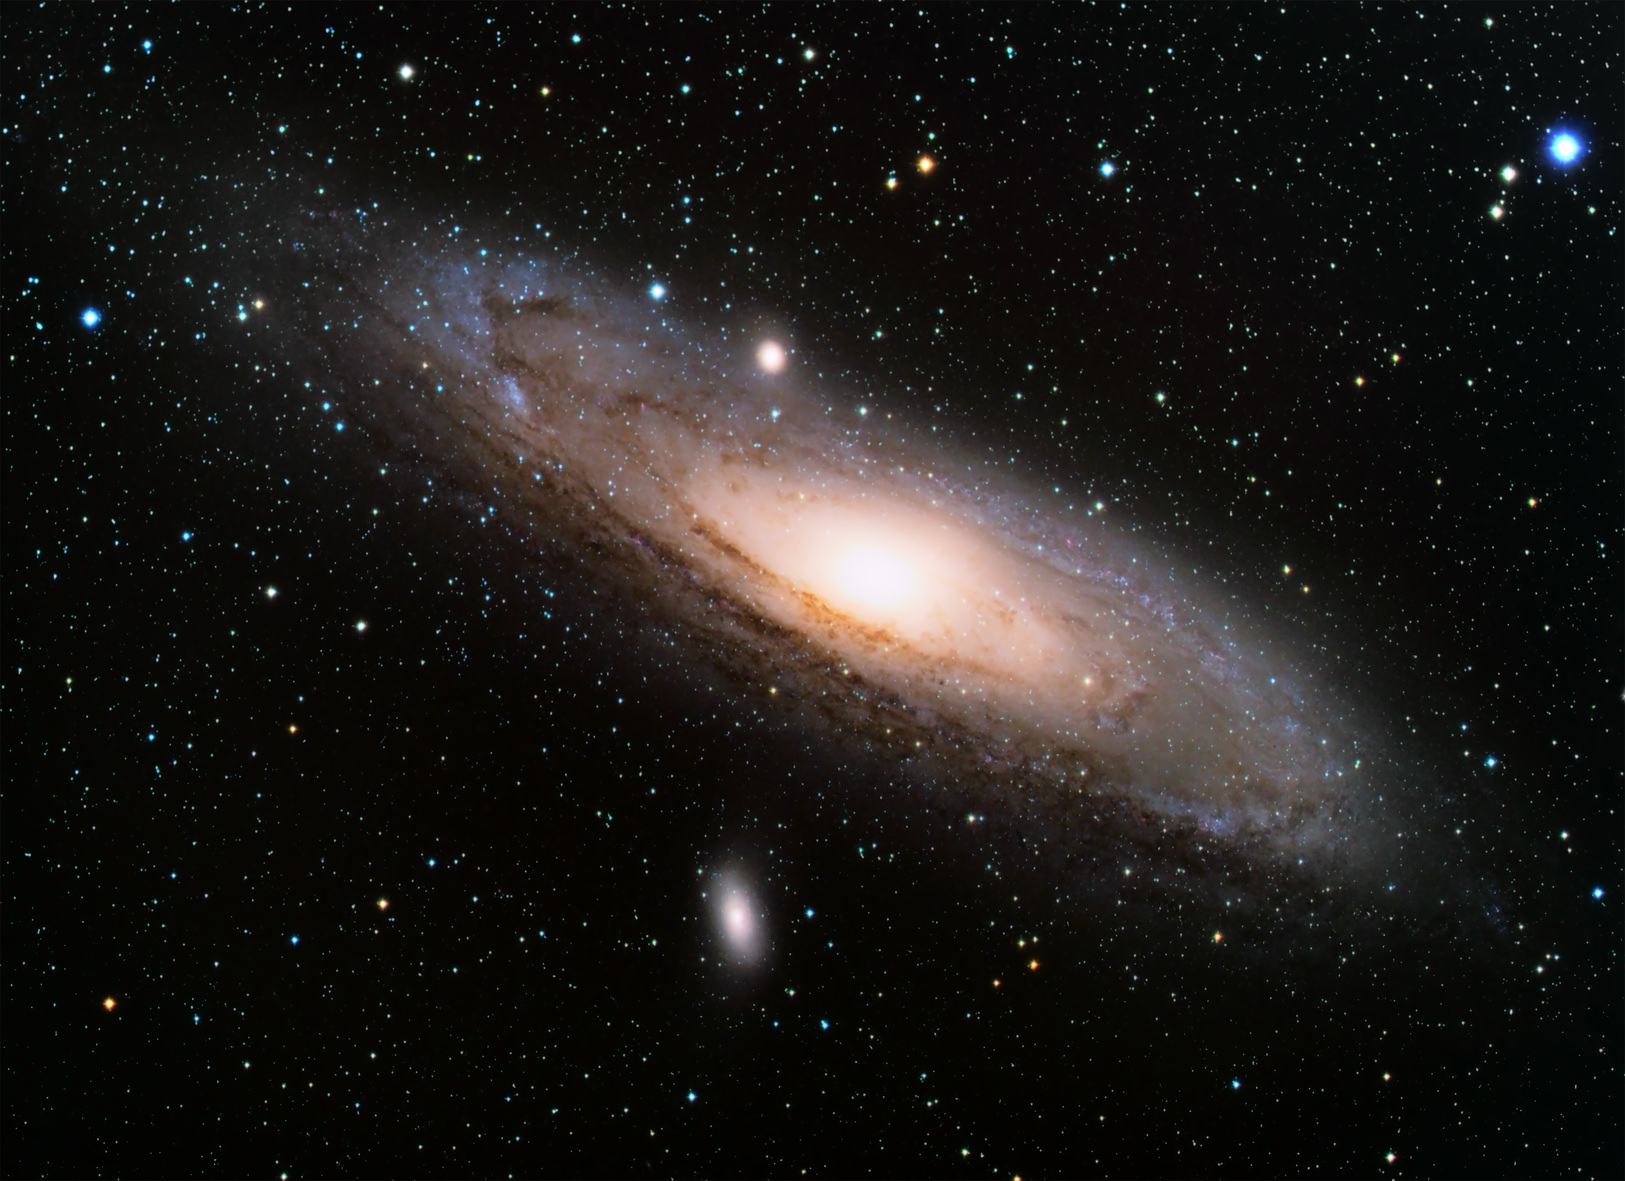
The Universe and our own solar system have always been awe-inspiring subjects for those of us living on this little, blue planet.
Capturing images of what's "out there" is an undertaking that we've tried to perfect since the invention of the camera and we – as a race – have developed extremely sophisticated instruments and technologies with that in mind. We've even launched incredibly complex telescopes and cameras into near space and sent others to the outer reaches of our solar system to beam back photographs of our nearest planetary neighbors.
The field of astrophotography emerged as a result of human efforts to gather those images of the Heavens and what they hold.
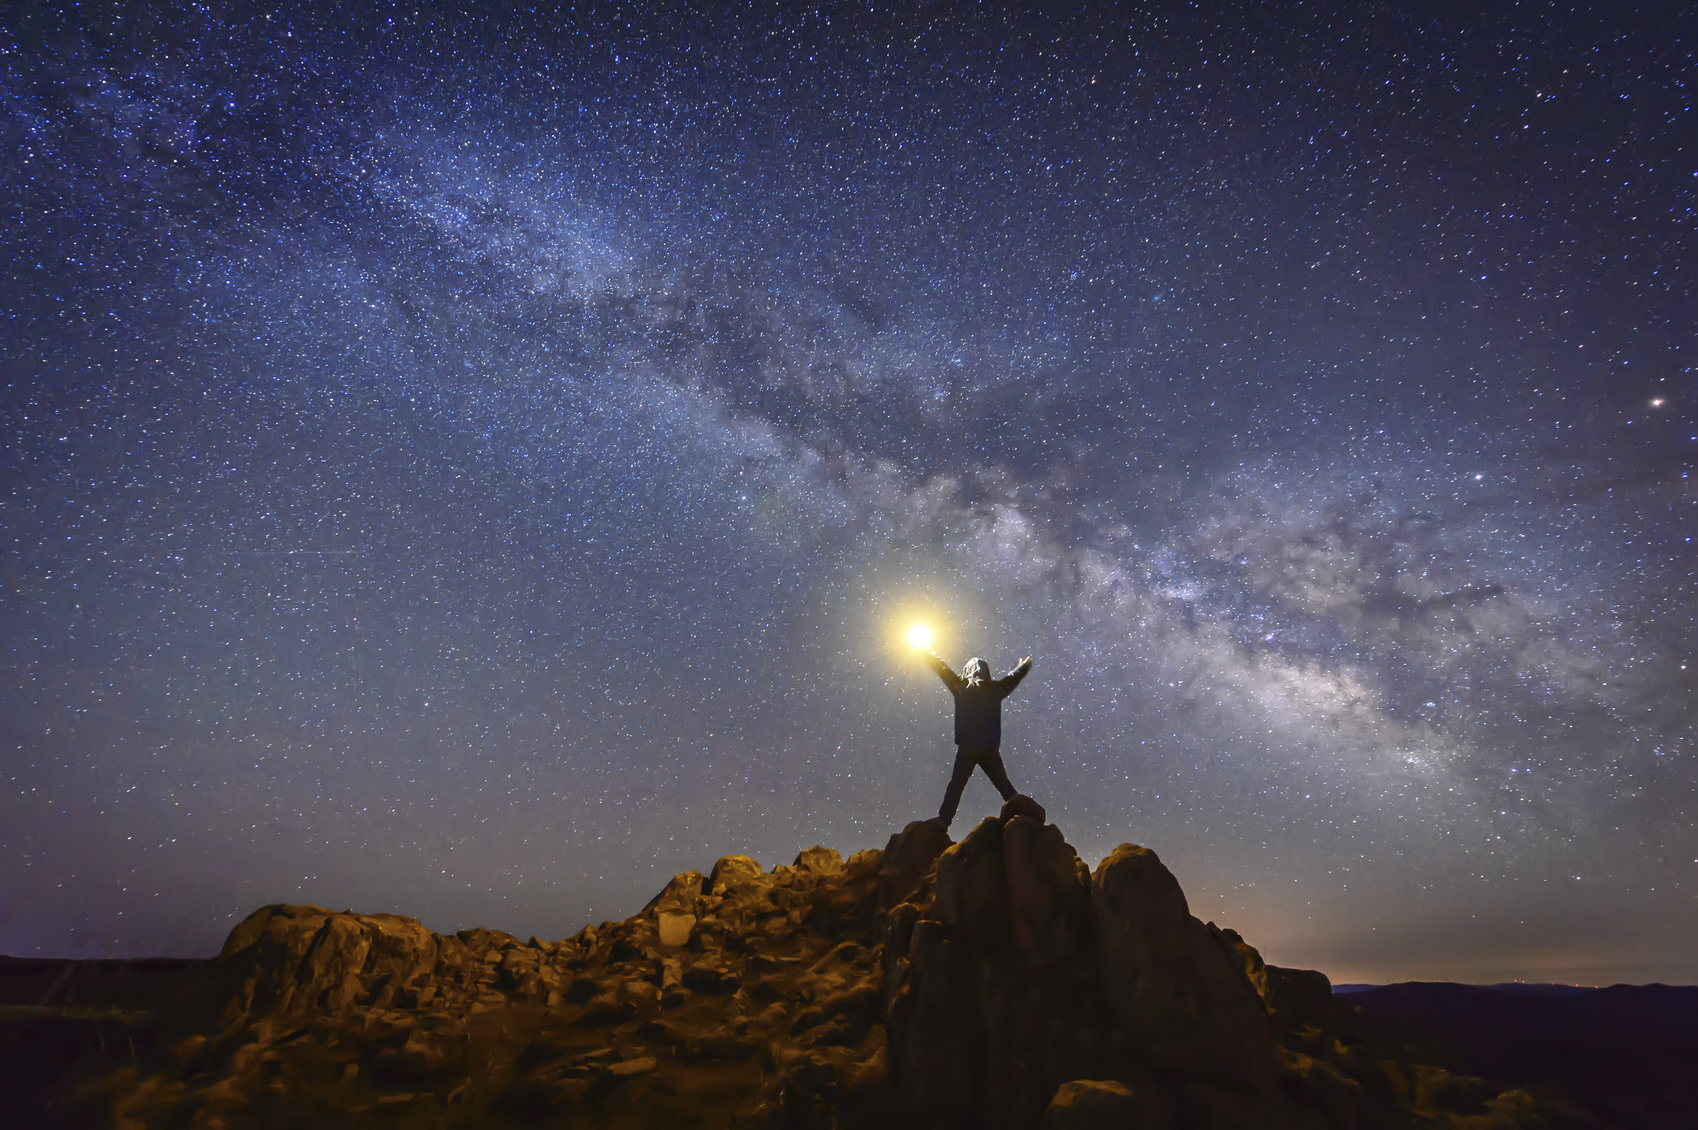
Its definition is, simply, photographing astronomical objects and the night sky. That definition covers a lot of areas, and so does the field itself.
When you point your smartphone camera at the moon, you're practicing astrophotography, just like that lucky guy or gal with an observatory in the backyard. From wide shots of the Milky Way to close-ups of planets, comets and asteroids, all of these images fit into the field of astrophotography.
Because of its wide scope, terrestrial-based astrophotography is generally divided into three distinct categories.
Wide-Field Astrophotography
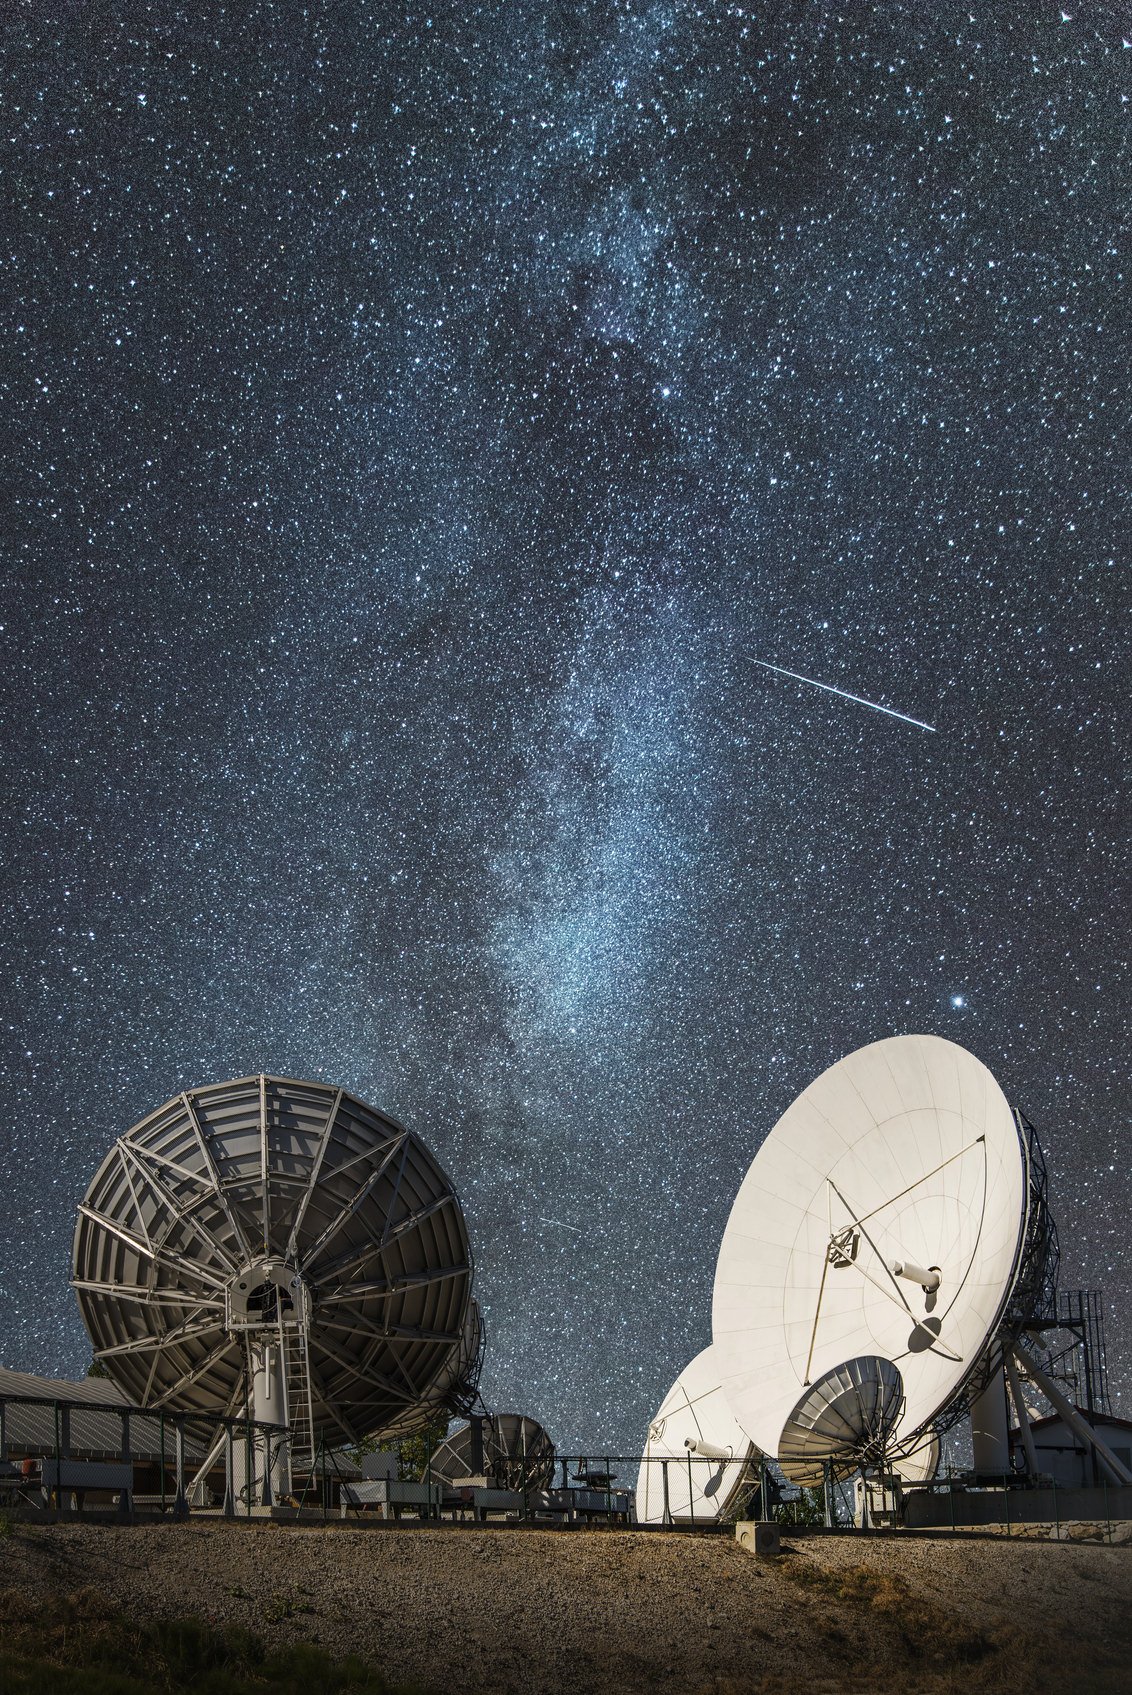
This category deals with images of the night (or pre-dawn or dusk) sky and the stars, planets and other objects visible in it. This type of photography requires little more than a camera, tripod, and patience, though a star-tracking mount is a great addition as well.
Wide-field images often include atmospheric phenomena such as the Aurora Borealis or Aurora Australis as well as the moon and/or landscape or architectural features. Star trail images also fall into this category.
In our collection of astrophotography articles, we'll touch on wide field photography techniques and some of the specialized equipment available, such as astronomy DSLRs, which can greatly enhance your astrophotography images.
Planetary Imaging
As the name implies, this category involves capturing images of individual planets. The reason it isn't referred to as planetary photography is due to the fact that images of planets and other celestial bodies are usually created from stills extracted from digital videos, then composited and enhanced.
As you might expect, this type of imaging requires a telescope with high enough magnification to let you locate a planet within the field of view, although many software applications exist that allow you to create stunning images from surprisingly small "blobs." It's also possible to adapt and use your DSLR to record the original videos, although specialized video recorders are available.
Deep Sky Astrophotography
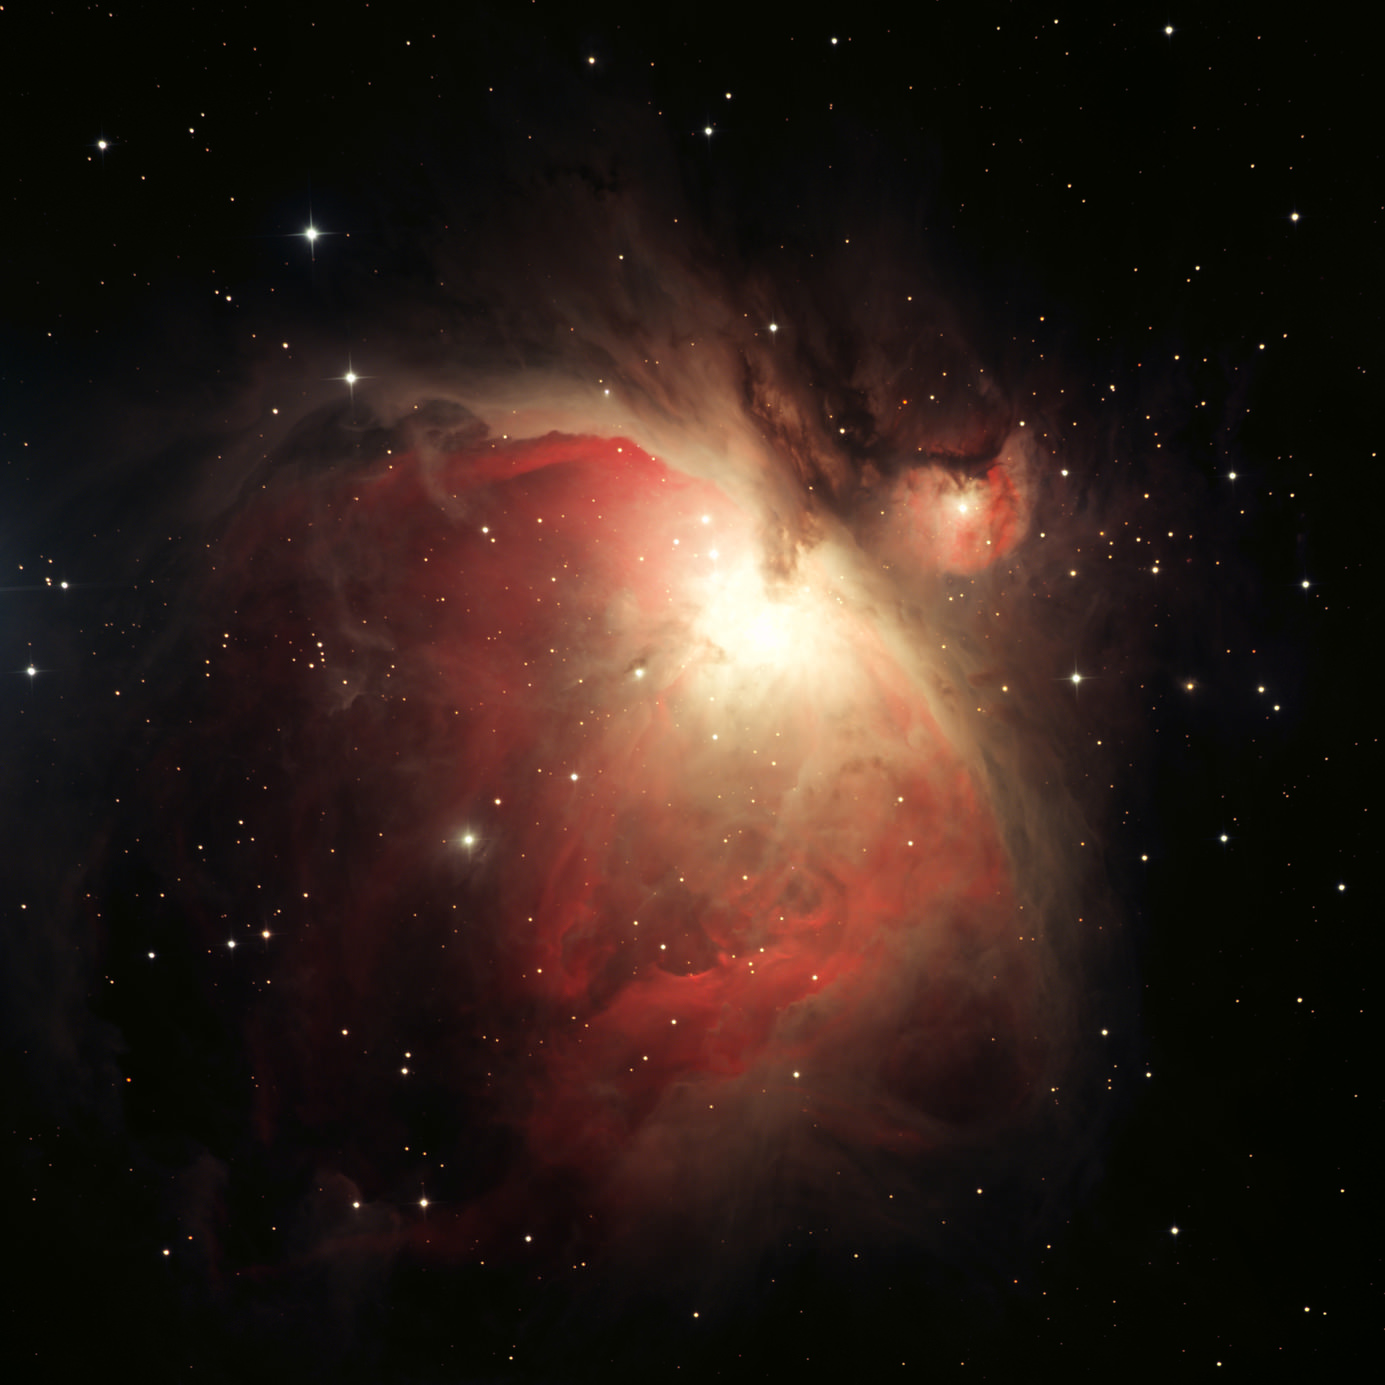
Images of nebulae, other galaxies, and other distant bodies in outer space might be considered the pinnacle category of astrophotography. This type of imaging requires specific techniques, including extremely long exposures. As with the previous category, creating deep-sky images often involves stacking several long exposures to help reduce noise.
A good quality, powerful telescope, a stable mount, and a top-quality photo guider are, of course, a requirement for this type of imaging. A DSLR may be used to record the original images, with the proper adapters. Again, the use of an astronomical DSLR will greatly enhance images taken of distant celestial objects.
If you've ever dreamed of capturing those breathtaking images of what's hidden out there, beyond the range of our vision, keep exploring our astrophotography section to get tips on everything from composing your images to learning the right camera settings to getting geared up with astrophotography equipment.
We Recommend
Master the Art of Drone Photography: Part 1

If you have a drone - and these days, who doesn’t - you understand the trials and tribulations as well as the joys of using an aerial vehicle for photography.
But to think that taking photos from above is the same as it is from your handheld camera is a total misconception. There are the photographic considerations, including subject matter and camera settings. There are also the issues related to the responsible, safe, and legal use of drones.
In the first part of our two-part series on drone photography, we explore legal and privacy issues, as well as topics related to safely flying your drone.
Legal Issues

As drones have become ever more popular, more and more laws have been passed governing their use. Since consumer-based drones are still relatively new, governments worldwide are scrambling to devise rules that pertain to when, where, and how drones can be used, and by whom.
At the center of it all is the common sense use of your drone. Naturally, flying it near buildings, over your neighbor’s backyard, or near airports will do nothing but get you in a heap of trouble. Additionally, flying your drone over something that could be damaged or destroyed should the drone crash is a simple matter of using your head and your wits. In short, if you’re about to fly your drone somewhere and you have doubts about the appropriateness of it, don’t do it!

In the United States, the Federal Aviation Administration has issued a broad spectrum of rules of which you need to be intimately familiar before you take your first flight. The FAA’s Unmanned Aircraft Systems website is the go-to place for the latest in terms of news, regulations, instructions on how to register your drone, and procedures for flying. Other entities, like states, and cities, may have their own set of rules as well. These regulations also vary from country to country, so it’s best practice to check with local authorities before sending your drone up into the sky.
Another excellent resource is the Know Before You Fly Campaign. With guidelines for responsible flying, resources for drone enthusiasts, and much more, it is worth a visit if drone photography is in your future.
Practice Makes Perfect

Once you’ve explored the legalities of flying a drone, it’s time to practice.
It goes without saying that you will need to examine a practice area to ensure that it is safe and legal to fly there. A wide-open area would be an ideal spot, such as an empty field in a rural area. Granted, not everyone that has a drone has the luxury of an open field nearby, so this is another common sense moment. Choose a location that is as open as possible and affords you sweeping views so you can maintain eye contact with your drone at all times. Above all else, ensure that your practice location has nothing that can be damaged and no people that can be hurt. If it crashes, you want to deal with a broken drone at the worst, not a destroyed car windshield or a hurt bystander.
You’ll also want to check the weather to be sure you’re taking to the skies in the best possible conditions. The less wind, the better, for obvious reasons. You will have enough to worry about just trying to master the controls of the drone; you don’t need a breezy day to add more stress to the situation!
Beware of the Battery

Many drones are equipped with a feature that, in case of an emergency, it will return to its launch point automatically. This is great for both you and the drone if something goes awry.
However, if you don’t keep an eye on the battery levels of your drone, it will land wherever it pleases, which can be inconvenient at best and downright destructive at worst. It’s far too easy to get caught up in the process of flying, and once you add taking photos, there is an awful lot to command your attention.
As such, you will need to develop a system for checking your battery life. Set a reminder on your phone. Have a friend time your flight and call out how many minutes of battery life are left. Try to launch the drone as close to the area you want to photograph as possible. These are simple steps, but they could very well save you lots of trouble should your drone run out of juice.
Understanding the factors that reduce battery life is essential as well. The more camera weight it has to carry, the less time your drone will be able to fly. Windy conditions and cold weather have a deleterious impact on battery life as well. Be prepared to cut your flight time in these conditions by as much as half!
Final Thoughts

There is far more to know about flying a drone for photography purposes, so be sure to check the resources provided in this article before you attempt to tackle drone photography. As noted above, it’s mostly about using common sense and being informed about what you can and cannot do with your drone. Be responsible, check local regulations, and take the time to learn how to fly your drone safely before you attempt to add photography to the mix.
We Recommend
Need a Spot for Astrophotography? Try These Incredible Destinations

For most of us, the lights of the city make it difficult (if not impossible) to see the stars in the night sky, let alone take high-quality pictures of the stars. Given how beautiful the night sky can be, this is a shame. But, there are still areas around the world that sport dark skies free of light pollution that allows stargazers and astrophotographers alike to come together and witness the beauty of space beyond the borders of our home planet.
The problem, of course, is knowing where on Earth you can go for the best night time views. To help you out, we’ve put together a list of three locations that are sure to give you the best opportunity for truly wonderful photos of the stars.
Hawaii
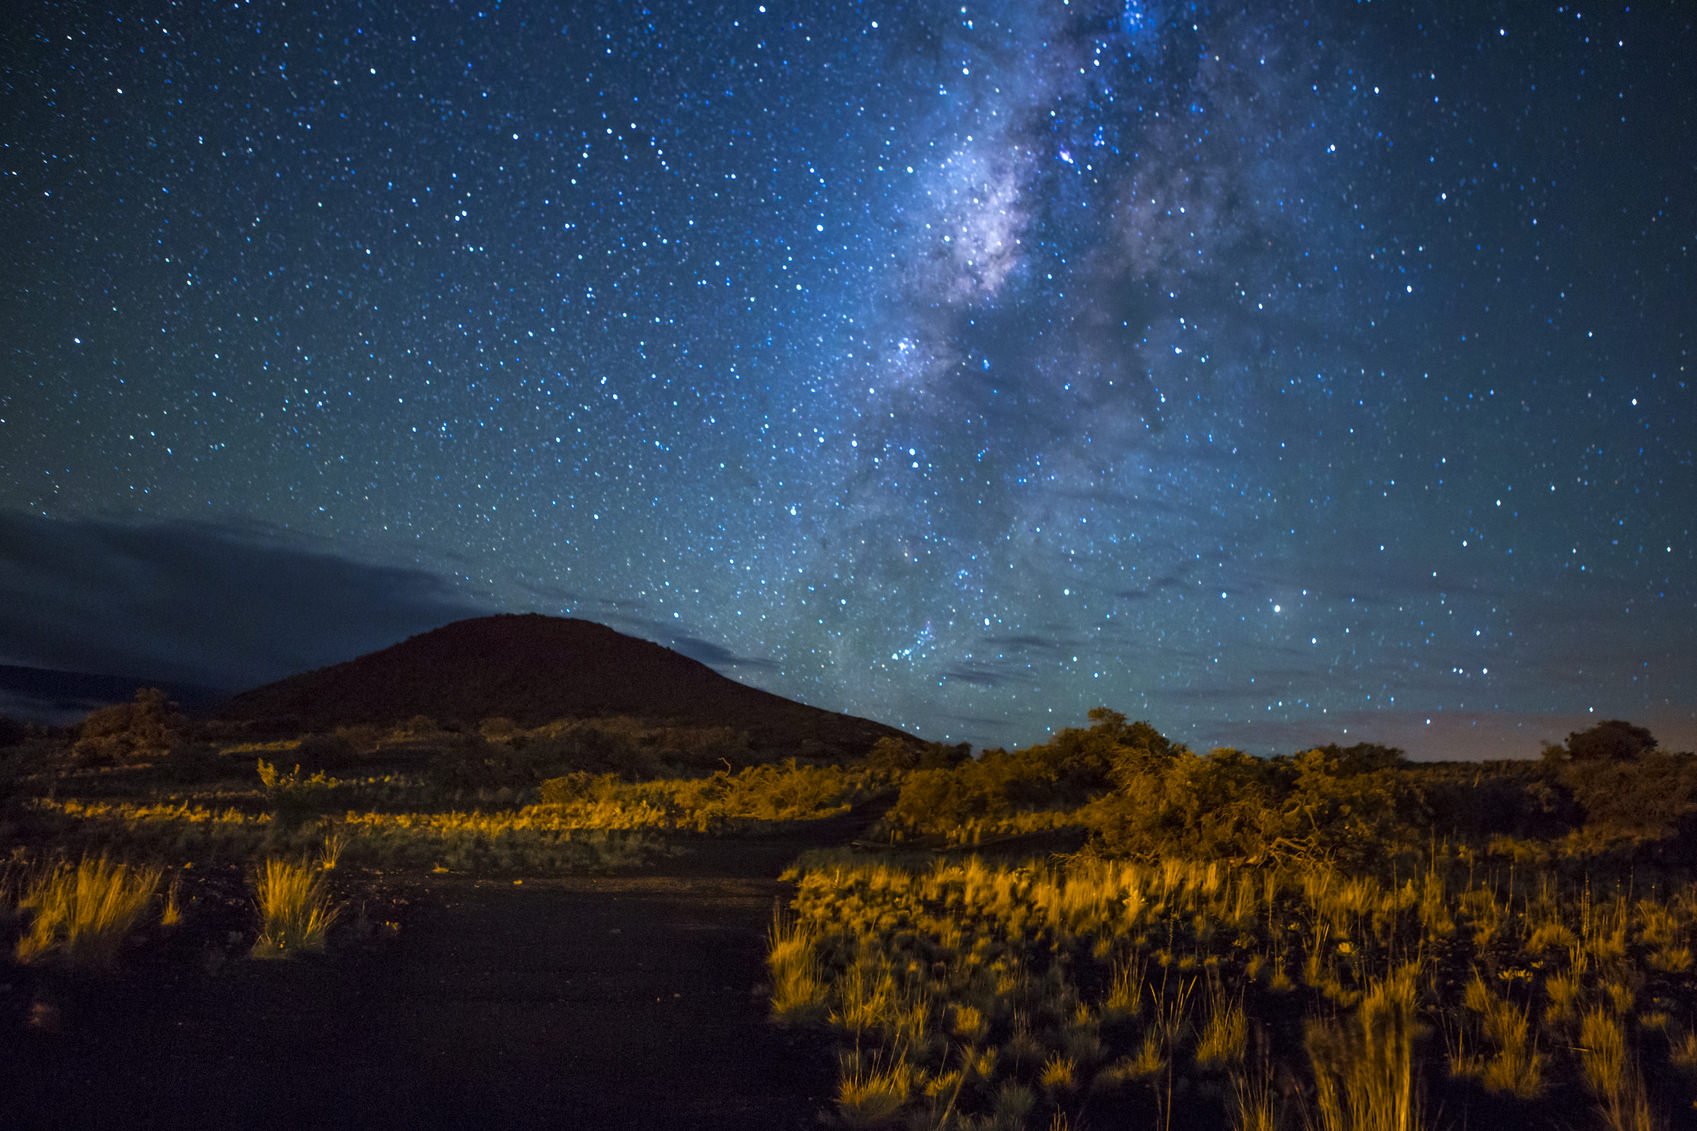
Hawaii isn’t just famous for its lush landscapes, gorgeous beaches, and active volcanoes; it’s also a favorite spot for astrophotographers to get out their cameras and capture the beauty of the night sky. Mauna Kea, the highest point on the Big Island of Hawaii, is an especially good spot, which is why it’s home to one of the best observatories in the world. At 13,800 feet above sea level, the mountain is certainly tall enough to give the observatory enough distance from any light pollution below. But visitors aren’t allowed to the summit after dark.
Fortunately, the Mauna Kea Visitor Center has plenty of areas for you to gaze upon and photograph the stars. Sitting at 9,200 feet above sea level, the oxygen levels in the air are still thin enough that visitors have an incredible view of the stars. For a slightly higher adventure, visitors can head to the top of the Haleakala Crater for a 10,000-foot-high view of the night sky.
Western Australia
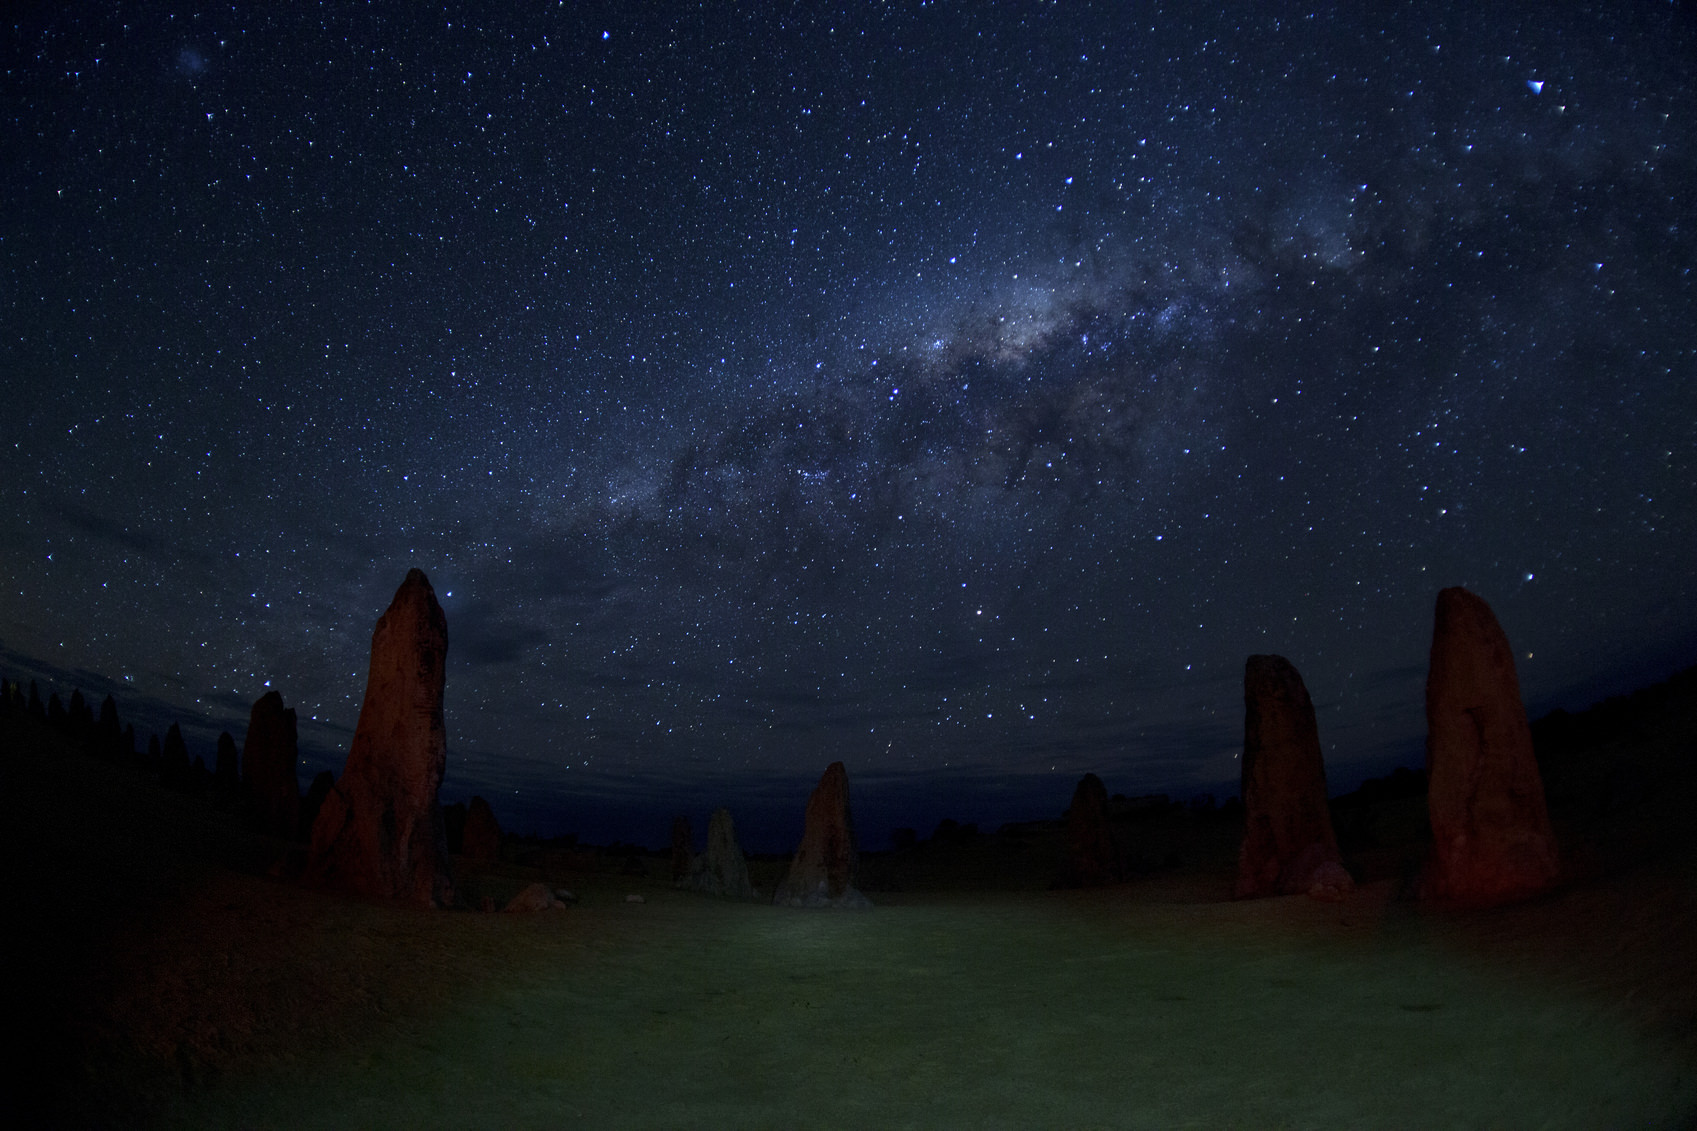
If it’s darkness you’re looking for, few places on Earth come close to the Australian Outback in Western Australia. Though the Outback doesn’t match Hawaii in terms of elevation, with no light pollution at all in many areas, the Outback offers stargazers and astrophotographers an ideal setup for viewing the stars.
Western Australia also offers varied terrain for an interesting combination of photos. Visit Nambung National Park near Perth to take photos with otherworldly rock formations in the foreground. Head to Wave Rock to get a horizon to horizon view of the night sky. Go into the Perth Hills to the Perth Observatory for night time shots of the stars and sky, with a touch of lights from Perth. No matter where you go, you’ll have an astounding view!
Alqueva Dark Sky, Portugal

For stargazers in Europe, Alqueva Dark Sky is an especially attractive place. There, you will find a Starlight Reserve in which the darkness of the area is preserved specifically for stargazing and astrophotography. A core zone of darkness is surrounded by a buffer zone so that it is protected from the effects of light pollution (and air pollution as well). Outside the buffer zone is an external zone in which special rules for lighting are enforced, again to protect the area from the effects of light pollution.
What all that means is that the area, which is near Alentejo in the south of Portugal, is a prime spot for unobstructed views of the stars. In fact, the Starlight Reserve includes approximately 1,864 square miles of dark skies, meaning you can pick a spot, set up your gear, and be relatively certain that you’ll have the immediate area all to yourself.
Be Prepared for Astrophotography
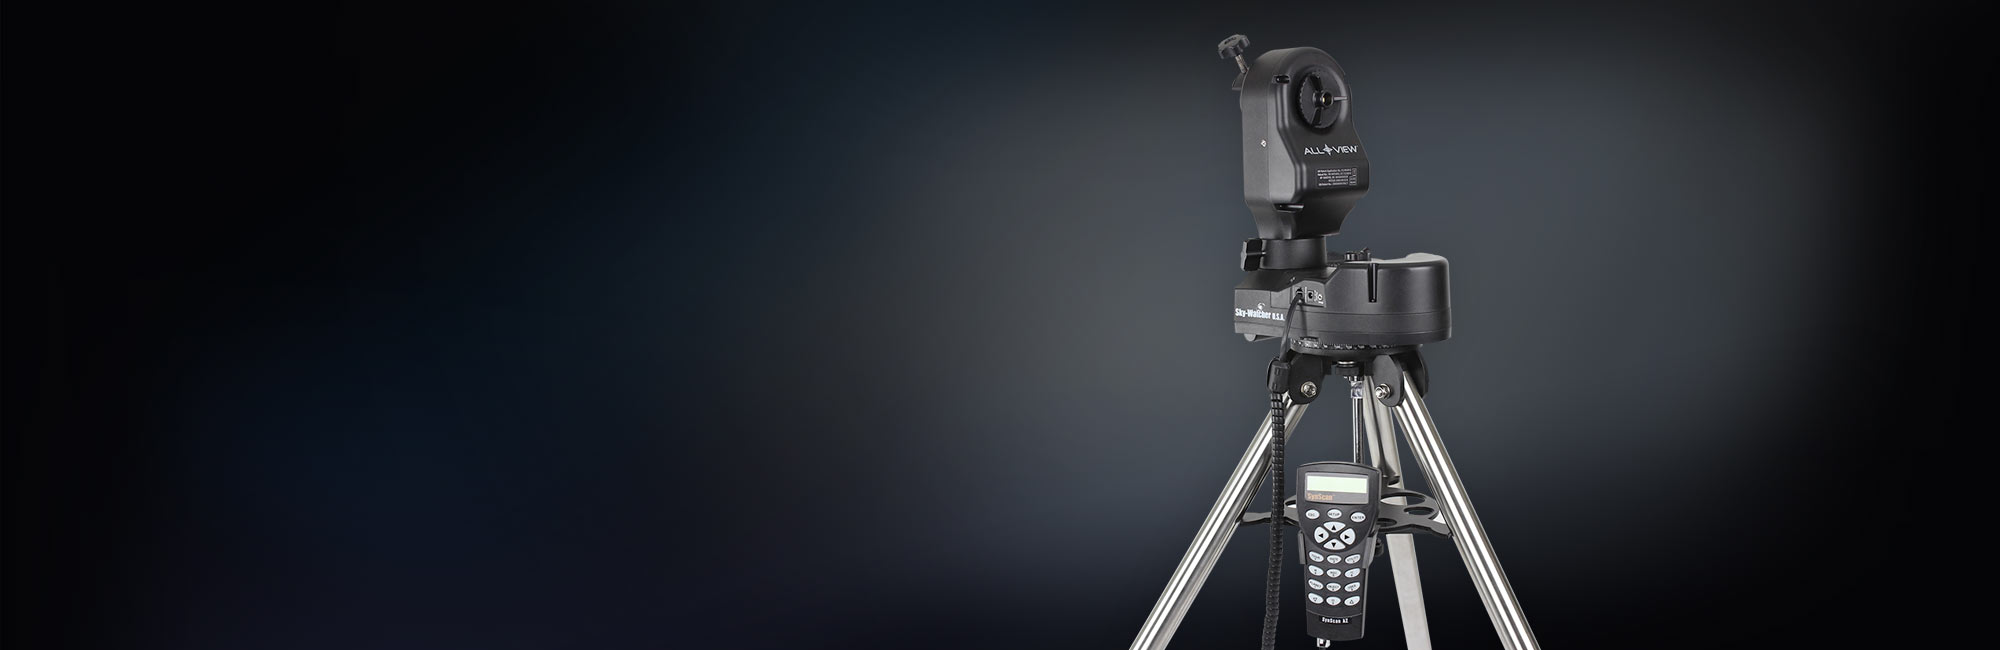
Of course, finding a prime spot to view the night sky is just the beginning. You also need to have the kind of photography gear that will set you up for astrophotography success.
Though you’ll need a fair amount of equipment, one of the most crucial pieces of gear you need is a good camera mount. Mounts come in all shapes and sizes, and from many manufacturers. But we like to recommend the mounts from Sky-Watcher USA because of their incredible features, great build quality, and excellent prices.
Among their line of camera mounts is the AllView. The AllView Mount is incredibly versatile, giving you the ability to take stills, time-lapse videos, regular videos, and it will even work with many telescopes too. You can capture 360-degree panoramas of the night sky with your DSLR as well. The AllView also has Go-To electronics that finds any one of 42,000 celestial objects, centers the object in your eyepiece, and tracks the object across the sky.
In short, the AllView has all the features you need - and more - to create breathtaking stills and video of the night sky, no matter which location you select. If you’re serious about getting top-quality images of the stars, you have to consider getting a mount from Sky-Watcher USA. Visit their website for details about the AllView and other fine products for astrophotography.
We Recommend
Photography Bucket List: Alaska Edition

There are few places on earth as rife with photographic opportunities as Alaska. From stunning landscapes to unique ways of life to natural phenomena like the Northern Lights, a trip to Alaska means that you’ll have something to photograph at every turn.
Though the list of photo-worthy things in Alaska is long, we’ve zeroed in on three must-see subjects that aren’t just photography gems but are also well worth the experience. See what you need to add to your photography bucket list, Alaska style!
The Northern Lights
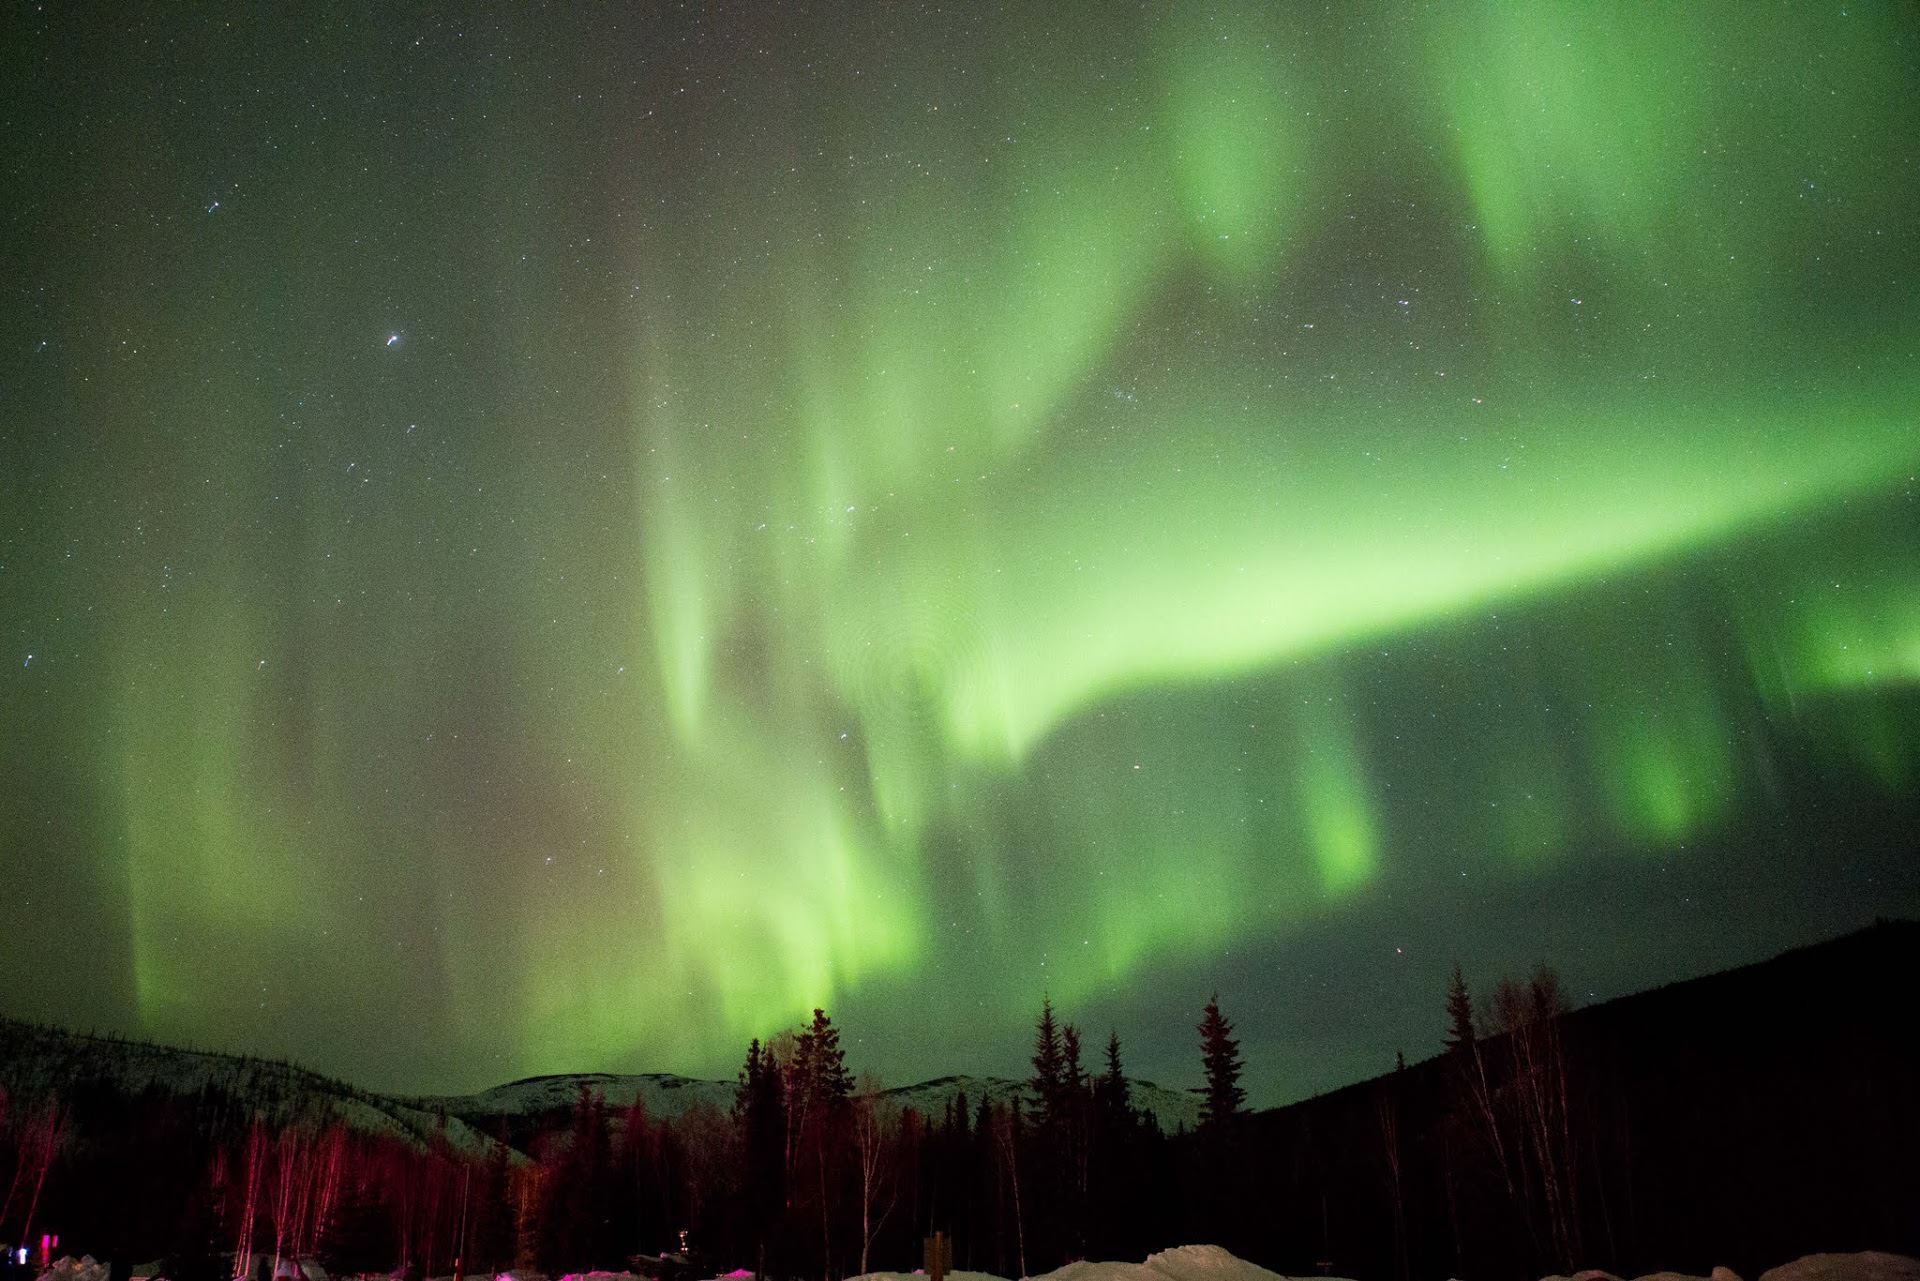
There are few sights as iconic as the Northern Lights. There are fewer places better for viewing them than Alaska in the winter.
Winter in Alaska is a gorgeous time in and of itself, but add in the prevalence of the Northern Lights, and you’ve got a recipe for an incredible photographic opportunity. The clear skies and long periods of darkness during the Alaskan winter mean that the Northern Lights are on full display. Just find a nice, dark place - which are abundant in Alaska - and watch as solar winds collide with earth’s magnetic fields and put on a display like no other!
Alaskan Landscapes
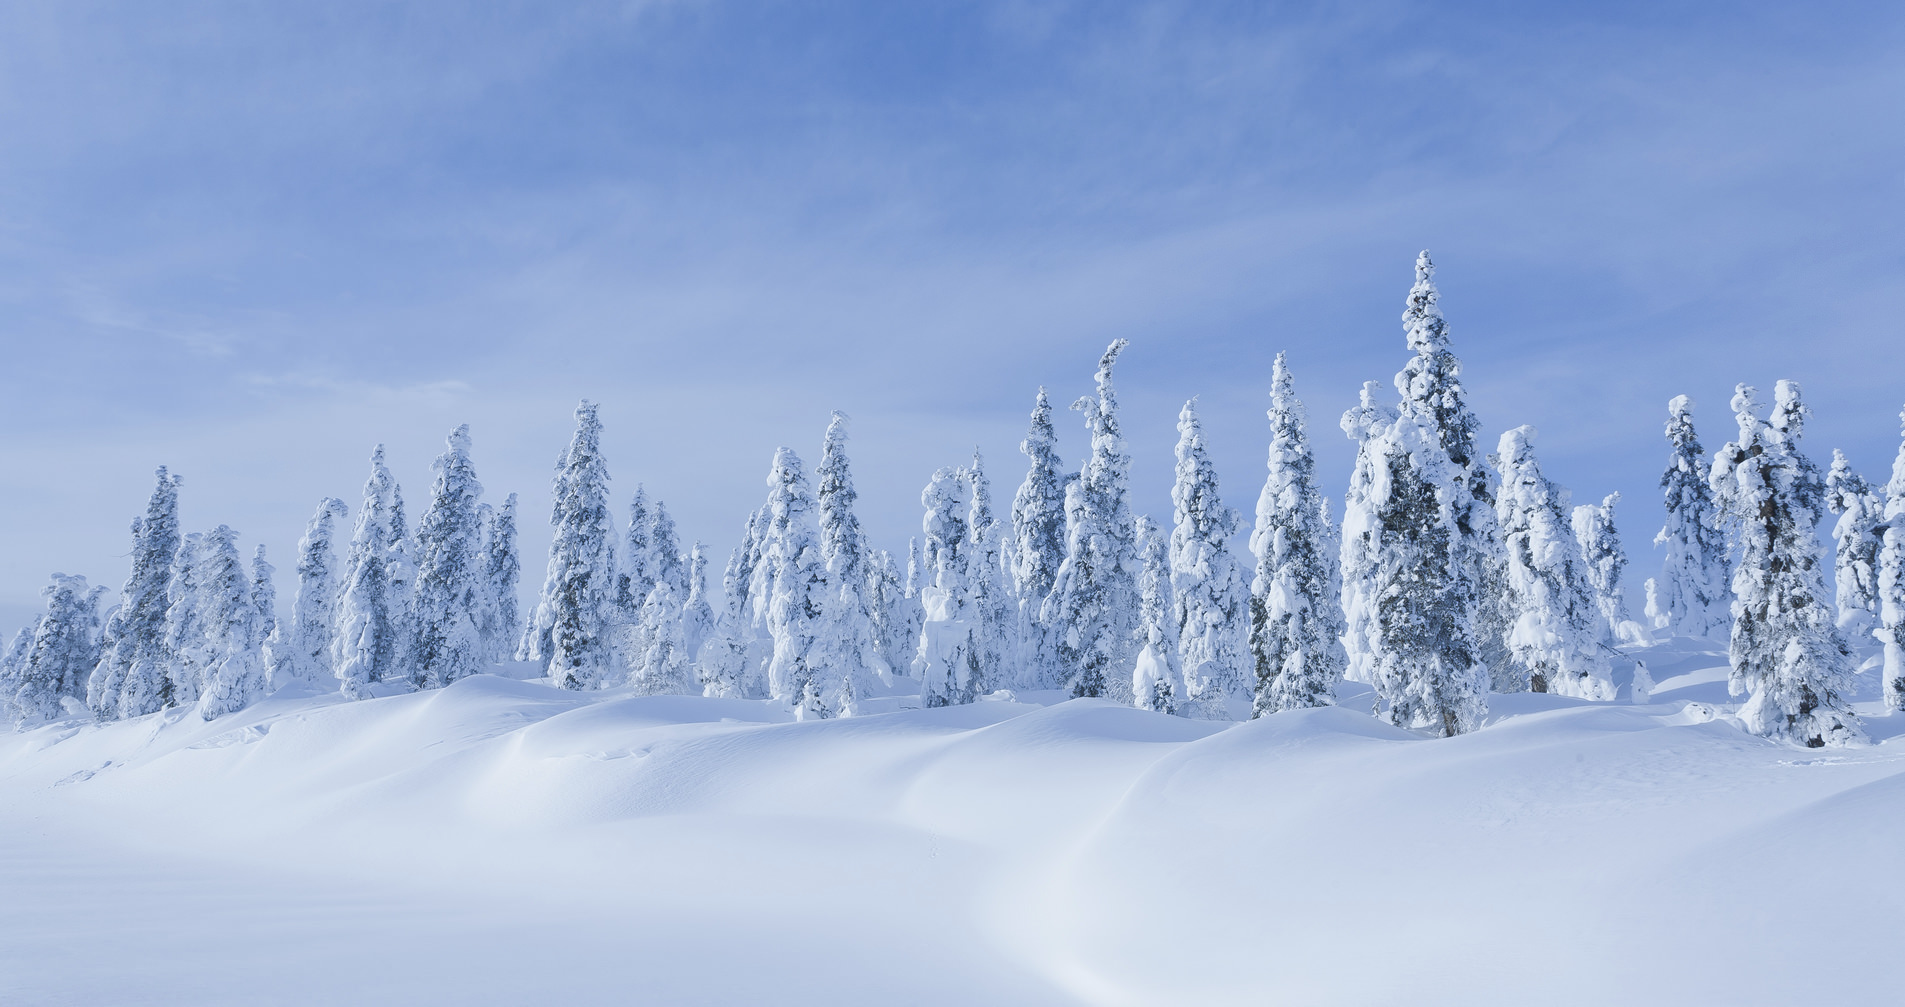
From coastlines to snow-covered peaks to miles and miles of tundra, Alaska has a variety of landscapes, each of which represents a unique opportunity to hone your landscape photography skills. Visit Alaska in the winter, and you’ll be able to stretch your photographic muscles by capturing the area’s beauty in the midst of the cold and snow.
One area that’s of particular interest is the hot springs at Chena, just outside Fairbanks. The area’s warm waters provide an interesting juxtaposition to the frigid cold of the winter landscape, not unlike the hot springs found in more well-known locales like Yellowstone. But, at Chena, you don’t have to fight the crowds to get a prime spot for photographing the area (or enjoying a soak!).
What’s more, the hot springs are one of the greenest spots in the world. Advocates there push for earth-friendly technologies and alternative energy sources that will help maintain the natural beauty of the area and beyond. So, while you’re photographing that beauty, you can learn a little about how to protect Mother Earth as well.
Alaskan Lifestyle
Perhaps one of the most well-known aspects of wintertime living in Alaska is the prevalence of dog teams and sleds. They are used for a variety of tasks, from travel to transporting goods. In many areas of Alaska, dog sleds provide the only means of transportation in the winter months.
But beyond their functionality, dog sled teams represent an ideal subject for portraying what life is like in America’s last frontier. Whether the subject of your photographs is the dogs themselves, the sled, the musher, or all three, no trip to Alaska in the wintertime is complete without documenting this iconic aspect of life in the north. It’s certainly worth it to take a ride too!
See All This Beauty in One Trip!
If it seems like there’s just too much to see and do in Alaska, you’ve got it all wrong! With Special Interest Tours, you can photograph and experience a genuine dogsled ride through the Alaskan wilderness. You can visit Chena Hot Springs too, and take photos of the steam rising from its warm waters in front of the surrounding wintery landscape and learn about green technologies at the same time. And, of course, you’ll be able to take in one of nature’s most astounding sights - the Northern Lights - capturing stunning photos and learning about their origin from world renowned astronomer Bob Berman.
Visiting and photographing Alaska in the winter might seem daunting, don’t be deterred. By taking this adventure with Special Interest Tours, you’ll not only get to experience the best Alaska has to offer in terms of subjects for your photographs, but you will also experience that beauty with a tour group with a proven track record of success. Join other Northern Lights enthusiasts on this once-in-a-lifetime adventure into Alaska’s winter wonderland!
The Northern Lights Tour is slated for February 2017. Registration is currently open, but closes December 15, 2016. Act now and reserve your spot, as they are sure to fill up fast. Don’t miss your chance to cross Alaska off your photography bucket list!
We Recommend
Quick Tips for Photographing the Full Moon or Supermoon

The great thing about photographing the moon is that you have many chances each month to photograph it in its various phases.
That means that if you don't quite get the shot you want the first time you try, just give it another shot the next day.
Even the full moon gives you an opportunity each month to capture its beauty. On more rare occasions, you can even photograph a supermoon!
The question is, how do you go about photographing the moon?
In this tutorial, I offer up a few tips to help you do just that.
Editor's Tip:To photograph the moon, you can use a regular DSLR or mirrorless body and a zoom lens like a 70-300mm. That will give you a wide range of focal lengths for getting shots that include interesting foreground elements as well as tighter shots of the moon on its own. You'll need a sturdy tripod to give your camera and lens a stable base for capturing the sharpest images, and a tripod head for smooth movement. We recommend the Berlebach Two-Way Tilt Head (shown above) because it has a high load capacity as well as the ability to swivel in the vertical direction by 90-degrees on both sides. Friction is adjusted using a wheel opposite the clamping element, and the guide handle is mountable for both right-handed and left-handed shooters. It's versatile, too, so you can use it with a spotting scope or binoculars, in addition to your camera
Scout a Location
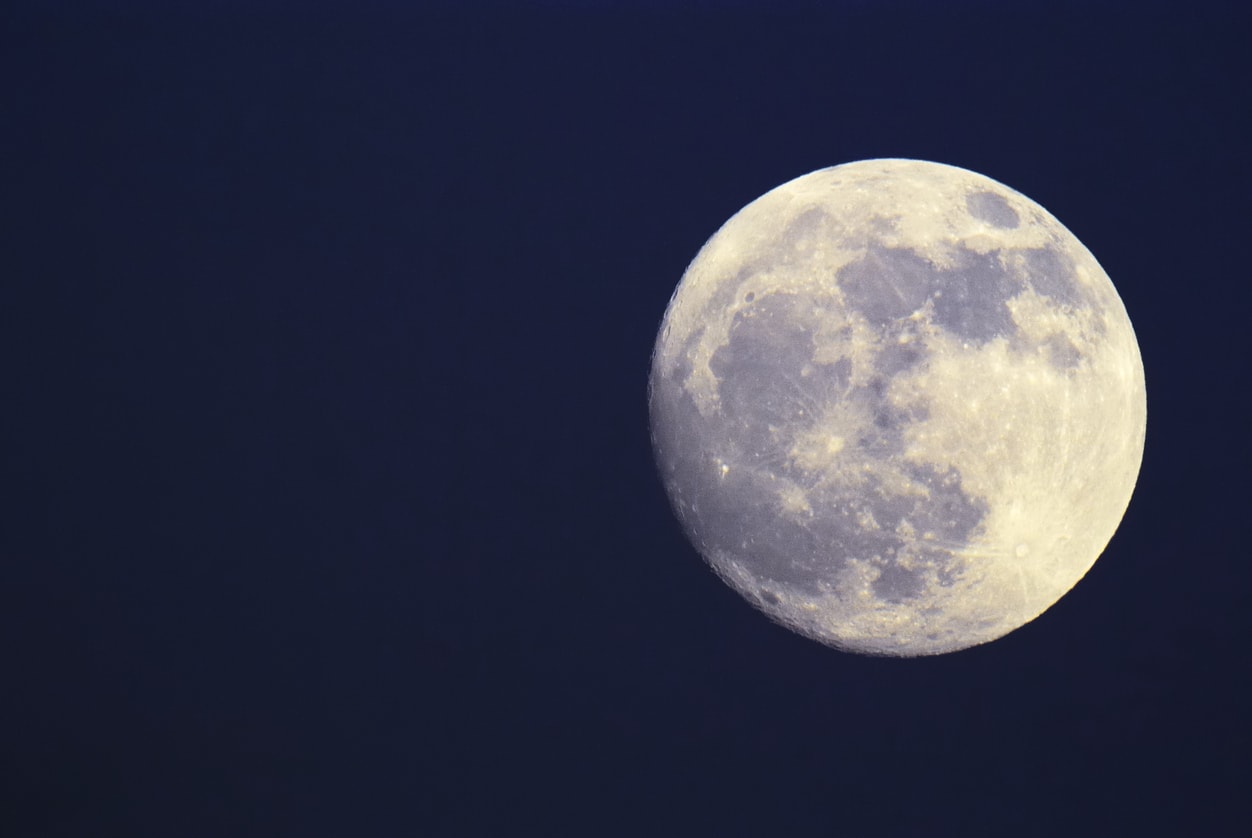
When photographing a full moon or supermoon, think about the type of image you want to create.
Naturally, if you want to fill the frame with the moon, you'll need a vantage point that offers an unobstructed view, as seen in the image above.
Close-ups of the moon offer the best view of its features and are perhaps the easiest to compose. Likewise, when adjusting your exposure settings, you have just one feature in the image to be concerned about, making it an easier shot from an exposure standpoint as well.
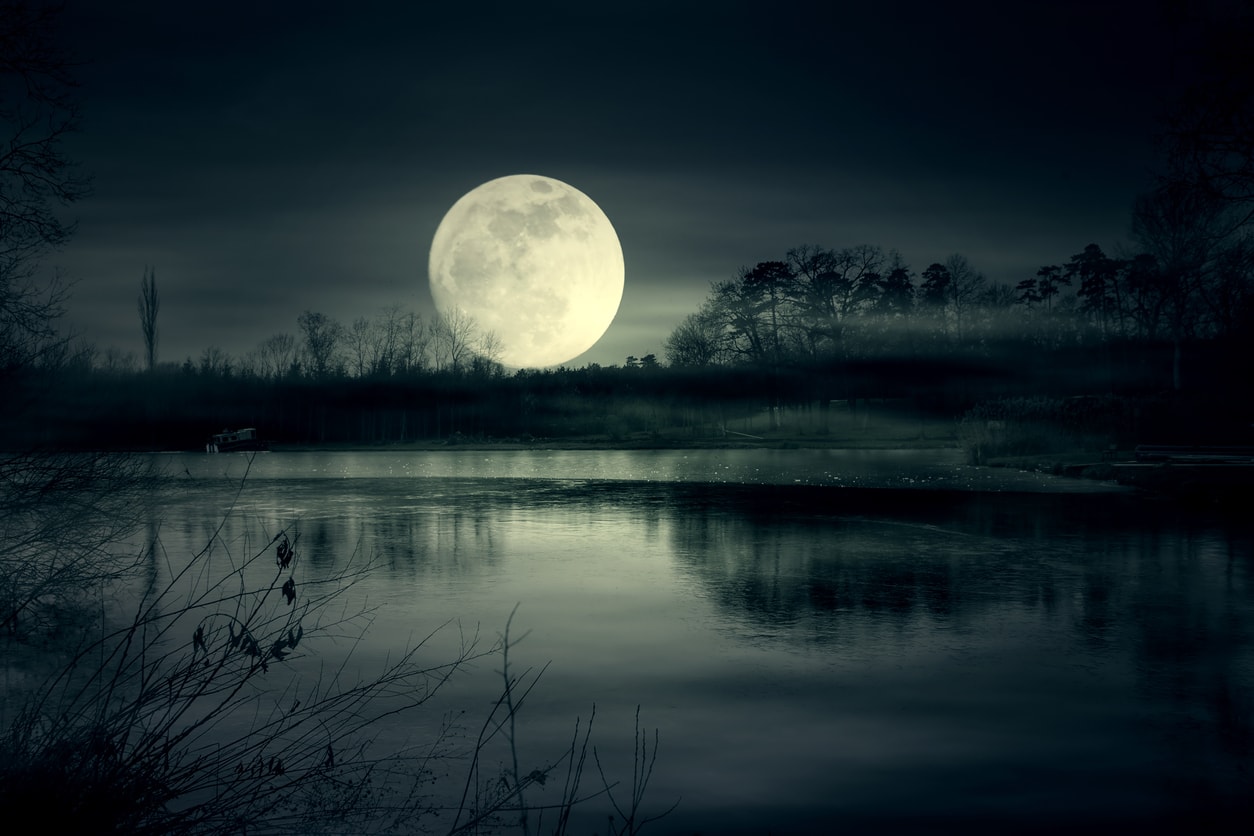
If you want to incorporate foreground elements into the shot, look for vantage points that allow you to include things like mountain peaks, trees, or other landscape features.
A wider shot like this requires that you work a little harder to get a well-exposed image.
That's because you'll have a wider dynamic range in the shot - from the very bright moon to darker foreground elements. If you expose for the moon, the foreground might be way too dark. Conversely, if you expose for the foreground, the moon might be far too bright.

An effective solution for this problem is to take multiple exposures - one exposed for the moon and one exposed for the foreground - and blend them together in a program like Photoshop or Lightroom.
When creating a composite, it is absolutely imperative that you do not move the camera. Otherwise, the two images won't line up perfectly.
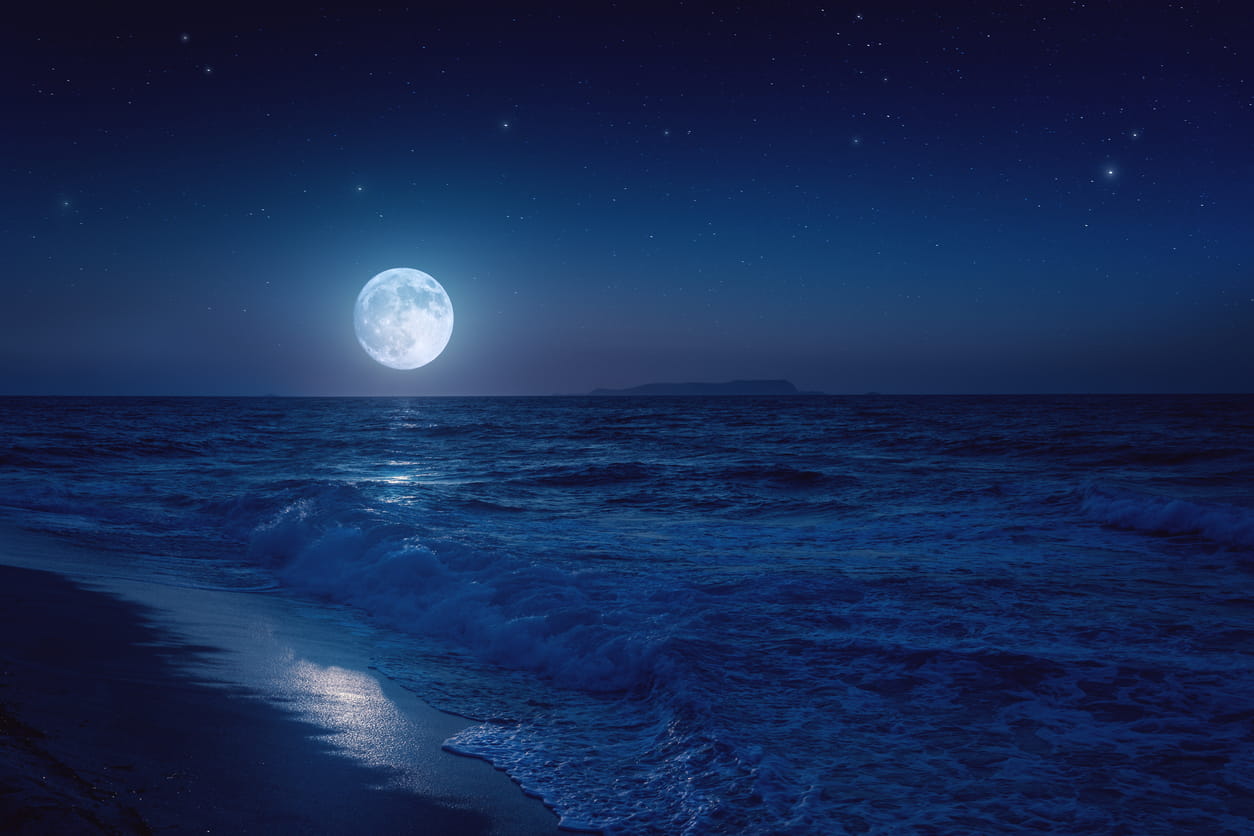
Something else to think about when scouting a location is if you want to create a composite by taking two completely different images.
For example, perhaps you take a shot of the moon on its own and then go to another location to photograph a night landscape.
Then, in post-processing, you can combine the two images together. This helps get around the issues of dynamic range discussed above, and also allows you to highlight both the moon and the landscape in a single image.
If you choose to utilize this method, just be sure you shoot both images with the same focal length to make the process of compositing the images easier. It also generates a more realistic result.
Learn More:
- Get Geared Up for Viewing and Photographing the Moon and Other Celestial Objects
- Learn How to Create a Composite Lunar Image in Photoshop
Set the Exposure
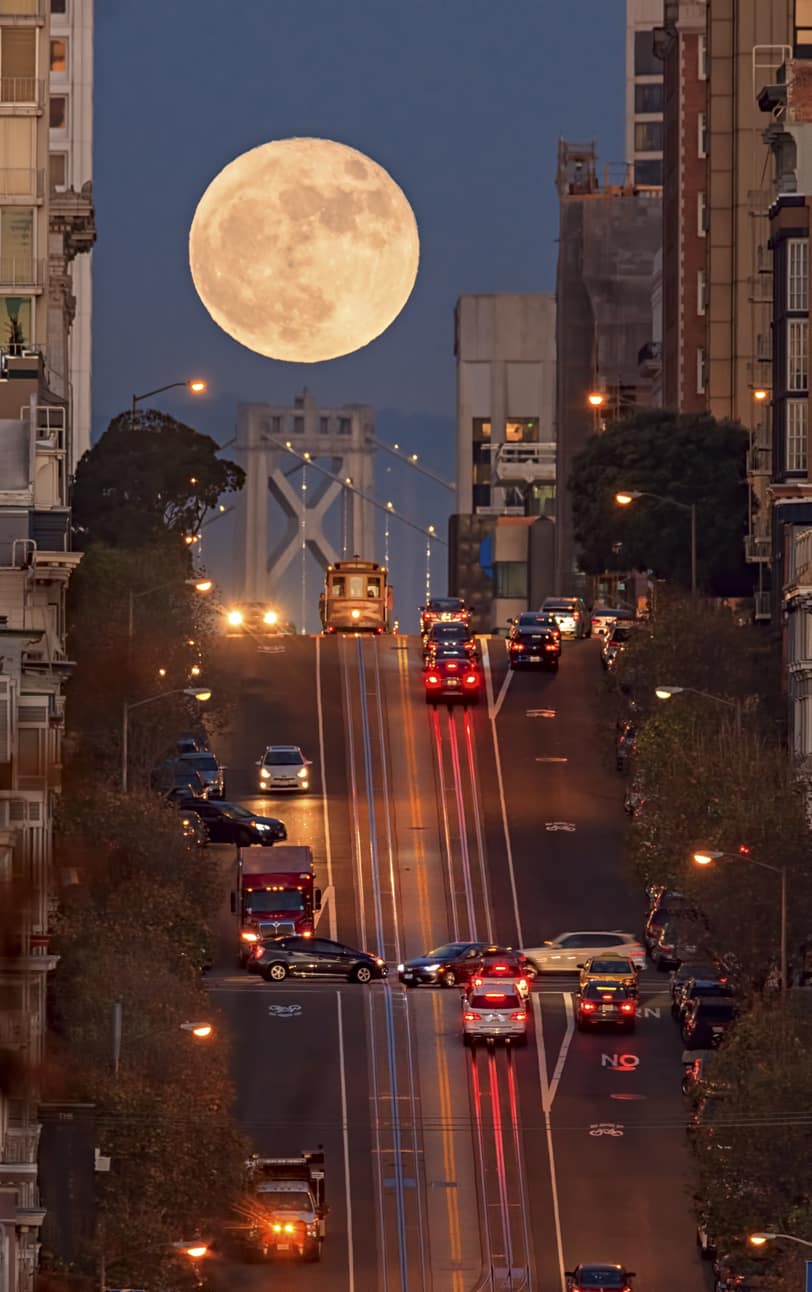
When photographing the full moon or a supermoon, it's advisable to dial in the exposure settings manually. You don't necessarily have to use manual mode, either, as aperture priority mode, shutter priority mode, or program mode can be used as well.
When dialing in the settings, err on the side of underexposing the image, that way you can retain the detail of the moon's surface without blowing out the highlights.
To determine the best settings, use spot metering to get a reading off of the moon and take a few test shots with bracketed exposures to find which one best aligns with your vision for the shot. Granted, if you're going to create a composite image, meter off the moon for one shot and for the other shot, meter off the landscape.
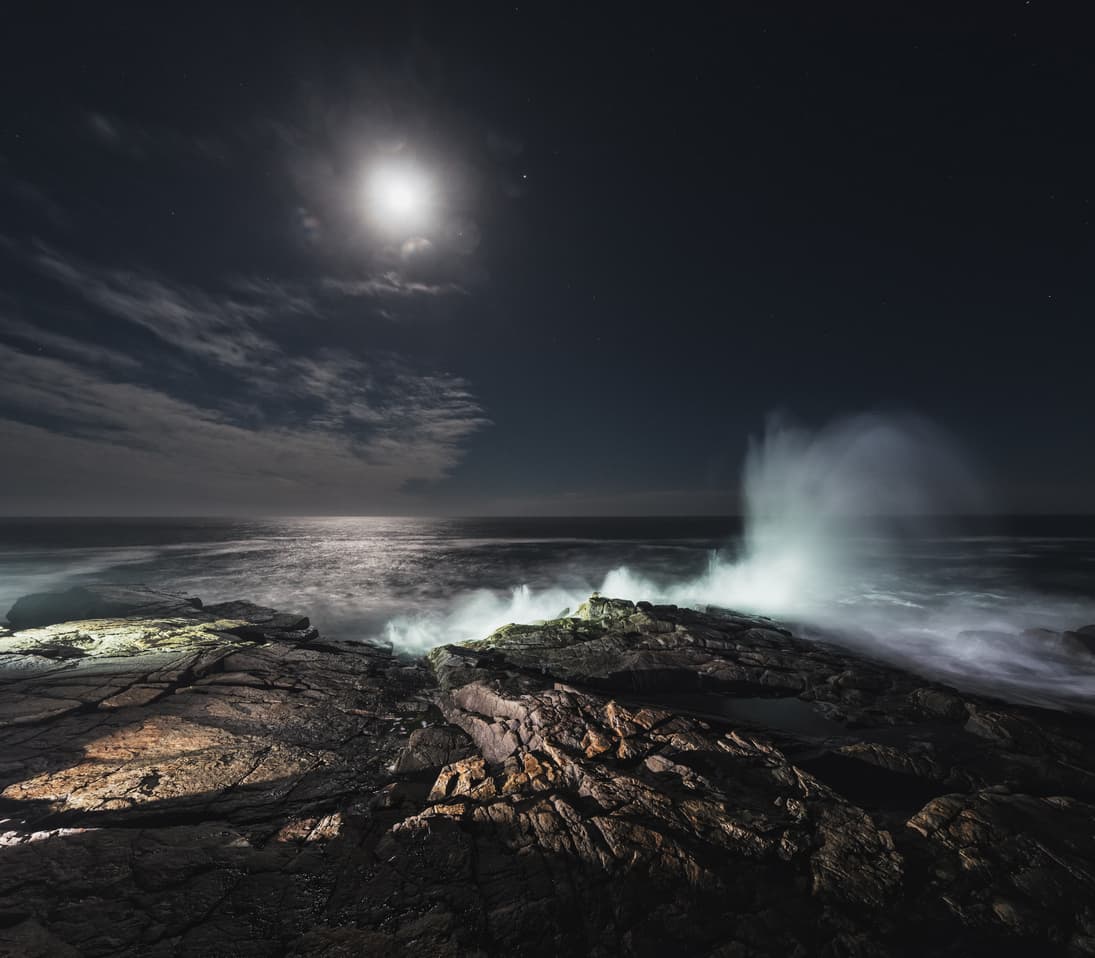
When choosing a shutter speed, start with 1/15 seconds, choosing faster shutter speeds if necessary as the movement of the moon is quite fast.
Next, select an aperture, probably in the range of f/8 or f/11, and set the focus to infinity. Adjust the ISO as needed to fine-tune the exposure.
From there, it's a matter of taking the photo or multiple photos if you want to create a composite as described earlier.
To avoid camera shake, use a camera remote or the camera's built-in timer to take exposures without causing vibrations to the camera.
Remember, you'll need to do some experimentation with the camera settings to get the exposure just right, but if you follow these steps, you can get great shots of the full moon, supermoon, or its various phases.
Learn More:
- Understanding Manual Mode of a DSLR Camera
- Beginner Photography Tip: Advanced Camera Controls That Will Take Your Photos to the Next Level
- Best tool for photographing moon and stars
We Recommend
Quick Tips for Planning Your Astrophotography Photo Shoot
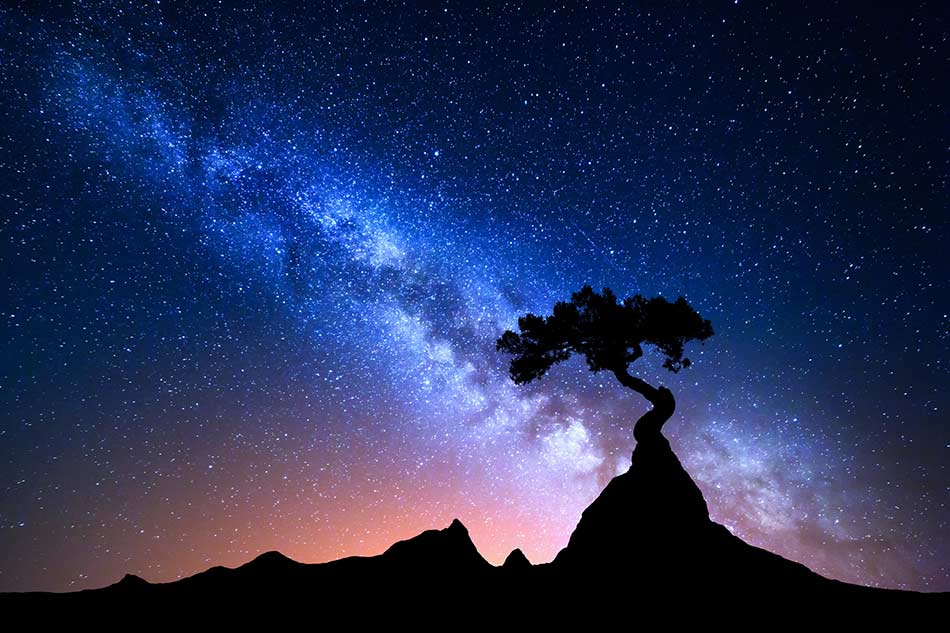
Looking at photos like the one above, it's no wonder why so many people want to take on the task of photographing the night sky.
Astrophotography is something that, not all that long ago, was reserved for serious enthusiast and professional photographers that had the necessary (and expensive) gear to get the job done.
However, in recent years, the quality of consumer-level cameras, lenses, and other photography equipment has improved greatly, making endeavors like night photography much more plausible, even for the hobbyist photographer.
Being out under a blanket of stars taking photos is a wonderful and exciting experience, to be sure. And seeing good results when all is said and done gives one as great a satisfaction as any.
But that success starts long before you're out in the middle of nowhere, just you and your camera gear.
That process starts at home, in the planning stages of your astrophotography photo shoot.
I won't claim that the planning stage is all that fun. But what I will say is that it is a crucial step that you must undertake if you're to get the best possible results.
Let's explore a few tasks you need to tackle in the planning stages of your night photography adventures.
Location, Location, Location
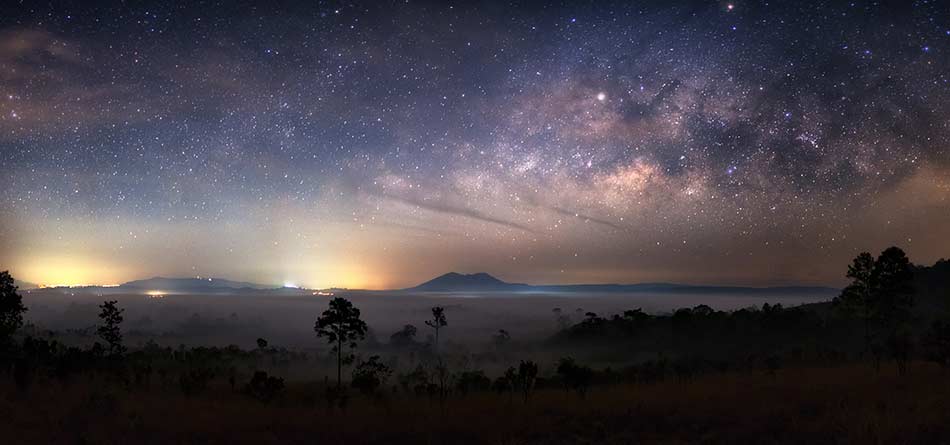
An obvious aspect of the planning process is nailing down a location for your photo shoot.
You can start by checking out examples of astrophotography online. Photographers almost always indicate the location at which the photo was taken, so you can find some good spots for your photos simply by looking at where others have gone.
Once you have a rough idea of good shoot locations, use Google Maps to get a better idea of its location relative to yours.
There are a few things about your selected location that you need to bear in mind:
- Is it sufficiently dark so as to avoid light pollution?
- Does it afford you an unobstructed view of the sky?
- Are there landscape elements you can include in the shot, like a mountain range, trees, or manmade objects like buildings or bridges that add interest to the scene?
- How long does it take you to get to the location?
- Is the location open to the public?
Answering each of the above questions will help you determine the best spots for your astrophotography. Now more than ever, you can use technology to help you answer these questions.

For example, you can use websites like Dark Site Finder (shown above) to locate areas near you with the least amount of light pollution.
It's as simple as entering your chosen spot and perusing the map for any bright areas. The darker the area on the map, the less light pollution there will be to interfere with your shot.
Something else that will help you is if you visit your selected locations during the day. That gives you a chance to scope out the area, make decisions about specific spots where you'd like to setup, and identify areas that give you the view you need of the sky while also incorporating interesting elements into the foreground for an improved composition.
Identify a Target
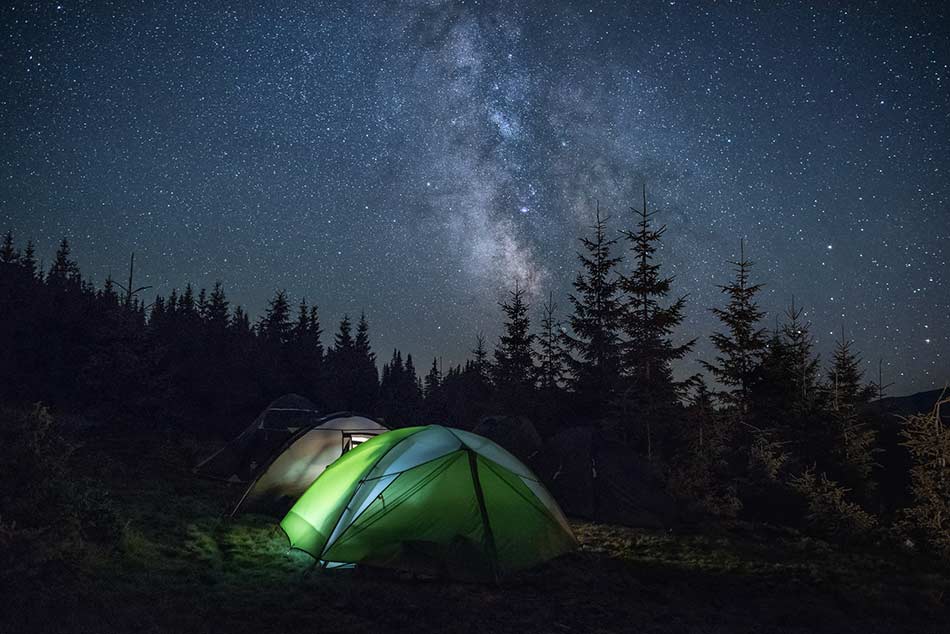
Of course, having a shoot location is just part of the puzzle.
You also need to identify the type of photo you want to take.
Are you heading out to grab a long exposure of star trails moving across the sky?
Do you want to capture a photo of the Milky Way?
Is there a particular constellation you want to feature?
Again, these are questions that are vital to your planning stages, and which can be answered by using any number of astrophotography tools available to the modern photographer.
One of the best apps out there for identifying your target is Sky Safari.

Just download the app to your iOS or Android device, and you can immediately pinpoint just about anything you want to photograph, be that the moon, the Milky Way, or any number of constellations.
In fact, there are over 200 celestial bodies in the Sky Safari library, so you'll have plenty to choose from in terms of your subject for your astrophotography adventures.
Get Necessary Permissions

Earlier, I noted that when selecting a location, a primary question to ask yourself is whether or not it's open to the public.
You might very well find that the place you most want to set up your shoot is on private land.
Rather than rolling the dice and hoping you don't get caught trespassing, it's recommended that you get the necessary permission to be on that property.
If it's owned by an individual, a quick call or visit might be all that's needed to get permission to be on their property.
Many public spaces might be free to use, but some require some sort of a fee, be that a camping fee or an entrance fee, that serves as permission for you being there.
Still other areas might restrict how many people have access, like some national parks. If that's the case, you might find yourself needing a permit to be in the area. You might also find yourself on a long list, too, which makes it all the more necessary to plan your trip well in advance.
If you can do those things, you might just find that once you get into the field that it's easier than you thought to capture stunning photos of the stars and other celestial bodies.
Get the Gear
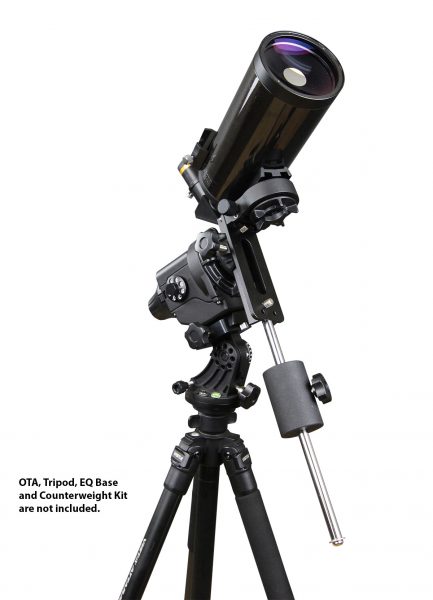
Naturally, part of the planning process is getting yourself outfitted with the tools you need to make the best photos.
Apart from the usual suspects in your kit - your camera, a few lenses, a sturdy tripod, an intervalometer, and so on - a special astrophotography mount is a must-have item if you want the best results.
The Star Adventurer Astro Package from Sky-Watcher USA pictured above is a top choice for photographers that want clear, sharp images of the night sky.
It has a built-in shutter release, that way you can compose the shot and fire the shutter remotely, giving you those sharp images you desire without the worry of camera shake.
This gadget also tracks celestial bodies for you, meaning that no matter what the object is you've selected to photograph, it will keep that object in full view as it moves across the sky with sidereal, lunar, and solar tracking modes.
Better yet, the Star Adventurer is user-friendly, so even if you're a novice, you can learn how to use it quickly so you get out in the field sooner. It's easy to setup and is highly portable too, so once you're out in the field, the setup process is minutes, not hours.
With low power consumption, you can rest easy that the Star Adventurer won't drain your batteries, and since it comes with lifetime firmware updates, you have the peace of mind that your mount will be up-to-date for the duration. You can even create time-lapse videos with preprogrammed speeds built right in!
Planning an effective astrophotography photo shoot takes a good deal of time, but the more effort you put into it, the better the results will be. If you're after breathtaking photos of the night sky like those seen throughout this article, be sure you take the time to find the best locations, identify a target subject, get the necessary permissions, and equip yourself with an astrophotography mount.
If you can do those things, you might just find that once you get into the field that it's easier than you thought to capture stunning photos of the stars and other celestial bodies.
We Recommend
Rule of Thirds
The rule of thirds the most ubiquitous rule in all of photography. The rule of thirds can be applied to virtually any type of photo, from a portrait to a landscape to a street scene. What’s more, the rule is more easily applied today than ever before - most cameras have a rule of thirds grid that can be engaged such that you can quickly and easily compose a better shot.
But, though the rule of thirds is probably the first rule that new photographers learn, there isn’t much discussion of why it’s important to learn. There might be an understanding of how to use the rule of thirds, but no understanding of how it makes an image more compelling to view.
In this guide, we take a deeper look at the rule of thirds, first defining it, then explaining how and why it works to answer the question, "What is the rule of thirds?" We’ll examine rule of thirds examples along the way, and even offer up some instances in which this rule should be broken.
With that, let’s get started!
Rule of Thirds Definition

The rule of thirds breaks an image into nine equal quadrants using two vertical and two horizontal lines, as seen in the sample image of the Great Wall of China. The resulting grid shows you where to place elements of interest in the shot such that they have maximum impact - along one of the four grid lines, or, even better, at one of the four intersecting points where the horizontal and vertical grid lines meet.
Using the image of the Great Wall of China as an example, note how the wall in the foreground and the tower both align with the leftmost vertical line of the grid. Note how the horizon line - the mountain peaks in the background - roughly align with the uppermost line of the grid as well. The photographer has used the rule of thirds to place these elements of interest along planes that maximize their impact, just as the rule suggests you do when composing a landscape photo.
Rule of Thirds Photography

Essentially, the rule of thirds allows viewers to engage with the photo in a more natural way. But how?
Our eyes tend to avoid the center of a shot, instead, going first to the areas where the rule of thirds lines intersect. Thus, placing objects of visual interest at one of those intersection points makes sense. It’s a way to use our natural visual tendencies to grab the viewer’s attention and pull them toward the subject of the shot.
So, why does this work? With the rule of thirds grid to guide you, you can create an image that avoids the 1:1 ratio that results when the subject is placed in the middle of the frame. That is, a 1:1 ratio occurs when there is an equal amount of space on either side of the subject. Instead, by creating an image with a 1:2 ratio, like the portrait of the young woman at sunset in which she is placed to the right of center, the image looks and feels more dynamic.
Quite simply, it’s a more interesting shot to view than if she had been placed smack in the middle of the frame. By shifting her to one side, the viewer’s eye has to move around to find her. Additionally, because there is so much space to explore on the left side of the image, it becomes a much more interactive photo.

Let’s use another image to further illustrate how the rule of thirds helps create a more interactive image and helps you master composition.
Looking at the sample image of the mountain biker, you can see that, again, the subject has been placed to the right of center near the rightmost vertical grid line (note how the biker’s body aligns well with the uppermost grid line as well). With his placement there, the eye is drawn to the right side of the photo. But, because the biker’s movement is clearly going to the left, the eye now follows that implied movement to the left as well. The result is that you engage more deeply with the photo because the eye has a place to go.
What’s more, even though the biker is shifted to the right side of the image, there is the perception of greater balance in the photo. If he’d been placed in the middle of the frame, the image would feel static and stuck. There would be no visual space for the biker to move into, nor would your eye have anyplace to go. So, even though there is more interest in the right side of the shot, the ability for our eyes to move to the left to see where the biker is headed allows the image to seem more balanced.
Photography Rule of Thirds: Horizons

The rule of thirds has an additional use - making images more interesting through the placement of horizons. Generally speaking, if you’re presented with a scene that has a lot of interesting elements in the foreground - or, conversely, has an uninteresting background - placing the horizon near the uppermost horizontal grid line helps you maximize the view of the interesting foreground elements.
In the sample image of the seascape, you can see how this strategy works. The sky has some interest, but the texture in the foreground rocks is far more interesting. By shifting the horizon upwards, the photographer is able to give us a better glimpse of those rocks, thereby introducing more texture and color into the scene.

Additionally, shifting the horizon line towards the bottom of the frame and placing it nearer the bottommost horizontal grid line, you can highlight an interesting background and minimize the view of a foreground that doesn’t offer much visual interest. This strategy works well in the image of the Northern Lights because it allowed the photographer to give us a fuller view of the gorgeous sky while minimizing the featureless and dark lake in the foreground.
The rule of thirds grids can also be used to help you keep the horizon straight. Just line it up with the horizontal gridline and you'll be able to avoid one of the most common composition mistakes: having a crooked horizon.
Rule of Thirds: When to Break It
Now that you have a deeper understanding of the rule of thirds, how it’s used and why, we can discuss why breaking the rule can be as advantageous as complying with it.
If you think about the purpose of the rule - to add interest and balance to a shot - there are instances in which completely breaking the rule actually gives the image more interest and balance.
Looking at the image of the Taj Mahal, you can see how the building is placed right in the middle of the frame. What’s more, the horizon line is also in the middle of the frame, yet the image still works. When it comes to balance, it’s hard to get a more precisely balanced shot than this. The visual weight is well proportioned from top to bottom and left to right.
There is also a lot of visual interest in the image to keep our eyes engaged, from shapes to patterns, lines to textures, and light and shadows. If you think about it, using the rule of thirds in this instance would have generated an image that just doesn’t make sense (just imagine the scene had the Taj Mahal been shifted to the left side of the image).

This concept works with portraits as well. Consider the candid portrait of the little girl and her pregnant mother as a prime example of how to break the rule of thirds. Note how the focal point of the image - the girl’s eyes - are placed along the vertical midline of the shot. Yet, the image still feels interesting. This placement allowed the photographer to give more importance to the girl placing her hand on mom’s belly.
Had the scene been shifted to the left, we wouldn’t have as good a view of this interaction because part of the belly and the hand would be cut off. Conversely, had the scene been shifted to the right, there would be too much dead space on the left side of the frame. So, again, breaking the rule of thirds generated the best possible outcome.
Final Thoughts

The rule of thirds is one of the three main rules of photography that have made countless photos better over the years. Yet, as we’ve learned here, there is a time and a place for using the rule and instances in which it’s best to simply throw it out the door.
Likewise, there are instances in which the composition doesn't perfectly fit the rule of thirds (like the image above), but it's close enough that it still has the effect of helping you create a balanced shot.
A good exercise is to look for rule of thirds examples not just in photography, but also rule of thirds in art - paintings, in particular.
By learning more about it and practicing using the rule of thirds in photography, you’ll become more adept at knowing when to use it and when to skip it. The result? More compelling images that keep viewers engaged. Who doesn’t want that?
We Recommend
Suggested Camera Settings for Astrophotography

If you’ve never tackled astrophotography, one of your first questions might be, “What camera settings do I use?”
The answer to that question is tricky and really depends on the situation. No two photography outings are the same, but that doesn’t mean there can’t be a set of suggested settings that give you a good starting point for your next astrophotography adventure.
Let’s explore a few essential settings that will get you going in the right direction.
Basic Settings
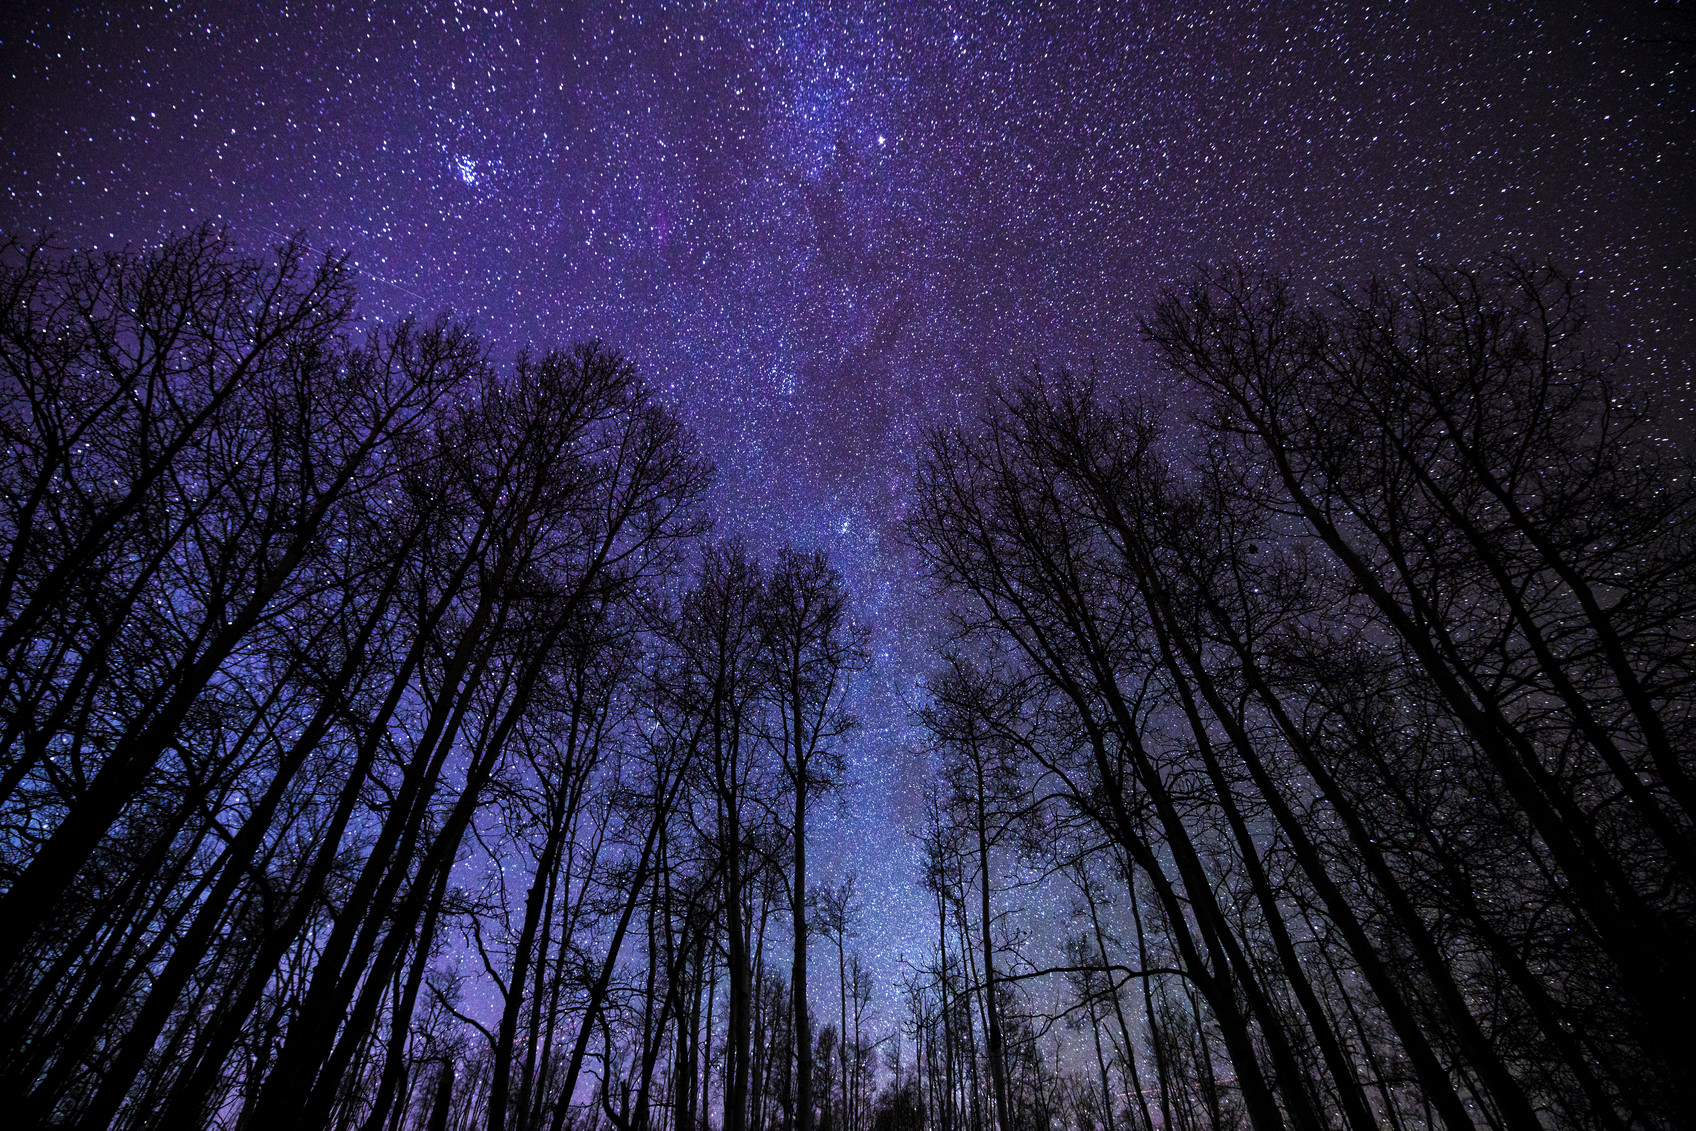
Obviously, controlling the amount of light that your camera gathers is a crucial element of astrophotography (and all photography for that matter). The exposure settings will vary from one situation to the next and will depend on many factors, including the presence or absence of light from light pollution as well as light reflected off the moon. Having said that, a good starting point is as follows:
Shooting mode - Manual
Drive mode - One-shot
Aperture - f/4
ISO - 1600
Shutter Speed - 4 minutes
Since most cameras only allow a shutter speed of up to 30 seconds, you’ll need to shoot in Bulb mode. This allows you to control the shutter for minutes or even hours at a time.
Advanced Settings

In addition to the basic settings outlined above, there are numerous advanced settings that should be tended to if you are going to get the best results.
Focus - Set to manual. Your camera’s autofocus system will not be able to set the focus appropriately, and you might end up with blurry photos.
Exposure compensation - Set to zero. There is no need for exposure compensation because you will be setting your exposure settings (aperture, ISO, shutter speed) manually.
White balance - The daylight setting usually produces good results, though setting a custom white balance will likely be even better.
Mirror lock-up - Unless you’re using a mirrorless system, you might consider locking the mirror of your DSLR in place, especially if your camera mount isn’t of a high quality. Doing so reduces vibrations that result from the mirror moving. Minimizing these vibrations will get you images that are sharper and clearer.
Image quality - Set to RAW. RAW files contain all the data collected by the camera’s sensor, as opposed to JPEGs which compress that data. By shooting in RAW, you have greater leeway in post-processing as a result of the larger amount of data in the file.
Long-exposure noise reduction - Many cameras have this setting to help reduce the level of noise in the image as a result of using a higher-than-normal ISO. However, many newer cameras also have vastly improved ISO performance such that even at ISO 1600, 3200, or 6400, noise is not much of a problem. Additionally, long-exposure noise reduction increases the time it takes your camera to process the images, which is a problem if you’re creating a time-lapse video. Because of this, in-camera long-exposure noise reduction is not recommended. If you find that your images have too much noise, you can use noise reduction in post-processing to take care of the issue.
Good Gear Changes Things
As noted above, the particular circumstances in which you are shooting will necessitate changes to these recommended settings. For example, if there is a particularly bright moon, you might adjust your ISO from 1600 down to 400 to compensate for its brightness, or you might utilize a faster shutter speed, such as 2 minutes as compared to 4 minutes.
Another factor that will determine some of your camera settings for astrophotography is the mount you use. A subpar mount, for example, might require that you use mirror lock-up so yourimages aren’t blurry. However, if you use a high-quality mount like theStar Adventurer from Sky-Watcher USA, mirror lock-up isn’t necessary. But why?
Top-shelf mounts like the Star Adventurer give your camera an incredibly stable base so you can get clear, tack-sharp images every time. The mount supports up to 11 pounds and gives you a highly precise tracking platform so you can take stills, long exposures, and even time-lapses of your favorite celestial bodies. What’s more, the Star Adventurer allows you to track sidereal, solar, and lunar movements, opening up lots of options for subject matter for your photos.
Better still, the Star Adventurer has a built-in polar scope with illuminator, a built-in auto-guiding interface, and a DSLR interface that gives you automatic control over your shutter. In short, the Star Adventurer gives you the tools you need to get better photos of the night sky, each and every time. And, with tons of features, the Star Adventurer will help you take on more and more advanced astrophotography shoots as you learn the craft and acquire new skills.
So, grab yourself a Star Adventurer, head out to your favorite night sky viewing spot, dial in these suggested settings, and set about taking breathtaking images of the Milky Way and other features of the night sky. It will take some experimentation, but in time, you’ll be able to capture images like the sample images in this article.
We Recommend
Take Better Photos at Night With These Simple Astrophotography Tips
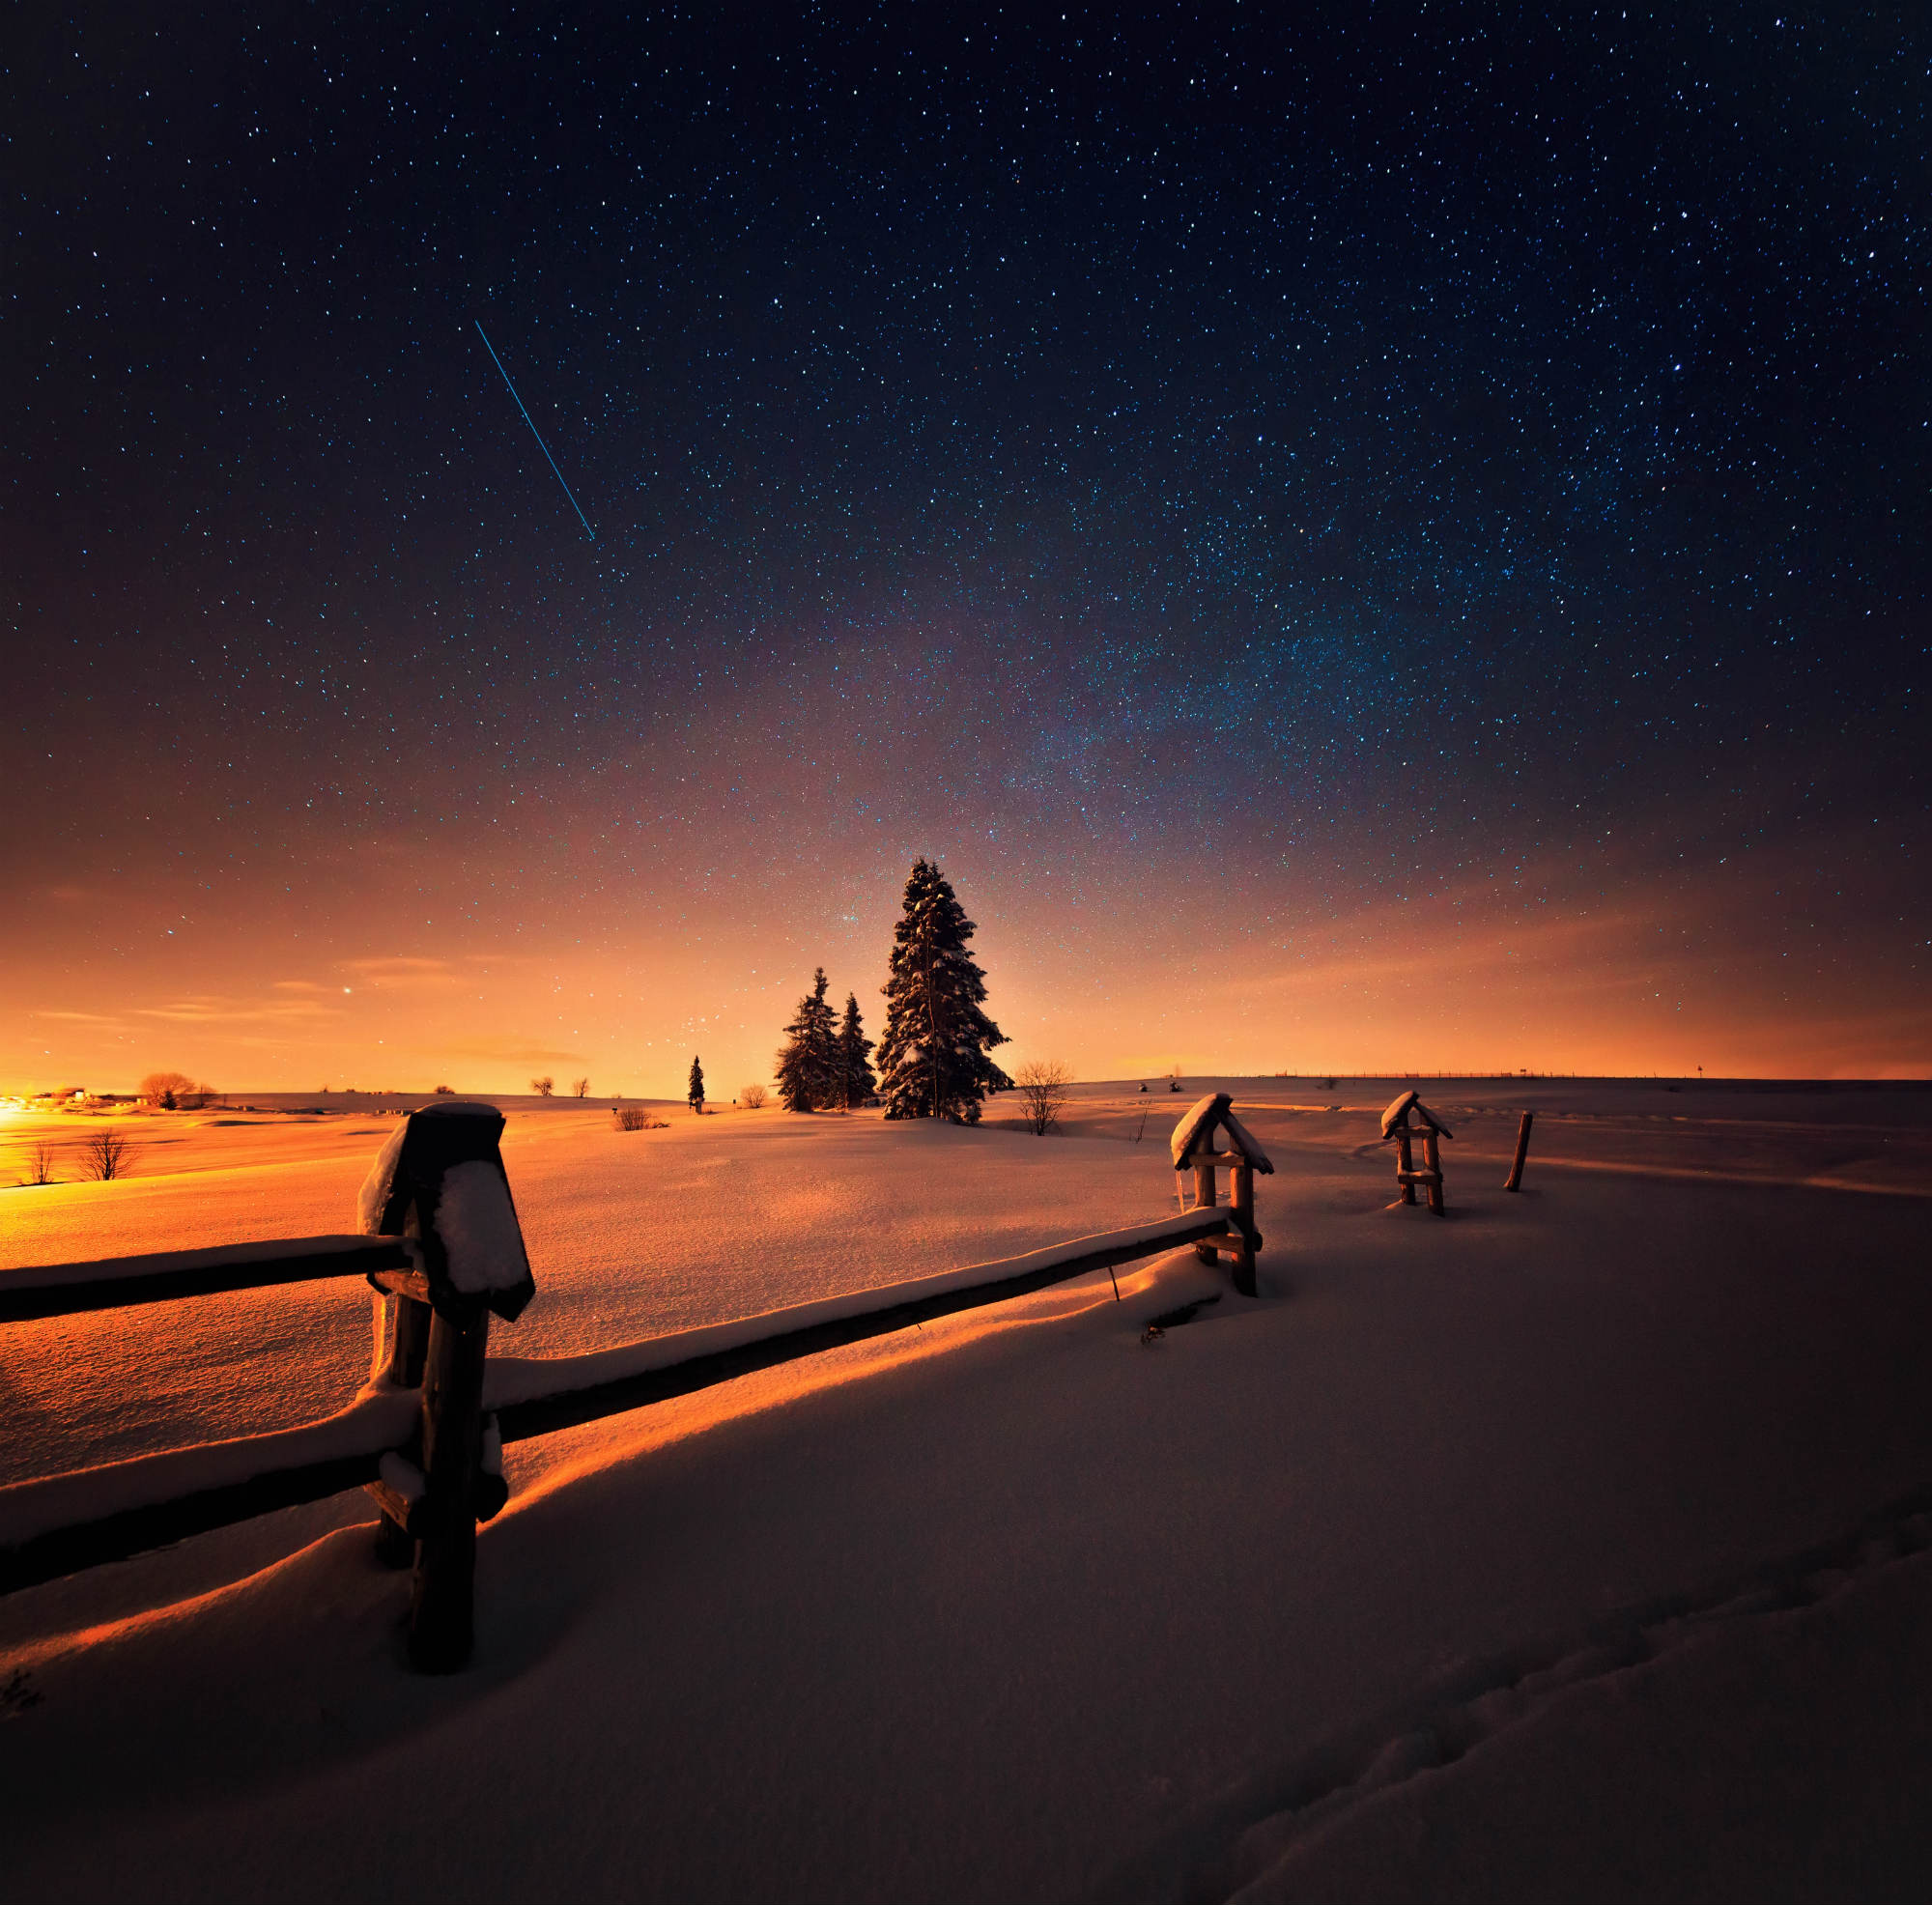
Sometimes the most difficult part of taking beautiful photos of the night sky is simply knowing where to begin.
That's where this tutorial comes in...
With the quick and easy tips outlined below, you'll get the pointers you need to start taking better shots of the stars sooner rather than later.
Let's get started!
Editor's Tip: Before you can take the best photos, you need the right astrophotography gear. Get geared up.
Use a Wide-Angle Lens
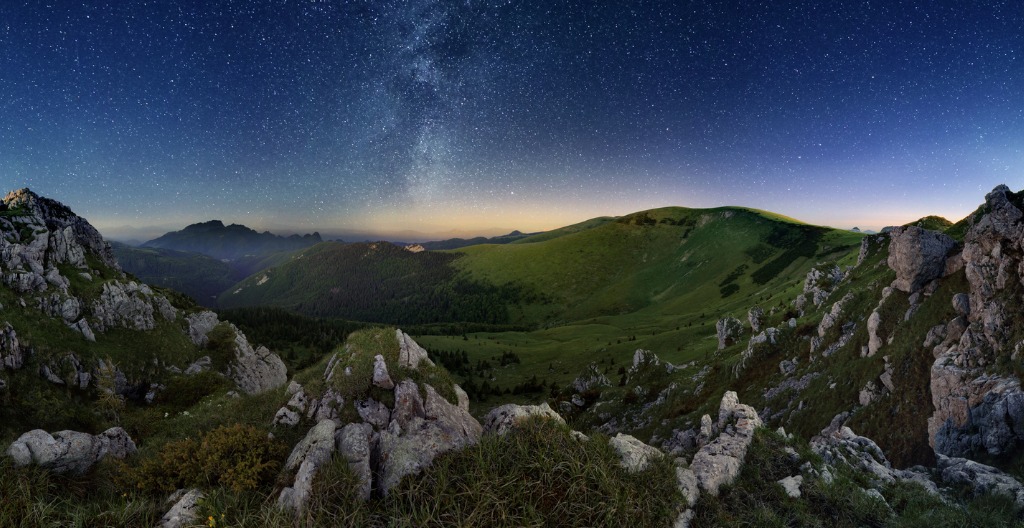
The wide angle of view afforded by a wide-angle lens means that you can incorporate more of the night sky into your photos, as well as the landscape beneath them.
Though you don't want to overwhelm the shot with too much detail, it's nice to be able to include elements that give the photo depth and context.
For example, in the photo above, the use of a wide-angle lens allowed the photographer to include much more foreground interest. That, in turn, gives the shot excellent dimension and depth.
Quick Tip: If you're in the market for a solid wide-angle lens, a 24mm f/1.4 is tough to beat.

But as with any photography rule of thumb, you have to be willing to make exceptions.
Just because wide-angle lenses are great for this type of photography doesn't mean that you can't try other types of lenses.
As you can see above, a tightly-framed shot with a telephoto lens can produce gorgeous results as well.
Learn More:

Use the 500 Rule for Sharp Stars (or Get a Star Tracker Mount)
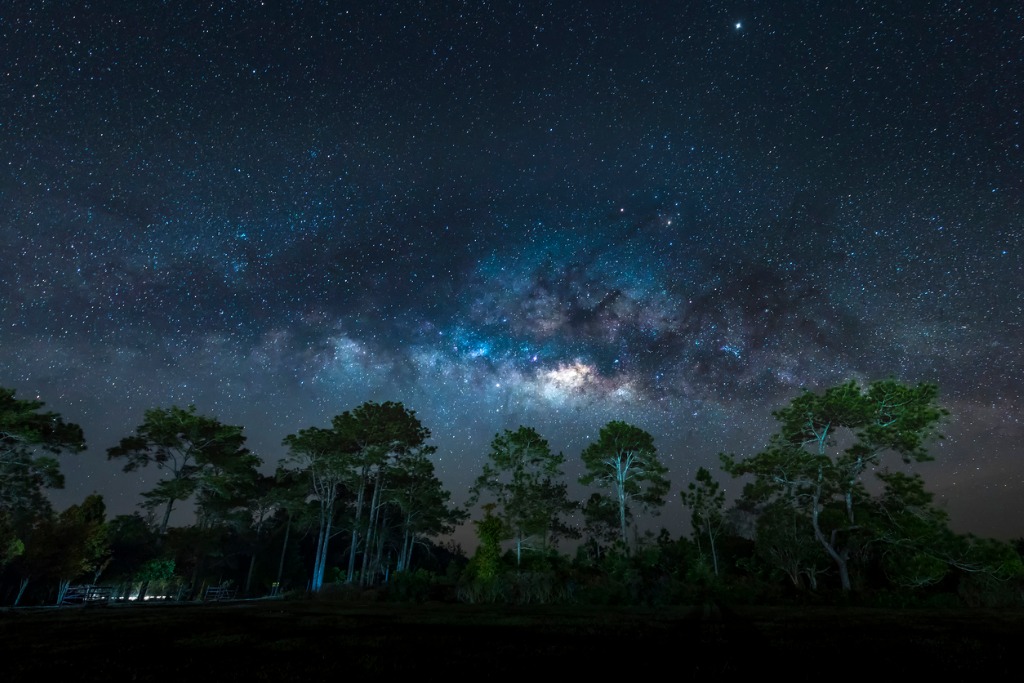
To get clear, pinpoint stars like those that you see in the image above, you have to figure out what shutter speed you can use without getting star trails.
The 500 rule stipulates that if you divide 500 by the focal length of your lens, that you'll get an exposure time that will get you pinpoint stars.
So, using our recommended 24mm lens, the equation would be: 500/24 = 20.83.
That means that with a 24mm lens, you can dial in a shutter speed of up to about 20 seconds and still get sharp photos.
An even easier way to get pinpoint stars is to use a star tracker mount, like the Vixen Polarie shown above.
This rig is purpose-built to help you get high-quality photos of the night sky because it's incredibly easy to setup and use.
Just mount the Polarie to any standard tripod, and in turn, mount any camera weighing up to seven pounds to the Polarie.
Then use the included compass to orient the mount to face north or use a polar scope for alignment.
Once the Polarie is in position, it will track the movement of the stars across the sky for you. That means you get pinpoint stars without having to mess about with the 500 rule!
Editor's Tip: It's easy to get pinpoint stars. Find out how right here.
Use a Remote or the Camera's Self-Timer
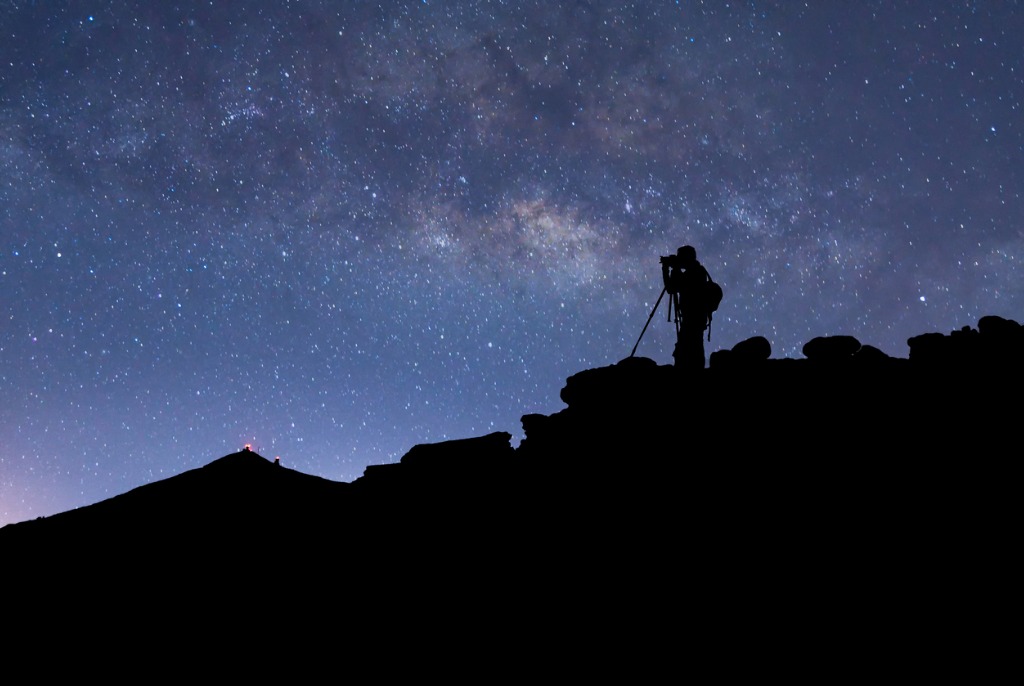
Since you need long exposures to get photos at night, that means that your camera is susceptible to camera shake.
Camera shake occurs when the vibrations you cause by pressing the shutter button result in a blurry photo.
If you remove that element of touching the camera from the equation, you'll get sharper photos as a result.
Just about every camera has a built-in timer that allows you to select from a variety of short delays.
Even a two-second delay should be enough time to let any vibrations calm down before the shot.
But for better results, it's best not to touch the camera at all.
Do do that, you need a camera remote.
You can pick up inexpensive remotes for less than $10 on Amazon, so it's not a huge investment of money to get one.
Even if you opt for something a little more spendy, the results will be worth it!
Editor's Tip:
Final Thoughts
As I noted in the introduction, sometimes all you need to get going are a few simple tips.
The tips outlined above will get you started on the right foot and help you get improved photos of the night sky.
For additional tricks to improve your astrophotography, check out the video above by Mango Street.
In addition to the instructions I've provided above, they offer hints on how to focus your shots, get sharper images, and camera settings to use, among other things.
We Recommend
Take Better Photos of the Stars With These Quick Tips
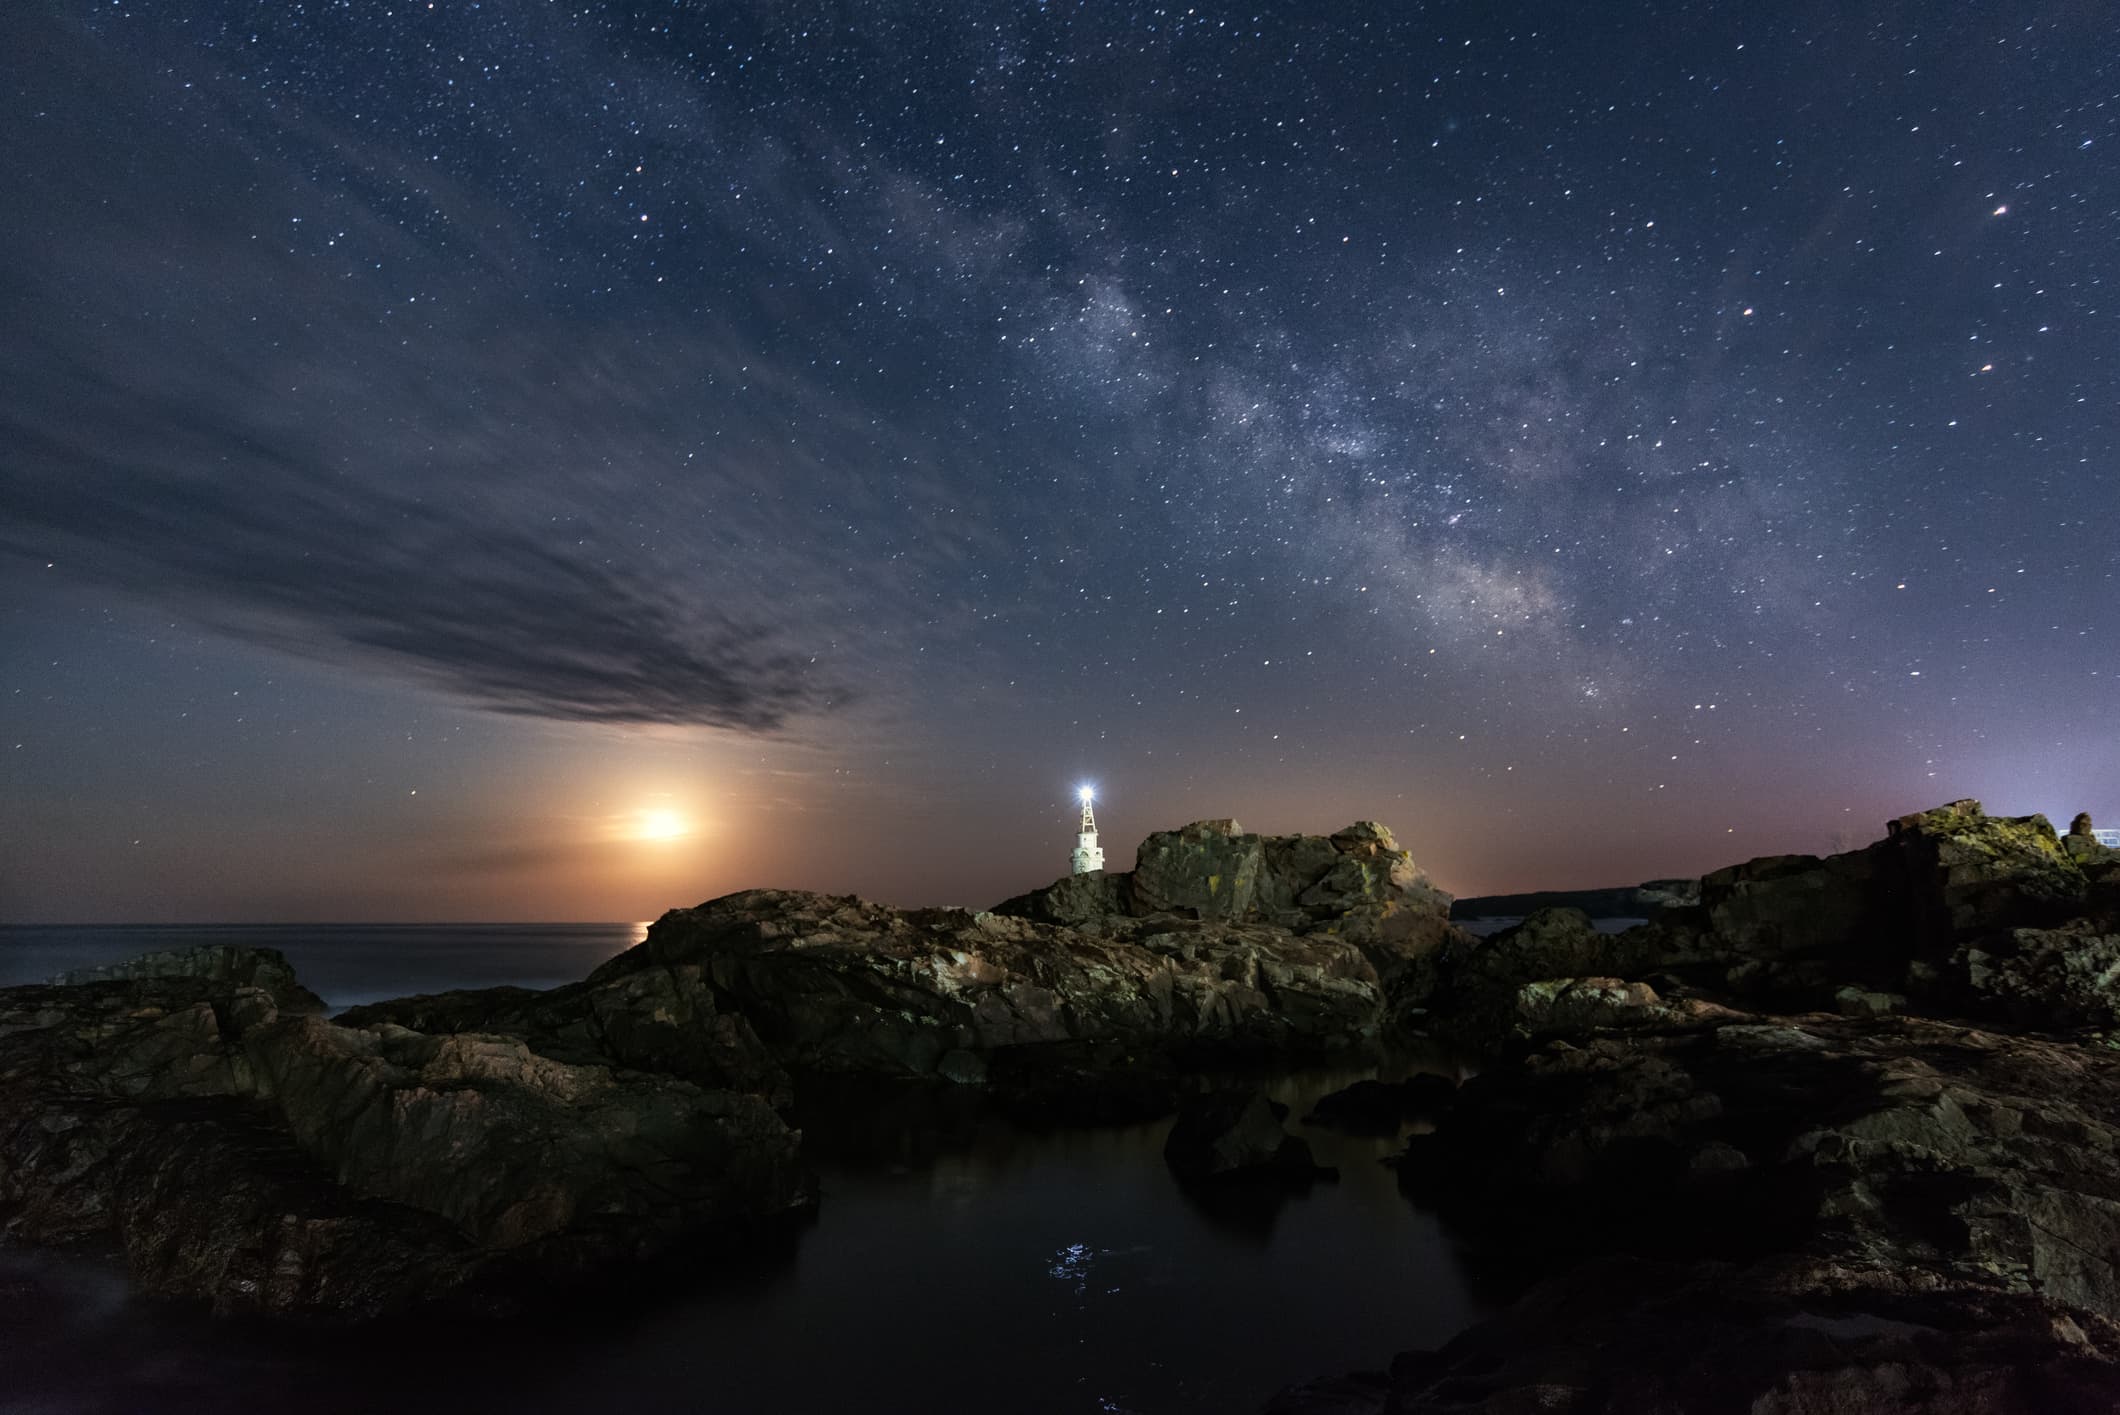
If you ask me, the night sky is one of the most beautiful subjects you can photograph.
The problem is conveying that beauty in the photos you take - it's a process that can be easier said than done at times.
However, astrophotography doesn't have to be overly complex or intimidating.
In fact, there are a number of quick and easy ways you can improve your photos of the stars.
Use a Fast Lens

A photography term that causes a lot of confusion for beginners is "fast lens."
Though a "fast lens" might indicate that it can achieve very quick shutter speeds, the term actually refers to the lens's aperture.
That is, a very wide aperture, like f/1.2, opens the aperture blades and lets in tons of light.
Since the lens can collect so much light, that means you can use a faster shutter speed in return, thus the term "fast lens."
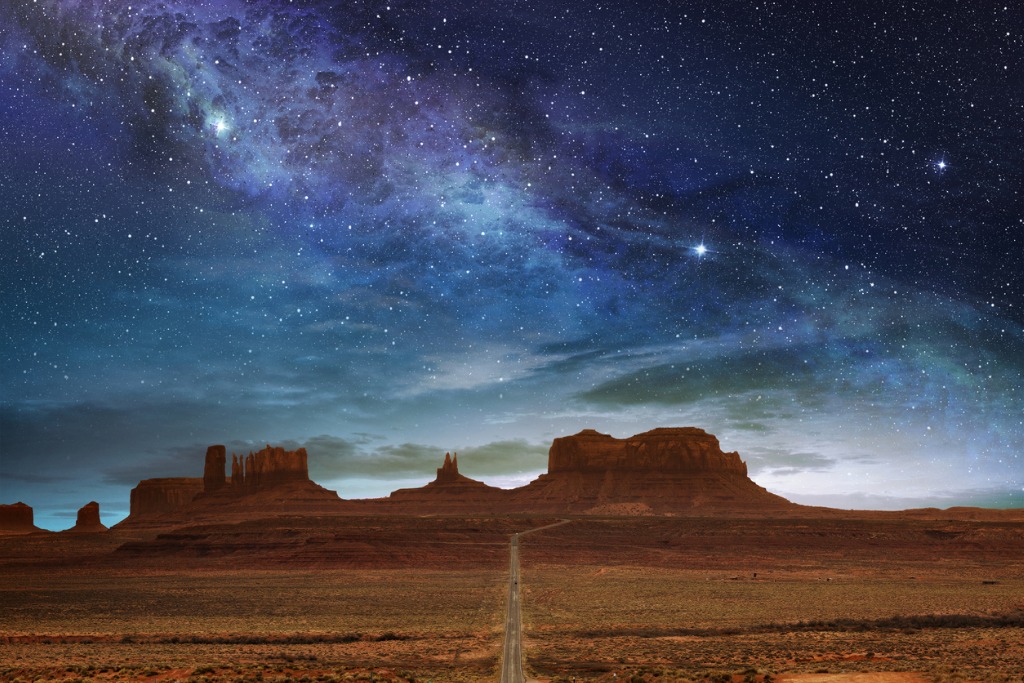
But a fast lens offers you further benefits as an astrophotographer.
For starters, the large aperture opening allows your camera to capture light from even the most distant stars. The result is a sky full of twinkling light.
Additionally, a fast lens allows your camera to capture that light in a shorter period of time, which helps in eliminating star trails (more on that next).
A standard kit lens opens up to f/3.5 at its shortest focal length, and you can get adequate results with that.
But if you really want to improve the lightness and brightness of the starry sky, upgrade to a lens with a larger aperture like f/2 or f/1.8 at the least.
Learn More:
Get a Star Tracking Mount
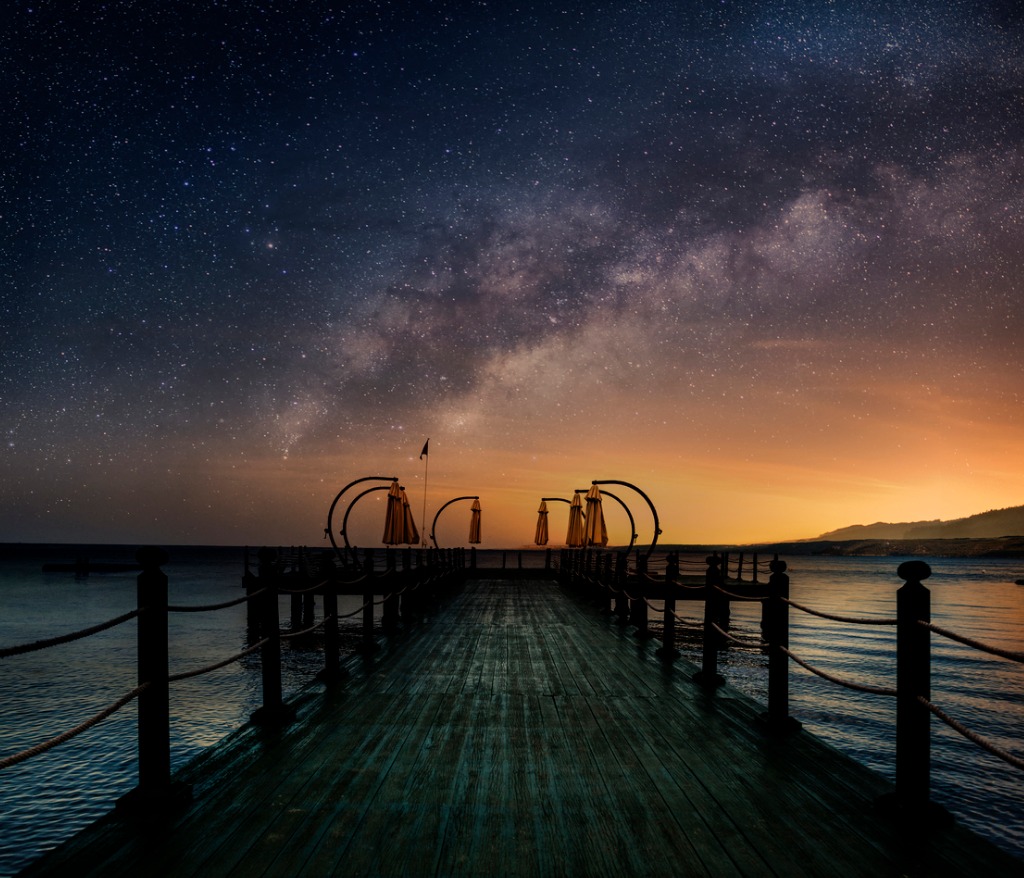
As noted in the previous section, a fast lens helps eliminate star trails, resulting in photos like the one above in which you see tack-sharp, pinpoint stars.
But to really make that a possibility, you need a star tracking mount.
The Polarie Star Tracker Mount shown below allows you to orient your camera to the north, and once set, it will track the motion of the stars as they move across the night sky.
But don't think that that's the only advantage of a star tracking mount...
Mounts like the Polarie are quick to setup - it attaches to a standard camera tripod and accepts any digital camera that weighs up to seven pounds.
Heck, you can even use it with your smartphone!
Additionally, the Polarie is easy to use, too. You can orient it to face north with the included compass, the North Star alignment window, or you can use it in conjunction with a polar scope for alignment as well.
In other words, this rig has all the features you need to step up your astrophotography game.
But don't take my word for it - check out the video above for sample images captured when using a Polarie.
Learn More:
- Get the Specs and Pricing on the Polarie Star Tracker Mount
- How to Compose a Killer Shot of the Night Sky
Processing Your Images is a Must
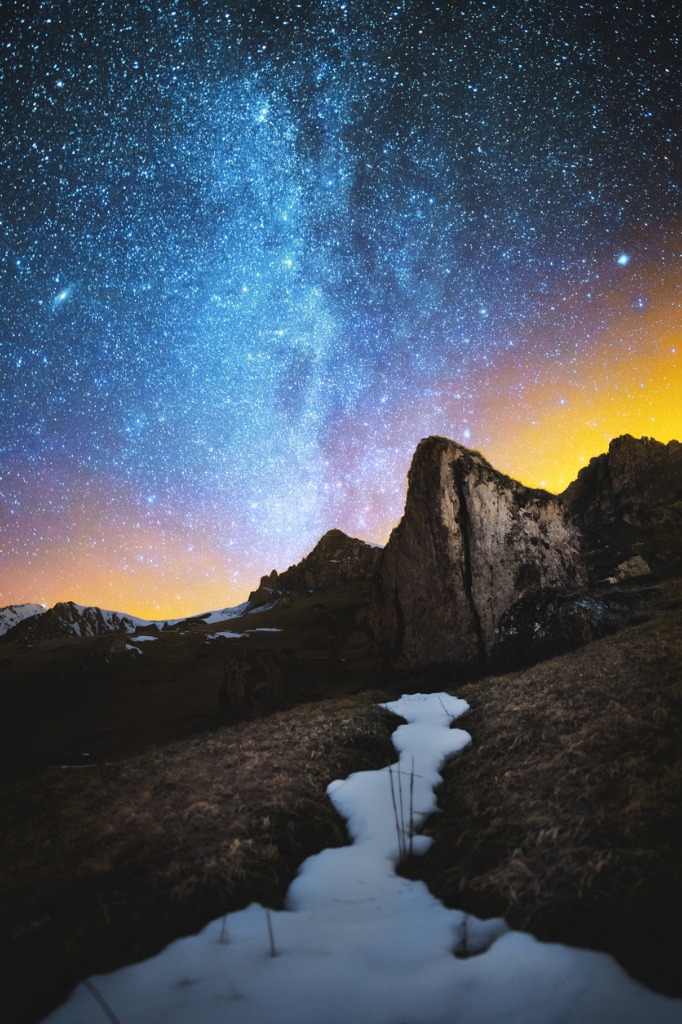
The raw, untouched images captured by your camera can be quite impressive, especially if you've put in the time and effort to plan your nighttime photo shoot and compose your images to have maximum impact.
However, even the nicest looking untouched images can be brought to life with post-processing.
Using a program like Photoshop or Lightroom, you can fine-tune your photos of the night sky such that the light of the stars pops.
Likewise, you can make adjustments to levels, curves, white balance, contrast, and so forth to give your images a more vibrant and colorful appearance.
You can even use post-processing programs to create panoramas, focus stack images, and other complex tasks.
For a beginner's tutorial on Photoshopping your photos of the night sky, check out the video above by AstroBackyard.
And with that, you have three rock-solid and easy tips to integrate into your astrophotography workflow that will help you maximize the visual appeal of your photos of the stars.
Learn More:
- These Common Astrophotography Mistakes are Holding You Back
- How to Photograph the Milky Way (in Simple English)
We Recommend
The Best Cameras for Beginner Astrophotographers

When getting outfitted with a camera for astrophotography, some beginners look at things like price above all else.
And while your budget is certainly an important consideration, so too are the features the camera offers for maximizing your ability to get high-quality nighttime shots.
With that in mind, I've put together this quick overview of some of the features to look for as well as a short list of the best cameras for beginner astrophotographers.
ISO Performance
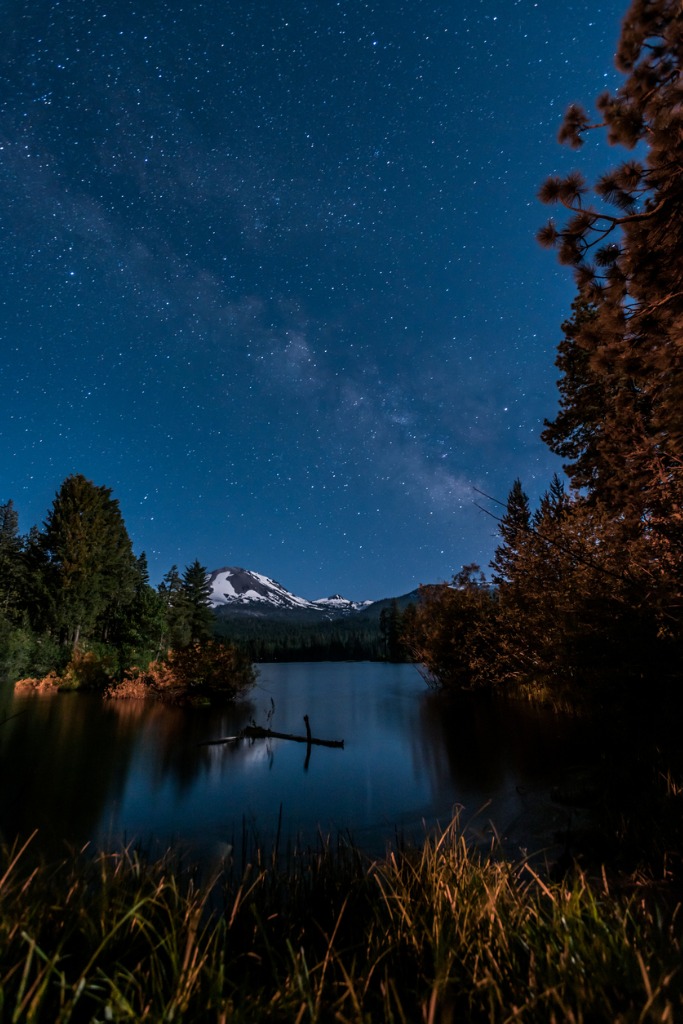
A good astrophotography camera needs to have certain functionalities in order to get you the results you want.
Primary among them is good ISO performance, which needs to be considered on two different points.
First, the camera needs to have a high ISO range, that way you can increase the sensitivity of the sensor in the absence of light.
Many cameras today - even entry-level models - have native ISO ranges up to 12800, 25600, and even higher.
But it's important not to get caught up in just the ISO range that's available.
Instead, you need a camera that performs well at high ISOs too. That is, the camera should be able to create images at higher ISOs with minimal noise.
The less noise the camera produces, the cleaner the images will be. What's more, a camera with noise reduction further allows you to get cleaner shots even at higher ISOs.
Battery Life, Vibration Control, and Articulating LCD
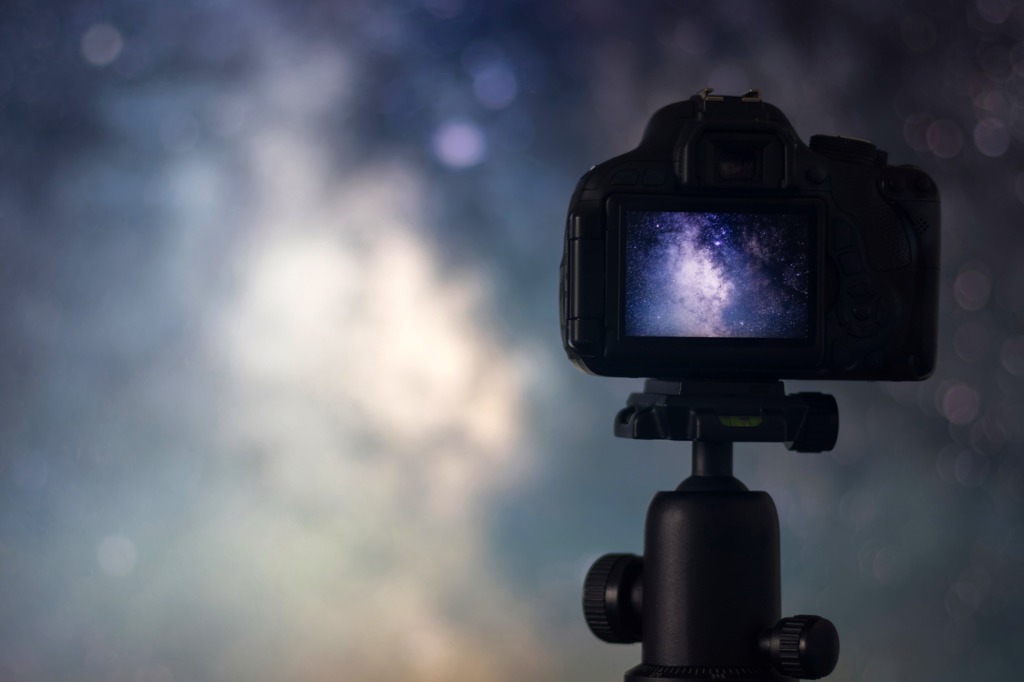
An additional feature to look for in an astrophotography camera is battery life.
Though Sony puts out some excellent mirrorless camera bodies, their battery life is notoriously short, so they aren't ideal for astrophotography.
Likewise, mirror vibration control is a handy feature to have to ensure sharper images. An articulating LCD is another feature to consider, as it enables you to more easily check your framing and composition, even when the camera is positioned at a steep angle towards the sky.
Editor's Tip: A crucial accessory for astrophotography is a solid tripod to give your camera a stable base. Shop for high-quality astrophotography tripods and other accessories at MrStarGuy.
Construction

The build quality of the camera is another factor that you must consider.
First, you don't want to spend hundreds and hundreds of dollars on a camera that isn't built to last. Granted, your camera won't be with you forever, but you want it to be constructed such that you get five or more years of good use out of it.
Second, since astrophotography is a night pursuit and requires you to be outdoors for long periods of time, you want a camera that can stand up to cold temperatures and inclement weather like rain or snow.
That means looking for a camera body that's weather-sealed to protect it against the elements.
Learn More:
Suggested Cameras for Astrophotography
There is a long, long list of cameras that are well-suited for photography out of the box, or are good candidates for astrophotography.
However, I've narrowed the list down to three models, each at a different price point. All three offer good ISO performance, low noise for long exposures, great battery life, and good build quality.
For Big Budgets: Nikon D810
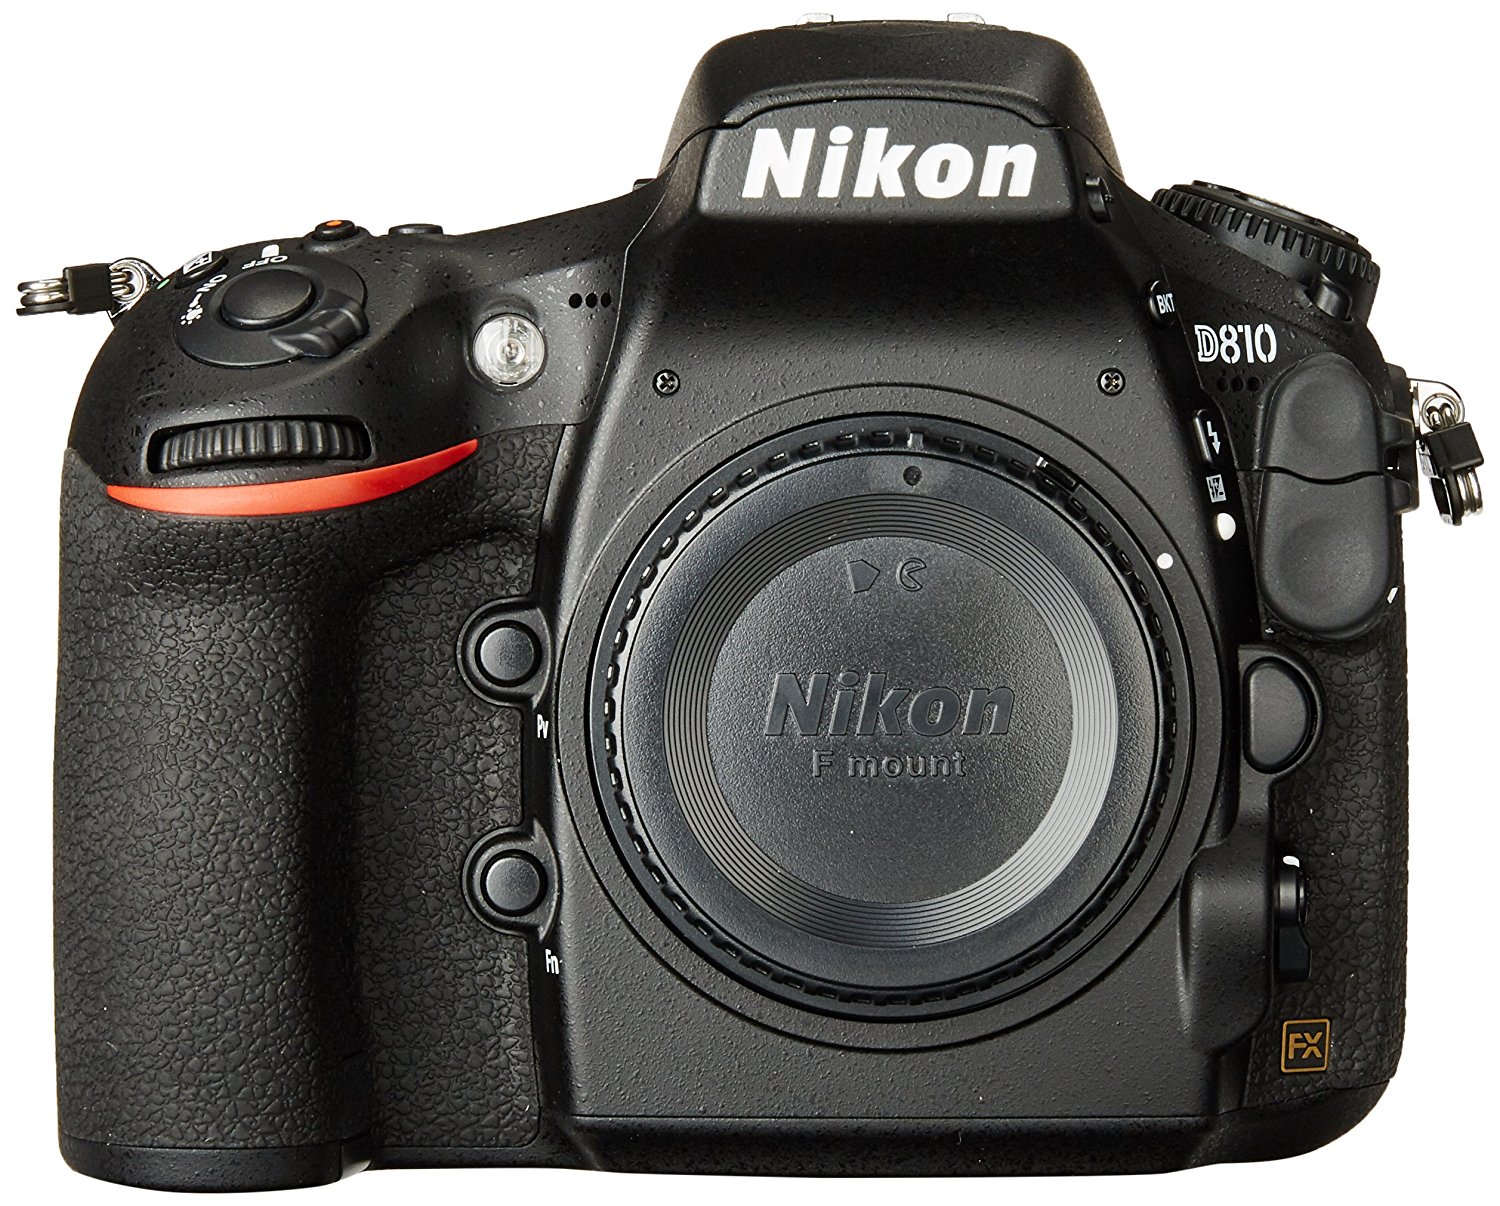
Though the Nikon D810 has since been replaced by the Nikon D850, it's still an excellent camera, and now that it's an older model, it can be found much cheaper, too. As of this writing, a new Nikon D810 runs around $2,800 for the body, compared to around $3,300 for a D850.
It's a full frame camera, which means it has a larger sensor and has improved low-light performance that translates into photos that are cleaner with less noise.
Other specs include:
- 36.3-megapixel full frame CMOS sensor
- Native ISO to 12800 (expandable to 51200)
- 3.2-inch LCD with 1.229-million dots
- 51-point autofocus systemWeather-sealed body
Nikon also makes a D810a, which is specifically designed for astrophotography.
The D810a's sensor is more sensitive to H-alpha red tones by a factor of 4, meaning it can capture celestial bodies like nebulae with much more sharpness, detail, and dynamic range.
It has an electronic front curtain shutter as well, which helps eliminate vibrations. This is especially handy when taking long exposures.
That being said, a normal Nikon D810 will be more than sufficient for a beginner astrophotographer.
Learn More:

For Mid-Range Budgets: Canon EOS 6D
Like the Nikon D810, the Canon EOS 6D is an older full frame camera with excellent low-light performance that you can find brand new for around $1,000.
For that price, you get just about all the must-have features you need for astrophotography, including:
- 20.2-megapixel full frame CMOS sensor
- Native ISO to 25600 (expandable to 102800)
- 3-inch LCD with 1.04-million dots
- 11-point autofocus system sensitive to -3EV
- Weather-sealed body
Clearly, the 6D's sensor isn't quite what the D810 offers, and its LCD isn't quite as large or resolute. However, for $1,800 less than the D810, you get a full frame sensor, a huge expanded ISO range, and a weather-sealed body.
The 6D also has built-in Wi-Fi and GPS, an electronic level to help you get the horizons perfectly straight, and a DIGIC 5+ image processor that makes quick work of in-camera processing tasks.
Learn More:
For Budget-Minded Buyers: Pentax K-S2
An excellent budget-friendly option for astrophotography is the Pentax K-S2.
Unlike the previous two recommendations, the K-S2 is a crop sensor camera, meaning it has a smaller sensor than the D810 and 6D.
However, the Pentax lacks an anti-aliasing filter, which results in sharper images. It also has excellent ISO performance, with the highest native ISO capabilities of the bunch.
Additionally, the Pentax features:
- 20-megapixel APS-C CMOS sensor
- Native ISO to 51200
- 3-inch fully articulating LCD with 921,000 dots
- 11-point contrast-detect and phase-detect autofocus system
- Weather-sealed body
Furthermore, because the K-S2 is a crop sensor camera, it weighs less and has a smaller form factor than the other two cameras on this list.
That could be a bonus for photographers that want something that's easier to carry or who are looking for a camera that can pull double-duty as a small, yet capable everyday camera.
Learn More:
Editor's Tip: No matter what camera you use, maximize your ability to capture gorgeous photos of the night sky by using an astrophotography mount like the Vixen Polarie. Compatible with any camera that weighs up to seven pounds, the Polarie will track the motion of the stars to eliminate star trailing. It's also easy to use and setup and is designed to function in most weather conditions. Learn more about the Vixen Polarie Star Tracker Mount.
We Recommend
These Common Astrophotography Mistakes are Holding You Back
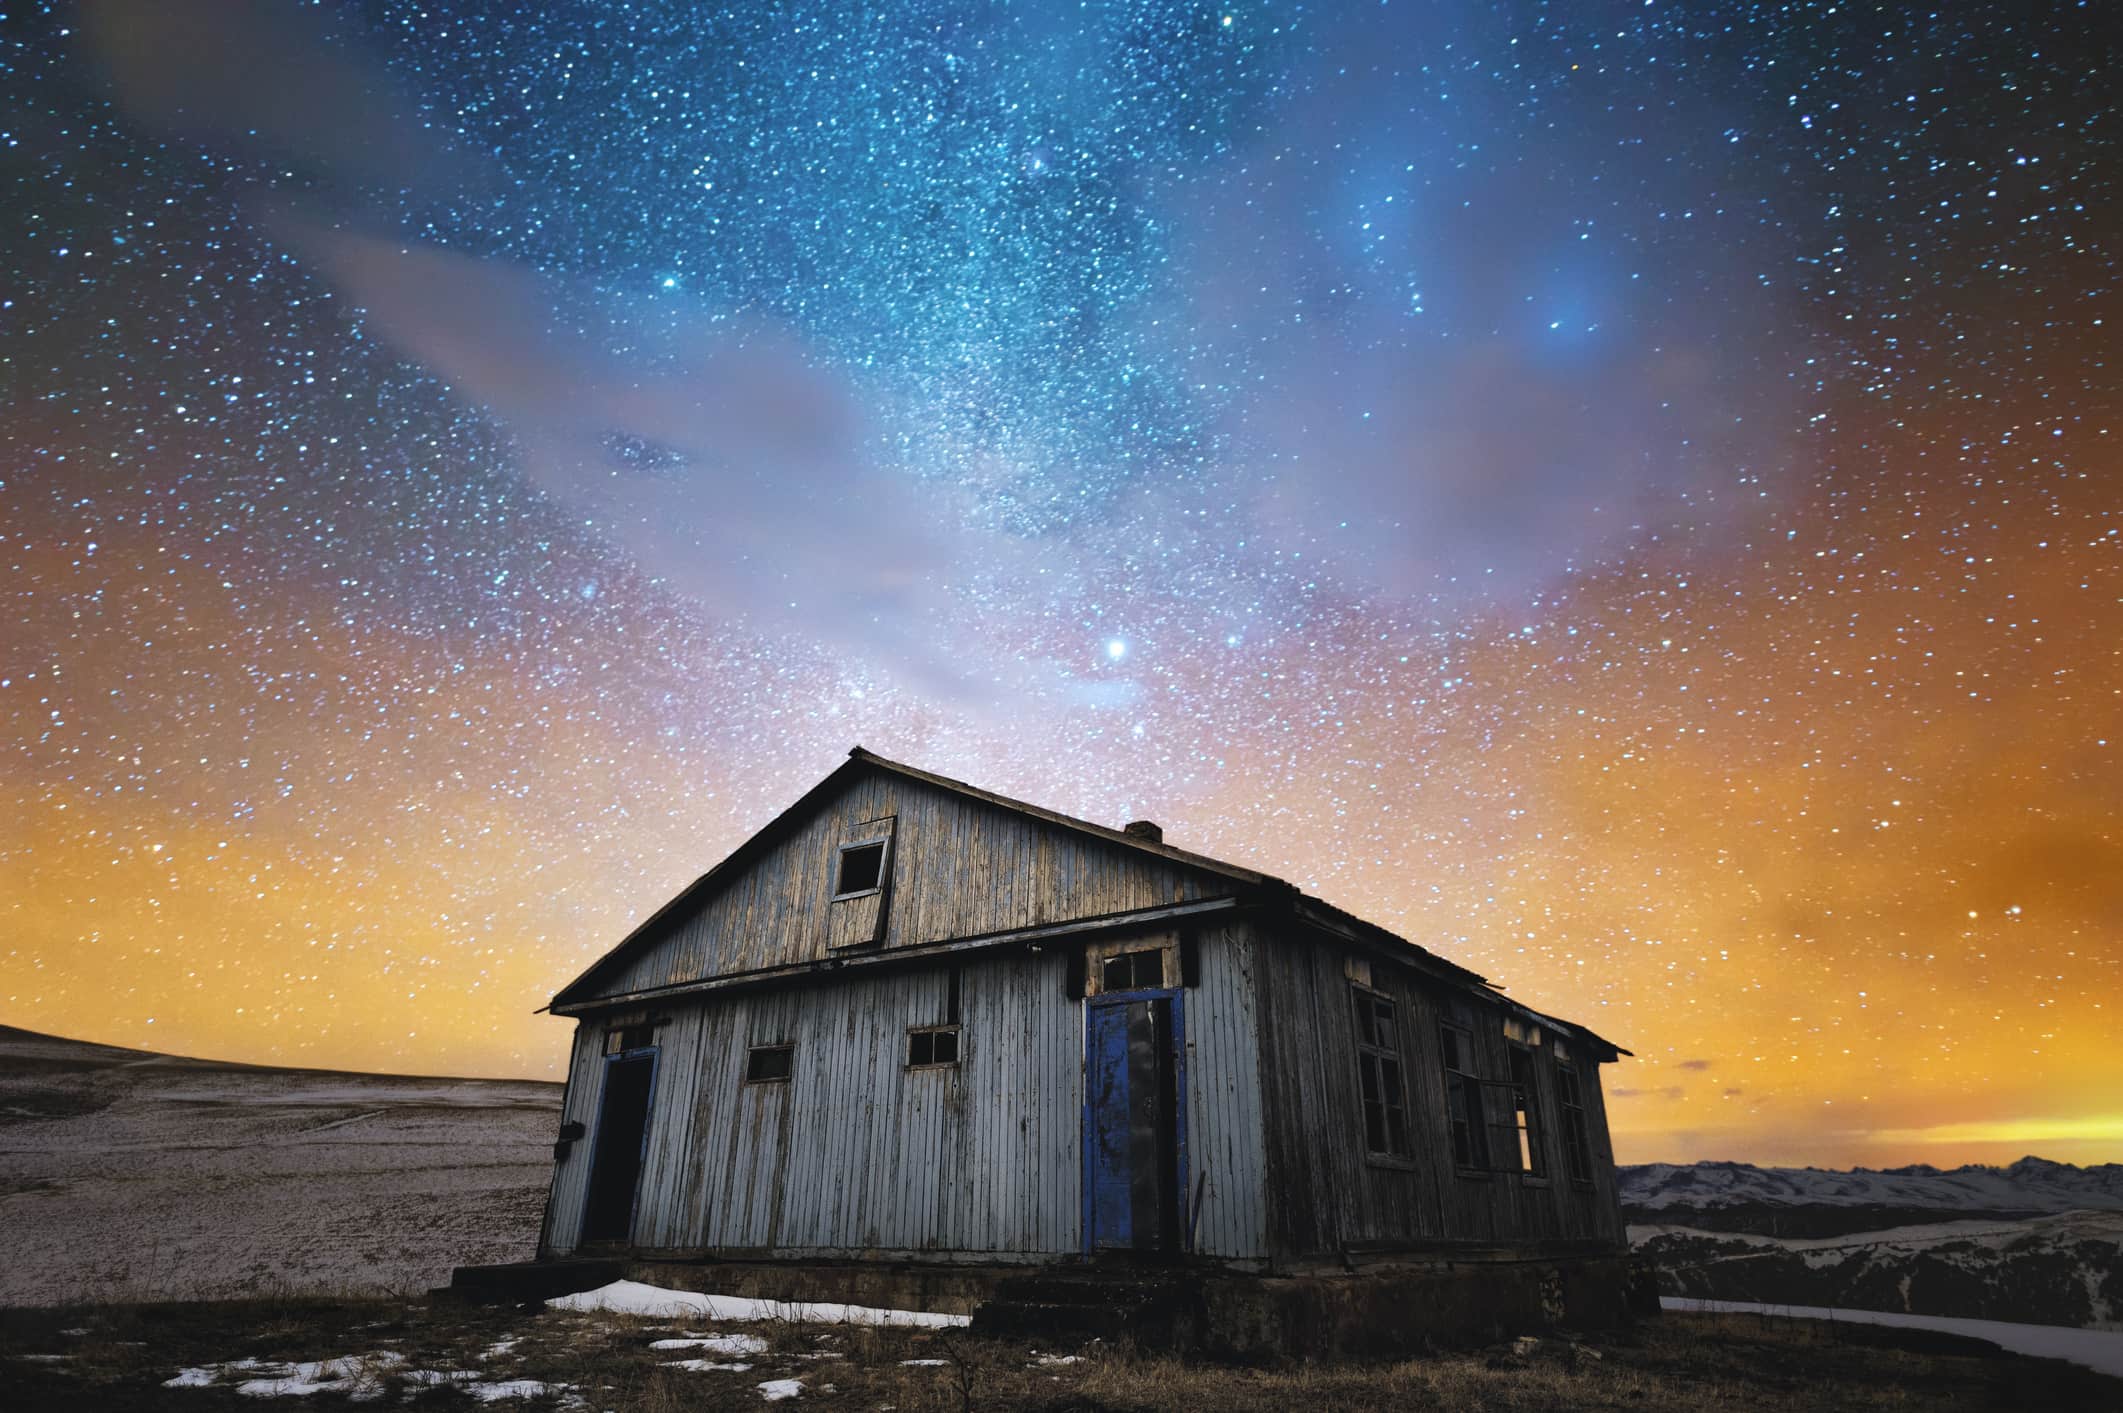
Let's face it - photography is difficult to master.
And astrophotography, well, that's a tough cookie, too.
But just because it's difficult doesn't mean that with practice you can't master the art of photographing the night sky.
There are some common astrophotography mistakes to avoid, however, if you're going to reach your potential.
Editor's Tip: Part of becoming a master astrophotographer is having the proper tools. We highly recommend MrStarGuy for all your astrophotography needs. With a wide selection of telescopes, tripods, mounts, and other accessories, it's your one-stop shop for everything you need. Visit MrStarGuy to learn more.
Mistake #1: Forgetting to Change the Camera Settings
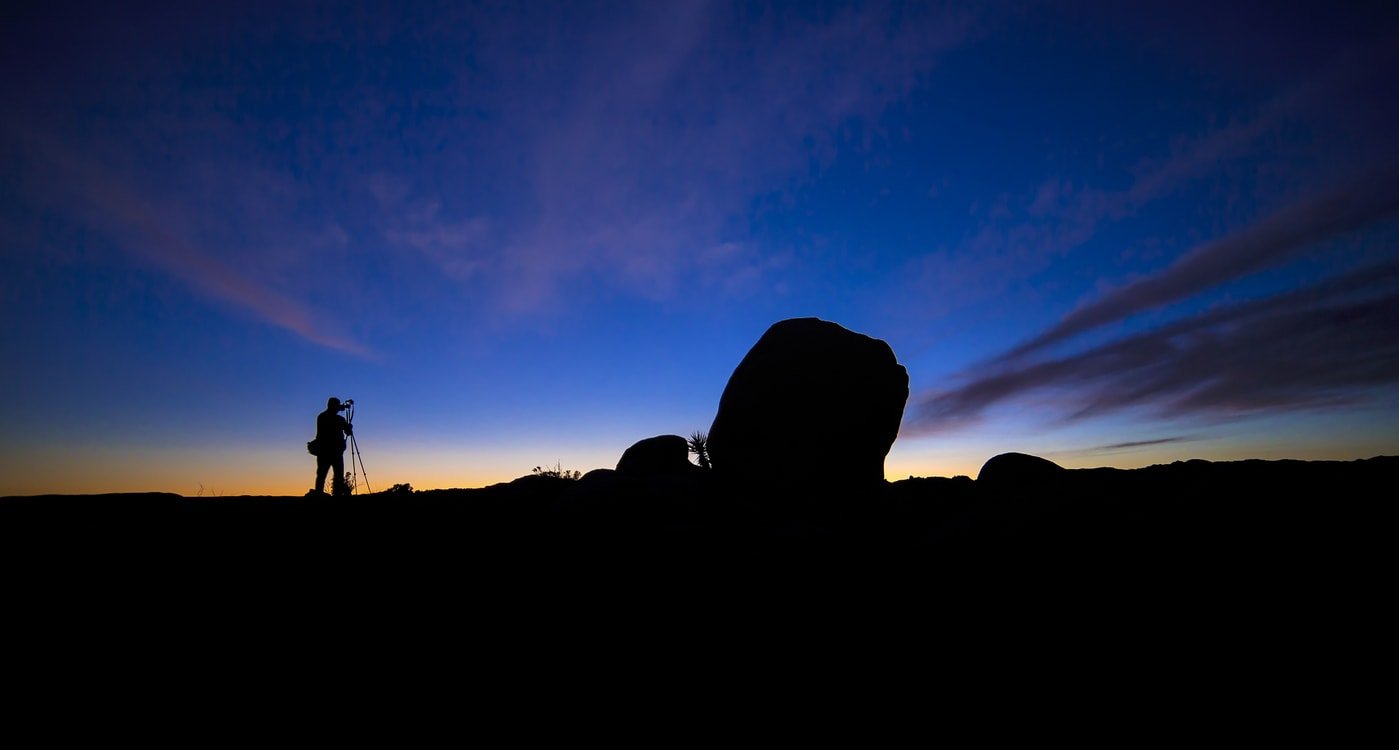
When you get your gear setup and you begin the process of framing the shot and getting it in focus, you need to use different camera settings than what you use for the actual exposure.
For example, when adjusting the focus, many astrophotographers use a very high ISO to shorten the exposure time so they can inspect the focus faster.
Unfortunately, some astrophotographers also forget to readjust the ISO for the actual shot, which renders their images too bright and full of noise.
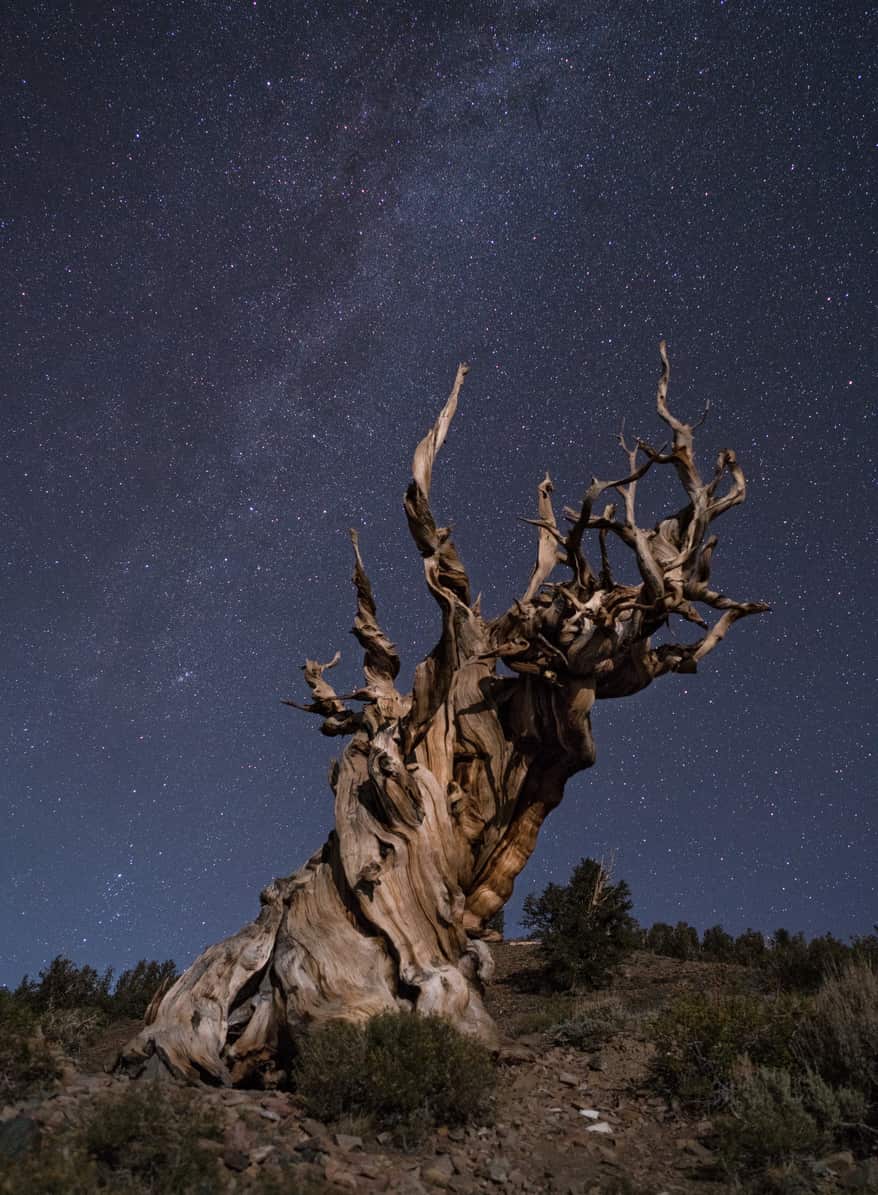
Aperture can also cause a few problems for night photography.
If you shoot during the day, you'll likely use a much smaller aperture than you'd use at night given the abundance of light during daytime hours.
But if you forget that you switched the aperture from the desired nighttime setting, the first shot you take of the stars could very well be an underexposed mess.

Though these seem like silly errors, photographers of all skill levels make them from time to time.
Just be sure that when you're setting up for your nighttime shots that you take a few seconds to get your camera settings lined out, and you'll avoid this problem.
Learn More:
Mistake #2: Not Using the Ideal Aperture
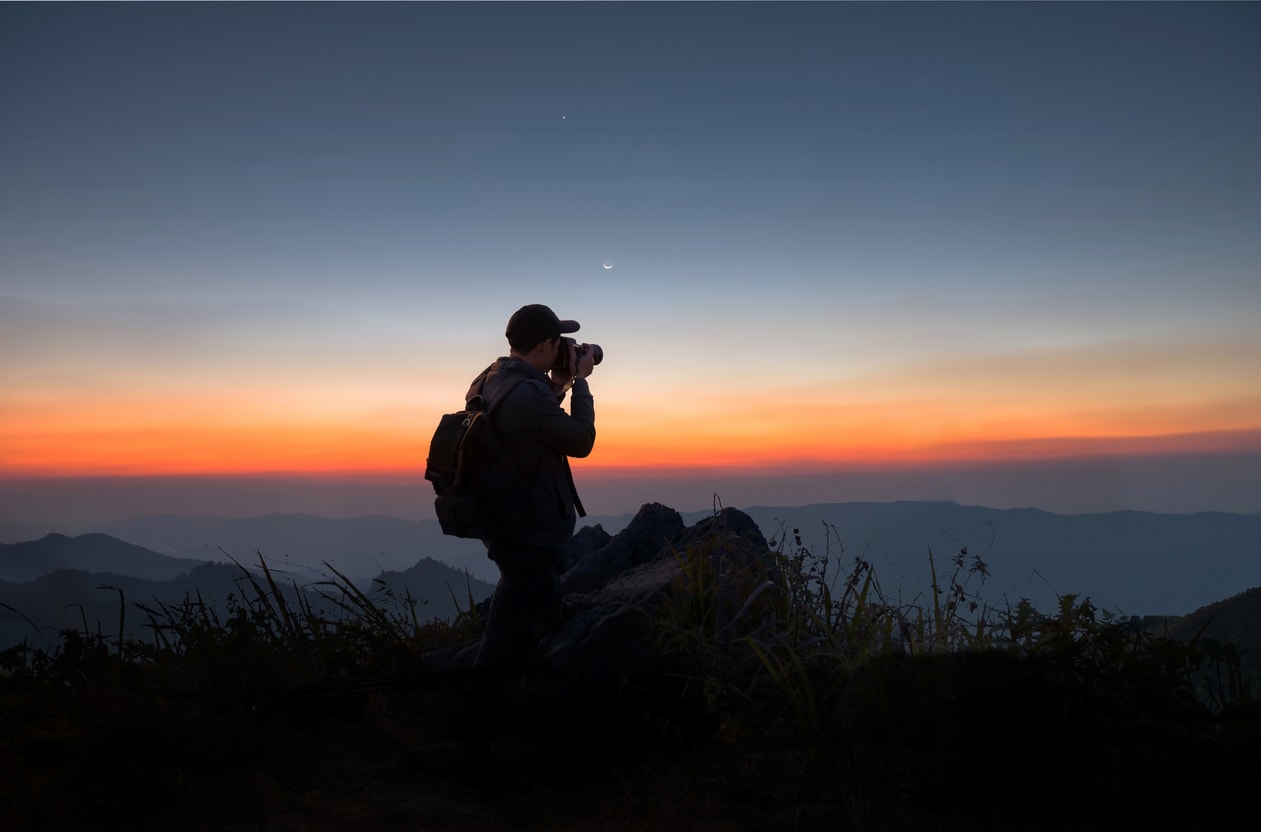
To build off the previous point, some astrophotographers mistakenly believe that using the largest aperture their lens allows will give them the best shot because it allows the most light into the lens.
The problem is that no lens performs its best at its maximum aperture.
That is, if you have a lens that opens up to f/1.4, the lens will not be able to produce as sharp an image at f/1.4 as it can at f/2, f/2.8, and so on.
All zoom lenses have a sweet spot - the ideal aperture for sharpness - which is typically around f/8 or f/11. Using that small of an aperture could create problems with the exposure of a nighttime shot, though.
So, the next best thing is to step your aperture down by one or two stops.
The reduction in light that results from doing so is a worthy trade-off for working at an aperture that gets you sharper results.
Editor's Tip: The aperture you use isn't the only factor in whether your photos of the stars are tack-sharp. To account for the rotation of the earth, you need a star tracking device like the Vixen Polarie Star Tracker (shown above), which eliminates star trails and helps you get images with gorgeous pinpoint stars. It's easy to setup, easy to use, and is compatible with any digital camera weighing up to seven pounds - including your mobile phone! Click here to learn more about the Vixen Polarie.
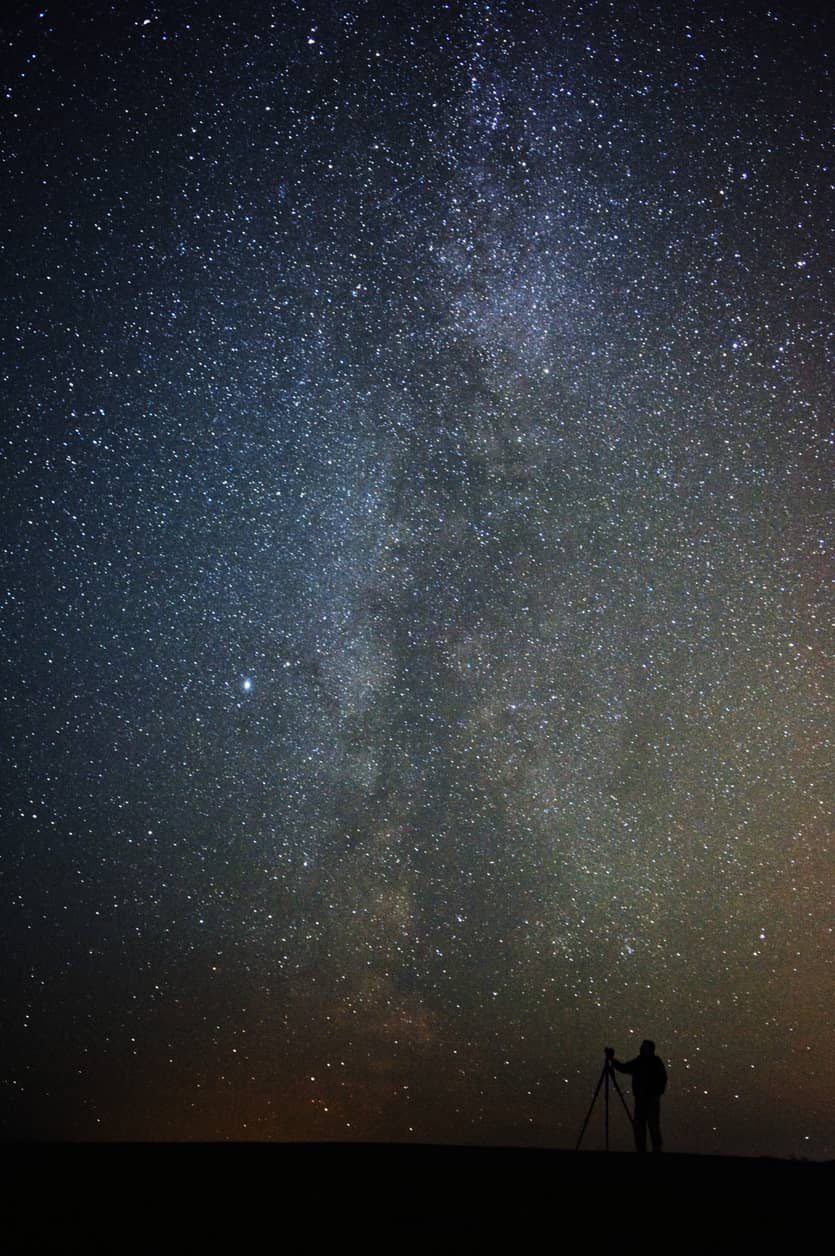
When discussing manual exposure settings for astrophotography, there are really no hard-and-fast settings because each situation is different.
However, when getting set up, consider the following as a guideline for where to start with your exposure settings:
- Shooting mode - Manual
- Aperture - f/2.8
- Shutter speed - Will vary, though you can dial in up to 30 seconds on your camera, or use Bulb Mode for longer exposures.
- ISO - 1600 or below
Again, these are not settings that will work in every situation, but it's at least a good starting point from which you can fine-tune things for your specific needs.
Learn More:
- Get Sharper Photos by Finding the Sweet Spot of Your Lens
- How to Photograph the Milky Way (In Simple English)
Mistake #3: Poor Planning
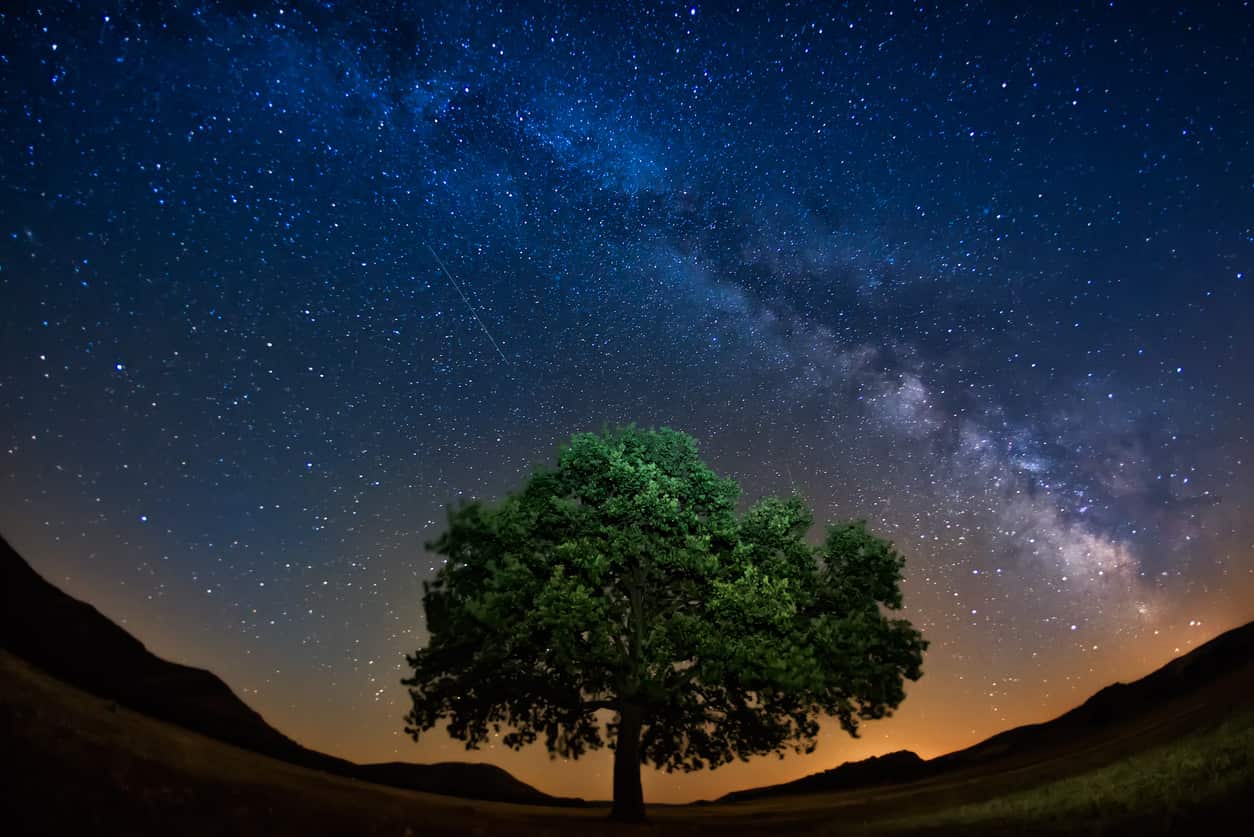
As my dad used to say, "prior planning prevents poor performance."
If you want to create the best astrophotography images, you need to be willing to invest a lot of time and effort into the process, especially the part where you plan things out.
The less time you spend planning, the more time you'll spend wandering around trying to find a spot to take your photos.
What's more, if you don't take the time to actually learn how to use your gear (i.e., manually focusing your lens), then any time you save skipping those steps ahead of time will be spent getting frustrated in a dark field somewhere because you don't know what you're doing.
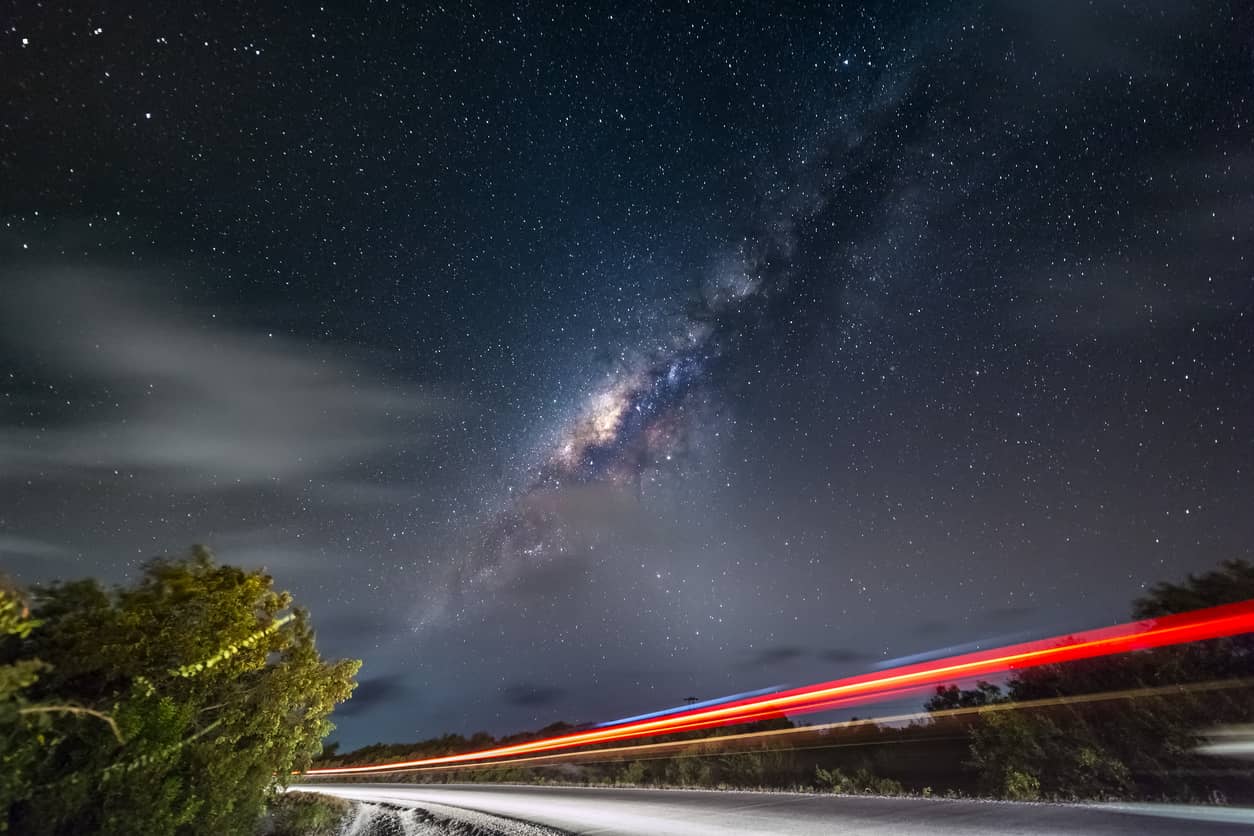
Along those same lines, if you don't understand when the sun sets, when it rises, the phases of the moon, weather patterns, and so forth, you might find yourself setting up in the dark, setting up too late to capitalize on the darkest hours of the night, or under the cover of clouds.
Naturally, none of these situations is conducive to astrophotography...
The point is that capturing gorgeous shots of the night sky isn't only dependent on your skill as a photographer and the gear you use.
Instead, a large part of your success will be determined long before you even set up your camera in the planning phase.
By having a solid plan in place, outfitting yourself with quality gear, and paying attention to your camera settings, you'll be able to minimize at least three common mistakes astrophotographers make and improve your chances of getting great shots of the stars.
Learn More:
We Recommend
These Hubble Space Telescope Photos Will Absolutely Boggle Your Mind
 By NASA, ESA, and M. Livio and the Hubble 20th Anniversary Team (STScI) [Public domain], via Wikimedia Commons
Taking photos of celestial bodies is no small feat.
Well, taking good photos of celestial bodies, anyway...
But NASA sure has perfected that art.
Then again, they have the best tools in the business, including the aging, but still pretty darn good Hubble Space Telescope.
Over the years, Hubble has captured some pretty amazing images.
Here are just a few that are sure to knock your socks off.
Editor's Note: To see celestial objects, we suggest visiting MrStarGuy to purchase your optics. MrStarGuy has a complete line of scopes, including reflector and refractor models, as well as grab and go scopes, astro binoculars, mounts, tripods, and so much more. As a family-operated company, MrStarGuy is dedicated to providing the best in optics along with the best possible customer service. Visit MrStarGuy today to get outfitted!
The Sunflower Galaxy
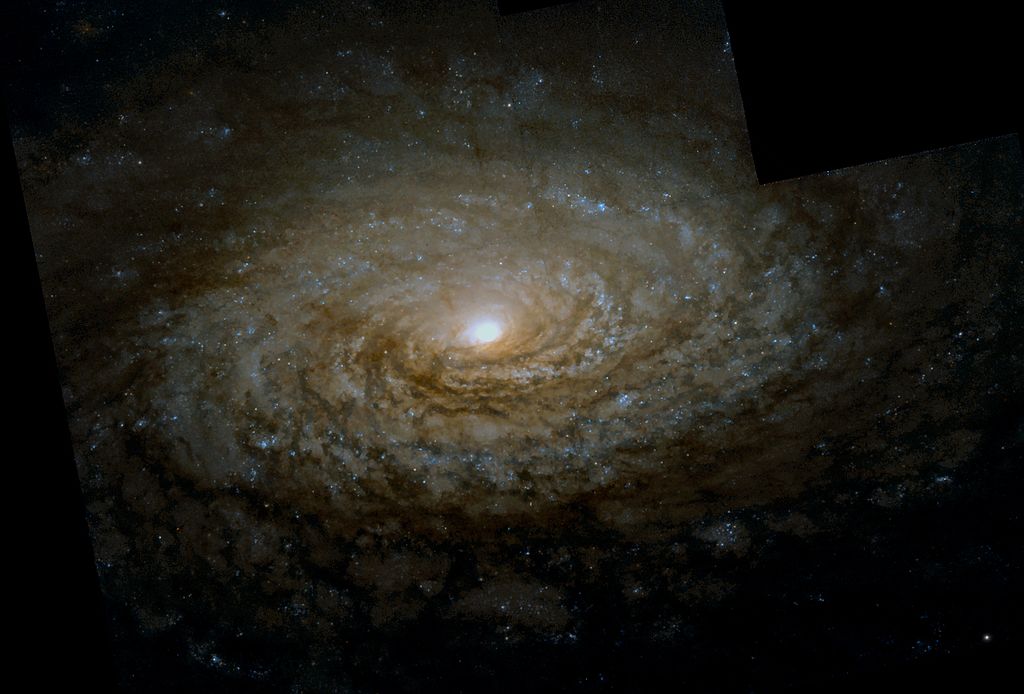 By NASA/ESA - The Hubble Legacy Archive (HLA): Space Telescope Science Institute (STScI), the Space Telescope European Coordinating Facility (ST-ECF), and the Canadian Astronomy Data Centre (CADC) - zoranknez (Aladin software) (Hubble Space Telescope) [Public domain], via Wikimedia Commons
Also known as M63, the Sunflower Galaxy was first discovered by Pierre Mechain in 1779.
It was one of the first galaxies identified that have the signature spiral structure that you can see in the image above, taken with the Hubble Space Telescope.
Its arms are made up of new blue-white giant stars, and some astronomers believe that there is a supermassive black hole at its center.
I Zwicky 18
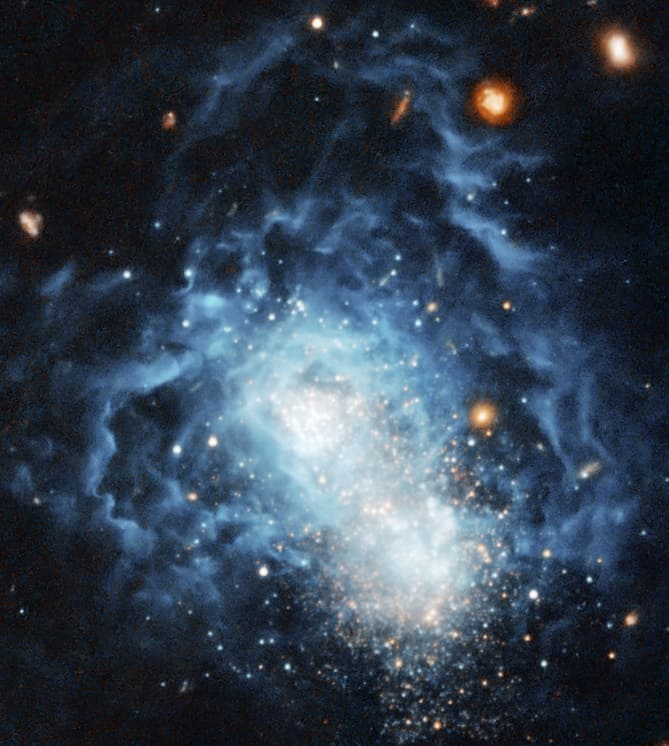 By NASA, ESA, and A. Aloisi (Space Telescope Science Institute and European Space Agency, Baltimore, Md.) (HubbleSite: NewsCenter) [Public domain], via Wikimedia Commons
Its name isn't the only strange thing about this galaxy...
For starters, I Zwicky 18 is a dwarf irregular galaxy, meaning it doesn't have a distinct or regular shape.

It also demonstrates some odd star development.
It's a relatively young galaxy at about one billion years old, yet some of its stars develop in a manner that's more typical of galaxy formation in the earliest days of the universe.
Whatever the case, it wasn't until 1930 that it was discovered by Fritz Zwicky.
Crab Nebula
 By NASA, ESA, J. Hester and A. Loll (Arizona State University) (HubbleSite: gallery, release.) [Public domain], via Wikimedia Commons
This composite image from the Hubble Space Telescope is actually 24 separate images put together.
What it shows is a supernova remnant in the Taurus constellation. The supernova exploded almost 1,000 years ago, an event that was recorded by Chinese and Japanese astronomers at the time.
And if you're wondering why it's named the crab nebula, it's because William Parsons, Third Earl of Rosse made a drawing of it after observing it with a 36-inch telescope in 1840. His drawing resembled - you guessed it - a crab.
Carina Nebula
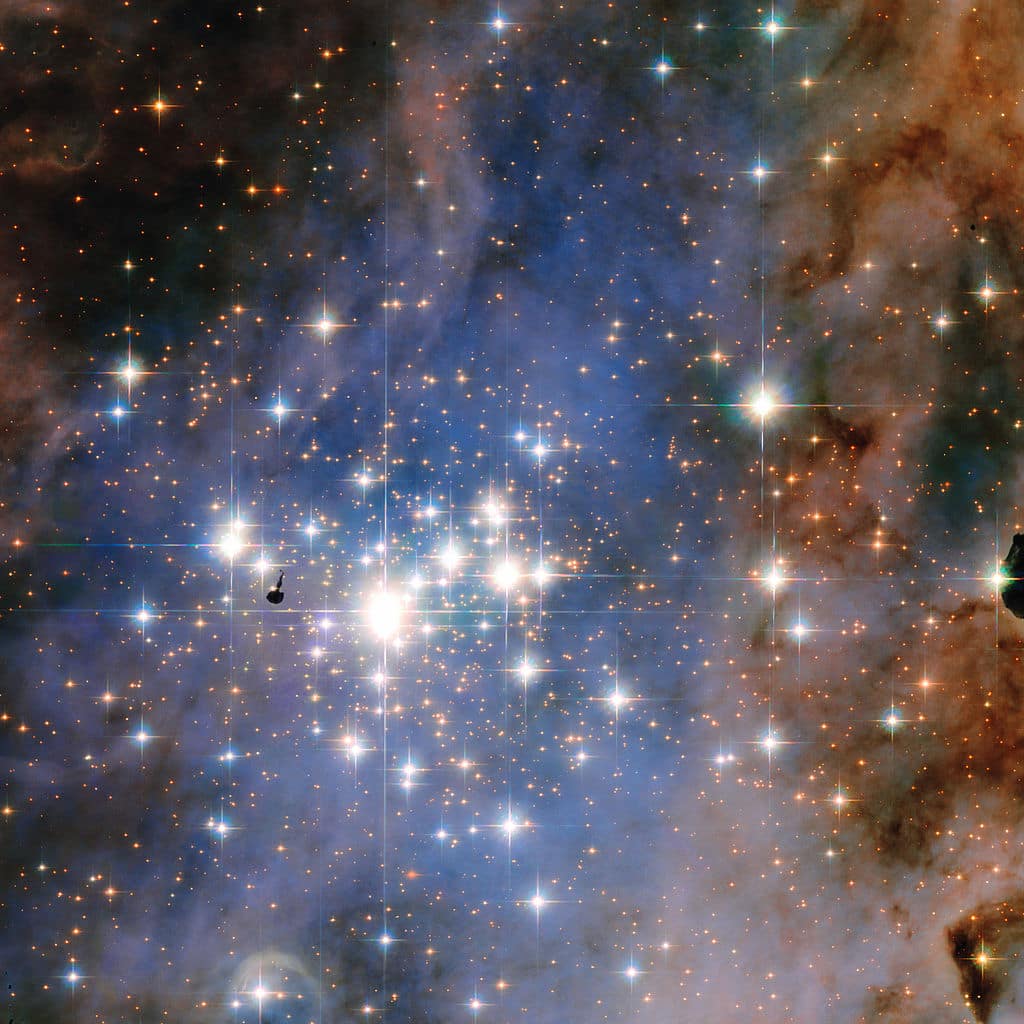 By NASA & ESA, Jesús Maíz Apellániz (Centro de Astrobiología, CSIC-INTA, Spain) (http://www.spacetelescope.org/images/heic1601a/) [Public domain], via Wikimedia Commons
The Carina Nebula is an interesting structure because it is so large and complex. It's actually one of the largest diffuse nebulae in the galaxy.
Within its area are open clusters, O-type stars, Wolf-Rayet stars-Rayet stars, and huge star clusters as well.
In fact, Trumpler 14 (shown above), one of the nebula's star clusters, is home to the most luminous star in the Milky Way, named WR 25.
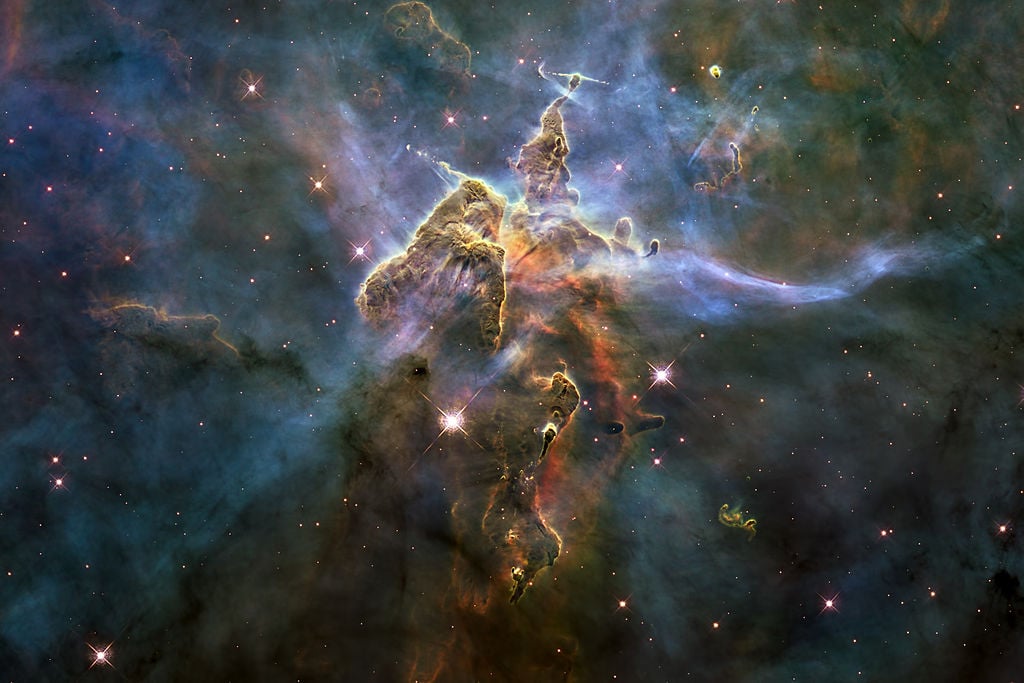 By NASA, ESA, and M. Livio and the Hubble 20th Anniversary Team (STScI) [Public domain], via Wikimedia Commons
Another part of the nebula, Mystic Mountain (shown above), is a dust-gas pillar that measures three light years in height.
The huge peaks that resemble mountaintops are created when nascent stars release gas, which streams outward to form the peaks.
This image was taken by the Hubble Space Telescope on its 20th anniversary in February 2010.
Whirlpool Galaxy
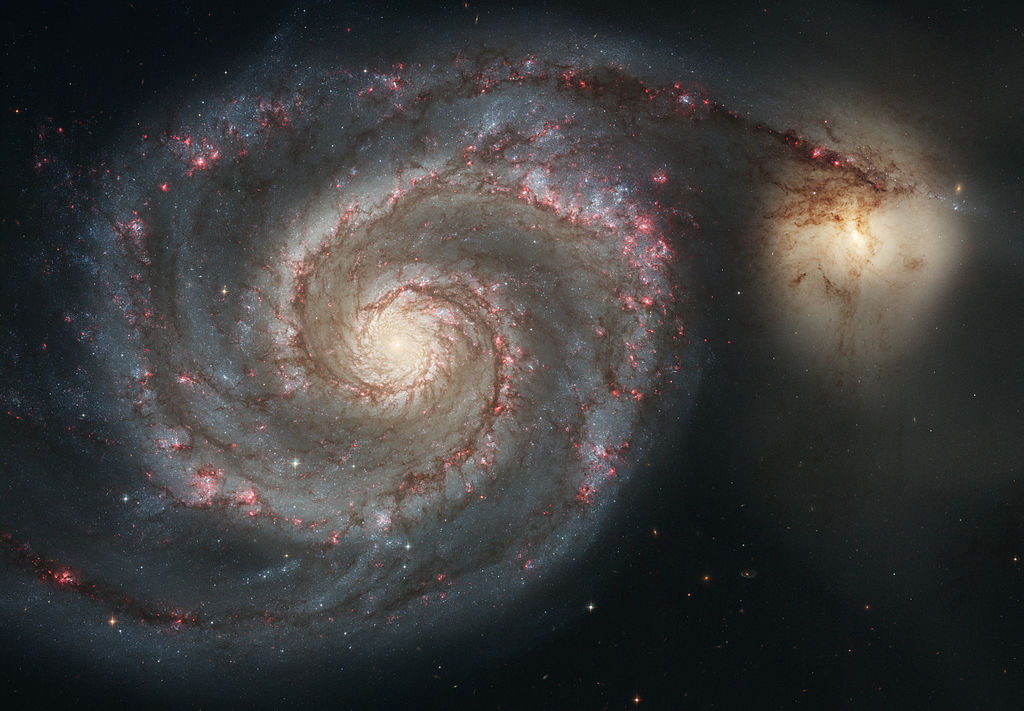 By NASA and European Space Agency [Public domain], via Wikimedia Commons
As you can see in the image above, the Whirlpool Galaxy is very aptly named, given its classic spiral shape. That shape is most likely due to the interaction of the galaxy with its neighbor, NGC 5195, shown upper right in the image above.
Aside from being spectacularly beautiful, the Whirlpool Galaxy is also home to a number of black holes as well as three supernovae.
It's also one of the most easily observed galaxies, and can even be seen with binoculars.
Pillars of Creation
 By Credit: NASA, Jeff Hester, and Paul Scowen (Arizona State University) [Public domain], via Wikimedia Commons
One of Hubble's most well-known photographs is this one of the Pillars of Creation in the Eagle Nebula, taken way back on April 1, 1995.
The pillars are comprised of interstellar gas and dust that are in the midst of creating new stars.
Interestingly, as they create new stars, the pillars are also being destroyed by the light from recently-formed stars nearby.

This photo is a composite of 32 different photos from four different cameras on the Hubble.
The green areas are hydrogen, the red is singly-ionized sulfur, and the blue indicates double-ionized oxygen atoms.
Westerlund 2
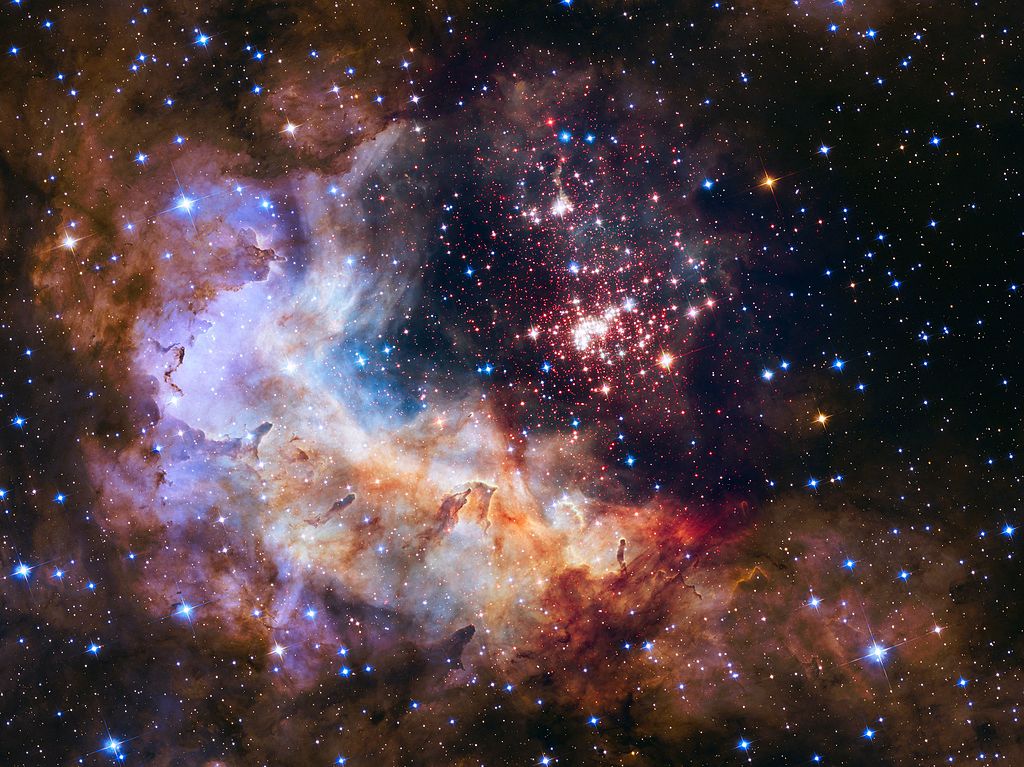 By NASA, ESA, the Hubble Heritage Team (STScI/AURA), A. Nota (ESA/STScI), and the Westerlund 2 Science Team [Public domain], via Wikimedia Commons
An obscured compact young star cluster, Westerlund 2 is home to some of the brightest, hottest stars as yet discovered.
The cluster is about 1-2 million years old, and wasn't even discovered until the 1960s by Bengt Westerlund.
So far, astronomers have identified more than a dozen early O stars and a number of Wolf-Rayet Stars within the cluster.
The image above was taken by the Hubble Space Telescope in honor of its 25th anniversary in 2015.
Editor's Note: If these images have sparked an interest in astrophotography, check out our astrophotography section for how-to guidelines for taking photos of the night sky. Be sure to visit our friends at MrStarGuy to get outfitted with all the necessary astrophotography gear, too. A top recommendation is their Vixen Polarie Star Tracker. This compact, yet highly functional mount attached to a normal tripod and can be used with cameras that weigh seven pounds or less. Using the included compass, a North Star Alignment Window, or a polar scope, you can orient the Polarie to face north. Once it's set, the Polarie will track the stars as they move across the sky, eliminating star trails and allowing you to take images of pinpoint stars. Learn more about this and other astrophotography gear at MrStarGuy.
We Recommend
These Photos From the Hubble Space Telescope Show Two Galaxies Colliding in Spectacular Fashion
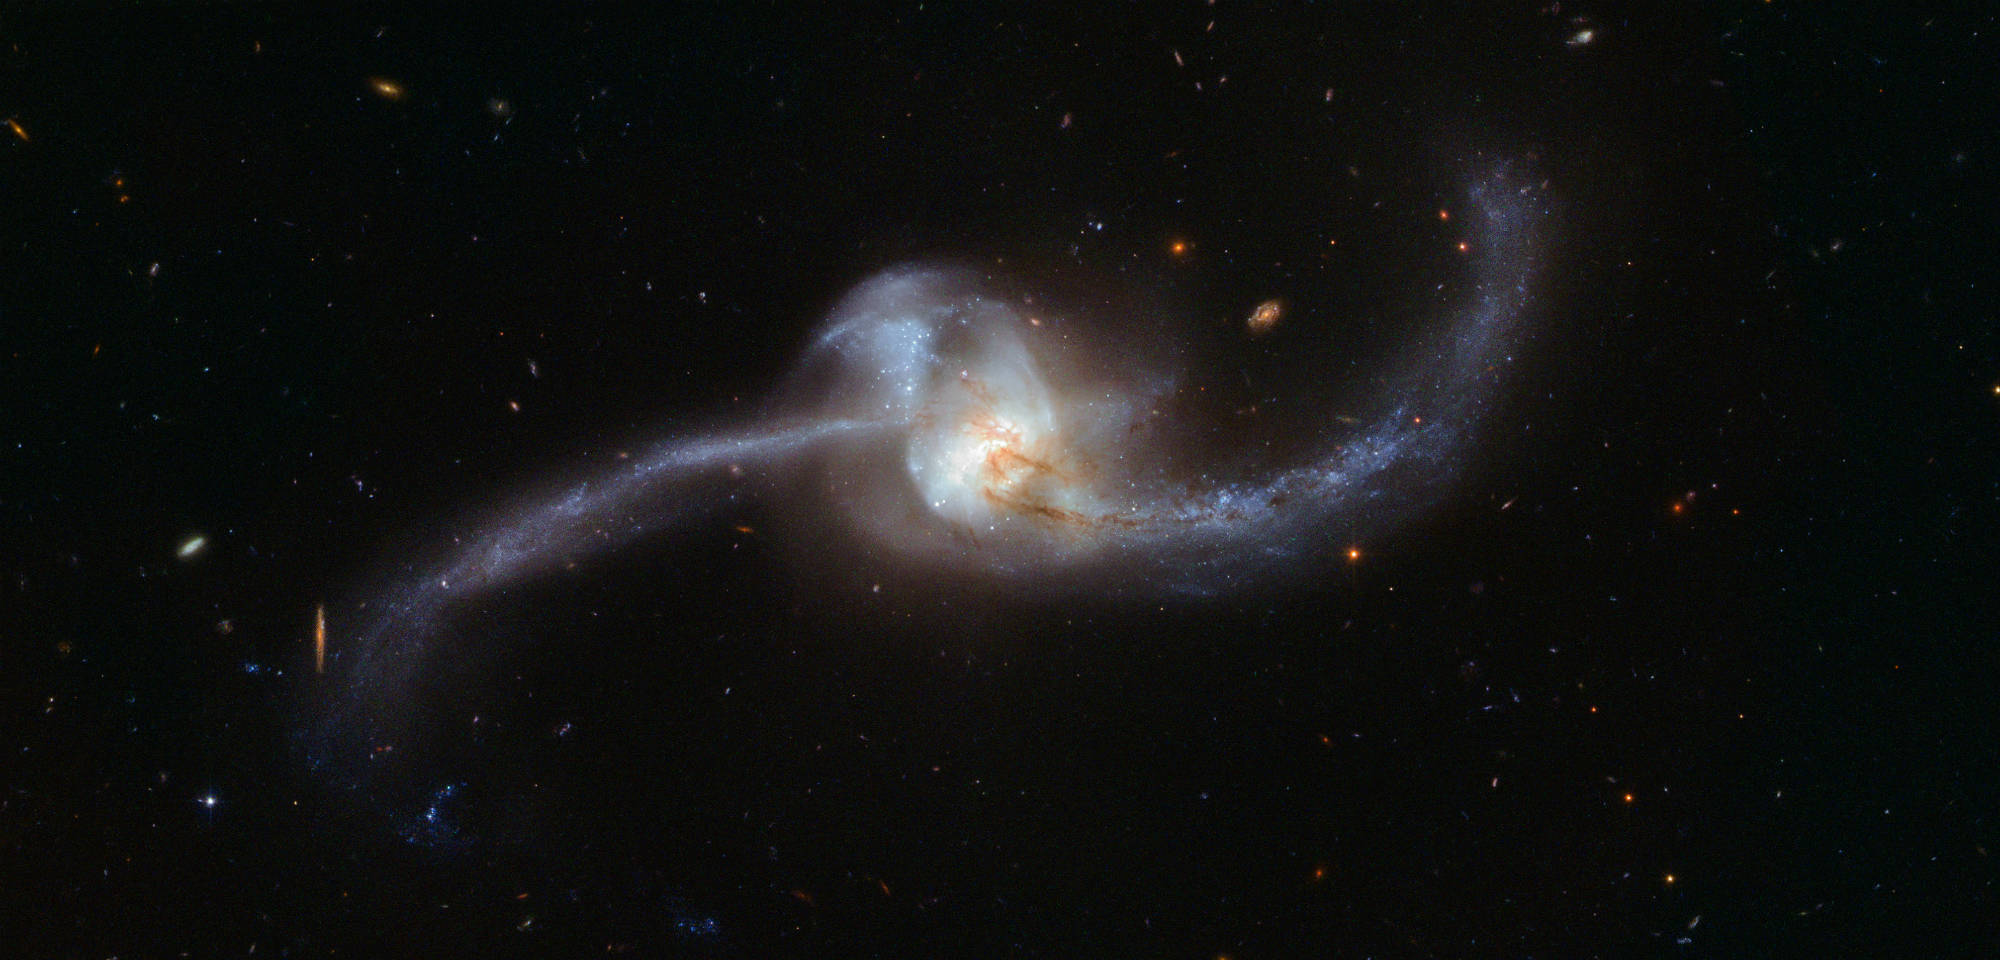 Photo by the European Space Agency/Hubble & NASA
Even after more than 27 years in space, the Hubble Space Telescope can still take one heck of a photo.
The image above was taken earlier this year and shows two galaxies merging into one.
Described by the European Space Agency and NASA as a "twisted cosmic knot" in the constellation Cancer, it's about 250 million light-years from earth.
The new galaxy, called NGC 2623, has the unique knot shape because of a collision between two previously distinct galaxies.
Naturally, galaxies colliding is an incredibly violent event. It causes gases to compress and mix together, which, in turn, starts the formation of a star.
What's interesting about this image is that it not only captures the formation of this new galaxy, but it also captures the formation of a new star - which is indicated by the bright blue areas in the photo that appear in the center.

There are also blue clusters evident in the gas and dust trails that extend out from NGC 2623.
These trails, called tidal tails, are about 50,000 light-years long.
Just to give you some context, one light-year is about 5.88 trillion miles, so those tidal tails are really long...
And just a head's up - our home, the Milky Way, will eventually collide with our neighboring galaxy, Andromeda, and when that happens, it will look something similar to what you see in this image.
We've got time to plan, though. That collision isn't scheduled to take place for about 4 billion years.
 Photo by the European Space Agency/Hubble & NASA
In another image of a different galaxy collision, you can see how beautiful these events can be.
The subject of this photo is IRAS 14348-1447, which is about one billion light years away from earth.
This galaxy collision is so bright and colorful because it's a combination of two highly gas-rich spiral galaxies.
All of that gas makes it an ultraluminous infrared galaxy, which means it shines incredibly brightly in the infrared spectrum.
The gas also makes the galaxy whirl around, giving it the ethereal appearance you see in the photo above.
I'm not ready for the Milky Way and Andromeda to collide, but in the meantime, I sure do enjoy these photos of other galaxies colliding.
Via European Space Agency/NASA from this article and this article.
We Recommend
This is Why Chile is the Best Place for Astrophotography
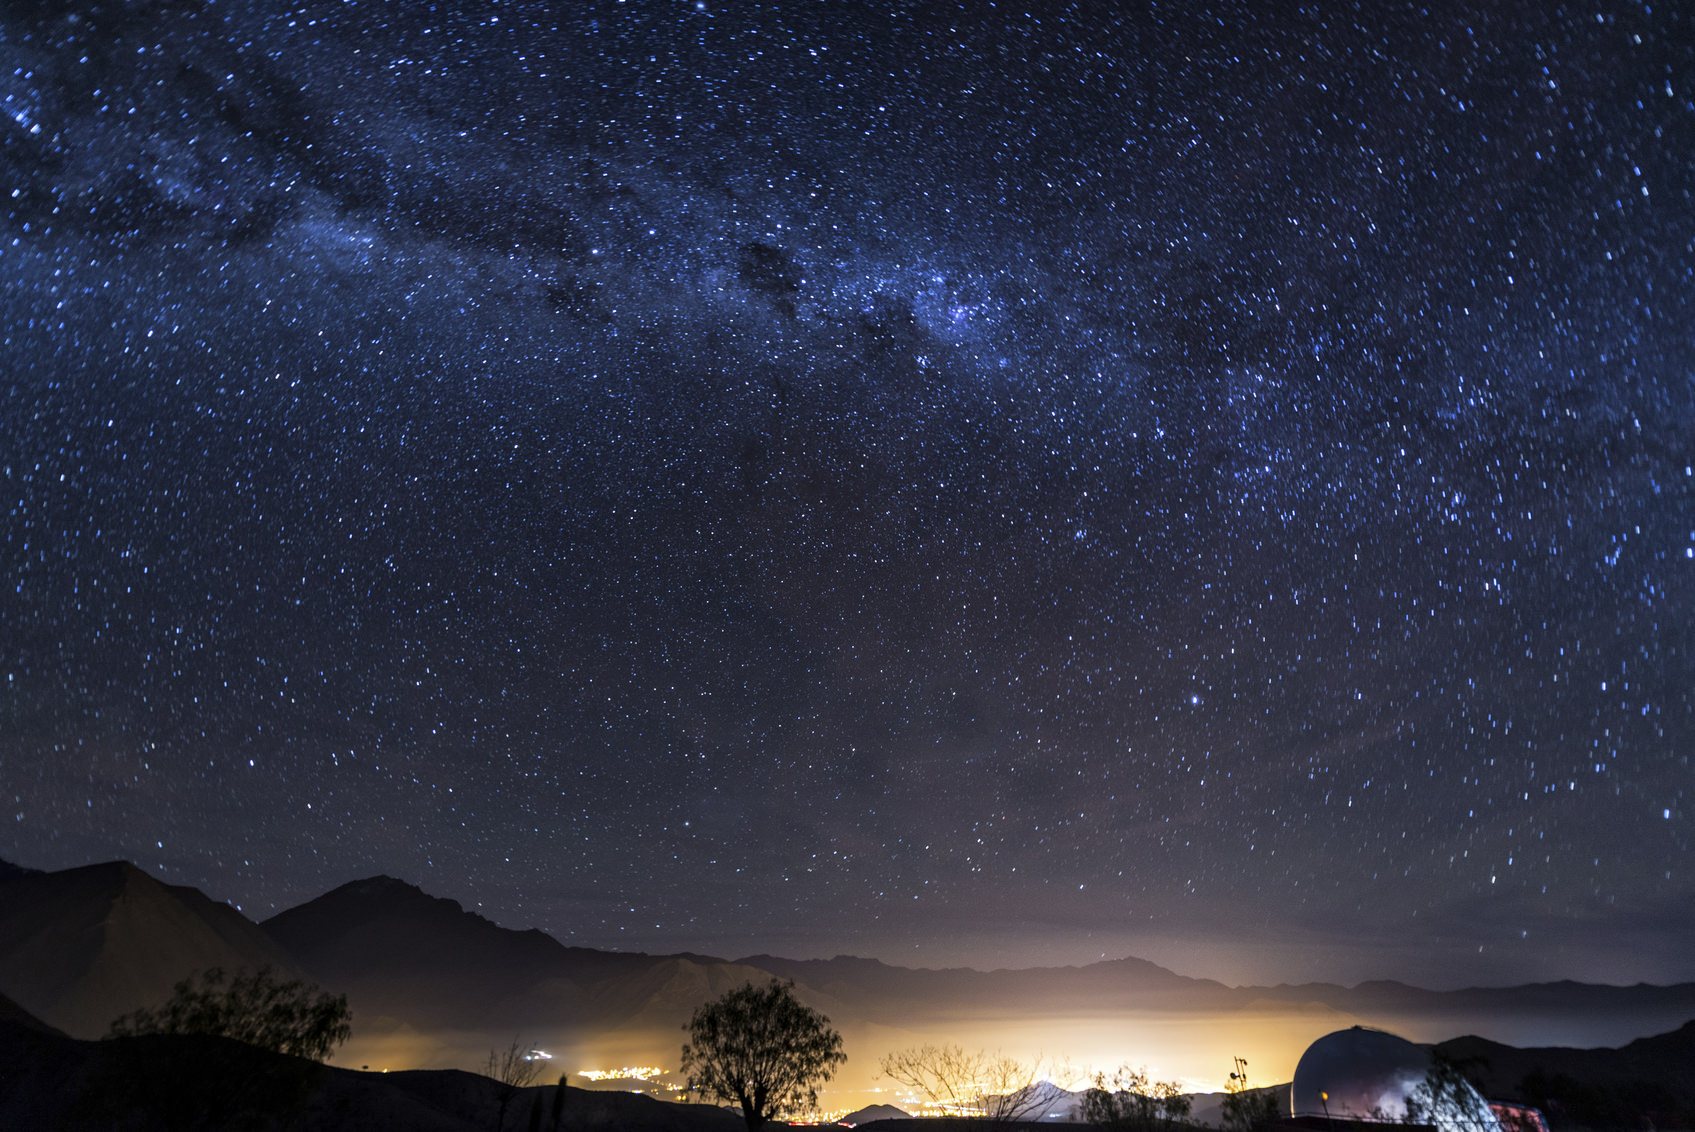
If you enjoy stargazing (who doesn’t?!), you know how difficult it can be to find a nice vantage point from which to look into the heavens. For many of us, there is simply too much light pollution, too many clouds or perhaps too little knowledge of celestial bodies to be able to have a good, long look at the vastness of space around us.
Though there are many places on Earth that afford great views of the night sky, Chile has to be at the top of the list. Here’s why…
Dark Skies
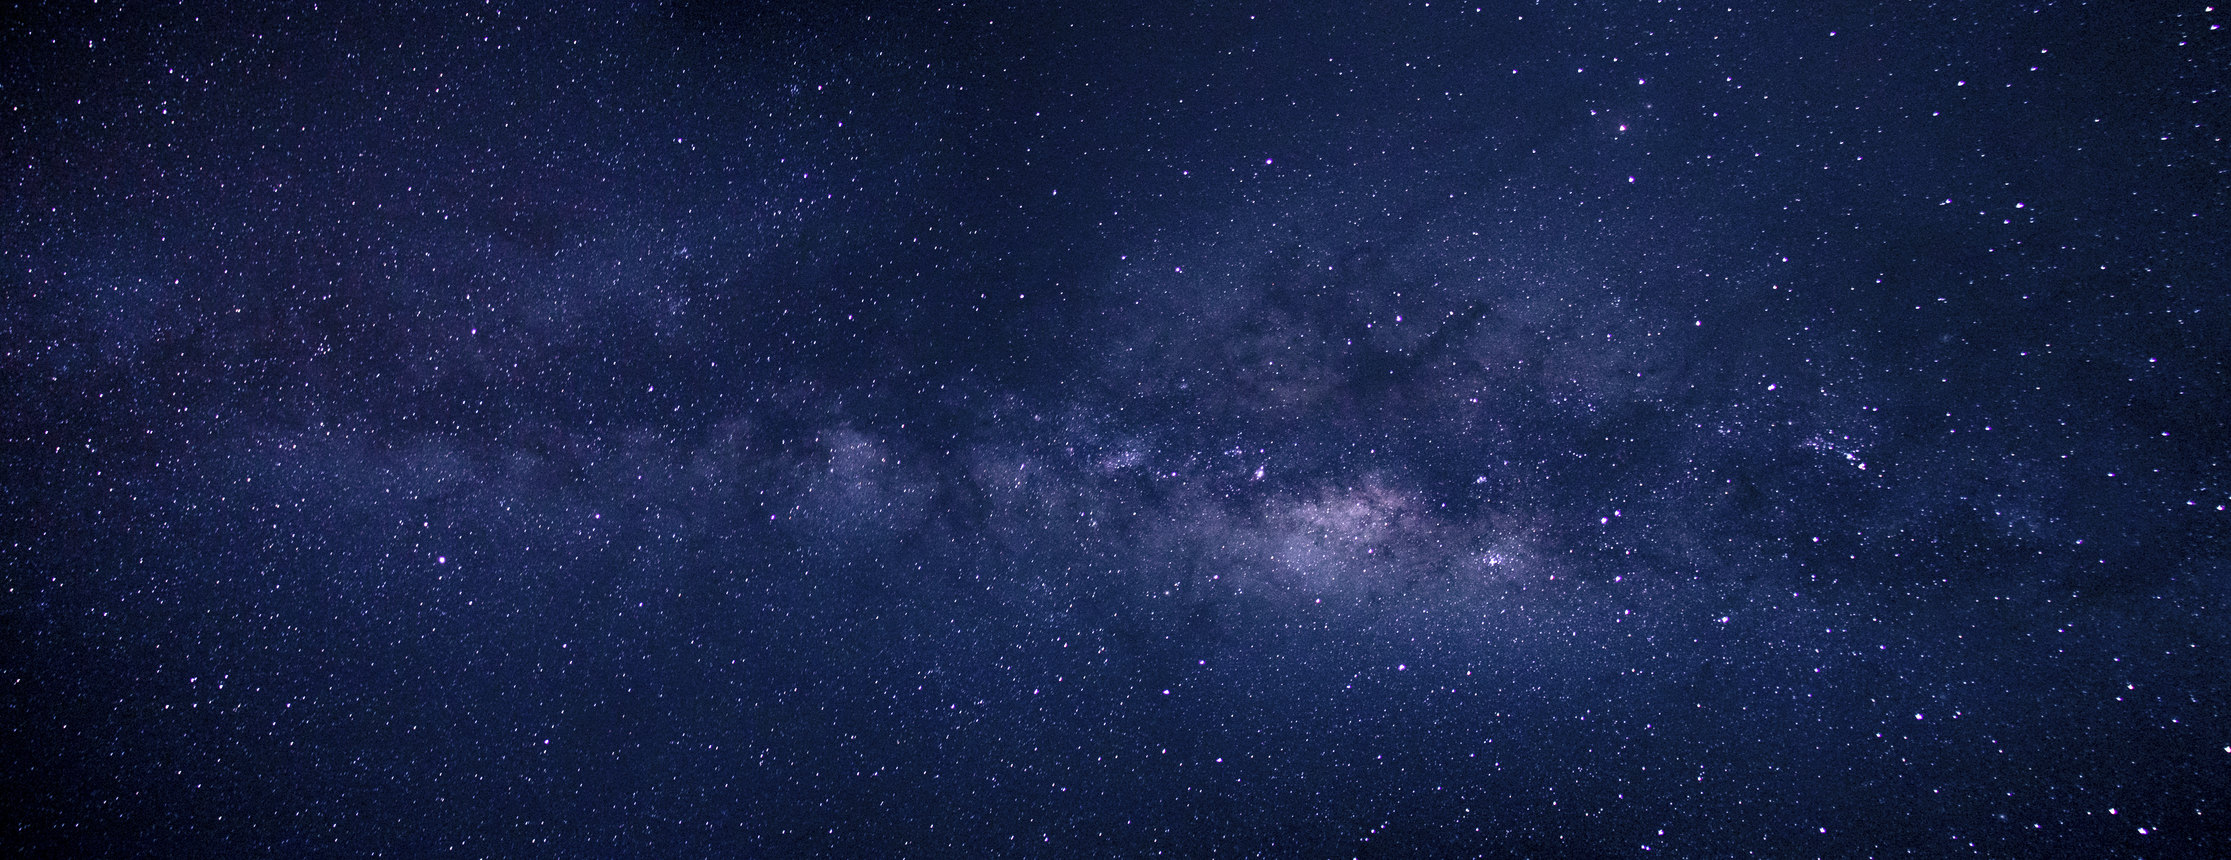
It’s obviously very hard to see the night sky if there’s a lot of light pollution. Actually, even if there’s a small amount of light pollution, your view is substantially decreased. But in many parts of Chile, light pollution simply isn’t a problem.
Take the Atacama Desert as a prime example. It is the driest area on Earth, and as a result, there is nothing there - no cities or towns, no villages or homes. When you visit the Atacama and set up your camera, the brightest thing for miles will be your camera’s LCD. That makes for some impressive night sky photography. As an added bonus, many areas of the Atacama are extremely flat, so you won’t have to spend a lot of time tinkering with your tripod to get your camera nice and level either!
Perfect Weather
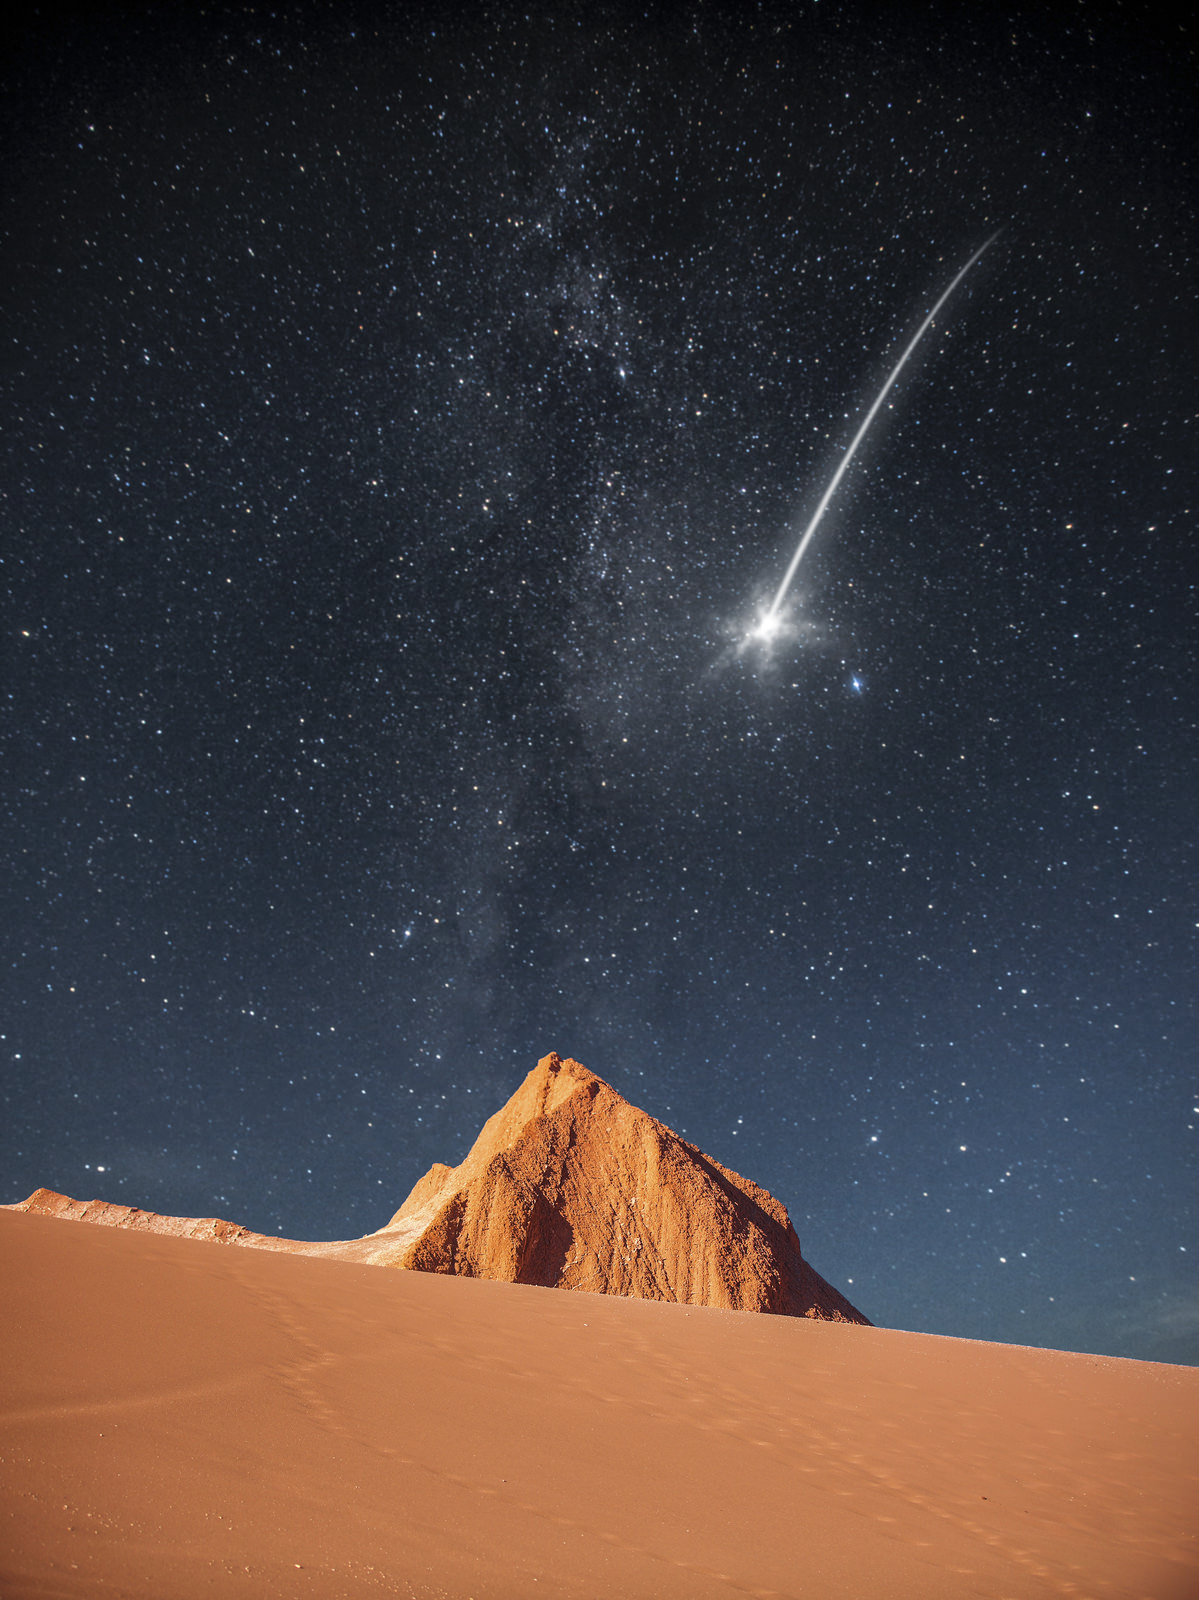
An excellent recipe for stargazing and astrophotography is high altitude and clear skies. Chile has both. Again, the Atacama is a prime viewing spot, because without the worry of rain, cloudless skies are the norm. In fact, in many areas of the Atacama, there are clear skies 90 percent of the year. What’s more, the high altitude of the area means cool weather, with an average temperature of just 66 degrees. That makes for a chilly, crisp nights for maximum stargazing opportunities. It’s no wonder that Chile is home to many world famous observatories, including the Las Campanas Observatory nestled at 8,000 feet above sea level.
Great Tours, Knowledgeable People
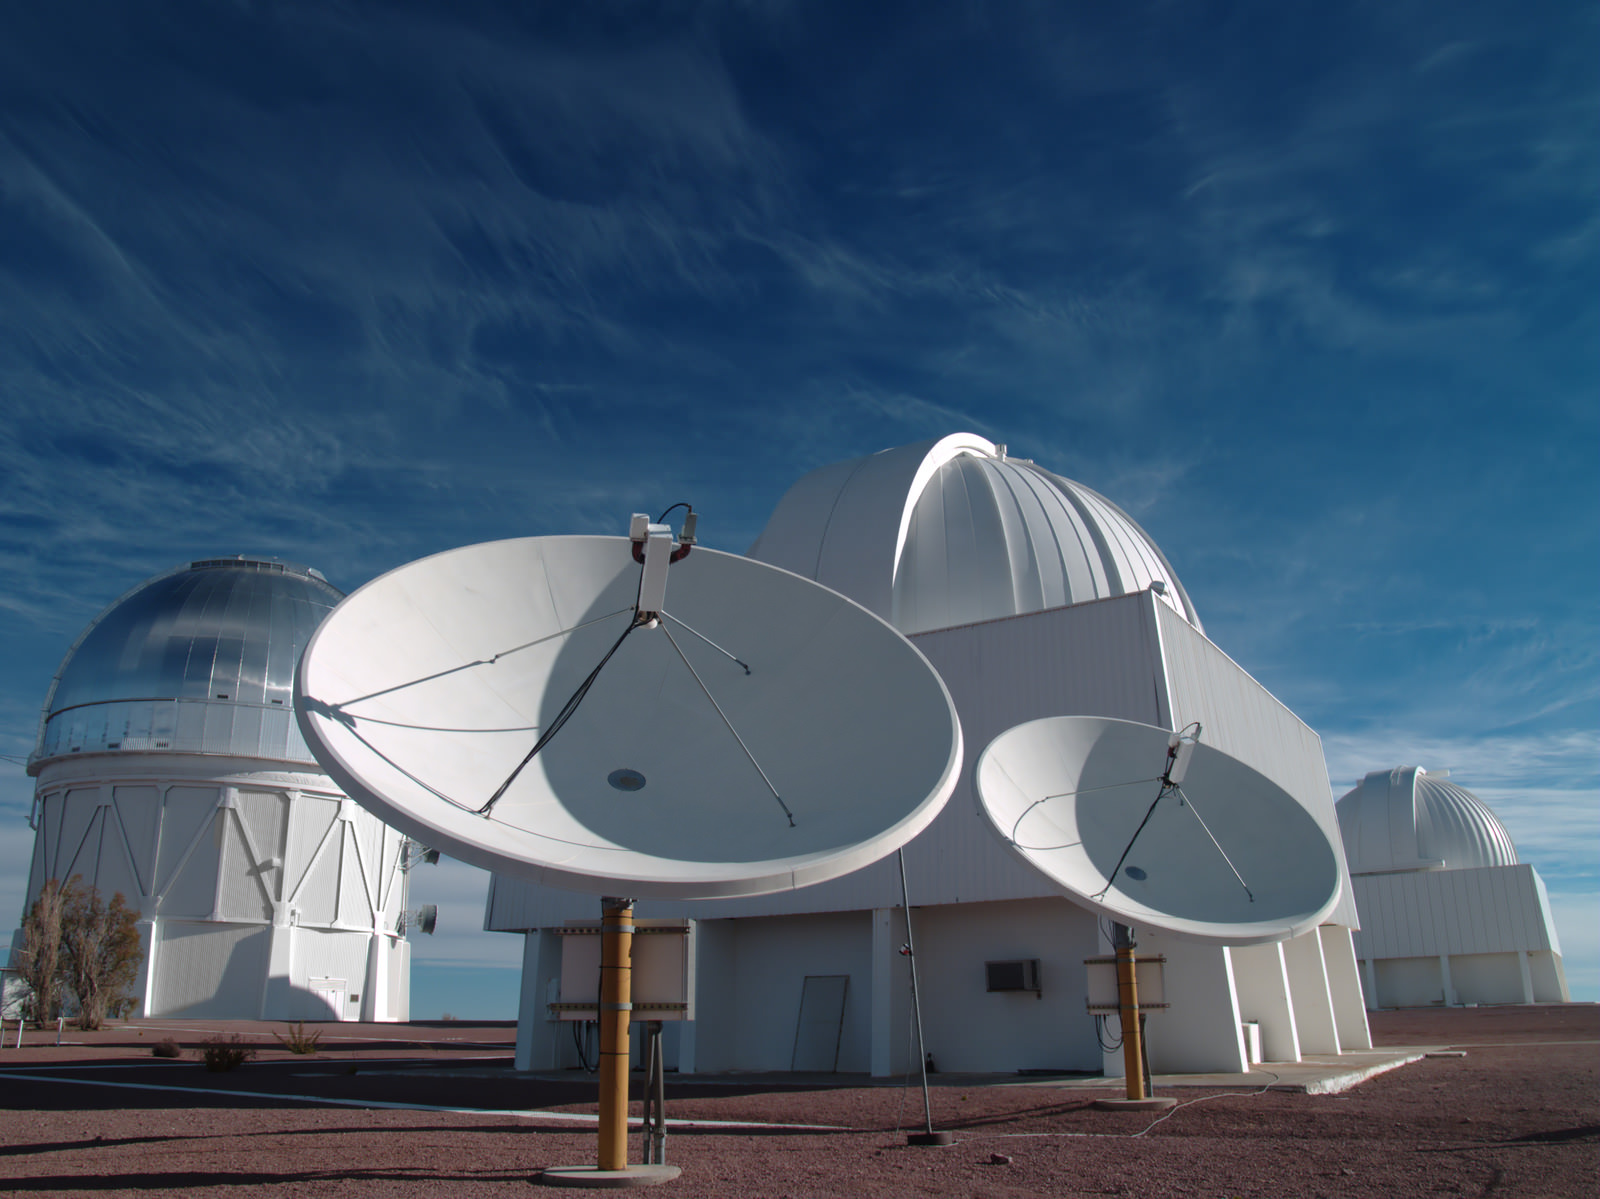
Apart from the necessary ingredients of dark skies and great weather, another must-have for making the most of your astrophotography experience is a tour specially designed for stargazers. Special Interest Tours has a Southern Skies Tour coming up March 24-29, 2017 that will tantalize you with views of the southern sky like you’ve never seen before. Part of the tour will take place in the Atacama Desert, complete with a private tour of the Las Campanas Observatory. Better still, you’ll be traveling with world-renowned astronomer Bob Berman, who offers multiple lectures and presentations about the night sky that will both impress and delight you.
But the Southern Skies Tour is much more than that. You’ll get to experience the hustle and bustle of Santiago, see small colonial villages seldom visited by tourists, watch wildlife including penguins and sea lions, see incredible architecture, and have the opportunity to travel with and get to know other photography and astronomy enthusiasts. That’s a combination that’s tough to beat!
For further details about the Southern Skies Tour or other photography travel opportunities, visit Special Interest Tours.
We Recommend
Types of Astrophotography

One of the benefits that today’s photographers reap is more advanced photography gear that makes astrophotography a much more accessible type of photography to undertake.
But, there’s always been different types of astrophotography, some that are relatively easy to do and accessible for beginners with nothing more than a DSLR and a tripod. Others are more advanced and require a lot more gear.
In this primer, we offer up a quick and simple description of the most common types of astrophotography, and offer a few recommendations in terms of high-quality gear that will allow you to take stellar photos of the night sky.
Let’s begin!
Night Sky Photography
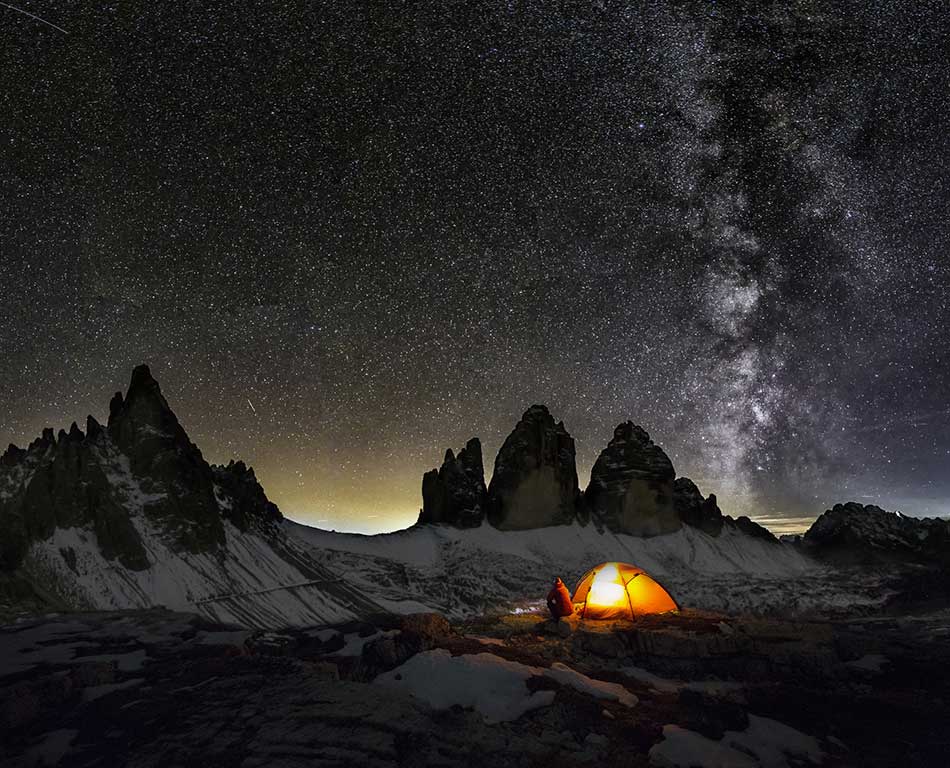
Night sky photography is the most simple and straightforward type of astrophotography. Essentially, as long as you have a camera that has a bulb setting, a good tripod and mount, and a good view of the sky, you can take on night sky photography.
But night sky photography isn’t just limited to photos of the stars. In fact, in night sky photography, you can capture constellations, star trails, the northern lights, and the Milky Way itself. Just how much detail you get in your photos depends in large part on your camera. For example, with higher end cameras and lenses, you might be able to see the colors of stars, capture meteors or nebulas, and even see planets, albeit as very small dots in the sky.
Piggyback Astrophotography
Perhaps a bit more complex than simple night sky astrophotography, the piggyback method involves mounting your camera to a telescope. Doing so allows you to track the movements of the night sky with the telescope, thus avoiding having any sense of movement in the image, like star trails, that occur during long exposures when the camera is mounted on a tripod.
The procedure for astrophotography using the piggyback method is more or less the same as with the simple night sky technique. You simply align the telescope mount and begin its tracking procedure, mount the camera to the telescope, acquire focus, dial in the appropriate camera settings, and compose the shot.
Prime Focus Astrophotography
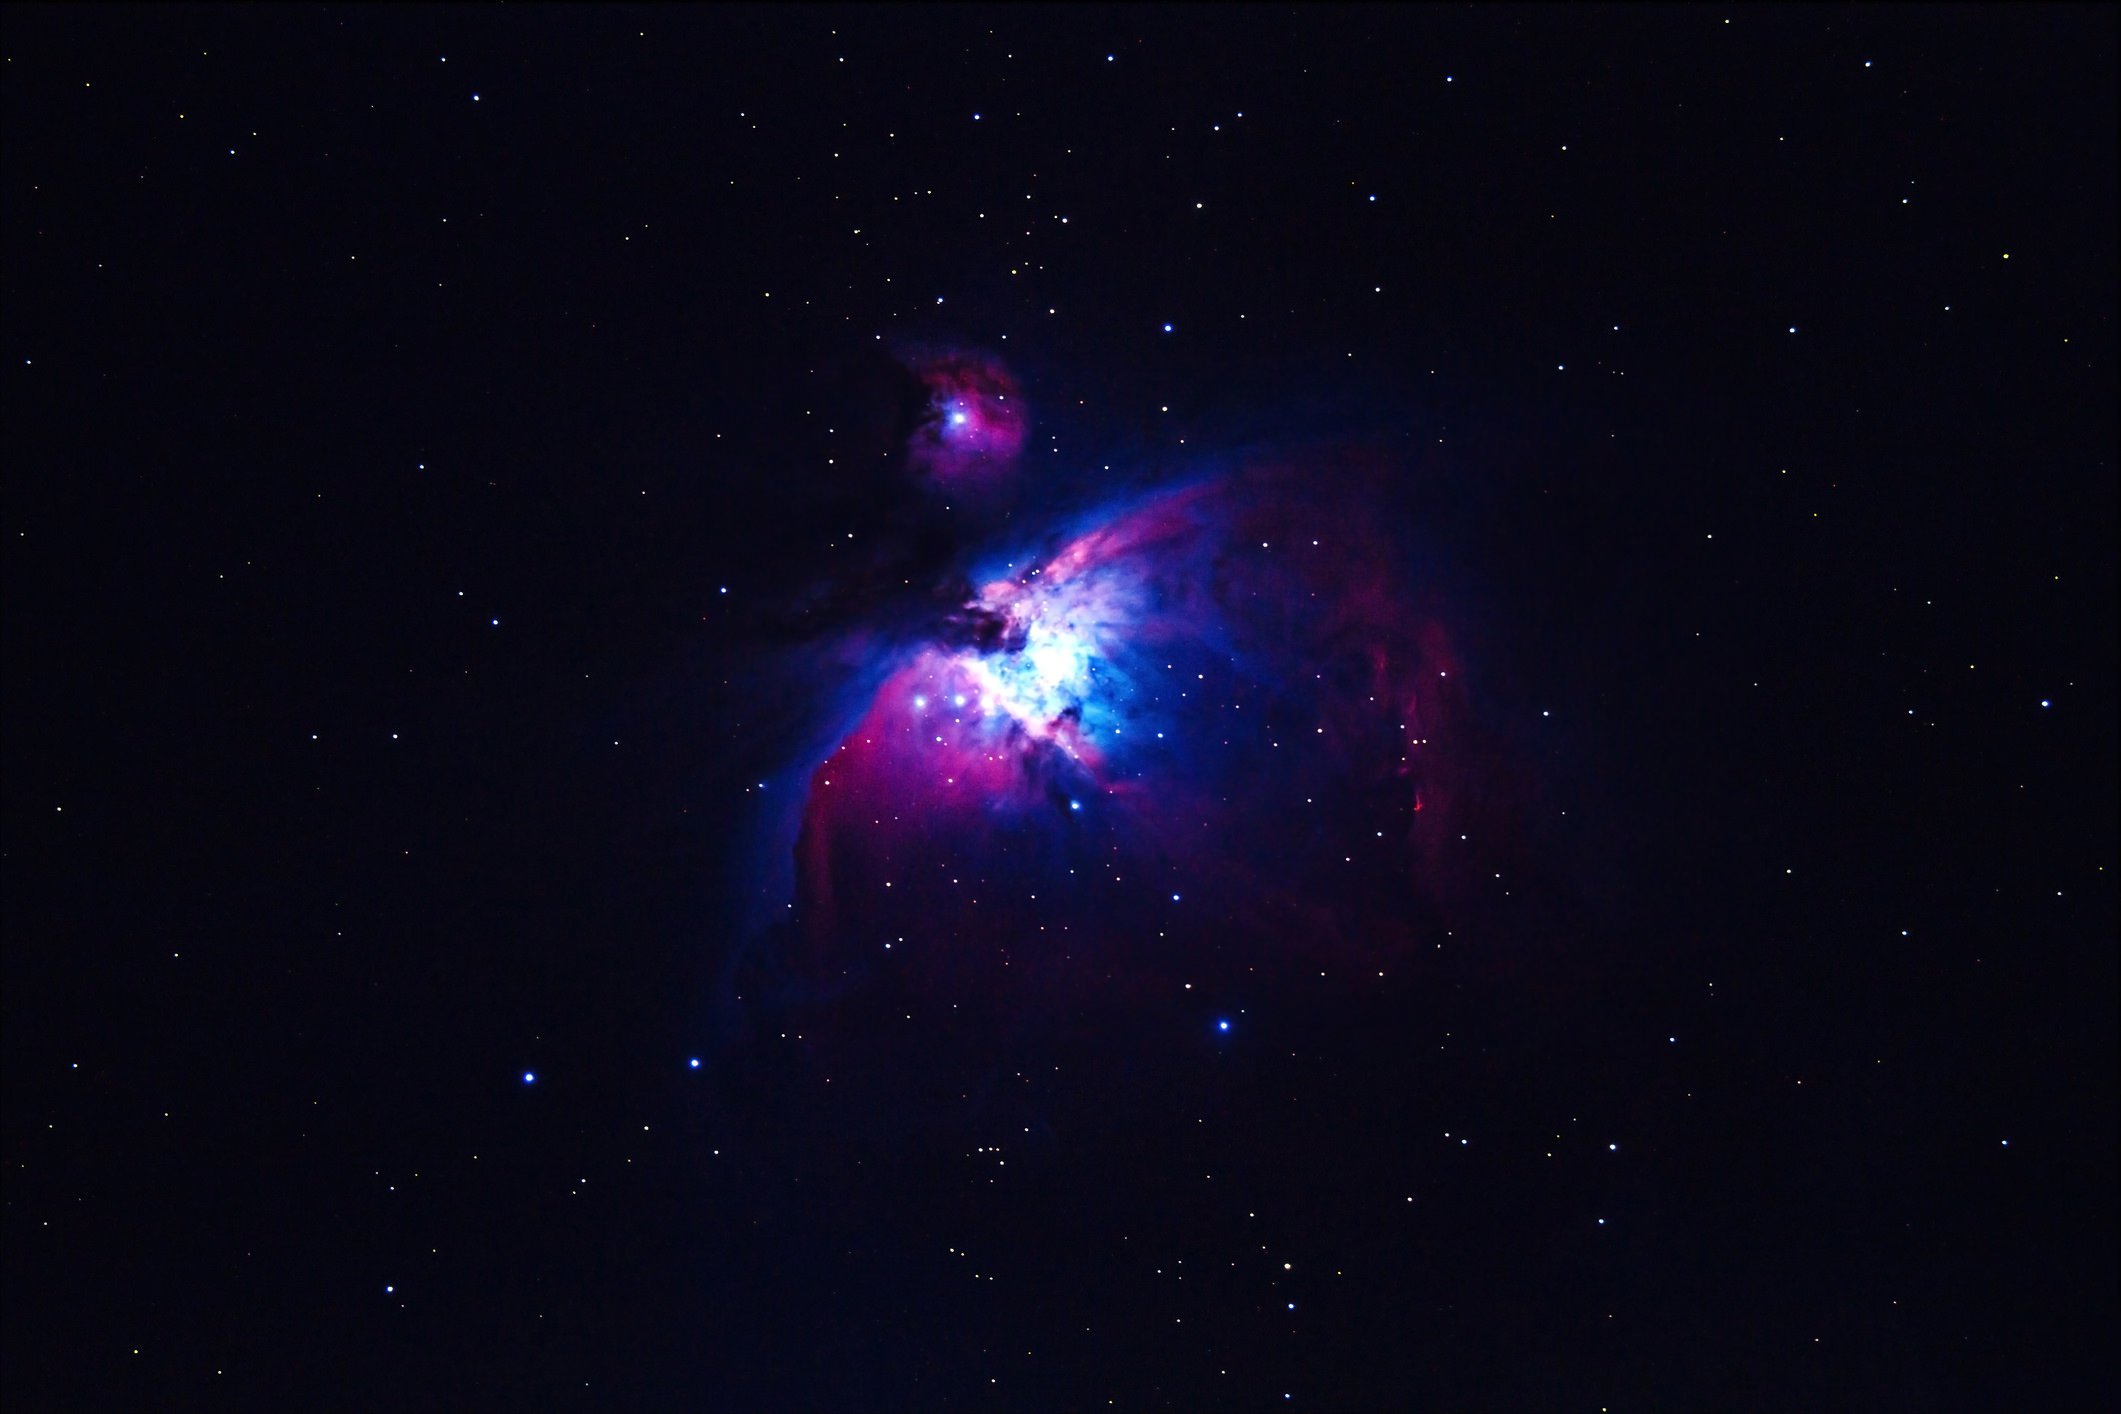
Unlike piggyback astrophotography, the prime focus technique does not use the camera’s lens but instead uses the telescope as the lens. You can add a focal reducer to lengthen or shorten the focal length of the telescope, where increasing the focal length magnifies the subject and decreasing the focal length gets you a wider field of view.
The advantage of prime focus astrophotography is that any object in the sky can be photographed, including those that cannot be seen with the naked eye. Planets are still very difficult to capture as more than a bright spot in the sky, but nebulae, like the Great Nebula in the constellation Orion (shown above), is an ideal target. Of course, no matter what the subject, this technique takes some practice to get high-quality images. And because you’re shooting at such a long focal length, a stable mount is an absolute necessity to stave off camera shake and blurry images.
Afocal Astrophotography
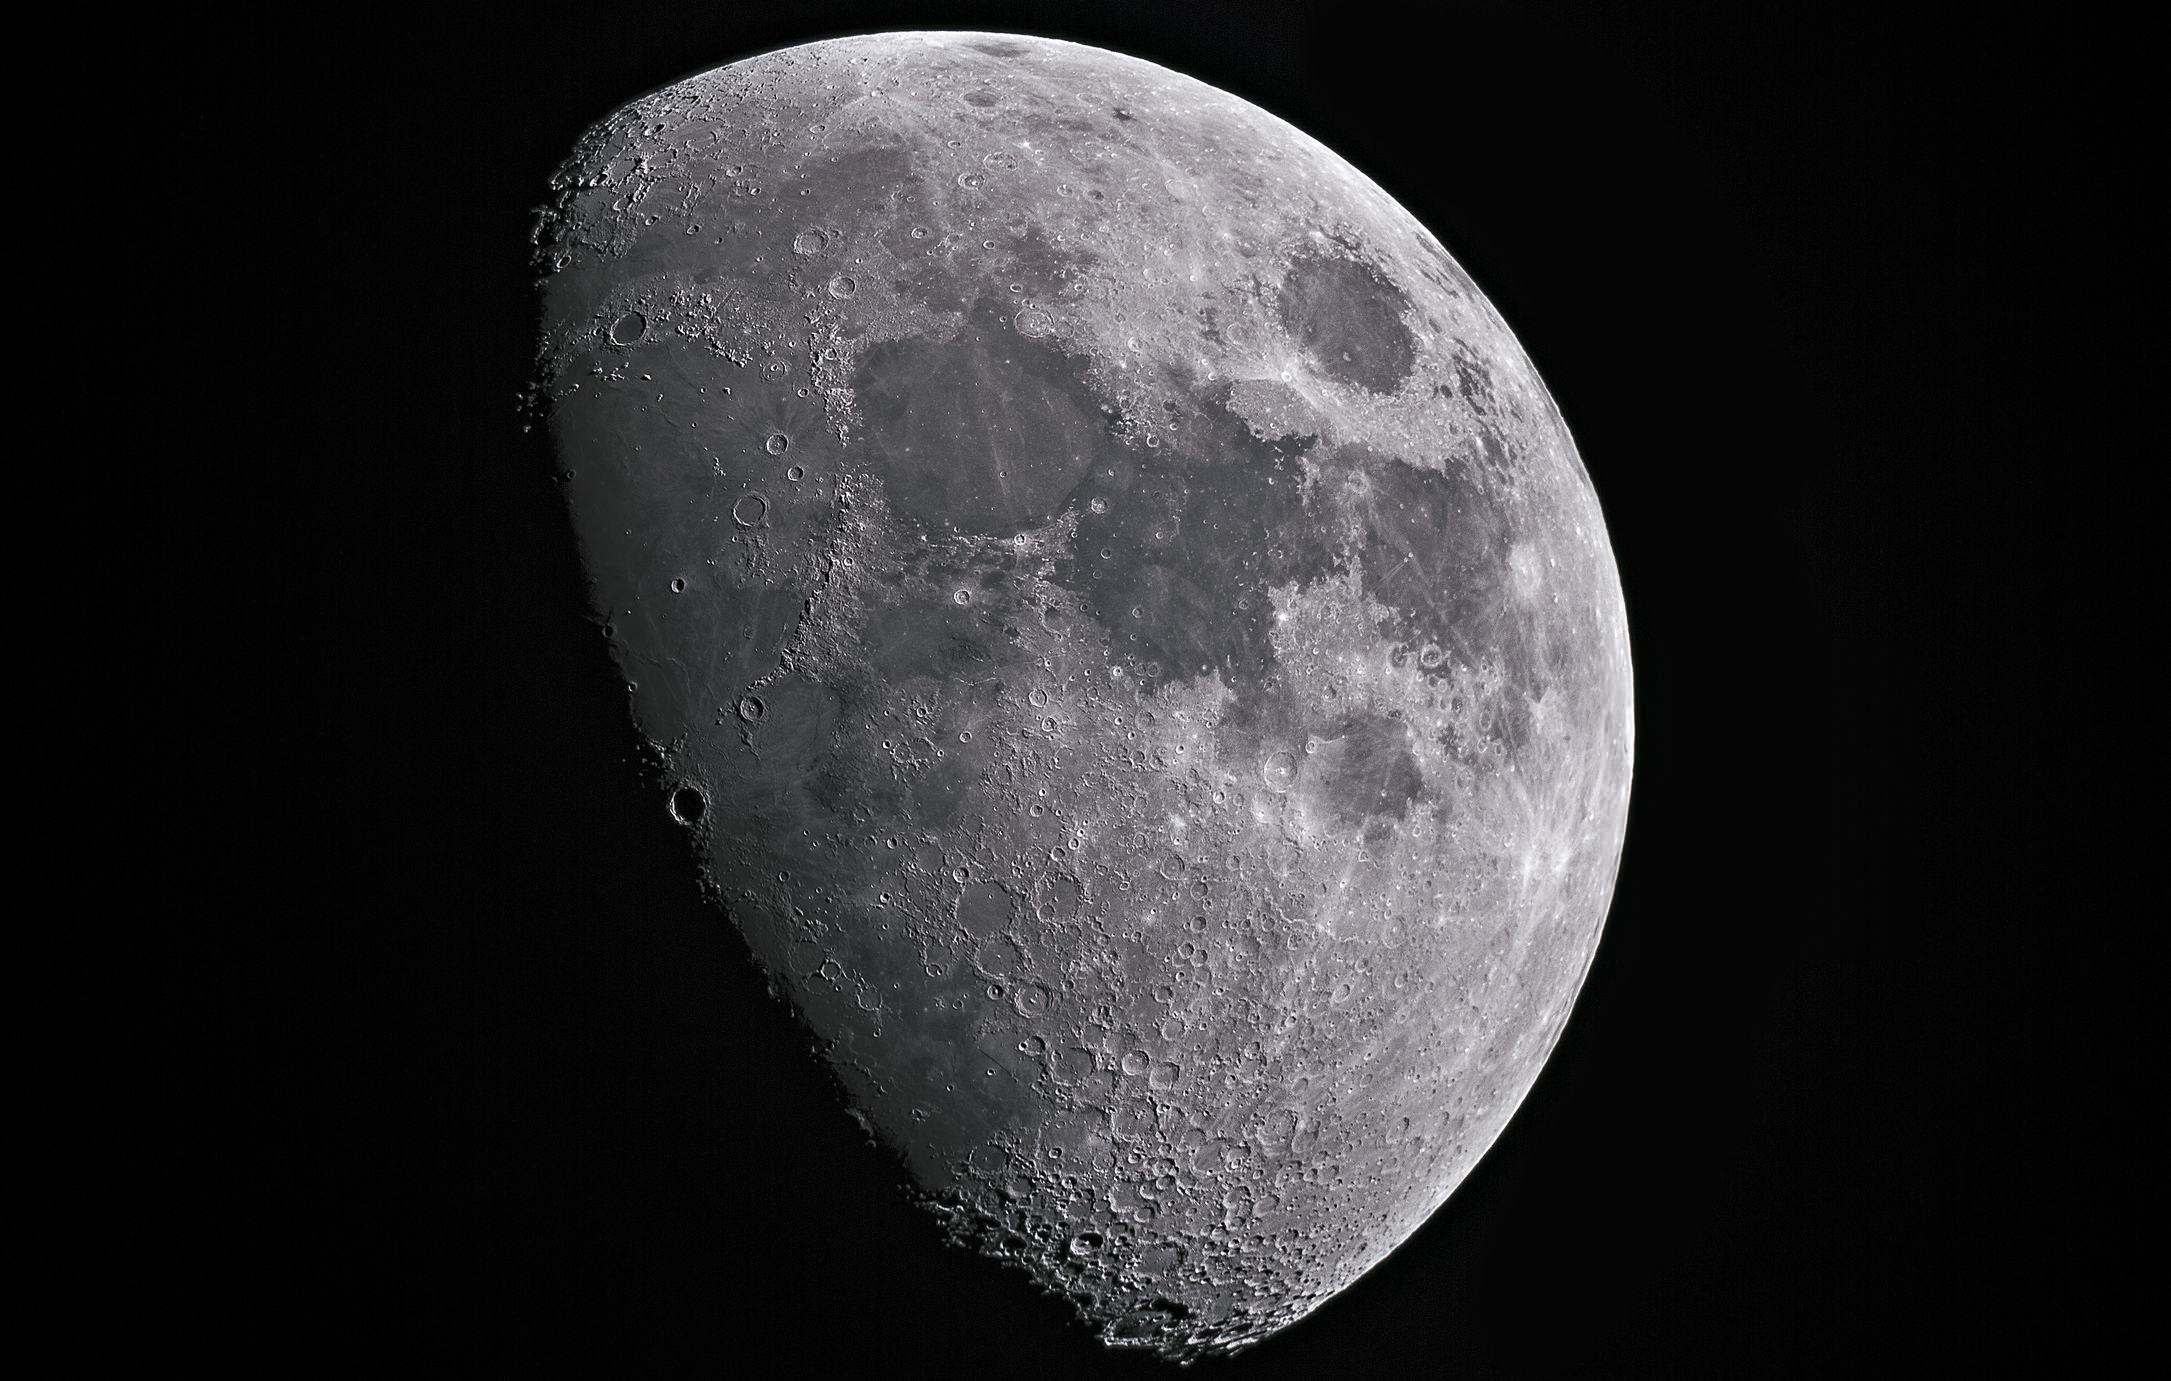
Afocal astrophotography might sound really complicated, but it’s actually straightforward. Quite simply, afocal astrophotography allows you to photograph the sky through an eyepiece mounted on a telescope. Typically, this method is best used to photograph large bodies, like the sun and moon, as well as planets that tend to be brighter in the sky.
To get a photo, you center the desired subject in the telescope’s eyepiece, using your eye to compose the shot. Then, focus the lens to infinity. From there, simply select the appropriate camera settings, then hold the camera lens over the eyepiece and take the photo. The resulting image will be of what you saw in the eyepiece with your own eye. Though you can get images by merely holding the camera above the eyepiece, you can also get adapters that allow you to securely mount your camera to the eyepiece for more stable photos.
Eyepiece Projection Astrophotography
Similar to afocal astrophotography, the eyepiece projection method uses an eyepiece on the telescope to zoom in on the desired subject. However, in this technique, the eyepiece joins the telescope and camera, so the image is essentially projected onto the camera sensor.
Though it might sound like a more efficient method of photographing the sky, you will likely find that objects in the sky are more faint than if you use the afocal technique. This is due in part to the fact that the image is projected onto the camera’s sensor. Another difficulty is that it can be very hard to find the objects you’re looking for, let alone composing the shot and focusing the image effectively. Nevertheless, you might find that this technique works for you in certain situations. The key, no matter which type of astrophotography you try, is to experiment with different gear (i.e. varying focal length lenses) and try varying exposures and camera settings to see what works best for your particular goals.
Get Outfitted for Astrophotography
Of course, taking on astrophotography requires some specialized gear, and for us, Sky-Watcher USA is the place to get outfitted. They have a complete line of equipment, from telescopes and telescope accessories to specialized mounts that make tracking celestial objects vastly easier.
One of their best products is the Star Adventurer mount, shown above. The Star Adventurer has several pre-programmed speeds, meaning you can create stunning time-lapse videos with your DSLR. With sidereal, solar, and lunar tracking rates, you can follow just about any object in the night sky. The Star Adventurer has a built-in auto-guiding interface, a DSLR interface for automatic shutter control, and an 11-pound payload, so you can mount your big full frame DSLR to it without issue.
In the end, diving into astrophotography requires a lot of time, patience, and late nights. But to get the very best results, you need the very best equipment as well. That’s why we highly recommend Sky-Watcher USA to all our friends that seek to create stunning photos of the night sky. Head over to Sky-Watcher USA to see what products they have for your astrophotography adventures!
We Recommend
Use This Surefire Workflow to Edit Your Milky Way Images
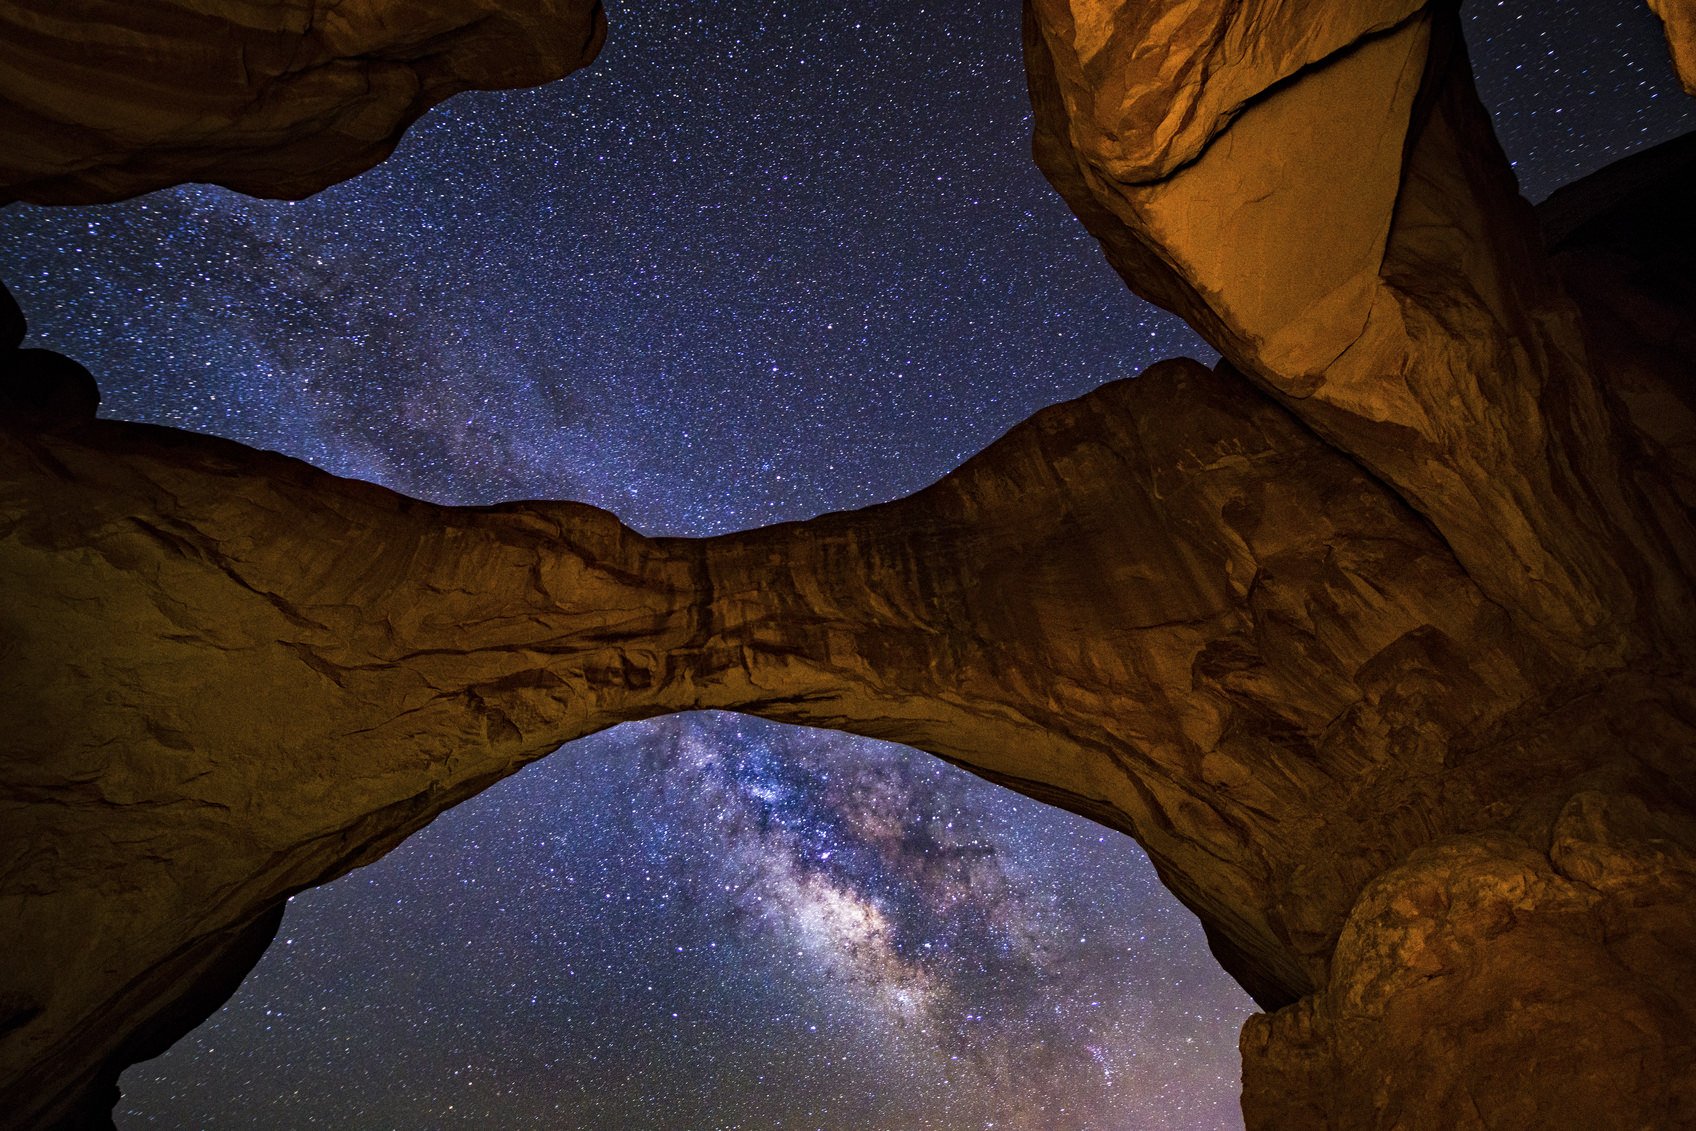
All too often, novice and intermediate photographers see an image like the one above and think that it’s just too advanced for them to replicate. Images of the Milky Way are stunning and impressive, to be sure, but they really aren’t that complicated to create, assuming you’ve got decent instruction regarding how to capture and edit them.
Luckily for us, Kenneth Brandon, also known as the Dark Sky Chaser, has an in-depth yet quick tutorial on how to process Milky Way photos in Photoshop. In the video below, he takes you through his entire workflow, from starting with the raw image, through each editing step, and ending with a breathtaking shot that shows off our home galaxy.