2020 Star Tracker Buying Guide
![]()
Photo by Smitt via iStock
Astrophotography has never been easier...
I don't mean to say that it's as simple as walking outside and pointing your camera at the sky, but astrophotography has definitely come a long way over the years.
One of the photography advancements that has made astrophotography so much easier is the development of star tracking devices.
The primary advantage of using a star tracker is that you can take photos of the night sky without worrying about the movement of the stars being captured. This means clean, crisp, and sharp stars with no star trails!
In this 2020 star tracker buying guide, we present you with some of the best star trackers currently on the market.
2020 Star Tracker Buying Guide: Move-Shoot-Move 2-in-1 Star Tracker
![]()
At the top of our 2020 star tracker buying guide is this little guy, the Move-Shoot-Move 2-In-1 Star Tracker.
And when I say little, I mean really little...
It measures just 1.7" x 3.15" x 3.9" and weighs in at less than a pound. It is truly a remarkably portable star tracking device. If you travel a lot and want a star tracker you can stuff in your backpack and not worry about carrying a ton of extra weight, this thing is the way to go!
![]()
The MSM 2-in-1 Star Tracker was designed by astrophotographers, which is why it's so small and portable.
But because photographers were behind its design, you'll also find that it's incredibly easy to set up and operate.
The integrated laser helps you polar align the unit to Polaris in a matter of seconds. You literally do that, set your exposure settings and focus, and you're ready to rock!
![]()
With this unit, you can take long exposures of the night sky that well exceed 60 seconds. In fact, you'll find many reviews of the 2-In-1 Star Tracker that sing its praises for long exposures that last up to five minutes!
Other features include:
- 6.6-pound payload capacity
- Up to a 3,000-shot battery life
- Passive motorized timelapse mode
- Worm-gear self-lock mechanism to ensure impeccable performance and long-lasting battery life
And if that's not good enough, this star tracker comes with a one-year warranty. You also get a 30-day full refund guarantee to give you peace of mind when you make your purchase.
This star tracker is even on sale at the moment, so it's an even better buy! Learn more about the MSM 2-In-1 Star Tracker.
Best Features: Tiny form factor, robust build quality, laser assist
Best For: Photographers that want a highly portable star tracker and those that don't want to sacrifice quality for budget-friendliness.
MSM 2-in-1 Star Tracker Price
- 2-in-1 Star Tracker: $199 at MSM
2020 Star Tracker Buying Guide: Sky-Watcher Star Adventurer
![]()
What makes the Sky-Watcher Star Adventurer a top choice for astrophotography is its robust payload.
This rig can accommodate up to 11 pounds of gear and has a clutch mechanism to lock it in place, so it's an ideal star tracker for DSLR setups with a long lens.
The Star Adventurer has an Alt-Az base, which makes polar alignment easy (and fast!) thanks to the separate azimuth adjustment and altitude adjustment knobs. There's also a built-in polar scope that makes polar alignment a breeze.
![]()
You can undertake various types of tracking with the Star Adventurer as well - solar, lunar, and sidereal - each of which has automatic DSLR shutter release control. You can even make time-lapse videos if you so choose.
The Star Adventurer has a rotary dial on the body that allows you to select the tracking speed. Likewise, its basic shooting speeds are easy to set up and literally takes just a few moments to dial in.
![]()
The unit has RA slew buttons and a hemisphere switch, too. The result of all this is ease of use that's off the charts. You can have the Star Adventurer set up and dialed in in a matter of moments.
It's worth noting that getting the Star Adventurer set up for time-lapses is a more involved process, but it's not complicated at all - just a bit more time-consuming.
![]()
What many Star Adventurer users also appreciate is the build of the Star Adventurer.
It weighs in at 3.63 pounds (with a declination bracket attached) and when you hold it in your hands, you get a sense that it's built like a tank. This heavy-duty construction is obviously a benefit given that it'll be toted around and subjected to cold nighttime temperatures.
Yet despite its rather bulky weight, the Star Adventurer is small and extremely portable. You can carry it in virtually any camera bag without feeling like you're loaded down with gear.
The fact that the Star Adventurer uses just four AA batteries for power (which gets you approximately 72 hours of runtime) means you don't have to carry a bunch of heavy batteries around, either. And if you have a power source closeby, you can power the unit via mini-USB.
Best Features: Big payload, excellent battery life
Best For: Experienced astrophotographers with DSLR and long lens
Sky-Watcher Star Adventurer Price
- Sky-Watcher Star Adventurer Photo Package: $319.00 at Adorama
- Sky-Watcher Star Adventurer Astro Package: $329.00 at Adorama
- Sky-Watcher Star Adventurer Pro Package: $399.00 at Adorama
Learn More:
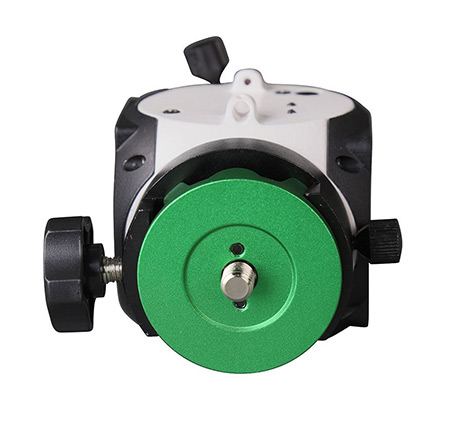
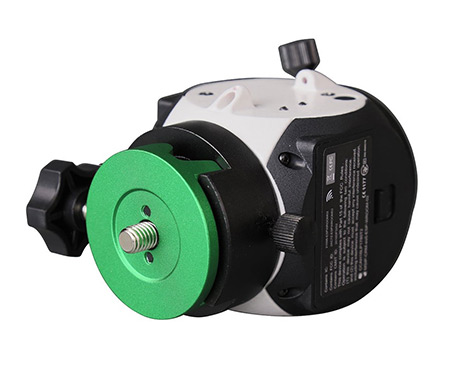
2020 Star Tracker Buying Guide: Sky-Watcher Star Adventurer Mini
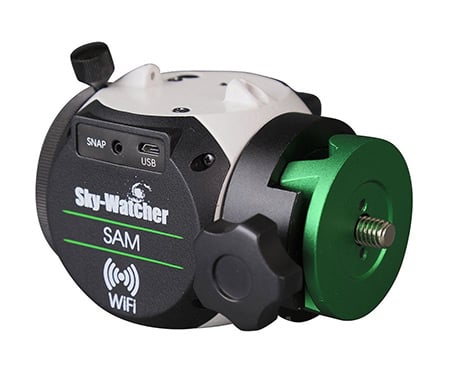
If you don't need the payload capacity of the original Star Adventurer, you might consider the Star Adventurer Mini as an ideal solution.
Designed for smaller camera setups like APS-C and mirrorless bodies paired with a short lens, this Star Adventurer Mini can accommodate a payload of up to 6.6 pounds.
Given the smaller payload, the Star Adventurer Mini does not have a clutch system like its big brother. However, it does have an easy-to-use dual-screw system that gives you the friction you need to keep the camera secure and prevent the mount from rotating.
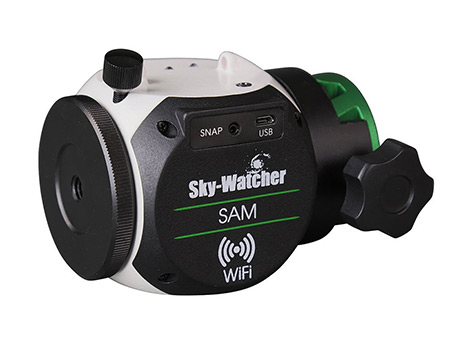
Like the original Star Adventurer, the Mini uses AA batteries for power (just two, though). That's enough juice to give you 24 hours of operation. You can also power it via a micro-USB cable for ease of use.
Speaking of easy, the Star Adventurer Mini was designed to be simple so even novices can get it set up in short order.
There is one button to turn the Mini on and off. When powered up, it uses Wi-Fi to connect to your smartphone where you can use the star tracker app (Android and iOS) to dial in settings and control the unit.
The star tracker app has tons of features that make creating astro photos a breeze.
You can control basic functions for star tracking, like the tracking speed and adjusting the hemisphere.
There is also a built-in polar finder, which is handy because the Mini does not have a built-in polar scope. Instead, you have to install it each time you shoot. There is a built-in intervalometer in the app so you can easily create time-lapses too.
In fact, the Star Adventurer Mini's app has multiple time-lapse modes built right in:
- Astro time-lapse, which tracks stars for the duration of the exposure and then repositions back to the start and repeats the process
- Regular time-lapse, which can be used to add a panning motion to daytime time-lapses
- Long exposure time-lapse, which can be used during the day (with ND filters) or at night. The Mini stays put during the duration of the exposure, and then pans to take another exposure.
Best Features: Ease of use, star tracker app
Best For: New astrophotographers with a lightweight camera setup
Sky-Watcher Star Adventurer Mini Price
- Sky-Watcher Star Adventurer Mini: $299.00 at Adorama
- Sky-Watcher Star Adventurer Mini Pro Package: $380.00 at Adorama
2020 Star Tracker Buying Guide: iOptron SkyGuider Pro
![]()
The iOptron SkyGuider Pro is a close competitor with the aforementioned Sky-Watcher Star Adventurer.
It has a payload of 11 pounds, just like the Star Adventurer, so it's another top choice for astrophotographers that have a bigger camera setup with long lenses.
The included dec mounting bracket offers stability for bigger cameras and lenses or even a small telescope if need be.
Yet, despite the big payload, the SkyGuider Pro is a compact unit that can fit in your hand. That makes transport and set up an easy task - just what you want when time is of the essence!
![]()
The SkyGuider Pro gets high marks for its silent tracking, precise controls, and a built-in rechargeable battery that gives you up to 20 hours of operation time (you can also power the unit via USB).
The built-in polar scope makes alignment an easy task, and it has a fine-engraved reticle with adjustable illumination so you can tailor its brightness to your liking.
What's more, iOptron has a companion app for iOS that makes for quick and accurate polar alignment.
![]()
When it comes to tracking the stars, you can choose from four different options: sidereal, solar, lunar, and 1/2X.
Each of these tracking options works in both the northern and southern hemispheres, and with a quick slew mode with forward and reverse options, you can quickly reframe the image without the need for changing the camera's position.
Speaking of positioning, the SkyGuider Pro has a removable alt-azimuth base that has degree markings for altitude, a built-in post for the azimuth control, and a bubble level, so you're sure to get the positioning of the camera just right.
![]()
As expected with bigger star tracker, the SkyGuider Pro is built to withstand some use and abuse.
All the mechanical components are metal for durability and the alt-azimuth bath is detachable for easier transport.
But don't think that because it's a heavy-duty mount that it's clunky or clumsy. This unit gets high marks from users for being incredibly easy to set up and use.
Best Features: Easy setup, excellent polar scope
Best For: Experienced astrophotographers
iOptron SkyGuider Pro Price
- iOptron SkyGuider Pro: $428.00 at Adorama
Learn More:
2020 Star Tracker Buying Guide: iOptron SkyTracker Pro
![]()
Another option from iOptron is the smaller, lighter-load SkyTracker Pro.
Like the Star Adventurer Mini, the SkyTracker Pro was designed for smaller gear setups weighing up to 6.6 pounds (with a counterweight kit).
As a result, the SkyTracker Pro is a light, portable star tracking option for photographers with an APS-C or mirrorless camera.
![]()
What's so great about this rig is the convenience it provides.
There's a built-in rechargeable battery with up to 24 hours of juice, an illuminated polar scope with eight different brightness levels, and four tracking rates - solar, lunar, sidereal, and 1/2X - to accommodate various needs.
Like the SkyGuider, the SkyTracker Pro can also be paired with the iOptron smartphone app to dial in the polar alignment both quickly and easily.
Also like the SkyGuider, the SkyTracker has a removable alt-azimuth base that has a bubble level, altitude degree markings, and a post for azimuth control.
Since the base is removable, you can attach the SkyTracker Pro head directly to any tripod with 1/4" or 3/8" threads. There's an included reversible mounting post for ball head mounting and a 1/4"-3/8" thread converter included.
![]()
This unit is made to last with an all-metal structure and ABS covers.
You'll get years of silent tracking, precise performance, and easy camera framing adjustment thanks to the quick slew mode.
In other words, this star tracker has everything you need to get started in astrophotography!
Best Features: Ease of use, lightweight
Best For: Beginner or enthusiast astrophotographers pursuing night sky images
iOptron SkyTracker Pro Price
- iOptron SkyTracker Pro: $299.99 at Adorama
We Recommend
Astrophotography Tip: How to Use the 500 Rule
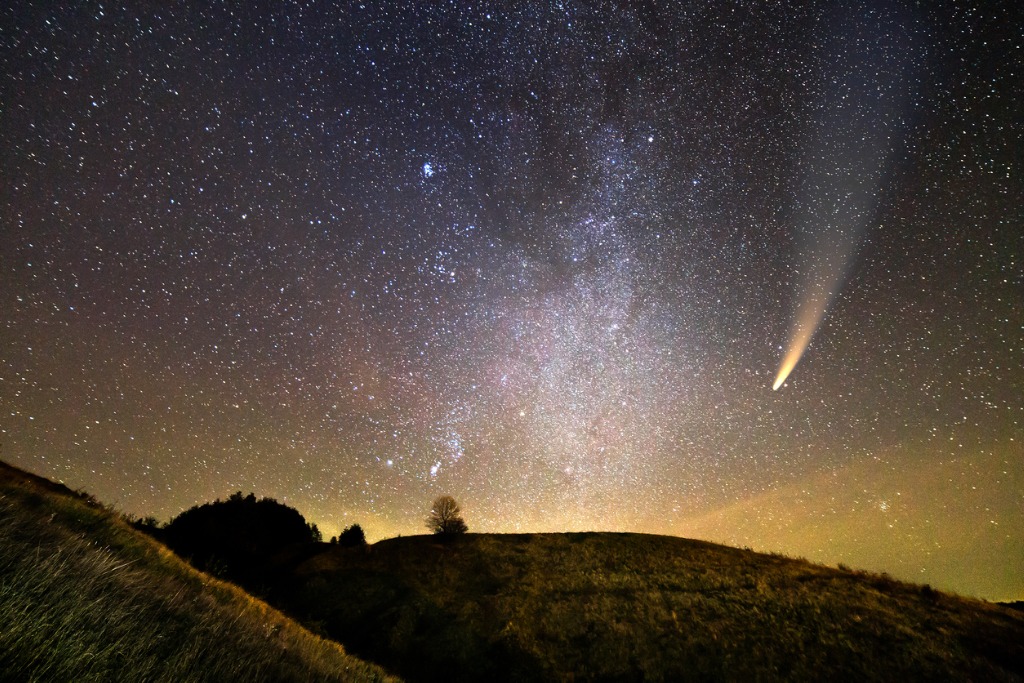
photo byBilanol via iStock
Astrophotography is awesome fun for photographers. One of my favorite astrophotography tips is knowing how to use the 500 Rule concerning exposure times, focal lengths, and sharp images.
Astrophotography is a major part of the entire art and science of photography in general. In fact, learning how to photograph the stars was actually one of the driving forces behind many of the early advances in the art, craft, and science of photography.
A Short History of Astrophotography
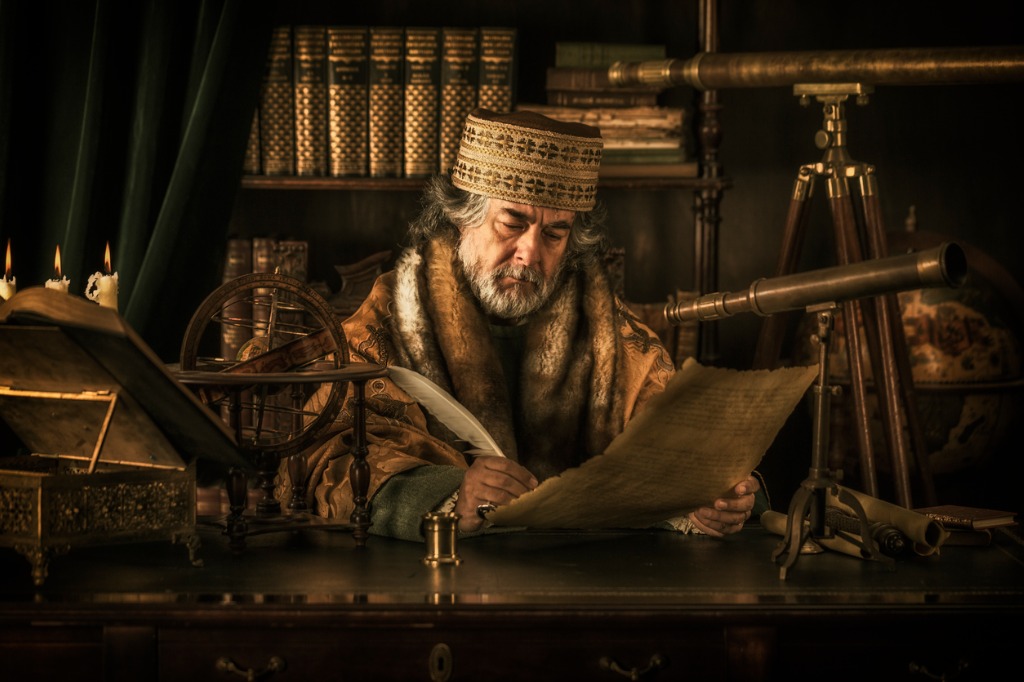
photo byaluxum via iStock
Don’t worry, I won’t take too much time on this. Suffice to say that without astronomers desiring to learn more about the stars and planets, the science of photography in general may have taken much longer to develop. (Pun intended!)
Astronomers needed better optics, sharper lenses with more light gathering ability and less distortion. The science of chemistry was also involved in that astronomers were seeking better films and printing papers as well as the chemicals used to develop them. It was actually a prominent astronomer that perfected the first useful fixing solution!
New astrophotography techniques, such as the science of long exposure calculations, also were advanced greatly by astronomers figuring out how to photograph the Milky Way.
Camera Settings for Astrophotography
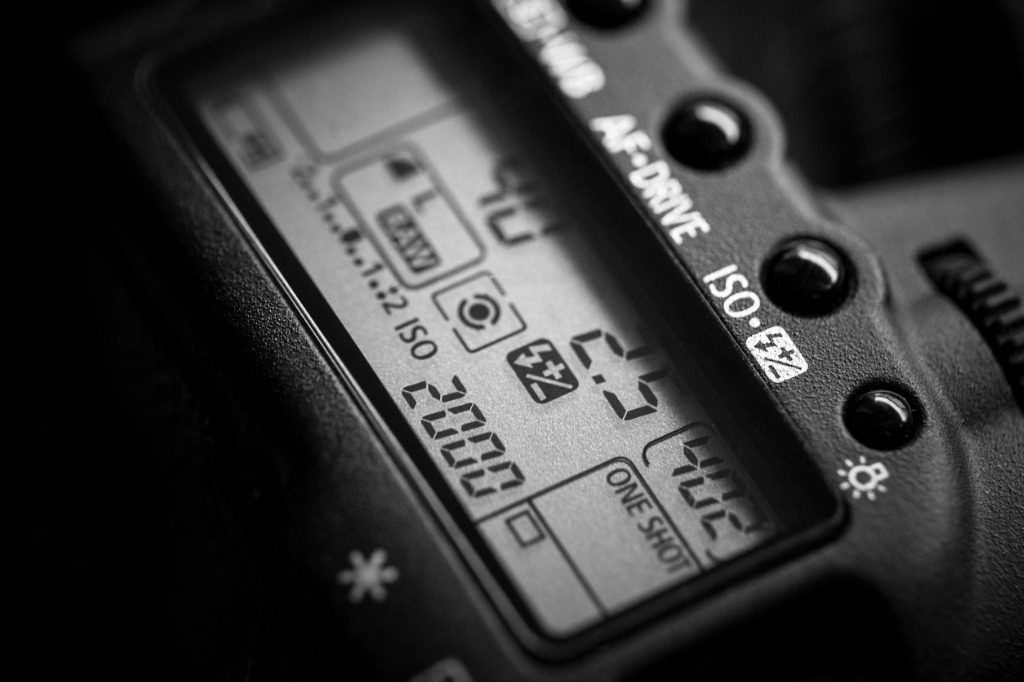
photo bydeepblue4you via iStock
Many photographers trying out astrophotography for the first time are disappointed in the results. This is often because of exposure times. It’s an interesting phenomenon, that we almost always overestimate how long of an exposure to use for astrophotography. By quite a bit, actually.
It’s because the sky is dark! And that automatically makes us want to just keep that shutter open. But that approach is rarely useful for astrophotography except for deep sky imaging.
But deep sky imaging uses specialty equipment such as equatorial mounts and very large aperture telescopes. That is part of astrophotography, but the astrophotography techniques for deep sky imaging with telescopes is substantially different than making landscape style images with the sky being a main subject.
Shoot the Moon!
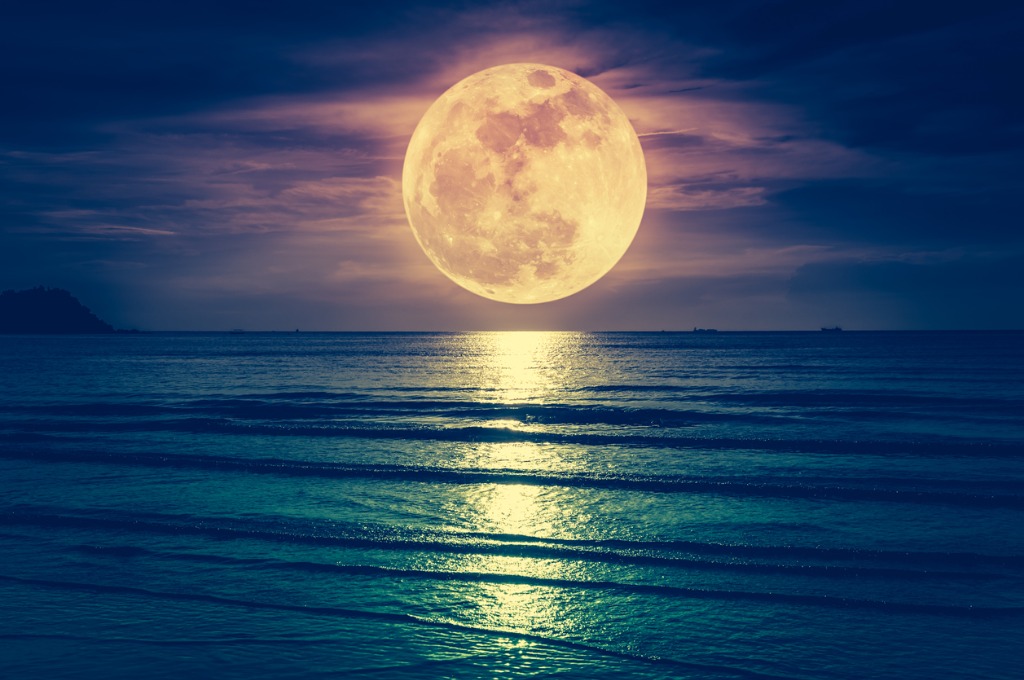
photo bykdshutterman via iStock
As an exercise in how we sometimes really need to rethink our thoughts of exposure times for astrophotography is to make an image of the full Moon. Set up on a tripod, get that telephoto lens zoomed in tight on the Moon to fill the frame, and decide what lens aperture and shutter speed to use.
Let me tell you how that worked for me the first time. I stopped down the lens all the way because I wanted to make sure the Moon was in focus. And I kept the shutter open for a few seconds because nighttime is dark.
What I ended up with was a large blob of white filling the frame. I had way overexposed. The Moon is actually a very bright object. It’s a subject fully lit by another heavenly object, the Sun. In truth, for an image of the full Moon, the Sunny 16 Rule of exposure is a better place to start. Full sunlight, remember?
Learn More:
- Take Better Photos at Night With These Simple Astrophotography Tips
- A Quick Guide to Choosing Locations for Astrophotography
Diffraction Limited Lens Aperture
photo byTrifonov_Evgeniy via iStock
And now for that aperture I set. Why did I think that an object at infinity focus for all of my photographic lenses required depth of field? In fact, stopping down a lens to minimum aperture for astrophotography introduces an image degrading optical effect known as diffraction.
Diffraction causes points of light to develop unwanted points or spikes. It’s the aperture blades that do this. But if we go to the other extreme and think we need the lens to be wide open. But that causes other issues such as coma, distortion, and color fringing.
So many issues! But that last issue is easy to fix, too. Stopping a lens down to it’s sweet spot aperture will usually greatly reduce if not eliminate those optical imperfections. On most lenses used for photography, that’s about two or three stops from maximum.
If we were to find a lens test for the lenses we use, we would look for the diffraction limited f-stop or lens aperture. That’s the aperture that reduces the optical distortion issues by the greatest amount before running into the unsharpening effect of diffraction.
On an f/1.4 lens, that might be f/4.0, an f/4.0 lens may have f/8 or f/11 as the sweet spot f-stop or diffraction limited lens aperture.
So, a good Full Moon exposure starting point might be ISO 400, 1/500th, and f/8.0. As a starting point. You should always take multiple images at slightly different exposures due to there being so many variables, including how much water vapor is in the sky that night. But you get the idea, rethink our exposure calculations for astrophotography.
How to Use the 500 Rule
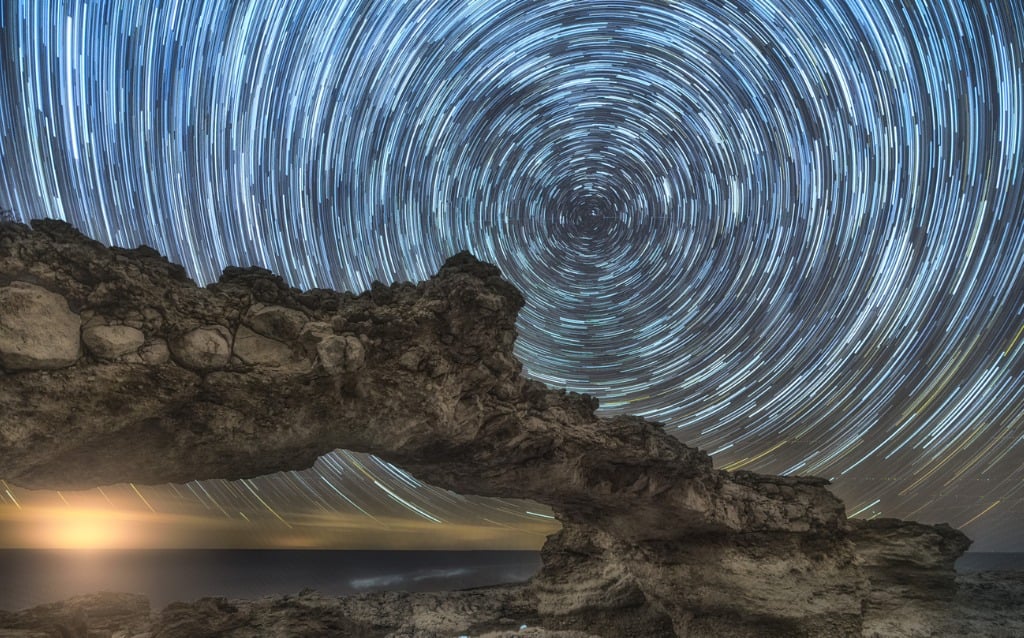
photo byIván M. Iglesias via iStock
With that primer behind us, now we get to the subject of this astrophotography techniques article, how to use the 500 Rule.
What is the reason for the 500 Rule? Surprisingly it’s camera movement, but not the camera movement we would first consider. No tripod on Earth will fix this camera movement because it’s the Earth itself that is moving.
While the sky seems relatively motionless as we stand outside and look at it, because of the rotation of our wonderful planet, this skyview is actually moving at about 15 degrees an hour. This movement will cause the stars, planets, and other sky objects to end up looking like a streak of light instead of a point of light as we see it with our naked eye.
An equatorial mount can eliminate the rotation by spinning along an axis counteracting the rotation of the Earth. If you have access to one, that’s awesome, be sure to set it up properly.
For capturing astrophotography images combined with terrestrial views, such as a mountain, forrest, or a rural silo, we mount our camera on a tripod, decide on an f-stop at or near our lens’s sweet spot aperture, and use the 500 Rule to device on a shutter speed (exposure time) range.
What is the 500 Rule?
photo byandresr via iStock
The 500 Rule is one of those super useful astrophotography tips that make it easier for us to capture usable images in this challenging field.
Here it is in a nutshell: Using a 35mm Full Frame format camera, a recommended shutter speed is going to be near the end result of 500 divided by your lens focal length. So On a Sony 7S, Canon EOS 6D, or Nikon D-750 with a 24mm lens, the longest shutter speed you can use before the stellar object begins to streak or trail is 500 ÷ 24, which gives us a time of about 20 seconds.
Let’s try it with different Full Frame format lenses.
- 200mm telephoto: 500 ÷ 200 = 2 ½ seconds
- 50mm Nifty Fifty: 500 ÷ 50 = 10 seconds
- 14mm ultra wide angle: 500 ÷ 14 = 36 seconds
What if we’re using a crop sensor camera such as APS-C or MFT format? Well, we figure in the crop factor into the equation. Let’s express it this way (algebra geekery to follow): 500 ÷ (CF x FL) = Shutter Speed
On a MFT format camera with it’s crop factor of 2, this can actually be super easy to do. Just half whatever you got with the 500 Rule. So the 50mm lens exposure time becomes 5 seconds.
APS-C format cameras have a crop factor of 1.5 (or 1.6 for Canon) so you’ll want to get out a smartphone or a notepad. Here are some calculations for common APS-C format lenses:
- 18mm lens: 500 ÷ (1.5 x 18) = 18 ½ seconds
- 55mm lens: 500 ÷ (1.5 x 55) = 6 seconds
- 200mm lens: 500 ÷ (1.5 x 200) = 1.6 seconds
How to Photograph the Stars
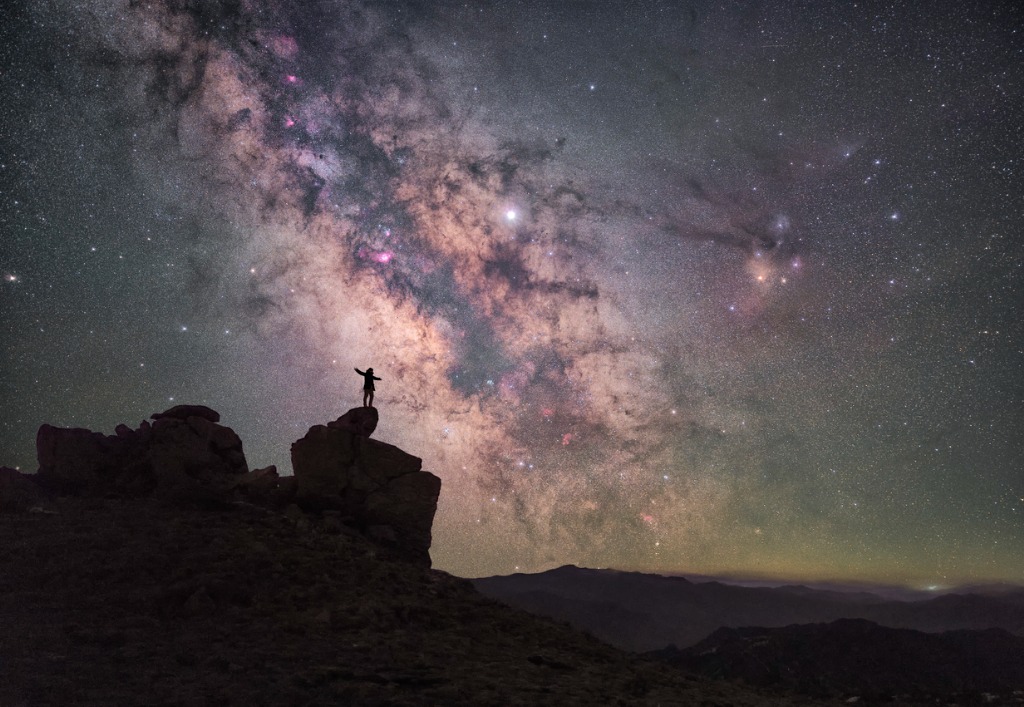
photo by6217230200005259512 via iStock
Keep in mind that this 500 Rule is like all the other “rules” of photography, it’s simply a guideline to begin calculations with and not a hard and fast rule.
You’ll want to take a lot of frames of your astrophotography subjects, adjusting camera settings up and down, varying composition, trying different focal lengths, and so forth. If the total exposure times can fit into the 500 Rule guidelines, you might also want to try HDR photography.
Any way you look at it, enjoy your outing, enjoy your post processing, and think about all of those people throughout the centuries who have gazed into the night sky in awe. WE get to capture those views, preserve them, and share them. Enjoy!
Learn More:
- These Common Astrophotography Mistakes are Holding You Back
- Astrophotography Tip: How to Manually Focus Your Lens
We Recommend
How to Photograph the Moon?
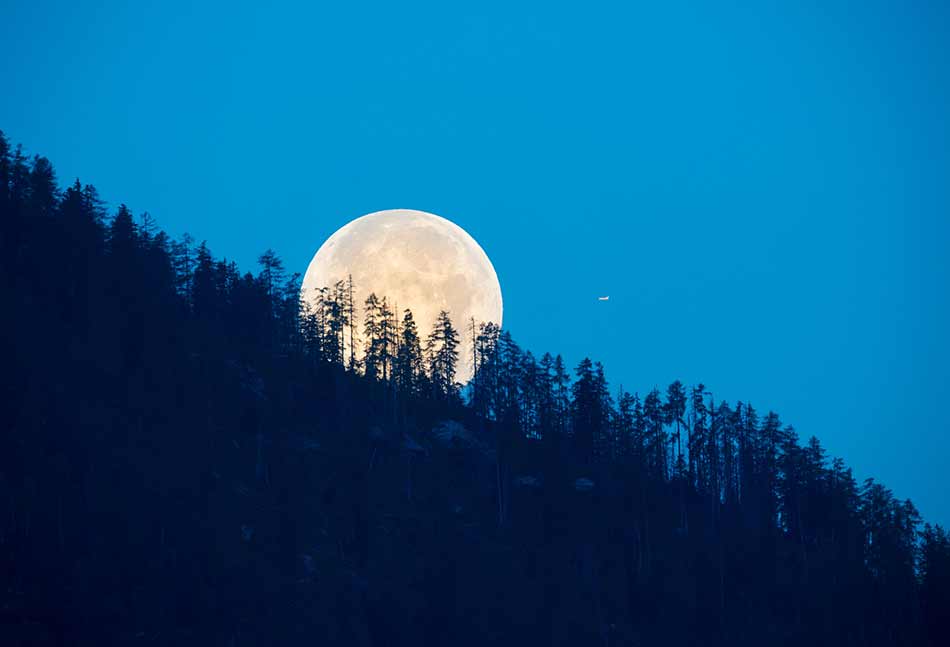
Moon Photography
The moon is 238,900 miles from earth.
In the vast majority of moon photos taken by amateurs, the moon looks like it’s that far away!
There’s plenty of obstacles to creating a beautiful image of the moon - you need an understanding of the moon’s phases and the right gear, like a telephoto lens, to get up close.
You also need to have an understanding of compositional choices that will make your photo shine. Getting the exposure just right is another challenge too.
And though that might seem like a lot to keep in mind, with a few tips, you can master these topics and create images of the moon like the one above.
I've put together a quick video tutorial on photographing the moon. Give it a watch above!
For more details, check out the article below.
Let’s get started!
Table of Contents
- How to Photograph the Moon: Get Familiar With the Moon's Behavior
- How to Photograph the Moon: Get the Appropriate Gear
- How to Photograph the Moon: Consider the Composition
How to Photograph the Moon: Get Familiar With the Moon’s Behavior

The first step in moon photography is to develop an understanding of the behavior of the moon. Naturally, this means understanding the moon’s phases so you know when the moon will be out from the earth’s shadow.
Because the earth has a counter-clockwise rotation, it’s shadow travels across the moon from right to left. That means that the best time to get photos of the moon is during its waxing stage, when the earth’s shadow is moving ever farther to the left, revealing more of the moon’s pockmarked surface.
To get a detailed understanding of the phases of the moon, watch the video below with Phil from CrashCourse:
There are plenty of apps that help you track the moon’s behavior as well. MOON - Current Moon Phase (shown below) is available on iTunes and gets very high marks from users. The app works offline, so you can be out in the wilderness without service and still know what the moon is doing and will do in the future.

This app also tells you the lunar illumination so you’re sure to capitalize on nights when it’s brightest. What’s more, the app also sends out notifications before new moons, full moons, and other lunar events, that way you can plan ahead. You can even view what the moon will look like on any day of the year by entering your desired date!
Other apps and websites you should check out are Photopills (which, among many other things, tells you the rise and set times of the moon) and Dark Site Finder, which helps you locate areas where you can photograph the moon without light pollution getting in the way.
Recommended Reading:
- Moon: Photographing the Moon 1840-Now
- The Moon: A Beginner’s Guide to Lunar Features and Photography
- Dusk to Dawn: A Guide to Landscape Photography at Night
How to Photograph the Moon: Get the Appropriate Gear
Like any other photo, getting a pleasing image of the moon requires that you have the necessary gear. Here’s a quick list of essentials you’ll need to get the best photos:
Camera

You can take photos of the moon with any camera, even your smartphone. The caveat is that for improved photos of the moon you’ll need a camera with certain features. A DSLR or mirrorless camera is typically the most advantageous because they have manual exposure controls.
What’s more, it’s best to have a camera with RAW shooting capabilities, simply because RAW files retain all the data collected by the sensor. That means that in post-processing you have more information to work with, which aids your ability to create the best-looking shot.
Lens

If you’ve ever taken a photo of the moon with your smartphone or a point-and-shoot or even a DSLR with a wide-angle lens, you know the disappointment of the moon appearing to be a small, white blob in the sky.
That’s a result of a focal length that’s too short - a wide-angle lens, for example, doesn’t get you close enough to the moon to make it appear of any significant size, nor does it allow you to capture the detail of its surface. Since wide-angle lenses make distant objects seem smaller, the moon thereby looks quite small.
This isn't to say that you can't get a nice shot of the moon with a wide-angle lens - just know that the moon will be a secondary feature in the image.
To get up close and personal with the moon as seen below, you’ll need a telephoto lens. Typically, moon photographers recommend at least 200mm. The longer the lens, the greater the magnification and the more pronounced the compression.

Where other types of astrophotography, like photographing the Milky Way, benefit from a fast lens, speed for moon photography isn’t as much of an issue.
For starters, the moon will be very bright and provide enough illumination on its own. Secondly, you’ll have your camera on a tripod, so you can utilize a longer shutter speed to compensate for the darkness of your surroundings.
So, when looking for a lens, worry less about the largest aperture available and focus on focal length. Solid options include the Nikon AF-S FX NIKKOR 200-500mm f/5.6E ED Zoom Lens. This lens is not cheap, but to get photos in which it seems the moon is very close (and large), a long lens is required, or at the very least, a teleconverter.
Tripod

Naturally, with a long lens and long shutter speeds, a sturdy tripod that will give your camera a stable base is of the utmost importance. It won’t matter how beautiful the composition is if the shot is blurry due to camera movement!
There is a mountain of tripods available with a wide array of features that can make your head spin. But the most important thing to look for is stability, quality construction, good feet that provide a stable base, and a center column hook that allows you to add weight to improve stability. Check out our camera tripod buying guide for some guidance on buying the right tripod for you.
Mount
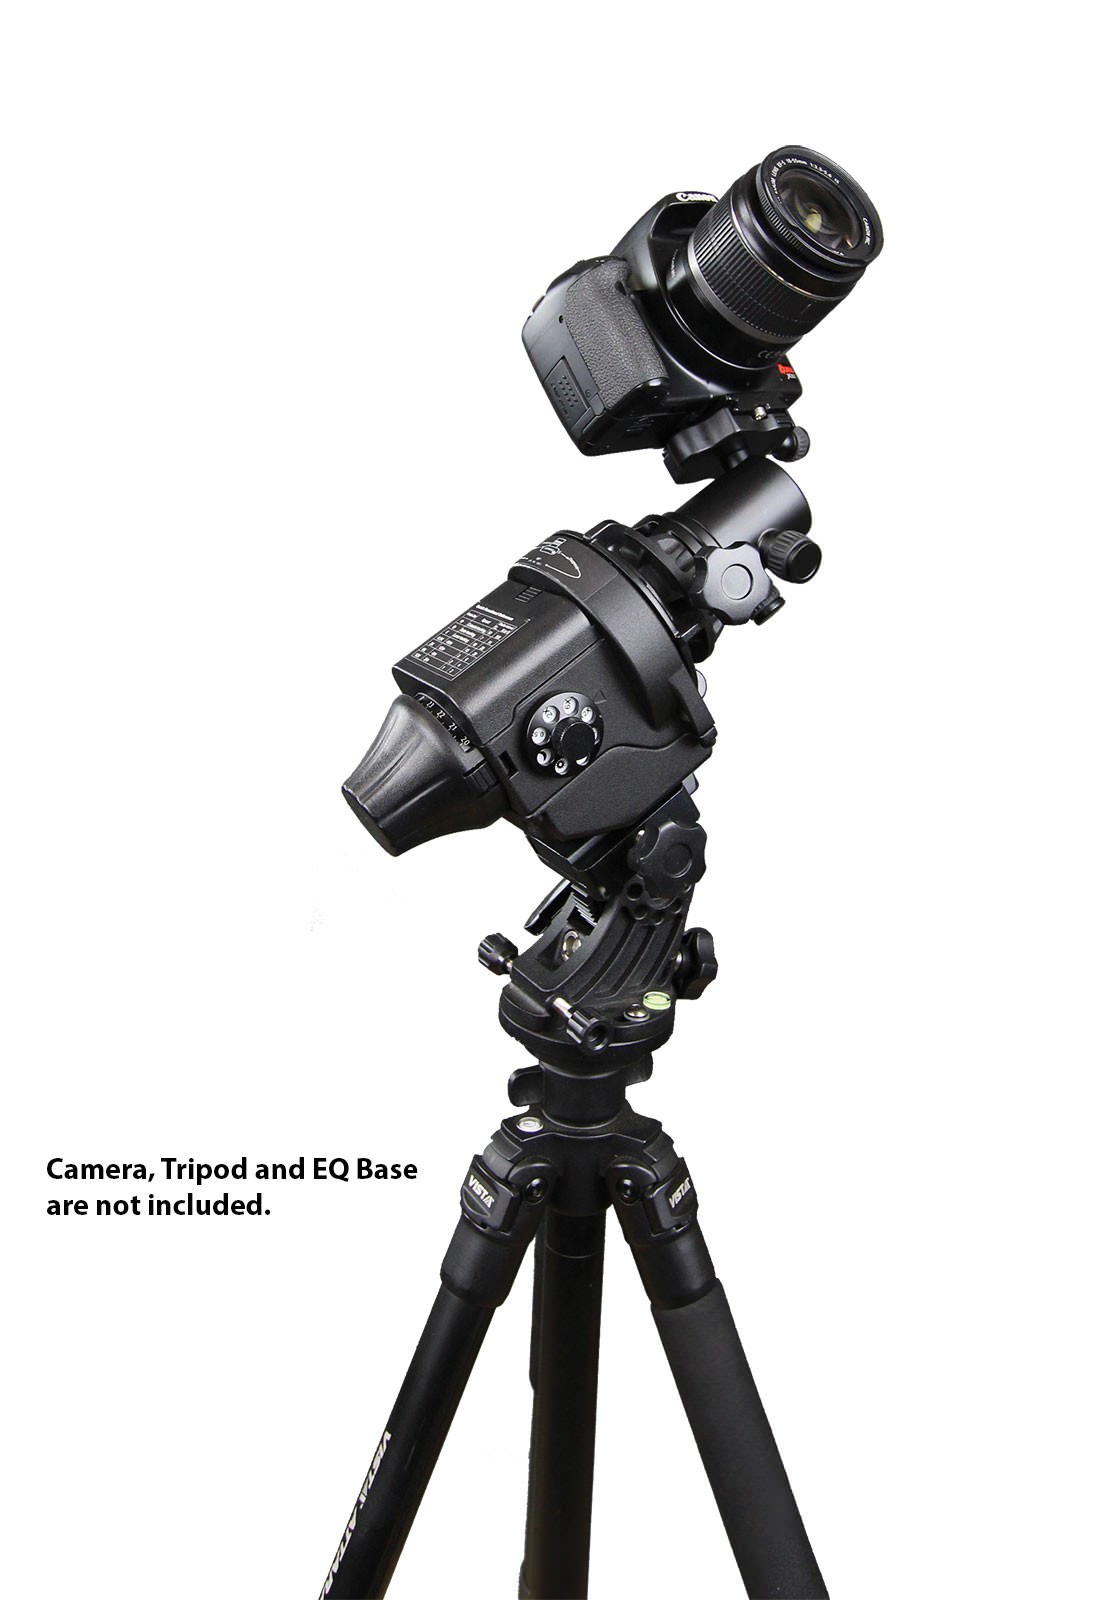
If you really want to take your lunar photography to another level, using a dedicated mount is certainly the way to go.
The Star Adventurer Mount from Sky-Watcher USA is an ideal tool for taking photos of the moon because it tracks celestial bodies. Keep the moon (or the sun or stars) in full view by using the mount to track it across the sky. With built-in shutter release control, the Star Adventurer also gives you the power of firing your shutter remotely, thereby helping to reduce the possibility of blurriness due to camera shake.
What’s more, if you want to create a beautiful timelapse video of the moon moving across the sky, you can! The Star Adventurer has preprogrammed parameters for creating timelapses both quickly and easily.
The setup shown above is Sky-Watcher’s special photo package, which comes bundled with the Star Adventurer mount, a polar scope illuminator, and a ball head adapter.
That means that right out of the box, you’re ready to head out, get set up, and take some stunning photos of the moon! Get to know the Star Adventurer Mount in more detail by checking out the video above from Sky-Watcher USA.
Here’s what you need to get this set up:

- Camera (Nikon D810 shown)
- SkyWatcher Adventurer
- Sturdy tripod (Sirui W-2204 shown)
- Strong ball head (Acratech GP shown)
- Shutter Remote (RFN-4 Wireless shown)

How to Photograph the Moon: Consider the Composition

As beautiful as the moon is, and as awe-inspiring as it can be, photos of the moon can easily be boring. This is especially true if you take a wide-angle shot in which the moon is relatively small in the frame.
In those instances, it’s necessary to pair the moon with interesting foreground elements, just as you would with any other type of landscape shot.
There are a myriad of possibilities here. If you live in a city, incorporate a structure of some sort into the frame - a building, a bridge, or the like, that adds some scale to the shot as well as provides visual interest that makes the image more complex.
If you can head out to less populated areas, pair the moon with natural elements like mountains, trees, or even reflect the moon in a still lake or pond to make the photo more visually appealing.
You might even find that photographing the moon at sunrise or sunset is advantageous because you can incorporate Golden Hour or Blue Hour lighting into the scene, which elevates the interest of the image with the addition of the warm, bright colors of the sky.
In the video above, Bryan Peterson with Adorama TV explains why shooting near sunrise and sunset is so advantageous, and also offers some tips on how to expose the image at this time of day.
Another option is to create a composite image in which you take a wide-angle shot of the landscape, a telephoto shot of the moon, and combine them together.
This method is used quite often to create images that have the best of both worlds - a gorgeous setting and a nice view of the moon.
Learn how to create a composite image of the moon in the video above by Brendan Williams.

From planning your outing to composing the shot to processing the images, you now have a better idea of what it takes to create gorgeous photos of the moon.
Though it’s a lot to take in, just remember that all it takes is a little bit of practice. Set aside some time to work on the tips and techniques outlined in this article, and you’re sure to develop the skills needed to capture some truly stunning lunar photos.
We Recommend
How to Take Killer Photos of the Night Sky
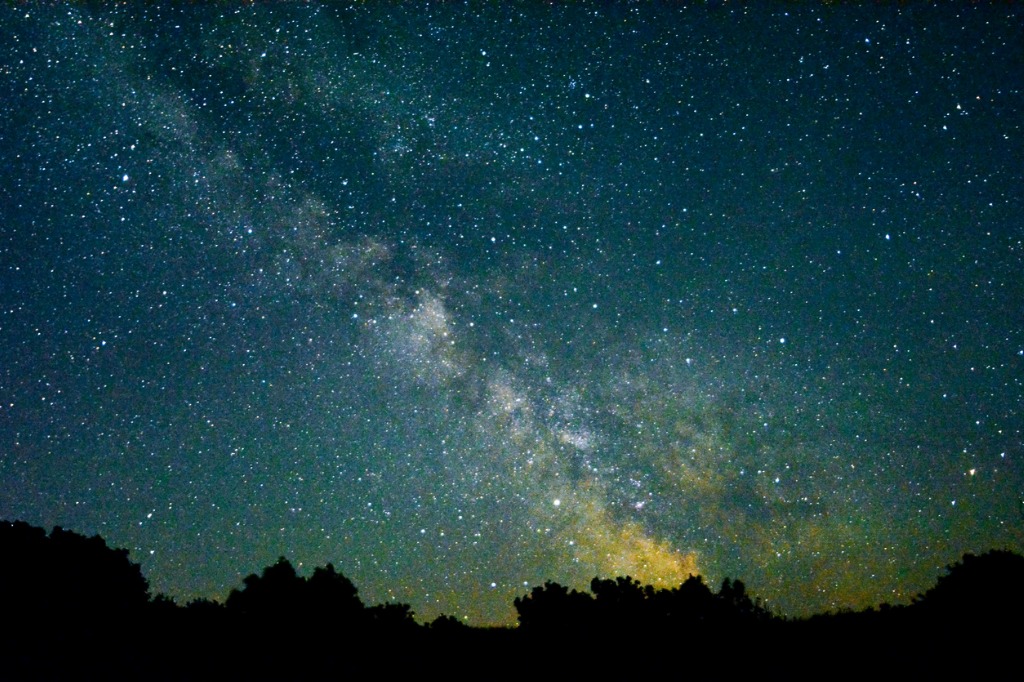
photo byInner_Vision via iStock
Photos of the night sky, also called astrophotography, are a definite challenge for any photographer, but the results can be outstanding and create a sense of awe and wonder. Some of the challenges can be met by equipment choices and proper use, other challenges are met by astrophotography techniques that have been proven over the course of time.
To be able to create your own beautiful photos of the night sky, follow this list of astrophotography tips and take a look at some of our previous astrophotography tutorials.
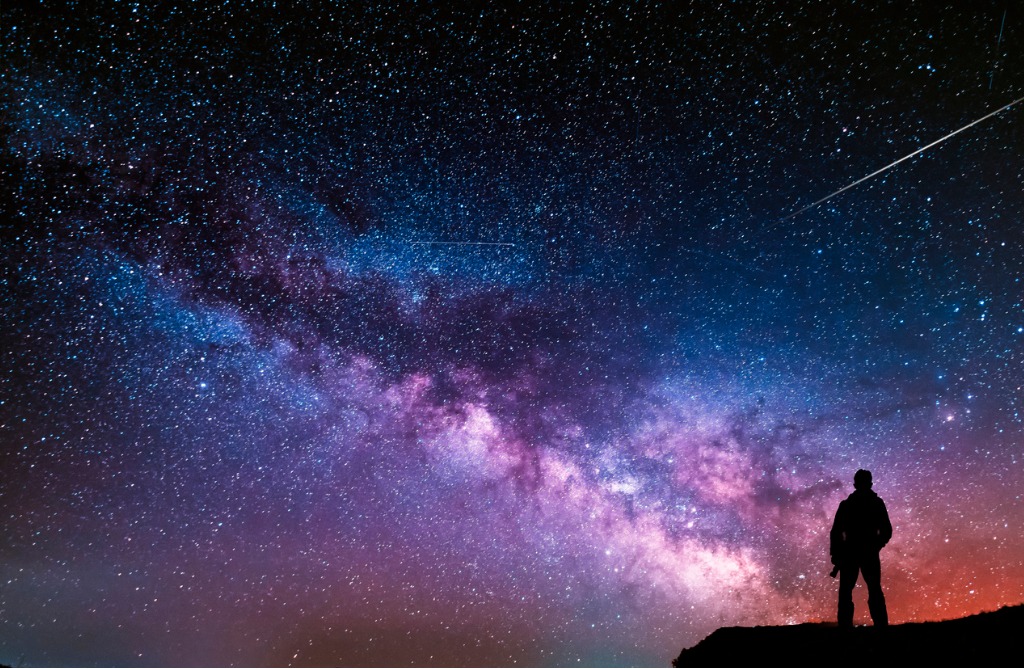
photo byInga-Av via iStock
Here is the short list of astrophotography tips for making great photos of the night sky:
- A Tripod is Essential
- You Need a Light Pollution Filter
- Grab a Remote Release
- Set Manual Focus
- Shoot RAW
- The 500 Rule
A Tripod is Essential
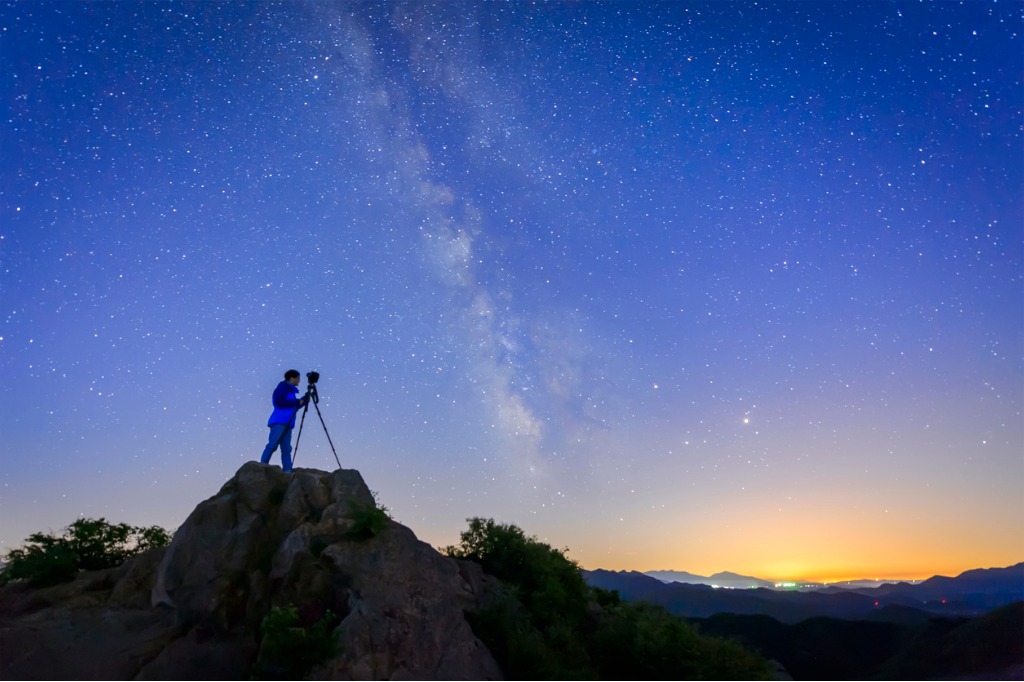
photo bybjdlzx via iStock
Astrophotography is almost always long exposure photography. The exposure times are commonly measured in full seconds but can stretch out to minutes or require stacking multiple exposures for certain astrophotography techniques.
Both long exposures and stacking multiple exposures requires that the camera be completely stable and unmoved. Any movement of the camera during a long exposure will degrade the image with a measure of streaking and any movement during stacking will result in registration errors.
You will want a tripod that is simple to set up and study enough to not have any chance of accidental movement. You will also want to practice good astrophotography techniques such as not touching the camera rig at all during the exposure or exposure sequence.
You Need a Light Pollution Filter
Light pollution is a very real concern for a large number of photographers when taking photos of the night sky. Just as smog pollution can obscure a view of any outdoor subject, light pollution can obscure the view of stellar and other night sky objects.
One solution that has been employed for decades of astrophotography is to travel to an area far from any city lights. Astronomers refer to these places as Dark Sky spots.
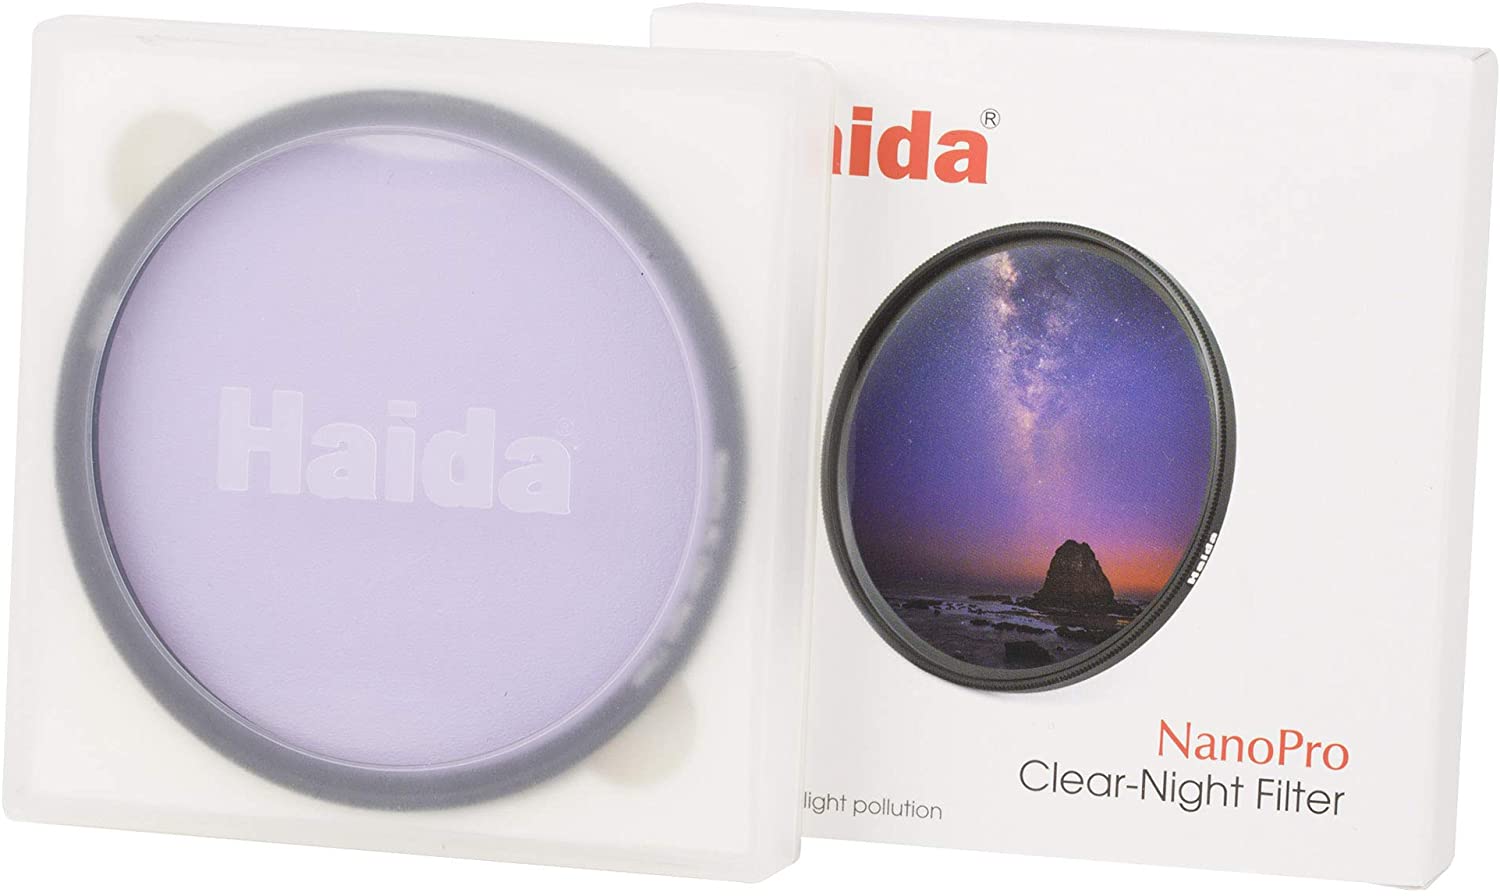
That requires a lot of time and effort for many of us, so another fine astrophotography technique is to add a filter designed to compensate for light pollution such as the Haida Clear-Night Filter that is available in a variety of sizes. I recommend buying the largest size you need and using a step ring to adapt to your other lenses.
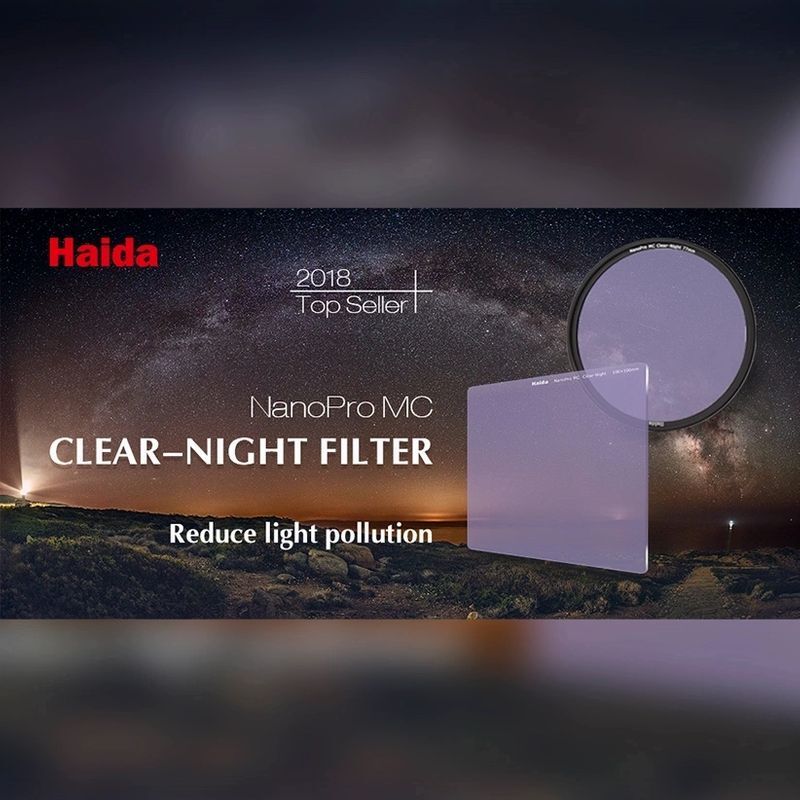
The Haida filter targets the spectrum emitted by sodium vapor and mercury vapor lights that are common in street lights, parking lots, and stadiums, and low CRI LED lights that are found in outdoor household lighting. By blocking or attenuating these wavelengths, the Clear-Night Filter opens up more light from deep sky subjects to be seen and recorded.
Grab a Remote Release
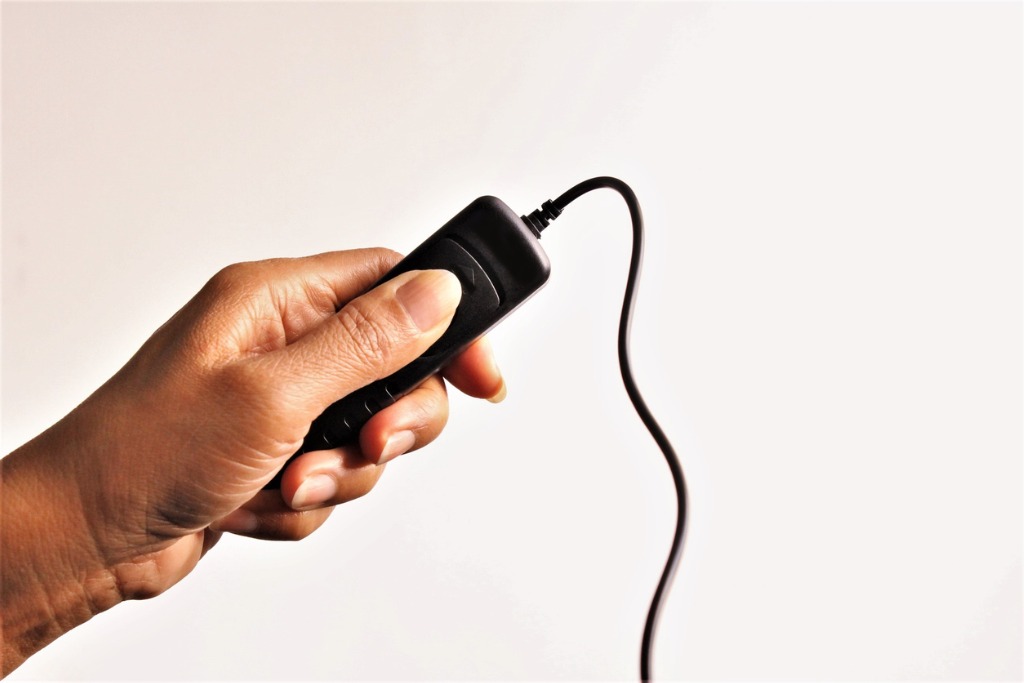
photo bySOMKHANA CHADPAKDEE via iStock
Since we are using long exposure techniques for taking photos of the night sky, an additional item to use with our tripod is a remote release. You really don’t want to touch the camera or tripod at all during these exposures, so having a long enough cord is also essential.
Many remote releases for modern digital cameras have extra features added beyond merely triggering the shutter. Some will also allow multiple exposures to be programmed or can be locked with the shutter open for extremely long shutter speeds.
Learn More:
Set Manual Focus
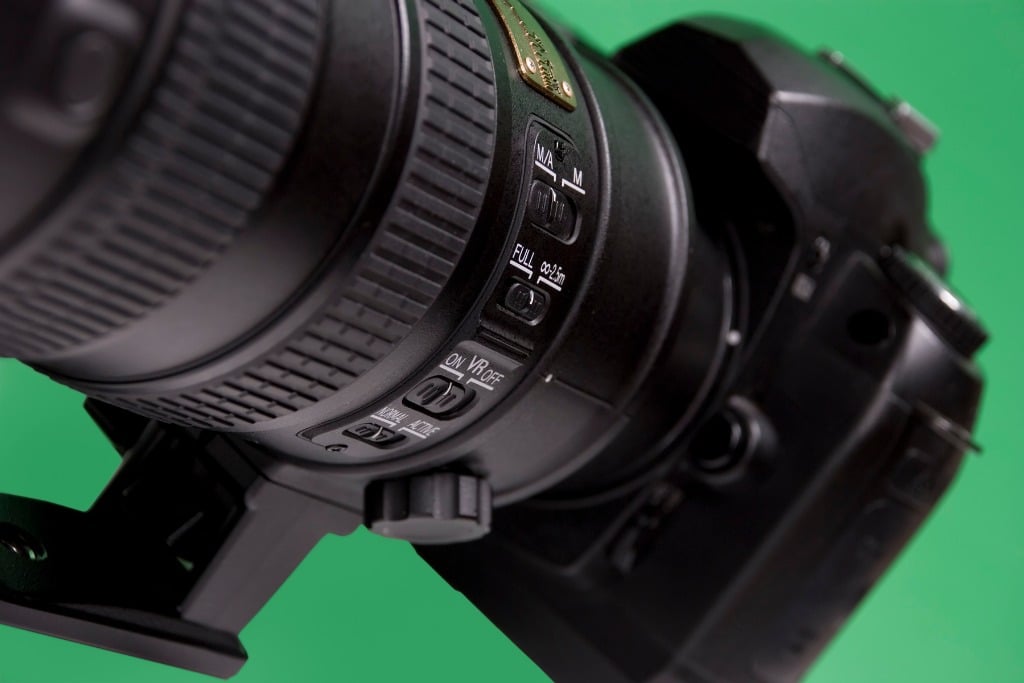
photo bystoffies via iStock
Turn off the autofocus feature of your camera. Everything in the night sky will be well beyond the furthest marked distance on your lens and will be at the lens infinity focus position.
What makes it a little more difficult than merely twisting the focus ring to the infinity position is that the infinity focus position can be a bit variable on many lenses, especially longer focal lengths. That’s why you may have noticed a little bit of play in the focus ring beyond infinity that has nothing to do with Buzz Light-Year.
Since the viewfinder may be a little hard to see for astrophotography, the rear viewscreen is a good option for confirming accurate focus. You might even use the magnify feature of the viewscreen if your camera offers that.
Shoot RAW
photo byPoike via iStock
Whenever we shoot in situations that have a lot of shadow detail area or unusual color temps, RAW is the preferred format for recording the files. Astrophotography certainly qualifies in both of those areas.
Shooting photos of the night sky in RAW means that we will have to post process in order to be able to view them on other devices or share them with others. An advantage of RAW is that we can assign a color temperature or a color profile that looks proper for the subject and also that we can pull out more detail from the dark areas than with a compressed file like JPEGs.
The 500 Rule
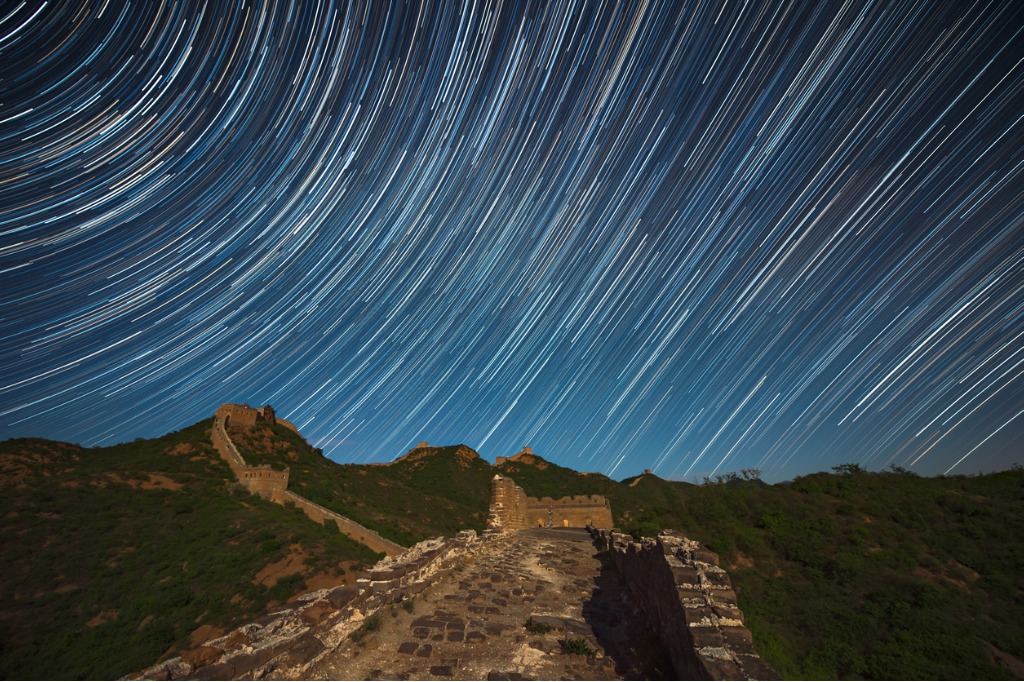
photo bybjdlzx via iStock
Subject motion is a huge issue when shooting photos of the night sky. Technically, it’s actually camera motion. Let me explain.
The deep sky objects appear fixed in the sky but they’re really not. Due to the motion of the Earth, its rotation specifically, that entire backdrop of sky is slowly moving on us. When we leave our shutter open long enough, the spots of light in the sky will eventually be streaked by this motion. How long do we have?
That’s the 500 Rule. 500 divided by the focal length of your lens equals the longest exposure time before stars start to streak, measured in seconds. So, for a 50mm lens, the longest we can expose before that dot becomes a line is 10 seconds. Our 24mm lens gives us 21 seconds and a 135mm lens reduces us to only 4 seconds.
All of this assumes Full Frame 35mm format. If using APS-C or MFT cameras, you will need to adjust the focal length by the crop factor before figuring the 500 Rule. So an 18mm lens on an APS-C camera will not be 28 seconds but rather 18 ½ seconds. Yes, it’s math, but you’re a photographer, you use math successfully all the time.
A motorized equatorial mount like you may have on your telescope is about the only way to get away from being bound by this 500 Rule.
Other Astrophotography Tips
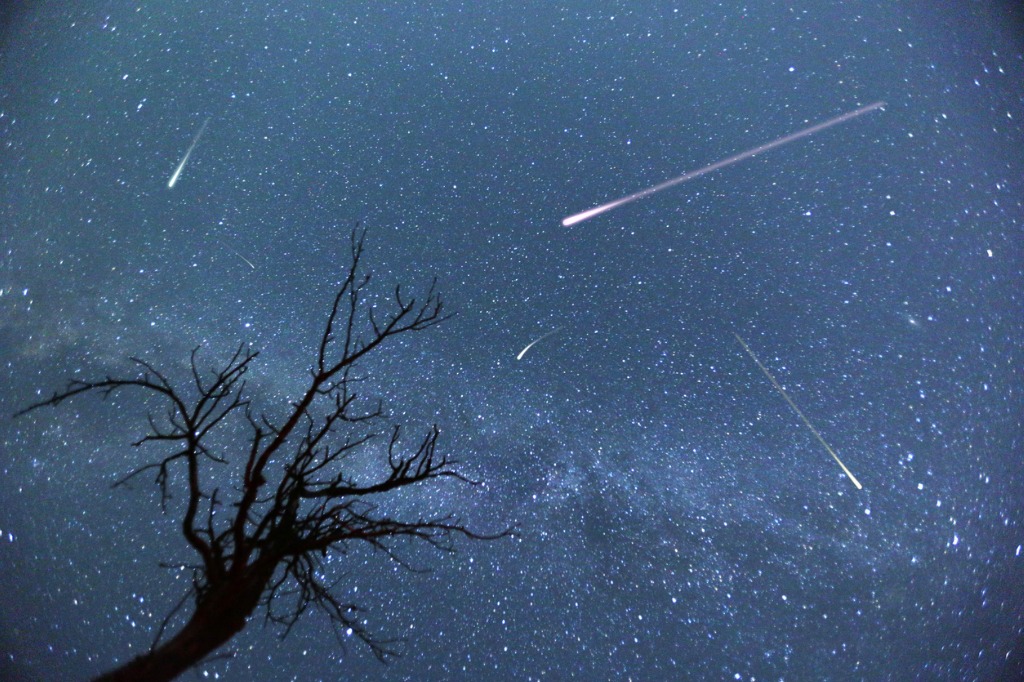
photo byCylonphoto via iStock
There are other things to consider for capturing great photos of the night sky, check out our other astrophotography tutorials.
Some additional things to consider are what ISO to use, why you don’t want to shoot with your lens aperture either wide open or stopped all the way down, but rather at the ‘sweet spot’ aperture for your lens, and what the astrophotography techniques of image stacking and dark frame subtraction accomplish.
You are up to the challenge of making amazing photos of the night sky. All you need are a few specific items and some great astrophotography techniques in order to succeed.
Learn More:
- How To Take Good Photos With a Kit Lens
- Mountain Photography Tips
- Best Aperture for Landscape Photography
We Recommend
Northern Lights: Best Places to See Them
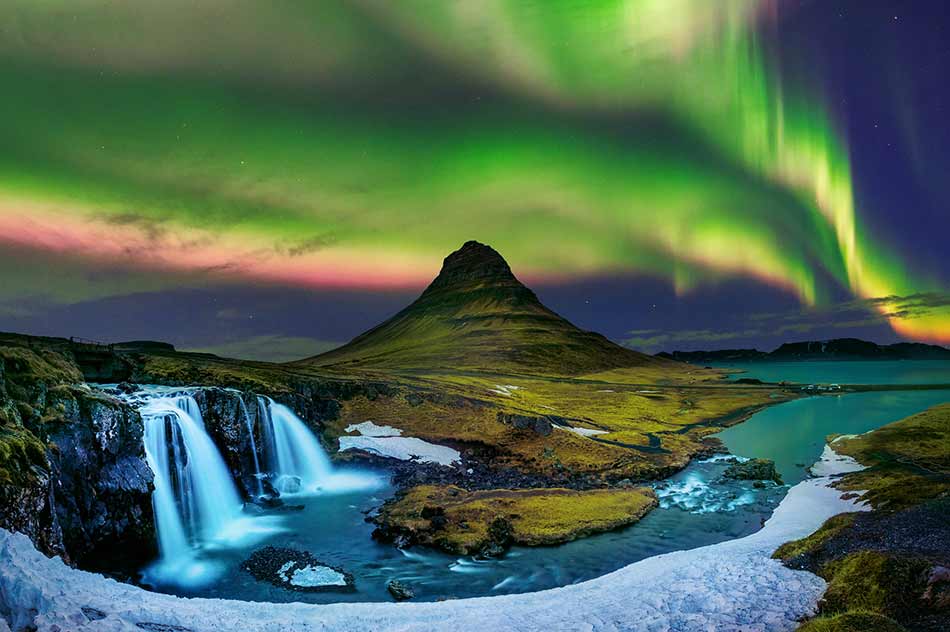
photo bytawatchaiprakobkit via iStock
One of the most beautiful phenomena you can witness in the northern hemisphere is the northern lights, or the Aurora borealis.
The dancing lights are certainly a wonder on their own, but when they’re paired with some truly beautiful landscapes, you have the makings of absolutely breathtaking photos.
That begs the question, where can you see the northern lights?
Let this guide direct you to some of the best vantage points for viewing and photographing the Aurora.
Table of Contents
- What are the Northern Lights?
- What Causes the Northern Lights?
- When Can You See the Northern Lights?
- Where to See the Northern Lights: Alaska
- Where to See the Northern Lights: Pennsylvania
- Where to See the Northern Lights: Canada
- Where to See the Northern Lights: Iceland
- Where to See the Northern Lights: Norway
- Where to See the Northern Lights: Finland
- Where to See the Northern Lights: Sweden
- Where to See the Northern Lights: Greenland
- Where to See the Northern Lights: Scotland
What are the Northern Lights?

photo byden-belitsky via iStock
Before we dive into where to see them, it’s worth it to explore what they are in the first place and what causes the northern lights.
The Aurora borealis (known as the Aurora australis in the southern hemisphere) is perhaps best known for pale green waves of color that appear to be dancing in the sky.
However, green is just one color that might be present - colors can actually range from yellow to violet and blue to red. Likewise, the dancing waves are just one form they might take. A simple glow in the sky is common, as are arcs of light, beams or rays of light, and streams of light in the night sky.
What Causes the Northern Lights?

photo bysolarseven via iStock
What causes the northern lights is the collision between particles from the sun that hit the Earth’s atmosphere.
More specifically, the electrically-charged particles released from the atmosphere of the sun collide with the gaseous particles in Earth’s atmosphere.
The type of particles involved influences the color of the northern lights.
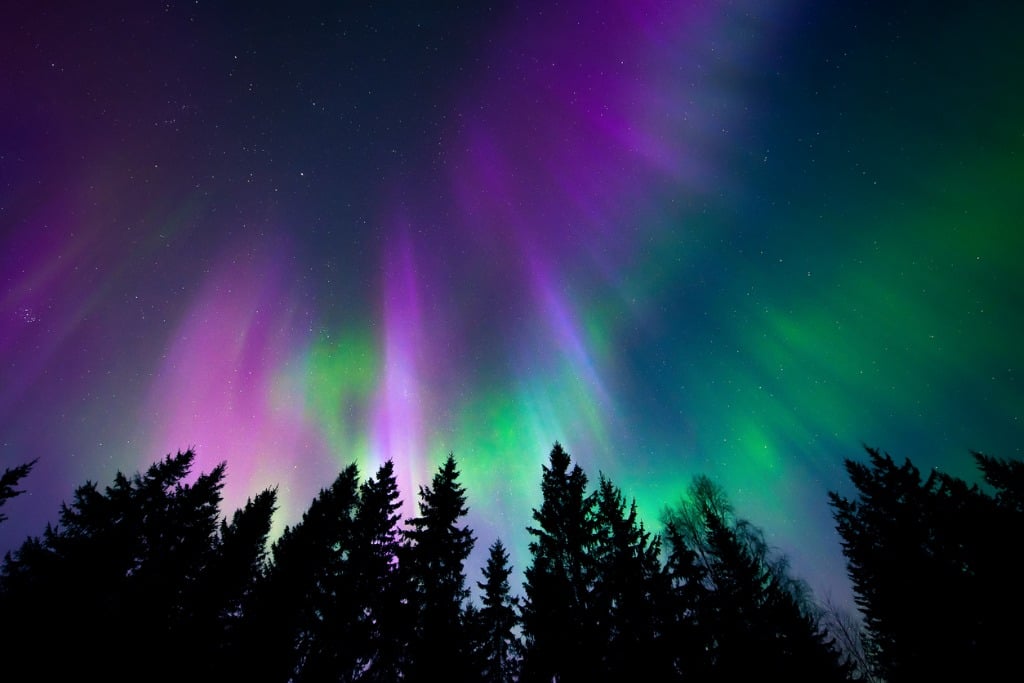
photo byFrozenmostvia iStock
For example, the most common color of the Aurora is a pale green with yellow undertones. This color is created by oxygen molecules in Earth’s atmosphere, typically at an altitude of 60 miles, but up to 150 miles as well.
Nitrogen molecules are associated with blue and purple Auroras, while red Auroras - the rarest kind - are the result of oxygen molecules at extremely high altitudes of around 200 miles above the surface of the Earth
Get a deeper explanation of what causes the northern lights, and what ancient peoples believed them to be, in the video above by BrainStuff - HowStuffWorks.
Learn More:
When Can You See the Northern Lights?

photo by mantaphoto via iStock
Apart from the obvious necessity of being nighttime, the best time to see the northern lights is in the winter.
Not only are the nights longer in the winter, but clear nights are also in greater abundance, giving you an unobstructed view of the night sky.
The prime time is around midnight local time, as that seems to be the peak of activity for the Aurora. Likewise, Aurora displays are cyclical in nature, and peak with heightened activity roughly every 11 years. This would mean the next “super Aurora” should occur in 2024.
Where to See the Northern Lights
Where are the northern lights? Fortunately, they’re all over the place in the Northern Hemisphere from Canada to Scandinavia, Russia to the continental United States.
But if you want the very best locations to see and photograph them, book a flight to one of the following locations.
Where to See the Northern Lights: Alaska

photo by Elizabeth M. Ruggiero via iStock
Fairbanks, Alaska’s second-largest city, is situated directly beneath an active band of northern lights activity that runs from August through April, which makes it a prime location for viewing the Aurora.
Typically most active between 11:30 pm and 3:30 am, there’s a significant window during which to take in the beauty of the lights, which range from green to yellow to purple.
Where to See the Northern Lights: Pennsylvania
Yes, that Pennsylvania…
More specifically, Cherry Springs State Park offers uber-dark skies far away from the hustle and bustle of cities like Philadelphia.
In fact, the park utilizes special lights that have zero effect on visibility and there are strict regulations about using headlamps, flashlights, and other light sources. For these reasons, the International Dark-Sky Association has designated the park as a Gold Level International Dark Sky Park, the highest possible ranking.
See the northern lights in action at Cherry Springs State Park in the video above by Gary Honis.
Where to See the Northern Lights: Canada

photo by NatashaWheatley via iStock
Head to the Yukon between August and the middle of April, and you’ll get to see spectacular shows of northern lights that swirl around the sky.
The lights are usually yellow or green (or a combination thereof), though other colors are present less frequently.
The Yukon is also home to the Northern Lights Centre, where you can learn about the scientific processes that cause the lights as well as the legends that peoples of the past developed to explain what the northern lights meant.

photo by Cheryl Ramalho via iStock
Another Canadian hot-spot for the northern lights is Churchill, a town in Manitoba that’s equally as well-known for its polar bear population.
With up to 300 nights of Aurora activity a year, it’s one of the best locations to get a glimpse of the lights.
Where to See the Northern Lights: Iceland

photo by ansonmiao via iStock
North, south, east, or west, Iceland offers epic locations for viewing and photographing the northern lights.
With shades of purple, pink, and green jetting across the sky, the combination of optimal nighttime viewing conditions and the rugged and beautiful landscape make this island country a top destination for northern lights photography.
If you’re wondering when you can see the northern lights in Iceland, the answer is about three-fourths of the year - from August to the first part of May.
Where to See the Northern Lights: Norway

photo by BublikPolina via iStock
Though you can view the northern lights from virtually anywhere in Norway, one of the prime viewing locations is Svalbard, a small group of islands roughly halfway between Norway’s northern coast and Greenland.
During the winter, Svalbard is in perpetual darkness because of its extreme northern location. That means you can view the northern lights day or night!

photo by mantaphoto via iStock
Another spot to check out in Norway is the city of Tromsø, which is right underneath an oval of lights in Northern Norway. Surrounded by fjords and mountains, it’s a breathtaking setting by itself, but under the glow of the northern lights, it’s even more spectacular.
Where to See the Northern Lights: Finland

photo by mantaphoto via iStock
Like Norway, Finland offers excellent viewing of the northern lights from virtually every corner of the country.
In fact, Finland experiences about 200 nights of the Aurora per year, so there’s no lack of time to grab your gear and snap some photos of the lights. The rural nature of much of Finland also means there’s an abundance of areas with little to no light pollution.
Where to See the Northern Lights: Sweden

photo by Oksana_Gracheva via iStock
Of course, Sweden, like the other Scandanavian countries on this list, offers excellent Aurora viewing.
Of particular interest should be the Aurora Sky Station, location in Abisko. With very little light pollution and clear, crisp skies, you can get epic views of the lights all night long from October through March.
Where to See the Northern Lights: Greenland

photo by RubyRascal via iStock
Greenland is an ideal location for photographing the northern lights because of its minimal light pollution. Likewise, visibility is often crystal clear for perfect views of the sky.
If you visit between September and April, you’re all but guaranteed to see the lights along with the Milky Way for a double-dip of celestial awesomeness!
Where to See the Northern Lights: Scotland

photo by Marc_Hilton via iStock
Though Scotland likely didn’t come to mind when you were searching for “where are the northern lights,” it’s a fantastic viewing spot, particularly in the far north, light the Shetland Islands.
Here, the northern lights are called Mirrie Dancers, and can be seen throughout the fall and winter months.
With that, you have some of the best places on earth to see the northern lights. Make plans to travel to one of these excellent locations this winter!
We Recommend
Types of Photography: 19 Popular Photography Genres You Can Try
 Photo by Christian Holzinger on Unsplash
When you're just starting out in photography, there can be many things that might overwhelm you.
Learning to use your camera is certainly one of them. Developing your creative eye is another. But with practice, these things become second-nature.
A different type of struggle that some photographers experience is simply trying to figure out what kind of photographer they want to be.
Is landscape photography the best type of photography? Or is it portraits? What about macro or street photography?
The answer is that there is no "best" genre of photography. Instead, you have to figure out which popular photography genre is the best fit for you.
Below, I've outlined 19 different types of photography to help you quickly explore which of these genres might be most appealing.
Table of Contents
- Landscape Photography
- Weather Photography
- Astrophotography
- Underwater Photography
- Wildlife Photography
- Aerial Photography
- Travel Photography
- Architecture Photography
- Real Estate Photography
- Street Photography
- Portrait Photography
- Wedding Photography
- Event Photography
- Fashion Photography
- Newborn Photography
- Documentary Photography
- Still Life Photography
- Macro Photography
- Pet Photography
TYPES OF PHOTOGRAPHY
Landscape Photography

One of the most popular types of photography styles, landscape photography is all about capturing the beauty of nature.
Though many landscape photos are wide-angle, sweeping shots of a landscape, there are plenty of opportunities for vertical landscape photography and even photos of very small vignettes in a larger landscape that highlight the details of the natural environment.
Landscape photography is also perhaps the most accessible as well. All you have to do to find a subject is head outside!
Explore our collection of landscape photography tips.
Recommended Landscape Photography Books:
- The Landscape Photography Book: The Step-by-Step Techniques You Need to Capture Breathtaking Landscape Photos Like the Pros
- National Geographic Greatest Landscapes: Stunning Photographs That Inspire and Astonish
- The Art, Science, and Craft of Great Landscape Photography
Weather Photography

I like to think of weather photography as landscape photography on steroids.
Instead of focusing on the serenity of nature, weather photography puts extreme weather events front and center.
Though most people think of tornadoes and thunderstorms when they think of this type of photography, it also includes blizzards, sandstorms, rainbows, and hurricanes, just to name a few.
Needless to say, photographing weather can be very dangerous, but if you play your cards right, you can get spectacular photos and keep yourself safe at the same time.
Astrophotography

The misconception about astrophotography is that you have to have a mountain of expensive gear to get high-quality shots. That's just not the case!
Instead, you can take epic photos of the night sky with essential astrophotography gear, like a DSLR or mirrorless camera, a fast lens, a tripod, and a remote shutter release.
Common problems with this type of photography include getting stars nice and sharp and understanding how to compose astro photos in a way that's compelling. It helps to have mad post-processing skills too.
But, as you can see above, when it all comes together, there are opportunities to create truly incredible photos.
Use these astrophotography tutorials to get started!
Underwater Photography

Of course, not all landscapes involve mountains, rivers, foul weather, or stars - there's a whole other world to explore with your camera underwater.
Granted, you'll need some additional gear to make underwater photography a possibility, but the reward waiting for you beneath the surface of the water can be epic.
So, grab a GoPro and a snorkel and see what you can find just under the water's surface!
Wildlife Photography

If you ask me, wildlife photography is one of the most difficult photography types to master.
That's because more than just about any other kind of photography, photographing wildlife requires an abundance of patience, and that is not something I have.
Though you might have to wait for hours and hours in a blind for that perfect moment, the payoff can be truly magical and breathtaking photos of animals.
Fortunately, to get started in wildlife photography, you don't have to trek to some distant mountaintop. Start practicing in your backyard with your dog or the local park with birds to develop your skills.
Recommended Wildlife Photography Books:
- Wildlife Photography: An Expert Guide
- Wildlife Photography: Proven Techniques for Capturing Stunning Digital Images
Aerial Photography

It seems like not that long ago, the types of photography shots that were available to most of us were those found while standing on the ground (unless you had a plane or helicopter handy).
But, with the development of drones in recent years, now any of us can take to the skies and get started in aerial photography.
For me, this type of photography involves photographing landscapes from a much different perspective than I normally do.
But aerial photography isn't limited to landscapes. Instead, you can use drones to take killer photos of anything from wildlife to weddings, real estate to sports.
Travel Photography

One look at Instagram and you'll quickly realize that one of the most popular photography types is travel photography.
Travel photography encompasses all sorts of other types of photography - landscapes, portraits, wildlife, and street photography among them - and as such, it has broad appeal.
The beauty of this kind of photography is that it helps showcase different places and peoples and helps us all feel a little more connected to one another in this big, beautiful world. It's not all that difficult to get started in travel photography, either.
Besides, who wouldn't like to travel the world taking photos? Talk about one of the most ideal photography careers!
Architecture Photography

I like to think of architecture photography as urban landscape photography. By that, I mean that instead of photographing natural elements, you're capturing the beauty of manmade structures and exploring how they've changed the urban landscape.
Though I enjoy a good shot of a city's skyline, there's something even more compelling about the detail-oriented shots of buildings.
Whether it's a beautiful arch or a gargoyle perched on high, there are plenty of opportunities to accentuate the beauty of humankind's architectural wonders.
Real Estate Photography

There are many types of photography jobs that one can pursue, including real estate photography.
Obviously, the purpose of real estate photography is to make residential and commercial properties as appealing as possible.
This involves everything from perfecting the staging of the property to finding the right angles to highlight interesting features or architecture.
Fortunately, there isn't an excessive amount of gear required for photographing real estate - in some instances, you might just need your smartphone!
Get all the real estate photography tips you need to kickstart your career photographing properties!
Recommended Real Estate Photography Books:
- The Business of Real Estate Photography: A Comprehensive Guide to Starting your own Real Estate Photography Business
- Photographing Real Estate Interiors and Architecture: A Comprehensive Guide to Equipment, Technique and Workflow for Real Estate Photography
Street Photography

Much like I think of architecture photography as urban landscape photography, I think of street photography as being urban portrait photography.
The whole point of street photography is to portray what life is like in the city. Often, it's done with quick snapshots without the subject knowing that they've been photographed.
The challenge with street photography is to turn simple, everyday scenes into something meaningful and beautiful. That is, you have to concentrate on how the composition, framing, lighting and so forth help you tell a compelling story about the people in your photos.
Portrait Photography

Even taking selfies out of the equation, portraiture is likely the most popular photography niche in the world.
But portrait photography is much more than simply pointing your camera at someone and taking a photo.
Instead, portraiture is all about telling the story of the person being photographed and highlighting what makes them unique.
But there are many more types of portrait photography than solo portraits, including family portraiture, fashion photography, professional headshots, graduation photos, and even sports photography as well.
Regardless of the type, for the best portraits, you have to master the camera settings for portrait photography in addition to learning the types of lighting in portrait photography.
Discover more ways to improve your portraits with our collection of portrait photography tips.
Recommended Portrait Lighting Books:
- Picture Perfect Lighting: An Innovative Lighting System for Photographing People
- The Dramatic Portrait: The Art of Crafting Light and Shadow
- Portrait Photography: From Snapshots to Great Shots
Wedding Photography

Getting married is a big deal, and so is being hired to photograph that event. Needless to say, no matter the type of wedding photography, wedding photographers have an immense responsibility, and that makes this kind of photography among the most stressful.
But being a wedding photographer isn't just about having the right skill set behind the camera. Instead, wedding photographers must be storytellers, problem solvers, and have tremendous people skills.
Perhaps the most difficult aspect of wedding photography is finding ways to get practice so you can minimize your wedding photography mistakes. Working as a second shooter is a prime option for learning the ropes as it takes some of the pressure off of you while giving you an opportunity to learn from a more seasoned wedding photographer.
Event Photography

From concerts to birthday parties, corporate events to the county fair, event photography encompasses a huge range of subjects.
This might include portraits of the people at the event, the food they're eating, the event space in which they're gathered, and so on.
In other words, event photography is a fast-paced and challenging genre of photography that is not for the faint of heart. You have to be ready for anything and have an array of gear (especially a range of lenses with different focal lengths) if you're to be a successful event photographer.
Ultimately, though, event photography is all about helping the people in attendance relive the event years and years down the road through the photos you create.
Fashion Photography

Fashion photography primarily exists for branding and advertisements, though as photography has become more accessible and social media has risen to prominence, fashion photography is becoming more broad-based.
Whether the purpose of the photo shoot is to create photos for a magazine or to post on Instagram, the point of fashion photography is to highlight clothing, makeup, and other fashion accessories in a way that makes them highly desirable for consumers.
Because of the need to showcase these items, a lot of fashion photos are full-body shots. What's more, fashion photographers must be experts in types of lighting in photography and have excellent portrait posing skills too.
Newborn Photography

Whether you know it as newborn, infant, or baby photography, this genre is perhaps the most rewarding.
Capturing what a newborn is like in the first days after their birth is a huge honor - and a big challenge.
Babies are unpredictable, so photographing them while they sleep is one of the top newborn photography tips to follow.
You'll find that they are sensitive to temperature fluctuations, sensitive to light, and might have accidents that require a diaper and a wardrobe change.
Being prepared for these eventualities is a must, and despite those challenges, the reward at the end of the shoot is well worth the time and effort!
Get easy-to-understand instruction on maternity and newborn photography tips.
Documentary Photography

Along with photojournalists, documentary photographers strive to depict newsworthy events in a way that helps people better understand or connect to the event that's occurring.
The focus of documentary photography is on emotionality - evoking a feeling in the viewer that makes the event more real.
Though war type photography is likely the best-known subgenre of documentary photography, many other events - presidential activities, state gatherings, and national celebrations - might fall under the purview of a documentary photographer. Additionally, many documentary photographers simply seek to capture daily life, history, culture, and so forth.
Still Life Photography

Still life photography is all about creating images of objects.
In many instances, just a single object or a few objects - a bowl of fruit, for example - might serve as the subject of a still life photo.
The key to a successful still life image is having excellent lighting that casts an even light on the subject while also minimizing shadows.
Even though it might not be the most popular type of photography, by focusing on the lighting, you can create an interesting scene out of even the most mundane of subjects - silverware, items on a desk, kids' toys, and so on.
Macro Photography
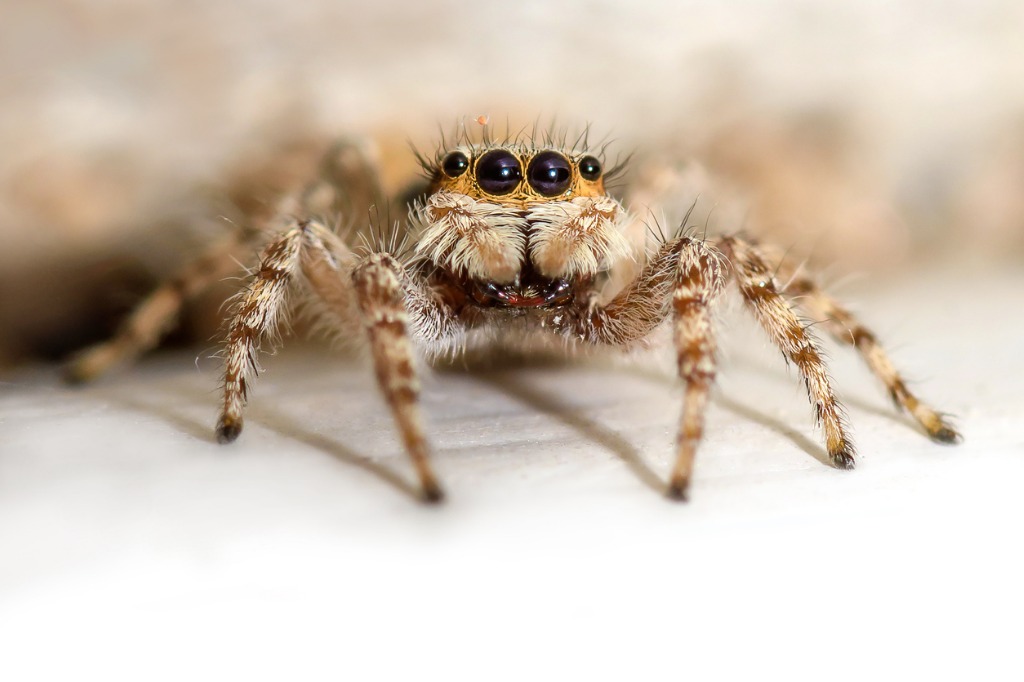
If you've got a keen eye for detail, macro photography might be for you.
Photographing small objects - flowers and insects, for example - is actually a lot easier than it looks, provided you have the right gear and the right approach.
In fact, you can use your smartphone for macro photography and get pretty awesome results!
Like any type of photography, becoming a pro at macro takes time, but if you commit yourself to practicing and learning, you can create some truly breathtaking photos.
Pet Photography

When you're just starting out in photography, your pets are one of the best subjects with which to work.
After all, they're easy to access, they'll listen to your direction (hopefully!), and you can photograph them in the comfort of your own home.
Better still, because many of the same principles of portrait photography apply to pet photography, it's a great primer for flexing your portraiture muscles down the road.
So, put your dog in his favorite costume, grab your camera, and start working on your composition skills, mastering camera settings, and storytelling abilities!
For a humorous look at these and other types of photography, be sure to check out the video above by Antti Karppinen.
In the meantime, use the information I've provided above to think about the type of photography that best suits your interests and skills.
Don't be afraid to test out multiple genres or different types of photography as well!