Canon EOS M Review
The Canon EOS M was a huge deal when it first came out in 2012 because it was Canon’s very first interchangeable lens mirrorless camera. Given the fact that mirrorless cameras were still a relatively new technology at that point, just about every photographer wanted one.
The Canon EOS M was released alongside two lenses for the “EF-M” mount. Of course, since then, Canon has vastly widened this pool of lenses.
Given this information, you may be quick to buy a Canon EOS M in 2021. However, since the Canon EOS M is approaching a decade of life, there are a few less than spectacular Canon EOS M features you should know about before you make that decision.
In this Canon EOS M review, I’m going to give you all of the Canon EOS M specs, I’ll talk a little bit about the Canon EOS M video performance, and then I’ll walk you through some steps you can take to get the absolute best Canon EOS M price.
Canon EOS M Specs
As I already mentioned, this camera was Canon’s first interchangeable lens mirrorless camera. The camera features an 18MP APS-C sensor, which put it above other similar cameras at the time that used Micro Four Thirds sensors.
That sensor is then paired with a Digic 5 processor and an ISO range of 100-12,800. This means that you can expect this camera to perform pretty well in dim lighting (for its age).
The camera also features Full HD video at up to 30p, a 31-point AF system, and a 3” 1.04m-dots touchscreen.
It’s burst mode is less than stellar at 4fps, but photographers needing a fast shot aren’t going to be looking at something this old anyways.
The camera comes with a 230-shot battery life, which isn’t too shabby, and weighs only .66 lbs, making it perfect for a camera you can literally take anywhere.
Other Canon EOS M Specs Include:
- 18MP APS-C sensor
- Digic 5 processor
- ISO range of 100-12,800
- Full HD video capabilities at up to 30p
- 31-point AF system
- 3” 1.04m-dot touchscreen LCD
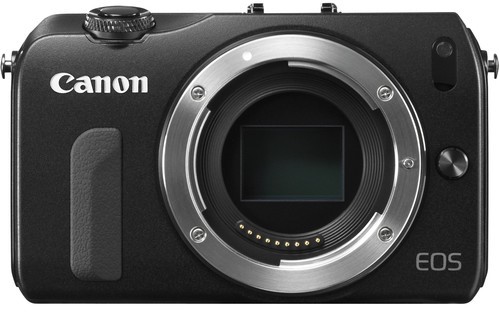
- Canon EF-M lens mount
- 4fps burst mode
- .66 lbs
- 230-shot battery life
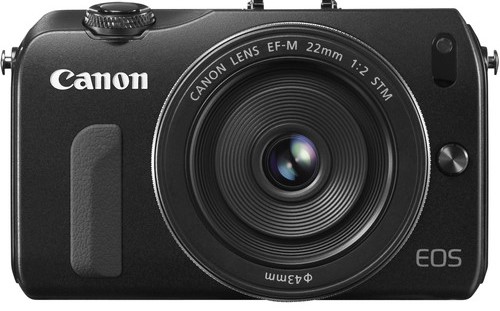
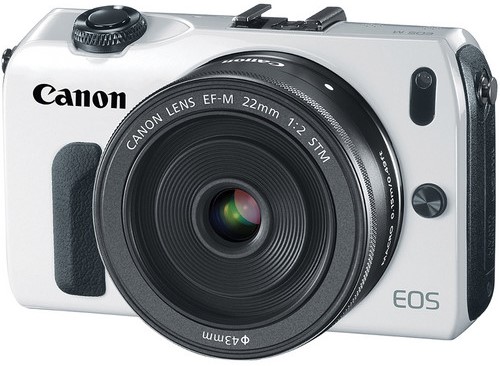
Canon EOS M Body & Design

The Canon EOS M design was built with the mirrorless crowd in mind, which means that it is small and perfect for everyday shooting. The camera weighs just .66 lbs and measures 4.3” x 2.6” x 1.3”.
The design is also a little odd, at least by modern standards. For starters, the camera comes in black, but it also comes in white. This makes it look a bit tacky in 2021. Though, the moment it lands in your hands, you know it is well built since it is mostly made of stainless steel and magnesium alloy.
The EF-M 18-55mm kit lens is also built pretty seriously.
Learn More:
Canon EOS M Build & Handling
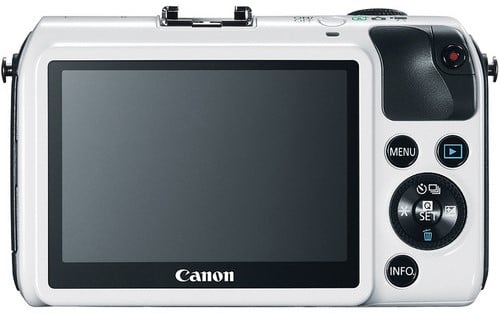
One of my favorite things about the Canon EOS M build is the camera’s touchscreen. It was one of the first cameras in this price range to rely on a capacitive screen. This means that the touchscreen is incredibly responsive. In turn, the camera is really fun to shoot with since you can navigate the main menu quickly even in the middle of a photoshoot.
The Canon EOS M handling is also really fun. Obviously, the fact that the camera is so small lends to an easy all-day shooting experience. But, the camera can also handle itself for longer shoots, since it features a CIPA rating of 230.
If you don’t love navigating a touchscreen, you’ll be happy to know that the camera also features more traditional navigation buttons, like a wheel on the rear.
Canon EOS M Video Performance
Huge shout out to ReviewLamp for the Canon EOS M video test above.
Whenever I cover cameras that are going on a decade old, one of my least favorite aspects to cover is the video performance. While other technology in a camera can get dated, it really feels like videography technology dates so quickly. Unfortunately, the Canon EOS M doesn’t buck this trend.
This camera obviously doesn’t shoot 4K video, since it is so old. It does shoot Full HD video at up to 30p, but this doesn’t really cut it for anyone who is looking to make money off of their video nowadays.
This camera also comes with face detection and object tracking autofocus that works pretty well in movie mode.
The kindest thing I can say about the video performance on this camera is that it is easy. So, if you’re a stills photographer who is looking for a camera that makes taking videos a breeze, you’ve found it. But, if you’re looking for anything fancy, you will need to look elsewhere.
Canon EOS M Price
The Canon EOS M is getting older. This means that the price on used Canon EOS M bodies continues to go down. When the camera was first released, you couldn’t find one for less than $800. However, you can now find one for as little as $200 that is in excellent condition.
Before publishing this article, I looked at used Canon EOS M prices on MPB, which is my favorite used camera retailer. MPB’s Canon EOS M page does have one listed for just $99, but before you get too excited, that version is in faulty condition.

However, MPB also has a number of Canon EOS M bodies that are in either excellent or like new condition for $214 and $224, respectively.
And one of the biggest reasons why I recommend MPB to my photographers is that their rating system is seriously good. If you buy a Canon EOS M in excellent condition on MPB, you can expect it to only show the lightest signs of use. The sensor will be completely free of any scratches, the camera body will be almost pristine, and you may even be able to find one with its original packaging.
For a better list of the reasons why I always recommend MPB, you can read my full MPB Review in the learn more links below.
Learn More:
We Recommend
Getting a Grasp on Your Camera Gear Insurance
You’ve heard it before and we’re here to remind you once more: you should really be insuring your camera gear with camera gear insurance.
Did you know that if more than 50% of your income stems from your photography business then your gear is likely not covered by your homeowners or renters insurance policy? How bummed would you be if someone broke into your home and not only busted a window but also snatched up all your business equipment?
Would you be able to replace everything using your own money? If you have a business, would you be able to go on with your day-to-day operations without the missing gear?
What if, while on a shoot, you drop your favorite camera and shatter the body. Would you be able to replace it out of pocket right there and then?
A lot of the time, the answer to these questions is a deafening, “No.”
The best thing you can do for your photography business is to purchase and carry camera gear coverage for all of your equipment on top of your photography insurance.
You might think camera gear insurance is super complicated, but that is not the case at all!
We’re here to explain camera gear insurance, what it is, what gear is covered, its benefits, and how you can prepare to purchase by calculating the worth of your gear.
Let’s jump in.
What is Camera Gear Insurance?
Camera gear insurance is designed to cover your cameras, lenses, lighting equipment, and other photography gear on and off premises and during transportation. This means that if something were to happen to your gear while on the job or while in transport you could likely file a claim and have the replacement or repair costs covered.
Camera gear insurance is essential in any photography business due to the risks associated with owning very expensive equipment. From traveling freelancers to stationary in-studio photographers, you should always do business with camera gear insurance in hand.
We insure our vehicles, right? Doesn’t your DSLR deserve the same kind of love?
Plus, when you purchase an annual photography insurance policy with the added camera gear endorsement you are covered with many other coverages. These coverages include:
- General liability insurance
- Rented property coverage
- Medical expense coverage
- Optional additional insureds
If you’re looking for clarification on what any of those coverages mean and what they would cover, head over to our post on navigating the world of photography insurance where Full Frame has detailed that all for you.

Is My Gear Covered?
You might be wondering, “What camera gear is covered?”
Full Frame Insurance covers equipment that is used primarily for your business. They may cover:
- Camera bodies
- Lenses
- Hard drives
- Tripods
- Reflectors
- Lighting equipment
- SD Cards
- Filters
- And more!
As long as the photography equipment you are trying to insure is used for business purposes, then Full Frame may insure it.
How Much Camera Gear Coverage Should I Have?
In short, enough.
Full Frame Insurance offers tiered pricing, so there’s an option for everyone. If you’re just starting out in the photography industry and only own a single camera and maybe a few lenses, then you’re obviously going to need a lot less insurance than the individual who has accumulated multiple cameras and an assortment of gear over the years.
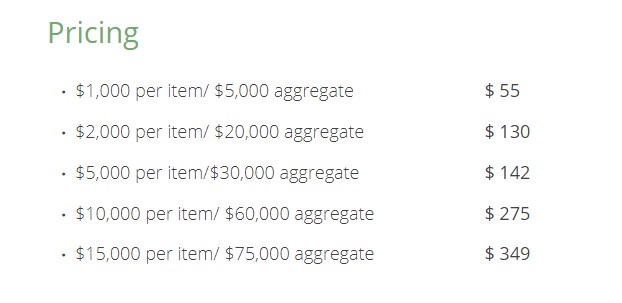
The best part about camera gear insurance is the price—you can’t beat Full Frame! Starting at just $55 on top of an annual insurance policy, you could give yourself peace of mind knowing that if an unfortunate were to happen to your gear then you could be insured for the replacement or repair costs of the item. For one flat fee, you get camera gear insurance for one full year. A $250 deductible applies to all plans.
“Awesome, how do I know which option to go with?” We’re glad you asked!
In order to figure out what tier of insurance to purchase, you should follow these easy steps.
- Collect all of your gear.This includes cameras you use on a shoot, the memory cards you carry, reflectors or lighting stands you own, your camera straps, and your hard drives. If you feel the primary purpose of a piece of equipment is for your business, then you’ll want to insure it.
- Calculate the replacement cost of each piece. This is pretty easy to do. Find out the current price of every piece you’re trying to insure by doing a quick Google search. Or, if you have recently purchased the gear you’d like to insure just add up all the receipts for the equipment you bought.
- Do some math. You’ll want to add up the total worth of your gear. Say you decide that to replace everything you own would cost roughly $9,000, and that’s just the pricier stuff that would be a pain to replace on your own. With that price in mind, you’d want to purchase the second tier insurance option because then each item you insure is covered for up to $2,000 in replacement costs and the max your insurance would payout would be $10,000, the total to replace everything you own.

With Camera Gear Insurance…
- You give yourself peace of mind that if something were to happen to your precious cargo, your business doesn’t take a huge hit.
- You let clients and future clients know that you are a professional who understands the risks of their business.
- You have photography business insurance in place, assuring you that if bodily harm or property damage were to occur then you have coverage in place in the case of a lawsuit.
Don’t leave your camera gear vulnerable while snapping shots. Full Frame Insurance offers photography insurance and camera gear insurance that is framed perfectly for photographers. From portrait photogs to wedding photographers, Full Frame has a plan for everyone.
We Recommend
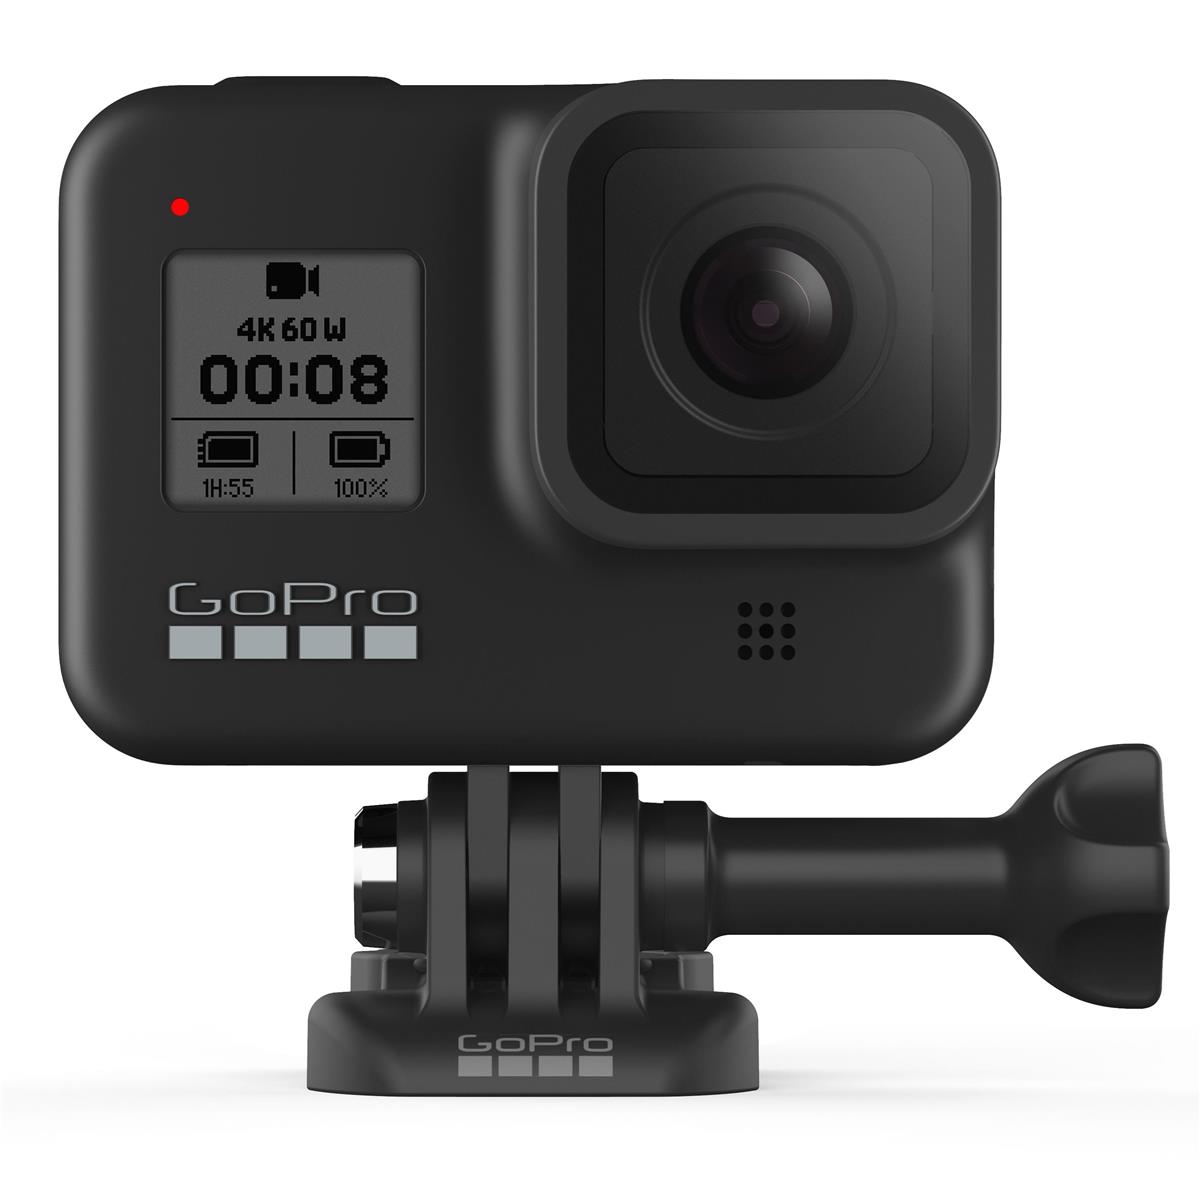
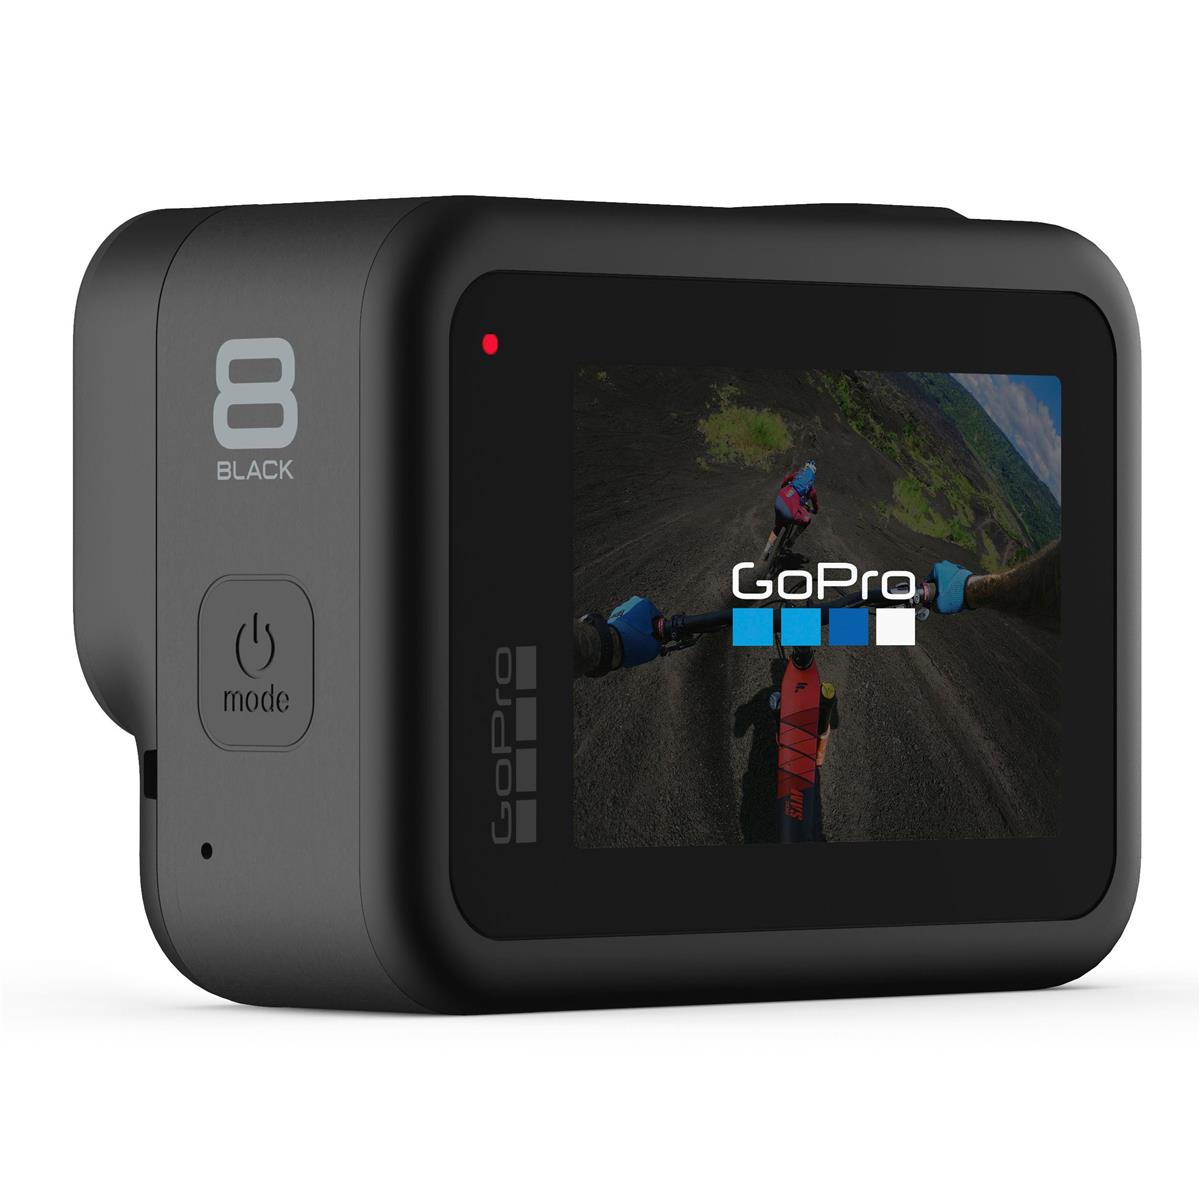
GoPro Hero 8 Released

Well, GoPro fans, today is the day we've been waiting for...
The GoPro Hero 8 was officially released today, and I have to say, it looks absolutely awesome, as you can see in the video below:
And that's without a single major new feature, as previous GoPros have boasted.
If you think about it, the Hero 7 debuted incredible image stabilization. The Hero 5 featured waterproofing. The Hero 4 was the first to have 4K/30fps video.
But the Hero 8 bucks the trend and incorporates a ton of small adjustments, which, together make it a giant improvement over its predecessors.
Editor's Tip: Get the most out of your GoPro Hero 8 with a killer mount that gives you tons of flexibility and ease of use. I use the OctoPad, a weighted, non-slip mount that keeps my GoPro steady and stable, even on the dashboard of my car! You can use it to support lights, your phone, and even a small camera. It's a go-anywhere alternative to mini tripods that you can use to get better shots. Check it out and see for yourself!
What's New in the GoPro Hero 8

Below is a partial list of new or updated features in the Hero 8:
- Built-in mounting pins, which negates the need for a frame to connect the camera to accessories
- New non-removable lens cover that's twice as strong as previous ones
- Even better image stabilization in HyperSmooth 2.0
- Upgraded TimeWarp features with an auto mode that uses sensors to detect motion and adjust the recording speed
- Digital lenses offer multiple field of view settings (SuperView, Linear, Wide, and Narrow)
- Capture presets for popular types of recording with the ability to create and save your own
- LiveBurst photo mode takes 1.5-second images before and after the shutter button is depressed (think Live Photos on iPhones)
- SuperPhoto, GoPro's version of HDR, gets improved image quality
- Face detection, smile detection, and blink detection
- Built-in GPS and motion sensors
- Livestreaming at 1080p
- 4K video footage at 60fps or 1080p/240fps at up to a 100Mbps bitrate
- A collection of mod accessories that make the camera even more usable and user-friendly

It's worth mentioning the HyperSmooth 2.0 is available for all resolutions and frame rates, which was not the case in the Hero 7.
What's more, it now features "boost mode" that gives you even more stabilized shots than the default setting. Boost mode does crop the image a little more, but in some cases it might be a worthy trade-off.
See the GoPro Hero 8 Black in action in the video below by Adorama:
TimeWarp's upgrade is also worth mentioning because the auto feature means you no longer have to guess what speed to record the video.
In the Hero 7, for example, I have to set a speed (i.e., 5x), record some footage, and see how it looks. But with this auto feature, the camera handles speed adjustments.
GoPro also incorporated a "real-time" button that allows you to move from TimeWarp into regular video that results in having a slow-motion sequence amidst a regular-speed video.
One of the most exciting features isn't even about the GoPro itself, but the new accessories available for it.
As mentioned above, GoPro has created a variety of mod accessories that extend the usefulness of the Hero 8.
At this time, these accessories include:
- A 200 lumen light mod
- A display mod with a fold-out screen
- A media mod with a built-in shotgun mic, two cold shoes, a 3.5mm audio jack, and HDMI connectivity

I'm certain more mods are to come, but if you ask me, the best of the bunch is the media mod.
Before, you had to buy tons of different accessories to equal the same functionality as this single mod, so that one in particular will be a popular must-have for GoPro 8 owners.
I'll be testing the GoPro 8 in earnest in the coming weeks, so stay tuned for a comprehensive review.
In the meantime, I think GoPro has made a huge step forward toward making the Hero line much more than an action camera.
Particularly with their new mods, it's now an even better option for vlogging and creating other video content. It's easier to use to boot, which should draw in more people that heretofore have stayed away from GoPro.
Time will tell just how good the Hero 8 is, but first impressions are that it is well worth the $399.99 price tag.

If you're looking for something a little different, GoPro also released the GoPro MAX today, a lightweight action camera the gives you basically three cameras in one body.
Not only can you capture videos and photos, but you can also take 360-degree videos.
It has six microphones built into its body that give you premium 360-degree audio to go with it.

There's a front-facing screen for easy vlogging, a large touchscreen LCD just like on the Hero 8, and is waterproof up to 16 feet.
You'll find the same digital lenses, GPS, motion sensors, HyperSmooth, TimeWarp, and scene detection features as on the Hero 8 as well.
But on the MAX, HyperSmooth takes it up a notch because it uses 180-degree capture as a buffer. The result is MAX HyperSmooth, which gives you even better image stabilization than in the Hero 8. Now that's impressive!

The GoPro MAX has other interesting tools and features as well:
- Horizon leveling, so you can get level, smooth footage whether the camera is upright, upside down, or sideways
- PowerPano, which creates distortion-free 270-degree panoramic photos
- 360-degree video in 5.6K/30fps
- 16.6-megapixel 360-degree photos
So, again, it seems GoPro is trying to position itself not just as an action camera company, but one that offers cameras that can go anywhere, do anything, and appeal to a very broad base of users.
It seems that whichever of these cameras you choose (the MAX is $499.99), you'll have a lot of fun features to play with that will help boost the creativity of your photos and videos.
We Recommend
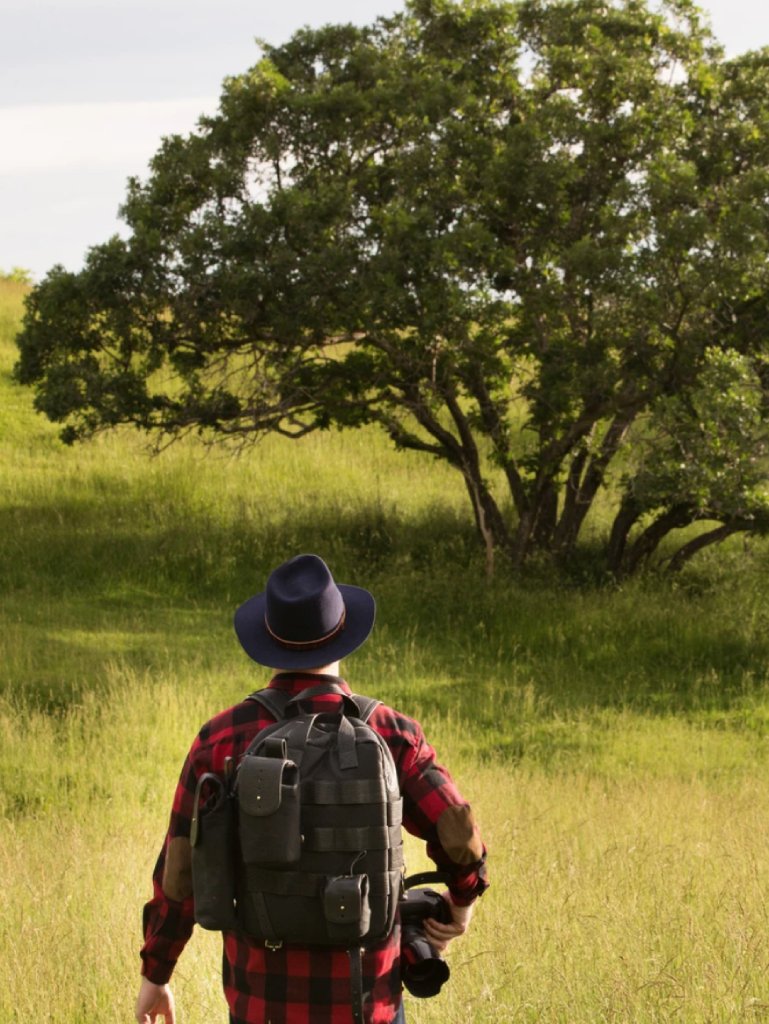
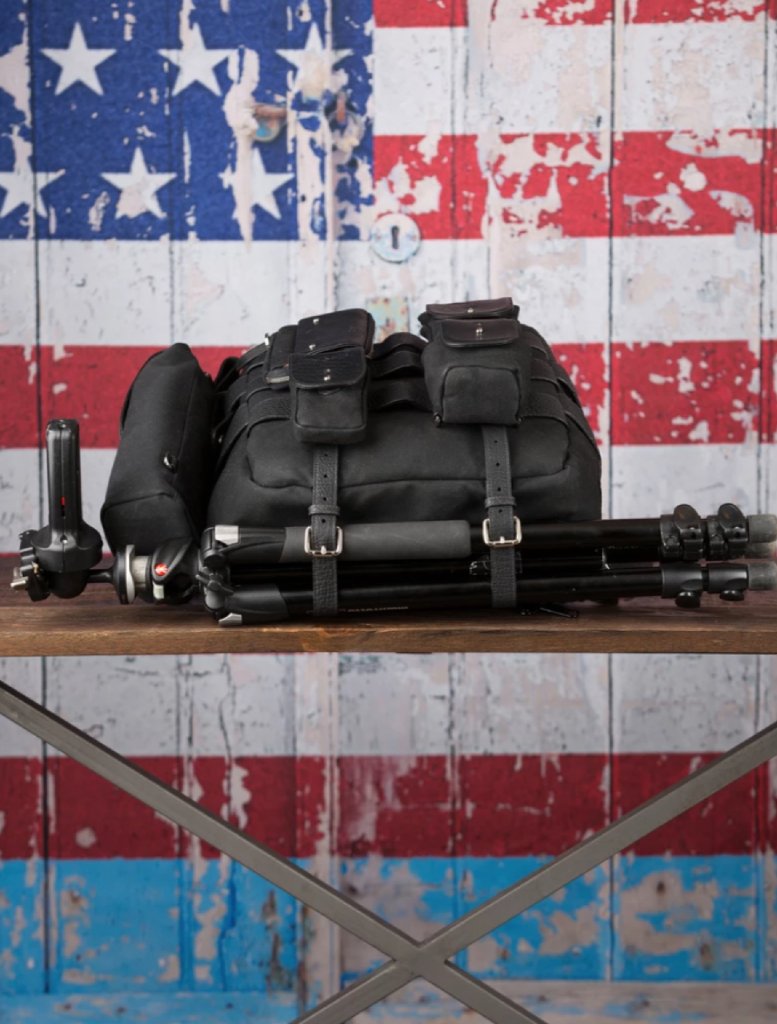
How to Carry a Lot of Camera Gear in Total Comfort
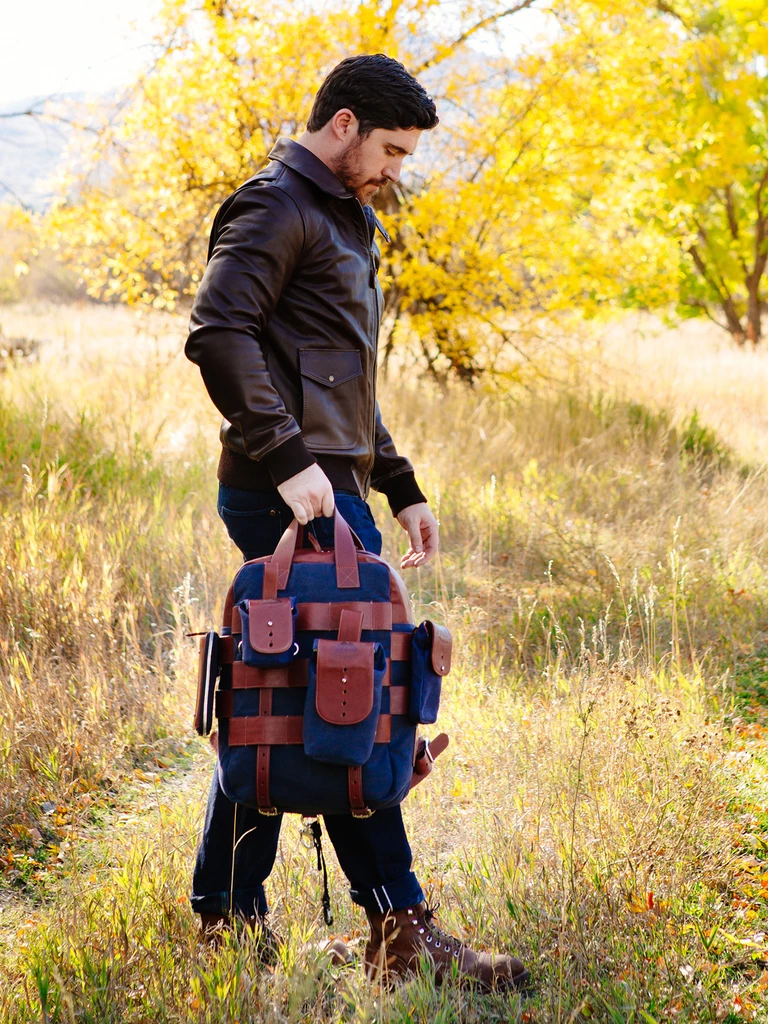
It took me about two months of seriously working as a photographer before I understood just how important choosing your camera gear backpack is.
The first thing to go on my way to becoming a true photographer were my $15 Walmart shoes. The second thing was my $40 camera backpack I bought off of Amazon.
The final thing to go was my kit lens, because buying a replacement lens was most expensive and let’s be honest, I had to be making some real income before I could justify it.
Your comfort is important in your job. Typically, it’s your employer’s job to ensure you have all the equipment you need to perform your best. But, since you’re a photographer, you’re probably running your own business, which means you need to take care of yourself.
So, let’s have a look at one of the best ways you can make your working life more comfortable and functional.
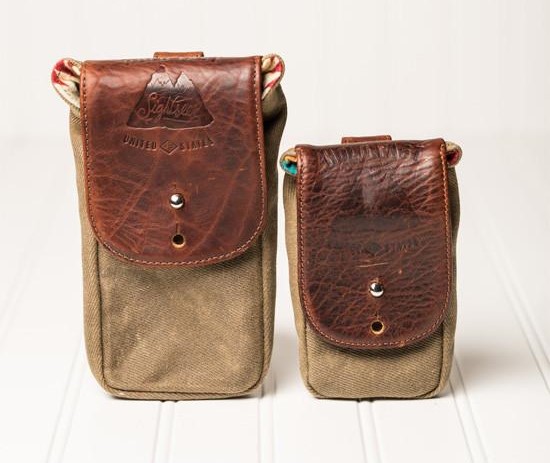
Gear Weighing You Down? Not With This Bag.
Camera gear is heavy. If I had to compare carrying my screaming toddler around all day with carrying all of my camera gear for a shoot, I think I would take the screaming toddler any day.
But, since he isn’t very useful on my shoots, I use the Sightseer backpack to carry my camera gear.
One of the reasons I chose the Sightseer is because it features heavily padded and contoured shoulder pads. There is nothing worse than carrying your camera gear around after an incredibly long shoot where your shoulders got cut into for 14 hours.
The creators behind the Sightseeralso put a high priority on making sure each one of their camera gear backpacks are adjustable to any body type.
So, the shoulder straps are thick enough to displace some of the weight of your camera gear, without being so wide they look odd on a petite person.
This comfortable camera bag also rests precisely on your lower back, to help make the load more comfortable to carry.
Learn More:
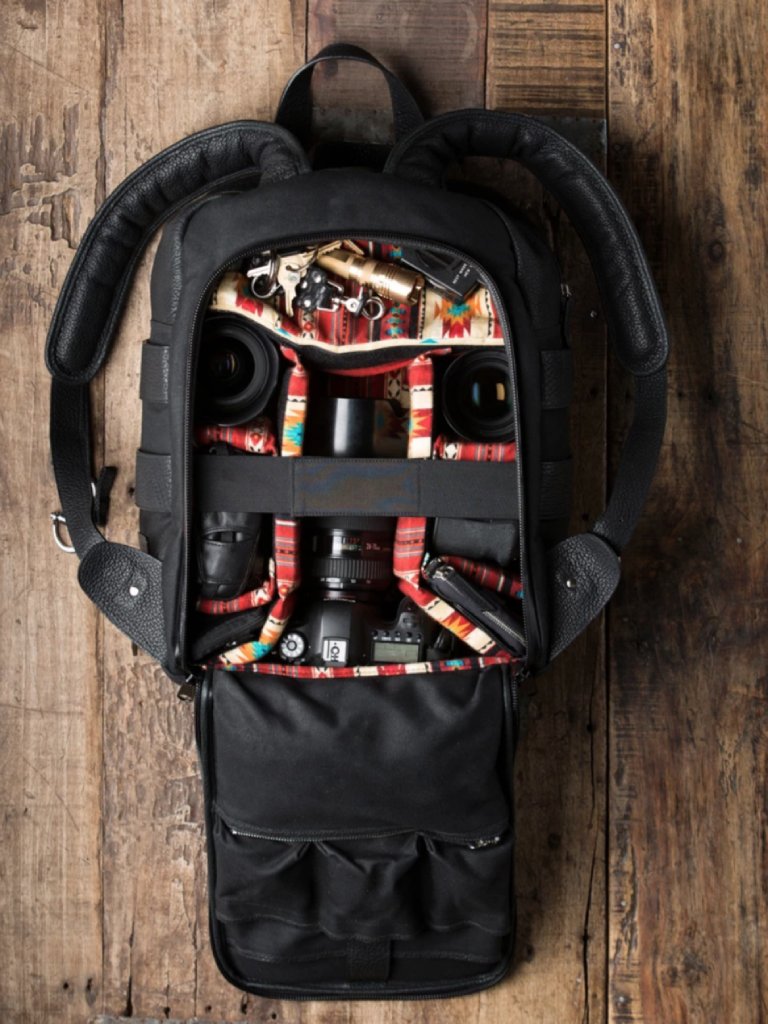
Easy Access to Gear Makes Gear Changes Easy
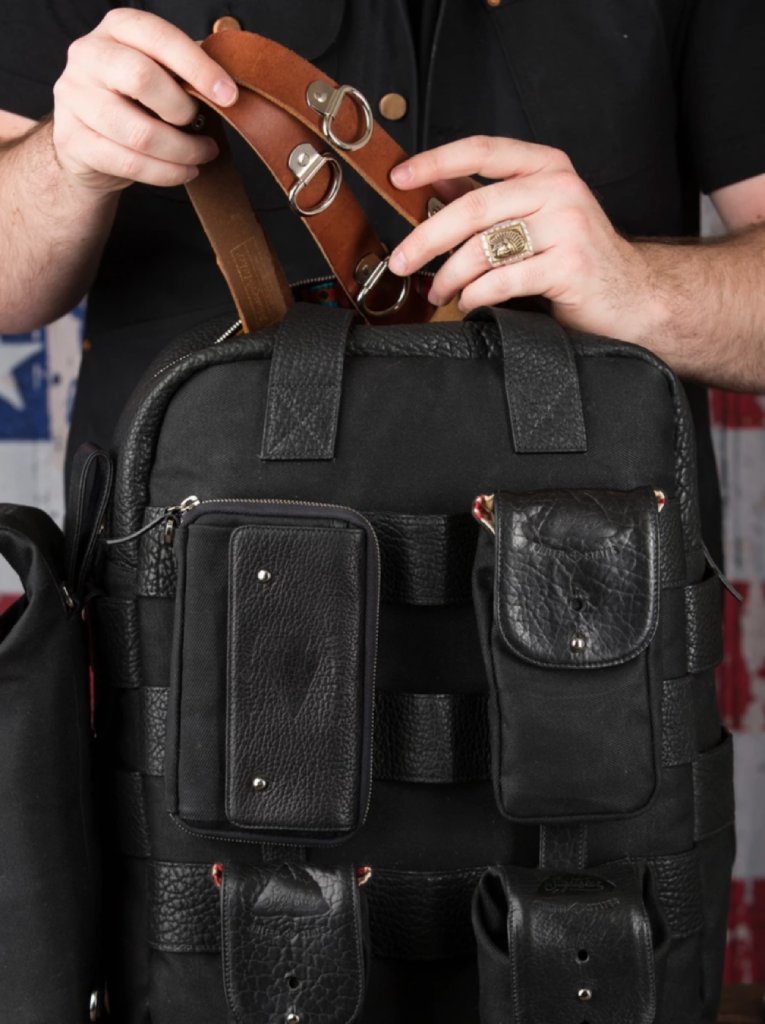
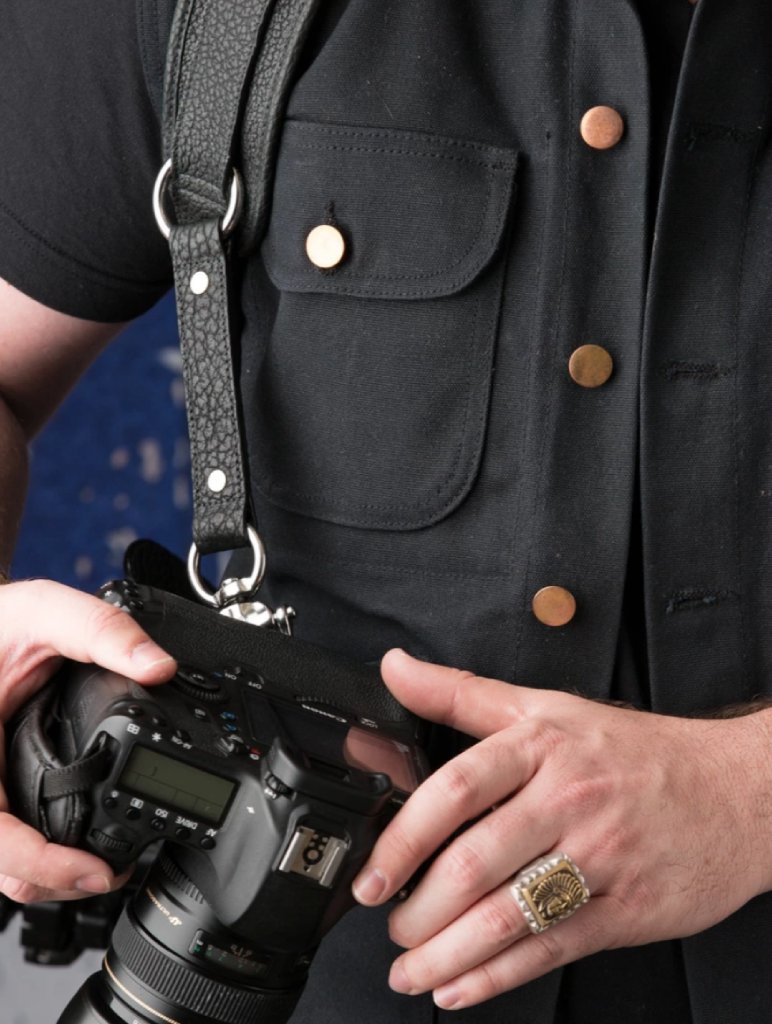
The reason I so firmly believe everyone should own a Holdfast camera gear bag is because of their ease of use.
Each Holdfast product works with the rest of the products in the Holdfast line, so if you can own the Sightseer bag, you can also purchase the Holdfast cell phone pouch, which attaches directly to the Sightseer.
Holdfast also has a lens pouch, which is great if you need more room for storage than the Sightseer provides or if you are in the habit of quickly needing to switch between lenses during shoots.
While all of these pouches will attach to the back of the Sightseer (as pictured above), you can also purchase leather straps that attach to this comfortable camera bag in order to be able to literally pull your camera to your eye at a moment’s notice.
Plus, the way the Sightseer is designed allows you to never need to fully remove the bag in order to get to the camera gear that matters.
With other camera backpacks you might still need to spend some time figuring out how to carry camera gear (i.e., learning how to pack your camera bag in the most convenient way). But with the Sightseer, a lot of this forethought is taken out of the equation because the interior compartment is so well designed with various cubbies for your camera, lenses, flashes, and other gear, as well as smaller pockets for little items like batteries and memory cards.
In other words, this bag has a spot for just about everything!
This Bag Offers Supreme Functionality
I will only recommend “top camera backpacks” if those backpacks can be thrown around, and the Sightseer can.
It’s got a huge handle on top, which makes for easy transfers from car to house to studio to field.
It’s also built out of buffalo hide, which is the strongest animal hide because it goes through the least amount of processing.

Plus, the Sightseer does what every camera gear bag should do and unzips all the way. I get so frustrated when I see photographers recommending a list of the best camera backpacks when I know I’ve used some of them before and they don’t open nearly wide enough.
I want to be able to see the gear I packed. I also don’t want my camera gear to get thrown around inside of my backpack. The Sightseer prevents this with customizable compartments, like those shown above.
I know it took me a few years to find a way for me to carry a ton of gear comfortably, but I hope you can learn from my experience and take a shot on the Sightseer. Trust me, it’s a decision you won’t regret!
Learn More:
Photos in this article are by Brandon Burk
We Recommend
How to Protect Your Camera Gear From the Elements
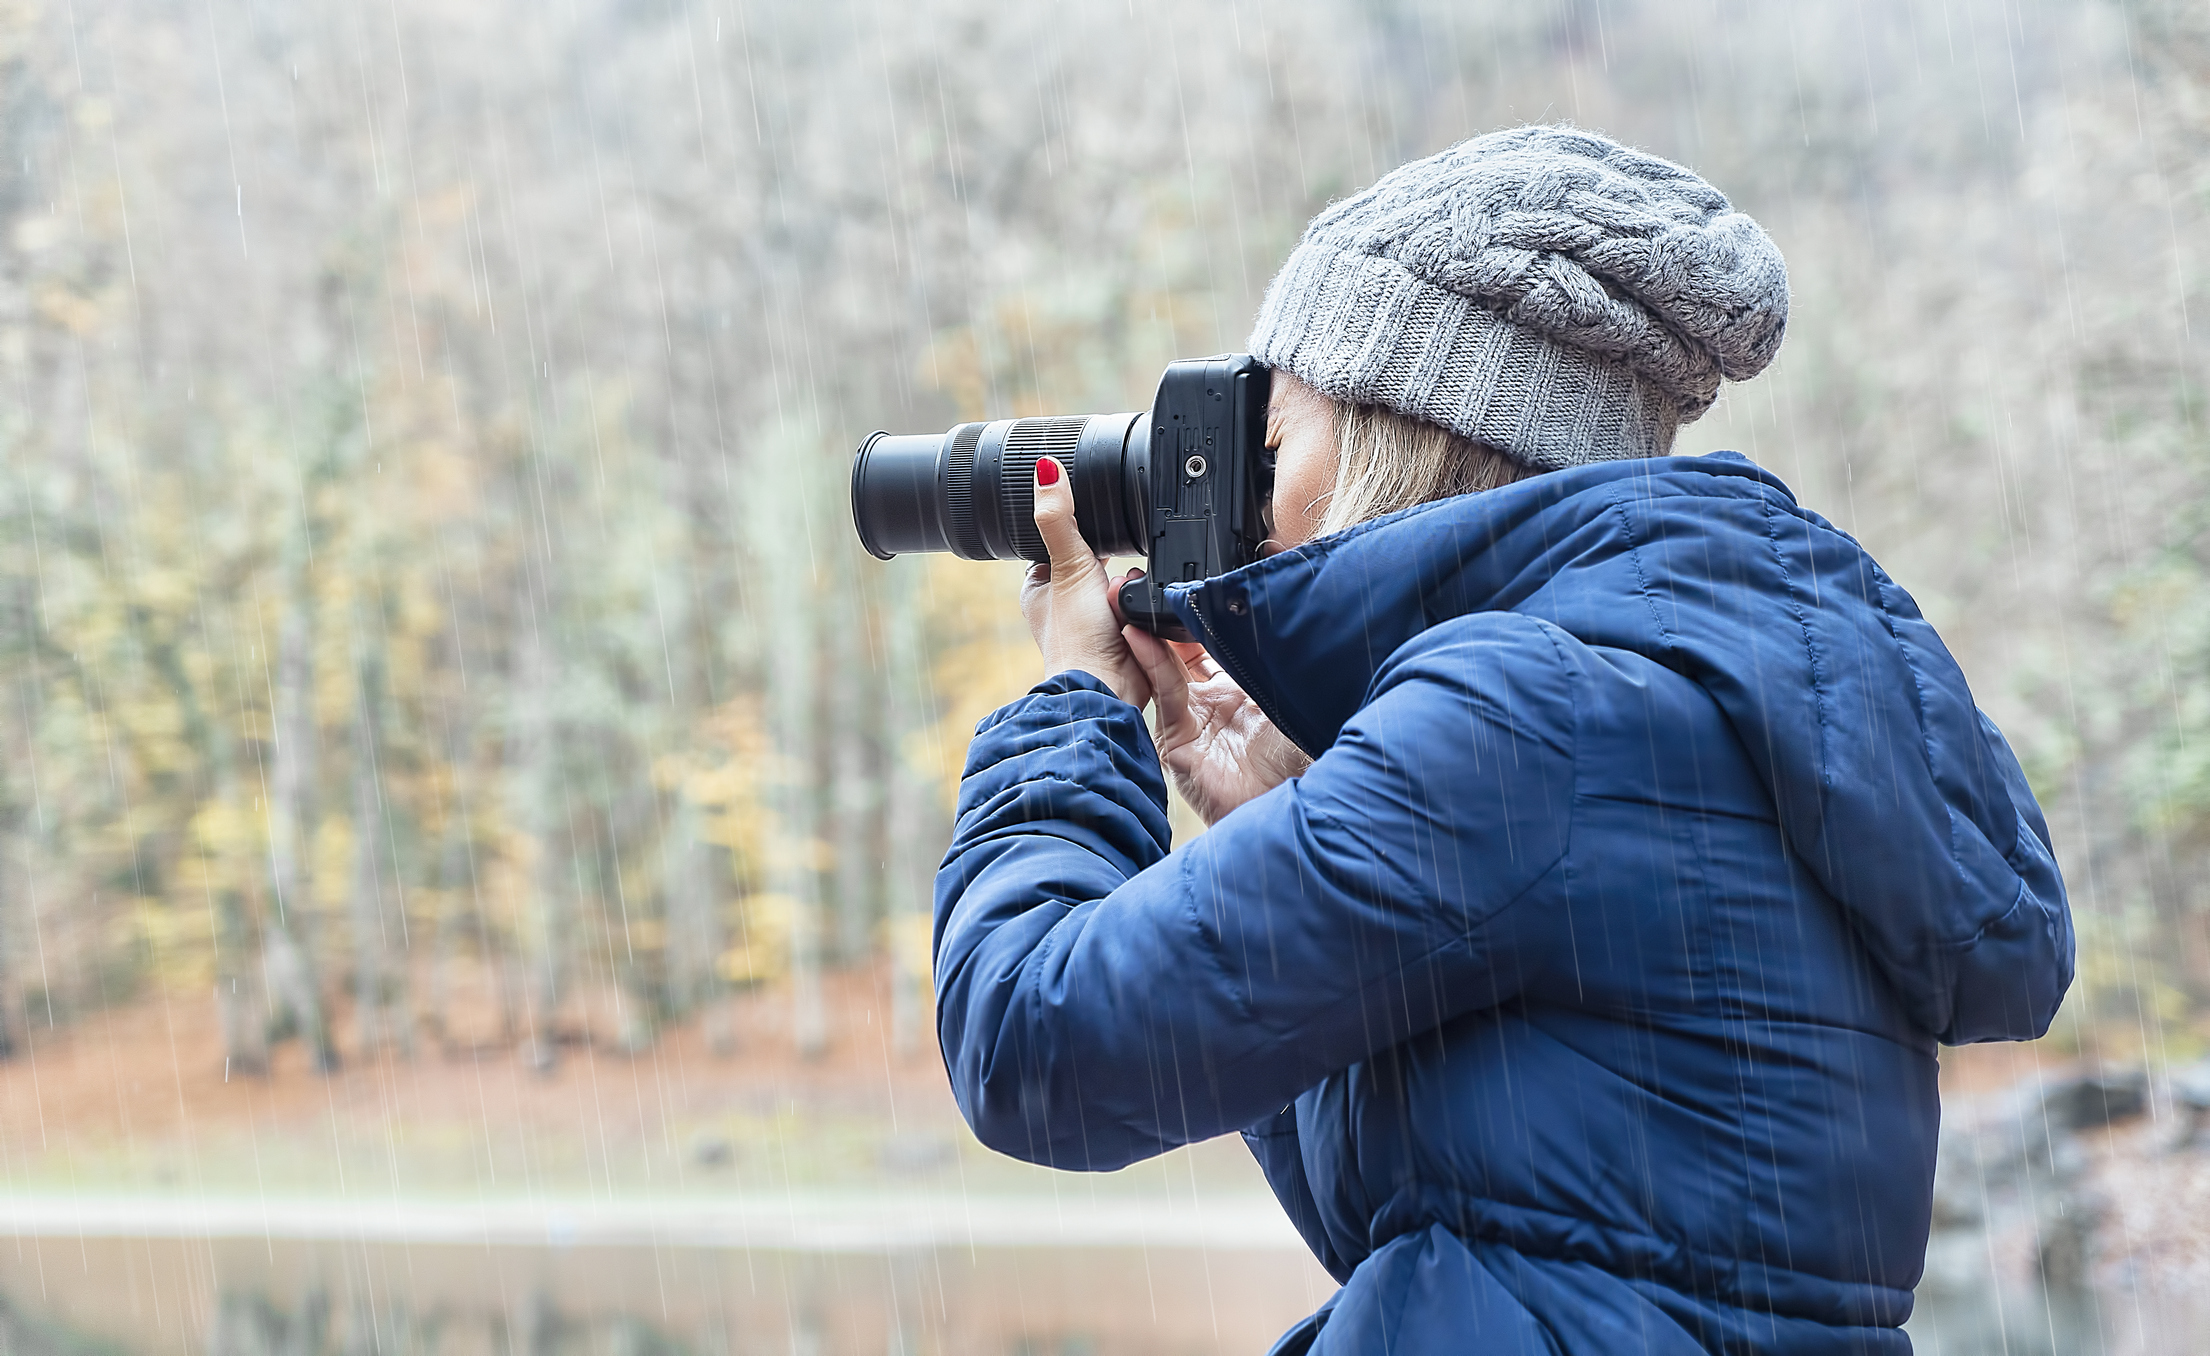
photo byEnes Evren via iStock
There is nothing worse than being unable to shoot because your equipment isn’t good enough for the bad weather you encounter. Learning how to protect your camera gear is an essential part of fixing that problem.
Not only is it frustrating, but it can also be costly depending upon the niche of photography in which you work…
For example, if it starts pouring rain in the middle of an outdoor wedding you’re shooting, but you don’t have the appropriate gear to protect your camera, you might have damaged gear at best and be unable to continue shooting at worst.
Instead, it’s best to take the Boy Scouts motto to heart - “Be prepared.”
Here are some of our best tips for protecting your gear from the elements.
Keep Rain at Bay With a Camera Canopy

This little gadget changed my life when I first encountered it a few month ago, and it kept changing my life as I decided to partner with them on PhotographyTalk.
Camera Canopy is a small company and it shows in the quality of their work. If I were to only have one tip for camera rain protection, it’s to buy yourself a camera canopy.
For one thing, it’s under $90 and has a 30-day warranty. Not only is $90 a relatively small investment for something as important (and expensive) as your camera and lenses, but it’s completely refundable if you don’t love it.

For another, I was done messing with plastic bags the first time I opened one to try and protect my camera from the rain. Traditional methods of camera rain protection are outdated. And until Camera Canopy, the market was flooded with bad “new” products for camera rain protection.
I have yet to ruin a single camera or lens with the Camera Canopy - it simply works like a charm. The peace of mind you get from knowing that the rain won’t have a chance of getting your camera wet is worth the price alone! You can purchase one here.
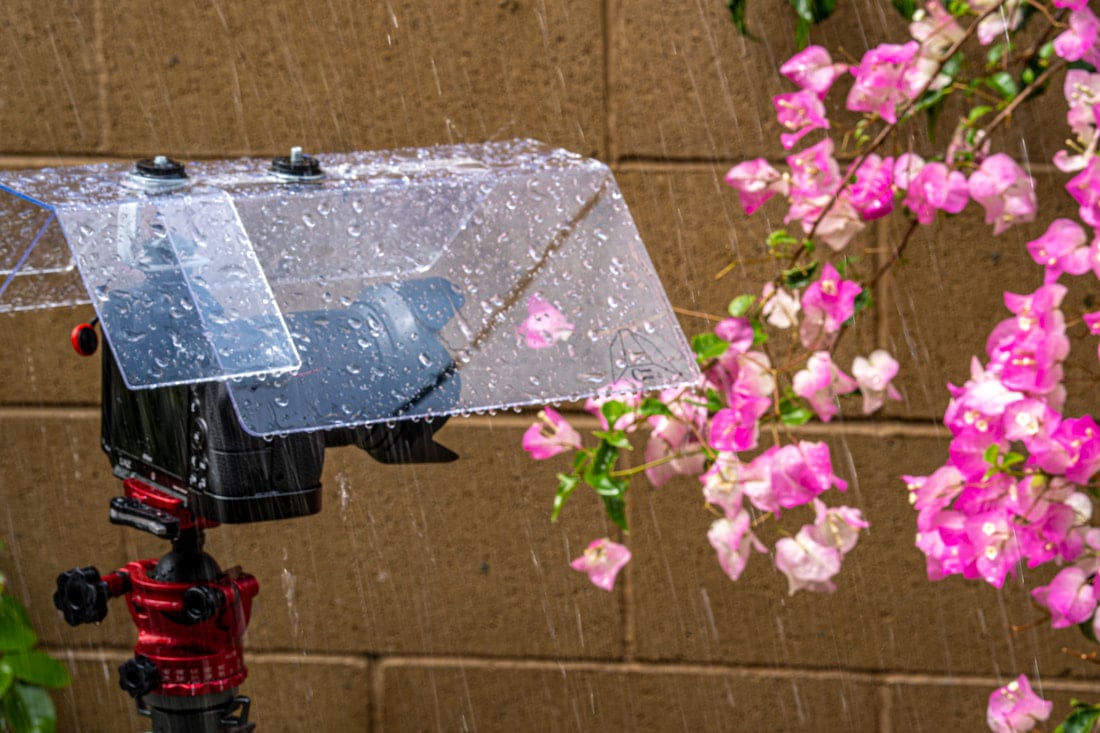
If you have a mirrorless camera or use a camera with a smaller lens, there's a Camera Canopy for you as well!
This smaller, lighterweight version still offers the same great protection from the elements.
I had a chance to test it out while photographing flowers in the rain (shown above), and true to form, it worked every bit as good as the original Camera Canopy!
You can pick up a mirrorless Camera Canopy for under $60.
Carry Your Gear in a Weatherproof Bag
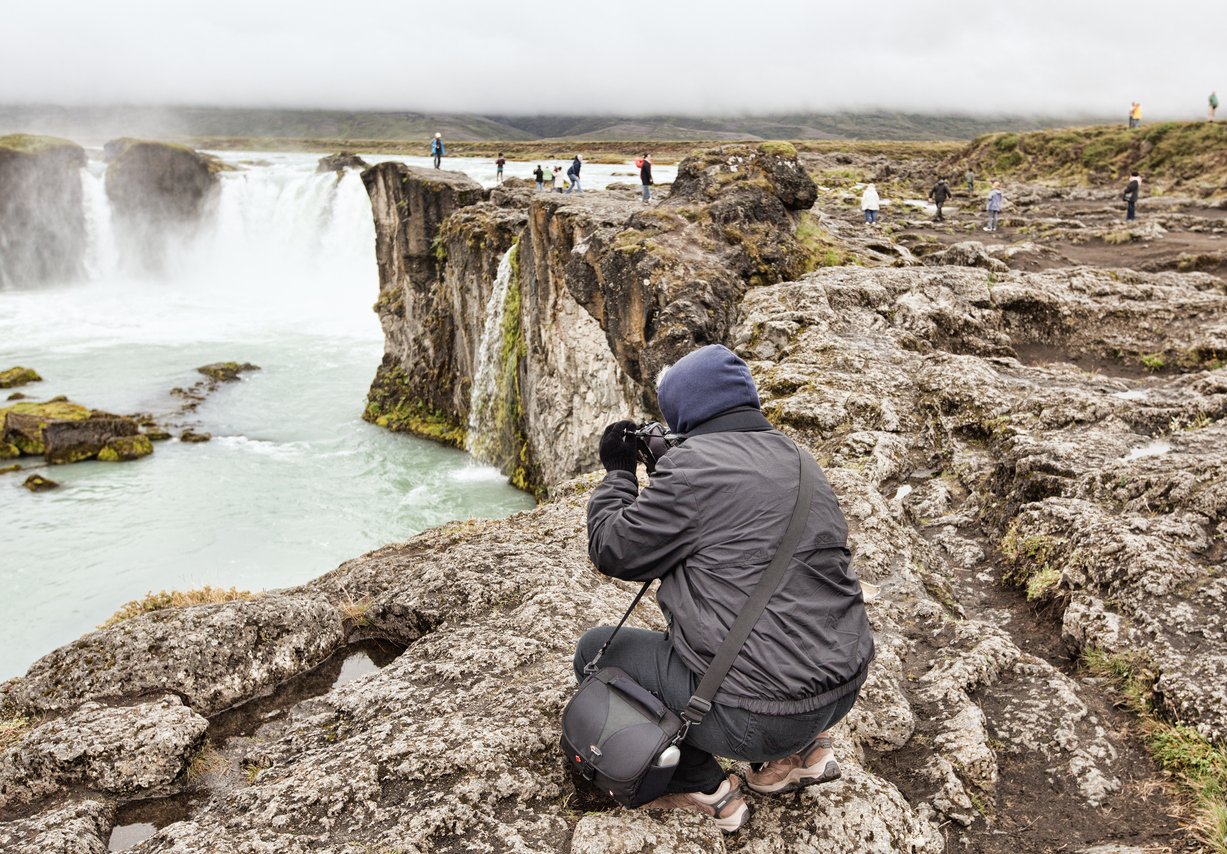
photo by Dougall_Photography via iStock
I don’t know why anyone owns a photography bag or backpack that isn’t weatherproof.
Maybe you live in a desert paradise, but I know that sudden storms have snuck up on me in the past, which is why I invested in a weatherproof bag long ago.
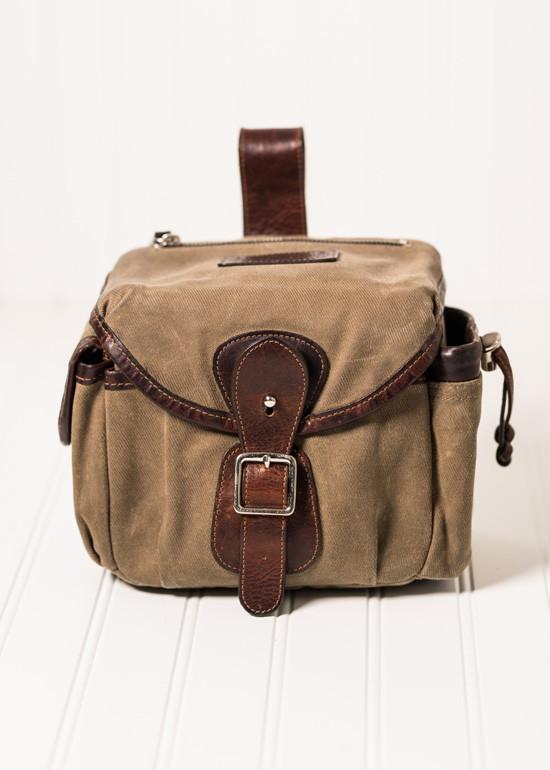
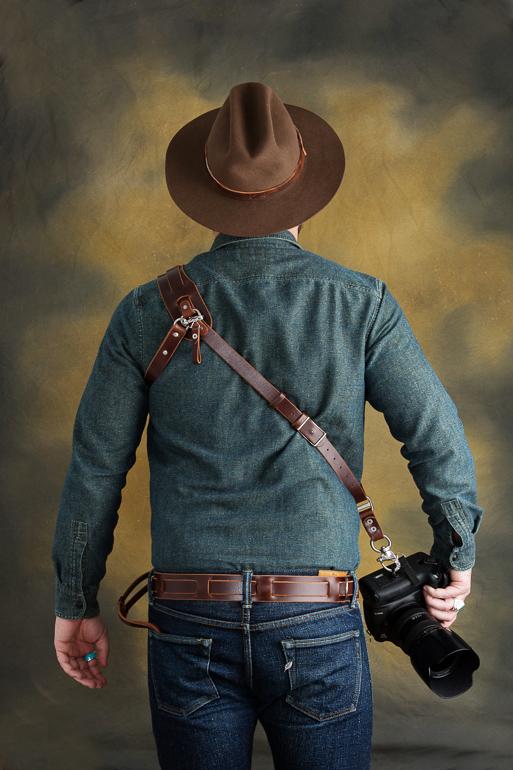
My preparation of choice is Holdfast’s Explorer Lens Pouch.
This bag attaches to my MoneyMaker harness and it does it all while looking fashionable too.
I hate traditional weatherproof bags that are really ugly. It’s hard to shoot a formal event like a wedding with a noisy, plastic-like camera bag that cheapens the look of my formalwear. The Explorer Lens Pouch not only does a great job of protecting my livelihood, but it also makes me look good while doing it!
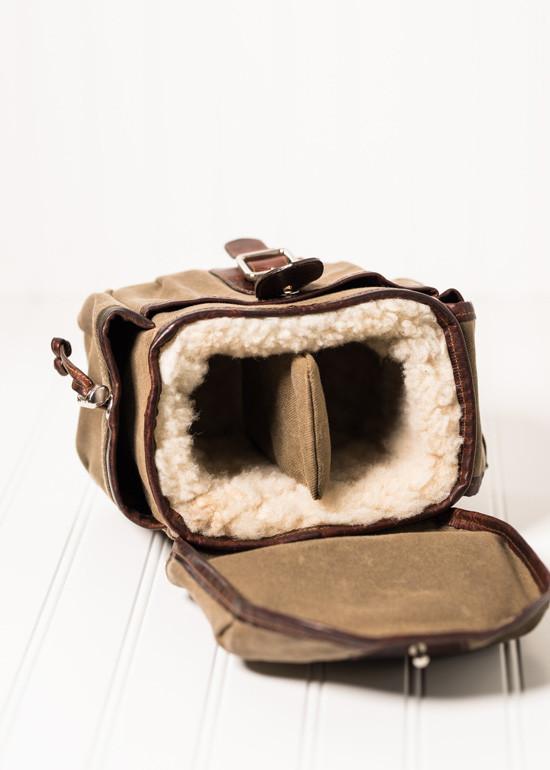
This bag also allows you to keep organized, because it has 4 pockets, a divider, and can carry up to 2 lenses plus a flash. There’s even a bigger option if you need to splurge for more room.
Whatever you do, don’t go on your next shoot without a weatherproofed bag!
Learn More:
Buy Weather-Sealed Gear
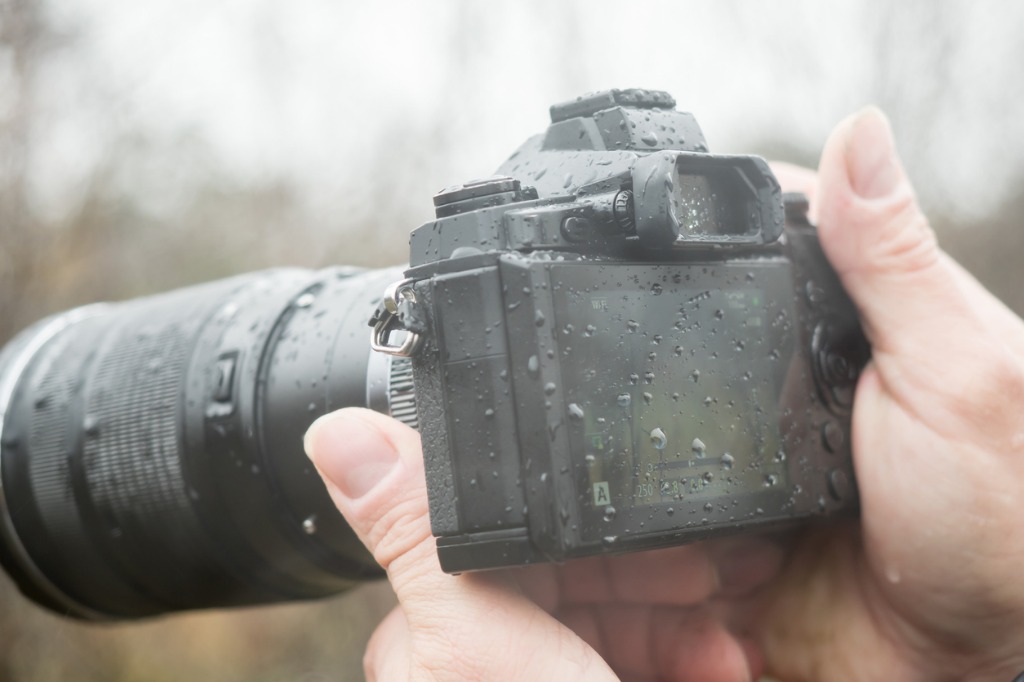
photo bySandra Dombrovsky via iStock
This one seems self-explanatory, and yet almost none of my photographer friends use it because of the initial investment.
Weather-sealed cameras and lenses are a couple hundred extra dollars up front, but if you even think of accidentally ruining one camera or one lens by not properly protecting it from the elements, then that couple extra hundred dollars will seem like a bargain.
Besides, weather-sealed cameras and lenses are often higher-end rigs that have more features and perform better than their bargain-basement counterparts.
Though you’ll spend more money up front, the durability you get out of these high-end cameras and lenses is well worth it - if you do your part and care for them properly, you’ll have a kit that will last you for years and years.
Protect Your Lens During Lens Changes

photo by CasarsaGuru via iStock
This isn’t something taught in photography schools and I don’t understand why it’s always forgotten.
You can’t protect camera from dust without shielding it from the wind.
My quick and easy fix for protecting my camera from dust and rain while changing my lenses is to change my lenses underneath my jacket.
This old-school trick is both cheap, because it doesn’t require you buy any new gear, and effective.
Pair this with getting out of the wind - in your car, behind a tree, whatever you can find - and you’ll have a much better chance of a dust and dirt-free lens change.
Work With the Temperature
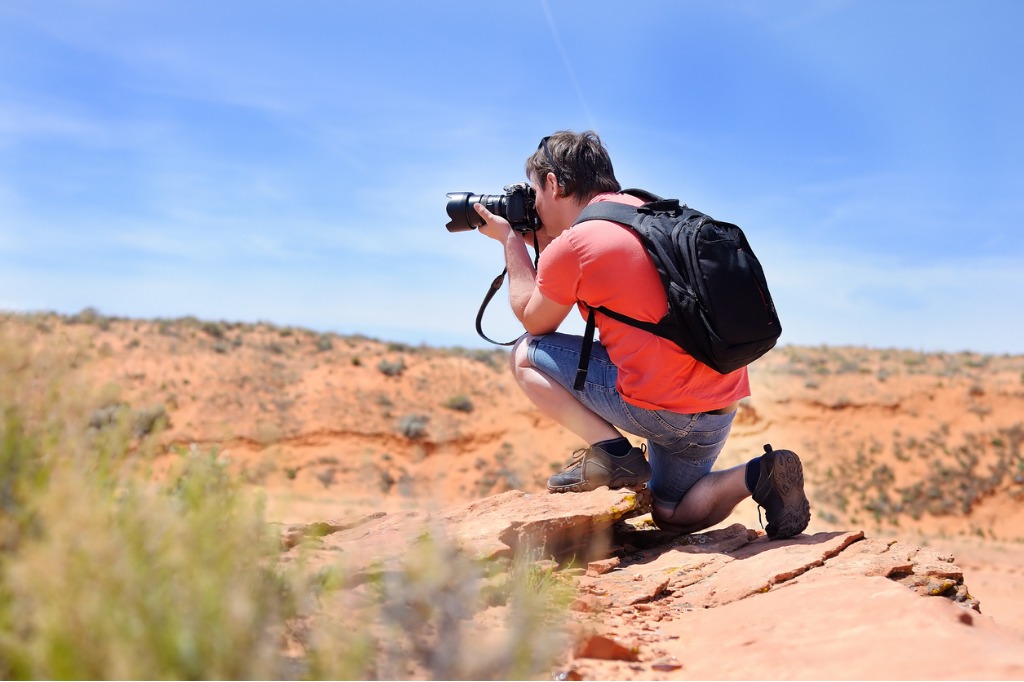
photo by SbytovaMN via iStock
You can’t warm your camera up when it’s cold outside if you’re planning on continuing to shoot with it. Condensation can form and your camera will be rendered useless, perhaps even permanently.
Almost all cameras nowadays are built for extreme weather, and unless you’re shooting in the Arctic, you should be fine to leave it out in the cold and snow.
The same cannot be said of working with the temperature and your camera when it’s hot outside. Whereas most humans can easily exist in temperatures up to 120 degrees for short periods of time, your camera cannot.
If it’s over 100 degrees outside you need to exercise caution shooting for extended periods of time. If it’s over 115 degrees outside you need to protect your camera with a towel or don’t shoot at all. If the external temperature is 115 degrees, the internal temperature on your camera will likely be much higher, and those kind of temps could easily damage the delicate parts inside your camera.
With that, you have a few tips for keeping your gear safe when the weather isn’t ideal. Take these tips to heart, protect your gear, and create gorgeous photos, even if Mother Nature isn’t cooperating.
Learn More:
We Recommend
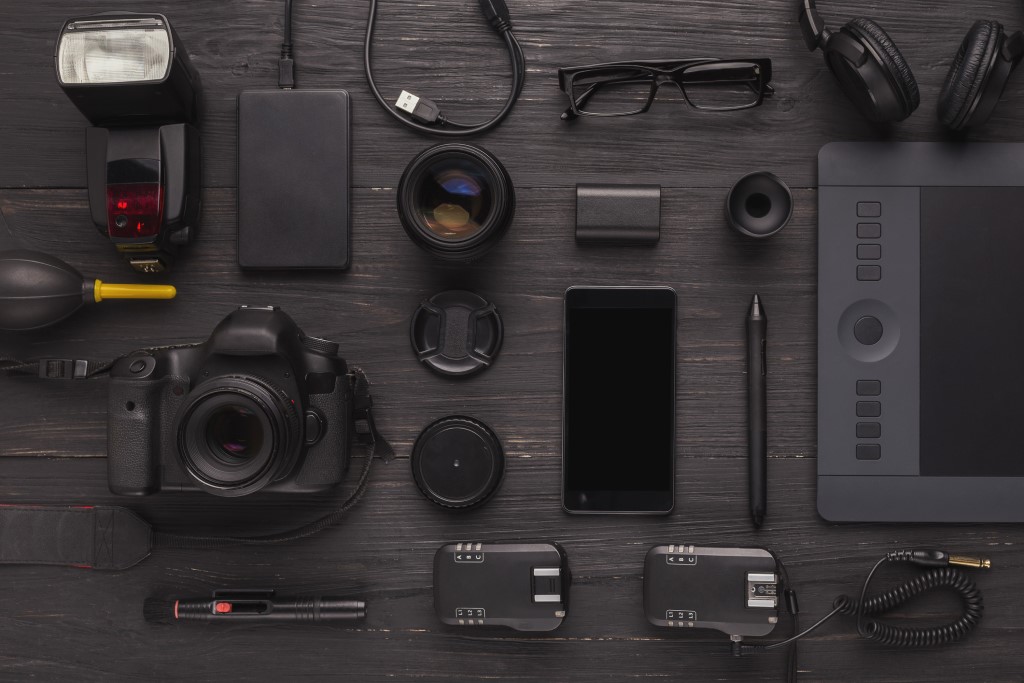
Must-Have Photography Gear That's Often Overlooked
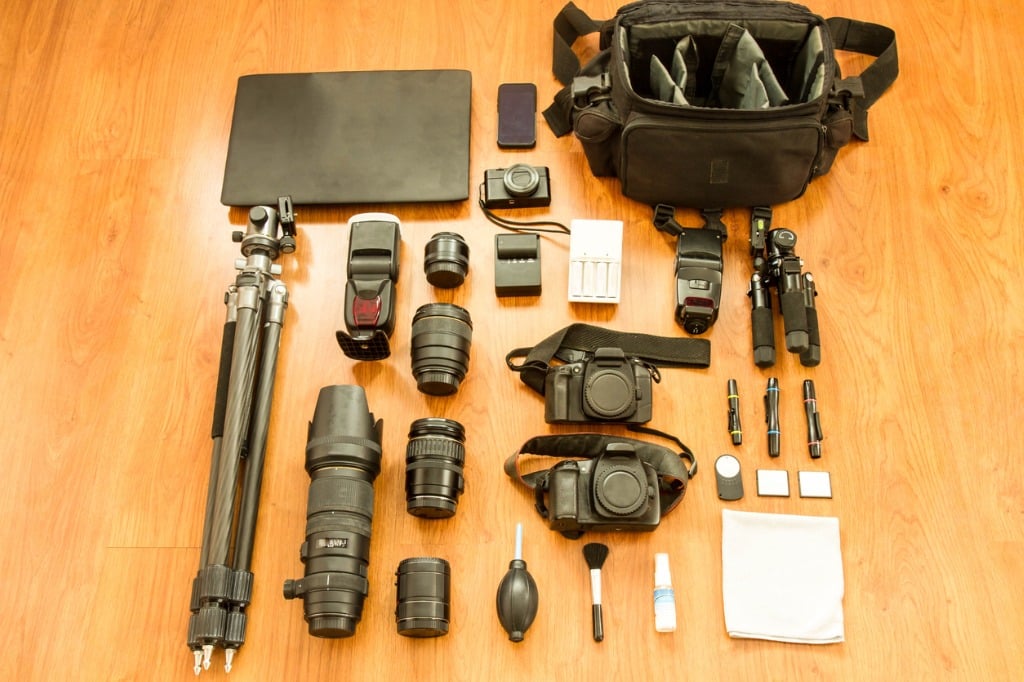
photo byNirut Punshiri via iStock
What photography gear do you consider as must-have photography gear? Ask any dozen professional photographers and you’ll likely get 12 different answers of what’s in their can’t-do-without photography gear list.
We all have our favorite cameras and lenses we prefer for general photography and for special uses. Photography gear that’s often overlooked by photographers wishing to improve their capabilities or perhaps even break into professional photography is often gear that is considered as working in a support category.
A Really Good Tripod
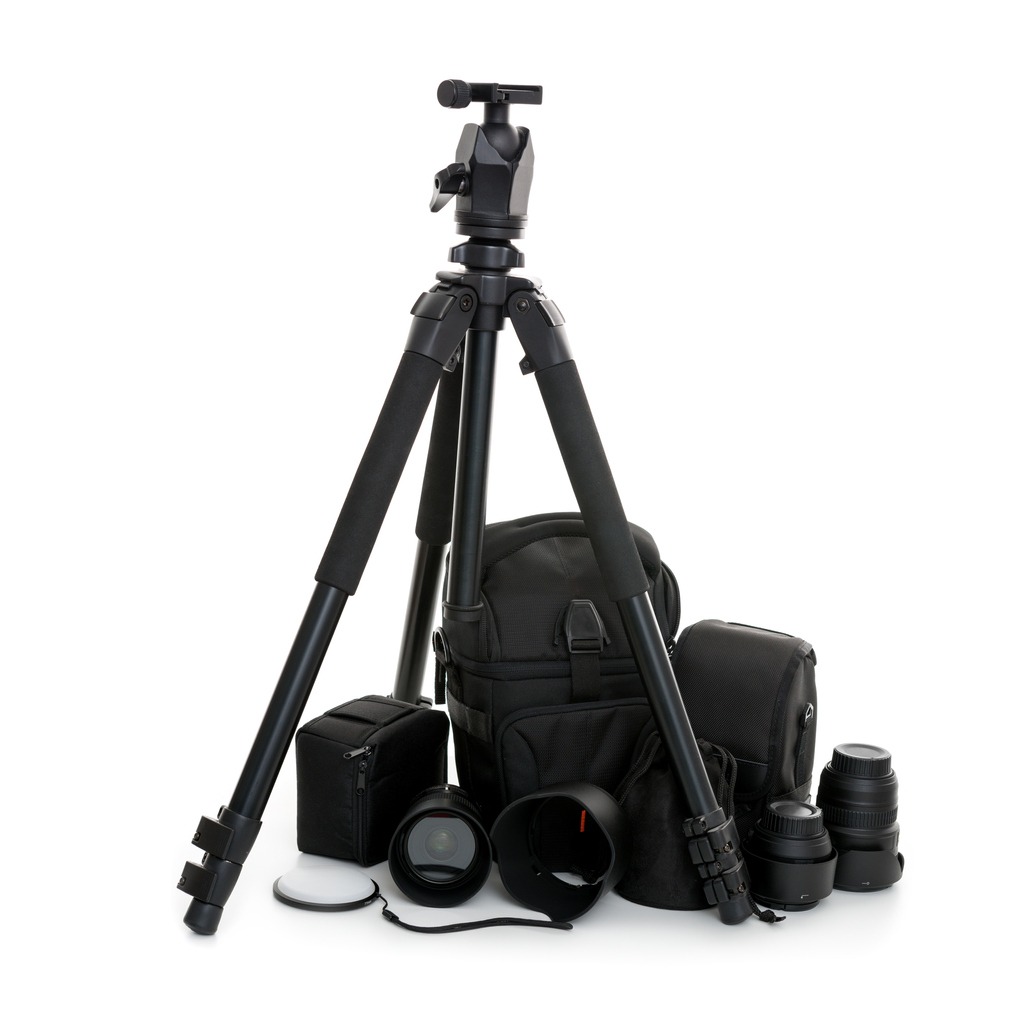
photo bydem10 via iStock
After the camera and lens options, choosing our primary tripod deserves some deep thinking. A good tripod can sometimes make the difference between being able to capture good shots or resorting to less than perfect workarounds.
Ask yourself what type of photography you generally do and also if there any specialty genres you engage in such as flat lay illustration photography or panoramic photography such as a Google Trusted Photographer. You’ll want to look at tripods that have features supporting the special needs of that style of photography.
I like large tripods for extra stability as a primary tripod, lightweight construction with carbon fiber legs and columns provides the best of both worlds. Not only are carbon fiber tripods lighter than aluminum models of the same size, but they actually have better dampening and are easier to handle in extreme weather, hot or cold.
I also differentiate between tripods for photographic purposes and video tripods since a quality tripod designed specifically for video is better for making movies than adapting a regular tripod with a video head.
Bubble Level
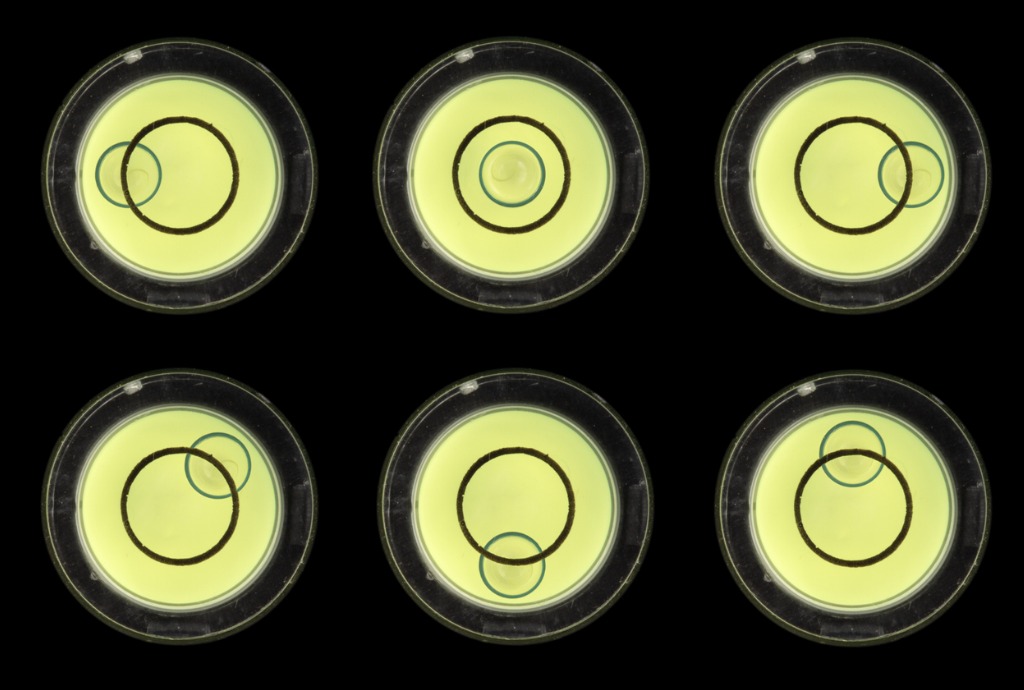
photo bylucato via iStock
Shooting with ultra-wide-angle lenses or imaging for real estate or architectural photography is best done with a level camera instead of trying to fix skewed and distorted lines in post. A simple bubble level that fits in the camera hot shoe solves the problem and usually costs about the same as a fast food burger combo. (Unless you're eating in a tourist trap.)
A Well-Built Camera Bag
I know that a camera bag might not fit under the "overlooked items" category, but a well-built bag might...
I see far too many folks carrying their gear in bags that have no business carrying expensive camera equipment.
Heck, when I started out, I crammed my camera and lenses into an old backpack - not a camera backpack, either! So I was guilty of not having a solid camera bag when I was first getting into photography. Not now, though, and you should have a well-built bag too!
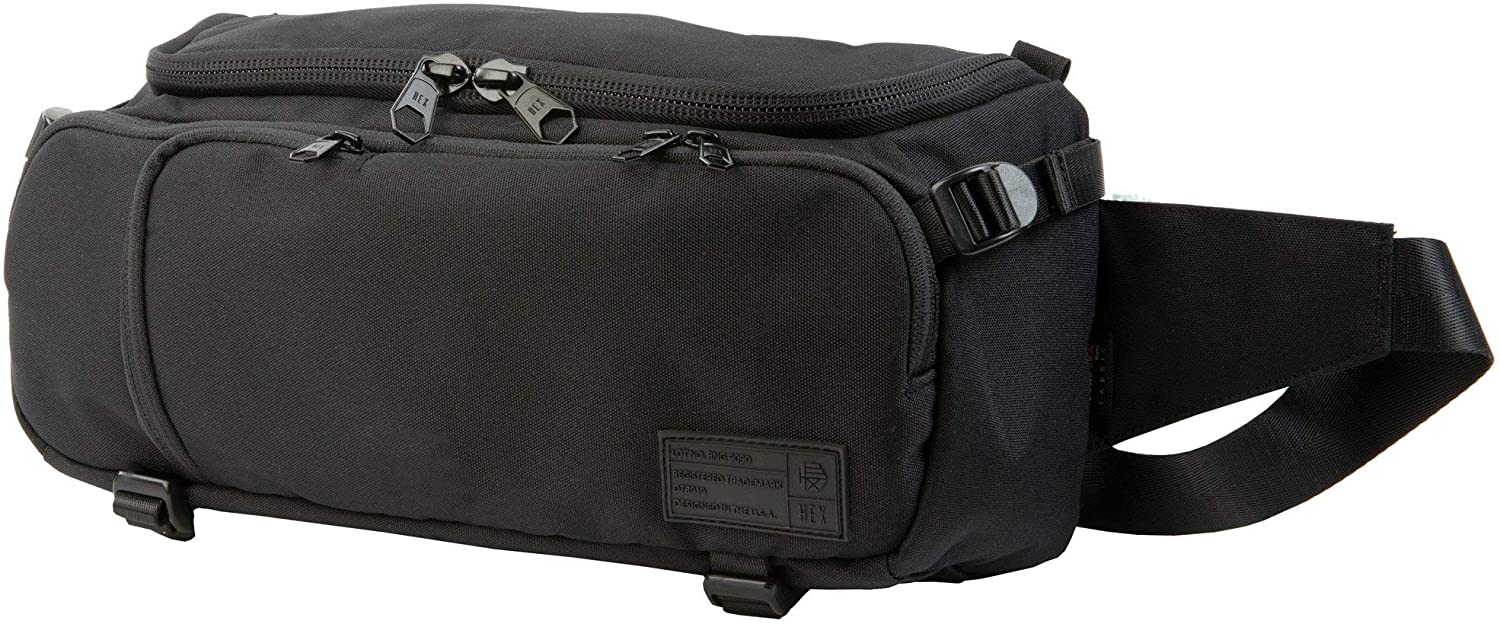
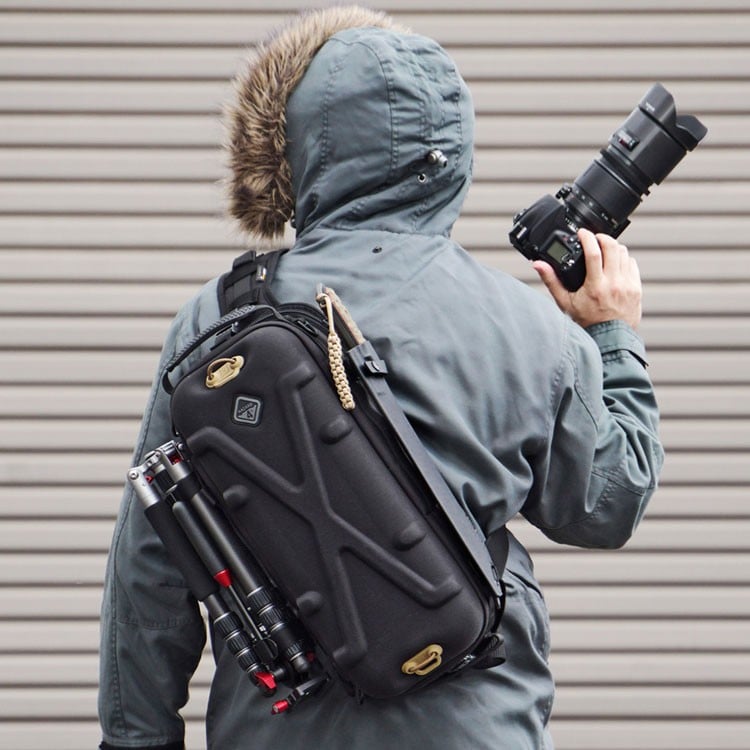
I've tested a lot of bags over the years, and only a few have truly impressed me. One such bag is the HEX Ranger DSLR Sling.
This bag is beautifully designed, impeccably built, and has all the features you could want in a camera bag.
We're talking collapsible interior dividers, a front access organizer, side adjustable load strap, and a faux-fur lined pocket for items like your sunglasses or your phone.
And with 8 liters of capacity, you have all the room you need for your kit!
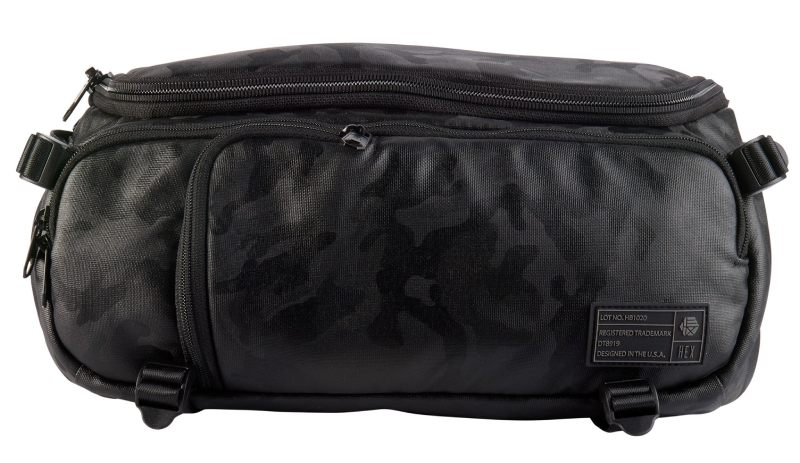
The newer V2 version of this bag adds additional goodies, like a double buckle strap for more sizing options, increased padding on the shoulder pad and the top lid, and a hideaway rain fly for those days when you get caught in the rain.
Perhaps best of all is the price point of this bag...
At less than $100, you really get a lot of bang for your buck. It helps that these bags are easy on the eyes as well!
Curved Screen Monitors

Post processing is an intrinsic part of a professional’s workflow and is also an enjoyable part of many other serious photographer's work. Anything that makes the process better is a welcome addition as photography gear you didn’t know you needed but now that you have it you can’t do without it.
Large, ultrawide, high resolution, curved screen monitors are that time for me (and many other photographers and videographers). The lack of eyestrain and the immersive viewing experience is a big part of that, but the quality of these monitors such as the ViewSonic VP3881 38 inch monitor is even more important in my work.

I have enjoyed ViewSonic brand monitors for a while as a video editing solution, and these brand new curved screen monitors are the best upgrade I’ve made to my editing studio outside of my computer upgrades.
ViewSonic monitors have excellent resolution and are capable of rendering over 4.39 trillion colors for a superior editing session whether editing still images or videos. Other features such as advanced contrast control and tiling multiple programs add to the usefulness of these important photography gear choices.
Learn More:
Spot Meter
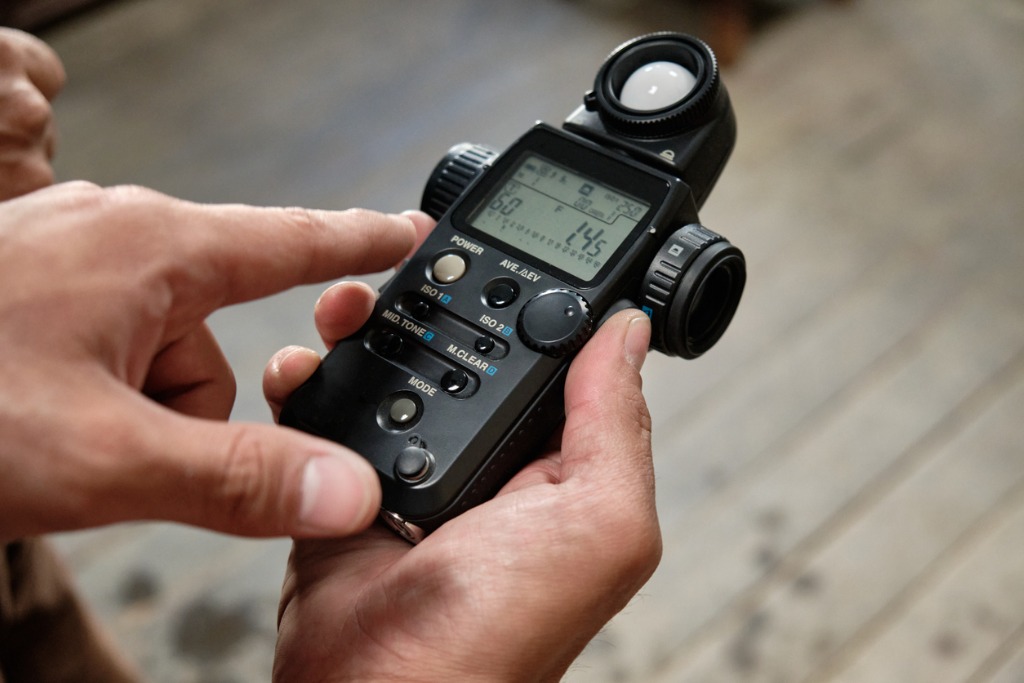
photo byLord_Ghost via iStock
Why use a separate spot meter when our cameras have fantastic and ultra sophisticated meters built in? I use a classic Pentax spotmeter for seeing the range of differences in exposure values throughout the scene for deciding on what GND filter to use or whether to shoot in HDR.
Graduated neutral density filters (GND) are a surprisingly useful piece of gear themselves, but deciding on what strengths to use can sometimes cause a little confusion. Being able to see the exact exposure difference in brightest to darkest areas of the scene helps me decide which GND filters to use.
Sometimes the exposure values I read will move instead to use the digital technique of bracket and merge high dynamic range (HDR) photography. My handy, compact spot meter lets me easily and quickly read the scene’s values. A spot meter is also useful for setting up lighting ratios in portrait photography and cinematography.
If you can’t find a classic Pentax model, don’t worry, there are lots of brands and models available, used and new. In addition to Pentax, the brands Minolta, Gossen, and Sekonic have been making several for years. Gossen, Minolta, and Sekonic have spot attachments for some of their regular handheld meters as well.
View Screen Hood
photo byponsulak via iStock
Whenever using Live View under bright light, which is pretty much every time I shoot video outside, seeing the viewscreen is a challenge. A simple solution for most cameras is a viewscreen hood that blocks out extraneous light.
These are also great for small product photography or for posing fashion, glamour, or boudoir models since I like to use Live View and a wireless remote to ease my shooting workflow. Try it out, you’ll see what I mean in about 8 seconds, just like I did the first time I sceptically tried it.
Smartphone Apps

photo byyalcinsonat1 via iStock
I use a variety of smartphone apps in my photography and videography jobs.
They allow for filling out, signing, saving, and sending model releases, can tell us what time sunrise or sunset is and how long twilight lasts, shows us the moon phases for knowing when to attempt deep sky astrophotography, and can help us find the exact location we’re supposed to be for that shoot.
Old Photography Books
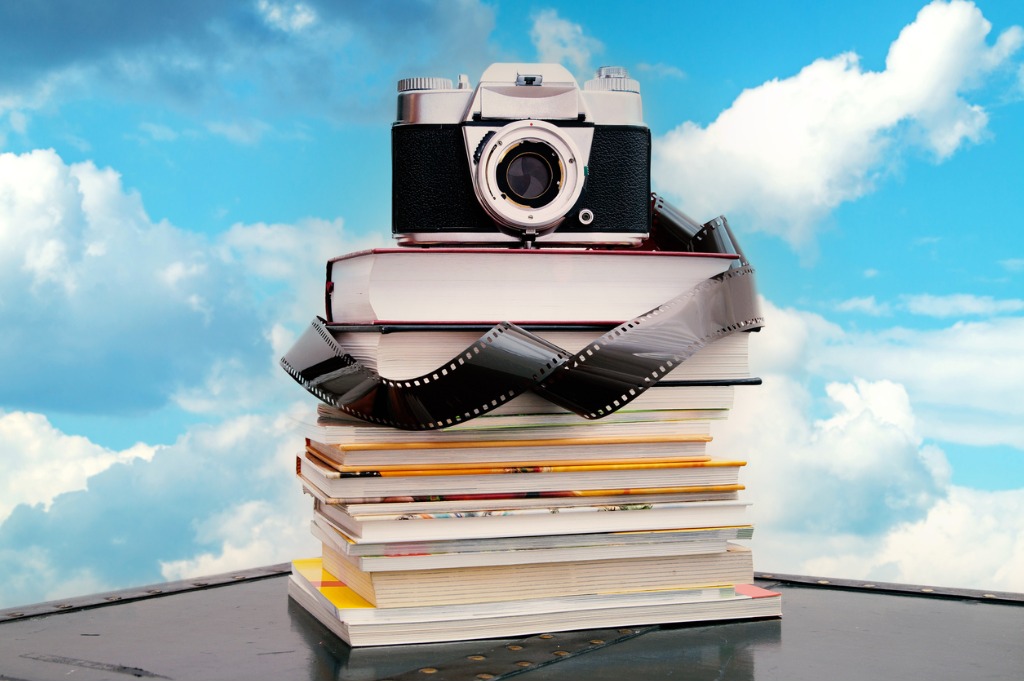
photo byImagesines via iStock
I love reading older books and magazines about photography, cinematography, and special techniques. Many of these were written during the height of the SLR film era and can teach us a surprising amount of currently relevant information.
Understanding Photography by Carl Shipman from 1974 is one of my favorites. It’s not very slick with illustrations but it is chock full of useful information. This book was written during the height of the film age but most of it still applies to modern digital photography, just not the info on film reciprocity failure.
For videography, a great read is The 5 C’s of Cinematography - Motion Picture Filming Techniques by Joseph Mascelli. Long regarded as one of the premier books for aspiring filmmakers, almost everything in this book is still relevant to digital video cinematography.
Many of these books are available as PDFs, on your Kindle app, or can be found used from various sources.
What’s In YOUR Photography Gear List?
photo byNBedov via iStock
I really want to know.
I can’t tell you how many times a fellow photographer has assisted me in learning something new or in getting better at various aspects of photography and videography. Part of our art and craft, our businesses too, is centered on knowing how to use the right equipment for our needs.
What's in your bag that you can’t do without?
Learn More:
- Must-Have Gear for Your Growing Photography Business
- Architectural Photography Tips
- Stock photography Success Tips: Planning and Research
We Recommend
Photography Equipment List for Beginners
photo byEXTREME-PHOTOGRAPHER via iStock
One of my favorite things to see online are questions from beginner photographers. Seeing or being asked questions tells me that the wonderful hobby of serious photography is growing and new photographers are reaching out to learn.
A common set of questions from beginners concerns the best photography equipment to purchase. I get asked this all the time and I have decided to create a photography equipment list for beginners that mirrors what I tend to say in person as replies. A beginner photography gear checklist, more or less.
The Camera
photo bywundervisuals via iStock
The Camera is the title of one of my favorite photography books, but I’ll get to books later in the list. Right now I am looking at good camera choices for beginners.
I usually assume that anyone asking about what camera to choose is probably a photographer who either has outgrown their smartphone or a photographer who used to shoot a lot on film as a hobby back when.
This type of beginner is familiar with the creative process and wants to do more, but also sees a new camera as a significant purchase that they don’t want to make a mistake getting. Basically, you’re simply needing an interpretation of all that ad junk so you can figure out what’s best for you.
I recommend one of the two larger crop format camera types. Either APS-C or MFT. These cameras come closest to the hobbyist film cameras of just a few years ago. So, they will feel correct to anyone coming back to photography. They are also full of helpful features that will be appealing to photographers coming from current smartphones. Get more details on APS-C vs MFT formats in the video below by The Hybrid Shooter:
If we were speaking in person, I would ask you several more questions myself to narrow down your wants and needs, but for now I can point you in a general direction of a couple of nice entry level but full featured cameras.
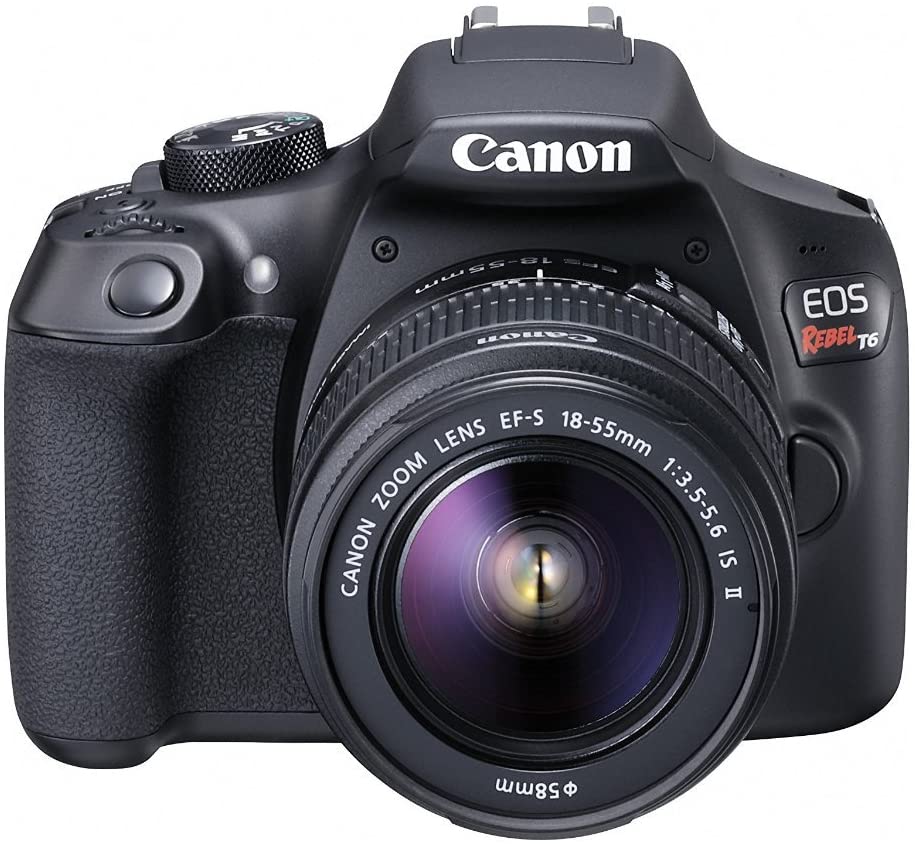
In the APS-C format DSLR category, a fine camera is the Canon EOS Rebel T6. It has an 18MP sensor, Wi-Fi, video recording, 3” rear screen, and a bright optical viewfinder. It has autofocus, auto exposure, full manual override, and menu options with special effects.
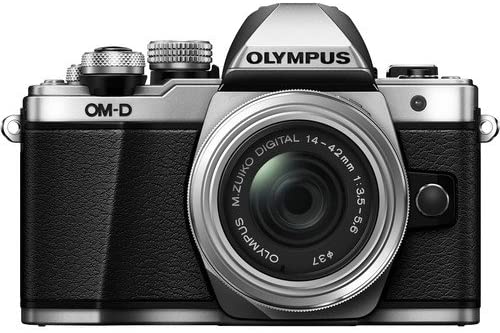
A mirrorless MFT format camera choice is the Olympus OM-D E-M10 Mk II. This superbly designed camera boasts a 16MP sensor, electronic eye level viewfinder, in body 5-axis image stabilization. Adding classic camera styling makes this an attractive camera for beginner photographers.
Recommended Photography Reading
- National Geographic Photo Basics: The Ultimate Beginner's Guide to Great Photography
- Photography: The Definitive Visual History
- Read This if You Want to Take Great Photographs
Prime and Zoom Lenses
photo by delihayat via iStock
Most of the entry-level cameras suitable for beginners come in kits with an all-around multi-purpose zoom lens. Lenses like 18-55mm or 14-42mm are common. These lenses have some limitations but are generally very optically sharp. So go ahead and buy the camera with the kit lens, the prices of most cameras with the kit lens is usually very close to the price of the camera body alone.
Part of the joy of moving into interchangeable lens cameras is having lenses to interchange. After the kit lens, other good choices are a telephoto zoom lens, an ultra-wide-angle zoom lens, or a fast prime lens.
You will probably get a telephoto zoom first, and as I explain in the video above, that’s a good choice. Telephoto lenses have long focal lengths that allow you to get up-close images of far-away objects, making them prime tools for things like sports and wildlife photography, though they have many more uses.
The fast primes available for these formats will allow for low-light imaging and selective focus tricks. Ultra-wide-angle lenses open up many interesting views for landscapes, interiors, and other creative ideas. This is the beginning of a decent photography equipment list for beginners.
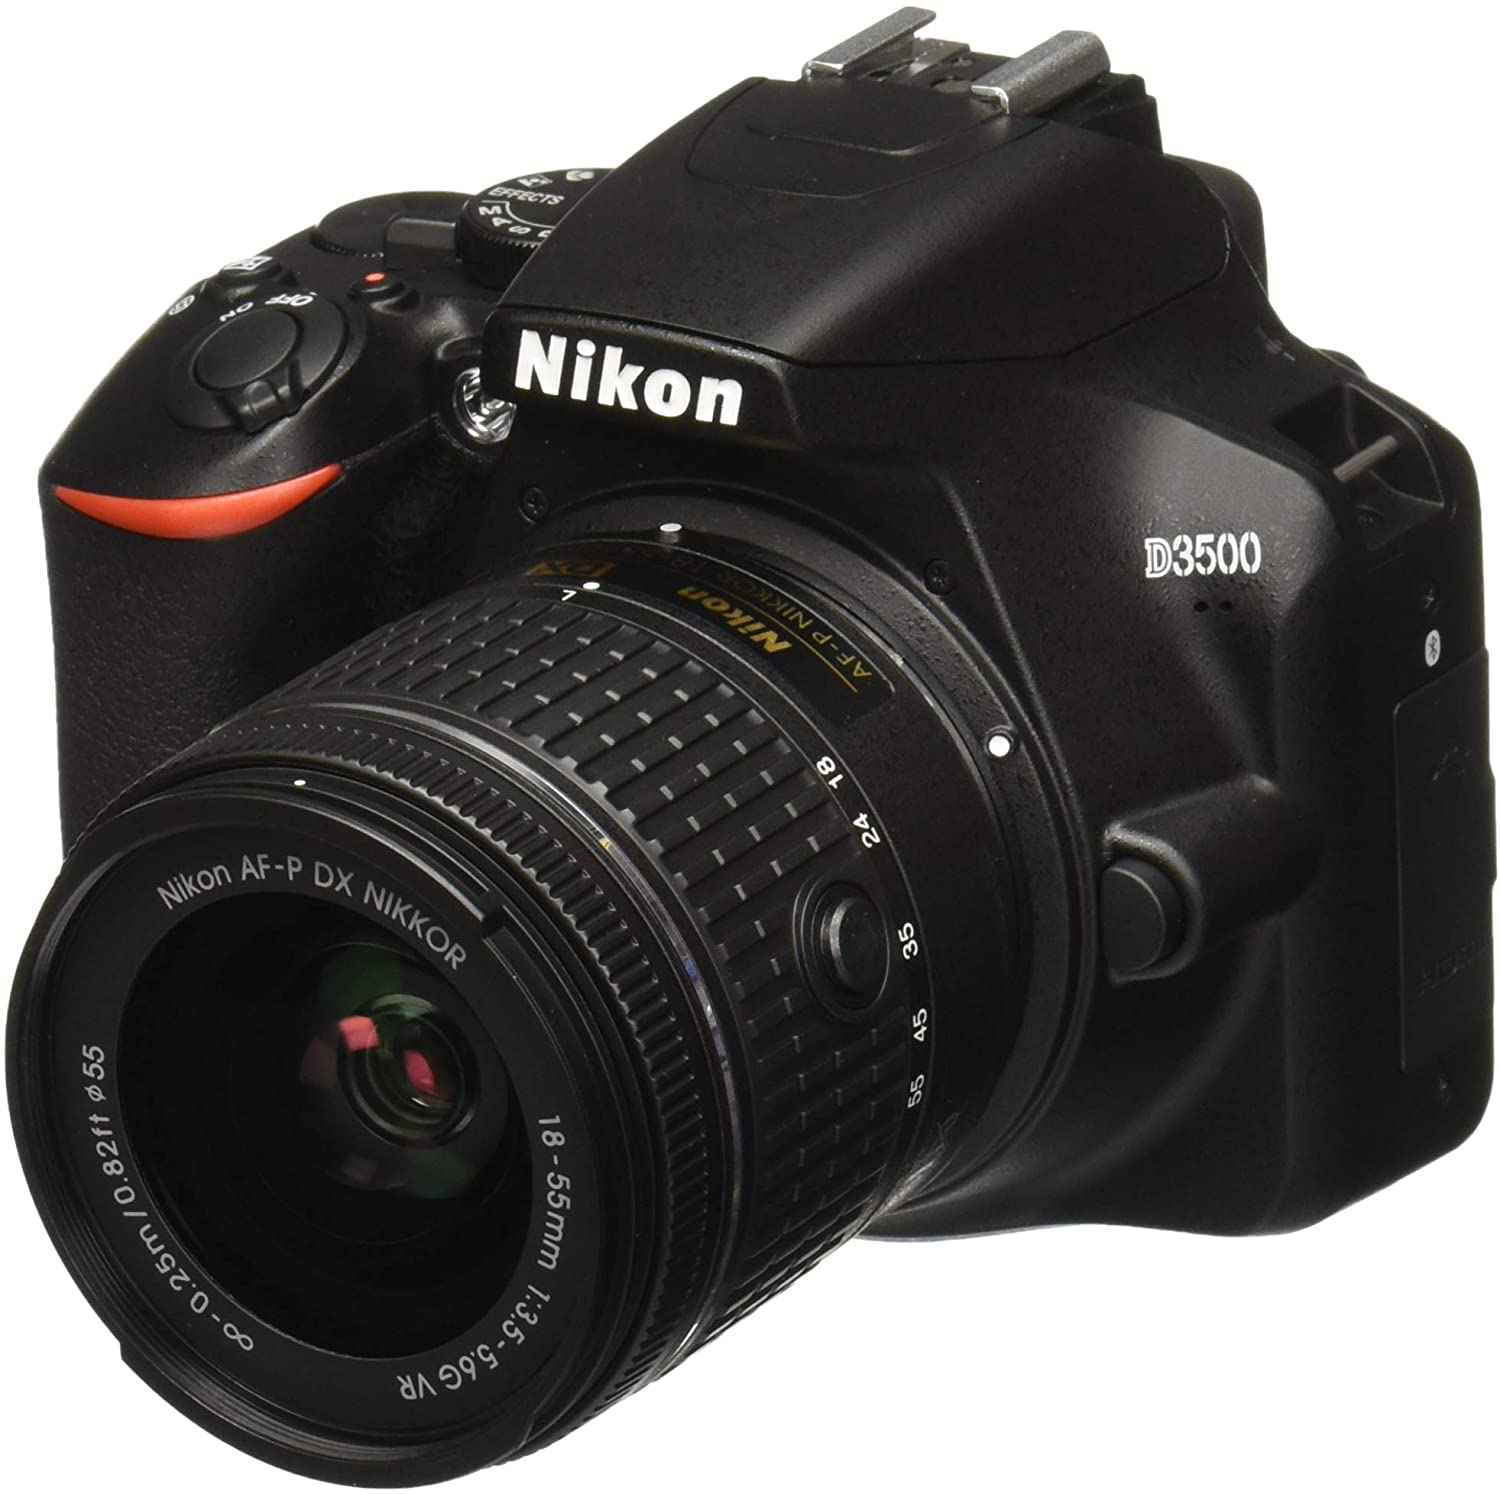
If you picked up a DSLR like the Nikon D3500 as your first camera, several Nikon brand lenses fit those criteria and are also relatively inexpensive. Some lens choices could be:
- Nikon 55-300mm f/4.5-5.6G ED AF-S DX NIKKOR VR telephoto zoom lens
- Nikon 35mm f/1.8G AF-S DX NIKKOR prime lens
- Nikon AF-P DX NIKKOR 10-20mm f/4.5-5.6G IF VR ultra-wide-angle lens
Each camera brand making the best photography equipment of APS-C or MFT cameras has a similar range of inexpensive lenses targeted for beginners and enthusiasts. Several independent brands such as Sigma and Tokina do so as well.
Learn More:
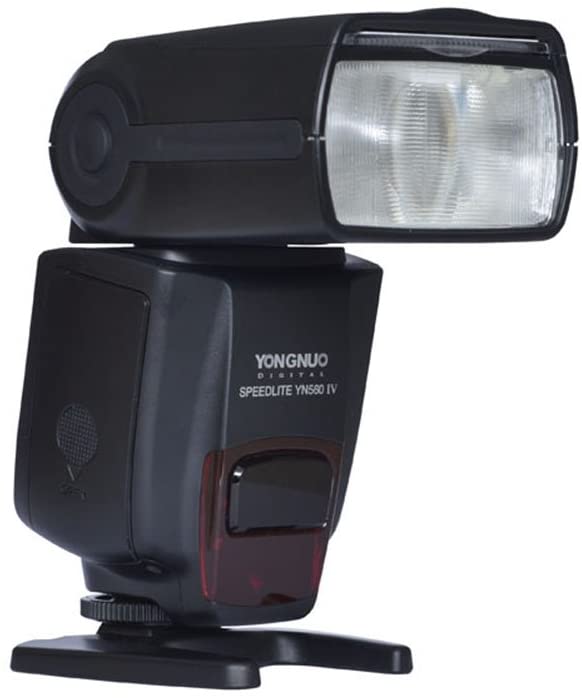
Flash or Speedlights
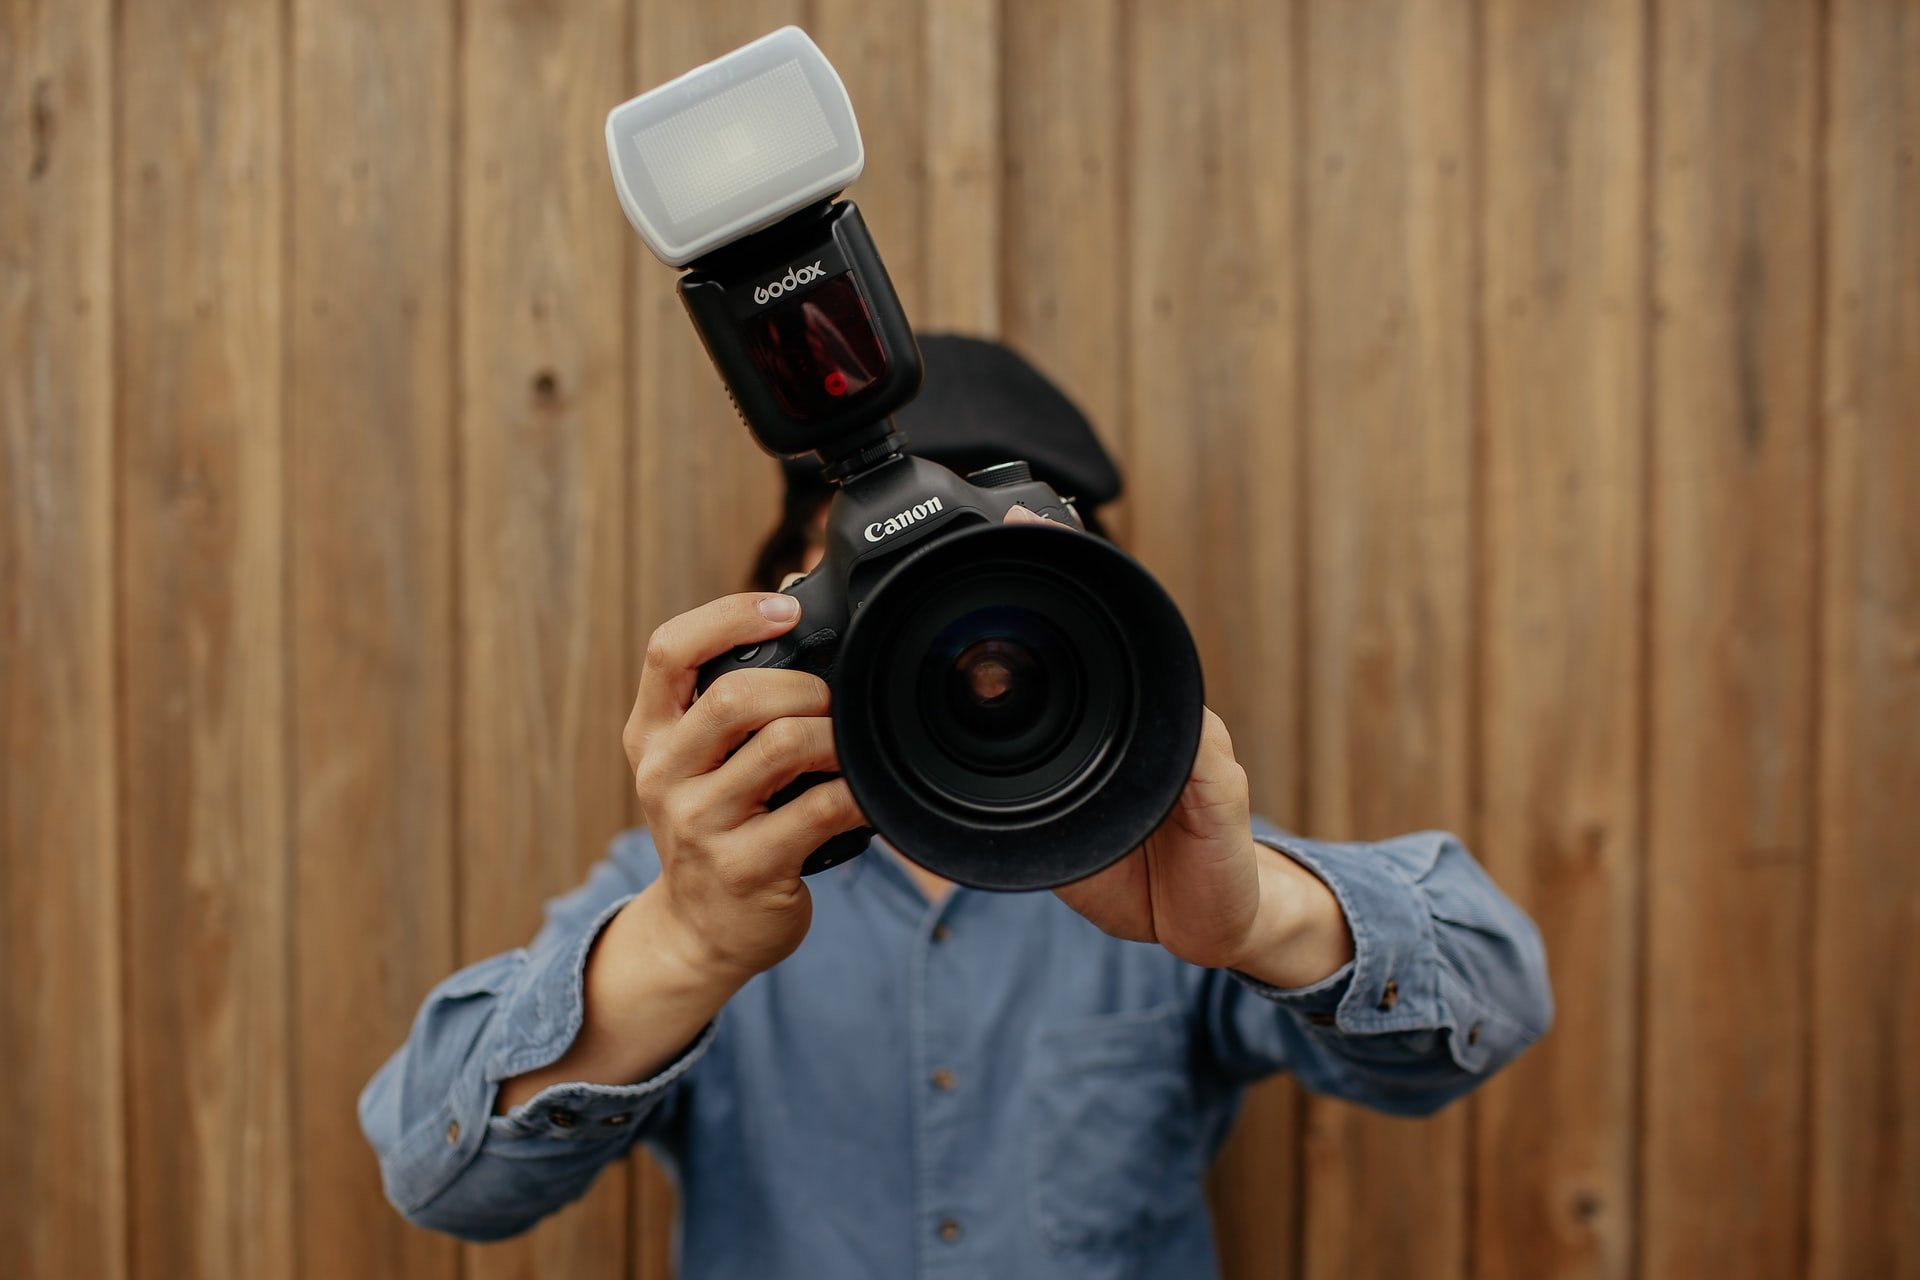
Photo by Tom Pumford on Unsplash
Those built in pop-up flashes are great photography tools for snapshots and to get good exposure for people pictures up-close. Their range is limited, though. As are their features. A virtually essential early purchase of photography equipment for beginners is an external flash.
An external flash opens up a whole bunch of opportunities for photographers, so be sure to include one on your own personal photography equipment list for beginners. External flashes give more power for increased range and a variety of exposure settings, plus they usually have zoom, bounce, and swivel functions, opening up yet more lighting options.
The camera brand speedlights can cost almost as much as the initial camera kit kit with lens does, but other, less expensive options exist. YONGNUO YN560 IV speedlite has most of the same features as camera brand flashes, such as TTL metering, slave and wireless control, and a deep menu.
Neewer NW-670 is another nice choice for our photography equipment list for beginners. It also has the features you expect and is a great lower priced option.
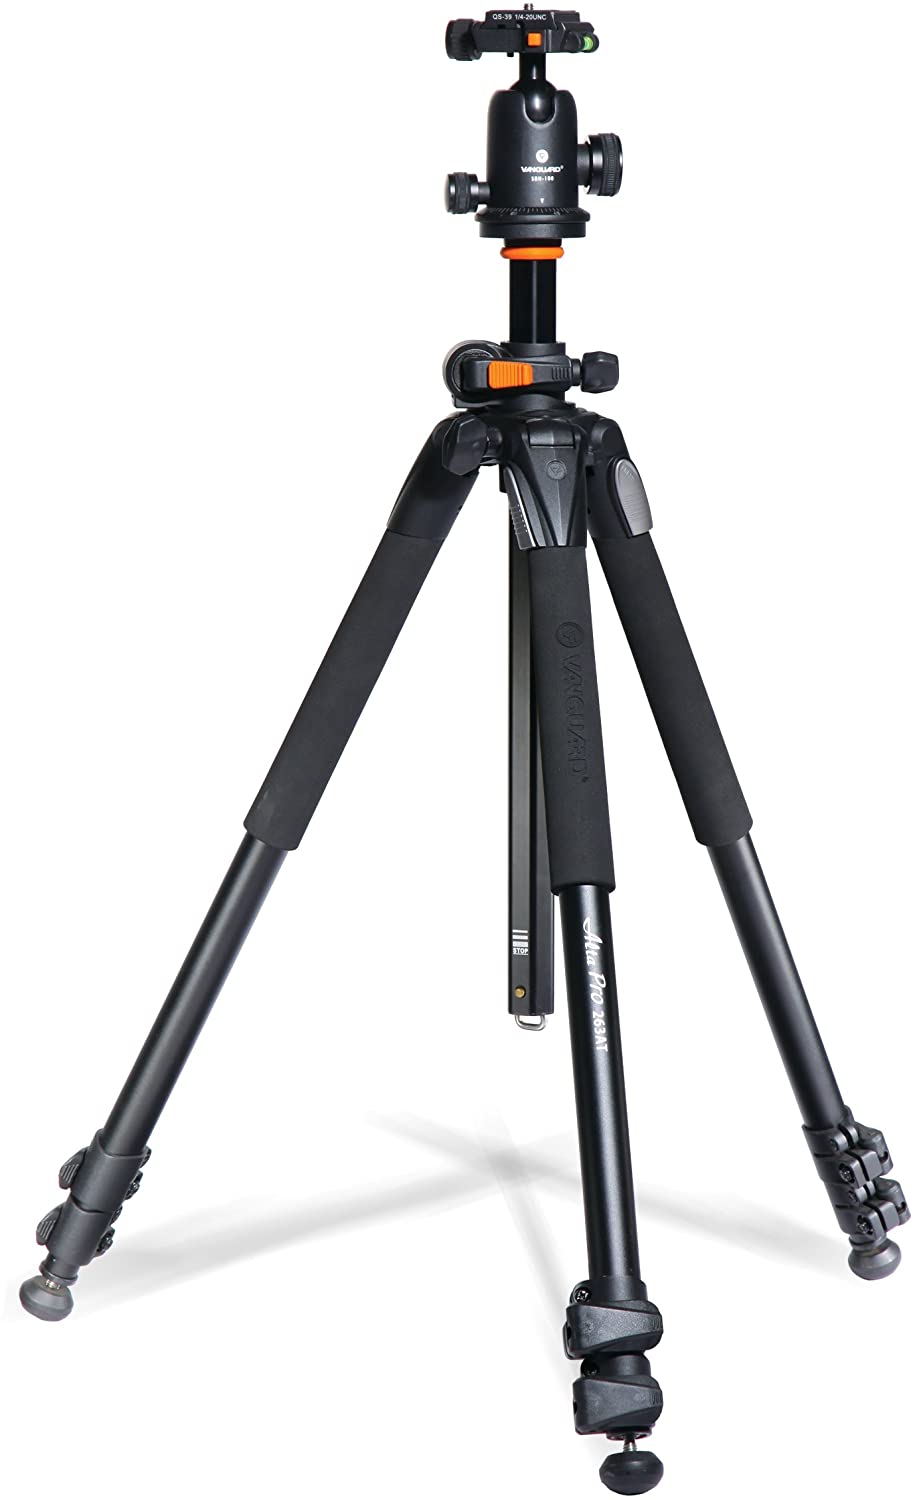
Tripod
A tripod of some sort definitely deserves a spot on our photography equipment list for beginners. Newer DSLRs and mirrorless cameras and their lenses have amazing image stabilization features. Even so, having a good tripod gives you the ability to take advantage of special techniques such as HDR, panoramas, and ultra long exposure.
The trick with choosing a good tripod is figuring out the balance between a stable platform and a portable tripod. Two good tripod choices for our beginner photography list checklist are the GEEKOTO AT24EVO aluminum tripod and the Vanguard 263AB-100 3-Section Aluminum Alloy Alta Pro 263-AB Tripod Legs with SBH-100 QR Ballhead.
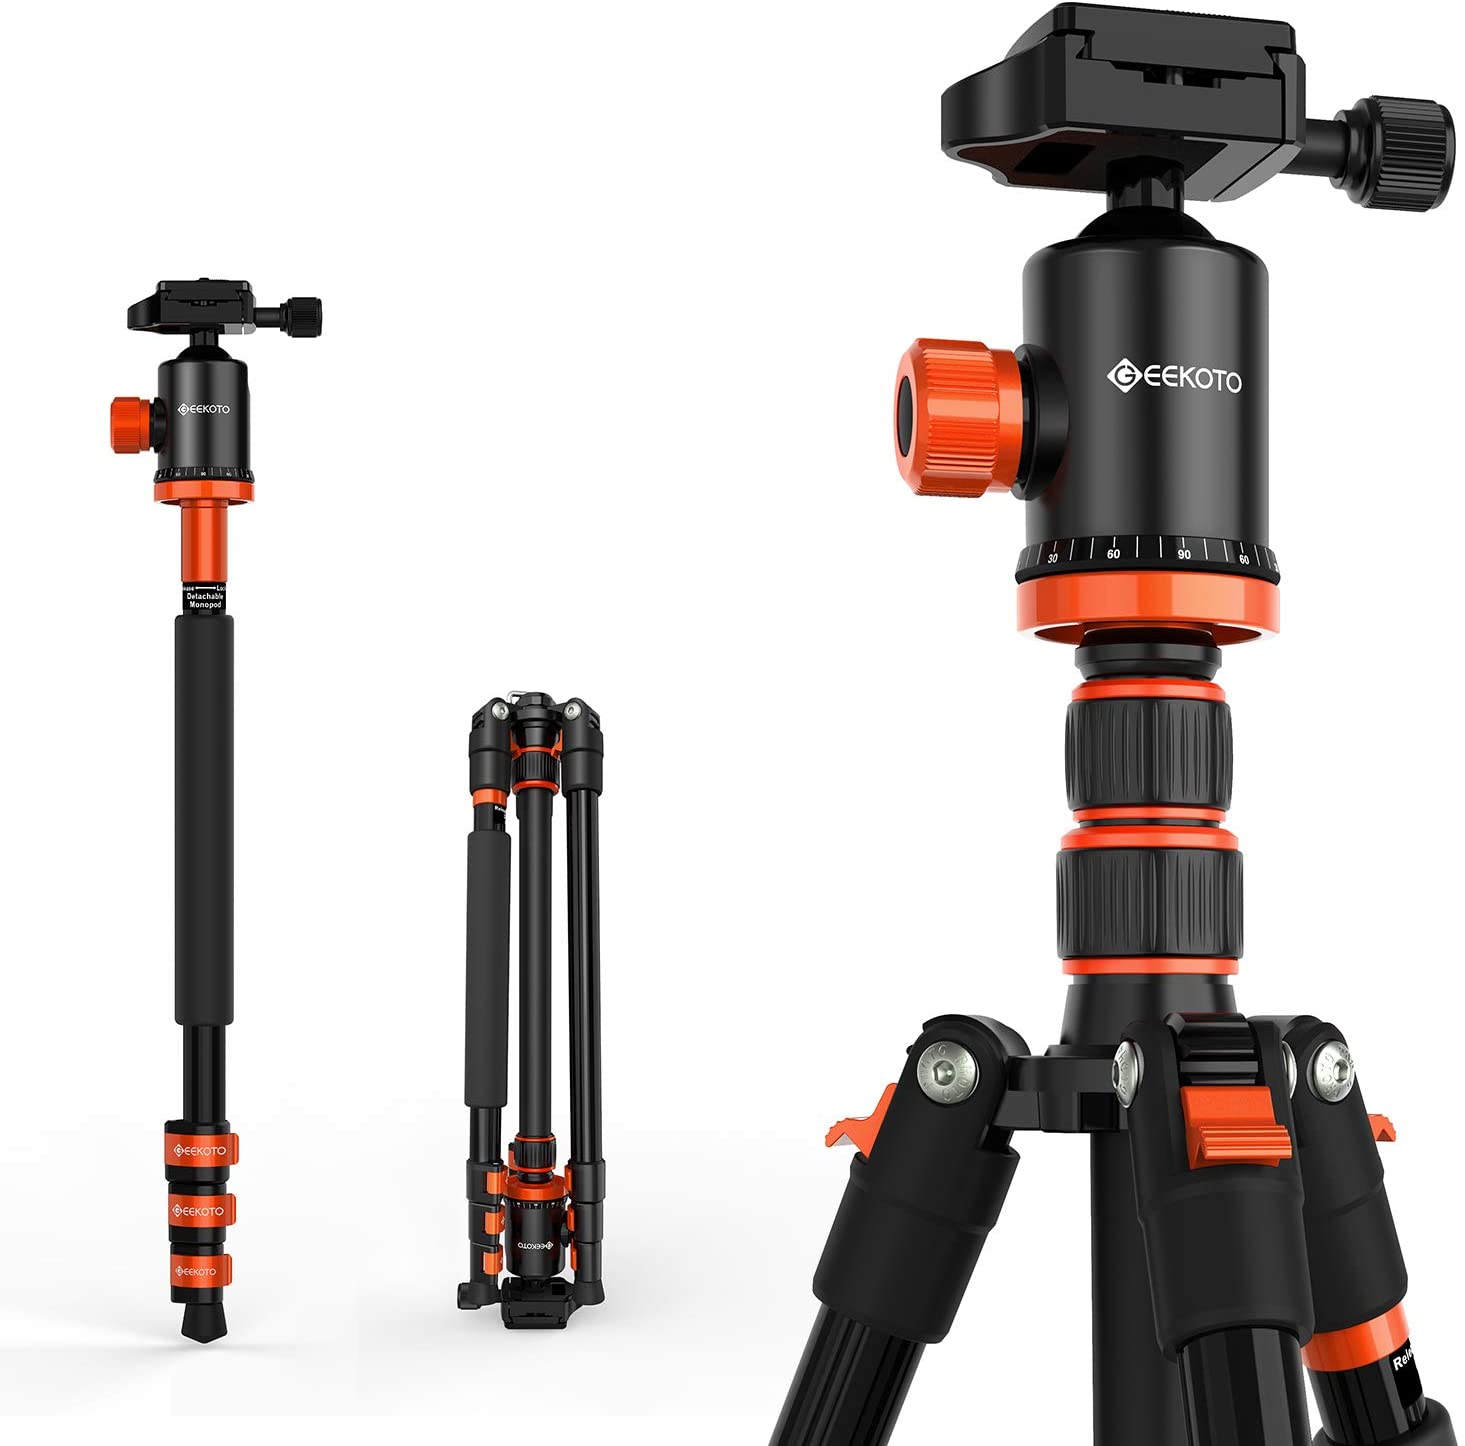
The Geekoto tripod has a removable center column that doubles as a monopod and the Vanguard Alta Pro has a center column that pivots plus extremely spreadable legs to let you put your camera anywhere you need for the picture.
If you’re going to have photography tools such as a tripod, it may as well be one that you can use to the full.
Learn More:
Filters
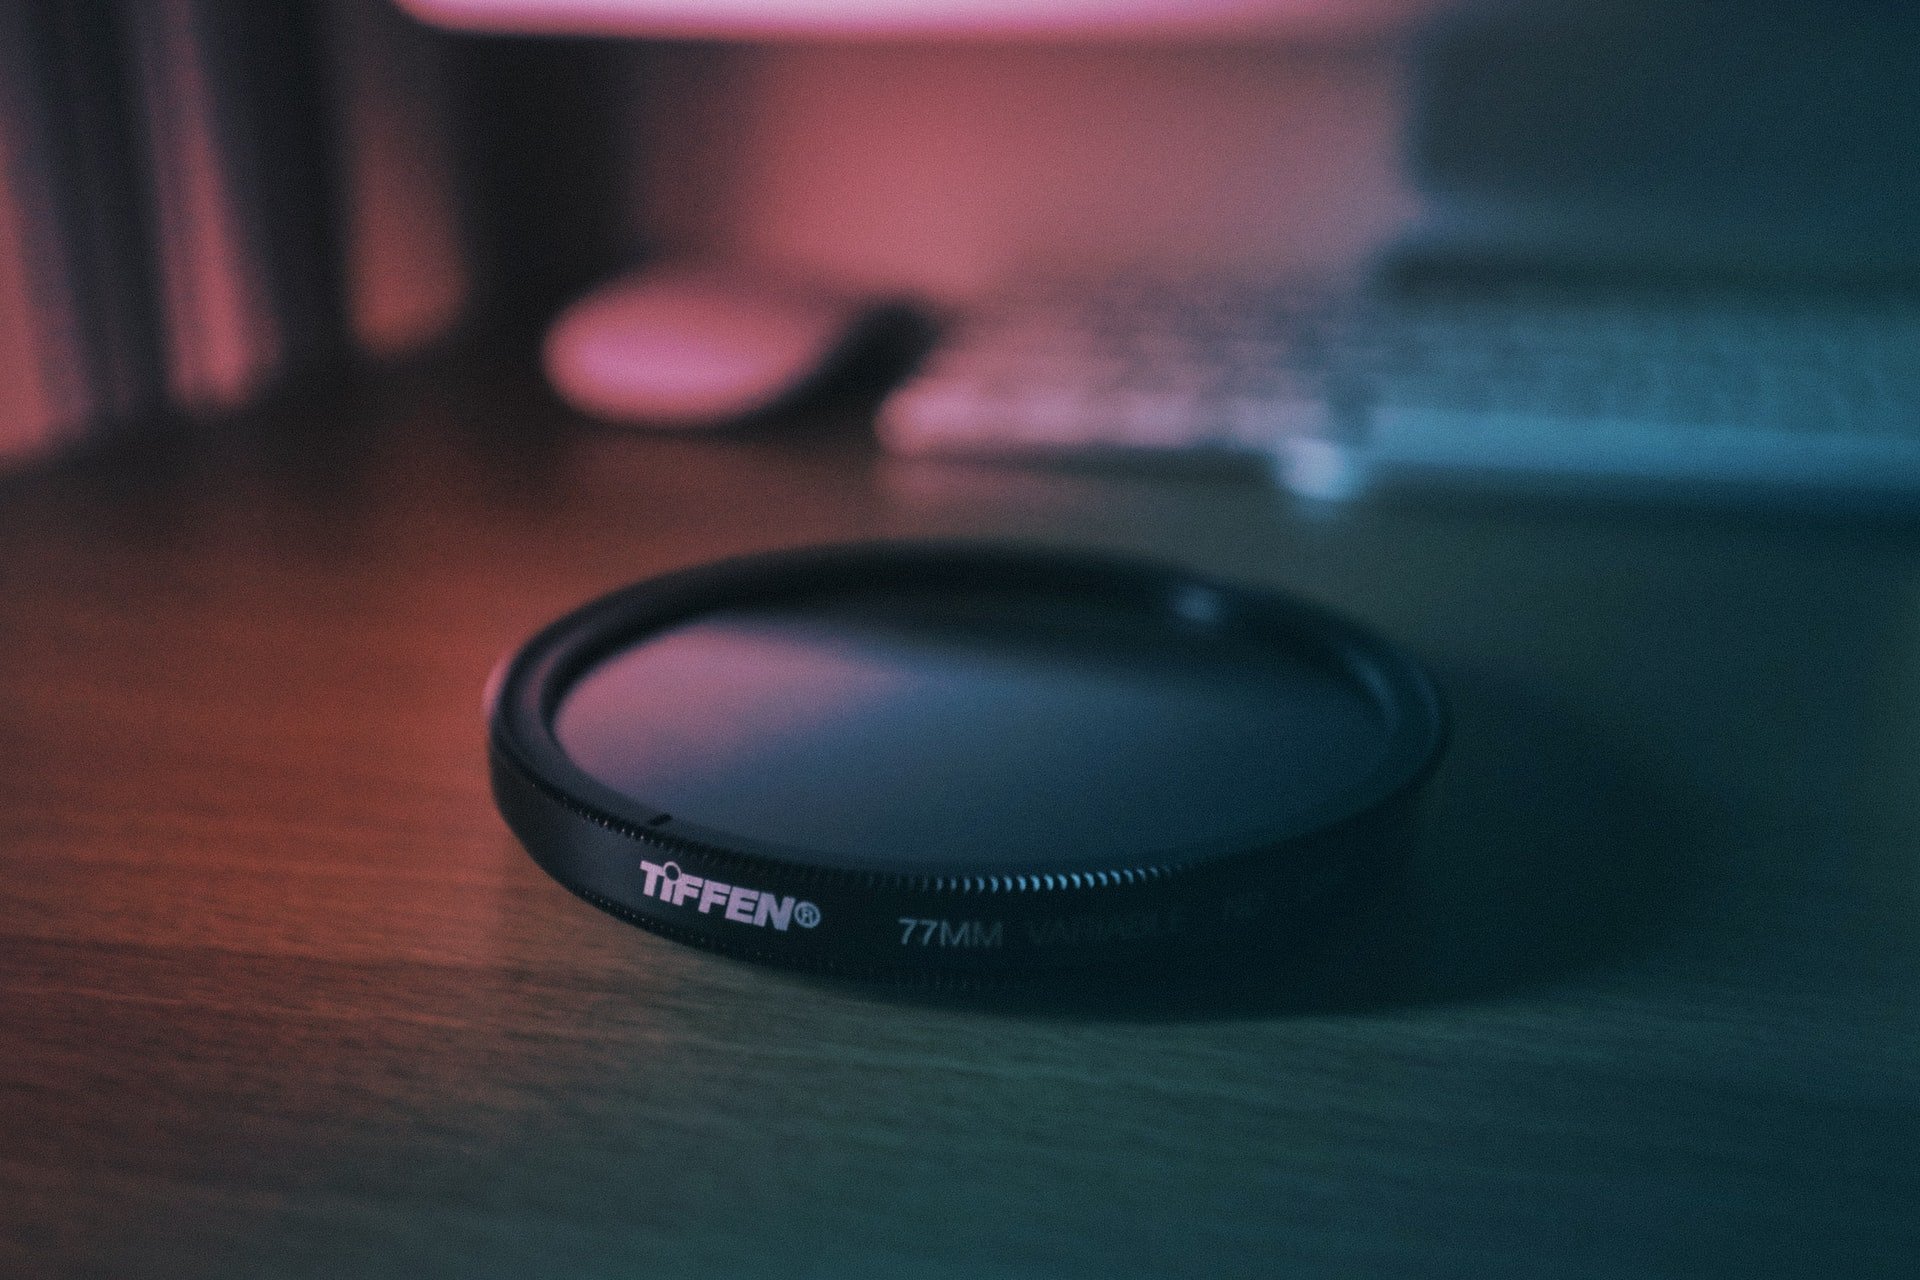
Photo by Chris Yang on Unsplash
If you’ve come from the world of smartphone photography, the term filter probably brings to your mind apps to use for certain effects or functions. Interchangeable lens camera systems use different filters, optical filters that fit on the lens.
A couple of extremely useful optical filters that belong on our photography equipment list for beginners are circular polarizers and neutral density filters.
Personally, I prefer filter systems with a filter holder, lens adapters, and the various filters to fit them. An advantage of a filter system is that you only need to buy one filter that can be adapted to fit on all of your lenses, and you can position the filters exactly as needed.
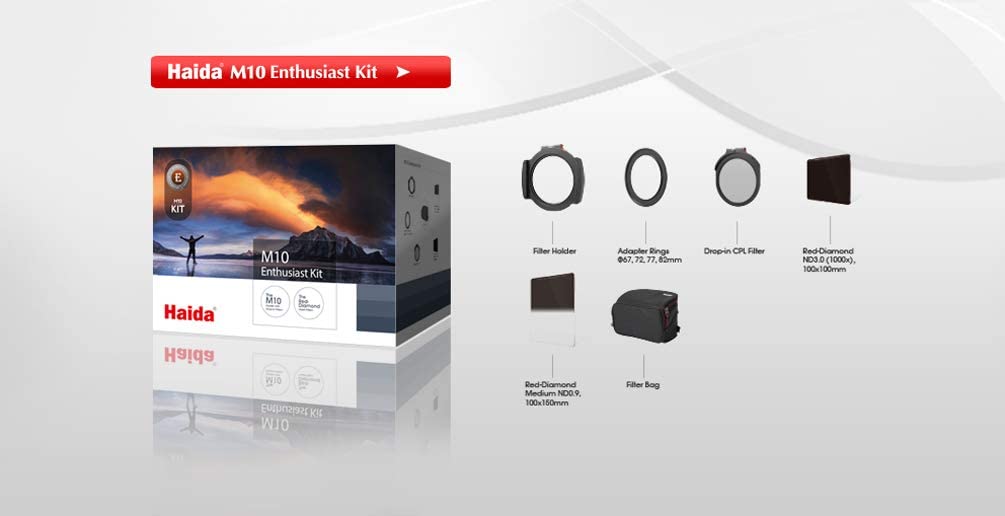
A fantastic set of filters is the Haida M10 Enthusiast Filter Kit with holder, adapters, circular polarizer (C-POL), 10 stop neutral density (ND), and graduated neutral density (GND) filters.
This kit may be a little more expensive than what you expected, but the beauty of a filter system is that it can be used on many different lenses, so it will grow along with you as you move on to other high quality photography tools including professional caliber cameras and lenses.
If your photography equipment list for beginners budget is more modest, an essential filter purchase that is easy to afford is the screw in circular polarizer. A high quality example is the Hoya Pro-1 C-POL filter, available in a variety of single sizes.
The polarizer filter is one of the most useful of all the photographic filters. We have a lot of good things to say about circular polarizers.
Camera Bag
You have a fair amount of the best photography equipment for you to use now, you also need a way to carry it safely and efficiently. It’s not enough to carry your photography tools around safely, you also need to be able to access them efficiently. Therefore, a camera bag should be designed around photography, not just the gear.
HAZARD 4® Plan-B Hard™ - Go-Bag Shell Sling-Pack is one of the better examples of a bag that meets both criteria for fantastic protection and very efficient operation. A less expensive, somewhat more traditional approach is the Lowepro m-Trekker SH 150 Shoulder Bag. Both bags are far better than the bag that was included in the kit you may have started with.
Learn More:
Extra Batteries
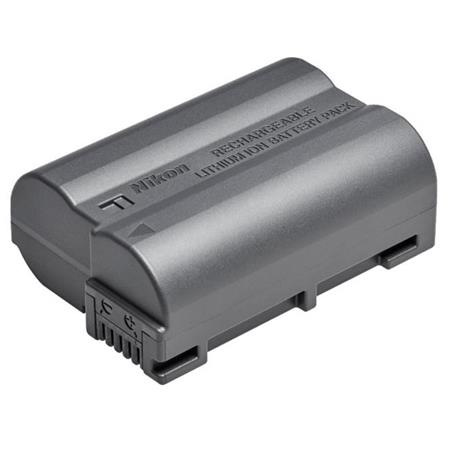
Learn from our mistakes. You don’t want to be at the photo opportunity of the year and have your battery die on you because you forgot to charge it. A very inexpensive way to make sure this doesn’t happen is also simple, keep an extra battery in your bag.
There are off-brand or third-party brands that fit and function well in many cameras, but some cameras don’t act properly with other brands that are not the manufacturer batteries. The camera brand batteries aren’t that much more expensive, so be sure to read the customer reviews to find out if the battery you are considering will work properly.
The battery for the Nikon D3500 and for the Canon EOS Rebel T6 will hold a charge for a long time in storage making them one of the essential photography tools that should be on our photography equipment list for beginners.
Memory Cards
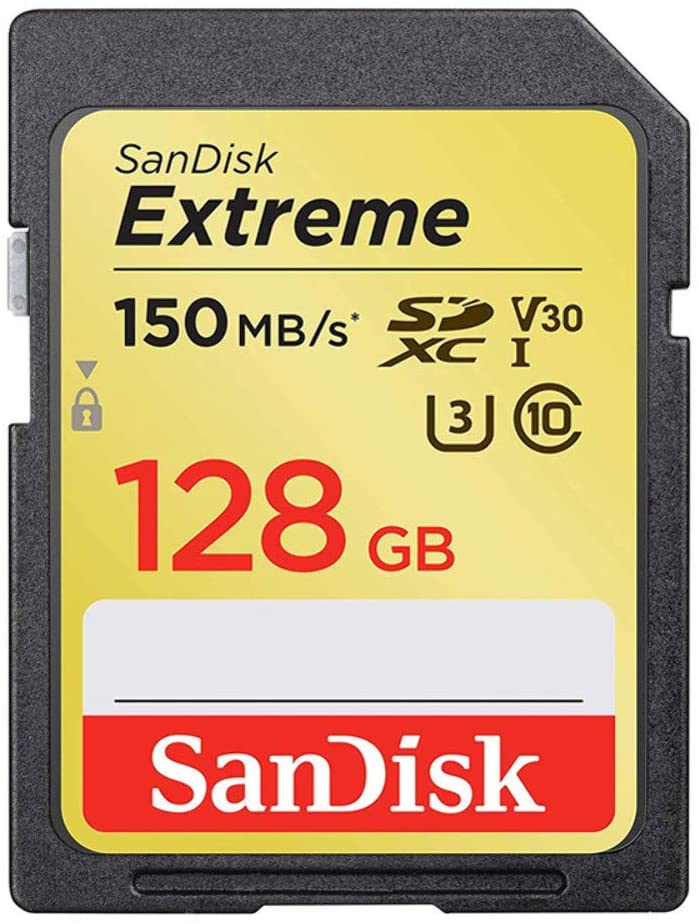
Memory cards are part of the film for digital cameras, taking what the sensor sees and holding it for transfer or storage. Just as with film, not all memory cards are created equal.
Besides the size of the card’s storage capacity, file transfer speeds are also an important consideration. With large file sizes, the speed a camera can write those files to memory may make a difference in capturing the best image.
So, we look for a balance here, too. A balance among memory size, durability, transfer speeds, and price. Good news for beginners is that there really isn’t a bad card out there. Most of the entry level cameras will use a variant of the SD card, a format with a good track record in digital photography.
You can either get a larger capacity cardor you might like having several smaller capacity cards. Either way, you’re covered if you have a few extra memory cards in your beginner photography gear checklist.
Post-Processing Program

photo by vgajic via iStock
Now comes the scary part. Photoshop! It’s really not that hard to learn, there are even tutorials you can take to give you a head start. Post processing is an essential part of digital photography, just as a darkroom or photo lab was a part of consumer film photography.
It can be a lot of fun, don’t let it worry you. Scaled down versions of some of the most powerful programs are simple and inexpensive, putting them on our best photography equipment list for beginners. Adobe Photoshop Elements 2020 and Auto FX software are two fine choices.
Learn more about post-processing in our continuing series of articles on this website.
Photography Books
photo by MesquitaFMS via iStock
You learn by doing, you also learn by instruction. Some of the best instruction for photographers comes from books written by experts. Websites with member forums and manufacturer websites are other good resources for helpful information.
Besides books like Nikon, Canon, or Sony for Dummies, there are general photographic instruction books that will expand your knowledge and skill set. DSLR Photography for Beginners
Is available in Kindle or dead tree versions. Another fine book, paper or electronic, is Mastering Aperture, Shutter Speed, ISO and Exposure.
Thousands of great instructional guides are out there, check the reviews to see which ones work for your photography equipment list for beginners.
Learn More:
What’s On Your Own List?
Pick and choose from our photography equipment list for beginners. You know your wants, needs, budget…
Then, give us a shout out here. I would love to hear what worked for you. By the way, welcome to the wonderful world of serious photography!
We Recommend
Selling Your Camera the Easy Way

Photo by Reinhart Julian on Unsplash
Have you ever purchased a used camera? It can be difficult to sift through bad pictures of cameras, dirty cameras, and posts with absolutely no information in them.
Why are photographers so bad at selling their old equipment? You would think a photographer could take a good picture of their camera kit.
Selling your camera doesn’t need to be difficult, though. In fact, there are more sites that cater to selling your camera now than ever before. Many professionals prefer to use MPB reseller to get a good price for their photography camera like the Nikon D3500.
Now all you need is to learn how to sell used camera gear.
Clean Your Kit
As Peter McKinnon showcases, the best tip for selling your camera is to clean it properly before you even put it online.
Lenses with fingerprints, viewfinders with a layer of dust, and pieces of debris stuck in your hot shoe mount all say the same thing to any potential buyers: you don’t care about this camera.
And if you don’t care about your camera while selling it, then of course the next logical assumption is that you also didn’t care about your camera while using it.

Photo by Math on Unsplash
You’ll know your camera is clean after you’ve hit all of the major components: take a microfibre cloth to the screen and viewfinder, use air to clear out the hot shoe mount, and clear any gaps of dust.
Cleaning the sensor and mirror (if your camera has one) can be a scary task, but it’s necessary to clean these delicate items if you intend to sell your camera for top dollar.
Don’t Lie in Your Post
photo by vorDa via iStock
It’s so frustrating when someone lies in a post they put online where they’re trying to sell something, but this frustration is only increased tenfold when the thing they are selling is worth hundreds or thousands of dollars.
If you’re truly trying to sell your camera quickly, then the worst way to do so is to embellish your post about it because as soon as the buyer receives it, they’re going to send it right back.
You’ll want to include info about the number of actuations, or shots the camera has taken, whether there are any scratches or dents on the body, and what shape the lens is in.
One trick I’ve found with my sales post is this: I’ll write up the post, being as honest as possible, and then let one of my friends read that post before showing them the camera. I’ll ask them questions like, “Would you be happy if this came in the mail based on the post about it?”
Include All of Your Extras

Photo by Tom Pumford on Unsplash
Have memory cards that don’t fit your new camera? Throw them in with your old camera.
Freebies allow you to remain competitive, while also being eco-friendly. I know my junk drawer is filled with old tech that’s going to end up in a landfill eventually; why not put that equipment to good use?

Photo by Owen Young on Unsplash
Some examples of extras I’ve included with a camera sale before are:
- Memory cards and memory card holders
- Extra batteries
- Camera cleaning kits
- Straps
- Old powerbanks
Basically, if I know I won’t use it again and I know I can’t sell it by itself, I’ll include it with my camera.
Use Good Images

Photo by Hanson Lu on Unsplash
It hurts me so much to go browsing used cameras and need to sift through horrific photos of those cameras.
We are photographers. I understand product photography might not be your niche, but there are some rules you need to follow with a sales post online, especially since nobody reads product descriptions before seeing product photos.
I’m of the belief that taking boring product photos on a white background isn’t necessarily the best way to go because I like to see pictures of equipment in their natural environments, like the photo above.
Regardless of your background, though, you’ll need to use a lot of natural light or a studio flash, you’ll need to nicely arrange your camera alongside its extras, and you’ll need to do a little post-editing to ensure you have balanced exposure throughout.

Photo by Math on Unsplash
Additionally, you need to ensure every single angle of your camera is captured. For many of my posts, I’ll have over a dozen shots. A good example of this is to look at a new camera on a camera manufacturer’s website, like Canon or Sony. Try and replicate the shots they have of their products, this way you don’t forget any angles.
Ship Your Gear Safely
Perfect Image Camera understands that half the trouble with selling photography gear is packaging photography gear for transport.
There is nothing more disheartening than hearing your camera got injured on its journey to its new home, especially because that means you’ll probably end up paying for it if you didn’t have insurance.

Photo by Bench Accounting on Unsplash
You’ll want to include an excess of bubble wrap, use a correctly sized box, and print the shipping label, as opposed to handwriting it because this leaves room for error.
Lastly, I mentioned insurance. Make sure to purchase it if your courier doesn’t already guarantee its packages.
Bonus: Choose Where You Want to Sell Your Camera Wisely

Truly, none of these tips for selling camera gear are going to be helpful if you end up choosing a bad camera resale marketplace.
That’s why I use Gear Focus. Firstly, they were recommended to me by a trusted friend, which is how they’ve picked up most of their business. The marketplace was created by photographers, which means they understand the razor thin margins most professional photographers work on.
Instead of Amazon or eBay which charge over 10% of your sales in fees, Gear Focus only charges 3.5%, plus you can try it free for the first month.
Additionally, they often have killer specials, so if you list your item for sale, you might be entered to win an awesome prize, like a new camera or a drone.
Gear Focus is simply a far better idea for selling your gear than the likes of eBay or Craigslist. Trust me...I’ve tried selling on those sites before, and the experience was nowhere near as smooth as Gear Focus!
We Recommend
Sony a7S II Review
Photo by Antonio Janeski from Pexels
The Sony a7S III is supposedly right around the corner (we’ll see how Sony does this year given the coronavirus pandemic), but to get you through these dark times without any new camera releases, we figured we would review an older camera right before it gets upgraded.
The Sony a7S II dropped nearly 5 years ago, yet it still packs a punch. Read up on the Sony a7S II in this Sony a7S II review.
Sony a7S II Specs
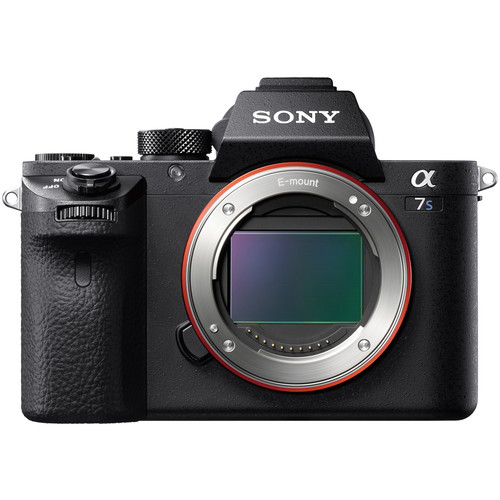
The Sony a7S II is a full-frame mirrorless with a 12MP sensor and 4K video capabilities.
It’s also known for its low-light shooting capabilities and an AF system that works in the most dire of circumstances.
Other Sony a7S II Specs Include:
- 12MP sensor
- ISO range of 100-102,400
- 4K video capabilities
- 3” tilting LCD with 1.22M-dots
- 100% EVF coverage
- 5fps burst mode
- 1.38 lbs
- Environmentally-sealed body
Recommended Photography Reading
- National Geographic Photo Basics: The Ultimate Beginner's Guide to Great Photography
- Photography: The Definitive Visual History
- Read This if You Want to Take Great Photographs
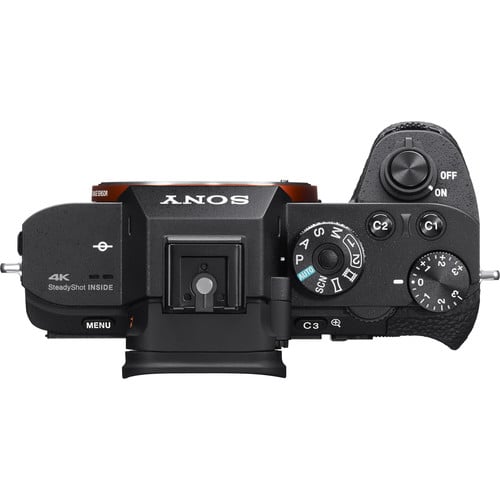
Sony a7S II Body & Design
One problem found in earlier versions of this camera was mechanical vibrations. It wasn’t a huge deal, but it was noticeable.
Thankfully, those vibrations are now about half as recognizable because the Sony a7S II was built with a reduced-vibration shutter. Additionally, this shutter will last at least 500,000 cycles, so you won’t need to purchase another camera for a good, long while.
This camera is also built out of more magnesium alloy than its predecessor, providing both strength and lightness to this camera. The magnesium alloy covers on the front, top and rear of the camera, also ensure the camera is more weather-resistant.
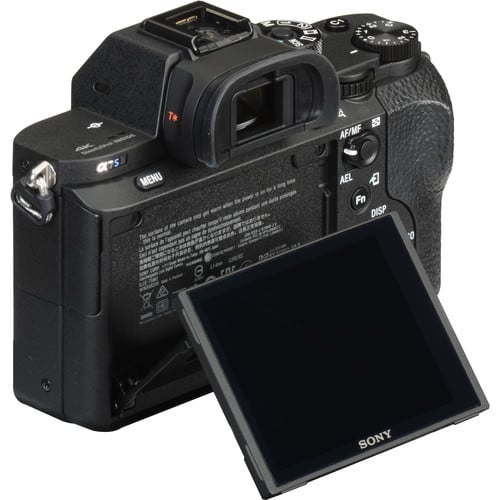
Sony a7S II Build & Handling
This camera, much like the a7 II and a7R II, allows you to comfortably hold it with easy reach to all of the controls. If you’ve owned either the a7 II or a7R II in the past, you can reasonably expect to pick up the Sony a7S II and understand the camera right out of the box.
The grip is now larger, the shutter release is located closer to the top of the grip, and tons of customization options are available.
One negative to the build of this Sony is that the video record button is located near the corner of the thumb-grip and it’s sort of awkward to reach while shooting.
But, the impressive EVF makes up for anything you may not like about the Sony a7S II handling. It features 100% coverage and almost perfectly matches the final shot.
Sony a7S II Video Performance
You don’t need to speak Spanish to understand that Ivan Lozano Films is a big fan of the 4K video shot on the Sony a7S II.
Given the impressive ISO range, shooting video in a variety of circumstances on this camera is incredibly fun.
As this video by TheBuffNerds showcases, you can capture 4K video on the Sony a7S II in either 30p or 24p with up to a 100Mbps bit rate.
Of course, you can also shoot full 1080p HD video at either 100Mbps or 60Mbps for great slow-mo.
Sony a7S II Price
You can purchase a new Sony a7S II on Amazon for $2,300.
Or, since the Sony a7S II is nearly 5 years old, you can save $1,000 by buying it used on MPB.

I know that buying a camera that’s five years old might give you pause, but the great thing about MPB is that they put each item they list through a rigorous inspection process. This results in a series of grades for the gear, that way you know precisely what the condition is before you ever press buy.
But, if you’re unpleasantly surprised by a malfunction or other issue, MPB has a six-month warranty on much of their gear. So, you can save money while having peace of mind. Not bad, right?!
We Recommend
The Sony a7 III Is the Best Sony Camera in 2020
Photo by Clint Patterson on Unsplash
The Sony a7 III dropped in 2018, but it’s still the best Sony camera for 2020. Why? Because it’s one of the most versatile mirrorless cameras Sony has ever released.
If you’re a photographer, a videographer, or you dabble in both, the Sony a7 III provides a camera with an excellent autofocus system, unbelievably clear shots and weather-sealing to ensure you never miss any action.
Plus, the Sony a7 III comes with an Eye AF system that works on pets, which is a cute, albeit unnecessary, perk.
Editor’s Tip: To help keep people inspired, MPB is doing a weekly #mpbthrowback Instagram giveaway. It's #tbt with MPB style: they’re inviting people to share a photo they've taken in the past, share where they were, how they noticed it, and what kit they were using. MPB knows that many people have been reminiscing about their photography adventures as they go through their portfolios, and they want to help amplify that inspiration!
Sony a7 III Specs
Photo by Alejandro Luengo on Unsplash
We published a fully Sony a7 III review a while back and you can read that here if you’re interested in a longer breakdown of this camera’s capabilities. But, here’s the basic specs:
- 24MP sensor
- 10fps burst mode
- 693-point AF system
- 4K video capabilities
- 3” articulating touchscreen LCD with 921.6k dots
- ISO range of 100-51,200
- In-camera image-stabilization
- Built-in Wi-Fi
- 710-shot battery life
Sony a7 III Video Test
Just so you can see the Sony a7 III in action, here is a video test by Picture Pulse.
The Sony a7 III is the best Sony camera for video because it shoots 4K video in a full frame format with S-Log. You can shoot 4K at 24fps, 25fps, or 30fps, or full HD at 30fps, 60fps, or 120fps.
Here’s another video test by Jakob Mihailo.
The one downside to the Sony a7 III’s video quality is that the in-camera image-stabilization hasn’t improved much since the technology first came out. Thankfully, Sony is already known for being the best for this feature.
Sony a7 III Stills
Here’s a slew of Sony a7 III stills so you can see what you’re getting into.

Photo by Thibault Mokuenko on Unsplash
Photo by Jose Martinez on Unsplash

Photo by Brett Frigo on Unsplash
My favorite quality about the Sony a7 III for stills is that the color has undoubtedly improved since the last Sony a7, with more accurate skin tones and easy transitions.
These photos are going to be easy to edit in post
Purchase a Sony a7 III
The Sony a7 III is available on MPB starting at $1,800. Considering that’s for a pre-owned camera in like-new condition with a battery, charger, and front lens cap, that’s a pretty good deal! That’s a savings of nearly $200 over a new one, and that’s money you can keep in the bank or use to snag a lens for your new-to-you a7 III.
If you’ve never bought a used camera before, it can be a little intimidating. There are plenty of horror stories from folks that have bought what they thought was a good camera on places like Craigslist, only to find that they were hoodwinked.
But buying through MPB gives you the peace of mind you deserve. MPB rates every camera so you know precisely the condition it’s in before you buy. Speaking of buying, it’s a simple process that gets your camera in the mail quickly and to your door ASAP.
I’ve bought (and sold and traded in) photography gear with MPB multiple times, and it’s been a pleasant experience all the way around. If you’re ready to upgrade your gear and do it on a budget, head over to MPB!
We Recommend
This Camera Belt Makes Carrying Gear a Breeze
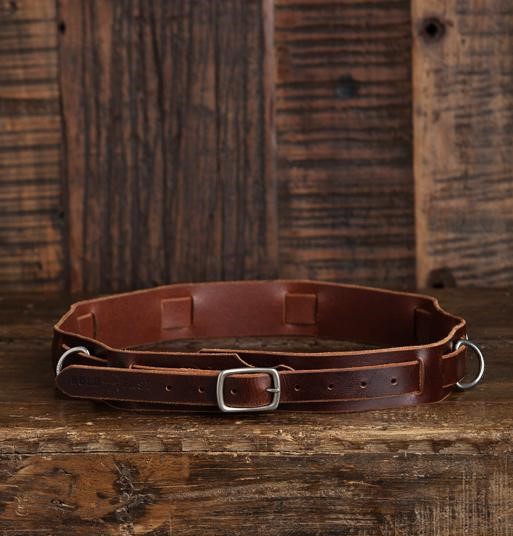
An alternative to camera bags, backpacks, and sling packs is using a camera belt. What is a camera belt? It’s a waist mounted belt that allows attachment of various pouches and clips so that you can carry your photography gear without being encumbered by any single large bag.
A camera waist belt may initially remind you of a fanny pack, but they are much more versatile and, quite frankly, don’t project a 1980s vibe to everyone.
Tanker Belt from Hold Fast
Case in point: the Tanker Belt from Hold Fast Gear.
Basic description of the Tanker Belt is a high quality, heavy-duty, wide leather camera belt that has numerous places and ways to attach camera belt pouches, gear clips, and different styles of straps for holding camera gear while you’re actively engaged in shooting or while trekking to or through the scenery.
Heavy-Duty / Nice-Looking
That’s a descriptor that could apply to many of us! Hold Fast’s Tanker camera belt is made from 9 oz leather in two choices, bridle leather which has a smooth finish, or bison leather which has texture. As with all fine leather goods, these camera belts will wear and age in a way that adds character to the piece.
Working with leather, ounces is a measure of thickness. Equivalent to a little over 1/8th of an inch (9/64ths to be exact), 9 oz leather is the same thickness used for crafting bridles, saddlebags, holsters and scabbards, and tool pouches.
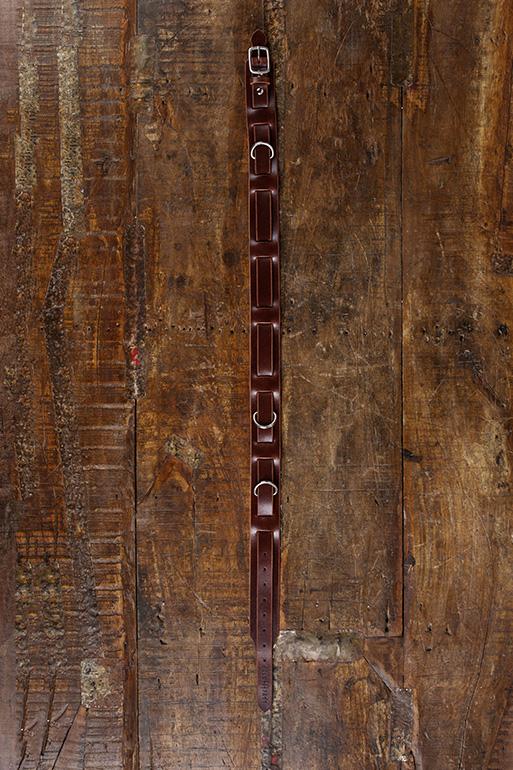
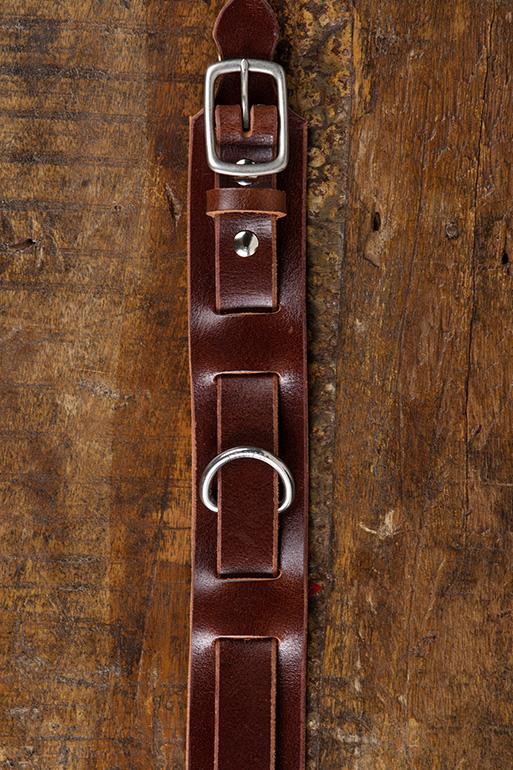
The Tanker camera belt is two pieces of 9 oz leather, a wide base and a narrower strap interwoven through a series of loops. There are three metal D rings and a user-changeable metal buckle included.
Learn More:
Comfortable / Versatile
One of the nice features of the Tanker camera belt is that two-piece construction. This allows you to customize it as a camera lens belt by adding one or more camera belt pouches to it such as the Sightseer Medium Lens Pouch.
The two pieces as layers also means your camera belt won’t sag your pants down such as often happens with a heavy tool belt. The base sits firmly against your jeans, hiking shorts, jodhpurs, or snow pants while the outer, narrow belt is allowed to sag a bit with the weight of whatever is attached to it.
Add Accessories
Some other pouches and holders you can pair with the Hold Fast Tanker camera belt are the Tanker Key Carrier, Sightseer Cell Phone Pouch, and Ranger MoneyMaker Attachment.
HoldFast Gear Tanker Belt is a versatile, high quality, heavy-duty, and nice-looking camera belt for active photographers. As much as we want one for ourselves, this camera belt also makes a wonderful gift for our photographer and videographer friends.
Learn More:
We Recommend
What are the Basic Camera Parts and How Do Cameras Work?
photo bynortonrsx via iStock
There’s no mistaking it that modern digital cameras are complex machines. There are tons of camera parts that make them work properly and record images as you’ve instructed the camera to do.
The question is, what are the essential parts of a camera? Beyond that, how do cameras work?
In this tutorial, we’ll seek to answer both these questions.
Table of Contents
- Digital Camera Parts: The Lens
- Digital Camera Parts: The Lens Aperture
- Digital Camera Parts: The Camera Shutter
- Digital Camera Parts: ISO
- Digital Camera Parts: The Camera Sensor
- How Do Cameras Work?
Digital Camera Parts: The Lens

Photo by Jeffrey Wegrzyn on Unsplash
First up is the lens, which, though it isn’t technically part of DSLRs or mirrorless cameras, is the first important component in making cameras work. Its job is to gather and focus light by using a series of glass elements inside its barrel.
The light that comes into the lens is bent, so it is directed onto the camera’s imaging sensor, which lies in the body of the camera. It is on the imaging sensor where the information about the light coming through the lens is recorded.
Obviously, the lens is a crucial component of this process, as without it, the light would not be directed onto the camera’s sensor.
Get details about the mechanics of how lenses work in the video above by CanonAsia.
There are many different types of lenses, from wide-angle to telephoto and primes to zooms.
For more details on the basics of lenses, check out this tutorial.
To summarize: Lenses gather light, focus it, and direct it through a series of glass elements where the focused light hits the camera sensor.
Digital Camera Parts: The Lens Aperture

photo by Rakdee via iStock
The aperture of a lens is comprised of multiple blades that open and close, thereby controlling the amount of light that’s allowed into the lens.
The larger the aperture opening, the more light that can reach the camera’s sensor. The smaller the aperture opening, the less light that’s allowed in. You can see how this works in the chart above.
Note that the aperture is measured in f-stops, where a small f-number like f/1.4 represents a very large aperture and a large f-number like f/32 represents a very small aperture.

photo by adamkaz via iStock
Likewise, the size of the aperture also influences the depth of field of an image, or the area that’s sharply in focus.
The smaller the f-number (i.e., f/1.4), the smaller the depth of field, like the portrait shown above. Notice how the background is blurry, which helps set the portrait subject apart in the shot.

photo by RobertBreitpaul via iStock
Conversely, the larger the f-number (i.e., f/32), the larger the depth of field, like the landscape scene in the photo above.
Notice how in this case everything from the foreground to the background is sharply in focus.
For additional insights into aperture and how it works, read our beginner’s guide to aperture and depth of field.
To summarize: The aperture of a lens controls the amount of light that enters the lens. The larger the aperture, the more light is available and the shallower the depth of field. The smaller the aperture, less light is available and the larger the depth of field.
Digital Camera Parts: The Camera Shutter
Moving into the camera body, the shutter is the next component involved in how cameras work.
The shutter is responsible for controlling the duration of light. So while the lens gathers light and directs it toward the camera’s sensor, the camera’s shutter acts as a gatekeeper for the light - if the shutter isn’t open, light does not pass to the sensor.
When the shutter button on a camera is pressed, the shutter opens for a period of time during which light hits the imaging sensor. You can see a camera shutter work in the video above by Criscamdotcom.

photo by PeopleImages via iStock
The duration of time the shutter is open ranges far and wide. For example, on professional cameras, the shutter speed might be as short as 1/8000th of a second. On the other hand, most cameras have shutter speeds as long as 30 seconds, and when the camera is in Bulb Mode, the shutter can be held open for minutes or hours at a time.
Most typically, however, photographers use shutter speeds between 1/4000th of a second and 10 seconds.
In addition to controlling how long light hits the camera’s sensor, the shutter speed is also responsible for how action is captured in an image.
Short shutter speeds will freeze movement of most subjects, like the runner in the image above.

photo by skynesher via iStock
Long shutter speeds result in blurred movement, like the waterfall in the photo above, because its motion is recorded over several seconds.
Naturally, the speed of the subject will determine the shutter speed you need to either freeze or blur its movement - to freeze the motion of a hummingbird’s wings, you’d need a much faster shutter speed than if you wanted to freeze the movement of a child playing soccer.
Get more details on this topic in our shutter speed tutorial.
In summary: The shutter speed is the gatekeeper of light and determines how long the light is allowed to hit the imaging sensor. Longer shutter speeds result in blurred movement while shorter shutter speeds are needed to freeze movement.
Digital Camera Parts: ISO
Though ISO isn’t a mechanical part of the camera, it works with the aperture and shutter speed to control the exposure of the images you take.
Where the aperture determines the amount of light and the shutter speed controls the duration of light, the ISO determines the sensitivity of the camera sensor to light.
ISO is measured on a scale, where smaller numbers (i.e., ISO 100) indicate less sensitivity to light and larger numbers (i.e., ISO 6400) indicate greater sensitivity to light.
Get more details on how ISO works in the video above by Benjamin Jaworskyj.

photo by Lisa5201 via iStock
ISO is also responsible for how much digital noise there is in an image.
Digital noise looks like film grain, and can be used as an artistic element to create an image that looks gritty and raw, like the black and white photo above.
However, in most situations, photographers endeavor to minimize digital noise, and thereby seek to minimize the ISO value to do so.
Learn more about ISO and how it influences your images in this beginner tutorial on ISO.
In summary: ISO determines the sensitivity of a digital camera’s sensor to light. The higher the ISO setting, the more sensitive the camera is to light and the more grain that will appear in the image. The lower the ISO setting, the less sensitive the camera is to light and the less grain that will appear.

It’s important to note that while aperture, shutter speed, and ISO have their individual duties and effects on your images, they also work together to help create each exposure.
When shooting in full auto mode, the camera controls all three settings, sometimes with good results, but often with a less-than-desirable outcome.
By learning how the exposure triangle works and how to manipulate each of these three settings on your own, you will have more control over how an image looks and will be better prepared to create an image that’s well-exposed.
Learn about the benefits of shooting in manual mode in this tutorial.
Digital Camera Parts: The Camera Sensor

photo by Claudia Nassvia iStock
Clearly, one of the most important parts of a camera is the imaging sensor.
As noted earlier, the sensor is where the focused light from the lens is directed and recorded. The information about light is recorded by millions of photosites, or pixels.
Imaging sensors are measured in megapixels, like 12-megapixels and 24-megapixels. Each megapixel contains one million pixels.

photo by estherpoon via iStock
As you might imagine, the more pixels there are, the more light information that can be captured. As a result, these images are generally of a higher quality than lower-megapixel images, at least from the standpoint of color rendition, contrast, and dynamic range, to name a few. This is why professional photographers tend to utilize full frame cameras with large imaging sensors rather than micro four-thirds or compact cameras, which have comparatively tiny imaging sensors, as shown in the graphic above.
This isn’t to say that high-quality photographs can’t be taken with cameras that have small sensors - far from it. However, larger sensors enable photographers to produce higher-quality images thanks to the improved light-gathering power of larger sensors.
Our tutorial on camera sensor sizes goes deeper into this issue. Read it here.
In summary: A camera’s imaging sensor records the light from the lens. The larger the camera sensor, the more capable it is of recording information about color, contrast, and so forth.
How Do Cameras Work?

photo by MarioGuti via iStock
Though there are many, many other parts of the camera with which you should be familiar, at their core, the lens, aperture, shutter speed, ISO, and imaging sensor are the primary components of capturing photographs.
As noted in the “in summary” notes throughout this tutorial, it is a process that requires many steps, from the lens focusing light to the aperture determining the amount of light to the shutter speed allowing light into the camera. From there, ISO is used to control the sensitivity of the sensor to light, and the sensor’s pixels record the light information to capture an image.
This is a simplistic summary of how cameras work, to be sure. But it gives you the basic notion of what needs to happen for an image to be recorded.
For a deeper examination of how cameras work, check out the video above by BBC Earth Lab.
And, with that, you have a quick explanation of camera parts, their functions, and how they work together to help you take a photo!