11 Quick Landscape Photography Tips to Instantly Improve Your Photos
The great thing about landscape photography is that there are so many possibilities for creating an awesome photo.
Whether you prefer mountains or beaches, forests or rivers or something in between, there's a landscape for every photographer.
The question is, how do you take better landscape photos?
Here's 11 can't-miss landscape photography tips that will help you improve the results you get.
Use Negative Space
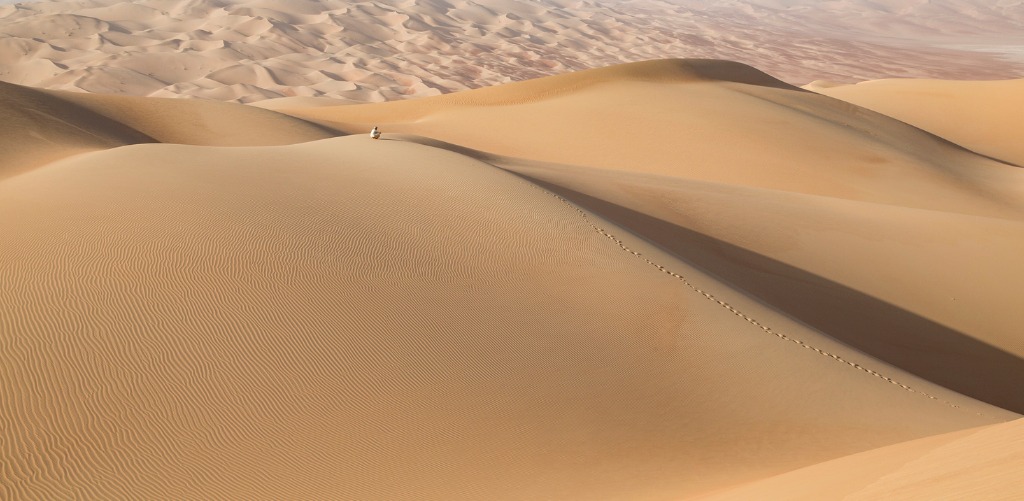
Sometimes landscape photos can look and feel a bit overwhelming. That's why simplifying things and utilizing negative space can be so effective.
Rather than trying to cram everything about a landscape into a single frame, try framing your photos in a way that surrounds the subject with negative space, as shown above.
Not only does this help viewers zero in on the subject more effectively (like the person in the photos above), but it also creates a more unique and interesting view of the scenery.
Use a Long Lens

Another way to help your subject stand out in a landscape photo is to use a long lens.
By shooting telephoto instead of wide-angle, your camera has much more reach so you can feature details that might otherwise get lost in the scene.
Like using negative space, this helps minimize the clutter in the photo.
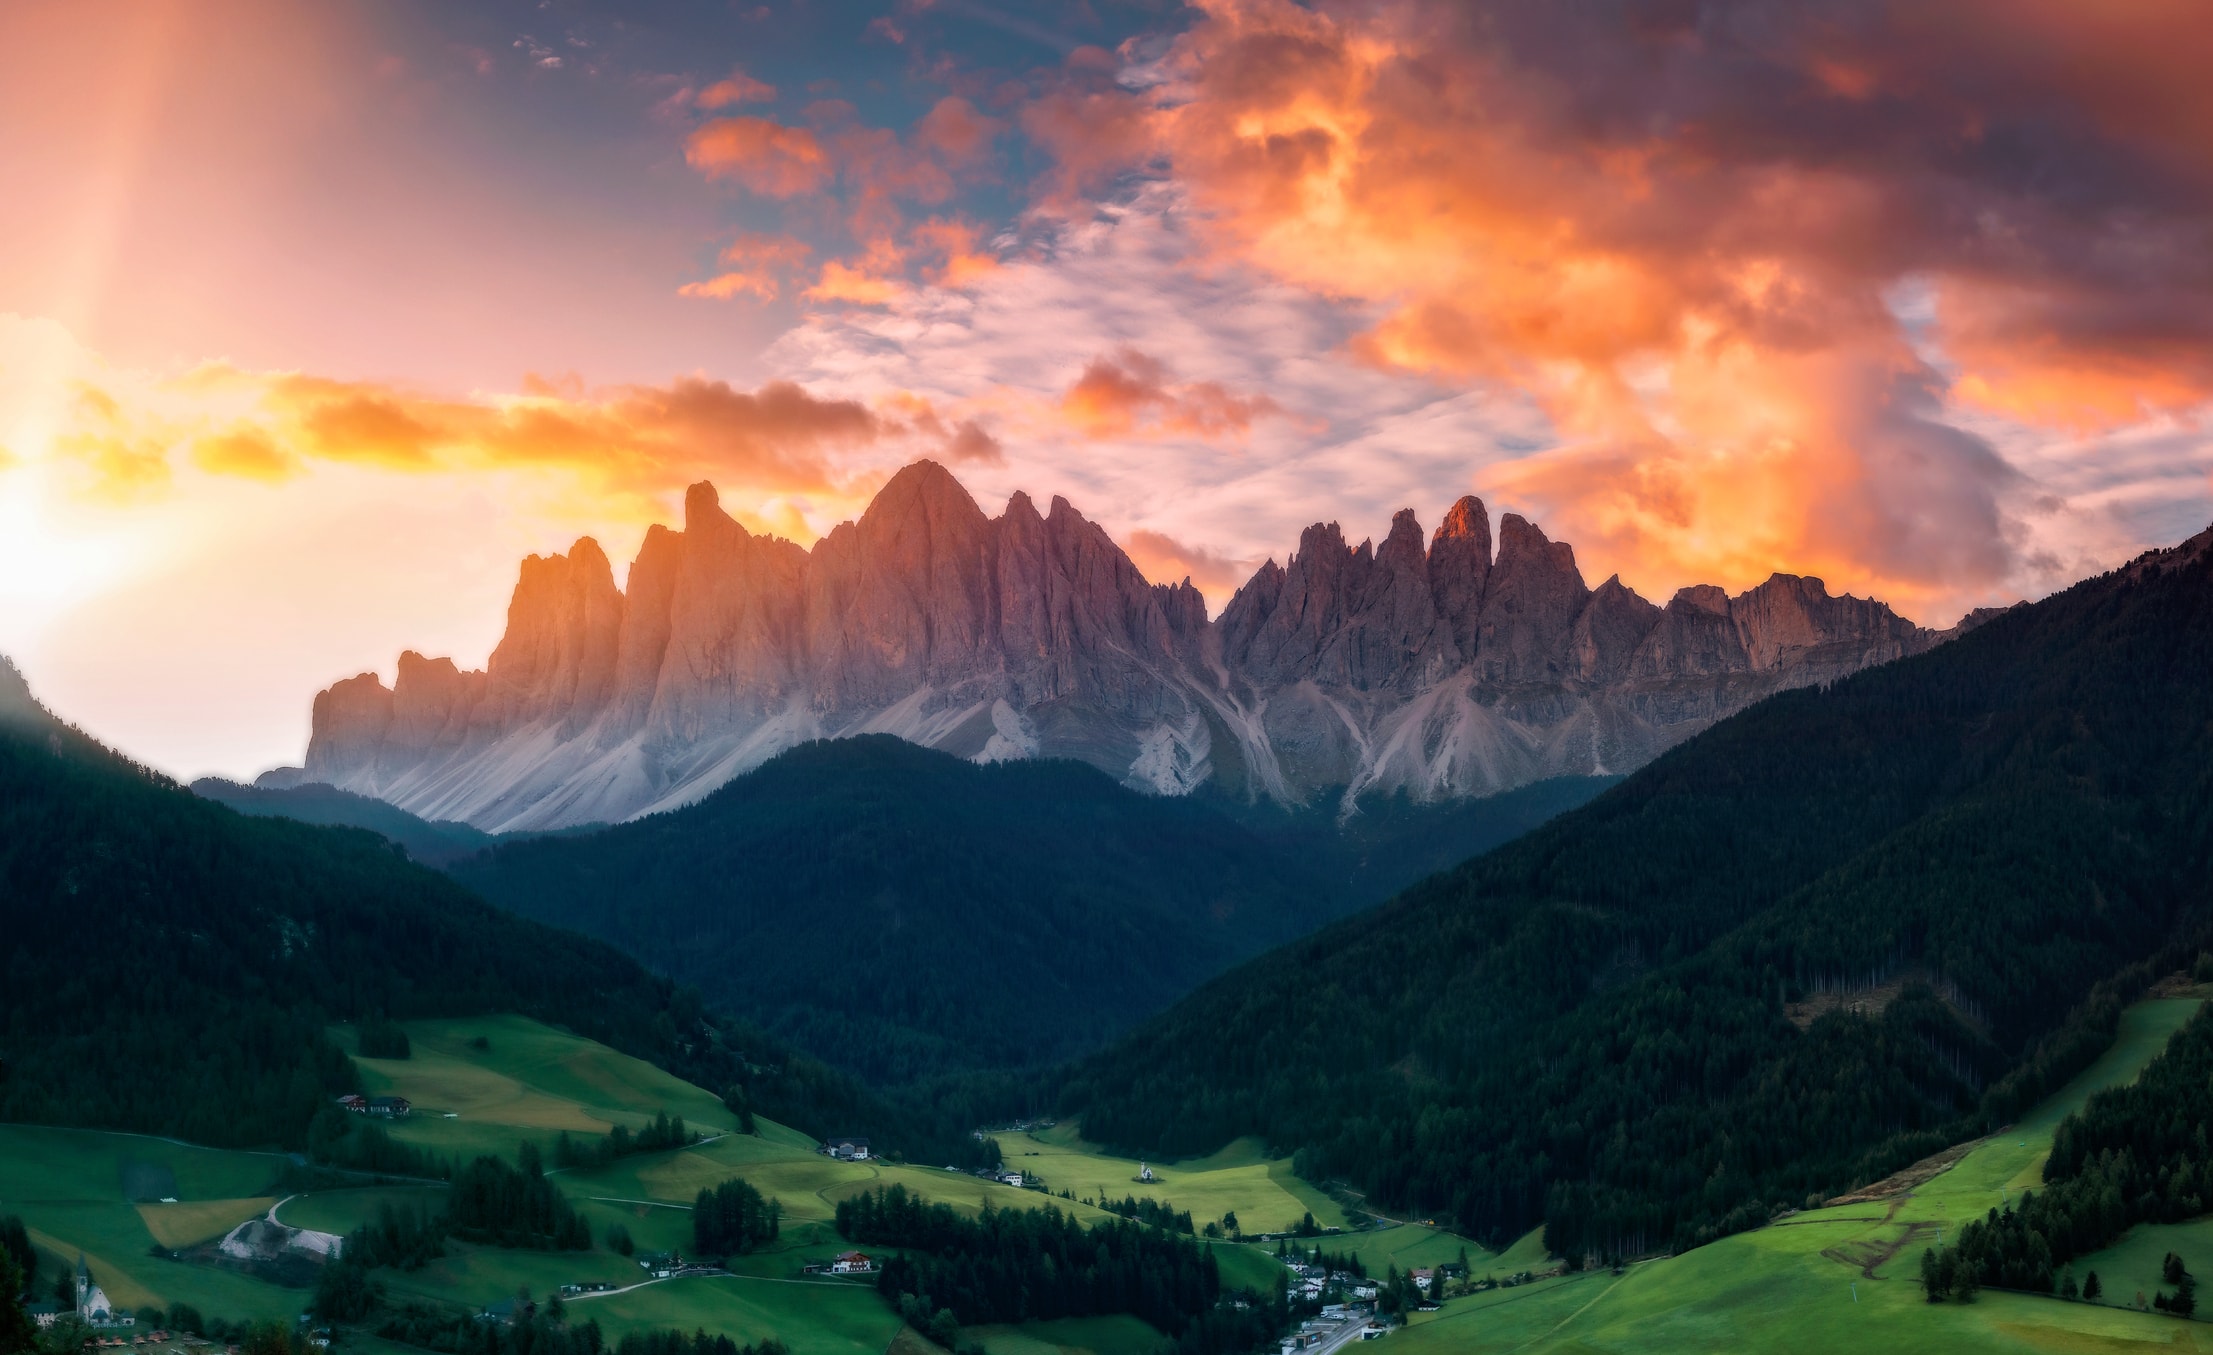
But shooting with a long lens also helps compress the perceived distance from foreground to background, so background elements appear much closer and larger, as seen above.
Add a Person
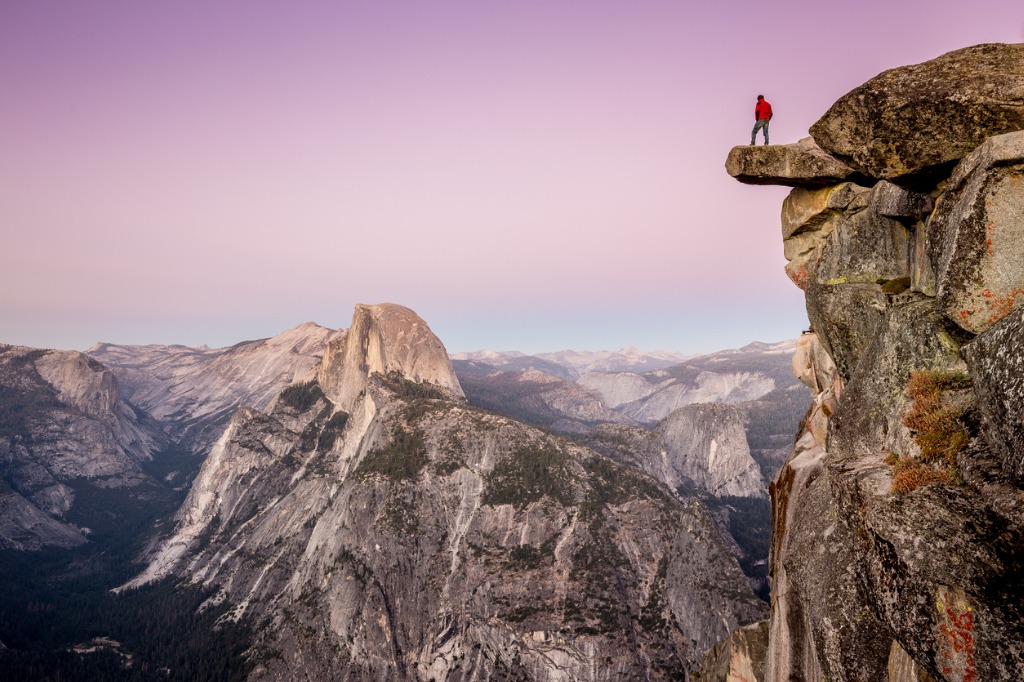
The problem with shooting landscapes is that it can be difficult sometimes for viewers to get a good sense of the scale of the scene.
One way to help them out with that is to place a familiar-sized object in the shot, like people.
In the image above, for example, the man standing on the overhanging rock gives us a much better understanding of just how big the mountains (and the vertical drop) are in this shot.
Often, using people as "props" for your landscape photos will help you increase the wow factor to create a much more dramatic photo.
Find a Strong Subject
All photos need a strong subject, and landscapes are no exception.
The problem is that when you're faced with a big, sweeping view of a gorgeous landscape, it might be hard to decide what feature to highlight as the subject of your photo.
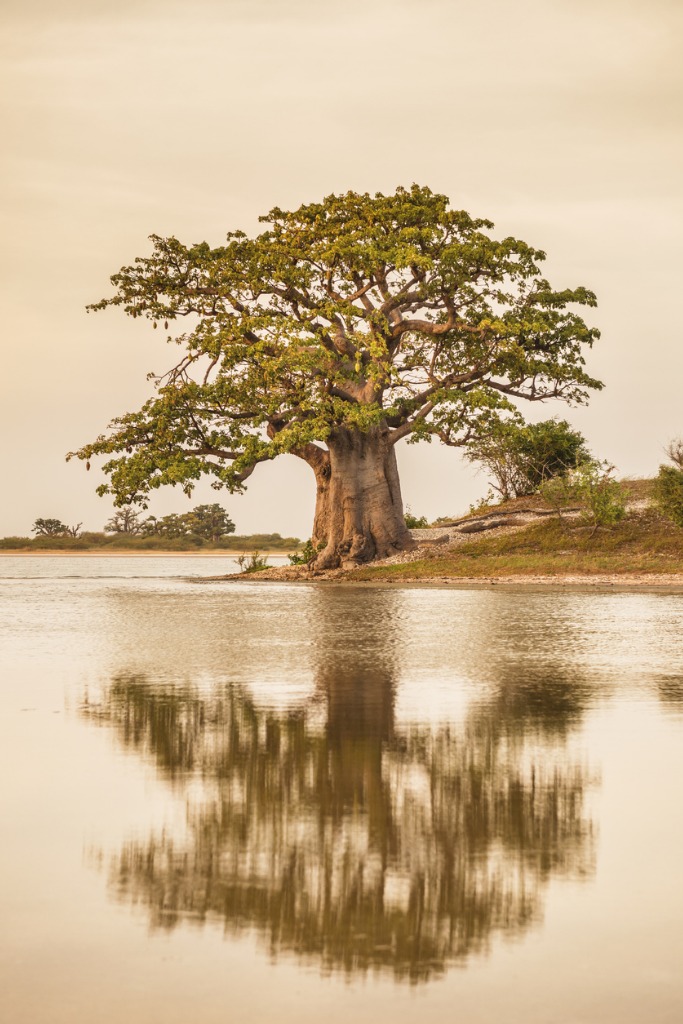
Strong subjects don't have to be big, like a mountain peak. Instead, they just need to be interesting and have a feature that grabs people's attention.
That feature might be its shape, color, texture or pattern. In the case of the image above, the tree's shape is eye-catching as is the pattern that its branches create.
Quick Tip: Don't be afraid to utilize the negative space or the telephoto lens techniques mentioned earlier in order to make your subject stronger in the frame.
Use Filters to Manage Tough Lighting
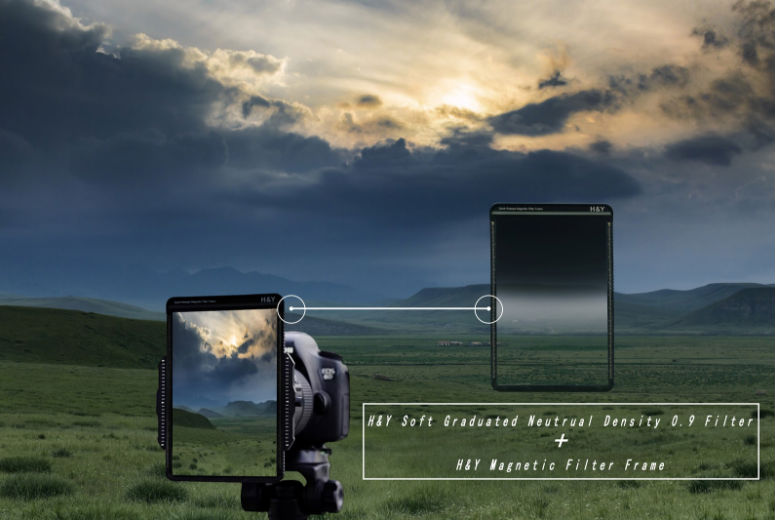 Photo Credit: Ding Zi Yu
When it comes to landscape photography gear, a good set of filters is a must-have.
That's because armed with the right filters, you can control challenging lighting that often gives your camera fits.
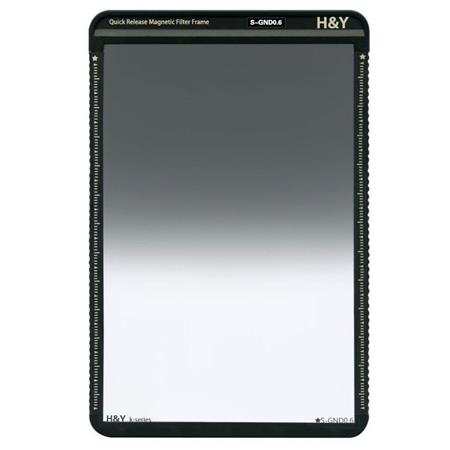
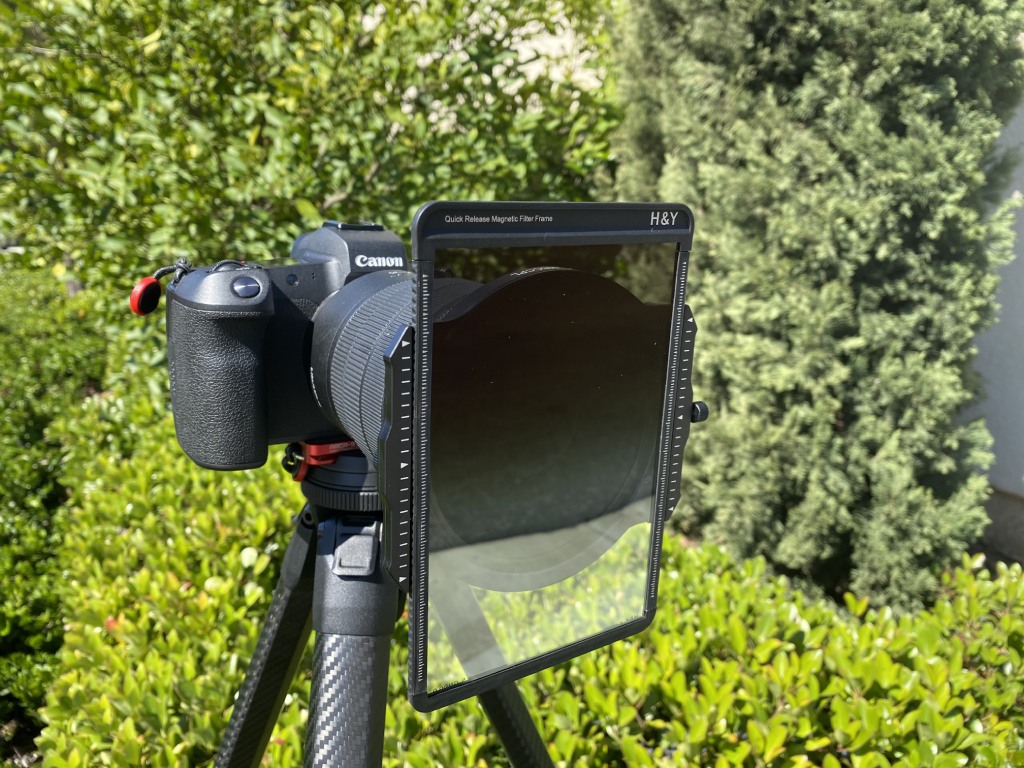
That is, you'll typically find that a landscape is dark relative to the sky. That creates challenges for many cameras that can't handle the range of values from light to dark. That's where a graduated neutral density filter comes in handy.
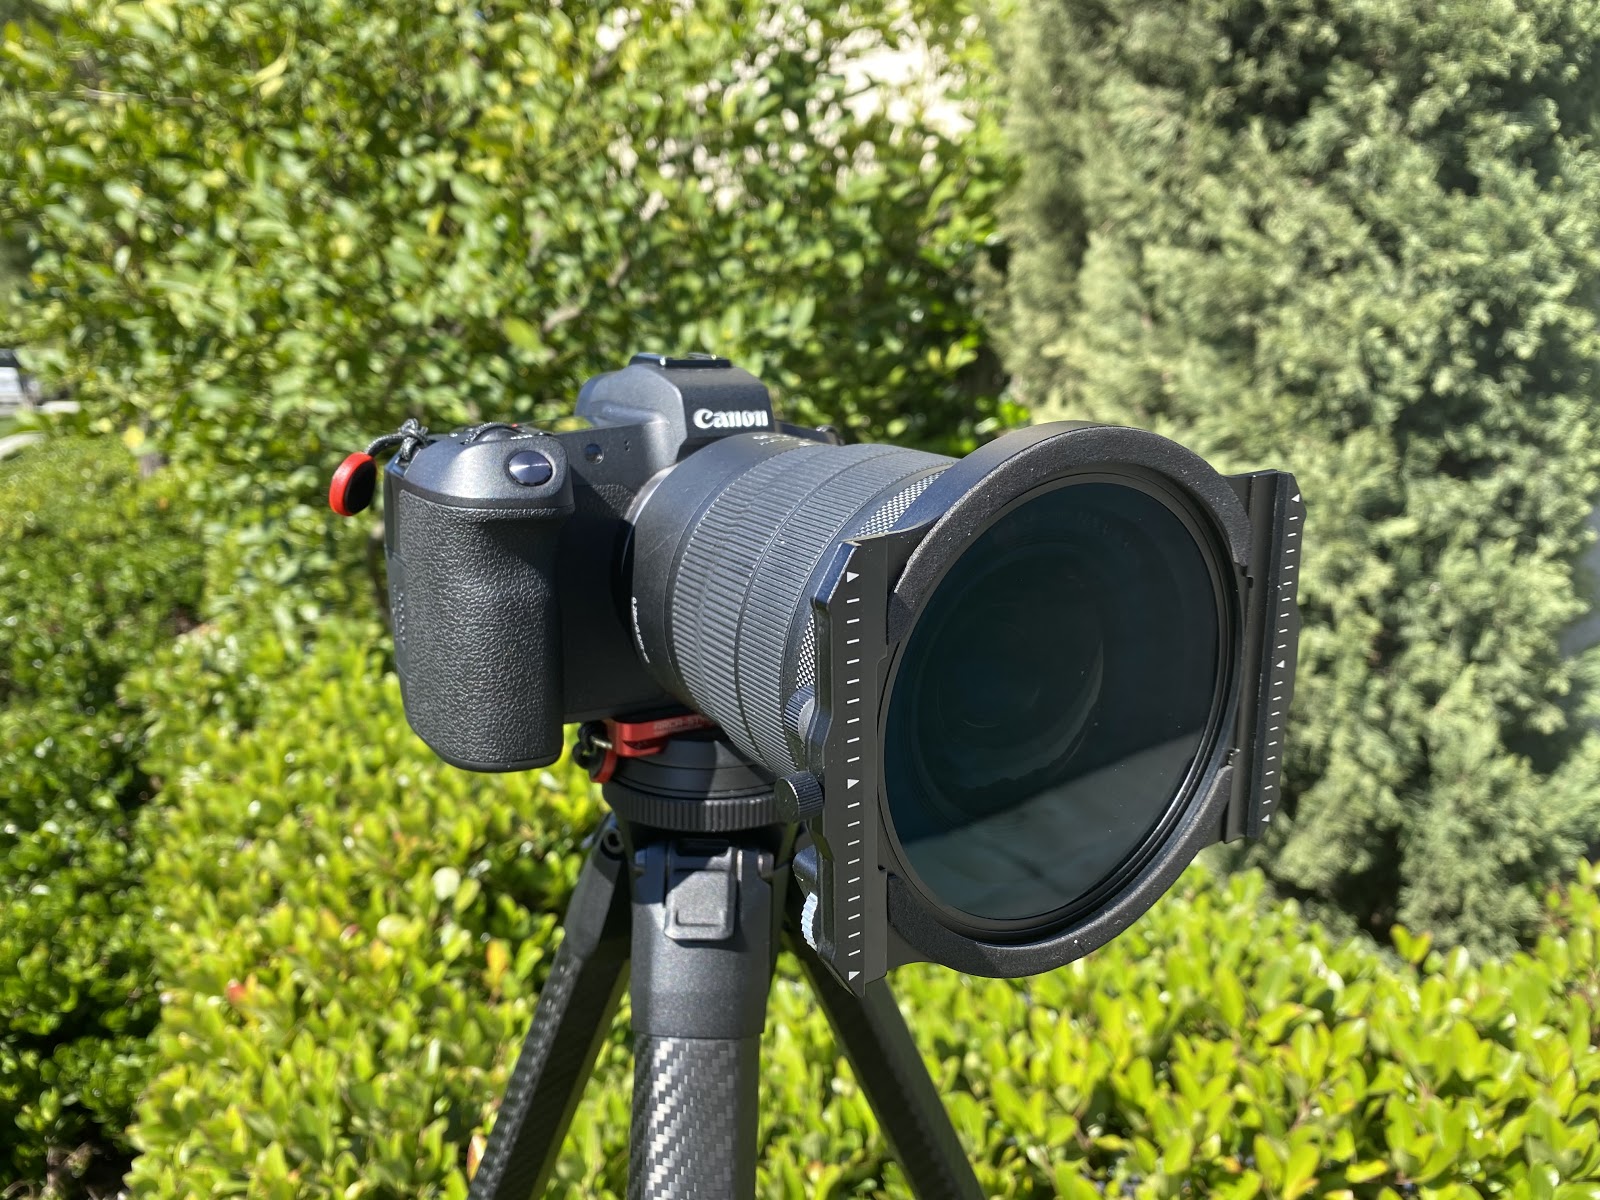
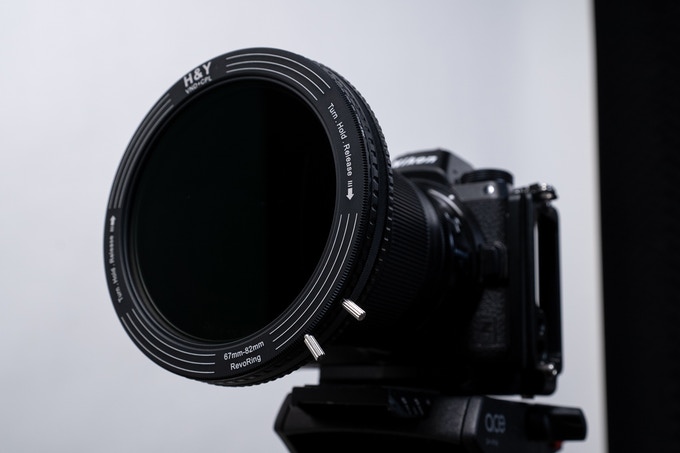
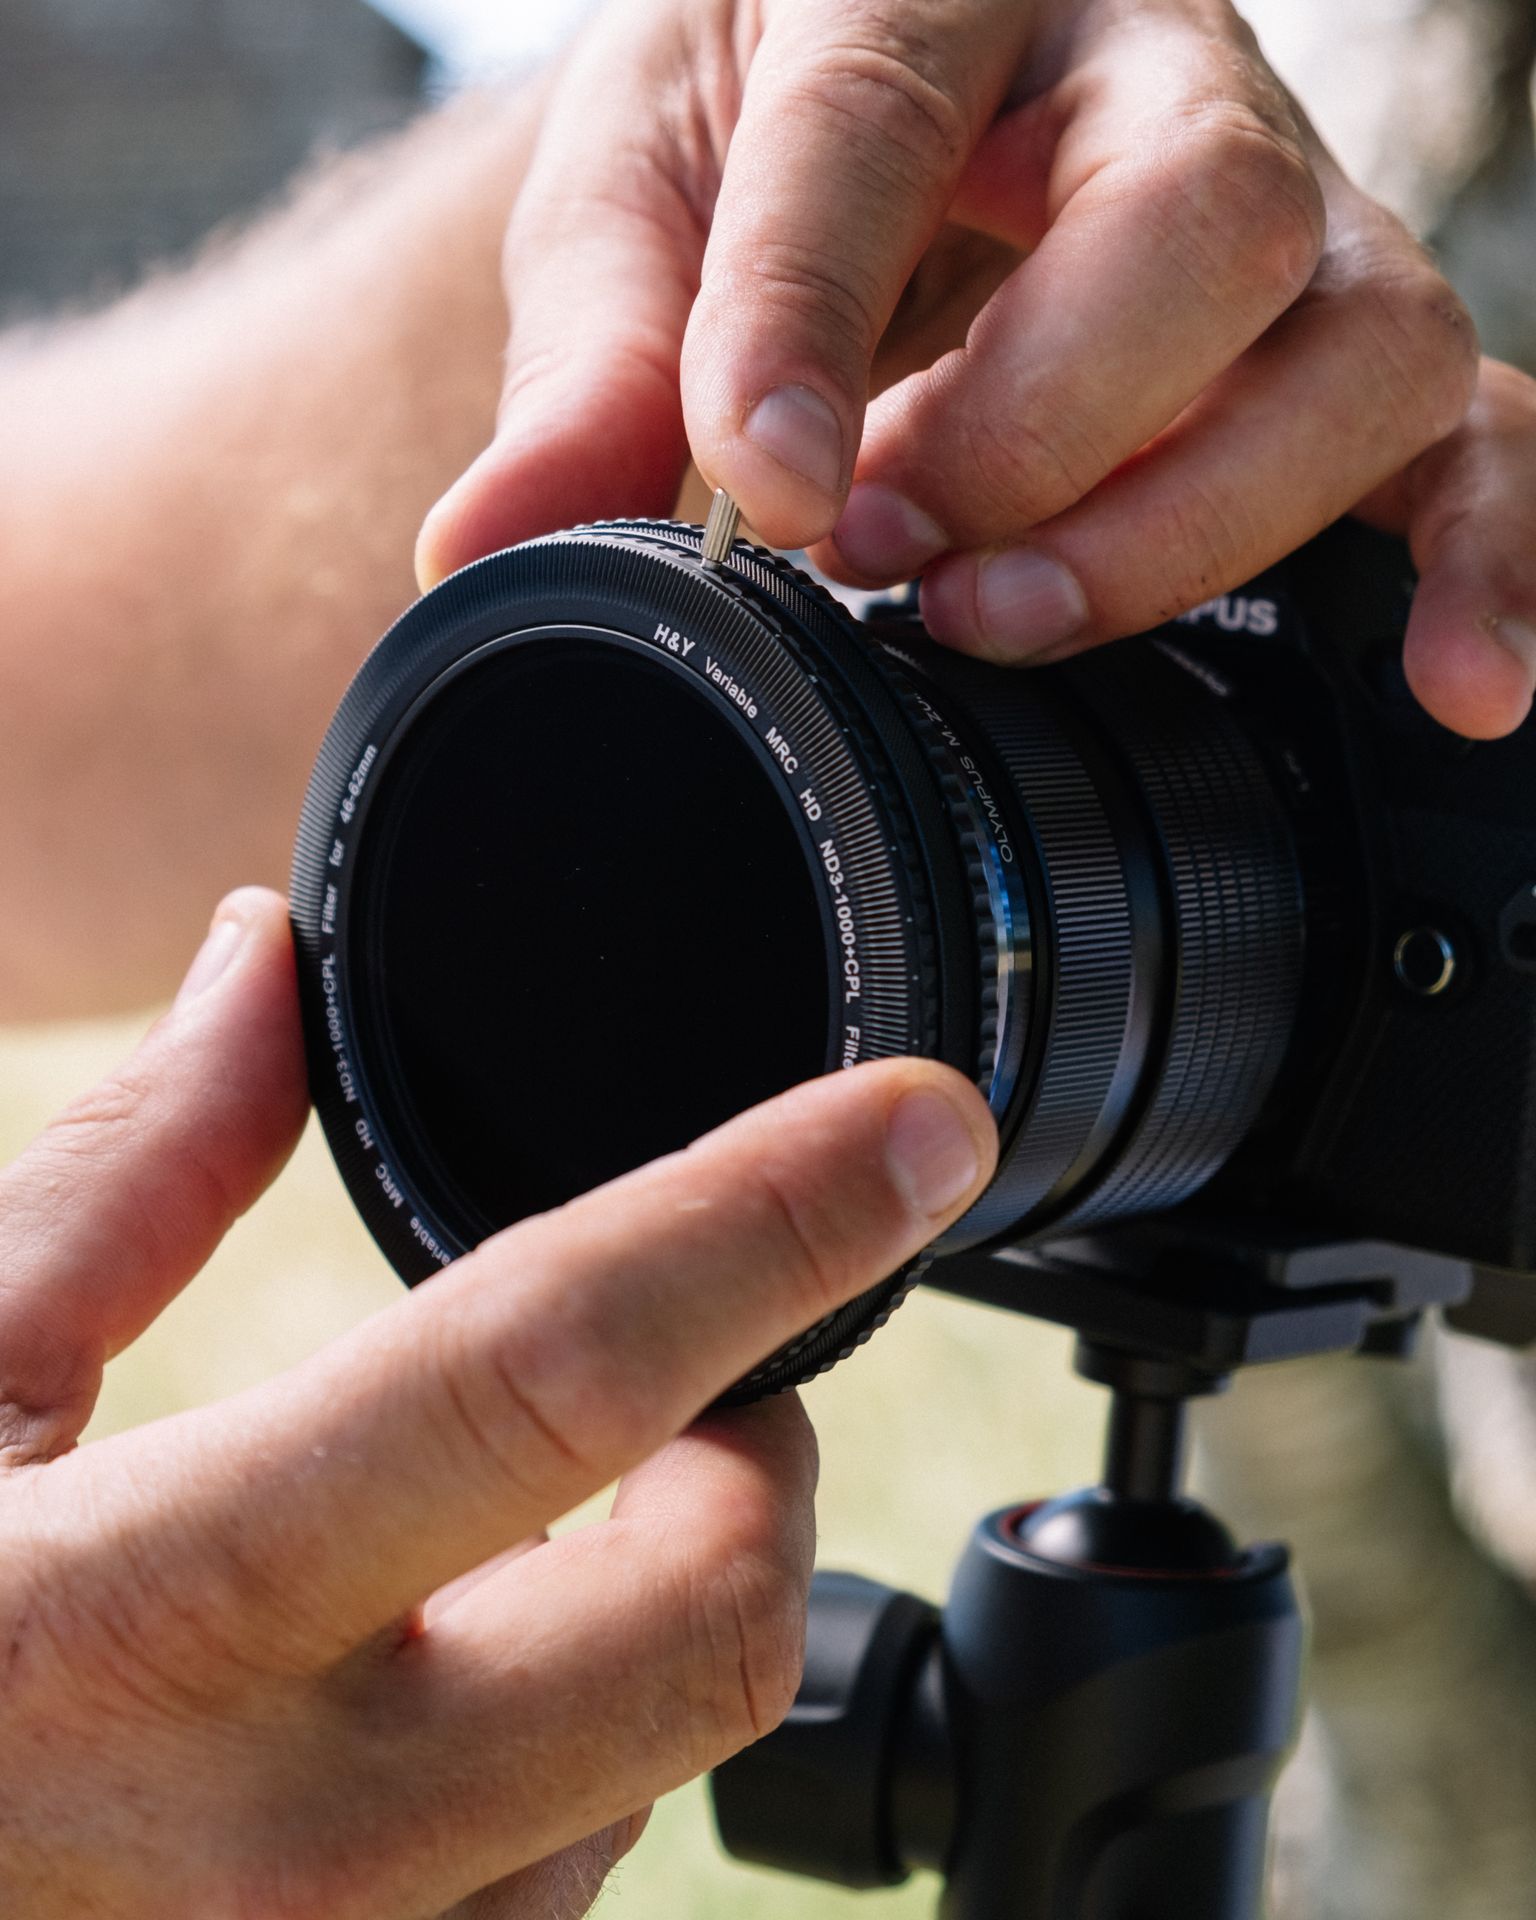
I had a chance to test out an H&Y soft-edge 0.9 graduated neutral density filter the other day, and I have to say that I'm really impressed.

At first I was skeptical because it has a magnetic frame. I was concerned that this system wouldn't work well and that light leaks would be a problem. That was definitely not the case!
In fact, I found this filter to be incredibly easy to use and highly effective, too.
The soft-edge transition between the dense and clear areas of the filter is perfect for landscapes that don't have a definite horizon.
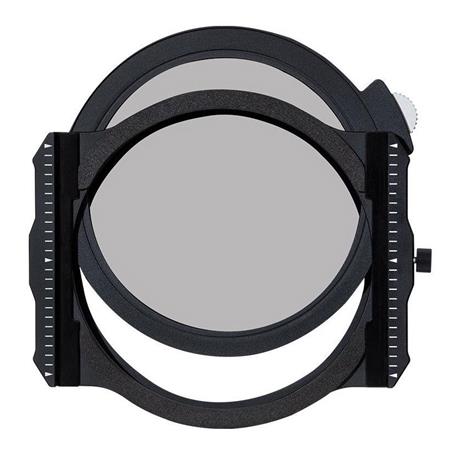
Combine the H&Y Magnetic K-series Holder with the H&Y Magnetic Filter Frame, and you can stack mount multiple filters and slide your filter to the preferred position without concern of them detaching. Gapless edges prevent extraneous light from entering between filters and causing flare or light leak as well.
Square and rectangular filters can be very fragile and easily scratched, smeared by fingerprints or dropped and broken, so the innovative patented H&Y Magnetic Filter Frame designed for 100×150mm and 100×100mm filters brings additional security to handling of filters and reduce fingerprints around the border of the filters.
Photo Credit: Ding Zi Yu
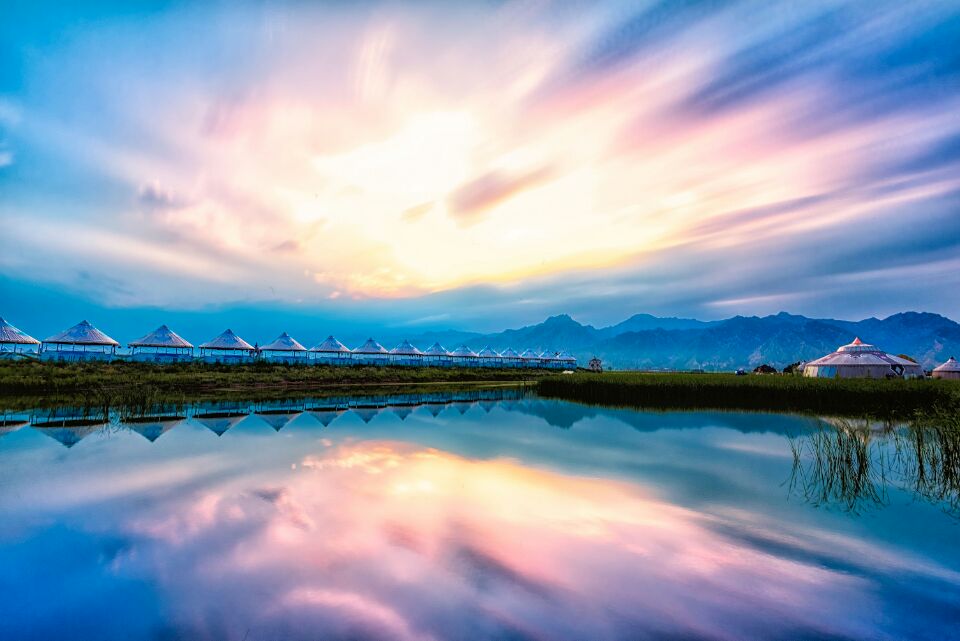
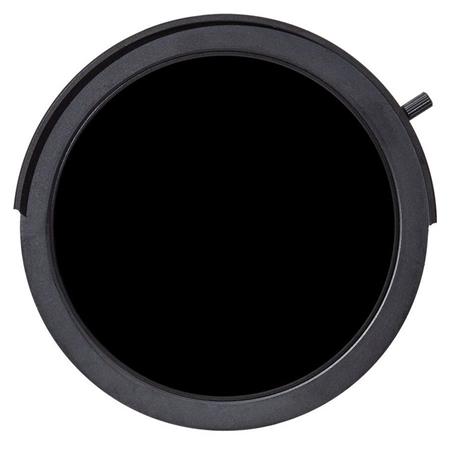
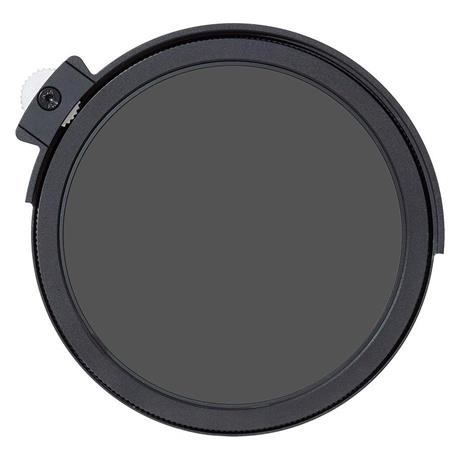
I appreciate the Gorilla glass construction of this filter as well. The tougher and more durable a filter is, and the more scratch resistance it has, the better!
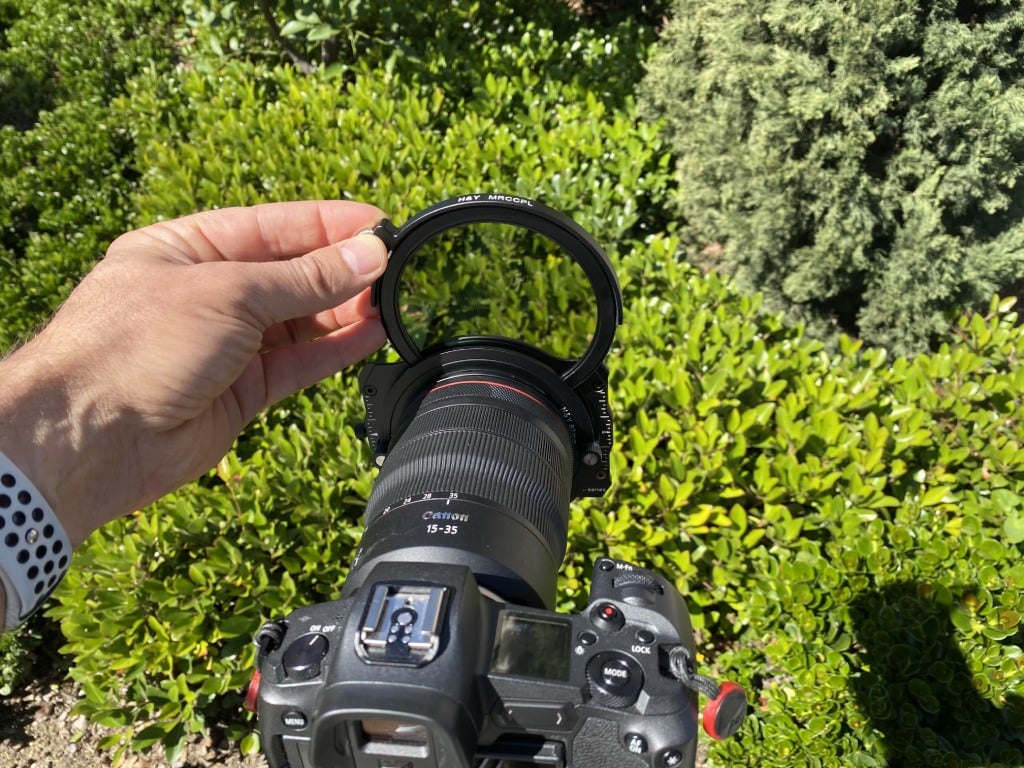
The coolest part of the filter, though, is the magnetic mounting feature.
It made attaching and unattaching the filter from the H&Y filter holder a total breeze, which is handy when I need to quickly change filters to adjust to changing light.
Even better, you can stack multiple filters that have this same magnetic feature.
In other words, though I had my doubts about these filters and filter holder, once I got them and used them, I quickly realized that they are made to last, work great, and helped me get better results. They can do the same for you, too!
Change Your Perspective

The vast majority of landscape photos are taken from the photographer's eye level.
The problem with that is that it can make your photo look a little boring because it's the same perspective from which everyone sees that landscape.
Instead, find a higher vantage point to shoot down towards the landscape (or use a drone, as shown above), or, conversely, kneel down or lay down on the ground and shoot up towards the landscape.
Utilizing these bird's eye and worm's eye points of view are among the easiest tips for how to improve landscape photos.
Incorporate More Foreground
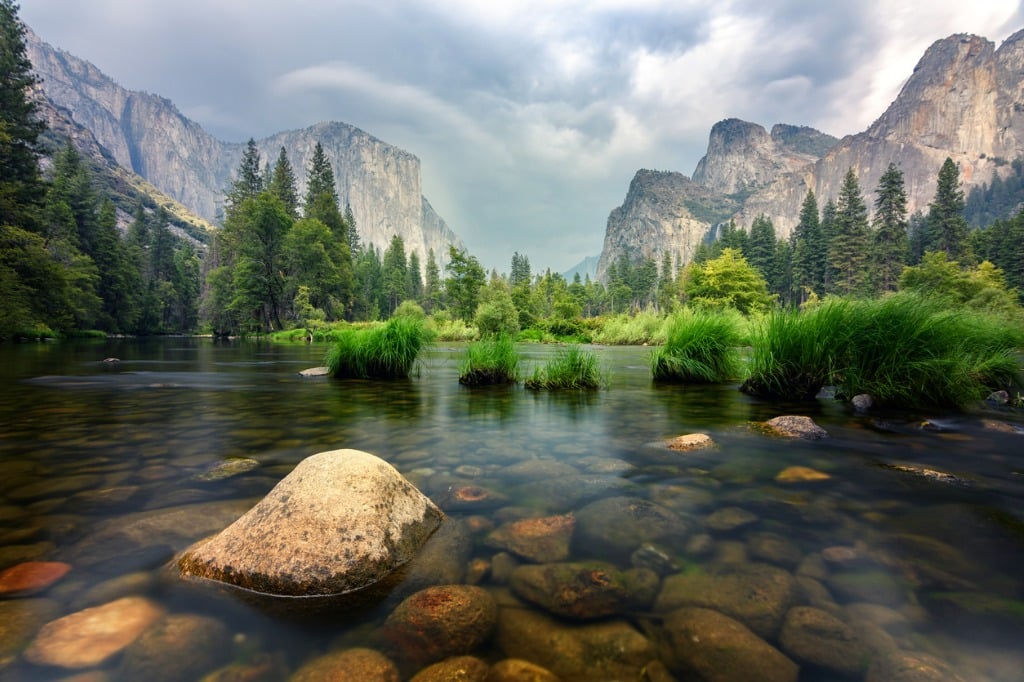
A benefit of dropping down for a low-angle shot as recommended in the previous point is that you can incorporate more foreground.
By doing so, you can give your landscape photos more depth and make them feel more like three-dimensional representations of the landscape.
Foreground elements can be anything from rocks and boulders to flowers or other plants. You can even use the textures created by wind in the sand or patterns created by the arrangement of rocks in a stream.
The point is that having interesting objects in the foreground will help draw viewers into the shot and drive their eyes deeper toward the background.
Use Leading Lines

Speaking of creating depth, using leading lines is an excellent way to give your landscape photos a feeling of being three-dimensional.
That's because our eyes naturally like lines, so when you incorporate them into your landscape photos, people will immediately follow them with their eyes.
Leading lines connect the foreground to the background and take viewers on a journey through the landscape.
Quick Tip: Leading lines don't have to be overt like a road or a fence. Instead, even faint lines created by an old hiking trail or something of the sort will serve well as a leading line.
Try Blue Hour
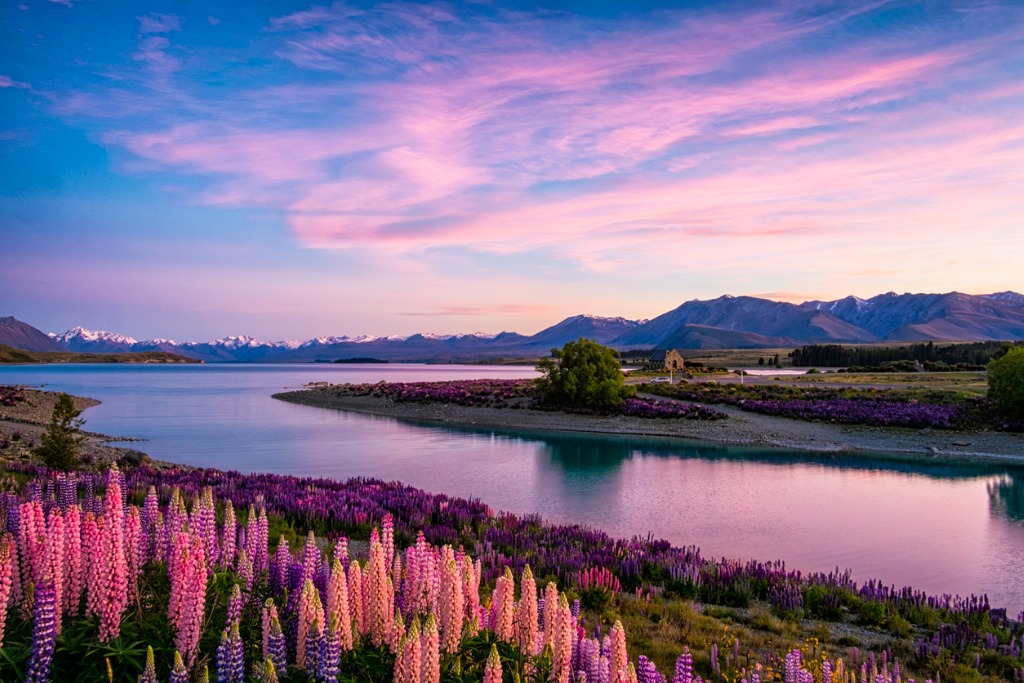
Golden hour gets all the glory in landscape photography tips and tutorials, but blue hour isn't too shabby.
The cool tones associated with blue hour are far more calm and gentle than those you find earlier in the day. That can help you create gorgeously serene shots like the one shown above.
Blue hour occurs before sunrise and after sunset, and really only lasts about 20-30 minutes depending on the time of year and your location.
But even though it's fleeting, shooting at blue hour can help you capture some impressive scenes!
Use a Frame
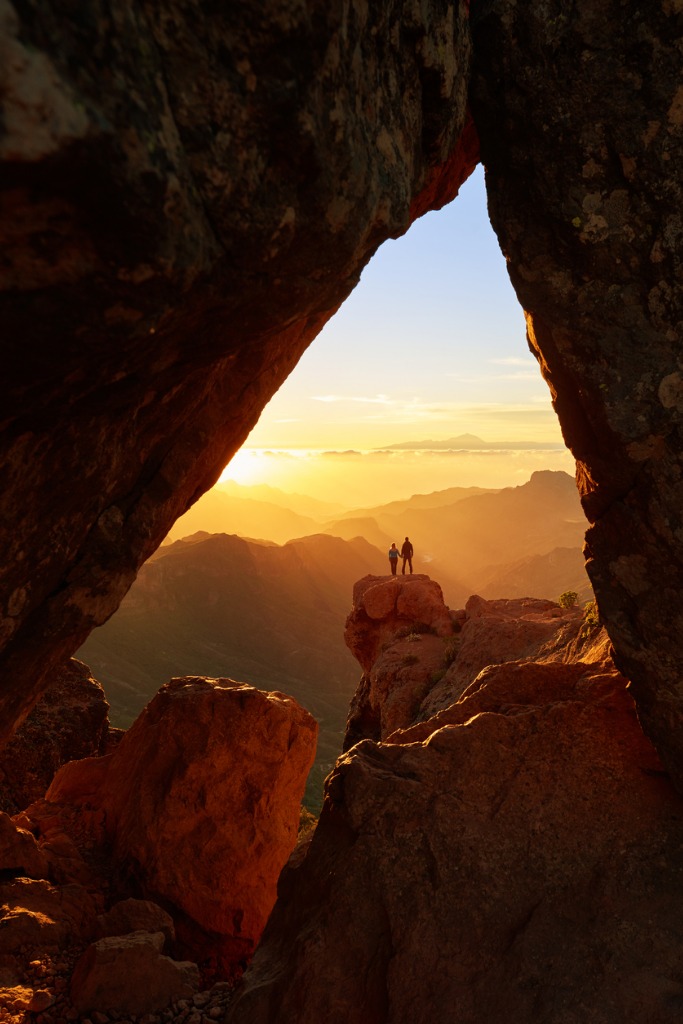
Earlier, I mentioned that adding foreground interest is a great way to create a photo with more depth.
Another tip for landscape photography is to use a frame within a frame.
By incorporating something in the foreground like the tree in the image above, you help drive the viewer's eyes deeper into the shot.
What's more, if used correctly, a frame can help make the primary subject stronger, too, much like the rock formation in the image above does for the people posed behind it.
Use a Tripod
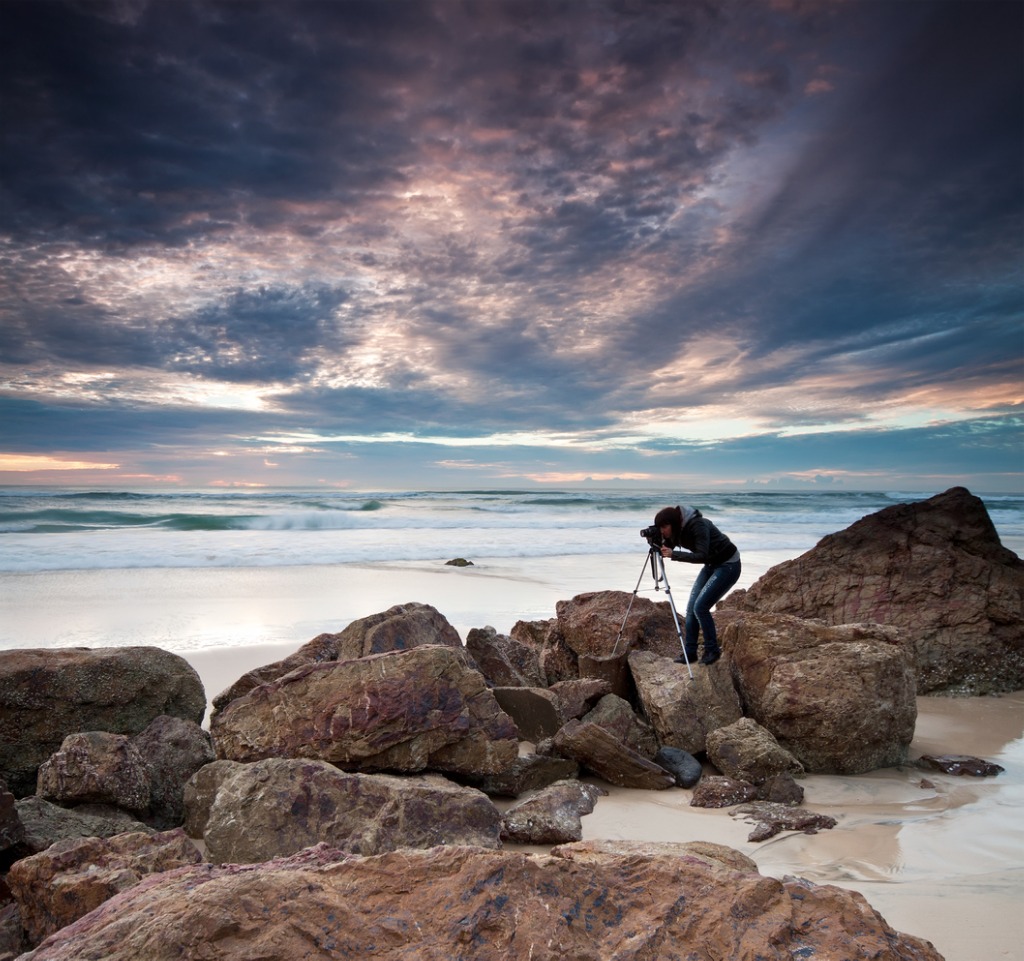
Perhaps one of the simplest tips for how to improve landscape photos is to use a tripod.
Not only does a tripod give your camera a more stable base for getting sharper photos, but it also helps you slow things down and concentrate more on things like composition, framing, and the perspective from which you shoot.
Some tripods even have inverted center columns that allow you to frame up shots close to the ground, which helps you incorporate foreground interest.
And today's tripods are so lightweight that you can easily take one with you on virtually any outing.
Use this and the other landscape photography tips outlined above, and you'll be on your way to taking much better landscape photos.
We Recommend
landscape photography tips, tips for landscape photography, how to improve landscape photos, landscape photography gear
5 Landscape Photography Accessories You MUST Have
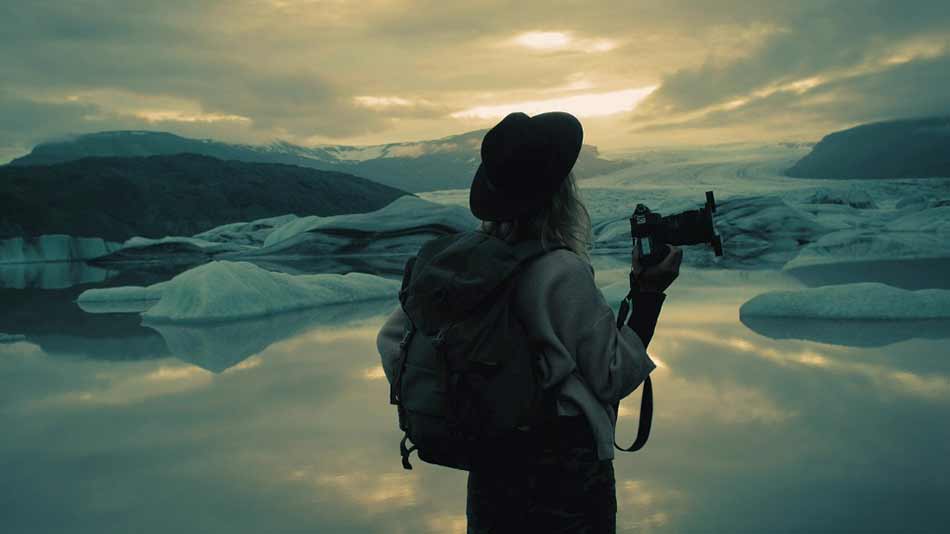
photo byjaniecbros via iStock
What landscape photography accessories are you looking for this year? By accessories, I mean things other than a lens or a camera, so there’s a lot of room for categories of items and landscape photography tips that can assist your landscape photography in some way.
You may be surprised by how little some of the best landscape photography gear costs. Because, let’s face it, it’s easy to just keep dropping money on more and more stuff. So here a few of my choices of accessory equipment that, used properly, could improve your landscapes.
Bubble Level
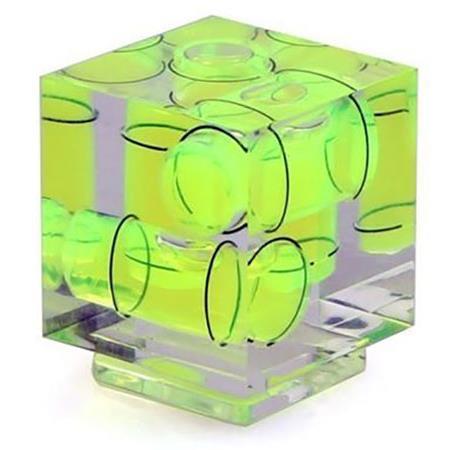
The horizon line is often very important in landscape photography composition, so keeping it straight can make the difference whether we end up capturing an outstanding image or we end up with files we have to adjust a lot in post.
Almost every post processing program I know has an adjustment for rotating the image, but you also end up losing part of the image as you do that. Leveling it up in camera is a better choice. Some cameras have their own built in bubble level, for others you can either use a tripod head with a level in it or add a bubble level to the camera hot shoe.
Here is an example of a bubble level from Vivitar that works very well for something costing around the same as a foot long submarine sandwich.
Rain Shield
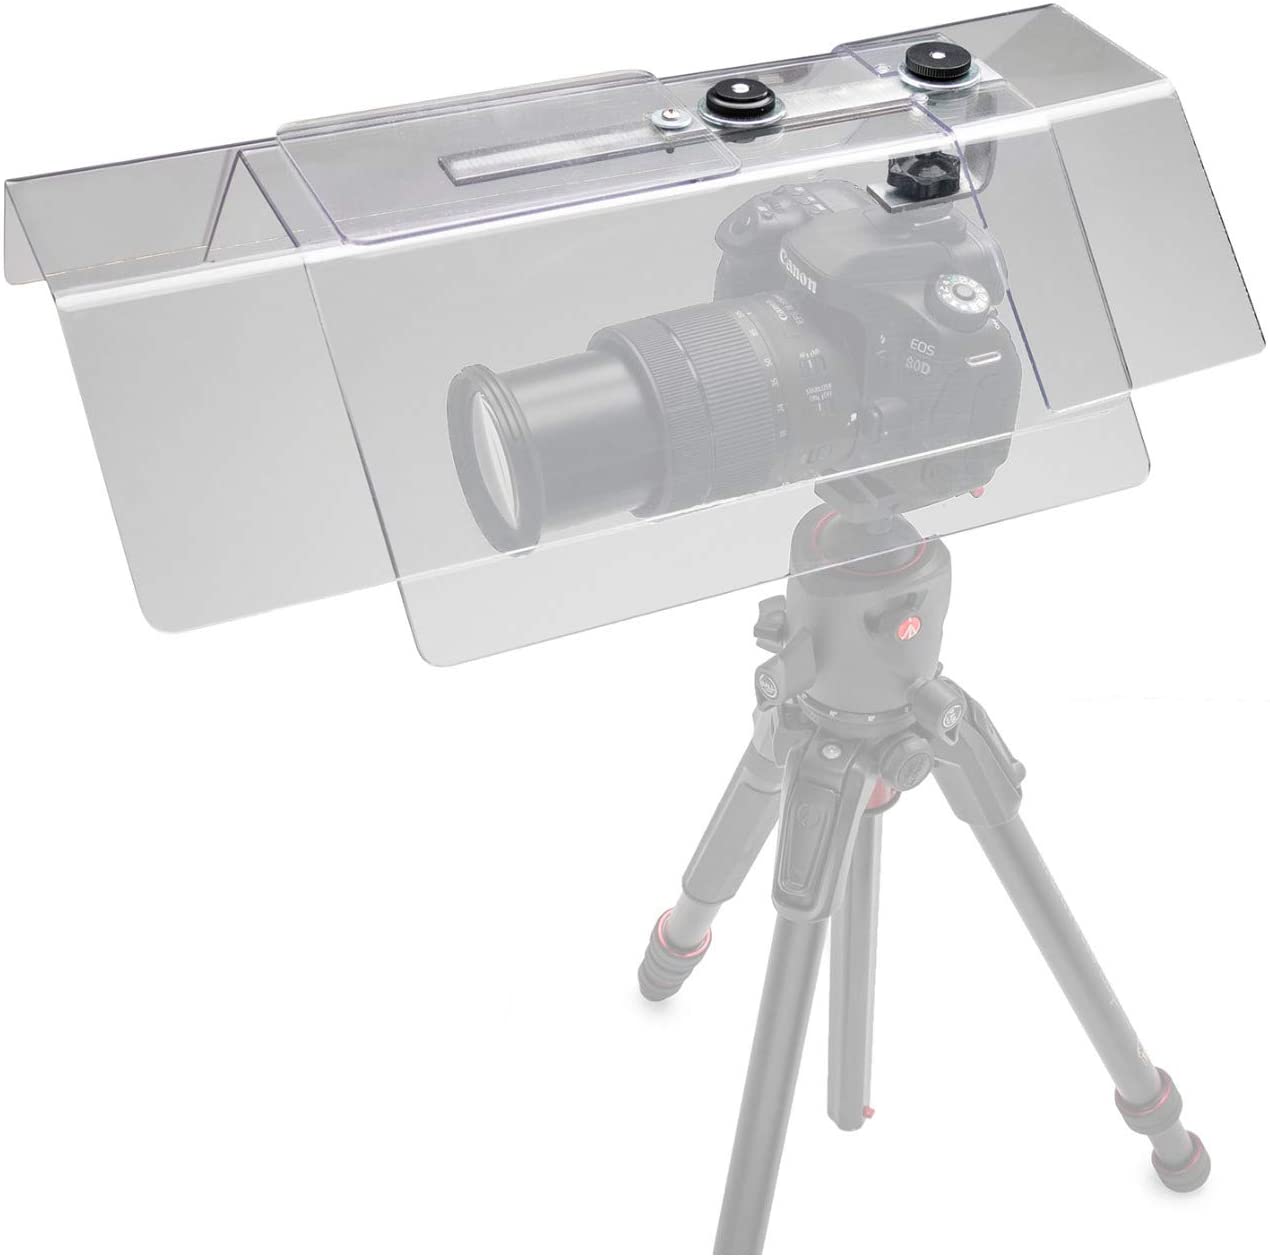
Light doesn't go away when it rains or snows, but it is changed. Take advantage of that different light quality with landscape photography accessories such as all weather bags or rain shields. Either one will let you keep shooting in inclement weather.
A bag style of rain shield that works well for cameras and larger lenses attached is from AquaTech. It is a little higher priced than a simple bag, but it allows shooting in some pretty nasty weather since it’s a wrap around style shield.
Another great idea is a rain canopy that is more like using an umbrella for your camera such as the Camera Canopy Shield. The advantage it has over a bag is that you have full easy access to camera controls, the disadvantage is that it is really best for more moderate showers and not for windy driven rain storms.
Learn More:
Lens Filter Step Ring

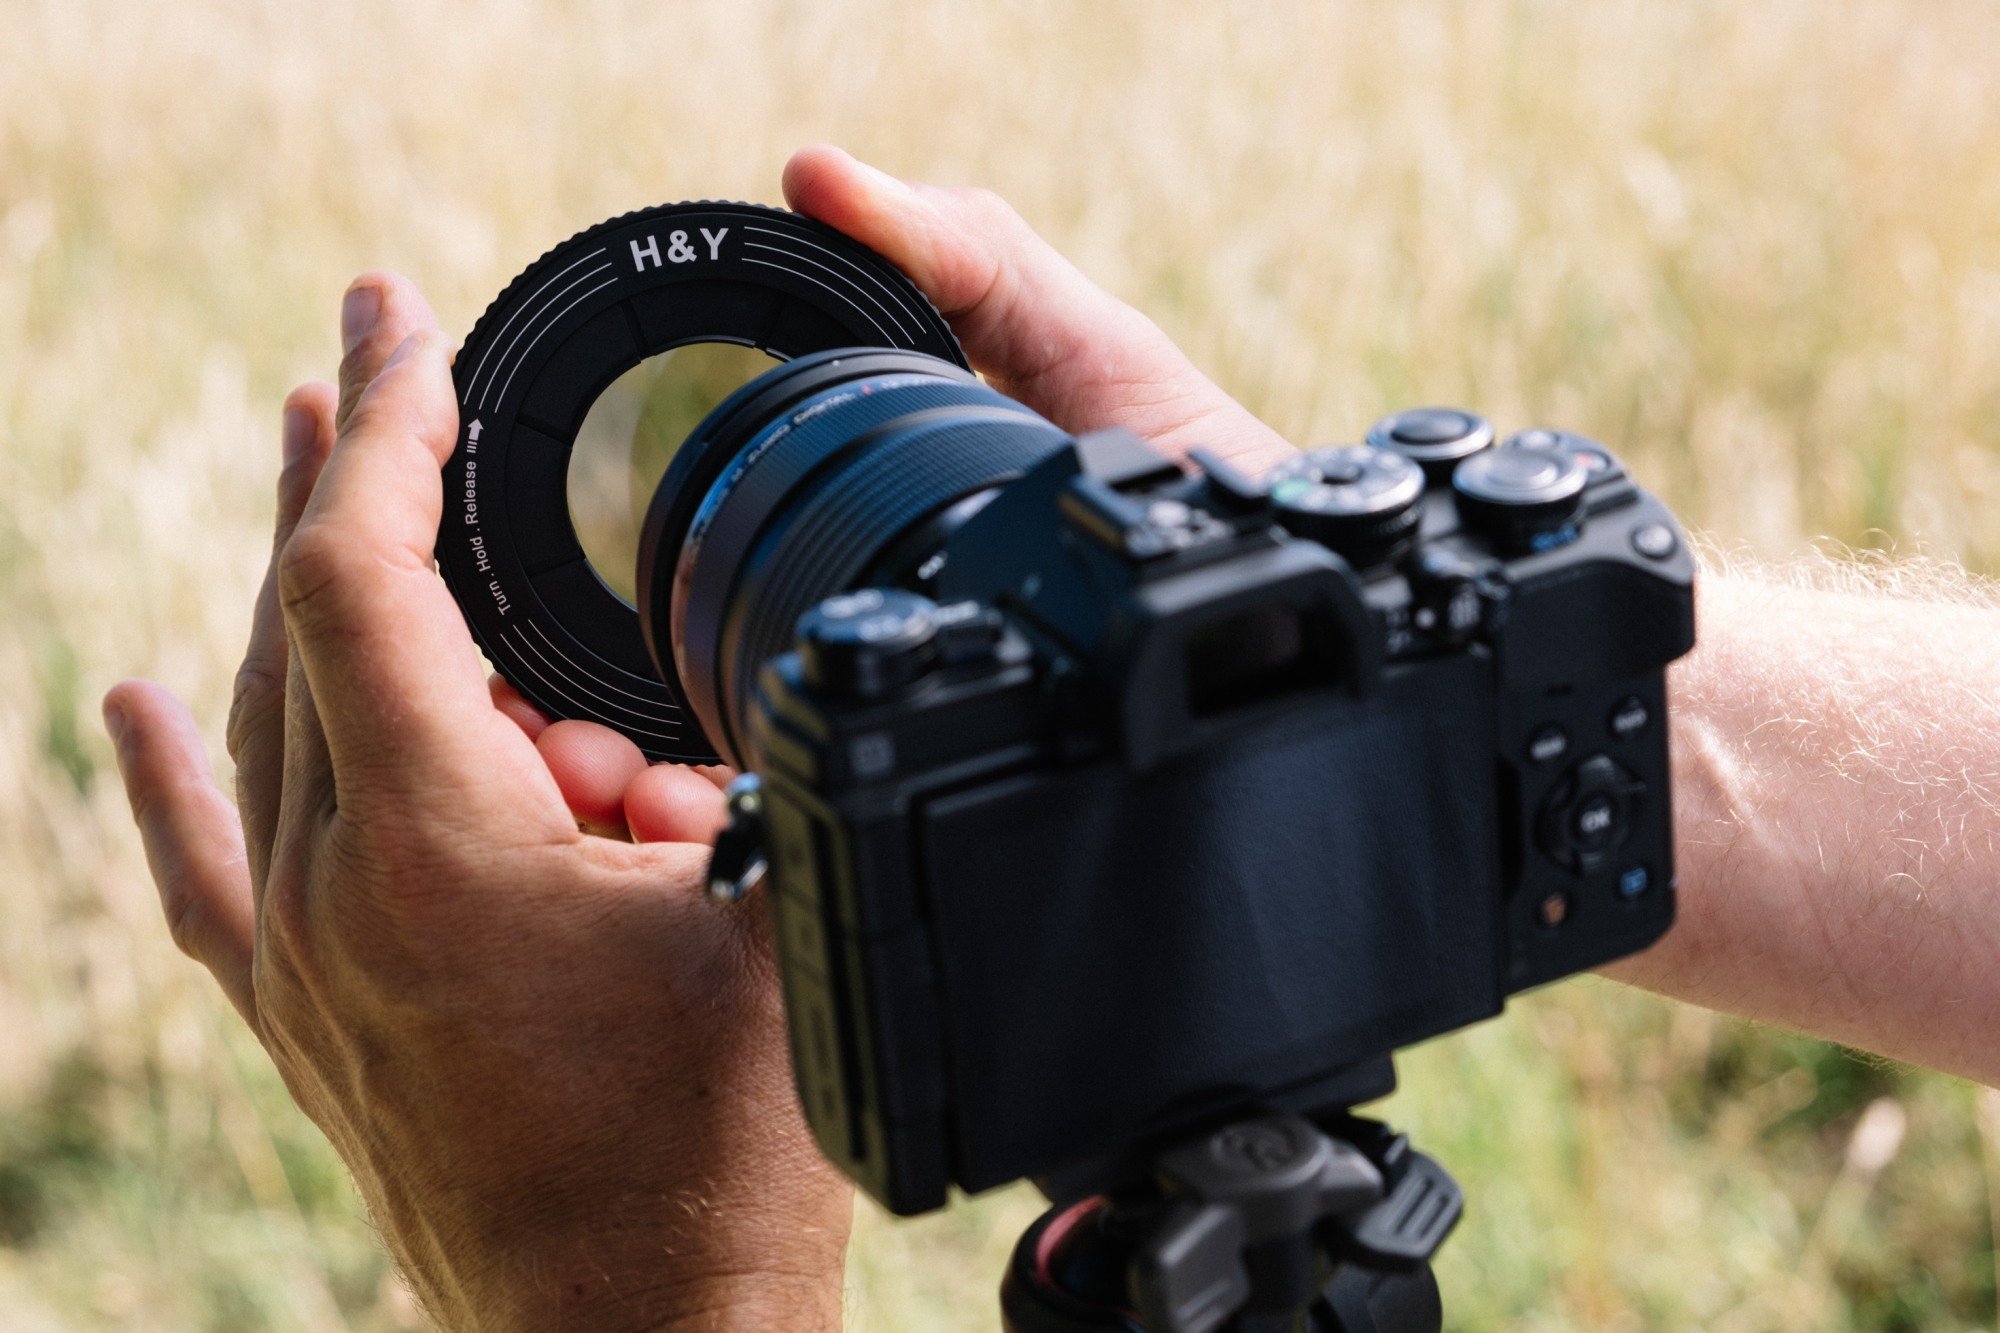
One of the best landscape photography accessories to come out in years is a specialty design multiple size filter adapter step ring system from H&Y Filters called RevoRing. H&Y Filters RevoRing is a variable size lens filter step ring system that allows for using one size high quality filters on multiple size lenses.
For my landscape photography needs, I like an aspect of it that may not be obvious at first glance. In addition to adapting for various sizes, the method used for that also allows it to be used as a quick release for filters. One super quick twist is all it takes to add or remove a filter from a lens when using the RevoRing.

It is also quick and convenient when changing lenses while shooting landscapes. Take off the filter and lens, mount the new lens on camera, and then attach RevoRing and whatever filter is on it to the lens on your camera. It is one of those landscape photography tips that can really improve your workflow.
Wireless Remote Control
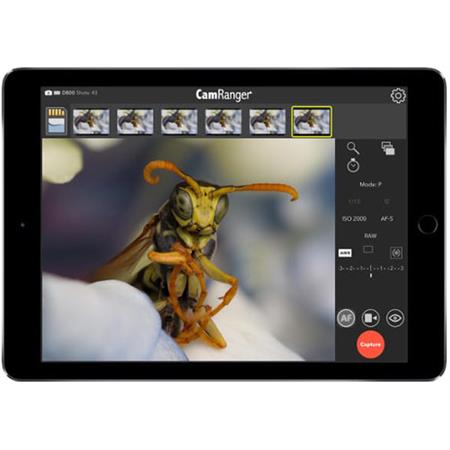
A standard statement in landscape photography tips is to use a remote shutter release to trigger the camera shutter. When using a tripod to maximize sharpness, you don’t want to mess up your careful planning by jarring the camera as you're triggering the shutter.
Way back in the days of all mechanical cameras, a simple cable plunger was used as a remote release. Nowadays we have some amazon options for totally wireless remote control of multiple camera functions in addition to triggering the shutter.
CamRanger Mini wireless controller is paired with your wi-fi enabled tablet or smartphone and allows changing almost every normal setting on your camera just like you touching the menu screen or buttons. It also gives you other features such as timelapse photography, HDR, and even remote viewing of what the camera is seeing.
Microfiber Lens Cloth

Keeping your lens clean, filters too, is paramount for successful landscape photography. Some sort of cleaning material needs to be included in your landscape photography gear bag. A lens blower brush is one good idea, especially if you get some large particles on your camera or lens.
A microfiber cleaning cloth is probably my most used of all of my landscape photography accessories. They’re reusable, can be washed, and provide an excellent way to remove smudges, fingerprints, and light oily dirt from your lenses, fileters, and even the camera body.
Use good sense, don’t use it to rub off large particles, a blower brush should be used first if that’s the dirt you have.
Camping Stool
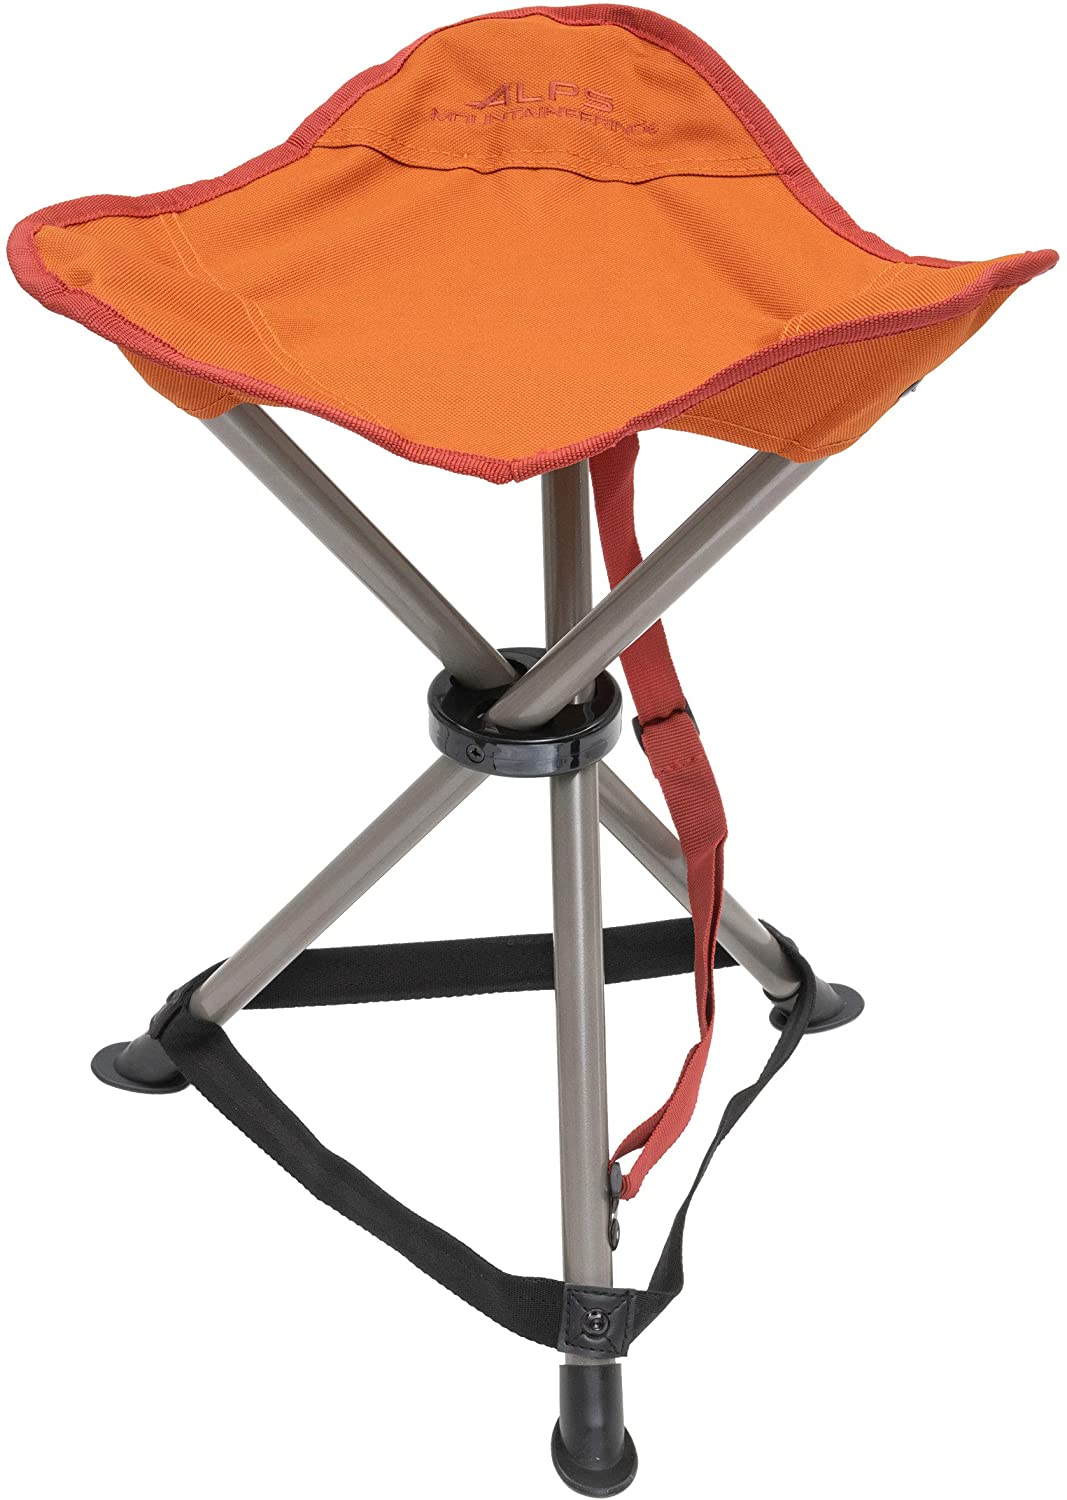
An often overlooked but vital piece of landscape photography gear is a simple camping stool. You’re going to need a place to sit and rest if you’re planning on being outside doing landscapes for a while, the ground, rocks, or a well placed tree stump aren’t the best solution.
Alps Mountaineering Tri-Leg Stool is a good choice to include in our landscape photography accessories. It’s lightweight, folds up compactly for easy transport, and is both strong and comfortable.
Make Good Clothing Choices, Too
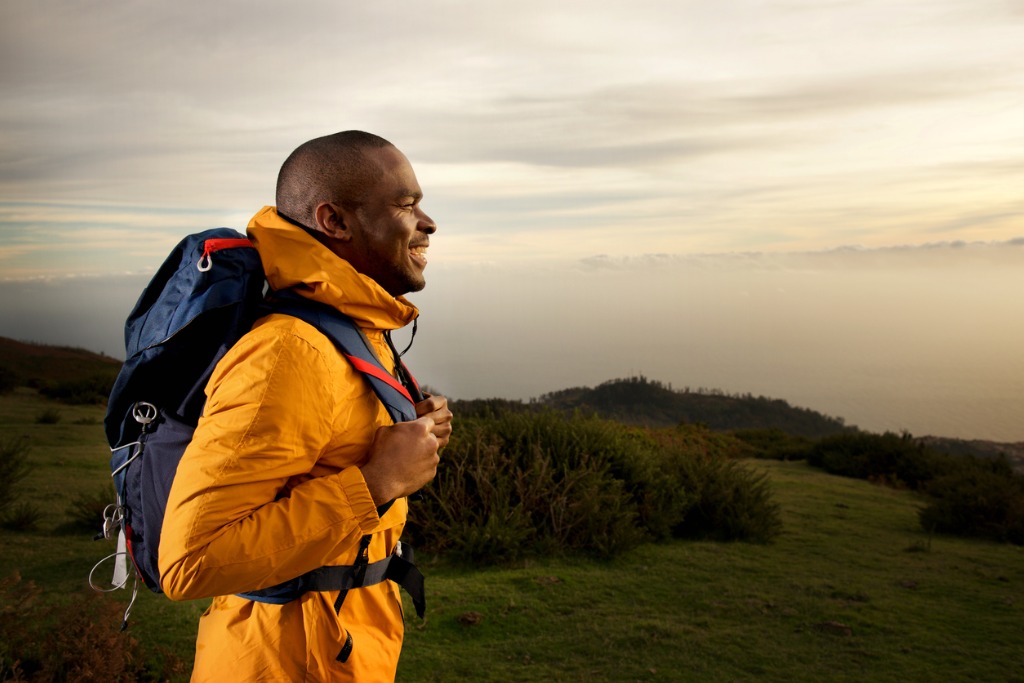
photo bym-imagephotography via iStock
Okay, that brings this list of 5 landscape photography accessories you must have up to 7 or 8 now, but I get excited when giving landscape photography tips, so bear with me! You really do need to make sure you’re dressed for the weather and are wearing really good shoes.
Now, take these tips and gear recommendations and adapt them to your own particular style and needs. Send me a line to tell me what works for you, we’d also like to see some of your landscape photography images.
Learn More:
We Recommend
5 Mistakes Photographers Make With Long Exposures
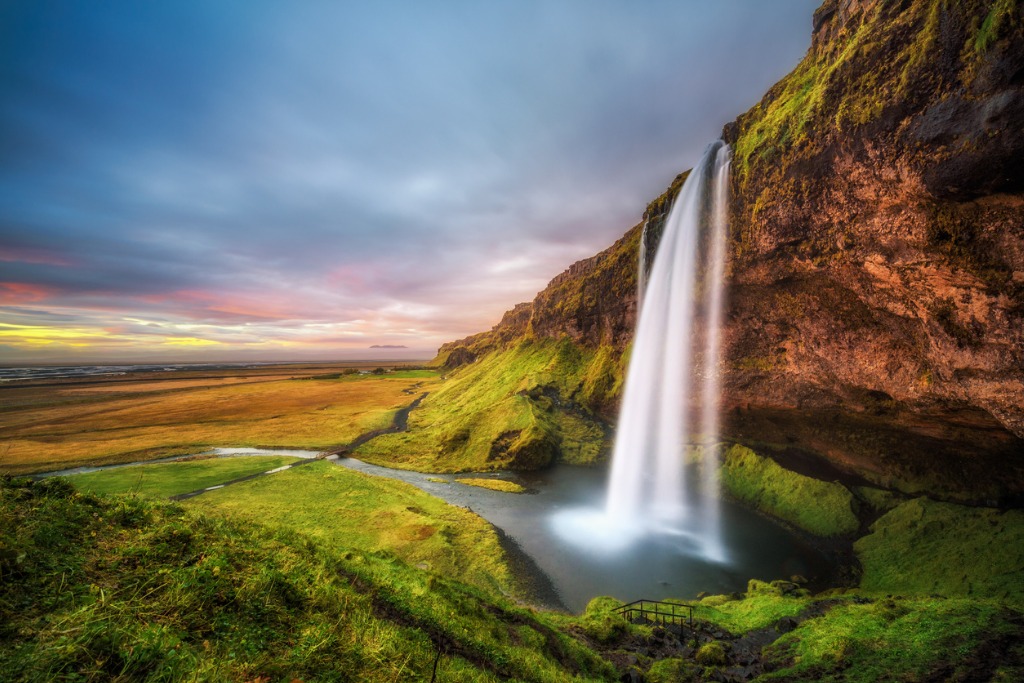
photo bymiroslav_1 via iStock
Long exposure photographs like the one above are unmistakably beautiful. But they can be a challenge to do well.
Capturing a gorgeous long exposure image takes time, planning, and preparation, as well as the right gear. If all these things are done well, you can expect to create a compelling image.
You’ll need to minimize your mistakes, though. With that in mind, here are five common long exposure mistakes you need to avoid.
Leaving Image Stabilization On

photo byFocusEye via iStock
Though not all cameras and lenses have stabilization systems, many do. These systems are hugely beneficial for shooting handheld and in low-light situations, but when used when your camera is mounted on a tripod, they can actually be a detriment.
Camera and lens makers call their stabilization systems by all kinds of different names, but they all essentially work the same - they detect movement and try to counteract it by moving the sensor in the camera or moving a group of elements in the lens.
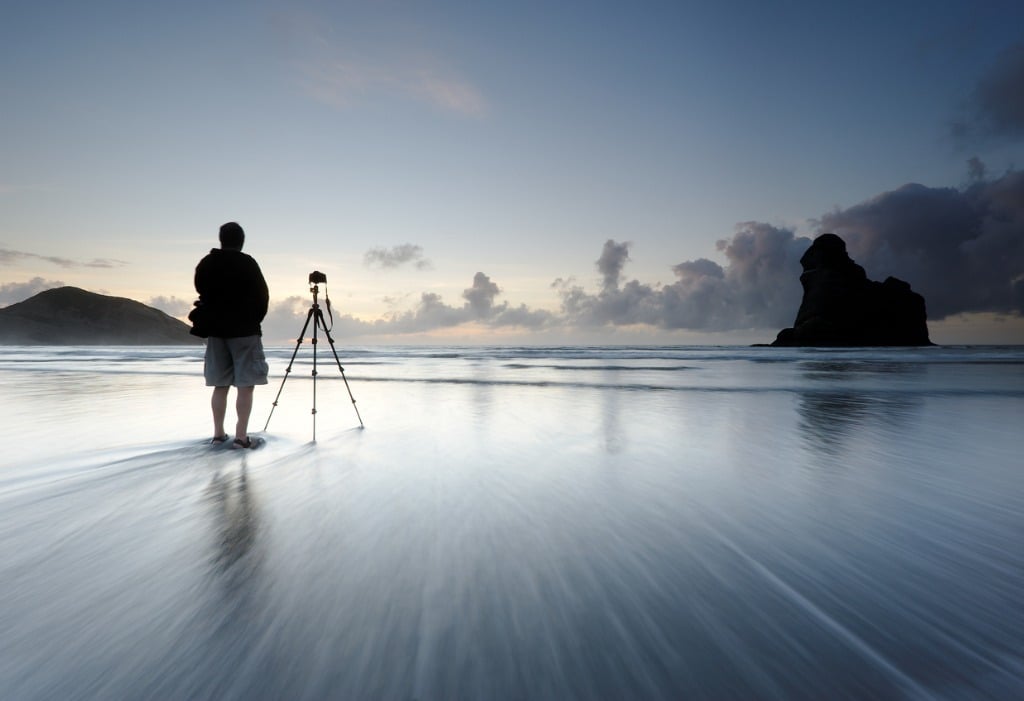
photo bydchadwick via iStock
But when your camera is mounted on a tripod (as it must be for long exposures), there shouldn’t be much - if any - vibration. The problem is, the camera or lens might still try to compensate for movement. The result is that movement is introduced to the camera or lens, thereby causing blur in the image.
So, before you take a long exposure, be sure that any image stabilization systems are in the off position to avoid this very common long exposure mistake.
Using the Wrong Aperture

photo bykyoshino via iStock
A mistake that many landscape photographers make is slamming the aperture down to its smallest opening - usually f/22 - with the thought that it will maximize depth of field and help prevent long exposures from being overexposed.
The problem is that the smaller the aperture opening, the greater the likelihood of diffraction, which, as Tony & Chelsea Northrup discuss in the video below, results in a loss of image sharpness. So while smaller apertures do contribute to a larger depth of field, it doesn’t do you much good if the image isn’t optimally sharp.
Likewise, there’s no need to close down the aperture to avoid overexposure. Shooting long exposures in the daytime necessitates having the right filters for the job, like neutral density filters, which block much of the light coming into the lens to prevent an overexposed image.
A better course of action is to select a larger aperture to avoid diffraction and use high-quality neutral density filters to avoid overexposure.
By and large, most lenses are their sharpest at around f/8 or f/11. And assuming the nearest object in the foreground is several feet away, you’ll still get a good depth of field that gives you sharpness from front to back.
Learn More:
Using Cheap Filters

photo by Koldunova_Anna via iStock
Cheap and poorly made filters often leave a color cast in your shots. They can also soften the image, so all the work you did finding the sweet spot of your lens is for naught.
Instead, it’s worth your time, effort, and money to research high-quality filters and invest in something that gets you the best image quality possible.
For my money, H&Y Filters offer the best bang for the buck. I’ve come to that conclusion after more than a decade of testing countless filters.
There are tons of filters available from many different manufacturers, and some are really quite good, but just as many are quite bad.
H&Y represents the cream of the crop for a variety of reasons, not the least of which being how innovative their filters and filter holder systems are.

I have the K-series filter holder, which I use in conjunction with three different drop-in neutral density filters: a 5-stop ND and polarizer hybrid, a 10-stop ND, and a 12-stop ND.

I love the drop-in design because it allows me to compose the shot and then add the filter to the filter holder without disturbing my camera. In other words, there’s no messing around with screwing filters onto the lens and unscrewing them each time I need to compose and focus the next picture (composing, then focusing, and then adding the filter is a must, as it is impossible to focus with these super dark filters in place). From a convenience standpoint, these drop-in filters are tough to beat for long exposure photography.


Likewise, H&Y takes durability to the next level with these filters.
These particular filters have anti-smear, anti-scratch, and anti-reflective coatings. They’re water repellant, oil repellent, and offer neutral light transmission so you don’t have to worry about those pesky color casts I mentioned earlier.


Truly, these filters have risen to the occasion each and every time I’ve used them for long exposure photography. They will do the same for you!
Learn more about H&Y filters by visiting their website.
Not Using Mirror Lock-Up

photo by nicky39 via iStock
Obviously, if you shoot with a mirrorless camera, this doesn’t apply to you...
But if you’re a DSLR user, not using mirror lock-up is one of the primary mistakes photographers make with long exposures.
When you take a photo with a DSLR, the mirror flips up and out of the way of the sensor. The shutter activates, the shot is taken, the image is recorded, and the mirror flips back down.
As Scott Wyden Kivowitz explains in the video above, the action of the mirror flipping up and down can create enough vibration in the camera to cause image blur. By engaging mirror lock-up, you negate this problem.
Not all DSLRs have a mirror lock-up feature, so you’ll need to consult your camera’s owner’s manual to determine if the feature is available and how to turn it on. Your images will be better for it!
Not Covering the Viewfinder

Photo by Neil Thomas on Unsplash
Even though light is only supposed to enter your camera through the hole created by the aperture blades in the lens, this isn’t the only access point for light to get in.
In long exposure photography, light often finds its way into DSLRs through the viewfinder. When this occurs, your photos usually have a purple blob in the image that ruins the shot.
Some cameras have a built-in cover for the viewfinder that you can switch on. Again, check your camera’s owner’s manual to see if your camera has this feature.
If it doesn’t, once you’ve composed the shot, simply cover the viewfinder with gaffer tape, painter’s tape, or any other dark, non-sticky material to prevent light leaks from occurring.
These are all simple mistakes, but each one can have huge negative consequences for your long exposure images. The next time you head out to take photos, be sure to avoid these mistakes, and the images you get will be far, far better.
Learn More:
We Recommend
6 Benefits of Using Lens Filters

The benefits of lens filters for photography are sometimes very obvious, but they require thought and knowledge. Possibly one of the most common benefits of lens filters is taming difficult lighting situations.
Those difficult lighting situations are why we use some thought when considering why and how we use lens filters. The lighting conditions aren’t always worked out by exposure techniques and methods of post processing.
Why Use Lens Filters
Photo by Garrett Morrow from Pexels
Large differences of exposure value or reflective light are some conditions that explain why use of lens filters assist us photographically. Lens protection, color correction or enhancement, and special effects are some other reasons to use lens filters.
Lens Protection
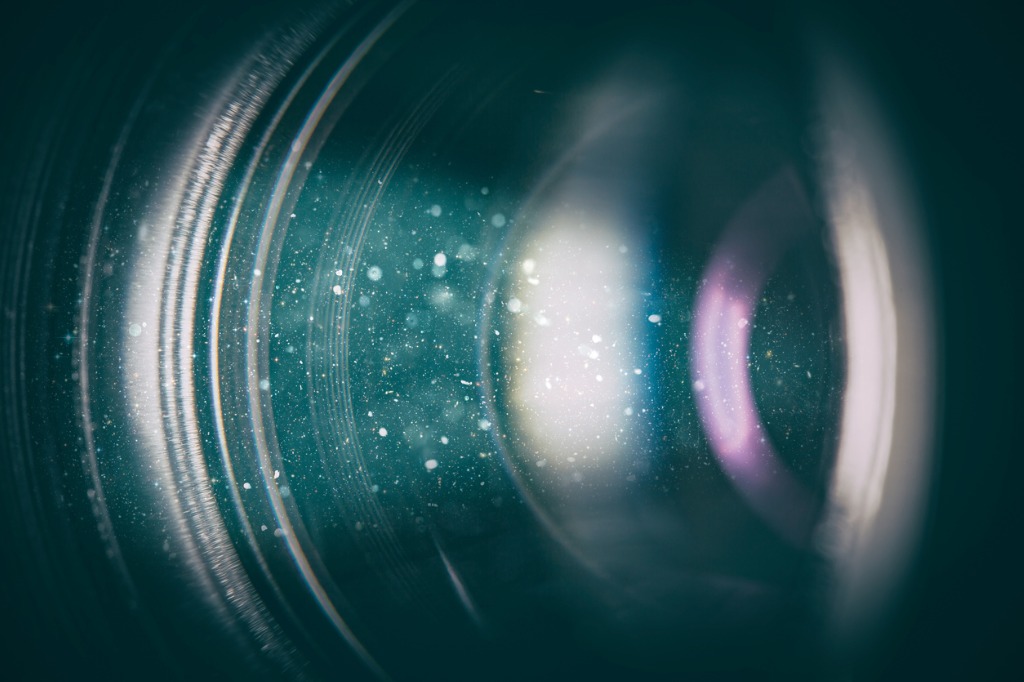
photo byscyther5 via iStock
We’ll get this out of the way first since there are two schools of thought here.
One school of thought is that our lenses tend to be expensive and damage to the front element can occur without warning to the most careful of photographers. The reasoning is it’s better to change out an easily replaceable and relatively inexpensive filter such as a UV filter than repair glass in the lens.
The other school of thought reasons why lessen the capability of that fantastic lens with inferior glass or add another possible source of reflection. Rigid lens hoods are fantastic protection, too, besides eliminating glare. And some lens designs don’t allow for front filters at all.
Either thought is valid. Don’t use cheap, low quality filters, make use of a lens hood whenever appropriate, and treat your gear with care in use and in storage.
Control Reflections
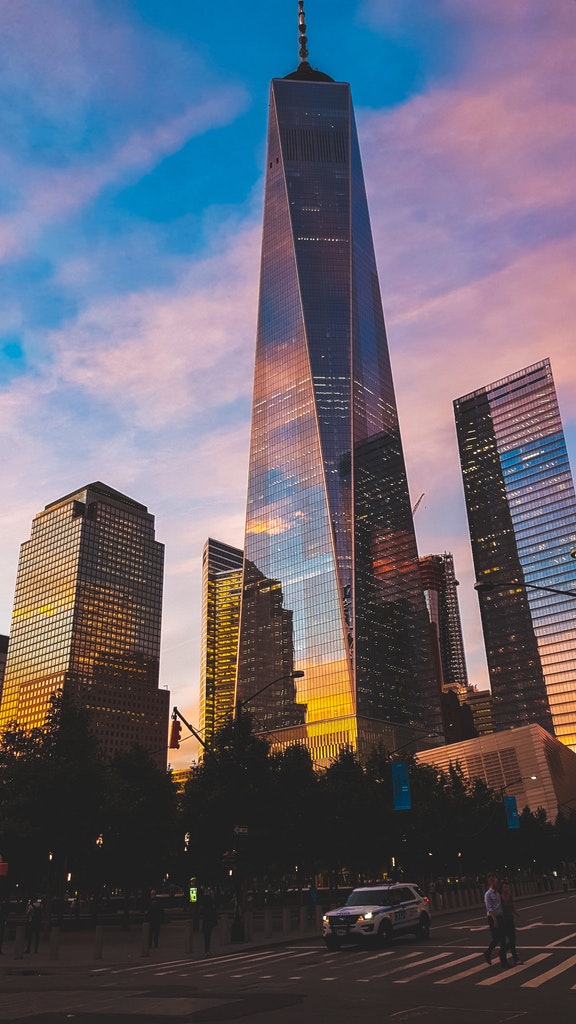
Photo by Mihai Vlasceanu from Pexels
Reflections are everywhere. Just the sky itself is full of reflective light due to scattering by dust particles and water vapor that can lower contrast. Reflective surfaces, too, affect our images for better or worse. Glass and concrete in cityscapes, lakes, oceans, and ponds in landscapes, or directional light in views of architecture or realty.
All of these conditions can be controlled to some extent by polarizer filters. A polarizer is one of the most important photography filters for landscapes, cityscapes, or scenes with sky and clouds.
With a polarizer filter, you can adjust the filter to reduce or get rid of reflections from glass and water surfaces which may be distracting or obscuring our view of subject elements. Sometimes, you can adjust enough to see right through the water to things below the surface.
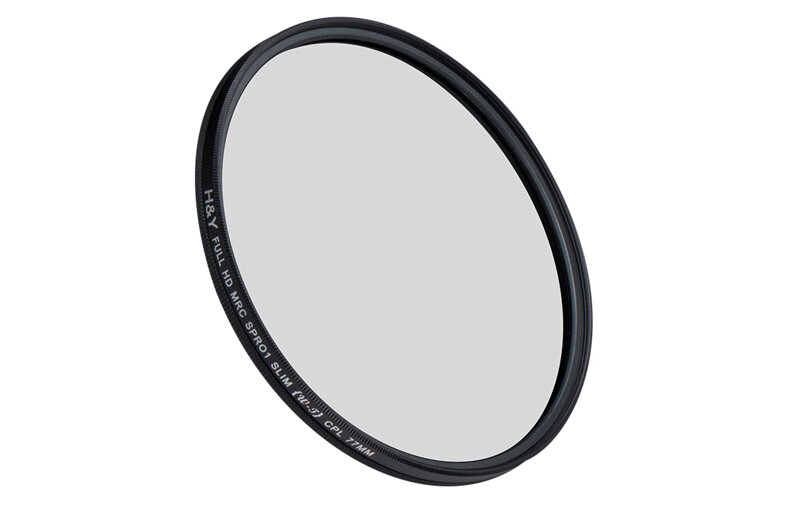
Polarizer filters can be screw-in filters that attach directly to the front of the lens or they can be part of a filter holder system like the H&Y K-Series filter holder with circular polarizer (C-POL) seen here.
While both are attachment methods are good, I tend towards filter holder systems for much of my filter work because of the extreme versatility they have. Filter holder systems are fantastic photography filters for landscapes because of their ability to hold multiple filters at once and the wide range of control options.
Control Wide Ranging Exposure Values
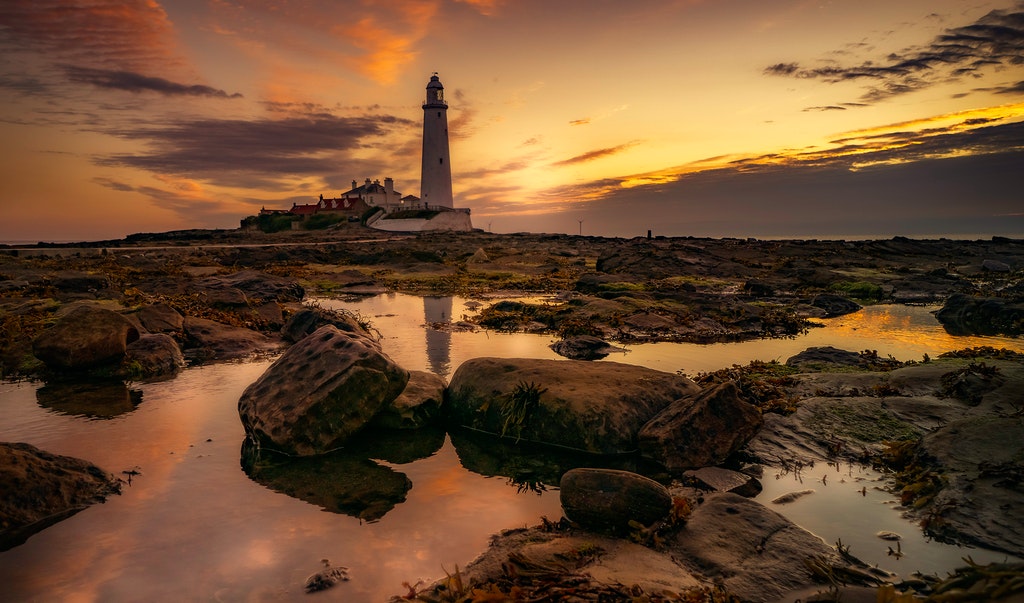
Photo by Ray Bilcliff from Pexels
A huge benefit of lens filters for photography of landscapes and cityscapes with wide ranging exposure values comes from graduated neutral density (GND) filters. A graduated ND filter lets you include large areas of light along with large areas of dark to be in the same image with neither side losing out.
Without a GND filter, either the highlights burn out for us to capture shadow detail, or the dark values bunch up for us to have usable highlights. Using a GND filter balances out those extremes for us, allowing us to capture both in one exposure.
GND lens filters for photography are best utilized in a filter holder system. A large, magnetic filter like the soft edge H&Y graduated ND filter in the filter holder system gives us almost complete control of where to place the light, dark, and transitional area of the filter within our field of view.
There are several types of GND filters, soft-edge, hard-edge, and reverse, each of them with slightly different benefits of lens filters available for our use in diverse types of photographic scenes and lighting conditions.
Learn More:
Change Exposure Options

Photo by Septimiu Lupea from Pexels
One of the benefits of lens filters often overlooked by beginner photographers is how certain lens filters let us use exposure tricks in unforgiving light.
For instance, if we are wishing to use a very large aperture in order to minimize depth of field for selective focus effects, a neutral density (ND) filter is a nice method of bringing the exposure value (EV) down for that to be a possibility.
An example of a ND filter that can radically change EV for our scene is the H&Y ND 1000 10 stop extreme ND filter. A less extreme ND example of photography filter for landscapes is a combo of ND and C-POL such as the H&Y Polarizer/ND Combo which has less effect on exposure but adds the benefit of reducing glare or reflections.
Incorporate Motion Blur

Photo by Pok Rie from Pexels
Along the same lines as the points in benefit 4 is the ability to increase shutter speeds for motion or blur effects in water, clouds, or other things. This is one of the more fun types of landscape tricks to take on. The benefits of lens filters in this situation is that you don’t have to take extreme measures to achieve extreme results.
Just to give a little historical perspective, when film was the main recording medium, you had to resort to some extreme processing tricks to lower the ASA/ISO of the film then add an ND filter or have a lens that stopped down to f/64 or so. I much prefer a digital sensor camera and a great ND filter system.
Ghost Out People and Vehicles
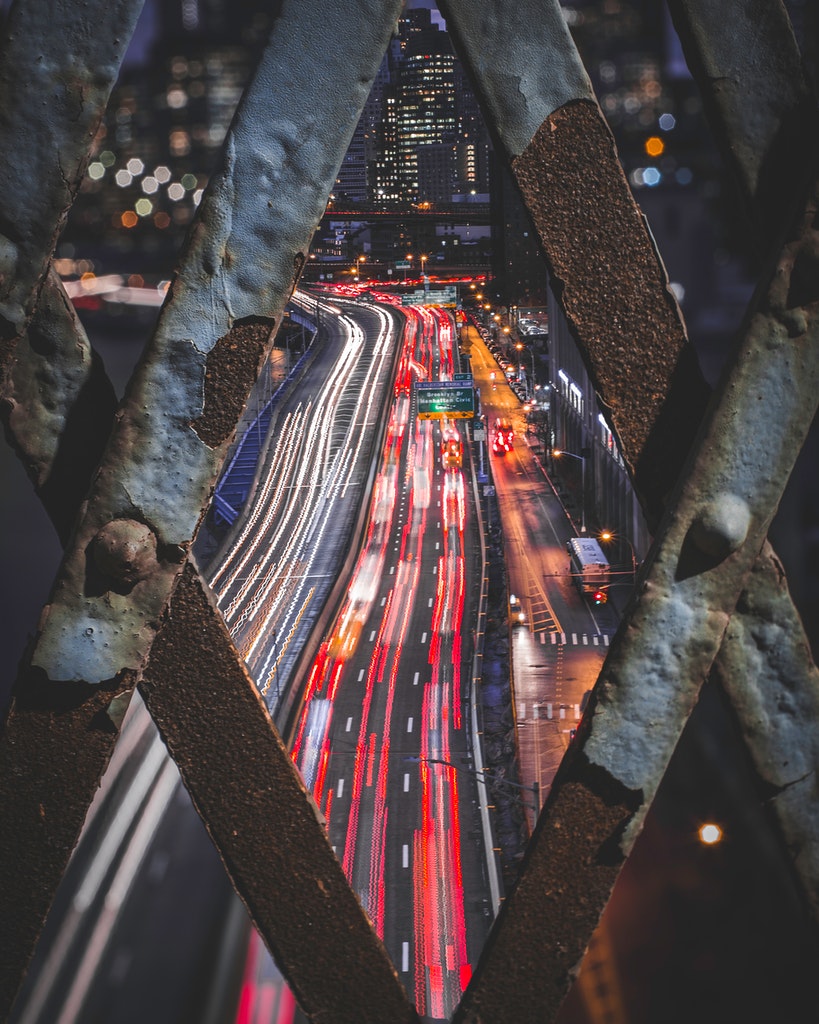
Photo by Jiarong Deng from Pexels
There’s more than one way to accomplish this awesome effect, too. Multiple exposures can be processed together or we can use an ND filter to radically increase exposure time.
What on earth am I talking about, right? Here’s this scenario: You are at a cultural icon or other hugely popular landmark and you would love to be able to imagine the subject without all those people in the way, detracting from or obscuring the view.
What happens is that if the exposure is long enough, the moving things in the field of view will not be in place long enough to register in the image. This really works best when it’s people that are the moving things and not vehicles, because streaking headlights and brake lights can still mess up the view. Street scenes of architecture are what I primarily consider for this method.
Benefits of Lens Filters

Photo by Immortal Shots from Pexels
There are far more than 6 benefits of using lens filters in photography. Find all of the ways that filters can enhance or change your image and subject elements in creative or helpful ways. We didn’t even cover special effects, lots of options there.
I like to stick with high quality lens filters. Unless there’s a specific effect I’m attempting. Primarily the benefits of lens filters are they allow you to do something better or differently photographically. Try them out, one at a time or as a filter kit, see what strikes your fancy.
Learn More:
We Recommend
Advantages of Drop-In Filters
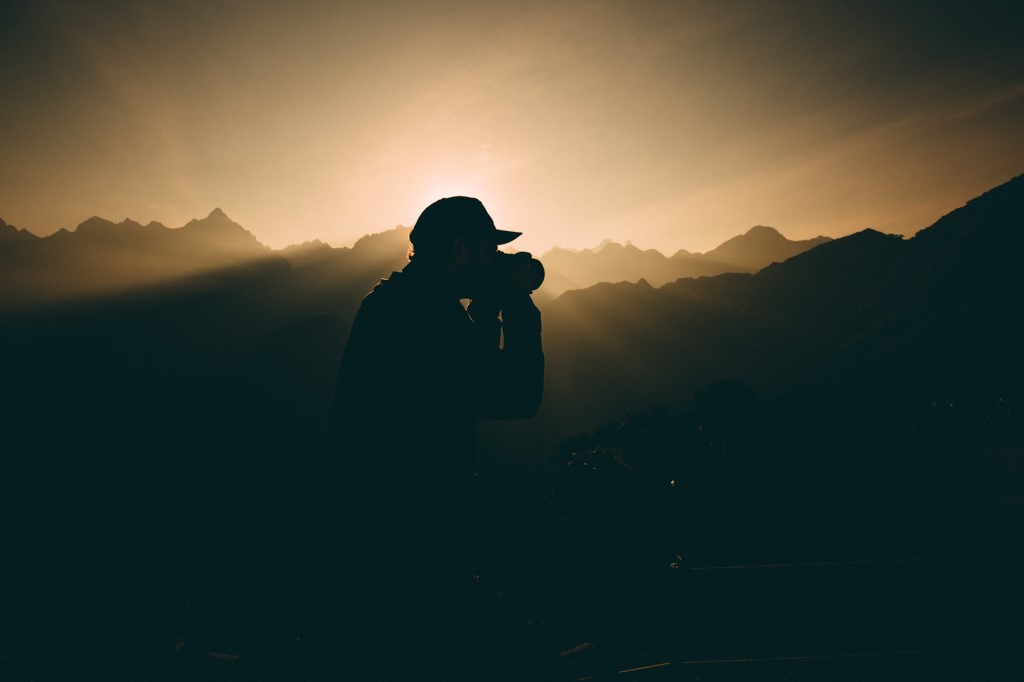
Photo by KAL VISUALS on Unsplash
I’ve been a filter fan since the days I cut my teeth on B&W film photography and we never left the house without a set of filters for changing contrast.
If you remember using screw-in red, yellow, orange, and light green filters, let me know. Drop-in filters for ND, GND, and Polarizers are in my current gear bag for serious photography.
What Is A Drop-In Filter?
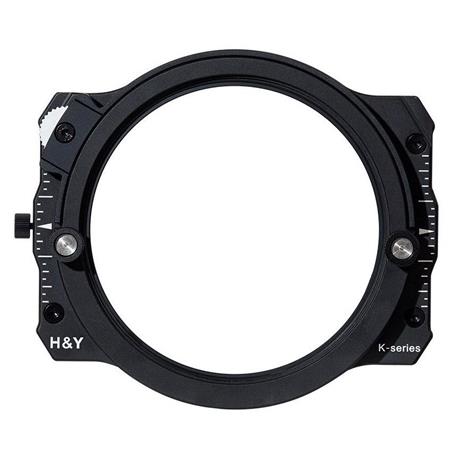
We’re using the term to describe a set of filters that fits into a filter holder system. A filter holder system consists of the holder, which often holds 2 or 3 filters at a time, lens adapters to attach to each size lens, and then the filters themselves, round, square, and rectangular.
Above, you can see an example of the H&Y K-Series Holder.
(To avoid confusion, there is another type of drop-in filter that is part of the mechanism of certain super telephoto lenses, but they only work on those giant lenses that cost more than some cars.)
In this photo, you see one way how H&Y drop-in filters filters drop into the filter holder:
So then, what are the advantages of drop-in filters?
Convenience
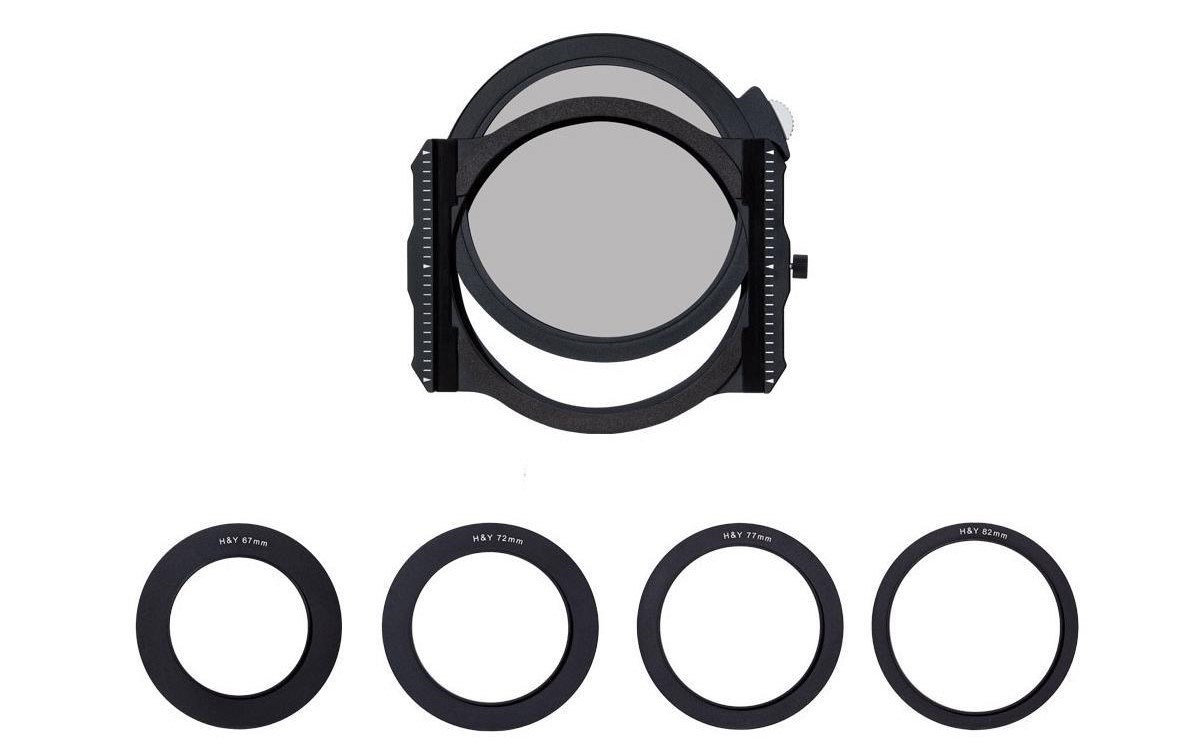
One of the benefits of drop-in filters is the convenience of only needing one of each type of specialty filters for all of your lenses. With multiple lens adapters, you can quickly change the filter holder from one lens to the other.
The H&Y K-Series Holder has lens adapters in sizes from 67mm to 82mm. The holder and many of the filters are magnetic, making attaching the filters an extremely simple and rapid process.
Since the only part that actually needs duplication is the lens adapter, the filters for the filter holder system are also convenient to store properly to avoid scratches and be easy to get out of your bag.
Price

High quality filters are an investment, but since you don’t need to duplicate any filters, you can choose to invest in different types of filters instead. With the H&Y Filter Holder system, for instance, there are around 18 different filter types currently available including graduated neutral density (GND) filters.
In addition to the fine optical quality of these filters, the materials used for the frames and for the holder itself are heavy duty and quite durable, adding to the value of these drop-in filters for photography.
Learn More:
Filter Stacking
One of the two greatest advantages of drop-in filters is the ability to stack filters in order to use multiple filters at once.
First off, a filter holder system makes it simple to add filters together since all you do is slide them in or attach magnetically as in the H&Y K-Series filters.
Secondly, since you are using a wide filter holder with large filters, you avoid the problem of vignetting that occurs when stacking screw-in filters.
Precise Filter Positioning
The other major advantage of filter holders and drop-in filters is the ability to place the transition area of GND filters in the exact position needed for the image you’re making. While looking through the viewfinder on the viewscreen, simply move the GND in the holder until you see the desired effect.
Above, you can see what that looks like in action.
The magnetic system of the H&Y K-Series makes this an exceptionally simple operation, but it also works well with non magnetic filters that fit the filter holder.
Specialty Filters
Since the drop-in filter holder system is a convenient and cost effective filtration method, this allows you to try out different specialty filters.
A couple of excellent specialty filters from H&Y are the 5-Stop ND & Polarizer filter combination and their center graduated neutral density filters.These two filters solve specific problems of tricky exposure situations in a unique way. With the drop-in filter system system, use of these filters is simple and convenient.
I can’t wait to see what else they introduce for the H&Y K-Series magnetic filter holder system.
We Recommend
Avoid These Common Lens Filter Mistakes
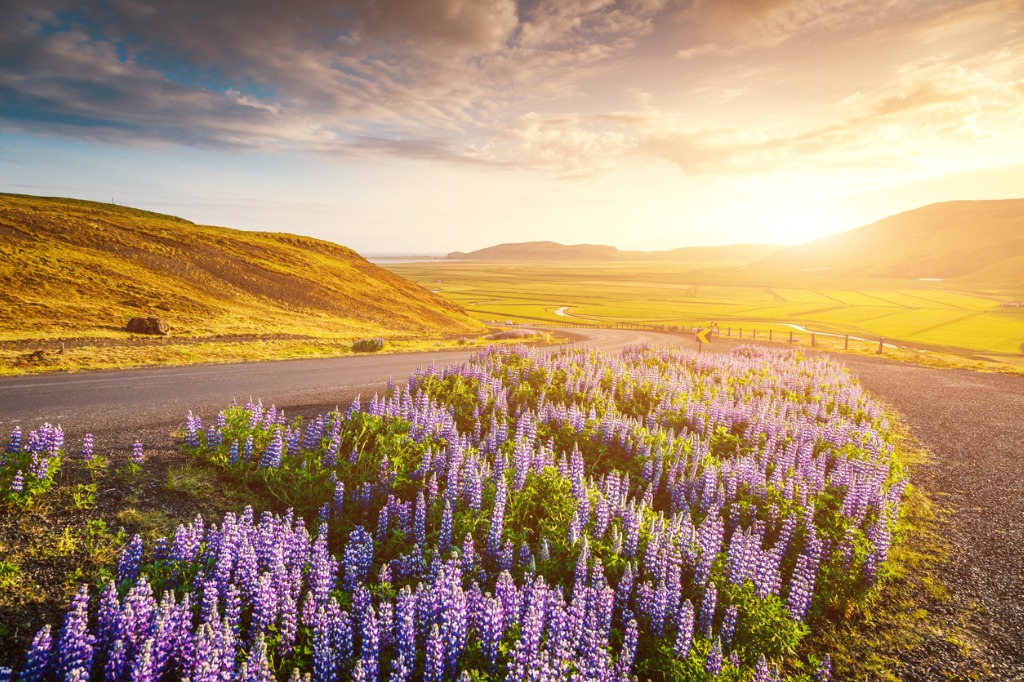
photo byleonid_tit via iStock
Digital photography is different from film photography in several major ways, the really big ones all of you most likely already know if you are taking the time to educate yourself in photography by following instructional websites like ours. By the way, thank you for being here, we enjoy the company.
A significant difference with digital photography that some may not realize unless you started out in film photography is learning how to use lens filters. With digital sensors, we no longer have to use a lens filter to change color balance for various color films and lighting conditions or enhance contrast in B&W film with Kodak wratten colors, we do all that from our camera menu or in post processing programs.
There are 3 very useful lens filters that we have kept using in digital photography, the circular polariser (C-POL), neutral density (ND), and graduated neutral density (GND) lens filters. These lens filters do work that we need done that our sensors and programs can’t, but we still need to watch out for common lens filter errors.

photo byBraunS via iStock
Lens filter mistakes are annoying and can ruin our images, but we can easily fix them before they ever happen. What are the lens filter mistakes we are likely to see and how do we avoid them?
Wrong Size Lens Filter
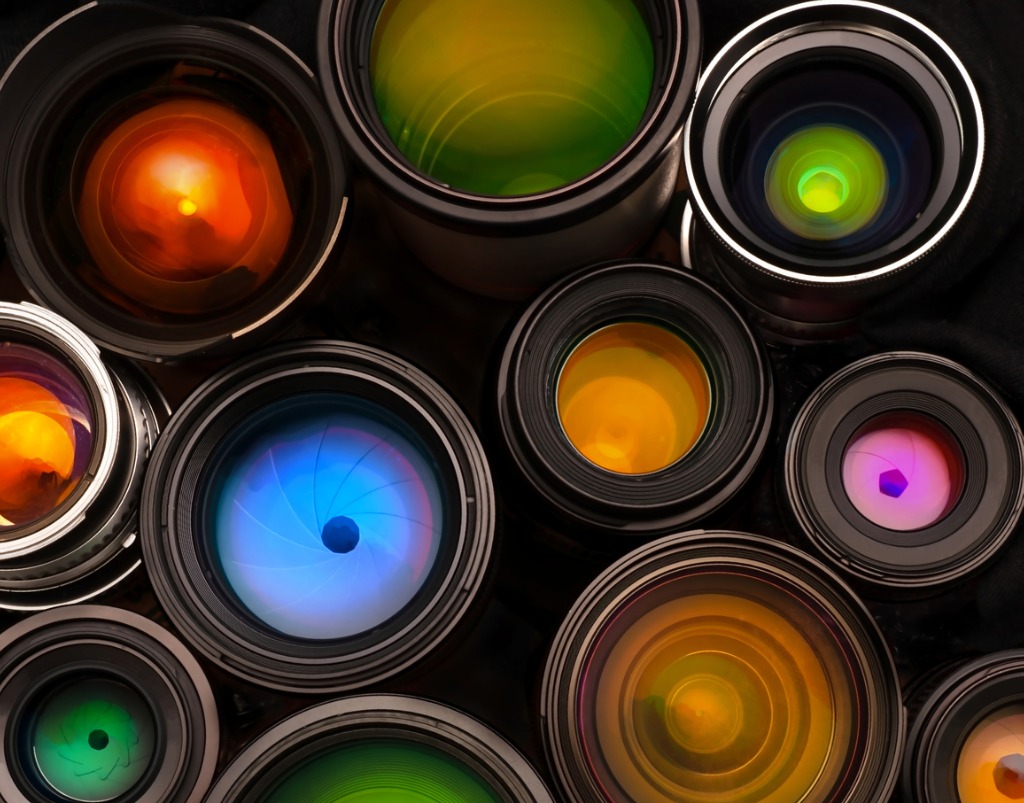
photo by66North via iStock
Imagine trying to hike to a great vantage point for a landscape photo and your shoes are the wrong size, too big or too small. That is how your image feels when you try to use a wrong size lens filter. You could use a stepping ring to correct the situation but beware that if you step down to a smaller filter size than the lens filter diameter, you could cause vignetting which makes it seems like you’re peering through a keyhole.
After a while, many photographers end up with lenses that have differing lens filter diameters. You could spend a lot of money duplicating lens filters for each lens size or you could buy just one filter in the largest size you need and adapt it to the other lenses in your kit bag.
Instead of buying and trying to keep track of multiple rings, the newest product from H&Y Filters, the Revo Ring, is a wonderful tool for digital photographers. Read all about the Revo Ring and why you should use one in our previous articles about the H&Y Filters Kickstarter.
Poor Positioning of GND Lens Filter
The graduated neutral density (GND) lens filter is an extremely useful tool for balancing out the extremes of exposure values that can exist in scenes, especially outdoors. They work by having color neutral (hence the moniker “neutral”) density on one side of the filter and none on the other side with a transition area in the middle.

photo byvalio84sl via iStock
In use, you place the density side of the GND lens filter over the part of the image area that you wish to tone down, such as the sky in a landscape. The transition area is where we can get tripped up. Especially with a hard edge transition, if we aren’t precise in where we put the transition, we will get a failed image.
A lot of photographers use the soft edge transition GND lens filters to avoid this issue, but it can still be seen even then with sloppy positioning. Besides where to put the line, we also should make sure it’s lined up properly and not tilted awkwardly.
Learn More:
Not Adjusting Polarizer
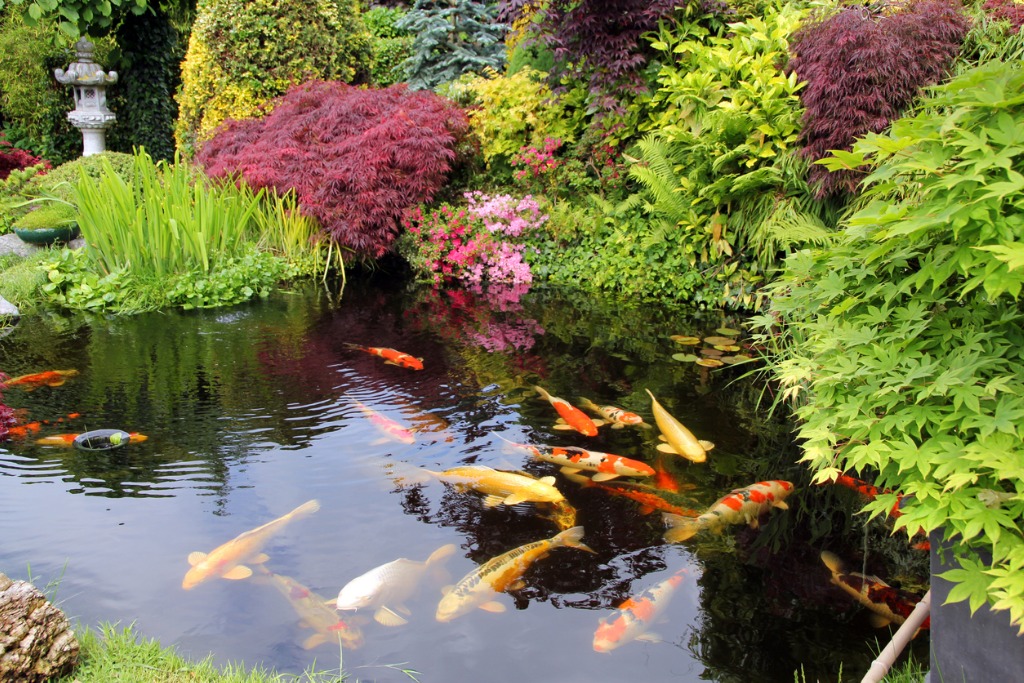
photo byBasieB via iStock
A polarizer is one of the most useful lens filters a photographer of any type can have, but they don’t work automatically. You have to twist the filter to get the effect you want. Simply mounting it on your lens won’t accomplish much in sky darkening or reflection removal if you don’t adjust it so that it actually polarizes.
Also, take it off when you’re not needing it. It’s not a protection filter like a UV lens filter and it adds about 1 ½ to 2 stops of density, requiring exposure adjustment.
Using Polarizer On Ultra Wide Lenses
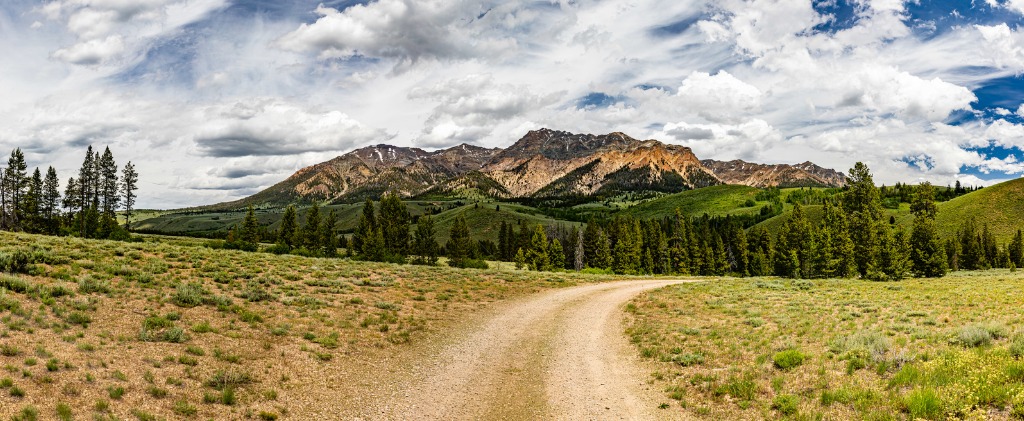
photo byDifferent_Brian via iStock
I know why we want to use a polarizer on our ultra wide landscape images, we want that dark sky and puffy clouds. But, since a polarizer works by adjusting the lightwaves coming into the lens, using one on a n ultra wide lens can result in uneven sky darkening. It’s just the nature of polarized light in our atmosphere.
We may still be able to use one, but it will require us to be on our toes, double checking in the viewfinder and then again on our viewscreen after exposing the image. If we really want that dark sky in an ultra wide view, perhaps a GND and some creative post processing might be a better method.
Forgetting AF May Twist Lens Barrel

photo byHelinek via iStock
All of that effort we made to line up the lines properly with our GND lens filter or adjusting the C-POL just right could be ruined if our lens barrel turns during focusing and our AF fine tunes right before exposure.
Check your lens, the barrel may not twist during focusing, many lenses considered pro style won’t. But if yours does, it’s a simple fix, turn off the AF. You will need to focus manually first, then adjust the lens filter for the effect you want.
Take a Little Time to Avoid Lens Filter Mistakes

photo byBobby Coutu via iStock
You’re already making the effort to use a lens filter to improve your digital photography, take a little time to ensure you get great results from your good technique with ND, GND, and C-POL lens filters.
Learn More:
We Recommend
Features to Look for in Lens Filters
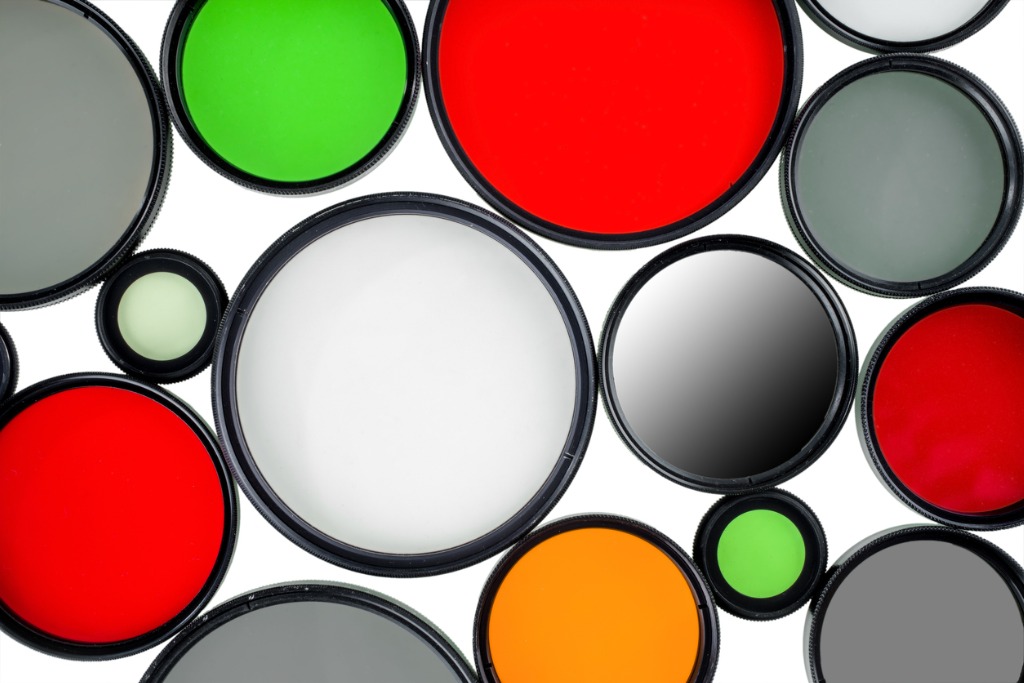
photo byVladK213 via iStock
Lens filters are among the most important photographic accessories for serious photographers. Besides the lens filters that some photographers use on certain lenses as protection, other lens filters are used to tame reflections, adjust dynamic range, or change exposure values.
The most used types of lens filters for digital photography are circular polarizers (C-POL), neutral density (ND), and graduated neutral density (GND) filters. Within the categories of these types of lens filters are some variations and combinations.
Costs of Lens Filters
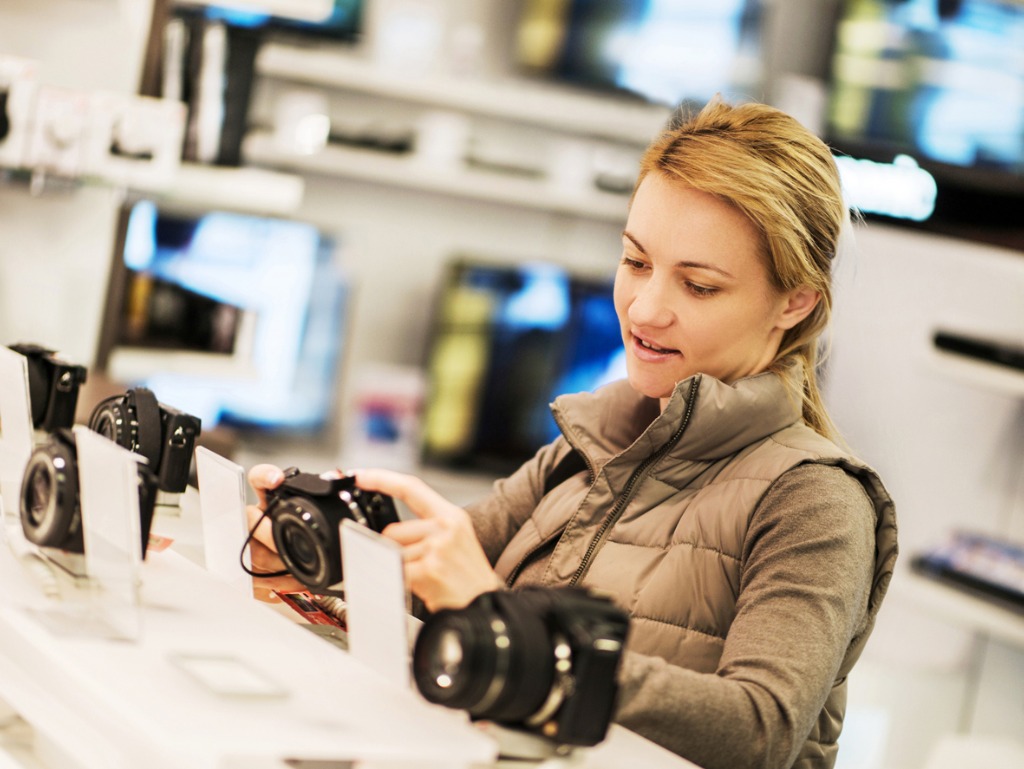
photo byBraunS via iStock
High quality lens filters might be budget priced, bundled in kits, or put on sale from time to time, but they will cost more than low quality accessories. This is to be expected, since we have likely already noticed price differences in our camera and lens options that relate to ruggedness, sharpness, or overall quality.
Even though as photographers many of us have at least a slight tendency to be gearheads, we still don’t want to waste time or money on photography gear that isn’t cost effective or useful for our photography.
Lens Filter Features

photo bybbsferrari via iStock
Here are some lens filter features and lens filter construction to look for when considering a new purchase of lens filters:
- High-Quality Optical Glass
- Anti-Reflection Coating
- Smudge Proof Coating
- Heavy Duty Construction
- Smooth Fit and Finish
- Textured Outer Ring
- Durable Markings
We’ll discuss each of these as to why they’re important, but we might also look at a game changing solution to the pricing issue of high-quality filters, too.
There is a new product released by H&Y Filters, the RevoRing, which is an innovative method for adapting filters to various size lenses. It saves us money by not having to buy several different sizes of high-quality filters. It can also save us time by operating as a type of quick release for filters. Check it out for yourself!
Now let’s examine the important lens filter features and construction.
Learn More:
High-Quality Optical Glass
photo bygilaxia via iStock
This should be our number one consideration when looking at new lens filters. If the filter glass optical quality is below what our lens is, the entire setup suffers. The overall optical quality of a lens plus a filter will be based on the lowest quality component.
Don’t negate the high-quality of your fine lenses by adding inferior quality glass into the optical path of the image taking machine.
Anti-Reflection Coating

photo byantoniotruzzi via iStock
Our lenses have coatings on each element to eliminate or reduce glare and poor light transmission, lens filters need this as well. Especially since the lens filter is the outermost piece of glass in the optical light path.
Smudge Proof Coating

Being the outermost piece of glass in the optical path also means a lens filter is likely to take some abuse regardless of how careful we may be. Fingerprints and smudges from accidental contact can be reduced by lens coatings. These lens filter coatings also help prevent scratches.
Heavy Duty Construction
Lens filters present a fairly unique construction problem in that the large and somewhat thin piece of glass has to be housed in a little bit of some type of material, the filter housing or filter ring. High quality lens filters tend to use aircraft aluminum as housing material due to its high strength and low weight.
Smooth Fit and Finish
photo byKoldunov via iStock
Since we already talked about high-quality optical glass, this point of lens filter construction will apply to the filter ring. Especially does the thread for attaching the lens filter need to be smooth and properly machined. Tiny changes in thread pitch or rough finish will make a lens filter difficult to use.
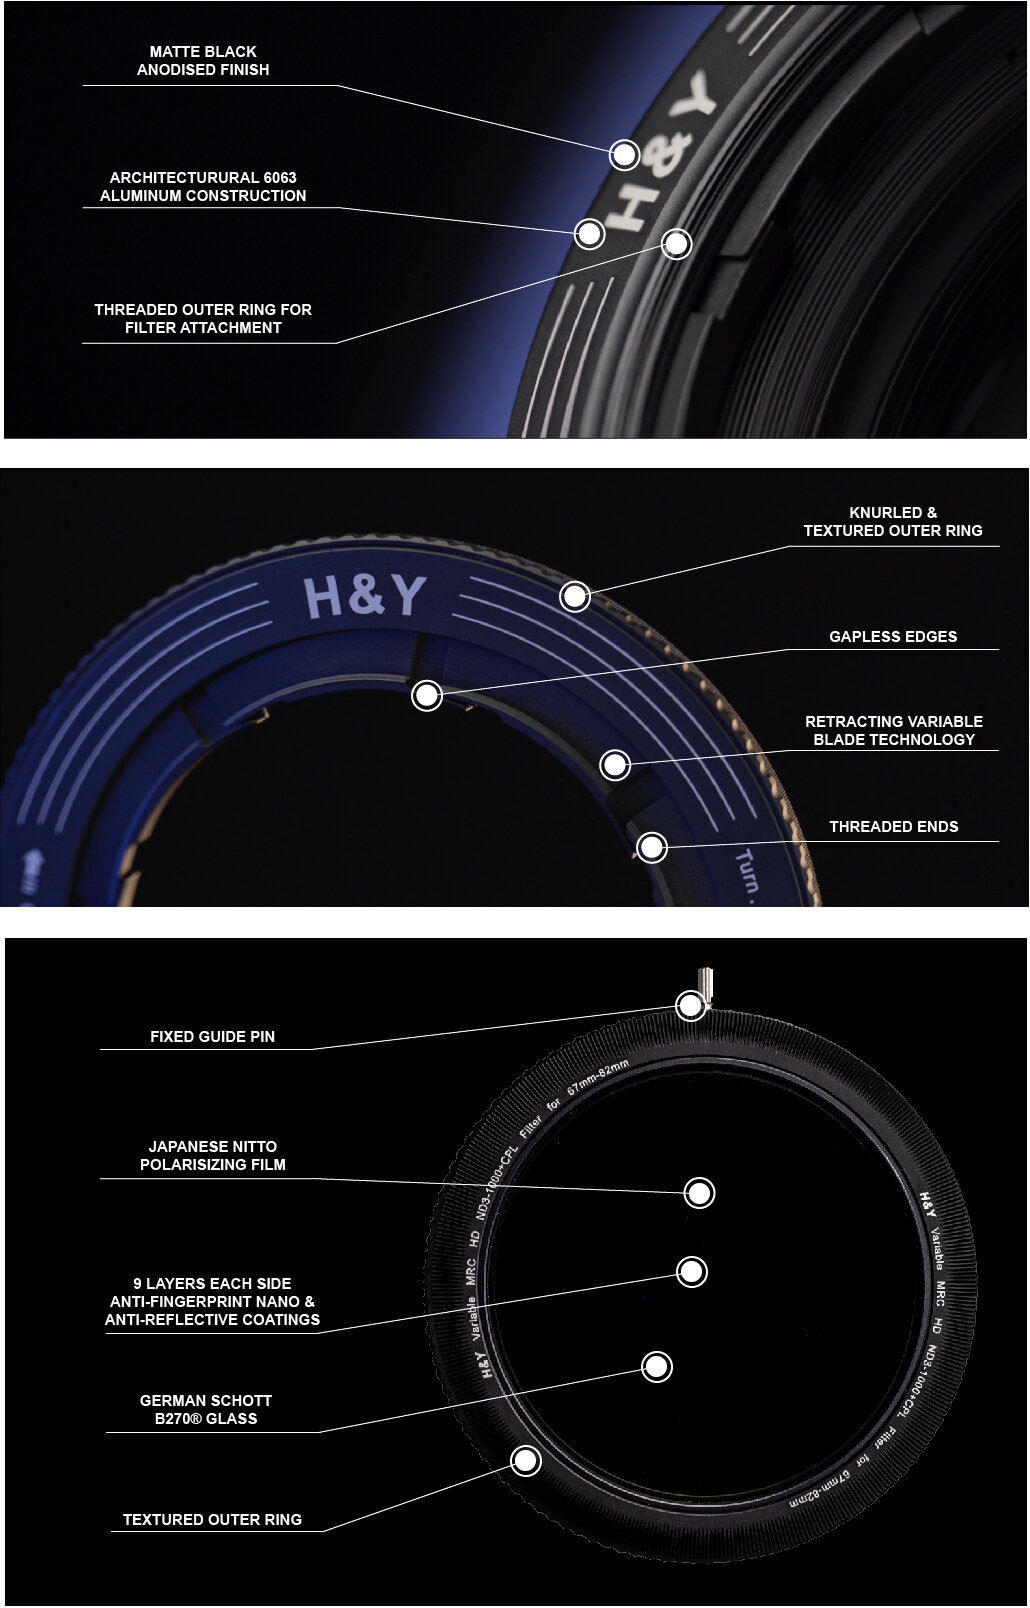
Textured Outer Ring

This applies mostly to ease of use. A textured or knurled outer ring is easier to attach and remove than a smooth outer rim. For polarizers and variable ND filters, it gives us something to grab onto while adjusting.
Durable Markings
If we can’t tell what filter it actually is after a few uses, we won’t get much use out of the lens filter. These markings may include the type of lens filter, the strength of an ND filter, and the thread size of the lens filter. We could guess, but it’s better to know for sure before digging out of the bag or case.
Worth the Effort
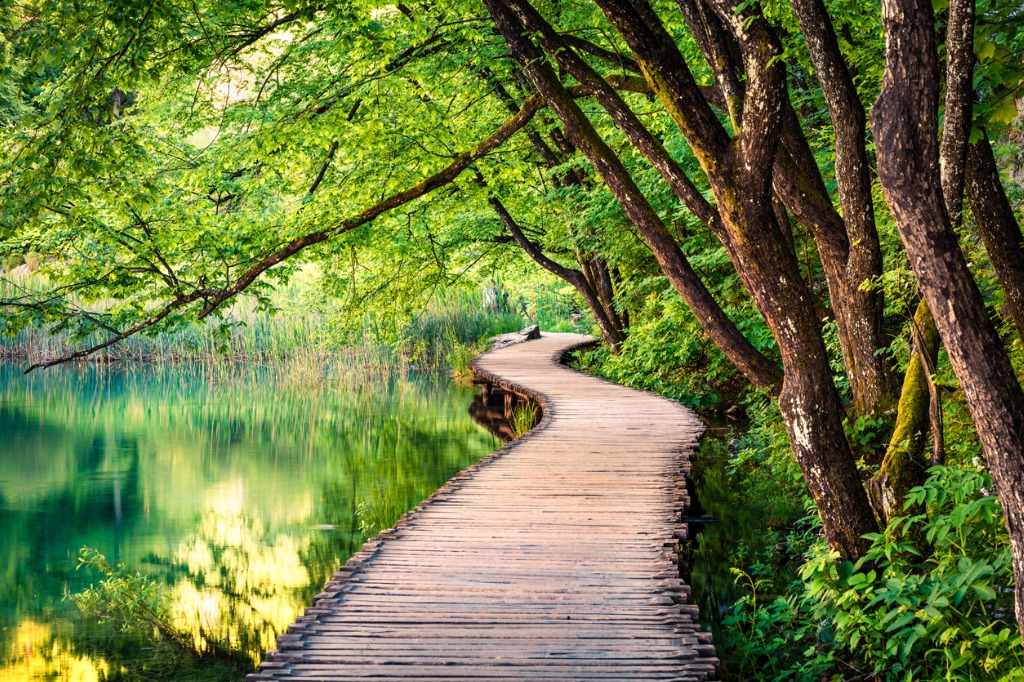
photo byAndrew_Mayovskyy via iStock
It may cost us a little more, and might require some extra research, but buying and using high-quality lens filters is the way to go for photographic accessories.
Learn More:
We Recommend
Gifts for Photographers Under $100 - 2020 Edition

Photo by svetikd via iStock
This has been a crazy year, and many folks have to seriously tighten their belts. This includes keeping their holiday shopping budget in check.
If you fall into that category and have a photographer on your shopping list, this list of gifts for photographers under $100 is for you!
From camera bags to gift cards to handy gadgets for their camera or lens, we've got awesome gift ideas that won't break the bank!
Gifts for Photographers Under $100: H&Y RevoRing Bundle
One of the most innovative photography gadgets of 2020 is also one of the most inexpensive!
A couple of months ago, H&Y unveiled RevoRing, which is a variable step ring. This is so innovative because it eliminates the need to carry a bunch of individual step rings to make filters and filter systems work with different lenses.
Instead, the photographer on your list can have this set of variable step rings in their camera bag and use it to adapt their filters to a variety of lenses.
This particular set includes 37-49mm, 46-62mm, and 67-82mm options, giving your favorite photographer lots of leeway in terms of which filters they use with which lenses.
It’s dead simple to use too - just twist the RevoRing, attach it to the lens, and it’s ready to rock!
There simply aren’t that many truly innovative photography gifts for under $100, but RevoRing certainly fits the bill.
If you want to surprise your loved one with a gift that is unique, functional, and will legitimately help them improve their photography workflow, look no further than RevoRing!
Learn more about the H&Y RevoRing
Gifts for Photographers Under $100: CanvasHQ Print

One of my favorite gifts to give (and to get, while we're at it) is a big, beautiful print.
Personally, I like canvas because of the texture the canvas gives to the print. Besides, a canvas print is something that will continue to give joy to the person that receives it for years and years to come!
Now, I know what you're thinking...canvas is so old-school.
But if you order your canvases from the right printers, you can get something that is beautiful, well-made and looks modern, even if the substrate is perhaps a bit old-school.
I have tons of canvases in my home, the vast majority of which are fromCanvasHQ.
These are some of the best canvas prints I've ever purchased. The sharpness of detail, the color accuracy, and the overall build quality of these prints is next-level good.
Part of the reason for this is the materials CanvasHQ uses. We’re talking archival-grade canvas, commercial-grade inks that are water and UV resistant, and kiln-dried pine frames to keep everything straight and true.

But CanvasHQ isn't just tops in the quality department...
They have excellent customer service that makes you feel heard and as though you're the only customer they have to worry about at that moment.
These guys are committed to getting it right, so if something doesn’t go as planned, you won’t be hung out to dry.
If you have questions, they’ll answer them. If you have a problem, they’ll fix it. If you need assistance with uploading your photo or even picking the best finishes for your canvas, they’ve got your back.
In the video above, you can see how one of my CanvasHQ prints stacks up against similar prints from other printing companies. I think you'll see why I'm so loyal to CanvasHQ!
Start shopping for your favorite photographer today on CanvasHQ.
Gifts for Photographers Under $100: ProGrade Digital Dual Slot Card Reader
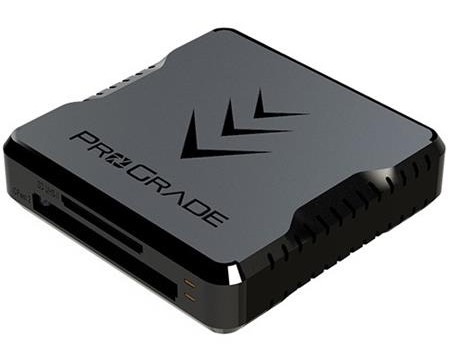
Photographers today have at their disposal lightning-fast memory cards that can accommodate things like 4K video and huge image files.
But it's not enough to have high-speed cards - you also need a high-speed card reader that makes transferring all those huge files to your computer a quicker task. That's where the ProGrade Digital Dual Slot Card Reader comes in.
With transfer speeds of up to 1.25GB per second, this card reader will make quick work of transferring files. Better yet, you can transfer data from two cards at the same time.
It's also a small and lightweight device, so the photographer on your list can easily take this reader with them on photoshoots or when they travel.
To ensure safety, this card reader has a magnetic base that pairs with a metal plate. Just attach the metal plate to your laptop, connect the reader, and you're ready to go!
This year, give the gift of convenience and help your favorite photographer save some time, too!
Learn more about the ProGrade Digital Dual Slot Card Reader
Gifts for Photographers Under $100:Hex Ranger DSLR Sling Bag

One of the best gifts you can give the photographer on your list is a new camera bag.
But not all camera bags are made alike...
Honestly, I’m a bit of a camera bag snob, so I look for things that others might skim over.

For instance, I check the stitching inside and out to see how well put together it is, and with this bag, it’s very well put together.
It’s part of the thoughtful construction and design processes that also make this bag an excellent choice for a gift for the photographer on your holiday shopping list.
One of the things I like most about the bag is the collapsible interior dividers - including the bottom divider. This gives you a bag that can not only be customized to your gear for each photoshoot, but you can also fold up or remove the dividers to allow the bag to be packed totally flat for travel inside another bag.
Speaking of customizations, this bag has side adjustable load straps and adjustable bottom carry straps so you can carry even more gear when needed.
This bag is also packed full of pockets to help you keep track of your stuff. There’s a front access organizer for small items, a faux fur lined pocket on the front for your phone or a pair of shades, a faux fur lined pocket for your table, and multiple hidden velcro stash pockets. And the bag sits very well when worn. It’s comfortable and easy to access your gear and really hugs your body.

With genuine Cordura material and YKK zippers with metal pulls, this bag will stand up to use and abuse, too. And since it’s so compact (just 1.3 pounds and 14.5"L x 7.25"W x 4.75"H), you can rock it in the urban jungle without worrying that it’ll be knocking into people as you move from shot to shot.
Something that really stood out to me was that, although the bag is listed at 8 liters, there is no wasted or negative space. In fact, I easily transferred all the gear I would normally carry in my Peak Design 10L Sling into the HEX Ranger Sling. I have to say that I am a big fan of the efficient use of space in this bag and the collapsible potential of the HEX bag certainly gives it a leg up.
With eight liters of storage space, a streamlined design, and looks that don’t quit, this is definitely a gift for photographers that will put a smile on their face!
Learn more about the Hex Ranger DSLR Sling Bag
Gifts for Photographers Under $100: Camera Canopy

If you want a unique, yet functional gift for the photographer in your life, the Camera Canopy is an ideal choice.
Photographers that spend any time outdoors understand that when it rains, it can really put a damper on their ability to get the photos they want. That’s because even weather-sealed gear isn’t completely water-tight.
And trying to manipulate camera controls with a traditional bag-like rain cover for a camera is a huge pain in the rear. That’s why Camera Canopy is a much better alternative.

Camera canopy attaches to a camera via its hot-shoe mount, and then acts like a roof to protect the camera and lens from rain. It even protects the glass of the lens so there’s no water droplets messing up the shot.
Better still, it’s adjustable for lenses up to 500mm in length, and there’s even a smaller version for mirrorless setups (shown above). Add in a 30-day money-back guarantee, and you’ve got the perfect gift for this holiday season!
Learn more about Camera Canopy and Mini Camera Canopy
Gifts for Photographers Under $100: PolarPro Belay Quick-Release Camera Strap
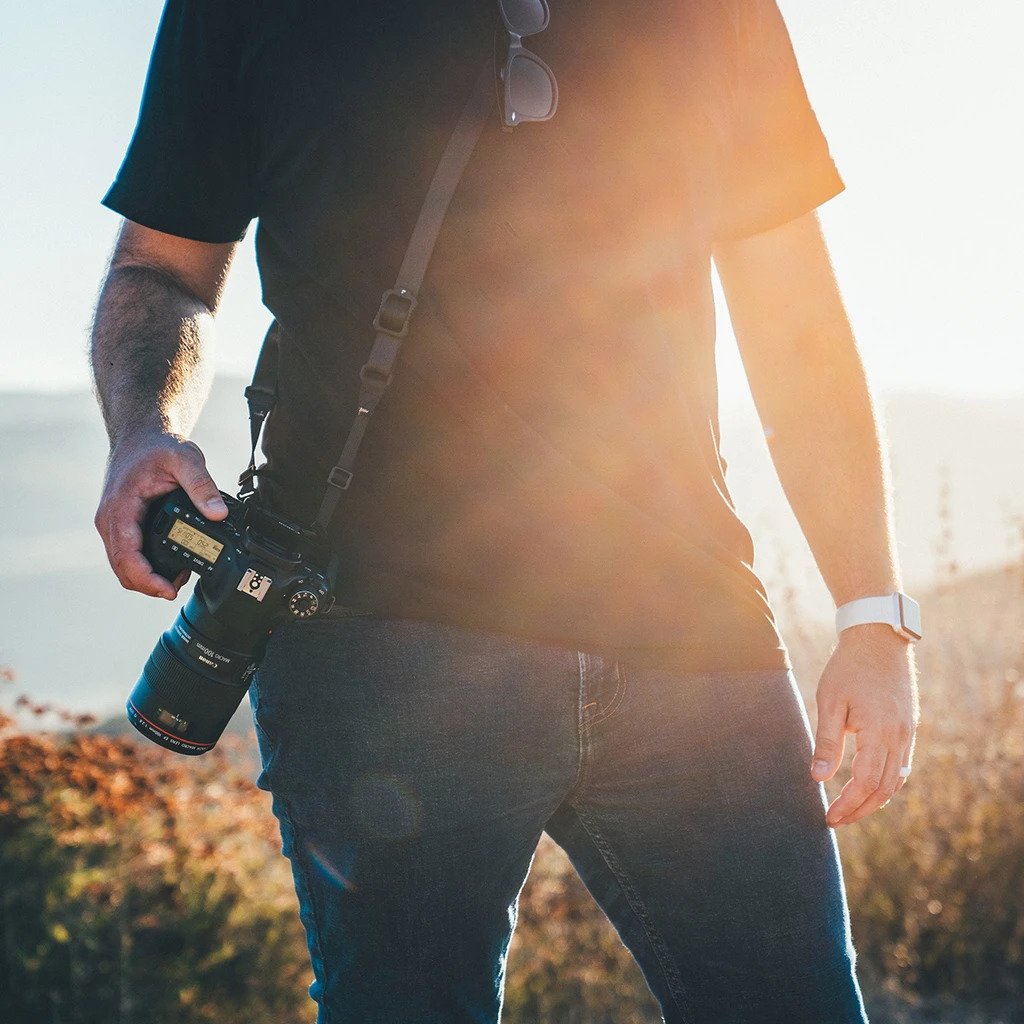
PolarPro continues to innovate with products that are smartly designed to maximize functionality for you. The Belay Quick-Release Camera Strap certainly fits the bill.
This strap allows you to carry your camera at your side without limiting your movement. This is possible because of the ergonomic anchor point that's attached to the bottom of the camera. This results in a lower carrying profile than traditional straps.
What's more, this strap has an integrated quick-draw mechanism so you can quickly remove the camera if need be. That's definitely a feature the photographer on your list will be looking for!
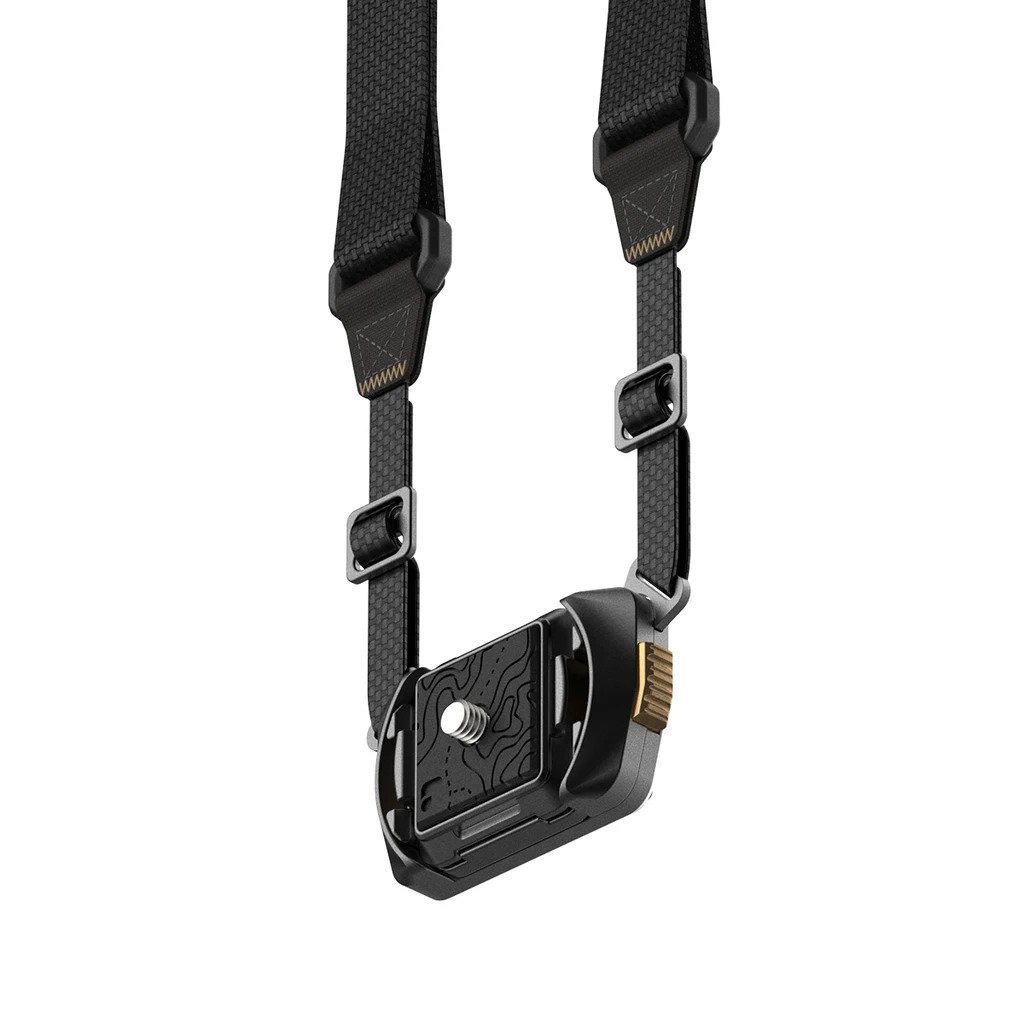
The quick-draw mechanism is made of aluminum while the strap is industrial nylon. In other words, the strap is lightweight, yet ultra-strong to give you peace of mind. In fact, this strap is rated to 50 pounds, so it will support even the heaviest of professional camera and lens combinations.
And with a wide 3/4-inch strap, you don't have to worry about your shoulder feeling pinched under the weight of your gear. Instead, the strap distributes the weight for a more comfortable carrying experience.
If you know a photographer that has been itching for a new camera strap, consider this as the ideal gift for them!
Learn more about the PolarPro Belay Quick-Release Camera Strap
Gifts for Photographers Under $100: PolarPro Traverse Strap Mount
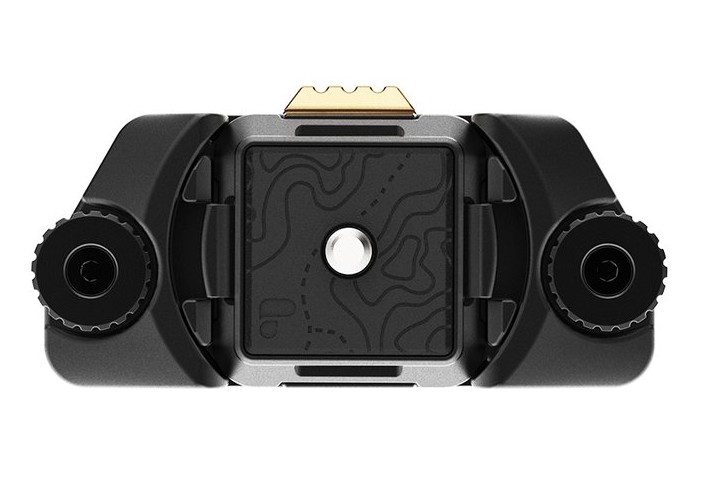
If the photographer on your list doesn't need another strap in their collection, the PolarPro Traverse Strap Mount might be a great alternative gift idea.
This is a QuickDraw camera mount, so you can quickly release the camera with a one-handed motion from the mount and start shooting.
When not in use, your camera is securely and comfortably mounted on your backpack, belt, or any other kind of strap.

The Traverse Strap Mount has a secondary locking mechanism which keeps your camera completely secure as you move. Better still, it'll support up to 100 pounds of gear, so even if the photographer on your list has a big, heavy DSLR and long lens, this mount will hold it!
Best of all, it's under $60, so you'll give a great gift without coming close to your $100 budget.
Learn more about the PolarPro Traverse Strap Mount
Gifts for Photographers Under $100: ViewSonic VA2246MH-LED 22 Inch Full HD 1080p LED Monitor

I have a couple of ultra widescreen ViewSonic monitors in my home office, and they have convinced me that ViewSonic is among the best brands of computer monitors.
If you're on a budget, you might consider the ViewSonic VA224MH 22-inch LED monitor as a great gift idea for the photographer on your list.
This widescreen monitor offers a 21.5-inch viewable screen that has an LED backlight. The thin bezel design increases the viewing area while helping maintain the smaller profile of the monitor for smaller work areas.
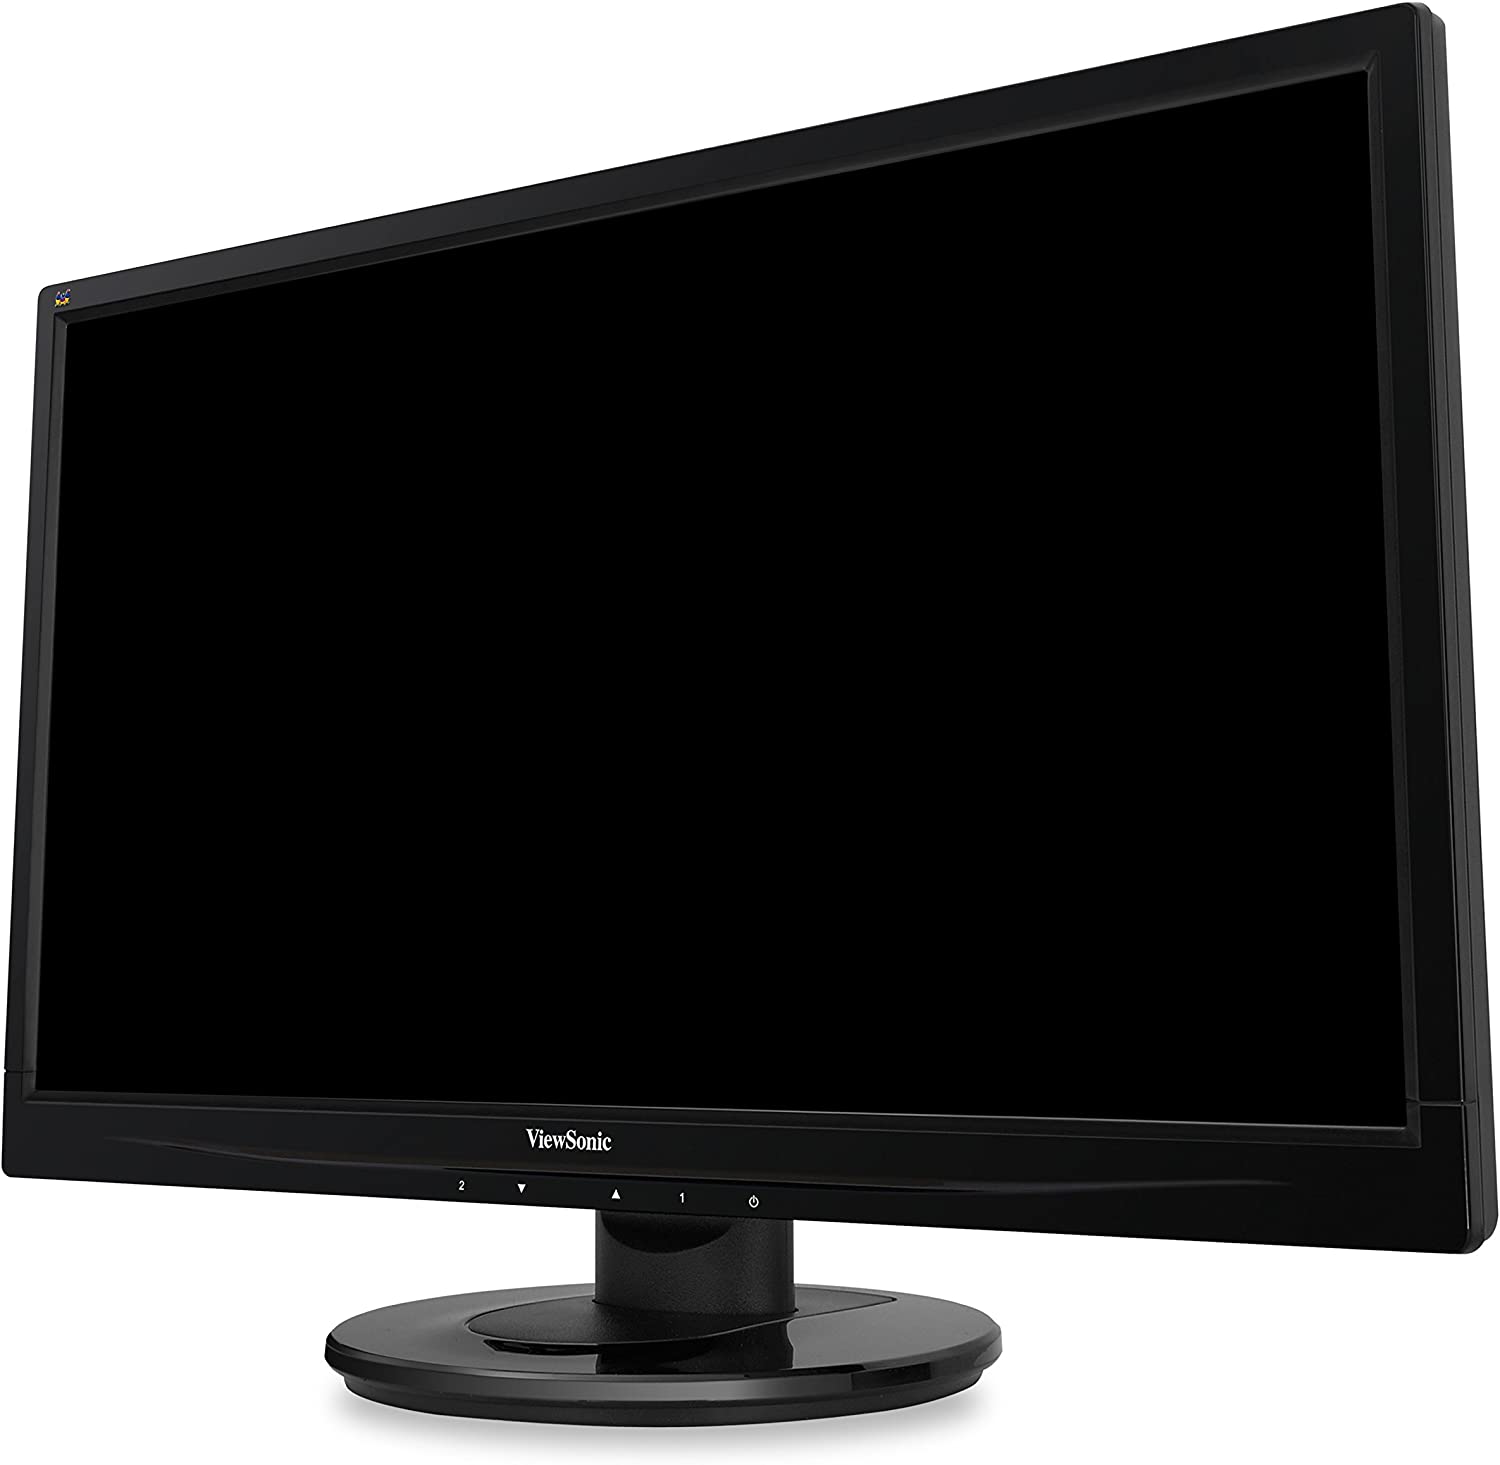
The monitor offers full 1080p HD resolution and mega dynamic contrast ratio for a clear, sharp, and contrasty display.
There are two integrated speakers, tons of connectivity options, and it's compatible with VESA mounts in case it needs to be mounted on the wall.
Your favorite photographer will also appreciate the flicker-free technology and the blue light filter to ease eye strain on those occasions when there's hours and hours of work to be done.
Learn more about the ViewSonic VA2246MH monitor
Gifts For Photographers Under $100: GoPro Smart Remote
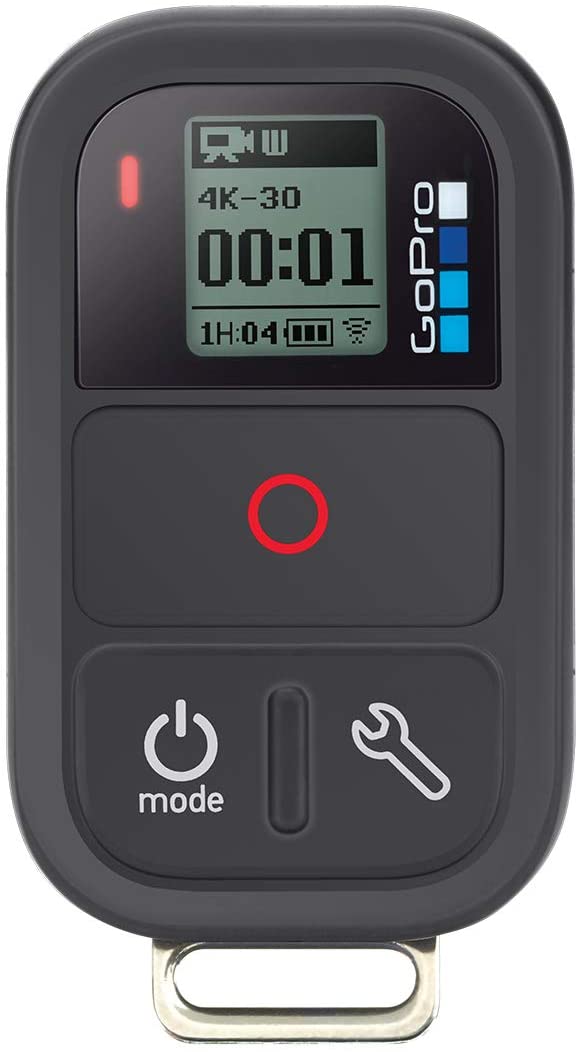
There are few cameras that are as versatile as the GoPro Hero 8 Black, but with the GoPro Smart Remote, you can make it even more versatile.
This remote gives you total control over the camera, including the shutter, camera settings, and turning the camera on and off.
You get long-range control as well - up to 600 feet if the conditions are just right.
The GoPro Smart Remote also enables control of up to 50 cameras at the same time, so if the photographer on your list has multiple GoPros, this remote is the perfect accessory!
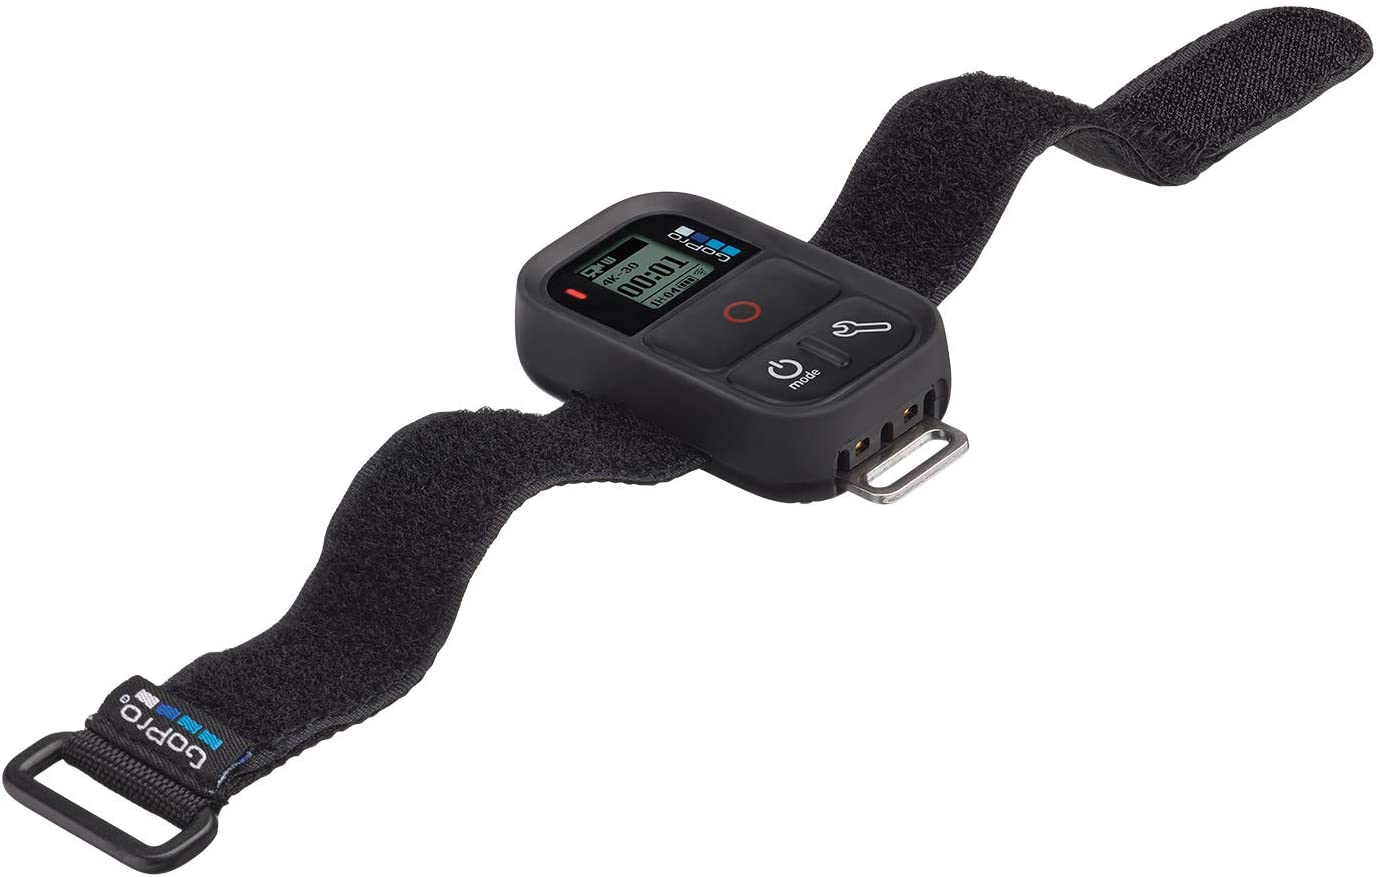
The GoPro Smart Remote has a rugged design that's waterproof up to 33 feet and is both mountable and wearable.
The LCD screen mirrors the screen on the camera's, that way you're abreast of the camera's status and making quick confirmations of the camera settings and functions.
This remote isn't just compatible with the Hero 8 Black, either. It also works with the Hero 8 MAX, Hero 7 Black, Hero 6 Black, Hero 5 Black, Hero 5 Session, and Fusion.
All this for well under $100 too!
Learn more about the GoPro Smart Remote
Gifts for Photographers Under $100: LitraTorch 2.0

I know what you might be thinking - this tiny light is worth $100??
Well, I’ve used the LitraTorch 2.0 for a few months now, and I can tell you it’s worth well more than $100…
Though it weighs just over three ounces, and is about 1.5 inches square, Litra packed 16 LEDs into it, so it has some serious light output!
In fact, you can adjust the output from 100 to 450 to 800 lumens depending on what you’re doing.

Better yet, this little light puts out beautiful light that’s clean and crisp and flicker-free, too. It has a wide 70-degree beam angle to illuminate your subject and offers a color temperature of 5700K - right in the sweet spot of natural-looking light.
On its low setting, the LitraTorch 2.0 will give you four hours of illumination while you get 35 minutes of light on full power. That’s a 10 percent improvement over the original LitraTorch.
It’s also waterproof up to 60 feet, has a magnet for easily attaching it to metal surfaces, and it’s built like a tank, so it’ll withstand some use and abuse.
This is simply a versatile, go-anywhere, do-anything light!
Learn more about the LitraTorch 2.0
Gifts for Photographers Under $100: RODE VideoMicro

This tiny shotgun microphone is perfect for a GoPro.
It's compact and lightweight, but audio quality isn't sacrificed. In fact, it has a high-quality cardioid condenser mic capsule so you can get clear, crisp audio.
And since it's a directional mic, it minimizes sounds from the periphery so your video has focused audio from the subject.
Add to that a thermoplastic suspension structure for minimizing vibrations as you adventure around with your GoPro, and you have the ideal audio companion for the best adventura camera on the market!
If the photographer on your list is an adventurer and utilizes a GoPro, this is the perfect gift idea!
Learn more about the RODE VideoMicro
Gifts for Photographers Under $100: Amazon Gift Card
![]()
Totally stumped regarding gift ideas for photographers on your list?
Why not go the easy route and get them an Amazon gift card?
Though a gift card isn't exactly the sexiest gift, when the photographer in your family sees that you have given them carte blanche to get what they want, they'll be stoked!
With an Amazon gift card, they can put the card amount towards whatever they want - a new lens, a second camera body, lighting gear, a laptop - you name it!
As far as flexibility goes, there's nothing better to give a photographer than a gift card.
Learn more about Amazon gift cards
We Recommend
Gifts for Photographers Under $50 - 2020 Edition

photo byelenaleonova via iStock
The holidays are coming in hot, and for many of us, finding gifts for the photographers in our lives is a tough task.
Photographers can be a finicky bunch. We’re loyal to certain brands. Many of us already have an ocean of photography gear, too.
So what do you buy the photographer on your list with a budget of $50?
We’ve curated a list of top options that will hopefully make your holiday shopping a little easier.
Gifts for Photographers Under $50: H&Y 37-49mm RevoRing
One of the most innovative photography gadgets of 2020 is also one of the most inexpensive!
A couple of months ago, H&Y unveiled RevoRing, which is a variable step ring. This is so innovative because it eliminates the need to carry a bunch of individual step rings to make filters and filter systems work with different lenses.
Instead, the photographer on your list can have this one variable step ring in their camera bag and use it to adapt their filters to a variety of lenses.
This particular RevoRing is 37-49mm in range, giving your favorite photographer lots of leeway in terms of which filters they use with which lenses.
It’s dead simple to use too - just twist the RevoRing, attach it to the lens, and it’s ready to rock!
There simply aren’t that many truly innovative photography gifts for under $25, but RevoRing certainly fits the bill.
If you want to surprise your loved one with a gift that is unique, functional, and will legitimately help them improve their photography workflow, look no further than RevoRing!
Learn more about the H&Y RevoRing
Gifts for Photographers Under $50: CanvasHQ Print
One of my favorite gifts to give (and to get, while we're at it) is a big, beautiful print.
Personally, I like canvas because of the texture the canvas gives to the print. Besides, a canvas print is something that will continue to give joy to the person that receives it for years and years to come!
Now, I know what you're thinking...canvas is so old-school.
But if you order your canvases from the right printers, you can get something that is beautiful, well-made and looks modern, even if the substrate is perhaps a bit old-school.
I have tons of canvases in my home, the vast majority of which are fromCanvasHQ.
These are some of the best canvas prints I've ever purchased. The sharpness of detail, the color accuracy, and the overall build quality of these prints is next-level good.
Part of the reason for this is the materials CanvasHQ uses. We’re talking archival-grade canvas, commercial-grade inks that are water and UV resistant, and kiln-dried pine frames to keep everything straight and true.
But CanvasHQ isn't just tops in the quality department...
They have excellent customer service that makes you feel heard and as though you're the only customer they have to worry about at that moment.
These guys are committed to getting it right, so if something doesn’t go as planned, you won’t be hung out to dry.
If you have questions, they’ll answer them. If you have a problem, they’ll fix it. If you need assistance with uploading your photo or even picking the best finishes for your canvas, they’ve got your back.
In the video above, you can see how one of my CanvasHQ prints stacks up against similar prints from other printing companies. I think you'll see why I'm so loyal to CanvasHQ!
Start shopping for your favorite photographer today on CanvasHQ.
Gifts for Photographers Under $50: GoPro Light Mod for Hero 8 Black
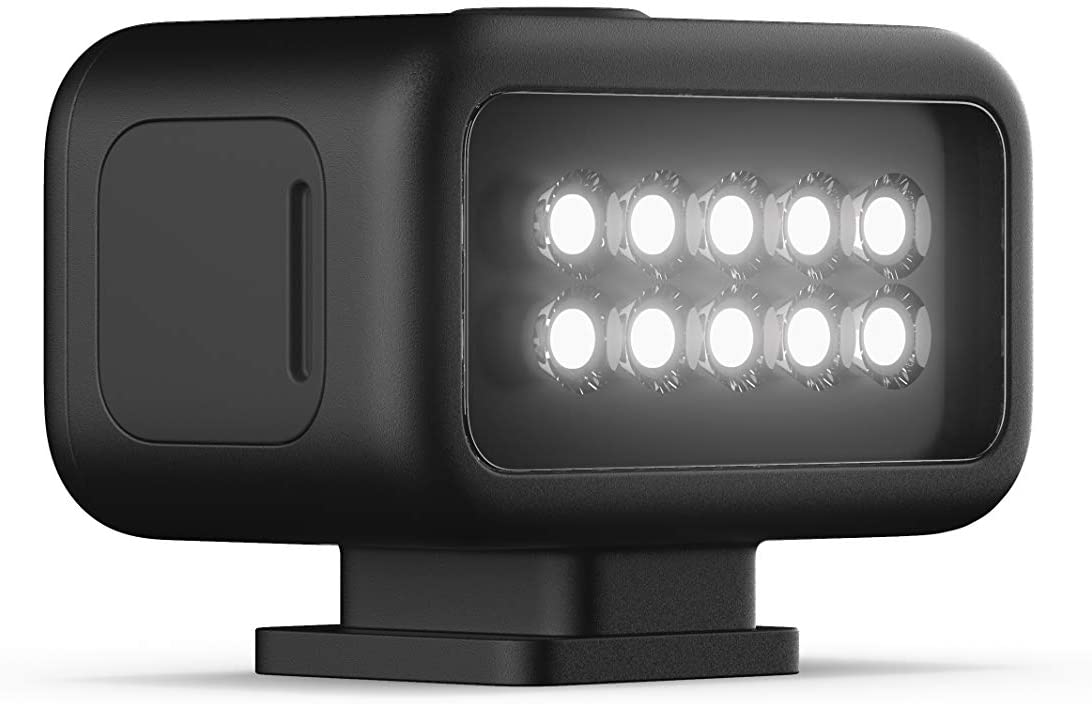
The GoPro Hero 8 Black is an awesome camera for still photography and videos. It’s functionalities and flexibility are undeniable, and with a wide array of add-ons, mods, and accessories, you can extend the usefulness of this camera even further.
If your favorite photographer has a GoPro Hero 8 Black, a great holiday gift idea is the GoPro Light Mod.
This little guy connects easily to the Hero 8 Black via the Media Mod (sold separately) or it can be attached to multiple GoPro mounts and other accessories for off-camera lighting.

It has four levels of brightness up to 200 lumens so you can easily highlight the subject with crisp light.
As you’d expect, the light is built to tough GoPro standards and is waterproof up to 33 feet. The built-in rechargeable battery offers up to six hours of runtime, so whether the photographer in your life is shooting stills, videos, is working underwater or above, they’ll have reliable, clean light to help them achieve their creative vision!
Learn more about the GoPro Light Mod for Hero 8 Black
Gifts for Photographers Under $50: Artbeat Studios 11x14 HD Metal Print

Nothing says happy holidays like a gorgeous metal print, especially when the person you’re buying for is a photographer! So why not surprise the photographer on your list with an incredible HD metal print from Artbeat Studios?!
Metal is a gorgeous substrate for all manner and type of photos. The crisp, clean detail and modern look is just what the doctor ordered for highlighting a beautiful image.
Artbeat Studios’ HD metal prints are so impressive in part because the image is heat infused directly into the metal. The result is unsurpassed resolution and color vibrancy.

What’s more, Artbeat Studios uses Chromaluxe® brand aluminum sheets. This brand of aluminum has a 3x better permanence than Kodak Silver Halide Prints and resists fading for more than 65 years. So not only is an HD metal print a great gift for this holiday season, but it’s a gift that will keep on giving for decades!
You can customize the look of the print by choosing different finishes, surfaces, and mounts. Additionally, you can choose from two different hanging systems and two different mounts. The result is a breathtaking and custom print that your favorite photographer is sure to love!
Learn more about Artbeat Studios’ HD Metal Prints
Gifts for Photographers Under $50: Octopus.Camera OctoPad

If you’re rushing around trying to find that perfect gift for your favorite photographer, you might consider the Octopus.Camera OctoPad as an excellent choice.
The OctoPad offers what many other stabilization devices don’t - it doesn’t collapse under the weight of gear it’s supporting and it doesn’t slide around, even if it’s placed on a smooth or an uneven surface thanks to its weighted non-slip mat design.
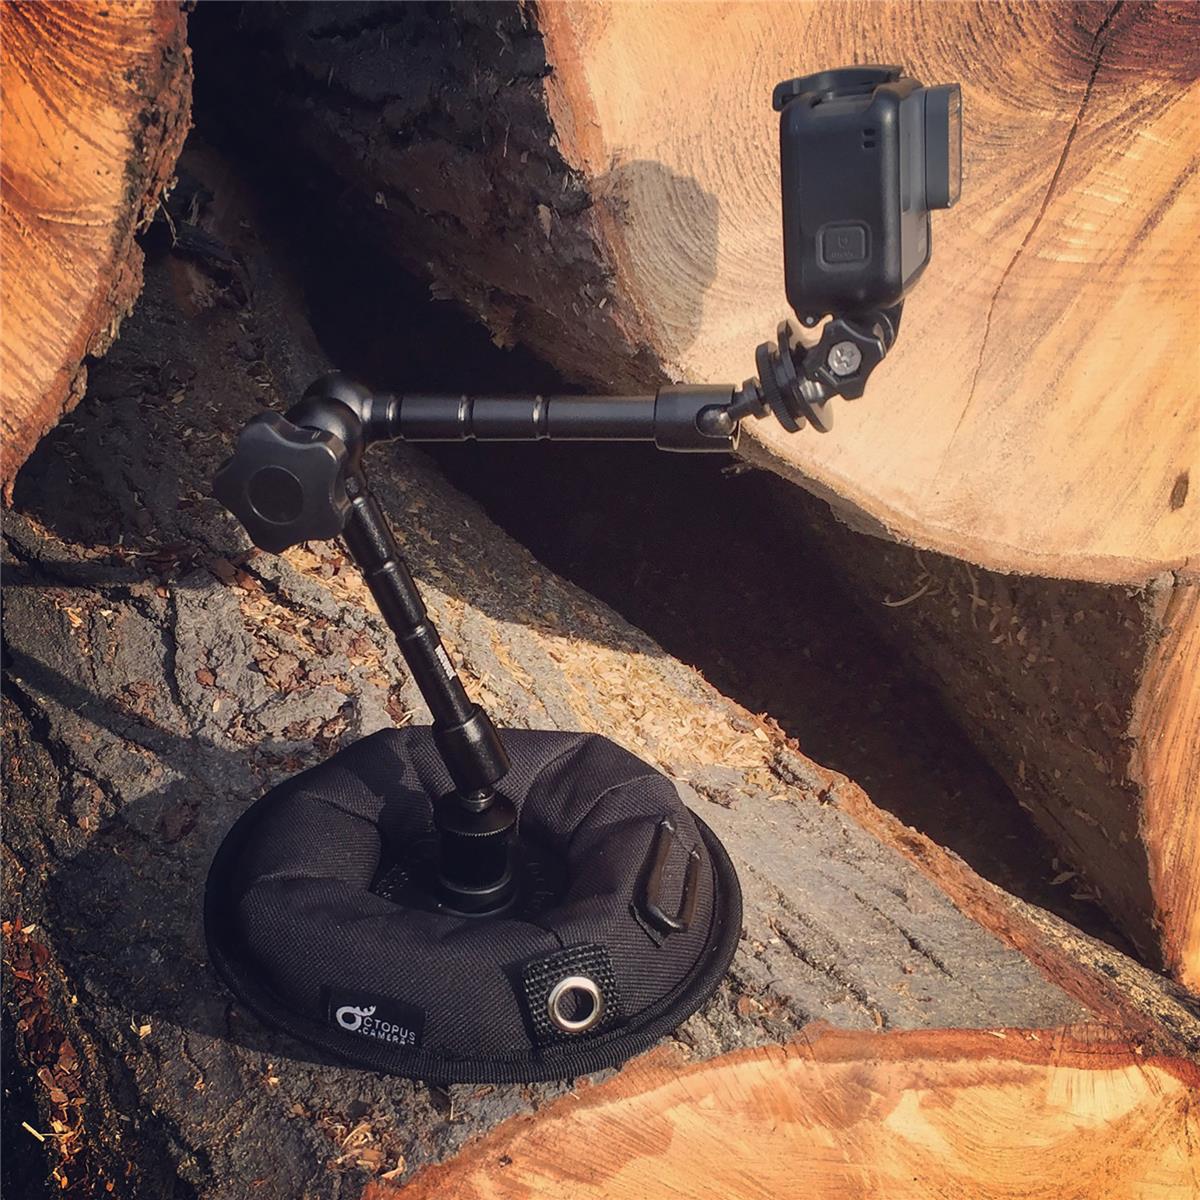
The OctoPad has a built-in male 1/4-20 inch threaded bolt for attaching accessories and a high-capacity removable ball head that also has an adjustable 1/4-20 inch threaded male bolt.
That means that not only is the OctoPad well-equipped to stay in place, but it can also support a wide range of gear, from a GoPro to a smartphone to a light or microphone.
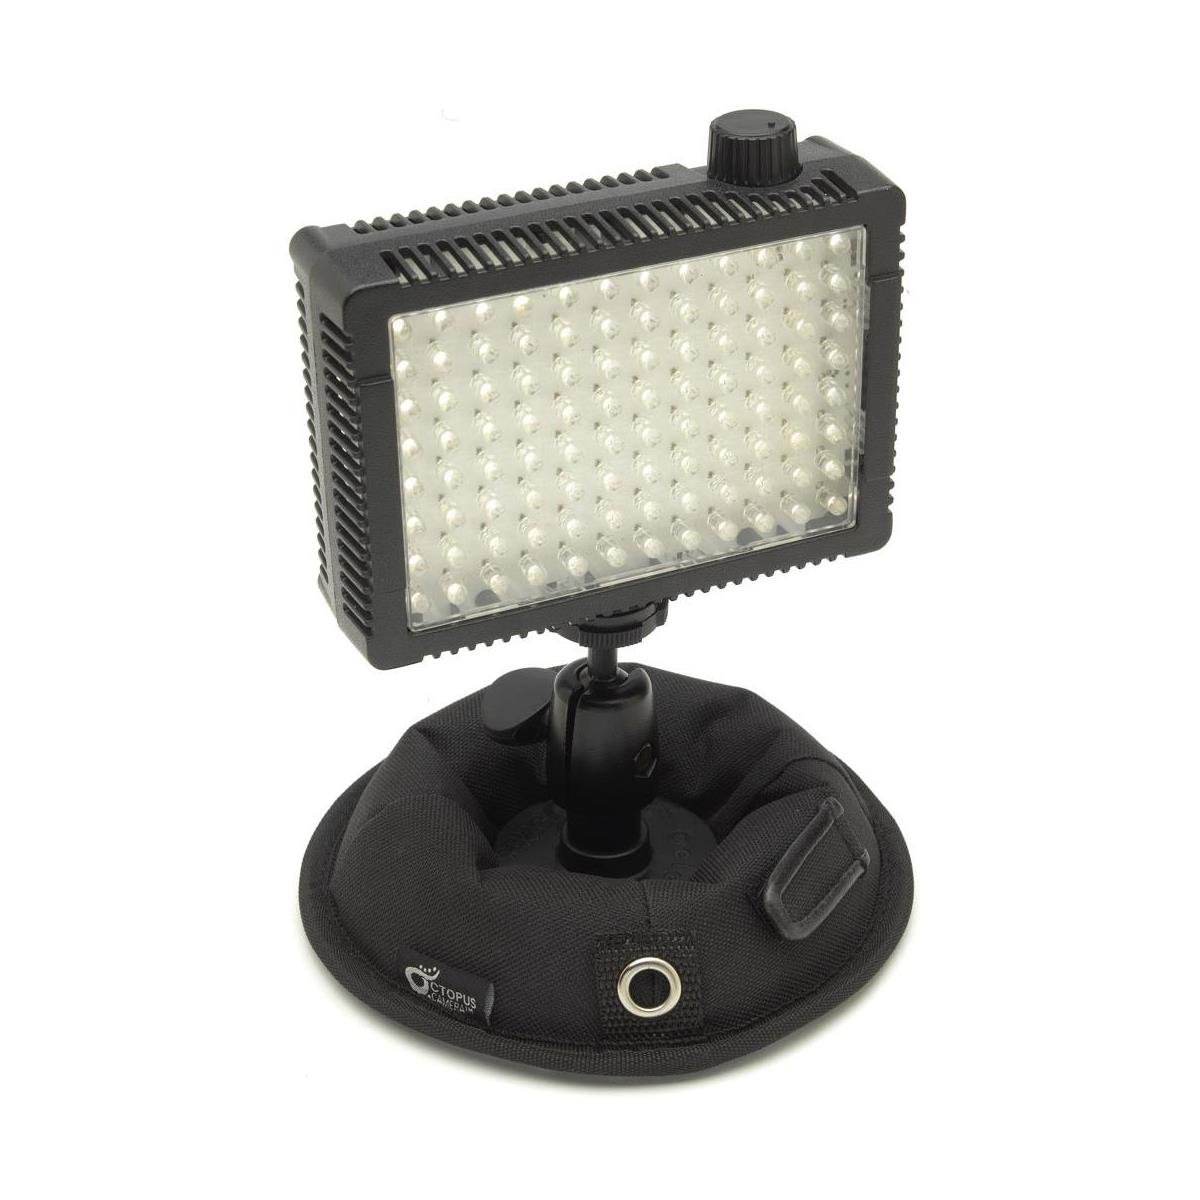
There’s even a built-in cable strap to keep cables from getting in your way and a clip grommet for attaching a lanyard to easily carry the OctoPad.
What photographers want in a gift is something that’s versatile and functional, and the OctoPad is definitely both. Best of all, it’s well below the $50 threshold, so you can give an awesome gift without busting your budget!
Learn more about the Octopus.Camera OctoPad
Gifts for Photographers Under $50: Ikan Stratus 15mm Static Lens Support
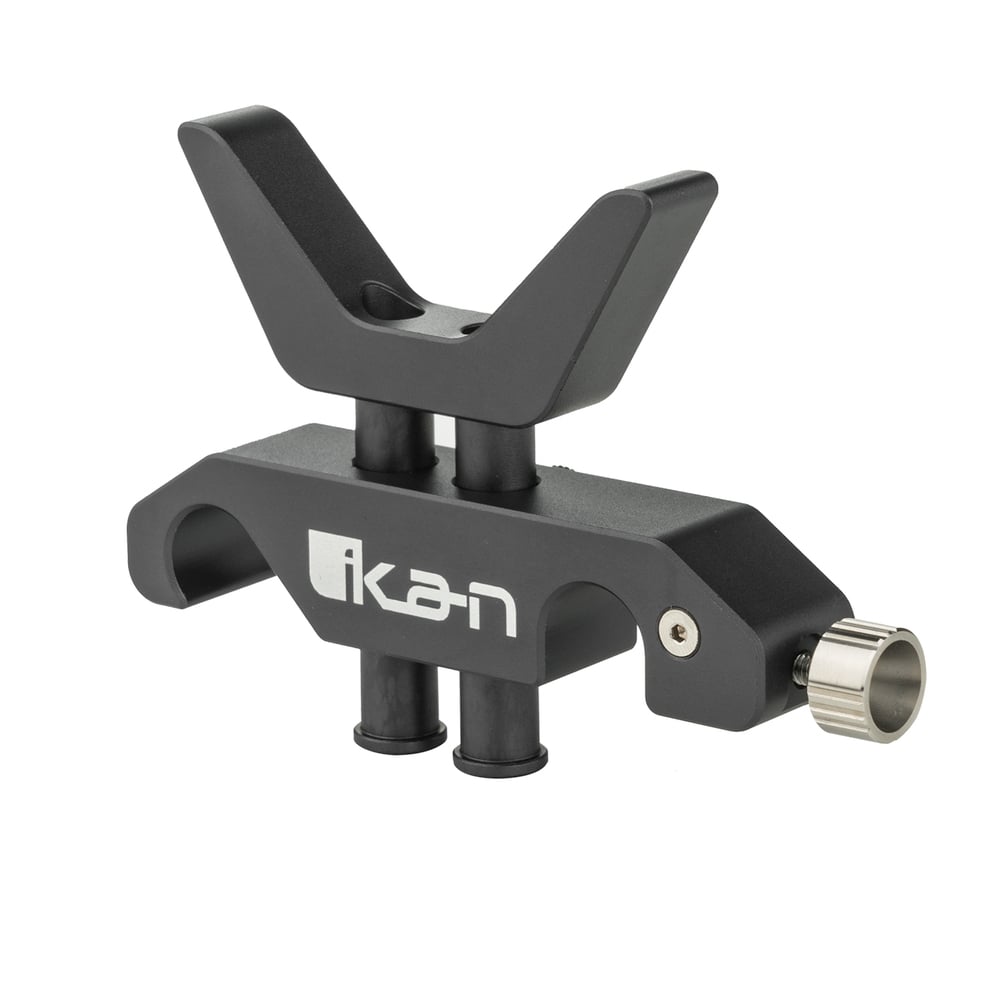
If the photographer on your list has a bunch of accessories for their camera, an Ikan Stratus Cage is all but a must.
And to make the Stratus cage even more functional, you can give the gift of a 15mm static lens support this holiday season.
The support attaches to the non-rotating part of a lens and helps support its weight.
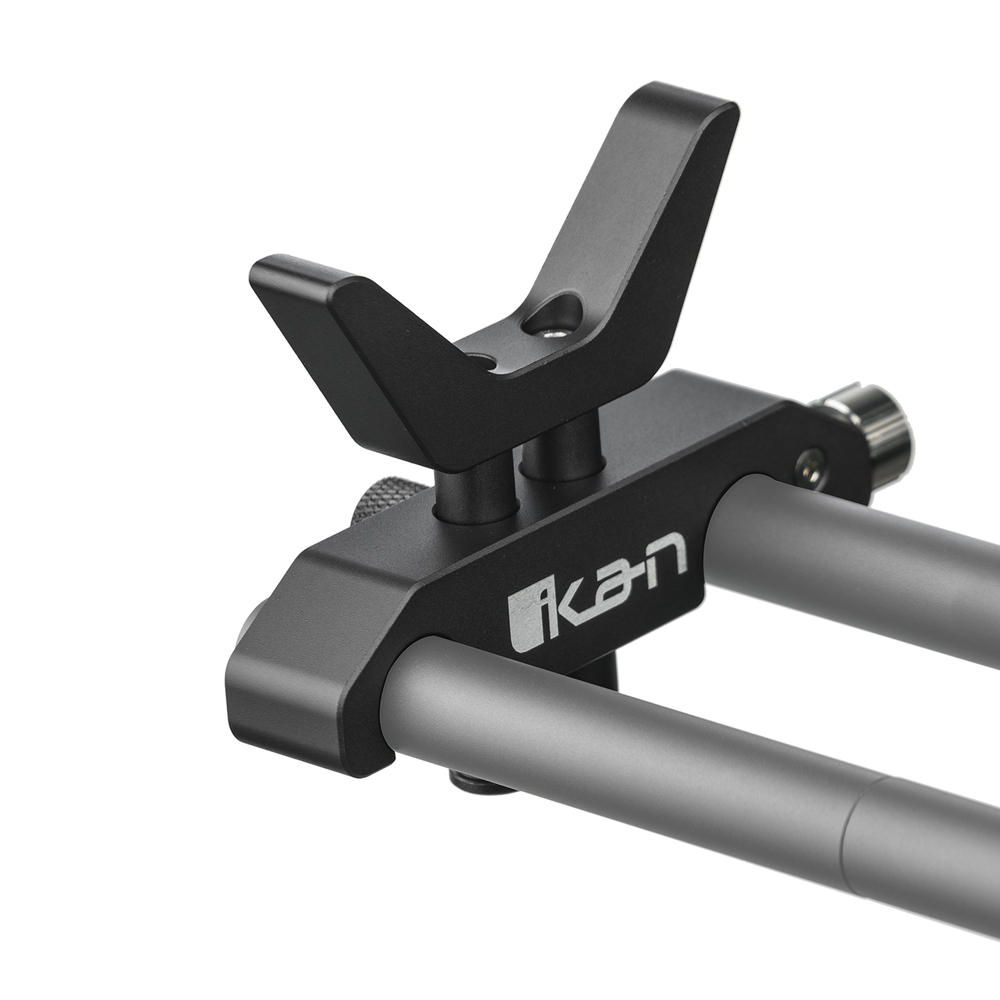
With 7/8-inches of vertical leeway, this gadget can support a lens in a number of positions.
It's easy to use, too - one of the 15mm rod mounts is open and angled, so it can be slid onto the rods from above or from the front.
And at $34.99, it's a bargain gift as well!
Learn more about the Ikan Stratus 15mm Static Lens Support
Gifts for Photographers Under $50: Holdfast Camera Leash Leather Wrist Strap
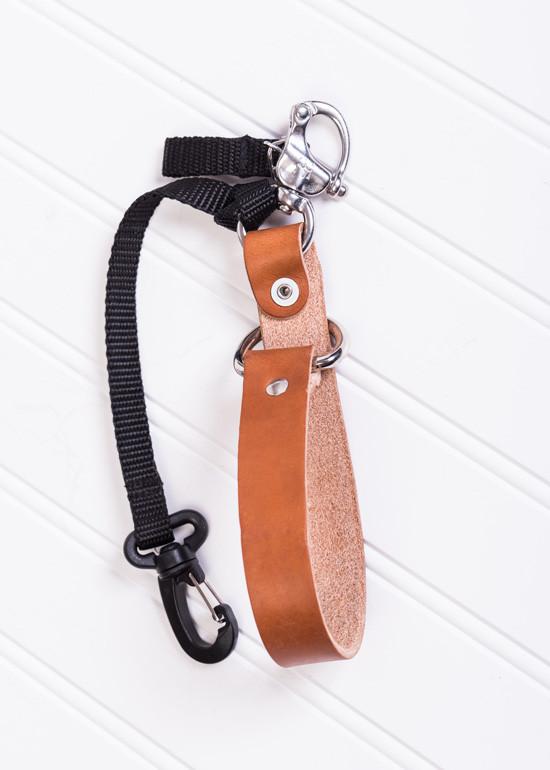
Not every photographer wants or needs a neck strap or camera harness, so why not give them the gift of a tough, useful, and gorgeous leather wrist strap?
The Camera Leash by Holdfast is impeccably made and comes in a variety of materials, including bridle leather, water buffalo leather, American bison leather, and python skin. There are also several colors available to suit your favorite photographer’s specific tastes.
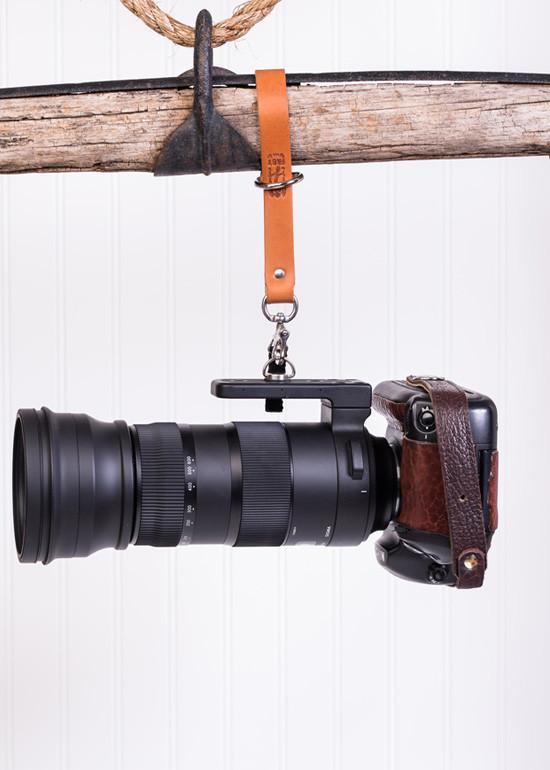
This strap is multi-functional, too.
Use it to carry your keys and attach them to a belt loop. Secure a water bottle to your backpack. Use two of them together to carry a third camera on the Holdfast MoneyMaker harness. There’s few products under $50 with that much functionality!
Plus, these things look absolutely incredible with fine details that scream, “I’m handcrafted!”
It’s a photography gift that your favorite photographer is sure to love.
Learn more about the Holdfast Camera Leash
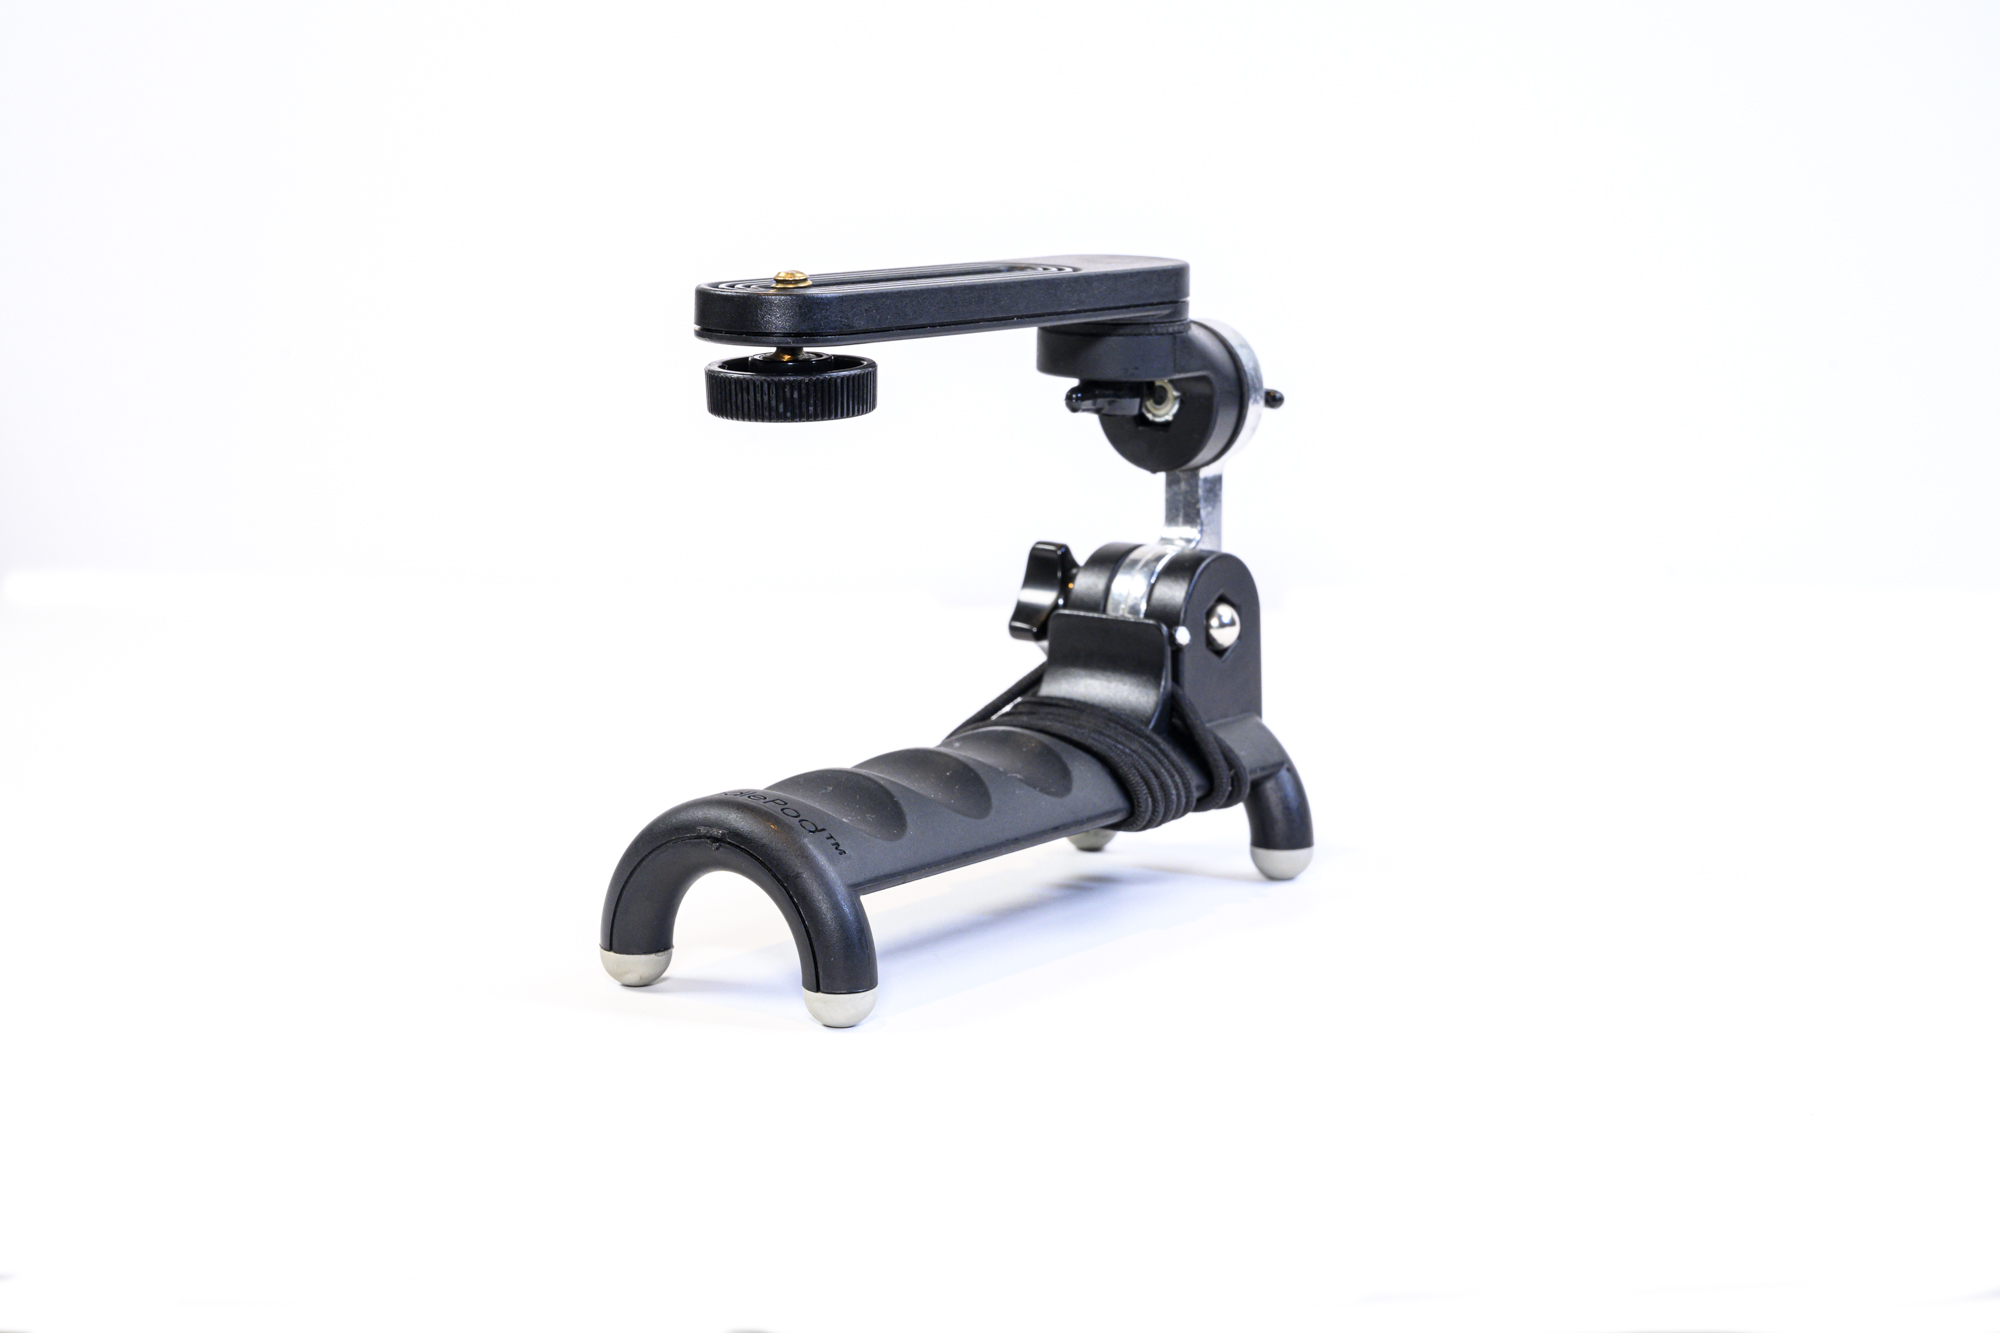
Gifts for Photographers Under $50: HandlePod 3-Axis Action Cam Mount
Does the photographer on your shopping list like to go out and adventure with their GoPro or other action cam?
I have the ideal gift idea for them - the HandlePod 3-Axis Action Cam Mount.
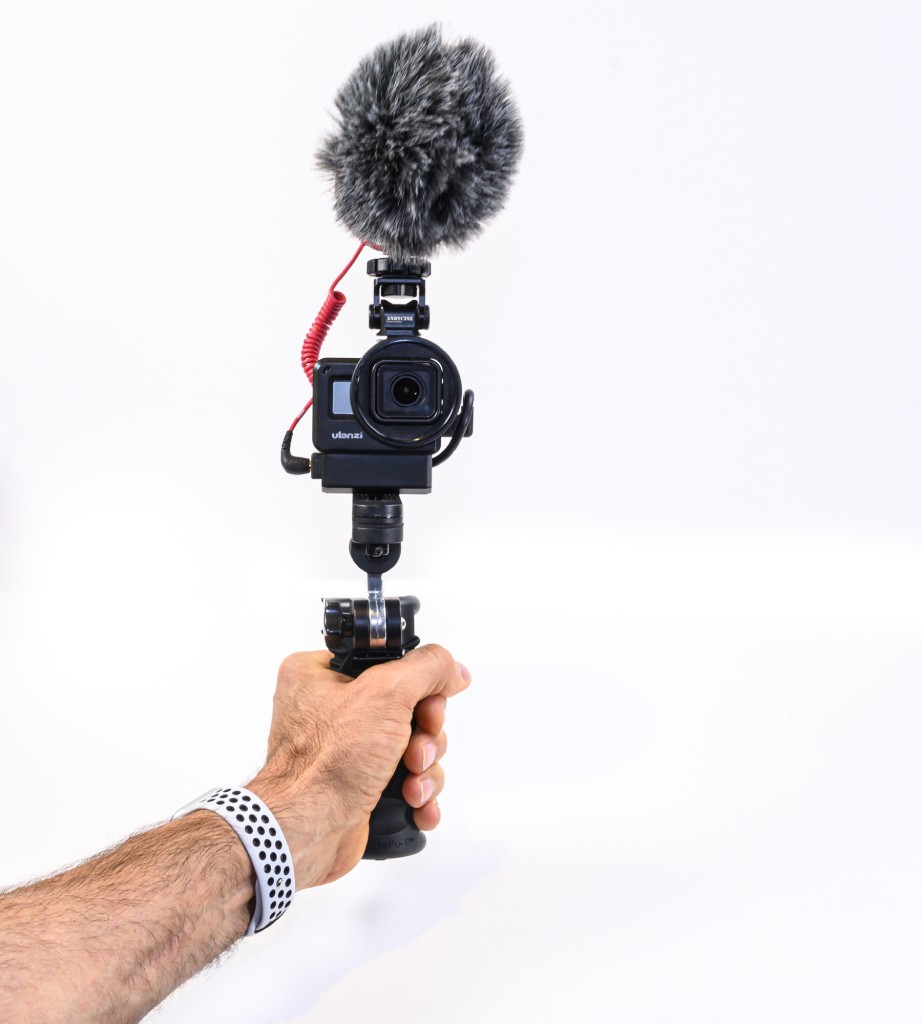
This ingenious gadget is a comfortable grip for shooting handheld video as well as a handy tabletop stand (or a stand for any horizontal surface for that matter).
Furthermore, it has an integrated elastic cord so you can lash it to stationary objects (i.e., a lamp post) for super steady hands-free recording.
The mount has 360-degree movement so you can capture smooth video and easily position it for the ideal still image as well.
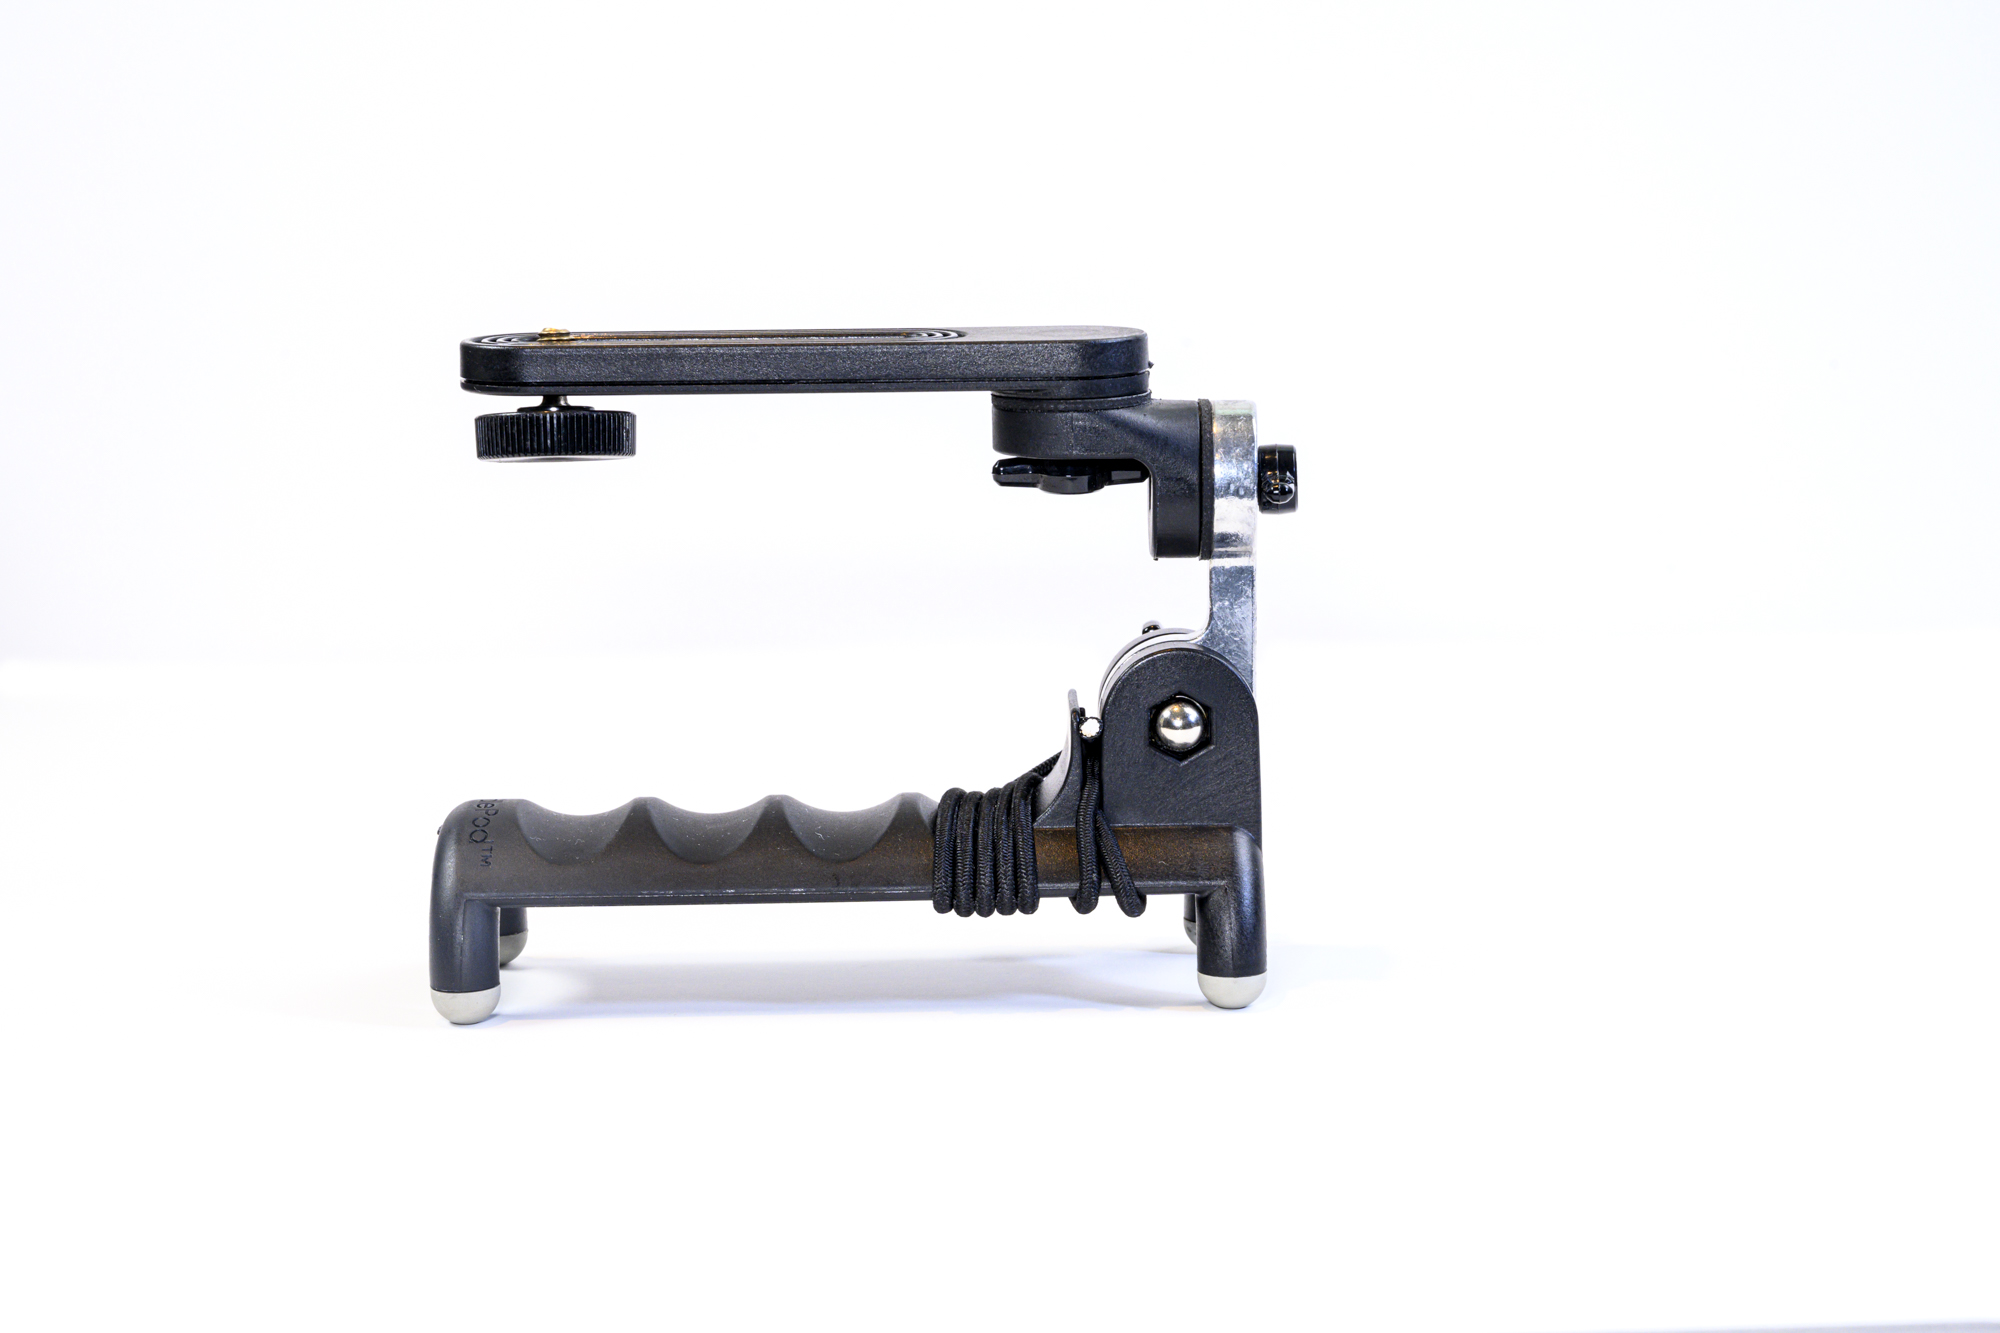
When used as a tabletop stand or lashed to a vertical surface, its four rubber feet keep it in place for anti-slip performance.
Perhaps best of all, it weighs just 4 ounces and fits in your pocket, so your favorite photographer can always have a stabilizing mount with them for their GoPro activities.
Learn more about the HandlePod 3-Axis Action Cam Mount
Gifts for Photographers Under $50: Snaptiles
If you’re in need of a killer photography gift, look no further than Snaptiles. Snaptiles are a patented Magnetic Photo Tile that is 8”x8”x1” and super lightweight.
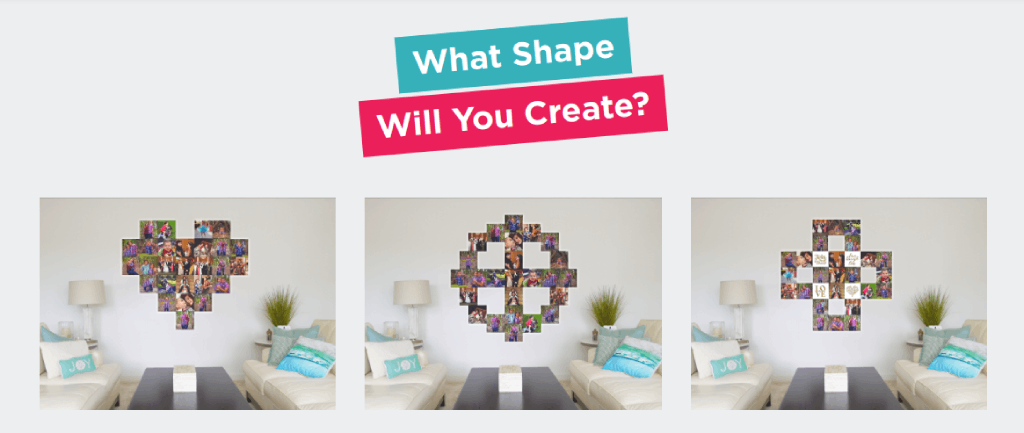
This innovative system uses a single wall mount with a built-in level to anchor a central print to the wall. Then you can snap together the other tiles onto the first! The wall mount uses four adhesive strips that don’t damage the wall, yet offer all the support that’s needed to display up to 12 tiles. Just make sure you press down firmly for 10 seconds. You can also push in the 4 included thumb tacks for additional support, then mount up to 30 tiles on the first tile! Not a bad tradeoff for 4 little pin holes in your wall.
The process is simple: just attach the wall mount to the wall, mount the anchor tile to it, and then begin to create an array of mixed tiles by adding additional Snaptiles.
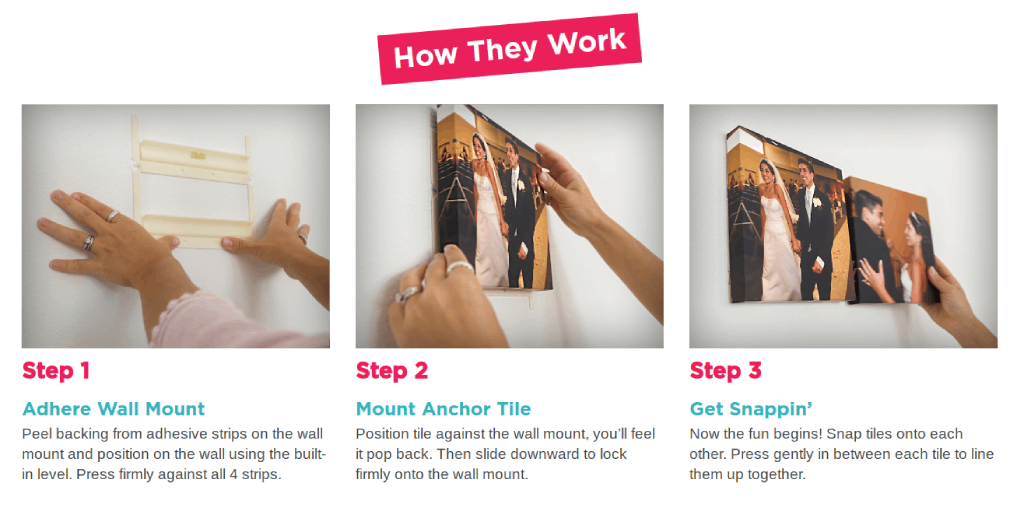
Each tile connects with strong magnets, so there’s no worry of the tiles sagging or slipping.
Best of all, though, this system enables you to swap images out as you get new photo tiles, rearrange them in the display, and create different shapes with an array of images.
It really couldn’t be any easier!
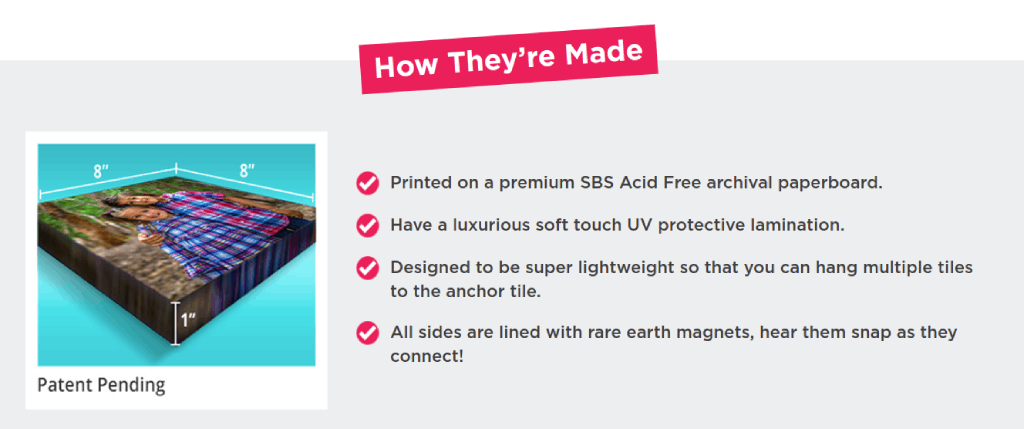
The images are printed on a premium SBS Acid Free archival paperboard to give you long-lasting durability. On top of that, the UV protective lamination on the tiles has a beautifully soft touch.
I just ordered 25 of these photo tiles for my son’s room. He loves art and he loves building, and I think he will love putting his Snaptiles together (with my help of course!) on his bedroom wall.
This isn’t just a great last-minute gift, but it’s also a fun project you can share with whomever you give them to. It’s a win-win!
Gifts for Photographers Under $50: HDRsoft Photomatix Essentials

Ask any photographer, and they’ll probably tell you that the toughest part of photography to master is exposure.
All too often, you get photos that have highlights that are too bright or shadows that are much too dark.
But by using the power of HDR photography - high dynamic range - photographers can combine multiple exposures into a single shot, thereby getting a well-exposed image throughout.
Photomatix Essentials by HDRsoft makes that process super easy with dozens of HDR settings and presets for getting the perfect HDR photo.
HDRsoft has even incorporated multiple HDR styles to give photographers further control over how their HDR images look. Truly, creating eye-catching photos has never been easier!
PLUS...HDRsoft is giving Photomatix Essentials away at the moment as part of their Quarantine Giveaway. You can’t get cheaper than free!
Learn more about HDRsoft Photomatix Essentials
Gifts for Photographers Under $50: Amazon Gift Card
![]()
Totally stumped regarding gift ideas for photographers on your list?
Why not go the easy route and get them an Amazon gift card?
Though a gift card isn't exactly the sexiest gift, when the photographer in your family sees that you have given them carte blanche to get what they want, they'll be stoked!
With an Amazon gift card, they can put the card amount towards whatever they want - a new lens, a second camera body, lighting gear, a laptop - you name it!
As far as flexibility goes, there's nothing better to give a photographer than a gift card.
Learn more about Amazon gift cards
We Recommend
H&Y Unveils RevoRing, a Variable Step Ring Adapter

Every once in a while a product comes along that makes you wonder, "Why didn't anyone think of this before?!"
The RevoRing by H&Y is one such product...
H&Y launched a Kickstarter campaign for RevoRing today, and it's already far exceeded their goal. That's not bad for a few hours' work!
But it's not surprising that so many people have already backed this product because it truly is innovative.
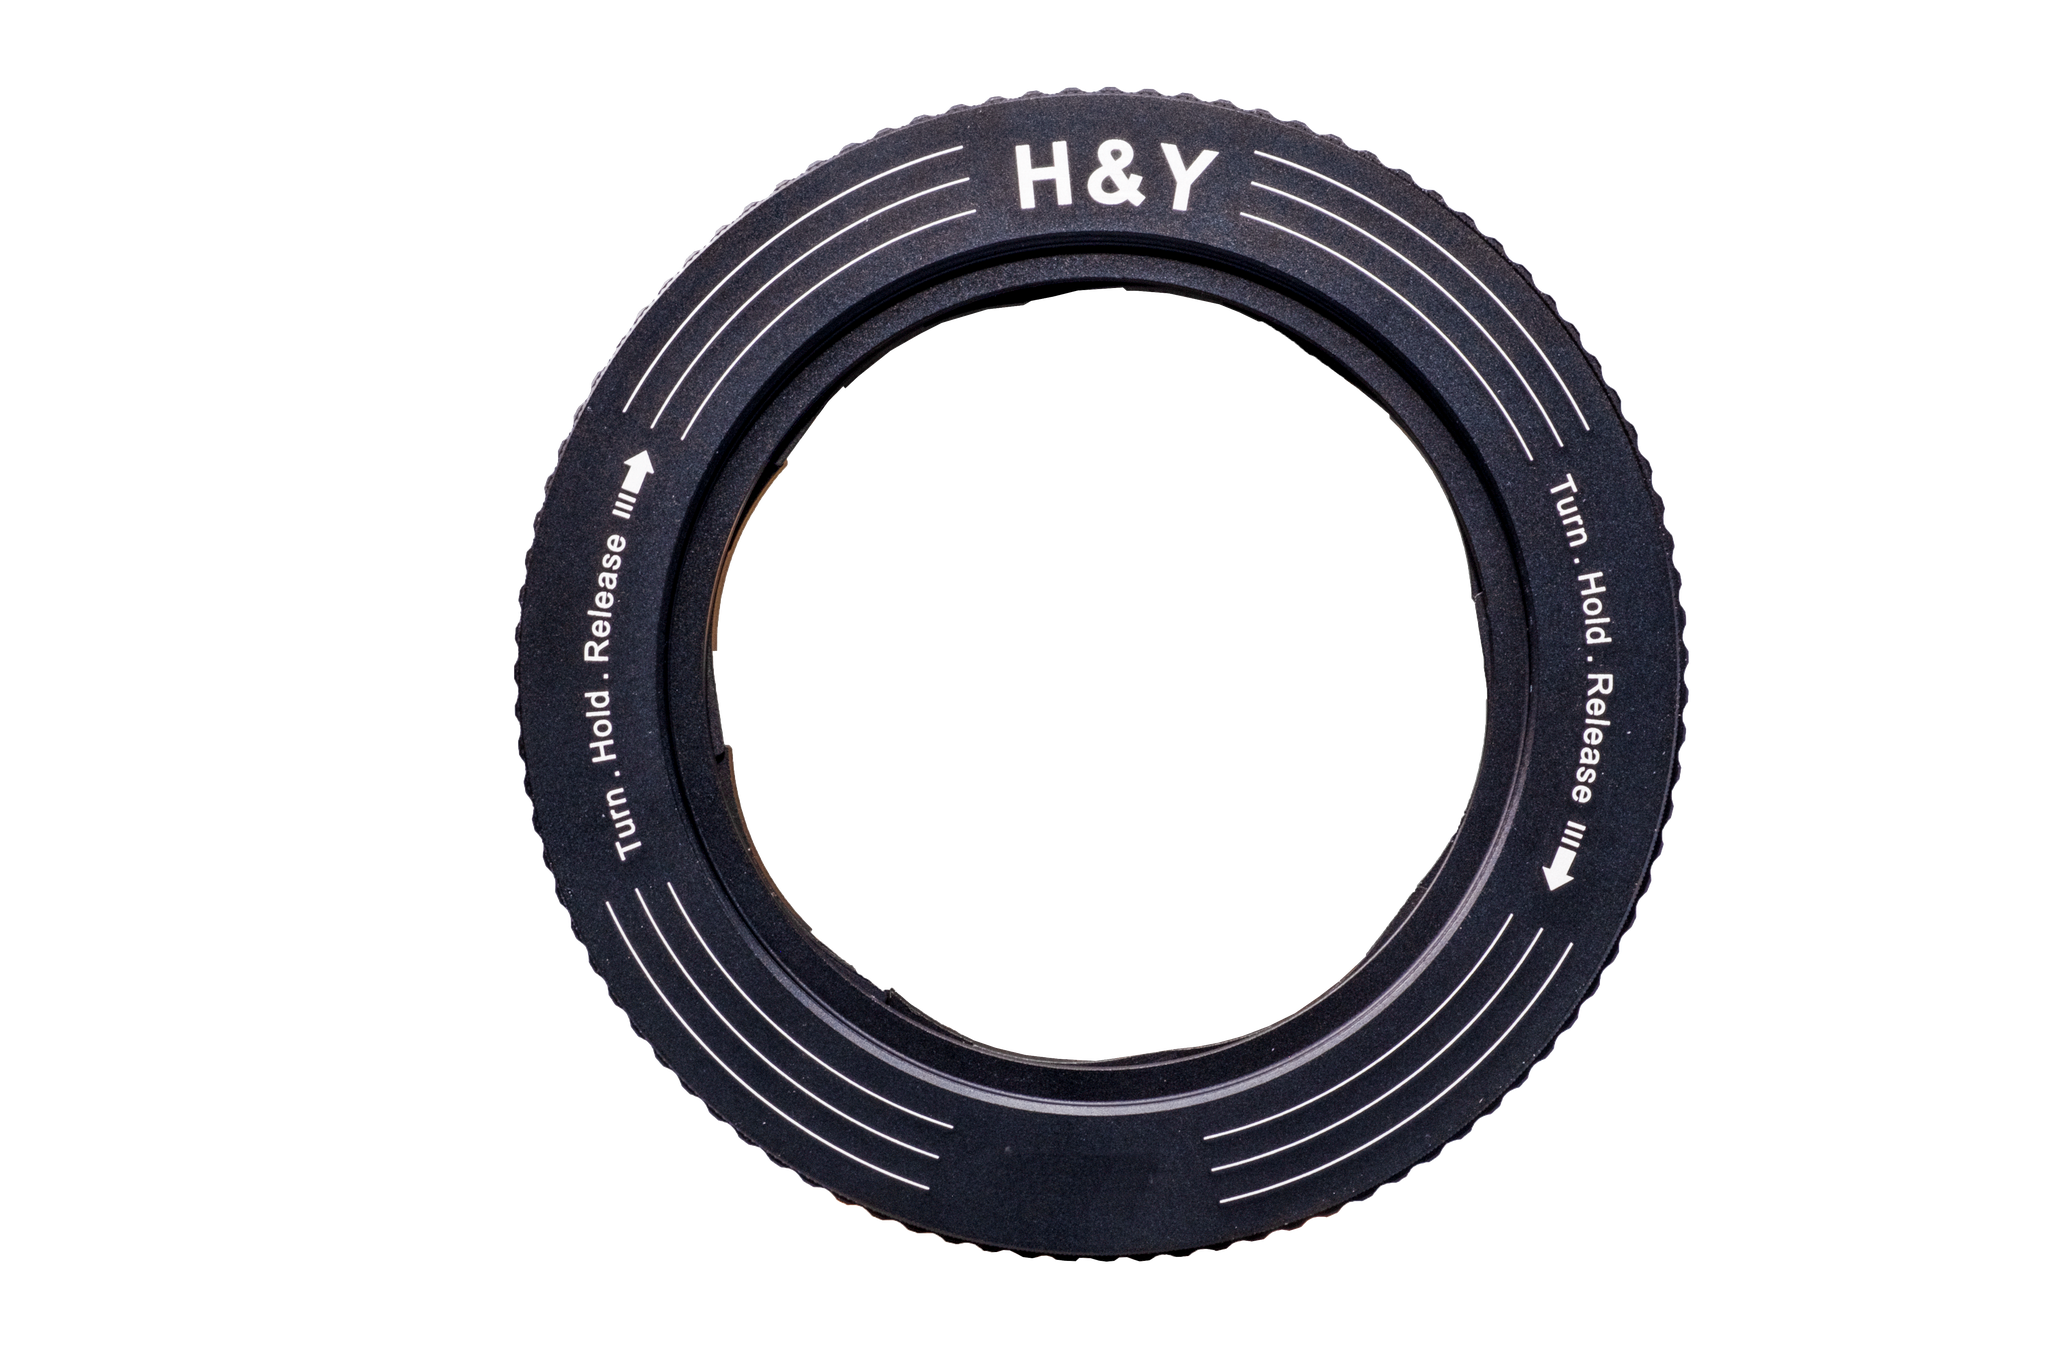
RevoRing is essentially a variable step-up ring.
There's a twist and release mechanism built into it that allows you to adjust its size. You just twist the outer housing to adjust its size, and when you release the housing, the RevoRing retracts to snugly fit your lens. You then just give it a few twists to lock it in place. This means that you can fit it to a range of different-sized lenses.
There are various RevoRings - 37-49mm (shown above), 46-62mm, and 67-82mm.
Each one will also accept 52mm, 67mm, and 82mm screw-in filters.
So, if your lens takes 67mm filters, you can use an 82mm filter on the lens with RevoRing.
H&Y has also developed a RevoRing with a built-in variable ND and polarizer that works the same way...
Just twist the housing to adjust its size, let it clamp down on your lens, lock it in place, and you're ready to go.
So, not only do you get the advantage of having a variable step-up ring, but you also get a variable ND and a polarizer all in one gadget.
There's separate controls on the filter housing so you can independently adjust the variable ND and polarizer. Not bad, right?
We don't back many Kickstarters because it's so hard to find products that truly are an innovation. However, the RevoRing definitely fits the bill.
It's more convenient to use than having a pile of step-up rings. It also saves you time in the field. It takes up less room in your bag, too!
Head over to Kickstarter to learn more about RevoRing.
We Recommend
How to Save Money as a Photographer

photo byRyanJLane via iStock
Photography has always had the capability of being very expensive. But you can save money as a photographer, we don’t have to spend a whole lot of money to be able to create great photographs, whether of nature, landscapes, portraits, architecture, or wildlife.
Sure, you could spend whatever you want, but you don’t have to. Any budget can make a success of high quality photographic imaging.
Money-Saving Ideas for Photographers
There are numerous ways to save money as a photographer, including simply avoiding making purchases you don’t need!
Let’s dive into a few top tips that will help you save more of your hard-earned money.
Maximize Your Existing Gear
Photo by Pok Rie from Pexels
You already have a very nice camera, but you are looking at that online ad for the newest version of the DSLR or mirrorless camera brand you use. Naturally, you start thinking that maybe the flaws that still exist in your photography are due to flaws in the equipment that having the newest gear might fix.
Well, there are upsides to buying newer cameras, lenses, and other equipment. For instance, the newer camera may have video capabilities that surpass the older versions, or a newer lens design focuses closer and is sharper. If these things are needed by you, go for it.
Other times, though, the camera or lens you are using are fantastic and we’re missing out on using it to the full because we need to figure out what features it actually has and how to access and use them.
Read the Big Manual

photo byfizkes via iStock
One of the biggest methods of how to save money as a photographer is simply not to buy something. Some features of newer gear would be nice to have, but if you don't really need the feature, it might be a good idea to hold off for now and satisfy that desire at a later time.
Our current camera might have some features we haven’t fully learned yet. The small instruction manual tells us the basics of camera operations, but it’s that giant instruction book that really tells us what our camera can do.
Understandably, those huge 400 to 1000 page manuals are intimidating, but I have found that if I am already used to the camera, sitting down for an hour or so with the full manual is actually a pretty easy and very interesting read. Just about any DSLR or mirrorless from that past few years is able to do things photographers didn’t even imagine a decade or so ago.
Clean Up and Tune Up
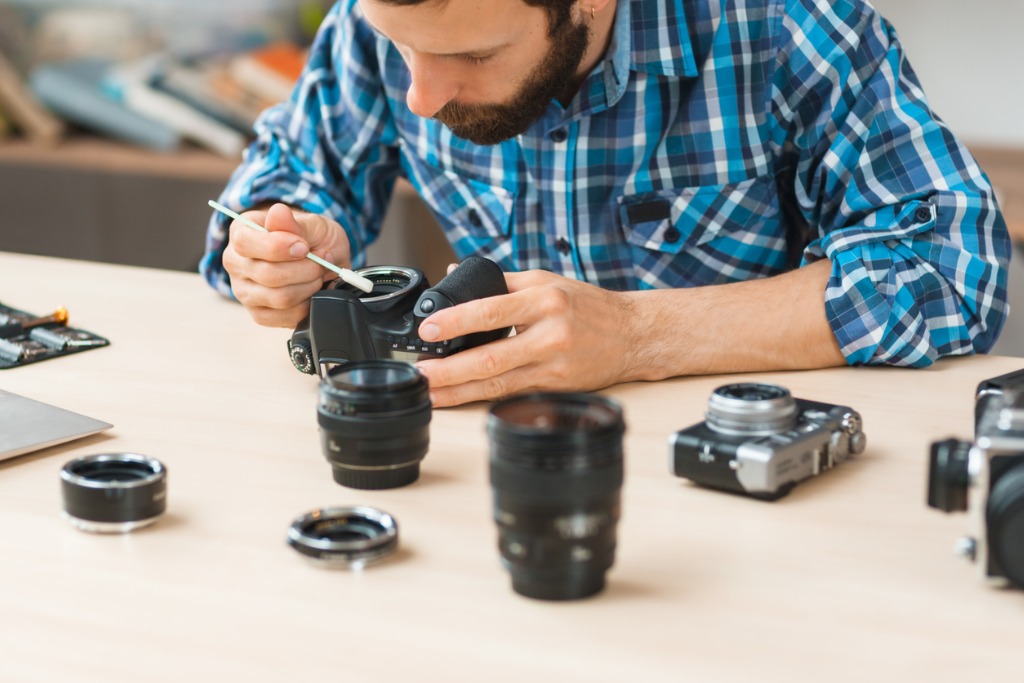
photo bygolubovy via iStock
Among the best ways to save money as a photographer is to make sure your cameras and lenses are operating to full capacity. Imagine your existing camera gear as a high performance vehicle that has been raced for a season or two. That engine needs a tune up, preventive maintenance, and it wouldn’t hurt to wash and wax it.
When mechanical film cameras were the norm, repair shops offered a service known as CLA, clean lube adjust. Current digital cameras are powerful computers that take photographs. The new version of CLA is to update the BIOS and clean the sensor.
Some of our lenses also have BIOS updates available for them. So do flashes and other accessories. Check the manufacturer website or photography forums to see what updates are available for your equipment.
Sometimes you save money as a photographer because the newest firmware actually adds that new feature that you were lusting over. How cool is that?
A deep cleaning of all of our lenses, the camera sensors, and even dumping dirt out of our bags is a good idea. Check your giant instruction manual to see if you can also recondition the batteries.
Don’t Duplicate Unnecessarily
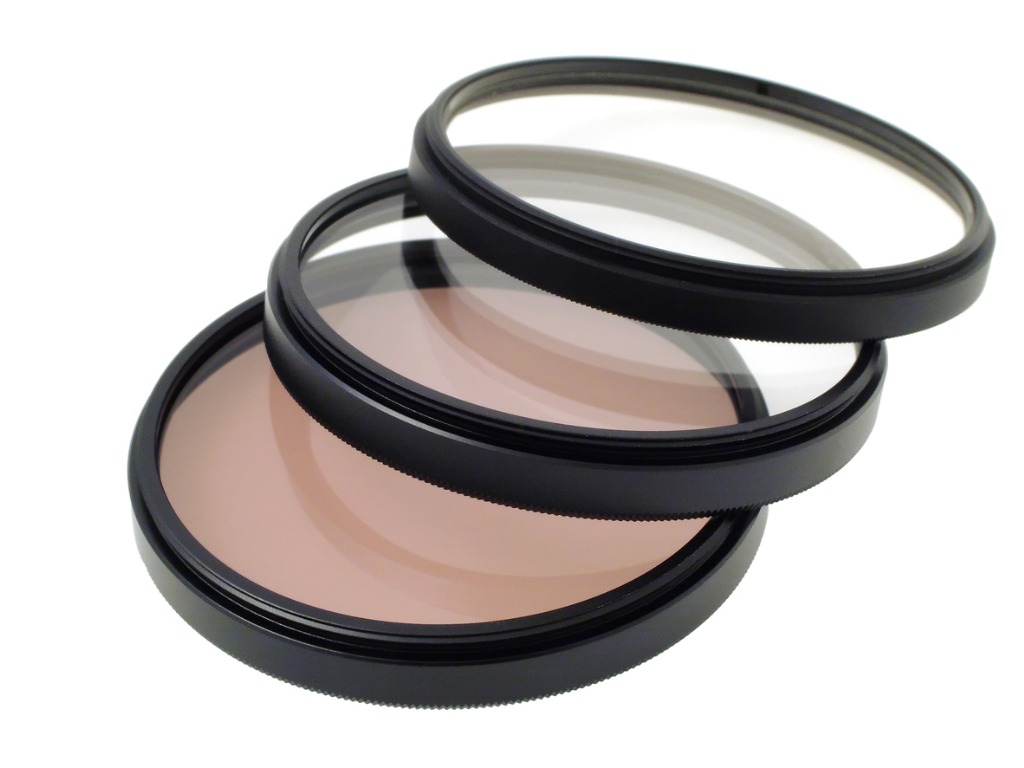
photo byChushkin via iStock
Some items you need to have multiple pieces, extra batteries, memory cards, protective filters, lens hoods for each lens, and so on. Other items don’t need to be duplicated. I don’t just mean lens focal lengths. (Though a 50mm macro and a fast 50mm are exceptions to this thought. An exception to every rule.)
I’m talking about specialty lens filters like circular polarizers and variable ND filters and other similar tools. Save money as a photographer by buying one of each in the largest size needed and stepping down to your other lenses.

Even here, there are ways to save money as a photographer while also saving time and frustration. Instead of buying up and down adapters of every size in your arsenal of lenses and filters, try out the new H&Y Revo Ring.
With the Revo Ring, you can use just one adapter for most of your filters and lenses. At the most, you’ll only need three of them, read this in depth description of this fantastic new concept.
Instead of several dozen adapter rings, save your money for the important things. Like a really good video monitor for editing!
Sometimes, You Have to Spend More

photo byfiladendron via iStock
In the world of digital photography, if it’s better and newer, it usually costs more. But if you look for ways to maximize what you already have, you can save some money and put it where you really need it in your photography budget.
Learn More:
- No Step Up Rings, No problem! Meet Revo Ring
- Revo Ring - An Inexpensive But highly Valuable Tool for Photographers
We Recommend
How to Simplify Your Photography Process
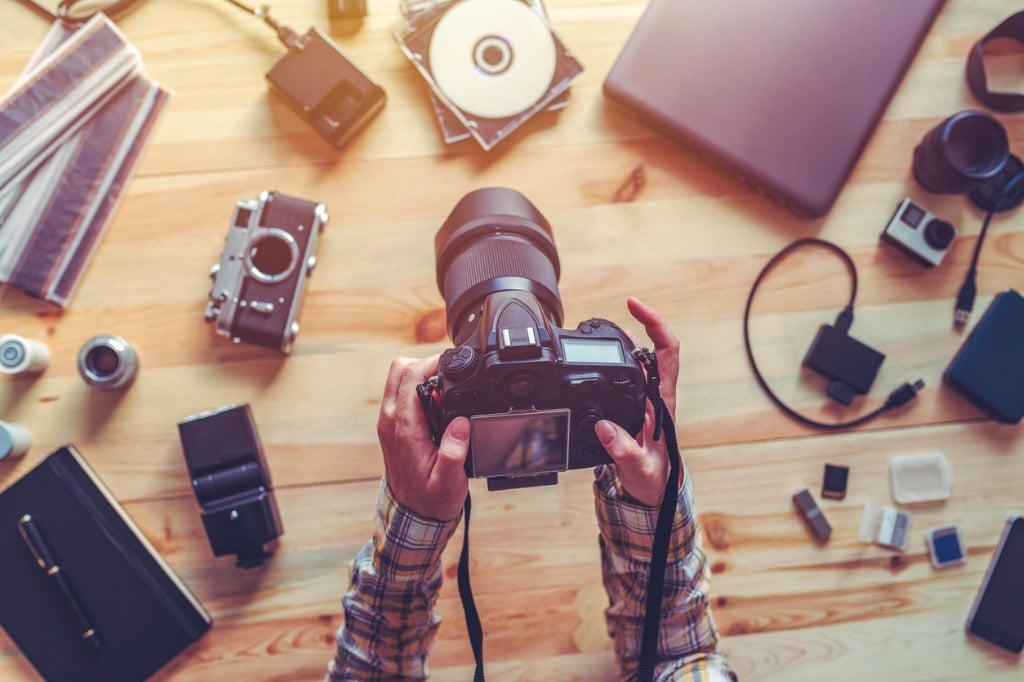
photo bystevanovicigor via iStock
Taking photos can be a lot of fun as well as a lot of work...
In order to simplify your photography, and thus possibly make it more enjoyable, we’ll take a look at our workflow, habits, and maybe at some of our gear, too.
Simplify Your Photography Habits
To make photography simpler, oftentimes we can start by looking at our habits concerning the photography process. So many of us, myself included, first learned photography by just picking up a camera and shooting with it.
Which is fine, but learning as we go allows us to develop habits based on how we finally figured something out rather than being based on sound photography processes.
Too Much Gear
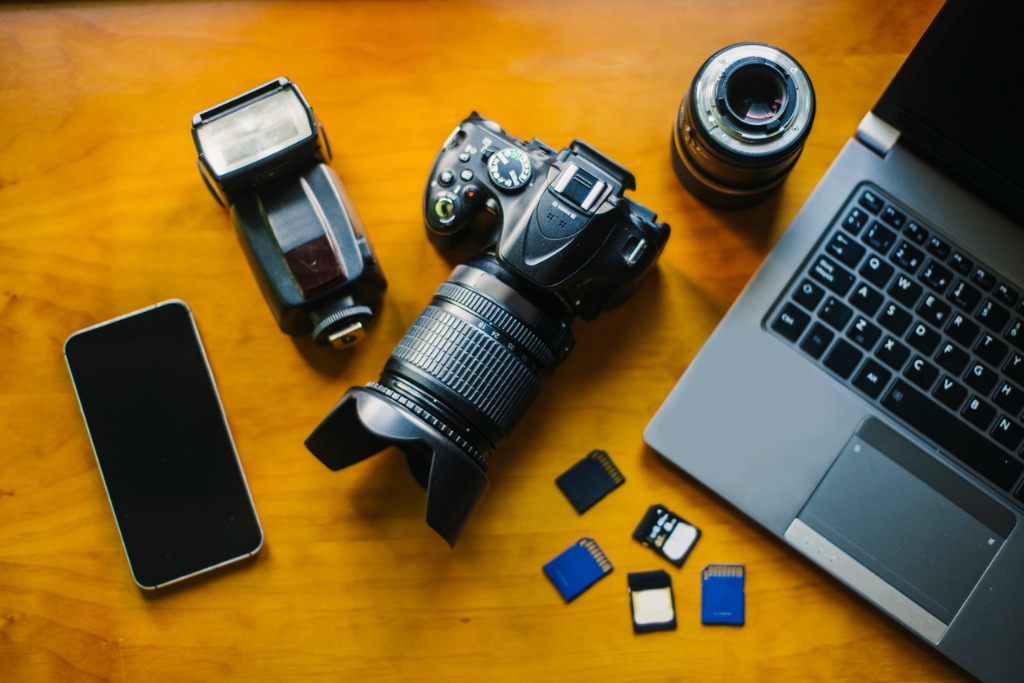
photo byMarioGuti via iStock
As an example, something I am still constantly working on myself, is how much gear to take when going out on a location photoshoot. While a certain amount of redundancy is a good idea, especially for a paid photoshoot, taking too much gear will slow you down.
I have a walkabout kit now that I use for my fun photo outings. It consists of a camera body and a faster wide to tele zoom lens instead of the basic kit lens. If I’m unsure of exactly what conditions or subjects I’ll run into, I’ll expand this kit by adding either an ultra wide lens or a tele zoom, a small LED light, and a couple of filters.
Over Thinking

photo byPhotographer and videographer via iStock
Another habit that is actually a good one to have but can slow us down and complicate things is over thinking composition and exposure. After a while, I’ve learned what situations deserve more thought and when I should I just go with the settings my meter suggests and a good enough composition.
That one can be tricky, though. A lot of times, it’s exactly that photography process of examining the scene and figuring out what might work better that is part of my fun. So, balance and discernment can help. If I'm out with my friends and family, I’ll spend less time fiddling with placement and settings than if I’m solo.
Social Media Worries

photo byzeljkosantrac via iStock
Another habit that can diminish our overall enjoyment of photography is overusing social media. If we are a professional photographer, this can also weaken our brand. While social media is an excellent tool for pros and fun for amateurs, constantly checking our likes on that last pic will slow us down and can discourage us.
Used properly, social media is fantastic for amateurs and pros alike. Too much worry, though, could take up too much time and cause undue anxiety.
Learn More:
Simplify Your Gear
Well, we already talked about some gear choices like trimming down our camera bag by carrying less, now let’s see how we can actually do that.
Sling Packs Are Nice
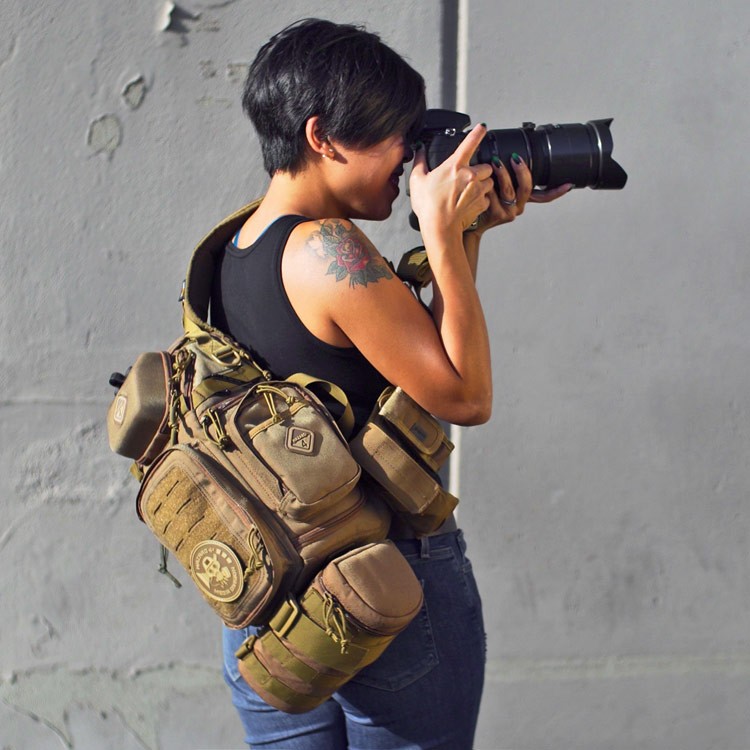
While I love my large gear bags and cases for storing my cameras, lenses, and accessories, I want a more convenient way to take out my fun photography kit mentioned earlier. Whenever I need to carry more than just a camera but less than a working kit, I grab a sling pack.
Sling packs come in a wide variety of sizes from compact to full size but I like to use the mid sized sling packs. A sling pack blends the ease of access of a shoulder bag with the comfort of a backpack. See our bag articles for some ideas of good sling packs to choose.
Revo Ring For Filters
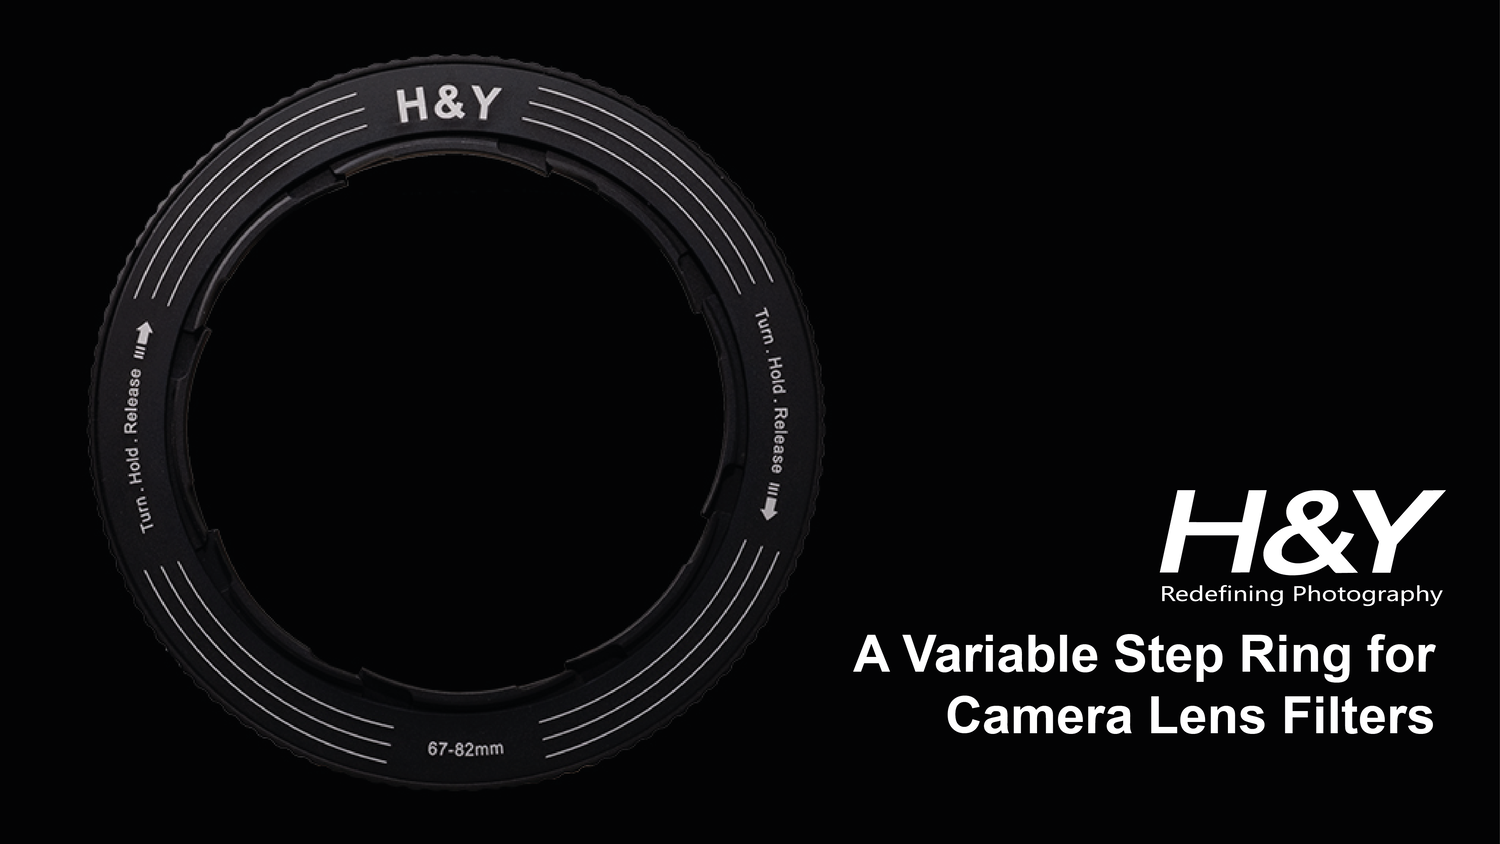
Since I feel naked without at least a good C-POL or ND filter in my gear kit, I usually find a way to pack them into my sling pack. Instead of having a couple of filters for each lens in the bag, I started using the new filter adapter from H&Y Filters, the Revo Ring.
H&Y Filter Revo Ring is an innovation that will help simplify your photography filter use whether out shooting for fun or professionally. Instead of multiple step rings, it’s a variable adapter that lets you fit one size filter to lenses of various sizes.
Simplify Your Photography Processing Workflow

photo byfilmstudio via iStock
The photography process doesn’t end once you click the shutter release, post processing is where we can make our well crafted images stand out with just a little bit of work. But post processing is definitely work, especially if you’re new to it. A couple of hints can make your photography simpler.
Lightroom Presets

photo byevgenyatamanenko via iStock
FIrst off, to really simplify your photography post processing workflow, you will likely have chosen as your primary program one with non destructive editing. Adobe Photoshop Lightroom is among the top choices for non destructive editing post processing.
Lightroom will already speed you up, setting up presets for repeated actions will help you out even more.
Keyboard Shortcuts

photo byapichon_tee via iStock
Well, there it is right in the subheading, shortcuts. I learned a few keyboard for the most used and most repeated actions of my programs, even the non photographic programs like Excel for my booking, and it really does smooth out any work session. The keyboard shortcuts are easily found on the program’s websites.
Enjoy Taking Pictures
photo byLumiNola via iStock
Whether involved in a paid photoshoot or event or just photographing for your own portfolio or for fun, you will simplify your photography most of all by relaxing and enjoying the photography process.
Learn More:
We Recommend
How to Use a Graduated ND Filter
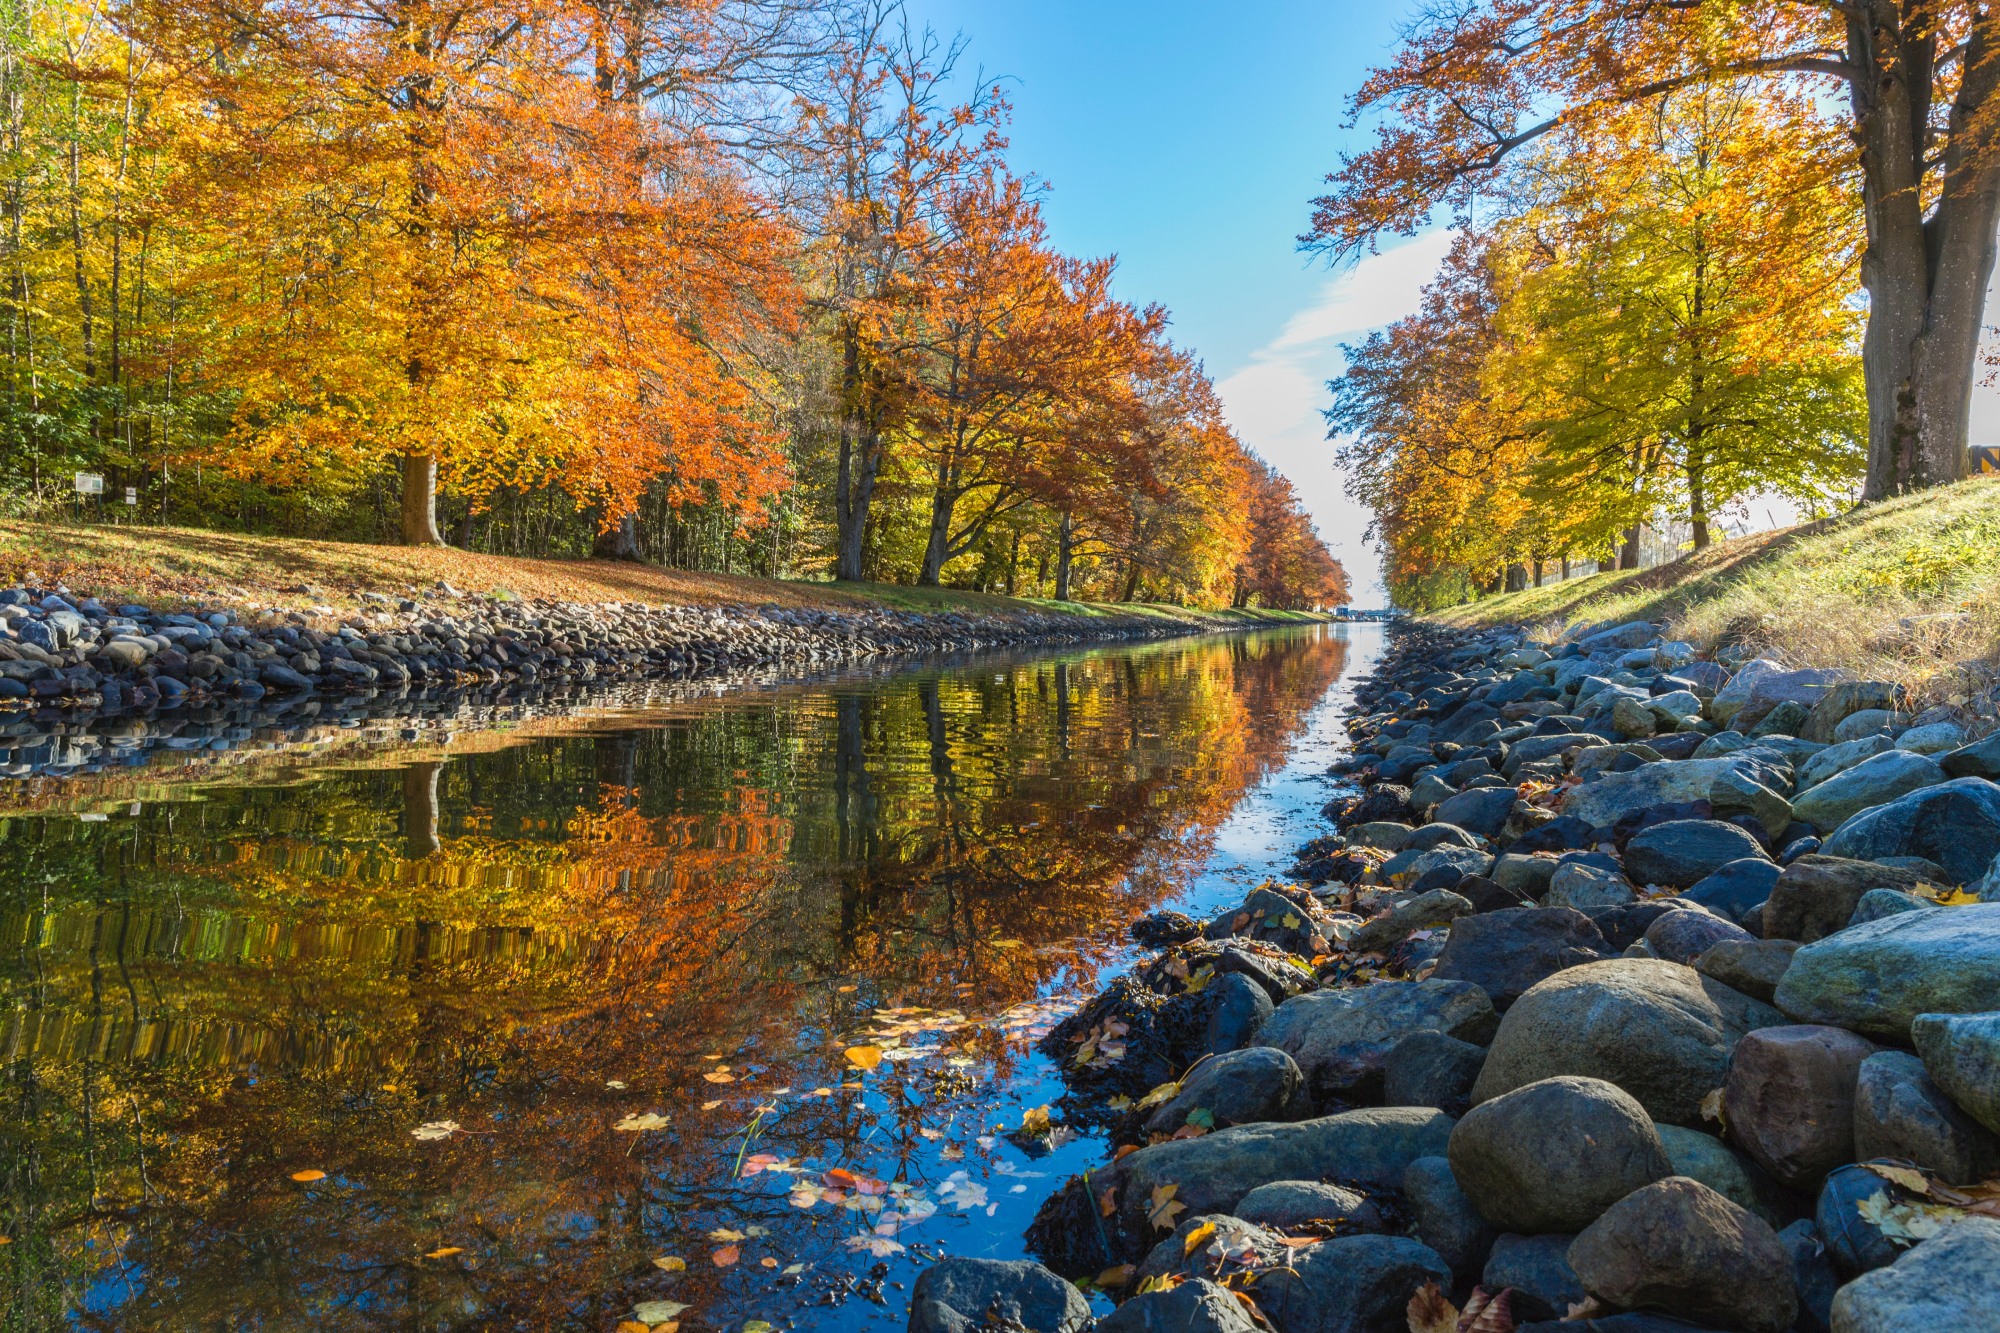
Photo by Inge Wallumrød from Pexels
Graduated ND filters are some of the most useful tools for landscape photography images. Learning how to use a graduated ND filter gives us power over dynamic range issues and also allows us to fully work with our own creative ideas.
What is a Graduated ND Filter?
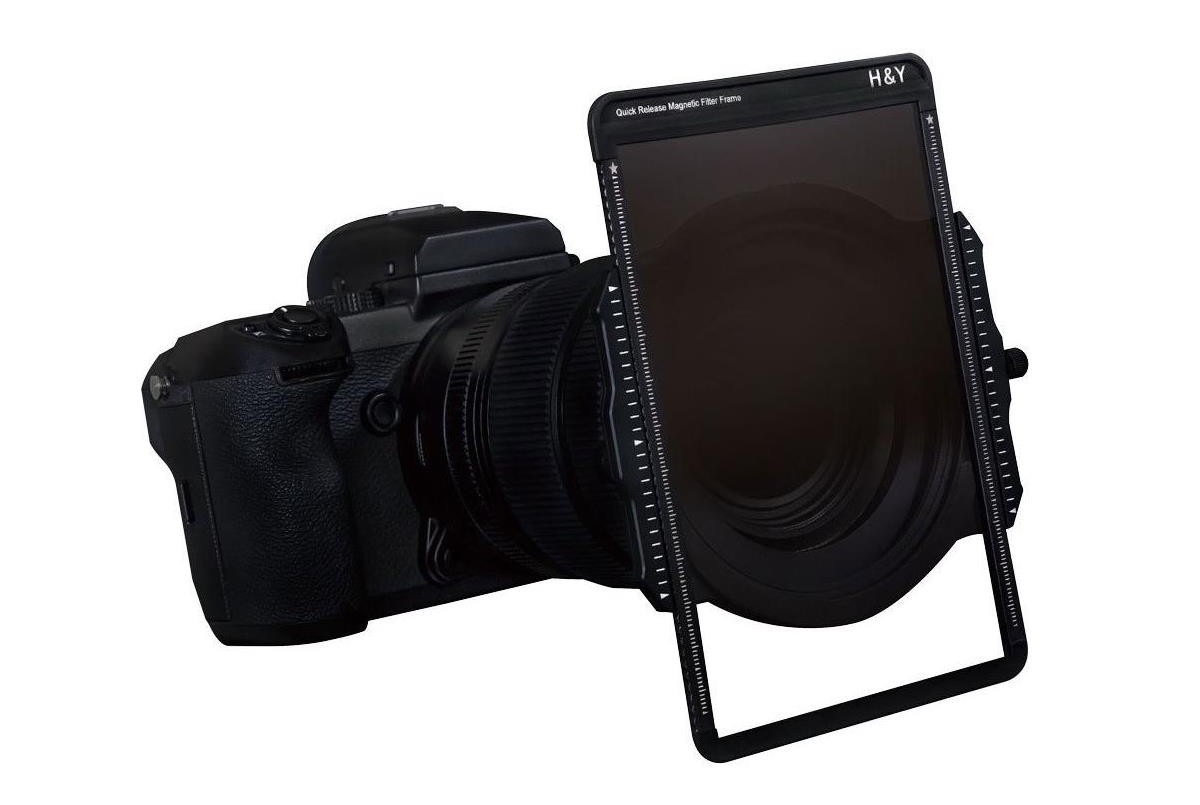
First, we should probably define what a neutral density filter is and then relate that to what does a graduated neutral density filter do.
In a photographic filter, “density” refers to subtracting light or adding darkness. No, that’s not exactly technical but it gets the job done for giving us a way to relate our thoughts to density. Adding density to the light path changes the exposure value of the light getting through to the sensor or film.
“Neutral” means that the density has no color cast at all. It is as neutral as Switzerland! The density will not alter any colors being transmitted in the light path to the imaging sensor. So, neutral density or ND will diminish the light intensity in your photographic light path and not change anything else.
As discussed in the video above by PhotoTEQ Limited, “graduated” or G part of the filter name tells us that the filter changes from clear to the darkest part of the density in a progressively intensifying manner. Some graduated ND filters have a broad area of transition, others change more rapidly. That’s the difference between a soft-edge graduated ND filter and a hard-edge graduated ND filter, respectively.
There is also a reverse ND filter that has a hard edge in the center with the most density and then gradually fades to a lighter value near the outer edge of the filter. Soft vs hard graduation and reverse ND filters are all useful in landscape and various other types of photography for some specific situations or for your own creative ideas.
How to Use a Graduated ND Filter
Using graduated ND filters requires a fair amount of input from the photographer. Some filters you simply screw in and whatever the filter does applies to the entire image more or less. With other filters, you have to do something to get the desired effect. Such as you have to rotate a polarizer to adjust the results.
To use graduated ND filters, I like the square filters that fit into a filter holder, as shown above. This arrangement provides the most control over placement of the lines of demarcation in the graduated ND filters. You can rotate the entire holder to adjust where the line will fall and you can move the filters back and forth in the holder to make that placement exact.
Though there are some screw-in filters for split ND, I can’t even imagine giving up the control that a filter holder system affords me. If I am using any type of graduated ND filter, it’s in a filter holder system.
The H&Y K-Series filter holder shown above is an excellent example of a filter holder for square, rectangular, or round interchangeable filters. It comes with a circular polarizer, several lens adapters, and a pouch to carry it all.
Some of the extra perks of using a high-quality filter holder system for graduated ND filters like the H&Y K-Series are the overall quality of materials and construction and the special touches that serious photographers appreciate.
One feature I especially like is the light-blocking gasket. I also am pleased that the C-POL filter rotates independently of all the other filter holder movements. Most of the filters designed for this holder are magnetic, making placement and adjustments super simple.
Learn More:
- What To Look For In Lens Filters
- 5 Mistakes Photographers Make With Long Exposures
- My Favorite Landscape Photography Filter
Soft-Edge Graduated ND Filters
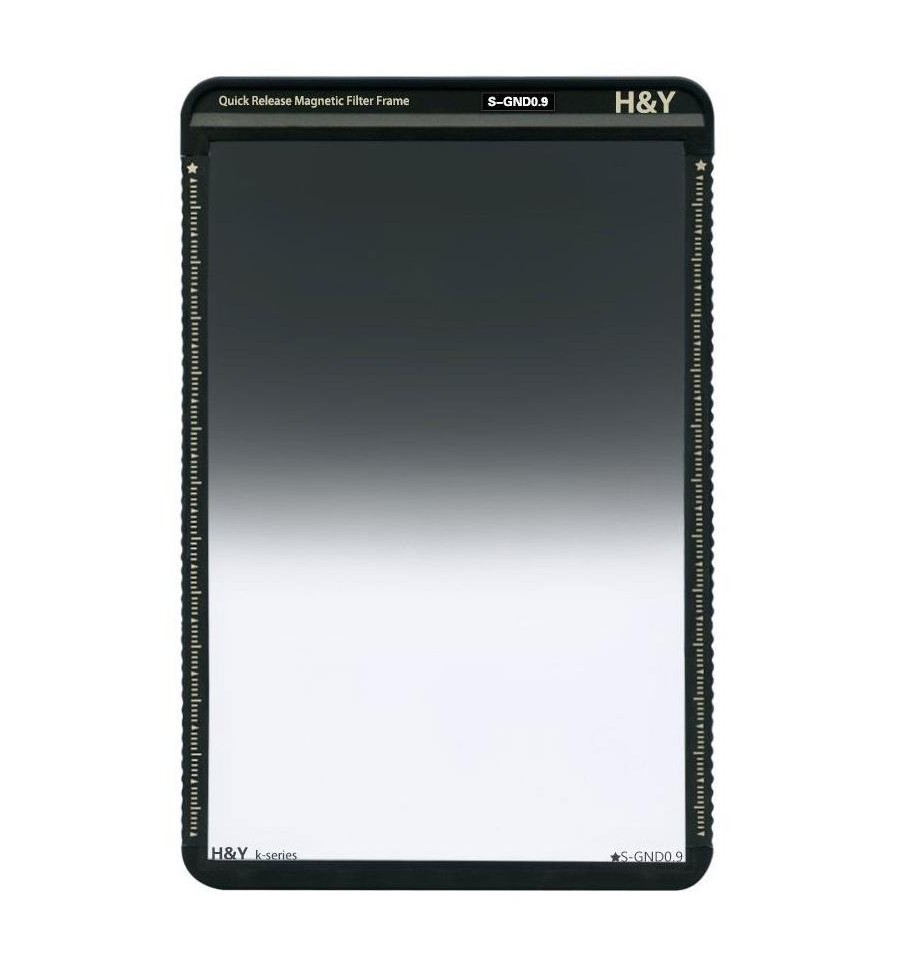
The graduated ND filter type I use most often is the soft-edge graduated ND. An H&Y version that fits their filter holder is the 3-Stop Soft-Edge Grad filter. It’s rectangular so you have a lot of leeway for positioning it properly.
This type of graduated ND filter, possibly the most common style, is often used for evening out exposure values in situations such as sunset and sunrise, overcast sky, or any scene where a large portion of the view is significantly brighter or darker than the rest of the area.
Since the area of transitioning from clear to dark is large and quite gradual, the effect is easy to control and should appear very natural in the resulting images. Shooting in RAW helps, since there’s so much exposure detail to work with when post processing a RAW file.
Hard-Edge Graduated ND Filters
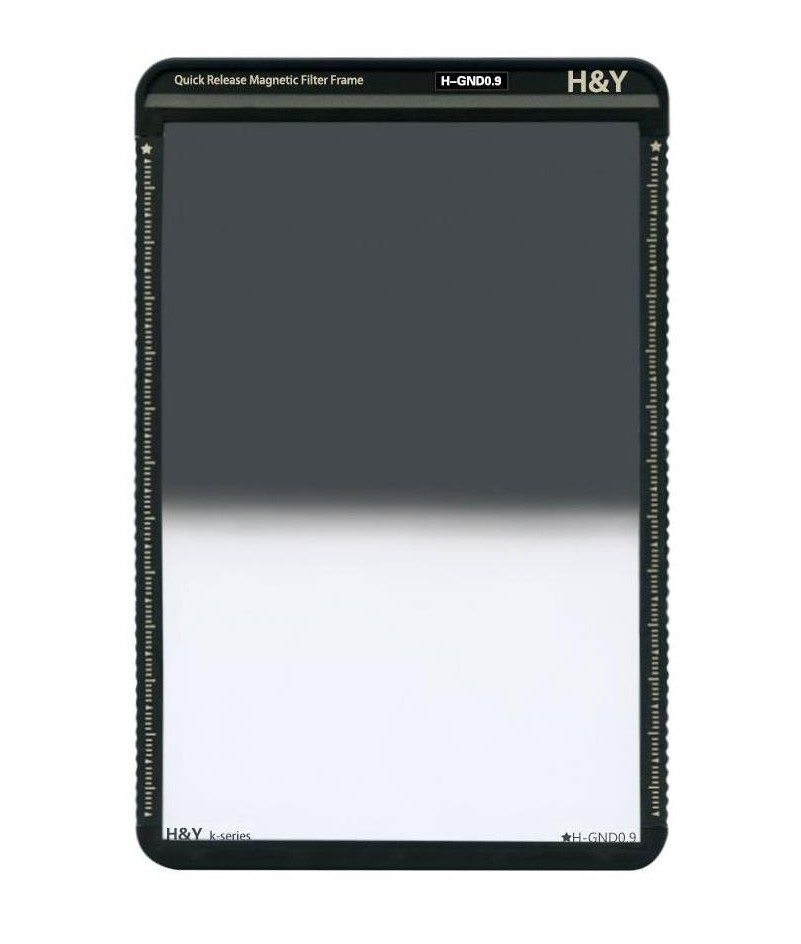
I like to use hard-edge graduated ND filters with images that have a clearly defined horizon line. Beach and ocean views, cityscapes, and rural scenes are situations that benefit from this type of filter.
H&Y 3-Stop Hard-Edge Grad filter is the filter to use here. As you can see, the transition from light to dark is very short. It’s still not a sharp edge, but a completely sharp edge sometimes is a little hard to work with.
Reverse ND Filters
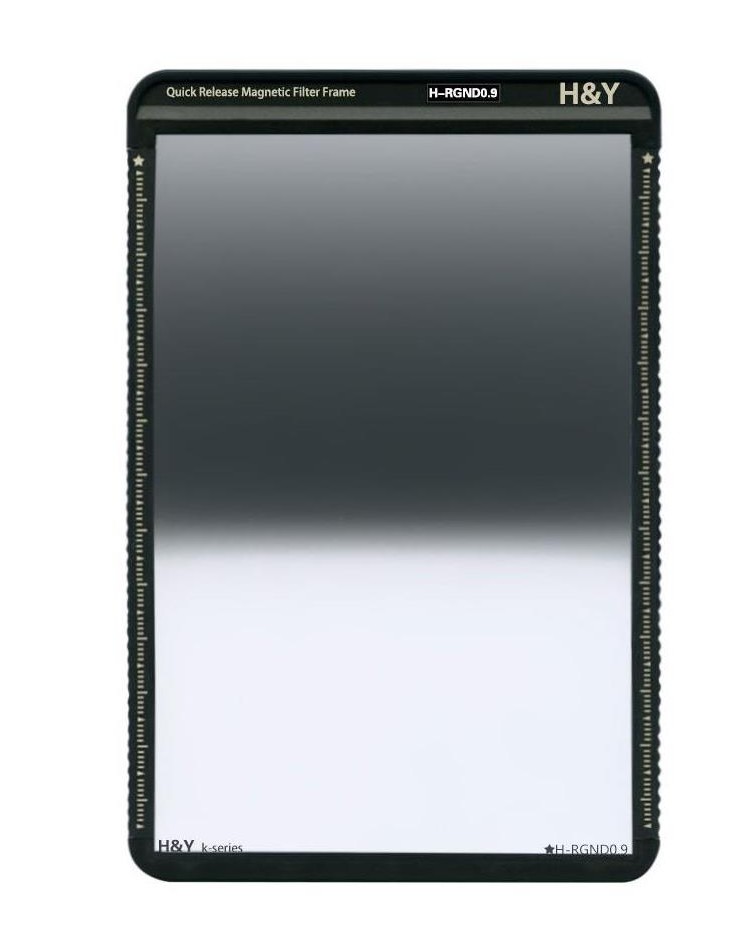
A troublesome exposure that sometimes comes up is that the sun is close to the horizon, but the sky above is dark, perhaps cloudy, and the foreground is also dark. The awkward exposure values have the brightest part closer to the center while both up and down from that is darker, usually the foreground is darkest.
So, you place the darkest, most density, part of the filter where the Sun is, the graduated ND part over the sky, and the clear part over the foreground. An example of this filter type is the H&Y 3-Stop Reverse Grad filter. The resulting image is easy to process and you retain all sorts of cloud and ground or water detail.
Refine Your Technique
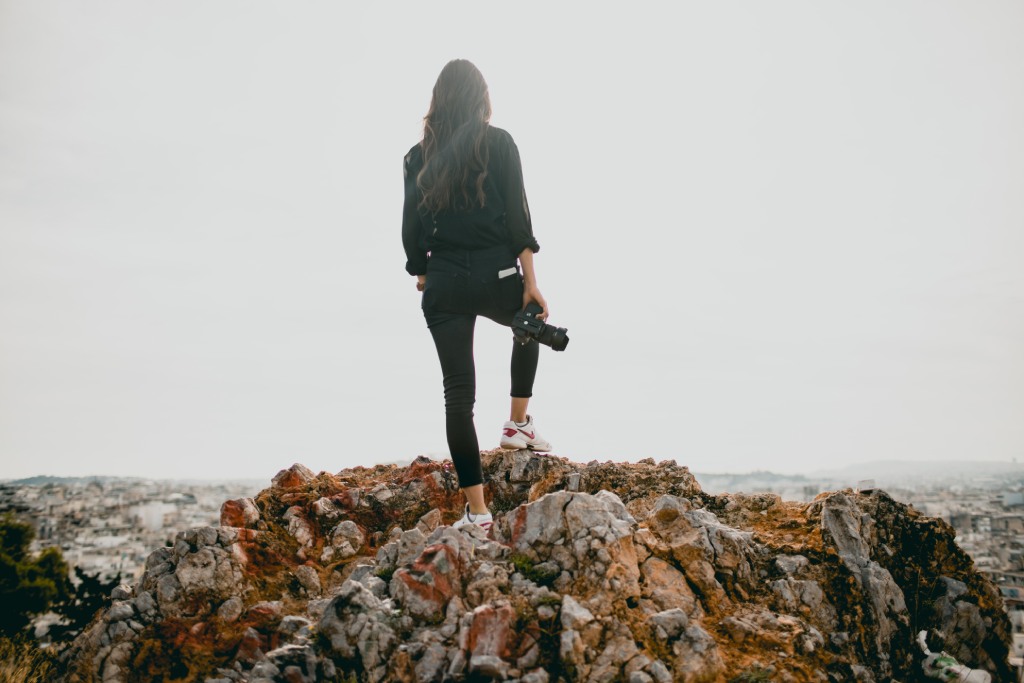
Photo by Rachel Martin on Unsplash
Using graduated ND filters causes you to refine your landscape techniques and post processing, too...
You’ll find yourself slowing down and really thinking about the entire scene and situation before you. Your photography in general will benefit from learning how to use graduated ND filters.
We Recommend
Landscape Photography Filter Guide: Do You Need a Hard Grad or a Soft Grad?
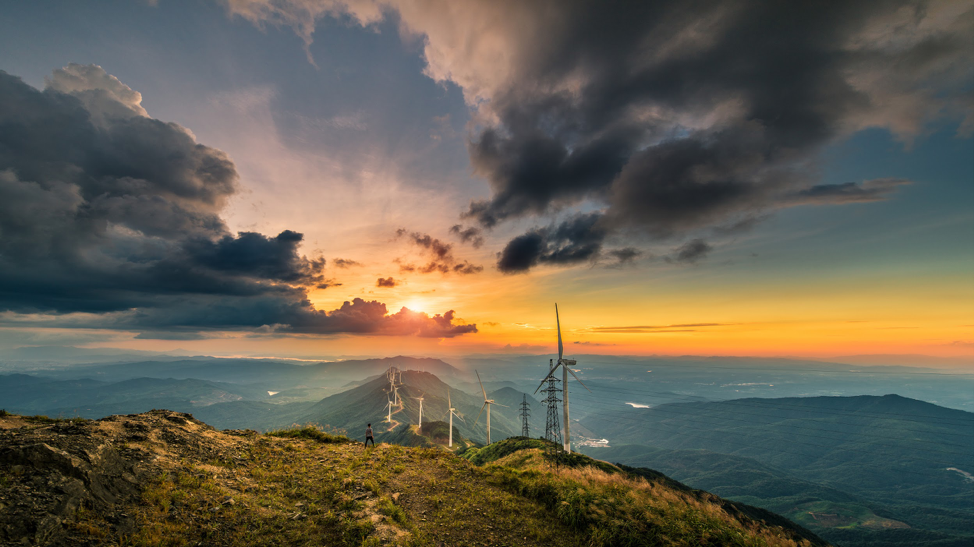 Image Credit: Liu Mang Tu
When you shoot landscapes, you need to have a variety of camera gear and accessories to give yourself the best chance of getting the shot you want.
Though cameras, lenses, and tripods are typically the first things you think of when you think of landscape photography gear, lens filters are another critical part of any landscape photography kit.
One such filter is a graduated neutral density filter. Actually, there are various kinds of these filters, which can cause some confusion, especially for beginner photographers.
In this landscape photography filter guide, you'll learn what a graduated ND filter is and what the different types of ND grads can do for your photos.
What is a Graduated Neutral Density Filter?
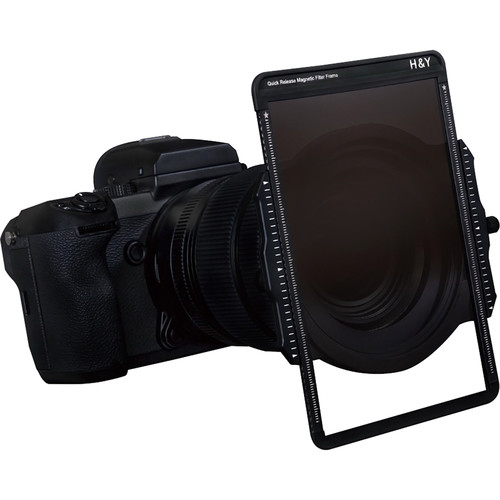
A graduated neutral density filter is a piece of glass or resin that attaches to the end of a camera lens, as shown above.
These filters have a gradation to their filtering power, from dark on top to light on bottom.
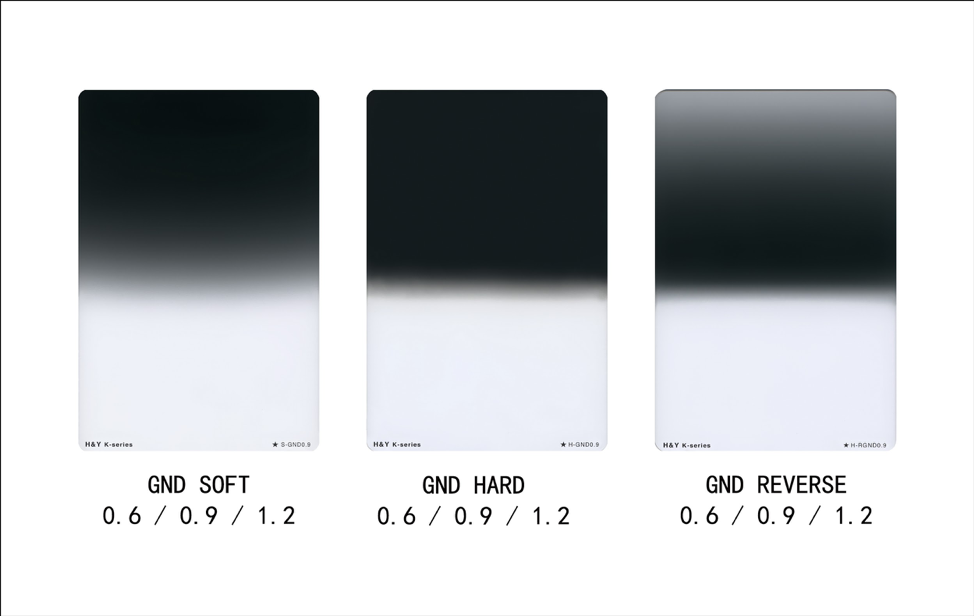
The "neutral" part of the name comes from the fact that the filter should have no impact on the colors in the scene - they remain as they appear.
The purpose of a graduated neutral density filter is to darken a bright sky without darkening the landscape. This is done to prevent overexposure of the sky, the result of which, is a much more pleasing image.
That is, rather than having to expose the image for the sky and have a dark foreground, or expose for the foreground and have a bright sky, with a graduated ND filter, you can get a well-exposed image throughout.
Learn More:
Types of Graduated ND Filters
There are three types of graduated ND filters: hard grads, soft grads, and reverse grads.
Reverse grads are made specifically for sunrise and sunset shots in which the brightest part of the scene is in the middle of the image.
As such, the darkest area of a reverse ND grad is in the middle, with a gradual lightening of the filter moving outward from the middle.
Let's take a look at hard and soft ND grads in more detail, as they are much more common.
Hard ND Filters
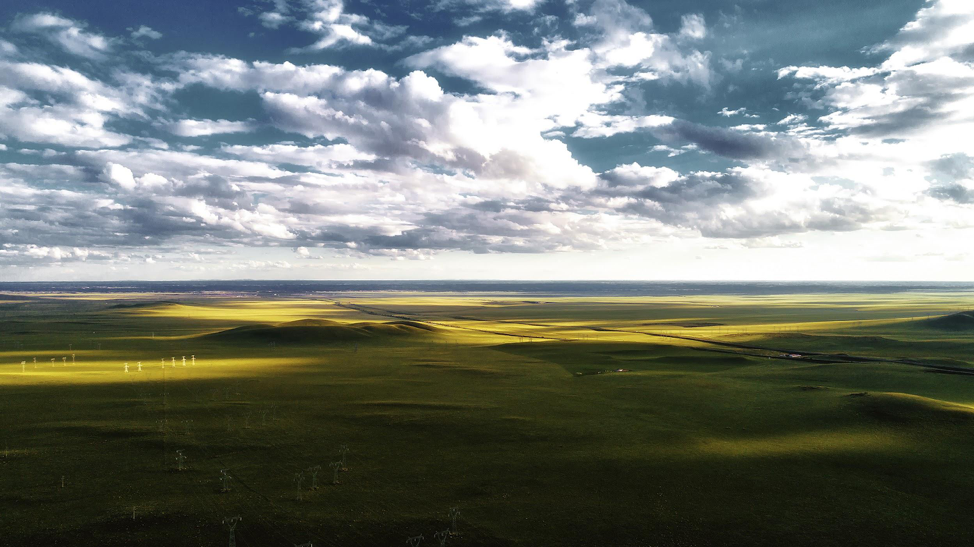 Image Credit: Ding Zi Yu
Hard ND filters have a very definite line between the darkened areas and undarkened areas of the filter.
In other words, the transition from one to the other is very abrupt, which creates a hard line between the darkened and undarkened areas.
Because these filters have such an abrupt change, they are best suited for landscapes that have a definite horizon, like when shooting a photo of the ocean.
By adding a hard ND grad to your lens, you can control the amount of light that enters the camera from the sky, bring that brightness down, and get a much more even exposure throughout the shot.
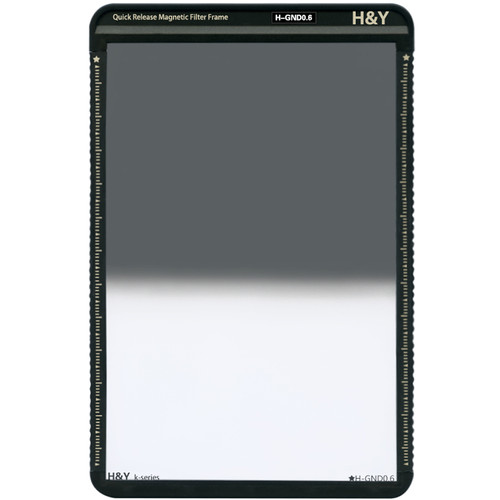
Different hard ND filters have different features and qualities.
For example, the H&Y 100x150mm K-Series 0.6 Filter shown above offers two-stops of light reduction, meaning, the brightness of the sky is darkened by two full stops in-camera.
What's more, these filters are constructed of Gorilla glass, which gives them improved scratch resistance, as well as better clarity and color rendition than other hard ND grads.
Maybe best of all, this filter has a quick-release magnetic frame, which makes it incredibly easy to add or remove the filter as you see fit (as well as stack different filters on top of one another).
When shopping for an ND grad, it's important to look at features like this to ensure you're getting a high-quality filter that will perform well.
Soft ND Filters
 Image Credit: Jing Yan
Unlike hard graduated ND filters, soft ND grads have a very gradual transition from the darkened to the light areas of the filter.
Given that the gradation is much more gradual, these ND grads are best suited for landscapes that do not have a definite horizon.
For example, if the scene has trees or mountains that peak up above the horizon line, a soft edge grad is more appropriate.
That's because a soft ND grad's filtering power eases the transition from light to dark, allowing elements that are in both light and dark areas of the photo to appear normal.
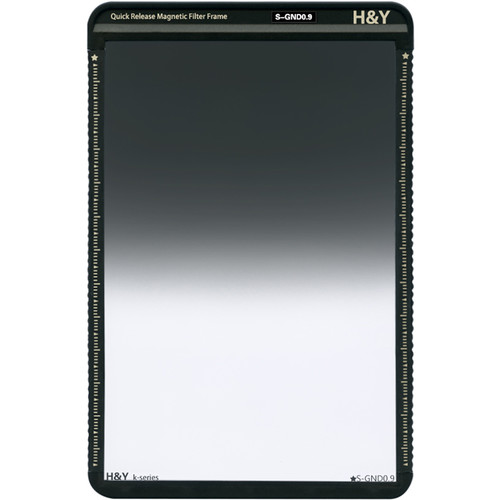
Again, soft edge grads come in various filtering powers and have different features, depending on the manufacturer.
For example, H&Y offers 2-stop, 3-stop, and 4-stop soft ND grads, with the 2-stop filter providing half the darkening power of the 4-stop filter.
They also have eight layers of anti-glare coating, that way you're sure to get images that are as free of flare and ghosting as possible.
Additionally, when looking for soft ND grads, opt for filters that have an anti-smear coating to cut down on fingerprints and smudges. Filters with water and oil-repellent features is also handy.
Learn More:
Final Thoughts
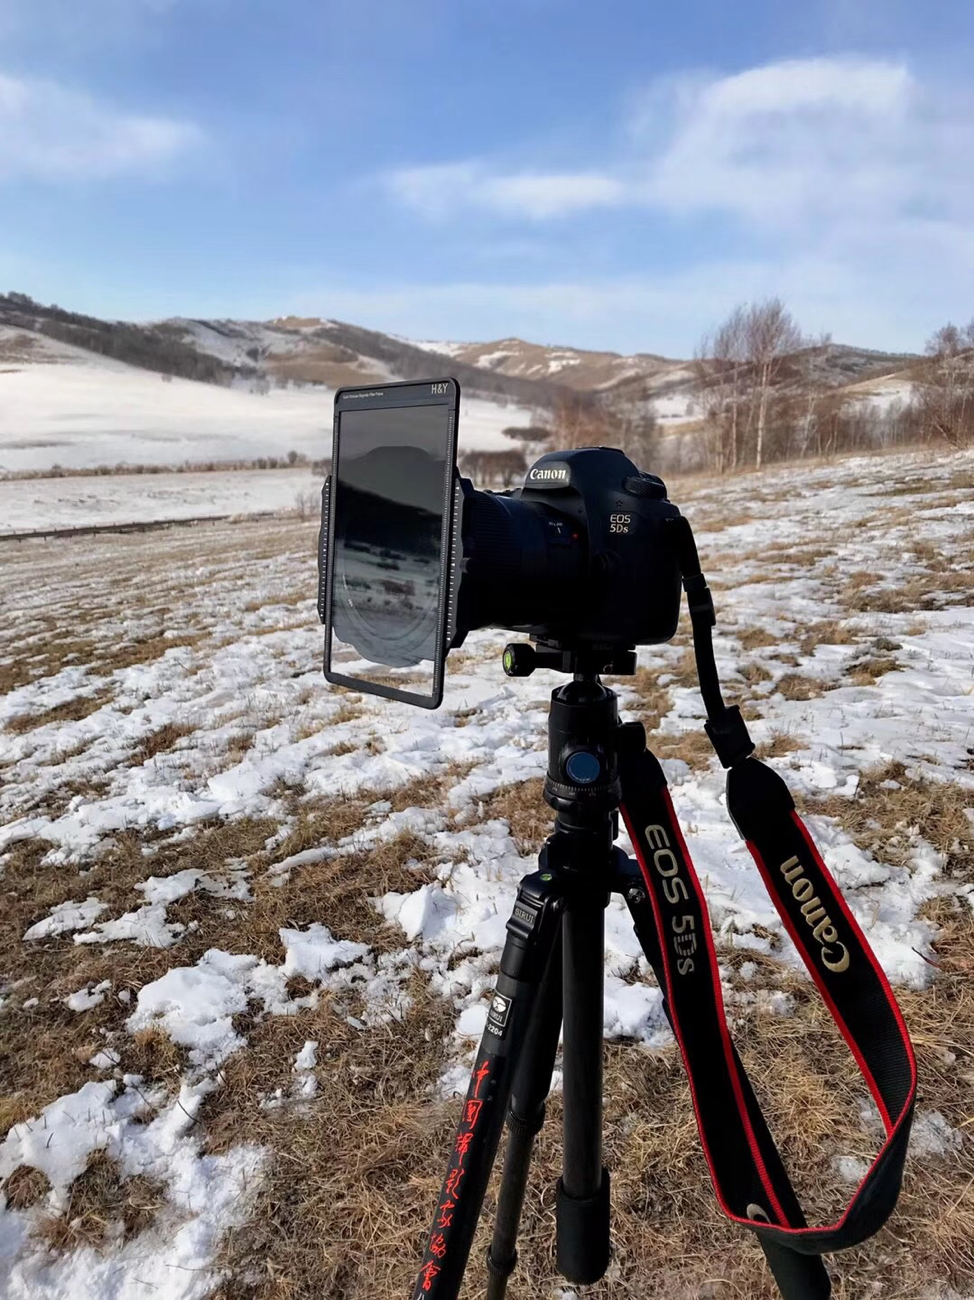 Image Credit: Fu Xiao
Both soft and hard ND grads are a valuable addition to your photography kit.
They help you get a better-exposed image by limiting dynamic range and improving the likelihood of getting a good exposure.
What's more, using these filters allows you to reduce the shutter speed to get blurry effects in features like water or clouds, and you can also open the aperture wider to reduce the depth of field.
As noted above, just be sure to do your due diligence and research different brands of filters to ensure you get the best one for your needs.
I personally enjoy using H&Y filters because they're impeccably made, produce excellent results, and with their magnetic frames, they're incredibly easy to use as well!
We Recommend
My Favorite Landscape Photography Filter

photo byMarioGuti via iStock
I know quite a few photographers that don’t have any lens filters in their kit. That’s a shame, because as powerful as post-processing software has become, it still can’t reproduce the effects you can achieve when using filters in the field.
I’ve tested dozens of filters and filter systems over the years. Many of them have been perfectly fine. A few have been really terrible. And some have blown me away. My H&Y filters fall into the latter category.
Someone asked me the other day what filter I would take with me if I could have only one. That’s easy - my H&Y 5-Stop ND/Polarizer. It is definitely a filter that has blown me away!
What is an ND/Polarizer Filter?
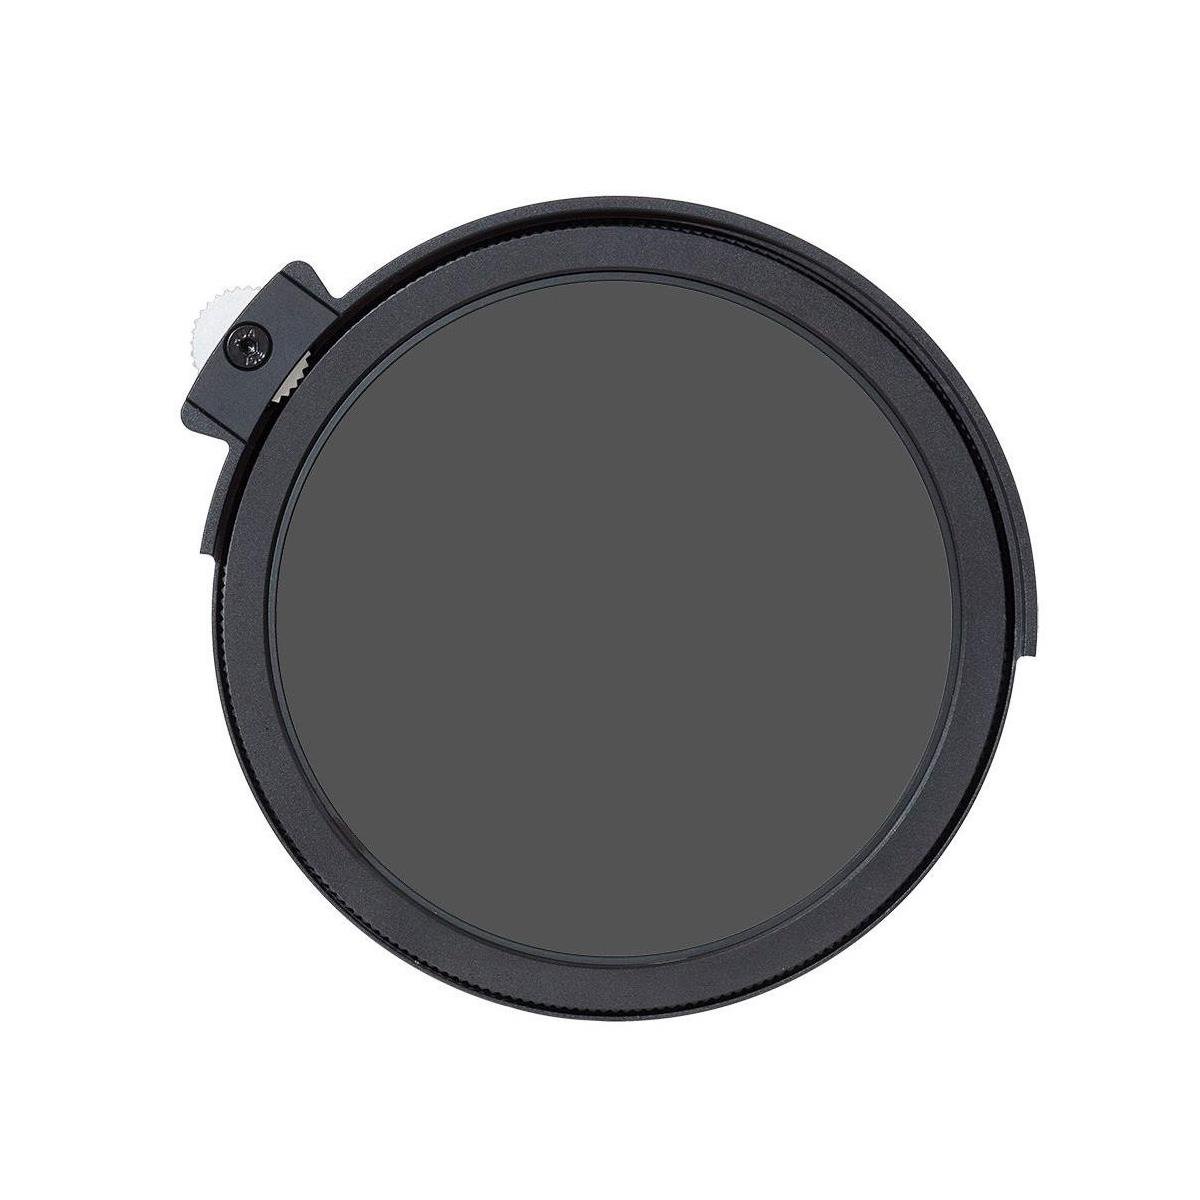
As the name indicates, an ND/CPL filter combines the powers of two of the most popular landscape photography filters - a neutral density filter and a polarizer.
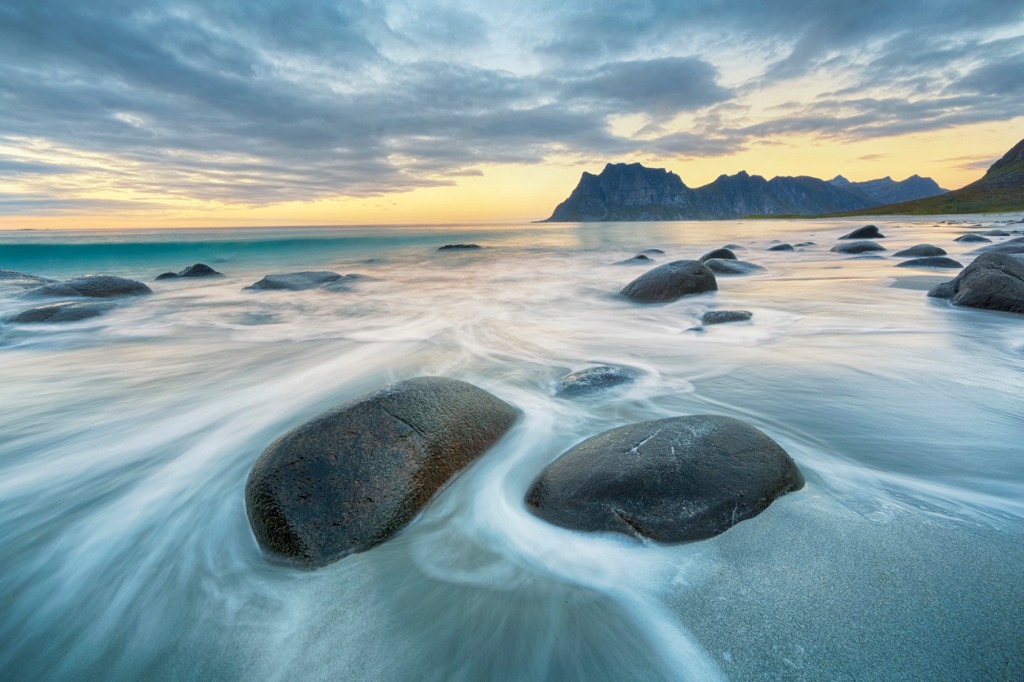
photo bytunart via iStock
The neutral density aspect of the filter helps block light that enters the camera, thereby giving you more control over the image’s exposure. For example, to get a shot like the one above in which you need a long exposure, a neutral density filter is used to block light so you can extend the shutter speed to get blurred motion effects.
The polarizing aspect of the filter controls glare off of non-metallic surfaces like water. For landscape photographers like myself, this is a crucial feature that enables you to photograph bodies of water with less concern about the sun’s glare off the surface of the water messing up the shot.

photo by Lara_Uhryn via iStock
But polarizers have other benefits, too. They boost contrast in the sky, so the atmosphere takes on a deeper blue tone and clouds appear to be a brighter white, as shown above. Additionally, polarizers help limit atmospheric haze, so elements in the background of the landscape have a cleaner, crisper appearance.
These ND/polarizer filter benefits aren’t just for still photos, either - they have the same effect when shooting video. What’s more, ND/polarizer filters can help you get smooth video at a slower shutter speed while also improving the color saturation and contrast of the scene.
Other Characteristics of ND/Polarizer Filters
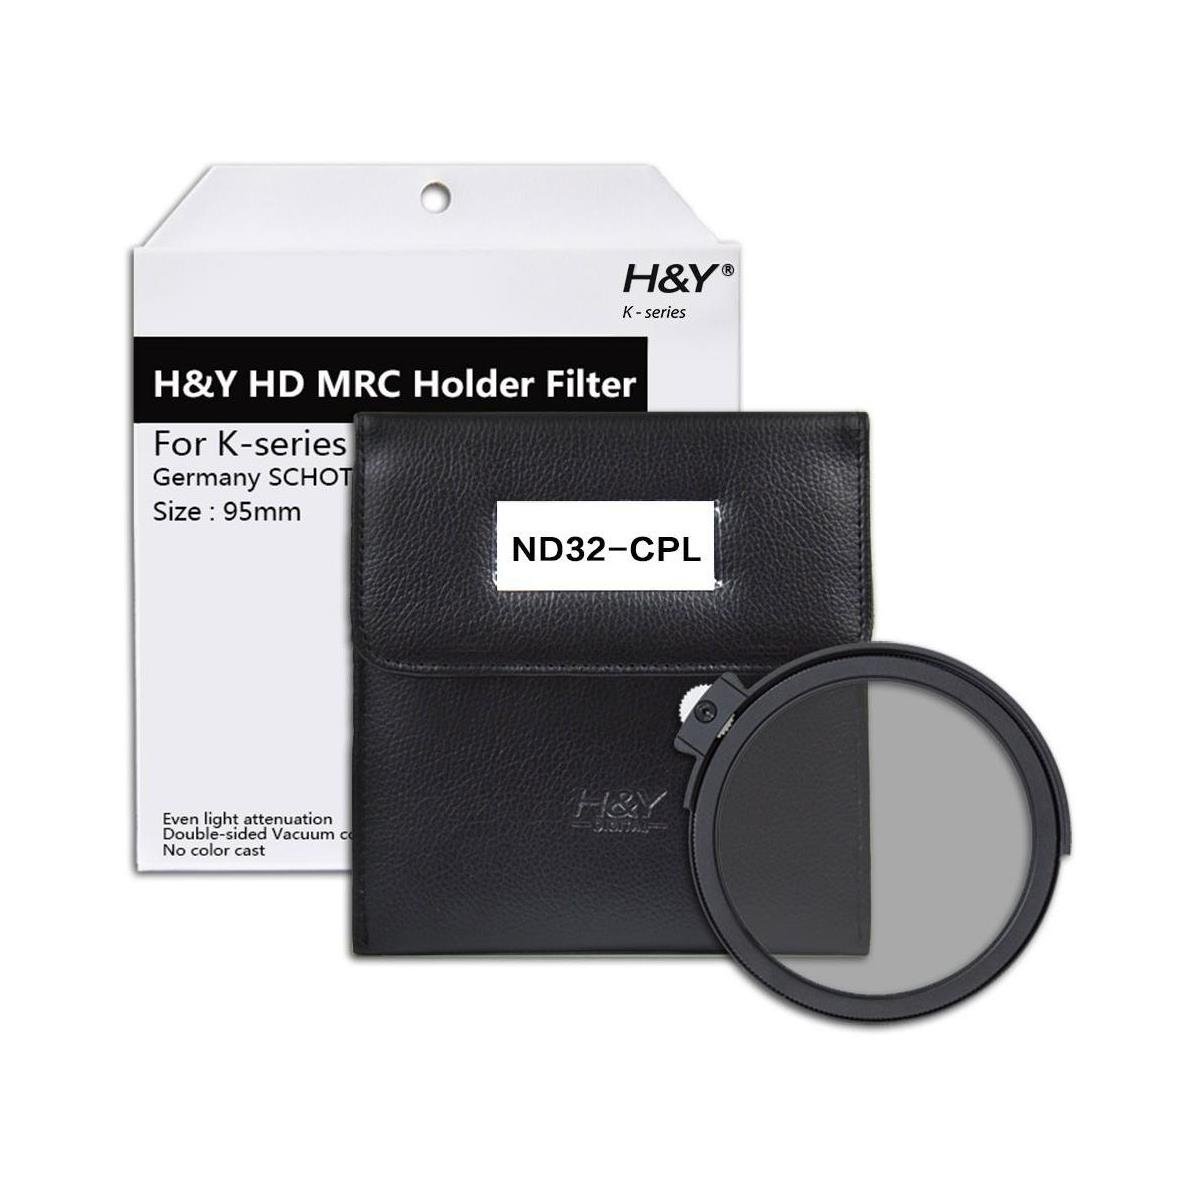
Typically, you find ND/polarizers in combinations that include common ND strengths, such as:
- ND8/CPL
- ND32/CPL
- ND64/CPL
As the number of the ND filter increases, so too does its light-stopping power. So, where an ND8 filter reduces the shutter speed by three stops, an ND64 filter reduces it by 6 stops.
Having a range of these filters is ideal because they are best suited for different situations.
For example, if I’m shooting a sunset at the beach and want to blur the motion of the water, I’d likely use an ND8/CPL because there’s less light that needs to be blocked to get a long exposure. But if I were at the same beach at midday under sunny conditions, an ND64/CPL would be a better choice.
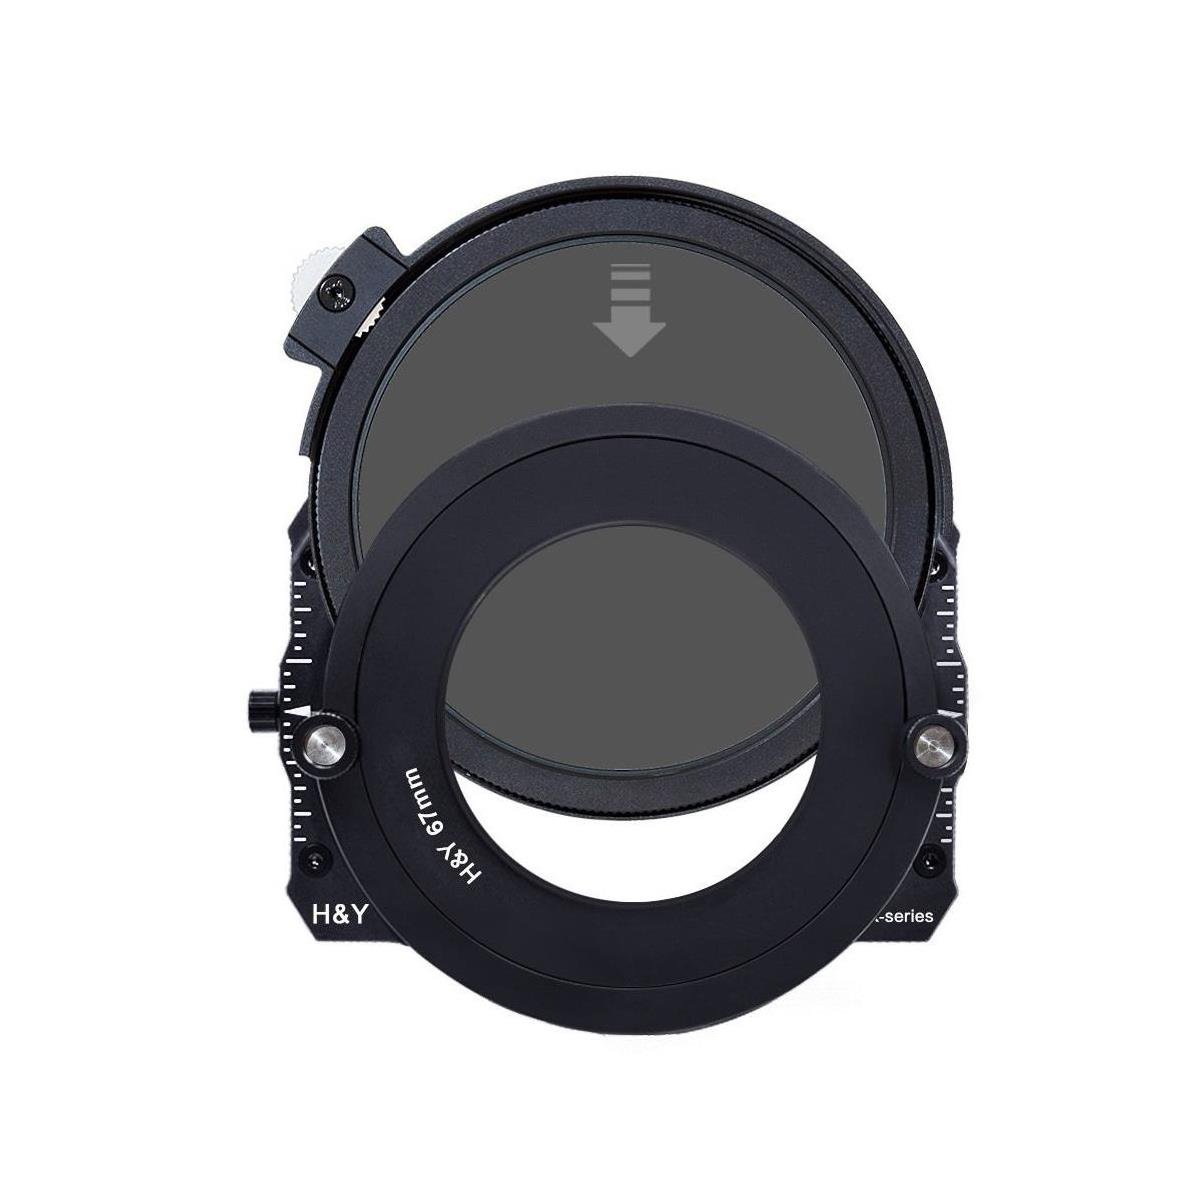
When it comes to the benefits of ND/CPL filters, it’s a huge bonus being able to get ND and polarizing features in a single filter. This negates the need to stack filters. The fewer filters in front of your lens, the better, because more glass in front of your lens can mean less sharpness and more aberrations in your photos.
Of course, there is a drawback to ND/CPL filters…
Polarizing filters work best when the sun is at a 90-degree angle. This means that you’re “limited,” for the lack of a better word, in how you use an ND/CPL filter. An ND filter doesn’t have this kind of restriction, so you can use them regardless of where the sun is relative to your position.
But since ND/CPL filters have polarizing capabilities, you need to strive to get the sun at a 90-degree angle (or as close as possible) to get the best effect.
Quick Tip: It’s useful to utilize a rectangular graduated neutral density filter when shooting a scene where the sky is brighter than the foreground. By adding a graduated filter you can manage the dynamic range which results in less need to make adjustments in post-processing. And since my H&Y filter holder can be tilted to match the horizon, that makes it very easy to adjust!
Why My H&Y ND/CPL Filter is My Favorite
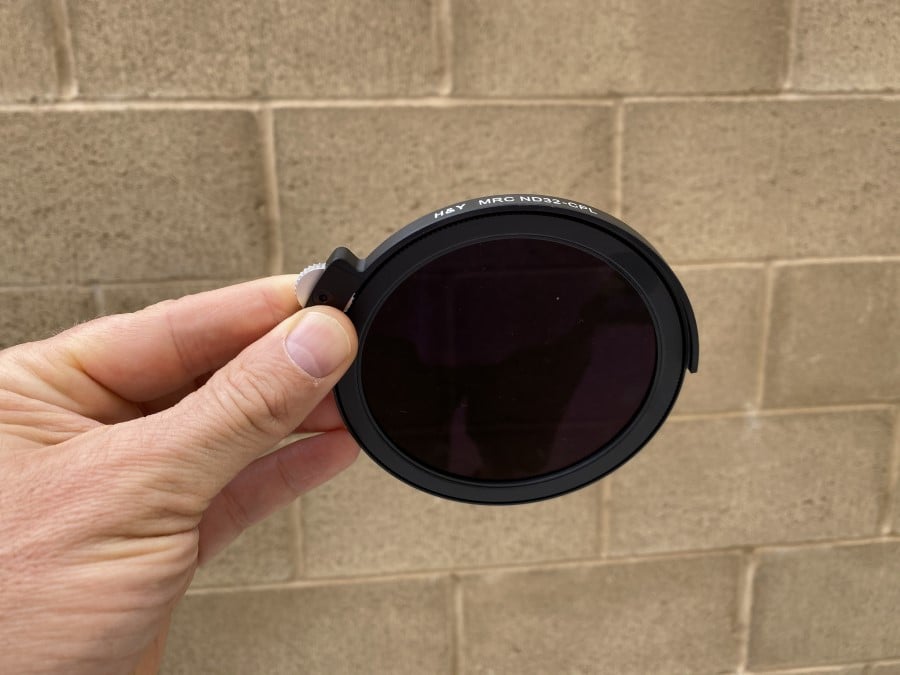
As I noted above, my H&Y ND/CPL is my favorite filter. It gives me five extra stops of shutter speed which enables me to get beautifully blurred shots of elements like water and clouds.
But since I’m often at the beach, the sun’s glare off the water is a concern, so having a polarizer is a must.
Again, my H&Y ND/CPL gives me exactly what I need, with polarizing power that minimizes the sun’s reflections and allows the beauty of the scene to come through.
Of course, with H&Y, you get high-quality construction and features like multiple layers of nanocoatings for superior performance, anti-smear, scratch, and reflective coatings, and water and oil repellent properties that make these filters a reliable addition to your kit.
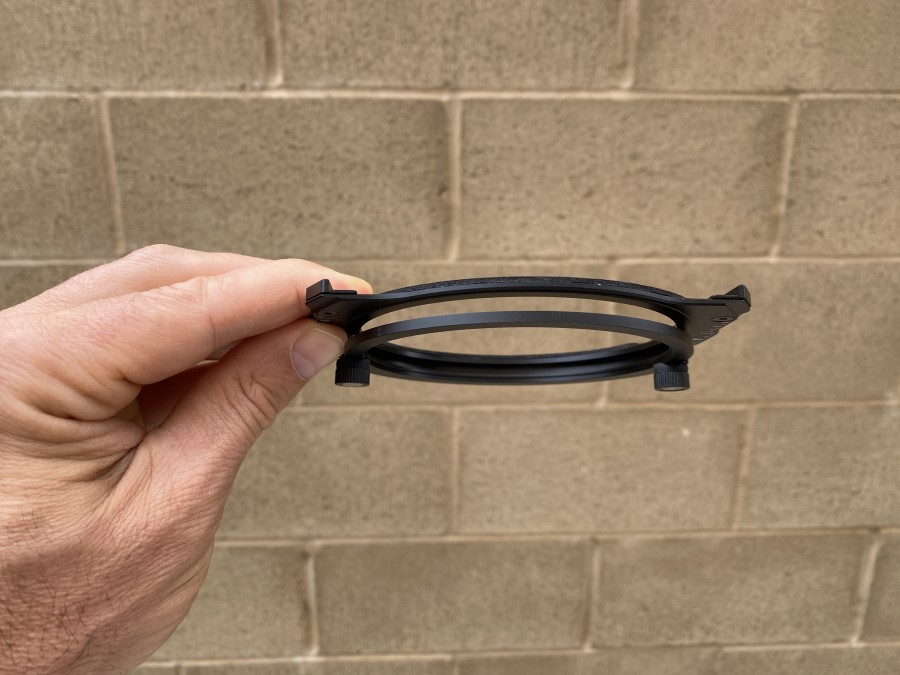
And since this filter drops into the H&Y K-Series holder (shown above), it’s a breeze to use. Just drop it in when you need it, pull it out when you don’t, and use the built-in wheel to rotate the CPL independently of the ND layer.
Photography can be a complex and time-consuming task, so having gear that helps you streamline that process is a must.
My H&Y 5-stop ND/CPL helps me do just that, while also combining all the benefits of having an ND filter and a polarizer into one filter. What’s not to like about that?!
Learn More:
We Recommend
No Step Up Rings? No Problem! Meet Revo Ring

As a serious photographer, you use a huge variety of lens filters in your work and personal photography.
Since many of us also have lenses with several different filter sizes, we either end up with a lot of filters or a pile of step up and step down filter adapter rings.
That is, until now...
H&Y Filters Introduces RevoRing

If that introduction describes you even a little bit, you will be very interested in the H&Y Kickstarter campaign for their new adapter, the RevoRing.
The RevoRing is a set of three sizing adapters for fitting lens filters to your various-sized lenses. It’s designed not merely to be variable for lens filter diameter, but also to be quick release and attaching as well as extremely strong and durable.
Variable Sizes in One Adapter
One of the best filter tips I ever got when starting out in serious photography was to buy expensive specialty lens filters in the largest size you need or even bigger and then use adapter rings to “step down” to the other lenses in your gear bag.
After several years of buying, selling, and trading lots of photography gear, I ended up with a lot of different specialty filters in a bewildering array of sizes as well as lenses with different front filter diameters. I also ended up with so many step up and step down rings, I sounded like a belly dancer as I walked around.
H&Y Filters made the RevoRing in three size ranges. The sizes are 37-49mm, 46-62mm, and 67-82mm. The outer filter thread sizes are 52mm, 67mm, and 82mm respectively, so any of the three adapters can accommodate those sizes of filters.
Quick Release

Attaching and removing the filters couldn’t be easier. I like to compare it to a tripod quick release system, since it is both very fast and completely secure. There is a video demonstration of the entire process on the H&Y Kickstarter campaign page.
Look at the short excerpt above to see how quick and simple the attaching and releasing is!
That takes less time than grabbing all of my adapter rings and searching for the exact match I need. Plus, it lets me switch virtually instantly between lenses in use.
Super Strong
Made from high quality materials just like all H&Y Filters products are, the adapter rings are very strong and durable. Plus, you do not have to worry at all about the filter holder releasing accidentally.
Join the H&Y Kickstarter Today!
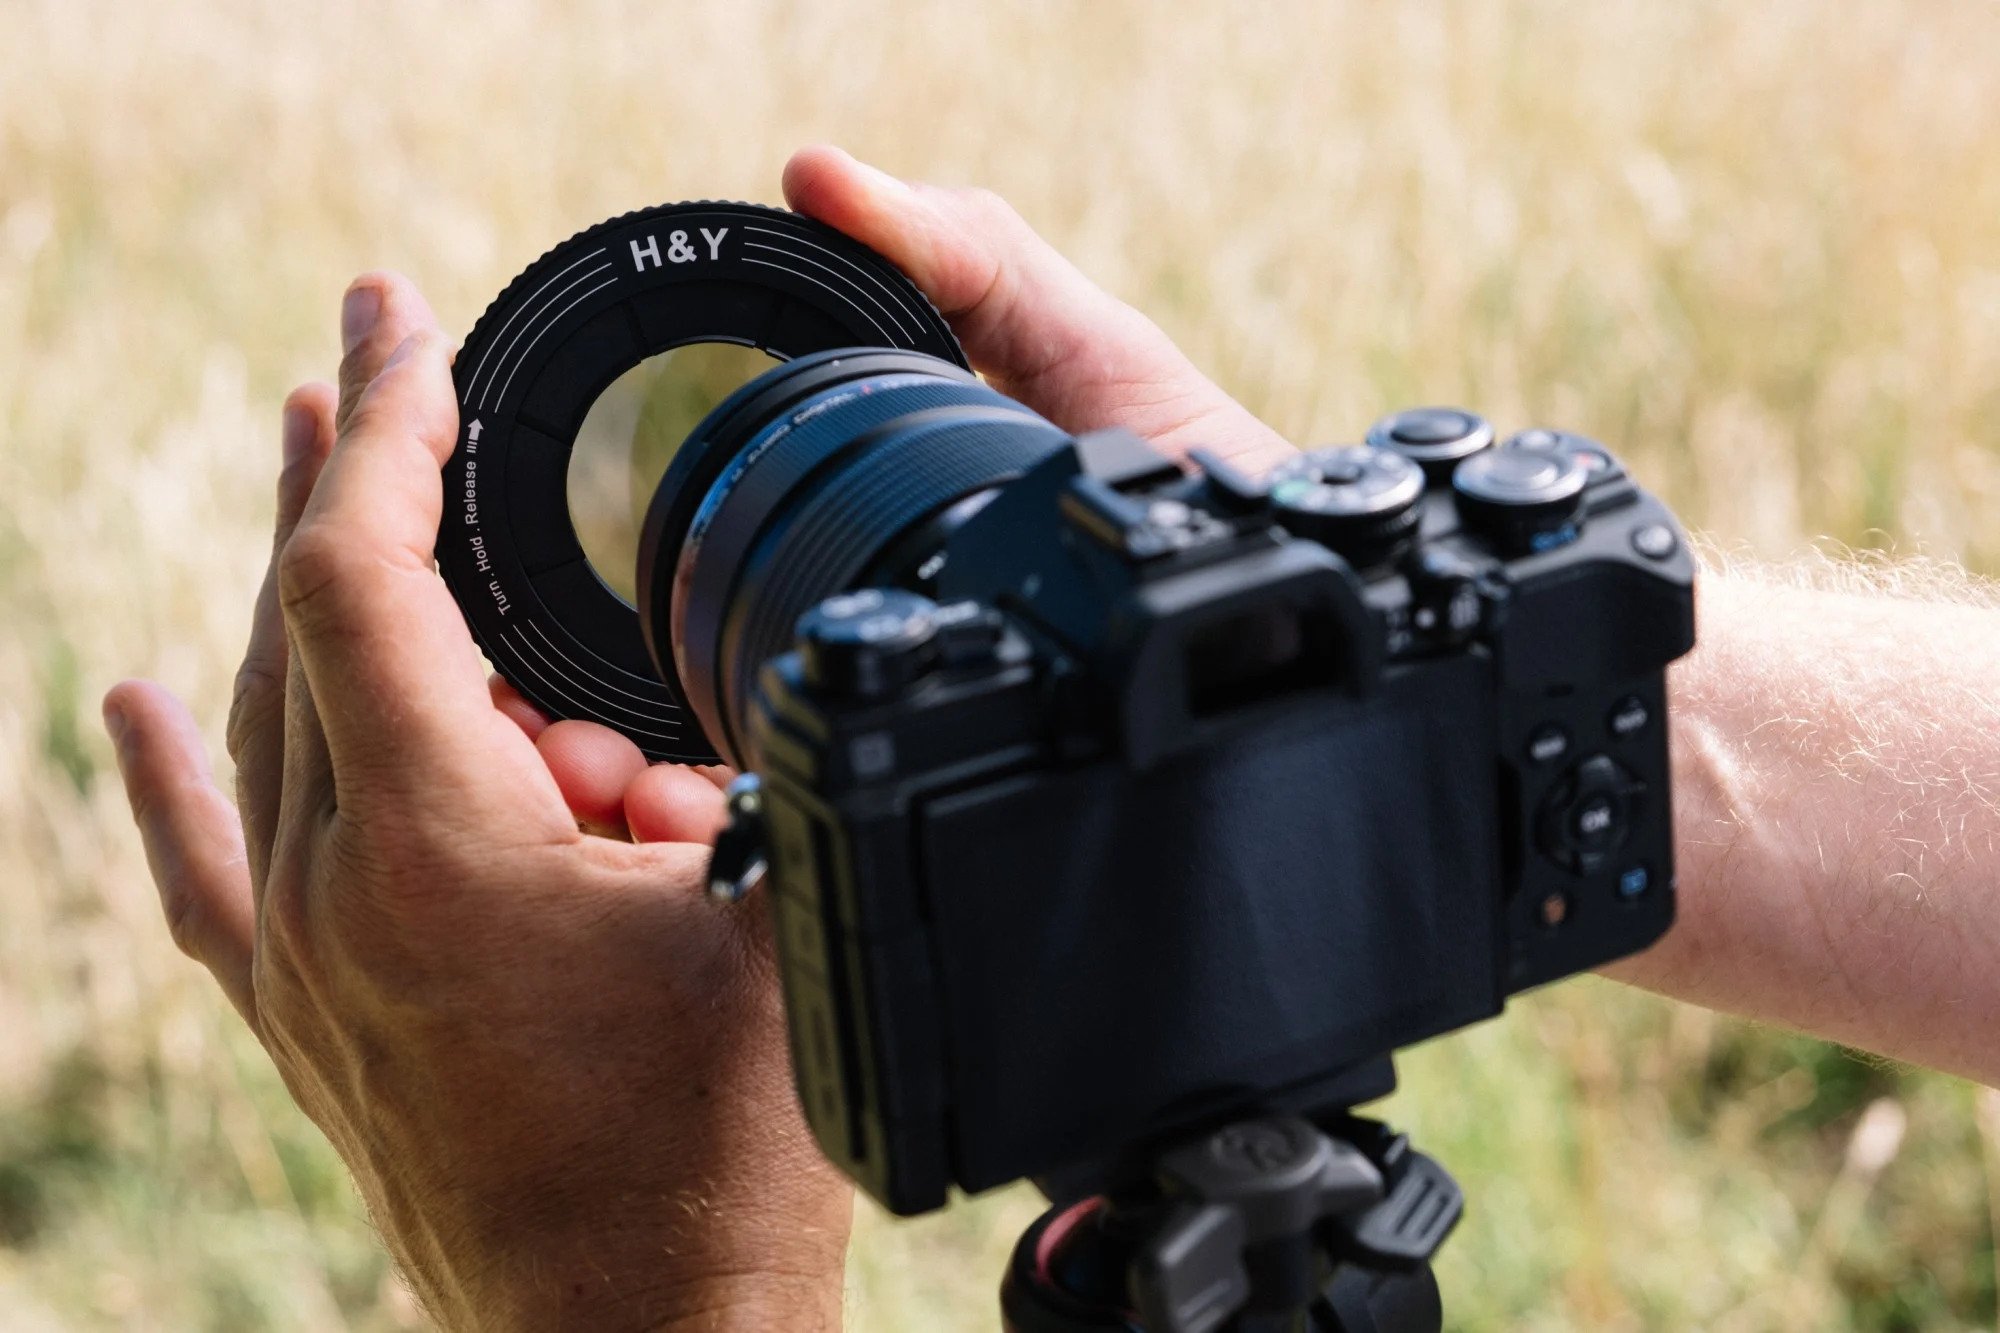
Once this hits the general market, it should take off like wildfire. It has already exceeded the initial Kickstarter goal by several thousand percent! I’m telling all of my photog buddies to reserve theirs now, and you should too!
Learn More:
- 5 Mistakes Photographers Make With Long Exposures
- What to Look for in Lens Filters
- 6 Benefits of Using Lens Filters
We Recommend
RevoRing: An Inexpensive, Yet Highly Valuable Tool for Photographers

Last week, H&Y Filters unveiled a Kickstarter campaign for their most recent innovation - the RevoRing.
RevoRing is a groundbreaking variable step ring that eliminates the need for you to have a mountain of step rings in your bag.
I don't normally get this excited for a single product.
However...
RevoRing is one of those rare photography gadgets that will not only save you money, but it will also save you space and weight in your camera bag.
On top of that, it will help you improve your workflow in the field, so it's a true triple-threat!
If there is one piece of photography gear you pick up in 2020, it has to be this thing.
Seriously...
I've been testing various RevoRings out for a few weeks now, and to say that I'm highly impressed is the understatement of the century.
As I noted earlier, I truly believe RevoRing will completely change how we use filters.
If you think about it, the time savings alone makes this a truly innovative product.
There's no more fiddling around with various step rings. Instead, you simply twist the mechanism built into the filter to adjust the adapter's size. It then locks into place on the end of your lens, thereby allowing you to use various-sized filters with multiple lenses.
RevoRing comes in three size ranges: 37-49mm, 46-62mm, and 67-82mm. So, if you have a lens with a 46mm filter thread but you have a 52mm filter, you can use the two together, no problem!
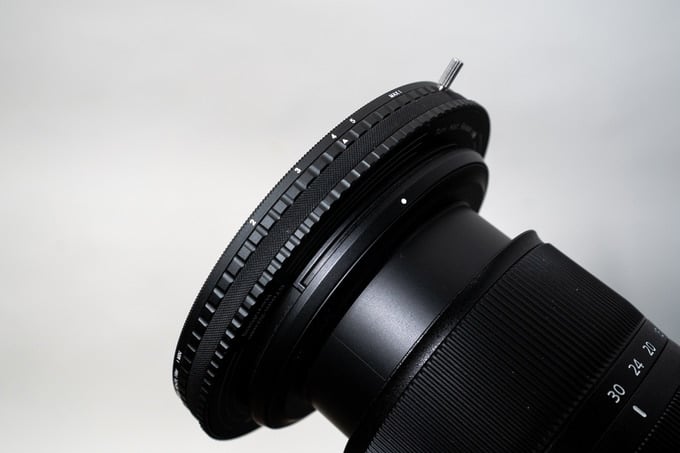
Better still, H&& developed a RevoRing that also has a built-in circular polarizer and a built-in variable ND filter.
Again, all you do is twist the filter housing to adjust it to the size of your lens, lock it in place, and you're ready to roll.
And with separate controls for the variable ND filter and polarizer, you have yet another triple-threat: a variable step ring, a variable ND filter, and a polarizer all in one neat and tidy package!
If there is one item you pick up in 2020, it has to be a RevoRing. There are just too many benefits not to get one!
The pre-production models I've been testing have demonstrated their worth in the time savings I get in the field. On top of that, it's nice not having to drag all my step rings and filter kits with me wherever I go. Truly, RevoRing will help you clean out the clutter in your camera bag so you can travel lighter and be more efficient as you work.
Earlier this week, I released a video on the Revo Ring to demonstrate how it works:
As you can see, it really is an ingenious product that's well-designed and well-built. But as a long-time user of H&Y filters, I'd expect nothing less!
But don't take my word for it...
Below is a sampling of just a few of the dozens of glowing reviews people have done on RevoRing. It's getting widespread acclaim, which is part of the reason why the Kickstarter for RevoRing exceeded its goal within a few hours of launch.
Head over to Kickstarter to learn more about this incredible product and to sign on as a supporter.
We Recommend
The Best of 2020
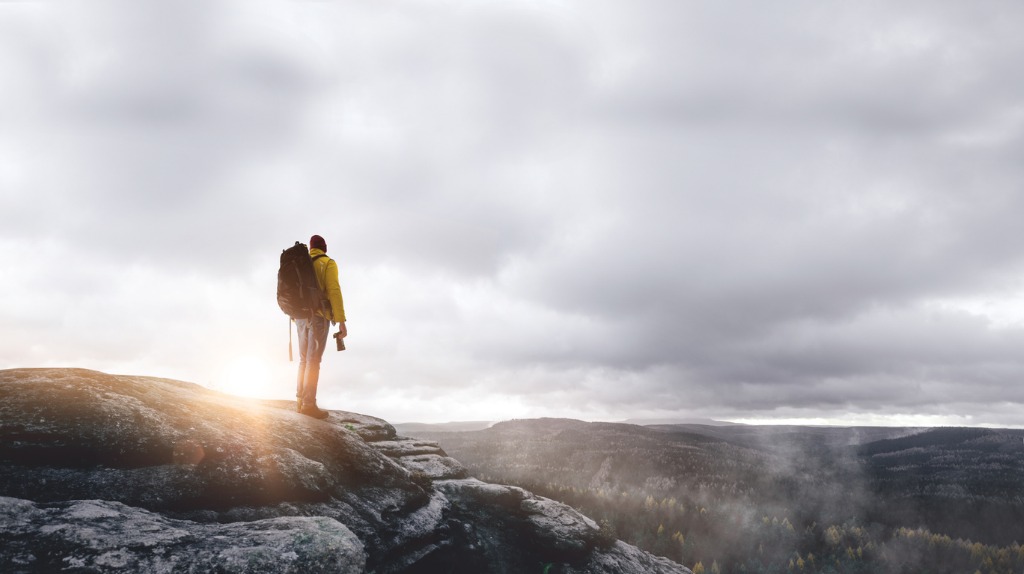
Photo by Marcus Millo via iStock
Each year I buy and test a ton of photography gear. And a lot of that gear is really good stuff that impresses me from moment one.
But a small percentage of that gear falls into the "innovative" or "game-changer" category. It's hard to be on the leading edge, yet the companies on this list have managed to plant themselves firmly at the forefront.
Below is my list of the Best of 2020. From bags to cameras, filters to monitors, there is something for everyone on this list.
Let's get to it!
Hex Brand Ranger Sling Bag
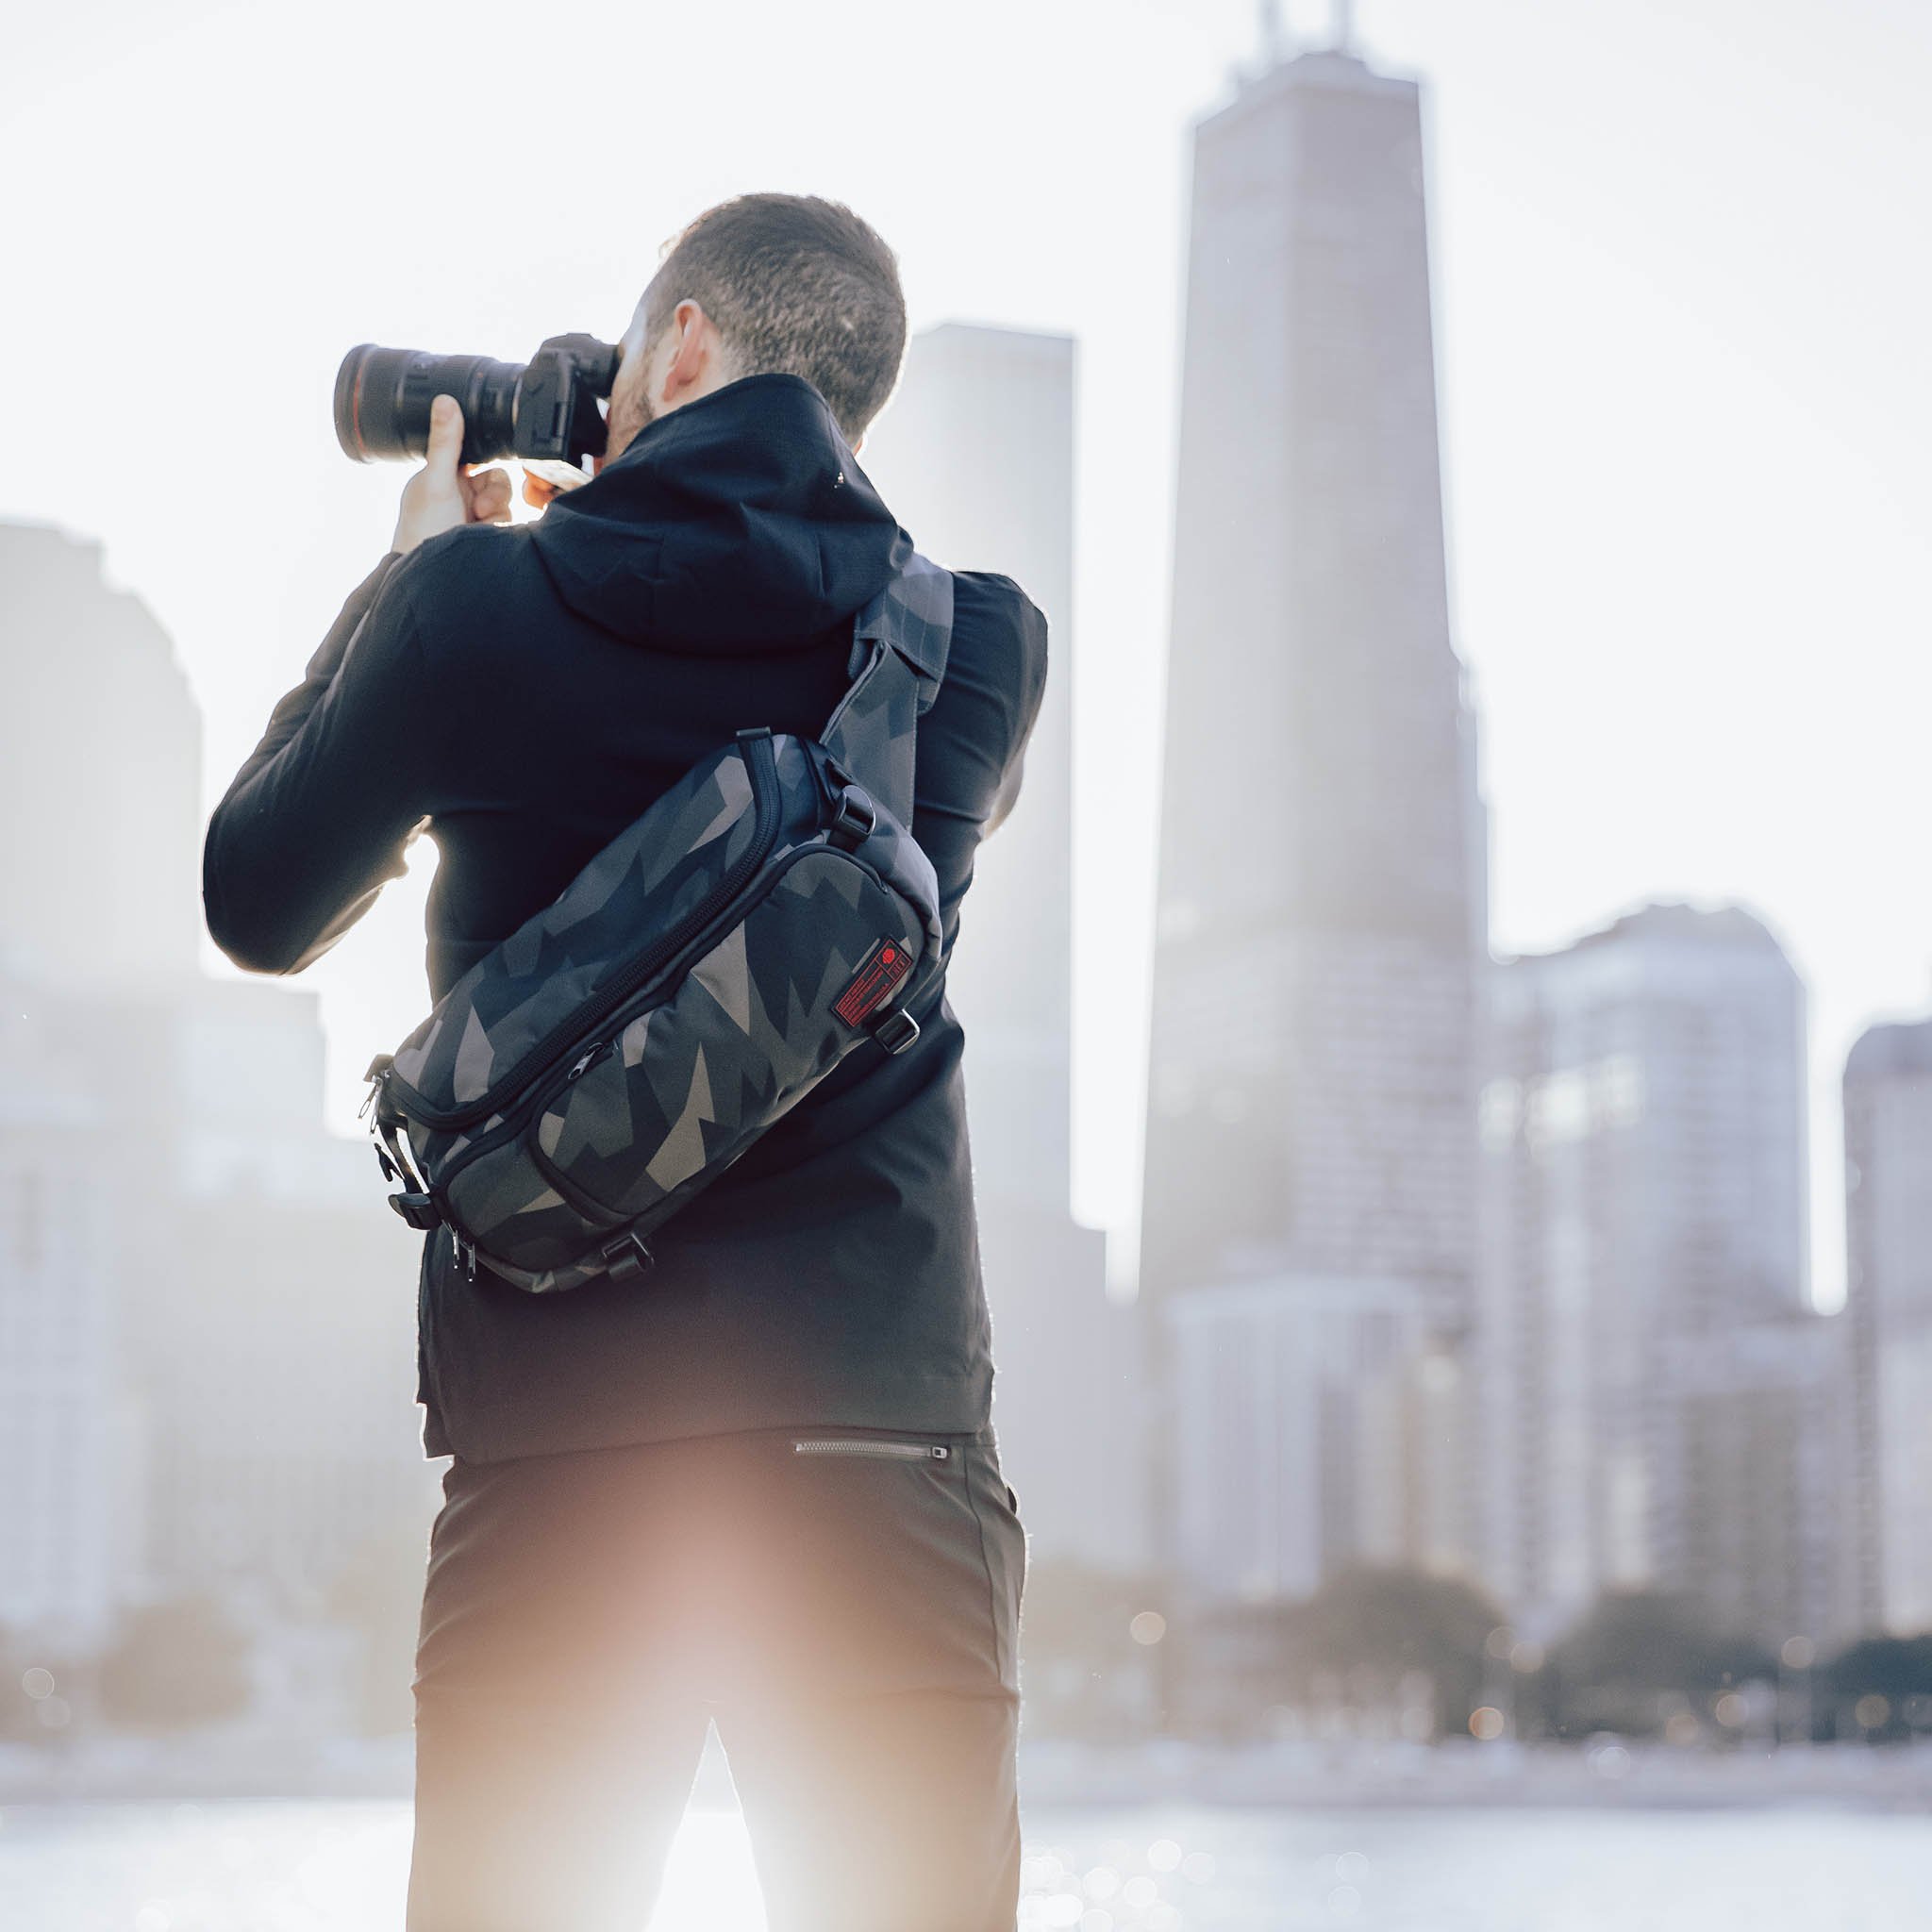
You might recall that the HEX Ranger Sling Bag was on my Best of 2019 list.
The new-and-improved Version 2 has appeared on this list because, just like its predecessor, it is an absolutely fantastic bag.
I remember when I brought this bag home for the first time just how impressed I was with it in every aspect.
The design of it is spot-on. It's big enough to hold eight liters of gear, but the way it's designed it hugs your body.
So, this means that you get all the room you need for quick photography outings, but in a bag that doesn't flop around or get in the way.
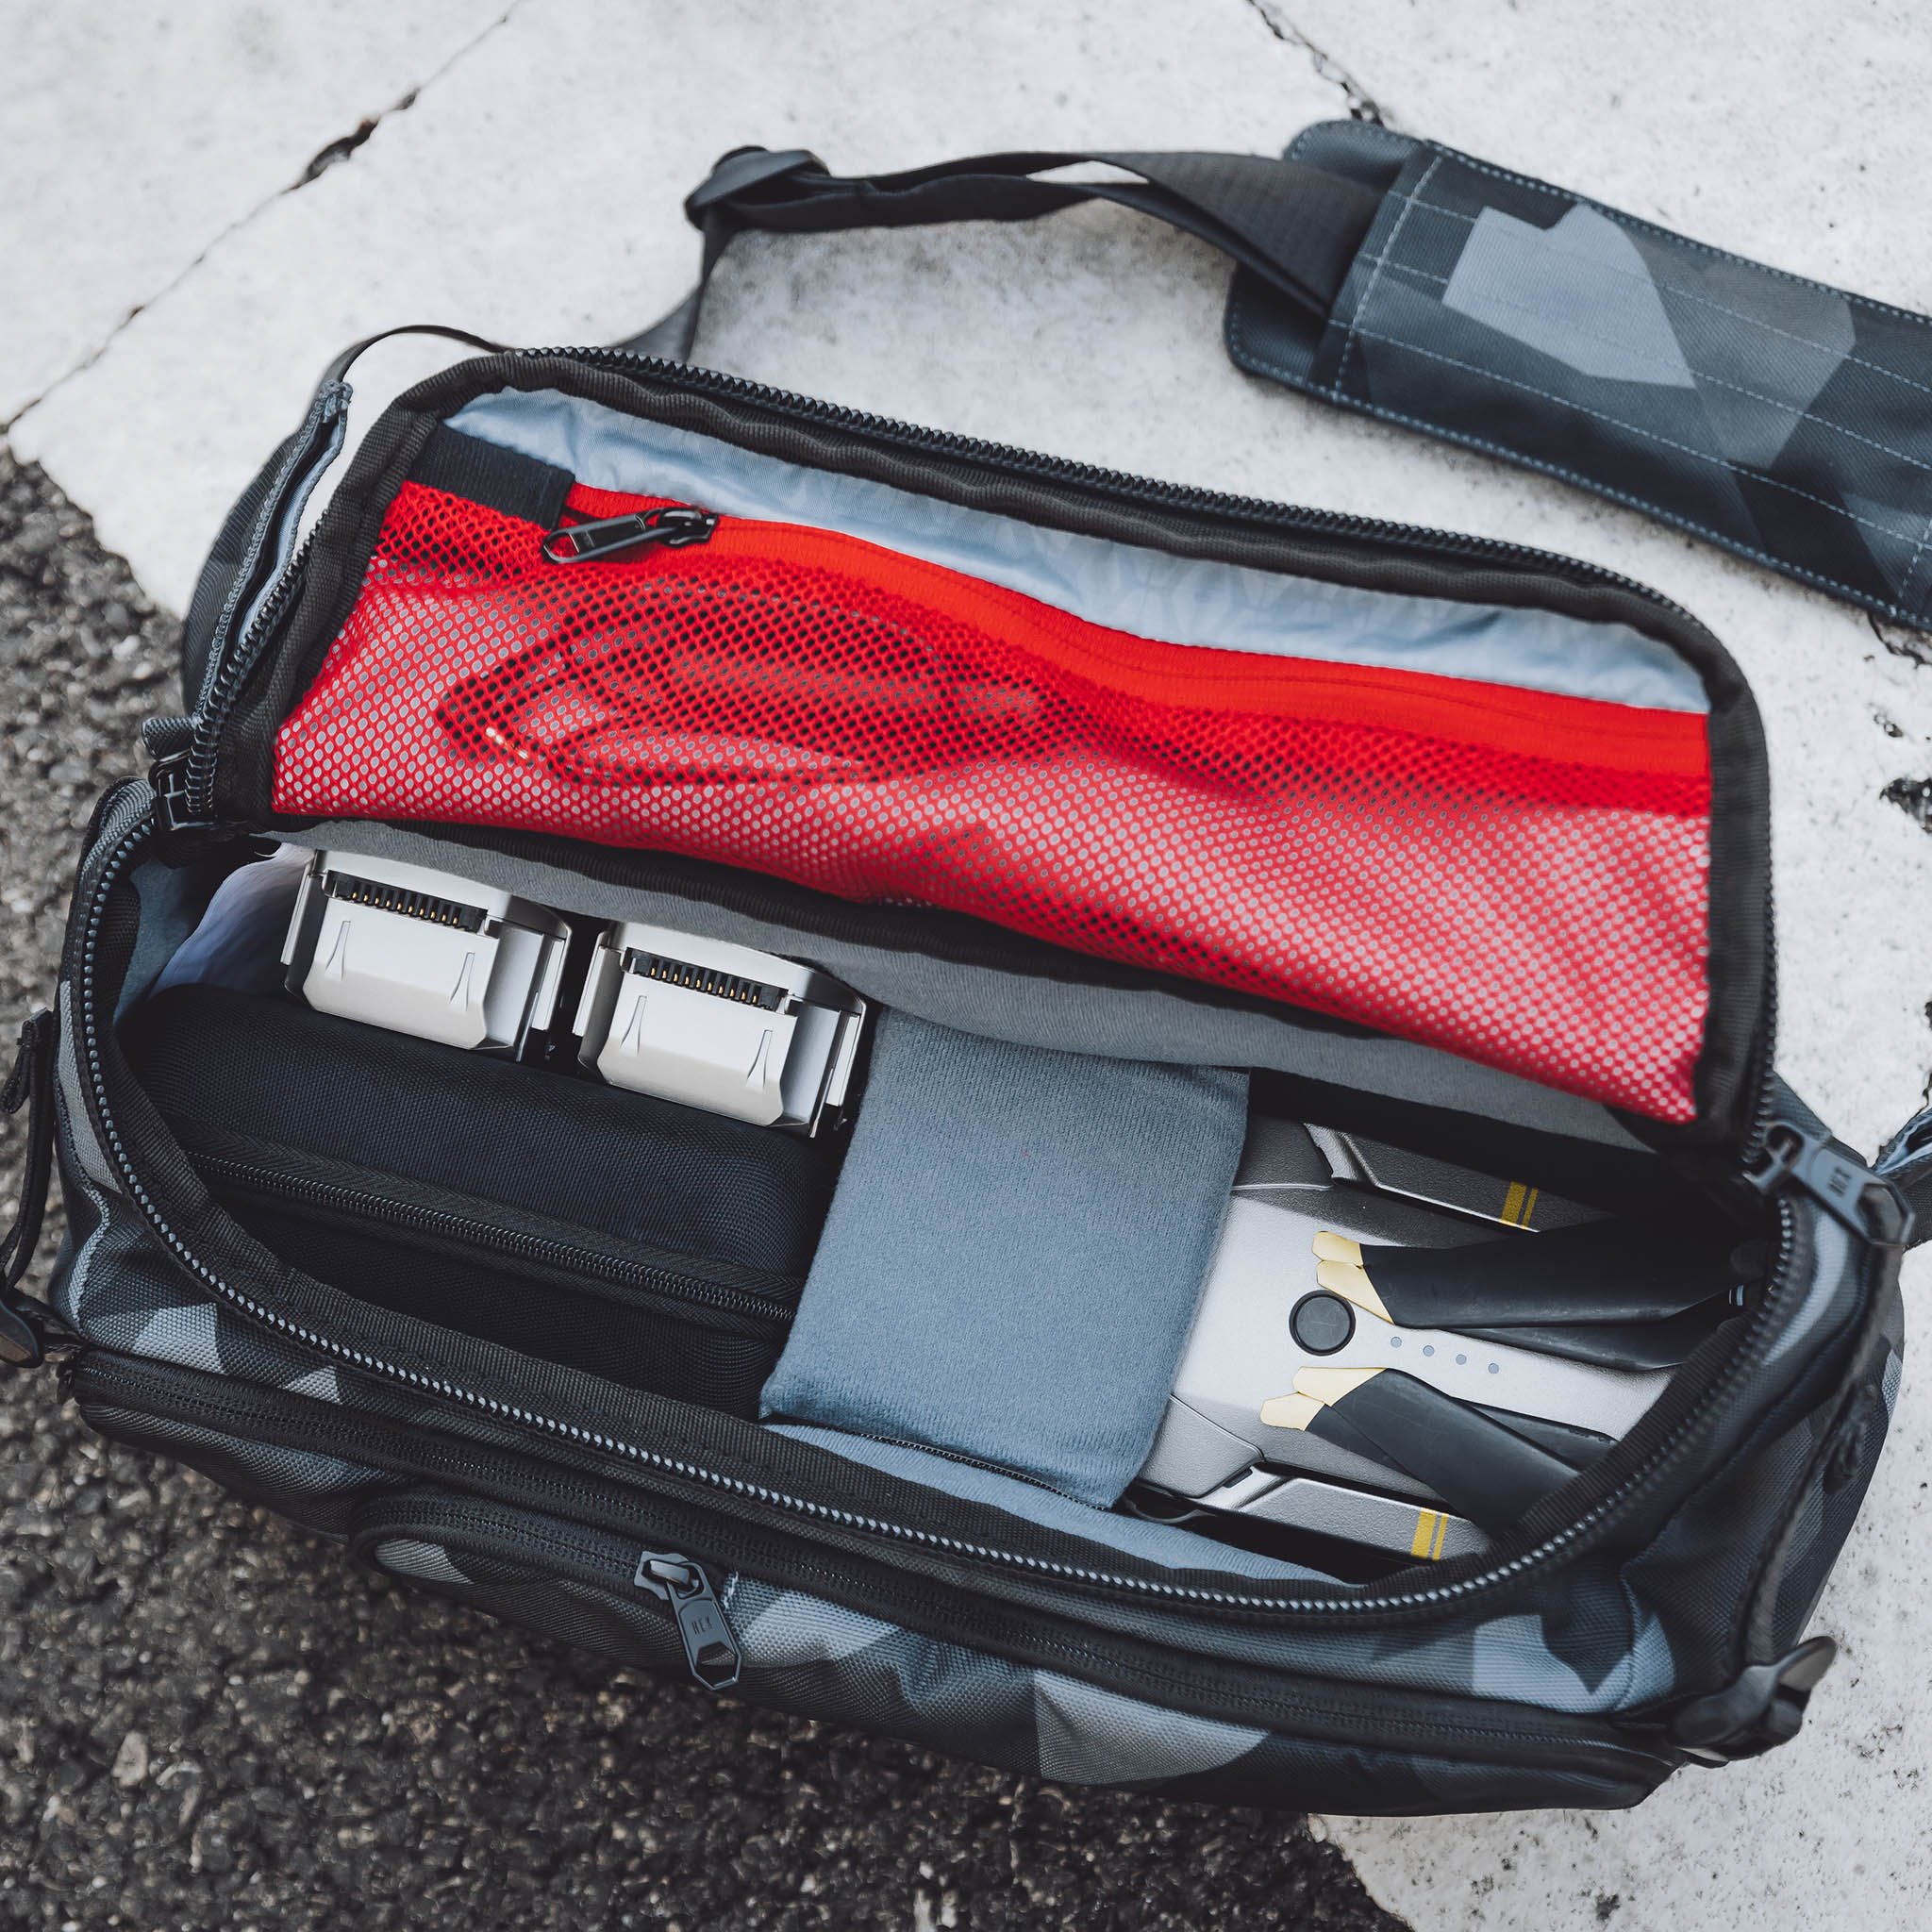
In fact, I've never owned a bag that conforms to my body as well as this one does. It's perfect for running and gunning, street photography, and trips where long hikes are involved.
Additionally, when you look at the stitching of this bag you really see the attention to detail.
It's thoughtfully constructed - and well-constructed too - which makes it a bag that works well for multiple purposes (and will work well for years to come).
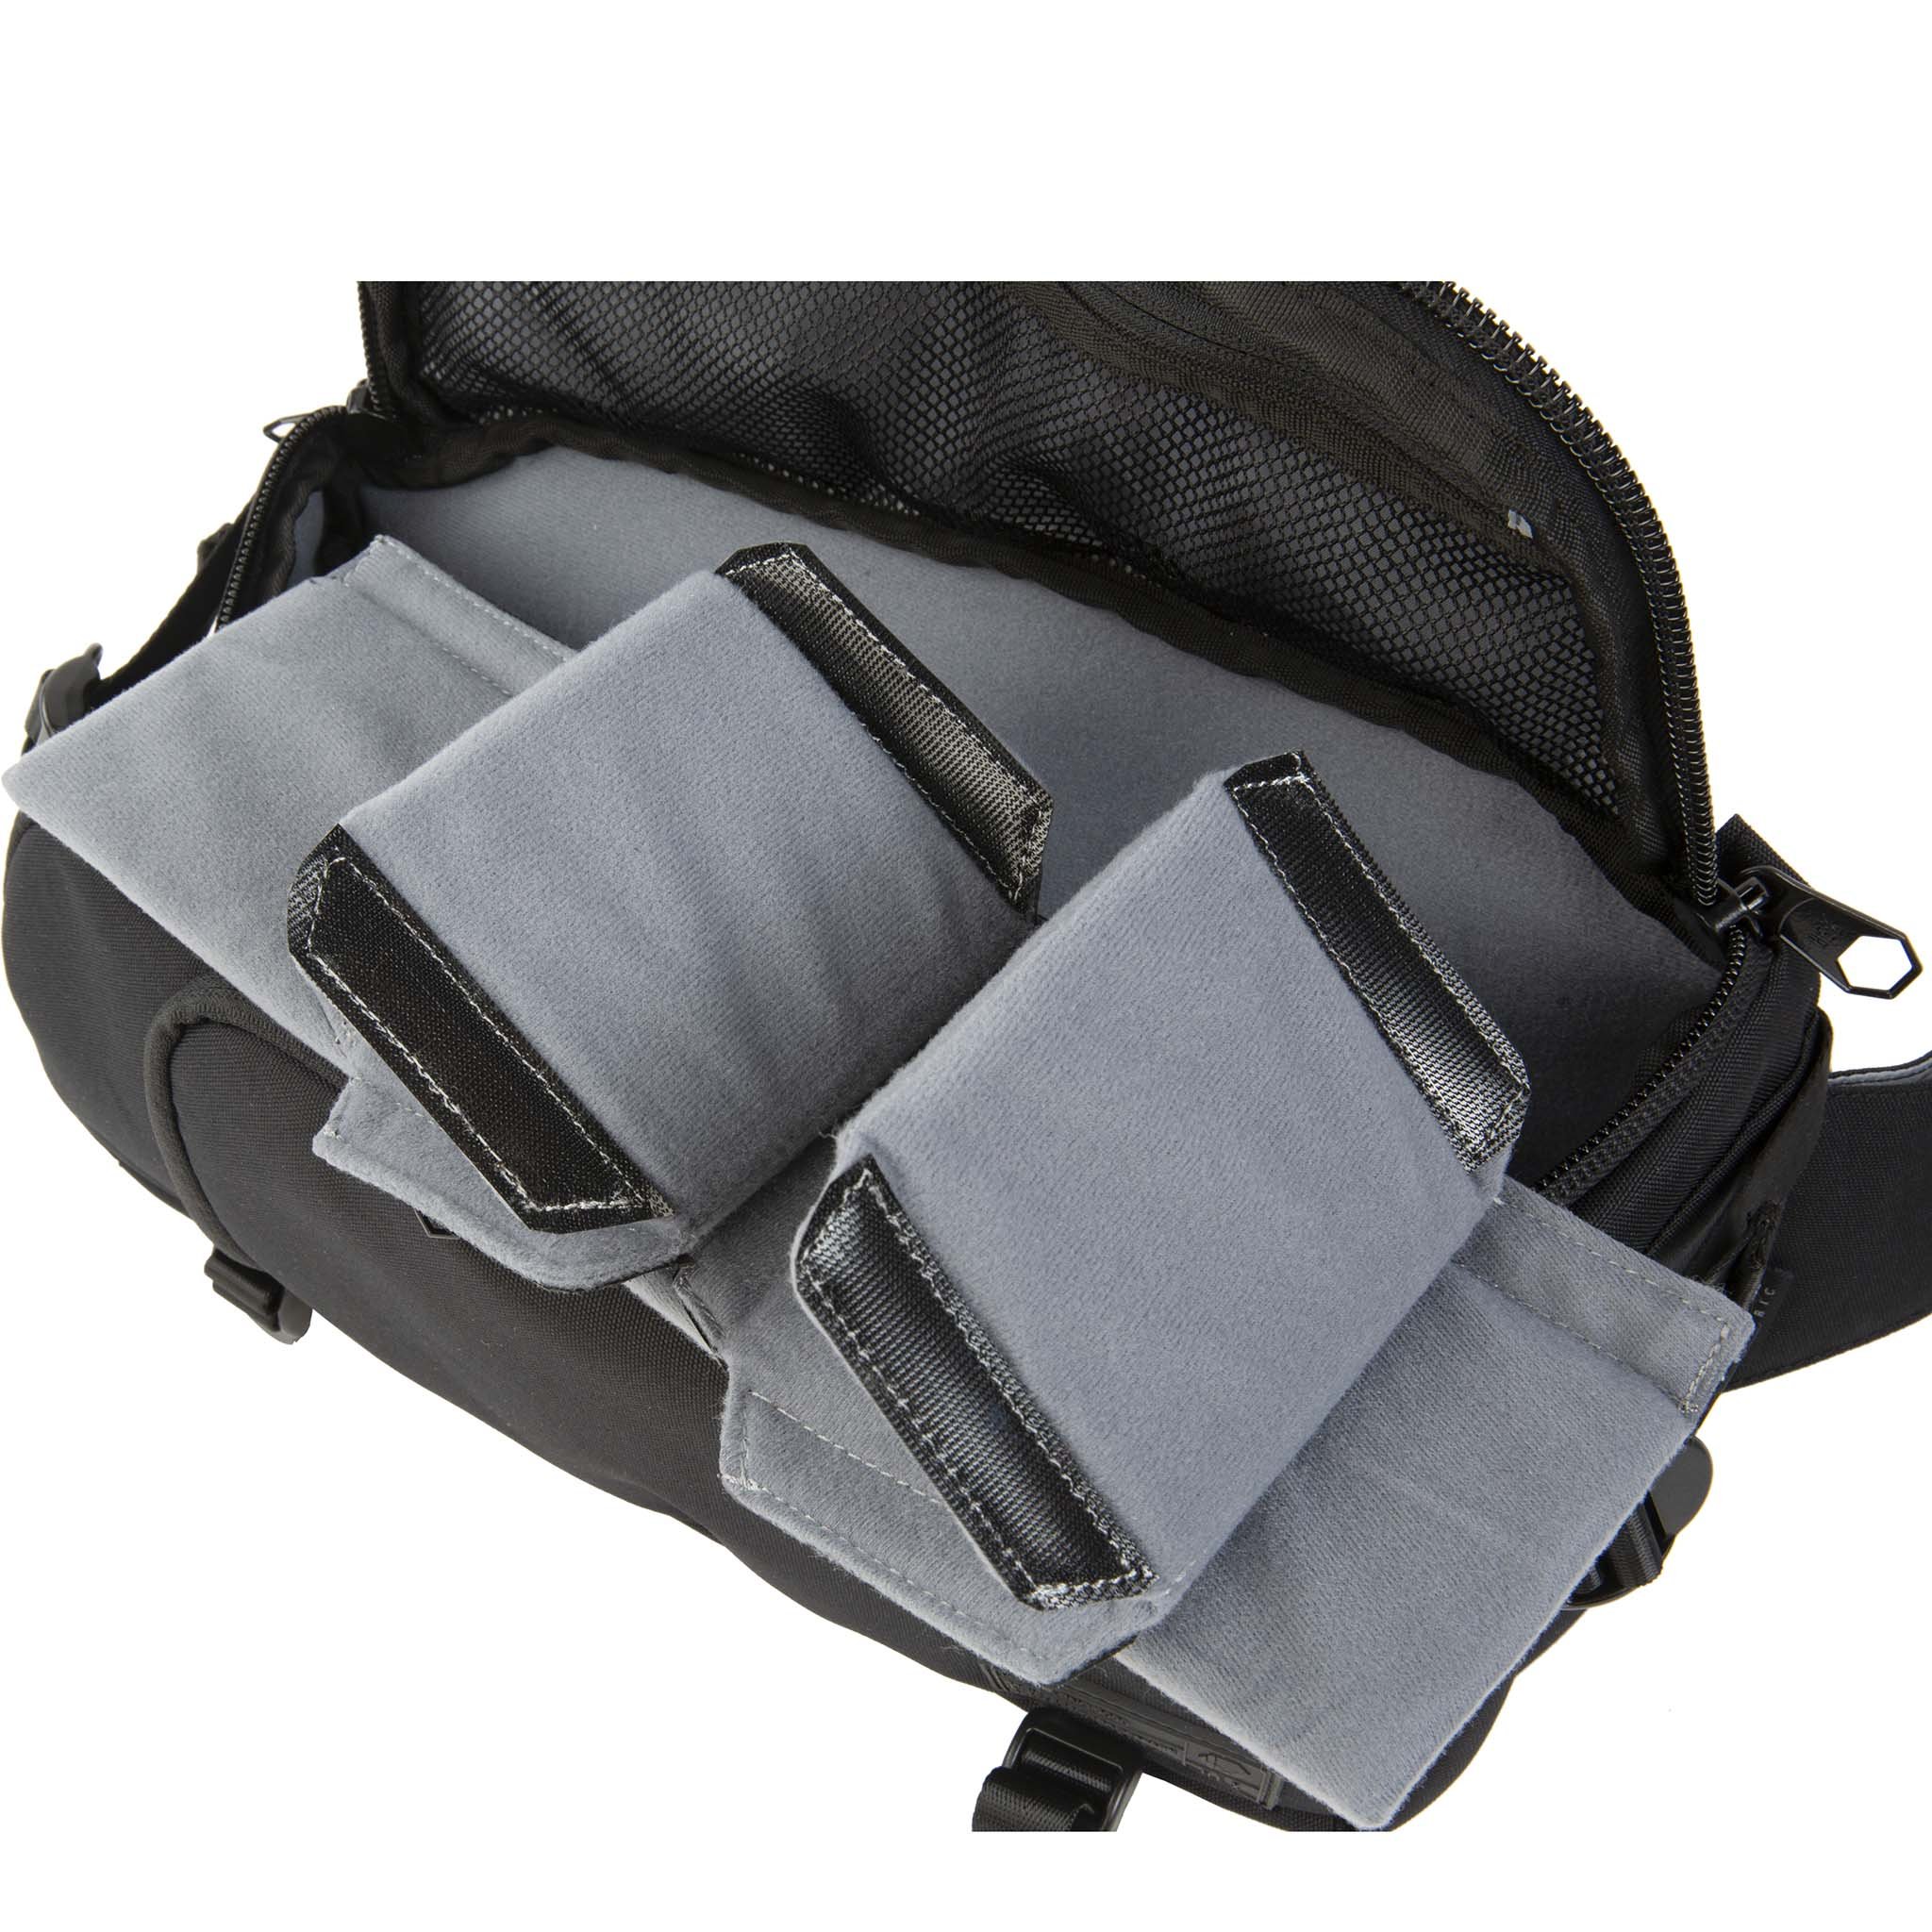
Another feature of this bag that's truly a home run is the collapsible interior dividers.
Having these dividers means a couple of important things. First, this bag is incredibly packable. It packs completely flat so you can stash it inside your carry on or another bag with ease.
Second, the collapsible dividers (which includes the bottom divider) mean you can completely customize the interior compartment to meet the needs of each individual photography outing. Not bad, right?
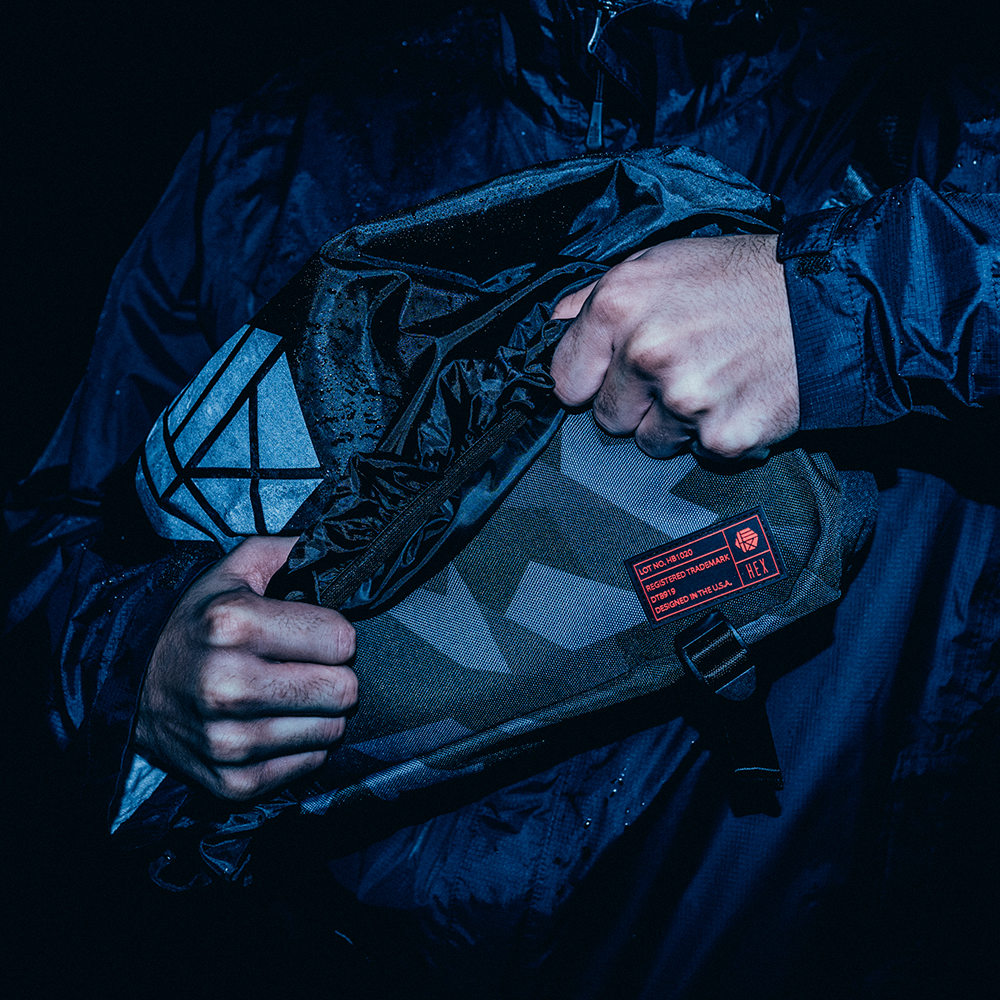
This bag has loads of other features that make it so useful for so many photographers...
There's a hideaway rain fly (shown above) for those drizzly days out shooting and increased padding on the top lid for added protection.
HEX also added more padding to the shoulder pad for added comfort and a double buckle strap that allows for more sizing options.
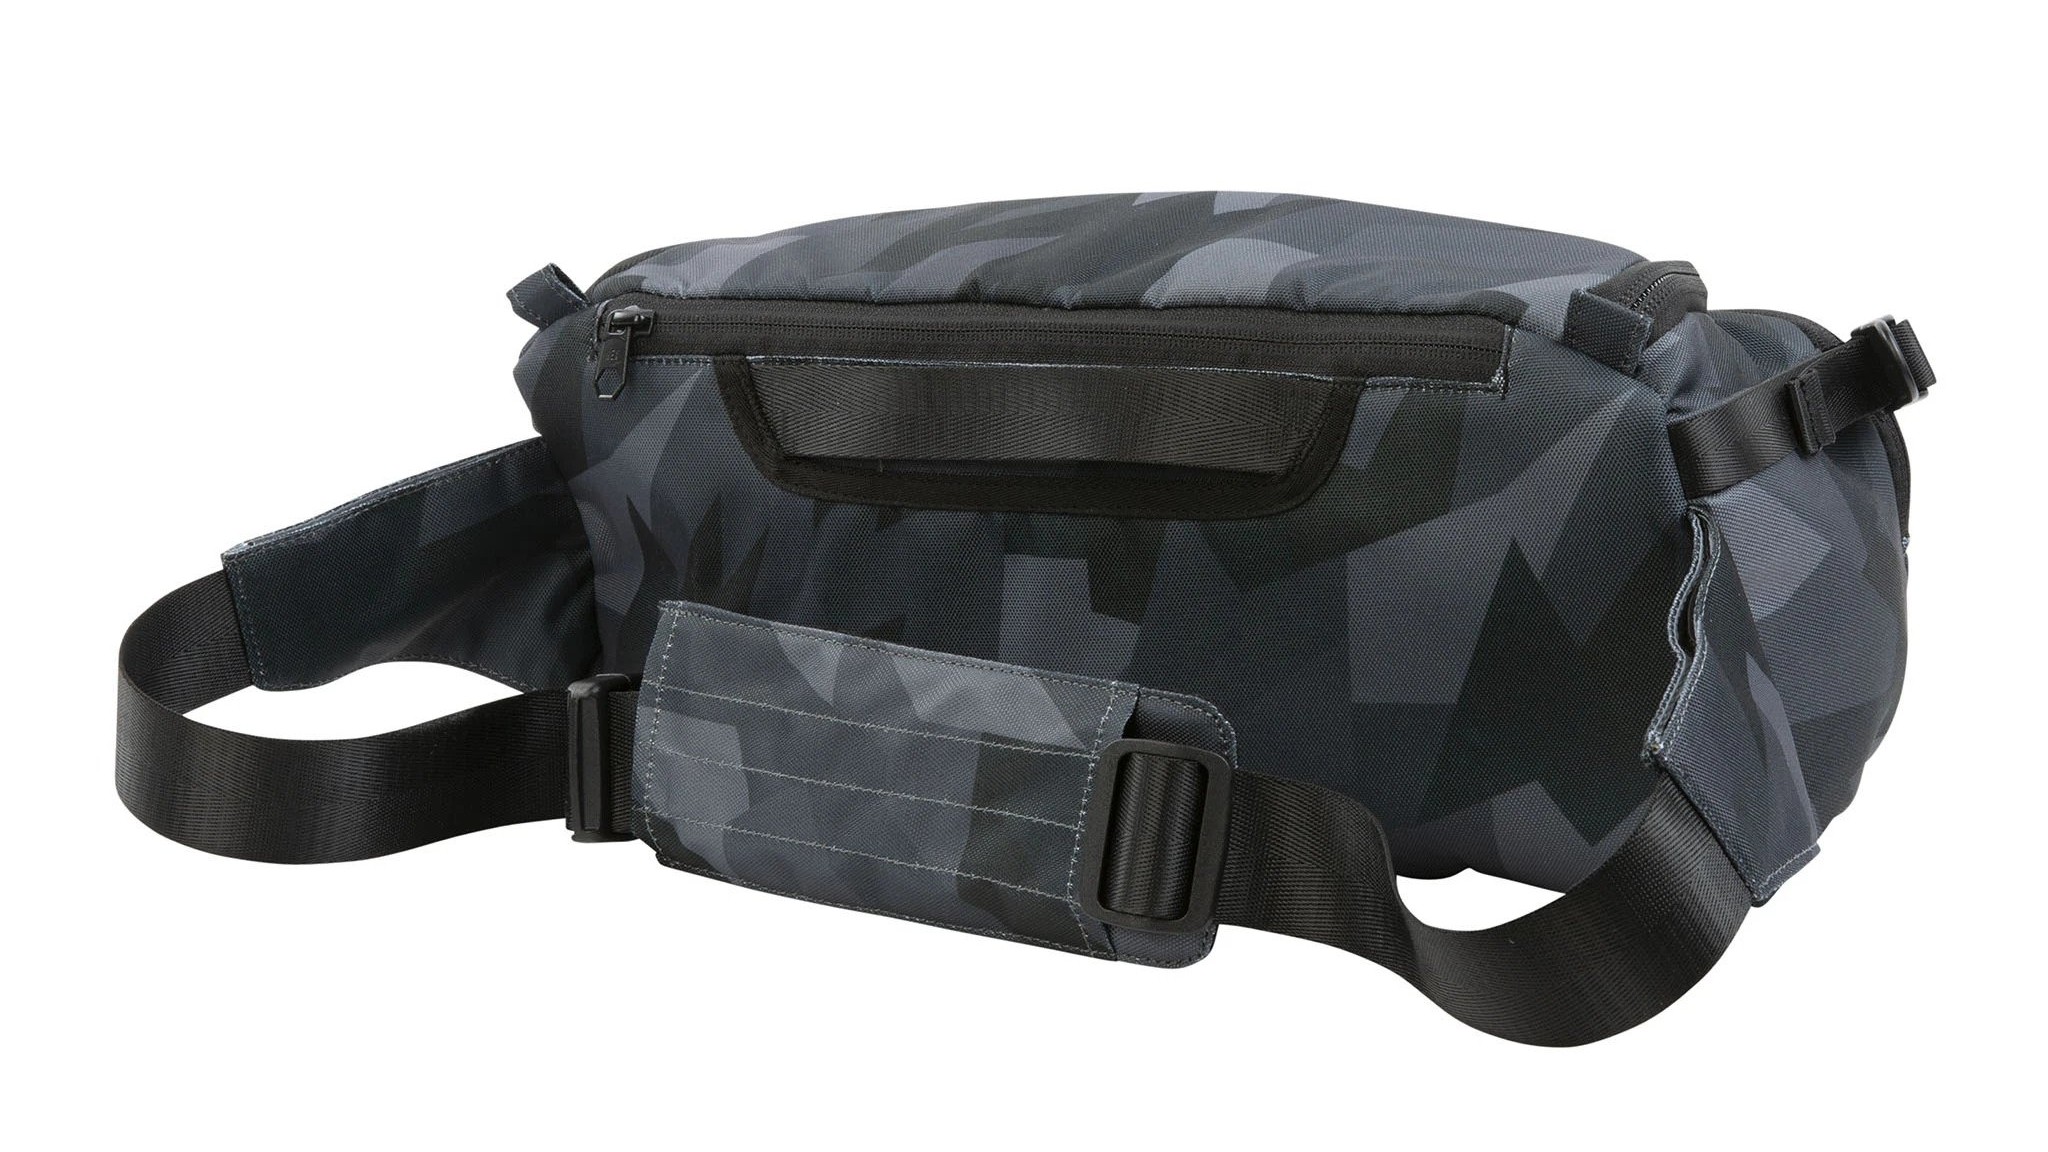
There are also side adjustable load straps and an adjustable bottom carry straps so you can carry your tripod or other gear if need be.
On the inside, you'll find pockets galore to keep your small items like memory cards neatly organized. Add to that a faux fur-lined pocket for your phone, another faux fur-lined pocket for your tablet, and multiple hidden Velcro stash pockets that are perfect for hiding your credit card or cash.
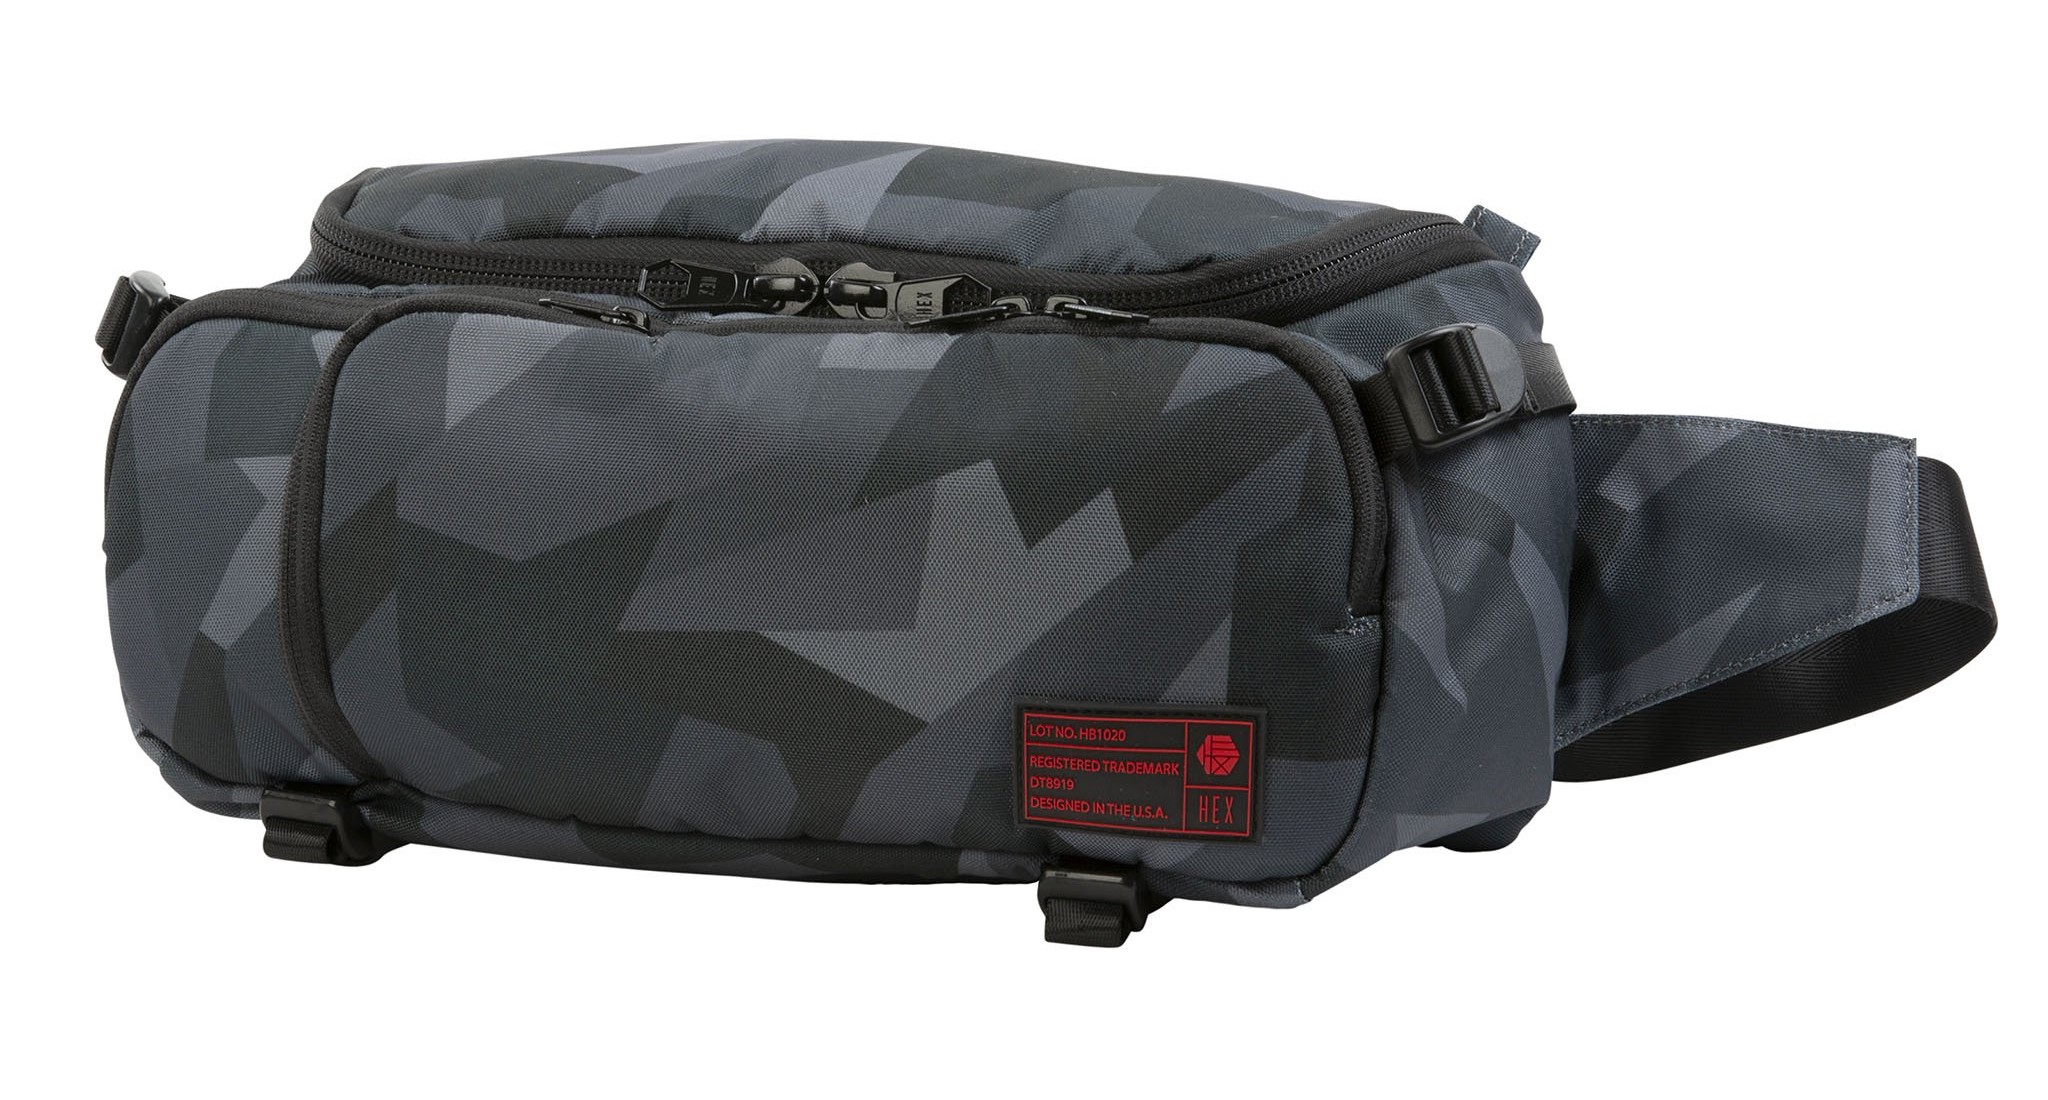
Back to the exterior, you'll find that it's made of genuine Cordura material for supreme durability. There are genuine YKK zippers with metal pulls as well, so you can rest assured that the bag will withstand years of use.
Between the streamlined design, the impeccable construction, the smart use of space, and the price tag of less than $100, you should be able to understand why this bag took top honors on my Best of 2020 list!
Learn more about the HEX Ranger Sling V2
ViewSonic VP3881 38-Inch Ultra-wide Curved Monitor

I have always used laptops for work simply because I want the mobility of being able to take my work with me when I travel.
So that means I need a larger monitor for my home office, that way I'm not staring at the tiny laptop screen all day.
Earlier this year, I upgraded my home office with a ViewSonic VP3881 38-inch ultra-wide curved monitor, and man, was that ever a good decision!
I had been an LG monitor user for years and years, but I decided to give ViewSonic a try after hearing so many good things about their 38-inch widescreen monitor.
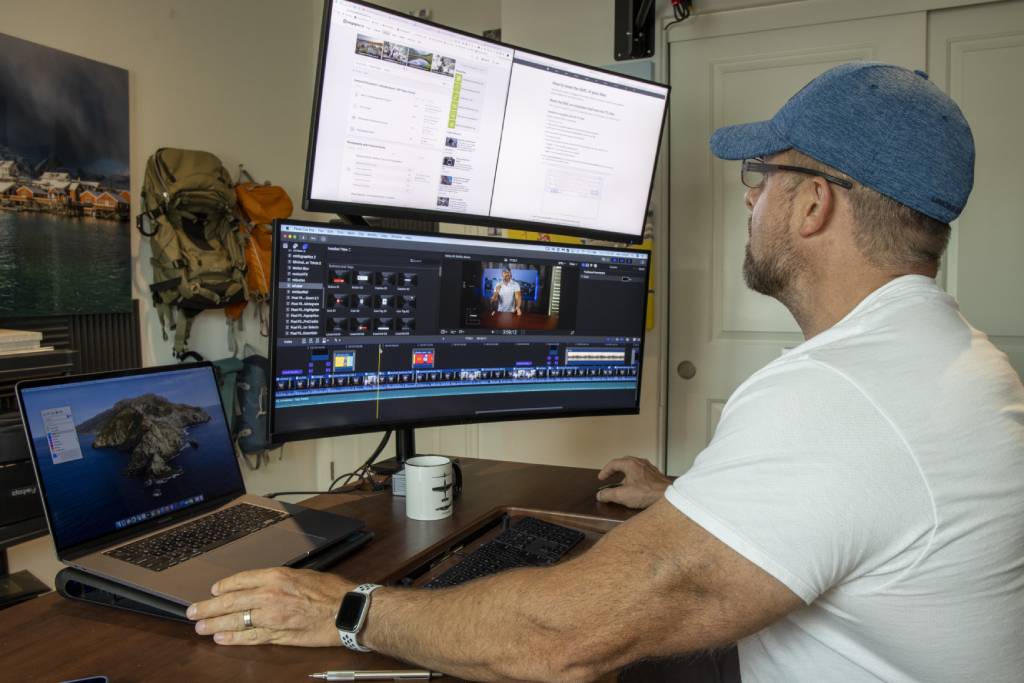
When ViewSonic says the curved widescreen design is an "immersive...curved viewing experience," they aren't kidding.
This thing has impeccable colors, gorgeous detail, and superb sharpness.
The 60Hz SuperClear IPS technology makes the viewing experience incredibly pleasant...even when I'm staring at the monitor all day long.
The monitor has multiple color spaces plus a 4.39-trillion color display. It has 14-bit LUT and 3D LUT capabilities as well. I also appreciate the simple calibration setup, that way I can quickly and easily make sure that the display matches the colors in my images files.
The frameless design means there isn't a huge bezel to look at, which I also appreciate. And with ViewSonic's ViewSplit technology, I can create multiple viewing windows to give my productivity a boost.
Add in U.S-based customer service and a three-year warranty, and you begin to see why I've put this monitor on my Best of 2020 list. It truly is the best monitor I've had the pleasure of using! Get more details about this monitor and how it's impacted my workflow in the video above.
Learn more about the ViewSonic VP3881 38-Inch Ultra-Wide Curved Monitor
H&Y REVORING
One of my favorite products to come out in 2020 is definitely H&Y's Revoring.
In short, Revoring is a variable step ring. It eliminates the need to have a pile of step rings in your bag and replaces it with one easy-to-use gadget.
But Revoring is so much more than easy-to-use. It is inexpensive, so you can save money. It also saves weight and space in your camera bag. On top of all that, it will help you improve and streamline your workflow. That's not a bad list of benefits if you ask me!
Using Revoring couldn't be easier...
As you can see in the GIF above, you simply twist the mechanism built into the filter to adjust its size. It then locks into place on your lens, allowing you to use different-sized filters with multiple lenses.
Revoring comes in three different variations:
- 37-49mm
- 46-62mm
- 67-82mm
This means, for example, that you can use the same filters with your lens with a 46mm thread as you do with your lens that has a 52mm thread.
But that's not all H&Y had up their sleeve...
They developed another Revoring that has a built-in circular polarizer and a built-in variable ND filter.
This Revoring works just like the other one - just twist the housing to adjust it to the size of your lens, lock it in place, and off you go.
Since it has separate controls for the polarizer and the variable ND filter, you get all the precision control you need to create beautiful images.
This is truly one of the most innovative products to come out in 2020 - if not the previous several years. It can totally change your workflow for the better...I know it has for me!
Learn more about the H&Y Revoring
Haida M10 Filter System
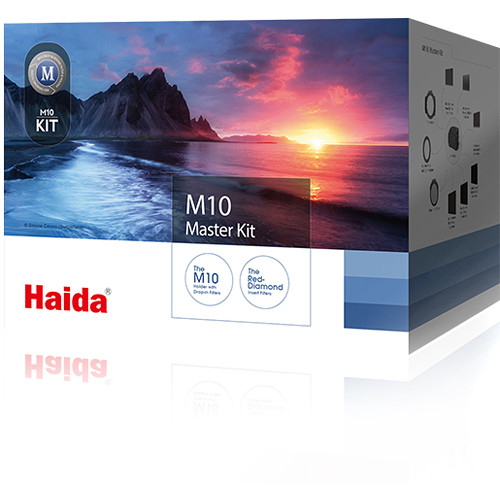
The Haida M10 Filter System gets a nod on my Best of 2020 list for a wide range of reasons.
For starters, I've tested my fair share of filter systems over the years, and this one is definitely among the very best.
Right out of the box, this filter system demonstrates how committed Haida is to quality.
The M10 holder itself is super lightweight. As you hold it in your hand, you can tell that despite its light weight it is a durably-constructed piece.

Something else I appreciate about the holder is that it has a felt lining that prevents scratches as you insert and remove filters.
Additionally, there is a quick-release clip for quick and easy removal. Even the clip shows a durability and quality that's above the norm - it has a good degree of tension that prevents you from accidentally knocking it off.
And since this is a drop-in system, it is super functional because you can use round or square filters.
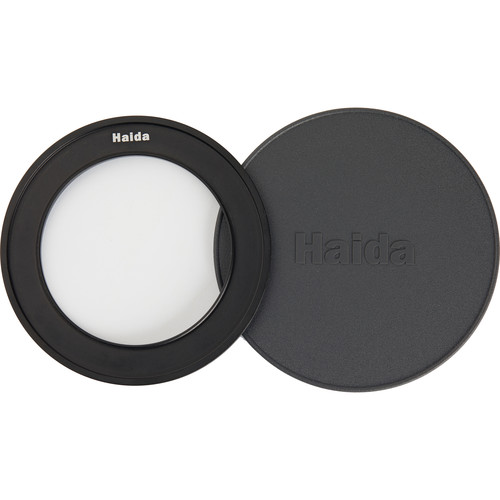
Speaking of the filters, the filters in this kit are impressive.
The kit I have has multiple square and circular filters, including graduated NDs, solid NDs, and a circular polarizer.
With two slots, you can mix and match and stack filters as needed.
The kit is well-designed, easy to use, and its matte black finish with red accents looks killer.

The included filters are well built, too.
Since I'm primarily a landscape photographer, the included polarizer is something that caught my eye from moment one.
Its holder has a seal that prevents light leaks for cleaner shots. There's also a dial on the filter that allows you to rotate the filter in its housing without having to move the filter holder.
Needless to say, this is very handy if you have stacked filters along with the polarizer!
This kit is well put together and super functional. I highly recommend it to my fellow filter snobs!
Learn more about the Haida M10 Filter system
Epson SureColor P900 Printer
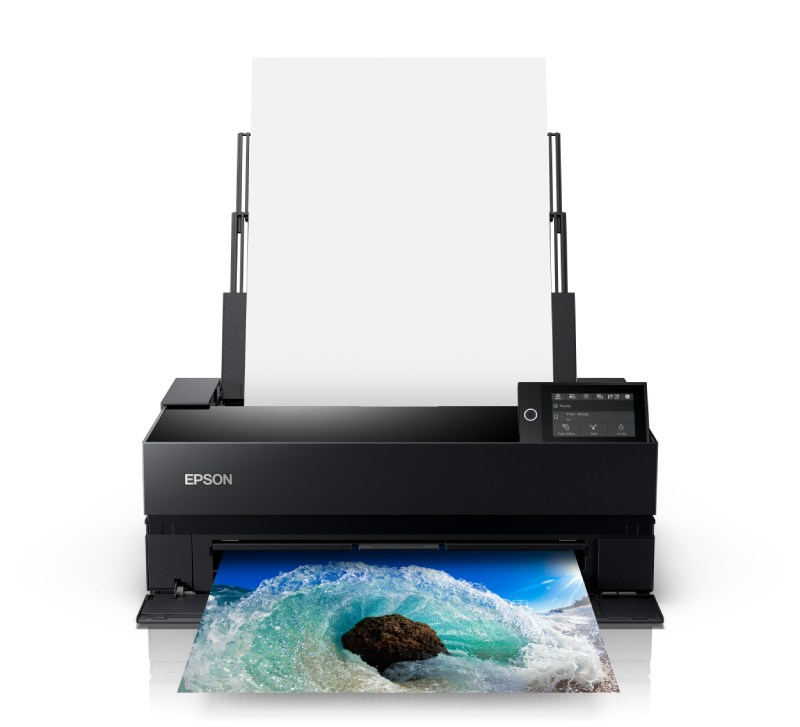
A few years ago, I made the switch from Canon printers over to Epson. My first Epson was the SureColor P800.
That printer completely changed how I viewed the quality that a desktop printer could produce.
Don't get me wrong...my Canon printers were reliable, functional, and did a great job. But that should tell you just how impressive that P800 printer was!
Now Epson has a new-and-improved version out, the SureColor P900.
Here's a quick overview of some of its basic specs:
- 17-inch printing capability
- Borderless printing
- 30-sheet media input tray
- Calibrated internal light
- 2.4 and 5 GHz Wireless
- 4.3-inch touchscreen panel
- 10-channel print head
- MicroPiezo AMC Print Head that has an ink-repelling coating that prevents clogs
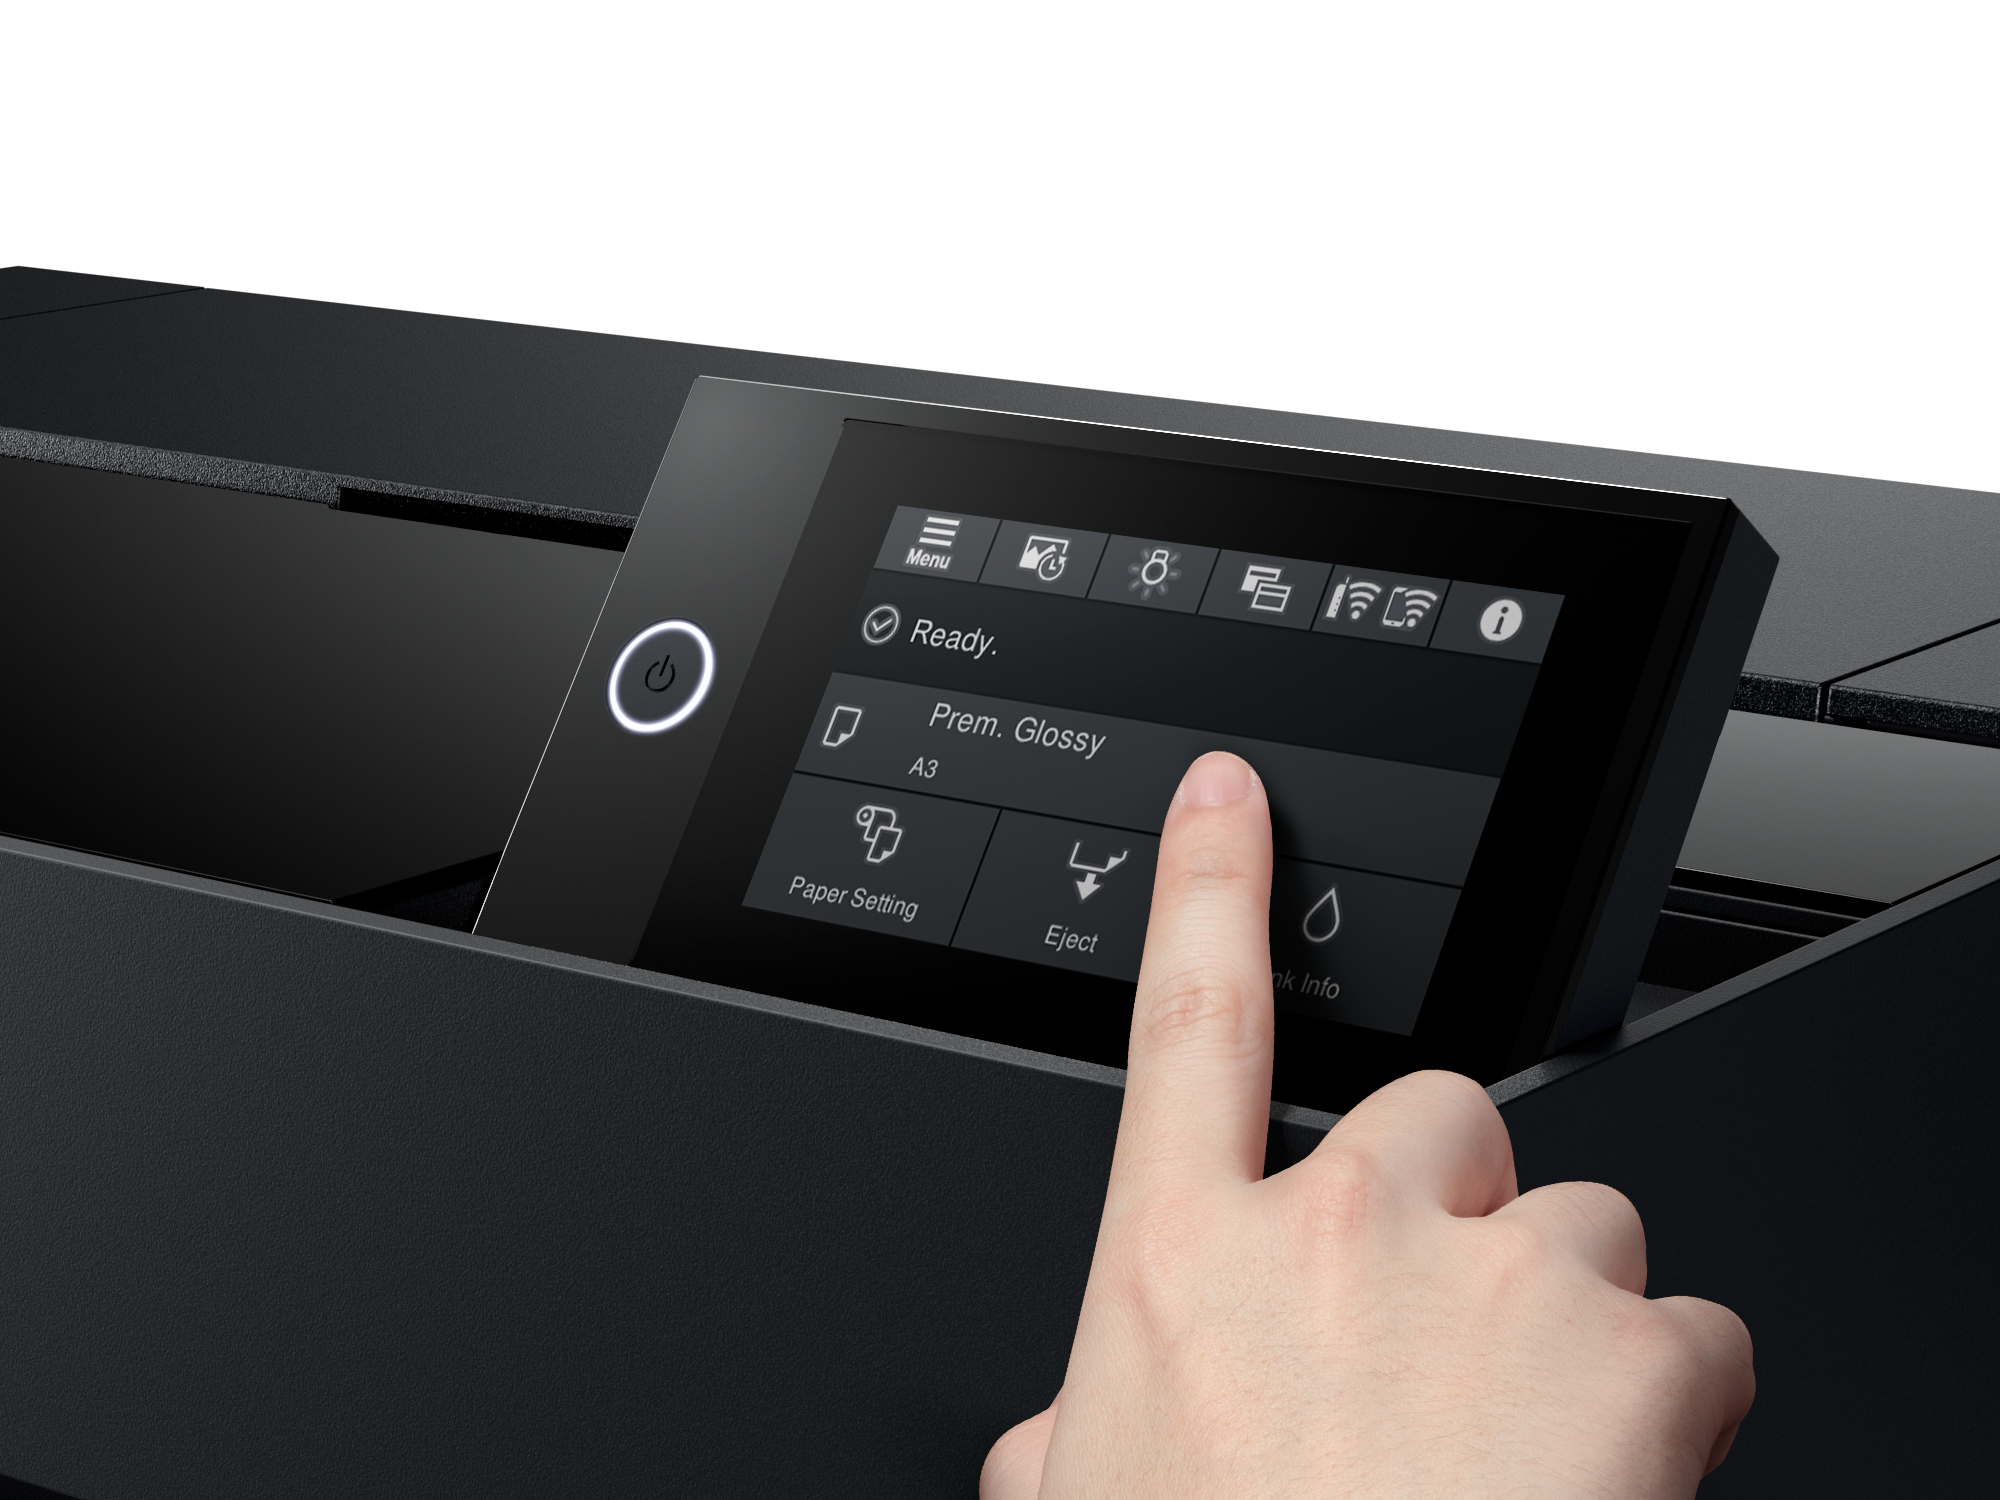
The P900 also has a larger 4.3-inch touchscreen that I really appreciate. The P800's touchscreen was 2.7-inches, so it wasn't tiny by any means, but the P900's screen is definitely easier to use and read.
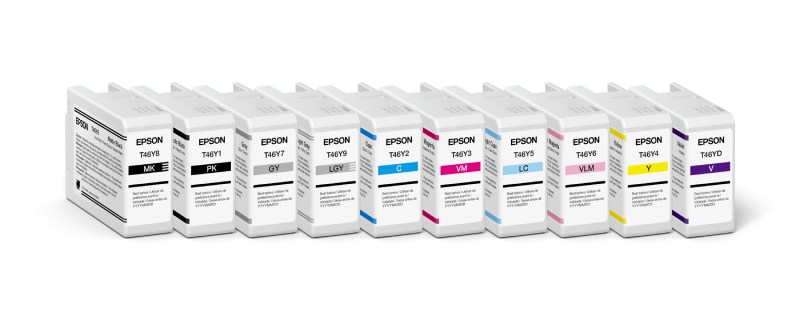
10-channel ink cartridges for the Epson SureColor P900
Second, the 10-channel print head is something to behold.
With 10 channels for printing, you get dedicated Matte Black and Photo Black. This means that you no longer have to swap between these cartridges. That's a very handy feature.
This 10-channel print head also has a new violet channel that gives you much-improved color rendition of violet, purple, and blue tones. In fact, the P900 has a 6 percent wider color gamut than its predecessor, and you can definitely see it when you print your photos!
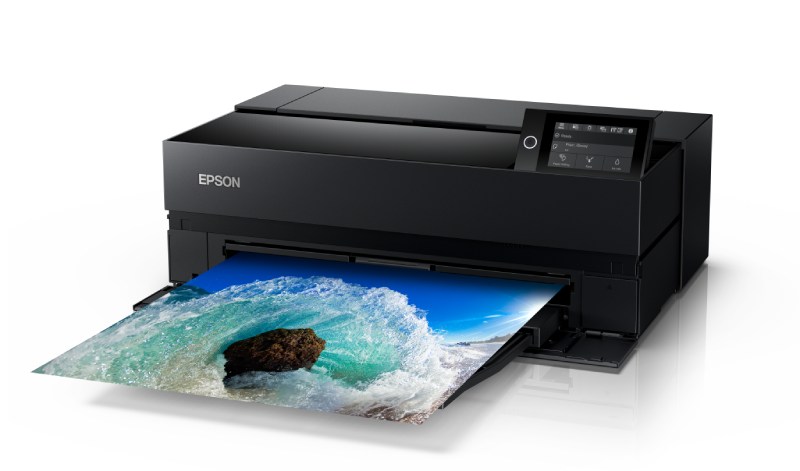
Additionally, these printers can use different printing medias, so you can adjust your printing process to your specific needs.
For example, you can use the 30-sheet media tray and use traditional photo paper, but you can also use rolls up paper up to 10-feet in length.
Add in high-capacity cartridges, color permanence that's measured in centuries, and updated print drivers, and you begin to see why I've put the Epson SureColor P900 on my list of the best of 2020!
Learn more about the Epson SureColor P900 Printer
PolarPro Shutter Collection for GoPro Hero 9 Black
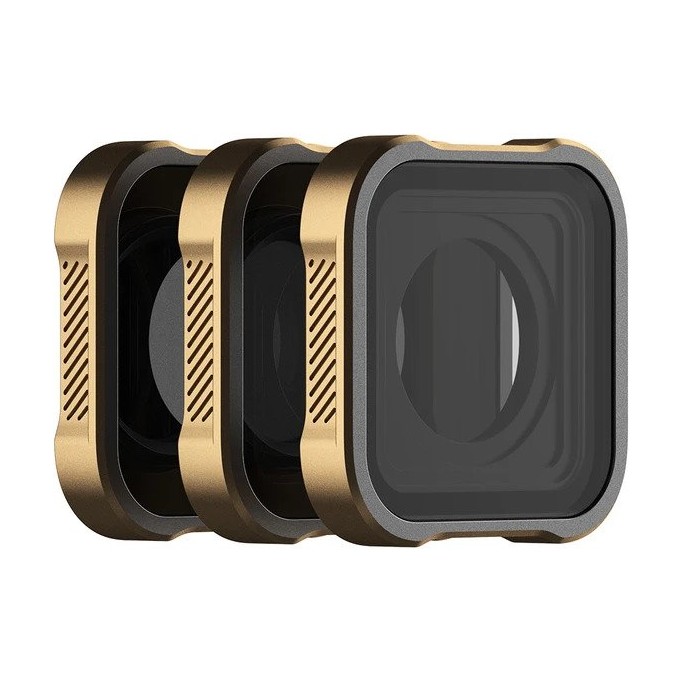
PolarPro has a long-standing reputation for developing innovative products, and their three-pack of ND filters for the GoPro Hero 9 Black is no exception.
By using these ND filters, you can slow the shutter speed on your GoPro to cinematic levels, giving you the ability to capture gorgeous slow-motion video and long exposures even in the brightest daylight conditions.
The pack includes ND8, ND16, and ND32 filters that are custom-engineered to directly replace the front lens element on the GoPro.
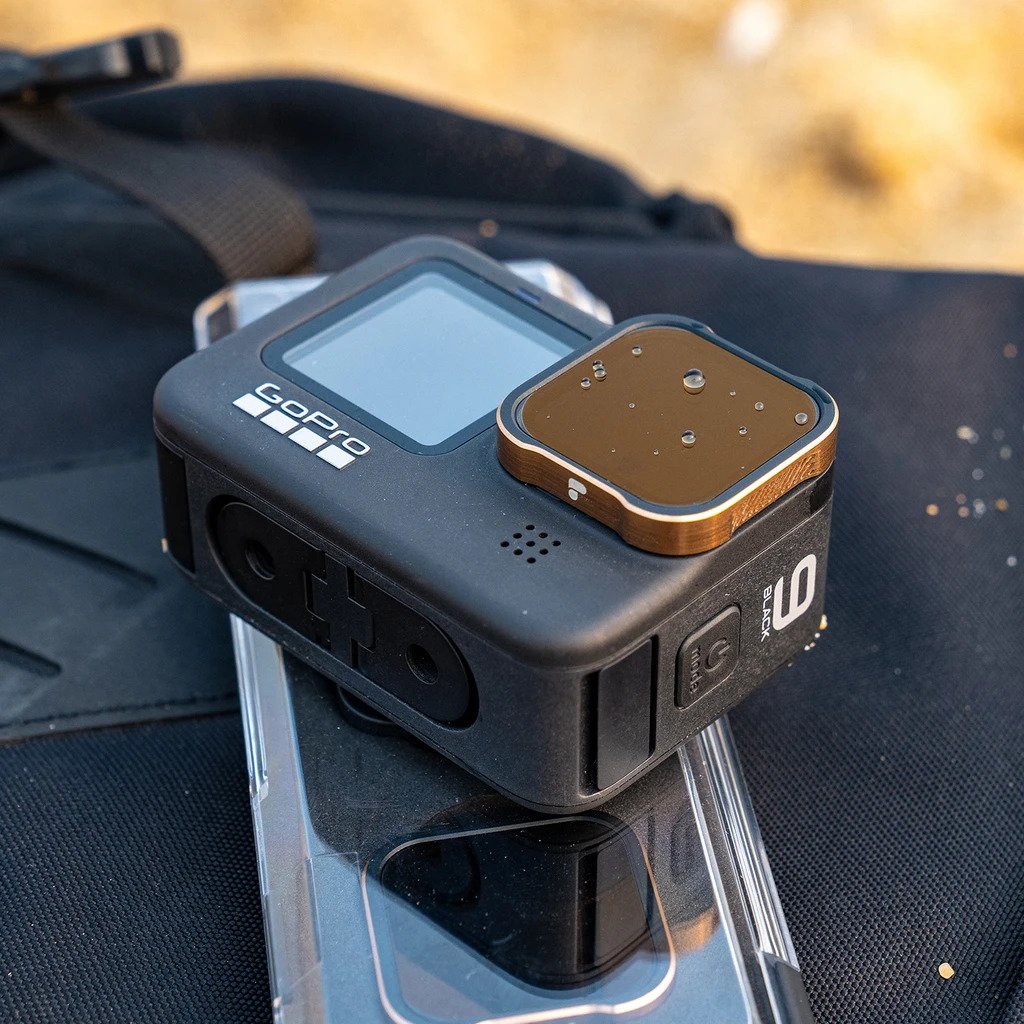
Each filter has CinemaSeries™ Glass, which offers superb durability and protection from impact while you're out adventuring.
Not only that, but the CinemaSeries™ Glass also has 16 layers of coatings that help protect from scratches, fingerprints, and oils. These coatings also minimize flare.
Add in a storage case for the filters, a low price, and PolarPro's Adventure Assurance™ money-back guarantee, and you have the makings of one heck of a photography product for 2020!
Learn more about the PolarPro Shutter Collection
Peak Design Mobile
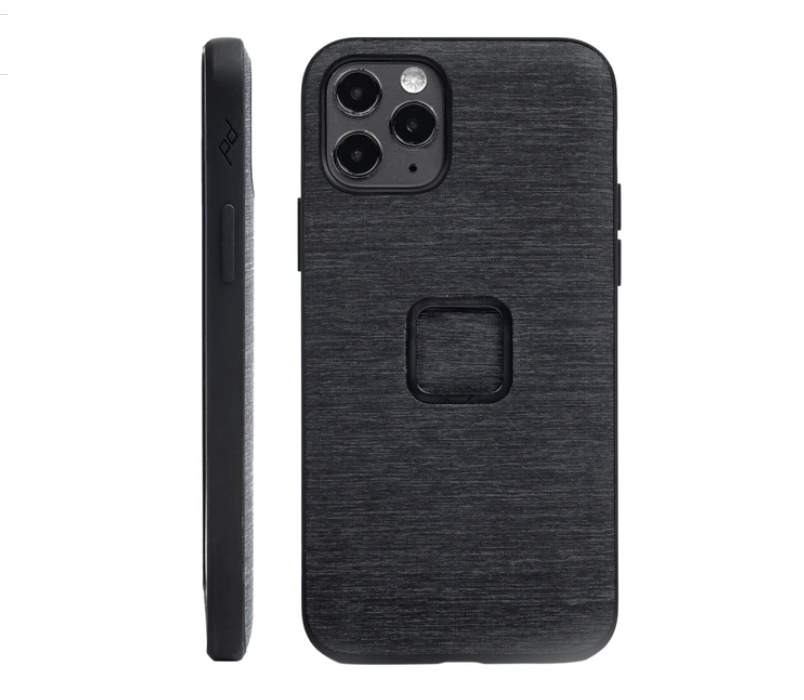
I've been a peak design fan for years and years.
I have a number of their bags. I also have their incredible Travel Tripod.
And now I will be adding their Mobile products to my kit.
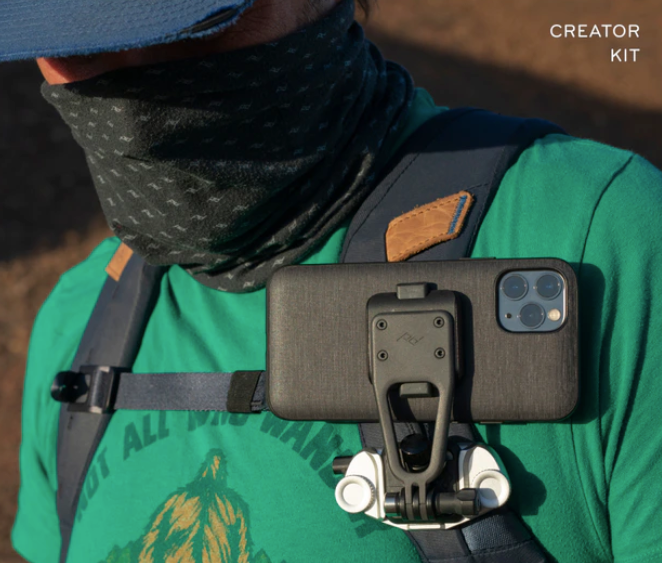
As usual, Peak Design is launching this product on Kickstarter. Their past campaigns have been hugely successful. This one is no exception.
Peak Design has a reputation for designing and building high-quality, innovative products. Their Mobile by Peak Design products will follow that trend.
I have the pre-production versions of the Mobile line, and I have to say that I am very impressed.
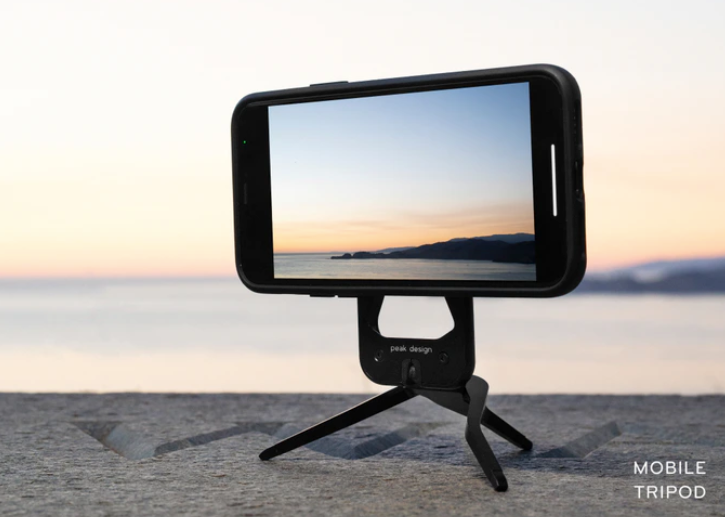
This isn't just some fancy phone cases...
Instead, the collection includes mounts, chargers, and other accessories that will help you integrate your phone more seamlessly into your life.
There's a kickstand wallet, a tripod, and a Creator Kit with goodies for content creators to maximize the power of their phone.
These accessories are compatible with the new MagSafe system on the iPhone 12, but they are also compatible with other phones, including some Androids.
All these accessories are centered around the Everyday Case.
This is a sleek, low-profile case with stunning good looks. Better still, it wraps around your phone rather than adding bulk.
One of the most interesting aspects of this case is its dual-locking mechanisms.
There's a soft lock that uses MagSafe-compatible magnets for light-duty use, like mounting your phone to your car's air vent. There's also a hard lock that has mechanical claws for a heavy-duty connection for rugged use - like riding dirt bikes.
In other words, this slim case and mounting system bring ruggedness, ease of use, a slim profile, and good looks together in one awesome package.
Each accessory in this collection has auto-aligning magnetic connections for ease of use and is made from premium materials. Each item is also individually serialized and is guaranteed for life. No more buying cheap accessories that fall apart...buying these bad boys is a lifelong investment!
Perhaps most impressive is that the Mobile line from Peak Design is 100 percent carbon neutral. That means you can score some killer gear while helping save the planet. Nice!
Learn more about Peak Design Mobile
Podium

If you run a photography business, you understand how the little tasks of the day can really add up to a significant amount of time.
That's why I'm always looking for ways to streamline my day so I can make more efficient use of the time I have.
One of the most interesting business tools I've come across in recent years helps you do just that. It's called Podium.
If you lament how much time you have to spend responding to emails, contact requests from your website, Facebook messages, and so forth, you can stay up-to-date with all those things (and more!) without leaving the Podium platform. It truly is a one-stop shop!

Rather than having to check all your socials and email and so forth, Podium allows you to text clients and prospective clients and organizes all those messages in a single dashboard, shown above.
Podium is built on the idea that the best way to get leads and turn prospects into customers is timely, genuine communication. This is important in any business, but particularly so in photography, where you're likely to have stiff competition for clients from other photographers in your area.
You want to make it as easy as possible for people to ask you questions or find what they’re looking for, and Podium will do just that!

If you use Podium, it not only saves a lot of time, but it can also help your photography business earn more money by ensuring that you're always the first one to respond to potential clients.
Podium even has a feature that lets you invoice clients right from the app so you can also get paid more quickly. It's these kinds of conveniences that make Podium a solid choice for the Best of 2020!
Razer Blade 15 Studio

Some of you might recall that I have a 2019 Razer Blade 15 Studio.
It's been an incredible computer, to be sure. The graphics card alone makes it one of the best laptops I've ever had.
But for this list, I want to talk about the 2020 model, which is even better...
It's retained many of the best features of the 2019 version and juiced up many others.
Get a load of these specs:
- Windows 10 Pro
- 8-core 10th Generation Intel Core i7 processor with up to 5.1GHz max boost
- NVIDIA Quadro RTX 5000 GPU
- 15.6” OLED touchscreen with Corning Gorilla Glass
- Up to 4TB of SSD storage
- Up to 64GB of dual-channel DDR4 memory
- Upgraded backlit keyboard

The biggest news with the 2020 Razer Blade 15 Studio is that it keeps the incredible GPU from the 2019 model - the NVIDIA Quadro RTX 5000.
When I say that this GPU is high-end, I mean it.
I've had plenty of laptops (and desktops, for that matter) that have claimed to have a "high-end" graphics card, but none have come close to what this NVIDIA card can do. In fact, I'd describe it as having Hollywood studio-level stuff in your laptop at home!
A second very exciting feature on the 2020 Razer Blade 15 Studio is that you can now get one with an 8-core processor.
Combined with the raw power of the NVIDIA GPU, these new 8-core processors make this a true workhorse for intense photo and video editing.
I appreciate the bigger OLED touchscreen that gives you 15.6-inches of real estate to view. The display is even color-calibrated and has a Gorilla Glass panel to beef up its durability.
This laptop has tons of ports, a UHS-III card reader, and a gorgeous anodized aluminum body as well. It is truly a work of art if you ask me!
Learn more about the Razer Blade 15 Studio
f-stop Coffee

Each year, our “best of” list includes photography gear that is innovative, unique, unusual, and above all, highly functional for photographers.
So while coffee might seem like a strange item to have on my list of the best of the best photography gear for 2020, when you think about it, it’s an essential part of the day for many photographers.
Speaking from experience, I just can’t get my brain to work until I’ve gotten my day kickstarted with some coffee.
Now, I fully admit that I’m a huge coffee snob. I’ve tested dozens of coffees over my lifetime, and I know when I get a great cup of coffee and when the coffee simply falls shot.
f-stop Coffee certainly belongs in the former category...it is quite simply a fantastic cup of Joe!
I first tested their f/1.4 Light Roast, and it was so good that I immediately added it to my 2020 list of the best gifts for photographers under $25.
I’ve now had the chance to take their f/11 Medium Roast and f/22 Dark Roast coffees for a test drive and they proved to be equally as tasty.
I’ve prepared f-stop coffee in two ways - in my Chemex coffee maker and in my French press. In both cases, f-stop’s coffee was tantalizingly good and allowed the different flavors and notes of each coffee to come shining through.

I’m a landscape photographer, so there are plenty of early mornings, late nights, and cold climates for me. f-stop Coffee is just what the doctor ordered when I’m out adventuring and need a pick-me-up. The same goes for right here in my office!
When you combine great taste, a full selection of brews, and inspiration from photography, you get the best coffee for photographers...f-stop!
Learn more about f-stop Coffee
ProGrade Digital 650GB CFexpress Type B Memory Card

A few months back when I bought my Canon EOS R5, I knew that I would need a big, beefy memory card to handle all the data that the camera recorded, particularly when shooting 4K and 8K video.
I needed a card with a huge amount of storage space as well as one that has quick read and write speeds.
The obvious solution was the ProGrade Digital 650GB CF Express Type B memory card...
This card can read up to 1700MB/s and write at up to 1500MB/s. Not only that, but the write speeds are guaranteed not to fall below 1400MB/s. This gives you the consistent speed you need no matter what kind of data is being written on the card, be that 8K video, 6K or 4K video, or fast burst shooting of still images.
Regardless, this card helps keep your camera's buffer clear so you don't miss any action.
On top of that, ProGrade Digital made this card backward compatible with XQD devices. All you have to do is download a quick firmware update and you're ready to roll.
And since this is a shock-resistant, vibration-resistant, temperature-resistant, and X-ray-resistant card, you don't have to worry about durability. It will give you long-lasting performance for years to come.
Plus, this card has features that many other cards don't...
For example, each card has laser-etched serial numbers to help prevent counterfeiting. ProGrade has advanced recovery software that helps prevent your files from corrupting too. On top of that, ProGrade has software that helps keep your card running at peak performance. Called Digital Refresh Pro, this software (which is offered separately) sanitizes your card to keep it at the top of its game.
In other words, this is a beast of a memory card that is worth every penny!
Learn more about ProGrade Digital CF Express Memory Cards
GoPro Hero 9 Black & Media Mod
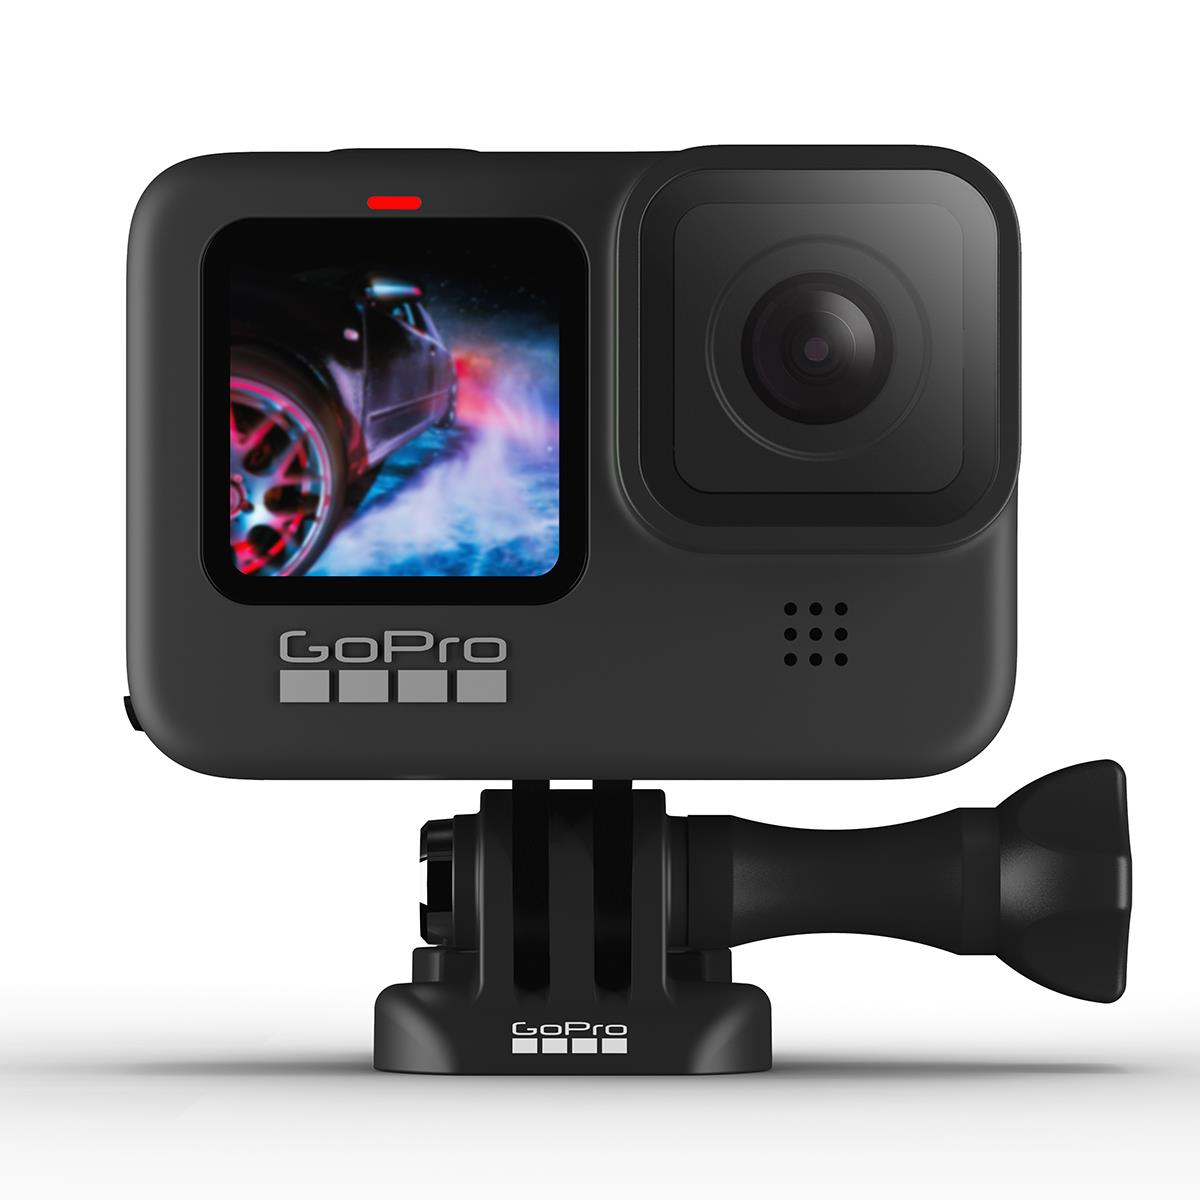
I've used GoPros for years and years. They have always been innovative little gadgets, but with the Hero 9 Black and Media Mod, these cameras are now becoming a more functional, all-around rig that you can use for much more than crazy adventures.
For those of you like me that had a Hero 8 Black, you'll immediately notice that the Hero 9 Black is bigger. In fact, it's about 10 percent larger.
As a result, some of the mods from the Hero 8 (like the Media Mod) won't fit. That's a bummer, but the trade-off is that the Hero 9 has a larger rear screen and a full-color front-facing screen as well. Having those features is well worth the price of having to buy a new Media Mod.
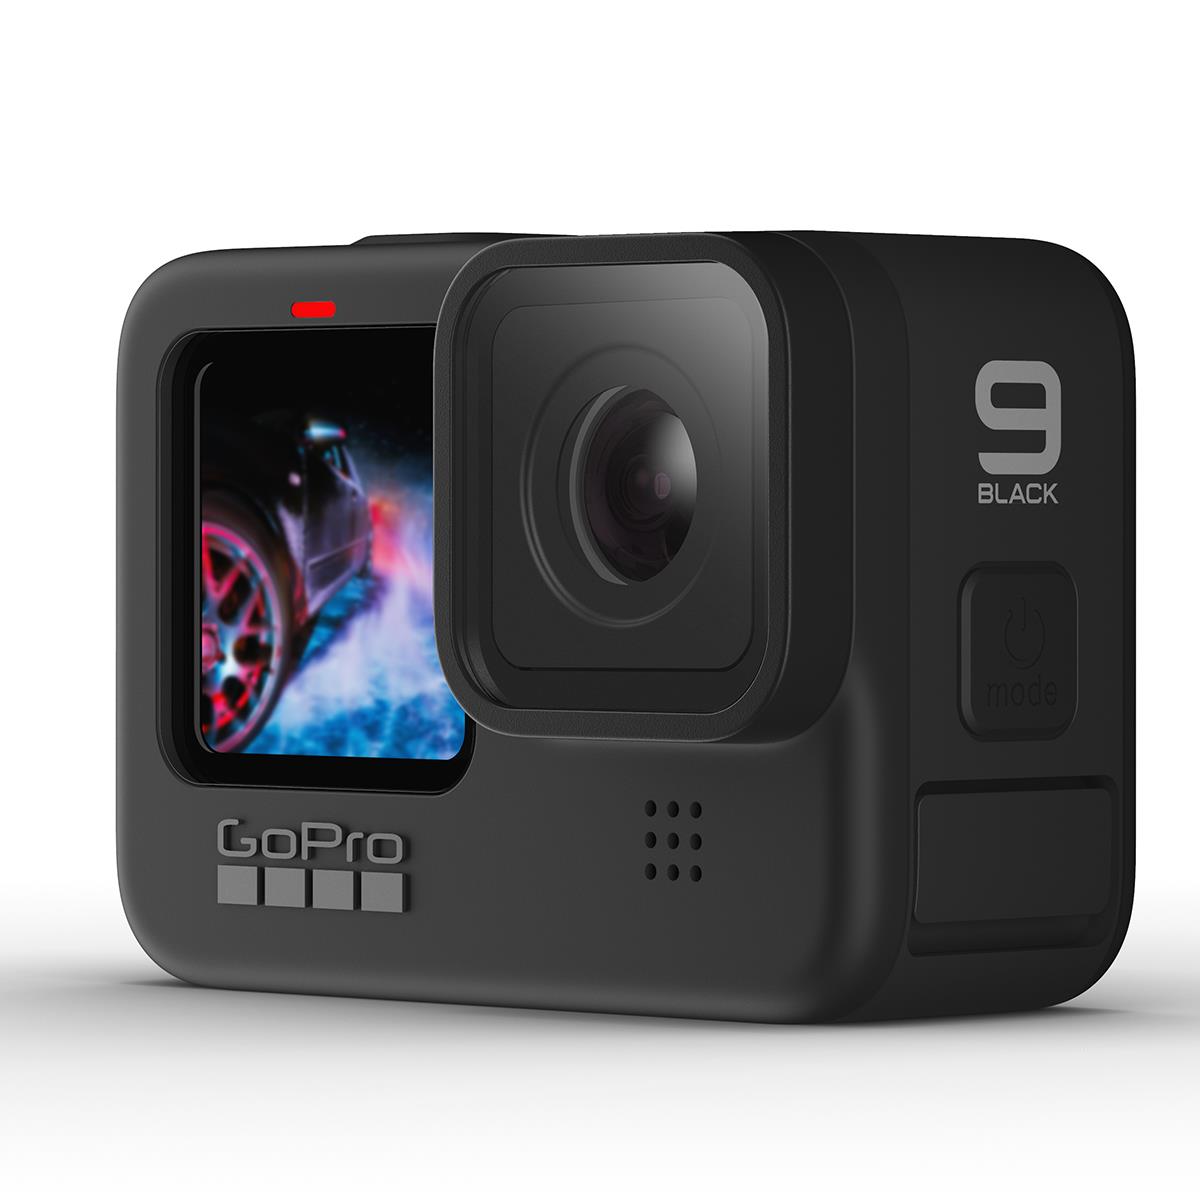
Another consequence of the larger size is that GoPro was able to fit a larger sensor inside. The Hero 8 has a 12-megapixel sensor but the Hero 9 has a whopping 23.6-megapixel sensor.
As a result of the larger sensor and added resolution, the Hero 9 can shoot 5K video at up to 30p. And for still images, the sensor allows for 20-megapixel photos that have a higher level of crispness than what you get on the Hero 8.
The list of improvements doesn't stop there, either....
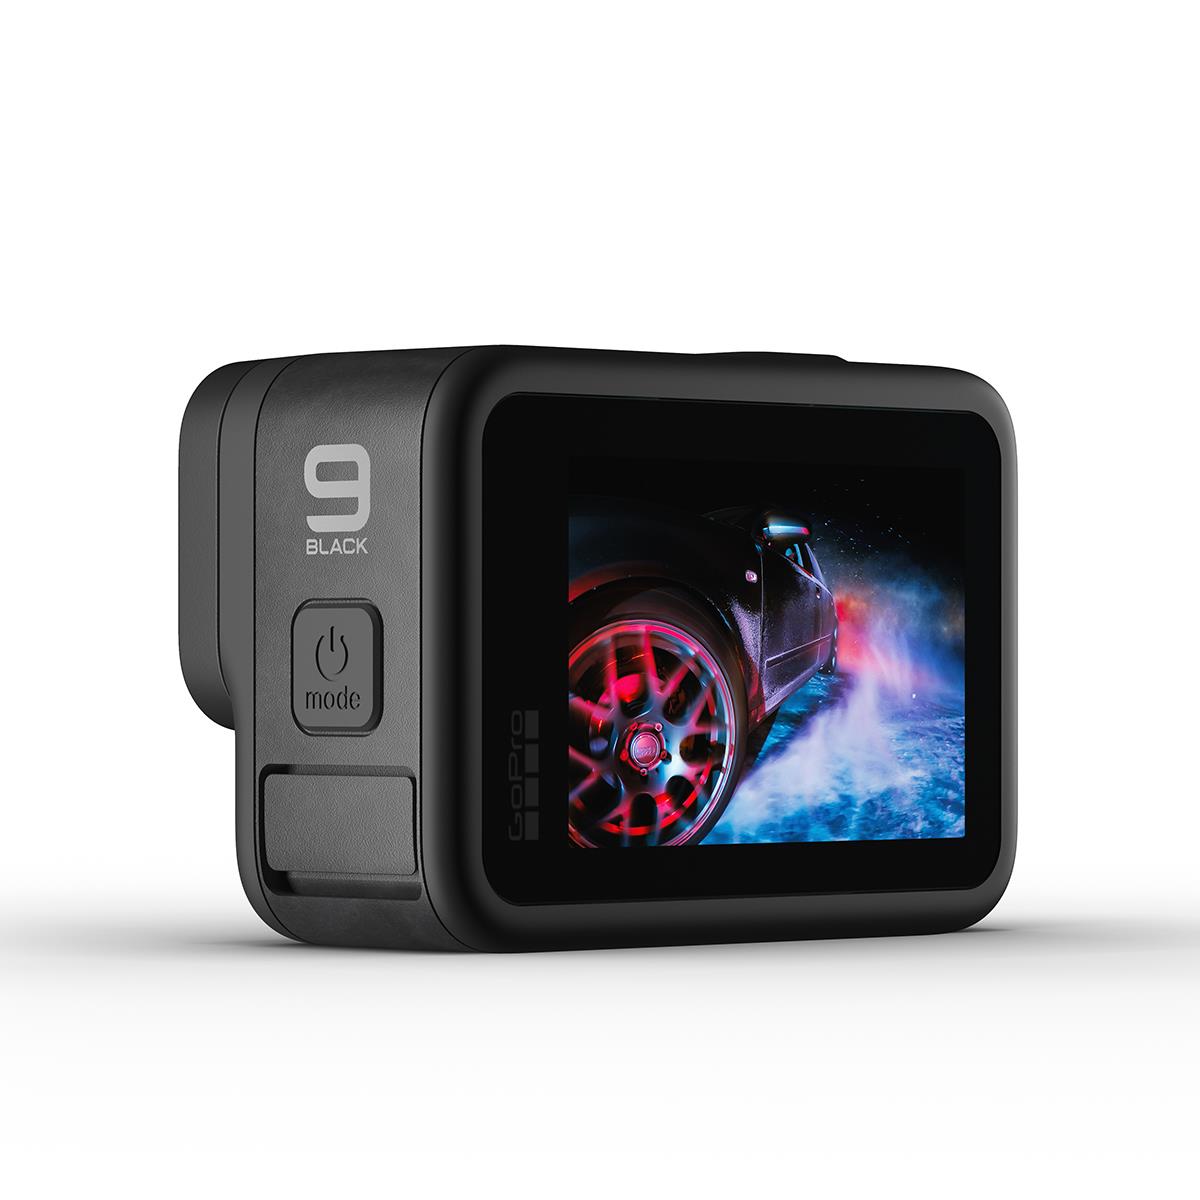
There's a new longer-lasting battery that has 30 percent more life. You also get built-in horizon leveling, HyperSmooth 3.0, and Hindsight, which records 30 seconds of video before you press the record button.
The Hero 9 also is also compatible with the new Max Lens Mod that gives you various lens options. You can also shoot 2.7K video at 60fps with a 155-degree angle of view.
Speaking of mods, the Media Mod is one of my favorite GoPro accessories...
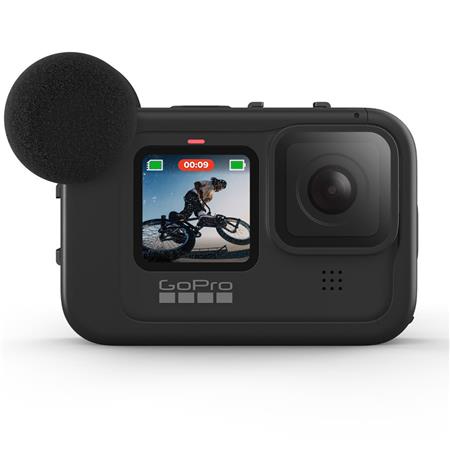
It has a built-in 3.5mm jack for an external mic as well as two cold-shoe mounts for adding accessories like the Light Mod.
There's a built-in microphone, which is okay, but definitely not up to par with my RODE mics. You also get an HDMI port so you can quickly review the footage you've shot
I like the design of it too - it fits the Hero 9 perfectly and feels like it's part of the camera rather than an add-on. And speaking of add-ons, there are all kinds of third-party accessories you can add to the Media Mod.
Learn more about the GoPro Hero 9 Black and Media Mod
Canon EOS R5
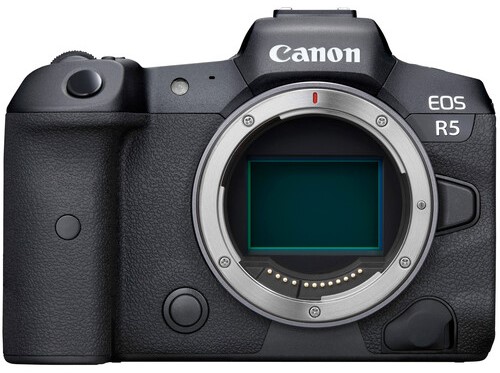
I was a Nikon shooter for my entire career until I sold off all my Nikon stuff and bought a Canon EOS R.
I decided to make the switch for a number of reasons, not the least of which was the RF lineup of lenses. So, really, the EOS R was a placeholder for me until a professional-grade camera came out to take advantage of the RF lenses. That camera is the R5.
To say that the R5 is the best camera I've ever owned is an understatement.
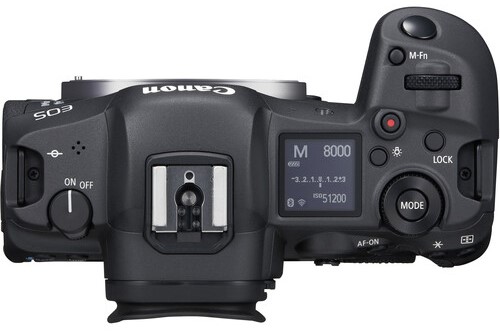
We all know about its game-changing 8K video capabilities...
And we also know about its 5-axis in-body image stabilization.
But I think my favorite feature of this camera is its Dual Pixel AF system with 1,053 AF areas.
This is an incredibly accurate autofocus system whether you're shooting stills or videos. Its ability to acquire and track a person's (or animal's) eyes is truly impressive. In fact, even when the camera can't see the animal's eyes, it can still figure out where the animal's face and body are.
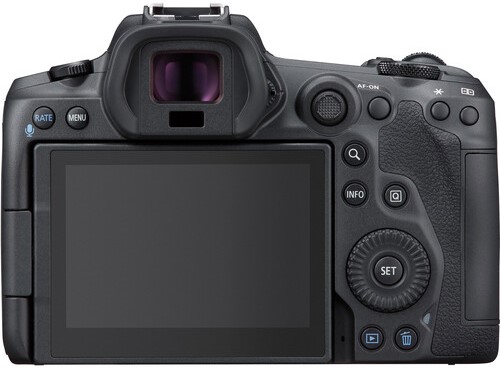
And then there's all the other awesome specs...
- 45MP full frame sensor
- DIGIC X Image Processor
- ISO Range of 100-51200, expandable to 102400
- 12 fps burst shooting with the mechanical shutter
- 20fps burst shooting with the electronic shutter
- Dual card slots
- 5.76 million dot OLED EVF
- Vari-angle LCD touchscreen
- 2.4/5GHz Wi-Fi
- Bluetooth
I mean, the list goes on and on...
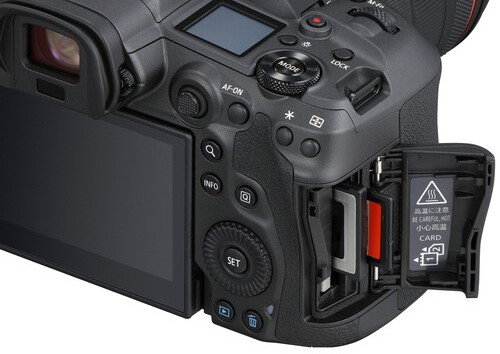
I reserve only my top picks for these lists each year. The products I include have to be innovative in some way, and this camera ticks multiple boxes on that front.
I honestly believe that in 10 years we'll look back at the R5 as being the one that changed how mirrorless cameras are made and what they can do.
I guess we'll have to wait a few years to see if I'm right!
Learn more about the Canon EOS R5
DJI Mini 2
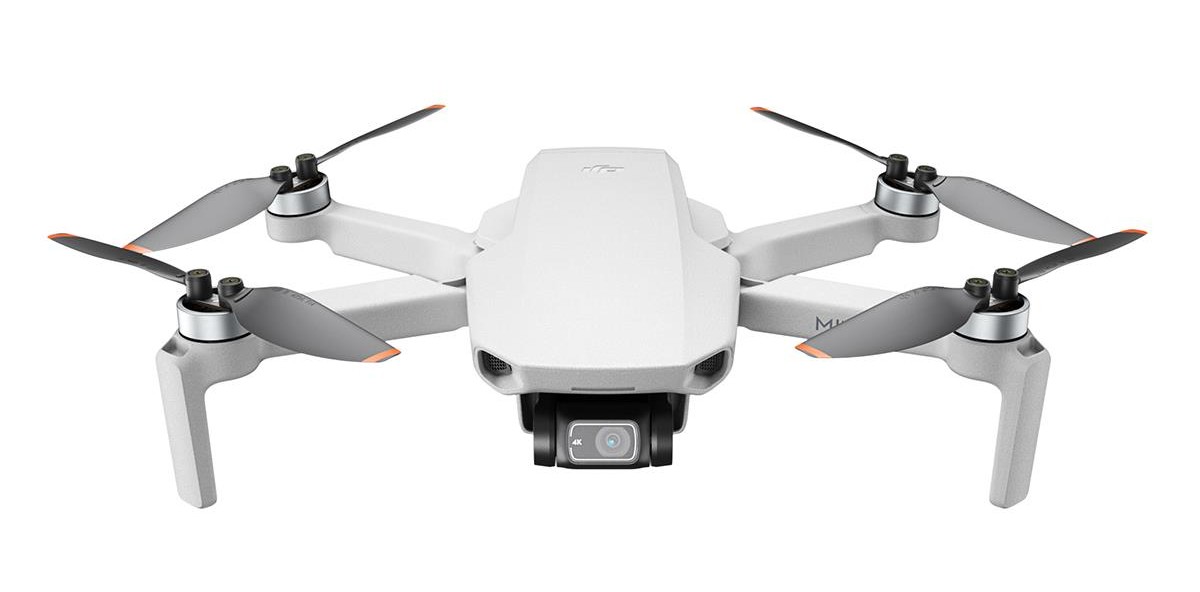
I've had DJI drones for years and years.
My current stable of drones includes the Mavic 2 Pro, the Mavic Air 2, and the original Mini. I recently added the Mini 2 to the fold as well.
Of these drones, my favorite is the Mavic Air 2. I think it's the best drone for the money out there.
However, that doesn't mean that the Mini 2 isn't a really impressive drone...
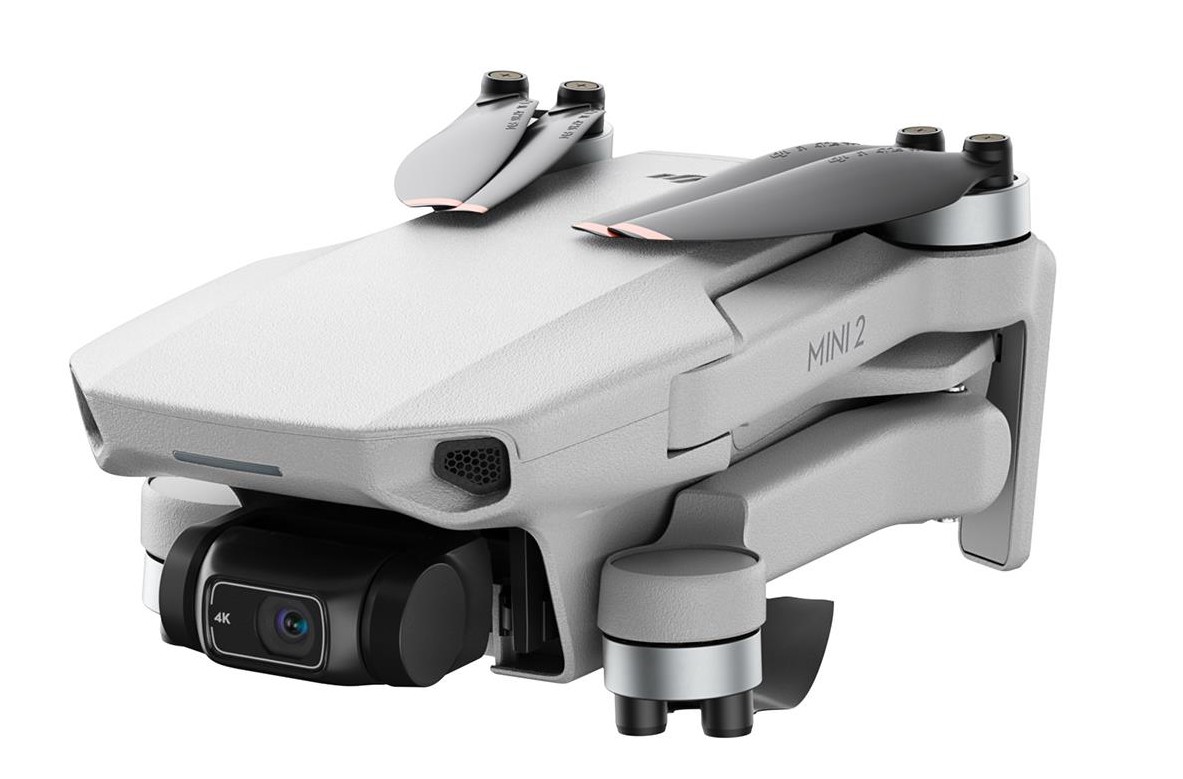
For starters, there are plenty of upgrades over the original Mini that makes the Mini 2 a huge leap forward.
And some of those new features are things you wouldn't expect on a drone that's priced under $500.
You get 4K video at 24, 25, and 30p, 2.7K video at 24, 25, and 30p, and 1080 video at up to 60p.
It's equipped with Occusync 2.0, which gives you a much stronger signal than the Wi-Fi transmission system on the original Mini, and you get no interference.
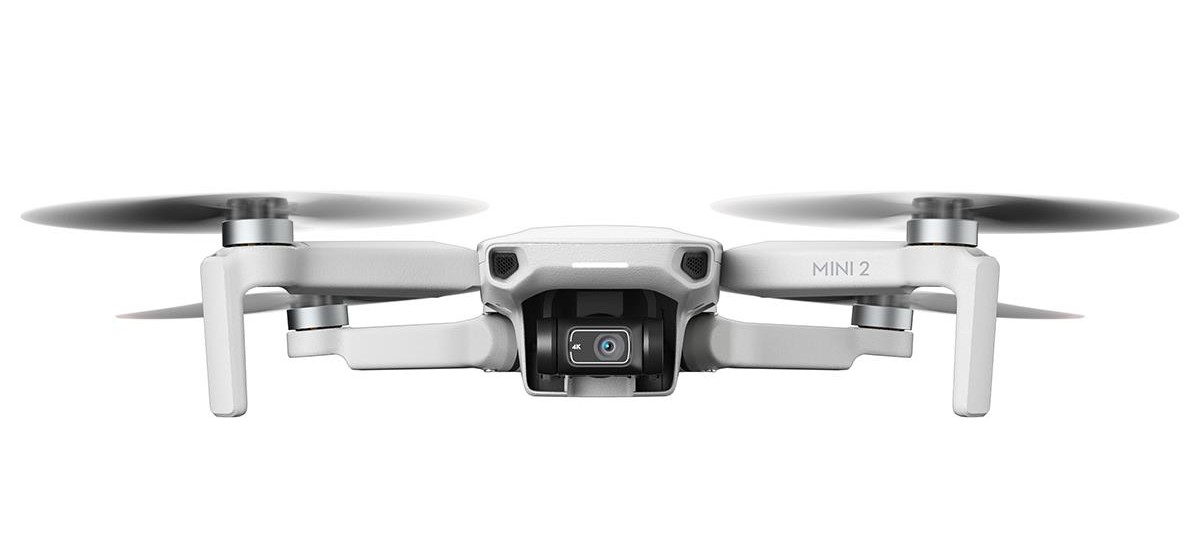
The Mini 2 has 4x optical zoom to go with its 24mm equivalent lens.
The 12-megapixel sensor can record JPEG and RAW options, and with a 3-axis gimbal, your images will be sharp and your videos will be beautifully smooth.
You get multiple QuickShot modes, including dronie, circle, helix, Cinesmooth, and rocket. And you have time to cycle through those QuickShot modes with a 31-minute flight time.
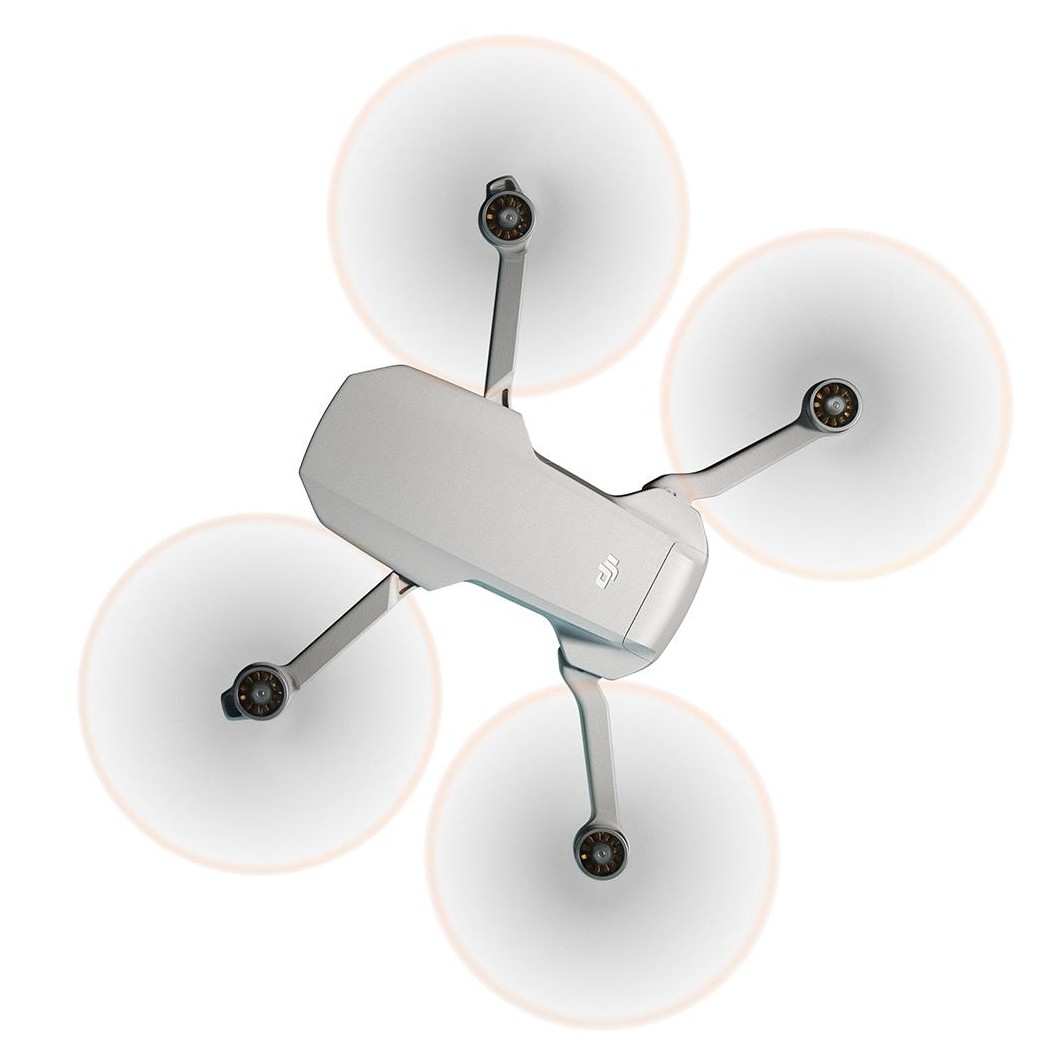
There's a new controller as well - the same redesigned one that comes with the Mavic Air 2. The controller has an updated battery too.
Then there's the transmission distance...it's 6.2 miles thanks to the Occusync 2.0 system.
So, you can see why I've counted this little guy as one of the Best of 2020. It has some high-end features while retaining an entry-level price.
If you're considering getting into drone photography and don't want to bust your budget, this is the drone for you!
Learn more about the DJI Mini 2
Holdfast
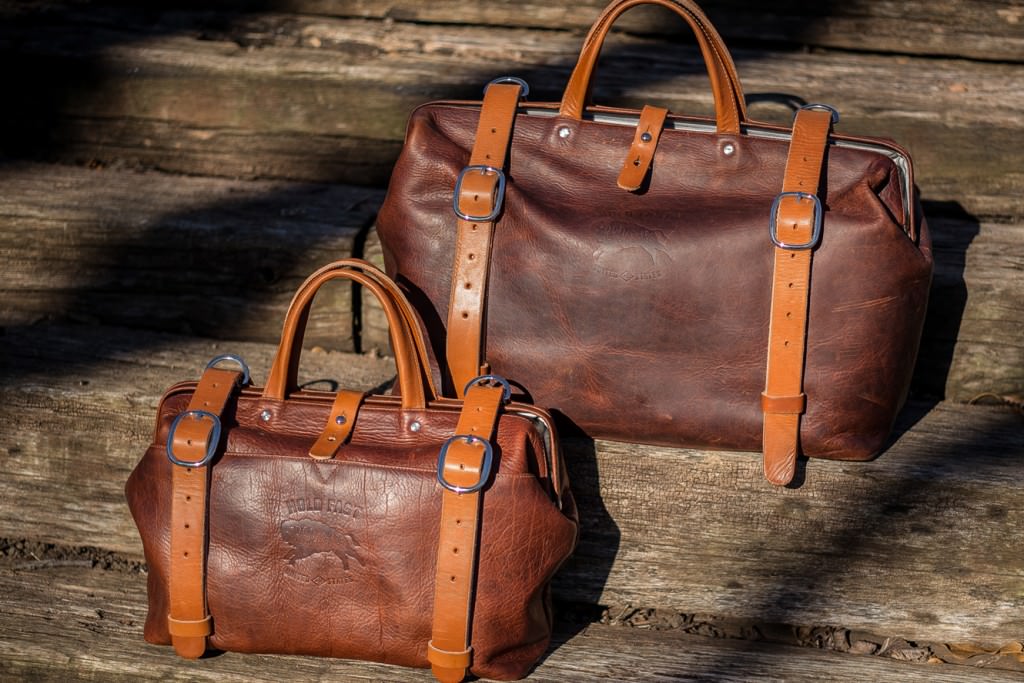
Holdfast has been one of my favorite photography brands for years.
And it isn't just because they continue to come out with innovative and functional photography gear...
Holdfast also has a high standard of quality that ensures each product is constructed in a way that makes that product reliable, durable, and beautiful too.
I appreciate that the Holdfast team is based in the U.S. and manufactures their goods here as well!
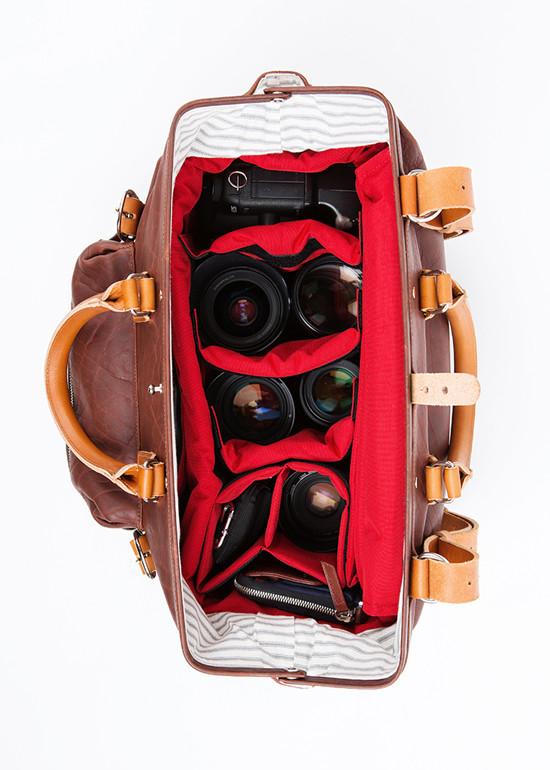
My first experience with Holdfast was with their Roamographer camera bag.
Not only is this bag big enough to fit my entire kit, but it does so in a way that keeps my gear organized, safe, and keeps me comfortable carrying it.
The Roamographer is impeccably designed, beautifully crafted using the finest materials, and it’s versatile, too.
Just remove the camera insert and you’ve got a gorgeous weekend bag with tons of space for all your clothes and other necessities for a fun few days away from home.

Another product I've enjoyed using is their MoneyMaker Solo camera strap.
Sometimes when you want to go out for a quick shoot, you just need a lean and mean strap for your camera. That's what the MoneyMaker Solo is.
The Solo is a streamlined version of the original MoneyMaker dual-camera strap. In fact, the Solo uses the same leathers and metal materials.
It has a big, contoured shoulder strap that offers you a comfortable carrying experience while the integrated stabilizer strap helps keep the shoulder pad in place.

The included Belt Anchor adds further stability to the MoneyMaker Solo by keeping your camera locked into place no matter if you’re walking, stooping, kneeling down, or something in between.
Just pull the release tab on the Belt Anchor and your camera is free so you can get the shots you need. A quick one-handed action engages the Belt Anchor again to lock your camera back in place.
The MoneyMaker Solo might be small, but with the ability to add lens pouches or a cell phone pouch, it’s got all the features and functionalities you’d expect from a Holdfast product!
We Recommend
This Kickstarter Could Change Photography Forever

You know how sometimes you come across a product that makes you exclaim, "Now, why didn't I think of that?!"
Well...there's a new photography product on Kickstarter that definitely falls into that category. It's called RevoRing, and it has the potential to turn photography on its head.
I've written about RevoRing several times here on PhotographyTalk, and even though it's been a few weeks since the launch of the Kickstarter, I just can't get this thing out of my head.
It is simply one of the most innovative photography products I've seen in a long time.
Basically, RevoRing is a variable step ring. As such, it eliminates the need for you to have a huge pile of step rings in your camera bag. Or, if you have multiple camera systems with different lenses, it all but eliminates the need to have several different filter kits, too.
RevoRing, which is the brainchild of H&Y Filters, comes in three different size ranges: 37-49mm, 46-62mm, and 67-82mm. This enables you to use it with a wide range of lenses. Or if you have a really wide range of lenses, it allows you to have two or three RevoRings in your bag rather than a million step rings.
So the first advantage of this thing is that it saves you money.
The second advantage is that it saves you time.
It couldn't be easier to put this thing on your lens - just twist the mechanism built into the filter to adjust the adapter's size. It then locks into place on the end of your lens, thereby allowing you to use various-sized filters with multiple lenses. You can see how easy this is in the GIF above.
It literally takes just seconds to add RevoRing to your lens, and then you're done! No more missed shots because you're messing around with a pile of step rings.
A third advantage of RevoRing is that H&Y developed one with a variable ND filter and a polarizer built into it.
This means that you can reap the benefits of a variable step ring, in addition to having two of the most important filters all in one tidy package.
With separate controls for the ND filter and polarizer, you get an easy-to-use, all-in-one filter for improving your photography workflow.
So, yeah, I'm really impressed with RevoRing. And I'm not the only one...
The original goal for this Kickstarter was only $9,999. As of this writing, the campaign was closing in on $430,000 from over 3,300 backers. Crazy!
If you want to capitalize on this incredible product, time is of the essence. Head over to Kickstarter, select your pledge level, and get ready to have one of the most innovative photography gadgets in recent years in your hot little hands!
We Recommend
Time-Lapse Photography Tutorial

photo by jamesteohart via iStock
Time-lapse photography has been around since near the beginning of photography and cinematography.
The genesis of time-lapse photography could arguably be the motion studies by Eadweard Muybridge in 1878. Motion picture pioneers showed time-lapse photography in films like those by Georges Méliès showing street scenes in 1898 and Percy Smith in 1910 which chronicled a flower’s blooming cycle.
Digital photography has made the process much more accessible to us without the need to purchase specialty time-lapse photography gear such as clockwork based intervalometers. We will discuss some time-lapse photography tips that will help you get started using this amazing technique.
Time-Lapse Photography Gear
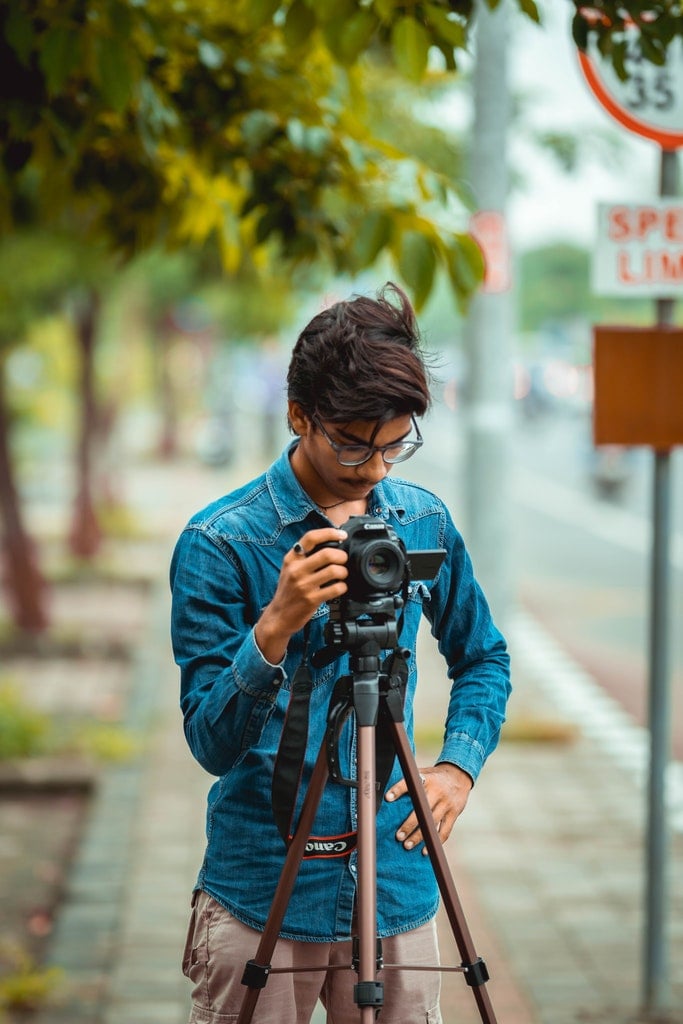
Photo by Kaushal Moradiya from Pexels
To begin, what gear do we need to have in order to make good time-lapse photography sequences?
First item is a good camera. With many of the newer DSLRs and mirrorless cameras, you may have all the essential controls already built into the camera’s features. Check within your camera’s deep menu for a control labeled “Time-Lapse” or “Intervalometer” which is probably in the video menu, though it may be under remotes or self timer.
Since you’re likely using an interchangeable lens camera, choose the lens that works best for the subject matter. A city street view time-lapse would probably need a wide angle while a blooming flower might require a macro lens.
My time-lapse photography tips include a word on camera and lens settings for time-lapse photography. You will get more consistent results if you set focus and exposure controls manually. Aperture priority may work for automation, but you should probably have a test run to decide those issues.
A sturdy tripod or other completely stationary camera mount is essential for most time-lapse photography subjects. An alternative to the static point of view is a time-lapse of some form of travel like a car or motorbike trip, but you will still need to have a secure mount for that, too.

Neutral density (ND) filters, especially the variable type, can really be useful, too. Variable ND filters can help even out exposure issues throughout the day and then there is also a specific style of time-lapse photography that is done with variable ND filters like the H&Y K-Series Variable ND filter.
How To Do Time-Lapse Photography
Now that you have gear chosen and ready, here is a condensed version of a time-lapse photography tutorial. Some of the steps are very similar to other genres of photography you are already mastering. For a more detailed explanation of some of these steps, you can search our huge database of photography articles.
Choose Location/Subject and Research
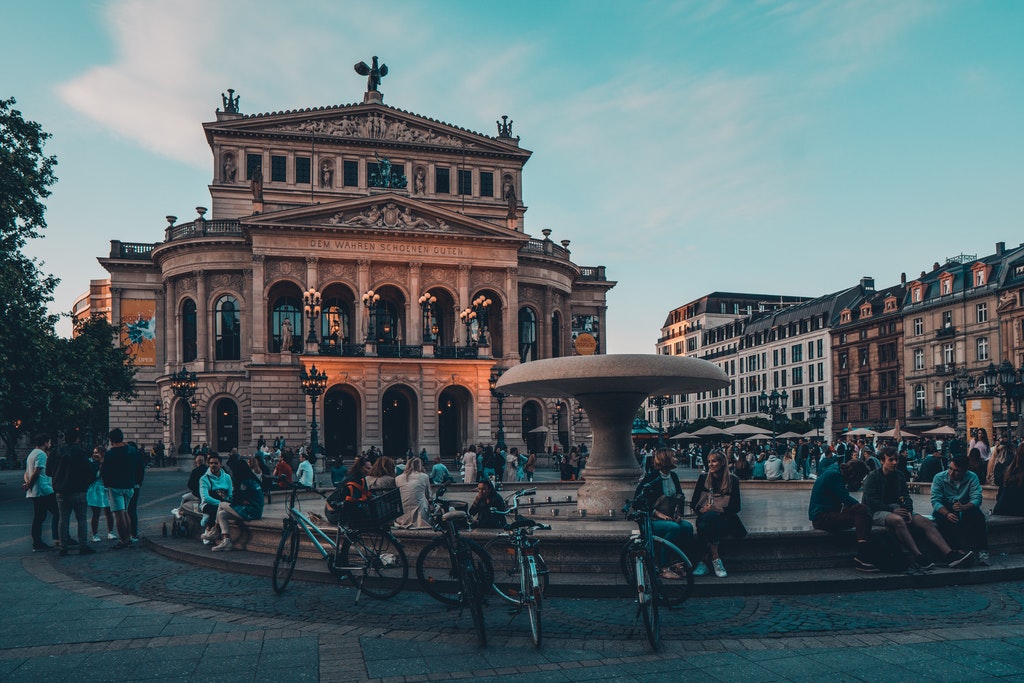
Photo by Masood Aslami from Pexels
Not every idea we have for time-lapse photography will actually work out for us. Some spots are simply too busy or have certain restrictions for visitors or photographers. The way you find out if a location or subject will be workable for you is to research it.
Obviously, Google is a good place to start since you can find links to maps, websites, and even other photographer’s previous photos. Another good place to research online is through the various online photography forums like our own.
Once you have the basic information about a place, a field trip may be in order. You can scout out for yourself some good spots to set up and take note of the lighting conditions at various times of day. You might as well make some time-lapse photography test runs, too.
Be observant and take note of all the variables. A notebook, an electronic or paper version, will come in very handy for this step, as there are lots of variables to track.
Secure Your Equipment
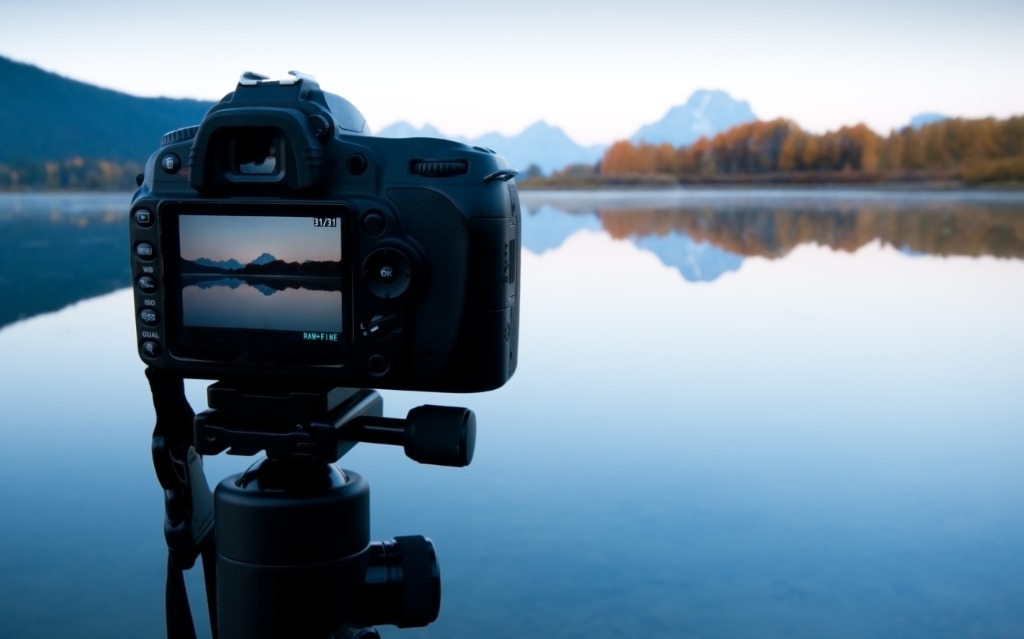
photo byBirdImages via iStock
By secure your equipment, I mean two things. One, have it mounted on a sturdy tripod or other style of camera mount such as clamps or a stand, something that won’t move even a micron throughout your time-lapse photography shoot.
The second meaning is to make sure it doesn’t get stolen, run over, or swept away by a lava flow. This may require constant monitoring, a lock, or placing it in a spot accessible only by you. Be careful! Some remote spots may be somewhat hazardous, involving heights, slopes, or tight quarters.
Set Focus and Exposure
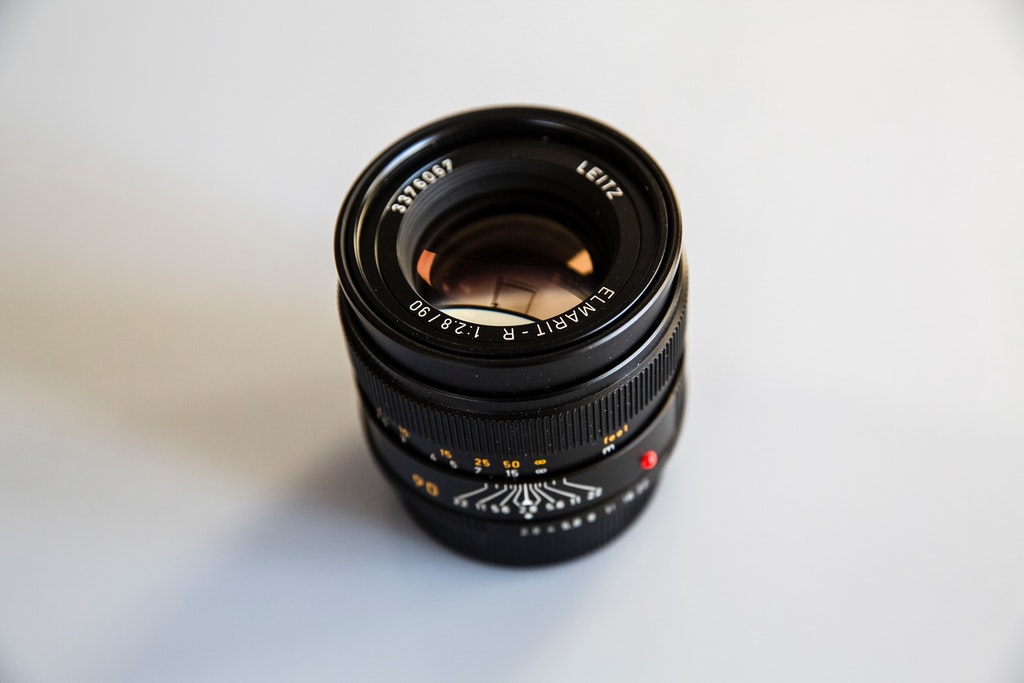
Photo by Markus Spiske from Pexels
For most time-lapse photography sessions, you will want to set both the focus and the exposure manually. In the days of film, we relied on the exposure latitude of color negative and black and white films to help us out, now we rely on RAW files for the same reasons.
This may seem counterintuitive to some, but leaving focus and exposure up to automation generally results in quite a few unsable frames, more so than setting manually and using good judgement does. Especially will the autofocus tend to mess things up for you.
Therefore, with the time-lapse photography gear most of us will be using, it’s a good idea to set up our equipment during a time period when the exposure settings aren’t likely to vary much. The full daylight hour from a couple of hours before Noon to several hours after seems to work well in many situations. The more experienced you become, the more latitude you will be able to handle.
Use Blur Motion Technique
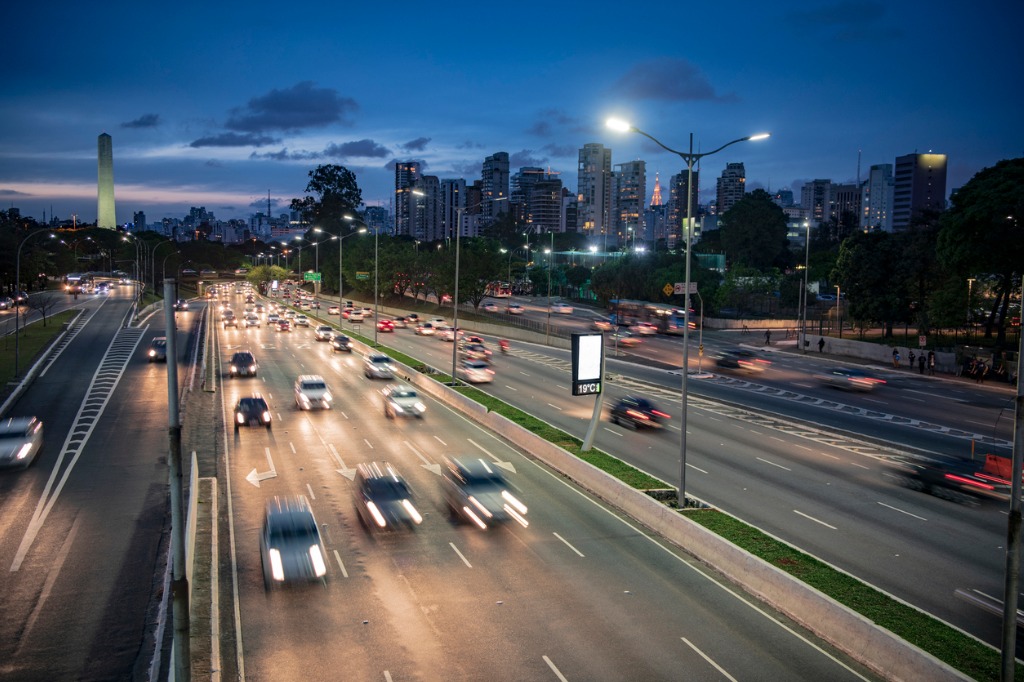
photo byJohnnyGreig via iStock
This is another idea that sounds counterintuitive at first. However, when you play back the finished video of your time-lapse photography at regular speed, sharply recorded moving objects will create a jarring stop motion effect. This is usable for some subjects, but for many others it just looks odd.
Using shutter speeds that let the subjects in motion blur out a little bit results in a video that feels more natural and is comfortable to view. Part of the reason is because we know the scene is changing due to things being in motion, seeing the apparent motion of slow shutter speed blur makes the brain react better than the jerky stop motion effect of clearly defined moving objects.
Sounds weird, but it really does work. A great way to be able to ensure a slow enough shutter speed for the exposures is to use a variable ND filter to attenuate the light intensity of the scene. I like a variable version of ND filters for this because it allows for more control options.
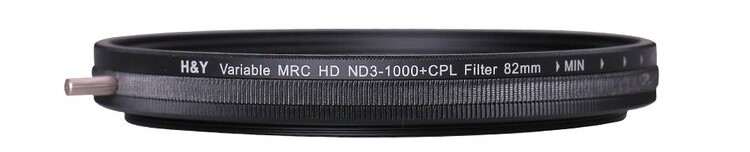
A filter like the H&Y K-Series Variable ND filter is perfect for this use, plus it adds into our set up being a very good circular polarizer as well, helping tame reflections and really drawing attention to cloud detail in the sky as the movie progresses.
Batch Processing
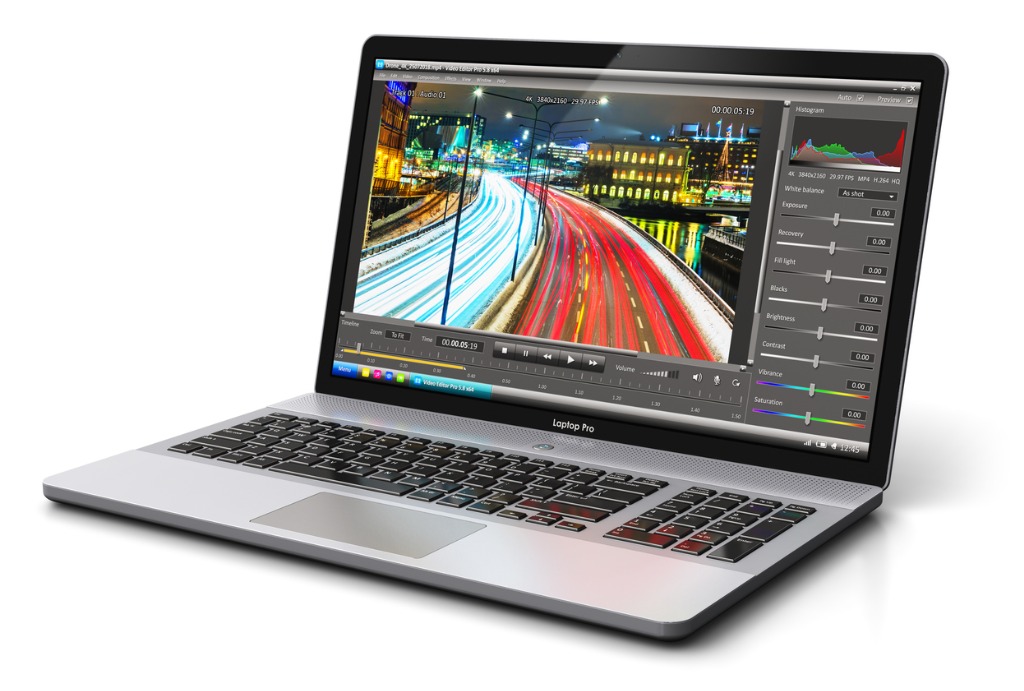
photo byscanrail via iStock
Since we are shooting in RAW for more latitude in exposure, we are going to need to post process the files. Time-lapse photography produces a lot of files, depending on the interval chosen between each exposure. Remember, each individual frame captured will only be seen for a fraction of a second at a time during playback.
Batch processing, especially with a non destructive program like Lightroom, will save you a whole lot of time in finishing your time-lapse photography project.
Batch means you can do the same operation to several files at once. Non destructive means your computer processor can work less, so the entire multi file operation can proceed relatively quickly.
The end result will be a whole lot fun to watch and share. Plus, each time you make a time-lapse, you will learn something to make your next time-lapse photography project even better.
Learn More:
- 5 Mistakes Photographers Make With Long Exposures
- My Favorite Landscape Photography Filter
- What To Look For In Lens Filters
We Recommend
Top 10 Gifts for Photographers Under $250 - 2020 Edition

Photo by franckreporter via iStock
I'm writing this the first week of August, so as you can imagine, it's a little weird talking about holiday gifts.
However, the first seven months of 2020 have flown by - despite the challenging circumstances - so I figured the next four months would be equally as fast. I might as well start naming my top gifts for photographers now, that way you have time to pick up the items you want for yourself or for the photographer on your holiday shopping list.
While $250 might not seem like a big budget for photography-related gear, you might be surprised at what you can find for less than that price point.
Below are ten of my favorite photography gifts for $250 or less.
Gifts for Photographers Under $250: CanvasHQ Print
One of my favorite gifts to give (and to get, while we're at it) is a big, beautiful print.
Personally, I like canvas because of the texture the canvas gives to the print. Besides, a canvas print is something that will continue to give joy to the person that receives it for years and years to come!
Now, I know what you're thinking...canvas is so old-school.
But if you order your canvases from the right printers, you can get something that is beautiful, well-made and looks modern, even if the substrate is perhaps a bit old-school.
I have tons of canvases in my home, the vast majority of which are fromCanvasHQ.
These are some of the best canvas prints I've ever purchased. The sharpness of detail, the color accuracy, and the overall build quality of these prints is next-level good.
Part of the reason for this is the materials CanvasHQ uses. We’re talking archival-grade canvas, commercial-grade inks that are water and UV resistant, and kiln-dried pine frames to keep everything straight and true.
But CanvasHQ isn't just tops in the quality department...
They have excellent customer service that makes you feel heard and as though you're the only customer they have to worry about at that moment.
These guys are committed to getting it right, so if something doesn’t go as planned, you won’t be hung out to dry.
If you have questions, they’ll answer them. If you have a problem, they’ll fix it. If you need assistance with uploading your photo or even picking the best finishes for your canvas, they’ve got your back.
In the video above, you can see how one of my CanvasHQ prints stacks up against similar prints from other printing companies. I think you'll see why I'm so loyal to CanvasHQ!
Start shopping for your favorite photographer today on CanvasHQ.
Gifts for Photographers Under $250: ViewSonic VG1655 Portable Monitor

Sometimes you need a bright, portable monitor, and for those occasions, the ViewSonic VG1655 is a great option.
This monitor has a frameless IPS 15.6-inch screen and weighs a mere two pounds. It has two-way power, dual USB-C ports, a stand cover, and a screen protector. It can be used in portrait or landscape orientation.
To help reduce eye strain, the monitor has a blue light filter. The flicker-free technology gives you a beautiful picture to view as well.
You can use this monitor with laptops, PCs, and Macs and comes with a three-year warranty. There are even dual built-in speakers!
Learn more about the ViewSonic VG1655 Portable Monitor
Gifts for Photographers Under $250: Haida NanoPro MC Variable ND Filter
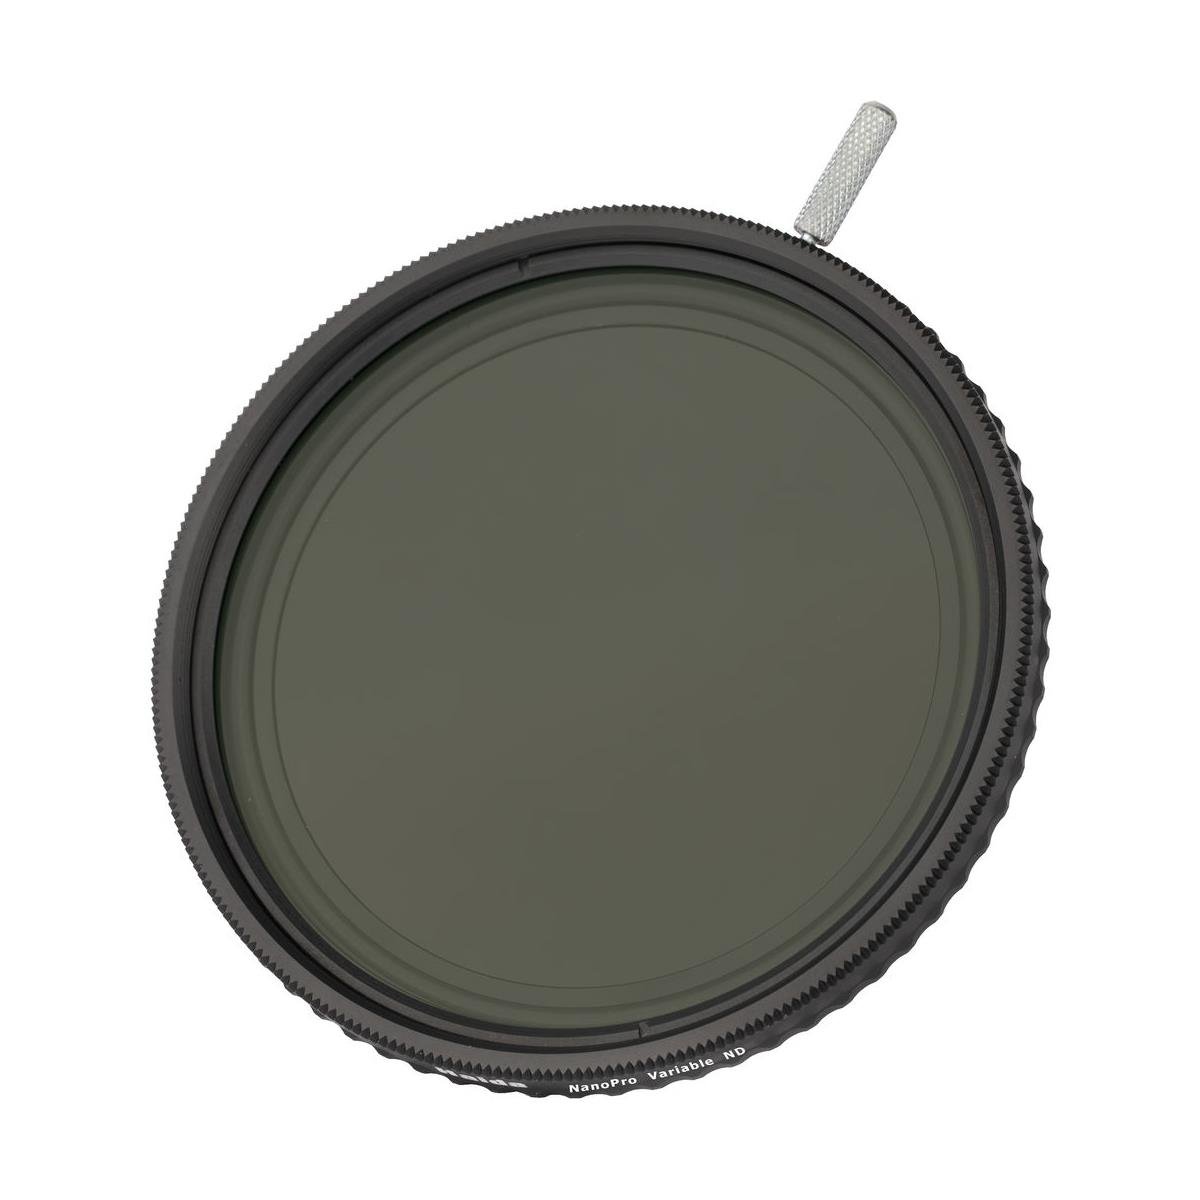
One of the best things about having a variable ND filter in your camera bag is that you can replace multiple ND filters with a single one.
That might not sound like a big deal, but for me (and many other photographers), it's nice to be able to streamline your camera bag and your photography workflow while you're at it.
What's so nice about the Haida NanoPro MC variable ND filter is that you get 4-stops to 9-stops of variability. This allows you to attack all sorts of long exposures in different lighting situations. Additionally, you can increase the aperture to control depth of field for beautiful background blur in your images.
This particular variable ND filter has nano multi-coatings on both sides of the glass that improves beading when the surface comes in contact with oil or water. So not only does it protect the filter glass, but this coating also results in a much more efficient cleaning process.
Speaking of efficiency, Haida included visual cues on the front filter ring that represent the different density values. This helps you dial in the desired density settings both easier and faster, and allows you to repeat the process more easily as well.
Where some variable ND filters reduce the overall clarity and color accuracy of the images you take, Haida has protected against both of these problems by using optical glass. Each surface also includes 10 layers of anti-reflection coatings to minimize internal ghosting and reflections.
You can also use this filter with other filters thanks to the front filter threads. Add in a side lever for easy rotation, a plastic case to protect the filter during transport, and a price WELL below the $250 mark, and you have the makings for one heck of a holiday gift idea for the photographer on your list!
Learn more about the Haida NanoPro MC Variable ND Filter
Gifts for Photographers Under $250: A Pre-Owned Canon EF 50mm f/1.4 Lens
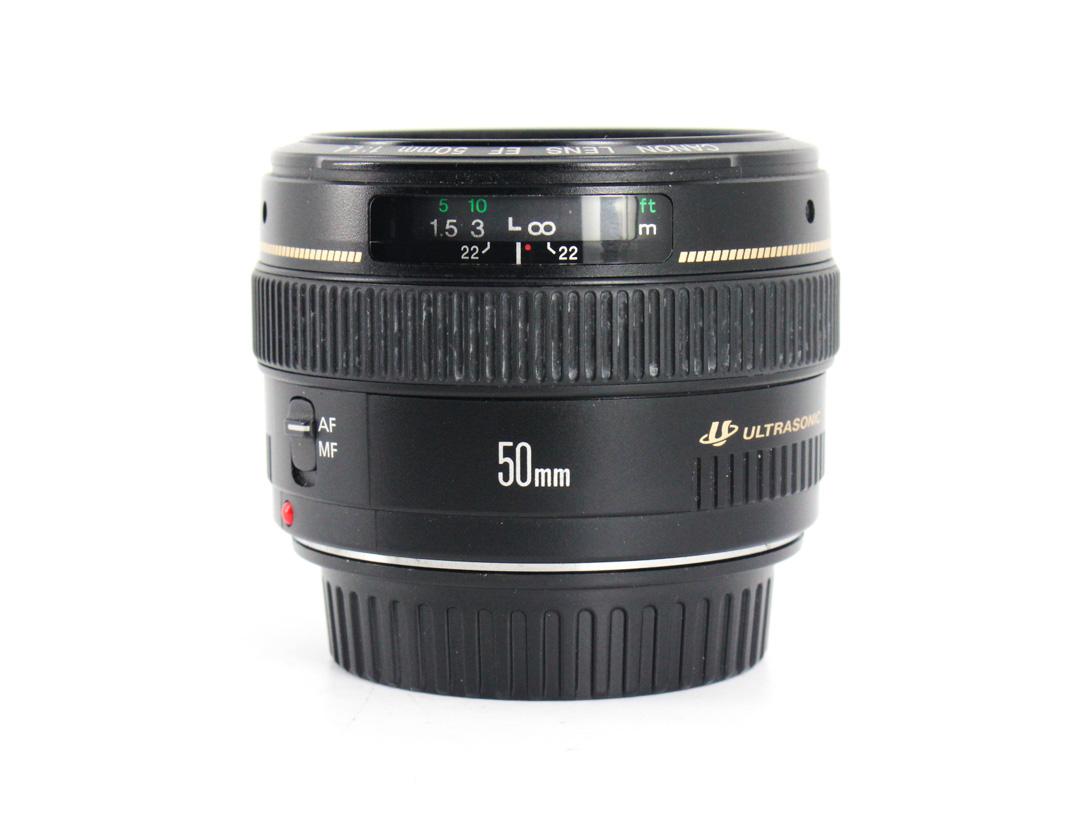
Ask just about any photographer what their first lens purchase was, and they'll say a Nifty Fifty. That makes it the ideal gift idea for photographers this holiday season!
There's a lot to love about 50mm lenses, too...
For starters, it's a great focal length for learning all kinds of photography, from landscapes to portraits and everything in between.
That also makes it an incredibly versatile lens.
In fact, put a 50mm lens on your camera, and you can shoot all day long without ever needing a different focal length. They're even great for shooting video!
You can find 50mm lenses with large apertures, too, like the Canon EF 50mm f/1.4 USM shown above.
At f/1.4, photographers can more readily shoot in low-light conditions without having to push the ISO too high, which helps reduce digital noise.
Having a large aperture like that is also beneficial for gathering tons of light, that way a faster shutter speed can be used. It's also helpful for blurring the background in portraits to get a more professional-looking shot.
Another benefit of a 50mm lens is that they force you to think more creatively about how you frame up your shots.
That is, since 50mm lenses have a constant focal length of 50mm, there's no zoom to rely on for getting close-up or wider shots.
By using a 50mm lens and "zooming with your feet," becoming a master of composition can be an easier task because you're forced to physically move further away or closer to the subject.
Of course, the biggest benefit of 50mm lenses is the price. These lenses are well-priced so you can bestow a great little lens with tons of functionality and versatility upon your favorite photographer without busting your budget.
That sounds like a win-win deal to me!
Learn more about the Canon EF 50mm f/1.4 lens
Gifts for Photographers Under $250: Holdfast MoneyMaker Solo
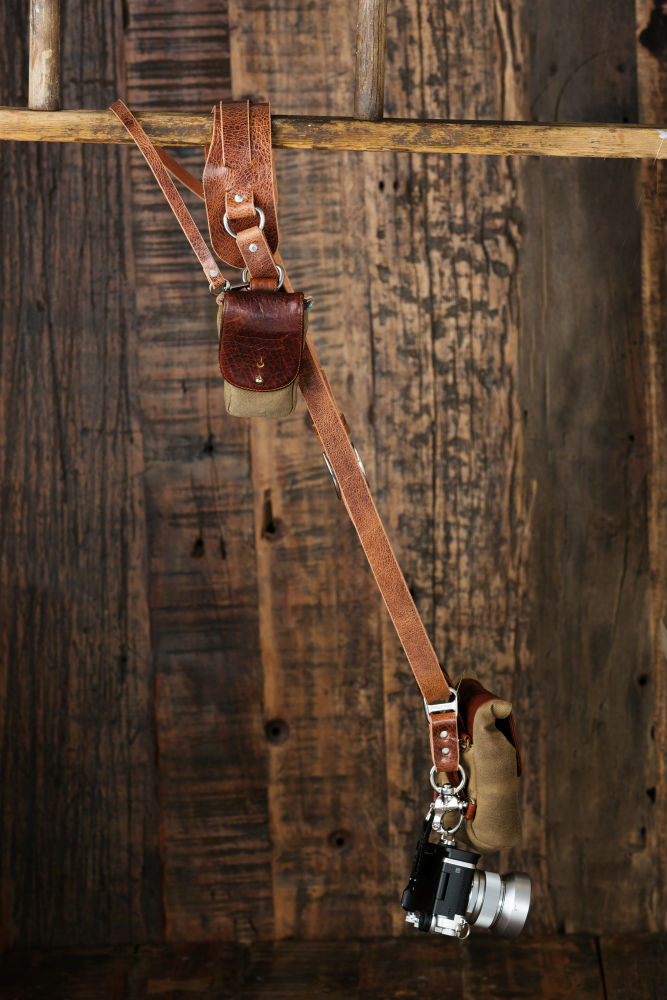 Photo by Brandon Burk
Designed specifically for single camera shooters, the Holdfast MoneyMaker Solo is a perfect choice for the photographer on your holiday shopping list.
The MoneyMaker Solo features impeccable designs and a commitment to quality for shooters that don’t need two or three cameras on their person as the original MoneyMaker provides.
Worn as a sling strap, the MoneyMaker Solo has a big, soft, contoured shoulder strap that ensures that you’ll have a comfortable carrying experience whether you’re only out shooting for a couple of hours or if you’re out shooting for an entire day.
With an integrated stabilizer strap, the MoneyMaker Solo will stay put on your shoulder so you don’t have to worry about it slipping off.
What’s more, you can use the Holdfast Belt Anchor to give the Solo even more stability, it locks the camera to your belt, no more flopping around as you maneuver and bend over while working. Then a quick pull on the release tab as you grab your camera and you’re ready to take the shot!
As well, you can also use all of the Holdfast Gear accessories with the Solo like a Holdfast Cell Phone Pouch or Lens Pouch. See how it all comes together in the video above.

Just like the original MoneyMaker, the MoneyMaker Solo gives you unparalleled freedom of movement so you can get the shots you want without having your gear in the way.
In that regard, the MoneyMaker Solo ticks all the boxes - it’s highly functional, incredibly comfortable, works without getting in your way, and it looks like a million buck!
Learn more about the Holdfast MoneyMaker Solo
Gifts for Photographers Under $250: Insta360 GO
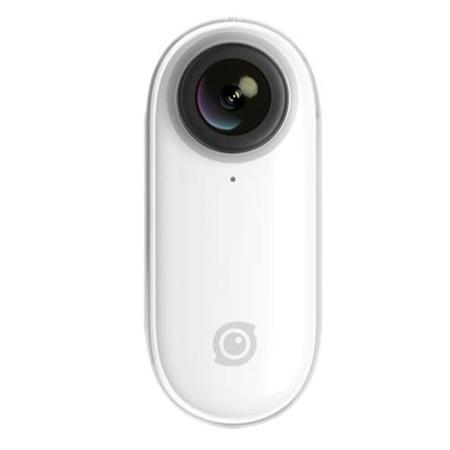
Photographers these days are almost as much about video as they are about still images. And for that reason, a camera that captures video is a must.
But not everyone wants a traditional video camera. That's where the Insta360 GO comes in...
This tiny stabilized camera shoots 30-second or 60-second clips with the press of a button. From those clips, you can find the best still frames if you wish, all with the help of artificial intelligence.
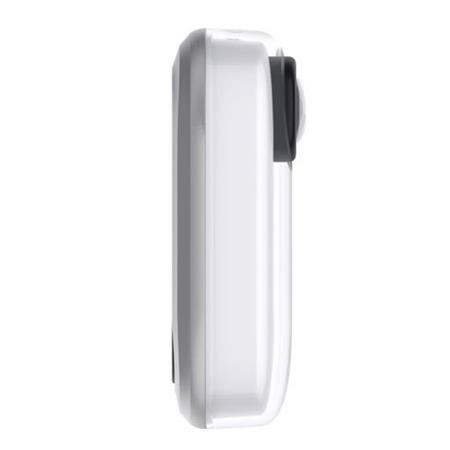
In addition to being stabilized, the Insta360 GO features Hyperlapse, automatic editing, timelapse, and slow-motion capabilities.
Using the Barrel Roll feature, you can adjust the rotation of the shot with a simple swipe. It's also water-resistant and can even withstand a quick dunk in the water.
Transferring files is as simple as plugging the camera into your phone. And with a battery that can handle about 200 shots on a charge, you can amass a lot of images and videos!
Learn more about the Insta360 GO
Gifts for Photographers Under $250: PolarPro Apex Minimalist Tripod
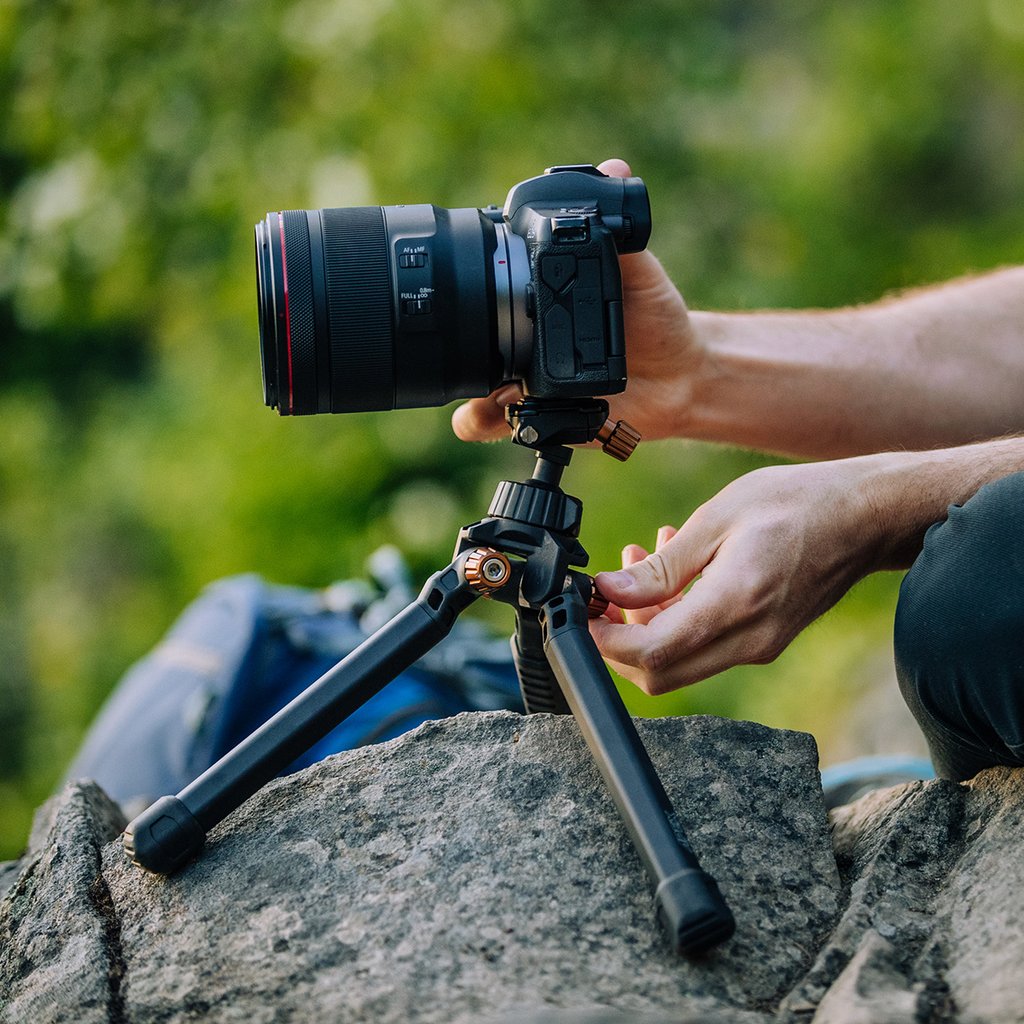
While PolarPro might be better known for their impeccable lens filters, they've expanded their product line to include many other useful tools, like the Apex Minimalist Tripod.
But don't let this tripod's small stature fool you...
It is every bit a PolarPro product with robust construction, superb design, and top-notch functionality.
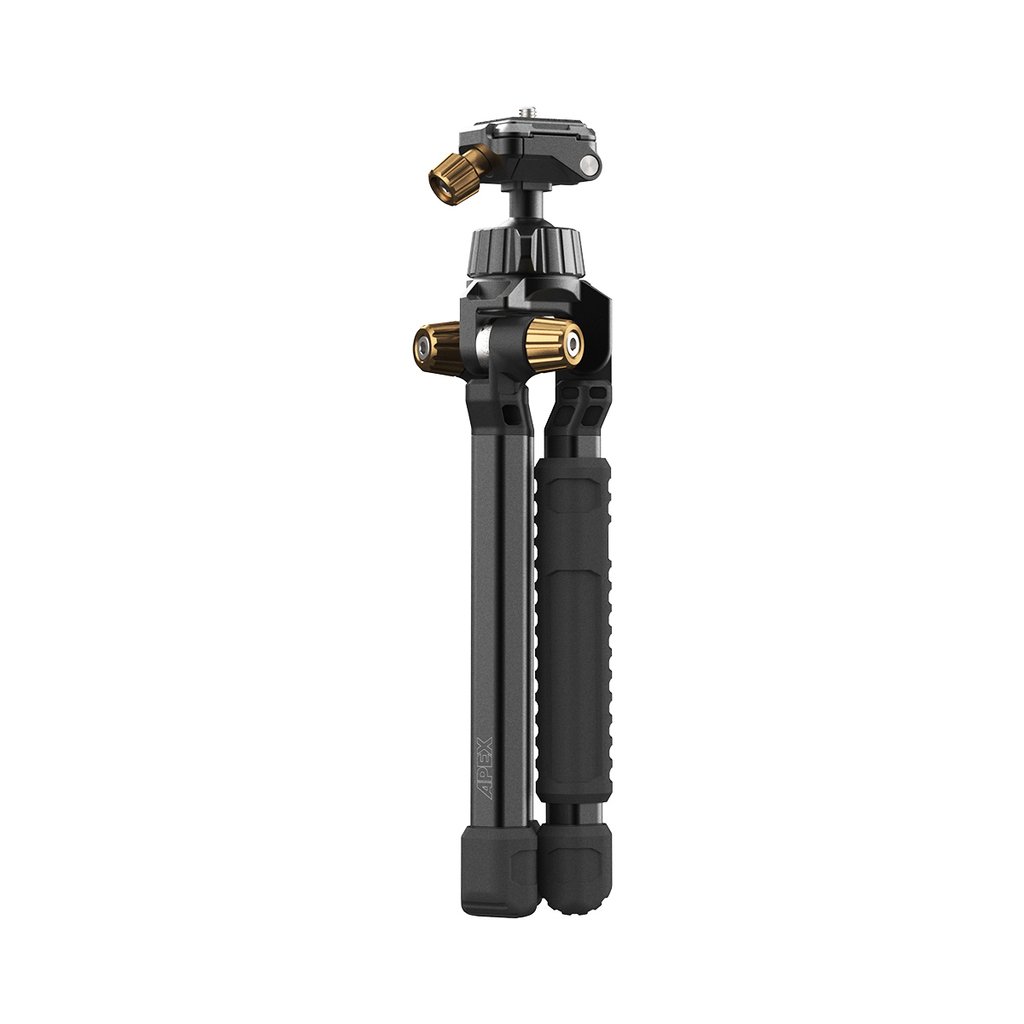
The smaller form factor of this tripod not only makes it a perfect companion for mirrorless or smartphone photography, but it's also a perfect addition to any photographer's travel bag.
The tripod can be completely locked into place by using PolarPro's excellent TiltLocks.
These locks allow you to lock the tripod down in many different orientations, that way you can get the precise shot you envision.
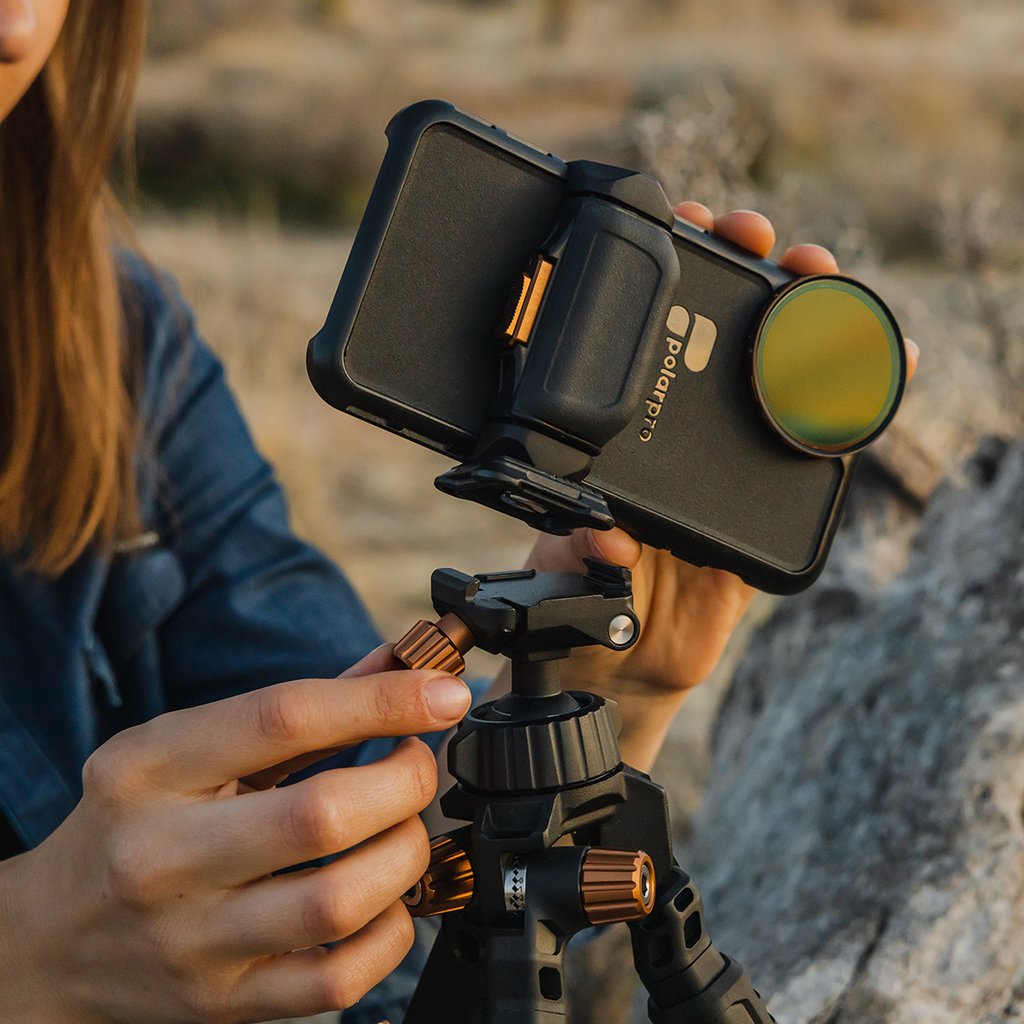
Additionally, this tripod comes with PolarPro's Apex ball head, removable rubber feet with aluminum spikes inside, and a 35-degree angled plate release know, which enables you to hot-swap other tripods and mounts.
And since this tripod is 95 percent aluminum, it's lightweight and durable at the same time.
If the you or the photographer on your holiday shopping list have been itching for a robust, yet small tripod, the PolarPro Apex should be something you take a long, hard look at.
Learn more about the PolarPro Apex Minimalist Tripod
Gifts for Photographers Under $250: H&Y K-Series Filter Holder
Another top pick for your favorite photographer is a rock-solid lens filter holder.
For my money, it doesn't get any better than the filter holder shown above - the H&Y K-Series.
What sets this filter holder apart from the rest is the quality of construction. Where many filter holders are made of plastic, this one is crafted of aluminum to give you the durability you need without adding unnecessary weight.

This particular holder also comes with a drop-in 95mm circular polarizer that features SCHOTT glass. The glass gets an HD polishing technique that improves light transmission so your images have even more reason to shine.
This circular polarizer also has multiple nano coatings that make it scratch-resistant, oil-repellant, and water-repellant.
Of course, a high-quality filter holder needs to minimize light leaks, and the K-Series is more than up to the task.
There are foam seals that prevent light from leaking in, that way the results you get with your images fulfill your precise vision.
Plus, this is a magnetic holder, so you can use any of H&Y's magnetic rectangular filters (like this one).
This is a filter holder system that's well designed, well built, and worth every single penny. The photographer on your list will love having this bad boy in their kit!
Learn more about the H&Y K-Series Filter Holder
Gifts for Photographers Under $250: HEX Ranger Clamshell DSLR Backpack
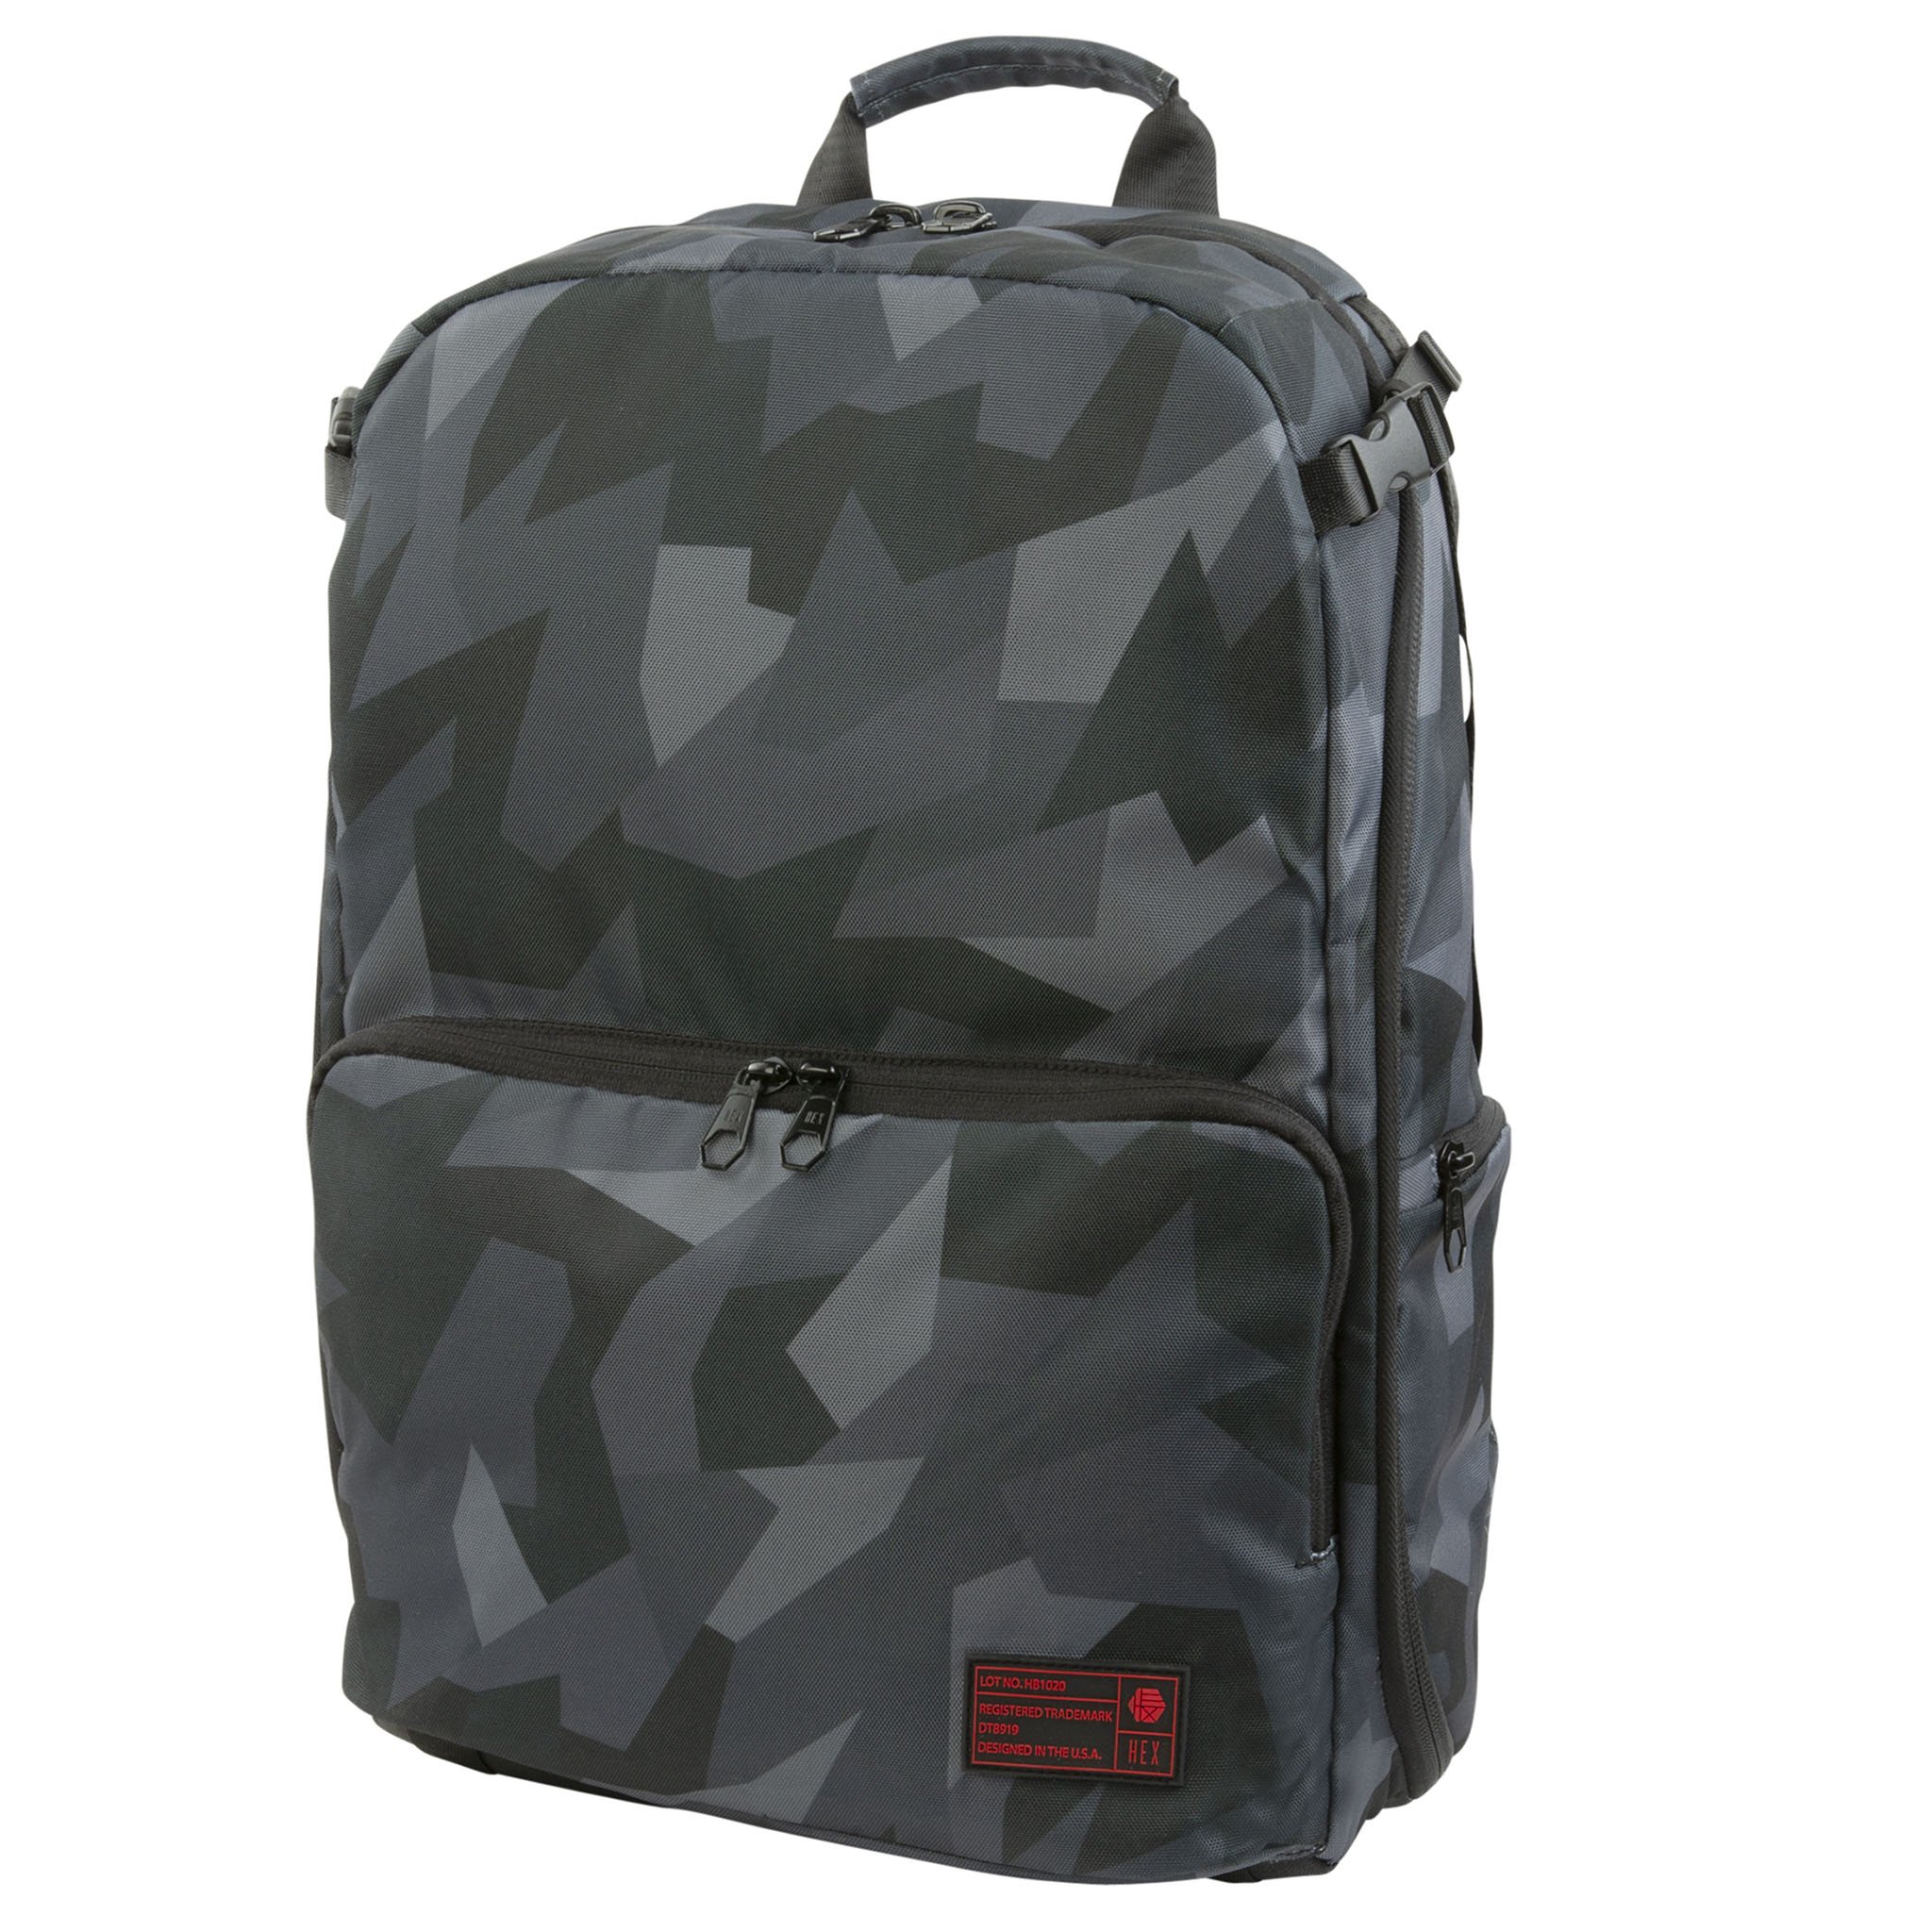
The folks at HEX have a passion for what they do, and it shows in the products they design and create.
I actually have a HEX Ranger DSLR Sling Bag. Talk about a camera bag!
But if the photographer on your list needs to carry more gear than I do, the Ranger Clamshell DSLR backpack is a prime choice.
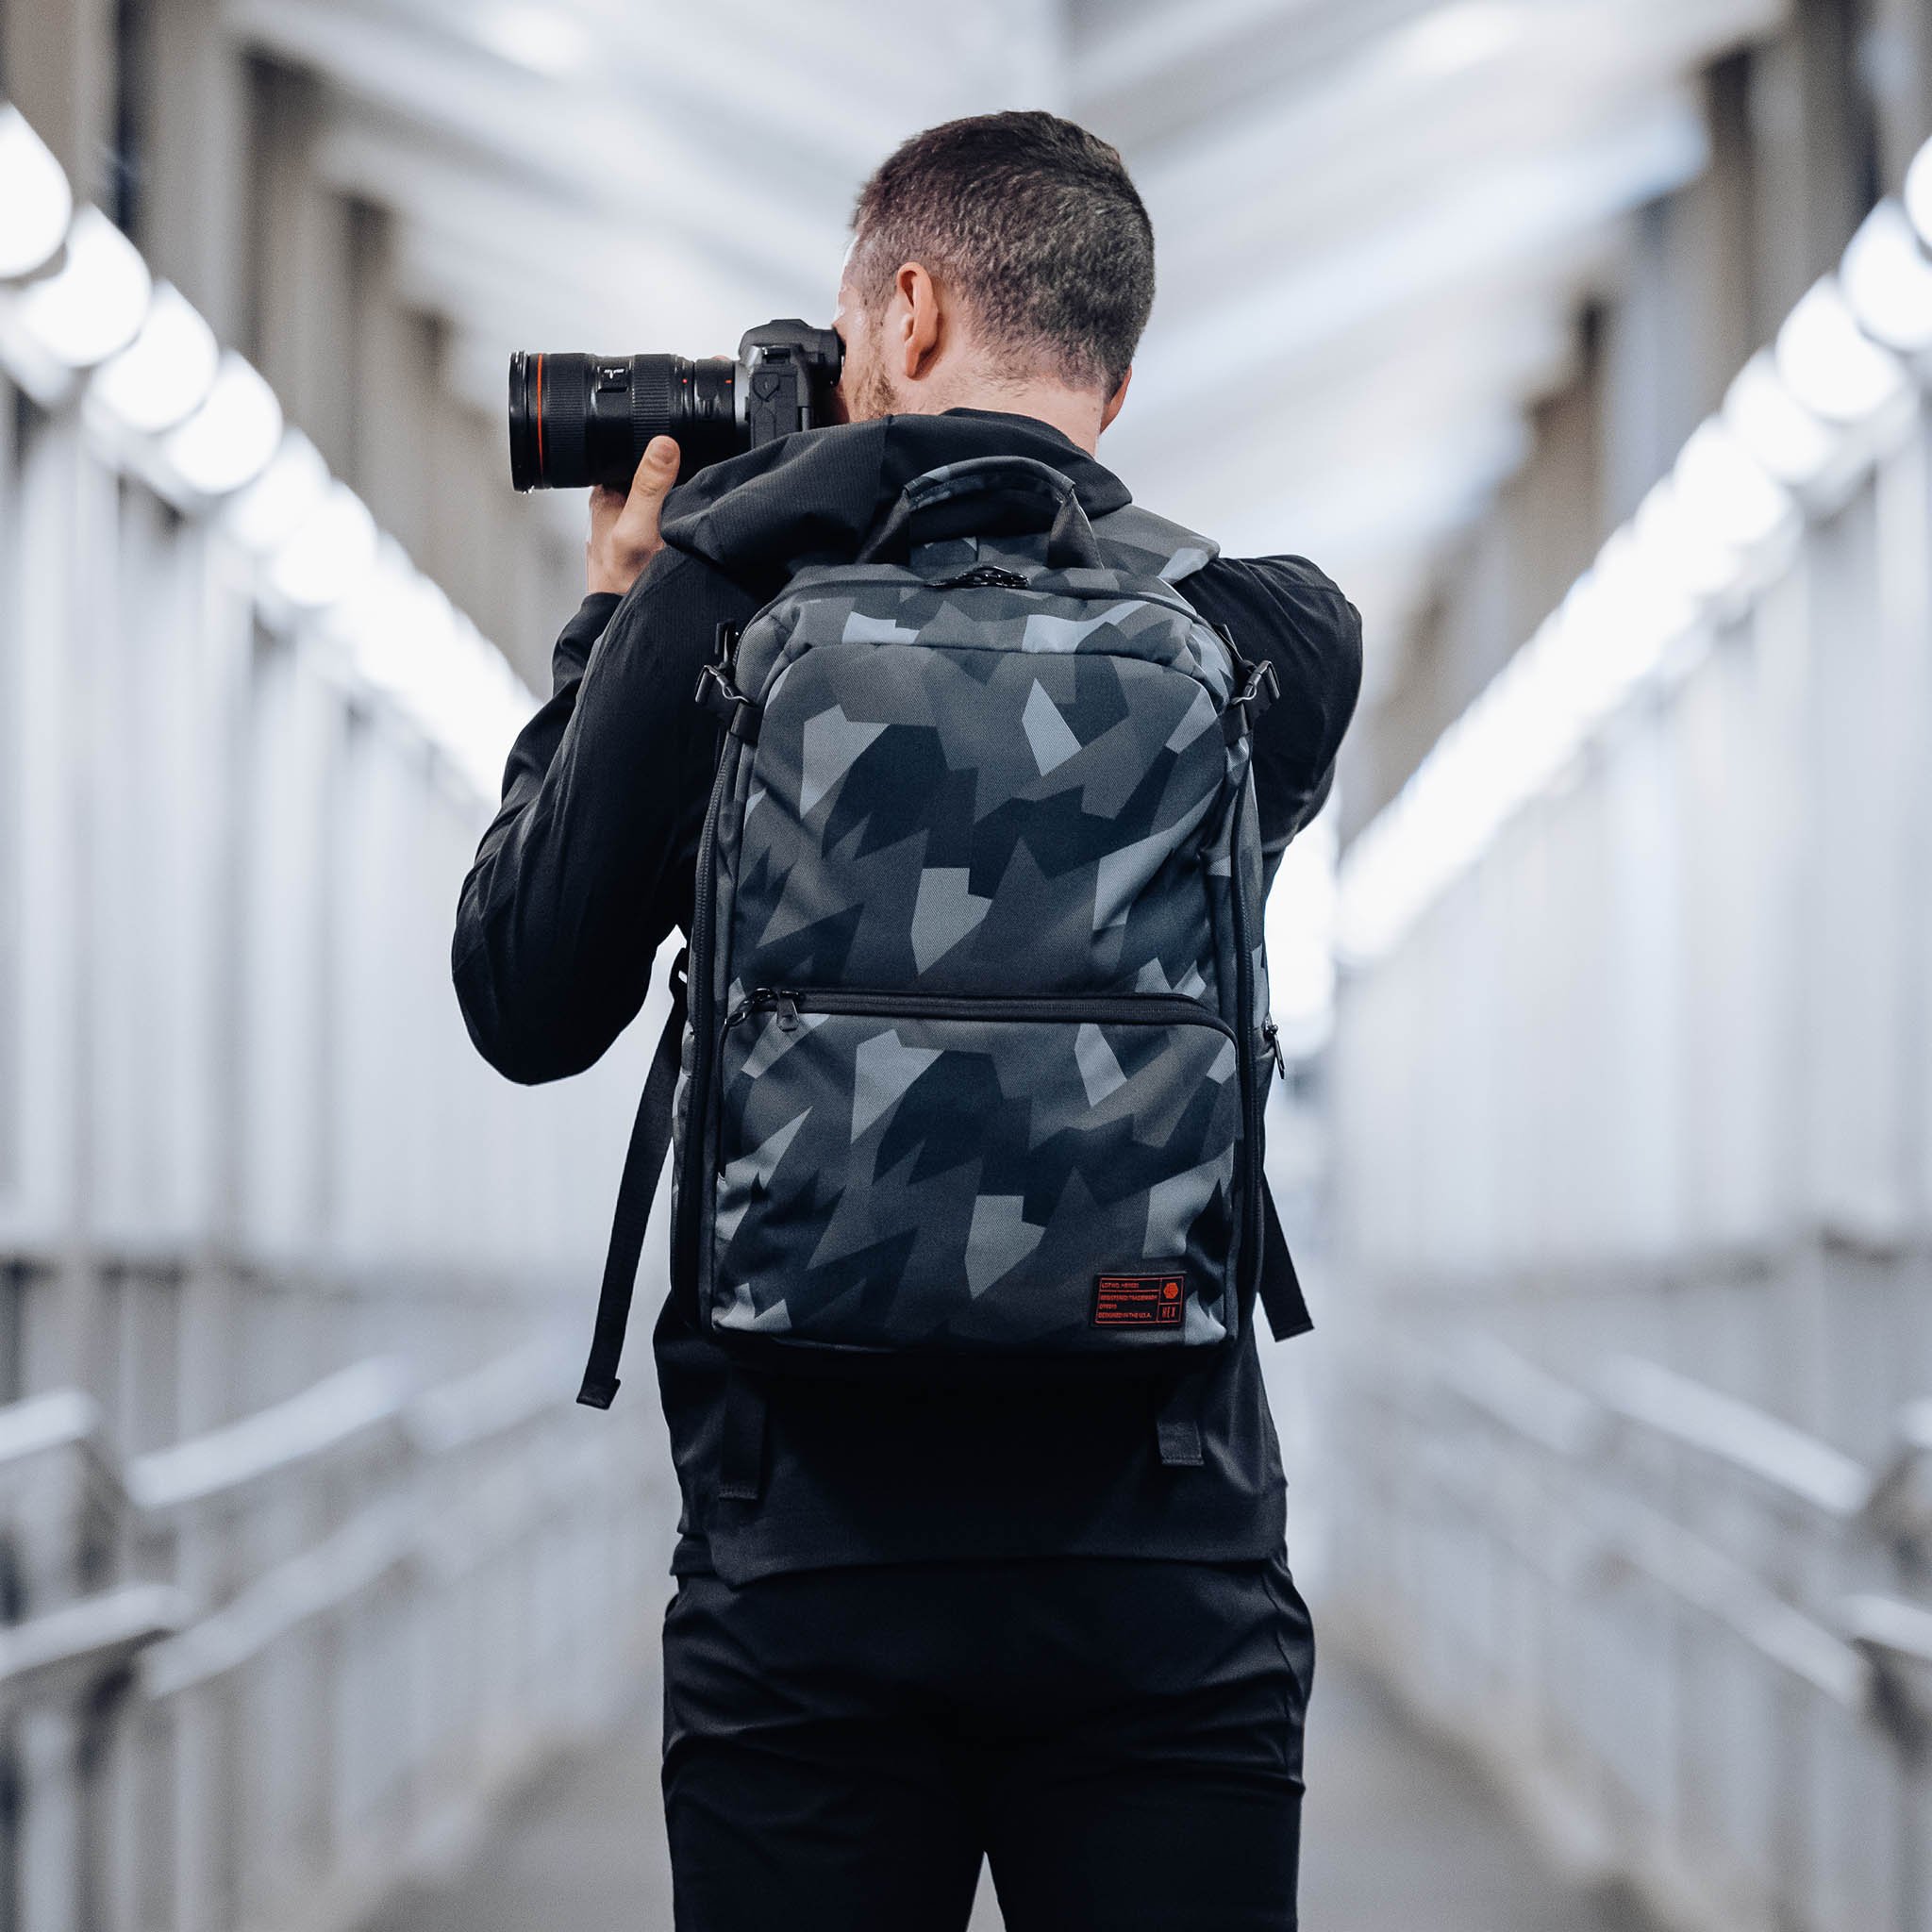
With a capacity of 21 liters, this bag can hold a ton of gear - a DSLR with lens attached, a couple more lenses, a laptop, a drone, and accessories, in fact!
The clamshell design makes it easy to see your gear, retrieve it, and put it away. And with fully customizable inserts, you can make the bag work for you no matter what arrangement of gear you need.
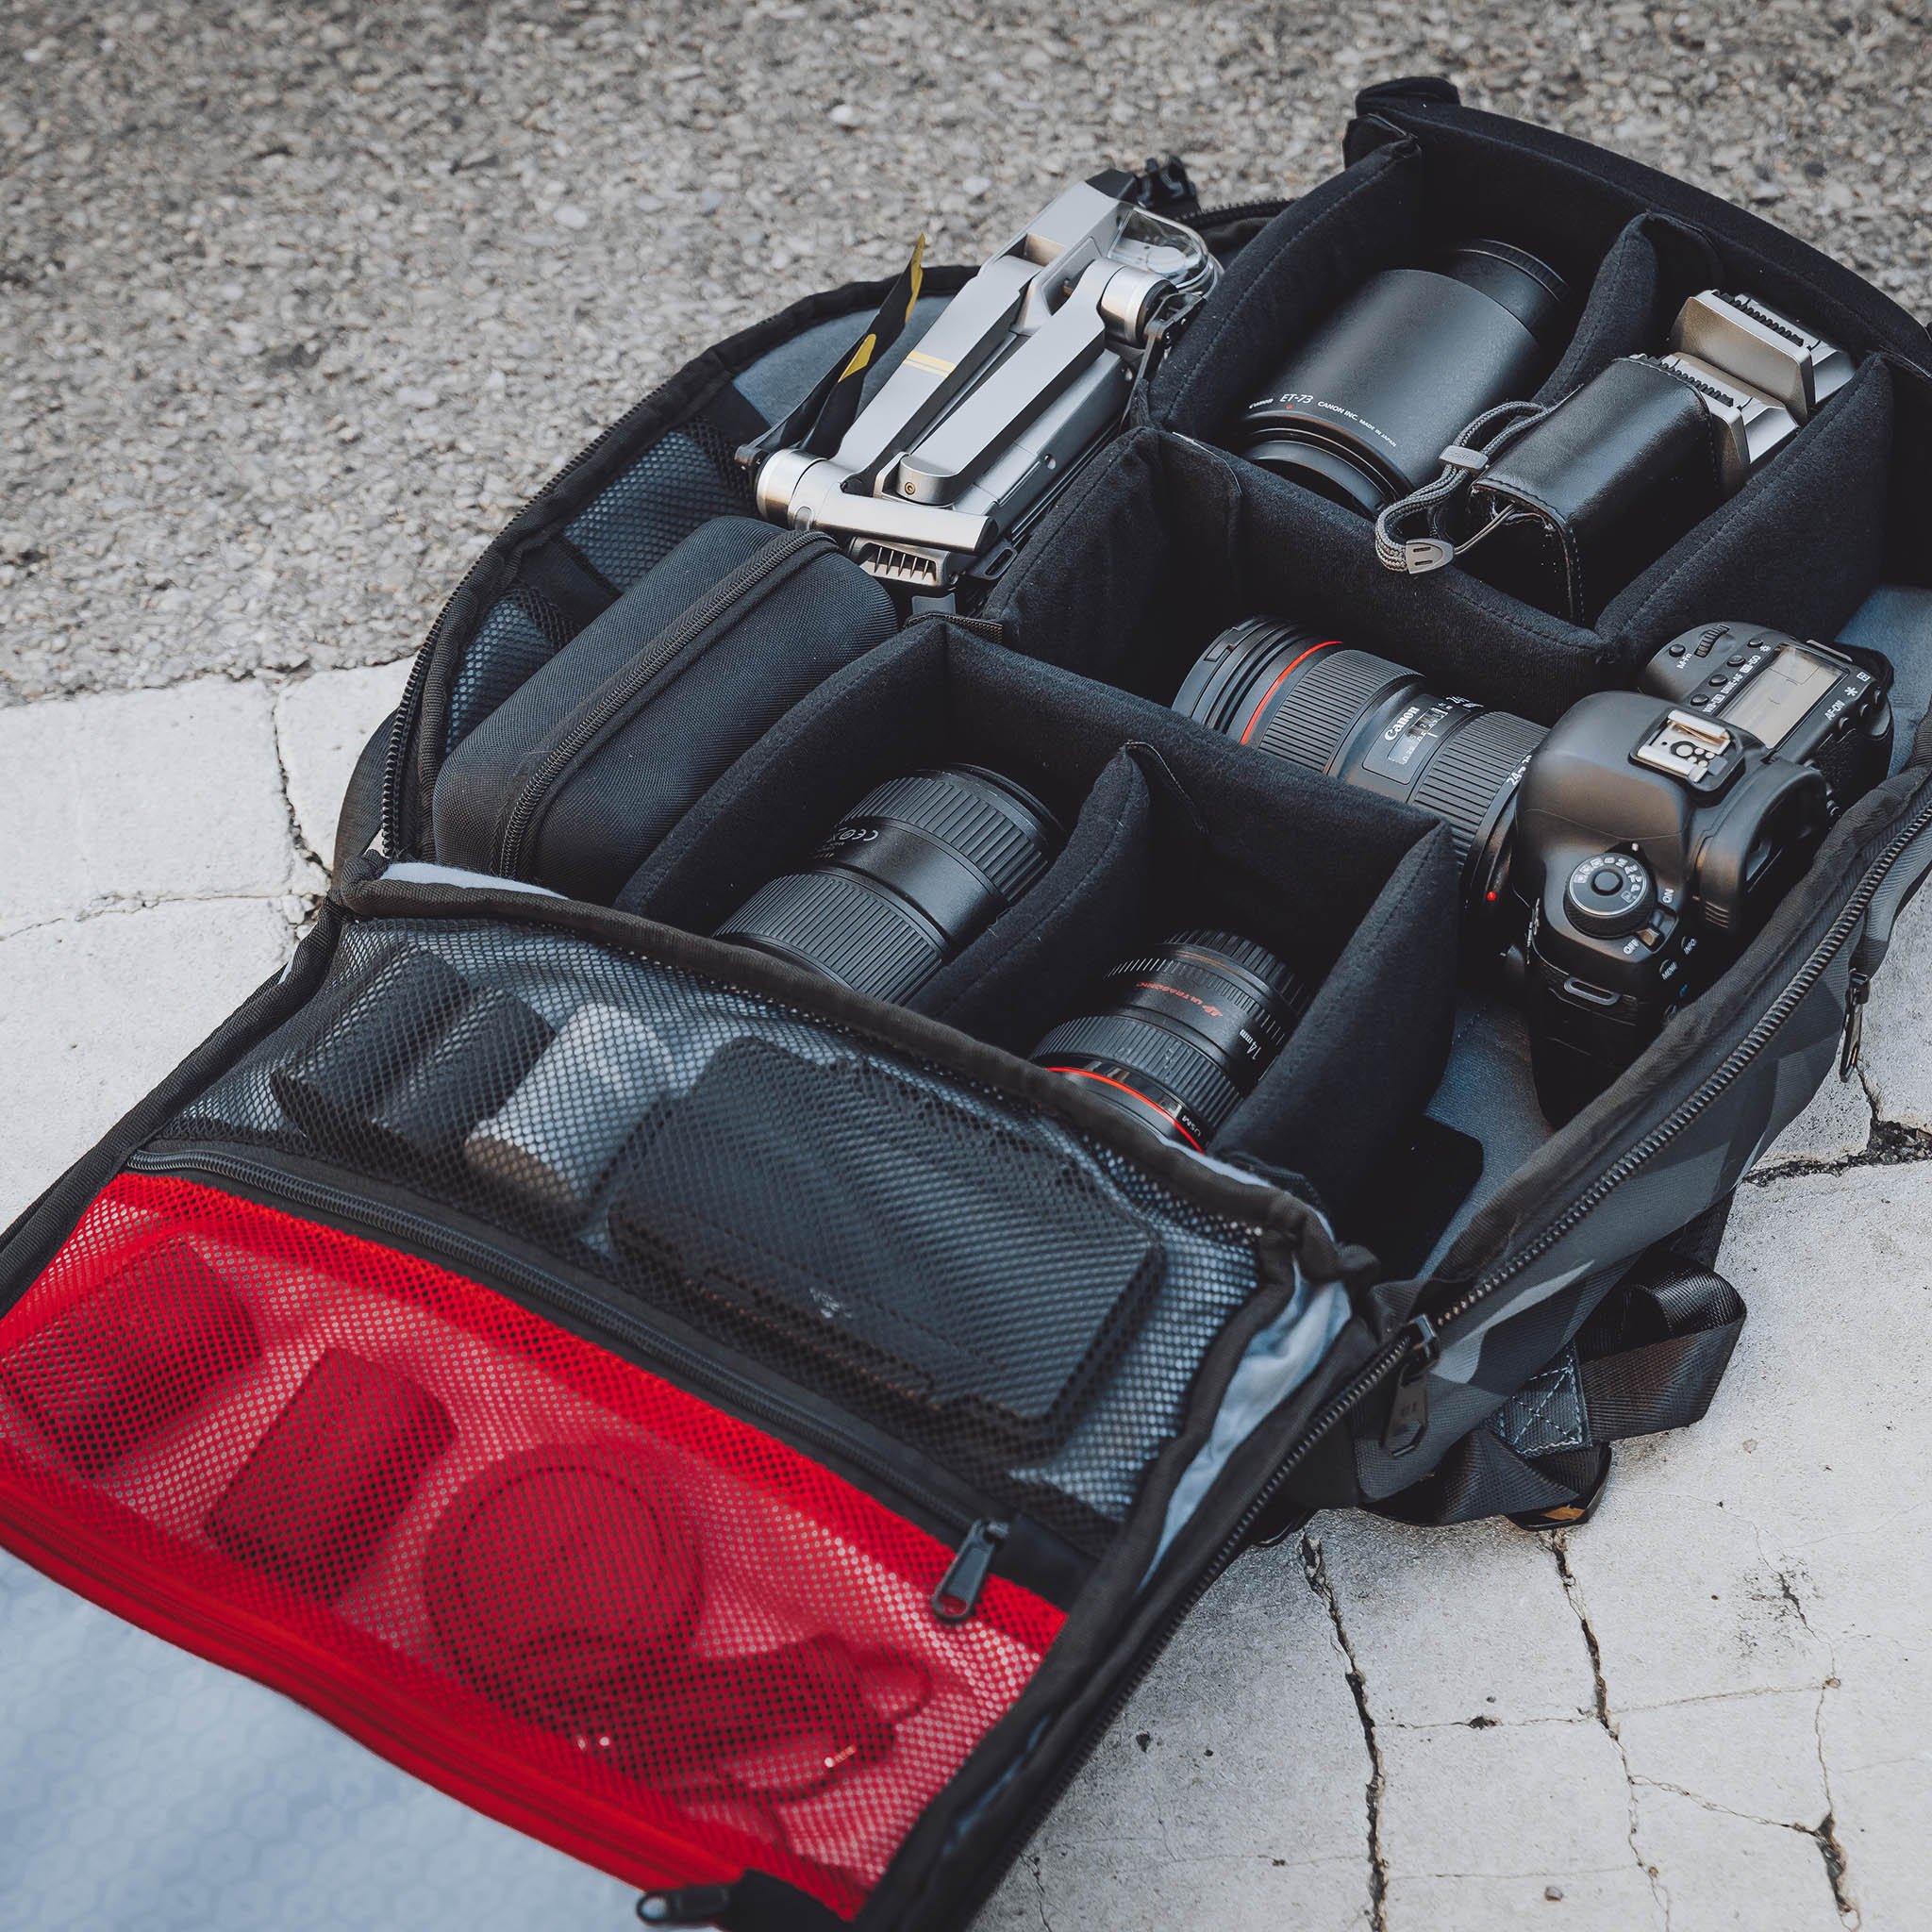
The all-important comfort factor is off the charts, too. It has ergonomic shoulder straps that hug your shoulders and fit perfectly. The air mesh construction will keep your shoulders and back cool as well.
Additionally, HEX included a custom molded and foam padded back panel, that way even when you’re carrying a heavy load, you’ll still be comfortable.
With tripod straps on the bottom, side straps for attaching more gear, a hidden rain cover, a water bottle pocket, and tons of other handy features, this is a bag that the photographer on your list will love, without a doubt
Learn more about the HEX Ranger Clamshell DSLR Backpack
Gifts for Photographers Under $250: EF to E-Mount Lens Adapter
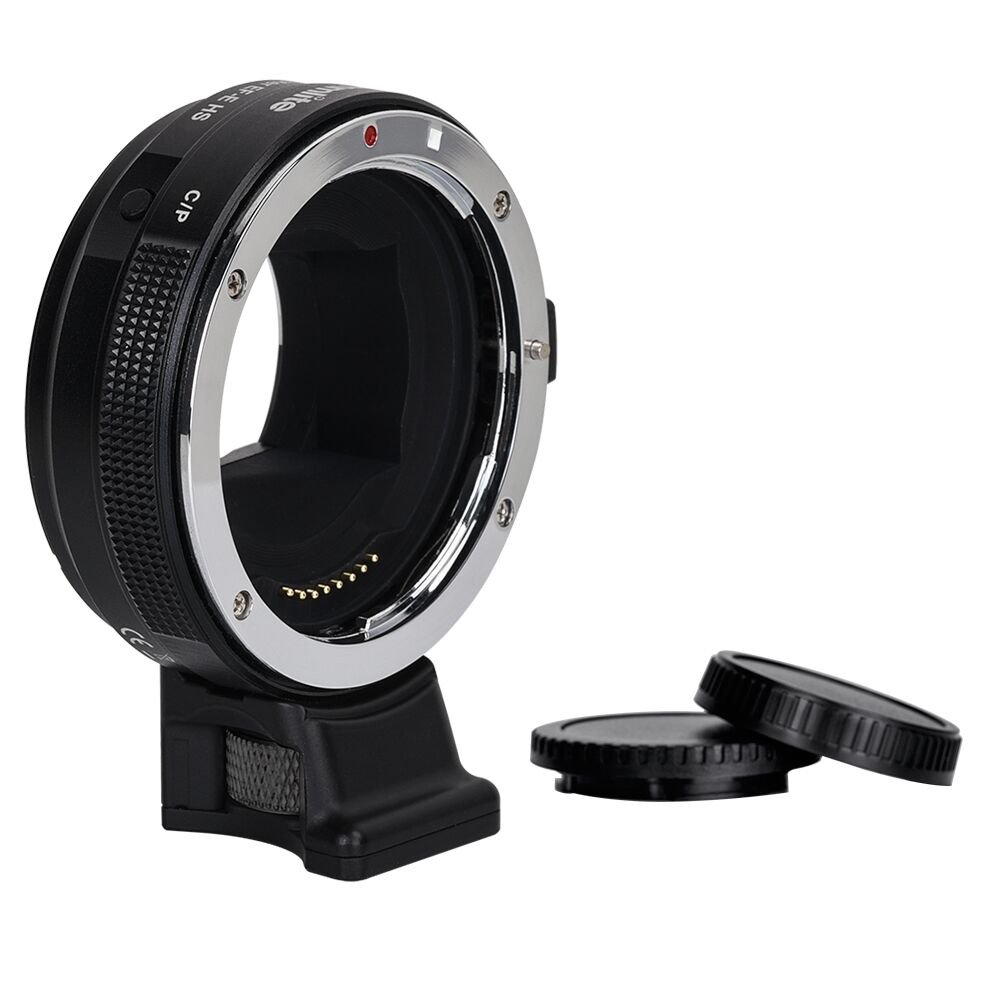
If the photographer you're shopping for used to be a Canon shooter and now has a Sony camera, you can give them this handy adapter that allows them to use their old EF and EF-S lenses on a Sony E-mount camera, like the a6300, a6400, a6500, a9 or a7, among many others.
This adapter has both autofocus function and aperture control, as well as a handy USB port for firmware updates.
You can switch between phase and contrast autofocus modes, and there's EXIF signal transmitting and IS functionality too.
There's simply no easier and more functional way to pair Canon lenses with a Sony E-mount camera!
Learn more about the EF to E-Mount Lens Adapter
Gifts for Photographers Under $250: Artbeat Studios HD Metal Print

Looking for a gift with a ton of visual appeal without it having a huge impact on your bank account? Look no further than an HD Metal Print from Artbeat Studios!
The great thing about an HD metal print is that it can be put just about anywhere in a home or office and immediately draw the attention of anyone that sees it. That’s due to the high-quality materials that Artbeat Studios uses to craft their prints.
For example, you can choose between a glossy or matte finish, where a glossy treatment adds depth to the image and creates a lot of drama and a matte finish eliminates glare and offers a more subtle viewing experience.
What’s more, you can choose from natural or black wood wall mounts, or if you prefer, silver or black aluminum wall mounts to further customize how the print looks. The mounts can be recessed from the edge of the print to give it the appearance that it’s floating on the wall, or you can opt to have the mount flush with the edges of the print to give it a little more depth and heft.
No matter how you choose to customize the print, it’ll be well worth the money!
Learn more about Artbeat Studios HD Metal Prints.
Gifts for Photographers Under $250: Pre-Owned Olympus OM-D E-M10 Mark II
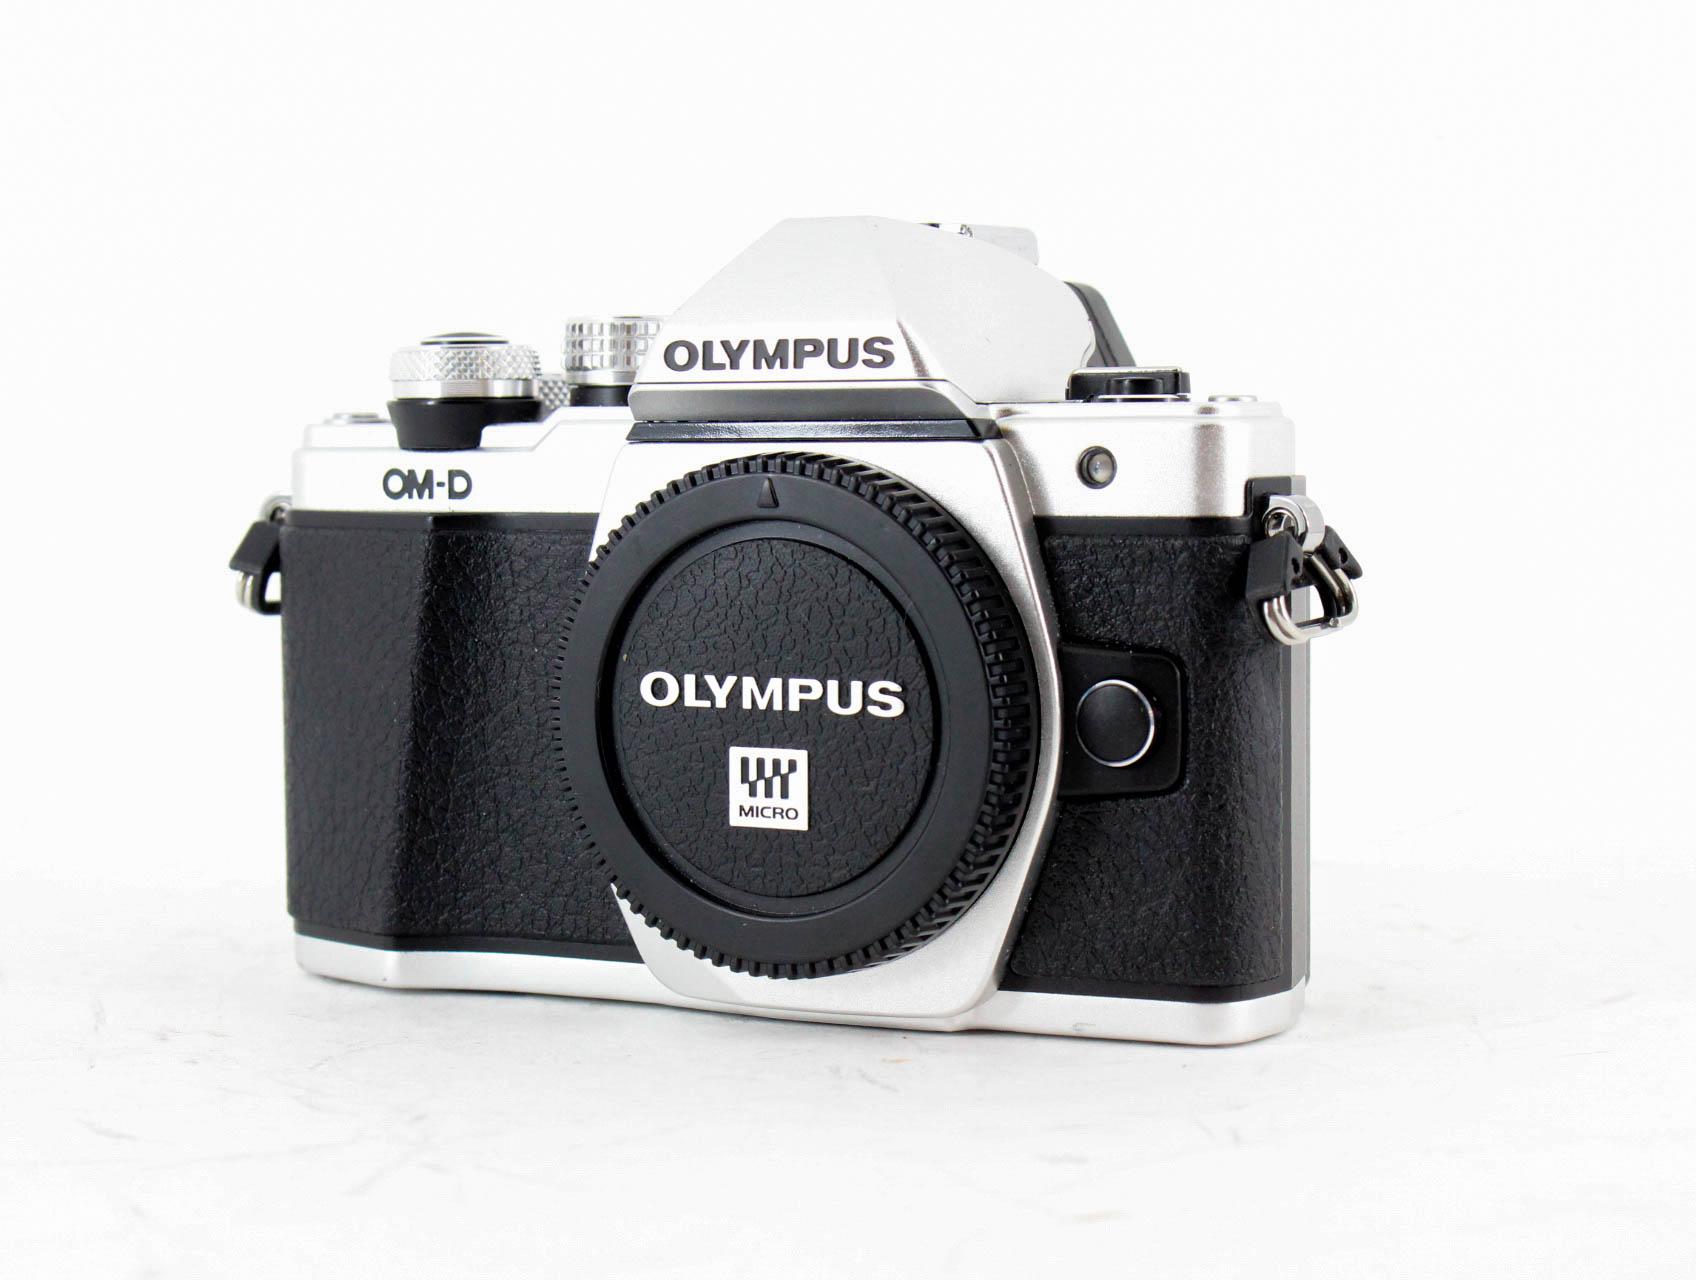
Whether the photographer on your list is just starting out and needs a solid first camera or is more experienced and wants a second camera body that's easy to handle and travel with, the E-M10 Mark II is a great option.
This camera is super small and lightweight, making it an easy addition to any camera bag.
But despite its small size, it's loaded with features that your favorite photographer will appreciate.
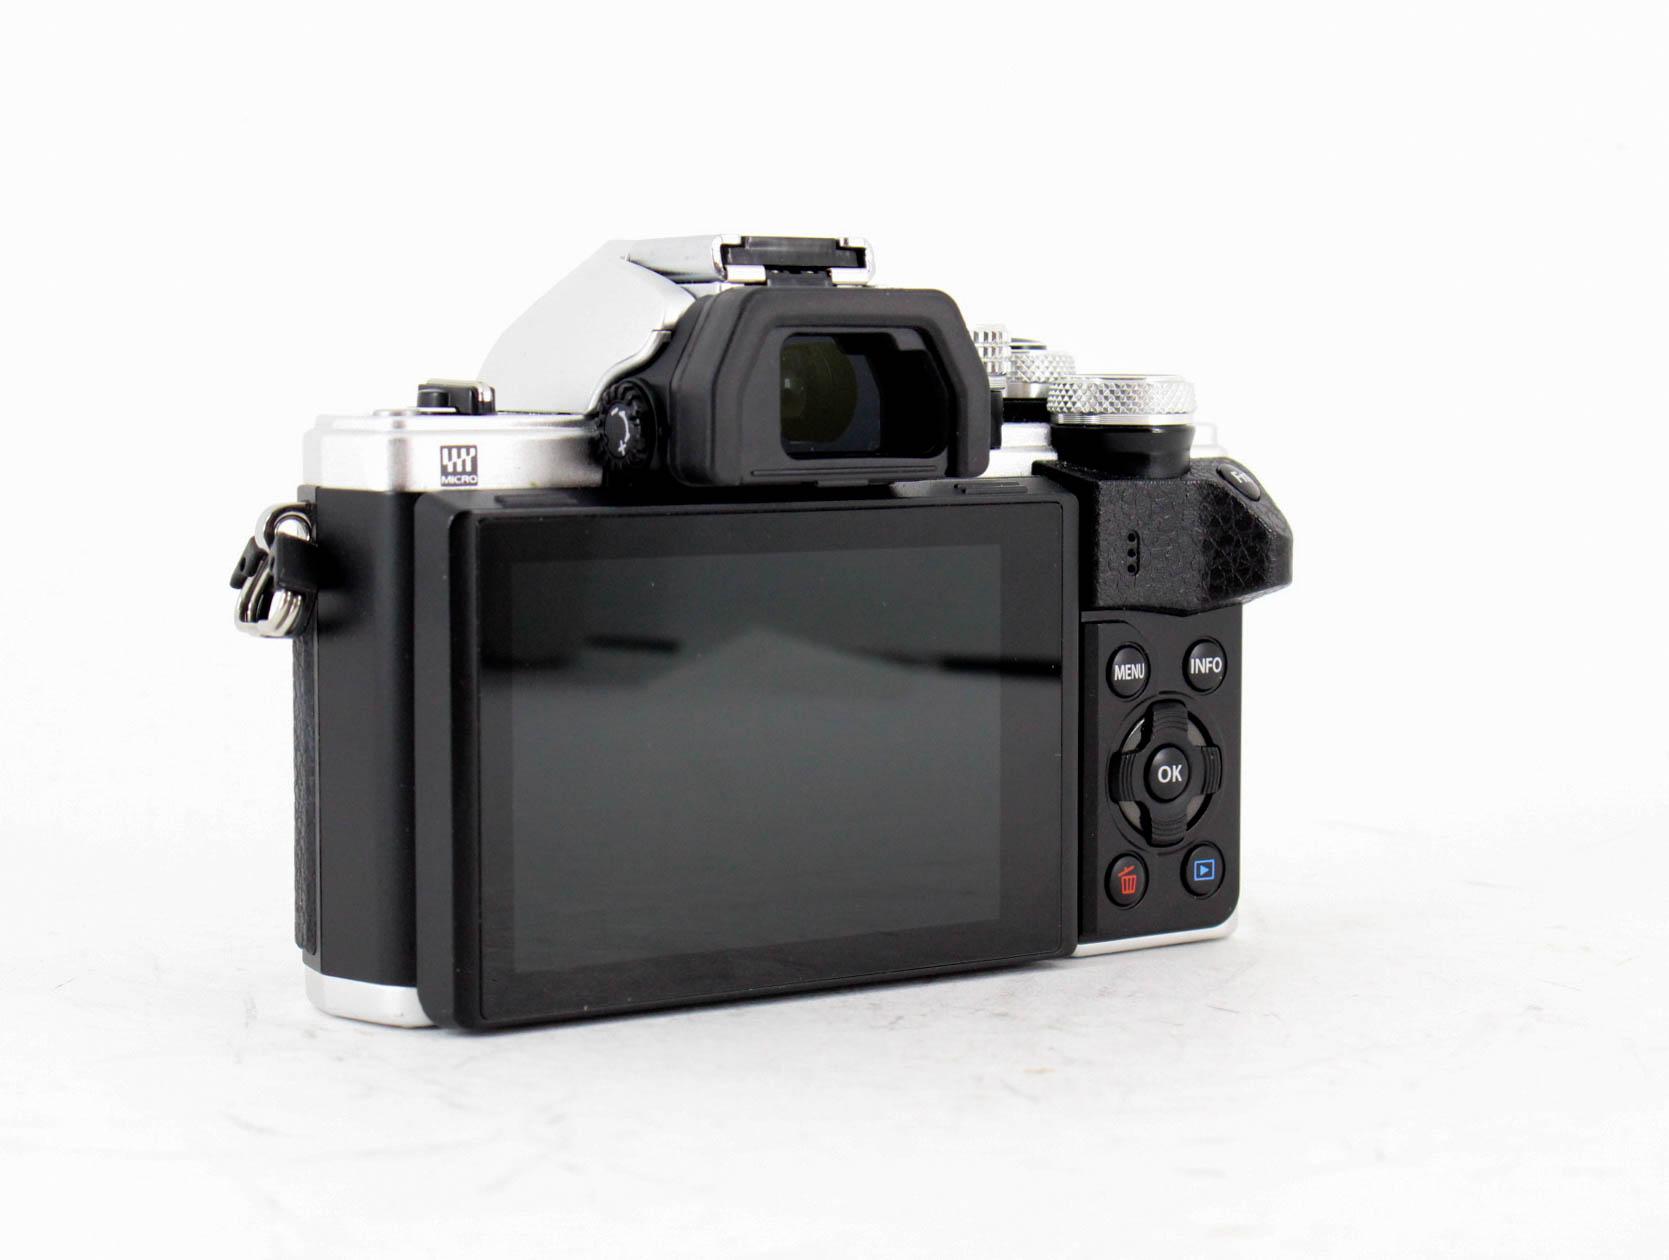
It has a 16.1-megapixel micro four thirds sensor paired with an 81-point autofocus system.
This camera has five-axis in-body image stabilization, a native ISO range from 100-25600, and 8fps burst shooting capabilities.
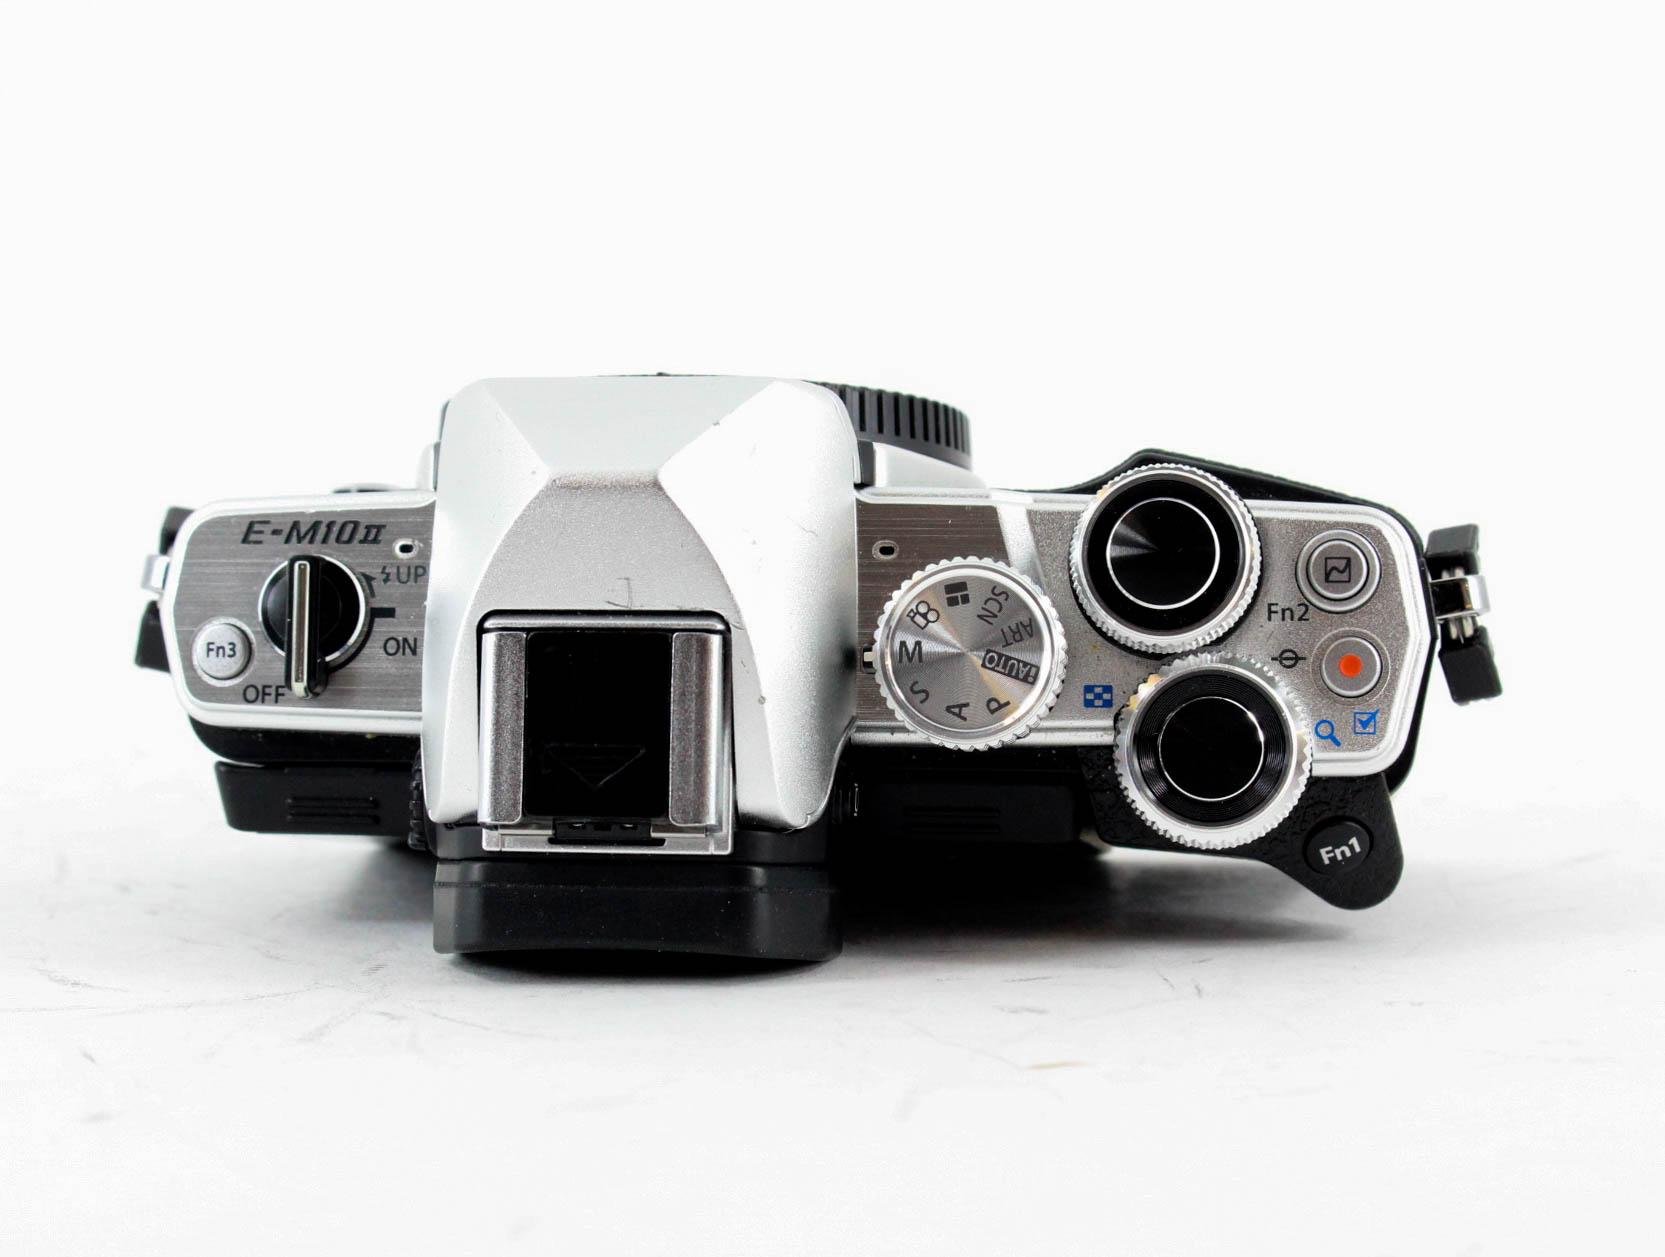
Additionally, this little Olympus offers 1080p HD video at up to 60fps, a beautiful electronic viewfinder, and a 3-inch LCD screen.
This camera is several years old, but still has many top-notch features that photographers today will enjoy. You'll enjoy the small price tag just as much!
Learn more about the Olympus OM-D E-M10 Mark II
Gifts for Photographers Under $250: Amazon Gift Card
![]()
Totally stumped regarding gift ideas for photographers on your list?
Why not go the easy route and get them an Amazon gift card?
Though a gift card isn't exactly the sexiest gift, when the photographer in your family sees that you have given them carte blanche to get what they want, they'll be stoked!
With an Amazon gift card, they can put the card amount towards whatever they want - a new lens, a second camera body, lighting gear, a laptop - you name it!
As far as flexibility goes, there's nothing better to give a photographer than a gift card.
Learn more about Amazon gift cards
We Recommend
Top 10 Gifts for Photographers Under $50 - 2018 Edition
 Image Credit: Handemandaci via iStock
If you think photography is an expensive endeavor, you aren't wrong.
I mean, you can easily drop a few thousand dollars on a camera body before you even get to lenses, tripods, camera bags, and other accessories.
But that doesn't mean that there aren't plenty of excellent gift ideas for photographers that won't break the bank.
Below, I've outlined some of my favorite budget-friendly photography gear for your consideration for this year's holiday shopping season.
Lensfinder

Let’s face it - photography gear can be expensive. Really expensive.
That’s a problem year-round, but when you’re holiday shopping and have tons of gifts to buy, it’s even more difficult to justify getting your loved one the $1,000 lens that they really want.
Fortunately, Lensfinder can help in more ways than one.
On the one hand, you can find great deals on pre-owned camera lenses at Lensfinder.
That means that you can get a truly top-notch lens for the photographer in your life but do so without busting your budget. It’s a win-win!
On the other hand, if you have some old lenses that you don’t use anymore, you can list them for sale on Lensfinder. When the lens sells, you can use it for holiday spending money for the photographer in your life.
 Image Credit: xxmmxx via iStock
The best part? You can list your lenses for sale for free.
There’s only a transaction fee (just 3.99%) when the lens sells (with a maximum fee of $500). If your lens doesn’t sell, there’s no charge at all!
And for peace of mind, the Lensfinder platform has advanced fraud filtering for both buyers and sellers as well as mediation services in the event that there’s a problem.
Payments are made and received via PayPal, so you can rest easy knowing that the transaction is safe and secure.
In other words, Lensfinder is the ideal solution for your holiday shopping needs. Either use it to find a loved one a killer lens or use it to sell old gear to pad your pockets for holiday spending!
Kizoa Online Movie and Video Maker

An under-the-radar gift you should consider for the photographer on your holiday shopping list is Kizoa, an online movie and video maker that can help any photographer create breathtaking, high-quality videos with excellent production value.
If you’re wondering why a photographer might want to create videos, the answer is simple…
As camera manufacturers have increasingly added more capable video tools to their cameras, it’s easier now than ever before for photographers to take video. And not just any video either, even entry-level and mid-range DSLRs and mirrorless cameras now offer 4K video recording.
But simply taking videos is a lot different than creating beautiful movies. That’s where Kizoa comes in.

With Kizoa, you get an online video maker that offers a vast library of ready-to-use templates, music, text, special effects, transitions and more. Effortlessly assemble a movie in a matter of minutes with intuitive photo and video editing tools for rotating, straightening and cropping in just a few clicks.
Once you’re done with the video, you can quickly and easily share it on Facebook or YouTube, send it to friends and family via email, burn it to a DVD, or download it as a video file in multiple formats including MP4, AVI, MOV, MPEG2, and even GIF.

Aside from comprehensive editing tools, Kizoa also works as a secure online cloud storage solution for virtually any photo and video file type including RAW images.
With an array of advanced features to choose from, Kizoa offers different levels of Premium memberships tailored to your photography needs. Starting at only $30 dollars for a lifetime, every membership is a one-time payment that will never have to be renewed again.
That’s a ton of benefits for photographers that are looking to expand the footprint of their business by offering additional services. With Kizoa, a photographer can provide professional-looking videos to their clients quickly, easily, and without much overhead.
Oh, by the way, Kizoa even has a free iOS app that makes it even more functional for photographers that want to get into videography.
That makes Kizoa an ideal gift this holiday season for the photographer on your list!
CanvasHQ 8x12 Canvas Print
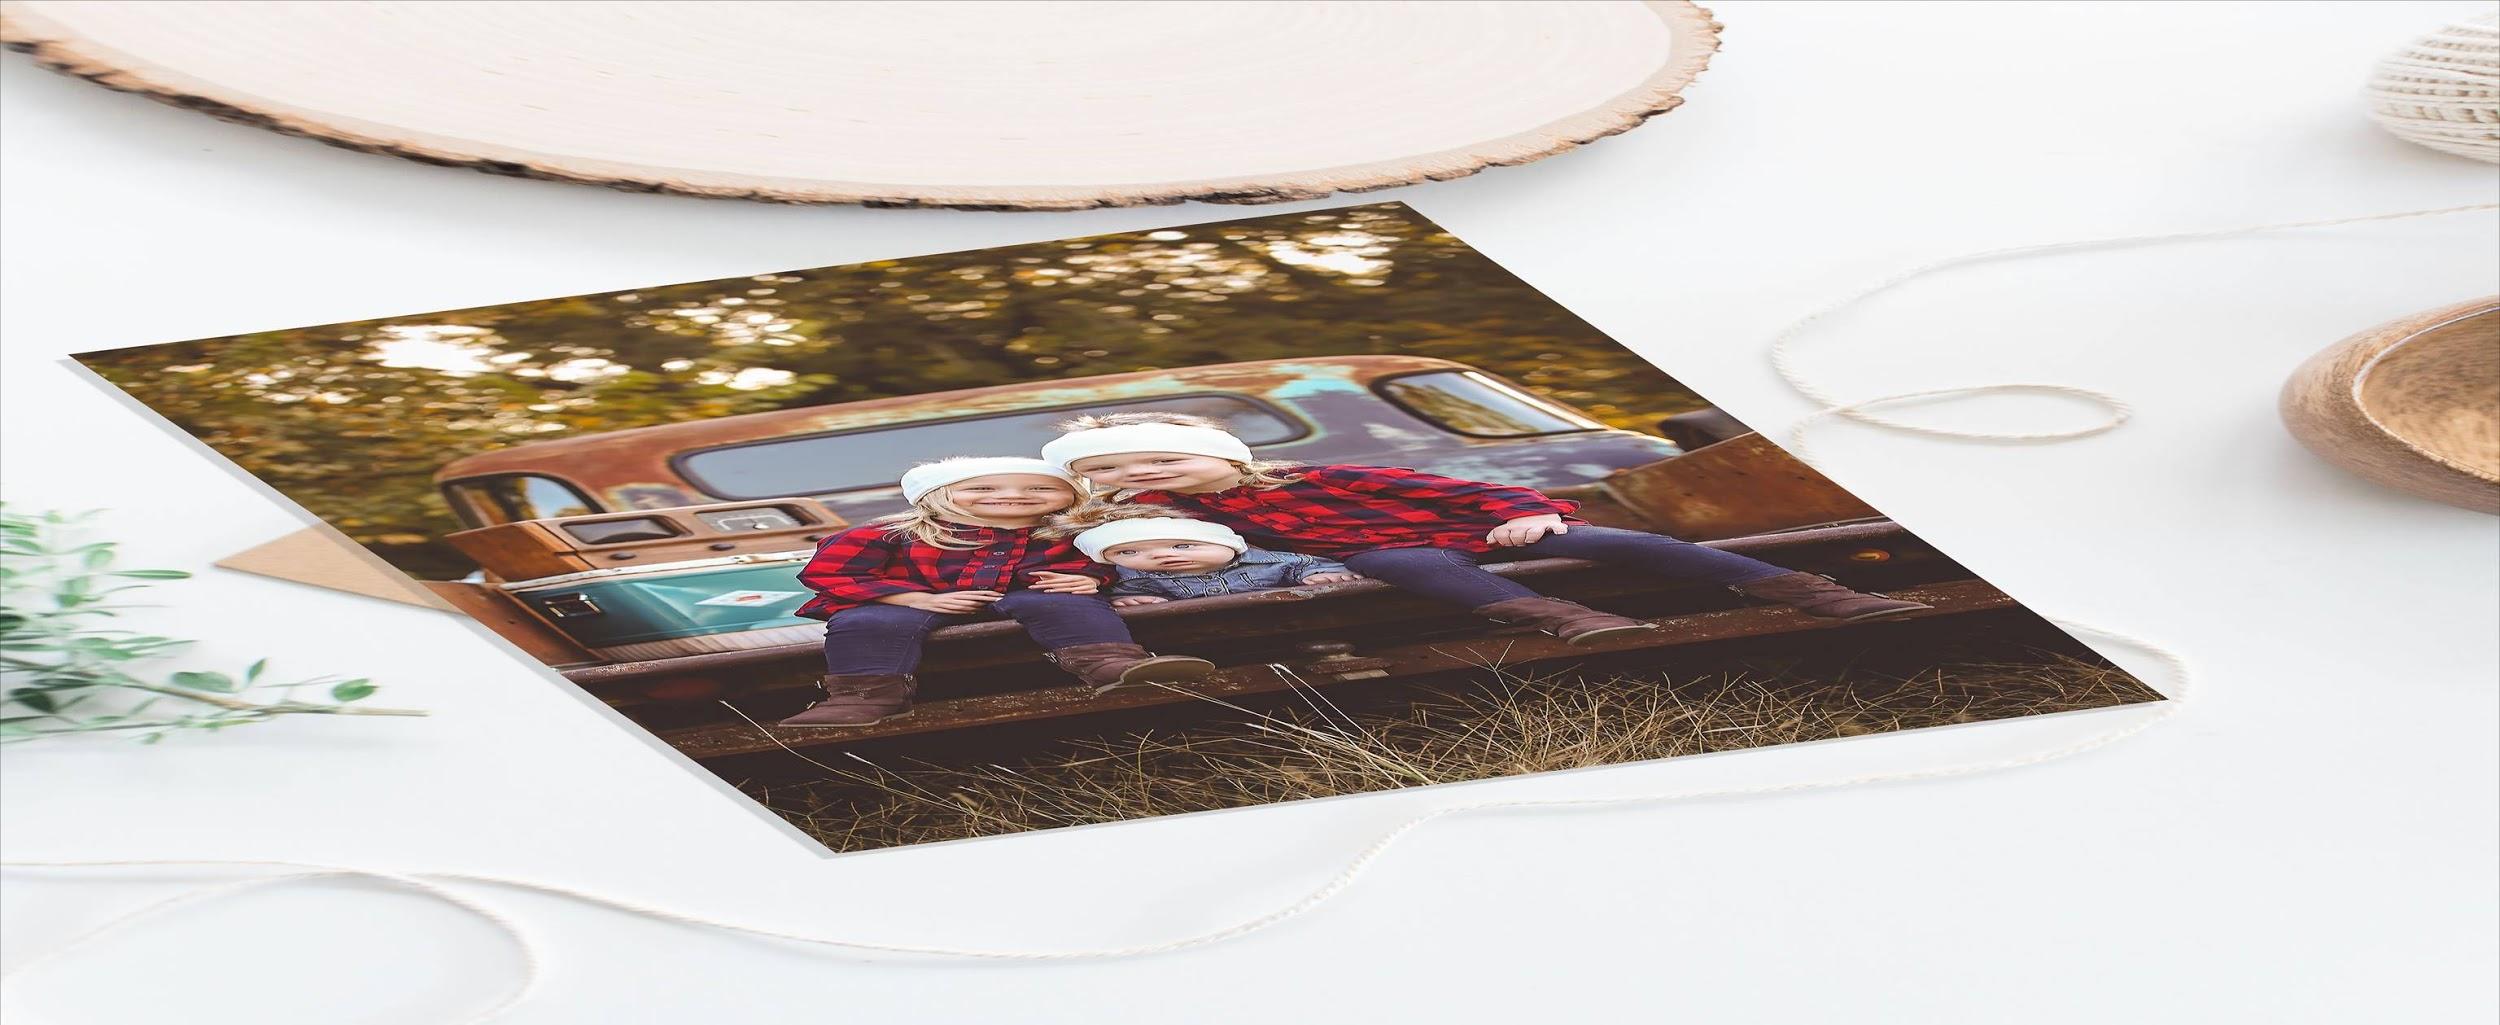
An 8x12 canvas print is just big enough to have impact on a wall but not so big that you spend your entire holiday shopping budget on one item.
These prints make ideal gifts for photographers (and anyone else on your list) because they're ideal for all kinds of photos. Get a print of a family portrait, the family pet, a landscape, or anything in between.
CanvasHQ offers a number of different 8x12 options with varying frame depths and finishes to get a custom look.
No matter what the options you select, you can rest assured that the print you get will have beautiful colors, gorgeous contrast, and be made to last for generations.
Giving art - especially personalized art - is a great gift idea for photographers. See what CanvasHQ can do for you!
Learn more about CanvasHQ 8x12 Prints.
Sew Trendy Newborn Mesh Wrap
 Belly Beautiful Photography
Sew Trendy Fashion & Accessories has built a reputation for crafting some of the finest newborn and maternity clothing, props, and accessories in the industry.
That being the case, if you have a photographer on your list that specializes in newborn photography, an ideal gift idea for them is a Newborn Mesh Wrap from Sew Trendy.
Created with a soft, high-quality mesh fabric, this set is a studio essential for any newborn photographer and is a Sew Trendy exclusive.
The mesh is both soft and stretchy, making it a perfect accessory for wrapping a newborn. It can be used as a base layer or layered with other fabrics.
The photographer on your list can even match this newborn set to Mama's gown to create an even more beautiful studio experience for mom and baby!
Learn more about the Sew Trendy Newborn Mesh Wrap
Drone World DJI Mavic Sling Bag
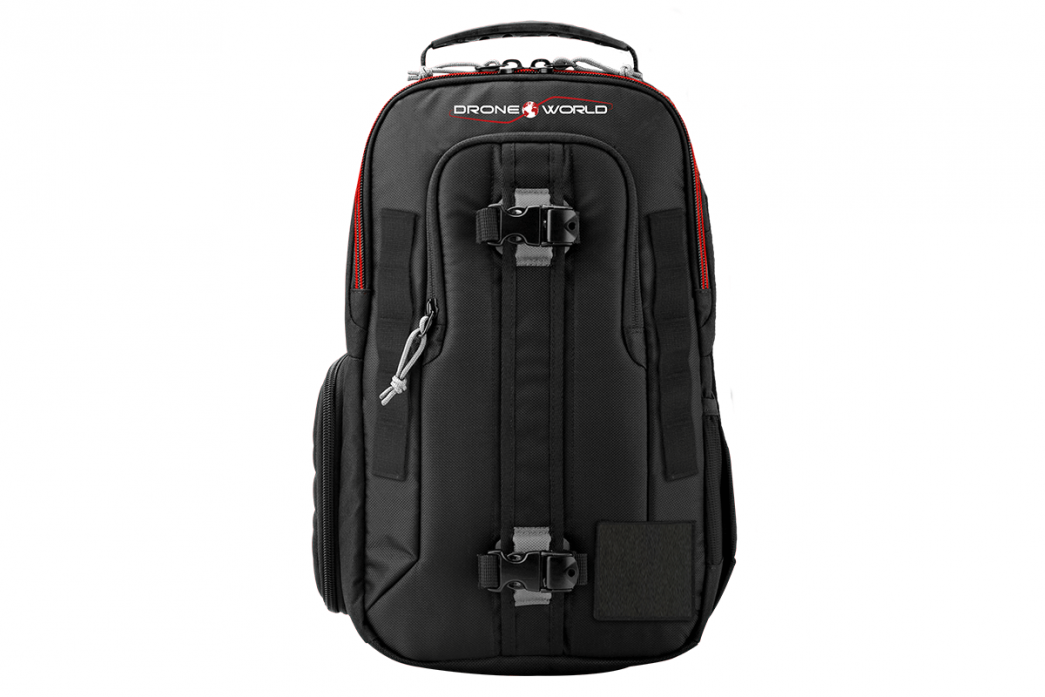
Drones are becoming the go-to photography device for a lot of folks, which is why a bag to carry their drone and accessories is such a great gift idea for photographers.
Drone World has developed a sling bag system to carry a number of DJI products, including the Mavic Air, Mavic Pro, Mavic Pro Platinum, and the Spark.
The bag offers a lightning-fast deployment system so your favorite photographer can get their drone out and into the sky in a flash.
The bag can be rotated to the front, the side-access can be unzipped, and the drone can be taken out and launched.
The bag has fully adjustable padded dividers and an all-weather cover to keep things dry, too.
Not bad for under $50, right?!
Learn more about the Drone World DJI Mavic Backpack
HDRsoft Photomatix Essentials
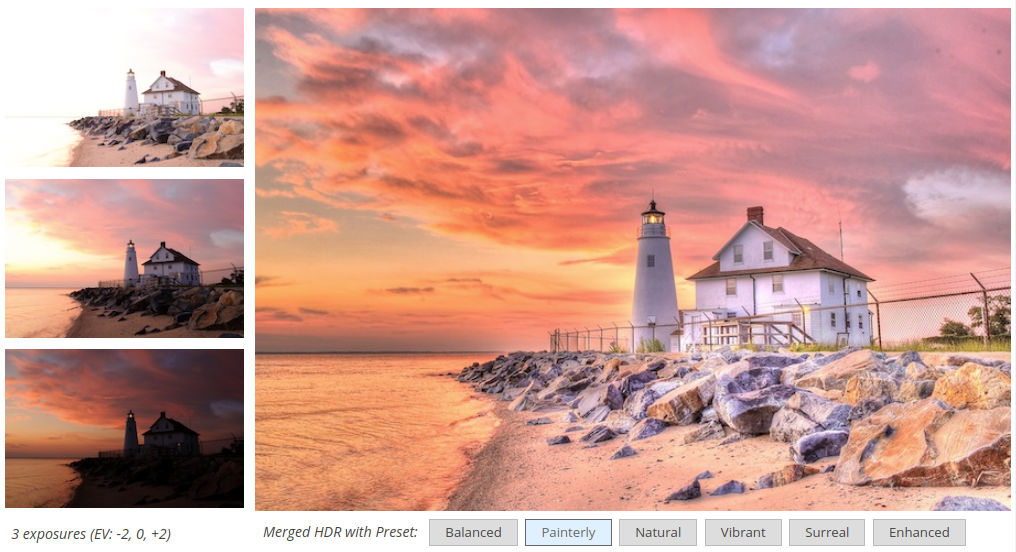
One of the most difficult things to master in photography is exposure.
Oftentimes, the highlights in a photo are too bright or the shadows are too dark.
But HDR - high dynamic range - photography takes care of that by combining multiple exposures into one photo, that way photographers have a well-exposed image throughout.
Photomatix Essentials by HDRsoft is an easy-to-use program that allows photographers to easily create HDR photos, even from source images taken when the camera is handheld.
The program has automatic ghost removal as well as 33 HDR settings and 30 built-in presets for perfecting HDR images.
There's even four HDR styles for further customizations.
Creating beautiful, well-exposed images has never been easier!
Learn more about HDRsoft Photomatix Essentials
Sirui Tabletop Tripod Kit
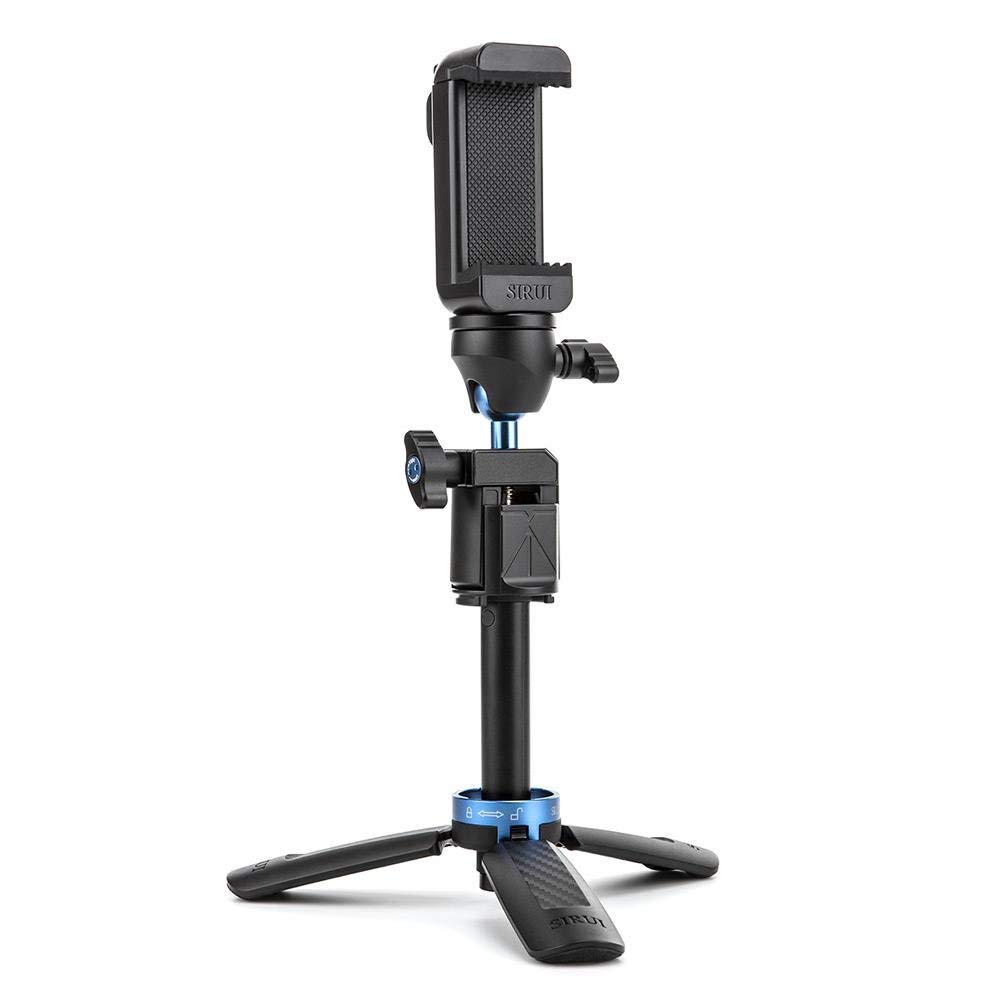
With the addition of powerful cameras, lenses, apps, and other features on smartphones that make them excellent cameras, it only makes sense that more and more photographers are using their phones as one of their primary camera systems.
That being the case, they need a compact, easy-to-use tripod to stabilize their smartphone for picture-taking.
The Sirui Tabletop Tripod Kit is a perfect complement for smartphone photography.
It includes a 3-stage folding tripod, a mobile phone clamp, a multi-function mini clamp ball head, and a Bluetooth shutter release.
The tripod can even be extended for use as a selfie stick!
Help the photographer on your list expand their creative abilities with their smartphone camera by hooking them up with a top-notch tabletop tripod.
Learn more about the Sirui Tabletop Tripod Kit
The Most Comfortable Camera Strap Available
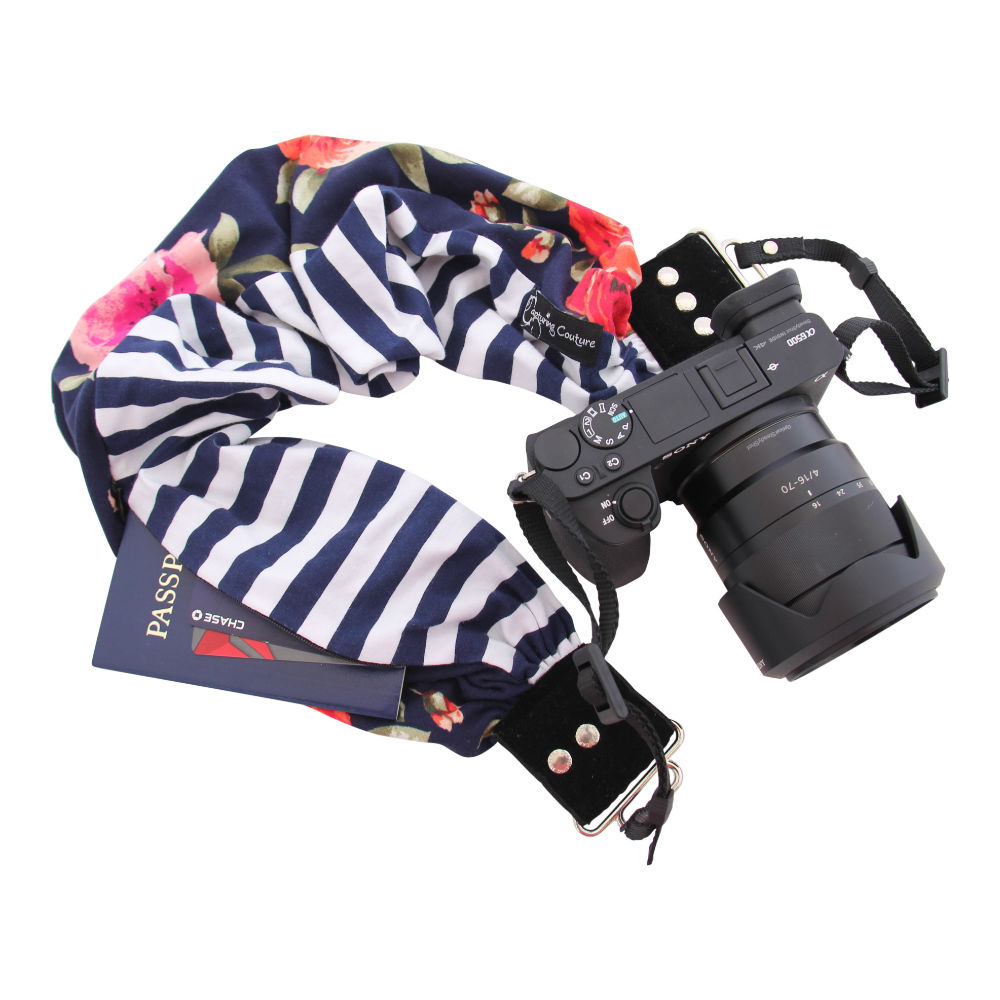
There is no doubt about it…scarves make the most comfortable camera straps!
For the photographer on your holiday list that wants something functional and fashionable, consider giving them the gift of a Capturing Couture Scarf Camera Strap.
On the functional side, these beautiful and unique camera straps, like the Sammie|Allie Model shown above, have all the strength and adjustability of any strap out there. With high-quality knit fabrics and strength-tested connector webbing, this strap can go from over-the-shoulder to across the body with no problem with a 35” to 53” variable length strap.
On the comfort side, the knit/cotton blend fabric is super soft to the touch and gives any outfit a trendy, updated look.
Exclusive to Capturing Couture is the added hidden pocket for your phone, lens cap, spare memory card and more! This patent-pending design won’t be found anywhere else.
No matter whether it’s hot or cold, whether it’s needed for a big or small camera, or whether the photographer on your list is a pro or an amateur, this strap is an easy choice to make. The hardest part is picking out a color!
Learn more about Capturing Couture Scarf Camera Straps
Freehands Photography Gloves
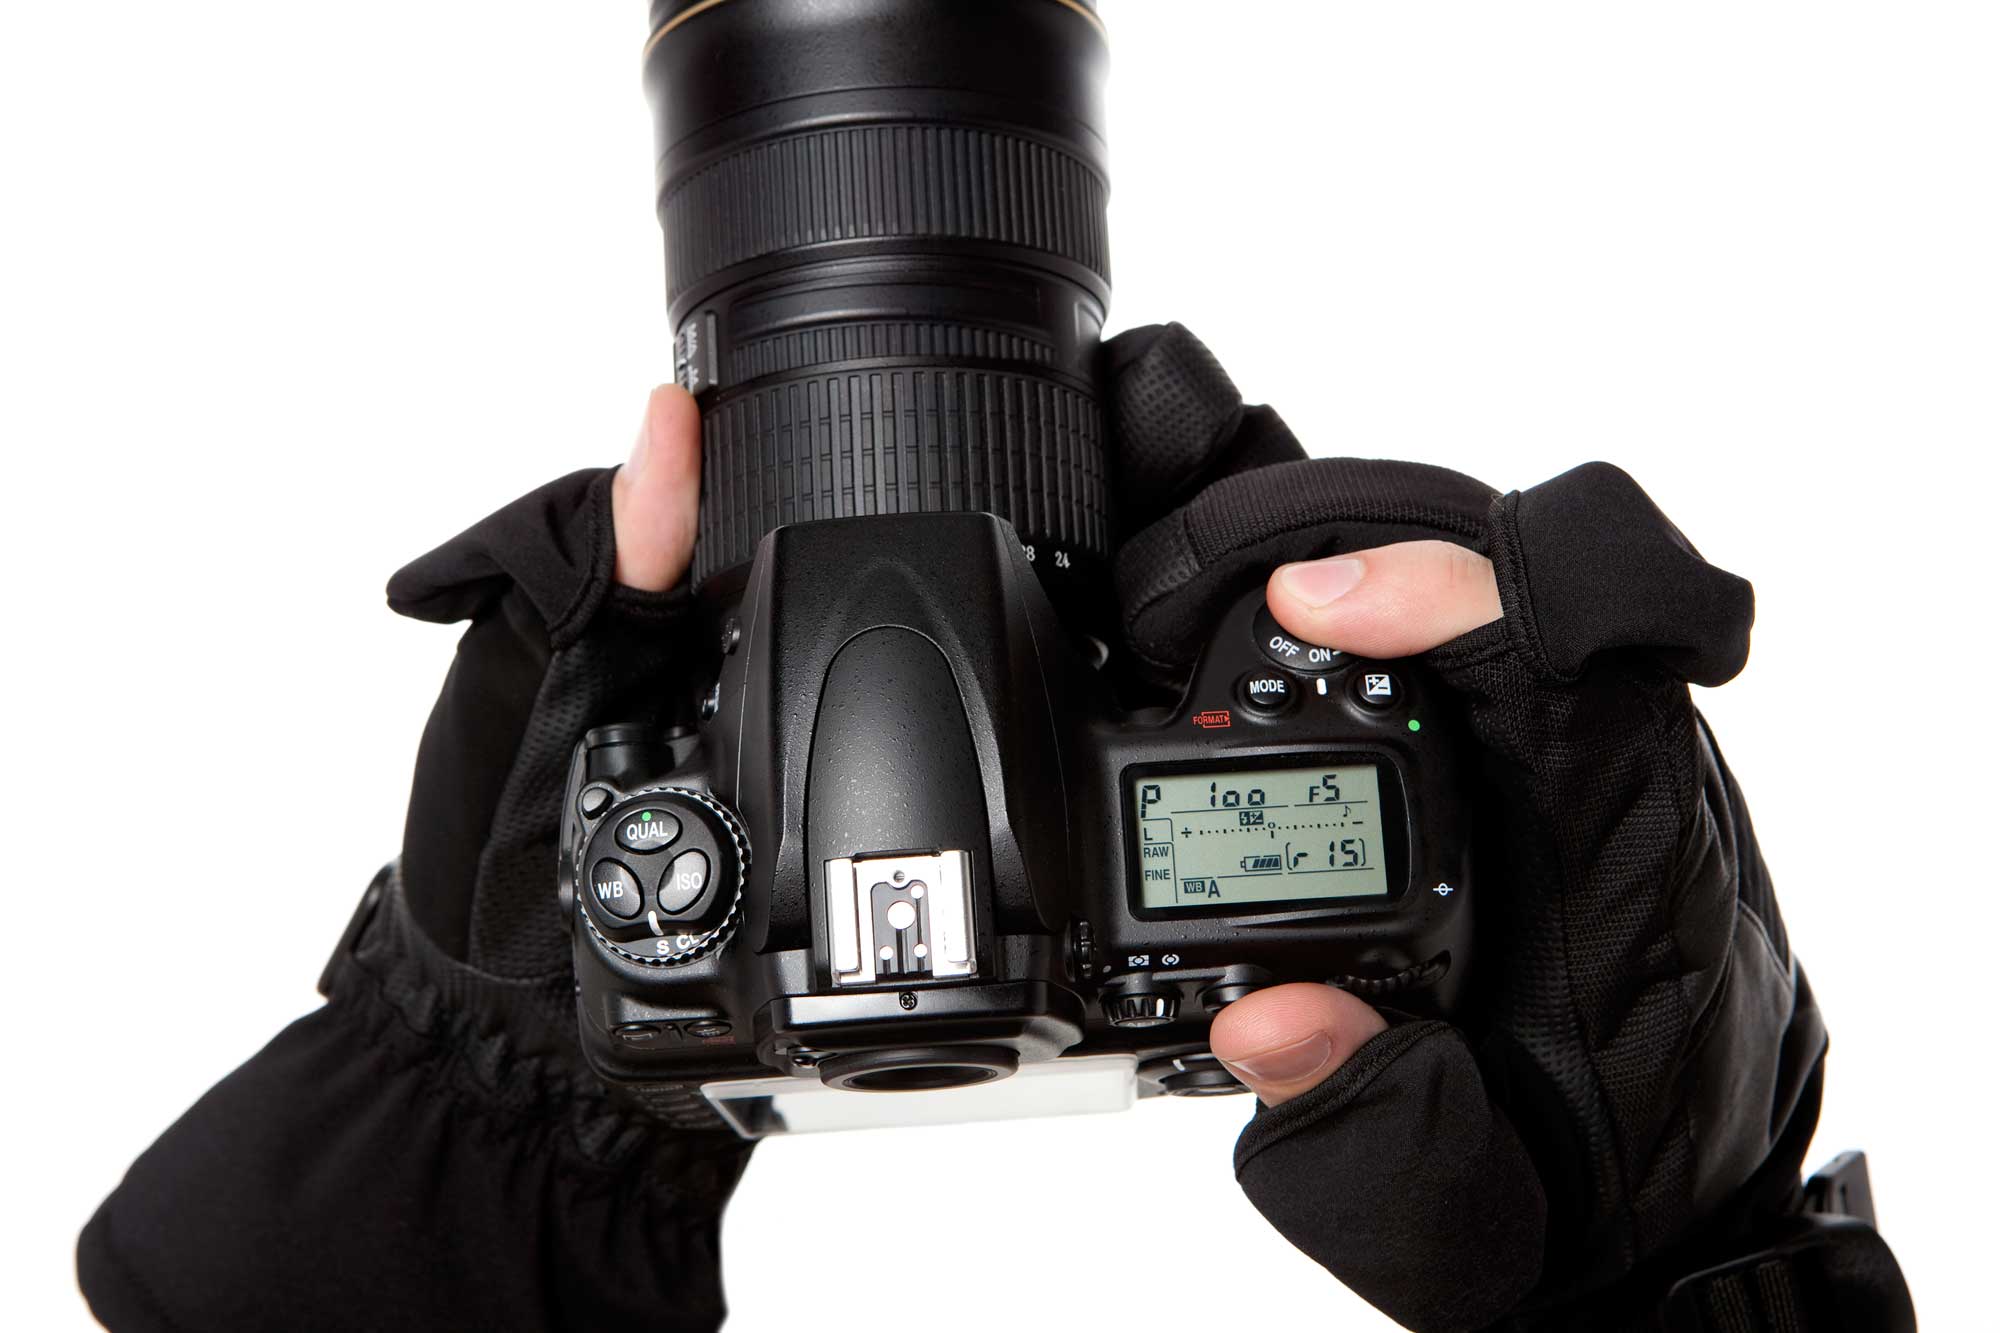
Just over a decade ago, New York City-based designer Josh Rubin realized that he needed to design gloves that provided more functionality than what he could find in traditional gloves.
His epiphany moment?
Answering his iPhone with his nose.
Josh didn’t want to take off his gloves, nor did he want to continue answering the phone with his nose. So, while at dinner one night with his father, Stanley Rubin - who is a glove maker, no less - the idea for the Freehands gloves was born.
Fast-forward to 2018, and Freehands is going strong with the third generation of family glove makers responsible for crafting gloves that are comfortable, aesthetically pleasing, and functional.
Though Freehands has tons of different gloves and has a world-recognized brand, I've outlined just a few of my favorite models below, each of which costs less than $50:
Stretch Glove (Mens and Womens)
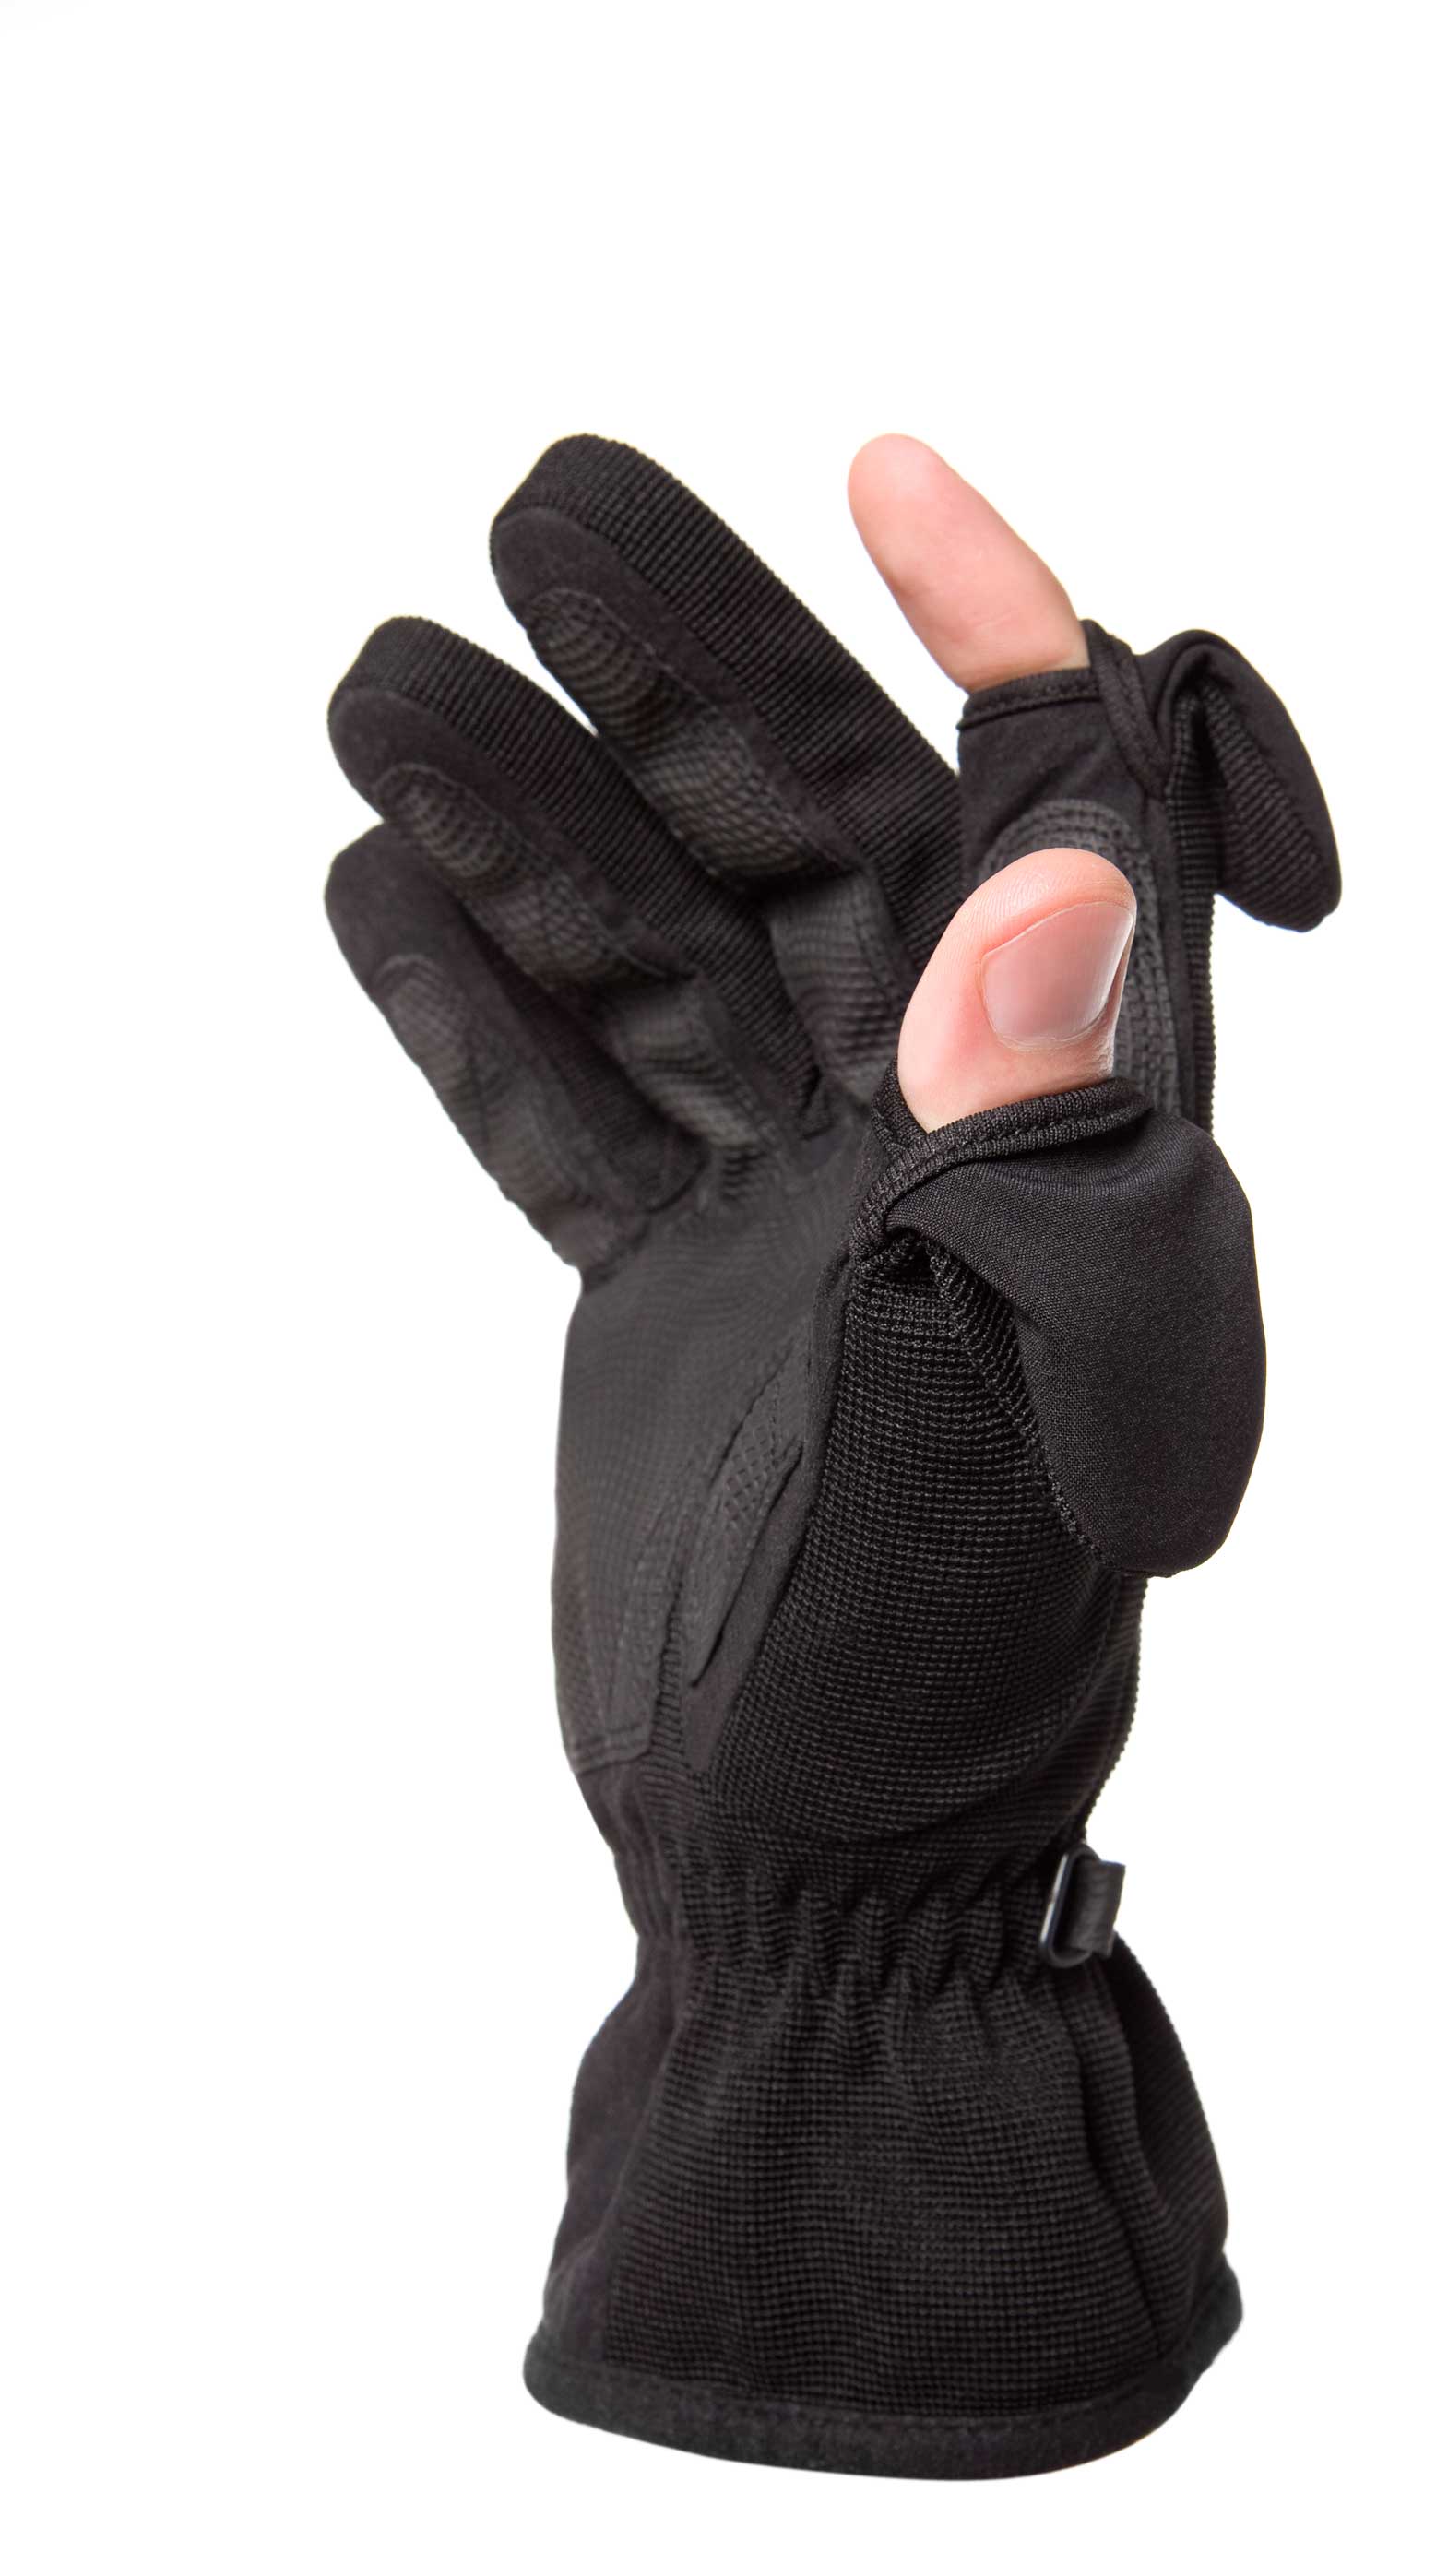
The windproof/waterproof barrier on the back of the glove and the full Thinsulate lining will keep your hands warm and dry while the finger cap edges are reinforced for long-lasting durability.
These gloves have a palm patch for added security when holding your phone or camera while the finger caps on the index fingers and thumbs are magnetically secured to ensure easy calling, texting, or operating your camera.
Fleece Glove (Mens and Womens)

If you or someone on your list needs an unlined fleece gloves for cool days, the Fleece glove is an ideal choice.
The full digital grip on the palm helps you keep a grip on your phone or camera while the improved finger flap overlap keeps cold air out when your fingers are covered.
There's a handy elastic wrist cinch and plastic hook to keep the gloves together, too.
Soft Shell Photography Gloves (Mens)
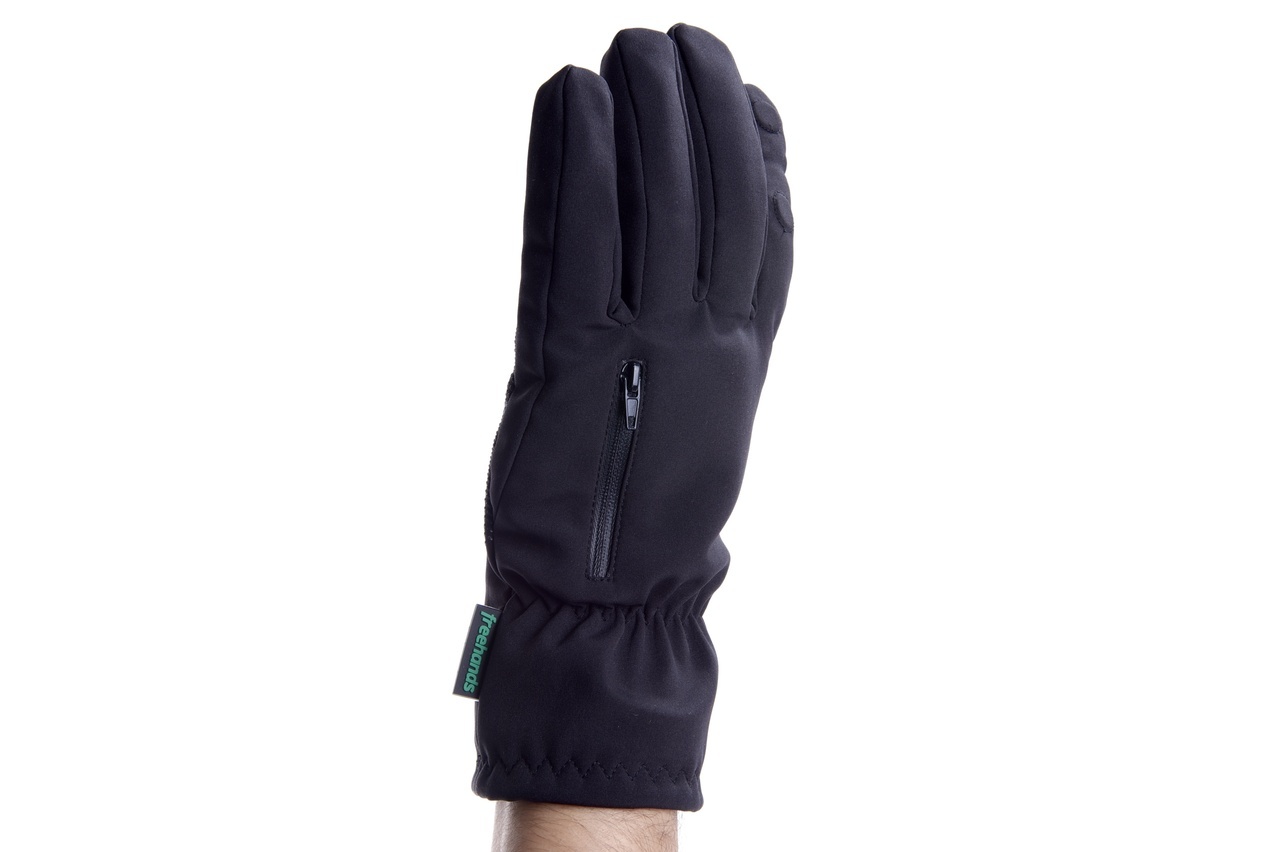
Designed specifically for photographers, this soft shell glove not only has the flip back caps on the index fingers and thumbs, but there's also an integrated zipper pocket on the back of the left hand that's a perfect spot for carrying a spare memory card.
Like Freehands' other gloves, this soft shell model offers superb warmth, performance, and durability. By customer request this style has a thin lining to cover the exposed finger or thumb when the cap is pulled back.
Finger Mitten (Mens)
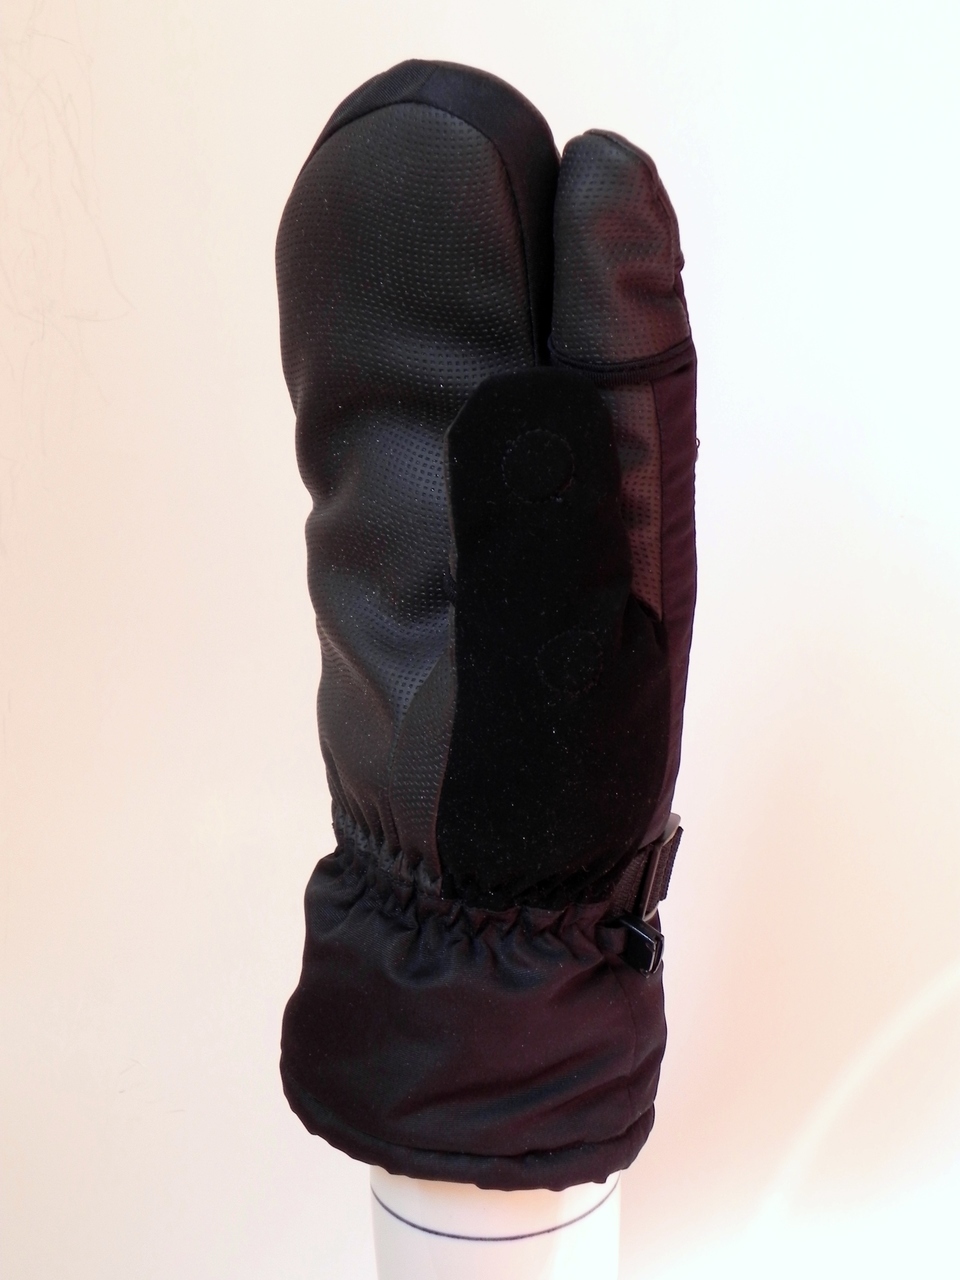
What your favorite photographer will appreciate most about these mittens is that they provide the warmth of a mitten while also having the functionality of an index finger and thumb.
Both the index finger and thumbs have flip back caps that are magnetized to keep them out of the way.
And with a Velcro-closure pocket on the back of the hand for a memory card or hand warmer, these mittens are ideal for photographers that have to work in chilly conditions!
Soft Shell Ski/Snowboard Glove (Mens)
The photographer on your holiday shopping list needs to unwind from time to time, and for those that ski or snowboard, the Freehands Soft Shell Ski/Snowboard Glove is a great gift.
It's got a soft shell outer layer, a soft velour lining, and a digital grip palm.
Add to that a storage pocket over the knuckles, an adjustable web strap, a cord lock, suede thumb, and water-repellent/breathable construction, and you have the makings of one heck of a cold-weather glove!
PhotographyTalk members can use the 20% off coupon code "PHOTOGRAPHYTALK" through 12/1/2019 at freehands.com
PhotoLogo

There are two things that many photographers worry about when they post their images online.
First, photographers have to be concerned about someone stealing their photos and passing them off as their own. It’s an unfortunate byproduct of the world we live in.
Second, photographers (myself included) worry about using signatures, logos, or watermarks on images because if they aren’t done well, they detract from the quality of the image, as shown below.

So, if you’ve got a photographer on your holiday shopping list, you might consider giving them a gift that addresses both of these issues. That gift is PhotoLogo.
For under $40, you can give your favorite photographer a custom-designed, handmade signature made by real humans that they can use to watermark all of their images.
It’s easy as pie, too. Just direct your loved one to PhotoLogo’s website where they can choose from a wide variety of samples to customize the look of their signature. In as little as 48 hours, they’ll receive a proof of the signature. If something’s off, a free revision is included, that way they get the exact signature they want.

Over 80,000 photographers and counting can’t be wrong. I mean, check out my PhotoLogo above. Not bad, right?!
This holiday season, help the photographer in your life identify their photos in style and sign their work, just like artists have for hundreds of years. Get them a PhotoLogo!
We Recommend
Uses for Variable ND Filters
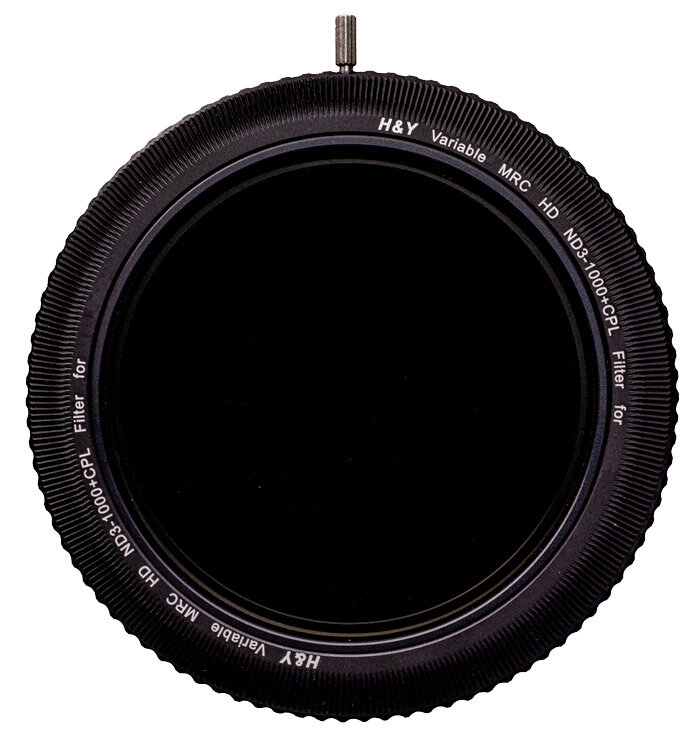
Photography and videography benefit from our knowing proper procedures and making use of the right tools. One often underappreciated and sometimes overlooked tool is the lens filter. Neutral density filters, also called ND filters, are one of the more useful lens filters for digital photography and videography. Variable ND filters make using these tools very simple.
Uses for Variable ND Filters

photo byKorisbo via iStock
What is a variable ND filter? Neutral density filters add density to the light path with no color tinge, allowing the exposure triangle to be altered in order to give us the exposure setting options we want. Why you need a variable ND filter will depend on whether you shoot stills or video and what type of scene you are capturing.
Here are a few uses for variable ND filters:
- Reduce shutter speed for motion effects
- Reduce shutter speed for natural video
- Widen lens aperture for selective focus
- Reduce overall exposure level
Motion Effects
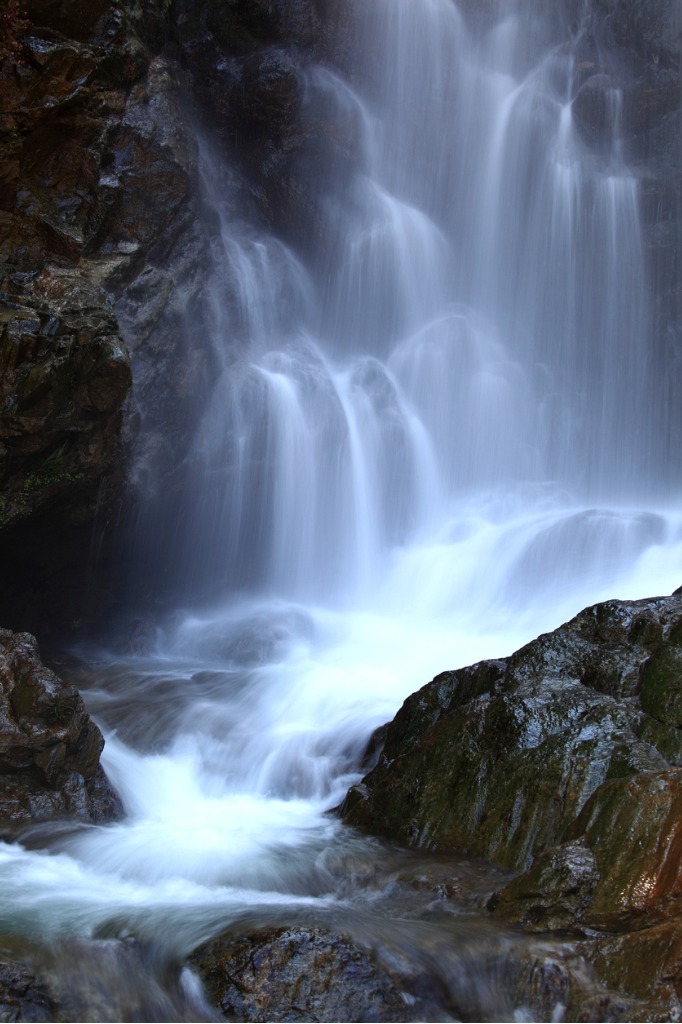
photo byBIHAIBO via iStock
When photographers think about variable neutral density filters, waterfalls and waves will jump to the front of their minds. That’s because those fantastic looking blurred water images of those subjects are often made with neutral density filters in order to get the slower shutter speeds needed.
Variable ND filters are also useful for time lapse photography that gets shown as a video even though it is a series of individual exposures. The reason you would use a variable ND filter for time lapse is in order to have a natural feel to the finished video, you want the objects in motion to be slightly blurred from motion. Otherwise, it looks like a jittery example of stop motion animation.
Natural Looking Video
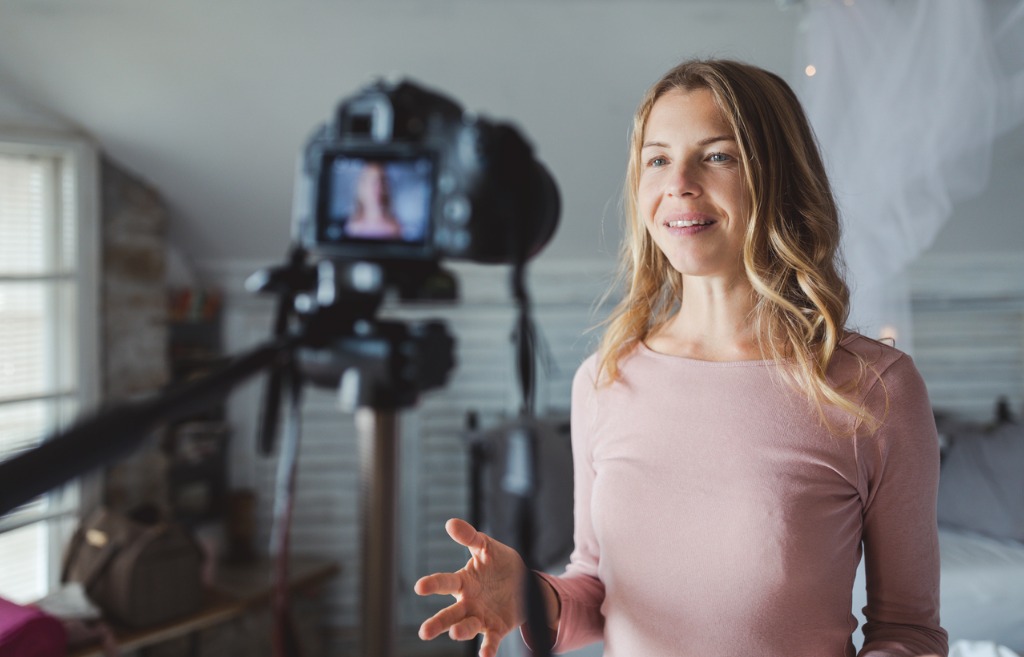
photo byJasmina007 via iStock
Frame rates and shutter speeds are part of what makes a video look natural on playback or look somewhat odd and uncomfortable. It’s an effect that mimics what happened with rotary shutters in movie cameras that used film. In order to achieve a natural look the rotary shutter needed to open a full 180 degrees which was equivalent to 1/48th of a second at 24 frames per second.
At ISO 400, it is difficult to get a shutter speed that slow in daylight or bright indoor lighting. With digital video, faster shutter speeds and frame rates have the same type of result now as it did with small degrees of opening in rotary shutters, an odd, somewhat jittery motion appearance which most viewers find unnatural.
Neutral density filters are used in these situations to diminish the light intensity coming through the lens. Variable neutral density filters are very useful for video in that you can attenuate the light variably instead of in one density level only, making your options more versatile.
Selective Focus Lens Aperture
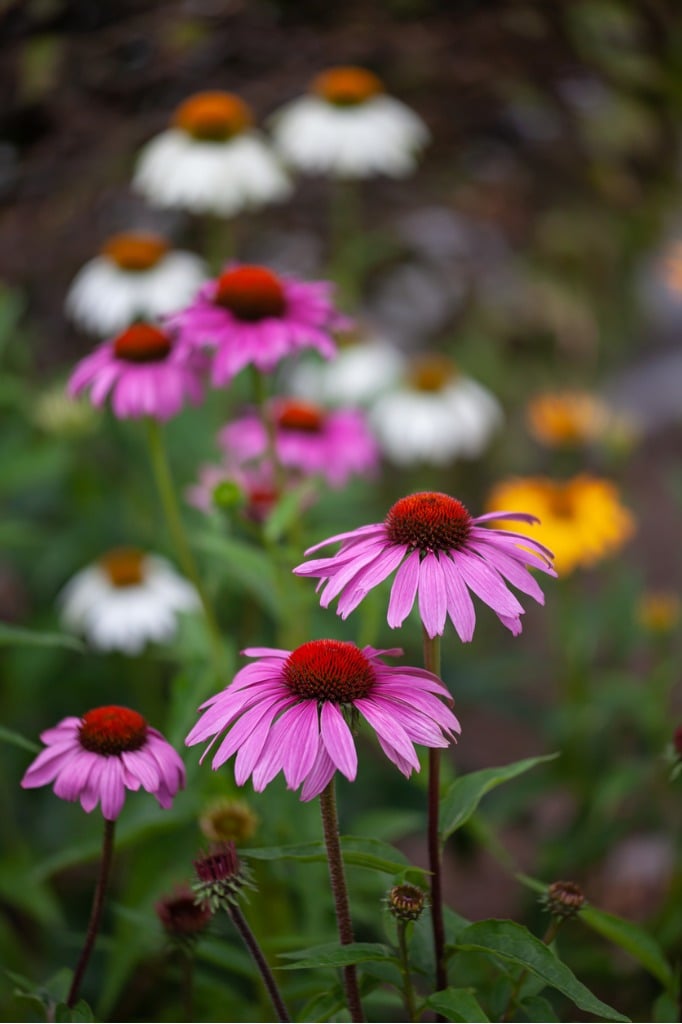
photo byjokuephotography via iStock
Related to shutter speed adjustment in the exposure triangle is the lens aperture or f-stop. Another function of lens aperture is depth of field or depth of focus.
A large lens aperture will provide shallower depth of focus, giving you the ability to select only a small portion of the scene to be in focus. This is called selective focus, where the foreground and background are out of focus and the subject is sharp. Problem is, just as with trying to get slower shutter speeds, many scene illumination levels just won’t let you choose a wide enough aperture and get correct exposure.
In videography and still photography, a neutral density filter can tame your exposure triangle to give you the wide aperture you want. A variable ND filter will give you options of how wide to open up the lens aperture, allowing more creative choices.
Reduce Scene Exposure Value

photo byNadezhda1906 via iStock
There are the specific reasons listed above for using variable ND filters, but there are other reasons we can use these lens filters. Simply to attenuate the light into whatever settings we want to use is a good reason why you need a variable ND filter.
For still photography and videography, we can easily think of how to add light with flash, strobes, continuous lights, and reflectors, but some scenes are just too bright for the settings we want to use. We may not be intending to blur motion or use selective focus, but having control over the aperture and shutter speed is always desirable.
Some types of scenes tend to be very bright, limiting our options in regards to exposure settings. A full daylight scene of a cityscape, a bright beach with white sands and lots of water, or a snow covered field or mountain will play havoc with your options in the exposure triangle.
What Filter Is Best?
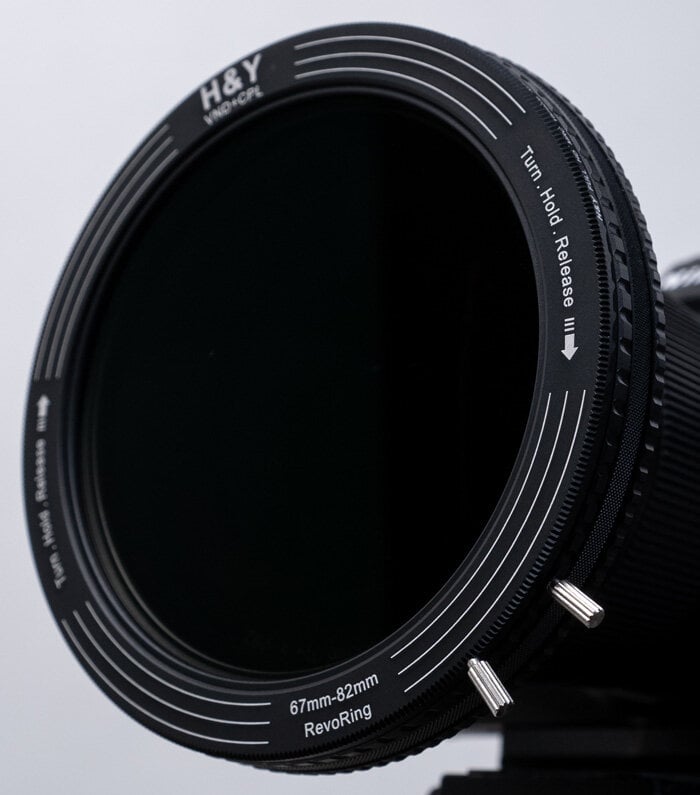
Well, we have discussed the reasons for using ND filters and why variable ND filters are a great option because of the ability to change how much density is being introduced to the light path. Now you want to know what filter is a good fit for your needs.
I used the word fit as a bit of a pun since I have really enjoyed testing a new concept in the world of photographic filters, the RevoRing from H&Y Filters. H&Y Filters RevoRing is an idea that should have been here sooner, but it is definitely worth the wait.
RevoRing is a variable size mounting system for filters that eliminates the need for multiple filters or dozens of step up adapter rings since it can be adjusted to fit whatever lens filter size you need. A great benefit of this method of mounting filters is that it also acts like a quick release for lens filters.
H&Y Filters has paired a RevoRing with one of their premier filters, the combination circular polarizer (C-POL) and variable ND filter together. The variable ND filter operates within a range of ND3 to ND1000 and has a C-POL built into the filter so you can also adjust the reflection reducing, haze penetration, and sky contrast while controlling exposure levels with the variable ND filter.
There are many good reasons to want to use variable neutral filters, so try one out for yourself. Especially if you shoot a lot of video with your digital camera will you find a variable ND filter quite valuable.
Learn More:
We Recommend
What are Step Up Rings and Why Do You Need Them?
Sooner or later, most avid photographers end up needing a step up ring for filters.
What are step up rings? These are non optical (no glass in them) rings that adapt from one filter size to another. They allow you to mount a larger filter on your lens than what your lens thread diameter is.
Among photography accessories, step up rings are one of the most useful yet inexpensive items in your camera bag. There are step down rings, too, but due to the issue of vignetting or intruding into the image area, they’re not as common.
What Are Step Up Rings?
A step up ring is a thin piece of metal that is threaded on two ends. On the smaller side of the ring, it is threaded in order to screw into the filter thread of a lens. On the larger side of the ring, it is threaded in order to receive a filter being screwed in.
You might use the adapter in the way we use a three prong to two prong adapter when plugging in something to a wall outlet. You are adapting from one size to another.
Why You Need Step Up Rings

photo byxxmmxx via iStock
Now that we know what a step up ring is, the reason for having one is easy to figure out. You have a filter that is one size, but your lens takes filters of a different size. So, you adapt the sizes with the step up rings.
Step down rings, going from a smaller filter to a larger size lens, are not as popular because they tend to hamper the image in ways photographers don’t like, such as intruding in on the image area due to vignetting.
The most common reason for having step up rings is to avoid duplicating expensive filters. You might have a UV filter on most of your lenses for protection, and that’s fine. But other filters aren’t on our lenses all the time and some are rather expensive.
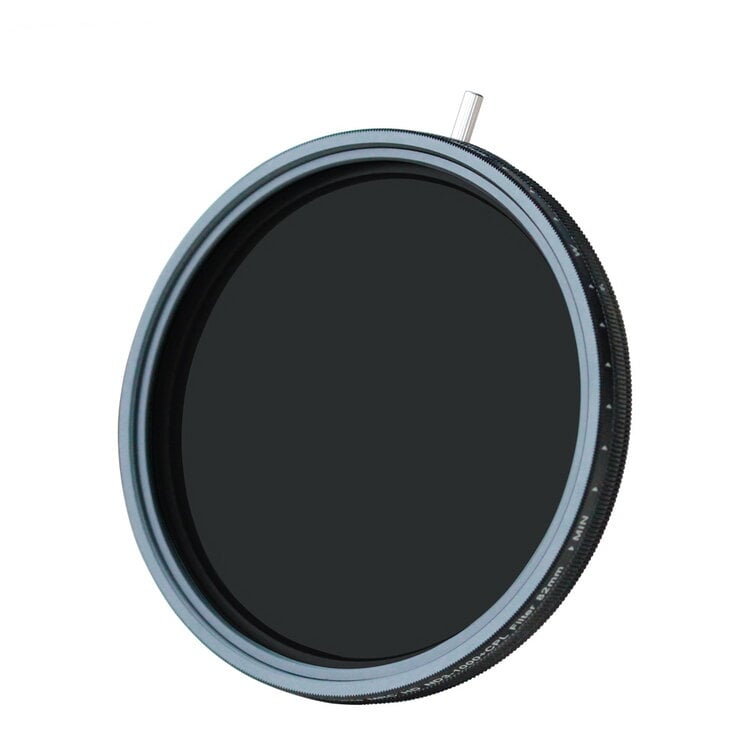
A high quality circular polarizer or variable ND filter would be a little costly to reproduce for each lens size we have. Even though lens manufacturers try to keep many lenses with a similar filter diameter, fast, ultra wide, or very long lenses tend to have larger filter diameters than our kit lens, Nifty Fifty, or normal range zoom lenses.
Plus, if you’re like me, you tend to buy, sell, and trade photographic equipment. I may run across a desired lens at an estate sale or listed in an online catalog of used photo gear that I want and the filter diameter is way down on the list of features for most of us. We end up with a lot of different filter diameters on our lenses.
I tend to do what photographers have done that I learned from and buy the biggest specialty filter size I need and then step up my from other lenses.
Learn More:
Quirks Of Using Step Up Rings
The issue with step up rings for me is that I never seem to have the right one with me even though I have purchased literally dozens through the years. Plus, it takes time to find the right two sizes, since the writing of what sizes it’s stepping is either too small to see or has worn off.
In the back of my mind I have had thoughts of there must be a better way to handle this necessary camera chore.
H&Y Filters RevoRing
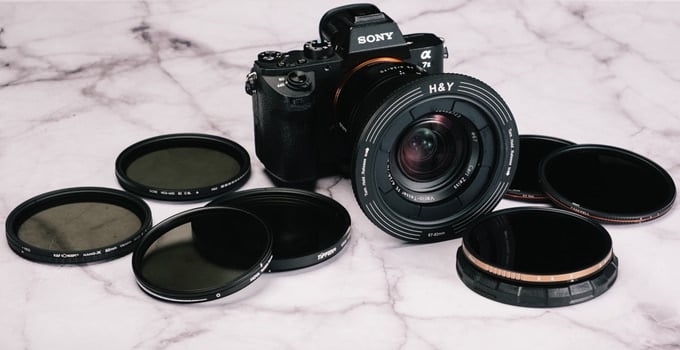
Which is why I’m excited about the RevoRing Kickstarter from H&Y Filters. The RevoRing is a variable size adapter for filters. Instead of needing several rings and fiddling with finding the proper combination of inner and outer szes, the RevoRing lets us adapt to almost any lens.
Another great feature of the method used for variably adapting to different lenses is that it becomes a lens filter quick release. It takes much less time to mount on my lens, especially if we count the time spent finding the right step up rings.
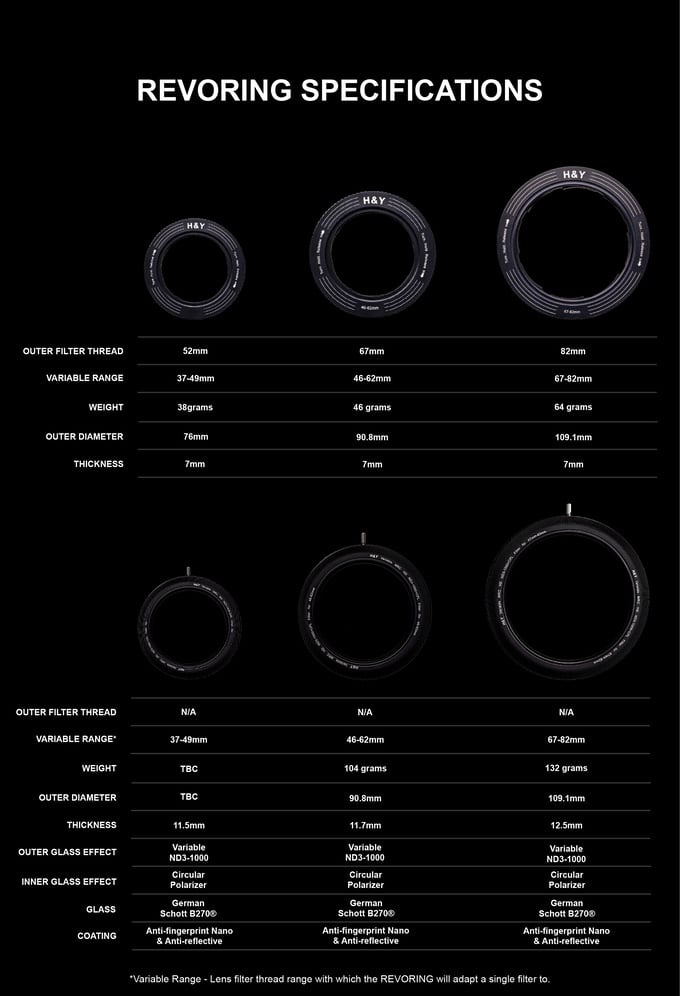
There are three different sizes of RevoRing, pretty much optimized for the three most popular advanced digital photography formats, MFT, APS-C, and Full Frame.
If you have ever had the need to adapt from one filter size to another, you should consider this new photography accessories tool. I opted in already, a full user report will come soon.
Learn More:
- No Step Up Rings? No Problem! Meet Revo Ring
- RevoRing: An Inexpensive, Yet Highly Valuable Tool for Photographers
We Recommend
What Do the Numbers for ND Filters Mean?
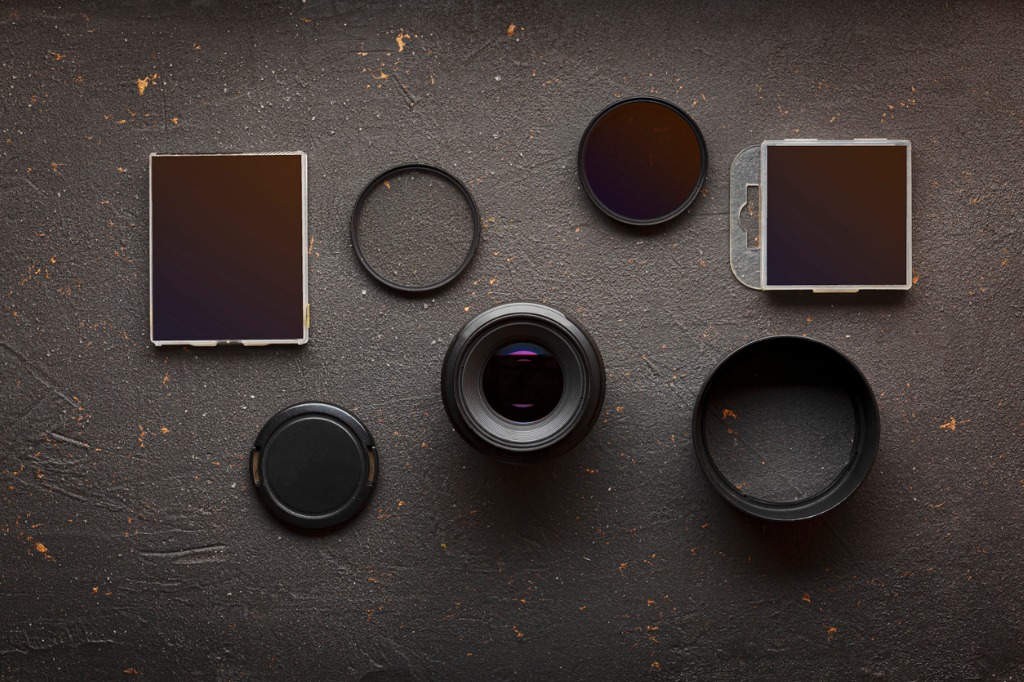
photo byGANNAMARTYSHEVA via iStock
Neutral density filters, commonly called ND filters, are a mainstay of modern digital photography. The numbers for ND filters can be very difficult to figure out, though. ND filter numbers don’t just confuse newcomers or beginner digital photographers, many advanced and professional photographers have a hard time with them
What Do ND Filters Do?
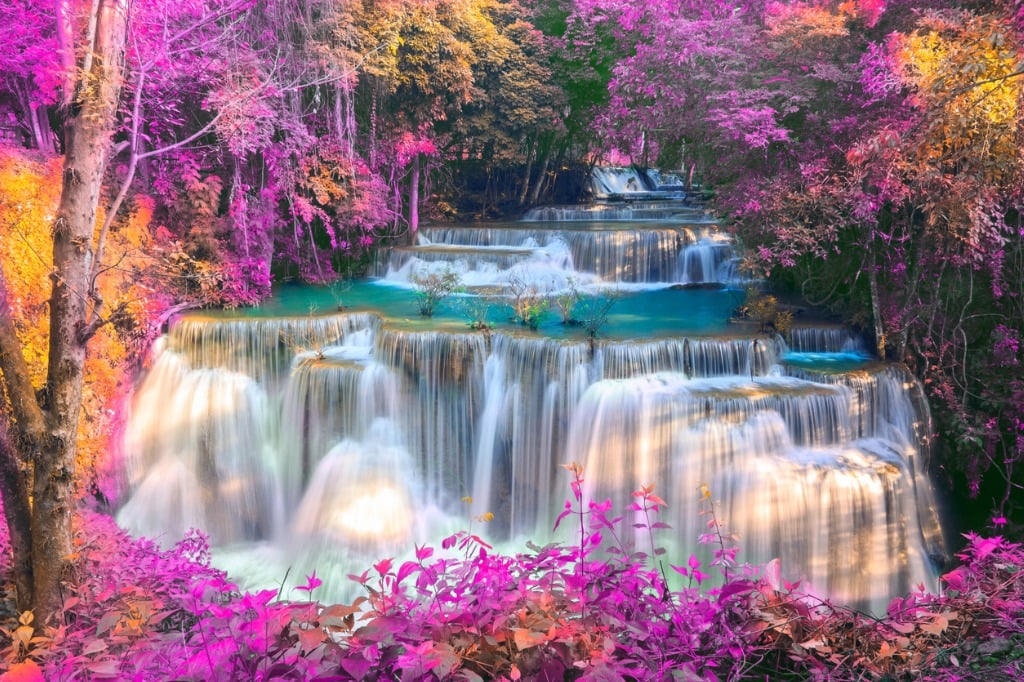
photo byTheerapolP via iStock
In simplest terms, ND filters cut down on the amount of light that reaches the imaging sensor. Alternatively, you could say that ND filters attenuate light transmission, subtract exposure value, or you could even say they add darkness. As long as you know what they do, I really don’t think it matters too much how we word it.
In general, you add a ND filter when you want to place the exposure into a range where you can do certain things with it.
And that’s where the ND filter numbers come in. By understanding the numbers, you will know exactly what effect the filter will have on your exposure. With the ND filter numbers and an ND filter calculator, you can figure it all out before you take the image.
So, regardless of how you say to yourself what ND filters do, we can all be on the same page when discussing these tools or when making purchasing and use decisions.
Prepare Yourself For Math

photo byfrancescoch via iStock
Thinking in mathematical terms isn’t new to many photographers. The Exposure Triangle, Depth of Field, Rule of Thirds, are all math concepts used for photography. Once you get used to them and see how they have a visible effect, the math gets easier and makes more sense.
For ND filters, the numbers used as labels, in descriptions, and for exposure calculations are filter factors, optical transmission, f-stop reduction, and optical density. At any given time, you may see all of these listed on a label or in a discussion.
- Filter Factor: The factor used for exposure triangle calculations involving the ND filter
- Optical Transmission: The percentage of light allowed through the ND filter.
- F-Stop Reduction: How many f-stops or stops of exposure the ND filter reduces.
- Optical Density: A precise logarithmic figure used for ND filter calculators.
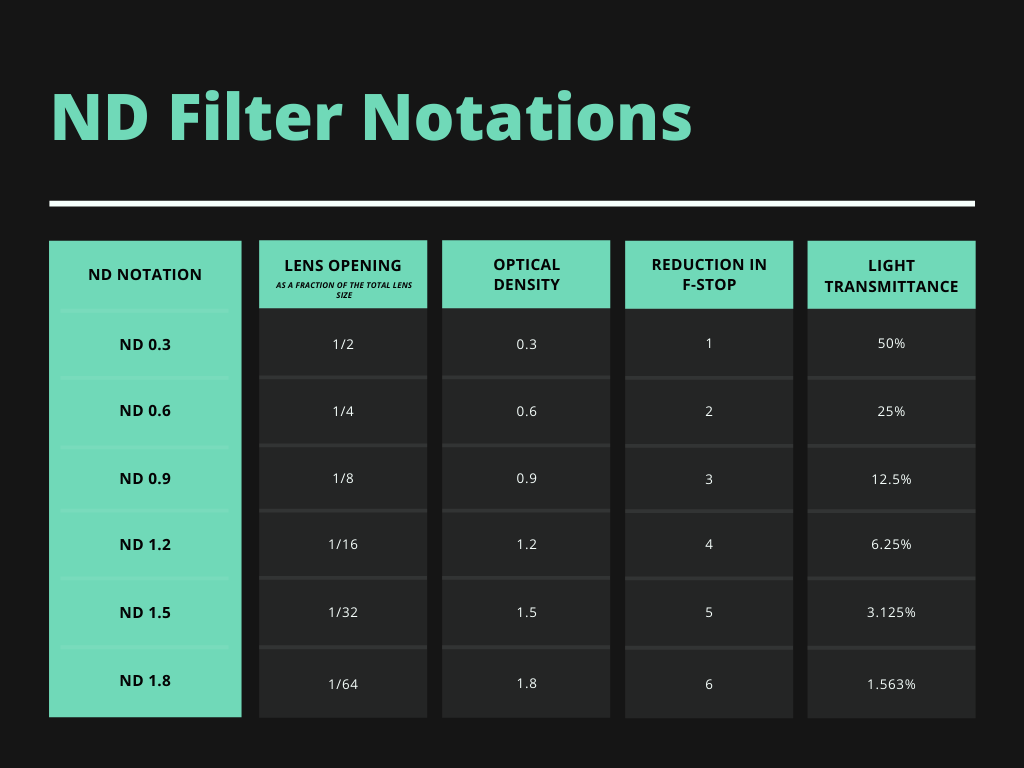
You might see a filter listed with any or all of these. To put it into a little perspective, let’s look at an ND filter you might already be using. I’ll use my H&Y ND1000 filter that I use in the H&Y K-Series Filter Holder.
Learn More:
In Practical Use
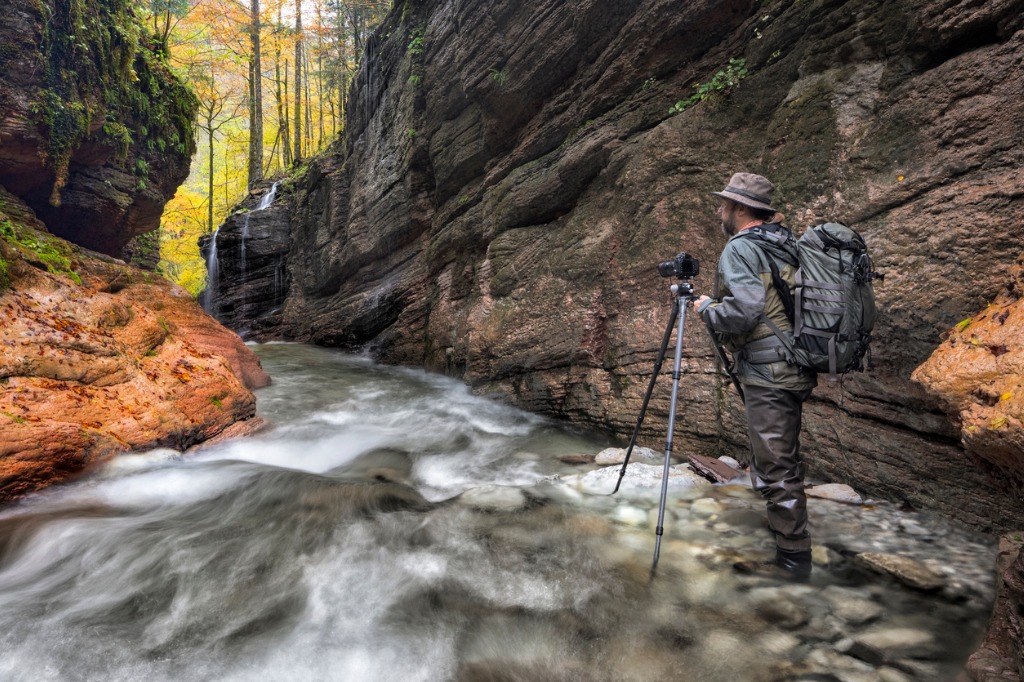
photo byDieterMeyrl via iStock
Using ND filters is a whole lot of fun, but those numbers for ND filters might intimidate you at first. So, let’s look at them.
The H&Y ND1000 has a filter factor of 1024, listed as ND1000 for easier labeling and discussion. The optical density of this ND filter is 3.0 and it transmits 0.098% of the light entering the optical path. Which all adds up to a f-stop reduction of 10 full stops.

Say we are shooting a scene with ISO 400 and the exposure we calculated is 1/2000th of a second at f/8. Yes, I’m pretty much using the Sunny 16 Rule for this example. Shooting RAW most likely, too, since we will be using our post processing program to fine tune the final image.
Now, with the addition of the ND1000 ND filter into the light path, we change 10 whole stops of exposure, which most of us could do in our head. You could also type in the filter factor or optical density into an online or smartphone app ND filter calculator.
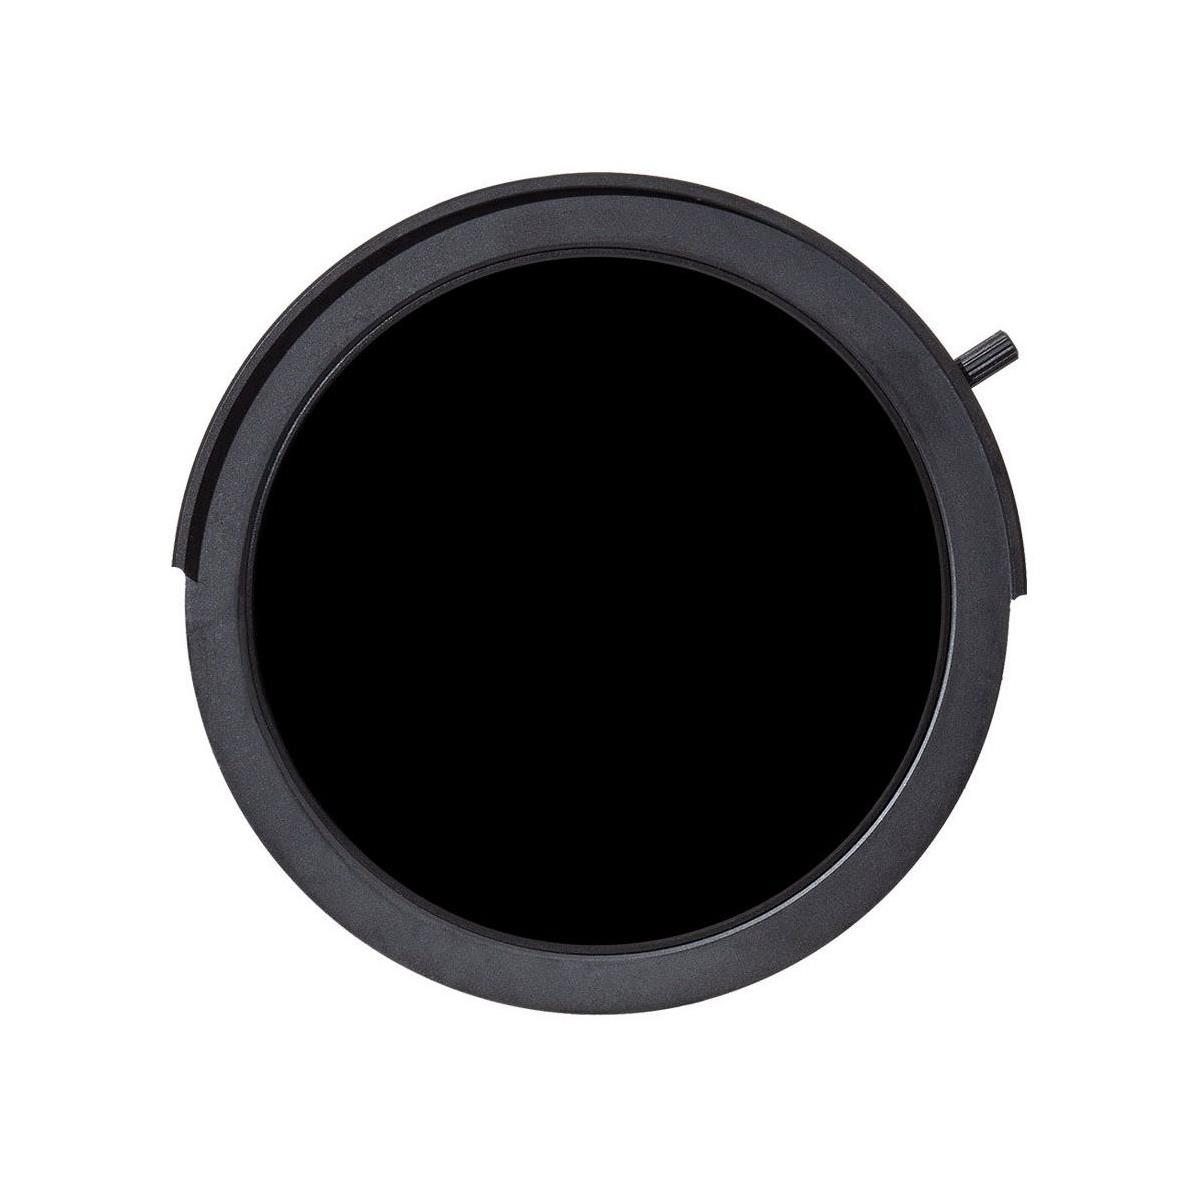
You get a shutter speed of 1 full second at ISO 400 and f/8.0 in broad daylight. That is a pretty significant change! Adjust the ISO down to ISO 50 and stop the lens down to f/22 and you could have an exposure time of 64 seconds, a minute and change, in a Sunny 16 Rule scene.
In Golden Hour or Blue Hour photography or on an overcast day, you could conceivably have exposure times of an hour or more. Think of what you could do with that!
Math Or No Math

Photo by Johannes Plenio from Pexels
Whether you decide to get all into the math of the ND filter numbers or simply make use of the printed numbers for ND filters and type them into an ND filter calculator, at least you know what the numbers mean and that they're consistent, just like all of our math problems used in photography.
The end result will be great images and the joy of creating those images!
Learn More:
We Recommend
What is the Point of Step Rings?
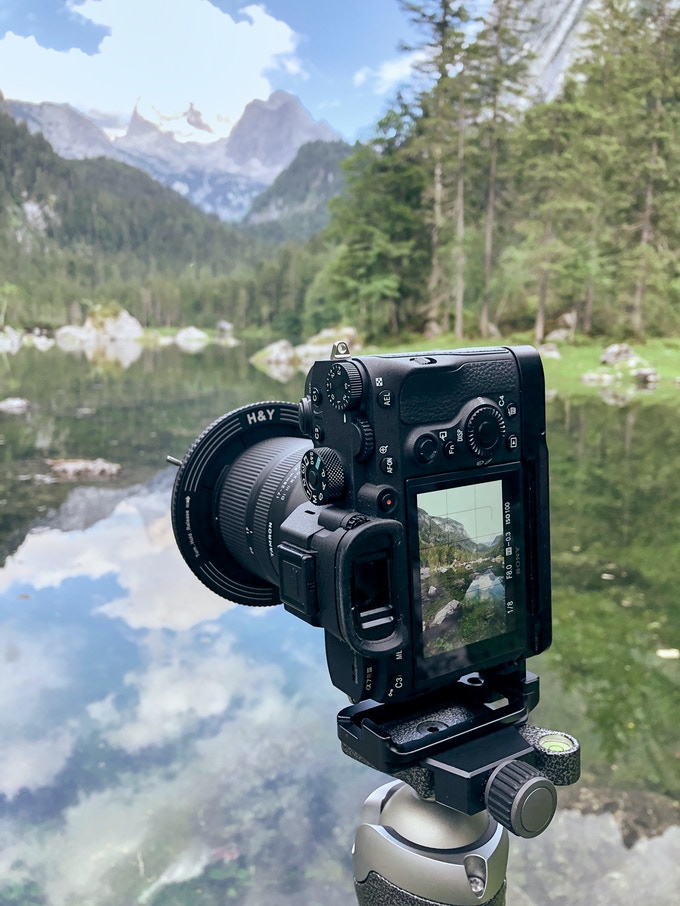
Step rings for lens filters are an essential item for almost any photographer who’s been engaging in photography for a while.
What are step rings and why do you need step rings as a photographer?
Let’s find out!
What Are Step Rings?
Step rings are adapters to change one thread size of lens filters to another size. There are step rings that go both directions - step up rings and step down rings.
The terms stup up and down are from the lens’ perspective. Step up goes from a small lens diameter to a larger diameter for the filter while step down rings reverse this.
Step rings are commonly made of machined metal, often aluminum, and can be very thin and prone to bending and flexing. A 72mm to 77mm step ring will be a large diameter of thin metal and can easily be warped in a camera bag full of other gear.
On the other hand, a 52mm to 77mm step ring will be somewhat thick.
Why Do You Need Step Rings?

Primarily, you need step rings to adapt your filters of various sizes to your lenses of various sizes. Many photographers, myself included, will buy a pricey filter in the largest size needed and then adapt it to our smaller lenses. Since the perspective is from our lens, this is stepping up. We step up from our smaller lens diameter to the larger diameter of the filter.
So, why not just buy filters for each size lens we have?
We do tend to do this for certain types of filters. For instance, if you believe in using protective clear or UV filters, you would put one on each lens that takes one. You might also have a couple of C-POL filters.
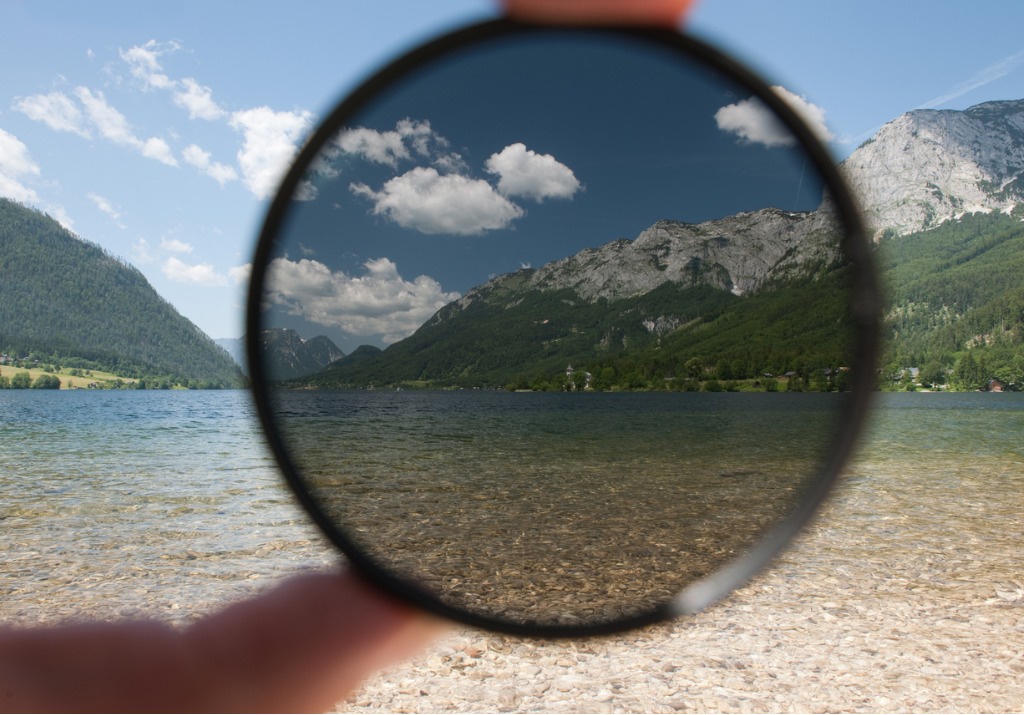
photo by4FR via iStock
Higher priced filters, such as large C-POL filters or ND filters, can quickly make a dent in your photography gear budget. If I have a lens that needs an 82mm filter and also have a lens that takes 72mm, buying two high quality C-POL filters in those large sizes is doubling up the price. Buy the larger filter and adapt it to the smaller lens diameter.
Why not adapt the larger lens to a smaller filter, step down? That might save a small amount of money, but stepping down also increases the likelihood of vignetting due to the ring intruding on the lens field of view. Unless I absolutely have to, I won’t use step down rings, only step up rings.
Learn More:
Useful Solution
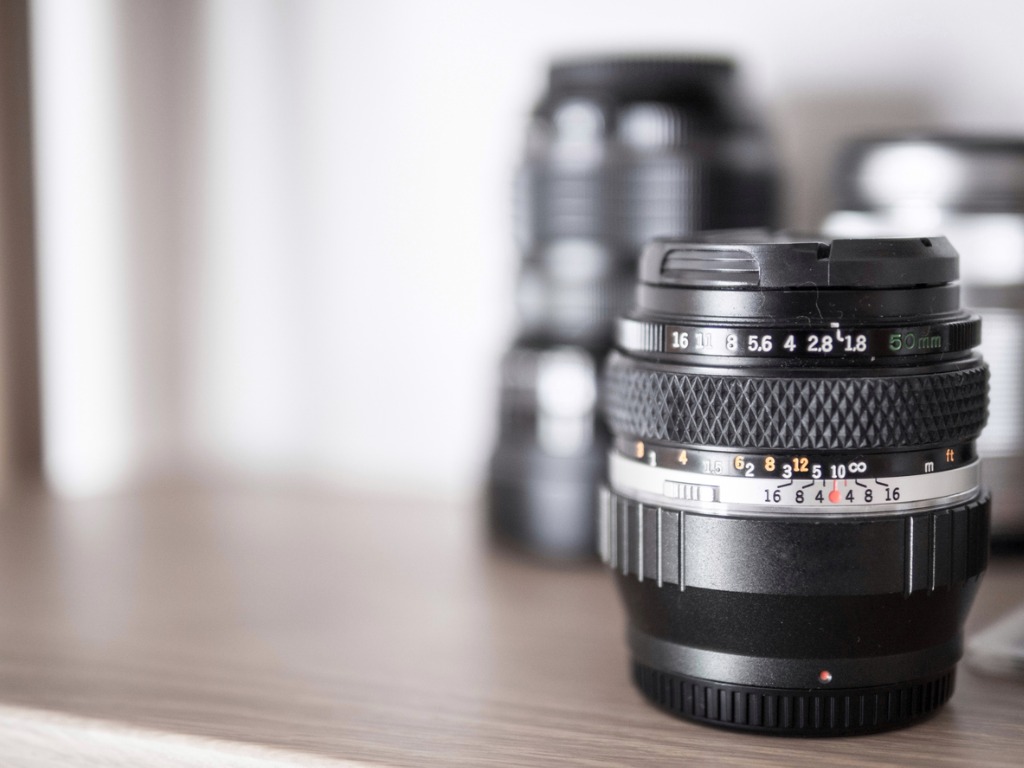
photo bySasaton Krungsee via iStock
Step rings are a useful solution to a problem. Other issues come up when you start buying, selling, and trading lenses and other photography gear, as us photographers are prone to do. Over years of doing this myself, I have accumulated a lot of different size lenses and filters.
I also have enough step rings to fill an entire dresser drawer, since I was always needing something different than what I had and I was prone to warping my step rings with rough handling and improper storage. Hey, I try.
A Better Solution

SInce many of you are a lot like me in regards to filters, I get to tell you some really good news that could be a real game changer in your filter use.
H&Y Filters has invented a variable step ring adapter called the Revo Ring that takes care of step ring needs and adds a nifty feature by way of how it adapts filters to lenses.
Revo Ring is an adapter for lenses to filters that is one size on the outer ring for the filters and varies throughout a wide range on the inner ring for the lenses. H&Y Filters has made three different range sizes which pretty much correspond to MFT, APS-C, and Full Frame camera formats.
Using the Revo Ring is surprisingly simple, you just mount the filter, and then put the Revo Ring on the lens and twist the ring until it fits. That’s it! No more fumbling with lots of different step rings to find just the right combination of sizes.
The unexpected feature for me is that the operation also makes it like a quick release for filters.
I can set up for my shot without a filter, then add my ND or C-POL filter in mere seconds and expose that image. If I change lenses, all I do is one quick twist to remove the filter from the one and another quick twist to mount in on the other.
Get in on Their Kickstarter
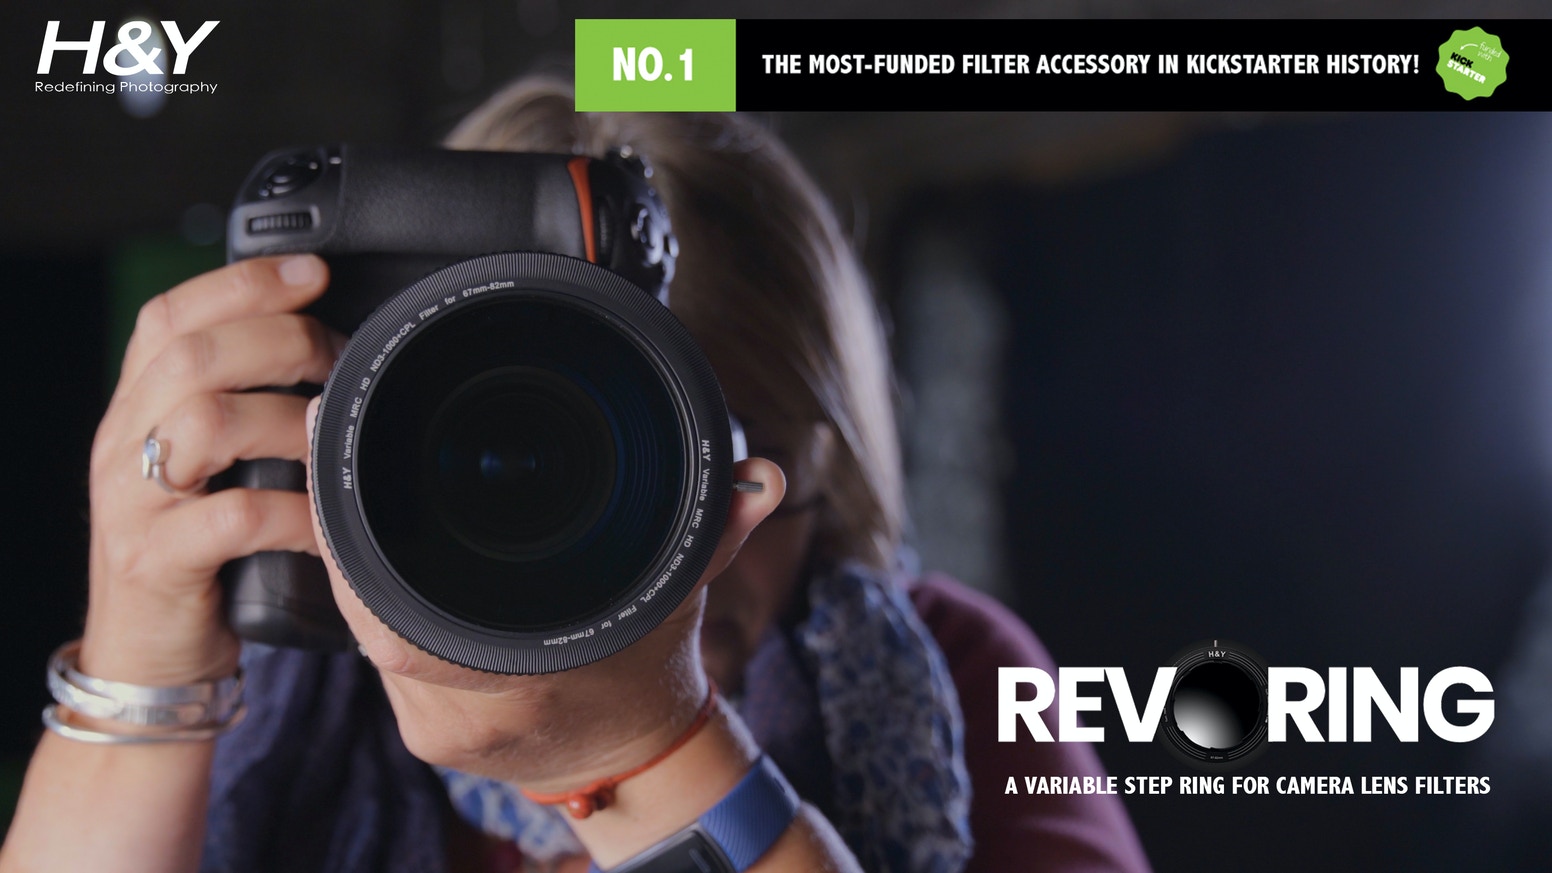
You will want to jump on this new idea as soon as you can, the Revo Ring will change your use of multiple filters on multiple lenses with step rings for the good. It’s one of the most ingenious new ideas for an old problem that I’ve ever seen in photographic gear.
Learn More:
We Recommend
What to Look for in Lens Filters
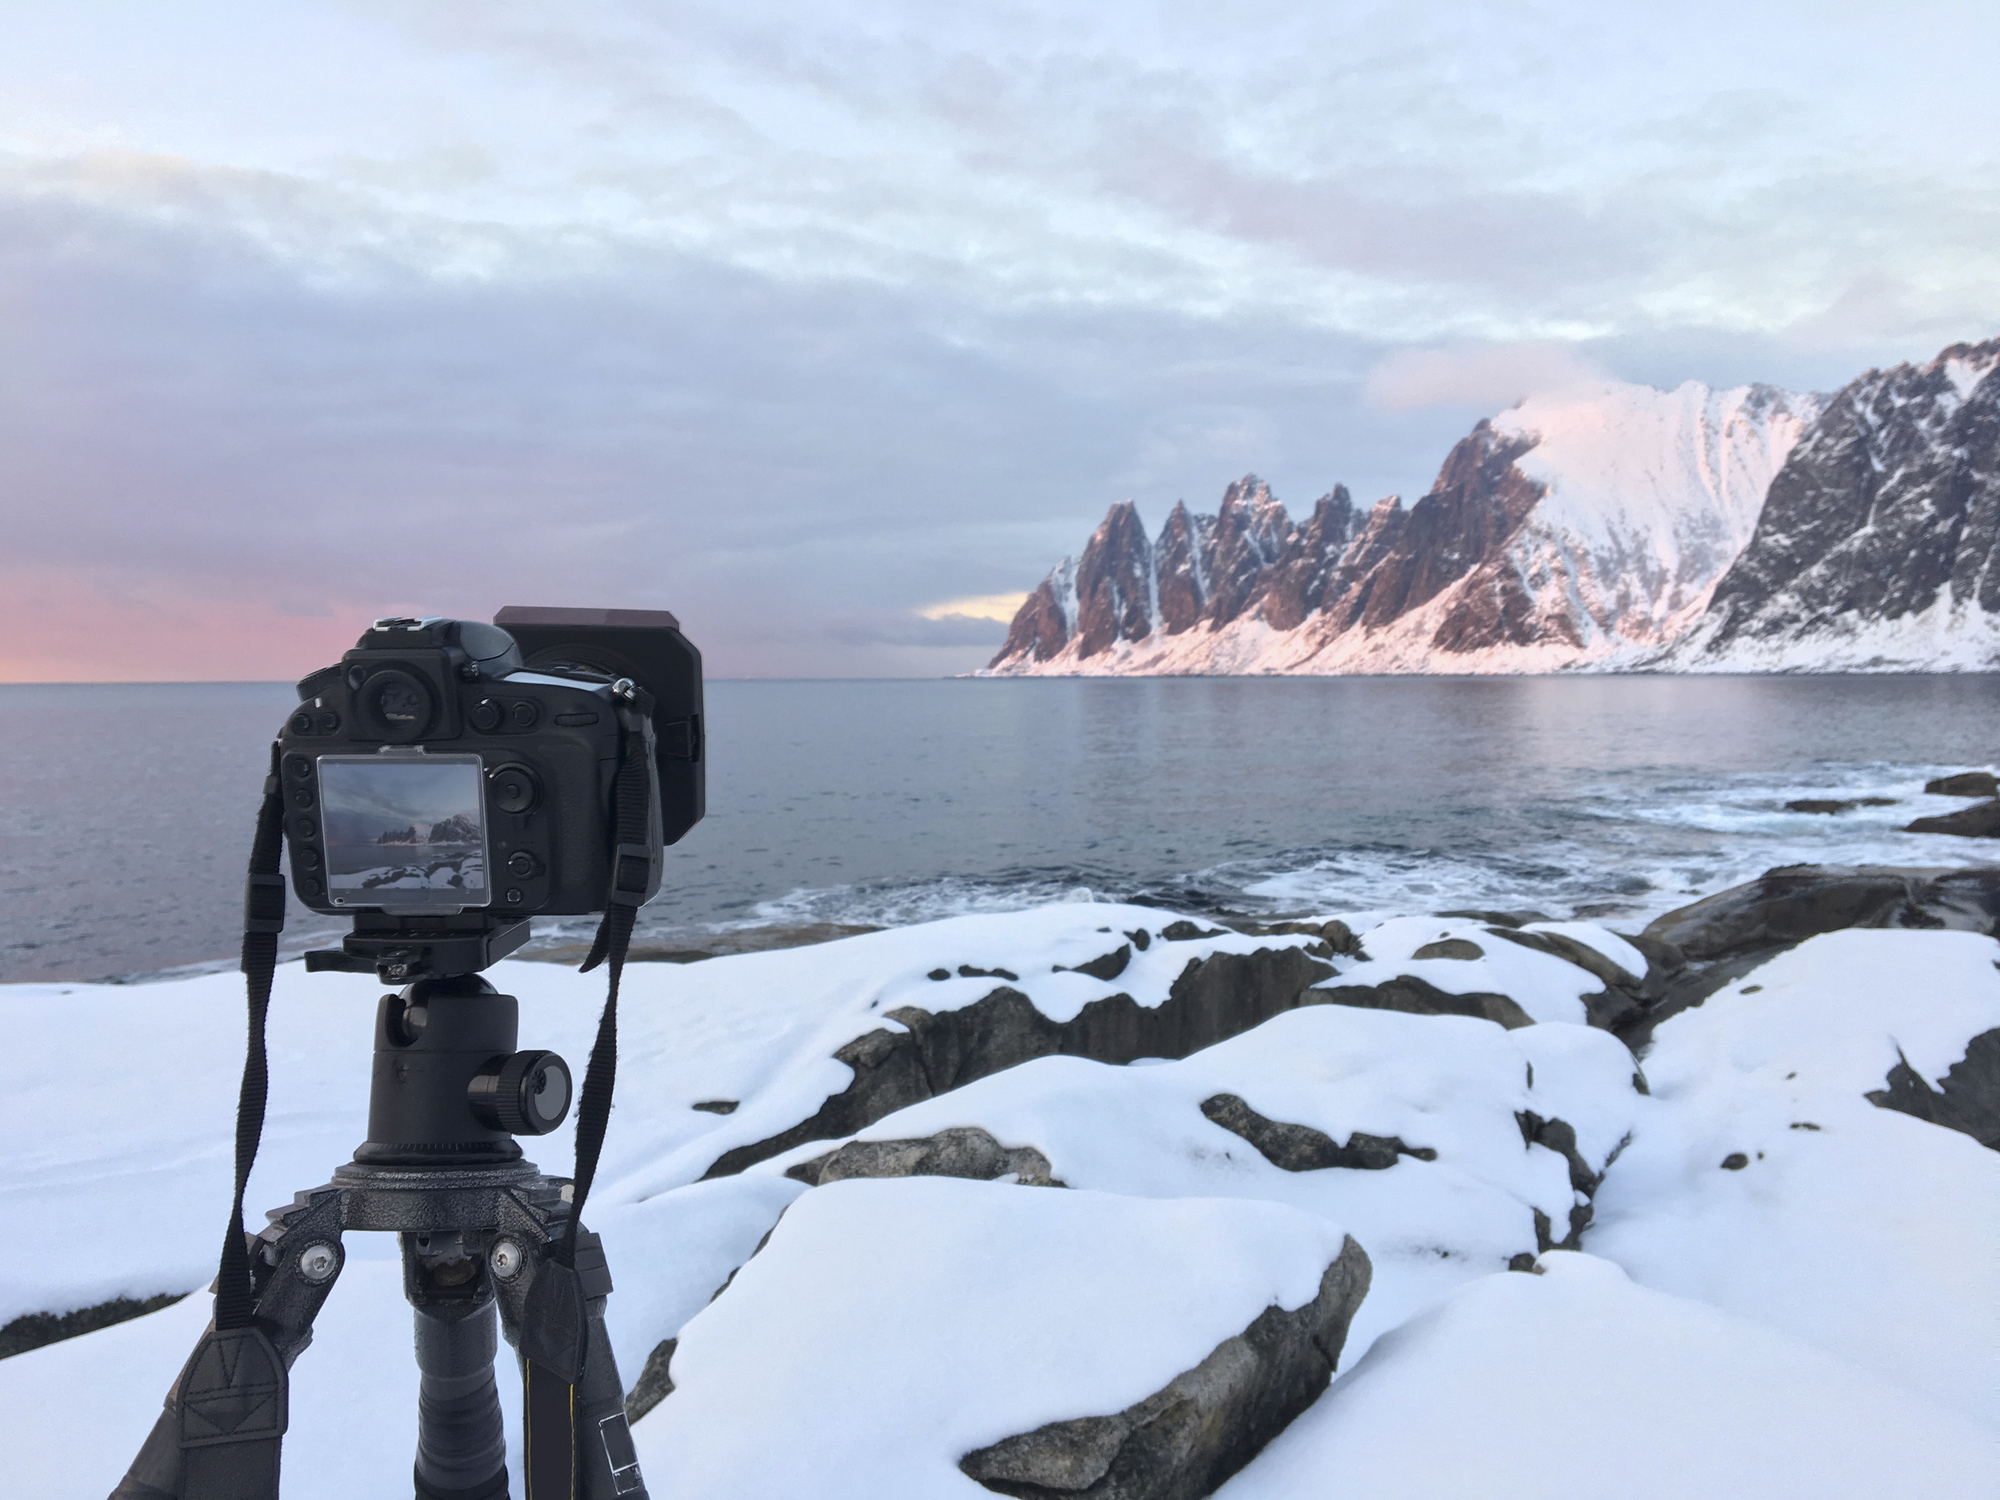
Photo by Sjo via iStock
What types of filters should I buy? What features are important? What brands do we recommend? Photographers touch base with us asking these questions (and many more!) on a frequent basis.
Make no mistake - there are lots of different filter brands out there. Many of them are excellent too. But how do you cut through all the noise and decide which filter system is right for you?
To be honest, choosing a filter system is a bit of an advanced skill.
Over the years, I’ve tested dozens and dozens of filter systems, and in that time I think I’ve developed a solid system of determining if a filter system is worth my hard-earned money or not.
That being said, in this quick buyer’s guide, I want to share three things I look for when investing in a lens filter system.
What to Look for in Lens Filters: Build Quality
Lens filters have hard work to do, so you want to invest in filters that are well-made and will stand up to the rigors of shooting in tough conditions for years to come.
Some filter housings and filter holders are made of plastic, and by and large, they simply do not offer you the durability you want out of a filter system. Others are made of materials like aluminum, which are highly durable, but also extremely lightweight.
The H&Y K-series filter holder pictured above and below is one such example. I was introduced to H&Y filters about two years ago and have enjoyed using them ever since.
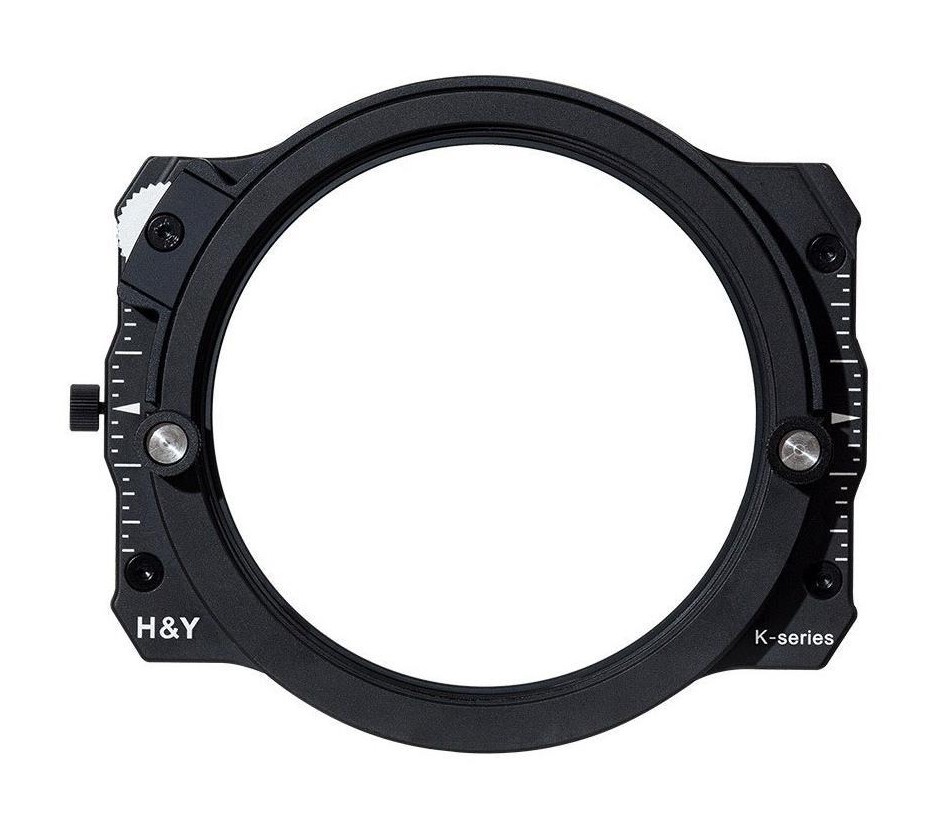
This K-series holder is constructed of aircraft-grade aluminum, so it can stand up to some bumps and bruises along the way without weighing down your camera bag.
In addition to looking for a durable holder, you want to buy filters that have shatter-resistant glass. Again, H&Y delivers with square and rectangular filters that feature materials like Corning Gorilla Glass III that won’t shatter if you accidentally drop the filter.
One such filter is a drop-in 95mm circular polarizer that comes with the K-series filter holder kit. In addition to being impeccably built, the SCHOTT glass in this filter gets an HD polishing technique that improves light transmission.
On top of that, filters like the circular polarizer shown above, have multiple nano coatings that make the filter water-repellent, scratch-resistant, and oil-repellent. This is not something you will find on lesser filters!
Something else I look for when examining build quality is how the filter holder system helps prevent light leaks.
In cheap filter systems, there are no such light-blocking components in place. But high-quality systems like those from H&Y include foam seals that prevent light leaks.
It’s these things - durable materials, thoughtful construction, and a commitment to quality design that set good filters apart from the bad ones.
What to Look for in Lens Filters: Convenience
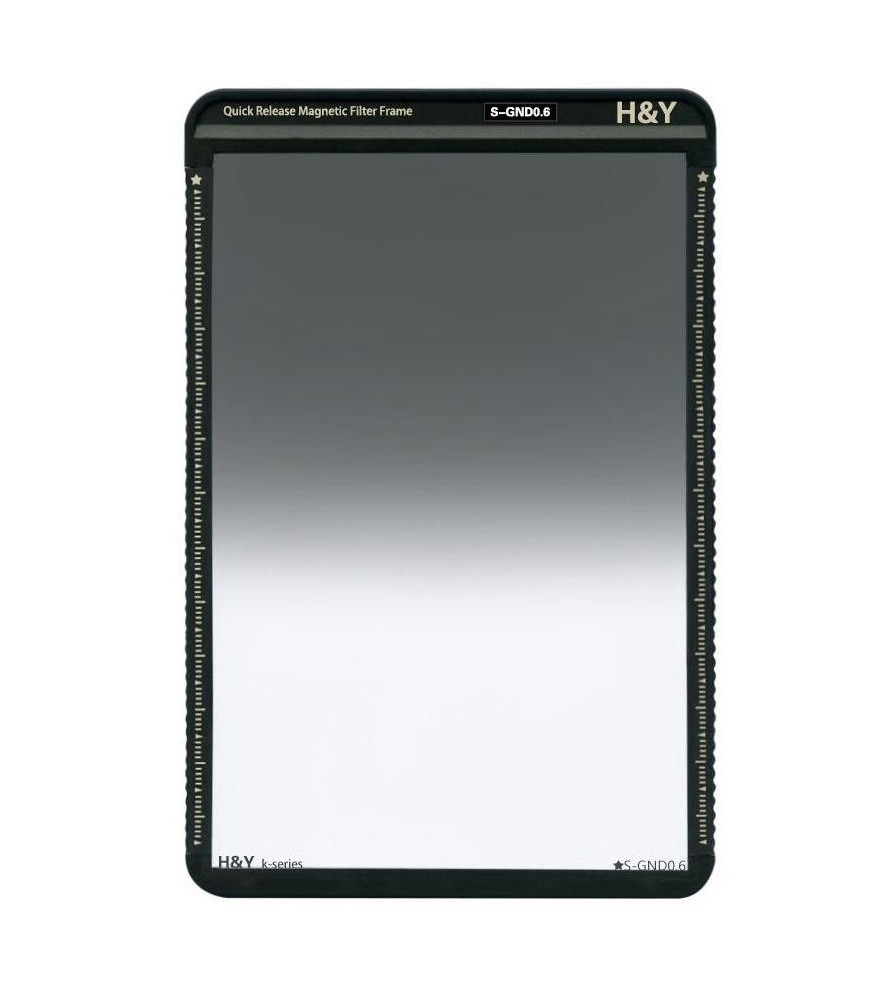
A second critical feature to examine when looking at lens filters is their level of convenience.
Now, I know what you’re thinking...how can one filter system be that much more convenient to use than the next?
In the case of my H&Y filters, like the 2-stop soft-edge grad pictured above, the answer to that question is simple - this system is magnetic, which makes using it an absolute breeze.
With a magnetic frame, the filters stick in place in the filter holder. Once they’re in position, they can be locked in place to prevent any movement.
But don’t think that this means you can’t use traditional square or rectangular filters in this type of filter holder…
In fact, the K-series filter holder accommodates most 100x150mm and 100x100mm filters from various brands, including H&Y, NiSi, Formatt-Hitech, Lee, and others. All you need is to add the H&Y magnetic frame and you can instantly convert your glass into a magnetic system!
This means that you get the convenience factor in two primary ways - first, you can use magnetic filters to make the process of adding and removing them a quicker process, and second, if you already have traditional filters, you can reap the conveniences of being able to use the tools you already have.
On top of all that, this filter system employs a drop-in design, which makes adding and removing filters (like the 5-stop ND and polarizer combo filter shown above) a quick, simple, and convenient task.
For example, if you want to tackle some long exposure photography, just focus on your subject, drop in an H&Y ND filter (10, 12 or 16 stops available) into the filter holder and away you go! No need to unscrew the ND filter, focus on the subject and then screw the filter back on to take the image.
What to Look for in Lens Filters: Utility
A final feature that I look for in my lens filters is utility. I want something that maximizes utility so I can get the most out of the filter holder and its filters that I possibly can. I have multiple lenses that have varying filter thread sizes, so I need a filter system that adapts to different-sized lenses.
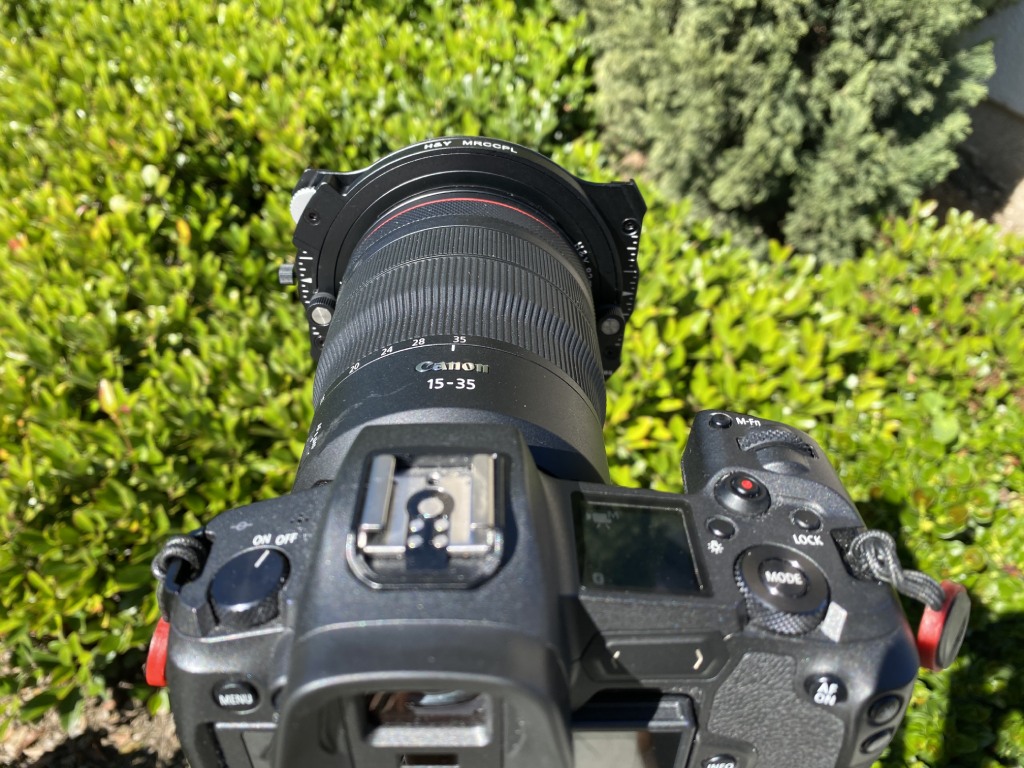
In the case of the K-series holder, it can range from 67mm up to 82mm with the included adapter rings. This means I can use it on all of the following lenses:
- Canon RF 15–35 mm f/2.8L IS USM (82mm filter thread)
- Canon RF 24–70 mm f/2.8L IS USM (82mm filter thread)
- Canon RF 24–105 mm f/4L IS USM (77mm filter thread)
- Canon RF 70–200 mm f/2.8L IS USM (77mm filter thread)
- Canon RF 85 mm f/1.2L USM (77mm filter thread)
Obviously, I’m a Canon shooter, but you can use this system with any other system from Nikon, Sony, Olympus, or other brands.
Between this type of utility, top-notch convenience, and superb build quality, I’ve found exactly what I need in my H&Y filter holder system. If you look for these features, I think you’ll be able to find the right filter holder and filters for your needs as well!
Stay tuned for a comprehensive two-year review of my H&Y filters coming up in the next few weeks!