2019 Best Lights for Photographers

Since photography is all about good light, one of the most important things you can have in your camera bag is a top-notch light.
Now, I know what you’re thinking - using artificial lights is expensive and time-consuming and difficult to learn.
And maybe that was true back in the day when you had to invest in big, heavy lighting gear to get the job done.
But these days, there are all kinds of small, portable, and affordable lights for photographers that make it far simpler to get just the right light for your photos.
That being the case, let’s check out the best lights for photographers that we’ve tested in 2019.
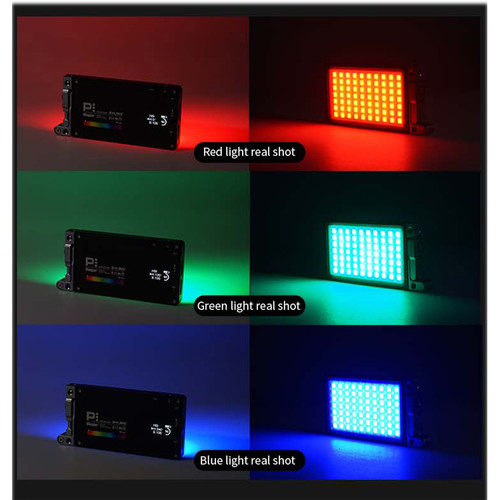
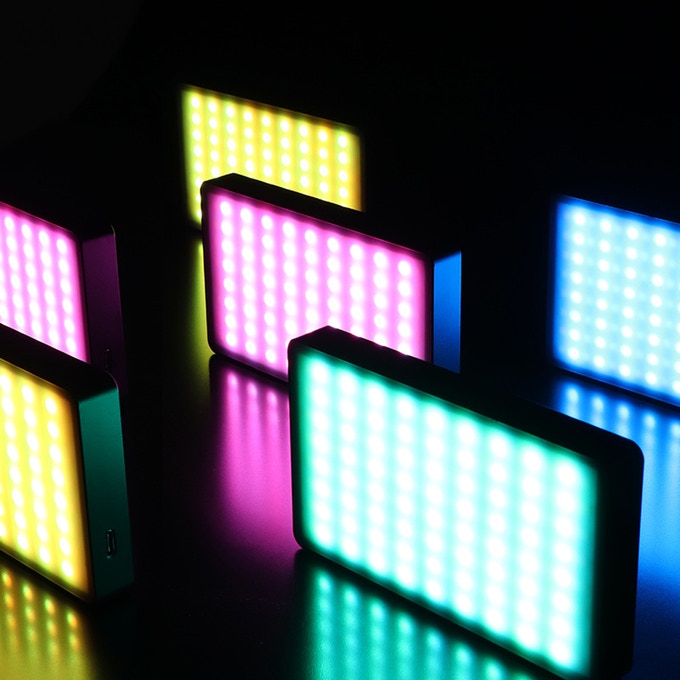
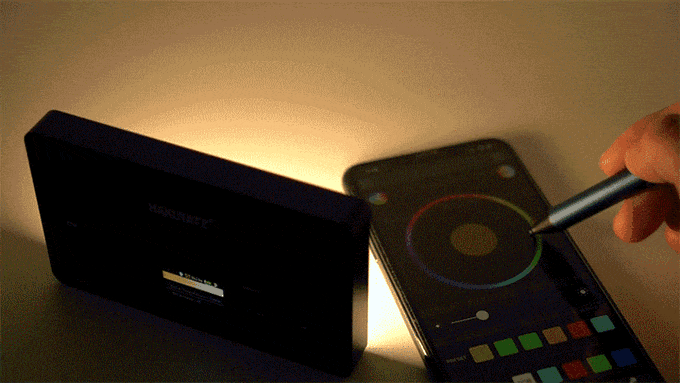
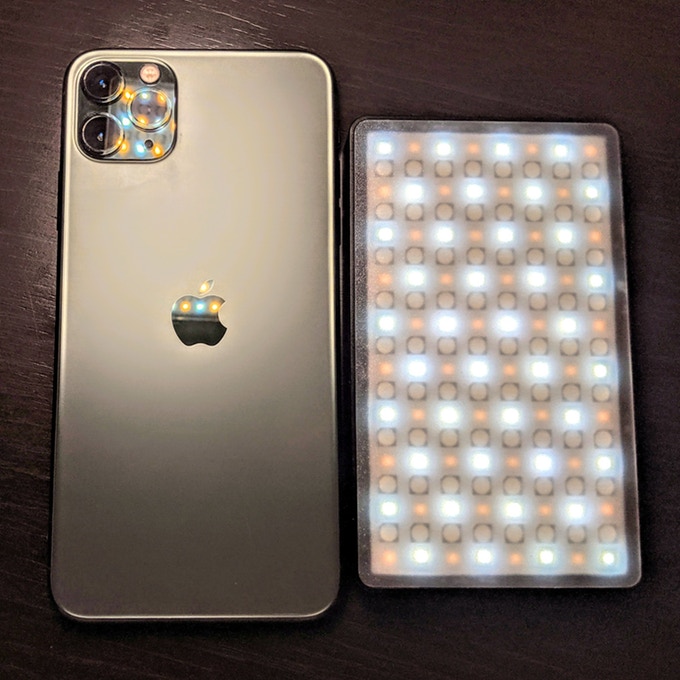
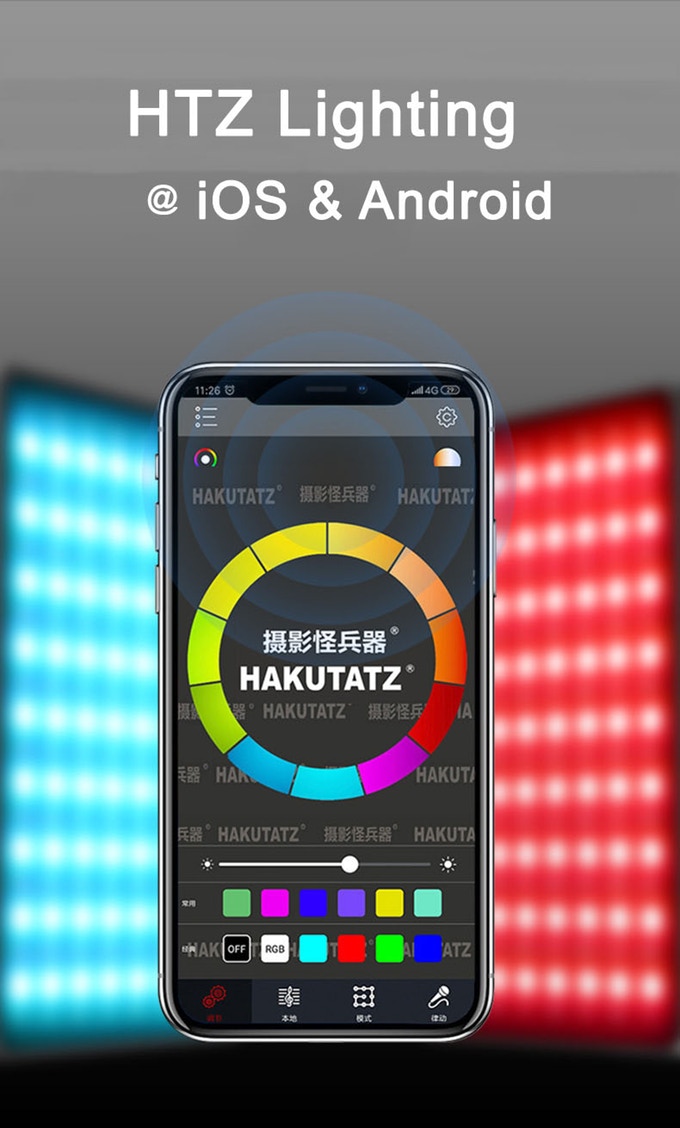
Hakutatz Pocket Size RGB+AW LED Light

As its name indicates, this little light fits in your pocket, but don’t let its small size fool you…
With amber, white, and RGB LEDs, you can come up with virtually any kind of light you need for your photos.
Add visual interest and drama with any color of the spectrum using the RGB lights or get the perfect white balance using the amber or white lights.
Editor's Note: The Hakutatz Kickstarter campaign was a huge success! Their Amazon store will be open and ready for orders in early December.
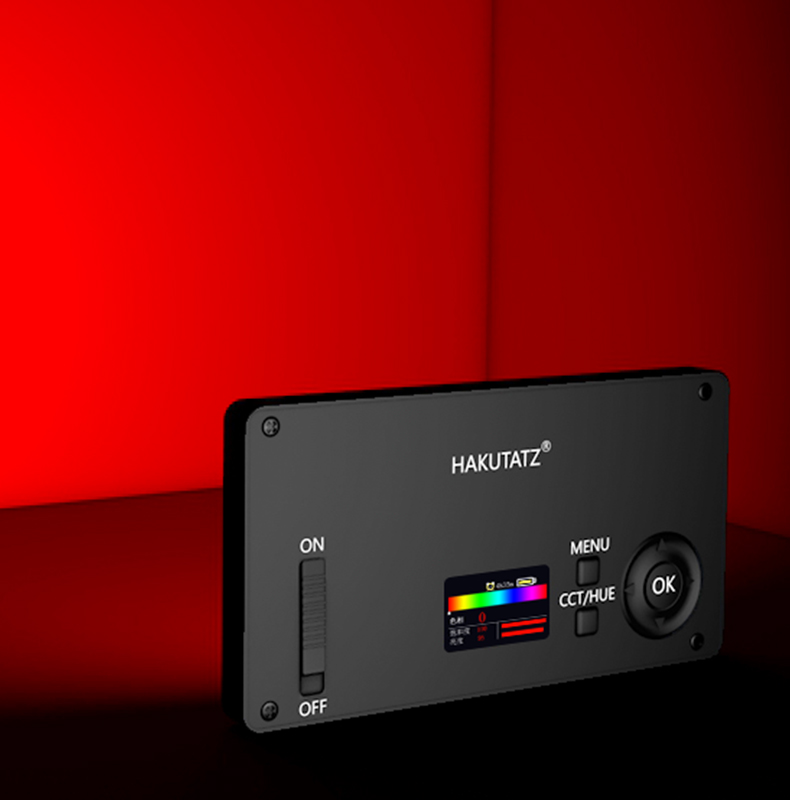
Whatever the case, you can fine-tune the settings using the companion app. That means that with a simple touch or swipe of your finger, you can adjust the RGB color, the color temperature, special effects, and even control multiple lights at the same time.
You can adjust saturation and brightness, too, so you don’t need to invest in other lighting gear like diffusers or softboxes. All you need is in this one little portable light!
Learn more about the Hakutatz Pocket Size RGB+AW LED Light
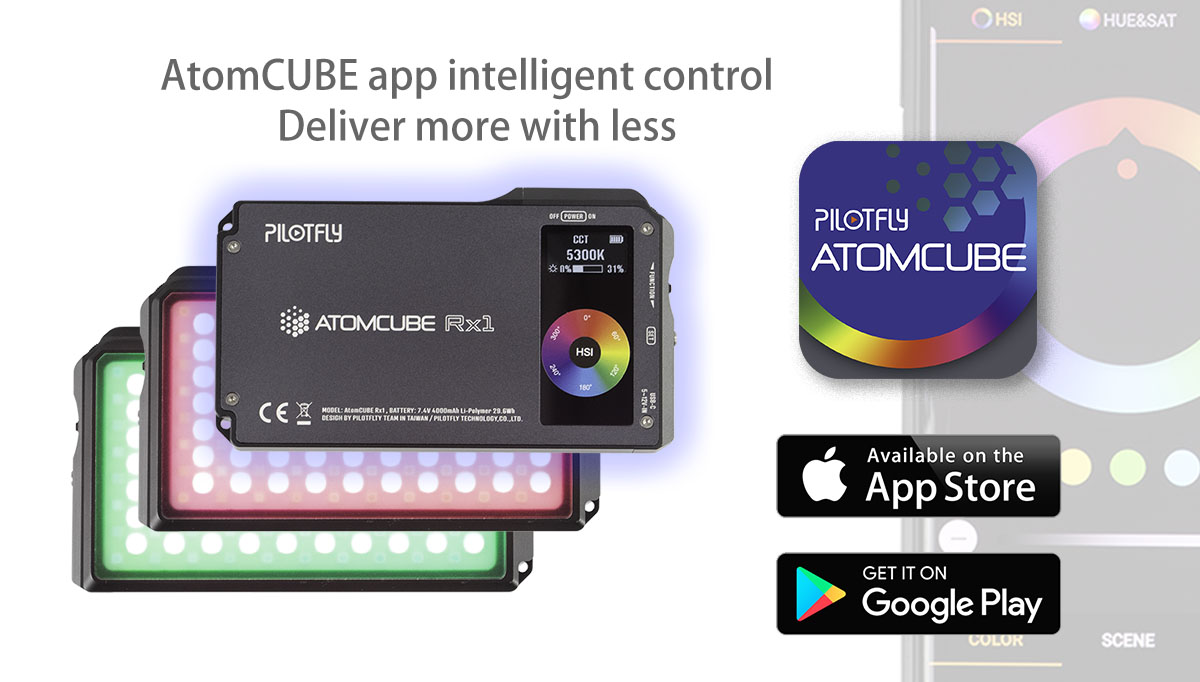
PilotFly AtomCube RX1 RGBCW LED Video Light

When considering what lights made this list of the best lights of 2019, one of the first to come to mind is the little guy shown above.
The AtomCube RX1 from PilotFly is another excellent example of how far lighting for photography and videography has come in the last few years.
Not only is this a key light in your pocket, but it’s also packed with features that will help you achieve your creative vision.
For example, it has nine common lighting scenarios built right in, that way you can quickly and easily implement a lighting scheme. Likewise, it offers tons of adjustments, from the color temperature to the brightness to the color saturation.
This light is also fully dimmable from 0-100 percent, so you can truly get the precise level of light you need for the shot or video sequence you’re working on.
If you need to create a more elaborate lighting setup, PilotFly has you covered because you can link up to 255 AtomCubes together via Bluetooth. And don’t worry about the light not being consistent - these lights are calibrated so you get color tone and brightness that looks the same across multiple lights, especially when they’re mounted together using Magic Cubes.
You can then control all those lights using the AtomCube smartphone app. Literally with just a few taps of your phone, you can adjust brightness, change the color temperature, and create an unlimited number of groups of lights, all in real-time. It doesn’t get much more convenient than that when you’re multitasking at a photo shoot!
The high-strength, all-aluminum frame makes this light super lightweight, yet incredibly durable, so it’ll be a solid companion and workhorse for you for years to come.
Add in a three-hour battery life on full power, a CRI of 95+, a TLCI of 97, and a variety of lighting accessories to expand your creative possibilities even further, and you begin to see just what a high-quality, reliable light this thing is!
Learn more about the AtomCube RX1 RGBCW LED Video Light
Litra Studio

Weighing in at just 33.5 ounces and measuring 5.5" x 3.9" x 2.9", this light is ultra-compact for easy transport, yet is capable of producing up to 3,000 lumens of continuous light and up to 6,00 lumens of flash. Nice!
Better still, the light is fully dimmable, tunable, and offers CCT, HSI, RGBWW, gel presets, flash modes, and effects as well.
It CCT mode, the light gives you 2,000-10,000K adjustable bi-color lighting with a green and magenta color shift control to allow for tunable blue and green screen optimization.
It also offers flicker-free lighting at all shutter angles and features a 97 CRI and TLCI color accuracy.
With a rugged, waterproof design, efficient passive thermal management, and up to 20 hours of battery life on the lowest setting, this light is one of the best lights for photographers this year, hands down.
Learn more about the Litra Studio
Andycine Boling P1 RGB Pocket LED Light
Designed for video use, the Andycine Boling P1 is pocket-sized for easy transport and has a 360-degree mount to make manipulating the direction of light a quick and simple task.
In RGB mode, the light gives you 360 unique colors so you can get just the right light for each situation.
Color temperature is adjustable - from 2500-8500K - giving you the ability to match any ambient light sources. There are also nine built-in special effects, including candles, car lights, and lightning.
The rechargeable battery will give you over two hours of continuous use and has a built-in feature that prevents overheating.
This light is fully dimmable, has a CRI of 96 and a TLCI of 97, and has a ¼-20” shoe mount for easy mounting.
Learn more about the Andycine Boling P1 RGB Pocket LED Light
iLED 144 Bi-Color Flood Light
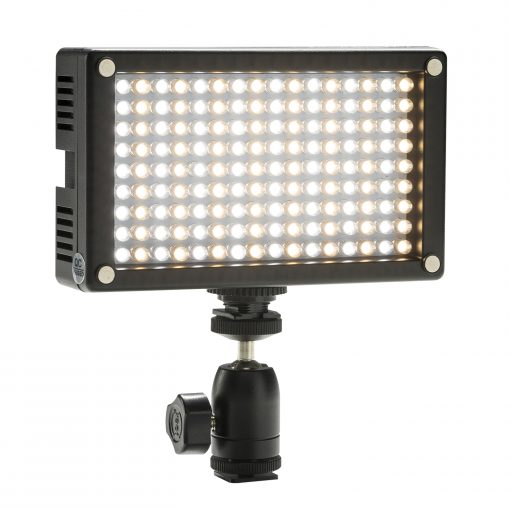
Another option for an affordable light for your photography work is the iLED 144 Bi-Color Flood Light.
This unit is just over 5 x 3 inches in size, so it offers excellent portability while also offering high-quality LED lighting.
Its solid construction means you get a light that's durable and reliable, and that will offer professional-grade performance for the long-term.
It utilizes energy-efficient bi-color LEDs and a 60-degree angle that gives you the reliable, consistent lighting you need to elevate the quality of your photos.
You can quickly and easily adjust the dimmer as well as the color temperature (from 3200-5600K) so you can dial in just the right lighting too!
This stackable on-camera light is also an affordable option that won't break the bank. What's not to like about that?!
Learn more about the iLED 144 Bi-Color Flood Light
Litra Torch LitraPro

As I noted in my LitraPro review, this little light is one of the smallest you can buy at just 6 ounces and measuring 2.75 x 2 x 1.2 inches.
But Litra has packed 60 LEDs into this light, which gets you 1200 lumens of light for your photos.
The light is flicker-free, crisp, even, and very clean, which is just what the doctor ordered when it comes to getting high-quality light for your photos and videos!

The LitraPro offers bi-color light and has an adjustable color temperature of 3,000-6,000K so you can customize the lighting for each specific shot.
It has a 70-degree beam angle, is waterproof up to 90 feet, and has a 10-hour battery life on low output.
Add to that MIL-SPEC 810 durability, a bright OLED display, and Bluetooth control, and you have the makings of one of the best small photography lights you can get your hands on!
Learn more about the Litra Torch LitraPro
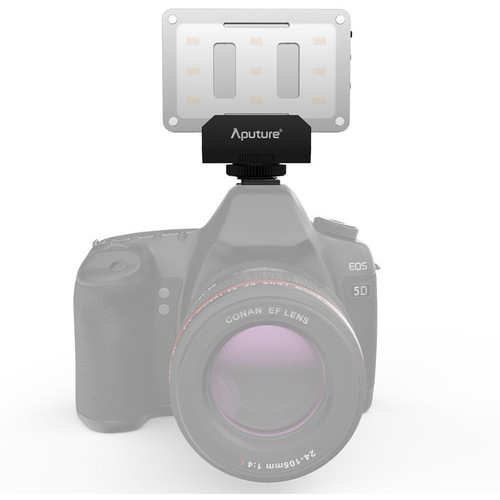
Aputure 120D II

If it’s a powerful studio light that you’re after, the Aputure 120d II performed very well in our review.
With a 1000-watt tungsten equivalent, fully dimmable light, and a CRI & TLCI of 97+, this light gives you beautifully clean output.
It comes with many different built-in lighting effects that enable you to create a more custom and interesting look in your images.

It has an integrated power and control box, which helps minimize clutter in your studio, and with an 18dB quiet fan, you won’t have to listen to a loud fan as you try to work with your clients.
I had the original 120d and while it was an excellent light, this one takes its spot on this list of the best lights for photographers because it’s 25 percent brighter than the original. It’s color temperature is also slightly warmer (5500K rather than 6000K) which I particularly like.
Add in a wireless remote, DMX controls, and good portability, and you have a light that ticks all the boxes for a quality addition to your studio.
Learn more about the Aputure 120d II
LitraTorch 2.0

This is yet another light I’ve reviewed this year that left me really impressed.
Not to be outdone in the smallness department, the LitraTorch 2.0 is by far the smallest light on this list, measuring 1.5 x 1.5 x 1.65 inches and weighing just 3.17 ounces.
In terms of portability, that’s hard to beat!
This light has 16 LEDs that offer 100, 450, or 800 lumens depending on what you need for the shot.

Regardless of the lumen output, you’ll get clean, crisp, flicker-free light with a 70-degree beam angle. As you’d expect from one of the best lights for photographers in 2019, this one offers a CRI of 90+ and a TLCI of 92.
You can use the light on its low setting for up to four hours or get about 35 minutes of output on the maximum brightness.
It’s also waterproof to 60 feet in case you need to do a little scuba diving, has a magnet for easily attaching to metal surfaces, and two ¼-20 mounts too.
Like the other lights on this list, the LitraTorch 2.0 is simply a versatile, do-anything light!
Learn more about the LitraTorch 2.0
Aputure Amaran AL-M9
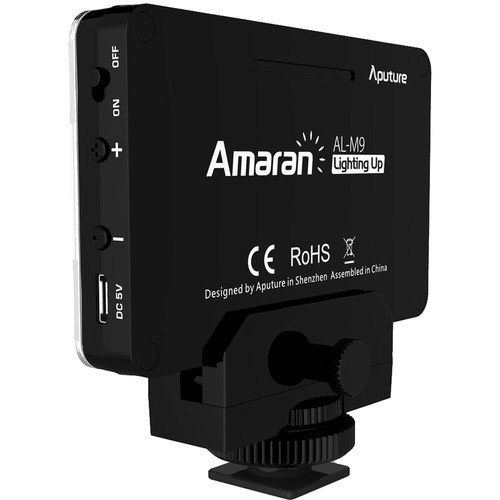
Rounding out my list of the best lights for photographers in 2019 is this little guy, the Aputure Amaran AL-M9.
This daylight-balanced LED light offers surprising brightness for such a small fixture.
It has a color temperature of 5500K and comes with a removable diffuser, CTO, and CTB filter. There are 9 steps of dimming as well.
The integrated battery gives you about two hours of runtime on full brightness when fully charged, and it can be charged quickly using the optional USB charger.
There are multiple mounting options as well, including as a cold shoe accessory or on a ¼-20 mounting point.
And at $45.00, it’s the cheapest light on this list!
Learn more about the Aputure Amaran AL-M9
We Recommend
5 Photography Tips That Will Make You a Better Photographer

photo by Lyndon Stratford via iStock
Let’s face it…
The road to mastering photography is a long one. In fact, it’s a journey that never ends! There is always something new to learn and existing skills that can be improved.
If you ask me, the most difficult part of learning photography isn’t getting started, but transitioning from being a beginner to a more advanced photographer.
The tips I’ve outlined below address this very period in your development and will help you get over the hump to become more skilled.
Let’s begin!
Table of Contents
- Get Out of Full Auto
- Learn to Use the Camera’s Histogram
- Learn How to Use Artificial Light
- Streamline Your Post-Processing Workflow
- Use a Circular Polarizer
Get Out of Full Auto

photo by Photographer and videographer via iStock
I’ve said before that using full auto mode when you’re a beginner can actually be a good thing. After all, without having to worry about exposure settings, you can concentrate more fully on things like composition and framing.
But now that you’re ready to become more of an enthusiast photographer, it’s time to leave full auto behind.
I think everyone should learn manual mode, but you don’t have to jump right to the big, scary M on your camera’s dial just yet.

photo by eROMAZe via iStock
A great way to exert more control over the camera settings is to shoot in aperture priority, shutter priority, or program mode:
- Aperture priority mode (A or Av on the camera dial, shown above) gives you control over the aperture and ISO while the camera controls shutter speed. This is a great mode to shoot in for things like portraiture or other scenes in which you want to control depth of field.
- Shutter priority mode(S or Tv on the camera dial) gives you control over the shutter speed and ISO while the camera controls the aperture. Use this setting if you want to control how motion appears in the shot.
- Program mode (P on the camera dial) allows you to set the ISO and the camera sets the aperture and shutter speed for you. This is advantageous in challenging light conditions in which you want a high ISO (in low light) or a low ISO (in bright light).
Getting familiar with these semi-automatic modes is a great way to take baby steps away from full auto without being overwhelmed by having to control all the exposure settings yourself.
Learn to Use the Camera’s Histogram

When I was a beginner photographer, I relied on the camera’s LCD to determine if the shot I just took was well-exposed.
The problem with doing that is that the LCD is not at all an accurate representation of the lightness or darkness of the photos you take.
Instead, if you want to become a better photographer with images that are better-exposed, you need to learn how to use the camera’s histogram.
Looking at the graph above, you can see why the histogram is so beneficial - it gives you a graphical representation of how many pixels are shadows, midtones, and highlights.
If the histogram is skewed to the left, you know that the image is too dark and that you need to brighten it up. If it’s skewed to the right, the opposite problem is at hand - the image is too bright and it needs to be darkened.
Take a deep-dive into how to read a histogram to get all the details on this very handy tool.
Learn How to Use Artificial Light

There are tons of natural light photographers out there that make masterful images. But there are also quite a few photographers that only use natural light because they don’t know how to harness the power of artificial lights.
Light is obviously the most critical aspect of photography, so understanding how to manipulate light is a critical skill you need to learn if you’re going to become a better photographer.
Unfortunately, when many beginners think of artificial light, they think of the pop-up flash on their camera.
The problem with the light emitted from pop-up flashes is that it’s intensely bright, which creates harsh shadows behind a very bright subject. That’s just not a flattering look.

A better option is to use an off-camera light to shape the light in a way that adds interest to the shot. You can see this concept in action in the image above.
The different colors of light add visual punch to the photo while also helping separate the subject from his surroundings.
And you don’t have to invest in expensive speedlights, light stands, and modifiers to do it, either.
A perfect light for photographers that wish to advance their skills is the little guy shown below, the Hakutatz Pocket Size RGB+AW LED Light.

Editor's Note: The Hakutatz Kickstarter campaign was a huge success! Their Amazon store will be open and ready for orders in early December.
Being such a small light, it’s easily portable and maneuverable, so you can experiment with light placement to get different effects in your photos.
What’s more, this light offers RGB light, which allows you to produce all the colors of the spectrum. There are also separate LEDs that produce white light and amber light, which can help you achieve the precise white balance you want in your images.

As shown above, you can manipulate the color emitted by the light using the companion smartphone app. How easy is that?!
Another aspect of mastering artificial light is learning how to use multiple lights at the same time.
Hakutatz makes this task super easy because you can use two, three, or more of these lights together to combine different kinds of light and different effects, allowing you to create an intricate lighting scheme without all the fuss.
Best of all, since this light has adjustable brightness, saturation, and color temperature, you don’t need light modifiers like softboxes or diffusers. Instead, you have all the tools you need wrapped up in this one awesome little light.
Learn more about the Hakutatz Pocket Size RGB+AW LED Light and see how it can help you elevate the quality of your photos.
Streamline Your Post-Processing Workflow

photo by photoguns via iStock
When I look back on how I edited photos when I was a beginner, I can’t help but shutter. It was bad. Really bad.
But back in the day, processing images was a much more complex and laborious task than it is today. There are all kinds of tools that help you tap into your creativity while at the same time making it an easier, less time-consuming task.
One of the best ways to make photo editing an easier process is to use presets that allow you to change the look and feel of your photos with a click of your mouse.

In Exposure, for example, there are over 500 presets from which to choose, including beautiful film presets that harken back to the days of film photography.
But these presets aren’t just applied in one way - you can customize how each one looks and save it for use on future images for a consistent look.

Another way to make editing your photos easier is to use non-destructive layers.
What this means is that you add effects and make adjustments to layers on top of the original image, so the original is left unchanged.
You can add presets, make adjustments to color and saturation, manipulate the exposure, and make many other changes quickly and easily to get the precise look you want in the photo.
And if you’re a bit of a disorganized mess like I am, you’ll appreciate editing programs that also offer tools for organizing your photos.
As shown in the video above, Exposure ticks that box as well, with the ability to create smart collections of photos based on specific criteria like image ratings, flags, or color labels. You can also organize images based on the camera use, when the photo was taken, when it was edited, and even the camera settings that were used.
Learning how to edit your photos and do so in a way that enhances their beauty is a crucial part of advancing from being a beginner to an enthusiast photographer. And with editing programs like Exposure, you can do that in a much more efficient manner.
See Exposure in action in the video above. To get your free trial, click here.
Use a Circular Polarizer
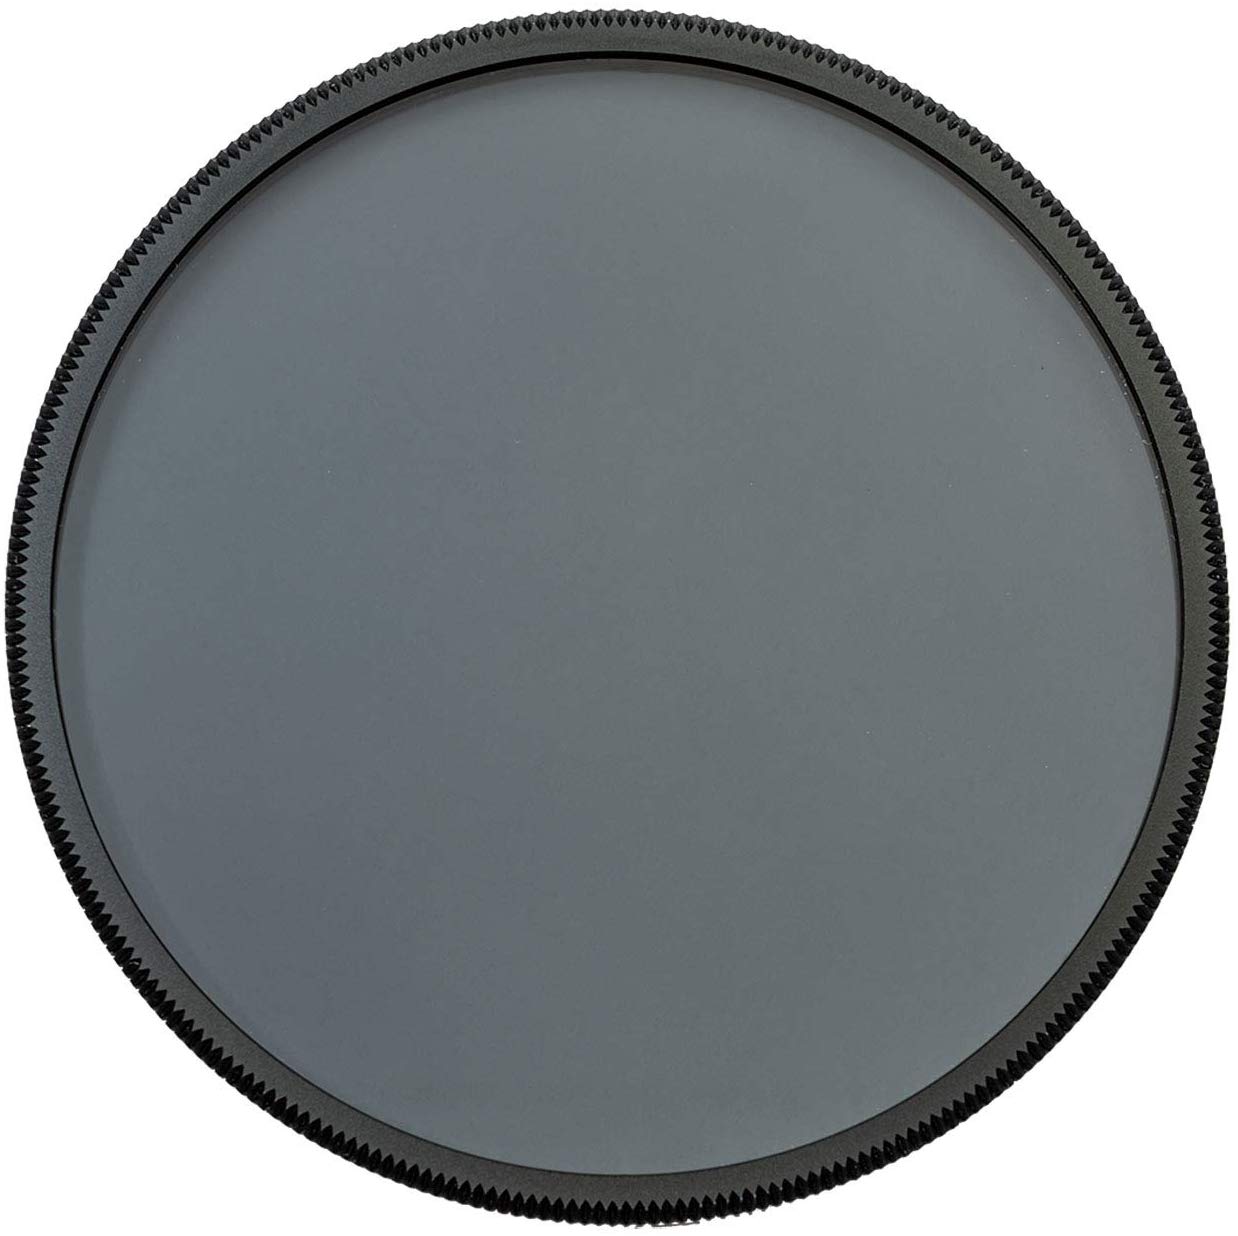
One of the best - and easiest - things you can do to improve your photos is to start using a circular polarizing filter.
These filters offer too many benefits to not have one in your camera bag. Take a look at what a polarizer can do:
- It reduces glare off non-metallic surfaces like water, wet plants and rocks, and even skin.
- It boosts contrast and saturation in the sky, making the blue atmosphere deeper and richer and the clouds a brighter white.
- It minimizes atmospheric haze, so distant features appear crisper.
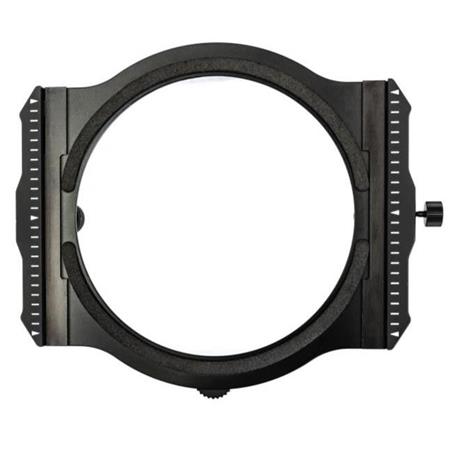
And the best part is that Marumi makes a magnetic filter system that makes using filters a veritable breeze.
Just attach the M100 filter holder (shown above) to your lens, pop the circular polarizer in place, and you're ready to rock!
And since the system is magnetic, it makes it super quick and easy to swap out filters when needed.
Part of becoming a better photographer is knowing what gear to use and when, and having a circular polarizer in your kit is certainly a piece of gear you should have if landscape photography is your vibe!
We Recommend
A Beginner's Guide to Studio Portraits

Photo by Jimmy Fermin on Unsplash
At some point in our photographic careers, we toyed with the idea of setting up for studio portraits. By careers, I’m not specifying making money, but how we approach photography. We have all gone from a person who takes pictures to a craftsperson creating art.
That’s us, that’s you, we are Photographers, capital P. This is true regardless of experience level, in my opinion. Beginner photographers are definitely a photographer, having grown from merely liking to take pictures to wanting to improve.
So, we thought about setting up our own studio, maybe for portraits, possibly for small product advertising. Well, let’s move beyond the thinking stage and actually start something. We’ll focus for now on getting geared up for studio portraits.
Table of Contents:
- How to Take Studio Portraits: Setup and Gear
- Taking the Portraits: Camera Settings and Lighting
- Keep Taking Pics, But Make Them Better
How to Take Studio Portraits: Setup and Gear

Photo by curtis powell on Unsplash
First we start looking at the basics of getting a portrait studio going with what we may already have or with gear we can pick up for lower cost. Here are some beginner studio portrait tips.
Where To Set Up

photo bysdominick via iStock
The first thing to consider is a spot for our portrait studio.
Many have started in what we could call a home studio. Some ideas are a spare bedroom in our home or apartment, rearranging our living room or dining room to use a corner or wall, space in our garage, a porch, a backyard shed, a wall of our workplace office, or an unused room in that office.
Truly, you don’t need a huge space to set up a makeshift portrait studio - just room enough for the model, your gear, and you!
Recommended Portrait Reading:
- POSE!: 1,000 Poses for Photographers and Models
- Mastering Portrait Photography
- The Dramatic Portrait: The Art of Crafting Light and Shadow
What Gear to Use

photo by AleksandarNakic via iStock
Many studio items can be found in the home or office already, other items are specific photographic and lighting gear that’s needed.
Some of the more basic items I use in my home studio include barstools and chairs, tables and nightstands, potted plants, and other things that can either be a prop or part of making the subject comfortable while posing.
Cameras and lenses are probably already covered by what we already have. An entry-level DSLR or mirrorless camera with the kit lens can take a fantastic portrait image when used properly. More on that in a bit.

Other gear that is really helpful include tripods or other mounts, and lighting equipment. Some of the most useful lighting equipment are the wonderful LED compact lights that can be mounted on camera or on stands or mounts.
A fantastic couple of items I’ve found extremely useful in a home or office studio are the Hakutatz portable LED light and the Octopad camera and accessory mount.

Using the Hakutatz LED light shown above, we can make use of various studio lighting techniques such as the Rembrandt lighting, low key portrait lighting, and other configurations.
What’s more, these lights offer a high-degree of customization, including an adjustable color temperature, brightness, and saturation.
Best of all, the light can be controlled via a smartphone app. In fact, you can operate multiple lights at the same time to create more complex lighting effects.
If using two or more lights for our studio lighting techniques, the Octopad mount comes in handy to place the light wherever we need it in our possibly tight home studio.

What’s nice about the Octopad is that it’s so small and portable. Whether you’re in your home, your backyard, or the local park, it’s easy to bring with you to support a light.
Depending on the camera you use, you can utilize the Octopad to stabilize it. Compact cameras, smartphones, and some mirrorless systems are ideal for use with this mount.

I also like that the Octopad has a non-slip surface on the bottom. I’ve put this thing on my dashboard and used it with my GoPro Hero 8 Black as a dashcam setup.
Even when I took my Volvo off-road, the Octopad held firmly in place. Just imagine how stable it’ll be for your studio lights!
Learn More:
- Basic Portrait Lighting Principles
- Essential Portrait Lighting Tips
- 2019 Best Lights For Photography
Taking the Portrait: Camera Settings and Lighting

photo by CoffeeAndMilk via iStock
To actually make the images, Here are some beginner studio portrait tips and beginner portrait techniques.
Camera Settings

Photo by ShareGrid on Unsplash
One of the most important camera settings for portraits is to capture your images in RAW format instead of JPEG. The reasons for using RAW when you can is that RAW files contain a lot more exposure information than a partially compressed file such as a JPEG.
This extra information allows for a whole lot of leeway in post processing the portraits for the best look possible. I like to use a program such as Adobe Photoshop Lightroom to take care of all the adjustments necessary for a showable or saleable portrait image.
We talked earlier about using the kit lens on our entry-level DSLRs and mirrorless cameras for portraits. Yes, you can use a kit lens for portraits. You could even sell a portrait made with a kit lens and entry level camera.

A different lens such as prime - like this Canon EF 85mm f/1.2L shown above - or a fast zoom - like the Canon EF 24-70mm f/2.8L - may give you more options for changing exposure settings to make use of selective focus techniques or bokeh. But if you haven’t picked up your next lens yet, your kit lens is likely to be very sharp and relatively distortion free.
The trick will be making use of the capabilities you actually have. A kit lens zoomed to short telephoto and with the aperture as wide as possible will still give you good options for selective focus and their bokeh is often quite nice. And if you record in RAW, you can really maximize your post processing program features.
Studio Lighting Techniques

photo by alvarez via iStock
Outside of all other options you have in front of you, your use of studio lighting techniques will be where you show the difference from merely snapping a pic to creating a portrait as a photographer.
Some lighting configurations can be made with one light, one light and a reflector, or two lights. Check the learn more links in this article for details on lighting setups.
In addition to the lighting, you can improve the portraits you’re creating by encouraging good, relaxed posing.
A big part of making the portrait subject comfortable enough to fall into natural looking poses is to have a good rapport with the subject. Especially when shooting in the smaller space of a home portrait studio do you need to be sure to have your portrait subject at ease with you and the photographic process.
As a beginner, you make the subject comfortable by being in charge of the session. Not over controlling, but giving the subject confidence in you and your art. You can do this! For practice, work on taking portraits of a friend or a family member.
Keep Taking Pics, But Make Them Better
We often speak about the difference between merely taking pictures and creating photographic images. Truth be told, there is nothing wrong with taking pictures, it’s fun! As photographers, we never really stop.
What happens is that we want to improve and then we make the improvements. Your studio portraits show off your growing talent and give your subjects images they can enjoy.
In the video above, get a thorough tour of studio portraiture by Academy of Photography.
Learn More:
- How to Use Rembrandt Lighting For Portraits
- Short Vs Broad Lighting For Portraits
- How to Create a Low Key Portrait
We Recommend
Basic Portrait Lighting Principles

photo bysilverkblack via iStock
One of the most important skills to have as a photographer of any kind is the ability to understand the different attributes of light.
From the direction of light to the quality of its tone, the color of light to its luminosity, there are many factors to consider when framing up your shots.
These factors are especially important when creating portraits, as they can quite literally make or break the shot.
With that in mind, let's have a look at a few basic portrait lighting principles you need to understand in order to make better portraits.
Learn to Work With Harsh Lighting
photo by skyNext via iStock
One look at outdoor portraits on Instagram or Flickr will reveal millions of portraits taken at golden hour.
Golden hour is a great time for portraits because light is soft, warm, and falls evenly across the scene, which gives portraits an elegant look.
But it’s not always possible to shoot portraits during golden hour, so learning to work with harsh lighting that you find throughout the day is a must.

photo by skyNext via iStock
The difference between soft and harsh lighting is simple - soft light has soft shadows and a gentle transition from shadowed areas to highlighted areas, like in the first image above. Harsh lighting, however, has an abrupt transition with very hard lines of shadow, as shown in the image immediately above.
You don’t have to be outside to make use of harsh lighting, either.
Photo by ViewFramer via iStock
In this example, a single, bright light is used to create extremes of brightness and shadow to create a more compelling black and white portrait.
Since black and white images rely on things like contrast for visual interest in the absence of color, using harsh light to create black and white images is a great option.
Learn More:
Learn How to Use Artificial Lighting

When some people read the term “artificial lighting,” they might shudder with thoughts of buying expensive lights, light stands, diffusers, softboxes, and other bulky photography lighting gear.
And while that’s certainly an option, if you aren’t a professional portrait photographer, you don’t need all that gear, nor do you need to spend that much money.
There are a ton of small, easy-to-use lights for photography that allow you to sculpt and shape light for portraits.
Take the Hakutatz RGB+AW LED Light shown above and below as a great example.
Editor's Note: The Hakutatz Kickstarter campaign was a huge success! Their Amazon store will be open and ready for orders in early December.

This light is small enough to fit in your pocket, yet allows you to get ultra creative with the way you light portraits.
For example, you can add colored light to the portrait using the light’s array of RGB LEDs.
If you want to warm up a portrait, you can use the amber LEDs to wash the subject is beautiful amber-toned light. There’s even white LEDs if you want that harder, edgier feel discussed earlier.

What’s more, lights like this can be used as a fill light (to soften shadows in the presence of harsh lighting), as a backlight to help separate the subject from the background, or even as a key light, which is the primary light used to illuminate the subject and highlight their form.
There are many ways you can use a single light to create a compelling portrait, too.

But the advantage of having a light like the Hakutatz RGB+AW LED is that you can use multiple lights at the same time to create more complex lighting scenarios.
With the accompanying smartphone app, you can control one or more lights and dial in the precise color temperature, RGB color, and even special effects you might like to use.
In other words, learning how to use smart lights like this enables you to craft the precise look you want in your portraits and unleash your full creativity at the same time.
What’s not to like about that?!
See the possibilities you can create for portrait lighting with the Hakutatz RGB+AW LED Light.
Learn Common Lighting Setups

photo by FilippoBacci via iStock
If you really want to step up your portrait photography game, it’s important that you learn the basic lighting setups used in portrait photography.
These setups go beyond simply having a single key light or using an LED light like the Hakutatz discussed above to separate the subject from the background.
Instead, the lighting setups shown above (and outlined below) enable you to create different looks in your portraits by manipulating how the light interacts with the model’s face.

- Short lighting involves casting a delicate shadow on the side of the model’s face nearest the camera by having the model look toward the light source.
- Broad lighting involves casting a delicate shadow on the side of the model’s face away from the camera by having the model look away from the light source.
- Butterfly lighting is created when the light source is in front of the model and above their eye level, which creates a butterfly-shaped shadow under their nose.
- Split lighting divides the model’s face into two equal sides - one that’s illuminated and one that’s in shadow - by placing the light source 90-degrees to one side of the model.
- Loop lighting creates gentle shadows while keeping most of their face in light by positioning the light source just above eye level at about a 45-degree angle from the camera.
- Rembrandt lighting results in a similar pattern as split lighting, with one side of the model’s face in light and the other in shadow. However, this lighting pattern creates a triangle-shaped area of light on the shadowed side of the face by positioning the light above eye level and casting the nose’s shadow onto the far cheek.
You can learn more about common lighting setups in this detailed tutorial.

photo by utkamandarinka via iStock
Whether you adapt your portraits to harsh lighting, learn to use artificial lighting, or incorporate classic lighting setups, you’ll find that your ability to create beautiful portraits will be much-improved.
Give each of these methods a try and see what works best for your workflow. Even better, practice each one and then incorporate them all into how you take portraits. I think you’ll be pleased with the results!
Learn More
- 5 Photography Tips That Will Make You a Better Photographer
- Quick and Simple Portrait Photography Tips
We Recommend
Basic Videography Gear for Beginners

photo byFilipovic018 via iStock
If you’re a photographer trying to branch off into videography, then you’ve probably figured out that videography gear is a whole other ballgame.
When I made the switch, I was entirely overwhelmed. Not only is there so much new videography gear to learn about, but most of it is quite expensive.
So, allow me to walk you through my favorite must-have videography gear (that you can buy on a budget).
Use the Camera You’ve Got

photo by basketman23 via iStock
It goes without saying that your camera is the most important part of your videography gear pack.
While you might be tempted to go out and buy a professional video camera or at the very least a high-end mirrorless camera that shoots 4K at 60p, you don’t need to do that right out of the gates.
Do what I did and transition slowly from camera to camera.
I began with an iPhone and expanded from there. If you’re not sure whether or not you want to stick with videography, definitely start shooting on your smartphone. It’s free because you already own it!
photo by basketman23 via iStock
If you’re already a photographer, however, and you own a DSLR or mirrorless camera, feel free to shoot with that as well.
Even if it’s an entry-level camera, chances are these days that it’ll shoot 4K video, or at the very least 1080p.
The point is that while cameras are obviously an integral component of creating video footage, you don’t need to blow your life savings on a new rig right now. Get practice on what you have first, and then as your needs and skills expand, upgrade to a more capable camera.
Invest in a High-Quality Light
One piece of equipment you definitely need to add to your kit is a high-quality light.
After all, just like photography, videography is all about light and how it interacts with your on-camera subject.
With the right lighting, you can create different moods and emotions that make for much more compelling video footage.
The question is, what kind of light is best?
Personally, I like using lights that give me tons of versatility while also being super functional. And for me, nothing says versatile and functional like the Hakutatz Pocket Size RGB+AW LED Light shown above.
I got my hands on one of these things, and to say that I’m impressed is an understatement.
For starters, it fits in your pocket, which is just what you want in a good video light. You want it to be portable so you can move quickly from one shoot location to the next without dragging around tons of big, heavy lighting gear.
Secondly, no matter if you need to use it as your primary light to illuminate the subject with amber or white light, use it as a means of separating the subject from the background, or use it to create interesting lighting effects, this light can do it all.
With a range RGB colors to add visual appeal to your videos, there is virtually no limit on the colors you can create.
Best of all, this light comes with a companion smartphone app, so you can customize how it works right from your phone.
Choose and change colors, adjust the color temperature, and select special effects, all on the fly.
You can even use these lights on their own or control multiple lights as a group for the ultimate in functionality.
Light has the ability to completely change the look, feel, and mood of your videos, so arming yourself with a light that can do it all is certainly something you should do to take the quality of your videos to the next level.
Editor's Note: The Hakutatz Kickstarter campaign was a huge success! Their Amazon store will be open and ready for orders in early December.
Learn More:
Tripods Prevent Shaky Footage
Photo by Jeroen den Otter on Unsplash
A tripod is essential gear for shooting video.
While gimbals might get more love from videographers because of their portability, you should still have a tripod in your videography kit.
Not only do tripods offer excellent stability, but they also serve to give you a place to attach extra accessories like lights, microphones, teleprompters, and so forth.
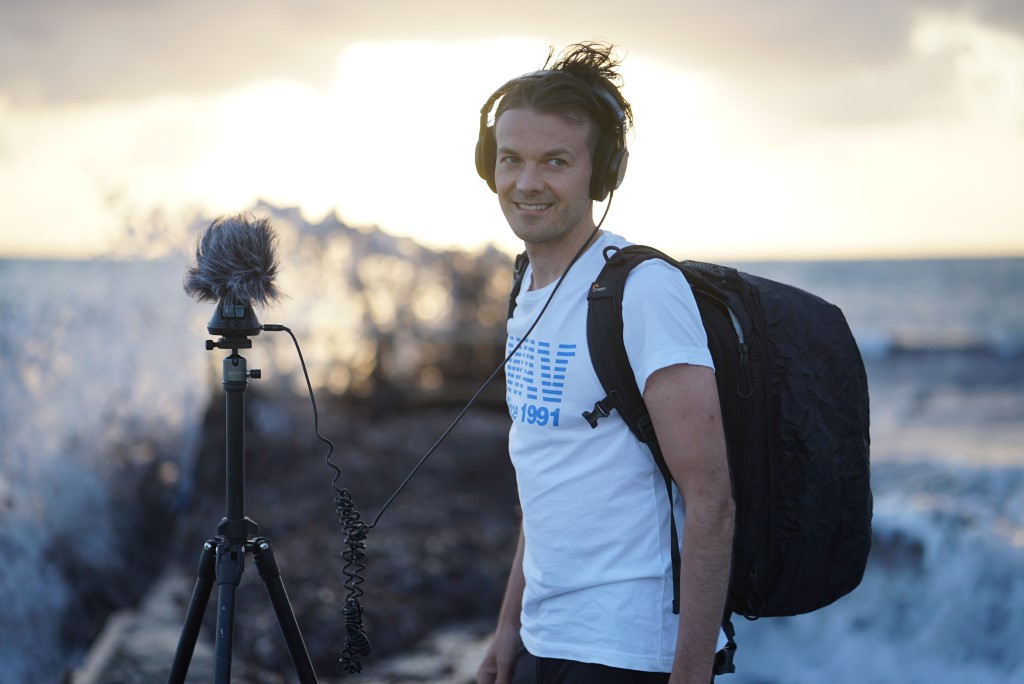
Photo by Free To Use Sounds on Unsplash
Just like with your camera, you don’t have to invest in a really expensive tripod right off the bat.
But don’t opt for some bargain-basement piece of junk, either…
Look for a good mid-range tripod that has features like non-skid feet, easy lock legs, and a good height range so you can vary the eye level of the camera as you shoot footage.
A tripod with a fluid pan head is also a good option, as it allows you to pan the camera from left to right for smooth sequences.
External Mics Help With Audio
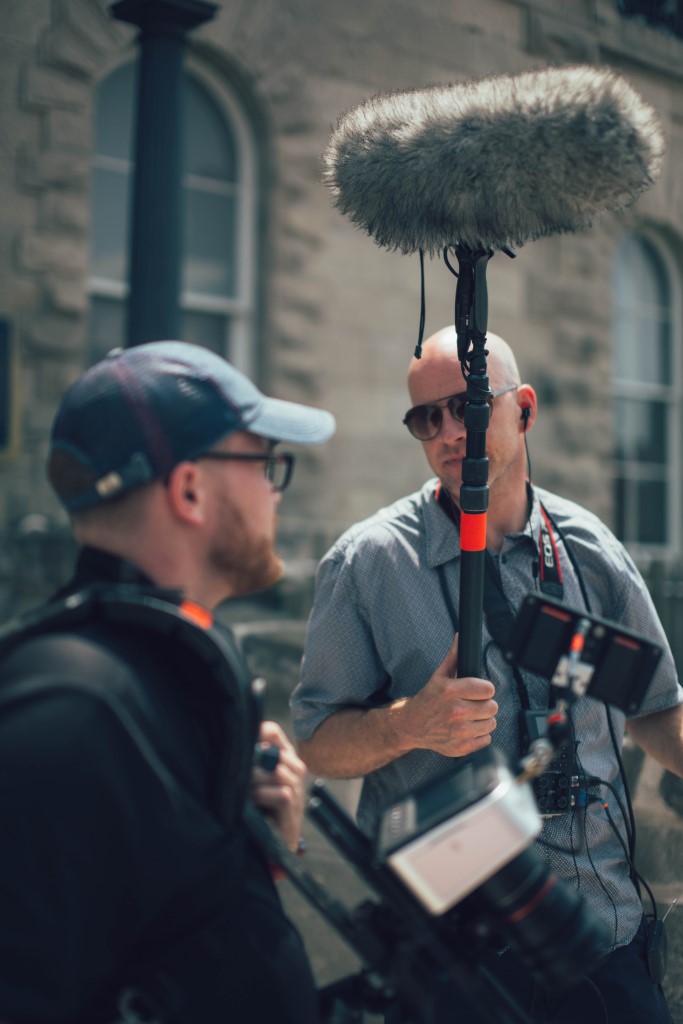
Photo by Nik MacMillan on Unsplash
While your smartphone, DSLR, or mirrorless camera will be a fine camera when you’re just starting out in videography, what is not fine are the microphones these devices use.
You can capture beautiful 4K footage all day long with your camera, but creating compelling videos isn’t just about what people see, it’s about what they hear, too.
The tiny mic on your phone or camera isn’t going to pick up clean, crisp audio. For that, you need an external mic.
You don’t necessarily need to add a boom mic to your videography gear right away, but the effects of a cheap shotgun mic set can’t be replicated with the mic in your camera.
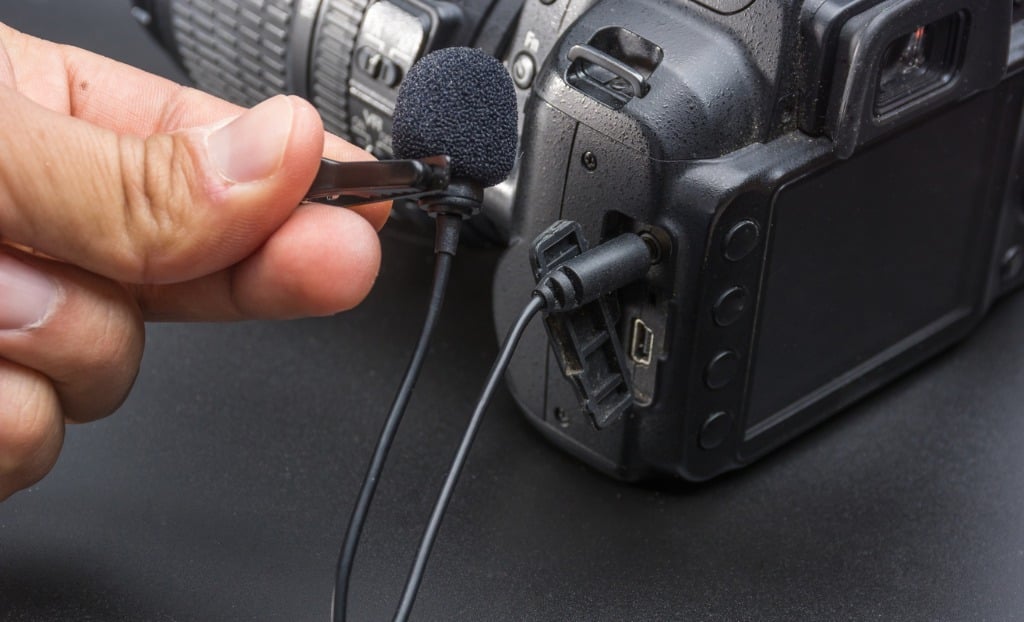
photo by istockphotoluis via iStock
I also recommend an inexpensive clip-on lavalier mic if you’re going to be conducting any interviews on camera.
There’s even a 4-star rated clip on lavalier mic that plugs into your smartphone for $12 on Amazon.
Trust me - nothing ruins great video footage like poor-quality audio or wind noise. Do yourself a favor and get a good external mic to capture great audio to go with your beautiful video.
With this tip and the others outlined above, you have recommendations for basic gear you need to produce awesome videos!
We Recommend
Easy Tips for Better Environmental Portraits
photo byvalentinrussanov via iStock
If you want to learn a little about how to take environmental portraits, or want to know what are environmental portraits in the first place, stick around.
The current excitement for environmental portraits is actually nothing new, it’s a portrait genre that has been around almost as long as photography itself. What is making it so popular currently is partly due to how tastes change and evolve continuously, but also because it’s a lot easier to create good environmental portraits now.
What Are Environmental Portraits?
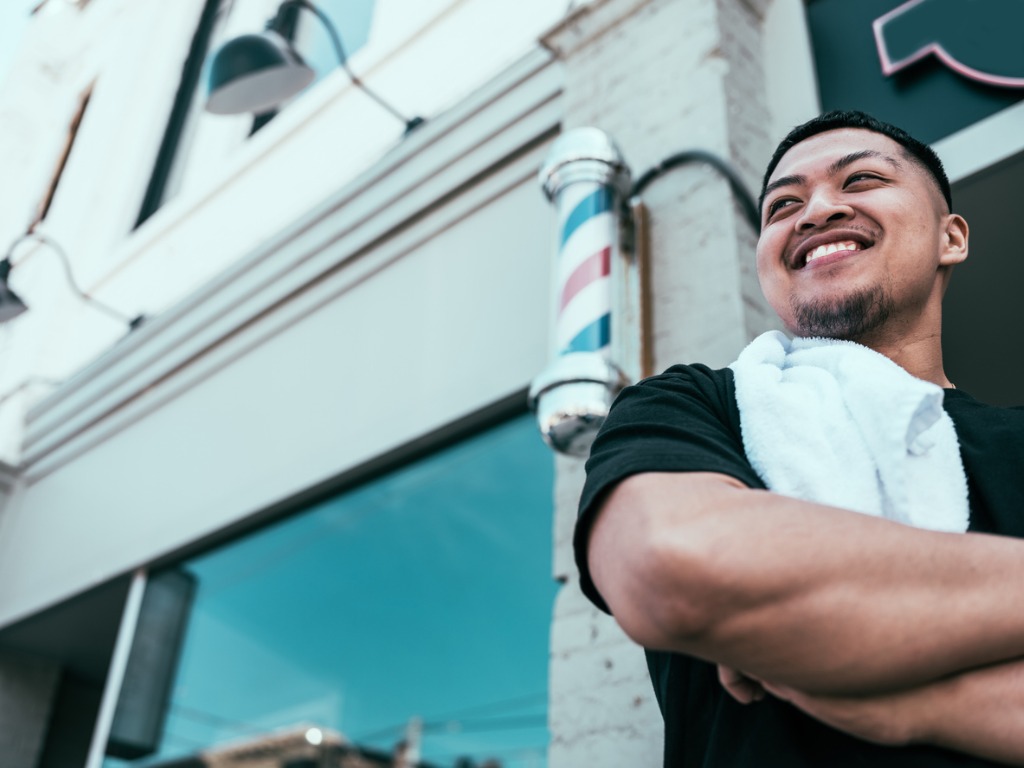
photo bySisoje via iStock
Environmental portraits are images of people, alone or in groups, that include extra visual information. The extra visual information usually tells us something about the people, such as what they do for work or fun or perhaps hints about their personality. In other words, we tell a story about the person.
Examples of environmental portraits that might tell a story about someone are someone working on their bike, a person painting, or someone sitting amongst a pile of stuffed animals. All of these examples tell us something extra about the person being imaged.
Environmental Portrait Tips

photo byfranckreporter via iStock
Learning how to create environmental portraits is actually a very simple thing to take on. For an environmental portrait tutorial, take everything you already know about portraits in general, including common portrait lighting setups, and add a few more things to that.
Such as…
Know your subject, widen out, posing and composition, getting used to portable lighting, and things like that.
Know Your Subject

photo byGoodboy Picture Company via iStock
In order to create good environmental portraits, you really need to know something about your subject. If they are a new client, an interview of some sort is often beneficial. It doesn’t have to be some elaborate session, simply talking to them for a while during the booking conversation can yield tons of ideas.
Be observant of visual cues. Did they ride up to your home office on a motorcycle? Might include bikes, a garage, or the outdoors somehow in their portrait.
Pay attention to their words. Did they mention a hobby or love of their pets at any time? Perhaps adding in their latest hobby project or them playing with their dog, iguana, or llama would be in order.
Their workspace or home is often a source of pride for some, especially if the environmental portrait session is of a group such as workmates or family. Be sure to just come out and ask them directly any of these questions if the cues aren’t readily evident. This way, you will capture something about them that helps explain to others who they are.
Widen Out
photo bySisoje via iStock
In order to capture some surroundings, one of the basic environmental portrait tips is to use a wider lens than what you might normally be using for portraits. An 85mm or 100mm lens is fantastic for head and shoulder pics or headshots, but the Nifty Fifty or a lens a little wider like 35mm or 28mm is probably going to work better for this style of portraits.
Some interesting environmental portraits have been made with lenses that are even wider than that, such as 20mm and wider. If you use lenses that wide, it’s a good practice to use a tripod and level to avoid skewed lines, also be very aware of facial elongation with close up portrait subjects.
Learn More:
- Lifestyle Portrait Tips
- Essential Portrait Lighting Tips
- 5 Photography Tips That Will Make You a Better Photographer
Posing and Composition
photo byJohnnyGreig via iStock
Subject placement, both posing and composition, is a vital aspect of setting up a workable environmental portrait. By varying the position of the subject in relation to the other parts of the image, you can change what is emphasized. For instance, the portrait subject off to the side of their work or hobby will emphasize the work or hobby more than the person.
Posing tips for environmental portraits include having the subject making eye contact with the camera for a more intimate feeling or having them look elsewhere, including off to the distance, for adding interest to the environmental part of the image.
Environmental portraits can often take advantage of the powerful composition techniques of Rule of Thirds and the Golden Ratio or Fibonacci Spiral. Just changing the orientation from vertical to horizontal can also change up the entire message of the image.
Use Portable Lighting
You might be tempted to rely on either available ambient light or an on camera flash for environmental portraits, but my experience has taught me that a good portable light or two is often the best choice for environmental portrait lighting.
Since you’re most likely away from wall sockets or without a lot of options for power supply, a small battery powered LED light such as the new Hakutatz LED light is a good choice for your environmental portrait lighting setup.

What I like about these types of lights is how versatile your portrait lighting setup is with them. The Hakutatz LED lights are about the size of an iPhone and can even be controlled by either an iPhone or Android device.
Using one light can help emphasize the person within the environmental portraits, two or three lights or a light and reflectors can be employed to even out ambient light conditions or create a natural feel to the scene.
In order to have an effective and natural looking portrait, it often is best to light in such a way that nothing important is either in too deep a shadow or much too bright. Unless you’re intending to have a high-key or low-key image.
It's Easier Than We Thought!
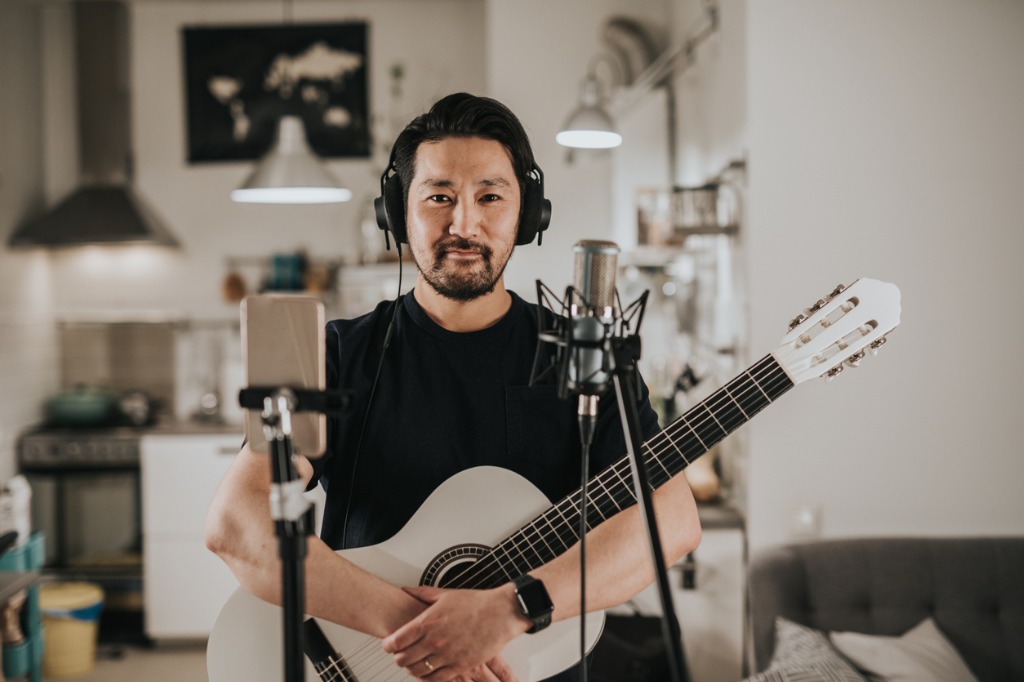
photo byvisualspace via iStock
If we take the approach of how to take environmental portraits by merely adding a few key thoughts or techniques to what we already know about portraits, we should end up with environmental portraits that tell a story about the subject.
Learn More:
- Quick Tips for Shooting Cloudy Day Portraits
- How To Use Fill Light for Outdoor Portraits
- Photography Gear Upgrades You Should Make in 2020
We Recommend
Essential Portrait Lighting Tips
 Photo by CoffeeAndMilk via iStock
Creating beautiful portraits depends on your ability to accomplish a variety of tasks - how you compose and frame the shot, the separation of the subject from the background, and, of course, the lighting that's used.
Not all light is made equal, and the manner in which you use lighting to illuminate the model will greatly influence how the final image looks.
In this quick tutorial, you'll learn a few techniques for manipulating lighting in a way that will enhance your portraits.
Let's get started!
Good Light Means Having Good Shadows
 Photo by VikaValter via iStock
In some portrait photography situations, you might strive to reduce shadows, like in a headshot.
In a headshot, shadows can be distracting. The point of a headshot is to be a clean, professional look.
But in other kinds of portraits, like the one shown above, shadows can actually greatly increase the visual appeal of the image. The interplay of the areas of light and shadow in this shot are hugely dramatic, are they not?!
It's important not to go crazy with shadows - they can be too much of a good thing - but experimenting with the placement of your lighting to create interesting shadows can be a fun and challenging exercise that helps you develop your creative eye.
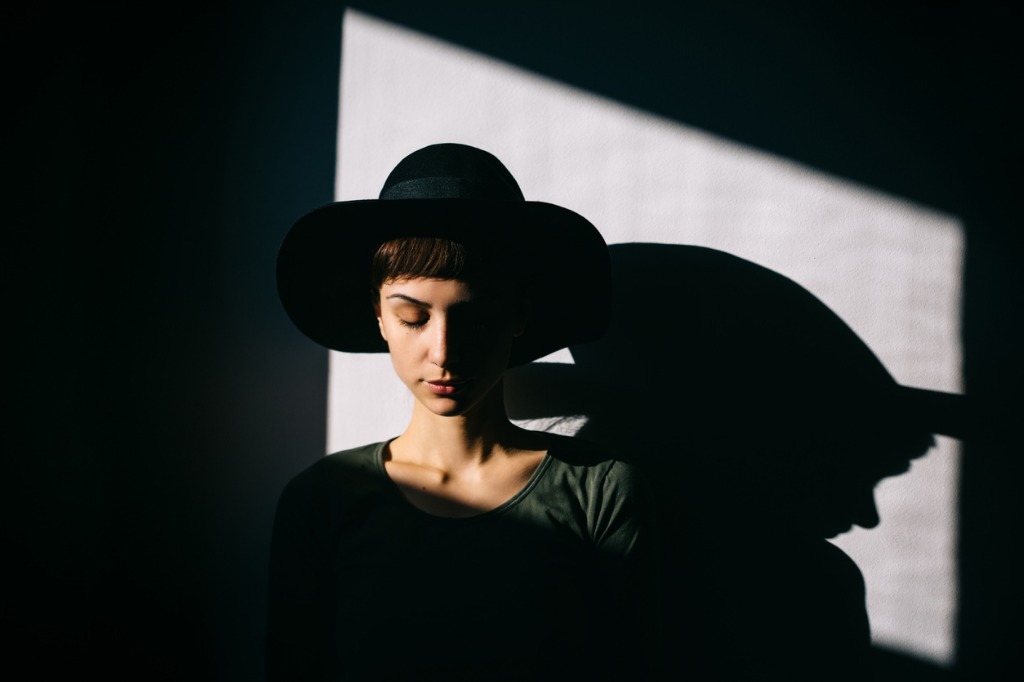 Photo by momcilog via iStock
Shadows balance out bright light while also giving your photos a much greater sense of depth and dimension.
As a result, the portrait will seem more three-dimensional and much more lifelike.
The image above is a great example of this - the woman's shadow on the wall makes this portrait much more interesting to look at while also providing some of that depth you want.
Learn More:
Understand How to Use Light to Get Just the Right Look
 Photo by HRAUN via iStock
Where you place artificial lighting will influence where the shadows fall in the shot. As discussed above, this can have an important impact on the overall look and feel of the portrait.
The positioning of the light also determines the kind of light you have to work with - frontlighting, backlighting, or sidelighting.
Where the light source is in relation to the model will have a significant impact on the results you get.
 Photo by izusek via iStock
For example, using frontlighting, in which the light source is directly in front of the model, helps illuminate the details of the person's face.
Shadows are minimized as well, because the shadows are cast behind them. This is often the kind of lighting used for headshots.
Frontlighting is quite easy to use - just place the light source a few feet in front of the model (at least to start...experimenting with distance is a good thing). There's one caveat, though - frontlighting can be a little flat and boring.
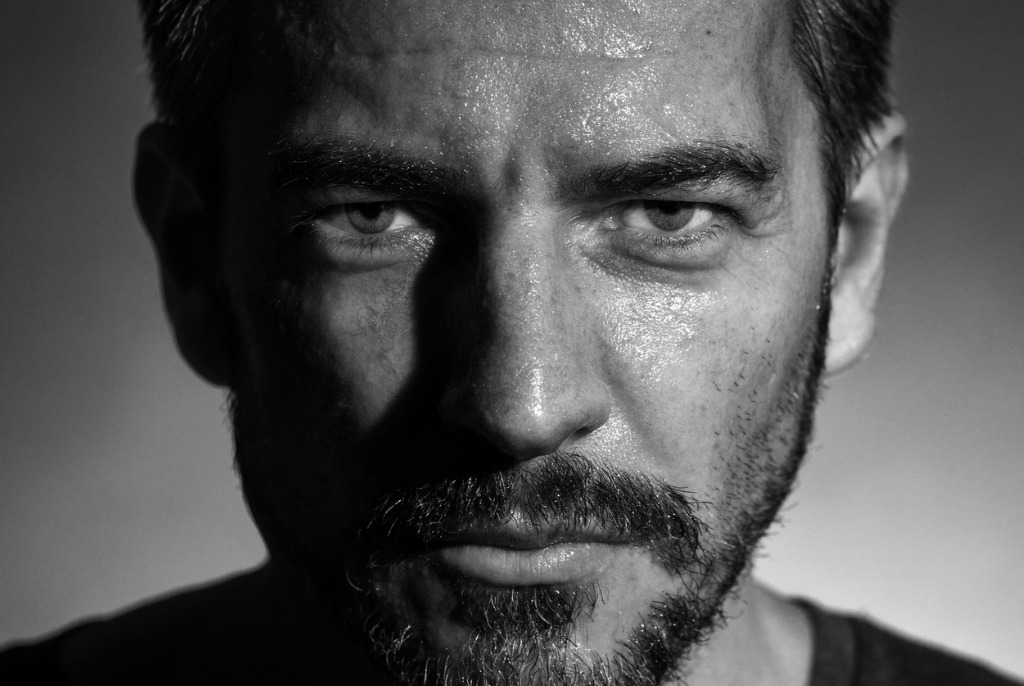 Photo by Umkehrer via iStock
Sidelighting, on the other hand, results from light emanating from the right or left of the model.
With the light falling across the model's face and body, shadows appear, which as I noted before, increased the depth and dimension in the photo.
Sidelighting is therefore more dramatic than frontlighting, but it's just as easy to use. But, sidelighting doesn't have to be as dramatic as shown above. In the image below, much softer sidelighting was used, yet there is still a lot of dimension in the model's face thanks the presence of shadows.
 Photo by JacobVanHouten via iStock
Just have the model turn away from the light source or position the light source to one side or the other (it doesn't have to be at a 90-degree angle, so, again, experiment!).
Just take care in noticing where shadows are falling. If the shadows become a distraction, adjust the positioning of the model or the light source to manage the appearance of distracting shadows.
Backlighting is yet another option, but is the most difficult to pull off.
Since the light is behind the subject, the camera is bombarded with light. If you aren't careful, this can result in a silhouette (which can be quite fetching), but if that's not the look you want, you'll have to make some adjustments.
In the video above by Gavin Hoey, learn how to master the camera settings for a backlit portrait using just a single light source.
Invest in a Light That Expands Your Creative Possibilities
There are a lot of photographers that market themselves as "natural light photographers," and that's great, and most of them are truly masters at what they do.
But for some natural light photographers, it's a bit of a cop out because I've known a few natural light photographers over the years that use natural light because they're afraid of artificial light.
Yes, using artificial lighting can be trickier, but understanding how to create light and manipulate it to your needs is a skill worth having.
Back in the day when I was learning photography, using artificial lighting meant a scene in which there were light stands and diffusers and flashguns that had to be used.
But today, there are lights that are small, portable, offer tons of customization options, and are easy to use.
For example, I've been testing the Hakutatz RGB+AW LED light (shown above and below) for a few weeks now, and it is one of the handiest lights I've ever used.
Editor's Note: The Hakutatz Kickstarter campaign was a huge success! Their Amazon store will be open and ready for orders in early December.
Not only can you take advantage of crisp white light, warm amber light, and millions of RGB colors, but you can also change the color temperature of the light and use special effects to get truly unique results.
The accompanying smartphone app makes changing the light's settings a breeze, too.
Perhaps best of all, these lights can be used for frontlighting, sidelighting, and backlighting, and you can control multiple lights using the smartphone app.
Often, learning a new skill in photography takes a lot of time and practice. I'm not saying that you can master portrait lighting in a single afternoon, but armed with tools like the Hakutatz RGB+AW LED light, it's certainly an easier task!
Learn More:
We Recommend
How to Create Minimalist Portraits

Photo by Tony James-Andersson from Pexels
A minimalist portrait can be a beautiful image. Though relatively simple to accomplish, making minimalist portraits does require some effort to do correctly.
Portrait photography is full of possibilities and potential pitfalls. Some of the most common pitfalls include distracting elements, distracting backgrounds, and poor lighting or exposure.
A minimalist portrait is exemplified by what’s not in the portrait as much as what is in it. Certain portrait photography techniques lend themselves naturally to minimalist portraits. Let’s look at a few.
Selective Focus
Photo by Daniel Xavier from Pexels
A good portrait captures the viewer’s attention and leaves them wanting more. One of the best portrait photography tips that helps us accomplish that is selective focus. Selective focus is where the intended subject is all that’s sharply in focus with everything else being at least somewhat out of focus.
You may have also heard of another term related to selective focus, bokeh. Bokeh is the aesthetic quality of out of focus parts of the image, particularly the highlights or points of light. A lens with pleasing bokeh will render these bright spots as a sort of background that is perfect for minimalist portraits.
Image by Ömer Kurt from Pixabay
Bokeh can also refer to darker out-of-focus elements, but those aren’t nearly as noticeable as the bright spots. They can still be an important part of what goes into a minimalist portrait.
You can achieve selective focus by several means. First and foremost is choosing a wide-open aperture or f-stop. The wider the aperture, the narrower the depth of field. Using a short telephoto lens helps out as well. Getting physically closer to the subject also creates less depth of field.
Doing all three of those things at once will virtually guarantee effective selective focus. This technique will separate your portrait subject from the background for a great minimalist portrait.
Recommended Portrait Lighting Books:
- Picture Perfect Lighting: An Innovative Lighting System for Photographing People
- The Dramatic Portrait: The Art of Crafting Light and Shadow
- Portrait Photography: From Snapshots to Great Shots
Light Your Subject Properly

Choosing the right lighting technique can go a long way towards making great minimalist portraits. Some lighting techniques that will help make minimalist portraits include split lighting, loop lighting, Rembrandt lighting, and rim lighting.
One of the best things about these portrait lighting techniques is that they can all be set up with a single light. A portable, battery powered LED light like the Hakutatz Pocket size RGB LED Light is an excellent choice for minimalist portraiture.

The Hakutatz LED light is a good choice for minimalist portraits for several reasons. Some of the reasons include the multiple color capabilities and the fact that it can be used with smartphones and virtually any other type of camera.
Learn More:
Expose for High Key or Low Key
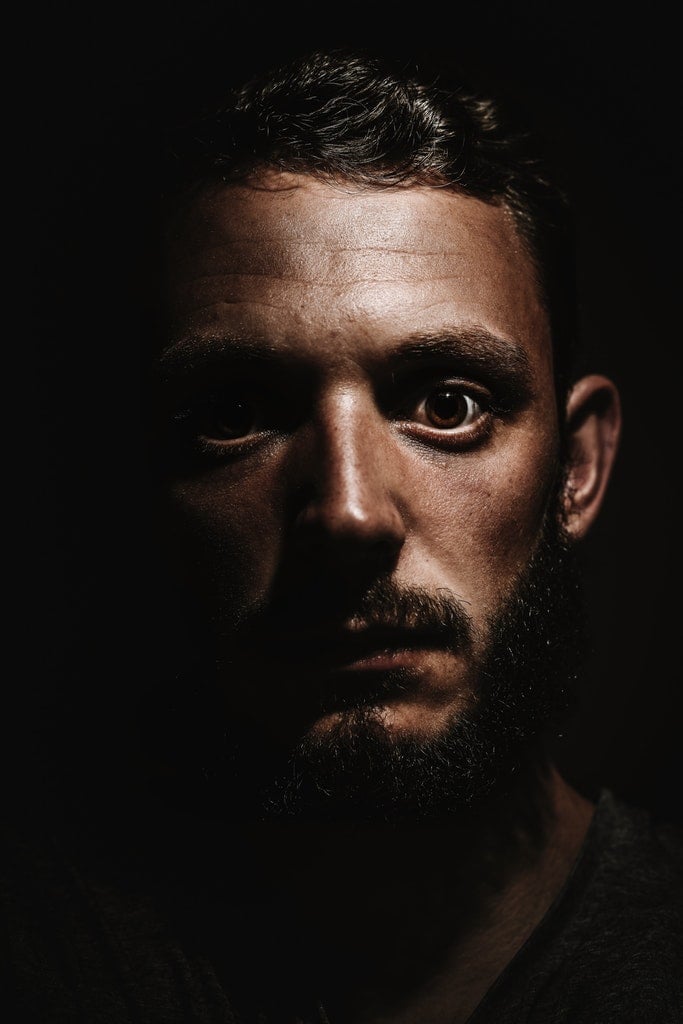
Photo by Alex Andrews from Pexels
In high key photography, the majority of the image is brightly lit, in low key, the opposite is true. While this can be made easier by proper lighting, these are actually exposure techniques more than anything else.
Photo by Rene Asmussen from Pexels
For high key photography, you expose for the shadows, letting the highlights build up. With low key photography, you expose for the highlights, letting the shadows bunch up.
Both of these exposure techniques are perfect for minimalist portraiture. The highlights or shadows effectively isolate the subject for a minimalist portrait.
Concentrate On a Single Color
You can do this in several different ways. Using a single color backdrop is an effective method for creating portrait photography that capitalizes on a simple color theme.
If you don’t actually have different color backgrounds, you can make them with colored lights. The Hakutatz LED light can be set to emit any number of different colors. So, if your subject is wearing red hues, light up the background with a red glow.
In addition to the colored light, exposing for high key or low key are other methods for capturing variation in the minimalist portrait.
Keep Extra Elements Simple
Image by Engin_Akyurt from Pixabay
A basic portrait technique for any style of portraiture is to keep any extra things in the image simple. In other words, instead of an ornate chair, use a simple wooden chair. Instead of an elaborate costume, have them wear a simple dress.
There’s nothing wrong with adding other or more complicated visual elements to our portraits, but if we decide on that, then we’re no longer shooting a minimalist portrait.
Edit As Black and White
Photo by mohamed Abdelgaffar from Pexels
If you’ve done several of these other methods, a final technique that yields truly minimalist imagery is using a post processing program to convert your image to B&W.
This works especially well with high key and low key exposure techniques. A black and white portrait calls to mind a time period when everything seemed more simple, less hectic. Provide your portrait subject with a Black & White picture and they will likely wax nostalgic about your awesome picture.
It Doesn’t Have to Be Complicated

Photo by mentatdgt from Pexels
It doesn’t have to be complicated to make a minimalist portrait. All it really takes is creative focus, exposure, and lighting techniques. Taking a little extra effort to ensure an uncomplicated photo, your portraits will stand out as interesting and desirable.
Learn More:
We Recommend
How to Use Fill Light for Outdoor Portraits
photo by Ridofranz via iStock
Photography is all about light. We all know that. But light can be tricky or non-sufficient sometimes. What do you do if you don’t have the best lighting situation when doing outdoor portraits? Do you suck it up and wait for better conditions?
No, you absolutely don’t have to wait.
There are a few simple ways to add some light and still keep your outdoor portraits looking natural. Fill light for outdoor portraits can be an easy solution when you want to lift harsh shadows, expose your subject and background evenly, and even add lights in the eyes.
What Is Fill Light
photo by MStudioImages via iStock
Directing the light and having control over how soft or how harsh it hits your subject is essential in portrait photography. Sometimes there simply is not enough available natural light, and sometimes the light is too bright and your model has dark shadows appearing on his or her face.
An excellent way to remedy lighting issues is to use a fill light. A fill light can be the flash on your DSLR, a strobe light, an LED light, or even your smartphone.
What type of fill light you use will depend on your photo project at hand. Knowing your needs will determine which fill light is best for you.
Maybe you need something light and portable because you’re heading outside to do portrait photos?
Fill Light for Outdoor Portraits
Fill light is useful when shooting mid-day when the sun is high. Shooting in these conditions may create shadows like dark circles under the eyes of your model.
That’s when a fill light comes in handy to cast light to soften these shadows. Watch what happens to the facial features when you add fill light.
Some new and exciting lighting options have been introduced in the photography industry in the last few years. One of these lighting solutions is the affordable, pocket-sized, rechargeable LED lights that have hit the market.
These small and convenient LED lights are perfect to use as a fill light for outdoor portraits. Sometimes you don’t have the possibility of being able to carry heavy gear like flash, softboxes, and tripods on your portrait shoots. These small and light LED lights are perfect for those occasions.
We personally like the Hakutatz Pocket Size RGB+AW LED Light because it’s versatile, has different lighting options, and lets you get creative with your portrait shoot. And it really does fit in our pockets! It has different colored lights that let you achieve the mood you want. All this can be controlled through the app on your smartphone.
Editor's Note: The Hakutatz Kickstarter campaign was a huge success! Their Amazon store will be open and ready for orders in early December.
Outdoor Portrait Lighting Tips
photo byRidofranz via iStock
Here are a few simple outdoor portrait tips to help you get those fantastic shots that look professional.
- Golden Hour The end of the day, when the sun is setting, is called the golden hour. This is usually an excellent time to shoot portraits because the light is warm, soft, and the shadows are long. The light may be nice for the background but insufficient for your model. This is when a fill light can come in handy.
- Exposure Expose for the background and cast the fill light as you wish on your model. This way, the sky will remain true to color and won’t be overexposed or blown out. Your model will have sufficient light with the fill light, and your shot should be evenly exposed.
- Avoid Direct Sunlight Avoid placing your model in direct sunlight, as this will cause squinting and unflattering facial expressions. Look for shade or use a diffuser and fill in the light with a fill light when necessary.
- Catch Lights Using a fill light when doing portrait photography can add catch-lights in your model’s eyes.
You don’t have to wait for the perfect exterior lighting conditions to shoot portraits outside. There are many lighting solutions that you can bring along with you to achieve the perfect portraits
that you want. You can get those professional-looking portraits by using affordable LED lights like the Hakutatz Pocket Size LED Light as a fill light for your outdoor portraits.
We Recommend
How to Use Loop Lighting for Portraits

Photo by Kareya Saleh on Unsplash
One of the most popular lighting techniques for portraits is Loop Lighting. It is also sometimes called Glamour Lighting. It can be accomplished by using one light, a single light and reflectors, or multiple lights.
In this quick tutorial, learn how to use loop lighting to create beautiful portraits.
What is Loop Lighting?
Photo by Atikh Bana on Unsplash
Loop lighting is a very simple light configuration that creates a somewhat flat lighting with a little bit of modeling. It is characterized by a loop of light and shadow under the nose.
Why is loop lighting for portraits a desirable lighting pattern? Because it gives photographers a way to have some light and shadow effect without any extremes of modeling that can be unflattering.
Another reason loop lighting is a great light configuration for portraits is because it is incredibly easy to set up.
How To Use Loop Lighting
Photo by Imansyah Muhamad Putera on Unsplash
In its simplest form, loop lighting can be accomplished with one light.
Pose the subject and frame up your shot. Place the light near the camera position and raise it a little bit above eye level, but not so much that casts a noticeable shadow under their nose and chin, though. Then, move the light over to one side or the other, not more than about 45 degrees.
That is your basic one light loop lighting configuration. Have your subject turn their torso and face one way and then the other, noting how the light and shadow helps mold the face without showing a whole lot of texture. Loop lighting for portraits is one of the best ways to control your portrait lighting.
Any type of light will work. You can use a studio strobe, an off-camera flash, a video light, or some other type of continuous light. A battery powered LED light such as the Hakutatz LED light shown above is a great choice for this portrait lighting effect.
The Hakutatz LED light is controllable by an app for Android smartphones or iPhones, so you can use loop lighting for iPhoneography portraits as well. Additionally, lights like this offer tons of flexibility in terms of the color of light (i.e., amber, white, and RGB) as well as the brightness, both of which are fully adjustable, even from the smartphone app.
Learn More:
Loop Lighting Tips

Photo by Jurica Koletić on Unsplash
A top tip for using loop lighting for portraits is to add another light source to the set up. A reflector can be added to the side across from the light. This will soften the shadow effect by redirecting some light back on to the face of the subject. I like to point this reflector at the subject’s eyes, making them shine brightly out of a slight shadow.
A second flash or continuous light can also be used in place of the reflector. If you choose to add a second light, lower the intensity of the light so there isn’t a 1:1 ratio between it and the main light. This would essentially be two main lights and the results would look very flat, which is a good setup for small product lighting, but not good for most portrait subjects.

If the power output of the second light is adjustable, start out ¼, ⅓, or ½ power and see how that looks. A multicolored light like the Hakutatz LED light can add color effects to your portrait when used as the fill light. That may not be to everyone's taste, but give it a try if you have access to a light with that feature or some color gel filters.
Inverse Square Law Gives You Control
photo by masterzphotois via iStock
If your second, or fill, light doesn’t have variable power, you can change the intensity of the second light by moving it away from the subject. The inverse square law will allow you to figure out how much light fall off there will be for the distance you move the light away from the subject position.
The Inverse Square Law in photographic lighting is calculated quite easily. If you double the distance from light source to subject, you reduce the light to ¼ intensity. That’s a general purpose calculation, other components factor in, but this will work as a rule of thumb. Being aware of this characteristic of light gives you control over lighting ratios.
Adding More Lights
Photo by Alexander Dummer on Unsplash
Other lights that can be added to this very basic loop lighting configuration are background lights and hair lights.
Background lights can be varied in several ways. The placement of the background light can be adjusted by pointing the light directly at the subject or at the background. The light can be the same color as the main and fill or any number of other colors. Power level changes also have an effect on the final image, too.
A hair light is often done with a snoot (a sort of light funnel) or a lens. The hair light can come from any direction and be any color or intensity.
Loop Lighting and Other Patterns
Loop lighting is simply one of the basic lighting patterns available to portrait photographers. Above is a simple-to-follow lighting patterns tutorial from Ernesto Sue Photography that helps explain portrait lighting for beginners and advanced photographers.
Using loop lighting for portraits will enhance your portrait photography skills and give you amazing results with just a little extra effort. Give these tips a try and see what a difference they can make in helping you get gorgeous results!
Learn More:
We Recommend
How to Use Natural and Artificial Light for Outdoor Portraits
Photo by Philip Boakye from Pexels
Natural light is great! For photography and videography, supplementing or enhancing natural light is also a good method to get the results we want. Adding an artificial light for outdoor portraits frees us from the exposure and directional constraints we are under when using natural light alone.
Done properly, adding an artificial light for outdoor portraits will still appear very natural in the finished pictures. Sometimes, it even looks more natural than ambient light on its own. Let me explain…
Natural Light Causes Unnatural Shadows
Photo by Luiz Fernando from Pexels
Human vision is a marvelous process. Light comes into our eyes, controlled by the iris (our natural aperture blades), hits our rods and cones (our natural sensors), and is interpreted by our brain’s vision centers (our natural image processing engine).
When we’re outside with another person, we look at them and all of these processes happen automatically. It’s so automatic that our brain actually helps interpret the scene to compensate for wide ranges in contrast of light and shadow. Auto HDR and matrix metering, you might say.
That’s our brain. Our photographic and video sensors and processing engines don’t have the computer power or intelligence to interpret scenes this way. They’re really good, but we have to help them along.
Photo by Omotayo Tajudeen from Pexels
A scene that includes brighter areas and shadows requires extra work from the photographer or videographer in order to end up looking as natural on screen or paper as our brain would have interpreted it in real life.
That’s where our nifty gadgets and tools of artificial lighting come in. Learning how to use natural light and artificial light together will free us up from the directionality and exposure constraints mentioned earlier, plus it will give us results for still photography and videography that look natural.
So let’s get started with what you came here to find, outdoor portrait lighting tips, the best portrait lighting setups, and some general portrait photography tips.
Fill Light for Outdoor Portraits

photo byajr_images via iStock
Even when partially or fully obscured by clouds, trees, or manmade structures, the Sun is a powerful source of light. It also has excellent natural characteristics, so it’s reasonable to use it for imaging people.
You may have noticed that when you turn someone to face the light for a portrait, either full on or lightly to the side for a little added modeling depth, that the exposure is easy to get correct, but the high contrast from light areas of the face to shadowed areas looks distracting in the final image.
Photo by Mateo Almendares from Pexels
In addition, the portrait subject will be squinting, even if only slightly, which affects the natural, pleasant facial features we’re trying to capture. So, we turn them around to not face the Sun. Now they have stopped squinting but their entire face is in shadow and there is little or no contouring or modeling.
The simple solution is to add some light back onto the subject. There are two common methods to do this, a reflector or an artificial light from camera position or nearby. A reflector is great but they are somewhat limited in directionality.
Learn More:
- Tips for Successful Impromptu Portraits
- Easy Tips for Better Environmental Portraits
- Lifestyle Portrait Tips
Fill Flash or Continuous Light?
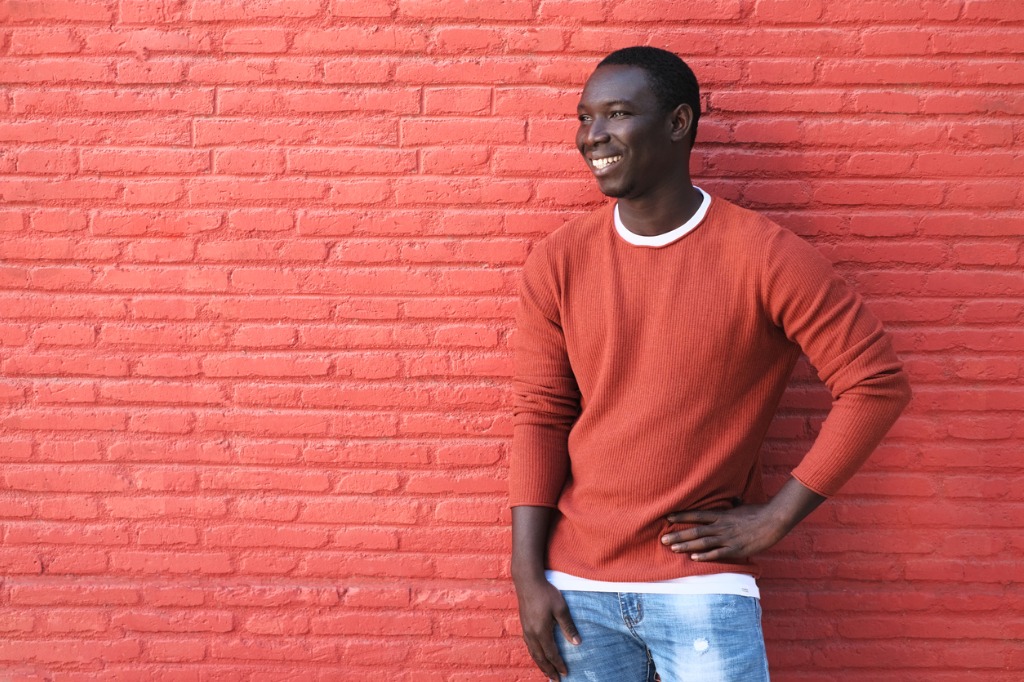
photo bydiego_cervo via iStock
Automatic flash control is one of the boons for photographic automation that many photographers like me have enthusiastically adopted. Whether doing it manually or in an auto mode, fill flash for outdoor portraits works by adding just the right amount of light to fill in the shadows while balancing the ambient light for a natural appearance.
You can use flash as the primary light source which can be beneficial at times but that approach tends to underexpose the surroundings. Fine if that’s your intent, but the natural look we’re discussing with artificial light for outdoor portraits mixes and balances ambient and added light.
We have a lot of options in our current digital photography, one of them being super lightweight, compact, cool operating, and powerful LED continuous lights, such as the Hakutatz Pocket Size RGB LED Light.
The Hakutatz is light enough to comfortably hold at arm’s length and the LED lights are cool operating so you won’t have to worry about heat if holding it in your hand.
Instant Visual Feedback
Photo by Matt Hardy from Pexels
An advantage of portable continuous lighting for adding artificial light for outdoor portraits is that you can instantly see the fill and the modeling effect of the light as you move it around.
I highly recommend moving the Hakutatz LED light around as you also direct your subject since you will be able to capture some very natural and spontaneous views of the portrait subject. After all, that’s our primary intent for this discussion, achieving the natural look our brain automatically sees.
You might want your camera on a tripod for this, but I also find that I can use my autofocus points and other camera controls one handed while holding the Hakutatz light in various positions. Practicing our good general hand holding technique will help.
Keep Them Moving
photo byyuriyzhuravov via iStock
My outdoor environmental portrait sessions are some of the most enjoyable photo shoots I do. Using all of the modern tools of digital photography can really free up your creativity, the model’s too.
Whether your camera is on a tripod or handheld, you can keep the model moving and also keep rearranging the light in your hand or on a bracket for implementing the best portrait lighting setups.
I like to tell my subject in these sessions to change facial expression or move slightly every time they hear my camera shutter. Although with my new mirrorless cameras, I may also say something each time since these cameras are very quiet and we are outside.
For a close up of their face or head and shoulders, you can ask the subject to hold the light themselves, opening up some more creative posing and portrait lighting setups such as split lighting or Rembrandt lighting.
Works Well for Video, Too
Photo by Ali Madad Sakhirani from Pexels
The same tools and many of the methods we use for adding artificial light for outdoor portraits will transfer over to our outdoor videography as well. Keep trying out new methods, new tools, and new ideas, you’ll get some very natural looking results.
Learn More:
- Video Lighting Tips for Beginners
- How To Use Fill Light for Outdoor Portraits
- Basic Portrait Lighting Principles
We Recommend
How to Use Rembrandt Lighting for Portraits
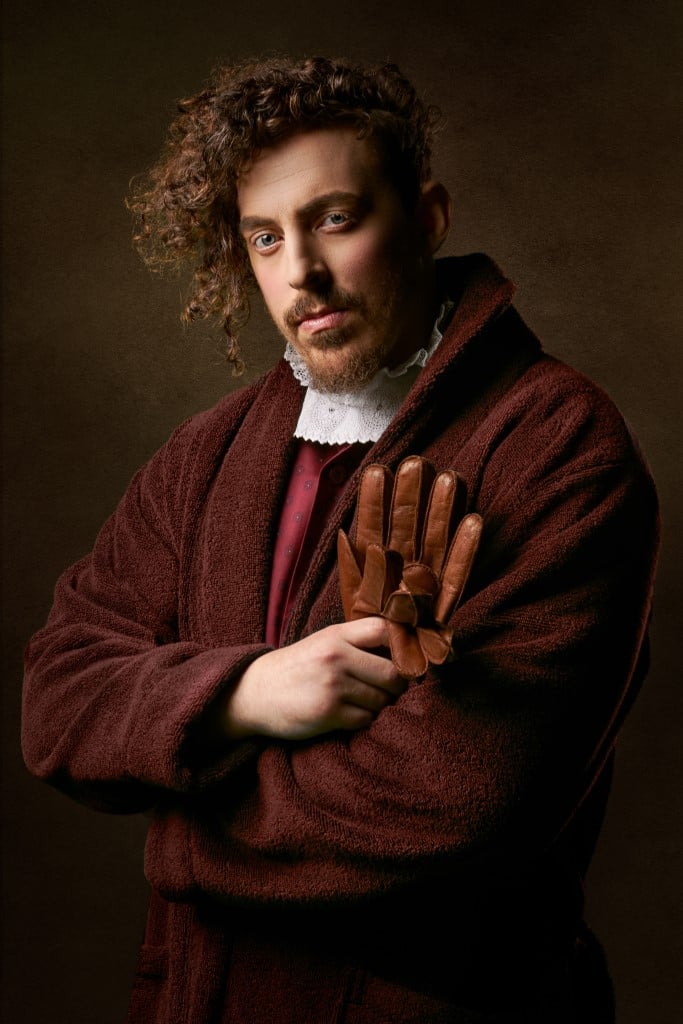
Photo by JJ Jordan on Unsplash
Rembrandt lighting is one of the most recognizable lighting techniques for portrait photography. What is Rembrandt lighting for portraits? What makes it so special? How do you configure your portrait lighting set up to make use of this technique?
Rembrandt Lighting for Portraits
Rembrandt lighting is a form of lighting similar to split lighting but with one crucial difference. Split lighting is a configuration that can be used to create a lot of contrast between the highlights and shadows. The light comes from the side of the subject and can be accomplished with a single light, a light and a reflector, or any number of multiple lights.
The thing that makes rembrandt lighting unique is the small triangle of light seen on the shadow side of the subject’s face.
How To Create Rembrandt Lighting for Portraits

Here is a very simple method to create the classic Rembrandt lighting. All you need is one light. It can be a large light bank such as a soft box or you can choose a smaller LED light bank such as the Hakutatz Pocket size RGB LED Light.
A sunny window could be your one light if the time of day is right. Using a soft box or window light will tend to lessen the overall effect of Rembrandt lighting, which may be a good thing for that particular portrait.
An LED panel light will provide the harder edge lighting that makes the Rembrandt lighting effect most noticeable. The Hakutatz Pocket size RGB LED Light has a feature that makes it an interesting choice for iPhone photography. It can be controlled from an app on the phone. That way, this portrait lighting technique is available to you at any time.
Learn More:
The Actual Light Set Up
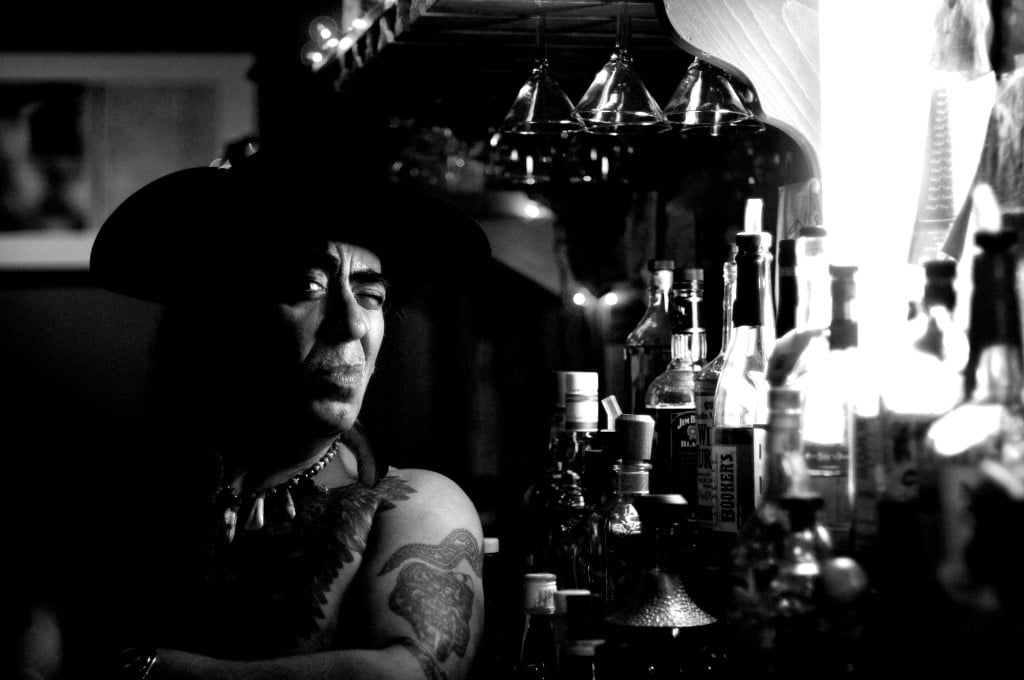
Photo by Hatim Belyamani on Unsplash
The easiest way to get the triangle of light on the shadow side of your split lighting portrait is to seat your subject so you can have a head and shoulders portrait, facing the camera. Get a little creative and have the subject place their torso at a 45 degree angle to the camera position and turn their face toward the camera.
Place your single light 45 degrees to one side of the subject and raise it up so that it also points down at about that same angle. The exact angle is not vital when initially setting up, because you will be adjusting it in a minute.
You can create this lighting effect with a single light, a light and reflector, or multiple lights. If using more than one light, use these instructions for the main, or key, light.
Photo by Joseph Gonzalez on Unsplash
Focus carefully on your subject’s eyes. Focusing elsewhere may cause visual confusion which could detract from the overall feel or mood of the portrait. Rembrandt lighting is inherently somewhat moody.
Now, have the subject move their head slightly so you can see a little triangle of light on the cheek that is in shadow. If you don’t see it, you will need to move the light slightly.
You may need to move the light more toward the camera position or away from it, also up or down as necessary. Have the subject maintain their pose so you can see what the light and shadow are doing.
Play with subject position and posing as well. Shooting from lightside or darkside will change up the mood and feel of the final portrait. Having the front of the torso either in light or shadow will also dramatically change the effect in the final image.
For the strongest version of the effect, minimize ambient light where you’re setting up. Overhead fluorescent lights will pretty much wash out what you’re attempting to create. Get more details on Rembrandt Lighting in the video above by Advancing Your Photography.
The lens f-stop or aperture will probably be very wide since you are shooting a portrait and will want to minimize depth of field for selective focus. Balance the exposure to get detail in both the highlights and the shadows.
Shooting in RAW will help you balance out exposure in post processing if desired. But, high contrast lighting is part of the reason for using Rembrandt lighting for your portraits in the first place.
Variations of Rembrandt Lighting

Photo by Jurica Koletić on Unsplash
In order to be Rembrandt lighting, there really can’t be too much variation. Without that triangle of light on the cheek, it’s simply a form of split lighting. Which is okay. Rembrandt lighting doesn’t work with all subjects.
Don’t think you have to limit using this lighting technique for subjects that have a lot of texture. Glamour and beauty portraits can be made with Rembrandt lighting and other split lighting. Try it out on your next portrait subject.
Learn More:
Rembrandt Lighting History
The lighting technique is named after the man who exemplified its use in painted portraits during the 17th Century, Rembrandt Harmenszoon van Rijn of the Netherlands. Rembrandt was a master of the style in drawing and painting known as Chiaroscuro.
Chiaroscuro is a method of using shading and brightness, or shadow and light, in order to create contrast and subject modeling. It can be employed on any subject. Besides portraits, you see this a lot in still life arrangements and renderings of architecture.
Rembrandt took this art methodology and tweaked ever so slightly, as true geniuses often do, and made his lighting idea one of the most iconic styles of portrait lighting in art, whether drawing, painting, or photography.
Try It Out for Your Next Portrait
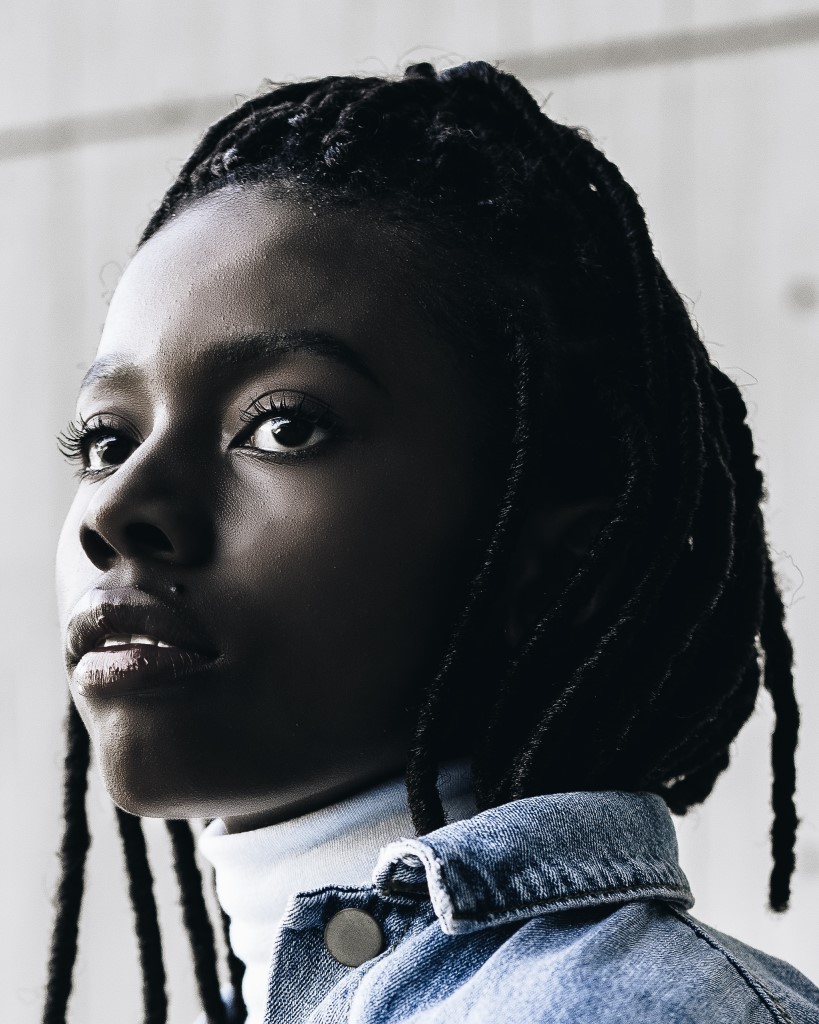
Photo by Oladimeji Odunsi on Unsplash
Your subject matter doesn’t have to be the creased face of an elderly person or the rugged face of a cowboy or oilfield roughneck. Though those faces make great portraits with Rembrandt lighting.
Use Rembrandt lighting with your regular subjects. Kids, senior portraits, beauty portraits, boudoir, or basic headshots. Any one of your subjects might look amazing with Rembrandt lighting.
We Recommend
How to Use Split Lighting for Portraits
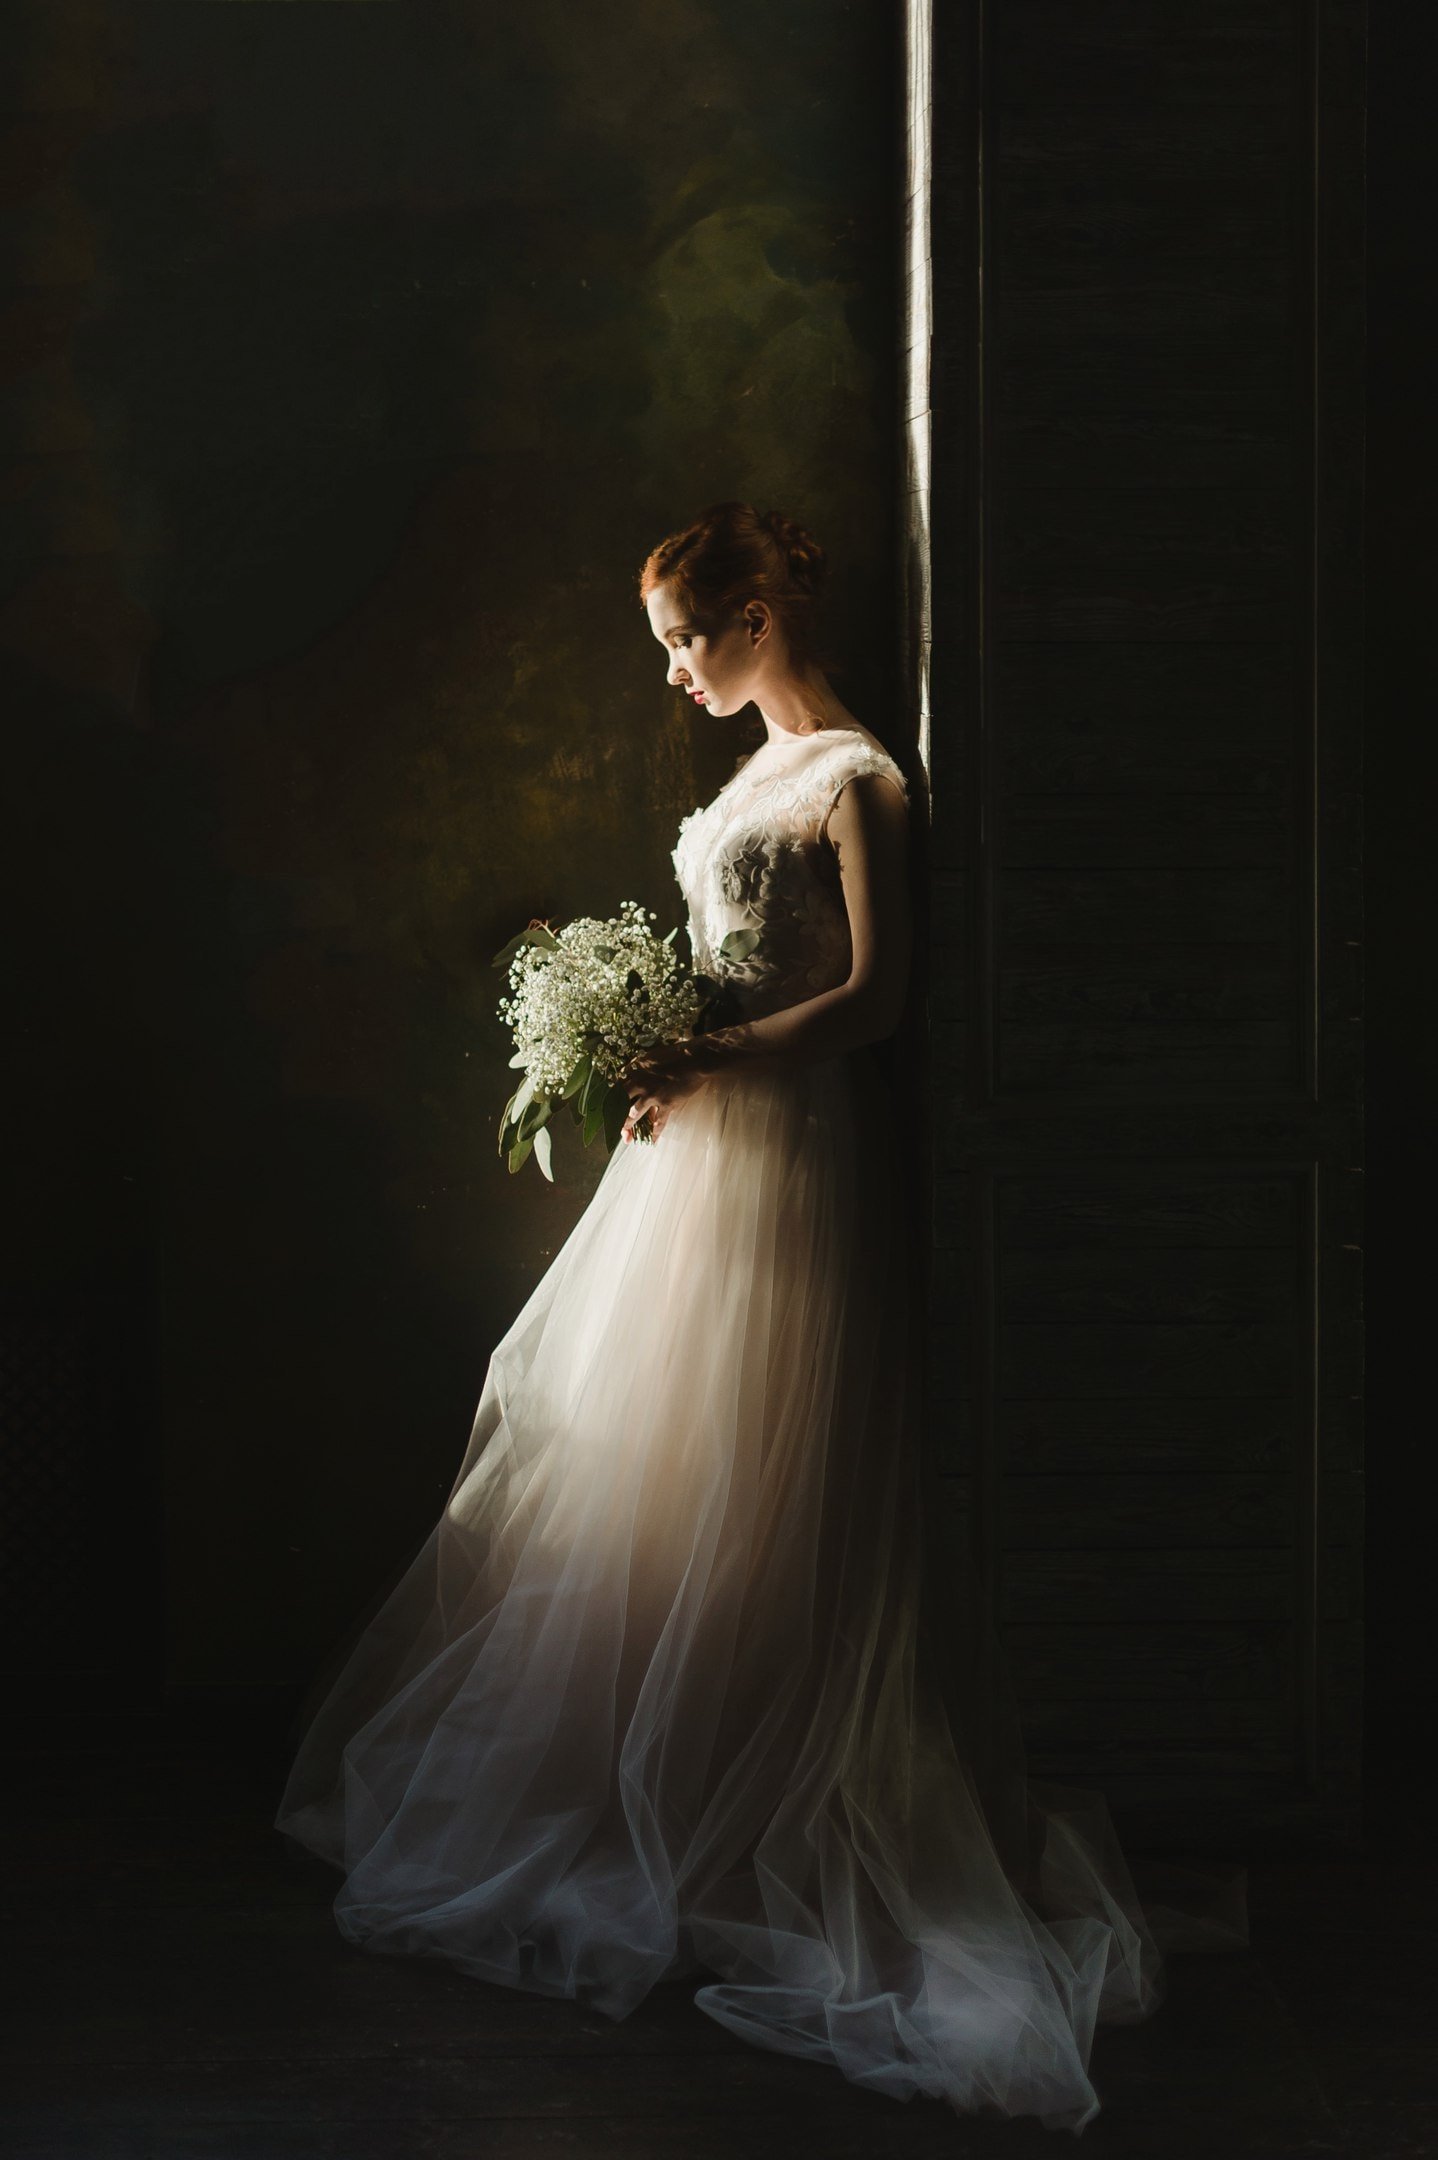
Photo by Petr Ovralov on Unsplash
When looking into portrait lighting setups, we come across many one-light portrait tips. Split lighting is one of the more commonly used lighting configurations for portrait photography.
What Is Split Lighting?
Split lighting illuminates one side of the subject’s face, leaving the other side in shadow. In its purest sense, the light is perpendicular to the person compared to the camera position.
Of course, there are also variations to this portrait lighting setup, including posing options, adding extra lights or reflectors, and exposure settings.
How To Set Up Split Lighting
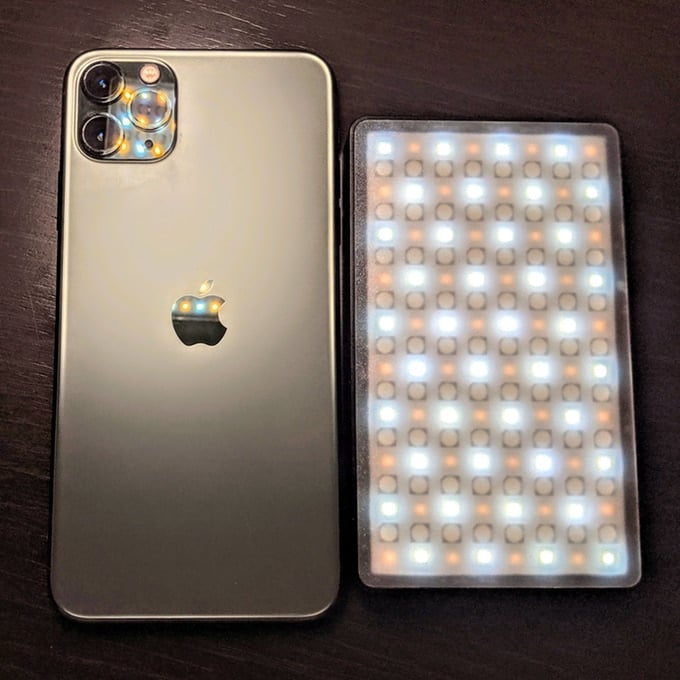
As mentioned earlier, in its most simple form, split lighting can be done with one light. It really doesn’t matter if that single light is a strobe or a continuous light, but if you’ve recently started exploring portrait lighting setups, a continuous light will make it easy to see what’s going on.
A compact portable lamp such as the Hakutatz LED lightmakes the operation simple. You can even use it with your iPhone for iPhoneography portraits. In other words, you can start using advanced portrait techniques with any type of camera, from smartphones to full frame DSLRs and mirrorless cameras.
Here is an arrangement that works well: Using a short telephoto lens (or a zoom lens with that focal length range), mount your camera to a tripod and frame your photo so that you have a head and shoulders pose. A short telephoto lens and framing for head and shoulders is a basic method for capturing flattering images of people.
A bar stool for the subject will make them more comfortable when posing. Have your subject face the camera and place the light to their side, lined up with one of their shoulders. In your captured images, you have a visual definition of split lighting.
Above is a nice video by Robert Silver Photography illustrating a simple one-light lighting portrait setup for split lighting.
Editor's Note: The Hakutatz Kickstarter campaign was a huge success! Their Amazon store will be open and ready for orders soon.
Add Variety to Your Portrait Lighting

photo byCasarsa via iStock
One of the first things you are likely to notice is that merely raising your single light a little bit adds some flattering modeling effects.
Adjusting subject posing adds subtle improvements as well. Since you’ve put your subject on a stool, there are a lot of poses they should be comfortable doing. Turn the model’s torso about 45 degrees towards the light and have them turn only their head to face the camera. Then reverse that with the torso turned away from the light.
photo by RonTech2000 via iStock
Now, let’s play with the light position. Moving the light closer to the camera position softens the effect of chiaroscuro (lighting for contrast and drama) in your final image. Moving the light further away, somewhat behind the subject, increases the Chiaroscuro effect, adding drama.
Learn More:
One Light, Two Light, White Light, Blue Light

Have fun with portrait lighting and play around with it. Using a small, portable light like the Hakutatz LED light, which gives you an array of controls right from your smartphone, you have some great options for adding interest to your portraits.
As an example, try this out: Take one light and place it in the split lighting position, perhaps a little higher up and slightly closer to the camera position. Use a second lamp behind your subject. Lower the intensity of that lamp and change the color output. Red, blue, yellow, whatever works with your model and your ideas.
What this will accomplish is to add visual interest to your composition. This especially might work with environmental portraits, for artists, for cosplayers, and so on. It will also allow your average Joe or Jane to act out or roleplay in the sessions. Making it fun almost always results in great images.
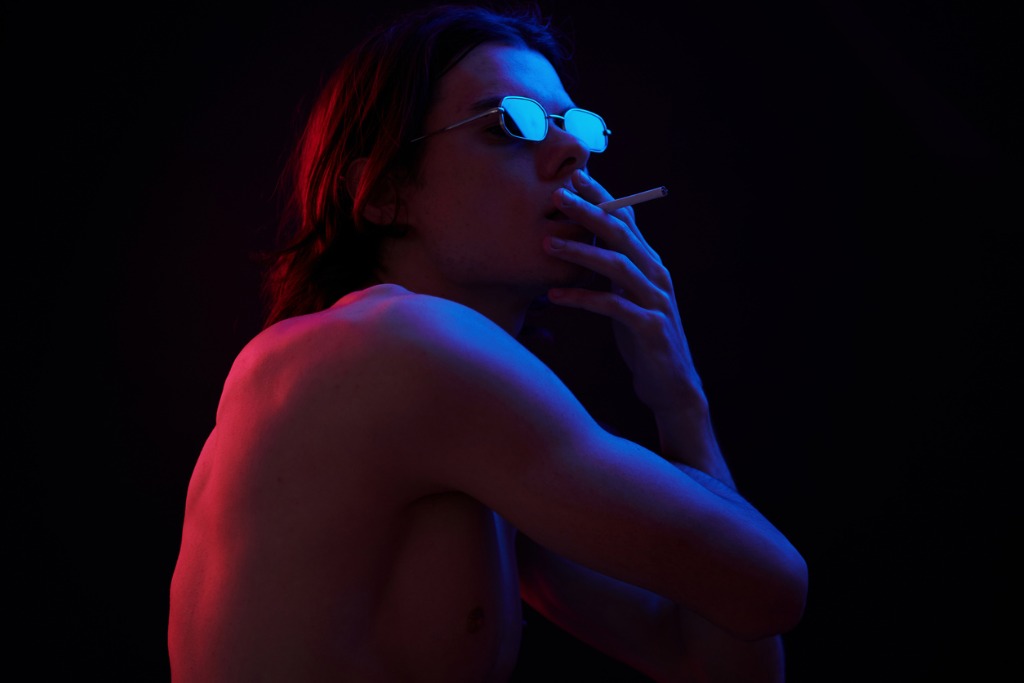
photo by standret via iStock
As another variation, place the second light much closer to the camera position, with the brightness reduced by 1/3rd or 1/4th from full power of the main side light. The chiaroscuro will be lessened quite a bit, but the end result will also be softer overall, possibly more flattering for certain subjects. A reflector will also work fine for this portrait lighting setup.
How To Expose for Split Lighting
photo byRanta Images via iStock
Previsualization is the key. Know what you want the end result to be and work back from that goal to accomplish it.
The first thing I like to consider is if I’m trying for a high key effect, which would generally also be less contrasty, or a low key, higher contrast effect.
Both high key and low key are capable of producing outstanding portraits, but there is definitely a mood difference in the two techniques’ results. High key tends towards a light, airy mood, playful even, while low key lends itself to the dramatic, somber or serious, with glamour and beauty also being capable of being highlighted.
Photo by Riki on Unsplash
Let’s examine another example: Couples portraits. High key might be perceived as playful, peaceful, family oriented, and so on. Low key couples portraits can become intense, romantic, with a fictional air. Experiment, get used to seeing how your images turn out in relation to your initial expectations.
To expose properly for a high key portrait, you will take meter readings from the shadow side of the subject. For low key, meter the lit side. You want the shadows to open up for high key, the highlights might even burn out, which is fine. You want to create contrast for the low key while preserving detail in the highlights.
If you are seeking a medium, more balanced, less extreme medium key effect, average out your readings, adjust the lights for optimal positioning, and go from there. I recommend shooting in RAW if your camera has that capability, because it provides more digital information to use when tweaking or adjusting in your post processing program.
Other Lighting Techniques
Split lighting is merely one of several basic techniques or lighting configurations for portraits and other subjects. I think it’s probably one of the easiest to accomplish and the quickest to master, too.
Whatever type of camera you’re using or what you use for lights, get out there and try split lighting for your next portrait.
Learn More:
We Recommend
Inexpensive Portrait Lighting Ideas
Photo by Daniel Edeke from Pexels
Sophisticated lighting techniques can be accomplished within any budget. Sometimes all we need to do is be a little creative. Inexpensive portrait lighting ideas can come from just about anywhere. I like to periodically search online for tips from others.
I can put what I find or what I came up with myself into two categories. Cheap portrait lighting gear and inexpensive portrait lighting ideas. Some people call these ideas hacks, but I find that if I search including the word “hacks,” I get an awful lot of fluff and some ideas that really don’t make much sense.
Inexpensive Portrait Lighting Gear
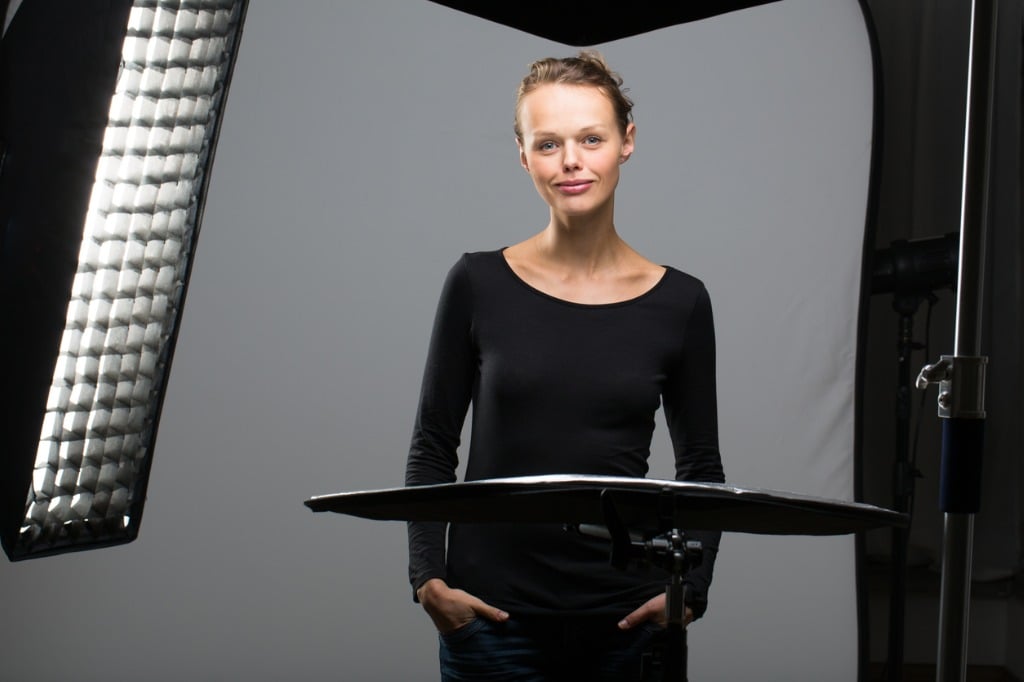
photo byViktorCap via iStock
Here are a few things I’ve been using for my own portrait lighting. You’ll notice that several of these are extremely useful for shooting portraits on location. Other tips are probably best suited for in our studios. Some ideas would make MacGuyver proud.
Portable Reflector
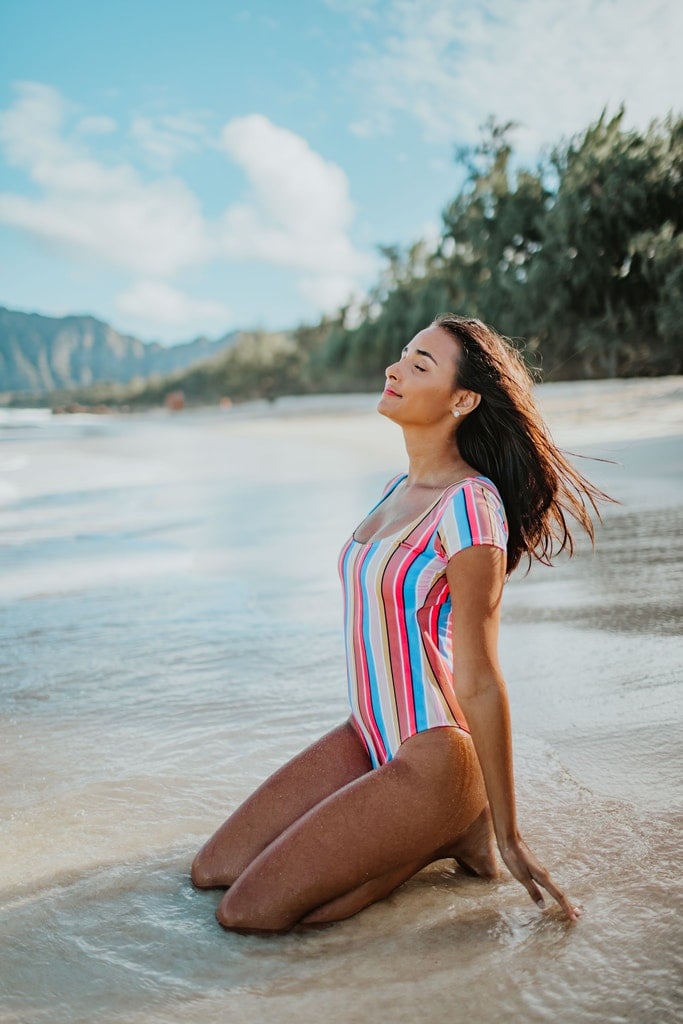
Photo by Leah Kelley from Pexels
I love using reflectors in my outdoor portrait lighting. They are also very useful in a studio or other interior location. Most often, we use a fold up reflector as a fill light, perhaps even an eye catch light
By strict definition, a reflector is not a light source, but rather a light modifier. This is because it does not produce any light on its own, it reflects light from another source. A nice trick or tip is to use the reflector to redirect light so that it actually becomes a form of light emitter itself.
As a thought exercise, we have moved our portrait subject around the park so that there is no direct sunlight falling on them. That skylight is a wonderful, soft light, like having a 28,000 mile wide softbox.
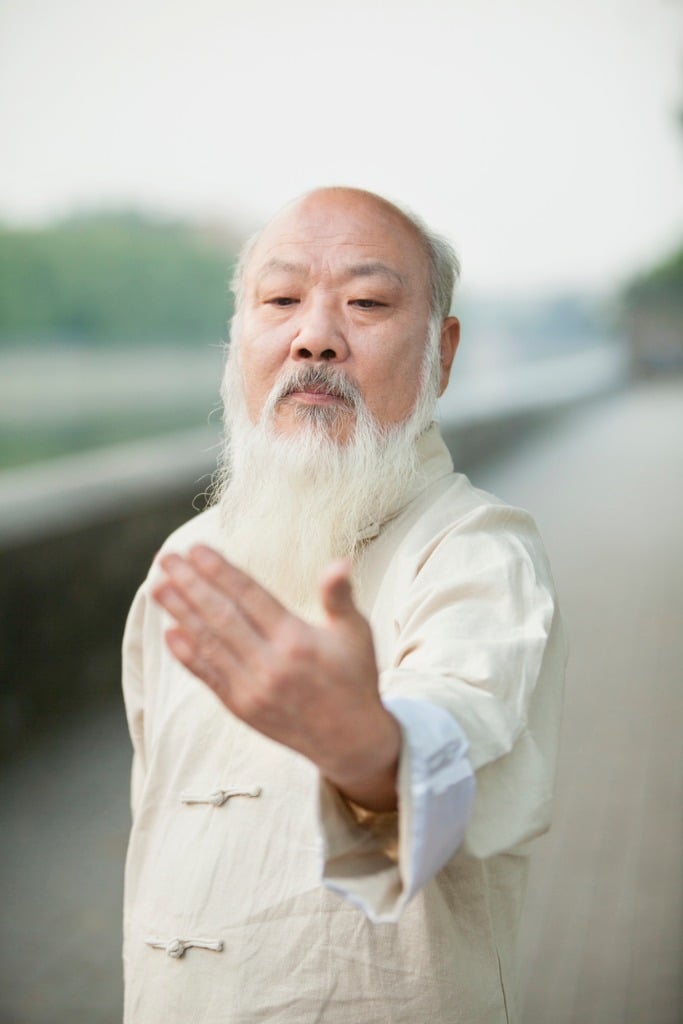
photo byXiXinXing via iStock
Trouble is, skylight is still rather directional, mostly from above, and it’s a little cool in color temperature. If your position is favorable, you could capture some direct sunlight in the reflector and throw it onto your subject. Thus the reflector could become the key light. Not available in every situation, but we’re just conducting a thought exercise.
Recommended Portrait Lighting Reading:
- Picture Perfect Lighting: An Innovative Lighting System for Photographing People
- The Dramatic Portrait: The Art of Crafting Light and Shadow
- Portrait Photography: From Snapshots to Great Shots
Handheld Portrait Light

If everything in the above scenario falls together perfectly, that’s an awesome portrait look. Nature often tends to be different from our ideas of perfect control, though. So other options for cheap portrait lighting should be on the table.
Perhaps the most usable option I have found for many different situations is a portable handheld portrait light. My current favorite is the Hakutatz LED light. It’s an LED light with adjustable color, battery powered, lightweight, and controllable from an Android or iPhone.
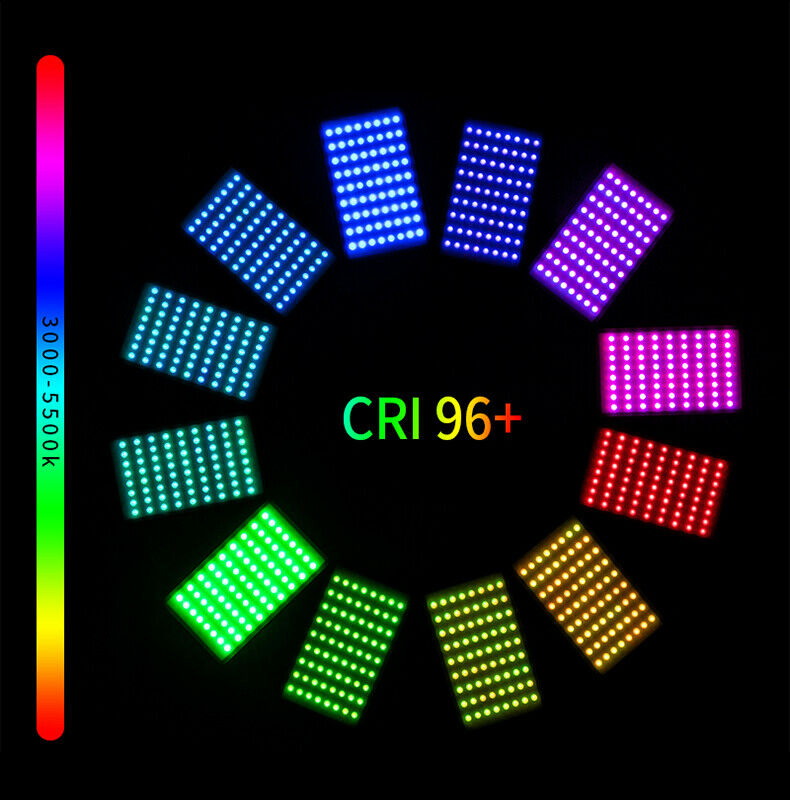
Let’s go back to that skylight lighting portrait scenario. If you don't see a shaft of sunlight peeking around a corner or a bright spot on the ground nearby indicating a clear view of the Sun, then you don’t have much for the reflector to work with.
So, pull out your small, smartphone sized Hakutatz LED light and use it as illumination. The portrait subject could hold it in their hand, with skillful direction from you on where to point it, and now it is either a fill light or primary light. Since you can control color and intensity from your smartphone, you have all the creative control necessary.
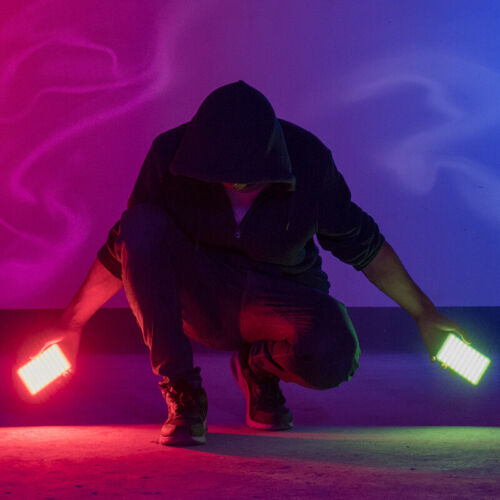
If your portrait subject feels odd holding the light, or if your framing would reveal the light in the picture, you could use a clamp or the always handy OctoPod to make using it handsfree.
An advantage of using a portable LED light is that you have control over where to position the light. An on camera light or flash will work, but having your inexpensive portrait lighting separate from the camera opens up a whole bunch of options.
Since it’s a continuous light source, you can see the results before snapping the picture. That makes positioning the light very simple, no guesswork involved. Your camera meter can provide the proper exposure or you can override with exposure compensation or manual settings.
Learn More:
Inexpensive Portrait Lighting Ideas
Some of the best options for cheap portrait lighting gear is to use what’s already available on your camera, in your photography gear bag, or in your vicinity. Without buying anything, or at least not anything else, you can take control of your portrait lighting for studio or on location shoots.
Built-In Camera Flash
photo by Koldunov via iStock
I often preach loud and clear about using some sort of lighting equipment other than the tiny flash built into your camera. Because those built-in flashes are tiny, they don’t have much power. Also, being so close to the axis of the lens, they can produce the dreaded red eye effect or give flat, unflattering lighting.
As explained in the video below from Adorama, properly controlled, the built-in flash can be very useful as cheap portrait lighting gear. In order to properly control it, we need to dig a little into our camera control settings menu. Look for the option that says something like Bracketing/Flash or Flash Control.
If you have it set for TTL Auto, you will probably get good results when employing it as outdoor fill light. Another method is to manually set it to a fractional output level. Some cameras allow variation from ½ power all the way to 1/128th or 1/256th power.
If the ambient light is bright enough, you probably won’t be bothered by red eye effects. Subject position and pose can also be used to control that extremely common portrait light mistake.
Exposure Compensation
photo by Ridofranz via iStock
Sometimes, there isn’t much you can do about light placement, especially if the light source is the Sun.
To avoid our outdoor portrait subject having squinty eyes, we often turn them away from the Sun. If the Sun is low in the sky, that may put us in a situation where the camera meter will give settings that result in a silhouette.
Opening up the camera menu, pressing the button, or twisting the dial for exposure compensation, we simply dial in on the plus side and add enough exposure to their face. You didn’t even have to spend a dime.
Coming Up With Ideas
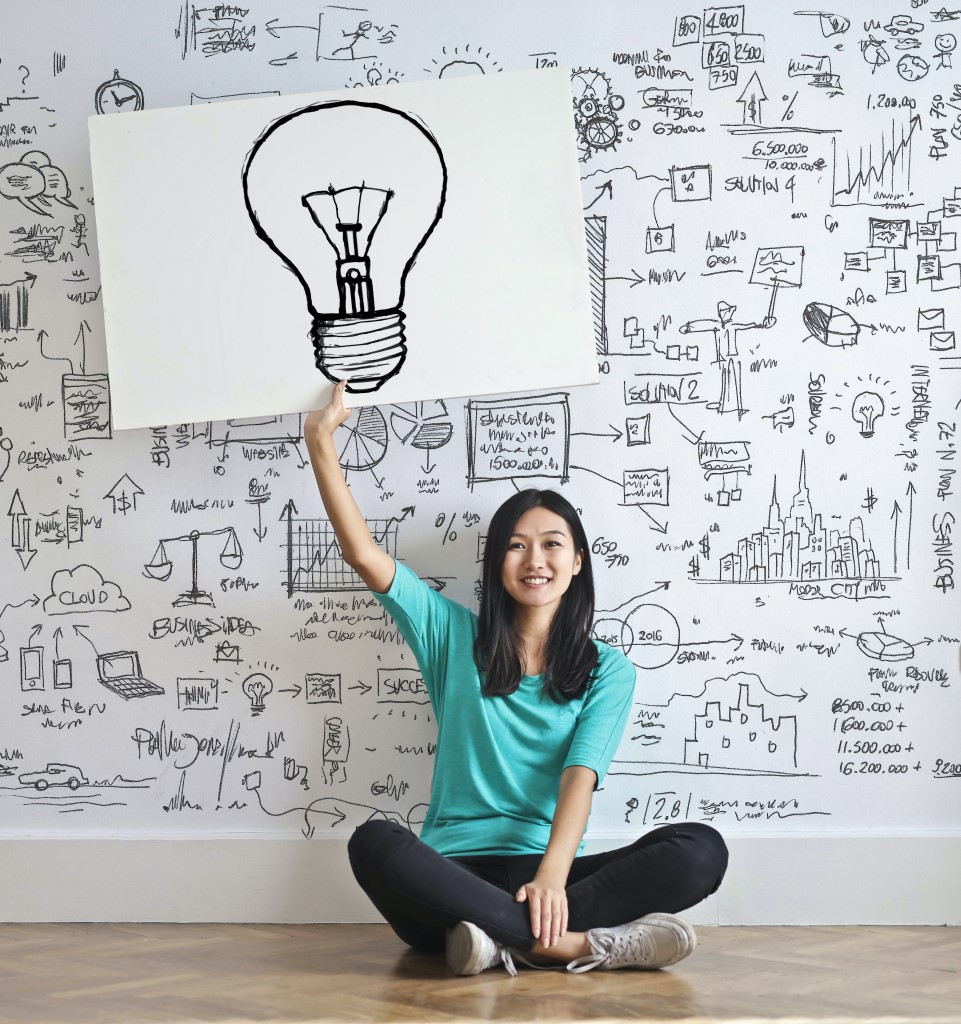
Photo by Andrea Piacquadio from Pexels
The best light for any photographic situation that may come up for you is that metaphorical light bulb that indicates an idea in your head.
Take stock of your current gear and methods, see where an addition of a reflector or a handheld light could benefit you. Also imagine situations to use what you already have and know but apply them to portrait lighting.
Inexpensive portrait lighting ideas are everywhere. Some are not worth trying, but many are. Try out what works for you and let us see the results!
Learn More:
- How To Use Fill Light For Outdoor Portraits
- Essential Portrait Lighting Tips
- Portrait Lighting Mistakes
We Recommend
Lifestyle Portrait Tips
Photo by Ben Dutton on Unsplash
Creating a lifestyle portrait gives you the opportunity to tell the story of the portrait subject in a way that communicates intimate details in visual form. A lifestyle portrait places the subject in surroundings that fit the person.
Some lifestyle portrait subjects that I’ve seen have a business person in their office, a sports star on the practice field, a craftsman working their craft, or a parent at home playing with the kids. As you can see, a lifestyle portrait can describe a person’s real life, not simply how they look.
Lifestyle Portrait Photography Tips
Photo by Gustavo Borges from Pexels
The techniques, gear, and methods for lifestyle portraits are pretty much the same kind of things I share as regular portrait photography tips.
At its simplest, portrait photography is composition, posing, lighting, and focus. Interweaved in this is using your photographic equipment properly, sometimes choosing the right gear is part of that.
Composition and Posing
photo by AJ_Watt via iStock
When engaging in lifestyle portraits, the rules of composition are important to use to create a sense of balance. Since you are incorporating scenic elements with the main portrait subject, using some of the most common rules of composition can make positioning the subject within their surroundings.
The Rule of Thirds and the Golden Ratio are two of the rules that tend to work best for making lifestyle portraits. Both of these portrait techniques work by putting the viewer at ease with the placement and spacing of the visual elements involved.
Posing goes hand in hand with composition in making the final image comfortable to look at. A choice that needs to be made in regards to posing is whether to have the portrait subject make eye contact with the camera or to present the scene as some sort of slice of life scene.

photo by standret via iStock
As an example, a lawyer in an office can be posed in front of their bookshelf of law books, slightly off center, looking straight at the camera. Another pose could be the subject in front of that same bookshelf, but this time looking an open book in their hands, the subject’s head and shoulders on one point of the Rule of Thirds, and their hands and book on another.
Both of these poses and compositions will make a great lifestyle portrait of the main subject. Search for examples on some of the photo hosting sites. In addition to the term lifestyle portrait, also include in your search the words environmental portrait.
Recommended Portrait Lighting Reading:
- Picture Perfect Lighting: An Innovative Lighting System for Photographing People
- The Dramatic Portrait: The Art of Crafting Light and Shadow
- Portrait Photography: From Snapshots to Great Shots
Portrait Lighting Techniques
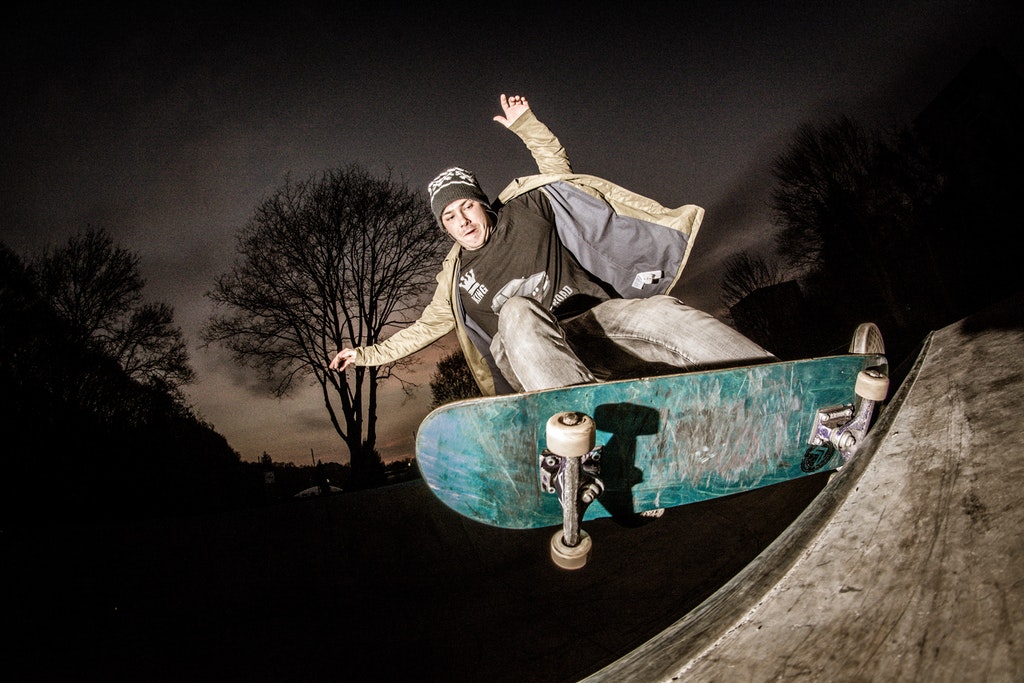
Photo by Jan Kopřiva from Pexels
Just like with the rules of composition, the same portrait lighting tips that are good for regular portraits are also usable for lifestyle portraits. A couple of techniques I like to employ for lifestyle portraits are Rembrandt lighting and loop lighting.
This is one of the cases where having the proper lighting gear for portraits can make the job easier. One of the newest lights I’ve been using for lifestyle portraits is the Hakutatz Pocket Size LED Light.

What makes this light so useful is that it’s battery powered, portable, can sync with iPhones for iPhoneography, and is very well corrected for color. Just because we are taking the pictures on location doesn’t mean we can’t control our portrait lighting.

Place a couple of these small LED lights on multi use mounts and you can set them wherever you need them for tha lighting technique you’re wanting to use. Since they are continuous lights, you can even leave your camera in auto exposure mode for ease of use.
Or use manual settings in combination with the Hakutatz multi power settings for creating the lighting ratio needed for the lighting technique you’ve chosen.
Learn More:
Focus and Lens Selection
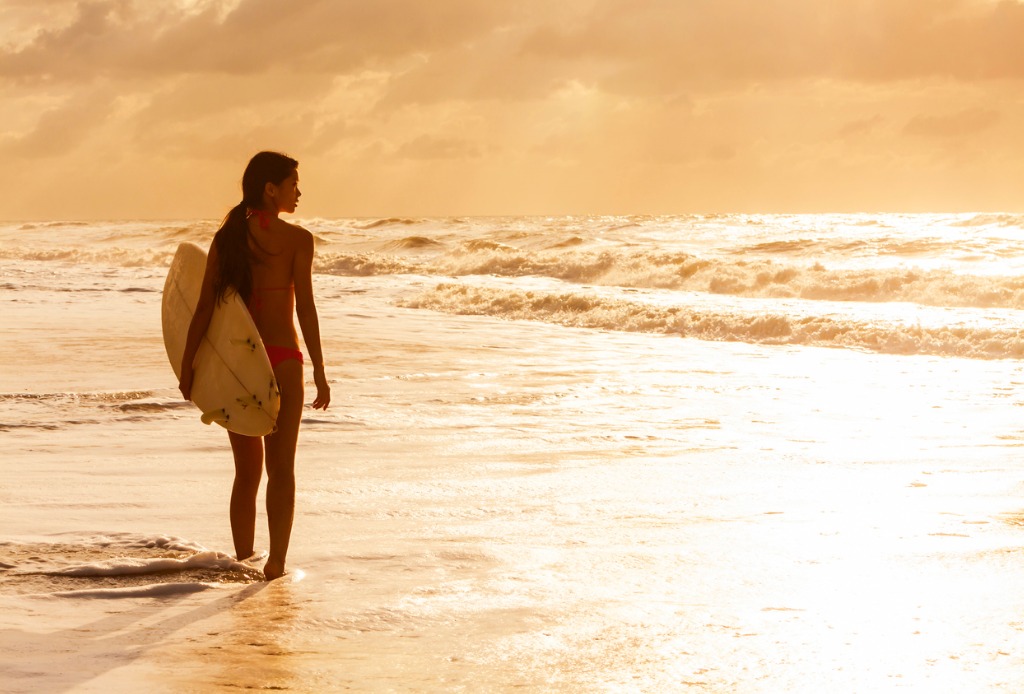
photo by dmbaker via iStock
Among the more useful portrait photography tips are selecting fast lenses and short telephoto lenses to take advantage of selective focus. When engaging in lifestyle portraits, it’s often more beneficial to use wider lenses and smaller f-stops for deeper depth of field.
Incorporating the surroundings into the image is part of the process for telling the story of the subject. A normal lens such as the Nifty Fifty for full frame cameras is also an excellent option. This lens focal length makes great lifestyle portraits due to its natural appearing perspective.
A lens like this can do double duty for portrait work. Used at a middle distance and a small aperture, it’s perfect for lifestyle portraits. Move in a little closer and open the f-stop for employing selective focus for a regular style portrait.
Other Lifestyle Portrait Tips
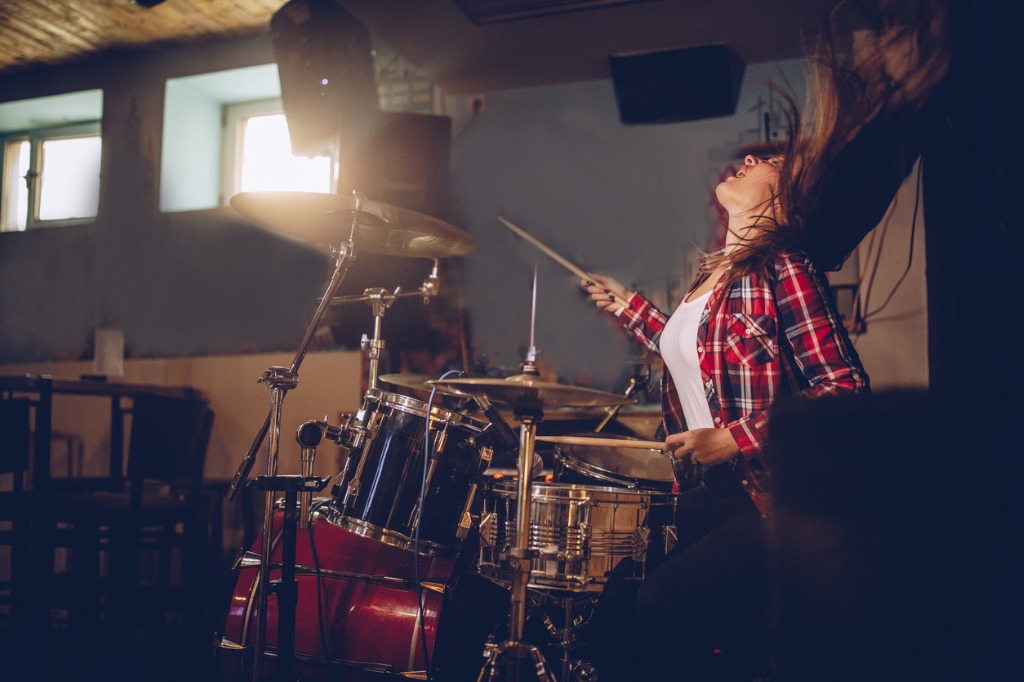
photo bySouth_agency via iStock
In addition to what is listed above, some other helpful tips are to use the RAW file recording option when you can in order to be able to pull out detail in some of the shadows of the scene of the lifestyle portrait. A second option for this is to use HDR photography in order to balance out the dynamic range of the scene.
Take advantage of good outdoor lighting such as what is found during Golden Hour to add interest to the portrait. A small LED light like the Hakutatz discussed above can ensure proper exposure in the fluctuating light conditions of Golden Hour.
Try out multiple light techniques, vary up your composition and posing, and employ various camera settings for beautiful and interesting lifestyle portraits.
Learn More:
- Photography Gear Upgrades You Should Make in 2020
- 5 Photography Tips That Will Make You a Better Photographer
We Recommend
Lighting Setups for Portraits of Men
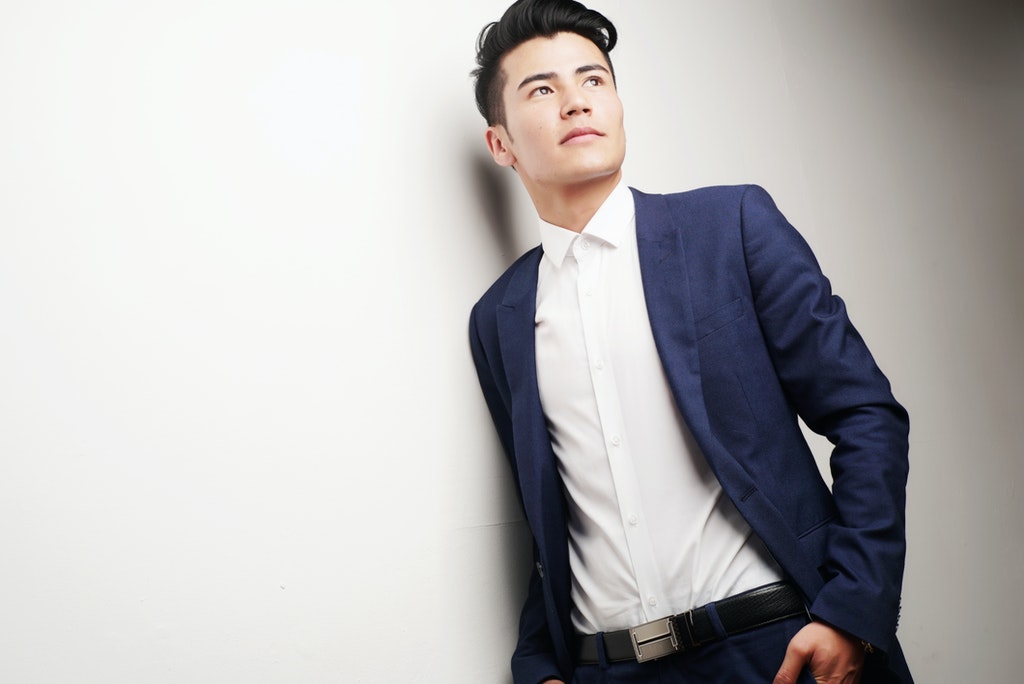
Photo by Royal A from Pexels
Men need portraits, too. Configuring lighting setups for portraits of men is simple to do. The same lighting setups will work just as well on men, women, or children. Even pets.
When deciding how to light a portrait for male subjects, we should decide how we want to have viewers perceive the subject. We can employ several of the different lighting setups in our repertoire, depending on what the desired end result is.
Table of Contents
- Smooth, Harsh, or Somewhere in Between
- Hard Light
- Rembrandt Lighting
- Direct Sunlight
- Soft Light
- Softboxes and Diffusers
- Skylight
- Men Are Great Portrait Subjects
Smooth, Harsh, or Somewhere in Between
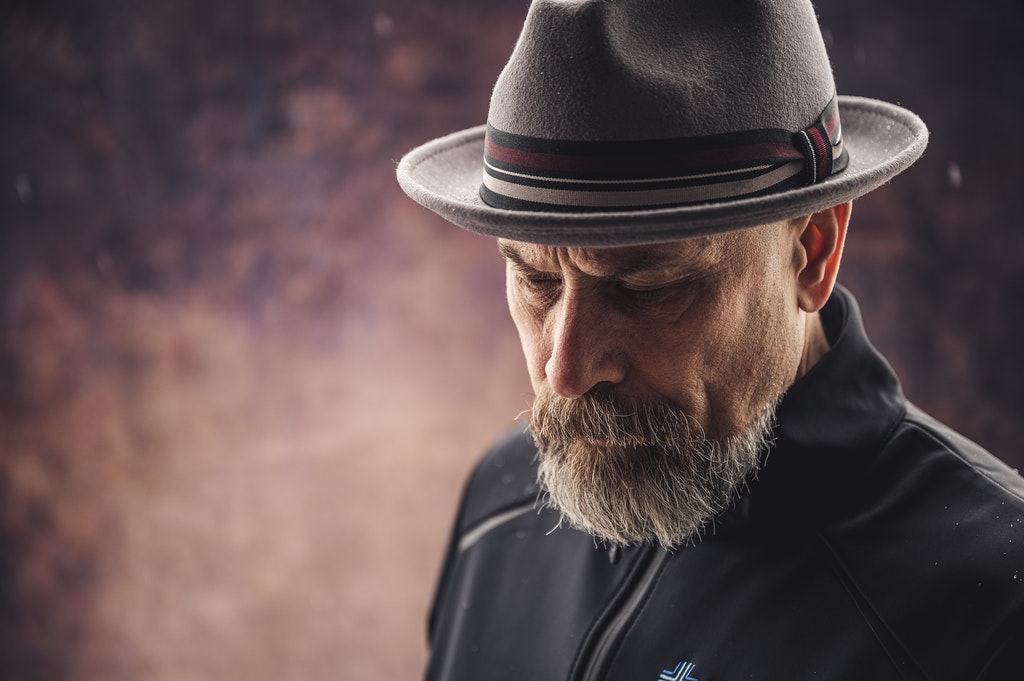
Photo by Brett Sayles from Pexels
Taking portraits of men can be very rewarding. With some men, they are open to several styles of portrait lighting.
I like to look at some of the classic portrait work from artists such as Yusof Karsh, Richard Avedon, and Edward Weston. In their portrait work, they used light as a very powerful tool. With some subjects, they lit it with hard lighting setups to emphasize texture. With others, diffused light can be used to soften lines. Both styles work great for portraits of men.
Somewhere in the middle of harsh lighting and soft, diffused light is a range that can emphasize texture without making texture the focus of the image.
Hard Light
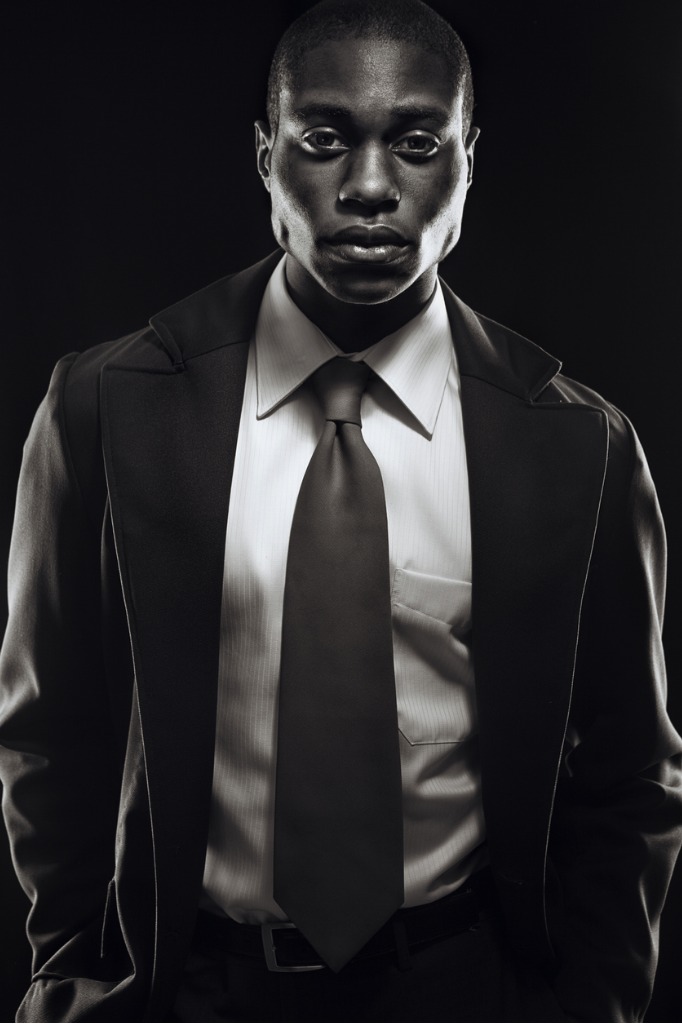
photo by RyanJLane via iStock
Hard portrait lighting setups that show texture can also create a mood or even a sense of power. The texture doesn’t have to be extreme, either. It can be the strong masculine features of the face or form, or it can be smaller scale, such as skin or fabric.
Since not all of our male subjects want their images to remind people of Winston Churchill or Fidel Castro, we should configure our lighting setups to not be too extreme. Basic portrait photography tips besides lighting can also be used.
In addition to lighting, such tools as posing, camera lens choice, rules of composition, and exposure techniques can all be used together to make portraits of your main subjects that themselves and others will like to look at.
Learn More:
Rembrandt Lighting
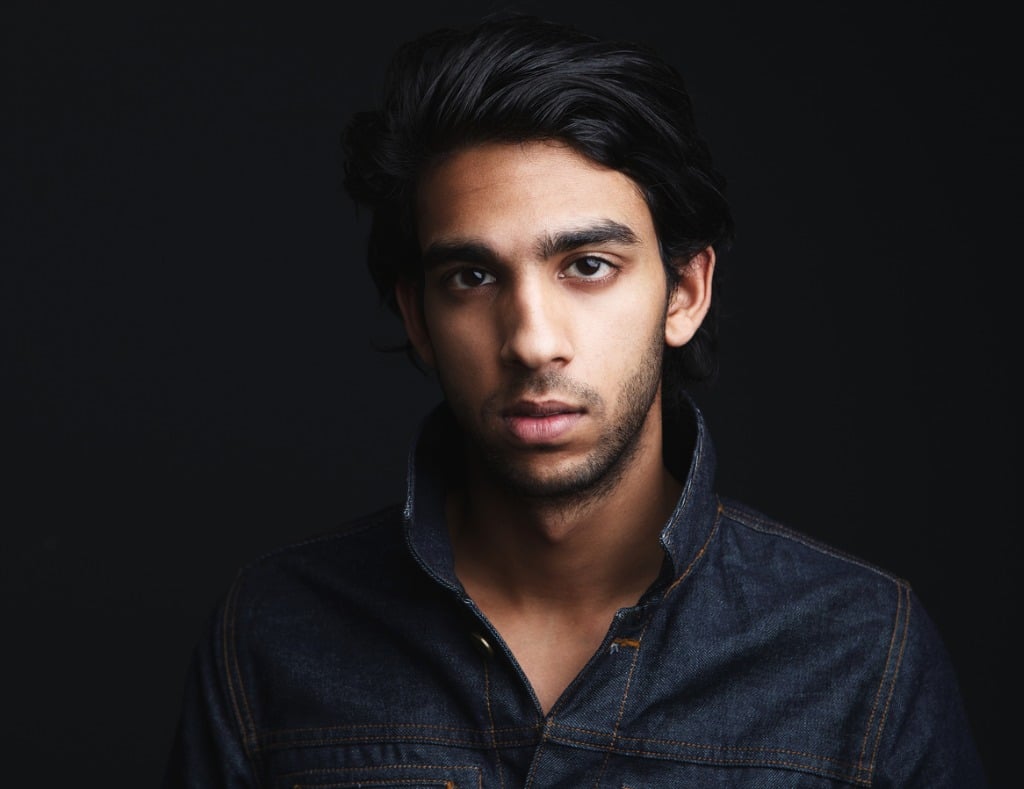
photo by m-imagephotography via iStock
One of the most talked about lighting setups in all of photography is Rembrandt lighting. While it may appear to be complicated at first, it’s surprisingly easy to make use of this portrait lighting setup.
We need two sources of light. But one of the sources can be sunlight, existing light, or even a reflector. The two most important aspects of this technique is that it is a modified form of side lighting and that we are looking for a particular shadow detail in the face.
Contrast is created by having the key or main light several stops brighter than our fill light. The side of the face closer to the key light can be bright or somewhat subdued, but we want the shadows on the face to be noticeable.
The triangle of light on the cheek away from the lit side is what makes the technique work. Without that tringle, it’s just a form of high contrast lighting setups. Posing and light position work together to create the proper effect.
A simple and quick way to get this effect either in the studio or in the field is to use a portable light that you can move around easily. I found success in the small battery powered LED lights from Hakutatz.
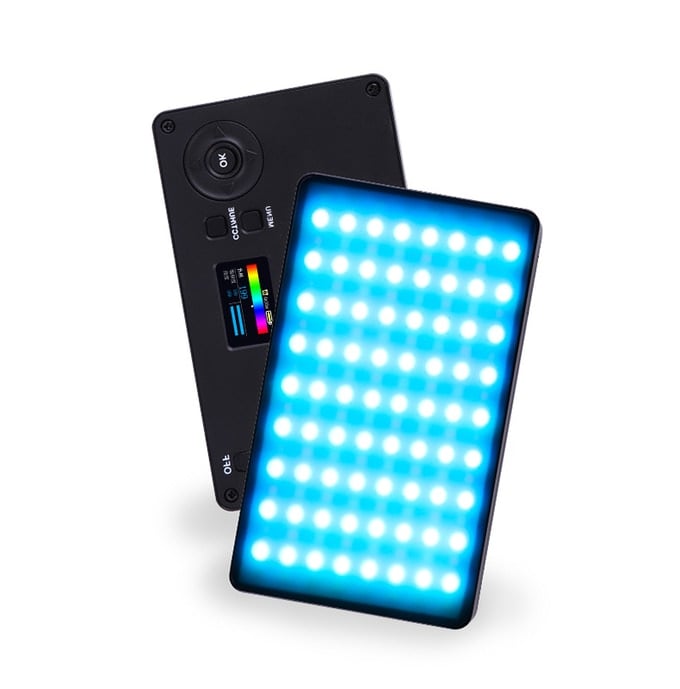
What makes this style of lighting gear a good choice is that they are small enough to be placed just about anywhere and the LED bulbs are so cool that a person can hold in their hands if they need to. That way, you have a lot of freedom to try out more or less severe versions of Rembrandt lighting for your male portrait subjects.
Direct Sunlight
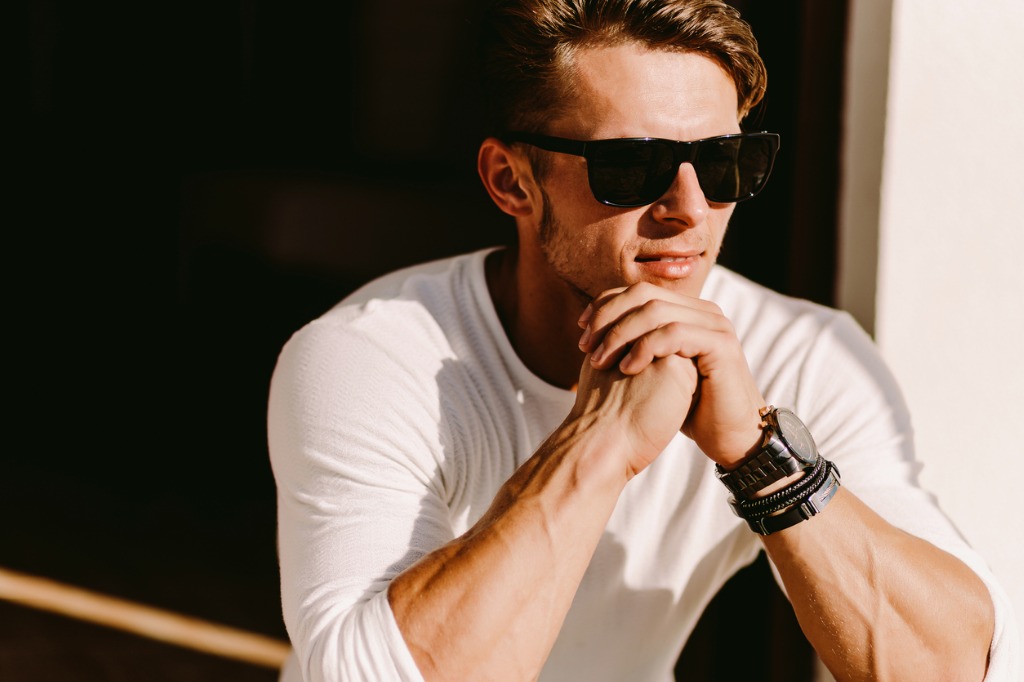
photo by shevtsovy via iStock
The ultimate point light source for outdoor portraits of men is the Sun. Point light sources are harder than diffused, broader sources. Point sources are also highly directional. You can take advantage of these qualities as part of your outdoor lighting setups for portraits of men.
If you want a little more control over direct sunlight, you'll have to add another light source. A reflector is a very good choice. It’s also a good situation to use a portable continuous light like the Hakutatz LED light. One of the reasons for using the Hakutatz in this situation is the ability to adjust not just the power level, but also the color balance to blend it in with the sunlight.

Soft Light
photo by alvarez via iStock
Moving the other way, employing some form of soft light is beneficial for pleasing portraits of men, too. Soft lighting setups minimize the effects of contrast, allowing for a smooth rendering of portrait subjects.
Some sort of diffusion is often the key in creating a soft light portrait. The results can take years off the face of older subjects or make people appear generally more approachable and friendly.
Softboxes and Diffusers
photo by PRASANNAPiX via iStock
It’s right there in the name, a softbox softens the quality of light falling on our male portrait subject. These are broad lights, which also softens light compared to point sources.
Besides the softboxes and umbrellas being broad themselves, the lighting technique of using broad lighting setups will result in a smooth, flattering effect. You can still get shadow modeling and contrast with soft light, it’s just quite a bit lowered compared to hard lighting setups like Rembrandt.
Skylight
Photo by Nathan Cowley from Pexels
The outdoors in daytime can be a soft lighting setup, too. An object or person lit by skylight can be brightly lit and yet virtually shadowless. In portrait lighting tips, this is sometimes referred to as open shade.
You find a spot without the Sun directly falling on the subject. Let the wide expanse of the open sky be your lighting setup. The light is diffused and therefore soft because it’s a huge light source. Over 28,000 miles wide as a natural softbox.
For fill light or eye catchlight, try out the small Hakutatz LED light here, too. Maybe adjust the color temperature to add a little warmth, since open skylight is also somewhat cool.
Men Are Great Portrait Subjects
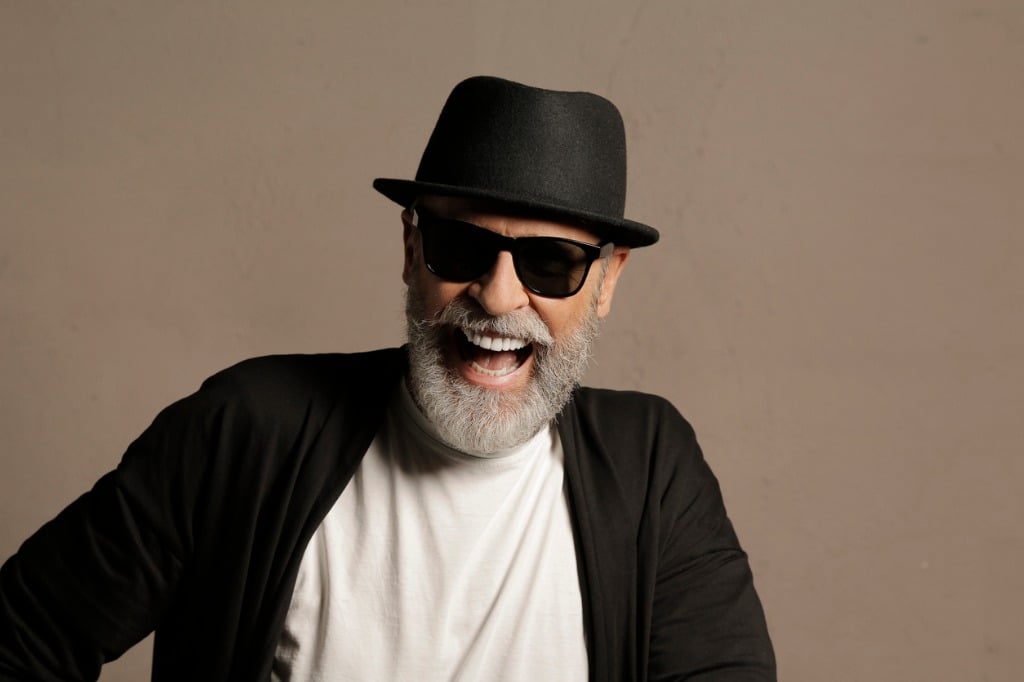
photo by ultramarinfoto via iStock
There are lots of reasons to want to make great portraits of men. From business headshots, to senior portraits, to family and environmental portraits, make use of your favorite lighting setups to create great portraits of male subjects.
Learn More:
We Recommend
Newborn Photography Lighting Tutorial

photo bymonkeybusinessimages via iStock
Babies make awesome photographic subjects. Parents love portraits of their precious newborn family members and other people are drawn to well done portraits of a newborn because the subject matter touches the hearts of most. Newborn photography lighting is a vital part of what makes these images so heartwarming.
As photographers, you probably won’t be surprised by what you will see in a newborn photography lighting tutorial. The way you light other subjects is also how to a newborn portrait, but with a few changes to make the configurations work better for newborns.
How To Light A Newborn Portrait
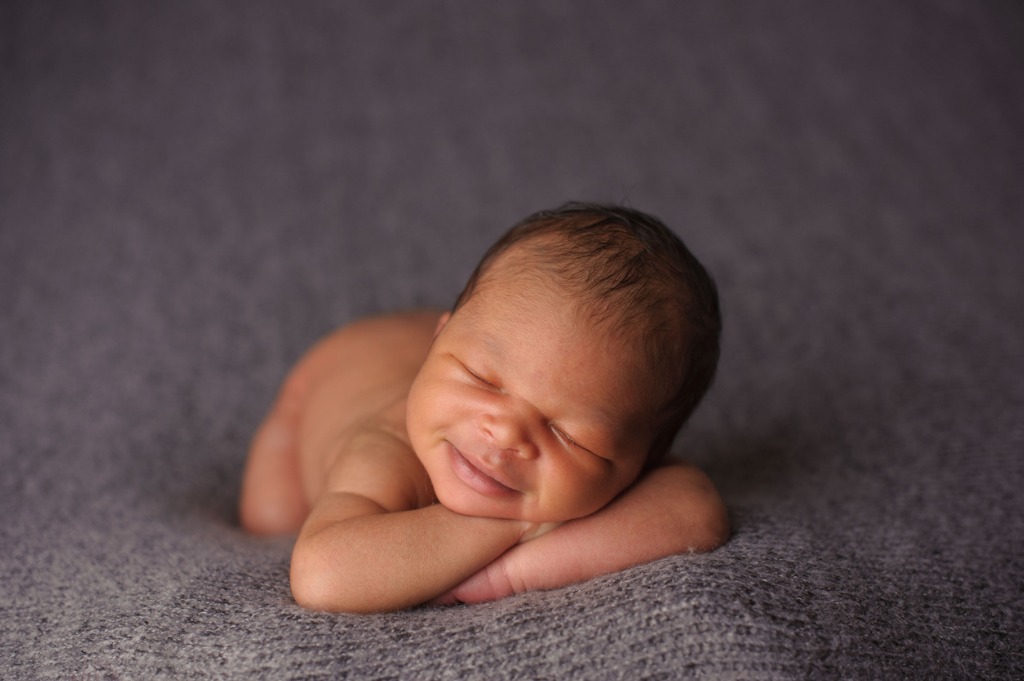
photo byRealCreation via iStock
There are several concerns to factor in with newborn photography lighting. We want to be able to control the lighting, both in placement of the lights and intensity, so we can get the lighting ratios and other things right. It is a portrait, so our regular techniques can apply, with some adjustment.
I have found that the best lights for newborn portraits are LED continuous lights. Continuous lights avoid the issue of startling the subject, which when involved with very small children and infants, can pretty much end the photo session right then and there.
An issue with standard continuous photography lighting gear, such as incandescent bulbs or quartz, is heat. Those lights get hot and that leads to the subject being uncomfortable, which in turn will also end the portrait session. LED bulbs are much cooler operating than other bulbs, even cooler than CFL bulbs.
LED bulbs are also incredibly power efficient, so you can find some excellent battery powered LED lights such as the Hakutatz LED lights. Portable, small, battery operated lights will open up the possibilities when taking newborn portraits as environmental portraits, which many parents prefer over coming to a studio.
Even in your own studio, small lights like the Hakutatz LED lights are very handy for setting up with a minimal floor footprint. This can allow the parent to stay close to their newborn and not be worried about bumping into your lights, tripping over a cord, or getting uncomfortable with heat.
Your Set Up For Newborn Portraits
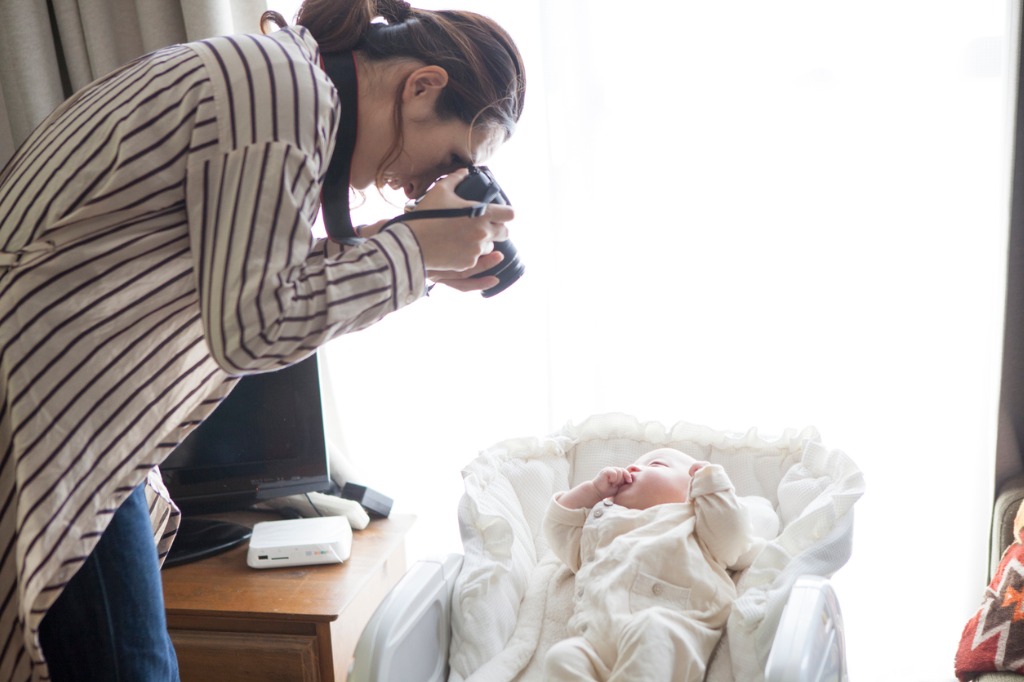
photo bykokouu via iStock
The camera and lenses you choose will depend on the desired end result, just as with adult portrait subjects. You choose your lens focal length based on what type of pose and composition you want. Lenses in a range of moderate wide angle to short telephoto, including normal lenses, will often be the best choice.
For full frame format, the focal lengths of 35mm, 50mm, and 85mm will give you a pleasing perspective and the right angle of view for the basic portrait compositions. Fast primes are useful for selective focus techniques, but a high quality normal range zoom lens will also work well. Kit lenses will work as well, but with less selective focus opportunities due to the slow maximum apertures.
Learn More:
- Inexpensive Portrait Lighting Ideas
- A Beginner's Guide To Studio Portraits
- Basic Portrait Lighting Principles
Safety And Comfort
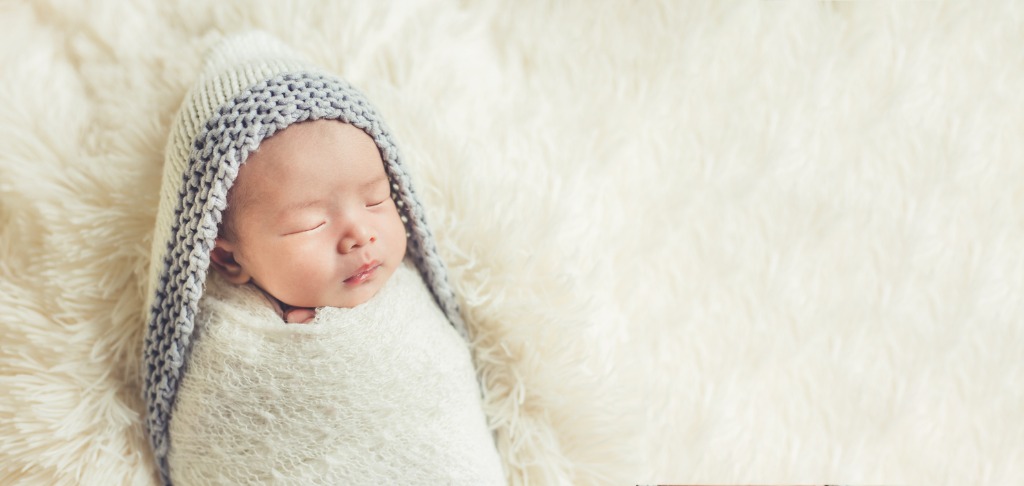
photo byBlue Planet Studio via iStock
There are multiple options for where to place the newborn subject. Some like large chairs and sofas, beds are a good option, and the floor is also available. Personally, I don’t like posing tables, because even though they may be sturdy, I worry about the baby falling. I’ve never heard of that happening to any photographers I know personally, but still…
Whatever space you use for the subject, you’ll need to adjust your camera and light placement to achieve good results. This may mean you will be low to the ground and will have to adjust your lighting configuration, too. That’s another reason I like to use small battery powered LED lights so you can move them around easily and not worry about cords.
The safety and comfort of your newborn subject is paramount. A nervous parent or photographer could transfer tense emotion to the young subject, too, so ensuring safety and comfort should also result in better images overall.
Newborn Photography Lighting Tutorial
photo byktmoffitt via iStock
Lighting newborn portraits is very much like lighting any other subject in your photography. If you have already taken any other photography lighting tutorials, the same principles apply as do many of the same configurations.
Some of the best portrait lighting techniques for newborn portraits include Rembrandt lighting, broad lighting, short lighting, and window lighting. You will probably be modifying these classic configurations somewhat to compensate for the special needs of each individual subject.
Most of these classic lighting techniques require two lights or a light and reflector to make them happen. You can find detailed explanations of these lighting techniques in our previous articles.
Window light can give us a very natural feel and is often soft and diffused. You can mimic window light by using a softbox and LED lights that allow for changing the color temperature of the light emitted.
Soft And Neutral
photo bykatrinaelena via iStock
Newborn photography is a fairly specialised niche of portrait photography with certain lighting and posing techniques working better than others.
A soft approach is often preferred over dramatic renderings. Soft light, soft poses, soft colors, even soft furnishings tend to appeal to the parents of the newborn over attempts at making exciting portraits.
As the kids grow up, the parents will want different styles in their kid’s portrait. Delivering the soft, loving view of a well lit and composed newborn portrait will please the parents and should create a satisfied repeat client for you.
And if you have a newborn of your own, congratulations! Take lots of newborn portraits in addition to all the candid shots you will get. You’ll cherish the memories with these beautiful images.
Learn More:
- Short Vs Broad Lighting For Portraits
- How To Use Rembrandt Lighting For Portraits
- Essential Portrait Lighting Tips
We Recommend
One-Light Portrait Lighting Tips
Photo by Omid Armin on Unsplash
You know the lighting configurations for various portrait lighting techniques already if you’ve been following our article for a while. Let’s now go over some helpful one-light portrait lighting tips and best practices, along with some information you can apply in general.
One-light portrait lighting can actually be done with multiple light “sources” such as a light and a reflector, a light and window light, or as a fill or main source outdoors in direct or indirect sunlight.
Get a Versatile Light
Learning how to light a portrait with one light is incredibly simple when your one light is a multi-purpose light. One of the best new multipurpose lights I’ve enjoyed using the last few months is the Hakutatz Pocket Size LED light.
What I like about this light is its portability coupled with high quality and good features. It’s not enough to have a portable light to use for your portraits, that portable light also needs to be usable and durable.
The Hakutatz has a lot of versatile features that you can use in your portrait work. Being small and portable means to me that it can be used anywhere.
Eye Level or Higher
photo byCarlosDavid.org via iStock
Light position for one-light portrait lighting is very important, too high or too low of the light placement can make the portrait either look a little bit odd or it can totally ruin what you’re trying to accomplish.
If you look at diagrams of how to light a portrait with one light, you’ll often see the angle of the light relative to the camera and subject, but it might not be completely obvious how high to put it. A little bit above eye level to about 45 degrees up seems to work best with many portrait lighting techniques.
Use Reflectors

photo bySpace_Cat via iStock
When looking at portrait lighting tips, we do well to think about reflectors. With reflectors, we can essentially double our lights. We use reflectors all the time to tame and redirect sunlight, those same properties are usable with one-light portrait lighting configurations.
Especially consider reflectors to provide that eye catch light that works so well with many portrait lighting techniques. A reflector can often open the shadows caused by the position of our single light.
Supplement Sunlight or Window Light
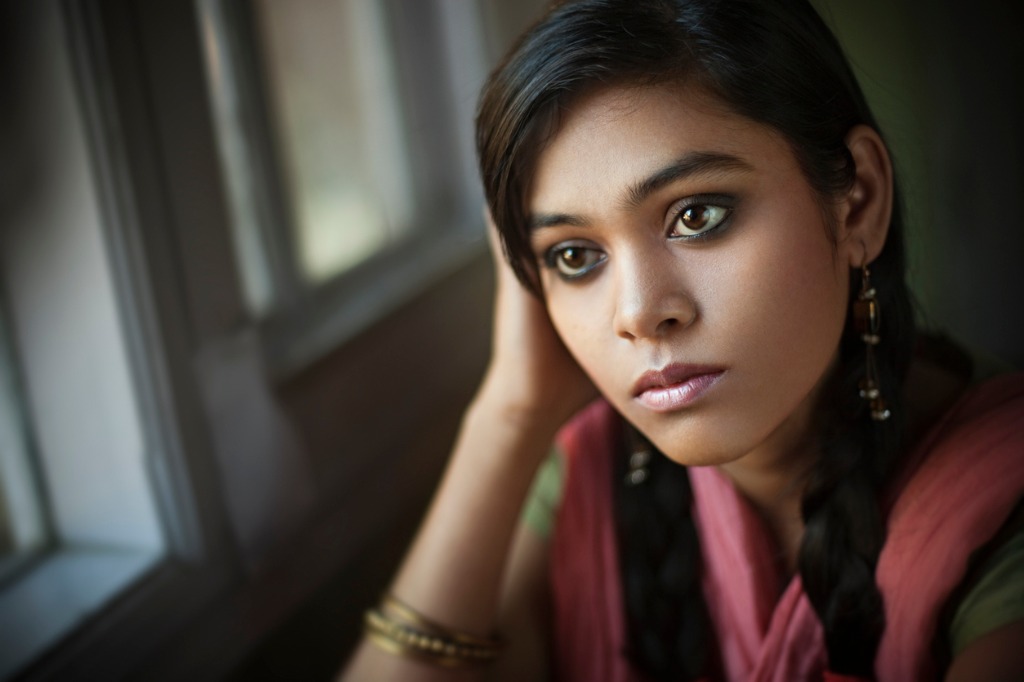
photo bygawrav via iStock
Sometimes, our single light takes on the role of the secondary light, such as when shooting environmental portraits with strong window light or when outside in sunlight.
In this situation, position the light where we may have been thinking of putting a reflector. Using the light instead, we can adjust the brightness level and even vary the color to make it appear very natural.
Learn More:
Further Away Is Harder
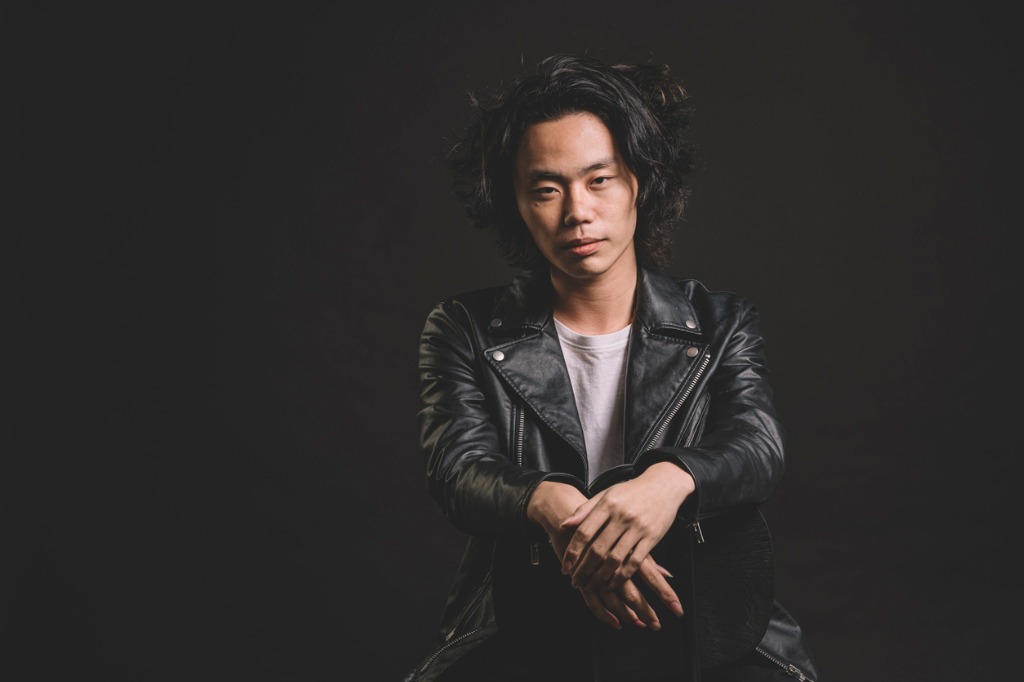
photo bychee gin tan via iStock
One of the things that makes a light source hard or soft is how far away it is. The closer a light is, the softer the light and the further it is, the harder. Which is why direct sunlight is a hard light because the Sun is a point light source.
If you have a bright portable light that you’re using as your single light source, vary the placement of it to change it from a hard light to a softer light. Some portrait subjects look better with hard light and very defined shadows.
Spot Metering Is Your Friend
photo byperkmeup via iStock
When playing around with one-light portrait lighting, light and shadow and contrast ranges are often at the top of our thoughts. The metering required for proper exposure is important to get right, so I like to use the spot metering capabilities of the camera I’m using.
Averaging and matrix or evaluative metering patterns can’t always cope with the scenes lit by a single light, at least not completely. Spot metering takes care of that problem. Some cameras allow you to take several spot readings and add them together for an accurate exposure.
Tone Down Background Highlights
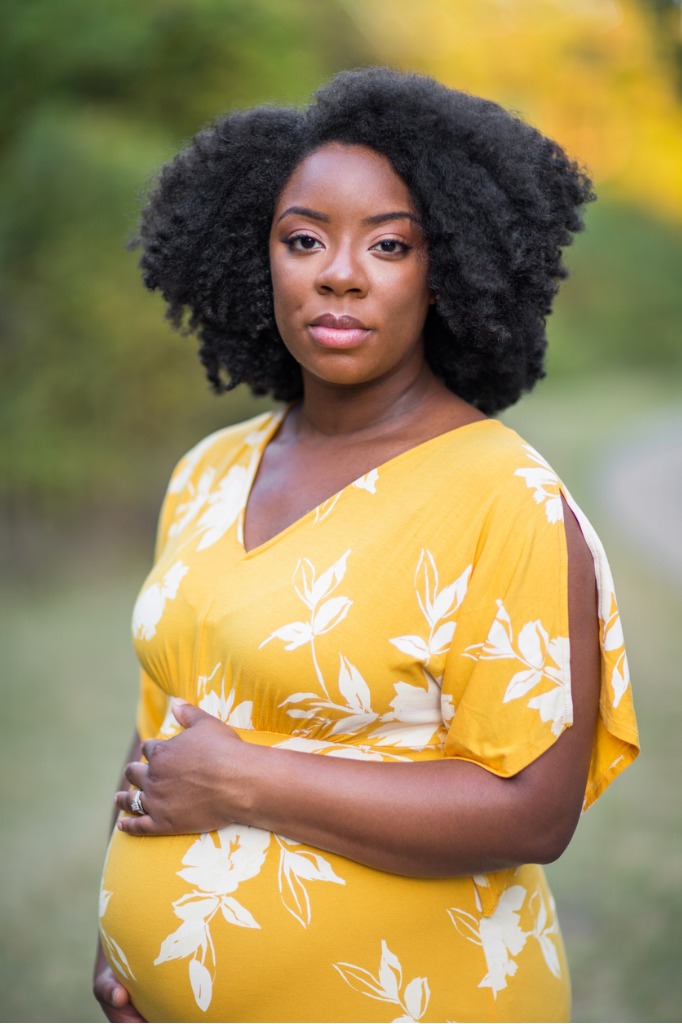
photo bydigitalskillet via iStock
Since you’re using your spot meter, take note of the hot spots in the background behind the portrait subject. If they are too bright or too defined, these hot spots could be distracting. A simple approach to fix this issue is to move your camera position in order to remove them from view.
Another option is to turn up the brightness of your single light. Doesn’t always work out if the background spots are extremely bright, though. Another option is to dodge and burn in post processing.
Barn Doors and Lens Hoods
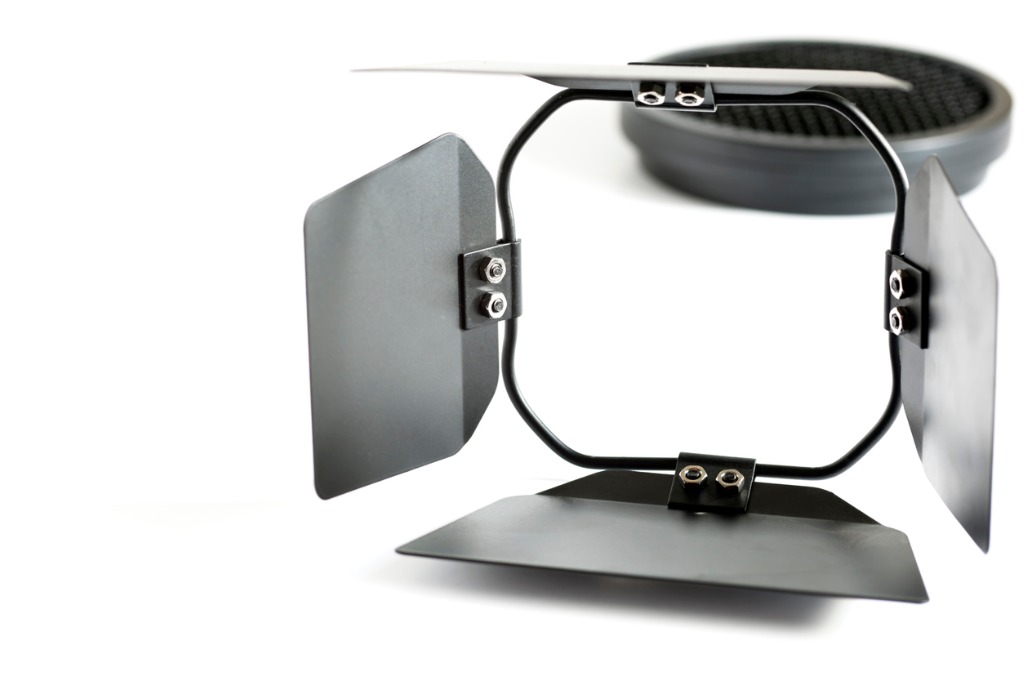
photo byneilkendallvia iStock
Using one-light portrait lighting may cause lens flare depending on where the light needs to be placed for our lighting technique. Barn doors on the light or a lens hood on the lens can help eliminate light spillage which causes flare.
Even if you don’t see the flare, it can still affect the image by lowering contrast in the image. Barn doors control light from the lamp, lens hoods block light coming at it from the side angles.
COLOR TEMPERATURE
If your one-light portrait lighting lamp has the capability to adjust color temperature, use that feature to balance out when using it to mix with sunlight window light or for balancing out your image.
The Hakutatz LED light can be adjusted in color temp and brightness level from your smartphone, so you can get what you want to have happen from the camera position without physically touching the light, useful for when you have the light mounted out of arm’s reach.
One-Light Portrait Lighting Tips
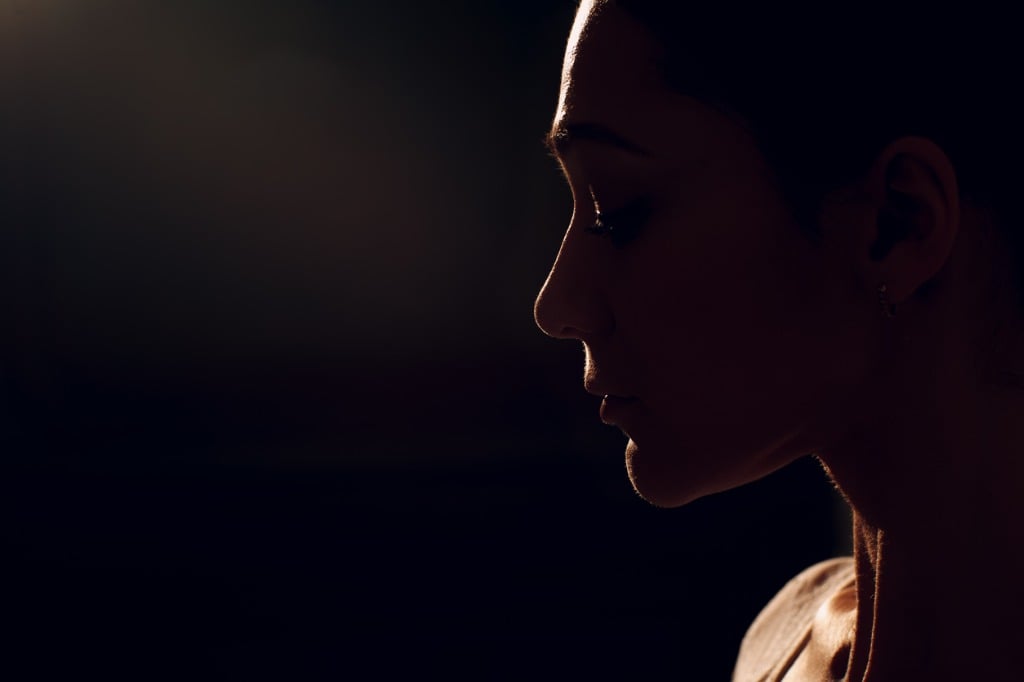
photo byprimipil via iStock
These tips should help you fine tune your own techniques and skills, resulting in great looking portraits that you are completely in control of, from start to finish. Grab your favorite light and start shooting.
Learn More:
We Recommend
Pet Portrait Lighting Tips

photo byKonstantin Aksenov via iStock
Pet portraits are one of the hottest photography trends right now, you can get into the field for profit with just about any camera and some basic portrait lighting gear.
As with other types of portraiture, you can make use of simple gear or high-end equipment, which includes whatever you choose for pet portrait lighting.
Pet Portrait Equipment
photoClarkandCompany by via iStock
What do you need for good pet portraits? A camera with adjustable settings is preferred. If you’re taking these pictures for your one enjoyment, one of the better smartphones with a full featured camera app will work.
An interchangeable lens camera, mirrorless or DSLR, will generally give you a whole lot more creative control, including lens focal length. An entry level APS-C camera with the kit can be used with great success. It’s not really so much the megapixel count you need as it is the control.
Generally speaking, kit lenses tend to have rather slow maximum apertures, so a fast prime might work well for you, especially if you want to try some selective focus techniques or include bokeh as part of the image.
A quiet spot in your home or office could prove beneficial as the place to set up for these shots, outdoors or other location environmental portraits might have too many distractions competing for the pet’s attention. You have more control over noise, lighting, and temperature inside.
Easy Pet Portrait Lighting Tips
photo byStockImages_AT via iStock
There are some types of lights I tend to avoid for pet portraits, flash, quartz bulbs, and incandescent bulbs. I prefer to use LED lighting or CFL bulb lights, with LED being my top choice.
My reasons have more to do with reactions of the subjects than with quality of light, since all these do a good job and I own some of all of them. But, a flash going off can startle the pet, and the heat produced by quartz or incandescent can make the pet very uncomfortable, neither of which makes for easy pet portraits.
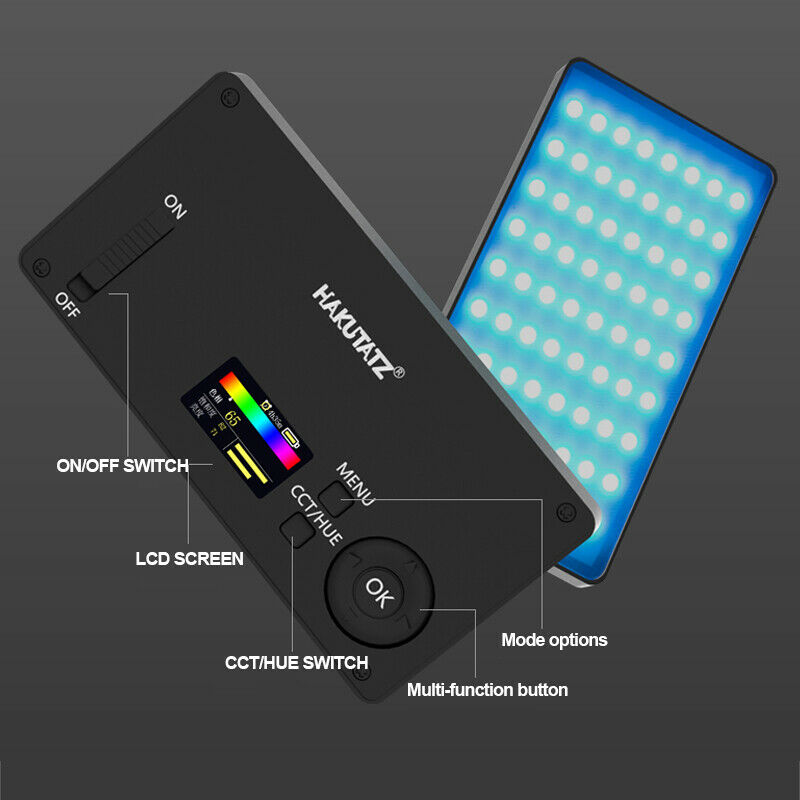
A light I’ve been using for a lot of my photography is the Hakutatz Pocket Size LED light with a smartphone control app.
It’s a great light for taking advantage of all the one light portrait tips in this article and others. The Hakutatz LED light is battery powered, has adjustable brightness and color temperature, and you can control the settings from your smartphone.
Simple Pet Portrait Lighting Configurations
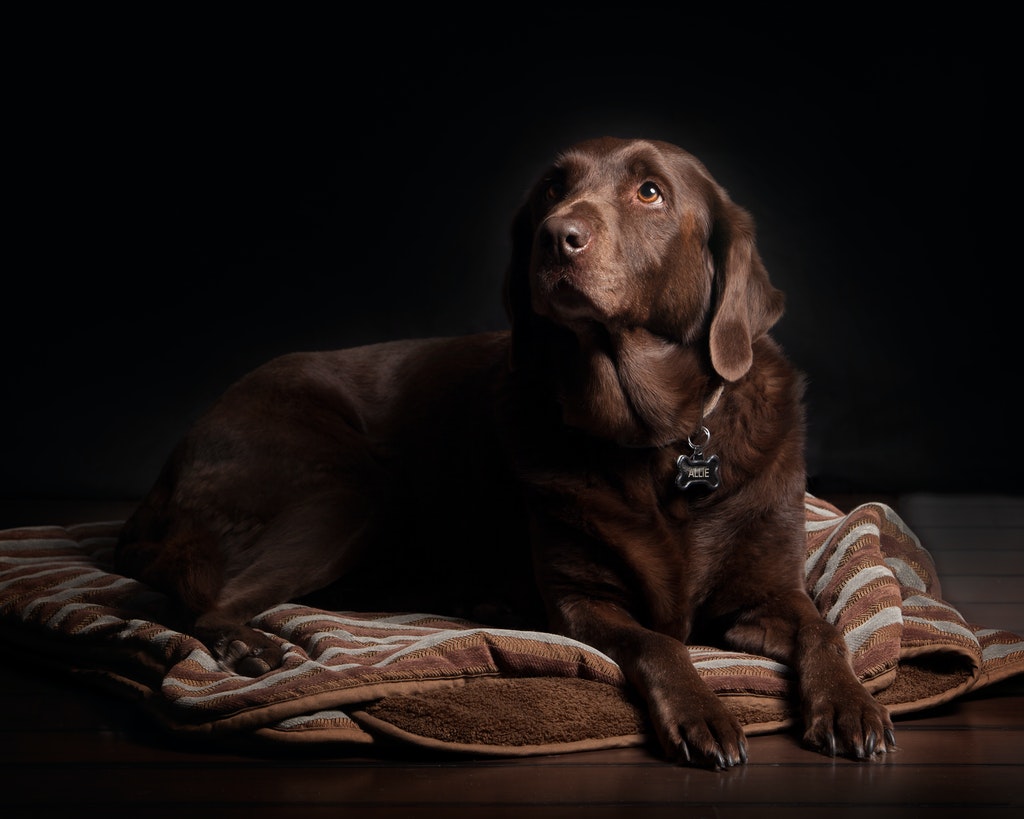
Photo by Binyamin Mellish from Pexels
Using one light and a reflector or two small lights allows for several classic portrait lighting techniques to be employed as pet portrait lighting.
Two pet portrait lighting tips I like using are the broad lighting and short lighting techniques due to their simplicity and consistently good results. You really don’t want to get too complicated with the light configurations, since the pets will likely move and change poses a lot during your session.
Learn More:
- Inexpensive Portrait Lighting Ideas
- Essential Portrait Lighting Tips
- A Beginner’s Guide To Studio Portraits
Broad Lighting
photo bySeregraff via iStock
Perhaps the easiest one light portrait tips for pets is the broad lighting technique. Broad lighting is when the side of the subject facing the camera has the most light falling on it.
In other words, if you are to the left of the subject, and the main or key light is to the left of the subject, and the subject is turned to face left towards the camera and light, then the largest part of the subject image is lit and you have broad lighting.
This will produce a pleasing and natural pet portrait that should also show lots of good detail if the image is exposed properly. The Hakutatz LED light works well for this type of pet portrait lighting since it’s small enough to hold in your hand while you are snapping pics with a remote release and your camera on a tripod.
Short Lighting
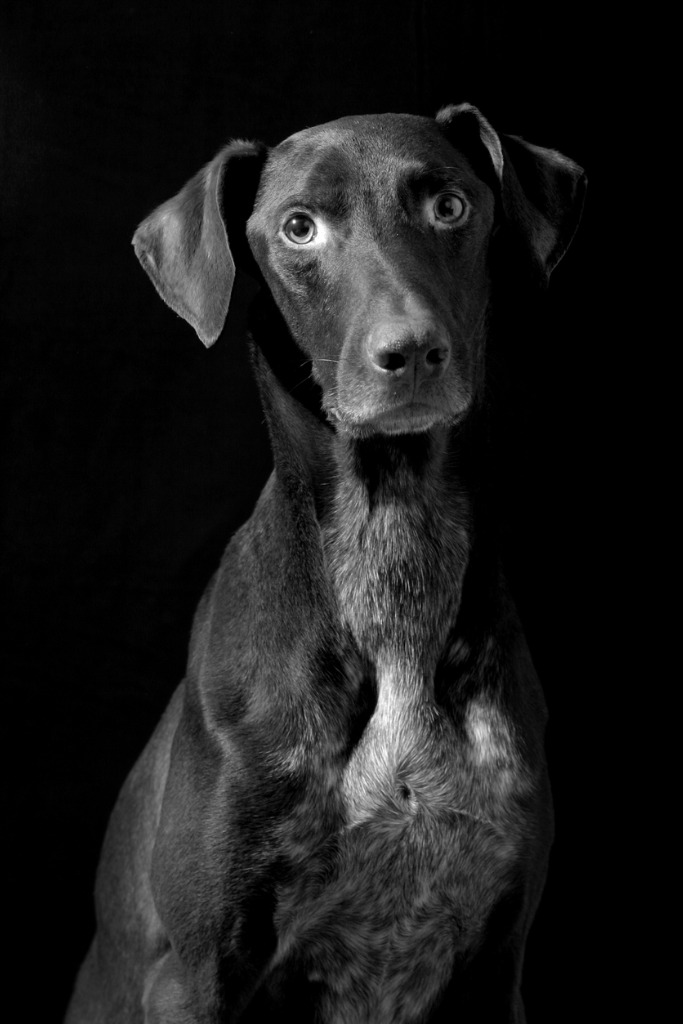
photo bySensorSpot via iStock
To make a short lighting configuration, keep everything the same as above, but move the light over to the other side. Now, the brightest light is on the side of the subject showing least in the image. You may find that adding a reflector for a catch light gives better results than the single light by itself.
This lighting technique shows texture such as the pet’s hair more clearly than board lighting does. How much texture can be varied by moving the light more towards or away from the camera position.
This pet portrait lighting technique can be used to create a mood as well. Since small LED lights like the Hakutatz can vary color temperature, you could also use that as part of the settings for creating a mood.
Your Pet Portrait Studio
photo bySeregraff via iStock
It’s also fun to make portraits of pets outdoors or in their own environment, but the indoor studio, even a small one, will afford you much more control over all the variables involved in pet portrait photography. And believe me, there will be many variables involved in taking photos of pets.
Start out with your own pets for practice and for experimenting to see what style of pet pet portrait lighting you are comfortable using. And let us see the results!
Learn More:
We Recommend
Photography Gear for Traveling Solo
photo byBoyloso via iStock
While nobody is doing much of anything nowadays, let alone participating in travel photography, I’ve definitely spent quite a few sleepless nights frantically Googling when researchers think it will be safe to travel again.
I’ve also spent quite a bit of time trying to figure out where the next trip is going to take me. And I don’t think I’m alone. Although I’ve recently heard a lot about how the coronavirus pandemic is going to create a huge boom in domestic travel, I know I’m excited to leave the country again.
So, since I’m already doing all of this research, I figured I may as well share some of the info I’m collecting. Since I obviously can’t recommend which trips to take just yet, one thing I can recommend is photography gear for your next vacation.
Keep in mind all of this travel photography gear is gear that I have either already used on a solo trip or plan to just as soon as all this madness is over. So, in order to make the cut, the photography gear had to be lightweight and easy to carry, relatively inexpensive (except for my main camera), and sturdy.
Let’s dive in.
Top Travel Camera: Sony a7S II
I’ve written a full review of the first item on this photography gear list and you can read it here.
The Sony a7S II is a full-frame mirrorless camera with a 12MP sensor and 4K video. While it’s best known for being a great low-light shooter, it’s also one of my favorite pieces to pack for all of my trips because of its weather-sealed body. It’s built with more magnesium alloy than any other Sony a7S, so it’s also really sturdy.
It also lasts for forever. This camera is rated at 500,000 cycles, which is plenty to last you for years of traveling.
It’s 3” tilting LCD screen comes in handy when photographing people on the street, or when photographing in crowded tourist areas.
It comes with 100% viewfinder coverage.
Some other specs include its ISO range of 100-102,400 and its 5fps burst mode.
Plus, it weighs just over 1.3 lbs so you can throw it in your carry on and not even realize it’s there.
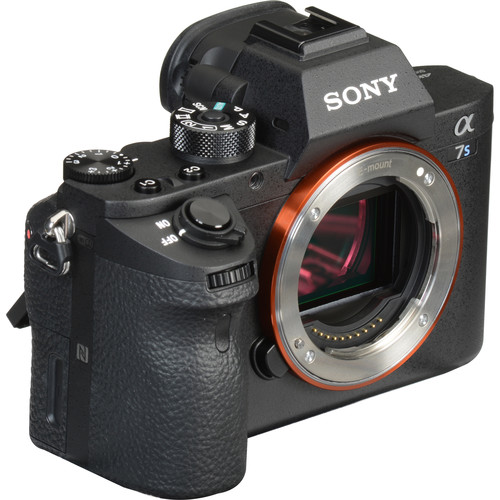
Unfortunately, all of these specs do come at a price. Since this is one of those essential photography gear pieces, I allowed myself to pick something a bit more expensive. The Sony a7S II is $2,400 if you opt to purchase it new.
But, no travel photography tips list would be complete without a few money hacks. Instead of buying the Sony a7S II new, you should purchase it off of MPB used.
Why? Well, the Sony a7S II starts at just $1,000 on MPB. Or, you can opt for one in excellent shape for just $1,500.
Inexpensive Backup Camera: Sony a6000
Okay, your photography gear bag definitely needs a backup camera when you’re traveling and let me tell you why: problems happen all the time, and if something goes awry with your primary camera (or God forbid it gets stolen), you don’t want to be on your trip without a camera.
The Sony a6000 works really well for me as my backup because it’s incredibly inexpensive. I purchased my used Sony a6000 off of MPB for a little over $400, but prices have fallen since then and you can now pick one up for as little as $325.
And I know that this camera is 6 years old and that’s why it’s so cheap, but this mirrorless camera comes with all the specs I need for traveling (except 4K video).
It features a 24MP sensor, 11fps burst mode, and a 3.0” tilting screen with 921.6K dots, which is just a step down from the screen on the Sony a7S II. While the screen isn’t a touchscreen, this really doesn’t bother me if I’m not going to be shooting with it very often.
It’s also really small, which means I can leave it in a locker at my hostel or hotel until the moment I need it.
Learn More:
Small But Mighty Tripod Alternative: Octopad
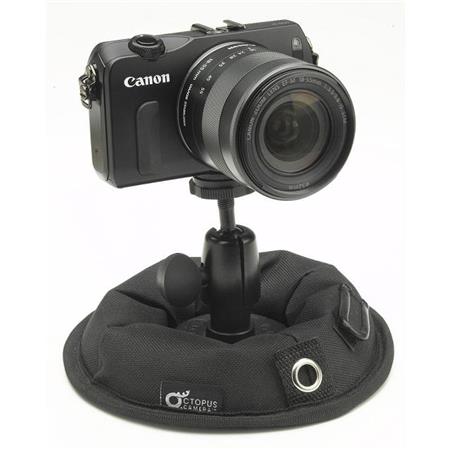
I talk about the Octopad a lot on PhotographyTalk (I did a full review a while back that you can read here) because I’ve yet to find a tripod that does as much as this does for this price point.
Obviously, my favorite part of any inexpensive photography gear is its price. The Octopad is just $27. At that price point, you’re going to be finding tripods that will break within the month and won’t do a great job of doing much else in the meantime.
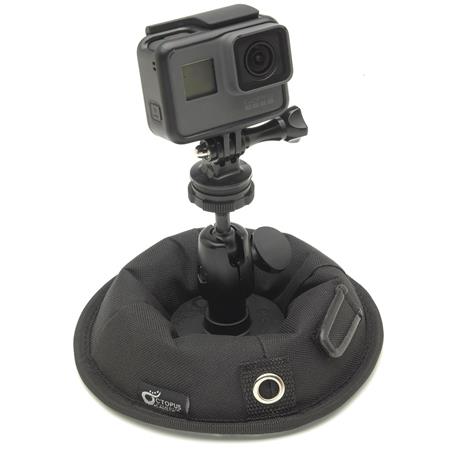
The Octopad, on the other hand, is incredibly small and lightweight while maintaining complete balance. Since it’s bottom heavy, you will never have problems shooting with it in extreme weather conditions. It’s sturdy as you need in a small package like you want for traveling.
You also don’t have to use the Octopad to hold your camera because it works well with a GoPro, or simply as a way to support an off-camera light to light the scene absolutely perfectly.
The only downside to the Octopad is that you aren’t going to be using it to keep your camera at eye level since it only works to hold your camera in place.
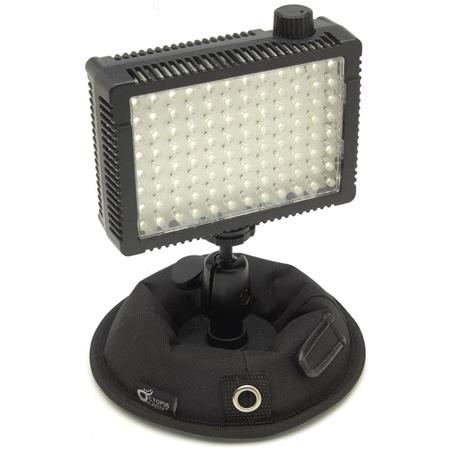
But, I don’t know of any tripods that can hold your camera or light at a 45 degree angle on any surface without tipping over.
It also weighs just 1.6 lbs and is 6.5” in diameter, so you can easily stick it wherever you need to in your luggage.
It definitely helps to have an Octopad in your photography gear bag when you need to shoot while hanging off of a cliff or participating in any other action sports.
A Bright, Portable Light: Hakutatz Pocket Size AW RGB LED Light
There’s no way for me to do a travel photography gear tips list and not include a pocket-sized light.
The Hakutatz Pocket Size AW RGB LED Light has got a name to match its capabilities. This light features amber, white and RGB LEDs so you can add drama to any scene with millions of possible colors.
It also comes with an app so you can adjust the lighting from your phone, which comes in handy when you’re watching your photography gear like a hawk.
You can also change the saturation or brightness from your app, which means you’ll have more room in your luggage for souvenirs since you won’t need to drag diffusers or softboxes with you everywhere you go. There’s a reason why I named it one of the best lights of 2019!
You can grab a Hakutatz Pocket Size AW RGB LED Light for $130.
Something to Carry It All In: HEX Back Loader Backpack
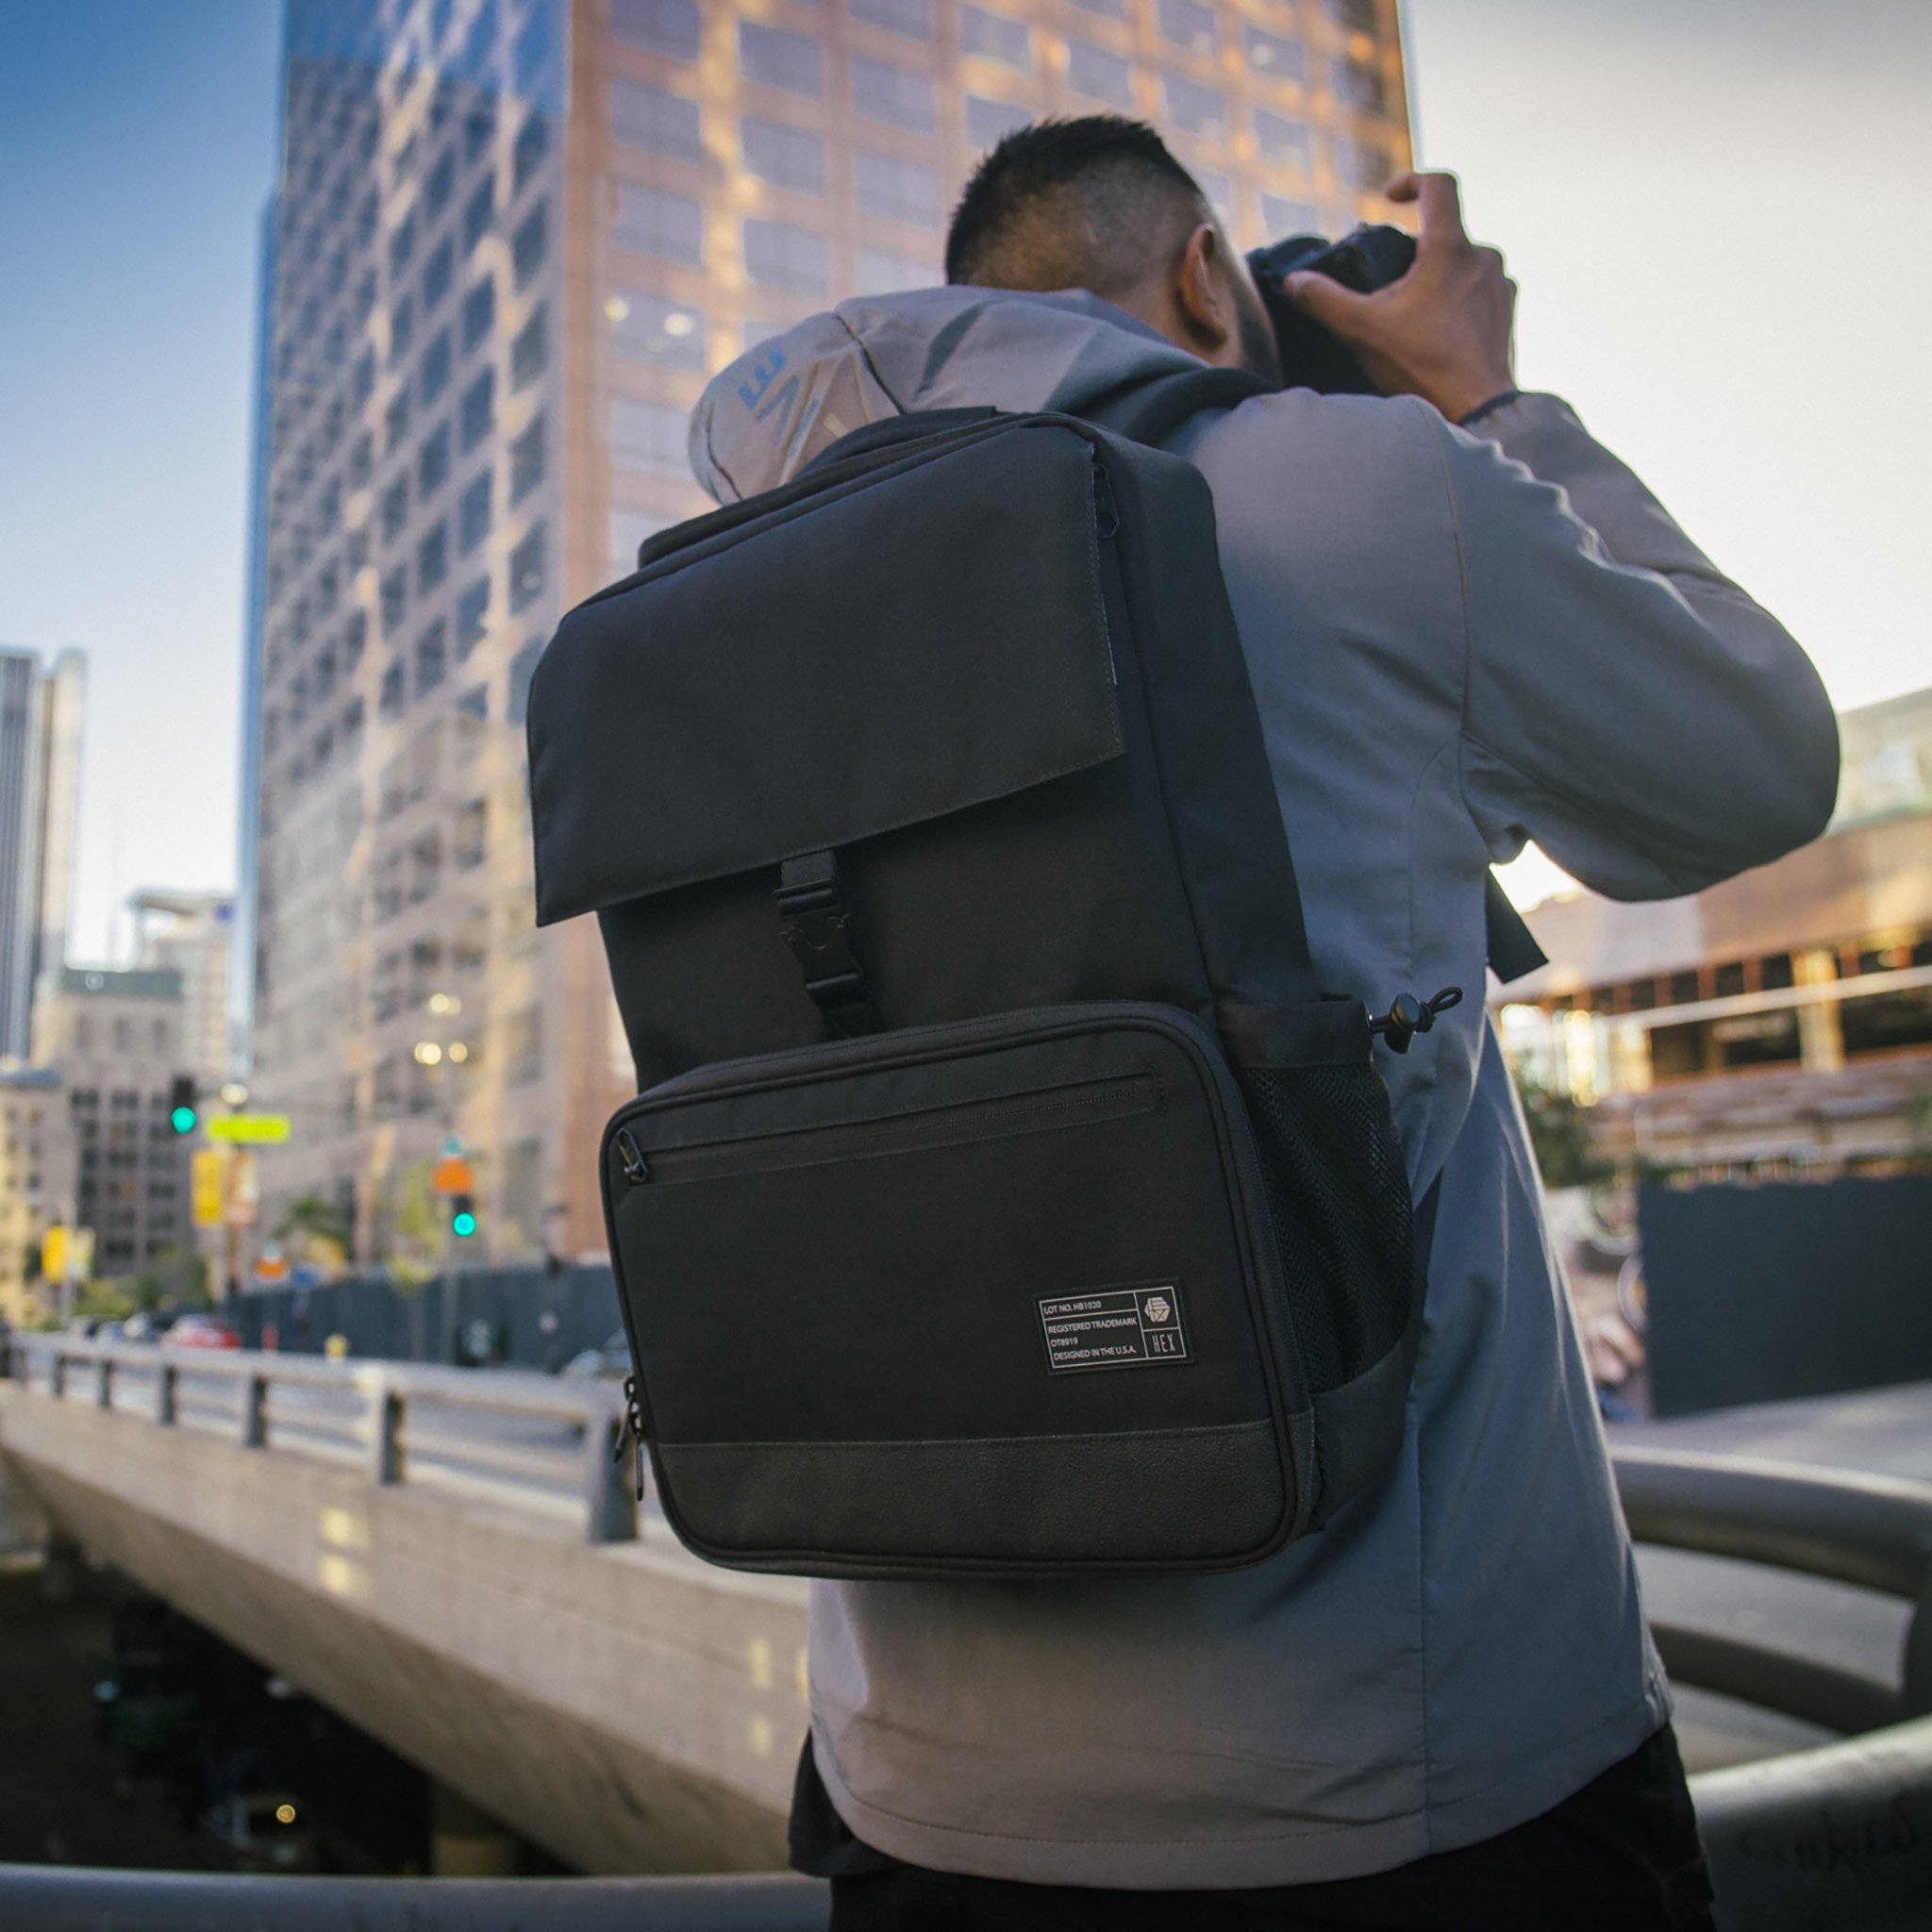
You’re obviously going to need a bag to carry all of your new photography gear in and the HEX Back Loader Backpack is just the one.
For starters, I’ll never recommend a bag that I don’t think is aesthetically appealing. Maybe this has something to do with the fact that my parents always said you should look your best because first impressions last, but I find I get more jobs when I look put together.
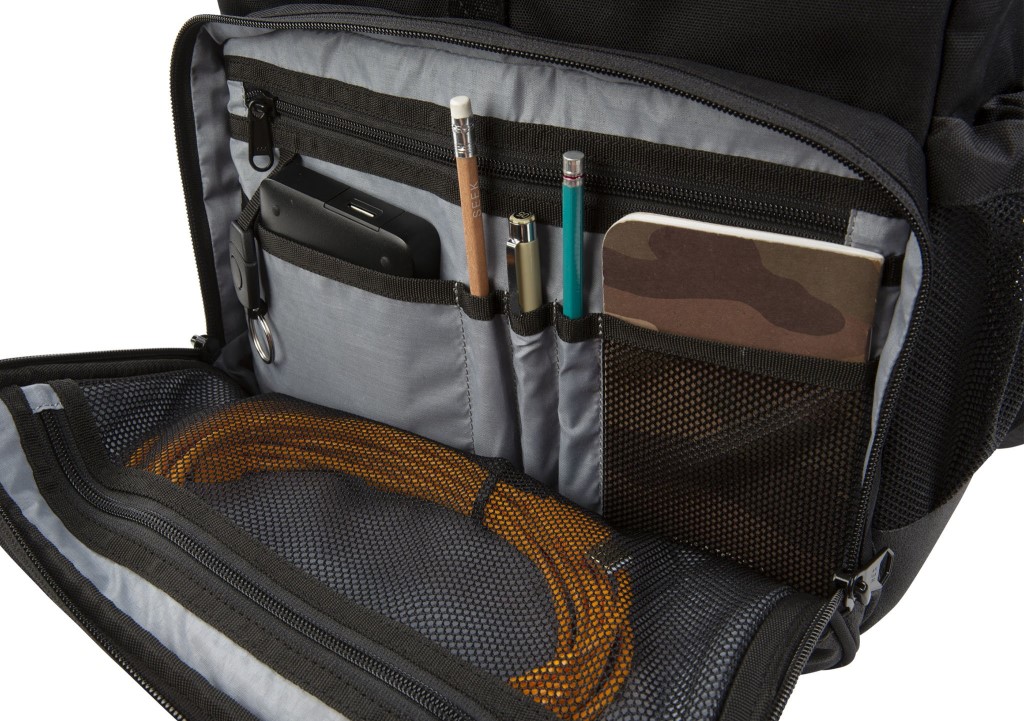
This bag is a sleek and modern black. It also happens to be pretty discrete, so nobody will know it is filled with thousands of dollars of photography gear.
I also won’t recommend a bag that isn’t comfortable because there’s nothing worse than running around London with a shoulder strap digging into your skin.
This bag features shoulder straps that are well-padded, a chest strap to more evenly distribute the weight of your photography gear, and, most importantly, really fast access to your gear.
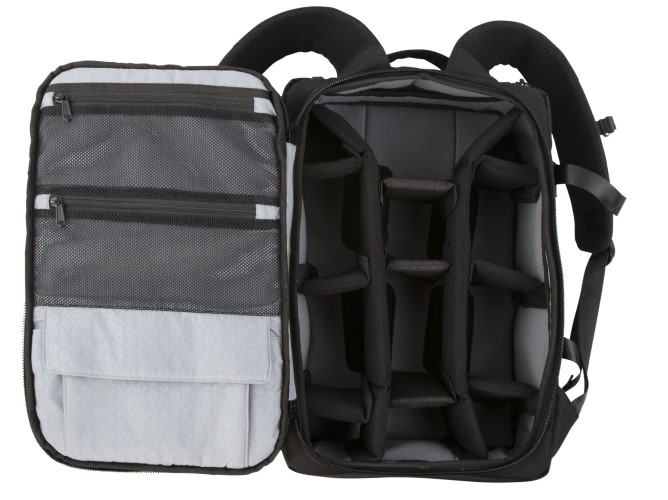
It’s also water resistant, so you won’t need to be worried about freak storms.
If you want to pick up a HEX Back Loader Backpack, they’re currently available for $190.
Learn More:
We Recommend
Photography Gear Upgrades You Should Make in 2021

Photo by Alexander Andrews on Unsplash
My photography gear has been through a pretty rough decade. My photography gear and I travelled to three continents, multiple countries, and survived a small flood in my house.
If your photography gear is like mine, it may be time to think about upgrading your photography gear for the new year.
So, we put a list together of essential photography accessories for 2021.
A Better Camera Strap

The first photography accessory I forget about in my photography gear bag is my camera strap, which if I’m being honest receives the most wear and tear of anything because its out in the elements with me.
If you’re looking to upgrade your photography gear, think about starting with your camera strap since it can really make or break a shoot based on your comfort.
My favorite camera strap is the MoneyMaker Solo by Holdfast.
With all of my photography gear and outdoor gear I try and pick a company that supplies a lifetime guarantee on their products, so at the turn of the next decade I won’t be looking for another camera strap.
Holdfast will send you another camera strap free of charge if yours breaks down over time, and at $175, it’s a pretty cheap investment for a lifetime of comfort.
The MoneyMaker Solo is aesthetically pleasing, it comes in six different colors, and it isn’t one size fits all, which I find rarely works with a camera strap.
Holdfast actually sells the MoneyMaker Solo in three different hand sizes and a different version for righties and lefties, so you know you’re going to get exactly the right size.
The camera strap also won’t slide around on your shoulder due to their stabilizing technology. You can have this camera strap out in the rain and moisture, because all of the D-rings are made out of stainless steel which doesn’t rust.
Overall, this is the best camera strap money can buy you for your 2021 photography gear update.
An Upgraded Lens

Photo by Warren Wong on Unsplash
This is one of the more conventional things you might think of replacing when you’re thinking of buying new photography gear.
Lenses can get scratched and dirty over time, which may require professional cleaning and professional cleaning is expensive.
But, moreover, you may just want to be a little more creative with your shots and that requires a new lens.
If you don’t have a nifty fifty, I’d push you to buy this essential photography gear for the new year.

This nifty fifty by Canon, the Canon EF 50mm f/1.8 STM lens, is a great place to start. At $125, it isn’t out of anyone’s price range for a good quality lens.
This lens performs well in low light, it has a 4.8-star review on Amazon out of 2,000 reviews, and it’s going to perform so much better than your kit lens.
Don’t have a Canon? No worries...every camera manufacturer has a similar lens at a roughly similar price!
Learn More:
- How to Get the Most Out of Your Nifty Fifty Lens
- Is a Single Camera Strap or a Dual Camera Strap Right for You?
Photography Insurance

Of course, there's no point in upgrading your lenses or other gear if you don't have it covered with photography insurance.
Operating a photography business without insurance is like driving a car without insurance...you're one accident away from disaster.
Fortunately, photography insurance is both affordable and easy to procure thanks to companies like Full Frame Insurance.
We recommend Full Frame because they offer policies with the right protection at the right price.

This includes equipment insurance for your business that starts at just $55 per year for a $1,000 per item and $5,000 aggregate policy.
The policy covers your cameras, lenses, and related gear, as well as other equipment primarily used in your business, like video equipment.
With just a $250 deductible, you can rest easy knowing that your expensive gear is covered in the event it's damaged.

What's more, you can quickly and easily get event insurance, either for a short-term gig or on an annual basis.
Again, the prices for these policy options are excellent - starting at $59 for event insurance (1-3 days) or $99 for an annual option.
Either way, Full Frame makes getting insured a painless process with the ability to buy coverage online 24/7.
Get all the details on covering your business by visiting Full Frame Insurance.
An Easy-to-Use Light
Seth Terwilliger reviews the Hakutatz Pocket-Sized Light in the video above. This crowd-funded light features lights in white, amber, and RGB, and as the name suggests, fits in your pocket.
Plus, this light comes with a companion app that allows you to control the light from your phone.
If you’ve ever found yourself in a situation where you didn’t realize you were going to need artificial light, this is the photography gear upgrade for you in 2021!
Think about it...one of the primary keys to a great photo is great light, and this little guy produces even, clean, beautiful light that is far superior to the flash on your camera.
You can use it as a key light or fill light for portraits, as a background light for videos, and even light paint landscapes with it. And that’s just the start!
Additional Batteries

Photo by Ramiz Dedaković on Unsplash
Unfortunately, extra batteries for your camera are not cheap. Yet, they are one of the most important photography gear upgrades you should make in 2021.
If you’ve ever found yourself with a dead battery right when you most need your camera, it’s the most frustrating feeling in the world.
While people traveling for long distances in developing countries may need to invest in additional batteries more than the average photography, there have been times when I caught myself needing power in the middle of New York City and it took me a desperate hour to find a Starbucks with a free electrical outlet.
So, next time you’re purchasing a camera body, do yourself a favor and get the package with an extra battery.
A Polarizing Filter

It shocks me how many photographers nowadays don’t have a polarizing filter. Polarizing filters got a bad name a few decades ago because the quality of the images you could get was not all that great. I’ve found that people in my generation tend to remember this period and look down on polarizing filters because of it.
But, that’s a mistake because polarizing filters in 2021 are incredible. They allow you to capture better landscapes with contrasty skies, more detailed rainbows, and bodies of water without glare. They also reduce atmospheric haze so distant landscape elements are cleaner and crisper.
Editor's Tip: Get Kenko’s latest updates and access to promos for discounted gear. Click here to sign up.

Plus, my favorite polarizing filter by Kenko Nyumon is just $43. It’s called the Kenko Nyumon Slim Circular Polarizing Filter and it’s created by the best-selling filter manufacturer in Japan.
It never gets snagged while you’re putting it on your lens, for ultimate ease of use, and it uses a multi-coated glass that repels water, smudges, and other contaminants. These filters also have multiple layers of anti-reflective coatings that helps minimize flare, ghosting, and other aberrations.
Do you have any other photography gear upgrades you’re trying to make in 2021?
Learn More:
We Recommend
Portrait Lighting Mistakes

Photo by Moose Photos from Pexels
We are making great looking portraits with the basic and advanced portrait lighting techniques taught here. Having fun with it all, too. But nobody’s perfect. There are some common portrait lighting mistakes we should be aware of so we can eliminate them from our photo shoots.
It’s easy to look at a portrait and say that it was not lit properly. Determining what actually is going on is harder, but vital if we want to avoid these same issues recurring. I will assume you are familiar with the common portrait lighting tips, techniques, and methods from earlier portrait lighting tutorials.
Lights Too Low - Power
Photo by Ary Shutter from Pexels
Some of the most common portrait lighting mistakes involve one or more lights in our configuration being turned down to low. Several of our portrait lighting techniques are accomplished with two or more lights and positioned or adjusted for lighting ratios.
Broad lighting, short lighting, Rembrandt lighting, loop lighting, high key, low key, and other techniques rely on manipulating chiaroscuro or lighting ratio and contrasts. If we don’t have the key light at a high enough power level, then the fill light ratio may not be able to be adjusted enough for our desired portrait lighting technique.
I have a lot of different lighting options in my main studio, but if I’m in my small home studio or on location for environmental portraits, I like to use small, battery powered continuous LED lamps with remote control as my lights. The Hakutatz LED lights shown above are a great addition to my portrait lighting equipment.
The Hakutatz lights are small and portable, emit good color, and I can control them from my smartphone for a smooth portrait session. The remote control function is what I really appreciate when on location or in cramped quarters. I can be at my camera, viewing my lighting ratios, and can change them without leaving my shooting position.
Recommended Portrait Lighting Reading:
- Picture Perfect Lighting: An Innovative Lighting System for Photographing People
- The Dramatic Portrait: The Art of Crafting Light and Shadow
- Portrait Photography: From Snapshots to Great Shots
Lights Too Low - Position
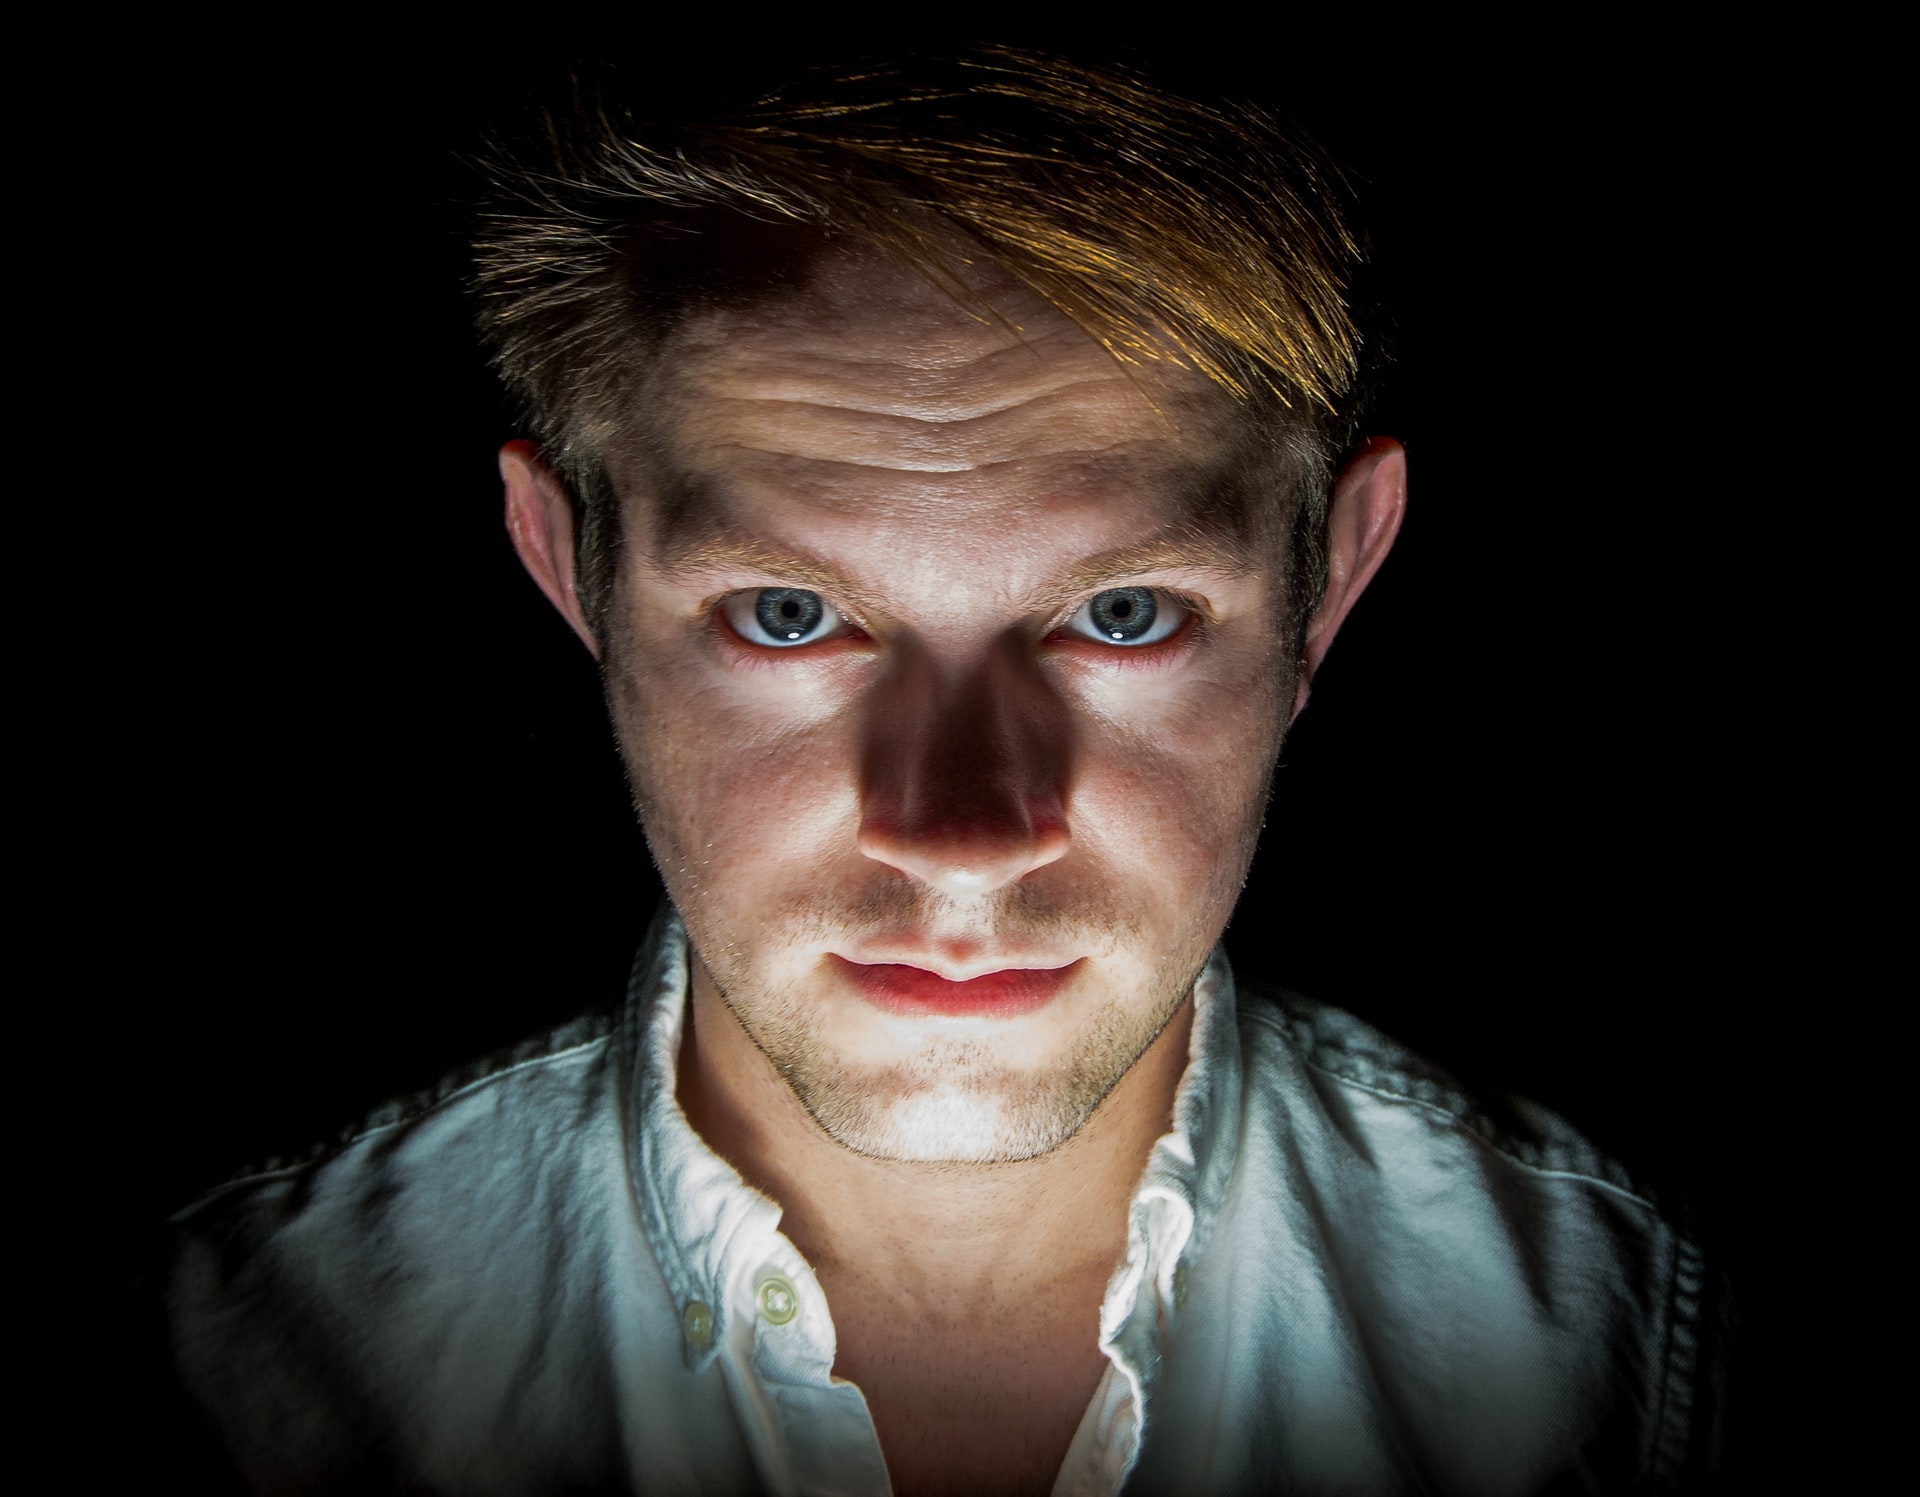
Photo by William Carlson on Unsplash
We know how to light portraits. Where to place the lights so we get the lighting rato we want. Sometimes, especially if in a hurry to set up, we may put in our lights in the correct position relative to the camera, but may neglect positioning at the proper height relative to the subject.
If we put the lights too high, probably not going to be much of an issue. For the most part, it won’t affect our lighting ratio or anything like that. Besides, if it’s really high up, we can see it easily.
When we place the lights too low relative to our subject’s face, then we introduce some extremely unflattering shadow effects. Under lighting makes people look scary. The effect is menacing. As kids, did you ever put a flashlight under your chin pointing up? Yeah, same effect.
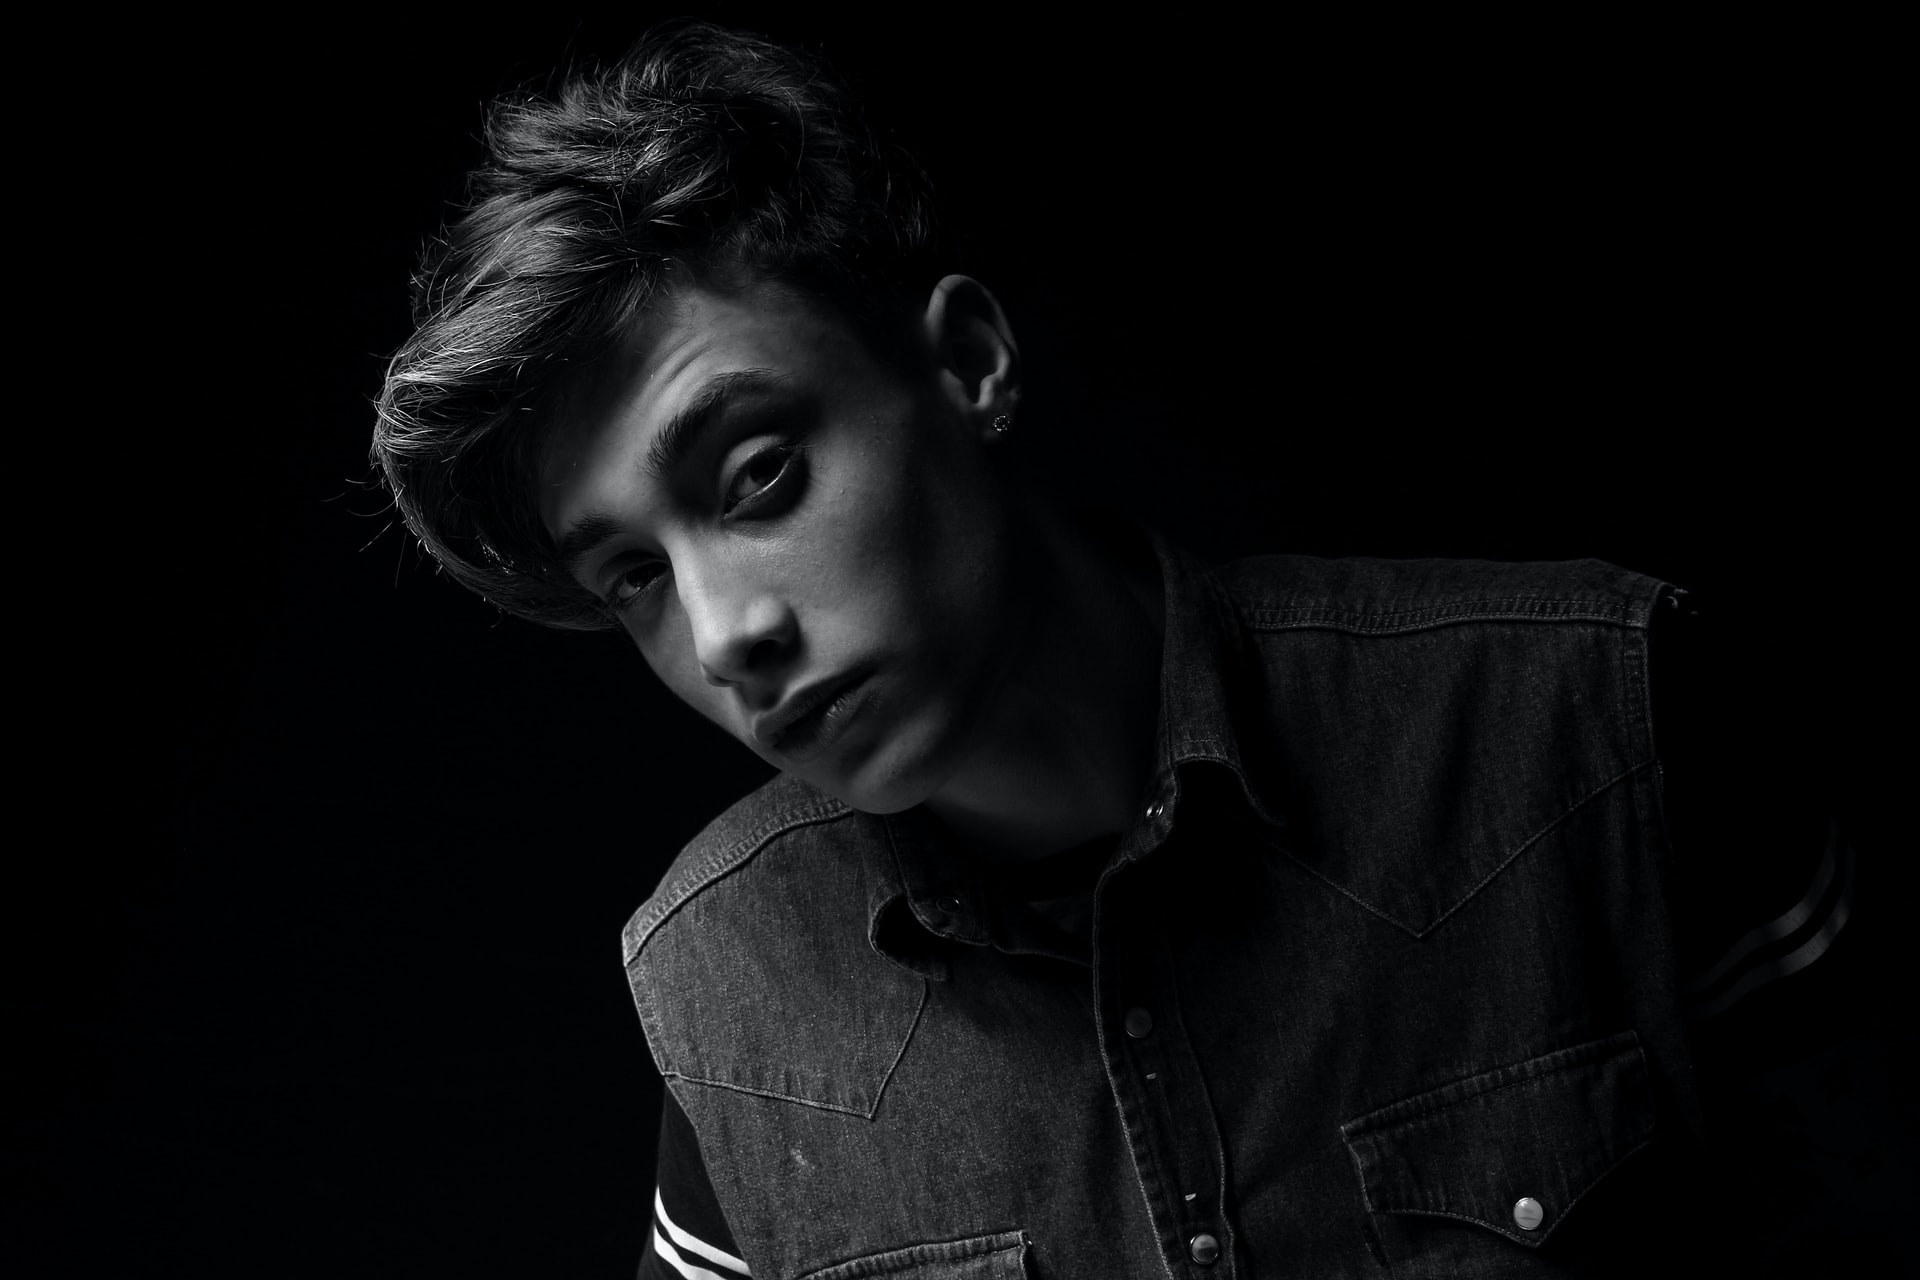
Photo by Augusto Lotti on Unsplash
Even just a little below eye level will add an unnatural, undesirable shadow or contrast effect that your subject won’t like when you show them the images. Which is another reason I like using portable continuous lights like the Hakutatz when on location.
Setting up location shoots can be a little hectic sometimes. So having the instant feedback of continuous lighting helps eliminate portrait lighting mistakes like this. Without even looking through the viewfinder or at the viewscreen, you can tell if your lights are poorly placed.
Learn More:
- Beginners Guide For Head Shot Portraits
- Essential Portrait Lighting Tips
- Basic Portrait Lighting Principles
Poor Shadow Placement
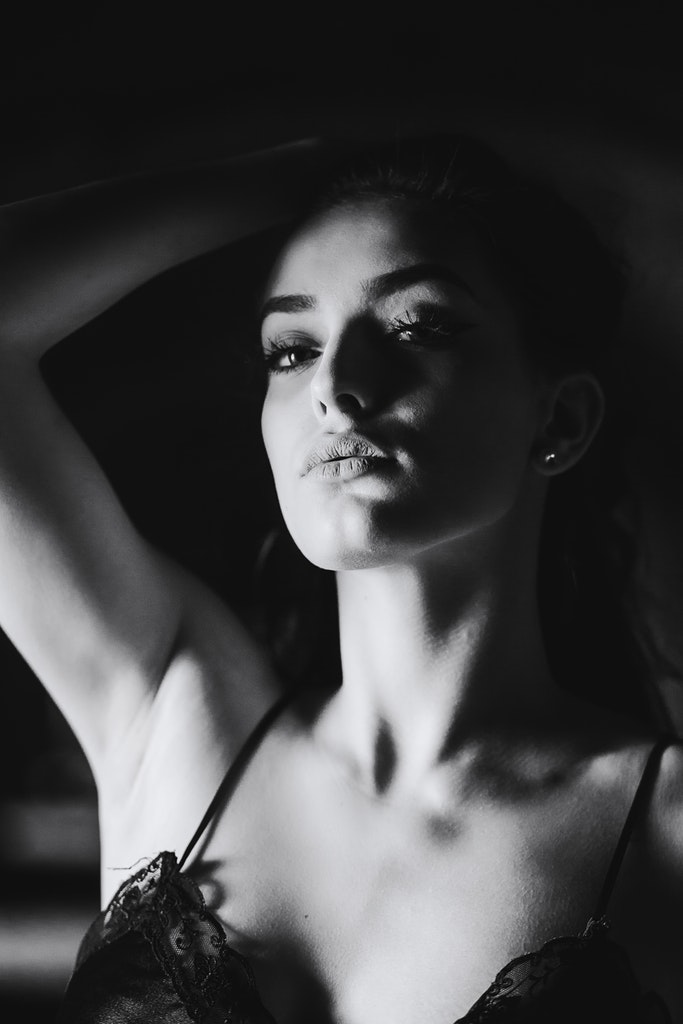
Photo by Alexander Mils from Pexels
This portrait lighting mistake can happen anywhere, with any type of portrait lighting equipment.
The purpose behind several of our portrait lighting techniques is creating and controlling shadows on the face of our subject. As an example, the Rembrandt lighting effect is a very specific shadow shape on the cheek of the portrait subject.
In our portrait lighting tutorials, we showed where you place the lights in order to get that triangle of light and shadow. But it’s more than just the lighting gear placement, the pose of the person also comes into play.
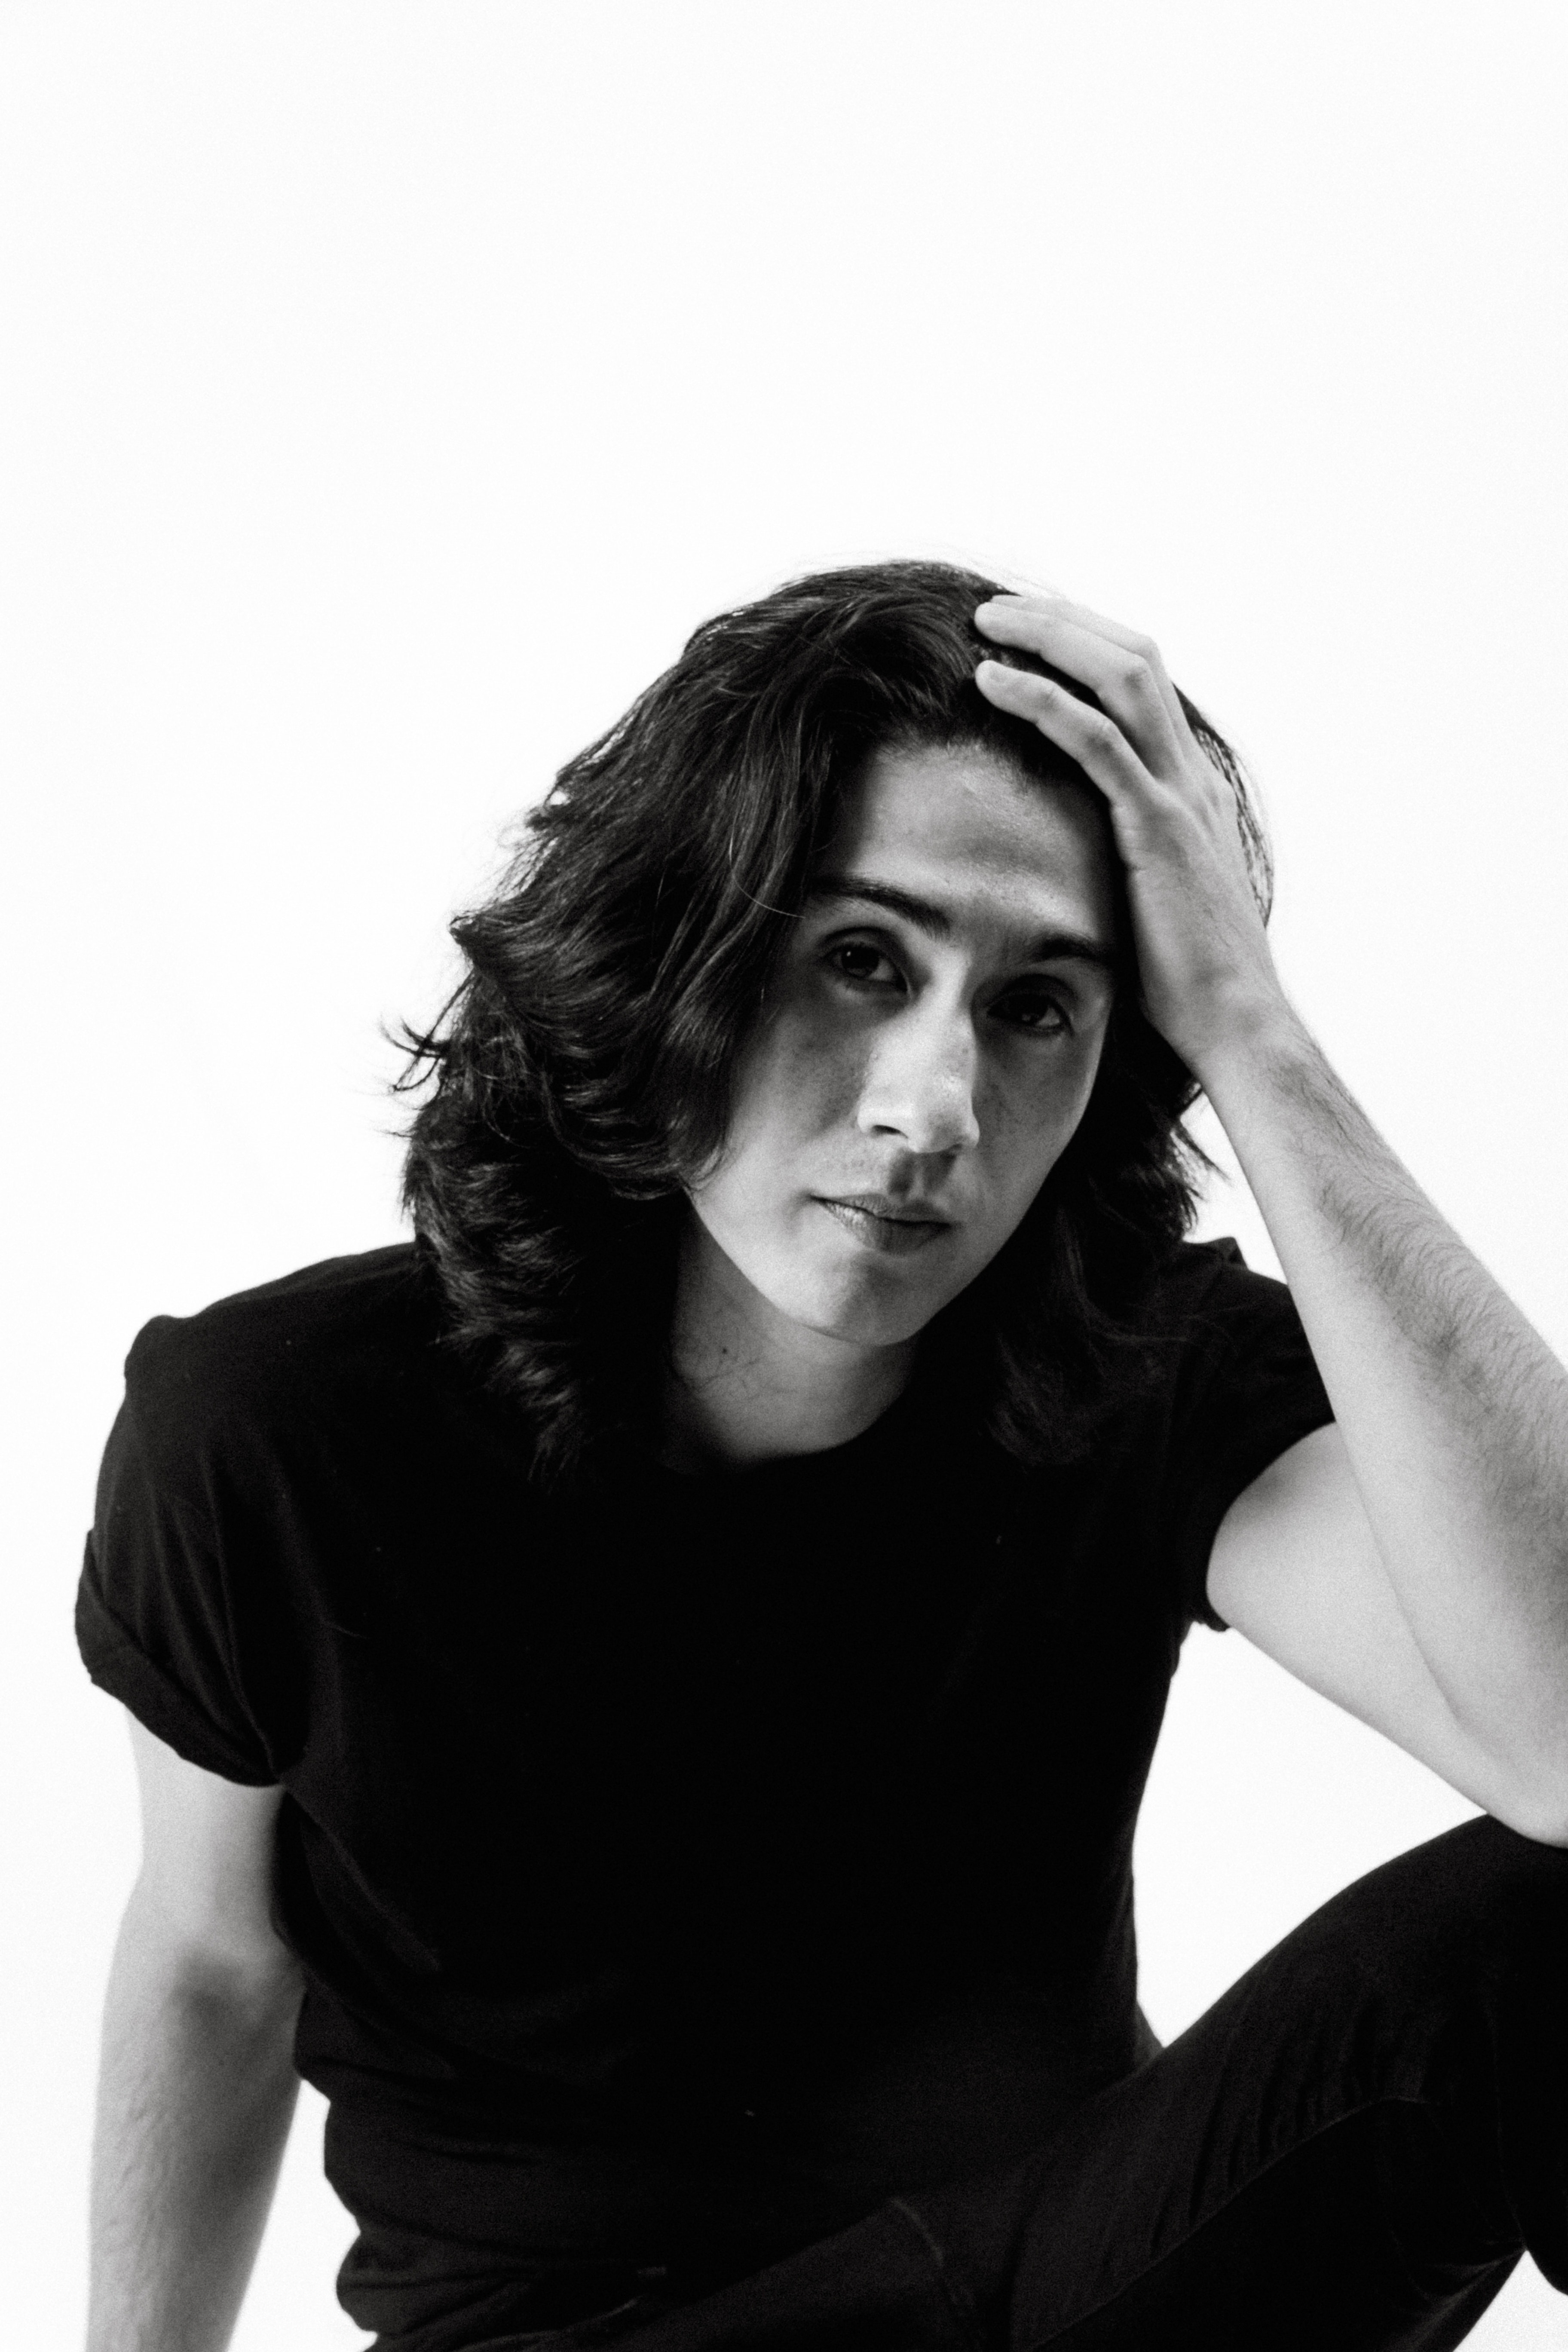
Photo by Wendy Wei from Pexels
Same thing with loop lighting, broad lighting, short lighting, and the other chiaroscuro techniques. In many instances, simply directing the portrait subject to turn their a little or tilt it one way or the other is all it takes to correct this portrait lighting mistake.
To be in control of this before even taking the picture, I either use continuous lighting or turn on the modeling lights of my strobes. Then, I will review the exposures in camera to see if any further adjustments are necessary.
Don’t take too long doing this type of image review, though. If you check after each and every click of the shutter or spend a long time reviewing, you’re likely to lose the confidence of your client or subject. And that is one of the most damaging of the common portrait lighting mistakes.
Losing the Subject’s Confidence
photo by Chris6 via iStock
The portrait subject, the person in front of your lens, is placing their trust in you as an artist and craftsman. They have confidence in you as a photographer that you know what you’re doing and are going to give them the results they desire.
The person whose picture you’re taking often knows nothing or little about portrait lighting or other portrait photography techniques. To them, that’s your job. If you’re spending their session time mucking around with your lighting configuration or chimping every shot, they won’t come back, won’t recommend you to others.
That’s not to say that you can’t review shots or adjust lighting. You still need to do that, otherwise you’ll make these other portrait lighting mistakes. Just be sure to have your basic lighting configuration set up and be confident enough in your own capability to show your own confidence to them.
Losing Your Confidence
Photo by Anna Shvets from Pexels
The worst of the portrait lighting mistakes is not having confidence in your ability, talent, or capacity to learn. You’re good enough, you’re smart enough, and dagnabbit, people like your photography!
Learn from your own mistakes how not to repeat them. Learn from the portrait lighting mistakes of others so you won't be making them in the first place.
Learn More:
We Recommend
Portrait Photography Tip: How to Create a Low-Key Portrait

photo byLookAod via iStock
When creating portraits, control of the lighting is an essential factor in whether it will turn out as a wonderfully artful portrait or merely as a snapshot of the subject.
Some of the basic lighting styles and configurations allow a photographer to control shadows, highlights, and contrast.
Beginner portrait photography tips show you common lighting configurations, or how to place the lights. They include Rembrandt lighting, butterfly lighting, short lighting, and broad lighting, among others.
Lighting styles can use all of the different configurations or setups, and are generally separated into high-key, mid-key, and low-key.
Table of Contents
- Portrait Photography: Low-Key vs High-Key
- How to Create a Low-Key Portrait
- Other Portrait Photography Tips
- Low-Key for High Quality
Portrait Photography: Low-Key vs High-Key
Most snapshots will fall into the range of mid-key. Averaging and evaluative metering modes in modern digital cameras tend to expose for a natural look.
High-key and low-key go beyond the average look. They are also sometimes referred to as mood lighting. A high-key image evokes a light and airy mood. Low-key feels subdued or dark, edgy even.

High-key image by Stephen Harker
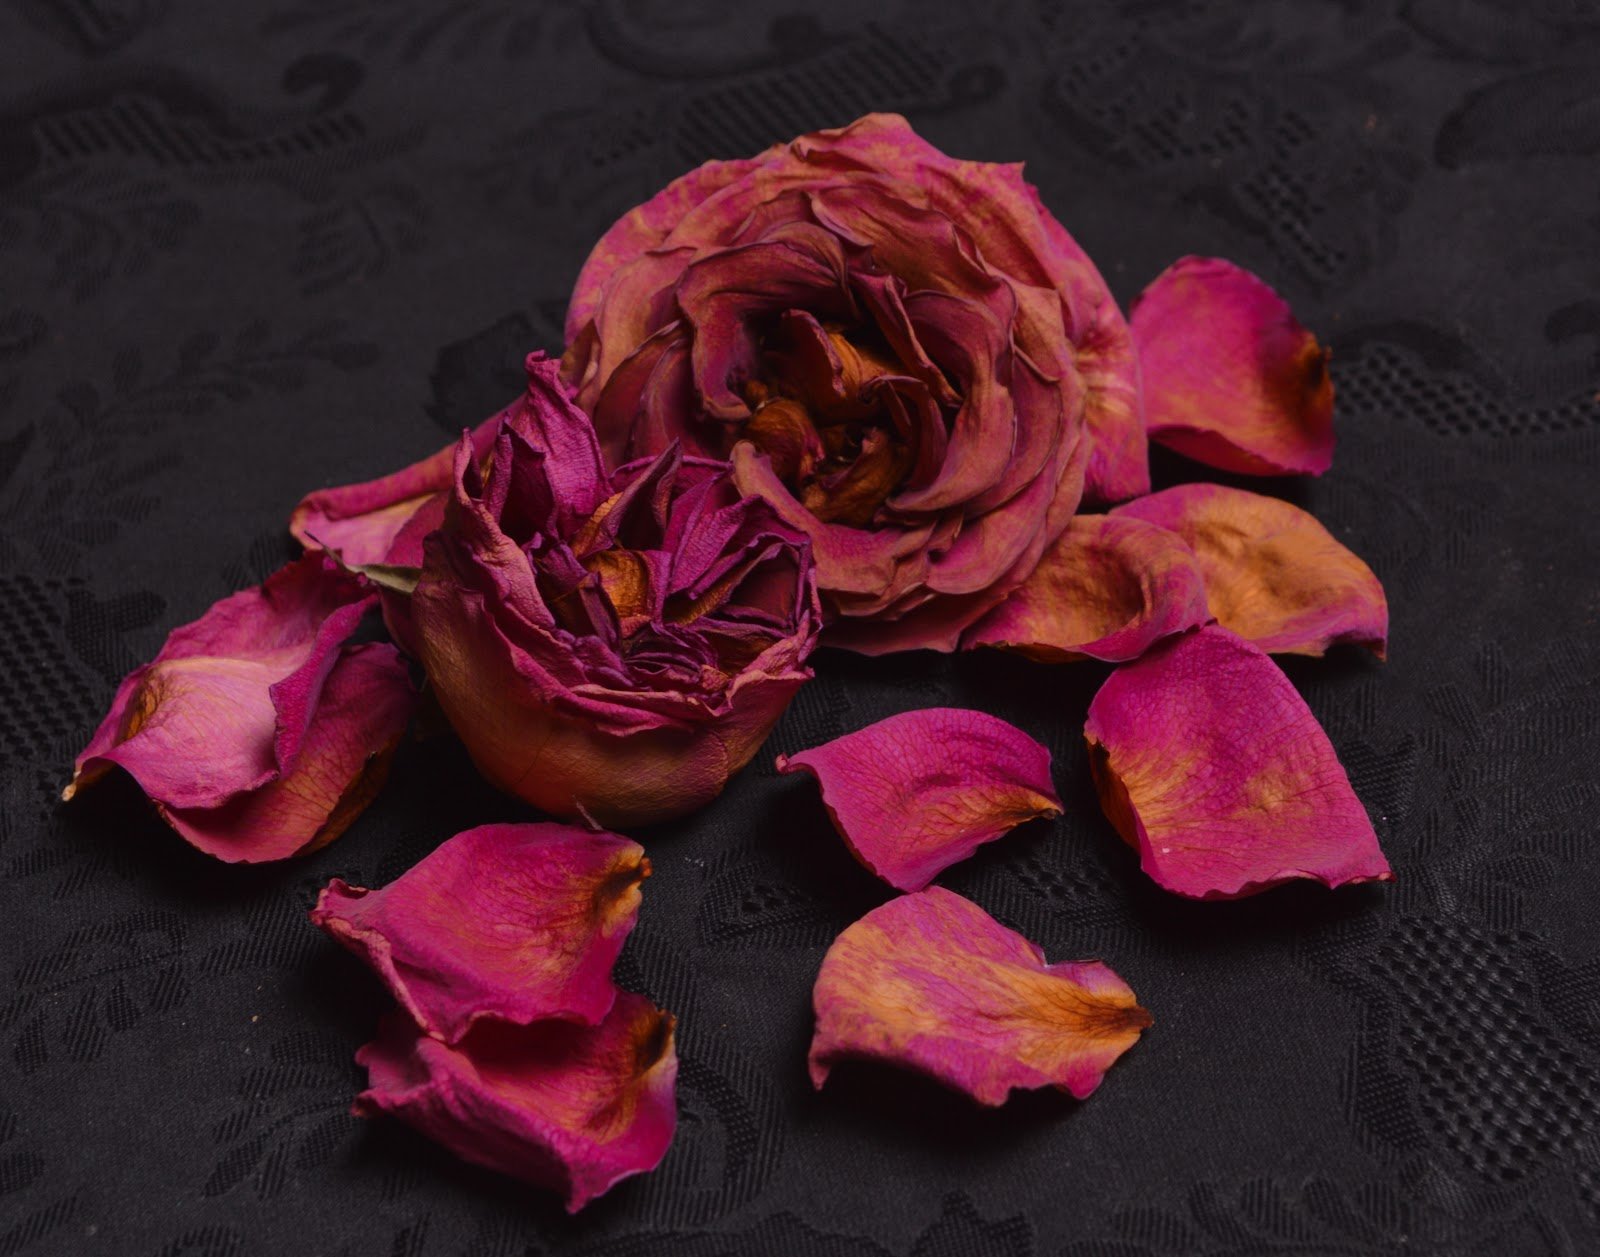
Low-key image by Stephen Harker
As an example of what I mean, take a look at two photos above of the same exact thing, one exposed for high-key and one for low-key. Both of them are properly exposed, but they have two distinctly different moods to them.
It’s All About Contrast
In order to achieve these moods, contrast is what needs to be controlled. Lighting ratio adjustment is one of the primary ways to control contrast.
Portrait photography tips sometimes skip over talking about high-key and low-key, even though they are teaching lighting ratios by showing the different lighting configurations.
photo byJenae Spriensma via iStock
To create a high-key effect, the contrast ratio needs to be lowered. This usually means that a low ratio of fill light to key light will be used. Ratios of 1:1, 1.5:1, or 2:1 make it easy to get the high-key look.
Generally, at least two lights will be used for high-key. A single soft light can also give you a high-key effect. Lighting the background also helps with creating a high-key effect.
photo byOtmarW via iStock
Low-key lighting is higher contrast. Ratios of 3:1, 5:1, or higher are useful for creating a low-key look. Just one light is needed, but multiple lights allow for more control of the ratios.
Exposure settings will need to be correct for the best results. One thought to get out of one’s head is that low-key is underexposed and high-key is overexposed. Both require proper exposure, just change the contrast ratios.
How To Create a Low-Key Portrait

photo byKangah via iStock
The secret to a great low-key portrait is using the right lights. You could use sunlight, provided you place the subject carefully.
A consistent way to get proper lighting for a low-key portrait is to use artificial lights. The two basic genres of artificial lights are strobes and continuous lights.
Strobes can be studio strobes, camera flash units, or portable strobes. Several current DSLR and mirrorless camera systems have remote flash metering and triggering, allowing for off-camera flash placement while maintaining exposure automation.
Continuous lights emit a steady light, so you can readily discern what your lighting ratios are while setting up the light or lights. I like the new breed of battery powered LED photo/video lights, such as the Hakutatz Pocket Size RGB+AW LED Light.
Learn More:
Rembrandt Lighting for Low-Key Portraits
photo byredhumv via iStock
One of the better lighting configurations for low-key portraits is the technique called Rembrandt lighting. Rembrandt lighting can be set up with one or two lights, even with window light. It creates the perfect ratios for low-key portraits.
This lighting technique is named after the Renaissance era painter Rembrandt Harmenszoon van Rijn. His portraits often had a low-key lighting effect with a specific pattern of light and shadow.
photo bymbbirdy via iStock
The key light is set about 45 degrees to the side of the subject and a few degrees above the subject’s eye level. Have the person face the light and then turn their head toward the camera until you see that triangle of light under the eye in the shadow.
Besides Rembrandt lighting, there are other lighting setups that work well for low-key portraits, such as loop lighting, a less specific style similar to Rembrandt, and split lighting, with about an even split between light and shadow.
Broad lighting and butterfly lighting can be used well for low-key portraits. Any of these can be done with multiple light sources if you want to play around with them.
Learn More:
The Advantage of a Small LED Light
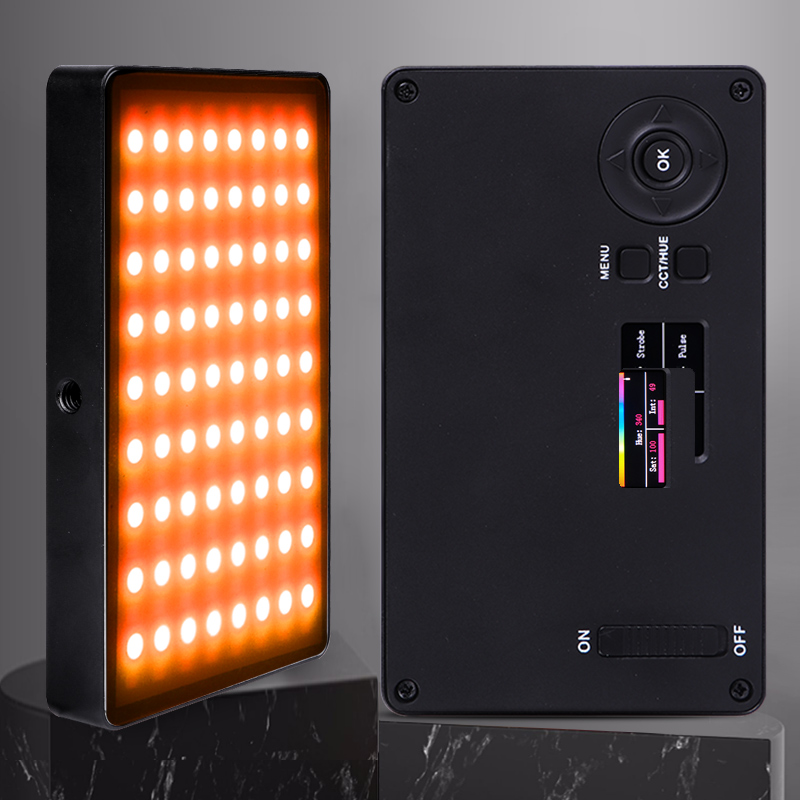
Looking for lights that are bright, portable, and easy to use led me to try these out. The battery life is pretty good, the LED bulbs are cool operating, and the color temperature of the light can be adjusted, all of which are plusses for a portable light for portrait photography.

Continuous lights like this one have an additional advantage. They can be used with smartphone cameras. Modern smartphones such as the iPhone 11 Pro, Google Pixel 4, and Samsung Galaxy Note 10 Plus have amazing capabilities for portrait photography.
The Hakutatz Pocket Size RGB+AW LED Light has an app that lets your smartphone control the light’s color and intensity. Multiple lights can be used, too. But this is just one of many high quality, small LED lights for photo and video.
Editor's Note: The Hakutatz Kickstarter campaign was a huge success! Their Amazon store will be open soon.
Other Portrait Photography Tips
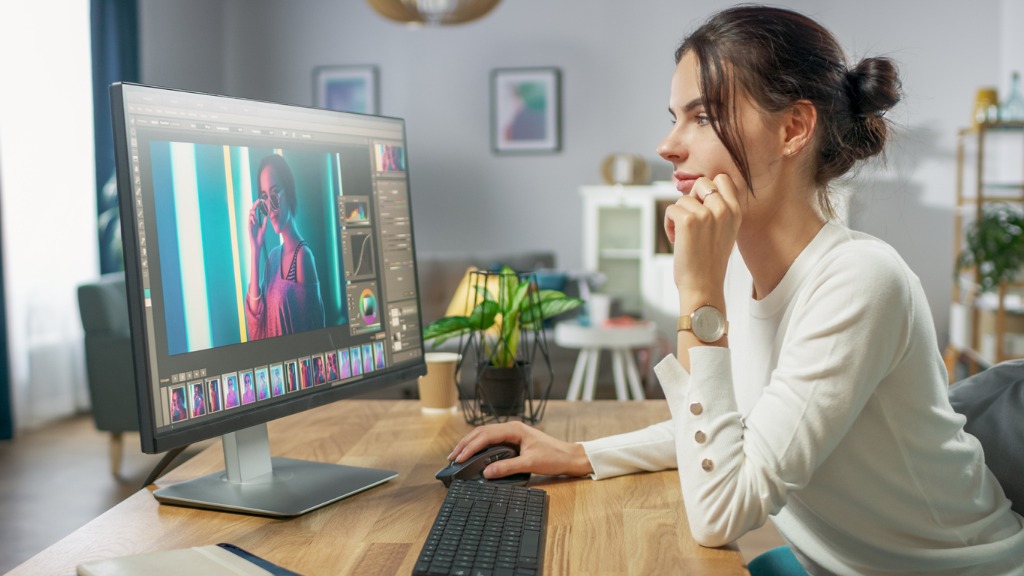
photo bygorodenkoff via iStock
Some other ways to increase contrast are with a post-processing programs or use snoots or spotlights instead of a softbox of other light diffuser.
You can also increase contrast by raising the ISO on the camera, which also can have the effect of increasing digital noise, resulting in a hard, grainy look to the finished portrait. Experiment to see how much each adjustment changes the final image.
Low-Key for High Quality

Photo by Dan Freeman on Unsplash
Despite the hard edge that low-key portrait lighting can lend to an image, one of the other effects is that it can generate an attitude of high-class luxury. This will also work with product photography and certain types of fine art photography.
Whether you’re using one of the new smartphones or a sophisticated DSLR or mirrorless camera system, give some of these ideas a try for low-key portrait photography.
We Recommend
Portrait Tips for Women
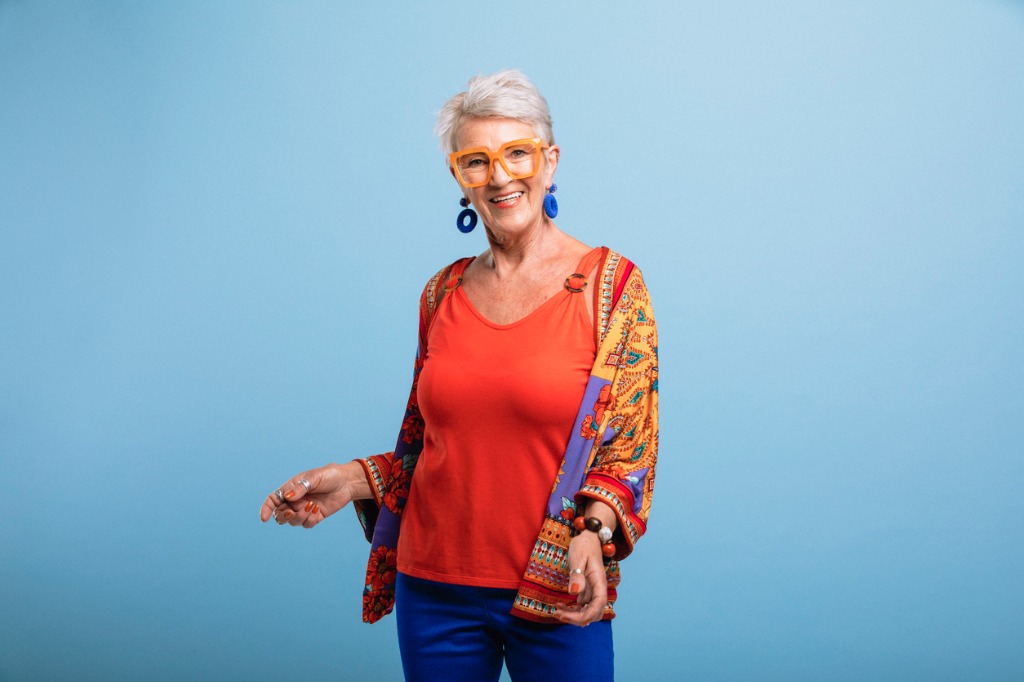
photo bySolStock via iStock
Portrait photographers love to make their subjects look good. Portrait lighting, exposure, and focus techniques are complemented by portrait posing tips for women. All of these work together to let us portray our subject in the most flattering way.
Making portraits of women is available for any photographer, male or female, young or old, professional or serious amature. Knowing how to pose female subjects gives us the power to control most of the variables that could affect the finished image for good or bad.
Look in some of our articles for advanced and basic tips and techniques concerning portrait lighting, selective focus, and composition. For this discussion, we’ll concentrate on posing tips for portraits of women.
Some of these portrait posing tips are focused on what you can do before the photo shoot begins and others will highlight how to pose female subjects while you’re in the photo shoot.
Find Their Good Side
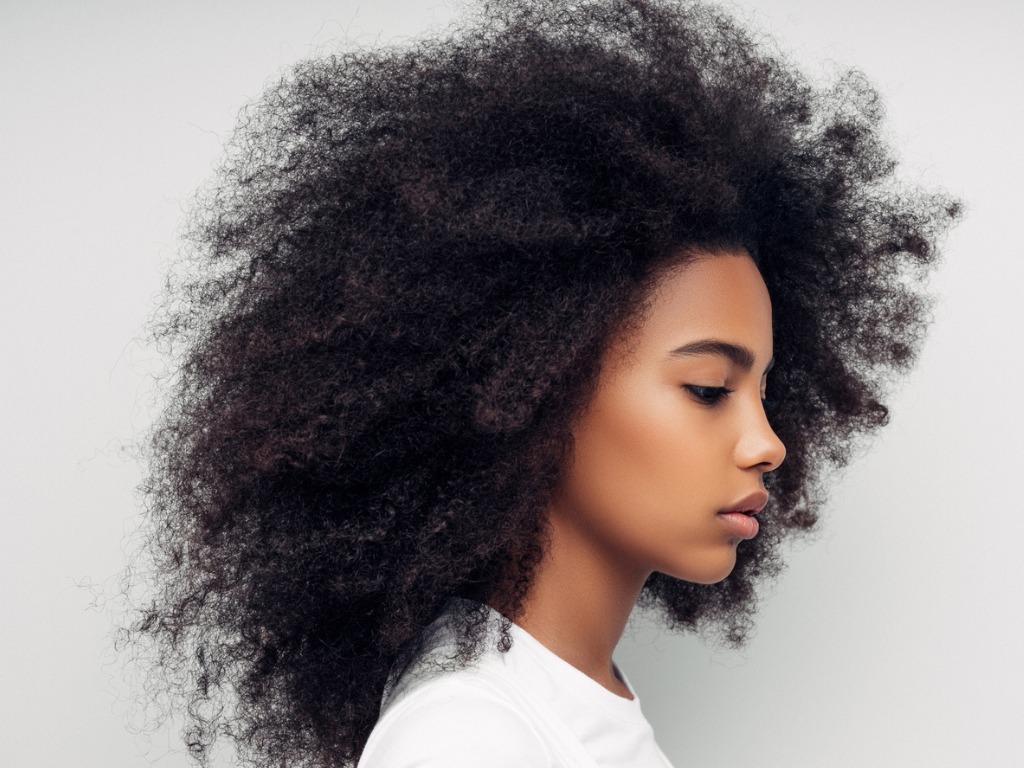
photo byCoffeeAndMilk via iStock
Almost everyone knows which side is their good side. In portraits of women, this works in regards to their face and also their figure. Just ask your subject . And then play to that perceived strength of theirs, providing good direction of course.
This will have an added benefit of giving the portrait subject a good reason to trust you. Trust that you will be delivering a portrait that they will enjoy and feel comfortable sharing.
Look At a Portrait Posing Guide
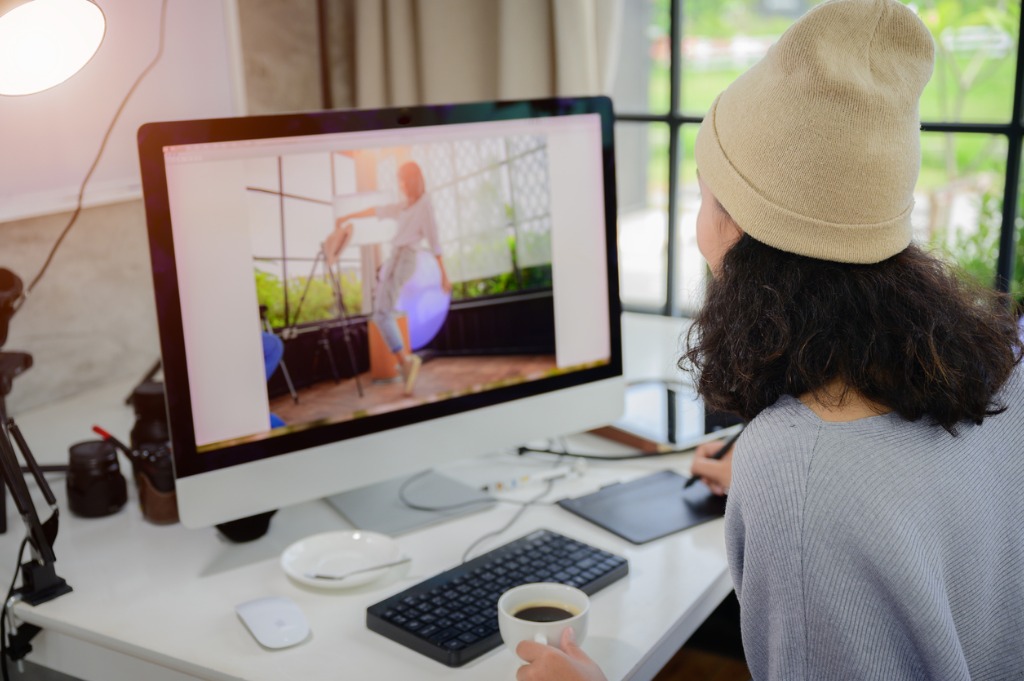
photo by Iam Anupong via iStock
To find out how to pose female subjects, I like to look at the work of other artists. Usually I find some inspiration for posing, composition, and for lighting. I also use preprinted posing guides.
Posing guides can be found in electronic form, too. An advantage of using posing guides for portrait posing tips is that a picture speaks a thousand words. Instead of attempting to describe how you want the subject to pose, show them.
Consult or Use Hair and Makeup Pros

photo by Drazen Lovric via iStock
A lot of photographers have arrangements with other artists to perform work for each other. Or, you might offer discounts to each other for the services needed. The portrait subject might have friends or a regular beautician they go to.
Any way it works, making use of a hair and makeup professional before a photoshoot is a good idea. Many women do a great job on their own, but professionals have tips and tricks of their own that will give better results.
Choose the Right Lens
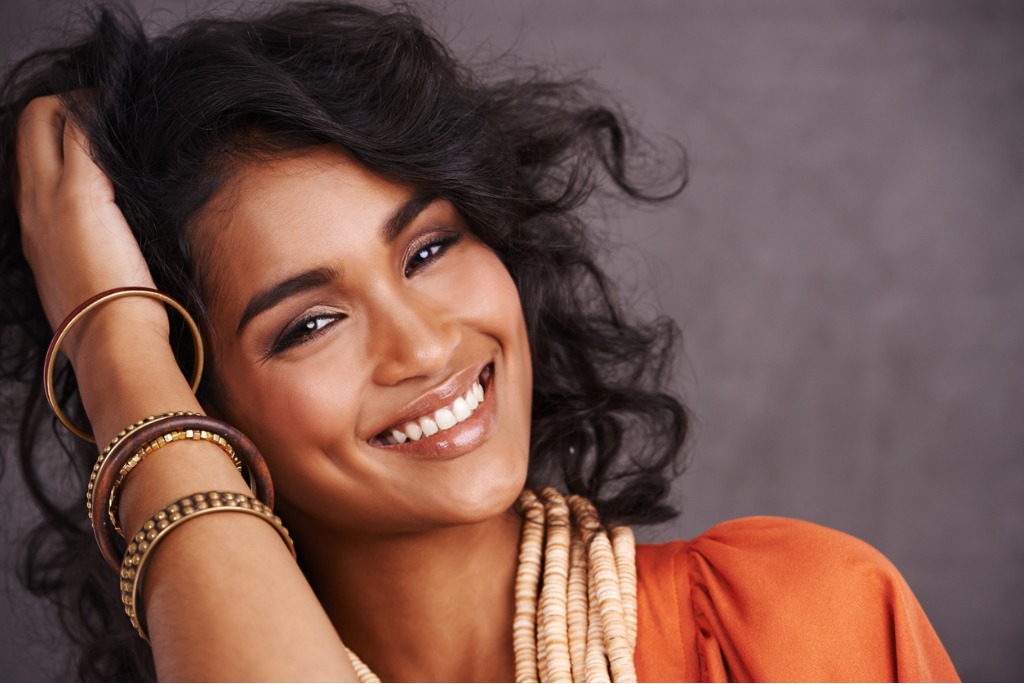
photo by PeopleImages via iStock
As with any portrait subject, the right lens will give you the best options for your intended results. You will have a pretty good idea of what results are desired by you and the portrait subject. For portraits of women, the lens choice will also depend on what type or style of composition you want.
Portrait posing tips for women or men show us that the focal length of the lens can make a huge difference in the type or style of image you end up with. If you want a head and shoulders portrait, you would likely use a short telephoto lens. For full length portraits of women, a normal lens or a slight wide angle may be a better choice.
Another option for portraits of women is the environmental portrait. A slightly different set of portrait posing tips or posing guides are helpful for this style of portrait. Environmental portraits are a wonderful way to have a subject tell a story about themselves.
Learn More:
Light It Properly

photo by shapecharge via iStock
Some of the most valuable portrait posing tips take into account how you relate the lighting configuration to the composition and how to pose female subjects.
When taking environmental portraits of women in their own homes or offices or anywhere outside of your own studio, controlling the light can be a major concern. SMall, battery powered, portable LED lights are extremely useful tools for our on location portrait sessions.

A versatile and high quality version of this type of light is the Hakutatz LED light. One of the biggest advantages this light has, besides its small size and correct color temperature adjustment, is the ability to control its functions from your smartphone.
You will need to relate the lighting configuration to your posing thoughts ahead of time and then adjust during shooting as need be.
Warm Up and Relax
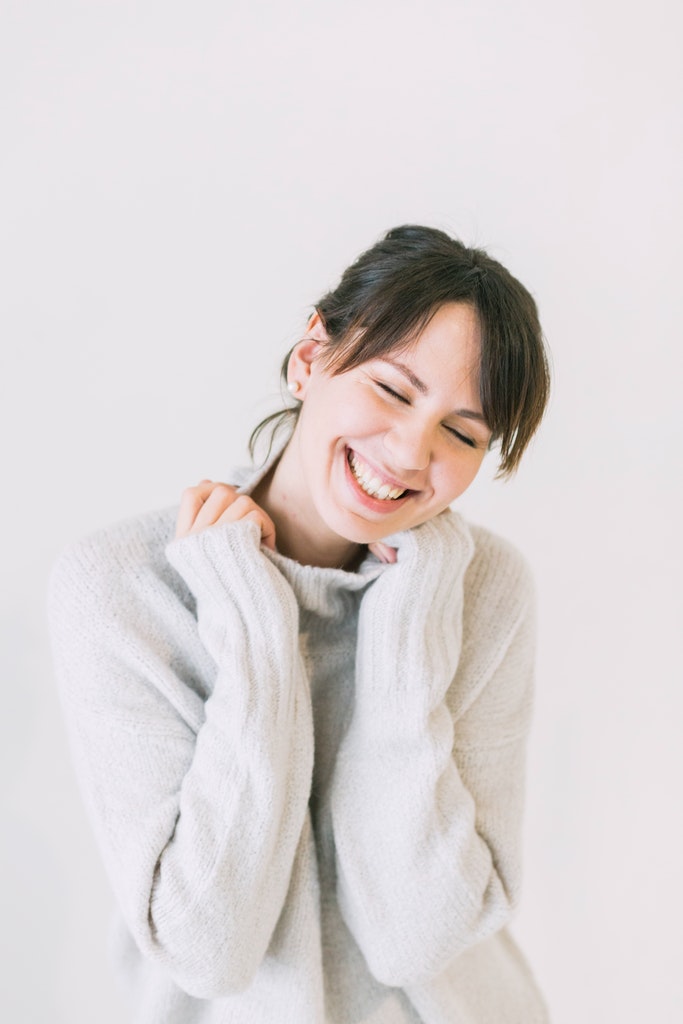
Photo by Daria Shevtsova from Pexels
Ambient temperature notwithstanding, an important portrait tip is we want to have our subject warm up to us so they are relaxed during our photo session. As the photographer, you need to relax, too.
Since you will be verbally directing the subject into various positions and poses, having a rapport with the subject will allow you to get the subject to follow your direction and your own portrait posing tips.
Don’t Get Too Close
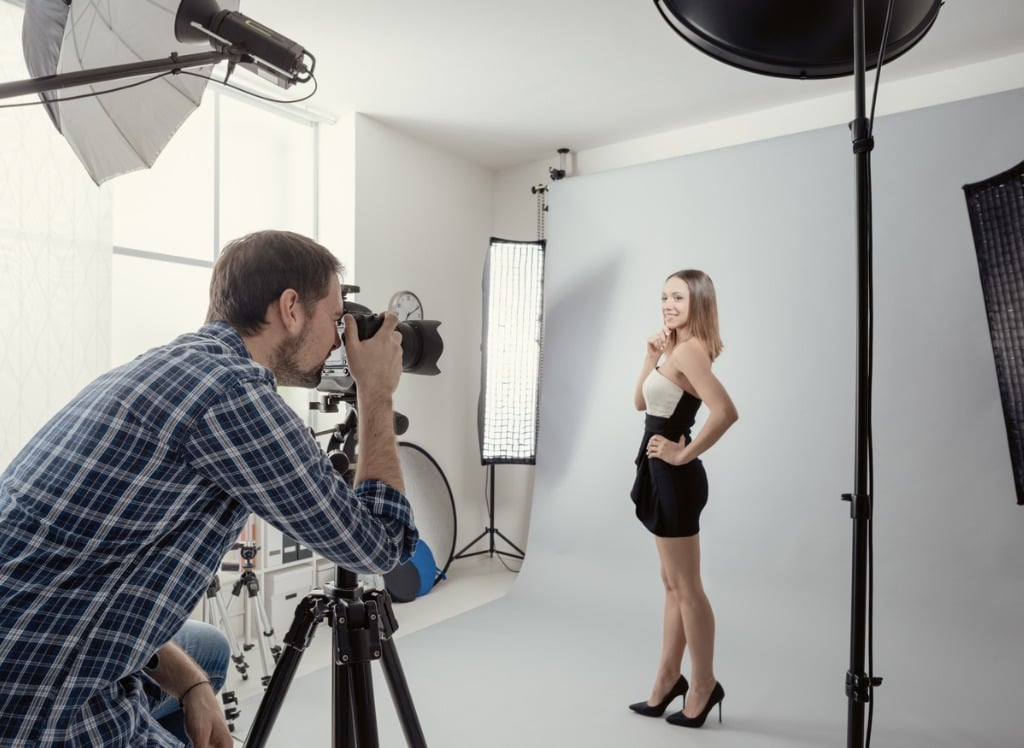
photo by demaerre via iStock
A common failure of snapshots as opposed to good portraits is being physically too close to the subject. We can generally obtain a better apparent perspective by using a longer lens and having some distance between us and the subject.
Keeping a little distance can add an air of professionalism to our session as well. An important portrait posing tip is that people are generally somewhat protective of their personal space. Intruding on the space can reduce all the relaxation we worked so hard to create.
You don’t want any lights you’re using to be too close either. Even with tiny portable lights, if you have a lamp with enough power, like the Hakutatz LED light, you can simply dial up the power level to adjust for movement of the subject. Which relates to the next of our portrait posing tips for women.
Keep Them Moving
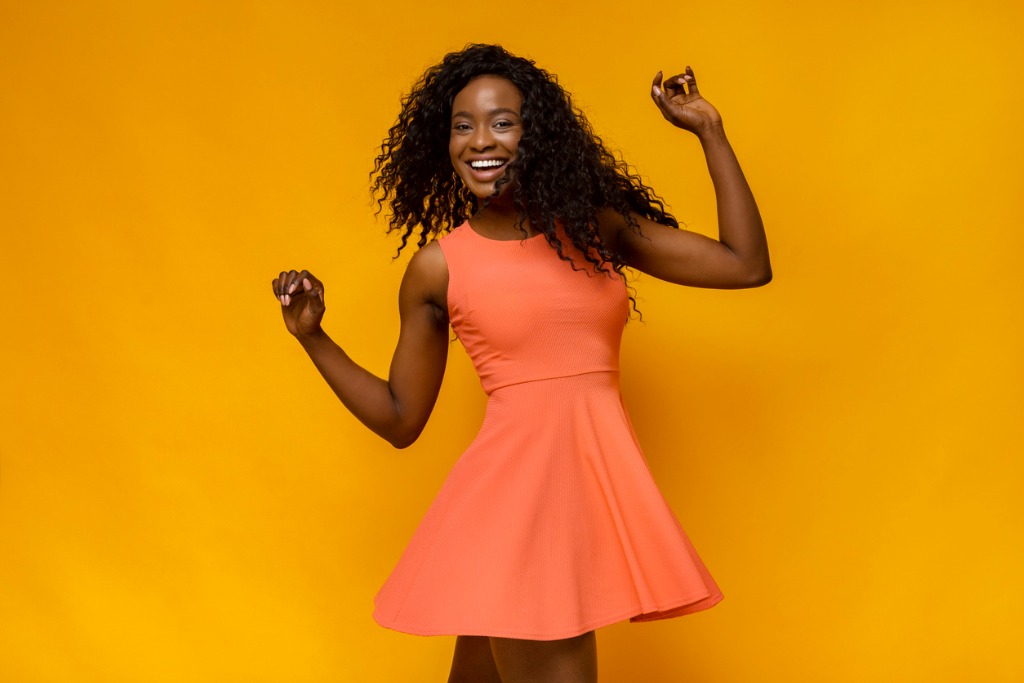
photo by Prostock-Studio via iStock
As you’re triggering the shutter, keep talking to your portrait subject, and keep them moving in and out of different poses and compositions. A good rule of thumb is to have them change something after every time they hear the shutter.
Tilt and Pivot
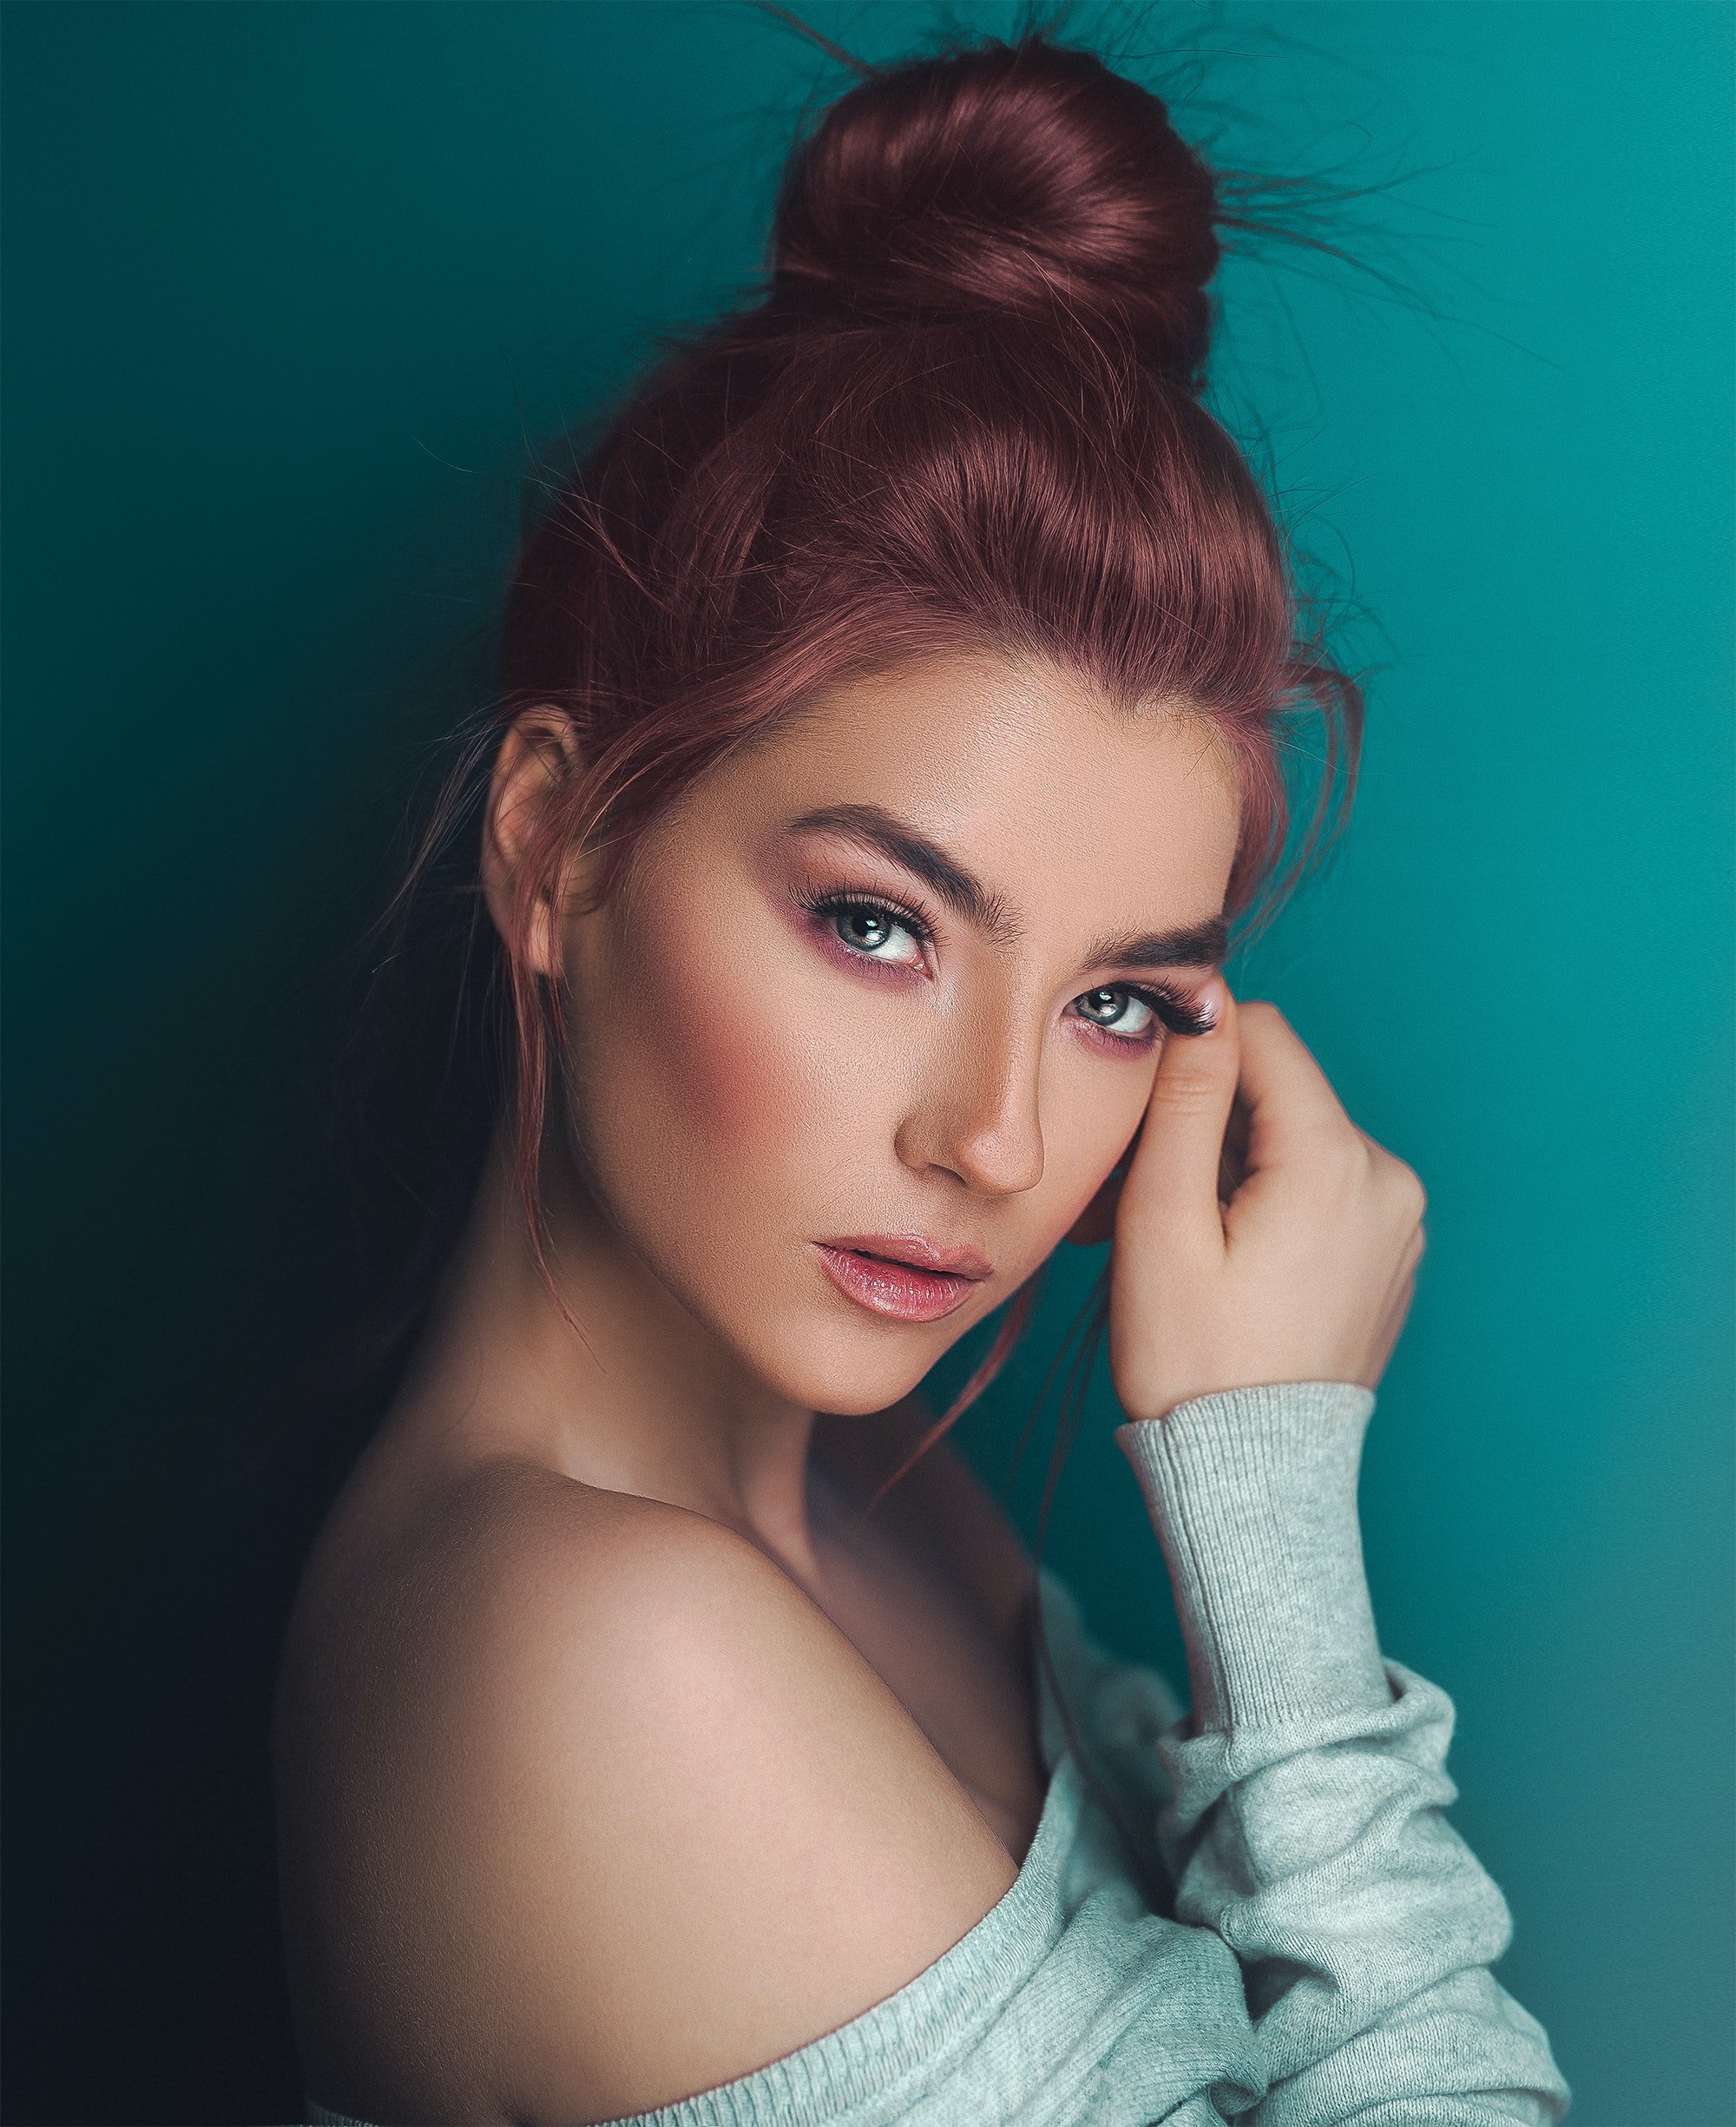
Photo by Ali Pazani from Pexels
What movements do you want from the subject? I like to tell them to tilt and pivot. If you have already discussed some portrait posing tips for women with them, you can give them some guidance for what poses to move into.
Tilt the head and pivot the torso. Tilt the torso and pivot the head. Tilt and pivot legs, feet, wands, arms. If you have the subject relaxed, they will fall into poses that feel natural to them. The biggest responsibility for the photographer at this point is to make sure their poses stay flattering and to also ensure your camera and light placement stays in positions that will enhance the portraits.
Review the Images Before Ending Session

photo by fizkes via iStock
One last thing that often helps, especially in environmental portraits of women, is to review a few of the images with your client. Some photographers don’t like to do this step, and that’s fine. What I like about this step is that I can give the portrait subject assurance that all went well. I also get to reassure myself that I captured images that really favors the subject.
Using these portrait posing tips for women will result in your images being flattering to the subject as beautiful portraits.
Learn More:
We Recommend
Practical Portrait Photography Tips for Photographing Your Teenager
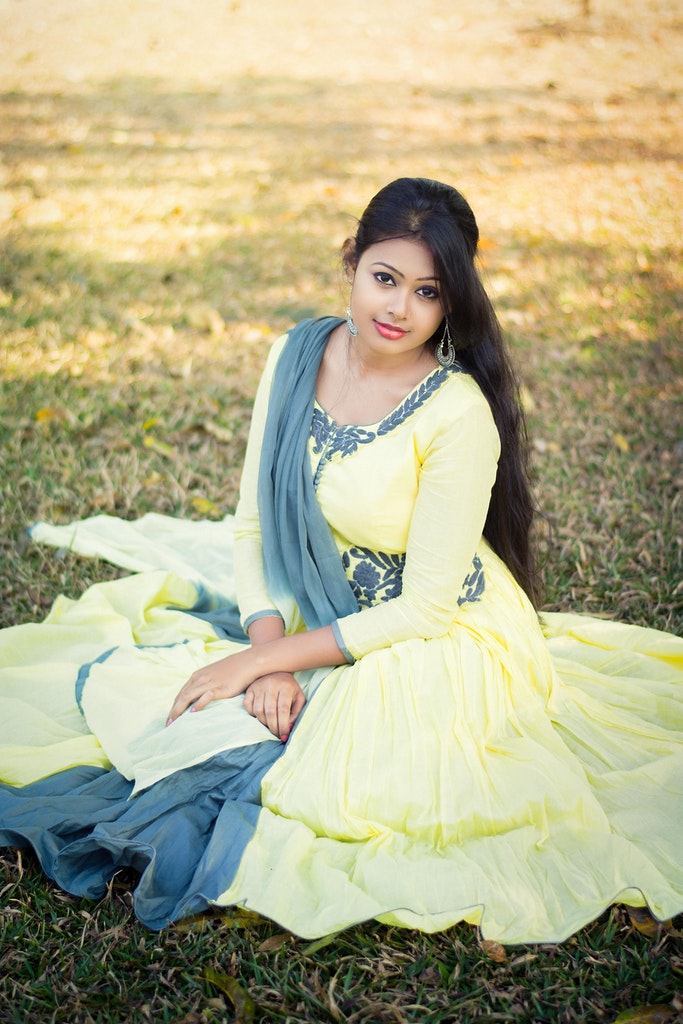
Photo by Joy Deb from Pexels
Your child has probably been a portrait subject of yours since birth, maybe even before.
Now that they are teenagers, the opportunities for making portraits continue. In fact, the opportunities increase!
The portrait photography tips provided below for making images of your teenagers are simple to implement. Use these tips to improve your photos and make images that you and your child can appreciate.
How to Photograph Teens
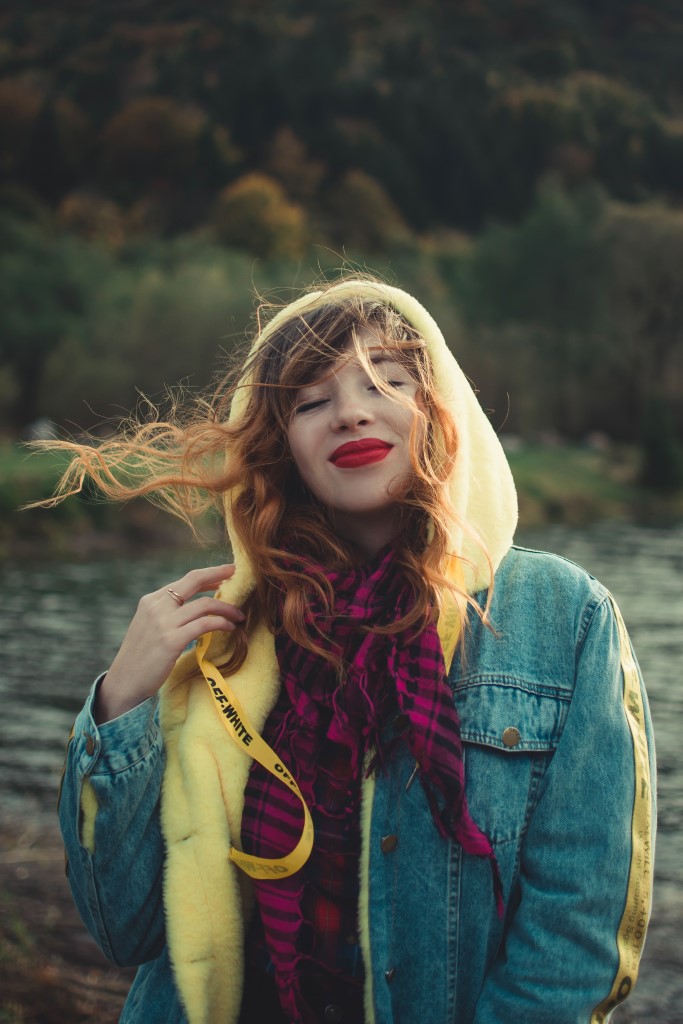
Photo by AndriyKo Podilnyk on Unsplash
Creating a pleasant portrait of a teenager is easier than you might think.
Part of the beauty of youth is just that, the beauty of youth. Using high-quality equipment, implementing the rules of composition and good posing, and making good use of portrait lighting techniques will give you great portraits of the young men or women in your family.
Photographing teens could also be a decent source of income by means of senior portrait sessions.
Senior portraits are one of the most desirable pictures teens and their parents are wanting at that momentous time of their life where they are transitioning from the life of high school to the adult world.
Let’s have a look at some top tips on how to photograph teens.
Recommended Portrait Lighting Reading:
- Picture Perfect Lighting: An Innovative Lighting System for Photographing People
- The Dramatic Portrait: The Art of Crafting Light and Shadow
- Portrait Photography: From Snapshots to Great Shots
Poses For Teenagers
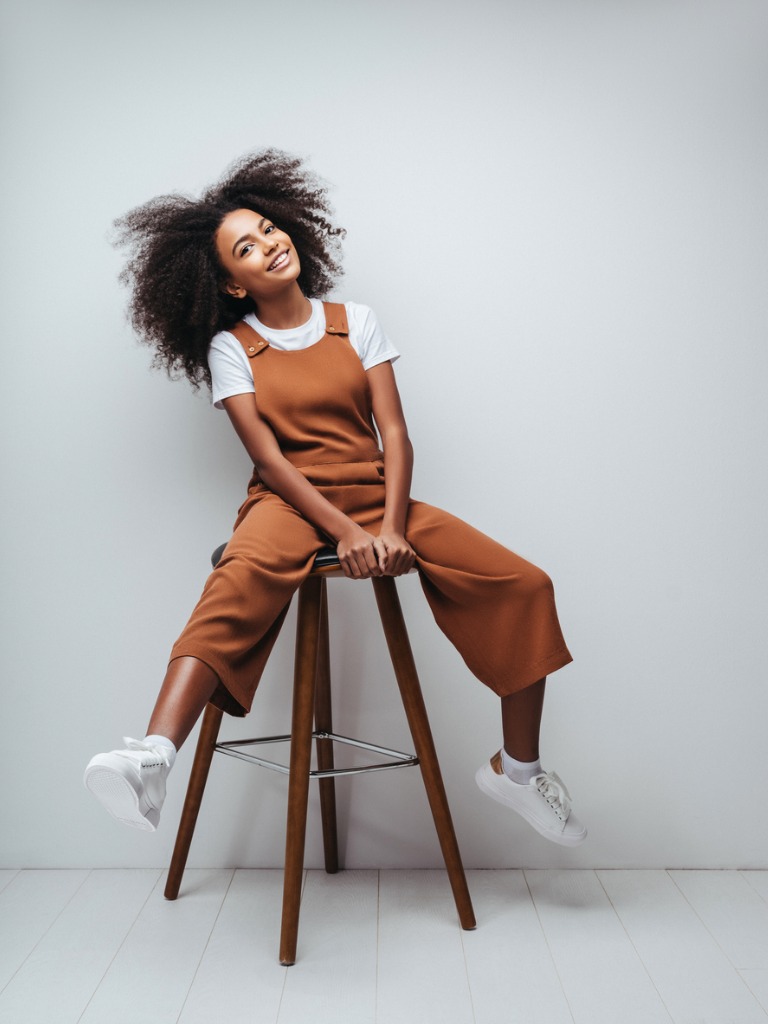
photo byCoffeeAndMilk via iStock
One of the more difficult aspects of how to photograph teens is finding poses for them that don’t make them feel self-conscious.
A couple of general or all-purpose portrait photography tips that I am fond of are to give subjects something to do with their hands or to turn your session into a lifestyle portrait.
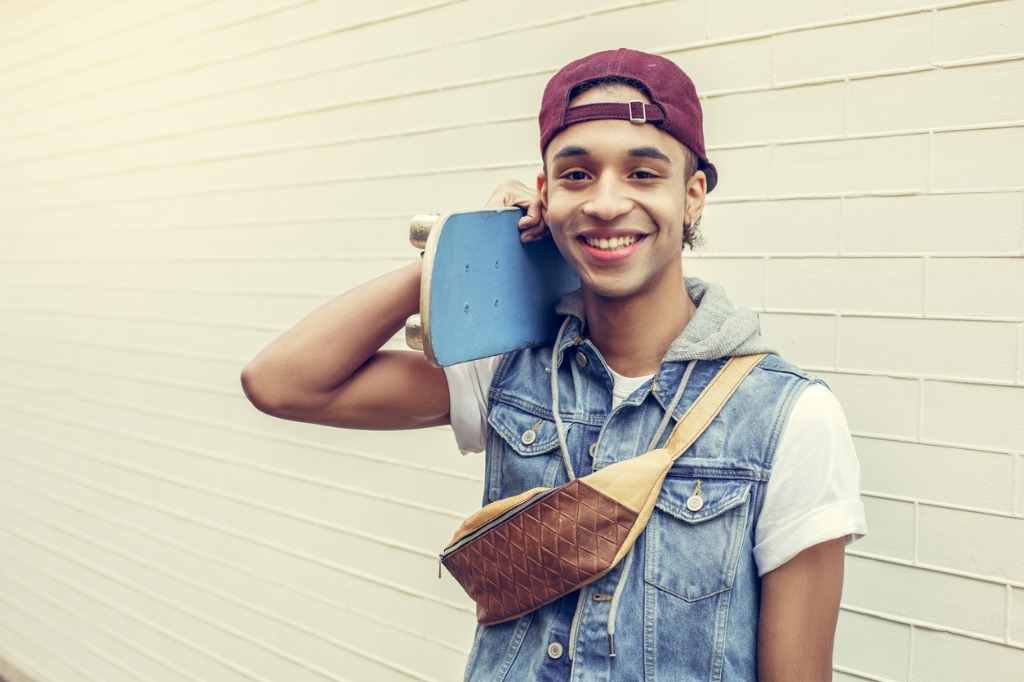
photo by Sergii Gnatiuk via iStock
Both of these options help cross that huge gap that sometimes exists between the subject and the lens. Putting the subject at ease is another method that results in pleasant, natural-feeling poses.
Sometimes all that’s needed is to hand your portrait subject one familiar item. When I try out this method, I like to stay away from any gender stereotyping. If a young woman enjoys auto mechanics or drafting, or if a young man is an amazing artist or dancer, play to their strengths
Above all, whatever method or technique used, poses for teenagers should feel comfortable for the young subject. A self-conscious person or a person forcing a pose will both appear uncomfortable and unnatural. In my experience, this applies especially to teenagers and younger people.
photo by AndreyPopov via iStock
Find out what works for you. Work with teenagers you know, perhaps relatives or your own children, or the kids of your close friends.
Once you figure out what is beneficial for your style or brand of photography, branch out to others if you want to start making great senior portraits.
Included in my personal tips for photographing teens is this safety message: Please stay off of train tracks. Several reasons…They are dangerous. It’s illegal trespassing in many jurisdictions. The pose on a train track image is passe and cliche anyways. Stay safe!
Learn More:
Portrait Lighting Tips for Teenagers
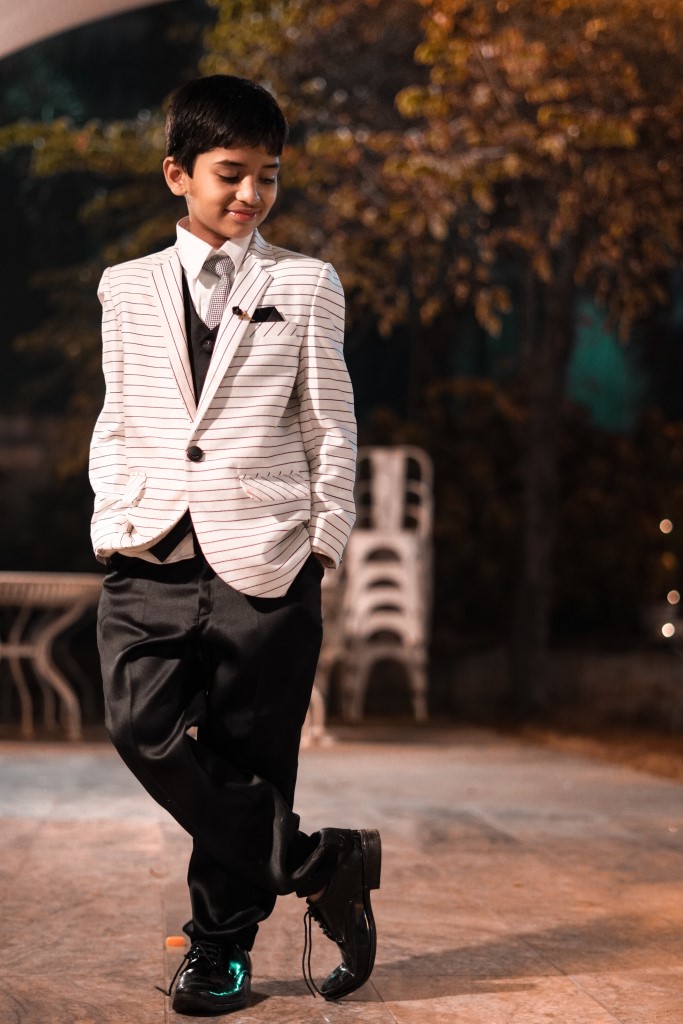
Photo by Tavqeer Athar from Pexels
Most of the standard lighting techniques for any style of portrait will suffice. A lot of times, instead of attempting to employ a specific technique or configuration such as Rembrandt lighting or broad lighting, I will go with the feel or atmosphere desired by subject and photographer.
Primarily, I will attempt to create either high-key or low-key images. The main difference between the two is contrast. High-key lighting will have small ratios of key to fill light. Common ratios are 2:1 or 1:1. The colors don't have to be bright or the image overexposed, just a low lighting ratio.
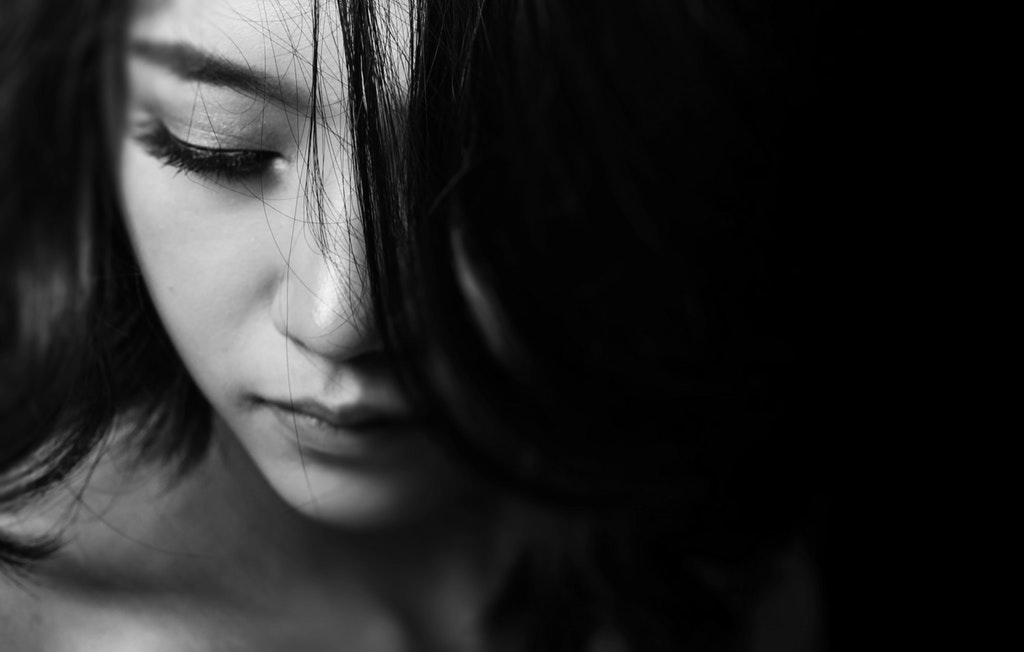
Photo by NEOSiAM 2020 from Pexels
In contrast, a low-key effect will have higher ratios, such as 3:1, 5:1, or higher. To keep it simple, high-key has low lighting ratios, low-key has high lighting ratios.
These two styles create a mood more than they do anything else. Regardless of colors or scene brightness, high-key tends to come across as light and airy, while low-key is somber and serious.

Artificial lighting is often the real key to achieving either of these lighting and exposure styles. An easy to use, portable, high quality I’ve been enjoying lately is the Hakutatz Pocket Size LED Light. It has excellent color and brightness, is completely variable in power and color output, and can be controlled by a smartphone.
One or two continuous lights, strategically placed, can give you complete control over style, mood, and exposure. If you’ve been searching for a portable light with excellent color and brightness, consider the Hakutatz LED Light.
Photographing Teens Can Be Fun
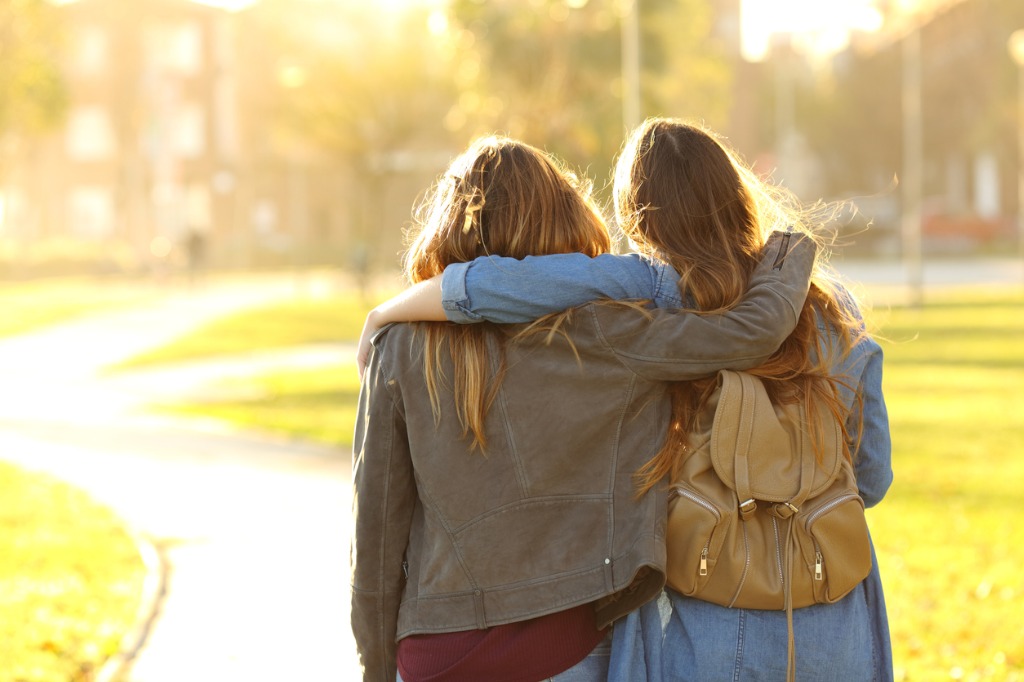
photo by AntonioGuillem via iStock
It can also be a profitable endeavor, if that’s what your intent is. Senior photography is one of the fastest growing and changing genres of portrait photography. Present some examples of your own quality imagery and you could be very busy during graduation season.
Making fun or moody portraits of your own teenage children can provide years of family interest and happy memories. It’s surprisingly easy.
Photo by JT Kim from Pexels
To sum it all up: give them comfortable posing direction, light it properly for whatever style of image you’re trying to make, make use of the tips and techniques of exposure, lens selection, and composition you already know, and put your subject at ease. Also be sure to check out the “Learn More” links in this article for even more guidance.
Following and expanding from these portrait photography tips will result in portraits you will treasure for years to come.
Learn More:
We Recommend
Quick Tips for Better Portraits of Kids

photo byDanielBendjy via iStock
Everyone loves taking pictures of their kids or having pictures done of their kids. If you are taking portraits of kids for yourself or for others, there are some tips and ideas we have found helpful concerning how to photograph kids.
Child photography tips and ideas will help us get better images of kids. Posing tips for kids, portrait lighting ideas, techniques for action photography, equipment choices, and other child photography ideas give us the tools to capture excellent images.
Start With Familiarity
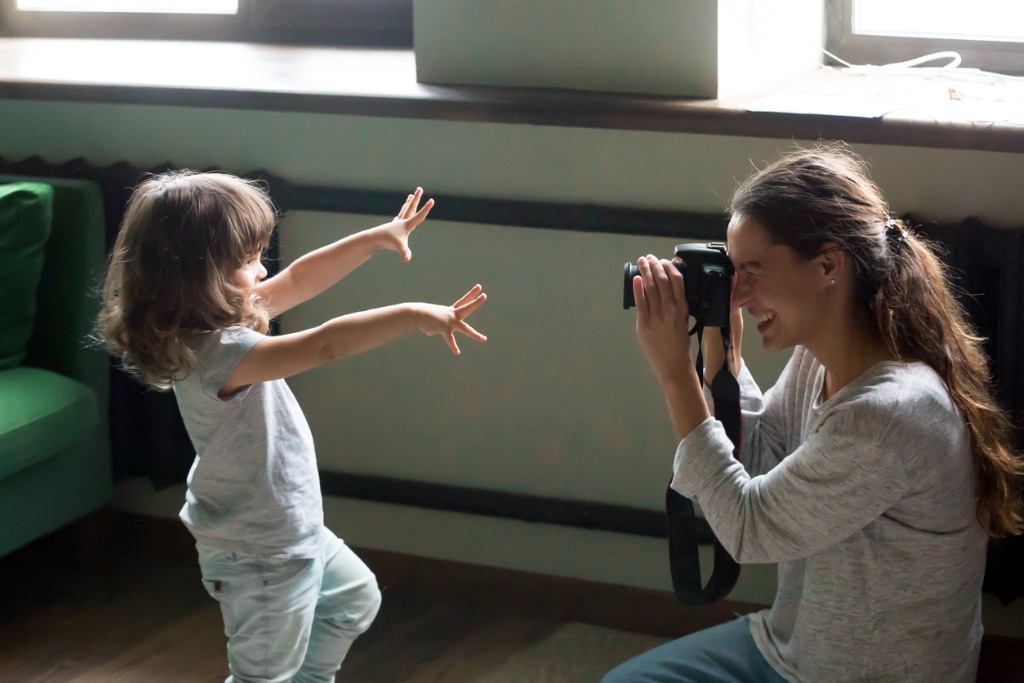
photo byfizkes via iStock
As with most attempts at portraiture, making really good portraits of kids requires a little bit of knowledge, or familiarity, of our photographic equipment, the basic rules and methods of good photography, and of our subject.
General child photography ideas and tips are similar to our other photographic endeavors. Being very familiar with the controls and features of our camera and other gear is vital. How can we expect to fully know how to photograph kids well if we’re still unsure of what exposure or focus mode to use to achieve particular results?
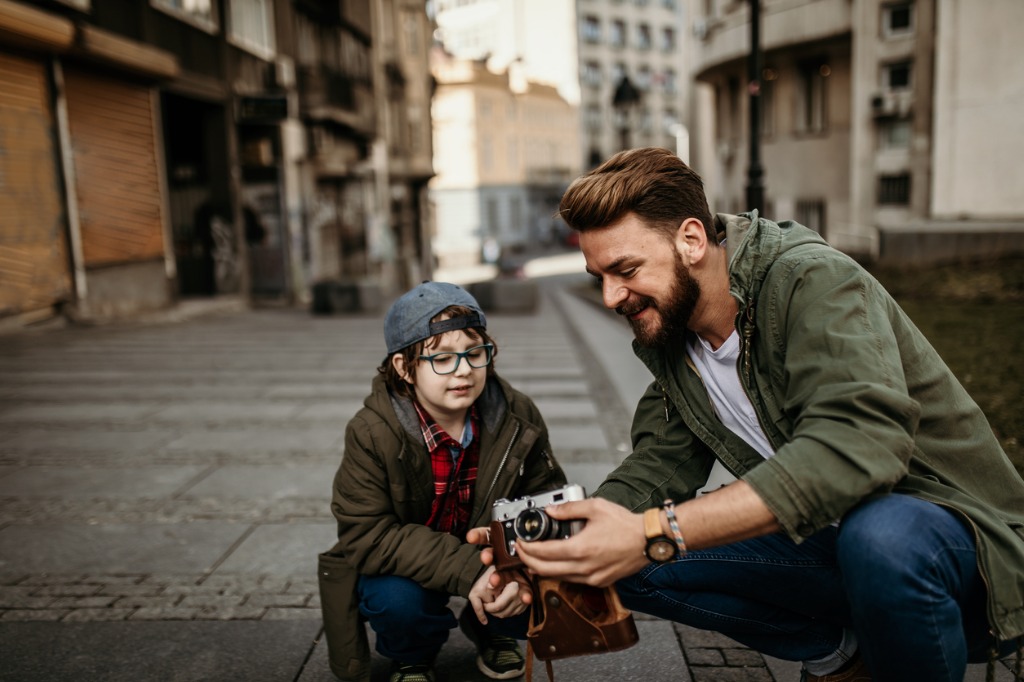
photo byanandabgd via istock
Thankfully, it’s not hard to learn how to use the modes and features of our gear. All it really takes is a little time and practice. If the kids are your own kids, use them as willing and fun subjects while getting familiar with your camera, lens, flash, portable lighting, filters, and other neat stuff.
Taking portraits of kids for other people is going to feel a little bit different than with your own children. Taking a little time to get familiar with your young subjects will pay off big time with great results. If you don’t already know them, chat with them and their parents. Be friendly and warm, holding the camera up for them to see.
If the kid is comfortable with you, the poses and expressions are going to be more natural and relaxed. They will also be more open to taking direction from you about changing position and expressions. All of this will result in better portraits of kids.
Portrait Lighting for Kids
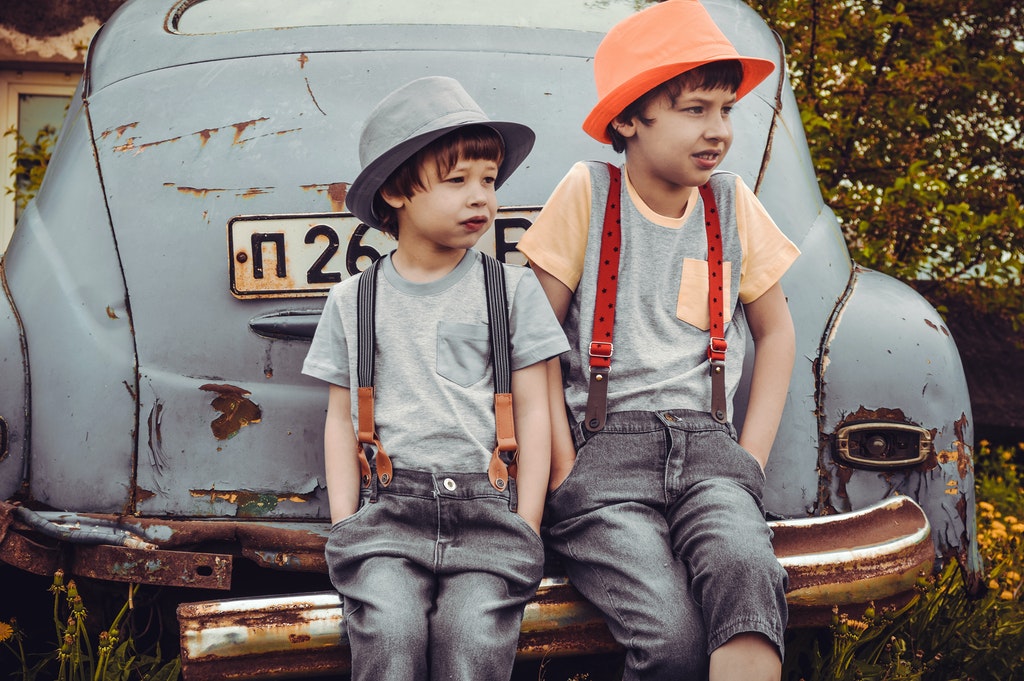
Photo by Victoria Borodinova from Pexels
Once again, the same portrait lighting tips for adults will mostly cross over to taking portraits of kids. The one thing I like to do is to keep it as natural appearing as possible. So, this pretty much eliminates the dramatic lighting configurations such as Rembrandt lighting and other techniques such low key effects.
That’s not to say that you shouldn’t ever take portraits of kids with these techniques and configurations. You may have a certain look or style that will mesh well with the intended subject. Personally, I love Rembrandt lighting and other similar styles on a wide variety of subjects, even pets, but speaking for general kids pics, natural seems to work best most of the time.
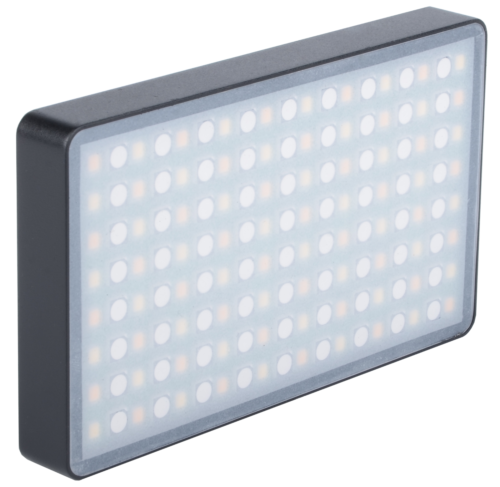
In the studio or in the field, I have come to value lightweight, cordless, simple lighting gear for portraits of kids. Portraits of children often involve a lot more movement than portrait sessions with adults. So, lightweight and portable are key factors for portrait lighting gear.

A light I have been extremely pleased with since it was first introduced on Kickstarter is the Hakutatz LED light that is battery powered and can be controlled by my smartphone. The Hakutatz LED light is very lightweight, has excellent control functions, and emits clean, high-quality light.
Learn More:
Environmental Portraits of Kids

photo bysam74100 via iStock
An excellent way to get a natural look for portraits is to shoot in an environment that is not your studio. Especially with kids, there’s just something about a studio set up that stiffens them up.
A local park or playground, a baseball or football field, a flower garden, or their own backyard are fantastic spots to take environmental portraits of kids. Inside their own home is another option, valuable to consider during bad weather.
The spot you’re using for the pics should be either the kid is very familiar with or that makes them feel comfortable and relaxed. Some of my favorite spots are neighborhood parks that tend to have multiple features, such as flowers, trees, grassy areas, and playground equipment.
Posing Tips for Kids
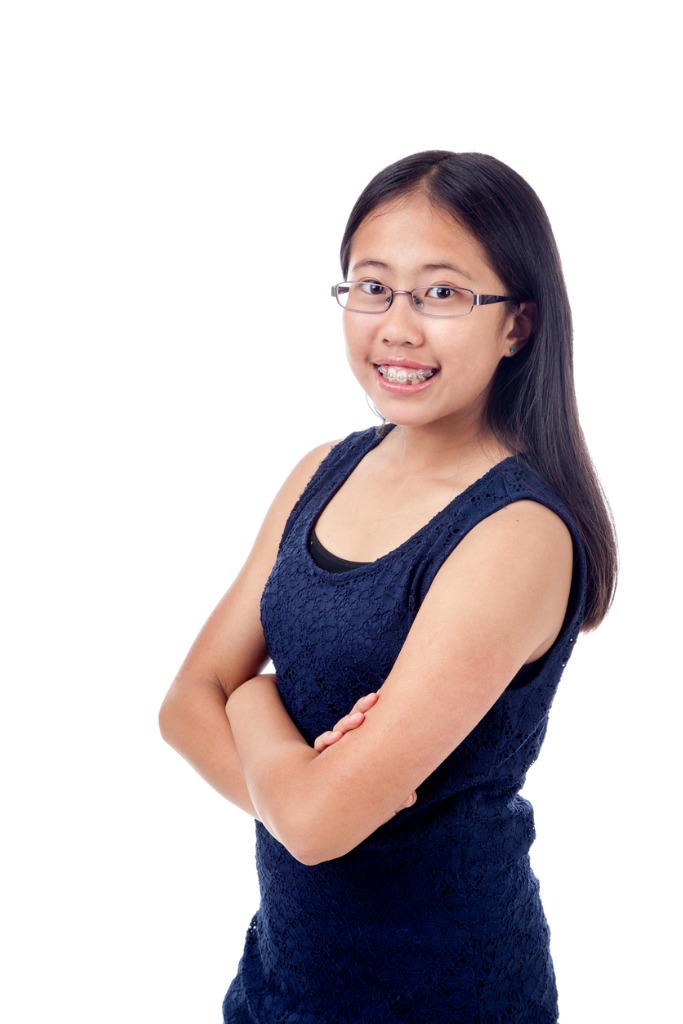
photo byronniechua via iStock
Speak to the child using their first name, or whatever name is the one their parents and friends call them by. For younger children, this allows you to capture their attention, even if only fleetingly, so you get them to interact with you and the camera. With older children, it can make them feel more comfortable with you pointing a camera at them.
Concentrate on simple poses, allowing them to move in and of different positions, poses, and facial expressions. Tone of voice is important when directing them - a kind, upbeat manner goes a long way towards ensuring good results.
Especially with younger kids, props can be a great help. This gives them something to do so they won’t feel or act too self-conscious about being photographed.
Camera Position is Key
Photo by Thgusstavo Santana from Pexels
You may have seen this or heard it many times, but you really do need to be on the same level as the kid for good portraits of kids. Otherwise, even if you light it perfectly, it will still remind people of the snapshots they already have on their smartphones. The kid looking up may be a familiar view, but that same kid looking straight at the camera without craning their neck is a very nice view.
How old the kid is, their personality, and even the parent’s demeanor can all affect the final results of your child portrait session. Using these tips and ideas should get you more usable images for portraits with your own kids or for portraits of other people’s children.
Have fun with it, relax, be familiar with the young subject, and you will get good portraits of kids.
Learn More:
- How to Use Fill Light for Outdoor Portraits
- Lifestyle Portrait Tips
- Basic Portrait Lighting Principles
We Recommend
Quick Tips for Shooting Cloudy Day Portraits
photo byAJ_Watt via iStock
We all know what those snapshots we took of our friend under the noonday sun look like…
Squinty eyes, deep shadows under the nose and chin, bright shiny forehead. That’s a reality of many outdoor portraits. If only we could put that sun in a soft box! Well, cloudy day portraits allow us to do just that.
An overcast day puts a cloud of diffusion between the light source, the sun, and our subject. The direction of the light has not changed, but it has been softened, diffused. The effect is similar to studio lighting with umbrellas, diffusion screens, or a soft box.
Shadow Control for Cloudy Day Portraits
photo byAndrii Zastrozhnov via iStock
As you’ve seen in many portrait lighting tips, softening the light quality does not eliminate shadows, but it will tend to lessen the contrast between highlight and shadow.
Shadow control is important for outdoor portraits in any quality of light. One method that works very well is to add another light source. Reflectors are one way to go, a light is another.
By adding a light to the already diffused sunlight, you can make use of the portrait lighting tips you have already learned. With an extra light, you can try out broad lighting, short lighting, rim lighting, and even perhaps Rembrandt lighting.
Recommended Portrait Lighting Reading:
- Picture Perfect Lighting: An Innovative Lighting System for Photographing People
- The Dramatic Portrait: The Art of Crafting Light and Shadow
- Portrait Photography: From Snapshots to Great Shots
Three Options of Adding Extra Light
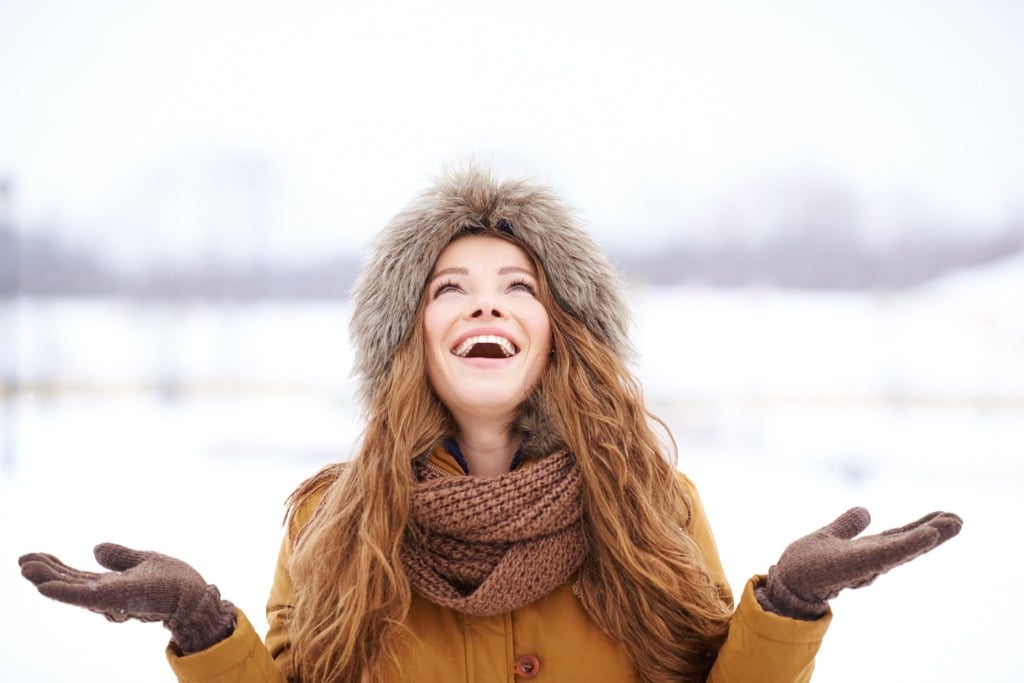
photo by AZImages via iStock
We have three options for adding an extra light to our cloudy day portraits. An external flash, a battery powered continuous light, or a reflector.
External flash, used off camera, will require some method of triggering the flash. Various wireless transmitters exist that can be used for this and some cameras have an optical control compatible with certain flash units for triggering from the camera.
Many of these flash units can be controlled by the camera for automatic exposure control, too, but you may want to experiment with fractional manual settings in order to get the lighting configurations you need for certain portrait lighting methods.
Get a quick tutorial on using an off-camera flash in the video above by Ed Verosky.
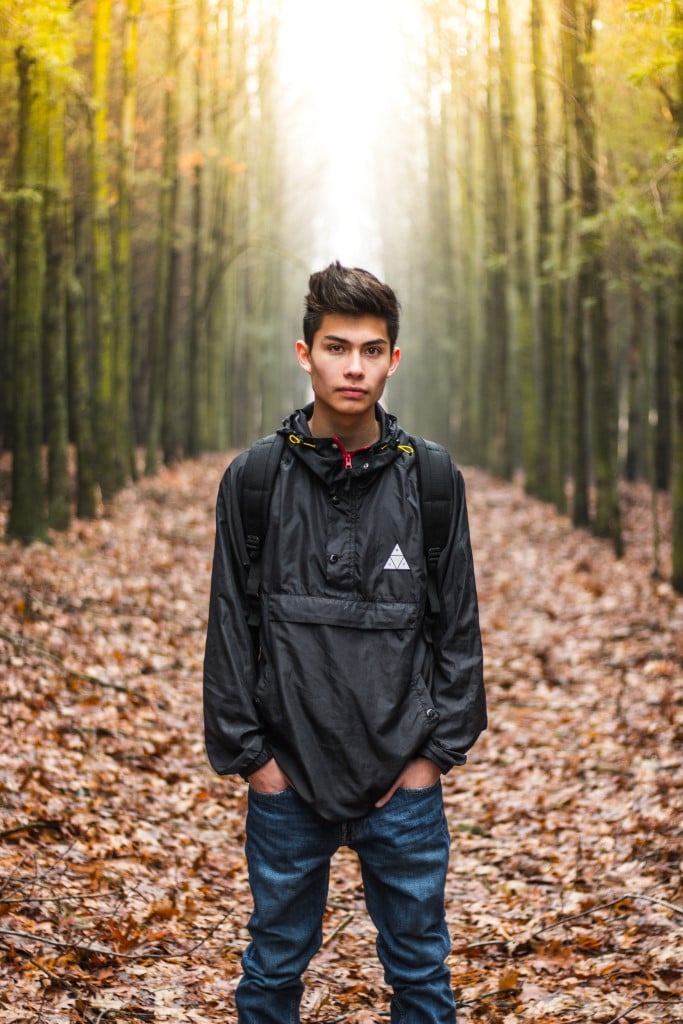
Photo by Talen de St. Croix on Unsplash
A battery-powered continuous light is another good option.
Being continuous light, you could use it in any camera mode, even the automatic modes, for adjusting exposure and contrast levels. A light like the Hakutatz Pocket Size RGB+AW LED Light I’ve reviewed before is an excellent choice.
The Hakutatz light is very compact, has LED bulbs for color correct cool operation, and is battery powered for true portability. A feature I really like is being able to control it from my smartphone with its app.
Speaking of control, you can adjust the brightness from 10-100 percent, the saturation from 1-100 percent, and select from dozens of RGB colors and lighting effects to get the precise look you need for your creative vision.
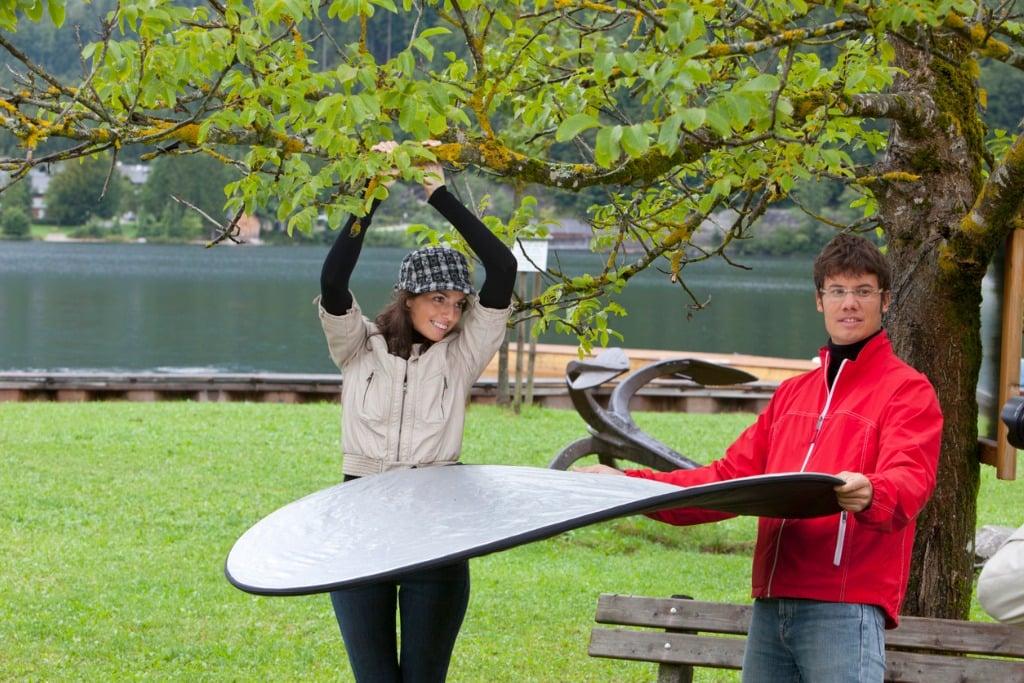
photo bybrittak via iStock
The third method requires no batteries or plugs, but it can be a little bit difficult to get exactly what you want out of it. Because the reflector’s light direction, intensity, and color depends on the primary light source. Since the clouds are diffusing the sunlight, using a reflector may not add the necessary amount of extra light.
Of the three options, I like the small continuous LED light best. It gives the most control over intensity, color, and direction. When considering how to take outdoor portraits, control and portability take center stage in importance.
Learn More:
- How To Create Minimalist Portraits
- Lifestyle Portrait Tips
- How To Use Rembrandt Lighting For Portraits
Shoot in RAW, not JPEG
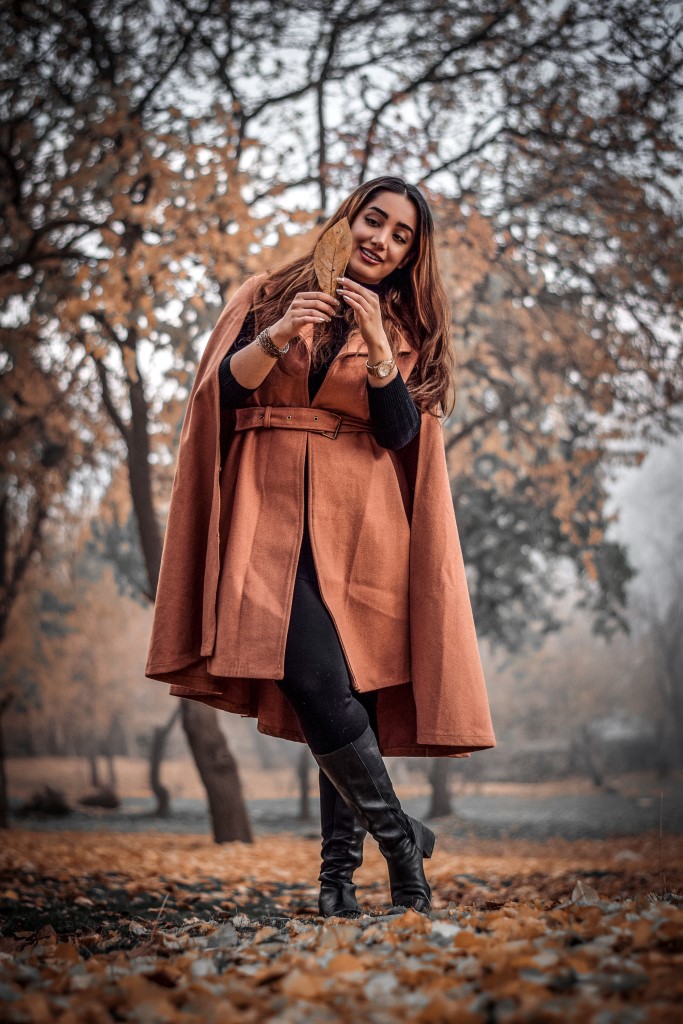
Photo by Pedram Normohamadian on Unsplash
I keep saying this, don’t I?
JPEGs are fine for many photographic situations, but a RAW file has so much more exposure information embedded in it. Working with a RAW file, we can adjust or tweak exposure levels and color profile to accomplish the final image we desire.
With a RAW file, we can assign a color balance as we see fit after the exposure. We can also pull out a whole lot of shadow detail in the image, adjusting for contrast and tweaking the exposure value.
RAW is where digital photography really comes into its own. The image manipulation possible with a simple post processing program allows for creating superb final images when used for cloudy day portraits. A full program such as Photoshop, Photoshop Lightroom, or ACDSee lets us do almost anything with the image.
Bokeh is Boss
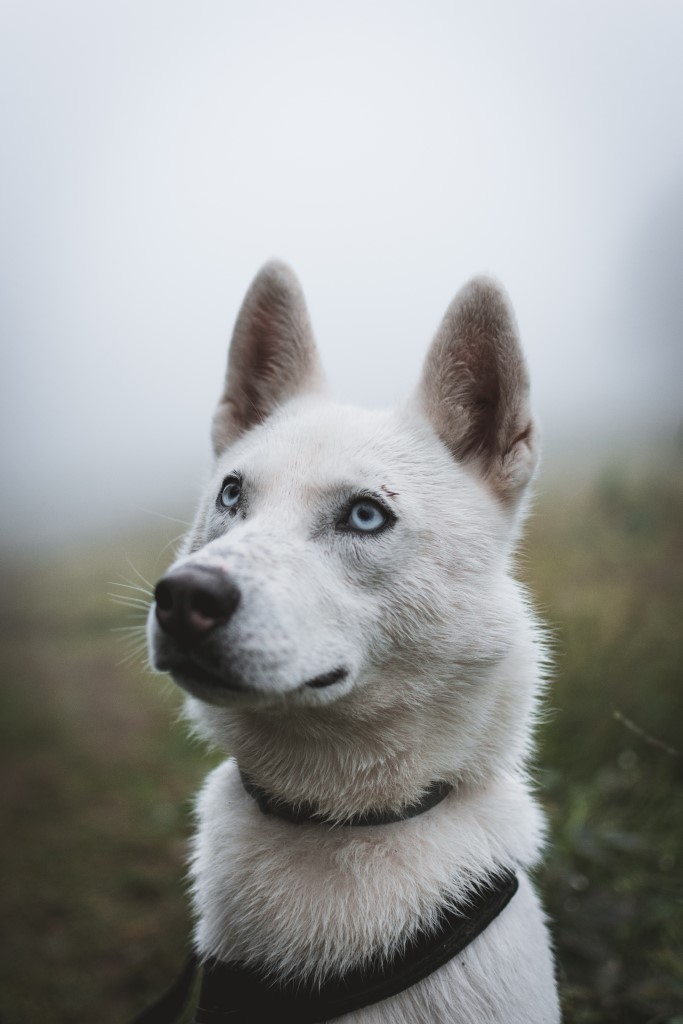
Photo by Tadeusz Lakota on Unsplash
The exposure values involved in cloudy day portraits allows for control over another aspect of outdoor portraits: bokeh. Bokeh is the aesthetic quality of out of focus parts of our images.
Since the light intensity is generally lower on an overcast day, this lets us employ wider or faster lens apertures or f-stops. A faster f-stop gives less depth of field and the possibility for creating amazing bokeh. It also lets us take advantage of selective focusing, which can be helpful when taking portraits.
Try Out Monochrome
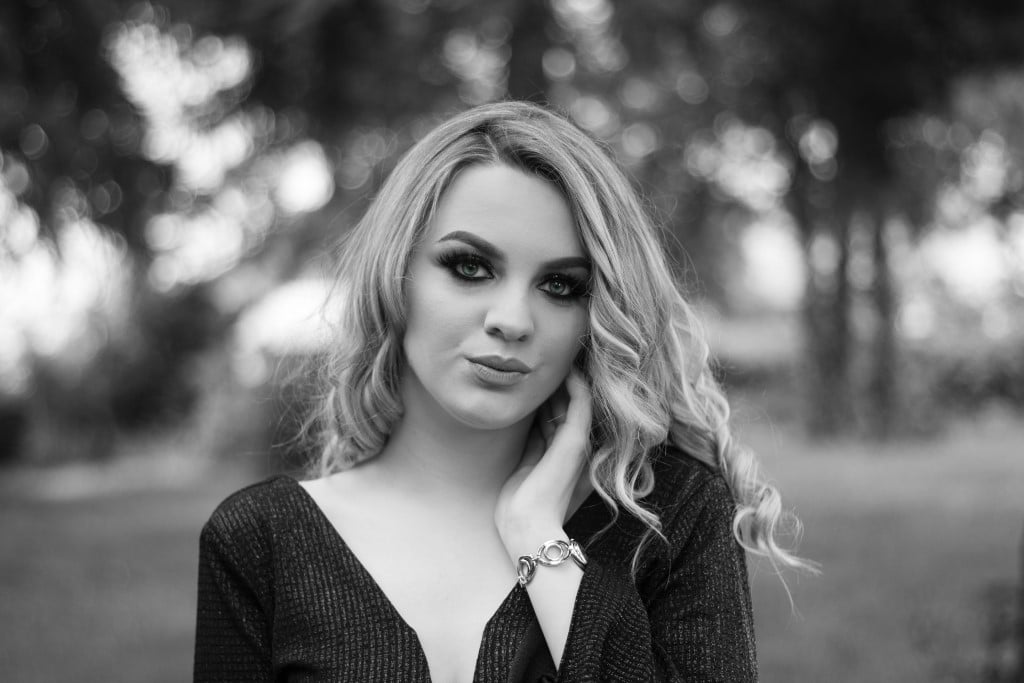
Photo by Anita Jankovic on Unsplash
The light quality of cloudy days gives us an opportunity to make images with a limited color palette. Monochrome images are often black and white, but they don’t have to be.
Some cameras have the ability to take monochrome images in camera, with others you will have to use a post-processing program to get the images turned into black and white. A black and white cloudy day portrait, when done well, can be a very pleasing image.
Other colors can be used for monochrome, too. Certain times of day, Golden Hour for instance, add a color tone to the image. Lens filters are another way to add a single color to the image. I like to use a good post-processing program to enhance one or two complementary colors in the final image.
Take Advantage of Cloudy Days
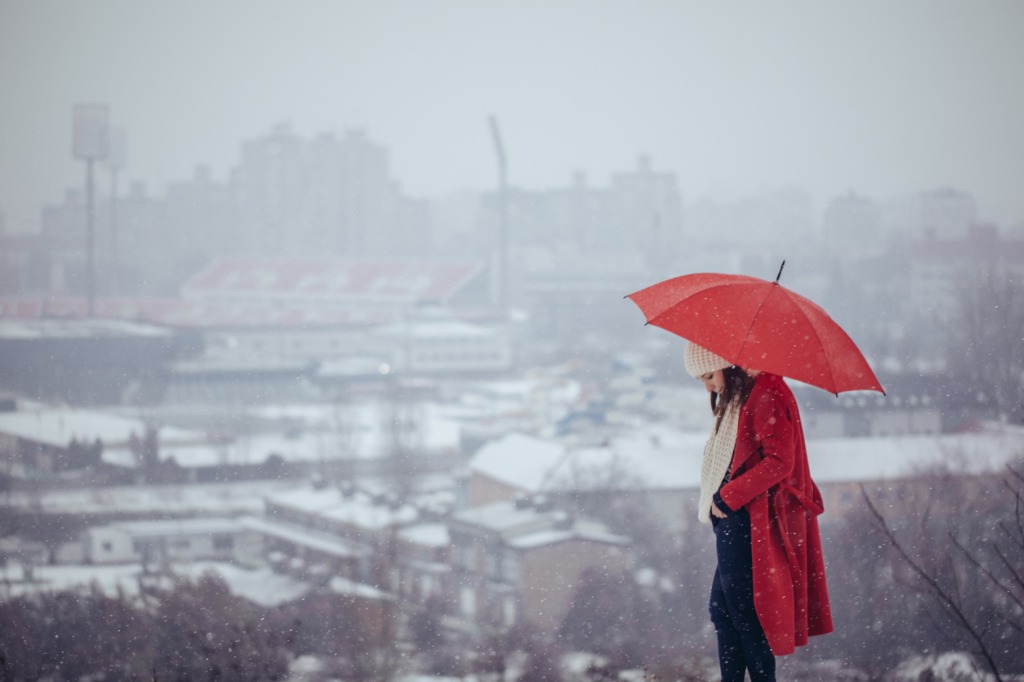
photo by South_agency via iStock
Instead of putting up our camera when it clouds up on our outdoor portrait session, learn to use the overcast sky to your advantage. The clouds can be heavy or very light or anywhere in between.
Cloudy day portraits let us make use of bokeh, selective focus, monochrome processing, and various portrait lighting methods. Soon, you’ll be looking for cloudy days to take pictures of your friends, family, or clients.
Learn More:
- How To Use Fill Light For Outdoor Portraits
- Basic Portrait Lighting Principles
- Essential Portrait Lighting TIps
We Recommend
Rim Lighting - Simple Technique for Dramatic Portraits
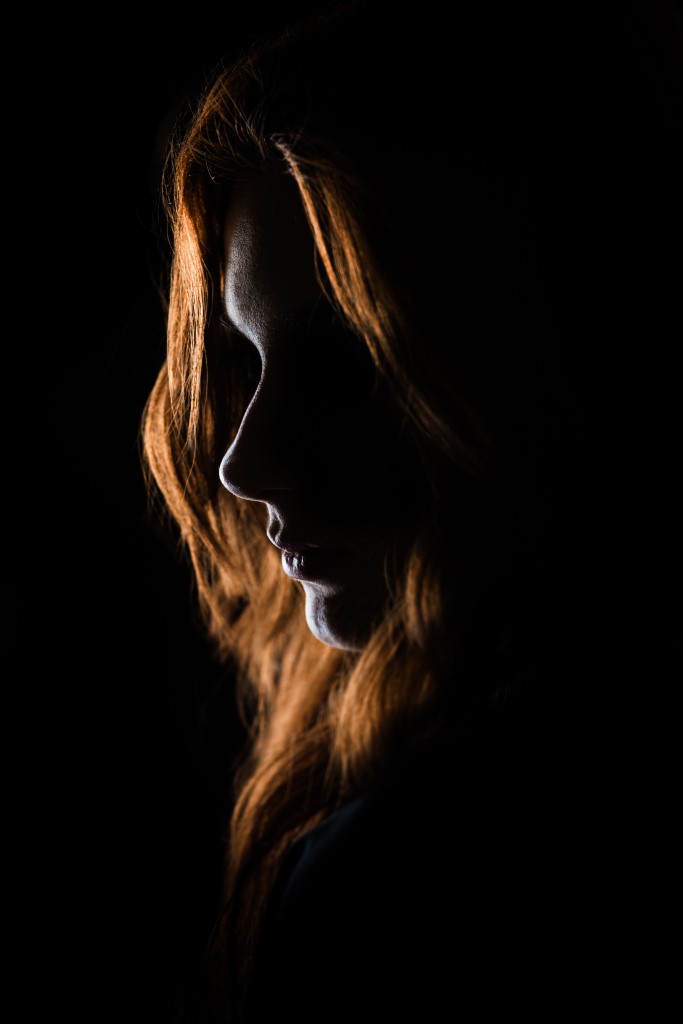
Photo by Christian Holzinger on Unsplash
Rim lighting is one of the techniques used to create amazing and dramatic portraits. The same technique can also be employed for small product photography and fine art photography.
In this tutorial, we will show what to use as rim lighting equipment, rim light placement, and how to use rim lighting.
What Is Rim Lighting?
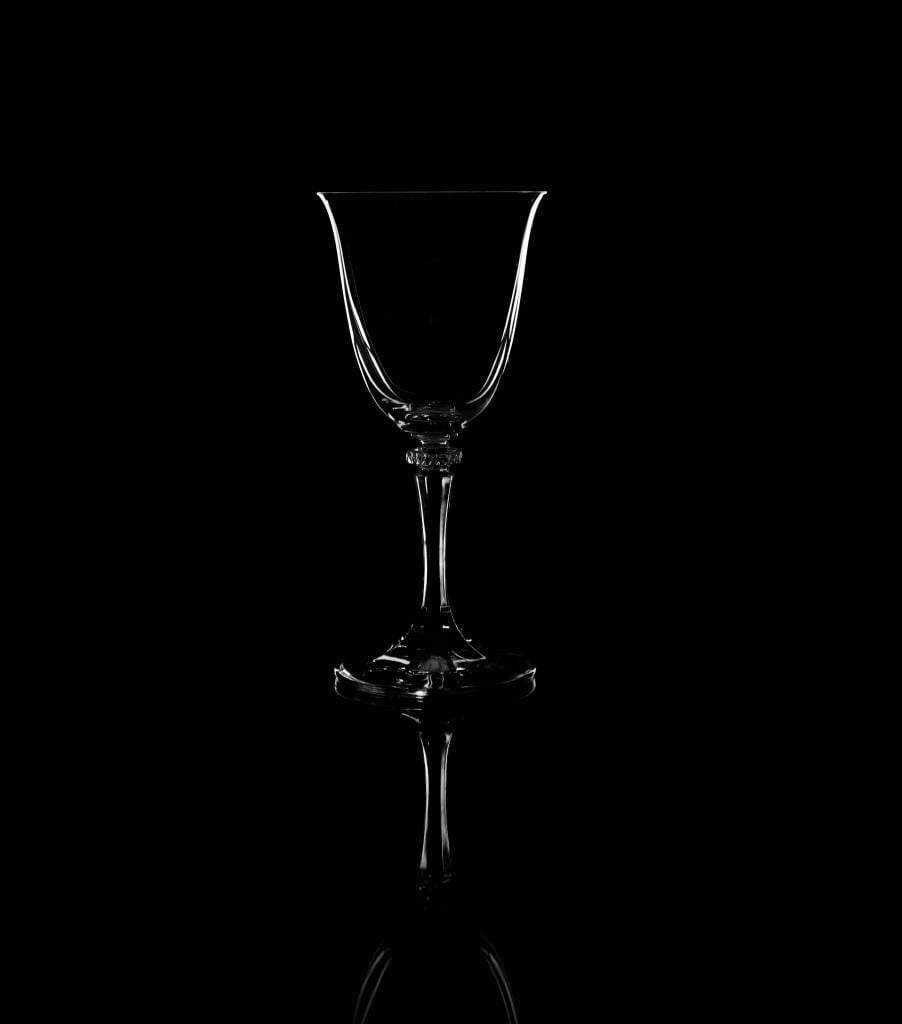
Photo by Luke Besley on Unsplash
Rim lighting typically comes from behind the subject and is a type of split lighting. Split lighting ‘splits’ your subject into two halves, one highlighted, the other in deep shadow. Rim lighting can be used by itself or in conjunction with other lighting configurations.
Photo by Caique Silva on Unsplash
In many instances, rim lighting is used to more or less silhouette your subject. I say more or less because rim lighting adds in the element of highlights around or along the edge of the subject. So it is not merely a dark figure with light behind it, part of the subject is in the light.
Portrait Lighting:
Recommended Portrait Lighting Books:
- Picture Perfect Lighting: An Innovative Lighting System for Photographing People
- The Dramatic Portrait: The Art of Crafting Light and Shadow
- Portrait Photography: From Snapshots to Great Shots
Simple Rim Lighting Setup
Let’s use a clock face to visualize where to place your rim lighting equipment to get a dramatic portrait.
If we place the portrait subject in the middle of the clock face, position your camera at six o’clock. Pose your subject so they are facing about five o’clock. Now, put your light at two o’clock or three o’clock. Expose for good detail in the highlight areas while letting the rest fall into deep shadow.

That’s a rim light placement! In this rim lighting example, you can make it happen with a single light. One of the lights I like to use for this rim lighting setup is the Hakutatz Pocket Size RGB+AW LED Light.
This light is a small, battery powered, continuous light. One of the things I really find useful with this compact LED light is that it can be controlled by a smartphone app. So, even if the only camera on you is your iPhone or Galaxy, you can still make use of advanced lighting techniques for portraits.
Learn More:
Add To Other Techniques
Photo by Alex Sheldon on Unsplash
Rim lighting works great as a single light portrait setup, but you can also add the effect to other portrait lighting configurations. Rim light placement would remain about the same as the example I laid out above, but the effect will be minimized compared to using a single light.
When added to other portrait light setups, it becomes a form of hair light or halo lighting. For this purpose, your rim lighting equipment should probably include a snoot.

Alternatively, you could use a light like the Hakutatz Pocket Size RGB+AW LED Light which has variable power and multiple colors available.
A well-lit portrait with a color rim added makes a very dramatic portrait when shot in low-key. Expose for high key and that color rim lighting exudes an air of playfulness. Play around with your options.
Editor's Note: The Hakutatz Kickstarter campaign was a huge success! Their Amazon store will be open and ready for orders soon.
Rim Lighting Examples
For some nice rim lighting examples, take a look at this video from Adrew Boey at the Beyond Photography YouTube channel.
Here is an informative article from one of the foremost online photography schools, New York Institute of Photography, that also has some interesting examples.
Rim Lighting With Natural Light
Photo by Jed Owen on Unsplash
Can you make use of rim lighting without using artificial lighting? Yes, you can. All you need is for the light to come from the proper direction for your needs.
The amazing light quality we get during Golden Hour photography is perfect for rim lighting. Golden Hour lighting is already beautiful by its very nature.
Moving around to capture the right direction for rim lighting is essential to natural lighting anyways. So, move around and expose for rim lighting with the setting or rising sun as your light source.
Rim Light is Beautiful Light

photo by primipil via iStock
When everything comes together for that perfect, dramatic portrait, it makes you feel great. Whether using a single artificial light, multiple lights with rim lighting added, or making use of Golden Hour sunlight, you will capture dramatic portraits with rim lighting.
Many of the lighting techniques used by professional portrait artists are available for anyone to use with minimal lighting equipment and any type of camera. Regardless of what level of photographer you consider yourself to be, try out rim lighting for dramatic portraits.
Learn More:
We Recommend
Short vs Broad Lighting for Portraits
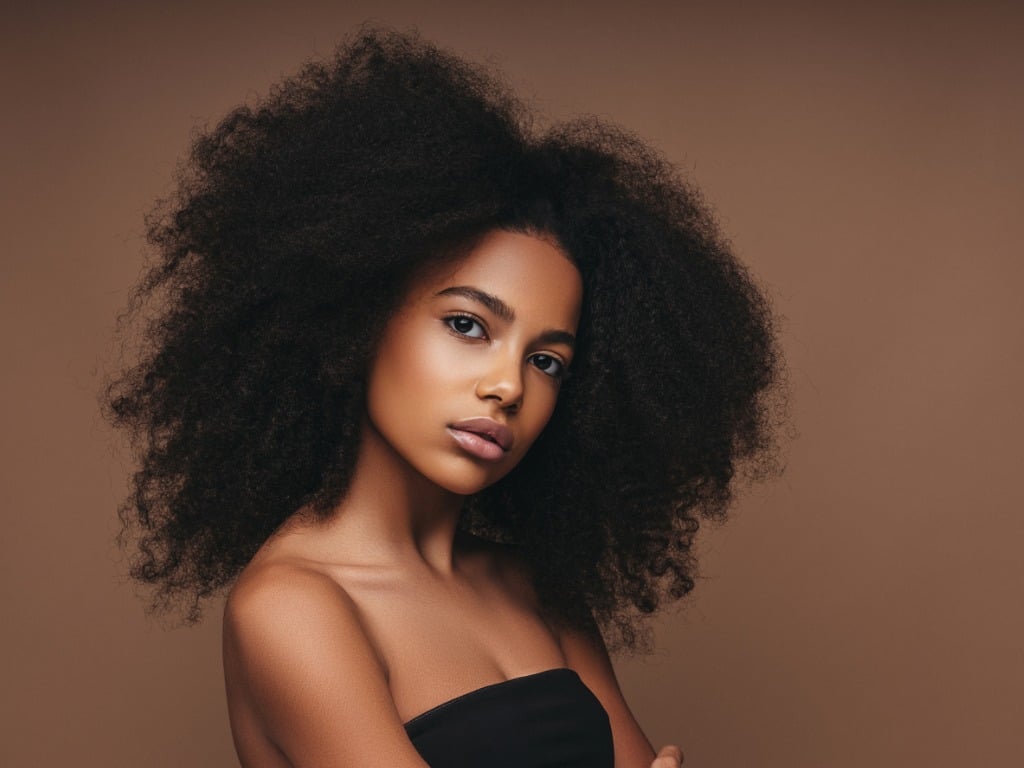
photo byCoffeeAndMilk via iStock
Portrait lighting can turn a basic photo into a work of art. Understanding how lighting configurations and lighting ratios affect your final images will allow you to control the creative processes used to make outstanding portraits.
Among the lighting setups for portraits are short lighting and broad lighting. What are short and broad lighting? What portrait lighting tips apply to short vs broad lighting? Which one is better for portraits?
Using Artificial Lights for Portraits

In order to control photographic lighting for studio use, many portrait photographers turn to artificial lights, both strobes and continuous lighting. Current lights such as the Hakutatz RGB+ AW LED Light give you options for using continuous light on location, even usable in iPhonography.
Battery powered or A/C powered, flash or continuous lights, the important thing for portraits is to take control of the light. You can modify and attenuate sunlight with reflectors and diffusers, but it’s a simple task to adjust artificial lighting to suit your needs.
Personally, I love sunlight for portraits, but much of my portrait work has been made under artificial light sources. In fact, understanding how to use artificial lighting for portraits is a must-have skill that allows you to create more impactful and dramatic portraits.
Editor's Note: The Hakutatz Kickstarter campaign was a huge success! Their Amazon store will be open and ready for orders soon.
Types of Portrait Lighting
There are several different configurations and techniques used by photographers for portrait lighting. You can use them in their basic forms or modify them to suit your needs.
Rembrandt Lighting

Photo by Albert Dera on Unsplash
Rembrandt lighting is a high contrast style exemplified by the subject’s face being half in light and half in shadow with some light spilling over to the shadow side in a specific way.
Short Lighting for Portraits
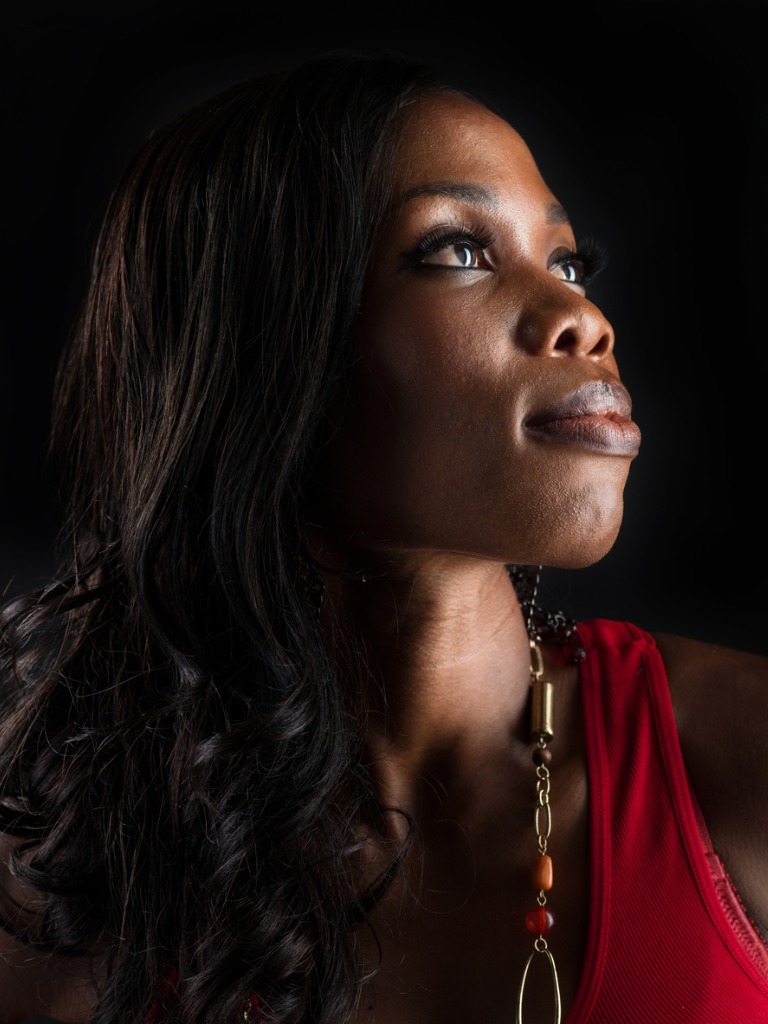
photo by Juanmonino via iStock
A short lighting configuration has the light illuminating the side of the face furthest from the camera position. This makes the lit side appear shorter than the shadow side. This is often used to visually narrow facial proportions which can be flattering for some subjects.
Broad Lighting for Portraits
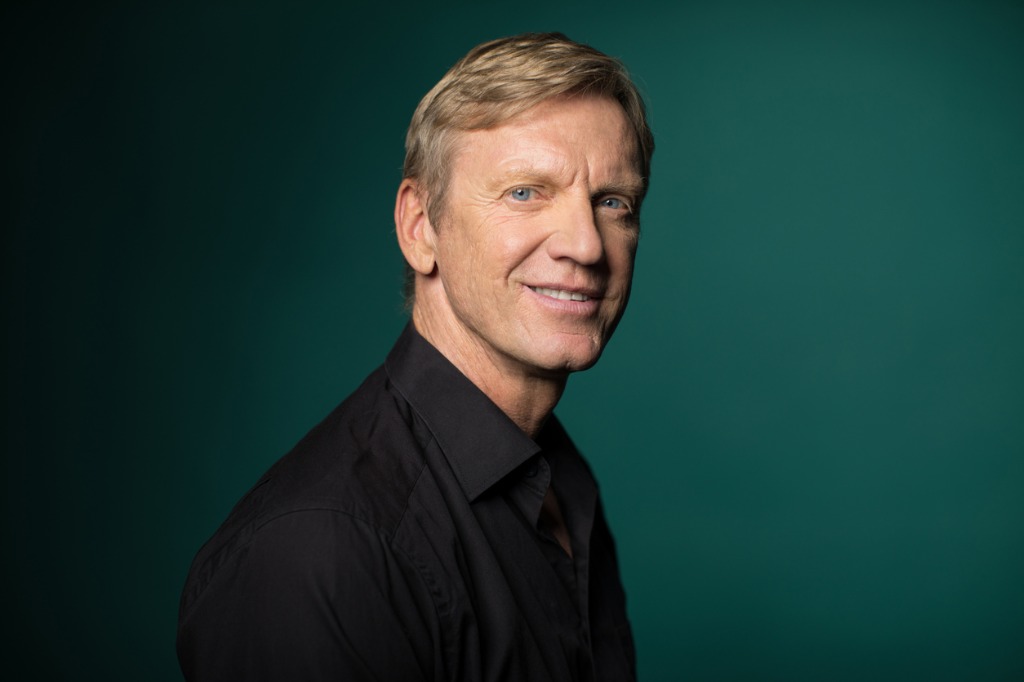
photo by alvarez via iStock
In broad lighting, the side of the subject closest to the camera is the side in light, with the shorter side of their face or torso in shadow. This lighting pattern visually widens faces, which may end up being useful for certain subjects, but can accentuate what other subjects perceive as unflattering.
Loop or Butterfly Lighting for Portraits
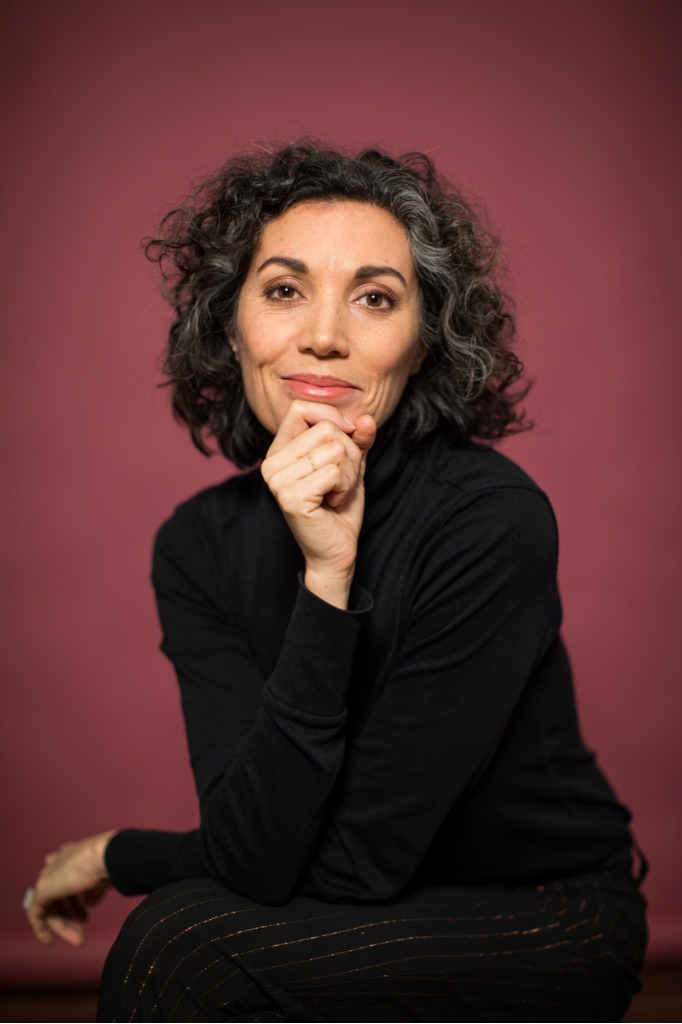
photo by alvarez via iStock
This is a flatter light set up but it offers some facial modeling that can be pleasant for portraits. It is called loop or butterfly because of the shadow pattern it causes under the nose of the portrait subject.
Learn More:
Short Vs Broad Lighting, Which Is Better for Portraits?
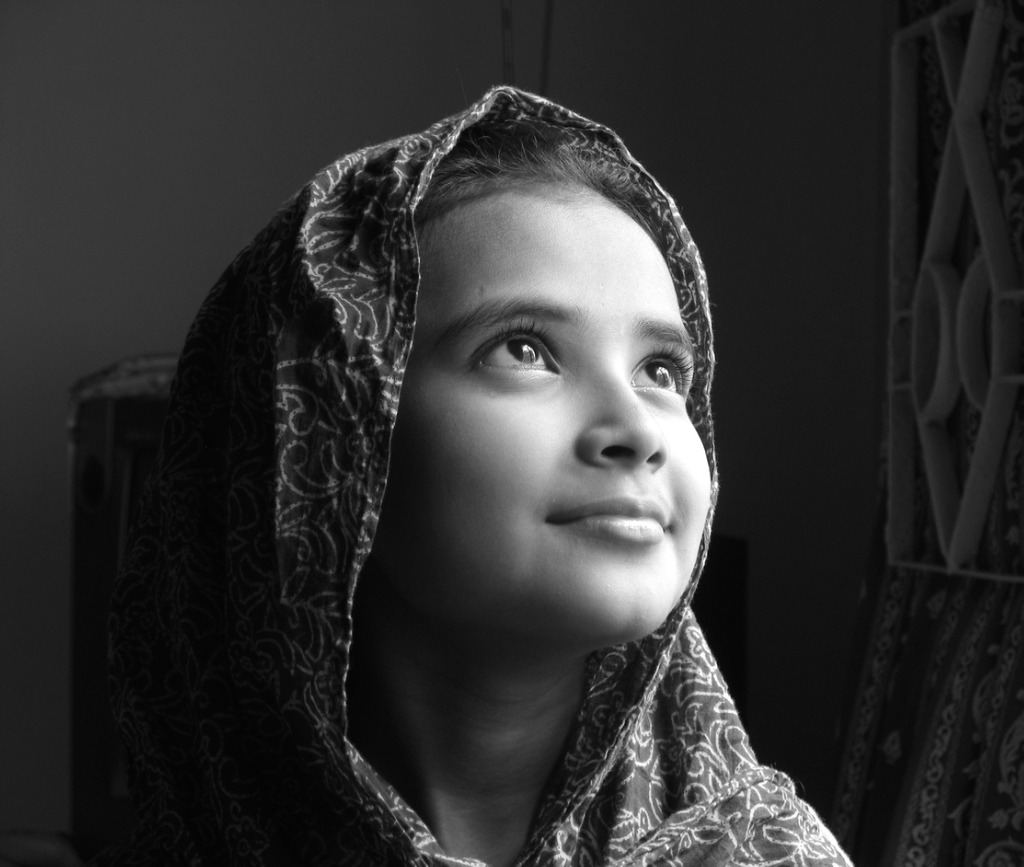
photo by Mr_Khan via iStock
Speaking in generalities, most portrait subjects will benefit more from short lighting than broad lighting. As mentioned above, short lighting narrows features which is flattering for many people.
However, broad lighting is quite useful for portraits that need to show a lot of detail. Environmental portraiture often takes advantage of broad lighting. Broad lighting does employ modeling to bring out dimensionality in the image.
You can see the difference for yourself by seating your subject and moving a portable light such as the Hakutatz RGB+ AW LED Light from one side of your subject to the other. Observe how the change in light and dark side of the face changes how the subject looks in the final image.
How To Set Up Broad and Short Lighting
Each of these lighting configurations can be set up with a single light, one light and reflectors, or multiple lights.
While both of these techniques are examples of split lighting, neither one is purely side light. For broad lighting, the light source will be placed closer to the camera position than 90 degree sidelight. Short lighting will place the light source further than the 90 degree side light.
Once you start playing around with light position, you will see the effects clearly on your viewscreen or other monitor.
Few of our portrait clients are likely to be as wooden as the subject in the video tutorial above, but Learning With Mark Warren highlights the differences rather well.
Other Portrait Lighting Tips
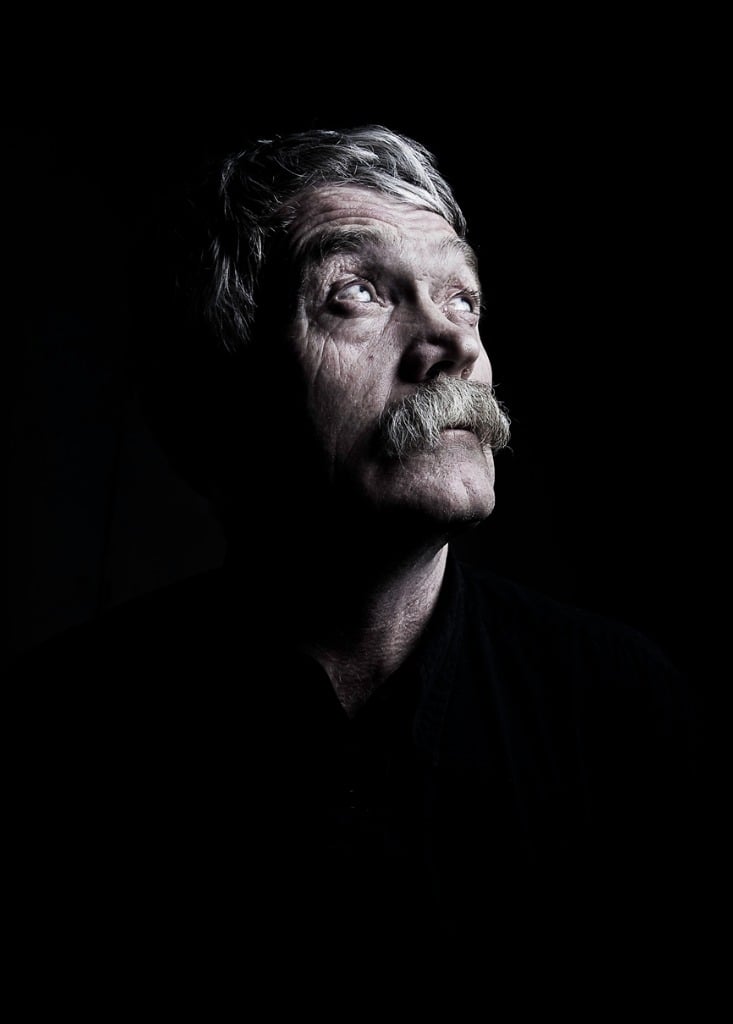
photo byKangah via iStock
There are so many ways to adjust lighting for portraiture. You can change the light quality from hard to soft by using photo umbrellas or soft boxes. Umbrellas and soft boxes soften the light diffusing it.
You may want to increase contrast contrast in your lighting by employing large lighting ratios of key to fill light. You don’t need a fill light at all in order to create a huge lighting ratio.
Reflectors are a valuable tool that can be used in many of the basic portrait lighting configurations. Judicious use of a reflector can emphasize the eyes in a strongly side lit portrait, for instance.
Control Is the Key
The most important aspect of portrait lighting is that you, the photographer, can be in complete control. It’s more than exposure or lens choice. You can control how modeled any light makes your subject appear in order to create the portrait you and your subject will enjoy.
Learn More:
We Recommend
Tips for Head Shot Portraits

Photo by Andrea Piacquadio from Pexels
Intimate portraits, head and shoulder views or head shot portraits, are an excellent way to provide great images for our clients. Since the view is so close, our subjects may feel somewhat anxious or intimidated by the thought of having such a close up portrait of themselves.
Since the subject, who is likely our paying client, is likely to be at least a little camera shy concerning head shot portraits, it is up to the photographer, you, to take control and make the photo shoot as smooth as possible.
This is easier than some may think. Here are some head shot portraits tips that may assist you in making the best head shots possible.
Talk It Out First

Photo by Canva Studio from Pexels
Before any images get captured, you should talk to the subject about their head shot portraits, their ideas of how they want to look, your ideas of clothing colors or styles that could be most flattering, and other thoughts.
That would be well before the head shot portrait session. Perhaps as you book the photo shoot, or as the scheduled date gets closer.
When the session starts, I like to chat around a bit. It doesn’t take long, just a few minutes. You don’t need to be an orator or comedian, just be yourself. That should help the subject relax and be themselves in the photos.
Recommended Portrait Lighting Reading:
- Picture Perfect Lighting: An Innovative Lighting System for Photographing People
- The Dramatic Portrait: The Art of Crafting Light and Shadow
- Portrait Photography: From Snapshots to Great Shots
Control Your Set Up
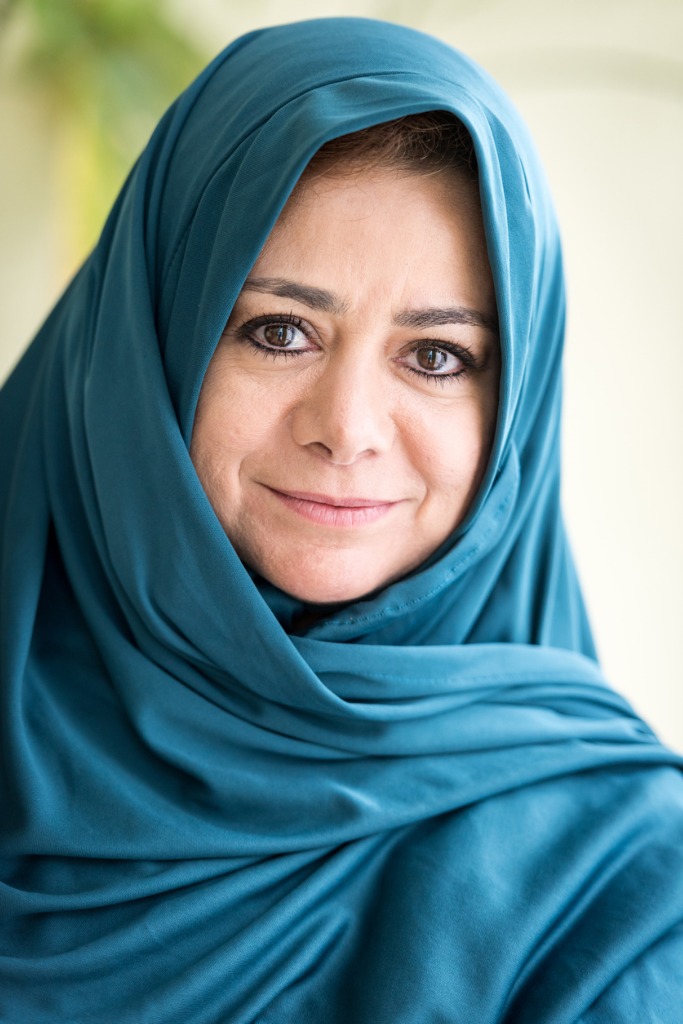
photo by Juanmonino via iStock
Whether in a studio or on location, the photographer has the ability and skill needed to control most of the variables involved in how to take head shots.
The set up can refer to your photographic lighting gear, the exposure setting you choose, and the lens used, plus how close or far you are to the subject and how close or far the subject is to the background.
All of these variables can be controlled, at least to some extent, by the photographer. Which brings us the head shot portrait lighting tips and head shot portrait composition tips.
Learn More:
Head Shot Portrait Lighting Tips
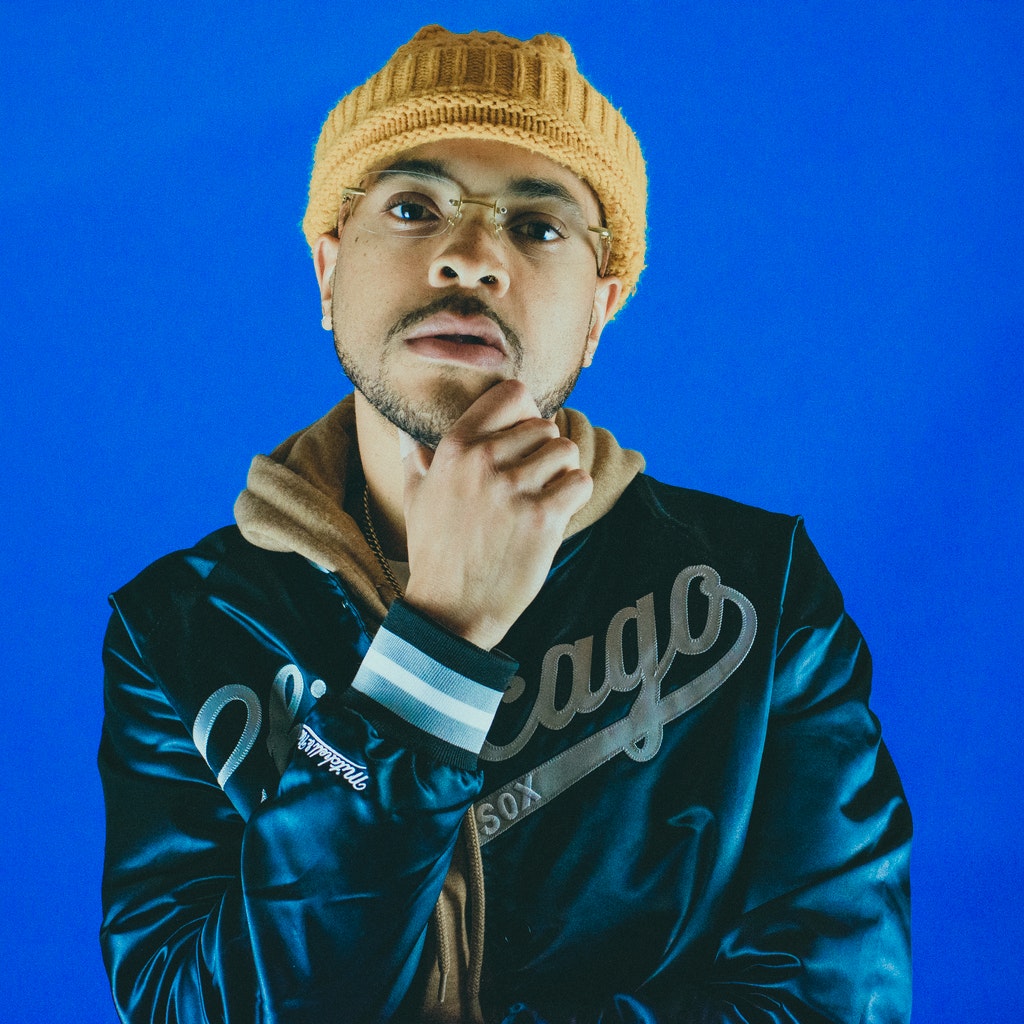
Photo by malcolm garret from Pexels
Photographic lighting for head shot portraits can be the same lights and lighting configuration you’re already using. A simple two light set up will work for flattering portraits whether in a studio or on location for environmental head shot portraits.
A configuration I like for head and shoulder views is the basic broad lighting technique. This can easily be accomplished with just one or two small lights. Indoors, you would likely use two lights, one either closer to the subject or set at higher power than the other light.
Outdoors, you can make this technique work for head shot portraits with one portable light optimally placed.
A small portable light I’ve been enjoying since their first Kickstarter campaign is the Hakutatz portable LED light. It’s very compact with a very bright power level that can be used indoors or out. Being battery powered, you can take it anywhere you need to add lighting. It’s now available in their new eBay store.
Additionally, this little light offers amber light, white light, and hundreds of RGB colors so you can truly customize the look and feel of the lighting you get for your head shots.
And since it can literally fit in your pocket, it’s easy to take with you wherever you go - and easy to set up, too.
Head Shot Portrait Composition Tips
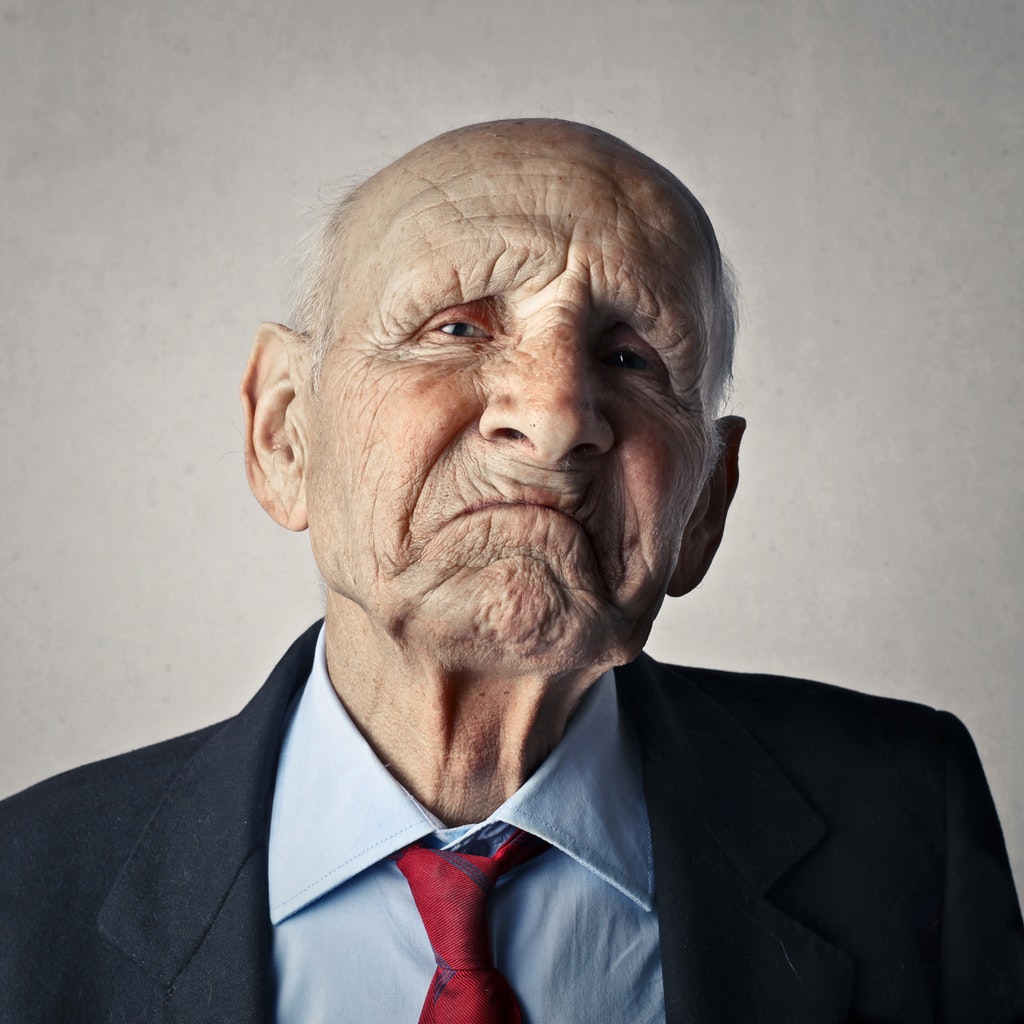
Photo by Andrea Piacquadio from Pexels
Good head shots portraits depend on posing and composition every bit as much as they depend on lighting and exposure.
The broad lighting technique mentioned above is half light placement, half subject placement. The lights are placed in a position that flatters the face, such as 45 degrees up and 45 degrees to one side.
The subject has their face and body mostly turned towards the light. This illuminates a large portion of the head shot, the broad part of the name for this technique. The short side is in shadow. A second light can be used to lighten the short side shadow.

Photo by nappy from Pexels
Outdoors, or with window light indoors, you would position the subject to take advantage of natural light as the broad light, adding a reflector or small light to fill in the dark side.
Other posing and composition ideas are to make use of the the Rule of Thirds and carefully watch their head placement.
The Rule of Thirds is an important composition tool for most head shot portraits. While there is definitely room for creativity, the head shot many clients will be expecting generally is a composition following established norms.
Make Your Head Shot Portraits Stand Out
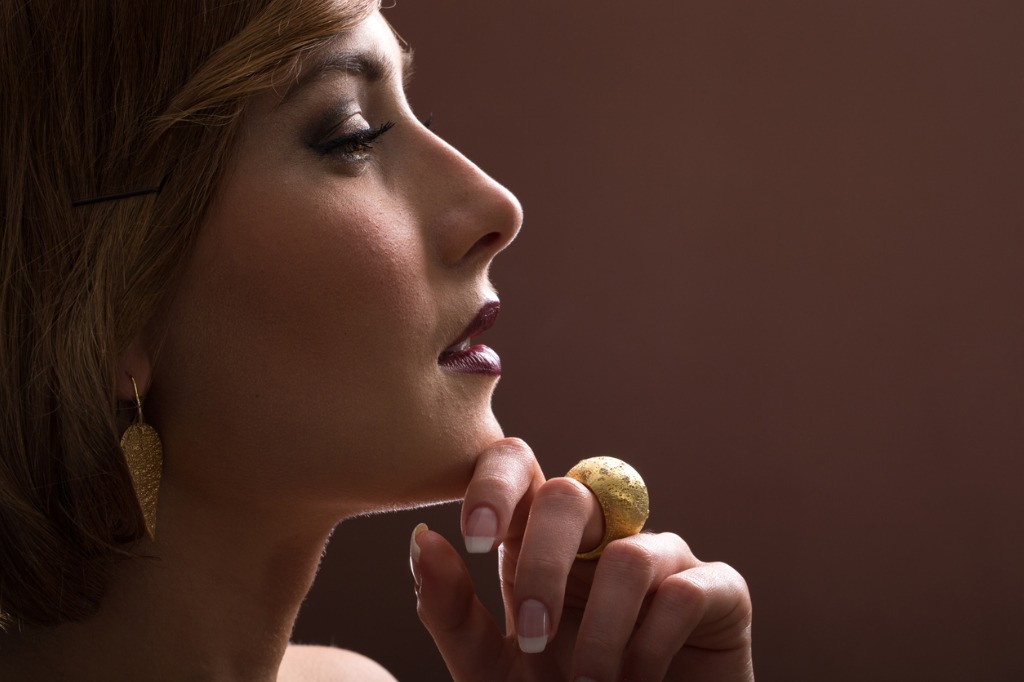
photo by CasarsaGuru via iStock
Two things that can help make your version of the regular head shot stand out from the crowd is assisting your subject with head and hand placement, and selective focus.
So many people act completely natural right up until the camera lens cap off. Then they seem paralyzed. As a photographer, this is when you take control and make suggestions for flattering head position and natural looking hand placement.
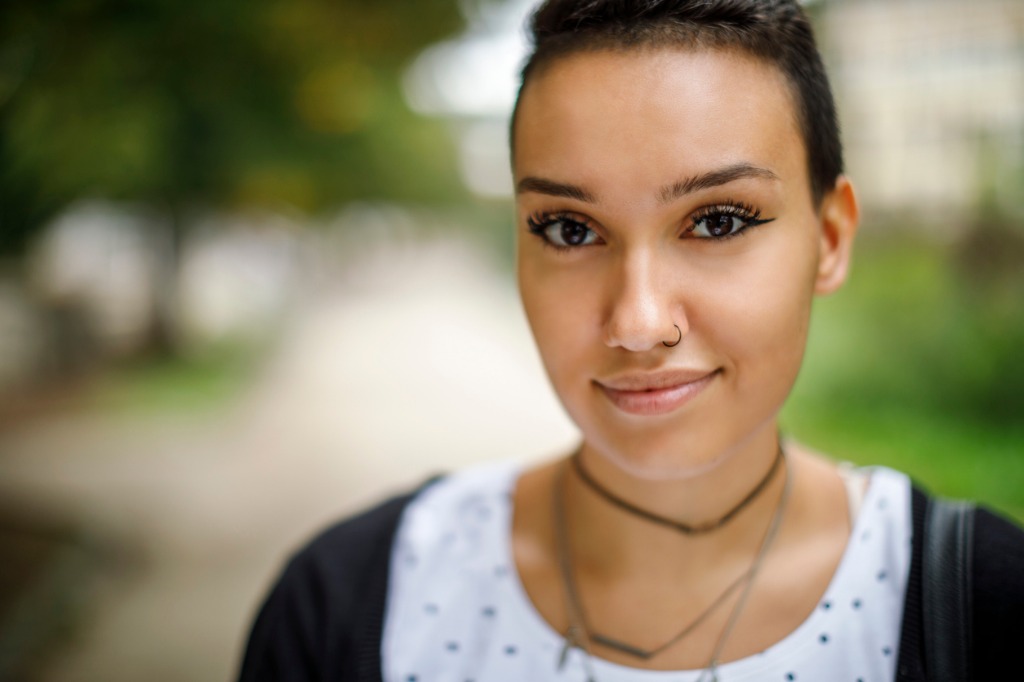
photo by damircudic via iStock
You also set your portraits apart by setting the head shot portrait subject apart from the background by means of selective focus and proper lens choice. Short telephoto lenses and wider apertures are a method you can use to make that happen.
As the photographer, you can take control of head shot portraits with good lighting, pleasing composition, and comfortable posing suggestions.
Learn More:
We Recommend
Tips for Successful Impromptu Portraits
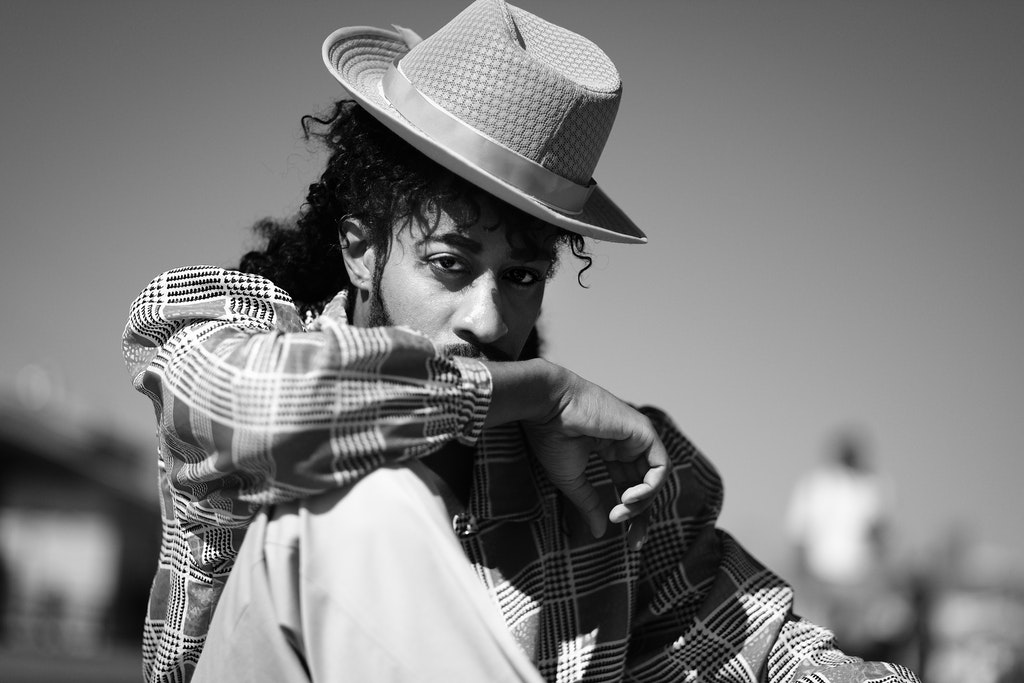
Photo by Xiaoming Tian from Pexels
Impromptu portraits opportunities such as street scenes, party pics, or just everyday pictures of people and friends that are a step or two above snapshot level can come up at any time, which is why they’re called impromptu portraits.
These impromptu portraits don’t have to be entirely unplanned, though, you can prepare ahead of time to maximize any outing you’re on with your camera in hand, even if that camera is your high quality smartphone.
Portrait Photography Tips
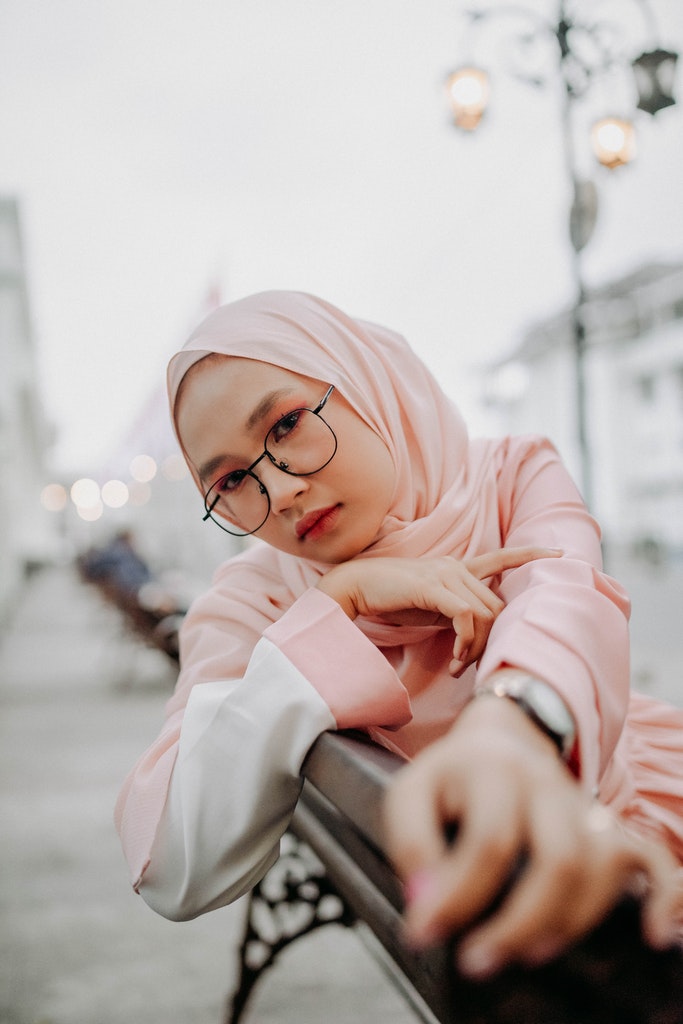
Photo by Deden Dicky Ramdhani from Pexels
When giving portrait photography tips for beginners, I like to show how you can make use of simple portrait photography gear, including items you probably already have. Other items, like portable portrait lighting, can be simple, easy to use, and relatively inexpensive.
We’ll cover some basic principles for impromptu portraits and impromptu shooting in general, portable portrait lighting ideas, and some useful portrait photography gear choices.
Take Your Camera!
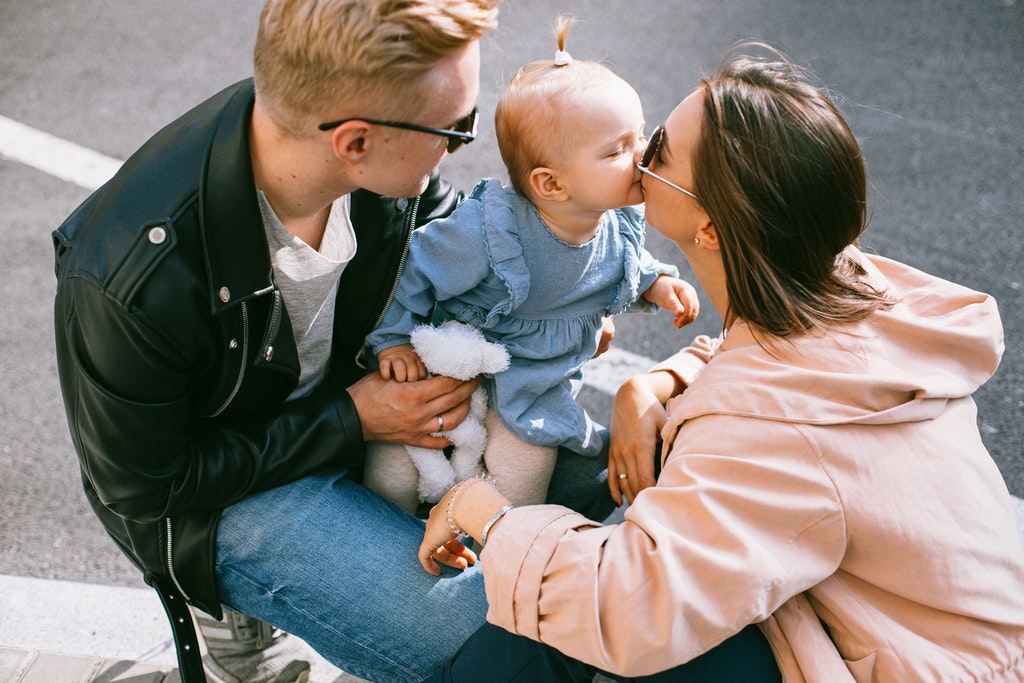
Photo by Katie E from Pexels
If your standard walk about camera is a smartphone, that’s fine. I really like the newest Galaxy phones and iPhones with their camera upgrades. I like to keep an upgrade camera with me most of the time instead of relying on my smartphone.
A great option for many photographers are the point and shoot (P&S) style cameras and bridge cameras. The newest versions of these have large sensors and lots of features to work with.
Personally, I tend to bring along my mirrorless camera and a versatile lens whenever I’m going anywhere that might have photo opportunities. Sure, it’s a little more trouble, but being ready for high quality photography requires a tiny bit of sacrifice.
If nothing else, at least I have my smartphone with me 98% of the time. I downloaded a better camera app for mine, check what is available for yours.
Learn More:
- Lifestyle Portrait Tips
- Quick Tips for Shooting Cloudy Day Portraits
- 5 Photography Tips That Will Make You a Better Photographer
Standard Lenses Work Best
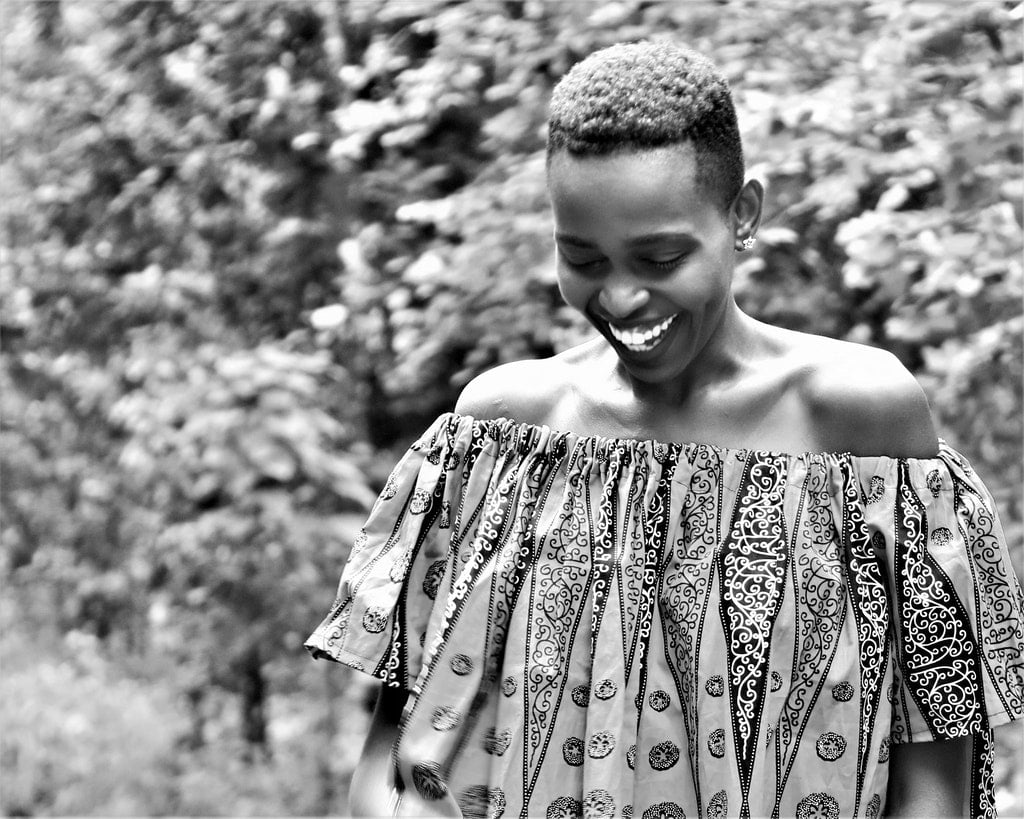
Photo by Desmond Gatimu from Pexels
A standard lens is a good choice for impromptu portraits or any type of impromptu photography. So, what am I defining as a standard lens for portrait tips? When I go out with a camera but with no real plan of what to shoot, I will put one of two lenses on my camera.
One option is the trusty Nifty Fifty fast 50mm normal lens (full frame format, adjust for crop factor with other formats). The 50mm focal length normal lens, with an f-stop of f/1.8 to f/2.0 is a fantastic choice for impromptu portraits. They are extremely sharp, have a wide maximum aperture for selective focus, and are compact for easy transport.
A second option, which is actually what I usually use for photo walkabouts, is a fast normal range zoom such as a 24-70mm f/2.8 zoom lens. Without losing too much in maximum aperture, I gain the versatility of having wide angle and short telephoto focal lengths. These are large, heavy, and somewhat pricey, but the worth of their capabilities can’t really be measured in dollars.
The kit lens for many DSPRs and mirrorless cameras also make good choices for impromptu portraits. These are very sharp, but usually have very slow maximum apertures, especially at the telephoto end of the lens. If you haven’t added any other lenses to your impromptu portrait photography gear yet, your kit lens will work just fine.
Portable Portrait Lighting
Since you’re out with your camera and not in a studio, maybe even not inside a building, any portrait lighting you choose to use will have to be portable. Battery power is preferred, as is small size so you can easily carry it.
The smartphone sized Hakutatz LED Lightis a good choice for impromptu portrait lighting due to its small size, bright light output, and long battery life. The continuous light output of the Hakutatz makes it simple to see what your light arrangement will produce, speeding up your light placement chores for those quick impromptu portraits.
Since these lights are hardly larger than a smartphone, you can keep on you while you go out to your event or place that just might have some unplanned photographic opportunities for you and your camera.
Be Prepared
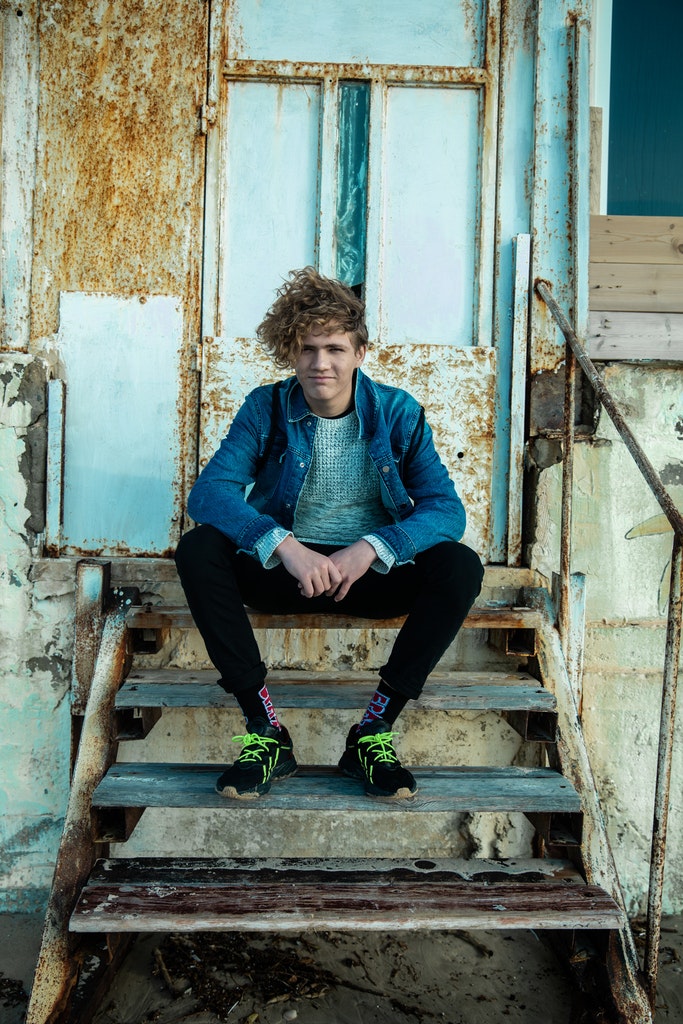
Photo by Ekaterina Belinskaya from Pexels
We’re not all boy scouts, but being prepared for impromptu portraits is a good idea for us as photographers. Impromptu may be unplanned, but we can always be ready for whatever picture taking opportunities come up.
Learn More:
- Basic Portrait Lighting Principles
- How To Use Fill Light for Outdoor Portraits
- Easy Tips for Better Environmental Portraits
We Recommend
Top 10 Last-Minute Gifts for Photographers - 2019 Edition
 Photo by evgenyatamanenko via iStock
Even though I'm writing this the last week of October, you and I both know that there will be some scrambling as the holidays draw near to find the perfect gift for the photographer in your life.
A lot of photographers are picky (myself included), so it can be difficult to find just the right gift that will bring a smile to their face and that won't end up shoved in the back of the closet.
With that in mind, I've put together the following list of awesome last-minute gifts for photographers that should give you some inspiration for your gift-buying this holiday season.
Let's get to it!
Camera Canopy

Those of you that follow my ramblings here on PhotographyTalk know that I love to shoot landscapes.
But something I definitely do not love is using those clingy camera rain covers that feel like you're reaching into a wet plastic bag.
Granted, I don't have to worry about the rain all that often here in Southern California, but when it does rain, I have my Camera Canopy with me.
As you can see above, the Camera Canopy sits above the camera and extends outward to protect both the camera body and the lens.
It attaches to the hot-shoe mount on your camera, so it's easy to attach when the weather turns sour.
The shield extends and retracts, so it'll protect your gear whether you're using a 50mm lens or a 300mm lens.
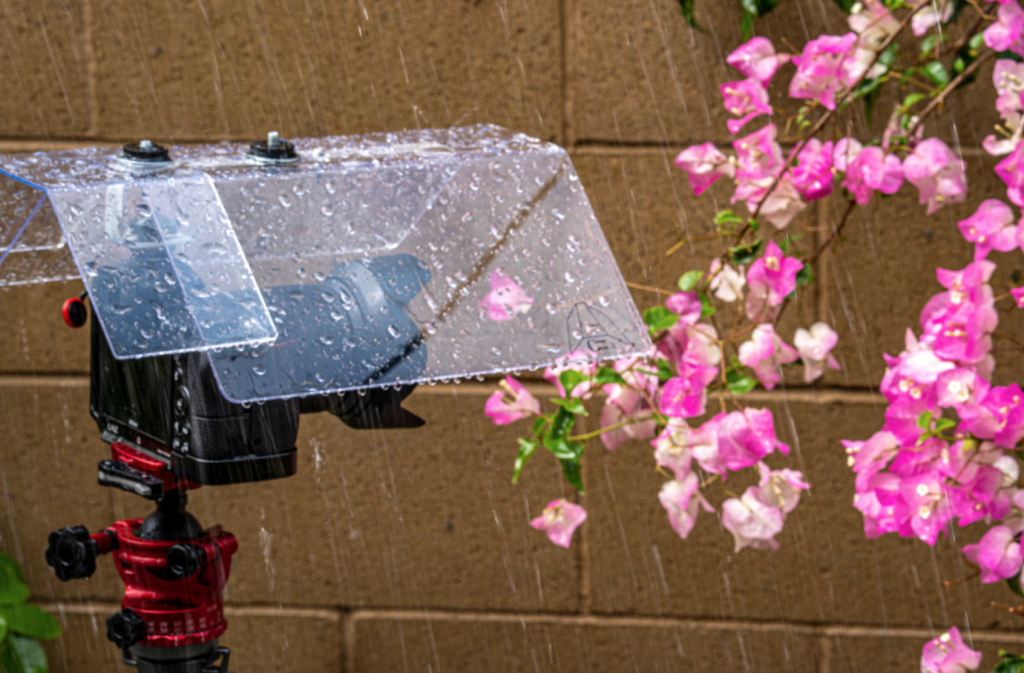
What's more, there are versions for DSLRs and mirrorless cameras, so no matter the camera system the photographer in your life uses, there's a Camera Canopy they can use.
Aside from the ease of use and the fact that the Camera Canopy protects the end of the lens from getting wet, I love that it doesn't obstruct the camera's LCD or controls. No more clingy wet plastic bag!!
So, this thing is convenient, functional, and well-designed, and would make an ideal addition to any photographer's kit.
Learn more about Camera Canopy for DSLRs or Camera Canopy for Mirrorless Cameras
A Large Print from AP Solutions & Graphics
What photographer wouldn't appreciate a large print or graphic of one of their photos?!
AP Solutions & Graphics makes it easy to give the gift of a beautiful large print thanks to their quick and simple online ordering process.
In fact, you can easily get a quote for your print based on your specifications, including height, width, depth, and media type.
They offer fine art canvases, photographic prints, and signs, banners, and other display medias too.
If you order from AP Solutions & Graphics, you can rest assured that the item you order is made from the finest materials and is constructed right here in the USA.
I appreciate the fact that these guys are dedicated to turning your favorite photos into lasting memories. And the photographer on your holiday shopping list will certainly appreciate it too!
No one wants to get a sub-par print, especially if it's of their own photos. But you don't have to worry about print quality with AP Solutions & Graphics because they use high-quality canvas, fine art photo paper, quality fabrics, top-grade inks, and more.
As a U.S. Navy Veteran, I try to patronize businesses that are owned by fellow veterans, and AP Solutions & Graphics fits the bill.
This veteran-owned, U.S.-based business is ready to make your last-minute holiday gift dreams come true!
Learn more about AP Solutions & Graphics
Hazard 4® Freelance™ Sling-Pack
Rarely do you encounter camera bags described as “tactical,” but in this case, the rank definitely fits the Hazard 4® Freelance™ Photo Sling-Pack.
Hazard 4® designs exceed military specs, so these are trusted by demanding users in the harshest environments - special forces to expedition reporters. Thoughtful sizes, organization, and ergonomics, with 1000 D Cordura® fabric, YKK zips, and patented hardware protect cameras, accessories and survival gear in a futuristic aesthetic that deflects harsh use.
You can cleverly rotate Freelance™ from back to chest for quick gear access without taking it off. Sized for most mirrorless systems with movable padded dividers to organize lenses and accessories, it’s also made in a Drone Edition with special dividers and “Drone Pilot” patch on its velcro I.D. panel.
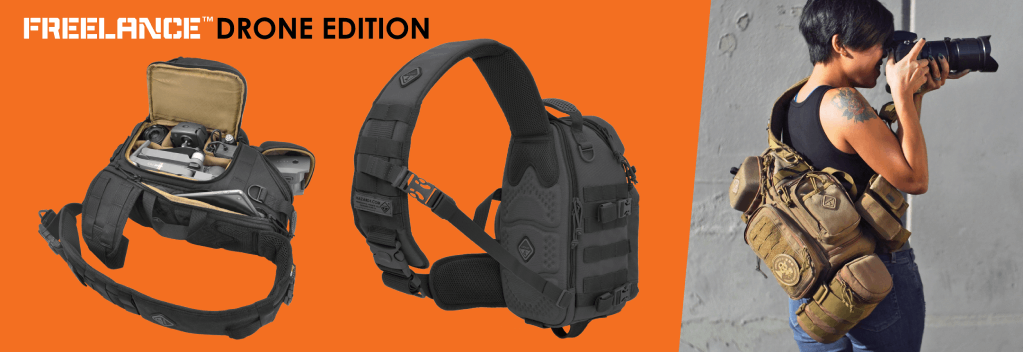
Three exterior pockets fit extra gear. A sweat managing thermo-molded zip back panel cradles 10.5” iPads®. An admin panel organizes pens and SD cards, among other small items. A molded shell fits two Mavic® Pro batteries and has a patented Hard Point® bus for attaching Hazard 4® systems loops and tie-downs or GoPros® via a ¼-20 screw.
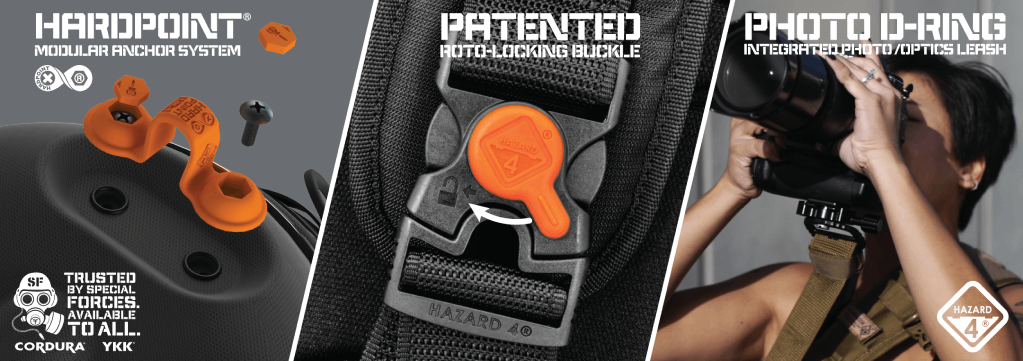
Modular webbing (molle) throughout allows exterior gear expansion. A patented roto-lock buckle prevents drops. Add grab-handles, tripod/compression straps, and more for the makings of one killer last-minute gift for the active photographer on your holiday shopping list!
Learn more about the Hazard 4® Freelance
PolarPro Summit Filters

PolarPro has built a reputation over the years of developing well-built, high-performance products, and their newest filters are no exception.
The Summit series was specifically developed for the rough-and-tumble world of landscape photography.
These filters are built to withstand the rigors of shooting outdoors in harsh conditions while at the same time having a design that makes them incredibly easy to use.
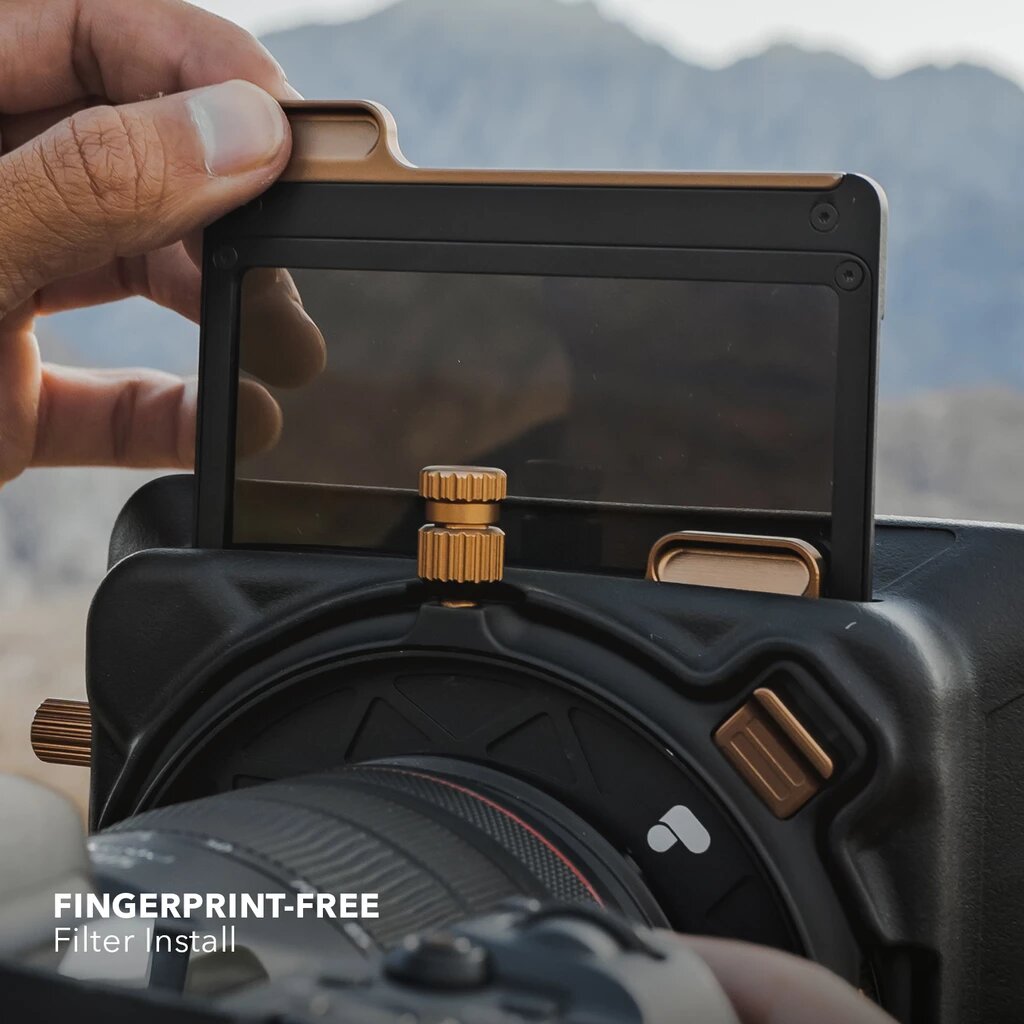
On the one hand, the ND and graduated ND filters have aluminum frames that both protect the filter and help minimize fingerprints getting on the filter glass.
So, not only do you get filters that are more durable, but you also won't spend as much time cleaning the filters to get rid of fingerprints. It's a win-win!
On the other hand, the filters and filter housing feature materials that ratchet up the build quality.
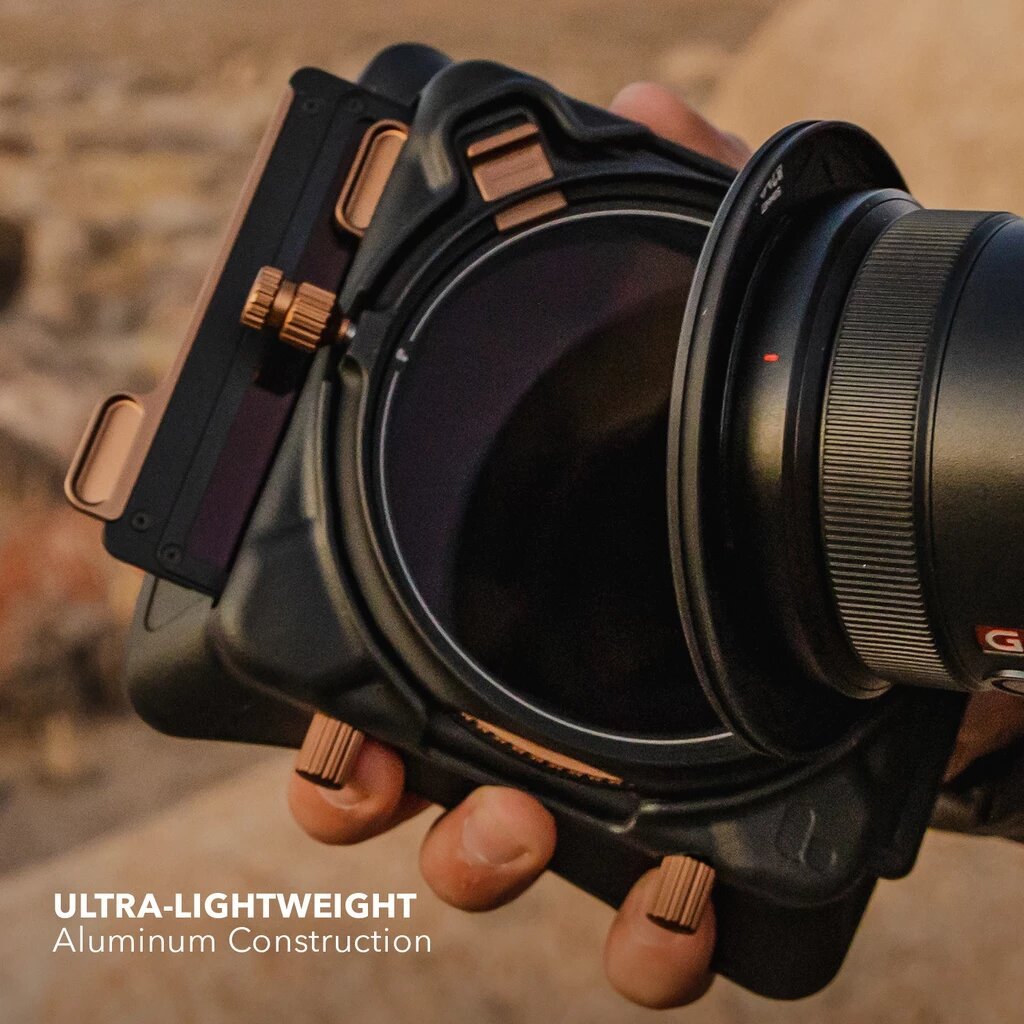
For example, the filters are made of fused Quartz glass with 16 layers of coatings that improve color fidelity and clarity while reducing glare.
As another example, the filter frames are made of lightweight aluminum that helps cut weight in your pack while providing you strong durability for years to come.
Add in a user-friendly design, light-sealed slots, filter locks to lock down the filter position, and the ability to rotate the filter system 360 degrees, and you have the makings of the ideal landscape photography filter kit to give your favorite photographer this holiday season!
Learn more about the PolarPro Summit Filter System
Snaptiles
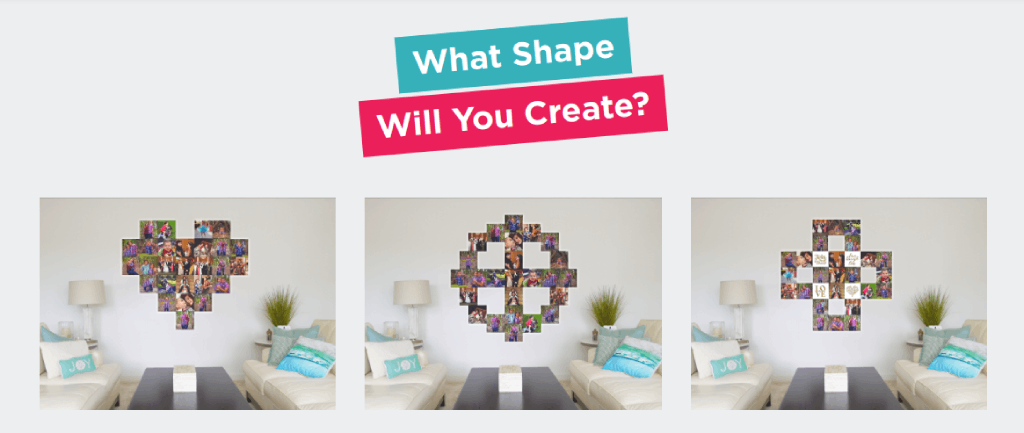
If you’re cutting it close for the holidays and need a killer photography gift, look no further than Snaptiles. Snaptiles are a new patented Magnetic Photo Tile that is 8”x8”x1” and super lightweight.
This innovative system uses a single wall mount with a built-in level to anchor a central print to the wall. Then you can snap together the other tiles onto the first! The wall mount uses four adhesive strips that don’t damage the wall, yet offer all the support that’s needed to display up to 12 tiles. Just make sure you press down firmly for 10 seconds. You can also push in the 4 included thumb tacks for additional support, then mount up to 30 tiles on the first tile! Not a bad tradeoff for 4 little pin holes in your wall.
The process is simple: just attach the wall mount to the wall, mount the anchor tile to it, and then begin to create an array of mixed tiles by adding additional Snaptiles.
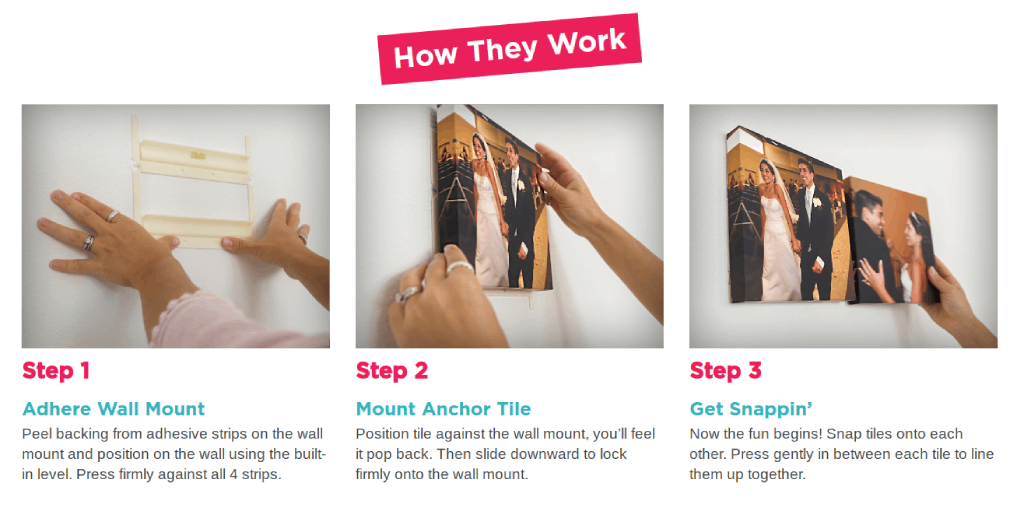
Each tile connects with strong magnets, so there’s no worry of the tiles sagging or slipping.
Best of all, though, this system enables you to swap images out as you get new photo tiles, rearrange them in the display, and create different shapes with an array of images.
It really couldn’t be any easier!
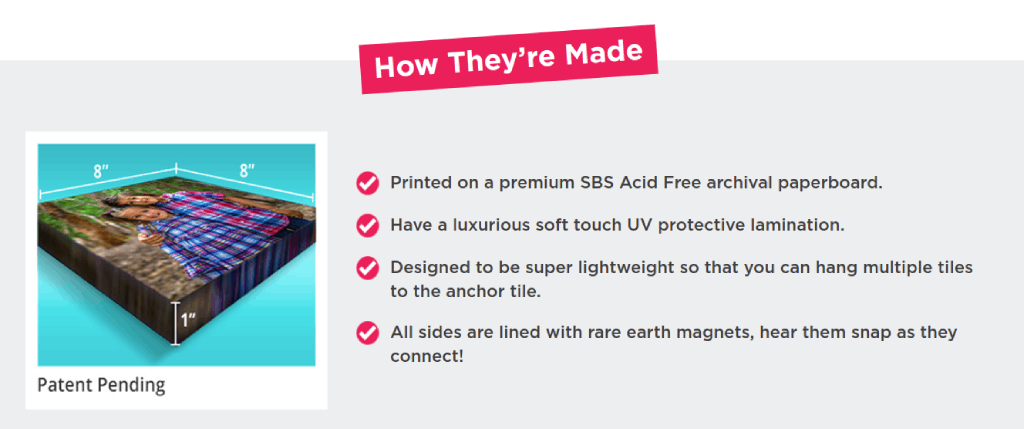
The images are printed on a premium SBS Acid Free archival paperboard to give you long-lasting durability. On top of that, the UV protective lamination on the tiles has a beautifully soft touch.
I just ordered 25 of these photo tiles for my son’s room. He loves art and he loves building, and I think he will love putting his Snaptiles together (with my help of course!) on his bedroom wall.
This isn’t just a great last-minute gift, but it’s also a fun project you can share with whomever you give them to. It’s a win-win!
Travel School Membership
 Photo by anyaberkut via iStock
Wouldn’t it be nice to travel the world as you make money, pursuing your dreams without being encumbered by a traditional job?
If that sounds like a dream that’s too good to be true - it isn’t! Even better, it’s a dream you can make a reality for that special person on your last-minute holiday shopping list.
Travel School is a comprehensive training program for starting an independent affiliate marketing business. It will take your loved one step-by-step through the process of building a business that is not only wildly successful in the short-term, but can sustain steady growth for the long-term too.
But Travel School isn’t just a step-by-step training program. Instead, it will change your loved one’s outlook on what it means to work, and at the same time will be a transformational experience that will change their entire life for the better.
With specific, actionable steps, the person on your holiday shopping list will learn how to connect with established brands, develop core marketing skills, and activate multiple income streams to realize their dream of living a life full of travel and freedom.
Travel School founder Emilian travels the world with his furry friend, Divak, and is eager to share his knowledge and experience with you and help you build a successful affiliate marketing business that will allow you to quit your traditional job and travel the world like you want!
Not only does Travel School aid in leveraging the credibility of amazing companies, but they will also offer weekly private webinars to keep your loved one motivated and on track toward accomplishing their goals.
Additionally, all training sessions are recorded and available at any time, that way if questions come up down the road or a little extra motivation is needed, the lessons can be easily accessed. There are opportunities to learn and collaborate with other students too!
It’s not often that you have the opportunity to give the gift of freedom, but in this case, Travel School is just that!
Learn more about Travel School
Deity D3 Pro Microphone

More and more photographers are getting into video production, and to do that, they have to expand their arsenal of tools beyond traditional photography gear.
And while having a camera with good video capabilities is a must, so too is having a high-quality microphone to record audio for the videos. After all, a video can have incredible footage, but with poor audio quality, the video will fall flat.
That's where the Deity D3 Pro comes in...
This super cardioid directional condenser shotgun mic has a sensitivity of -50dB to 28dB and uses an on-board microprocessor that digitally talks to the audio input it's connected with.
That means it can work with a tablet, a DSLR, a mirrorless camera, or a smartphone - essentially anything with a 3.5mm microphone jack.
The internal battery offers a whopping 51 hours of runtime, yet it charges in less than two hours.
A neat feature is that you can adjust the gain by using the stepless analog gain adjustment dial. This is the only microphone in the world that has this feature!
Add in on-board low-cut filters, a rycote shock mount, and broadcast-quality sound, and you have the makings of an ideal gift for a photographer that wants to step up their videography game!
Learn more about the Deity D3 Pro Microphone
Octopus.Camera OctoPad

If you’re rushing around trying to find that perfect last-minute gift for your favorite photographer, you might consider the Octopus.Camera OctoPad as an excellent choice.
The OctoPad offers what many other stabilization devices don’t - it doesn’t collapse under the weight of gear it’s supporting and it doesn’t slide around, even if it’s placed on a smooth or an uneven surface thanks to its weighted non-slip mat design.
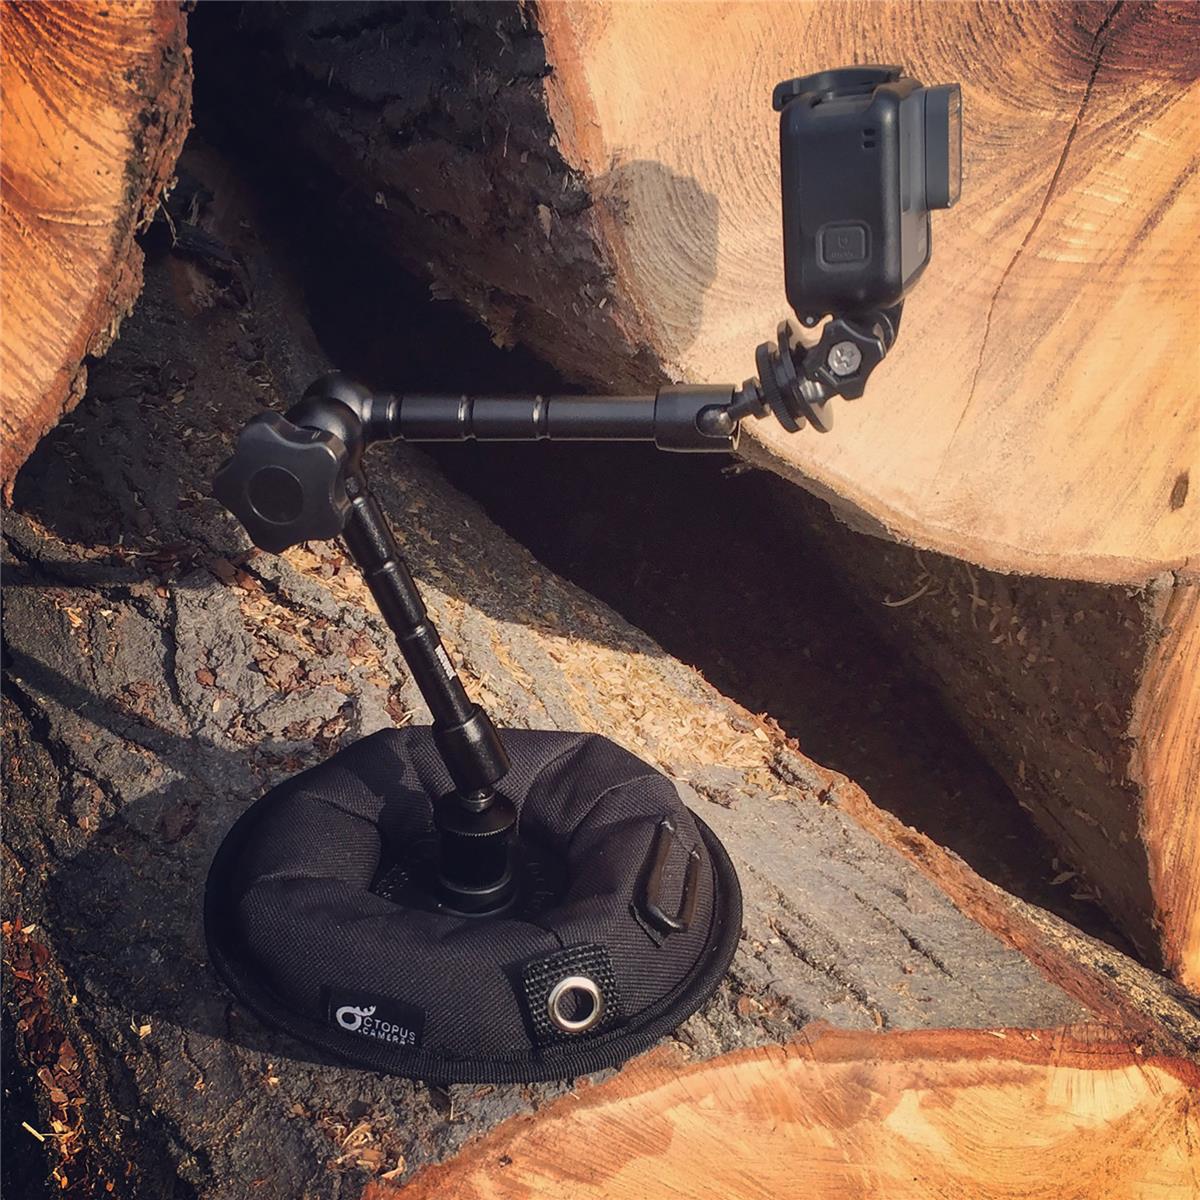
The OctoPad has a built-in male 1/4-20 inch threaded bolt for attaching accessories and a high-capacity removable ball head that also has an adjustable 1/4-20 inch threaded male bolt.
That means that not only is the OctoPad well-equipped to stay in place, but it can also support a wide range of gear, from a GoPro to a smartphone to a light or microphone.
There’s even a built-in cable strap to keep cables from getting in your way and a clip grommet for attaching a lanyard to easily carry the OctoPad.
What photographers want in a gift is something that’s versatile and functional, and the OctoPad is definitely both. Best of all, it’s just $26.95, so you can give an awesome gift without busting your budget!
Learn more about the Octopus.Camera OctoPad
Aputure Amaran AL-MX Bi-Color LED Mini Light
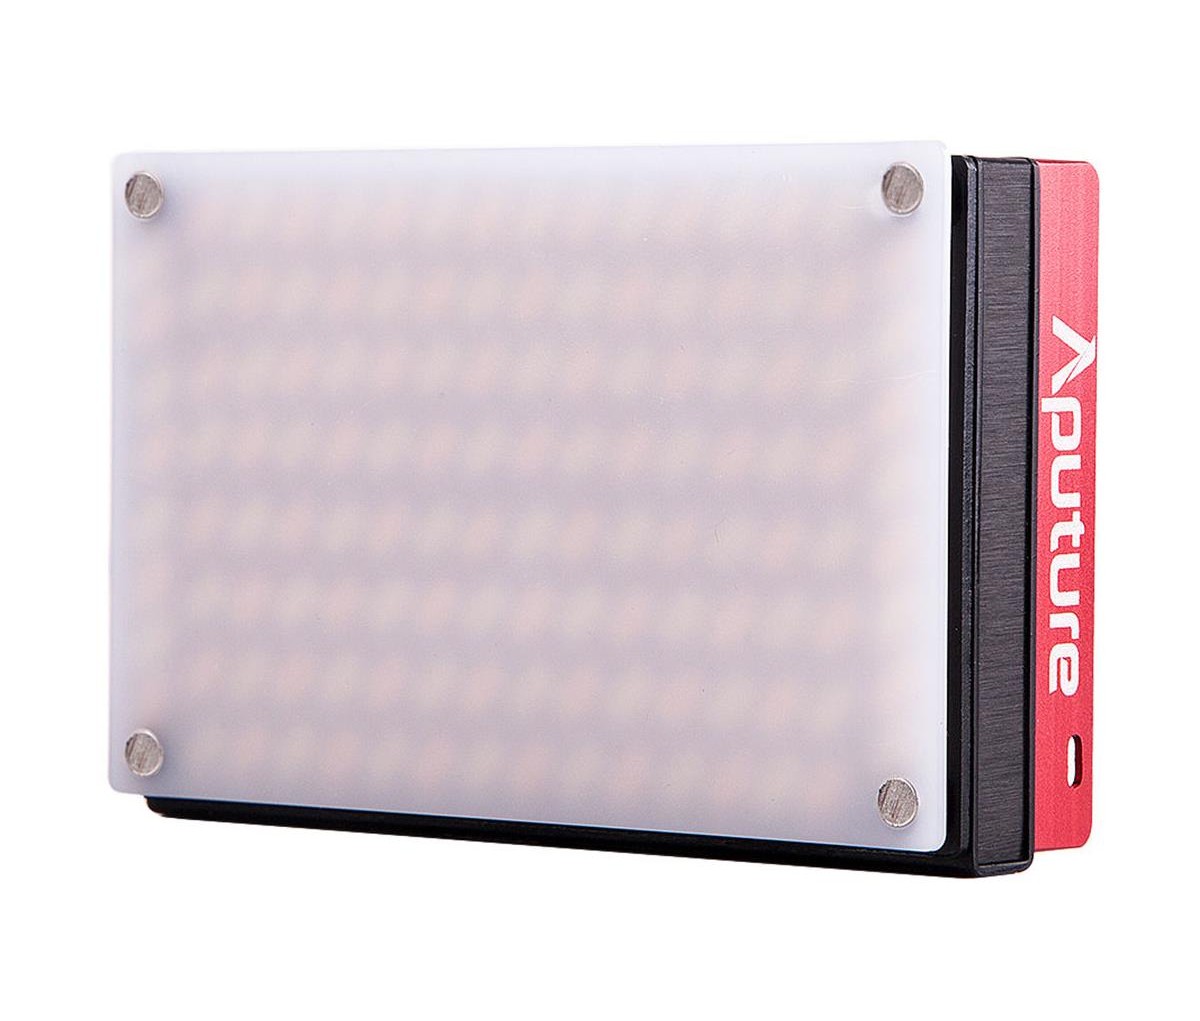
This pocket-sized light might be small, lightweight, and portable, but it packs a mighty punch with 128 LEDs, 3200lux of brightness, and a "boost mode" that increases brightness by 30 percent for bursts of 60 seconds.
Add to all that power the ability to tune the light from 2800-6500K so the photographer on your list can make fine adjustments to how the light looks to suit each and every photograph.
The quality of the light is top-notch, too - it offers a CRI of 95+ and a TLCI or 95+ as well.
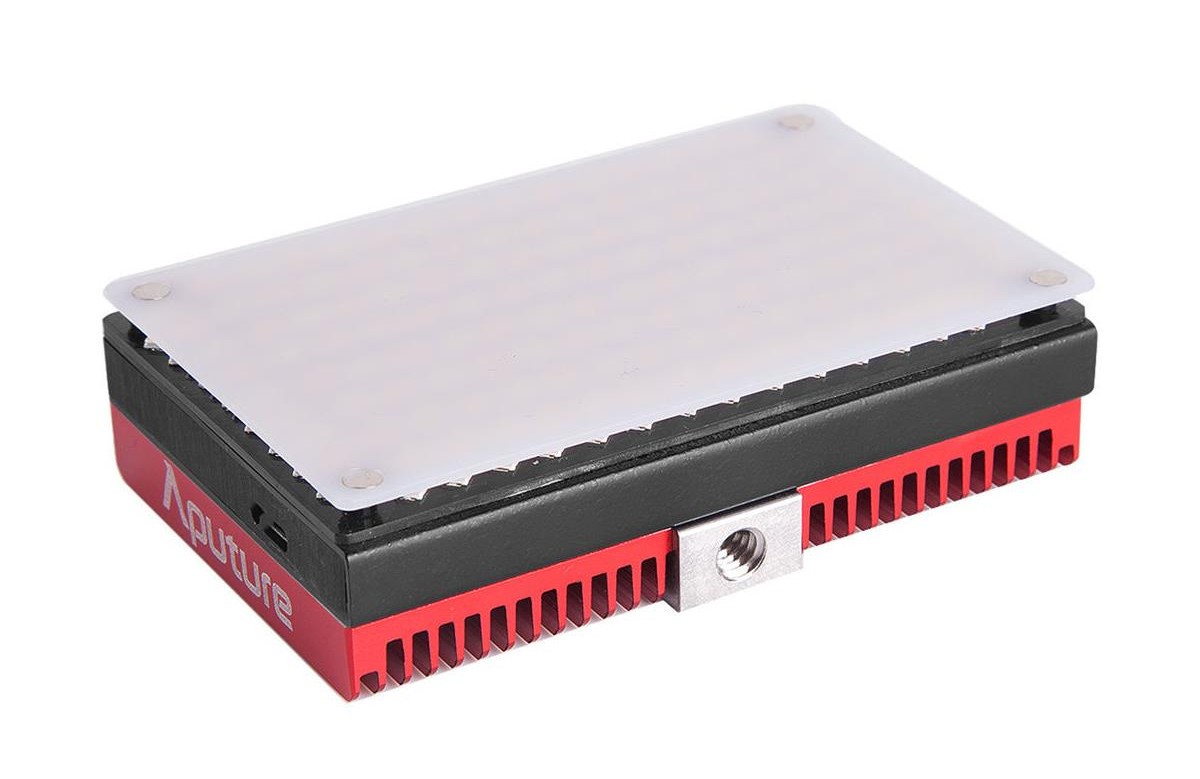
This light has a wide beam angle of 120-degrees, a portable design that's about the width and height of a credit card, and a durable metal body that's crafted of aircraft-grade aluminum.
It has a 1/4 screw and a universal cold-shoe mount so it can be mounted on a camera, a tripod, a light stand, and so forth.
This unit has a built-in battery that offers about an hour of runtime at full power and four hours of runtime at minimum power. The battery is rechargeable via a USB-C cable.
This is simply a well-built, bright, easy-to-use light that any photographer would appreciate in their stocking this holiday season!
Learn more about the Aputure Amaran AL-MX Bi-Color LED Light
Haida M-10 Filter System

One of the newest additions to my camera bag is the Haida M-10 Filter System, and I can't sing its praises enough.
The filter holder is super lightweight thanks to its aluminum construction, so it's durable and sturdy, but doesn't add unnecessary weight to your lens.
Inside the holder are slots where you can drop filters in. The slots are even lined with felt to help prevent scratches to the filters!
Another neat feature is that the holder has a quick-release clip for easy on and off. The clip is well-built and has a good amount of tension, so you don't have to worry about accidentally disengaging the clip as you work.

You can use square or circular filters with this holder. In fact, the kit comes with a variety of filters, including a circular polarizer, a variety of graduated ND filters, and solid ND filters as well.
And since the holder has two filter slots, you can mix and match filters as needed.
Both the filters and the holder are very well built - you can tell when you're holding them that they are high-quality products that will last a good, long while.
That being the case, if the photographer on your list has been hinting at needing a new filter system, you've got the perfect gift for them!
Learn more about the Haida M-10 Filter System
Exposure Software

The latest version of Exposure - Exposure X5 - was released just a few weeks ago to much fanfare.
Exposure has a ton of easy-to-use, yet powerful editing tools that any photographer would appreciate. This includes:
- An extensive library of film presets that you can customize
- Creative tools like tilt-shift, creative lens focus, and film grain
- Non-destructive editing with layers
- Selection and masking tools to apply effects to specific areas
- An intuitive and easy-to-use workspace
On top of all that, Exposure X5 has 3D color masking functionalities that will give the photographer on your shopping list the ability to have precise control over where an adjustment is made to an image.
These color controls can be defined by very specific features, like saturation, hue, and luminance, which means you can target the sky, skin tones, or other specific color ranges, all with just a few clicks.
This software also has vignette correction, chromatic aberration correction, fringe removal, and custom camera profiles to boot.
You can even test-drive Exposure for free for 30 days to see if it's something you want to give as a gift this holiday season.
Hakutatz Pocket Size RGB+AW LED Light

If you’re not sure what to get the photographer on your holiday shopping list, an ideal last-minute gift is the gift of light.
Light - good light - is essential for making high-quality photographs, and good light is exactly what you get with the Hakutatz Pocket Size RGB+AW LED Light.
This rechargeable light is ultra-portable and will fit in a photographer’s pocket for easy transport.
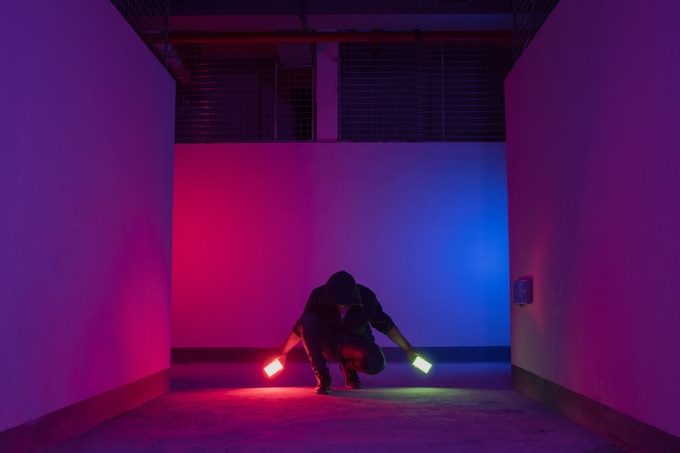
Photographers can utilize both white and amber light and a wide variety of RGB lighting options that allow for precise adjustments to get just the right light for each shot.
With 152 LEDs (40 white, 40 amber, and 72 RGB), adjustable saturation from 1-100%, 1480 lux brightness, and an adjustable color temperature from 3000-6500K, this light offers superb functionality and tons of customizations.
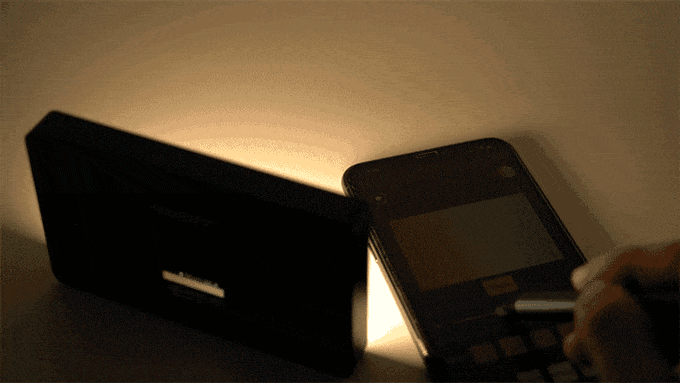
The light connects to any Android or iOS smartphone, which allows for changing the color temperature, the RGB color, and dialing in special effects. These changes can be made both quickly and easily thanks to the intuitive and user-friendly LCD display.
Use one light on its own or multiple lights to combine effects to get the perfect shot. Either way, photographers have the power to add vibrancy, visual interest, and accents to their photos right at their fingertips!
Learn more about the Hakutatz Pocket Size RGB+AW LED Light
BlueTooth Photo
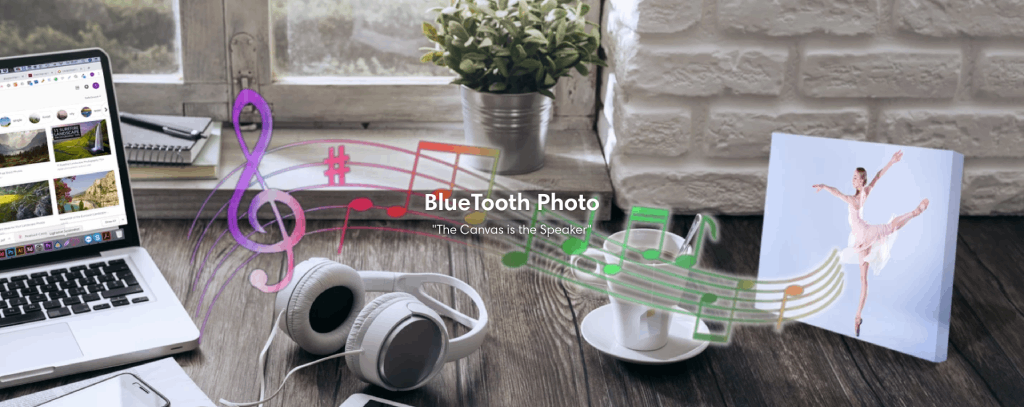
I don’t know how many BlueTooth speakers I’ve had over the years. Come to think of it, I couldn’t even tell you how many BlueTooth speakers I have in my house right now.
They’re utilitarian. They’re forgettable. Most BlueTooth speakers are nothing special.
But the patent-pending BlueTooth Photo changes all that because it turns your favorite photo or piece of art into a canvas that sings.
All you have to do is upload your image and the fine folks at BlueTooth Photo do the rest. You get a premium-grade, artist-quality canvas that showcases your favorite images all the while being the perfect vessel for fantastic audio quality for your music.

What better way to enjoy music than by listening to it emanate from your favorite photo? And what better way to appreciate your favorite photo than by having a look at it each and every time you want to listen to your favorite songs?
It’s the best of both worlds!
BlueTooth Photo is a fantastic gift idea for the photographer (or anyone else!) on your holiday shopping list. Get them an 8x12 image in either portrait or landscape orientation this Christmas for just $89.00.
Use the coupon code PT20 to get $20 off your purchase!
Learn more about BlueTooth Photo
Luminar 4

Yet another top choice for a last-minute gift for the photographer on your list is Luminar 4.
At the time of this writing, Luminar 4 is still a couple of weeks from being released, but I've had a chance to look at it, and WOW is a word that immediately comes to mind.
Luminar makes use of artificial intelligence to allow photographers to make specific and detailed edits to their photos, but without the process being one that's laborious or time-consuming.
For example, Luminar 4 features an AI Sky Replacement tool that allows you to automatically change the sky in any photo. Yes, change the sky - not just edit it to look prettier.
Better still, you can change the sky without creating masks or making selections, and the AI Sky Replacement Tool will relight the entire image, that way the original image and the new sky match in terms of brightness.
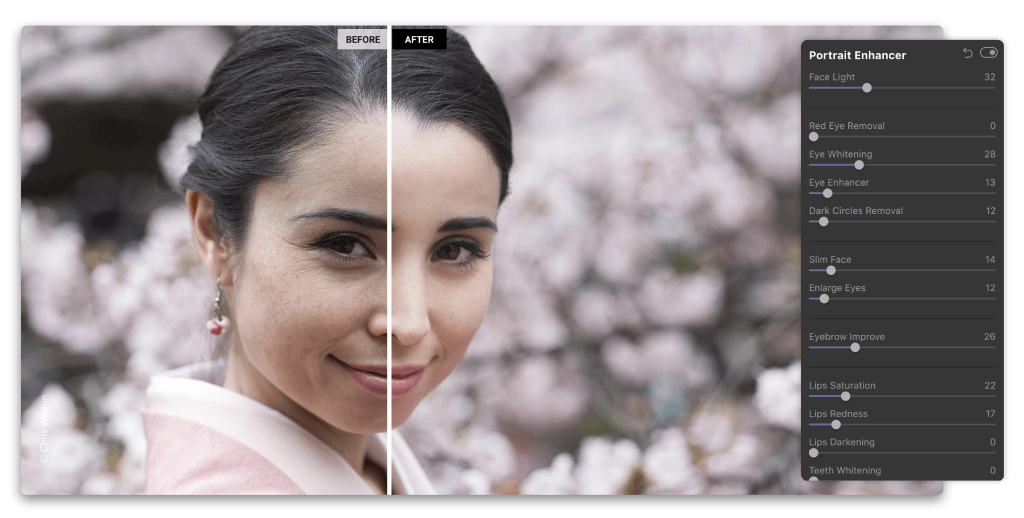
Luminar 4 also has handy tools for portrait photographers, like the AI Skin Enhancer, which detects blemishes and removes them, all the while preserving details in the skin. This tool will detect skin anywhere in the photo (not just people's faces), and its corrections are made with just one click.
There's also an AI Portrait Enhancer that has 12 tools that enable you to make corrections to the face, eyes, and mouth in a way that maximizes control while maintaining ease of use.
Needless to say, Luminar 4 is packed with features and will make a great addition to any photographer's workflow!
Wiral LITE Cable Cam

I've had the Wiral Lite Cable Cam for a couple of months now, and I can't tell you how much fun I've had using it.
It is incredibly easy to use, too, as it has a simple rope system that allows for quick setup.
And once you have it setup, you can get beautifully smooth, dynamic tracking shots that take your videos to the next level.
This patent-pending rope system is called "Quickreel," and uses an ultra static rope so you get superb performance with excellent safety. The beauty, though, is that this rope doesn't add bulk or weight, so it's easy to carry.
This rope system can be used with a variety of cameras, from a GoPro to your smartphone to a DSLR or mirrorless camera.
If you watch the video above, you can see the kind of long, smooth video sequences that are possible.
It looks like a video that was taken using a big, expensive setup!
But this rig is less than $500...
Quick setup, loads of features, huge functionality, and a great price. What more could you want in a last-minute gift for the photographer on your list?!
Learn more about the Wiral LITE Cable Cam
Holdfast MoneyMaker Solo

One of my favorite pieces of gear is my MoneyMaker Solo camera strap. This thing is gorgeously crafted, easy on the eyes, and super functional, too.
What I like most about this strap is the comfort it offers.
It has a big, contoured shoulder strap that helps keep fatigue at bay. The shoulder strap stays in place on your shoulder too (go figure!), so carrying your camera for extended periods of time doesn't turn into making constant adjustments to how the strap interacts with your body.
Part of what helps the strap stay in place is the stability strap that wraps under your arm.

The other component of that is the ingenious Belt Anchor, which keeps the camera attached to your hip, rather than flopping around as you walk.
Not only does that improve the comfort level, but it makes it a safer endeavor to carry your camera, especially in crowded areas.
The construction of this thing is worth mentioning, too.
It's made of a single piece of full-grain leather, so it's absolutely stunning to look at.
The high-quality leather is paired with stainless steel hardware, so you know that the strap and its components will last the photographer on your list for years and years and years to come!
Check out my Holdfast MoneyMaker Solo Review to get more details on this awesome gift idea for photographers.
Learn more about the Holdfast MoneyMaker Solo
We Recommend
Top 5 iPhone Photography Accessories for 2021
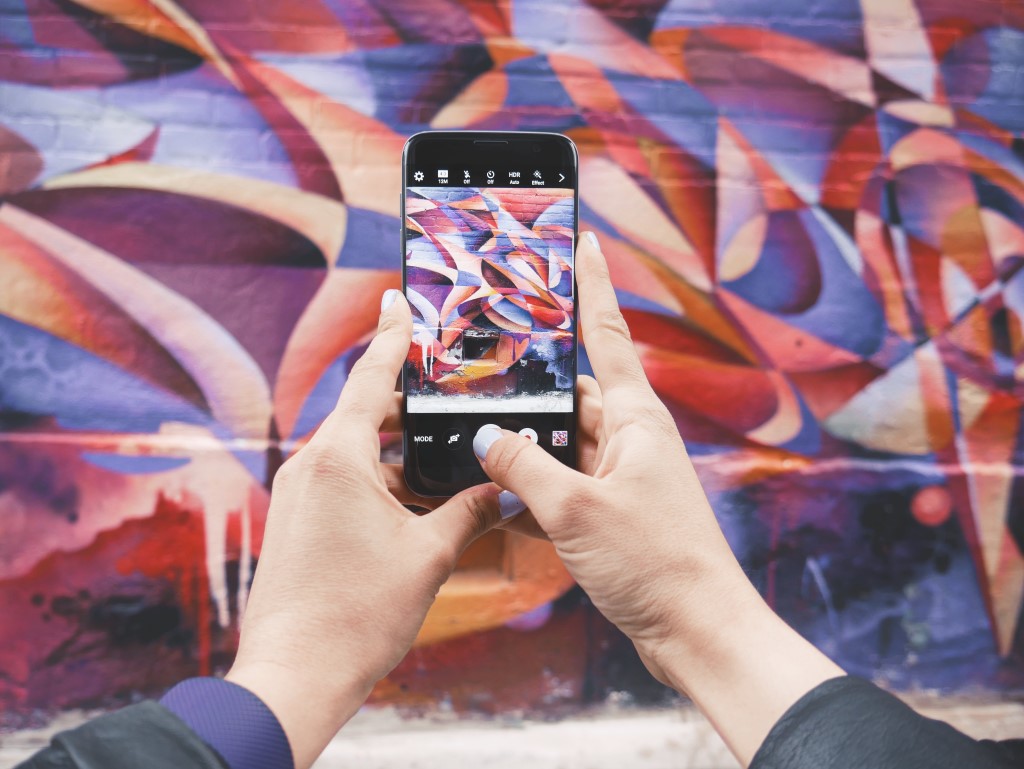
Photo by Patrick Tomasso on Unsplash
Smartphone photography has grown so much in the past few years. Led by Apple, iPhoneography is a well established genre in the world of photography.
Much the same way users of other cameras do, many of us are looking for iPhone photography accessories and other smartphone photography accessories to enhance our photographic experience.
5 Top Smartphone Camera Accessories for 2020
Using the right photography accessories, photographers can engage in a lot of techniques and methods. Some camera accessories let you make long exposures, some are artificial lighting, others may be related to the A/V capabilities of modern cameras including smartphone cameras.
OctoPad Camera Support
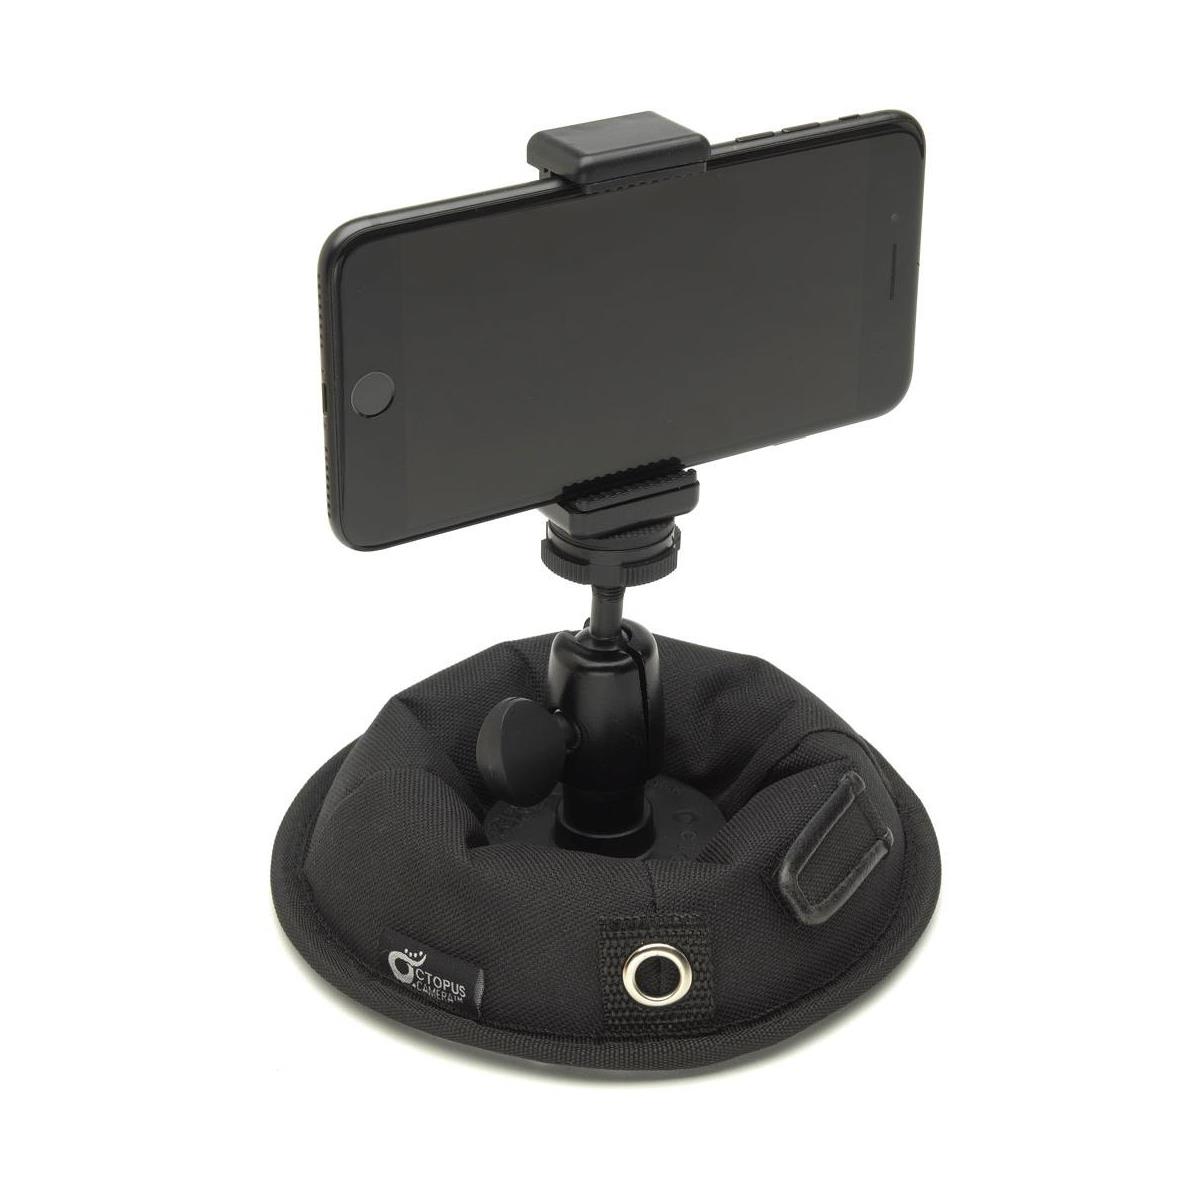
Think of this patent-pending unique small camera support as the alternative to carrying a tripod. Mobile devices are meant to be mobile. But sometimes that mobility puts us in a situation where we need to support or iPhone camera with something other than our hands.
Photographers have been making use of some form of camera support since the inception of photography for the masses in the mid-1800s. Tripods were designed into extremely useful and very portable devices.
What makes the OctoPad one of the best iPhone photography accessories is that it is small, easy to use, inexpensive, and it really holds your smartphone camera securely in many situations.

It is a non-slip, weighted pad that can be placed on nearly any surface, and it has a ball and socket head. You can attach any number of mounting adapters to it, including a smartphone holder. It’s not a suction cup, the weight and the non-slip material is what holds it in place.
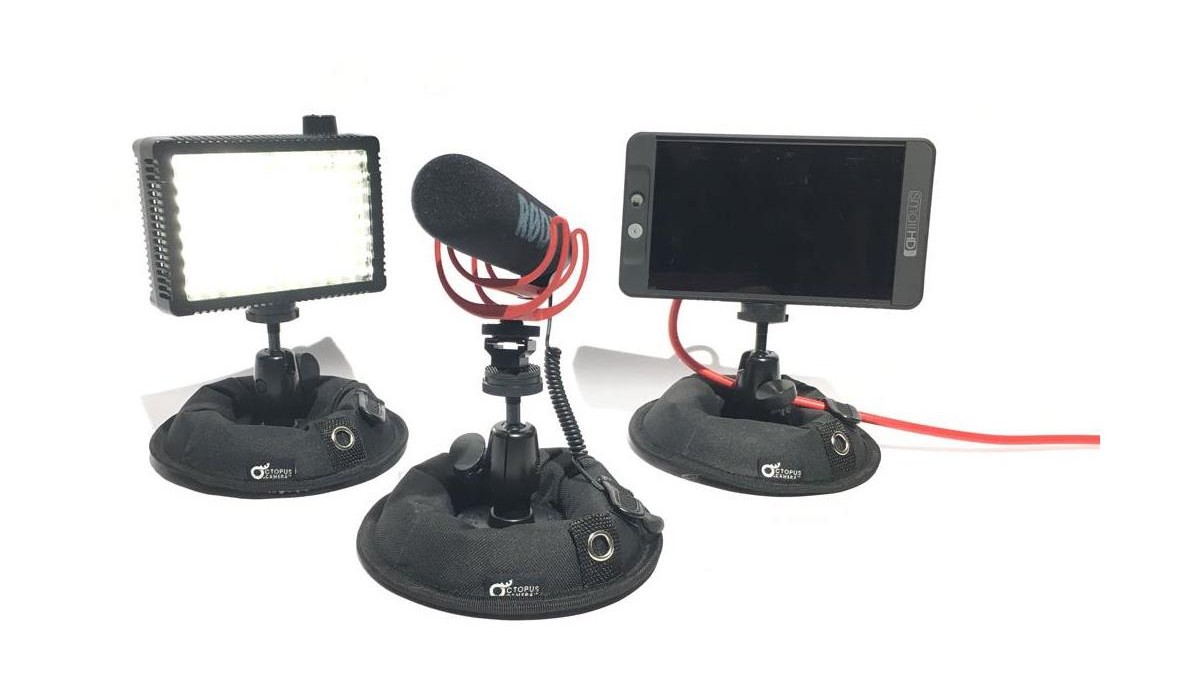
Since the cost is very budget friendly, you could combine several together to accomplish what you need to do. As an example, if you are filming remotely for your YouTube channel, use an OctoPad for your phone to free up your hands, one to hold a microphone close to your subject, and another OctoPad for your auxiliary light source.
Learn More:
Hakutatz Portable LED Light

A primary concern for many of our potential images is the lighting. We need to make sure we have enough light and that the light is placed where it needs to be. The Hakutatz battery powered portable LED light is one of the photography accessories iPhoneographers should be aware of.
This portable light is one of the best iPhone photography accessories to have for several reasons. It’s battery powered and portable, it emits low heat, is energy efficient, has very bright LED bulbs, it has multiple color options, and it can be controlled by our smartphone with an app.
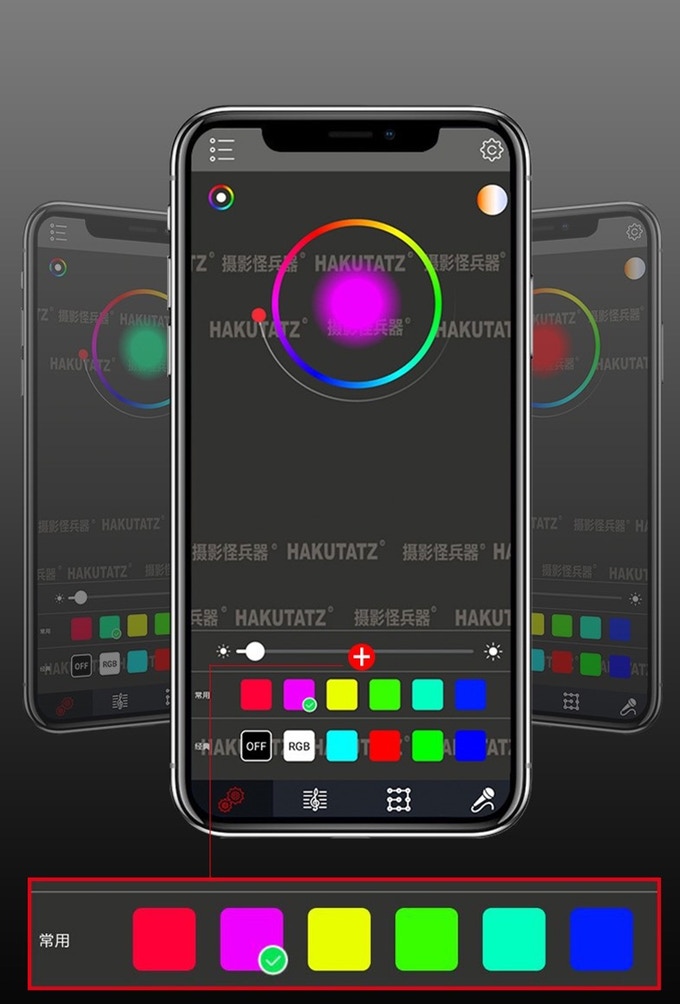
With one or more of these awesome lights, we can have complete control over our smartphone photography. Even though our smartphone cameras are amazing, the lenses are slow by their very nature. So, we often would get better results for still images and video by adding an artificial light source.
The multiple color capability of this small LED light is for more than special effects. With the smartphone app, we can dial in the proper color temperature to match the ambient light. This allows for our artificial light to blend in perfectly with the entire scene.

Great photos need great light, and despite the incredible advances in the cameras and software on iPhones, the tiny flash just doesn’t cut it.
That’s why the Hakutatz pocket-sized LED light is one of the most useful smartphone camera accessories we could find.
Bamoer 22x Telephoto Lens Kit
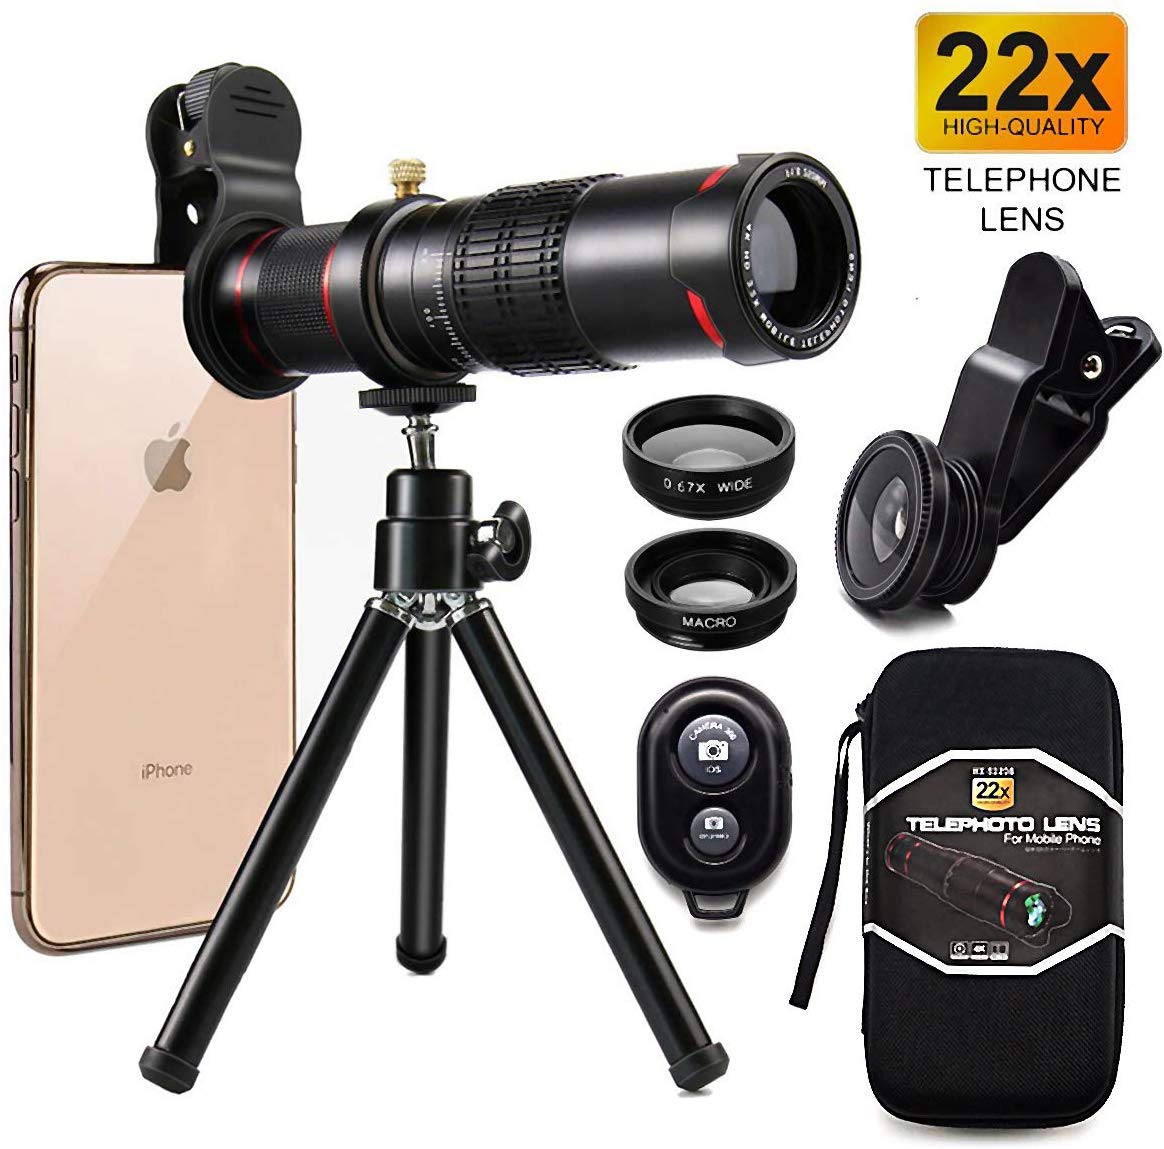
Our smartphone cameras have high-quality lenses, but they are limited compared to interchangeable lens cameras. Several manufacturers have figured out ways to add extra lenses to smartphones. Many of these lens kits fit Samsung, iPhone, Google, and other brand smartphones, making them great smartphone photography accessories.
There are several good choices, but I liked the Bamoer 22X Telephoto Lens Kit for its huge range of focal length alternatives to our built-in lens.
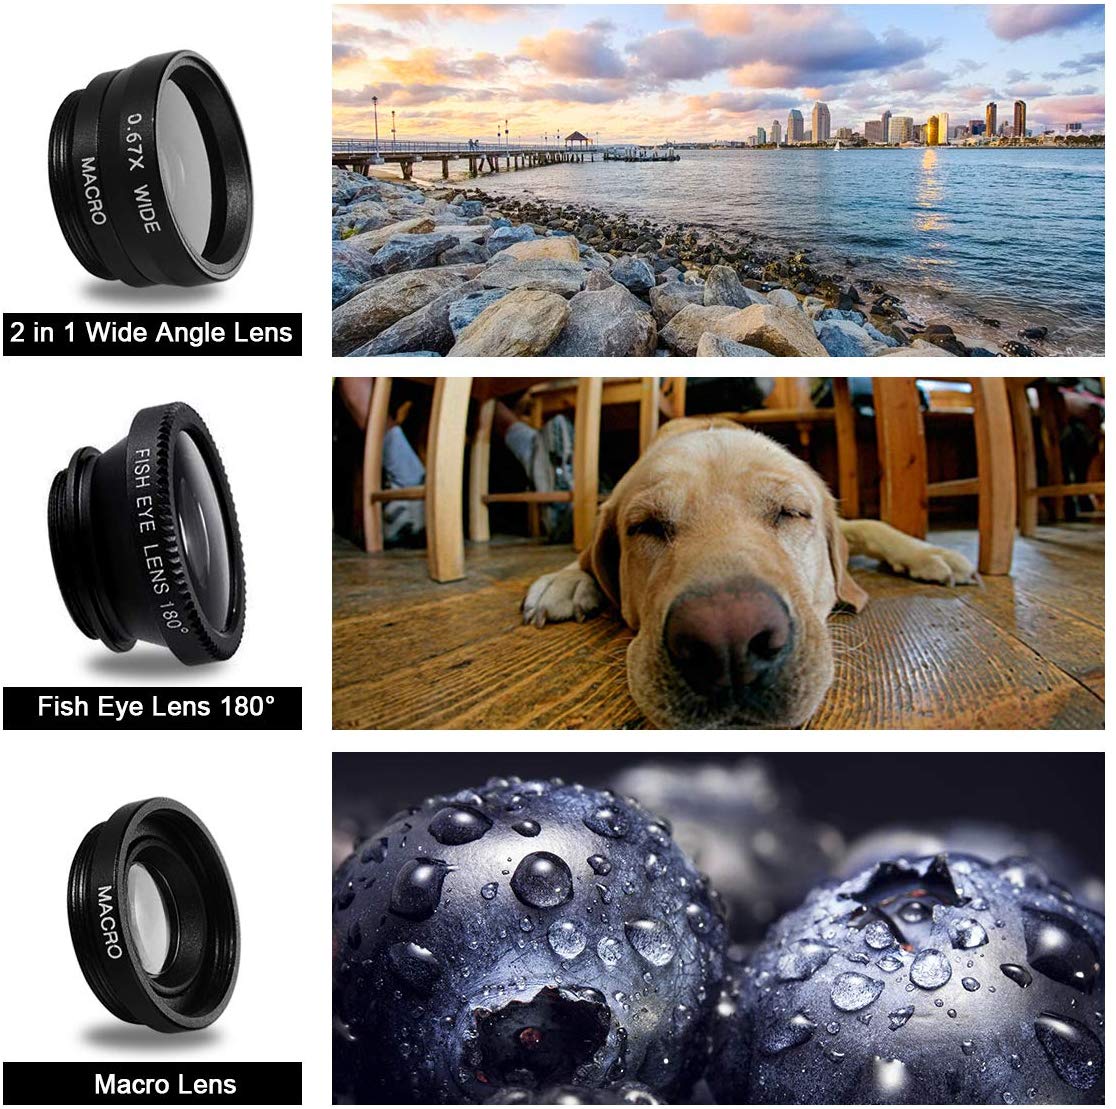
The most noticeable item in the kit is that super telephoto attachment. Magnifying 22X is the equivalent of using a 1,100mm lens on a 35mm full frame camera. That’s a whole lot of telephoto. Using the included small tripod or a mount like the OctoPad is essential for that much telephoto power.
Lenses also included in the kit are a macro for ultra-close focusing, an ultra-wide angle, and an extreme wide-angle 180-degree fisheye lens. As smartphone camera accessories go, this choice will expand your photographic options quite a bit.
Wireless Lavalier Microphone
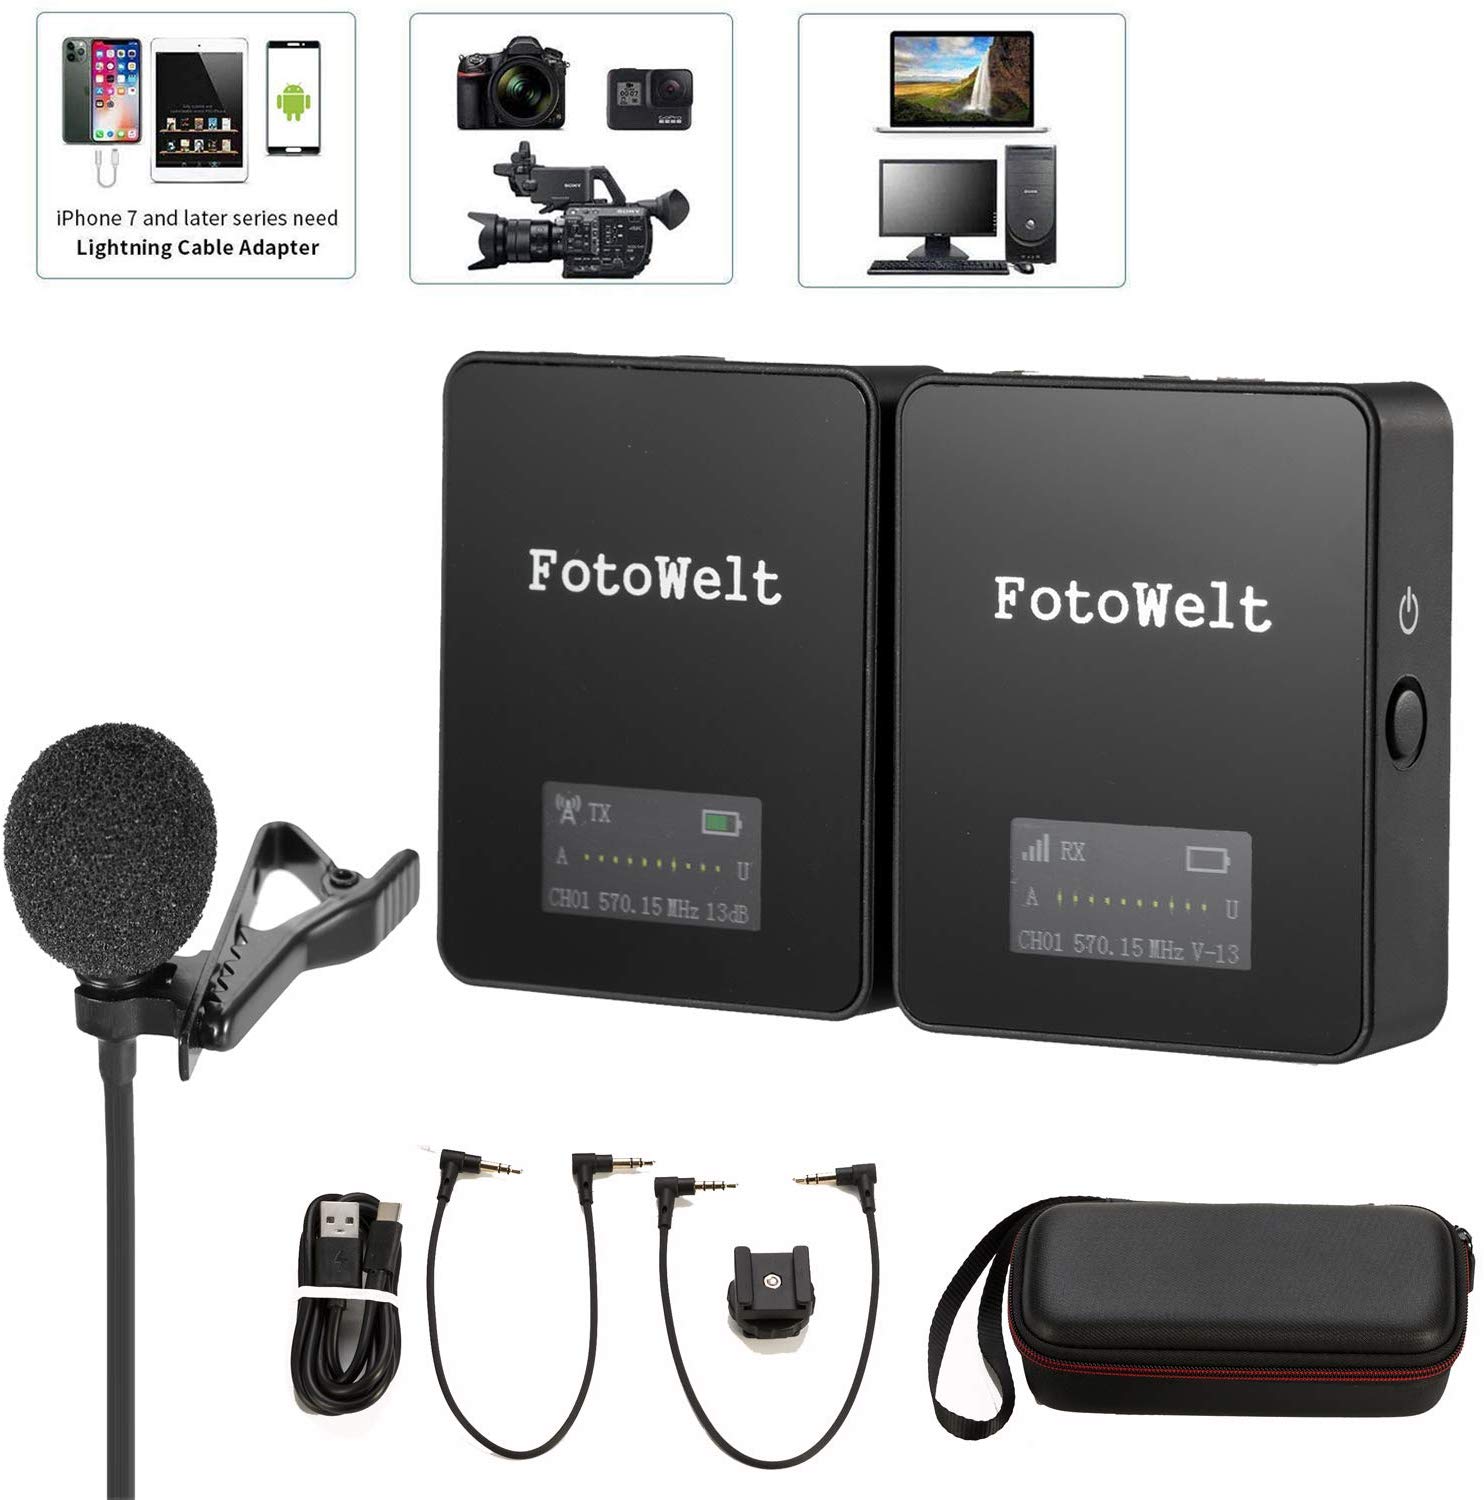
YouTubers, vloggers, and anyone else using their smartphone for video recording will benefit from a remote mic. One of the easiest to implement is a wireless lavalier mic system.

Using this will improve the audio quality of your recording immensely. Other options to consider are lightweight shotgun mics that you would use from camera position.
Audio is a vital part of any video we shoot, so this idea fits perfectly with the best smartphone camera accessories we may consider.
Learn More:
Anker PowerCore 10000 Portable Power Pack
All of these smartphone photography accessories and iPhone videography gear tend to draw a lot of power, draining our phones batteries. If not actually functioning by means of our phone battery, the increased amount of time we spend using all these cool gadgets means we use more power.

Therefore, an external, extra source of electronic power can really come in handy. One of the better models we found is the Anker PowerCore 10000. It operates with many different mobile devices, allowing you to stay out in the field longer, making movies or capturing images.
Other iPhone Photography Accessories
We included the top 5 that can give you the most versatility in your smartphone photography. Other accessories you might find useful are bags, waterproof cases and sleeves, remote controls, and awesome editing apps.
Adapting one or more of these items to your iPhoneography will enhance your photographic experience and could enable you to take your photos and videos to the next level!
We Recommend
Top Software and Gear Updates That Rocked 2019

photo byzeljkosantrac via iStock
It was a great year for photography, particularly on the software and gear fronts.
From camera accessories to post-processing software, camera bags to lighting gear, we saw tons of new, updated, and innovative products and services come to market in 2019.
It would be impossible to review everything that rocked the photography world this year, so we’ve done the next best thing and outlined more than a dozen of our favorite updates below.
Luminar 4
I’ve been a big fan of Luminar going back to when it was called Luminar 2018. And when Luminar 3 came out, I got my copy and began enjoying it immediately.
Now Luminar 4 is here, and with a host of improvements and expanded capabilities, it is the best Luminar yet.
If you’re unfamiliar with Luminar, let me give you a quick overview…
It’s chock-full of revolutionary tools that help you create better photos, faster.
That’s thanks in large part to artificial intelligence that drives easy-to-use tools that streamline your workflow yet still give you pinpoint control over how your images look.
Joining tools like the Accent AI Filter and the AI Sky Enhancer from Luminar 3 is a suite of new AI-powered tools that take image editing to a whole new level.
For portrait enthusiasts, the AI Skin Enhancer and Portrait Enhancer tools will revolutionize the way photo editing is done.
Using human-aware technology, the AI Skin Enhancer detects all the skin in a photo, smooths it out, removes blemishes, and does so while preserving the texture of the skin, pores, and hair.
It takes just one click to apply the Skin Enhancers edits, and then with a single slider you can adjust its strength for a picture-perfect result.
The AI Portrait Enhancer gives you a host of tools to quickly and easily make detailed changes to portraits, like whitening teeth and eyes, removing dark circles under eyes, and removing red eye, just to name a few.
In all, the Portrait Enhancer includes twelve revolutionary tools that turn editing portraits into a process that takes a minute or less!
Luminar 4 has some goodies for landscape photographers as well.
Primary among them is the AI Sky Replacement tool.
As its name suggests, this tool replaces the sky in your photos automatically - there’s no masking or selections to be made on your part.
The selection algorithms work so well, in fact, that it knows to exclude leaves, grass, and animals from the sky selection.

Not only that, but this tool relights the entire image, that way the foreground matches the brightness of the new sky.
It’s advancements like this that make Luminar 4 one of the most powerful, easy-to-use editing programs on the planet today.
Need more convincing? Get Luminar 4 today and see for yourself!
Hakutatz Pocket Size RGB+AW LED Light
Gone are the days when you have to lug around huge lights to get the key light or fill light you need for awesome portraits.
Instead, companies like Hakutatz have developed powerful pocket-sized LED lights that give you the power to customize the type of lighting to your specific needs.
This particular light has RGB, amber, and white LEDs, so you can add accent colors to your photos and videos or dial in the ideal white balance by using the amber or white lights.
This light is completely adjustable, with controls for saturation, brightness, and color temperature. Better still, you can adjust the light’s settings via a well-designed and user-friendly smartphone app.
That means that with a simple touch or a swipe of your finger, you can fine-tune everything from the RGB color to special effects. You can even control multiple lights at the same time right from the app. No wonder their Kickstarter campaign was such a huge success!

Hakutatz literally puts the power to dial in complex lighting schemes in the palm of your hand, and does so in a way that’s clean, simple, and super functional. That’s by this little light rocked the photography world in 2019!
Be on the lookout for Hakutatz’ online store to have these lights in stock in December!
Learn more about the Hakutatz Pocket Size RGB+AW LED Light
Hazard 4® Cyclone™

Framing shots with your action cam in direct sun can be frustrating; glare in your eyes and the camera’s tiny, reflective screen are really fatiguing. Blowing sand, water or snow don’t help. But the best action is shot outside - Cyclone™ is the first real solution.

This patent-pending optic blocks the sun, but it’s lens also magnifies the screen and protects it. You effectively add mirrorless camera style composition and review to your tiny affordable GoPro or DJI action cam that survive where real mirrorless can’t. Better still, the viewfinder mounts to your action cam’s bottom screw in seconds, so there is no fumbling. But you’ll probably choose to keep it on since this little guy doubles as a tiltable handle - keeping fingers out of frame and for extension. With cheap additional hardware you can even head mount it for hands-free composition while biking, paragliding etc, and it tilts out of the way at will.


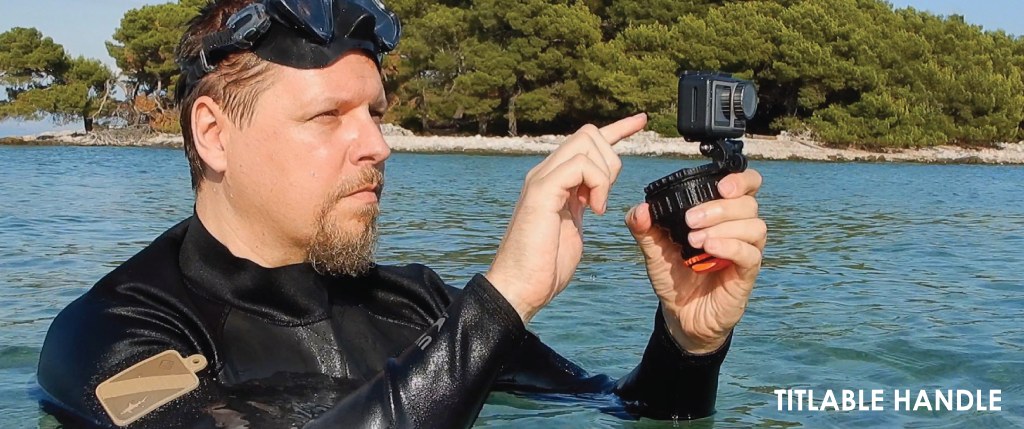
The simple, waterproof, tough, design accordions flat for easy portability and flattened can be a selfie mini tripod. It has diopter focus - even helping out ageing eyes. The high-vis cap self closes to protect the lens. And you get a tether loop action cams don’t include.

Hazard 4® has a reputation for innovating outdoor photo accessories; the Cyclone™ is no exception. As usual they have gone above and beyond to design a multi-functional, easy to use bombproof solution to a common video shooter problem. Perhaps this may push GoPro® or DJI® to finally up the resolution on their LCD’s under magnification and drive the mirrorless wars into the action cam space. Either way, you don’t have to rely on the wide angle lens for your framing anymore- you can actually compose like a pro.
This device is currently on Kickstarter, with a fund date of January 7, 2020. Head over to Kickstarter now to learn more about this device.
The Camera Pack by Nomatic and Peter McKinnon

Billed as a “functional camera pack for all types of travelers,” the Camera Pack by Nomatic and Peter McKinnon is certainly worthy of inclusion on this list.
The Kickstarter campaign to fund this pack had a goal of $100,000. It raised nearly $2.3 million. That speaks to the reputation of Nomatic and Peter McKinnon!
This bag is ridiculously well designed and has a functionality level that’s off the charts.
It’s designed to cure the woes of travel photographers who have to have one bag for their gear and another bag for their personal items.
The Camera Pack solves this problem by having a clothing side and a gear side which are separated by an interior panel. This keeps everything neat and tidy so you aren’t rifling through the entire back when you need something.
Better still, the bag has a “Cube Pack” inside, which serves as the ideal organizational module within the interior ecosystem. However, as the gif below shows, the Cube Pack converts to a daypack, so if you need to run and gun a little, you don’t have to take the larger Camera Pack with you. Ingenious!

Overall, the Camera Pack can hold 35 liters of gear, but can be expanded to accommodate up to 42 liters of gear. That’s a lot of stuff! And with a full clamshell opening, you can see all the gear you’ve stowed away with ease.
And everything is neatly organized thanks to a main camera compartment with moveable interior dividers. There’s a sleeve for your tablet, pockets for your camera accessories, and quick side access for easy retrieval of gear, too.

On the clothing side, there’s compression cubes for your clothes, compression straps to keep everything where it should be, and more pockets for smaller items.
This is just a really well designed and impeccably built backpack. And with the input of a photography expert like Peter McKinnon, you know that it’s been designed with photography needs in mind.
Learn more about the Camera Pack by Nomatic and Peter McKinnon
GearFocus.com

If you buy and sell your used photography gear on places like Craigslist, you’re doing it all wrong.
That’s because there are much better alternatives that take the hassle out of buying and selling used gear. GearFocus.com is certainly one of the best.
One of the top reasons GearFocus makes our list of the Top Software and Gear Updates is because they focused on building a community where people like you and I can buy quality used gear and get fair market value for stuff we sell.
Unlike other used gear sites, GearFocus doesn’t take a giant chunk of your profits when you sell your gear. Instead, they offer the lowest seller fees among B2C and C2C marketplaces, which means more money in your pocket when your item sells.
Additionally, GearFocus ensures each transaction is safe and secure by screening and monitoring every single post and transaction. Gear Focus was made by creatives, for creatives and they’ve been in this business long enough to be able to spot suspicious listings and red flags from a mile away. Without scammers creating fake listings, the buying and selling experience is enhanced so you can get the best deal on used gear and the most money for the items you sell.
Heck, they’ll even intervene on your behalf if something goes wrong! Having that kind of peace of mind alone is enough to land these guys on this list!
It’s not often that you find companies like this that prioritize community building and supporting one another over making a buck. That focus on customer service is just the icing on the cake for patrons of GearFocus. They are here to help FEED YOUR PASSION!
Learn more about GearFocus.com
Litra Studio
To say that the Litra Studio is powerful is an understatement.
Weighing in at just 33.5 ounces and measuring 5.5" x 3.9" x 2.9", the Litra Studio is certainly easily transported without taking up a ton of space in your camera bag.
But don’t let its small size fool you - this light can produce over one million unique colors that will help you light up your portraits and videos.

The Litra Studio can produce up to 3,000 lumens of continuous light and up to 6,00 lumens of flash. In CCT mode, you get 2,000-10,00K adjustable bi-color lighting with green and magenta color shift controls to allow for tunable blue and green screen optimization.
On top of that, this light is fully tunable and dimmable, and offers CCT, HSI, RGBWW, gel presets, flash modes, and effects, too.
The light it produces is clean and flicker-free at all shutter angles. The CRI and TLCI of 97 speak to its impeccable color accuracy.
Litra even made sure this light is rugged and durable. It’s waterproof, has highly efficient passive thermal management, and offers up to 20 hours of battery life on the low setting.
That makes this a go-anywhere, do-anything light that made huge waves in the photography world this year.
Learn more about the Litra Studio
GoPro HERO 8

While the GoPro HERO 8 doesn’t boast any major updates, it does represent a culmination of a wide range of smaller updates that, taken together, make it the best GoPro thus far.
In fact, I’d say this is the most innovative and user-friendly GoPro yet.
It has built-in mounting pins so you can directly mount the camera to accessories rather than needing a frame to do so.

There are built-in digital lenses for multiple field of view settings from Narrow and Wide to Linear and Superview. The camera’s physical lens cover is not not removable and it twice as strong as those found in older models.
Also on the ease-of-use front are numerous capture presets that allow you to create and save popular types of videos. SuperPhoto, which is GoPro’s version of HDR, gets a refresh that results in improved image quality as well.
The GoPro HERO 7 debuted incredible image stabilization with HyperSmooth, and the HERO 8 builds on that with even better results with HyperSmooth 2.0.
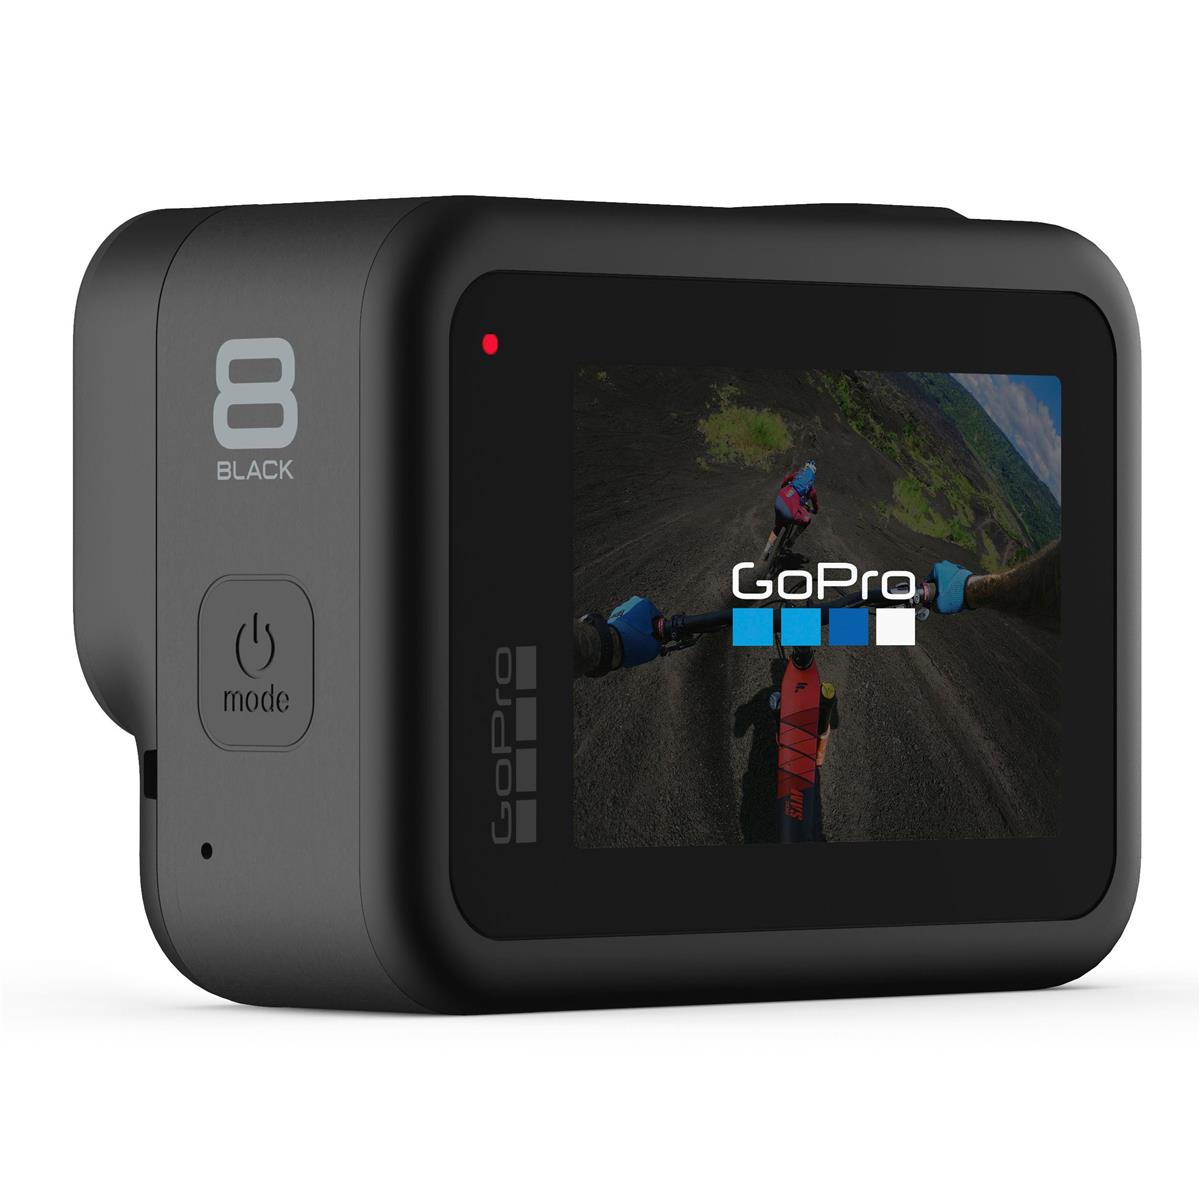
The HERO 8 also gets upgraded TimeWarp features, including an auto mode that uses sensor to detect motion and adjust the recording speed accordingly.
The camera also has improved photo-taking capabilities with face detection, smile detection, and blink detection functions, as well as LiveBurst mode for taking 1.5-second-long images before and after the shutter button is depressed.
Add in built-in GPS, motion sensors, live streaming capabilities at 1080p, 4K video at 60fps, and a host of mod accessories to expand the camera’s capabilities, and it’s no wonder that this rig set the photography world on fire in 2019!
Learn more about the GoPro HERO 8
Aputure 120D II
As far as studio lights go, it’s tough to beat the quality lights that Aputure puts out.
And at the top of their lineup is the 120d II, a light I reviewed earlier this year and was very impressed with.
This light is 1000-watt tungsten equivalent, so you get plenty of brightness for your studio work. It’s fully dimmable, too, and has a CRI and TLCI of 97+. That kind of quality light is a must-have for discerning photographers.
Aputure also included a variety of built-in lighting effects so you can dial in custom looks for your images. With this light, there’s nothing stopping your creativity!
But what’s really impressive about the 120d II is what’s “behind the scenes.”
It has an integrated power and control box, which keeps clutter to a minimum in the studio. Any studio photographer will appreciate that!
What’s more, it has an 18dB quiet fan, which keeps that annoying “whooshing” sound to a minimum so you can concentrate more thoroughly on getting killer shots.
Add in the fact that this light is 25 percent brighter than its predecessor and that it has DMX controls, a wireless remote, and excellent portability, and you have the makings of a top light for your photography studio.
Learn more about the Aputure 120d II
Exposure X5
Exposure X5 is yet another software update that sent shockwaves through the photography world in 2019.
Its predecessor, Exposure X4, was highly functional, user-friendly, and super powerful, so it was hard to imagine how the folks at Exposure could make X5 better. But they did.
For starters, Exposure X5 has custom camera profiles that allow you to control how the software interprets color from RAW files. These profiles (created by X-Rite, among others) can be applied automatically by matching the serial number of your camera or by using the camera model. Furthermore, these profiles can be matched to a specific lens or ISO range.
You get advanced chromatic aberration correction in X5 too. This allows you to remove unwanted artifacts using lens profiles, or you can remove them by making manual adjustments if you prefer.
There’s also a new fringe removal tool, so X5 makes getting rid of chromatic aberrations easier than ever before.
There are a host of other new features too.
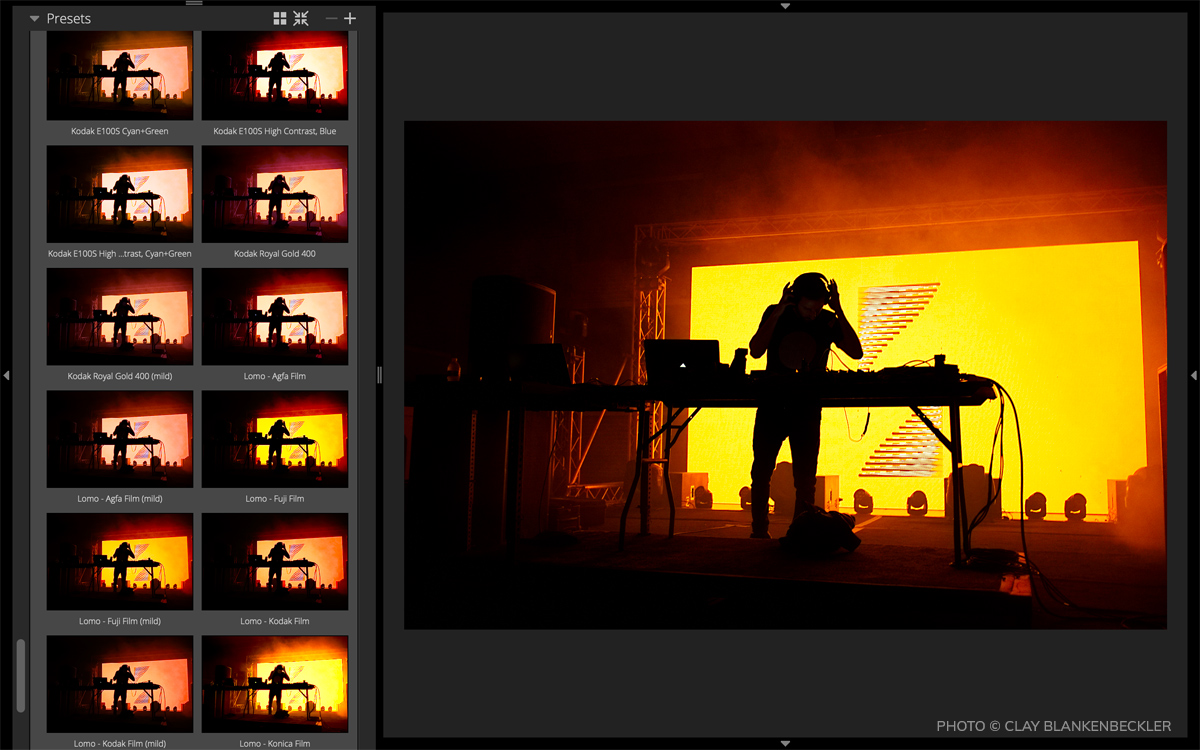
Exposure X5 includes new complementary color presets, new season-inspired looks, and new light and airy presets that give you expanded creative potential when editing your photos.
There are more black and white film options than ever before, support for grayscale TIFF and JPEG images, and new image flip options too. Exposure X5 also has multiple language options, including English, German, and French.
But for me, the best new feature in Exposure X5 is 3D color masking.
Basically, you can use this tool to make incredibly precise selections for applying adjustments to your photos. You can see it at work in the video above.
This fine level of control is made possible by using specific color characteristics (hue, saturation, and luminance) to define the adjustment areas.
What this means is that you can quickly and easily target specific areas for color masking, like the sky in a landscape photo or skin tones in a portrait. This is all done with just a few clicks.
Exposure X5 is powerful, easy to use, and incorporates tons of new features that make it the best Exposure software to date. If you’ve never tried exposure, give it a test-drive for free.
Holdfast Tanker Belt

I’ve been a Holdfast customer for a long time, and what initially drew me to them was the absolutely outstanding build quality of their products.
They use only the finest materials - things like full-grain leather and stainless steel - so when you buy a camera strap or harness or bag, you get something that is durable and will last you for years.
But as the years have gone by, I’ve come to appreciate more and more the sheer innovation that these guys display when developing new products. That being the case, I had to include Holdfast on this list of the best gear updates of the year.

One of Holdfast’s latest products is the Tanker Belt, which changes the way you carry your gear.
It’s actually two belts in one, the first of which cinches around your waist like a normal belt and the second, outer belt, which forms loops for attaching your gear.
This ingenious design means the belt stays put (as do your pants) while maximizing the amount of gear you can carry around your waist.

There are three D-rings on the belt for attaching things like your keys or a wallet, and the D-rings are moveable, so you can customize precisely where your items hang on your waist.
And, as you’d expect with Holdfast, this belt looks and feels like a million bucks - it's gorgeous handmade leather is something to behold!
Better still, the Tanker Belt was designed with functionality in mind, so it’s compatible with a wide range of Holdfast products.

You can attach the Ranger Leash to the belt and take Fido for a hands-free walk, or you can add a cell phone pouch and keep your smartphone safe and secure and out of the elements.
Add a lens pouch or two (small, medium, or large) so you have extra glass for your next shoot too!
With sizes from 28-inches up to 44-inches and multiple colors (black, tan, chestnut, and burgandy), you can customize the Tanker Belt to your specific needs and tastes.
Learn more about the Holdfast Tanker Belt
Panasonic 10-25mm f/1.7 Lens
I picked up a Panasonic GH5 earlier this year, and it quickly won me over with its astonishing video capabilities.
It wasn’t until recently, though, that I got to test out the Panasonic 10-25mm f/1.7 lens, and I have to say, I wish I would’ve gotten my hands on it a lot sooner! This is a fantastic lens, to say the least.
You can get some of my thoughts on this lens in the video above, but I want to expound on its features a little bit more.
Make no mistake - this is a gigantic lens, especially for a micro four-thirds camera. Fortunately, it’s not hard to handle at all, and despite its footprint, it’s actually not all that heavy.

But it’s massive size means that Panasonic was able to cram lots of goodies inside to help you get superb images.
This lens is supremely sharp, beautifully responsive, and gets you clean, crisp images each and every time. Its bokeh is buttery smooth and there’s wonderful brightness throughout its aperture range.
It has 17 elements in 12 groups, including three aspherical lenses and four extra-low dispersion elements which work to all but eliminate spherical aberration, distortion, and chromatic aberration. The result is images with impressive quality.
But where this lens was a game-changer in 2019 was in its video capabilities…

It’s compatible with up to 240fps high-speed sensor drives and offers silent operation thanks to the inner focus drive system and the de-clicked aperture ring.
The focus clutch is a nice touch as well, as it enables instant switching between autofocus and manual focus as well as improved accuracy when manually focusing.
With next to zero focus breathing, a micro-step drive system that accommodates brightness changes when panning and zooming, and Leica build quality, this lens certainly doesn’t disappoint!
Learn more about the Panasonic 10-25mm f/1.7 lens
Sony a7R IV

When the Sony a7R IV was announced earlier this year, it set the internet on fire with news of its massive 61-megapixel sensor. And while the sensor is impressive, it’s just the beginning of the impressive specs of this camera.
Paired with a BIONZ X image processor, the a7R IV’s back-illuminated sensor is capable of rendering images that are beautifully crisp.
You get an eyeful of all that beauty with the brand-new UXGA OLED Tru-Finder viewfinder, which has a whopping 5.76-million dots of resolution for a clean, bright, detailed look at what you’ve framed up in the shot.
This camera has a native ISO range of 100-32000 for low-light shooting, and with 15-stops of dynamic range rendering, you’ll have no problem getting tons of details in the shadows and the highlights.
Of course, the a7R IV carries on the Sony tradition of excellent autofocusing, with an ultra-fast hybrid AF system that has 567 phase-detect AF points to give you quick and accurate autofocus tracking.
Throw in UHD 4K video at 30p, Real-Time Eye AF tracking, 10fps shooting, and a bevy of other features, and you can see why the Sony a7R IV was one of the best gear updates of 2019.
Learn more about the Sony a7R IV
Haida M10 Filter System

The Haida M10 filter system is something I’ve been testing as of late, and I have to say that I’m impressed with this system.
Like the other products and services on this list, I’ve found numerous innovative and unique features that compelled me to include this product on this list.
Haida is a great value for the money with well-built components that show an attention to quality and detail that many filter companies just can’t match.
I have multiple components in my kit - the M10 filter holder, a circular polarizer, a couple of solid ND filters, and a soft-edge grad (shown above) - but you can also buy complete kits of varying sizes, including their Master Filter Kit, their Professional Kit, and their Enthusiast Kit, if you’d rather go that route.
Either way, I think you’ll find, as I have, that the Haida system is one that enhances your ability to get quality shots.
The aluminum alloy filter holder can accommodate two 100mm filters, but it can expand to include a third slot if needed. The Haida filters are made of shock-resistant optical glass and features 10 layers of anti-reflective nano coating and 10 layers of scratch and water resistant coatings.
The holder rotates a full 360-degrees, which is enormously helpful for getting just the right positioning when using graduated ND filters.
I also like the fact that Haida incorporated gaskets in the filter slots to help prevent light leaks. They even include a “dummy” filter housing that can be dropped into the filter if you’re shooting without the circular polarizer in place. Again, this helps prevent light leaks so you get a cleaner exposure.
The pinch and pull system for adding and removing filters make using this system super easy, as do the rounded edges of the rectangular filters - they’re much easier to slide into the filter holder without sharp edges.
This is just a well thought out system for beginners and enthusiasts alike!
Learn more about the Haida M10 filter system
Sony a6600

Though the Sony a7R IV probably got more attention, the Sony a6600 is certainly not something to forget about…
With a much smaller price tag than the a7R IV and more applicability for more photographers, the a6600 rocked our world this year by bringing many flagship features to a mid-range camera.
Its 24.2-megapixel Exmor CMOS sensor is ideal for capturing beautifully resolute images while the native ISO range of 100-32000 gives you excellent low-light shooting capabilities with reduced noise.

As I get more into video creation, I appreciate the fact that this camera sports UHD 4K video capabilities that can be internally recorded in XAVC S format.
The five-axis image stabilization is a dream, giving you five full stops of stabilization, while the weather-sealed construction means you can head out in adverse weather with less worry about what will happen to your camera.
With additional features like a beautiful XGA OLED Tru-Finder viewfinder, a tiltable LCD monitor, 11 fps continuous shooting, and much more, this camera is certainly worthy of the title of gear that rocked 2019!
Learn more about the Sony a6600
RODE Wireless GO

A final product I wanted to mention on this list of the top software and gear updates is this handy little guy, the RODE Wireless GO.
This wireless system automatically pairs in just three seconds and transmits via RODE’s new Series III digital transmission system. It’s a 2.4GHz system that’s optimized for short-range operation, particularly in environments in which there is a lot of RF and Wi-Fi interference. It also offers line-of-sight range of up to 70 meters.
You also get broadcast-grade audio thanks to the built-in condenser mic’s superb isolation and transparency. Alternatively, you can use it with a lavalier mic using the 3.5mm TRS input.
Additionally, the Wireless GO system operates up to seven hours on a full charge, and since the unit is so small and compact, it’s super lightweight and portable.
You can even use up to eight systems in one location if you have the need!
If you’ve ever used a ROD mic before, you know they’re some of the best in the business. The RODE Wireless GO is certainly no exception!
Learn more about the RODE Wireless GO
We Recommend
Video Lighting Tips for Beginners
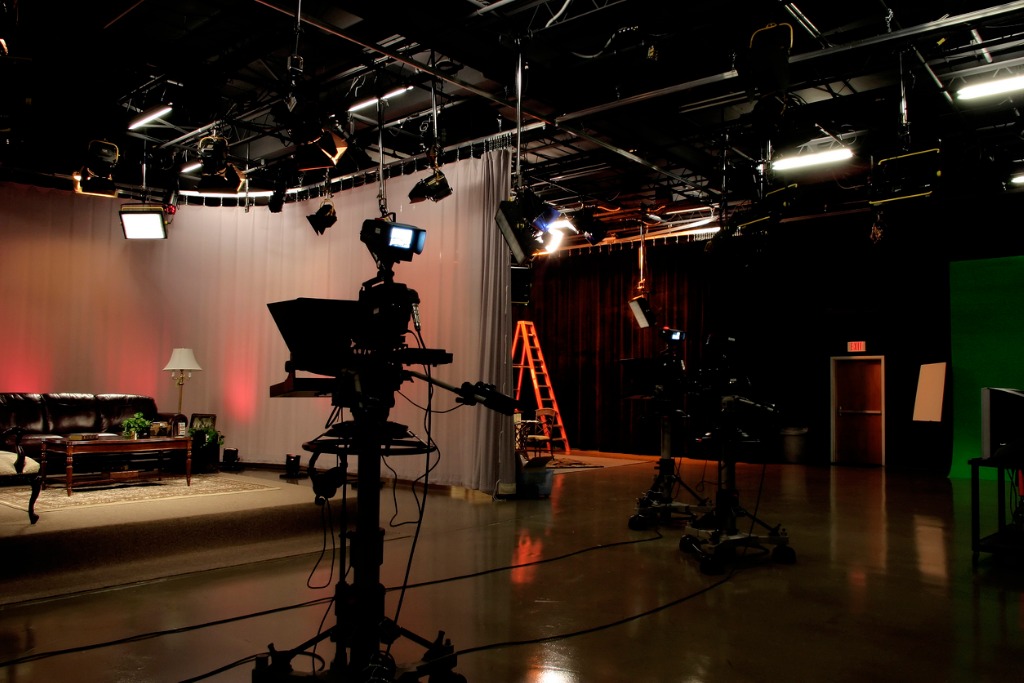
photo bydsabo via iStock
For beginners, video lighting could be rather tricky for mainly two reasons – 1) your subjects in your scene may move and 2) you may have to shoot moving shots.
And more movement means that your lighting needs more planning.
Another issue with video lighting is you often need to maintain consistency between shots.
Suffice to say, an ideal setup for video shooting is one that gives you more control over your lighting.
With that in mind, read below some video lighting tips for beginners.
Table of Contents
- Consider the Unpredictability of Sunlight
- Choose the Right Video Lighting Kit
- Understand Basic Video Lighting Setups
- Mind the Distance and Size of Your Light Source
- Use the Right Color Temperature
Consider the Unpredictability of Sunlight
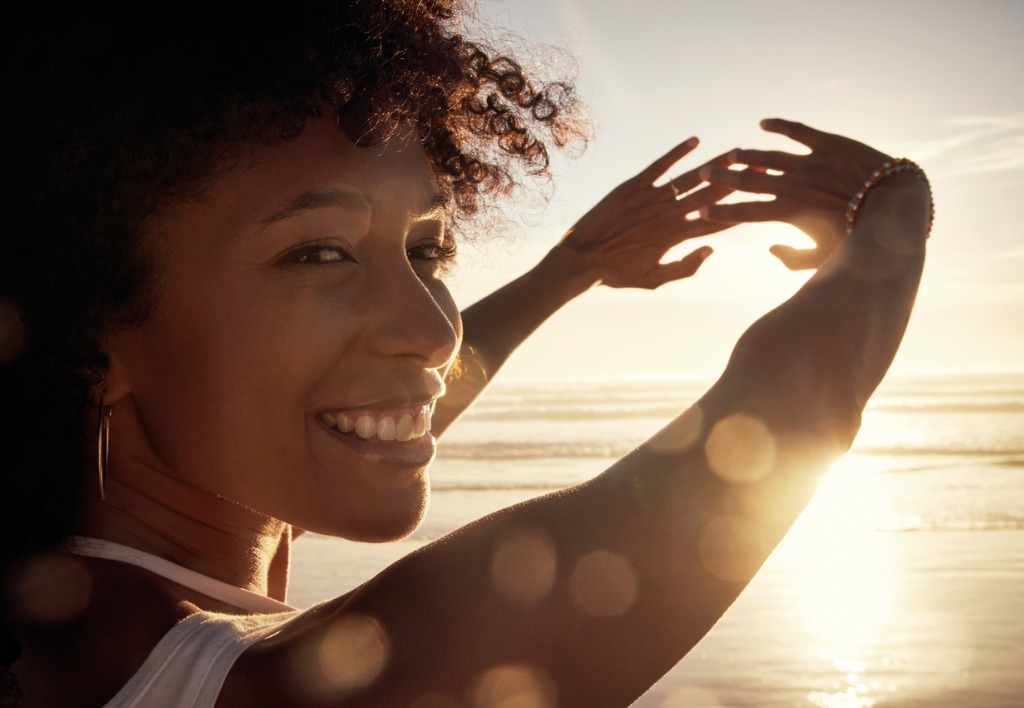
photo by pixdeluxe via iStock
It could be tempting to use natural light for most of your video shoots. After all, natural light is free and abundant.
However, be wary of the fact that the sun is unpredictable. Weather conditions can change at the drop of a hat. Clouds can cover the sun within seconds.
In situations like this, the intensity and color of light could vary noticeably from shot to shot. Ideally, avoid using natural light altogether in indoor shoots.
However, when the sun is a little less unpredictable (think outdoor shooting on a bright, sunny day), the sun can be a great source of light for your video shoot. You can even use it as a backlight to get a nice edge light around your subject.
Choose the Right Video Lighting Kit
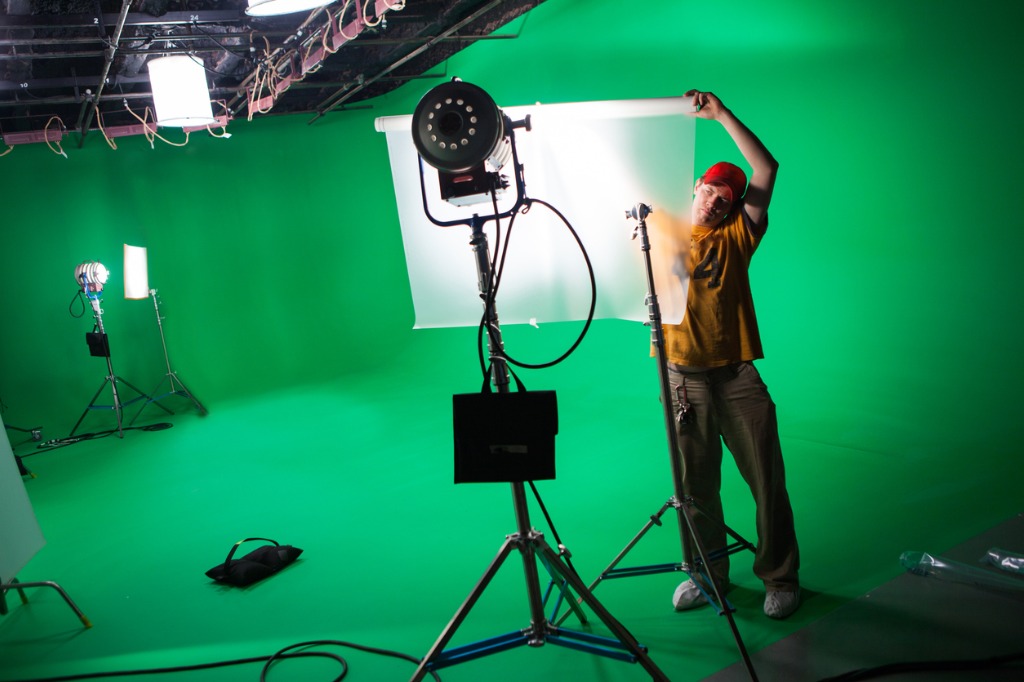
photo by bjones27 via iStock
You’ll find different types of video lights, with each type having its own pros and cons.
Tungsten lighting kits, for instance, produce a warm, amber light and offer almost perfect color rendition but can quickly heat up and consume a lot of power.
Fluorescent lighting kits, on the other hand, produce a cool, white light. You can use them in both indoor and outdoor shoots. They are lightweight and have low power requirements. However, flickering is a common issue with them. Also, the color rendition isn’t that great!
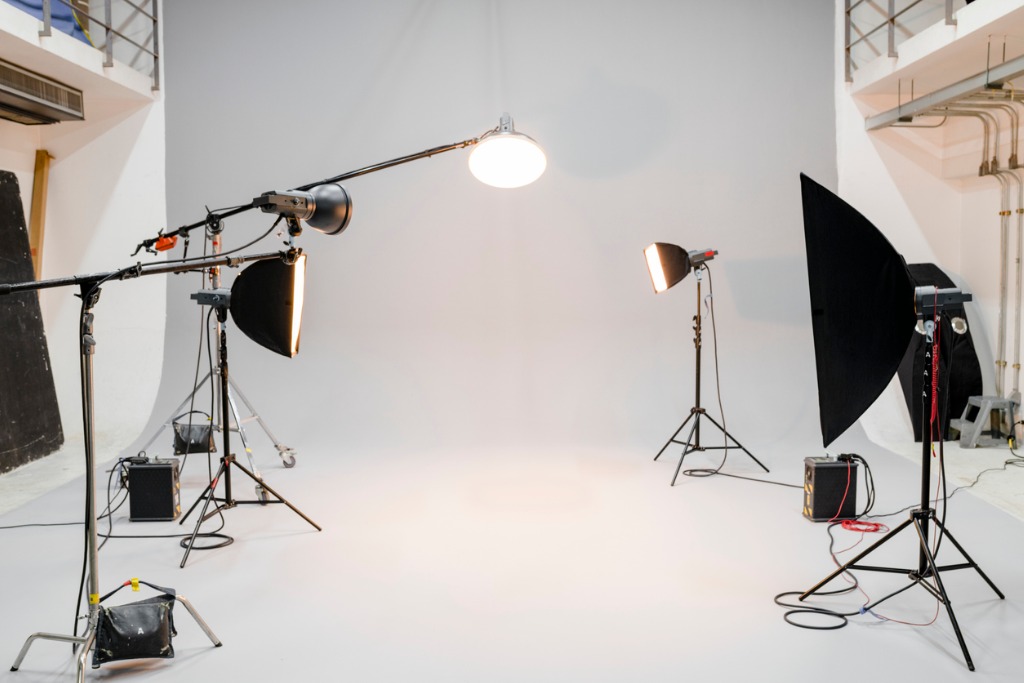
photo by Rawpixel via iStock
To actually use these professional lights, you’ll also need light stands, soft-boxes, and diffusers. So the cost could add up. Unless you have specific lighting needs, you may not want to spend hundreds of dollars on them.
If you are looking for compact and lightweight video lights on a budget, one great option would be LED lights. Some of them are made to suit almost all types of lighting requirements.
For instance, Hakutatz Pocket Size RGB+AW LED Light can deliver both amber and white light, so you can switch between warm and cool light as needed.
Lights like this are typically battery-powered and easy to carry around. You can connect them to your smartphone and adjust the RGB, color temperature of your light instantly.
There is no such thing as the perfect lighting for video recording, but lights like the Hakutatz RGB+AW LED offer a great all-round solution.
Learn More:
Understand Basic Video Lighting Setups
photo by Gizmo via iStock
As a beginner, it could be difficult to decide where to position your lights during a video shoot. Thankfully, there is a standard rule called the 3-point lighting rule.
The rule says you should place three different lights at three separate positions to properly illuminate a scene.
The main source light, or the key light, should be placed to either the left or the right of your camera, preferably to the side your subject is looking at. And it should be the strongest of all the three lights. The height of the light should around 45 degrees above your subject.
As you can imagine, the key light will create a strong shadow on the other side, which you’ll need to soften with another light called the fill light. Use a diffused or soft light as your fill light and place it on the opposite side of the key light.
Finally, use the third light as backlight from above and behind the subject. This should be a strong light on the subject’s shoulder from above and behind. The idea is to create a light contour, so the subject looks separated from the background.
Now a valid question you may have is how you’ll arrange three different lights with varying intensity and softness, especially as a beginner with a limited budget for lighting. We recommend starting with easy-to-use lights like the Hakutatz Pocket Size RGB+AW LED.
Lights like this allow you to use multiple lights at the same time. So, whether you need using a key light, backlight, fill light or all of them, you are good to go within minutes.
Watch the above video by DiCasaFilm to understand 3-point lighting and how it works is a studio setup.
Mind the Distance and Size of Your Light Source
As shown in the video above by Lindsay Adler Photography, there are two great ways to soften the light on your subject. You can bring the light source closer to the subject or use a larger diffuser in front of your light source.
In either case, you are basically making the light source larger relative to the subject. The opposite is also true. So, if you move the source light further from the subject, it would help cast harder light on your subject.
Use the Right Color Temperature
Not all lights have the same color temperature. That’s why some lights look bluish while others look more yellowish.
Simply put, a light's color is measured by its color temperature in degrees Kelvin. The color of sunlight, for instance, keeps changing throughout the day.
As much as possible, you should try not to mix lights of different color temperatures. If you shoot with lights of different color temperatures, it could result in unnatural looking shots due to incorrect color balance.
Thankfully lights like the Hakutatz RGB+AW LEDHakutatz RGB+AW LED gives you more control over color temperature. You can program the color temperature of these lights to ensure correct color balance and make your scenes look exactly how you want them to look.
In the end, using user-friendly lights like these will help you create the best lighting for video projects, and you can do it on a budget!
Learn More: