2019 Cyber Monday Deals for Photographers
 Photo by Jevgeni_Tr via iStock
If you missed out on the smokin' Black Friday deals for photographers, no worries!
Cyber Monday holds many huge discounts and awesome deals on cameras, lenses, bags, and other gear.
Check out some of the best Cyber Monday deals for photographers below!
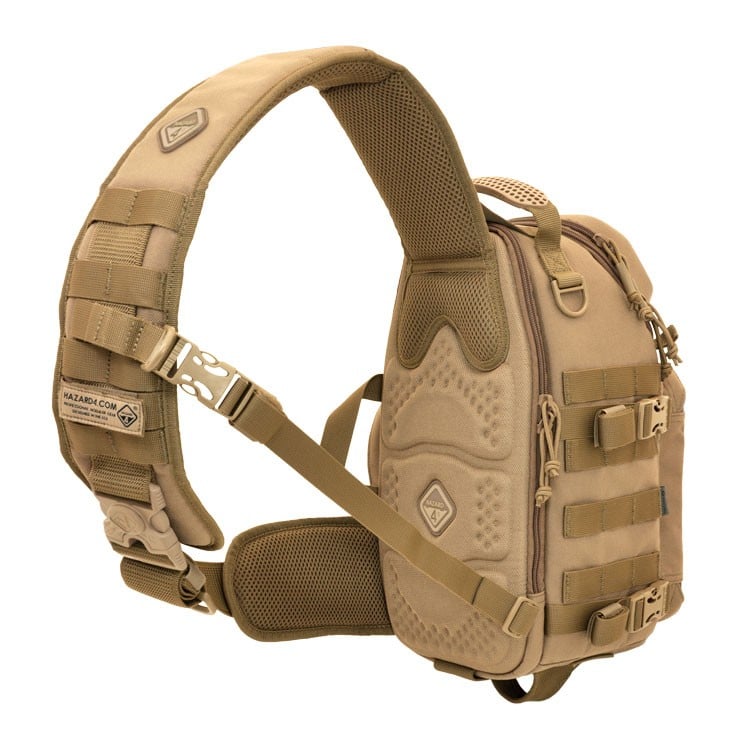
Hazard 4 is Offering Up to 35% Off on Select Products

Adorama Has Up to 50% Off on Cyber Monday

Adorama's Cyber Monday sale offers up to 45% off on cameras, up to 30% off on lenses, up to 30% off lighting, and up to 40% off on computers.
There are savings of up to 50% on items site wide, including exclusive doorbusters on popular brands like Canon, Nikon, Sony, Fujifilm, Panasonic, and Apple.
Shop Adorama's Cyber Monday deals
Skylum is Offering Almost $400 Off
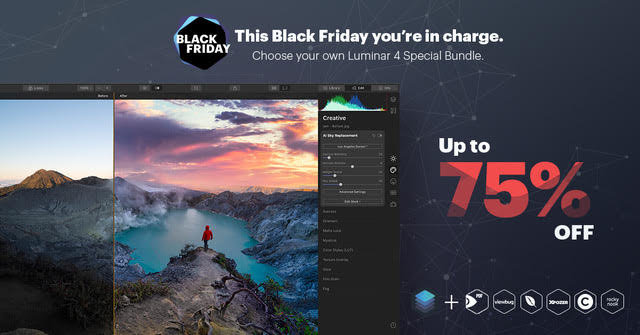
Are you tired of getting hundreds of Black Friday offers for something you will never use? Ugh, we are too!
Skylum’s Black Friday offer is different. It’s about Creativity, Freedom, and Choice.
Instead of getting a slightly bigger TV this Black Friday, how about giving an enormous boost to your artistic powers (and saving almost $400)?
You can build your very special bundle that will include Luminar 4 to create mind-blowing images with unique features not available anywhere else. And you have the freedom to choose what bonuses you like (your options are wide, for example the highly acclaimed PDF Expert, Envira Gallery, ViewBug, Xpozer and more). Pick only those that bring a real benefit to you.
Offers:
- Bundle #1 - $79 - Luminar 4 + 2 bonuses of your choice
- Bundle #2 - $99 - Luminar 4 + 5 bonuses of your choice
- Bundle #3 - $129 - Luminar 4 + All bonuses
Bonuses:
- PDF Expert - free app - $80 value
- Envira Gallery - free plan + 30% off of other plans - $29 value (+up to $90 discount)
- ViewBug - free 1 year of Pro plan - $118 value
- Xpozer - discount - $75 value
- Clipchamp - 3 months free of Clipchamp’s Create account - $30
- Rocky Nook - free book of a choice - ~$44.99 value
- Look Pack (Skylum) - free presets - $25 value
- Look Pack (Skylum) - free presets - $25 value
The sale starts November 27, 2019. Your creativity will not expire on December 2, but this offer will! Make sure you don’t miss out.
Get more details on Skylum’s Black Friday 2019 deals
Get 20% Off Site-Wide at Litra

I have several Litra lights in my arsenal, and they are among the best photography lights I’ve ever used. They’re durable, have excellent battery life, and emit beautiful, flicker-free light.
Litra’s Black Friday sale runs November 25-December 2, 2019.
Get a Litra light (or two!) for Black Friday
Get 10% Off Popular Products at MPB
This Black Friday, MPB is offering 10 percent off a wide selection of cameras and lenses from Sony, Canon, Nikon, Olympus, Fujifilm, Panasonic, and even Hasselblad.
Their curated selection of used gear is already discounted, so the extra 10 percent off is just an added bonus!
Shop MPB for Black Friday discounts
Save Up to $350 on f-stop Bags
Makers of some incredible bags, f-stop has already kicked off their Black Friday event.
This year, they’re offering up to $350 off bundles, which are full modular setups used by the pros. If you live in the U.S.A. or the EU, you get free shipping, too! International shipping is just $49.
Shop f-stop Black Friday deals while supplies last
We Recommend
Basic Landscape Photography Tips for Beginners

Landscape photography is one of the more enjoyable forms of photography for beginners to engage in, and one that can be simple to get into provided you have the right techniques and methods. Basic landscape photography tips can point us in the right direction to capture outstanding images.
To bring it down to the fundamentals of photography, basic landscape photography is capturing a view of the outside world in a way that shows it to others in a meaningful way. We can all take snapshots to share and show friends where we were or to hold on to our own memories.
Landscape photography goes beyond the mere act of recording an image. We create an image. These beginner landscape photography tips will assist you to transition from snapshots to crafted landscape photography.
Along the way, if you also want to take some snapshots, please do. I certainly do myself, as does almost every professional or other advanced photographer I know does. We constantly snap pictures, with our fancy cameras, with basic cameras, and with our smartphone cameras. It’s fun to share pictures and it’s nice to hold on to cherished memories.
Tip 1: Stop. Look Around

Photo by Archie Binamira from Pexels
In order to create an outstanding landscape image, we should put ourselves into a photographic state of mind, a mood. One of the ways we can accomplish that is to slow down and really observe where we are and what’s going on around us.
As far as beginner landscape photography tips go, this is an important one. Sometimes all it takes is for us to pause before even setting up our camera gear and really take in the scene where we are. Sure, we see that giant mountain or sprawling sea shore, but what else is there?
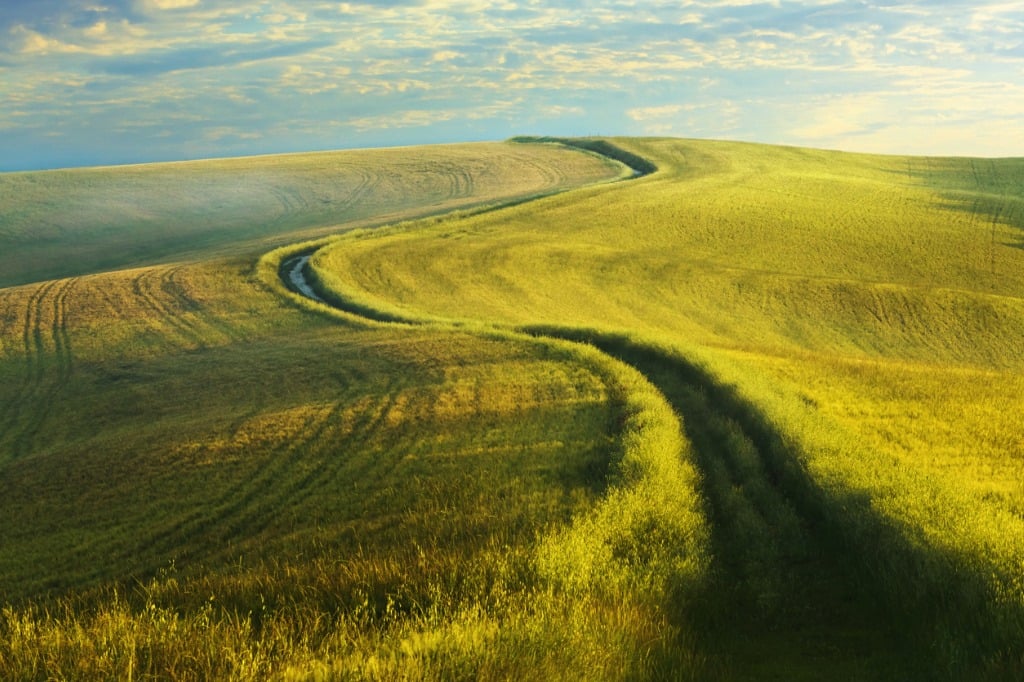
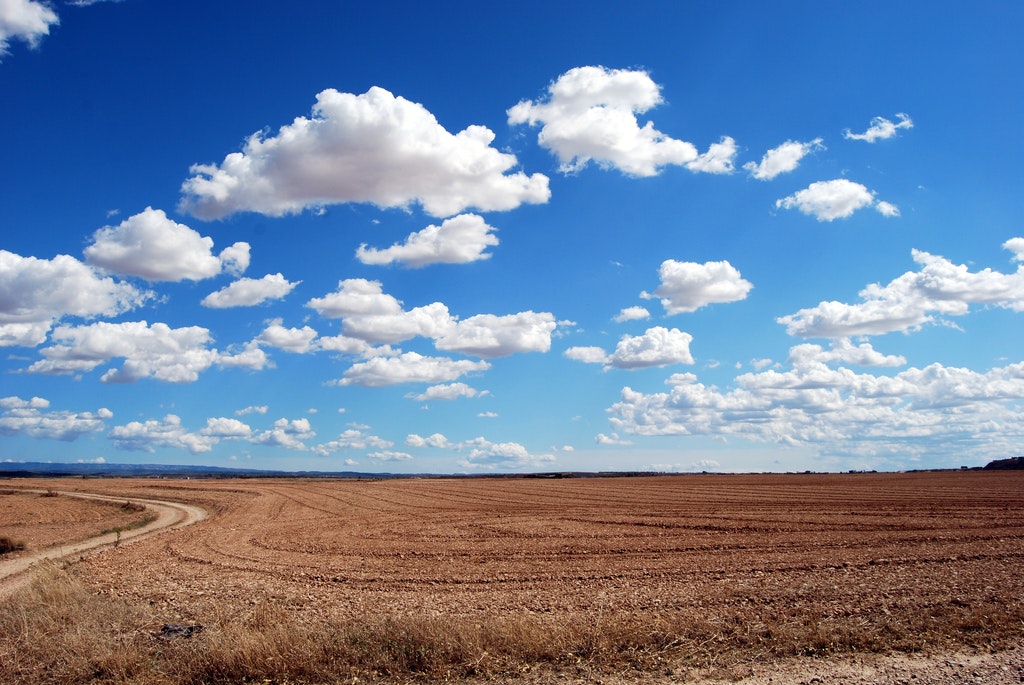
photo bymammuth via iStock
The sky often holds a lot of detail that could be interesting, we can think about how to include it, how to compose and expose. Besides the large main subject, we might notice a smaller aspect that can become the focus of an image. If we turn around and look to the sides or behind us, we might find a fresh view of the beautiful scene in which we are immersed.
All the fancy camera gear in the world won’t capture the scene we’re not looking at. Slowing down and carefully observing the scene leads us to the next of our valuable basic landscape photography tips.
Tip 2: Develop A Plan
To me, here’s where landscape photography really starts to get fun. This where we actually craft a photographic image instead of merely snapping a picture.
As we’re looking around our scene, noticing what we want to shoot and highlight, what we want to de-emphasize, we should start thinking about the actual image making process. This is the step where we visualize the final image and work backwards to find the settings and techniques to use in order to end up with that result.
Are we going to include or emphasize the sky? If so, are we going to use a polarizer filter or possibly a graduated neutral density filter? What exposure will give us detail in either highlights or shadow?

photo byFilippoBacci via iStock
Maybe we found a nice view of a foreground subject in our scene. Are we going to focus on that exclusively or as part of the entire image? That decision will tell us to use selective focus techniques or deep depth of field, or something in between. That, in turn, will affect our exposure, since lens aperture is involved and that aperture or f-stop is part of the Exposure Triangle.
What type of lens do we want to use? A wide angle to gather a larger field of view or a telephoto to limit the field of view? Do we want to amplify the apparent perspective of our lens choice or minimize it?
We can also decide on any post processing methods or techniques in this step, such as HDR photography or making a panorama. And that naturally leads to tip number 3 in our list.
Learn More:
Tip 3 : Shoot In Raw

More so than shooting in manual mode, capturing files in RAW format is a vital step in being able to craft outstanding images.
I’ve noticed that a lot of beginner to intermediate photographers are under the impression that using manual exposure mode is essential to good photography. While this is true to a certain extent, out file choice can often give us more control over the final than camera setting adjustments
A lot of professional and advanced photographers appreciate the automatic modes of our advanced cameras. Especially when using complicated flash photography set ups. And even when we do adjust the camera controls manually, we often base our initial exposure considerations on a meter reading.

photo byarisara1978 via iStock
While the exposure meters of our modern cameras are excellent and the automated modes are useful, I consistently urge everyone to get out of the Green Dot fully automatic camera setting. That Green Dot setting doesn’t afford you any control over exposure or focus setting at all. Personally, I don’t even use it when I’m taking snapshots.
So, manual mode, semi automatic, programmed automation, flash automation, all can be used effectively for advanced photography. The RAW file format setting however, is more akin to our film choice than an exposure setting.

photo byAnchiy via iStock
JPEG is a standard file format that can be used or viewed across a wide variety of devices from cameras to computers to digital photo frames and is all over the internet. It’s a great format for sharing and viewing. But there is a better choice for shooting, and that’s RAW.
The RAW file format holds much more information about our scene exposure than JPEG. With this extra exposure information, we can use our post processing program to fine tune the image. It’s like the darkroom of our digital photographic process, where we handled film and printing. Which segues to my number 4 of basic landscape photography tips.
Tip 4: Learn Basic Post Processing

Photo by Jiarong Deng from Pexels
This step freaks out more photographers than the thought of going all manual. Post processing is seen by some photographers as either difficult or boring. It doesn’t have to be either. In fact it can be a simple and enjoyable part of our landscape photography.
Admittedly, some post processing can be difficult and some programs seem to put you through a whole lot of steps to give you an end result. For instance, whenever I have to do something that only a very powerful program like Adobe Photoshop can do, I use my cheat sheets and review tutorials on the subject (even some I’ve produced myself).
photo byMaksym Azovtsev via iStock
However, many of the newer programs, such as Lightroom, ACDSee, or Photoshop Elements have made post processing less complicated, more intuitive as a photographer instead of feeling like a computer programmer.
If you’re shooting in RAW file format, you will need to get familiar with at least one simple post processing program. Check out our article on the subject to find one you can be comfortable using.
Tip 5: Protect Your Landscape Photography Gear

Photo by Asad Photo Maldives from Pexels
This is an important step for various styles of photography, landscape photography introduces hazards of the great outdoors which can negatively impact our camera equipment.
Impact is one of the major concerns. Banging around our cameras, lenses, and other items isn’t going to help out our photographic imaging. Even the more rugged, weather resistant cameras and lenses benefit from being protected.
The right type of camera strap and a good bag can keep our gear safe and allow us to not miss out on making good landscape images. The bag and strap that came with your camera can be improved on without spending a lot. I look for things that are comfortable, well made, durable, as well as functional in the field.

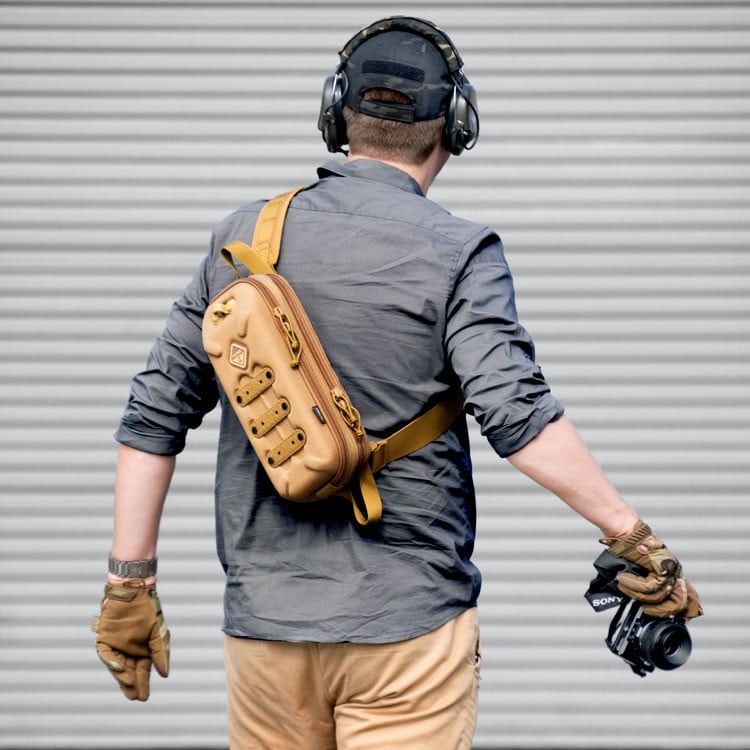
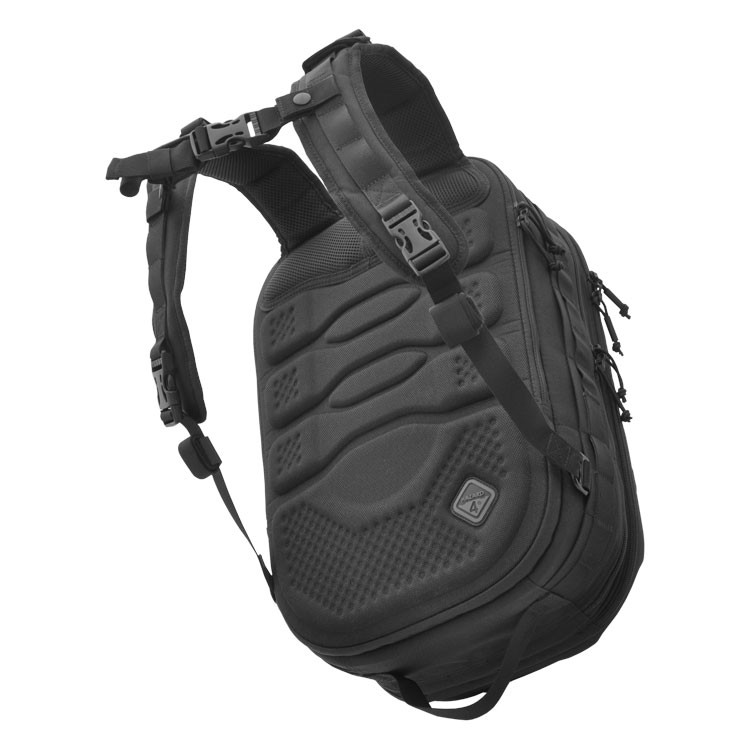
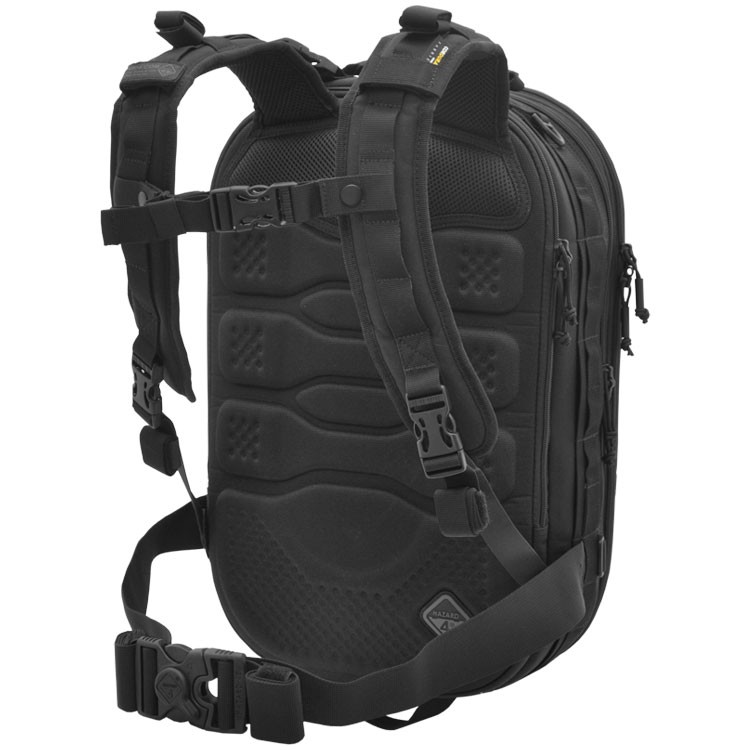
A nice bag I’ve been using for day trips is from Hazard4®, manufacturer of tactical and protective photographic gear. It’s the Plan-B Hard™ sling pack. I like the sling pack style for outdoor photography since I can carry it comfortably and then rapidly swing into position to access my gear.

Some beneficial features of the Plan-B Hard™ in addition to the sleeping pack styling are YKK® zippers and real Cordura® 1000D nylon that won’t be affected by changing conditions outdoors, hot or cold. It has a molded hard shell, lots of interior room and adjustment, plus patent pending strap and hardware for safety plus rapid access to our camera and lenses.
Other ways we protect our camera gear are in some of our product reviews available on this website.
Tip 6: Try Out What You’ve Learned

Photo by James Wheeler from Pexels
All of these landscape photography tips are mere words until we start putting them to use. The process of making outstanding landscape images is enjoyable and accessible to any level of photographer.
Start using those exposure techniques, special photographic processes, filters, and anything else physically or mentally you’ve picked up. Get into the right frame of mind and start shooting. Show us your results, too, that’s a huge part of the fun for all of us.
Learn More:
We Recommend
Camera Bags for Every Kind of Adventure
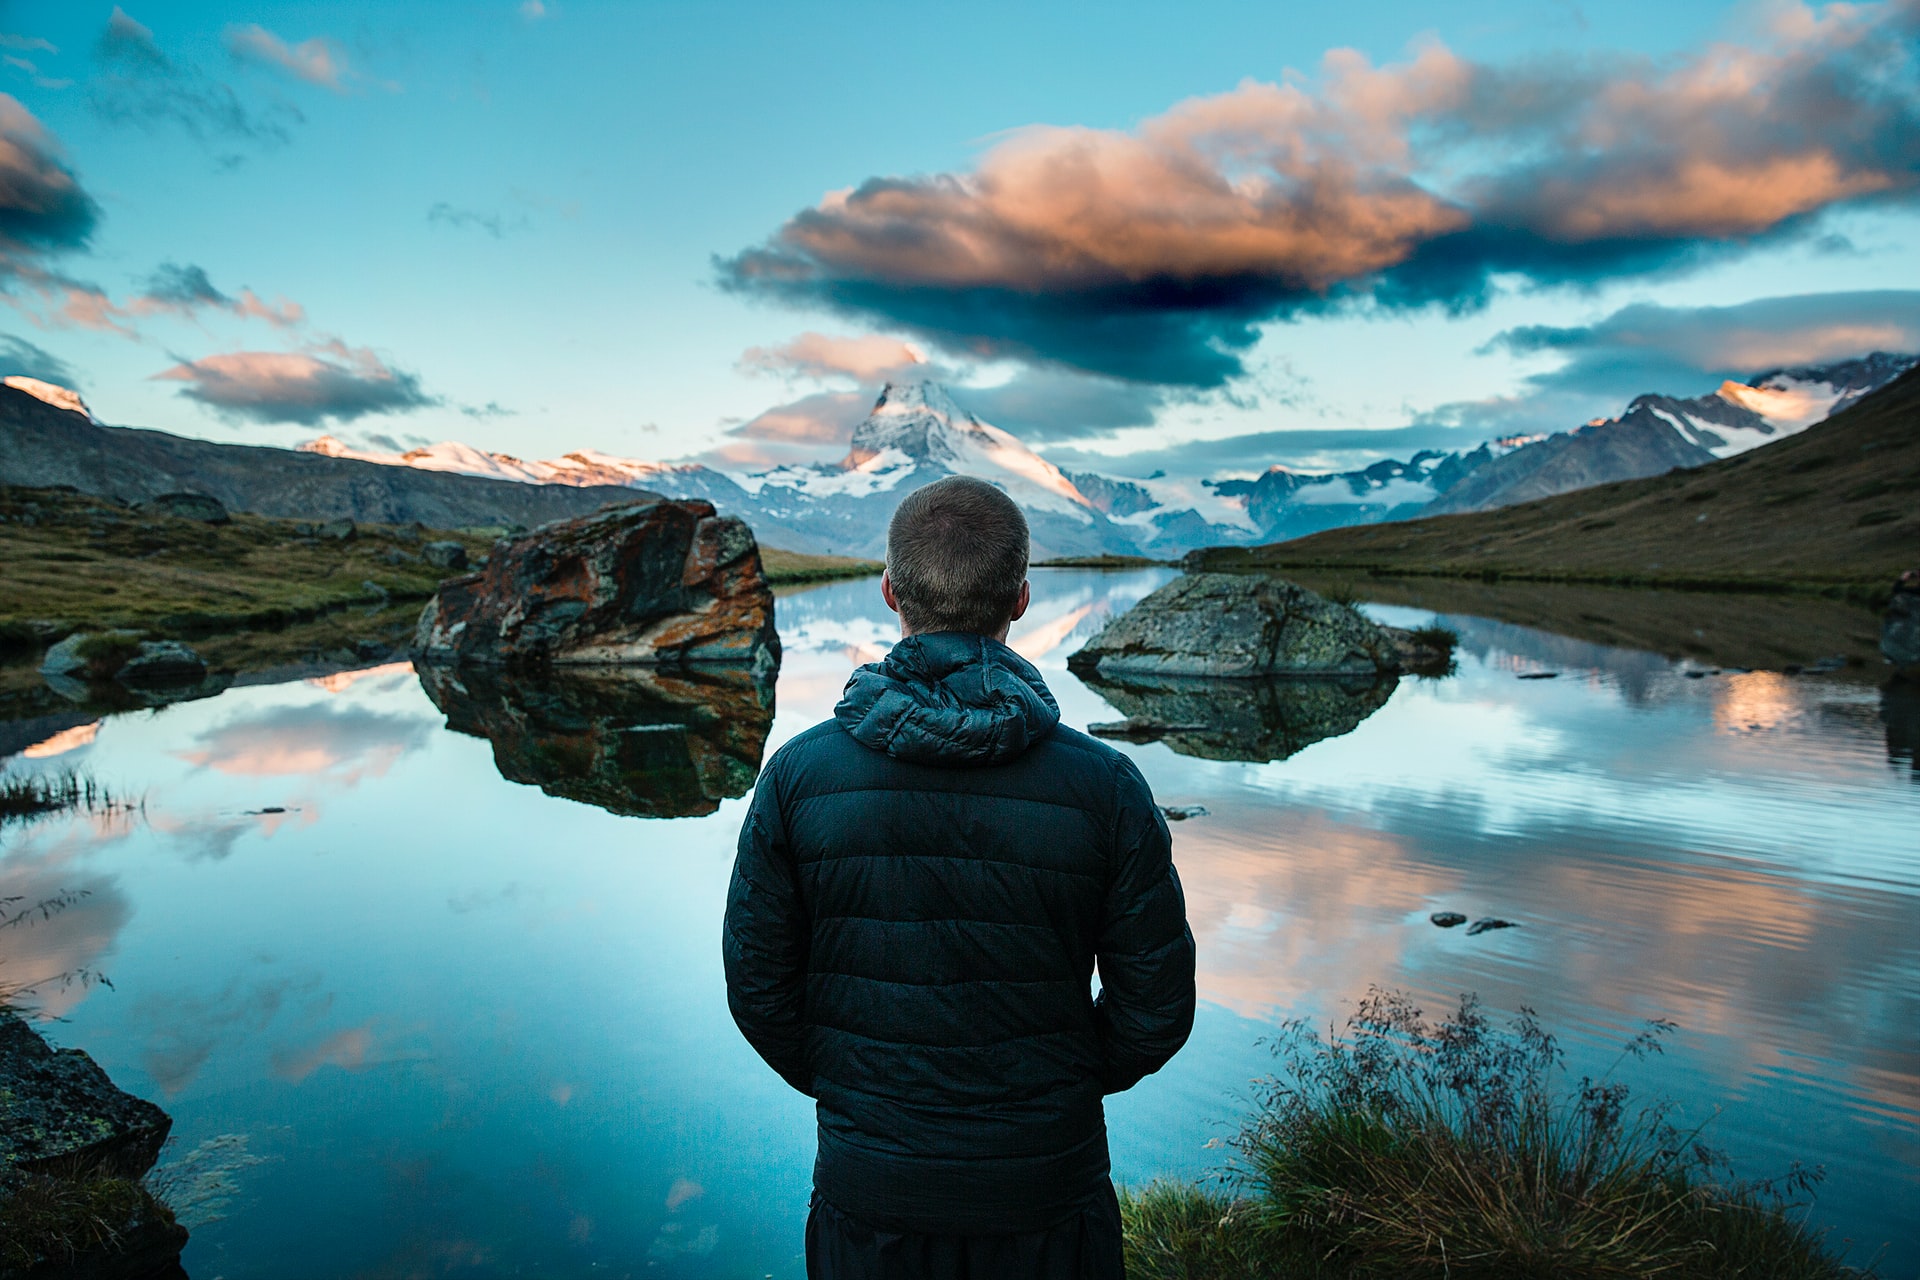
Photo by Joshua Earle on Unsplash
When I first started in photography as a youth, I carried all of my stuff together in a bag I purchased at my local camera store that barely held all the stuff I had, let alone protect it.
I have evolved my tastes and practices since then, and the makers of camera bags have evolved and developed new types and styles of bags that provide both protection and convenience.
Among the current lines of photography bags are styles such as hard cases, camera backpacks, roller cases, camera sling bags, and other dedicated camera bags.
Photography Bags For Your Needs
One of the ways my tastes and needs for camera bags has changed over time is that I now choose a camera bag based on the anticipated needs and requirements of the planned photographic job or outing.
When going out just for fun or some other photographic excursion that only requires one camera and perhaps a couple of lenses or just one, a smaller camera bag is preferable. Working a photo job that requires more equipment, or on a trip of a couple of days, a medium sized camera bag works. Sometimes, a photographer needs most of their gear at hand inside a large carryall.
Learn More:
Hazard 4® Photography Bags
Hazard 4® manufactures tactical gear and top quality outdoor adventure, extreme sport, and travel gear. Clothing, luggage, watches, eyeglasses, and other equipment is manufactured by Hazard 4® in the U.S.A. to a high level of quality and usefulness.
I’ve been using Hazard 4® bags for awhile now, and they have proven to be of superb build quality, functionality, and convenience.
Let’s take a look at three of my favorite Hazard 4® bags for any kind of adventure.
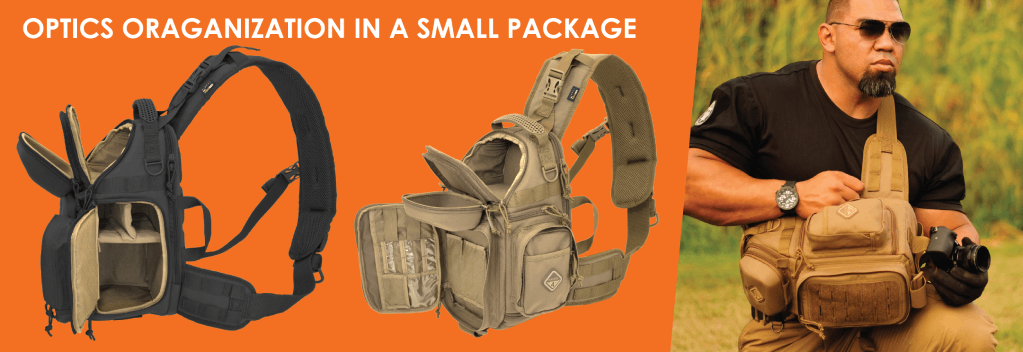
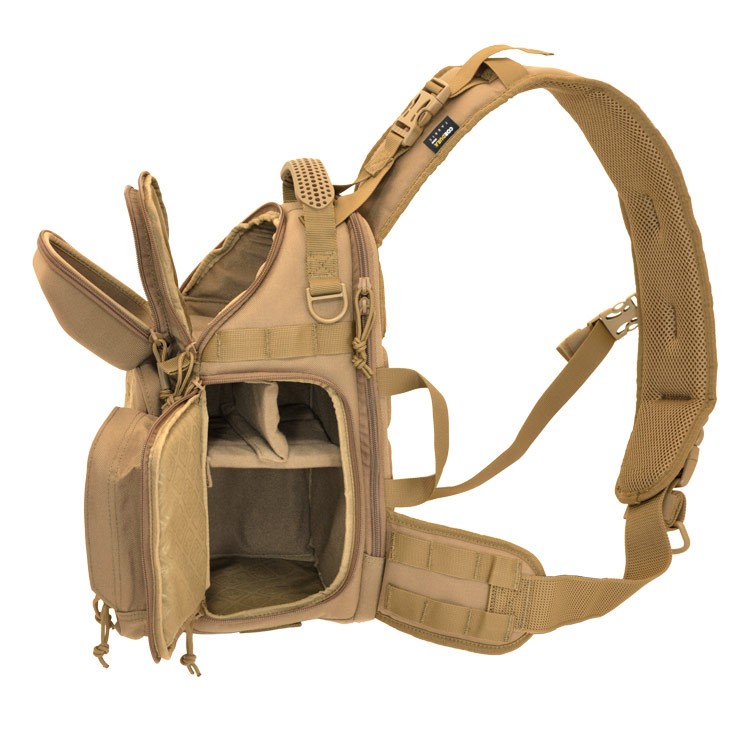
Bandoleer™ Small Sling Pack
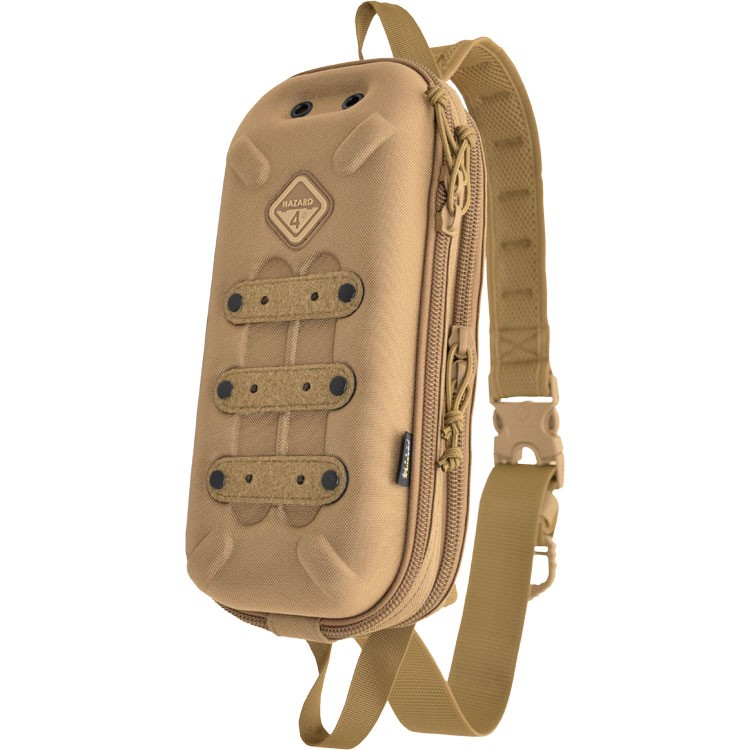
The Bandoleer™ Sling Pack is one of the smaller size camera bags designed as a camera sling bag. A sling pack combines the advantages of a backpack, namely the ease, comfort, and safety with the easy to access capability of a regular photography bag.
Worn as a camera sling bag, you travel with it on your back and sling it around to your front side to reach in and grab your camera and lens.The Bandoleer™ has a hard molded shell with padded interior for a high level of protection.
Their patented Hard-Point® connectors allow you to attach extra items to the outer shell. Inside are three dividers that can adjust the padded interior to conform to your particular needs. It’s big enough for a compact mirrorless or DSLR plus a few accessories.
Additionally, Hazard 4® included a patented photo d-ring to tether your camera to the main strap with an optional ¼ 20 screw. 1000D Cordura® fabric and YKK® zippers complete the high quality materials making this one of the best camera bags for rugged protection and hard use.
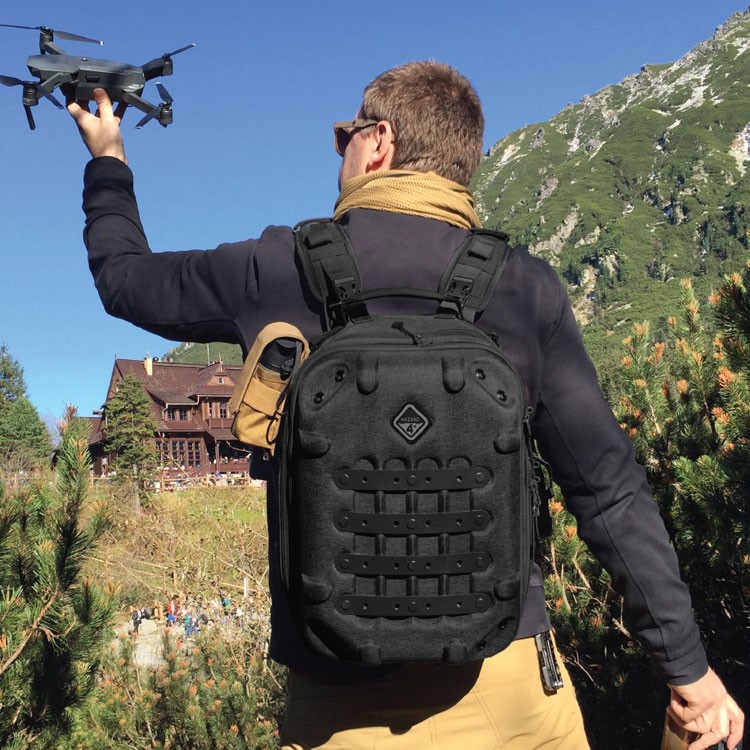
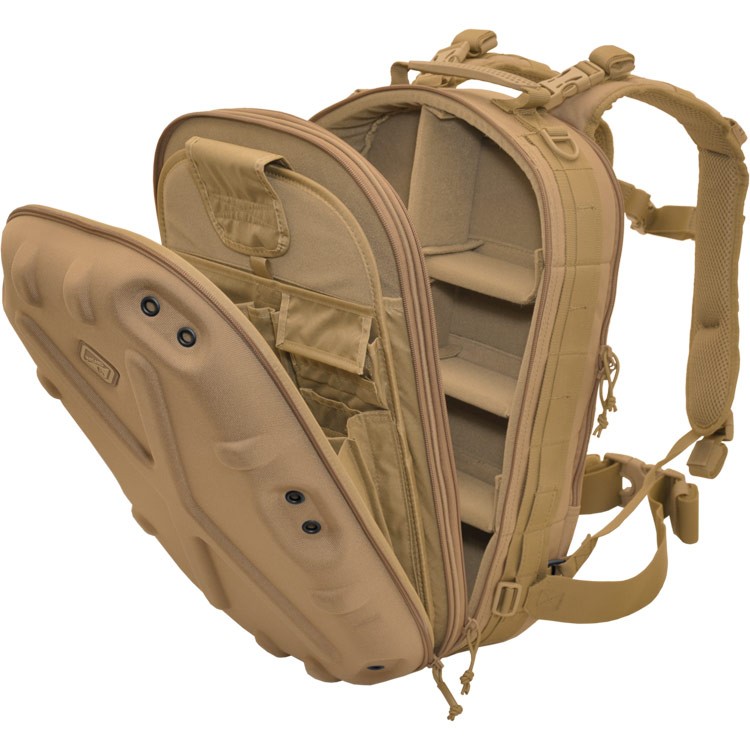
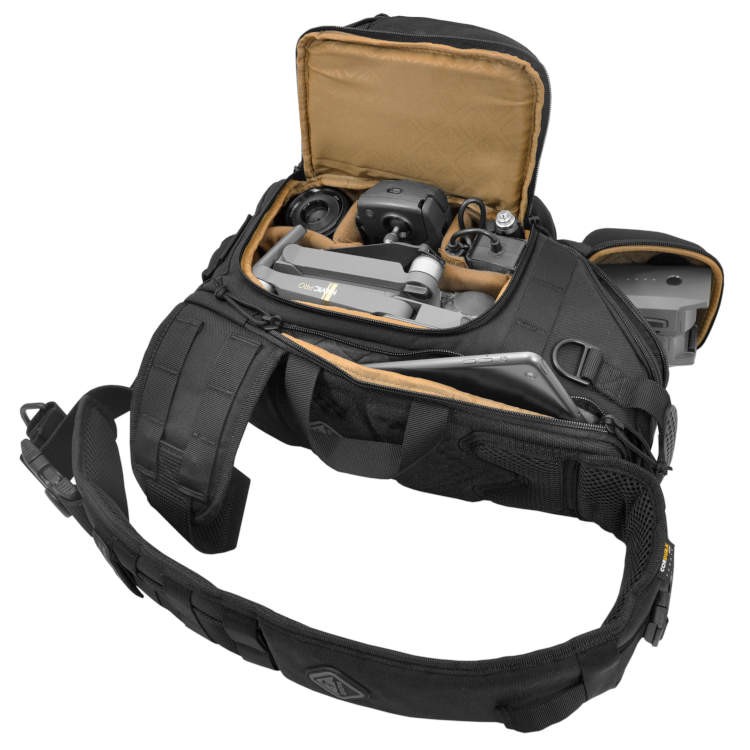
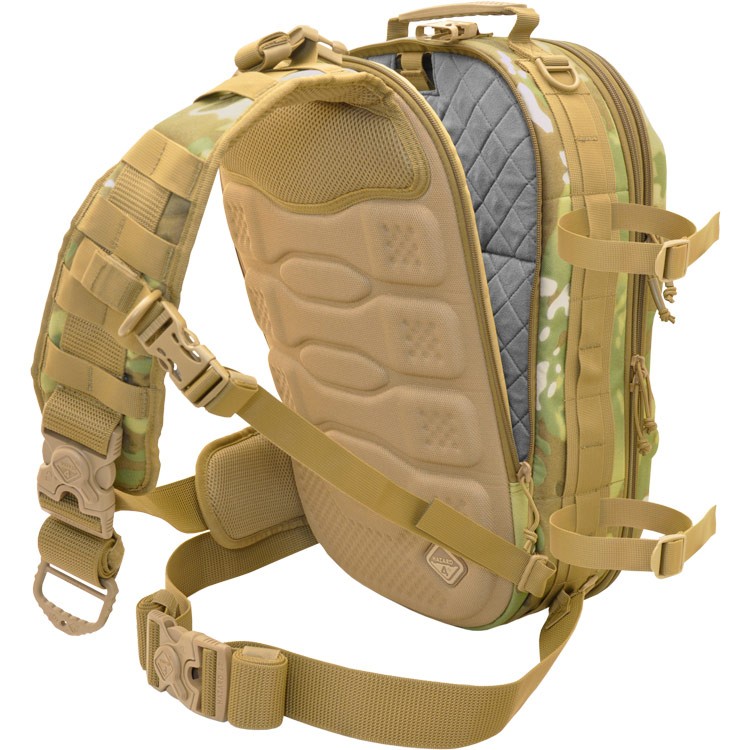
Grill™ Hard-Molle Medium Size Photo Pack
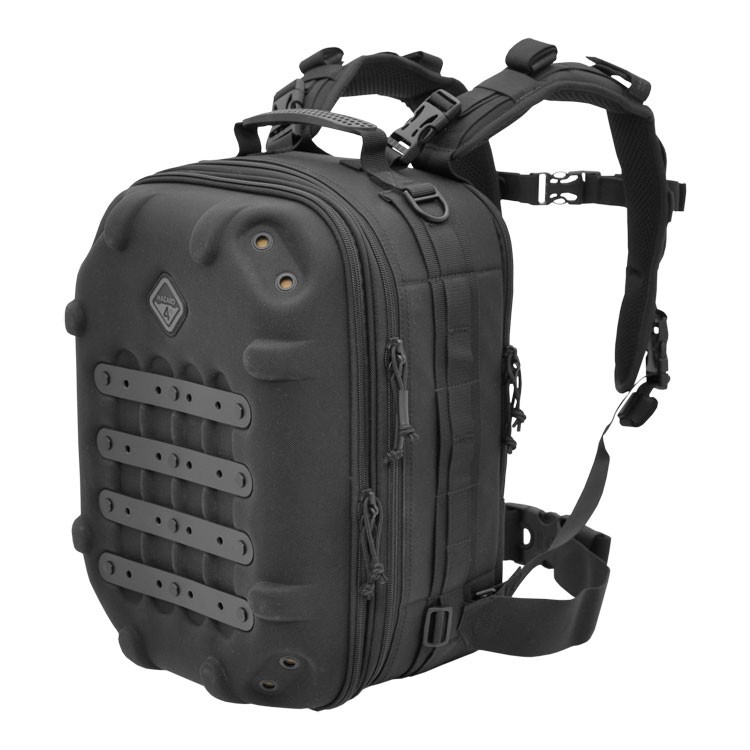
Capable of holding a larger camera or a couple of smaller cameras, several lenses, or a drone with all its accessories plus a small camera, the Grill™ Hard-Molle Photo Pack. For an onsite photo job or a long weekend vacation, this is one of the better options in protective photography bags.
Military modular webbing (MOLLE) is provided throughout the camera bags interior and exterior. Construction includes 1000D Cordura® fabric and YKK® zippers for hard use with an extreme level of camera gear protection. Patent pending hard molle provides attachment points for mounting to the hard surface of the camera bag.
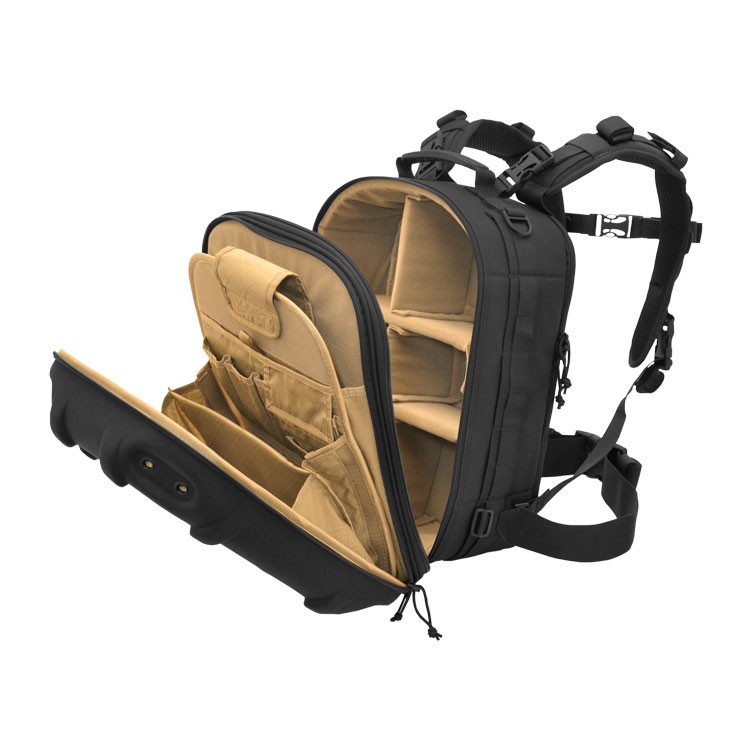
The molded back pad on the side against your back protects you and offers a level of comfort not usually found in hard shell camera bags. The molded back pad even prevents discomfort due to sweat build up. The interior can be customized in multiple configurations to protect items such as a laptop or drone in addition to cameras and lenses.
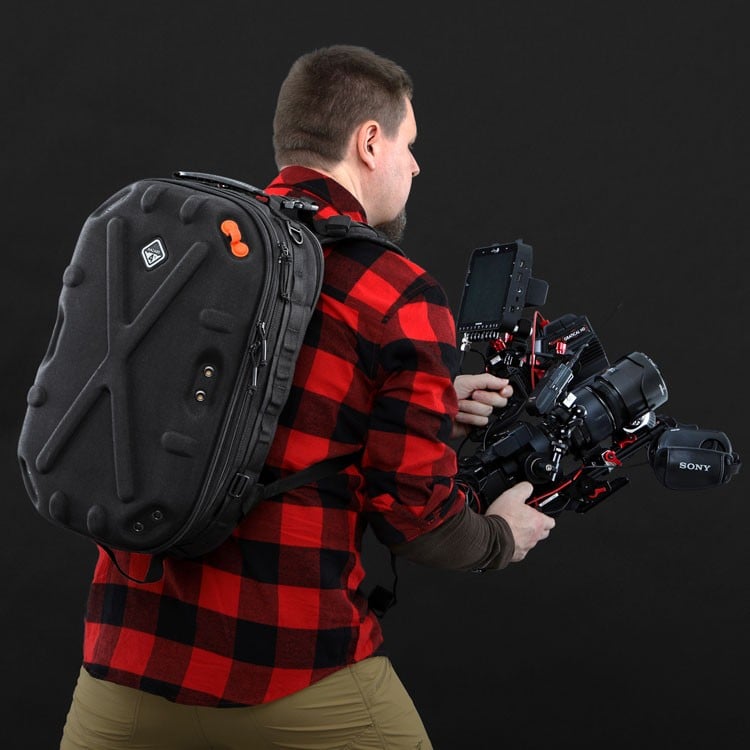
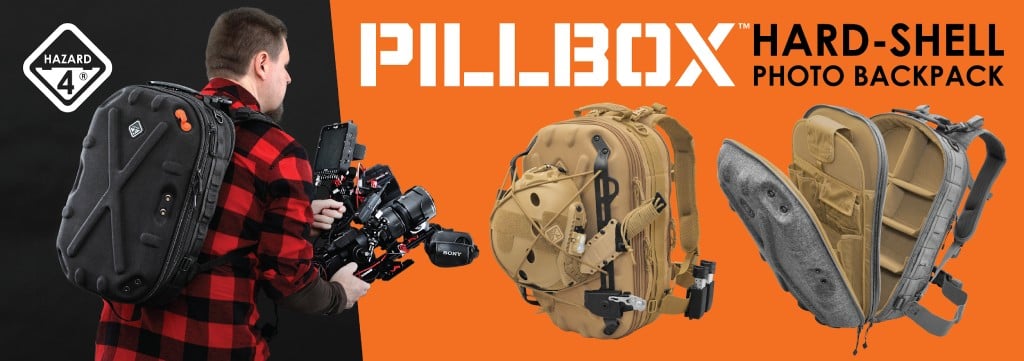
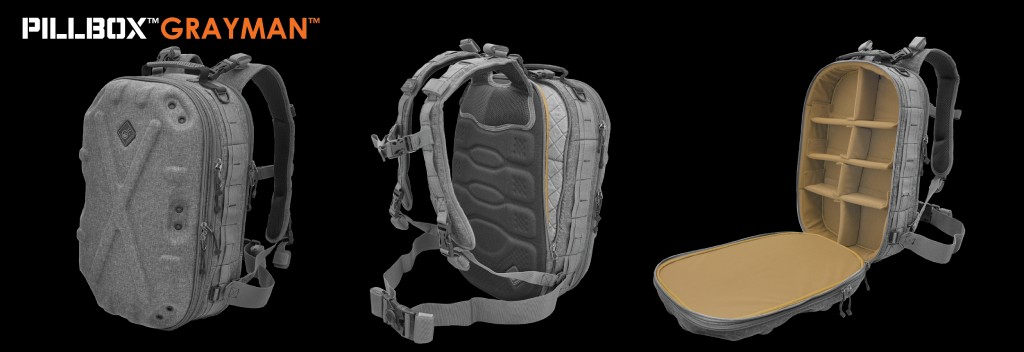
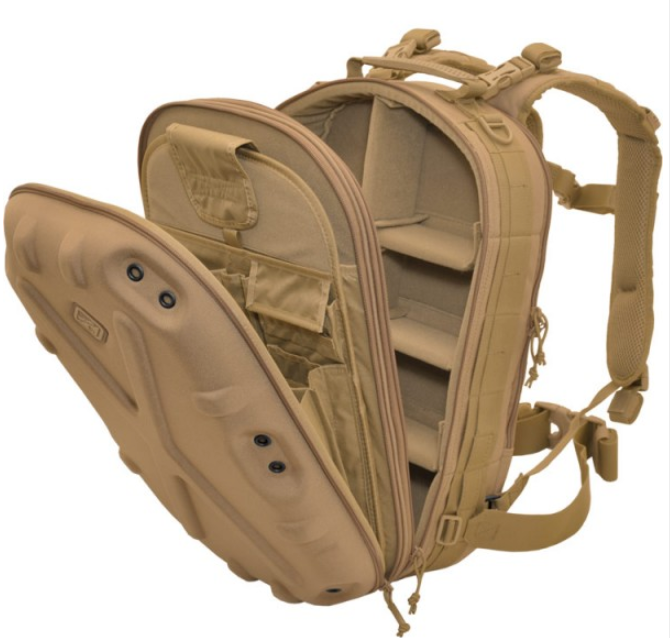
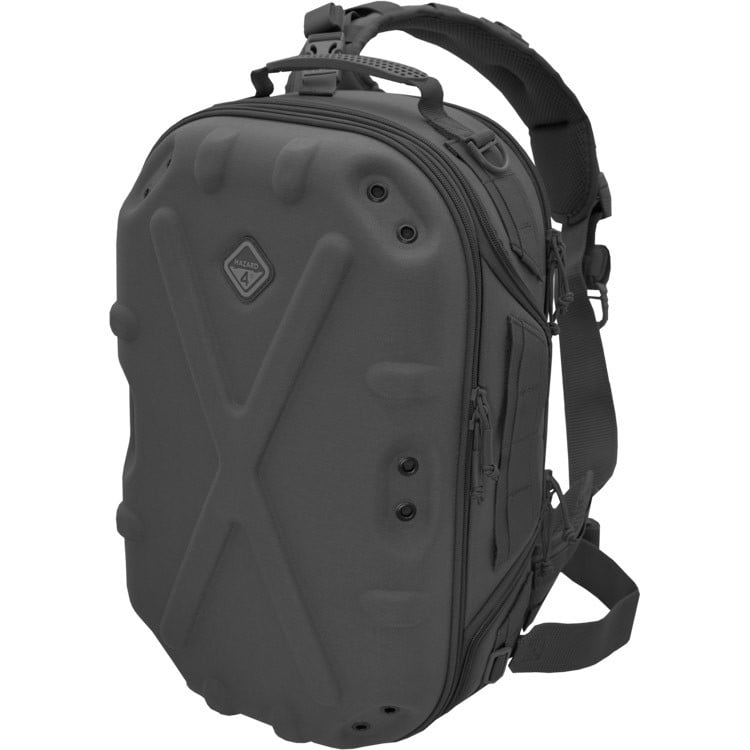
Pillbox™ Large Shell-Pack Backpack Camera Bag
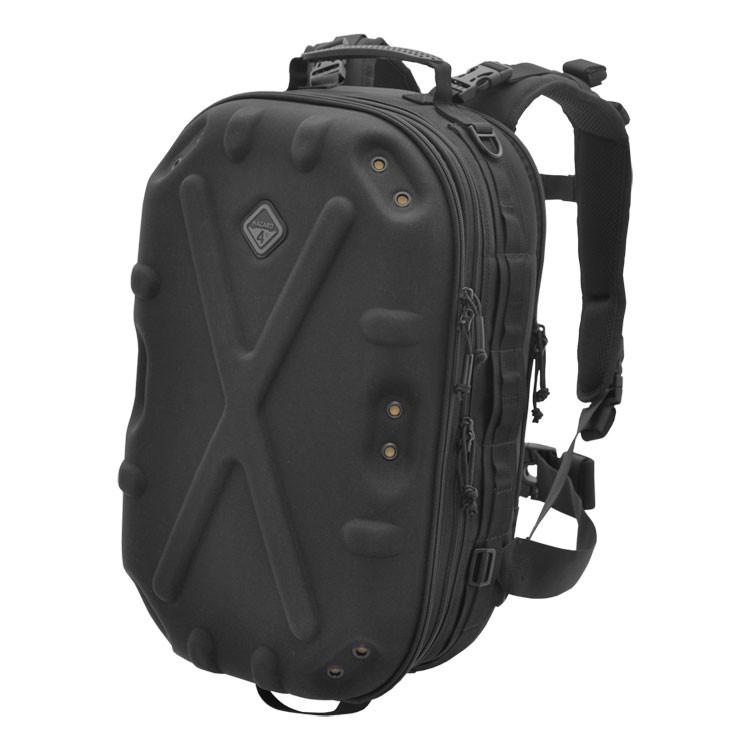
Capable of holding several cameras and lenses, a drone or lights, a laptop up to 16 inches, and multiple accessories, the Pillbox™ Shell-Pack large camera backpack from Hazard 4® offers a high level of protection during transport and ease of access to your gear during use.
Constructed of a lightweight molded foam shell with all around interior padding, the Pillbox™ camera backpack has multiple organizing partitions and 7 moveable padded dividers of various sizes. One of the compartments is an administration organizer panel for holding things like SD cards, notebooks, important papers, and other small items.
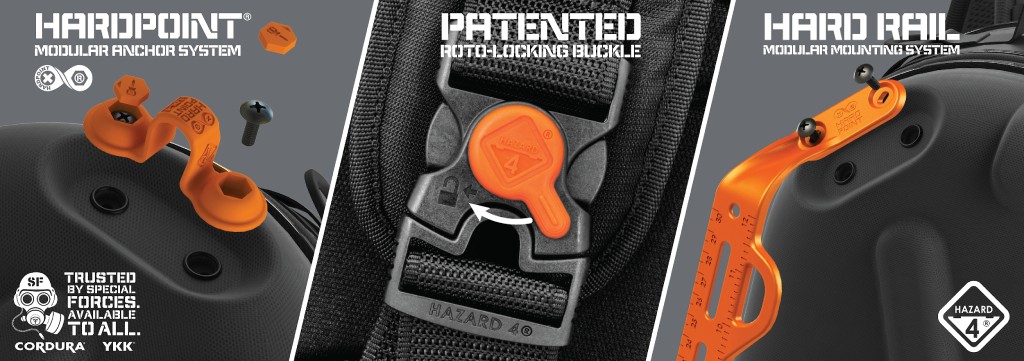
The outer shell has their patented Hardpoint® double grommets for attaching extra Hazard 4® accessories and pouches to the external modular webbing (MOLLE) to extend your carrying capability.
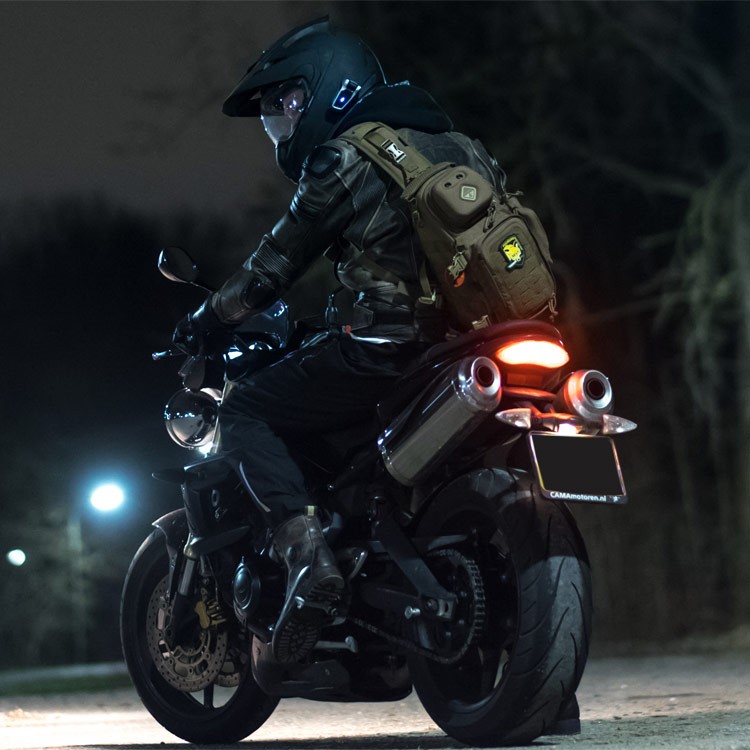
It’s made with YKK® Zippers, real Cordura® 1000D nylon, and reinforcing stitch patterns for added durability. The Pillbox™ camera backpack, Grill™ Hard-Molle photo pack, and Bandoleer™ camera sling bag are also free of loose exterior material so you can even strap them on your back while on a motorcycle or in crowded public areas.
Protective and Fashionable Camera Bags
These protective photography bags from Hazard 4® are incredibly rugged and durable but they also are very good looking. I know it probably shouldn’t matter to me, but these bags have a professional appearance that is equally at home in a corporate office, industrial factory, or destination wedding.
Form and function add up to making these Hazard 4® camera bags perfect for every kind of adventure or job. Out on a day off, taking enough gear for a small photo job, or transporting a large amount of camera gear for involved or longer photographic outings, Hazard 4® camera bags are an excellent choice.
If one of these three camera bags don’t exactly fit your particular needs, browse through the Hazard 4® web catalog for all of their rugged options.
Learn More:
We Recommend
Great Camera Bags for 2021
Photo by freemixer via iStock
Best Camera Bag
I'm fortunate to own many different camera bags. I test many, many more each year.
And this year, I think I've had more awesome camera bags in my hands than any year before.
On top of that, the bags that make my best camera bags of 2021 list are more varied in their design than any year before, too.
From slings to backpacks, leather camera bags to duffels, this list has something for everyone.
Best Camera Bags of 2021: Hazard 4® Pillbox™
The Hazard 4® Pillbox™ Modular Shell pack certainly falls into the impressive category…
To first address the different aesthetic; it’s due to Hazard 4’s legacy users. From special forces recon teams to expedition reporters, these are first designed to endure the world’s harshest jobs and environments. Cameras, accessories and survival gear are protected while patented modularity allows broad mission customization. Thoughtful sizing, organization, ergonomics, and unique functions, with 1000 D Cordura® fabric, YKK zips, and patented hardware result in the tough, futuristic design that now many enthusiasts also choose.
From a comfort standpoint, the molded back-pad with removable belt is one of the bag’s best features. It’s abrasion resistant without chafing, aerated to ventilate sweat, and conforms to your spine for daylong comfort while padding a <16” MacBook Pro in it’s zip-compartment, that can hang hydration bladders too while the laptop moves to the shell’s other laptop holder!
In terms of ruggedness, it doesn’t get much better than the lightweight, yet durable molded foam shell and internal 360° moveable gear padding. The shell’s six mounting detents host their patented Hardpoint® system which can be used to attach optional loops, panels, rails, bungees, lights, and other hardware to hold tripods, holsters, helmets, etc. And with military modular webbing (molle) and velcro panels throughout, the pack allows expansion of its functionality by adding i.d. patches and pouches/holsters as needed.
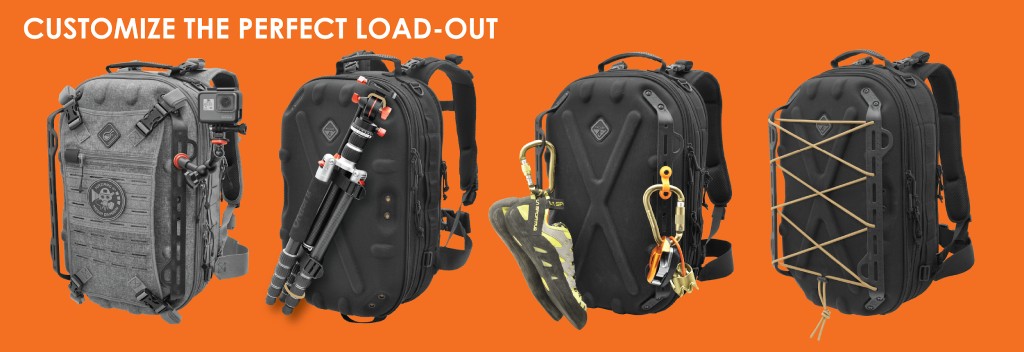
This bag is also supremely versatile. Carry a laptop, tablet, camera system, and drone in the bottom, with clothes, food and first aid in the shell. Even weapons are retained for those who serve. A large admin organizer keeps your pens, SD cards, and tools neatly organized.
The professional mil-spec looks make this an eye-catching and unique bag with all the functionality you need to get the hardest field job done in style; like a James Cameron future loadout but in 2021! In three colors from urban to desert, if you want a bag to accommodate lots of gear with carry comfort and patented modularity/security features while looking like a tough, tech trend-setter, this is the one for you.
Learn more about the Hazard4 Pillbox
Best Camera Bags of 2021: The Camera Pack by Nomatic and Peter McKinnon

Another camera bag that really, really impressed me in 2021 is the Camera Pack by Nomatic and Peter McKinnon.
This pack was specifically designed for people that need to travel with their camera. It's ingenious design helps you organize your personal gear and your photography gear into a single bag.
As you can see below, there's a clothing side and a camera gear side that are separated by an interior panel.
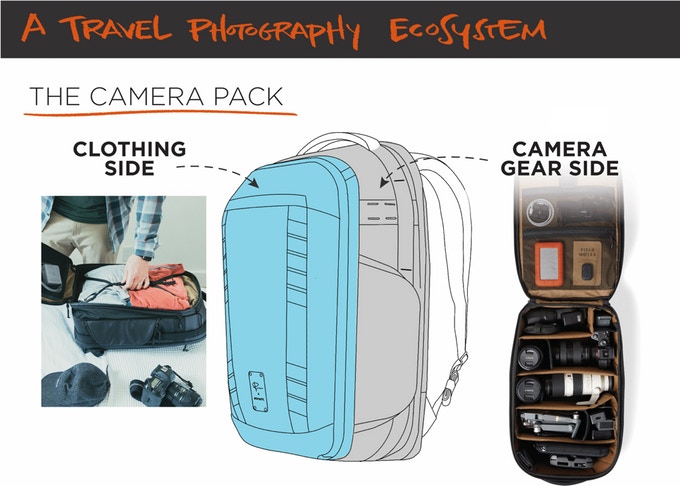
This beautifully designed "ecosystem" means you can travel with a ton of gear without having to rifle through a disorganized bag to find it.
Except...it isn't a single bag. There's a removable day pack inside (called a Cube Pack), that way you can run and gun when you need to.

This backpack can hold up to 42 liters of gear when expanded (35 liters otherwise), so there's no lack of space. And with a full clamshell opening, you can see all the gear you’ve stowed away with ease.
The moveable interior dividers allow you to customize the space to your specific needs. There’s even a sleeve for your tablet, pockets for your camera accessories, and quick side access for easy retrieval of gear, too.

For your personal belongings, you can use compression cubes for your clothes, compression straps to keep everything where it should be, and pockets for smaller items to keep things organized.
The Kickstarter goal for this pack was $100,000. It raised nearly $2.3 million. If that doesn't speak to the innovative features and quality of this bag, I don't know what does!
Learn more about the Camera Pack by Nomatic and Peter McKinnon
Best Camera Bags of 2021: Wandrd HEXAD Access Duffle

This bag by Wandrd is the only duffel-type bag on this list.
And while I'm not usually a duffel bag kind of guy, Wandrd certainly makes the duffel something to consider.
After all, it's beautifully designed, extremely comfortable to carry, and incredibly functional, too.
It’s tough to beat a great camera bag as a gift for the photographer on your list.

One of the best features is the enormous clamshell opening on the top of the bag. With an unobstructed view, you can see exactly what gear is where, that way you can grab what you need and get the shots you want.
The three organizational compartments help you keep things tidy, which is supremely important when the bag has a carrying capacity of 45 liters of gear!
Fortunately, despite its massive interior space, this bag is lightweight at 4.9 pounds and has a relatively small form factor at 9"H X 14"W X 22"L.
On the outside of the bag, you'll appreciate the weather-resistant materials, the high-quality zippers, the side camera access, and the removable backpack straps and camera protection.

The exterior also features waterproof Tarpaulin and 1680D Ballistic Nylon with a WR army coating.
In other words, this bag has tons of capacity, huge functionality, and durability for the long-haul.
Learn more about the Wandrd HEXAD Access Duffle
Best Camera Bags of 2021: f-stop Sukha
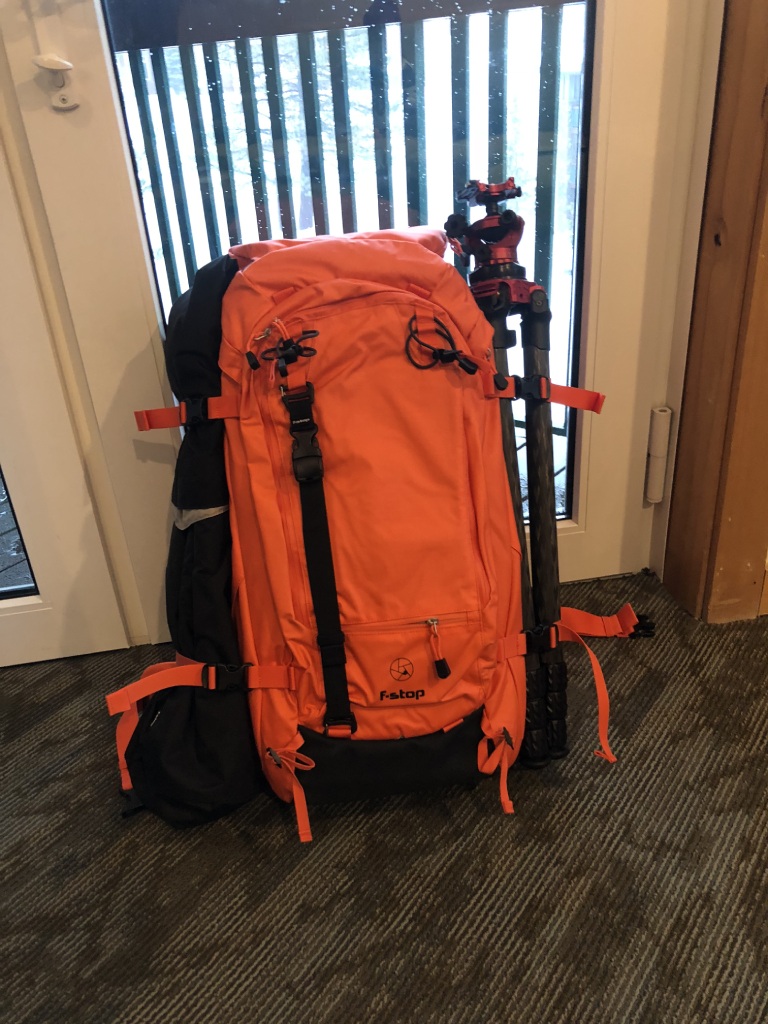
One of the first bags to impress me in 2021 was this bad boy, the f-stop Sukha.
This bag holds an astonishing 70 liters of gear, so needless to say this would be an ideal pack for a very long travel photography outing.
The Sukha is waterproof, so even if you encounter some inclement weather, you can rest assured all your gear and other belongings will stay dry.
And even though this is a monstrous bag, you can still easily find what you need.
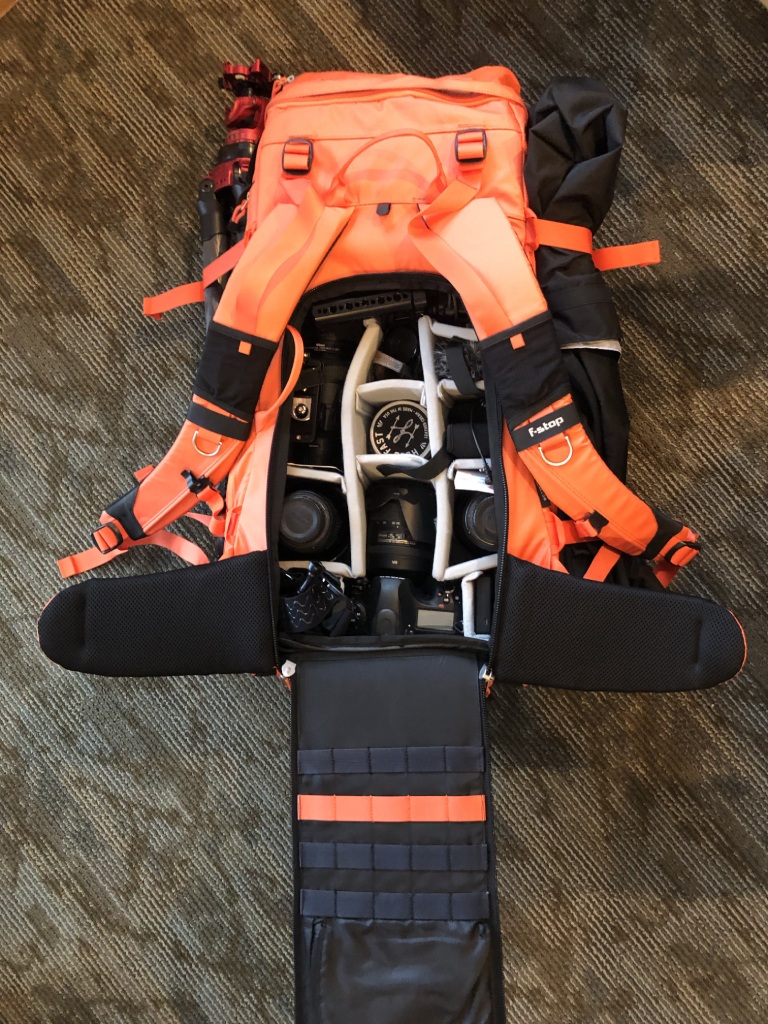
That's because f-stop utilizes Internal Camera Units (ICUs) that enable easy organization of a lot of gear.
As you can see above, even though I have the bag full, it's still perfectly tidy and easy to see what's inside.
In addition to that, this pack has a huge amount of padding that keeps your gear safe.
I also appreciate the fact that this bag has expandable zipper pockets on the side in case I need a little more room for gear.
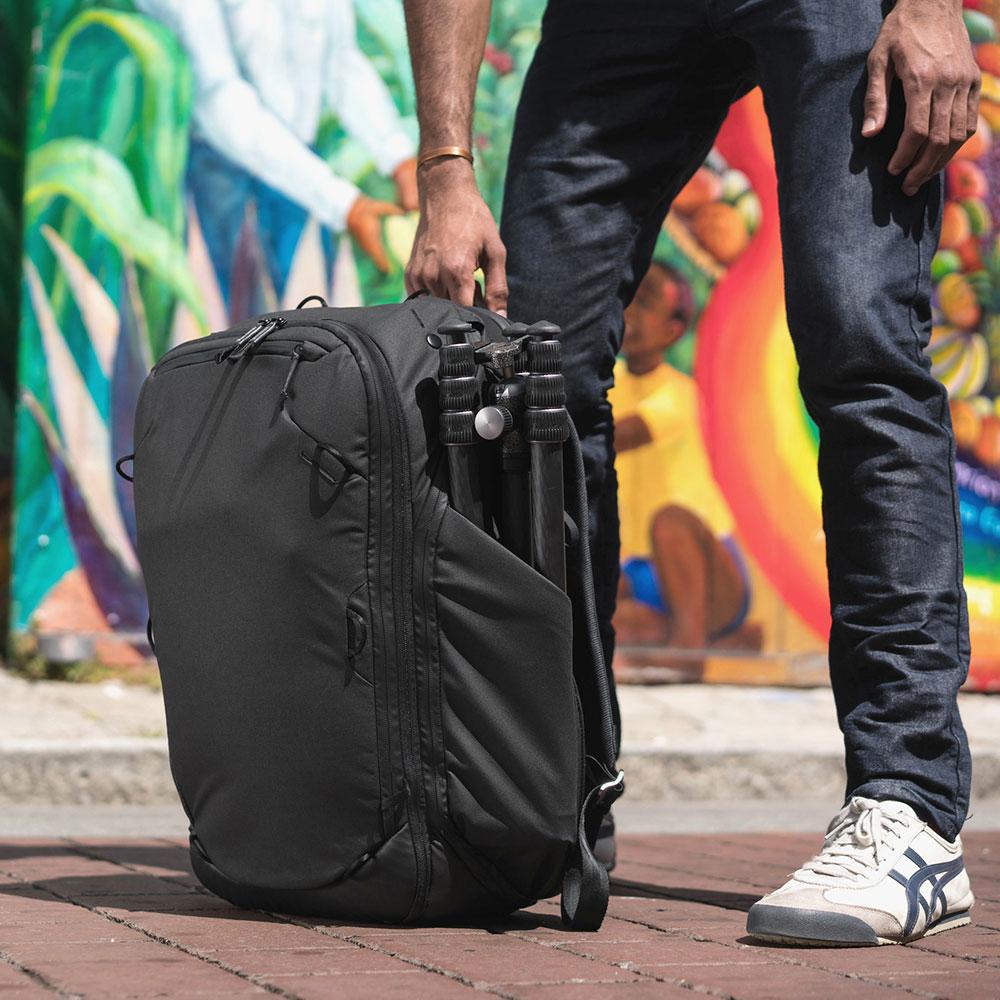
On the exterior of the bag are reinforced carry straps that let you add even more gear - like your tripod - to the bag.
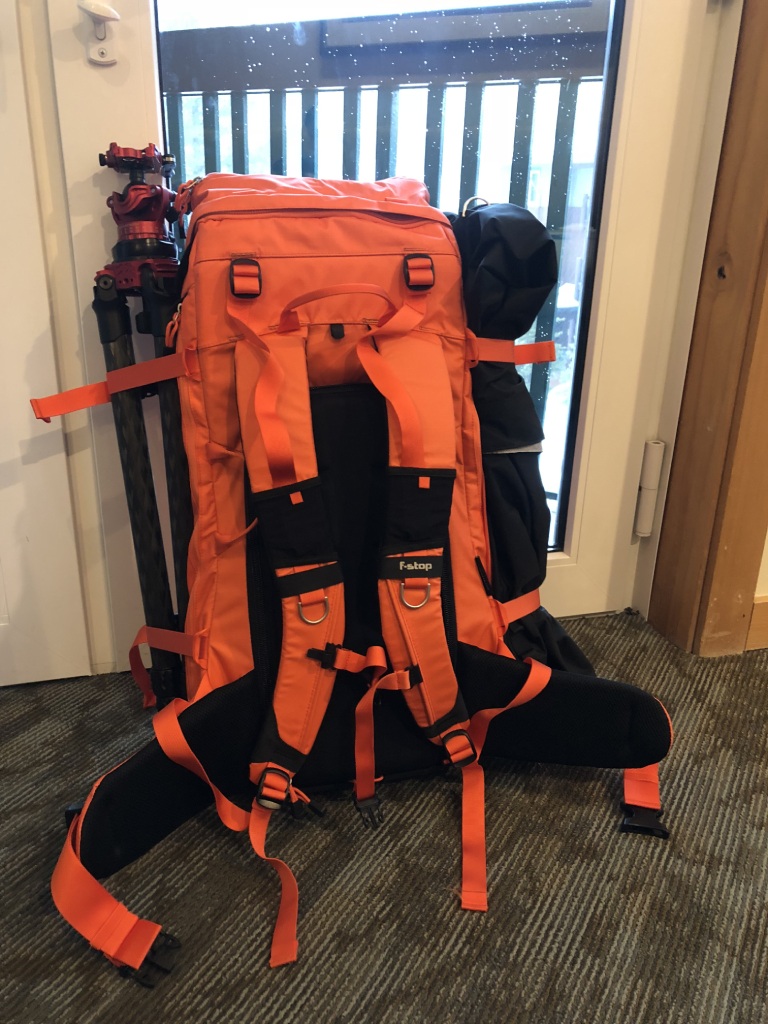
And even when fully loaded, this bag is surprisingly comfortable to carry. The internal aluminum frame makes the pack nice and rigid while the EVA-padded Jersey laminate shoulder straps and hip belt help soften the load you're carrying.
The f-stop Sukha is just a well-designed and rugged bag that holds an incredible amount of gear.
Learn more about the f-stop Sukha
Best Camera Bags of 2021: Peak Design Everyday Backpack V2
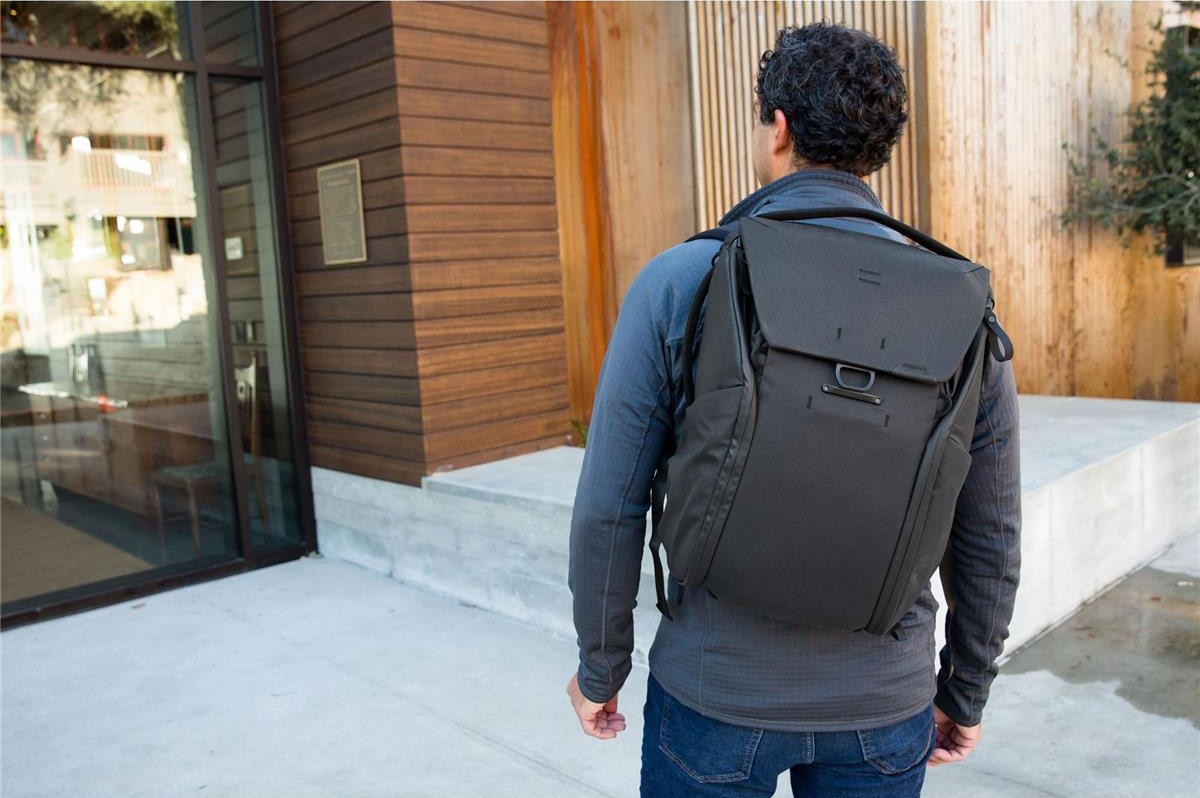
No best camera bags list would be complete without an entry from Peak Design, which seems to find ways to improve on their already incredible lineup of camera bags year in and year out.
Their Everyday Backpack V2 is certainly one of the best bags I've gotten my hands on this year, with new and improved features that make it more usable than ever.
Peak Design incorporated MagLatch hardware on the top of the bag so you can open it up and access your gear in a flash.
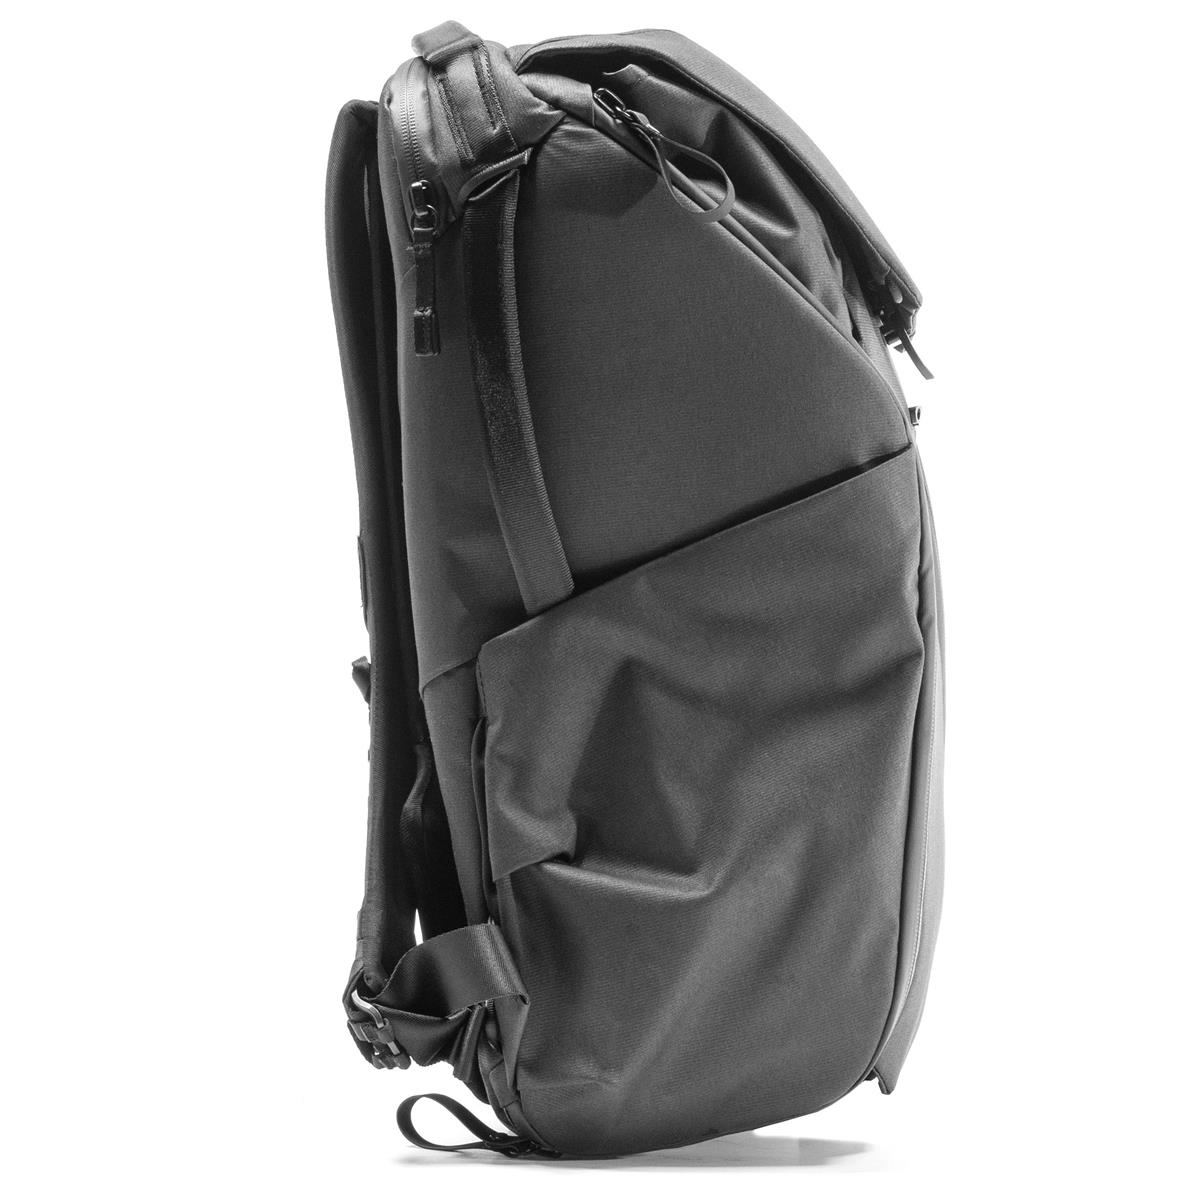
To expand access further, this pack has two side access panels that are secured by weatherproof UltraZips.
The shell of the bag is comprised of 100-percent recycled 400D weatherproofing so your gear stays nice and dry. There's also a handy tuck-away strap system that enables you to lash gear to the exterior of the bag to expand its carrying capacity.
As impressive as the outside is, the inside of the bag offers lots of goodies.
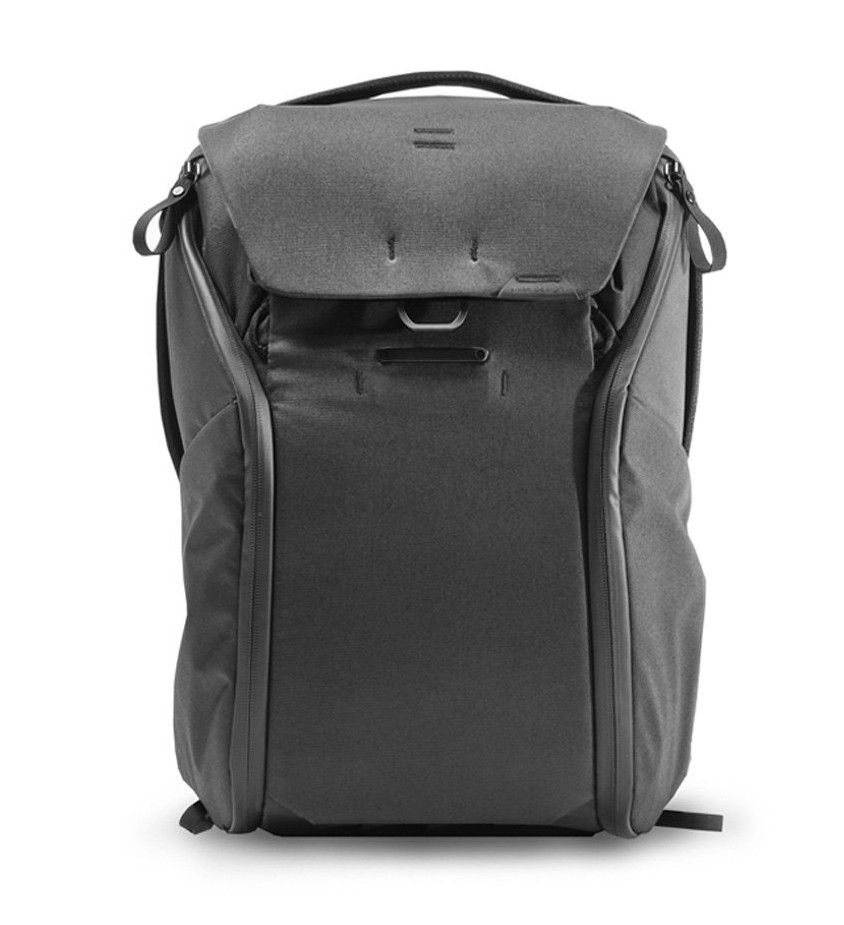
There's dedicated sleeves for up to a 15-inch laptop, numerous internal slip pockets for smaller items, and three configurable FlexFold dividers to help keep your gear organized.
Of course, the FlexFold dividers also help protect your gear by keeping it neatly organized and separated from one another.
The Everyday Bag V2 is available in 20 liter and 30 liter sizes so you can select the right fit for your needs.
Either way, you'll end up with one of the best bags of 2021!
Learn more about the Everyday Backpack V2 20 Liter or 30 Liter versions
Best Camera Bags of 2021: Hazard 4® Freelance™ Sling-Pack
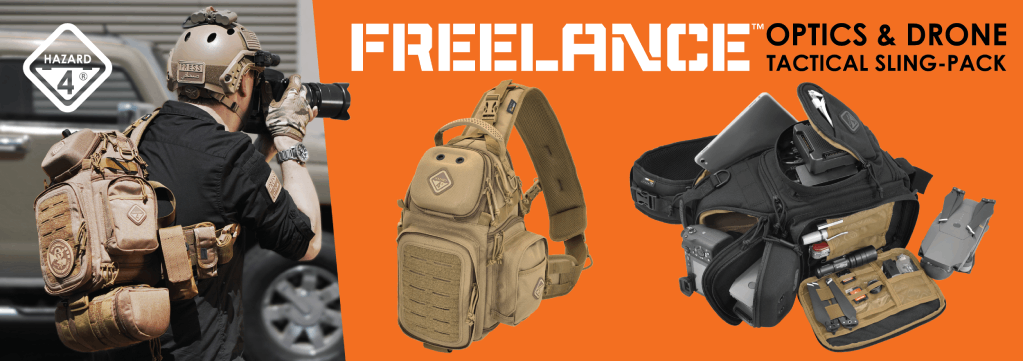
Rarely do you encounter camera bags described as “tactical,” but in this case, the rank definitely fits the Hazard 4® Freelance™ Photo Sling-Pack.
Hazard 4® designs exceed military specs, so these are trusted by demanding users in the harshest environments - special forces to expedition reporters. Thoughtful sizes, organization, and ergonomics, with 1000 D Cordura® fabric, YKK zips, and patented hardware protect cameras, accessories and survival gear in a futuristic aesthetic that deflects harsh use.
You can cleverly rotate Freelance™ from back to chest for quick gear access without taking it off. Sized for most mirrorless systems with movable padded dividers to organize lenses and accessories, it’s also made in a Drone Edition with special dividers and “Drone Pilot” patch on its velcro I.D. panel.
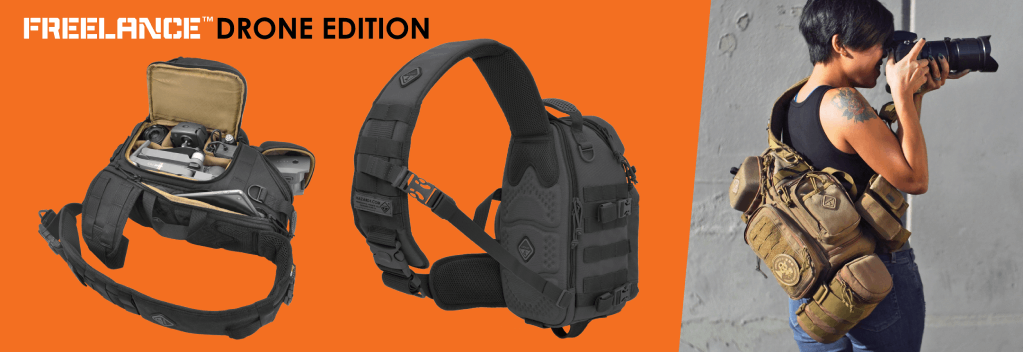
Three exterior pockets fit extra gear. A sweat managing thermo-molded zip back panel cradles 10.5” iPads®. An admin panel organizes pens and SD cards, among other small items. A molded shell fits two Mavic® Pro batteries and has a patented Hard Point® bus for attaching Hazard 4® systems loops and tie-downs or GoPros® via a ¼-20 screw.
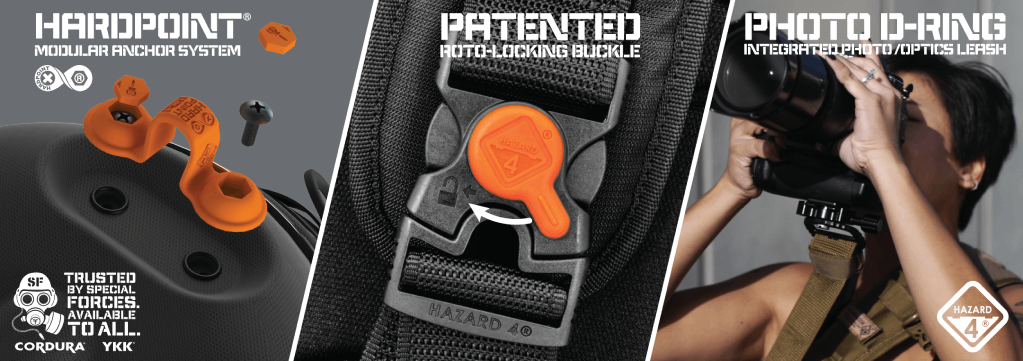
Modular webbing (molle) throughout allows exterior gear expansion. A patented roto-lock buckle prevents drops. Add grab-handles, tripod/compression straps, and more for the makings of one killer camera bag for active photographers!
Learn more about the Hazard 4® Freelance
Best Camera Bags of 2021: Peak Design Travel Backpack
What I like most about the Peak Design Travel Line Backpack 45L is that it has a modular design that allows you to customize the bag to fit your specific needs.
There's a zippered panel that divides the bag into two compartments - one for camera gear and one for personal items.
But if you're in need of tons of gear (or tons of personal items), you can unzip the divider and have one large space for storage.
Don't think that having all that storage space means your stuff will be all jumbled up...
Peak Design has a wide range of optional packing tools that extend the functionality of this bag.
You can get packing cubes for your clothes, a was cube for toiletry items, shoe cubes to keep the dirty bottoms of your shoes contained, and, of course, cubes for your camera gear as well.
Furthermore, there's four mesh zippered pockets on the front of the bag and a host of internal pockets to further your organizational abilities.
Another neat feature is that this bag has rigid sidewalls. Not only does that aid in protecting your gear but it also helps the bag retain its shape, even if it's empty.
When it's full of gear (or when you need to load up), you can do so from the access panel on the back of the bag, the top, or from the side access panels.
I love the weatherproof construction (even the zippers are weatherproof), the abundance of exterior handles for easy grabbing, and the ability to expand from 30 liters to 45 liters. With all that, you have the makings of one of the best camera bags of 2021!
Learn more about the Peak Design Travel Line Backpack
Best Camera Bags of 2021: HEX Ranger DSLR Sling Bag

I don't often use sling bags, but I can tell you that this bad boy has made me a sling bag fan.
One look at the specs on this thing, and you'll understand why I think so highly of it...
What strikes you immediately is the small form factor of the bag.
It weighs only 1.3 pounds and is 14.5"L x 7.25"W x 4.75"H. Though it's rated at 8 liters, I could fit everything from my 10L Peak Design bag into the HEX bag, no problem. There is no wasted space in this thing, so the manner in which it was designed gives you the utmost efficiency of space.

Additionally, this bag hugs your body, so it's a carrying experience unlike any other I've ever had with a sling bag - it stays in place and doesn't bounce around or knock into things as some lesser sling bags tend to do.
The outside of the bag features adjustable load straps and adjustable bottom carry straps, so I can easily add my Peak Design tripod to the bottom of the bag when need be.
There's a front access organizer for small things like batteries or memory cards and a faux fur lined pocket on the front where you can keep your phone. There are multiple stash pockets too.

Inside, one of the best features is the collapsible interior dividers.
The dividers can be folded up or even removed so you can truly customize the bag to suit your needs.
My setup includes a Nikon Z7 with a lens attached, an additional lens, and filters, and there's plenty of room for all of it inside the bag.
The HEX Ranger is just a great looking bag that's well-thought-out and beautifully crafted. If you're in the market for a new sling bag, give this one strong consideration!
Learn more about the HEX Ranger DSLR Sling Bag
Best Camera Bags of 2021: Holdfast Roamographer
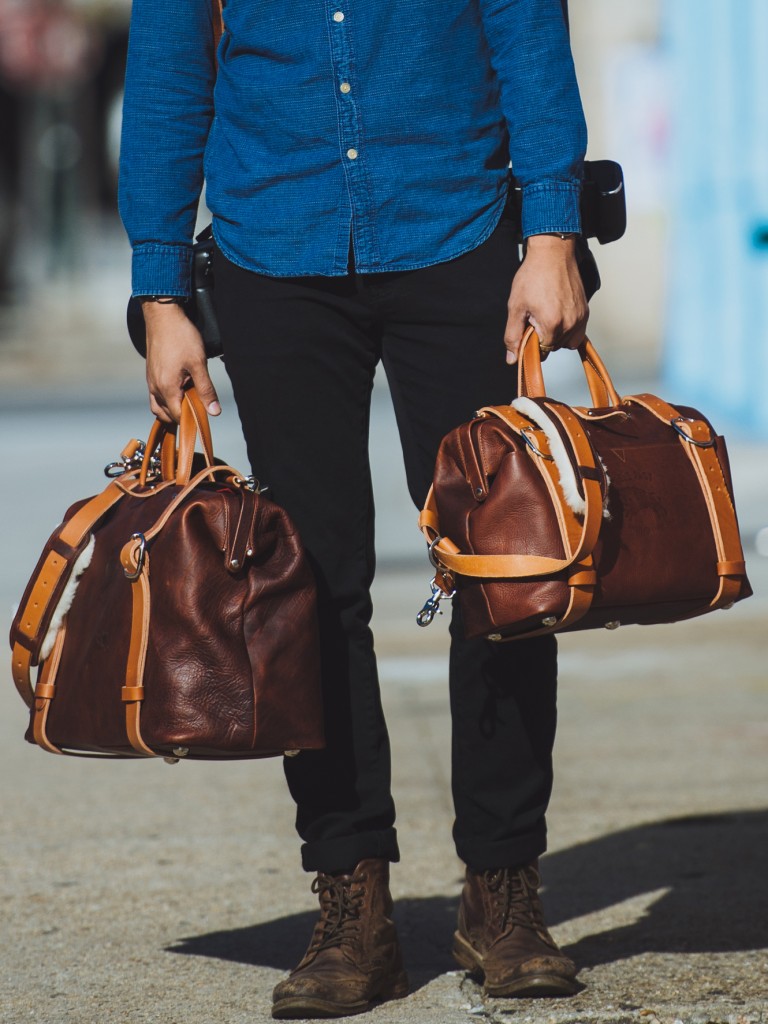
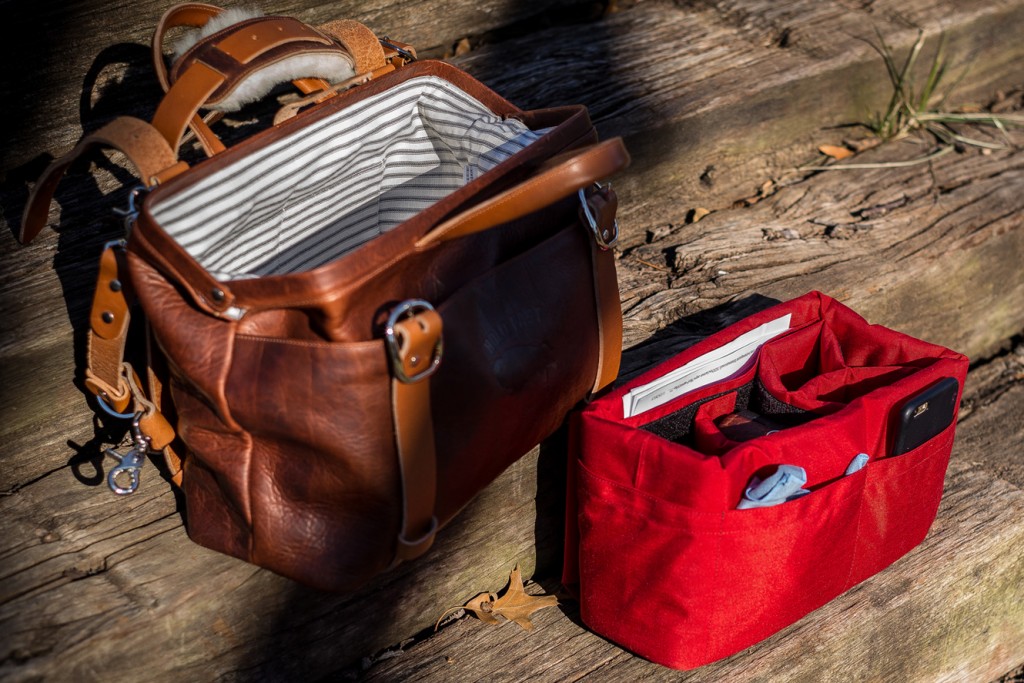
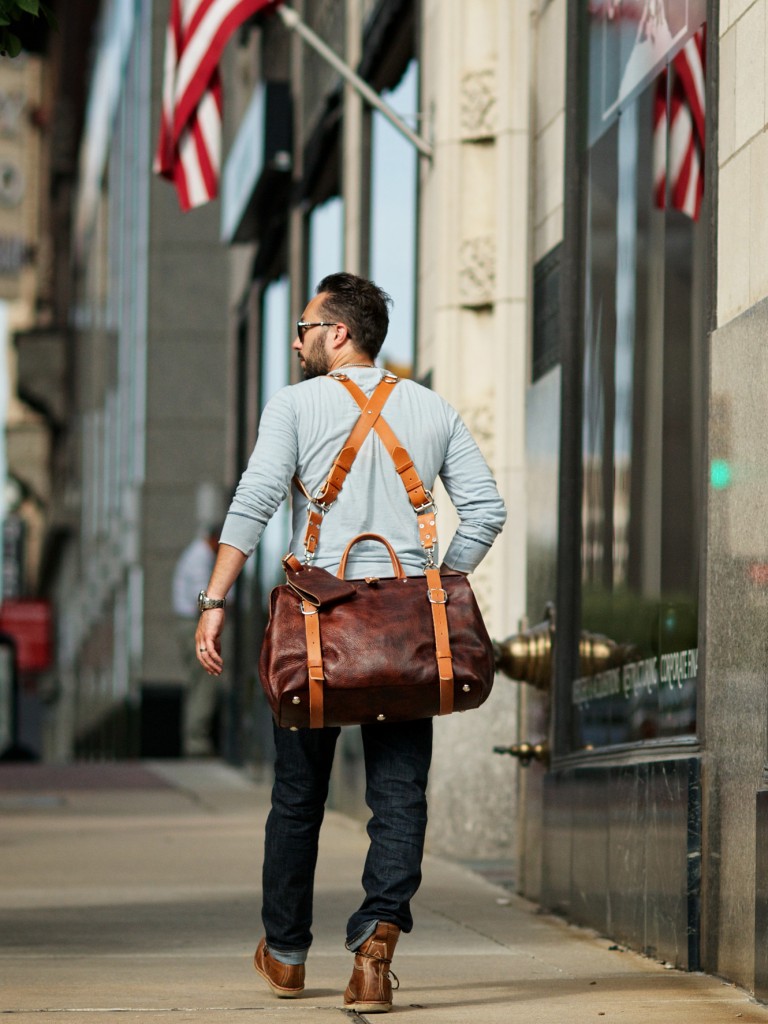
One of the best leather bags on the market today is without a doubt the Holdfast Roamographer.
There's a lot of reasons for that, too.
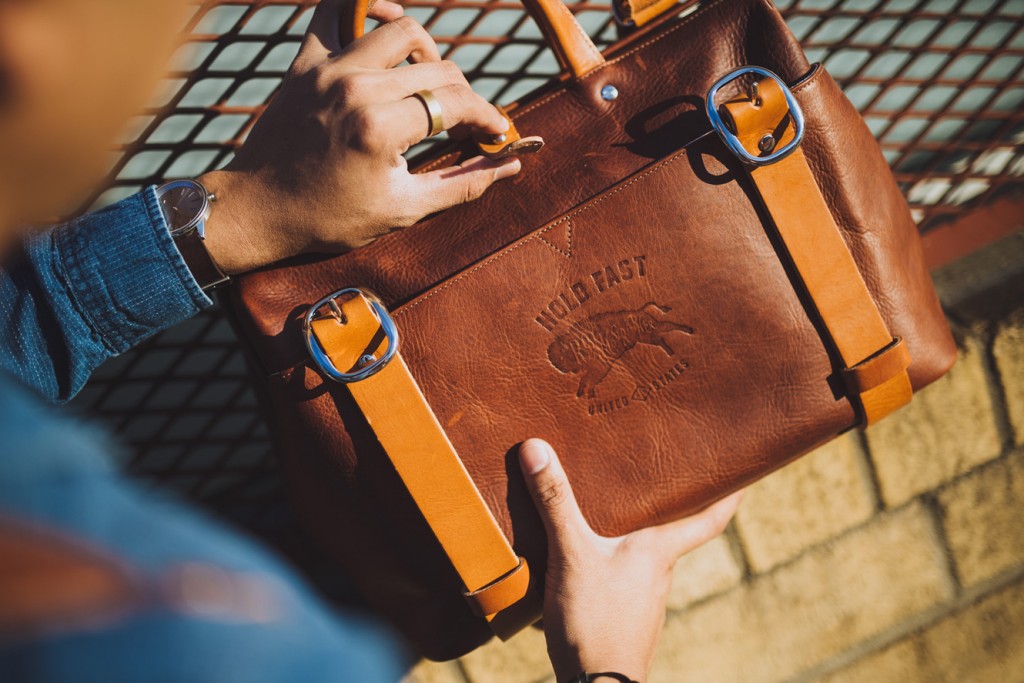
First of all, the Roamographer truly does fit the bill for form and for function.
This bag is stunning to look at, with its handcrafted details and beautiful American Bison leather jumping out at you.
Even the buckles, straps, handles, and shoulder strap show impeccable design and attention to detail.
Speaking of the straps, you can carry a tripod by lashing them to the bag via the straps, and carrying the bag is a joy considering the strap has a shearling-lined shoulder pad to keep your neck and shoulder as comfortable as possible.
You can even carry a small camera on the Roamographer's shoulder strap so that you don't miss any split-second shots.
But since I like a utilitarian bag, what impresses me the most about the Roamographer is that it isn't just a pretty face.
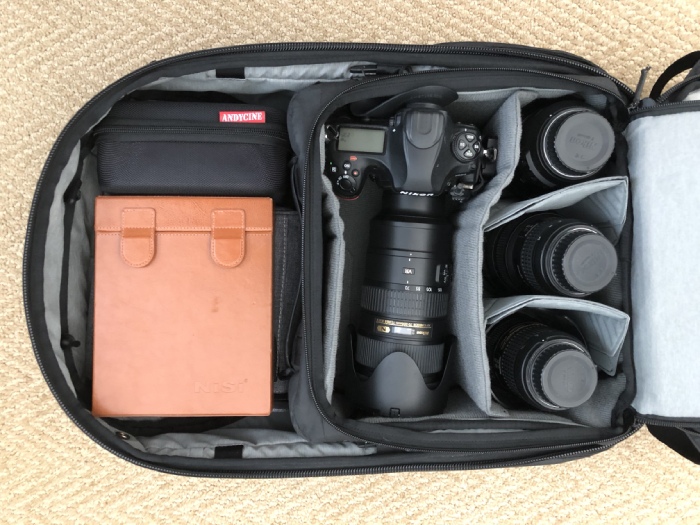
Inside, it surprises you with a removable camera insert that's soft and thickly padded to provide your gear the protection it needs. It keeps all your gear nicely organized as well with various sleeves, pockets, and dividers.
And since the insert is removable, you can use the bag as a weekender full of clothes and personal items when you don't need it to carry your camera gear.
With two large exterior pockets and two interior sleeve pockets, the Roamographer has no lack of storage space. There's even a large and small version for DSLR and mirrorless gear, respectively.
You can carry the Roamographer using Holdfast's excellent Moneymaker Camera Strap for the ultimate in utilitarian function (while looking good too!).
Learn more about the Holdfast Roamographer Bag
Best Camera Bags of 2021: f-stop Dalston Bag

If you're in need of a smaller bag that doesn't skimp on high-quality materials and versatility, then look no further than the f-stop Dalston.
This bag was designed with meeting the demands of the urban jungle in mind.
As a capable everyday bag, it not only offers excellent storage space but also has a sleek silhouette that makes it less bulky, which is ideal for photographing in tight spaces.
The bag is easy to access, too, with side-access pockets for quick grab and go.

But don’t think that the Dalston is just for quick daytime adventures…
At nearly 19 inches tall and 11.4 inches wide, this bag can hold up to 21 liters of gear. That’s plenty of space for extended photoshoots in which a photographer needs lots of space packed into a sleek bag.
Add in weather-sealed zippers, a removable internal organizer for keeping your gear tidy, a Jersey laminate EVA-padded back panel, and Thermoformed EVA shoulder straps for comfort, and you have the makings of a spectacular bag for photographers of all kinds!
Learn more about the f-stop Dalston
We Recommend
How to Photograph Urban Landscapes
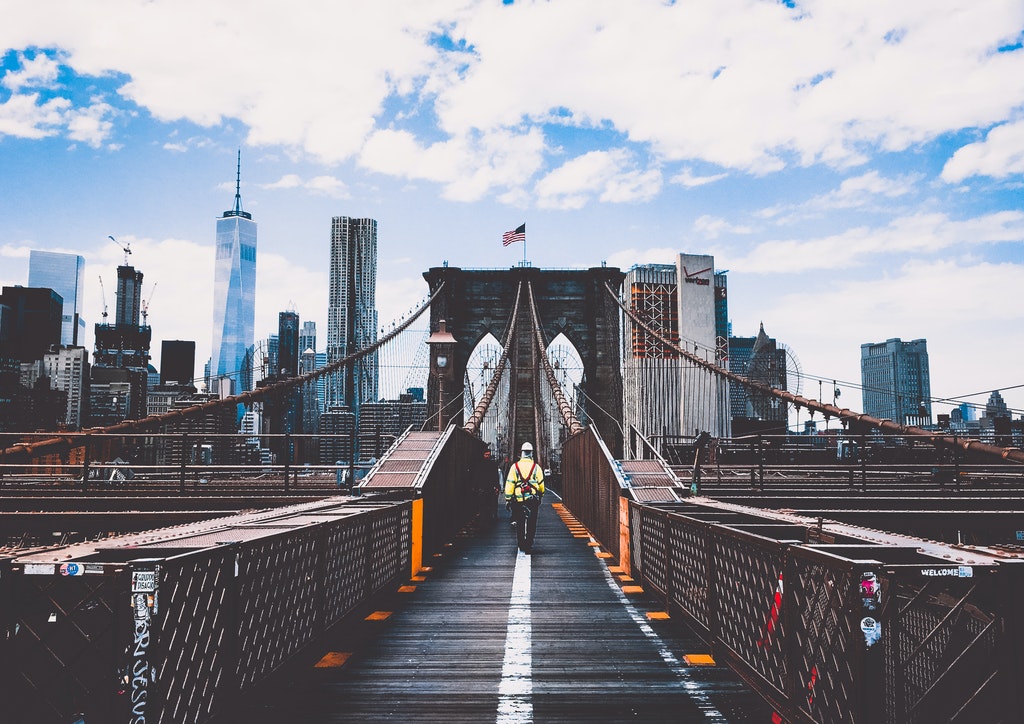
Photo by Lex Photography from Pexels
Urban landscapes are fascinating photographic subjects. Also known as cityscape photography, urban landscape photography is similar to other outdoor genres but also has some specific considerations to be aware of.
Compared to natural landscapes, urban landscapes have advantages for some photographers. If you live in the city or suburbs, you don’t have far to travel. So if you have an afternoon off in your schedule, you could either walk out your door or take a short drive to be right in the middle of great city photography subjects.
Even though we may be right there, ready to go, we may still want to get some good tips on how to photograph urban landscapes.
Table of Contents
- Investigate Ahead of Time
- Capture a Wide View
- Focus in on the Details
- Choose the Right Camera and Lens
- Use a Polarizer
- Protect Your Gear
- Post-Processing Tricks
- Rewards of Urban Landscape Photography
Investigate Ahead of Time

Photo by Startup Stock Photos from Pexels
To create great urban landscape photography, it helps to start with a great subject. One way to find workable subjects is to simply go out and start looking. Or you may already have an idea of a subject that could transfer into an amazing image.
Investigating online or in print is a very good way to see what might be an interesting subject where you live. Word of mouth is another valid investigative technique. Ask your friends, co-workers, neighbors, even your kids.
Sometimes a great image is just waiting to be captured by the right artist. That right artist is you, or could be if you just knew where to go to capture that image.
That’s for your own hometown. The same approach is usable when visiting other urban landscapes. A primary source of information for other areas can be found online. Google Images, Google Maps, and Google Earth are excellent sources.
You can even see pictures of what other people have taken of subjects you’re interested in, giving you ideas of what may or may not work photographically.
Capture a Wide View
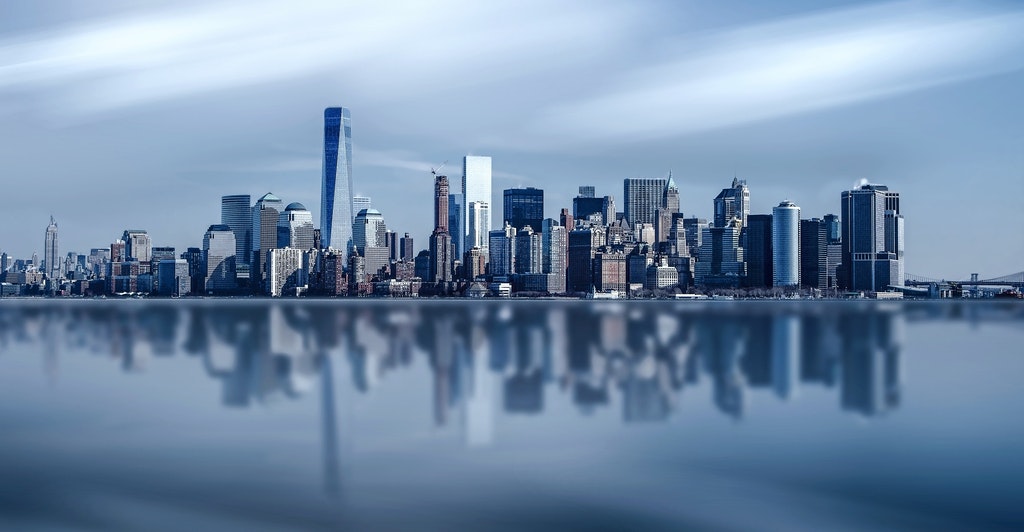
As with natural landscapes, the urban landscape is often seen as a very big picture. Wide-angle lenses are a natural choice to gather the entire view. Panoramic images are another option that is very easy to do with existing equipment. Careful hand holding technique is important, image stabilization features can help out a lot as well.
Another camera feature that can aid for capturing the wide view of an urban landscape is turning on the viewfinder grid lines. This will help you keep lines straight so that the buildings don’t look like they’re falling over.
Some cameras have an electronic version of a spirit level, which can also be used to keep lines straight. A travel tripod and a hot shoe mounted spirit level are also good alternatives for capturing wide views of the urban landscape.
Focus in on the Details
Photo by Philipp Birmes from Pexels
As in natural scenic areas, some of the best urban landscape photography images are found in a narrower view of the scenery. Especially in regards to architecture, the smaller details in city photography make interesting images.
As an example, an iconic image of San Francisco is the Golden Gate Bridge. A wide view of that structure makes an excellent image. Focusing in on a smaller aspect of that same structure, perhaps from under the span will still show that the image is in San Francisco, but highlight an out of the ordinary view.
Choose the Right Camera and Lens
Photo by Suliman Sallehi from Pexels
When engaging in urban photography, I prefer to use more compact equipment. Several reasons. Lugging around a big heavy camera kit all over the city can become tiring and uncomfortable.
Safety is another valid reason for choosing smaller equipment. It’s a fact of life that carrying and using larger photographic equipment in today’s urban environment can call unwanted attention to photographers from both the authorities and from undesirable elements. I won’t editorialize about that right now, but I have plenty to say on the subject.
Learn More:
Use a Polarizer

Photo by Thorsten technoman from Pexels
The large expanses of glass and concrete in the buildings and roads of urban landscapes are just crying out for us to use a polarizer. A polarizer will tame the reflections and also deepen the color of blue sky showing in our images. The contrast and color enhancement of using a polarizer adds interest to our urban landscapes.
Protect Your Gear
The concrete jungle is just as dangerous to the good health of our camera and lens as is a tropical jungle or a snowy mountainside. You can protect your equipment with a good camera bag. One of the best for urban landscape photography is the Hazard 4® Freelance™ Sling Pack.
Very well padded inside, this bag has a protective shell, patented strap and buckle technology, and many compartments and pockets for keeping your gear safe. The sling pack design lets users quickly rotate it from back to chest for fast gear access without taking off the bag.

Reinforced stitching adds strength and durability to the bag’s construction. Other features making this bag a good companion for your urban landscape photography are military modular webbing (MOLLE) in the straps and on the sides of the bag, YKK® zippers that are smooth, rugged, and resistant to the elements, and soft tricot inside to protect your gear from damage due to bouncing around.
Post-Processing Tricks
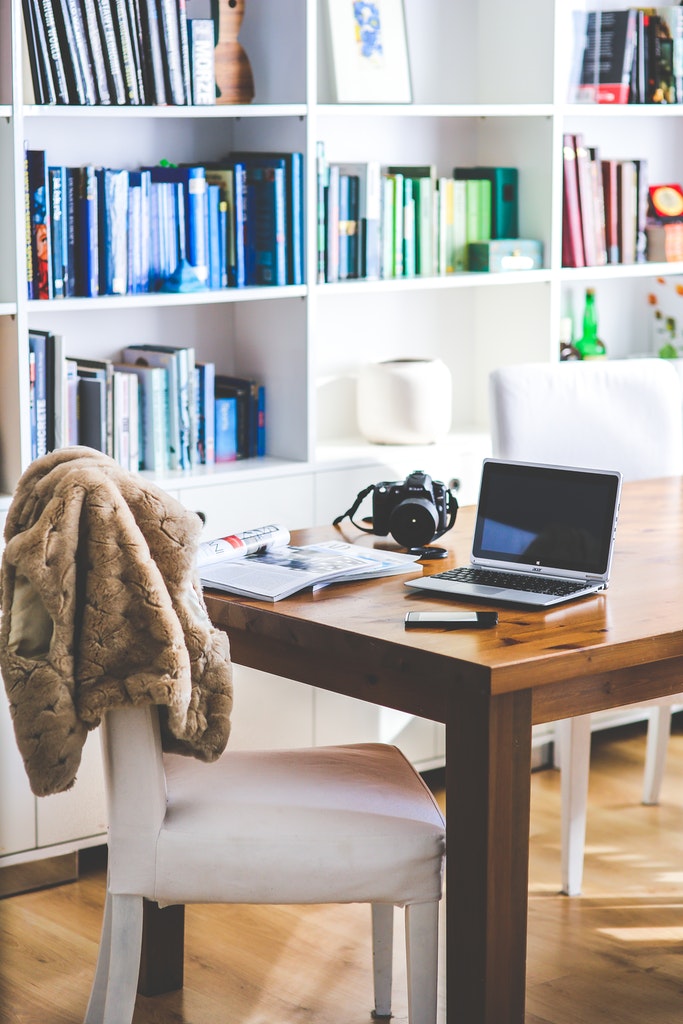
Photo by Kaboompics .com from Pexels
Since the urban landscape is full of challenges for proper exposure and handling contrast and dynamic range, two methods are well suited for cityscape photography. Shooting in RAW and using HDR.
Using either one of these techniques, or both together, will let you capture more detail that can be processed with your favorite image processing program.
Rewards of Urban Landscape Photography
Photo by Andrea Piacquadio from Pexels
Urban landscape photography is one of the more rewarding types of photography for creating images for your own and other’s enjoyment. Try out some of these tips and let us see your images for our own inspiration.
Learn More:
We Recommend
How to Protect Your Camera Gear From Wear & Tear
Photo by Pedro Sandrini from Pexels
Sometimes, photography can be a rough job. Certain events or excursions can seem like a cross between a roller derby and a jungle safari. In order to adequately protect your gear from breakage, you may need to adjust some habits, methods, and invest in some better protective camera gear.
Protective camera bags, camera skins, sling straps, and other protective camera gear are one part of the equation. Adjusting our methods are the other. Let’s look at protective camera bags and other gear first.
Recommended Photography Reading
- National Geographic Photo Basics: The Ultimate Beginner's Guide to Great Photography
- Photography: The Definitive Visual History
- Read This if You Want to Take Great Photographs
Protective Camera Bags

I’m starting here because I think it’s one of the more important things to have as a photographer. Many of us have a lot of money invested in our cameras and lenses. Even if you’re just now starting out in more advanced photography with an entry-level camera and a couple of kit lenses, it’s still a substantial monetary outlay.
For some beginners, the camera bag that may have been thrown in with their camera kit looked fine at first, but soon revealed its limitations. For one, it barely holds the camera gear you have. Second, there is little to padding, and lastly they’re often not well made and inconvenient to use.
The complete opposite of that description is the Freelance™ sling pack from Hazard 4®.
Hazard 4® is a manufacturer of tactical gear and clothing plus a wide array of photographic accessories. Their sling packs have become one of my favorite finds in my search for how to protect your camera gear.

A sling pack is a cross between a shoulder bag and a backpack. They are comfortable to carry yet easy to get in and out of. The Freelance™ sling pack has a huge padded shoulder strap, a wide belt strap for travelling stability, and it even has a handle for moving around on the job.
The bag or case part of the Freelance™ sling pack is very thoughtfully laid out with moveable partitions and excellent padding. The thermoformed back panel keeps you dry and comfortable even with a full load of heavy cameras and lenses.

It has three external pockets, one of which has a protective shell for added protection of sensitive items like batteries. Besides protecting your gear from bumps, drops, and whacks, the Freelance™ lets you grab your camera quickly even while wearing the sling pack. It’s also weatherproof, making it my number one recommendation for your next camera bag.
Learn More:
Silicone Camera Skin
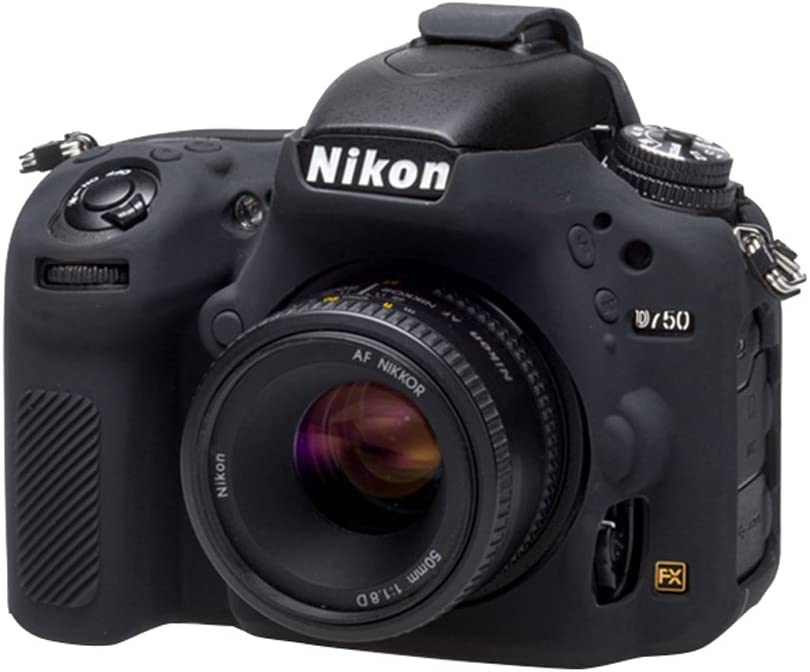
A camera skin is like a wetsuit for your camera. It may not be waterproof, but it fits close to the outer shell of the camera giving you more protection from rough use. Plus, it makes the camera a little easier to grab and hold.
One example is the easyCover Silicone Protection Cover available from multiple vendors like Amazon. The skins are custom made for each camera model and some are available in a variety of colors. It’s a fun and simple way to protect your camera gear from breakage.
Sling Straps
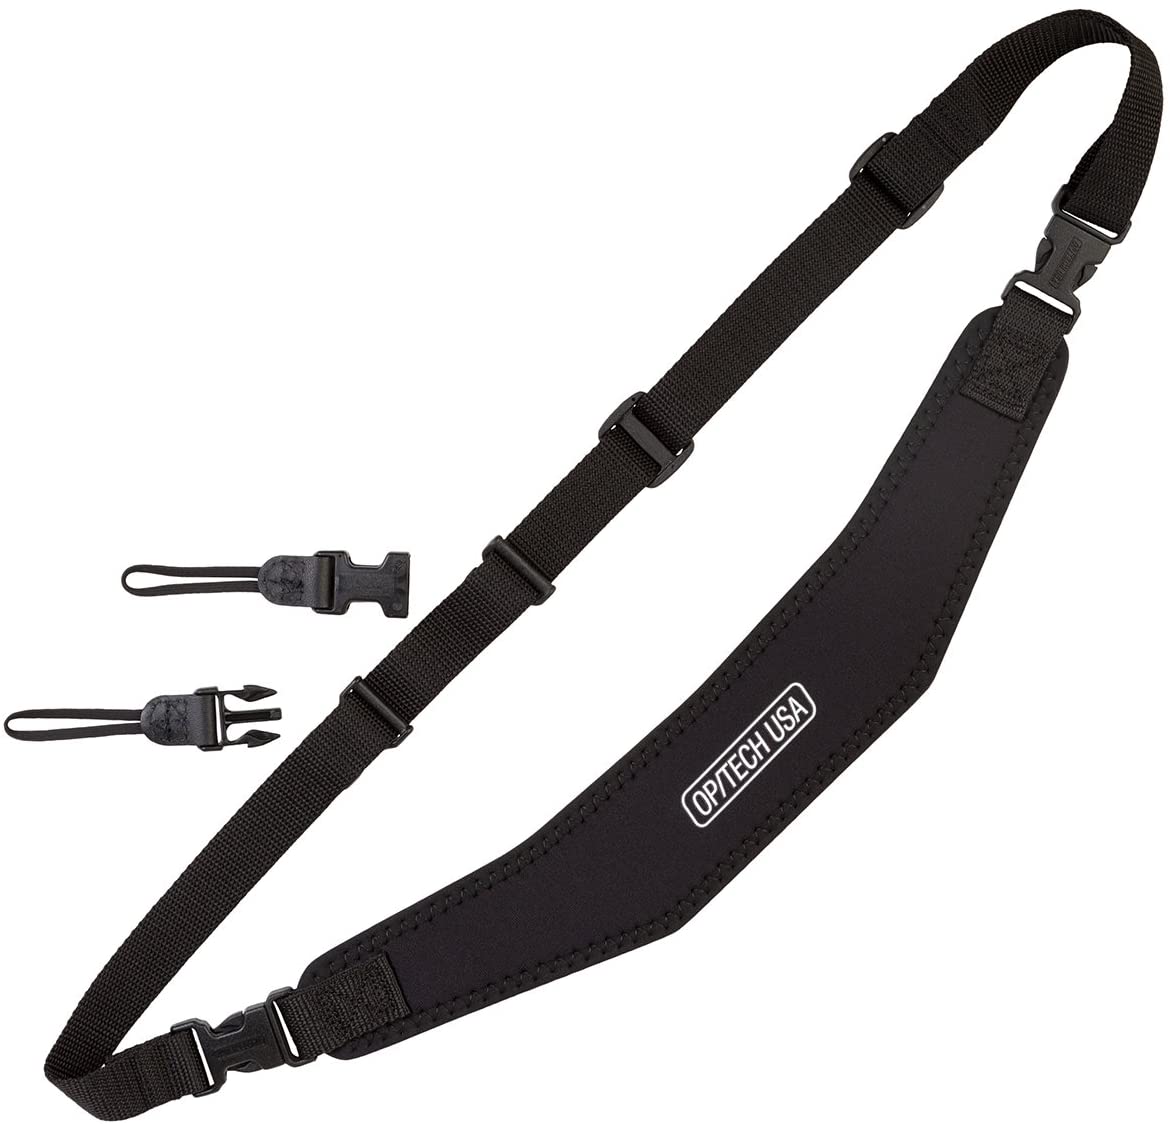
A sling strap is basically a longer camera strap that lets you sling the camera gear over your shoulder instead of around your neck. This has several advantages.
It makes it more difficult for someone to snatch your camera gear from you. It spreads out the weight of the camera and lens over more of your body, instead of just around your neck. This style of strap also makes it less likely that you’ll drop your camera gear while walking round.
Other Ways to Protect Your Camera Gear
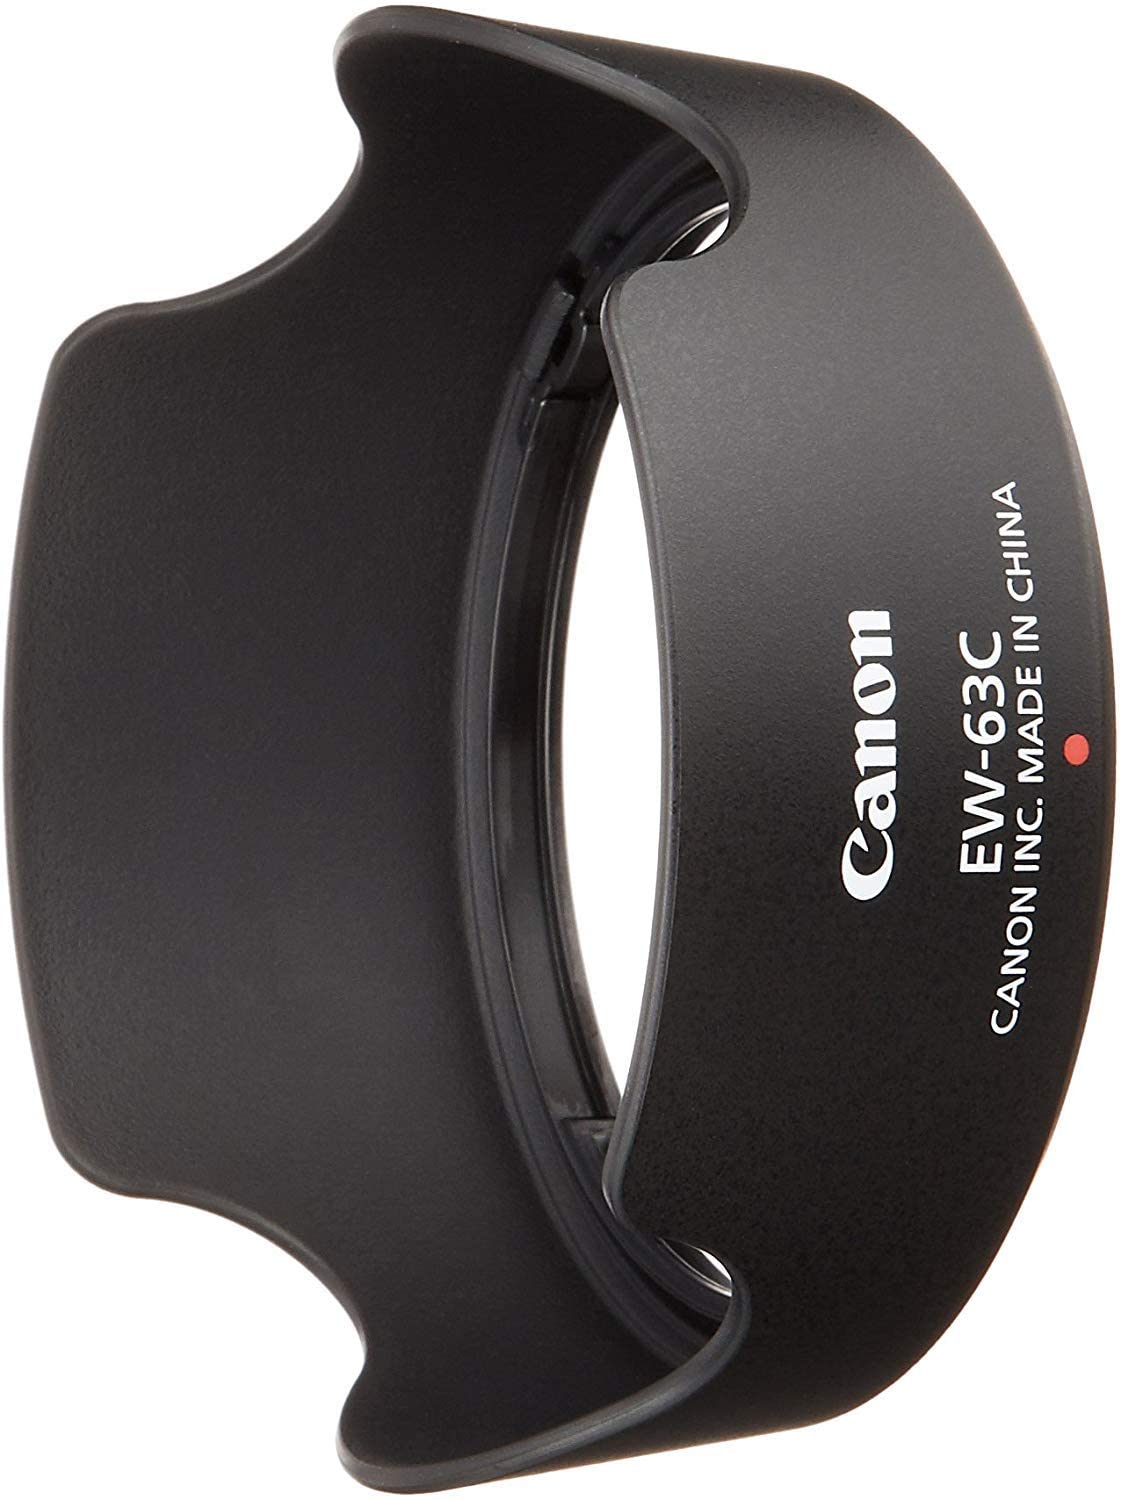
One of the biggest ways to protect your camera gear from breakage is to change how you approach carrying and using your camera gear.
A rigid lens hood is a very valuable photographic accessory. Not only does it shield the front element of the lens from extraneous light causing glare or flare, but it also can act like a bumber to protect the lens from scratches and breaks.
I like to use on every one of my lenses that it’s appropriate to use on, which is most of them other than my fisheye and ultra wide lenses.
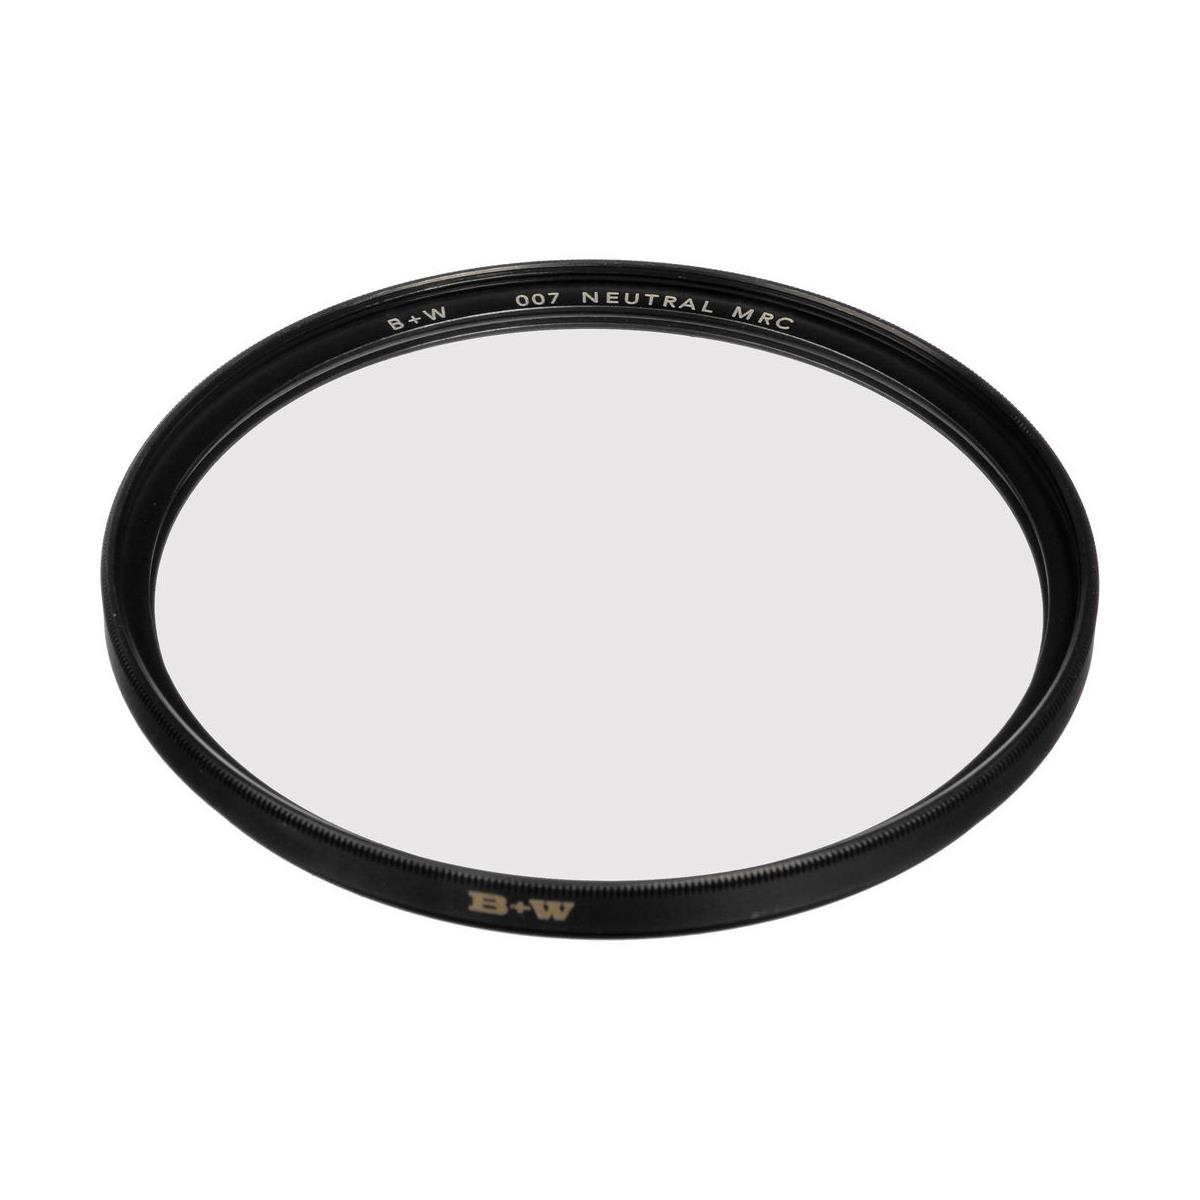
A protective lens filter is a method used by many photographers to protect the front lens element. Though some photographers don’t like the thought of putting any other glass in the lens optical path. For the lenses that I do put a protective filter on, I make sure to use the best optical filters available.
Photographic Insurance

A fact of life in photography is that if you do any work for profit with your camera gear, even if not a fulltime or partime professional, if you damage your camera gear or it gets stolen, your homeowner or auto insurance is probably not going to cover the loss for you.
Companies like Full Frame Insurance make it simple to protect your assets. Additionally, these policies can guard against any liability claims against you for damage you accidentally cause while taking photos.
Change Your Habits
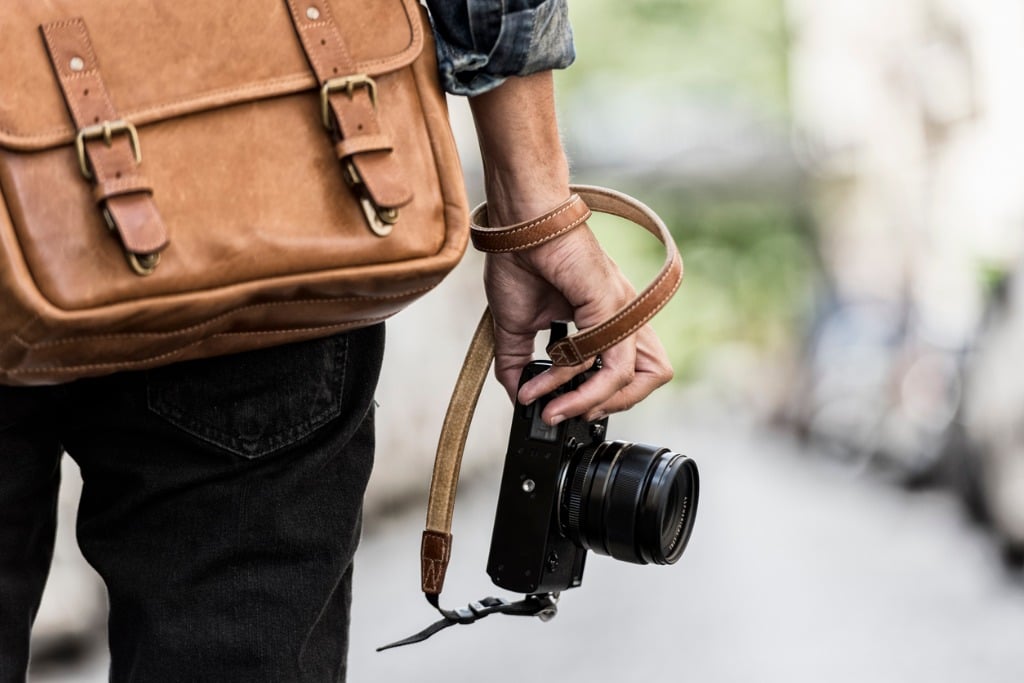
photo byLDProd via iStock
Look how rough we treat our phones. How many do yu know walking around with a smartphone that has a cracked screen? It’s because of carelessness. Yes accidents happen, but we really don’t want to be more prone to accidents that can harm or precious camera gear.
Use good quality protective equipment, adjust your habits, and make a concerted effort to be more careful. The best protective gear you can have is the one you never have to use. Just because you’re photographing roller derby or on a jungle safari doesn’t mean your camera gear is toast.
A little effort to be more careful and having good protective gear will protect your camera from unintentional damage or loss.
Learn More:
- Rugged Camera Bags for Your 2020 Photography Adventures
- Photography Mistakes You Need to Stop Making
We Recommend
Introduction to Drone Photography
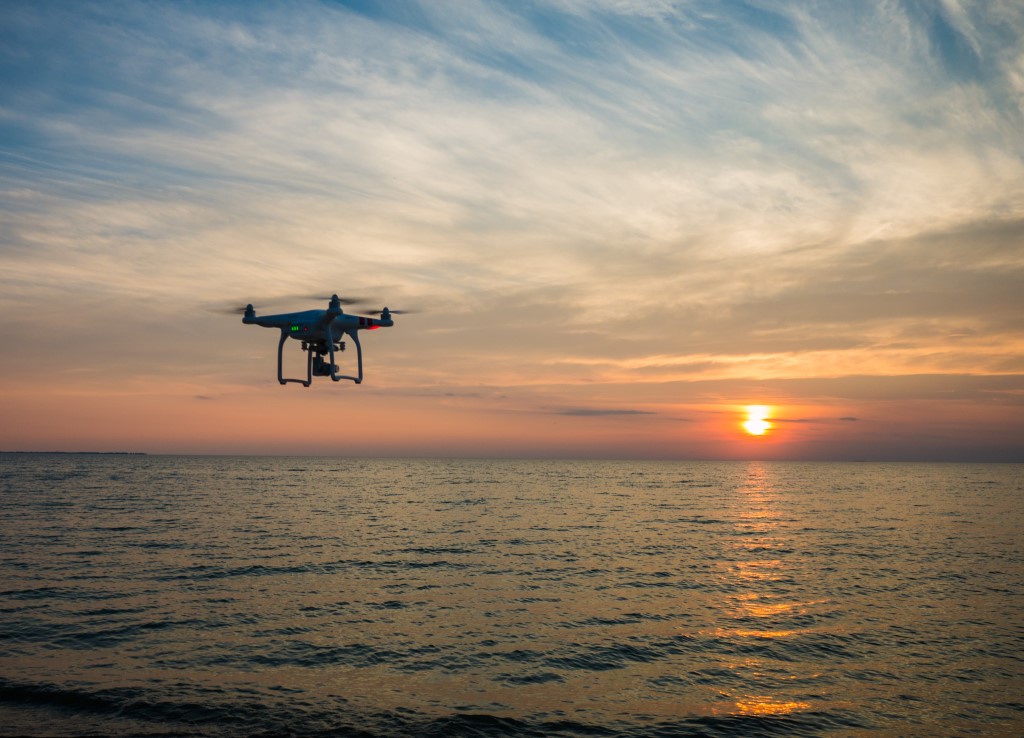
Photo by Aaron Burden on Unsplash
If you are interested in drone photography, you are not alone. It is one of the hottest things to do right now in all of digital photography.
Questions naturally come up. What do I need to know about drone photography? Is it safe to fly a drone for photography? What can help me get the best out of drone photography?
In this introduction to drone photography, we will answer these questions and give you some drone photography tips.
Getting Started: Pick a Drone

photo byzsv3207 via iStock
You’ve done your research, you know what you want to do with drone photography gear. Now you choose your drone based on how its features and capabilities match up with those needs and wants. You also have decided how much to spend, so let’s assume you already have your new drone.

Perhaps you now have a drone capable of professional quality photography and videography like the DJI Mavic 2 Pro. This drone has forgiving flight characteristics with several shooting modes, great battery life of over 30 minutes, and excellent image and video quality.
It is equipped with a Hasselblad camera and lens incorporating a 1-inch type sensor of 20MP. The lens is equivalent to 28mm in full frame format, focuses as close as 1 meter, and has an aperture range from f/2.9 to f/11.0.
With a drone like this, you can create beautiful examples of photography and video. Its top speed is almost 50mph and you can control it from almost 5 miles away as well
Recommended Drone Photoghraphy Books:
- Drone Photography Basics: Your Guide to the Camera in the Sky
- Drone Photography Explored: Beautiful Drone Photography
Protect Your Drone

Your drone photography gear requires protection, and one of the better things you can get to achieve this end is a drone photography bag. I can’t tell you how many times I see an eager new drone photographer bring their drone to locations in the box it came in.
You have a bag for your DSLR or mirrorless camera and lenses. So, why keep your drone in a box that will wear out and is inconvenient to use?
One of the best bags I’ve found for drone photography is the Freelance™ Drone Edition tactical sling-pack from Hazard 4®.
Hazard 4® bags are designed for extreme use while offering excellent protection. Their bags and accessories are perfect for outdoor photographers and videographers. Being outdoors in nature or in urban settings exposes your valuable camera gear to hazards, so you want a protective bag that is also convenient to use.

The Freelance™ Drone Edition tactical sling-pack is specifically designed internally for drone use. The dividers are custom sized and it has multiple features to make life easier for active drone photographers.
This particular bag is designed to hold the DJI Mavic pro and other similar-sized folding drones.
When you get out into the field, the bag easily rotates from your back to your chest so you can quickly access your drone and other gear without taking the bag off.
The dividers inside the bag are movable so you can customize the carrying experience depending on the needs for each specific outing. There are three large pockets, one of which has an admin area, and another with a protective shell for items like batteries.
The strap has a molle covering with a locking buckle for security while the thermoformed back panels gives you comfort and dryness all day long.
In other words, this pack is purpose-built for long, rugged days outside with your drone!

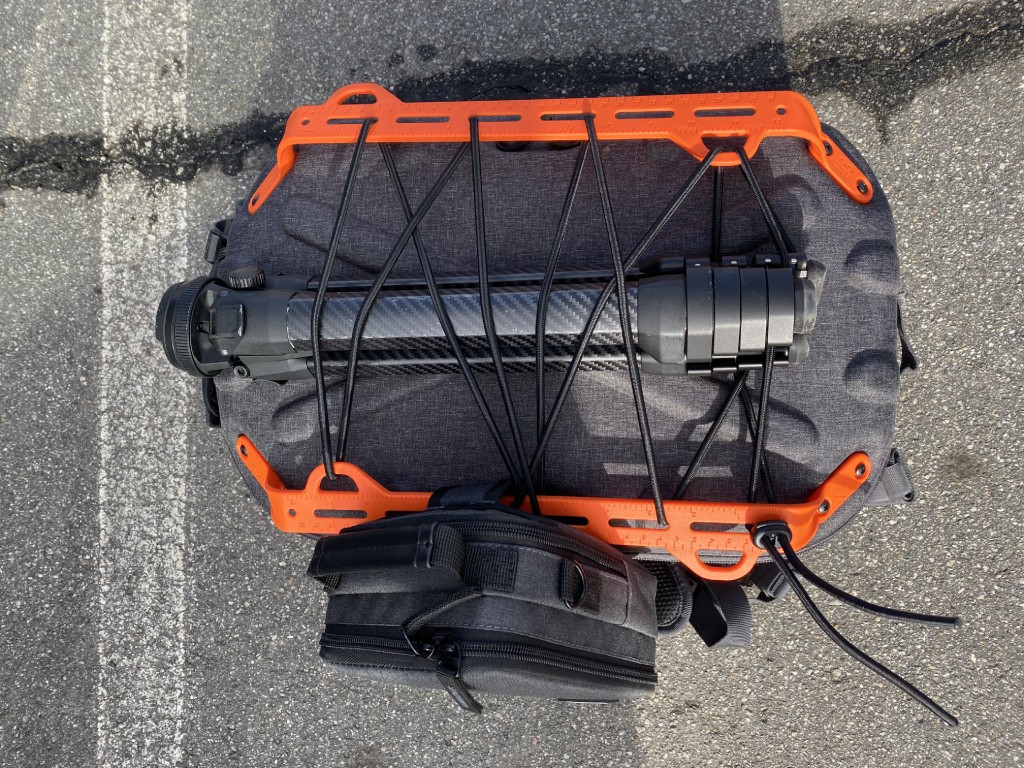
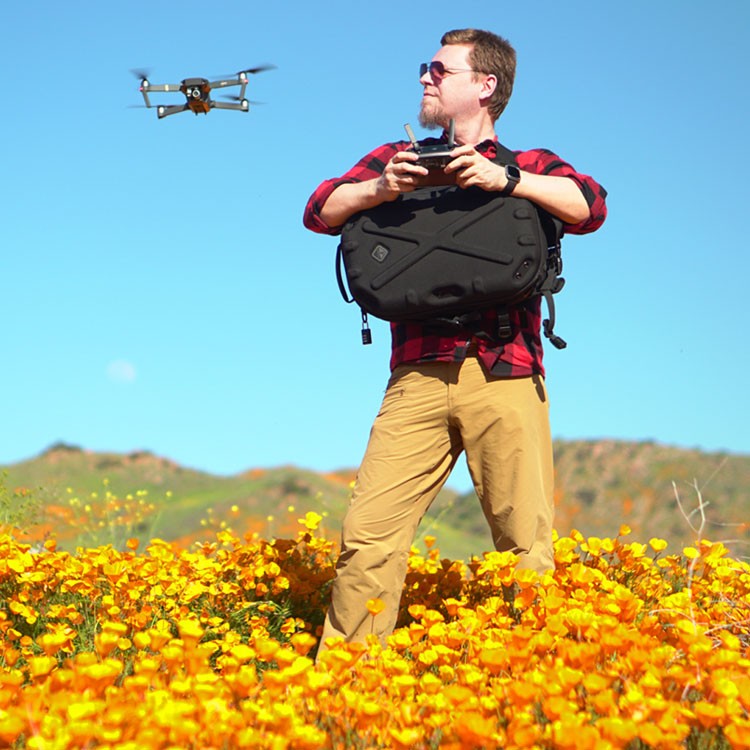
Of course, sometimes you need a larger bag to accommodate more gear, and for that, I personally use the Hazard 4® PillboxTM.
As you can see in the photos above and below, this bag can accommodate a ton of gear - I have two drones, my camera with a lens attached, multiple batteries, and a drone remote with plenty of space to spare.
The large clamshell opening is just the start of the thoughtful design of this bag.
The ergonomics are superb and offer you a supremely comfortable carrying experience, even when the bag is loaded for bear, as mine was.
The 1000 D Cordura® fabric, YKK zippers, and patented hardware give this bag all the durability you need with a futuristic design that looks incredible.

The versatility of this bag is off the charts as well.
In addition to all the gear I had in the bag for my day trip out with my drones, I could have also brought along a laptop, a tablet, clothes, a first aid kid, food, water, and more!
The interior space is well organized to keep all that gear neat and tidy while the admin organizer keeps SD cards, pens, tools, and other small items organized.
I live in Southern California, so there can be some extremely hot days. This bag is ideal for hot weather drone photography because it has a molded back-pad and removable belt that are aerated to ventilate sweat.
What’s more, they’re both abrasion-resistant and the back-pad conforms to your spine so you can be out and about with your gear in complete comfort.

This bag is simply well thought out, beautifully designed, rugged as a tank, and is functional as the day is long.
If you’re serious about drone photography, investing in a camera bag like the Hazard 4® PillboxTM is a no-brainer!
Drone Photography is Photography First

Photo by Leonard von Bibra on Unsplash
A drone with a camera for still images or videos is an amazing tool and can be quite fun to use. Once you get past the inevitable initial thrill of flying over everything in sight, you settle down to making good pictures and videos with your drone
The same rules (guidelines, actually) of composition, exposure, and other techniques of excellent photography and videography also apply to images and video captured with a drone.
Use the rule of thirds to compose balanced shots. Shoot at golden hour to take advantage of the soft, warm light, as shown above. You know the drill!
If an image wouldn’t fly (excuse the pun...) when you tried taking it with your regular camera at ground level, taking it with a drone won’t magically fix whatever the issue was. Simply taking the shot or footage from an overhead perspective usually isn’t enough.

Photo by Dennis Ottink on Unsplash
Some of the best drone imagery and footage I’ve seen from drone masters isn’t obviously done with a drone. It’s because the photographer took the effort to make a pleasingly-composed, well-exposed, high-quality image.
The same applies with video.
Amazing primary or B-roll footage can be captured with a drone. Don’t limit yourself to only overhead views from your new drone. Drone footage captured at eye level or lower can be absolutely amazing. The drone allows you complete freedom of movement while filming to give your final product a polished look.
Stay Safe and Legal

Photo by Brennan Martinez on Unsplash
Drones have been in the news recently due to some operator’s poor choices. There are regulations involved for drone use and there are safety protocols as well. Drones like the DJI Mavic series can fly fast, high, and a long distance. Therefore, a responsible drone photographer will learn safety protocols and follow the law.
If you’re in the United States, take a look at FAA regulations regarding drone registration and flights before you launch your drone for the first time.
Enjoy Your New Drone

Photo by Lance Asper on Unsplash
Drones are awesome photo tools. And when it comes down to it, drone photography can open up your creativity and may even provide you with some extra income.
The keys to drone photography success are to keep all those photography rules in mind regarding composition, exposure, and so forth. Fly responsibly and safely. Carry your drone and other gear in a bag that actually protects it, too.
Do these things, and you’ll be able to have fun and shoot beautiful pictures and videos!
We Recommend
Must-Have Gear for Handheld Video
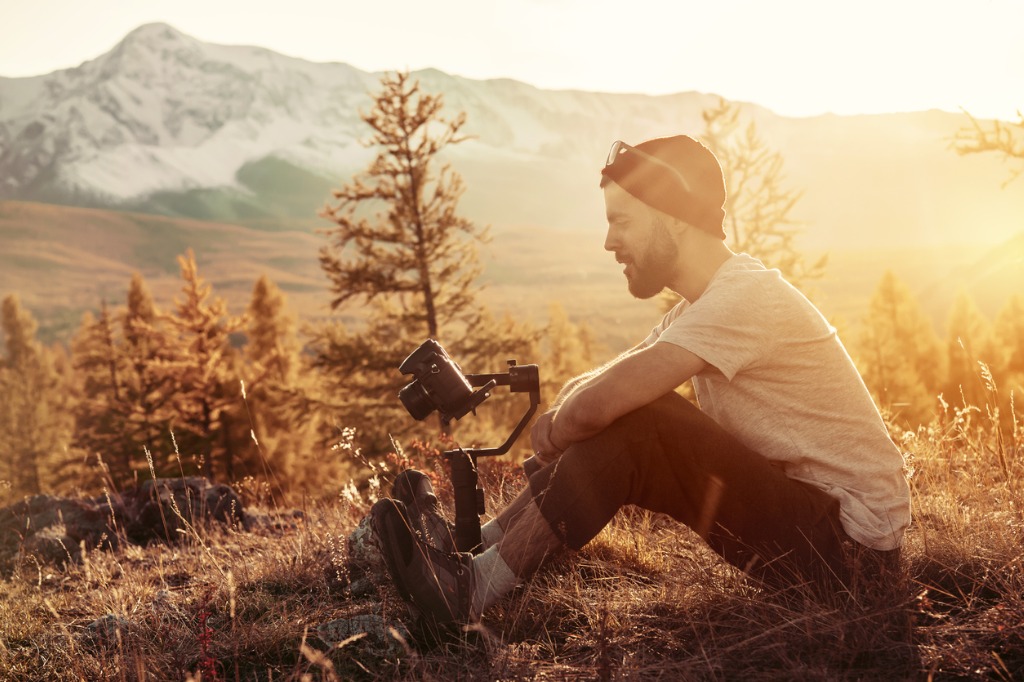
photo bymolchanovdmitry via iStock
I love that our modern digital cameras have amazing video capabilities in addition to their superb still imaging. Many of us may not have ever thought too much about shooting handheld video before but now that we have the ability, we should all be looking at adding video to our digital repertoire.
Since video is motion pictures, it makes sense for us to try to have our camera free to move about, too. Certain gear for handheld video will help make us more mobile and make that mobility usable for creating viewable handheld videos.
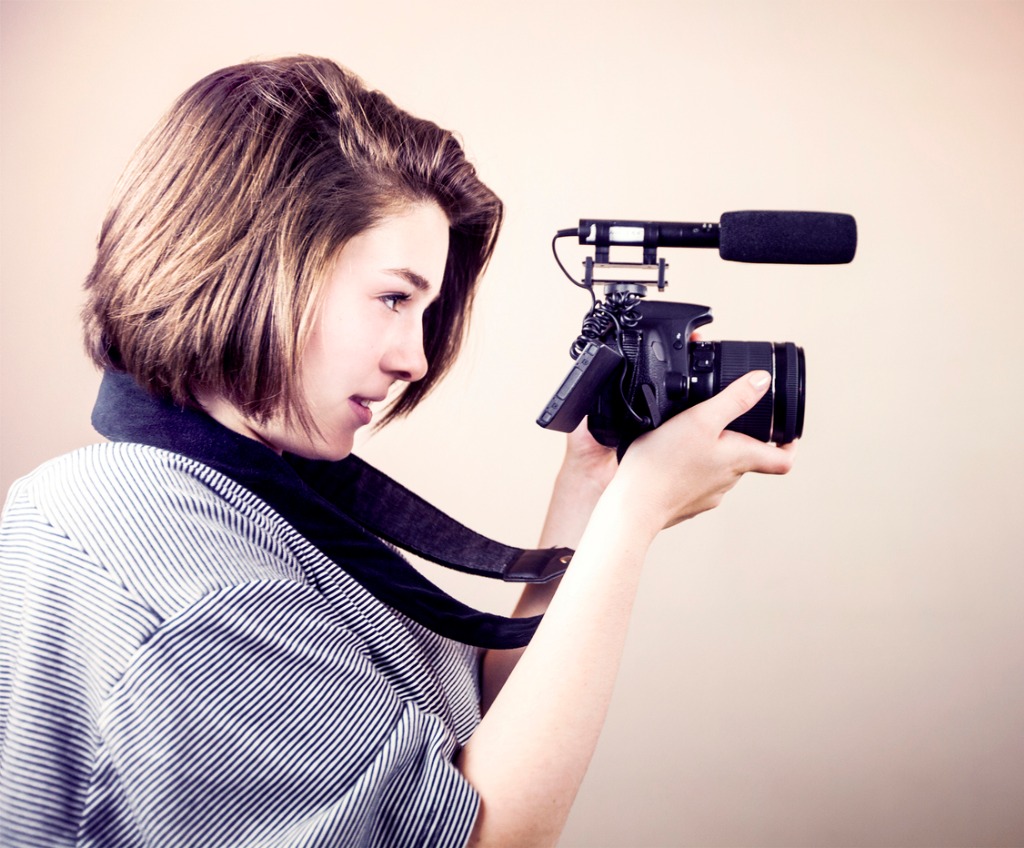
photo byRenphoto via iStock
What do you need for handheld video? Whether shooting video with a DSLR or shooting video with a mirrorless camera, there are few items that will definitely assist us in how to improve handheld video. Here are some great options of gear for handheld that I found:
- Handheld video stabilizer
- Shotgun microphone
- Portable LED light
- Huge memory card
- Sling-pack camera bag
Obviously, while proper technique is absolutely vital for great handheld video, using some of these accessories will give you options for techniques you may not have without them.
3-Axis Angled Handheld Gimbal Stabilizer from Ikan
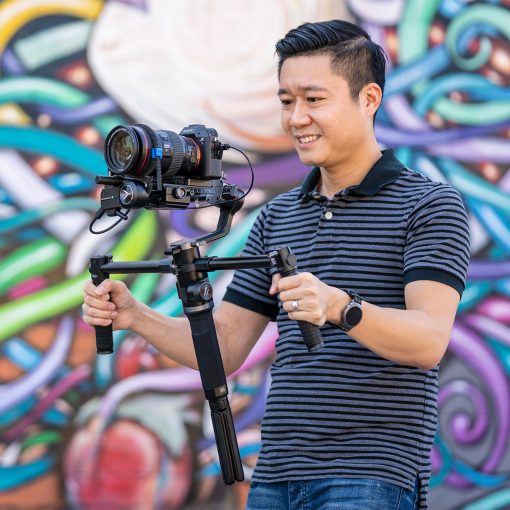
When Steadicam first came out in the 1970s and saw widespread use in the 1980s for film and television, it revolutionized the industry for mobile cinematography. While Steadicam is an impressive and expensive brand name product, you can get results that increase the steadiness of your own handheld video productions by means of a gimbal.
The Horizon Pro 3-Axis Angled Handheld Gimbal Stabilizer from Ikan is an electronically balanced 3-axis gimbal that will smooth out most of your handheld video shots with modern DSLR and mirrorless camera rigs weighing up to about 7 pounds. It’s also relatively inexpensive making it a good fit for many serious videographers.
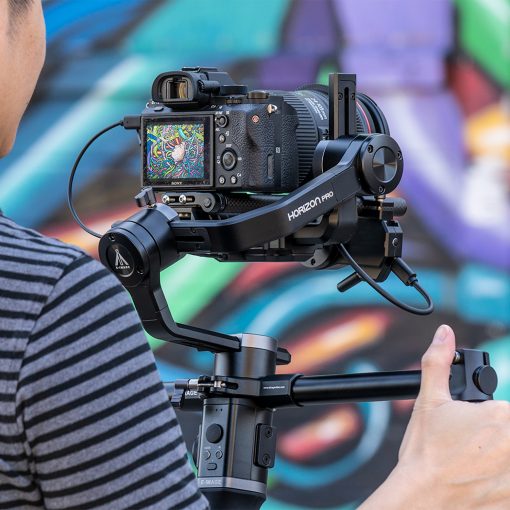
Being a 3-axis gimbal is an important aspect of how to shoot handheld video, since it dampens movement up and down, side to side, and yawing or pivoting. It comes from Ikan which makes and sells their own videography accessories for serious video cinematographers. Being their own manufacturer, they can offer extremely well designed gear for reasonable prices.
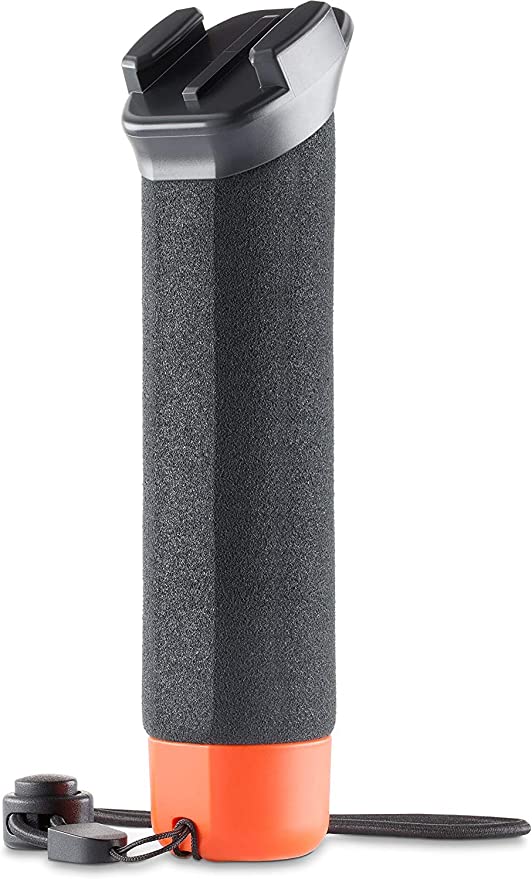
Editor's Tip: If you have a GoPro, you can easily use it as a handheld camera with The Handler Grip. This official GoPro accessory is just $30, yet gives you the functionality to do some selfies, record vlog-style videos, and give viewers your perspective as you shoot photos and videos. This grip floats, has a quick-release base for rapidly switching out mounts, and has a bright orange cap so you can easily spot it in the water. It's an ideal accessory for adventure-minded individuals that don't want to pay an arm and a leg to make their camera more functional!
Rode VideoMic Pro
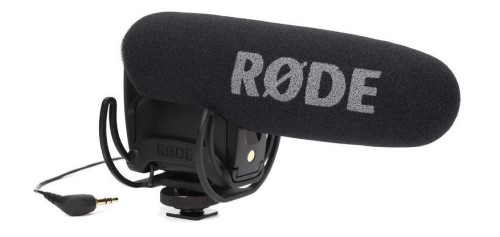
Shotgun style microphones are an excellent choice for shooting video with a DSLR or mirrorless camera handheld because it mounts directly to the camera and points in the direction of what’s being filmed.
I like the Rode VideoMic Pro for its compact size and excellent sensitivity, being just under 6 inches and 3 ounces and having a frequency response of 40 Hz to 20 kHz in a supercardioid pickup pattern.
What that all means for you and your handheld video is that you will capture excellent audio along with gimbal smoothed video. While some photographers may be under the impression that their fine camera has a good enough mic for serious video, the reality of the matter is that we need better mics for the highest quality video productions. Thankfully, they’re not very expensive, so it is a no brainer, more or less, to add one to our handheld video gear.
Learn More:
- Mirrorless Camera Accessories You Need Right Now
- Plan a Solid Video Shoot with These Pre-Production Tips
- How To Shoot Quality Video Footage
Aputure Amaran AL-MX LED Light
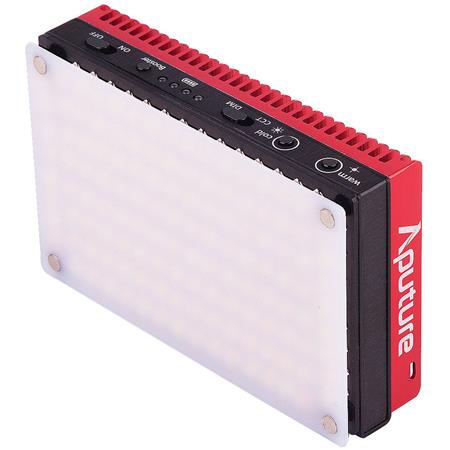
Next order of business is to light up our handheld video shoots with portable lighting equipment such as the Aputure Amaran AL-MX LED Light which is hardly bigger than a man’s wallet.
Handheld video has its own set of logistical problems, how to get enough light on the subject is an important one to handle. Handheld, portable, cool operating, battery powered LED lights are among the best alternatives for how to improve handheld video.
These lights are very small and lightweight, the face is about credit card sized and it weighs about 10 ounces. Their color output is variable from 2800K to 6500K so you can seamlessly blend the on camera light with ambient lighting. The built-in battery will power the cool temperature LED bulbs for about 30 minutes per charge.
ProGrade Digital 325GB Memory Card
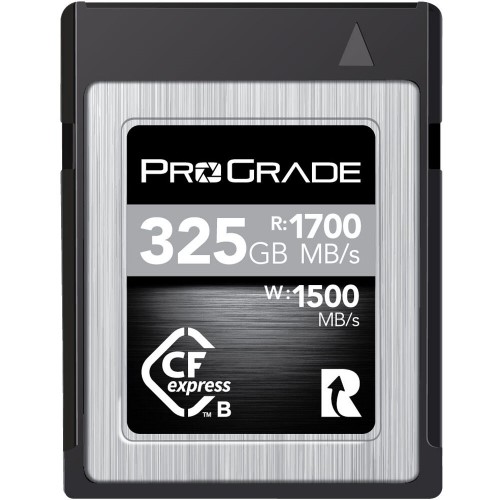
In order to effectively capture high quality handheld video in the field, we want to use the best video capture mode our camera has, but that takes up a lot of card memory, so we want to have a very high capacity memory card.
CFExpress is the memory card choice for most of the higher end prosumer and professional digital cameras due to their fast read and write speeds and their near indestructibility. An excellent example of a high capacity CFExpress memory card to use during our handheld video shoots is the ProGrade Digital 325GB Memory Card that is also backwards compatible with XQD cards using cameras that have had the proper firmware update. With 1500MB/s read/write speeds, this card will be able to keep up with your high quality video mode recording.
Freelance™ Tactical Sling-Pack

Since you’re out shooting handheld video, you need something to carry all your gear for handheld video. The sling-pack style of camera bags is secure as well as being easy and quick to get into and out of for your gear.
Hazard 4® makes a fantastic series of tactical bags that are very durable, offer great equipment protection, and are easy to use. The Freelance™ Tactical Sling-Pack is small enough to be very comfortable while large enough to hold all your handheld video gear such as lights, batteries, and filters.
Now, you’re all set to go out and capture some great handheld video with your new DSLR or mirrorless camera.
Learn More:
- 4 Must-Have Accessories for Shooting Video
- Beginner's Advice for Using a Gimbal
- Tips for Better DSLR Video
We Recommend
Must-Have Landscape Photography Accessories
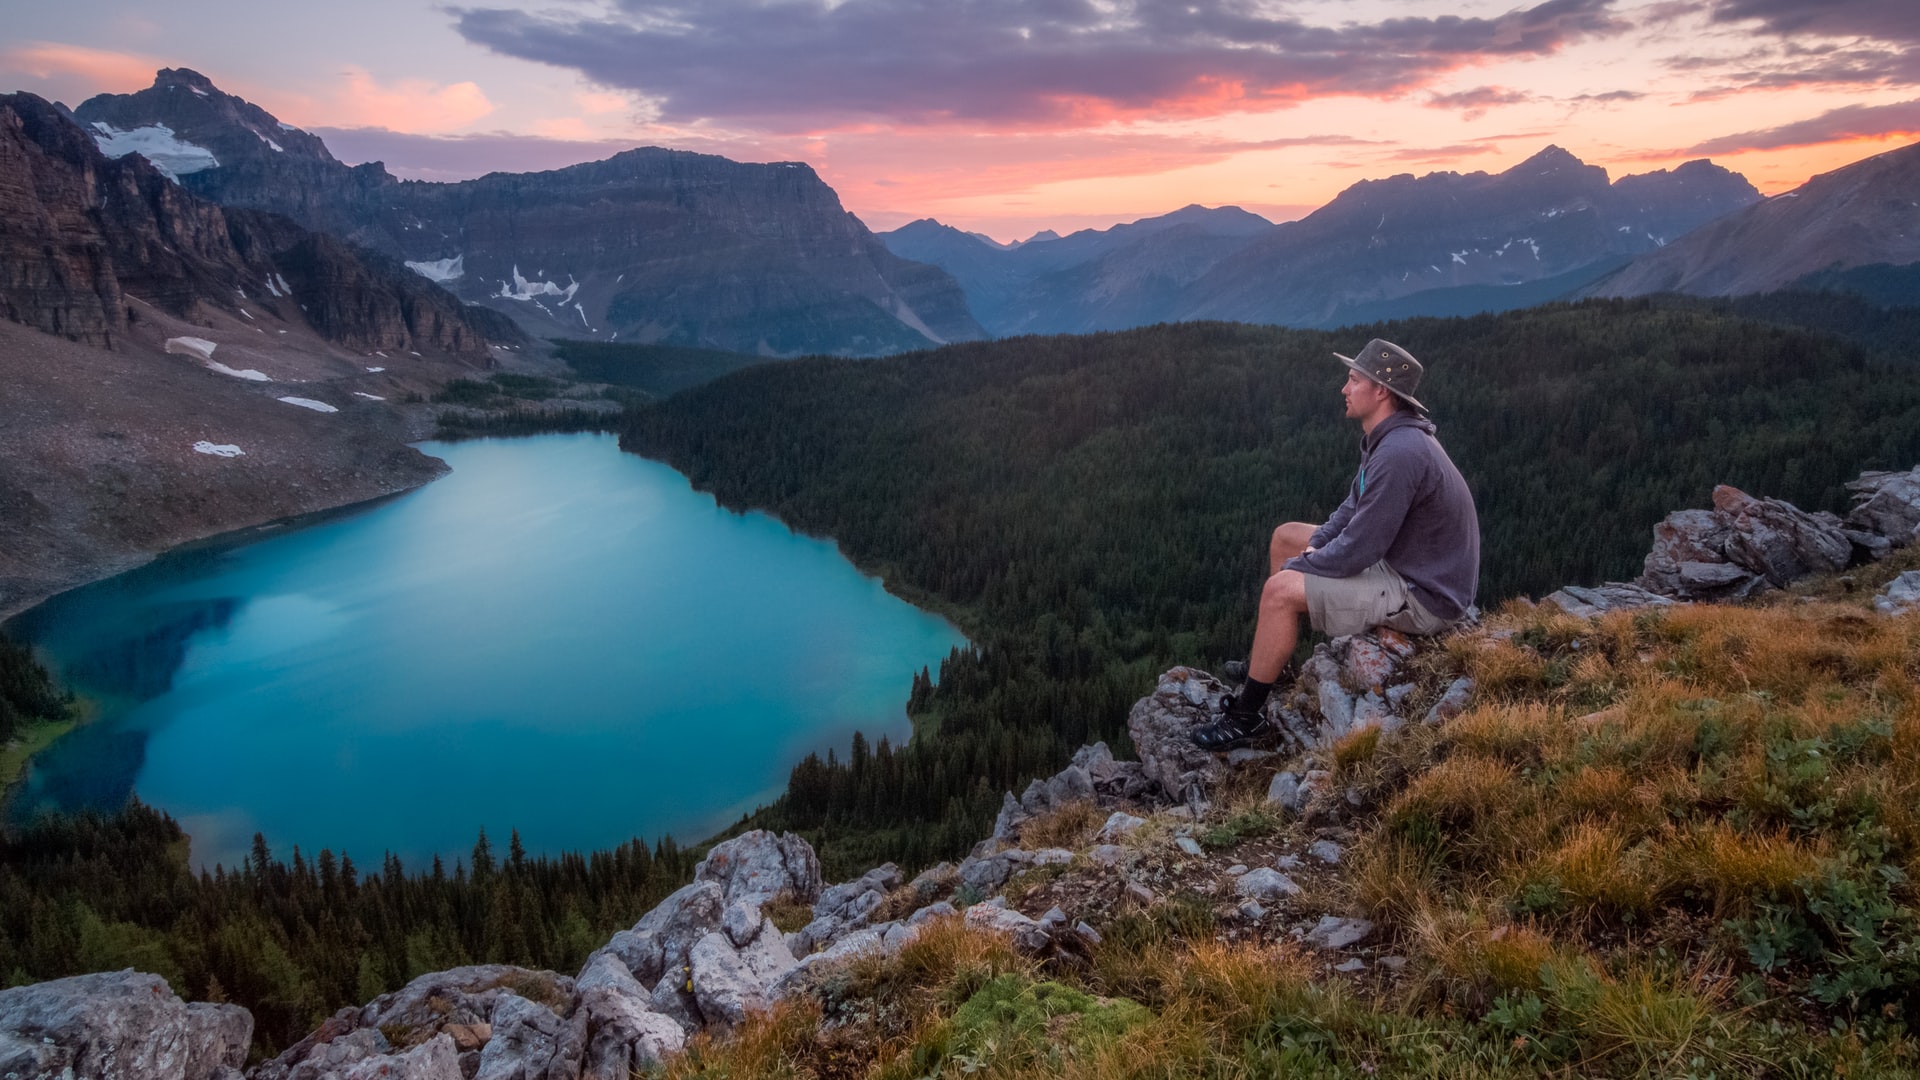
Photo by Kalen Emsley on Unsplash
Landscape photography accessories help make capturing beautiful images a little or a lot easier. Your skill level is what matters the most, then the quality of your main landscape photography gear, the camera and lens.
After those things, the other stuff adds to the ease of your landscape photography, or gives you a capability over your basic gear, or allows you to accomplish something special.
Camera and Lens
Photo by Nils Leonhardt on Unsplash
These two items are the core pieces of your landscape photography gear. Whatever you are currently using and comfortable with is a good choice. If you are near time for an upgrade, there are some qualities and features you should consider.
Entry-level cameras, like the Canon EOS Rebel SL3 are fantastic, and pro-level cameras, like the Nikon Z7, are amazingly complete tools, but there’s a level or two of cameras in between I like for outdoor and landscape photography. I’ll call them enthusiast and prosumer cameras.
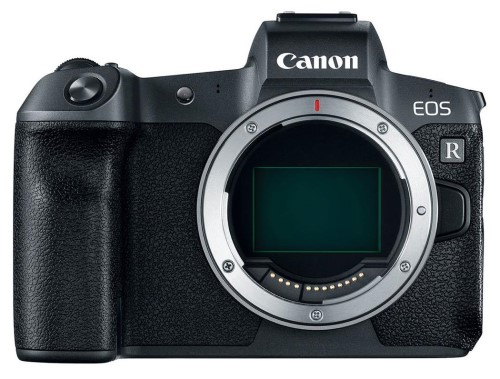
While being smaller, lighter, and less expensive than top-of-the-line pro models, these camera types add features, capabilities, and quality above the entry-level cameras. Two prime considerations are useful functions that are easy to access and more durable and rugged construction. Examples of enthusiast and prosumer cameras include the Nikon D5600, the Canon EOS R (shown above), and Sony a6400.
Along with that, the lenses that are a step up from kit lenses have the same considerations as the landscape photography camera choices. In the video above, I talk about three of my favorite landscape lenses. My choices are more expensive, pro-level lenses, but you can get a good idea of features and ideal focal lengths to look for that fit your budget.
After the camera and lens is chosen, I have three prime categories of landscape photography gear and several other landscape photography accessories I prefer.
Recommended Photography Reading
- National Geographic Photo Basics: The Ultimate Beginner's Guide to Great Photography
- Photography: The Definitive Visual History
- Read This if You Want to Take Great Photographs
You Need a Great Tripod
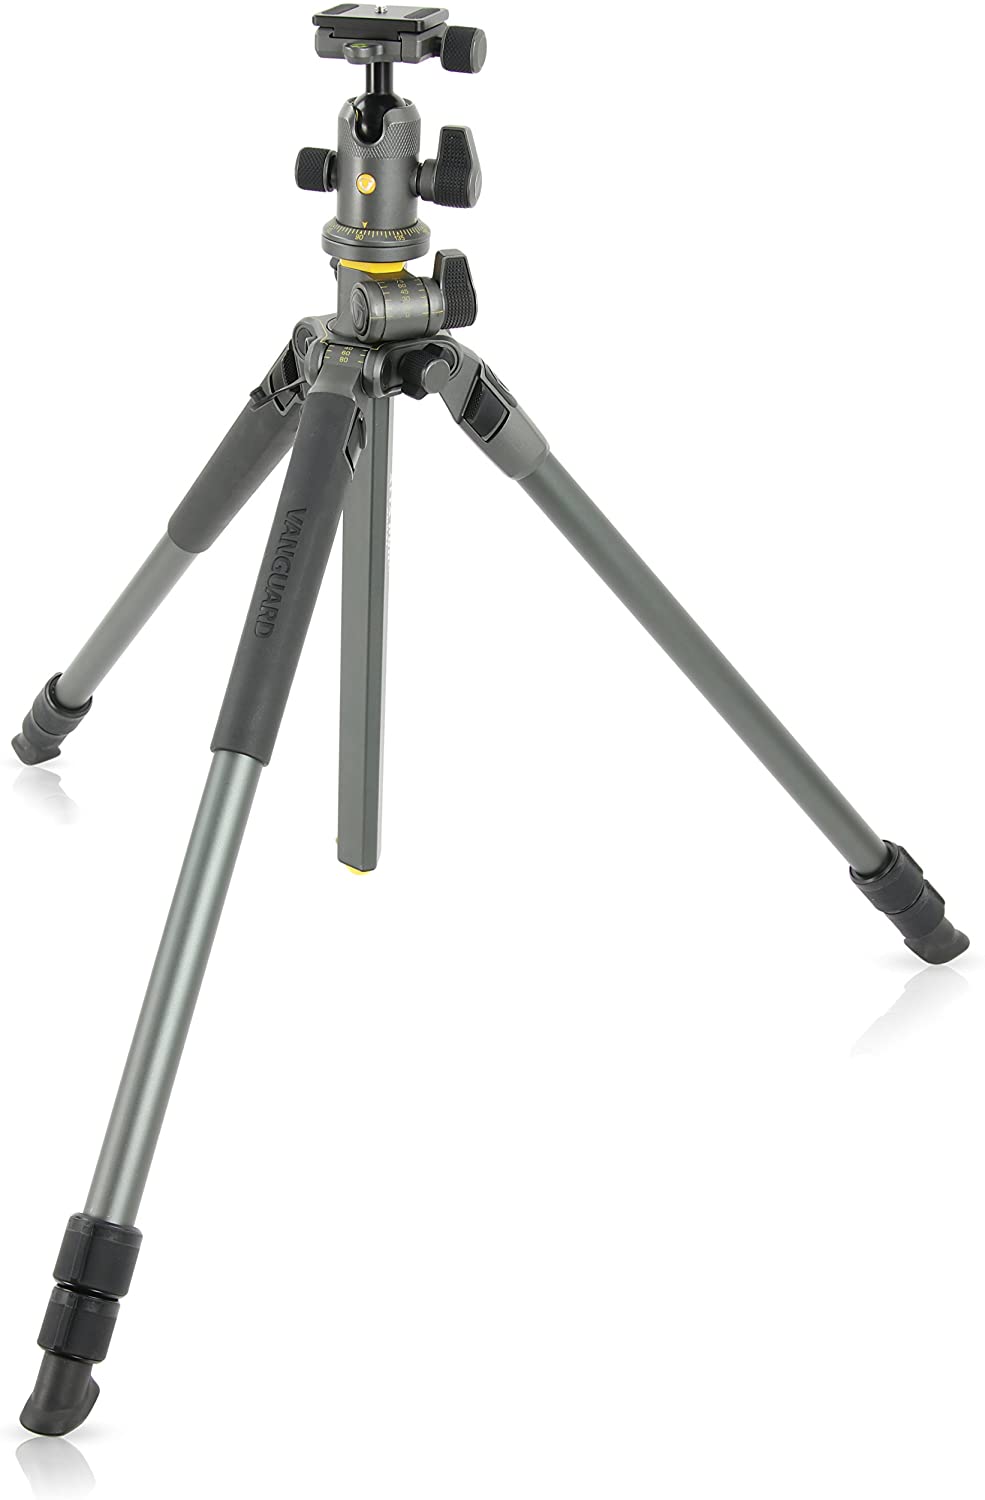
A great tripod is on my short list of must-have landscape photography accessories. In some photo situations, it’s absolutely vital to have one you can use with ease and that you can trust with your camera and lens.
My criteria for an outdoor use tripod are sturdiness, portability, and versatility. Sturdiness is listed first because if I’m going to go through the effort to have a tripod in my landscape photography gear, it better do the job I need it for.
Portability and versatility will make it easy to carry out into the field and give me some extra options. The Vanguard Alta Pro 2+ 263AB 100 aluminum tripod with Alta BH-100 ball head is one of the most versatile and study tripods in a moderate price range. Extremely sturdy, the multi angle center column is what really makes this tripod stand out as great landscape photography gear.
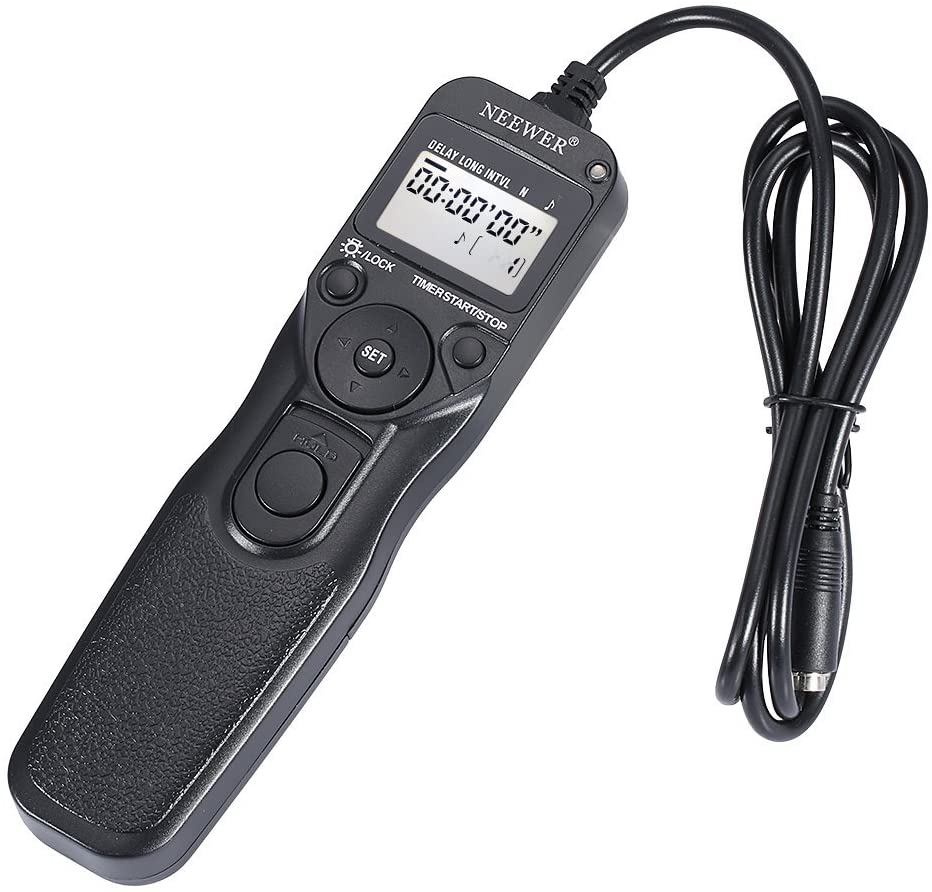
Along with a tripod, add in a remote release, wired or wireless. This will increase the stability of the camera on the tripod during the exposure since you won’t need to touch the camera to take the picture.
Learn More:
- Camera Bags For Every Kind Of Adventure
- Five Things You Need to Know About Tripods Before You Buy One
The Right Filters
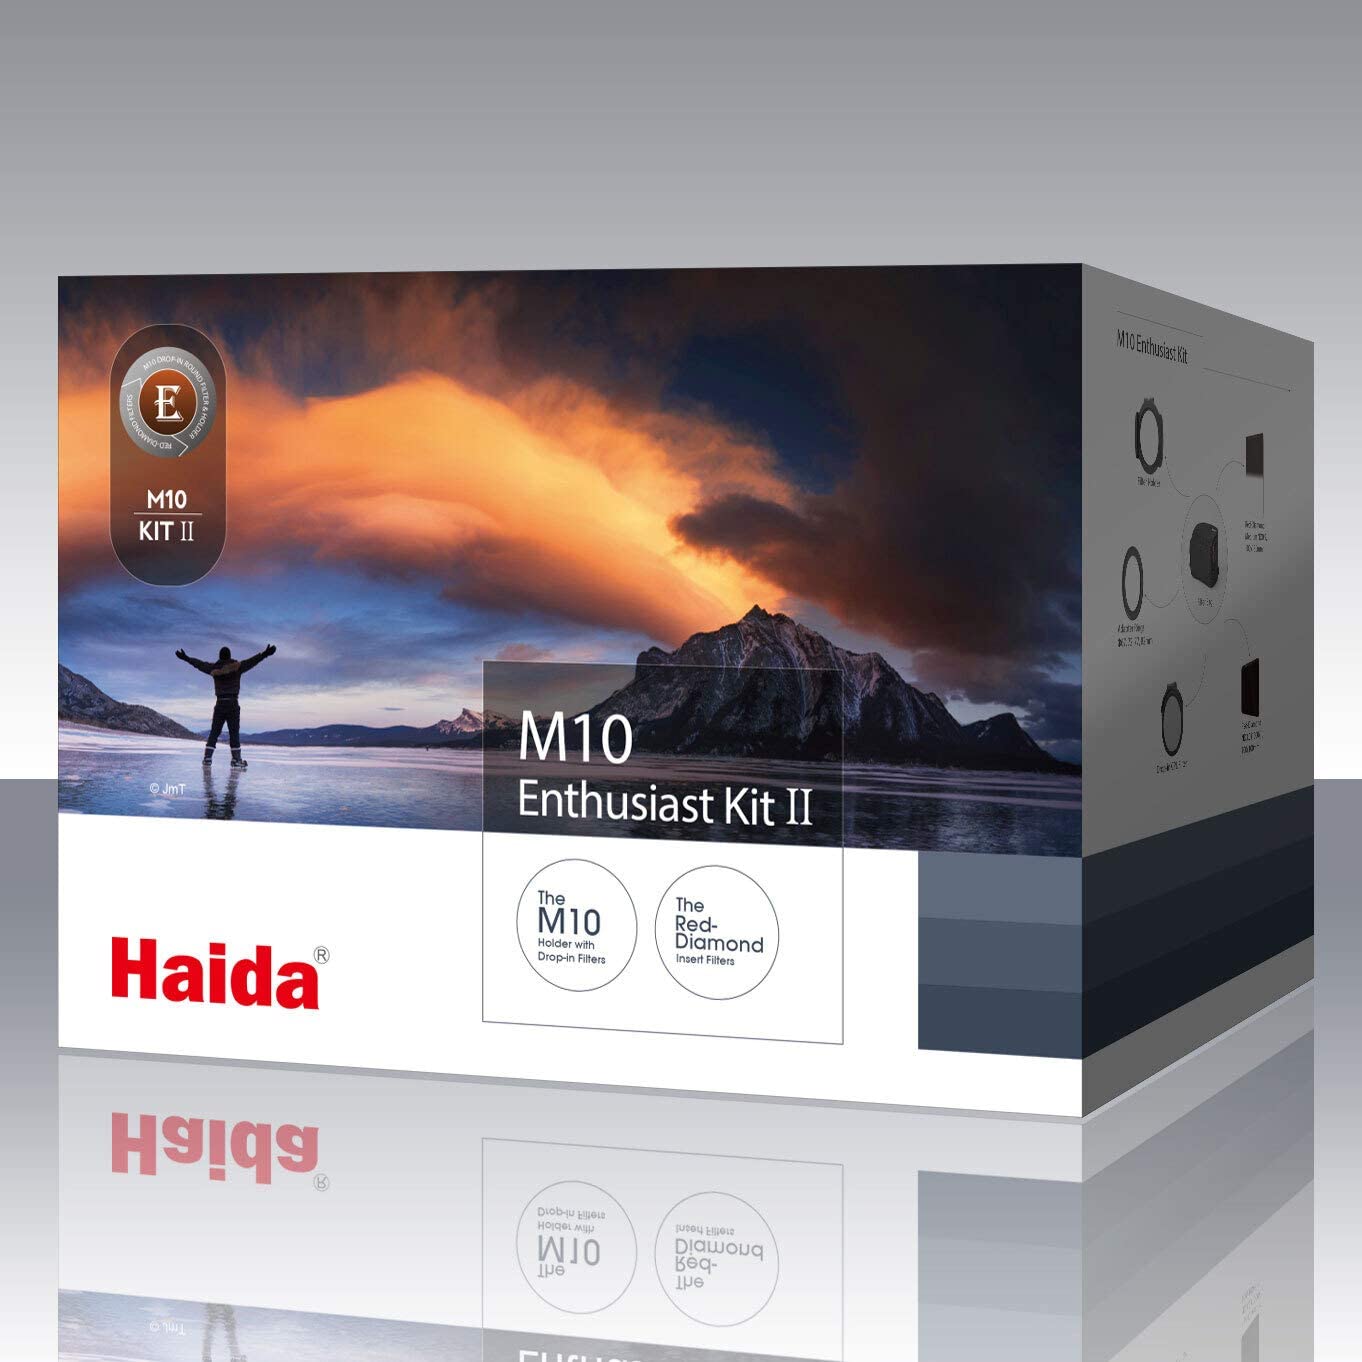
Three filters are in the prime category for must-have landscape photography filters. C-POL, ND, and GND.
Circular polarizer (C-POL) filters remove reflections, deepen colors, and adjust contrast for capturing outstanding landscape photography images. Neutral density (ND) and graduated neutral density (GND) filters give us the capacity to tame the extremes of exposure variables within our scenes.
A filter system such as the Haida M10 Enthusiast Filter Kit II has a filter holder and lens adapters plus the C-POL, ND, and GND filters most desired by landscape photographers.
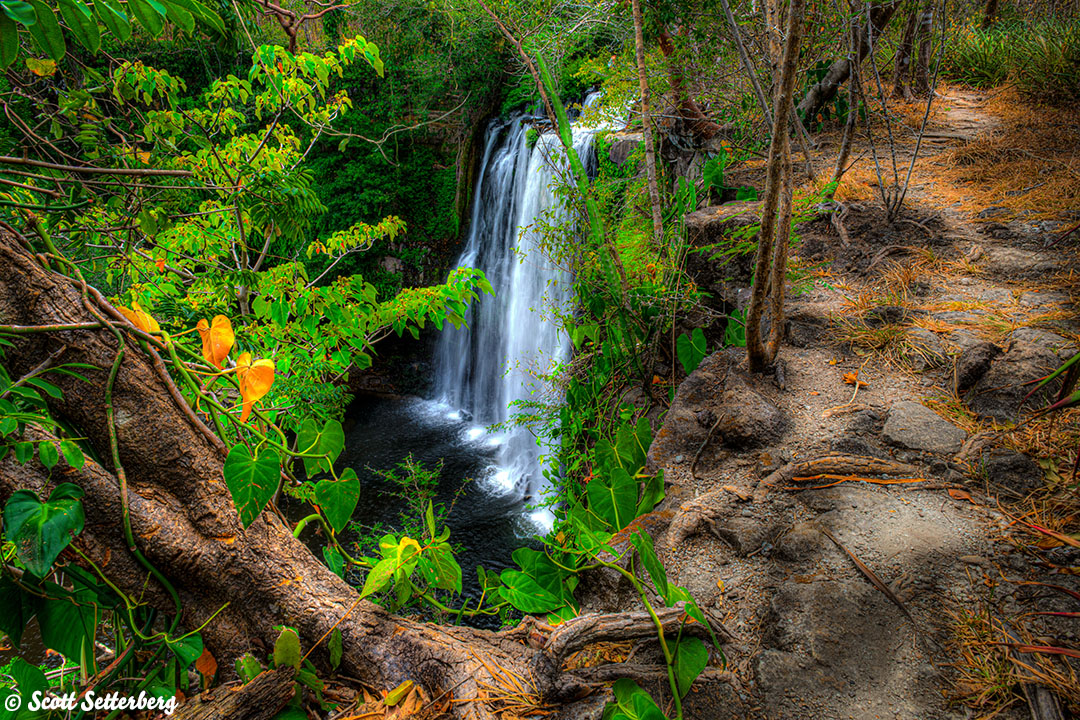
Editor's Tip: Having the right gear for landscape photography is just one part of becoming a better photographer. You also need to learn new skills, practice what you learn, and get feedback on the images you create. A great way to accomplish all of these tasks is on a photography tour! ColorTexturePhotoTours, led by Scott Setterberg, offers all-inclusive packages that put you in beautiful settings where you can develop your photography skills in a small-group setting. You get plenty of one-on-one time with Scott, opportunities to share your photos and get feedback from the group, and enjoy beautiful accommodations, fine food, massage therapy, and many other amenities. Visit ColorTexturePhotoTours today to see what your next photography adventure will look like!
A Protective and Efficient Bag
The outdoors can be rough on a camera. Just look at what it does to your shoes! The best landscape photography camera bag will combine rugged protection for your landscape photography gear with making it easy to get at your camera when you’re ready to take a photo.
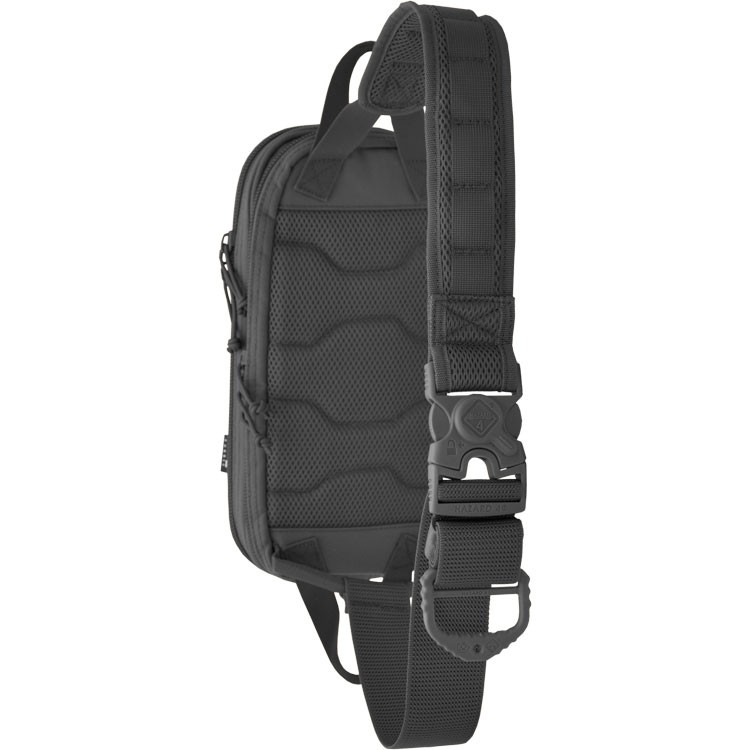
One of my favorite bags for carrying my cameras, lenses, and the rest of my landscape photography accessories is the Blastwall™ sling pack camera bag from Hazard 4®, manufacturer of extreme use tactical gear.

It is a sling pack design, comfortable to carry and convenient to access as needed. Lightweight shell construction and convertible pads for gear protection with Hardpoint® hardware and also strap rests for attaching tie-downs, straps for a tripod, and other extra items. It’s made so that nothing blows in the wind during extreme weather or riding on a motorbike or ATV.
The Blastwall™ features multiple MOLLE webbing on the sides and main strap along with a patented roto-locking buckle keeps the sling pack secure. Heavy duty construction features YKK zippers, real Cordura® 1000D nylon or 600D Polyester and reinforcing stitch patterns for added durability. There’s even space for a laptop computer or a water bladder for hiking refreshment.
It’s one of the best extreme use outdoors and landscape photography camera bags to protect your camera gear and give you rapid access.
The next few items either solve specific problems or make landscape photography more convenient and pleasurable.
Bubble Level
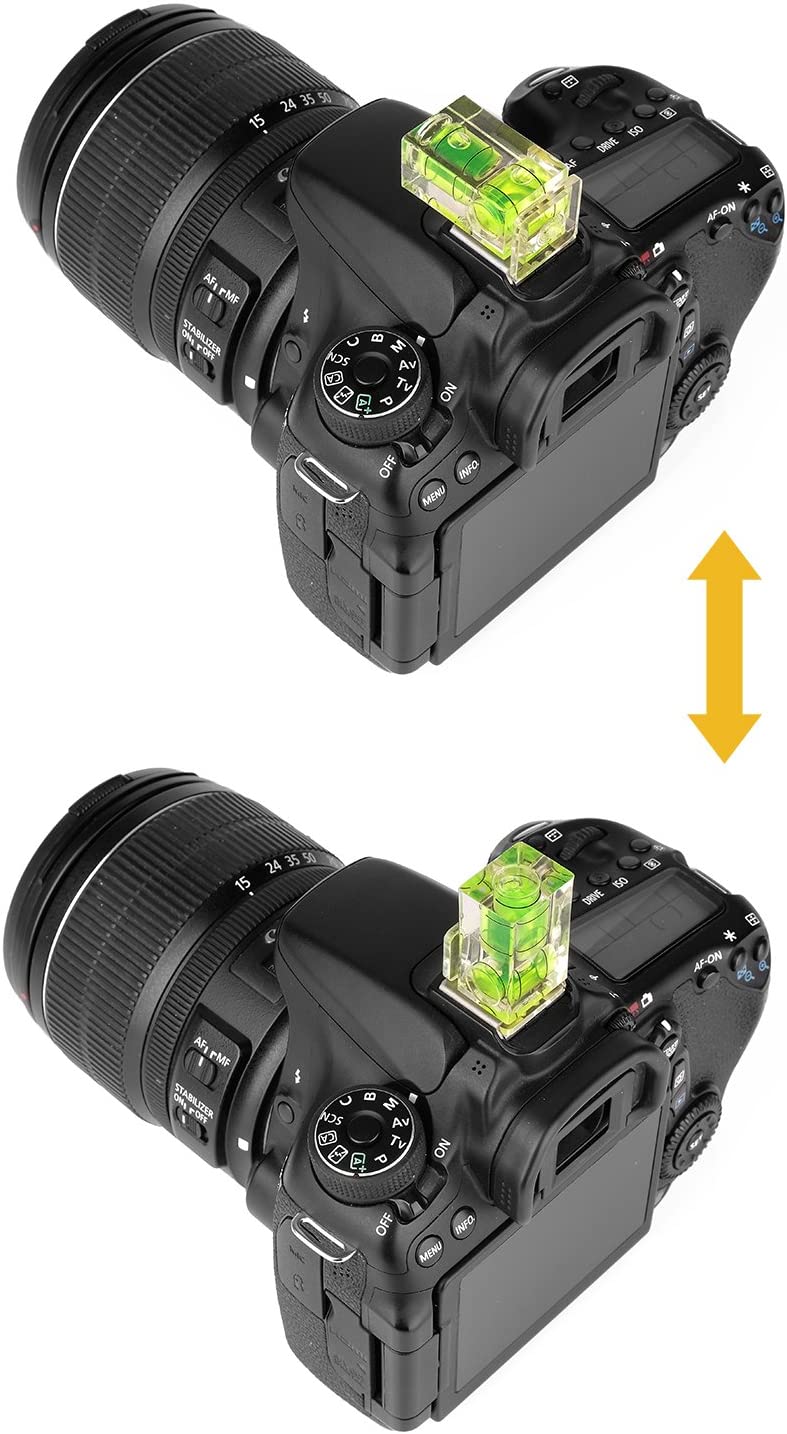
Some cameras have this as a built in function, for others you will need an external level. Especially when using ultra wide lenses or attempting a limited panorama, keeping the camera level will avoid odd and uncomfortable viewer apparent perspectives.
If your camera has this function, find out how to turn it on. It may be buried in a deep menu tree. If not, or if you prefer an external visual aid, a hot shoe mounted bubble level like the ChromLives Hot Shoe Bubble Level multi pack is very useful.
It has two different styles of bubble or spirit levels for adjusting your camera with a wide lens while on a tripod. It’s cheap as pocket change and you can keep one in your pocket, making it a must-have landscape photography accessories choice.
Extra Batteries or a Battery Pack
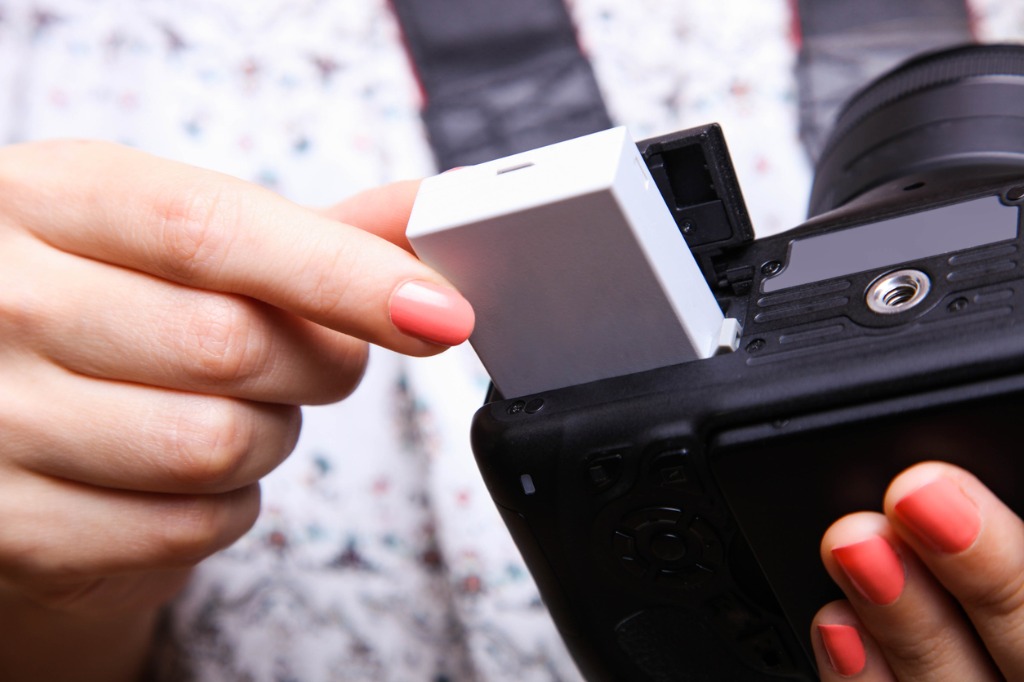
photo by Alexthq via iStock
Some photographers prefer to carry extra charged up batteries in their camera bag, while others like having a camera mounted battery pack with extra batteries in that. Either way, the intent is to make certain you don’t run out of battery power before your photo trek is over.
Because if you run out of power, your photo trek IS over. Which is why extra batteries are must-have landscape photography accessories.
Extra Memory Cards
Same reasoning as with batteries, once you’re out of a place to keep your images, you’re done. This is the equivalent of running out of film.
Most of the enthusiast and prosumer cameras use SD cards. Options are a couple of high capacity cards, or several smaller cards. Either way, extra memory cards are must-have landscape photography accessories.
What’s In Your Bag?

Photo by Avi Richards on Unsplash
The landscape photographer has a great job. Outdoors, taking pictures. What could be better? These landscape photography accessories can make that endeavor easier, more productive and more fun. Let me know what’s in your bag.
Learn More:
We Recommend
Photography Equipment List for Beginners
photo byEXTREME-PHOTOGRAPHER via iStock
One of my favorite things to see online are questions from beginner photographers. Seeing or being asked questions tells me that the wonderful hobby of serious photography is growing and new photographers are reaching out to learn.
A common set of questions from beginners concerns the best photography equipment to purchase. I get asked this all the time and I have decided to create a photography equipment list for beginners that mirrors what I tend to say in person as replies. A beginner photography gear checklist, more or less.
The Camera
photo bywundervisuals via iStock
The Camera is the title of one of my favorite photography books, but I’ll get to books later in the list. Right now I am looking at good camera choices for beginners.
I usually assume that anyone asking about what camera to choose is probably a photographer who either has outgrown their smartphone or a photographer who used to shoot a lot on film as a hobby back when.
This type of beginner is familiar with the creative process and wants to do more, but also sees a new camera as a significant purchase that they don’t want to make a mistake getting. Basically, you’re simply needing an interpretation of all that ad junk so you can figure out what’s best for you.
I recommend one of the two larger crop format camera types. Either APS-C or MFT. These cameras come closest to the hobbyist film cameras of just a few years ago. So, they will feel correct to anyone coming back to photography. They are also full of helpful features that will be appealing to photographers coming from current smartphones. Get more details on APS-C vs MFT formats in the video below by The Hybrid Shooter:
If we were speaking in person, I would ask you several more questions myself to narrow down your wants and needs, but for now I can point you in a general direction of a couple of nice entry level but full featured cameras.
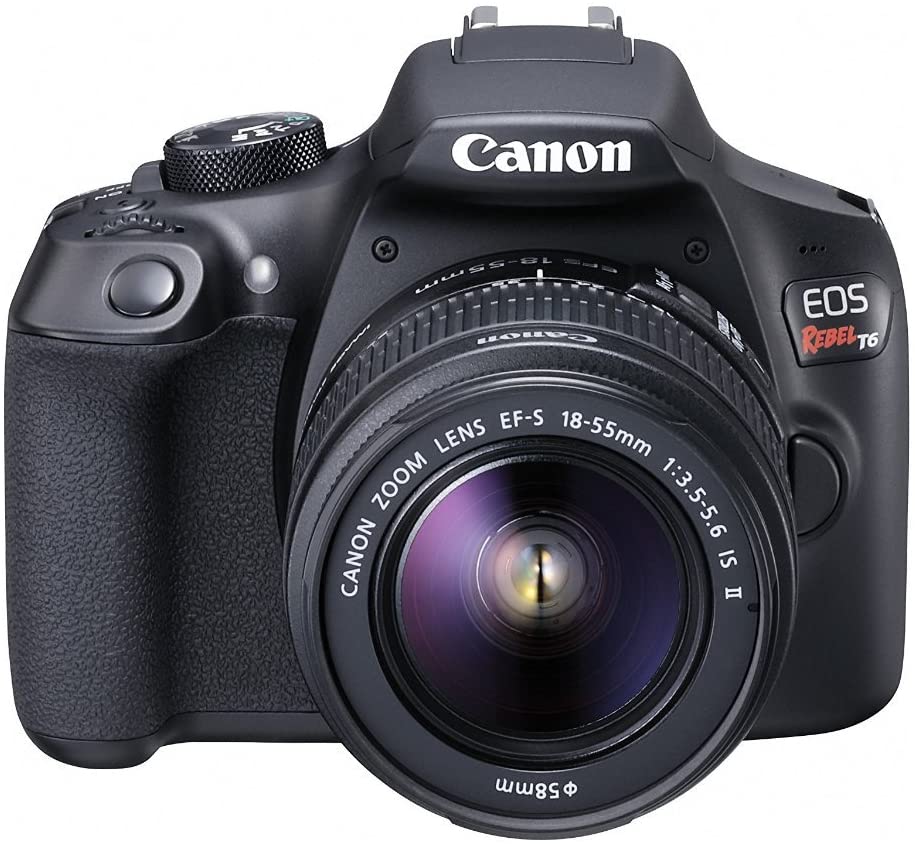
In the APS-C format DSLR category, a fine camera is the Canon EOS Rebel T6. It has an 18MP sensor, Wi-Fi, video recording, 3” rear screen, and a bright optical viewfinder. It has autofocus, auto exposure, full manual override, and menu options with special effects.
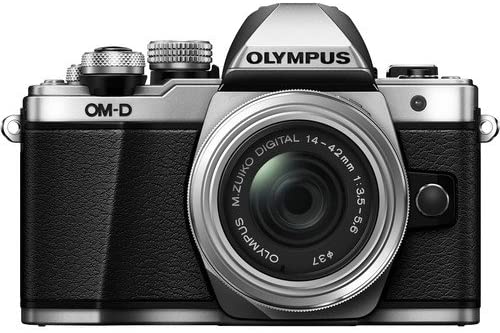
A mirrorless MFT format camera choice is the Olympus OM-D E-M10 Mk II. This superbly designed camera boasts a 16MP sensor, electronic eye level viewfinder, in body 5-axis image stabilization. Adding classic camera styling makes this an attractive camera for beginner photographers.
Recommended Photography Reading
- National Geographic Photo Basics: The Ultimate Beginner's Guide to Great Photography
- Photography: The Definitive Visual History
- Read This if You Want to Take Great Photographs
Prime and Zoom Lenses
photo by delihayat via iStock
Most of the entry-level cameras suitable for beginners come in kits with an all-around multi-purpose zoom lens. Lenses like 18-55mm or 14-42mm are common. These lenses have some limitations but are generally very optically sharp. So go ahead and buy the camera with the kit lens, the prices of most cameras with the kit lens is usually very close to the price of the camera body alone.
Part of the joy of moving into interchangeable lens cameras is having lenses to interchange. After the kit lens, other good choices are a telephoto zoom lens, an ultra-wide-angle zoom lens, or a fast prime lens.
You will probably get a telephoto zoom first, and as I explain in the video above, that’s a good choice. Telephoto lenses have long focal lengths that allow you to get up-close images of far-away objects, making them prime tools for things like sports and wildlife photography, though they have many more uses.
The fast primes available for these formats will allow for low-light imaging and selective focus tricks. Ultra-wide-angle lenses open up many interesting views for landscapes, interiors, and other creative ideas. This is the beginning of a decent photography equipment list for beginners.
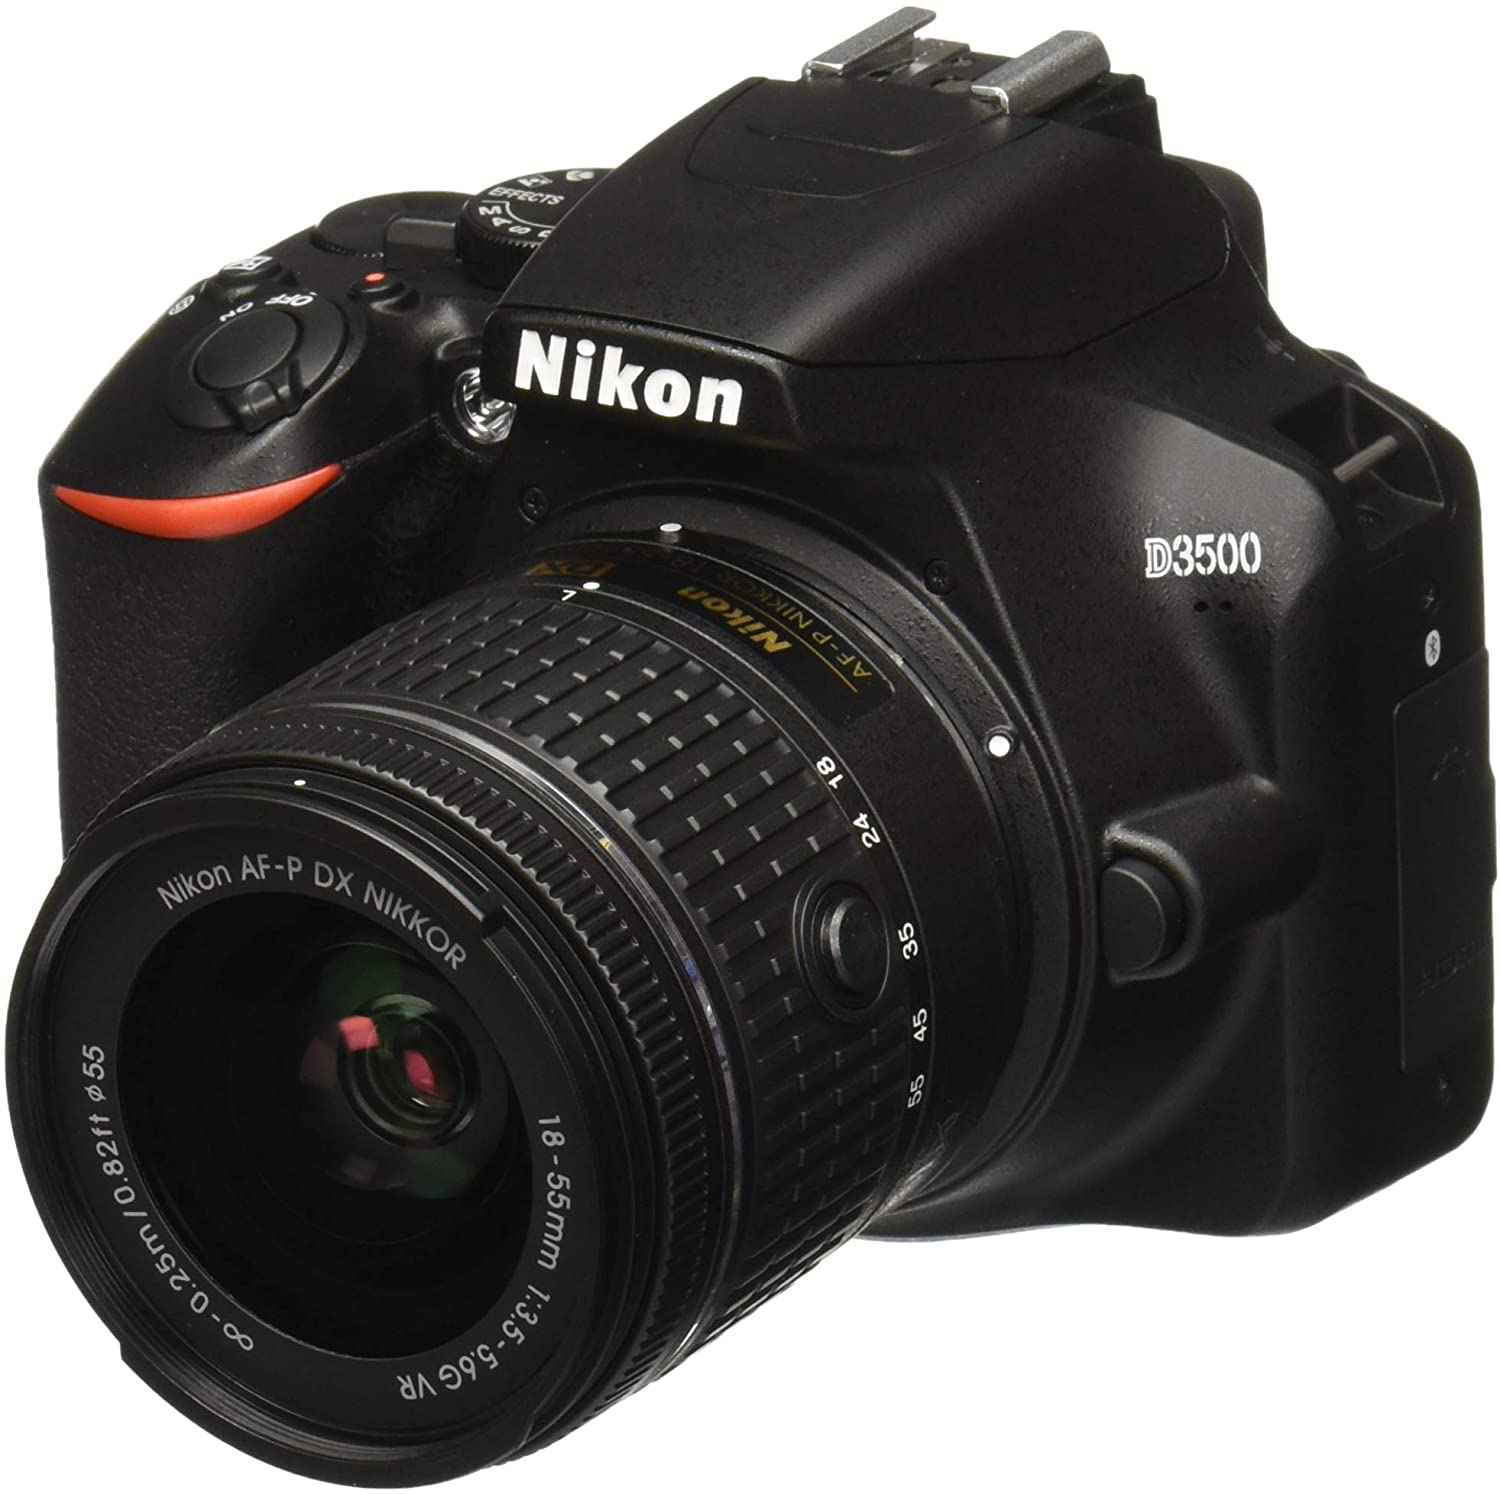
If you picked up a DSLR like the Nikon D3500 as your first camera, several Nikon brand lenses fit those criteria and are also relatively inexpensive. Some lens choices could be:
- Nikon 55-300mm f/4.5-5.6G ED AF-S DX NIKKOR VR telephoto zoom lens
- Nikon 35mm f/1.8G AF-S DX NIKKOR prime lens
- Nikon AF-P DX NIKKOR 10-20mm f/4.5-5.6G IF VR ultra-wide-angle lens
Each camera brand making the best photography equipment of APS-C or MFT cameras has a similar range of inexpensive lenses targeted for beginners and enthusiasts. Several independent brands such as Sigma and Tokina do so as well.
Learn More:
Flash or Speedlights
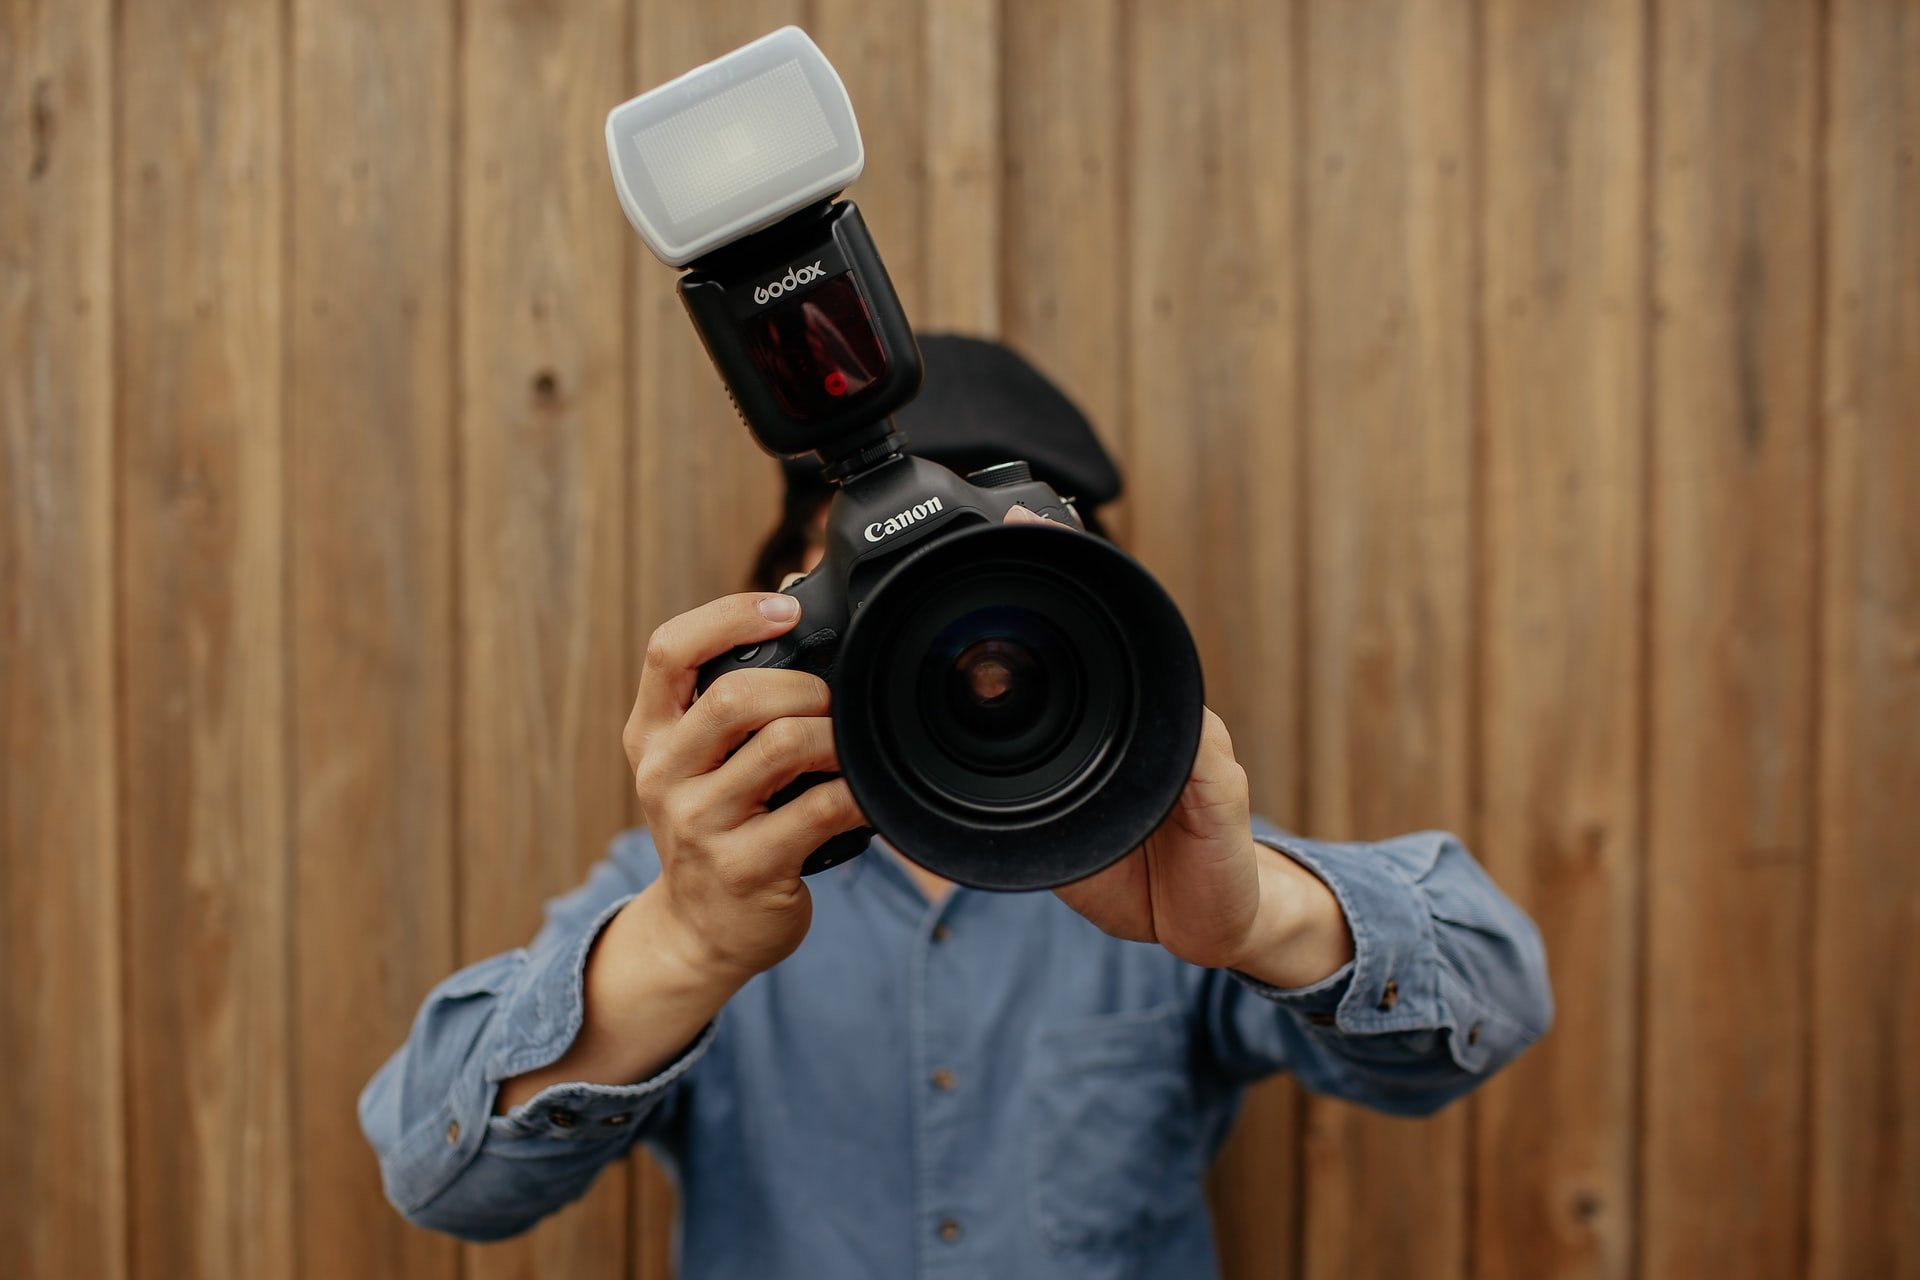
Photo by Tom Pumford on Unsplash
Those built in pop-up flashes are great photography tools for snapshots and to get good exposure for people pictures up-close. Their range is limited, though. As are their features. A virtually essential early purchase of photography equipment for beginners is an external flash.
An external flash opens up a whole bunch of opportunities for photographers, so be sure to include one on your own personal photography equipment list for beginners. External flashes give more power for increased range and a variety of exposure settings, plus they usually have zoom, bounce, and swivel functions, opening up yet more lighting options.
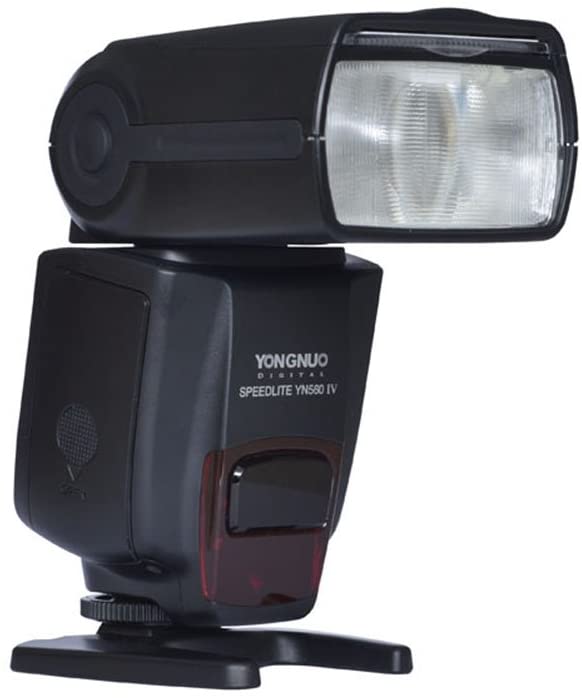
The camera brand speedlights can cost almost as much as the initial camera kit kit with lens does, but other, less expensive options exist. YONGNUO YN560 IV speedlite has most of the same features as camera brand flashes, such as TTL metering, slave and wireless control, and a deep menu.
Neewer NW-670 is another nice choice for our photography equipment list for beginners. It also has the features you expect and is a great lower priced option.
Tripod
A tripod of some sort definitely deserves a spot on our photography equipment list for beginners. Newer DSLRs and mirrorless cameras and their lenses have amazing image stabilization features. Even so, having a good tripod gives you the ability to take advantage of special techniques such as HDR, panoramas, and ultra long exposure.
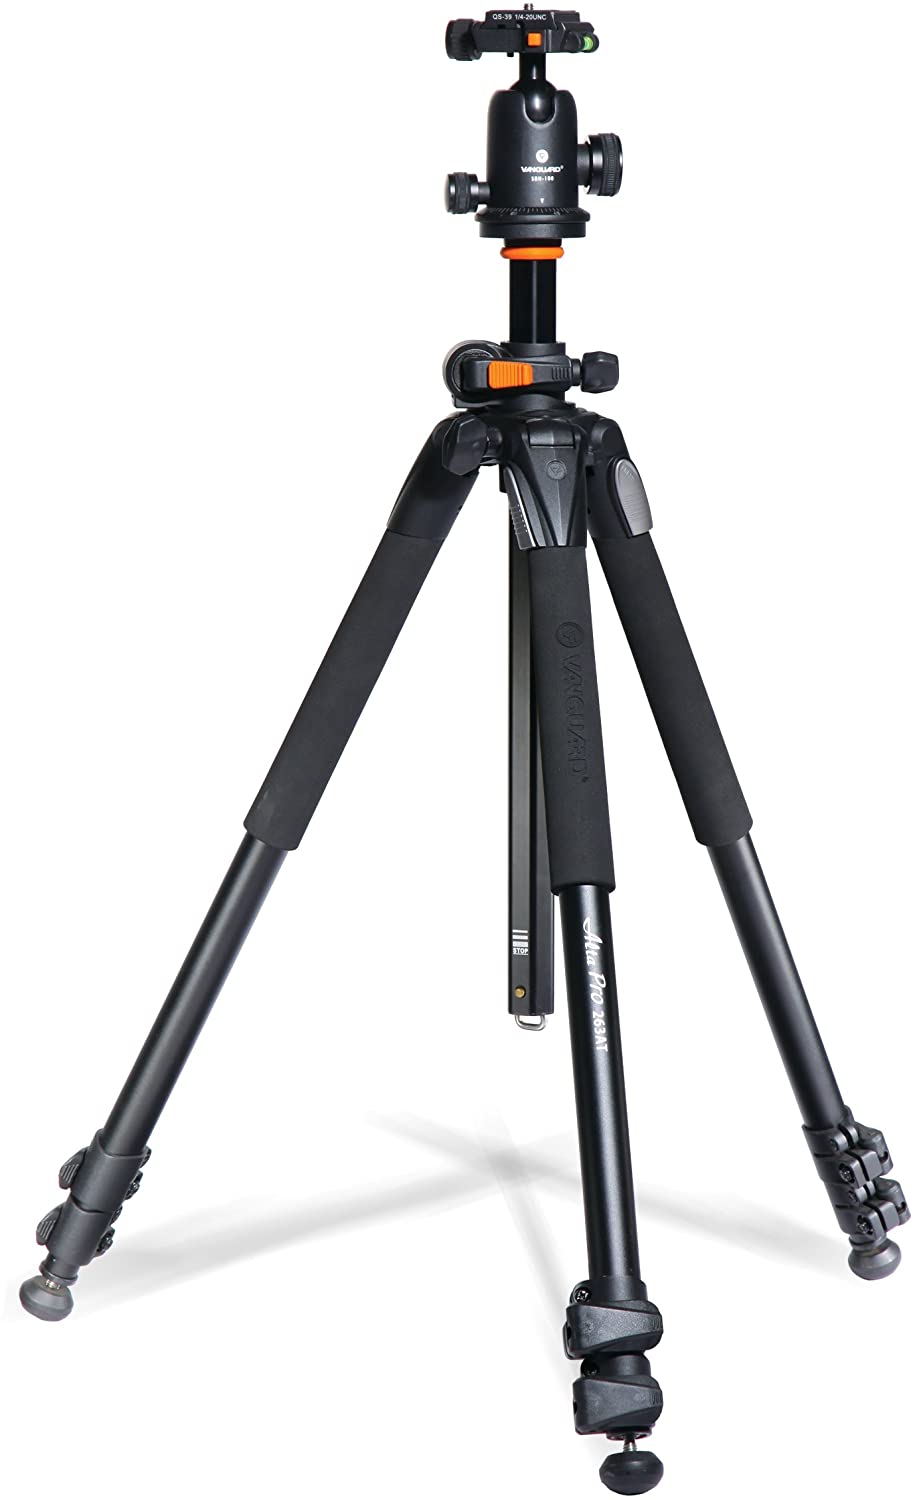
The trick with choosing a good tripod is figuring out the balance between a stable platform and a portable tripod. Two good tripod choices for our beginner photography list checklist are the GEEKOTO AT24EVO aluminum tripod and the Vanguard 263AB-100 3-Section Aluminum Alloy Alta Pro 263-AB Tripod Legs with SBH-100 QR Ballhead.
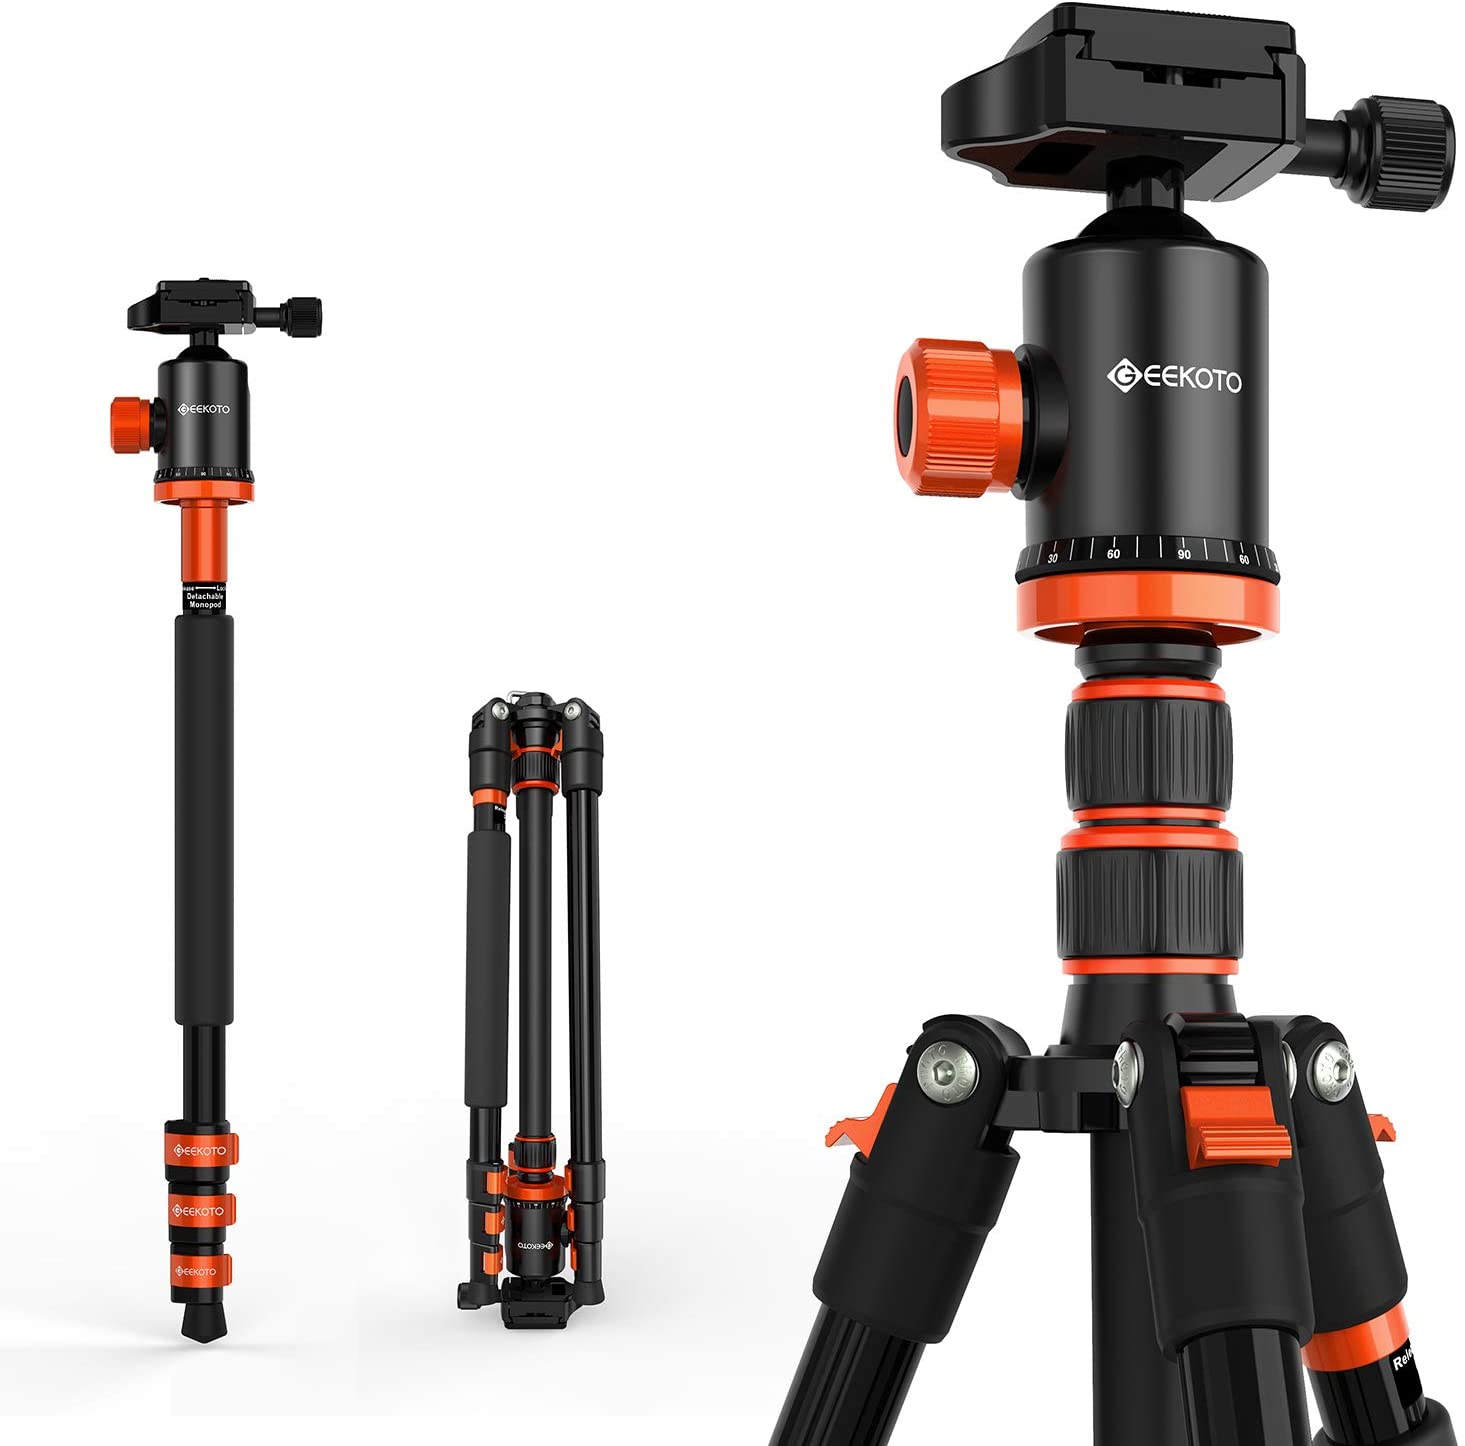
The Geekoto tripod has a removable center column that doubles as a monopod and the Vanguard Alta Pro has a center column that pivots plus extremely spreadable legs to let you put your camera anywhere you need for the picture.
If you’re going to have photography tools such as a tripod, it may as well be one that you can use to the full.
Learn More:
Filters
Photo by Chris Yang on Unsplash
If you’ve come from the world of smartphone photography, the term filter probably brings to your mind apps to use for certain effects or functions. Interchangeable lens camera systems use different filters, optical filters that fit on the lens.
A couple of extremely useful optical filters that belong on our photography equipment list for beginners are circular polarizers and neutral density filters.
Personally, I prefer filter systems with a filter holder, lens adapters, and the various filters to fit them. An advantage of a filter system is that you only need to buy one filter that can be adapted to fit on all of your lenses, and you can position the filters exactly as needed.
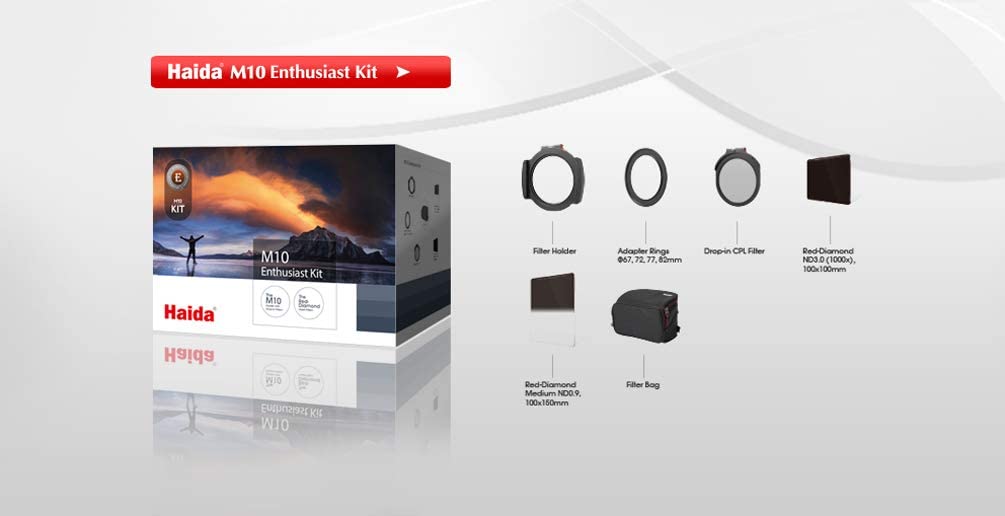
A fantastic set of filters is the Haida M10 Enthusiast Filter Kit with holder, adapters, circular polarizer (C-POL), 10 stop neutral density (ND), and graduated neutral density (GND) filters.
This kit may be a little more expensive than what you expected, but the beauty of a filter system is that it can be used on many different lenses, so it will grow along with you as you move on to other high quality photography tools including professional caliber cameras and lenses.
If your photography equipment list for beginners budget is more modest, an essential filter purchase that is easy to afford is the screw in circular polarizer. A high quality example is the Hoya Pro-1 C-POL filter, available in a variety of single sizes.
The polarizer filter is one of the most useful of all the photographic filters. We have a lot of good things to say about circular polarizers.
Camera Bag
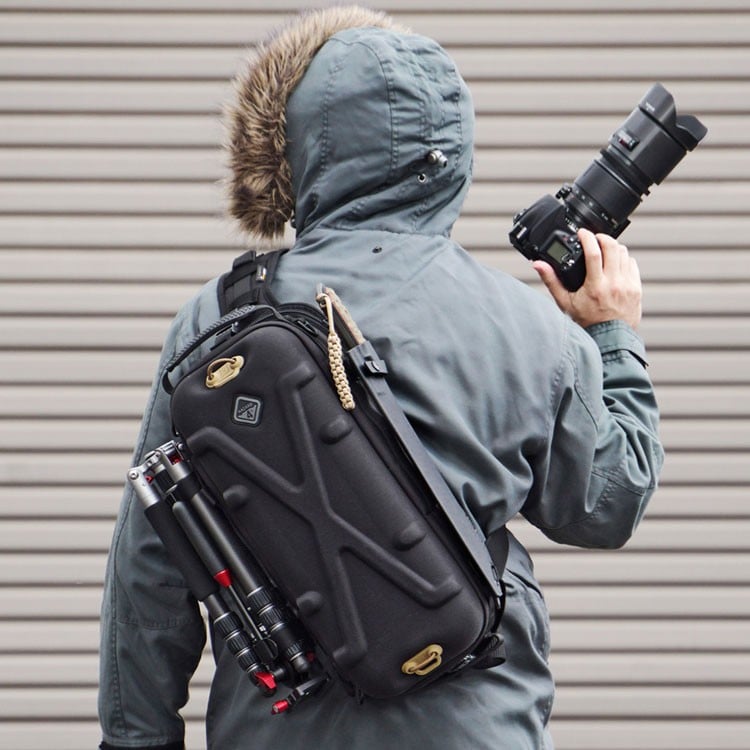
You have a fair amount of the best photography equipment for you to use now, you also need a way to carry it safely and efficiently. It’s not enough to carry your photography tools around safely, you also need to be able to access them efficiently. Therefore, a camera bag should be designed around photography, not just the gear.
HAZARD 4® Plan-B Hard™ - Go-Bag Shell Sling-Pack is one of the better examples of a bag that meets both criteria for fantastic protection and very efficient operation. A less expensive, somewhat more traditional approach is the Lowepro m-Trekker SH 150 Shoulder Bag. Both bags are far better than the bag that was included in the kit you may have started with.
Learn More:
Extra Batteries
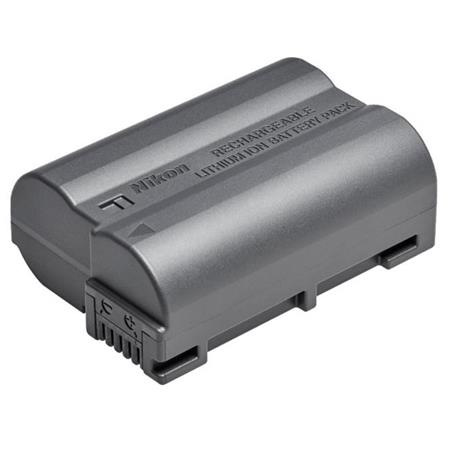
Learn from our mistakes. You don’t want to be at the photo opportunity of the year and have your battery die on you because you forgot to charge it. A very inexpensive way to make sure this doesn’t happen is also simple, keep an extra battery in your bag.
There are off-brand or third-party brands that fit and function well in many cameras, but some cameras don’t act properly with other brands that are not the manufacturer batteries. The camera brand batteries aren’t that much more expensive, so be sure to read the customer reviews to find out if the battery you are considering will work properly.
The battery for the Nikon D3500 and for the Canon EOS Rebel T6 will hold a charge for a long time in storage making them one of the essential photography tools that should be on our photography equipment list for beginners.
Memory Cards

Memory cards are part of the film for digital cameras, taking what the sensor sees and holding it for transfer or storage. Just as with film, not all memory cards are created equal.
Besides the size of the card’s storage capacity, file transfer speeds are also an important consideration. With large file sizes, the speed a camera can write those files to memory may make a difference in capturing the best image.
So, we look for a balance here, too. A balance among memory size, durability, transfer speeds, and price. Good news for beginners is that there really isn’t a bad card out there. Most of the entry level cameras will use a variant of the SD card, a format with a good track record in digital photography.
You can either get a larger capacity cardor you might like having several smaller capacity cards. Either way, you’re covered if you have a few extra memory cards in your beginner photography gear checklist.
Post-Processing Program

photo by vgajic via iStock
Now comes the scary part. Photoshop! It’s really not that hard to learn, there are even tutorials you can take to give you a head start. Post processing is an essential part of digital photography, just as a darkroom or photo lab was a part of consumer film photography.
It can be a lot of fun, don’t let it worry you. Scaled down versions of some of the most powerful programs are simple and inexpensive, putting them on our best photography equipment list for beginners. Adobe Photoshop Elements 2020 and Auto FX software are two fine choices.
Learn more about post-processing in our continuing series of articles on this website.
Photography Books
photo by MesquitaFMS via iStock
You learn by doing, you also learn by instruction. Some of the best instruction for photographers comes from books written by experts. Websites with member forums and manufacturer websites are other good resources for helpful information.
Besides books like Nikon, Canon, or Sony for Dummies, there are general photographic instruction books that will expand your knowledge and skill set. DSLR Photography for Beginners
Is available in Kindle or dead tree versions. Another fine book, paper or electronic, is Mastering Aperture, Shutter Speed, ISO and Exposure.
Thousands of great instructional guides are out there, check the reviews to see which ones work for your photography equipment list for beginners.
Learn More:
What’s On Your Own List?
Pick and choose from our photography equipment list for beginners. You know your wants, needs, budget…
Then, give us a shout out here. I would love to hear what worked for you. By the way, welcome to the wonderful world of serious photography!
We Recommend
Photography Mistakes You Need to Stop Making
Photo by JESHOOTS.com from Pexels
As photographers, we are continually striving for improvement in our craft. However, despite our best intentions, we all make photography mistakes. Common photography mistakes affect all photographers, including seasoned professionals.
What are some of the more common mistakes photographers make and what can be done to correct them?
Table of Contents
- Not Reading the Manual
- Busy Backgrounds
- Uncharged Batteries
- Using a Cheap Camera Bag
- Not Learning the Basics
- The Worst Beginner Photography Mistake
Not Reading the Manual
photo byridvan_celik via iStock
Nobody likes to read the instructions for anything it seems. The cure is simple: read the manual. Let’s take it a little further. Your camera likely came with two different sets of instructions. One that has the basics, often with lots of illustrations, and another that looks like a Tosltoy novel written in code.
I’ll be honest, that basic one often looks so simple that we think we don’t really need to look at it. And that comprehensive one is intimidating.
photo by123ducu via iStock
I’ve been doing this for years, so I sometimes get the mindset that I know this stuff. But, I have also learned that no two cameras (or lenses, flashes, or lights) are completely alike in controls and operation. I once spent an entire day wondering why my ISO kept changing. Then I read the basic illustrated instruction sheet and the reason was covered in the 5th point.
The in-depth gear guides published by independent sources are among my favorite things to read now. In addition to the operations of the camera, these guides give great advice and tips for getting the most out of your new gear.
Recommended Photography Reading
- National Geographic Photo Basics: The Ultimate Beginner's Guide to Great Photography
- Photography: The Definitive Visual History
- Read This if You Want to Take Great Photographs
Busy Backgrounds

Photo by Andrea Piacquadio from Pexels
We look back at our old photo albums and see images that only are interesting to us. So we tend to overlook the glaring problem in many of our snapshots, busy backgrounds.
Especially when photographing people, we need to be aware of the background. A common error in portraits is a twig or pole that looks like it’s growing out of Uncle Bill’s head. Another issue I often see is that is so much happening around whatever our subject is that our main interest is lost in the jumble.
Photo by Sarmad Mughal from Pexels
Composition rules and techniques such as selective focus, as shown in the image above, will fix this mistake for future images. And it also teaches us to pay attention to what’s going on around our subject, Whether it’s a person, a group, a building, or a scenic vista, we can take the time to examine our entire image area, not just the point of interest.
Sometimes, the easiest way to fix this beginner photography mistake is to use our feet. Move over a few feet, walk further away or closer to the subject, change the height level of our camera position. All of these simple methods will help us correct this mistake.
Learn More:
- 4 Basic Photography Tips for Beginners
- Beginners Guide to Composition
- How To See Like a Photographer
Uncharged Batteries
photo byAkintevs via iStock
So, we’re at that never to be repeated event or in a location we traveled far to reach. We pull out our camera to start shooting. And we look at the battery charge indicator only to see it blinking! We forgot to charge our batteries.
In order not to miss images, I recharge my batteries in all my devices before I head out to someplace or something important. Still, forgetting that step can happen when doing several things at once. Another good idea is to have a backup camera battery.
Rechargeable batteries for our devices can be picked up cheaply. If our camera or other device does not use a rechargeable battery, carrying extra AA or AAA batteries is also cheap and easy. Keep them in a pocket in your camera bag.
Using a Cheap Camera Bag
photo byDusan Ilic via iStock
Camera bags are often the neglected photographic accessory. Beginner photographers tend to buy the kits offered by major brands and stores which tend to have a cheap bag included as part of the deal.
After using that bag for a while and gathering more gear like extra lenses and an external flash, photographers start looking for something better, But there are so many choices. Beginner photography mistakes include settling on the first bag that pops on on a web search.
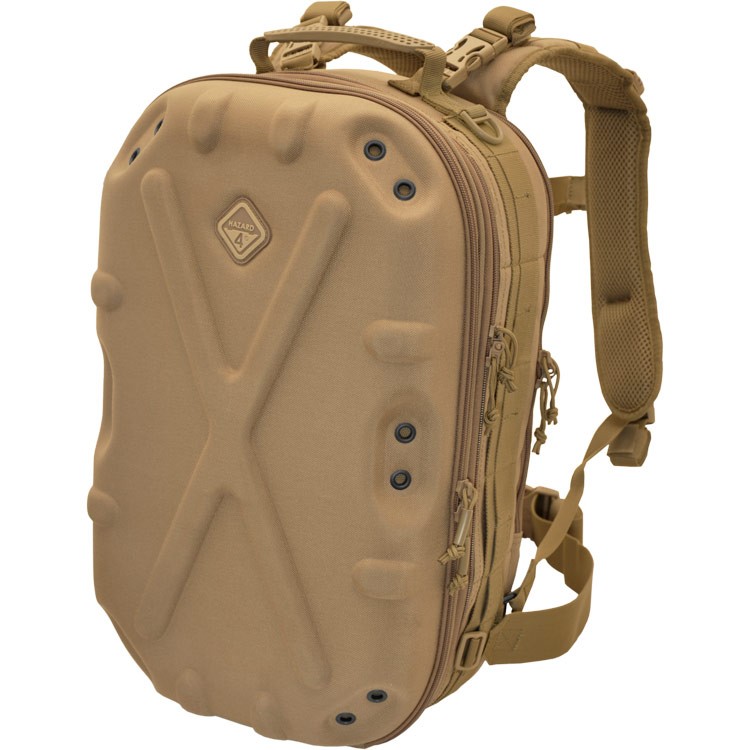
Alternatives can be found from several brands. One of the best replacement bags I’ve found is the Pillbox™ from Hazard4®. It is an extremely versatile bag. You can wear it as a backpack or carry it. It offers an obscene level of protection for your camera gear, having been designed and manufactured by Hazard4®, maker of some of the best tactical gear around.

It also gives you excellent protection while being easy to get in and out of. You can even put your drone in it. The Pillbox™ is modular and adaptable for fitting what gear you have. A good bag like this will probably outlast some of your current camera gear!
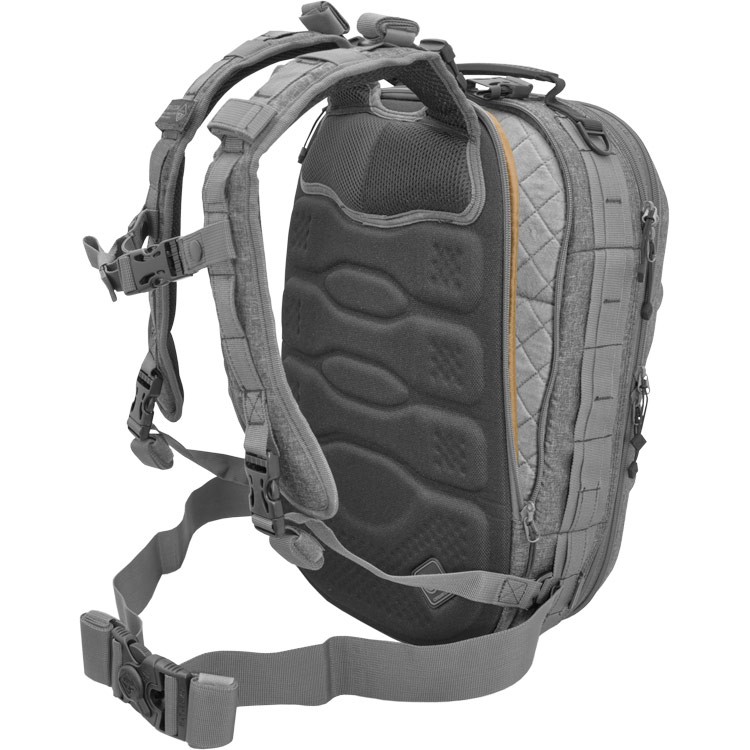
It’s comfortable, too. The shoulder straps feature thick padding that helps lessen the impact from carrying a fully-loaded bag. There’s also a molded back-pad that’s abrasion-resistant, molds to your spine, and ventilates sweat.
I went to Death Valley last year for an impromptu night photography shoot, and I wish I wouldn’t have my Pillbox™ at that time. The bag I used ended up being far too big for what I needed and it didn’t keep my back cool like the Pillbox™ would. Lesson learned!
Not Learning the Basics

photo byspooh via iStock
By basics, I mean such vital photographic concepts, guidelines, and rules as the Exposure Triangle, Rule of Thirds, and Sunny 16. Other good things for all photographers to know are techniques that can improve your images. Selective focus, depth of field, how to capture or blur motion, and how to hold your camera steady are all good things to learn.
The Worst Beginner Photography Mistake
photo byogichobanov via iStock
The one worst of all of the possible mistakes photographers make is not fixing or learning from your mistakes.
The first time my battery died while I was hiking a beautiful trail, I vowed to check my battery levels often. The first time I broke a piece of gear because it fell out of my cheap bag, I decided to find a better bag. The last time I messed up my composition, I decided (one more time!) to take the time to look at the entire scene in front of my lens.
Mistakes are common, but they don’t have to be a habit. Learning from mistakes, from ourselves or others, will make us a better and happier photographer.
Learn More:
We Recommend
Photojournalism 101
photo byRawpixel via iStock
So you have a camera and want to be a photojournalist? I think that’s great! Photojournalism is one of the most important aspects of modern society. Without photojournalism, many of the most important changes in human history may not have ever happened.
Photojournalism can only really be good and effective when done well. Here are some tips and ideas for how to be a photojournalist that you can start as a beginner photographer.
Please note that becoming a working photojournalist with a media outlet will often require a degree or other extensive training. But not every image distributed as photojournalism is taken by a degreed full time journalist working for a major media outlet. There’s room for you and your images.
Some of our photojournalism tips involve equipment choices, others cover photojournalism techniques.
Tell A Story

photo byaragami123345 via iStock
The entire existence of photojournalism depends on journalism which is spreading news and information. If a person looks at your image and is informed about something, it could be photojournalism. What is photojournalism without the story?
The action, location, or subject should be able to be discerned as conveying this information with a minimum of added words of commentary. Sometimes this could require a series of images in order to tell the story adequately.
Your skill as a photographer will help you to develop this photojournalism skill. You are already making images that tell a story of some kind, even if the story is simply “pretty flower.” Just take that a bit further and look for ways to include the viewer in the photo somehow.
Get Close

photo byRonTech2000 via iStock
Except for certain images like the Tiananmen Square tank standoff, most photojournalism images will be some sort of closer view than standing off in the distance while taking pictures.
Making use of photojournalism techniques, this may mean getting physically closer. Be sure to take adequate precautions to protect yourself and your equipment. I like the sling-pack style of photographic equipment bags such as the Freelance™ photo and drone tactical sling-pack from Hazard 4®

First off, it’s a sling-pack, which I highly recommend for photojournalism. A sling-pack lets you carry a fair amount of gear comfortably with its large Molle covered main strap.
The design allows for quickly moving the bag into position to access your gear so you never have to take off the bag and put it down somewhere, it can stay attached to you. Perfect for getting up close near the action.
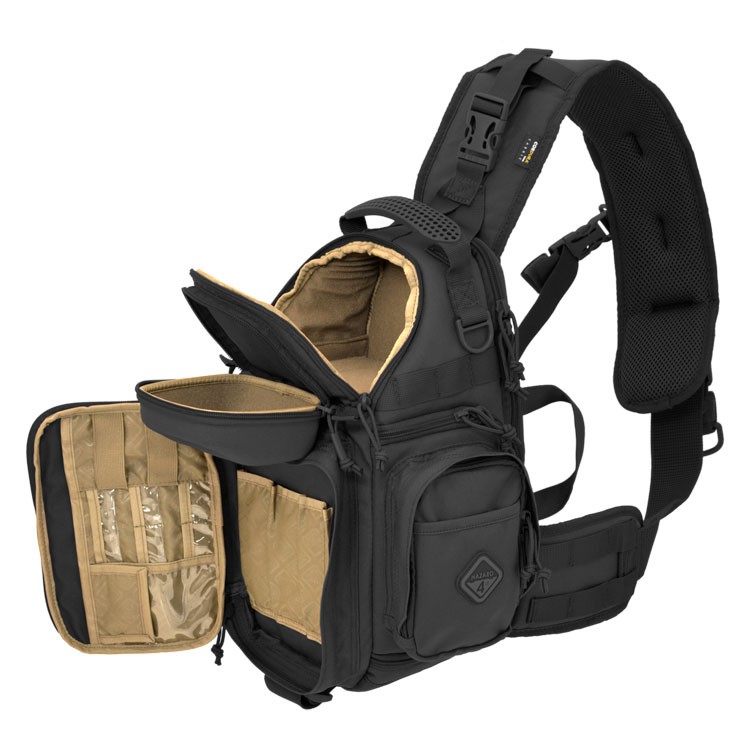
The Freelance™ is great protection for your cameras and lenses since it is built around a thermoformed shell and includes a padded interior and moveable dividers. The HardPoint™ mounting system gives you multiple places to attach your other photographic equipment.
Learn More:
- Camera Bags For Every Kind Of Adventure
- How To Photograph Urban Landscapes
- Run-and-Gun Photography Tips
Get Closer
photo byloranger via iStock
You may not always be able to get as close as you might prefer, so using a telephoto lens becomes a great option. For the full frame DSLRs and mirrorless cameras, a fast telephoto zoom lens in the 70-200mm f/2.8 range becomes a valuable tool.
A zoom lens gives you versatility to choose focal lengths, telephoto brings you apparently closer to what is being photographed. A fast lens affords you even more options in regards to exposure settings and depth of field techniques, plus you gain the added benefit of many of these fast telephoto zooms being professional quality, rugged and very sharp.
Stay Alert
photo byerlucho via iStock
Being aware of what’s happening around you is paramount for a journalist. Learning how to be a photojournalist, you will find that the more comfortable you are with your camera gear and with basic photographic tips and techniques, the more you will be able to focus on the possible news going on as you’re out and about.
You may be going to a specific event or area, looking for a story to capture. This will require you to really be alert. You already know there is the possibility of a good photojournalism story, now you need to be extra alert to all the nuances of what’s happening.
Pay attention to the background noise. That chatter just might be a clue as to where to point your camera. Besides the voices of other people, keep an eye out for anything in the surroundings that could be your next image.
Keep It Sharp
photo byjacoblund via iStock
Sharply in focus, that is. A blurry shot of the most important moment of this month isn't likely to get picked up by Reuters or the AP, unless you’re absolutely the only person there at all with a camera. How likely is that scenario with the ubiquitous smartphone in everyone’s hands?
So you will need to practice your focusing techniques. Know what your camera autofocus can do, how to control it, and when to focus manually. Henri Cartier-Bresson mastered the photojournalism techniques of prefocusing and capturing the peak of the action or the decisive moment.
Those photojournalism tips play a huge role in being able to capture images that tell a story and tell it well. The decisive moment also takes into account subject motion and good hand holding techniques. We’ve covered all of these in other articles on this website.
Shoot A Lot
photo byBurak Sür via iStock
You won’t be able to carefully plant yourself somewhere and set up for the one perfect shot in most cases. Taking a lot of pictures is going to help you get into the flow as well.
You don’t really want to just keep shooting without any thought, but if one image is going to be used somewhere, it couldn’t hurt to have a variety of images to choose from.
This is one of the cases where shooting in JPEG may actually be preferable to camera RAW, since their smaller size won’t fill up memory cards as fast, plus, the JPEGs can be shared immediately if necessary, no processing required.
Edit To Find The Best Image

photo byandresr via iStock
If your own image doesn't grab you, it won’t capture attention from someone else either. Look for image issues, such as bad focus, subject motion, deep shadow, burnt out highlights, uncomfortable composition or camera angle, or anything else that detracts from the image.
Just because we’re capturing news doesn’t mean that just any image will do regardless of quality. If given the choice, any news editor will choose a well exposed, sharply focused image over a lower quality photo.
How To Be A Photojournalist
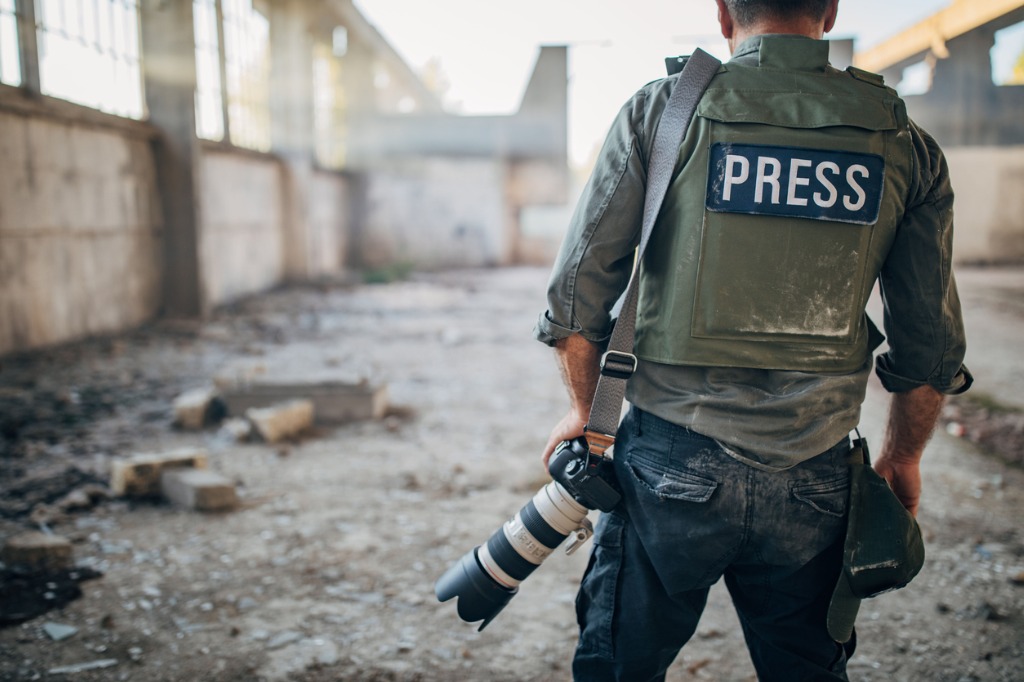
photo byNes via iStock
There are many things to consider as you take your first steps towards being a photojournalist, these photojournalism tips are designed to get you up and running. Keep taking your camera with you, keep looking for a good story, and do keep safe, too.
If you find this world of photojournalism to be something worth entering, build on these ideas and keep practicing. You may also find yourself wanting some more education concerning how to be a photojournalist. Online schools and courses exist for free or low cost from numerous sources.
Who knows, we might be seeing and talking about one of your photojournalism images next.
Learn More:
We Recommend
Rugged Camera Bags for Your 2021 Photography Adventures
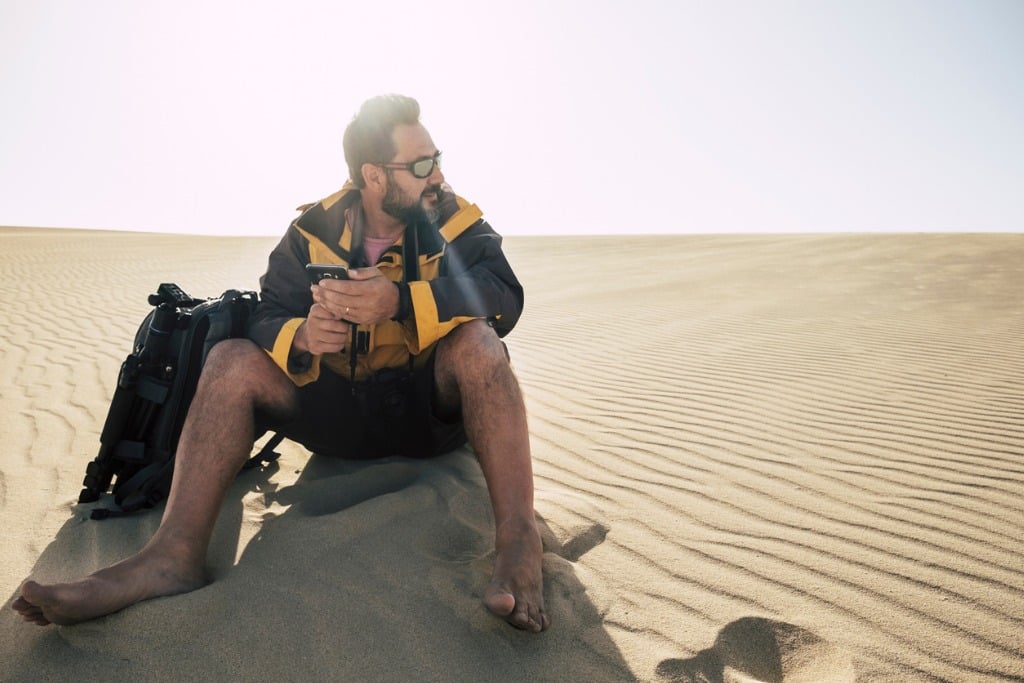
photo bysimonapilolla via iStock
Hey there, all you adventurous types of photographers! Do you need a new camera bag?
There are all kinds of bags on the market for photographers that need a go-anywhere, do-anything rig. But not all camera bags are made alike - especially those that claim to have the durability you need to stand up to your active photography pursuits.
With that in mind, you’ll be interested in these extremely rugged and useful camera bags for 2021.
Who Needs a Super Tough Camera Bag?
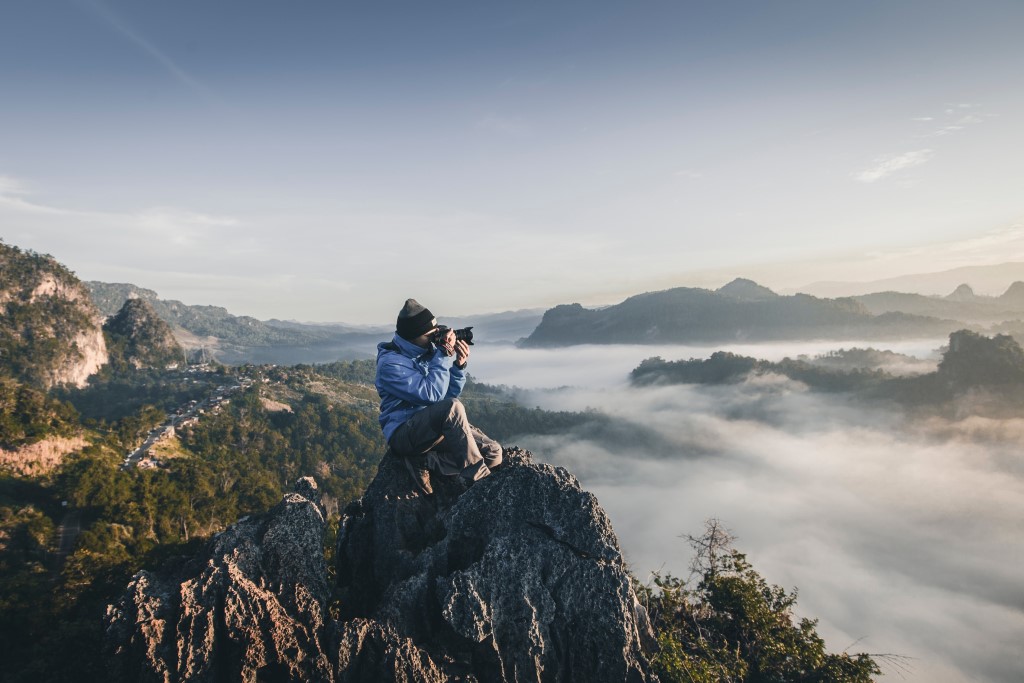
Photo by Alif Ngoylung on Unsplash
A lot of photographers could use a very rugged and secure way to transport their equipment. Obviously, a nature or wildlife photographer would benefit, but so would other types of photographers. A wedding or event photographer can find themselves needing their equipment protected, as could an architectural or real estate photographer.
An event photographer often finds themselves in situations that could damage gear in the blink of an eye. Being jostled and dropping your gear bag, or having it trampled on, is a nightmarish occurrence to even think about, but it happens more than you might think.
Taking pictures outside has hazards, too. You could be hiking over ice, rocks, and boulders in the wilderness, or you could be walking on asphalt, concrete, or gravel inside city limits. Indoors can be dangerous to your gear, from tile floors to wood and metal furniture to windows and doors, all of which have the potential to damage camera gear if impacted.
Really, any photographer that regularly needs to bring valuable equipment to a jobsite or photoshoot will want to consider how to protect their equipment from damage. Here are some choices for the best hard-core camera bags for adventurous photographers.
Recommended Drone Photography Books:
- Drone Photography Basics: Your Guide to the Camera in the Sky
- Drone Photography Explored: Beautiful Drone Photography
Hazard 4® Camera Bags
Hazard 4® is a company headquartered in Southern California that makes and markets a fantastic line of bags, apparel, and other accessories for a wide variety of uses.
They make dive watches good to 300 meters, holster systems for firearms used by law enforcement and military, and luggage that could be dropped from a moving vehicle with no adverse effect to what’s inside.
If a company like this were to tackle photographic gear, it would be something useful, practical, and tough. Well, they have. Hazard 4® has an impressive line of camera accessories and bags that fit into the company line up.
Let’s examine three different styles of hardcore camera bags and discover which type will cover your own camera transport requirements.
Blastwall™ Sling Pack
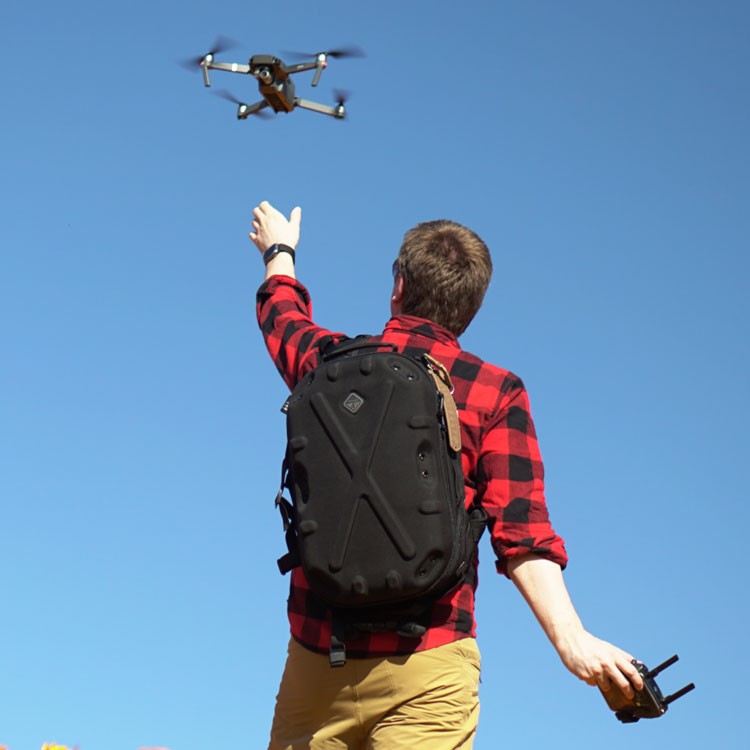
The Blastwall™ Sling-Pack is a hybrid style camera bag with features of a hard shell case and a sling.
Exterior dimensions are 19.7” long by 12.2” wide by 7.5” deep, and interior capacity is 1800 cubic inches. Construction is molded foam, padding, and CoduraTM nylon. Protection is all around the bag - 360 degrees of rugged walls and padding.
Other aspects of the bag’s construction include military modular webbing (MOLLE) in the straps and on the sides of the bag, YKK® zippers that are smooth, rugged, and resistant to wear and the elements, and soft, fuzzy tricot inside to baby your gear. Reinforced stitching adds strength and durability.
The sling method of carrying is supplemented by a wide waist belt for extra comfort, because camera gear can get heavy. The patented locking roto-buckle is used on the straps and their patented photo-D-ring allows you to mount and carry extra equipment externally.
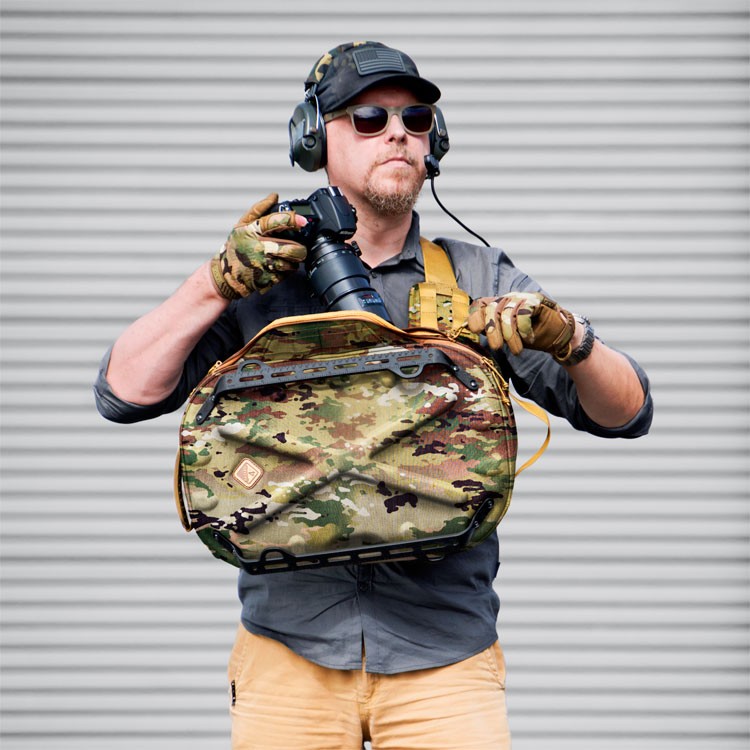
Along the exterior of the hard shell are patented Hardpoint® mounting points for additional accessories you may want to carry in the field.
The interior is separated into three areas - one side of the case is a spot for pens, memory cards, maps, and a small tablet. On the other side is a space for a laptop computer or large tablet. The main area uses modular dividers so you can configure it to your needs.
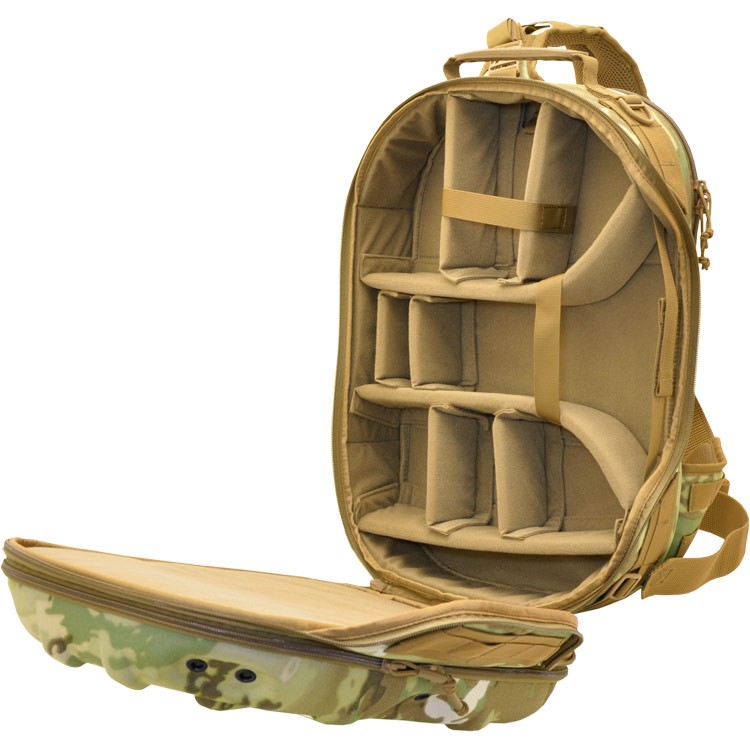
Photojournalists, travel photographers, and real estate pros can make good use of this style of rugged camera bags. It can hold quite a bit of full frame mirrorless equipment, camera and lenses, as well as mobile devices used by photographers. Smaller to medium size drones will fit, as well.
If you are on the go and ease of access is a must, this is a great camera bag for you.
Learn More:
PillboxTM Day Pack
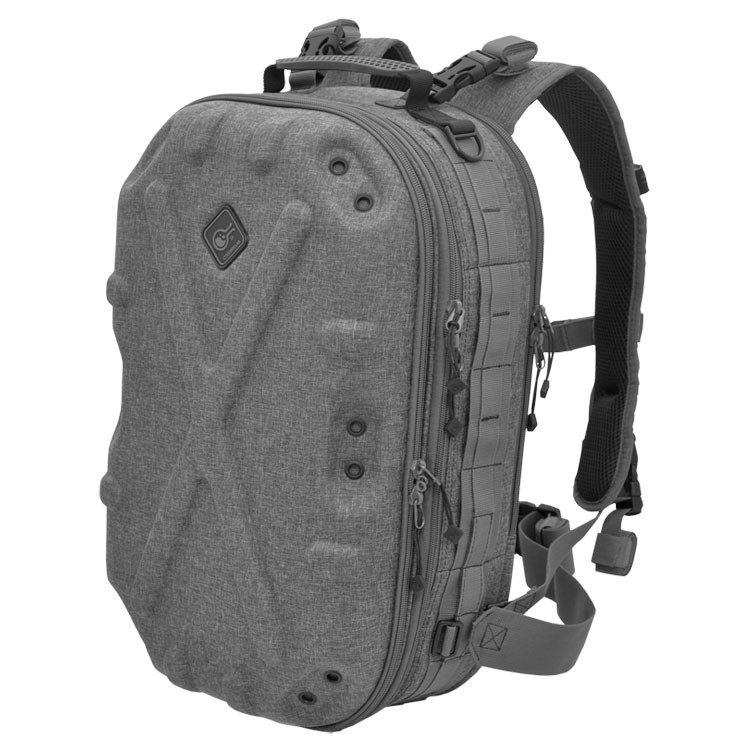
With the same dimensions as the BlastwallTM Sling Pack, the PillboxTM is designed as a daypack backpack.
Backpack straps allow the photographer to carry more weight comfortably than other styles of strapping. This makes this rugged camera bag a nice option for photographers shooting with heavier gear such as professional or prosumer DSLRs or videographers using high-end video cameras.
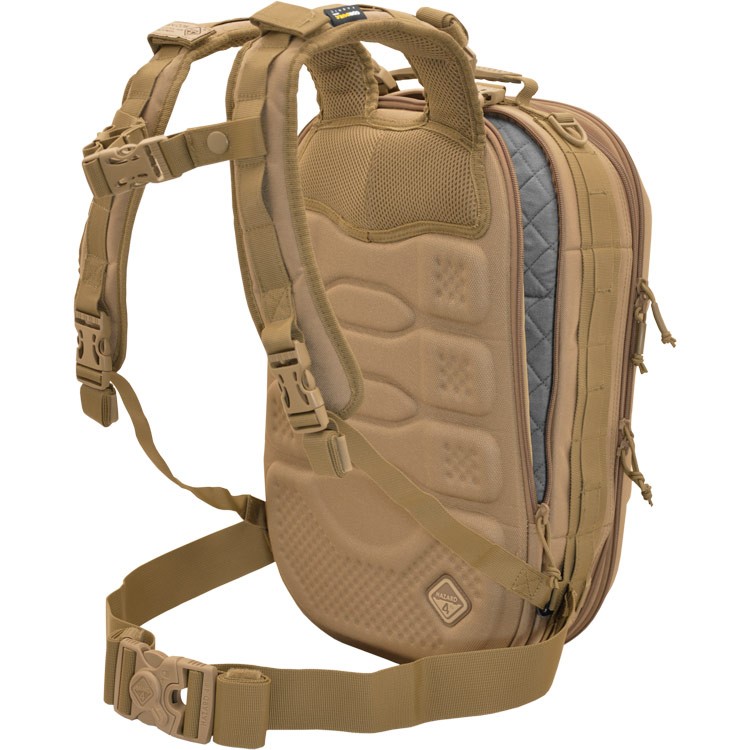
The same construction details of the BlastwallTM apply to this hardcore camera bag. The patented HardPointTM mounting points are also included, which lets you carry a lot of extra gear that may not need padded protection. Favorites of active photographers are the patented locking roto-buckle used on the straps and the patented photo-D-ring for attaching extra equipment.

Wildlife and sports photographers will get a lot of use out of a bag like this, as will pros transporting their gear through busy and crowded locales that are prone to theft or accidents.
AirstrikeTM Carry On Camera Bag
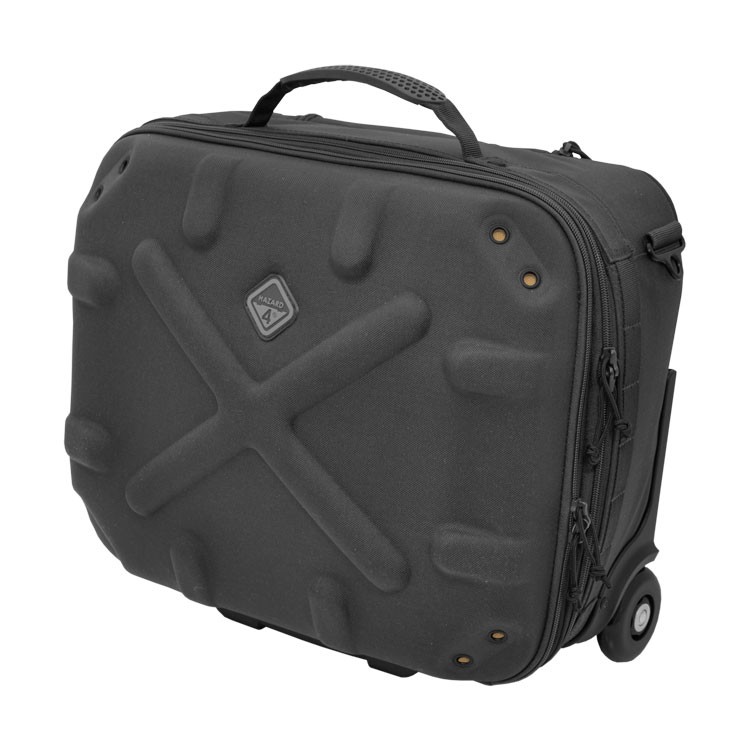
Around the same size, but with a different purpose in mind, the AirstrikeTM carry on style camera bag is perfect for photographers who regularly travel via the airlines.
The dimensions are designed to fit into a standard overhead luggage compartment in commercial airliners and yet still accommodate a large amount of camera gear. For easier movement through airports, train stations, and hotel aisles, the AirstrikeTM has roller wheels and an extendable handle.
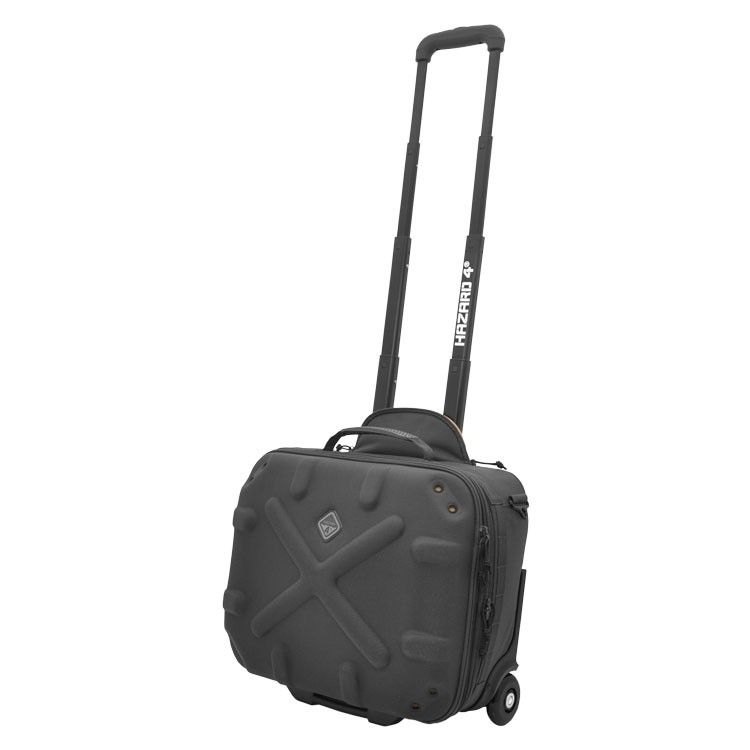
One of the other changes to this bag is a larger administration panel. It’s on one side of the bag, so you can pack a larger laptop or books and other things.
The main compartment is ample size for professional camera gear and large lenses. It uses the same patented locking roto-buckle on the straps, patented photo-D-ring, and patented Hardpoint® mounting points for additional gear.
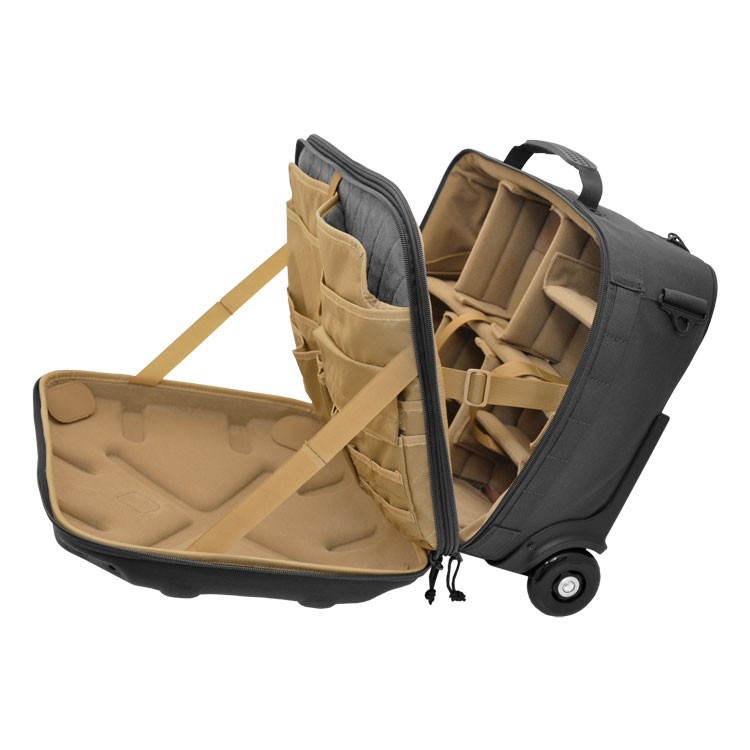
Construction materials are the same as the other two hordcore camera bags we discovered, making this roller bag great for travel and leisure photographers or any other photographer who regularly uses airlines and other forms of public transportation.
Best Camera Bags for 2021
If you want a heavy duty, very capable, hardcore camera bag that exudes rugged dependabilty, it’s hard to find any better choices of rugged camera bags for protecting your gear while keeping it easy to access than those outlined above.
I’ve personally used Hazard 4® bags and can attest to the quality of the construction, the functionality of their design, and the high level of functionality that these bags offer.
If I’m headed into an extreme situation like harsh weather as I’m photographing landscapes, there is no company I trust more to protect my gear than Hazard 4®!
Learn More:
We Recommend
Run-and-Gun Photography Tips
Photo by Vanilla Bear Films on Unsplash
There’s nothing quite like grabbing your gear and heading out for a quick run-and-gun session with your camera.
I love the spontaneity of it - going out at a moment’s notice and seeing what the world presents to you.
But as much as I enjoy a spontaneous moment, I don’t enjoy getting out there and realizing I’ve forgotten something or struggling through an uncomfortable afternoon because my pack is too heavy or realizing that leaving the house without any plan at all might’ve been a bad choice.
Let’s have a look at a few run-and-gun photography tips that will help you make the most of those spontaneous outings with your camera.
Run-and-Gun Photography Tip #1: Prep Beforehand
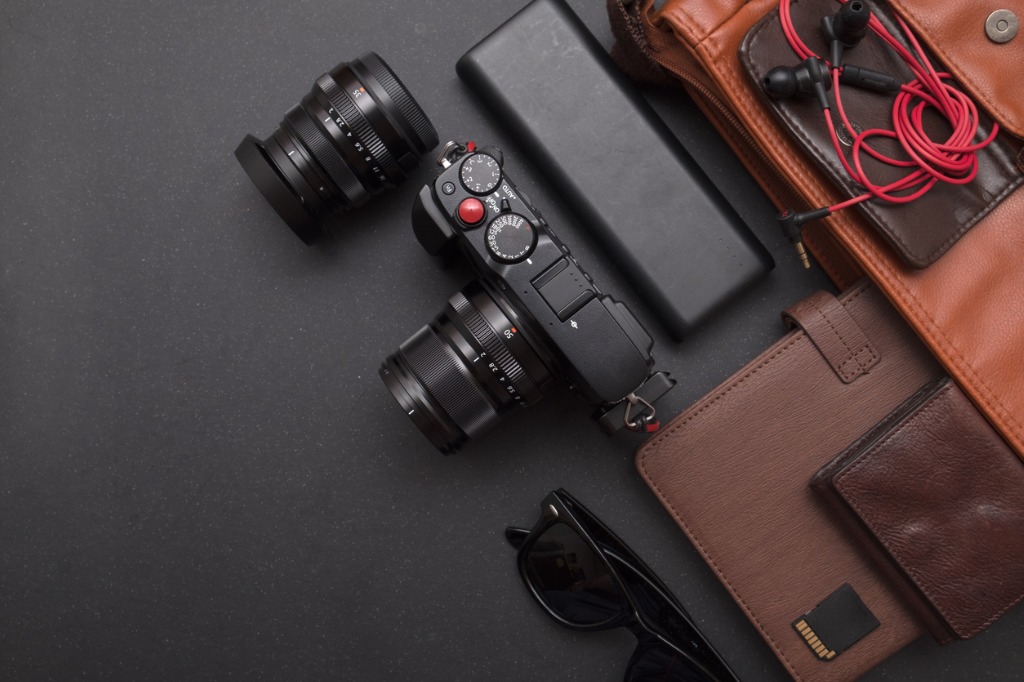
photo bystructuresxx via iStock
I know that being spontaneous and making a plan don’t exactly go hand-in-hand, but I think there can be a marriage of the two.
Let’s say you get a wild hair and want to ditch work one afternoon to go shoot. That’s the spontaneous part. The planning part can come next, where you spend just a few minutes doing things like:
- Deciding where to go. This doesn’t have to be a definitive thing, either. Create a short list of a few locations you’d like to explore, and when you get in the car, make a decision as to which one is the winner.
- Checking the forecast. It literally takes 15 seconds to check the weather. I’m all for being spontaneous, but what I don’t want is to be surprised by a thunderstorm. Getting a weather update will help you pack the gear you need for a successful run-and-gun session.
- Prep your gear. I live in the L.A. area, so when I leave the house in a hurry, I need to be sure I have everything I need. If I get to the location I want to shoot and realize I left something at home, it’s not exactly a short drive to go back and get it.
- Travel light. Running and gunning is not the time to pack every single piece of gear you have. Keep it to the essentials (camera, lens, tripod, bag) and you’ll have a much easier time.
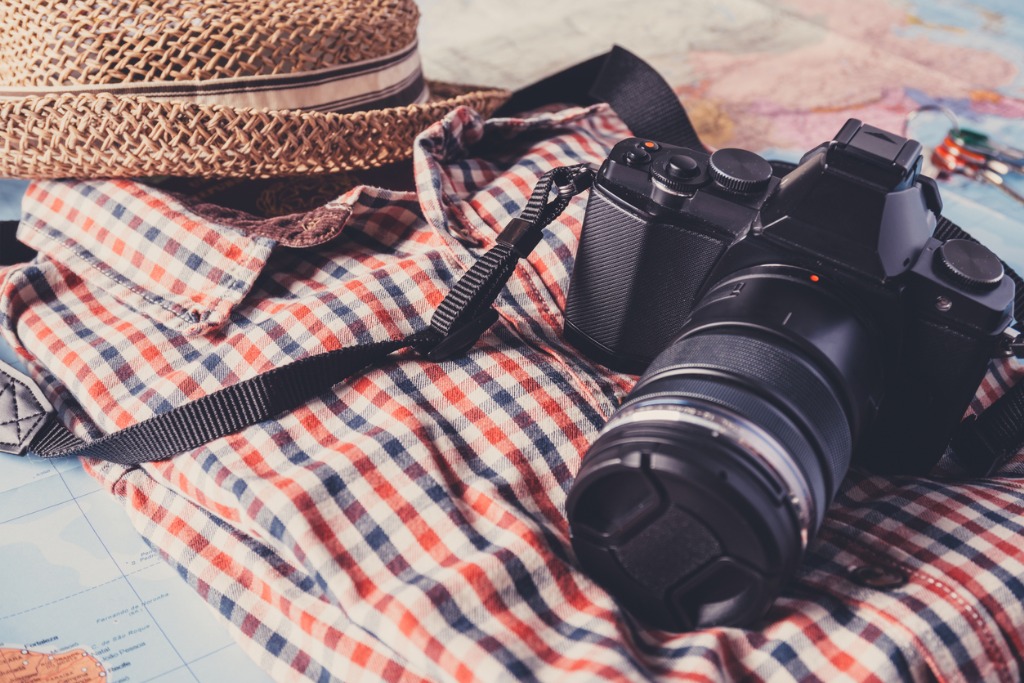
photo byFilippoBacci via iStock
There are plenty of other planning activities you can undertake here, but for me, these are the four most important. By deciding where to go, knowing what weather to expect, double-checking your gear, and packing light, you can save a ton of time and maximize your chances of getting the best shots.
Learn More:
- Rugged Camera Bags for Your 2020 Photography Adventures
- Top Software and Gear Updates That Rocked 2019
Run-and-Gun Photography Tip #2: Be Comfortable
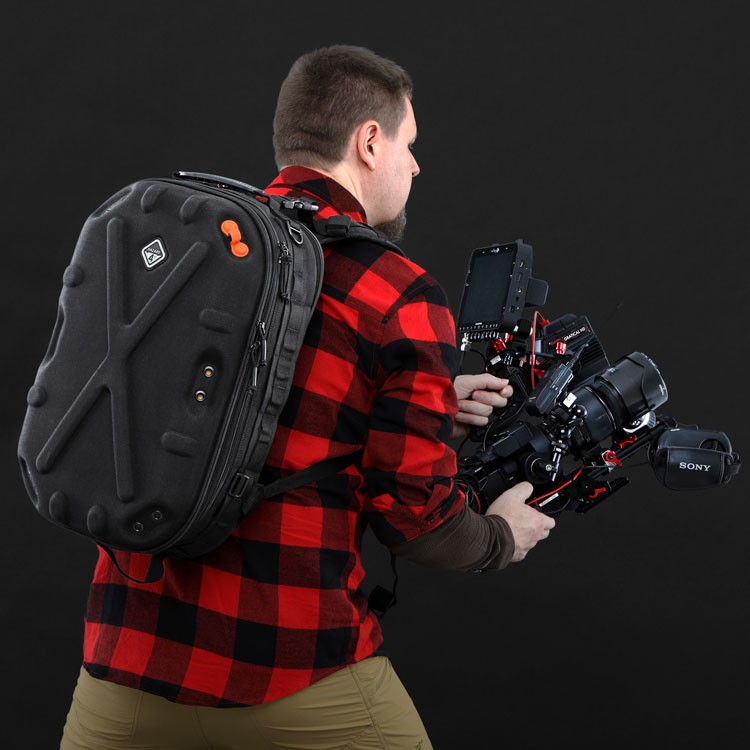
Maybe it’s because I’m firmly in my 40s, but I really like to be comfortable. Crazy, right?
Like a lot of people, my shoulders and back tend to be where I feel the stress and strain of daily life, so having a comfortable camera bag is hugely important. Additionally, having a camera bag that also helps me stay organized is a big bonus when I’m heading out the door quickly.
I’ve found that the Hazard 4® PillboxTM fits the bill on both fronts.

With regard to comfort, the molded back panel is both abrasion resistant and conforms to your spine. When you put this thing on, it feels like an extension of your body - it’s that comfortable!
Additionally, the back pad facilitates ventilation, that way you don’t suffer with a sweaty back as you’re moving quickly from one shot to the next.
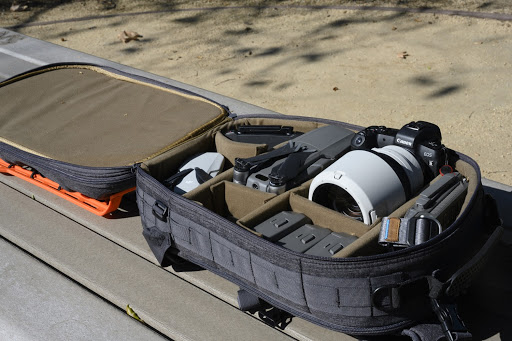
With external dimensions of 19.7" x 12.2" x 7.5" and a carrying capacity of nearly 30 liters, this bag can accommodate a ton of gear. And even when fully loaded, it’s still a comfortable carry.
Obviously, when you’re running and gunning you likely won’t have a full pack, but it’s nice to know that if I plan an extended trip that the Hazard 4® PillboxTM will keep me comfortable, even when it’s loaded for bear.

On the organization front, this bag has completely changed the way I prepare for a photography outing - run-and-gun or otherwise.
It has compartments that will fit my laptop, my camera and lenses, and a drone. There are also plenty of smaller compartments for items like card readers and memory cards, a first aid kit, a rain shell, snacks, and so forth. There’s even an admin organizer keeps small items like SD cards, pens, and tools, neatly kept.
Better still, the huge clamshell opening makes it easy to quickly survey the contents of the bag and figure out what else I need to pack.
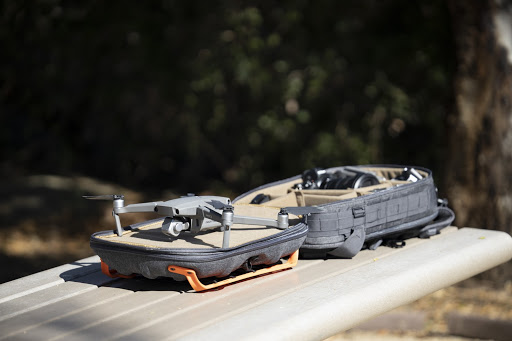
When I’m out shooting, having everything in its own cubby is enormously beneficial. Likewise, the optional patented Hardpoint® system allows me to add additional gear to the exterior of the bag.
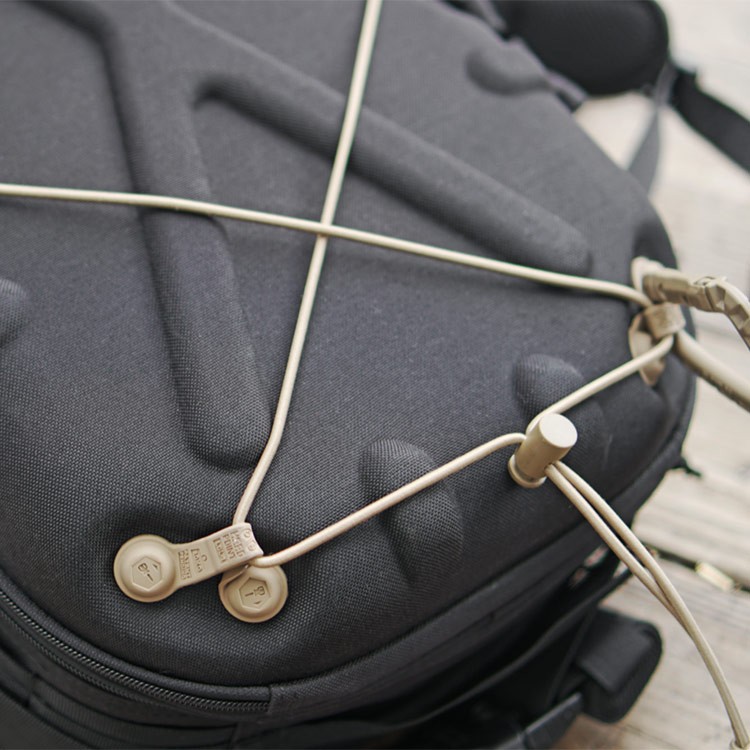
There are six spots for Hardpoint® accessories, which allows you to carry lights, tripods, and other items for quick access.
To top it all off, the Hazard 4® PillboxTM is ultra rugged and it looks killer, so for me, it’s the best of all worlds!
Recommended Photography Reading
- National Geographic Photo Basics: The Ultimate Beginner's Guide to Great Photography
- Photography: The Definitive Visual History
- Read This if You Want to Take Great Photographs
Run-and-Gun Photography Tip #3: Bring a Versatile Lens
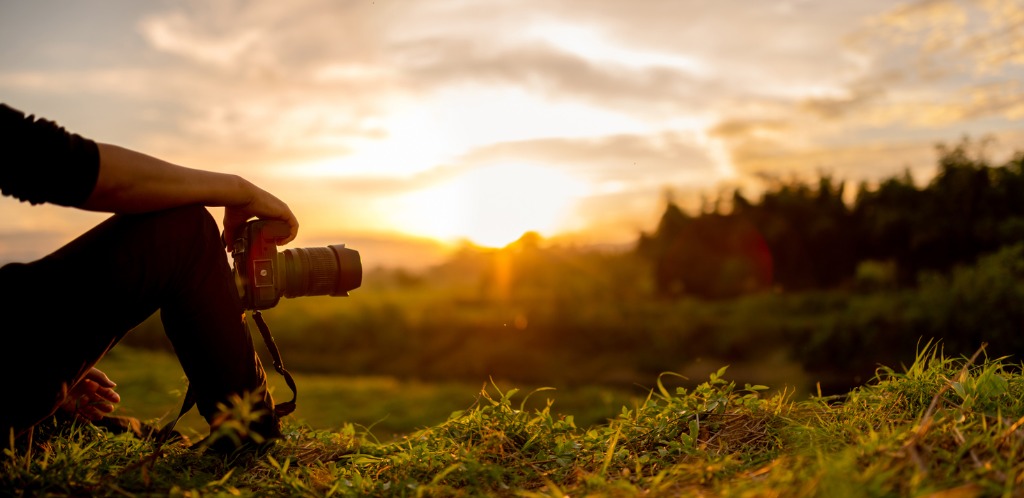
photo byPakorn_Khantiyaporn via iStock
When you’re moving quickly from one shot to the next, the last thing you want to do is pause your workflow to do a lens change.
That’s why I recommend tackling your run-and-gun photography with a versatile zoom, like a 24-70mm or 70-200mm.
I shoot more landscapes than anything, so for me, the Canon RF 24-70 f/2.8L is my go-to versatile lens.
I like having the wide-angle option at 24-35mm and then the standard focal range of 35mm to about 50mm, with short telephoto at up to 70mm as well. For my needs, this is an ideal focal range.
Between having a versatile lens, a great camera bag, and doing some quick pre-planning, you’ll be in position to rock it out and have a successful run-and-gun session.
Now all that’s left to do is get out there and shoot!
Learn More:
We Recommend
Top Accessories for the DJI Mavic 2 Pro & Mavic 2 Zoom
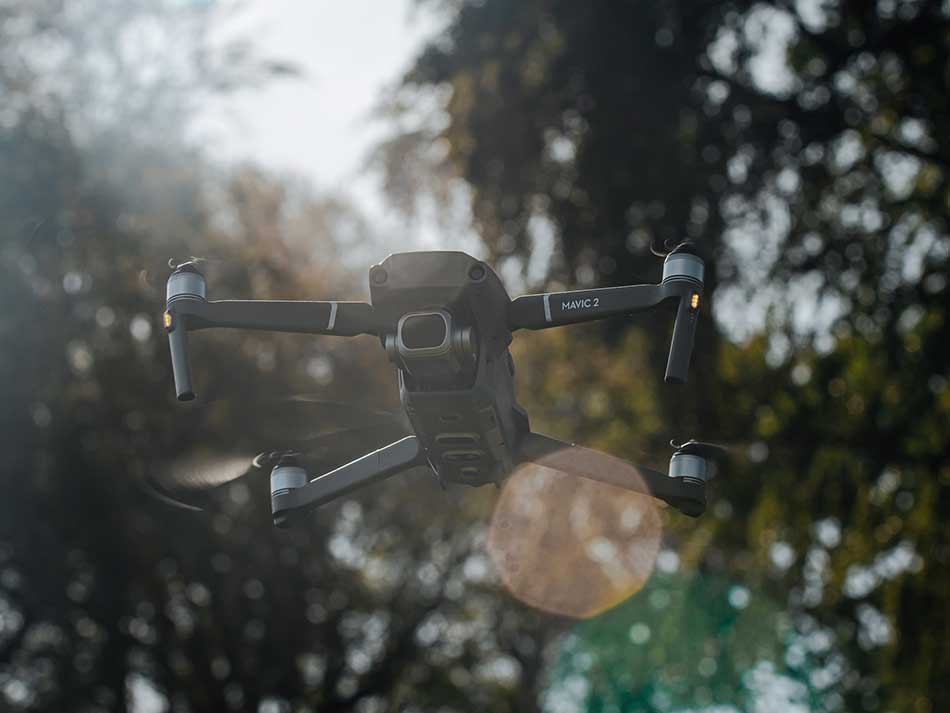
DJI Mavic 2 Pro Photo by Jacob Buchhave on Unsplash
Two of the best drones for photography and videography are the DJI Mavic 2 Pro and DJI Mavic 2 Zoom. The best DJI Mavic Pro accessories and the best accessories for the DJI Mavic 2 Zoom will expand their capabilities, make them more versatile, and ease your workflow.
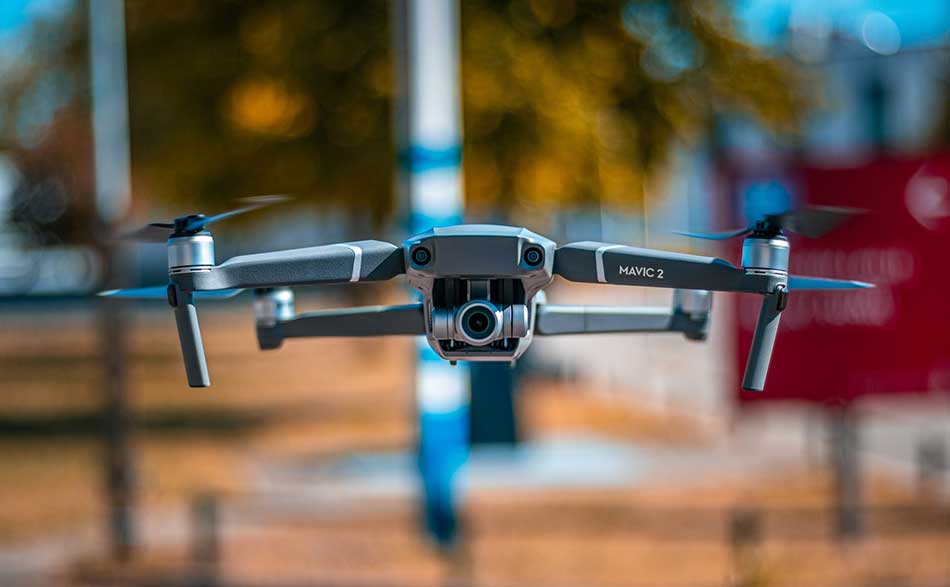
DJI Mavic 2 Zoom Photo by Tommy van Kessel ? on Unsplash
Sometimes the least thought of accessory will become the one item you now realize you can’t live without. For the DJI drones, the items listed below have been chosen as the most likely to become that item for you.
Hazard 4® Freelance™ Sling Pack

Among the best bags for active photographers is the Hazard 4® Freelance™ Sling Pack. The sling pack design combines the comfort of a backpack for hauling heavier gear with the ease of access of a belt pack or regular camera bag.

The Hazard 4® Freelance™ Sling Pack also offers a secure way to access your gear while in the field. Some other features that make it a great bag choice over all are the thermoformed panels for protection and comfort, the adjustable internal dividers, and HardPoint™ external accessory mounting points.

The DJI Mavic 2 Pro accessories fit perfectly in this bag along with the drone and even a tablet. Your drone deserves protection and you need to have everything readily available while you’re in the field. And it looks good, too.
DJI Smart Controller

Instead of using your smartphone, this controller is the best way to fly and film with your DJI Mavic 2 Pro or Mavic 2 Zoom. The DJI Smart Controller has a 5.5 inch touch screen, two joysticks, and dedicated buttons to make controlling all the advanced features of the drones easy to access.
Automatically switching frequencies allow for an extended range between drone and controller. The SkyTalk feature lets you live stream video feed to various online platforms while you’re flying.
The screen is incredibly bright, letting you clearly see things in the harshest sunlight, making this one of the best Mavic 2 Pro accessories for users filming under various weather conditions.
The DJI Smart Controller will synch to the drone from the moment you power up the drone. It’s customizable via DJI and third party apps so you can design features and capabilities based on how you will use the drone. It operates under extreme weather conditions from -20 C to 40 C, letting you fly and film virtually anywhere.
ND Filters for Mavic 2 Pro

Mavic 2 Pro accessories for controlling exposure options include ND Filters for Mavic 2 Pro. The Haida NanoPro ND Filter Kit includes neutral density filters of ND0.9 (8x), ND1.2 (16x), and ND1.8 (64x).
The DJI Mavic 2 Pro has one of the top cameras of any drone in its class, the 20MP Hasselblad L1D-20c gimbal camera with its large 1-inch CMOS sensor and f/2.8 lens that stops down to f/11.0.
On very bright days, ND filters are an exposure taming option that lets you shoot at reasonable shutter speeds and a natural appearing frame rate for video which makes them some of the best accessories for the DJI Mavic 2 Pro.
These are very high quality filters, so you won’t be losing anything by using them on the amazing camera in this drone. Optical grade glass, multi coated on both sides, and mounted in aircraft grade aluminum, these ND filters for Mavic 2 Pro match up fine.
ND & Polarizers for Mavic 2 Zoom
DJI Mavic 2 Zoom accessories also include a fine set of filters. The ND & Polarizers for Mavic 2 Zoom by Tiffen is a set of 6 filters to optimize your use of the zoom lens and high end camera in this drone. In addition to neutral density, you also get the option to add polarization to the neutral density.
The 6 filters in the kit are ND4, ND4PL, ND8, ND8PL, ND16 and ND16PL filters. This set gives wide ranging exposure options as well as offering control over glare and reflections. They also improve contrast and color saturation when that is a priority.
Made of high quality optical glass, these Tiffen filters feature anti glare coating and hydrophobic coating which makes the surface waterproof and also has scratch prevention technology. So these filters are tough as well as superb optically.
Propeller Guards

PGYTECH Propeller Guard for DJI Mavic 2 Pro and Zoom are essential accessories for two reasons. They protect the propellers and they protect what the propellers might come into contact with.
The propellers on drones spin at extremely high RPM rates. Even when piloting very carefully, you could accidentally impact something which could either be damaged itself or cause damage to your drone’s propeller blades. If the blades are damaged, that’s the end of that flying session.
Things that could engage the propellers are twigs, leaves, and lines outside, or furniture and cords insides. Let’s not forget fingers, hair, clothing, and curious pets either. These prevent injury and damage under regular and difficult flying conditions.
They don’t add much weight, nor do they impede any airflow characteristics, so using them all the time is a viable option.
Intelligent Flight Battery

What makes a battery intelligent? When used with the DJI GO app, the DJI Intelligent Flight Battery lets you monitor overall battery status, real-time battery cell status, circle number, temperature, and other vital information.
Other things that make the Intelligent Flight Battery smart is overcharge protection, eliminating rapid discharge in flight, and cold weather fatigue protection. Additionally, when the battery senses that it has been in storage for a while, it automatically discharges down to 50% charge to prevent damage and to optimize the overall life of the battery.
Since drone batteries have to power a lot of stuff, having an extra battery or two for your drone is the simplest way to ensure you don’t run out of juice while flying and recording.
Car Charger

Another way to ensure you don’t run short of power is use a car charger to power up the batteries for your drone. The Mavic 2 Car Charger can charge up batteries while you’re driving and it won’t overcharge the batteries either due to its advanced circuitry.
It’s safe, reliable, and it does the job, keeping your batteries charged and ready to use for extended flying and filming sessions.
To Sum Up

Some of the most useful and beneficial accessories for the DJI Mavic 2 Pro and Mavic 2 Zoom are ND and polarizer filters for controlling exposure, contrast, and reflections, propeller guards to prevent damage to the blades or to other things that get in their way, and extra batteries plus a way to charge them in the field.
Upgrade to the Smart Controller for advanced piloting and filming, and then pack it all into the Hazard 4® Freelance™ Sling Pack for the ultimate in protection and easy access. Added to the superior capabilities of these two drones, you will be ready for making great video and capturing superb images.
We Recommend
Top Sling Packs for Landscape Photography
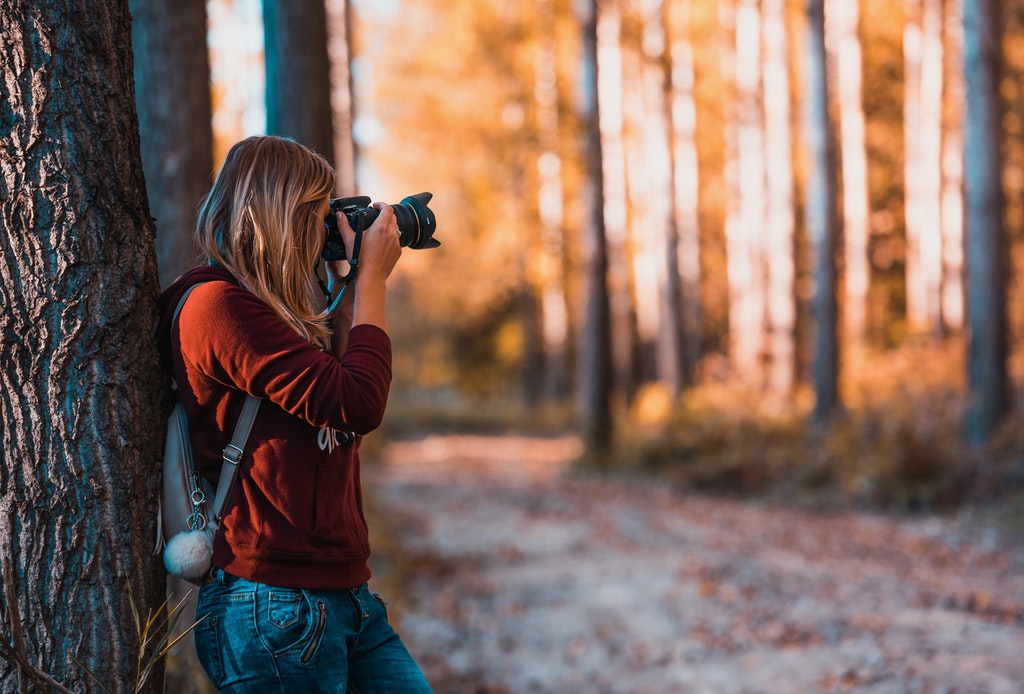
Photo by David Bartus from Pexels
Landscape photography can take a toll on your equipment.
Think about it...those backcountry roads can wreak havoc on your tires. The trails wear out our Timberland hiking boots. Outdoors is full of things that are amazing to look at and photograph that can become hazardous to optics and electronics in a heartbeat.
Wind, water, sand, dirt, leaves, animals - all those things we love about imaging for landscape photography can ruin our precious cameras if we’re not careful.
It’s Easy To Be Careful
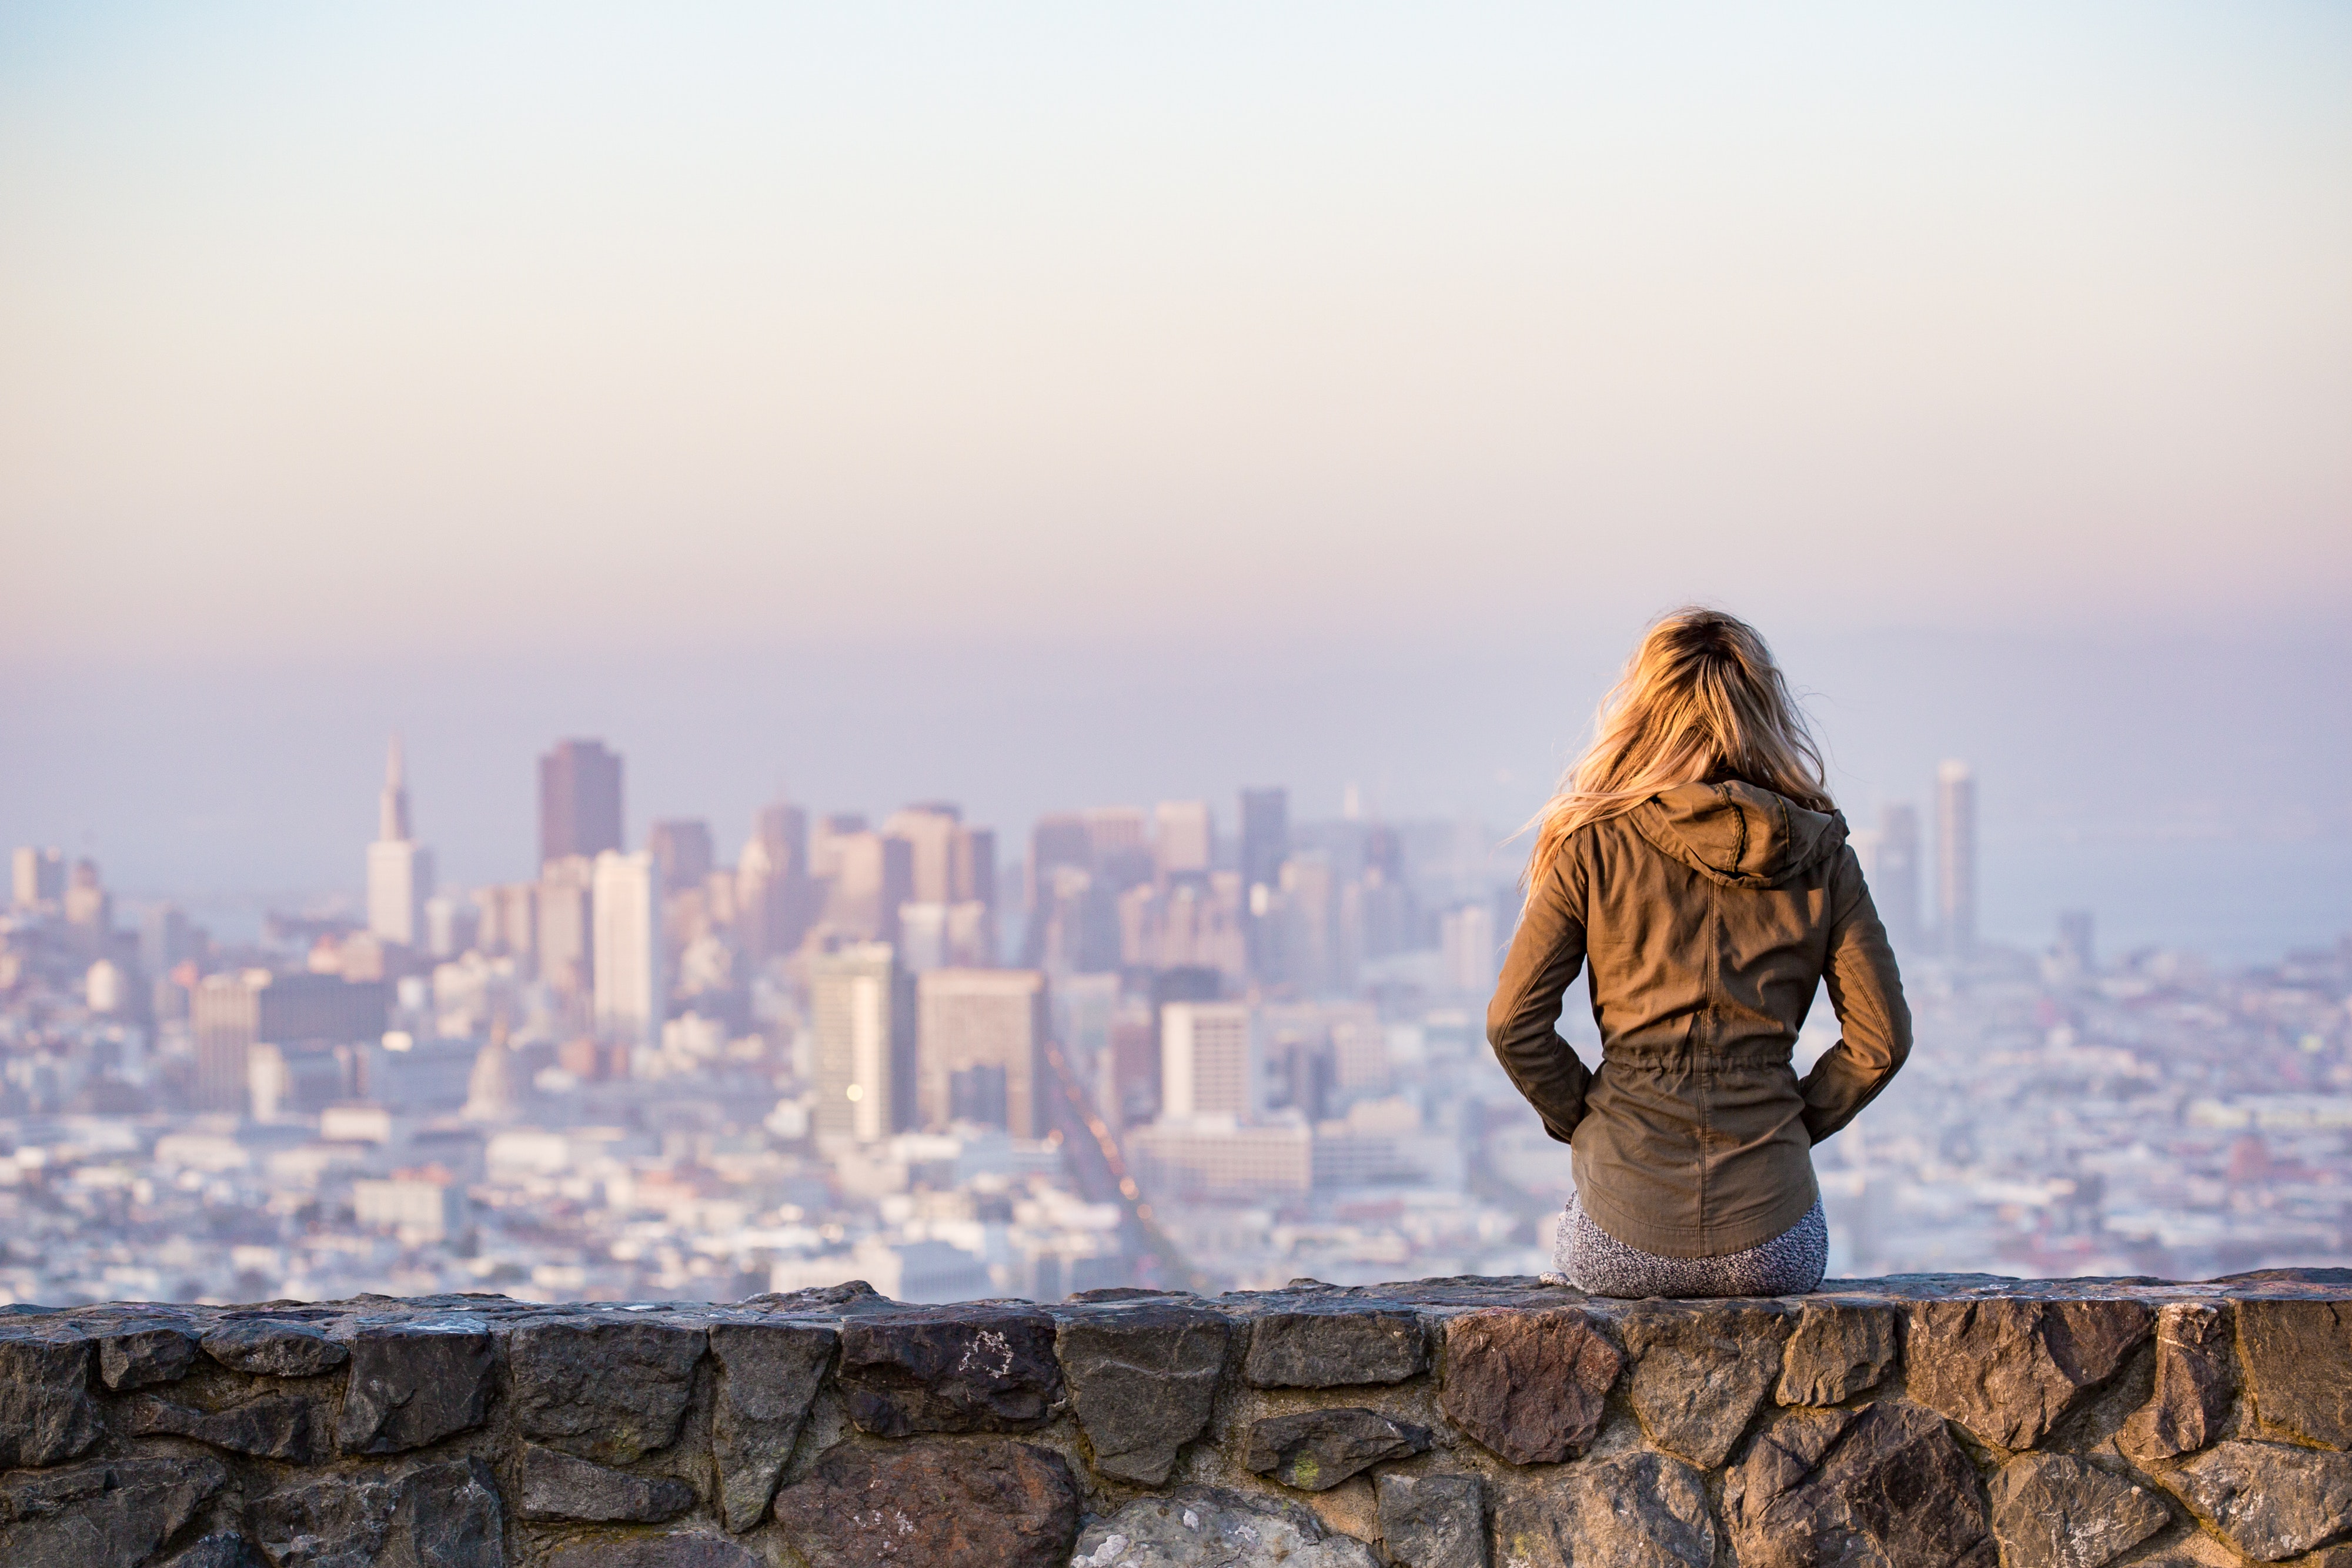
Photo by picjumbo.com from Pexels
he sand, wind, or rain aren’t the real culprits in regards to the hazards of landscape photography, it’s us being careless. Good news for photographers is that we have outstanding options for keeping our photographic gear safe and dry.
A major consideration for me in choosing a workable camera bag is how easy I can access my gear while in the field. A hard waterproof case with foam inserts will protect photographic gear from almost anything, but it’s not convenient for using while actually shooting.
A soft camera bag is very convenient to use but it may not protect the gear inside from unintentional impacts or drops. And ever-ready cases, those fitted cases we saw on cameras used by tourists all the time in years past, are not popular options anymore. As a matter of fact, I haven’t seen anyone use one on a DSLR or mirrorless ever, probably mostly because of rear view screens.
Learn More:
Sling Packs Are an Awesome Option
Photo by mirsad mujanovic from Pexels
I have become a huge fan of sling packs as camera bags. They combine the best aspects of a backpack and an over-the-shoulder bag. You can pile a large amount of equipment in a sling pack and carry it without causing shoulder pain.
And unlike a backpack, you can easily get your camera out of the bag without having to take off the pack. You slide the sling pack around into a position where you can reach into it and grab your stuff. It doesn’t get much easier than that!
Three Excellent Choices
Photo by Joshua Woroniecki from Pexels
Hazard 4Hazard 4® is the manufacturer of a great series of outdoor gear that works very well for photographers. Their sling packs meet the criteria for extreme use protection just like their tactical equipment with which they made their reputation.
Designed with photographers in mind, the Hazard 4® sling packs will protect your gear in the wilds of nature or the wilds of urban settings while allowing unencumbered access to your cameras or other gear.
There are other brands of really good sling packs, and even Hazard 4® makes several styles of sling packs and other bags and cases. But I’m going to limit my list to just three. They represent what makes Hazard 4® tactical and photographic equipment so good. While other bags and packs are good, theHazard 4® sling packs take rugged protection to the next level.
Recommended Landscape Photography Reading:
- The Landscape Photography Book: The Step-by-Step Techniques You Need to Capture Breathtaking Landscape Photos Like the Pros
- National Geographic Greatest Landscapes: Stunning Photographs That Inspire and Astonish
- The Art, Science, and Craft of Great Landscape Photography
Bandoleer™ - Small Sling Pack
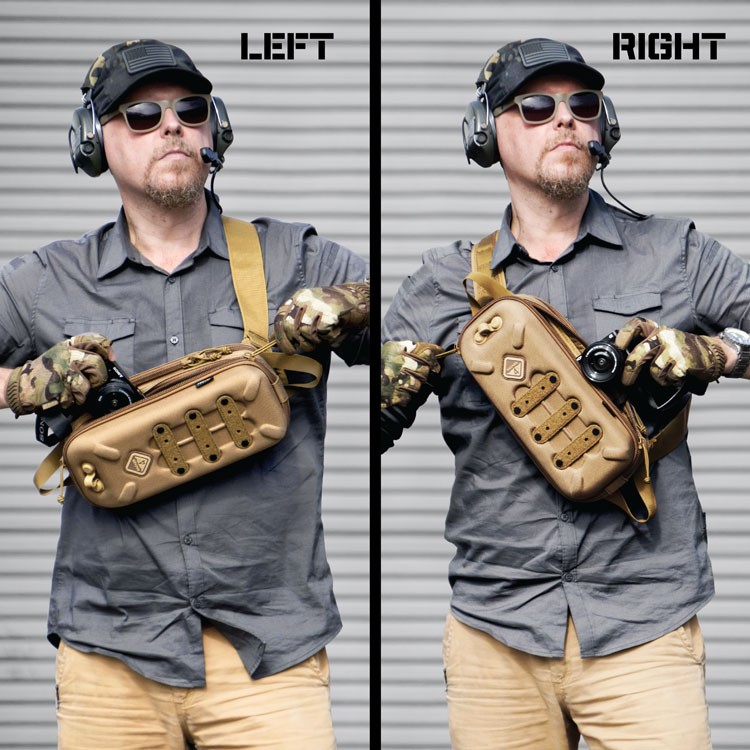
Going out on your landscape or cityscape photoshoot with just a single camera and one or two lenses, the Bandoleer™ is a small size sling pack that offers superb protection. It has a hard molded shell and numerous HardPoint™ mounting points for carrying extra items like lights, pouches, and so forth.

You strap it on with the patent-pending auto-shift ambidextrous shoulder strap that allows for ambidextrous placement. The zippers and pockets can also be accessed from either side. Us lefties don’t have to struggle any longer!
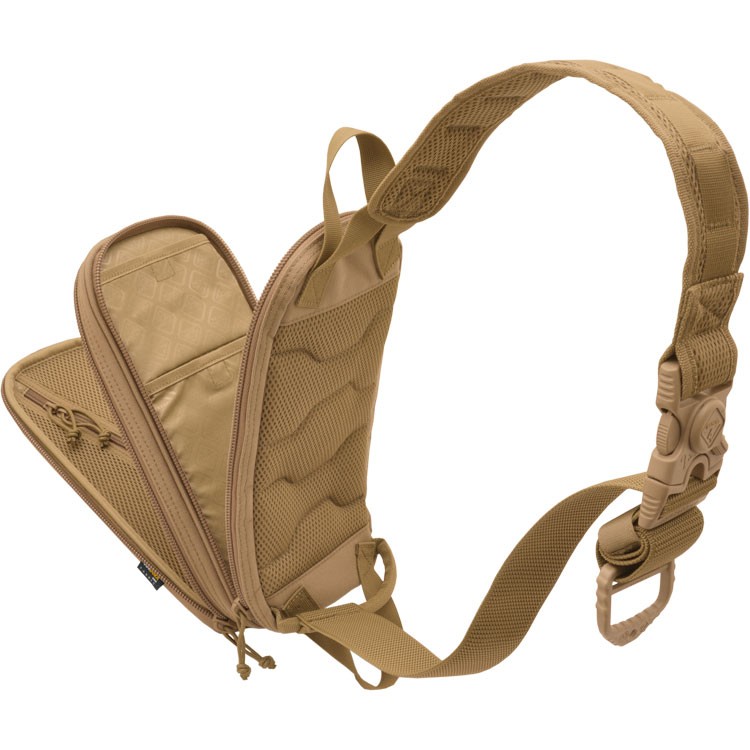
Inside is padded material and military modular webbing that holds your gear still and keeps it safe from damage. The various pockets and cubbies keep your small kit neatly organized so grabbing what you need is that much easier.
Learn more about the Hazard 4® Bandoleer™.
Photo-Recon™ - Medium Size Sling Pack
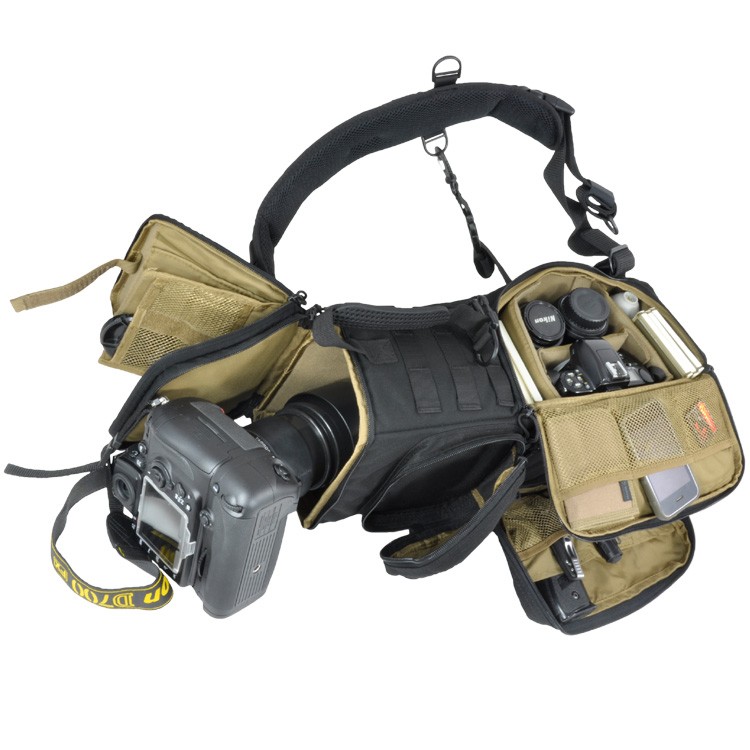
Photo-Recon™ is part of the Evac™ series of bags from Hazard 4® that is designed for quick access and ultimate protection whether travelling in a crowded subway or an ATV or a helicopter.
It has a slim design that makes it easy to maneuver in and out of vehicles or while trekking through narrow spots on a hiking trail or in a crowd.
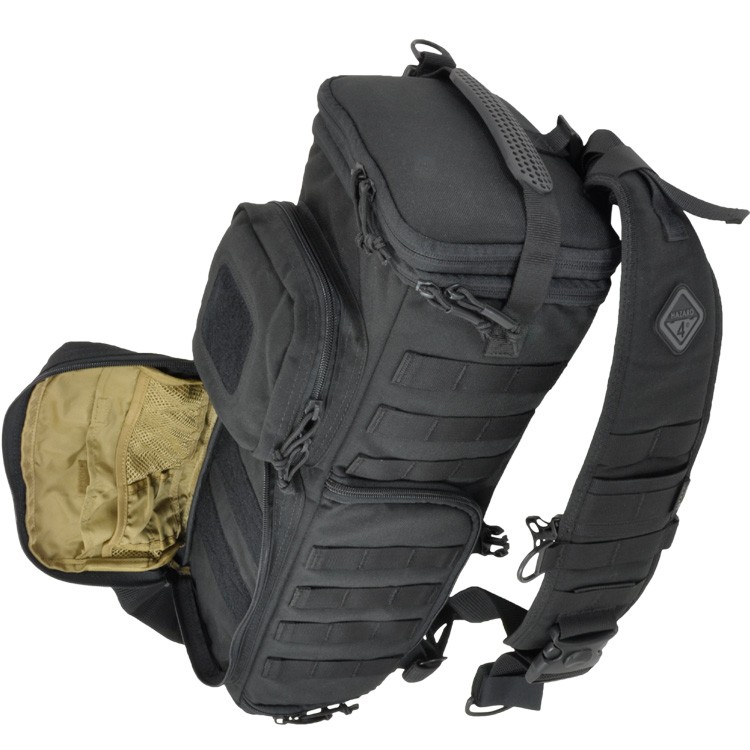
The bag is comfortable to carry on your shoulder even with a full load of gear. In use, the Photo-Recon™ can be rotated to the chest for effortless access, and all pockets are designed to face the user in this mode on either the right or left side for a truly ambidextrous capability.
Inside are padded, moveable dividers that hug your gear and protect it from harm. On the exterior you’ll find compression straps for bringing your tripod along with you.
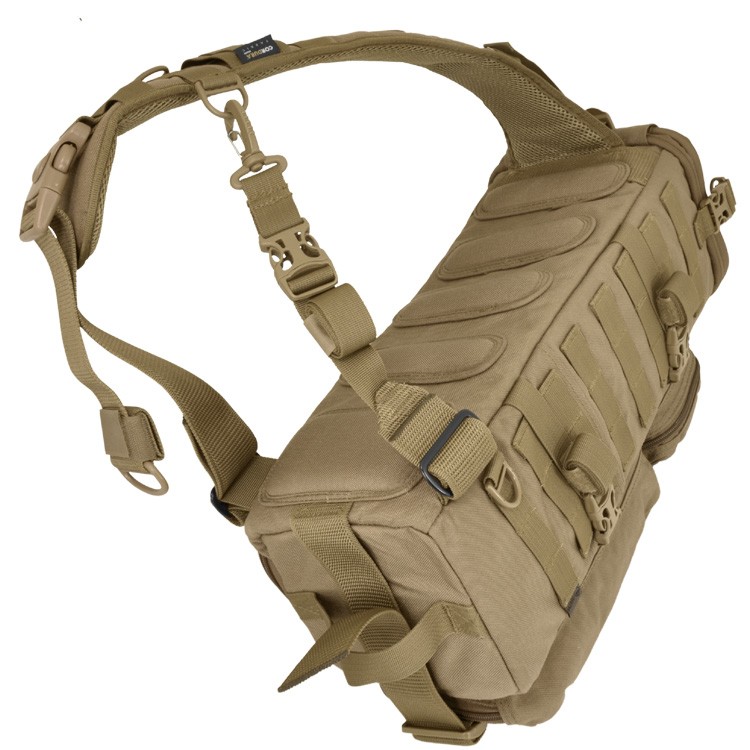
Regardless of how much gear you have in the bag, you can expect a supremely comfortable carrying experience thanks to the generously padded back with air circulation pad array and the 3-D padded shoulder strap that prevents the strap from digging into your shoulder.
If you have a medium-sized kit and need a bag that can go anywhere and do anything, this is it!
Learn more about the Hazard 4® Photo-Recon™.
Plan-B Hard™ - Large Sling Pack
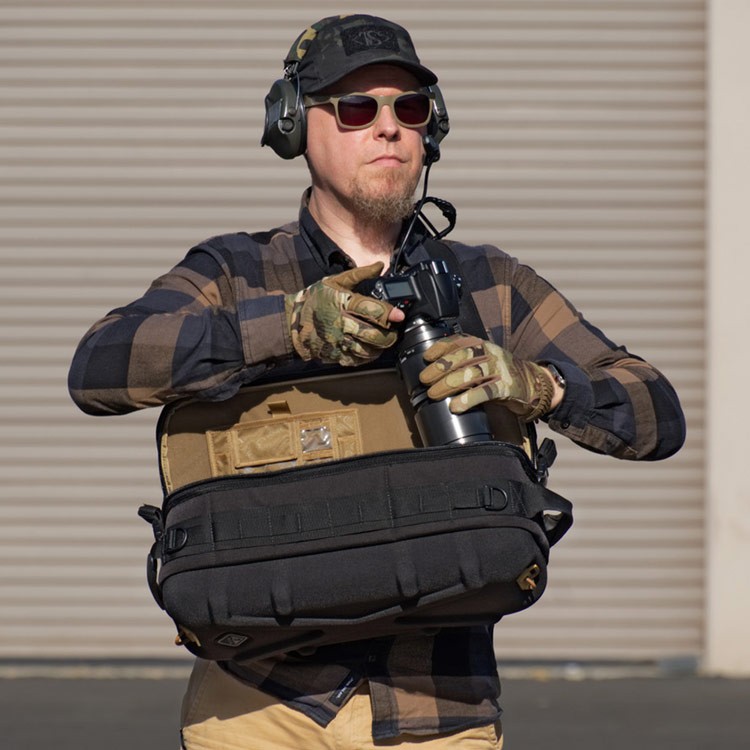
Also part of the Evac™ series from Hazard 4®, the Plan-B Hard™ sling pack holds just about all you would need photographically for a full day of landscape photography.
Though large enough to hold a huge amount of camera equipment, the Plan-B Hard™ sling pack has a slim design to make carrying it out into the field less of a hassle while not sacrificing any ruggedness and durability.
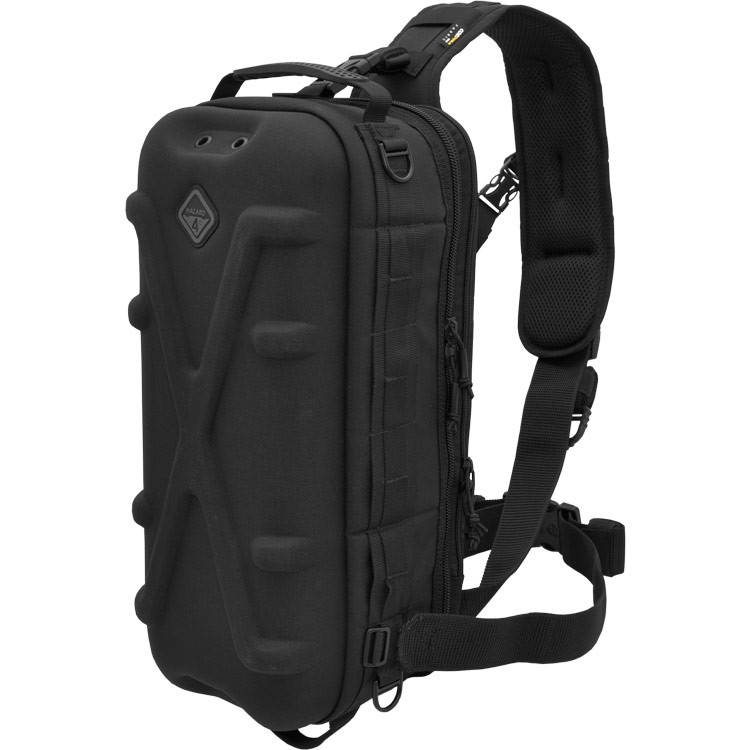
As with all of the Hazard 4® sling packs, the Plan-B Hard™ uses the best materials for rugged, wet, dirty, bumpy use. Military modular webbing (MOLLE), Hardpoint® external mounting points, YKK® zippers, and Cordura® 1000D nylon complete the package for these military and tactical grade camera sling packs.
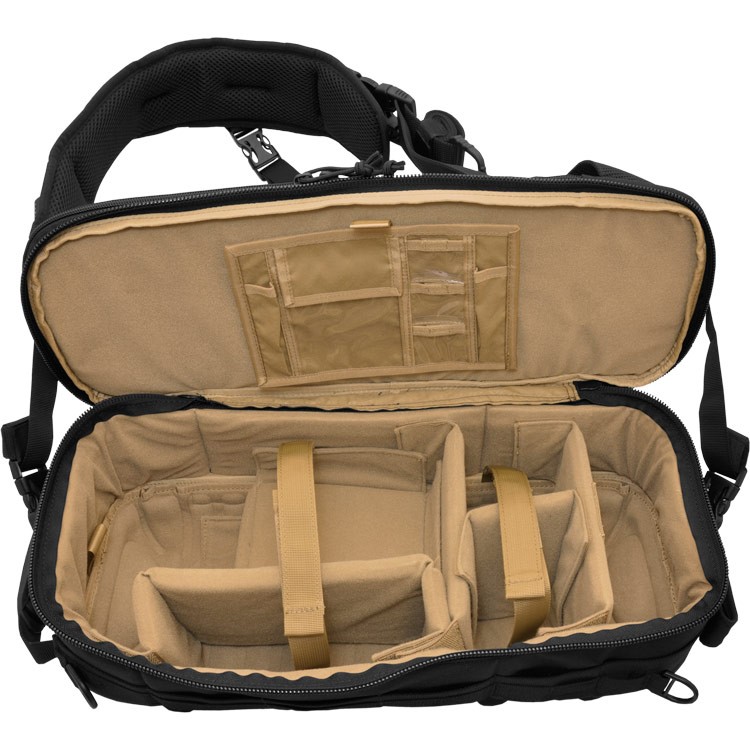
The interior space offers a photo divider system for your camera, lenses, batteries, drone, and more. In fact, there are five removable padded dividers so you can customize the carrying space.
This pack also offers the patented roto-locking buckle that keeps the bag securely on your back. And, as always, Hazard 4® has implemented a molded breathable back pad to reduce sweat and maintain comfort.
Learn more about the Hazard 4® Plan-B Hard™.
It’s a Tough Job
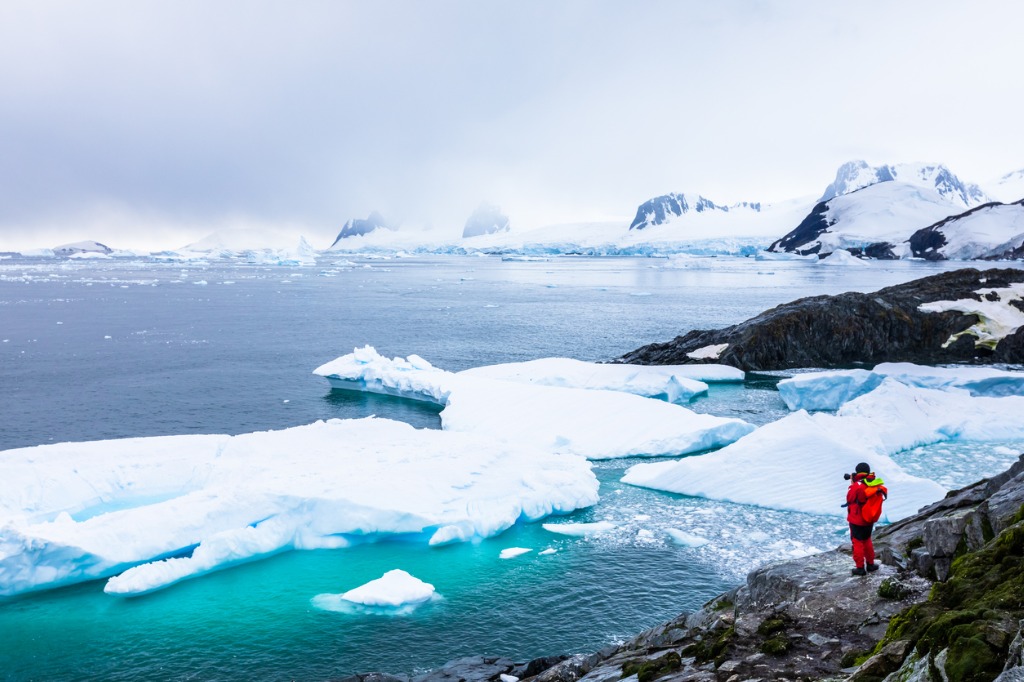
photo by NicoElNino via iStock
Landscape, urban, sports, wildlife, and wedding photography can put an amazing amount of wear and tear and physical strain on both you and your camera gear. Keeping your equipment safe, dry, and unbroken while still allowing unfettered access makes a rugged sling pack an excellent choice for carrying your camera.
Hazard 4® is one of my personal favorite brands for camera protection. They also make all sorts of other awesome gear for outdoor use. Be careful visiting their website, it’s dangerous to see so much good stuff at reasonable prices all in one place!
The Great Outdoors, whether natural or urban or somewhere in between, is full of great images just waiting for you to capture them. Make sure your gear survives the trek and that you can keep coming back for more.
Learn More:
- Rugged Camera Bags for Your 2020 Photography Adventures
- Top Software and Gear Updates That Rocked 2019
We Recommend
Top Software and Gear Updates That Rocked 2019
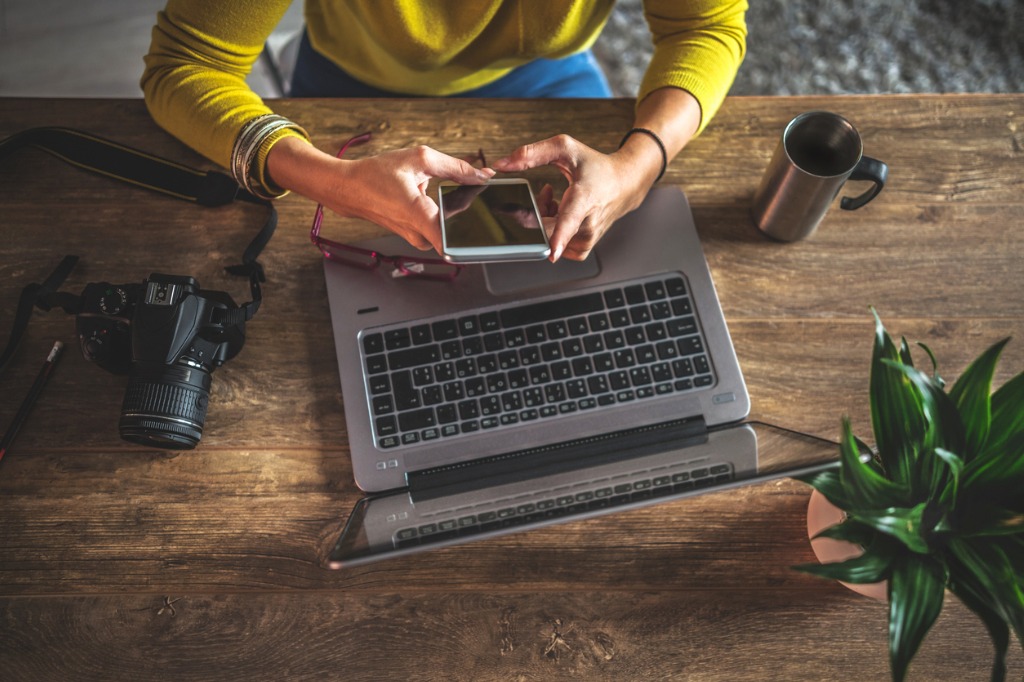
photo byzeljkosantrac via iStock
It was a great year for photography, particularly on the software and gear fronts.
From camera accessories to post-processing software, camera bags to lighting gear, we saw tons of new, updated, and innovative products and services come to market in 2019.
It would be impossible to review everything that rocked the photography world this year, so we’ve done the next best thing and outlined more than a dozen of our favorite updates below.
Luminar 4
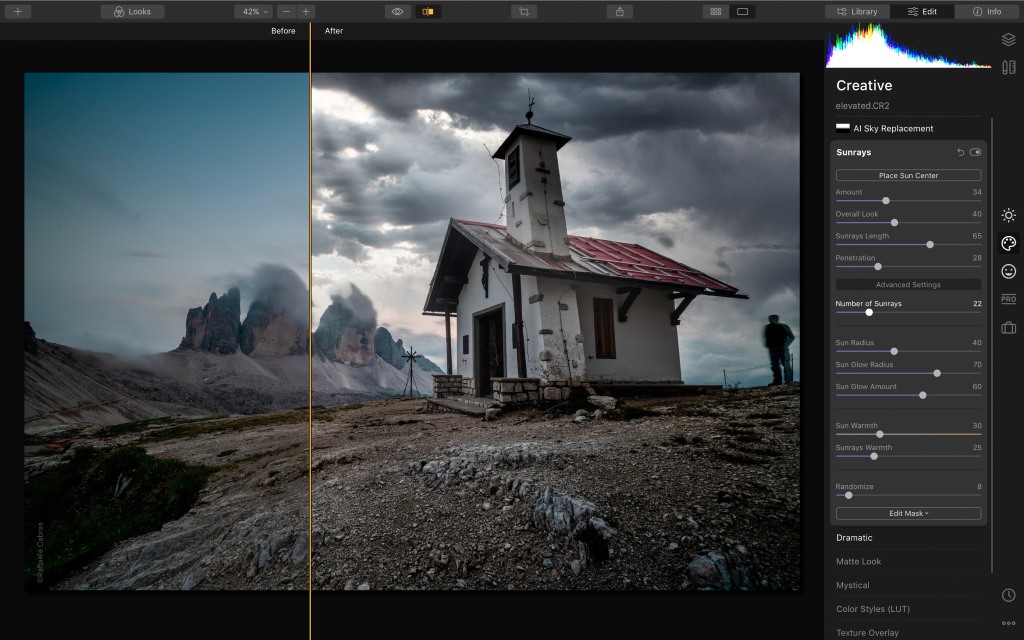
I’ve been a big fan of Luminar going back to when it was called Luminar 2018. And when Luminar 3 came out, I got my copy and began enjoying it immediately.
Now Luminar 4 is here, and with a host of improvements and expanded capabilities, it is the best Luminar yet.
If you’re unfamiliar with Luminar, let me give you a quick overview…
It’s chock-full of revolutionary tools that help you create better photos, faster.
That’s thanks in large part to artificial intelligence that drives easy-to-use tools that streamline your workflow yet still give you pinpoint control over how your images look.
Joining tools like the Accent AI Filter and the AI Sky Enhancer from Luminar 3 is a suite of new AI-powered tools that take image editing to a whole new level.
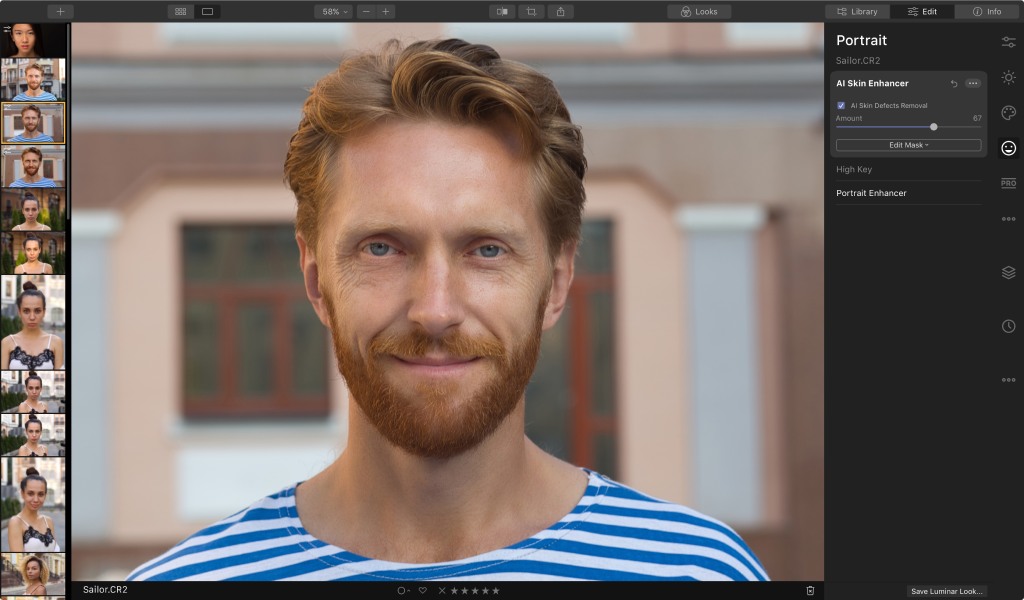
For portrait enthusiasts, the AI Skin Enhancer and Portrait Enhancer tools will revolutionize the way photo editing is done.
Using human-aware technology, the AI Skin Enhancer detects all the skin in a photo, smooths it out, removes blemishes, and does so while preserving the texture of the skin, pores, and hair.
It takes just one click to apply the Skin Enhancers edits, and then with a single slider you can adjust its strength for a picture-perfect result.
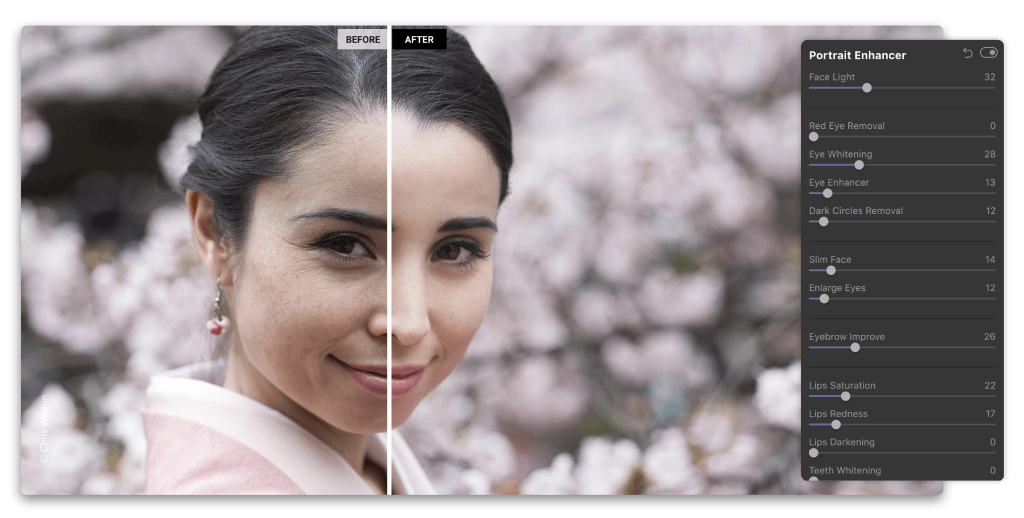
The AI Portrait Enhancer gives you a host of tools to quickly and easily make detailed changes to portraits, like whitening teeth and eyes, removing dark circles under eyes, and removing red eye, just to name a few.
In all, the Portrait Enhancer includes twelve revolutionary tools that turn editing portraits into a process that takes a minute or less!

Luminar 4 has some goodies for landscape photographers as well.
Primary among them is the AI Sky Replacement tool.
As its name suggests, this tool replaces the sky in your photos automatically - there’s no masking or selections to be made on your part.
The selection algorithms work so well, in fact, that it knows to exclude leaves, grass, and animals from the sky selection.

Not only that, but this tool relights the entire image, that way the foreground matches the brightness of the new sky.
It’s advancements like this that make Luminar 4 one of the most powerful, easy-to-use editing programs on the planet today.
Need more convincing? Get Luminar 4 today and see for yourself!
Hakutatz Pocket Size RGB+AW LED Light

Gone are the days when you have to lug around huge lights to get the key light or fill light you need for awesome portraits.
Instead, companies like Hakutatz have developed powerful pocket-sized LED lights that give you the power to customize the type of lighting to your specific needs.

This particular light has RGB, amber, and white LEDs, so you can add accent colors to your photos and videos or dial in the ideal white balance by using the amber or white lights.
This light is completely adjustable, with controls for saturation, brightness, and color temperature. Better still, you can adjust the light’s settings via a well-designed and user-friendly smartphone app.
That means that with a simple touch or a swipe of your finger, you can fine-tune everything from the RGB color to special effects. You can even control multiple lights at the same time right from the app. No wonder their Kickstarter campaign was such a huge success!

Hakutatz literally puts the power to dial in complex lighting schemes in the palm of your hand, and does so in a way that’s clean, simple, and super functional. That’s by this little light rocked the photography world in 2019!
Be on the lookout for Hakutatz’ online store to have these lights in stock in December!
Learn more about the Hakutatz Pocket Size RGB+AW LED Light
Hazard 4® Cyclone™

Framing shots with your action cam in direct sun can be frustrating; glare in your eyes and the camera’s tiny, reflective screen are really fatiguing. Blowing sand, water or snow don’t help. But the best action is shot outside - Cyclone™ is the first real solution.

This patent-pending optic blocks the sun, but it’s lens also magnifies the screen and protects it. You effectively add mirrorless camera style composition and review to your tiny affordable GoPro or DJI action cam that survive where real mirrorless can’t. Better still, the viewfinder mounts to your action cam’s bottom screw in seconds, so there is no fumbling. But you’ll probably choose to keep it on since this little guy doubles as a tiltable handle - keeping fingers out of frame and for extension. With cheap additional hardware you can even head mount it for hands-free composition while biking, paragliding etc, and it tilts out of the way at will.


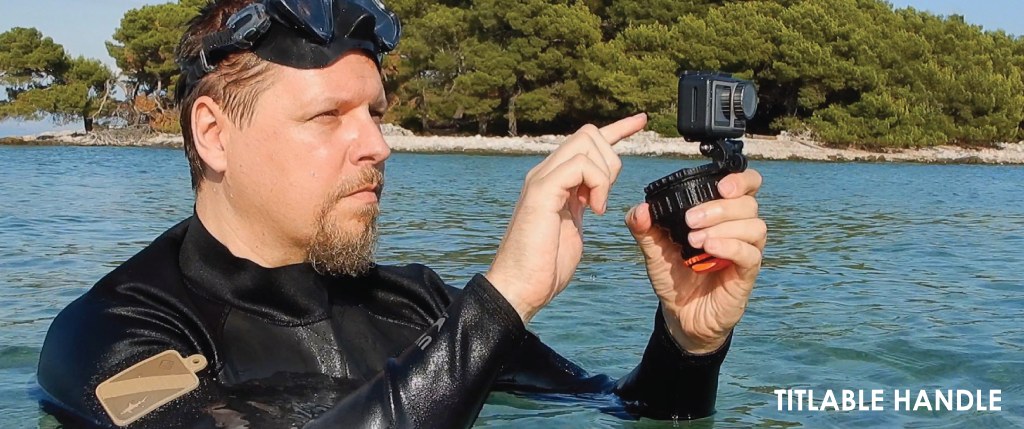
The simple, waterproof, tough, design accordions flat for easy portability and flattened can be a selfie mini tripod. It has diopter focus - even helping out ageing eyes. The high-vis cap self closes to protect the lens. And you get a tether loop action cams don’t include.

Hazard 4® has a reputation for innovating outdoor photo accessories; the Cyclone™ is no exception. As usual they have gone above and beyond to design a multi-functional, easy to use bombproof solution to a common video shooter problem. Perhaps this may push GoPro® or DJI® to finally up the resolution on their LCD’s under magnification and drive the mirrorless wars into the action cam space. Either way, you don’t have to rely on the wide angle lens for your framing anymore- you can actually compose like a pro.
This device is currently on Kickstarter, with a fund date of January 7, 2020. Head over to Kickstarter now to learn more about this device.
The Camera Pack by Nomatic and Peter McKinnon
Billed as a “functional camera pack for all types of travelers,” the Camera Pack by Nomatic and Peter McKinnon is certainly worthy of inclusion on this list.
The Kickstarter campaign to fund this pack had a goal of $100,000. It raised nearly $2.3 million. That speaks to the reputation of Nomatic and Peter McKinnon!
This bag is ridiculously well designed and has a functionality level that’s off the charts.
It’s designed to cure the woes of travel photographers who have to have one bag for their gear and another bag for their personal items.
The Camera Pack solves this problem by having a clothing side and a gear side which are separated by an interior panel. This keeps everything neat and tidy so you aren’t rifling through the entire back when you need something.
Better still, the bag has a “Cube Pack” inside, which serves as the ideal organizational module within the interior ecosystem. However, as the gif below shows, the Cube Pack converts to a daypack, so if you need to run and gun a little, you don’t have to take the larger Camera Pack with you. Ingenious!
Overall, the Camera Pack can hold 35 liters of gear, but can be expanded to accommodate up to 42 liters of gear. That’s a lot of stuff! And with a full clamshell opening, you can see all the gear you’ve stowed away with ease.
And everything is neatly organized thanks to a main camera compartment with moveable interior dividers. There’s a sleeve for your tablet, pockets for your camera accessories, and quick side access for easy retrieval of gear, too.
On the clothing side, there’s compression cubes for your clothes, compression straps to keep everything where it should be, and more pockets for smaller items.
This is just a really well designed and impeccably built backpack. And with the input of a photography expert like Peter McKinnon, you know that it’s been designed with photography needs in mind.
Learn more about the Camera Pack by Nomatic and Peter McKinnon
GearFocus.com
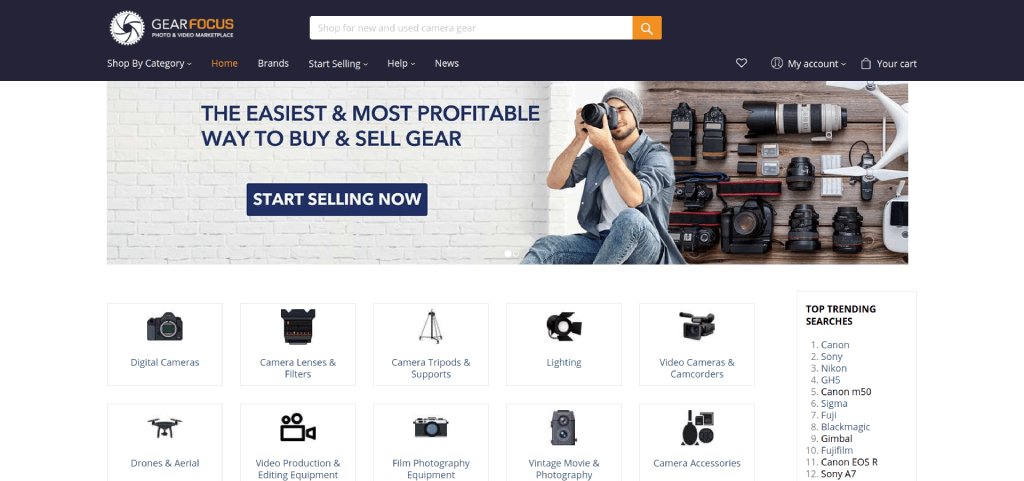
If you buy and sell your used photography gear on places like Craigslist, you’re doing it all wrong.
That’s because there are much better alternatives that take the hassle out of buying and selling used gear. GearFocus.com is certainly one of the best.
One of the top reasons GearFocus makes our list of the Top Software and Gear Updates is because they focused on building a community where people like you and I can buy quality used gear and get fair market value for stuff we sell.
Unlike other used gear sites, GearFocus doesn’t take a giant chunk of your profits when you sell your gear. Instead, they offer the lowest seller fees among B2C and C2C marketplaces, which means more money in your pocket when your item sells.
Additionally, GearFocus ensures each transaction is safe and secure by screening and monitoring every single post and transaction. Gear Focus was made by creatives, for creatives and they’ve been in this business long enough to be able to spot suspicious listings and red flags from a mile away. Without scammers creating fake listings, the buying and selling experience is enhanced so you can get the best deal on used gear and the most money for the items you sell.
Heck, they’ll even intervene on your behalf if something goes wrong! Having that kind of peace of mind alone is enough to land these guys on this list!
It’s not often that you find companies like this that prioritize community building and supporting one another over making a buck. That focus on customer service is just the icing on the cake for patrons of GearFocus. They are here to help FEED YOUR PASSION!
Learn more about GearFocus.com
Litra Studio
To say that the Litra Studio is powerful is an understatement.
Weighing in at just 33.5 ounces and measuring 5.5" x 3.9" x 2.9", the Litra Studio is certainly easily transported without taking up a ton of space in your camera bag.
But don’t let its small size fool you - this light can produce over one million unique colors that will help you light up your portraits and videos.

The Litra Studio can produce up to 3,000 lumens of continuous light and up to 6,00 lumens of flash. In CCT mode, you get 2,000-10,00K adjustable bi-color lighting with green and magenta color shift controls to allow for tunable blue and green screen optimization.
On top of that, this light is fully tunable and dimmable, and offers CCT, HSI, RGBWW, gel presets, flash modes, and effects, too.

The light it produces is clean and flicker-free at all shutter angles. The CRI and TLCI of 97 speak to its impeccable color accuracy.
Litra even made sure this light is rugged and durable. It’s waterproof, has highly efficient passive thermal management, and offers up to 20 hours of battery life on the low setting.
That makes this a go-anywhere, do-anything light that made huge waves in the photography world this year.
Learn more about the Litra Studio
GoPro HERO 8

While the GoPro HERO 8 doesn’t boast any major updates, it does represent a culmination of a wide range of smaller updates that, taken together, make it the best GoPro thus far.
In fact, I’d say this is the most innovative and user-friendly GoPro yet.
It has built-in mounting pins so you can directly mount the camera to accessories rather than needing a frame to do so.

There are built-in digital lenses for multiple field of view settings from Narrow and Wide to Linear and Superview. The camera’s physical lens cover is not not removable and it twice as strong as those found in older models.
Also on the ease-of-use front are numerous capture presets that allow you to create and save popular types of videos. SuperPhoto, which is GoPro’s version of HDR, gets a refresh that results in improved image quality as well.
The GoPro HERO 7 debuted incredible image stabilization with HyperSmooth, and the HERO 8 builds on that with even better results with HyperSmooth 2.0.
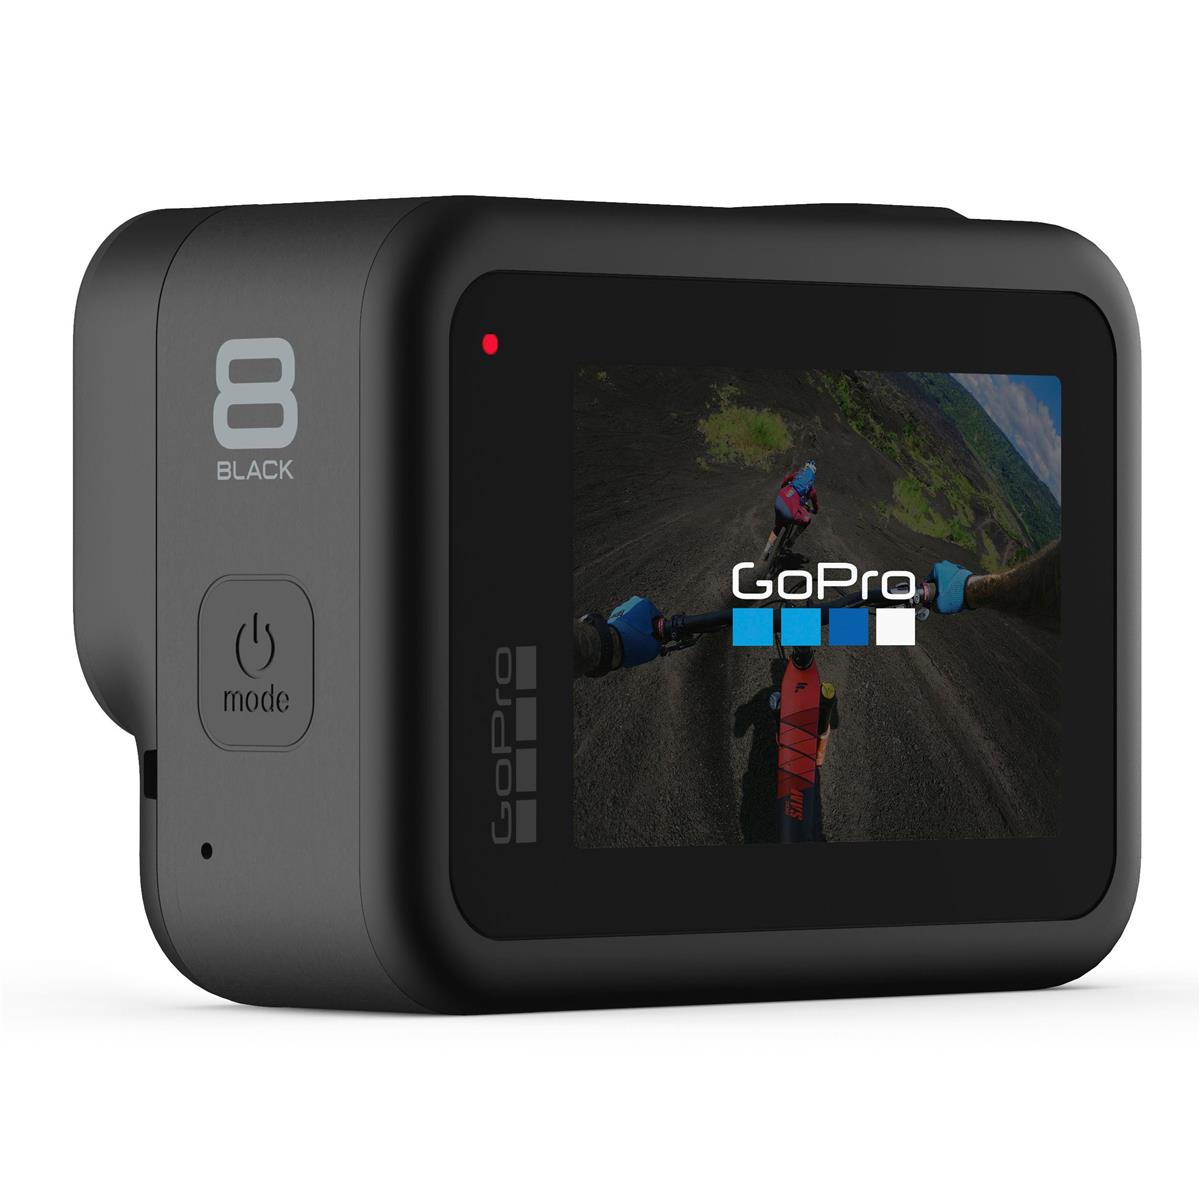
The HERO 8 also gets upgraded TimeWarp features, including an auto mode that uses sensor to detect motion and adjust the recording speed accordingly.
The camera also has improved photo-taking capabilities with face detection, smile detection, and blink detection functions, as well as LiveBurst mode for taking 1.5-second-long images before and after the shutter button is depressed.
Add in built-in GPS, motion sensors, live streaming capabilities at 1080p, 4K video at 60fps, and a host of mod accessories to expand the camera’s capabilities, and it’s no wonder that this rig set the photography world on fire in 2019!
Learn more about the GoPro HERO 8
Aputure 120D II

As far as studio lights go, it’s tough to beat the quality lights that Aputure puts out.
And at the top of their lineup is the 120d II, a light I reviewed earlier this year and was very impressed with.
This light is 1000-watt tungsten equivalent, so you get plenty of brightness for your studio work. It’s fully dimmable, too, and has a CRI and TLCI of 97+. That kind of quality light is a must-have for discerning photographers.
Aputure also included a variety of built-in lighting effects so you can dial in custom looks for your images. With this light, there’s nothing stopping your creativity!

But what’s really impressive about the 120d II is what’s “behind the scenes.”
It has an integrated power and control box, which keeps clutter to a minimum in the studio. Any studio photographer will appreciate that!
What’s more, it has an 18dB quiet fan, which keeps that annoying “whooshing” sound to a minimum so you can concentrate more thoroughly on getting killer shots.
Add in the fact that this light is 25 percent brighter than its predecessor and that it has DMX controls, a wireless remote, and excellent portability, and you have the makings of a top light for your photography studio.
Learn more about the Aputure 120d II
Exposure X5

Exposure X5 is yet another software update that sent shockwaves through the photography world in 2019.
Its predecessor, Exposure X4, was highly functional, user-friendly, and super powerful, so it was hard to imagine how the folks at Exposure could make X5 better. But they did.
For starters, Exposure X5 has custom camera profiles that allow you to control how the software interprets color from RAW files. These profiles (created by X-Rite, among others) can be applied automatically by matching the serial number of your camera or by using the camera model. Furthermore, these profiles can be matched to a specific lens or ISO range.
You get advanced chromatic aberration correction in X5 too. This allows you to remove unwanted artifacts using lens profiles, or you can remove them by making manual adjustments if you prefer.
There’s also a new fringe removal tool, so X5 makes getting rid of chromatic aberrations easier than ever before.
There are a host of other new features too.
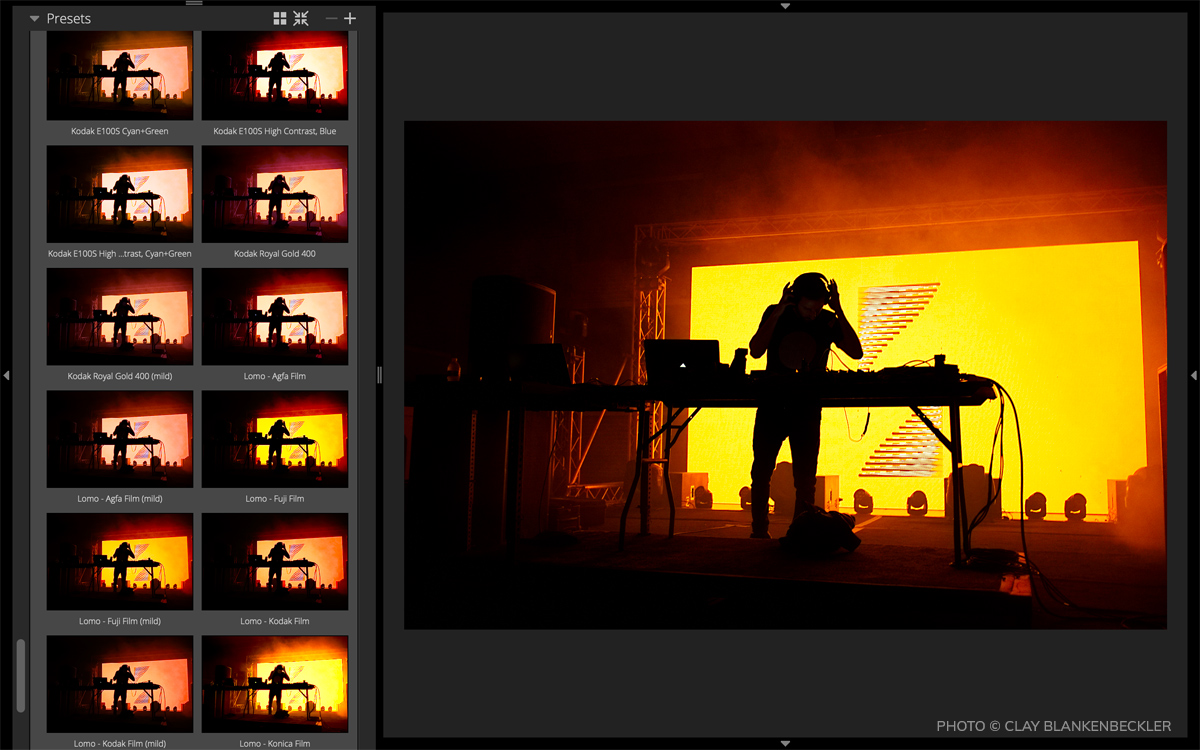
Exposure X5 includes new complementary color presets, new season-inspired looks, and new light and airy presets that give you expanded creative potential when editing your photos.
There are more black and white film options than ever before, support for grayscale TIFF and JPEG images, and new image flip options too. Exposure X5 also has multiple language options, including English, German, and French.
But for me, the best new feature in Exposure X5 is 3D color masking.
Basically, you can use this tool to make incredibly precise selections for applying adjustments to your photos. You can see it at work in the video above.
This fine level of control is made possible by using specific color characteristics (hue, saturation, and luminance) to define the adjustment areas.
What this means is that you can quickly and easily target specific areas for color masking, like the sky in a landscape photo or skin tones in a portrait. This is all done with just a few clicks.
Exposure X5 is powerful, easy to use, and incorporates tons of new features that make it the best Exposure software to date. If you’ve never tried exposure, give it a test-drive for free.
Holdfast Tanker Belt

I’ve been a Holdfast customer for a long time, and what initially drew me to them was the absolutely outstanding build quality of their products.
They use only the finest materials - things like full-grain leather and stainless steel - so when you buy a camera strap or harness or bag, you get something that is durable and will last you for years.
But as the years have gone by, I’ve come to appreciate more and more the sheer innovation that these guys display when developing new products. That being the case, I had to include Holdfast on this list of the best gear updates of the year.

One of Holdfast’s latest products is the Tanker Belt, which changes the way you carry your gear.
It’s actually two belts in one, the first of which cinches around your waist like a normal belt and the second, outer belt, which forms loops for attaching your gear.
This ingenious design means the belt stays put (as do your pants) while maximizing the amount of gear you can carry around your waist.

There are three D-rings on the belt for attaching things like your keys or a wallet, and the D-rings are moveable, so you can customize precisely where your items hang on your waist.
And, as you’d expect with Holdfast, this belt looks and feels like a million bucks - it's gorgeous handmade leather is something to behold!
Better still, the Tanker Belt was designed with functionality in mind, so it’s compatible with a wide range of Holdfast products.

You can attach the Ranger Leash to the belt and take Fido for a hands-free walk, or you can add a cell phone pouch and keep your smartphone safe and secure and out of the elements.
Add a lens pouch or two (small, medium, or large) so you have extra glass for your next shoot too!
With sizes from 28-inches up to 44-inches and multiple colors (black, tan, chestnut, and burgandy), you can customize the Tanker Belt to your specific needs and tastes.
Learn more about the Holdfast Tanker Belt
Panasonic 10-25mm f/1.7 Lens
I picked up a Panasonic GH5 earlier this year, and it quickly won me over with its astonishing video capabilities.
It wasn’t until recently, though, that I got to test out the Panasonic 10-25mm f/1.7 lens, and I have to say, I wish I would’ve gotten my hands on it a lot sooner! This is a fantastic lens, to say the least.
You can get some of my thoughts on this lens in the video above, but I want to expound on its features a little bit more.
Make no mistake - this is a gigantic lens, especially for a micro four-thirds camera. Fortunately, it’s not hard to handle at all, and despite its footprint, it’s actually not all that heavy.

But it’s massive size means that Panasonic was able to cram lots of goodies inside to help you get superb images.
This lens is supremely sharp, beautifully responsive, and gets you clean, crisp images each and every time. Its bokeh is buttery smooth and there’s wonderful brightness throughout its aperture range.
It has 17 elements in 12 groups, including three aspherical lenses and four extra-low dispersion elements which work to all but eliminate spherical aberration, distortion, and chromatic aberration. The result is images with impressive quality.
But where this lens was a game-changer in 2019 was in its video capabilities…

It’s compatible with up to 240fps high-speed sensor drives and offers silent operation thanks to the inner focus drive system and the de-clicked aperture ring.
The focus clutch is a nice touch as well, as it enables instant switching between autofocus and manual focus as well as improved accuracy when manually focusing.
With next to zero focus breathing, a micro-step drive system that accommodates brightness changes when panning and zooming, and Leica build quality, this lens certainly doesn’t disappoint!
Learn more about the Panasonic 10-25mm f/1.7 lens
Sony a7R IV

When the Sony a7R IV was announced earlier this year, it set the internet on fire with news of its massive 61-megapixel sensor. And while the sensor is impressive, it’s just the beginning of the impressive specs of this camera.
Paired with a BIONZ X image processor, the a7R IV’s back-illuminated sensor is capable of rendering images that are beautifully crisp.
You get an eyeful of all that beauty with the brand-new UXGA OLED Tru-Finder viewfinder, which has a whopping 5.76-million dots of resolution for a clean, bright, detailed look at what you’ve framed up in the shot.
This camera has a native ISO range of 100-32000 for low-light shooting, and with 15-stops of dynamic range rendering, you’ll have no problem getting tons of details in the shadows and the highlights.
Of course, the a7R IV carries on the Sony tradition of excellent autofocusing, with an ultra-fast hybrid AF system that has 567 phase-detect AF points to give you quick and accurate autofocus tracking.
Throw in UHD 4K video at 30p, Real-Time Eye AF tracking, 10fps shooting, and a bevy of other features, and you can see why the Sony a7R IV was one of the best gear updates of 2019.
Learn more about the Sony a7R IV
Haida M10 Filter System

The Haida M10 filter system is something I’ve been testing as of late, and I have to say that I’m impressed with this system.
Like the other products and services on this list, I’ve found numerous innovative and unique features that compelled me to include this product on this list.
Haida is a great value for the money with well-built components that show an attention to quality and detail that many filter companies just can’t match.

I have multiple components in my kit - the M10 filter holder, a circular polarizer, a couple of solid ND filters, and a soft-edge grad (shown above) - but you can also buy complete kits of varying sizes, including their Master Filter Kit, their Professional Kit, and their Enthusiast Kit, if you’d rather go that route.
Either way, I think you’ll find, as I have, that the Haida system is one that enhances your ability to get quality shots.
The aluminum alloy filter holder can accommodate two 100mm filters, but it can expand to include a third slot if needed. The Haida filters are made of shock-resistant optical glass and features 10 layers of anti-reflective nano coating and 10 layers of scratch and water resistant coatings.

The holder rotates a full 360-degrees, which is enormously helpful for getting just the right positioning when using graduated ND filters.
I also like the fact that Haida incorporated gaskets in the filter slots to help prevent light leaks. They even include a “dummy” filter housing that can be dropped into the filter if you’re shooting without the circular polarizer in place. Again, this helps prevent light leaks so you get a cleaner exposure.
The pinch and pull system for adding and removing filters make using this system super easy, as do the rounded edges of the rectangular filters - they’re much easier to slide into the filter holder without sharp edges.
This is just a well thought out system for beginners and enthusiasts alike!
Learn more about the Haida M10 filter system
Sony a6600

Though the Sony a7R IV probably got more attention, the Sony a6600 is certainly not something to forget about…
With a much smaller price tag than the a7R IV and more applicability for more photographers, the a6600 rocked our world this year by bringing many flagship features to a mid-range camera.
Its 24.2-megapixel Exmor CMOS sensor is ideal for capturing beautifully resolute images while the native ISO range of 100-32000 gives you excellent low-light shooting capabilities with reduced noise.

As I get more into video creation, I appreciate the fact that this camera sports UHD 4K video capabilities that can be internally recorded in XAVC S format.
The five-axis image stabilization is a dream, giving you five full stops of stabilization, while the weather-sealed construction means you can head out in adverse weather with less worry about what will happen to your camera.
With additional features like a beautiful XGA OLED Tru-Finder viewfinder, a tiltable LCD monitor, 11 fps continuous shooting, and much more, this camera is certainly worthy of the title of gear that rocked 2019!
Learn more about the Sony a6600
RODE Wireless GO

A final product I wanted to mention on this list of the top software and gear updates is this handy little guy, the RODE Wireless GO.
This wireless system automatically pairs in just three seconds and transmits via RODE’s new Series III digital transmission system. It’s a 2.4GHz system that’s optimized for short-range operation, particularly in environments in which there is a lot of RF and Wi-Fi interference. It also offers line-of-sight range of up to 70 meters.
You also get broadcast-grade audio thanks to the built-in condenser mic’s superb isolation and transparency. Alternatively, you can use it with a lavalier mic using the 3.5mm TRS input.
Additionally, the Wireless GO system operates up to seven hours on a full charge, and since the unit is so small and compact, it’s super lightweight and portable.
You can even use up to eight systems in one location if you have the need!
If you’ve ever used a ROD mic before, you know they’re some of the best in the business. The RODE Wireless GO is certainly no exception!
Learn more about the RODE Wireless GO
We Recommend
Top Unusual GoPro Accessories
 Photo by lzf via iStock
Can you believe it's been 15 years since the first GoPro went on the market?
Crazy, right?
In the decade-and-a-half since, GoPros have become the most recognized action camera in the world. Their durability, functionality, battery life, and other features have made leaps and bounds over the years to make GoPros fully-featured video and still cameras.
What's also changed a lot is the accessories you can buy for GoPros. It used to be a selection of suction cup mounts and harnesses. That's no longer the case.
So, I thought I'd take a look at some of the unusual GoPro accessories on the market that make GoPros even more functional.
Table of Contents
- Hazard 4® Cyclone™
- Octopus.Camera OctoPad
- Handlepod 3-Axis Action Cam Mount
- LitraTorch 2.0
- GOWORX GoKnuckles
- Wiral Lite Cable Cam System
Hazard 4® Cyclone™
As much as GoPros have improved over the years, there is no denying the tiny, ultra reflective screen. That glare in the sun makes it annoying to compose your shots, and can cause significant eye strain too. Throw in blowing water, sand, or snow, and you have a situation in which it's virtually impossible to see what you're framing up.
But now there's a real solution to this issue - the Hazard 4® Cyclone™ optical viewfinder.
Not only does this patent-pending device block out the bright sun so you can actually see the GoPro's screen, but it magnifies that small screen to give you a better look at the details.
Additionally, the Cyclone™ protects the GoPro screen from the elements, avoiding scratches and other damage that makes the screen even more difficult to see.
Speaking of the elements, it’s waterproof in rain or snow, and durable for a go-anywhere addition to your GoPro.
Hazard 4® took care to design this device in a way that it is easy to mount to your action cam. It takes just seconds to mount it to your GoPro's bottom screw, enabling you to quickly review the scene and get your shots without missing any action.
What makes the Cyclone™ unusual is that it isn't just a viewfinder.
Instead, you can tilt it downward and use it as a handle, which keeps your fingers out of the frame so you can get clean, unobstructed shots. And with an inexpensive add-on, you can head mount the Cyclone™ for occasions when you need your hands free.

It collapses down for transport. Heck, this thing can even be used as a mini tripod if need be!
With a diopter focus for getting a crystal-clear view, a tether loop for keeping this gadget close-by, and a high-vis, self-closing cap to protect the lens, the Cyclone™ just doesn't quit with innovative and unusual features that greatly increase the functionality of your GoPro.
Learn more about the Hazard 4® Cyclone™
Octopus.Camera OctoPad

One of the most interesting and unusual GoPro accessories I got my hands on this year is this little fella, the Octopus.Camera OctoPad.
What I've found is that this gadget is a much better alternative than more traditional suction cup mounts for my GoPro.
That's because it has a weighted anti-slip mat to help keep it in place, even when the going gets rough.
In fact, I mount my GoPro to my OctoPad and put it on my dashboard to use as a dashcam, and it stays in plays - even when I go offroad.

Aside from its ability to stay put, OctoPad doesn't wither under the weight of my GoPro like some mini tripods have done in years past.
And with a 1/4-20 threaded male bolt, the OctoPad enables me to add accessories for recording videos, like my LitraTorch 2.0 (discussed below).
But the OctoPad isn't just for using with a GoPro. You can use it as a light stand, a microphone stand, a stand for your smartphone, and even as a support device for a compact camera.

OctoPad is easy to use and easy to transport, too. It takes up next to no space in my camera bag, and it has a built-in grommet for carrying it with a lanyard.
There's even a cable strap to keep your camera cables and accessory cables out of your shots. Nice!
OctoPad is durable, functional, and has tons of uses. It's also budget-friendly! If that isn't a great combination of features for a GoPro accessory, I don't know what is.
Learn more about the Octopus.Camera OctoPad
HandlePod 3-Axis Action Cam Mount

The great thing about the HandlePod 3-Axis Action Cam Mount is that you can use it in a variety of ways, depending on what the situation calls for.
It's a fantastic grip for shooting handheld video, but it also deploys as a stand to act like a mini tripod (as shown above). It even comes with an elastic cord for lashing it to objects like trees or fenceposts to get hands-free video and stills with your GoPro.
So whether you're indoors or out, stationary or on the move, the HandlePod can help you get steady and stable video with your GoPro.
Learn more about the HandlePod 3-Axis Action Camera Mount
LitraTorch 2.0

As I mentioned earlier, I often use a light with my GoPro, and that light is the tiny, yet powerful LitraTorch 2.0.
At just 1.5 x 1.5 x 1.65 inches and weighing 3.17 ounces, this is the perfect light to use with a GoPro.
In terms of portability, you just can't beat this thing!
This light has 16 LEDs that offer 100, 450, or 800 lumens depending on what you need for the shot.

Regardless of the lumen output, you’ll get clean, crisp, flicker-free light with a 70-degree beam angle. As you’d expect from Litra, this light offers a CRI of 90+ and a TLCI of 92.
You can use the light on its low setting for up to four hours or get about 35 minutes of output on the maximum brightness.
It’s also waterproof to 60 feet in case you need to do a little scuba diving, has a magnet for easily attaching to metal surfaces, and two ¼-20 mounts too.
The LitraTorch 2.0 is simply a versatile, do-anything light, and is the ideal pairing with a versatile, do-anything camera like the GoPro!
Learn more about the LitraTorch 2.0
GOWORX GoKnuckles

What might be the most unusual GoPro accessory on this list is the GOWORX GOKnuckles pictured above.
This unique handheld mount certainly won't go anywhere thanks to its interlocking design.
The patented design connects with your fingers so you get reliable and secure hands-free performance while you're skiing, paragliding, snorkeling, skating, and so forth.
The durable rubberized plastic construction is safe in fresh and saltwater, sand, snow, and other elements.
You can use the mount on either hand for low-profile, hassle-free performance with your GoPro.
And since it's just 5.5-inches long and weighs 3 ounces, it's a GoPro accessory you can easily throw in your camera back and take on every adventure!
Learn more about the GOWORX GoKnuckles
Wiral LITE Cable Cam System

Another one of my favorite and unusual GoPro accessories is the Wiral LITE Cable Cam system.
Cable cam systems aren’t anything new, but what makes this one so unique is how small, lightweight, and easy to set up it is.
In fact, one of the most unusual features of this rig is that it takes about three minutes to set up. Crazy!
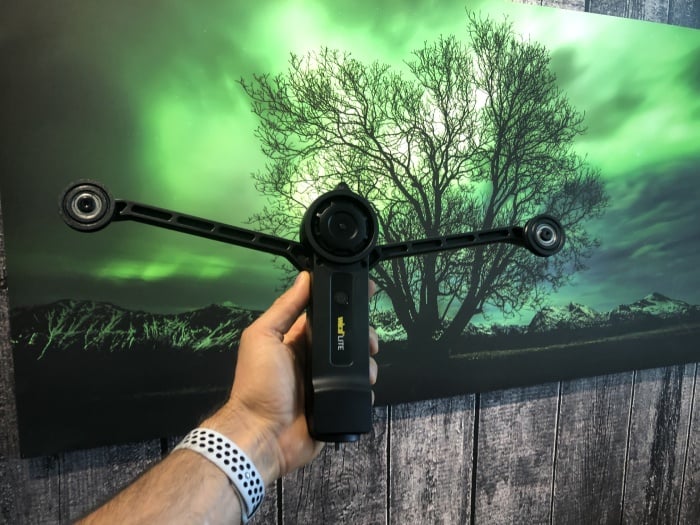
The Wiral Lite includes just three components - the main unit (shown above), the remote control, and the quick reel rope system.
The whole thing is tiny and super portable, so it's easy to take along with you on your adventures with your GoPro.
It has a payload of up to 3.3 pounds, so it has more than enough capacity for your Hero 6, 7, or 8.
The cable itself is incredibly innovative, too.
The unit comes with 164 feet of rope (or you can get an optional 328-foot length if need be) so you can send your GoPro over just about any span you want.
The thinness of the rope is absolutely incredible - it’s just 0.1 inches thick. It can be that thin because Wiral uses UHMWPE ultra static rope that’s incredibly lightweight without sacrificing payload capacity or safety.
It really is quite a marvel, which you can see in my video above. I think we got some pretty darn good footage myself!
Learn more about the Wiral LITE Cable Cam System