A Quick Primer on How Variable ND Filters Work

Not all that long ago, I used a complete ND filter kit - I had five rectangular ND filters and a filter holder to carry around.
I’m not knocking the performance of that filter kit because it was great. But eventually I got tired of having all that stuff in my camera bag. I also got tired of constantly attaching the filter holder, unattaching it, inserting filters, swapping filters out, and so forth.
That’s when I decided a variable ND filter was the way to go.
In this article, learn what a variable ND filter is and how variable ND filters work.
What is a Variable ND Filter?

As you might have surmised already, a variable ND filter is like a bunch of ND filters in one, thus the “variable” part of its name. Like traditional ND filters, variable ND filters block out different levels of light.
Rather than having a big filter kit with various filters, each with a different degree of filtering power, a variable ND filter simply screws onto the end of your lens.
In that regard, it’s much more user-friendly, both from the standpoint of having less stuff in your bag and not having to fool around with multiple filters every time you want to take a shot.
Learn More:
How Variable ND Filters Work

The premise of how variable ND filters work is quite straightforward.
It’s able to block out light because of the manner in which it’s constructed - there’s two layers of polarized glass positioned opposite one another. The inner layer of glass is what attaches to the lens, and is fixed in place. The outer layer of glass is housed in a ring that allows the filter to rotate.
Editor's Tip: Get Kenko’s latest updates and access to promos for discounted gear. Click here to sign up.
Since it’s fixed in position, the inner layer of glass reduces light on a single plane. The outer layer, however, can reduce light to a varying degree because it can rotate. That is, the further the outer layer is rotated, the more light-reducing power it has.
In other words, as the outer layer of glass approaches a 90-degree angle to the inner layer of glass, the maximum light-reducing power is achieved.
Why Variable ND Filters are Beneficial

As noted above, variable ND filters are simply easier to use than a traditional ND filter setup.
Rather than inserting individual ND filters in to a housing, you can simply rotate the outermost layer of glass of a variable ND filter to get the desired effect.
What’s nice about this is that you can fine-tune the filtering power to a precise degree to get the exact outcome you want. That is, where a fixed ND filter has a set amount of light-stopping power, a variable ND filter gives you a range from which to choose, usually from about 1-stop to 8-stops.
As you can see above, the lens housing has markings that indicate which way to turn the filter to increase or decrease its effects.
Another benefit of good variable ND filters is that they don’t display the dreaded X-pattern that you often find in bargain variable ND filters. See how this can be accomplished in the video above by Kenko Global.
This X-pattern occurs when you push the filter too far to its minimum or maximum range, at which point the two filter elements begin to interfere with one another. This pattern can also emerge on very long exposure.
Photographers like variable ND filters because they make composing images much easier than standard ND filters do. By that, I mean that you can rotate the filter to a minimal degree of filtration, compose the shot, and then adjust the filtration to the desired level.

photo by RobChristiaans via iStock
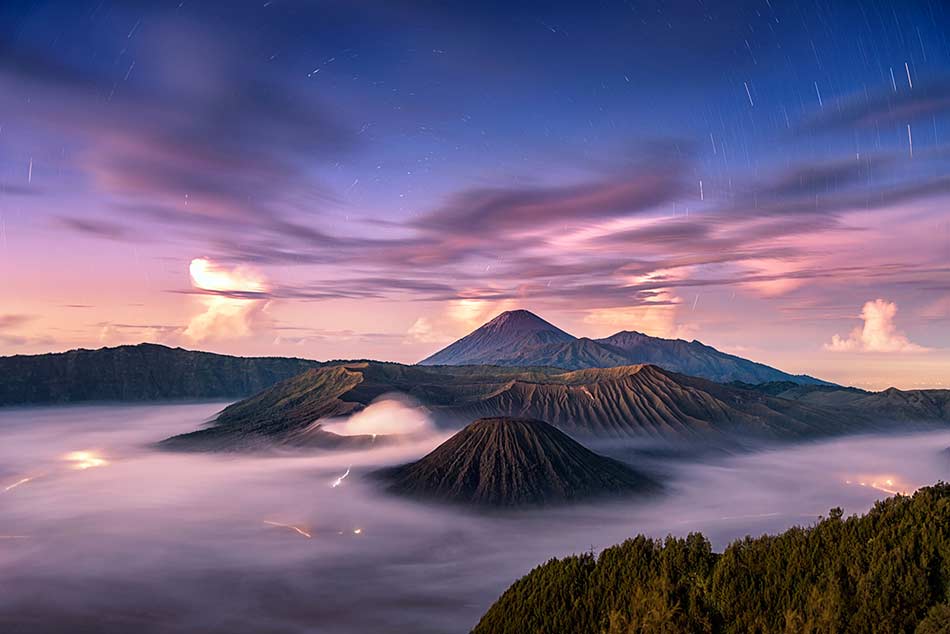
This is particularly handy when you needa lotof filtering power, like 10 stops, to create dreamy scenes like the one above. If you use a fixed ND filter, all that light-stopping power makes it virtually impossible to see the scene through the viewfinder. Granted, you can compose the shot ahead of time and then add a fixed filter, but simply being able to turn a variable ND filter to adjust it is much more convenient.
Of course, like fixed ND filters, variable ND filters offer the benefit of allowing you to slow down the shutter speed to blur motion or open up the aperture to reduce the depth of field.
These are important factors that can be used for all kinds of photography, from portraits to landscapes, street photography to action photography.
Learn More:
Invest in a Good Variable ND Filter

As noted above, good variable ND filters minimize the X-pattern you find in cheaper versions. With improved optics and build quality, higher-end variable ND filters will also last you a lot longer than some cheap thing you pick up on Amazon.
I use the Kenko Variable NDX filter, and it has been a joy, to say the least.
Like any good filter, it offers hyper-neutral results with no color casting. That’s thanks in large part to its Japanense Asahi Optical Glass and match polarization foils.

photo by miroslav_1 via iStock
I also like the fact that there’s so much variability with this filter - from 1.5 stops up to 10 stops. From slight motion blur in a waterfall to ethereal landscapes in which the rolling tide is rendered beautifully smooth, this filter can do it all!
And since it has such a wide range of filtering power, there’s no need to stack filters, and that means less vignetting for a cleaner, crisper shot from edge to edge.
Give the Kenko Variable NDX filter a try, and you’ll see that it is well worth the investment!
We Recommend
A Step-by-Step Guideline for Long Exposure Landscape Photography
When you see a long exposure image like the one above, what first comes to mind is probably how beautiful it is. Unlike a traditional image, a long exposure is much more dynamic; rather than capturing a split second in time, it gives us a view of what a landscape looks like over seconds, minutes, or even hours.
After pondering the image’s beauty, you might have thoughts about how complicated it must be to create images like that. After all, what you see in the landscape as you’re creating the image isn’t what you end up with in the final photograph. That must be hard to do, right? Learn more about the best landscape camera on our website PhotographyTalk.com.
Not so! To think that long exposure photos are overly difficult or time-consuming is a misnomer. All it really takes is good planning, practice, patience, and the right gear - things that any good photograph requires. See what I mean in my video above!
Let’s review the essential steps you need to take to create compelling long exposure images of landscapes.
Step 1: It’s All About Location

The first step in creating a gorgeous long exposure image is choosing a landscape that is conducive to this kind of landscape photography. Long exposures are ideal for conveying movement, so whatever landscape you choose, ensure that there is something in the scene that will indicate the passage of time - a river, a waterfall, waves crashing on the beach, or passing clouds come immediately to mind as ideal subjects.
Once you’ve identified a location, think about ways that you can incorporate static objects into the shot to give the moving element a greater feeling of motion. Boulders in a stream, for example, create a nice juxtaposition with the movement of the water as it rushes by. A building set in front of a sky full of blurred clouds works nicely as well.
Step 2: Consider Your Timing

Because you’ll be working with long shutter speeds, lighting is a crucial consideration for long exposures. Shooting at dawn or dusk, before the sun rises and after it sets, allows you to extend your shutter speeds to highlight the movement discussed above, but do so without overexposing the image.
Alternatively, you can use a neutral density filter to make daytime long exposures a possibility. A neutral density filter blocks out light such that you can utilize a longer shutter speed. Neutral density filters come in a variety of strengths, from those that extend the shutter speed to a few seconds to those that make hours-long shutter speeds a possibility. As a general rule of thumb, a 10-stop neutral density filter is a good starting point for daytime long exposures.
When thinking about timing, you also need to consider the best time of day or year to capture the photo you have in mind. For example, a beach shot of the waves coming in would be best at high tide, so you’d need to know the tide schedule to capitalize on that. Springtime is when most thunderstorms occur in many areas, so to get a long exposure of a passing storm, you’d need to plan to be most active during that time of year.
Step 3: Get Geared Up

Aside from a neutral density filter, you’ll need a few more pieces of gear that are essential to a successful long exposure image:
-
A camera body with the capability of long shutter speeds, including bulb mode. A DSLR or mirrorless body is a good choice.
-
A wide-angle lens, which allows you to capture more of the scene, and thus more movement as well. This isn’t to say that you can’t create long exposures with longer lenses, but wide-angles are simply preferred.
-
A sturdy tripod that will remain absolutely still throughout the exposure. A tripod with a center column hook is a great idea because it allows you to hang a bag to add weight, thereby making the tripod more stable.
-
A remote shutter release is essential because it allows you to trip the shutter without actually touching the camera. This reduces the chance of vibrations, which can ruin a long exposure photo.
Quick tip: Remove your camera strap from the camera body before mounting it to the tripod. The camera strap can catch any breeze that’s present and cause the camera to shake during the exposure.
Step 4: Dial in the Settings

This is the most complicated aspect of creating a long exposure because every situation will be different. That being said, because the shutter speed is prolonged, no matter what the situation, you’ll need to adjust the aperture and ISO camera settings to ensure you get a well-exposed image.
Minimize ISO
Generally speaking, this means using the lowest possible ISO setting (which is usually 100 or 200). Remember that ISO determines the sensitivity of the camera sensor to light, so using the lowest value means that the sensor is minimally sensitive. Additionally, by using the lowest ISO you can will minimize digital noise in the shot, which looks like grain in a photo taken with film. The less noise there is, the higher the image quality will be.
Use the Smallest Aperture Without Sacrificing Sharpness
You’ll need to step down the aperture as well. However, don’t use the lens’ smallest aperture. As you approach a lens’ smallest aperture opening, diffraction, which causes blurriness around the edges of the frame, starts to occur. Instead, opt to shoot as near the lens’ sweet spot (it’s sharpest aperture value) as you can. This is usually in the f/8 to f/11 range, which is plenty to give you a nice depth of field while maintaining sharpness throughout the photo.
Manage Movement With Shutter Speed

The movement indicated in the long exposures you create depends on the shutter speed. For greater indicated movement, use a longer shutter speed. For less movement, like in the image above, dial in a shorter shutter speed.
Of course, the shutter speed you use will depend on the subject as well. Very fast-moving subjects, like passing cars on a highway, might be blurred with just a one-second exposure. Conversely, a slow-moving stream might require several seconds just to get a little bit of movement.
The point here is that the shutter speed you use will require a good bit of experimentation. Each subject will be different, and your creative vision will change as well. Just be prepared to try a wide range of shutter speeds before you begin to get an idea of what will work best for the shot.
Shoot in RAW
Where a JPEG is a lossy format - that is, some of the data recorded from the sensor is thrown out to create a smaller file size - a RAW file maintains all the information collected by the camera’s sensor. By shooting in RAW, you’re doing yourself all kinds of favors when it comes to post-processing because you’ll have much more data to work with. What’s more, you can make non-destructive edits to RAW files, so no matter what you do in terms of processing, the original RAW file will be unchanged.
Better still, RAW files open up many more possibilities for processing. You can adjust white balance, levels, curves, saturation, brightness, and correct for lens distortion, among other things, right from the RAW editor.
Step 5: Mind the Composition

Once you arrive at your selected location, take a few moments before setting up your gear to think about the composition of the shot. This involves a number of considerations:
-
Where is the movement occurring? If you’re photographing water, take a lower shooting position such that you can incorporate as much water into the shot as possible. If you’re photographing the clouds, adjust your shooting angle such that you can capitalize on the sky.
-
What elements of interest can you include? As mentioned above, adding static elements to the shot will help enhance the feeling of movement. Look for natural or manmade objects that you can incorporate into the scene to add interest, like the dock and the boat in the image above.
-
Consider the foreground. Foreground interest will help draw the viewer’s eye into the shot. Leading lines, like the dock in the image above, are especially powerful foreground elements.
Quick tip: When composing the shot, think about how you’d compose it if it were a traditional, static image. Meaning, watch your framing to ensure there aren’t any elements like tree limbs or street signs protruding into the shot. Look at the background to ensure it isn’t distracting. Examine how any shadows fall across the scene and if they enhance or detract from the shot as well.
But, also consider how movement will occur as the shutter is open. In that regard, you have to anticipate where the object will be when the exposure ends. For example, if clouds are your chosen subject, don’t just frame the shot based upon where the clouds are at the outset - think about how far the clouds might move over the course of the exposure and frame up the shot accordingly.
Step 6: Process the Image

Though you should strive to get everything right in-camera, a little post-processing can go a long way to enhance the look and feel of your long exposure landscape images. Consider enhancing colors by boosting saturation or vibrancy. Adjust the levels and curves to create an image with a more robust dynamic range. If you find areas of the shot are too bright or too dark, try your hand at dodging and burning to create a more well-exposed image throughout. A little sharpening might be in order as well.
Ultimately, however, what you do in post-processing will be a personal preference that is as much your own creative spin on photography as it is to compose the shot in the field. Make the adjustments that you feel are necessary and create the image that you want to create. By following the steps outlined here, you’ll be well on your way to making long exposure landscape pictures that match your creative vision, whatever it might be.
We Recommend
Long Exposure Tutorial: Beach Photography
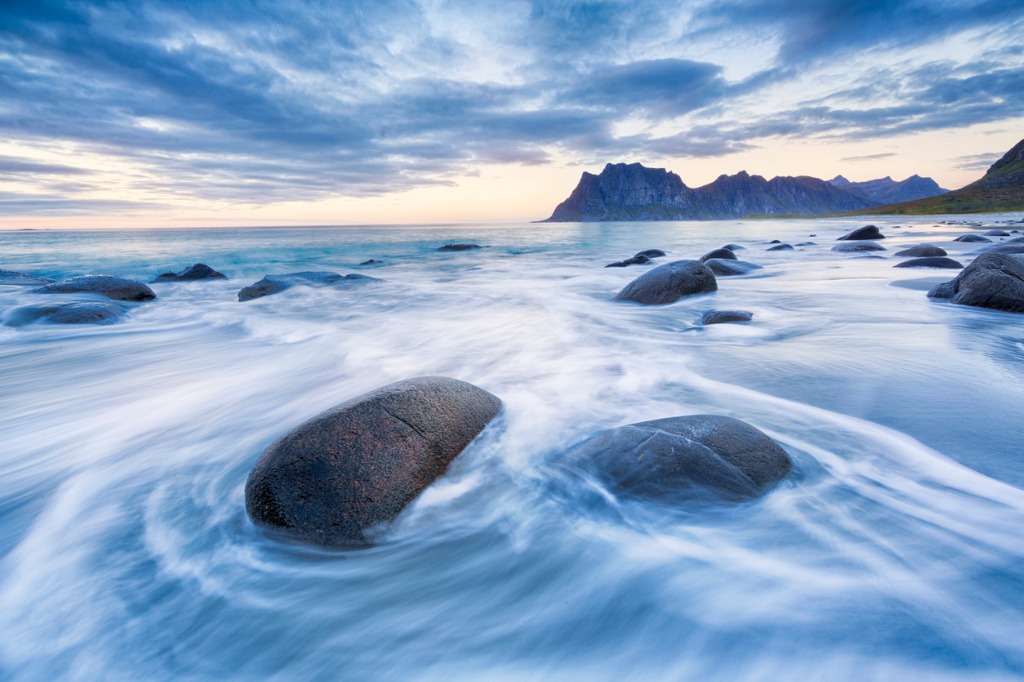
photo bytunart via iStock
Long exposure images are fun to create and the results can look absolutely amazing if done well. Good long exposure images involve more than simply letting the shutter remain open for a long time. We will provide a brief long exposure tutorial for the beach to give you somewhere to start beyond the remote shutter cord.
Ocean photography, beach photography, and photographing waves all require long exposure to come up with that smooth, sometimes misty water effect. The long exposure camera settings have much to do with this, but some other aspects of photography also figure into our calculations and set up for this style.
Plan Ahead

photo byvalentinrussanov via iStock
My long exposure tips are similar to many other special photography tips, at least as far as the number one tip. There’s a reason I’m constantly saying to plan ahead, do your research, previsualize, and take control of the imaging process from beginning to end - it makes the difference between getting good pics and creating outstanding images.
Since long exposure beach photography is basically the art of photographing waves, we need to know where the waves are. We need to know more than just “at the beach,” we also want to be aware of what time of day looks best, what special shore features could enhance our images, and what time is high tide.
Choose the Time
photo byMikeMareen via iStock
The time of day is a variable that could completely change the final image as far as exposure, lighting conditions, direction of the light, and the color of the light. Sunrise and sunset may both look good for ocean photography, but the light will be coming from different directions, making shadows on opposite sides of other scene elements such as rock formations or man made structures.
There is sometimes a subtle color difference between sunrise and sunset, it depends on some other factors such as atmospheric conditions and the surrounding landscape, but there is a huge difference in light color from high noon to golden hour, sunset or rise, and twilight.
Shore Features
photo byDieterMeyrl via iStock
The landmarks we use for navigating around the beach often make great visual elements for our long exposure beach photography. If all we have in the image area of our photograph is the blurred water, it may not look all that interesting. Including the shore features we enjoy in the images of ocean photography will add a lot of visual interest. Photographing waves looks great when they are part of an overall image.
High Tide
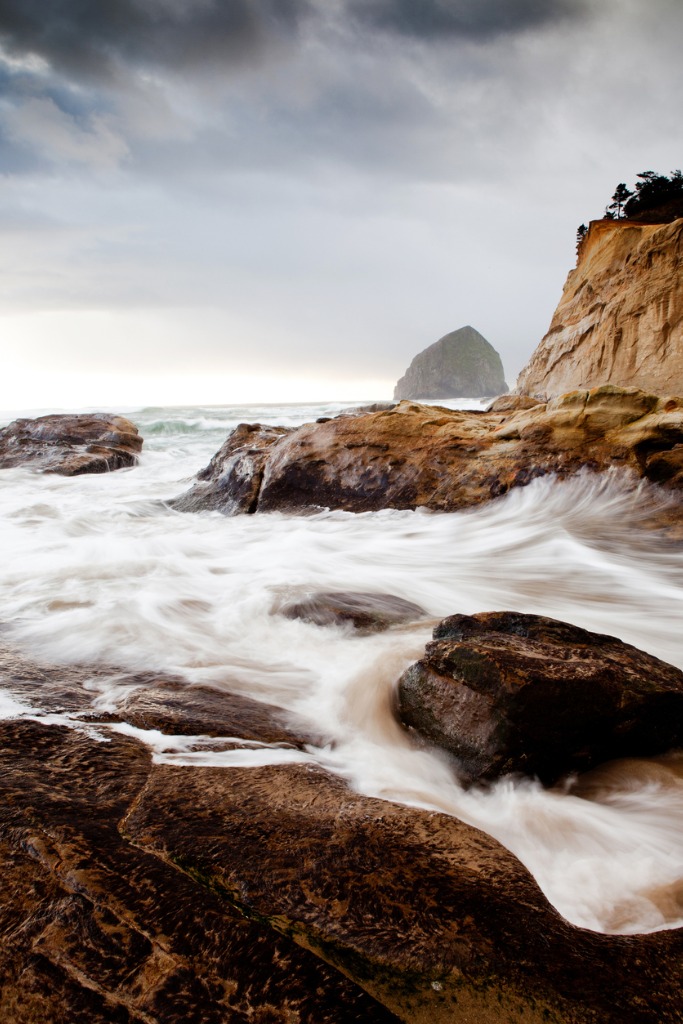
photo byandipantz via iStock
As the public safety part of our long exposure tutorial, it is vitally important to know when high tide is where you will do your beach photography long exposures. If you are caught up in taking photographs and don’t notice the water rising to cut off your way out, you could lose more than your camera gear. It could turn deadly.
Besides, the high and low tide will definitely impact the visual aspects of your beach and ocean photography. In some areas, it can radically alter the view. If you aren’t familiar with the timing of tides, it is super to find it online with a google search on your smartphone or computer.
Guard Your Gear
photo bySouth_agency via iStock
Beach photography can play havoc with your photographic equipment. The sand and the salt air are the two biggest concerns. Blowing sand can mess up the mechanics of your camera and lens, the salt air can adversely affect the electronics. A rain shield of some type is a good idea, as is thoroughly cleaning everything once you get off the beach back home or in your hotel room.
You also want to guard your gear from accidents such as dropping them while you're climbing, dunking from a huge breaker or tripping into a tidal pool (yes, I’ve done that), or tipping over your tripod due to shifting sand underneath or a strong wind gust. Basically, if you just pay attention and be careful, you’ll be fine.
Use a Tripod
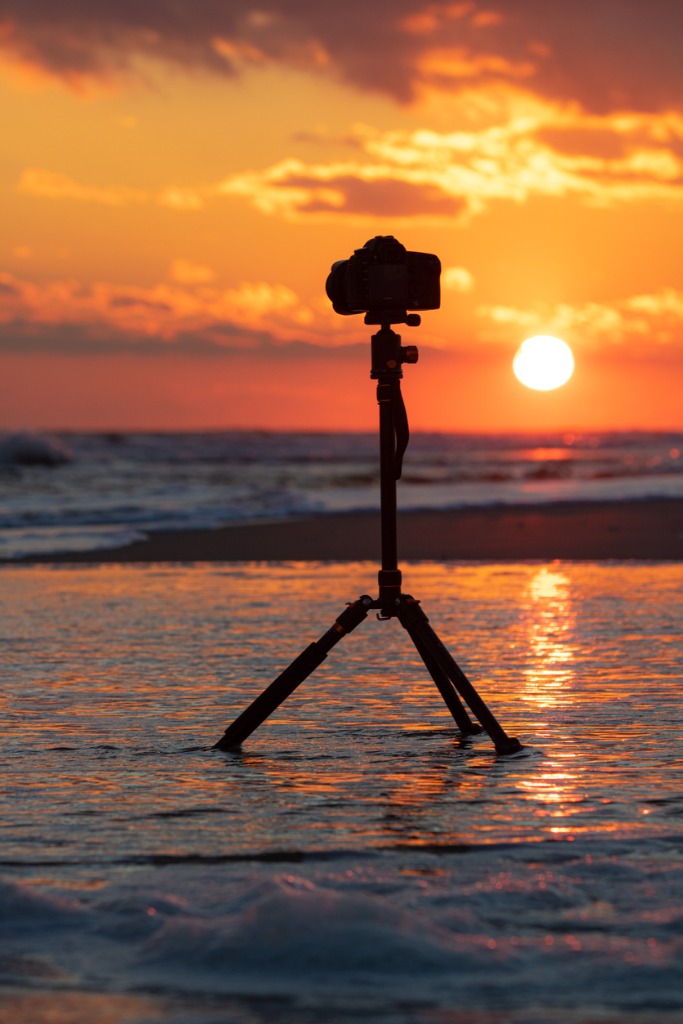
photo byScott Heaney via iStock
And now, we get to talk about the picture taking part of our long exposure tutorial for ocean and beach photography. Since we are specifically looking at long exposures for photographing waves, keeping the camera position stable is a prime consideration. I like the carbon fiber tripods for beach photography, but any large enough tripod will work well.
Learn More:
- How To Streamline Your Landscape Photography Workflow
- 6 Expert Tips For Improving Your Landscape Photography
- Why You Need a Filter Kit For Landscape Photography
Filter It If Light Is Too Bright
Sometimes, beginner and experienced photographers alike will lose sight of one very important option with regards to setting the exposure with a long enough shutter speed to create the right amount of blur we want to capture.
Daytime beach photography is already difficult enough for our poor exposure meters, often requiring us to dial in exposure compensation, but full daylight sun also generally means short shutter speeds to satisfy the exposure triangle.
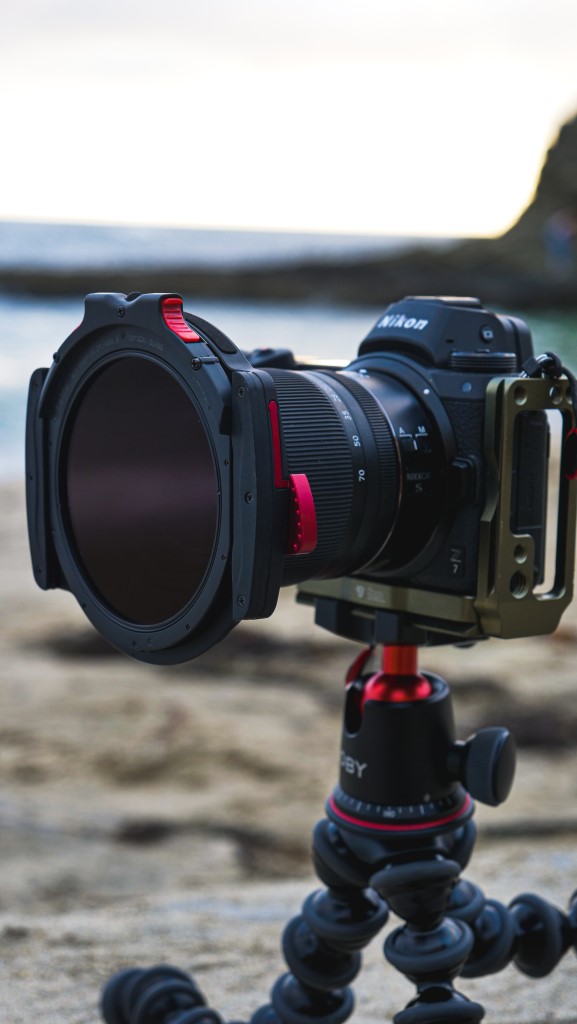
The solution is as elegant as it is simple, use neutral density (ND) filters. A good ND filter will let you slow down the shutter speed to something that blurs the wave action even in high noon full daylight. You’ll want the filters to be very high quality so your image sharpness isn’t diminished, and you want them to be easy to use as well.
I am a big fan of filter holder systems for ND filters and graduated neutral density (GND) filters since they allow precise placement of the filter transition line for GND filters and are easy to add or remove filters for ND and other types such as circular polarizer (C-POL) filters.
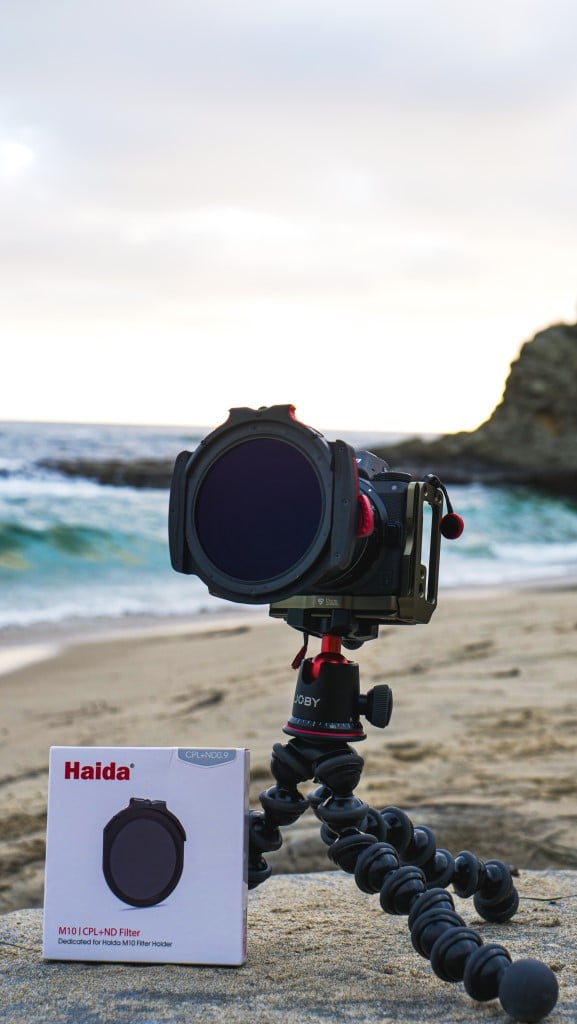
Haida M10 Filter System
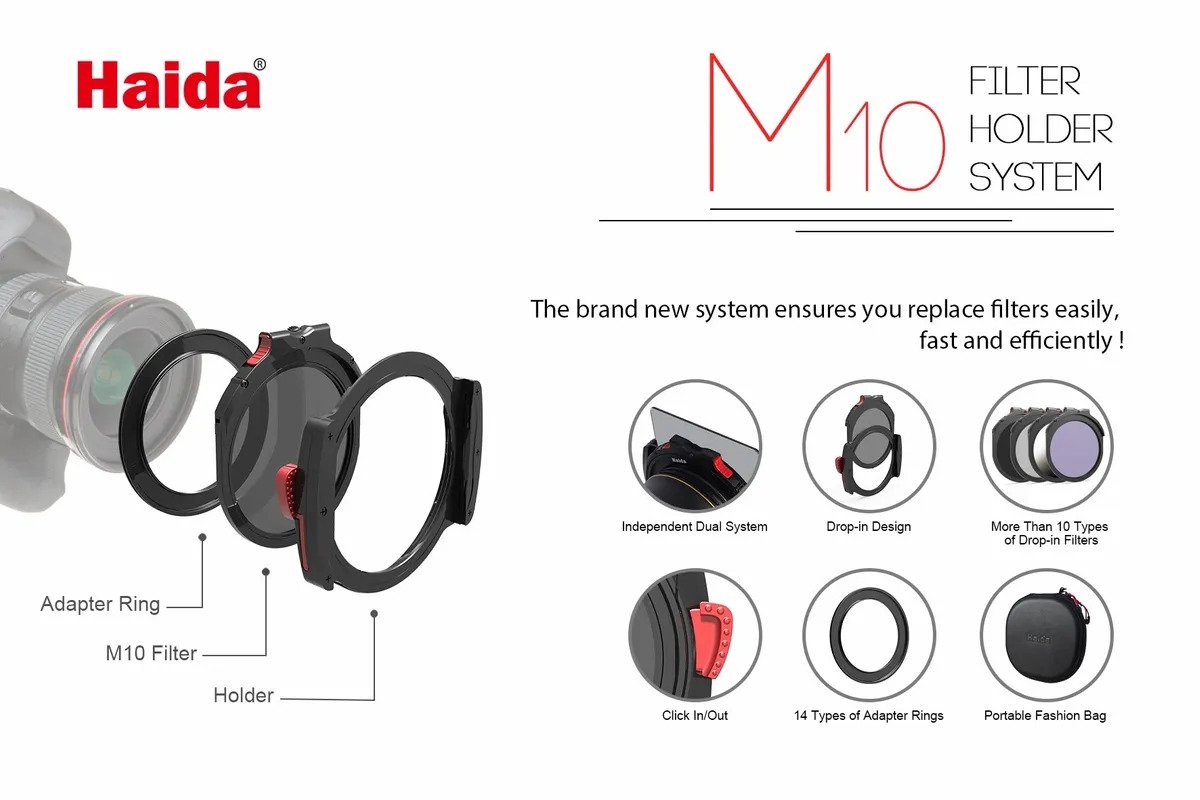
I’ve been enjoying the Haida M10 system and their fine set of high quality filters such as the 3 ND set with 6, 10, and 15 stop ND filters. Another great filter choice is the CPL+ND filter that combines a C-POL filter with a 10 stop ND filter.
As with any polarizer filter, you would adjust the filter by turning it until you see the effect you want in regards to darkening the sky or removing reflections or atmospheric haze. With the Haida CPL+ND filter, you ten also get to add in 10 full stops of exposure time. That can change a 1/250th shutter speed to 8 full seconds. That’s enough to blur out vigorous wave action.
If you use your ND filters at golden hour or twilight, you can achieve long exposure times of over a minute which can also give substantial motion blur to clouds and virtually flatten even a storm driven set of waves.
Diffraction Limited Aperture
photo byAntonio Bordunovi via iStock
Since we’re using ND filters to change the shutter speed to a long exposure, we can now select our optimum lens aperture or f-stop. The optimum aperture for maximum sharpness is called the diffraction limited aperture. This means that it’s the f-stop that eliminates the aberrations caused by wide open apertures but before the smaller apertures start causing unwanted image softening diffraction. With most lenses, about 2 or 3 stops down from maximum aperture is the sharpest f-stop.
Obviously, if you want deep depth of field to go along with your long exposure for beach photography, you’ll use smaller apertures and just deal with the slight issues caused by diffraction. With high quality lenses, it can be only a slight problem anyways.
Composition and Other Concerns
photo byzetter via iStock
We still want to use good composition techniques such as Rule of Thirds, Leading Lines, and Golden Spiral in order to create an truly outstanding long exposure ocean photography image. After all, the blurred water effect we’re making looks best if we have a solid object for contrast with the motion effect.
A balanced composition and the blurring of moving water can create a serene, maybe even a surreal photograph. The long exposure is merely the part of the process that creates the blurred water effect, it still needs to be a good image before the effect in order to make a truly outstanding long exposure photograph of waves.
In this long exposure tutorial, we learned that iIf we plan ahead for knowing the tides and lighting conditions, take advantage of our special equipment such as ND filters, and use our basic landscape photography techniques such as rules of composition, we will end up with a fine collection of long exposure beach photography and have a whole lot of fun making them.
Learn More:
- Circular Polarizer Do’s and Don’ts
- Get Better Landscape Photos With These Simple Tips
- Best Aperture for Landscape Photography
We Recommend
Motion Blur Photography Tutorial
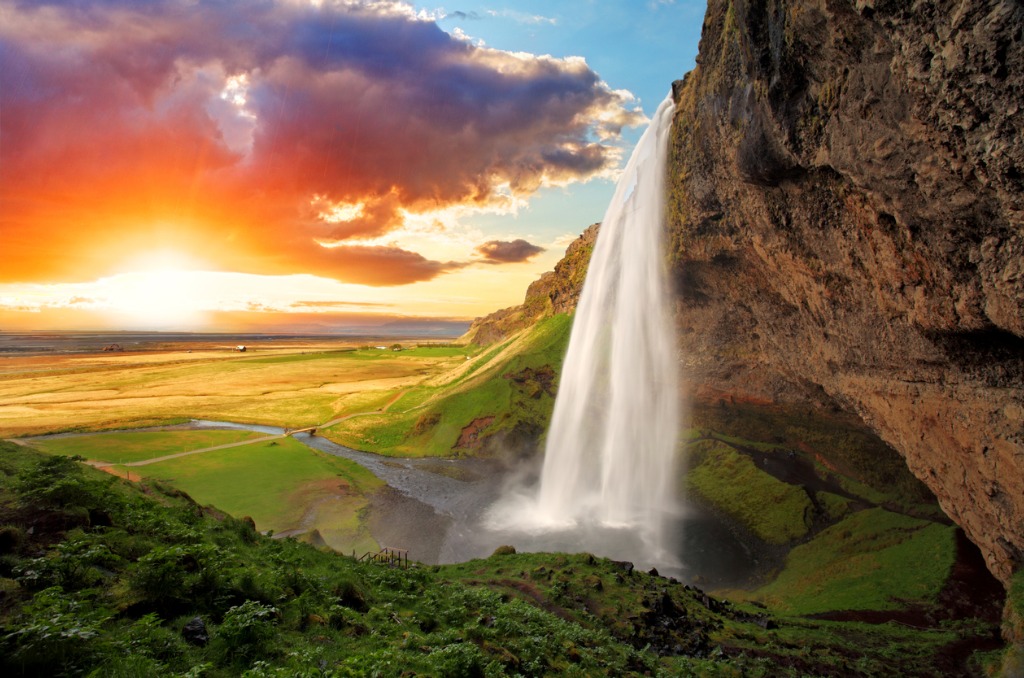
photo byTomasSereda via iStock
As photographers, we often have the mindset of needing to arrest any motion of the camera or subject in order to capture the sharpest possible, but creatively using motion blur photography opens up a lot of interesting possibilities.
Motion Blur Photography Ideas
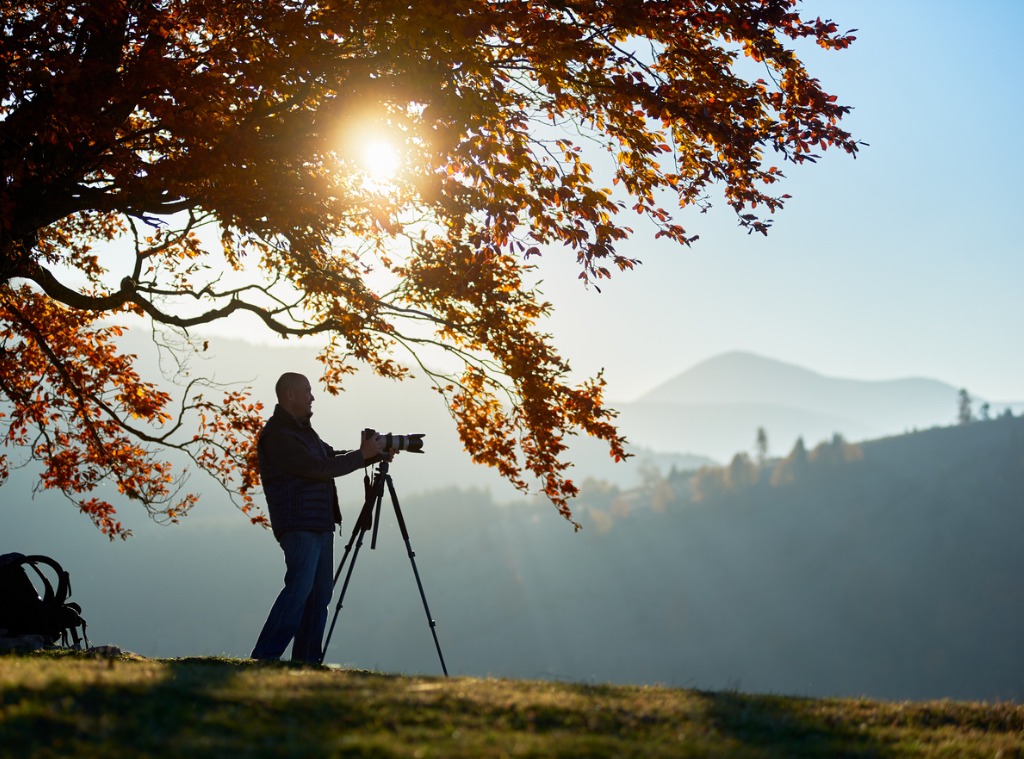
photo byanatoliy_gleb via iStock
Thinking about motion blur photography ideas, we automatically think of various sports. Motor sports, any type of racing, sports where you swing an instrument such as a golf club, tennis racket, jai alai scoop, or baseball bat, and other controlled movements such as skating or gymnastics.
Other motion blur photography ideas are blurring moving water such as waterfalls, waves, or streams, blurring cloud movements, making light streaks at night, moving the camera during exposure, and ghosting out people from crowded scenes.
Each of these motion blur photography techniques use their own tips and camera settings. Follow along with this motion blur photography tutorial to get your own ideas of how to capture motion blur.
Motion Blur Photography Settings
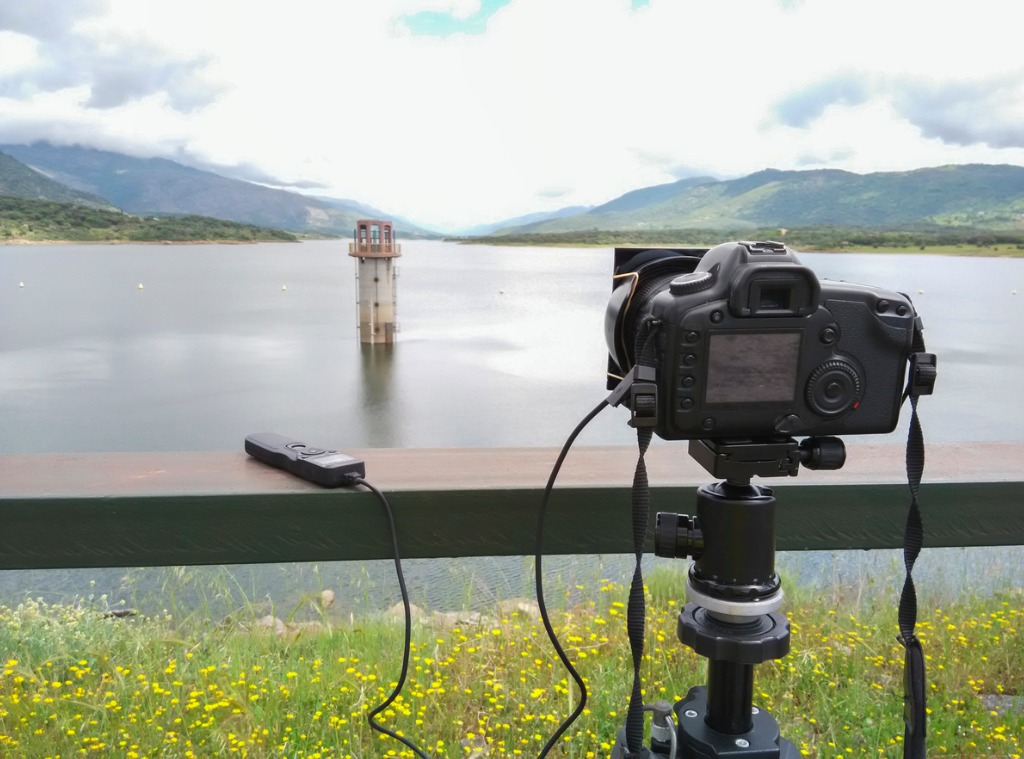
photo byMario Elias Munoz Valencia via iStock
When shooting action, our motion photography settings for arresting motion center around short or fast shutter speeds. We like shutter speeds of 1/4000th and 1/8000th of second if our light levels and ISO allow for them, or we pan with the motion and await the peak of action if we’re forced to use slower or longer speeds.
In order to purposefully capture any type of motion blur, photography settings skew toward slower or longer shutter speeds. For some styles, it’s not unusual to have motion blur photography settings with shutter speeds measured in full seconds or even minutes instead of fractions of a second.
In order to achieve longer shutter speeds, we adjust the other parts of our exposure triangle, the lens aperture and ISO. An ISO of 100 or 200 is available on most entry level and intermediate level cameras. Many prosumer and professional cameras have the ability to set a lower ISO such as ISO 50 or 25 by means of their extended range.

photo byNakteve via iStock
A smaller lens aperture will result in longer shutter speeds, too. Many lenses have minimum apertures of f/16 and f/22, while some may have minimum apertures of f/32. I’ve used some lenses for large format cameras that have even smaller f-stops, f/64 and f/128, but those aren’t usually available in lenses for Full Frame, APS-C, and MFT formats.
Neutral density (ND) filters are extremely useful for many motion blur photography techniques. A 2 stop, 6 stop, or 10 stop ND filter can allow us to reach those extremely long exposure times measured in full seconds and minutes.
Now let’s consider some motion blur photography tips for the ideas mentioned earlier.
Sports Photography Motion Blur
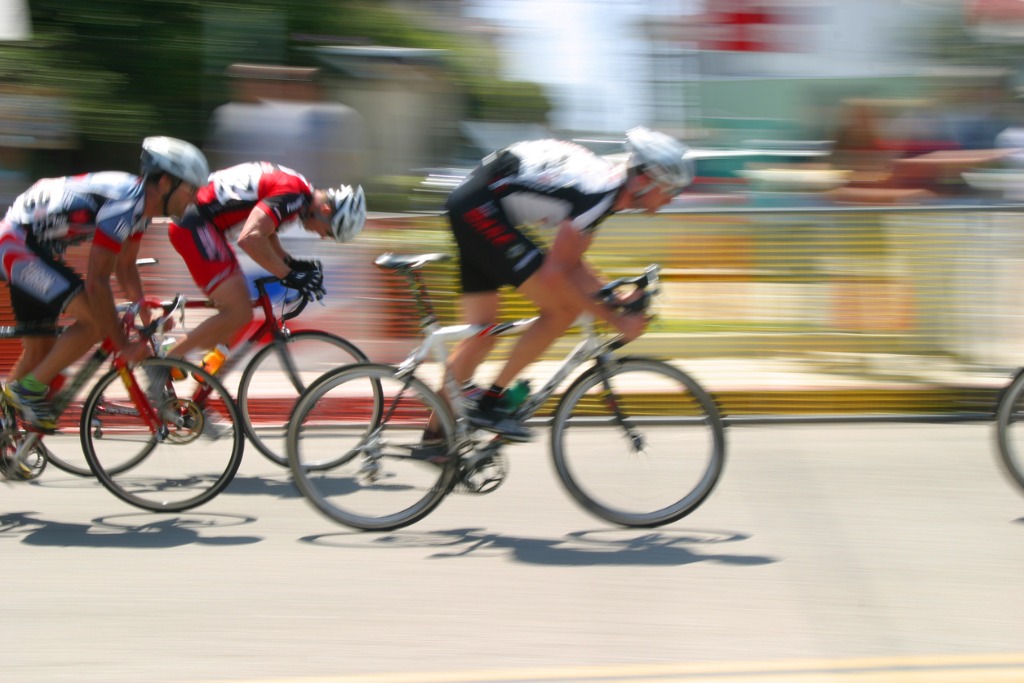
photo byP_Wei via iStock
There are two lines of thought for sports motion blur photography. One is to keep the camera relatively still and let the slow shutter speed blur the subject in motion while the background remains sharp. The other is to pan along with the subject movement which keeps the subject relatively sharp while the background blurs.
Panning with the subject motion means that we move our tracking camera along with the subject and keep that movement going during the time the camera shutter is open. A shutter speed of 1/30th of second to perhaps ½ second will get you these photos for most sports subjects.
You can reach those shutter speeds even in broad daylight by lowering the ISO and stopping down the lens aperture. You don’t need to worry about the small aperture giving too deep depth of field because the blurred background will isolate the main subject. If you need a little slower speed then adding a 2 stop ND filter is probably all you need.
Learn More:
- Long Exposure Photography Gear List
- These Long Exposure Mistakes are Preventing You From Taking Awesome Photos
Water and Cloud Movement
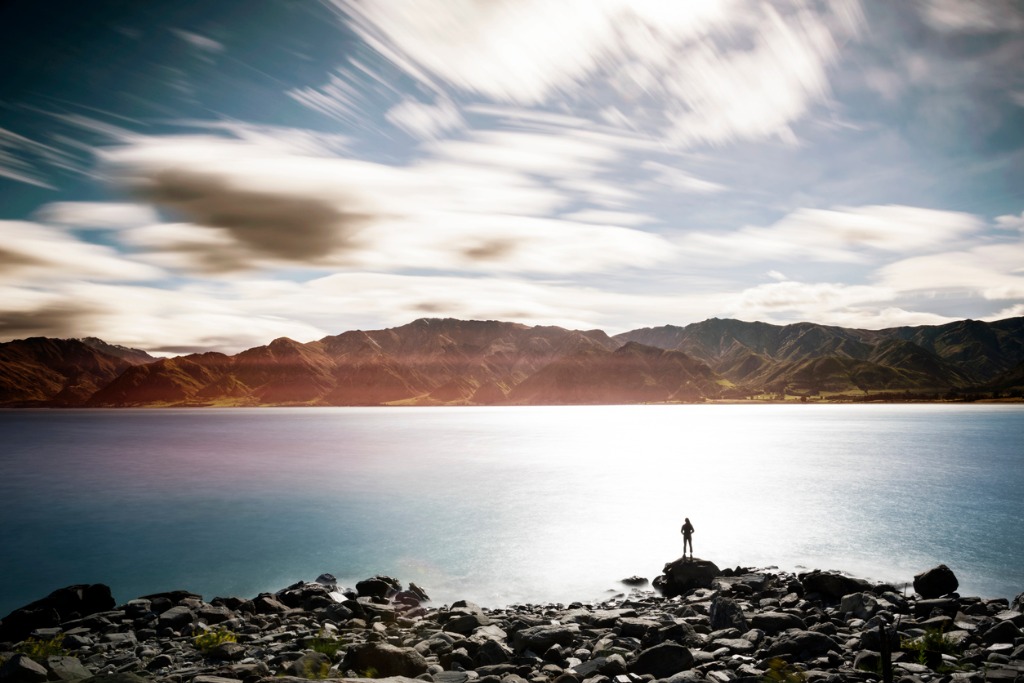
photo bysubman via iStock
This is probably the subject matter most photographers think about when reading a motion blur photography tutorial. There are also two general lines of thought for this technique, too. One is only slightly blur the water motion with a shutter speed of ½ second to maybe 2 or 4 seconds depending on how fast the water may be moving.
The other method is to calculate for a very long shutter speed, such as in the 15 seconds ro longer range, going into full minutes for some scenes. This will create a very smooth blur with virtually no detail at all in the moving water or clouds.
To capture these motion blur photography images, you’ll also need to use a heavy duty tripod or camera mount to keep the camera rig as motionless as possible. ND filters are a virtual necessity, too. There’s no way to get a shutter speed of multiple seconds in daylight without using ND filters, not in DSLRs and mirrorless cameras anyways.
The lens aperture will make a difference in exposure, but it also will factor into our depth of field calculations since we’re using a tripod to keep the camera still.So choose whatever lens aperture you want and add ND by means of filters if you want a specific range of exposure time.
Light Streaks at Night
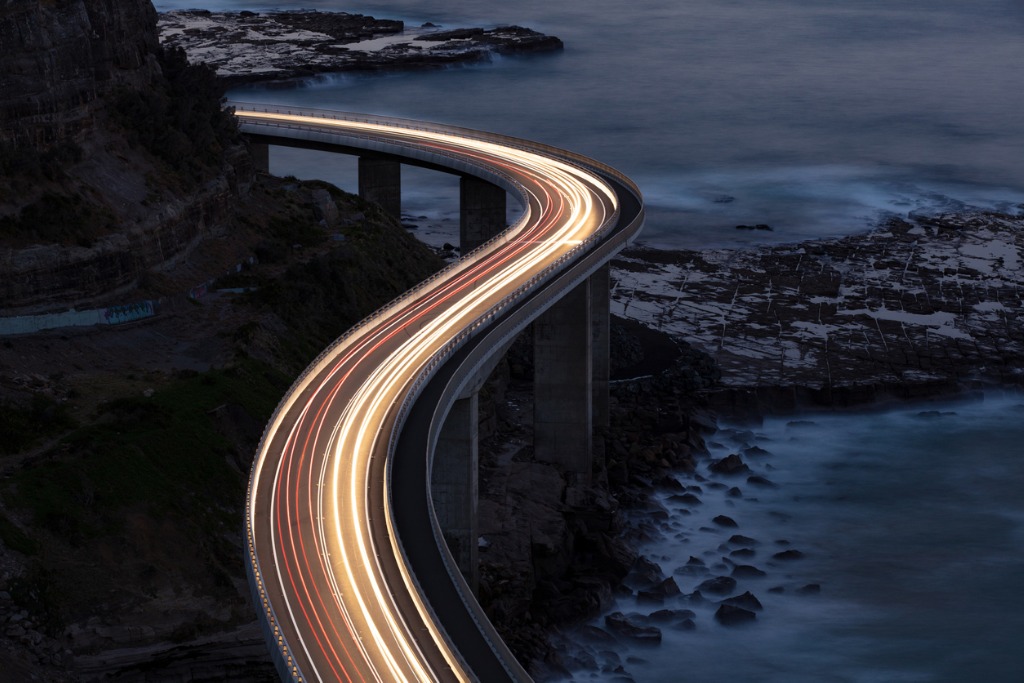
photo byVeni via iStock
One of the most simple of the motion blur photography techniques, it’s also full of variables in how we can do it. We can use our camera on a tripod and let automotive traffic paint light streaks. We can use a penlight with or without color gels to paint the scene while the camera’s shutter is open.
Or we can mount the camera on a moveable device and move through a scene of lights. Astrophotography gives us even more options as we can use the Earth’s rotation to create star trails. The shutter speeds are likely going to be measured in multiple seconds up to many minutes.
Moving the Camera
photo bybaona via iStock
This motion blur photography technique can be done with a wide range of shutter speeds. If you have videography gear such as a dolly or a slider, you can open the shutter up for any length of time while moving the camera and create a blur of subject or streaks of light.
You can also handhold the camera with a moderately slow speed such as 1/8th of a second or so and rotate the camera around the axis of the lens causing an interesting motion effect.
Ghosting People
photo bypetekarici via iStock
When shooting architecture or some other large subject that has a lot of people milling about, in the way of our subject, a long exposure can effectively remove moving people from the image. The way it works is that if the static exposure is long enough, a scene element moving fast enough will not register in the image file.
There is another way to this, making multiple exposures as though making an HDR image but not altering the exposures by bracketing, simply taking multiple pictures spaced seconds apart. Then when you merge the exposures together, you choose the option in the program to ghost out what the program considers spurious image elements.
It’s Going To Take Experimenting
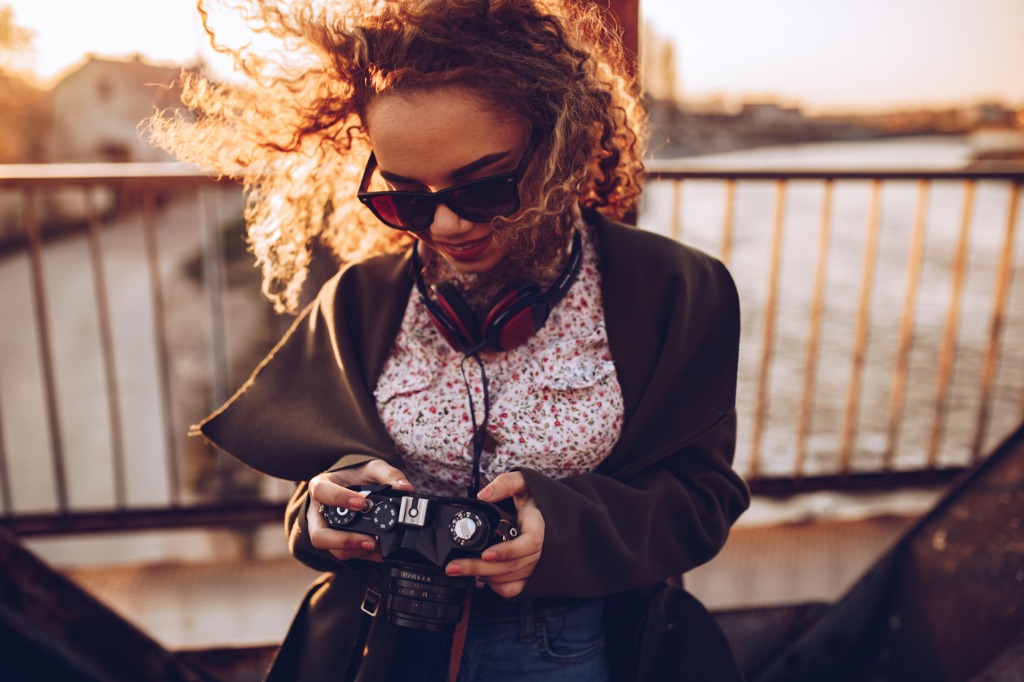
photo bymatrixnis via iStock
The problem with trying to predetermine motion blur photography settings such as just what shutter speeds or exposure times will work is that there are many variables to consider. Sometimes, light values within a scene may even change during exposure as when clouds cover and uncover brighter areas of sky.
So, have some fun with creating your own personal motion blur photography tutorial by playing with these ideas and tips to find what works for your photographic vision.
Learn More:
- A Beginner's Guide to Long Exposure Photography
- Use Long Exposures to Create More Unique Landscape Photos