10 Easy Ways to Help You Develop Your Creative Eye
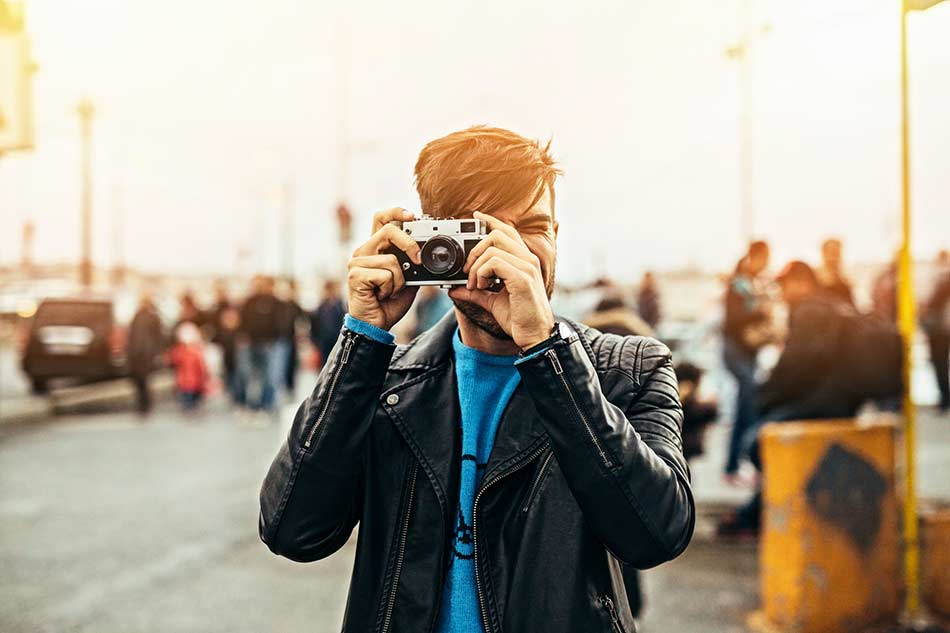
No matter how great a photographer is, they had to start at some point. Ansel Adams, at some point in his life, was fumbling around with his first camera, learning the tricks of the trade, identifying how to control his camera settings, and learning how to compose creative and dynamic photos.
You have to start somewhere as well, and working on your creative eye is a great place to begin.
But often, it’s not the creativity aspect that’s difficult for new photographers, it’s simply figuring out how to use their creativity to develop their photographer’s eye. In this article, we offer a few quick and easy tips that will help refine your creative eye such that you make more interesting photos.
Let’s begin!
Practice - A Lot
It’s a cliche bit of advice, but it’s probably the most impactful advice you can get. Like any artistic pursuit, getting better at photography simply takes time. Snapping a few photos every Saturday won’t cut it. Instead, you need to commit a bit of time every single day to interact with your camera, learn the ins and outs of exposure, experiment with lighting, and exploring your surroundings. In other words, even if it’s for just 10-15 minutes a day, immerse yourself in the creative pursuits of photography. Only then will you begin to expand your creative possibilities.
Quick tip: Get into the habit of practicing your photography skills by taking part in a photography challenge. For example, you might strive to create a different type of photo every day for 30 days or come up with a different photography subject for each week of the year.
Tweet These 10 Easy Creative Eye Tips
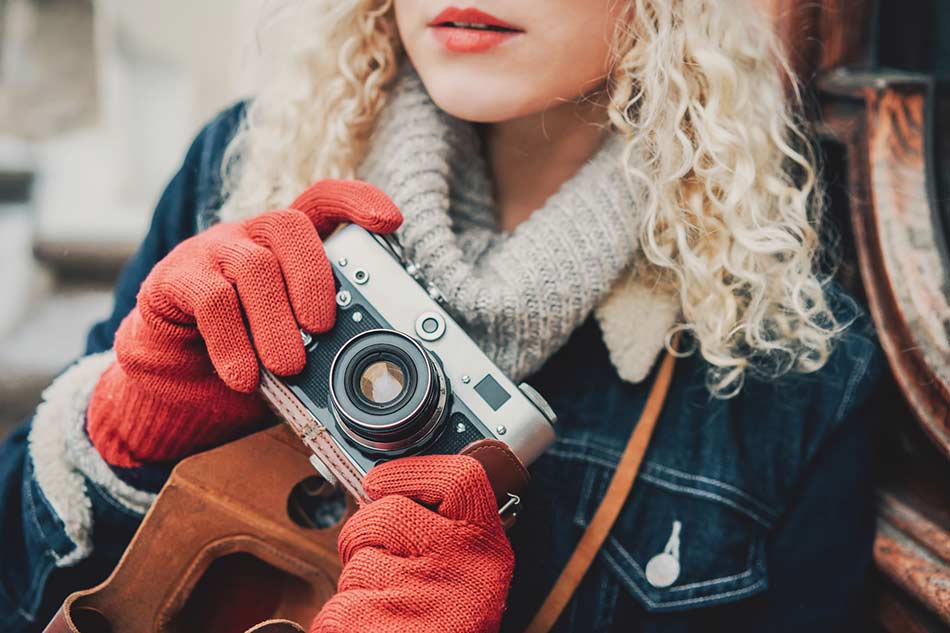
Look at Other People’s Photos

Developing your creative eye can even be done while you’re at home sitting on the couch. Buy a few photography books, subscribe to a photography magazine, or go online and view images. Pore over them. Break them down and identify what you like and what you don’t like. Then, determine why you like what you like. Look at technique. Explore things that you might have done differently. Then, as you go through your daily routine, you’ll find that you start to look at scenes with this same critical eye. You’ll soon find that this results in improved photos because you can take what you’ve learned from others and apply it to your own artistic pursuits.
Quick tip: Don’t be afraid to share your images with others so you can get some feedback. No two people view a photograph in the exact same way, so getting an outside perspective on the images you create will only help you grow as a photographer.
Learn More:
- See What Happens When a Pulitzer Prize-Winning Photographer Takes Photos With a Toy Camera
- 5 Camera Tricks for Cheapskates
Develop a Personal Artistic Style

One of the benefits of getting a lot of practice and examining the work of others is that you’ll begin to identify your personal style. You’ll begin to see patterns in the types of images that are on your memory card. You’ll also note that many of the photos you enjoy viewing by other photographers share certain characteristics. Perhaps it’s the way light is used. Maybe it’s the manner in which the subject is framed in the shot. It could be something as broad as the subject matter - black & white or architectural photography, for example. The point is that once you identify your personal photography style, you’ll find that you’ll be more apt to find creative ways of expressing that style.
Learn - and Break - The Rules

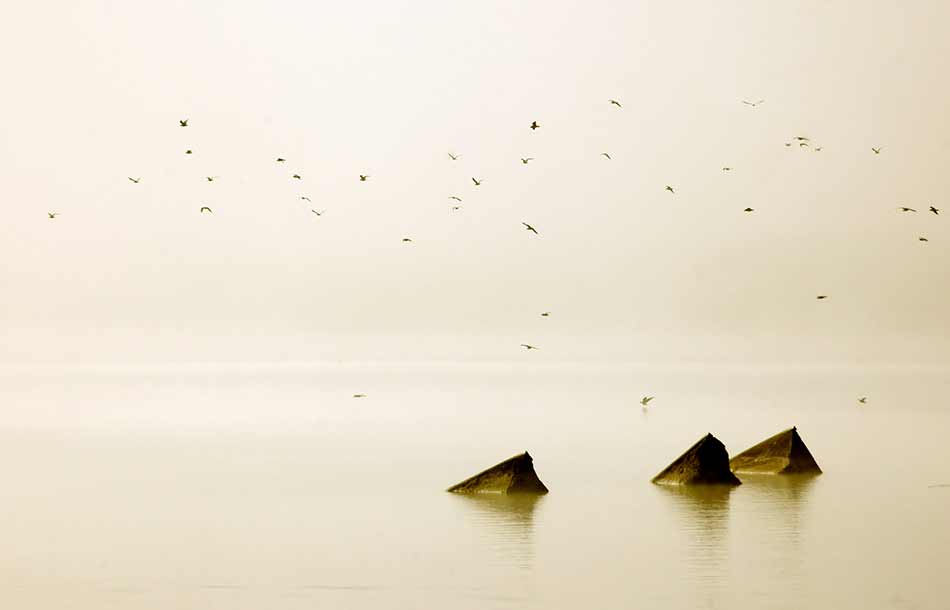
Part of learning how to develop your creative eye is being willing to break convention and create images that don’t adhere to the standard photography rules of thumb. An ideal example of this is the Rule of Thirds. On many occasions - perhaps the vast majority of times - the Rule of Thirds helps you create images that are more organized, balanced, and compelling. But sometimes, as seen in the image above, going against the rule can result in a beautiful image nonetheless.
With that in mind, it’s important to learn the rules, but perhaps even more important to break them. Create a portrait with a background that’s in focus. Don’t include leading lines in a landscape shot. Use a telephoto lens for street photography. Doing so will force you to use your creativity to find new subjects and learn unique ways of framing shots that will help you create more interesting images.
Quick tip: Don’t just break the rules for the sake of breaking them. Instead, be purposeful in the way you compose your shots, that way, even if you break the rules, your image won’t look like it was simply a mistake.
Editor's Tip: Not sure what all those numbers mean on your lens? Learn how to read the markings on your lens.
Go Easy When Deleting

Every photographer takes a few moments to cull their photos, and in the process delete all the ones that didn’t live up to their expectations. But in the process of doing so, there often isn’t much time spent examining the photos, but instead, just a few split seconds to determine if they are keepers or not. The danger in doing that is that you might overlook something that might not be that fantastic at the moment, but with some post-processing might turn into a very nice image. In this regard, you’re developing your creative eye on the back-end; you’ve already taken the photo so there’s nothing more to do compositionally, but you can learn how to look at an image and see improvements you can make with some editing.
Quick tip: Sometimes, all that’s needed to transform an image is a bit of cropping. If you come across a photo you think isn’t that great, see how cropping the image might make it more eye-catching.
Learn Manual Controls

Nothing will hold back your creativity more than shooting in full auto mode. Though it can be comforting to know that the camera is making all the decisions for you, the results will never be as good as if you take the reins and make decisions about things like exposure all on your own. Manual mode is scary, to be sure, but as noted above, practice makes perfect, and if you never take control of your camera, you’ll never be able to fully develop your photographer’s eye.
To start, try shooting in aperture priority or shutter priority mode. Experiment with different settings so that you develop an understanding of how adjustments to aperture or another camera setting changes the look and feel of your image. As you shoot, note what changes you make, then inspect the image to see exactly how those changes translate into the visual you create. In doing so, you’ll not only develop a more robust creative eye, but you’ll also gain a good deal of technical knowledge as well.
Learn More:
- A Beginner's Guide to Aperture Priority Mode and Exposure Compensation
- Everything You Need to Know About Shutter Priority Mode
Play With Perspective

All too often, photographers take their photos from the same perspective that they see the world - from their own eye height. And though many successful photos are taken from this point of view, not venturing beyond that typical perspective won’t do anything for aiding in the development of your creative eye.
By dropping down low for a worm’s eye view or getting up high and composing a shot looking downward, you’re forced into seeing things in a completely new way. As a result, there might be shapes, colors, textures, and so on that catch your eye which you can then highlight in your photos. So, the next time you’re out taking a few shots, don’t just stand pat. Move to the left and the right. Walk around the subject to see if there’s a better angle of view. Get down low, then get up high. See how the movements you make change the scene for the better.
Quick tip: Practice finding different angles of view by taking a series of photos of the same subject, but from different perspectives. For example, you might find a beautiful flower to photograph in your backyard and take four photos, each from a different angle.
Look for Photo Opportunities, But Leave Your Camera at Home

Oddly enough, one of the biggest barriers to developing your creative eye is simply not taking the time to see opportunities for photos. If you’re lugging around your camera and constantly looking at the LCD to inspect your previous photo, you could very well miss an even more compelling shot. So, by leaving your camera at home, you can give your surroundings a thorough visual inspection. After all, you can’t create an incredible photo if you don’t first see the opportunity for a photo with your own eyes!
Tweet These 10 Easy Creative Eye Tips
Take Chances

Maybe you’re most interested in portraiture. Perhaps landscapes are your favorite. It’s certainly okay to enjoy one type of photography more than others. But there is a wonderful opportunity to develop your creative eye by taking chances on creating images that are out of your comfort zone. If you enjoy nature and wildlife photography, head into town and try your hand at street photography. If you love landscapes, try still life photography. The point is that every genre of photography requires a little bit of a different approach, and learning how to create gorgeous photos that are out of your comfort zone will only help you in creating beautiful photos once you get back to photographing subjects with which you are most comfortable.
Quick tip: Another way to take chances is to travel light. On your next photography outing, take just one camera body and one lens. Force yourself to learn how to use the few implements you have to create eye-catching photos, no matter the subject.
Editor's Tip: Finish off your photos by turning them into a great print. See what your images look like as fine art.
Don’t Be Afraid to Make Mistakes

Above all else, one of the easiest things you can do to develop your creative eye is to grab your camera and take photos without the worry of making mistakes. Mistakes will happen - it’s unavoidable. Even the best photographers in the world still make mistakes. However, by letting go of the fear of screwing up a photo, you’re more able to approach photography in a relaxed, calm manner. In the end, photography is an art, and art is incredibly personal. What you think is a mistake might be viewed as a jaw-dropping photo by someone else. Let go of your fears, bring the camera to your eye, and fire away!
We Recommend
11 Macro Photography Tips for Beginners
 Image Credit: Trifonov_Evgeniy via iStock
Macro Photography
One of the great things about macro photography is that it allows you to bring the tiniest of details to the forefront in an image.
What's more, it challenges you to see your surroundings in a completely different way - to look for those small details that deserve center stage in a macro photograph.
Whether it's leaves or insects, flowers or fungi, there is a world of possibilities for taking breathtaking photos when you have a macro lens on your camera.
If you're ready to dive into the world of macro photography, consider these 11 tips as a great place to get started.
Timing is Everything for Macro Photography
 Image Credit: ryasick via iStock
The saying that "the early bird gets the worm" definitely applies to macro photography.
By getting an early start and heading out with your camera in the morning, you maximize the likelihood that you'll get the best results.
This is the case for a couple of reasons.
First, the early morning light is soft and has a warm glow that's much more pleasing than mid-day light. Secondly, the chances of there being wind are less early in the morning than later in the day.
Third, early mornings mean a greater likelihood of dew, which adds a beautiful element to a macro shot. Lastly, insects are just waking up in the early morning, and the slower they are, the easier they'll be to photograph!
Consider Renting Different Lenses
 Image Credit: BrianAJackson via iStock
Not all macro lenses are alike, so it would behoove you to give a variety of lenses a try.
Some macro lenses have a short focal length like 12mm while others are 100mm or longer.
On top of that, different lenses have different working distances, or the distance between your lens and the subject, and different minimum focusing distance, which is the distance to the subject the lens can be and still get the shot in focus.
Many macro photographers find that longer focal length macro lenses are advantageous because you don't have to be as close to the subject to get an up-close shot.
With that extra room, you can add things like a ring flash to illuminate the subject better. Keeping a little more distance between you and an insect might also make it more likely that the insect isn't bothered by your presence. It's hard to photograph insects if they fly away!
Get a better idea of how a macro lens can positively impact your work in the video above by Kellan Reck.
Learn More:
Try the Parallel Camera Trick
 Image Credit: afreydin via iStock
When taking macro photos of flat subjects - leaves, for example - try to keep the back of the camera parallel with the subject.
This is called the "parallel camera trick," and it serves the function of giving the camera the fullest use of what little depth of field there is.
By keeping the subject and camera parallel, the likelihood of the entire focal plane being in focus is greatly increased. However, if the camera is skewed from parallel, you might find that parts of the subject that are further away from the camera are out of focus.
Macro lenses have razor-thin margins of depth of field, so you'll always have elements in the shot out of focus.
But by keeping the camera parallel, you can at least ensure that everything that should be in focus, is.
Use Depth of Field Preview
 Image Credit: DebbiSmirnoff via iStock
The optical viewfinder on your camera shows the scene at the largest available aperture.
While this is great for actually seeing the image (the larger aperture makes it brighter in the viewfinder), it does nothing in the way of helping you determine the depth of field.
To see what you’ve got in focus and what’s blurry, use your camera’s depth of field preview button. Doing so will tell the camera to show you the scene at the working aperture so you have a better idea of what’s sharp and what’s blurry.
Not sure where the depth of field preview button is or how to use it? Give this tutorial a quick read.
Give Indoor Macro Shoots a Chance
 Image Credit: cruphoto via iStock
While there's a wealth of subjects to photograph with a macro lens outdoors, don't discount the value of getting your macro photography sea legs underneath you by staying inside.
Think about it - there's no wind indoors and you can't mold the lighting to whatever you want it to be.
What's more, still subjects like fruit and plants are a heck of a lot easier to photograph than bugs that move around.
Really all you need is a small, clear area like a countertop or a table to set up your subject.
Add a non-descript background (even a sheet will do), set up your camera and tripod, any lighting gear you have, and start firing away!
Learn More:
Make a DIY Background
A macro shot can be made or broken by what’s happening in the background.
Even though the background will be blurry, its colors, textures, and patterns will still be visible, thus necessitating that it is of a high quality.
For indoor shots, create a collection of high-quality backgrounds using fabric, paper, or even prints of neutral and natural scenes you’ve taken before.
Even a bowl of water with food coloring could make a good macro background!
Learn how to make your own DIY macro background in the video above by Bonnie Marquette.
Don’t Discount Large Apertures
 Image Credit: republica via iStock
Although it’s common practice to use small apertures to maximize depth of field in macro shots, that doesn’t mean that you can’t use a large aperture to create an image with a different look.
A large aperture will have a razor-thin depth of field, resulting in an image with a very small area of sharp focus with the foreground and background nicely blurred, as shown above.
Or, if you want to go more abstract, try shooting your subject completely out of focus for a bokeh-filled shot that’s full of beautiful abstract blur.
Learn More:
Avoid Maxing Out Your Aperture
 Image Credit: dlerick via iStock
If you opt for using a smaller aperture to increase your depth of field, avoid using the maximum aperture available, which is often f/22.
Although f/22 gives you the greatest depth of field, it is also most susceptible to creating a soft image in which some of the sharpness is lost due to diffraction.
Instead, try to keep your aperture in the f/8-f/11 range, which is typically where the lens's sweet spot will be. Doing so will still get you a nice depth of field but will avoid the extreme softness that often occurs when shooting at f/22.
Try a Ring Flash
If you’ve got a macro scene you want to photograph but it’s just too dark to get a good exposure, try using a ring flash.
Not only will a ring flash give you nice, even light on your subject, it will also allow you to shoot at a higher shutter speed. This is advantageous if you want to photograph a fast-moving subject, like an insect, and want to freeze its movement.
A higher shutter speed is also great for windy days and for handholding your camera with less worry of camera shake.
Watch a quick tutorial on how to use a flash for macro photography in the video above by Silversurfer1.
Learn More:
Don’t Be Afraid to Crop
 Image Credit: BravissimoS via iStock
The point of a macro shot is to get up close to the subject.
While you should endeavor to frame the shot tightly in-camera, don’t be afraid to make further adjustments to the framing in post-processing.
Cropping the image tightly will help you bring more attention to the subject by filling the frame with it. A tight crop also gives you the option of creating a more abstract composition by focusing the viewer’s attention on one small detail within the larger, original shot, as was done above.
Practice Patience
 Image Credit: lauriek via iStock
The advice to “be patient” may sound cliche and simplistic, but in the end, if you can’t be patient, macro photography (and any other type of photography, for that matter) will be impossible to master.
It’s difficult to avoid the temptation to run around, firing your shutter at all the pretty macro scenes you come across. But the resulting images will likely look hurried, and will probably suffer from poor exposure, blurriness, bad framing, or all of the above.
Instead, slow things down, be diligent in how you set up your camera and other gear, and the results will be much more pleasing!
Learn More:
We Recommend
11 Macro Photos That are Out of This World!

I'm guilty of not always appreciating the beauty around me.
And I don't mean the big stuff like mountains or the beach...
I mean the unseen world that goes on outside our normal realm of view, like the featured image above.
Just look at that!
Who knew dragonflies are so cool looking up close?
Especially this one, which seems to be waving at us!
This image shows that if you take the time and put forth some effort, you can create a stunner of a photo with a subject that might otherwise go unnoticed, even if you're a beginner macro photographer.
Let's have a look at even more incredible examples of macro photos that are totally out of this world.

Just like any portrait, in a macro shot of an insect like the one above, the eyes have it.
You have an incredibly small depth of field when working so up close, so you have to be selective in terms of what's in focus. One look at this image and you can see just how shallow that depth of field really is.
By focusing on the eyes, you give the viewer something to zero in on.
Just like in a portrait of a person, having the eyes nice and sharp helps the viewer connect with the subject.
Note as well the little hairs on this insect's head. It's those fine details - along with tack-sharp eyes - that really make the shot.

After seeing this photo, the next time I have a fly in the kitchen, I might just try to take its photo rather than swatting the life out of it.
Here, we see the value of working in macro, with the insane detailing of the fly's eyes on full display.
As if the texture and coloring of its eyes weren't enough, the whiskers on its nose and head add an incredible level of detail to this image too.
Notice the very tight crop as well. In this case, the photographer framed with purpose - it looks intentional. That is, there's no question that the photographer wanted to get as close in on the fly's eyes as possible.
Just as you do when you crop a portrait, if you're going to crop tightly, crop very tightly so viewers understand it's not a mistake.

Here again, we have another prime example of how a macro shot benefits from maintaining focus on the eyes and having a very tight crop on the insect.
Unlike the previous image, this one takes a more frontal view so the mouth of the fly is on full display.
It looks like something out of one of the Alien movies, right?!
Here, the depth of field is large enough that the photographer was able to keep the fly's eyes, face, and mouth in perfect focus.
When framing up shots like this, it's important that you use live view to zoom in on the subject to check focus - if the insect stays put long enough, that is!

Like any other photo, when creating something in the macro realm, it's important to understand the applicable photography rules of thumb to get a pleasing shot.
For example, in the image above, the fly benefits from nice, even lighting that allows the photographer to put the detail of the fly's face on full display.
Likewise, the photographer uses depth of field to their advantage, throwing the background out of focus so our eyes don't stray from inspecting the incredible level of detail of this insect.
Note also that some rules of photography can be cast aside. In this shot, the fly is positioned in the middle of the frame - a clear violation of the rule of thirds. Yet, it makes the image better to break the rule.
When composing your macro shots, keep all those photography rules in mind, but don't be afraid to be a rule breaker either!

Though insects have an astounding amount of detail in their eyes and bodies that make for excellent subject matter in a macro shot, it's worth adding in "props" sometimes, just to give your macro images a little more visual interest.
In this example, the dragonfly certainly delivers with its eyes, legs, and the coloring of its body.
However, the shot is really made with the inclusion of the "props" in the foreground. The single blade of grass and a few drops of dew give the image a bit of context and additional depth.
Likewise, the softness of the dew drops contrasts nicely with all the harsh lines in the shot while also mimicking the roundness of the dragonfly's eyes. Those kind of repeating elements make the image much more pleasing to view.

This is another ideal example of how a tight crop on an insect's eyes can make the image completely transformative.
Again, the detail of the eyes and the body of this dragonfly give this photo an otherworldly vibe, as though we're looking at an alien lifeform that is set to jump off the screen and attack!
When composing shots like this, it's important to consider the background. As noted earlier, the depth of field is so razor thin that the background will certainly be out of focus in a macro shot.
However, you still need to ensure that the background doesn't have any crazy textures or colors that will distract the viewer's eye from the subject. In this case, a dark, black background is a perfect canvas upon which to feature this dragonfly. The shape of its body and its gorgeous blue color really pop on such a dark backdrop.

Here, we see again how the tightly framed shot of an insect on a dark backdrop really makes the details of the insect come to life.
Something else that aids in this is the use of the right lighting.
The right lighting means different things to different people in different situations. In some of the images in this article, natural lighting was used. In others, like this one, a front-facing light was used to illuminate the dragonfly with clean, even, bright light.
In other cases, you might find that you need two lights or perhaps a ring flash attached to the end of your lens.
The point is that you might need to experiment with a few different lighting setups to determine which one best fits in with your workflow and the aesthetic you're going for in your macro images.

This close-up of a fly demonstrates perfectly how you have to select your focal point very, very carefully.
Note how the eye on our left is in focus, but the eye on our right is not. That's because, at this distance, the depth of field might be just a few millimeters deep.
That means that sometimes you have to choose which eye is in focus or if you place the focal point somewhere else, like right between the insect's eyes.
Like the previous two images, again, we see how a non-descript background aids the viewer in getting the full preview of the insect's features. In this case, the white background gives the image a feeling of lightness and airiness, which, in turn, makes this photo seem a little less alien like and scary.

Not all macro photos of insects have to be from a front-facing view.
As we see in this gorgeous example, a profile shot can actually prove to be far more interesting for the viewer's eye.
I mean, just look at all the detail to delight our visual senses - the coloring and texture of the eye, the abundance of razor-sharp whiskers, and what appears to be a nose that juts downward from the insect's face.
I'm no insect expert, but I know a gorgeous shot when I see one. I think this one certainly qualifies!
When creating macro shots, go for a little variety and change up the perspective from which you shoot. It's a good rule of thumb taken from other kinds of photography that will help you generate a series of photos that offer unique perspectives of the same subject.

Wasps are a prime target for macro photography because of their interesting coloring.
Here, you see the same concepts at work discussed in other examples above - tight framing, even lighting, and perfect focus on the insect's eyes.
But with this wasp, we get the added visual pleasure of the pattern created by its yellow and black coloring.
I don't know if that black spot in the middle of its face is a nose, but it sure looks like it! And combined with the sharpness of detail of its whiskers and antennae, this is one macro image that packs a strong visual punch.
As we've seen in each of the photos here, macro work relies on many of the same compositional and technical tricks that you rely on to take any other kind of photo. The only difference, of course, is that you're working in very close quarters with a specialty lens (or, at the very least, add-ons like extension tubes) to get the shot.
Nevertheless, framing, composition, focusing, and lighting remain the hallmarks of a good photo whether you're taking a portrait of your kid or a portrait of a fly. If anything, these photos show that macro photography isn't as scary as you might think, even if some of the subjects you encounter might look like they're from another world!
We Recommend
12 Photo Projects You Can Do From Home During the COVID-19 Pandemic
Photoshoot Ideas At Home
Now that the COVID-19 pandemic is global and most of us are practicing social distancing to help flatten the curve, that leaves many of us with a lot of downtime.
With things like proms and graduations and weddings postponed, photographers the world over are feeling the pinch of reduced business because of the virus.
But rather than sitting around worrying about what this means for your finances - which, by the way, I've been doing a lot the last few days - it's probably a good idea to take some time to focus your mind and attention on some photography projects that can help you become a better photographer.

Part of becoming an improved photographer is understanding how to challenge yourself to put the skills you already have to the test and acquire new skills that will allow you to expand your boundaries as a photographer.
But what many photographers seem to think is that in order to find a challenge, one must travel to far-off locations to find material worthy of a photo. In this day and age, that's not a possibility, so turning inward and finding things to photograph at home is a must for photographers affected by coronavirus.

In that spirit, we’ve put together a list of simple home-based photography projects that you can easily do in your downtime and that will help you become the photographer you want to be.
Now, these don’t just ask you to try typical around-the-house projects like “photograph your children playing” or “create a still-life photo of a household object.” Instead, these projects try to get you to think more outside the box so you come away with more creative photography ideas at home - and better skills too.
Give one or two a try, or challenge yourself to try all 12. Either way, there’s plenty to do in your own backyard to improve your photography during COVID-19. Here are some photoshoot ideas at home:
Photo Ideas For Food

It’s easy enough to snap a photo of your dinner with your smartphone. For this project, however, try to turn your food - or better still - the ingredients you use to make a meal - into a fine art photo.
Whether it’s julienned carrots, slices of apple, or little piles of spices, get in close with your camera directly above the ingredients, get sharp focus using your camera’s live view function, and fire away. Just be sure you have enough lighting (and even lighting to minimize shadows).
Get more details on how to photograph food at home in the video above by Sean Tucker.
Tweet These 12 DIY Photo Projects
A-Z Photos: A Perfect Photo Project for Home

Nothing challenges your photographic creativity than having to hunt for a subject that corresponds to each letter of the alphabet. For a fun twist, photograph concepts that represent more difficult letters - a horse galloping in a field could represent Q for quick.
Over the course of a series of 26 photos, you’ll be challenged to find subject matter (let’s face it...X and Z are difficult!). But not only that, you’ll develop your photographer’s eye in the process.
Part of learning the craft of photography is seeing subjects worthy of photographing where other people do not. This project will help you do just that. Plus, this is one of the best home-based photography projects because it takes a lot of time off the clock.
Go Black and White

Like the A-Z photo project, shooting only in black and white will help develop your creative eye, but in a different way.
Because of their lack of color, black and white photos depend on other factors, namely, lines, patterns, textures, shapes, and, of course, light and shadows, to retain the interest of viewers. Thus, learning to see in black and white is an important skill not just for black and white photos, but for color photography too. After all, it’s often those fine details that make a good photo a great photo!
So, with that in mind, try a weeklong or two-week black and white challenge. No matter what subjects you capture, look for the elements listed above to try and elevate your photos.
Get some excellent black and white photography tips in the video above by Jamie Windsor.
Capture Oil & Water
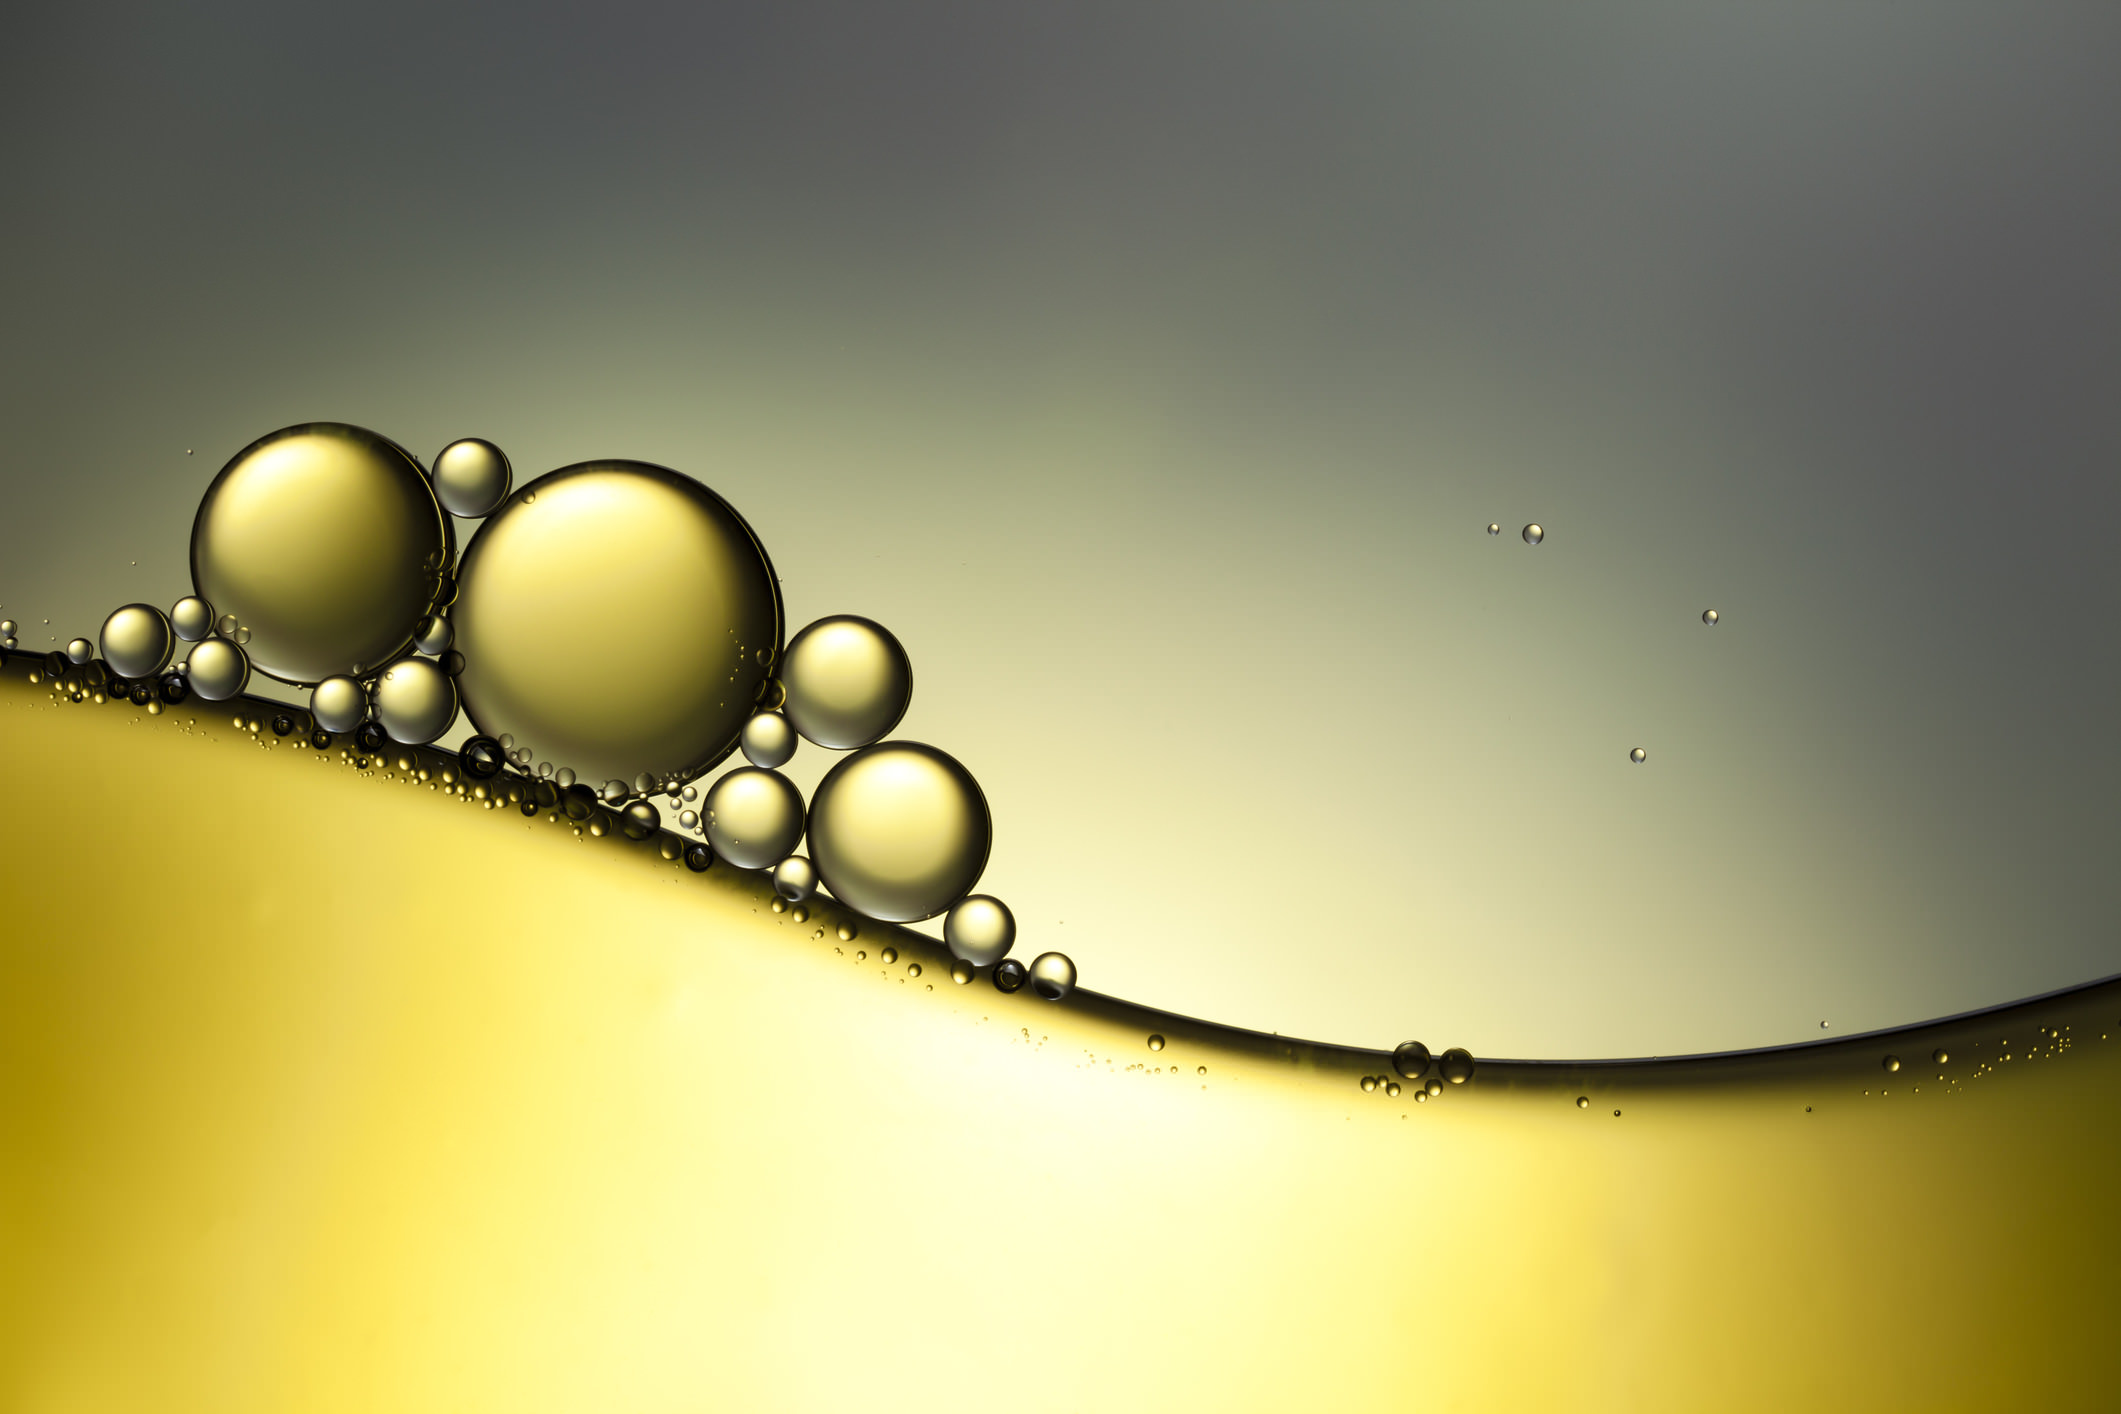
Test your ability to create some abstract art by photographing oil and water.
Put a colorful cloth or piece of paper on a table. Place several drops of cooking oil into a clear, glass dish of water, then set the dish on top of the cloth or paper. Then, add a light source - a flash or even an incandescent lamp that can be angled - and capture the striking interaction of these elements.
The results, like the image above, can be breathtaking! Plus, you’ll acquaint yourself with creating abstract photos, and you can begin to build close-up or macro photography skills as well.
Create a Photo Scavenger Hunt

If you want to expand your photography skills, a photo scavenger hunt is a great activity. It's also one of the best things that photographers affected by coronavirus can do to occupy their time.
If you're social distancing at home with your family, have each member of the group come up with a list of things to find and photograph, put them into a hat, and pick out a dozen or so subjects. Then, find each subject and fire away!
If you're social distancing on your own, get a group text going with your photography pals, solicit ideas for items to hunt for, and each of you can search your own homes for those items. Share the photos you take and offer critiques of one another's work.
Photoshoot Ideas At Home - Work With Water

All you need for this project is a container of water with a small hole that allows small drops to fall through, a good lighting source (like natural light through a window), a nondescript background, and a camera setup just right to capture the drops in midair.
It’s a simple enough idea, but is a fairly complex process of getting the lighting, the timing, and the camera settings just right. But those are good things for you - the more you practice adjusting your camera’s exposure settings, for example, the quicker you’ll be able to make adjustments for all types of photos. That’s learning that has wide applicability!
First Man Photography has a great tutorial on water droplet photography. Check it out in the video above for the complete steps from start to print.
Photography Ideas At Home: Practice Shallow Depth of Field

Mastering depth of field is just one of many important photography concepts that will take your images to the next level.
Using a shallow depth of field is a common practice in portraiture because it allows you to draw the viewer’s eye to the subject. That is, with a shallow depth of field, the background becomes nicely blurred, allowing the subject of the photo to take center stage.
Fortunately, you can practice this skill in the comfort of your own home. Just open the aperture to a wide value (i.e., f/2.8, or as wide as the lens will go), place your subject a good distance from the background, and take a position close to the subject, and voila - you’ll have a blurry background that totally changes the look of your portraits!
Learn more about aperture and depth of field in the video above by Chris Bray Photography.
Use the “Wrong” Lens

Something that can stall your creativity as a photographer is to get shoehorned into using a particular kind of lens in a particular kind of setting. A great way to break out of that is to purposefully use a lens that typically isn’t recommended for the type of photos you’re taking.
For example, I might pose my kid in the backyard, and instead of using a portrait lens like my Canon RF 85mm f/1.2 with my Canon EOS R, I might photograph him at the wide end of my 15-35mm f/2.8 to create some pleasing environmental portraits. Using a telephoto lens like the Canon RF 70-200mm f/2.8 to take portraits of the family dog is another option. I might also visit a nearby landscape and forego the wide-angle lens in favor of a macro to get up-close shots of smaller details.
In doing so, you’ll be able to see everyday subjects in a whole new light and develop your photographer’s eye that much more.
Creative Photoshoot Ideas - Look Down

When we take photographs, it’s natural to look outward at our own eye level. But if every shot you take is from this point of view, they will soon start to all look the same.
Spice things up by changing your perspective and looking at your feet for photograph-worthy subjects. This isn’t just an exercise in looking down, though. Instead, this challenge will help you to become more observant - to look for little details that can be highly impactful in an image.
It also helps you become more adept at mastering angles and points of view - you might take a shot of something on the ground from directly above or you might get on the ground yourself and provide viewers with a worm’s eye view of the scene.
Whatever the case, the more you look around and find new points of view, the more interesting your images will be.
Tweet These 12 DIY Photo Projects
Home Photography - Go Minimal

Perhaps one of the hardest things to do as a photographer is to learn to thin the herd, so to speak, and compose images that are simple.
Going minimal is hard because we don’t see minimal scenes with our own eyes - whether it’s our living room, our backyard, or the view from the front porch, we’re bombarded with stimuli, so it’s natural that we tend to create images with all that stimuli included.
But, instead of incorporating absolutely everything into a single image, try to exclude all the clutter and focus on a single, strong subject. All photos benefit from a strong subject, so this project will result in better photos whether they are minimalist or not!
Give the video above by Mango Street a quick watch and learn how to use negative space in your photos.
Work in Low Light

Taking photos in low light is a scary proposition for many photographers because with less light, you have to work a little harder to get the camera settings that will result in a pleasing photo.
But that extra level of work will benefit you in the end because mastering the manipulation of aperture, shutter speed, and ISO not only helps you photograph scenes in low light, but will also help you photograph scenes across all levels of lighting.
Again, the more you practice manipulating your camera’s settings, the more natural and intuitive those adjustments will become. Then, no matter if you’re shooting at midday or at dusk, you’ll have the confidence to dial in the appropriate settings.
Photograph the Mundane

Perhaps the ultimate home-based photography challenge is to make a gorgeous photo out of mundane, everyday objects or scenes.
Why?
Without an inspiring subject or great lighting or interesting details, the onus of creating an eye-catching photo falls even more on your skills as a photographer. Instead of relying on vibrant colors or unique subject matter, you have to trust your compositional skills to frame up a shot that will be pleasing to the viewer’s eye.
By using the skills you develop in the other 11 projects on our list, you will be even more likely to capture the beauty inherent in the humdrum events of everyday life.
Besides, appreciating the small things isn't a bad thing as we all deal with the COVID-19 pandemic. As you tackle these projects, do so carefully and with the health of you, your friends, and family in mind.
We Recommend
3 Simple Tricks to Help You Learn Photography Faster

In today’s world in which we have high-tech cameras at our disposal with all sorts of features that promise to make photography faster, simpler, and easier, it’s hard not to get caught up in the notion that shortcuts will help you become a better photographer. What makes it even more difficult is the sheer volume of things out there to photograph - wildlife, landscapes, portraits of friends and family, street scenes, and so on.
But the fact of the matter is that becoming a better photographer is a process. After all, photography is an artform; a craft that takes years to perfect. What’s more, how one approaches portraits varies greatly from how one approaches landscapes or street scenes. It’s not necessarily a one-skill-set-fits-all situation.
Having said that, there are some strategies you can use to help you develop your skills while also simplifying photography. It’s really just a matter of focusing on a very straightforward workflow that includes three parts.

Pick One Lens and Roll With It

Photographers are notorious gear hoarders, with drawers and bags full of filters, tripod heads, camera bodies, and especially lenses.
While it’s nice to have a solid collection of gear once you get the hang of things, scattering your attention (and money) around on multiple lenses will only complicate matters for a beginner. Each lens does things a little differently, and lenses of different focal lengths have widely varying purposes. The best way to develop an understanding of how each lens in your kit behaves is to spend a lot of one-on-one time with each one.
The key here is not to pull out your wide-angle lens and spend an hour taking photos with it. Instead, spend a significant amount of time getting to know your lens. Explore its features, learn about its behaviors and idiosyncrasies. Photograph different subjects to determine what the lens’ strengths and weaknesses are as well. There’s no prescribed long-term time limit here - for some, a few days of shooting with one lens will be enough time to get to know it inside and out. For others, the process might be weeks or months.
What’s the benefit of the one lens strategy, you ask?
Not only will this help you get to know your gear, but it will also give you an opportunity to focus on the process of taking a photo rather than worrying about changing lenses. If you aren’t constantly waffling back and forth between lenses, you’ll have more time to concentrate on actually composing good photos. It also gives you a clearer picture of what your next lens purchase needs to be so you can fill in the holes that your current lens doesn’t quite fill. In that regard, this strategy helps you on all fronts - becoming familiar with your gear, improving the composition of your photos, and protecting your bottom line.
Simplify the Subject Matter

Given the broad capabilities of today’s camera systems, it’s hard not to get sucked into the idea that it’s easy to take great photos of any subject. If you think about it, how often do you grab your camera and head out to take photos of nature or landscapes, then along the way decide you’re going to take a few portraits and city shots as well?
The problem with hopping from one type of subject matter to another is much like the problem with trying to work with too many lenses - instead of becoming adept with one, you spread your attention across many different areas. More often than not, having this approach means you get more photos, but photos that are of a lesser quality.
Why is that?
The issue is that each subject necessitates different camera settings, if not different lenses as well. So, when you head out to photograph a sunset, you’ll need very different camera settings than if you were to take a portrait of a friend indoors.

Again, part of what will make you a better photographer is practice and experience. Bouncing from one subject to another won’t help you in that endeavor. Instead, strive to simplify things by focusing on one subject at a time. If you’ve set your camera up to take long exposure shots of a waterfall, take long exposure shots of a waterfall. If you’re good to go for natural light portraits, take natural light portraits.
This isn’t to say that you can’t change the subject matter you photograph from one day to the next; but in a single outing, limiting your attention to one type of subject will get you more time to practice your craft. In the long-run, the benefit will be a much deeper level of understanding of the camera settings, equipment, and creative aspects of taking higher-quality photos for that specific subject, the result of which are better photos.
Don’t Get Distracted by Gadgets

There are tons and tons of accessories and gadgets available for photographers. So many, in fact, that it’s easy to get into buying mode and end up with a camera bag full of accessories that you don’t necessarily need.
When you become distracted by gadgets, your attention is taken away from actually learning the processes involved in taking high-quality photos. Sure, it’s neat to be able to control your camera with your smartphone, but how does that help you learn the fundamentals of photography, like shutter speed, aperture, ISO, and the like?
The short answer is that it doesn’t. This isn’t a knock on the cool accessories and gadgets available today as they can certainly add to your ability to create the photos you wish to create. But before you begin investing in a bunch of accessories for your camera, focus first on learning the fundamentals of photography. Doing so will benefit you in the long run because with a deeper level of understanding of composition, lighting, exposure, and the like, you’ll be able to create more compelling photos, and you’ll be able to use the gadgets you buy in a more purposeful manner. Again, it’s a win-win situation!

If anything, limit the accessories you buy (at least initially) to a tripod, a set of filters, and a remote shutter release. These accessories will vastly expand your capabilities in terms of the types of photos you take without overwhelming you with possibilities.
The moral of the story is to simplify your approach and resist distractions. Spend time working with one lens and one type of subject so you can perfect your understanding of the fundamentals of photography. By engaging more deeply in the process of creating a photo, and resisting the urge to jump from subject to subject, lens to lens, and accessory to accessory, you will better your understanding of photography, and, in turn, improve the photos you create. It’s that simple!
We Recommend
A Step-By-Step Guide to Macro Photography Jargon and Equipment

Macro photography has the ability to wow viewers with seldom-seen views of the world in which we live. For that reason, it’s a highly popular undertaking amongst photographers.
But for some people itching to get into macro photography, there are a couple of barriers that seem difficult to overcome at first: all the macro-related jargon and all the specialized equipment that macro photographers can use to get incredible shots, like the one above.
In this step-by-step guide, you’ll learn some of the terminology that seems a bit confusing and get an introduction to a few key pieces of equipment that can help you attain your macro photography goals.
Step 1: Understand the Jargon

First, let’s clear up any confusion there might be about a few macro photography-related terms that get thrown around a lot.

Macro vs. Close-Up
Where all macro photography is close-up, not all close-up photography is macro. A macro photograph is one in which you seek to make a small subject appear much larger. The image of the ladybug above is an example of this. Conversely, a close-up shot is just that: it is an image of an object taken at close range, and which fills the frame. Where a true macro shot is taken at a specific level of magnification, typically with a dedicated macro lens or other macro photography equipment, a close-up shot can be taken with just about any lens - even a telephoto.
Magnification
Magnification refers to the size of the subject on your camera’s sensor. Many macro photographs are taken at a 1:1 magnification. All that means is that if the subject, say, a dragonfly, is one inch long in real life, it will be one inch long on your camera’s sensor at 1:1 magnification.
Another example: if that same one-inch-long dragonfly only occupies half an inch on your camera’s sensor, it’s a 1:2 magnification. There is some disagreement regarding the point at which magnification exits the realm of macro, but a good rule of thumb is that if the image on your sensor is at less than a 1:10 magnification, you’re no longer taking a macro shot.
Working Distance

Working distance is defined simply as the distance between the subject and your camera sensor at your lens’ nearest focus distance. This means that at a working distance of 10 inches and with a camera/lens setup that is six inches long, the end of your lens will be four inches from the subject.
In macro photography, a larger working distance is desired, simply because you can still get a great shot, but don’t have to be just inches away from the subject. Many of the top-shelf macro lenses have a working distance of a foot or more, meaning you can snap images of insects and other skittish creatures without horning in on their space quite so much.
Though a larger working distance is nice, it comes at a price: as working distance increases, magnification decreases. That is, shooting at 1:1 magnification requires you to minimize the working distance such that the subject appears life-size on the camera’s sensor, whereas shooting at 1:2 magnification means you have additional working distance, but the subject appears smaller.
Step 2: Become Familiar With the Gear
There are a lot of different pieces and parts that you can add to your kit that will help you capture stunningly detailed macro shots. Some, like a plain old macro lens, aren’t that confusing. Others, like extension tubes and reversing rings can make a novice macro photographer’s head spin. Note that you don’t necessarily need to run out and purchase the items below to take macro photos, but they might help you out, particularly if you’re on a budget.
Extension Tubes

Extension tubes allow a lens to focus at a closer distance by putting space between the camera body and the lens. Extension tubes have no glass; they are merely empty elements that attach to your lens, and in turn, attach to your camera. Essentially, by extending this distance, you reduce the minimum focusing distance while also increasing magnification.
For example, a 50mm lens that has a magnification of 0.15 coupled with a 25mm extension tube would then have a new magnification factor of 0.65. Extension tubes come in various sizes, usually between 8mm and 25mm, although you can stack them on top of one another to achieve a longer length, if needed.
Extension tubes have their pros and cons, to be sure. On the one hand, they allow you to convert a normal lens into a macro lens without spending a lot of money. At the same time, the quality of the image that results cannot stand up to one created with a dedicated macro lens.
Bellows Units

Much like an extension tube, a bellows unit extends the distance between the camera sensor and lens. Unlike extension tubes, bellows units are expandable, making them a versatile addition to your kit. Unfortunately, they can be big and bulky, which usually limits them to usage in a studio. On the plus side, if you have a telephoto lens and you want to take macro shots, bellows units will do a better job of making that lens perform at a macro level than will extension tubes.
Reversing Rings

Another macro photography equipment option is a reversing ring. Like the name implies, the ring allows you to mount a traditional lens to your camera, only backwards. Doing so allows you to use a prime lens or wide-angle lens to get magnification levels of two times, or even more.
Again, in the absence of having a dedicated macro lens, a reversing ring can allow you to get into macro photography, but on a budget. And while it might sound crazy to mount a lens to your camera backwards, it can actually garner quite impressive results.
Step 3: Decide What You Need and Get Started!
Now that you have a little bit of insight into some of macro photography’s confusing terms and odd equipment, you can decide how you want to begin taking macro photos. Look for ways to use magnification and working distance to your advantage so that you can capture images of macro scenes with greater ease. Ponder the various budget-friendly options for equipment explored above, and consider how using extension tubes, a bellows unit, or a reversing ring can help you get your start.
Recommended Reading

Of course, you’ll need some guidance regarding other gear, camera settings, and compositional ideas as well, which you can get in our recommended reading for the week: The Complete Guide to Macro and Close-Up Photography by Cyrill Harnischmacher.
This book offers everyone from beginners to veterans essential tips for success. Learn about the concepts related to macro photography, different accessories you can use to get great macro shots, and discover shooting techniques and methods of working with different lighting that will help you highlight your subject. There are more than 600 sample images in The Complete Guide to Macro and Close-Up Photography as well, so you’re sure to find the creative inspiration you need to create macro shots like those you see in books and magazines.
Recommended Vendors
Don’t forget that we’ve got a list of high-quality vendors that might just have the macro photography gear you seek. Check out our Recommended Vendor section to see what’s available, from cameras, lenses, and accessories to workshops and photography services. We only support the very best, so rest assured that these photography companies are the best choice when you need to complete your macro photography kit.
We Recommend
A Step-by-Step Guide to Mastering Minimalist Photography
Ask ten people what minimalism means to them, and you’re likely to get ten different answers. It’s a difficult concept to define because minimalism means different things to different people. And when minimalism is combined with an artform like photography, you have an even broader spectrum of what the two mean.
Nevertheless, there are common features to minimalism that transcend most definitions. Simplicity. Use of negative space. Highlighting color or texture. Simple backgrounds. Using these elements will get you well on your way to creating a stunning minimalist photograph.
Let’s explore each element in more detail.
Embrace Simplicity

For many photographers, simplicity translates into boring. That assessment is not exactly fair, however. If you include a strong subject, even if that subject doesn’t occupy much of the frame, you instantly make the image more interesting while maintaining its simplicity.
The essential benefit of composing a simple shot is that you give the viewer more freedom to interpret your work. In this way, even though there isn’t much occupying the space in the frame, viewers still have an opportunity to deeply engage with the shot because so much of it is left to their interpretation. With more responsibility to discover the meaning of the image placed on the viewer, minimalism really does do more with less, and engages viewers on a deeper level.
Utilize Negative Space

A hallmark of minimalist photography is the appropriate use of negative space. Generally speaking, negative space is the area around and between subjects that is devoid of much detail. Without much detail to speak of, these areas then serve to enhance the importance of a subject. No matter the type of photography, be it a portrait, a landscape, a cityscape, or anything in between, the inclusion of negative space gives the viewer’s eye a chance to scan the image without becoming overwhelmed. Combined with the increased emphasis on the main subject, this creates a situation in which your image has a great deal of power and is very impactful, all without being overrun with visual details.
Emphasize Color and Texture

People who claim that minimalist photography is boring clearly don’t understand that part of minimalism is to embrace color and texture. Both features give great visual interest to a scene, yet by keeping things simple, such as using the same tones throughout, the image can remain minimalist while having a pop of color or texture that really grabs the attention of viewers.
This is especially powerful when there are multiple, small subjects in the frame. Using color to bring greater attention to each element is a handy trick. The same thing can be done with textures or even patterns. The key here is to use highly saturated colors or primary colors that are bright and vibrant. Better still, try using complimentary colors, like blue and orange, using one color as your negative space and the other color as your primary subject, as was done above.

Without all the distractions that other photos might have in the frame, you can get away with making bold choices related to colors and textures. In fact, you might even use multiple colors or textures to really pump up the interest in the shot. If you take this approach, be careful in terms of how much space is occupied by the colors and textures in the frame. Use each sparingly to stick with the spirit of the minimalist shot.
Stick With the Rule of Thirds (But Know When to Break the Rule)

Minimalist images can sometimes feel unbalanced because of the lack of subject matter. However, if you stick to the rule of thirds and place the areas of interest along its grid, the resulting image will have greater balance, and will therefore engage viewers in a more meaningful way.
Now, this doesn’t mean you have to place the primary subject exactly at one of the intersection point of the rule of thirds grid. Instead, use the rule of thirds as a guide for composing your shots while maintaining the freedom to throw the rule out the window when the situation is warranted.
Final Thoughts

Mastering minimalism is all about embracing its hallmark features and training your eye to find the vignettes that benefit from such simplicity. If you’ve never tried minimalism before, and even if you have and it didn’t go well, try focusing on the four steps outlined in this lesson to devise a more powerful, minimalist statement. You need not include each of these four elements in every image. In fact, that might be a bit overwhelming. Instead, get some practice incorporating each element into your photos, and with time, you will train your eye to see the many types of minimalist scenes you encounter in everyday life.
We Recommend
A Step-by-Step Guide to Regaining Your Inspiration
Creative ruts are the worst, but they always happen. If you’ve been carrying a camera for any length of time, you’ve undoubtedly found yourself completely uninspired by your surroundings. You might try to force the issue and go out and take photos in spite of your lack of creativity, but that might just push you deeper into the doldrums.
Instead, you need to find inspiration in new places, and doing so means that you need to expand your boundaries and remove some of the limits you’ve placed on yourself.
Let’s find out how to do that.
Step 1: Break Your Routine

We naturally like routine. It’s comfortable and familiar, and helps us stay on task and accomplish what needs to be accomplished in a given day.
The problem with routine, however, is that it can be an enemy to creativity. After awhile, the same commute to work each day, the same walk in the park at lunch, and visiting the same pond each evening as you walk the dog become less an opportunity to take interesting photos and more rote repetition of something that just needs to get done.
Breaking out of that routine might be all you need to jumpstart your creativity. Take a different route to work. Spend your lunch watching people on the street. Get up early and catch a sunrise. Take portraits of your friend’s kids. Just do something out of the ordinary and see how it might inspire you to do something different with your camera and lens.
Step 2: Get Uncomfortable

Closely related to the idea of breaking your routine is the concept of getting uncomfortable with your photography. It’s simple, really: if you traditionally take portraits, try landscapes for awhile; if you usually photograph landscapes, give wildlife photography a try; if you are most comfortable taking portraits of friends and family, head to the street and try photographing strangers.
You can also get uncomfortable by making alternative choices when it comes to gear and composition. Take portraits with a wide-angle lens or landscapes with a telephoto lens. Challenge yourself to hand hold your camera even when conditions might call for a tripod. Try using a slow shutter technique. Frame shots from unique perspectives, such as from up high or down low to the ground.
The point is that if you put yourself in uncomfortable situations, you’ll have to rely on your photography talents and know-how to make the most of those situations. By proxy, you’ll have to be creative in how you approach these situations, which might be just what you need to get your photography mojo back in order.
Step 3: Be Less Technical

Although photography is an artform, there are a lot of technical aspects to it as well. There are the mechanics of your camera and lens, the science behind exposure, and all the rules of composition that, when used together properly, can result in breathtaking images.
The problem is that if you focus too much on the technical side of things, and spend too much time worrying about whether or not you are doing things the “right” way, you can easily lose your creative touch. When faced with a dynamic scene, approaching it with the coldness of getting everything technically right might mean that you miss out on capturing the spontaneity or the emotion of the moment.
Being less technical doesn’t mean that you should purposefully head out and totally disregard all of the rules and suggestions of how to use your camera or compose a photo. Instead, give more credence to the power of being in the moment. Look for elements in the scene that grab your eye or elicit a response - for whatever reason - and snap away. Make minor adjustments as necessary, but focus more on the moment and less on things like, “Is my shutter speed right?”
Final Thoughts
The ebb and flow of creativity and inspiration is just a natural part of creating art. Some days you will be oozing inspiration and have trouble finding enough time to create all the photos you want to create. Other days, you won’t take a single photo that you like and find that you lack any inspiration at all. But simply breaking out of your routine, challenging yourself with new photographic pursuits, and focusing less on the technical aspects of photography and more on simply being in the moment are three easy ways to try to kickstart your creative juices. If you’re in a rut, give one (or all!) of these methods a try and see where they take you!
Recommended Reading

As noted in this lesson, creative ruts are just part of ebb and flow of photography. Though the recommendations we’ve outlined here are a good start for finding your inspiration again, a more in-depth reading to consider is The Creative Fight by Chris Orwig. In the book, Orwig discusses the difficulties of the creative process, and dives into easily implemented methods you can employ to be inspired, regain your creativity, and find meaning in the work you do once again.
The Creative Fight would be a solid addition to your library that you can reference over and over again to get back to the pinnacle of your creativity when inspiration seems to elude you. With chapter-based exercises designed to help you put concepts into action, The Creative Fight is the ideal tool for regaining your inspiration.
We Recommend
Demystified: Extension Tubes for Macro Photography

If you’re interested in macro photography, you have to buy a special macro lens, right?
Wrong!
There are a few workarounds you can use, including extension tubes, which are much less expensive than investing in a specialized macro lens.
In the video below, Eric and Michelle from Prime Photography tackle the ins and outs of using extension tubes, including a few insights into the benefits and detriments of doing so. Have a look and see if extension tubes are right for you!
Amazon Recommendations
- Fotodiox Canon EOS Macro Extension Tube Set for Extreme Close-Ups
- The Complete Guide to Macro and Close-Up Photography
- David Busch's Close-Up and Macro Photography Compact Field Guide
We Recommend
Fun (and Functional) Gadgets You’ll Want for Your Canon or Nikon Camera

Hey Canon and Nikon lovers, are you itching to add a new toy to your kit?
There are tons and tons of incredible camera accessories out there, but not all of them are worth your time or money. We’ve done the heavy lifting for you and found three innovative, functional, and fun tools that will help you maximize the power of your Canon or Nikon system and take your photography to a whole other level. PhotographyTalk.com has an interesting article about Nikon Vs Canon camera, check it out.
Check these things out!
Pulse by Alpine Labs

Whether you like to shoot stills, long exposures, videos, or time-lapses, Pulse by Alpine Labs has got you covered. This little gadget is the ultimate camera remote if we’ve ever seen one. It allows you to operate your Canon or Nikon camera remotely from your smartphone. Just plug it into your DSLR or mirrorless camera, mount it on top of your camera using the hot-shoe mount, and take wireless control of your rig.
Pulse gives you the ability to adjust a whole host of camera settings - ISO, aperture, and shutter speed among them. Create stunning still images with remote shutter release, record video at the touch of a button, and create basic or advanced time-lapses, all from Pulse’s intuitive and easy-to-use smartphone app. You can even control multiple Pulse-enabled cameras from your phone, giving you the chance to do some professional-level, multi-camera work!
Pulse has a 24-hour battery life so that you can tackle jobs of any size. It’s compatible with iOS and Android devices and will work with more than 60 Canon and Nikon cameras. And, at just 1.5 oz and measuring just 40mm x 60mm, it’s easy to transport. Heck, just put it in your pocket and off you go!
Canon MR-14EX II Macro Ring Lite

If macro photography is your thing, you know that getting close to the subject and illuminating it with clean, even light is essential to capturing the details of smaller worlds around us. When tight spaces preclude natural or typical artificial lighting from illuminating the scene, the ideal answer is to add lights to the end of your lens.
You can do that with the Canon MR-14EX II Macro Ring Lite. This ring light outperforms your camera’s built in flash because the pop-up flash on your camera is often too harsh and doesn’t provide the even coverage you need for close-up work. The Macro Ring Lite actually has two flash tubes that are independently adjustable, so you have an even greater level of creative control when tackling your next macro subject. Just attach the light to the end of your Canon lens (several are supported), attach the master unit to the camera’s hot-shoe, plug it into your camera, and you’re ready to roll!
Zacuto Z-Finder Pro 2.5x

Regardless of whether you create stills or videos with your Canon or Nikon camera, the Zacuto Z-Finder Pro 2.5x will become a necessary accessory when you shoot. The Z-Finder Pro makes shooting handheld or on a tripod easier because it turns your camera’s 3” LCD display into a large viewfinder for much easier focusing. Even when shooting outdoors in bright, mid-day sun, the Z-Finder Pro still gives you a crystal clear magnified image to inspect the details of your shot.
The large eyecup makes it comfortable to view your screen, the protective lens covers prevent fogging, and the dioptre is fully adjustable up to -4.75, so you can be sure to focus sharply even if you’re quite nearsighted. Just attach the Z-Finder to your camera using the included Gorilla Baseplate and mounting frame, and you’re ready to take images and videos with better sharpness than ever before!
We Recommend
Fun Macro Photography Tips for Beginners
 Leo Rosas/COOPH
Macro photography is one of those things that I appreciate for how cool it looks, but I don't spend much time doing it.
But that might change...
In the video below, our friends at COOPH have put together a few fun macro photography tips that you can do at home, even if you don't have any macro experience.
As you'll see in the video, with a few simple tricks, you can create breathtaking images with nothing more than water, a few household items, and a macro lens.
Give the video a look, and for a detailed breakdown of how to take epic macro photos, check the tutorial below.
Macro Photography Tips: How to Create Water Droplets
 Leo Rosas/COOPH
In looking at the image above, you might think that creating a macro photo like that would be complicated.
However, it's actually quite simple...
First, fill a tank with water. Then set up your camera on a tripod and position it close to the tank.
Next, place a colored sheet of paper (or a two-toned sheet of paper, as was done in this case) behind the tank.
Using a straw or a sponge (or some other apparatus), simply drip water into the tank.
 Leo Rosas/COOPH
Another fun option is to modify the light that illuminates the tank.
You can cover a flash with a colored gel, use a colored reflector, or even place colored paper under the tank to give the water an interesting, color-filled look.
As you can see above, the final results can be quite eye-catching!
Learn More:
Techniques for Macro Photography: Water Distortions
 Leo Rosas/COOPH
Creating water droplets isn't the only fun way to do macro photography. You can also create gorgeous water distortions.
There are a number of ways you can go about doing this.
In the image above, the photographer simply found a water droplet on a tree branch, got in close with a macro lens, set a fast shutter speed, and voila, an awesomely distorted water droplet image!
 Leo Rosas/COOPH
Another option is to use a straw to place water droplets on a clear plastic sheet.
Then, have a model hold the plastic in front of them.
When you shoot through the water droplets on the plastic, you can get a crazy, out-of-this-world result like the one shown above.

Water Bubbles are a Fun Macro Photography Trick
 Leo Rosas/COOPH
Using the same tank of water as before, simply insert a straw into the tank and start blowing bubbles.
By setting the camera up on the same eye level as the bubbles and placing an interesting background behind the tank, you can capture something like the shot above.
Looking at it, you'd never know how simple it is to create!
Learn More:
Use Oil and Water for the Best Macro Photography Results
 Leo Rosas/COOPH
As far as macro photography goes, I'm always impressed with what oil and water look like close up.
Creating images like the one above is about as simple as it comes, too.
Just pour oil into a water tank and get in close to snap photos of the oil and water mixing together on the surface.
 Leo Rosas/COOPH
You can also shoot from a lower perspective and capture the moment that the oil descends into the water.
The drops of oil take on an ethereal vibe, especially if you add a bright background behind the water tank to show off the interaction of the oil and water.
There's plenty more where that came from, too.
Be sure to check out the video above for all of COOPH's awesomely easy macro photography tips!
We Recommend
How to Take Interesting Photos in the Most Boring Places

Mundane Surroundings? No Problem!
All too often we get enamored with photographing the spectacular - the Yosemites of the world, for example - and shun the everyday locations with which we are familiar.
However, this is a mistake because gorgeous photos can be created in even the “ugliest” locations. It’s just a matter of getting creative.
Consider these quick and easy tips for making the mundane magnificent.
Focus on the Details
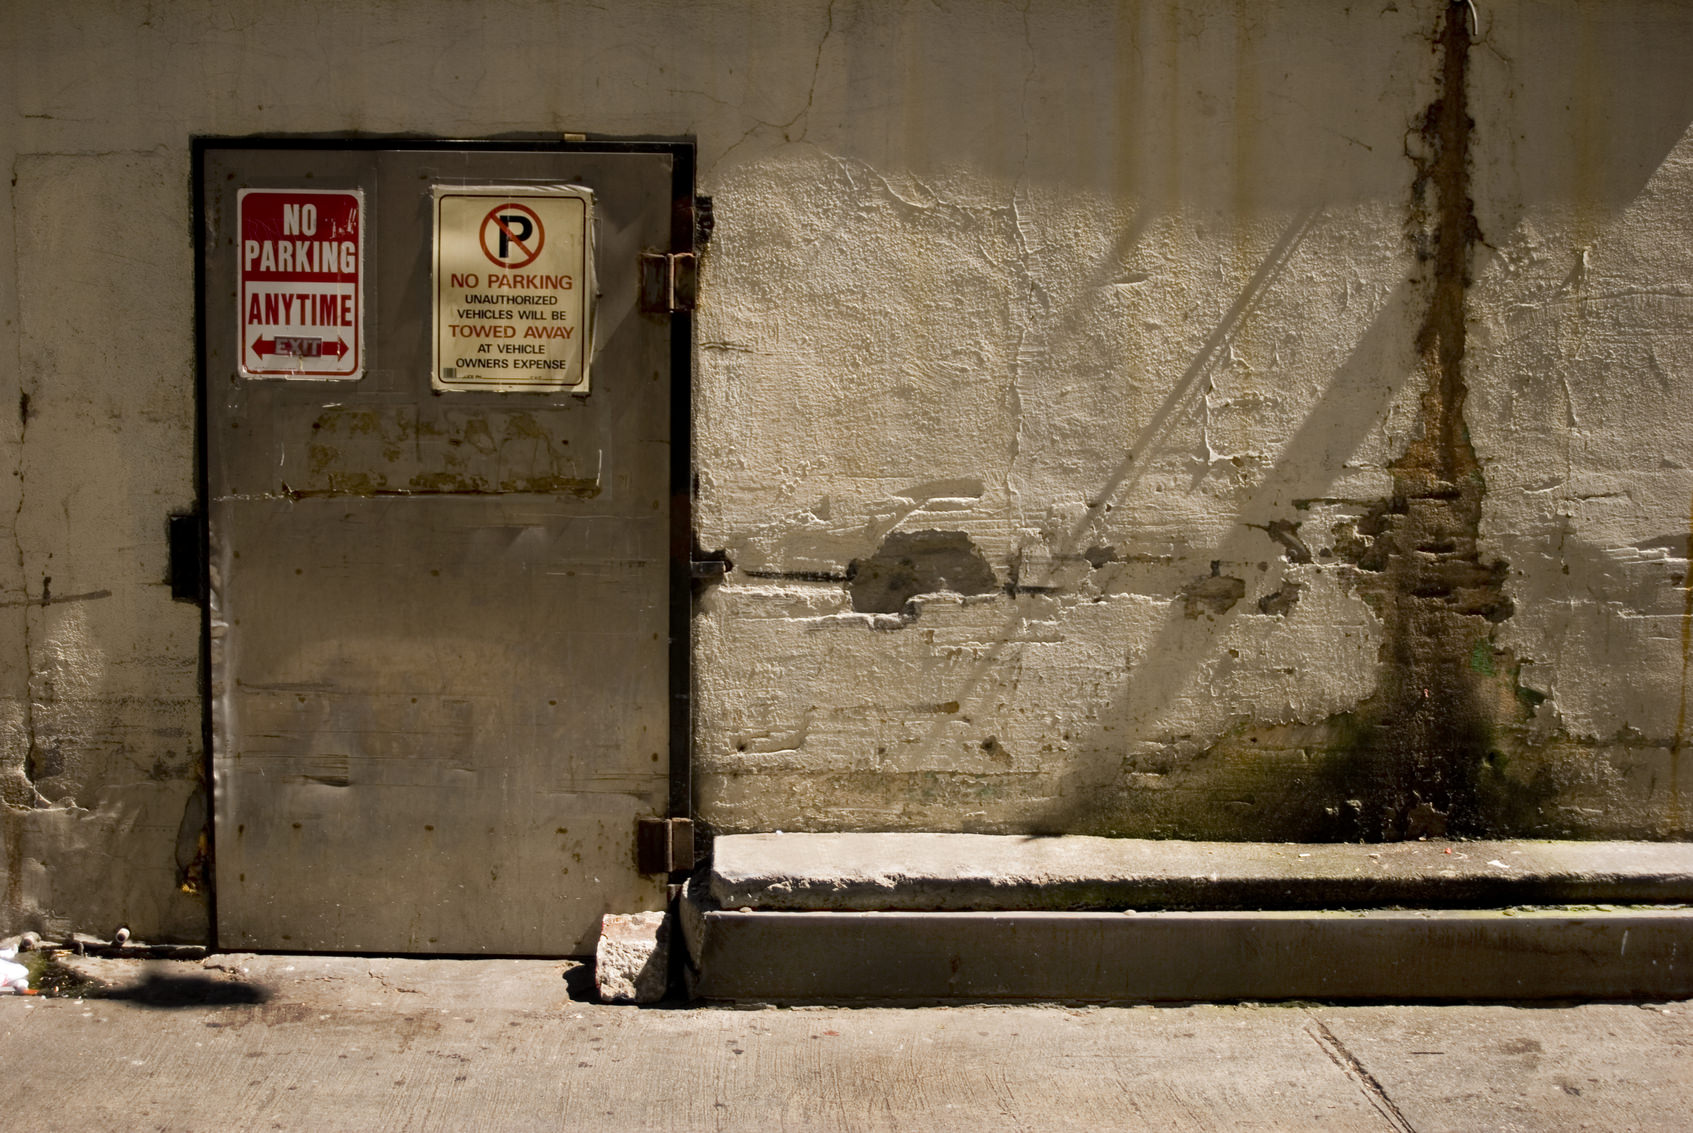
When striving to find beauty in the mundane, it’s important to focus on the little details. Doing so opens up new avenues for portraying the subject because you can focus on fundamental elements like shape, color, texture, patterns, light and shadows, to name but a few.
The image above benefits from this approach. The detail of the wall, with areas of peeling paint and cracks, along with the shadows cast by elements unseen in the frame, gives this image all sorts of visual appeal. What’s more, including typography in the frame - the signs on the door - adds another layer of punch, both in terms of the visual interest of the lettering and in terms of the pops of color that are added to the scene.
Look for details like these in your everyday scenes, and use them to create a more compelling image.
Go For Broke With Your Composition

Often, the manner in which you frame your shot, the way you utilize depth of field, or the perspective from which you shoot will have a tremendous impact on how your image is received. For example, shooting from eye level, from a standing position, with your subject centered perfectly in the frame might not be the most compelling composition. In fact, that sort of composition might make the most spectacular scene seem a bit boring.
Just like with any photo, an image of a “boring” subject needs to benefit from how you compose the shot. As a result, do what you can to shake things up. Try shooting downward to get a top-down perspective, as was done in the image above. Play with your aperture to see how a blurry background might change the impact of your photo. Shift your subject to the extreme edges of the frame, giving viewers something totally unexpected in terms of subject placement. You might very well find that doing so makes the shot.
Don’t Be Shy

A large part of your success in making great photos of less-than-stellar subjects is in your willingness to experiment and see what you can create. It’s a difficult process to learn how to take high-quality photos. But when you combine that with subjects that maybe aren’t as grand or gorgeous as you’d like, the process becomes a little tougher to master.
Nonetheless, don’t let an increased level of difficulty dissuade you. There will be many bad photos, no doubt, and many moments of great frustration as well. But being willing to try new things and stretching your comfort zone will not only result in an expanded set of technical skills, but it will also help you grow creatively. So, don’t be shy - grab your camera and a couple of friends, and see what “boring,” everyday subjects you can find in your house, your yard, or your neighborhood to highlight in a gorgeous photo.
We Recommend
Macro Lens Guide

photo byConstantinCornel via iStock
This macro lens guide will describe the features of macro lenses and the macro lens specs that make them different from regular lenses.
We’ll also look at the various macro lens focal lengths and discuss why one of these awesome lenses may need to be in your gear bag.
Macro Lens Specs and Features
photo byJohn Long via iStock
What makes a macro lens different from other lenses? The most obvious features of macro lenses is their ultra-close focusing ability. But it’s more than the act of focusing closely that gives a macro lens its label.
Flat Field

photo byPanama7 via iStock
A macro lens is specially corrected for using ultra-close focusing distances. Most lenses have a characteristic known as curvature of field. A lens does not focus all points on exactly the same plane - there is a slight curvature to the focus plane compared to the film plane or sensor.
This phenomenon exists due to the nature of focusable optics. In regular photography with modern lens designs, this slight curve of the focused plane is covered by the depth of field inherent in most conditions. Depth of field covers what is on both sides of the lens, both the view of the scene and the projection to the film plane or sensor.
Macro focusing changes these conditions. Since depth of field is controlled by focusing distance as well as aperture and focal length, the super close-up distances of macro focusing can cause a large difference from center to edge of image sharpness.
Among the major features of macro lenses is that they have special optical correction to minimize the curvature of field into a flatter field of focus. This is especially helpful with the magnification ratios of 1:4, 1:2, 1:1, and beyond.
Which is why a “macro zoom lens” isn’t going to be as good for ultra close-up as a true macro lens. A macro zoom lens merely focuses very close, but isn’t corrected for flat field. Except for some specialty cinema zoom lenses and the amazing old (1970s vintage) Vivitar 90-180mm Flat Field Zoom, few zoom lenses have the needed corrections to be true macro lenses.
Macro Lens Specs - Reproduction Ratios
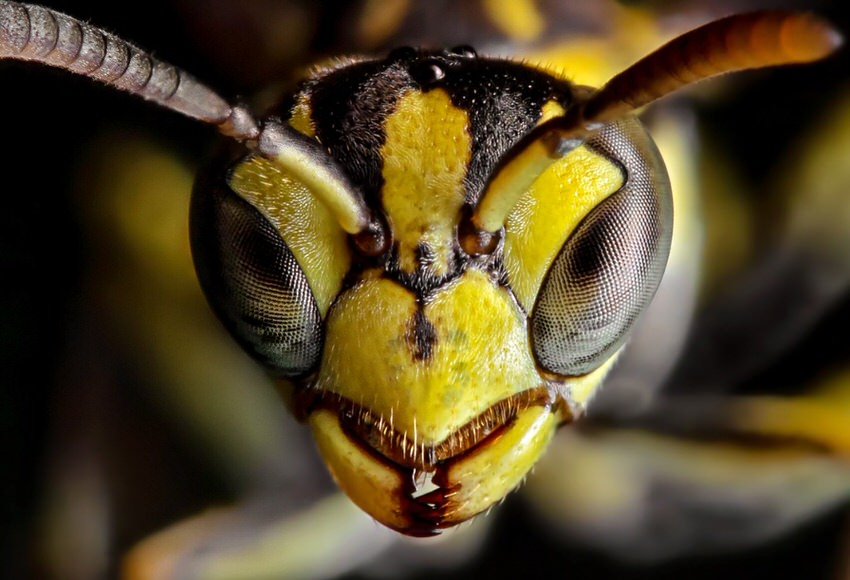
photo byBackiris via iStock
One of the macro lens specs used for a macro lens guide is the magnification ratio, another is the minimum focus distance. Since the minimum focus distance is factored in with lens focal length, most macro lens guides will list the magnification ratio as the major macro lens specs.
You will see the ratios listed as a mathematical notation of a ratio, such as 1:2, 1:1, or 2:1. These numbers just listed correspond to half lifesize, lifesize, and twice lifesize. What this means is that if a macro lens focuses close enough to create a one-to-one lifesize image, this is referring to the size of the subject compared to the size of the image on the sensor or flm.
In other words, if we are photographing a 10mm disc on a full frame sensor, a lifesize reproduction ratio means that the size of the recorded subject on the recording medium is also 10mm. So, it corresponds to the actual size of the object used as the subject, thus “lifesize” or a 1:1 (one-to-one) reproduction ratio. Half lifesize would have a 5mm disc on the sensor, twice lifesize, 20mm, and so on.
Since the ratio refers to the size of the subject on the film or sensor, any enlargement of the image is going to increase the magnification to the end viewer. So, if we make a physical enlargement or view the image file on a large monitor, the magnification ratio is even greater.
As an example, if we take that same 10mm disc and photographed it at a lifesize ratio, then printing an 8X10 photograph will result in the disc on the print being 80mm in size. On a 16X20 enlargement, the disc would be 160mm. So, a macro lens reproduction ratio results in very large size views in physical prints or when seen on a computer monitor or TV set.
Learn More:
Macro Lens Focal Lengths
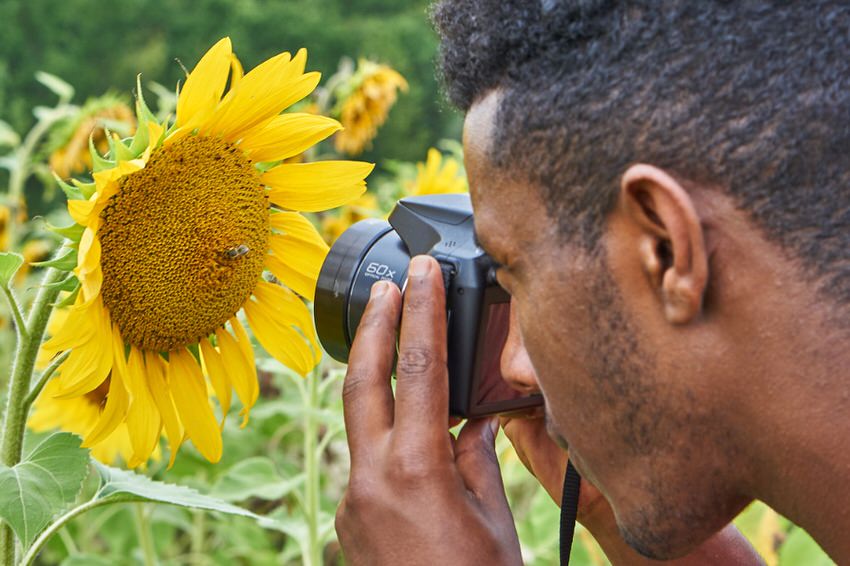
photo bysufiyan huseen via iStock
At any given reproduction ratio, the macro lens focal lengths will also determine the working distance or close focusing distance. A 50mm lens at 1:1 will have you focusing at around 6 inches, a 100mm lens will double that distance to a full foot, and a 200mm lens would be focused at 2 feet.
One thing to remember about these macro lens specs is that the focus distance is measured from the actual film plane or sensor and not the front element of the lens. So you can see where we’re going here.
If our camera is about 2 inches thick and the lens is around 3 inches long, that 6 inch focus distance for 1:1 with a 50mm lens results in the front element of the lens being only about 1 inch or less from the subject.
With many subjects, this may not matter much at all, but we are attempting macro lens use in the field as many of us landscape photographers will do, being that close to a subject will make lighting somewhat difficult and if the wind is blowing or the subject is a living creature, then keeping the subject in frame could be problematic.
Which is why longer focal focal lengths are often chosen by wildlife or nature photographers, because the subject-to-lens distance is more workable. The shorter macro lens focal lengths, though, are generally smaller, lighter, have a faster maximum aperture, and are less expensive.
Macro Lens Lighting
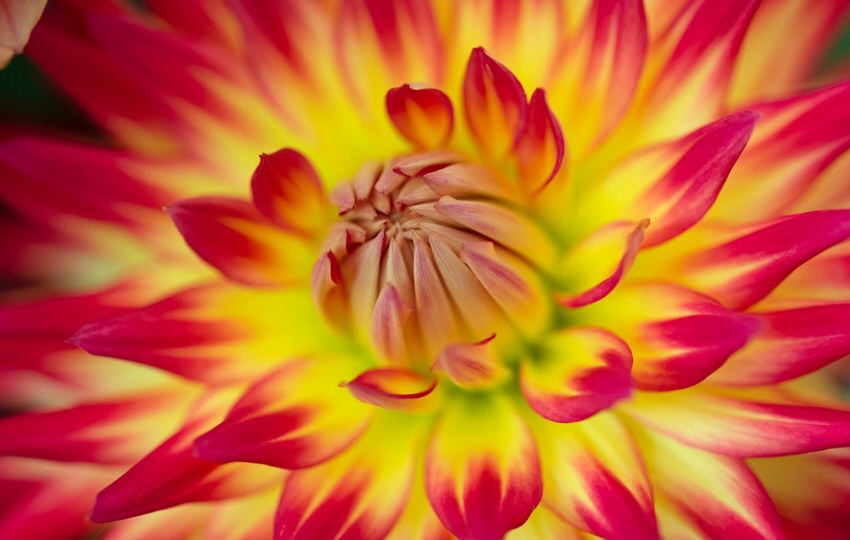
photo byJaap2 via iStock
Since the lens-to-subject working distances are pretty close, even with longer macro lens focal lengths, lighting can become an issue. If we put the sun behind us, just leaning into the subject for those macro reproduction ratios will affect the lighting. Also, the longer the distance from the rear element of a lens to the image sensor, the more light falls off, affecting exposure calculations.
So, several different solutions have been invented to light our macro subjects. One of the best solutions is a ring light, another is a lens-mounted flash or light bracket. A portable ring light can be mounted right on the lens or a stand-mounted ring light could be used and the lens is used inside the inner hole. Ring lights provide virtually shadowless lighting.
A lens-mounted flash bracket can also be used to provide lighting for macro images. Going this route will allow for some modelling of the light which can be very beneficial in some situations.
For these lighting solutions, we have the options of either using strobes or flash units, or we could make use of LED continuous lights. These are both good methods, with flashes having super long battery life versus continuous lighting, but continuous lighting is very predictable and it’s easy to see the results of our lighting configuration as we frame the shot.
Camera Automation for Macro
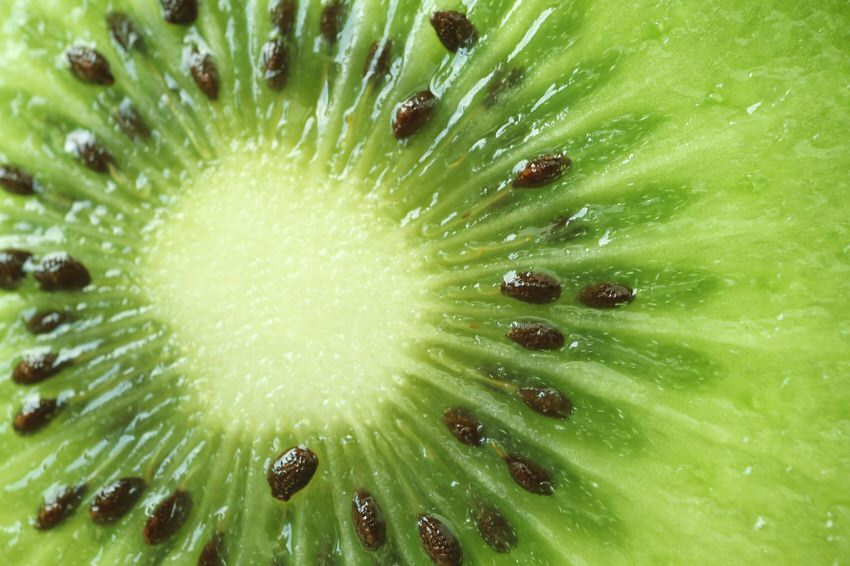
photo bylovelypeace via iStock
Since the lights are very close to the subject, and also factoring in the light fall off issue of macro focusing, many photographers find using the camera exposure automation is a preferred method.
With flash use, exposure automation is good for us. As long as you are aware of what your camera automation is doing and how to control it, modern exposure automation is a very valuable tool.
One word of caution in regards to camera automation for macro lens use is to be wary of autofocus for macro focusing. While it can be useful for lesser magnification ratios, AF doesn’t work very well for many high magnification ratios. So, manual focus is often preferred. Another method is to preset your focus and use moving your body or a focus rail to get the subject in focus.
Macro Lens Guide
photo byMikeLaptev via iStock
What macro lens focal lengths are available for the major camera lines? There are many, since there are lenses made for both full frame format, APS-C, and MFT formats. We’ll list just a few for full frame format cameras from three top brands, Sony, Canon, and Nikon.
Canon Macro Lenses
Canon has two macro lenses for their APS-C format cameras, a 35mm f/2.8 and a 60mm f/2.8 lens, both very reasonably priced.
In full frame format, Canon macro lenses include several tilt and shift lenses, 50mm, 90mm, and 135mm, regular macro lenses in focal lengths of 100mm and 180mm, plus a special 65mm that provides ratios from 1:1 to 5:1, 1X to 5X.
A fast 35mm f/1.8 macro lens was recently introduced for the full frame mirrorless R series of EOS cameras with more sure to come.
Nikon Macro Lenses
Nikon macro lenses include the 40mm for their APS-C cameras, 55mm, 60mm, and 105mm for full frame DSLRs, 45mm and 85mm tilt and shift lenses for full frame DSLRs. For Z mount cameras, an FTZ lens adapter can be used with any of the DSLR lenses, with a fast macro prime lens rumored to be in development.
Sony Macro Lenses
Sony macro lenses include the 30mm for APS-C mirrorless cameras, 50mm and 90mm in full frame mirrorless, and 50mm and 100mm for full frame DSLR Sony cameras.
Third Party Macro Lenses
Sigma makes 50mm, 70mm, 105mm, and 150mm macro lenses, Tamron makes a 90mm, and Tokina makes a 100mm macro lens. These lenses are also superbly corrected for macro use and are as sharp as camera manufacturer lenses.
Your Next Lens - Macro!
photo byTocarciuc Dumitru via iStock
Your next lens may very well be one of these macro lenses. They also double as superb and very sharp prime lenses for general use, so that may make the jump into the world of macro lenses a little easier, since they are quite versatile lenses.
Hopefully this macro lens guide will help you decide. Any way you go, a specially designed macro lens is a great tool for any nature photographer.
Learn More:
We Recommend
Macro on a Budget: Reversing Rings and Manual Lenses

Macro lenses for your DSLR or mirrorless camera can be very pricey, especially good ones. That's one of the main reasons that many talented photographers never really delve into looking at the world through the macro perspective and that's a shame. There's a way to nail incredible macro shots without making a huge investment in equipment and it's not only simple, it's fun.
I'm sure most readers have heard of a reversing ring, but for those that haven't, it's a simple device that lets you turn a lens around and mount the front of it to your camera, pointing the inner element at the objects you want to photograph. It's an inexpensive solution and in most cases, will give you much better results than a close-up “filter”. That's because the only thing that's altered in the optical path is the direction the light travels through the lens.

Because the lens is reversed, instead of compressing a big scene into a small circle that fits the camera sensor, it now magnifies a very small area so that it covers the sensor, getting you “up close and personal” with the subject. You'll be amazed at the results, but there are a few things to know before you start:
- Shorter focal lengths will yield higher magnification ratios.
- You'll need to get very close to your subjects with the front of the lens.
- Focusing is done by physically moving the camera back and forth in very small increments.
- Aperture control will be disconnected, so you won't be able to adjust depth of field.*
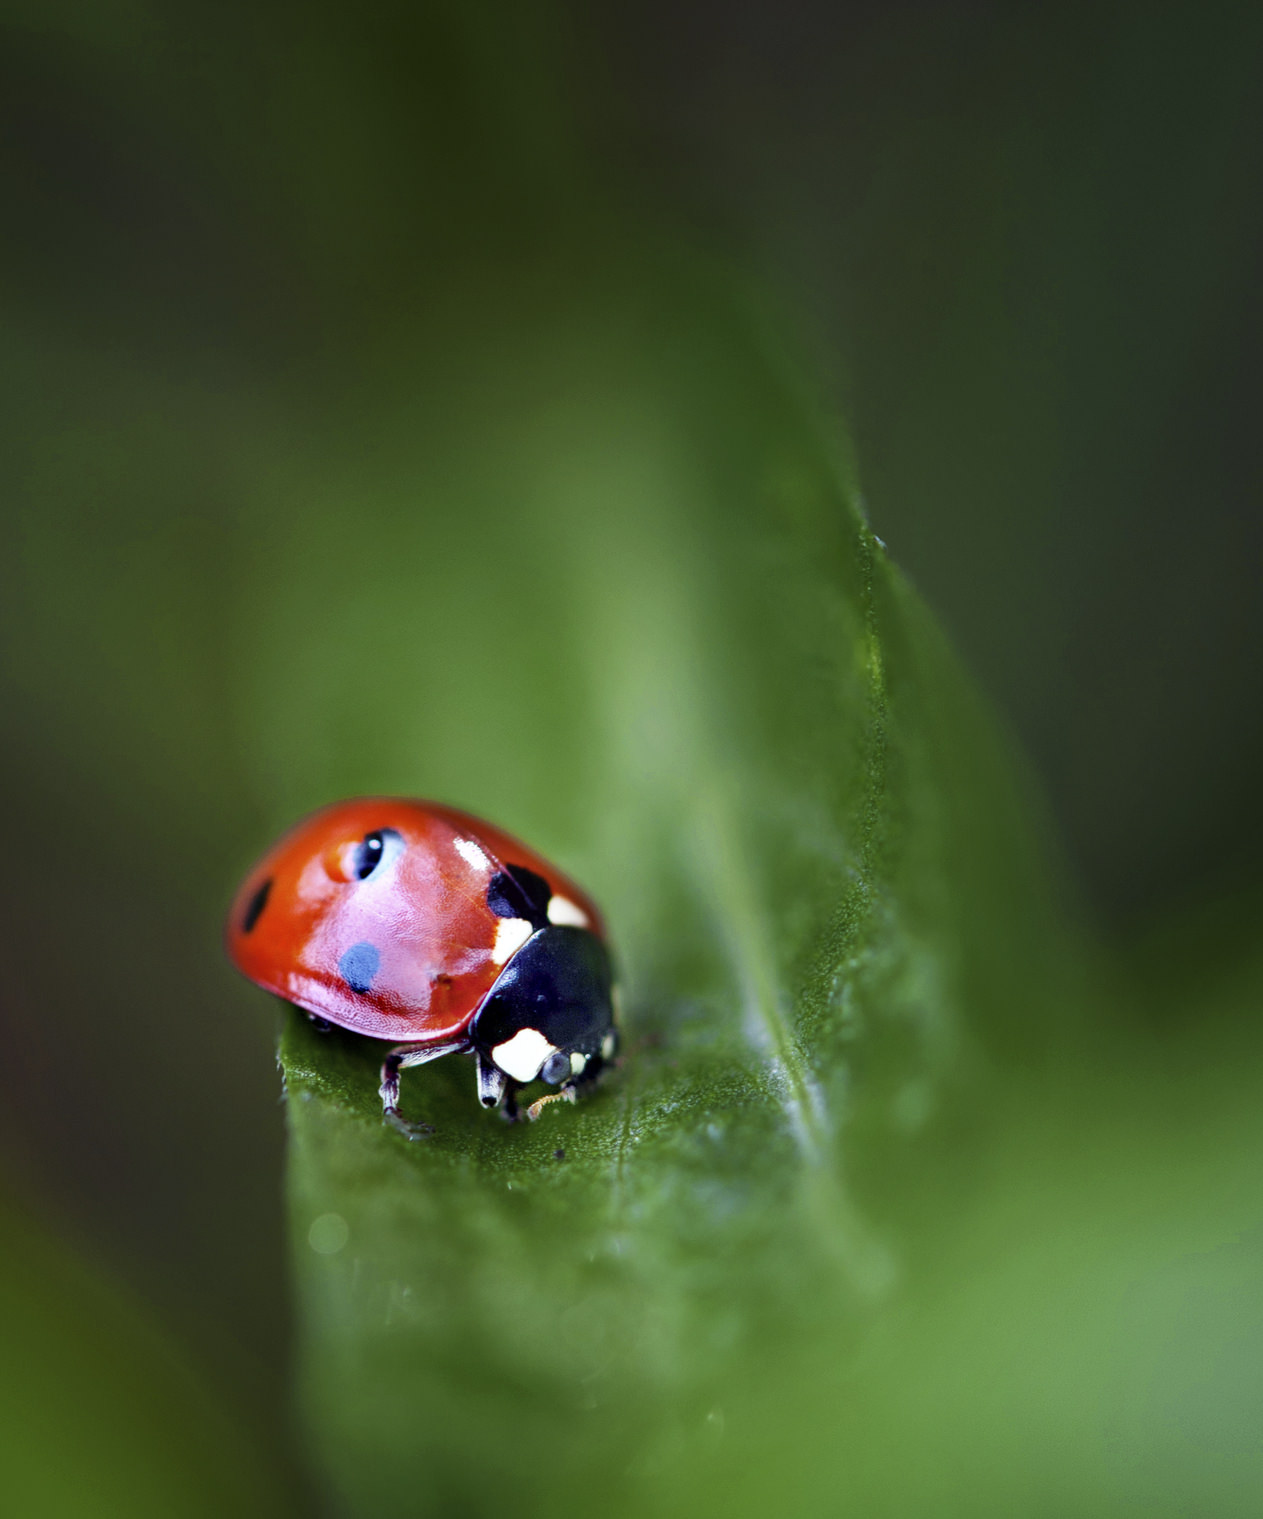
*There's a way around that last issue that highlights one of the cool things about shooting macro this way. Since you're connecting the lens to the reversing ring via the filter threads, you can use pretty much any lens, even if it's not made for your camera! In fact, one of the best ways is to fit a lens made for a film SLR that has an aperture control ring and “Voila!”, you have depth of field control again.

You can find great quality, used lenses made for older SLRs and often at very low prices. Check out this short list of examples that will work nicely with a reversing ring:
Now, remember, these lenses will work reversed on your DSLR regardless of the manufacturer, because you're mounting it by the filter threads. I recommend choosing and buying the lens first, so you'll know what filter size to specify when buying the reversing ring. I also recommend shopping at Used Photo Pro to find the best deals on rated and warrantied lenses like those above. You'll need to match the ring to your camera mount, so be sure to specify the exact type when you shop. Here's a good place to start.
As you can see, great macro photography doesn't have to cost an arm and a leg. Go get started!
We Recommend
Macro Photography Composition Tips
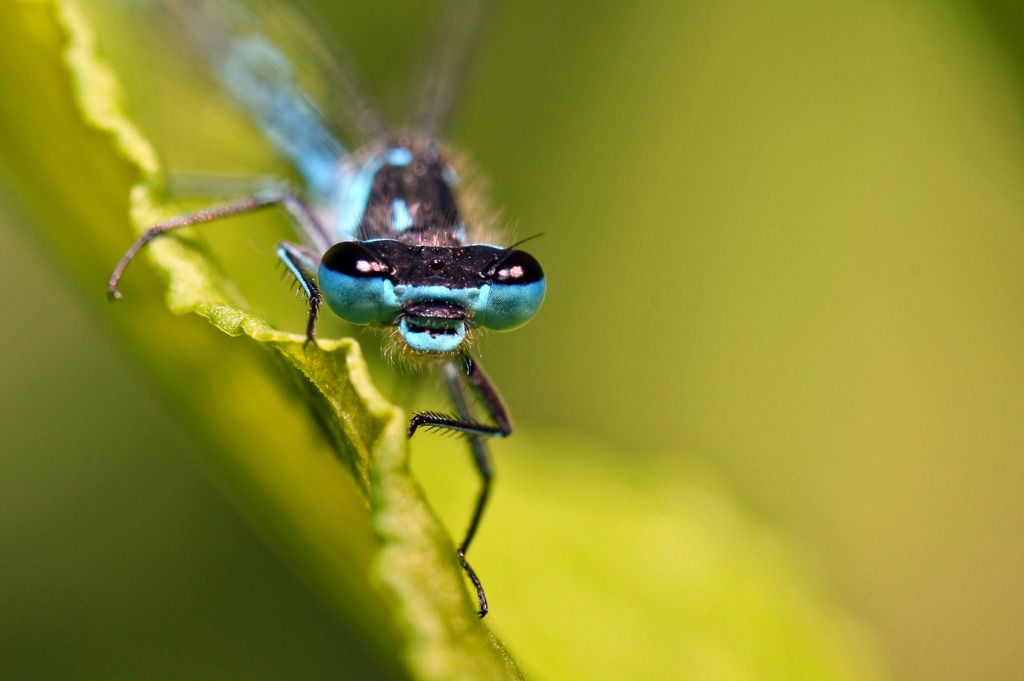
photo byJanBoesen via iStock
The world of ultra-close up photography, macro photography and photomicrography, is a fascinating part of digital photography. In addition to the technical challenges of focusing and lighting these extreme views, many of us will also benefit from macro photography composition tips.
How to compose macro photos is an important aspect of this field. Many ultra close views tend to have the subject centered, because the very nature of macro photography tends to emphasize the non standard nature of these extreme views.
We can also apply general photography composition tips to our macro photography. Photomicrography is a little bit different, but even in this super extreme view, we can sometimes apply the macro photography tips that we learn in our macro photography composition tutorial.
Don’t Get So Close
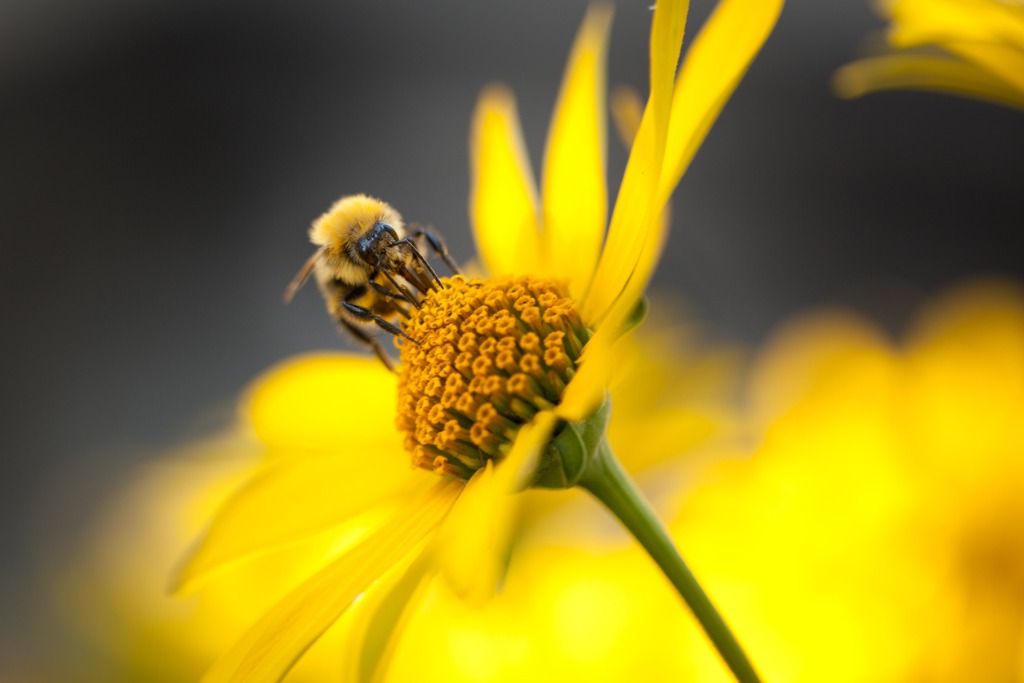
photo byPaffy69 via iStock
Macro photography is close up by very definition and here we are telling you not to get so close! The reason is because sometimes getting closer is close enough without getting into macro reproduction ratios.
An example of this type of macro photography composition tips is capturing a butterfly or a bee on a garden flower or a large sunflower. It might actually happen while you’re playing around with the flower that an insect suddenly lands in the field of view.
The tried and true composition tool Rule of Thirds is often what can be utilised in this circumstance. Having the insect fall on one of the intersection points of the dividing lines will create a pleasing balance, enhancing the natural beauty of what’s happening.
The Leading Lines and S Curve composition tools might also be useful in photos that are close up but quite macro photography. We could use the same example, a bug and a flower, or we might try this out with a still life composition. Sometimes, getting in a little closer than normal makes a huge difference in how the picture turns out.
Get Really Close
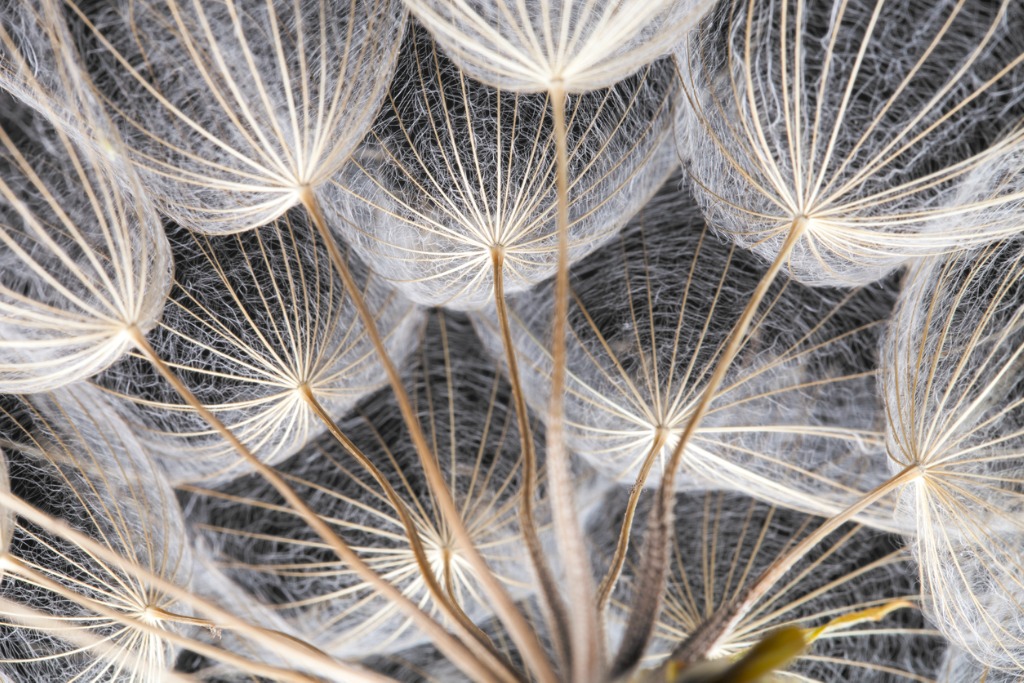
photo bymalerapaso via iStock
The distance we are from our subject is a huge factor to consider in macro photography composition tips. Subject distance, lens choice, camera position, all play a part in photographic composition. This remains true in macro photography and photomicrography.
Since we mentioned those two terms again, let’s touch on what they mean, what the differences and similarities are.
There are some good guidelines to consider about the close up photography capabilities open to us. As a personal consideration, I like to think of macro photography beginning at a reproduction ratio of ¼ life size. Anything else before getting that close is simply me doing close up photography.
Macro photography reproduction ratios are typically ¼ life life size, also labeled 1:4, ½ life size, 1:2, and 1:1 lifesize. These reproduction ratios refer to how big the object is on the capturing medium, our sensor. Crop factors, physical print sizes, and screen sizes will all make the item being imaged display as an even bigger ratio.
Photomicrography involves closer focussing and larger reproduction ratios. There are some specialty lenses available for DSLR and mirrorless camera lens mounts that work in this range, or you can use an adapter on a microscope like what we used in biology class at school.
Common reproduction ratios are 2.5:1 to about 6:1 for lenses we can mount directly to our camera and maybe up to 10:1 or 15:1 for microscopes using a photographic adapter..
Higher reproduction ratios are possible in micrography using specialty instruments, but I consider that an even different realm of imaging than macro photography and photomicrography. Transmission, scanning, and tunneling electron microscopes are capable of imaging bacteria and atomic force imaging has revealed the structure of molecules.
Learn More:
Centered Is Great

photo byThomasVogel via iStock
But let’s get back to our personal cameras and lenses. As we get closer to our subjects, we’re often concentrating on the subject alone. So we end up with that ultra close up subject matter smack dab in the middle of the frame.
That’s good. Since the macro aspect of the image can be the sole purpose of the composition for macro photography, it makes perfect sense to have the image composition be centered.
If we are using centered composition for our macro shots, we really want the focus and exposure to be as good as we can get it. Since the close up thing IS the image when centered, making it as clear to see as possible is important.
Negative Space Is Your Friend
photo byThomasVogel via iStock
One of the nice things about macro photography composition is that we’re pretty much in a selective focus frame of mind throughout the entire process. Focus distance is one of the variables involved in calculating depth of field along with focal length and lens aperture. The closer you focus, the less actual distance is within the zone of sharpness (circle of confusion).
Therefore, you have an easy to access composition tool when considering how blurred the foreground and background can be when shooting macro. Almost everything else in the image, regardless of brightness level or color, can be used as negative space for composition.
Negative Space composition allows you to move the subject out of the dead center spot of the image area. Once you do that, you can employ Rule of Thirds, Implied Motion, and Leading Lines composition tools to add interest or impact to your macro photography image.
Shooting Angle Matters

photo byfreedom_naruk via iStock
I’ve noticed that a lot of us tend to make the same choice with how to compose macro photos that we do when taking pictures of kids or pets. At least, when we’re not actively thinking about it. We shoot from a standing position, maybe leaning over just a bit.
That’s great for when the primary interest of our macro image is best seen from straight overhead, but all we need to do to give ourselves better options is get down. Kneel, sit, lie down, lower our tripod by reversing the center pole or sing a tripod alternative that’s low to the ground, all of these open up opportunities for a different view.
Focus Stacking

photo byjhorrocks via iStock
While we’re discussing macro photography composition tips, we’ll also include another great tool for these ultra close views that’s made available to users of digital cameras: focus stacking.
What is focus stacking? Think of it as HDR for focus. In HDR, we take images at different exposure levels and use bracket and merge functions in our post processing programs to blend them together.
Focus stacking does the same thing for focus distance. When there is no way to capture enough depth of field while imaging a macro subject, you can focus on different parts of the subject and then blend the image files together to create the depth wanted in the final image.
A Fascinating World
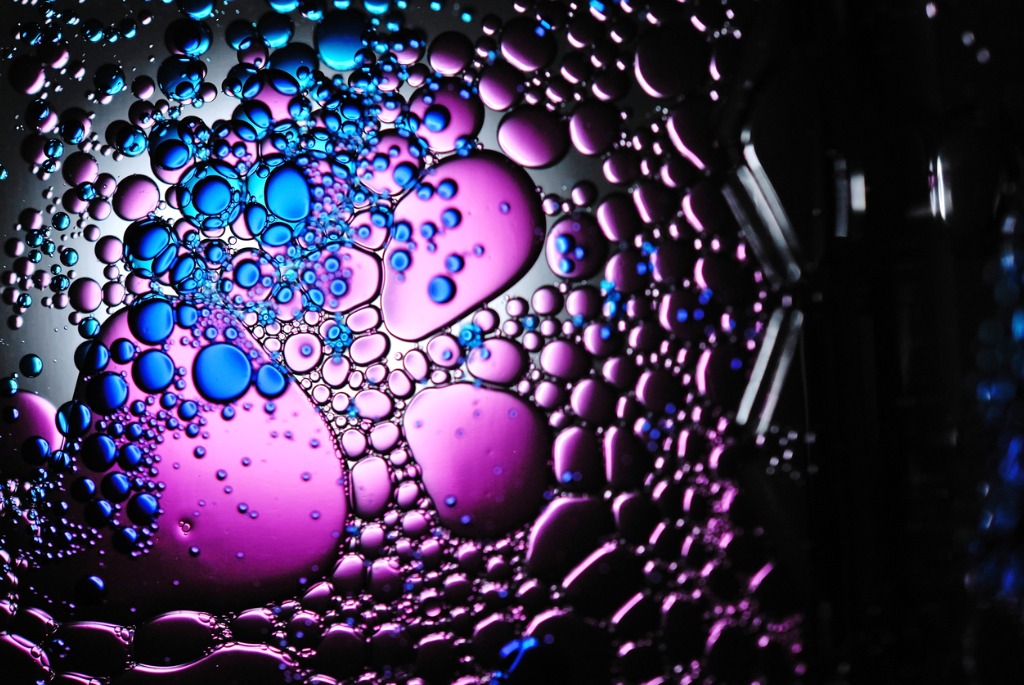
photo bymstwin via iStock
The world around us is full of amazing things that can be revealed by macro photography. From flowers to insects, pets to people, there are really no bounds to how creative you can be in terms of the subject matter, composition, and style of your macro images.
Use these macro photography composition tips to make the images you capture both interesting and beautiful!
Learn More:
We Recommend
Macro Photography Hacks You Need to Try Today

I don't know about you, but when I see macro photos, I'm completely spellbound.
I just love the richness of detail that you can get when shooting ultra-close to the subject.
Of course, getting high-quality macro photos requires much more than just shoving your camera up-close to a flower, insect or another subject.
In the video above, Micael Widell shares his 10 best macro photography secrets.
If you've been leery about trying macro, this video will help you figure out precisely what to do!
For a breakdown of a few of Micael's top tips, read on below.
Think About the Location and Weather for Macro Photography

What you photograph with your macro lens will, of course, depend on your personal tastes.
But many beginner macro photographers choose to photograph insects, flowers, and plants, and in those cases, you need to consider the location and the weather when you go out shooting.
As far as location goes, you can find flowers and insects anywhere - even your own yard.
That's beneficial because you don't have to spend hours in the car wandering around to find something to photograph!

As far as weather is concerned, insects are more active when it's warmer, say, 60 degrees or more.
Something else to think about is the cloud cover when you go out to shoot.
Though bright, sunny days might seem like the ideal lighting, shooting with cloud cover is actually more advantageous.
That's because the clouds diffuse the sunlight, making it much more even and soft. That helps eliminate harsh highlights and shadows that are difficult for your camera to accommodate.
Learn More:
Use a Flash

By using a flash, you help your camera get a good exposure without having to max out your aperture.
The problem with maxing out the aperture is that it creates such a small depth of field (sometimes just a couple of millimeters) that it's impossible to get the entire insect or flower into focus.
Now, sometimes such a narrow depth of field is desired, and that's fine.
But if you want to extend the depth of field, you need to give your camera more light to collect.

That's where the flash comes in.
You can use your camera's pop-up flash, if its so equipped.
If not, you can buy a lens-mounted ring flash that will give you a much better quality of light.
The brightness provided by a flash like this will allow you to step down the aperture by several stops, increase the depth of field, and create an even better macro photo.
Editor's Tip: Print your macro photos in large format to create an impactful piece of art. Find out how.
Crank the Shutter Speed

There are two primary reasons why you need to use a faster shutter speed in macro photography.
First, when handholding the camera, you need to ensure that the shutter speed is fast enough not to be impacted by camera shake caused by the natural movements of your hands and body.
Second, when photographing insects, you need a fast shutter speed to freeze any movement.
To do so, Micael suggests using a shutter speed of 1/250 seconds at a minimum.
Remember, if you shoot with a flash, your camera will have the light it needs to get a good exposure even with a fast shutter.
So, don't be afraid to shoot at 1/500, 1/1000 and above to get the sharpest macro photos.
Learn More:
- Everything You Need to Know About Shutter Priority Mode
- Shutter Speed Mistakes (and How to Fix Them)
How to Do Macro Photography: Experiment With Angles

The beauty of macro photography is that you can easily move around the subject to find a more pleasing angle.
By experimenting with the angle from which you shoot, you can try different backgrounds, see different views of the subject, and discover ways to create a more compelling shot.
Changing your perspective from shooting top-down, for example, to shooting across at the subject, can completely change the look and feel of the shot.
So, as Micael says in the video, don't be lazy - work around the subject to find the most pleasing angle!
Be sure to check the video for even more great macro photography tips, and then use what you learn to start mastering macro photography!
Editor's Tip: Do your budget a favor and search for pre-owned macro lenses.
We Recommend
Macro Photography Lenses (and Other Must-Have Gear)
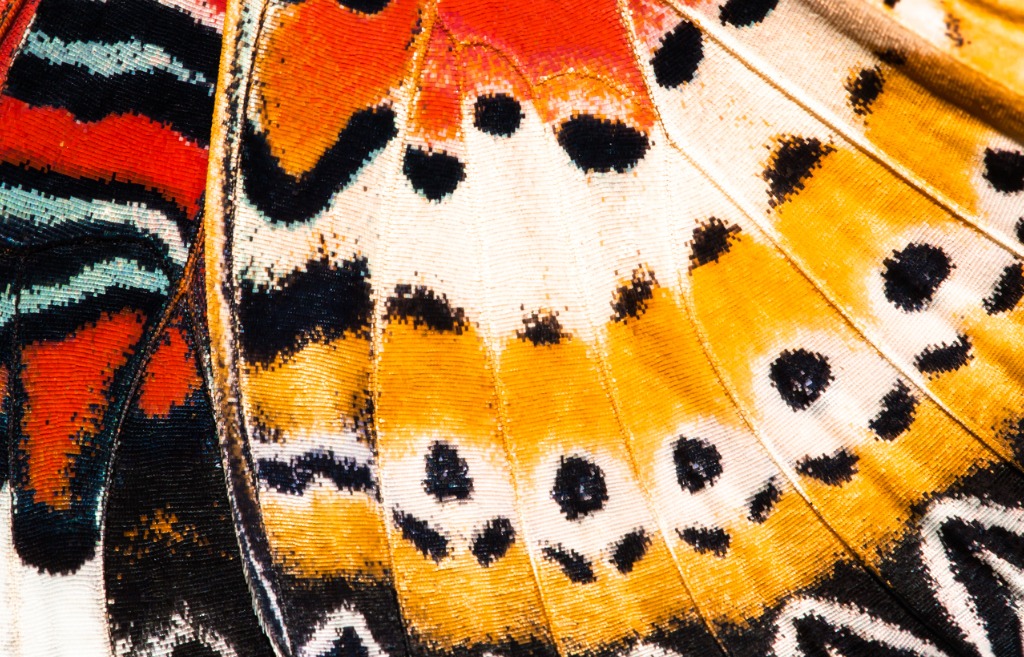
Photo by lirtlon via iStock
Ultra close-up photography, macro photography, is a fascinating art form that photographers of all types can enjoy. Have you tried out some close-up photography but been a little disappointed in the results? Are you looking at macro photography lenses and a little confused as to what to choose?
In order to have success at macro photography, you will need to have the right macro photography gear and a good understanding of the basics of ultra close-up imaging. Let’s get you set up with some awesome macro photography lenses and other items and methods that will assist.
Table of Contents:
- Macro Is More than Close Focus
- Macro Photography Lenses Characteristics
- Flat Field Focus
- Auxiliary Macro Photography Lenses
- Prime Macro Photography Lenses
- Macro Photography Gear for Steadiness
- Lighting for Macro Photography
Macro Is More than Close Focus
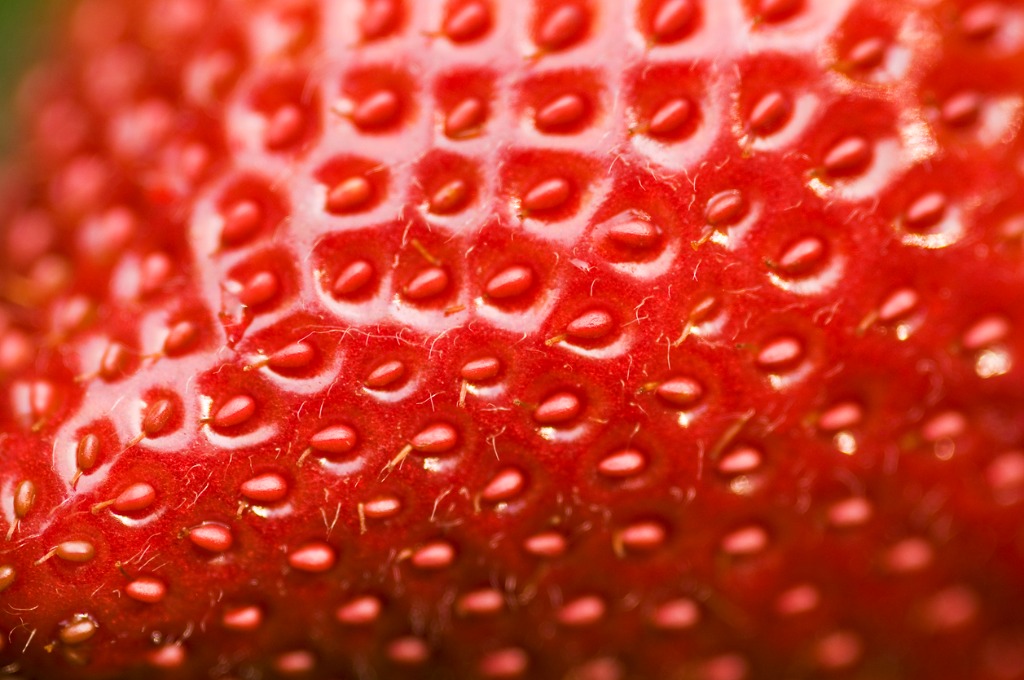
Photo by digihelion via iStock
To get started, let’s get a few terms and ideas clear in our heads. Macro photography is more than merely getting closer to a subject and having it in focus. It involves getting extremely close and thus requires some different methods and quite often some different gear than you might already have.
The kit lens you have with your new camera is a great lens. It can take you from a wide-angle, through normal, and up to a little bit of telephoto. It’s also pretty sharp and even allows a fairly decent close focus.
It has a few limitations, however. The wide-angle end is pretty wide, but the telephoto side of the range usually seems a little limited. The maximum lens aperture (or f-stop) is also pretty slow. Finally, that close focusing ability always seems to be not quite close enough for certain subjects or photo ideas.
So, if you’re thinking about expanding your camera’s capabilities, you are likely thinking about adding new lenses and some other gear to that great camera you have. Macro photography lenses are a good idea if we want closer focus.
As said earlier, though, close focus isn’t all there is to macro. How close is macro supposed to be anyways? In addition to macro photography lenses, what other items should be in your macro photography gear bag?
Macro Photography Lenses Characteristics
Macro photography lenses have two main characteristics that make them different from non-macro photography lenses. One is the extremely close minimum focusing distance, the other is flat field focus.
The close minimum focusing distance in macro photography lenses is usually not specified in inches or feet, but rather in a reproduction ratio. The ratio is based on the actual size of the subject and how it’s recorded on the imaging sensor or frame of film.
The reproduction ratio is usually referenced with life-size being the common denominator. A ratio of 1:4 is ¼ life-size, 1:2 is half life-size, and 1:1 is full life-size. A full life-size ratio means that the subject photographed is the same size on the film plane as it is in real life. So a 1” wide circle would be captured as exactly 1” on the camera sensor.
It’s important to realize that this ratio is how it reproduces on the film plane, in the frame of the camera sensor, hence the term “reproduction ratio.” Once you enlarge the image file, whether on a computer screen or as a physical print, the subject matter will appear many times life-sized.
Which part of the appeal of macro photography lenses. If you took a macro photo of a tiny ½” flower bud at 1:2 macro photography reproduction ratio, then the resulting size of that bud on the sensor is ¼“, or half of the life-size of the subject matter.
Blowing it up to an 8x10” print means you’re enlarging the image file to that size, making everything bigger than what the size of things on the sensor image is. It isn’t noticeable with regular photography subjects because it’s a reproduction of a real-world scene we expect to see.
But when it’s a macro photography image, that tiny real life thing is now reproduced many times bigger than how we see it in real life. So the impact of the image is substantially different than more mainstream subject matter.
Learn More:
Flat Field Focus
Photo by Sinan Kocaslan via iStock
Flat field focus is where true macro photography lenses separate themselves the most from regular lenses. Most lenses project from the rear of the lens a plane of focus that is slightly curved. Simply a matter of basic physics. The lens elements curve light rays.
In regular photography at common focusing distances, we rarely notice this effect at all. Since depth of field (or depth of focus) is controlled by focusing distance as well as lens focal length, lens aperture, and format size, focusing closer narrows that depth of field. Not just as a function of focus but also as how it projects onto the sensor.
Macro photography lenses are specially designed to project a flatter field, meaning there is less curvature to the plane of focus. What would happen if you took a regularly corrected lens and tried to photograph a stamp or piece of paper money at a focusing distance that gave a 1:4 to 1:1 reproduction ratio?
If the center was in focus, the edges would be blurred, and vice versa. With macro photography lenses that are corrected for flat fields, the edges and center are both in focus at the extremely close focusing distances of macro photography.
So, a flat field is actually more important than merely how close the lens lets you get to the subject. Which is why macro photography lenses and other macro photography exist.
Auxiliary Macro Photography Lenses
We can adapt virtually any lens with a filter screw mount into allowing closer focus. This is done with filters called Close-Up Filters, Close-Up Lenses, Diopters, or Auxilliary Macro Lenses.
Many of these close-up lenses (like this one from Hoya) are extremely well made and well corrected optically, but they will still leave a curved image field at the film plane. So, while they can be used for many macro photography subjects, such as that flower bud, that don’t have much along the edges of the frame, their limitations will be obvious for any frame-filling object of any flat artwork.
They are a great way to get started in extreme close-up imaging, though, so you may want to try them out before investing in true macro photography lenses.
Prime Macro Photography Lenses
Since you know what it means for gear to be actual macro photography lenses, let’s see a couple great examples you can purchase for your interchangeable lens cameras. One lens for Full Frame format and one for a crop format camera.
Canon RF 100mm f/2.8 L Macro IS USM lens is a medium telephoto prime focal length lens for Canon R mirrorless Full Frame cameras. It focuses so close, you can achieve a greater than life-size reproduction ratio. The medium telephoto focal length also makes it a good lens for portraits and other photography.
Nikon AF-S DX Micro-NIKKOR 40mm f/2.8G lens is made for crop format APS-C format Nikon DSLRs. It is extremely lightweight and very budget-friendly besides being super sharp and a great example of the many macro photography lenses available for all the camera brands, formats, and types.
Macro Photography Gear for Steadiness
One of the first things you’ll notice about macro photography is that it’s hard to keep the camera still when working at the high reproduction ratios and close distances of macro photography lenses. Subject matter moving (like a bee flying) is a different problem altogether, but your camera’s image stabilization can help with that.
Camera shake and your hands moving imperceptibly will show up in a major way when engaging in macro photography. Anything you can do to combat that should be considered.
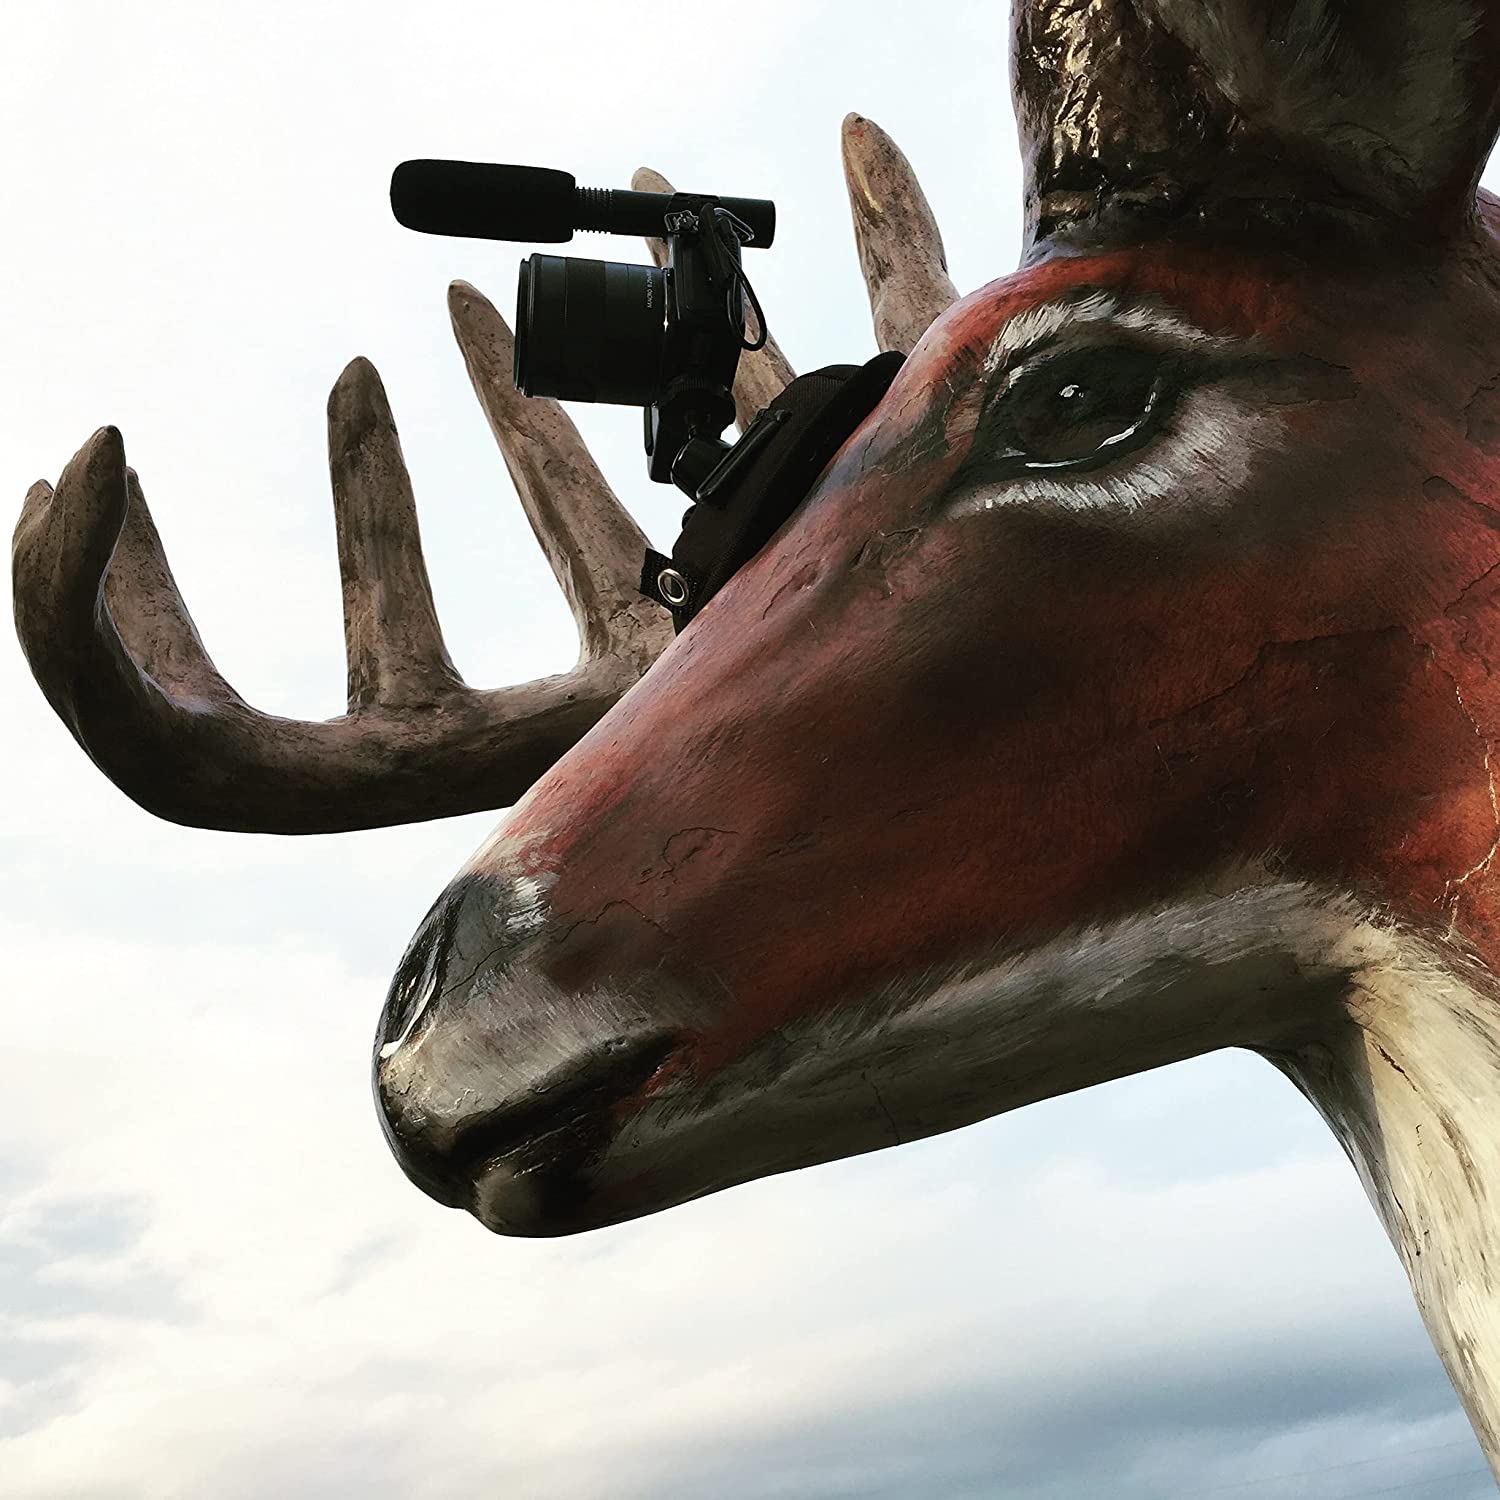
A piece of macro photography gear that I absolutely love is the OctoPad camera mount. OctoPad is a unique mount. It is a compact, semi-rigid, circular disc with a tripod head on top and a non-slip pad underneath.
With the OctoPad camera mount, you can place your camera and lens on almost any surface, indoors or out, even surfaces angled up to 45 degrees. Since it is lightweight and inexpensive, you could take advantage of having 2 or 3 OctoPads to hold lights and maybe a microphone for video recording.
A regular style tripod can be extremely useful as well, but I prefer the style of tripod that has a horizontally adjustable center column as macro photography gear. A good example is the Neewer 79 inch aluminum tripod with horizontal column.
That horizontal center column works well for those stamps, documents, and other flat art mentioned earlier, as well as for other macro photography. A wireless remote release is another vital piece of macro photography gear that you will find very useful to reduce any camera movement.
Lighting for Macro Photography
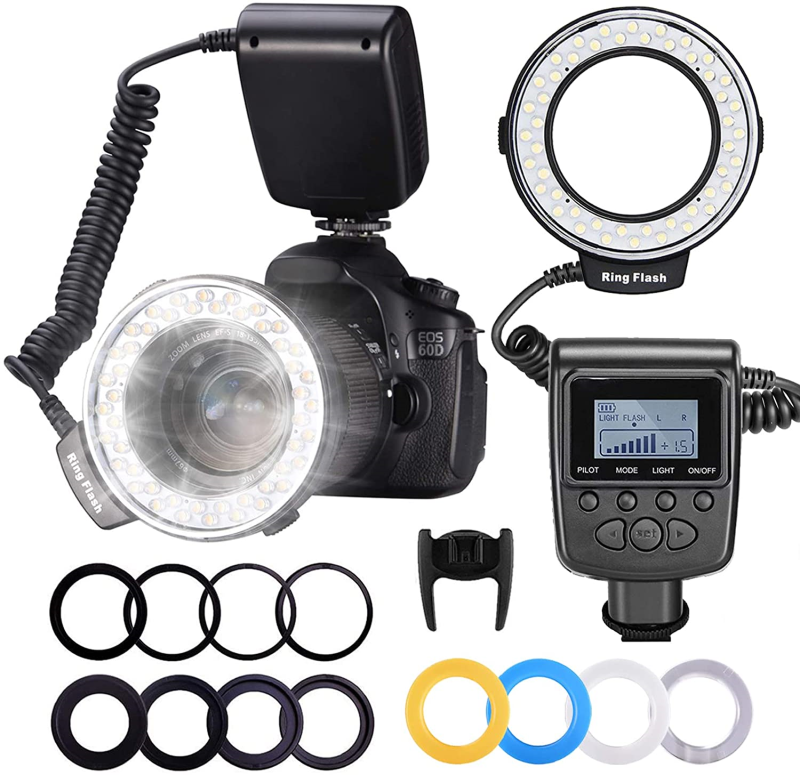
Another aspect of macro photography gear is finding lighting gear you will be comfortable using. Since you’re so close to the subject, an LED ring light that fits on the end of the lens will be a great assist. The Neewer 48 Macro LED Ring Light Flash is super versatile, offering both continuous light and flash.
You can also get a lot of value out of a collapsible reflector such as this 5-in-1 oval reflector from Godox. Besides its use as a lighting tool, a reflector like this can also make a fine windbreak when photographing macro subjects outdoors.
With these or similar macro photography lenses and macro photography gear for your personal camera brand, format, and type, you will be very well equipped for all sorts of serious macro photography.
Learn More:
We Recommend
Macro Photography on a Budget

As we all know, photography isn’t exactly a cheap endeavor. The sheer amount of gear you need for different types of photography can make it impossibly expensive for some. For others, it means sticking to one genre and not getting to explore other areas of photography as much.
However, there are ways to make photography more budget friendly. This even applies to macro photography, which can be among the most expensive types to pursue, what with its special lighting, lenses, and so forth.
In the video below, Adam from First Man Photography gives us insight into ways you can pursue macro photography on a budget, including using reversing rings and extension tubes. For more tips and tricks, have a look and learn how easy it is to get into macro photography!
Amazon Recommendations
- The Complete Guide to Macro and Close-Up Photography
- Neewer Pro 4 Way Macro Focusing Focus Rail Slider
- Fotodiox 52mm-67mm Macro Close-up Reverse Ring for Nikon, Canon, Sony, Olympus, Pentax, Panasonic, and Samsung
We Recommend
Macro Photography Tips for Beginners

For many photographers, macro photography is the last genre they tackle. There are all kinds of reasons for this, ranging from the expense associated with macro gear to just plain being scared of tackling a new photographic undertaking. But if you’ve never tried your hand at macro photography and just don’t know where to start, all you need is a few pointers to get off on the right foot.
In the video below, Chris Niccolls of TheCameraStoreTV offers a detailed tutorial for beginning macro photographers that covers everything from lighting to composition to gear recommendations. Follow along as he gives us insight into his workflow and offers up some inspiration for beginners that is sure to demystify macro photography.
Amazon Recommendations
- Sony a7R II Full-Frame Mirrorless Interchangeable Lens Camera, Body Only
- Sony SEL90M28G FE 90mm f/2.8-22 Macro G OSS Standard-Prime Lens for Mirrorless Cameras
- Macro Photography: From Snapshots to Great Shots
We Recommend
Macro Photography Tutorial for Beginners
photo byThomasVogel via iStock
Macro Photography is a fascinating aspect of close up photography that many beginning photographers are eager to try. We’ll also give some helpful macro photography tips and hints that any level of photographer can use in this macro photography tutorial.
What Is Macro Photography?
photo byStephM2506 via iStock
The word Macro means big, which seems counterintuitive to the thought of taking pictures of small things. But when we get ultra-close to a small subject in order to photograph it, the resulting image makes that subject look huge, so “macro” works. (To confuse matters, some lens makers call their macro lenses Micro, but we’ll just stick with Macro.)
But that’s basically what macro is, ultra-close focusing, often of small subjects or of aspects of a larger object that isn’t normally viewed up close. Macro photography for beginners can be a little intimidating at the start so we’ll go through a few beginner macro photography tips that will demystify the genre and help you capture some neat images.
There are some basic ideas you’ll need to know such as magnification ratios, depth of field concerns, what makes a good working distance, and lighting macro photography tips, so let’s get started on our macro photography tutorial and build on that.
Macro Photography Magnification Ratios
photo byMarioGuti via iStock
When looking at lens choices for macro photography, you’ll often see references to “life size” or perhaps a ratio such as 1:4, 1:2, or 1:1. What does all that mean?
The ratios or or terms such as ¼ life size refer to the size of the subject and what size it appears on the image sensor or the film frame. Saying a lens focuses close enough to have ¼ life size marco means that the subject size recorded on the sensor format is ¼ of what it is in real life. This ¼ life size can also be written as the magnification ratio 1:4 (1 to 4).
That doesn’t seem like much but we don’t view our images at the size of the image sensor, we view an enlargement of it. Even a smartphone screen is quite a bit larger than a full frame image sensor. So then the tiny ¼ lifesize on the image sensor becomes significantly bigger than life size when viewed on the screens of any device or as a physical print.
Zoom lenses will often have a close focusing capability which delivers a pretty good macro ratio. There are also specialty lenses designed and corrected for this ultra-close focusing and these are what you see labeled as a Macro (or Micro) lens. These special lenses are usually a single prime focal length and will focus close enough to render a magnification ratio of 1:1 or life size.
So while a zoom lens may be labeled as a macro zoom because it focuses close enough to give a ¼ life size image, it is actually not as entirely capable for macro work as a prime macro lens. Don’t let that stop you, though, a close focusing zoom lens will work for a large variety of close up imaging.
Learn More:
Depth of Field
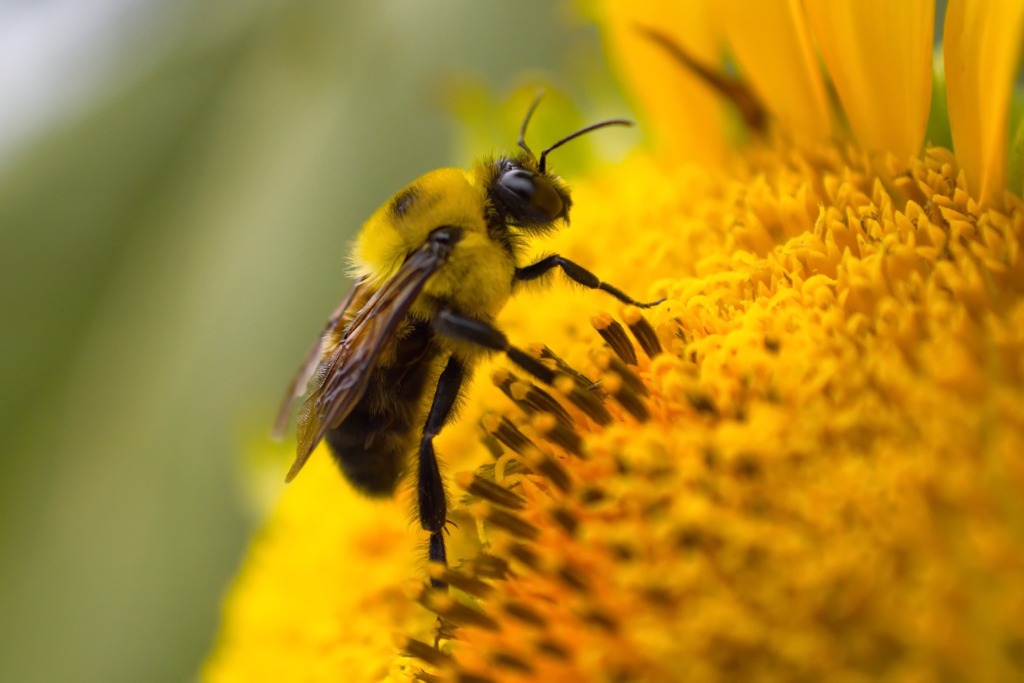
photo byStephen Harker via iStock
You have learned that besides exposure, lens aperture also controls how much of an image is in or out focus, also called depth of field. But the lens aperture is not the only thing affecting depth of field, focusing distance is also part of that calculation.
As an important part of our macro photography tips, the closer you focus, the tighter or shallower the depth of field. As you get into the macro photography magnification ratios, the depth of field gets extremely shallow.
This won’t be an issue with flat or one dimensional subject matter, but when trying out macro photography on 3D subjects, such as a flower or an insect, the tight depth of field can result in an image missing important detail.
The problem in macro photography for beginners is that in order to get good enough depth of field for a 3D subject, you need a small aperture. A small aperture will require a longer shutter speed to get correct exposure.
Those longer shutter speeds will require us to compensate somehow in order to counter camera shake. The closer we focus, camera and subject motion is greatly magnified. A monopod or tripod is another of the more important macro photography tips for capturing sharp macro photography images.
Macro Lenses and Working DIstance
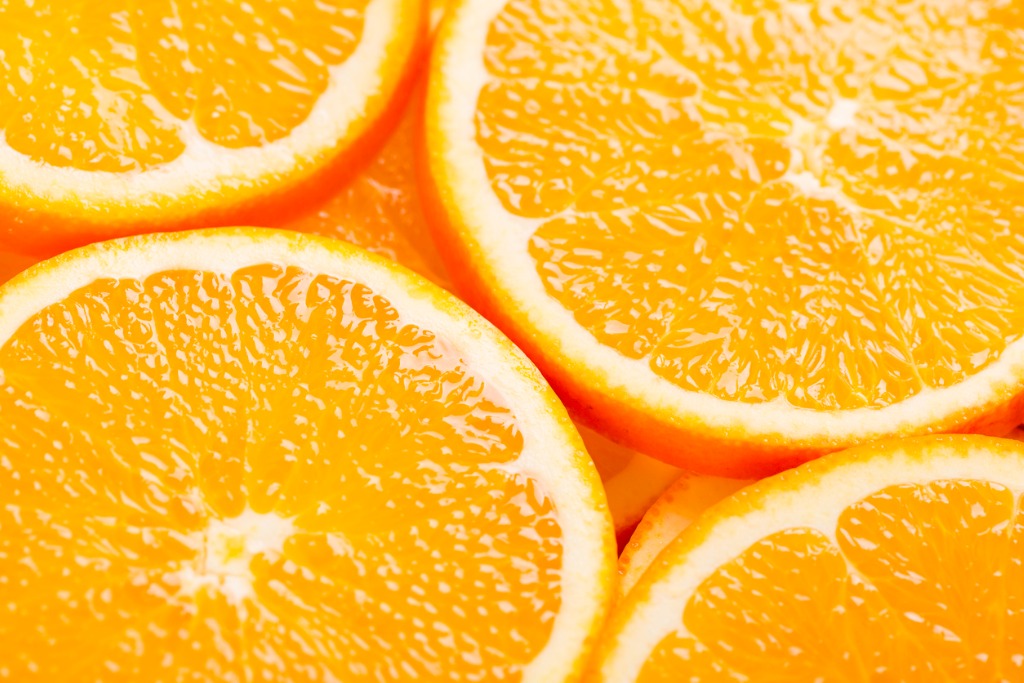
photo byAdam Smigielski via iStock
In order to get these ultra-high magnifications with macro lenses, we are actually going to be physically very close to the subject. If we are using a zoom lens, we’re probably going to be shooting at the telephoto end of its zoom range. Which is good for a lot of macro photography subjects since we might not be able to capture the image we want if we’re too close.
When choosing one those specialty macro lenses mentioned earlier, our choices are generally in the 50mm range of the 90mm to 105mm range. The primary advantage of using a longer focal length is to give us a greater working distance between the front of the lens and the subject.
The longer length macro lenses are generally bigger, heavier, and more expensive so you might want to rent one before committing to a major lens purchase.
Lighting for Macro Photography
photo byALOKHIN via iStock
Good lighting is very important in macro photography. With strong enough light, we can use smaller apertures for more depth of field while maintaining shutter speeds fast enough to eliminate blur due to the subject or camera motion.
The problem is that we may be so close to the subject that we’re blocking the good light. And the flash in our camera won’t help either when we’re that close because the light will go over the subject instead of illuminating it.
A great solution is a ring light. We have battery and AC powered LED ring lights that we can carry into the field or use in our home studio, some of them attach directly to the lens. As an added bonus, ring lights provide shadow less lighting which is often perfect for capturing fine details in macro photography subjects.
Try It Out Yourself

photo byAslan Alphan via iStock
Macro photography for beginners doesn’t have to be complicated. You can probably begin with the equipment you have now. After trying out some of these macro photography tutorial tips, you’ll be able to decide which direction you want to go in regards to equipment and what type of macro photography you want to do.
Learn More:
We Recommend
Master the Art of Drone Photography: Part 1

If you have a drone - and these days, who doesn’t - you understand the trials and tribulations as well as the joys of using an aerial vehicle for photography.
But to think that taking photos from above is the same as it is from your handheld camera is a total misconception. There are the photographic considerations, including subject matter and camera settings. There are also the issues related to the responsible, safe, and legal use of drones.
In the first part of our two-part series on drone photography, we explore legal and privacy issues, as well as topics related to safely flying your drone.
Legal Issues

As drones have become ever more popular, more and more laws have been passed governing their use. Since consumer-based drones are still relatively new, governments worldwide are scrambling to devise rules that pertain to when, where, and how drones can be used, and by whom.
At the center of it all is the common sense use of your drone. Naturally, flying it near buildings, over your neighbor’s backyard, or near airports will do nothing but get you in a heap of trouble. Additionally, flying your drone over something that could be damaged or destroyed should the drone crash is a simple matter of using your head and your wits. In short, if you’re about to fly your drone somewhere and you have doubts about the appropriateness of it, don’t do it!

In the United States, the Federal Aviation Administration has issued a broad spectrum of rules of which you need to be intimately familiar before you take your first flight. The FAA’s Unmanned Aircraft Systems website is the go-to place for the latest in terms of news, regulations, instructions on how to register your drone, and procedures for flying. Other entities, like states, and cities, may have their own set of rules as well. These regulations also vary from country to country, so it’s best practice to check with local authorities before sending your drone up into the sky.
Another excellent resource is the Know Before You Fly Campaign. With guidelines for responsible flying, resources for drone enthusiasts, and much more, it is worth a visit if drone photography is in your future.
Practice Makes Perfect

Once you’ve explored the legalities of flying a drone, it’s time to practice.
It goes without saying that you will need to examine a practice area to ensure that it is safe and legal to fly there. A wide-open area would be an ideal spot, such as an empty field in a rural area. Granted, not everyone that has a drone has the luxury of an open field nearby, so this is another common sense moment. Choose a location that is as open as possible and affords you sweeping views so you can maintain eye contact with your drone at all times. Above all else, ensure that your practice location has nothing that can be damaged and no people that can be hurt. If it crashes, you want to deal with a broken drone at the worst, not a destroyed car windshield or a hurt bystander.
You’ll also want to check the weather to be sure you’re taking to the skies in the best possible conditions. The less wind, the better, for obvious reasons. You will have enough to worry about just trying to master the controls of the drone; you don’t need a breezy day to add more stress to the situation!
Beware of the Battery

Many drones are equipped with a feature that, in case of an emergency, it will return to its launch point automatically. This is great for both you and the drone if something goes awry.
However, if you don’t keep an eye on the battery levels of your drone, it will land wherever it pleases, which can be inconvenient at best and downright destructive at worst. It’s far too easy to get caught up in the process of flying, and once you add taking photos, there is an awful lot to command your attention.
As such, you will need to develop a system for checking your battery life. Set a reminder on your phone. Have a friend time your flight and call out how many minutes of battery life are left. Try to launch the drone as close to the area you want to photograph as possible. These are simple steps, but they could very well save you lots of trouble should your drone run out of juice.
Understanding the factors that reduce battery life is essential as well. The more camera weight it has to carry, the less time your drone will be able to fly. Windy conditions and cold weather have a deleterious impact on battery life as well. Be prepared to cut your flight time in these conditions by as much as half!
Final Thoughts

There is far more to know about flying a drone for photography purposes, so be sure to check the resources provided in this article before you attempt to tackle drone photography. As noted above, it’s mostly about using common sense and being informed about what you can and cannot do with your drone. Be responsible, check local regulations, and take the time to learn how to fly your drone safely before you attempt to add photography to the mix.
We Recommend
Most Inspirational Photographers of the Month - April 2017

Another month has gone by, and we had another month's worth of pretty amazing Inspirational Photos of the Day.
Whether you like landscapes, portraits, macro, or something in between, we found some incredible imagery last month that certainly got our creative juices flowing.
Hopefully, you found these images as inspiring as we did!
If you missed any of them, take a moment to see what you missed...
April 1, 2017 - Trevor Anderson
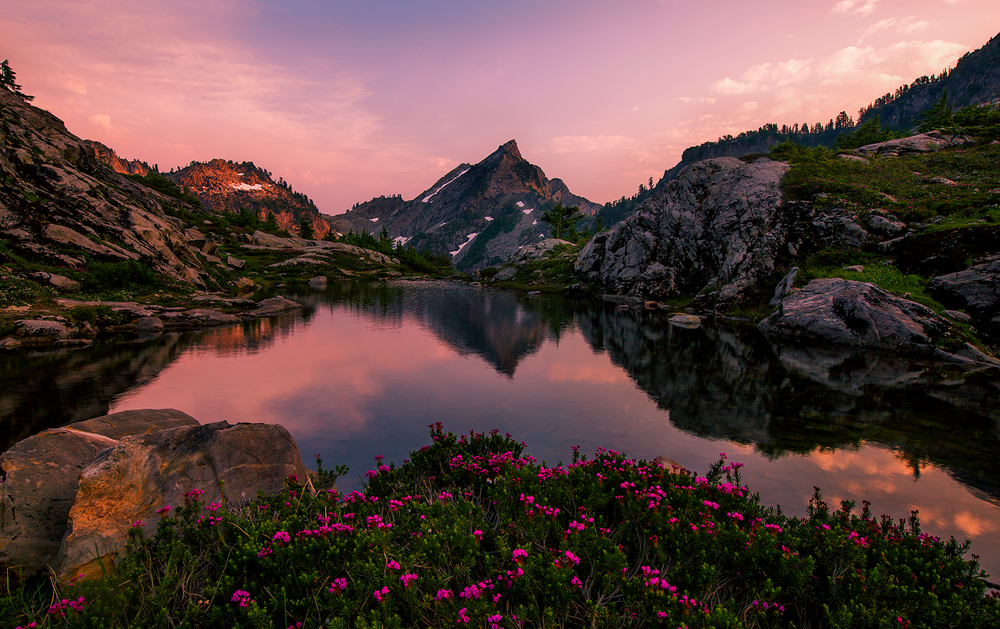
April started off with a bang with this incredible shot by Trevor Anderson...
Between the incredible light of Golden Hour, the foreground interest of the flowers, and the interesting textures and shapes of the rocks and mountain peak, there's a lot to like about this photo.
That reflection in the calm waters of the lake isn't bad either, right?!
April 2, 2017 - Martin Hroch

If there were an award for the most colorful photo of the month, this beauty by Martin Hroch would have certainly come out on top.
Often, architectural photos focus on the lines and forms created by the structures.
And though there's plenty of lines and forms to delight the eye in this shot, I think we can all agree that it's the colors that really grab your attention!
Also note how the blue "trees" elongate the photo - even though it's in landscape format, the tall structures make the image seem like it has more verticality.
April 3, 2017 - Nico Babot

Combining landscapes with portraiture can get you some incredible results, like this stunner of a shot by Nico Babot.
At first, the most breathtaking thing about this image is the waterfall in the background.
However, as you move your eyes around the shot, you notice all the little details that make it truly compelling, from the human figure to the blurry water in the foreground to the incredible textures and details of the canyon walls.
Talk about taking us on a visual journey!
April 4, 2017 - Zachary Martgan

Canada's Banff National Park is certainly one of the most gorgeous locations for landscape photography, and all that beauty is certainly on display in this photo by Zachary Martgan.
The layering in this shot is especially powerful - note how the foreground rocks draw you in, guiding your eye to the lake in the midground, which reflects the colors of the sunset in the background.
Those jagged mountain peaks are a nice addition too, don't you think?
April 5, 2017 - Jessi V. Photography

Our friends at Sew Trendy helped us celebrate the arrival of spring by sharing this sweet photo of a mom and her daughter by Jessi V. Photography.
Notice how the colors of the shot scream spring - lots of greens, pinks, and yellows that give this image tons of colorful depth.
The sunlight in the background of the shot is beautiful as well, warming up the image even though mom and daughter are both in shadow.
The colorful and texture-rich gowns mom and daughter are wearing is the icing on the cake too!
April 6, 2017 - Mark

If ever there was a portrait that showed the power of the wardrobe selection, this one by Mark is certainly it!
The scene is beautiful, to be sure, but it lacks color to provide more interest.
By putting the model in a flowing red dress, the portrait immediately has more impact and drama.
And though the building in the background is certainly interesting, with that dress, all eyes are on the model - right where they should be!
April 7, 2017 - Kurt

If there was a photo this month that looked like the initial shot in Planet Earth, this would be it!
This photo screams Africa, with the bright, golden sun casting the trees in silhouette.
The framing of this shot is on point too - notice how the foreground tree is framed in the middle of the image, but that despite breaking the rule of thirds, the photo still seems balanced.
The tree in the background and the sun framed to the left of center helps achieve that balance. Great work, Kurt!
April 8, 2017 - Tony
Even though much of the scene is obscured in the shot above by Tony, there's still an incredible sense of action in the image.
The emergence of the horse and rider from the dust just goes to show that with a strong subject, you don't need much else in the frame to make a compelling photo.
This is another rule-breaking shot, too: typically, when photographing motion, you want the moving object to have room to move into.
However, Tony proves that rules are meant to be broken!
April 9, 2017 - Datchinamoorthi

One of the great things about nature and wildlife photography is that sometimes you can capture a moment that shows the personality of the animal.
I think you'll agree that Datchinamoorthi did just that in this adorable shot of a baby owl.
The photo has a playful vibe to it, as though the owl is playing hide-and-go-seek with the photographer.
That's because the framing - with the tree on which the owl is perched occupying the left side of the frame - enhances that peek-a-boo type feel.
April 10, 2017 - Fotodenis

As the saying goes, perspective is everything, and this shot by Fotodenis proves that point.
When presented with a typical scene, finding a unique perspective from which to view it can make even the most mundane setting seem much more interesting.
By simply taking a bottom-up view, the photographer gives us a dynamic, high-contrast image of this forest that's much more engaging than a normal view would be.
All those long, thin lines move your eyes skyward, helping to elongate the frame as well. Great work, Denis!
April 11, 2017 - Cirezende

Cirezende sure knows how to create a minimalist portrait with tons of visual impact.
In this case, the subtle texture of the street combined with the interesting shape created by the doorway and its adornments makes for a visually interesting shot.
But the most interesting element in this photo is certainly the shape of the woman, her arm extended with her broom.
Add in a pop of color in her wardrobe, and you've got a masterclass in simple, yet powerful portraits.
April 12, 2017 - Martin Hroch

Martin Hroch makes a second appearance on this list with this stellar panoramic landscape photo.
What makes this image so eye-catching is the way that the light pouring through the clouds illuminates the landscape below.
As if that's not enough drama, the dark, low-hanging clouds add a bit of an ominous tone to the landscape.
Add in the texture of the rocks in the foreground and the wide angle of view, and you've got a winning photo!
April 13, 2017 - Ed

With "Truly Golden," Ed certainly hit the nail on the head with the subject matter and the title.
What makes this shot so great is that it's not the typical postcard photo of the Golden Gate Bridge.
Waiting until night to highlight the glow of the bridge in front of the city lights makes this a more unique photo.
The long shutter speed to blur the water, the lights, and the clouds is a nice touch as well!
April 14, 2017 - Glenn Donharl

Ask any photographer what the most difficult subject to photograph is, and many of them will tell you birds, especially birds in flight.
Yet, in this case, Glenn makes it look easy with this gorgeous shot of a little hummingbird.
Even though the bird's wings are moving too fast for the shutter speed, it's head and beak are in focus, giving us a good view of the texture and colors of the bird's body.
That framing is on point as well!
April 15, 2017 - Xljphotography

When taking photos of the night sky, typically you want to minimize light pollution as much as possible.
But as Xljphotogrpahy demonstrates with this shot, you can still get some spectacular results, even if light pollution is present.
Better still, this image shows how framing is so important. Note how the positioning of the camera is just right to get the top of the lighthouse to reflect in the puddle.
That's how planning and thinking about the shot help you make a more successful photo!
April 16, 2017 - Gary R. Hook

Getting the focus point just right in a macro shot can be tough to do because of the razor-thin depth of field.
However, Gary R. Hook shows us that if you nail the focus, you get a highly pleasing image to view.
In this case, the manner in which the very edge of the rose's petals are in focus shows off the delicate nature of the flower, and the precise work of Gary.
The black and white conversion helps make this a more dramatic photo too!
April 17, 2017 - Krishanu

In many landscape photos, the color tones tend toward blue.
But in this photo by Krishanu, we see how a warmer tone can make the scenery even more dramatic than it is.
Also of note in this shot is the low perspective - it seems like you can just walk into the photo and right into the river, right?
When taking landscape photos, think about elements like this that give the image more vitality and a unique look. It will help your photos stand apart from the rest.
April 18, 2017 - Keith

The interplay between light and shadow in this shot by Keith just goes to show how thinking about how light falls across the scene helps you create a more compelling photo.
Sunset photos at the beach can be a little boring, so by framing the shot with the cliffs, Keith adds elements that make the image more eye-catching.
What's more, the cliff in the midground helps create that interesting light and shadow that gives this shot the added level of interest it needs.
Bravo Keith!
April 19, 2017 - Ella Jeans
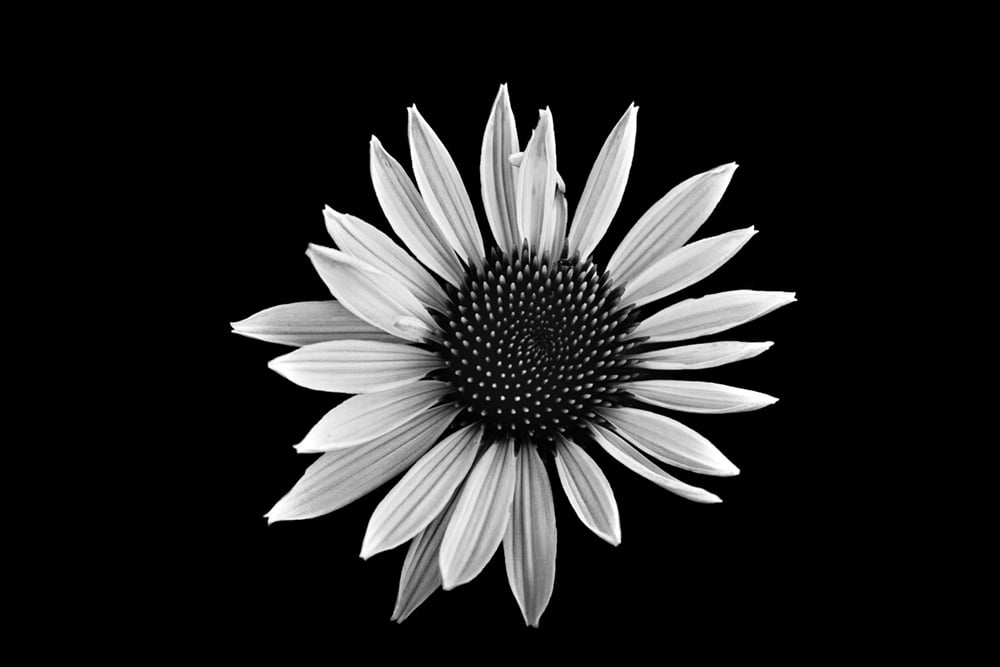
Some of the most powerful photos are the ones that are also the simplest.
That concept is on full display in this beautiful black and white photo by Ella Jeans.
The high contrast between the flower and the background certainly catches your attention, but so too do the delicate features of the flower.
The fact that the image is perfectly in focus also helps!
April 20, 2017 - Harold Zeltner

Another sunset photo, another great example of how to make it more interesting!
In this case, Harold Zeltner not only frames the sunset beautifully, but he also adds gorgeous silhouettes that give the shot much more depth.
The action of the waves crashing on the beach adds just enough motion to make the photo a little more dynamic too.
The boats just offshore add additional detail to be appreciated as well, don't you think?
April 21, 2017 - PJ van Schalkwyk

There's a lot of photos from last month that stunned because of the lighting, but this one by PJ van Schalkwyk has to be at the top of the list.
The coolness of tones in the foreground give it a frigid feel. But the bright, golden light in the background warms up the image.
The contrast between the two types of lighting is certainly the most eye-catching aspect of this photo, don't you agree?
April 22, 2017 - Roberto Pavic

Shooting landscapes in vertical format isn't as common as horizontal format, but Roberto Pavic reminds us of the value of a vertical composition with this incredible shot.
When there's foreground interest and background interest, a vertical format photo helps highlight both.
In this case, the rocks in the foreground also create a leading line, directing our eyes to the beautiful village in the background.
This is one great shot, Roberto!
April 23, 2017 - Dave

Much like the previous image, this one highlights how foreground interest is such an integral component of an impactful landscape shot.
Here, the juxtaposition of the soft, flowing clouds and the blurry water with the harsh, texture-filled rocks in the foreground creates a gorgeous dynamic between hard and soft.
What's more, Dave got the horizon perfectly straight - something that's easy enough, but yet so many photographers struggle to get right.
When there's a definite horizon, be sure to check your level. Otherwise, a crooked horizon could ruin an otherwise awesome photo.
April 24, 2017 - Mikeclegg7

When you hear the term "cityscape," I doubt many of you think of something like what you see in the image above by Mikeclegg7.
But a cityscape it is! Just a much more serene and gorgeous one than what most of us typically encounter.
There's a lot at work in this shot to make it compelling, from the clean lines of the architecture to the pops of color from the flowers to the reflection of the scene in the tranquil water.
In other words, it looks like a great spot to just sit and soak it all in!
April 25, 2017 - Paul

When using leading lines in a landscape photo, they don't have to be overt.
In this beautiful image by Paul, notice how the ridgeline in the middle of the shot helps draw your eye from left to right. That, in turn, allows you to inspect the image from the explosion of color in the foreground to the white, barren, snow-covered background.
When framing the shot, look for ways to connect disparate areas in the landscape; it helps create a much more cohesive image.
April 26, 2017 - Lior Yaakobi

This absolutely stunning image by Lior Yaakobi was one of the most popular of the month, and it's easy to see why.
This landscape is full of drama, from the iconic silhouette of The Matterhorn to the gorgeous colors of the sunset to the surface of the water in the foreground that's starting to show signs of freezing.
In other words, this photo has it all - shape, texture, color - you name it!
That symmetry is something else too, right?!
April 27, 2017 - Dave

When framing a landscape shot, consider where you place the horizon.
If, like in the image above by Dave, there's lots of foreground interest, shift the horizon upward to give more room in the photo to highlight the foreground.
However, if the sky or the background is more interesting, shift the horizon downward to give it more real estate in the shot.
Doing so allows you to frame the most interesting elements in the photo, which, in turn, makes for a more impactful photo.
April 28, 2017 - Paul

Something to consider when taking a photo of the night sky is whether or not you'll include star trails.
If you want circular star trails like in the image above by Paul, you'll need to locate the north star. Doing so allows the movement of the earth to create the gorgeous, swirling trails seen above.
But remember - no matter how gorgeous the sky is, be sure to include elements in the foreground to add structure and depth to the shot as well.
April 29, 2017 - Jens Klettenheimer

Golden Hour gets all the glory, but Blue Hour - the time before Golden Hour at sunrise and after Golden Hour at sunset - has a lot to offer as well.
This image by Jens Klettenheimer demonstrates how the cool, blue tones make for an even more serene image.
Add in the smooth water of the pond and the nicely blurry clouds in the background, and you have a recipe for a photo that's not just eye-catching, but relaxing to view as well.
April 30, 2017 - Dinko.Denovski

There's something gritty about this photo that makes it worthy of a huge print on the wall.
Perhaps it's the black sand beach. It might be the decaying remains of the plane crash. It might even be the cool, monotone colors of the shot.
But whatever it is, this photo has tons of visual appeal even though it's so minimalist in nature.
Excellent work, Dinko!
There you have it, folks, another round of photos to get you inspired to grab your gear and take more (and better!) photos.
Though they are varied in subject matter and approach, I think this collection of images gives us all plenty of fodder for trying to improve the photos we take.
Just be sure to add your photos to the PhotographyTalk galleries so our editors can see your work. Plus, you never know when your images might be featured in an article just like this!
We Recommend
Staycation Photography: What to Photograph Close to Home

There seems to be the idea floating around that you have to “go somewhere” to take a fantastic photograph. Sure, it’s great to go to exotic or picturesque locales and take photos, but you don’t absolutely, positively have to pack your bags to find photo-worthy subject matter.
In fact, there are plenty of subjects right in your own backyard! It just takes a bit of imagination and an understanding of composition to get the breathtaking images you seek.
Here are a few photography project ideas for how you can maximize your staycation photography.
Look for the Right Stuff

All great photos have some things in common - good lighting, a strong subject, colors, shapes, or forms to give the image interest, or even motion. Certainly, you won’t find a vignette with all of these visually engaging qualities, but rest assured that with a little time spent looking at the scenes around you, you will find something that can be made into a high-quality photograph.
Part of looking for the right stuff is finding the best perspective from which to compose your photograph. The first angle you shoot from might get you a quality photo, but the second, third, and fourth angles might be even better. Get up high and down low and move to the left and the right. Move around the subject you’ve chosen to find the most appealing background. Look for ways to enhance the impact of the lighting that’s available. Don’t just settle for the first shot - keep looking and see what you can find that will get you an even better photo! Learn more about photography ideas at home on our website PhotographyTalk.com.
Get the Gear
Staying close to home means that you have easy access to your entire collection of gear. Try different camera bodies and lenses. Go macro, then go telephoto. Try some close-ups with a wide-angle lens too. Manipulate the shutter speed to freeze and blur movement. Mount your camera to a tripod, then hand hold it for additional shots. The point is that this is a great time to experiment and push the boundaries of what you typically do.
Focus on Depth of Field

A common complaint of people who try to photograph things near their home is all the ugly stuff they don’t want in the image - street signs, trash cans, freeway on-ramps, and so on.
Of course, these things can be easily eliminated by working with a very shallow depth of field. Remember that depth of field decreases as the aperture widens, so try shooting as wide open as possible. Also remember that the distance from your lens to the subject, and the subject to the background impact depth of field. As a result, get in close, and try to frame the shot with as much room behind the subject as possible. If you do these things, it won’t really matter what’s happening in the background because it will all be nicely blurred.
Subject Suggestions
There is a multitude of subjects just out your front door that are worthy of a photo, especially if you catch them at the right time. Here are a few of our favorites:
Birds

The birds that visit and live near your home are one of the best subjects to try your hand at wildlife photography. They are easily accessible, used to humans being present, and if you provide them with a birdfeeder, birdhouse, or bird bath, they will hang around for awhile, giving you time to snap their photo.
Insects
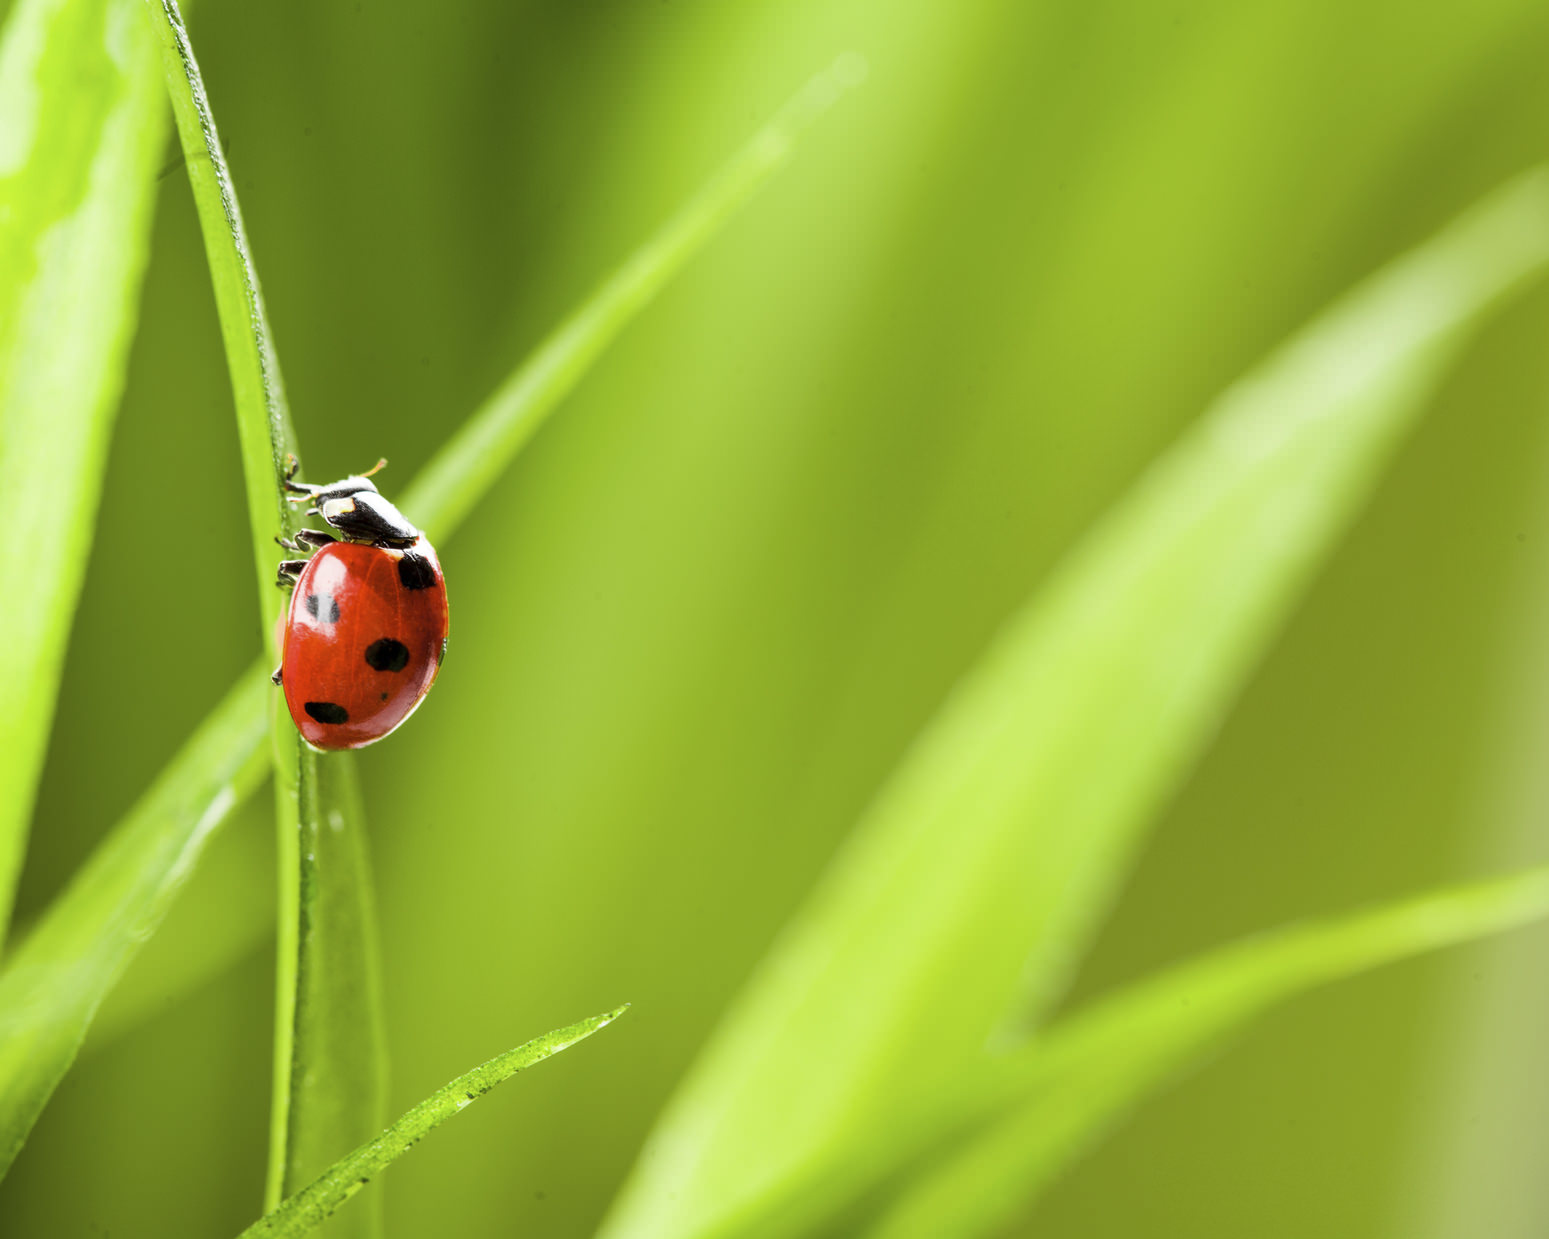
Your yard or garden is rife with life on the macro level. Grab your macro lens, ring light, tripod, and remote shutter release and head out to find ladybugs, spiders, dragonflies, and other insects that you can highlight in a macro shot.
Flowers

Flowers are abundant in many areas and make a wonderful subject for a lovely close-up photo. When photographing flowers, try to isolate a single bud in the frame, ensuring that it is in sharp focus in front of a nicely blurred background. Alternatively, you can step back for a wide-angle shot if there is a lot of variety in terms of color and shape. You can also check another post about photo projects.
Dew

In the spring and the fall, in particular, your grass and plants will be covered with dew in the morning. The dew drops are an excellent visual addition to any photo, particularly if you can position yourself such that there is backlighting to make the dew drops sparkle. Look for spider webs for a more graphic visual element.
Sunrise or Sunset

Golden Hour is an ideal time of day to photograph just about anything. Whether it’s a nearby field where you can isolate a single stalk of wheat in front of the rising sun or the silhouette of your kids playing in front of a sunset, Golden Hour will give you great lighting to highlight the everyday objects, people, and events like those outlined above.
We Recommend
The Beauty of Macro Photography: A Closer Look at the World's Tiniest Wonders
Photo by Valengilda via iStock
As a landscape and nature photographer, I love macro photography. Seeing the tiniest bit of a macro photography flower projected as a large print or filling a computer screen is a great reward for trying macro photography.
There’s a lot going on when we’re doing macro photography. There’s the equipment, such as a macro photography lens, a tripod or alternative camera mount, and perhaps some lighting control.
And the calculations are going on, figuring exposure or exposure modes and compensation, setting the focus, and using depth of field properly.
Then there’s also the thought of ‘How am I thinking of displaying this macro photography image?’ Will it be a large metal or acrylic print to wow the viewers? Am I illustrating an eBook or an online article?
I have five worthwhile tips on different aspects of the macro photography puzzle to help you make the most of capturing those amazing macro photography images for your own art.
Table of Contents:
- What Is Macro Photography?
- Macro Photography Tip #1: Focus is Key
- Macro Photography Tip #2: Steady the Camera
- Macro Photography Tip #3: Lighting Enhances Things
- Macro Photography Tip #4: Exposure Tricks
- Macro Photography Tip #5: Post-Processing Punches It Up
- Macro Photography Wrap Up
- Recommended Photography Gear
What Is Macro Photography?
Photo by ithinksky via iStock
Macro Photography is more than simply getting close to the subject matter, though it is a big part. It’s extreme close-up photography where the subject's size in the final display medium exceeds life size.
Life-size in macro photography is used as a representation of how close focusing is used. If a macro photography lens is labeled as reproducing Life Size (1:1) or Half-Life Size (1:2) in its macro capability, that means that the subject will be captured on the film or sensor as a 1-to-1 ratio (1:1) or 1-to-2 ratio (1:2) of its actual size.
In real-world words, if I’m photographing a ½” bug as 1:1, then the bug image on my sensor will take up ½”. With a 1:2 ratio, that bug is ¼” on my sensor. Some macro photography lenses can reproduce greater than life size, such as 2:1 (1” bug on the sensor) or more.
But that’s only the size it is on my camera’s sensor (or film frame if shooting analog). Once I enlarge the image file, that bug is bigger. For a Full Frame sensor image file, if I make an 8X10” print, that bug is now bigger than life. It measures 4 inches on the 8X10 print. Make bigger prints or view on a larger monitor, and things get interesting quickly!
That’s why macro photography is so fun and amazing. By the way, it doesn’t have to be a bug or a flower part. Lots of natural and man-made objects make interesting macro photography subjects.
Macro Photography Tip #1: Focus is Key
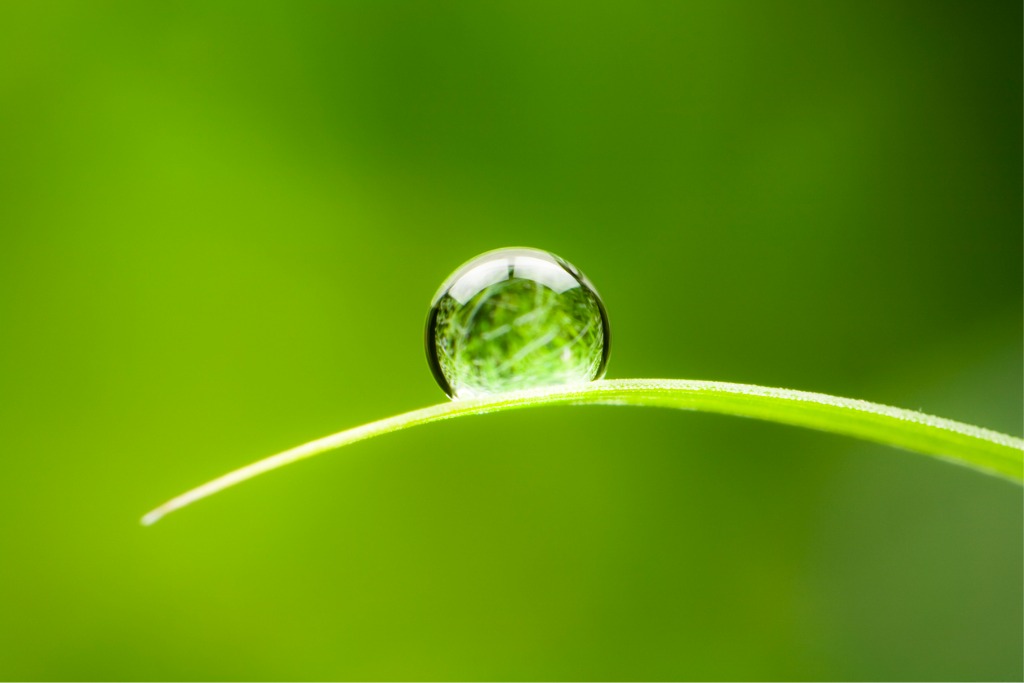
Photo by Thomas Vogel via iStock
Among the most vital components of creating good macro photography is proper focus. A rule of how optics work in photography is that the closer we are to our subject, the less depth of field there is at any given aperture. In other words, less is in focus in front of or behind what our actual focus plane is.
Adding to the issues confronting us when doing macro photography is that lens aberrations are also increased. For many lenses, this ultra close focusing emphasizes a common optical characteristic of photographic lenses, curvature of field.
Lens elements curve the plane of focus by a tiny bit. In normal distances, this curvature is well within the generous depth of focus. As you focus closer, however, this curve can sometimes affect the image. The depth of focus at super near focusing distances isn’t enough to cover the focus plane curve.
We can use that to our advantage with macro photography of some subjects such as that friendly bug or a flower part, concentrating on focusing on the desired part of the subject, letting the rest of the focus plane work as a part of selective focus.
Our regular lenses probably won’t focus close enough, so adding extension tubes or diopters (close up filters) is how we get close enough. If that focus plane curve is well corrected, we could use our lens to capture images that are flat, 2-dimensional.
That’s the advantage of using a macro photography lens. Not only do they have the mechanical means to focus super close, but they are also corrected for “flat field." A flat field macro lens can actually be used for copying documents, stamps, art, and so forth.
Macro Photography Tip #2: Steady the Camera
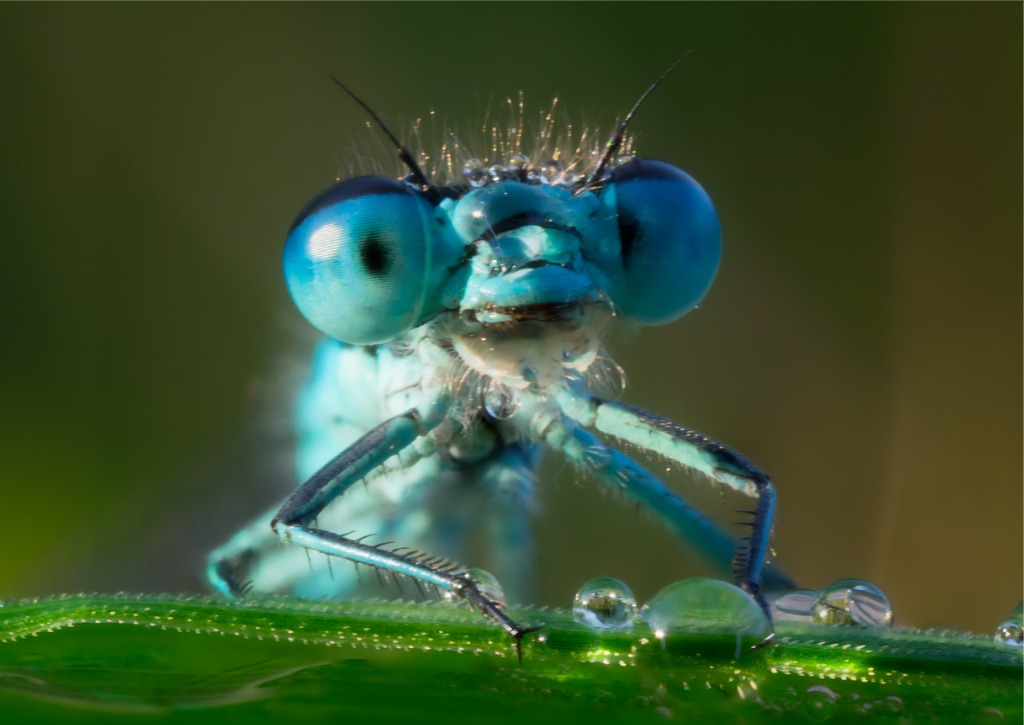
Photo by DieterMeryl via iStock
Focus plane curvature isn’t the only thing greatly magnified when narrowing in; so is vibration and camera shake. It seems that no matter how hard I try to implement my tried and true handheld techniques when doing macro photography, it just isn’t enough.
We need to mount our camera on a tripod or a tripod alternative. I often bring up the alternative to tripods with macro photography because sometimes my regular tripod is too much. I have found Octopad camera mount to be a great tool for steadiness in macro photography.
It’s more compact than a travel tripod and steadier than a monopod or my own well-practiced stance. Octopad is a compact, flat disk of heavy-duty, weighted material with a ball head attached to the top. Underneath is a non-slip pad that allows your camera to be placed on the uneven surfaces we may find ourselves in, even if that surface is angled up to 45 degrees.
Keeping the camera and macro photography lens rig still also helps in focusing. I can use a slower shutter speed and a smaller lens aperture for more depth of field. And it’s much simpler to make some of the focus ring micro adjustments I find myself doing when the camera and lens are secured in place.
Macro Photography Tip #3: Lighting Enhances Things
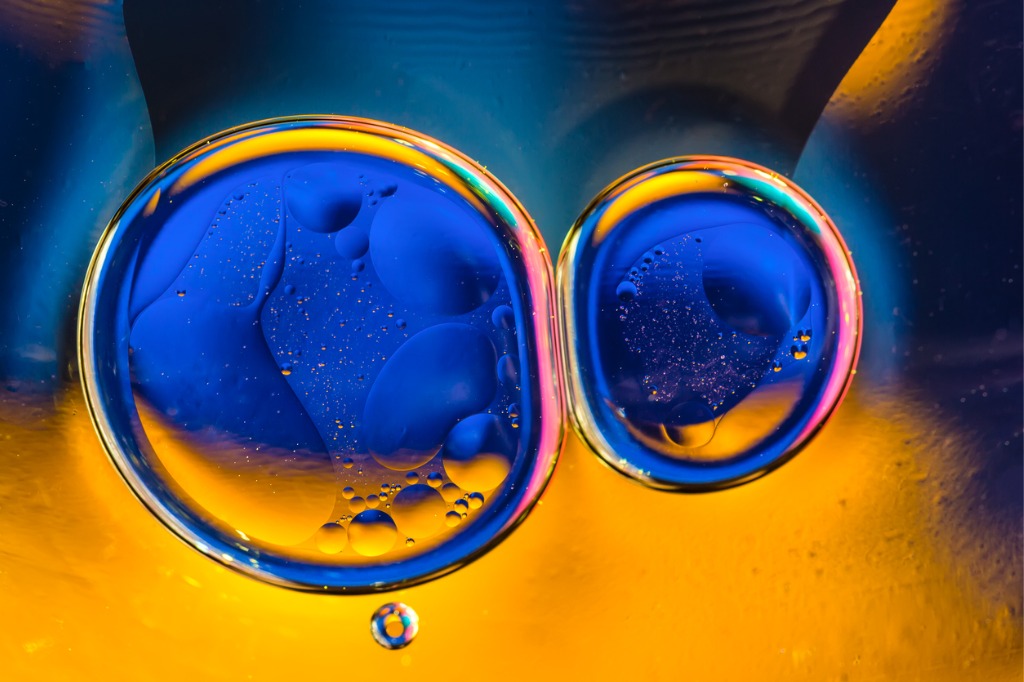
Photo by nantonov via iStock
A lot of the time, I’m engaging in macro photography. I’m in the great outdoors, away from controlled auxiliary lights. Still, I want the image to be the best I can create, so I use light modifiers more than anything else.
A flashgun could be used sometimes, but we’re often too close. The camera and lens will partially block the built-in flash, and an off-camera flash calls into play using a hand that is tied up with holding and adjusting my camera.
I have found several options that fix these issues. A foldable reflector can be placed or propped up in the right spot to reject a small amount of light where I need it. Bonus tip: that reflector is the perfect portable background for a lot of nature-based macro photography.
I regularly use two more things in the field and closer to home or studio: a flash or an LED light. But I just got through complaining about holding a flash! Here’s the trick - I’m not holding it. My tripod, small light stand, or Octopad is holding it.
Same with the small, portable, battery-powered LED lights I love so much. Put it on my stand or alternative mount and point it exactly where the light falls. TTL flash control can be remote on a couple of my cameras. With an LED light, I can vary the power level for my exposure and also adjust color temperature.
Macro Photography Tip #4: Exposure Tricks
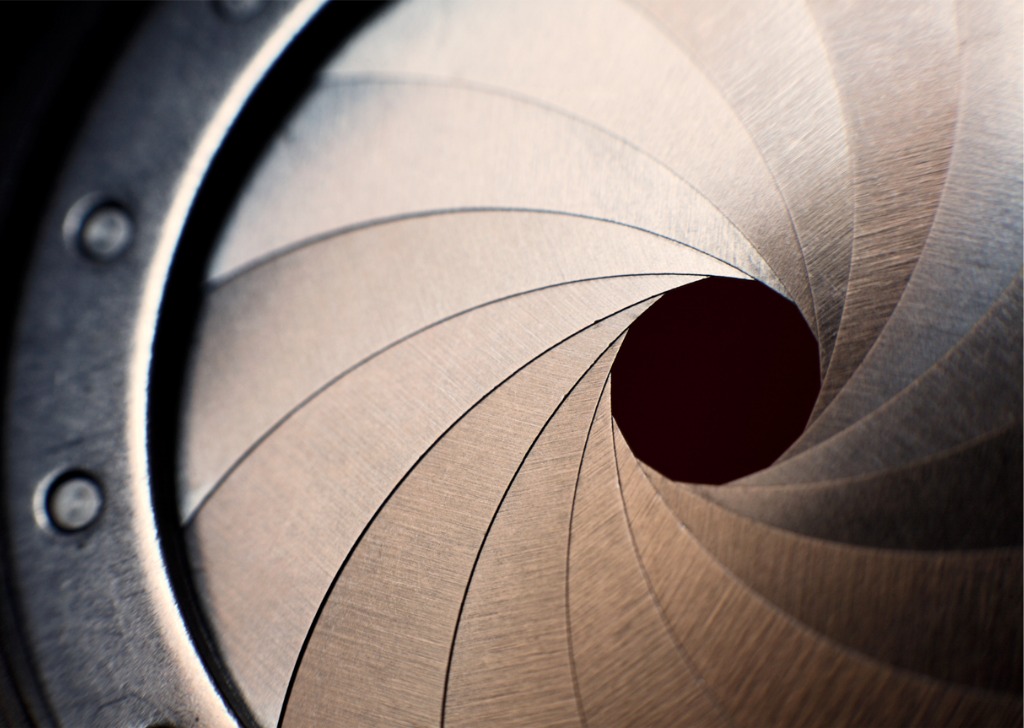
Photo by LdF via iStock
Well, not really tricks as such… more like using our basic photography skills to enhance our macro photography. The Exposure Triangle is king when I’m having fun with macro. Since my camera is likely already well-supported, and I have some lighting issues at least a little bit under control, I can play with the triangle.
A longer shutter speed requires a smaller aperture for correct exposure with any given light value. Since I'm not worried about camera shake, I can stop my lens down. In macro photography, every bit of extra focus depth can often be handy.
A handheld light meter can also be a great aid for macro photography. Here’s a nice video on some basic metering tips from Robert Machado:
Instead of relying on the built-in meter reading reflected light, I can hold a meter up to my subject and read the light falling on it. This is called incident meter reading, using that little dome cover with our meter pointed back at the camera. For macro photography, I find this method is sometimes best.
Macro Photography Tip #5: Post-Processing Punches It Up

Photo by lirtlon via iStock
Post-processing these files is the penultimate step of my macro photography. (The final step is printing it or displaying it somewhere.)
With many post-processing programs, the backgrounds can be minimized with different tools to make the macro photography subject stand out even more. One nifty trick I enjoy is selective color. Simply dial down the color or desaturate whatever isn’t the main subject, making that bug stand out even more by being in vivid color while everything else is closer to monochromatic.
Post-processing can also enhance the difference between in-focus and out-of-focus parts of the picture. Another great tool is noise reduction for less visual distraction, making the image POP even more, thus further enhancing your macro photography.
Macro Photography Wrap Up

Photo by Mordolff via iStock
Almost any camera and lens combination is capable of macro photography; hey, my iPhone does it! Using a macro photography lens, keeping things steady, controlling light and exposure, and post-processing judiciously will let your macro photography images grab attention.
Take those small things, whether it’s a bug, flower, computer chip, or something else, and put them on center stage with great macro photography techniques.
Recommended Photography Gear
Learn More:
- Outdoor Photography Gear You Need Before Your Next Trip
- 4 Essentials for Hiking Photography
- Get Better at landscape Photography
We Recommend
Why Bracketing Should Be Part of Your Photography Workflow

Getting your photos as right as possible in-camera has never been easier. There’s all sorts of modes, buttons, and dials to help you achieve greatness when it comes to exposure and focus, among many other things. The issue is that some photographers don’t understand how to use these features to their full advantage.
If you’ve read a few photography tutorials, you’ve undoubtedly heard of exposure bracketing. But did you know that you can also bracket for focus as well? Let’s explore both types of bracketing and see what a difference each can make on the photos you create.
What is Bracketing, Anyway?

By Muhammad Mahdi Karim (www.micro2macro.net) Facebook Youtube (Own work) [CC BY-SA 3.0 (http://creativecommons.org/licenses/by-sa/3.0) or GFDL 1.2 (http://www.gnu.org/licenses/old-licenses/fdl-1.2.html)], via Wikimedia Commons
Bracketing is the act of taking multiple photos to ensure you have at least one good picture. If you set your camera to burst mode, for example, it is in the hopes that one of the photos will be a winner - you have more images from which to choose, so the chances that there’s at least one good one is increased.
Bracketing for exposure and focus involves a similar concept: you take multiple photos of the subject, but each at slightly different settings. Then, you can select the best one, or if you wish, you can combine the images into a final shot that looks good throughout. This concept is demonstrated in the series of photos above - the one on the left is a single image focused on the fly’s eyes, the middle image is focused behind the fly, and the image on the right is a composite of six different images, each with a slightly different focus point.
Exposure Bracketing

Modern cameras have various metering modes and shooting modes that help you get images that are well-exposed. If you’re well-versed in the ways of photography, you can even shoot in manual mode and make adjustments to aperture, shutter speed, and ISO to get a well-exposed image on your own.
Yet, there are times when the lighting conditions are just too tough for your camera to get a good exposure all by itself. That’s when bracketing comes in handy.
Exposure bracketing involves taking a series of photos of the exact same scene, but with different exposure settings dialed in for each shot. The easiest way to do this is to set your camera to Program mode and use your camera’s exposure compensation feature. It’s quite simple:
-
Take a photo that should be properly exposed.
-
Use the exposure compensation feature to purposely underexpose the image by one or two stops.
-
Use the exposure compensation feature to purposely overexpose the image by one or two stops.
The result is a series of photos that are compositionally the exact same, but are at different exposure levels. This is a benefit to you for a couple of reasons: first, it gives you several exposures from which to choose, assuming one of them is well-exposed, and second, it gives you several exposures that you can blend together to ensure everything in the scene is well-exposed. This blending technique is especially useful for things like landscape photography where some parts of the scene are quite dark and others are quite bright.
Focus Bracketing
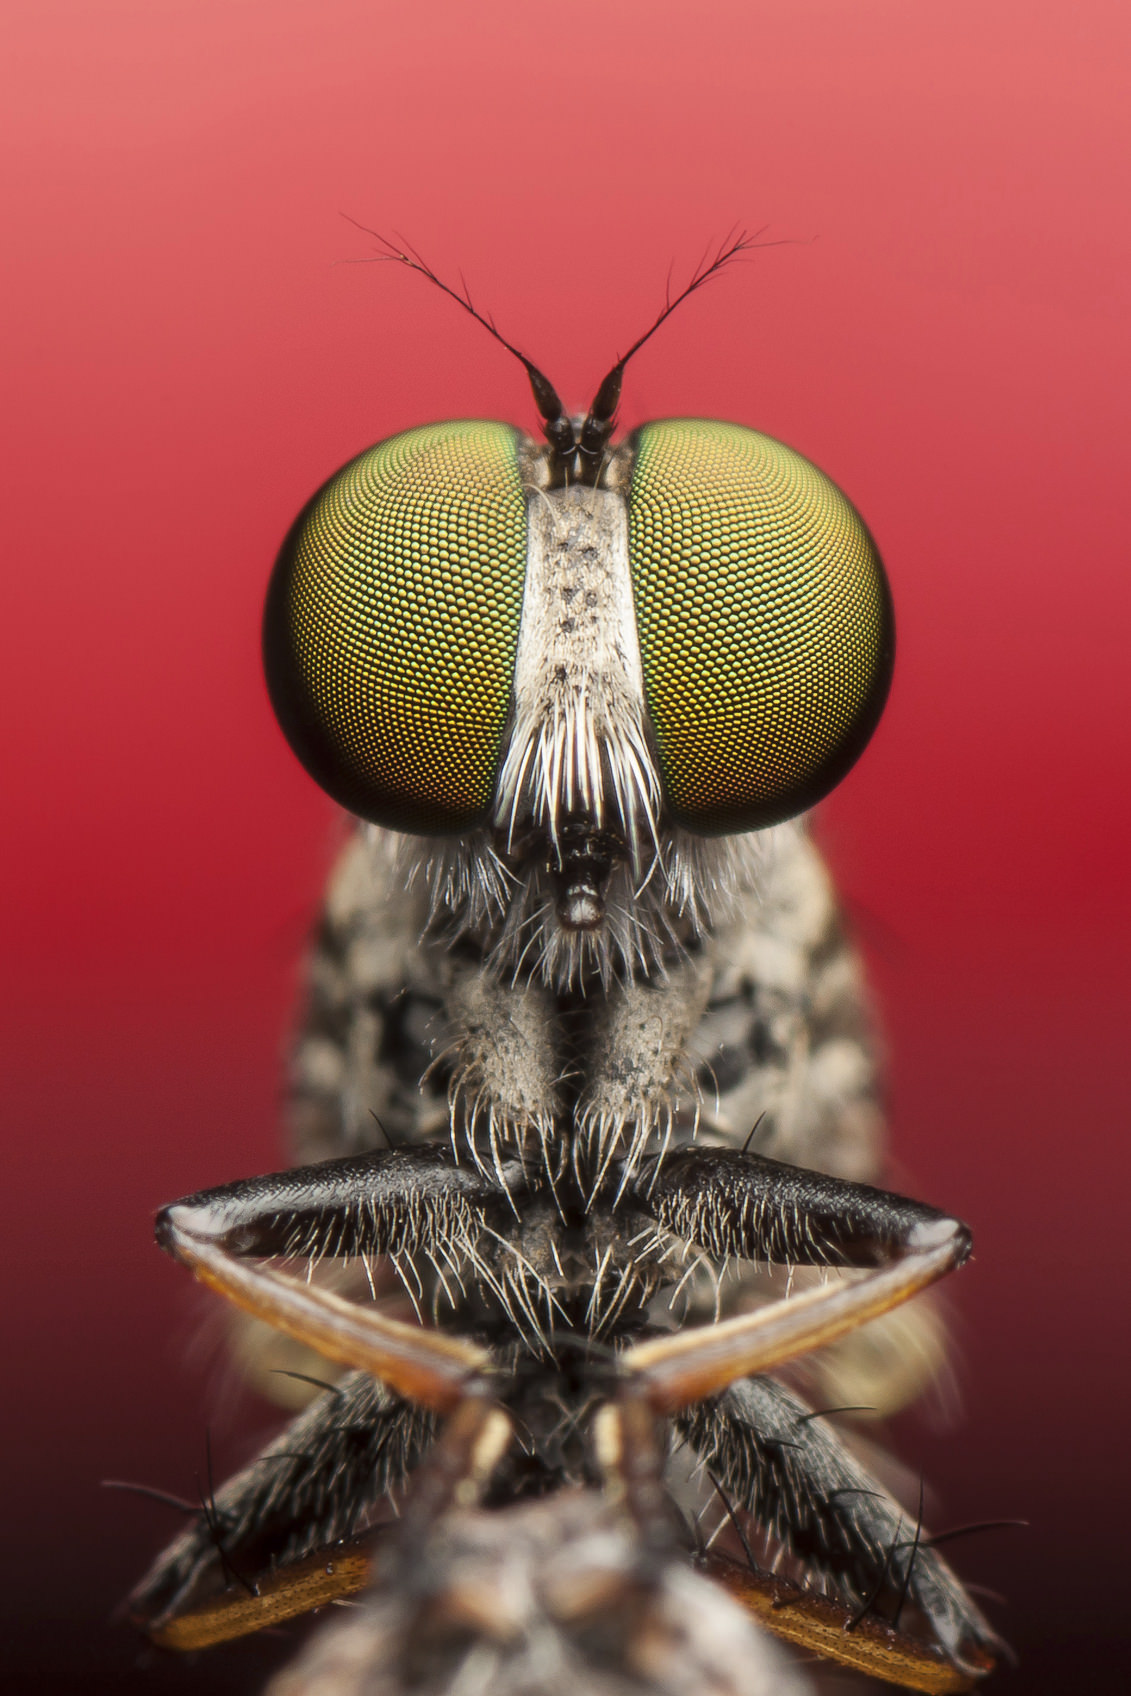
Just as you can bracket your exposures, you can also bracket focus. This method is especially helpful for things like macro or close-up photography because of the shallow depth of field that such photos require.
Basically, when you place your camera up close to a subject, your lens might have a bit of trouble focusing appropriately when in autofocus (or in manual focus, for that matter, although manual focus will get you more reliable results). Nonetheless, when taking a macro shot, for example, you might find that instead of the eyes of the bug you’re photographing being in sharp focus, that the focal point is slightly in front of or behind the bug - not what you want.
Get around this issue by shooting with manual focus and taking a series of photos, each with a slightly different focal point. Start out by placing the focus just slightly behind your subject and taking a photo. Then gently, and slowly adjust the focus, and take another shot. Repeat this process until you’re focused on an area slightly in front of the subject.
Once you have your series of photos, inspect each one on your computer to see which shot has the best focus. Now you’ll have multiple images from which to choose, rather than hoping that your lens’ autofocus system gets it right. You can also combine the images into a single image in post-processing using a process called focus stacking, although it’s much more complicated than focus bracketing.
Final Thoughts
In the days of film, photographers had to be very careful how many images they took, lest they use up all their film (and their money getting the film developed). However, the digital revolution means that today’s photographers can fire away and take hundreds - if not thousands - of photos, all on a single battery charge and a single memory card.
If you’ve got the space and the battery power to take that many photos, why not add bracketing to your typical routine? Sure, it takes a little bit longer given that you have to take multiple shots, but that little bit of time is worth the sacrifice if it gives you more photos to choose from and increases your chances of getting an image that is perfectly focused or perfectly exposed. That’s the value of bracketing!