3 Budget-Friendly Circular Polarizers

Before you decide which circular polarizer you want to buy, you should figure out what you’re looking for in a circular polarizer.
Four important things to keep in mind when shopping for a circular polarizer are: the size of the frame, whether the circular polarizer casts color on your images, whether the circular polarizer uses a hydrophobic coating, and the type of glass used.
If your circular polarizer features a thick rim, then the chances of vignetting on the edges of your photo drastically increase, so slim circular polarizers are best.
You also don’t want your circular polarizer to add any colors to your photos - you’re looking for hyper-neutral results instead.
Finally, the top circular polarizers should use a hydrophobic coating to keep water at bay, and higher transmission glass, to prevent light restriction. After all, you don’t want to be constantly wiping water off the filter, nor do you want it to influence the exposure.
For the purpose of this article, we picked three budget-friendly circular polarizers that are each under $100.
Kenko Nyumon Slim Circular Polarizer

At the top of my list is the circular polarizer I currently have in my bag, the Kenko Nyumon Circular Polarizer.
This filter ticks all the boxes when it comes to features you want in a polarizing filter.
It’s made of precision Asahi optical glass that maximizes the quality of the image. This type of glass is similar to what’s used to make the elements in a lens, so you know it’s of a very high quality.

The slim housing minimizes the chances of vignetting while the eight layers of anti-reflective coatings reduce ghosting and reflections.
Likewise, the coatings on both sides of the filter help repel environmental conditions like water, dust, and oils from your fingers.
These filters also have minimal effect on the exposure - about 1.5 stops.
In other words, I’ve found this filter to not only be a durable and effective filter, but it’s also extremely budget friendly at just $43.00 for a 37mm version on up to about $53.00 for an 82mm version.
Pros of the Kenko Nyumon Circular Polarizer:
- Excellent price
- High-quality glass
- Eight layers of coatings
Cons of the Kenko Nyumon Circular Polarizer:
- Threads can be a little difficult to screw onto the lens
Get more details on the Kenko Nyumon Circular Polarizer
Editor's Tip: Get Kenko’s latest updates and access to promos for discounted gear. Click here to sign up.
Learn More:
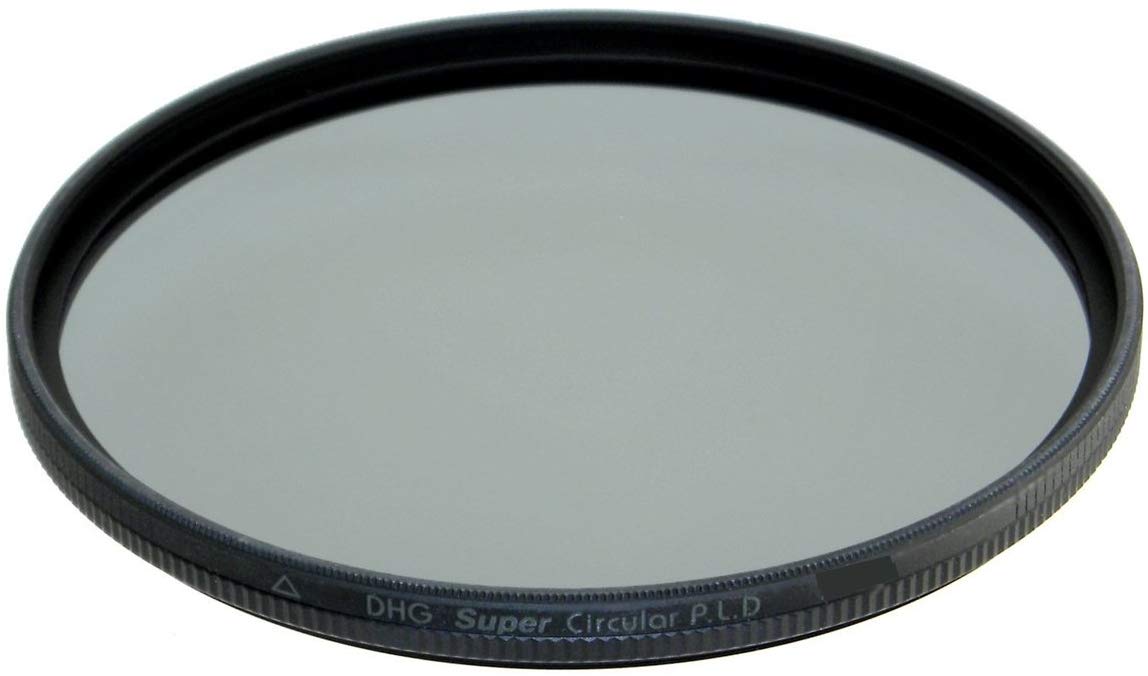
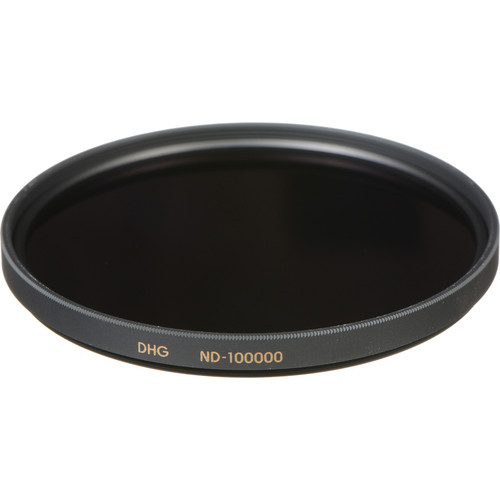
MARUMI DHG Super Circular Polarizer
Just a head’s up…
Marumi has an extensive line of circular polarizers, which can get a little confusing simply because of the number of choices. Just make sure you’re picking up the DHG Super Circular Polarizer at the store.
This circular polarizer is water and oil resistant. It also doesn’t affect image quality at all, with no vignetting on the edge of photographs because of how thin the polarizer housing is.
You can also pick up this polarizer in a wide range of sizes from 37mm to 95mm.
Plus, most importantly, it screws on efficiently and quickly, which isn’t something you want to worry about when you finally catch an elusive scene you’ve been chasing for hours.
Pros of the MARUMI DHG Super Circular Polarizer:
- Water and oil resistant
- Comes in a ton of different sizes
- Doesn’t interfere with image quality
Cons of the MARUMI DHG Super Circular Polarizer:
- Slightly impedes light transmission
- More expensive
The MARUMI DHG Super Circular Polarizer is available on Amazon for just $80.
B + W XS-Pro Kaesemann High Transmission Circular Polarizer
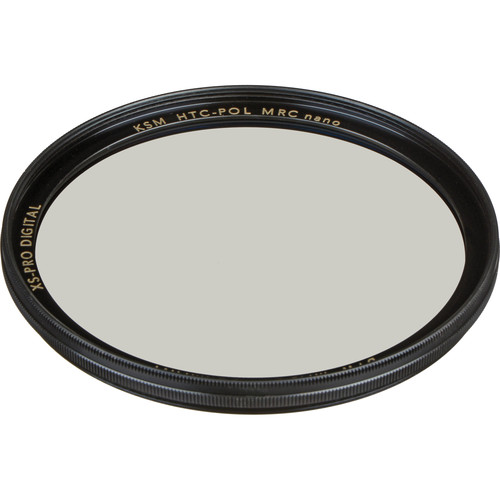
B + W thought the high transmission glass they made this circular polarizer out of was so important they included it in the name.
It fully lives up to expectations. It only loses between 1 and 1.5 stops of light.
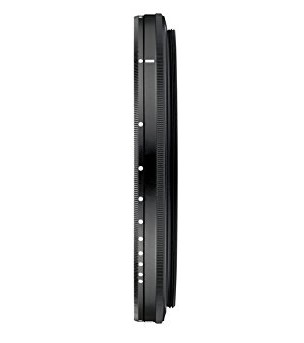
It also doesn’t interfere with image quality at all, because it’s a mere 4.5mm thick. This circular polarizer is also the easiest to grip out of all three on our list.
The coating is a little disappointing, however. B + W claims the coating is fingerprint and water resistant, but I found the opposite to be true.
For more info on the B + W XS-Pro Kaesemann High Transmission Circular Polarizer, view Nikhil Kumar’s unboxing video above.
Pros of the B + W XS-Pro Kaesemann High Transmission Circular Polarizer:
- High transmission glass means less lost light
- A ton of sizing options
- Doesn’t interfere with image quality
Cons of the B + W XS-Pro Kaesemann High Transmission Circular Polarizer:
- Most expensive circular polarizer on our list
- No impressive coating
The B + W XS-Pro Kaesemann High Transmission Circular Polarizer is available on B&H for $100.
Learn More:
We Recommend
4 Beginner Photography Questions You Should Stop Asking

Photo by Kelly Sikkema on Unsplash
If you’re new to the photography game, it can be overwhelming. You’re probably stressed about trying to start making money, or if it’s a hobby then you’re stressed about being able to see out your artistic vision.
But, there are a few questions that every pro photographer is tired of hearing, and not because it’s annoying to answer them but because the answers to these questions really won’t help you to get better at being a photographer.
That being the case, here’s a few photography questions you should stop asking...
“I’m Taking a (Insert Type of Shot Here). What Exposure Settings Should I Use?”
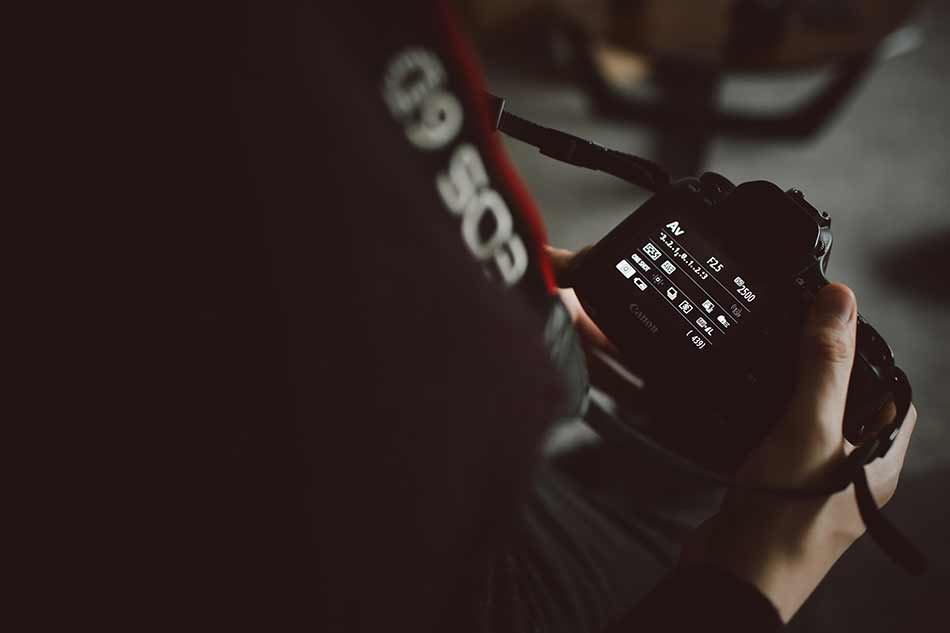
Photo by James Bold on Unsplash
People love asking this question because they assume you can use your exposure settings the same exact way for a particular shoot (like a portrait) everytime.
Your exposure settings are difficult to learn because they aren’t formulaic. If they were, photography would be rather boring, and these annoying beginner photography questions wouldn’t exist.
Sure, there are some general rules you can use to get a well-exposed photo - baseline suggestions for portrait photographyor landscape photography - but the specific settings you use are situation-specific. There’s simply no exact answer to this question, just suggestions!
The best way for you to learn what exposure settings you want to use for a particular shoot is to get out there and start experimenting.
If it’s really bothering you and you want to use another photographer’s exposure settings as a guide, try rephrasing the question. A simple, “I have my shutter speed at 1/125, do you think that’s appropriate for this shoot?” will get you so much farther.
If you’re not quite comfortable shooting in manual mode and making on-the-fly adjustments to aperture, shutter speed, and ISO, check out the video above by Sawyer Hartman.
“Do I Really Need Filters?”
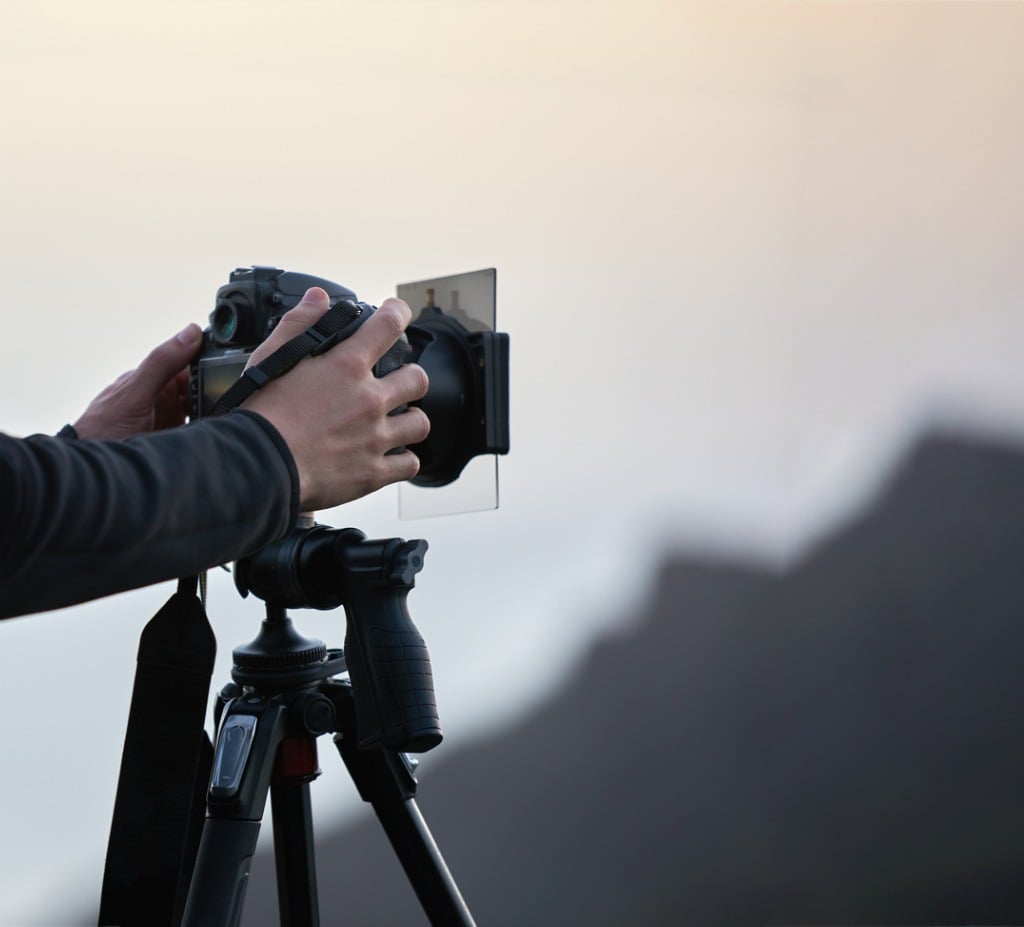 Photo by stock_colors via iStock
Yes, you need filters!
Though programs like Photoshop and Lightroom offer very powerful editing tools that can correct some of the issues that filters correct, the effect simply is not the same. You just get higher-quality results when using filters.
This is especially true with a circular polarizer, because despite the power behind today's editing programs, the effect a polarizer has simply cannot be replicated in post-processing.
When shopping for a filter system, it's important that you don't skimp and get bargain-basement filters. Cheap filters just don't work as well as quality filters, so investing in a quality system from the get-go is the way to do it.
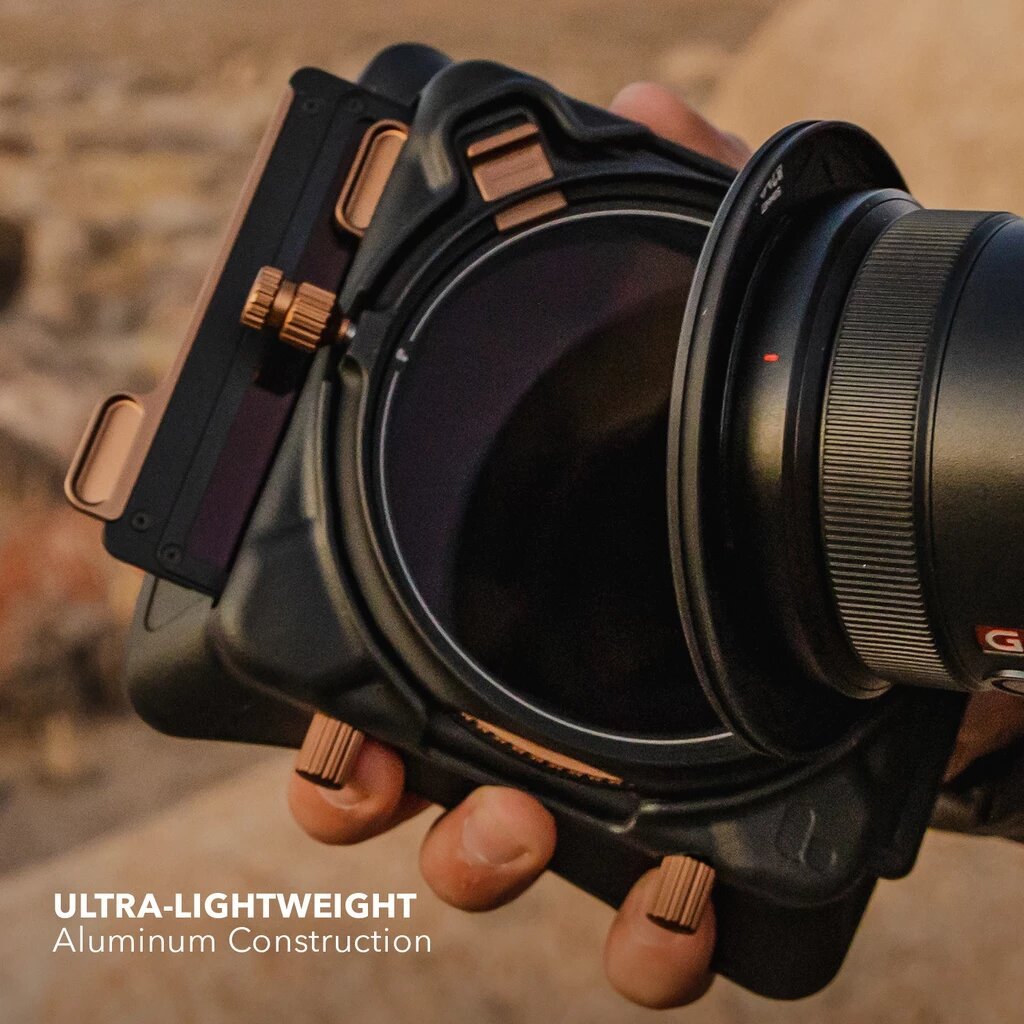
I personally recommend Marumi's magnetic filter system because it's both well-made and easy to use.
Marumi uses the finest materials to ensure its products are durable and perform at their peak.
For example, the M100 filter holder shown above is made of lightweight aircraft aluminum that will stand the test of time.
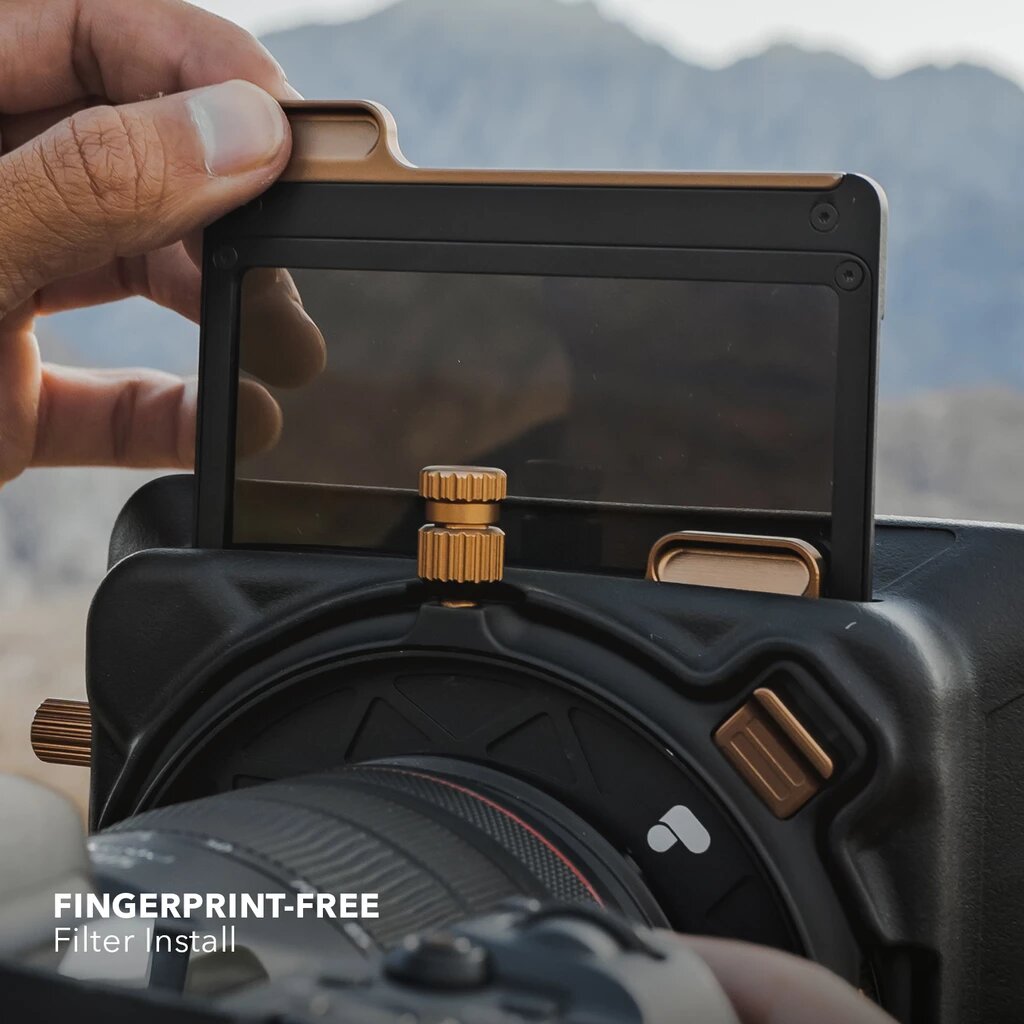
The gaskets on the front of the holder make light leaks a thing of the past, while the magnetic attachment makes for easy changes of filters.
So, you can start with a solid ND filter for extending the shutter speed and getting dreamy motion in your photos, then swap it out for a graduated ND filter for managing the dynamic range of a beautiful landscape with a bright sky above it.
What's more, you can add a circular polarizer to the mix (shown above), which will reduce atmospheric haze, boost contrast in the sky, and minimize glare off non-metallic surfaces, ensuring that your landscape photos are beautifully rich in detail.
And since this filter system is magnetic, it couldn't be easier to use. You'll spend less time fiddling around with your gear and more time actually taking photos!
What's not to like about that?!
Learn More:
“What Lens Should I Buy to Take Photos Like You?”
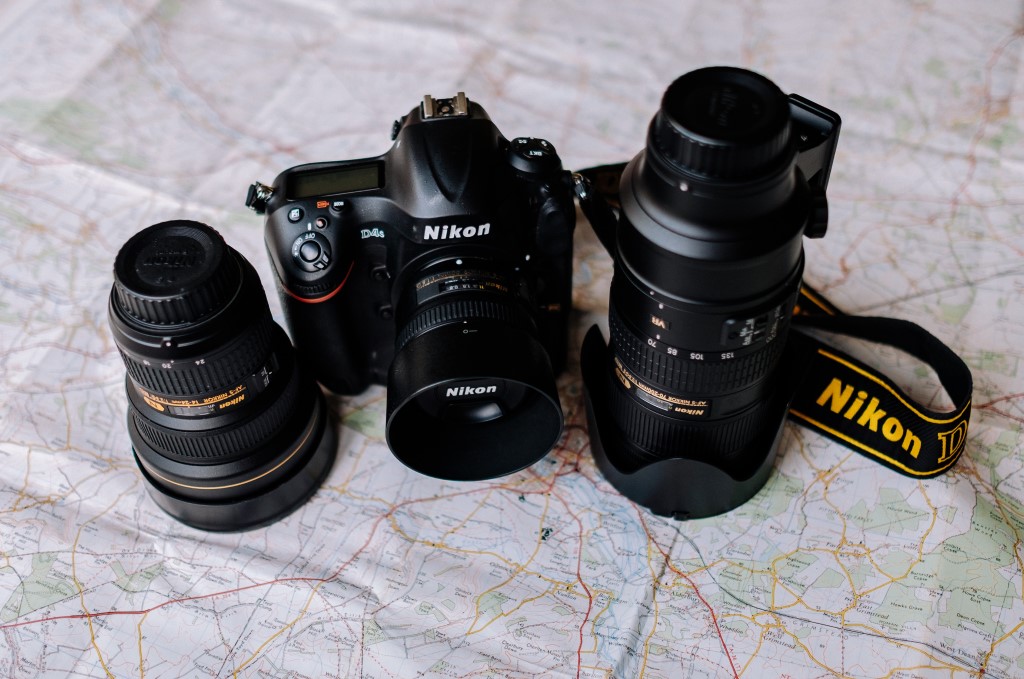
Photo by Annie Spratt on Unsplash
This question works hand-in-hand with my first question. Just because you’re using the same exposure settings as I am doesn’t mean our finished product will look identical. The same can be said for lenses - it’s not the lens that makes the photo, it’s the person using it!
Besides, beginner photography gear is cheaper than professional photography gear, and you can use this to your advantage.
I especially hate this question because it makes me feel guilty. I’ve been in the industry for many years and I’ve made enough money to buy some expensive lenses.
If I tell a beginning photographer what lens I’m using and they immediately begin looking it up on Amazon, I don’t want them to feel like they need to purchase that lens if they want to take photos like me.
Which leads me into the most annoying question I get from beginner photographers…
“How Much Was Your Gear?”
Photo by Jakob Owens on Unsplash
Yikes. This hypothetical question is making me cringe.
The answer is a lot. Some of my equipment is expensive. As any photographer who makes a living from photography will tell you, a good chunk of our salary gets turned back around and is put into our business.
If I’m not spending my client’s money on my mortgage, I’m probably saving it for a new lens!
But, in the same breath, I own some very cheap equipment. I have been in situations where I’ve DIYed a filter before and it worked out so well that I kept it.
photo by welcomia via iStock
The reason I don’t think this question is helpful to beginning photographers is because usually the price of your equipment doesn’t tell you anything except how long that person has been doing photography professionally.
Unless they are bankrolled by a trust fund, many photographers take a fair portion of their expendable income for the year and save it to purchase new equipment. If I’ve been doing that for 15 years, then my equipment will be more expensive than someone who has only been doing it for 2.
Plus, the price of your equipment definitely does not mean you are a better or worse photographer.
This question is also misleading because I buy almost all of my lenses secondhand.
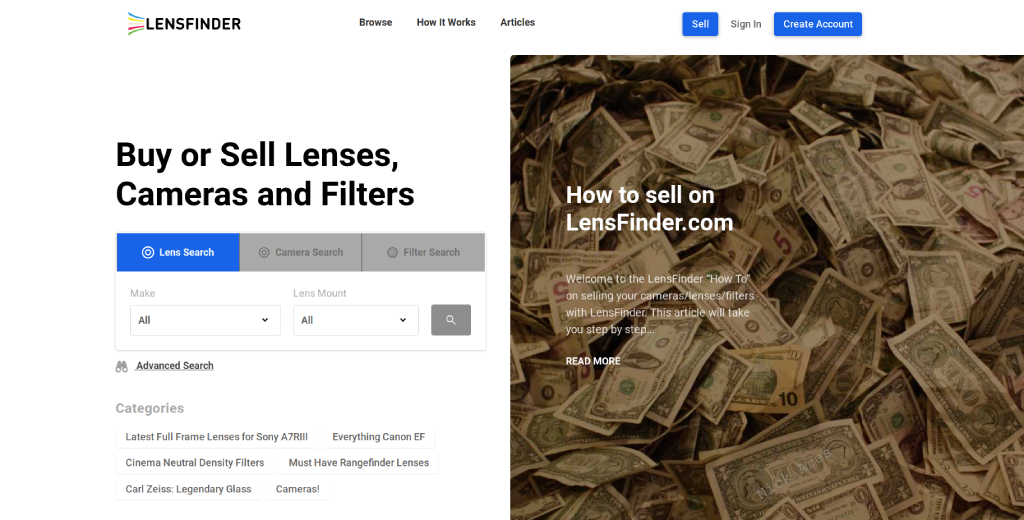
If you ask me how much my equipment costs, I will likely ignore the question and point you in the direction of a good secondhand shop, like Lensfinder.
Beginner photographers can save so much money by buying their equipment secondhand, yet most beginner photographers I know don’t take advantage of it.
While a kit lens will work for you for a while, eventually you will need to upgrade.
Lensfinder is a great starting point because it’s a community of photographers selling their old equipment, so all of your photography questions can be answered by the seller, unlike other websites like Amazon.
Stop googling, “how to get better at photography,” and start by saving some cash and buying one or two lenses to practice with!
Learn More:
We Recommend
5 Photography Tips That Will Make You a Better Photographer

photo by Lyndon Stratford via iStock
Let’s face it…
The road to mastering photography is a long one. In fact, it’s a journey that never ends! There is always something new to learn and existing skills that can be improved.
If you ask me, the most difficult part of learning photography isn’t getting started, but transitioning from being a beginner to a more advanced photographer.
The tips I’ve outlined below address this very period in your development and will help you get over the hump to become more skilled.
Let’s begin!
Table of Contents
- Get Out of Full Auto
- Learn to Use the Camera’s Histogram
- Learn How to Use Artificial Light
- Streamline Your Post-Processing Workflow
- Use a Circular Polarizer
Get Out of Full Auto

photo by Photographer and videographer via iStock
I’ve said before that using full auto mode when you’re a beginner can actually be a good thing. After all, without having to worry about exposure settings, you can concentrate more fully on things like composition and framing.
But now that you’re ready to become more of an enthusiast photographer, it’s time to leave full auto behind.
I think everyone should learn manual mode, but you don’t have to jump right to the big, scary M on your camera’s dial just yet.

photo by eROMAZe via iStock
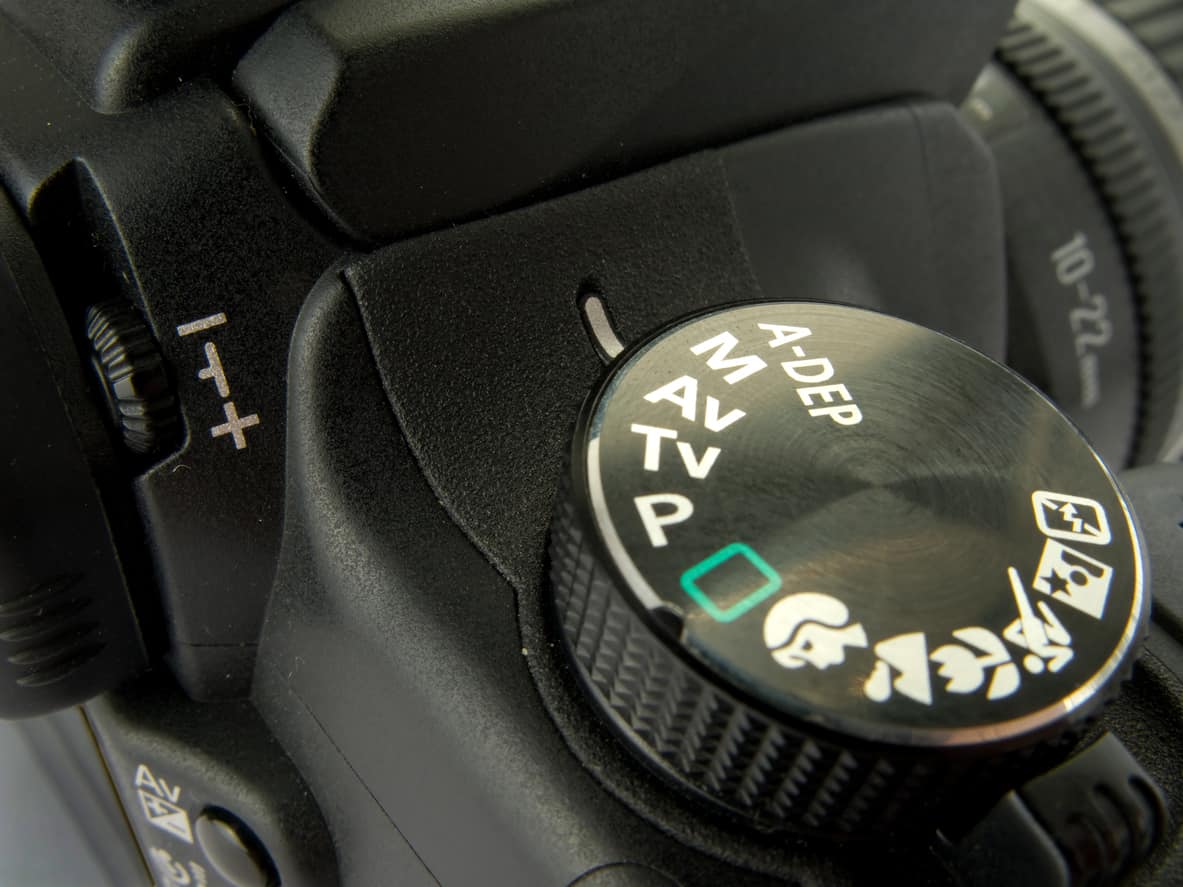
A great way to exert more control over the camera settings is to shoot in aperture priority, shutter priority, or program mode:
- Aperture priority mode (A or Av on the camera dial, shown above) gives you control over the aperture and ISO while the camera controls shutter speed. This is a great mode to shoot in for things like portraiture or other scenes in which you want to control depth of field.
- Shutter priority mode(S or Tv on the camera dial) gives you control over the shutter speed and ISO while the camera controls the aperture. Use this setting if you want to control how motion appears in the shot.
- Program mode (P on the camera dial) allows you to set the ISO and the camera sets the aperture and shutter speed for you. This is advantageous in challenging light conditions in which you want a high ISO (in low light) or a low ISO (in bright light).
Getting familiar with these semi-automatic modes is a great way to take baby steps away from full auto without being overwhelmed by having to control all the exposure settings yourself.
Learn to Use the Camera’s Histogram

When I was a beginner photographer, I relied on the camera’s LCD to determine if the shot I just took was well-exposed.
The problem with doing that is that the LCD is not at all an accurate representation of the lightness or darkness of the photos you take.
Instead, if you want to become a better photographer with images that are better-exposed, you need to learn how to use the camera’s histogram.
Looking at the graph above, you can see why the histogram is so beneficial - it gives you a graphical representation of how many pixels are shadows, midtones, and highlights.
If the histogram is skewed to the left, you know that the image is too dark and that you need to brighten it up. If it’s skewed to the right, the opposite problem is at hand - the image is too bright and it needs to be darkened.
Take a deep-dive into how to read a histogram to get all the details on this very handy tool.
Learn How to Use Artificial Light

There are tons of natural light photographers out there that make masterful images. But there are also quite a few photographers that only use natural light because they don’t know how to harness the power of artificial lights.
Light is obviously the most critical aspect of photography, so understanding how to manipulate light is a critical skill you need to learn if you’re going to become a better photographer.
Unfortunately, when many beginners think of artificial light, they think of the pop-up flash on their camera.
The problem with the light emitted from pop-up flashes is that it’s intensely bright, which creates harsh shadows behind a very bright subject. That’s just not a flattering look.

A better option is to use an off-camera light to shape the light in a way that adds interest to the shot. You can see this concept in action in the image above.
The different colors of light add visual punch to the photo while also helping separate the subject from his surroundings.
And you don’t have to invest in expensive speedlights, light stands, and modifiers to do it, either.
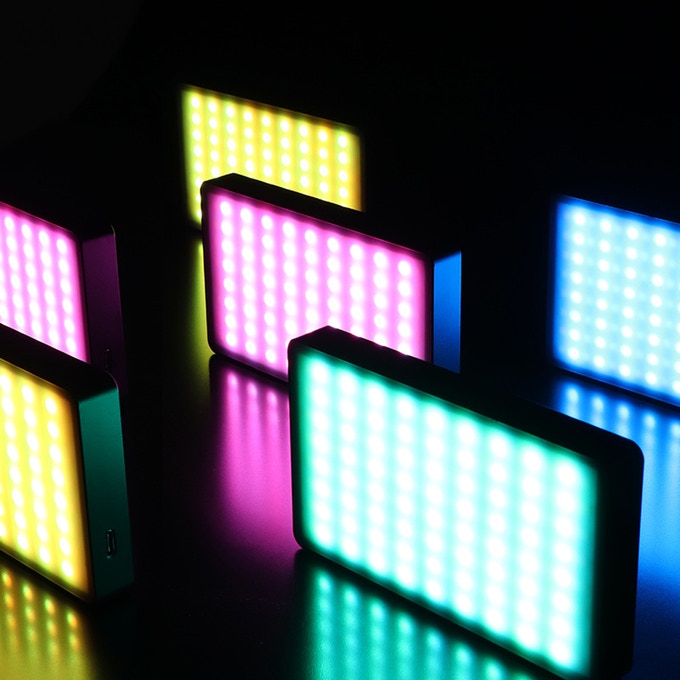
A perfect light for photographers that wish to advance their skills is the little guy shown below, the Hakutatz Pocket Size RGB+AW LED Light.

Editor's Note: The Hakutatz Kickstarter campaign was a huge success! Their Amazon store will be open and ready for orders in early December.
Being such a small light, it’s easily portable and maneuverable, so you can experiment with light placement to get different effects in your photos.
What’s more, this light offers RGB light, which allows you to produce all the colors of the spectrum. There are also separate LEDs that produce white light and amber light, which can help you achieve the precise white balance you want in your images.

As shown above, you can manipulate the color emitted by the light using the companion smartphone app. How easy is that?!
Another aspect of mastering artificial light is learning how to use multiple lights at the same time.
Hakutatz makes this task super easy because you can use two, three, or more of these lights together to combine different kinds of light and different effects, allowing you to create an intricate lighting scheme without all the fuss.
Best of all, since this light has adjustable brightness, saturation, and color temperature, you don’t need light modifiers like softboxes or diffusers. Instead, you have all the tools you need wrapped up in this one awesome little light.
Learn more about the Hakutatz Pocket Size RGB+AW LED Light and see how it can help you elevate the quality of your photos.
Streamline Your Post-Processing Workflow

photo by photoguns via iStock
When I look back on how I edited photos when I was a beginner, I can’t help but shutter. It was bad. Really bad.
But back in the day, processing images was a much more complex and laborious task than it is today. There are all kinds of tools that help you tap into your creativity while at the same time making it an easier, less time-consuming task.
One of the best ways to make photo editing an easier process is to use presets that allow you to change the look and feel of your photos with a click of your mouse.

In Exposure, for example, there are over 500 presets from which to choose, including beautiful film presets that harken back to the days of film photography.
But these presets aren’t just applied in one way - you can customize how each one looks and save it for use on future images for a consistent look.

Another way to make editing your photos easier is to use non-destructive layers.
What this means is that you add effects and make adjustments to layers on top of the original image, so the original is left unchanged.
You can add presets, make adjustments to color and saturation, manipulate the exposure, and make many other changes quickly and easily to get the precise look you want in the photo.
And if you’re a bit of a disorganized mess like I am, you’ll appreciate editing programs that also offer tools for organizing your photos.
As shown in the video above, Exposure ticks that box as well, with the ability to create smart collections of photos based on specific criteria like image ratings, flags, or color labels. You can also organize images based on the camera use, when the photo was taken, when it was edited, and even the camera settings that were used.
Learning how to edit your photos and do so in a way that enhances their beauty is a crucial part of advancing from being a beginner to an enthusiast photographer. And with editing programs like Exposure, you can do that in a much more efficient manner.
See Exposure in action in the video above. To get your free trial, click here.
Use a Circular Polarizer
One of the best - and easiest - things you can do to improve your photos is to start using a circular polarizing filter.
These filters offer too many benefits to not have one in your camera bag. Take a look at what a polarizer can do:
- It reduces glare off non-metallic surfaces like water, wet plants and rocks, and even skin.
- It boosts contrast and saturation in the sky, making the blue atmosphere deeper and richer and the clouds a brighter white.
- It minimizes atmospheric haze, so distant features appear crisper.
And the best part is that Marumi makes a magnetic filter system that makes using filters a veritable breeze.
Just attach the M100 filter holder (shown above) to your lens, pop the circular polarizer in place, and you're ready to rock!
And since the system is magnetic, it makes it super quick and easy to swap out filters when needed.
Part of becoming a better photographer is knowing what gear to use and when, and having a circular polarizer in your kit is certainly a piece of gear you should have if landscape photography is your vibe!
We Recommend
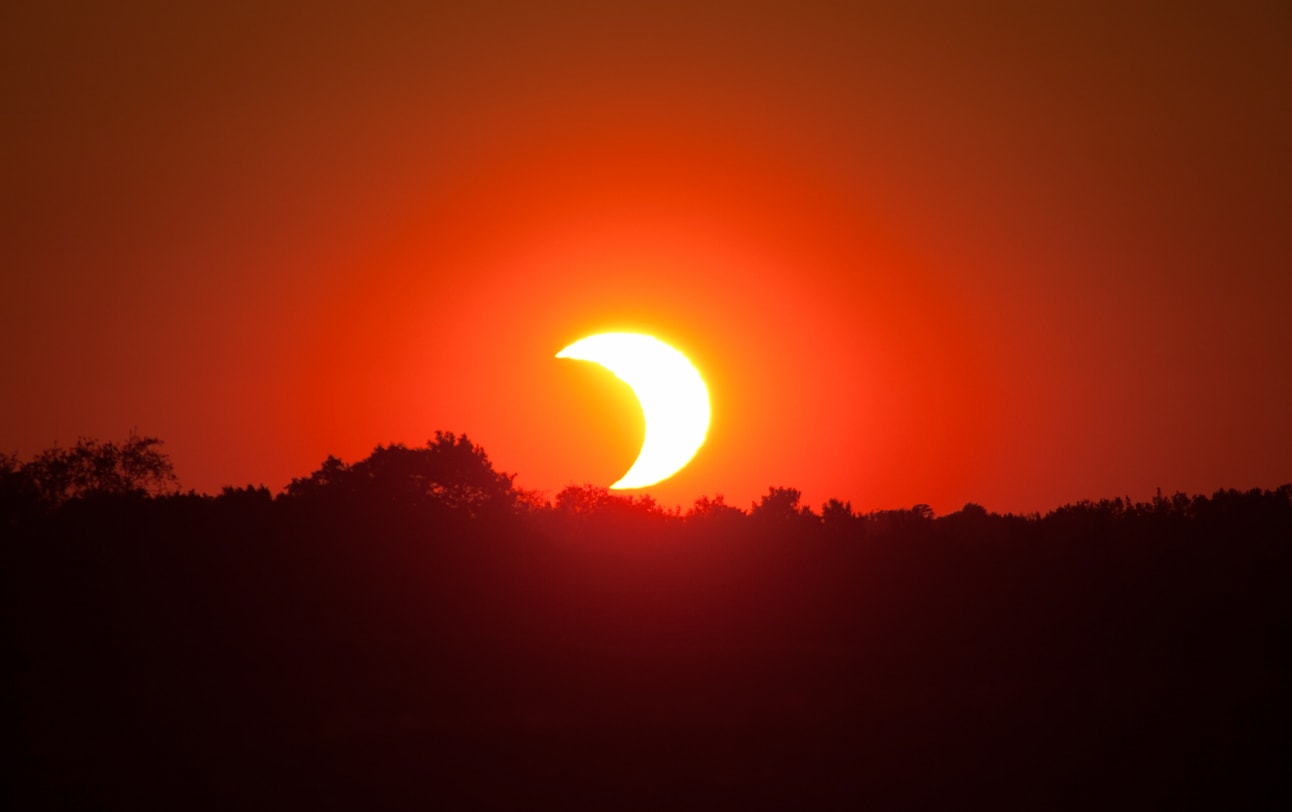
Basic Camera Settings for Photographing the 2017 Solar Eclipse
If you haven't already made plans to photograph this year's solar eclipse on August 21st, time's a wasting!
With cities along the eclipse's path dealing with an overwhelming demand for hotels, campsites, and spots to photograph the event, the sooner you make your plan, the better off you'll be.
A while back, I wrote about the basic gear essentials you need to photograph the eclipse. If you missed it, you can check it out here.
In this installment, I want to focus more on the basic camera settings that you'll need to use to get the best images of the eclipse.
Don't Forget a Solar Filter

Before I launch into the settings you need to use, bear in mind that the recommended settings are for use with a solar filter.
Pointing your lens at the sun without a solar filter is a surefire way to ruin your optics.
There are plenty of choices out there for solar filters - some that cost as much (or more) than the lens they're designed to protect.
But don't think that you have to spend hundreds and hundreds of dollars to get a solid filter that will protect your lens and allow you to get awesome photos of the eclipse.
Marumi makes a 16.5-stop solid neutral density (ND) solar filter that fits the bill perfectly.
The filter's 5.0 density darkens the entire image, giving you a nice, even exposure from corner to corner.
And since it's a solid ND, you can use a much wider aperture or a much slower shutter speed than would be possible without the filter attached to your lens.
That leeway gives you the opportunity to create unique shots with varying depths of field or different levels of indicated movement.
And since Marumi filters have anti-reflection coating, there is little worry of reflections or ghosting.
What's more, a Digital High Grade coating means the filter has better protection against smudges and dirt. That means clearer photos with less time in post-processing trying to rid your photos of fingerprints and dust specks.
You don't have to worry about odd colors, either. Marumi's filter is made of optical glass for excellent color fidelity.
It's a well-built filter, too, with an aluminum-alloy filter ring that will prove to be durable for this and future eclipse events.
Learn more about Marumi Solar Eclipse Filters, available in 58mm and 77mm sizes.
Now, onto the camera settings...
Shoot in RAW

By shooting in RAW, you enable your camera to record as much detail as possible.
That means that you'll also have as much detail as possible to work with in post-processing, too.
Because RAW files are so much larger than JPEGs, beware of the space they will consume on your memory card.
If need be, buy a new memory card with more space (at least 32GB), but also have multiple memory cards in case something goes awry with your primary.
Use Mirror Lock-Up
If you have a DSLR, the mirror inside the camera body moves up and down as you take photos.
This simple movement is actually enough to cause vibrations that can diminish the sharpness of your image.
To get around this issue, use your camera's mirror lock-up function to lock the mirror in place.
The manner in which you set this feature varies from camera to camera, so consult your owner's manual for instructions if you don't already know how to lock the mirror.
Shoot in Manual Mode
Manual mode can be a bit intimidating as it requires you - not the camera - to decide things like aperture, shutter speed, and ISO.
However, shooting the 2017 eclipse in manual mode will enable you to get the sharpest image. To do so, begin with the following settings:
- Aperture: f/8
- Shutter speed: 1/4000 seconds
- ISO: 100
Why these settings?
At f/8, you should be at or near the sweet spot of your lens. The sweet spot is the aperture at which the lens produces the sharpest results.
By using a fast shutter speed, you also minimize the impact of camera shake.
Even though you need to have your camera mounted on a tripod, a strong breeze can still cause enough vibrations to result in less-than-sharp images. The faster the shutter speed, the less time the camera has to record such vibrations.
Lastly, by minimizing the ISO, you also minimize the occurrence of digital noise in the shot. With less digital noise, you get a "cleaner" image that appears sharper.
Now, these settings are not going to get you a well-exposed image each and every time.
They are, however, a good starting place to do some experimentation.
If the image is still too bright, try using a faster shutter speed - 1/8000 seconds if your camera is so equipped - or shoot with a smaller aperture, like f/11.
Conversely, if the image is too dark, slow down the shutter - to 1/2000 seconds - or open the aperture by a stop. You can also increase the ISO to 200 without a significant increase in digital noise.
Learn more about shooting in manual mode in the video above by MyStudio Table Top Photo Studios.
Manually Focus the Lens, Too
As I noted earlier, you'll need to do a lot of planning to pull off the best 2017 eclipse photos.
That couldn't be more true with it comes to focusing your lens.
Relying on autofocus isn't an option here, so you'll need to become adept at manually focusing your lens.
The evening before the eclipse, head to your desired shoot location, set up your gear, and while in manual focus, set the focus of your lens on a bright star. Be sure to do so without your solar filter attached.
To perfect the focus, use your camera's live view feature to zoom in on the desired star to inspect the level of focus. Fine-tune the focus as needed.
What this allows you to do is preset the focus at infinity, that way when the eclipse occurs, you'll already have the lens focused for the event.
Just be sure to use gaffer's tape to prevent the lens's focus ring from moving between your pre-focus outing and the eclipse itself.
Get more details on manually focusing in the dark in the video above by Milky Way Mike.
Wrapping It Up
The planning and preparation that goes into photographing an eclipse is certainly time-consuming.
However, the more you plan, the more familiar you are with your gear and its settings, the better off you'll be when the 2017 eclipse arrives.
Get yourself a quality solar filter, work on getting comfortable making the manual camera adjustments outlined above, and do some test runs of setting up your gear.
You'll find that this kind of preparation will pay dividends on August 21, 2017!
We Recommend
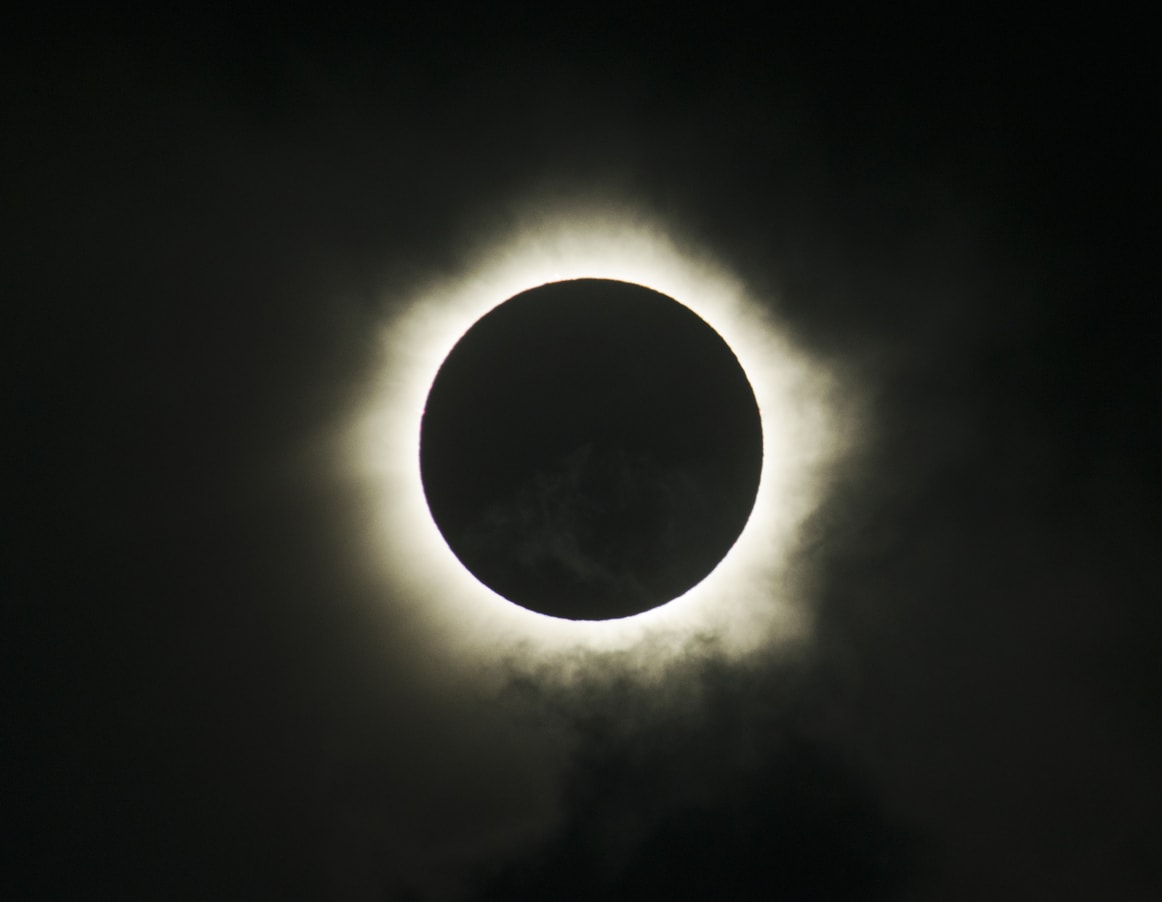
Beginner’s Guide to Photographing the 2017 Solar Eclipse on Budget
If you haven't already made plans to witness the 2017 solar eclipse that's coming on August 21, you need to.
A full solar eclipse is rare enough, but this is an even more special kind of eclipse...
For the first time in almost 100 years, it will be visible from the west coast to the east coast of North America.
That means that eyes from Oregon to Wyoming to Missouri to South Carolina will be gazing skyward come August to see the moon block the sun and turn day into night. Get a preview of where the solar eclipse will be best viewed in the video below from Eclipse 2017:
Of course, the 2017 eclipse isn't just about witnessing a spectacular celestial event - it's also an opportunity for photographers across the country to record the event for posterity with their cameras.
The question, of course, is how to do that without buying a ton of expensive gear while protecting your camera and lens at the same time.
Let's dive deeper into how you can get excellent photos of the 2017 eclipse on a budget.
Rent a Camera Body and a Telephoto Lens
If you already have a DSLR or mirrorless camera with an interchangeable lens system, you're sitting pretty to get photos of the eclipse on a budget.
If all you have is a compact camera or a point-and-shoot, you'll need to invest in a DSLR or mirrorless camera for the event by renting one from Borrow Lenses, Lens Rentals, or another reputable retailer, where you can rent a camera body for three days for less than $100.
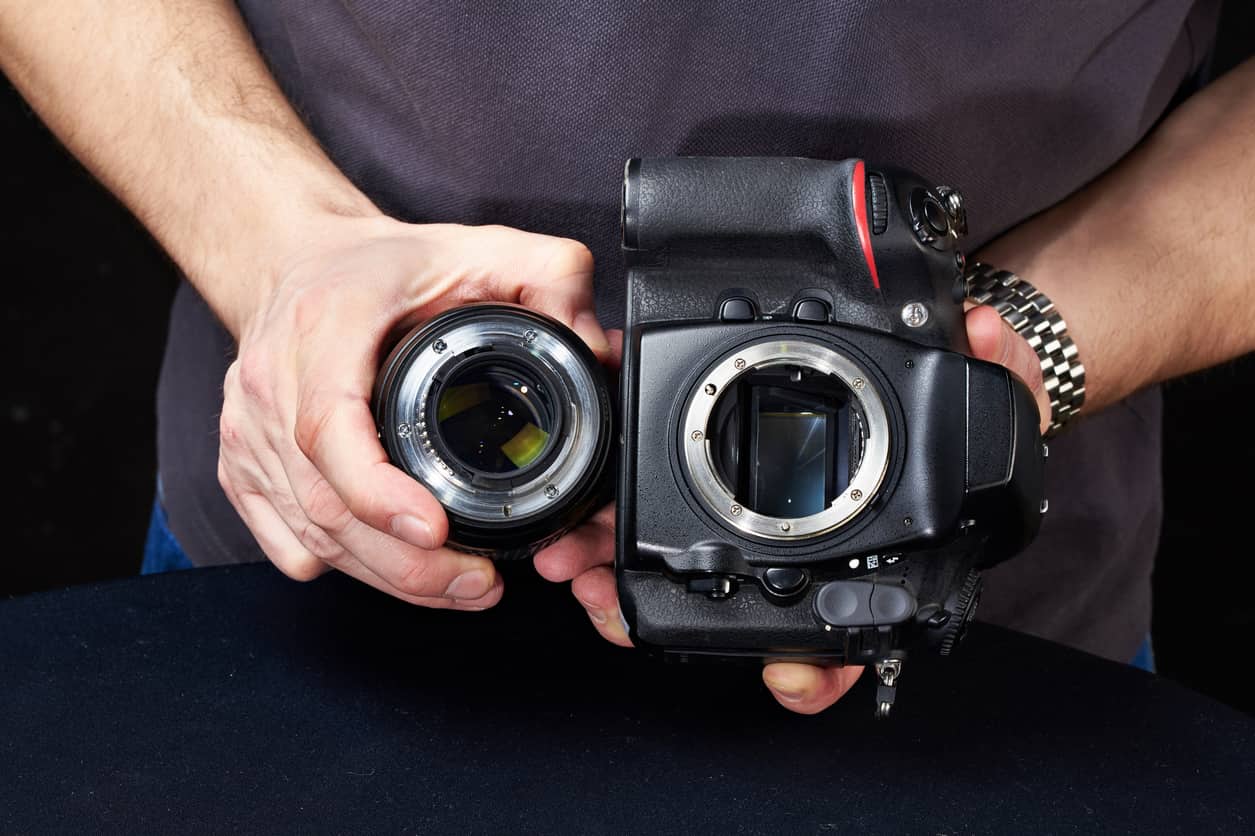
If you've got a camera already, and you think that you can get a great close-up photo of the 2017 solar eclipse with your kit lens or a short telephoto lens, think again.
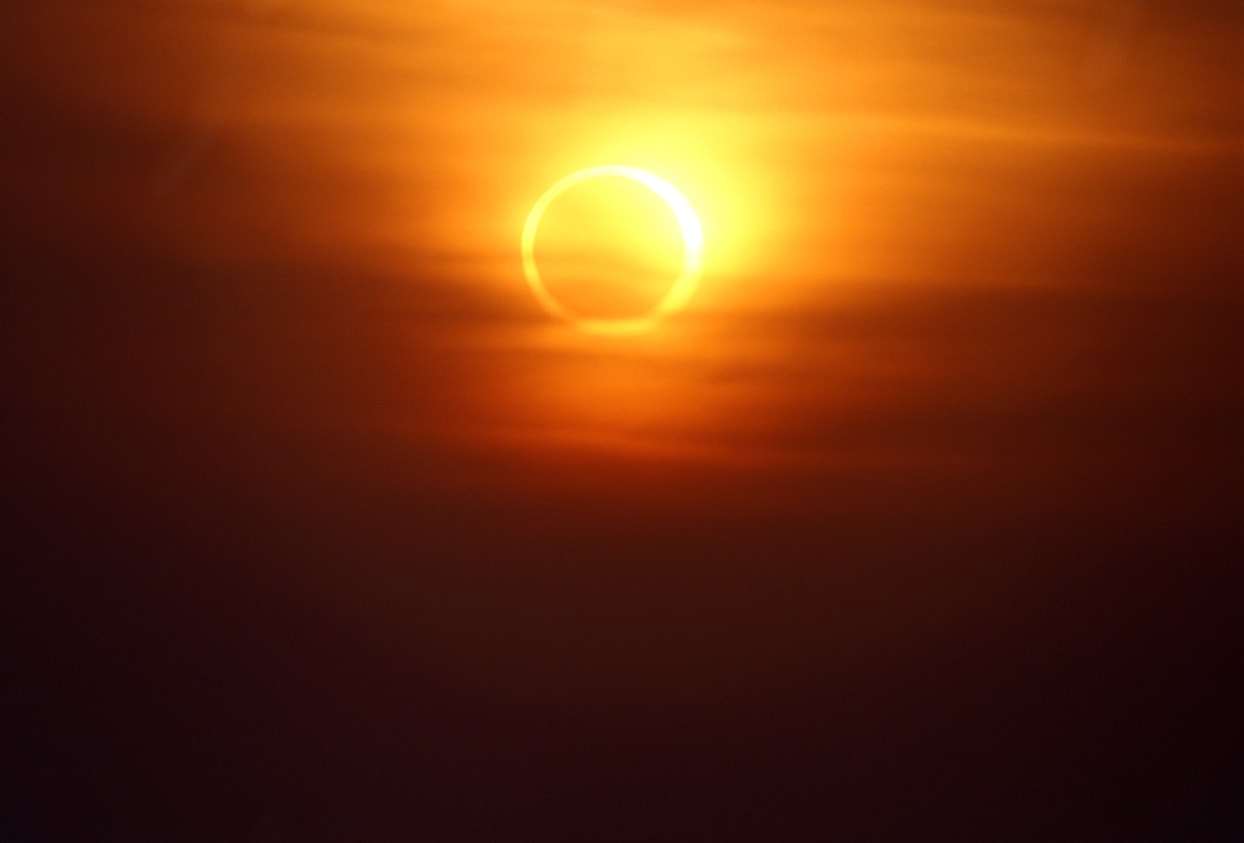
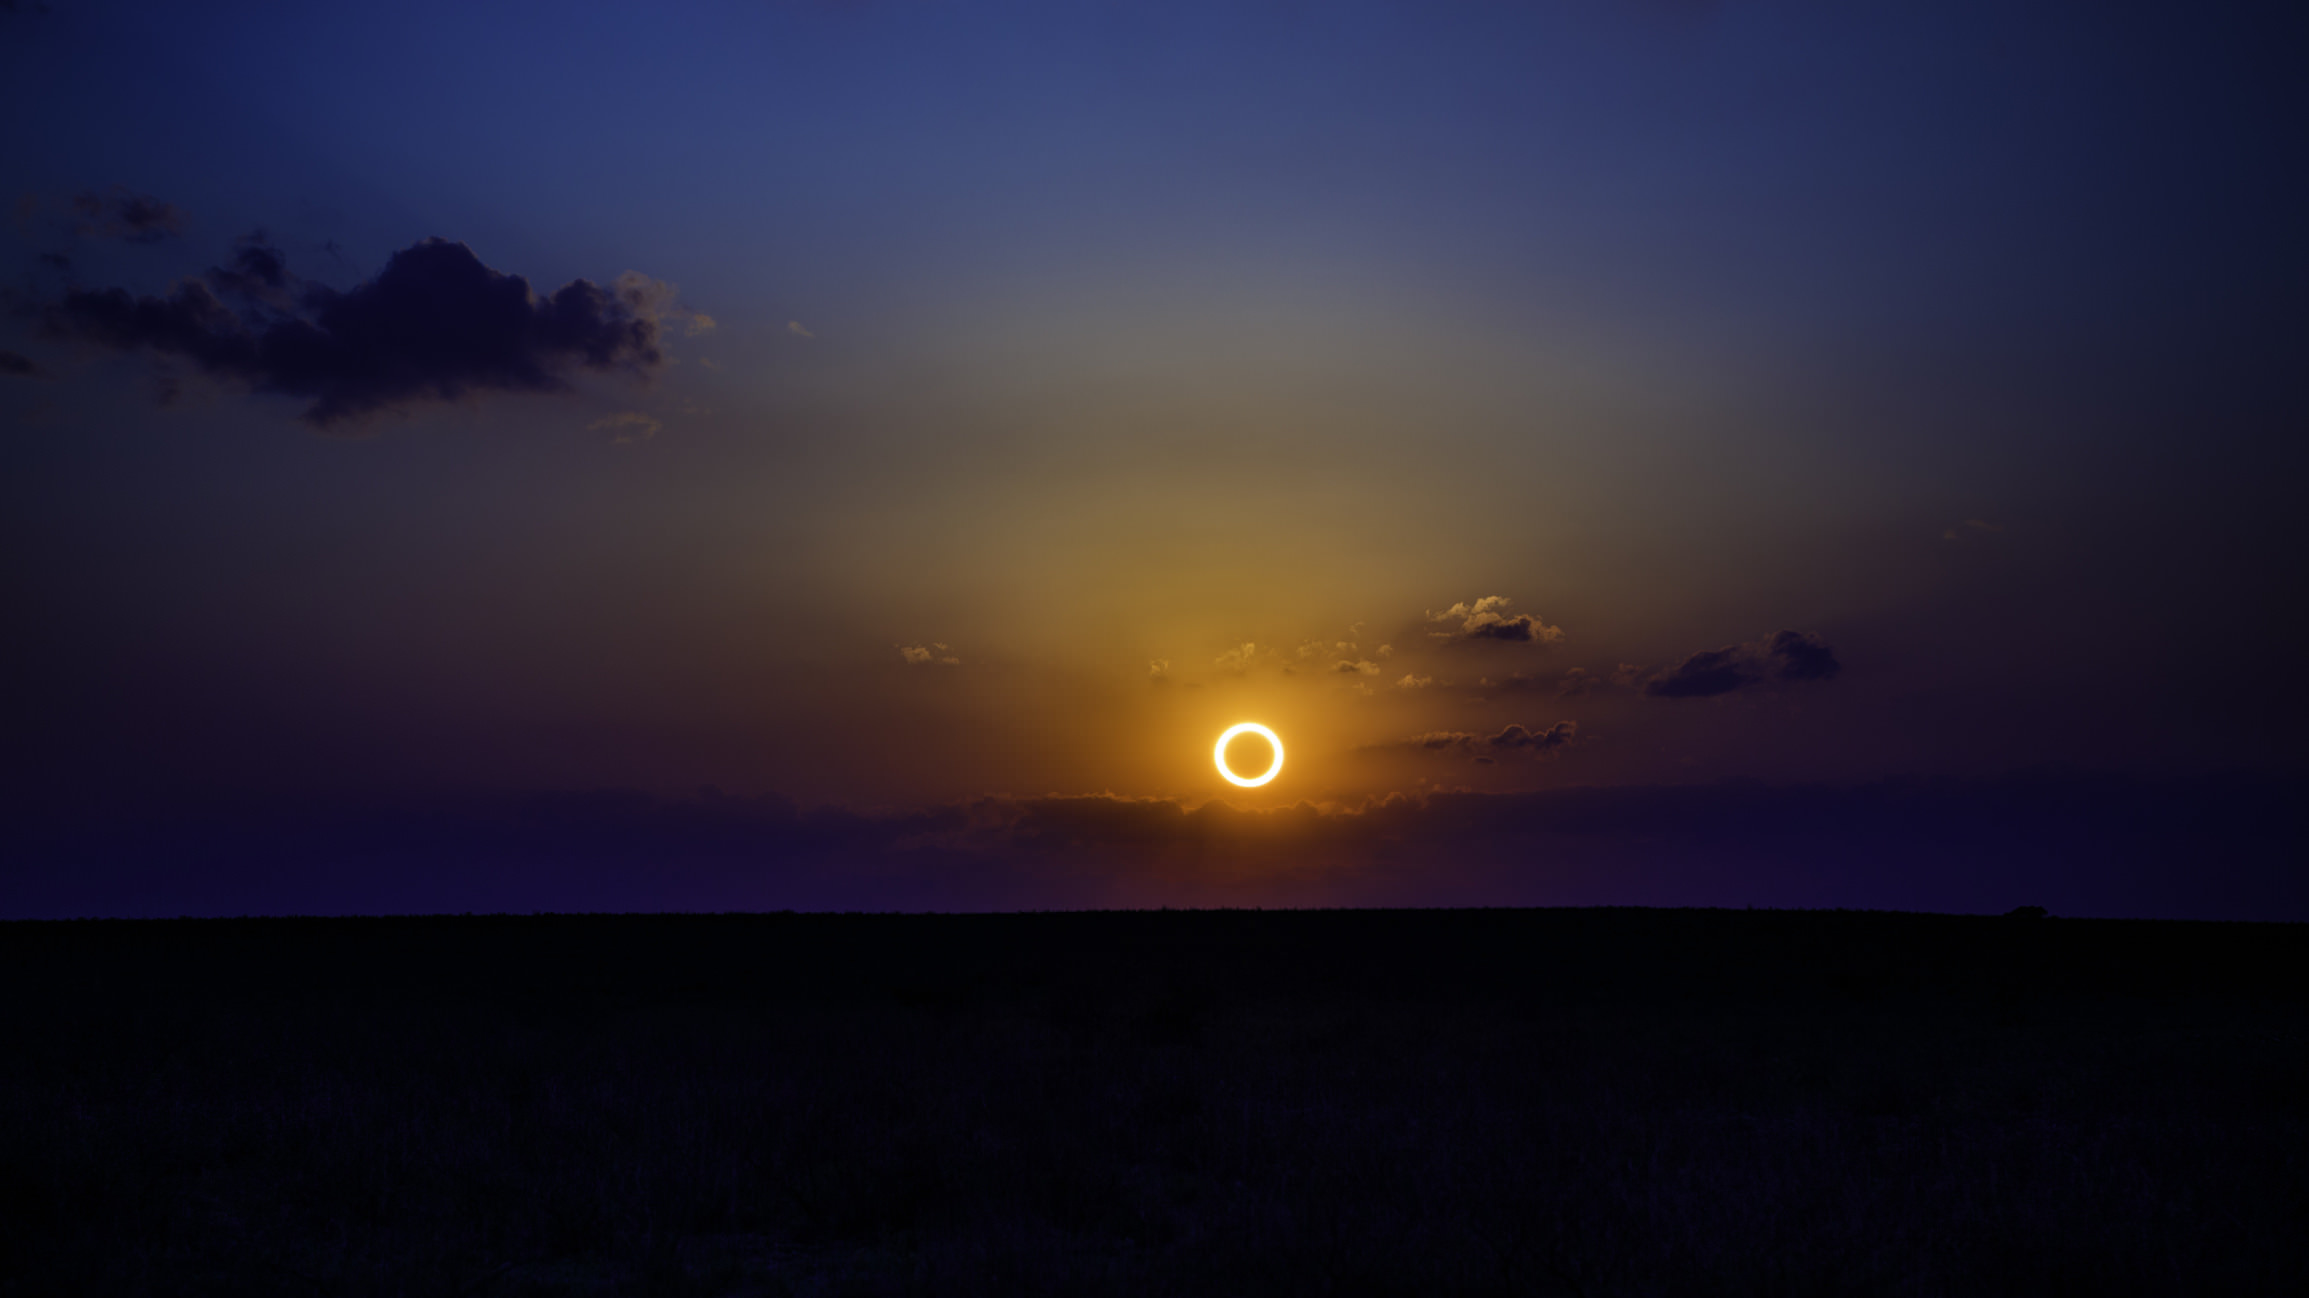
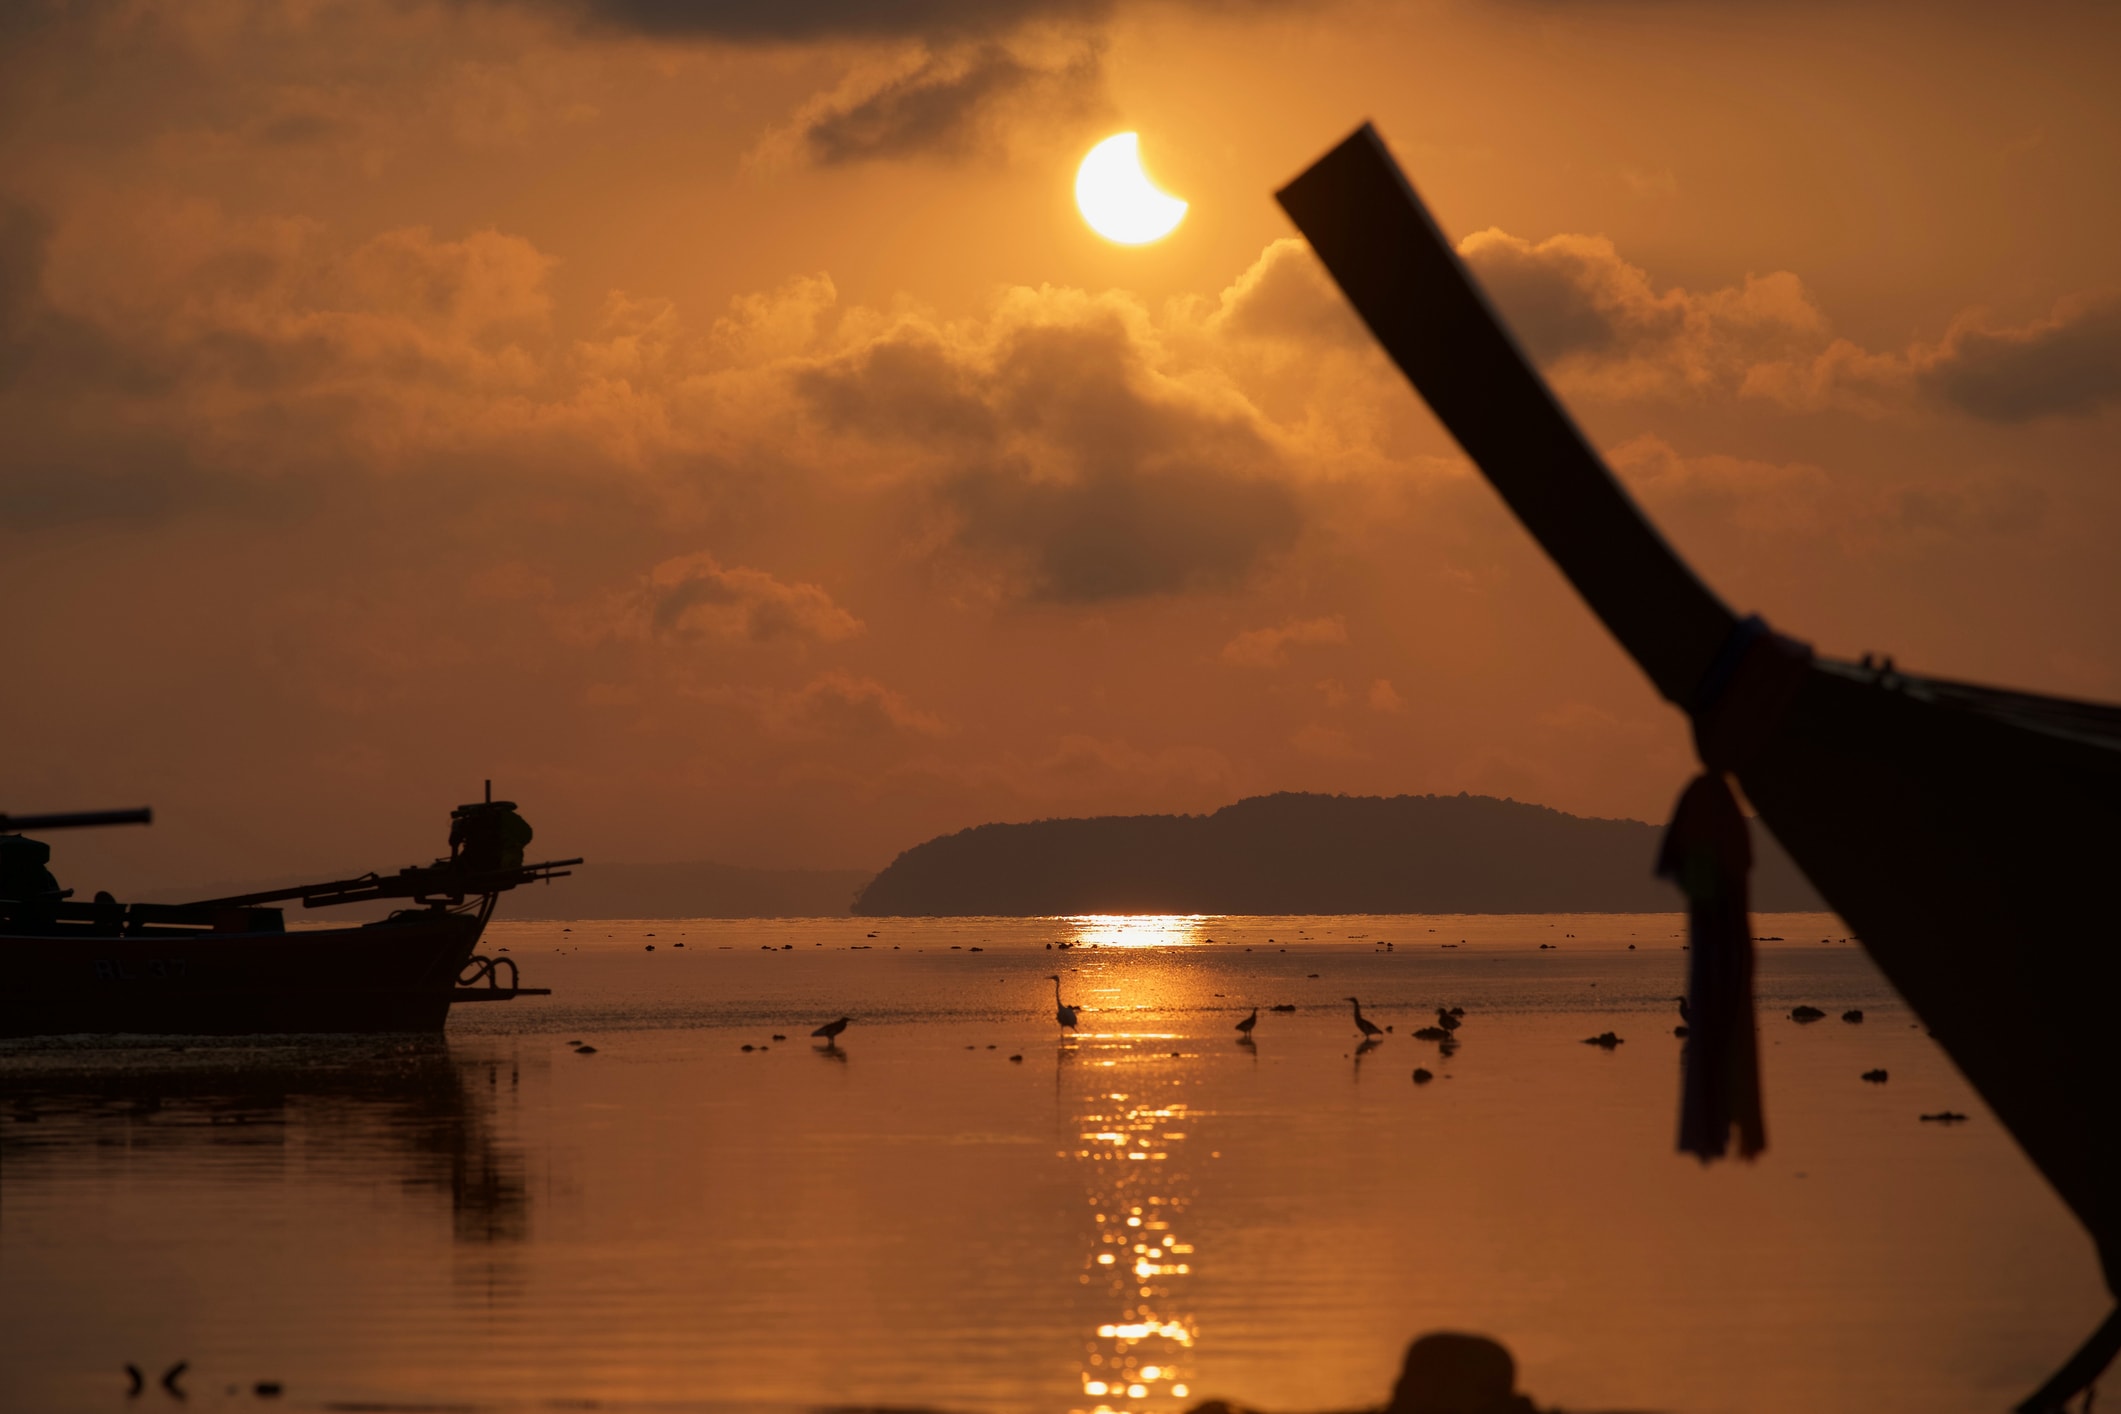
To get up close and detailed shots like the one above, you'll need a telephoto lens in the 300-400mm range or longer.
Of course, if you don't have a lens that long, buying one new (or even used) can easily set you back thousands of dollars.
Rather than buying a lens you may or may not use to warrant the expense, rent one for the eclipse, again from Borrow Lenses, Lens Rentals, or a comparable outfit.
The rental price depends on a number of factors, not the least of which is the quality and size of the lens. The bigger the lens and the higher the quality, the more they will cost.
Nevertheless, you can get a 300mm telephoto lens for around $50 for a three-day rental, which is well worth the price if it means getting a stunning shot of the solar eclipse more likely.
Invest in a Solid Tripod

Like good lenses, most good tripods don't come cheap.
But hear me out on this...
If you don't already have a high-quality tripod, now is the time to upgrade.
Not only do you need a solid base for your camera and lens to get the best photo possible of the 2017 solar eclipse, but you can use that tripod over and over again to improve your day-to-day photos of people, landscapes, and everything in between.
You could easily spend several hundred dollars on a high-end tripod, but since we're being budget-friendly, there are plenty of options that will get you the solid base you need without busting your budget.
The Vanguard VEO 265CB Carbon Fiber Tripod shown above is an excellent choice.
Since it's constructed of carbon fiber, it's light yet durable, and can support up to 17 pounds.
Its feet have retractable metal spikes, so if your vantage point for the 2017 solar eclipse isn't ideal, you can rest easy knowing that your tripod will have a good grip on the surface of the ground.

Another tripod that's even more budget-friendly is the Sirui ET-2004 Aluminum Tripod shown above.
This tripod can support even more weight than the Vanguard - 26.5 pounds.
That means that even with a full frame camera and a large telephoto lens, the Sirui will give you the stable base you need for sharp images.
Like the Vanguard tripod, the Sirui also has retractable metal spikes on its feet for improved stability.
Either way, these tripods and those like them offer you all the features you need to keep camera shake at bay, whether that's during the solar eclipse or whether that's taking everyday photos between now and then.
Get a Special Filter Without Breaking the Bank
Naturally, you can't just point your camera and lens at the sun and do so without causing damage to your gear.
That's where the light-stopping power of a neutral density filter comes in.
But because the light and heat from the sun is so intense, you can't use just any neutral density filter.
Marumi makes a Solid Neutral Density Filter that has 16.5 stops of light filtering power.
Do the math, and you'll find that those 16.5 stops equal a 92,000x filter factor.
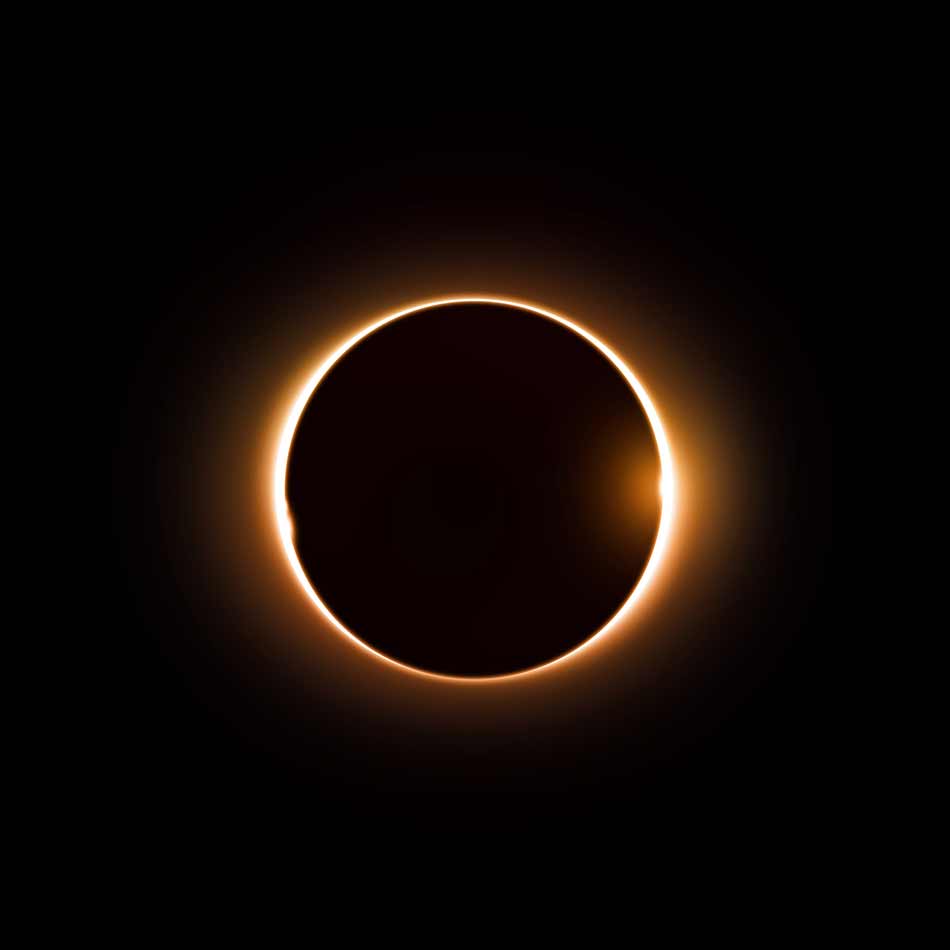
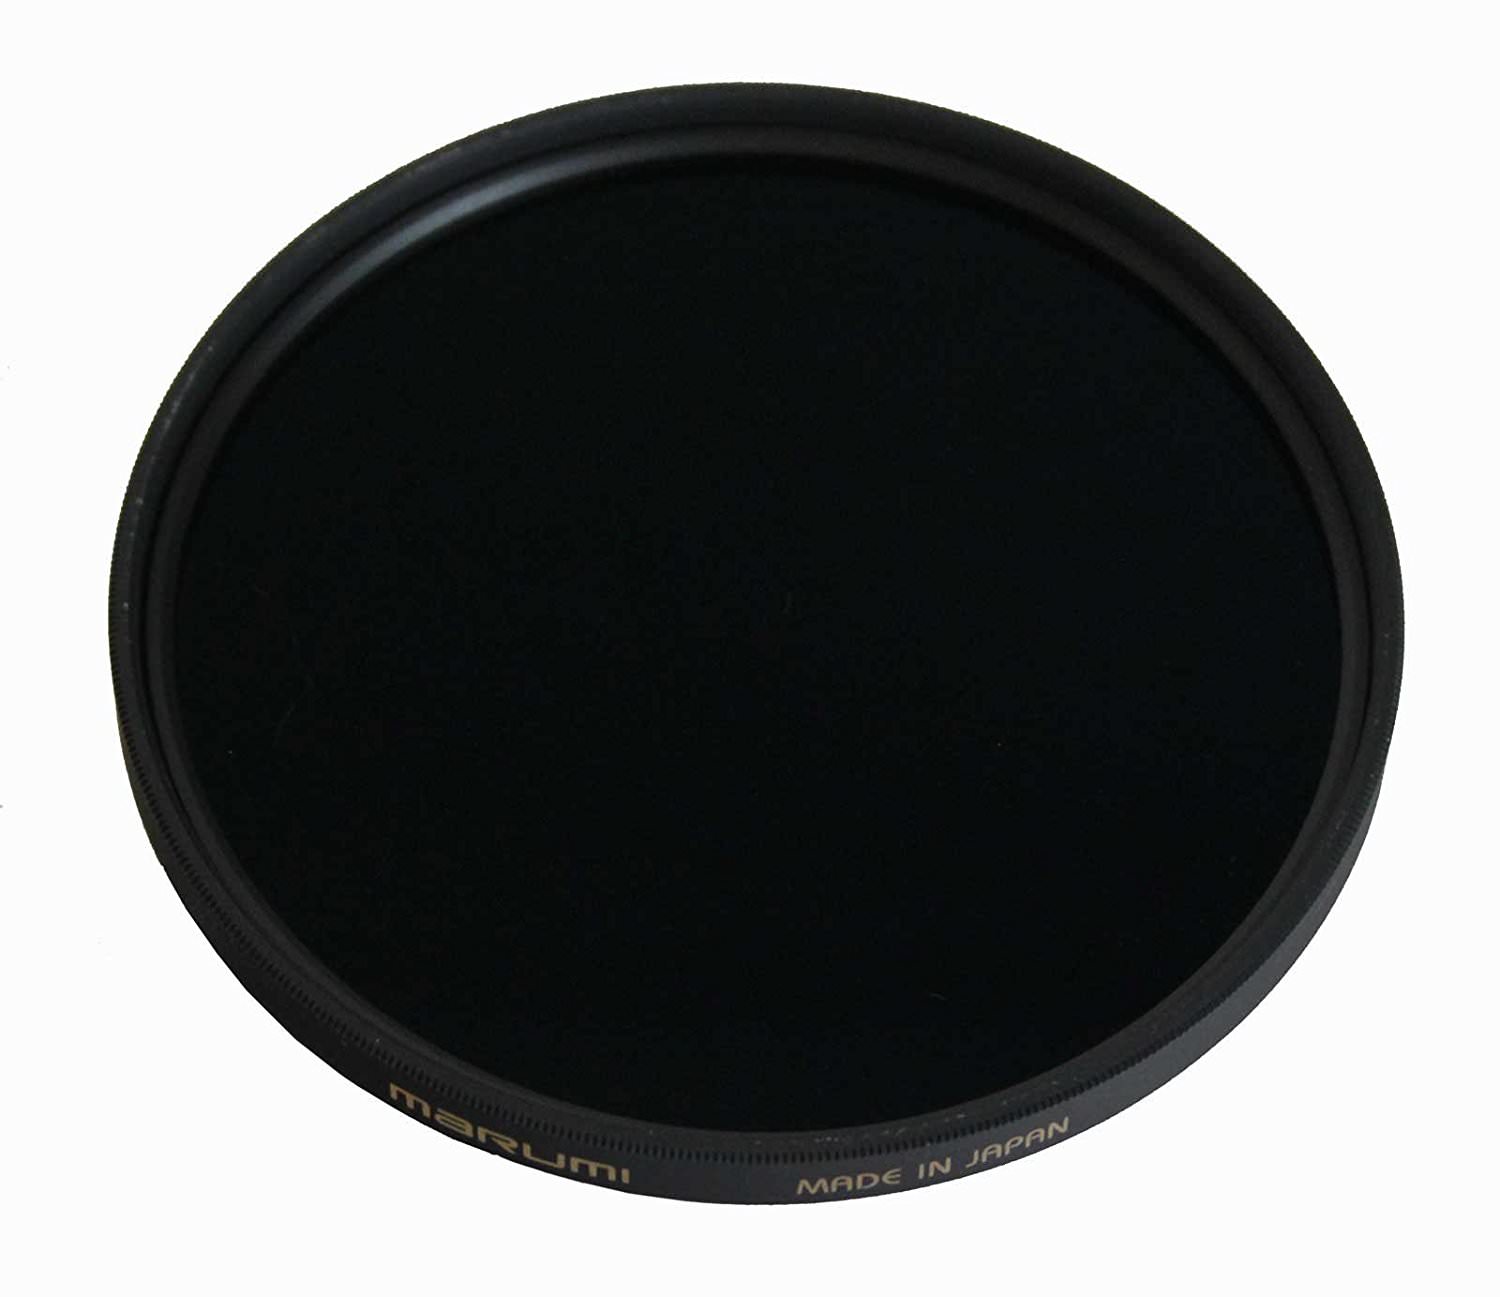
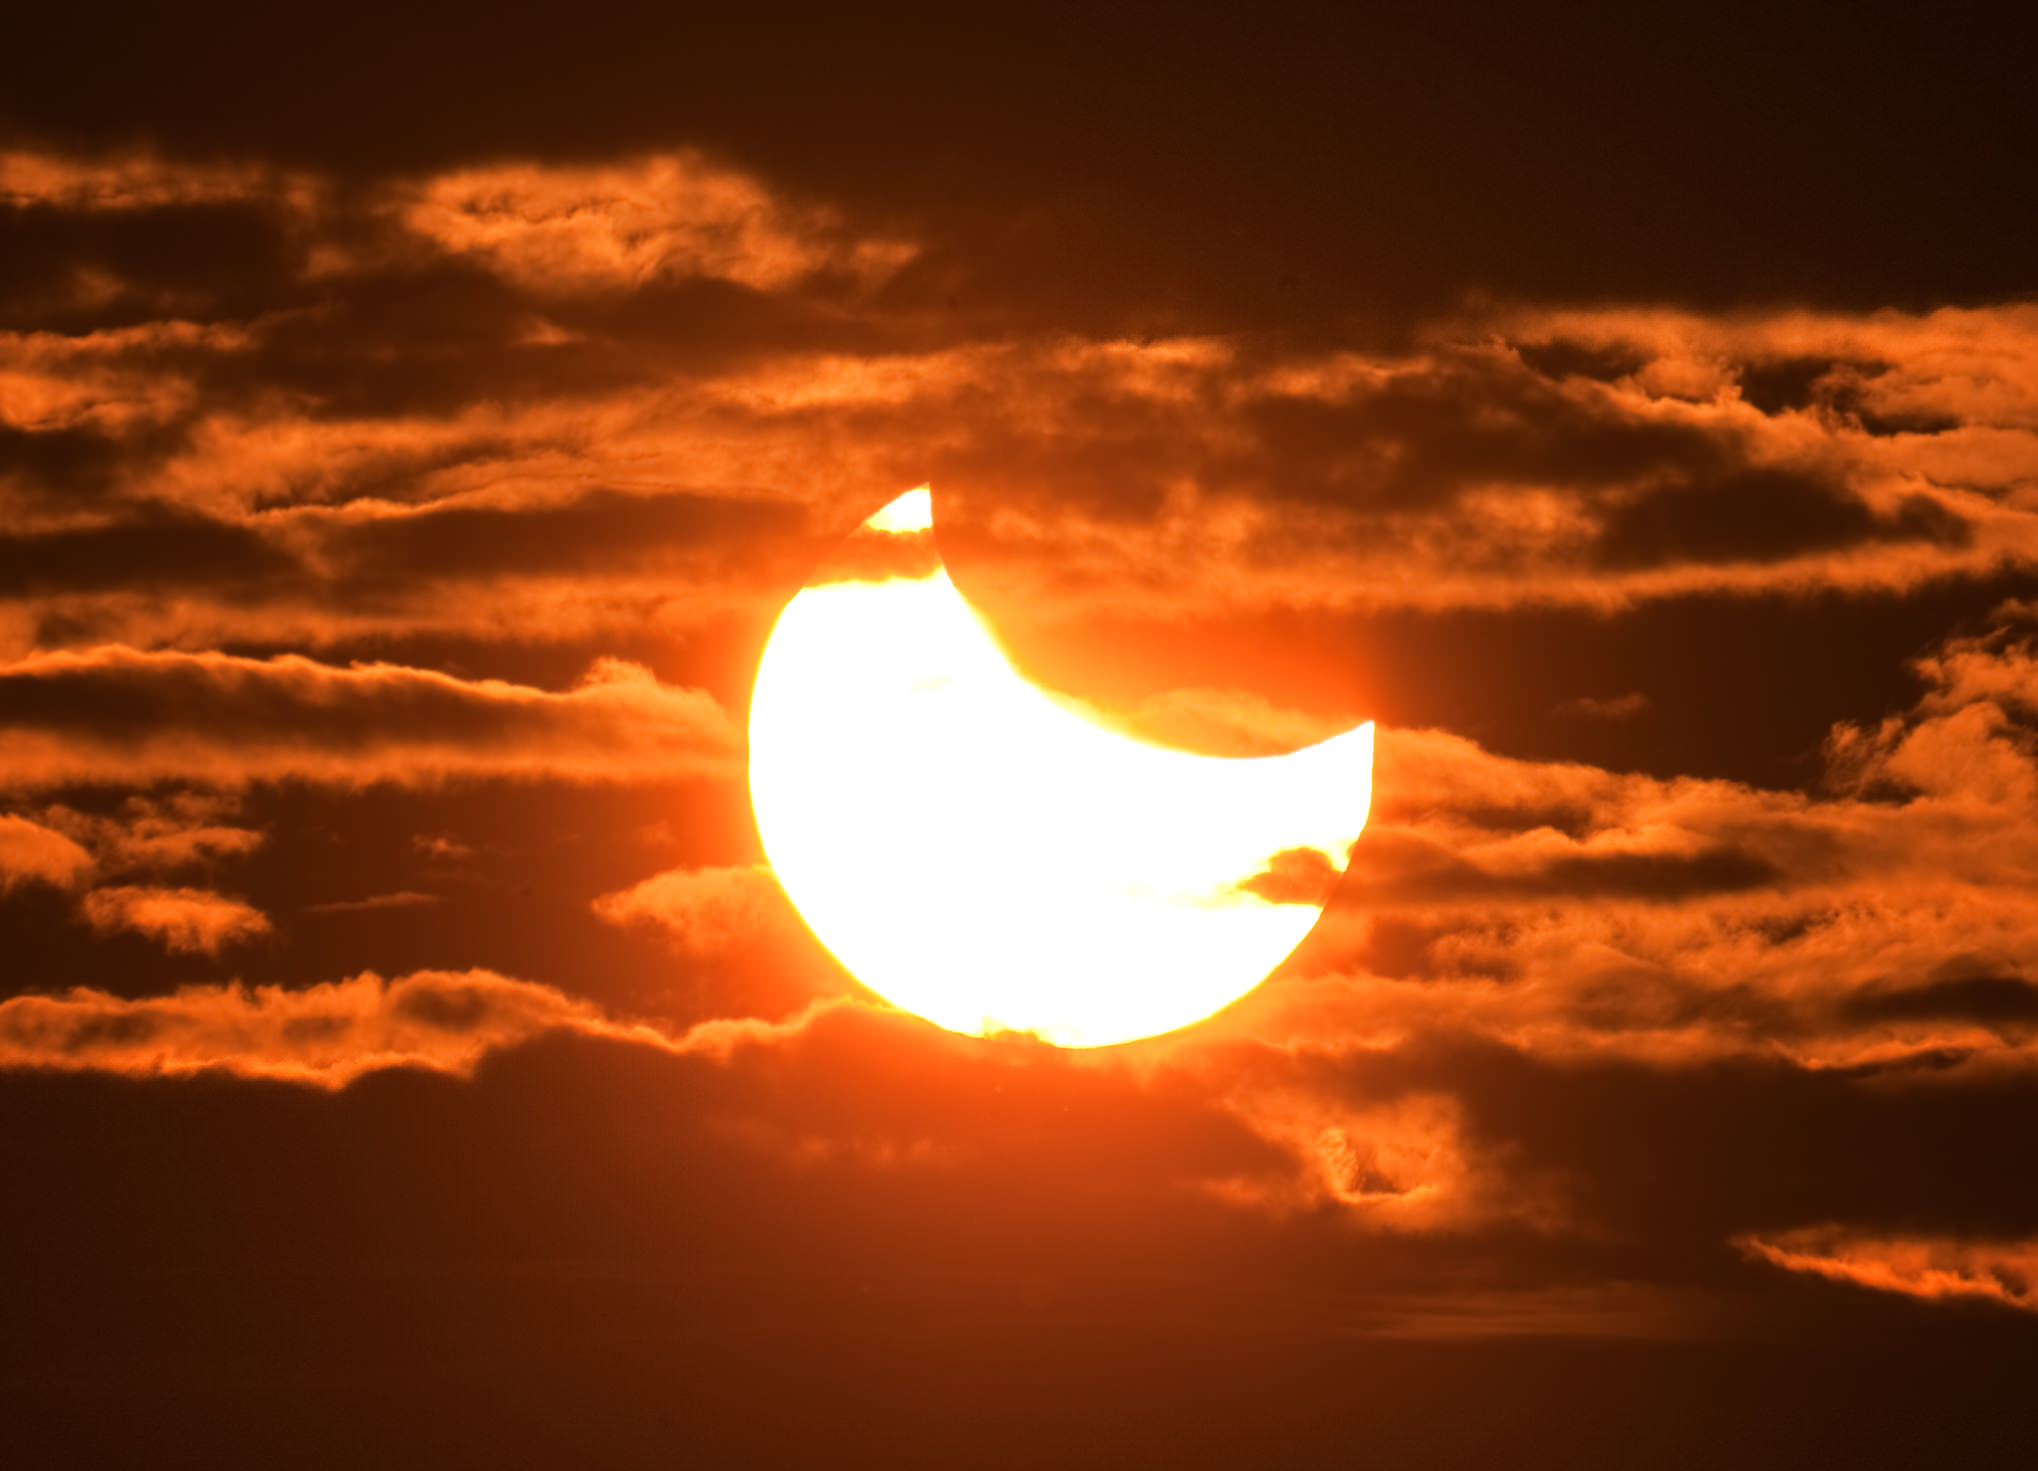
You can see just how dark this lens in the images above and below, and it's perfect for the 2017 eclipse
With a 5.0 density, this filter darkens the entire image, allowing you to open the aperture and dial in a slower shutter speed as well.
Like any good neutral density filter, the Marumi DHG Solar Eclipse Filter does not impact the colors of the images you take of the eclipse. Instead, what you get is an image that has no ghosting or reflections, thanks to its nine layers of anti-reflection coating.
This Solar Eclipse Filter is available in two common sizes - 58mm and 77mm - to accommodate a wide variety of lenses. Just screw it directly onto your lens, or use a stepping ring to adapt the filter to a different sized lens.
Better still, this Marumi Solar Eclipse Filter isn't just a one-trick pony. Keep it in your bag for creating daytime long exposures or hang onto it for the next eclipse that hits the U.S. in 2024.
Either way, there's not a better, more budget-friendly way to protect your camera and lens than by outfitting it with a Solar Eclipse Filter from Marumi.
So, before it's too late, check out rental options for lenses and reserve your telephoto lens before they're all spoken for. Then, get a high-quality solar eclipse filter so you're sure your camera and lens are protected.
On the day of the eclipse, grab your camera, lens, filter, and tripod, and give yourself plenty of time to get setup and take some test shots. In fact, it might be a good idea to get prepared ahead of time and take a few test shots between now and then by using the moon as your subject so that you can perfect the framing and composition of your shot.
August 21, 2017, will be here before you know it! For more details about the eclipse, visit NASA's Eclipse 2017 website. For some pointers on taking photos of a solar eclipse, check out the video below by Matt Granger:
We Recommend
Best Variable ND Filters of 2019

photo by jk78 via iStock
If you’re a landscape photographer, there are plenty of different filters you should have in your bag.
A polarizer is a must, and a graduated neutral density filter is a good asset as well.
Many landscape photographers also carry a kit of neutral density filters. I used to be one such photographer, but now I’ve started using a variable ND filter instead.
The convenience of having multiple ND filters in one is simply too good to pass up. Of course, like any other lens filters, there are good and bad options when choosing a variable ND.
If you’re ready to upgrade your kit with a quality variable ND filter, consider one of the following options.
Kenko Professional Variable NDX Filter

This Kenko Variable NDX is the ND filter I have in my kit, and it has impressed from day one.
It offers a range of light-stopping power from 1.3-8.5 stops, so it truly offers a wide range of possibilities for creating long exposures.
Editor's Tip: Get Kenko’s latest updates and access to promos for discounted gear. Click here to sign up.
What’s more, the practical use factor range is ND2.5-450 and is extendable to ND1000. Just imagine the gorgeously smooth motion you can get at ND1000!
Kenko offers these filters in 77mm and 82mm sizes. The filter is made by mounting two pieces of high-quality polarizing glass opposite one another, that way when you turn the filter ring, it provides smooth operating motion and lightens or darkens as you see fit.

When using ND filters of any kind, getting a neutral color result is key. Kenko ensures that your images have hyper-neutral color balance thanks to a depolarizing plate inside the filter.
That means there’s no color shifting, no vignetting, and no flare. Instead, you just get a wide range of stopping power thanks to high-quality materials and top-quality construction.
Why carry around a big ND filter kit when something like this will do the job and do it well?!
Learn more about the Kenko Professional Variable NDX Filter
Marumi DHG Variable ND Filter

I’ve used Marumi filters many times over the years, and they have performed well (and are typically priced affordably, too).
Their DHG Variable ND Filter offers continuous adjustment from ND2 to ND400. Though that isn’t quite the range of the Kenko filter outlined above, it’s still a good variation of light-stopping power for most shooters.
Marumi uses prime Japanese optics to craft these filters, so they provide crisp, clean, and sharp results.

The ultra-thin screw thread on the filter frame is both easy to attach and detach from your lens, and because it’s so thin, vignetting isn’t a problem.
The aluminum filter frame is lightweight and durable, so it can stand up to a little punishment as you strive to get those gorgeous long exposures you seek.
Like Kenko, Marumi has ensured that the filter produces hyper-neutral colors, so you don’t have to worry about color casting when using this filter. As you can see in the before and after images above, there is no difference in the color tones, yet in the second image, the shutter speed has been extended to blur the movement of the water.
There’s a reason why Digital Camera Magazine awarded Marumi Variable ND Filters with their Gold Award - they are simply built right to give you top performance!
Learn more about the Marumi DHG Variable ND Filter
Syrp Variable ND Filter

Though Syrp might be better known for their motion control devices, they actually make a really good variable ND filter.
I tested this rig a couple of years ago, and I found it to be every bit as good as some of the heavy-hitters in the filter industry.
What’s nice about the Syrp option is that it comes with two step-up rings so you can fit an 82mm filter to a 72mm or 77mm lens. They even throw in a genuine leather carrying case and a lens cloth too!
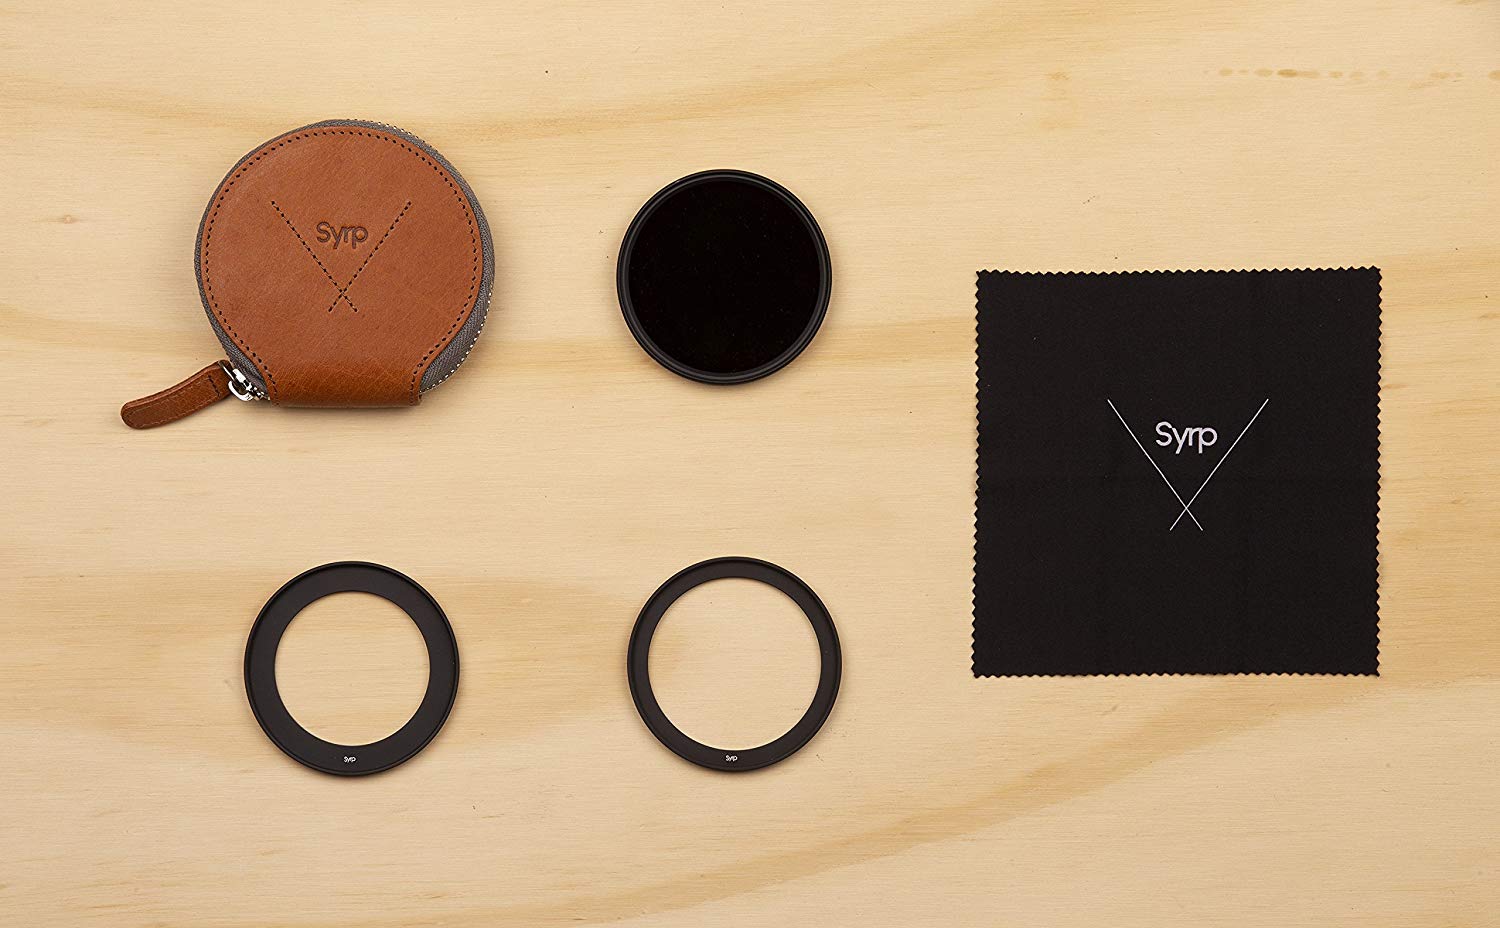
The filter itself is made of high-quality Japanese glass so you get those sharp results you’re looking for whether you’re using the filter for still photos or videos.
This particular model offers 1-8 tops of filtering power, so you can smooth out motion for long exposures or open up the aperture nice and wide to get gorgeous bokeh.
If you’ve never used a variable ND filter before, this is a good one to start with!
Learn more about the Syrp Variable ND Filter
B&W XS-Pro Digital Vario ND Filter

Though this filter is $300 for a 77mm version, it’s still a good buy considering a complete ND filter kit would likely cost twice that much.
And for that price, you get B&W’s solid reputation for building some of the best filters in the business.
This model offers 1-5 stops and has an extra wide mount that aids in avoiding vignetting when using wide-angle and ultra wide-angle lenses.
The filter has a Multi-Resistant Coating with Nano Technology that ensures the filter repels contaminants like water and oils from your skin.
The filter ring is made of brass, so it’s a little heavier than other filters on this list. But brass is also highly durable, so this rig can stand up to a ton of use for years and years to come.
That’s just what you want in a variable ND filter - excellent results and long-lasting durability.
Learn more about the B&W XS-Pro Digital Vario ND Filter
Tiffen Variable ND Filter

If you’re a more budget-conscious buyer, Tiffen makes a quality variable ND filter that won’t bust your budget.
Just like the other filters discussed above, the Tiffen Variable ND Filter has a built-in rotating ring that allows you to quickly and easily adjust its filtering power. The ring offers smooth rotating action for precise control that discerning photographers demand.
With exposure control from ND 0.6-2.4, this filter will give you 2-8 stops of filtering power. Again, that’s not as wide a range as other filters on this list, but is still more than adequate for most photographers.

What makes this filter an especially good buy is Tiffen’s ColorCore technology. ColorCore ensures that you get color-neutral results, which is not something that many budget-friendly variable ND filters can claim.
On top of that, ColorCore helps control the precise density of the filtration. This means that you have more control over the exact degree of filtration in your photos.
At about $90 for a 77mm filter, it’s a steal too!
Learn more about the Tiffen Variable ND Filter
We Recommend
How to Get the Best Photos of Fall Colors
 Image Credit: DenisTangneyJr via iStock
I love living in Southern California, but I definitely miss being able to walk out the door and take photos of fall foliage like I was able to do during my days living in upstate New York.
The explosion of colors this time of year is, in my opinion, one of the most beautiful sights in nature, and it's a favorite target of mine with my camera.
That got me thinking - what's the best way to photograph fall foliage?
In this quick-start guide, I offer up a handful of easy tips that will help you get jaw-dropping fall color photography.
Shoot Towards the Sun
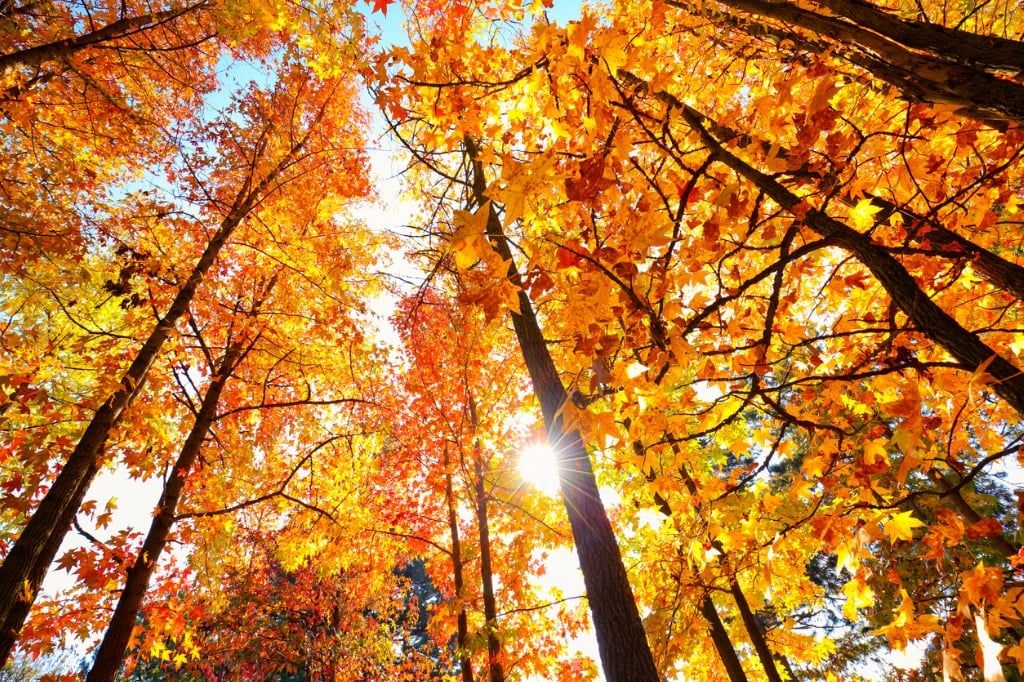 Image Credit: bgfoto via iStock
Shooting towards the sun during autumn means that you can backlight all the gorgeously colored leaves.
The leaves are translucent this time of year, so the light will filter nicely through the yellow, red, and orange leaves. That means that your photos will have a smorgasbord of color to delight the viewer's eyes.
When shooting towards the sun, the contrast in the scene might be a little overwhelming at first. But the tradeoff is that you get intensely vibrant colors that pop in the photograph.
Just take care to prevent lens flare, either by using a lens hood or blocking the sun from your lens with your hand.
Learn More:
Use a Large Aperture to Narrow the Depth of Field
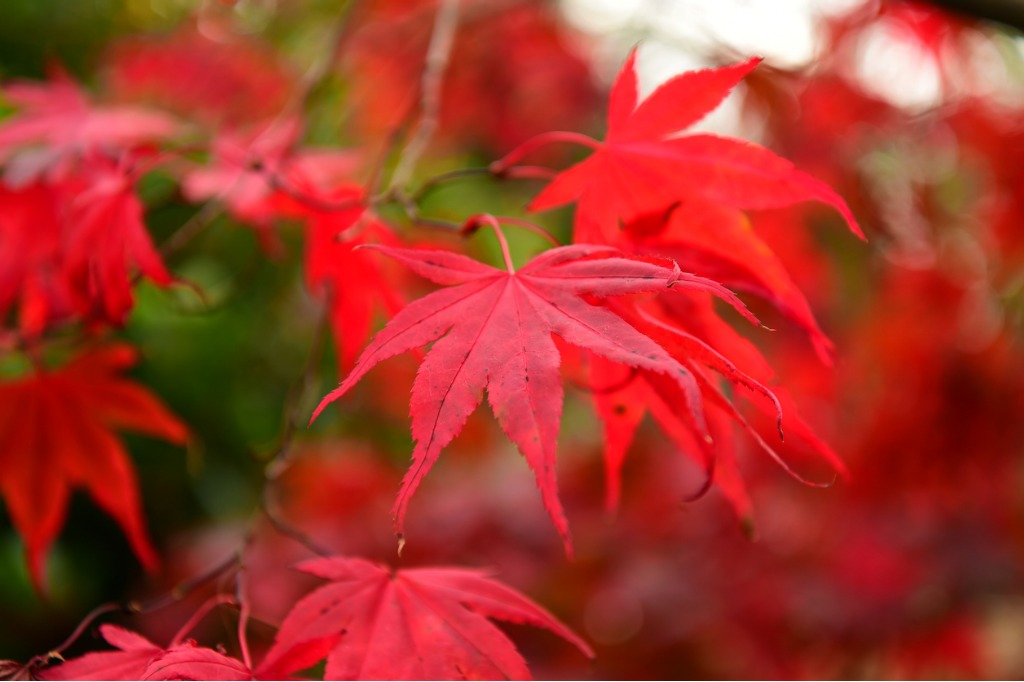 Image Credit: mauinow1 via iStock
Typically, I'd recommend narrowing the aperture to get a deeper depth of field for a landscape shot.
However, when photographing foliage, using larger apertures to narrow the depth of field helps you (and the viewer) zero in on the beautiful details of the foliage.
What's more, it helps you create more interesting compositions that take on an almost abstract vibe, with intense colors that are nicely blurred in the background.
The mood of the shot changes with a shallow depth of field as well - the scene becomes more contemplative and quiet.
Use a Polarizing Filter
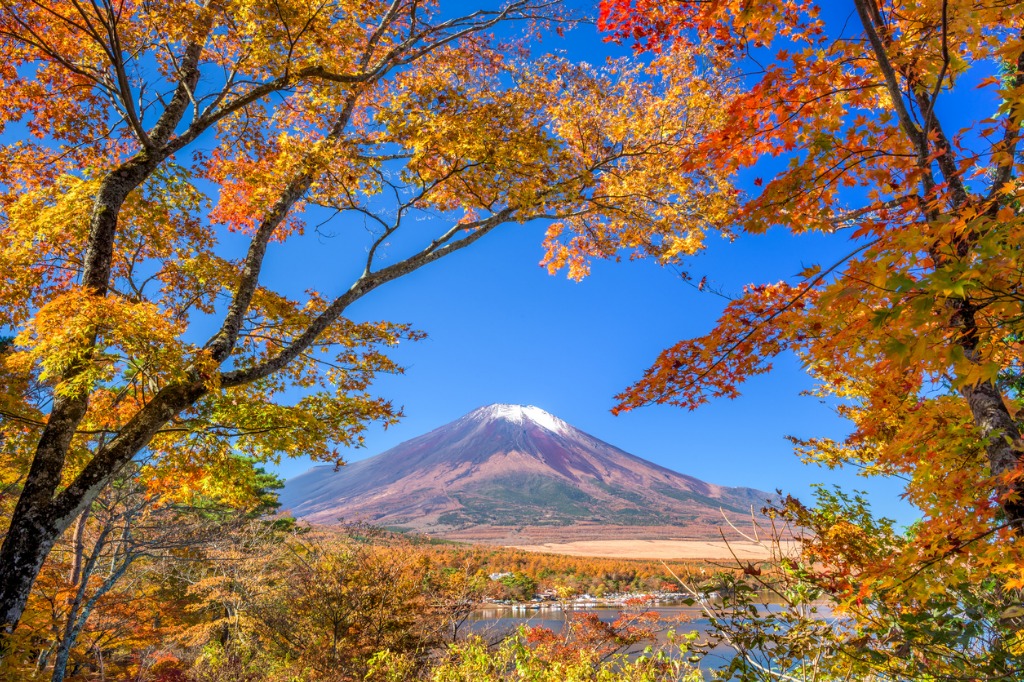 Image Credit: SeanPavonePhoto via iStock
Hands down, the best thing you can do for your fall color photography is have a good polarizing filter on your lens.
That's because polarizers boost the contrast in the sky, making the blue tones of the atmosphere deeper while simultaneously making the white clouds pop.
Additionally, polarizing filters help reduce glare off of water, which is a good thing because incorporating reflections (discussed below) is a must-have tip for fall foliage photography.
These filters also reduce glare off of wet foliage while also boosting the color of the leaves. What's not to like about that?
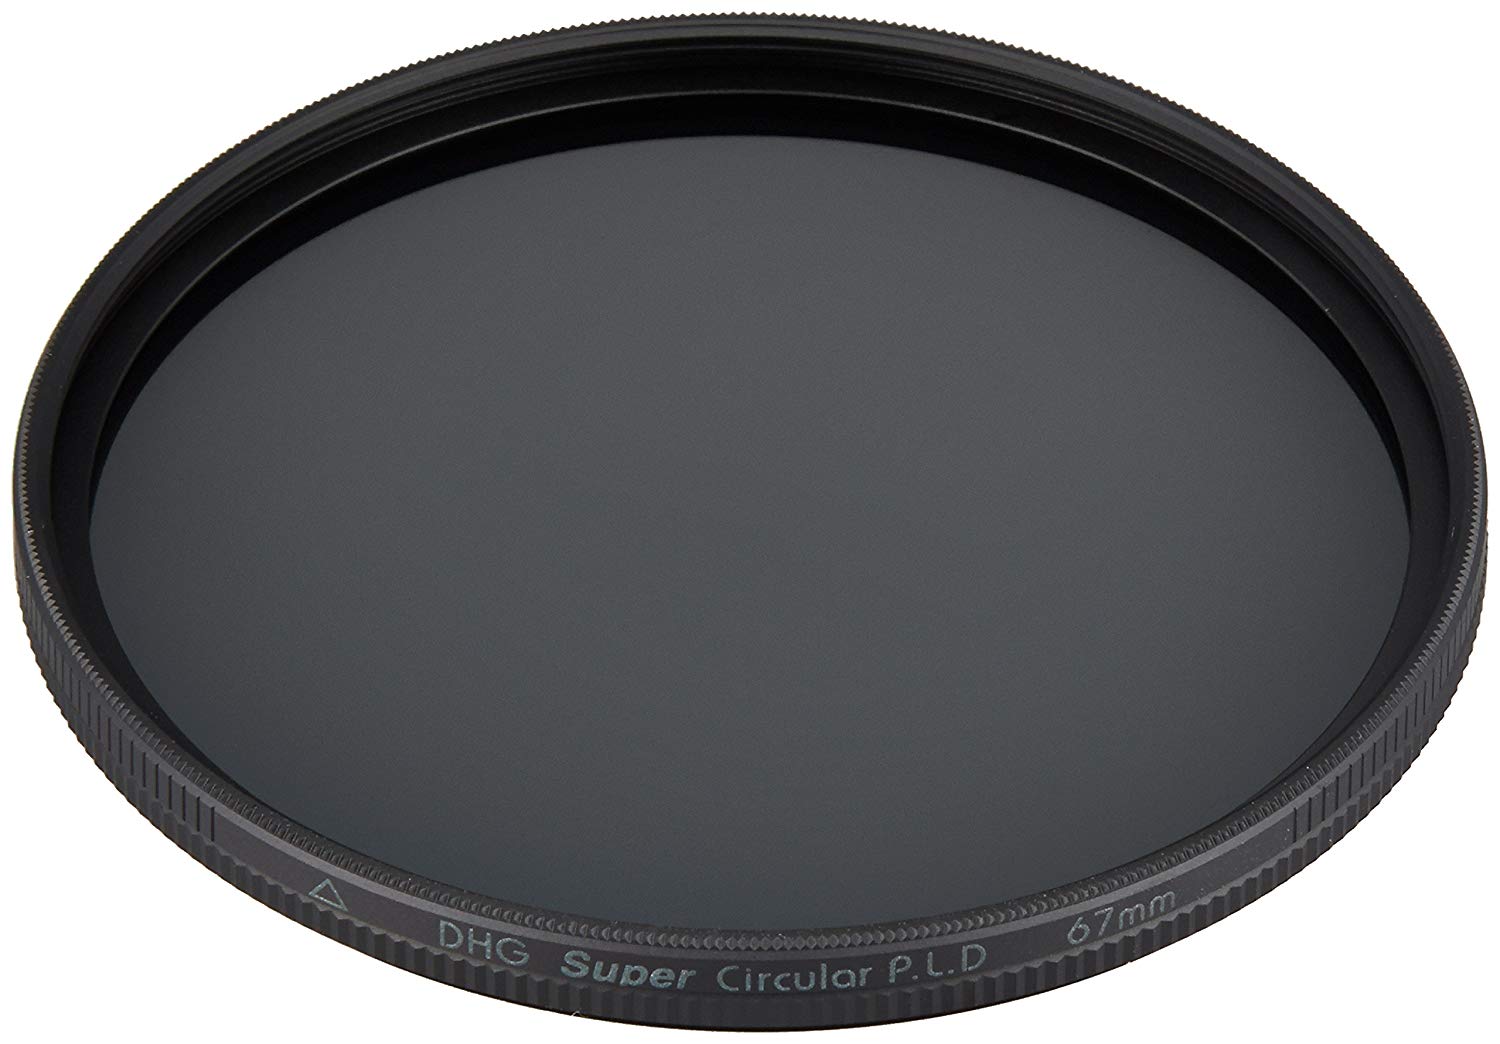
I've used Marumi polarizing filters on many occasions, and have been impressed not only with the build quality of these filters but also their performance.
Typically, you have to pay a pretty penny to get the best performance with filters, but Marumi has managed to manufacture polarizers that give you the results you want without busting your budget.
Marumi's excellent Super DHG Circular Polarizer has an ultra-thin mount, so you don't have to worry about the lens mount making an appearance in your shot.
Additionally, these filters have a light transmission rating of 99.5% so all the beautiful color and contrast in the scene shines through in your photos.
With a superior multi-coating, these polarizers are incredibly durable, scratch-resistant, and easy to clean, too.

Marumi polarizing filters are available in a host of sizes, from 37mm to 95mm, so no matter the size of your lens, chances are that Marumi has a polarizer for you.
And with prices starting at just $53.95, you get a high-performance filter for a budget price!
It's important to note that the best time to use a polarizer is in the middle of the day when the sunlight is most intense.
That sunlight creates more contrast in the scene to make the colors pop even more when using a polarizer.
Learn More:
Find Water
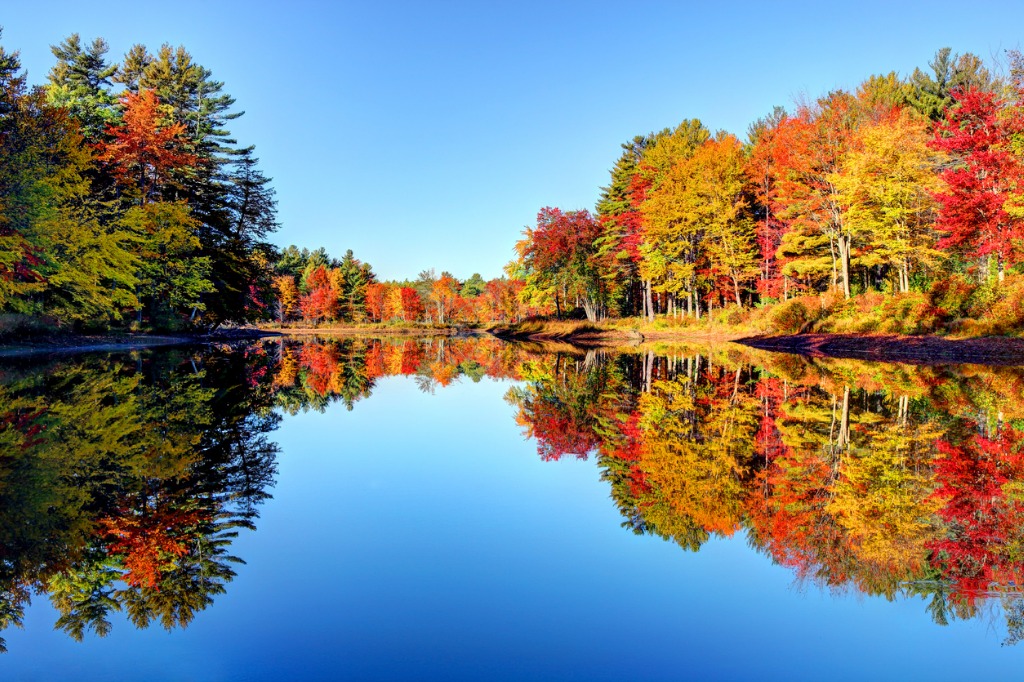 Image Credit: DenisTangneyJr via iStock
The colors of the fall are so beautiful that you might as well double your pleasure by finding water for some gorgeous reflections.
Whether it's a creek or stream, a pond or a lake, water will amplify the colors you see, making for a much more eye-catching photograph.
Additionally, the water will reflect what's happening in the sky, too. The combination of orange, red, and yellow leaves with a deep blue sky with white clouds is tough to beat!
Utilize both wide-angle and longer lenses, that way you can snap photos that have a great deal of foreground in them as well as isolate a smaller scene of foliage and their reflection.
Create Intimate Scenes With a Long Lens
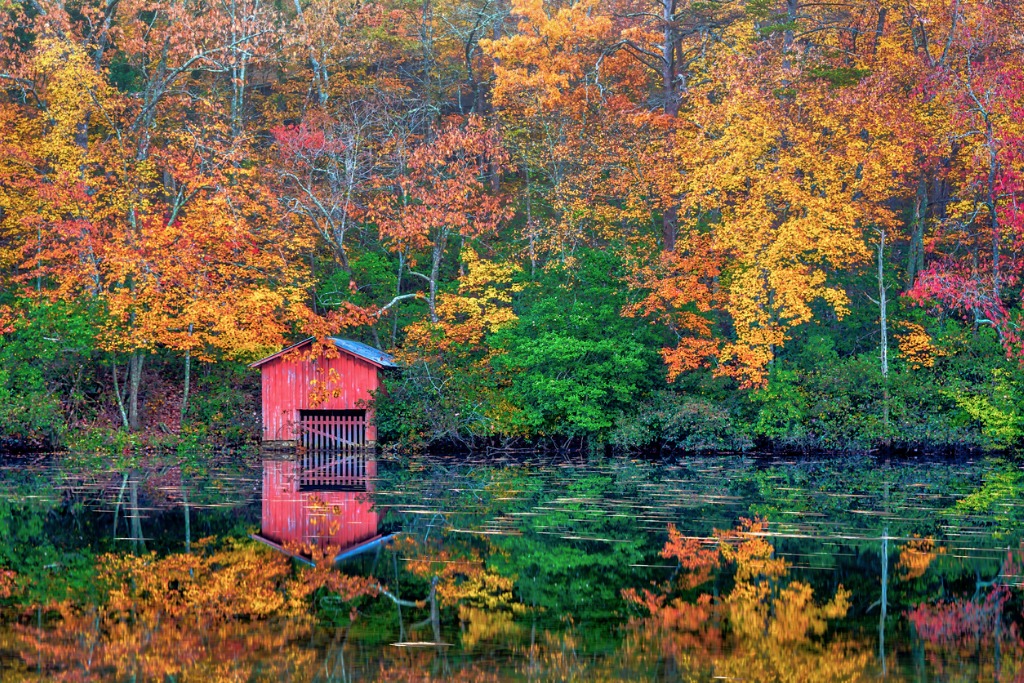 Image Credit: James Deitsch via iStock
Autumn is the perfect time to break out your telephoto lens.
Using a longer focal length allows you to really get in close and highlight the different textures, shapes, and patterns created by fall foliage. Naturally, it also helps you highlight the color of the foliage as well!
Landscapes can be a little overwhelming from a visual standpoint, and narrowing things down with a telephoto lens can reduce the chaos and leave you with a simple, yet highly engaging composition.
When using a longer lens, look for intense contrast - the bright pop of fall foliage against a dark tree trunk, for example.
Using a long lens also necessitates the use of a good, solid tripod to stabilize the heavy lens. Using a camera remote as well, that way you eliminate the possibility of camera shake.
Learn More:
We Recommend
How to Master Using Neutral Density Filters
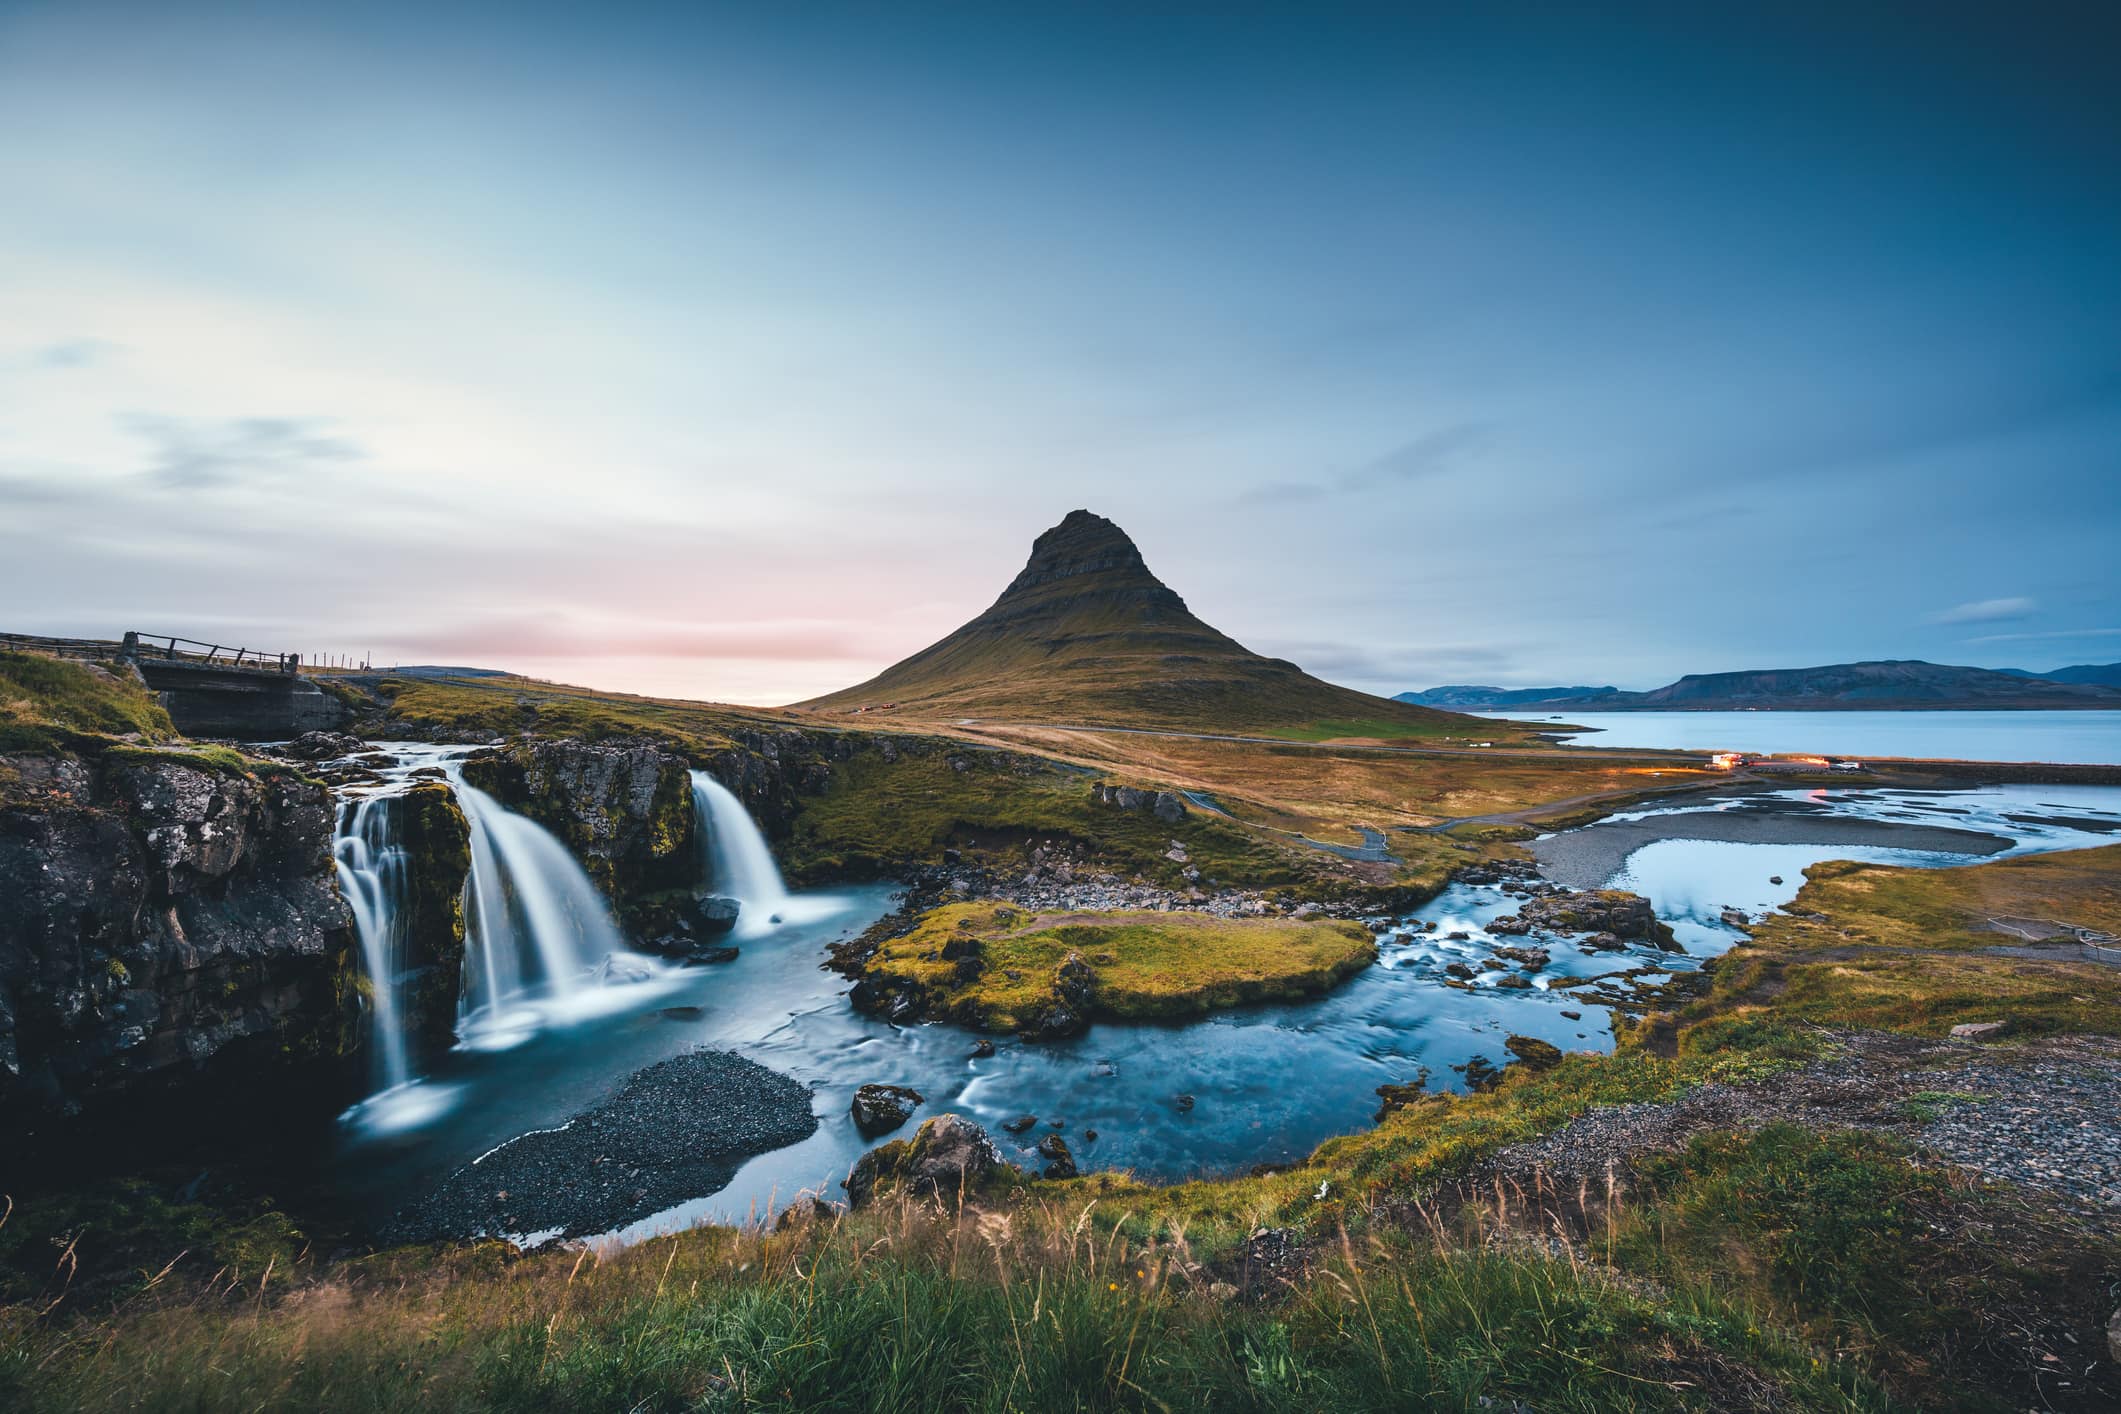 Image Credit: borchee via iStock
Creating long exposure photos is one of the best ways to turn an otherwise "okay" photo into one that totally wows.
By introducing blurred movement - clouds, water, passing cars, or people - you create an image that has much more visual appeal and a little bit of whimsy, too.
But mastering the art of using neutral density filters isn't as simple as slapping a filter on your lens.
Instead, bear the following tips in mind for the best results.
Use a Tripod
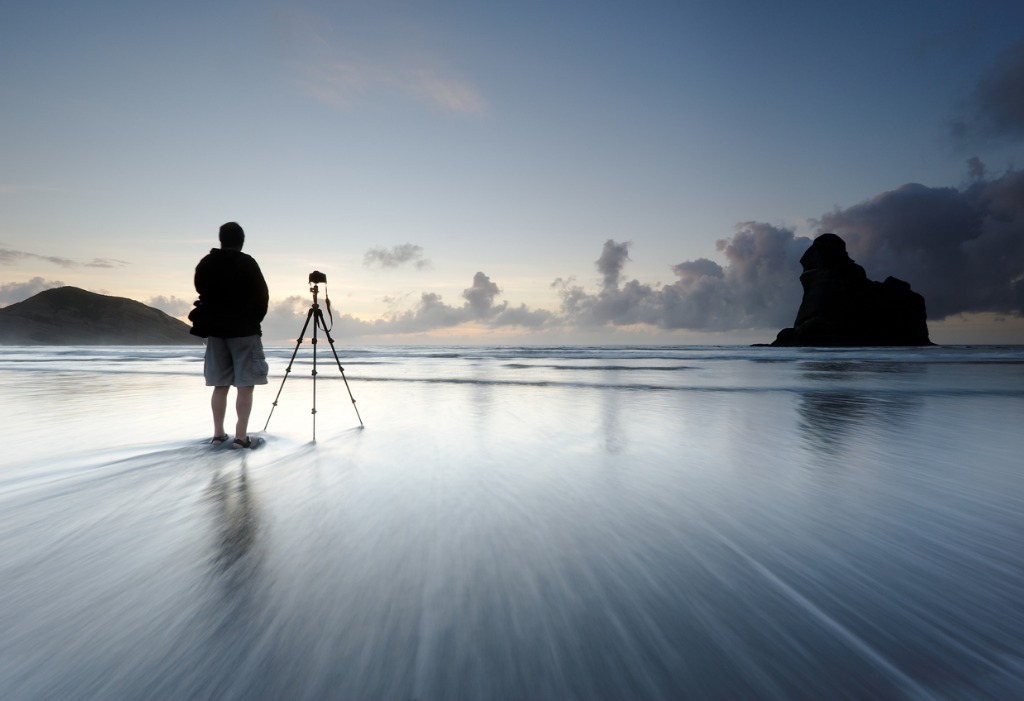 Image Credit: dchadwick via iStock
Since using a neutral density filter is all about enabling you to use slower shutter speeds, you definitely need to support the camera with a sturdy tripod.
Even if the shutter speed is relatively fast, like 1/30 seconds, the likelihood that camera shake will occur due to the tiny movements of your hands as the shutter is open is quite good.
So, to get the sharpest results, get your camera set up on a good, solid tripod, ensuring that the legs are locked and the tripod's feet are on stable ground.
If your tripod has a center column hook, hang your camera bag or another heavy item from it, that way it will help weigh the tripod down and give it extra stability.
Furthermore, if your tripod has an integrated bubble level, use it to make sure that the horizon is perfectly straight. Wonky horizons will ruin your photos!
Learn More:
Shoot in RAW
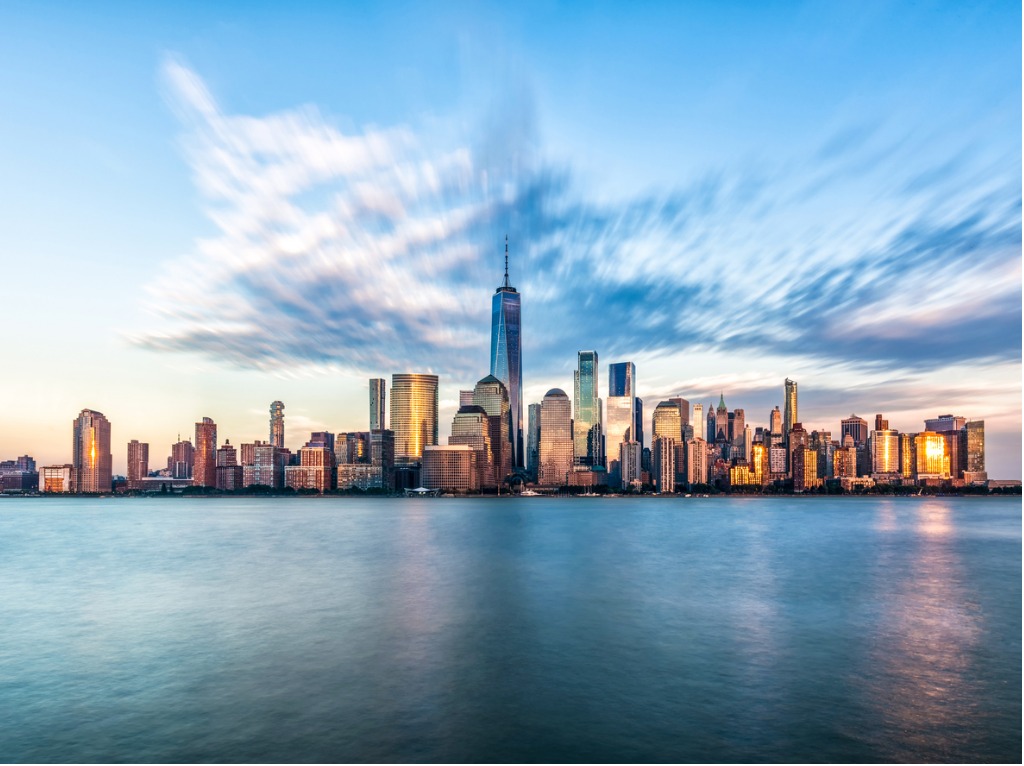 Image Credit: loi_Omella via iStock
There's no reason why you shouldn't shoot your long exposure photos in RAW format.
RAW files retain all the detail that the sensor collects, thereby giving you much more data to work with in post-processing.
That'll come in handy when you edit your photos and want to work on highlights, shadows, colors, contrast, and other elements of the image.
That's especially true of long exposure photos that often need a little touch-up here and there to maximize the ethereal look that the blurred motion gives the shot.
Bonus Tip: Try shooting at a lower perspective to incorporate more foreground into the shot. This is especially beneficial for making the primary subject in your long exposure image look larger and more powerful in the frame.
Incorporate Static Elements
 Image Credit: kellyvandellen via iStock
What's so great about long exposures is that the indicated movement of the blurry elements helps create an image that has tons of life.
You can amplify that feeling, though, by incorporating static elements to give the shot visual tension.
In the image above, for example, the rocks in the river provide that tension - they're perfectly in focus in the midst of the beautifully blurred waters of the river.
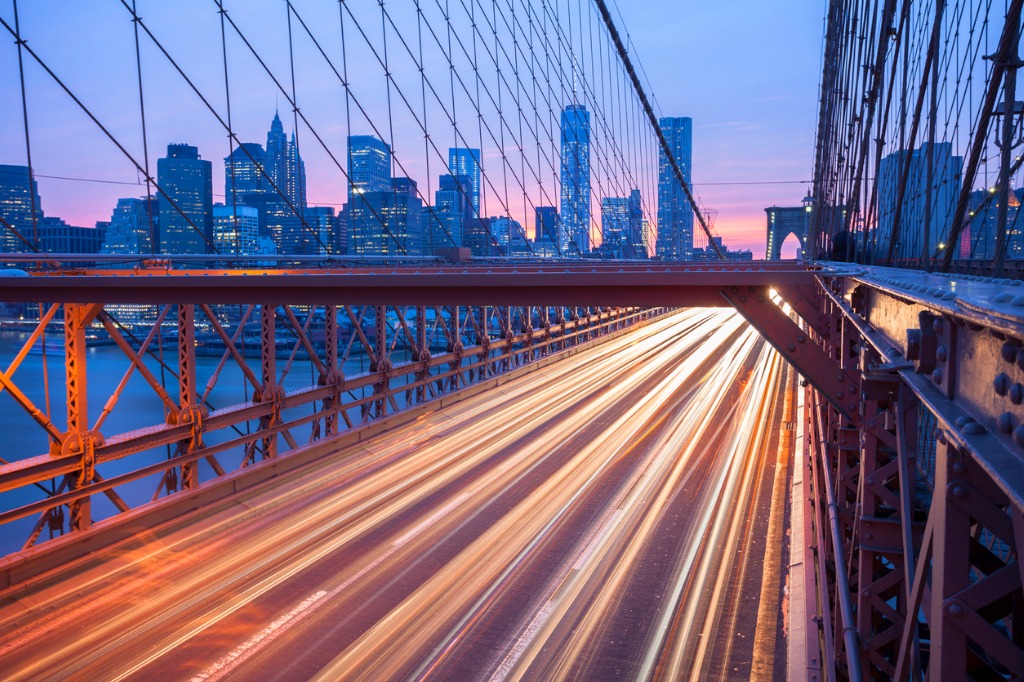 Image Credit: B&M Noskowski via iStock
The same goes when photographing other long exposure subjects...
If photographing passing cars, include things like buildings or a bridge in the background.
If photographing a landscape with blurry clouds, be sure to have something like a mountain peak or other immovable element in the shot as well.
Creating that visual tension between moving and static objects makes for a much more interesting photo!
Learn More:
Don't Use Cheap ND Filters
While it can be tempting to get on Amazon and order the cheapest neutral density filter that you can find, you'll definitely get what you pay for.
Cheap ND filters can cause all sorts of problems, from color casts in the images you take to light leaks, ghosting, flare, and other aberrations that detract from the quality of your shots.
Instead, spend a little more money and invest in a good ND filter that actually has the chops to do what it's supposed to do.
A great option that's budget-friendly is the Marumi line of neutral density filters.
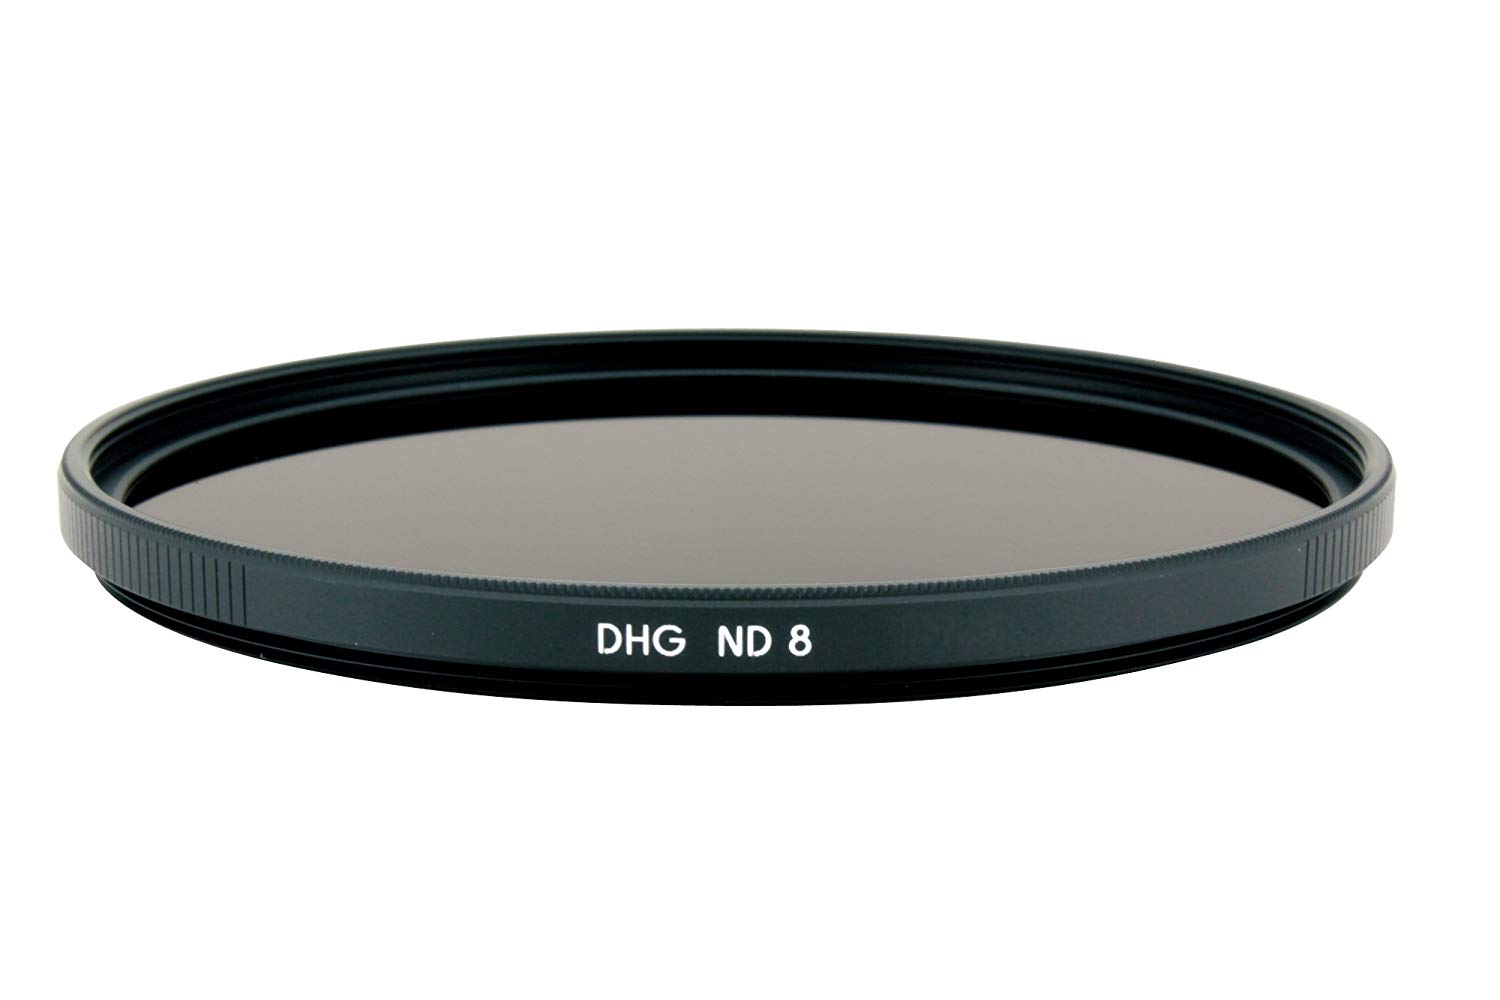
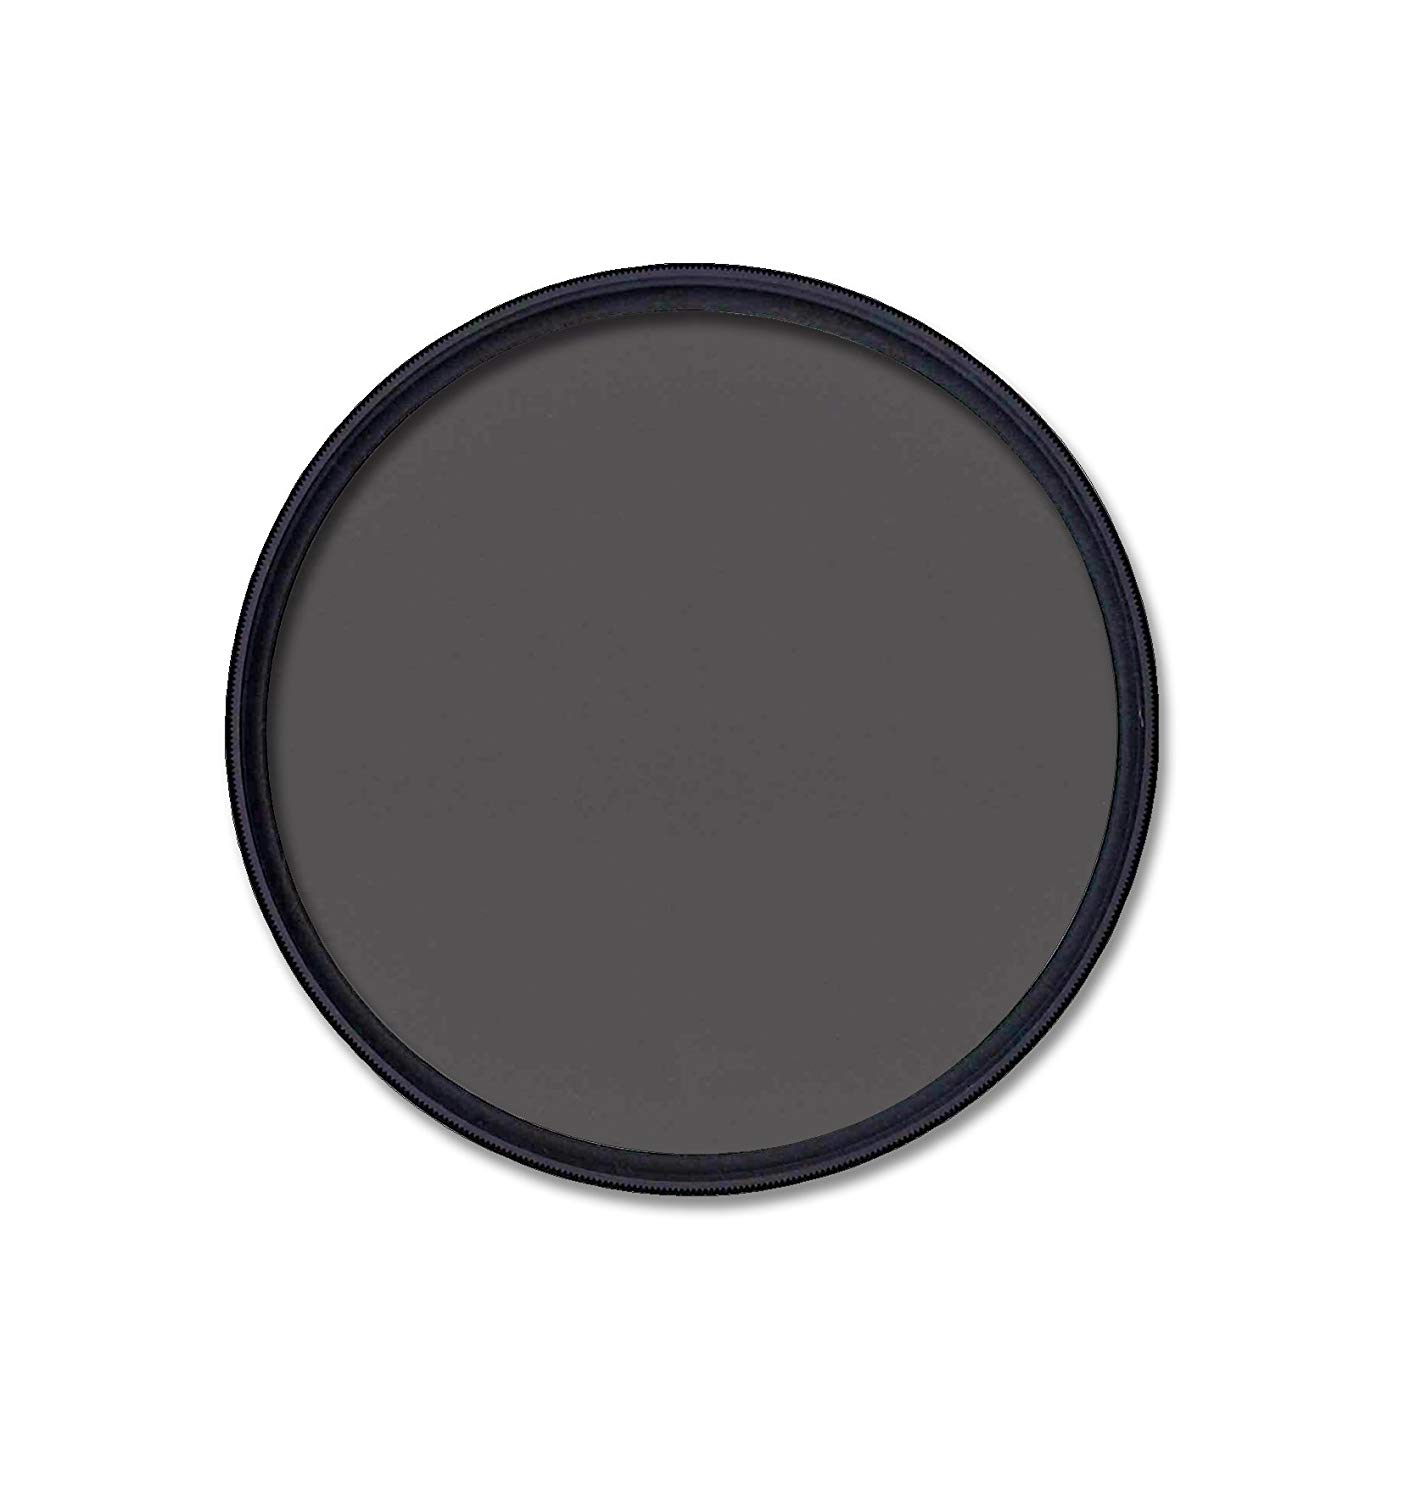
These filters (like the ND8 shown above) have an AR multicoating that helps reduce surface reflections, that way the scene comes through beautifully without the distraction of intense reflections.
The outer rim of the filter glass is also blackened, which is a great feature because it helps reduce ghosting and flare, which as noted above, is a common problem with neutral density filters.
What's more, Marumi has outfitted their neutral density filters with an ultra-thin frame that vastly reduces vignetting, which is a major problem for lesser filters.
You'll also appreciate the fact that the filter frame has a satin finish that reduces reflections off the frame.
In other words, the Marumi line of ND filters - which come in various strengths including 3-stop, 4-stop, 5-stop, 6-stop, 9-stop, and 10-stop options - has everything you need in terms of the features and functionality for long exposure photography while also being budget-friendly.
That means that you can take better-quality long exposure photos without busting your budget.
What's not to like about that?!
We Recommend
Last-Minute Photography Tips for the Great American Solar Eclipse
On August 21, 2017, a huge swath of the United States will experience darkness in the daytime as the "Great American Solar Eclipse" makes its way across the continent.
Some folks have been planning and preparing for the event for years. Others are just starting to get solar eclipse fever.
If you fall into the latter group, consider these last-minute photography tips as essential to snapping some quality photos of the eclipse next month.
Get the Gear
In the "Learn More" section below, I link to a previous article I wrote on the gear you'll need to capture photos of the eclipse.
But I want to reiterate in this article the need for a solar eclipse filter.
You can buy or rent the nicest camera and lens that money can buy, but if you point it at the sun - even one eclipsed by the moon - you run the risk of severely damaging your photography equipment.
So, in my mind, the most important piece of kit you need is a solar filter.
The question is, what filter should you buy?
I'd like to make the case that the Marumi Solar Eclipse Filter is a good bet.
The filter shown above is a solid neutral density filter.
That means it has the light-stopping power to prevent the sun's rays from damaging the delicate internal parts of your camera and lens.
And believe me - this filter has a ton of light-stopping power at 16.5 stops!
If you do that math, that works out to a 92,000x filter factor - more than enough for a solar eclipse.
And since it's a solid ND filter, your photos of the 2017 eclipse will have a consistent look throughout.
Even better, with so much light-stopping power, you can also open the aperture or slow down the shutter speed to perfect your exposure.
Some solar eclipse filters out there are flash-in-the-pan sorts of things that have been quickly put together and marketed to take advantage of this event.
Not so with Marumi's filter...
This thing is built with the finest precision to ensure that it has no impact on the color of your photos. Furthermore, with ten layers of anti-reflection coating, the Marumi Solar Eclipse Filter eliminates reflections and ghosting.
What that means is that for not a whole lot of money, you get a top-quality filter that will protect your gear, help you create better photos of the eclipse, and you can even use it for long exposure photos of normal, everyday subjects like landscapes, too.
If that's not a sound investment, I don't know what is!
Learn More:
- Get the specs on Marumi Solar Eclipse Filters
- Beginner's Guide to Photographing the 2017 Solar Eclipse on a Budget
Choose Your Viewing Spot Wisely
The 2017 solar eclipse will be viewable for much of the country. In fact, a large part of the U.S. will experience total darkness.
That means that millions of people will be flocking to the areas along the path of totality to experience peak darkness.
On the one hand, this necessitates that you plan your outing well in advance so that you're sure you know where to go, how to get there, and are ready to deal with heavy crowds.
On the other hand, this also necessitates that you investigate the best spots to see the eclipse.
The question is, what constitutes the best spot?
That depends...
When planning your trip to photograph the 2017 solar eclipse, bear the following in mind:
- What time of day will the eclipse occur? The West Coast will see the eclipse just after 9:00 am, which places the sun lower in the sky for easier opportunities for incorporating landscape elements into your shots.
- How long will the eclipse last? Some areas will have just over a minute of darkness; others will have nearly 2 minutes, 45 seconds of darkness.
- Are there elements in the area you can incorporate into the shot? (More on that below...)
- Is the path of the eclipse on public land or will you need to get permission from landowners? Think about fees, too. You want to have money with you in case you have to pay an entrance fee, such as in a national park.
- What is the weather typically like at the locations you're investigating? Don't head to an area that's typically cloudy and rainy!
Mind you, not everyone will be hopping on a plane to fly to the "perfect" eclipse viewing spot.
However, even if you're just driving a couple of hours, choosing to head west or east could make all the difference in your experience and your ability to photograph the event.
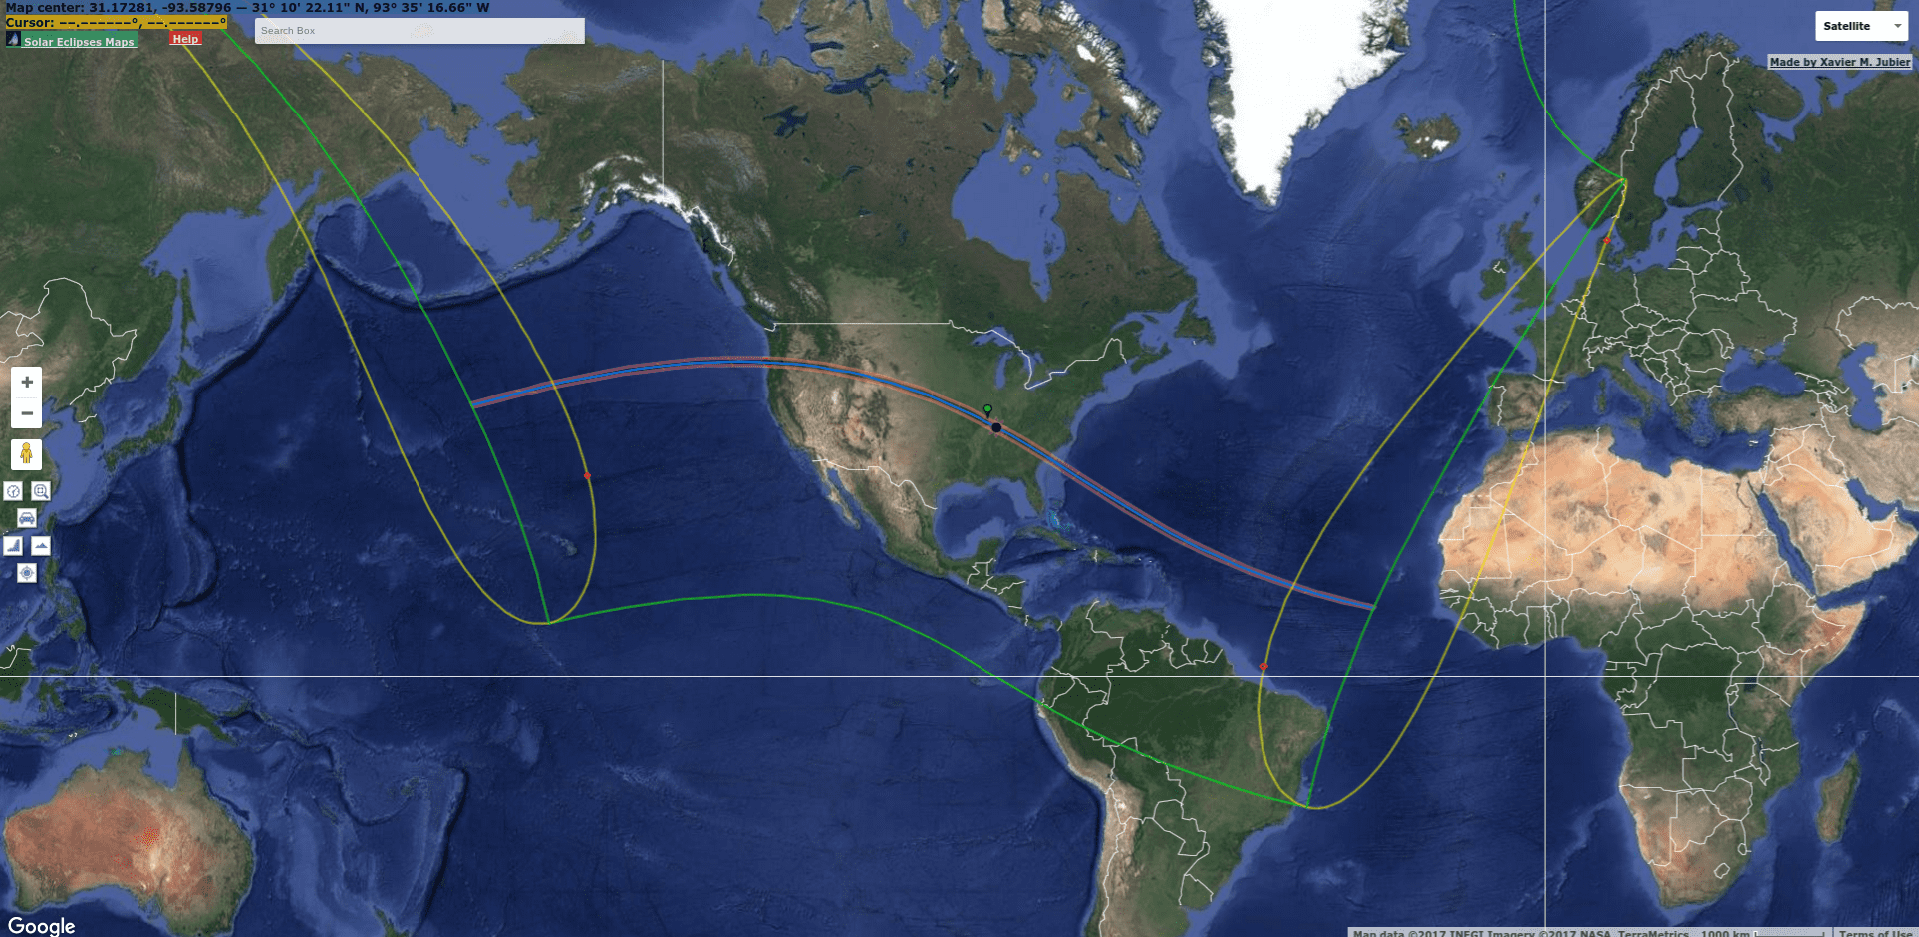
Try using the 2017 Solar Eclipse Interactive Map (shown above) from Xavier Jubier to pick the ideal spot.
Learn More:
- Shop for Marumi Solar Eclipse Filters
- Basic Camera Settings for Photographing the 2017 Solar Eclipse
Find a Foreground Element
One of the problems with photographing the 2017 solar eclipse is that for many of us, the eclipse happens in the middle of the day.
That means a very steep camera angle will be needed to photograph the eclipse as it happens.
Aside from the comfort issues that will be involved from craning your neck to see the event high in the sky, there are also compositional issues that will arise.
Typically, photos of celestial bodies - be that the moon, the Milky Way, or an eclipse - benefit from something else being in the shot to add interest and context.
That might be the spine of a mountain range, a tree, or even a person...
But with the sun so high in the sky for most of us, incorporating those kinds of supporting elements will be difficult during the eclipse.
That's why it's important to choose your viewing spot wisely.
Not only do you want somewhere that's a nice place to view the eclipse, but you also want to maximize your ability to get the most interesting photos.
Here's a few ideas of elements you might incorporate into your 2017 solar eclipse photos:
- The spire of a tall building
- The rim of a canyon
- Interesting rock formations
- People
- Trees
Granted, you'll likely be shooting with a telephoto lens, so incorporating these types of elements might be a struggle.
Nevertheless, it's worth a shot to see what you can do (just practice ahead of time!). After all, with this being one of those once-in-a-lifetime events for much of the country, you want the photos you take to be of the highest quality.
We Recommend
Lens Filter Buying Guide

Photo by oxime via iStock
With the calendar firmly into 2020, I figured it was time to unleash an updated lens filter buying guide.
There is a wide variety of filters you can have in your camera bag, both in terms of types and manufacturers.
But like camera lenses, lens filters are not all made alike - cheap filters can cause color casts, vignetting, and degrade the sharpness of an image.
In other words, why invest in a great lens if you're going to put a junk filter on the front of it?
Bear in mind that I'm using "cheap" as a reference to build quality, not to price. There are many excellent budget lens filters that will give you excellent results.
Without further ado, let's get to the best lens filters for 2020 - lens filter kits, circular polarizers, ND filters, and more!
Haida M10 Pro Filter Kit

I recently got my hands on the Haida M10 Pro 100mm filter kit, and I have to say that I'm impressed.
I've used other Haida filter systems as well, and they are a great combination of features, quality, and price.
In this case, the kit has a 100mm filter holder that has a drop-in slot for a circular polarizer. This makes it quick and easy to add or remove the CPL as needed. As a landscape photographer, having a good circular polarizer is an absolute must!

In this case, I particularly appreciate the gear on the side of the drop-in filter slot that allows me to rotate the polarizer with much greater ease.
Likewise, the filter hold rotates 360-degrees so I can position the filters with precision. The locking mechanism keeps everything in place, too.
In front of that are three slots for 100mm filters, so you can purchase solid ND filters, graduated ND filters, or reverse grads and add them to the holder for the specific effects you need.
The kit includes four adapter rings to accommodate popular lens sizes (67mm, 72mm, 77mm, and 82mm), a storage pouch, and four lens caps. Get more details in the video below by Ikan International:
With all these components included in the kit, this is a great starter filter kit for any photographer.
And with Haida's extensive line of 100mm filters, you can add the necessary filters to the kit as you go along and build a high-quality system that helps you improve the quality of your photos.
Price: $228.27 at Amazon
Learn more about the Haida M10 Pro Filter Kit
Kenko Nyumon Circular Polarizer
 Photo by Gary Gray via iStock
If you ask me, there is no more important filter to buy than a circular polarizer.
That's because a polarizing filter can have a positive impact on your photos in a whole host of ways.
They cut down glare off of non-metallic surfaces like water and they also help boost the contrast in the sky for a deeper blue atmosphere and whiter clouds.
Additionally, a polarizing filter cuts down on atmospheric haze so distant elements in the shot appear to be crisper, as shown in the image above.

If you're after a budget-friendly polarizer, look no further than the Kenko Nyumon polarizer shown above.
This filter is crafted using optical-quality glass that's polished and coated to repel everything from water droplets to the oils from your skin.
On top of that, Kenko has smartly mounted it in a SLIM ring, that way there's less chance of vignetting occurring when using a wide-angle lens.

There's a wide range of sizes available as well, so virtually any lens you have, Kenko likely has a polarizer to fit.
And starting at less than $15.00, these things are easy on your bank account too!
This is a prime example of how budget lens filters can strike a balance between price and performance.
Price: Starting at $43.00 at Kenko Imaging USA
Learn more about the Kenko Nyumon Circular Polarizing Filter
Editor's Tip: Get Kenko’s latest updates and access to promos for discounted gear. Click here to sign up.
PolarPro Summit Filter Kit

Earlier, I mentioned that not all filters are made alike.
The Summit filter kit by PolarPro is an excellent example of that sentiment.
To begin, this system has an integrated circular polarizer.
As you can see above, the polarizer slides into the filter holder to create a light-sealed system. The CPL is both low-low profile (to prevent vignetting) and it installs and removes easily.
What's more, the Summit system has tool-free mounting options, a tool-less rail mount, and a snap-on hood attachment that make using this system a breeze. This is a huge benefit for those instances in which the light is changing quickly and you need to adapt your setup sooner rather than later.
PolarPro has made the Summit system super lightweight, too, so you don't have to carry a big, heavy, bulky set of filters around with you as you seek the next great photo opportunity.
It helps that each filter has an aluminum frame, as that reduces fingerprints on the filter glass while also maximizing protection for the filter.
And since these filters are available in 67mm, 72mm, 77mm, 82mm, and 95mm, you can find the right size for your specific needs.
If you're a landscape photographer and you don't have a good set of filters, the PolarPro Summit system is an excellent option for you.
Price: $599.99 at PolarPro
Learn more about the PolarPro Summit Filter System
Formatt-Hitech Firecrest Ultra ND Filter

A solid ND filter allows you to slow down the shutter speed or open up the aperture when shooting in bright conditions without overexposing the image.
Photos with blurred motion wouldn't be possible when shooting in broad daylight, because all that light from the long shutter speed would result in a completely blown out photo.
ND filters come in all kinds of strengths, with darker ND filters blocking out more light, thus allowing you to get longer exposures or use larger apertures.

Formatt-Hitech's Firecrest Ultra ND filters are a good choice because they offer excellent features without busting your budget.
These filters are bonded, which helps protect the filter's coating from damage. This means that you get a filter that helps you achieve your photographic goals while also giving you longer-lasting and durable performance over the long-term.
Formatt-Hitech also uses a lap and polish technique when manufacturing the Firecrest Ultra ND filters, which results in glass that offers hyper-neutral performance. There is no color casting and you get superb sharpness, minimal aberrations, and enhanced clarity, too.

These filters are available as 100mm x 100mm squares and come in a wide range of popular densities from 1 to 10 stops.
If you're in need of an ultra-dark filter, though, Formatt-Hitech has Firecrest Ultra NDs that go from 13 stops up to a whopping 24 stops!
It's that kind of variety that enables you to select the precise ND filters you need to create beautiful long exposure images, even on the brightest of days.
Price: Starting at $179.00 at Formatt-Hitech
Singh-Ray Variable ND Filter

Years ago, variable ND filters didn't have a good reputation. They just didn't work well and left you with images that had artifacts that ruined your images.
But today's variable ND filters are a new breed, and options like this one from Singh-Ray are among the best.
A variable ND filter is one of the best filters for landscape photography.
In a single filter, you have the capability of blocking anywhere from two to eight stops of light with the turn of the filter in its housing.
If you need to build a run and gun setup, having a single variable ND filter could be advantageous, rather than carrying multiple ND filters to achieve the same feat.
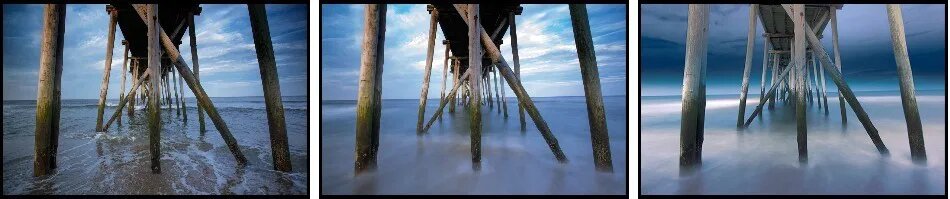 Image Credit: Marco Crupi
As explained earlier, an ND filter is a must-have if you want to introduce motion effects - like blurry water or clouds - when photographing during the daytime.
With this filter, all you have to do is turn the filter to control how much light passes through the lens. And since it's a Singh-Ray, you can depend on quality construction that retains the color fidelity of the scene (and the sharpness, too).
Variable ND filters aren't just for still photography, though - you can utilize them when shooting video as well!
Price: $340.00 at Amazon
Learn more about the Singh-Ray Variable ND filter
Breakthrough Photography X4 Circular Polarizer

Breakthrough Photography's X4 circular polarizer is a top choice of many photographers thanks to its excellent performance and superb build quality.
The durable design is built to withstand the rough-and-tumble world of landscape photography. You can use it in high winds, in the presence of saltwater or dust, and other arduous environmental conditions and not worry that it will fail.
Additionally, these filters are guaranteed to maintain their optical clarity and color neutrality for 25 years thanks to its weather-sealed design.

This polarizing filter is one of our best filters for 2020 because of its nanocoating. Breakthrough Photography utilizes a bespoke nanotec coating that beads water and other elements off the glass. This means a cleaner filter for improved results while minimizing smearing, fingerprints, and so forth.
Paired with the SCHOTT Superwhite B270 optical glass, you get excellent light transmission, particularly in the ultraviolet, visible, and infrared spectrums.
Add to that a state-of-the-art multi-resistant coating that reduces reflections and improves contrast, and you have a recipe for a polarizer you can get a lot of mileage out of (and great results, too).
Price: Starting at $129.00 at Adorama
Lee Hard-Edge Graduated ND Filter

Our Lens Filter Buying Guide 2020 wouldn't be complete without a hard-edge graduated ND filter.
This one, by Lee, comes in various sizes to accommodate different setups, including 75mm x 90mm, 100mm x 150mm, and 150mm x 170mm. They're also available in various strengths, from 1-stop to 4-stops.
These hard-edge grads are perfect for landscape situations in which there is a definite horizon.
The quick transition from darkened to undarkened areas allows you to match up the filter with the horizon and get the desired filter effects for the sky while leaving the landscape below it untouched.

What sets this filter apart from those by other manufacturers is that it is hand-made with a gradual build-up of the ND gradation.
The gradation on the filter is created by dipping the filter into baths of dye. As a result of this hand-made process, you get hyper-accurate results that give you the ultimate in creative control.
With a hard-edge grad or two in your bag, you'll be better equipped to create beautiful landscape images that are well-exposed throughout.
Between the quality build and reasonable prices, you can see why this is among the best lens filters for 2020!
Price: Starting at $113.00 at Adorama
Learn more about Lee Hard-Edge Graduated ND Filters
Argraph Marumi M100 Filter System

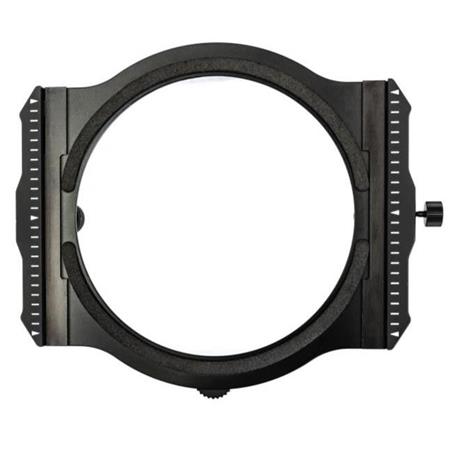
Marumi’s Magnetic M100 Filter Holder and their line of magnetic filters are just what the doctor ordered for photographers that are sick of sliding filters in and out of their holders.
The M100 filter holder sports a slim 10mm design with strong magnetic attachments that hold the filter in place. The foam gaskets on the filter holder ensure that there are no light leaks to ruin your photos.

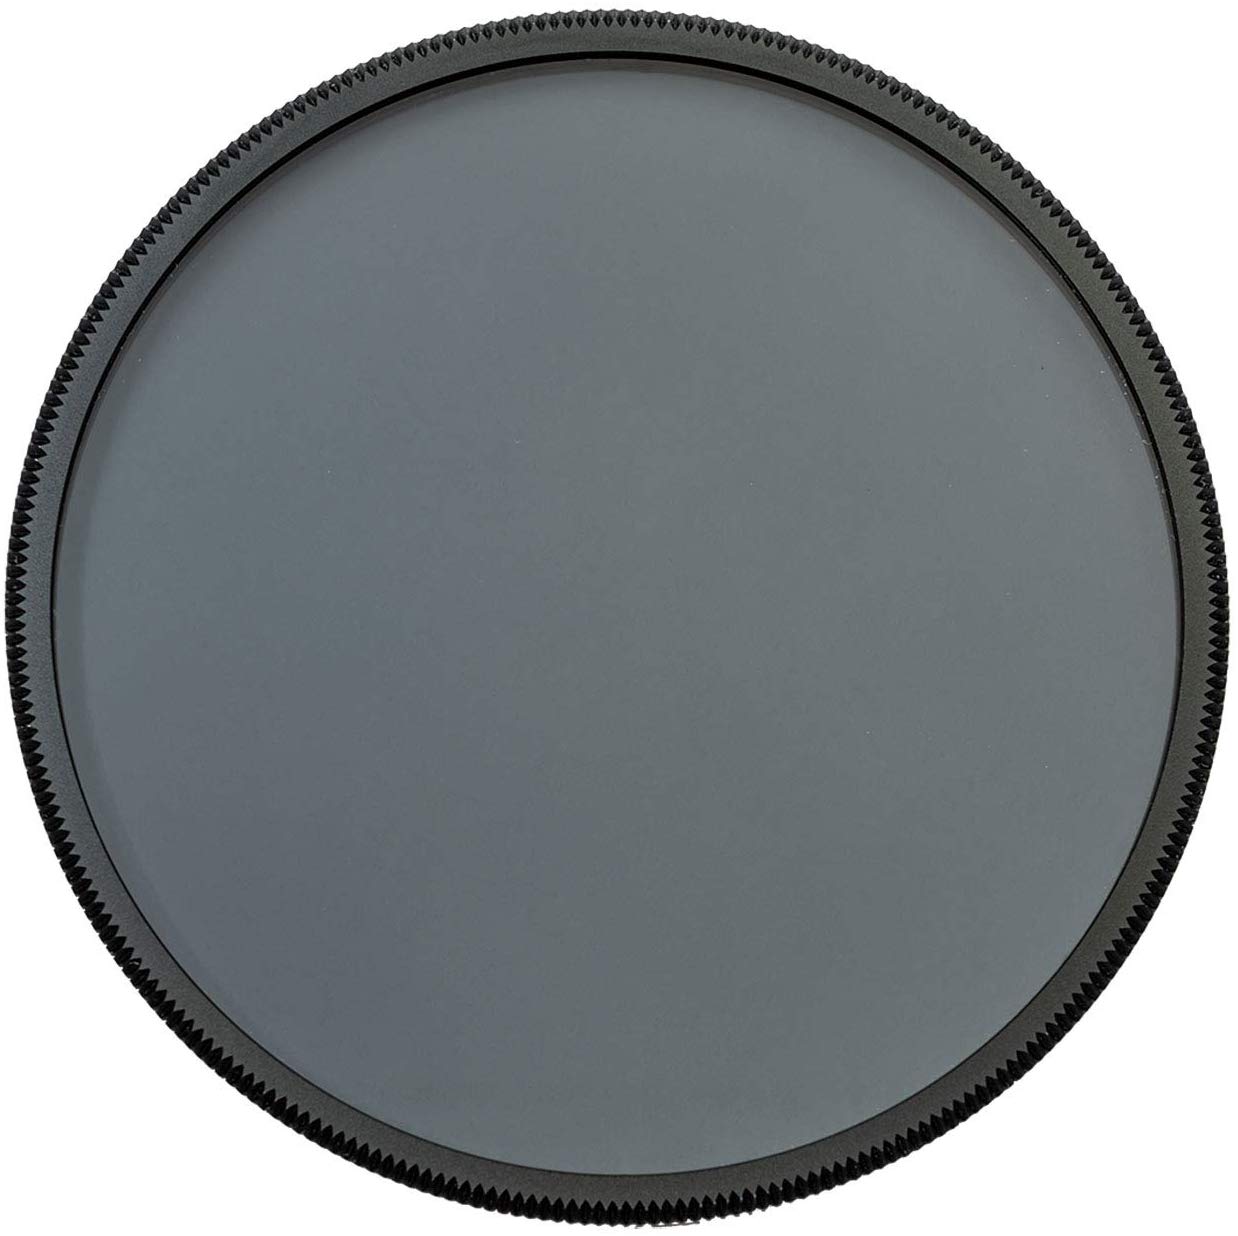
If using a circular polarizer, it rotates independently in the filter holder and features water and oil-repellent coatings on both sides that minimizes clean up.
The filter also has anti-static-anti-scratch, and anti-reflection properties that ensure you have the ideal shooting experience.

The other magnetic filters in Marumi’s lineup have the same features, including their graduated ND filters and solid ND Filters.
The graduated ND filters include hard-edge, soft-edge (as shown above), and reverse grads for photographing landscapes with a definite horizon, a variable horizon, and at sunrise and sunset, respectively.

Of course, there are also many different solid ND filters available from 2-stops all the way up to 15-stops.
Like the other Marumi filters mentioned above, these ND filters are made of durable Schott 5270 glass that offers high-definition results.
When photographing landscapes, the quality of light can change from one second to the next. That’s why this magnetic system is so compelling - by reducing the time spent swapping out filters, you can spend more time photographing the beauty before you!
Price: $149.99 for the M100 Filter Holder, $139.95 for the circular polarizer, and $199.95 for solid ND filters.
Cokin P-Series Soft-Edge Graduated ND Filter

Another popular filter for landscape photographers is a soft-edge grad, like this one by Cokin.
A soft-edge grad is ideally suited for use when there is not a definite horizon.
Unlike the hard-edge grad we discussed above, this one has a much more gradual transition from the filtered to non-filtered areas.
This allows for use in situations in which there are undulations in the horizon line, and when buildings, trees, and other objects that extend above the horizon.


What makes this Cokin soft-edge grad so great is its price - it's one of the best budget lens filters we've yet to find at less than $28.
But don't let that cheap price fool you - this is a well-built filter that performs well (as shown by the before and after photos above), which is why it has 4.5 out of 5 stars on Adorama!
It's specifically designed for use with Cokin's excellent P-series filter holder and features hyper-neutral results that you would expect from a high-quality filter.
This filter comes as a 3-stop, which is an ideal strength for many landscape photography situations in which the bright sky needs to be brought down a little.
Price: $27.61 at Adorama
Learn more about the Cokin P-Series Soft-Edge Graduated ND Filter
Haida NanoPro MC Reverse ND Grad

Last but not least, a great filter to have in your camera bag is a reverse ND grad, like this one by Haida.
A reverse ND grad is specifically designed for sunrise and sunset photos when the brightest part of the sky is along the horizon.
As you can see, the darkest part of the filter is in the middle, and it gradually gets lighter as you go toward the top (with no filtration on the bottom). This means you can manage the brightness of the sky along the horizon without impacting the darker areas of the sky above and the darker landscape below.

As you'd expect from Haida, this filter is well made without a huge price tag.
You get a high-quality, multi-layered filter that helps repel dirt and smudges. These filters are also extremely scratch-resistant, which is exactly what you want for your landscape photography outings.
These filters offer excellent sharpness, zero color casting, and they reduce reflections as well.
The high-grade optical glass is durable, too.
Price: Starting at $90.00 at Adorama
We Recommend
Neutral Density Filters for Beginners
 Image Credit: miroslav_1 via iStock
Not sure what a neutral density filter is? Can't figure out how to use one? Then this article is for you...
Though using neutral density filters might be a more advanced topic than you're used to, with a little guidance, there's no reason why a beginner photographer can't use ND filters and use them well.
In this guide, you'll learn what an ND filter is, the different types of ND filters and their purposes, and how to use one to create more dramatic photos as well.
Let's get started!
What is an ND Filter, and What is It Used For?
 Image Credit: SasinParaksa via iStock
Think of an ND filter as sunglasses for your camera's lens. A neutral density filter is designed to block a certain amount of light from entering the camera's lens, just like sunglasses are designed to block light from entering your eyes.
The purpose of doing so is to be able to use slower shutter speeds during the day to get beautiful motion effects like you see above.
If you tried to take the same shot using the same camera settings in broad daylight without an ND filter in place, you'd end up with a photo that is way too bright, or overexposed.
 Image Credit: Martinan via iStock
What's more, using ND filters also allows you to use very large apertures, which limits the depth of field.
Doing so keeps the subject in sharp focus, but the background is nicely blurred, as shown above.
Again, if you used a large aperture like f/1.4 in broad daylight you'd need a lightning-fast shutter speed to prevent overexposure - sometimes a shutter speed so fast that your camera can't accommodate.
However, with an ND filter in place, you can use that huge aperture and a much slower shutter speed as well to avoid that problem and get the nicely blurred background you want.
Learn More:
What are the Different Types of ND Filters?
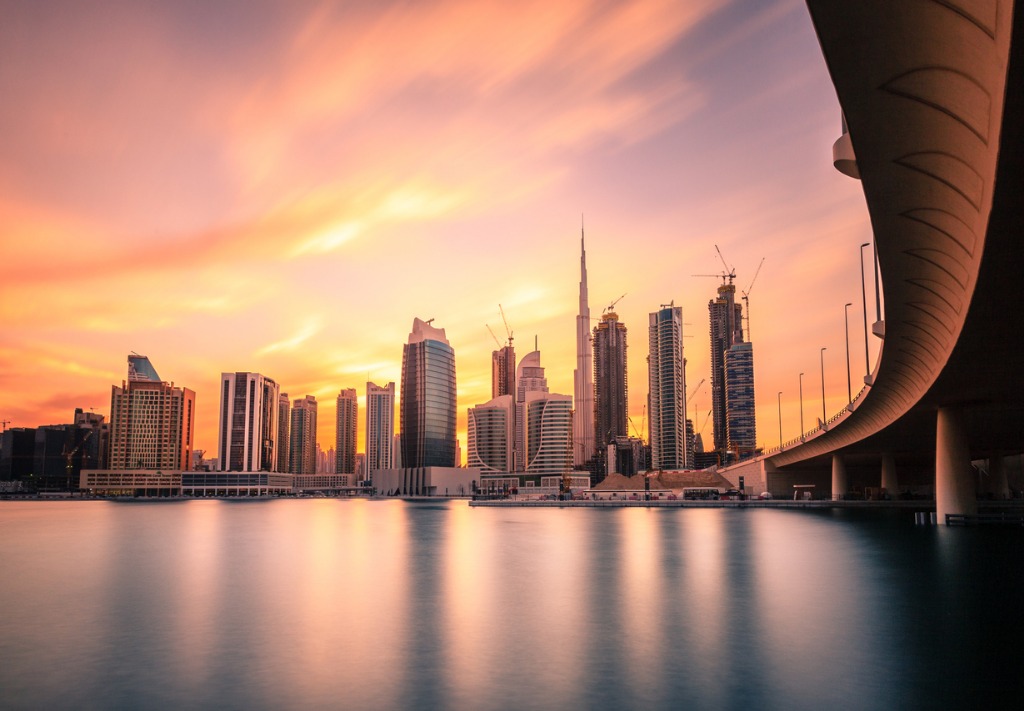 Image Credit: alexeys via iStock
ND filters are classified using their light-stopping power. That is, the darker the filter is, the more light it will absorb.
So, an ND filter with 0.1 light-blocking power is a much lighter filter than one with 0.9 light-blocking power.
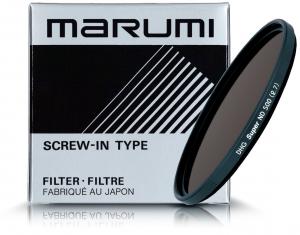
Common designations for ND filters run the gamut from 0.1-0.9. Some companies, like Marumi, offer even darker ND Filters, like 1.2 or 1.5.
It's important to note that these numbers refer to the optical density of the filter. But sometimes ND filters are referred to by the number of f-stops you can reduce when using the filter.
The more f-stops the filter reduces, the less light that enters the camera's lens. That means that a 2-stop ND filter blocks twice the light as a 1-stop ND filter. A 4-stop ND filter blocks twice the light as a 2-stop ND filter, and so on.
Confusingly, some ND filters are described as being ND4 or ND8 and so forth. What does that mean?
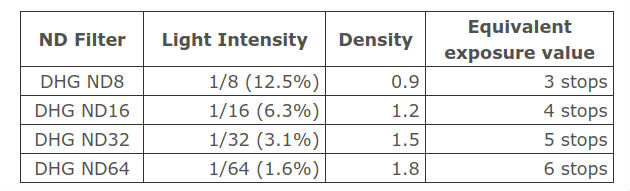
It's just another way to specify the darkness of the filter. In this case, ND2 means a 1-stop filter because it allows 50% light transmittance, which is measured as 21 (2x1 = 2) An ND4 filter, which allows 25% light transmittance, is measured as 22 (2x2 = 4). An ND8 filter, which allows 12.5% light transmittance, is measured as 23 (2x2x2 = 8). You get the idea...
The whole point here is that the darker the filter, the more light that's blocked and the longer your shutter speed can be. Therefore, regardless of whether a filter is labeled as 1.5, 5-stop, or ND32, you know that it's darker than an ND filter labeled as 0.6, 2-stop, or ND4.
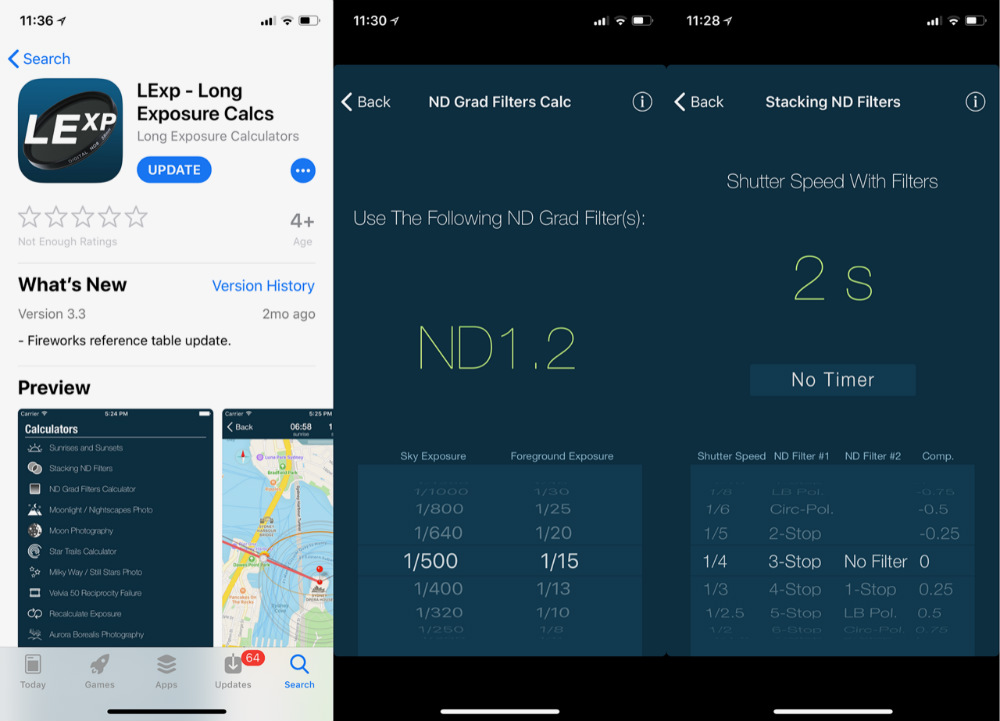
Rather than try to figure out all that math on your own, there's an app for that.
In fact, there are a number of long exposure apps you can use, but my particular favorite is LExp - Long Exposure Calcs.
This easy-to-use app will tell you how long or short your shutter speed should be based on the filter you're using. It even has specific calculators for things like shooting landscapes, the stars, and fireworks.
Learn More:
Which ND Filter is Right for You?
The ND filter you use really depends on the look you want in your final image.
If you want very slight indicated movement, a lighter ND filter like an ND4 is in order. Conversely, if you want very strong movement effects, go for something like an ND32 filter. For even more pronounced effects, you can go super dark with an ND500, like the one shown above.
Really, this all comes down to experimentation. If you find that you can't achieve the motion blur you want with a lighter filter, try a darker one and see what results you get.
As a rule of thumb, though, 0.6 (2-stop), 0.9 (3-stop) and 1.2 (4-stop) filters are a good place to start for long exposure landscape photography.
Whatever kind of ND filter you get, they're easy to use.
In the case of the Marumi filters referenced above, they simply screw onto the end of the lens. Once attached, use the LExp app to help you determine the right camera settings and fire away!
Final Thoughts
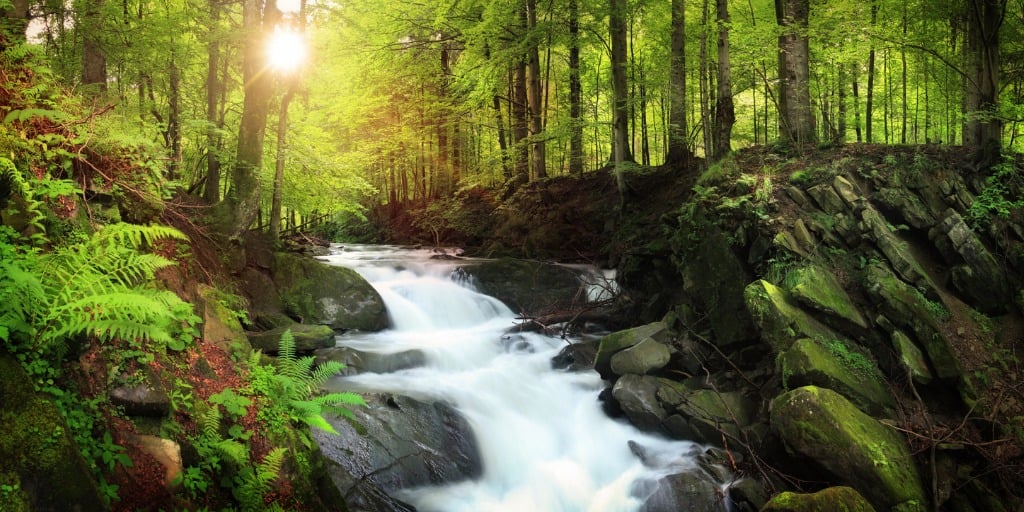 Image Credit: konradlew via iStock
Using ND filters can, at first, be a little confusing.
However, my hope is that with these quick tips, you'll find that you better understand what ND filters are, how they can benefit your photos, and their value as an important piece of your photography kit.
So, grab yourself a couple of ND filters, find some clouds, moving water, or passing cars, and see what beautiful creations you can make with an ND filter!
We Recommend
The One Thing That Will Immediately Improve Your Landscape Photo
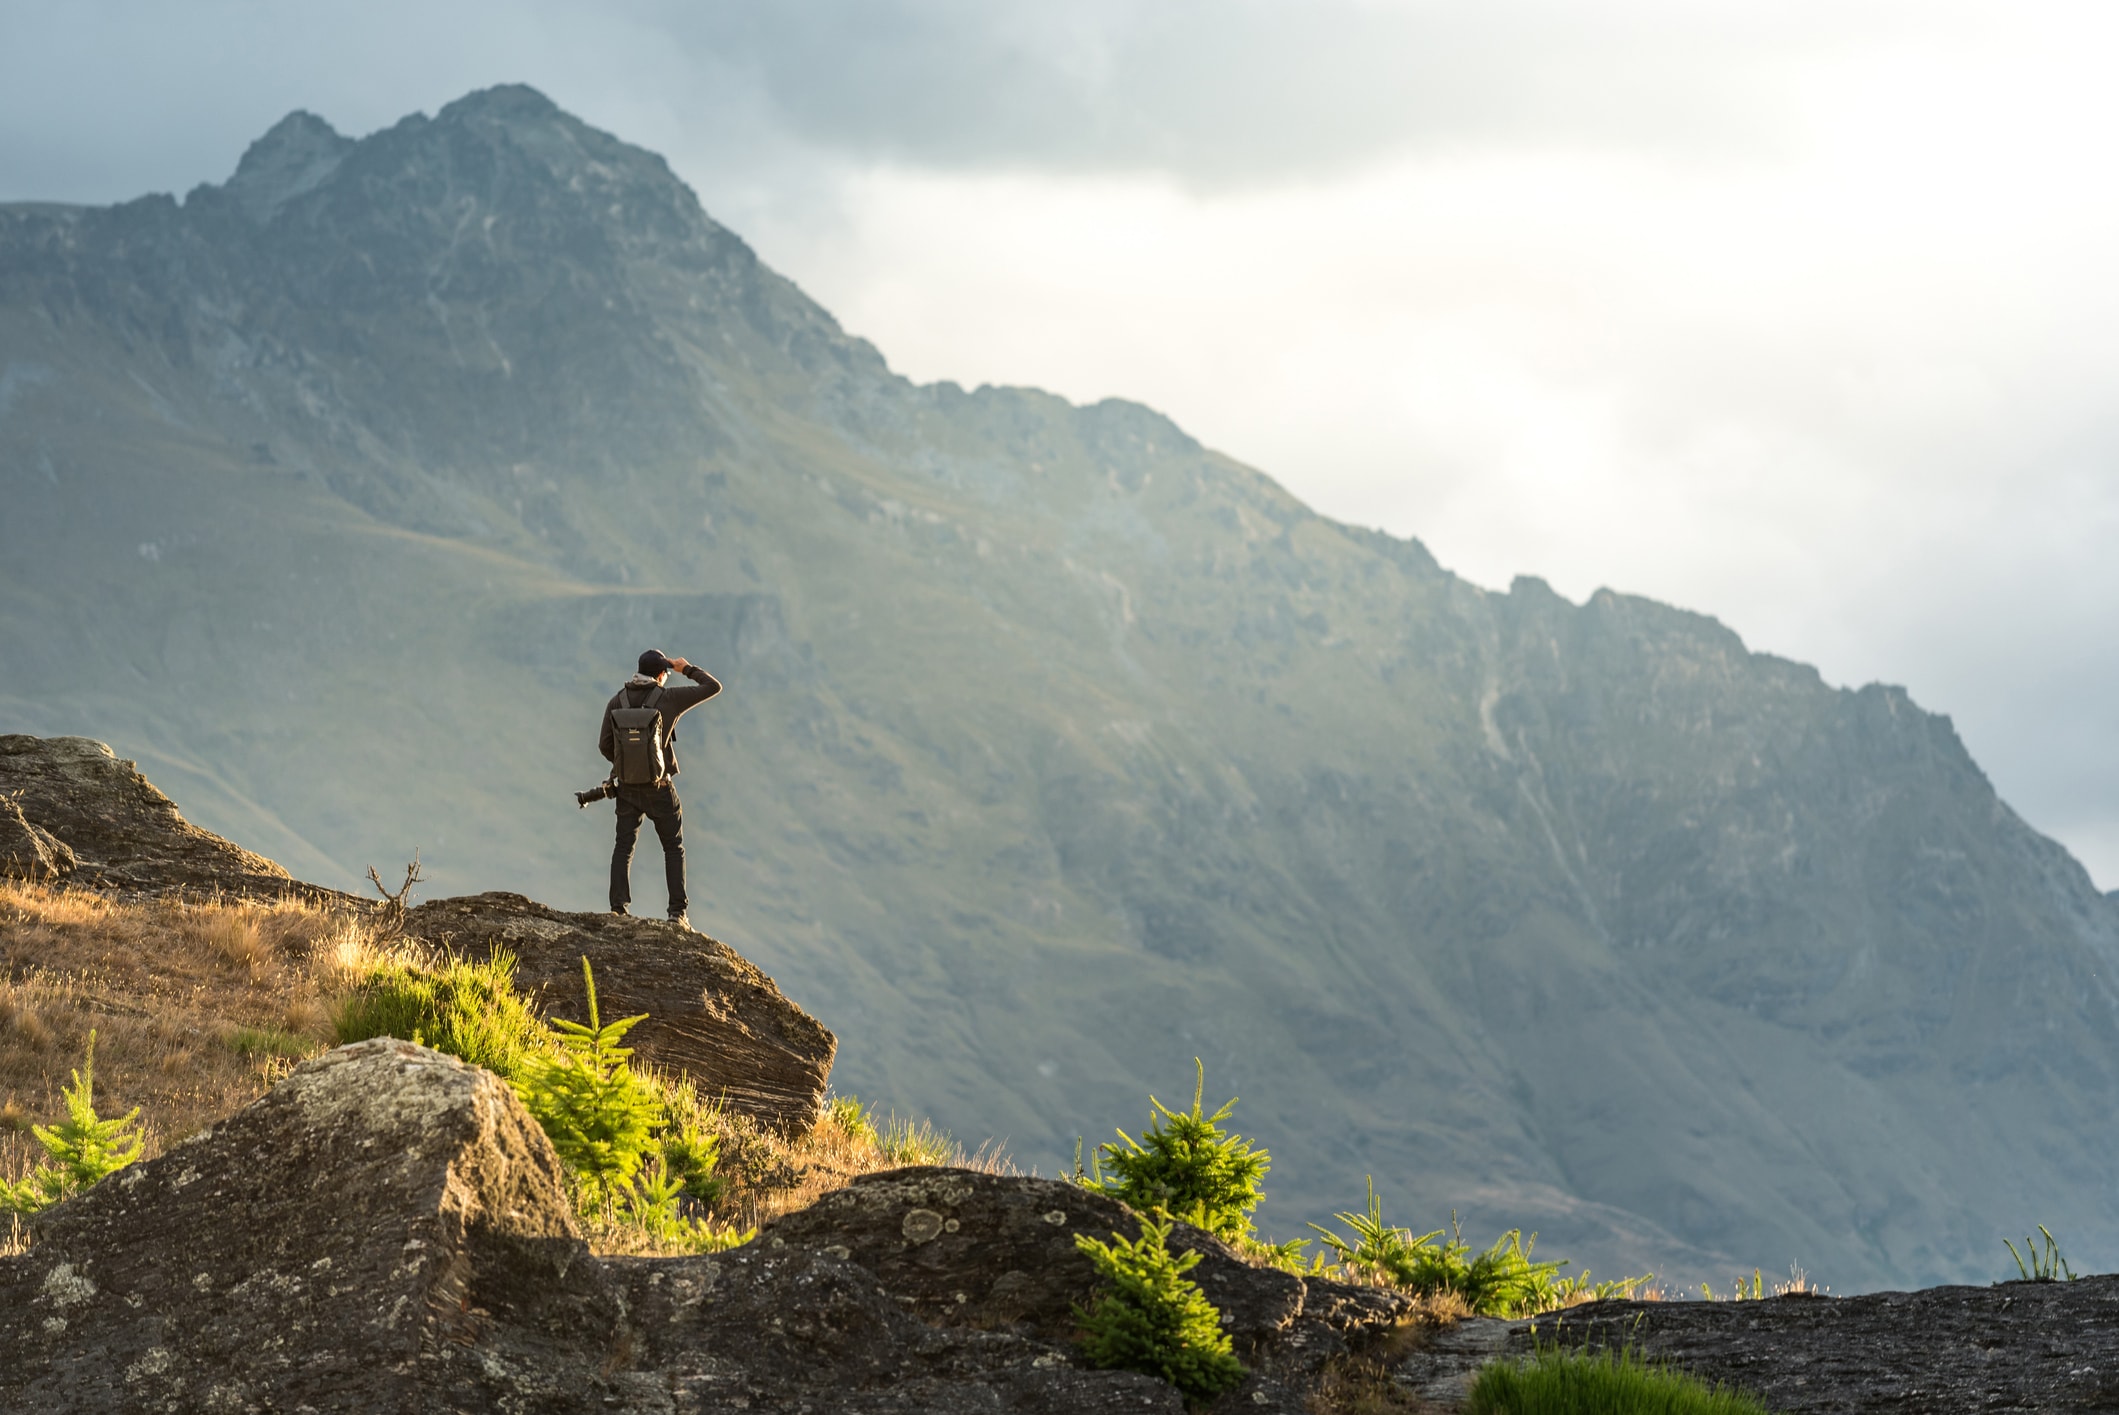
I've been photographing landscapes for years and years, and I'm constantly amazed by just how beautiful the world around me can be.
I also like the challenge - no two landscapes are ever alike, nor are the conditions in which you photograph them.
There's a simplicity to landscape photography that I enjoy as well.
This isn't to say that it's easy; rather, there's no model release forms, no flashguns or softboxes to worry about.
Instead, landscape photography is all about you, your camera, and the scene before you.
If you're ready to improve your landscape photos, I'd like to share one of the best landscape photography tips there is with you.
Use a Polarizing Filter
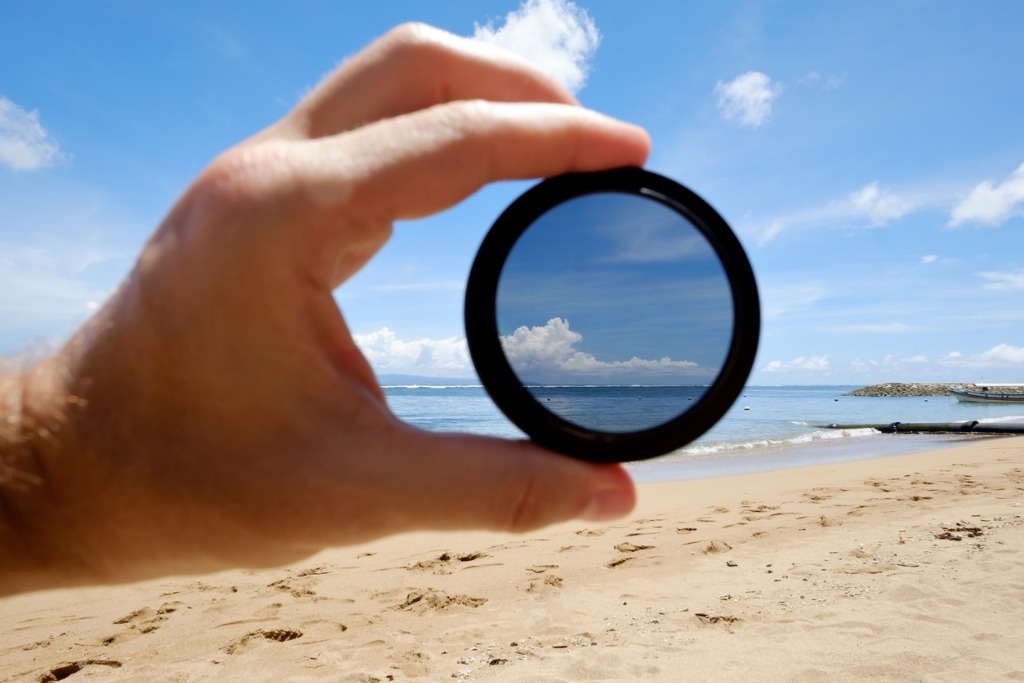
If you love to photograph landscapes, the most important piece of gear you can have is a high-quality polarizing filter.
I'll get to the specifics of what a polarizer does in just a moment, but for now, just know that they can have a positive impact on your photos in a number of ways.
And it couldn't be easier to use a polarizer, either.
A circular polarizer simply screws onto the end of your lens. There's not an installation procedure easier than that!
Once the filter is on your lens, simply turn the polarizer in its housing to get the desired effect.
If you find that your landscape photos suffer from glare, poor contrast, or washed out skies, a polarizer is the perfect antidote.
Learn More:
Benefits of Using a Polarizing Filter

There are three primary benefits of using a polarizing filter:
- Polarizers increase contrast in the sky, making the blue sky darker and the white clouds brighter, as shown above. This increased contrast gives landscape photos gorgeous, dramatic skies. Colors throughout the scene can be enhanced as well.
- Polarizers suppress glare off non-metallic surfaces like water, allowing you to create perfect reflections of the landscape rather than having sun glare blocking the view. This also lets you see beneath the surface of the water to view elements just under the surface, like sand or rocks.
- Polarizers reduce the effects of atmospheric haze, making distant landscape features look clearer and more defined.
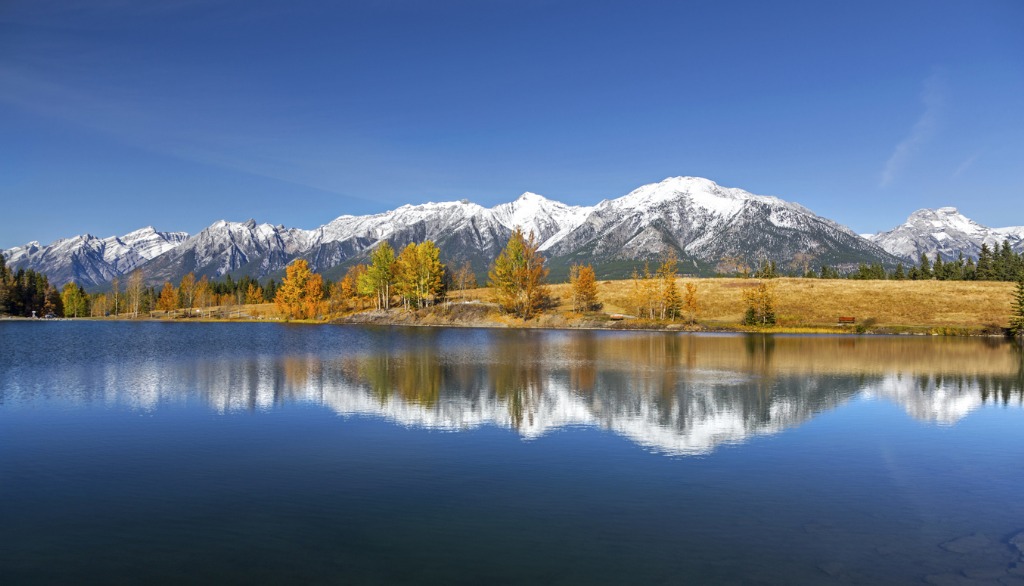
In addition to these benefits, consider this: the effects that you derive from a polarizing filter simply cannot be matched in post-processing.
That is, though you can certainly boost colors and contrast in your images in Photoshop, Lightroom, and the like, these programs can't duplicate the haze-reducing and glare-reducing effects of a polarizer.
What's more, why spend more time processing your image at home when you can get better effects by using a polarizing filter in the field?
Choosing a Polarizing Filter
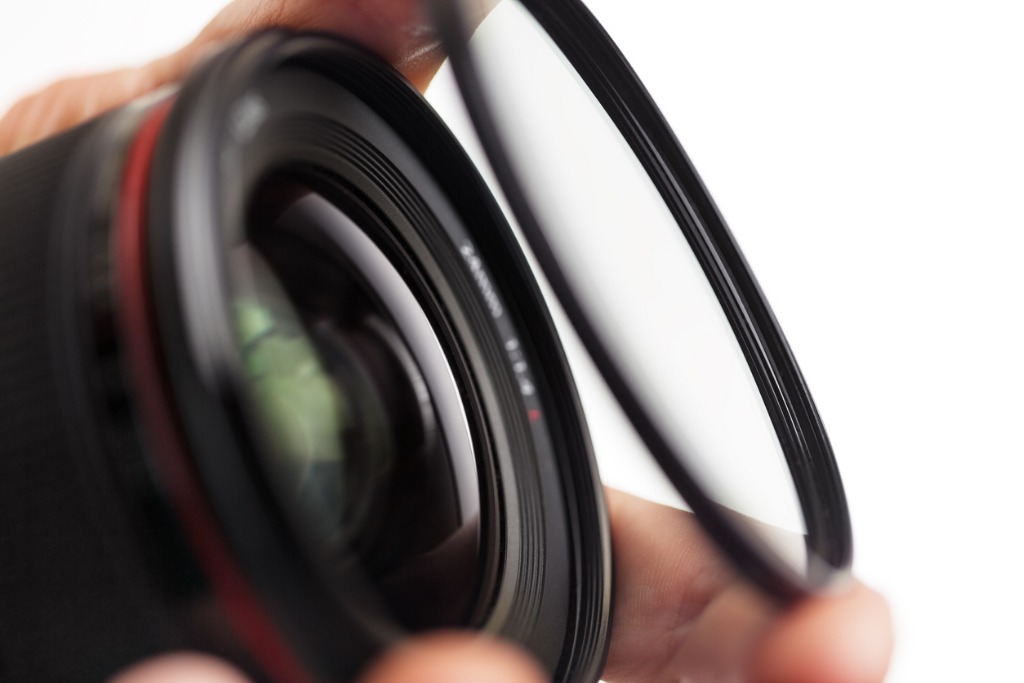
Now that you know a little more about the benefits of a polarizing filter and understand that they're dead-simple to use, the question on your mind is surely, "What is the best polarizing filter?"
That's a bit of a loaded question given that there are so many excellent polarizers out there.
I'd like to make the case for the Marumi DHG Super Circular Polarizing Filter as being among the best available.
Here's why...
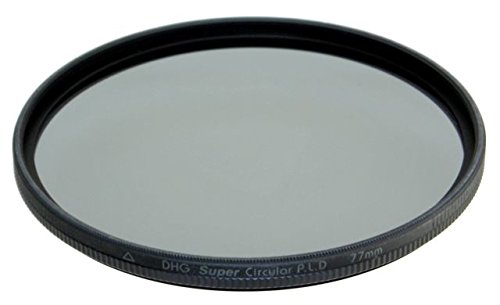
These filters are crafted in Japan with high-grade optical glass. The lens ring has a satin finish that reduces reflections as well.
In fact, the filter has six coatings, including an anti-static layer to prevent dust and dirt from sticking to the glass and an ultra-low reflective layer to minimize reflections even further.
What's more, these filters are just 5mm thick, which lessens the profile of the filter in front of your lens. That means less chance of vignetting when shooting with a large aperture.
The blackened outer rim of the filter reduces ghosting and flare, giving you further ability to take photos that are crisp, clean, and free of aberrations.
These filters are even available in a host of sizes, from 37mm up to 105mm.
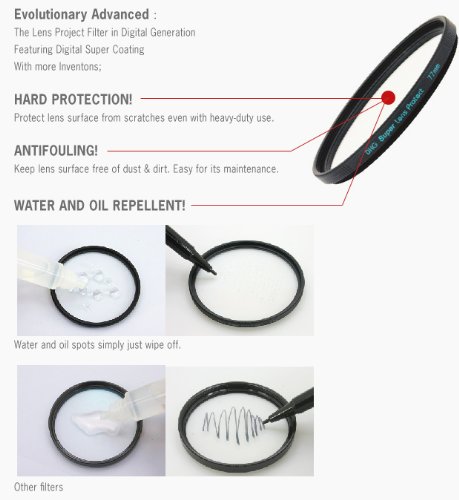
Additionally, Marumi has added both a water-repellent and an oil-repellent finish.
That means that when you're shooting in the rain or snow, you can worry less about raindrops on your filter and more on getting the shot.
Likewise, the oil-repellant finish helps ward off stains and fingerprints to keep your filter clean so that your camera can capture the beauty before you.
In other words, the Marumi DHG Super Circular Polarizing Filter is the ideal choice for photographers that want to immediately improve their photos.
Perhaps best of all, these filters balance quality and price - where other polarizers will set you back hundreds of dollars, the Marumi CPLs start at under $60 at time of writing (depending on size).
Learn More:
Final Thoughts
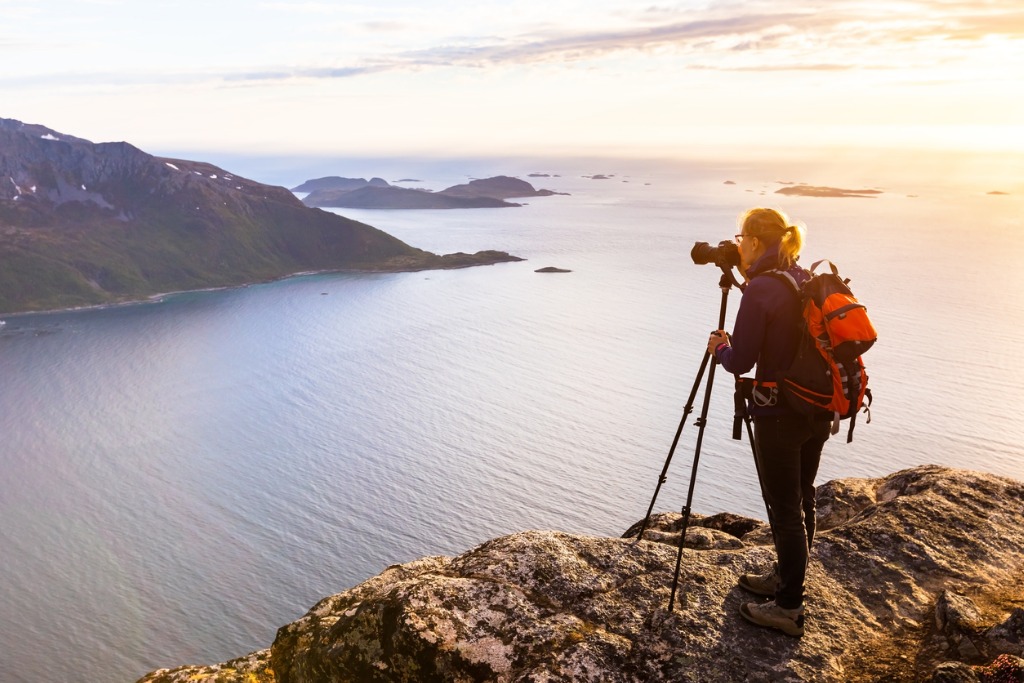
When it comes to how to improve your landscape photos, there are tons of landscape photography tips that will help you do just that.
But for me, one of the most effective ways to get more impressive shots is to use one of the best polarizing filters you can afford.
As noted earlier, it'll improve various facets of your images while also saving you time in post-processing.
What's not to like about that?
We Recommend
Top 10 Gifts for Photographers Under $100 - 2018 Edition
 Image Credit: Tom Merton via iStock
Even though we're still firmly in summer, it never hurts to start thinking about what the photographer in your life might like for the holidays this year.
And with a budget of $100, there's some pretty cool things you can get them, too. There's functional items as well!
You might not think that $100 can go very far when it comes to photography gear, but as our list of the best gifts for photographers shows, there's some great ideas that don't break the bank.
Lensfinder

Let’s face it - photography gear can be expensive. Really expensive.
That’s a problem year-round, but when you’re holiday shopping and have tons of gifts to buy, it’s even more difficult to justify getting your loved one the $1,000 lens that they really want.
Fortunately, Lensfinder can help in more ways than one.
On the one hand, you can find great deals on pre-owned camera lenses at Lensfinder.
That means that you can get a truly top-notch lens for the photographer in your life but do so without busting your budget. It’s a win-win!
On the other hand, if you have some old lenses that you don’t use anymore, you can list them for sale on Lensfinder. When the lens sells, you can use it for holiday spending money for the photographer in your life.

Image Credit: xxmmxx via iStock
The best part? You can list your lenses for sale for free.
There’s only a transaction fee (just 3.99%) when the lens sells (with a maximum fee of $500). If your lens doesn’t sell, there’s no charge at all!
And for peace of mind, the Lensfinder platform has advanced fraud filtering for both buyers and sellers as well as mediation services in the event that there’s a problem.
Payments are made and received via PayPal, so you can rest easy knowing that the transaction is safe and secure.
In other words, Lensfinder is the ideal solution for your holiday shopping needs. Either use it to find a loved one a killer lens or use it to sell old gear to pad your pockets for holiday spending!
SANDMARC Telephoto Lens for iPhone XS Max
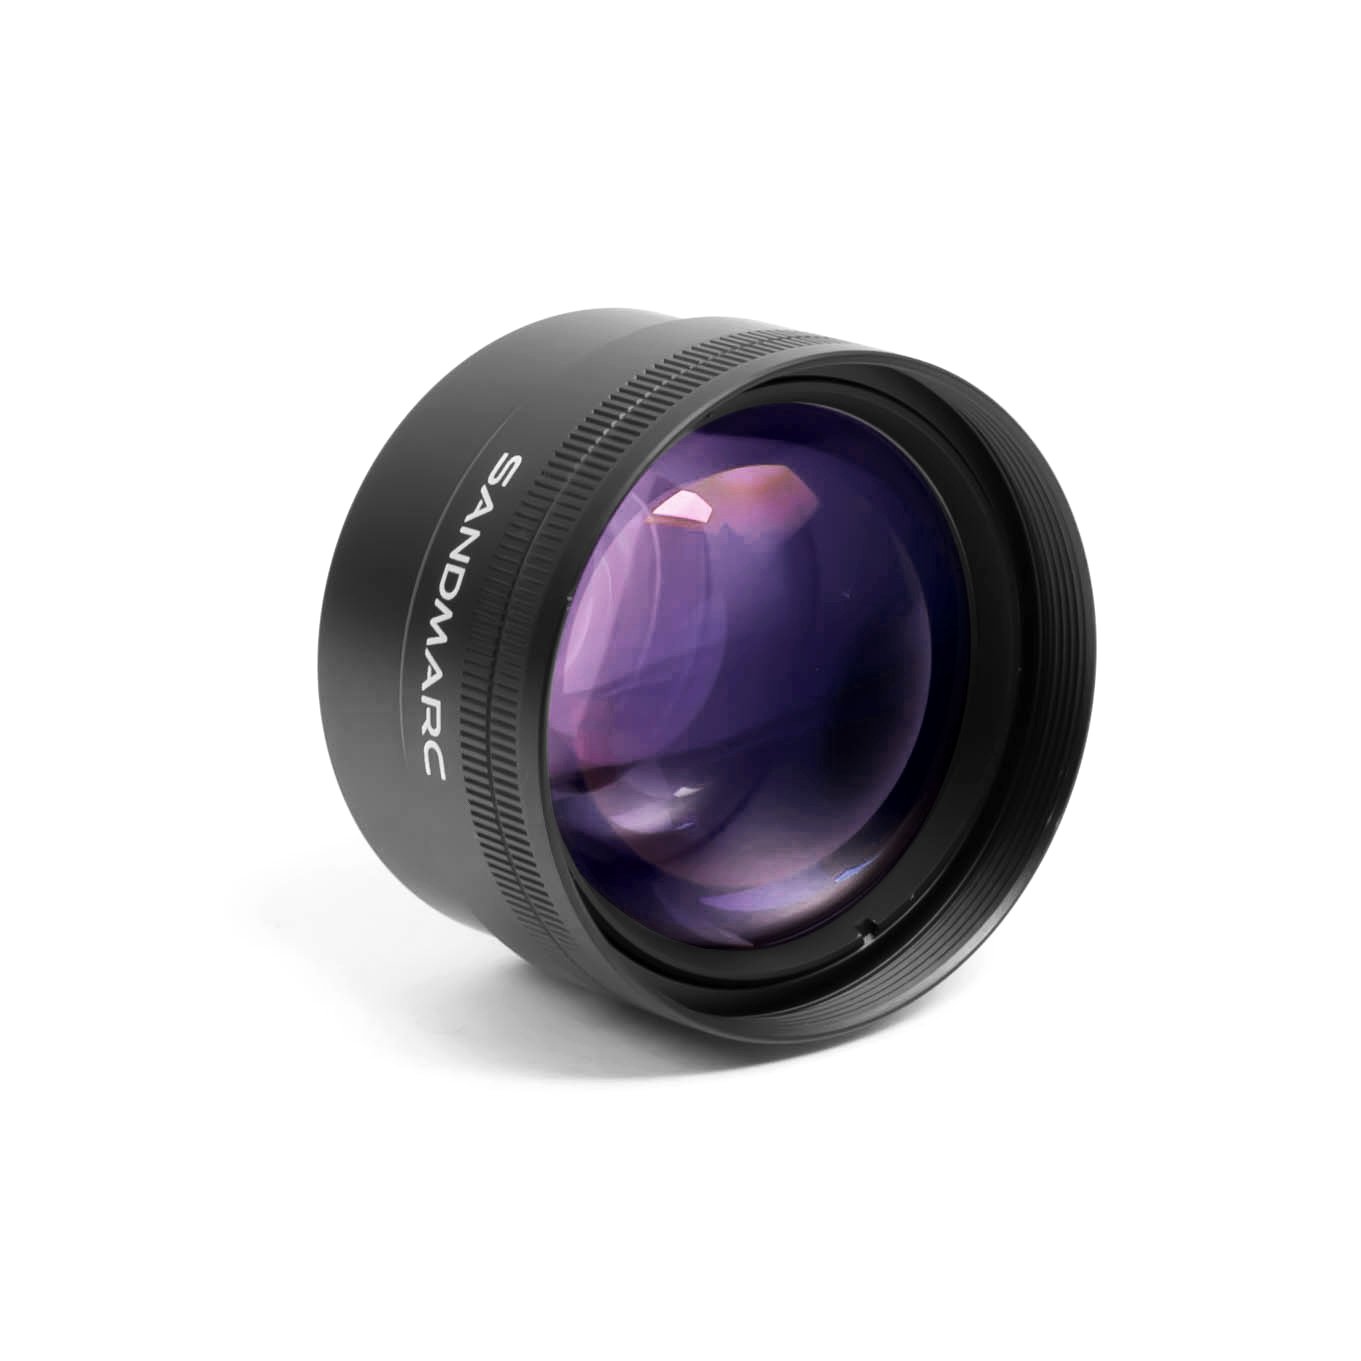
With Apple's new iPhone XS Max just hitting the market, an ideal gift for the photographer on your list is a high-quality aftermarket lens to extend the iPhone XS Max's capabilities even further.
And for that, SANDMARC offers a 60mm telephoto lens with 2x magnification.
This lens has multi-coated glass that minimizes aberrations. It attaches to the iPhone in two ways - either as a clip-on lens or with the included case, which is the world's thinnest lens case mount.
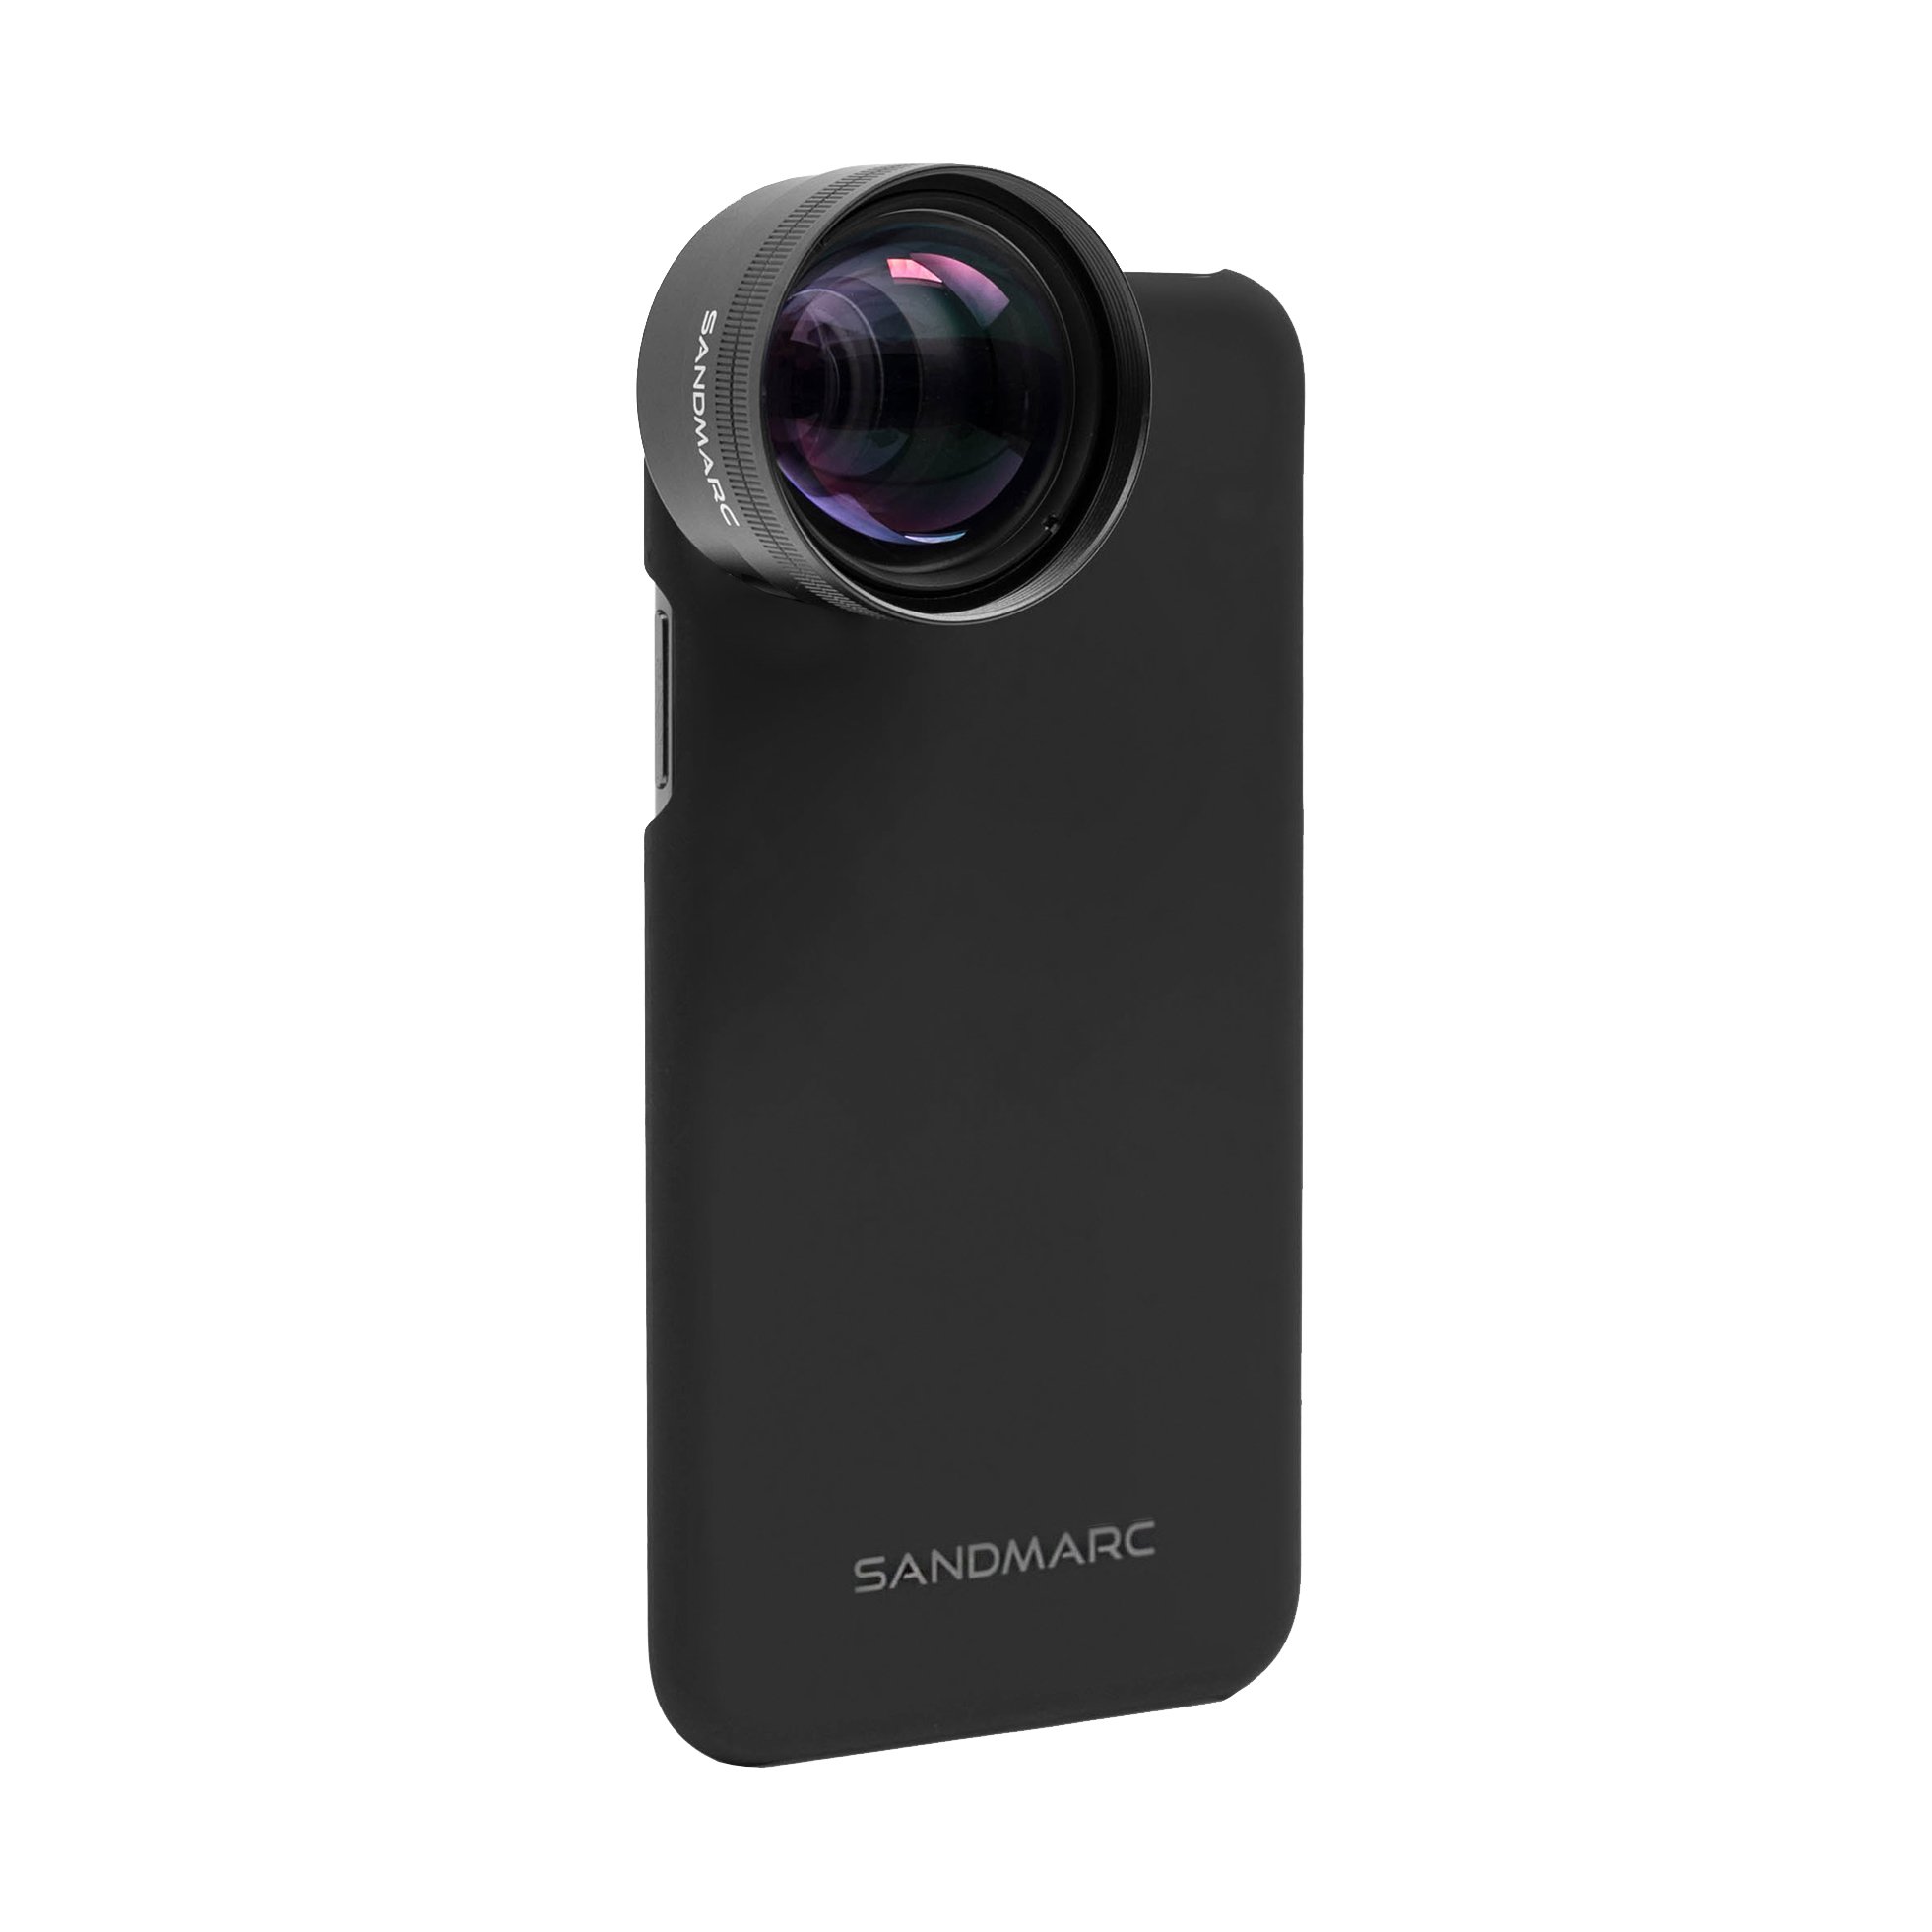
The construction of these lenses is impeccable - I know firsthand because I have a set of SANDMARC lenses for my iPhone X!
In fact, I've used a ton of lenses for my phones over the years, and I have to say that none have come close to the quality and performance of SANDMARC.
This packages includes the telephoto lens, lens cap, a clip-on mount, a lens case mount, and a carrying pouch.
Best of all, you get high-performance optics for less than $100. Just imagine the possibilities of pairing the best iPhone yet with the best lenses for iPhones that money can buy!
Learn more about the SANDMARC Telephoto Lens for iPhone XS Max
Marumi EXUS 55mm Circular Polarizer Filter
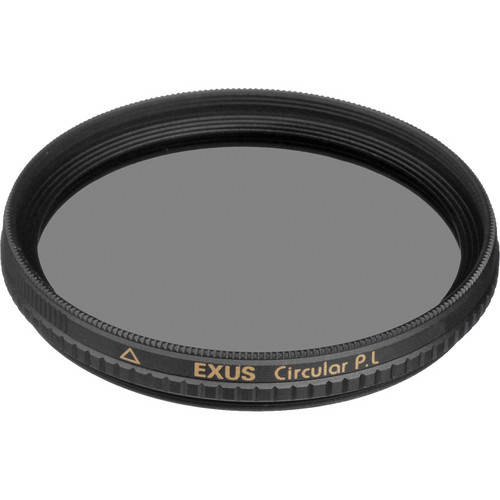
One of the best gift ideas for photographers is a good circular polarizing filter.
A polarizing filter can help a photographer create better photos in a variety of ways...
They reduce glare off non-metallic surfaces like water and also boost the contrast in the sky by making white clouds pop off the blue atmosphere.
Additionally, polarizing filters reduce haze so distant features in the landscape look crisper.
But not all filters are made alike, so be sure to give your favorite photographer the quality and durability of a Marumi polarizing filter.
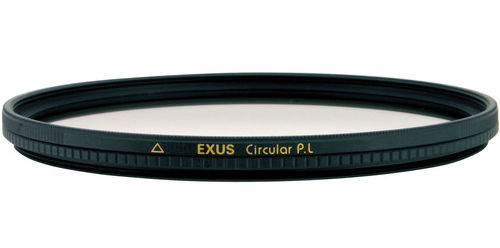
Marumi has integrated anti-static and stain-resistant coatings to protect the filter and make it more user-friendly.
What's more, it's made from optical-grade glass to ensure photos are as clear and sharp as possible.
Add to that the fact that this filter has a thin profile with low reflectivity, and you have the makings of the perfect gift for photographers under $100!
Learn more about the Marumi EXUS 55mm Circular Polarizer Filter
BlackRapid Curve Breathe Camera Strap
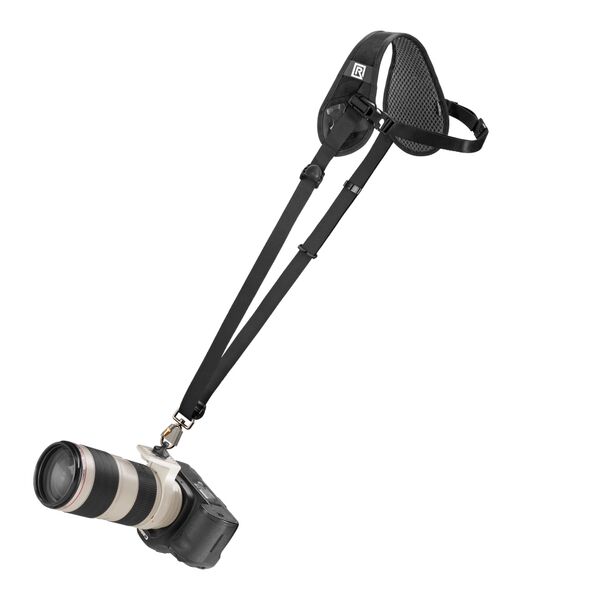
The great thing about the BlackRapid Curve Breathe Camera Strap - well, one of the great things about it - is that it's one of the most comfortable camera straps money can buy.
That's thanks to the fact that it gets the weight of the camera off your neck into a more comfortable carrying position so you can go out and shoot all day long.
That's why this is a fantastic gift idea for photographers this year!
The shoulder pad has moisture-wicking qualities and has a Brad Breathe Stabilizing Strap to ensure that no matter if your favorite photographer is walking through city streets or hiking long trails that the camera stays put under their left shoulder.
Designed to be worn across a right-handed shooter's body, the strap drapes toward the right hip where a connected camera rests upside down. This is the ideal place to carry a camera because it's at one's fingertips yet out of the way when not in use.
In other words, photographers love these straps because they're the height of comfort, they provide excellent functionality, and because with its brass and zinc-alloy hardware, it's durable, too.
Learn more about the BlackRapid Curve Breathe Camera Strap
PolarPro DJI Mavic Air Cinema Series Filter 3-Pack
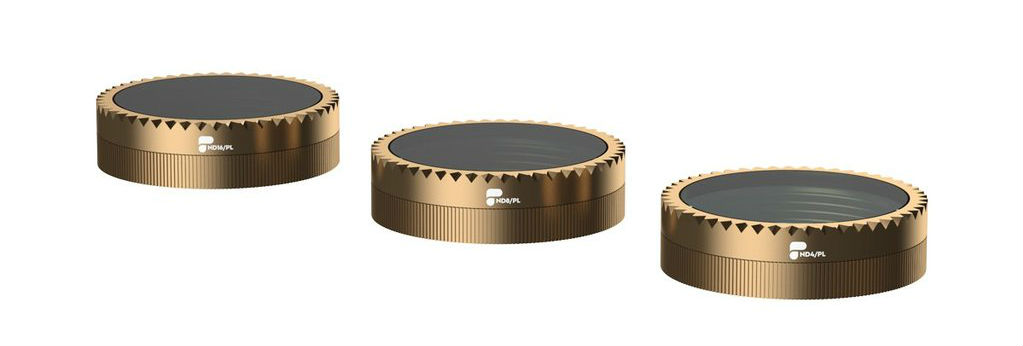
As popular as drones are these days, it makes sense to include top-notch drone camera filters on our list of must-have gifts for photographers for the upcoming holiday season.
And as far as the best drone filters go, it’s hard to beat PolarPro’s DJI Mavic Air Cinema Series Filters.
Available in two variations - the Vivid Collection and the Shutter Collection - you can help your favorite drone pilot step up their aerial photography game with production-grade, multi-coated glass filters that have an airframe aluminum construction that won’t add undue weight to their drone.
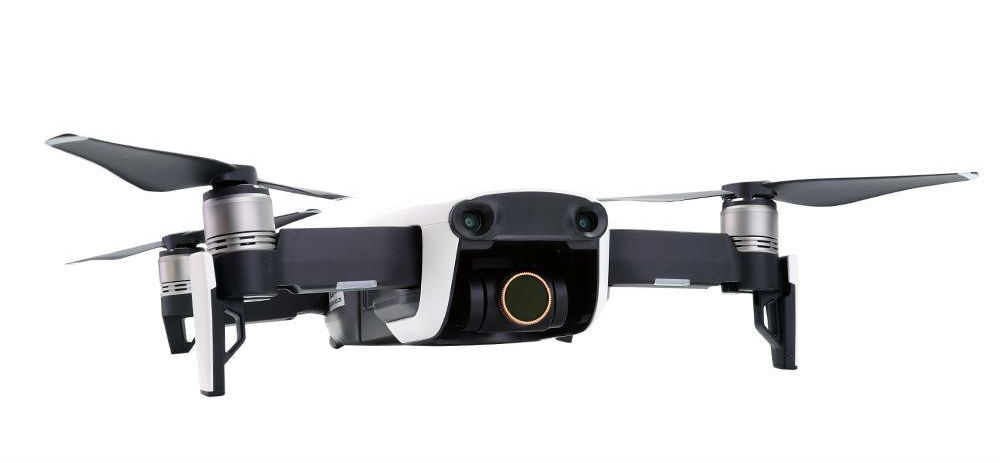
In the Vivid Collection, you’ll find three neutral density/polarizer filter combinations that allow you to slow the shutter for gorgeous, cinematic videos while also reducing glare off of non-metallic surfaces and boosting the contrast of the sky.
In the Shutter Collection, you get three straight neutral density filters that allow you to extend the shutter speed for smooth video captures without changing the color profile of the footage you take.
In both cases, these collections come with other goodies, namely a hard case to safely store the filters and a lifetime warranty. They simply thread on in place of the stock lens bezel for easy installation, too. That makes these filter packs ideal holiday gifts for the drone enthusiasts in your life!
Learn more about PolarPro’s DJI Mavic Vivid Collection and Shutter Collection Filters
Marumi 77mm DHG ND-100000 Solid Neutral Density 5.0 Solar Eclipse Filter
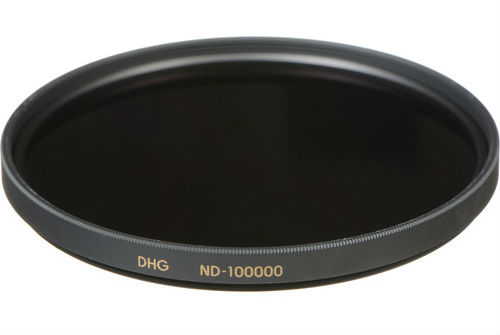
We had an incredible solar eclipse here in the U.S. last year, and another one is on the way in 2024.
But there's solar eclipses all around the world quite often, so get the photographer on your list prepped and ready with a high-quality solar eclipse filter from Marumi.
This solid ND filter has a 92,000x filter factor that gives it a whopping 16.5-stops of exposure reduction.
The 5.0 density darkens the whole image, that way the sun can be photographed safely without damaging any of the delicate internal components of a camera.
But this isn't just for solar eclipses...
Because it's so dark, photographers can use it with a big aperture or slow shutter speed to have more control over depth of field and how movement appears in images.
In other words, this is the perfect gift idea for photographers that want to get more creative in the coming year!
Learn more about the Marumi 77mm DHG ND-100000 Solid Neutral Density 5.0 Solar Eclipse Filter
Excire Search AI Plugin for Lightroom
The great thing about Lightroom - well, one of the many great things about it - is that you can use it for processing your images as well as organizing them into catalogs based on keywords so you can easily find the images you want later on.
The problem, though, is that most photographers (myself included) simply upload their images to Lightroom without taking advantage of its organizational capabilities because manually tagging every image takes tons of time. And even if you catalog every single shot you upload to Lightroom, at some point, you’ll have thousands and thousands of images which makes it hard to keep track of them all.

That’s why Excire Search is such a fantastic gift idea for photographers…
That’s because Excire Search takes all the time and effort out of tagging your photos in Lightroom by utilizing artificial intelligence to identify content in every single image in the Lightroom catalog. There’s 125 different keywords in Excire Search, so it makes tagging photos with common features a breeze.
That process not only results in the identification of objects in photos like “mountain,” “boat,” and “dog,” but it also identifies properties of each photo, like the predominant color.
Then, all you have to do is use Excire Search to find the images you need from the catalog whether you’re looking for something that’s blue or green, something with a beach or a desert, and so on.
Even better, the folks at Excire have a deep love of photography and a strong commitment to helping photographers further their education and give back to their communities. That’s why with every purchase of Excire Search, they set aside a small portion that goes into a special fund for supporting non-profits throughout the U.S.
In other words, for just $69.00, you can give the photographer on your list the ultimate gift of helping them organize all their photos while also helping give back to the community as well!
Learn more about Excire Search AI Plugin for Lightroom
Sew Trendy Bean Bag and Wrap Set
If the photographer you’re shopping for photographs newborns, then this beautiful Bean Bag and Wrap Set is an ideal holiday gift idea.
Not only will an accessory like this help the photographer on your list elevate the quality of his or her work, but the soft, high-quality Jersey fabric is delicate on baby’s skin, too.
An absolute studio essential, a bean bag allows photographers to support a baby’s delicate head, neck, and spine while photos are being taken. What’s more, they provide a perfect backdrop for their photos.
And adding a wrap not only helps baby stay warm and comfortable, but it also helps photographers create the heartwarming, cuddly look you see in the photo above.
Better still, since the newborn set can be matched to a variety of Sew Trendy gowns, photographers can create a cohesive look in their photos of mom and baby.
Learn more about the Sew Trendy Newborn Bean Bag and Wrap Set
Pacific Inkjet 11x14” Professional Luster Inkjet Photo Paper
When photographers print their images at home, they need the best equipment and supplies to get the best prints.
And for my money, it’s tough to beat the quality that Pacific Inkjet brings with their 11x14” Professional Luster Inkjet Photo Paper.
I know that inkjet printing might conjure up thoughts of paper that’s a curled mess, but Pacific Inkjet’s paper is a totally different story.
At 268gsm, it’s thicker than paper offered by many professional printing labs, which means you can help the photographer on your list print gorgeous photos right from home.
The semi-gloss texture adds depth to photos while the luster finish brings out all the beautiful details and colors in the image.
Images printed on this paper have fingerprint and scratch resistance, too, meaning photos last far longer.
In other words, for under $100, you can give your favorite photographer the gift of at-home, professional printing with this 100-sheet pack!
Learn more about Pacific Inkjet 11x14” Professional Luster Inkjet Photo Paper
Peak Design SL-AS-3 Slide Camera Strap
One of the most important photography accessories money can buy is a good camera strap, and the Peak Design SL-AS-3 certainly fits the bill.
For under $70, you can give the photographer on your list a strap that's not just stylish, but also functional and comfortable, too.
The strap has strong, removable anchor connectors that attach to the eyelets of a camera, so it can easily support both DSLR and mirrorless systems.
Paired with the strap's adjustable length from 39 inches to 57 inches, it can work as a neck strap, shoulder strap, or sling strap to fit any photographer's preferred workflow.
At 1.8-inches in width, this strap is nice and wide to help distribute the weight of the load across more surface area. The internal padding helps in that department, too.
The two sides of the straps have different properties as well - one side is smooth for sliding your camera to your eye when using the strap as a sling, and the other has a grippy silicone finish that prevents slippage when using it as a neck or shoulder strap.
Having a multi-functional camera strap is one of the best things a photographer can have in his or her arsenal, and as far as multi-functional straps go, it's hard to beat this one!
Learn more about the Peak Design SL-AS-3 Slide Camera Strap
FRDM Midweight Photography Gloves
The worst part of winter (if you ask me, anyway) is trying to stay warm when you’re out taking photos of winter’s beauty.
And the toughest part of your body to keep warm is your hands, because with traditional gloves, you have to take them off to operate your camera.
Not anymore…

The FRDM Midweight Photography Gloves have a three-layer shell that’s breathable, water-resistant, and windproof. If that doesn’t keep your hands nice and warm, I don’t know what will…
But because these gloves were made with photographers in mind, the index fingers and thumbs on both gloves have magnetized caps that pull back, that way you can more effectively press the buttons on your camera and use touch-enabled screens. Not bad, right?
What’s more, there’s touchscreen conductive material on the index fingers and thumbs, so if you don’t want to unfurl the finger caps, you don’t have to!
These gloves also have a silicone screen-printed graphic on the palms that make them extra grippy so you can maintain a solid grip on your camera.
Learn more about the FRDM Midweight Photography Gloves
Bonus Gift Idea - Vanguard ALTA Rise 43 Sling Bag
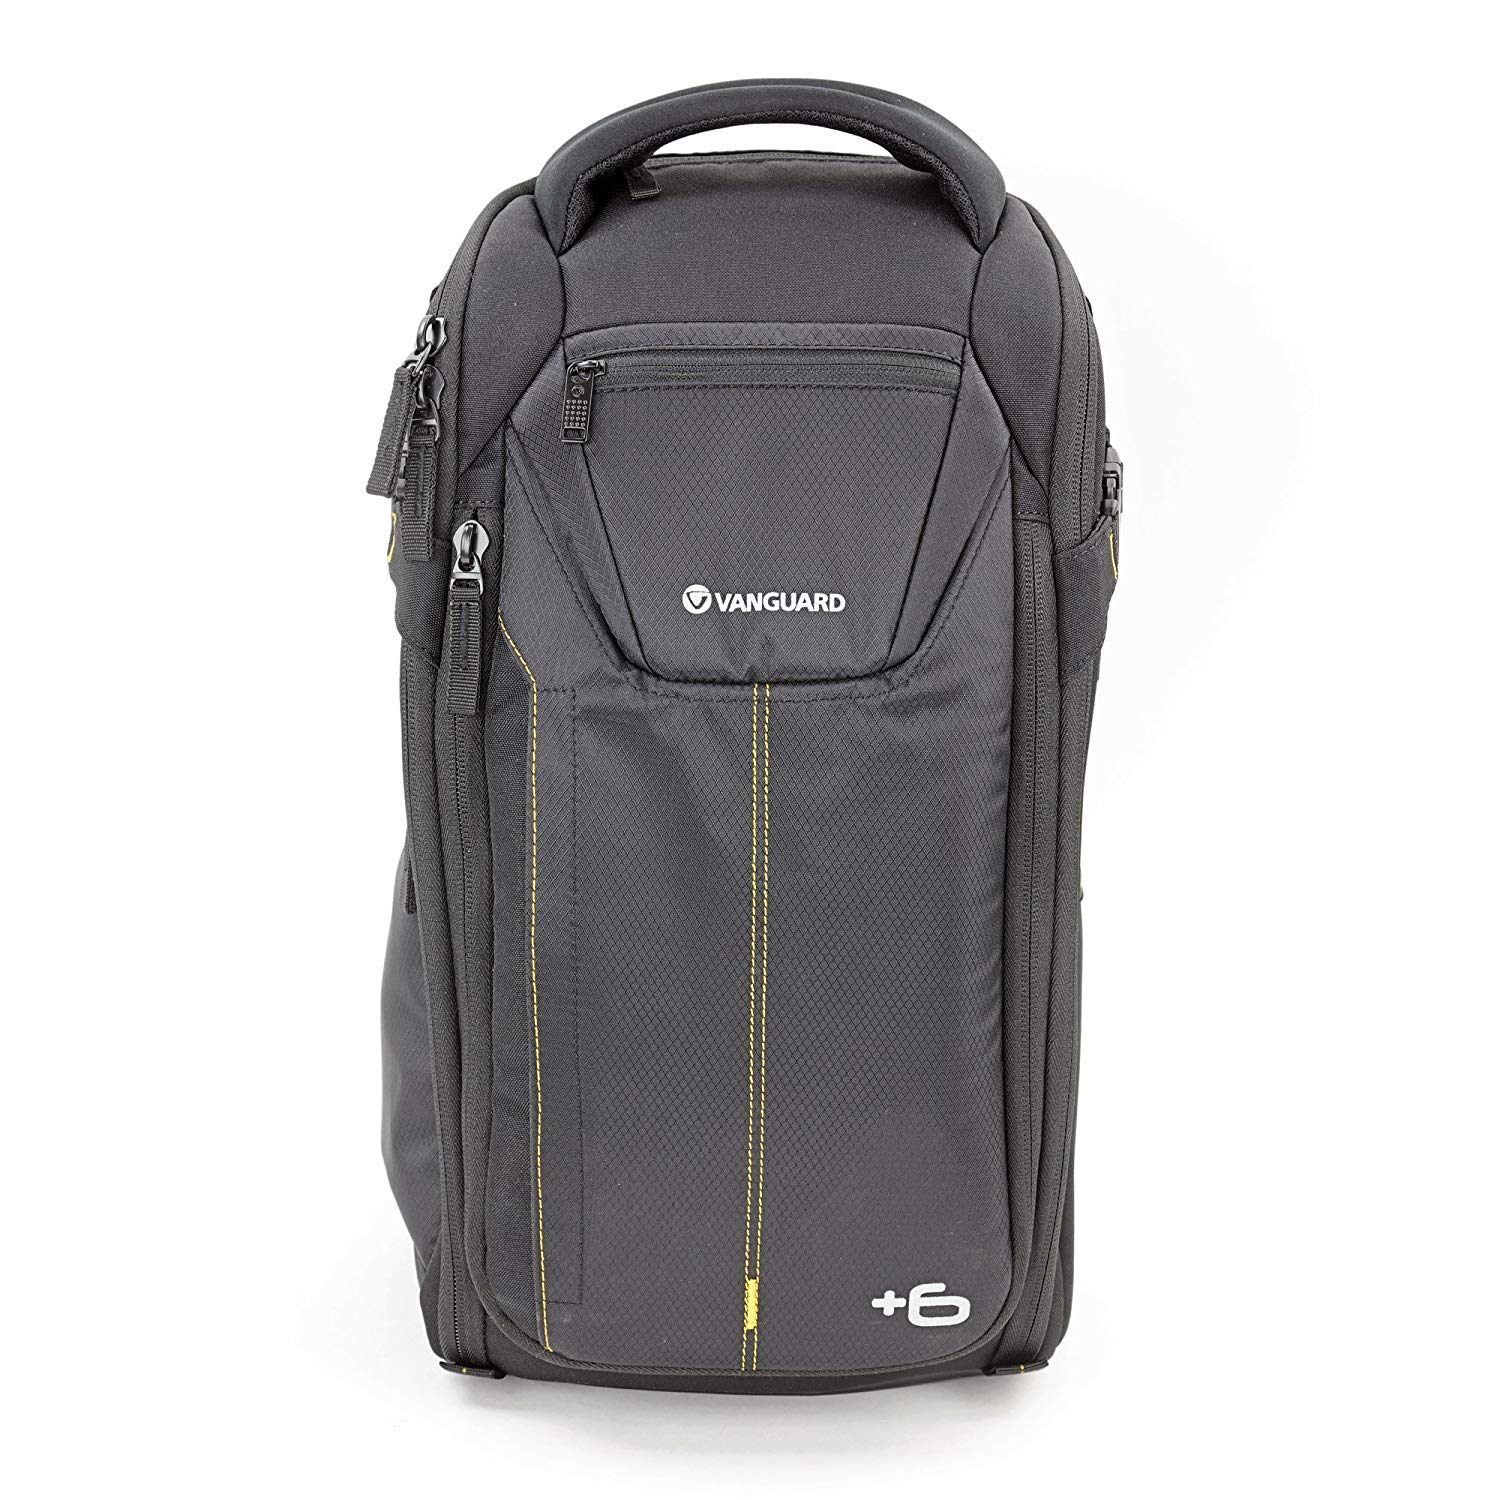
For the photographer on your holiday shopping list that wants a versatile bag that can carry a ton of gear, the ALTA Rise 43 Sling Bag should be on your radar.
Built to hold a professional DSLR body, 4-5 lenses, a flash and other photography accessories as well as a tablet or small laptop, this bag has plenty of space for all of your favorite photographer’s necessities.
Carrying the bag is a breeze with its Air System back, padded sling strap, and securing strap to keep the load evenly distributed on the body. The bag is protected with padding all the way around, too, so gear will be safe from bumps and bruises along the way.
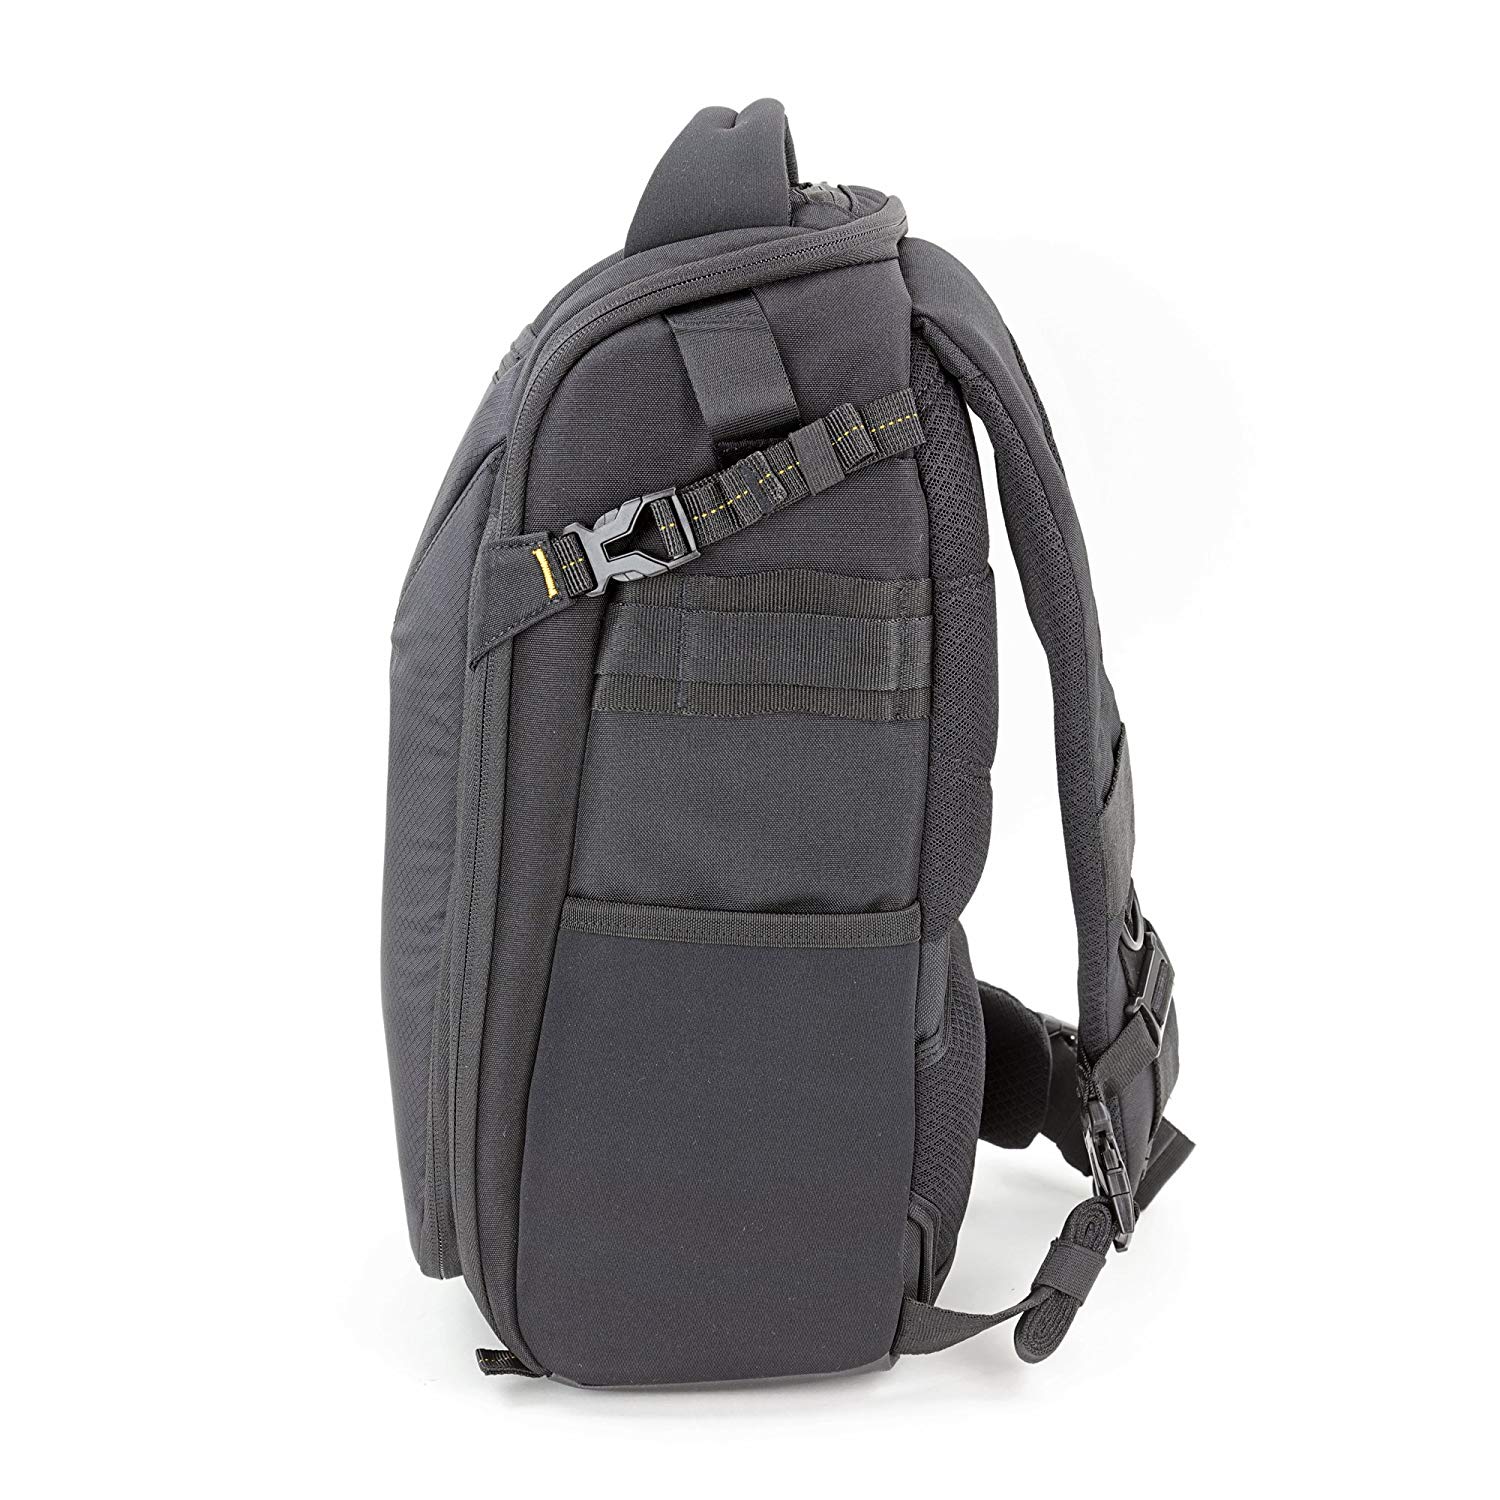
When it’s time to take a photo, this bag has quick access with side zippers that make reaching gear incredibly easy. The brightly colored interior further makes for ease of use, as your favorite photographer won’t have to dig around in a dark bag to find what they need. And since it’s a sling bag, it’s quick and easy to take on and off, too.
In short, this bag is feature-rich, comfortable to carry, and priced right at under $100!
Learn more about the Vanguard ALTA Rise 43 Sling Bag
We Recommend
Top 10 Gifts for Photographers Under $150 - 2019 Edition

photo by GMVozd via iStock
With the holidays getting closer - and Black Friday closer still - it’s necessary to start thinking about what gifts you’ll bestow on the photographers in your life.
With a budget of $150, there are a lot of options that will make a photographer’s eyes light up this holiday season.
Below, we’ve outlined ten of the best gifts for photographers under $150. From canvas prints to lens filters to video microphones, there’s something for everyone!
Gifts for Photographers Under $150: CanvasHQ Print

If you’re like me, sometimes finding the perfect gift for certain loved ones is a long, drawn-out process that causes tons of stress, and often you still don’t get something that totally blows them away.
I think a lot of photographers fall into this category. We have specific likes, and many of us already have most of what we want or need gear-wise, and what we don’t have is usually too expensive to put on a Christmas wish-list anyway.
But for all those hard-to-shop-for photographers on your 2019 holiday shopping list, I have the perfect solution - a large-format canvas print.

Think about it…
A canvas print is the gift that keeps on giving.
Not only can you immortalize one of your favorite images from your favorite photographer, but you also give them a means to showcase their work in a format that’s drop-dead gorgeous.
I have tons of canvases in my home, the vast majority of which are from CanvasHQ.

Now, I know what you’re thinking - canvas is old school.
Sure, maybe it is, but I’m telling you that these canvas prints from CanvasHQ are mind-bogglingly beautiful. In fact, they go head-to-head with any metal or acrylic print I have in my home.
The attention to detail is just amazing, and the materials they use are top-of-the-line. We’re talking archival-grade canvas, commercial-grade inks that are water and UV resistant, and kiln-dried pine frames to keep everything straight and true.
I love the personality that the canvas texture gives my images. That’s true whether it’s a portrait of my son or a landscape photo.

I’d be remiss if I didn’t mention the customer service you get with CanvasHQ.
These guys are committed to getting it right, so if something doesn’t go as planned, you won’t be hung out to dry.
If you have questions, they’ll answer them. If you have a problem, they’ll fix it. If you need assistance with uploading your photo or even picking the best finishes for your canvas, they’ve got your back.
In the video above, I explain why I highly recommend a CanvasHQ canvas print as the ideal gift for the photographer on your holiday shopping list.
Start shopping for your favorite photographer today on CanvasHQ!
Gifts for Photographers Under $150: Marumi M100 Magnetic Filter Holder

This innovative magnetic filter system by Marumi speeds up the process of changing filters by enabling quick attachment and detachment.
When seconds count as the light changes, having a filter system that streamlines your workflow is a huge asset, and something that the photographer on your list is sure to appreciate.
Made of aircraft aluminum, this filter holder is supremely strong and durable, yet super lightweight too, making it the perfect companion for landscape photographers that need a quality filter holder that doesn’t weigh down their bag.
The gaskets on the front of the holder help prevent light leaks while the holder ensures there is no vignetting when used with a 16-35mm lens. That means clear, clean, beautiful results when using Marumi magnetic filters with the M100 filter holder.
Learn more about the Marumi M100 Magnetic Filter Holder
Gifts for Photographers Under $150: Holdfast Sightseer Small Lens Pouch

One of the best features of the Holdfast Gear Sightseer line of bags is that they are modular, so as your kit grows, your bag system can grow along with it.
Part of that modular system is the Sightseer Small Lens Pouch shown above.
These beautifully crafted lens pouches are constructed of waxed canvas and American Bison leather. Inside, the Aztec flannel fleece looks like a million bucks while providing a soft, secure environment that cradles your lens.
The outside of the pouch is weather resistant while the Aztec flannel on the interior is scratch resistant, which means your favorite photographer won’t have to worry about their gear getting wet or scratched no matter how many times they go out and shoot.
These pouches can be worn on any belt, on the Holdfast MoneyMaker, or on the exterior of the Holdfast Sightseer Bag, so there’s a ton of different ways for photographers to have their favorite lens right at their fingertips.
What better gift to give this holiday season than one that’s super functional, looks great, and is supremely versatile too?!
Learn more about the Holdfast Sightseer Small Lens Pouch
Gifts for Photographers Under $150: Wolverine Data F2D Titan

If you’re like me, you probably have a box or two of old 35mm negatives or slides laying around in your house somewhere.
If the photographer on your shopping list has hoarded a few negatives and slides, think about getting them the ultimate photography gift this holiday season - the Wolverine Data F2D Titan.
This rig allows you to convert all sorts of analog stuff to digital - 35mm/127/126 & 110 negatives, slides, 8mm and Super 8 movies.
In fact, not only does the F2D Titan convert these files, but it does so into 20-megapixel digital images in mere seconds. Literally - you push a button, and the Titan does the rest without the need for any additional software or even a computer
Each image you scan is saved to the internal memory on the device, or you can opt to insert an SD/SDHC memory card for saving files.
You can also transfer the images to your Mac or PC for storage or editing, or if you want to quickly view the images, you can hook the Titan up to your TV to watch a slideshow (TV cable not included)
With the versatility and ease of use of this product, it’s a perfect gift idea for photographers that have a ton of old negatives, or even a friend or family member that’s been hanging onto their old memories, but unable to do much with them. Give them the gift of organizing their photos and being able to enjoy their old memories quickly and easily too!
Learn more about the Wolverine Data F2D Titan 8-in-1 High Definition Film to Digital Converter.
Gifts for Photographers Under $150: Kenko PL Fader Variable ND Filter

The great thing about a variable neutral density filter is that it’s like having a complete ND filter kit wrapped into a single filter.
This PL Fader by Kenko offers variable densities from ND3 to ND400, offering photographers a wide range of possibilities for controlling exposure.
Made with two high-transparency polarizing film layers, this filter controls the amount of light that passes through to the camera lens, giving photographers supreme control over shutter speed for blurring motion during the daytime.

What’s more, this filter can also help control the aperture, allowing photographers to open up the aperture to minimize depth of field without worrying about overexposing the shot. That goes for still photography and videography too!
Whether your loved one enjoys photography, videography, or both, they’ll certainly appreciate having a variable ND filter that enables them to achieve the creative effects they want without worrying about overexposure.
Learn more about the Kenko PL Fader Variable ND Filter
Gifts for Photographers Under $150: RODE VideoMic

If the photographer on your list is like me and has expanded their activities into video production, then they need a high-quality microphone.
The RODE VideoMic is just that…
It has a Rycote Lyre Suspension System that helps prevent unwanted vibrations and noise from handling.

It easily mounts to any camera with a hot-shoe and is effective at eliminating noise from either side while picking up the desired audio from the front.
Even in noisy environments or at moderate distances, this mic is capable of capturing clean audio to complement beautiful video footage.
With a battery life of about 100 hours, the photographer in your life will have plenty of juice to keep recording and recording too!
Learn more about the RODE VideoMic
Gifts for Photographers Under $150: Kenko Pro ND 100000 Filter

If the photographer on your list specializes in long exposure photography, then they need this ultra-dark ND 100000 filter from Kenko.
With 16.5-stops of light-stopping power, this filter enables photographers to extend their shutter speeds to incredible lengths - several minutes, in fact.
The result of having the shutter open for so long is gorgeously ethereal scenes with beautifully blurred movement of water, clouds, and other moving features.

Likewise, this filter is dark enough that it can be used as a solar filter, so your favorite photographer will be ready to go for the next solar eclipse.
This filter glass is made using a carbon vapor deposit method that ensures and even coating that completely blocks out infrared light.
The glass itself is made of Asahi optical glass and has a multi-coating to ensure maximum resolution.
Available in multiple sizes, this filter is a must-have for photographers that want to explore the possibilities of long exposures!
Learn more about the Kenko Pro ND 100000 Filter
Gifts for Photographers Under $150: f-stop Dalston Bag

If the photographer on your holiday shopping list is in need of a high-quality, versatile camera bag, then look no further than the f-stop Dalston.
This bag was designed with meeting the demands of the urban jungle in mind.
As a capable everyday bag, it not only offers excellent storage space but also has a sleek silhouette that makes it less bulky, which is ideal for photographing in tight spaces.
The bag is easy to access, too, with side-access pockets for quick grab and go.

But don’t think that the Dalston is just for quick daytime adventures…
At nearly 19 inches tall and 11.4 inches wide, this bag can hold up to 21 liters of gear. That’s plenty of space for extended photoshoots in which a photographer needs lots of space packed into a sleek bag.
Add in weather-sealed zippers, a removable internal organizer for keeping your gear tidy, a Jersey laminate EVA-padded back panel, and Thermoformed EVA shoulder straps for comfort, and you have the makings of a killer bag for photographers of all kinds!
Learn more about the f-stop Dalston
Gifts for Photographers Under $150: Westcott Rapid Box Octa Softboxes

If you’re in need of a gift for the photographer on your holiday list, don’t just settle for any old thing. Instead, wow them with a gift that has the ability to help them elevate the quality of their photos.
In photography, light is everything, and if the photographer you’re shopping for takes any portraits at all, they need a high-quality softbox in their collection of gear.
And for me, the best softboxes on the market are those by Westcott.

I particularly like their Rapid Box Octa series because they’re lightweight, easy to set up, and supremely durable
The all-aluminum frame is strong and helps the octabox keep its shape - a shape, by the way, that has a very shallow depth, so it can still be used even if space is at a premium.
But what will impress your favorite photographer most about the Rapid Box is probably not its durability or construction, but the way it modifies light.

There’s a silver reflector that’s sewn into the back of the box’s diffusion panel, which minimizes the hot spot from the speedlight and results in gorgeously even light from corner to corner.
Speaking of the diffusion panel - it’s made of an all-natural, unbleached nylon fabric, which softens the light without changing its color temperature. Lesser softboxes cannot claim the same!
In the end, you want the gift you give to your loved one to be something that they love, but also something that they can use over and over again. The 26-inch Westcott Rapid Octa softbox certainly fits the bill!
Learn more about the 26-Inch Westcott Rapid Octa Softbox
Gifts for Photographers Under $150: ProMediaGear BP1-PBX3 Paparazzi Bracket

Photographers that need to have a few accessories on their camera will love this ProMediaGear Paparazzi Bracket.
It attaches to a PMG Arca-Type flash bracket base plate and enables you to mount a flash, a flash trigger, or another accessory right next to the camera.
This facilitates better camera balance without greatly impacting its form factor. You can also install the bracket forward or backward, depending on your specific needs.

This bracket comes with the necessary mounting hardware, an anti-rotation mounting plate, and a 1/4-20 threaded adapter. With two 1/4-20 threaded female accessory holes, the bracket arm gives you the option of removing the extension plate if you need a more compact setup.
For photographers with lots of accessory needs, this bracket is the ideal holiday gift!
Learn more about the ProMediaGear BP1-PBx3 Paparazzi Bracket
We Recommend
Top 10 Gifts for Photographers Under $250 - 2019 Edition

photo byBaramyou0708 via iStock
When it comes to buying holiday gifts for people, I always try to start early. Like way early, which is why I’m already thinking about gift ideas even though it’s still August as I’m writing this.
Part of the reason why I like to start early is because often you can find deals way ahead of time - like the upcoming Labor Day holiday.
Besides, no one wants to be nervously watching the mail in the days leading up to Christmas, hoping that the last-minute gift you got for a loved one arrives on time.
With all that said, here’s some of my favorite gift ideas for photographers that’ll set you back less than $250.
Gifts for Photographers Under $250: CanvasHQ Print

If you’re like me, sometimes finding the perfect gift for certain loved ones is a long, drawn-out process that causes tons of stress, and often you still don’t get something that totally blows them away.
I think a lot of photographers fall into this category. We have specific likes, and many of us already have most of what we want or need gear-wise, and what we don’t have is usually too expensive to put on a Christmas wish-list anyway.
But for all those hard-to-shop-for photographers on your 2019 holiday shopping list, I have the perfect solution - a large-format canvas print.
Think about it…
A canvas print is the gift that keeps on giving.
Not only can you immortalize one of your favorite images from your favorite photographer, but you also give them a means to showcase their work in a format that’s drop-dead gorgeous.
I have tons of canvases in my home, the vast majority of which are from CanvasHQ.
Now, I know what you’re thinking - canvas is old school.
Sure, maybe it is, but I’m telling you that these canvas prints from CanvasHQ are mind-bogglingly beautiful. In fact, they go head-to-head with any metal or acrylic print I have in my home.
The attention to detail is just amazing, and the materials they use are top-of-the-line. We’re talking archival-grade canvas, commercial-grade inks that are water and UV resistant, and kiln-dried pine frames to keep everything straight and true.
I love the personality that the canvas texture gives my images. That’s true whether it’s a portrait of my son or a landscape photo.
I’d be remiss if I didn’t mention the customer service you get with CanvasHQ.
These guys are committed to getting it right, so if something doesn’t go as planned, you won’t be hung out to dry.
If you have questions, they’ll answer them. If you have a problem, they’ll fix it. If you need assistance with uploading your photo or even picking the best finishes for your canvas, they’ve got your back.
In the video above, I explain why I highly recommend a CanvasHQ canvas print as the ideal gift for the photographer on your holiday shopping list.
Start shopping for your favorite photographer today on CanvasHQ!
Gifts for Photographers Under $250: Marumi 100x150mm Magnetic Graduated ND Filter
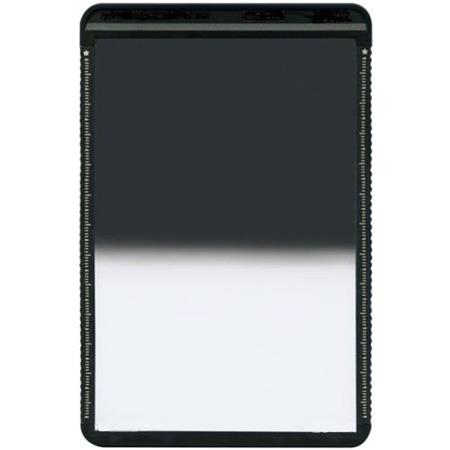
The benefit a graduated ND filter gives your favorite photographer is that it allows them to control the dynamic range in a scene.
That is, with the darkened area on top of the filter, it tones down the brightness of the sky while leaving the foreground untouched, the result of which is a better-exposed image without any blown-out highlights or deep shadows.
The hard edge on the filter above is perfect for landscapes in which there is a definite horizon, like taking a photo looking out at the ocean.

But you can also give a soft-edge filter, which has a much more gradual transition from dark to light. This is a better option for landscapes in which the horizon line isn’t very clear.
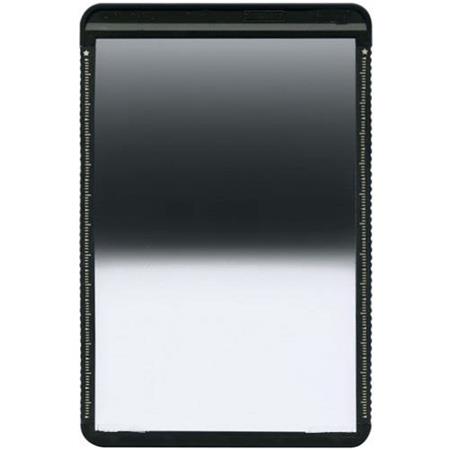
There’s even a reverse graduated ND, which is darkest in the middle - an ideal option for taking breathtaking sunrise or sunset photos.
What makes these Marumi 100x150MM Graduated ND filters so special is that they attach to the Marumi M100 filter holder with magnets.
This quick and easy on and off helps streamline the process of using these filters in the field, that way the photographer on your holiday shopping list spends more time actually taking photos and less time messing with their gear.
These filters are made with high-definition Schott B270 glass and have a double-sided coating to ensure minimal reflections. These filters also have anti-static, anti-scratch, water repellant, and oil repellent features.
Available in 2-stop, 3-stop, and 4-stop versions, as well as hard and soft-edge versions, you can give the gift of improved photos this year by giving a Marumi Magnetic Graduated ND!
Learn more about Marumi Magnetic Graduated ND Filters
Gifts for Photographers Under $250: Holdfast Camera Swagg Camera Harness
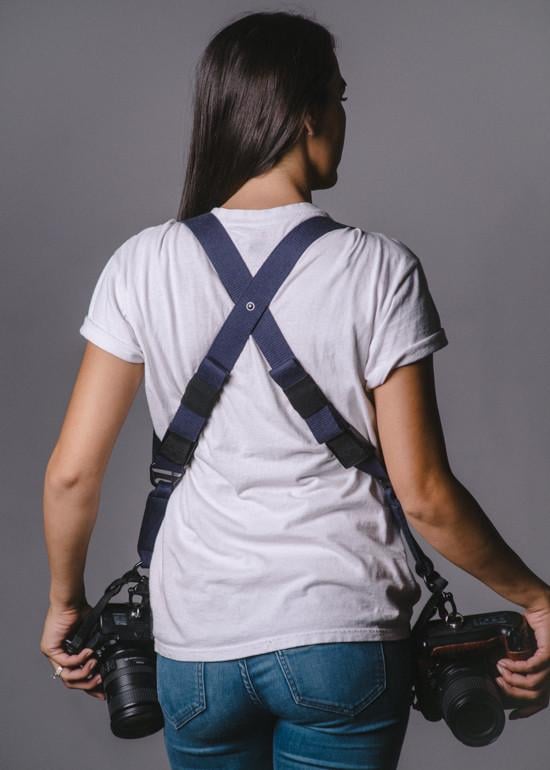
I’ve been a Holdfast customer for years and years, and I have one of their impeccable MoneyMaker leather dual camera straps.
But not everyone wants a leather camera strap, and for those folks, the Camera Swagg is the ideal solution.
Offering the same functionality as the leather version, the Camera Swagg dual camera harness enables photographers to carry two cameras right at their fingertips.
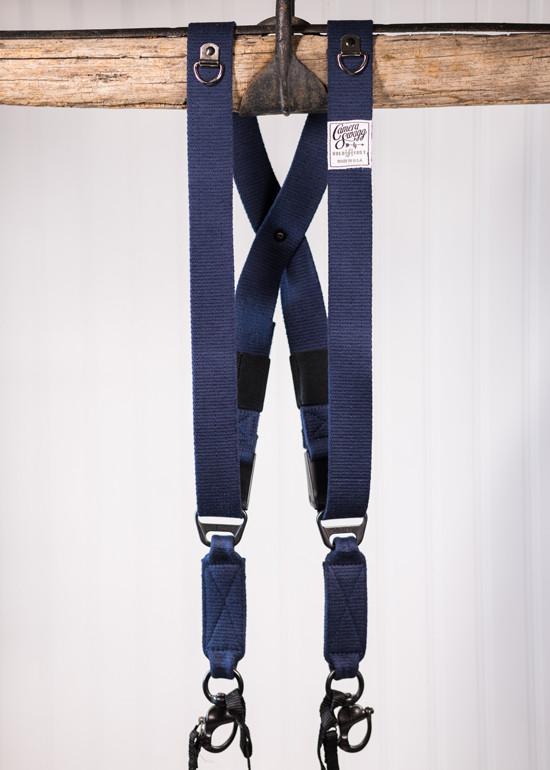
Made of 100 percent high-grade cotton canvas, this harness is both durable and comfortable. The wide straps sit nicely on your shoulder without digging in, and the harness feels quite light as well.
You’ll find the same reliable stainless steel hardware on the Camera Swagg as you do on leather MoneyMakers. That includes anchored D-rings and safety straps that connect to the camera’s side lug mount, which together ensure you have a rock-solid system for carrying your gear safely.
Add in supreme functionality and a price well below the $250 mark, and you have the makings of the ideal gift for photographers this holiday season!
Learn more about the Camera Swagg Camera Harness
Gifts for Photographers Under $250: LitraTorch LitraPro
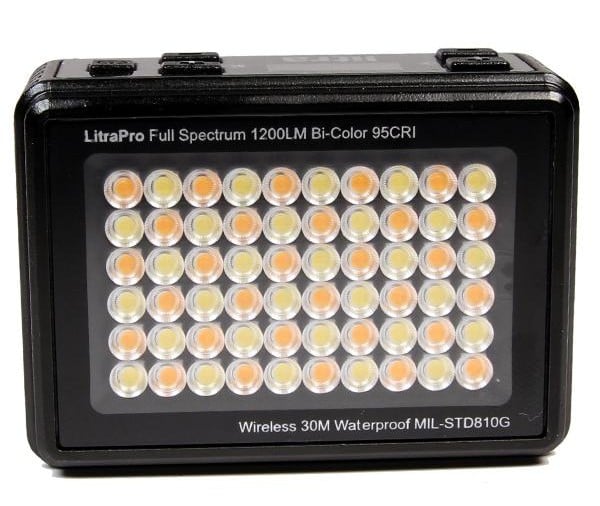
Great photos need great light, and fortunately you don’t have to spend an arm and a leg to give the photographer on your list an excellent light source for their photo and video work.
Sure, the LitraTorch LitraPro is a tiny light that weighs just 6 ounces and is 2.75 x 2 x 1.2 inches in size, but that doesn’t mean it can’t put out a great deal of light.
In fact, this little guy has 60 ultra-bright LEDs that put out up to 1200 lumens of light. That’s a lot!
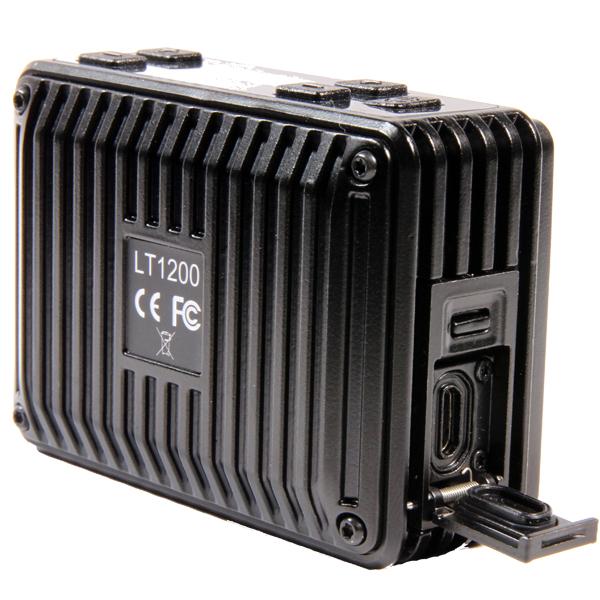
And it isn’t just the sheer brightness of the light it produces that impresses.
Instead, this light puts out crisp, clear, flicker-free light that any photographer would appreciate. Users can also adjust the color temperature from 3000K to 6000K to customize the light output to the specific needs of each photoshoot.
Add in a 70-degree beam angle, a maximum of 10 hours of operating time, and MIL-SPEC 810 construction that makes it virtually indestructible, and you have a photography gift that will keep on giving for years and years!
Learn more about the LitraTorch LitraPro
Gifts for Photographers Under $250: Luminar 3, Luminar 4, and Aurora HDR Bundle
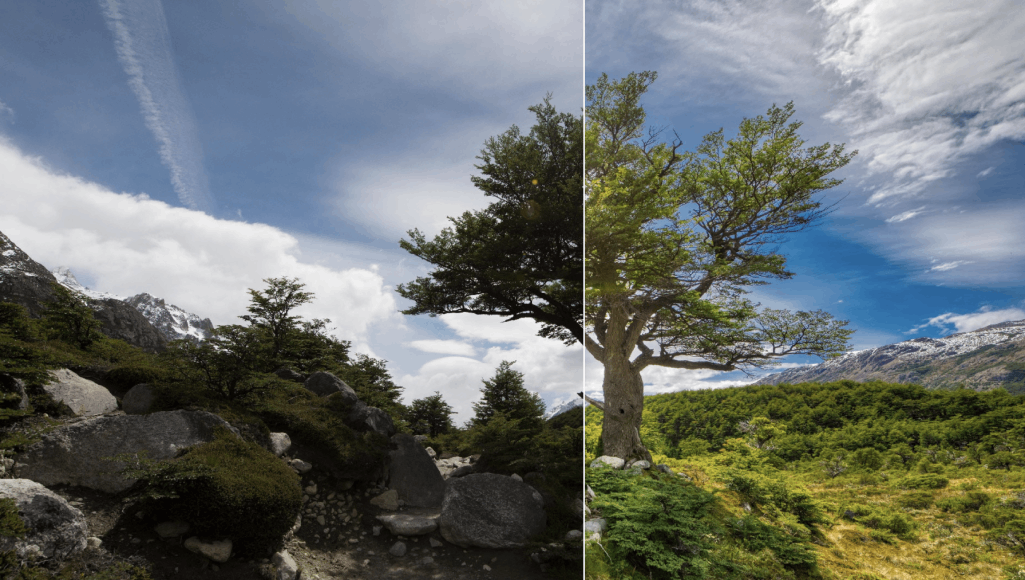
If you’re looking for a gift that will really impress the photographer in your life, look no further than this bundle of awesomeness from the folks at Skylum.
Not only can you give the gift of Luminar 3 - an incredible, multi-award-winning editor that makes processing images a veritable breeze - but you can also give the gift of the upcoming Luminar 4, which is poised to take photo editing to another level later this year. And on top of that, Skylum throws in their award-winning Aurora HDR software for making quick, beautiful, precise edits to HDR images.
Let’s unpack all that in a little more detail…
Luminar 3 offers cutting-edge tools that speed up the process of editing photos whether the photographer on your shopping list uses a Mac or a PC.
You get tools like the AI Sky Enhancer, which uses artificial intelligence to detect the sky in the photo and automatically enhance it based on its colors and texture.
What’s more, the Sky Enhancer does this whether the area of sky is bright, dark, big, or small, and the adjustments made can be easily manipulated by a single slider.
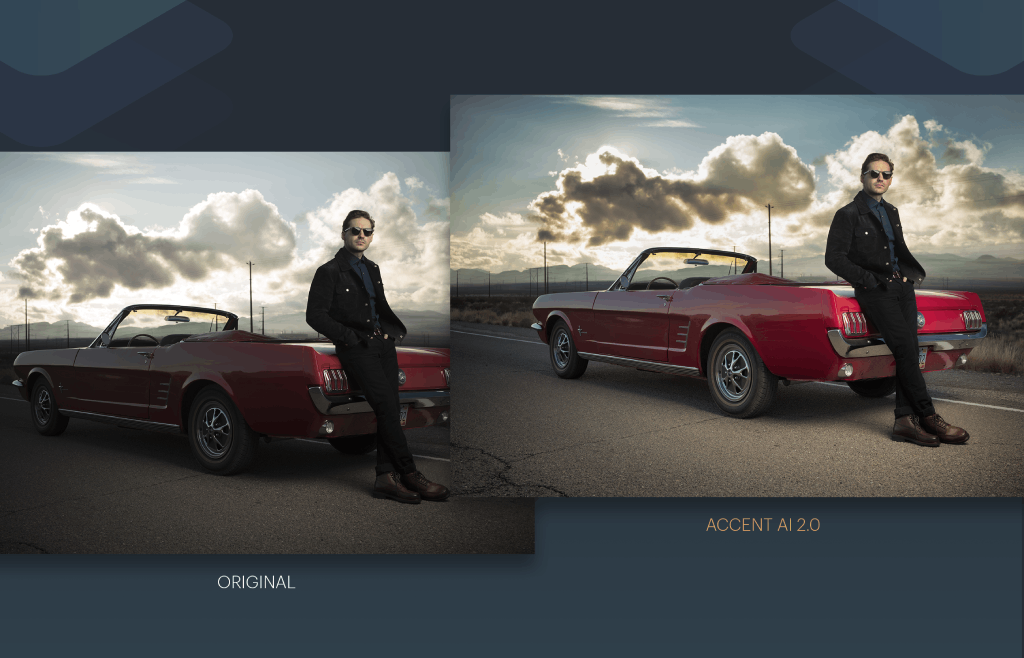
Luminar 3 also sports the supercharged Accent AI 2.0 filter, which makes about a dozen adjustments to the image instantly.
Again, this filter is manipulated by a single slider, so changing things like the exposure, color, tone, and other basic elements is done quickly and easily.
As you can see above, the Accent AI 2.0 filter can automatically detect people in the shot and apply its changes in a way that renders beautifully realistic results.
Add in dozens of Looks to give your photos artistic flair, many different filters that can do everything from sharpen the image to add sun rays, and an easy-to-use Library where you can view, sort, and rate your photos, and you begin to see why Luminar 3 is so widely regarded.
But if you think those tools sound amazing, Luminar 4 kicks it up a notch with some exciting new features that will expand post-processing abilities even further.
In the video above, you can see two new tools in action - the AI Skin Enhancer and the Portrait Enhancer.
When you think about what makes editing portraits such a long, drawn out process, it’s all the small manipulations you have to make, like removing blemishes and dark circles, enhancing eyebrows and lips, and whitening teeth.
But in Luminar 4, those detail-oriented processes are handled by AI, and you can fine-tune the results with individual sliders for incredible results.
Luminar 4 also introduces AI Structure and AI Sky Replacement.
As shown above, AI Structure boosts details only where needed using content-aware tools, that way people in the photos aren’t overprocessed but objects like clouds and buildings are beautifully detailed. See what I mean in the video above.
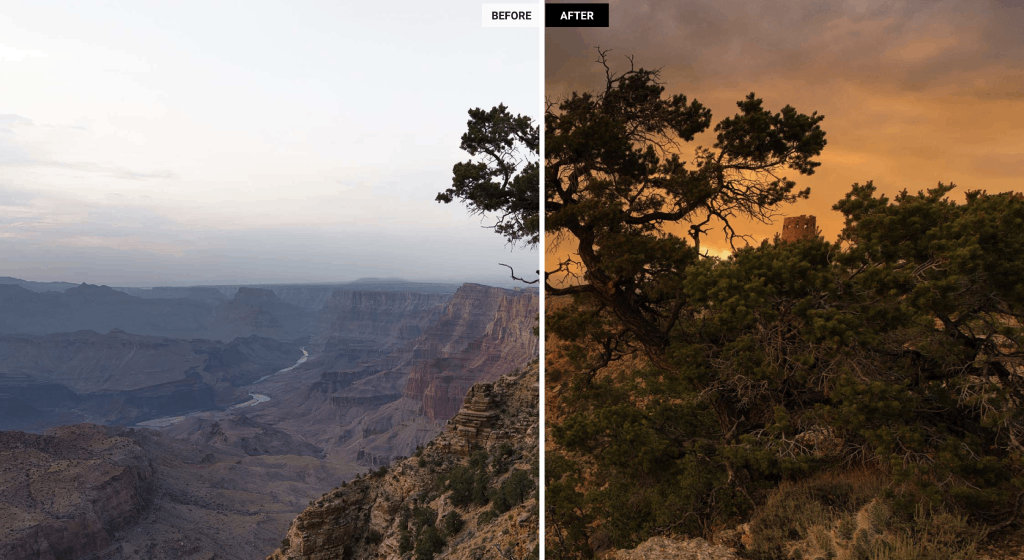
Likewise, AI Sky Replacement gives photographers the power to change the sky in one click. So, if you shot a beautiful landscape, but the sky isn’t all that great, you can easily pick a new sky to give the shot the look and mood you want. Not only that, but Luminar 4 will relight the entire photo to the original image and the new sky match.
The AI Sky Replacement tool also uses intelligent selection algorithms to remove artifacts, hard edges, and halos. And with the ability to fine-tune foreground contrast and brightness, you can create epic landscape shots in short order.
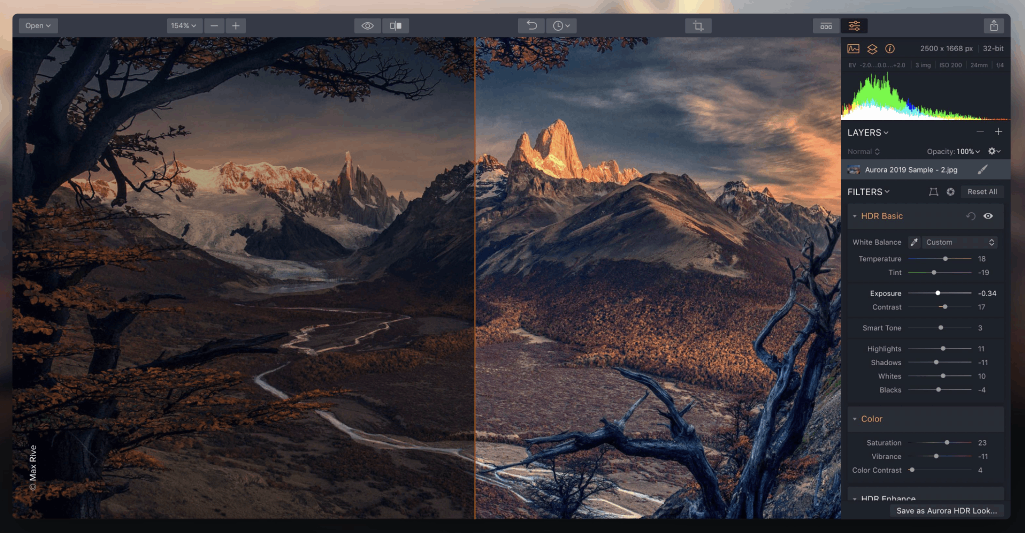
As if all that isn’t enough, this bundle also includes Aurora HDR.
There’s a reason why the top HDR photographers in the world use Aurora HDR…
Its AI-powered Quantum HDR Engine gives you the highest-quality bracket merging with no artifacts, no halos, and no chromatic aberration.
With more than 20 HDR tools, including color toning, dodge and burn, creative LUT mapping, and more, photographers can create flawless HDR images in seconds.
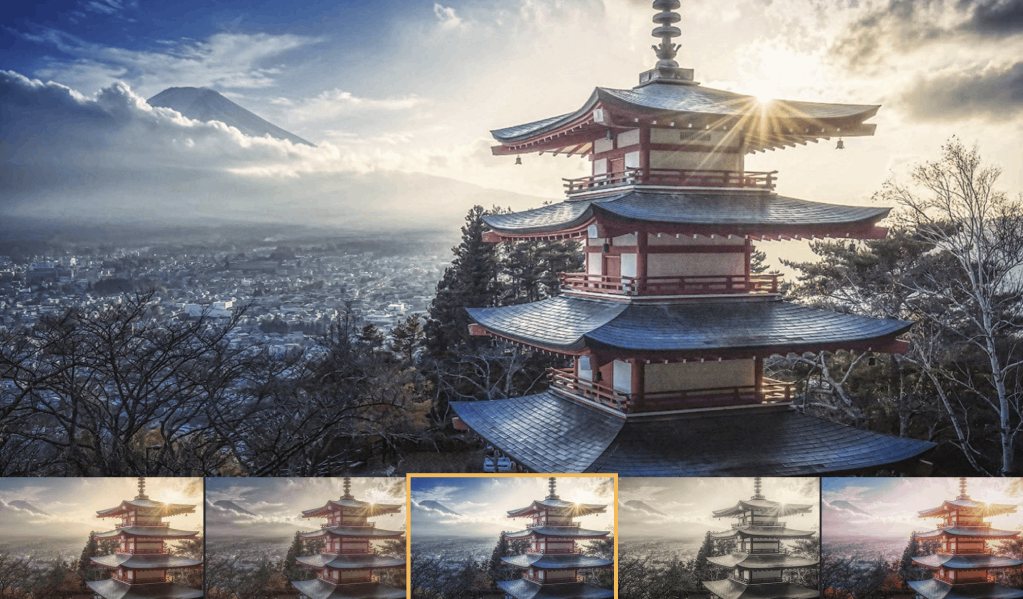
Like Luminar 3 and 4, Aurora HDR has a vast selection of Looks that with one click will take your photos from blah to beautiful. With more than 80 professionally-crafted Looks, you have the power to create top-notch images in a matter of seconds.
Aurora HDR also works magic with single photos, enabling you to bring out beautiful details and dynamic range, even when you don’t have bracketed exposures to work with.
Truly, this is the ultimate holiday gift for any photographer - the power to make fast, beautiful, and precise edits whether the images are portraits, landscapes, architecture or something in between!
See all the possibilities your favorite photographer can explore by visiting the Skylum website. Additionally, you can order the Luminar 3, Luminar 4, and Aurora HDR Bundle, or if Luminar 3 and Luminar 4 is more your style, you can order that bundle instead.
Gifts for Photographers Under $250: PilotFly AtomCube RX1 RGBCW LED Video Light
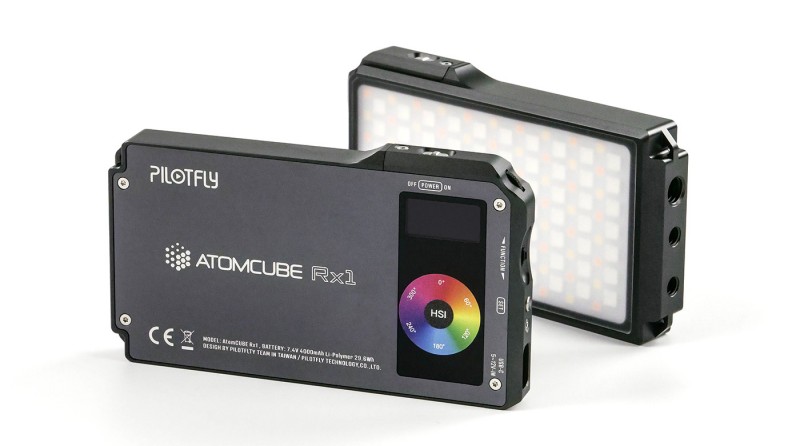
Having a high-quality light for photography and videography is a must, and the PilotFly AtomCube certainly delivers on multiple fronts.
For starters, this light is small enough to fit in your pocket, yet offers 1800 lux luminance at 0.5 meters. It’s completely dimmable from 0-100 percent, offers 360-degree full color, and has an adjustable color temperature from 2500-8500K so you can tune the light to your specific needs.
Add in cold white and warm white light, and you have the makings of a light that offers you precise colors and high CRI as well.
You can even mount multiple lights together using a Magic Cube to expand the effect. Nice!
The AtomCube comes with Bluetooth mesh technology that allows you to control up to 255 lights all at once. Whether you’re a portrait photographer, a videographer, or something in between, that kind of flexibility is an enormous asset to have.
Speaking of assets, the color tone and brightness between units is highly consistent, especially when mounting multiple units together. Because the lights are calibrated, you don’t have to worry about inconsistent lighting when you use more than one light at a time.
No matter if you’re using one AtomCube light or dozens, you can control them with the accompanying app. It’s an incredibly convenient way to control your lighting right at your fingertips, especially when you’re multitasking.
The intuitive interface of the app makes it easy to make precise adjustments. Likewise, you can connect lights, create groups of lights, and control brightness and color temperature, all with a few taps of your phone’s screen.
This light is durable, functional, has available accessories to advance the experience even further, and offers a variety of features that make lighting for photos and videos a breeze. It’s a key light in your pocket! That makes it a great gift for the photographer on your holiday shopping list!
Learn more about the PilotFly AtomCube RX1 RGBCW LED Video Light
Gifts for Photographers Under $250: HEX Ranger Clamshell DSLR Backpack
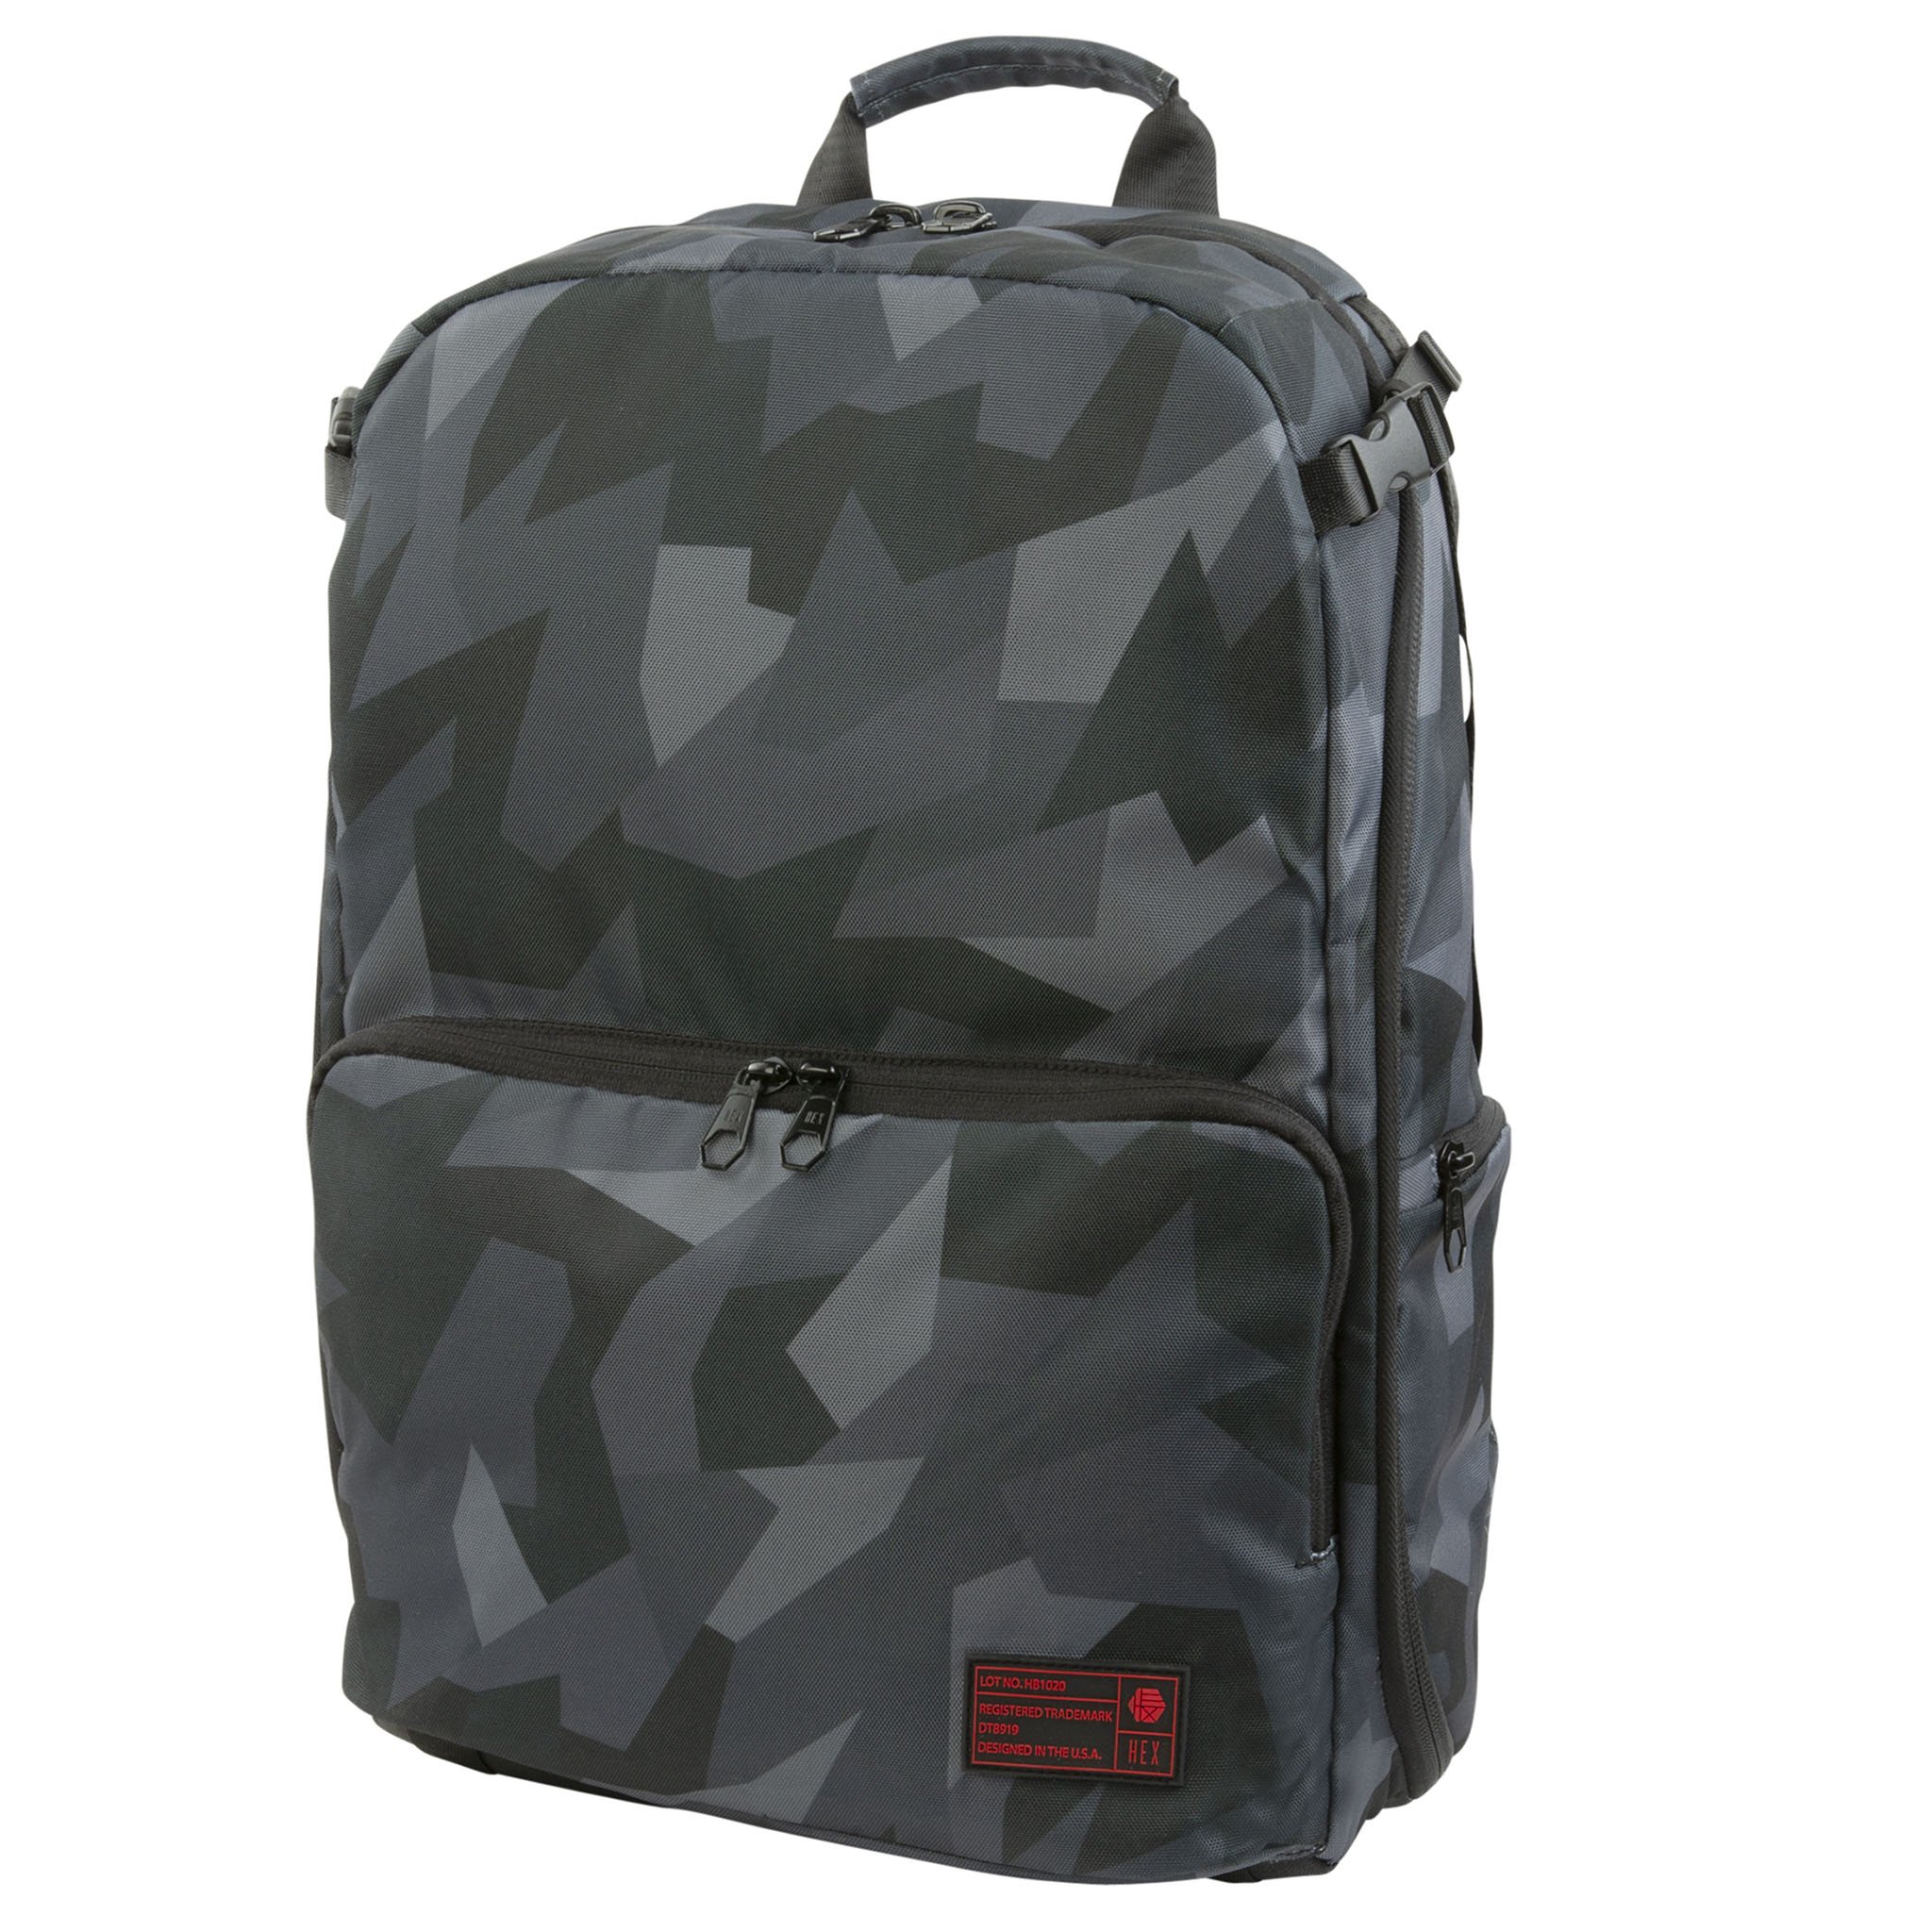
I met the guys behind HEX just last week, and I have to say that not only was I impressed by their operation in downtown Los Angeles, but I was also impressed with them.
They have a passion for what they do, and it shows in the products they design and create.
I actually brought a HEX Ranger DSLR Sling Bag home after seeing it firsthand. Talk about a camera bag!
But if the photographer on your list needs to carry more gear than I do, the Ranger Clamshell DSLR backpack is a prime choice.
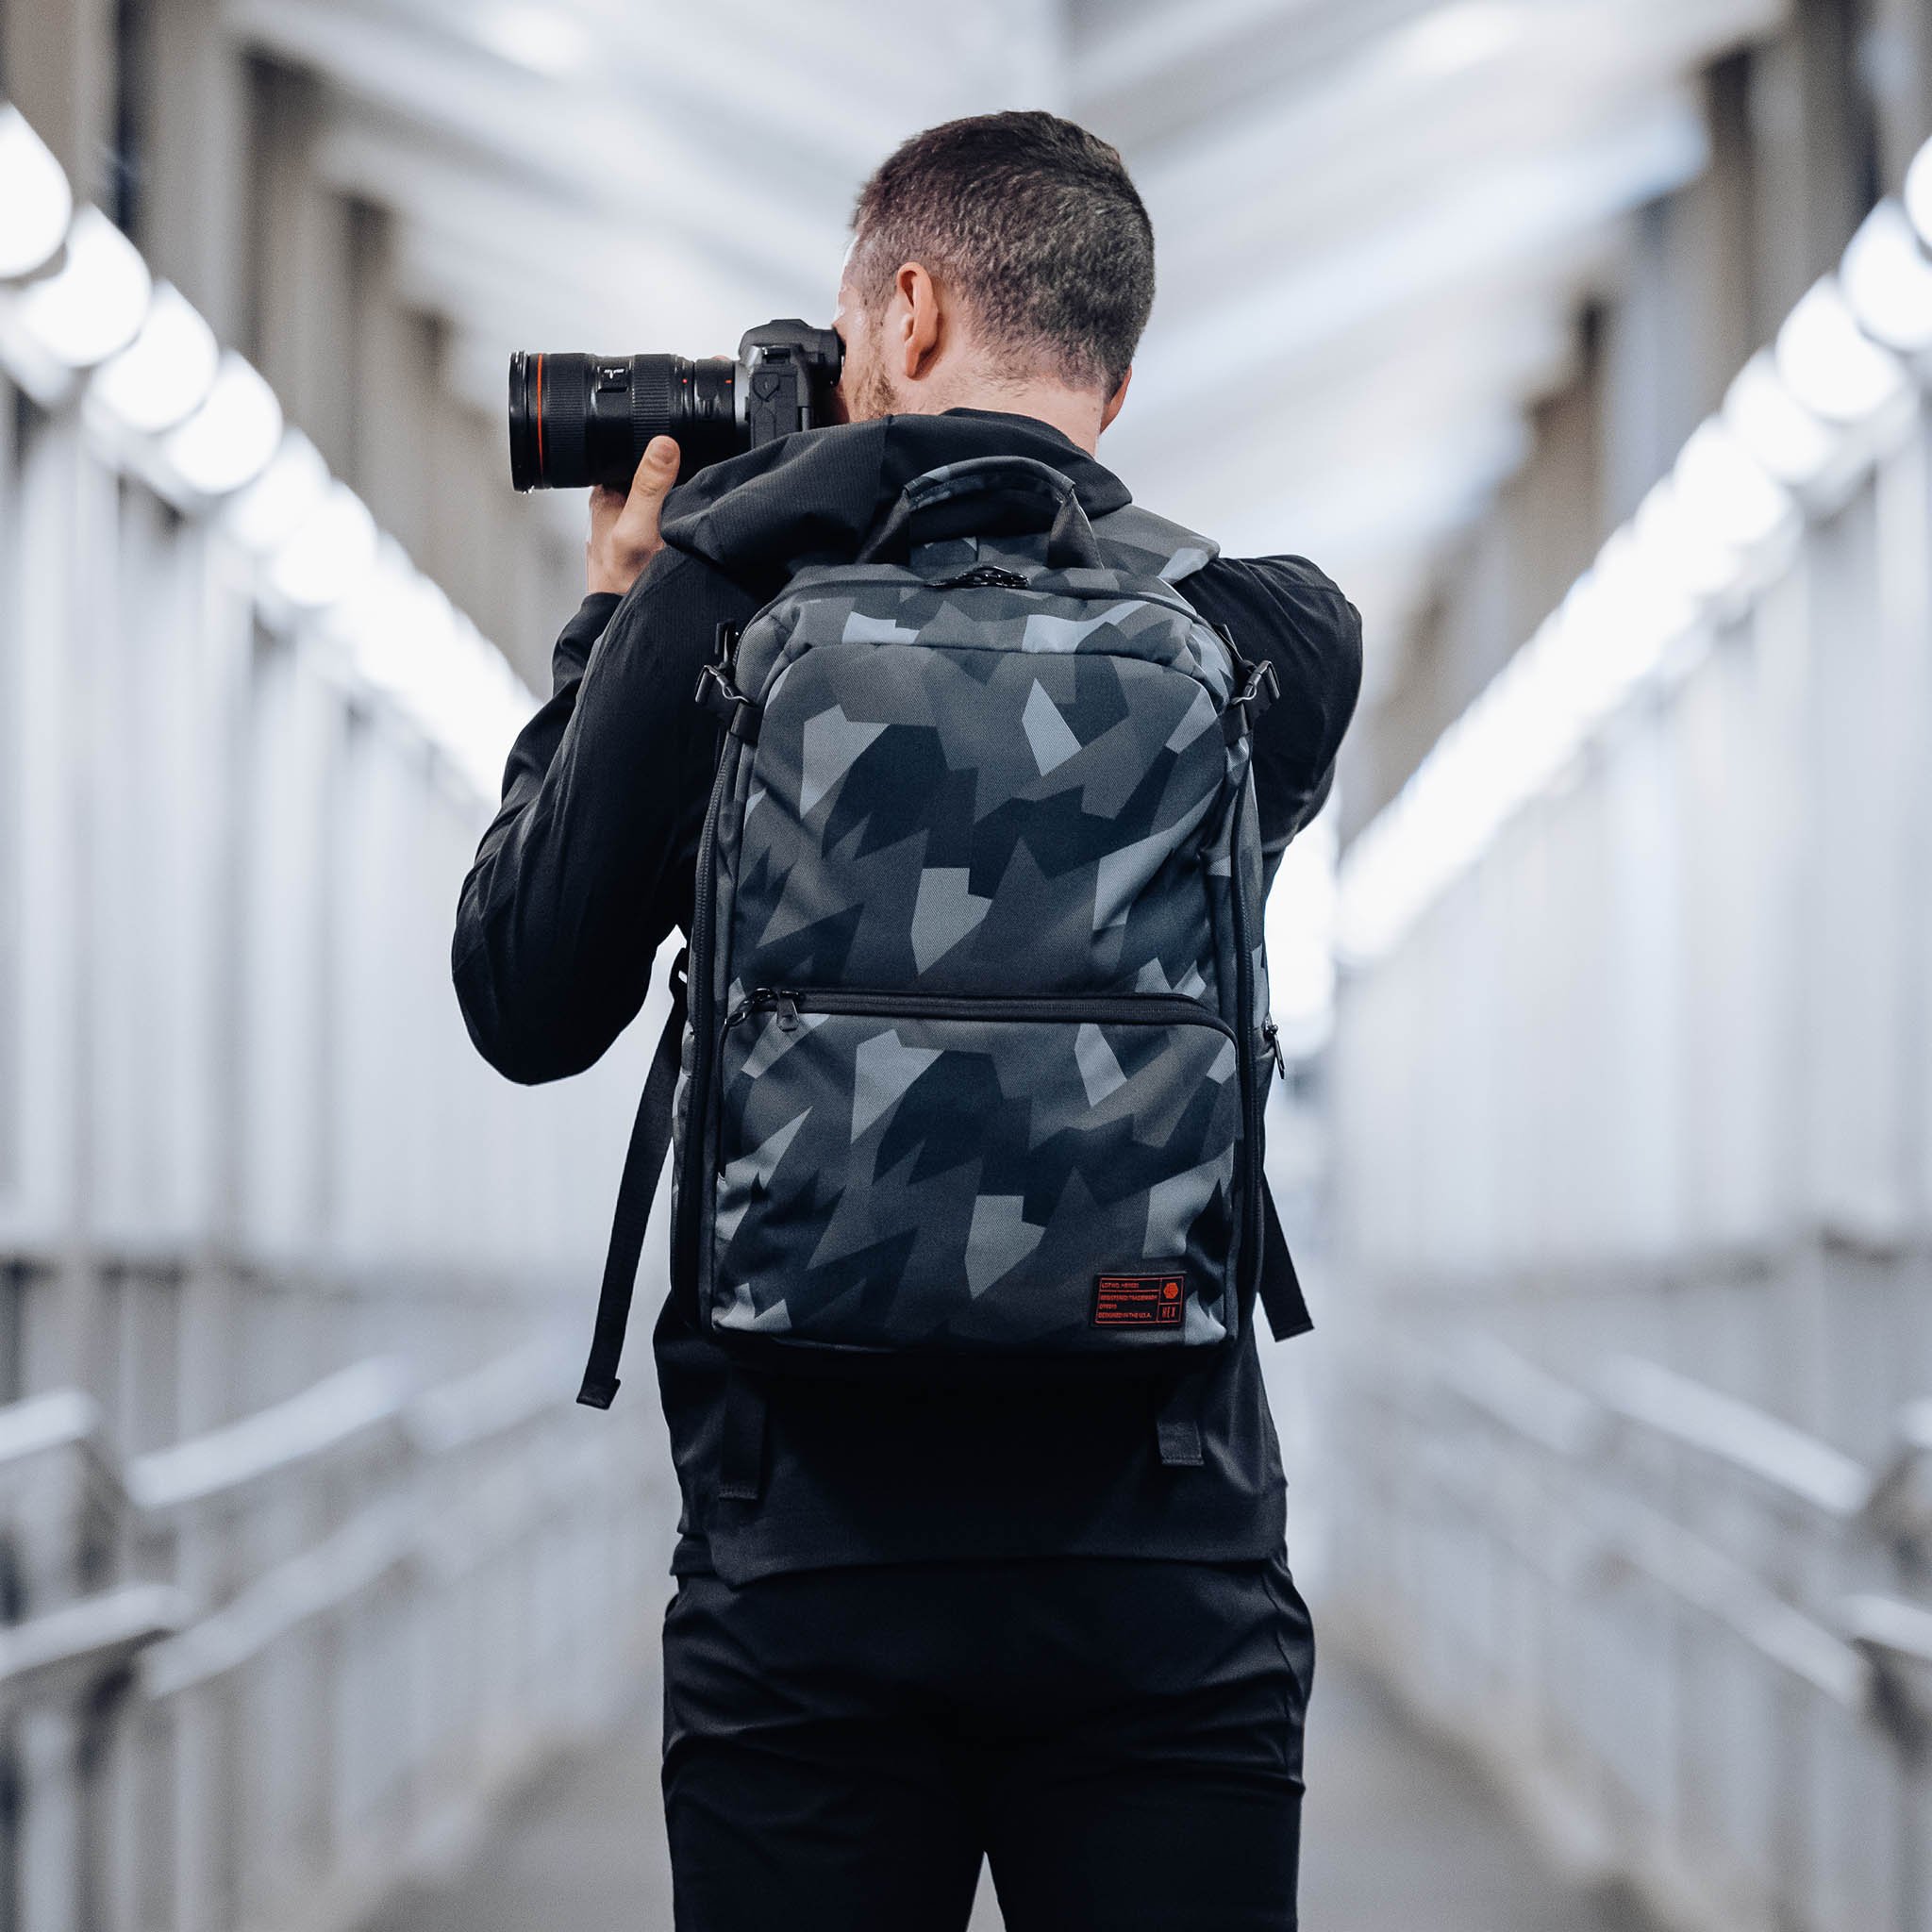
With a capacity of 21 liters, this bag can hold a ton of gear - a DSLR with lens attached, a couple more lenses, a laptop, a drone, and accessories, in fact!
The clamshell design makes it easy to see your gear, retrieve it, and put it away. And with fully customizable inserts, you can make the bag work for you no matter what arrangement of gear you need.
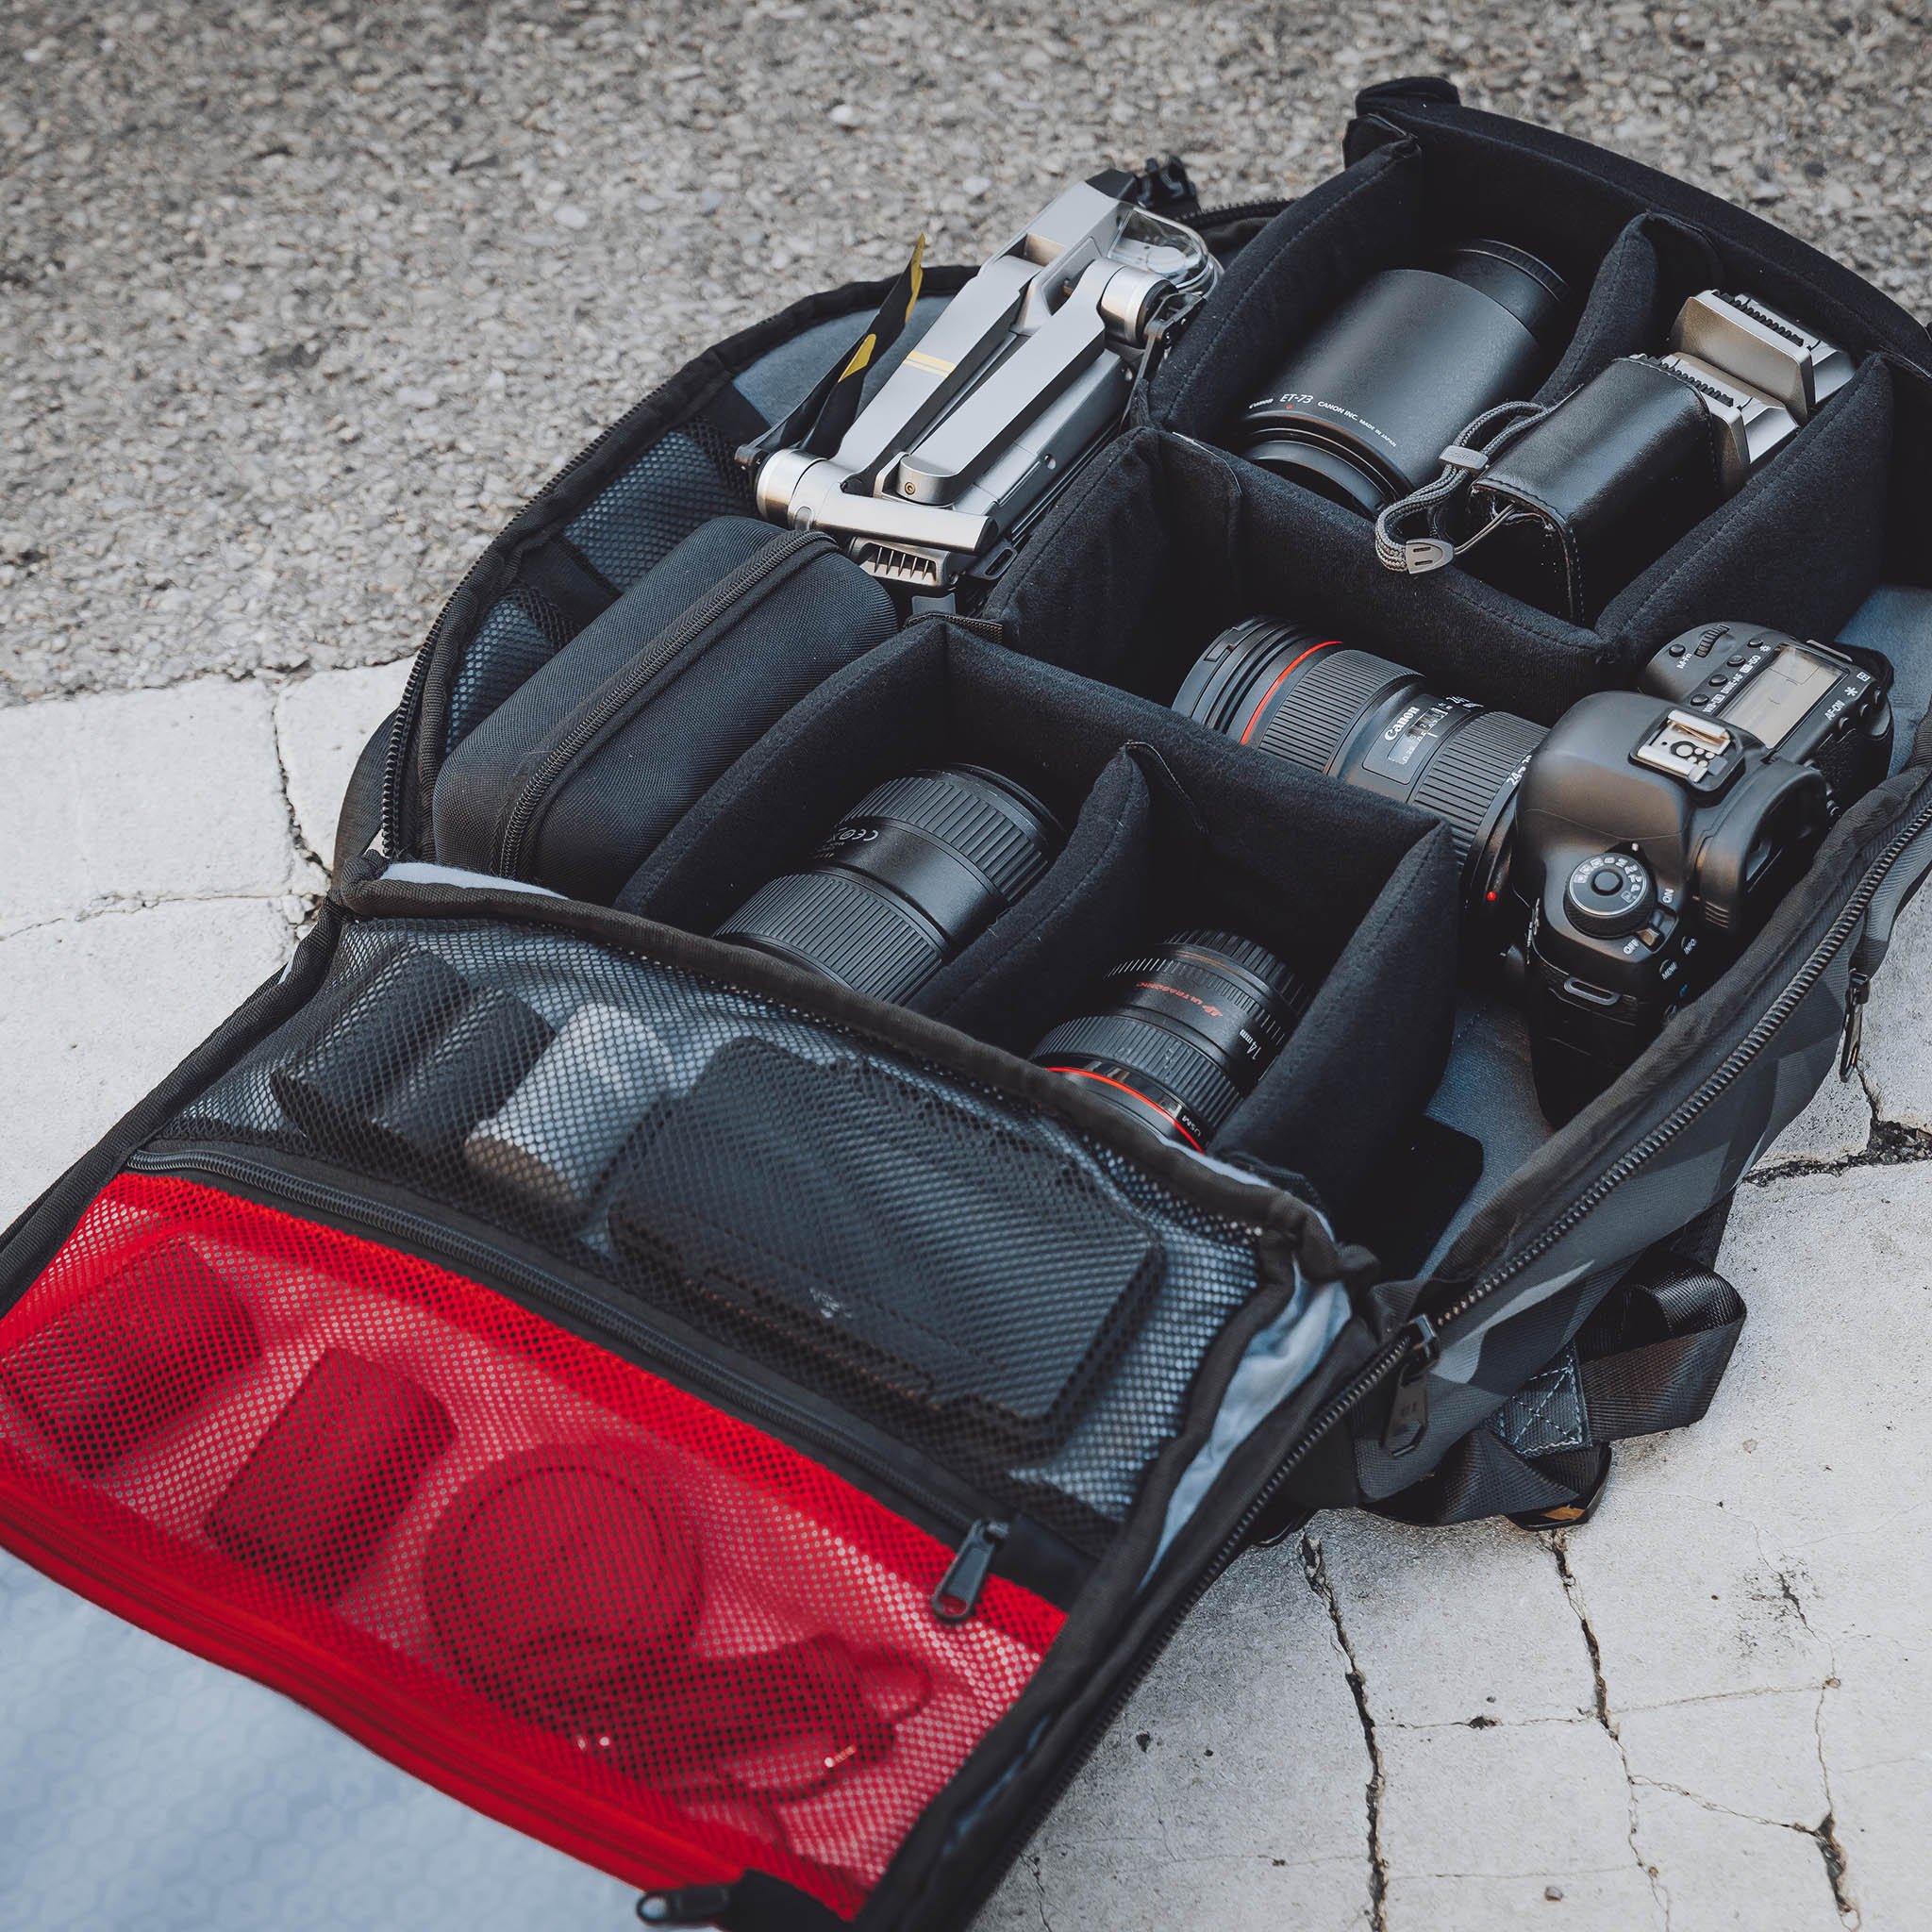
The all-important comfort factor is off the charts, too. It has ergonomic shoulder straps that hug your shoulders and fit perfectly. The air mesh construction will keep your shoulders and back cool as well.
Additionally, HEX included a custom molded and foam padded back panel, that way even when you’re carrying a heavy load, you’ll still be comfortable.
With tripod straps on the bottom, side straps for attaching more gear, a hidden rain cover, a water bottle pocket, and tons of other handy features, this is a bag that the photographer on your list will love, without a doubt
Learn more about the HEX Ranger Clamshell DSLR Backpack
Gifts for Photographers Under $250: A Pre-Owned Canon EF 50mm f/1.4 Lens
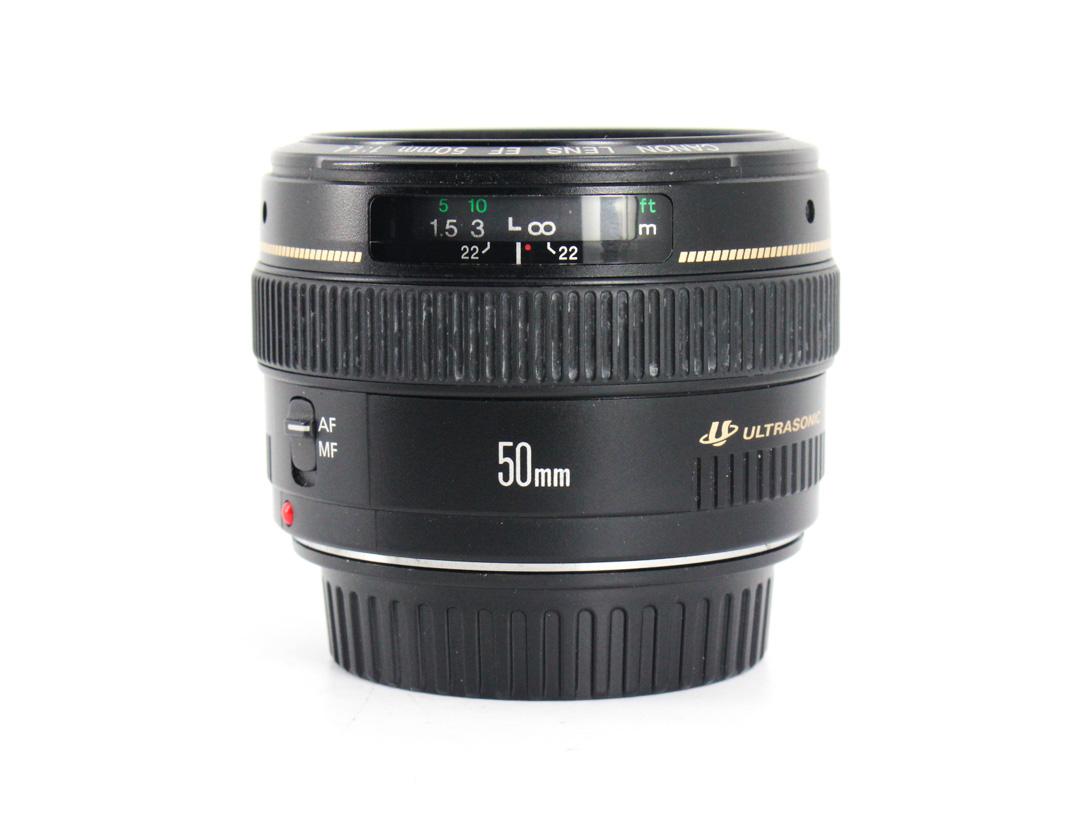
Ask just about any photographer what their first lens purchase was, and they'll say a Nifty Fifty. That makes it the ideal gift idea for photographers this holiday season!
There's a lot to love about 50mm lenses, too...
For starters, it's a great focal length for learning all kinds of photography, from landscapes to portraits and everything in between.
That also makes it an incredibly versatile lens.
In fact, put a 50mm lens on your camera, and you can shoot all day long without ever needing a different focal length. They're even great for shooting video!
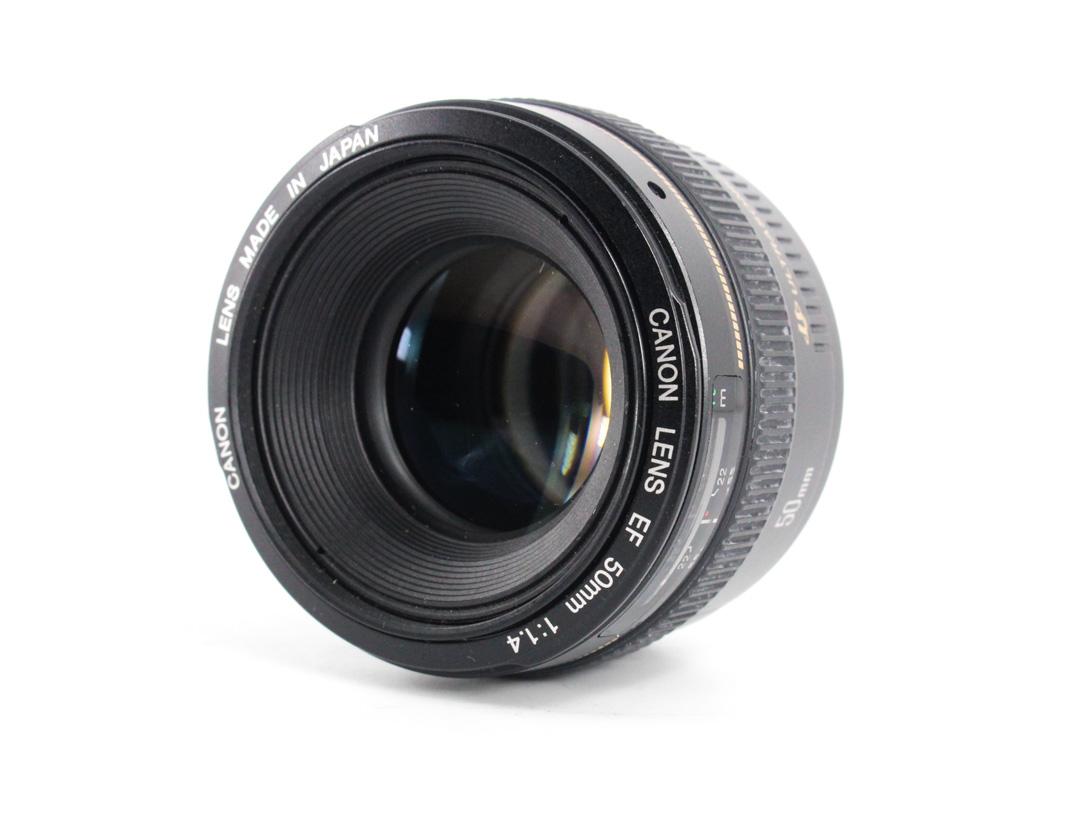
You can find 50mm lenses with large apertures, too, like the Canon EF 50mm f/1.4 USM shown above.
At f/1.4, photographers can more readily shoot in low-light conditions without having to push the ISO too high, which helps reduce digital noise.
Having a large aperture like that is also beneficial for gathering tons of light, that way a faster shutter speed can be used. It's also helpful for blurring the background in portraits to get a more professional-looking shot.
Another benefit of a 50mm lens is that they force you to think more creatively about how you frame up your shots.
That is, since 50mm lenses have a constant focal length of 50mm, there's no zoom to rely on for getting close-up or wider shots.
By using a 50mm lens and "zooming with your feet," becoming a master of composition can be an easier task because you're forced to physically move further away or closer to the subject.
Of course, the biggest benefit of 50mm lenses is the price. These lenses are well-priced so you can bestow a great little lens with tons of functionality and versatility upon your favorite photographer without busting your budget.
That sounds like a win-win deal to me!
Learn more about the Canon EF 50mm f/1.4 lens
Best Gifts for Photographers Under $250: Wandrd DUO Daypack
Not every photography adventure requires a gigantic bag…
Instead, a daypack works for most of us most of the time, and one of the best upcoming daypacks you can get your hands on is the Wandrd DUO Daypack.
This bag is packed with innovative features that will make the photographer on your holiday shopping list smile from ear to ear.
There’s dual side access panels for quickly and easily grabbing gear and a radical “infinite zip” system allows for access to items in the top or side of the bag, or you can simply unfurl the front panel completely for unfettered access.
Speaking of in the bag, this thing is an organizational dream with pockets, pouches, and cubbies for days.
Photographers can keep their camera body in the Pop Camera Cube, slide a flash into one of the many pockets on the inside back of the bag, and have tons of room left for everything from lenses to flash cards to car keys. There’s even a tablet sleeve and a laptop sleeve that can accommodate most 15-inch laptops.
On the outside of the bag, you’ll find a water bottle pocket, quick-access pockets, and four attachment points for Wandrd Accessory Straps, which enables you to carry a tripod on the outside of the bag.
Started on Kickstarter where it raised over $650,000, the DUO daypack is the ideal gift for on-the-go photographers that need a single bag that takes them from work to play and points in between.
Wandrd really has thought of everything with this bag, which is why it would make the perfect holiday gift for the photographer in your life!
Learn more about the Wandrd DUO Daypack
Gifts for Photographers Under $250: EF to E-Mount Lens Adapter
If the photographer you're shopping for used to be a Canon shooter and now has a Sony camera, you can give them this handy adapter that allows them to use their old EF and EF-S lenses on a Sony E-mount camera, like the a6300, a6400, a6500, a9 or a7, among many others.
This adapter has both autofocus function and aperture control, as well as a handy USB port for firmware updates.
You can switch between phase and contrast autofocus modes, and there's EXIF signal transmitting and IS functionality too.
There's simply no easier and more functional way to pair Canon lenses with a Sony E-mount camera!
Learn more about the EF to E-Mount Lens Adapter
Gifts for Photographers Under $250: Syrp Genie Mini II
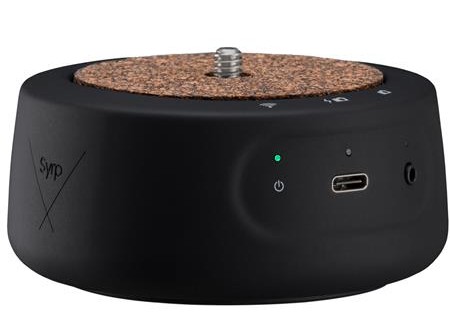
I’ve used Syrp’s time-lapse gear for years now, and when they released the Genie Mini II, I was skeptical that it could be much better than the original Genie that I’d been using. I was wrong.
The updates to the Genie Mini II are mostly under the hood, but they are significant.
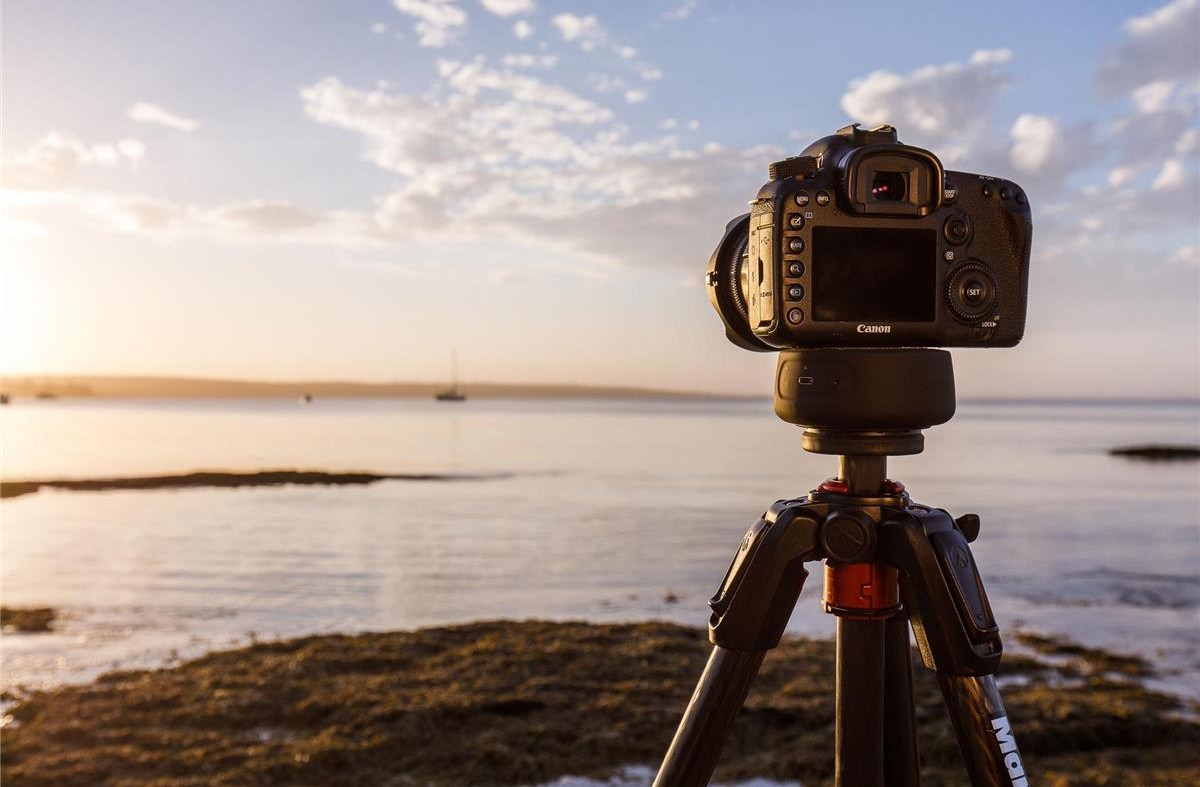
For example, Syrp added the functionality to control two Genie Minis at the same time from a new companion app. That enables photographers to create beautiful pan-tilt motion in their videos at the touch of a button.
Syrp also incorporated keyframing functionalities, so you can set up to 10 keyframes all the while panning at different speeds and in different directions. Nice!
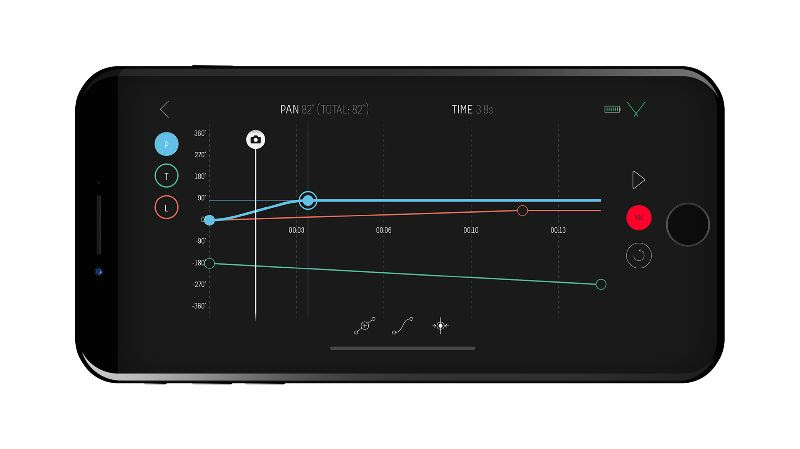
There are other goodies too: a time-lapse compiler that allows you to process video directly on your device and share to social networks; autoexposure ramping to create day-to-night time-lapses; and camera control that allows you to control your camera from your phone.
If you’re shopping for someone that’s at all interested in creating epic videos, this is the gift for them!
Learn more about the Syrp Genie Mini II
Gifts for Photographers Under $250: Aputure AL-MW Mini LED
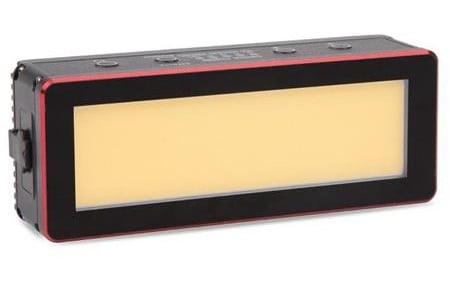
The beauty of the Aputure AL-MW is that it offers you superb light in a tiny package.
In fact, that tiny package is about as bulletproof as you can get, too. It’s rugged, well-constructed, and waterproof, so it can go just about anywhere the photographer on your holiday shopping list needs it to go!
But don’t let its small size fool you - this thing puts out some serious light…
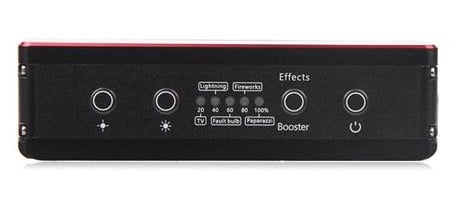
With 6000 lux output, this is about all the light you need, and yet it can fit in your pocket. If the photographer you’re shopping for is like me, having highly portable gear is a must.
Beyond that, the Aputure AL-MW has excellent color fidelity and has a rating of 95+ for CRI and TLCI.
Add in a gel holder with CTO and CTB filters, a battery that’ll give you up to 24 hours of runtime, and pre-programmed lighting effects, and you can see why this little light is worth its weight in gold!
Learn more about the Aputure AL-MW
Gifts for Photographers Under $250: Syrp Super Dark Variable ND Filter
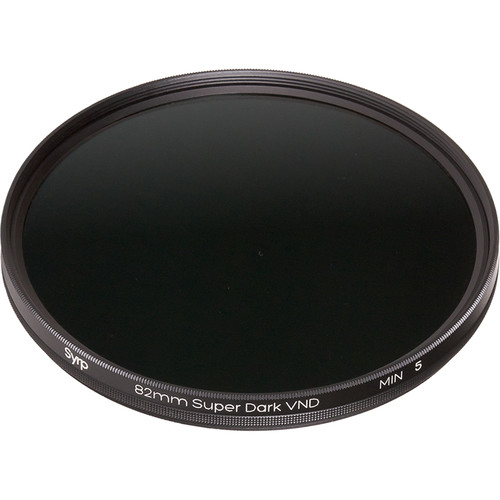
If the photographer on your list loves to shoot long exposures, then a variable ND filter is a perfect gift idea.
Variable ND filters are like having a complete ND filter kit, but in an all-in-one unit.
The Syrp Super Dark Variable ND filter gives photographers between 5 and 10 stops of filtering power so they can get just the right amount of light for their long exposure creations.
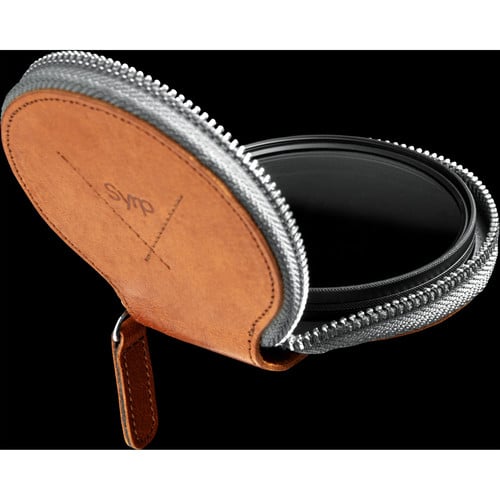
This filter is available in tons of popular sizes, too, from 52mm to 82mm, so you can find the precise size your favorite photographer needs.
And since it’s made of high-quality Japanese glass, the results you get are exceptionally good - clear, precise, and color-neutral, just like it should be when using an ND filter!
Learn more about the Syrp Super Dark Variable ND Filter
We Recommend
Top Lens Filters of 2018
 Image Credit: blackred via iStock
One of the most important photography accessories you can own is a good set of filters.
The operative word here is "good"...
There's lots of dirt cheap filters out there that might entice you with a bargain basement price. However, those filters often use bargain basement materials, too. That's not what you want in front of your lens!
Instead, investing in high-quality filters will get you better results - and more durable filters to boot.
If you're in the market for new photo filters, consider any of the following as a good bet.
Best Lens Filters: NiSi V5-Pro 100mm Advanced Kit

If you're a landscape photographer, there's nothing better than a top-of-the-line filter kit that sets you up with all the goodies you need to create epic images.
NiSi's V5-Pro 100mm Advanced Kit includes a 100mm filter holder, a NiSi 0.9 Soft ND Grad, and three neutral density filters (3-stop, 6-stop, and 1-stop).
Additionally, you get a NiSi Reverse ND filter, a circular polarizer, and multiple adapter rings for fitting the kit to lens threads that run from 67mm up to 82mm.

On top of all that, you also get a cleaning cloth, an air blower, a cleaning eraser, and a carrying case.
It's truly an all-in-one kit that gives you the tools you need to control glare, manage dynamic range during sunrise or sunset, even out bright skies and dark landscapes, and create breathtaking long exposures.
And with NiSi's stellar reputation as one of the top manufacturers of lens filters, you know that with this kit, you'll get high-quality, durable products that will last you for years and years to come.
In that regard, this NiSi filter kit is a long-term investment that will more than pay for itself over the years.
Learn more about the NiSi V5-Pro 100mm Advanced Kit
Best Lens Filters: Kenko Professional Variable NDX Filter

Why carry a bunch of different neutral density filters when Kenko has a variable ND that offers you a range of light-stopping power from 1.3-8.5 stops?
Available in 77mm and 82mm sizes, this filter offers a practical use factor range of ND2.5-450, and is extendable to ND1000.
Kenko crafted this filter by taking two pieces of the highest-quality polarizing glass and mounting them opposite each other.
That means that when you turn the filter ring, the filter darkens or lightens as you see fit.

Not only is this kind of filter invaluable for controlling exposure, but it also lets you get beautiful creative blur for long exposure photos.
When maxed out, this filter allows you to utilize a shutter speed that's several seconds long, even when shooting in full sun.
Editor's Tip: Get Kenko’s latest updates and access to promos for discounted gear. Click here to sign up.
And because Kenko has devised a depolarizing plate that's included in the filter, you get hyper-neutral color balance in the image.
No color shifting, a wide range of light stopping power, and top quality materials make this one of the top lens filters of the year.
Learn more about the Kenko Professional Variable NDX Filter
Best Lens Filters: Kenko Nyumon Circular Polarizing Filter
If it's a circular polarizer you're after for your kit, the Kenko Nyumon Circular Polarizing Filter should be a top choice for consideration.
These lens filters are the top-selling filters in Japan, and they're now available in the U.S.
They have optical glass that's coated and polished so that they resist environmental conditions like water and oils from your skin.
Additionally, the Nyumon series filters have a SLIM mounting ring to minimize vignetting when using wide-angle lenses.
Available in sizes from 37mm to 82mm, these filters are compatible with a wide range of lenses for Canon, Nikon, Sony, Olympus, Fuji, Tokina, and many other major brands of lenses.
Better still, these filters are priced very well, so you can get a top-quality filter without breaking the bank.
Learn more about the Kenko Nyumon Circular Polarizing Filter
Best Lens Filters: Formatt Hitech Firecrest 3-Stop ND Filter

With its Firecrest technology, this ND filter from Formatt Hitech offers neutral color rendition across multiple light spectrums including UV, visible, and infrared light.
This Firecrest coating is sandwiched between the layers of filter glass, which gives it the ultimate protection from damage.
And since the filter glass itself is made in the United Kingdom using Schott Superwite glass, you know that it's not just durable and dependable, but is also some of the best optical glass available today.
These 100x100mm filters are compatible with a variety of filter holders, including those from Formatt Hitech, Lee, and NiSi.
And with a range of filters available from 1-stop to 16-stops, there's no shortage of selection for you to get precisely the amount of light-stopping power you need!
Learn more about the Formatt Hitech Firecrest 3-Stop ND Filter
Best Lens Filters: B+W Circular ND Filter
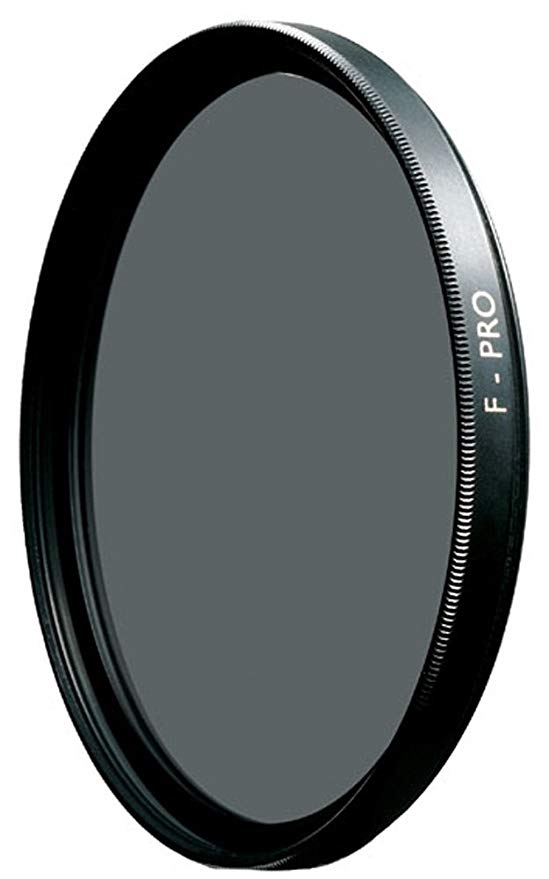
If a circular ND filter is more your style, look no further than this model from B+W.
This particular example offers 6-stops of light-stopping power, which means a shutter speed of 1/60 seconds can be extended to a full second.
Because it has a higher transmission of red tones, the filter also has a slightly warming effect on the color of your images.
With a truly neutral gray design, Water-White Schott Glass construction, and brass threads, this little ND filter offers you tons of benefits at a more than reasonable price. There's even multiple sizing options and filter factors as well!
Learn more about the B+W Circular ND Filter
Best Lens Filters: PolarPro Quartzline ND 8/Polarizer Hybrid Filter
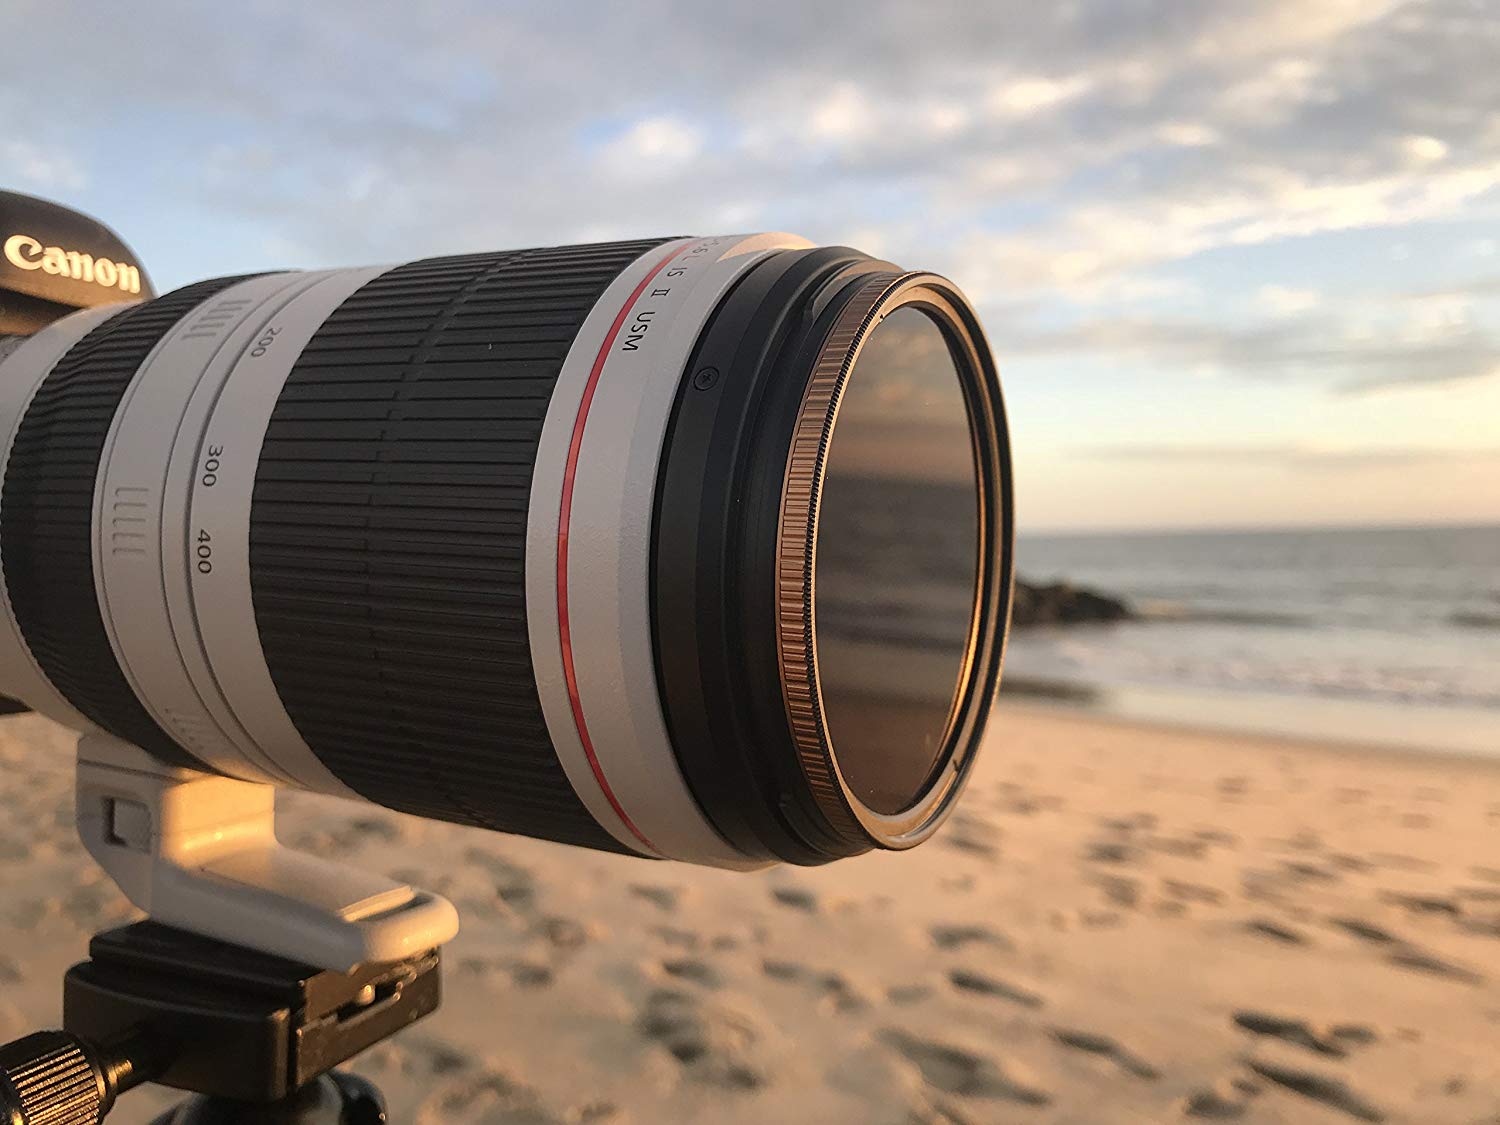
What's not to love about this Quartzline filter from PolarPro?
Not only is this filter made of 99.9% pure fused quartz that gives it unrivaled clarity and incredible durability, but it's also a neutral density/polarizing filter hybrid.
That means you get the best of both worlds for extending your shutter speed while also boosting contrast in the sky and managing glare off non-metallic surfaces.
The filter glass has optical coatings that give them hyper-neutral color profiles with enhanced resistance to water and scratches.
What's more, PolarPro has crafted the filter housing out of brass, that way they thread on smoothly while providing the utmost in durability.
In addition to a top-quality filter, you also get a microfiber cloth for cleaning, a soft filter pouch, and a hard filter case for protecting your filter when it's not in use. There's even multiple sizes and ND strengths to choose from as well.
Learn more about the PolarPro Quartzline ND8/Polarizer Hybrid Filter
Best Lens Filters: Marumi DHG Super Circular Polarizing Filter
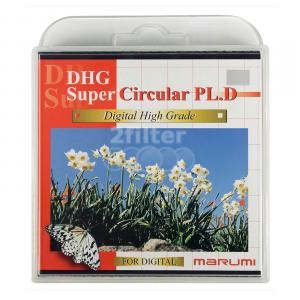
The Marumi DHG Super Circular Polarizing Filter is one of the best available on the market today.
With their high-grade optical glass that improves durability and a satin finish on the filter housing that reduces reflections, you have a filter that's tough, smartly designed, and inexpensive to boot.
The filter has six coatings - including an anti-static layer that prevents dirt and dust from sticking to the glass. There's also an ultra-low reflective layer to minimize reflections.
On top of that, this filter is just 5mm thick, which lessens its profile on the front of your lens. That means less vignetting when shooting with a wide-angle lens and at a wide aperture.
From 37mm up to 105mm, Marumi has a circular polarizer for just about any lens!
Learn more about the Marumi DHG Super Circular Polarizing Filter