10 Easy Ways to Help You Develop Your Creative Eye
No matter how great a photographer is, they had to start at some point. Ansel Adams, at some point in his life, was fumbling around with his first camera, learning the tricks of the trade, identifying how to control his camera settings, and learning how to compose creative and dynamic photos.
You have to start somewhere as well, and working on your creative eye is a great place to begin.
But often, it’s not the creativity aspect that’s difficult for new photographers, it’s simply figuring out how to use their creativity to develop their photographer’s eye. In this article, we offer a few quick and easy tips that will help refine your creative eye such that you make more interesting photos.
Let’s begin!
Practice - A Lot
It’s a cliche bit of advice, but it’s probably the most impactful advice you can get. Like any artistic pursuit, getting better at photography simply takes time. Snapping a few photos every Saturday won’t cut it. Instead, you need to commit a bit of time every single day to interact with your camera, learn the ins and outs of exposure, experiment with lighting, and exploring your surroundings. In other words, even if it’s for just 10-15 minutes a day, immerse yourself in the creative pursuits of photography. Only then will you begin to expand your creative possibilities.
Quick tip: Get into the habit of practicing your photography skills by taking part in a photography challenge. For example, you might strive to create a different type of photo every day for 30 days or come up with a different photography subject for each week of the year.
Tweet These 10 Easy Creative Eye Tips
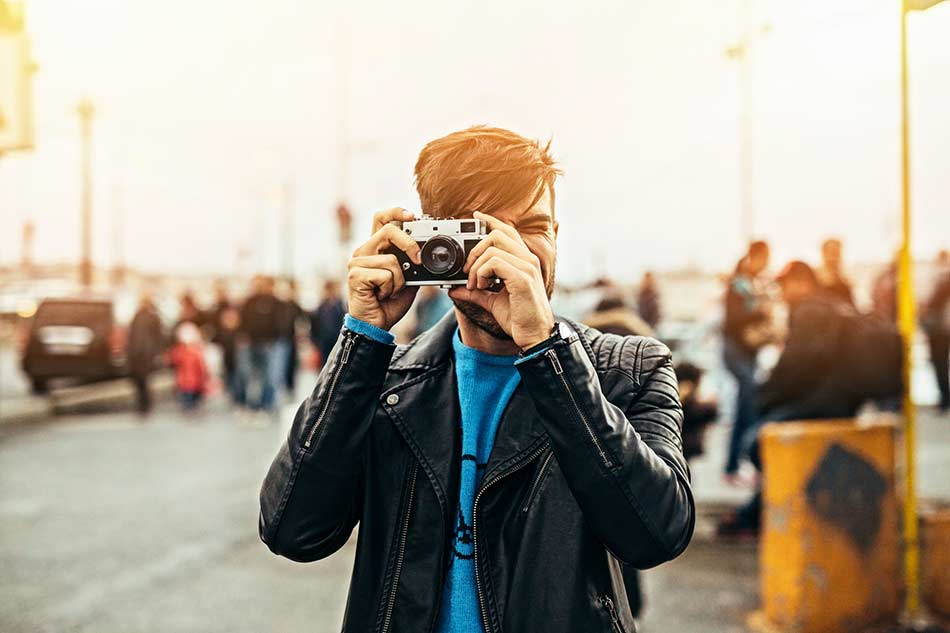
Look at Other People’s Photos

Developing your creative eye can even be done while you’re at home sitting on the couch. Buy a few photography books, subscribe to a photography magazine, or go online and view images. Pore over them. Break them down and identify what you like and what you don’t like. Then, determine why you like what you like. Look at technique. Explore things that you might have done differently. Then, as you go through your daily routine, you’ll find that you start to look at scenes with this same critical eye. You’ll soon find that this results in improved photos because you can take what you’ve learned from others and apply it to your own artistic pursuits.
Quick tip: Don’t be afraid to share your images with others so you can get some feedback. No two people view a photograph in the exact same way, so getting an outside perspective on the images you create will only help you grow as a photographer.
Learn More:
- See What Happens When a Pulitzer Prize-Winning Photographer Takes Photos With a Toy Camera
- 5 Camera Tricks for Cheapskates
Develop a Personal Artistic Style

One of the benefits of getting a lot of practice and examining the work of others is that you’ll begin to identify your personal style. You’ll begin to see patterns in the types of images that are on your memory card. You’ll also note that many of the photos you enjoy viewing by other photographers share certain characteristics. Perhaps it’s the way light is used. Maybe it’s the manner in which the subject is framed in the shot. It could be something as broad as the subject matter - black & white or architectural photography, for example. The point is that once you identify your personal photography style, you’ll find that you’ll be more apt to find creative ways of expressing that style.
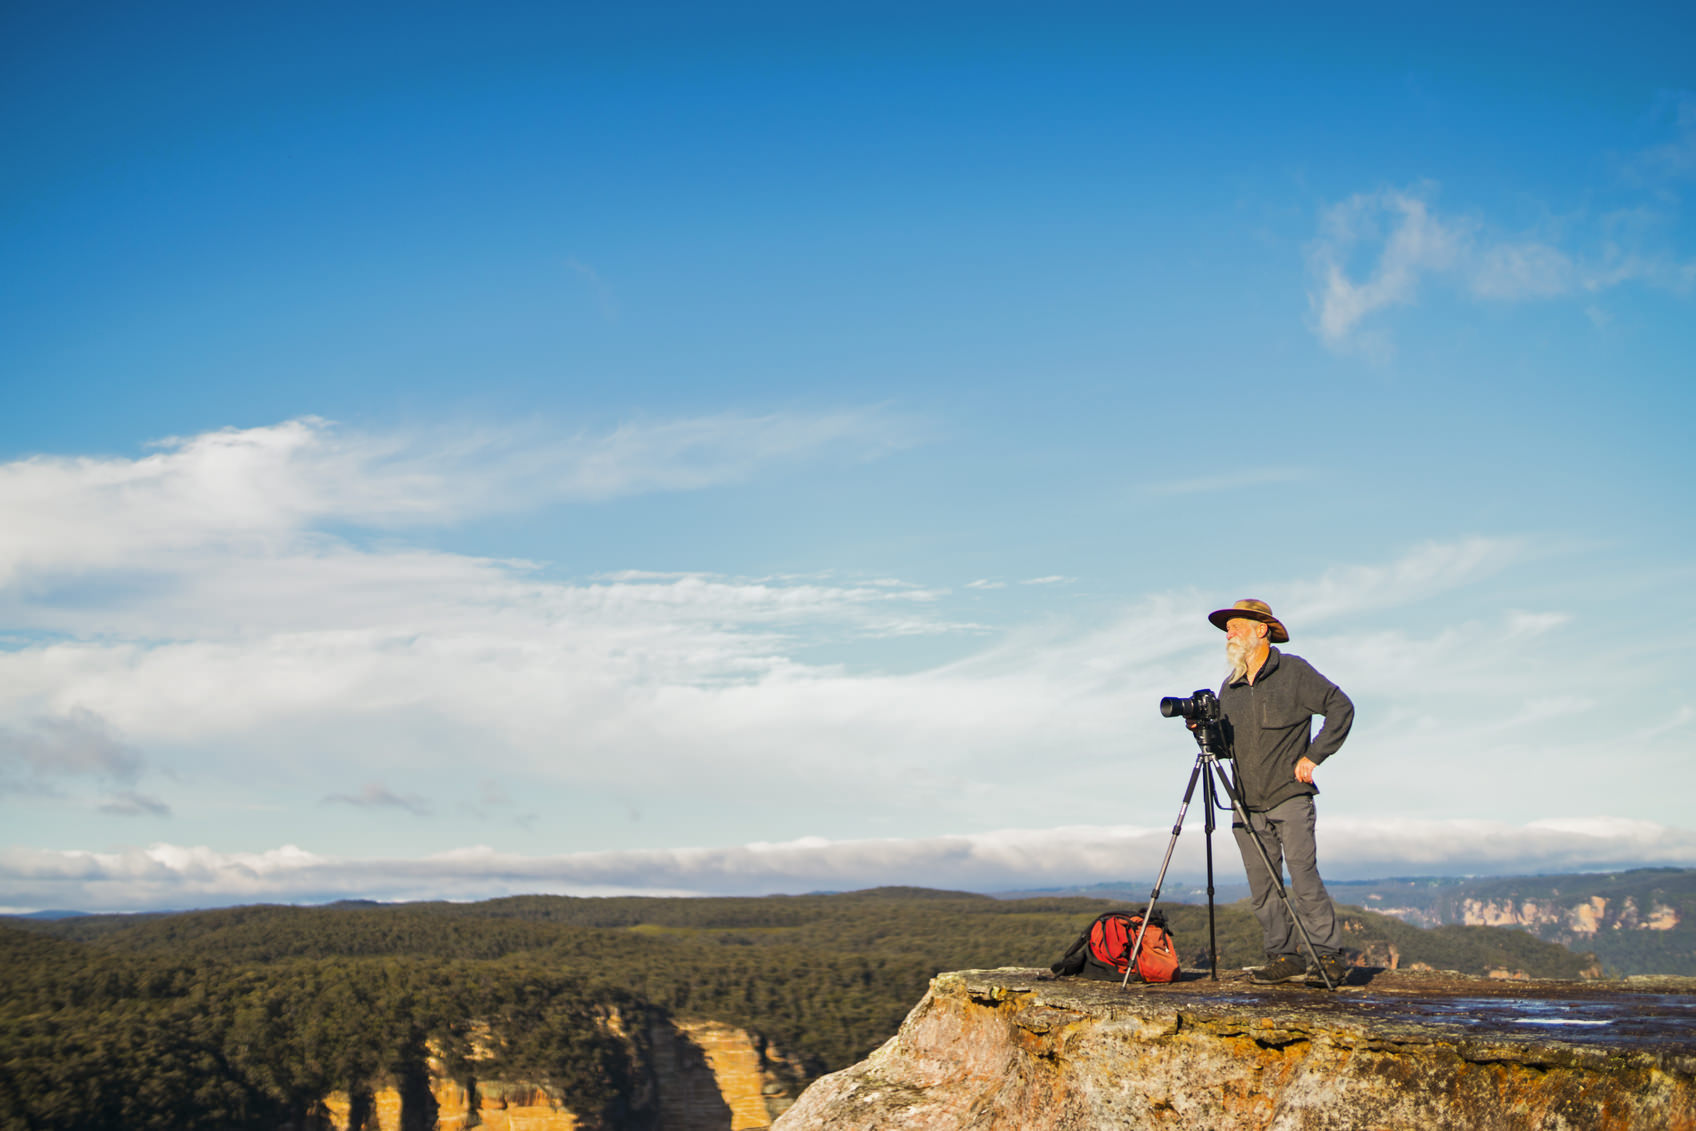
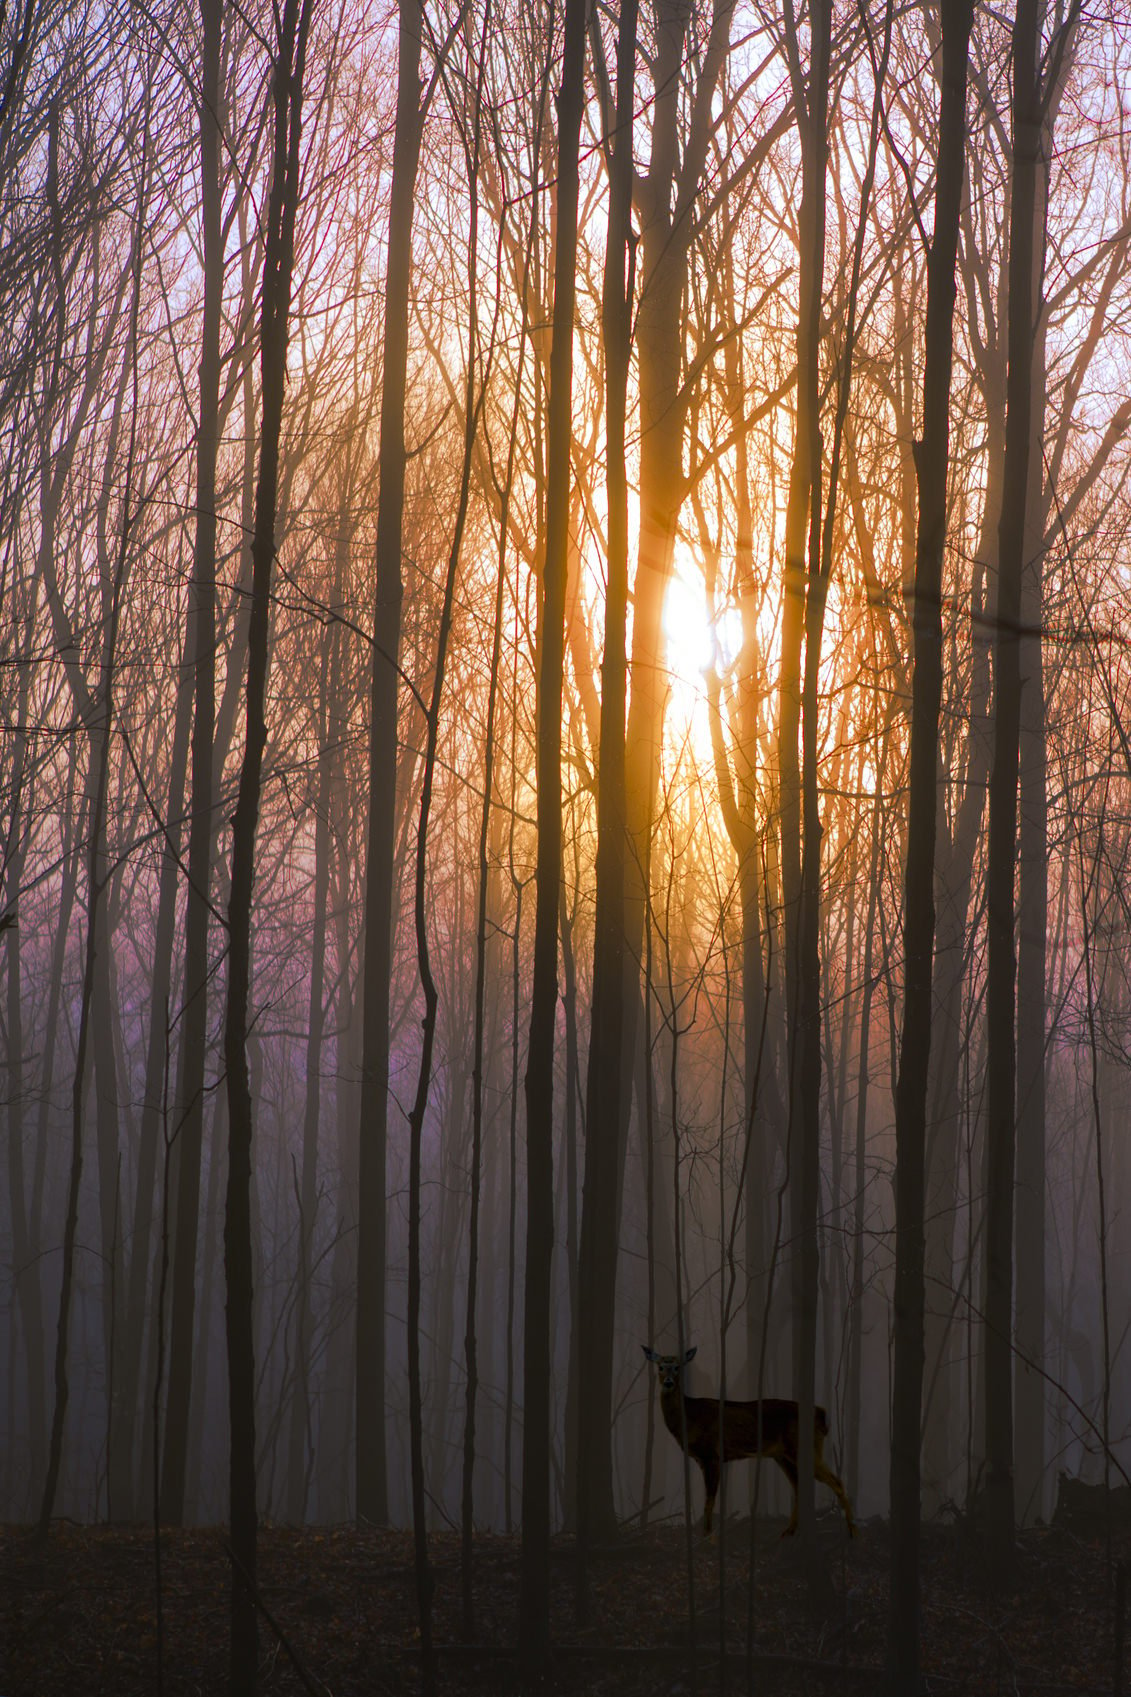
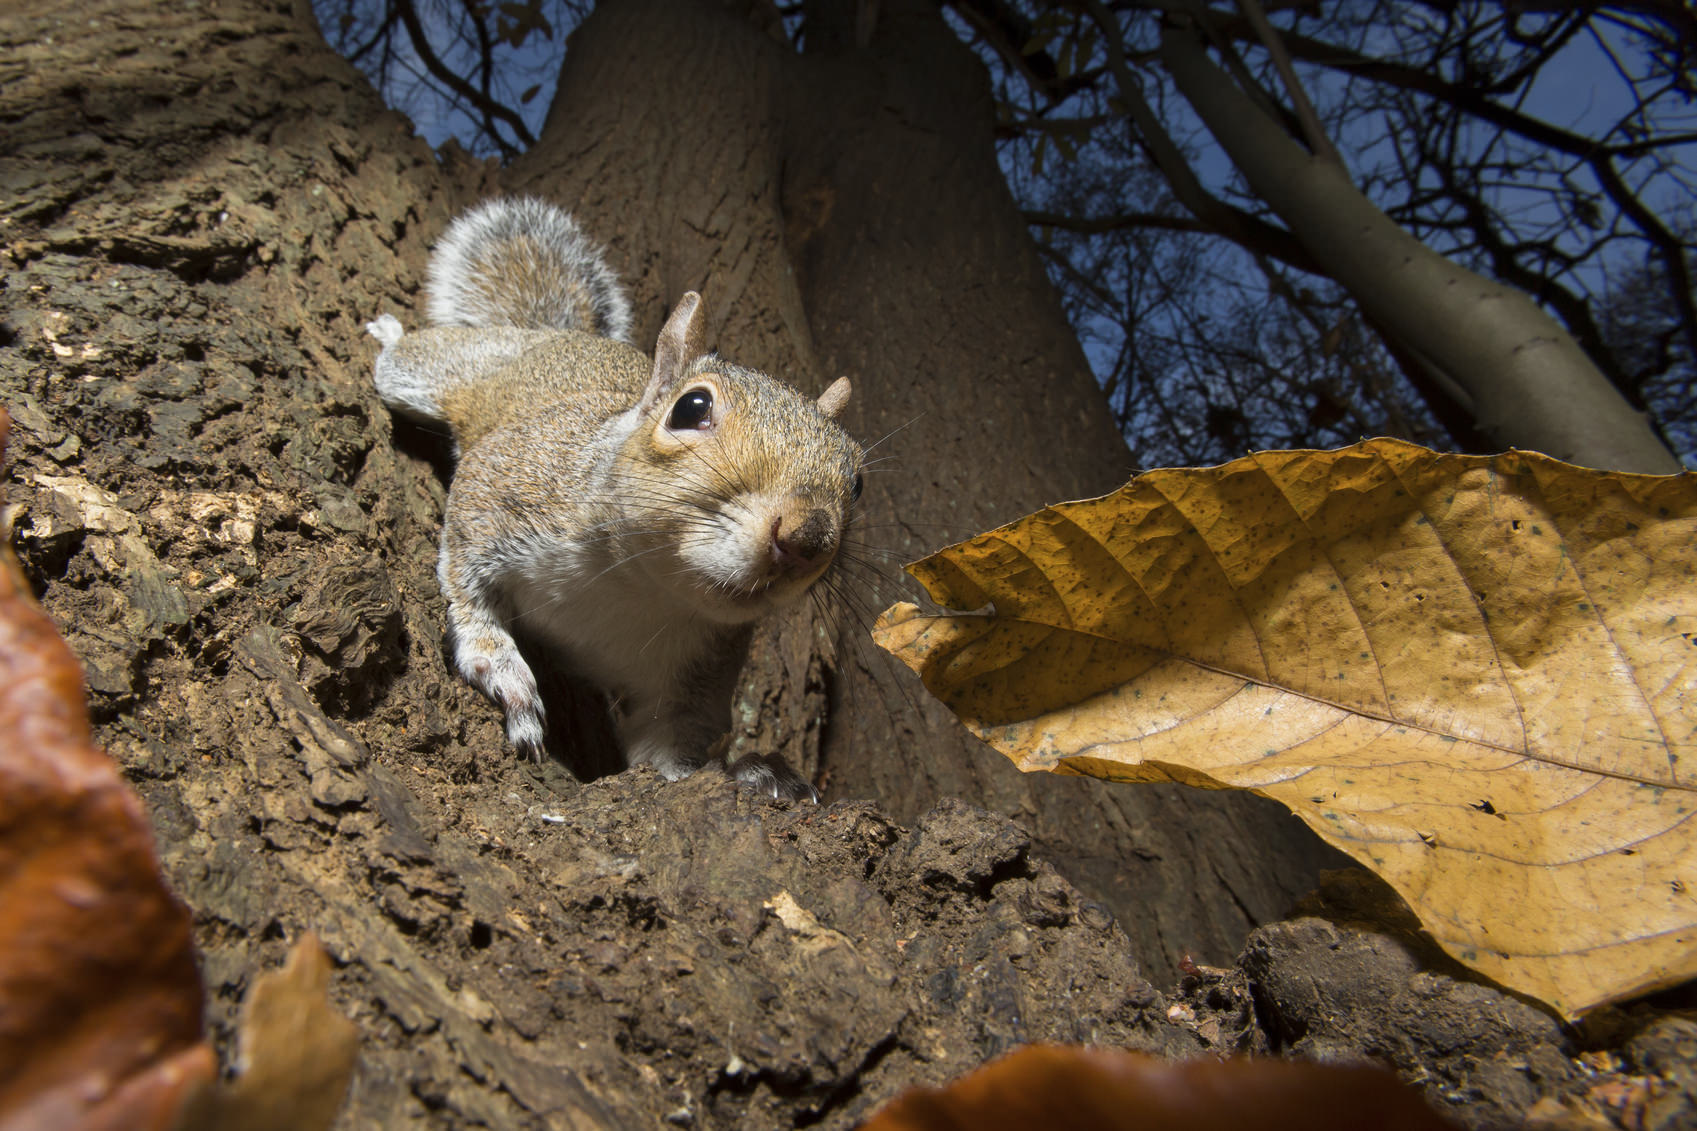
Learn - and Break - The Rules

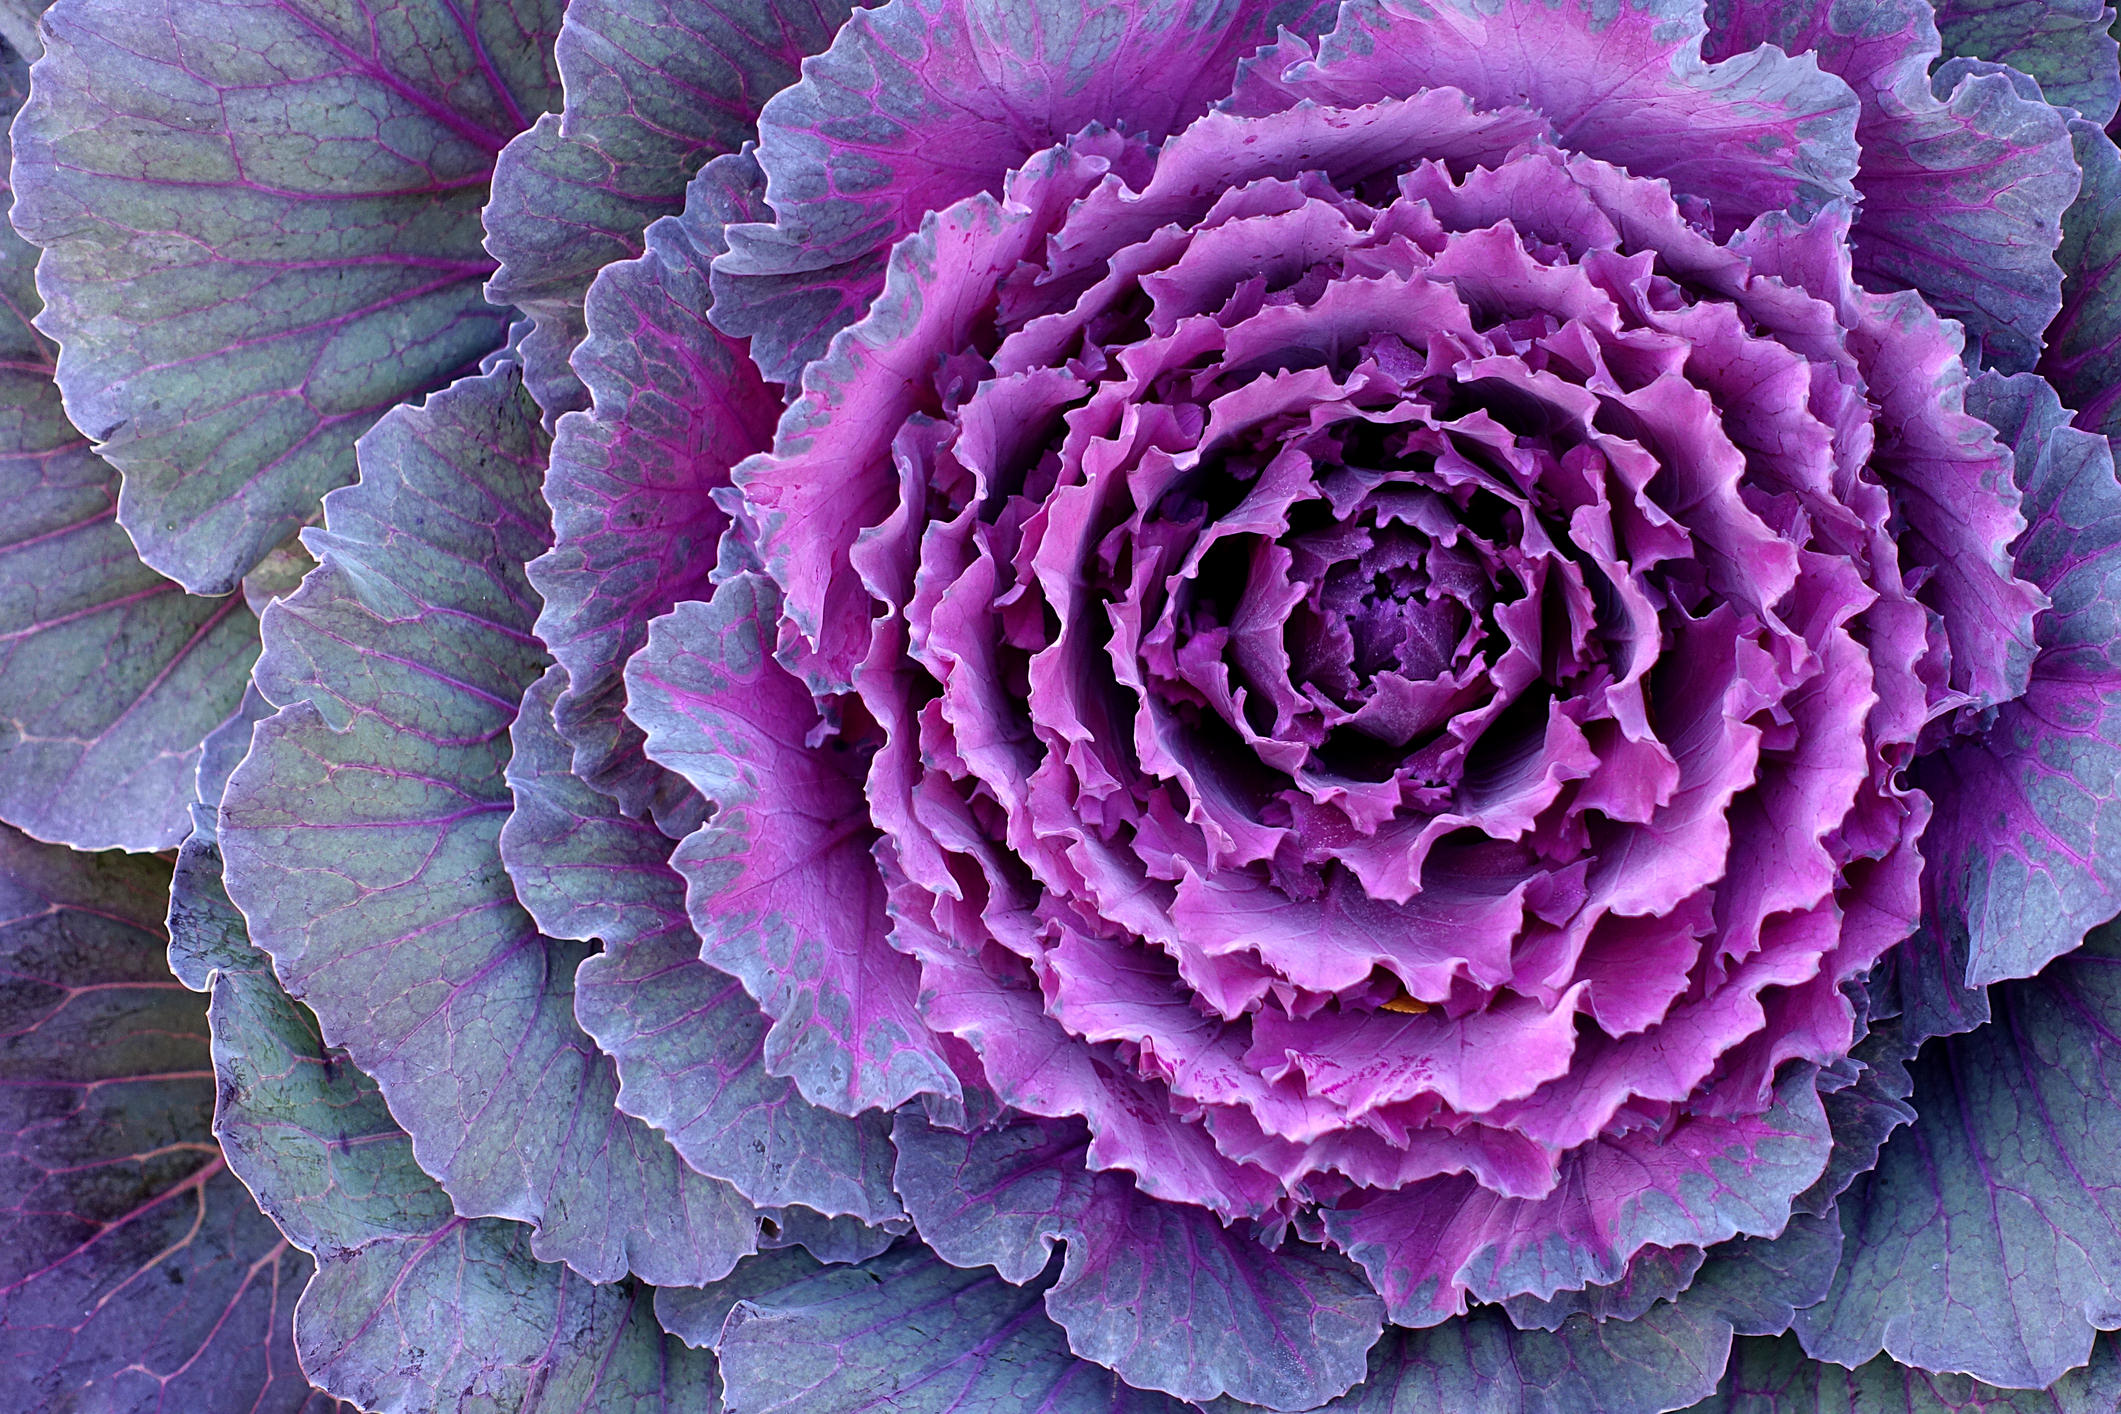
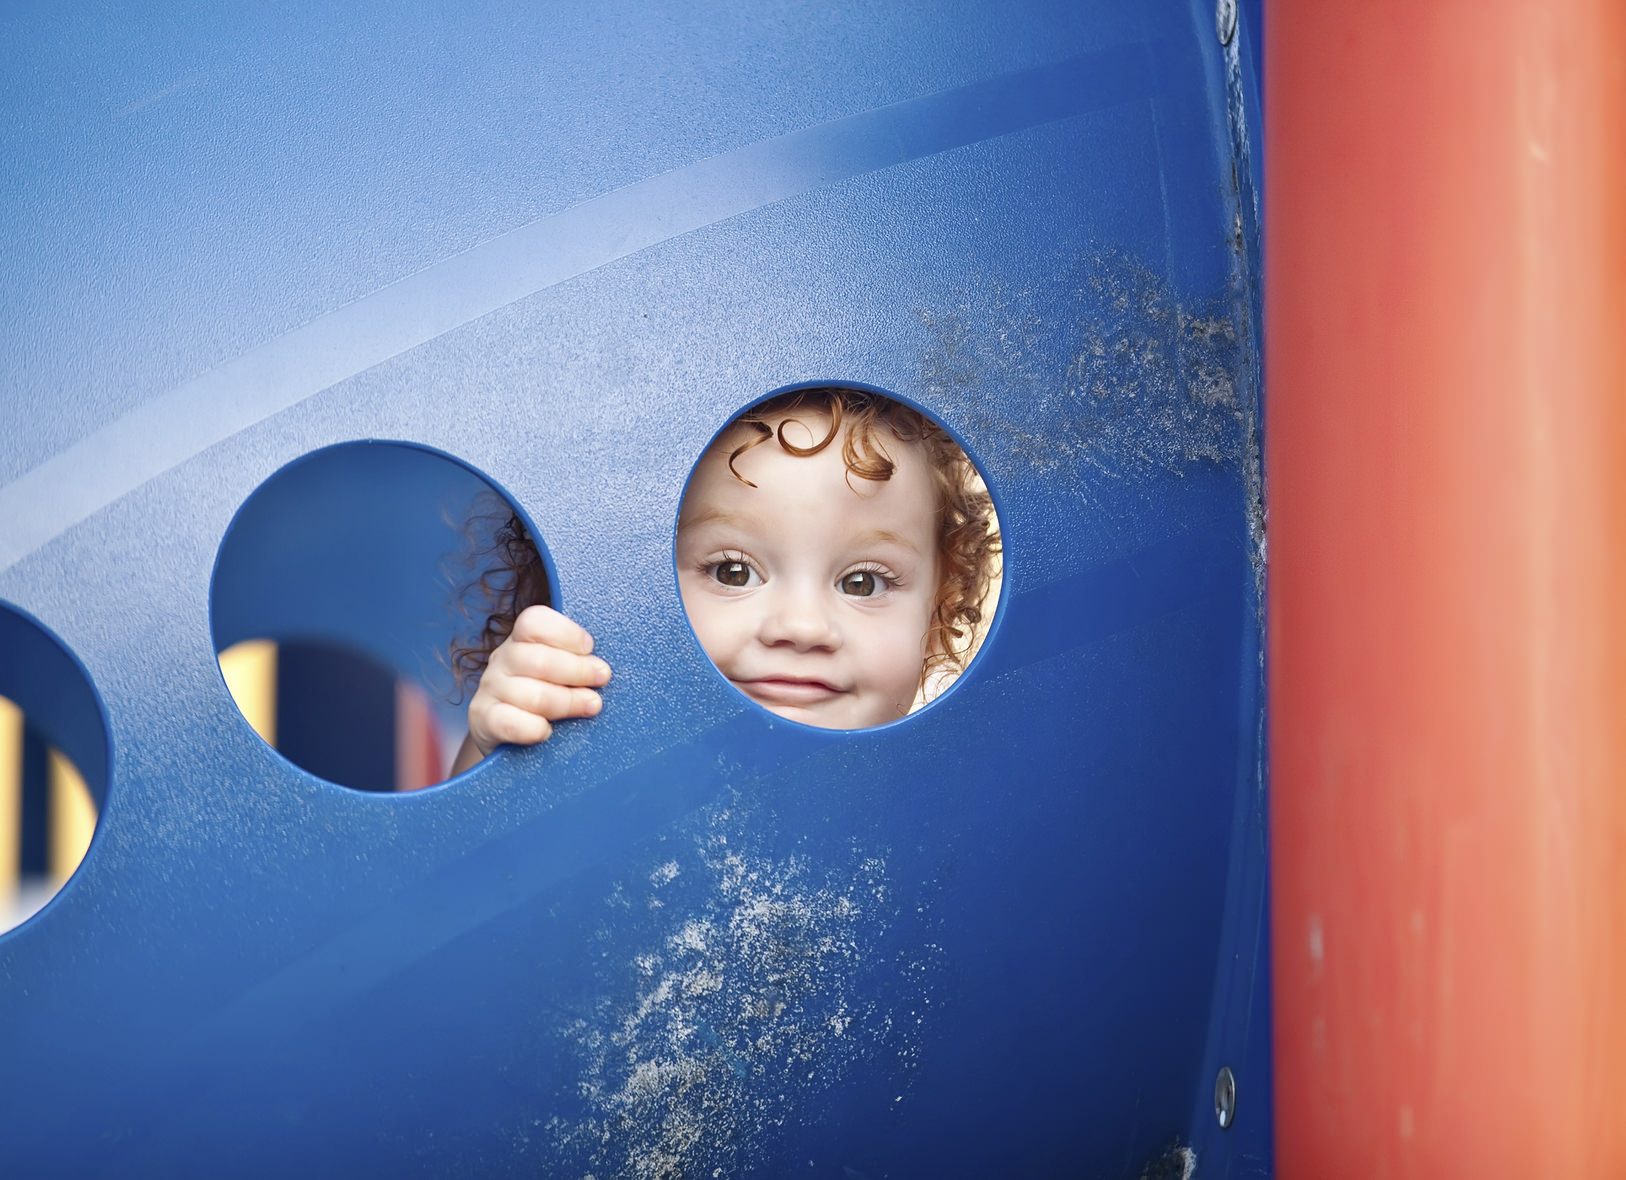
Part of learning how to develop your creative eye is being willing to break convention and create images that don’t adhere to the standard photography rules of thumb. An ideal example of this is the Rule of Thirds. On many occasions - perhaps the vast majority of times - the Rule of Thirds helps you create images that are more organized, balanced, and compelling. But sometimes, as seen in the image above, going against the rule can result in a beautiful image nonetheless.
With that in mind, it’s important to learn the rules, but perhaps even more important to break them. Create a portrait with a background that’s in focus. Don’t include leading lines in a landscape shot. Use a telephoto lens for street photography. Doing so will force you to use your creativity to find new subjects and learn unique ways of framing shots that will help you create more interesting images.
Quick tip: Don’t just break the rules for the sake of breaking them. Instead, be purposeful in the way you compose your shots, that way, even if you break the rules, your image won’t look like it was simply a mistake.
Editor's Tip: Not sure what all those numbers mean on your lens? Learn how to read the markings on your lens.
Go Easy When Deleting

Every photographer takes a few moments to cull their photos, and in the process delete all the ones that didn’t live up to their expectations. But in the process of doing so, there often isn’t much time spent examining the photos, but instead, just a few split seconds to determine if they are keepers or not. The danger in doing that is that you might overlook something that might not be that fantastic at the moment, but with some post-processing might turn into a very nice image. In this regard, you’re developing your creative eye on the back-end; you’ve already taken the photo so there’s nothing more to do compositionally, but you can learn how to look at an image and see improvements you can make with some editing.
Quick tip: Sometimes, all that’s needed to transform an image is a bit of cropping. If you come across a photo you think isn’t that great, see how cropping the image might make it more eye-catching.
Learn Manual Controls

Nothing will hold back your creativity more than shooting in full auto mode. Though it can be comforting to know that the camera is making all the decisions for you, the results will never be as good as if you take the reins and make decisions about things like exposure all on your own. Manual mode is scary, to be sure, but as noted above, practice makes perfect, and if you never take control of your camera, you’ll never be able to fully develop your photographer’s eye.
To start, try shooting in aperture priority or shutter priority mode. Experiment with different settings so that you develop an understanding of how adjustments to aperture or another camera setting changes the look and feel of your image. As you shoot, note what changes you make, then inspect the image to see exactly how those changes translate into the visual you create. In doing so, you’ll not only develop a more robust creative eye, but you’ll also gain a good deal of technical knowledge as well.
Learn More:
- A Beginner's Guide to Aperture Priority Mode and Exposure Compensation
- Everything You Need to Know About Shutter Priority Mode
Play With Perspective

All too often, photographers take their photos from the same perspective that they see the world - from their own eye height. And though many successful photos are taken from this point of view, not venturing beyond that typical perspective won’t do anything for aiding in the development of your creative eye.
By dropping down low for a worm’s eye view or getting up high and composing a shot looking downward, you’re forced into seeing things in a completely new way. As a result, there might be shapes, colors, textures, and so on that catch your eye which you can then highlight in your photos. So, the next time you’re out taking a few shots, don’t just stand pat. Move to the left and the right. Walk around the subject to see if there’s a better angle of view. Get down low, then get up high. See how the movements you make change the scene for the better.
Quick tip: Practice finding different angles of view by taking a series of photos of the same subject, but from different perspectives. For example, you might find a beautiful flower to photograph in your backyard and take four photos, each from a different angle.
Look for Photo Opportunities, But Leave Your Camera at Home

Oddly enough, one of the biggest barriers to developing your creative eye is simply not taking the time to see opportunities for photos. If you’re lugging around your camera and constantly looking at the LCD to inspect your previous photo, you could very well miss an even more compelling shot. So, by leaving your camera at home, you can give your surroundings a thorough visual inspection. After all, you can’t create an incredible photo if you don’t first see the opportunity for a photo with your own eyes!
Tweet These 10 Easy Creative Eye Tips
Take Chances

Maybe you’re most interested in portraiture. Perhaps landscapes are your favorite. It’s certainly okay to enjoy one type of photography more than others. But there is a wonderful opportunity to develop your creative eye by taking chances on creating images that are out of your comfort zone. If you enjoy nature and wildlife photography, head into town and try your hand at street photography. If you love landscapes, try still life photography. The point is that every genre of photography requires a little bit of a different approach, and learning how to create gorgeous photos that are out of your comfort zone will only help you in creating beautiful photos once you get back to photographing subjects with which you are most comfortable.
Quick tip: Another way to take chances is to travel light. On your next photography outing, take just one camera body and one lens. Force yourself to learn how to use the few implements you have to create eye-catching photos, no matter the subject.
Editor's Tip: Finish off your photos by turning them into a great print. See what your images look like as fine art.
Don’t Be Afraid to Make Mistakes

Above all else, one of the easiest things you can do to develop your creative eye is to grab your camera and take photos without the worry of making mistakes. Mistakes will happen - it’s unavoidable. Even the best photographers in the world still make mistakes. However, by letting go of the fear of screwing up a photo, you’re more able to approach photography in a relaxed, calm manner. In the end, photography is an art, and art is incredibly personal. What you think is a mistake might be viewed as a jaw-dropping photo by someone else. Let go of your fears, bring the camera to your eye, and fire away!
We Recommend
10 Essential Wildlife Photography Tips
It’s hard not to enjoy the beauty of nature and wildlife. Even animals that are fairly common in your area can be fun to watch and great subjects for wildlife photos. Of course, the problem with photographing wildlife is if you’ve never done it before, it can be difficult to know where to start. After all, it’s the basic fundamentals that will help you build a solid foundation for wildlife photography success.
Steve Perry is a long-time wildlife photographer, and he offers up 10 essential wildlife photography tips in the short video below. Each tip addresses the basics of photographing wildlife such that when you have an opportunity to capture an image of a wild animal, you’ll have the knowledge and skills to do so. Have a look, and learn what you can do to be a more successful wildlife photographer.
Amazon Recommendations
- Wildlife Photography: Advanced Field Techniques for Tracking Elusive Animals and Capturing Magical Moments
- Digital Wildlife Photography
- Wildlife Photography: From Snapshots to Great Shots
We Recommend
15 Breathtaking Examples of Bird Photography
Just about any time I see a bird, I’m reminded of that iconic scene in the original Jurassic Park when Dr. Grant schools the precocious kid about how dinosaurs have more in common with today’s birds than today’s reptiles.
It’s an intriguing thought, to be sure.
But thank goodness birds are much prettier than dinosaurs!
And much less dangerous, I’d imagine…
Having seen a few birds today, I thought it’d be fun to have a look at various birds from around the world.
This collection of photos is a chance for us to admire the beauty of birds, and maybe they will provide a bit of inspiration for your own photography pursuits too.
So, whether you’re a bird photographer or not, enjoy these stunning photos of birds!

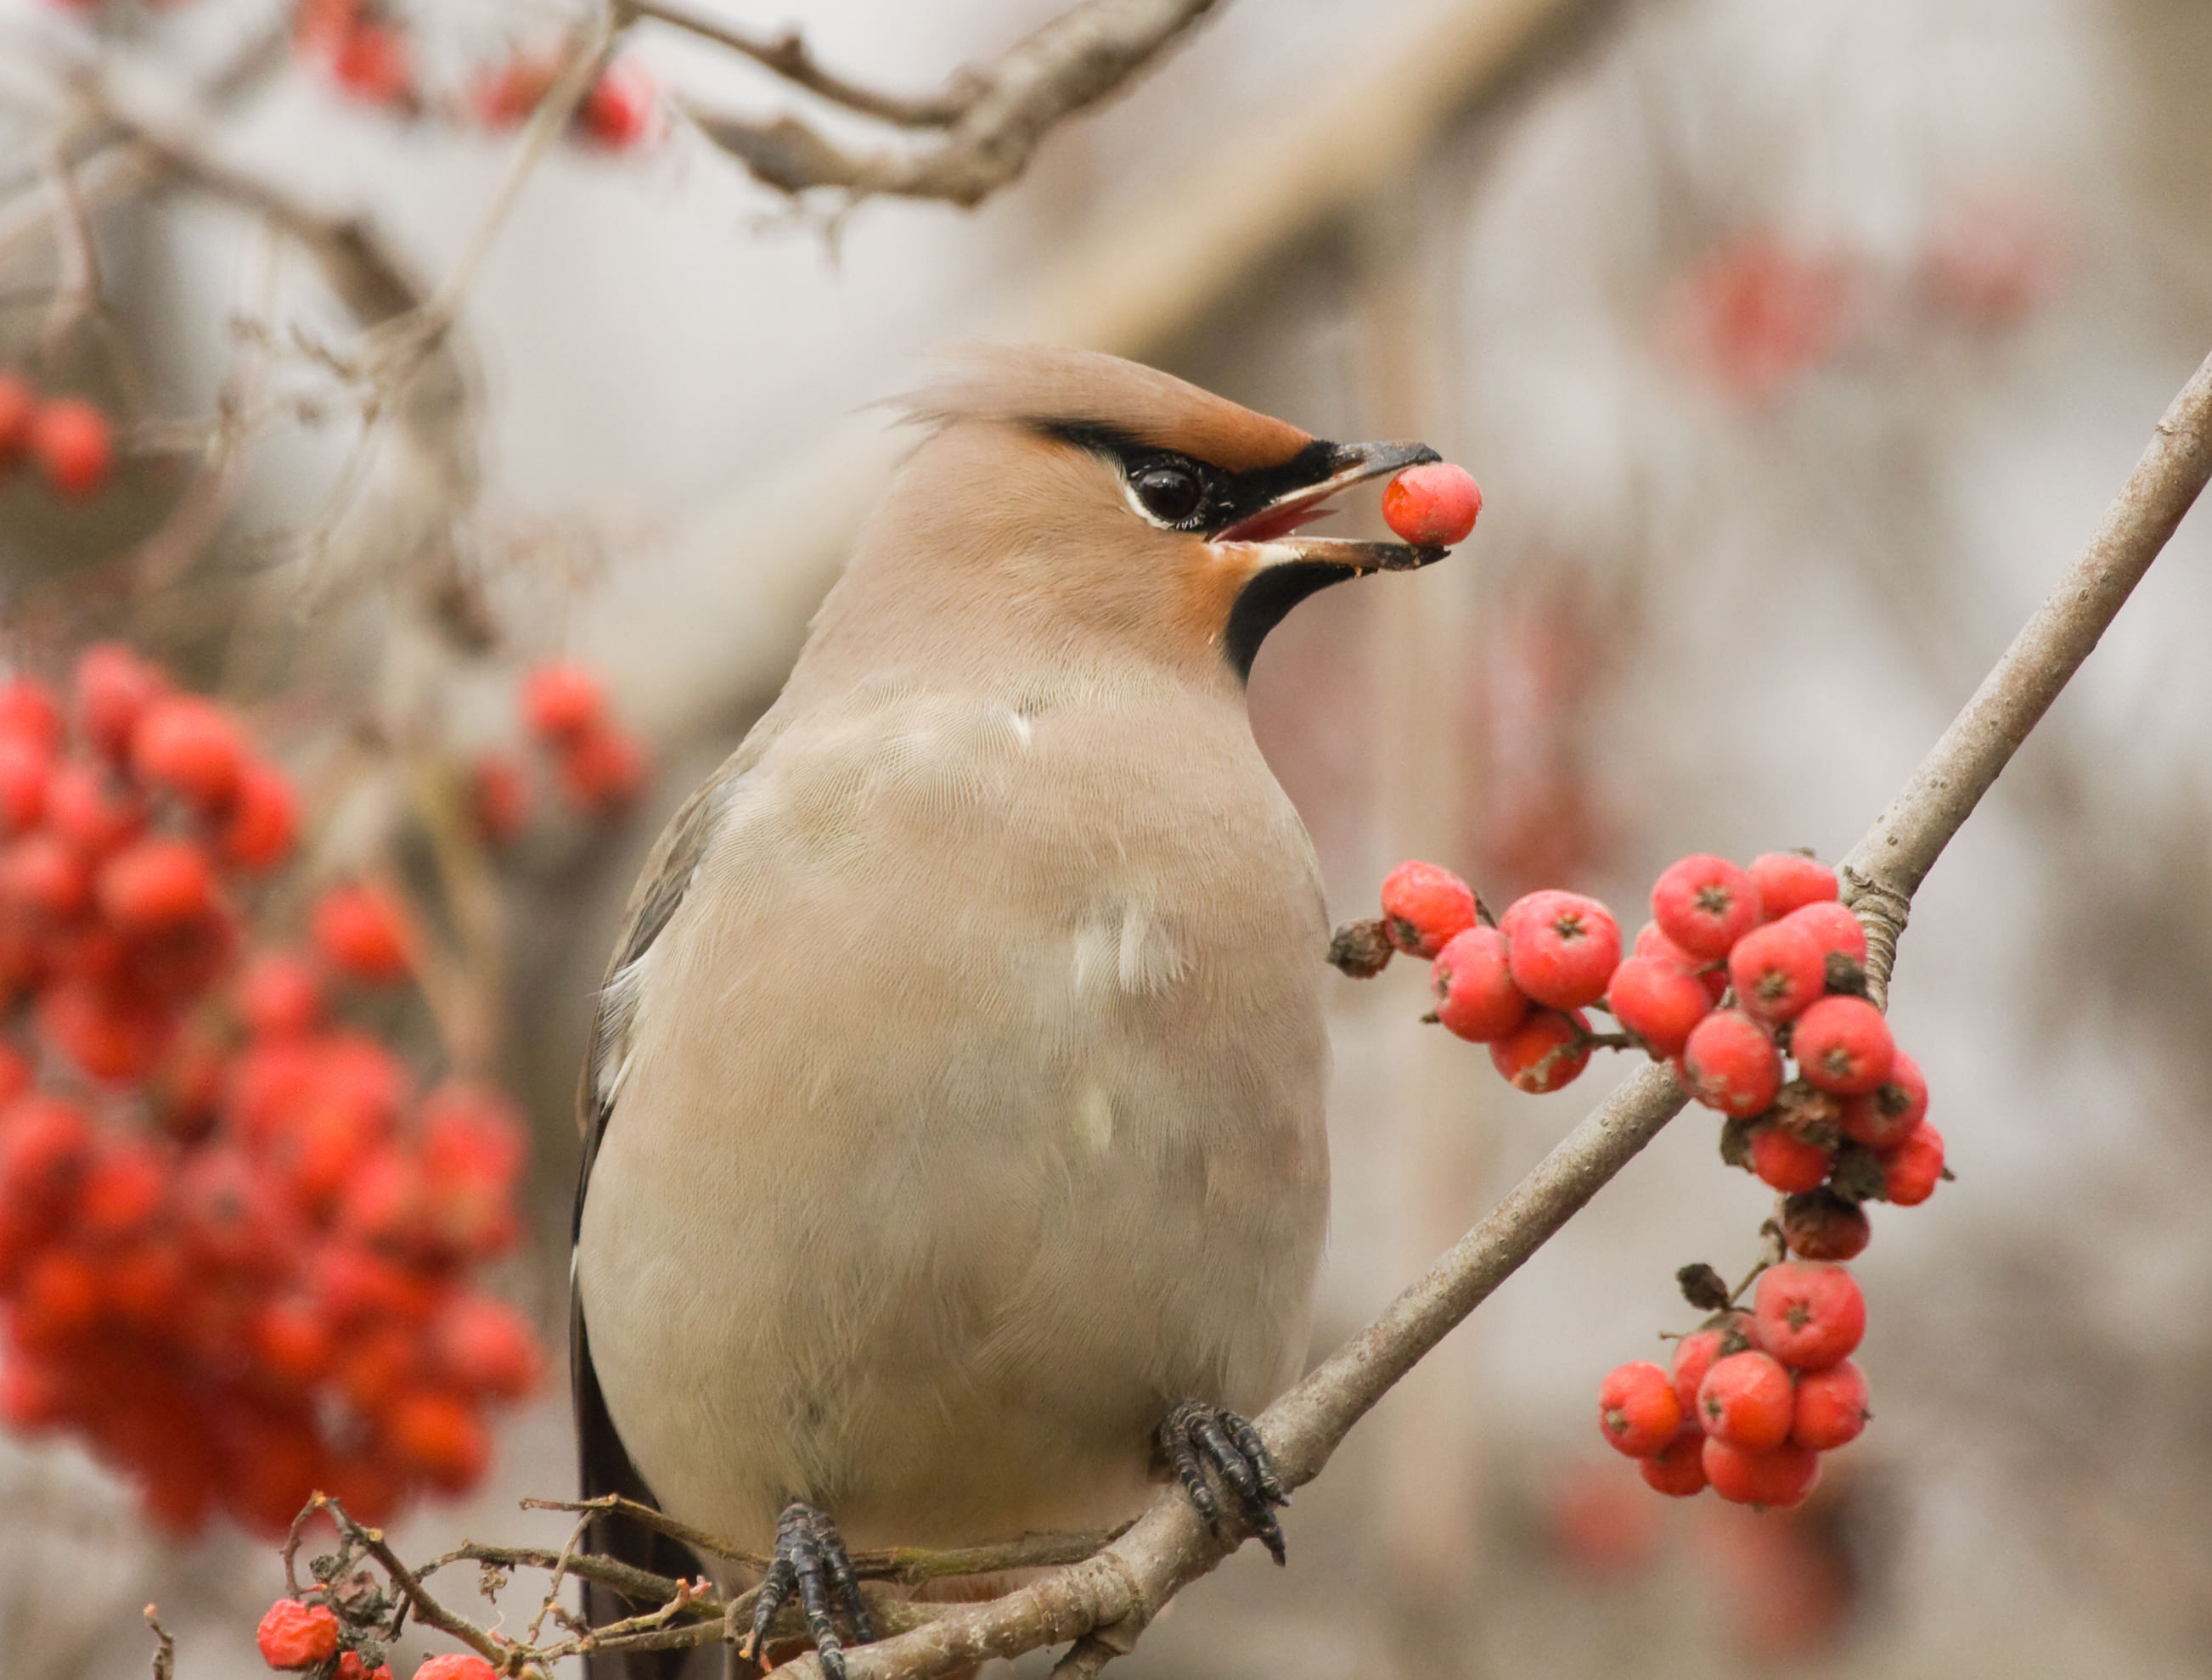
When photographing birds, especially small ones like the bohemian waxwing above, it’s important to work your shooting angle such that the background doesn’t distract from the bird. Even if the background is blurred, bright colors, weird textures, and odd shadows can wreak havoc with the composition. If need be, move left or right, up or down to eliminate distracting background elements to get an improved composition like the one above.
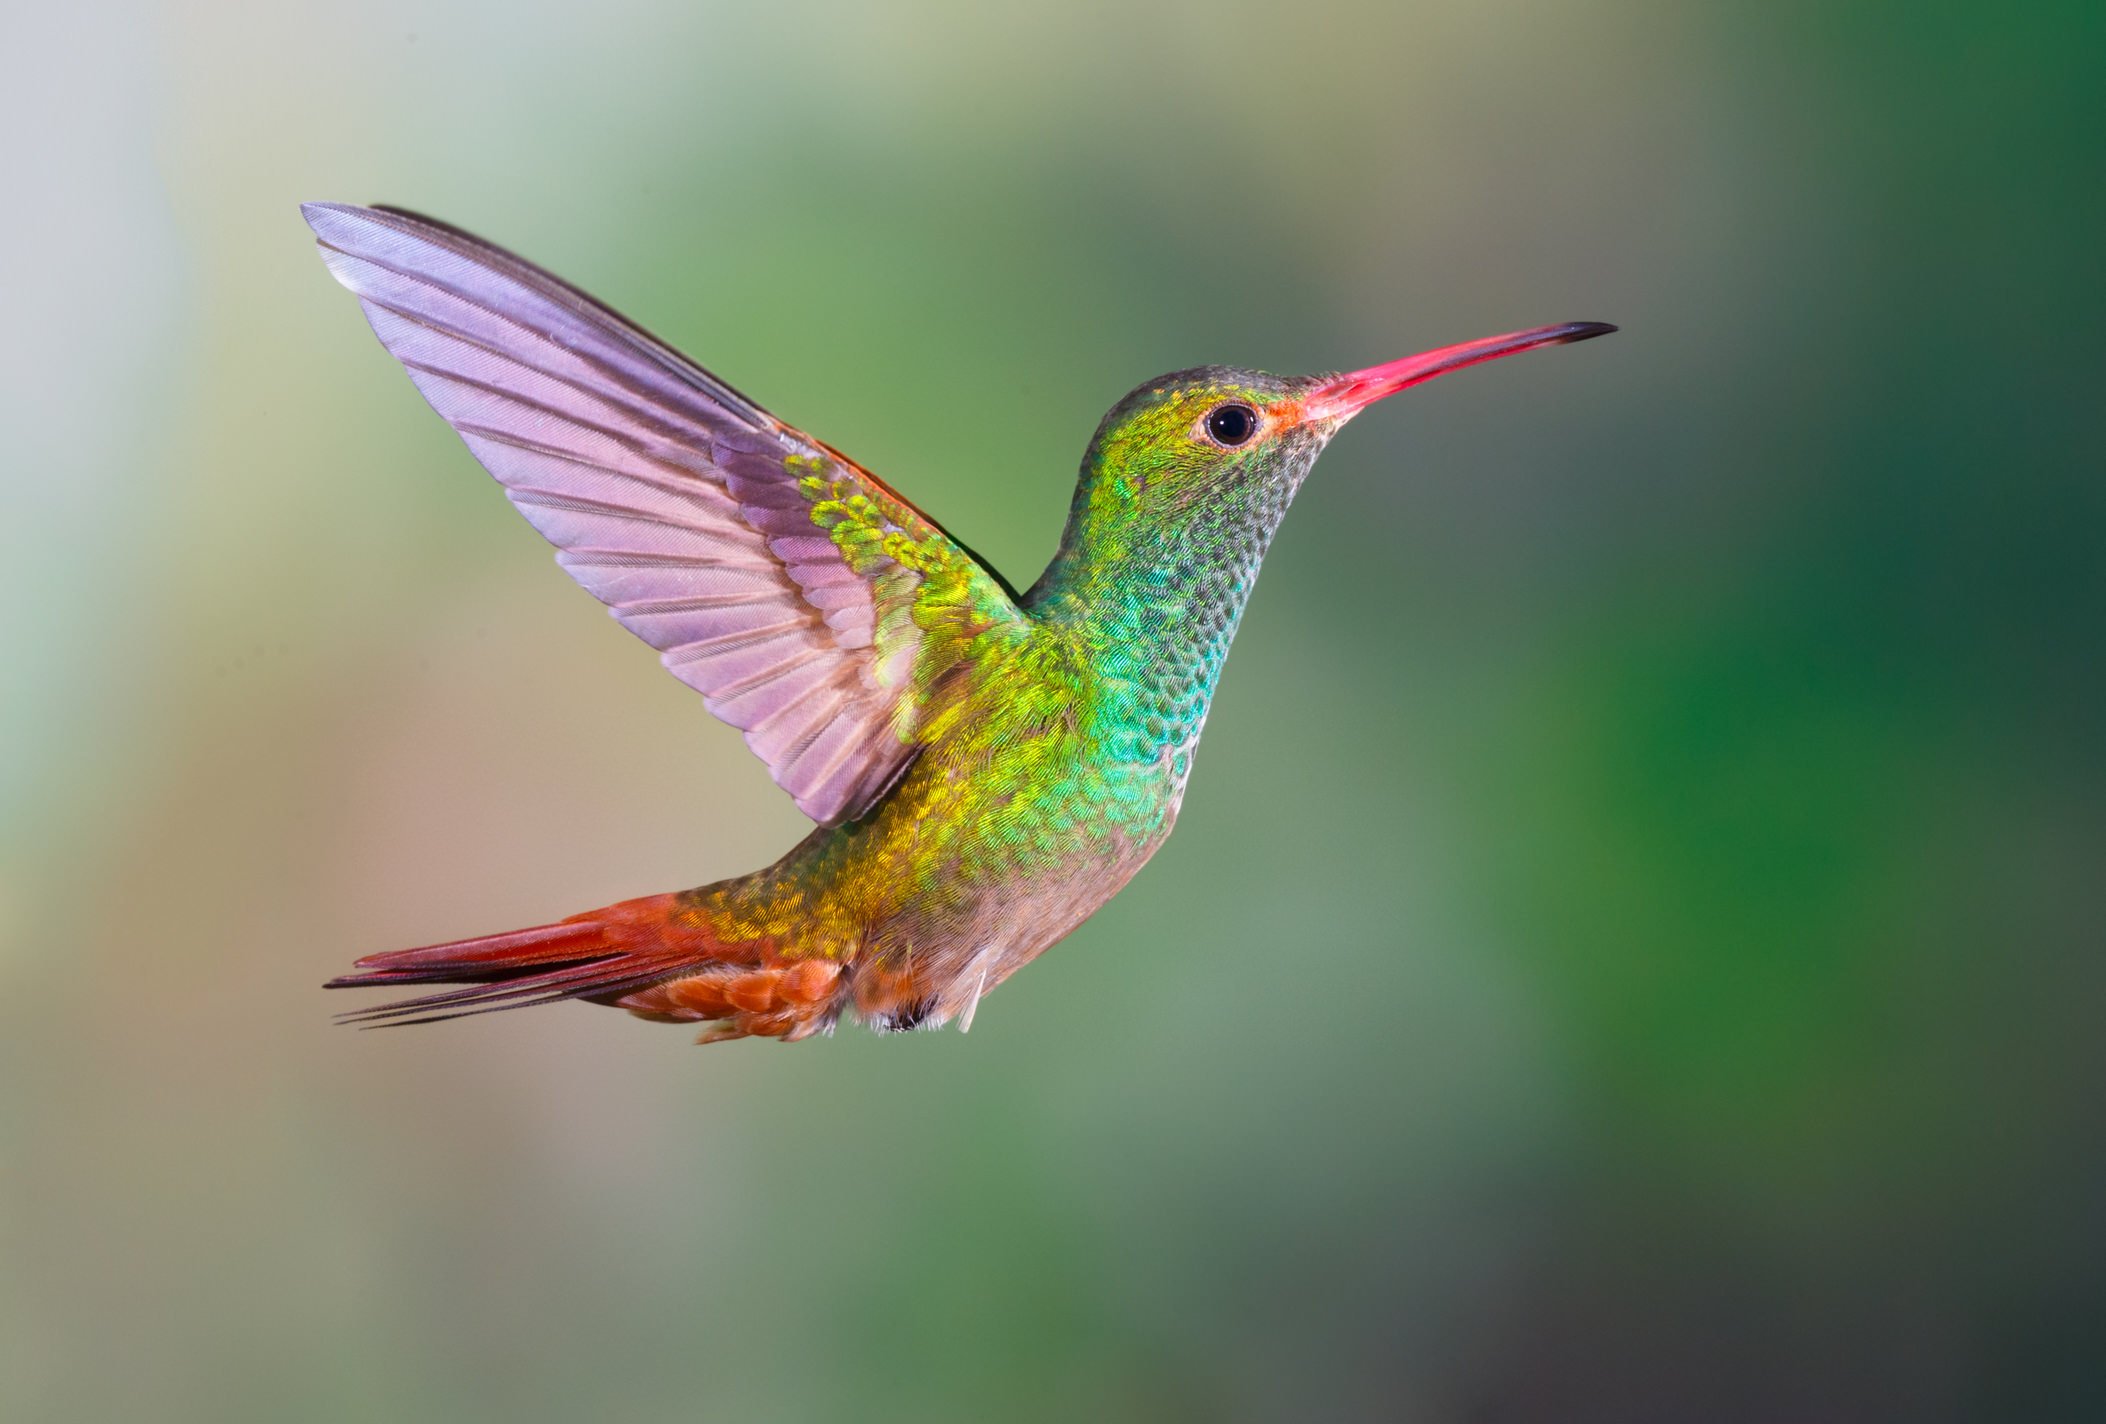
If you have the patience, photographing a hummingbird can be incredibly rewarding. Naturally, you have to work with a super fast shutter speed to freeze the movement of a hummingbird’s wings. But because you’ll likely be shooting with a very wide aperture, you can get a nicely blurred background like in the image above. Because hummingbirds are so small, try to frame the shot without anything else in the frame - that way the bird takes center stage in the photo.
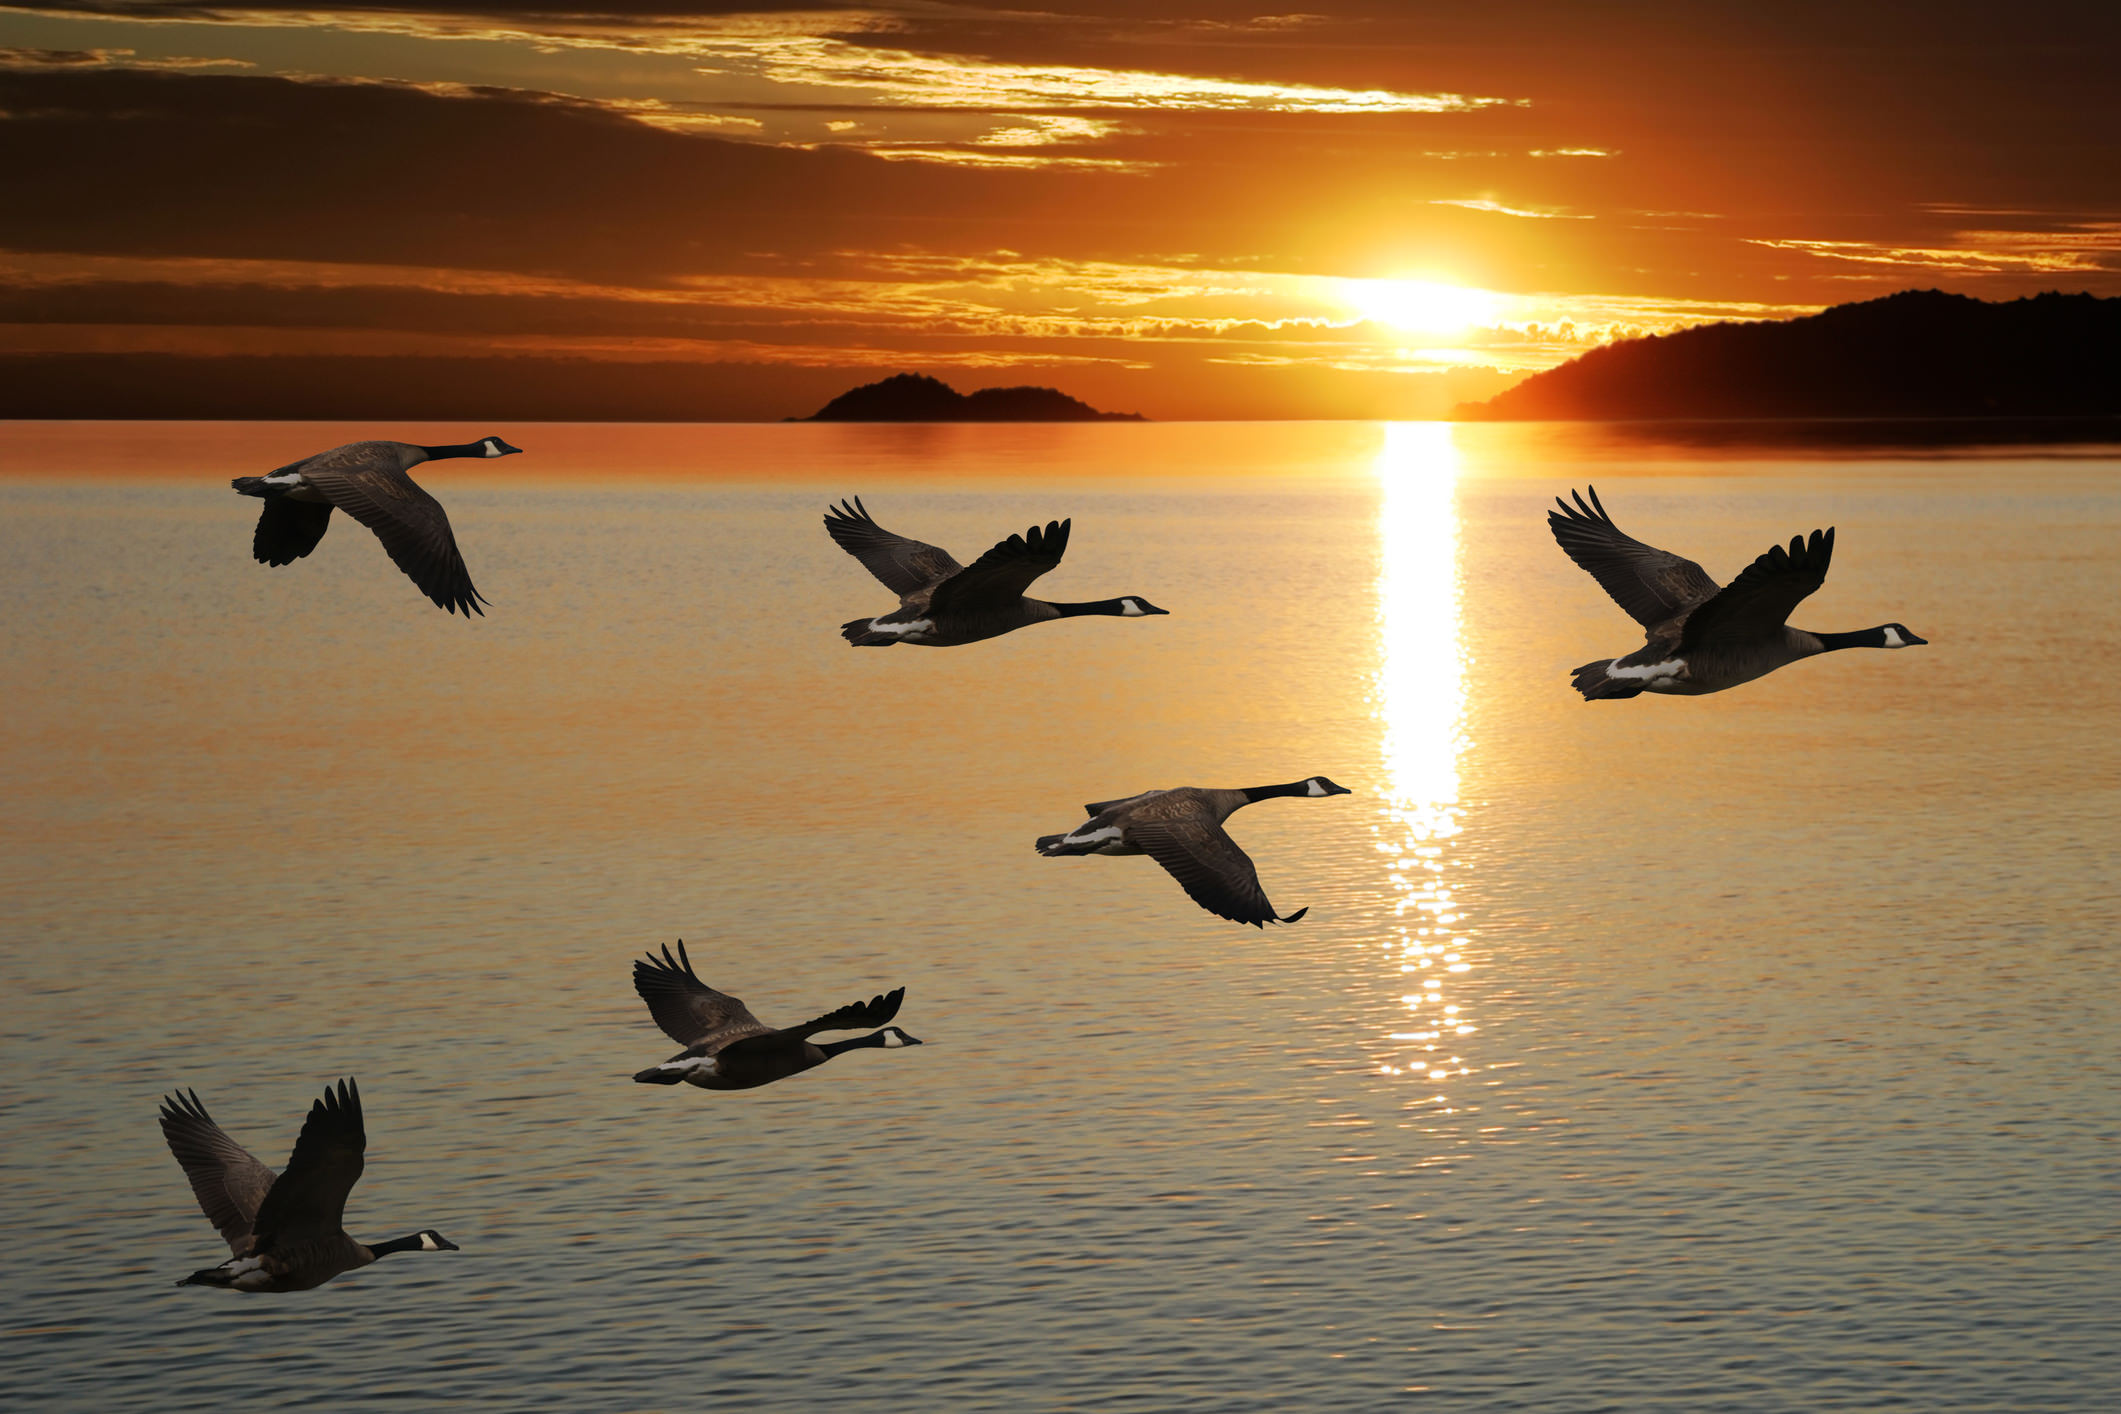
Photographing birds in flight - and a flock of birds at that - requires a good deal of skill and a bit of luck too. As with the previous example, you’ll need to ramp up the shutter speed to avoid blur in the birds’ wings, but because you’re photographing a group, a smaller aperture to extend the depth of field is necessary. Use a higher ISO to get a good exposure, if need be. When framing the shot, get in close enough such that the viewer can see some detail, but keep it wide enough to give some context to the environment surrounding the birds.
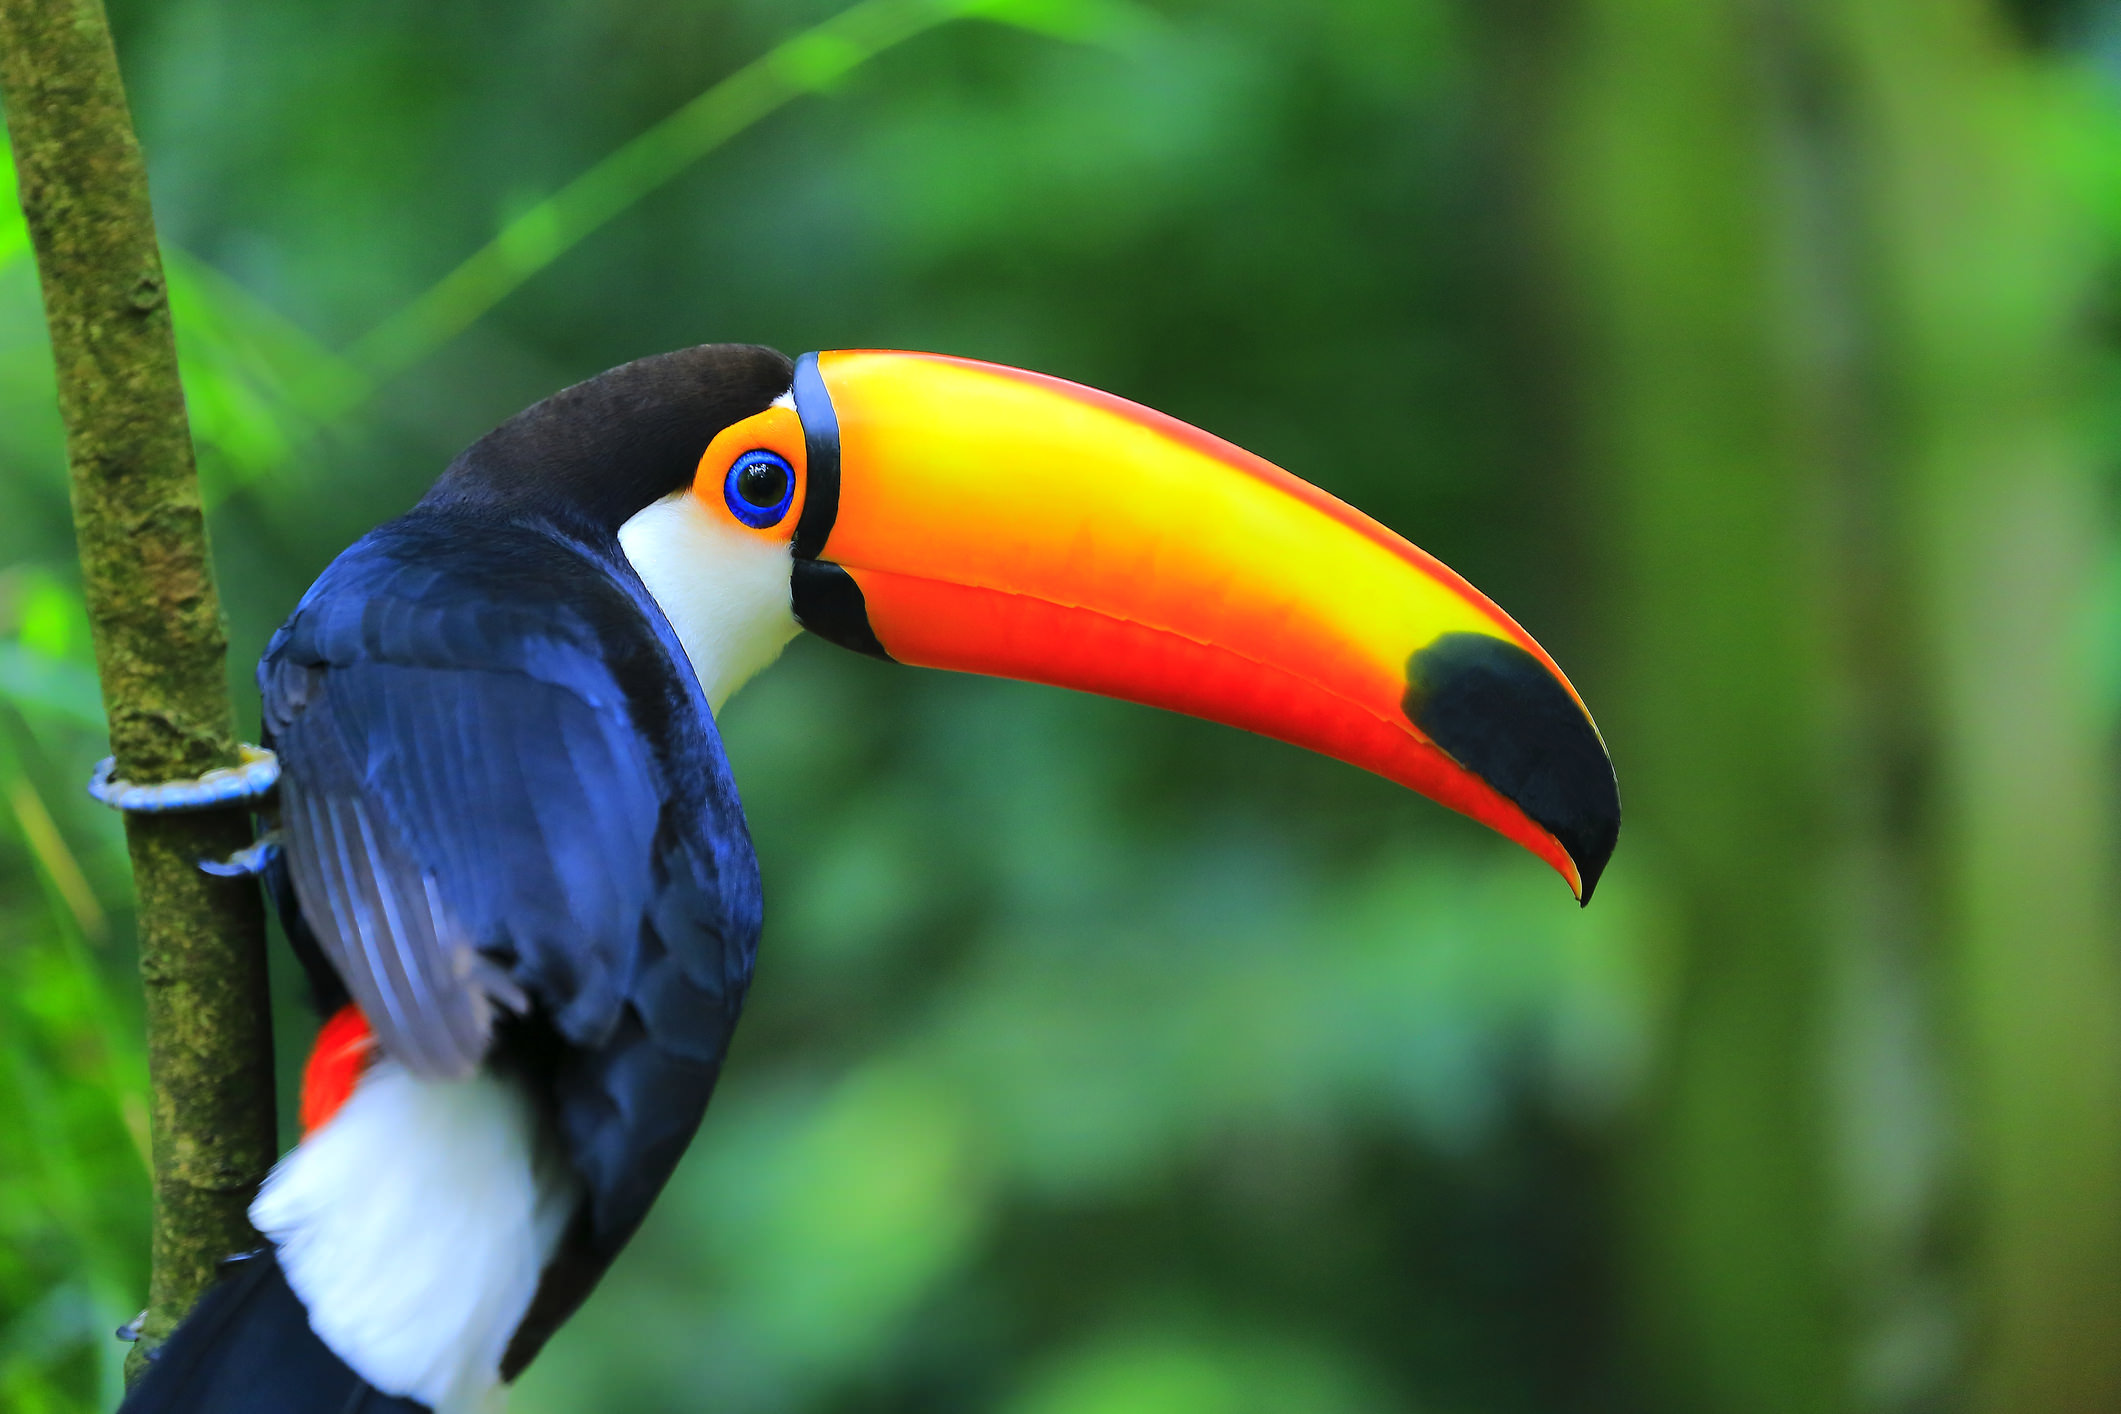
When photographing a bird as colorful as a toucan, it’s important to keep the rest of the image as simple as possible to avoid overwhelming the viewer. Too much color, texture, light, and so forth can be distracting and end up feeling a bit muddled. However, when you tone down the rest of the scene - keeping it relatively one color and blurring the background, as was done in the image above - you make it easier for the viewer to process the sheer beauty of the bird’s color. The soft, even natural lighting helps make the image better as well.
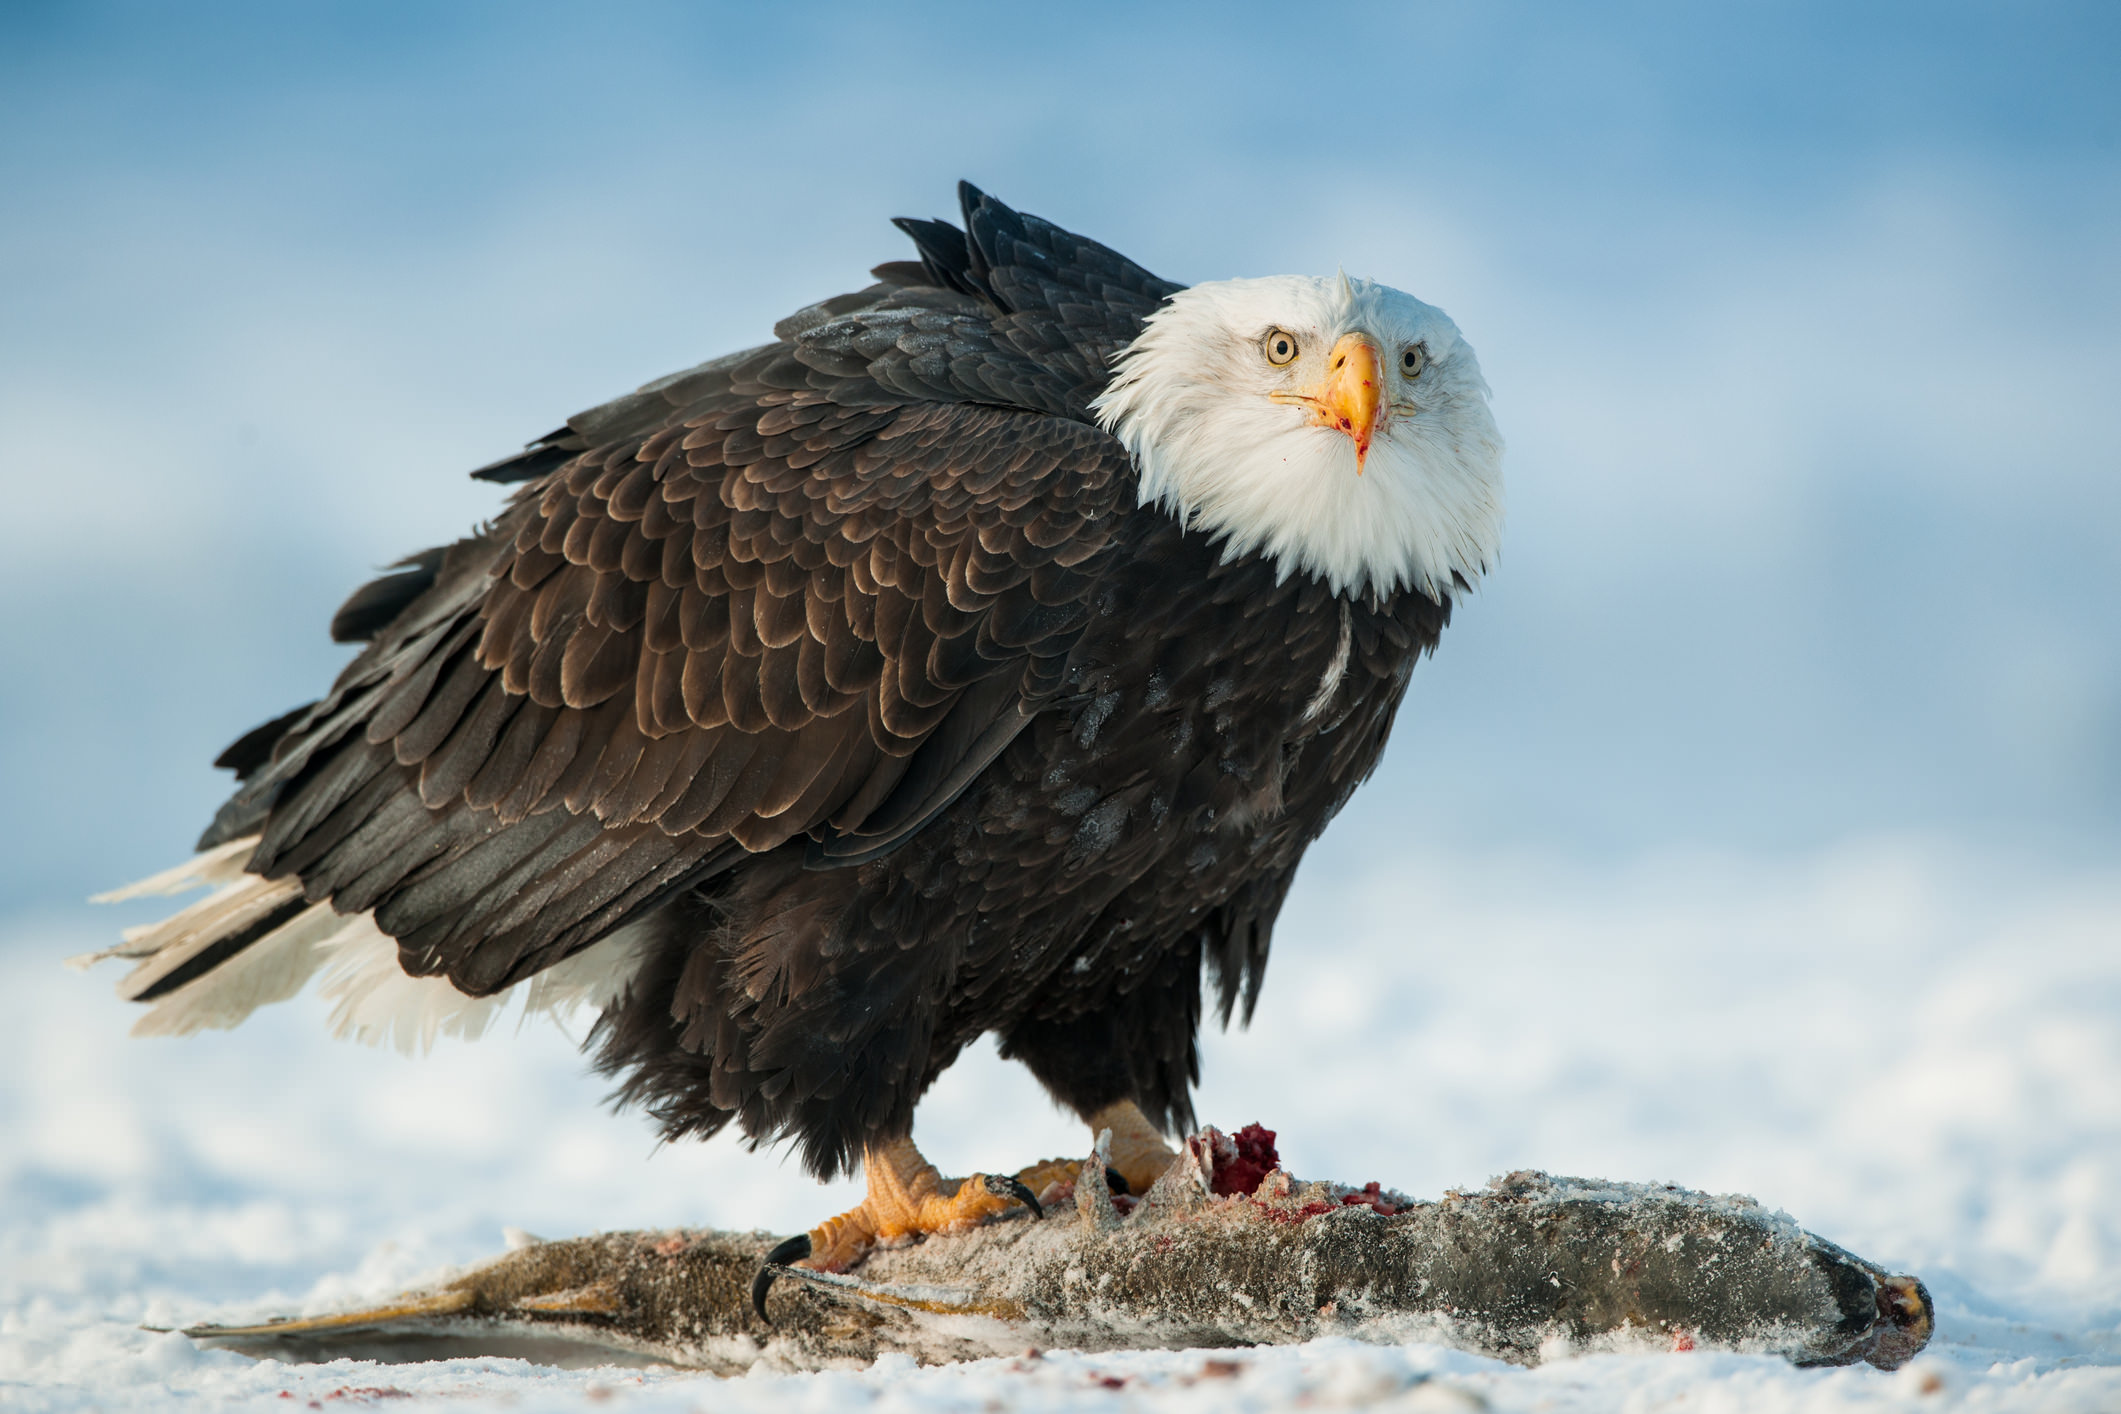
Birds of prey are one of the favorite targets of bird photographers because they provide so much action, even when they aren’t in flight. In this example, the shot is framed perfectly to include the eagle’s dinner. But note how the fish doesn’t distract from the details of the eagle - it’s intense eyes, sharp beak, the texture of its feathers, and its enormous claws are all on full display.
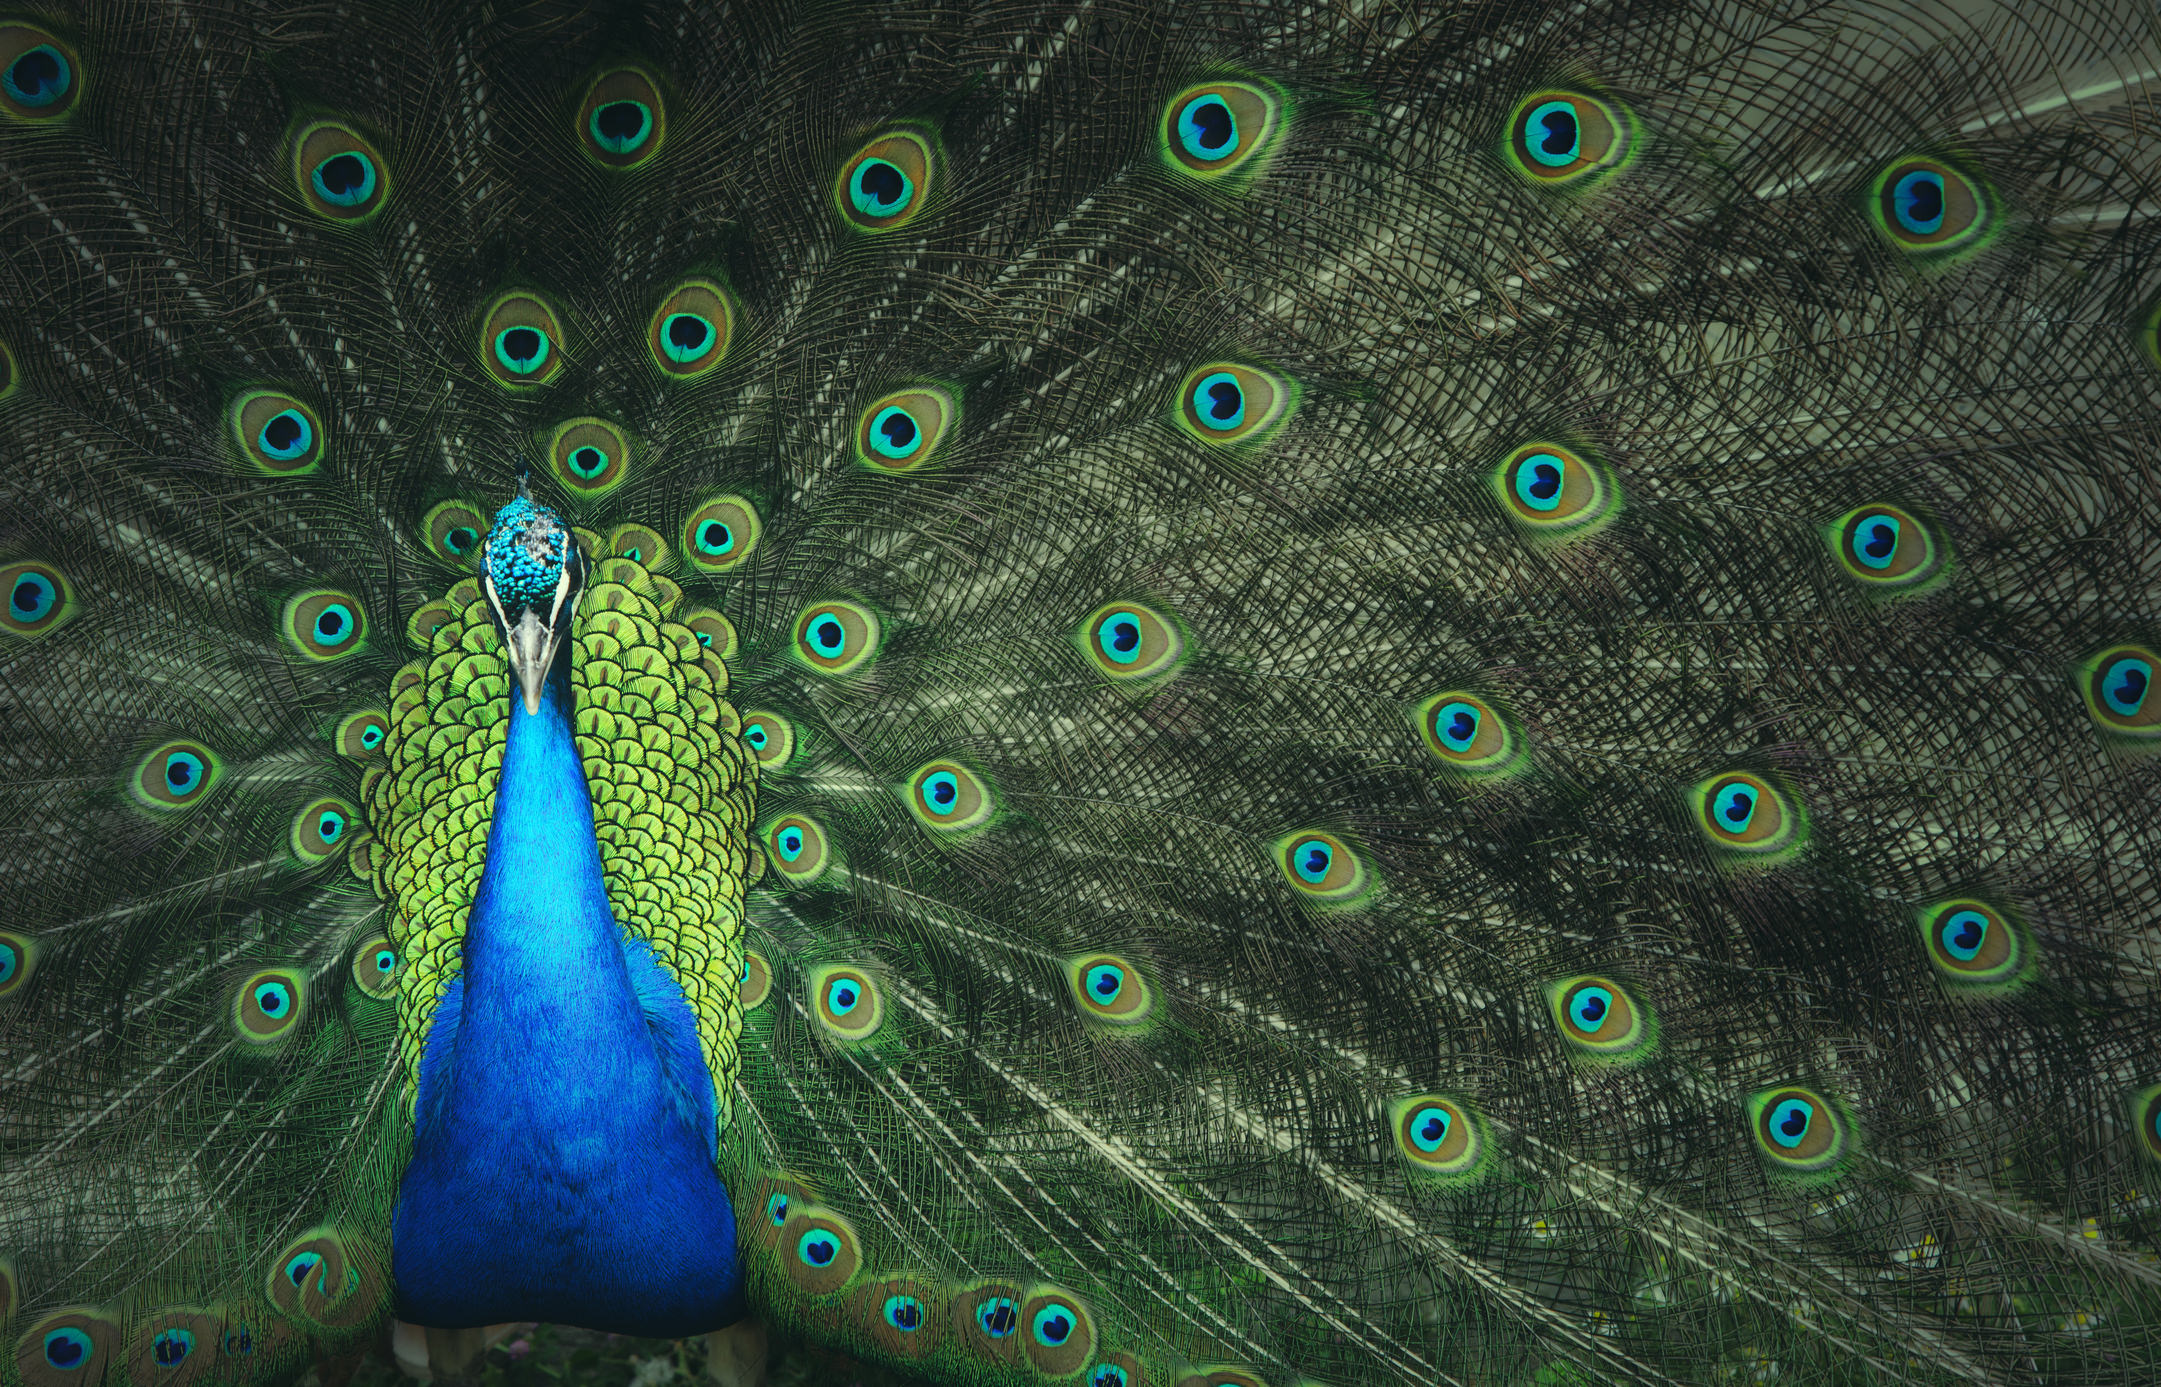
Peacocks are one of the most photogenic birds, and this photo shows us why. By filling the frame with the bird, we can more easily examine the intricate details of the peacock’s feathers. It also gives us a sense of the enormity of the bird’s feathers. Additionally, by filling the frame, the bright blue body and head of the bird are on full display.
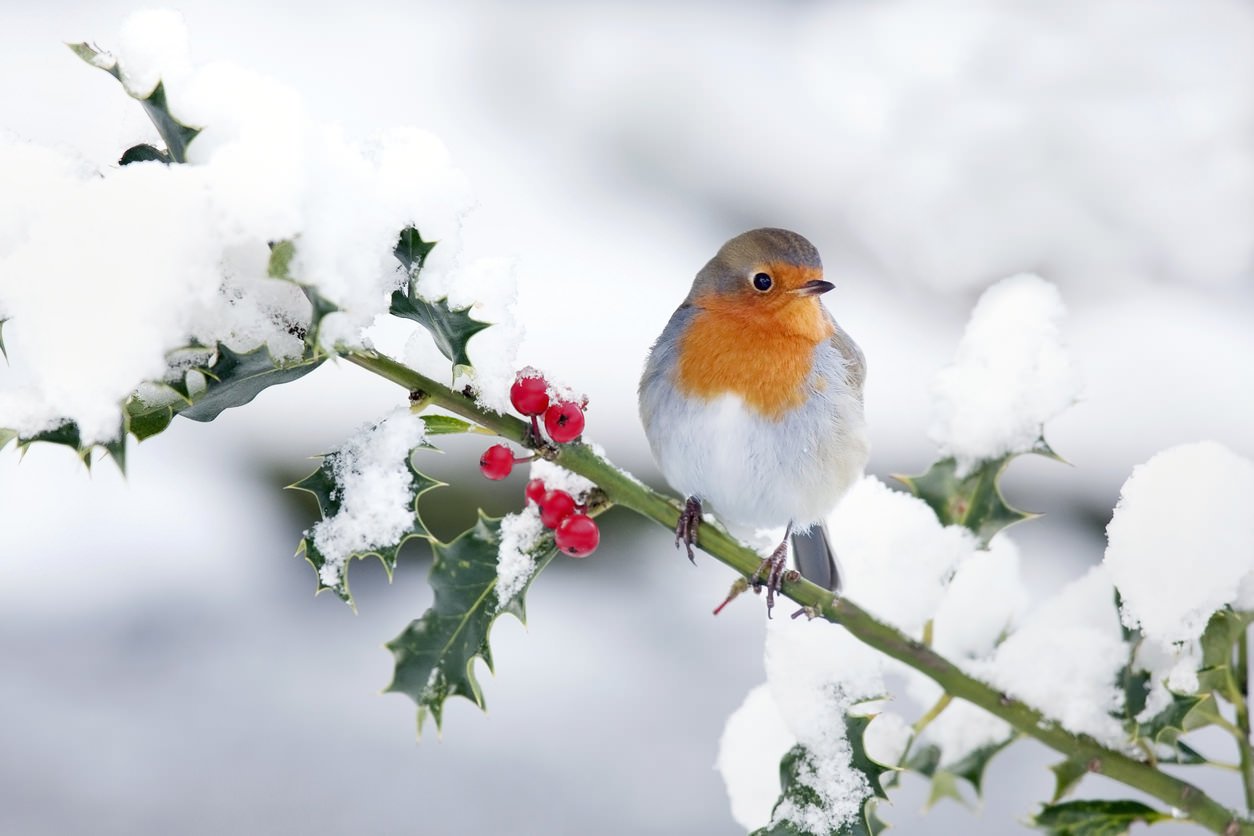
When photographing small birds like this robin, incorporating the perch on which they sit can help add context and dimension to the shot. In this case, the upward angle of the branch provides a little bit of interest, as do the bright red berries. However, not that it’s still the bird - and not those supporting details - that is tack-sharp in the image so as to draw more attention to it.
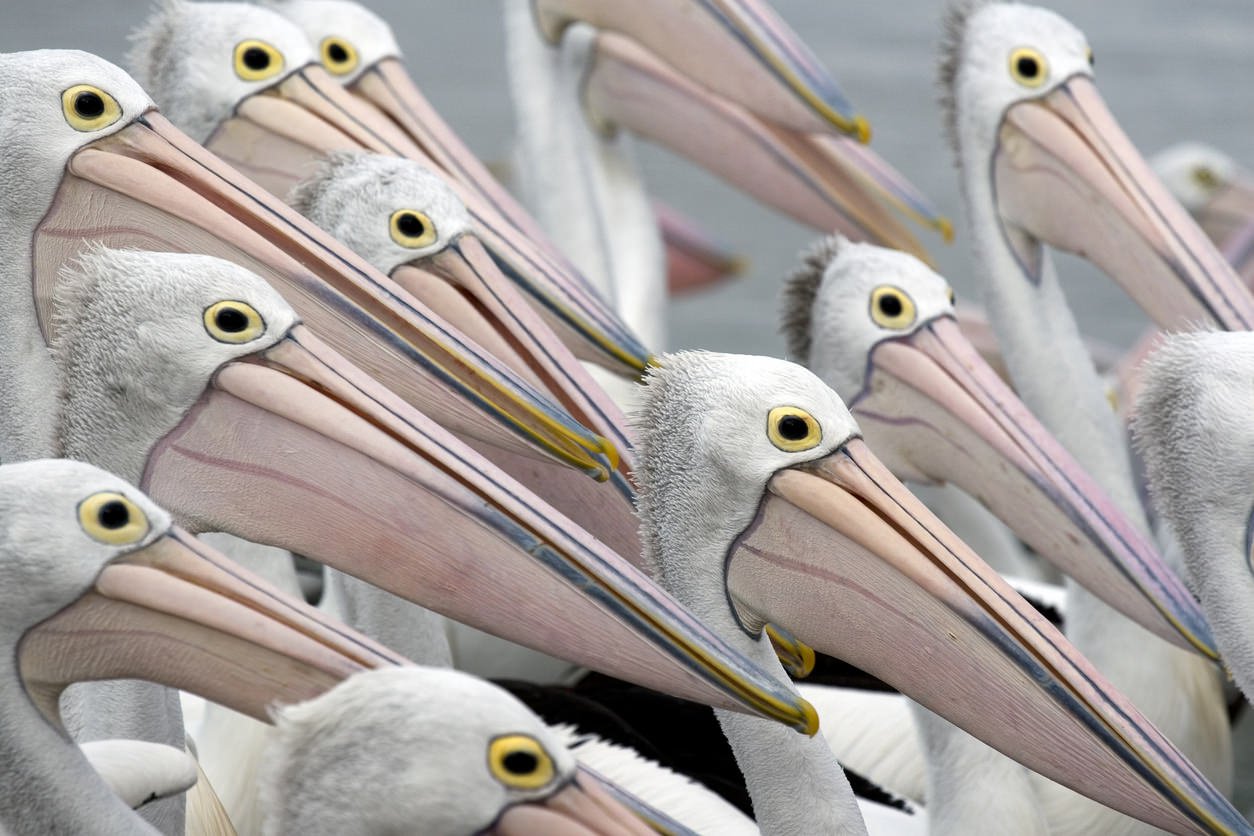
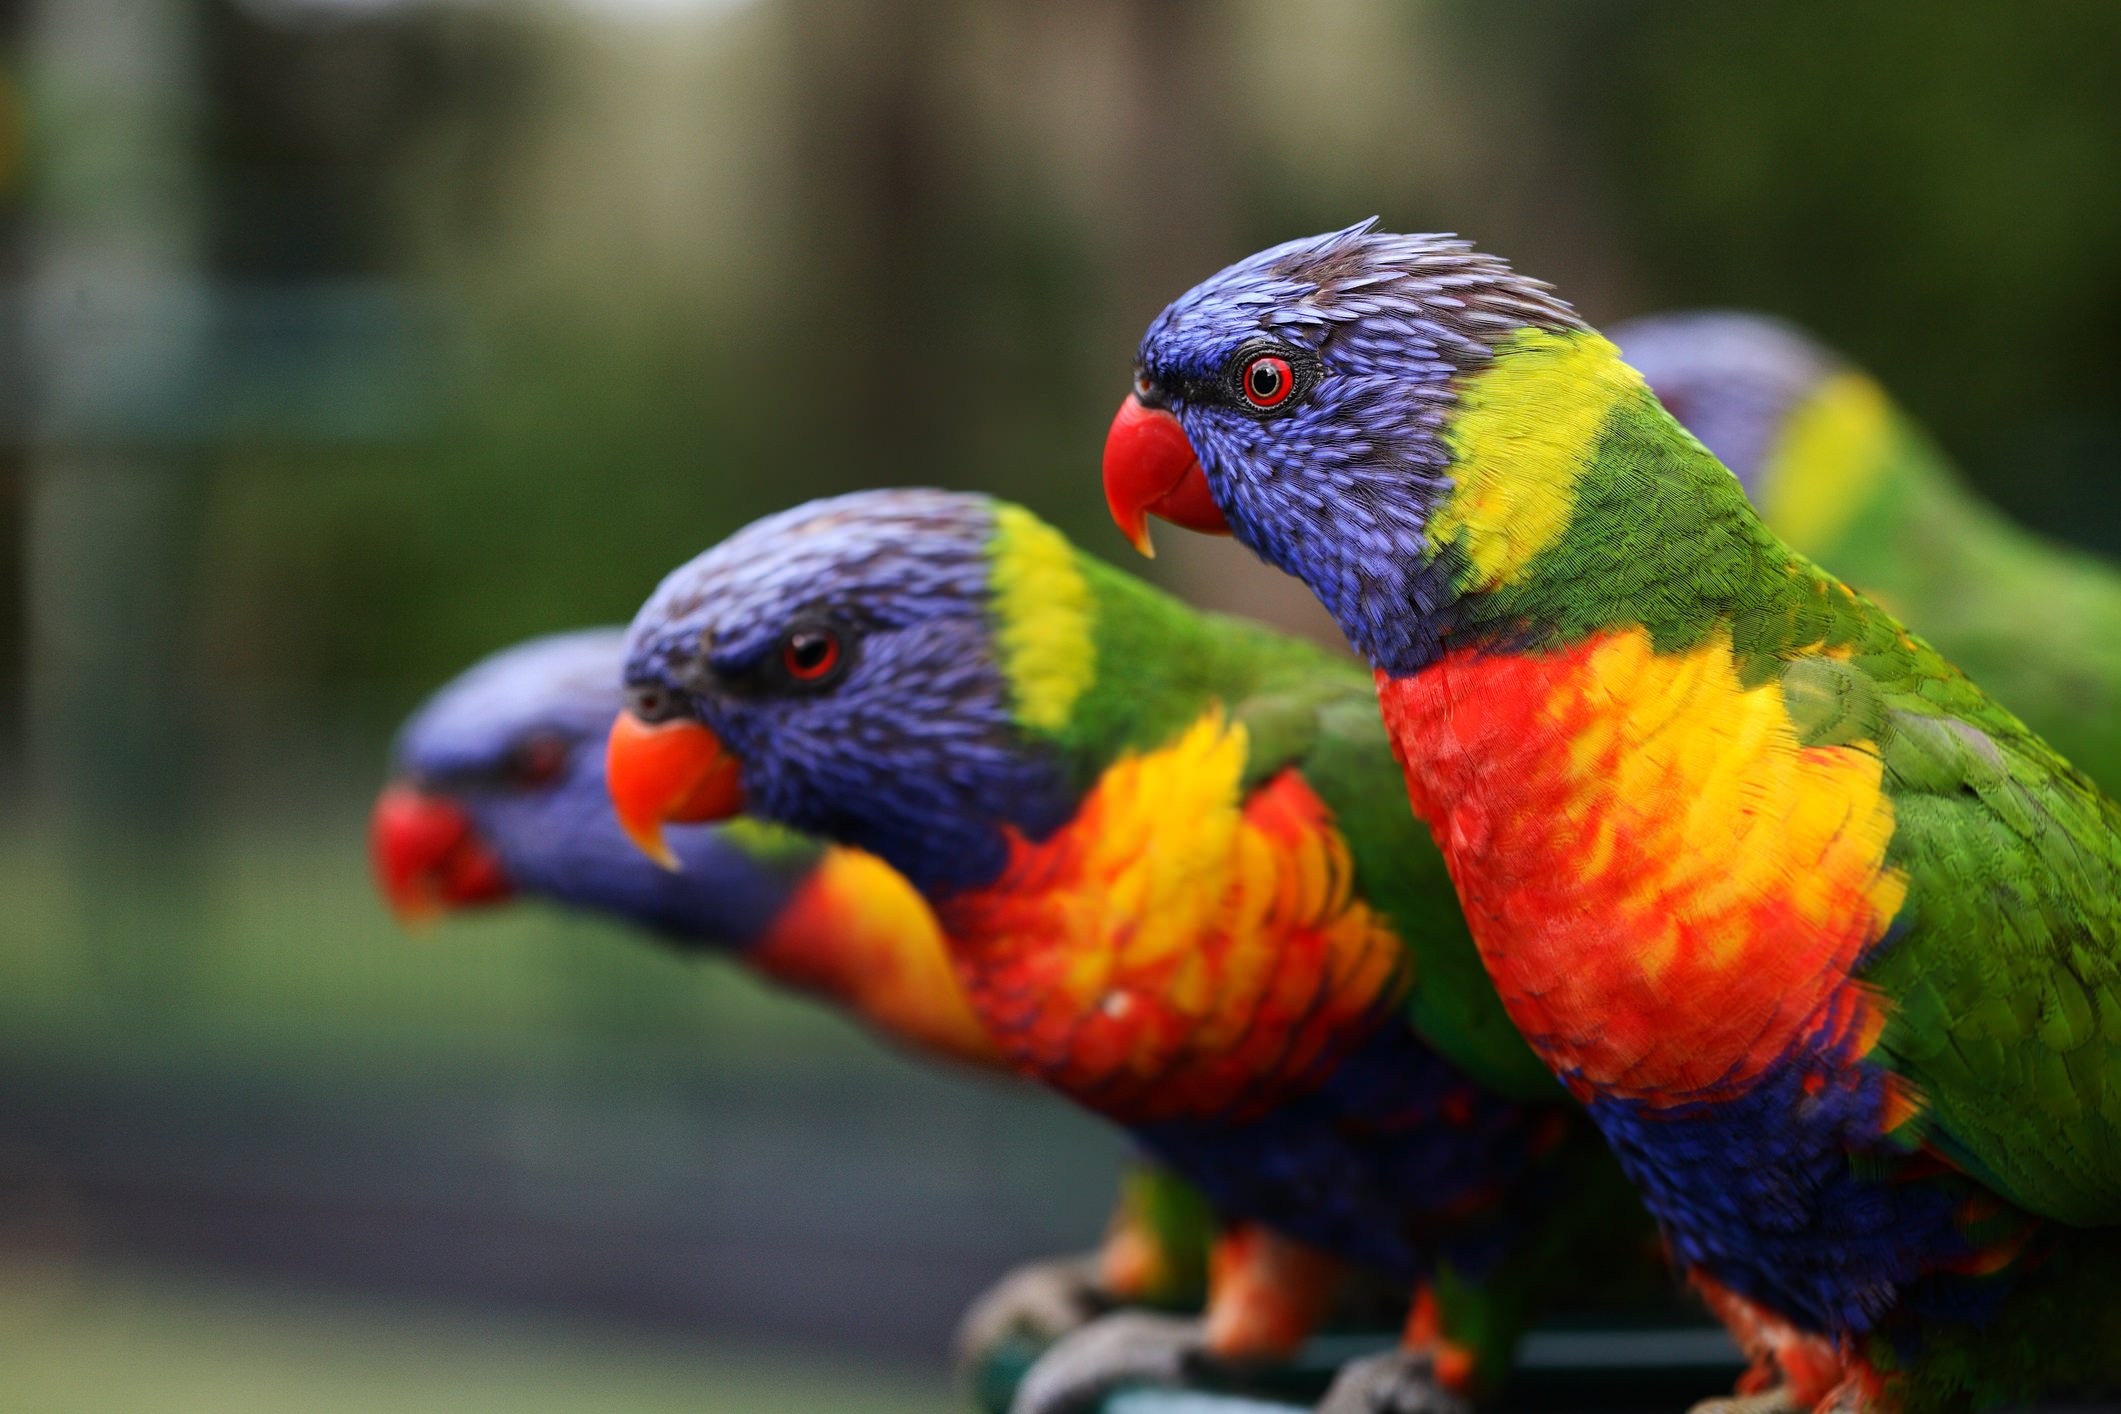
Humans naturally enjoy patterns, and that is no exception when it comes to photographs like this. By framing the shot such that each bird is looking in the same direction, we get very strong repeating patterns of beaks and eyes that makes for a much more dramatic shot. Furthermore, much like the peacock image above, by filling the frame with this pattern, we get a sense that this group of birds is quite large.
In this group shot, we see the value of a shallow depth of field. Though the bird in the front is obviously the point of focus, the birds in the background nevertheless add depth to the shot. In this case, rather than being able to inspect the details of their feathering, we’re able to get more color detail in the shot from the birds in the background. Note that in this case, the background is relatively devoid of color (as other examples have been) to prevent the shot from being overloaded with color.
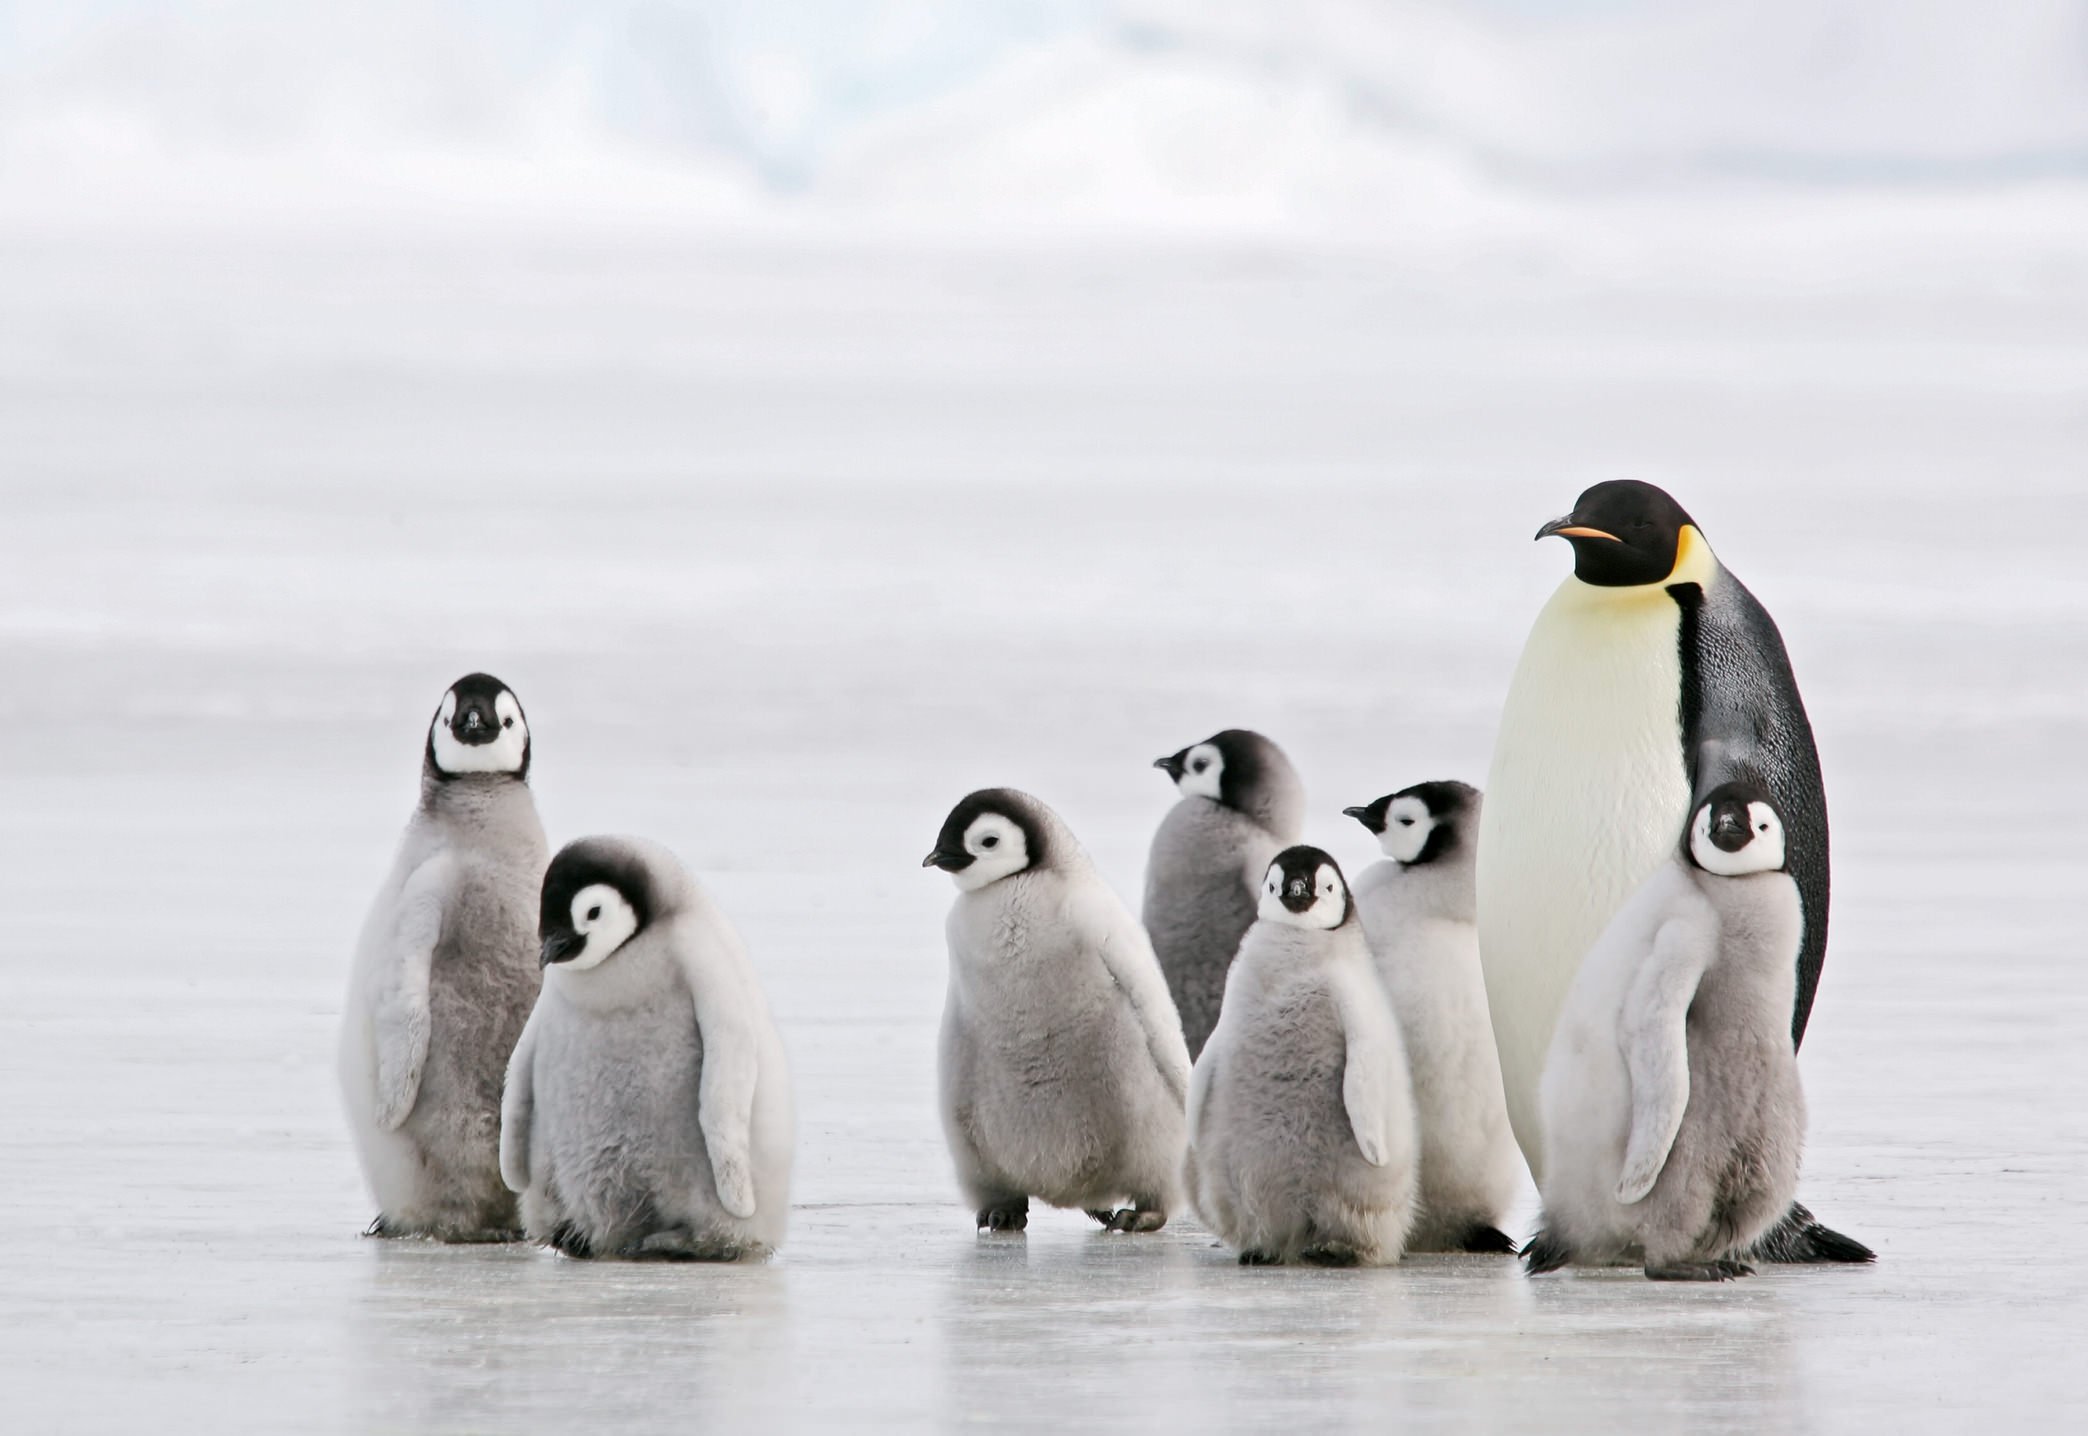
When the setting in which you shoot is devoid of much detail, as the one above, a good strategy is to try to photograph groups of birds. By doing so, you add more visual interest to the shot because there are more subjects with which the viewer can engage. In this case, with eight individual birds to interact with, the image becomes much more interesting. The linear arrangement of the penguins in a horizontal line also helps - it acts as a sort of leading line, taking us from one penguin to the next.
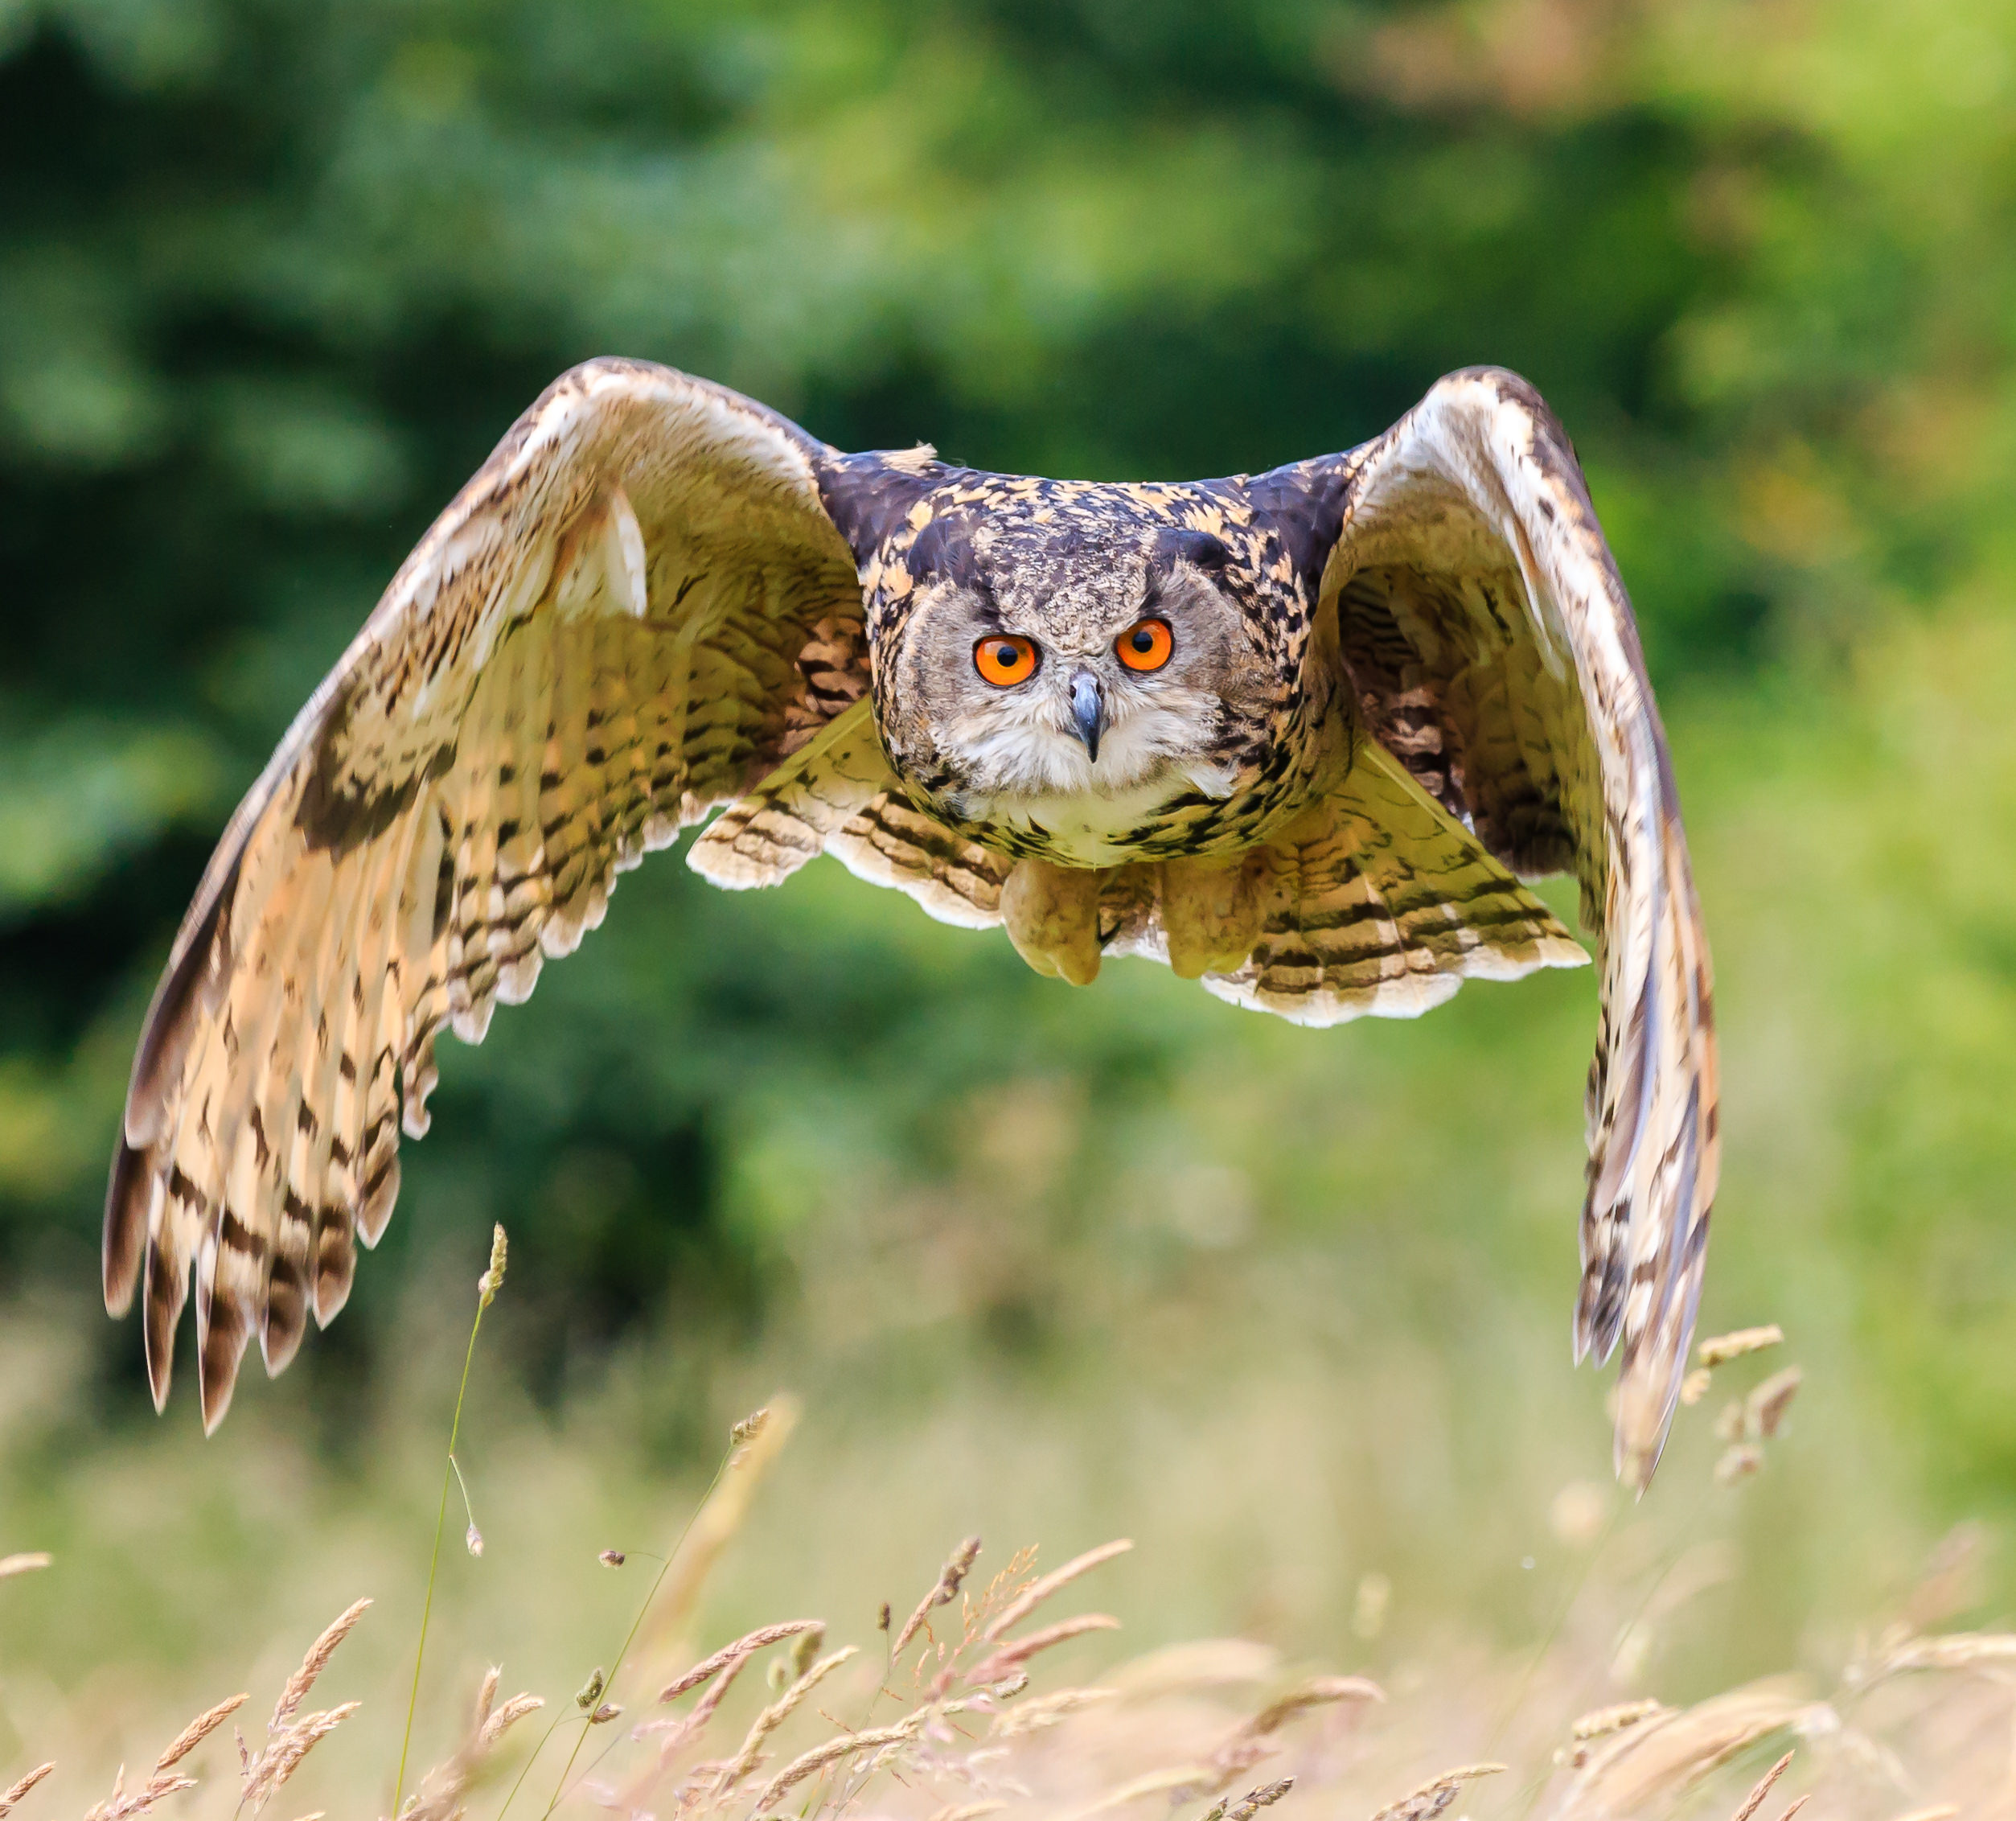
Much like photographing other wildlife, getting on the eye level of a bird can result in a much more engaging photograph. This, however, is easier said than done! But, as you can see in the image above, capturing a photo from a bird’s eye level - especially a bird of prey - gives you the opportunity to frame a shot that highlights the intensity with which the bird hunts. The key is to use a fast enough shutter speed to freeze the bird’s movement and to maintain focus on the bird’s eyes to keep them sharp.
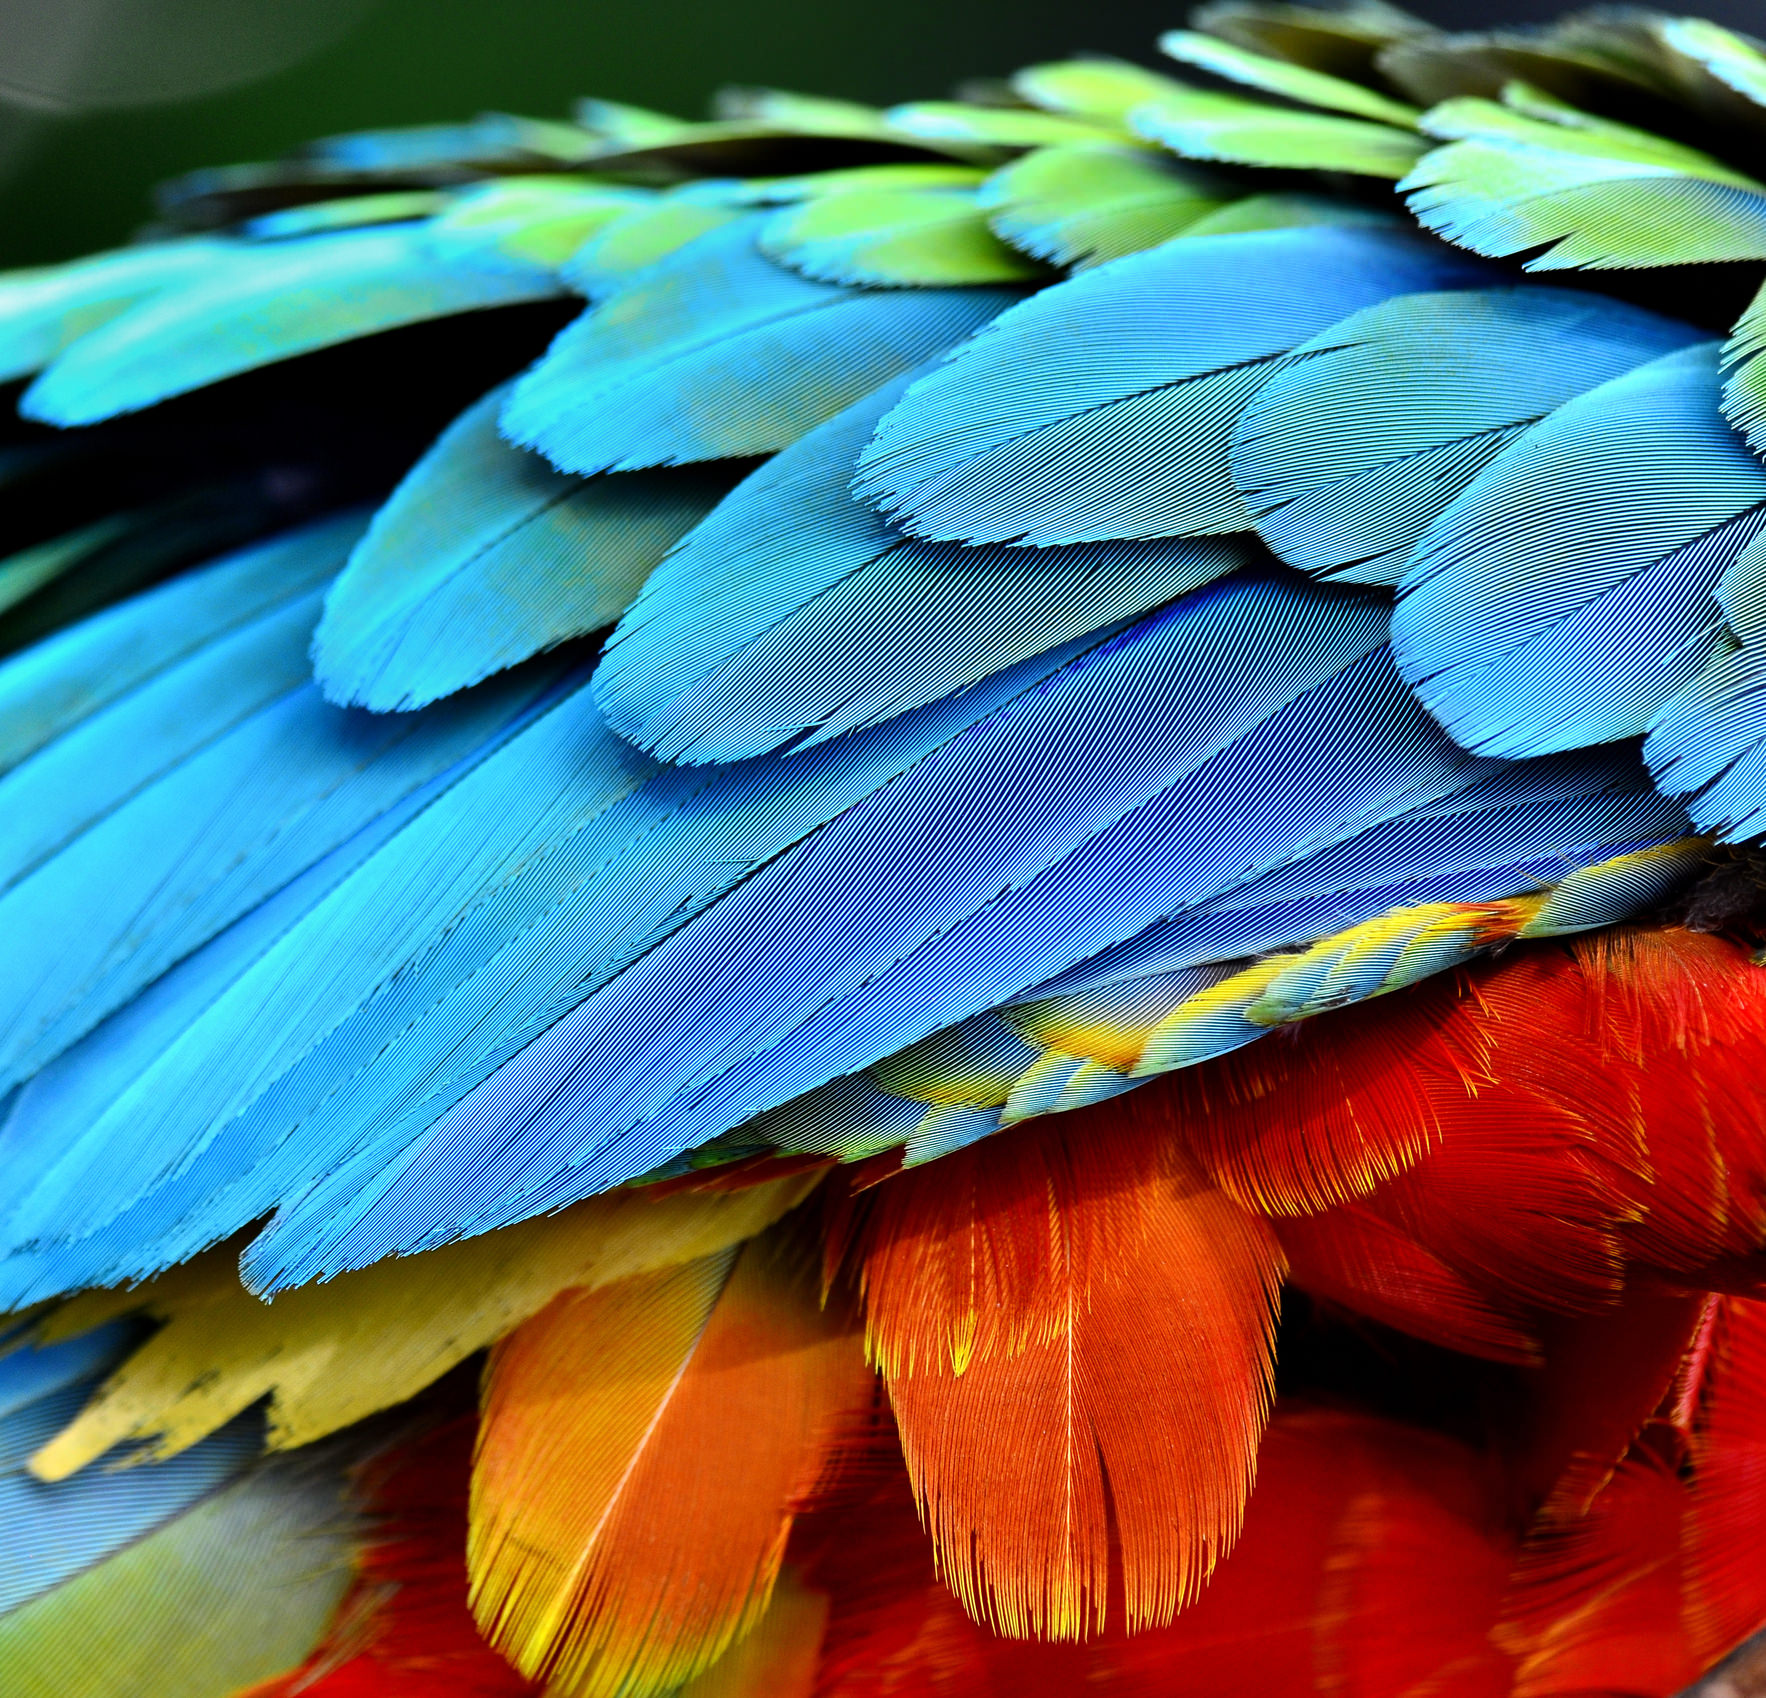
In this example, we see how not all bird photography has to include the bird’s face. When there is an abundance of color or texture, framing an extreme close-up can generate rewarding results. The colors of this macaw’s feathers certainly jump out at you, but also notice the intricate texture of the bird’s feathers. Note as well how they are layered, creating a good detail of dimension in the shot.
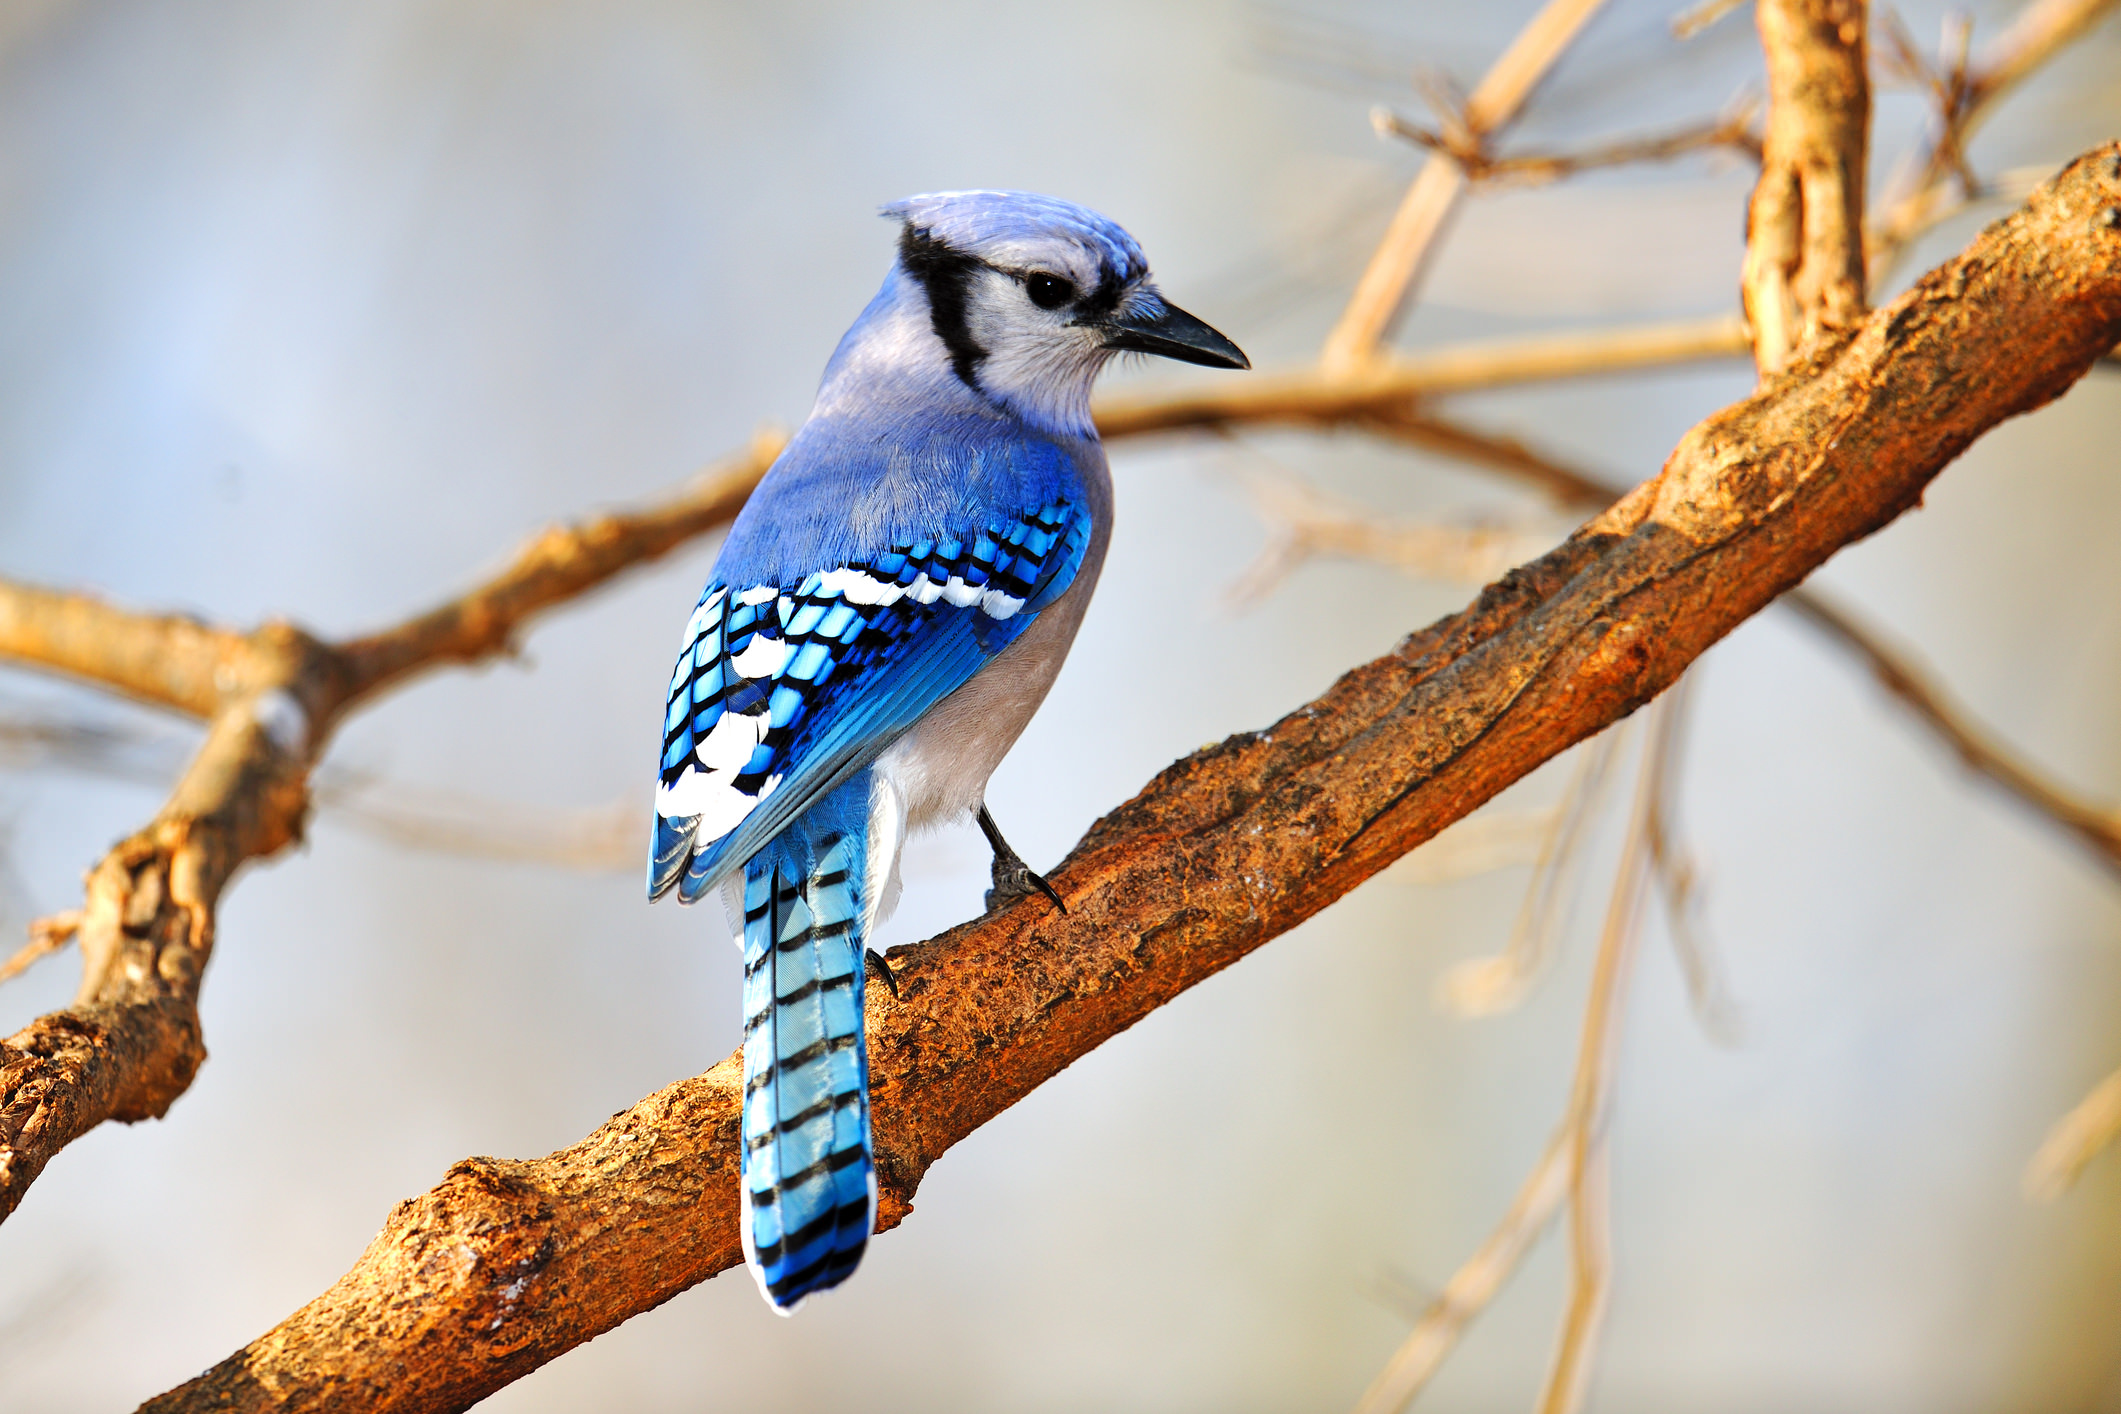
Though many bird photos show the bird from the front, don’t neglect taking a shot from behind the bird, especially if it’s hind feathers have beautiful details, as is the case with the blue jay above. Approaching a bird from behind might be easier, anyway, particularly if they are in the midst of an activity like feeding. Timing, as with virtually any photo of a bird, is everything - it’s advantageous to have the bird looking to the side so you can add their eye and beak to the photo.
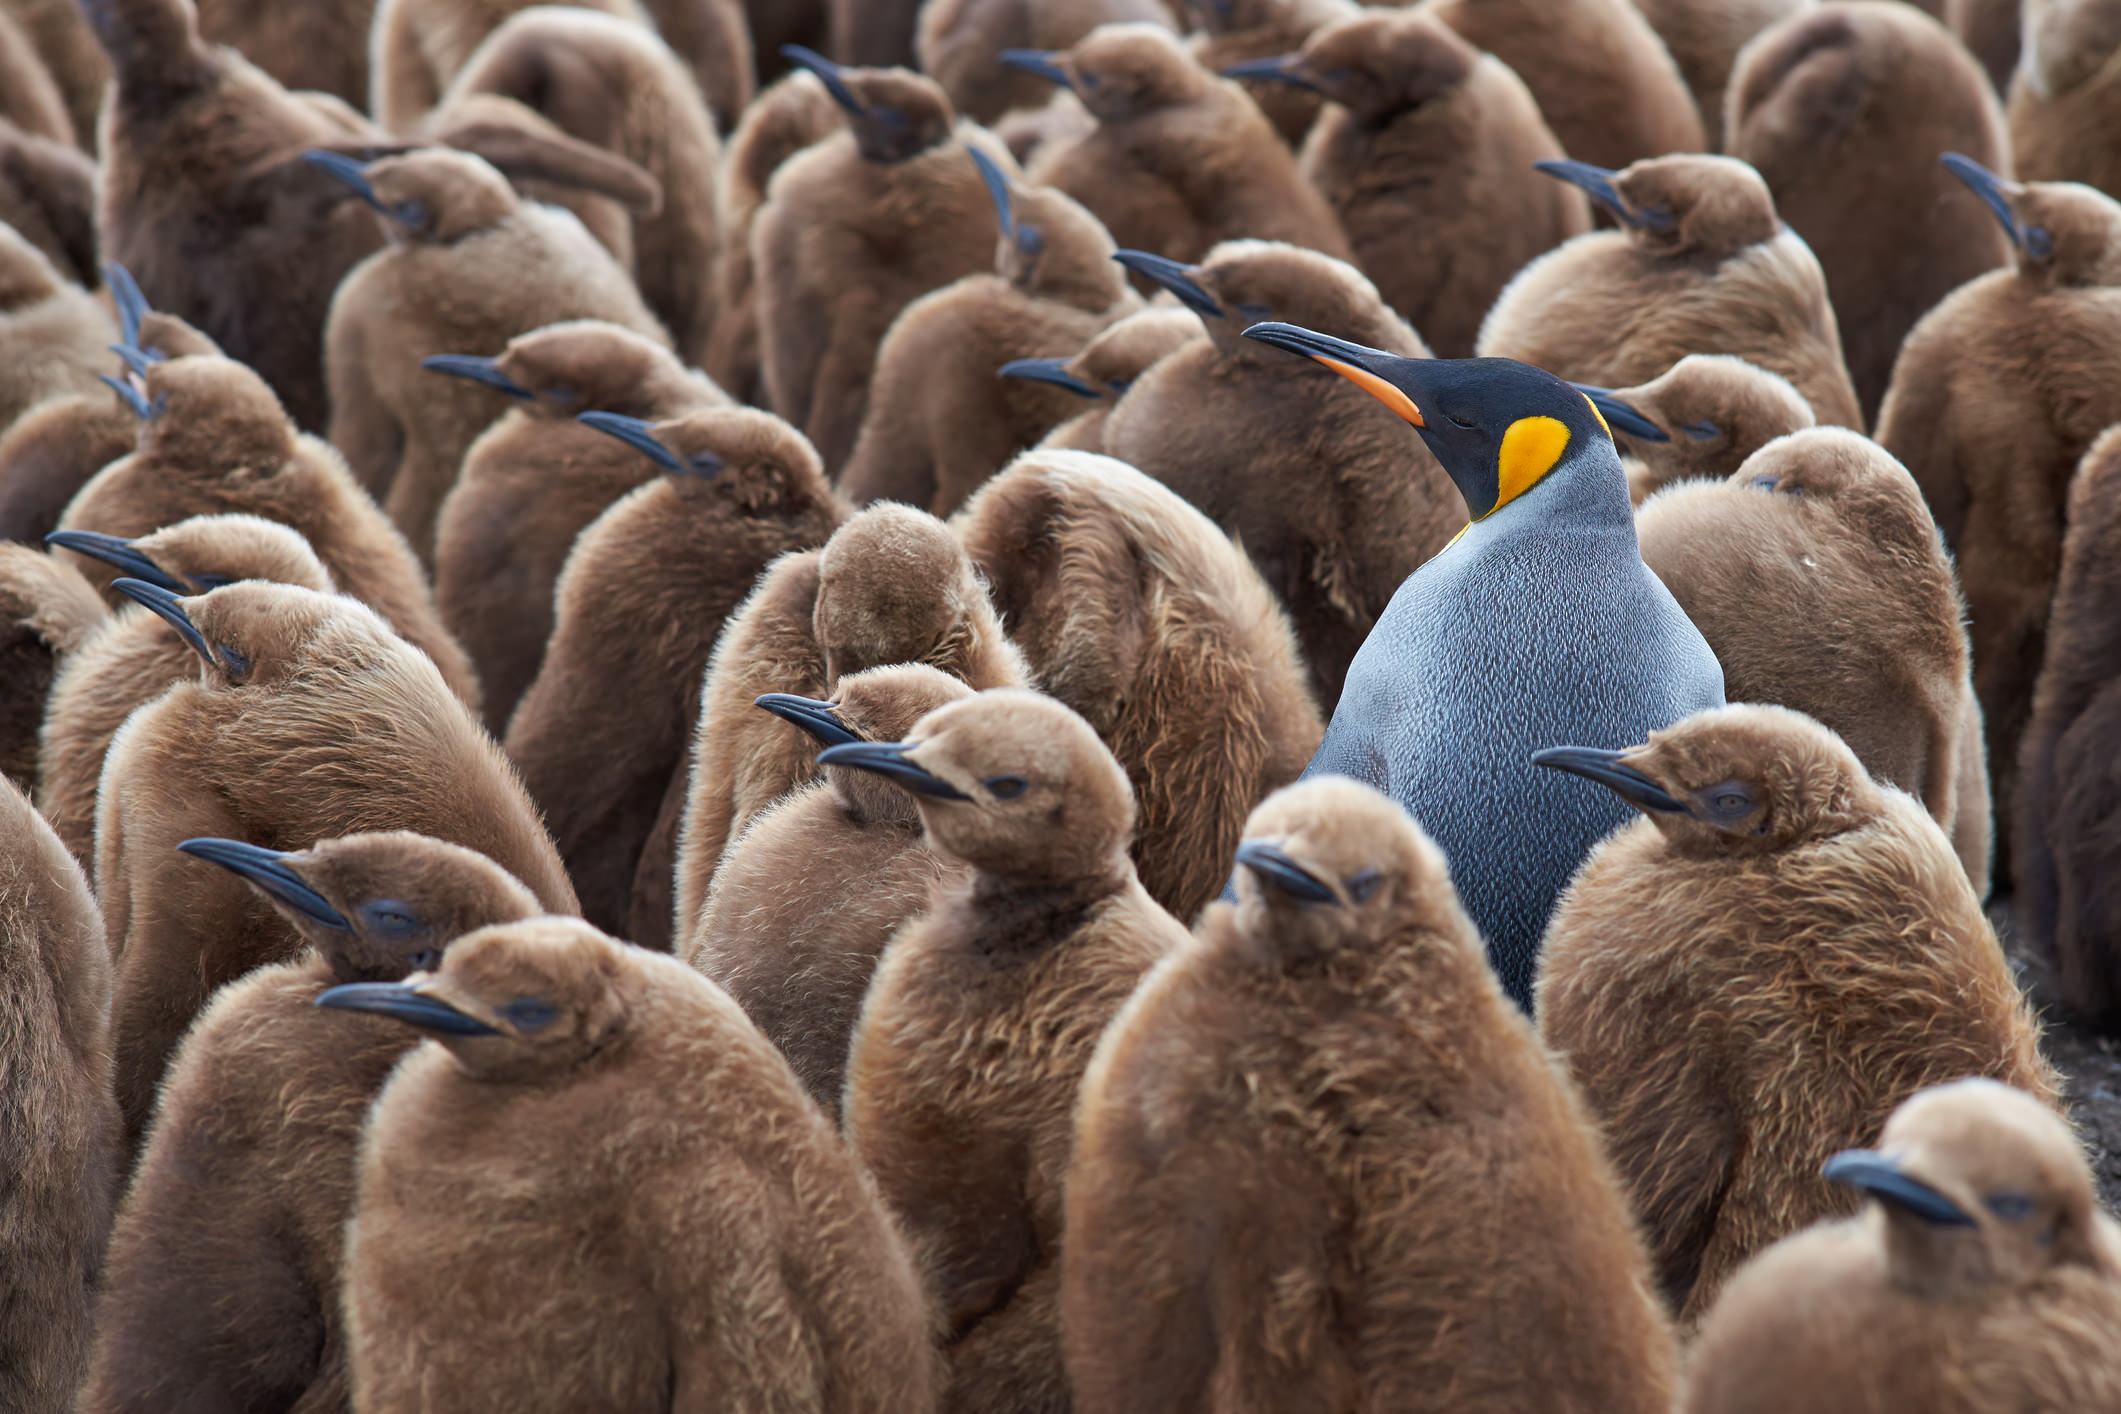
Again, we see how a large group of birds filling the frame can create quite a compelling image. Much like the pelican photo above, we have an interesting repeating pattern created by the penguins looking in the same direction. But, unlike the pelican photo, the addition of the older penguin with different coloring adds an additional layer of interest to the shot. But notice how despite its different appearance, the older penguin maintains the overall pattern by looking in the same direction as the other birds.
We Recommend
3 (More) Things You Believe to Be True About Photography That are False
Last week, we took a look at three commonly held beliefs about photography that simply aren’t true. In that article, we explored the notions that aperture priority is the best shooting mode, that shooting with the lowest ISO is always necessary, and that tripods are a requirement for most shots.
After debunking those myths, we thought it would be fun to tackle three more photography falsehoods.

Photos Should Always Convey the Truth

Unless you’re a photojournalist, your photos do not have to convey the truth. Photography is an art, and as such, you have the creative freedom to do with your compositions what you want. What’s more, it’s often difficult to achieve a completely truthful photo anyway because the way you frame or crop the image, for example, means that you’re excluding something. Doing so bends the truth just a little, right? What’s more, how you create your photo may or may not jive with how people perceive it. You might create an image that you feel conveys a bright, cheerful mood, but a viewer might interpret it as being something else entirely.
Striving for the truth in your images is an admirable undertaking, but no matter how candid the shot, no matter how little post-processing you do, images can easily distort reality. Embrace this quality and focus on being artful and creative instead.
Shooting at f/2.8 Gets Better Photos

Sure, if you’re taking a portrait, f/2.8 will get you a better image than if you try to shoot the same image at f/16. The shallow depth of field you get with f/2.8 creates gorgeous bokeh-filled, blurry backgrounds that help the subject stand out.
But shooting at f/2.8 isn’t always the way to go. Not every photo you take needs a shallow depth of field. Not every background needs to be blurred. In fact, there are times when the subject matter calls for a large depth of field so that you can more effectively convey the context of the situation. Landscapes certainly come to mind as being subject matter that necessitates shooting with a smaller aperture, but so too does street photography, nature and wildlife photography, and travel photography, to name but a few.
Though it’s fun to shoot wide-open, it’s not a given that doing so will get you better photos. Match your aperture to the context to have greater success.
My Photos Suck if They Aren’t Perfect
Much like striving to create a truthful image, creating a technically perfect image is a tough task. Even the most veteran photographers can’t create an image that is perfect from corner to corner. More often than not, there is a compositional element missing or misused, an area that’s too dark or too bright, or a subject that isn’t quite aligned with the rule of thirds grid. And that’s okay!
The imperfection in the photos you create doesn’t mean that your images are terrible. Despite a less than ideal exposure, you can still have a wildly interesting and visually stimulating photo. Even though your subject looked away just as you clicked the shutter doesn’t mean the portrait you create of them should be deleted. The point is that if you find that one of your images isn’t quite exposed right or that it isn’t as sharp as you’d like, don’t automatically write it off. There’s much more to a compelling photo than technical perfection.
Just go out and shoot, stop worrying about being perfect, and leave your false beliefs about photography behind. You’ll have more fun, and probably get better results too!
We Recommend
3 Simple Tricks to Help You Learn Photography Faster

In today’s world in which we have high-tech cameras at our disposal with all sorts of features that promise to make photography faster, simpler, and easier, it’s hard not to get caught up in the notion that shortcuts will help you become a better photographer. What makes it even more difficult is the sheer volume of things out there to photograph - wildlife, landscapes, portraits of friends and family, street scenes, and so on.
But the fact of the matter is that becoming a better photographer is a process. After all, photography is an artform; a craft that takes years to perfect. What’s more, how one approaches portraits varies greatly from how one approaches landscapes or street scenes. It’s not necessarily a one-skill-set-fits-all situation.
Having said that, there are some strategies you can use to help you develop your skills while also simplifying photography. It’s really just a matter of focusing on a very straightforward workflow that includes three parts.
Pick One Lens and Roll With It

Photographers are notorious gear hoarders, with drawers and bags full of filters, tripod heads, camera bodies, and especially lenses.
While it’s nice to have a solid collection of gear once you get the hang of things, scattering your attention (and money) around on multiple lenses will only complicate matters for a beginner. Each lens does things a little differently, and lenses of different focal lengths have widely varying purposes. The best way to develop an understanding of how each lens in your kit behaves is to spend a lot of one-on-one time with each one.
The key here is not to pull out your wide-angle lens and spend an hour taking photos with it. Instead, spend a significant amount of time getting to know your lens. Explore its features, learn about its behaviors and idiosyncrasies. Photograph different subjects to determine what the lens’ strengths and weaknesses are as well. There’s no prescribed long-term time limit here - for some, a few days of shooting with one lens will be enough time to get to know it inside and out. For others, the process might be weeks or months.
What’s the benefit of the one lens strategy, you ask?
Not only will this help you get to know your gear, but it will also give you an opportunity to focus on the process of taking a photo rather than worrying about changing lenses. If you aren’t constantly waffling back and forth between lenses, you’ll have more time to concentrate on actually composing good photos. It also gives you a clearer picture of what your next lens purchase needs to be so you can fill in the holes that your current lens doesn’t quite fill. In that regard, this strategy helps you on all fronts - becoming familiar with your gear, improving the composition of your photos, and protecting your bottom line.
Simplify the Subject Matter

Given the broad capabilities of today’s camera systems, it’s hard not to get sucked into the idea that it’s easy to take great photos of any subject. If you think about it, how often do you grab your camera and head out to take photos of nature or landscapes, then along the way decide you’re going to take a few portraits and city shots as well?
The problem with hopping from one type of subject matter to another is much like the problem with trying to work with too many lenses - instead of becoming adept with one, you spread your attention across many different areas. More often than not, having this approach means you get more photos, but photos that are of a lesser quality.
Why is that?
The issue is that each subject necessitates different camera settings, if not different lenses as well. So, when you head out to photograph a sunset, you’ll need very different camera settings than if you were to take a portrait of a friend indoors.

Again, part of what will make you a better photographer is practice and experience. Bouncing from one subject to another won’t help you in that endeavor. Instead, strive to simplify things by focusing on one subject at a time. If you’ve set your camera up to take long exposure shots of a waterfall, take long exposure shots of a waterfall. If you’re good to go for natural light portraits, take natural light portraits.
This isn’t to say that you can’t change the subject matter you photograph from one day to the next; but in a single outing, limiting your attention to one type of subject will get you more time to practice your craft. In the long-run, the benefit will be a much deeper level of understanding of the camera settings, equipment, and creative aspects of taking higher-quality photos for that specific subject, the result of which are better photos.
Don’t Get Distracted by Gadgets

There are tons and tons of accessories and gadgets available for photographers. So many, in fact, that it’s easy to get into buying mode and end up with a camera bag full of accessories that you don’t necessarily need.
When you become distracted by gadgets, your attention is taken away from actually learning the processes involved in taking high-quality photos. Sure, it’s neat to be able to control your camera with your smartphone, but how does that help you learn the fundamentals of photography, like shutter speed, aperture, ISO, and the like?
The short answer is that it doesn’t. This isn’t a knock on the cool accessories and gadgets available today as they can certainly add to your ability to create the photos you wish to create. But before you begin investing in a bunch of accessories for your camera, focus first on learning the fundamentals of photography. Doing so will benefit you in the long run because with a deeper level of understanding of composition, lighting, exposure, and the like, you’ll be able to create more compelling photos, and you’ll be able to use the gadgets you buy in a more purposeful manner. Again, it’s a win-win situation!

If anything, limit the accessories you buy (at least initially) to a tripod, a set of filters, and a remote shutter release. These accessories will vastly expand your capabilities in terms of the types of photos you take without overwhelming you with possibilities.
The moral of the story is to simplify your approach and resist distractions. Spend time working with one lens and one type of subject so you can perfect your understanding of the fundamentals of photography. By engaging more deeply in the process of creating a photo, and resisting the urge to jump from subject to subject, lens to lens, and accessory to accessory, you will better your understanding of photography, and, in turn, improve the photos you create. It’s that simple!
We Recommend
3 Things You Believe to Be True About Photography That are False
No matter how much time you’ve spent as a photographer, the chances are that at some point, you’ve believed something to be true about this craft that is quite simply false. Some false beliefs have to do with the best semi-automatic mode in which to shoot, others involve always minimizing ISO, and still others revolve around the idea that you must use a tripod if you want to get a sharp, clear shot.
Let’s dive deeper into these false beliefs and see what the truth of the matter really is.
False Belief #1: The Best All-Around Shooting Mode is Aperture Priority
While it’s true that aperture priority is a great mode that makes many photographic situations easier, it isn’t the end-all, be-all mode for every situation you encounter. When your camera is mounted on a tripod, manual mode is an ideal way to shoot because you needn’t worry about a shutter speed that’s too slow to hold steady. Likewise, in situations in which the lighting is even and consistent, manual mode is a good choice because you can more easily pinpoint the correct exposure on your own and not rely on the camera to try and figure things out.
In other situations, shutter priority is a better choice, such as when you wish to freeze or blur movement. Whether it’s your kid’s soccer game, a waterfall, or cars passing you on the street, action shots benefit from the use of shutter priority because of the increased emphasis placed on shutter speed. Sometimes, when people rely too much on aperture priority they get well-exposed images, but don’t quite grasp the proper usage of shutter speed to freeze movement. Shooting in shutter priority will help alleviate that problem, as will shooting in manual.
False Belief #2: The Smallest Possible ISO is Always Required
A decade ago, this was definitely true. Early digital cameras were not nearly as refined as they are today, and in many cases, shooting at ISO 400 or above meant tons of digital noise and a terrible looking shot.
But camera technology has come a long, long way, and today’s cameras can perform very well, even at high ISOs. In fact, with many camera systems, you can push the ISO to 3200, 6400 and well beyond, and still get a high-quality image. Yet the myth that shooting at ISO 100 at all times still persists.
Granted, there are situations in which a low ISO is ideal. For example, if you’re shooting a landscape and you intend to blow the photo up to hang on the wall, a low ISO would benefit you greatly. The same goes if you’re in a studio with your camera mounted on a tripod taking portraits of people.
However, for just about any other application, pushing the ISO is perfectly fine. If you’re on the street photographing strangers, shooting a wedding, traveling the world photographing wildlife, shooting in black and white, and so on, don’t be afraid to use a higher ISO than you’ve traditionally been comfortable with. You will find that a willingness to bump up the ISO means you can use better shutter speed and aperture settings, which can result in more technically pleasing photograph.
False Belief #3: You Always Need a Tripod
How often have you been visiting a faraway city or stopped at a beautiful spot in a national park to find people setting up their cameras on a tripod? The belief that a tripod is always necessary just isn’t true. There are times when it’s beneficial to have a tripod - long exposures and shooting at dusk immediately come to mind. Your purposes for your image will be a deciding factor as well - if you intend to create a giant print, a tripod would be helpful.
But in broad daylight, shooting photos that will be printed small or shared online, there is no reason why anyone should be fiddling with a tripod. This is where the false belief about ISO comes in as well: if you push the ISO up, you can shoot handheld in many more situations. Without a tripod, you can also move more quickly without lugging around the extra weight, which means you can set up faster and, in theory, get better shots (and more of them!).
And that’s what it’s all about, right? Getting better shots sometimes means challenging convention, or at least putting false beliefs to rest. So free yourself from the notion that you always need a tripod, that you always need to minimize ISO, and that aperture priority is the best shooting mode at all times. Once you do that, you’ll likely find you enjoy photography more and have better results as well.
We Recommend
4 Advanced Wildlife Photography Tips
photo bydrferry via iStock
I’m sure many photographers would like to know how to take better wildlife photos or perhaps how to photograph wildlife in general. You’ve found the right place!
Photographing wildlife can be an exceptionally rewarding endeavor, and with these advanced wildlife photography tips, you’ll be better prepared to capture gorgeous images.
Let’s get started!
The Basic Tips
photo byjohan63 via iStock
We already know the basic wildlife photography tips of how to photograph animals and wildlife. Use a long lens to isolate the subject but don’t be afraid of normal or wider lenses for including the surroundings, try to have fast shutter speeds for action stopping but also allow for motion blur to imply speed of action, and use composition tips such as Rule of Thirds or negative space to achieve a nice view.
Using the right equipment is only half the story, being able to control it to achieve the wanted results is vital as well. So we learn all of the functions and features of our camera and practice the techniques of wildlife photography so that they become comfortable and familiar, allowing us to concentrate on the photography.
Here are 4 other advanced wildlife photography tips to take your images to the next level.
Focus Points
photo byWerner Baumgarten via iStock
Autofocus is one of the best advances in modern photographic equipment, allowing us to get sharp photos in many varied situations. Modern AF is actually so good, many professionals use it for most of their work.
The advanced technique is how to make AF work even better. Choosing the right focus points and AF modes will get you better wildlife images.
Some cameras have an incredible amount of focus points, these points are activated by predictive programs or can be assigned and chosen by means of shooting modes or physically assigning them.
For wildlife photography tips, choosing a few or even one focus point puts you in control of what to focus on and what can be ignored by the camera automation. Some cameras have available modes such as eye focus automation, but you will want to practice with these modes first before relying on them 100% for capturing your wildlife images.
Using one or a centralized small group of focus points is very helpful when shooting for selective focus techniques. Learning the back focus button technique is also a nice option.
Other aspects of AF control are the settings for continuous AF or single shot AF modes. Most cameras allow the shutter to be released regardless of focus status when set for continuous, while single shot allows shutter release only when focus is confirmed.
Continuous AF can be very useful when tracking wildlife motion, but the odds of being slightly off focus, especially with long lenses and selective focus, are high enough to require our careful attention while shooting.
Learn More:
- The Canon 7D Mark II Is a Great Budget Camera for Wildlife Photography
- Wildlife Photography Tips for Bad Weather
Embrace the Elements
photo byRimenPix via iStock
Since we’re covering advanced wildlife photography tips, it pretty much is a given that we will be outside ourselves. Even in the relatively mild wilderness of being outside near our home in the city or the suburbs, the weather conditions can have an immediate impact on our imaging choices.
Sometimes, the wildlife we’re seeking seem to enjoy inclement weather more so than a bright, clear, sunny day. So, we need to be prepared with adequate protection for ourselves and our camera gear.
Much of this protection is stuff we probably already have, but if not, moisture wicking undergarments are essential gear for outdoor photography in every season. Especially will moisture wicking socks be a welcome addition to your outdoor wardrobe.
Camera protection can be simple or sophisticated. Simple gear can be as simple as a plastic bag and rubber bands. More sophisticated camera protection will range from specialty made plastic bags for your specific type of camera gear, to rain shields that mount to the camera like a canopy, all the way up to underwater housings good for as deep as 300 feet or more.
Clear lens filters and hard lens hoods are important for many wildlife photographers, as they add an extra layer of damage protection from bumps and pokes and blowing things.
Concealment
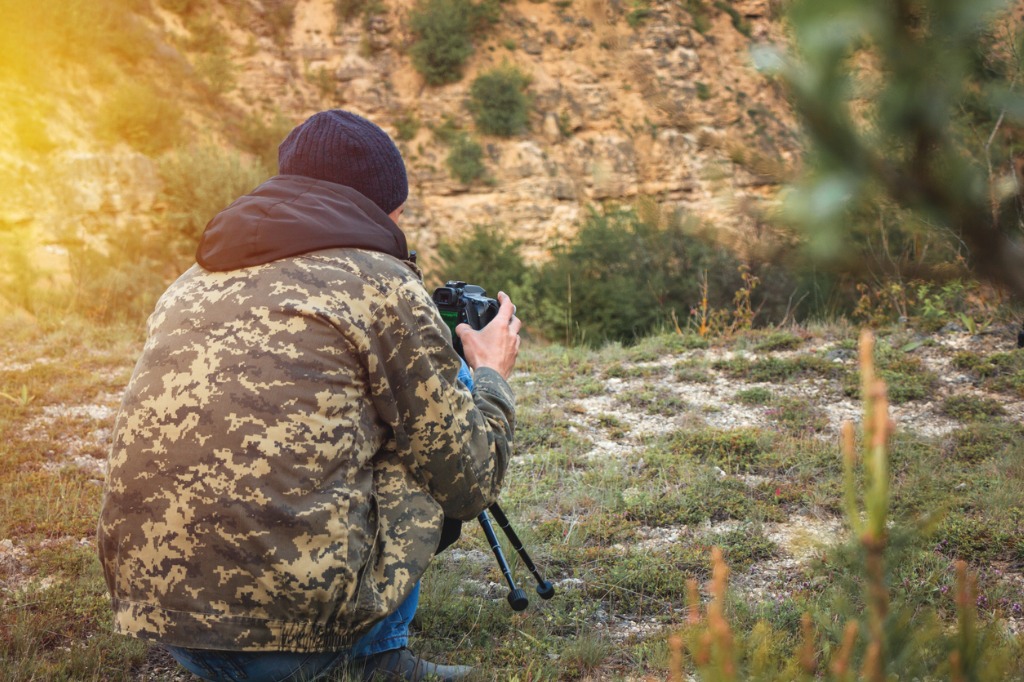
photo byRudenko Taras via iStock
In addition to protecting us and our camera gear from the elements, some of that same gear can also be used as a form of concealment and stealth.
A trip to a local outdoor gear store that caters to a wide range of outdoor enthusiasts, such as hunting, fishing, camping, and outdoor sports, will teach us how much can be found and how concealed, or not, we want to be for our wildlife photography.
If our cameras have silent modes, these are also useful for concealing our intrusion into their habitat. Many current lenses use silent focus motors, we can turn off all beeping notices, and if we have a mirrorless camera we can be almost completely silent, though DSLRs can be quieted down quite a bit by different settings and by using some of the weather proofing gear already discussed.
Work When They Do
photo byTahirAbbas via iStock
Unlike that old cartoon, animals rarely punch time clocks, so we will need to know when and where our photography targets will be active and available for imaging opportunities.
A lot of animals are very active at times some of us may consider to be outside our normal work hours, such as at dusk and dawn. A little research will go a long way in our figuring out when to try to take our wildlife photos.
Take full advantage of these and other advanced wildlife photography tips for increasing your enjoyment of this fascinating genre.
Learn More:
We Recommend
8 Tricks to Help You Master Composition
In photography, as in any other artistic and creative endeavor, there are no set rules or regulations. Ultimately, what you create depends on your creative eye and your aesthetic sensibilities. However, that doesn’t mean that there aren’t certain tricks or rules of thumb that you can use to enhance the quality of your image, and therefore make it more pleasing to view.
In this comprehensive guide, we explore eight essential compositional rules of thumb that will help you take your photos to the next level. Some of these tips and tricks, like the rule of thirds, are quite well-known and implemented often. Others are more specialized to certain types of photography, but are valuable tools to have nonetheless.
The Rule of Thirds

Let’s start with the most well-known rule in photography, the rule of thirds. Put simply, the rule of thirds suggests that you divide the image you wish to take into nine equal quadrants using two vertical and two horizontal lines, equidistant apart. By placing important elements of the scene either along one of the four lines, or, even better, at one of the four intersection points of the grid, you’re able to create a more balanced image that holds the viewer’s attention.
Note how the rule of thirds helps the image above feel more balanced. Even though the dog is off-center, the image feels nicely balanced because the dogs face, snout, and tongue roughly align with the rule of thirds grid. What’s more, it’s a better composition - by shifting the dog to the left, the image is more interesting for the viewer than if the dog had been framed smack in the middle of the shot.
Great for: all types of photography
Use Negative Space
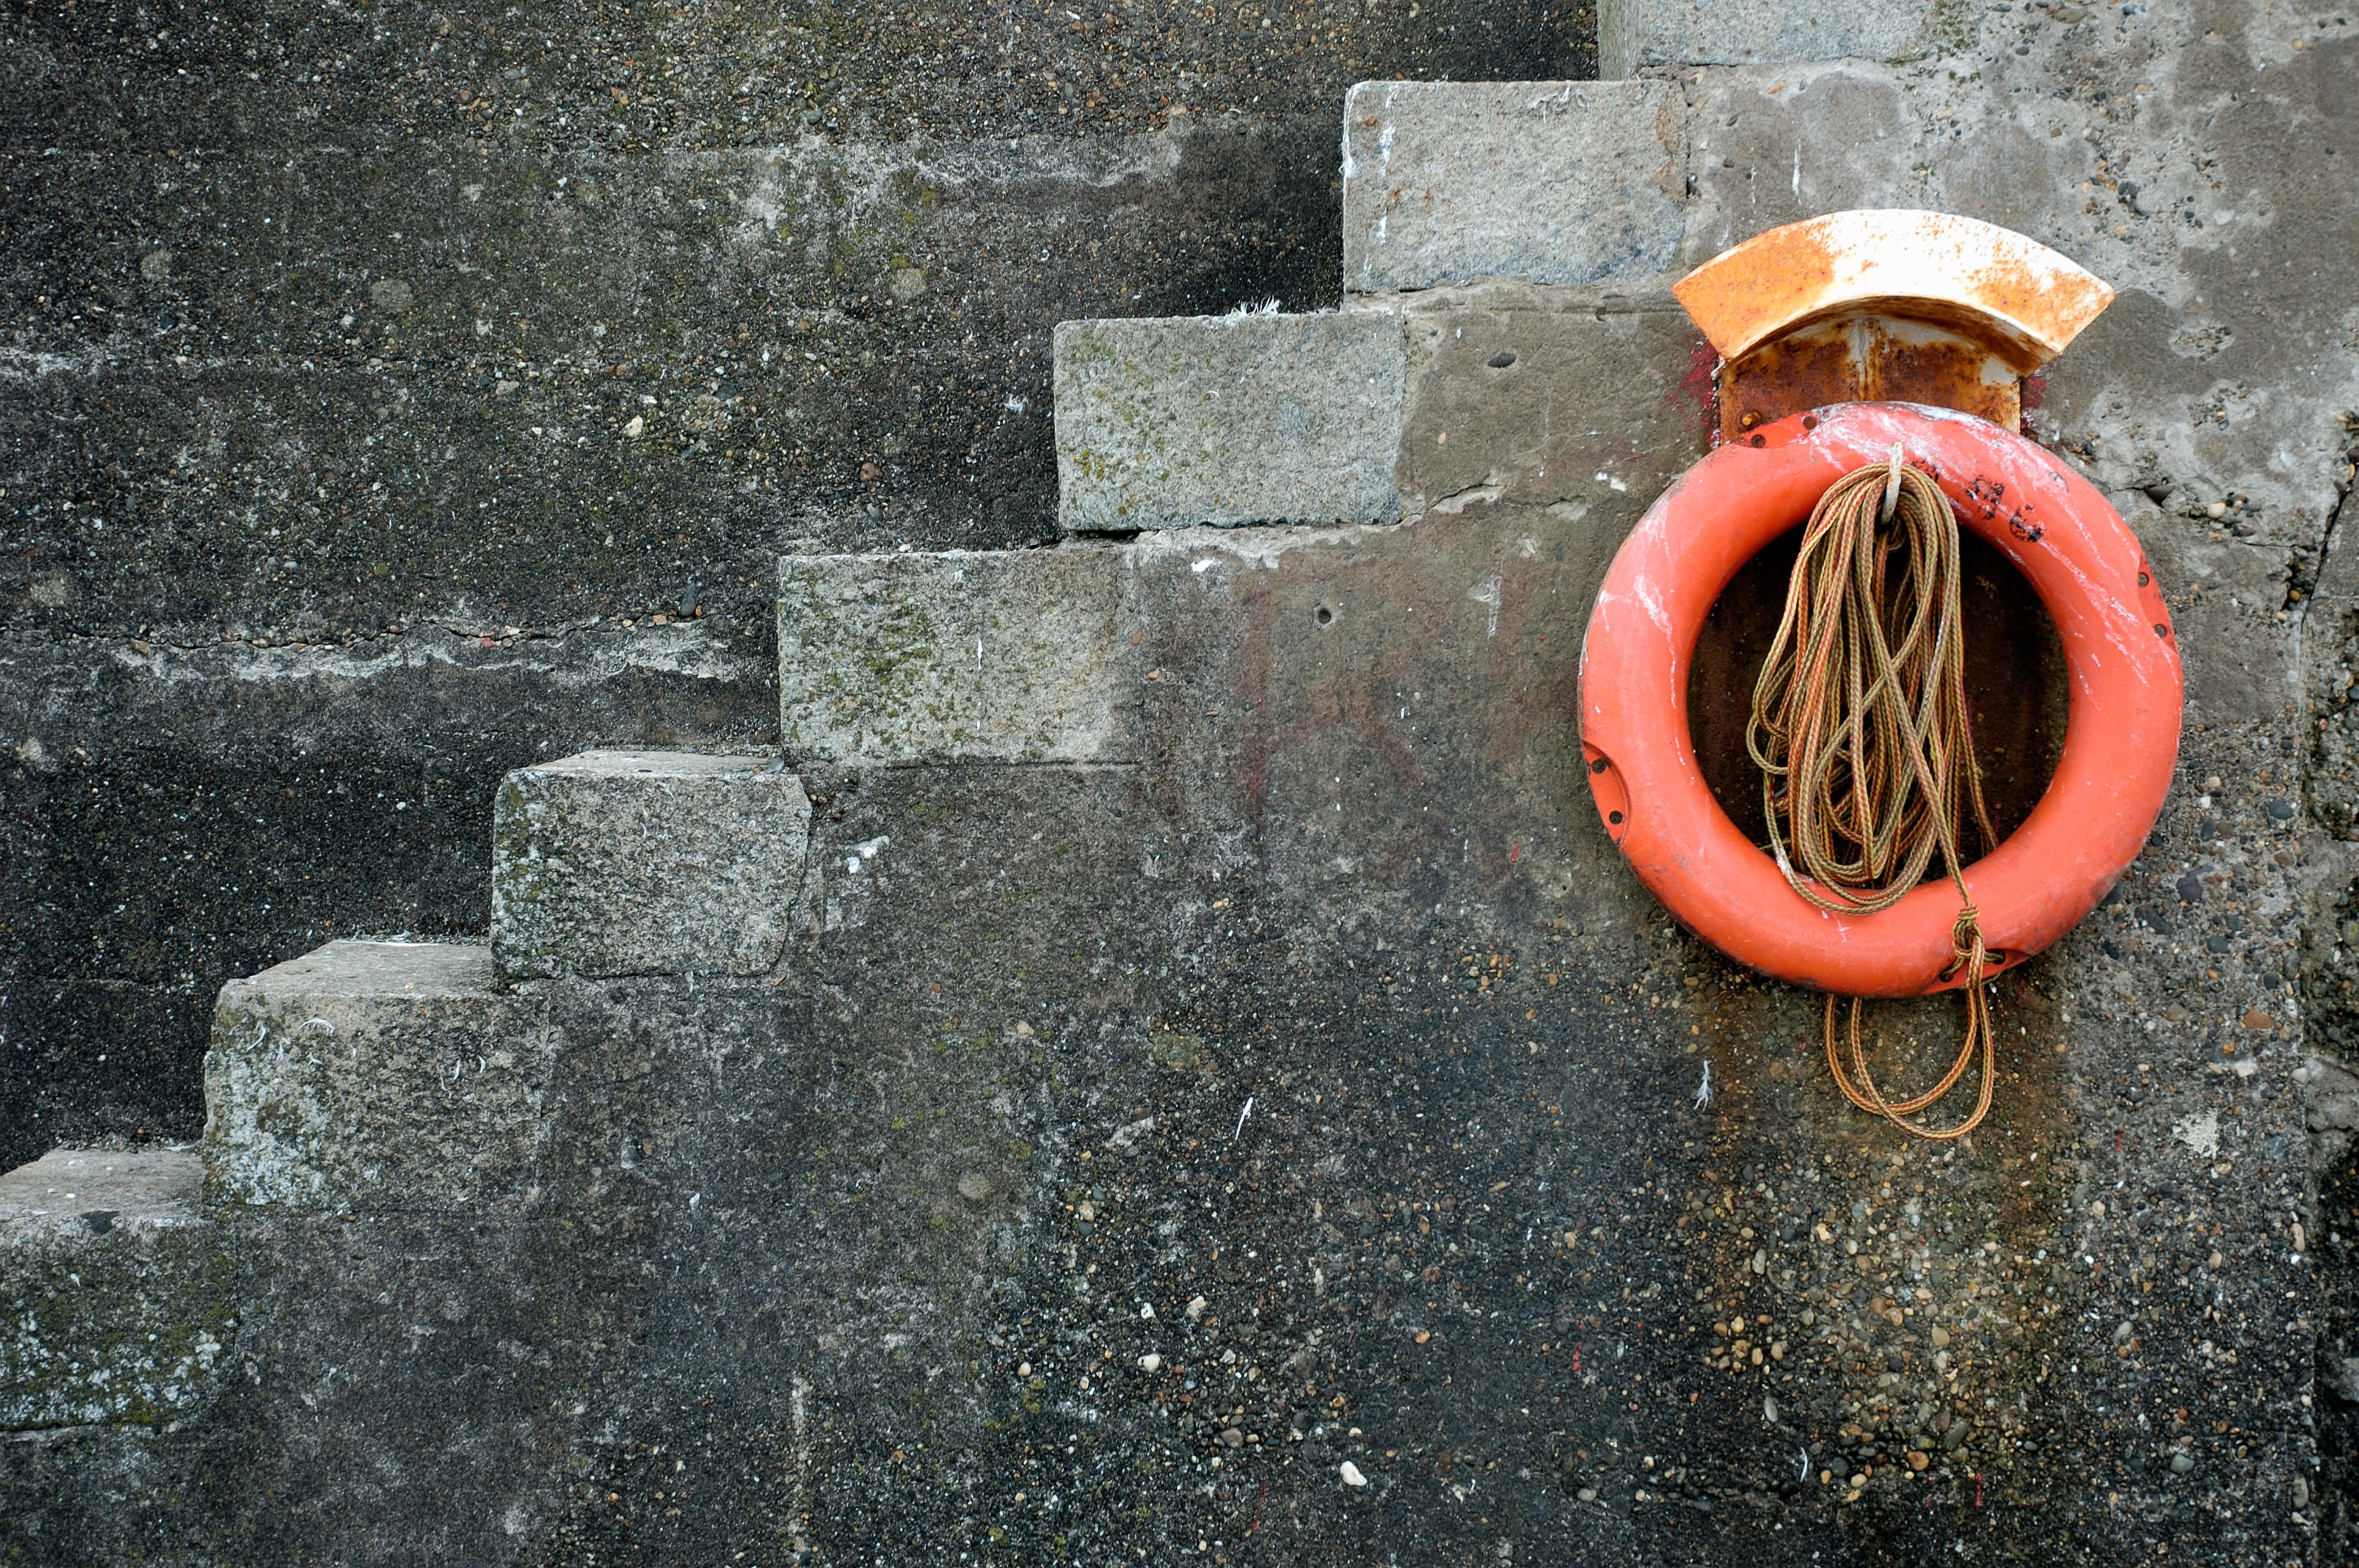
An identifying feature of minimalist photography is the use of negative space. Usually, this means that the area around a subject or between multiple subjects has little detail. In the absence of detail in these areas, the importance of the subject is amplified, drawing the viewer’s eye and commanding their attention for a longer period of time.
But this trick isn’t just for one type of minimalist images. Whether you shoot portraits, cityscapes, landscapes, or just about any other subject, you can use the principle of negative space to create a breathtaking image that delights the viewer’s eye. Often, it’s the simplest images that have the most impact, so learning how to edit out unnecessary elements from your images is a handy skill to have.
Note how negative space was used effectively in the image above. The eye is immediately drawn to the life ring, both because it is surrounded by the gray, relatively detail-free concrete wall, and, of course, because of its bright orange color. This image is a good example of the rule of thirds as well - with the life ring shifted to the right, the image is more visually interesting. Just imagine this photo had the life ring been positioned in the middle of the shot. It wouldn’t be as effective, would it?
Great for: minimalist photos, landscapes, portraits
Fill the Frame
On the opposite end of the spectrum from using negative space is filling the frame with your subject. Sometimes, in order to appropriately highlight the subject, you need to get close to it. Really close. Doing so is certainly a challenge because composing a close-up is much more difficult than standing back and snapping a photo of the larger scene. And, as you’ve likely encountered in the past, by standing too far from the subject, you run the risk of the subject getting lost in the scene, thereby diminishing its impact.
Instead, try filling the frame with whatever it is you’re photographing. The image above certainly benefits from filling the frame because the intricate details of its leaves are on full display. Not only that, we’re given a close-up view of its beautiful colors and the way in which the colors fade as they get further from the center of the plant. Now imagine if this image had been taken from ten or fifteen feet away - this plant would not have the same visual impact.
Great for: macro photography, portraits, landscapes
Use Color to Your Advantage
Regardless of what you’re photographing, using color in a smart or unusual way can take the image’s composition to another level. Perhaps more than any other visual element, color can add great interest to an image. Of course, given that color is so powerful, it can easily be overdone.
Instead, inspect the colors in the scene to ensure they work well together. This takes some understanding of color theory, like using complementary colors like blue and orange, which contrast nicely with one another. Have a look at the sample image above - notice how it’s a very simple image, with just two colors. However, because blue and orange are complementary, the image is quite visually impactful.
Great for: landscapes, cityscapes, street photography, abstracts
Change the Perspective
When you look at the photos that beginner photographers take, you’ll likely see a number of patterns. Chief among them is that many of the photos use the same perspective - one that is gained by standing straight up and photographing the subject from the eye level of the photographer.
Now, this isn’t bad all the time, but certainly, changing the perspective from which you shoot now and again will help you create images that are more interesting, if not unexpected.
With that in mind, you can improve your composition simply by moving around a little bit. Instead of standing, try kneeling down or even lying down on the ground. Find a high vantage point and take a photo looking down on the subject. Move left or right. Look up. The point is that the more you move around and find ways to give the viewer to see the subject, the more interesting the photo will be.
Great for: portraits, cityscapes, landscapes
Focus on the Details

If you’ve ever gotten married or looked at someone’s wedding album, you know that some of the pictures taken that day are of the small details - the wedding rings, the place settings, and the like. But focusing on the small details isn’t just a trick for wedding photographers. In fact, by focusing on the details, you can create a landscape image, a portrait, a street photo, or even a photo of food that has far more power than an ordinary image.
Look at the image above. In traditional portraits, it’s the individual’s face, and in particular, their eyes, that are the focus of the image. However, in this image, we get to see a different side of the subject, one that, in the case of their hands, shows a lot of detail and character. In fact, you can tell that the people holding hands in this image care deeply for one another - you don’t need to see their faces to understand that. Therein lies the beauty of focusing on small or unusual details in your images - you can tell a powerful story, but do so in an unexpected way.
Great for: macro photography, portraits, landscapes
Use Visual Direction

Visual direction refers to the concept of the impression of movement in an image. For example, in the image above, we understand that the horses are running to the left because of the impression of movement in that direction in the photograph. However, visual direction doesn’t just apply to people, animals, or objects on the move. In a portrait, if the subject is looking to the right, the viewer will feel a sense of movement to the right, even though there is no movement actually occurring.
This trick is advantageous from a compositional standpoint because it can be used to draw attention to the subject, to draw attention to what the subject is looking at or moving towards, and it can help you achieve an image that has greater visual balance as well.
Great for: action photography, portraits
Use Visual Weight
Visual weight is used to describe the power of an object in a photo to draw the attention of the viewer. Obviously, objects that have certain features, like being large in size, being highly colorful, or positioning in the foreground of an image, have more perceived visual weight. But that doesn’t mean that you can only use this trick when one of those situations applies.
For example, in the image above, where does your eye go right off the bat? Likely to the person positioned in the background on the left. Even though the person isn’t physically large, brightly colored, or in the foreground, their form still holds a lot of visual weight. That’s because our eyes are naturally drawn to the human form, even if larger objects or more brightly colored objects are also in our field of view.
Great for: landscapes, street photography, nature & wildlife photography, portraits
Why You Should Break These Rules
Clearly, there are a lot of tips and tricks you can use to compose a better photo. But, as many beginner photographers discover, it’s very easy to get caught up in always adhering to these rules.
The problem with that is that if you blindly apply each and every rule you learn to every shot you take, your photos will all end up looking the same. What’s more, they will likely feel (and look) forced, as though you were trying to shoehorn the subject into some preconceived notion of what the photo “should” look like.
The task, then, is to learn these compositional tricks, and then learn to apply them when necessary while understanding that sometimes, you simply have to break these rules to get the best shot. In the end, being open to breaking all the rules is being open to creativity and creating images that reflect who you are as an artist. So, give these tips and tricks some thought, but let your creativity flow as well!
We Recommend
A Beginner’s Guide to Using Framing
Framing your shot in this context refers not to placing your final image in a literal frame, but instead refers to the compositional technique in which you use an object - natural or manmade - within the image to draw attention to your primary subject.
Framing is a technique used in all aspects of photography, from portraits to landscapes and everything in between. It is effective for a wide variety of reasons, and can be used to give your image added pop and depth, while signifying the importance of your focal point as well.
Using framing is quite simple too. For starters, just about anything can be used as a frame - a tree branch, the entrance to a tunnel, doorways, fabric, or even areas of shadow. Secondly, using framing doesn’t require you to be precise - the frame might only extend across one or two sides of your shot, but even so, will still serve to direct the viewer’s attention where you want it. Lastly, your frame might be in focus or it might not - that decision is left completely up to you.
As you can see, framing isn’t so much about being precise and technical as it is about using it to your advantage to create a more dynamic image. There are many benefits to framing your images as well.
Frames Create Depth
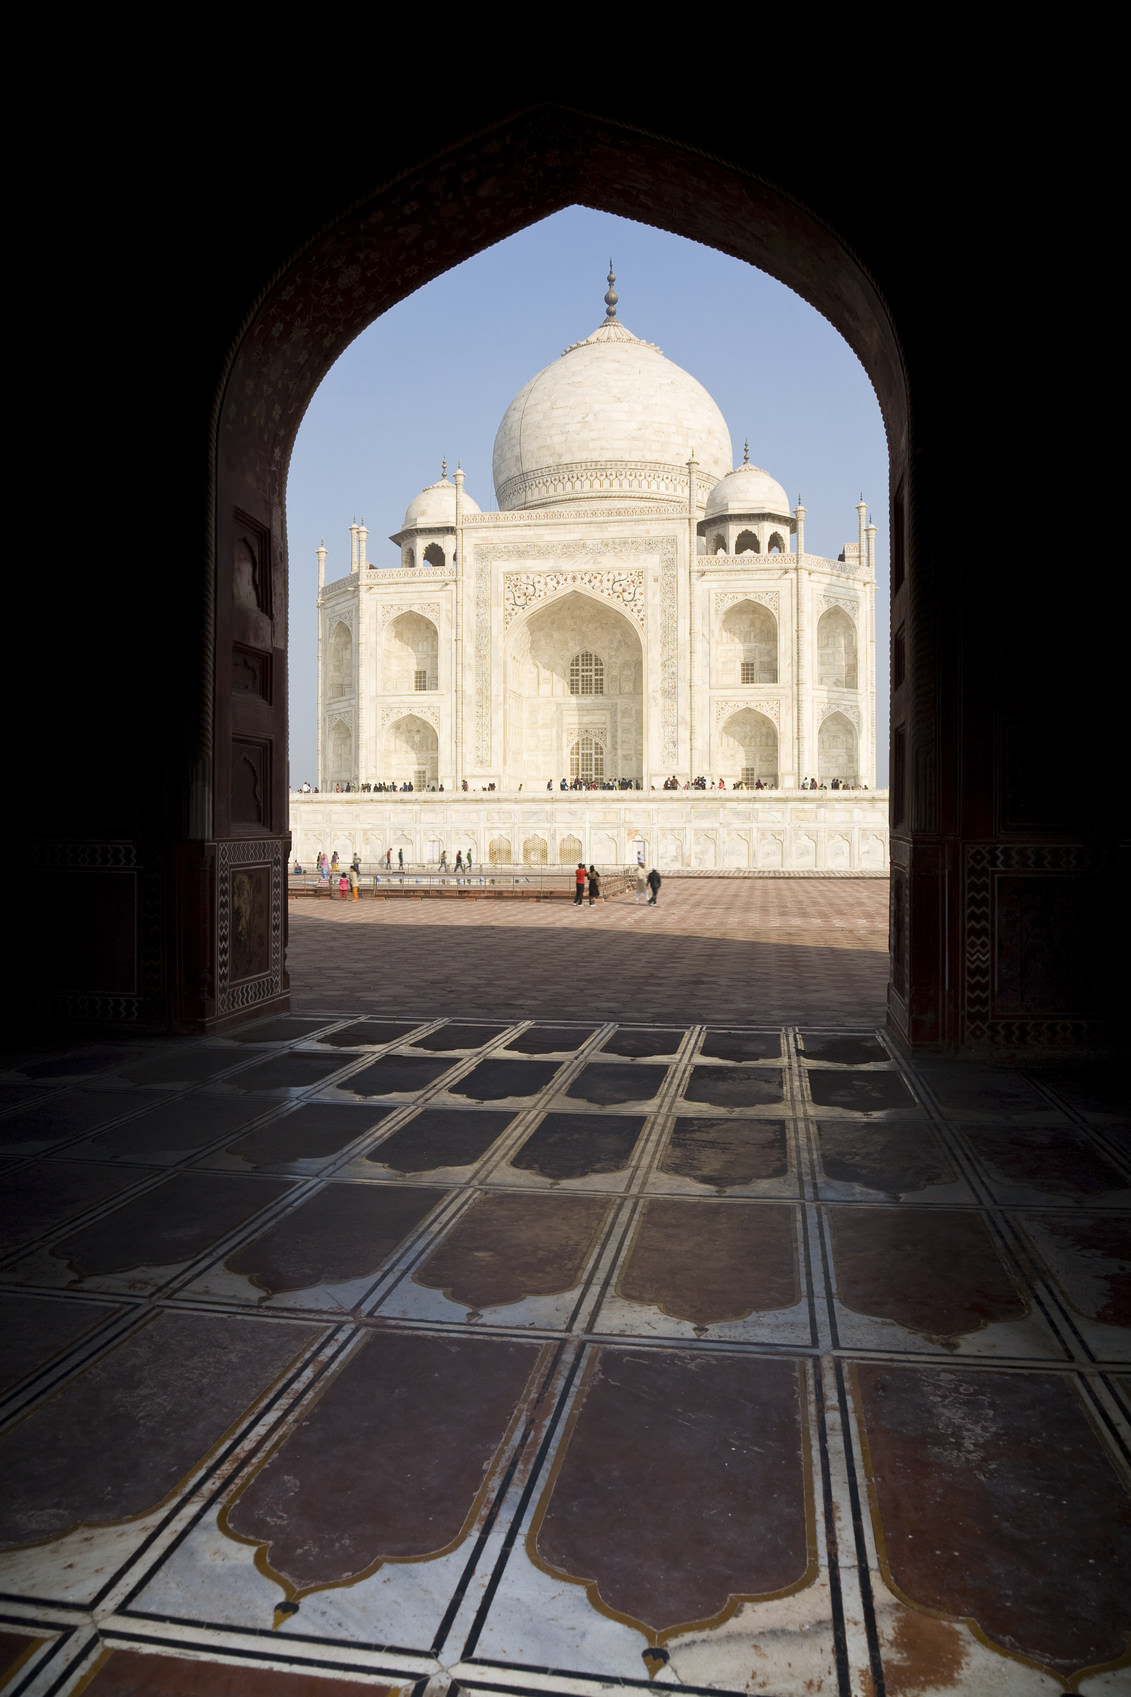
By utilizing the framing technique, you instantly create depth in the image. A foreground frame, like the one pictured above, sets the stage for the viewer’s eye to travel deeper into the shot. By including elements in the image at different distances from the lens, the eye has multiple points of interest to which it can travel. The result is an image that has a three-dimensional feel to it, even though it’s only two-dimensions.
Frames Direct the Eye
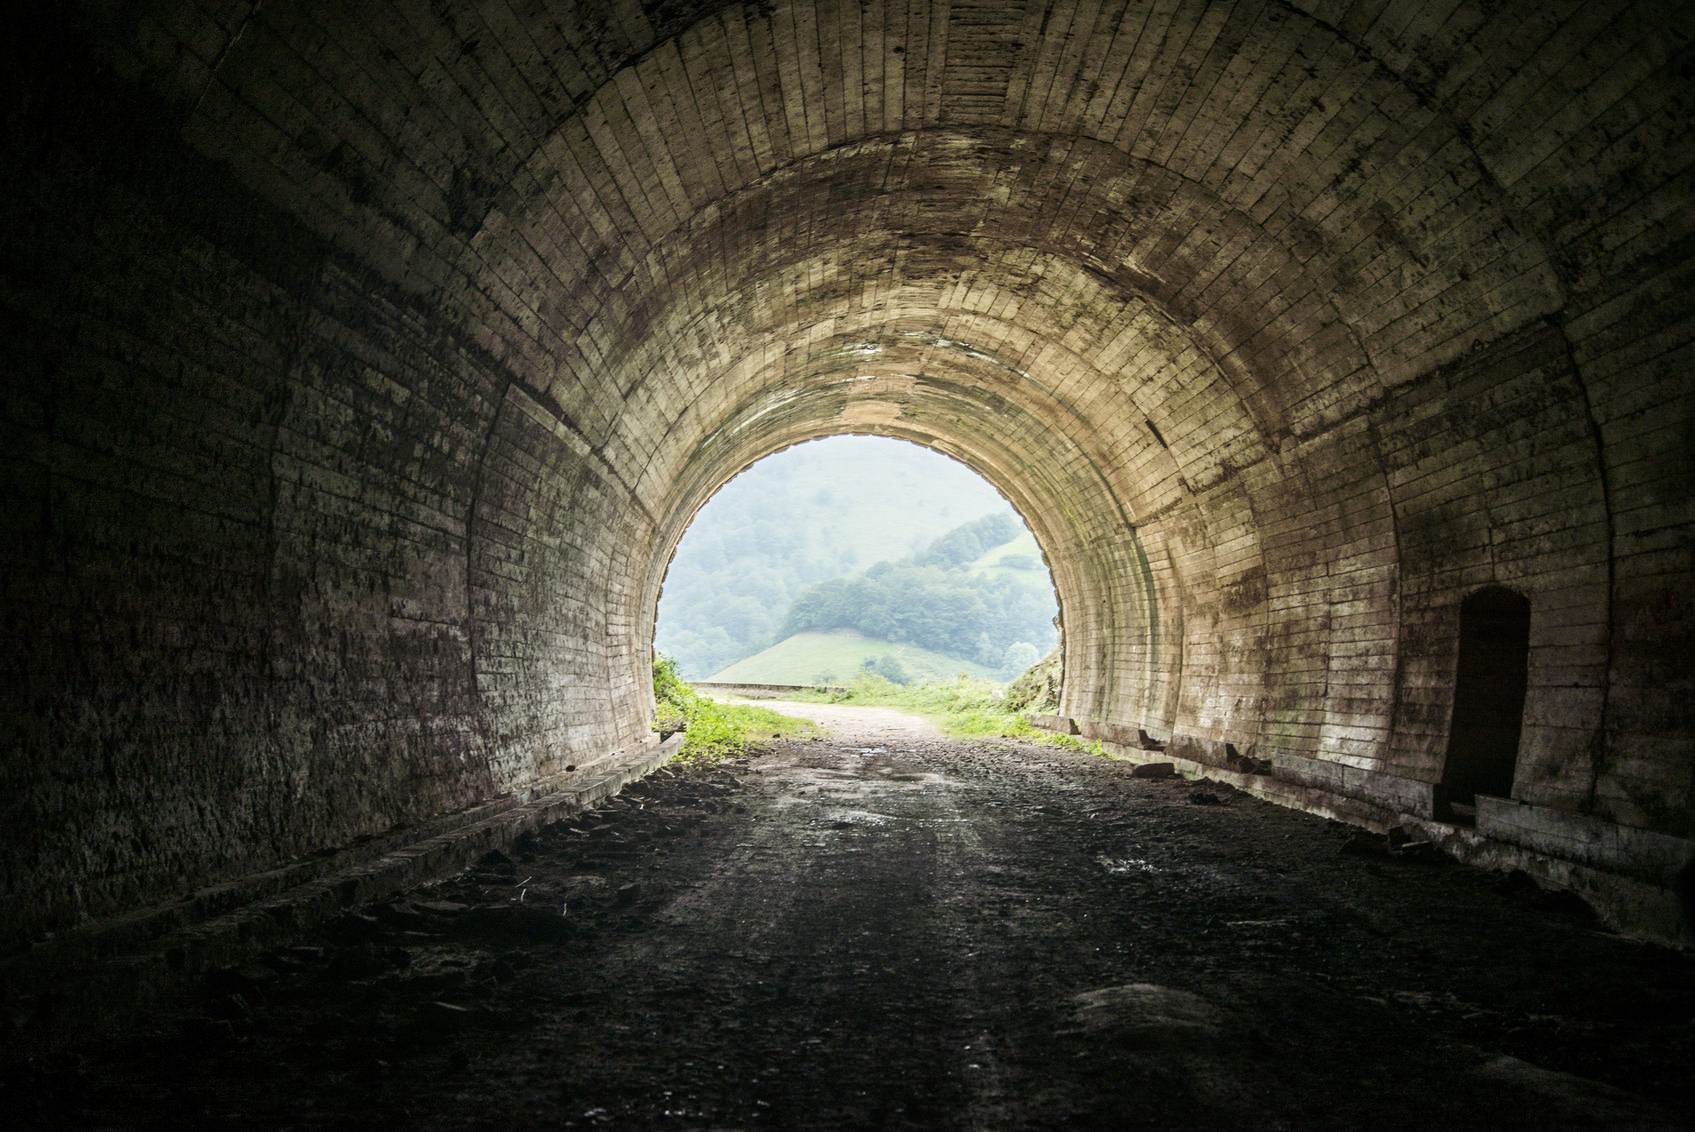
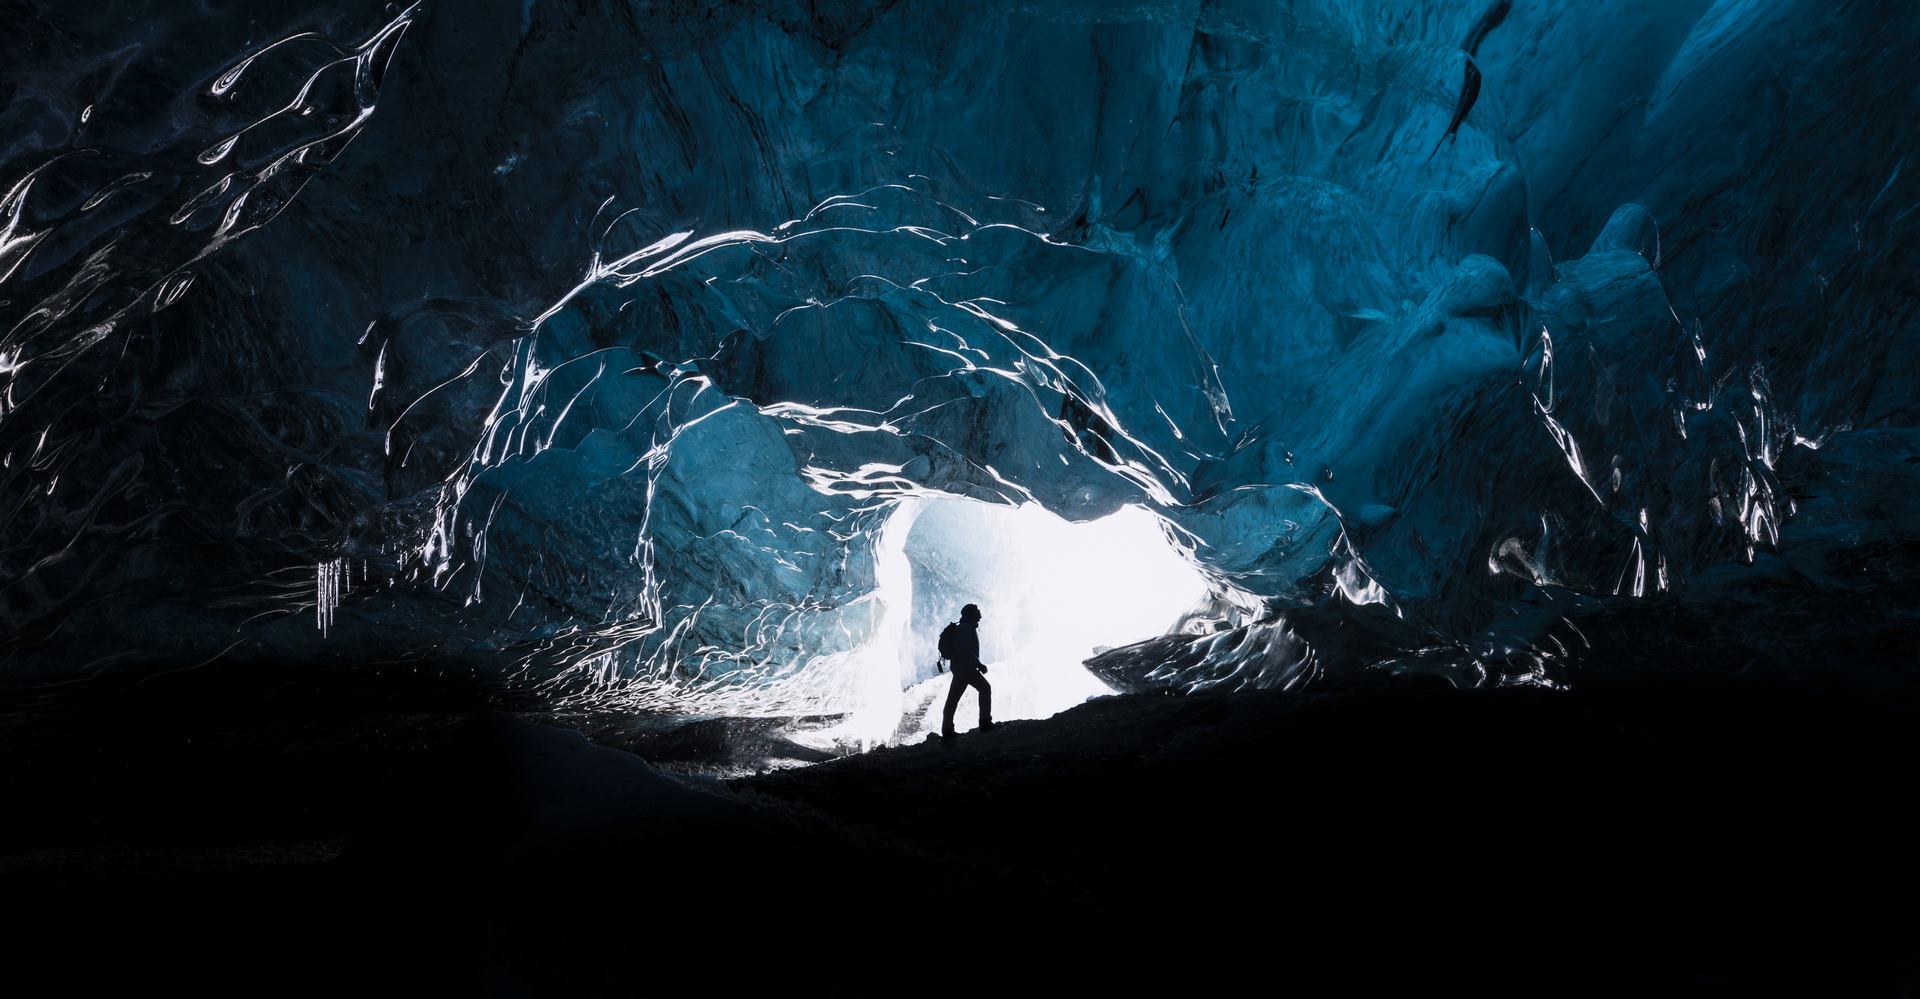
As noted above, the inclusion of a frame in your image more purposefully directs the viewer’s eye to the focal point or primary subject of the photo. Shape has something to do with this - the curvature of a tunnel or cave, for example, might be more effective in drawing the viewer’s eye toward the primary subject than a simple tree branch framing the top of the photo. Nonetheless, any frame that you use will allow you to create a barrier between the center of the photo and the edges of the image, which tends to help viewers engage with the image in a deeper, more meaningful way.
Frames Provide Context
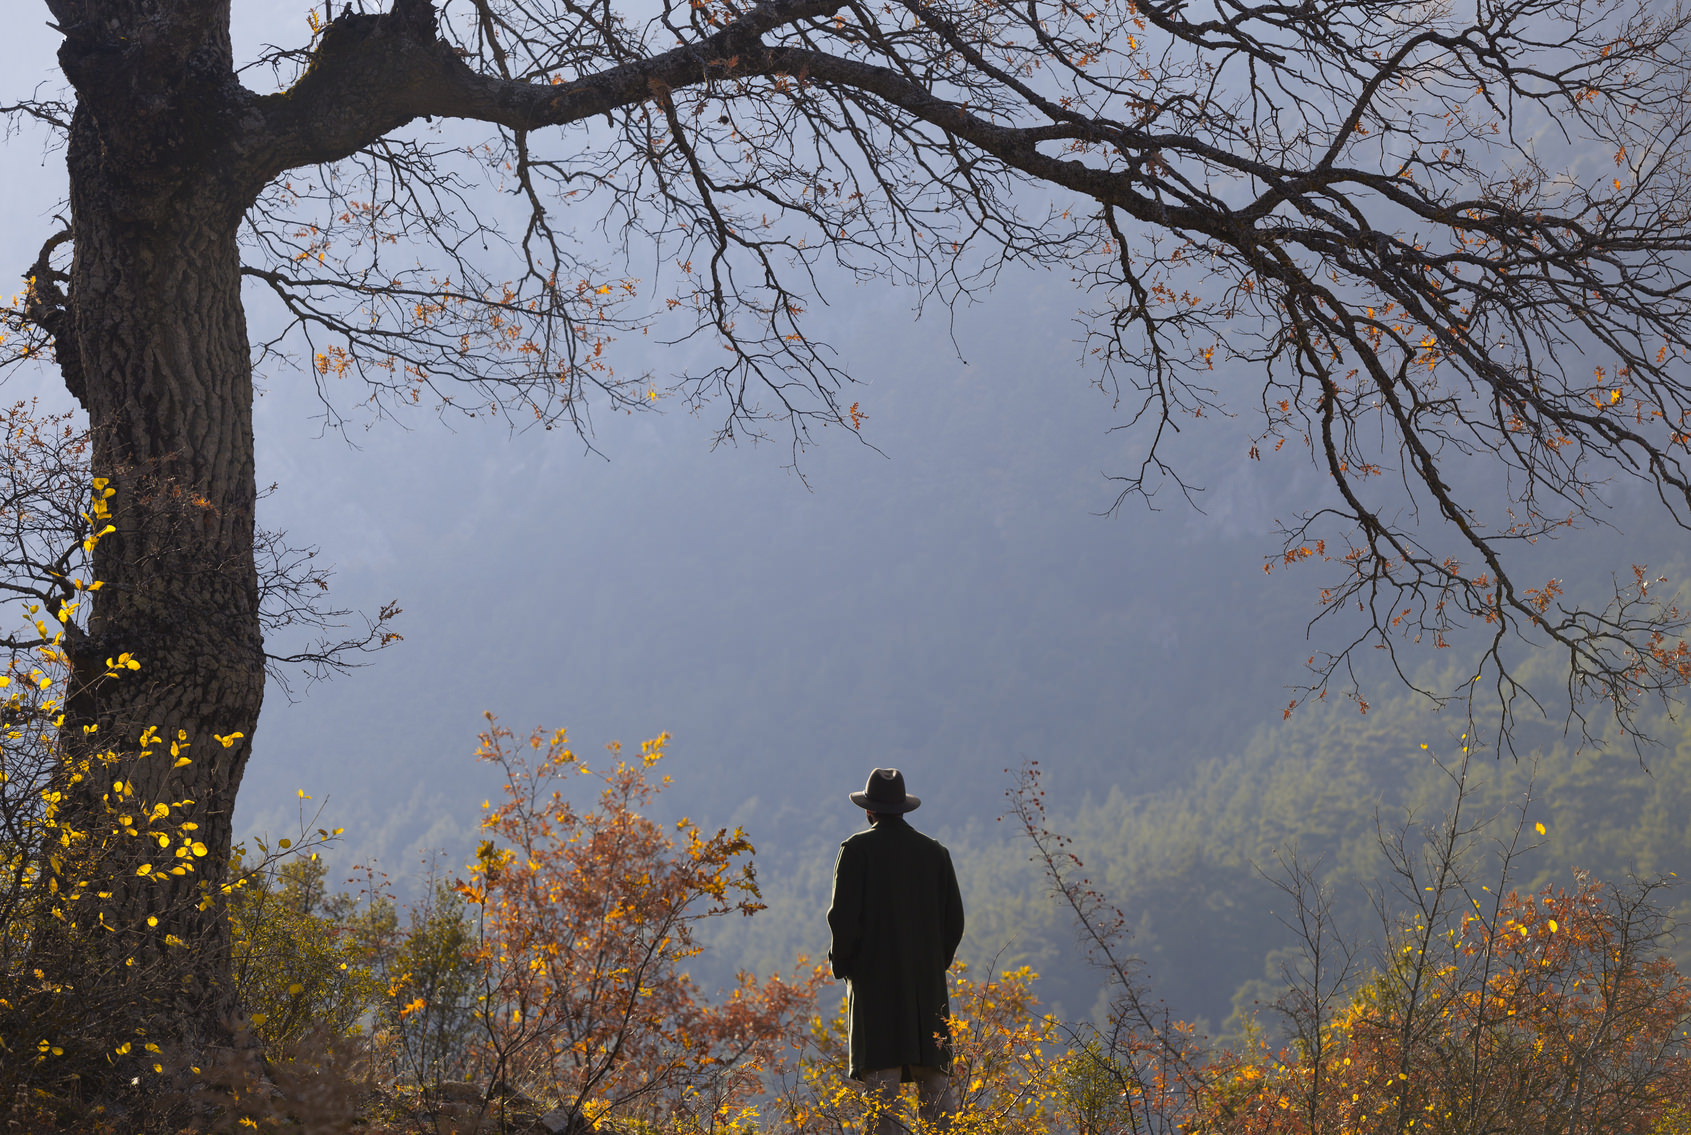
The form your frame takes also gives you an opportunity to provide more context to the shot you create. For example, if your frame is the branches of a tree that has bright, autumn leaves on it, the viewer is clued into the time of year the photo was taken. Likewise, if you use people as the frame, the viewer better understands the primary subject’s place in the context of the gathering of people. In the image above, the frame draws attention to the child’s face, but also let’s us know that the child is playing on a playground. Having that extra bit of context gives your image greater impact because viewers have a better understanding of what is going on in the photo.
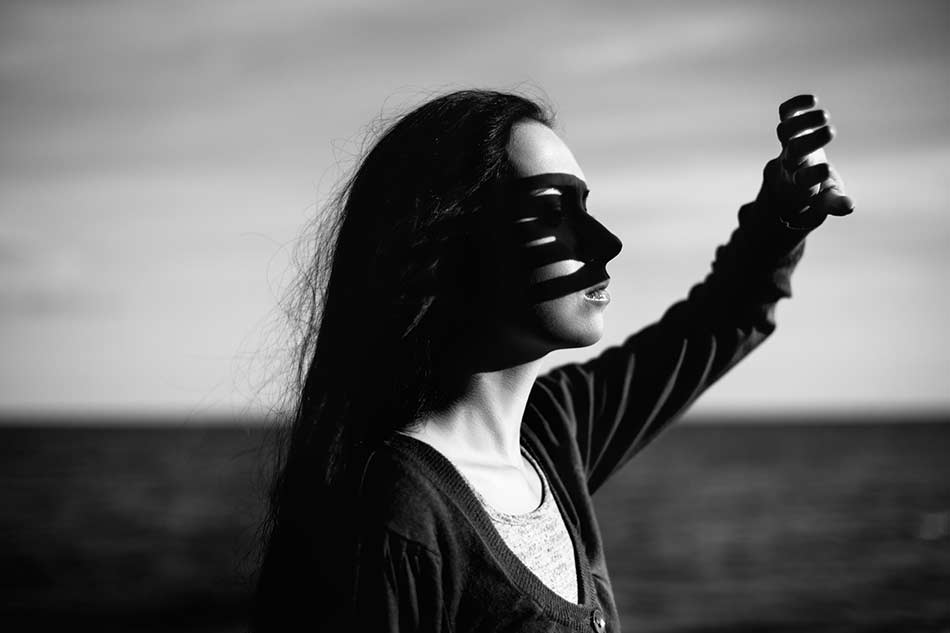
Frames Create Mystery

Certainly, frames help provide context to a situation that gives the image more meaning. But other times, frames can be used to mask what’s happening in the scene, creating a greater sense of mystery and intrigue. What goes on behind the frame can be just as interesting as what you’re able to see. In the image above, one can’t help but wonder where this woman is and what she’s looking at beyond the wall.
Creating some mystery gives viewers the opportunity to ponder and to question, both of which induces them to spend more time inspecting the photo and engaging with it. And in the end, isn’t that what we want to happen? Frames facilitate that, and as we’ve noted above, they can do much more as well.
We Recommend
A Beginner’s Step-by-Step Guide to Improved Wildlife Photos
Along with landscape photography, wildlife photography has seen increased interest over the years by beginner, amateur, and intermediate photographers. More feature-packed gear has made wildlife photography a much more accessible endeavor, yet, having better gear doesn’t always equate to taking better photos. Have a look at any wildlife photography forum and you’ll see lots of good photos, some so-so photos, and plenty of photos that just don’t do justice to the subject.
If you want your photos to be in the good category and not the others, follow the steps in this quick guide so you’re sure to have the knowledge to be prepared for your next wildlife photography outing.
Step 1: Get to Know Your Gear
This seems like a common sense step, yet many budding photographers simply skip it. Sure, it’s much more fun to be outdoors taking photos of wildlife, but if you don’t take the time to get intimately familiar with your gear, your chances of getting a great shot are vastly reduced. A good, thorough reading of your camera’s owner’s manual and several hours spent practicing with your gear is essential before you head out on your first wildlife photography adventure.
Of the utmost importance is:
-
Learning how to manually change exposure settings.
-
Becoming adept at manual focusing.
-
Being comfortable shooting in burst mode.
-
Understanding how to switch focus points.
-
Knowing the minimum shutter speed you can use with your specific lens and camera combination.
-
Understanding how much leeway you have with shutter speed with camera or lens stabilization engaged.
-
Knowing the highest ISO you can use while still getting images that have an acceptable amount of noise.
This is just a short list; there are many, many other gear-related skills to master. But those listed above are some of the most essential. The kicker is that since wildlife photography is often a game of seconds, you need to be able to make these adjustments without moving your eye from the viewfinder. Doing so will take a lot of practice, so why not start off on the right foot and become as familiar as you can with the gear you use?
But the learning doesn’t stop there - just because you know how to use your gear doesn’t mean there isn’t more to learn. Photography is a lifelong pursuit, and committing yourself to always learning new techniques will keep you on top of your game.
Step 2: Develop an Understanding of Light
Light is one of the most essential components of a good photo, so learning how to use light to your advantage is another critical step in maximizing your ability to create eye-catching photos.
There is much discussion about Golden Hour - the first and last hours of light each day - and how it’s the best lighting under which to create photos. The reason Golden Hour is so good from a lighting perspective is because the light is warm and soft, and since the sun is so low on the horizon, long shadows are cast across the scene which gives the image improved depth.
Granted, shooting at Golden Hour isn’t always possible, and even if you manage to be shooting at Golden Hour, there will be times when your position isn’t ideal, such as shooting directly into the sun. But understanding light will help you resolve issues such as these. For example, though shooting at mid-day on a clear day is less than ideal due to the harshness of the light, shooting at mid-day on an overcast day can get you some excellent photos. The cloud cover acts like a giant softbox, diffusing the light in all directions. This results in images with very soft (if any) shadows that are extremely pleasing to the eye.
Another example of understanding light is having the ability to use it to your advantage, even when you are out of position. For example, if you’re shooting toward the sun, you can still create dynamic images by creating a silhouette shot. Obviously, this requires the knowledge suggested in step one, as you will need to understand your gear and the appropriate settings to get a good silhouette shot.
The point is that due to the importance of lighting, you need to have the knowledge and skills that will help you maximize light to your advantage, even if the lighting situation is less than perfect.
Step 3: Learn to Compose Close-Ups
Too many wildlife photographers stand back, use a giant telephoto lens, and compose images that show wildlife and the surrounding environment, like the image above. This is an excellent image, and environmental shots certainly have their place in wildlife photography as they tell a larger story about how the animal interacts with its surroundings. But there is something to be said about wildlife closeups as well.
Composing a closeup image takes a different skill set altogether. You can use a long lens and zoom in on an animal’s face, for example, or, if it’s safe to do so, you can use a wide-angle or standard focal length lens, get closer to the animal, and compose a similar shot. Regardless of how you approach it, creating a closeup image of wildlife gives you an opportunity to tell a more intimate story about the animal. You can highlight the texture of its skin, fur, or feathers, focus on battle scars, and incorporate the animal’s eyes into the shot in a more purposeful manner. The result is often a shot that wows viewers and engages them in the photo more deeply. Doing so helps push your creativity as well and helps you grow as a photographer.
Step 4: Learn to Get Low (or High)

Like lighting, the point of view from which you shoot is a critical element that can determine the success or failure of your photo. This is especially true in wildlife photography because getting your viewer on the same eye level as the animal you’re photographing makes for a much more engaging shot, like the one above. By confronting viewers with a view of the world from the animal’s perspective, you force them into understanding how the world looks from the animal’s point of view.
We all know what the world looks like from our eye level, but seldom do we get to experience the world from the point of view of a ground squirrel, a tiger, or a giraffe. Work to find improved angles from which to shoot, even if that means kneeling down or lying down on the ground. Granted, you need to remain safe and obey any and all rules regarding interacting with wildlife in the area in which you’re shooting. But, if possible, try to get on the animal’s eye level. The shots you take will be far more interesting as a result.
Final Thoughts
Honing your skills as a wildlife photographer will be a years-long process. However, starting out on the right foot will get you to a place in which you can take high-quality photos of wildlife much faster and with greater ease. The tips outlined in this guide will give you a good start, as will the tips in this guide to nature and wildlife photography. Commit yourself to learning how to use your gear, develop an understanding of the value of light and perspective, and strive to compose more interesting shots, and you will find that the resulting images are vastly improved.
Recommended Reading
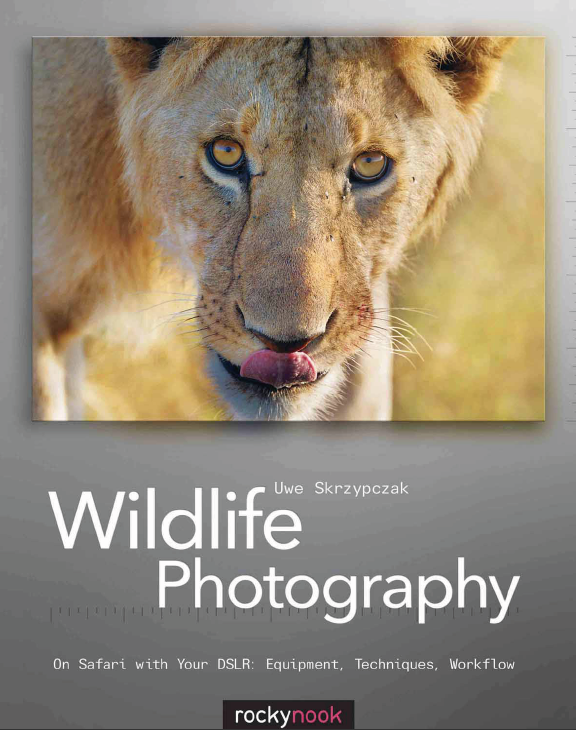
If you’re looking for a book to help you develop your wildlife photography skills and which also takes a conservationist approach to protecting wildlife, Wildlife Photography by Uwe Skrzypczak is an excellent choice! Focusing on the animals that live in East Africa, particularly Serengeti National Park, Skrzypczak covers all aspects of this craft, from the equipment needed to compositional techniques to practical tips that help improve your workflow. The book is stuffed with hundreds of incredible wildlife images to inspire your creativity as well. No matter your desired subject or the location in which it lives, the tips included in Wildlife Photography will prove beneficial to you.
We Recommend
A Different Take on Wildlife Photography: Using a Wide-Angle Lens
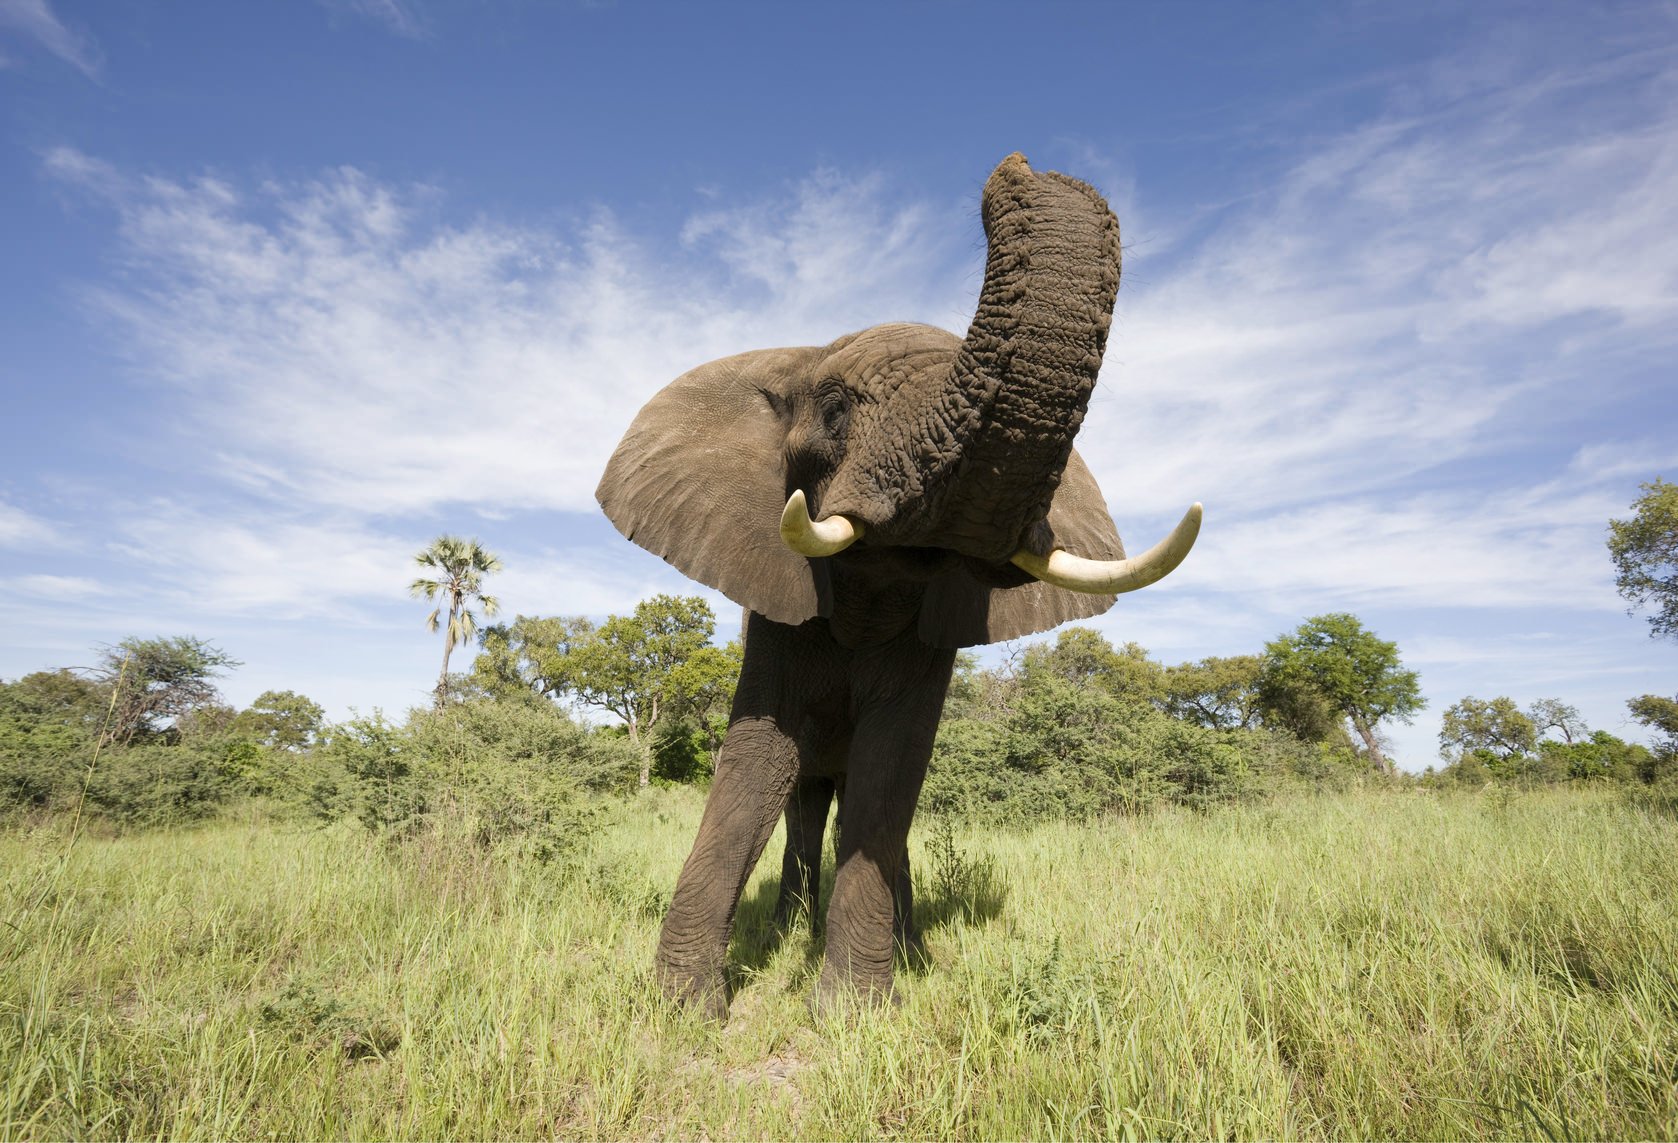
If you took a poll and asked people, “What kind of lens do wildlife photographers typically use?” the chances are that an overwhelming majority of respondents would say a telephoto lens.
While telephotos are indeed the go-to choice for most wildlife photographers, there are plenty of opportunities for excellent photos at the other end of the focal spectrum.
Wide-angle lenses give you a totally different perspective on the life of the animals you’re photographing and their relationship to the environment that surrounds them. Naturally, using a wide-angle versus a telephoto lens will require a bit of a reboot in terms of your thinking and approach. Here’s how to do that.
Gear Up
The most obvious gear you’ll need are your camera and a wide-angle lens. Don’t be afraid to go really wide here - something like a 14mm prime can get you great results. But, if a prime doesn’t suit your fancy, try a zoom lens that opens nice and wide, like an 18-35mm. The point is to give yourself the focal length you need to get the wide point of view you want.
Aside from that, a tripod is a necessity so you’re sure to get the most stable, clear shots. Consider taking along a small travel tripod that allows you to set up at ground level. You’ll find that’s a handy solution for photographing small critters like chipmunks, marmots, meerkats, and the like.
It’s also a good plan to outfit yourself with a high-quality remote shutter release. Look for something that utilizes radio signals which don’t require a line of sight to work. Radio-based remotes also have a range well over 100 yards, so you can set your camera up and find a hiding spot, yet still be able to fire your shutter.
Dial in the Settings
Clearly, the conditions in which you are shooting will dictate the precise settings you use, but a good place to start is aperture priority mode so your camera can easily adapt to changing light conditions. Choose an aperture that’s in the mid-range, say f/8, so you’re sure to have an opportunity to get clear images whether the animal approaches your camera up close or stays a good distance away. Adjust the aperture as the lighting and compositional needs of your shots change over the course of the shoot.
Additionally, set your focus to manual mode. This will give you more leeway in terms of where to set the focus rather than relying on your camera to do the work. Nailing down the focus point will take some time and practice, but once you get the hang of it, you will be able to get sharply focused images. Also consider shooting in continuous or burst mode. Doing so will give you a better chance of getting at least one image that is a winner.
Composition
Since you have such a large angle of view, composing wildlife shots with a wide-angle lens is a bit different than if you were composing a shot with a telephoto lens. The latter generally takes the form of a closely cropped image that focuses in on the details of the animal. The former allows you to capture the entire animal and its surroundings simultaneously, thus giving you a greater ability to tell the animal’s story.
With that in mind, a very low perspective like that mentioned above is a good place to start. By placing your camera near the ground, you give viewers a seldom seen perspective into the world of wildlife. The world becomes a more unique place when seen from the point of view of something like a squirrel, not to mention that when viewers are below the eye level of the animal, it makes the animal feel much larger than life. That, in turn, makes for a much more dynamic and interesting image, one that grabs the viewer’s eye and holds their attention for a longer period of time.
Conversely, shooting from eye level or a perspective from even higher up will likely result in an image that looks empty. Though you might be able to show off the animal’s surroundings from those perspectives, it will be difficult to make the animal large enough in the frame (unless it’s a very large animal or your camera is very close to it). If your subject is small, get as low as you can. If your subject is large, you can probably pull off a wide-angle shot from a higher point of view.
But Beware
One of the reasons why so many wildlife photographers rely on telephoto lenses is to ensure they aren’t disturbing or harming the wildlife they photograph. Naturally, with a wide-angle lens, you have to be much, much closer to the animals you seek to photograph, and with that, is an increase in the likelihood of disturbing the animal or causing it undue stress.
When using your wide-angle lens for wildlife photography, it is imperative to do so in an ethical and responsible manner. Do not disturb the animal or its routine. Avoid using a flash as flashes are detrimental to many species of wildlife. If you wish to photograph a nest, avoid a wide-angle lens in favor of a longer focal length, as your presence at the nest can cause the young a great deal of stress, and might even result in the parents of the young to flee and abandon their brood. Also be smart about your safety, and understand the dangers you face when getting close to wildlife.
Having said that, some animals are highly approachable, perfectly comfortable around human beings, and don’t pose much if any danger. Squirrels or pigeons in the park come immediately to mind. Regardless of the subject matter, a wide-angle lens affords you a much more interesting perspective on animal life. The key is to use your wide-angle lens in a manner that captures the beauty of the animal without causing it (or yourself) harm.
We Recommend
A Step-by-Step Guide to Regaining Your Inspiration
Creative ruts are the worst, but they always happen. If you’ve been carrying a camera for any length of time, you’ve undoubtedly found yourself completely uninspired by your surroundings. You might try to force the issue and go out and take photos in spite of your lack of creativity, but that might just push you deeper into the doldrums.
Instead, you need to find inspiration in new places, and doing so means that you need to expand your boundaries and remove some of the limits you’ve placed on yourself.
Let’s find out how to do that.
Step 1: Break Your Routine

We naturally like routine. It’s comfortable and familiar, and helps us stay on task and accomplish what needs to be accomplished in a given day.
The problem with routine, however, is that it can be an enemy to creativity. After awhile, the same commute to work each day, the same walk in the park at lunch, and visiting the same pond each evening as you walk the dog become less an opportunity to take interesting photos and more rote repetition of something that just needs to get done.
Breaking out of that routine might be all you need to jumpstart your creativity. Take a different route to work. Spend your lunch watching people on the street. Get up early and catch a sunrise. Take portraits of your friend’s kids. Just do something out of the ordinary and see how it might inspire you to do something different with your camera and lens.
Step 2: Get Uncomfortable

Closely related to the idea of breaking your routine is the concept of getting uncomfortable with your photography. It’s simple, really: if you traditionally take portraits, try landscapes for awhile; if you usually photograph landscapes, give wildlife photography a try; if you are most comfortable taking portraits of friends and family, head to the street and try photographing strangers.
You can also get uncomfortable by making alternative choices when it comes to gear and composition. Take portraits with a wide-angle lens or landscapes with a telephoto lens. Challenge yourself to hand hold your camera even when conditions might call for a tripod. Try using a slow shutter technique. Frame shots from unique perspectives, such as from up high or down low to the ground.
The point is that if you put yourself in uncomfortable situations, you’ll have to rely on your photography talents and know-how to make the most of those situations. By proxy, you’ll have to be creative in how you approach these situations, which might be just what you need to get your photography mojo back in order.
Step 3: Be Less Technical

Although photography is an artform, there are a lot of technical aspects to it as well. There are the mechanics of your camera and lens, the science behind exposure, and all the rules of composition that, when used together properly, can result in breathtaking images.
The problem is that if you focus too much on the technical side of things, and spend too much time worrying about whether or not you are doing things the “right” way, you can easily lose your creative touch. When faced with a dynamic scene, approaching it with the coldness of getting everything technically right might mean that you miss out on capturing the spontaneity or the emotion of the moment.
Being less technical doesn’t mean that you should purposefully head out and totally disregard all of the rules and suggestions of how to use your camera or compose a photo. Instead, give more credence to the power of being in the moment. Look for elements in the scene that grab your eye or elicit a response - for whatever reason - and snap away. Make minor adjustments as necessary, but focus more on the moment and less on things like, “Is my shutter speed right?”
Final Thoughts
The ebb and flow of creativity and inspiration is just a natural part of creating art. Some days you will be oozing inspiration and have trouble finding enough time to create all the photos you want to create. Other days, you won’t take a single photo that you like and find that you lack any inspiration at all. But simply breaking out of your routine, challenging yourself with new photographic pursuits, and focusing less on the technical aspects of photography and more on simply being in the moment are three easy ways to try to kickstart your creative juices. If you’re in a rut, give one (or all!) of these methods a try and see where they take you!
Recommended Reading

As noted in this lesson, creative ruts are just part of ebb and flow of photography. Though the recommendations we’ve outlined here are a good start for finding your inspiration again, a more in-depth reading to consider is The Creative Fight by Chris Orwig. In the book, Orwig discusses the difficulties of the creative process, and dives into easily implemented methods you can employ to be inspired, regain your creativity, and find meaning in the work you do once again.
The Creative Fight would be a solid addition to your library that you can reference over and over again to get back to the pinnacle of your creativity when inspiration seems to elude you. With chapter-based exercises designed to help you put concepts into action, The Creative Fight is the ideal tool for regaining your inspiration.
We Recommend
Beginner Wildlife Photography Tip: Basic Camera Settings

So, you’ve gotten yourself outfitted with a new camera, a telephoto lens, and a monopod. You’ve wrapped your lens with camouflage gaffer’s tape (and outfitted yourself with some camo too!). You’ve found a nearby wildlife preserve complete with a stand where you can hide away from the wildlife and have an unimpeded view of their habitat to take great photos. Then you realize…
You don’t know what camera settings to use.
If you’re just starting out in your wildlife photography adventures, one of the first things you need to master is the essential camera settings that will allow you to document wildlife in a way that shows their beauty, their relationship to their environment, and does so in a well-composed, well-exposed image.
In the video below, Tom Mason from Wex Photographic unmasks these essential camera settings. Follow along as he offers his expert advice for setting yourself up for success on your wildlife photography photo shoots.
Amazon Recommendations
- Wildlife Photography: Advanced Field Techniques for Tracking Elusive Animals and Capturing Magical Moments
- The Complete Guide to Nature Photography: Professional Techniques for Capturing Digital Images of Nature and Wildlife
- The New Art of Photographing Nature: An Updated Guide to Composing Stunning Images of Animals, Nature, and Landscapes
We Recommend
Composition Tips for Beginner Bird Photographers
Just like with any subject, when you compose a photograph of a bird, you can enhance its visual appeal by adhering to a set of photography composition rules of thumb.
But sometimes the most difficult part of the process is actually figuring out what those essential rules of thumb might be.
In the video above, Tim Boyer offers his expert advice regarding basic bird photography composition tips.
If you're a beginner or an enthusiast bird photographer, the video is an excellent resource to get started in bird photography.
Have a look at the video, and below, see examples of some of Tim's pointers as illustrated with his own photos.
Use the Rule of Thirds
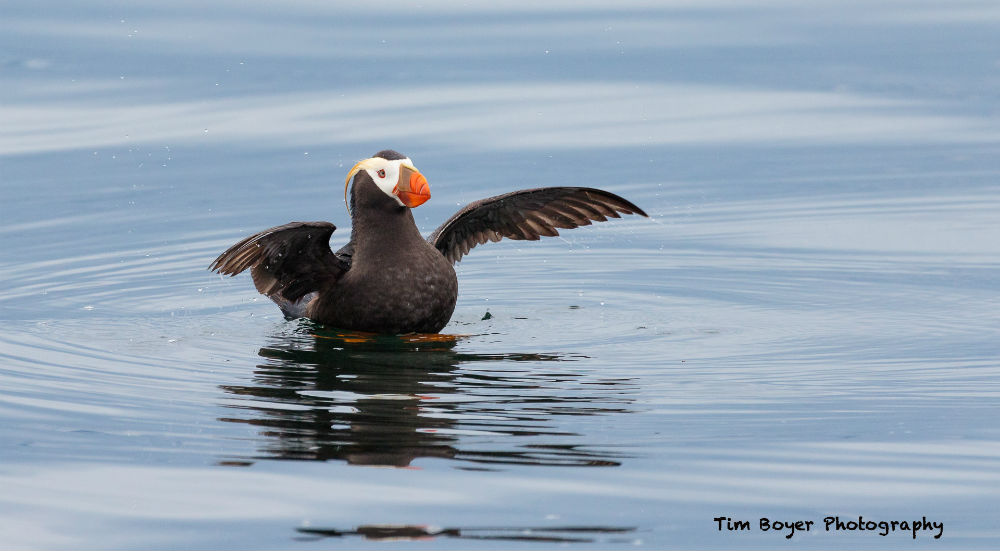
We all know about the rule of thirds and how it helps you create a more balanced and interesting composition.
However, what you need to consider is that you don't have to strictly adhere to the rule of thirds to get a compelling photo.
In the image above, you can see how this Tufted Puffin is offset from the center of the frame, but not so precisely as to perfectly align with the rule of thirds.
As Tim notes in his video, as long as the bird is offset to the side by some degree, you'll have a more successful composition.
Of course, as with all rules of thumb, there are exceptions.
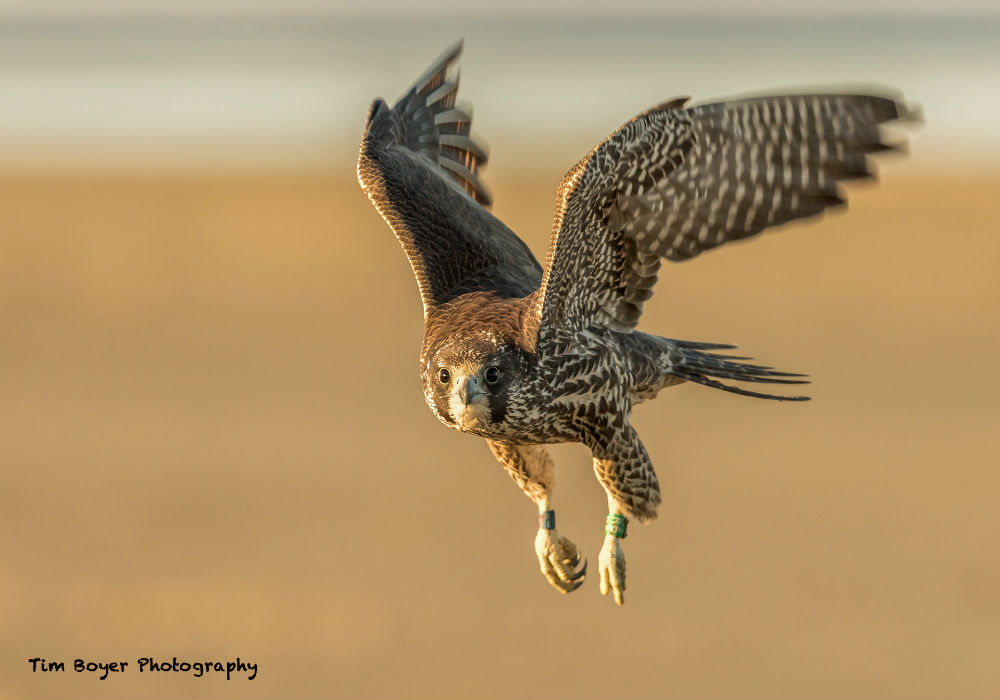
In the image above, note how the Peregrine Falcon's head is smack dab in the middle of the shot.
But that's okay for a couple of reasons...
First, the bird needs some room to fly, so the positioning of its body slightly to the right of center helps us understand that the bird is moving to our left.
And second, the bird is making direct eye contact with the lens. If you find a bird that's looking right at you, just take the picture!
Learn more about bird photography
Keep the Distance in Front of the Bird

As noted above, when framing up shots of birds, you want to give them room to move.
That is, whether they are stationary and looking to one side as the Tufted Puffin is doing in the image above or they have taken flight like the Peregrine Falcon in the image below, you want to minimize the area behind the bird and maximize the area in front of it.
Just imagine if the photo above had been framed with the bird to the far right of the shot.
The bird would feel cramped, would it not? That's not to mention that it wouldn't have anywhere to go in the frame.
Granted, the bird isn't going anywhere in a still photo, but having space in front of it helps us perceive movement, which results in a much more dynamic and interesting image.
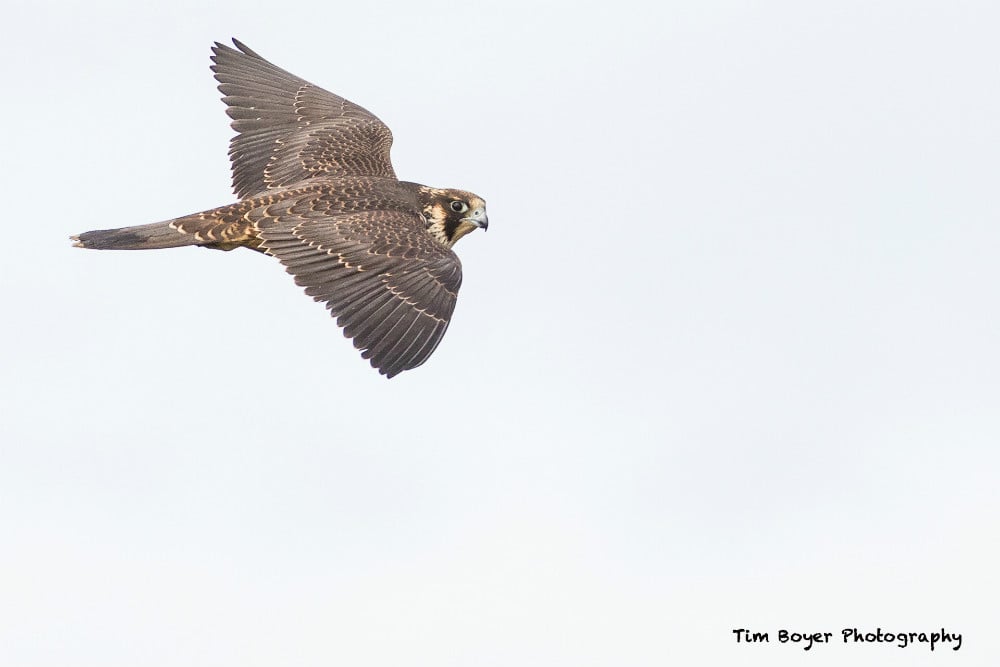
Watch the Background
I know when I've tried photographing birds in the past, I found that I was so concerned with getting a great shot of the bird that I forgot about the background.
And though the background certainly isn't the star of a bird photo, it can be distracting enough that it ruins the viewing experience.
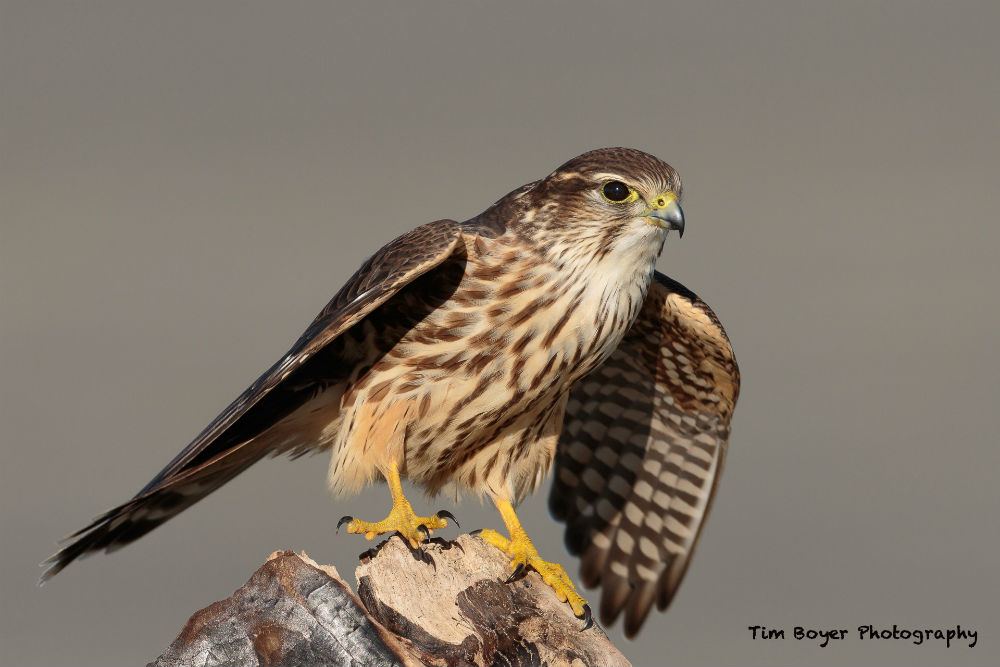
On the one hand, you can create a nice, soft background that blurs out the details, as shown in the image above of a Merlin.
But if you find yourself in a situation in which you didn't quite have the shallow depth of field you need to blur the background, you can always work on the background in post-processing.
Alternatively, if you have a decent background that just needs to be cleaned up, you can use Photoshop, Lightroom or another post-processing program to get rid of any distractions.
Have the Bird Occupy About One-Third of the Frame
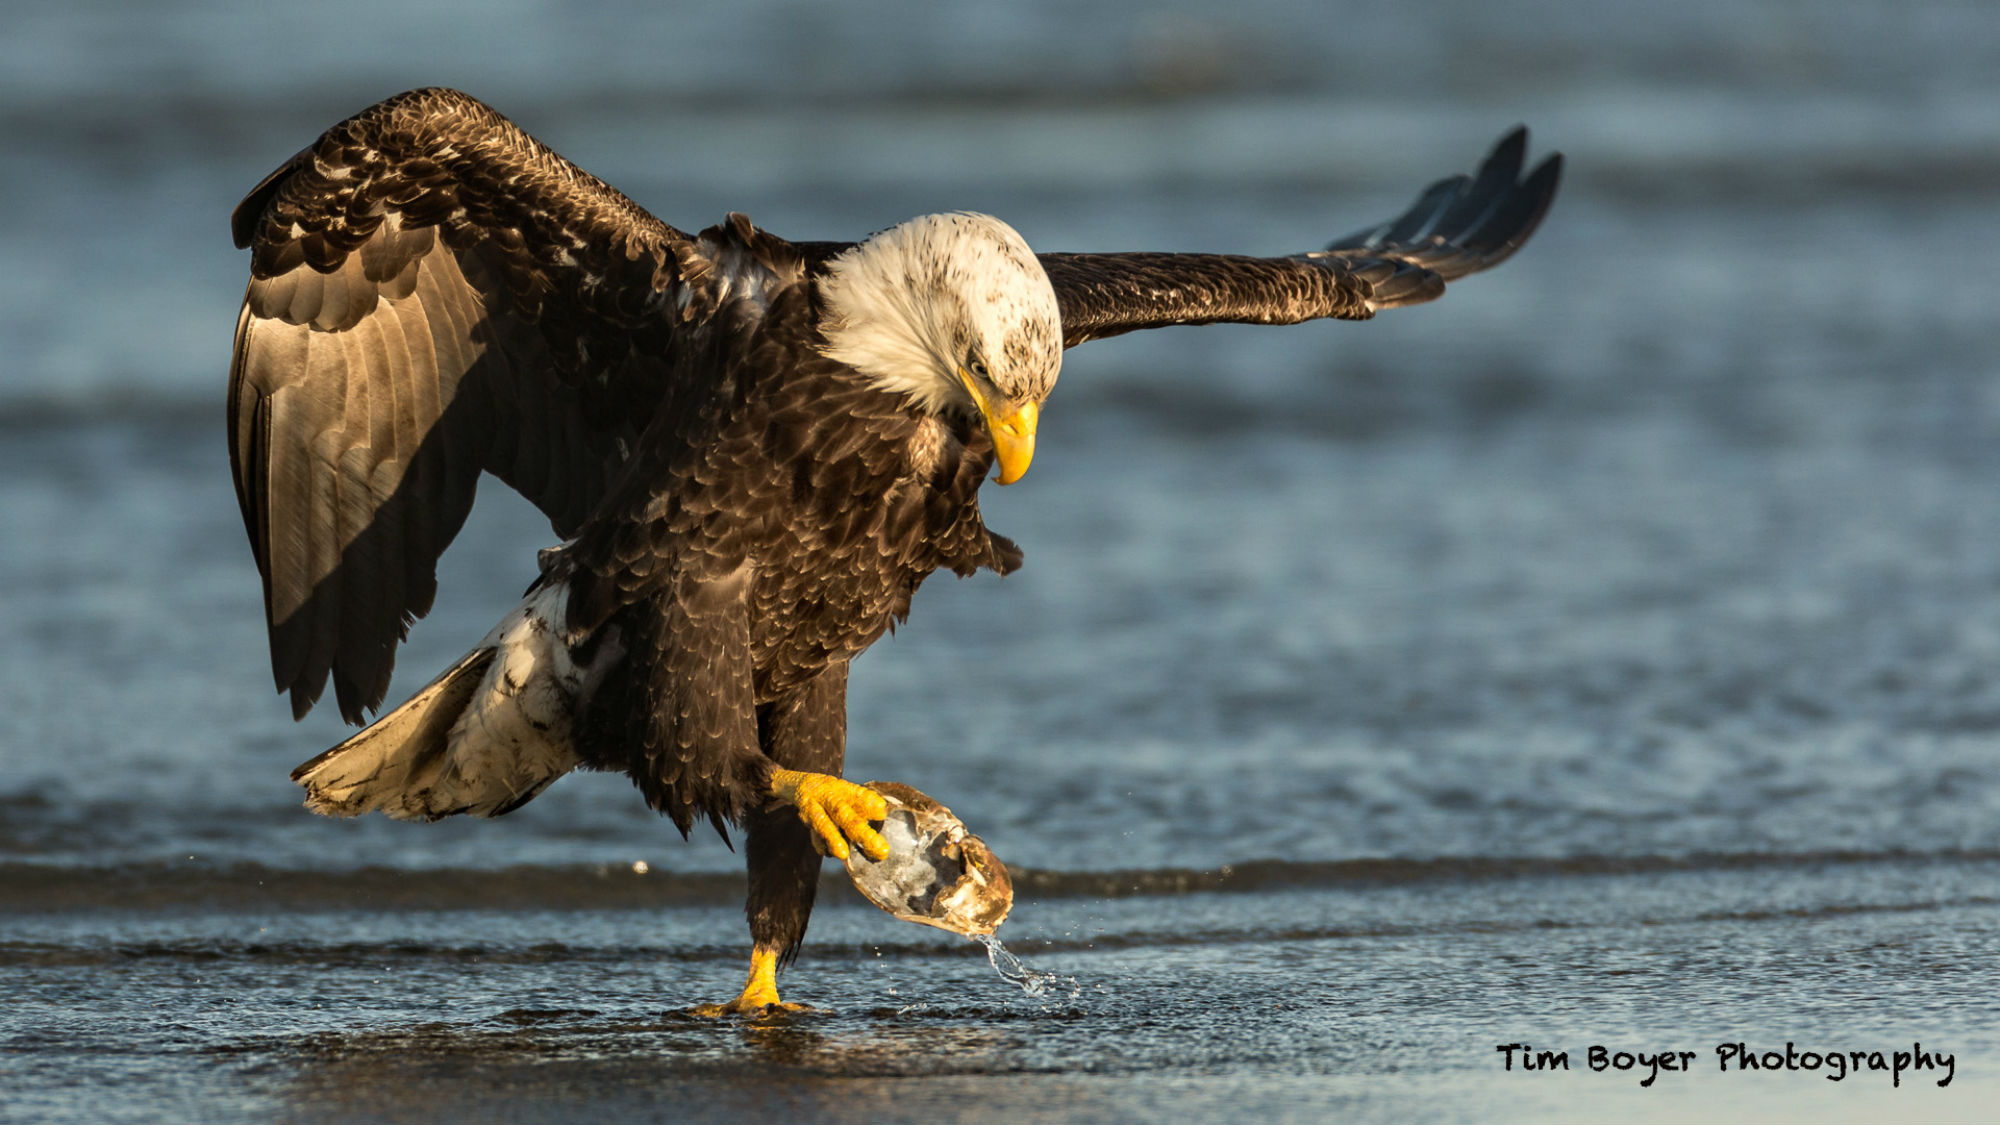
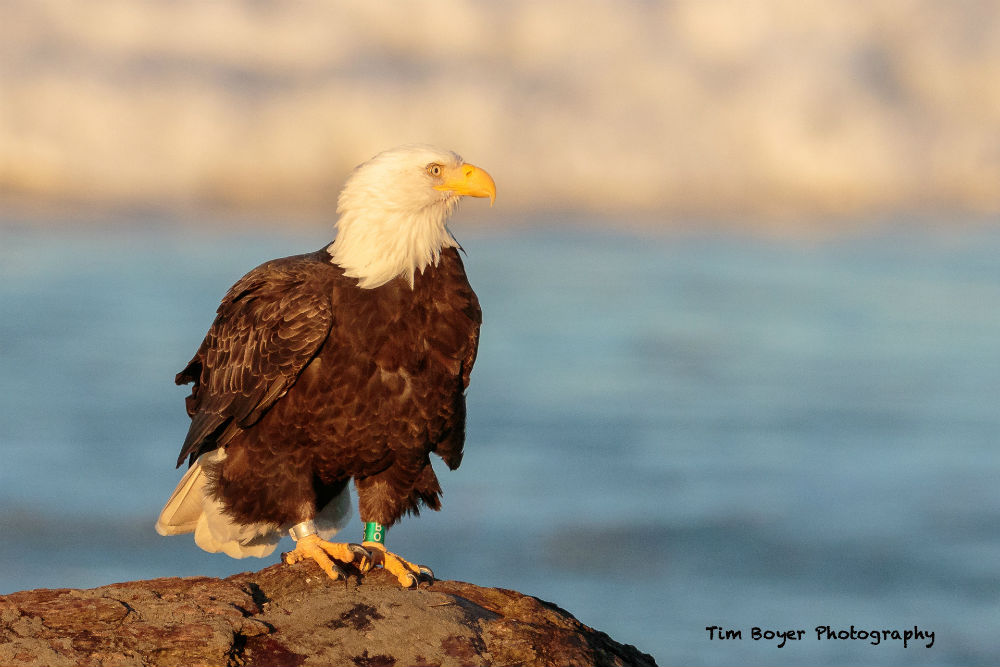
If you aim to have the bird appear in about one-third of the frame, you get compositions like the one above of the Bald Eagle.
On the one hand, the bird is large enough in the frame that you can see details like the texture of its feathers, the sharpness of its eye, and the size and shape of its claws.
But on the other hand, at about one-third of the frame, the bird isn't so large that it feels like it's cramped in the image.
Granted, this one-third rule isn't as much a hard and fast rule and is just a general guideline, so if the bird is a little smaller or larger than one-third of the frame, you'll still be okay.
Get more bird photography tips
Don't Cut Off Heads, Wings or Feet
When you take a portrait of a person, you don't want to cut off the top of their head, their arms and hands, or their legs and feet.
The same rule applies when you compose a shot of a bird.
By keeping the entire bird in the frame, you're able to give viewers a complete view of the bird, not to mention create a more professional-looking image.
When body parts get cut off, the shot looks a little careless, as though you didn't take the time to compose it correctly.
So, if need be, zoom out a little bit to get the whole bird in the shot, and you'll have a much better photo!
Remember, for additional tips on composing better bird photos, be sure to check out Tim's video at the beginning of this article.
About Tim

Tim Boyer is an award-winning nature photographer. His images have been published in many bird and nature magazines. He is a full-time photographer and a graduate of Seattle Audubon’s Master Birder Program. He enjoys sharing his knowledge of photography and birds through workshops and presentations. His bird photography workshops are offered in locations where there are lots of birds and thus ample opportunities to learn and practice the art of bird photography. He also has a YouTube channel where he posts weekly bird photography tutorials. Shorebirds are his favorite family group of birds, and he spends a lot of weekends on the Washington Coast.
Tim has a degree in Recreation and Parks Management and had a career as a mountain guide in Alaska, Washington, Canada, Mexico, and Ecuador. He’s been to the top of North America (Denali) six times. Toss in a few marathons, an eighteen-year stint at a large non-profit where he was once the Corporate Controller (which he still can’t believe) and you can see he’s ready for adventure. He’s been a photographer since high school (you know back when they used black & white film) and a birder since college. He always knew he would have three careers, but didn’t think that Bird Photography Workshop Leader/Author would be number three.
Connect with Tim on his website.
We Recommend
Essential Tips for Photographing Bears in Alaska
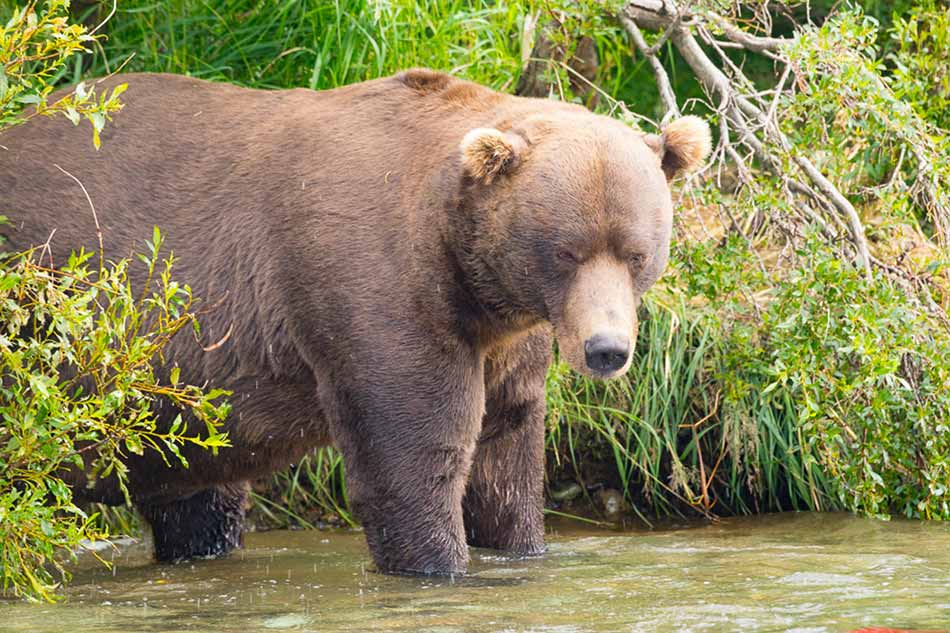
If you've never been to Alaska, you're missing out on a treasure trove of beauty.
I've been several times, and no matter how many times I visit the same places and see the same sights in this beautiful state, I always come away shocked by its magnificent sights.
Of course, Alaska isn't just a hotbed for landscape photography. It also offers abundant opportunities to photograph wildlife as well.
When it comes to Alaska wildlife photography, there are few experiences as exciting as photographing grizzly bears.
Here are a few essential tips to keep in mind when photographing bears in Alaska.
Editor's Note: The images in this article are by our friend John Slonina and are used with permission.
Safety is Priority #1

Close calls with wildlife happen all the time, and unfortunately, it sometimes ends with a photographer or an animal being injured or killed.
When photographing Alaskan grizzly bears, it's important to keep your distance, particularly from mother bears with cubs.
Additionally, having protection from bears is essential, either in the form of bear spray, a firearm, or both.
Venturing out into the Alaskan wilderness on your own is not a good plan, either.
Instead, to photograph bears safely, it's recommended to join a photography tour, that way you not only have safety in numbers, but you also benefit from having an experienced guide that knows the area (and knows the bears, too).
Have Two Cameras at the Ready
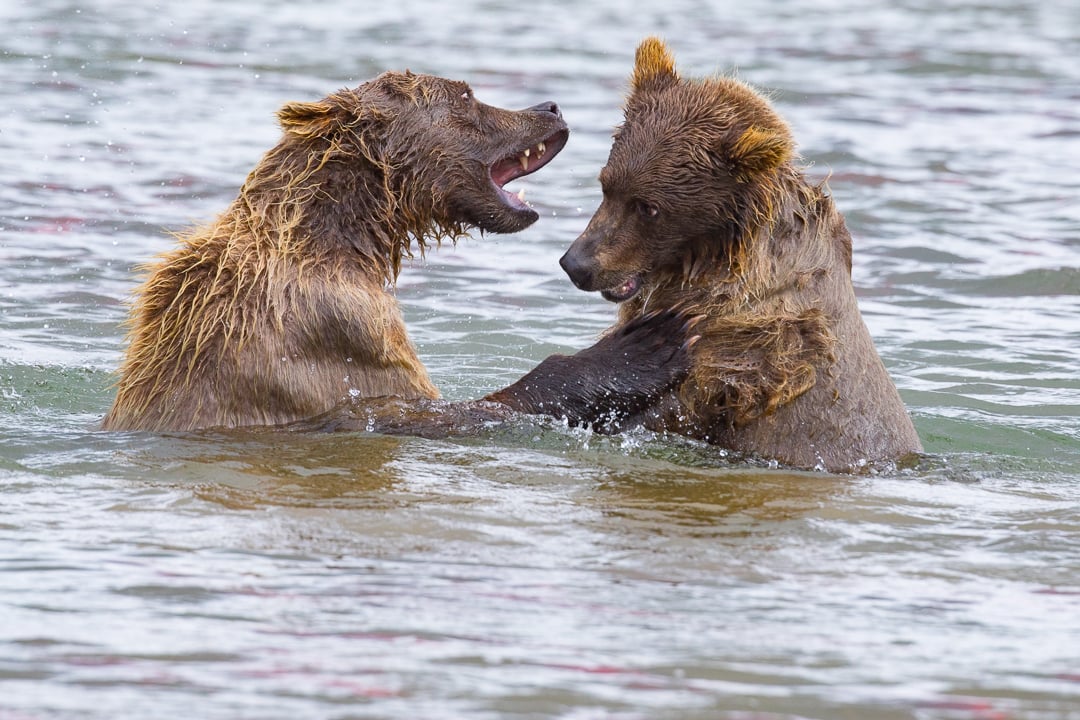
One of the most basic wildlife photography tips is to have two camera bodies, each with a different focal length lens, charged up and ready to go.
By having two bodies, you can shoot wider shots with one for environmental-type portraits of bears and close-up, more intimate shots with a longer lens that shows the detail of these beautiful animals.
This will enable you to get more shots, more quickly. Additionally, without having to constantly change your lenses, you'll be part of the action instead of missing critical shots because you're in the middle of a lens change.
Get on the Bear's Eye Level
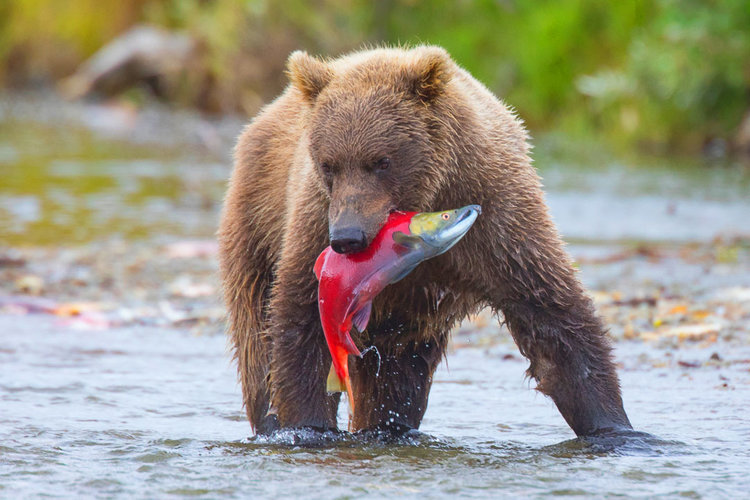
One of the keys to a great photo of a bear is to get on their eye level.
For one, this helps the viewer see the world from the bear's perspective, which, depending on the bear's position (laying down, standing up, etc.) could be much different from what we see from a typical human eye level.
Secondly, getting on the bear's eye level makes the photos you take much more dynamic.
Think about it - if you're photographing a grizzly fishing for salmon, the image will have more impact if you kneel or sit down than if you shoot from a higher perspective, downward towards the bear.
Just like shooting a portrait of a person, by focusing on a bear's eyes from its eye level, you'll end up with a much more satisfying photo.
Keep Up With the Action
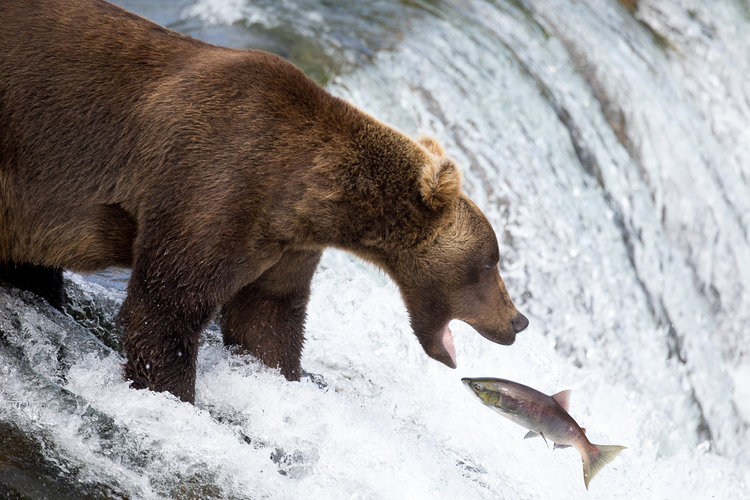
Bears are constantly on the move, and as such, you need to dial in the right camera settings to keep up with all their movement.
That means using continuous autofocus so that your camera is constantly adjusting its focus as the bear moves around.
That also means setting up back-button focusing so that you can use the shutter button to meter and a button on the back of the camera for focusing.
Using a fast shutter speed is critical as well.
Bears might seem like big, slow animals, but that's simply not the case. They can be lightning-quick, so you don't want to end up with blurred motion because your shutter speed is too slow.
Though different situations call for different shutter speeds, 1/500 seconds is usually a good starting point for daytime shooting.
Do Your Homework
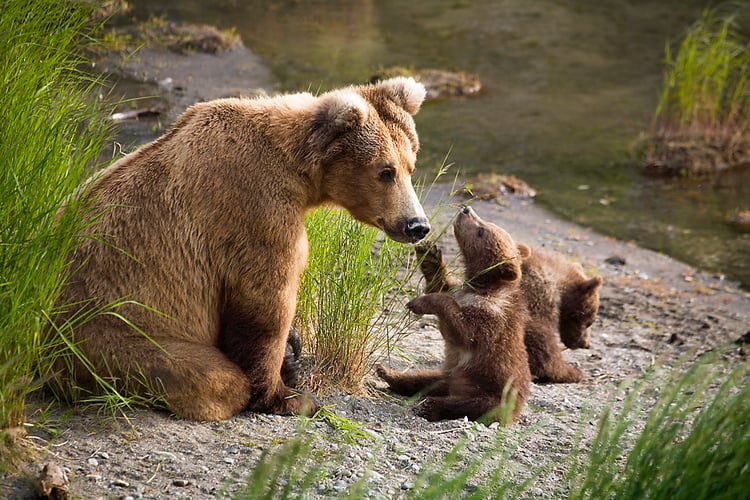
Of course, your success in photographing bears in Alaska begins with doing your homework.
You'll want to research grizzly bears to learn about their habitat, their behavior, their diet, where they live, and so forth.
Additionally, understanding when salmon runs occur, when bear cubs are born and are most active, and how to get to prime bear territory are musts as well.
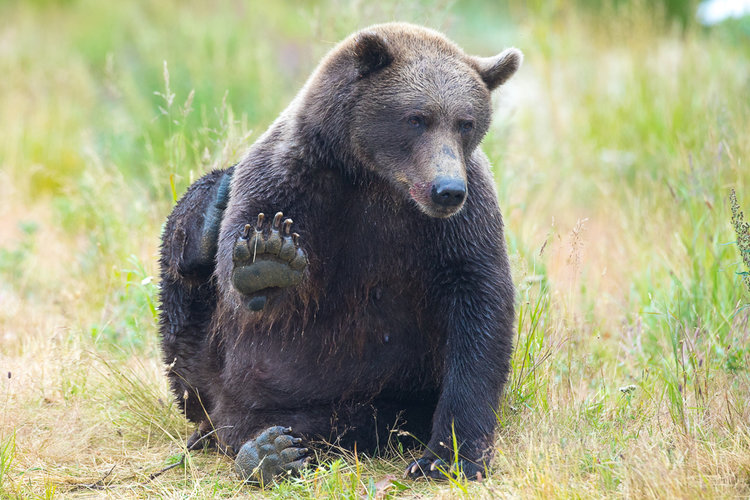
As noted above, though, visiting Alaska to photograph bears is best done not on your own, but as part of a photography tour.
Not only do photo tours take care of the planning aspect of photographing bears, but with seasoned photographers at the helm, you'll also have a chance to learn more about how to photograph bears.
Slonina Photography offers one such bear photography tour.
While there are other tours that focus on photographing grizzlies, what sets Slonina Photography apart is that you travel by floatplane to various locations.
That includes Katmai National Park, which sprawls over four million acres in southern Alaska. It has one of most dense bear populations in the world (about 2,200 at the National Park Service’s last count).
Slonina Photography takes you to several different locations at Katmai. They are not stuck with the same bears and the same background.
Instead, they have the aforementioned planes to take you to different locations, that way every day you can visit different bears with different scenery.
One day you may have a bear on a waterfall, the next day bears fishing in the river with a mountain or glacier in the background. The next day may be bears digging for clams in the ocean. Variety is key with several options to explore at this incredibly beautiful national park.
By monitoring several sites for bear activity, this allows the tour to visit the best places at the best times, that way you get your money's worth when it comes to getting photos of these beautiful animals.
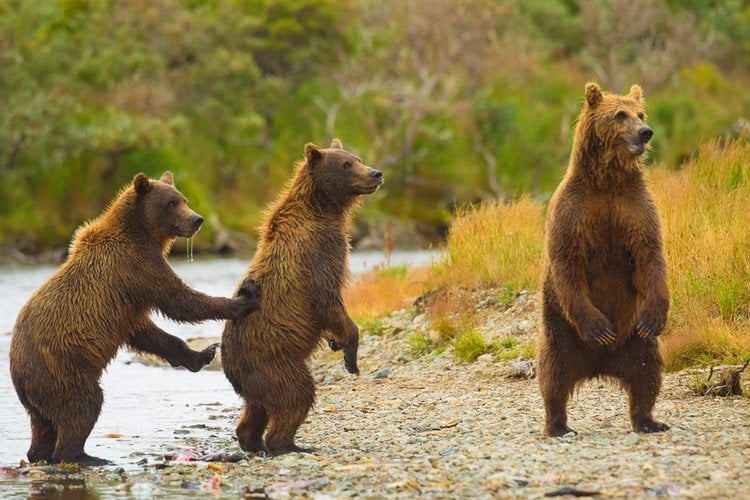
What's more, this tour includes workshop time during which you will learn about bear behavior so you can get high-quality action photos of bears playing, fighting, fishing, and so on.
After each day's adventure, there is downtime at a lakeside lodge where you will learn about post-processing techniques for enhancing your images.
There's also time to share and critique images, thus enhancing the educational component of the trip.
In other words, bear photo tours and workshops like this one offer the full experience, with access to photography experts, bear experts, and seldom-seen bear habitat.
That's why there's only one spot left for the upcoming photo tour August 7-13, 2018!
You can register for the final spot here or get on a waiting list. Another tour is scheduled for July 16-21, 2019.
We Recommend
Essential Tips for Photographing Birds in Flight

There are few things in nature as common as seeing a bird in flight, yet there are few things in wildlife photography that are as difficult as capturing that moment. Whether the focus is off, the framing is bad, the background is ugly, and so on, there are a lot of things that can - and do - go wrong when trying to document a bird flying gracefully through the sky.
Adam Karnacz of First Man Photography has a few solutions to these problems, however. In his video below, follow along as he explains what gear is most useful for bird-in-flight photography. Adam also gives some insight into the best camera settings and offers some hints on techniques that maximize your ability to get the shots you want.
We Recommend
Four (More) Things About Photography That Beginners Don’t Want to Hear

Last week we shareda few things about photography that beginners don’t want to hear about their new hobby.
Hold on tight, because there’s four more things to think about as you dive into the fun and exciting world of photography!
You Need the Right Gear
That kit lens that came with your camera isn’t going to cut it if you want to take true macro photos. Want to photograph wildlife at long distances? You’ll need a lens for that too. If you want to get into studio work, you’ll need lighting, softboxes, and backgrounds, just to name a few essential items. Though your starter kit will go a long way as you learn photography, there will come a point when you need to start filling out your collection of gear such that you can better pursue the types of photography you want to pursue.
Then Again, Gear Doesn’t Matter
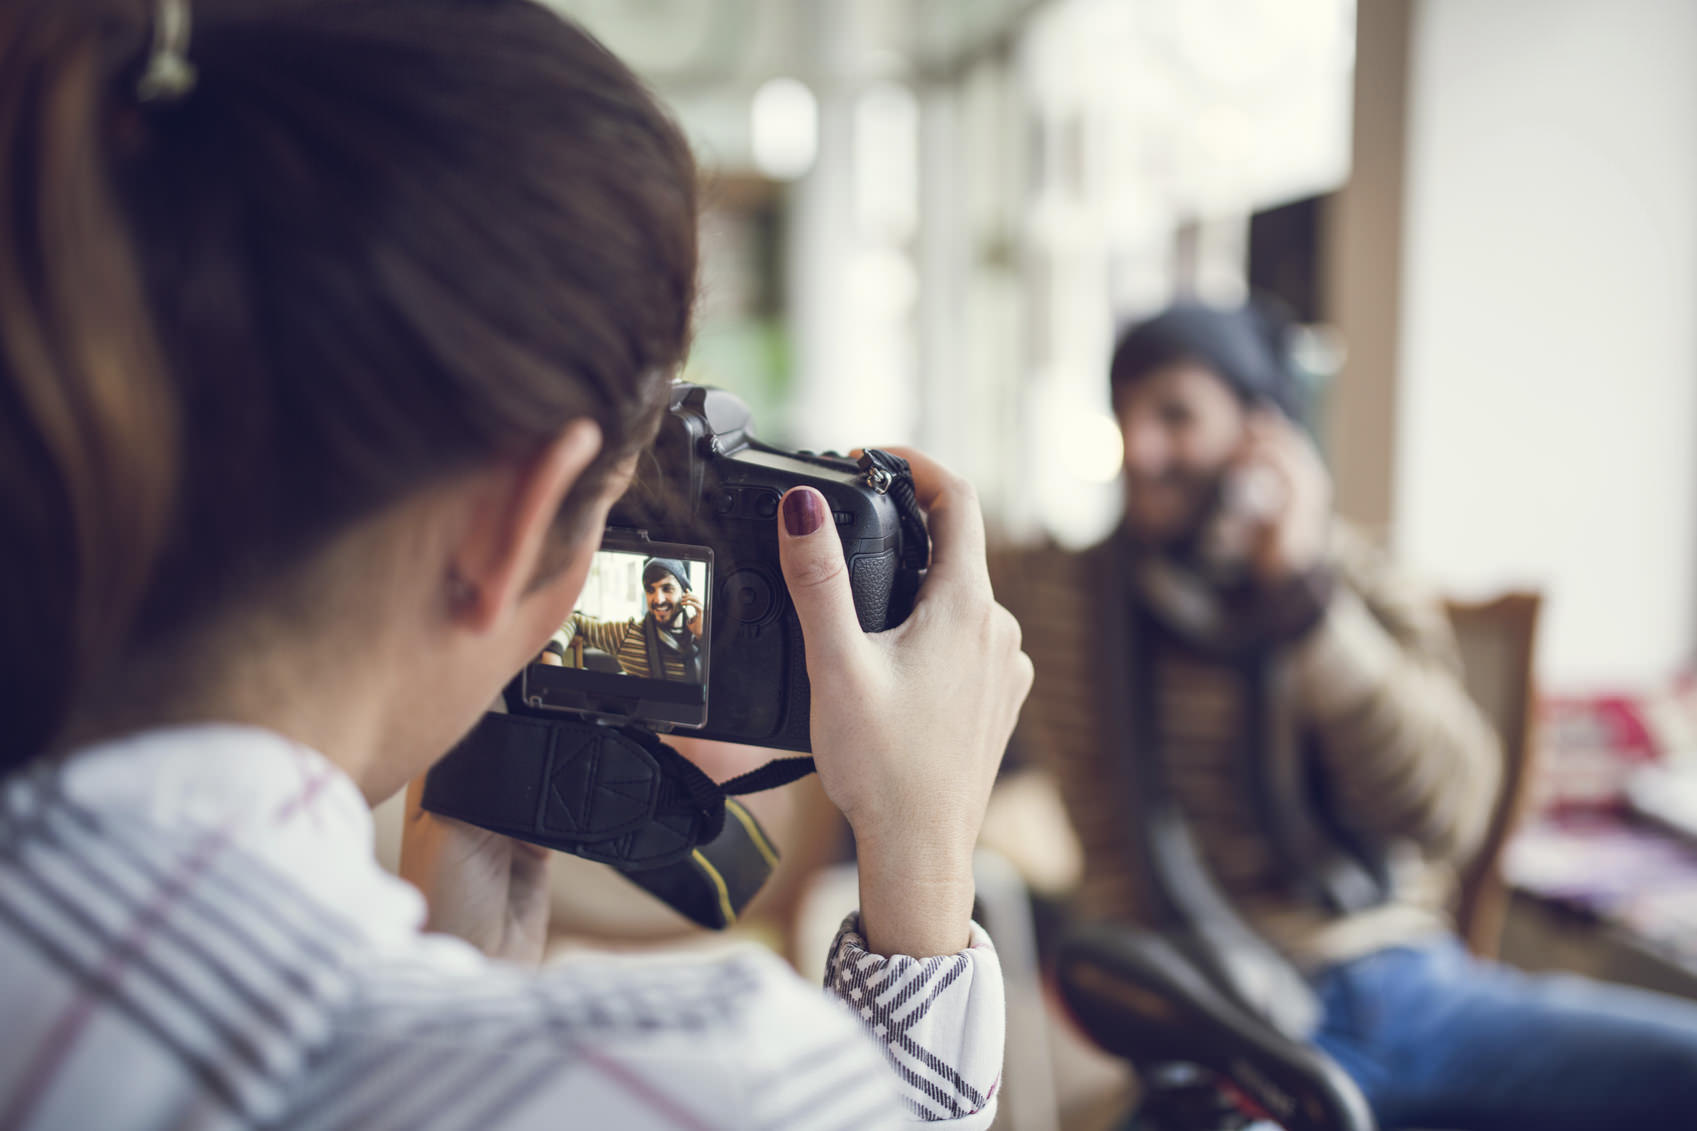
Of course, having all the nicest, fanciest photography gear in the world isn’t going to make you a good photographer. Time spent learning the fundamentals - lighting, exposure, framing, and composition, for example - will be what has the greatest impact on the quality of the images you create. In fact, you can create better photos with your smartphone if you practice the technical and creative aspects of photography than you will if you just go buy the most expensive gear you can find and jump in without learning how to be a photographer.
The point is that experience is key if you want to become a better photographer. Sure, incredible gear will help, but at the end of the day, photography is about a commitment to learning, and that will take time.
Gear is Heavy
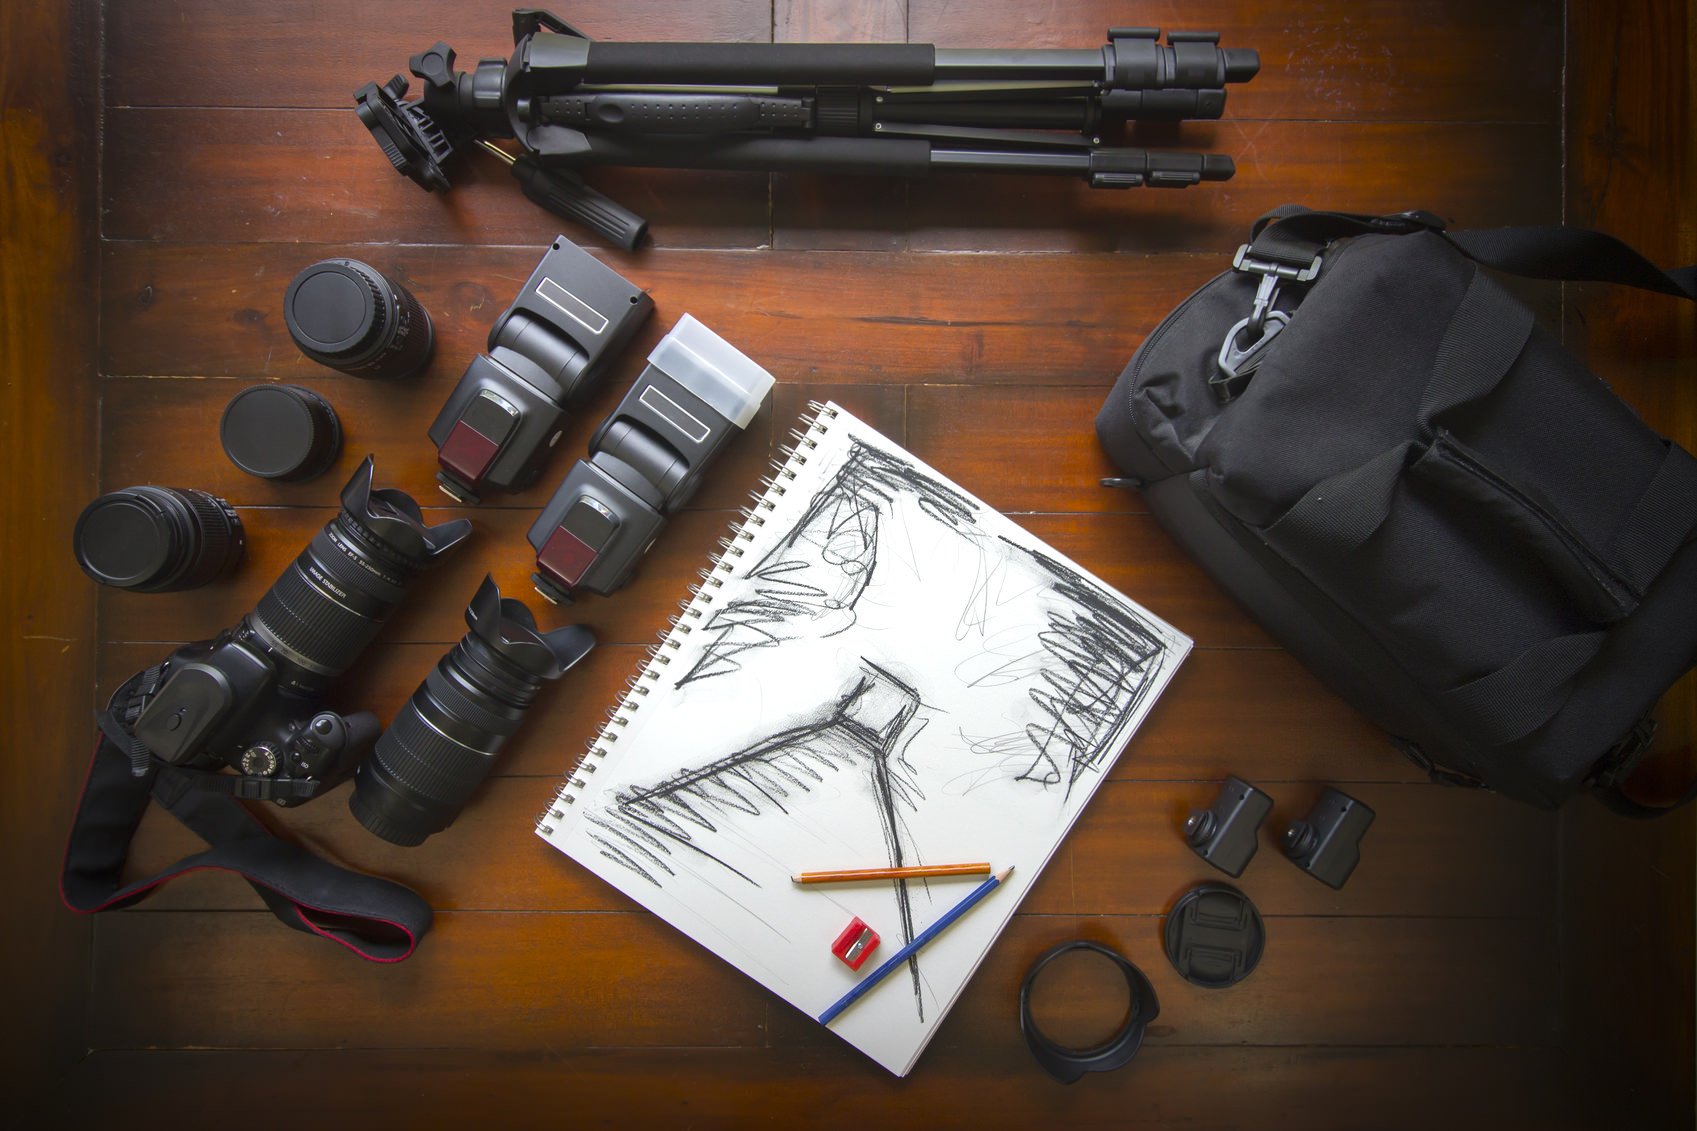
Granted, not everyone loads all their gear into a backpack or camera bag and lugs it around all day. But even just transferring things from your house to the car can be a daunting task, especially if you’ve gone the way of packing ALL your gear for every shoot. Even if you don’t take all your gear, by the time you load up your bag with a DSLR, a couple of lenses, filters, a lens cleaning kit, a tripod, a tripod head, and other basics, you’re looking at carrying at least 8-10 pounds. That might not sound like a lot, but after a few hours, it can be a killer.
The moral of the story? Pack smart and pack light. If you have three lenses, take two. If you won’t be needing your tripod, don’t take it or take a small travel tripod. Do what you can to limit the load you carry and your back, neck, and shoulders will be thankful.
Prepare to Lose Sleep
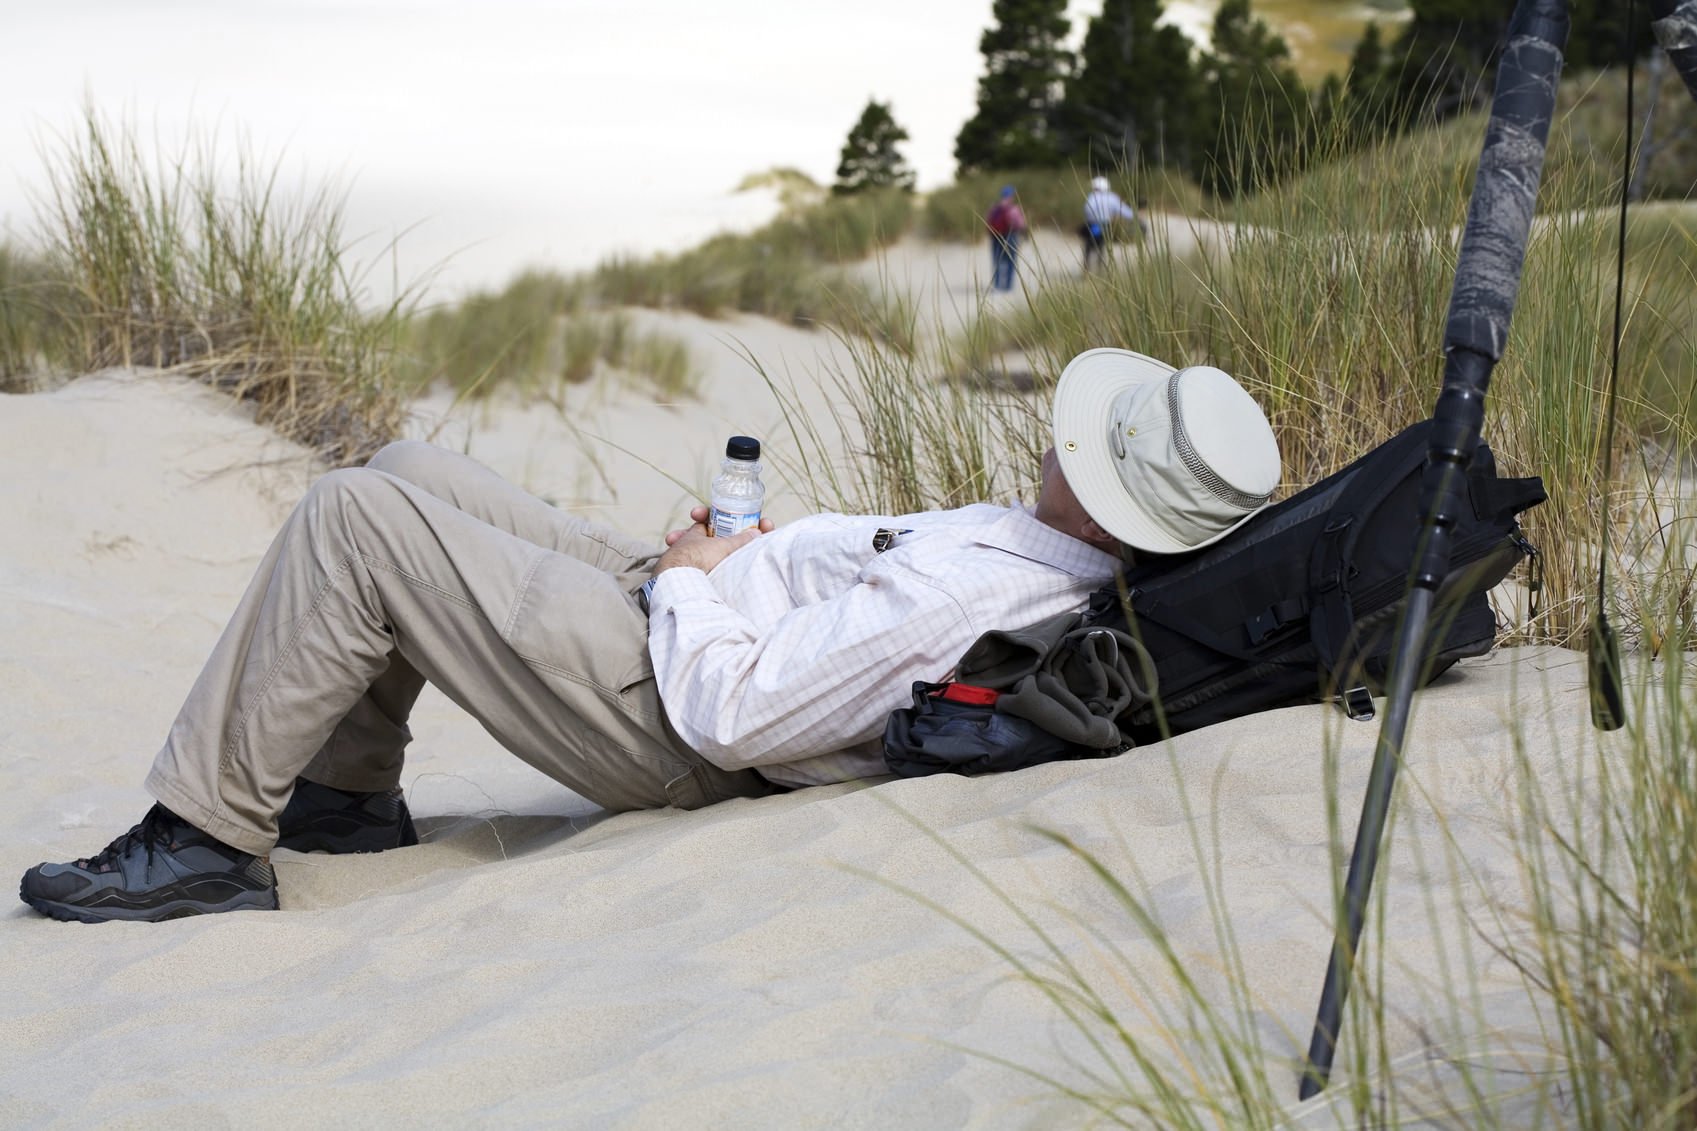
Many photography pursuits require early mornings or late nights: landscapes, astrophotography, and travel photography come immediately to mind. Obviously, it’s hard to photograph a sunrise unless you’re up before the sun is. You won’t be able to document wildlife without some early mornings as well. Whatever your photographic pursuits, it’s one thing to use your skills and knowledge to take a great picture at 9 am. It’s another thing to do it at 4:30 am in a sleep-deprived state.
At the end of the day, photography is a challenge to be sure. But man is it worth it! The early mornings and late nights, the heavy loads to carry, the time spent learning techniques and skills, and the array of gear that’s needed to take quality photos are a small price to pay for the rewards of creating compelling images that last a lifetime. You may not want to hear that photography is hard, but the sooner you accept that, the sooner you’ll be able to meet the challenges of this most rewarding endeavor.
We Recommend
How to Photograph Birds in Flight
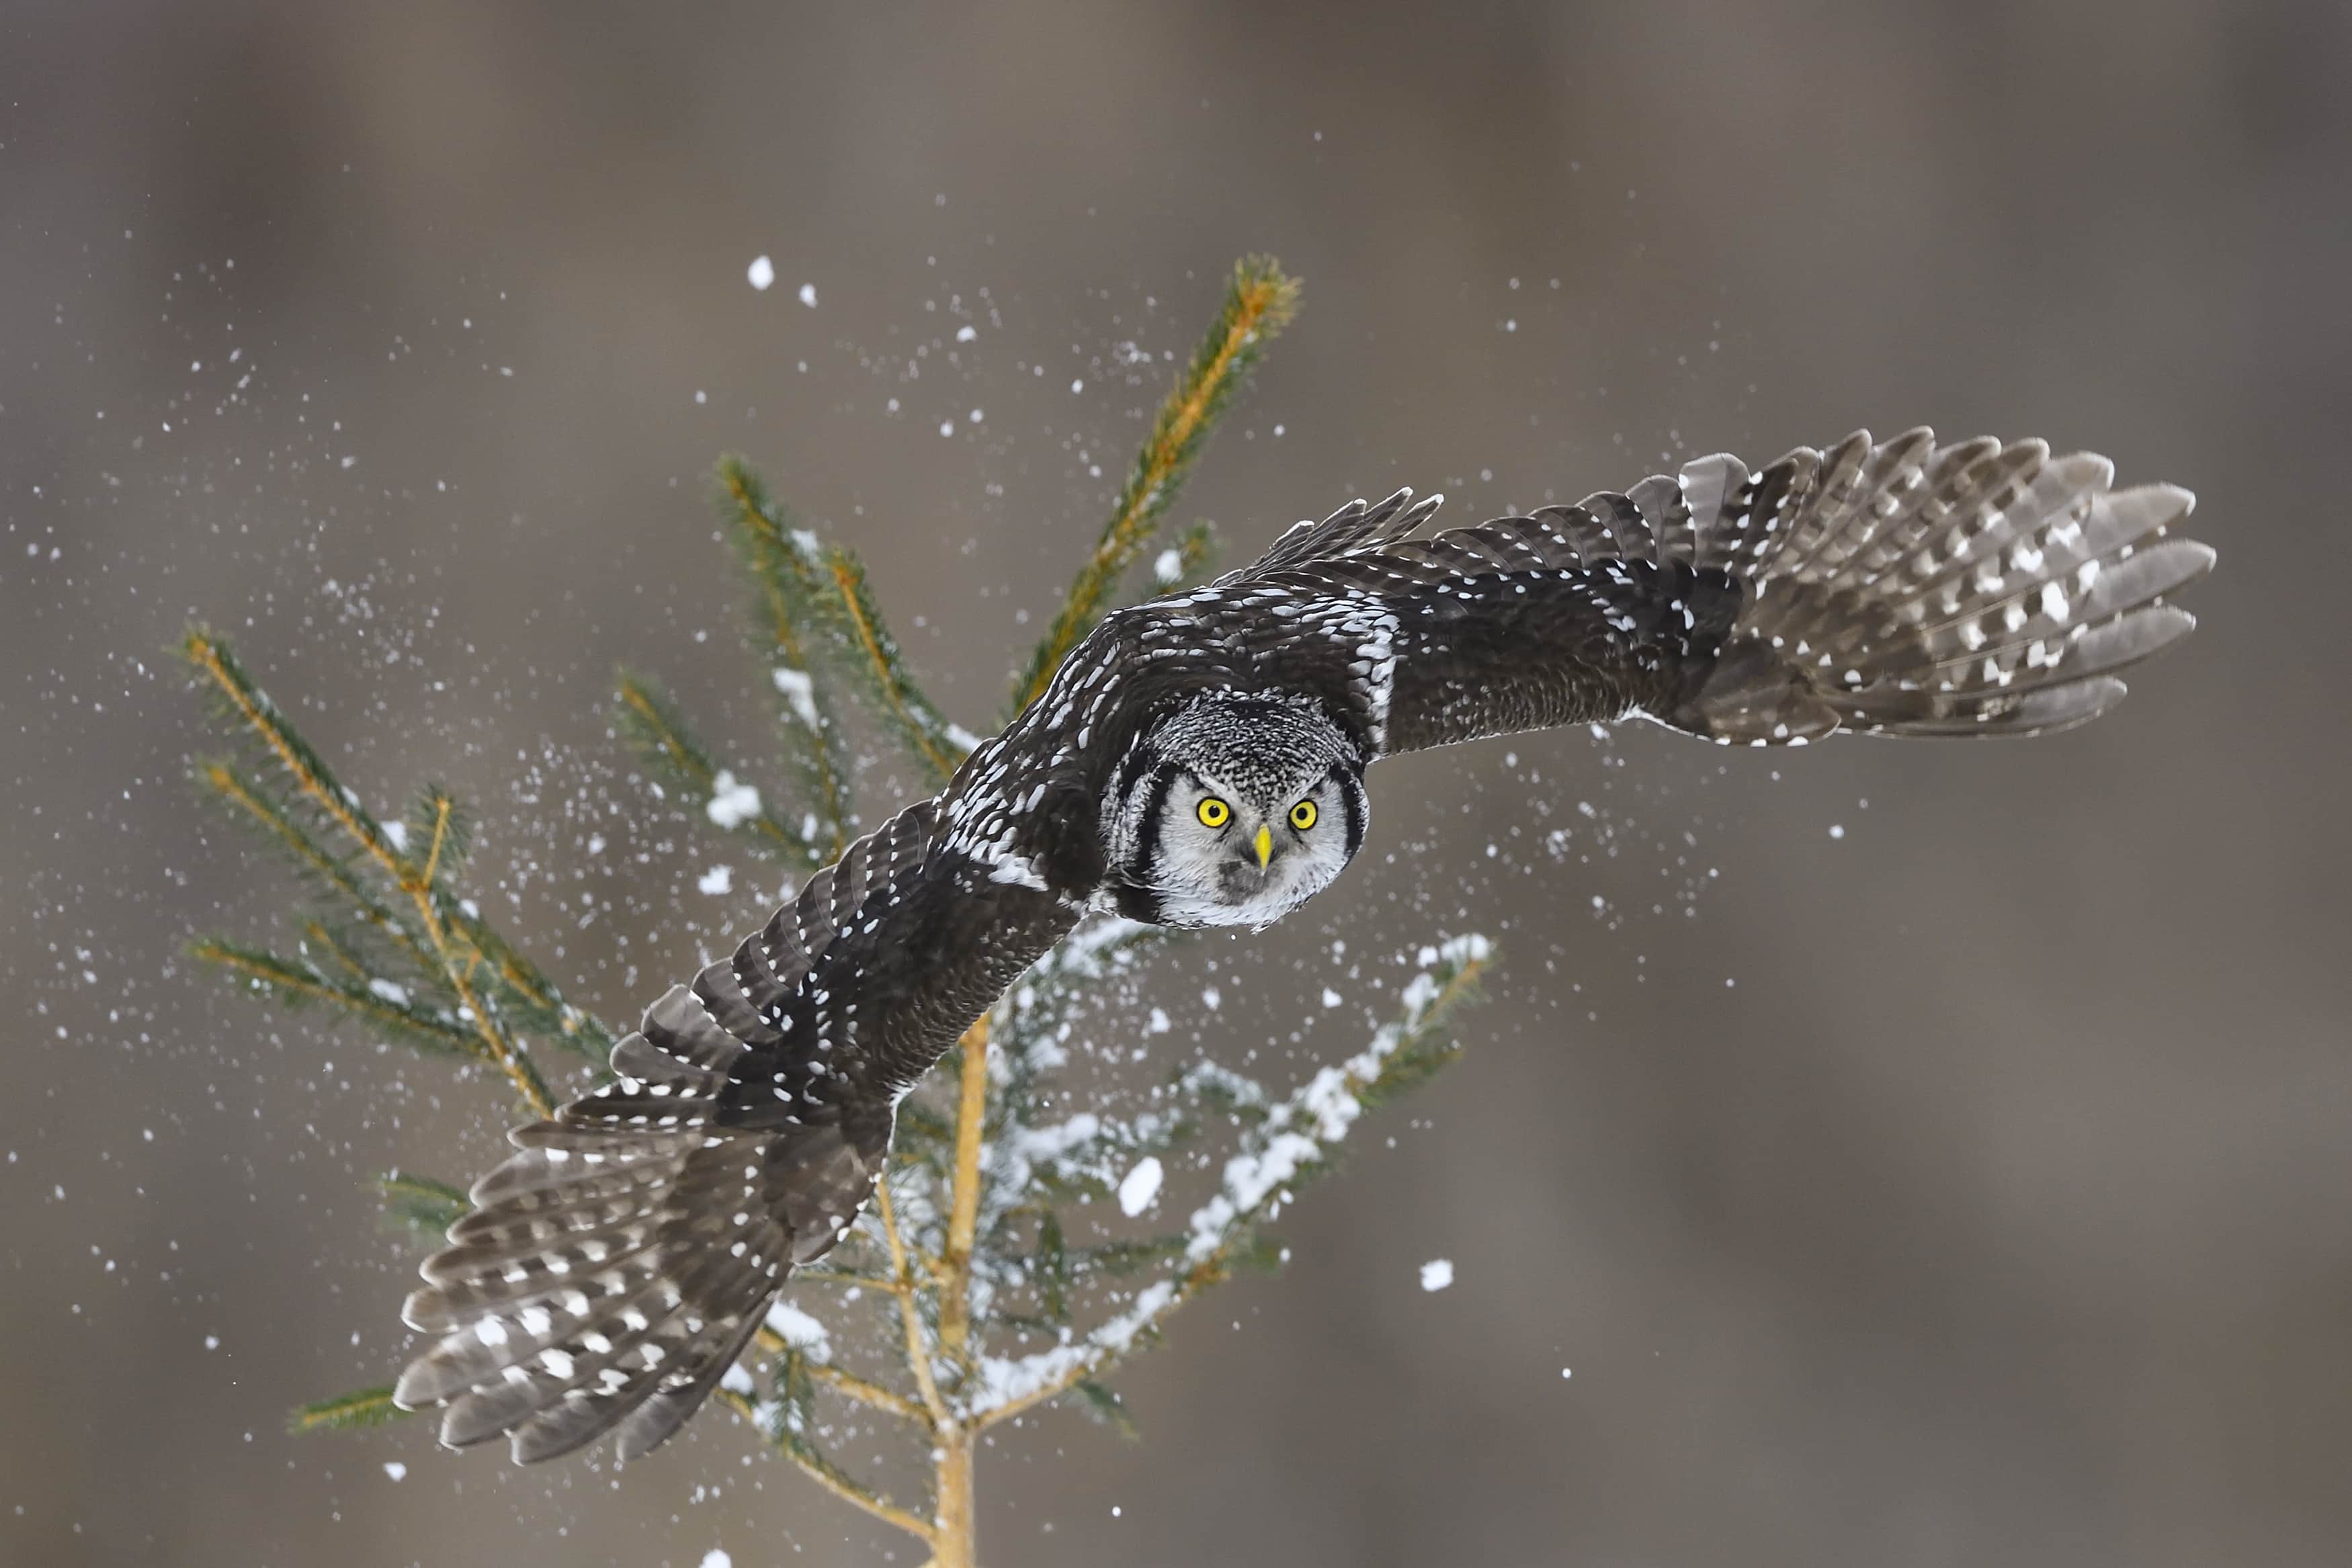
One of the toughest tasks that a photographer can undertake is trying to capture a clear, sharp photo of a bird in flight.
But that doesn't mean that it's impossible to take a high-quality shot of a flying bird...you just have to be prepared (and practice, of course!).
In the video above, our friend Tim Boyer offers up a few quick tips for bird-in-flight photography that will make it much easier for you to get the shots you want.
From practical tips for getting ready to shoot to camera settings that will make great shots more likely, you'll learn the basic building blocks of successfully photographing birds in flight.
For a quick summary of each tip, check the article below.
Be Prepared
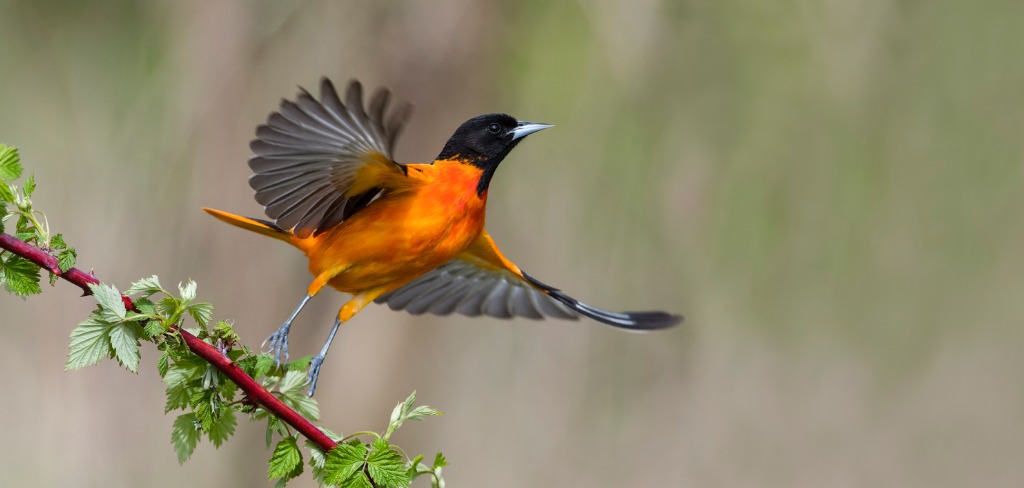
Tim's first advice is to get yourself ready in advance of heading out for bird photos.
The first tasks are simple ones, yet many people neglect them.
Be sure your battery is fully charged (and have a spare battery, too) and that your memory card is empty.
After all, it's really hard to take photos if your battery dies or your memory card fills up!
Editor's Tip: Scouting ahead of time will make your bird photography outing more successful. Research local birds and find out where they gather so you've got the most opportunities to capture the photos you want.
Lens Choice
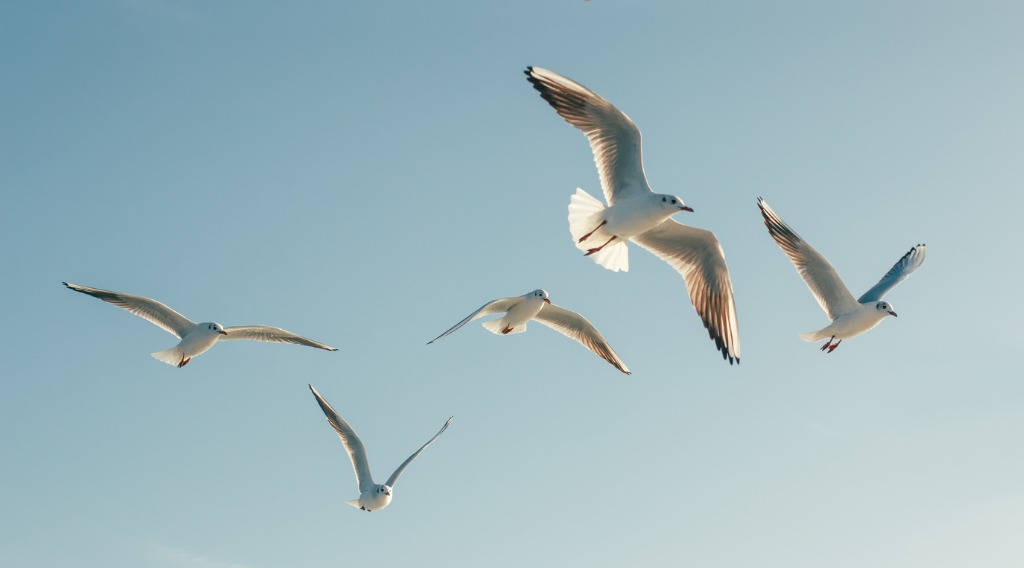
In the video, Tim points out that he used a 70-200mm lens.
That's a popular option for many bird photographers because it has such a wide focal range. Plus, you can use an extender to give the lens more reach, which Tim did for some of the photos he took.
Other options include a 100-400mm zoom lens, a 200-500mm zoom lens, or even a 400mm or 600mm prime.
In this case, Tim sets the limiter switch to 2.5 meters to infinity, that way the lens doesn't try to focus on any elements that are close to him and instead gives him focusing power to get birds nice and sharp in his photos.
Learn More:
Camera Settings
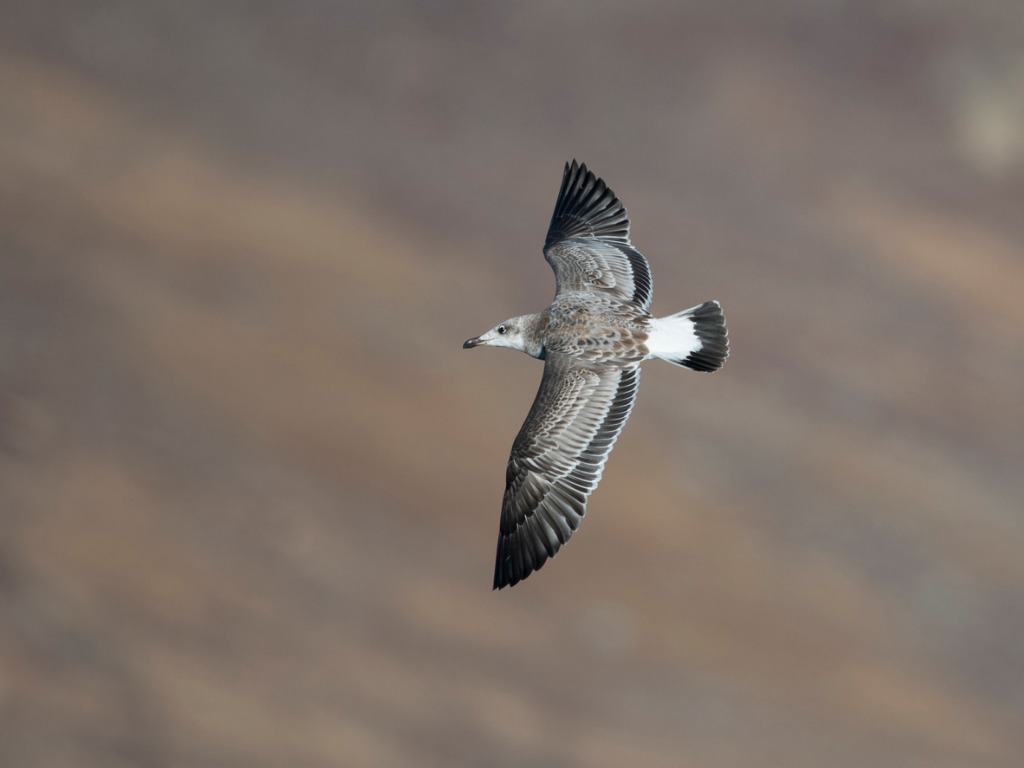
Additionally, Tim suggests using autofocus, as it would be too time-consuming to manually focus the lens while tracking a flying bird.
Tim also suggests turning image stabilization off, assuming of course that your shutter speed is sufficiently fast to avoid camera shake.
In this case, he's shooting in manual mode with a shutter speed at 1/1500 seconds with an ISO of 400 and an aperture of f/8.
In other words, the exposure settings give Tim more than enough leeway to handhold his camera and not worry about camera shake.
In addition to the exposure settings noted above, Tim also selects in the center autofocus point for his shots.
Since the birds he's photographing move pretty consistently without any erratic movements, the center focus point will work just fine.
Editor's Tip: If you aren't quite ready for shooting in manual mode, try shooting in shutter priority mode. That allows you to determine the shutter speed and ISO and the camera will select an aperture to match.
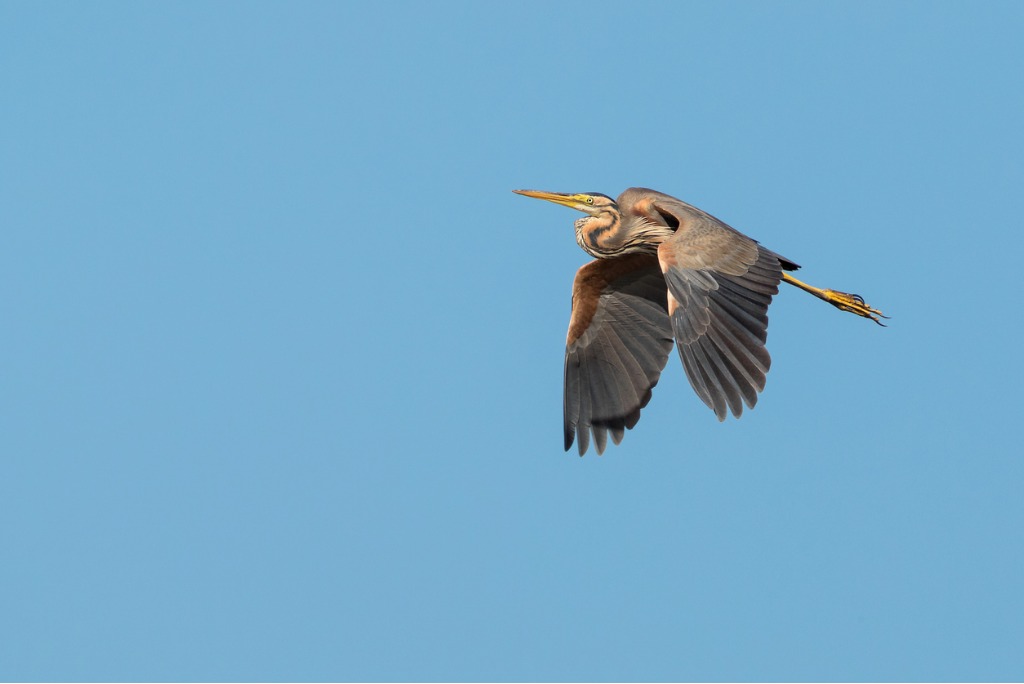
Something else to note is the white balance setting.
Since today's cameras do a pretty good job of getting the white balance correct (or close, anyway), shoot using auto white balance.
Doing so will free you up from having to worry about it, and you can devote more time and mental energy to making adjustments to shutter speed, tracking the bird as it's flying, working on composition, and so forth.
Besides, with programs like Photoshop and Lightroom, it's easier than ever before to fine-tune white balance if what the camera does isn't quite on point.
Learn More:
Learn More About Bird Photography
We Recommend
Inspirational Monday: Photographing Pairs in Nature
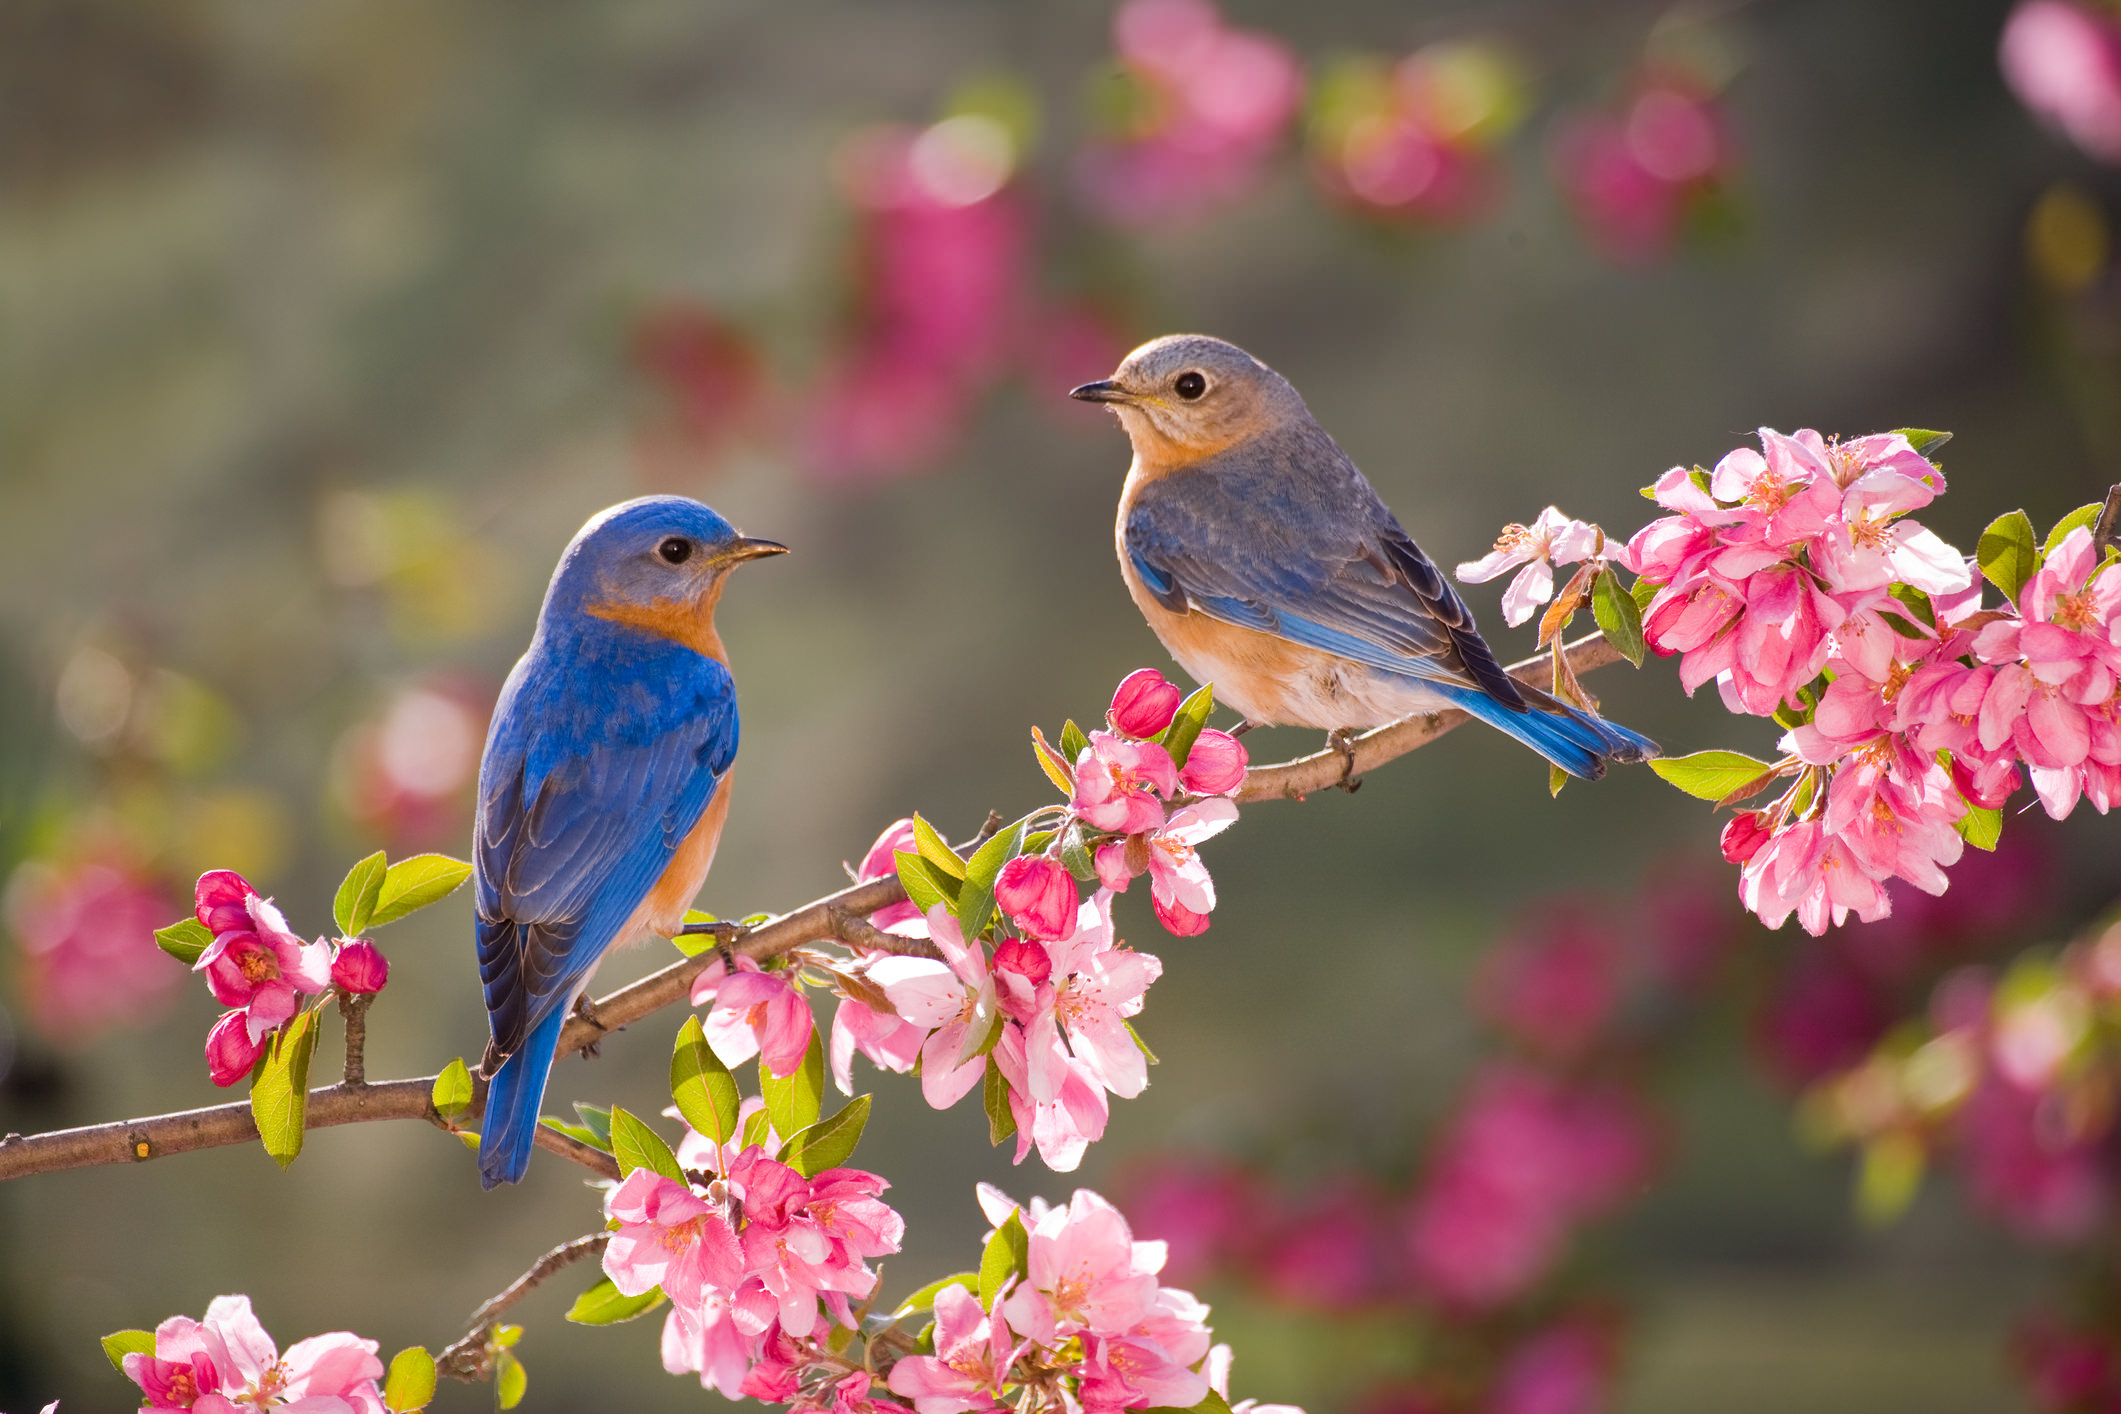
It’s the start of another week, and I’m back with a list of photos to inspire your photographic pursuits.
This go-round, I have 17 incredible wildlife photos to help you envision how to capture the beauty of the natural world around us.
In this case, each of the images has a common theme: pairs.
Ask any nature and wildlife photographer and they’ll tell you that photographing a single animal is extremely rewarding. Add another animal to the shot, and there’s all sorts of opportunities for creating a compelling photo.
Have a look, and see how you might be inspired to change your nature and wildlife photos this week for the better, and do so in a way that minimizes your mistakes.
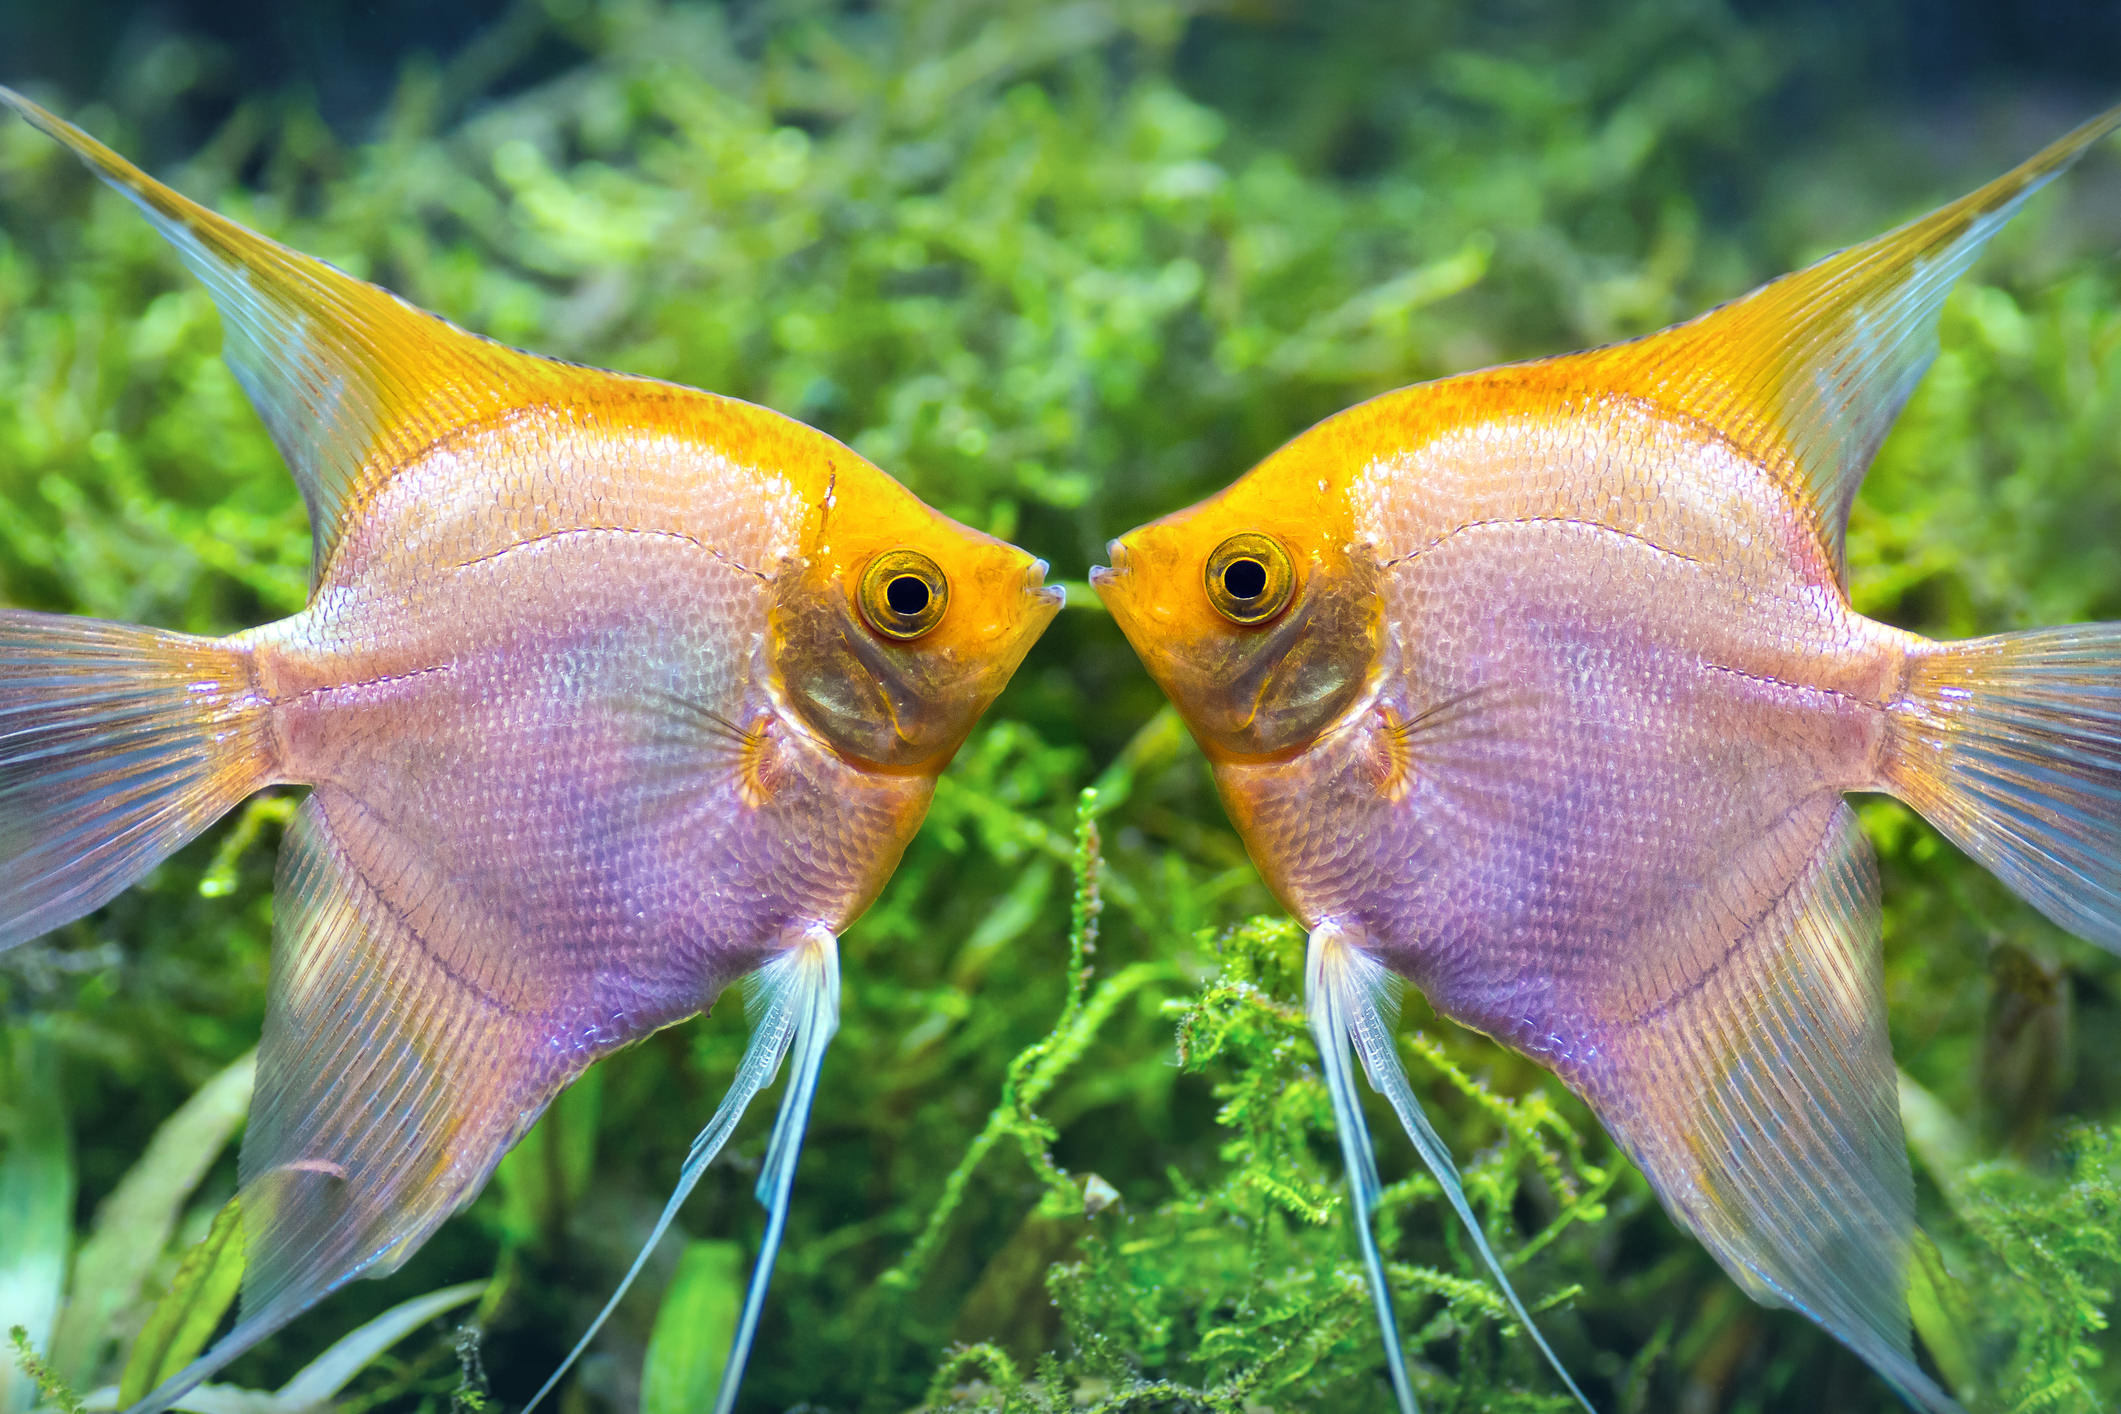
At first glance, you might think that this is a mirror image photo that was manipulated in Photoshop. But look again...you’ll notice the fish on the right is slightly higher at the mouth than the one on the left. Also notice the difference in the shape and structure of the plants in the bottom corners of the frame. The takeaway here is that this composition forced us to inspect the shot in more detail - which is one of the goals of photography, right? Mission accomplished!
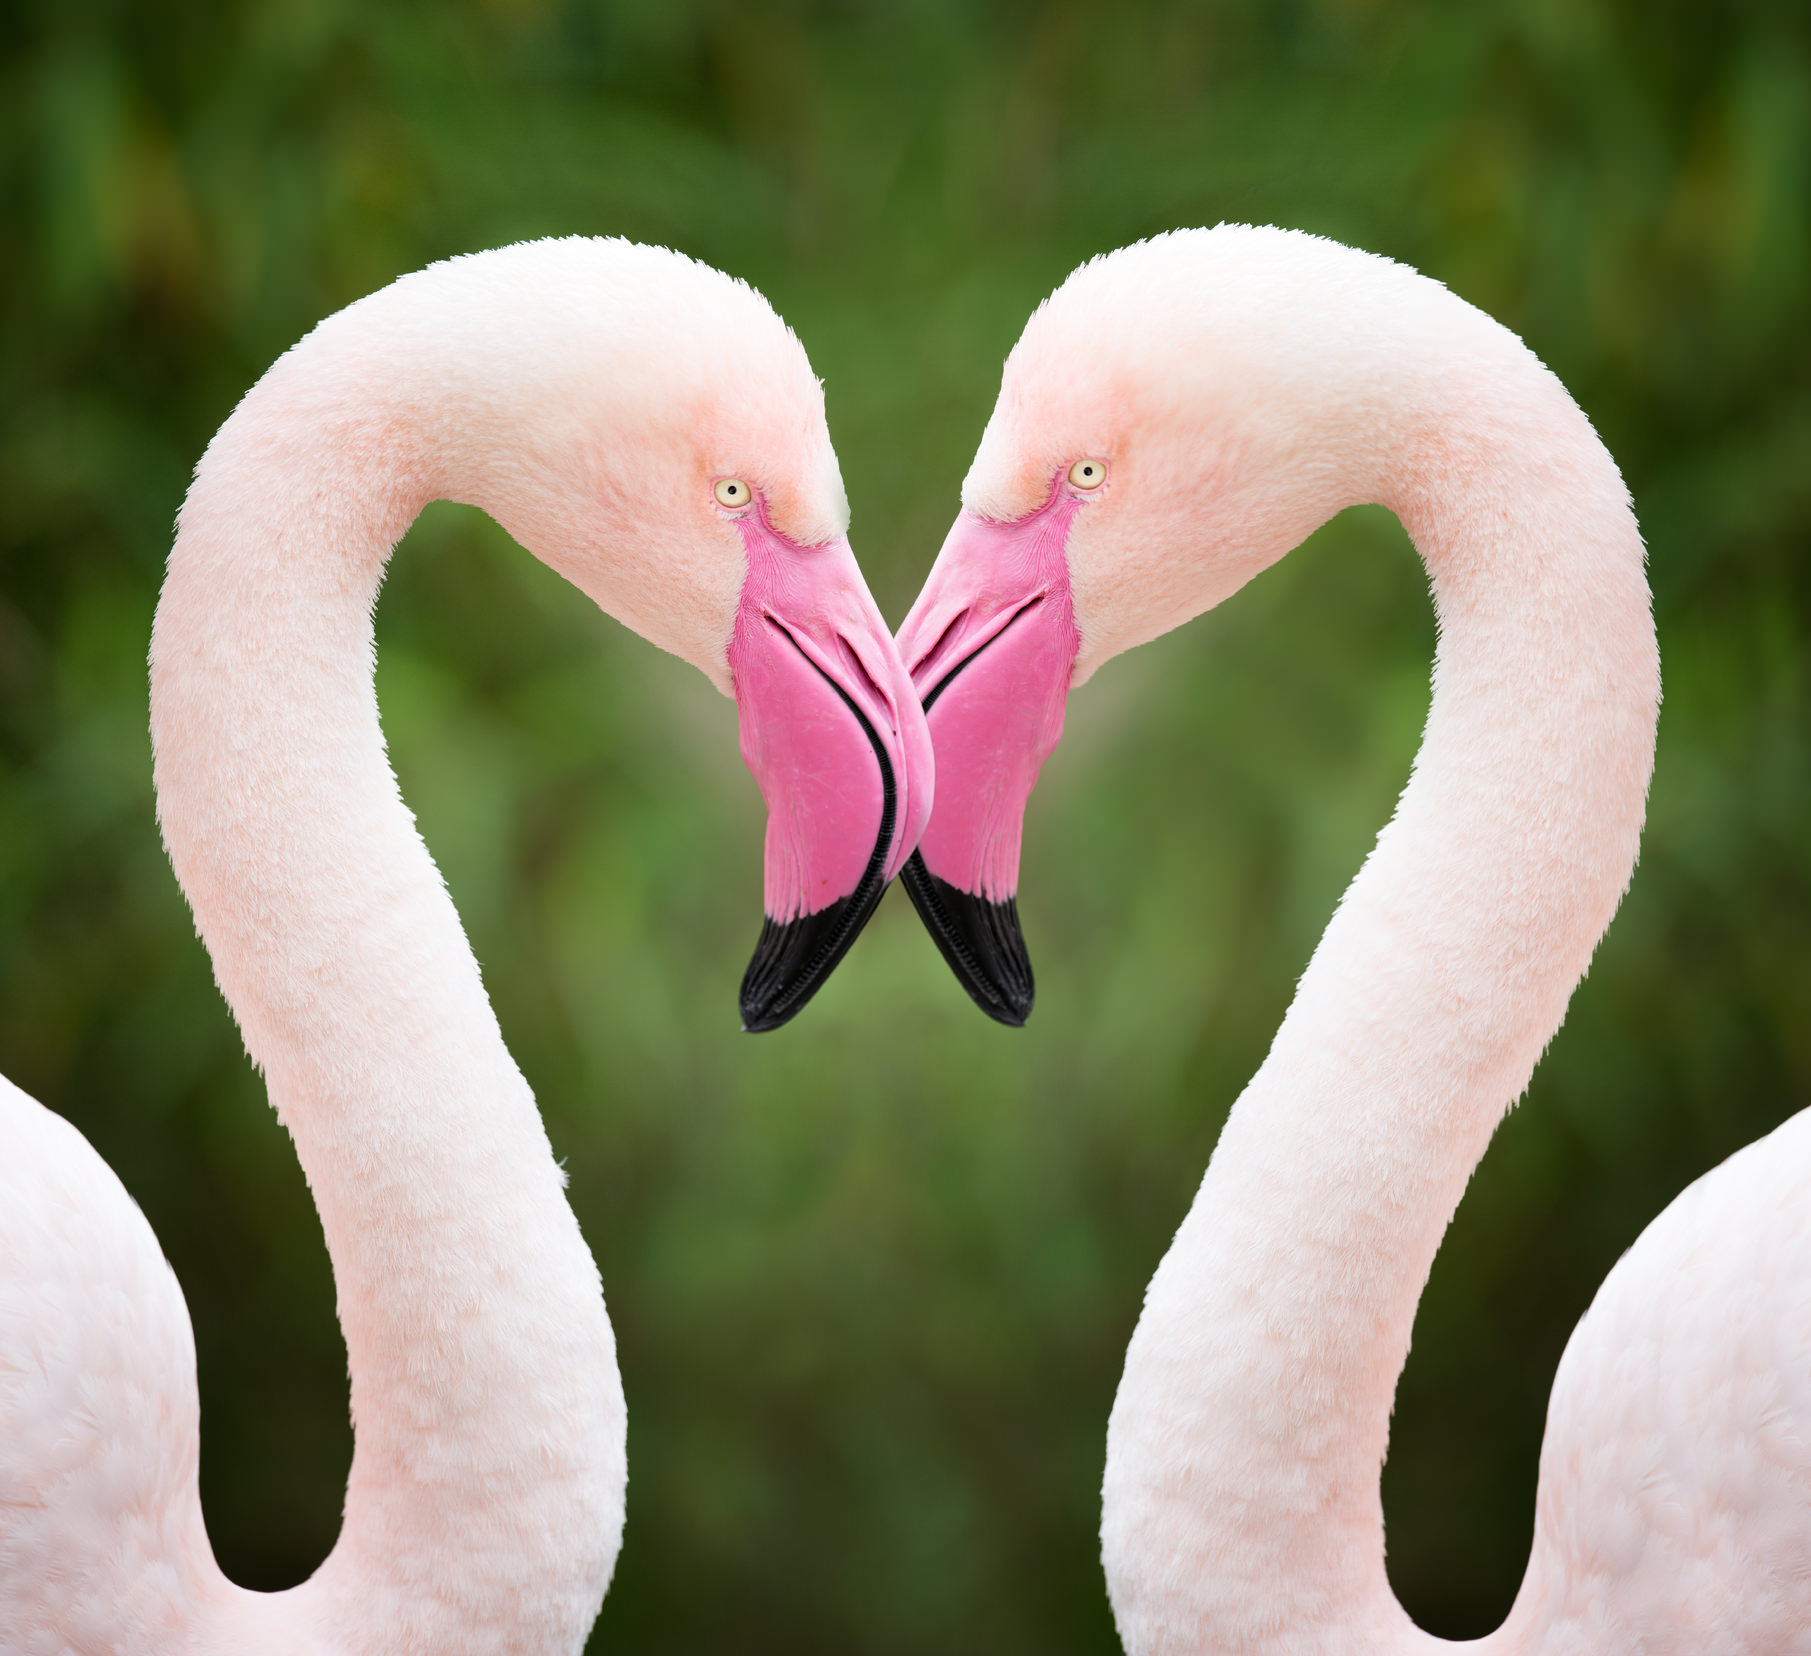
Even when photographing a pair of gorgeous animals, it’s important to look for compositional opportunities that allow you to enhance the visual interest in the shot. In this case, the heart-shaped form created by the necks and heads of the flamingo adds another layer of interest. Note as well that the eyes of the birds are absolutely tack-sharp. Just like when taking a portrait of a person, it’s necessary to keep an animal’s eyes perfectly in focus.
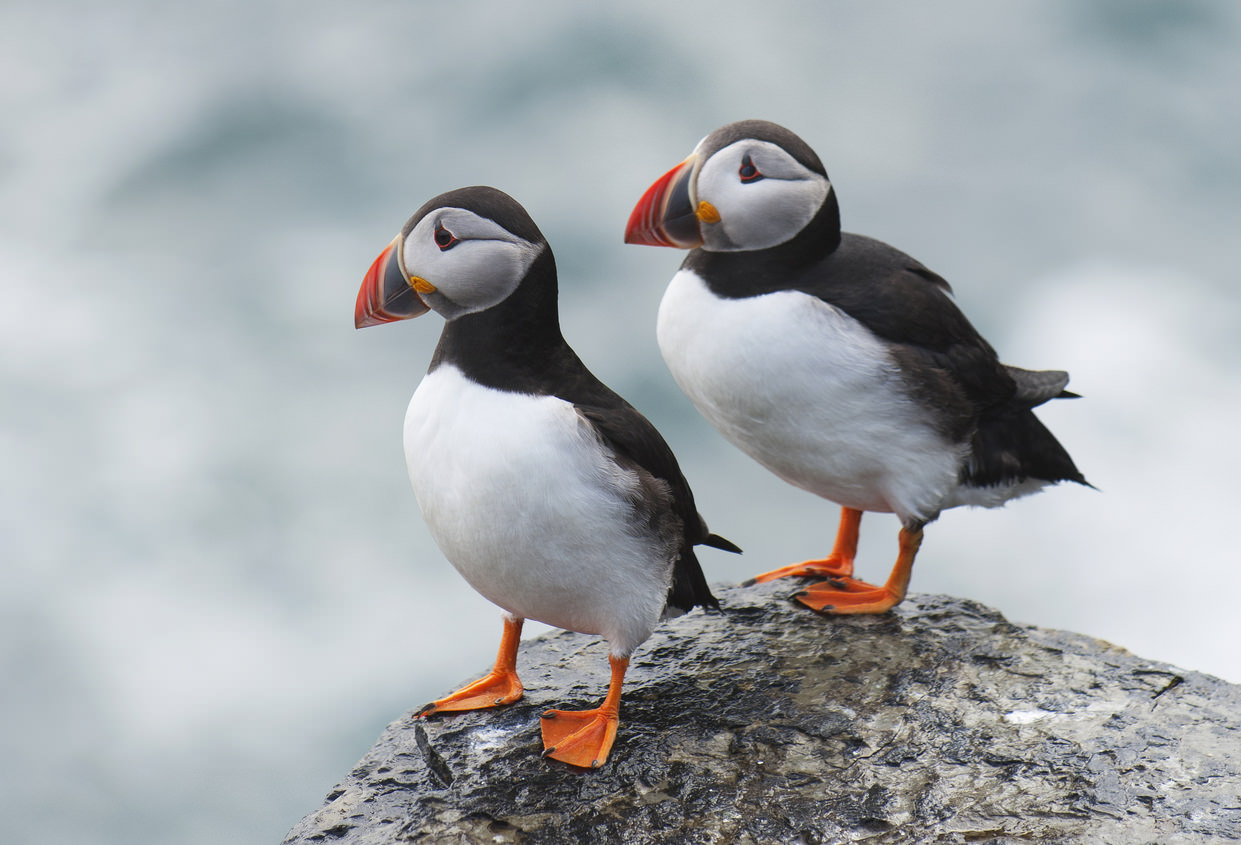
This photo is a prime example of how photographing a pair makes the shot. Imagine this photo with just a single puffin - left with the same framing, the photo wouldn’t be nearly as interesting. But with two puffins, both of which are looking in the same direction, we get a strong visual cue that expands the space of the shot. It helps that their colorful beaks and feet are set against a neutral background, which allows those color details to pop. Also note how the photographer used the appropriate camera settings to create a blurry background that helps the puffins pop even more in the shot.
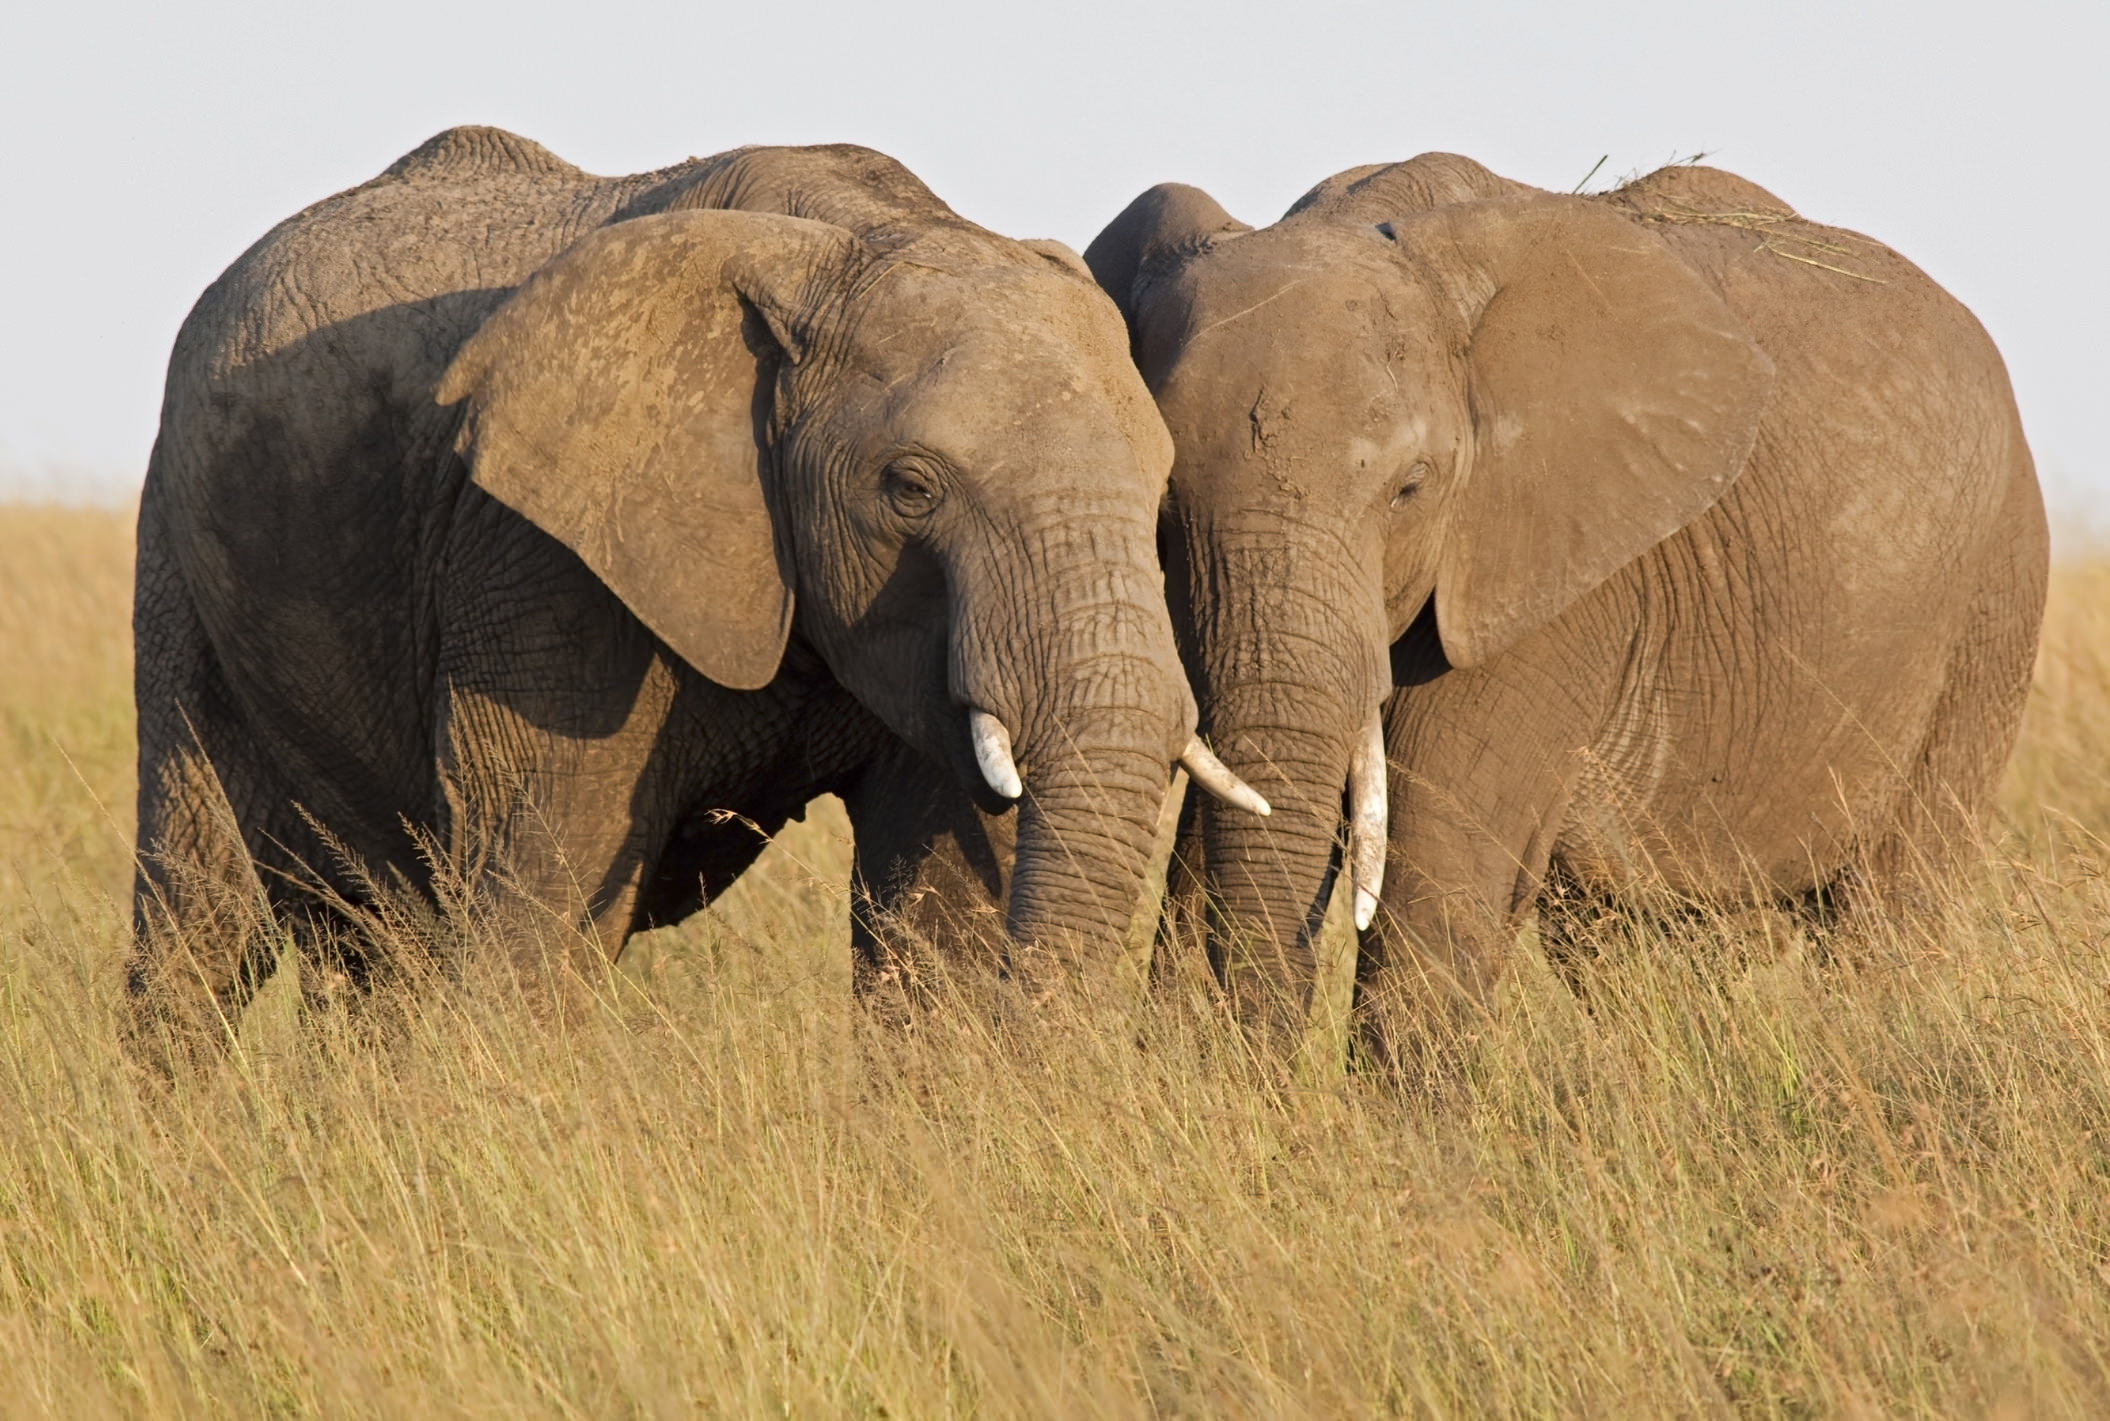
Opposite the previous image, the elephants in this image are looking inward, giving the effect of a more intimate photo. In this case, the shot becomes more like a portrait of a human couple - the elephants appear to be highlighting their close relationship by “posing” in this way. Instead of directing our eyes out of the frame, the inward position of the elephants keep us locked in on their eyes and the details of their ears, tusks, and trunks.
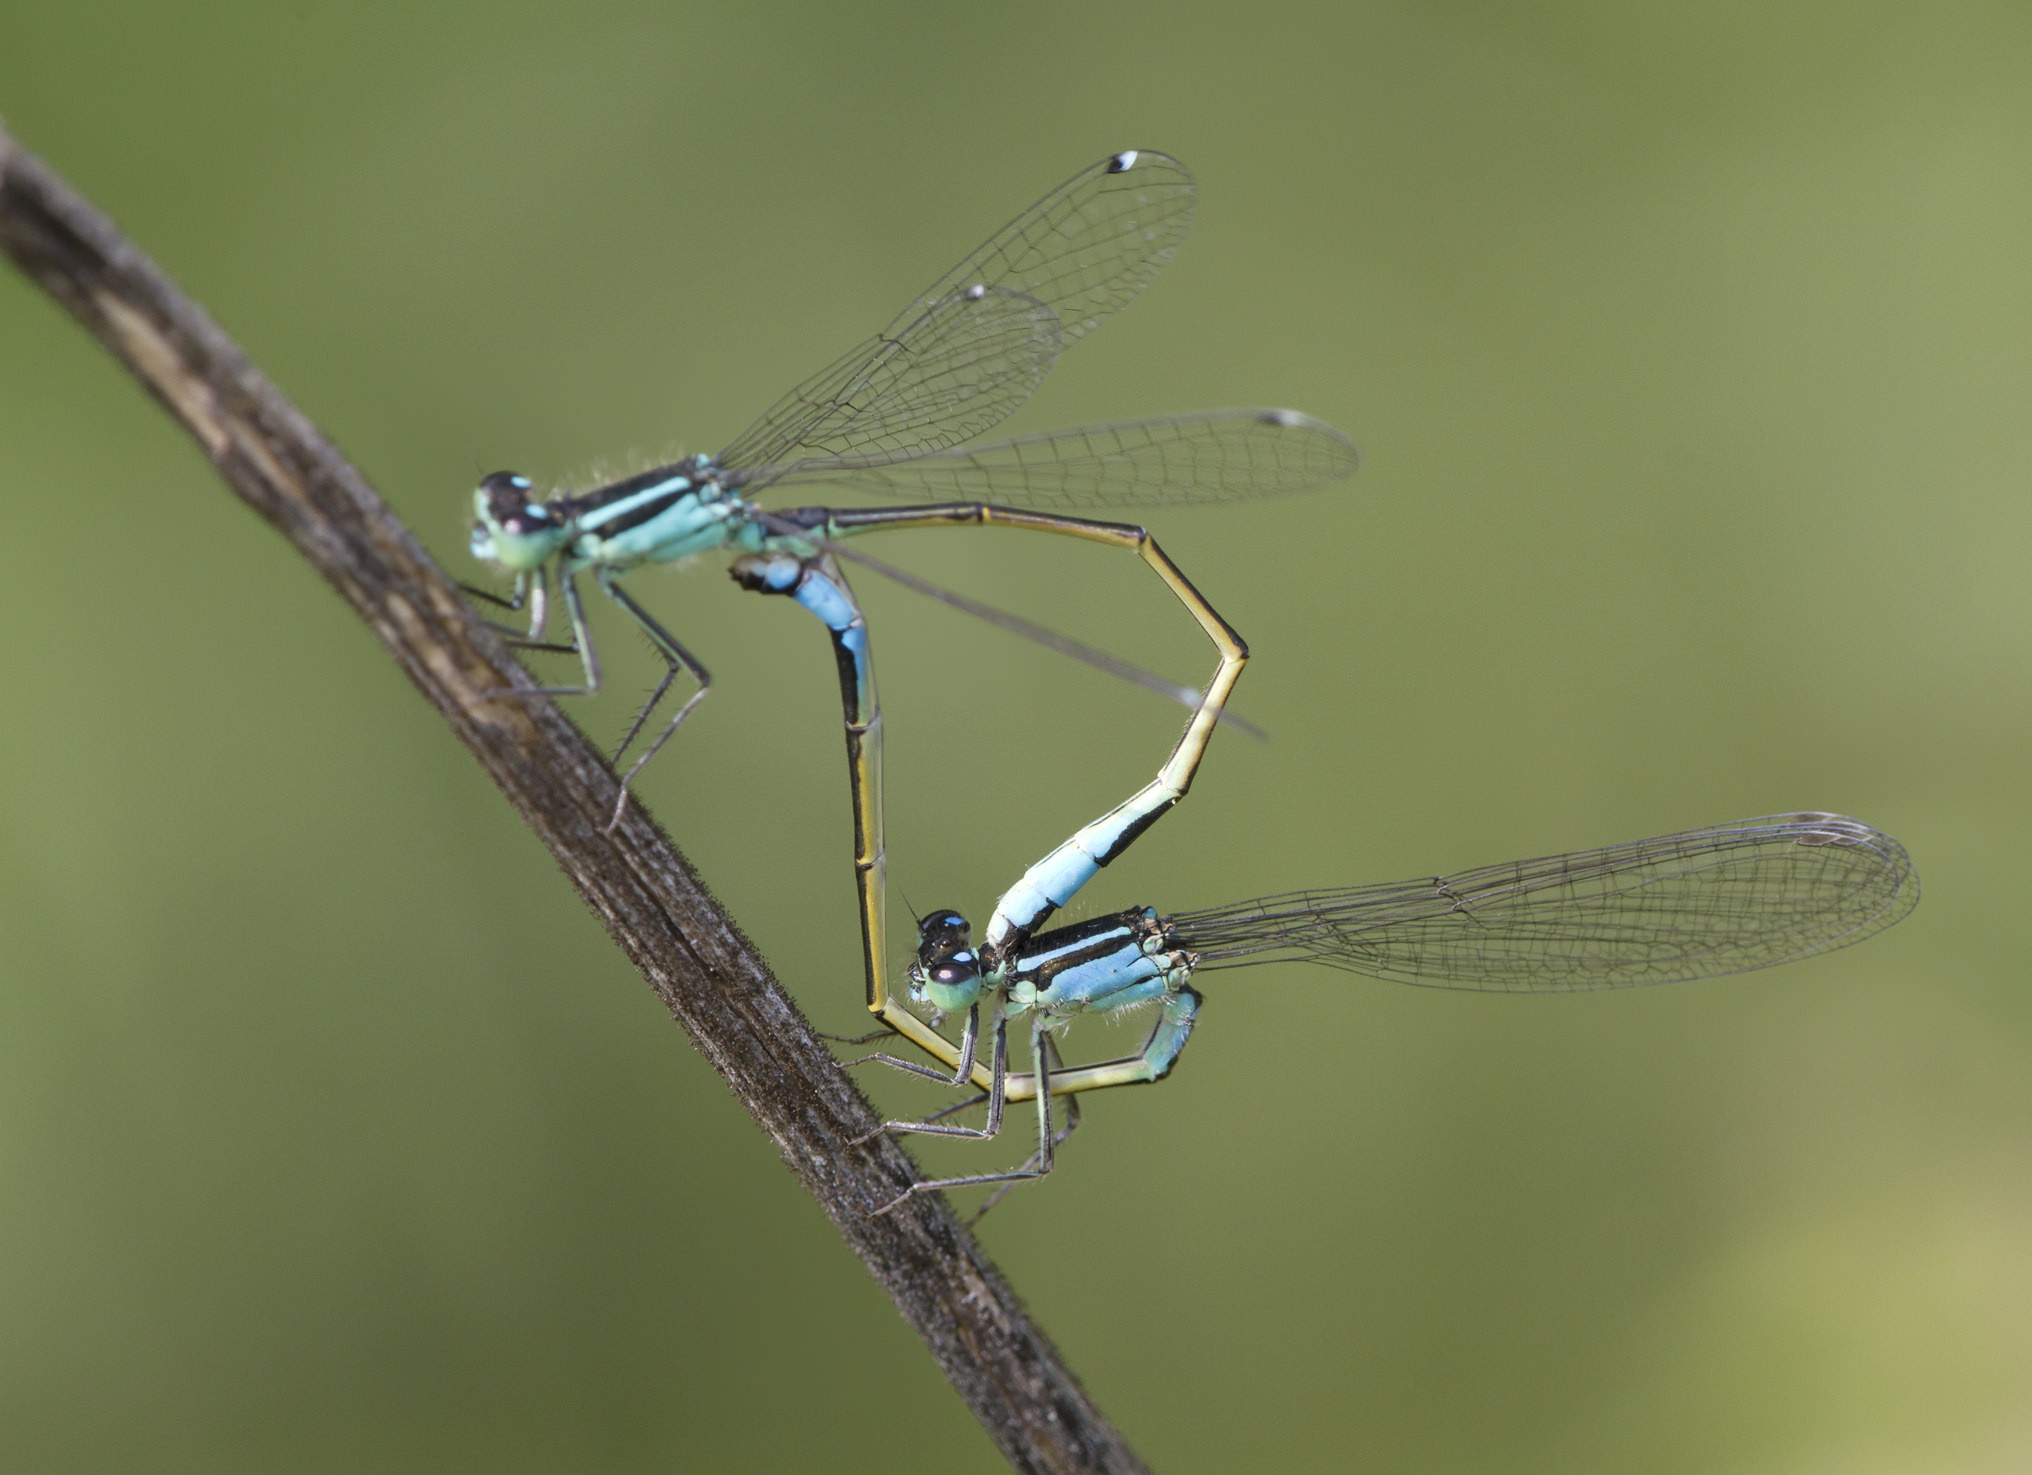
Shooting in pairs is an effective strategy for very small wildlife as well, as seen in the image of the damselflies above. Their gorgeous coloring and contorted shape of their bodies gives this image plenty of visual interest. Note that the non-descript background is ideal for showing off the details of their wings. And even though the damselflies are framed in the middle of the shot (which can lead to a “stuck” visual feeling), the inclusion of the twig adds visual action, leading our eye from right to left.
This image is a great reminder that in wildlife photography, timing is everything. The fact that the dolphin on the right is in the act of jumping adds a nice sense of action and movement to the shot. At the same time, it’s partner gazing up from the water gives the photo a distinct feeling of playfulness that allows the viewer to connect more deeply with these animals. Also notice how the horizon line is perfectly straight. When taking nature and wildlife photos, keeping the horizon straight is as important as your timing with the shot!
Speaking of action, these young lions engaging in play creates a completely different kind of image of these beasts. Where they might seem imposing or even dangerous in a “traditional” front-facing portrait, these guys remind us that they are just big cats after all. Again, timing is everything, with a more dramatic wildlife image created by snapping the shutter at the precise moment the lion on the took to the air.
If you want an example of how animal pairs can add a little levity to your shot, this is it. Though the owl on the right looks stately and composed, the owl on the left, peering out from behind a tree branch, has a silly appearance that makes you smile. Not all photographs of nature and wildlife have to be serious or documentary - when the opportunity arises to create an amusing photo, take it! What’s more, use this image as an example of how shooting through something can give an image more depth. The presence of the blurred leaves in the foreground gives us an indication of how far the owls are from the lens.

Typically, it’s common practice to photograph an animal from its eye-level. However, this image shows us that sometimes breaking the rules is the best option. By shooting at a slightly upward angle, the photographer emphasizes the length of the birds’ tails - one of their most prominent features - and this has been done without sacrificing a view of the birds’ faces. Note as well how the background - though varied in light and color - is still subdued enough such that it doesn’t distract attention away from the birds.
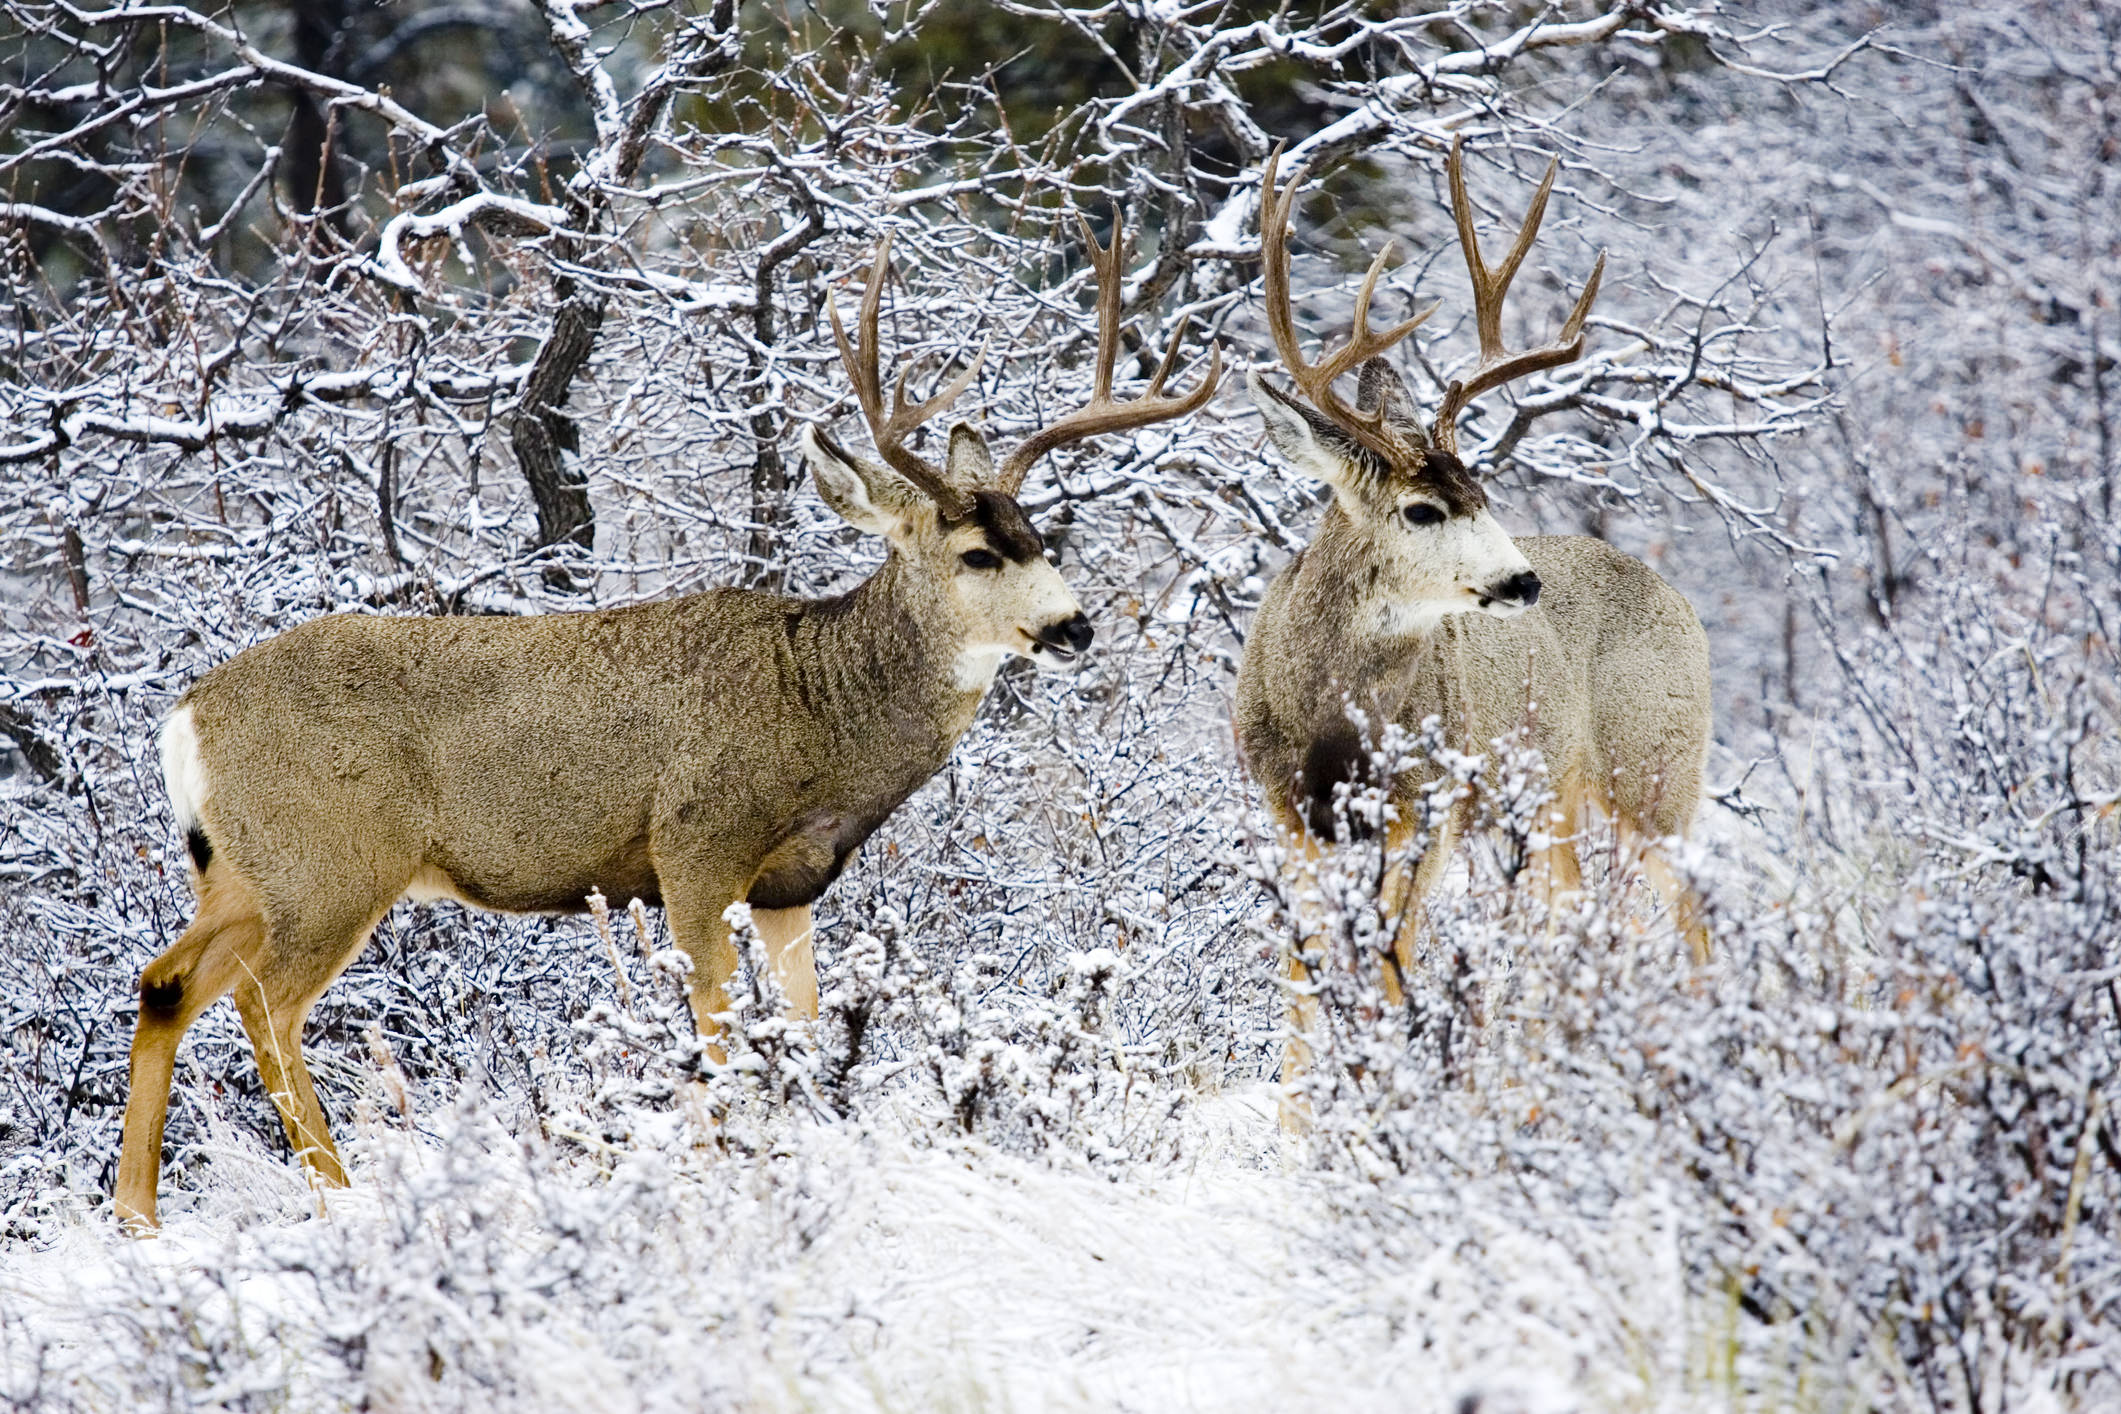
Wintertime photos are difficult to create of any subject. With so much white in the photo, it’s easy for your camera to be tricked into thinking the scene is brighter than it is, resulting in snow that looks dull and gray. In this instance, we see the value of taking control of white balance, as the snow surrounding the mule deer is bright and white. Also, much like in previous images, the fact that both deer are looking in the same direction gives us a sense of movement and wonderment as to what they might be looking at outside the frame.
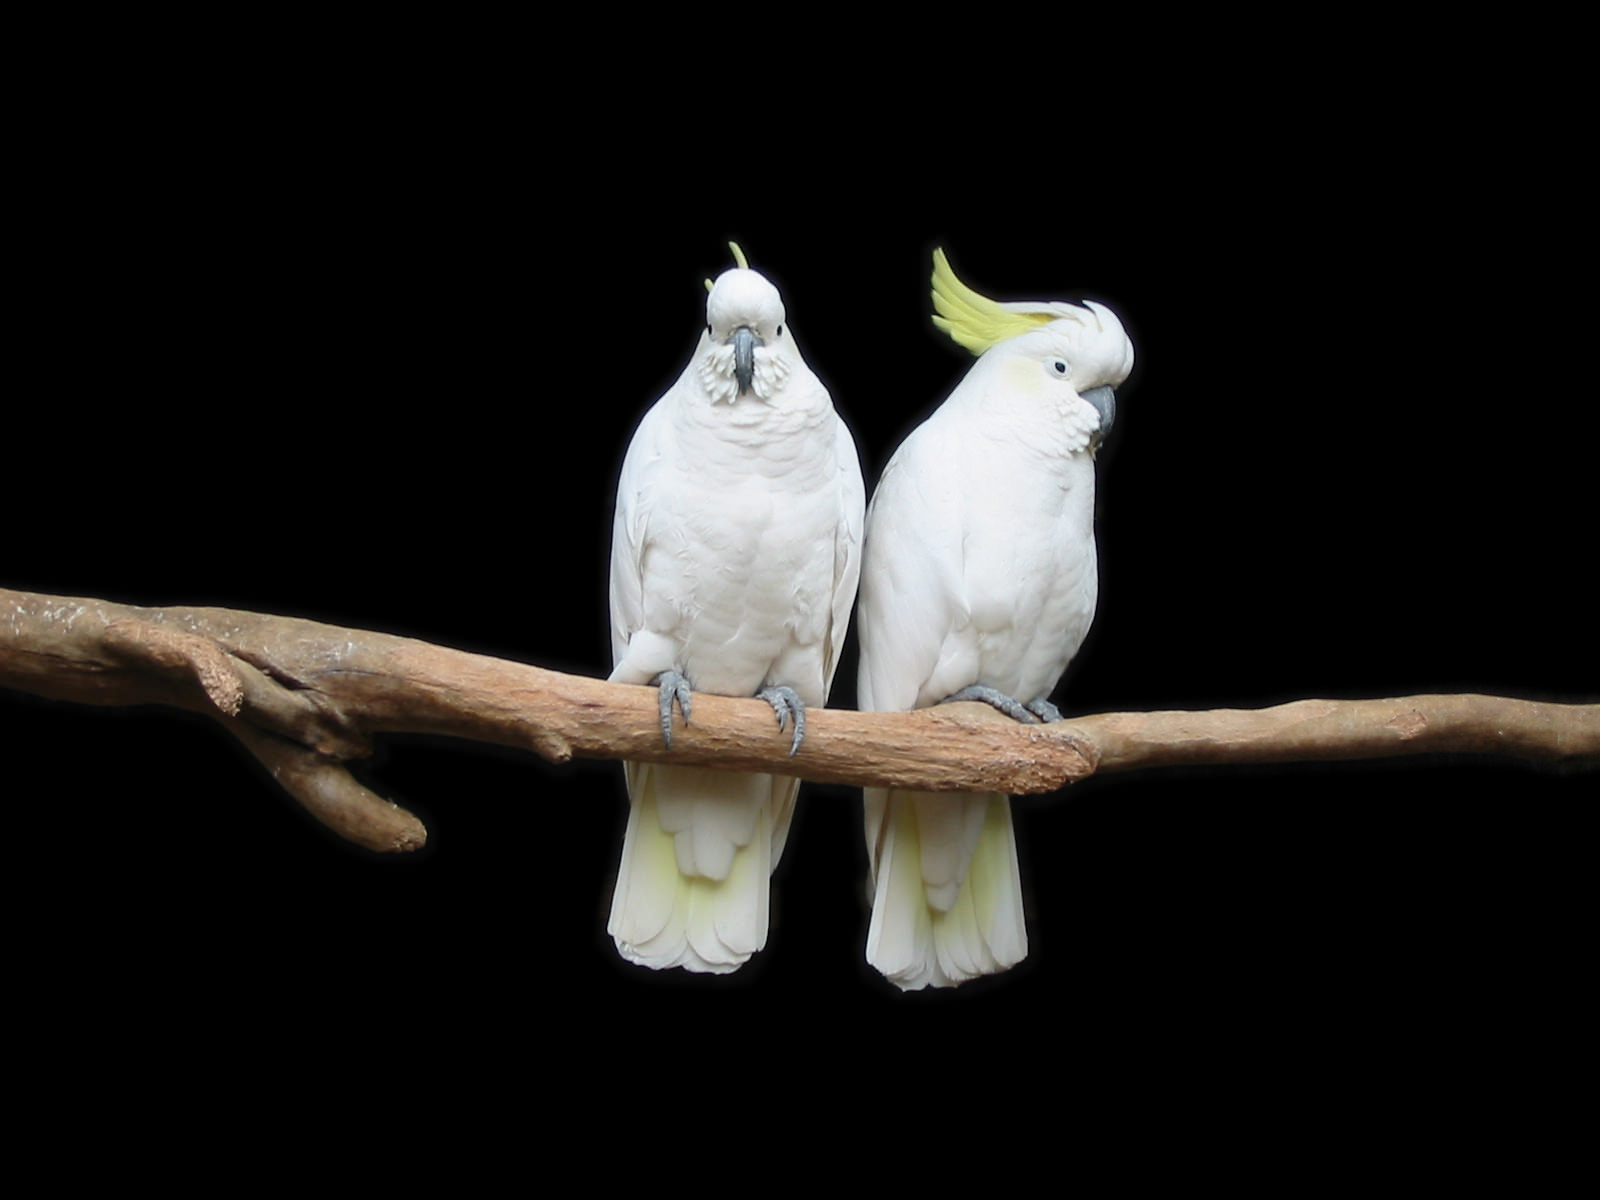
When photographing wildlife, the need for a background that allows the animals to take center stage cannot be understated. In this case, the pure black background is the ideal backdrop for a couple of reasons. First, the white-on-black color scheme gives the image excellent contrast and great visual appeal. Second, without any distracting elements in the background, we’re able to pick up the fine details of the birds, including the shape and structure of their feathers.
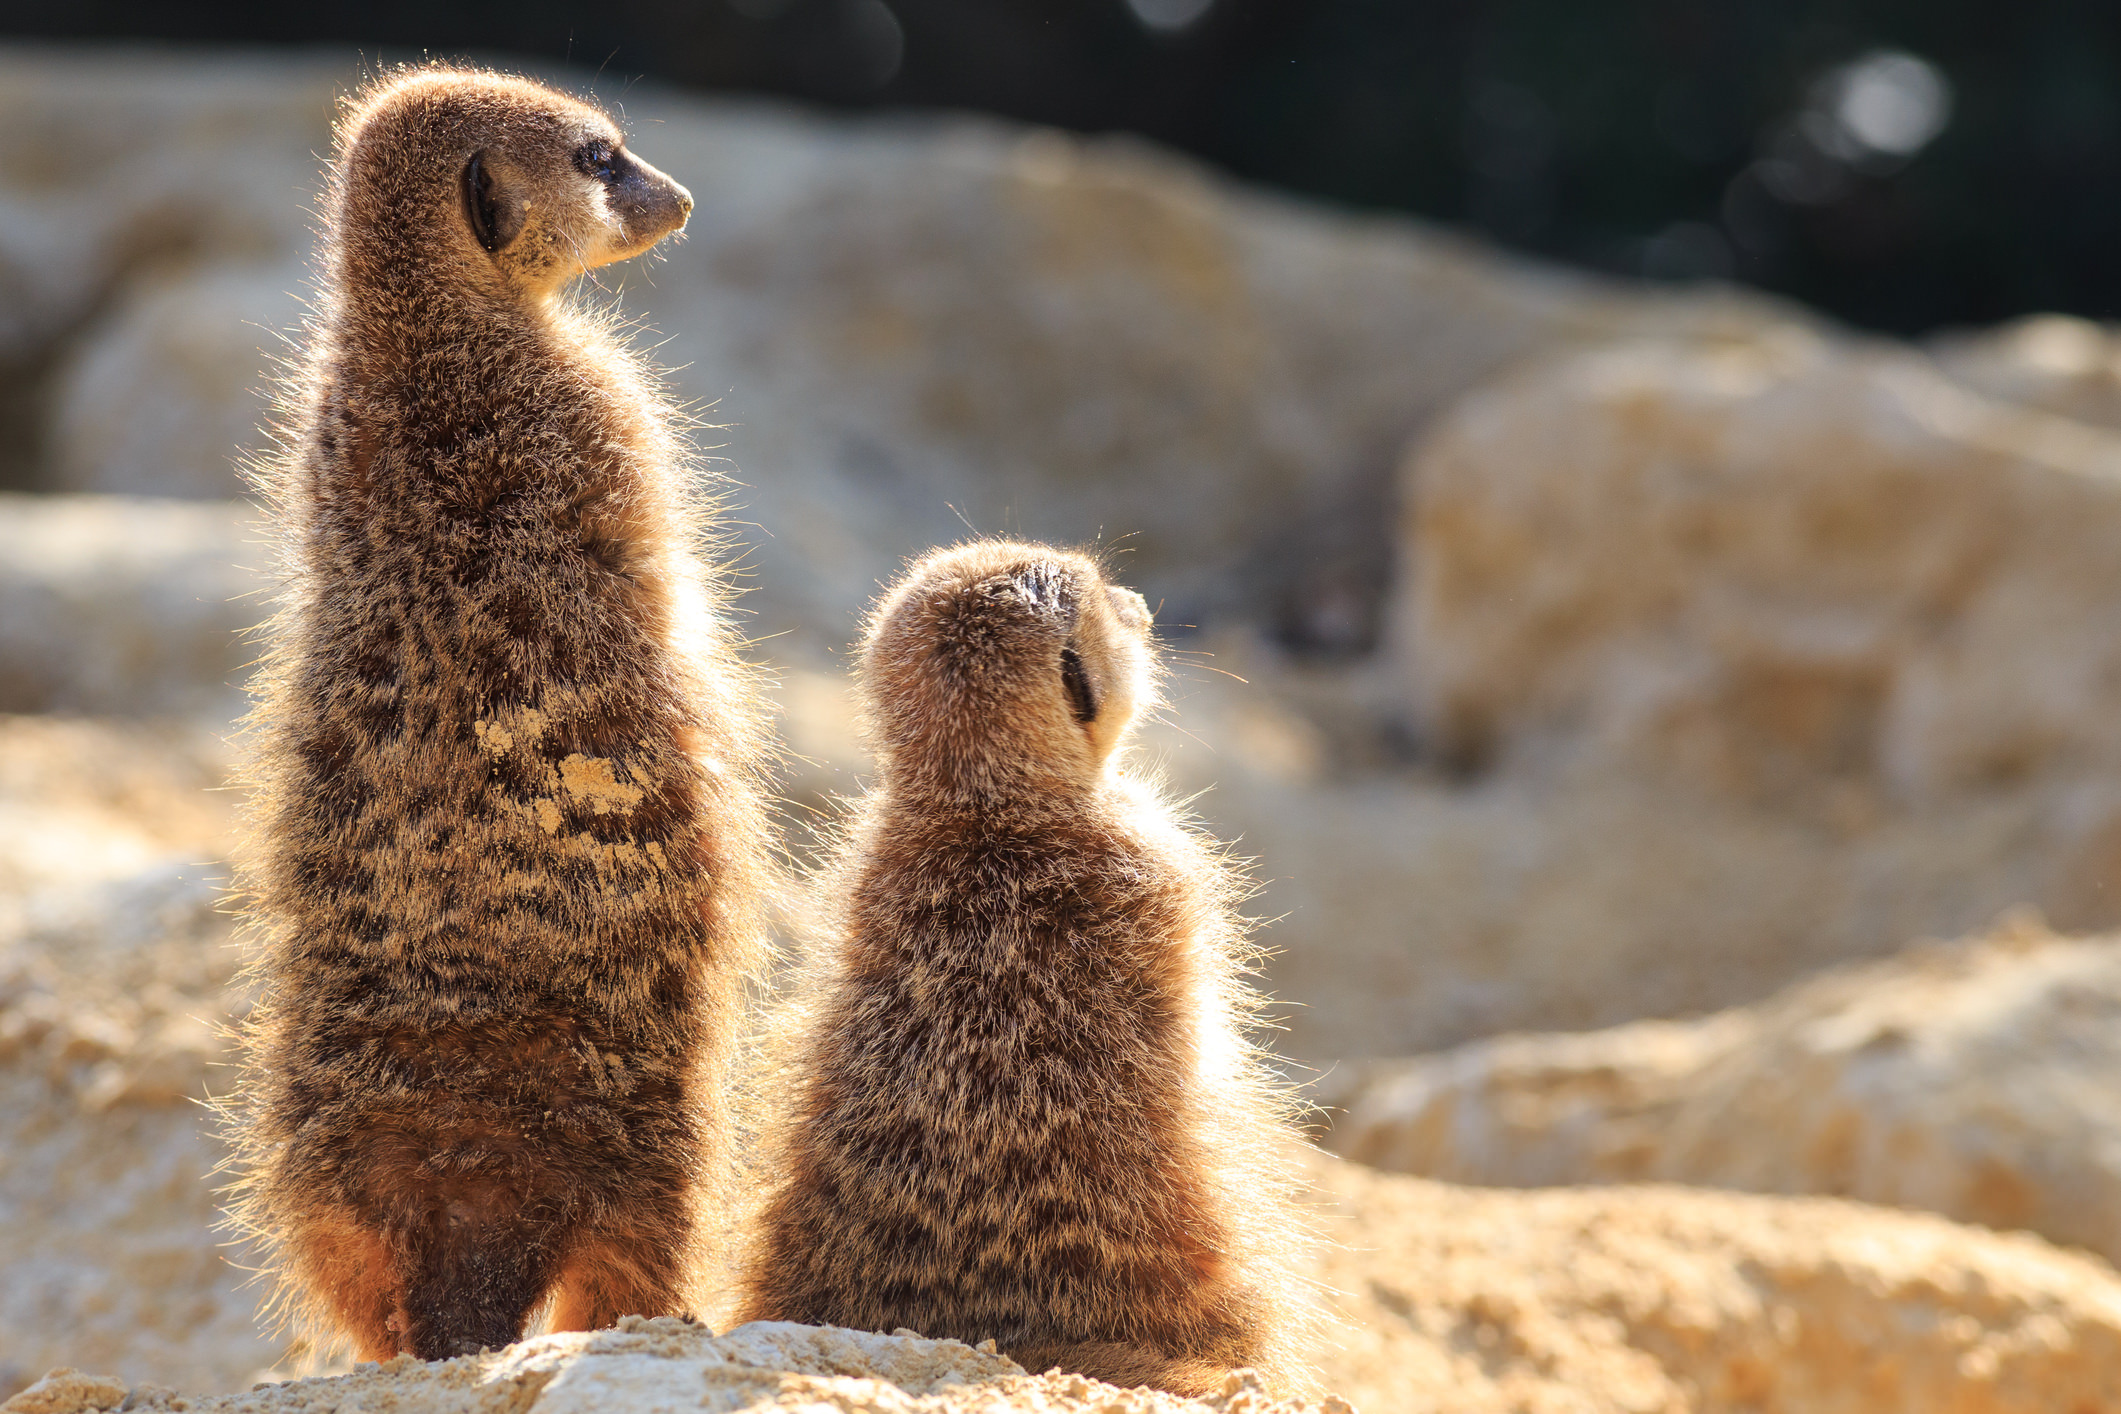
Though it’s usually recommended that the wildlife you photograph is facing you, in this example, we can see that even if the animals peer in another direction, the image can still be a success. There is a sense of action here, as both meerkats are looking off to the right, creating a sense of intrigue as to what they are viewing. The soft backlighting also helps make this image pop, as it helps put the detail of the meerkats’ fur on full display.
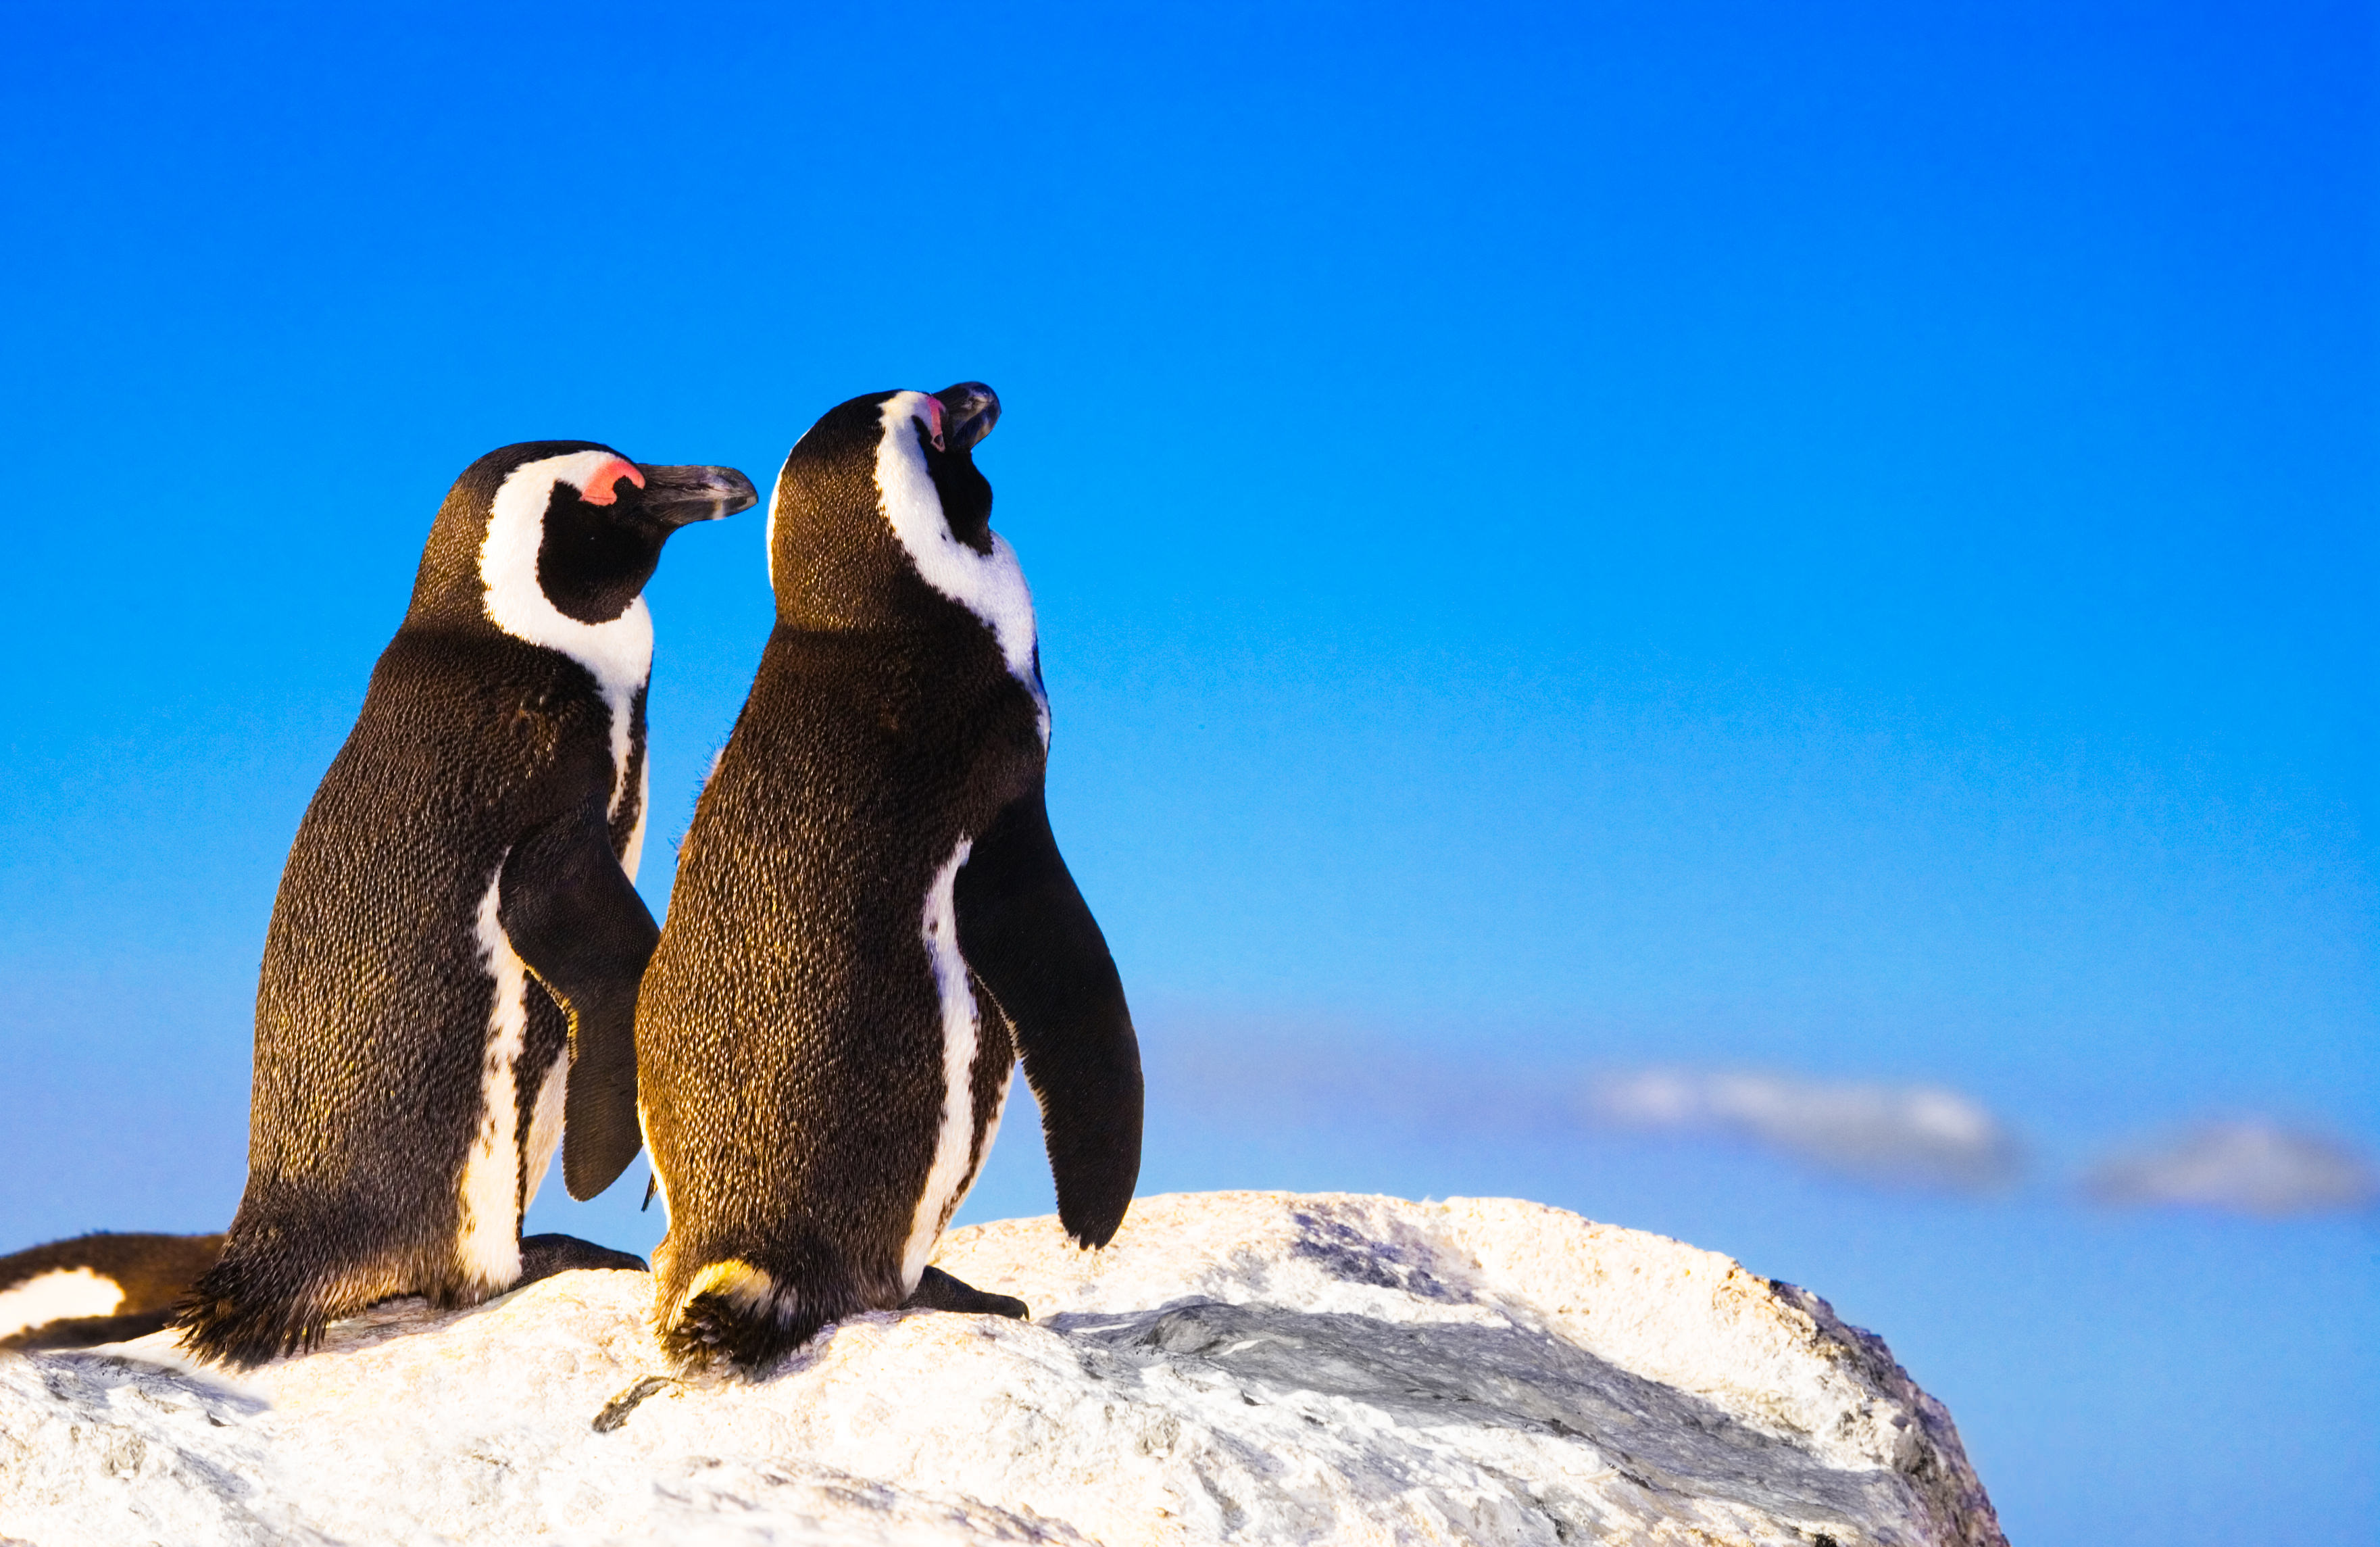
Here, we see how dramatic color in a wildlife shot can take it to an entirely other level. The deep, bright blue of the sky contrasts beautifully with the snow in the foreground and the white and black coloring of the penguins. Note as well how the sky was incorporated into the shot - the photographer is shooting at an upward angle. Not only does this put the sky on full display, but it also makes the penguins more prominent in the frame, accentuating their height.
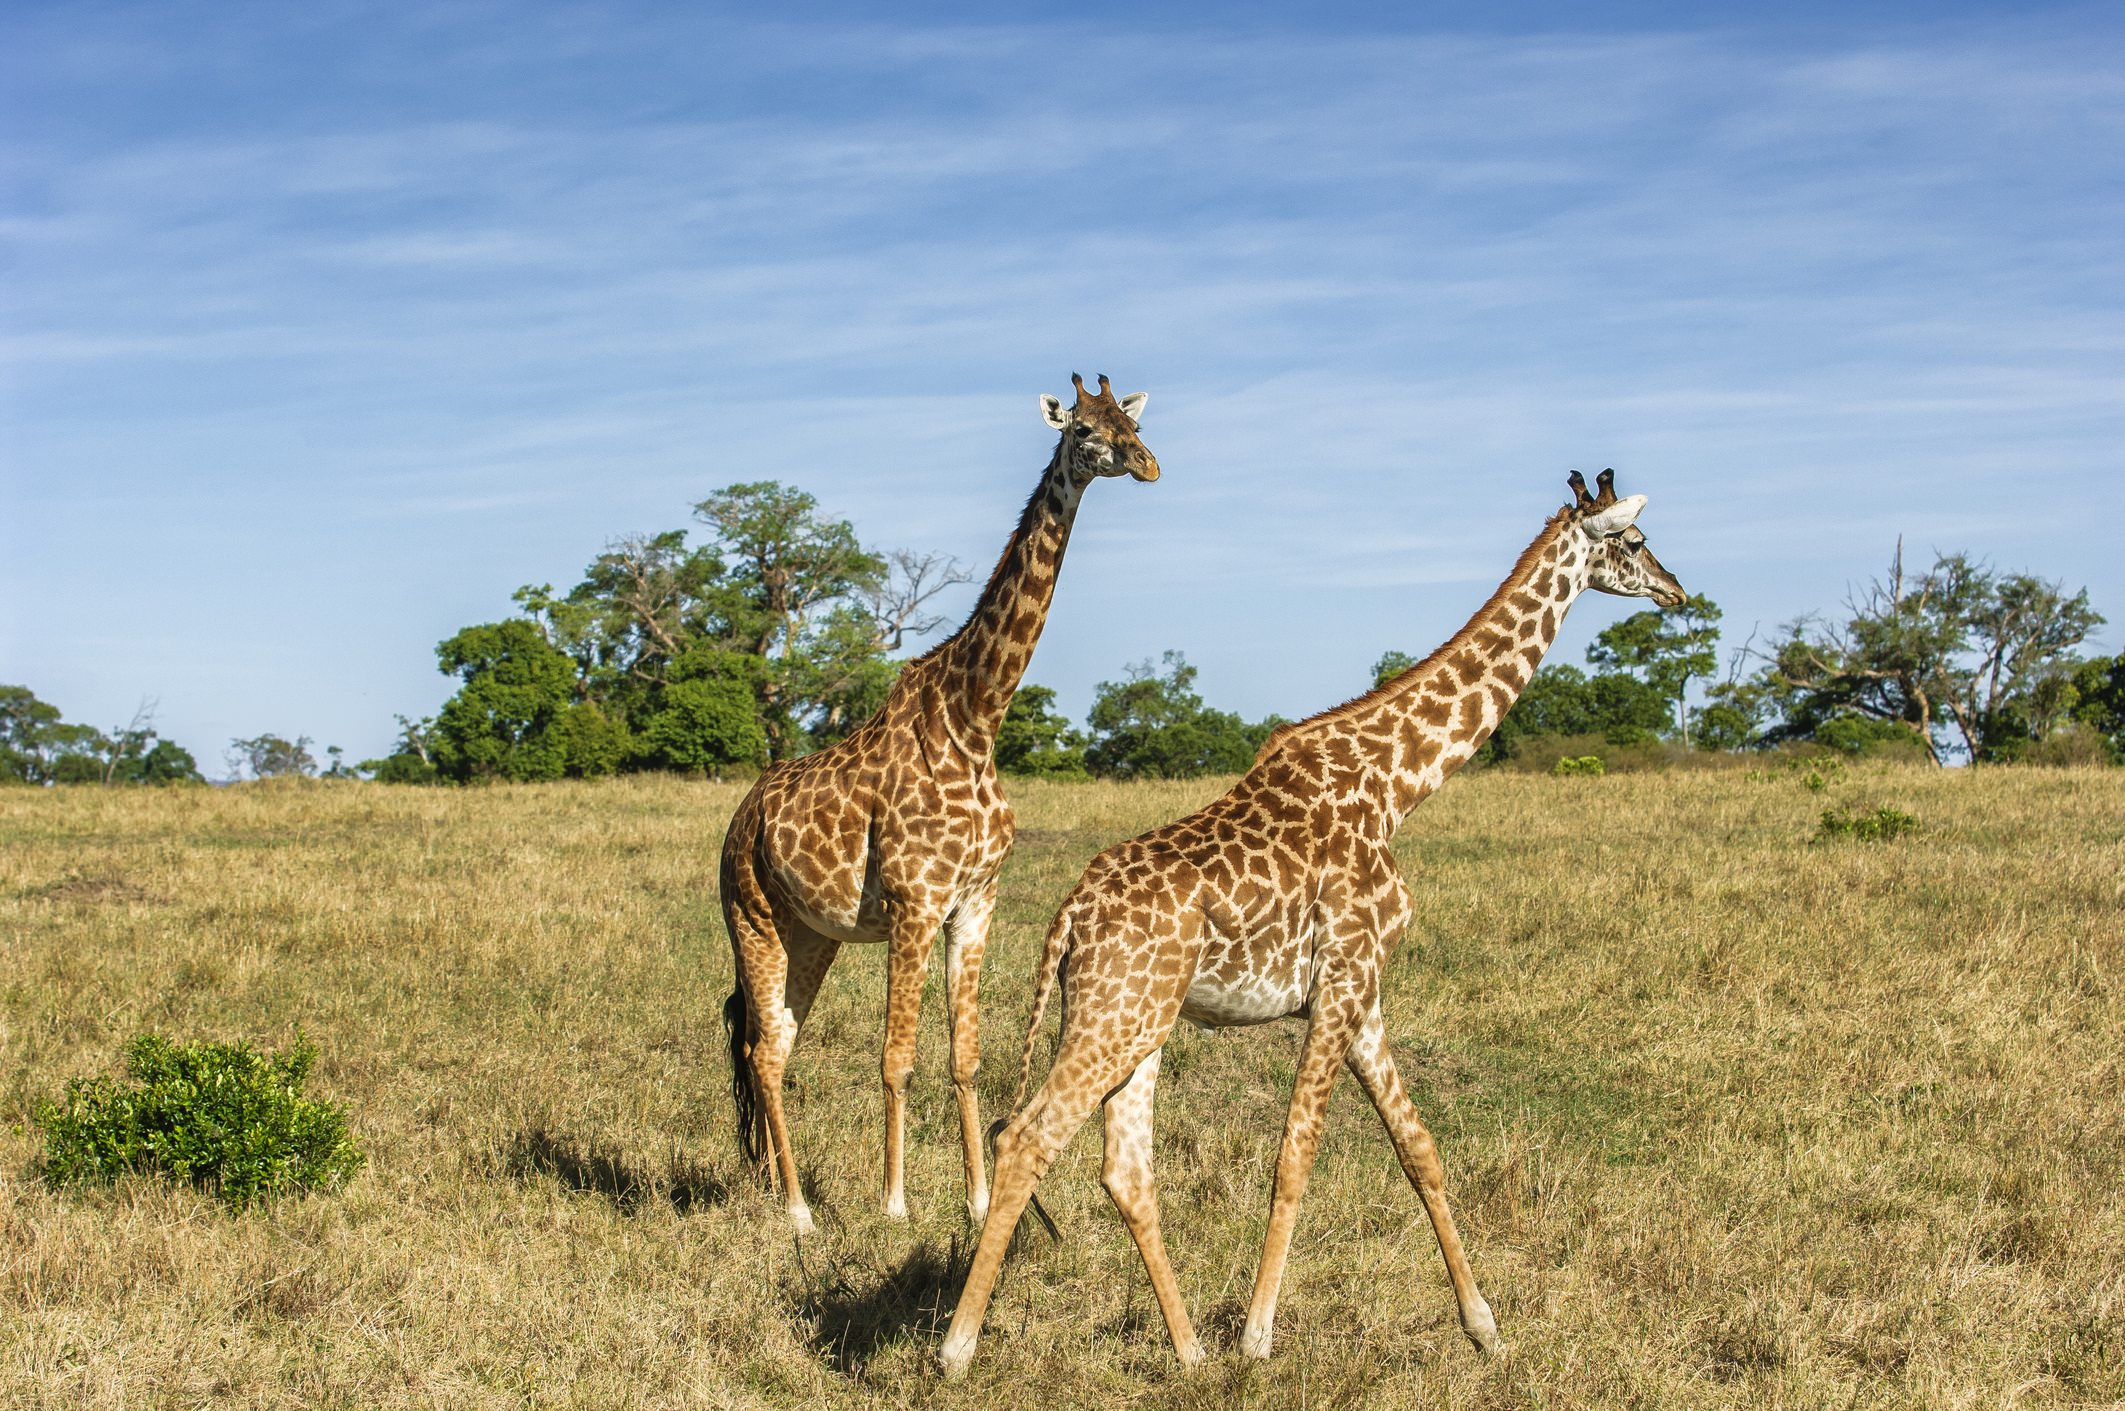
Positioning of animals in a wildlife shot is crucial to the success of the image. In this image of the pair of giraffes, the difference in their position relative to the camera gives the photo improved interest. In the instance of the giraffe on the right, the profile view allows us to see the full extent of its legs and neck, something that we can’t fully see in the giraffe at the right. And, as is the case in several other images above, the photo has a greater feeling of activity and movement because the giraffes are both looking in the same direction.
Like the penguin photo earlier, this image of jellyfish shows how bright, bold colors can add a sense of visual appeal to a wildlife shot. In this case, using Lightroom to manipulate the saturation levels of the background makes up for the relative lack of color in the jellyfish. What’s more, by taking a shooting position at the same depth as the jellyfish, the photographer is able to give us a full view of the interesting shape and texture of their bodies.
I was going to close off the article, but how can I not include Little Nemo?! This shot of clownfish shows us again how including pairs of animals creates an image with a better dynamic and improved depth. The narrow depth of field works to the photographer’s advantage, as the background elements are both bright and texture-rich. By throwing the background out of focus, our attention remains on the fish and allows us to inspect their shape, color, and other details more fully.
With that, you’ve got 17 beautiful nature and wildlife photos to inspire your photography this week. See how you might use these images to create improved images of your own, and then upload your photos to the PhotographyTalk galleries. I, for one, would love to check out the photos you take. And, you never know when your photo might be selected for a feature on the site!
We Recommend
Master the Art of Drone Photography: Part 1

If you have a drone - and these days, who doesn’t - you understand the trials and tribulations as well as the joys of using an aerial vehicle for photography.
But to think that taking photos from above is the same as it is from your handheld camera is a total misconception. There are the photographic considerations, including subject matter and camera settings. There are also the issues related to the responsible, safe, and legal use of drones.
In the first part of our two-part series on drone photography, we explore legal and privacy issues, as well as topics related to safely flying your drone.
Legal Issues

As drones have become ever more popular, more and more laws have been passed governing their use. Since consumer-based drones are still relatively new, governments worldwide are scrambling to devise rules that pertain to when, where, and how drones can be used, and by whom.
At the center of it all is the common sense use of your drone. Naturally, flying it near buildings, over your neighbor’s backyard, or near airports will do nothing but get you in a heap of trouble. Additionally, flying your drone over something that could be damaged or destroyed should the drone crash is a simple matter of using your head and your wits. In short, if you’re about to fly your drone somewhere and you have doubts about the appropriateness of it, don’t do it!

In the United States, the Federal Aviation Administration has issued a broad spectrum of rules of which you need to be intimately familiar before you take your first flight. The FAA’s Unmanned Aircraft Systems website is the go-to place for the latest in terms of news, regulations, instructions on how to register your drone, and procedures for flying. Other entities, like states, and cities, may have their own set of rules as well. These regulations also vary from country to country, so it’s best practice to check with local authorities before sending your drone up into the sky.
Another excellent resource is the Know Before You Fly Campaign. With guidelines for responsible flying, resources for drone enthusiasts, and much more, it is worth a visit if drone photography is in your future.
Practice Makes Perfect

Once you’ve explored the legalities of flying a drone, it’s time to practice.
It goes without saying that you will need to examine a practice area to ensure that it is safe and legal to fly there. A wide-open area would be an ideal spot, such as an empty field in a rural area. Granted, not everyone that has a drone has the luxury of an open field nearby, so this is another common sense moment. Choose a location that is as open as possible and affords you sweeping views so you can maintain eye contact with your drone at all times. Above all else, ensure that your practice location has nothing that can be damaged and no people that can be hurt. If it crashes, you want to deal with a broken drone at the worst, not a destroyed car windshield or a hurt bystander.
You’ll also want to check the weather to be sure you’re taking to the skies in the best possible conditions. The less wind, the better, for obvious reasons. You will have enough to worry about just trying to master the controls of the drone; you don’t need a breezy day to add more stress to the situation!
Beware of the Battery

Many drones are equipped with a feature that, in case of an emergency, it will return to its launch point automatically. This is great for both you and the drone if something goes awry.
However, if you don’t keep an eye on the battery levels of your drone, it will land wherever it pleases, which can be inconvenient at best and downright destructive at worst. It’s far too easy to get caught up in the process of flying, and once you add taking photos, there is an awful lot to command your attention.
As such, you will need to develop a system for checking your battery life. Set a reminder on your phone. Have a friend time your flight and call out how many minutes of battery life are left. Try to launch the drone as close to the area you want to photograph as possible. These are simple steps, but they could very well save you lots of trouble should your drone run out of juice.
Understanding the factors that reduce battery life is essential as well. The more camera weight it has to carry, the less time your drone will be able to fly. Windy conditions and cold weather have a deleterious impact on battery life as well. Be prepared to cut your flight time in these conditions by as much as half!
Final Thoughts

There is far more to know about flying a drone for photography purposes, so be sure to check the resources provided in this article before you attempt to tackle drone photography. As noted above, it’s mostly about using common sense and being informed about what you can and cannot do with your drone. Be responsible, check local regulations, and take the time to learn how to fly your drone safely before you attempt to add photography to the mix.
We Recommend
Nature and Wildlife Photography Tip: The Lightroom Editing Process From Start to Finish

Lightroom has become one of the go-to tools for photographers for post-processing their images. But like Photoshop, if you haven’t used Lightroom that much (or at all) it can be a bit of an overwhelming experience, leaving you frustrated and wondering, “Where do I even begin?”
YouTuber YuriFineArt has all the answers you need, with his in-depth tutorial of how to edit nature and wildlife images in Lightroom. Watch as Yuri takes a flat, dark wildlife photo and uses Lightroom to change it into a vibrant and colorful masterpiece. You’ll learn each step needed to make the same type of impact on your images, from importing the RAW file to saving the final image, and, of course, all the necessary steps in between. Check out the video below!
Amazon Recommendations
- The Complete Guide to Nature Photography: Professional Techniques for Capturing Digital Images of Nature and Wildlife
- Digital Nature Photography: The Art and the Science
- Lightroom CC Complete Training: Learn the Entire Photographers Workflow in the new Lightroom CC
We Recommend
Nature Photography Tip: How to Most Effectively Use Your Zoom Lens
Go to any beautiful overlook and the chances are that you will find a herd of photographers gathered there, most of which have some sort of zoom lens. They stand there, lenses mounted to their tripods, zooming in and zooming out, hopefully getting gorgeous photos of the scene laid out before them.
But what many novice and even intermediate photographers don’t realize is that the key to maximizing the benefits of a zoom lens is in moving yourself around as well. Rather than just picking one spot and zooming in and out, moving your body around and changing the distance between you and your subject will help you maximize the effectiveness of your lens.
Let’s explore just what this means.
Why Not Just Zoom?
To begin, zoom lenses are excellent tools for photographers and this is not a knock on using them. In fact, there will be times that you are incapable, for whatever reason, of getting closer to your subject, so a zoom lens is a critical part of your nature photography kit.
Having said that, the problem with just relying only on your zoom to compose your shots is that all you’re doing is cropping the image: Zoom out for a wider view; zoom in for a tighter shot. The same thing can be accomplished in post-processing with just a few movements and clicks of a mouse. Just crop an image with a wide view of the scene and you will get the exact same image as if you zoomed in.
But there is so much more you can do just by moving around!
Why Moving and Changing Focal Length Are Important
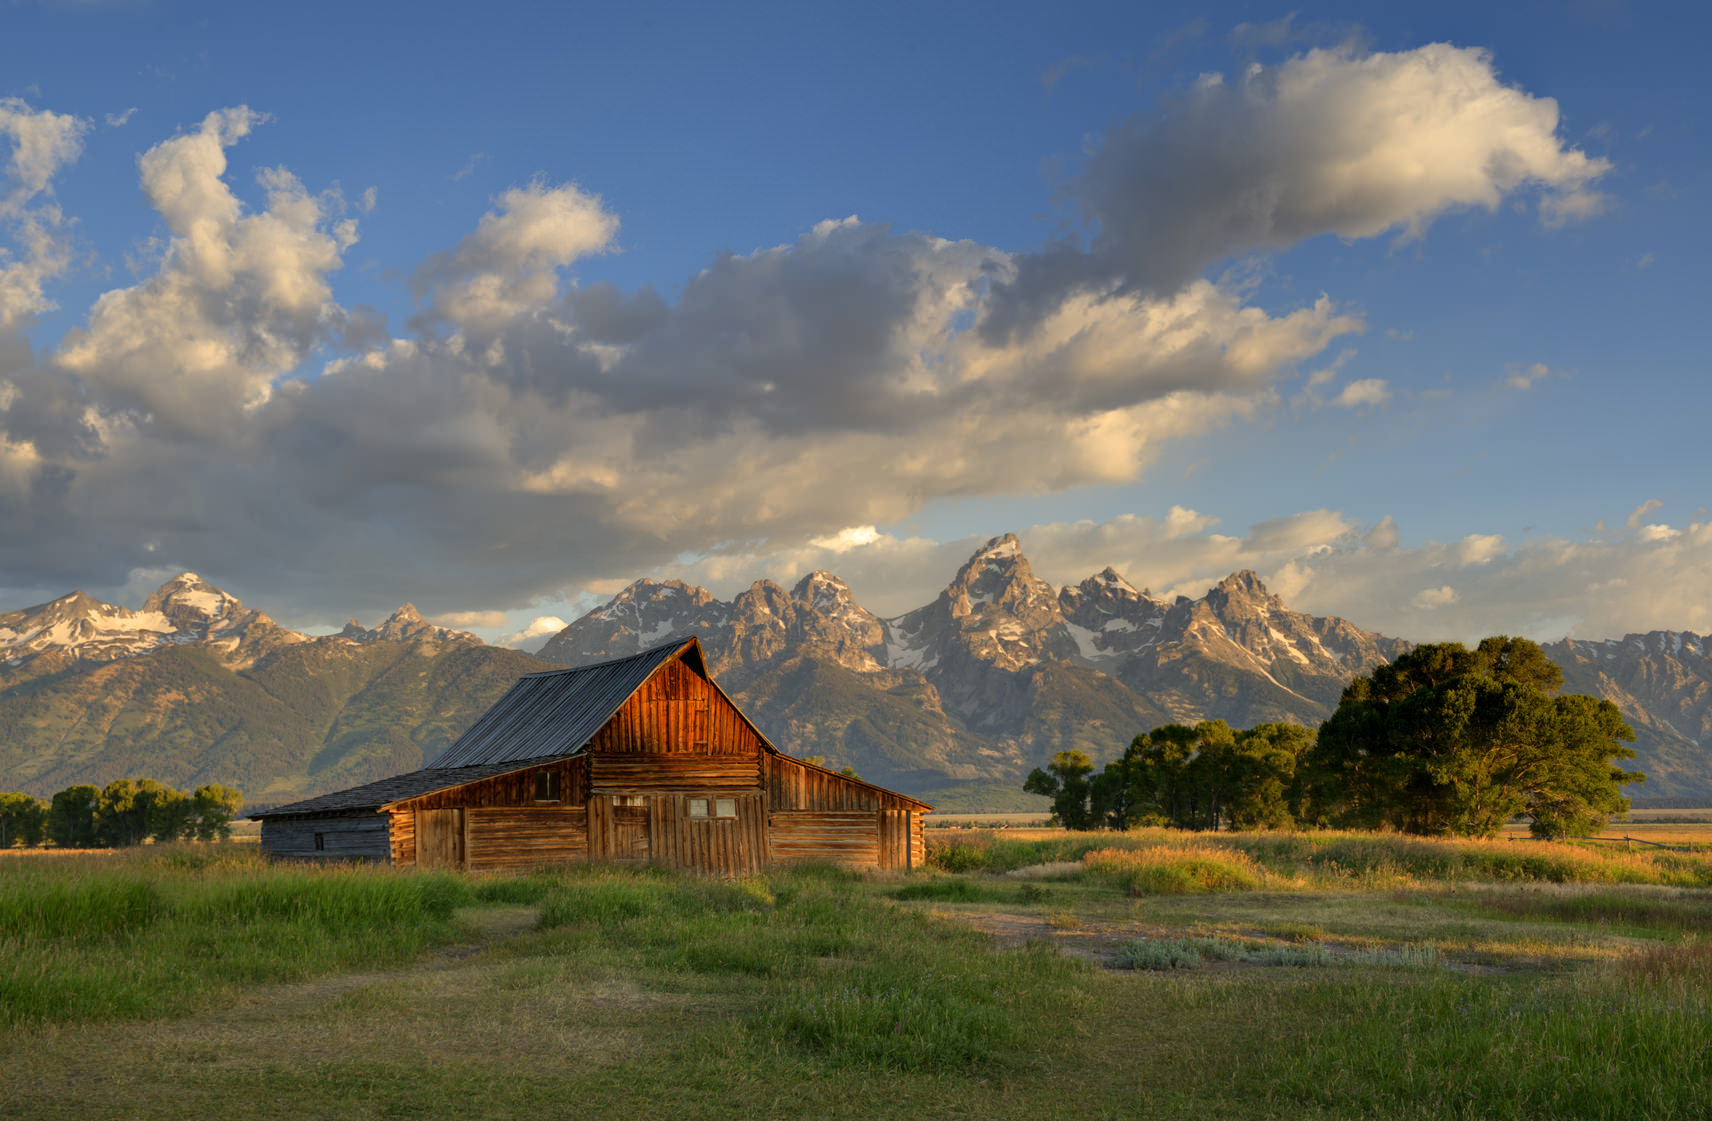
By changing the distance between your lens and the subject, and combining that with the effects of using a wide-angle or telephoto focal length, you can give your images much more drama.
Remember that a wide-angle focal length increases the depth of field while simultaneously making the background appear smaller. Assume you have a nice background, perhaps some mountains, set behind some foreground interest, like a barn. If you use a wide-angle focal length while standing close to the barn, what results? A background in which the mountains look distant, as seen above.
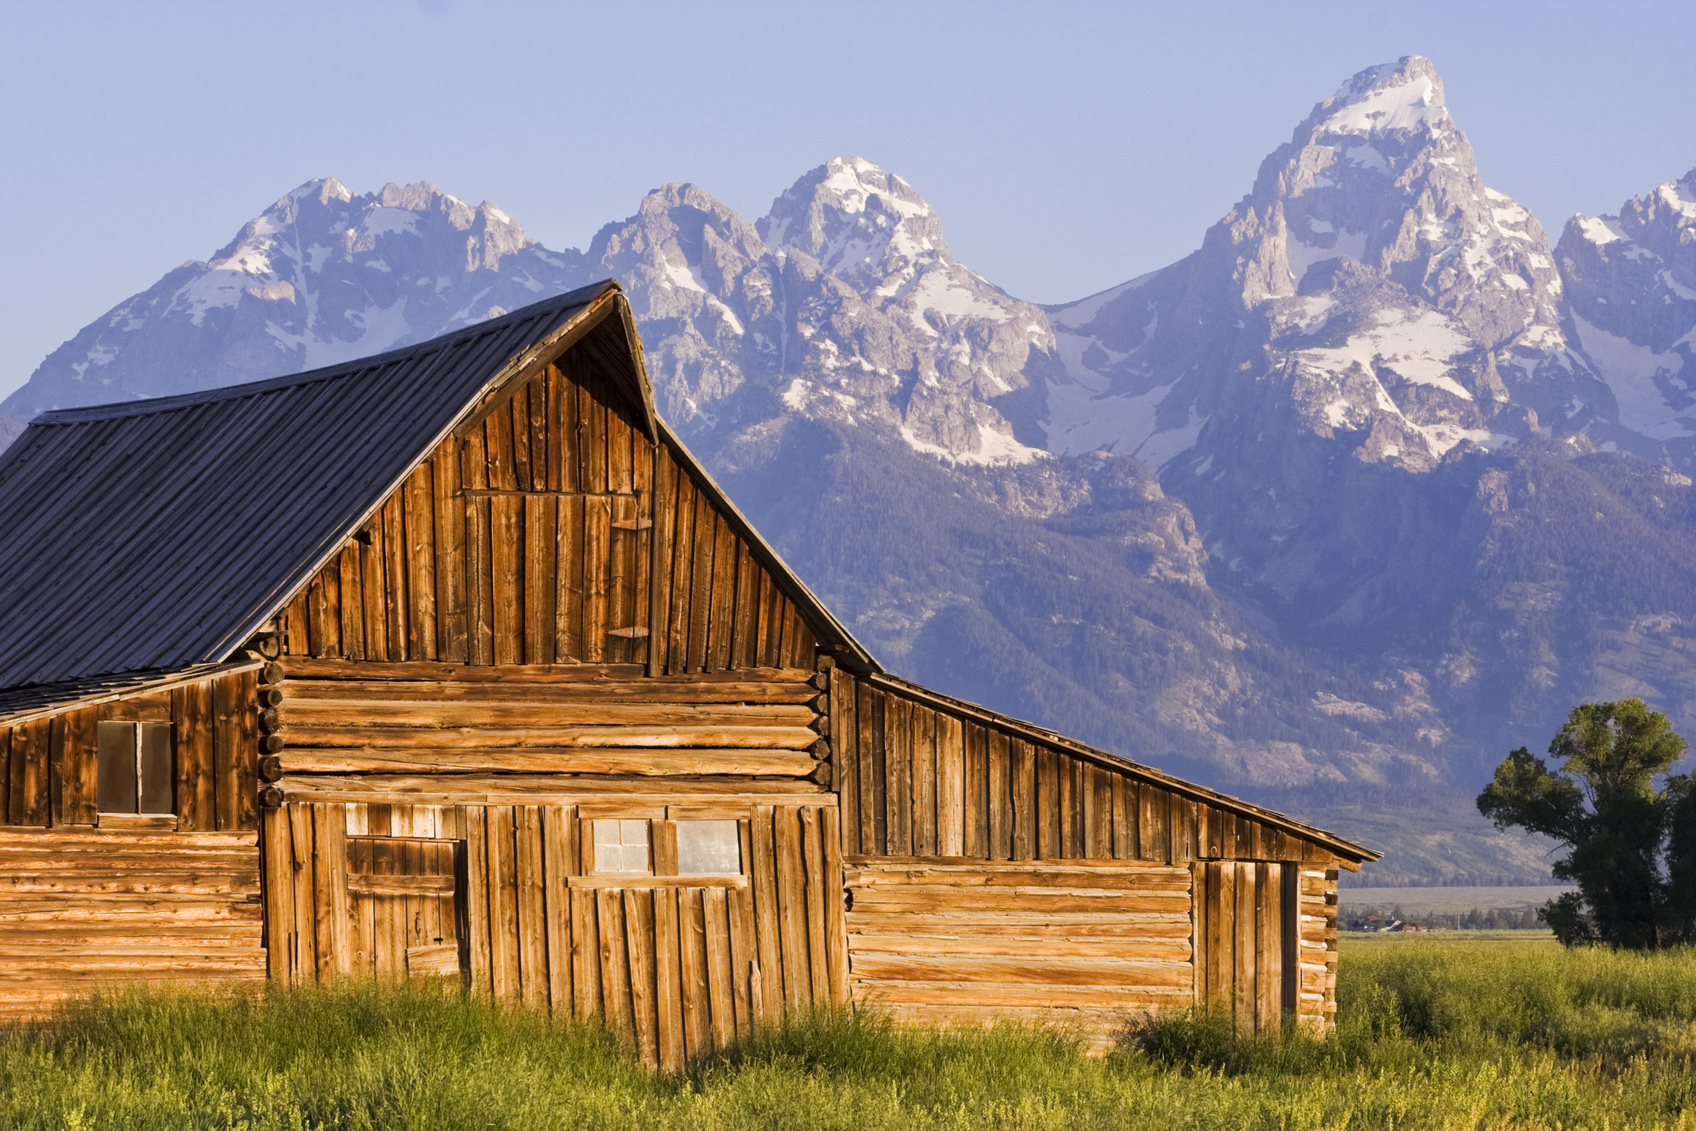
However, if you zoom in on a scene, the qualities of the longer focal length are evident: the depth of field decreases, the perspective of the shot is compressed, and the mountains that looked further away appear much larger and closer, as seen above.
The advantages of the different focal lengths aside, the benefit of combining focal length and changing your distance to the subject is this: it can change the background of the shot while keeping the subject the same size.

For example, if you find that the background just isn’t working from a close position and a short focal length, back up, use a longer focal length to compress the scene, and you will be able to keep the subject the same size in the frame. Therefore, the barn in the wide-angle image above would retain its size and visual impact if you stepped back and zoomed in. The difference is that the background, when zoomed in, would be compressed and appear much larger in the frame, as seen below.
This would not be possible if you simply zoomed in or out from the same position. Instead, by moving back and increasing the focal length, you change the visual relationship between the barn and the background to make a more compelling shot, but are able to do so without making the barn lose its significance in the shot.
Final Thoughts
Using this technique opens many more avenues for a dramatic shot. You can change how the foreground and background, foreground and subject, and subject and background all visually interact with one another, simply by taking a few steps forward or backward, and manipulating your focal length at the same time. You can’t get the same effects by simply standing pat and zooming in and out, so the next time you’re out in nature, be sure to use movement and focal length to your advantage.
We Recommend
Photography Bucket List: Alaska Edition
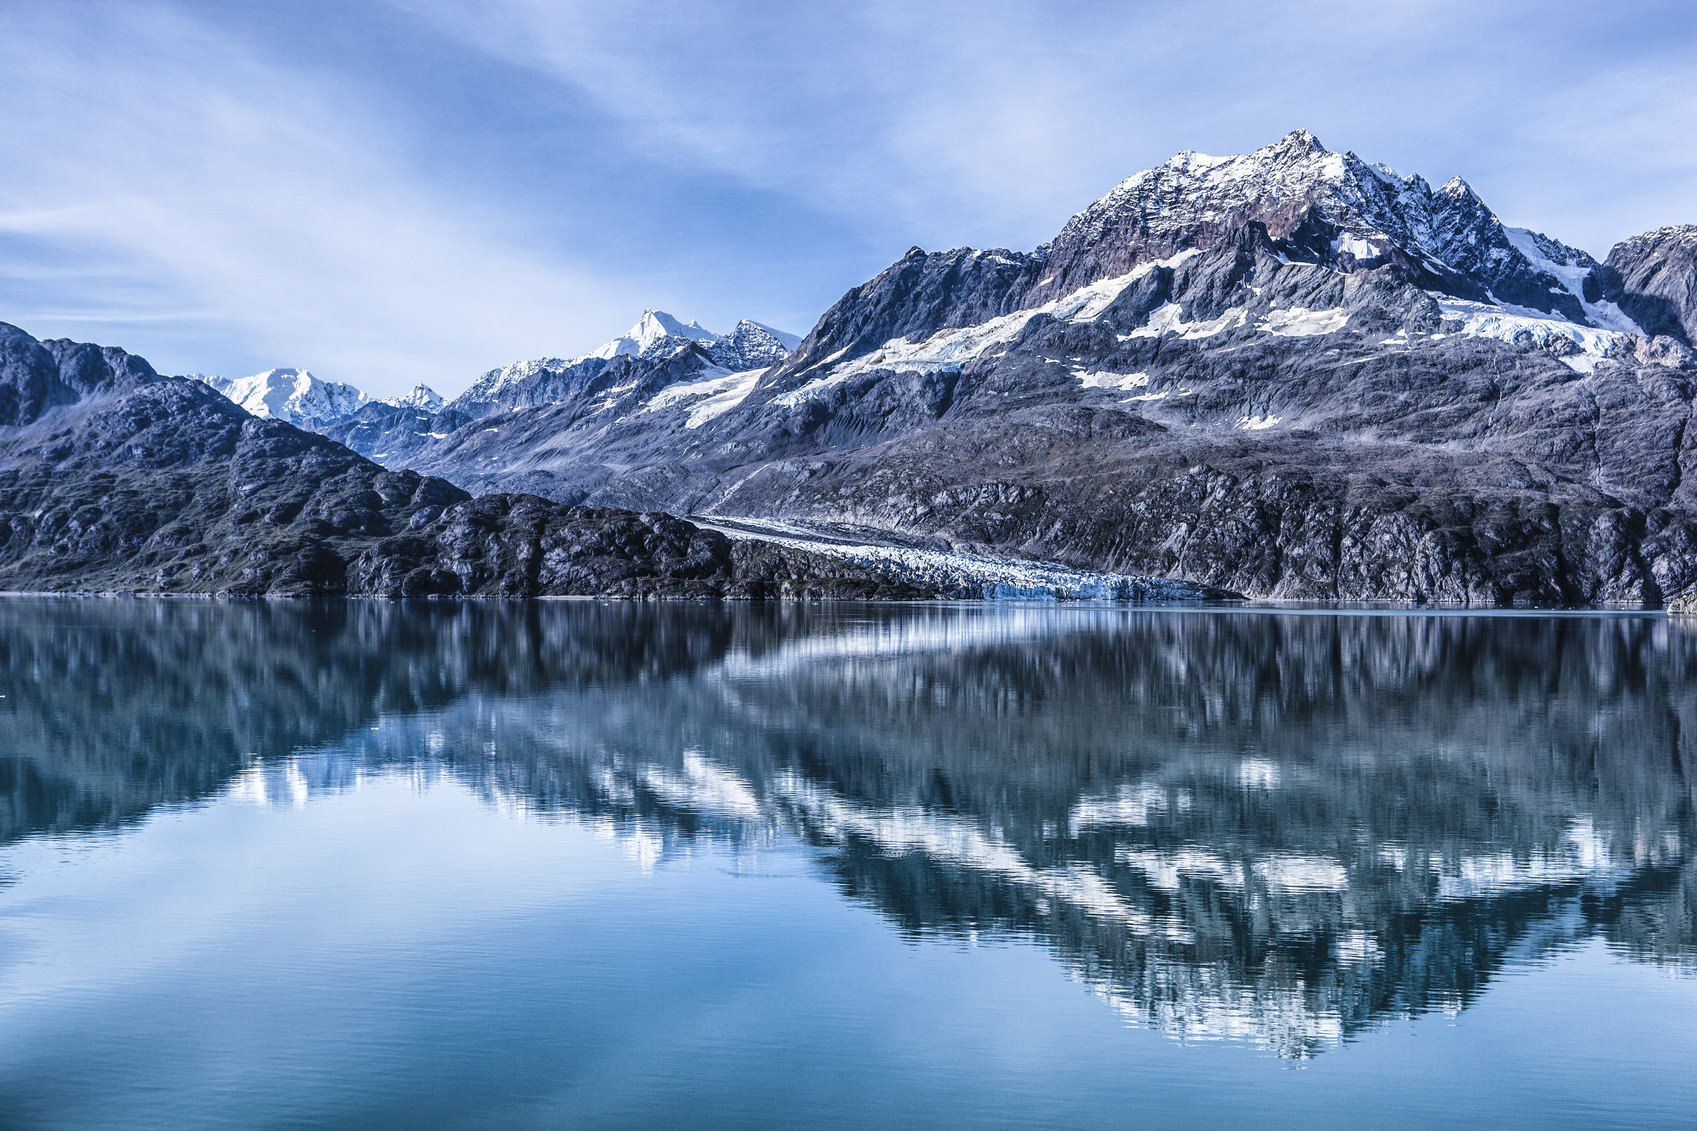
There are few places on earth as rife with photographic opportunities as Alaska. From stunning landscapes to unique ways of life to natural phenomena like the Northern Lights, a trip to Alaska means that you’ll have something to photograph at every turn.
Though the list of photo-worthy things in Alaska is long, we’ve zeroed in on three must-see subjects that aren’t just photography gems but are also well worth the experience. See what you need to add to your photography bucket list, Alaska style!
The Northern Lights
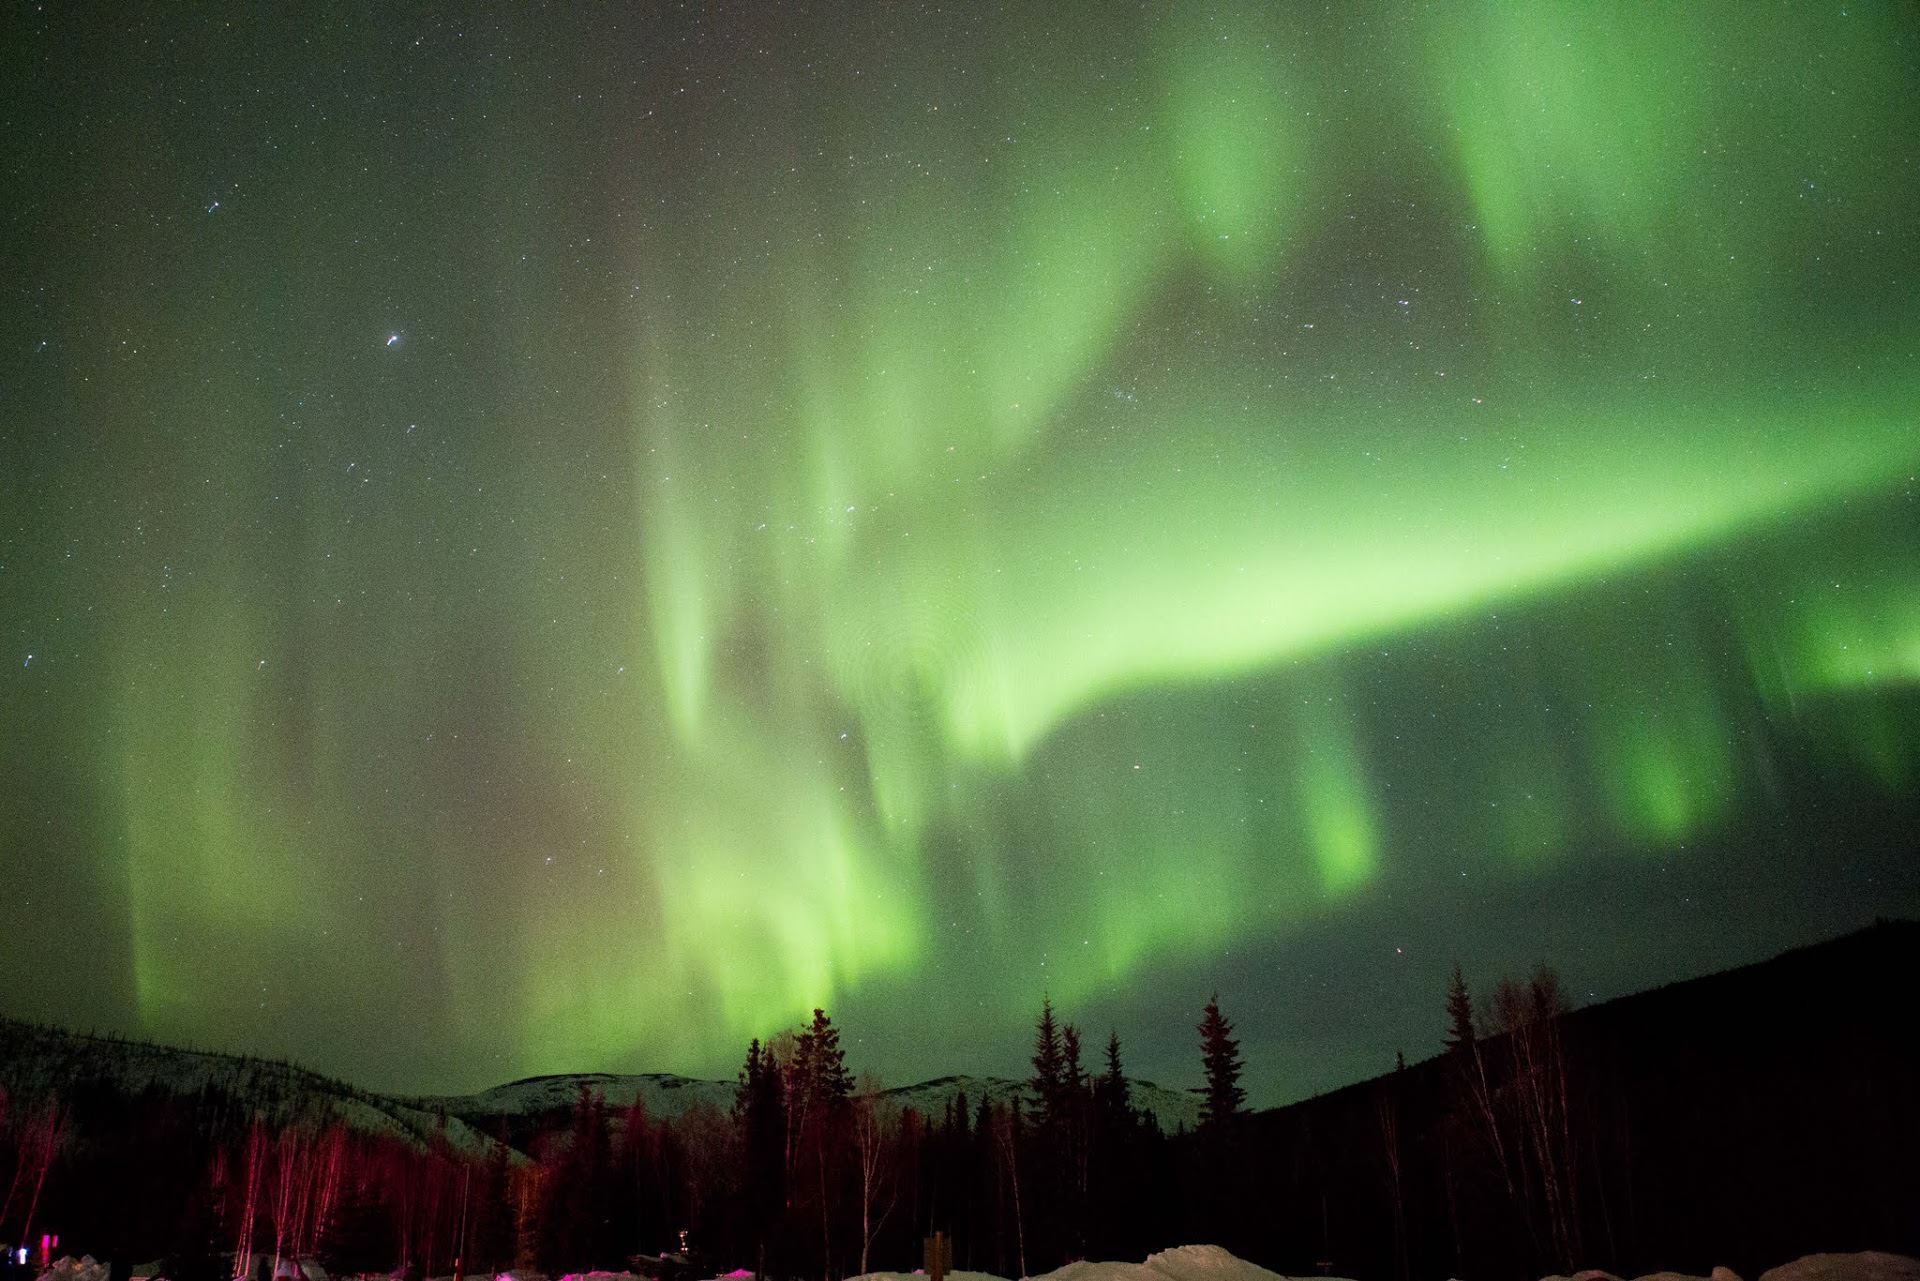
There are few sights as iconic as the Northern Lights. There are fewer places better for viewing them than Alaska in the winter.
Winter in Alaska is a gorgeous time in and of itself, but add in the prevalence of the Northern Lights, and you’ve got a recipe for an incredible photographic opportunity. The clear skies and long periods of darkness during the Alaskan winter mean that the Northern Lights are on full display. Just find a nice, dark place - which are abundant in Alaska - and watch as solar winds collide with earth’s magnetic fields and put on a display like no other!
Alaskan Landscapes
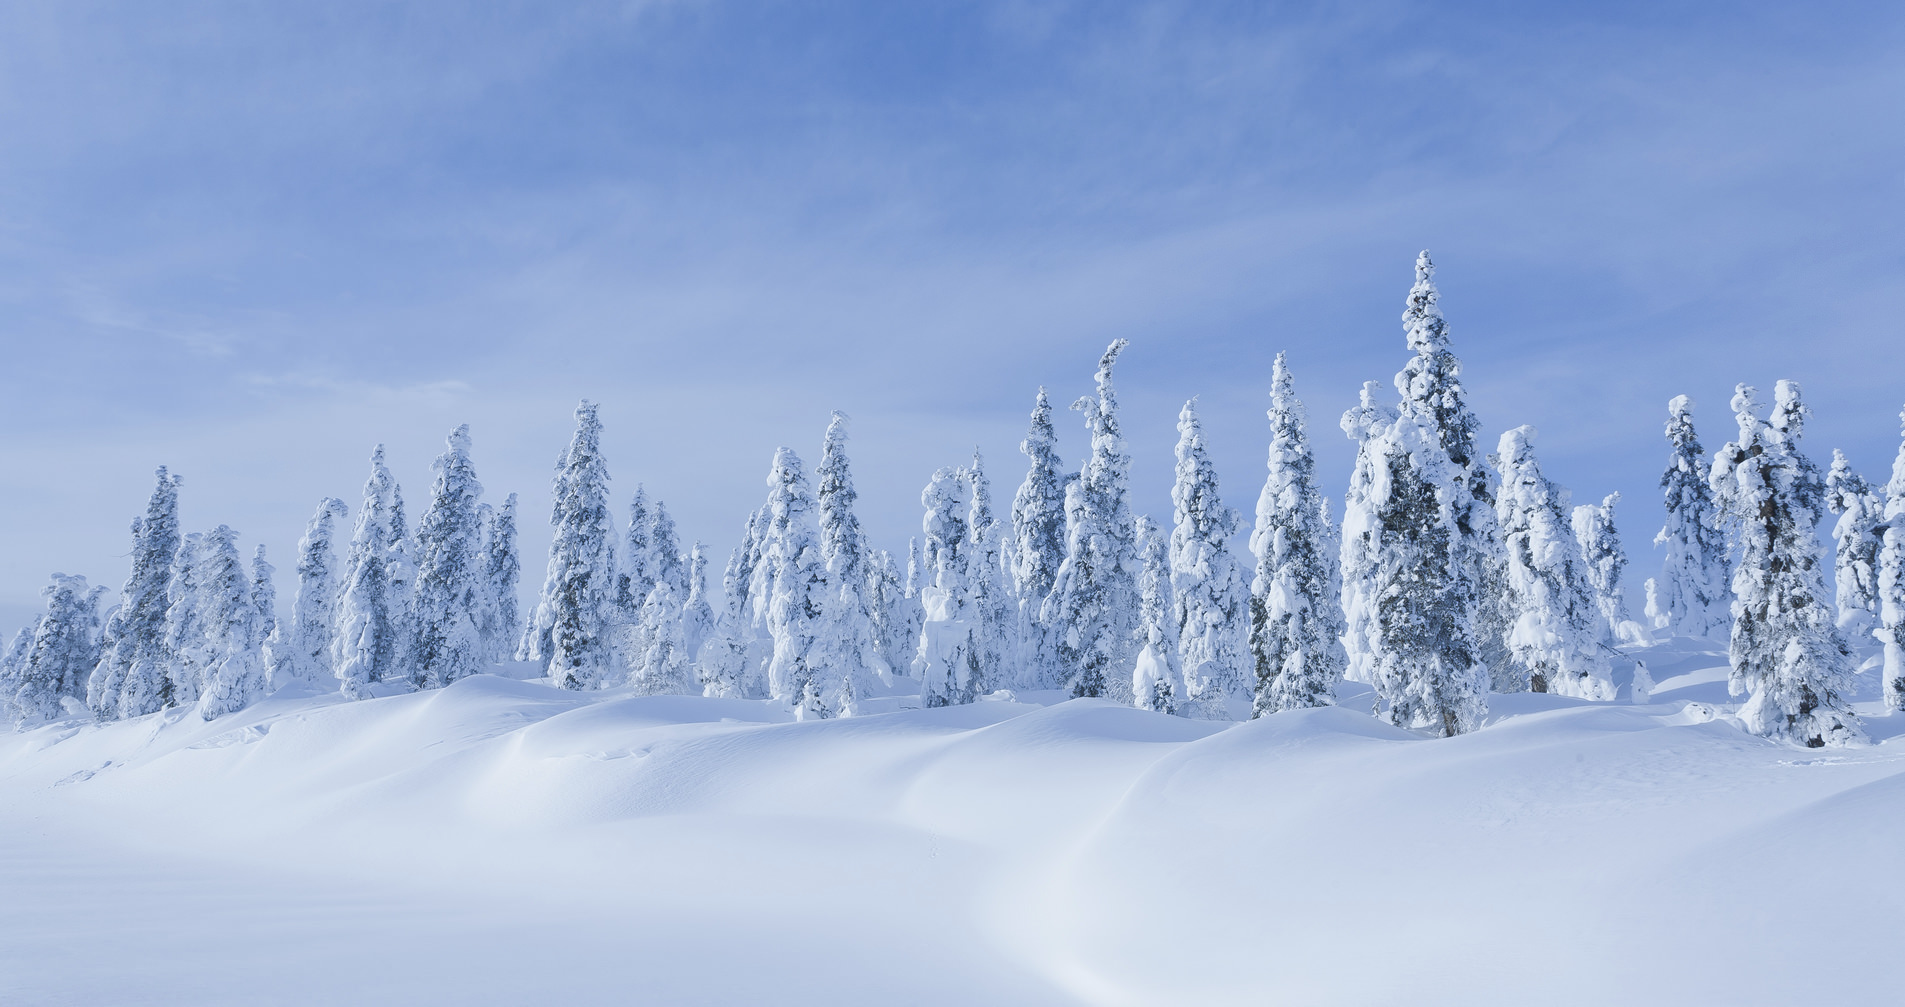
From coastlines to snow-covered peaks to miles and miles of tundra, Alaska has a variety of landscapes, each of which represents a unique opportunity to hone your landscape photography skills. Visit Alaska in the winter, and you’ll be able to stretch your photographic muscles by capturing the area’s beauty in the midst of the cold and snow.
One area that’s of particular interest is the hot springs at Chena, just outside Fairbanks. The area’s warm waters provide an interesting juxtaposition to the frigid cold of the winter landscape, not unlike the hot springs found in more well-known locales like Yellowstone. But, at Chena, you don’t have to fight the crowds to get a prime spot for photographing the area (or enjoying a soak!).
What’s more, the hot springs are one of the greenest spots in the world. Advocates there push for earth-friendly technologies and alternative energy sources that will help maintain the natural beauty of the area and beyond. So, while you’re photographing that beauty, you can learn a little about how to protect Mother Earth as well.
Alaskan Lifestyle
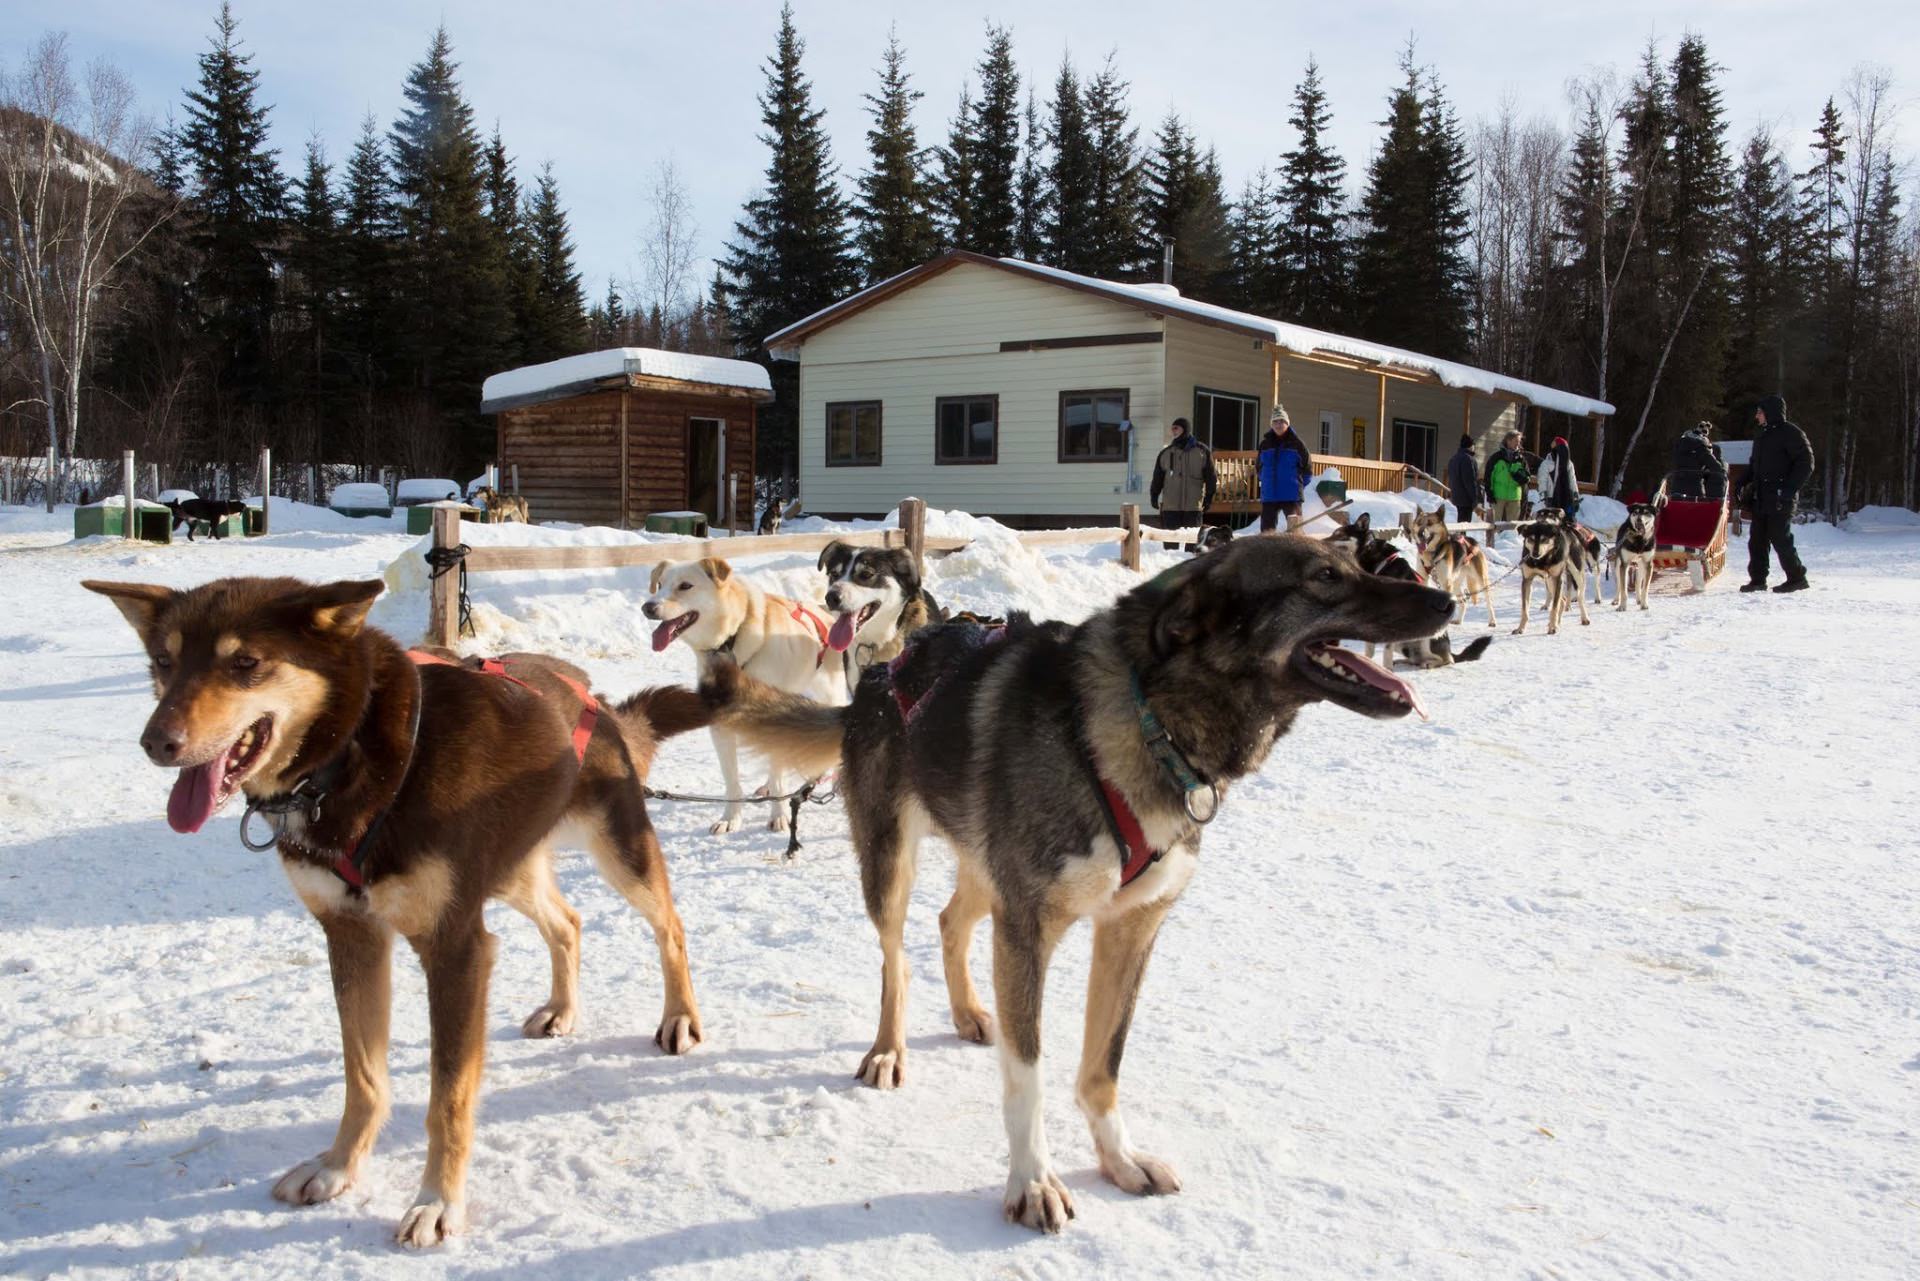
Perhaps one of the most well-known aspects of wintertime living in Alaska is the prevalence of dog teams and sleds. They are used for a variety of tasks, from travel to transporting goods. In many areas of Alaska, dog sleds provide the only means of transportation in the winter months.
But beyond their functionality, dog sled teams represent an ideal subject for portraying what life is like in America’s last frontier. Whether the subject of your photographs is the dogs themselves, the sled, the musher, or all three, no trip to Alaska in the wintertime is complete without documenting this iconic aspect of life in the north. It’s certainly worth it to take a ride too!
See All This Beauty in One Trip!
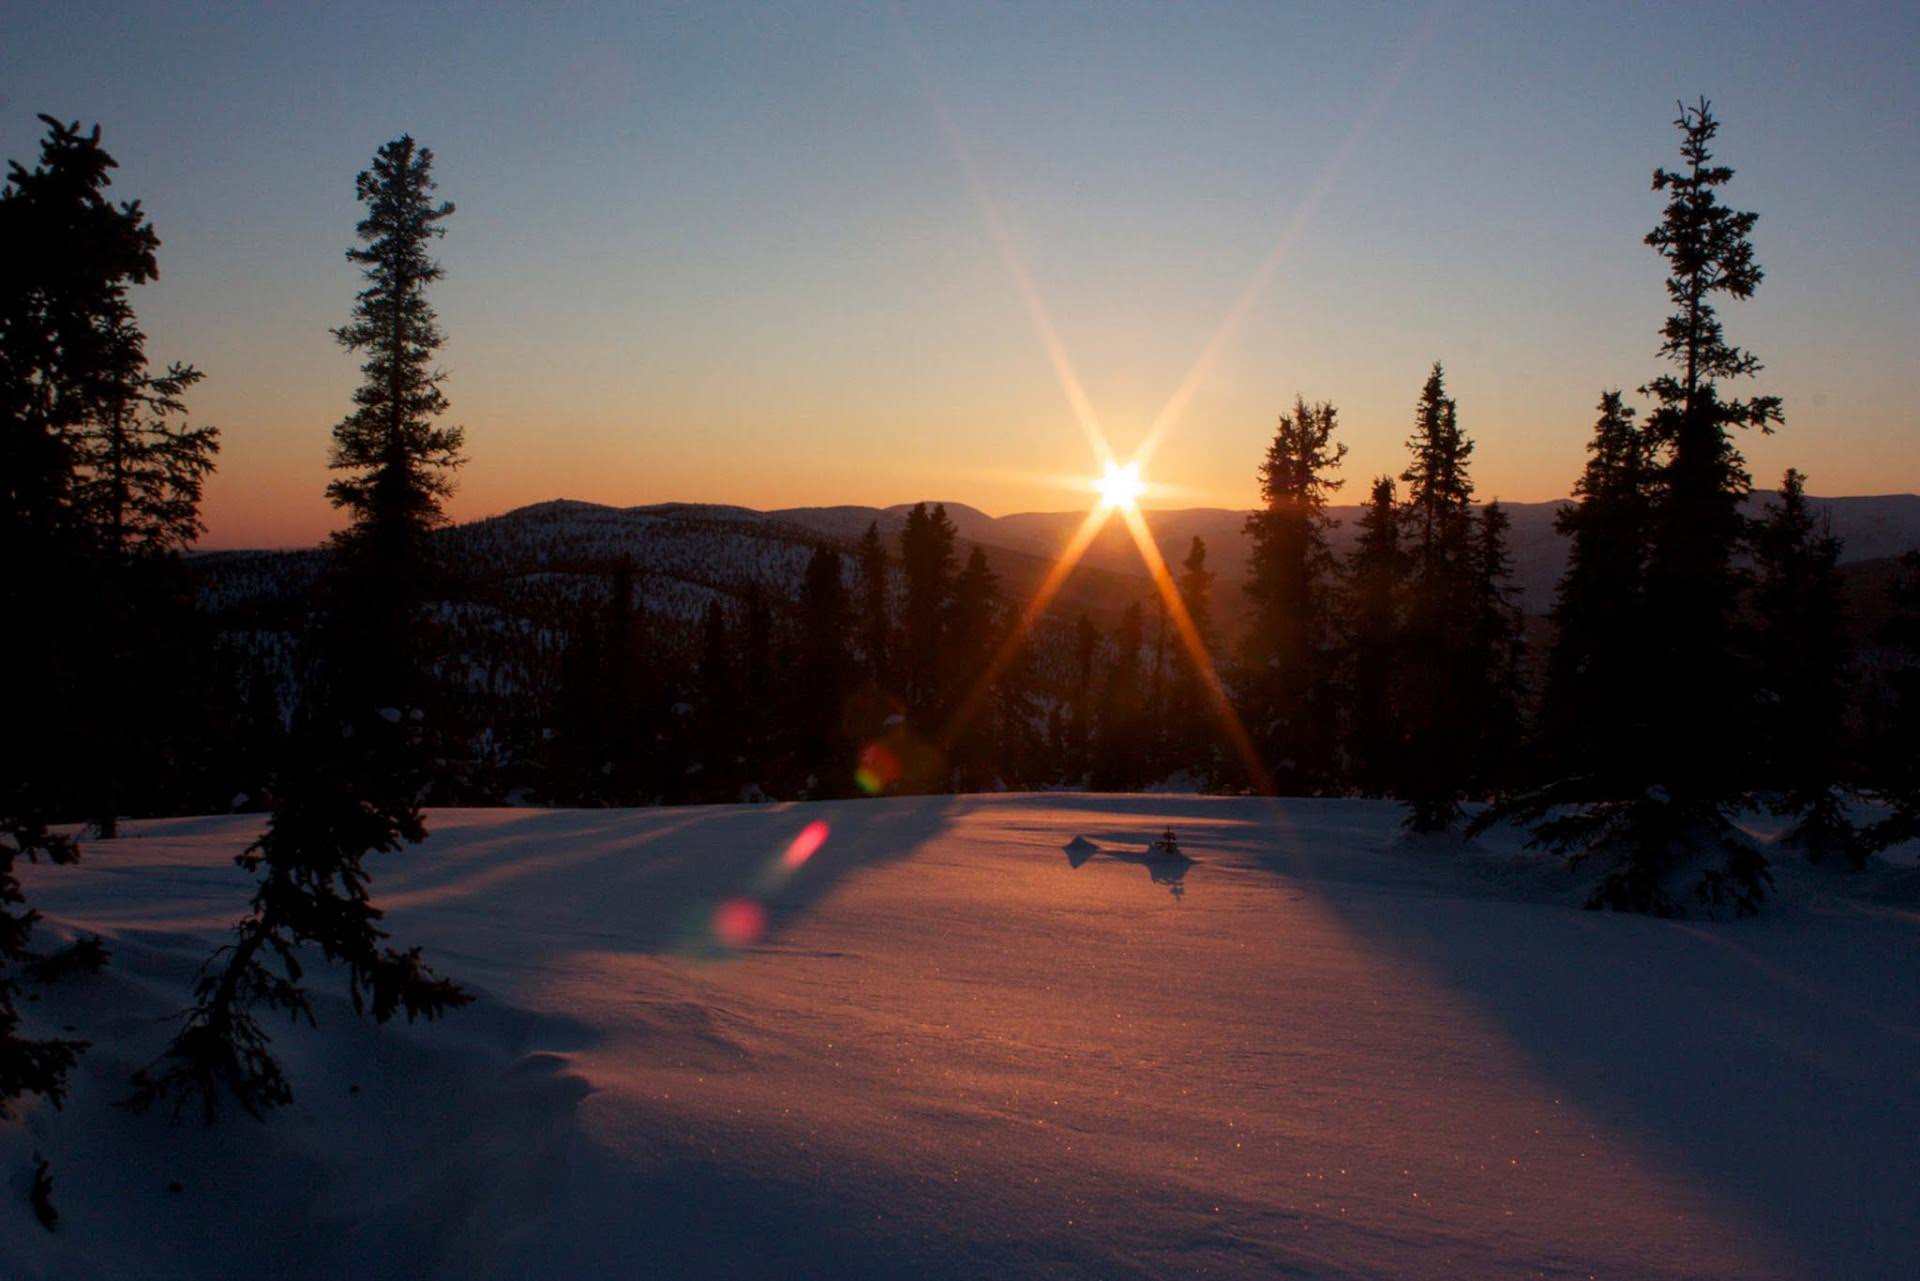
If it seems like there’s just too much to see and do in Alaska, you’ve got it all wrong! With Special Interest Tours, you can photograph and experience a genuine dogsled ride through the Alaskan wilderness. You can visit Chena Hot Springs too, and take photos of the steam rising from its warm waters in front of the surrounding wintery landscape and learn about green technologies at the same time. And, of course, you’ll be able to take in one of nature’s most astounding sights - the Northern Lights - capturing stunning photos and learning about their origin from world renowned astronomer Bob Berman.
Visiting and photographing Alaska in the winter might seem daunting, don’t be deterred. By taking this adventure with Special Interest Tours, you’ll not only get to experience the best Alaska has to offer in terms of subjects for your photographs, but you will also experience that beauty with a tour group with a proven track record of success. Join other Northern Lights enthusiasts on this once-in-a-lifetime adventure into Alaska’s winter wonderland!
The Northern Lights Tour is slated for February 2017. Registration is currently open, but closes December 15, 2016. Act now and reserve your spot, as they are sure to fill up fast. Don’t miss your chance to cross Alaska off your photography bucket list!
We Recommend
Point of View for Bird Photographers
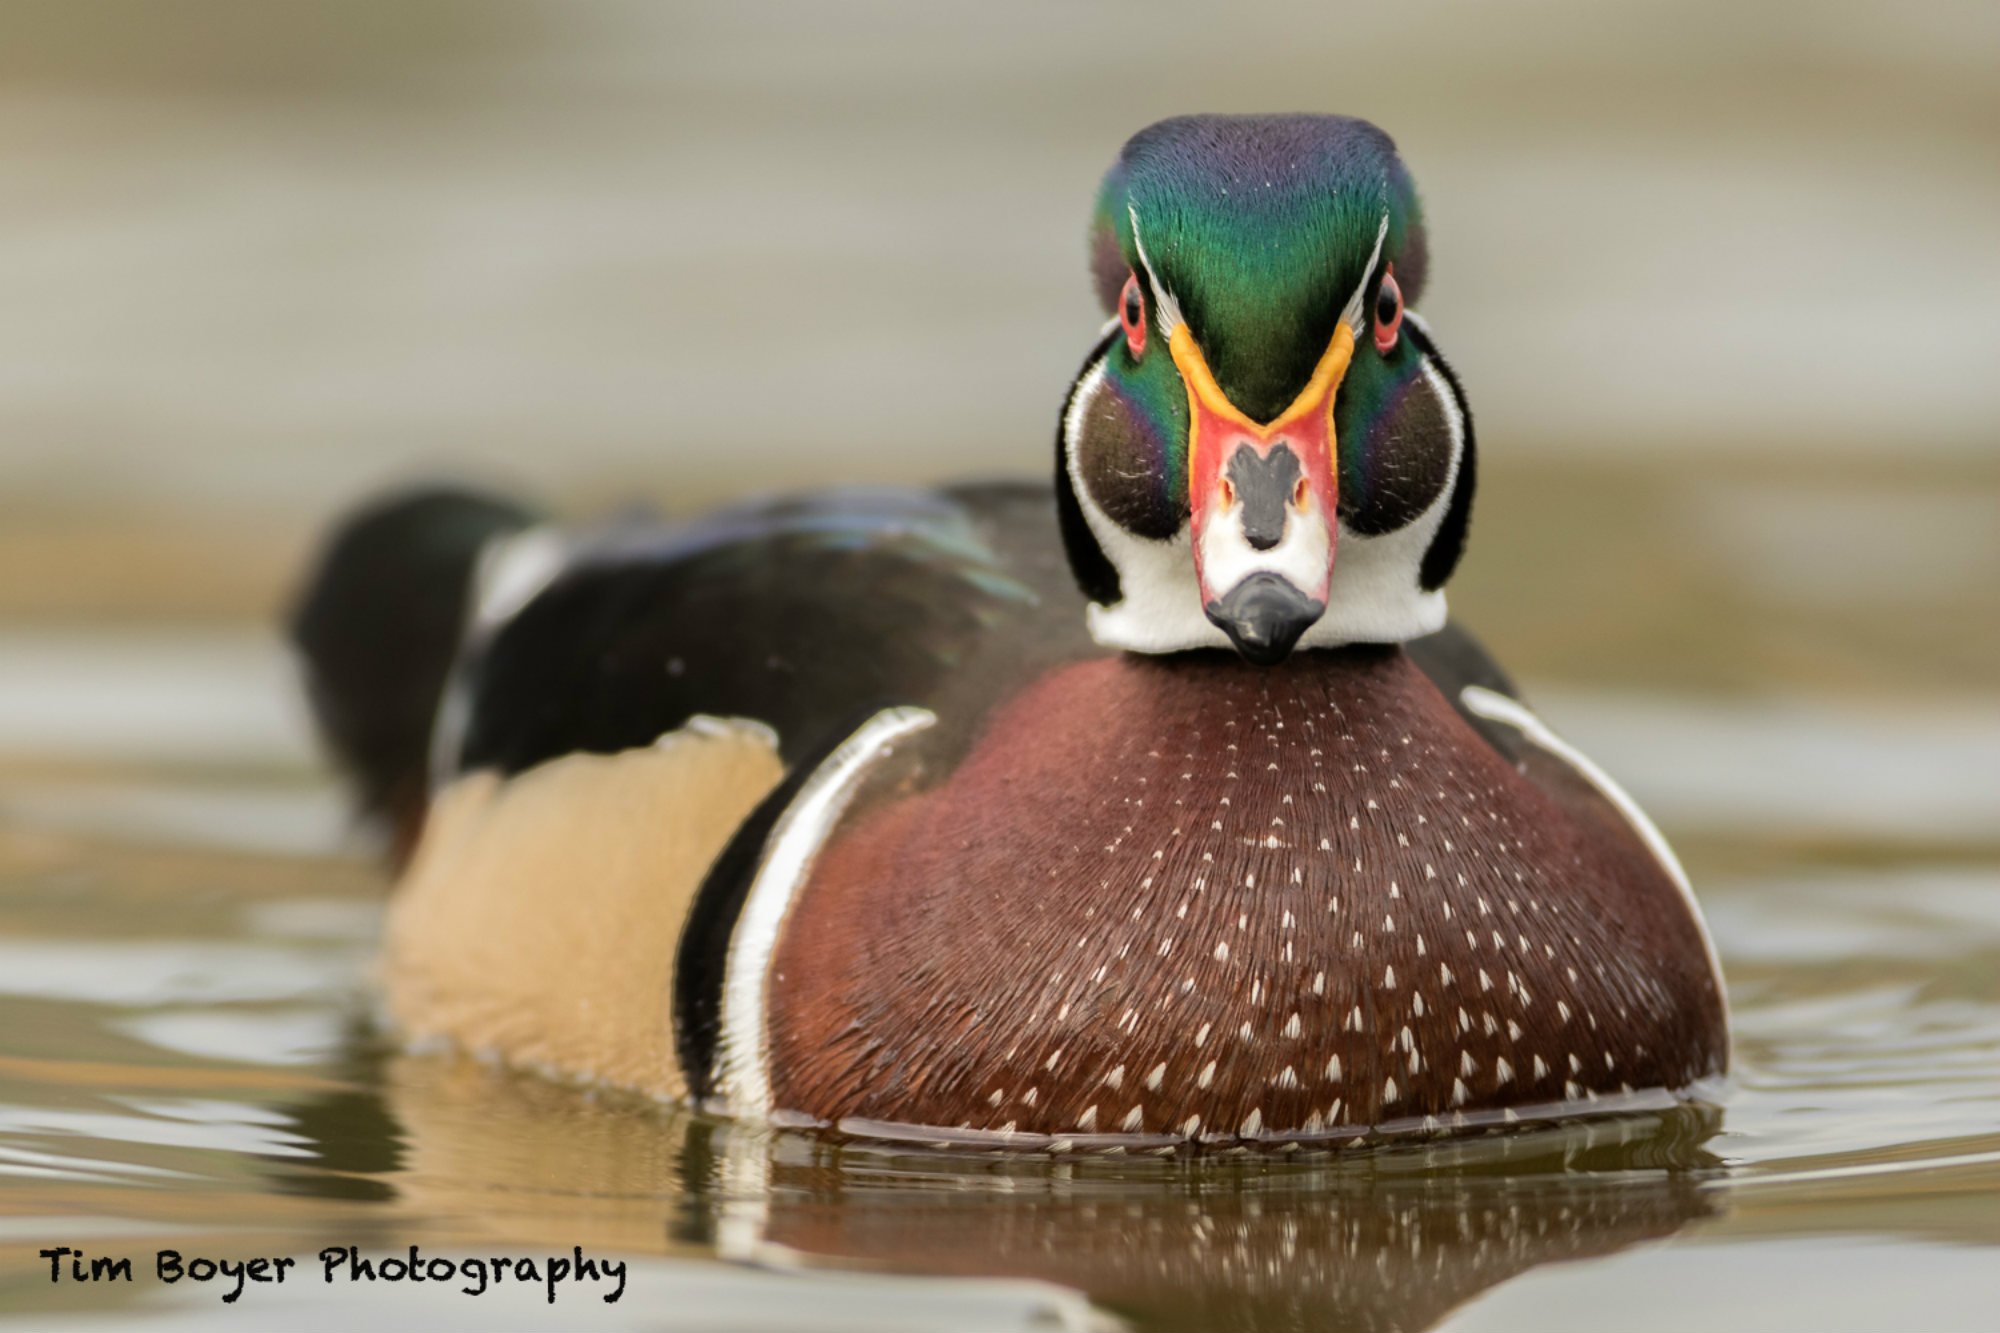
Editor's Note: This is a guest post by our friend and master bird photographer Tim Boyer.
Point of view is different than perspective. The lens and the depth in an image determine perspective.
Point of view is the relationship between the photographer and the bird (or subject). Point of view is important because getting the best angle for the bird impacts the story your image tells.
If you want the viewer of the image to instantly connect with the bird, take an image at eye level with the bird looking straight into the lens. The viewer will connect with the bird; there will be an emotional response and the viewer will “like” the image.
There are various ways to situate yourself in relation to your subject. Below, I offer insights into how to photograph birds.
Standing Up

If we’re standing up and shooting down on birds, the overall story of the image might be that we’re superior or above them. When a movie director wants to make a character seem weak, they shoot from above; if the director wants to make a character seem strong, they shoot from below, looking up at the actor. Shooting eye level doesn’t add an element of superiority or weakness - it’s neutral.
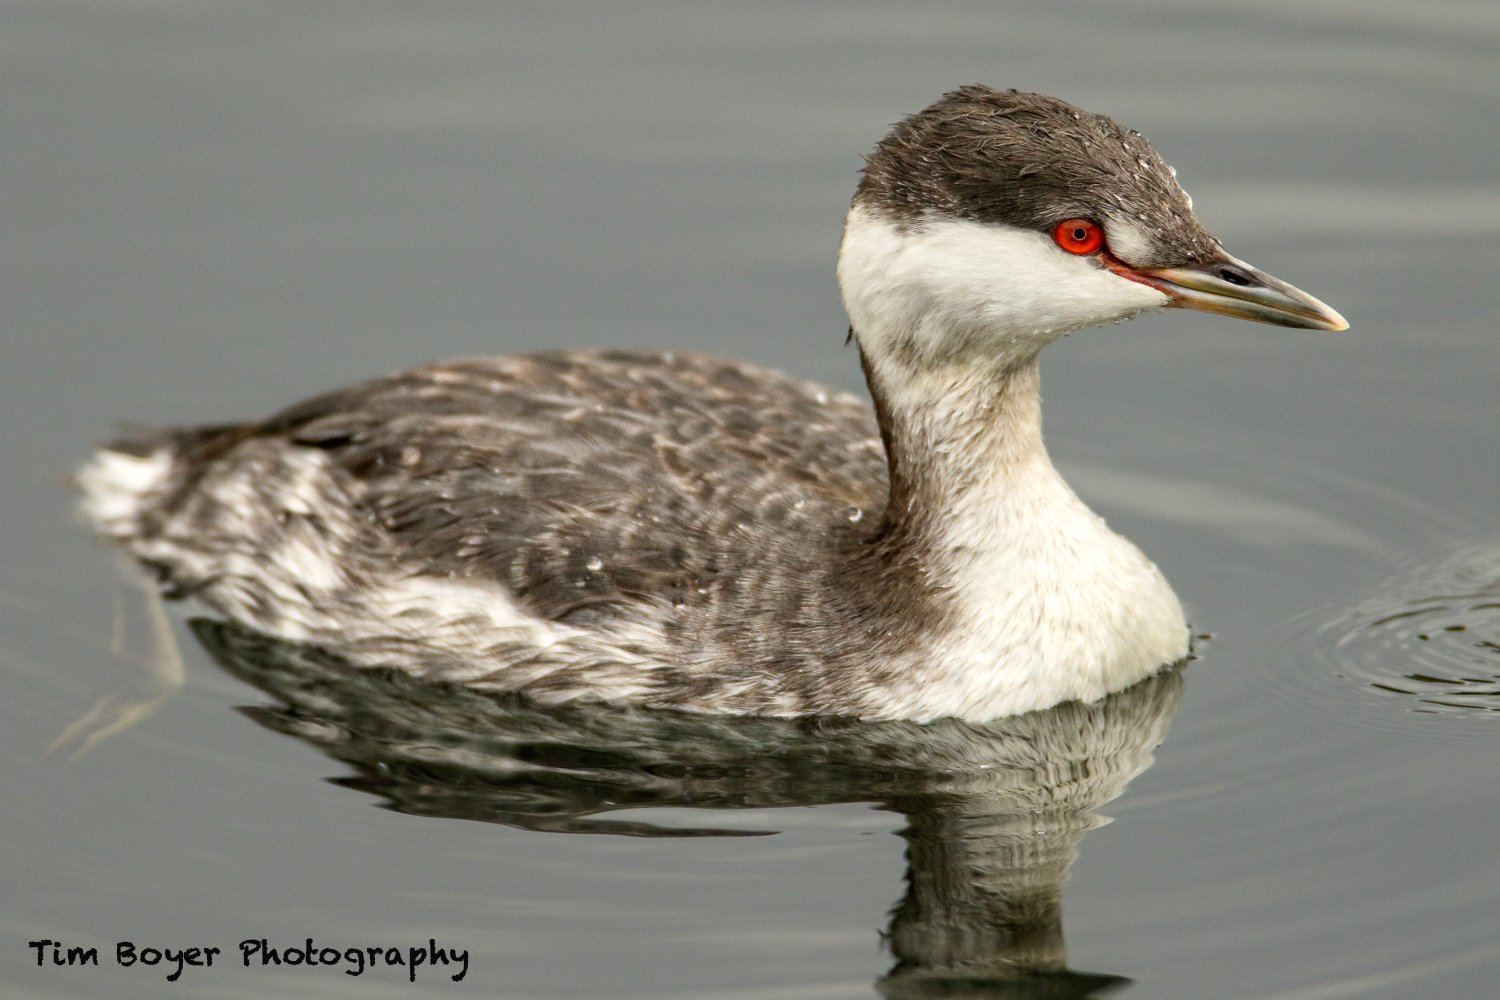
In this image of a Horned Grebe, I had my tripod fully extended and I was standing up on a dock that was a couple of feet above the bird, so I had about eight feet of height from the camera to the bird.
When I look at the image, I don’t learn that much about the bird, and I don’t connect with it.
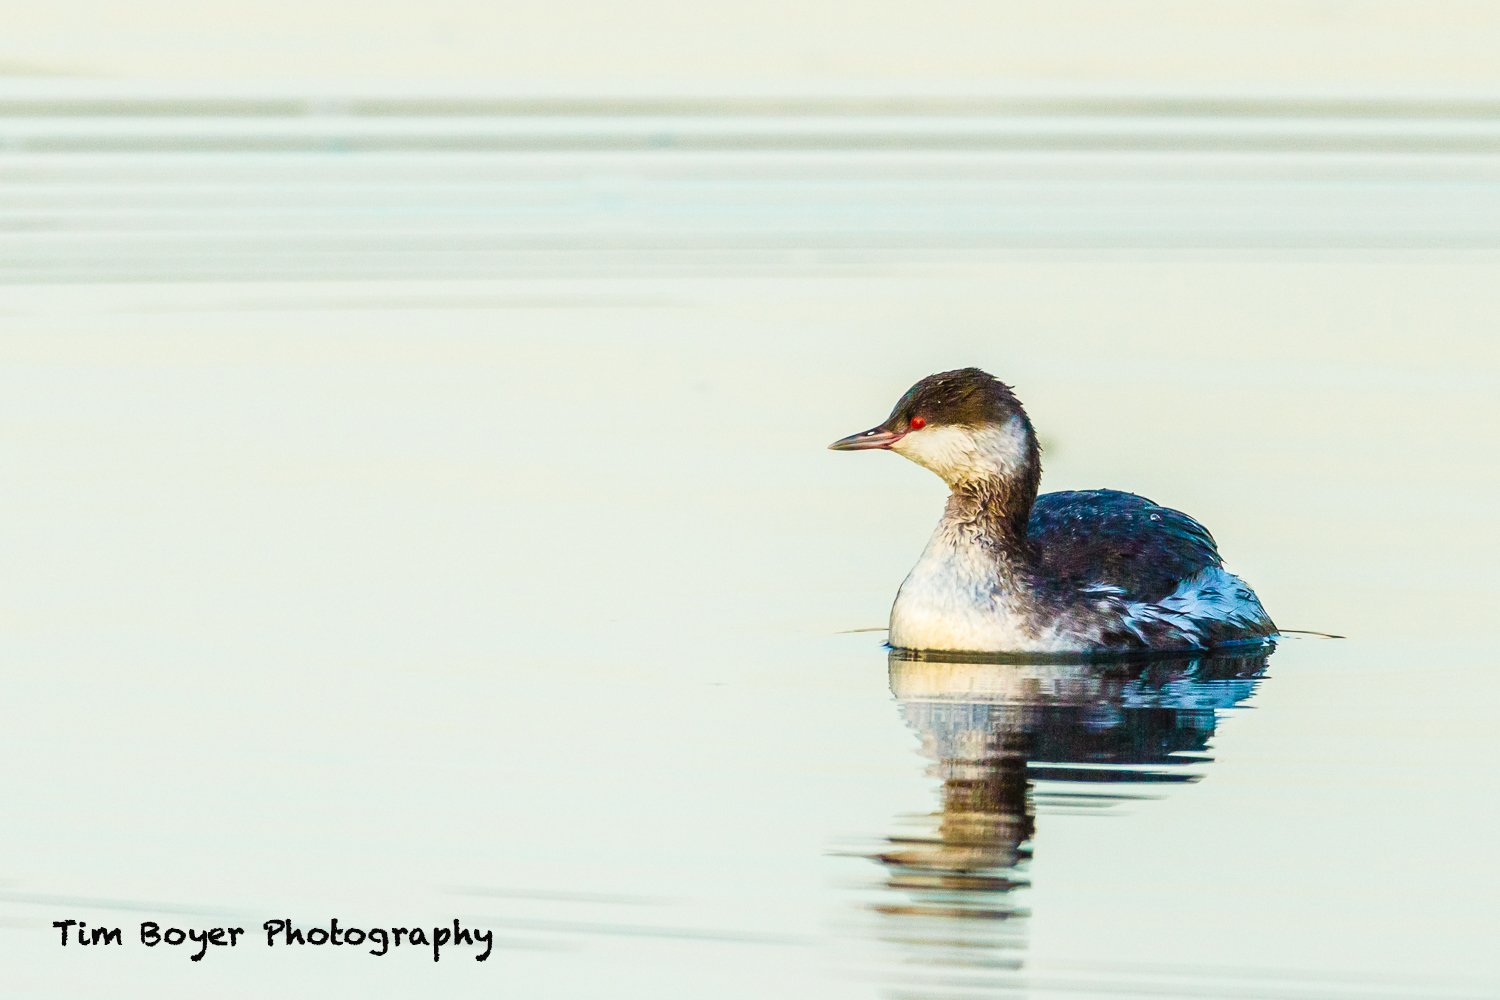
In this image of a Horned Grebe, I was sitting on a dock and the height of the camera above the bird was about two feet.
In this image, we learn more about the bird's environment and habitat on the water, but we’re closer to eye level and there’s more of a connection to the bird.
Editor's Tip: Learn more about point of view in Chapter 5 - Designing the Image, in Tim's book, Learn the Art of Bird Photography.
Kneeling
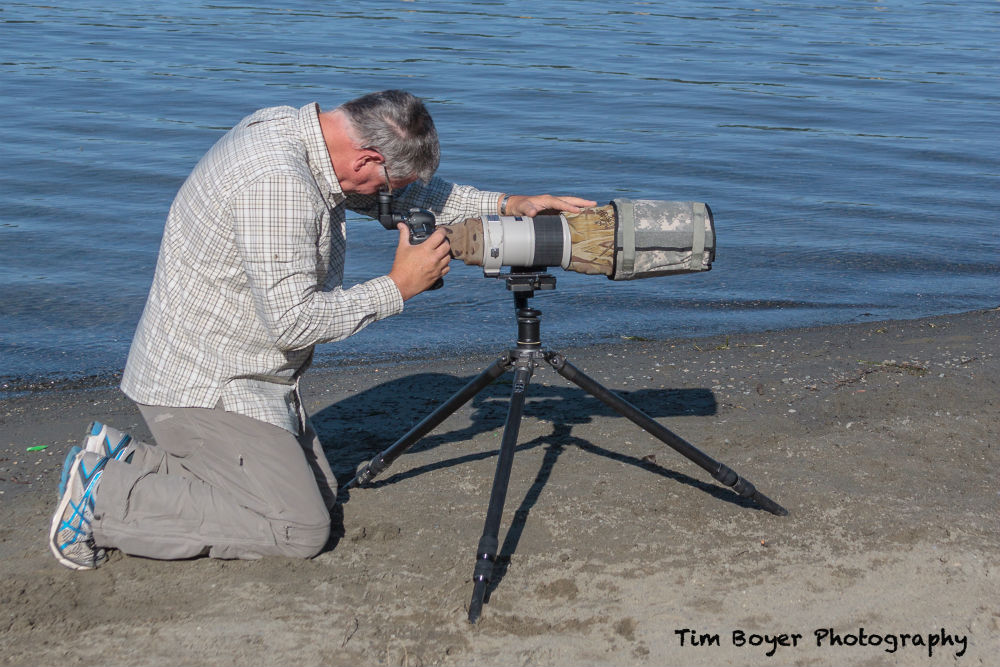
For the Black-bellied Plover image shown below, I was kneeling behind my tripod, as shown above.
Sometimes it’s just not possible to get to eye level. The small rise of sand between the bird and my camera would have blocked out too much of the bird, so I needed to shoot from a higher point of view.
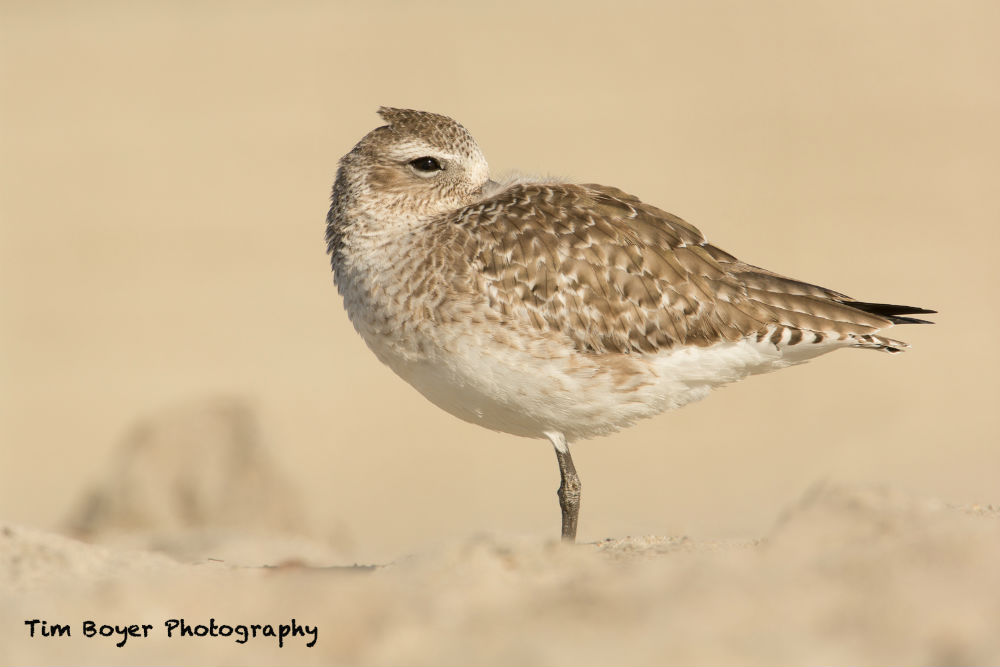
This will also be the case if you want to get a bird’s reflection in the frame. Shoot from slightly higher than eye level to get the reflection.
It should be mentioned that I used a Canon Angle Finder C, so the camera and lens can be a little lower. If you have a flip out LCD screen on your camera, you won’t need this extra tool, and you can get your camera lower.
Learn More:
Sitting
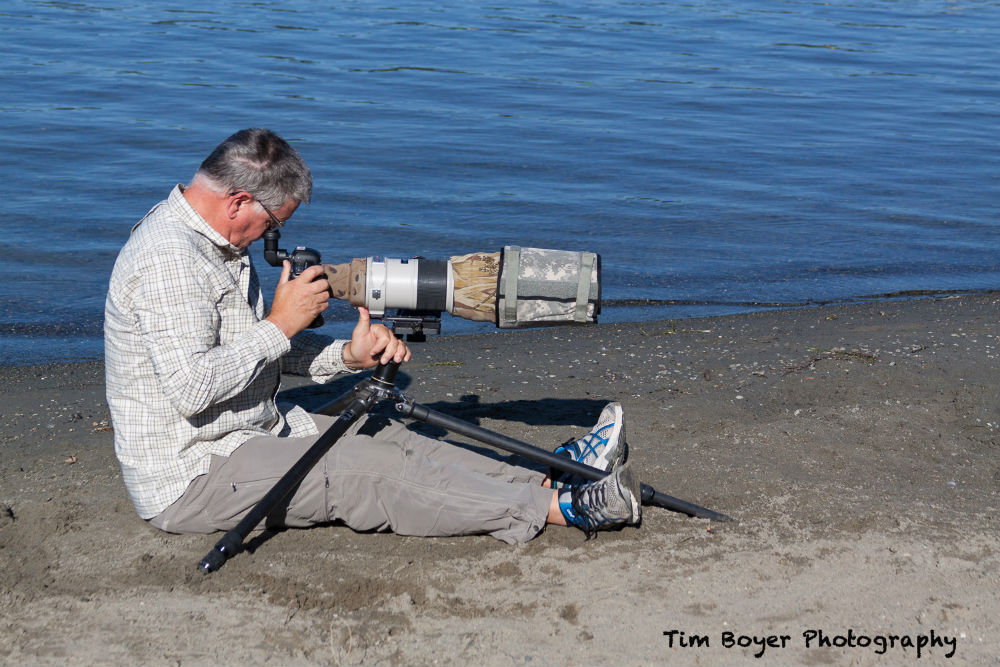
If I’m going to be someplace for an extended period of time, like waiting for some ducks to swim by, I’ll sit behind my tripod and relax until they come closer.
By not moving too much, being patient, and quiet, the birds will come back.
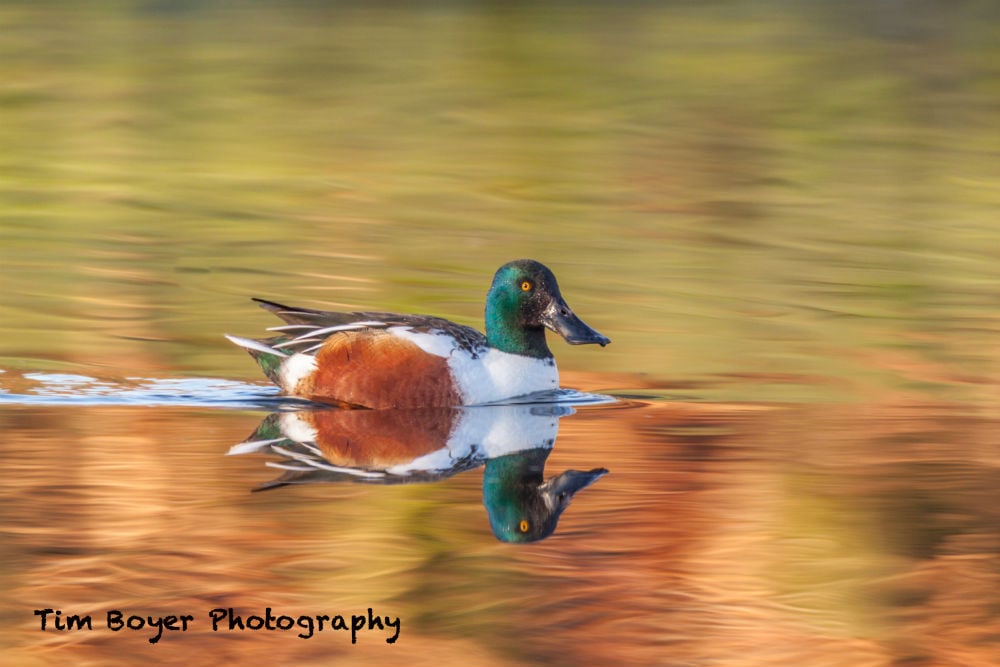
This image of a Northern Shoveler was taken after a 15 to 20 minute wait, but it was worth it.
The low point of view, the reflection of the fall colors, and the reflection of the bird all make it very approachable to the viewer.
Laying Down

For shorebirds and waterfowl, lying down will most often be the best option to really connect and show off the bird at its best.
In the image of a Western Sandpiper below, I wore chest waders and a waterproof jacket so I could lie in the wet sand long enough for the incoming tide to push the shorebirds towards me.
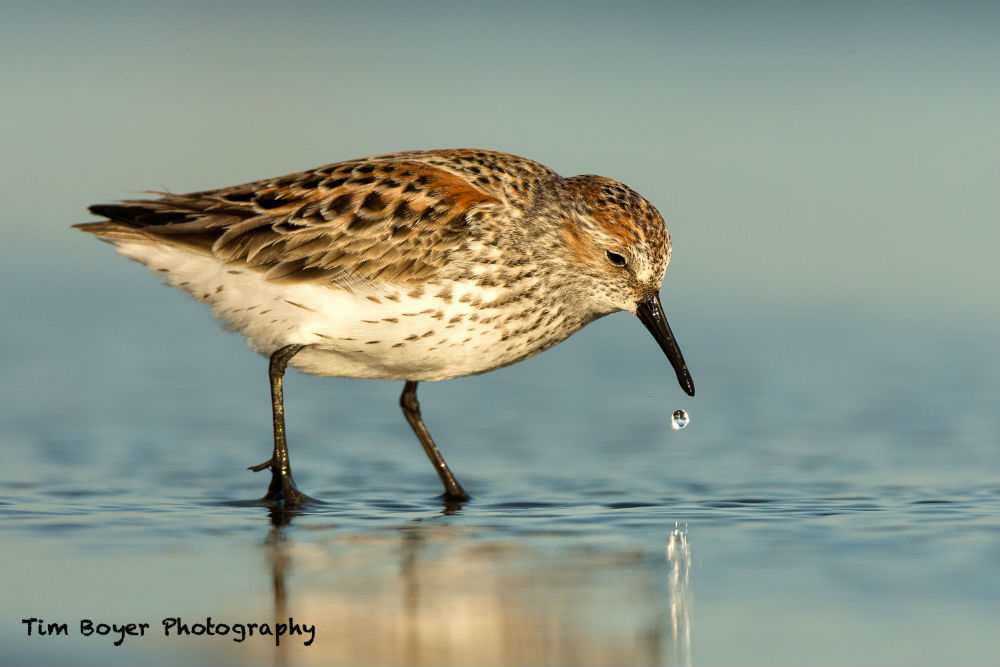
By the time they got to where I was laying in the sand, I was just part of the habitat, and I felt like I could reach out and touch them. That’s what this image says as well - we’re eye level, we’re in their world, so it is a great point of view.
Editor's Tip: Visit Tim’s website - TimBoyerPhotography.com - to learn about his upcoming Shorebird Photography Workshop in August 2018.
Equipment Recommendations for Getting the Best Point of View
Use a tripod without a center column.
In the absence of a center column, you can flatten the tripod down all the way to the ground by spreading the legs out.
For some bird photography tips on how to buy the right tripod for bird photography, check out the video above.

A ground pod or skimmer will help you move your camera and lens along in the sand and almost guarantees a great point of view.
In the image above, you can see how the skimmer assists me in making quick adjustments to my lens.
I also recommend knee pads for those hard sidewalks and gravel paths around lakes and ponds!
Lastly, gear up with an angle finder or use the flip out LCD screen on your camera to help you get the camera lower for an improved point of view.
Learn More:
- Lightroom Post-Processing Techniques for Bird Photography
- Bird Photography Tip: How to Get Sharp Photos With a Big Lens
We Recommend
Quick & Simple Nature Photography Tips

photo byJon Root via iStock
While a lot of other types of photography were hit really hard in 2020, nature photography became more and more popular. It is one of the only types of photography that you can do while being socially distanced and it also works really well for people who are looking to do staycations in beautiful parts of their home states.
For this reason, I think that nature photography is likely going to continue being super popular in 2021. But, this poses a lot of problems for people who have never tried nature photography, and they may have a lot of questions like what type of nature photography gear do I need and what types of nature photography techniques should I be trying?
If you’re looking for nature photography tips to get your new year started out with, then you’ve come to the right place.
Highlight Textures

photo byVladimirovic via iStock
The moment you start paying attention to the natural world around you, you will start to see all sorts of interesting textures. Leaves can be fuzzy or spiky, flowers can be soft or bristled, and animals come with just about every texture you can think of. A porcupine is a good example of this, although I don’t know that I would recommend you getting close enough to capture a photo of it.
In order to highlight textures in your photos, you just need to start taking photos that are a bit closer to your subjects than you would normally take.
I love highlighting textures in my nature photography tips because some beginning photographers aren’t comfortable focusing on something this closely. It will even help you become a better photographer in other photography niches because attention to detail is a skill you need no matter what you’re photographing!
Understand the Science Behind Your Subjects

photo byProstock-Studio via iStock
I hesitated to put this tip in my nature photography tips article because it has less to do with photography and more to do with research. But, I’m a strong believer that the better you are at research as a photographer, the better you become at photography.
You need to understand the science behind your natural subjects. For instance, if you’re planning on shooting sunflowers, then you would likely need to know what time of year sunflowers bloom so that you can capture them at their most beautiful.
If you are photographing a specific type of animal, on the other hand, then you need to understand that animal’s migration pattern (if it has one), it’s mating season, and it’s food and water preferences. All of this information will tell you when you’re most likely to actually find your animal and where you should camp out in order to do so.
I think this is likely why hunters make such great wildlife photographers. They inherently understand nature photography tips that most others don’t.
Learn More:
Equip Yourself with Good Gear
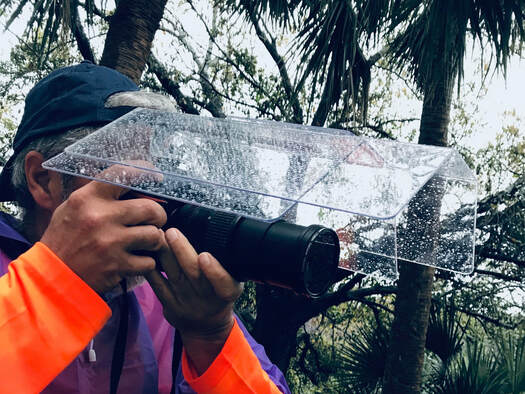
You can study as many nature photography tips as you want and still not be prepared to actually shoot out in nature if you don’t have good gear.
You obviously want to make sure that you’re dressed appropriately for the weather, or else you’re going to be miserable while you’re out shooting, but you also want to make sure that your gear is dressed appropriately.
What I mean by this is your gear doesn’t like being too hot or too wet in just the same way that you don’t. Cameras don’t operate very well in humid environments, especially if it just came from an air-conditioned room, so it’s important for you to know how to protect your camera from the humidity. Hint: you’ll need a plastic bag to prevent the camera from fogging up.
You’ll also need to prevent your camera from getting wet with rain, sleet, or snow. Traditionally, photographers used large plastic bags that looked a lot like those cheap raincoats you can buy at theme parks to keep their equipment dry. But, it’s now 2021 and you no longer have to do things the traditional way.
I recommend the Camera Canopyfor photographers looking to keep their camera and lens out of the rain. The Camera Canopy is a rain shield for your camera that attaches directly to your camera’s hot shoe. It extends outward over your lens (up to 500mm!) and back over the rear of the camera so you can use the viewfinder without your face getting wet either.
You can buy a Camera Canopy for your DSLR for $87.99 or one for your mirrorless camera for $59.99.
While all of the nature photography tips on this list are helpful, making sure you have the right equipment is absolutely essential.
Get a Good Camera Bag
As discussed in the previous section, good gear helps prepare you for taking better shots. But you have to get your gear to the shot location first! That means investing in a camera bag that will protect your camera, lenses, and other accessories. And for that, there's nothing better than f-stop.
I've used f-stop bags for several years now, and I have been nothing but impressed. Their Dyota bag, shown above and below, is just one example.
At 20 liters, this bag has the perfect capacity for a day trip of photographing landscapes.
There's a padded insert for your camera and lenses that's customizable and removable in addition to an organizer compartment where you can keep cables, spare batteries, and other small items.
If you need to bring additional gear, no problem! There are external gear attachments that you can use with Gatekeeper straps to carry larger items like your tripod. There's also a dedicated laptop or tablet sleeve, an expanding roll top, and dual-sided curved zippers that give you easy access to the interior of the bag.
It's a smartly designed and beautifully constructed bag that will give you years of durable performance!
Choose Your Shooting Time Carefully
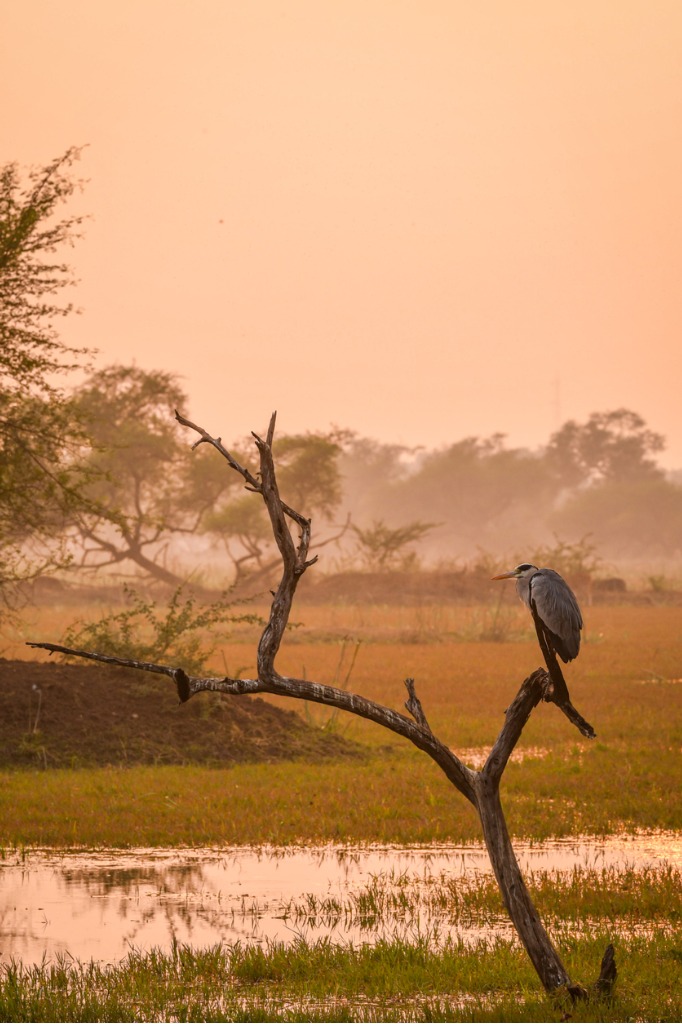
photo bySourabh Bharti via iStock
While a lot of nature photography tips focus on things you can control, it’s important to remember that when you’re shooting in nature, there are a lot of things you can’t. For instance, you can’t control the sun and you can’t control other people.
For this reason, you need to choose your shooting time carefully. Make sure that you’re shooting during a time when you have good sunlight, like Golden Hour. Also, if you’re going to be shooting in a park that receives a lot of annual visitors, you need to make sure that you’re going either very early in the day or very late in the day so as to avoid the crowds.
Experiment with Angles
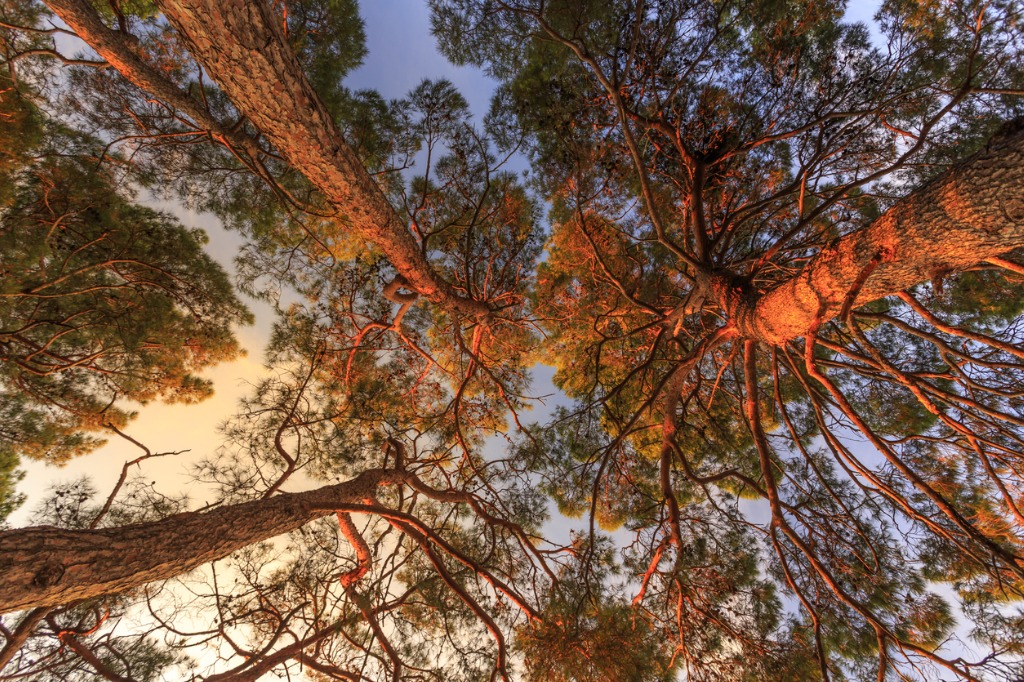
photo byfoment via iStock
When you first start experimenting with photography, it can be really overwhelming. I think this is one of the reasons why people focus so much on following all of the nature photography tips to a detrimental point.
Sometimes, you need to throw all of the nature photography tips out of the window and just start experimenting with things you like.
One way to get yourself into a creative headspace like this is to start experimenting with angles. Try capturing plants and animals around you from an angle that nobody has ever done before. Sure, you may feel a little awkward rolling around in the dirt, but in the end it’s going to be so much more fun for you.
I hope that some of these nature photography tips for beginners were helpful for you.
Learn More:
We Recommend
Rule of Thirds
The rule of thirds the most ubiquitous rule in all of photography. The rule of thirds can be applied to virtually any type of photo, from a portrait to a landscape to a street scene. What’s more, the rule is more easily applied today than ever before - most cameras have a rule of thirds grid that can be engaged such that you can quickly and easily compose a better shot.
But, though the rule of thirds is probably the first rule that new photographers learn, there isn’t much discussion of why it’s important to learn. There might be an understanding of how to use the rule of thirds, but no understanding of how it makes an image more compelling to view.
In this guide, we take a deeper look at the rule of thirds, first defining it, then explaining how and why it works to answer the question, "What is the rule of thirds?" We’ll examine rule of thirds examples along the way, and even offer up some instances in which this rule should be broken.
With that, let’s get started!
Rule of Thirds Definition

The rule of thirds breaks an image into nine equal quadrants using two vertical and two horizontal lines, as seen in the sample image of the Great Wall of China. The resulting grid shows you where to place elements of interest in the shot such that they have maximum impact - along one of the four grid lines, or, even better, at one of the four intersecting points where the horizontal and vertical grid lines meet.
Using the image of the Great Wall of China as an example, note how the wall in the foreground and the tower both align with the leftmost vertical line of the grid. Note how the horizon line - the mountain peaks in the background - roughly align with the uppermost line of the grid as well. The photographer has used the rule of thirds to place these elements of interest along planes that maximize their impact, just as the rule suggests you do when composing a landscape photo.
Rule of Thirds Photography

Essentially, the rule of thirds allows viewers to engage with the photo in a more natural way. But how?
Our eyes tend to avoid the center of a shot, instead, going first to the areas where the rule of thirds lines intersect. Thus, placing objects of visual interest at one of those intersection points makes sense. It’s a way to use our natural visual tendencies to grab the viewer’s attention and pull them toward the subject of the shot.
So, why does this work? With the rule of thirds grid to guide you, you can create an image that avoids the 1:1 ratio that results when the subject is placed in the middle of the frame. That is, a 1:1 ratio occurs when there is an equal amount of space on either side of the subject. Instead, by creating an image with a 1:2 ratio, like the portrait of the young woman at sunset in which she is placed to the right of center, the image looks and feels more dynamic.
Quite simply, it’s a more interesting shot to view than if she had been placed smack in the middle of the frame. By shifting her to one side, the viewer’s eye has to move around to find her. Additionally, because there is so much space to explore on the left side of the image, it becomes a much more interactive photo.

Let’s use another image to further illustrate how the rule of thirds helps create a more interactive image and helps you master composition.
Looking at the sample image of the mountain biker, you can see that, again, the subject has been placed to the right of center near the rightmost vertical grid line (note how the biker’s body aligns well with the uppermost grid line as well). With his placement there, the eye is drawn to the right side of the photo. But, because the biker’s movement is clearly going to the left, the eye now follows that implied movement to the left as well. The result is that you engage more deeply with the photo because the eye has a place to go.
What’s more, even though the biker is shifted to the right side of the image, there is the perception of greater balance in the photo. If he’d been placed in the middle of the frame, the image would feel static and stuck. There would be no visual space for the biker to move into, nor would your eye have anyplace to go. So, even though there is more interest in the right side of the shot, the ability for our eyes to move to the left to see where the biker is headed allows the image to seem more balanced.
Photography Rule of Thirds: Horizons
The rule of thirds has an additional use - making images more interesting through the placement of horizons. Generally speaking, if you’re presented with a scene that has a lot of interesting elements in the foreground - or, conversely, has an uninteresting background - placing the horizon near the uppermost horizontal grid line helps you maximize the view of the interesting foreground elements.
In the sample image of the seascape, you can see how this strategy works. The sky has some interest, but the texture in the foreground rocks is far more interesting. By shifting the horizon upwards, the photographer is able to give us a better glimpse of those rocks, thereby introducing more texture and color into the scene.

Additionally, shifting the horizon line towards the bottom of the frame and placing it nearer the bottommost horizontal grid line, you can highlight an interesting background and minimize the view of a foreground that doesn’t offer much visual interest. This strategy works well in the image of the Northern Lights because it allowed the photographer to give us a fuller view of the gorgeous sky while minimizing the featureless and dark lake in the foreground.
The rule of thirds grids can also be used to help you keep the horizon straight. Just line it up with the horizontal gridline and you'll be able to avoid one of the most common composition mistakes: having a crooked horizon.
Rule of Thirds: When to Break It
Now that you have a deeper understanding of the rule of thirds, how it’s used and why, we can discuss why breaking the rule can be as advantageous as complying with it.
If you think about the purpose of the rule - to add interest and balance to a shot - there are instances in which completely breaking the rule actually gives the image more interest and balance.
Looking at the image of the Taj Mahal, you can see how the building is placed right in the middle of the frame. What’s more, the horizon line is also in the middle of the frame, yet the image still works. When it comes to balance, it’s hard to get a more precisely balanced shot than this. The visual weight is well proportioned from top to bottom and left to right.
There is also a lot of visual interest in the image to keep our eyes engaged, from shapes to patterns, lines to textures, and light and shadows. If you think about it, using the rule of thirds in this instance would have generated an image that just doesn’t make sense (just imagine the scene had the Taj Mahal been shifted to the left side of the image).

This concept works with portraits as well. Consider the candid portrait of the little girl and her pregnant mother as a prime example of how to break the rule of thirds. Note how the focal point of the image - the girl’s eyes - are placed along the vertical midline of the shot. Yet, the image still feels interesting. This placement allowed the photographer to give more importance to the girl placing her hand on mom’s belly.
Had the scene been shifted to the left, we wouldn’t have as good a view of this interaction because part of the belly and the hand would be cut off. Conversely, had the scene been shifted to the right, there would be too much dead space on the left side of the frame. So, again, breaking the rule of thirds generated the best possible outcome.
Final Thoughts
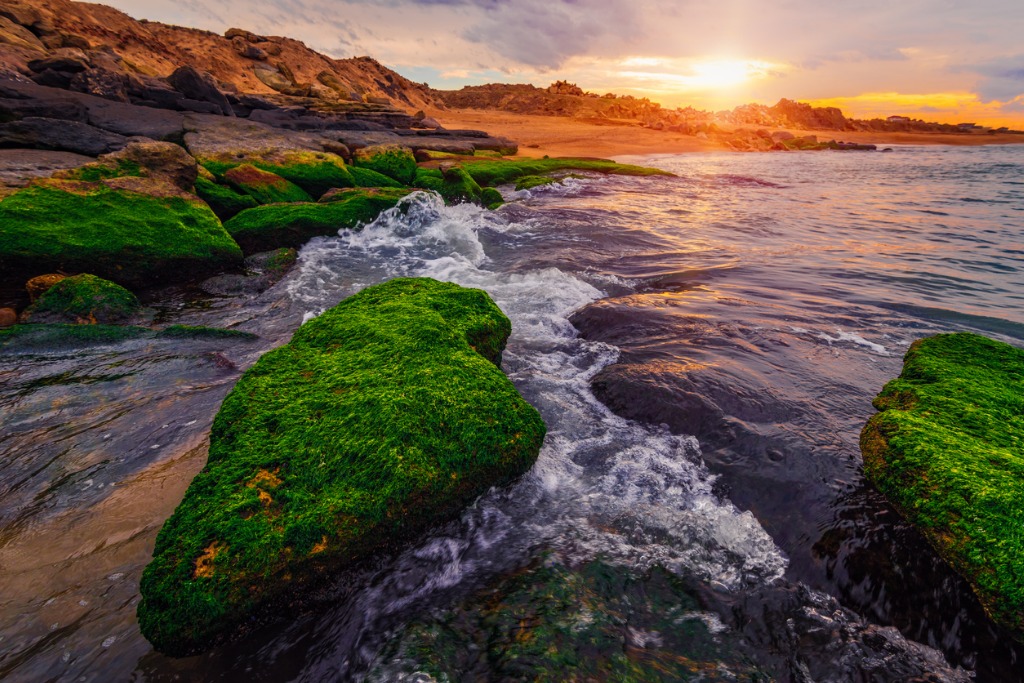
The rule of thirds is one of the three main rules of photography that have made countless photos better over the years. Yet, as we’ve learned here, there is a time and a place for using the rule and instances in which it’s best to simply throw it out the door.
Likewise, there are instances in which the composition doesn't perfectly fit the rule of thirds (like the image above), but it's close enough that it still has the effect of helping you create a balanced shot.
A good exercise is to look for rule of thirds examples not just in photography, but also rule of thirds in art - paintings, in particular.
By learning more about it and practicing using the rule of thirds in photography, you’ll become more adept at knowing when to use it and when to skip it. The result? More compelling images that keep viewers engaged. Who doesn’t want that?
We Recommend
Staycation Photography: What to Photograph Close to Home

There seems to be the idea floating around that you have to “go somewhere” to take a fantastic photograph. Sure, it’s great to go to exotic or picturesque locales and take photos, but you don’t absolutely, positively have to pack your bags to find photo-worthy subject matter.
In fact, there are plenty of subjects right in your own backyard! It just takes a bit of imagination and an understanding of composition to get the breathtaking images you seek.
Here are a few photography project ideas for how you can maximize your staycation photography.
Look for the Right Stuff

All great photos have some things in common - good lighting, a strong subject, colors, shapes, or forms to give the image interest, or even motion. Certainly, you won’t find a vignette with all of these visually engaging qualities, but rest assured that with a little time spent looking at the scenes around you, you will find something that can be made into a high-quality photograph.
Part of looking for the right stuff is finding the best perspective from which to compose your photograph. The first angle you shoot from might get you a quality photo, but the second, third, and fourth angles might be even better. Get up high and down low and move to the left and the right. Move around the subject you’ve chosen to find the most appealing background. Look for ways to enhance the impact of the lighting that’s available. Don’t just settle for the first shot - keep looking and see what you can find that will get you an even better photo! Learn more about photography ideas at home on our website PhotographyTalk.com.
Get the Gear
Staying close to home means that you have easy access to your entire collection of gear. Try different camera bodies and lenses. Go macro, then go telephoto. Try some close-ups with a wide-angle lens too. Manipulate the shutter speed to freeze and blur movement. Mount your camera to a tripod, then hand hold it for additional shots. The point is that this is a great time to experiment and push the boundaries of what you typically do.
Focus on Depth of Field

A common complaint of people who try to photograph things near their home is all the ugly stuff they don’t want in the image - street signs, trash cans, freeway on-ramps, and so on.
Of course, these things can be easily eliminated by working with a very shallow depth of field. Remember that depth of field decreases as the aperture widens, so try shooting as wide open as possible. Also remember that the distance from your lens to the subject, and the subject to the background impact depth of field. As a result, get in close, and try to frame the shot with as much room behind the subject as possible. If you do these things, it won’t really matter what’s happening in the background because it will all be nicely blurred.
Subject Suggestions
There is a multitude of subjects just out your front door that are worthy of a photo, especially if you catch them at the right time. Here are a few of our favorites:
Birds

The birds that visit and live near your home are one of the best subjects to try your hand at wildlife photography. They are easily accessible, used to humans being present, and if you provide them with a birdfeeder, birdhouse, or bird bath, they will hang around for awhile, giving you time to snap their photo.
Insects
Your yard or garden is rife with life on the macro level. Grab your macro lens, ring light, tripod, and remote shutter release and head out to find ladybugs, spiders, dragonflies, and other insects that you can highlight in a macro shot.
Flowers

Flowers are abundant in many areas and make a wonderful subject for a lovely close-up photo. When photographing flowers, try to isolate a single bud in the frame, ensuring that it is in sharp focus in front of a nicely blurred background. Alternatively, you can step back for a wide-angle shot if there is a lot of variety in terms of color and shape. You can also check another post about photo projects.
Dew

In the spring and the fall, in particular, your grass and plants will be covered with dew in the morning. The dew drops are an excellent visual addition to any photo, particularly if you can position yourself such that there is backlighting to make the dew drops sparkle. Look for spider webs for a more graphic visual element.
Sunrise or Sunset

Golden Hour is an ideal time of day to photograph just about anything. Whether it’s a nearby field where you can isolate a single stalk of wheat in front of the rising sun or the silhouette of your kids playing in front of a sunset, Golden Hour will give you great lighting to highlight the everyday objects, people, and events like those outlined above.
We Recommend
Surprising Facts About Yellowstone for Photographers
Yellowstone is the world's first national park, and deservedly so.
It's an ecosystem that boasts incredible diversity of wildlife and an equally incredible landscape that ranges from ancient forests to mud pots, geysers to sweeping valleys, and mountain peaks to hot springs.
The park is a mysterious place, too, and that makes it an ideal subject for your camera's lens.
Here's a few surprising facts about Yellowstone that will help you plan your next adventure in this amazing place.
Old Faithful Isn't the Park's Tallest Geyser
Though Old Faithful is certainly the most famous geyser in Yellowstone (and perhaps the entire world), it isn't the biggest in the park.
That distinction goes to Steamboat Geyser, which can shoot water up to 300 feet in the air - 200 feet higher than a typical Old Faithful eruption.
But the reason why Old Faithful gets so much love is because its eruptions are highly predictable, occurring every 30-120 minutes or so.
Steamboat, on the other hand, is wildly erratic, rarely erupting multiple times in an entire year. Of course, it erupted three times in a little more than a month earlier this year, so that only adds to the mystery and intrigue of when the big geyser will blow its top.
While Steamboat puts on a much more impressive show for photographers, you're better off going with the reliable Old Faithful for your geyser photos.
Bacteria Give Hot Springs Their Spectacular Colors

Grand Prismatic Spring should be on your must-photograph list when you head to Yellowstone.
It's a breathtaking sight to see with vibrant colors that look otherworldly.
Those colors are thanks to bacteria that live in the hot pools of water. The sunlight reflects off the different bacteria, lighting up the hot springs in an array of incredible colors.
The different colors in the pools represent different kinds of bacteria that only live in very specific temperature ranges.
Summertime provides the best time for capturing the most intense colors at Grand Prismatic, though it's an impressive sight in winter, too (more on that later).
For the best vantage point, ditch the crowded boardwalks that run around the spring and head for the Fairy Falls Trail, which provides an overlook down onto the basin where the hot spring is located.
Wolves Might Be the Most Important Animal in the Park
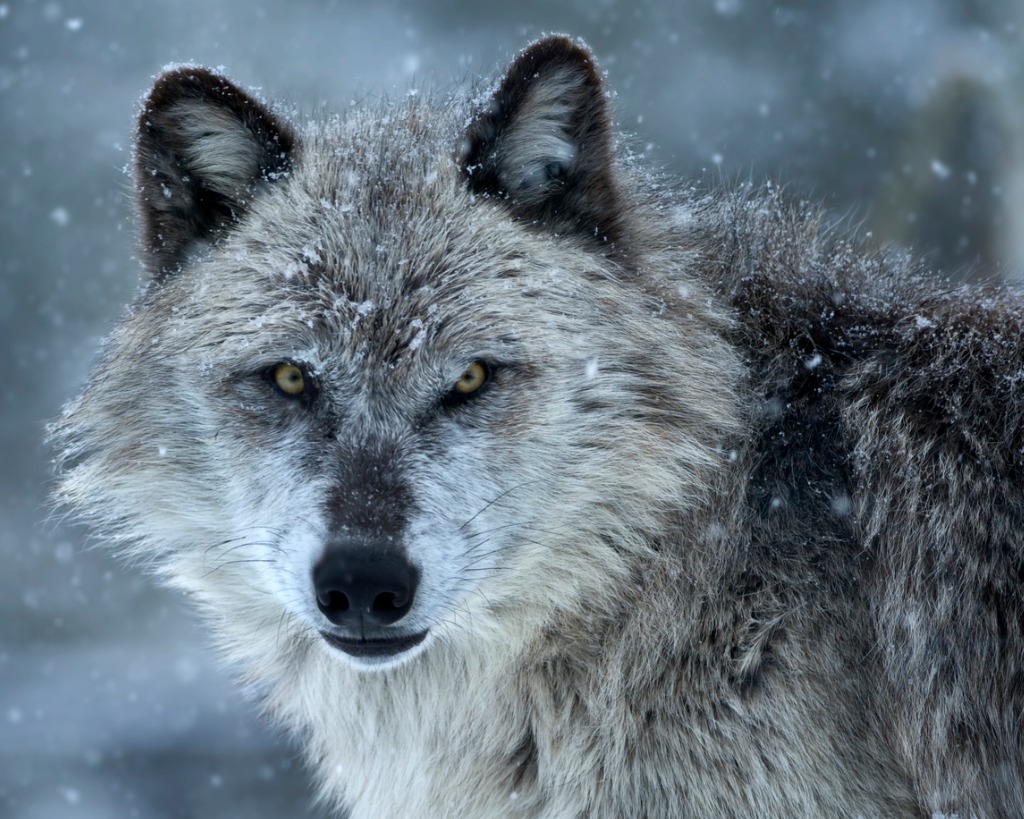
In 1995, wolves were reintroduced into Yellowstone National Park after having been wiped out by government predator control programs in the early 1900s.
The last gray wolf in Yellowstone was killed in 1926, and though some sightings were reported over the years, Yellowstone was essentially without wolves until the re-introduction program began in the mid-1990s.
While there was fierce opposition to wolf reintroduction at the time from some groups, it has proven to be highly beneficial to the park.
There were too many bison and elk in the park, and they had become complacent in the absence of major predators.
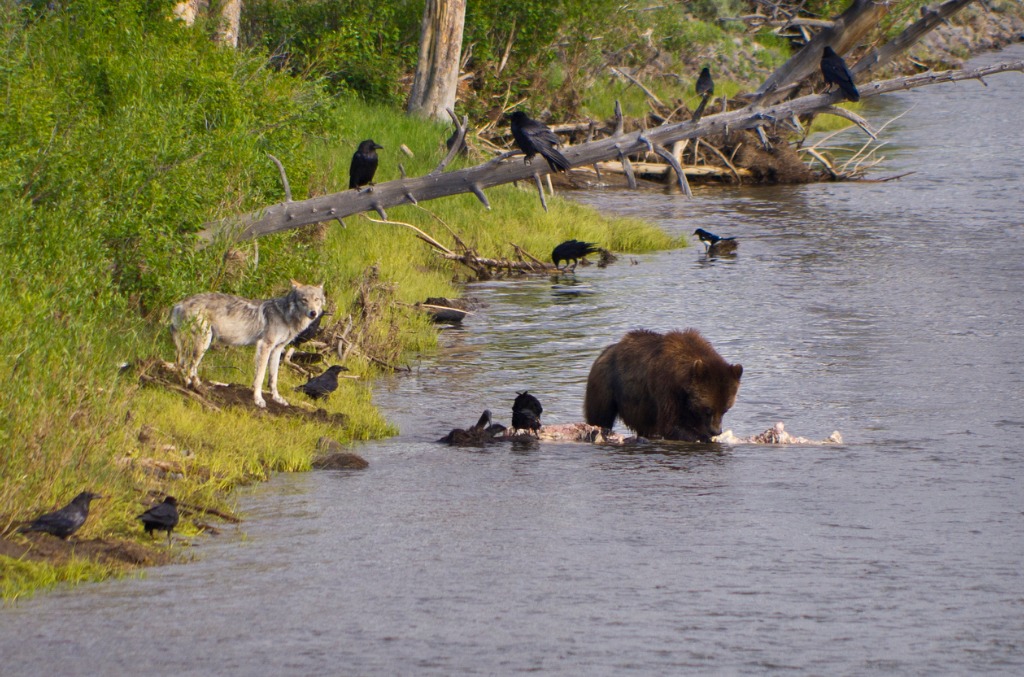
But when wolves rebounded, they found easy kills and brought the ecology of the park back into balance.
Elk and bison returned to healthy numbers. Vegetation along streams - no longer mowed down by overpopulations of elk and bison - also returned to form. Wolves are even credited with helping increase the variety of songbirds in the park.
For photographers, wolves are tough customers as they are very elusive. However, a good wildlife photography tip is to head to Lamar Valley in the northern reaches of the park, where you'll find wide-open valleys with plenty of prey for wolves.
Summer is Not the Best Time to Visit Yellowstone
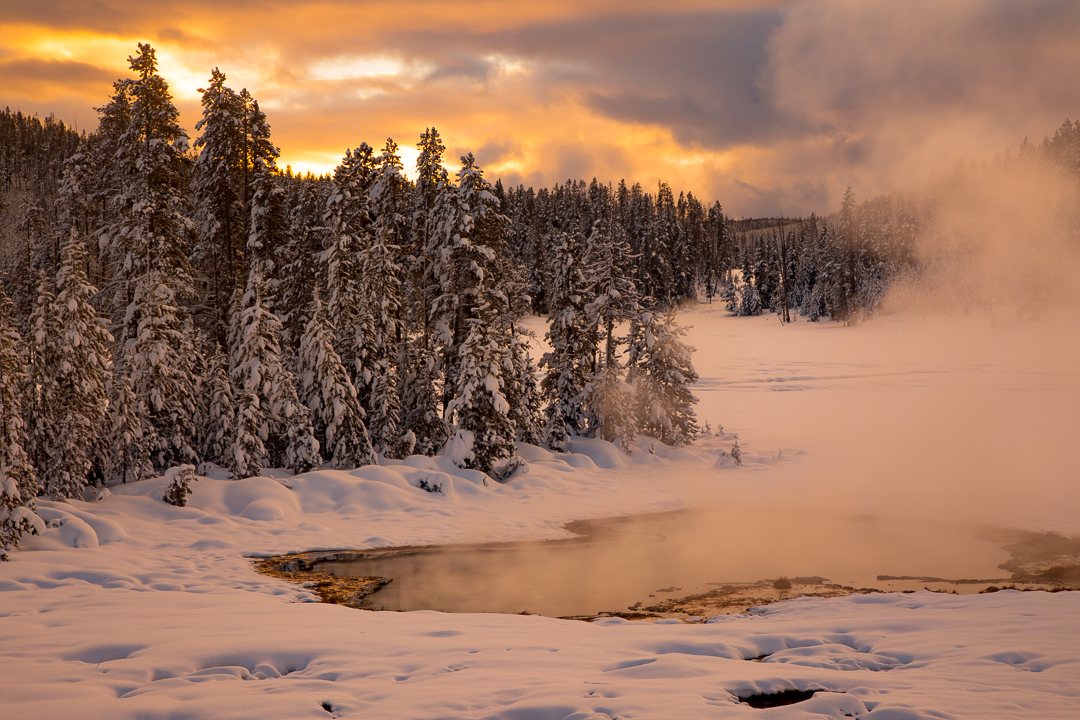 Image Credit: John Slonina
The vast majority of tourists that travel to Yellowstone do so between May and September. That makes for a very busy park with crowded boardwalks, lots of traffic, and not much peace and quiet, unless you park your car and head out on one of the park's many designated trails.
Your other option - and a far better one if you ask me - is to visit Yellowstone in the winter.
Not only will you encounter far fewer people, but the Yellowstone ecosystem is perhaps even more impressive in the dead of winter.
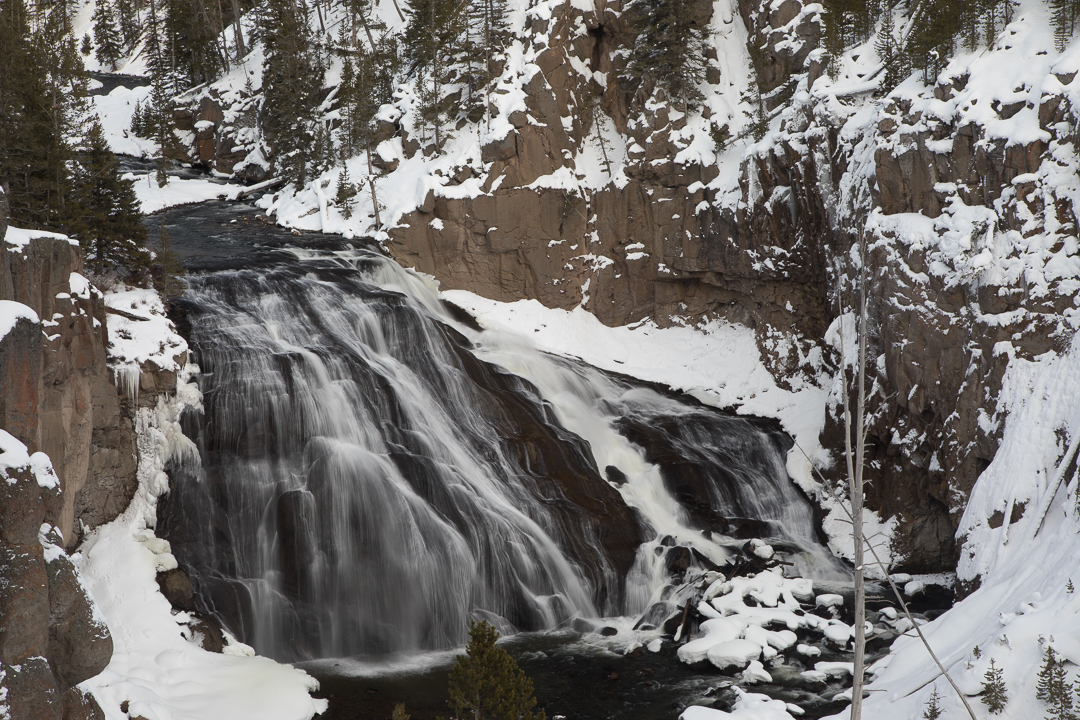 Image Credit: John Slonina
The bubbling mud pots and erupting geysers take on an even more otherworldly appearance in the winter as they're shrouded in an eerie veil of steam.
Waterfalls - some of which flow throughout the winter despite temperatures that can reach -40 degrees Fahrenheit - are lined with giant towers of ice and look like something right out of a fairy tale.
Primary among the must-see waterfalls in winter are the Upper and Lower Falls of the Yellowstone River, located in the Grand Canyon of the Yellowstone.
At 308 feet in height, the Lower Falls is more than twice the height of Niagara Falls and puts on an impressive wintertime show for photographers.
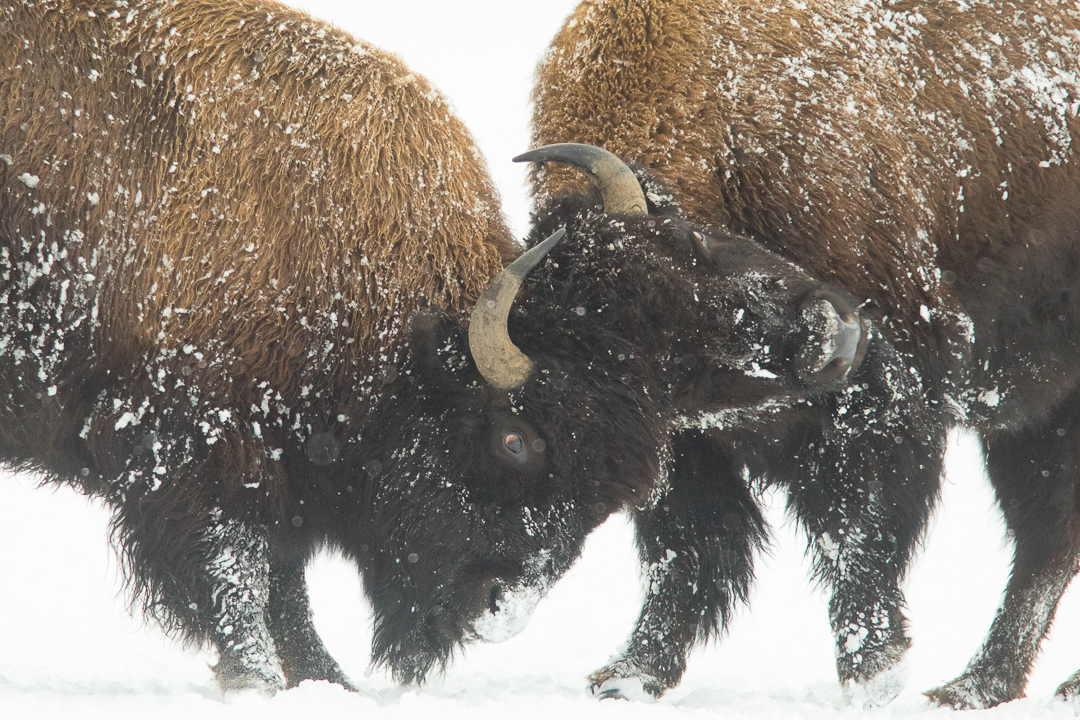 Image Credit: John Slonina
Perhaps the best part of taking your camera to Yellowstone in the winter is the opportunity to photograph tons of wildlife.
For starters, animals stand out against the wintry background, making them easier to spot and photograph.
What's more, the frigid temperatures and heavy snows in the upper elevations force many animals down into the lower valleys in search of food.
It's not uncommon to see giant herds of bison and elk, solitary moose, mule deer, and bighorn sheep. Coyotes, foxes, bobcats, bald eagles, trumpeter swans, and great grey owls are exciting finds as well. If you're lucky, you'll spot a few wolves, too.
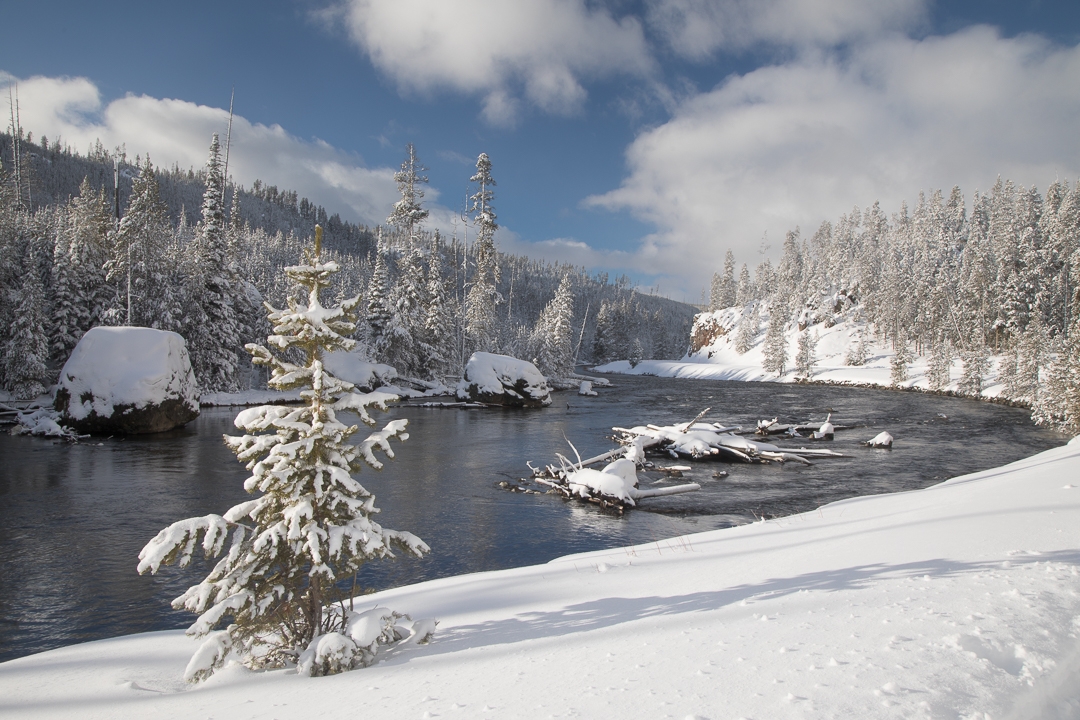 Image Credit: John Slonina
Yellowstone in winter is an unforgiving place, and that necessitates having an experienced guide with you to help you find those magical moments to photograph.
John Slonina is one such expert, having photographed Yellowstone for nearly 20 years.
His 2019 Yellowstone Winter Instructional Photo Tour and Workshop is a must for photographers that want to capture the breathtaking beauty of this area in the winter.
John's workshops blend the incredible sights of the park with instruction on essential photography techniques.
That means you'll get to explore the the park via snowcoach and photograph abundant wildlife and breathtaking landscapes on the one hand, and on the other, you'll learn about things like post-processing techniques using Lightroom.
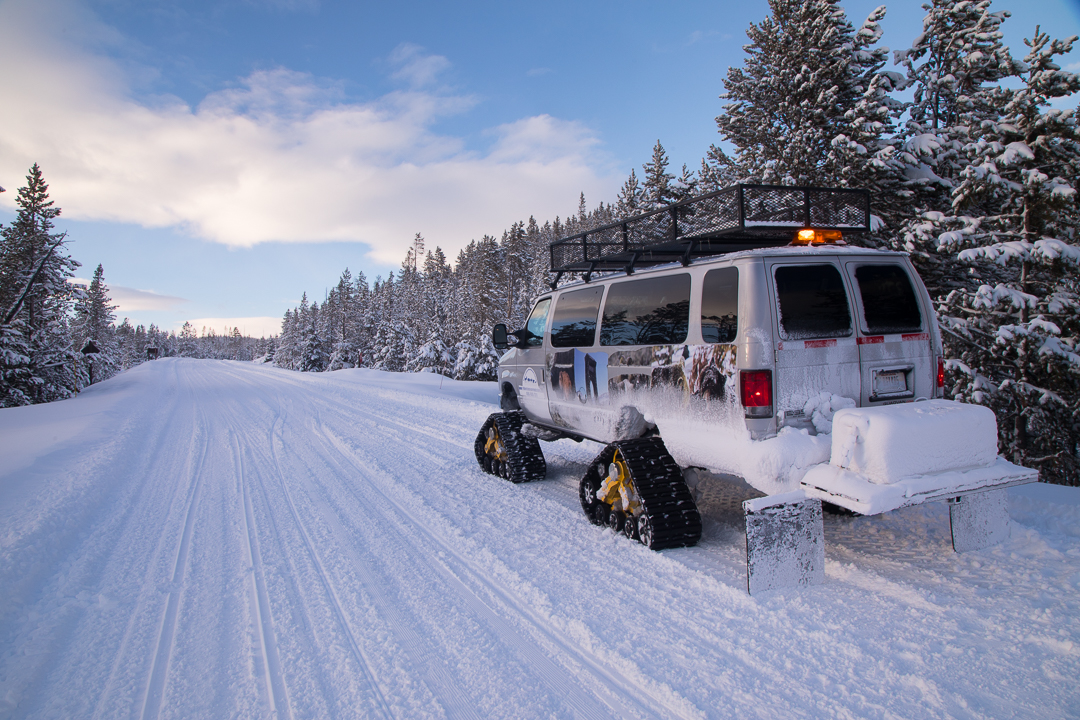 Image Credit: John Slonina
Better still, John's tours are small. That means that you get more one-on-one instruction time to hone your skills.
That also means that the tour uses just one coach, which makes it easier to access more remote areas and see more wildlife from a closer point of view.
In other words, if you're a photography enthusiast that's itching to document the wilds of Yellowstone and asking yourself when to photograph Yellowstone, you need to do so in winter on a tour with John Slonina.
The tour takes place January 11-19, 2019. Visit John's website for more details and to register.
We Recommend
These Examples of Fine Art Nature Photography Show the Beauty of Simplicity
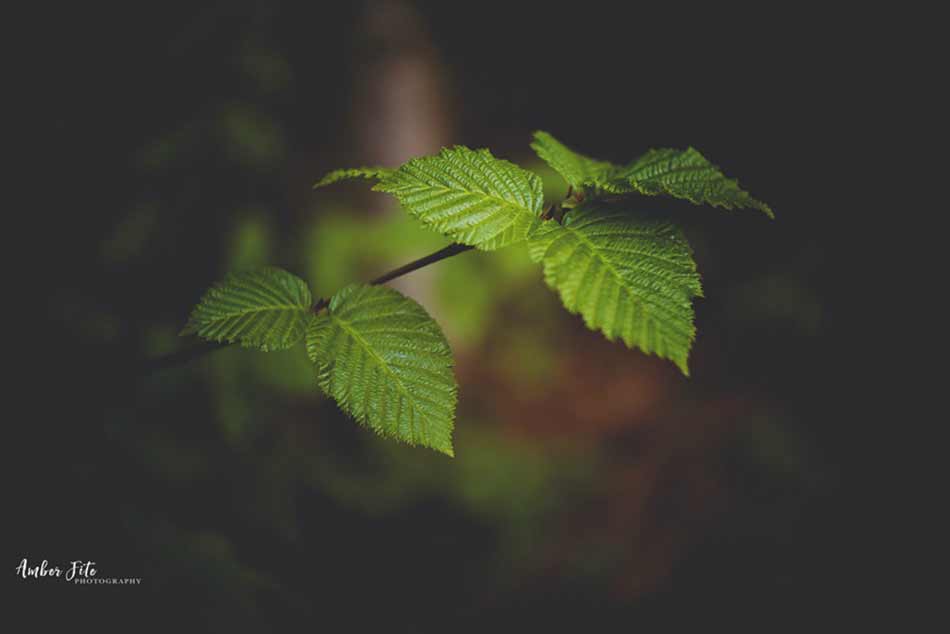
My photography passion is landscapes. I'm just one of many, right?
That includes my good friend, Amber Fite, whose photography expertise ranges from landscapes to maternity portraits.
She shared a few images with me the other day of beautiful, unique, and intimate nature scenes, and I just had to share them with you.
Not only are these images fun to look at, but they offer teachable moments as well.
So, have a look at these beautiful examples of nature photography and learn a few tips and tricks for improving your photos at the same time.
Light is Always Key for Nature Photography
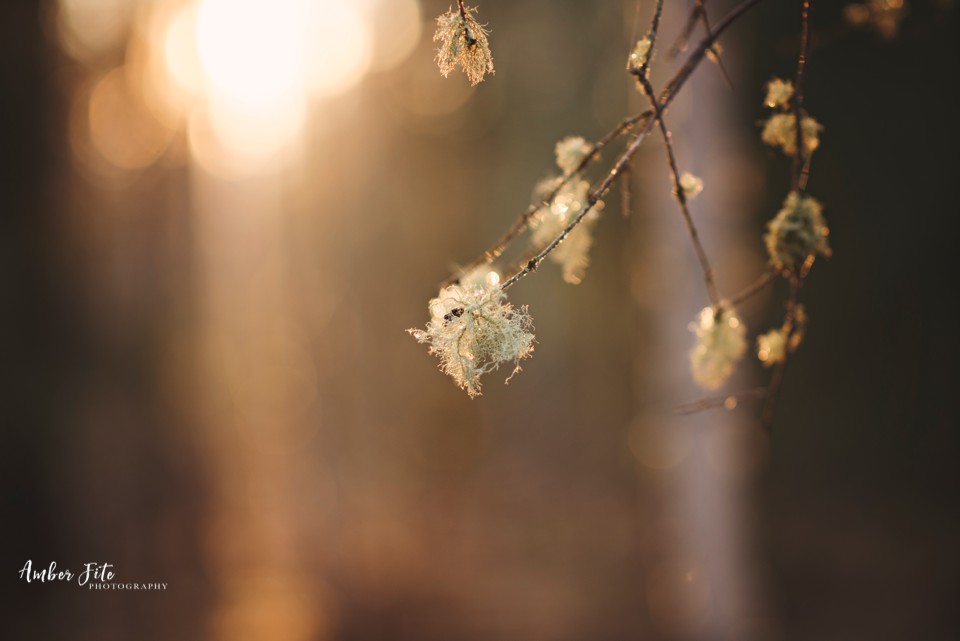
No matter if you're taking a photo of a large, sweeping landscape or zeroing in on a small detail like the plant in the image above, good lighting is an absolute must.
In this case, the warm tones of the sunlight filtering into the shot from the background serves a couple of different purposes.
First, it lightens up the background, keeping it from feeling too heavy.
And second, it catches the dew on the plant, creating tiny flickers of light that add visual interest to the shot.
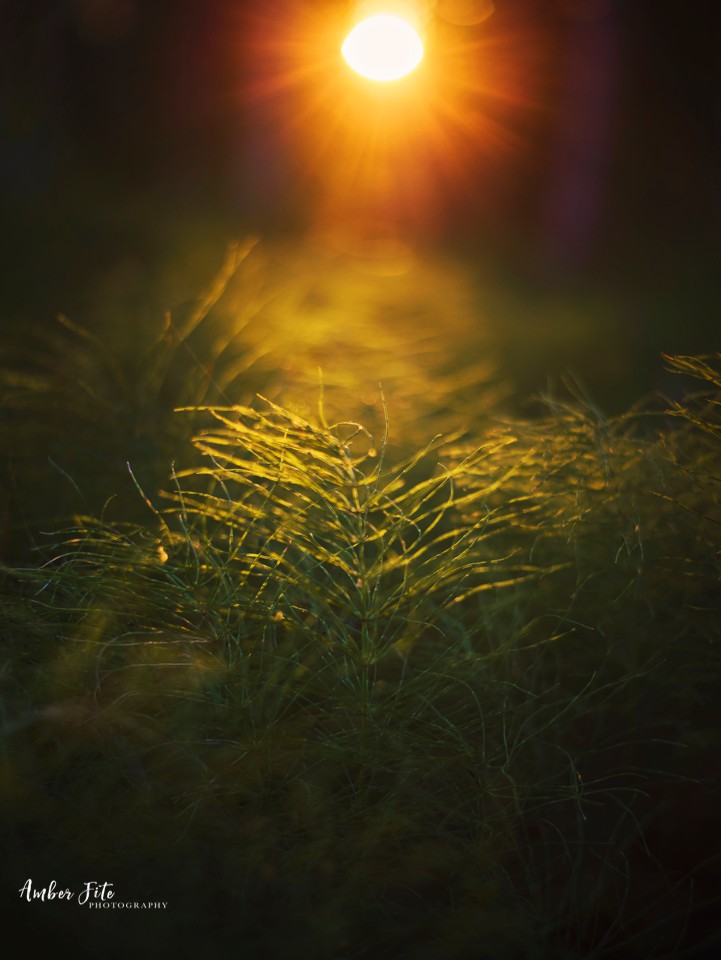
In this example, the sunlight is more obvious and direct.
Again, you can see how the sun brightens up the background and provides gorgeous backlighting that helps make the grasses in the foreground a stronger subject.
When creating photos of nature and landscapes, look for opportunities to backlight the scene to get contrast-filled, dramatic results.
Texture Can Be the Subject
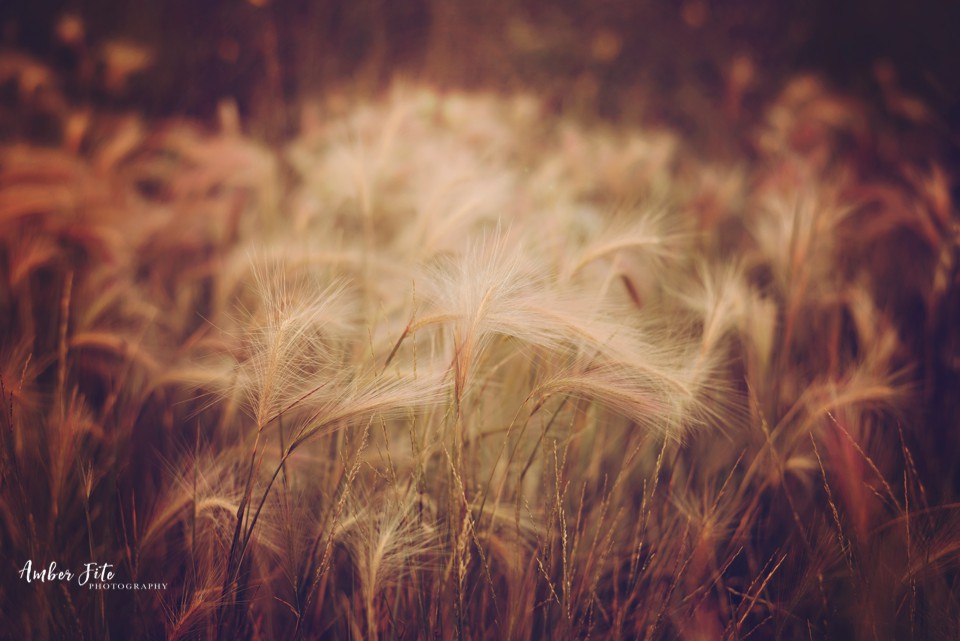
Any type of nature photography will benefit from the inclusion of textures in the image.
That's because textures give the photo extra visual interest that grabs the viewer's attention.
But textures don't have to play a supporting role in the photo - instead, they can be the subject of the shot.
In the image above, the texture of the grasses is the focal point of the shot thanks to the very shallow depth of field that's blurred out everything else in the photo.
Notice how the structure of the plants adds so much depth to the photo as well.
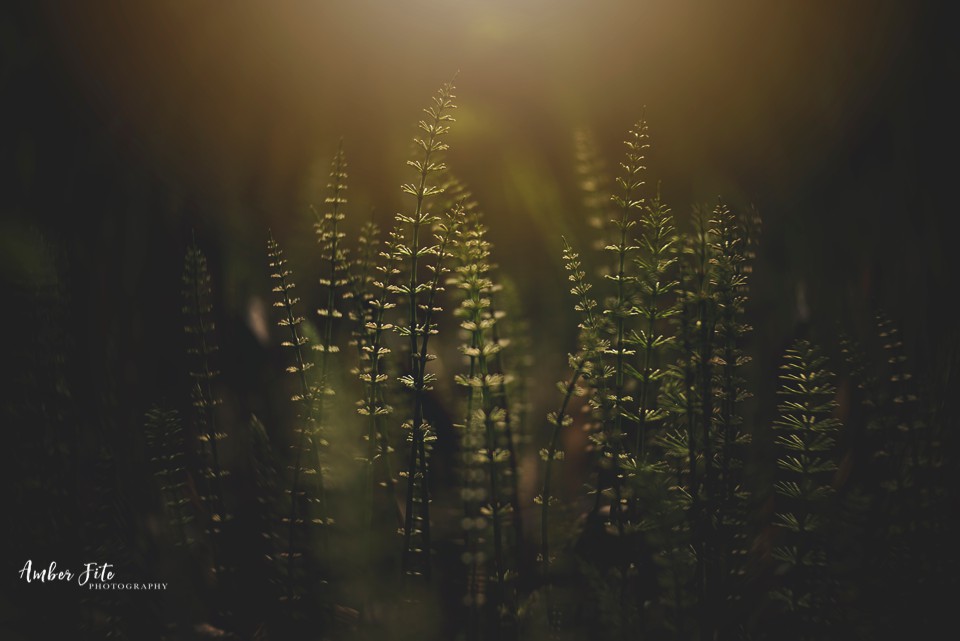
In this image, the texture takes a much different form.
The linear lines created by the plant stems give a verticality to the shot while the tiny leaves created a repeating texture that delights the eye.
Again, you can see how backlighting helps set this scene off, making these lines and textures much more obvious amongst the darker surroundings.
Use a Shallow Depth of Field to Create a Sense of Intimacy
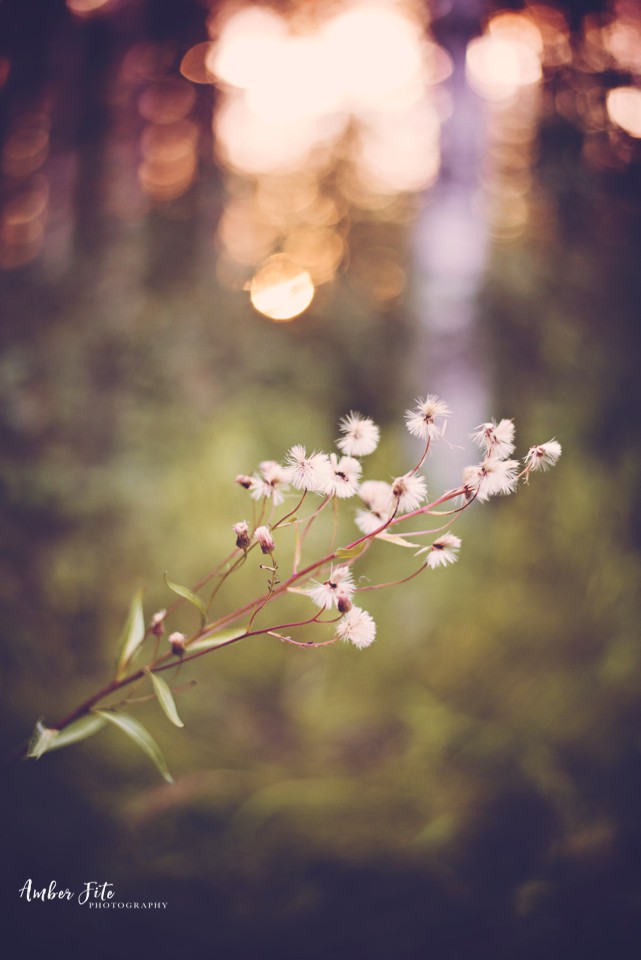
One of the problems that nature and landscape photographers have to get around is that when you photograph large landscapes, sometimes they can feel a little empty, and even overwhelming.
One solution to this issue is to go against the norm and shoot with a very shallow depth of field.
As you can see above, with such a narrow field of focus, you get a much more intimate photo in which this one branch on one plant becomes the star of the photo.
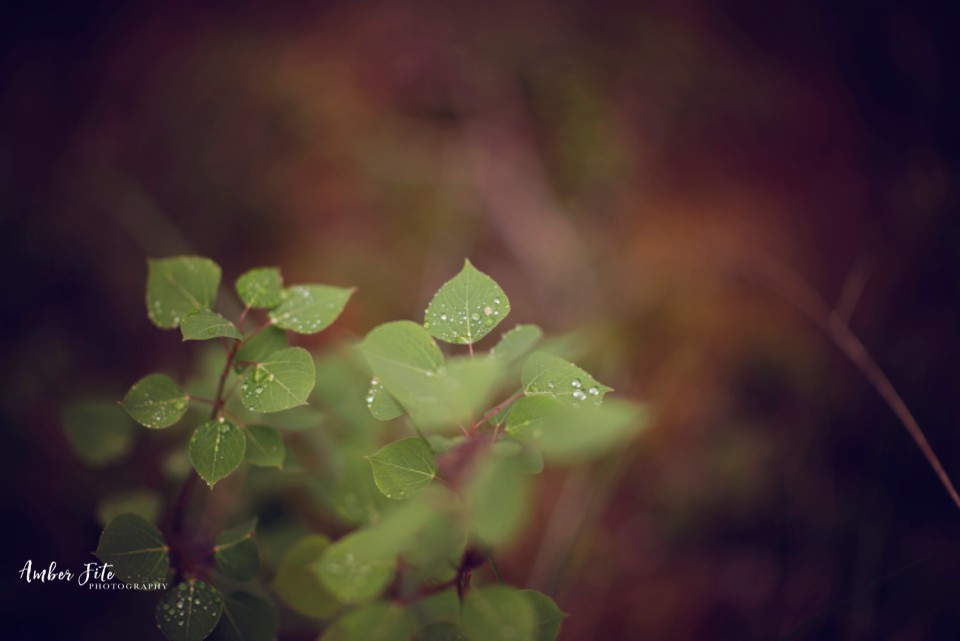
And again, in this shot, Amber has opted for a very narrow depth of field to bring our focus to an even smaller area - the group of leaves on this plant.
By framing this shot with the plant in the foreground out of focus, she's also managed to create a photo with tons of depth, even though the area of focus is so small.
If your large, sweeping landscapes are feeling a little too big and cold, give this more unique view of nature a try.
Find Beauty in the Details
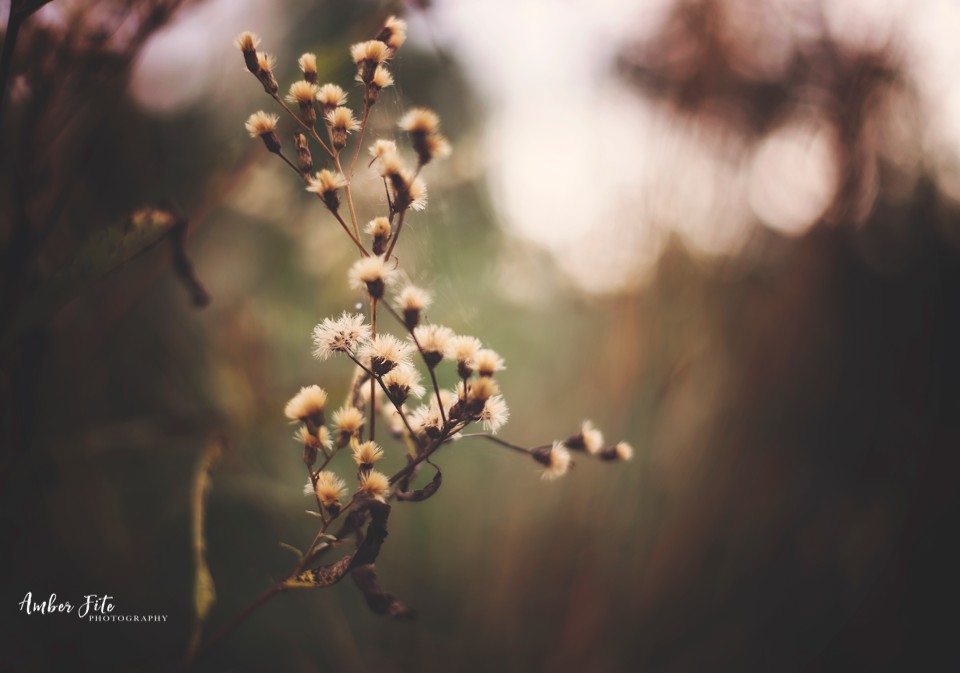
As noted earlier, sometimes nature photography can feel a little cold and impersonal.
But finding the beauty in the very small details in a landscape is how to take nature photos with more visual appeal.
Take the image above as a perfect example of this...
Your eyes are drawn first to the remains of the white, circular flowers because they're the only thing in focus in the shot.
But if you look carefully, notice how the spiderwebs that appear all over this plant add a touch more detail that elevate this shot even more.
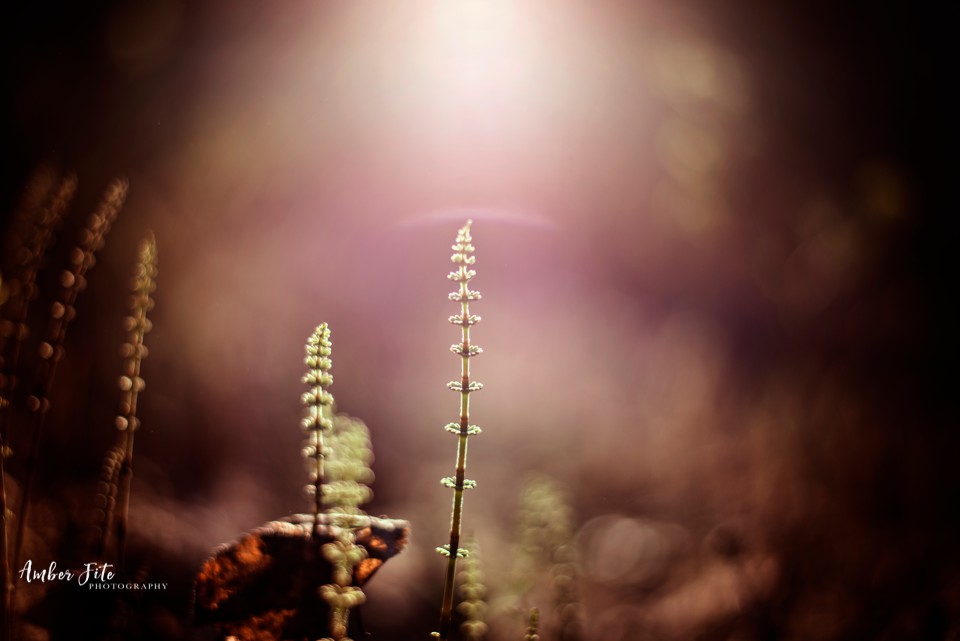
In this example, Amber once again utilizes a delightfully shallow depth of field to keep our attention on the gorgeous shape of this single plant.
But in doing so, she created a wonderland of bokeh in the background that provides a delicate richness to the shot.
That bokeh works much like the spiderwebs in the previous image - it's a small detail that makes the image as a whole more successful. This is one of the easiest nature and professional landscape photography tips to implement, and one of the most successful, too!
Find Ways to Incorporate Angles
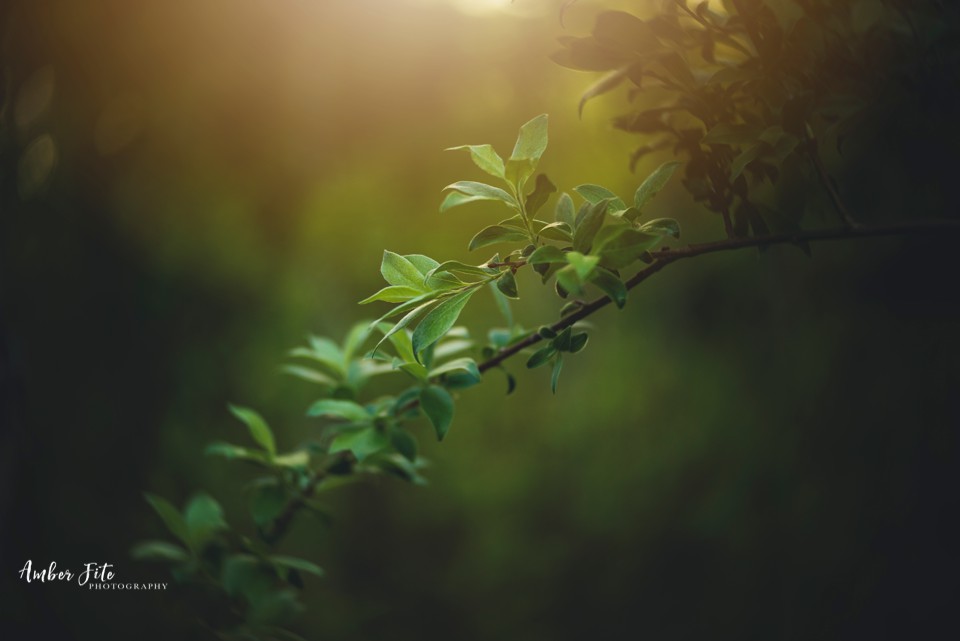
Perhaps one of the lesser-known nature photography techniques is to incorporate angles into your photos.
We all know about leading lines and how they can help you connect the foreground to the background and lead the viewer's eye through the photo along the way.
But including angles in your photos can help you do the same thing.
In the photo above, the branch creates two (roughly) triangular shapes - one below and to the right and one above and to the left.
This helps our eyes "divide and conquer," and inspect the subject (the branch) as well as the background from corner to corner.
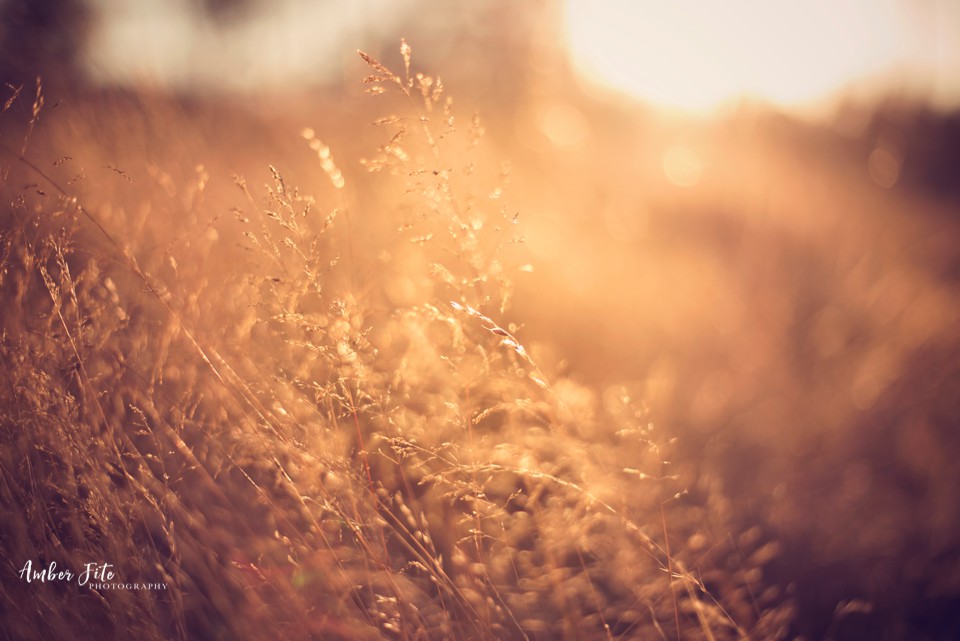
Of course, angles can be used in other ways to create interest.
In this image, the left-leaning grasses form a right triangle with the bottom-left corner of the shot.
This, in turn, makes for a more active scene - we understand that the breeze is moving the grasses to the left, and as a result, the photo has more life and vitality to it.
The moral of the story is that rather than simply snapping photos, take time to consider the composition and how lines, angles, and other shapes can help you compose a more impactful photograph of nature.
About These Photos
Location: Alaska, Washington State
Equipment: Nikon D750, D600, Nikon 50MM 1.4, Nikon 85MM 1.4
From the Photographer: Many photographers see the world in a different light. Things, people, objects, may look one way to the average person, but an artist sees the beauty in the simplest things. For me, I am a lover of light. Good light can make just about anything beautiful. For example, the images that I have taken for this article are the “in between” beauty of nature, the stages of nature between seasons. Most people are in awe over the flowers that are fully bloomed, or the tree that is full and plentiful. What is forgotten is how beautiful nature is during the transitions of season. The grass, the moss, the dead leaves, the ferns, the weeds; many things that people walk right by in search of that beautiful flower.
See more of Amber's work on her PhotographyTalk Profile.
You can also connect with Amber via:
We Recommend
These Spectacular Photos of Bears Show the Beauty and Personality of These Animals
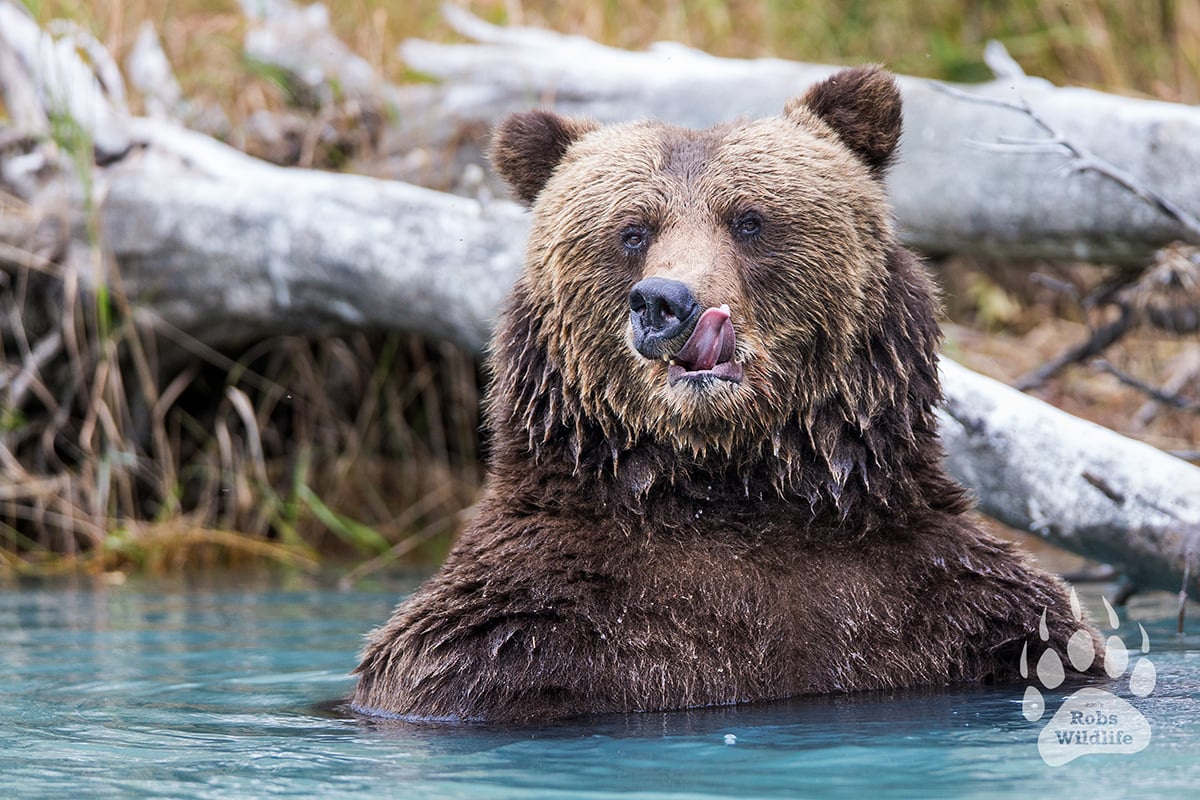
I live in the Los Angeles area, so my opportunities to see wildlife are pretty slim. That's especially true for bears.
I suppose that's why I'm so impressed with the collection of bear images that my friend Rob Daugherty has just uploaded to PhotographyTalk.
I mean, capturing photos of animals in the wild is difficult enough if you ask me. But capturing spectacular, drama-filled images like those he's gotten is much more difficult. And it's not just bears, either - his photos of eagles are something else!
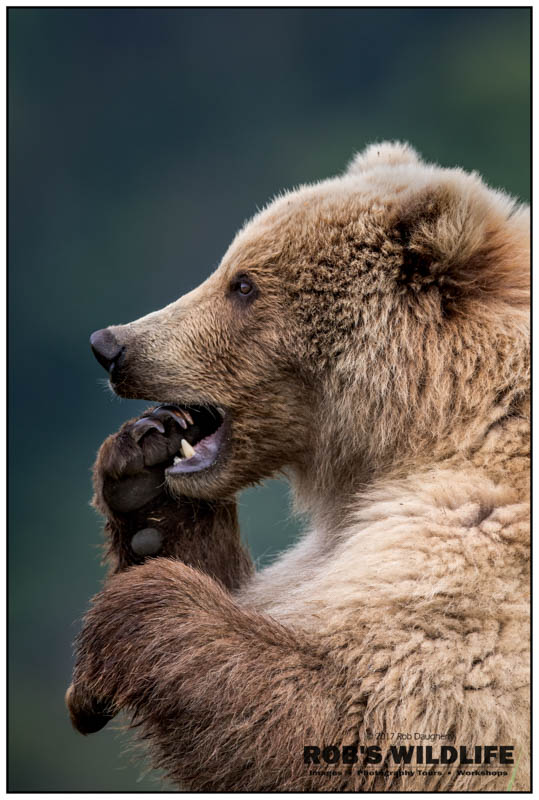
No doubt, to be a successful wildlife photographer, you must be ultimately patient. There's a ton of planning as well - you have to be in the right place at the right time.
Additionally, you have to do your research. You need to get to know the animals you wish to photograph and understand things like their feeding habits, migration patterns, the habitat in which they live, and so forth.
Seeing this gorgeous images got me thinking...how in the heck did Rob get these shots?
Here's my Q&A session with him from the other day...
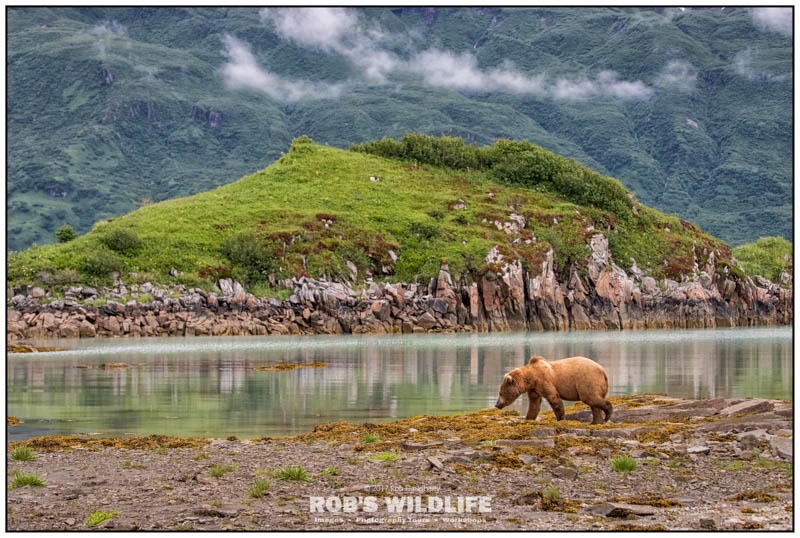
Alex: What is the best time of the year to photograph bears?
Rob: It all depends on where you’re going. For instance if you’re headed to Alaska, it’s common to see bears in May in places like Lake Clark National Park and Katmai National Park. I have found that June is the best time to see a variety of bears, which is why I do an Alaska Brown Bear workshop that time of year. In June there are lots of baby bears, lots of fighting, and lots of mating. Unfortunately the salmon run is usually more of late July through early August. The peak of salmon run varies from year to year so if you are only there for a couple days, it’s quite possible you could be too early or too late.
In Yellowstone and Grand Teton National Parks, a variety of bears (black bears, grizzly bears, cinnamon bears) are out from May through October. Be forewarned that the tourist population in Yellowstone and the Tetons between Memorial Day and Labor Day is also at its peak.
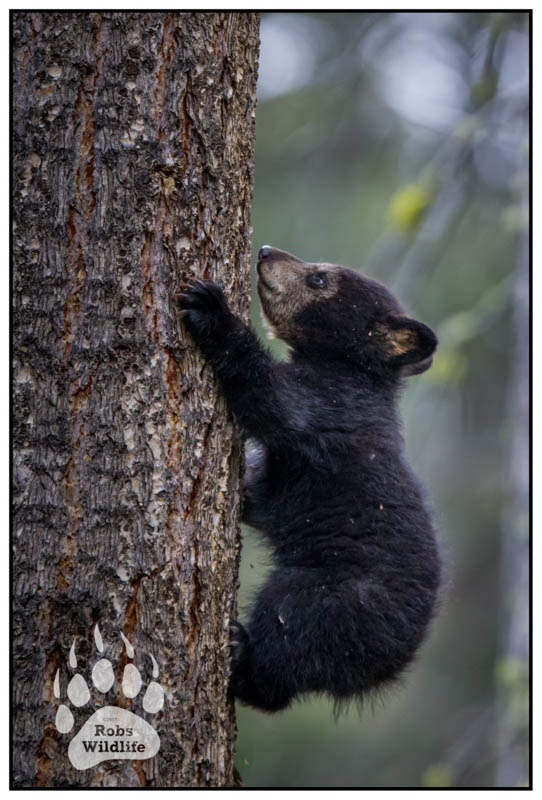
Alex: Where are you able to find these bears?
Rob: In Alaska, there are bears in Denali National Park and along the Kenai Peninsula; the bulk of the bear population is at remote destinations in Kodiak, Lake Clark, and Katmai. In Yellowstone and the Tetons, you can drive around and generally see bears throughout the day, the best time being very early mornings and in early evening.
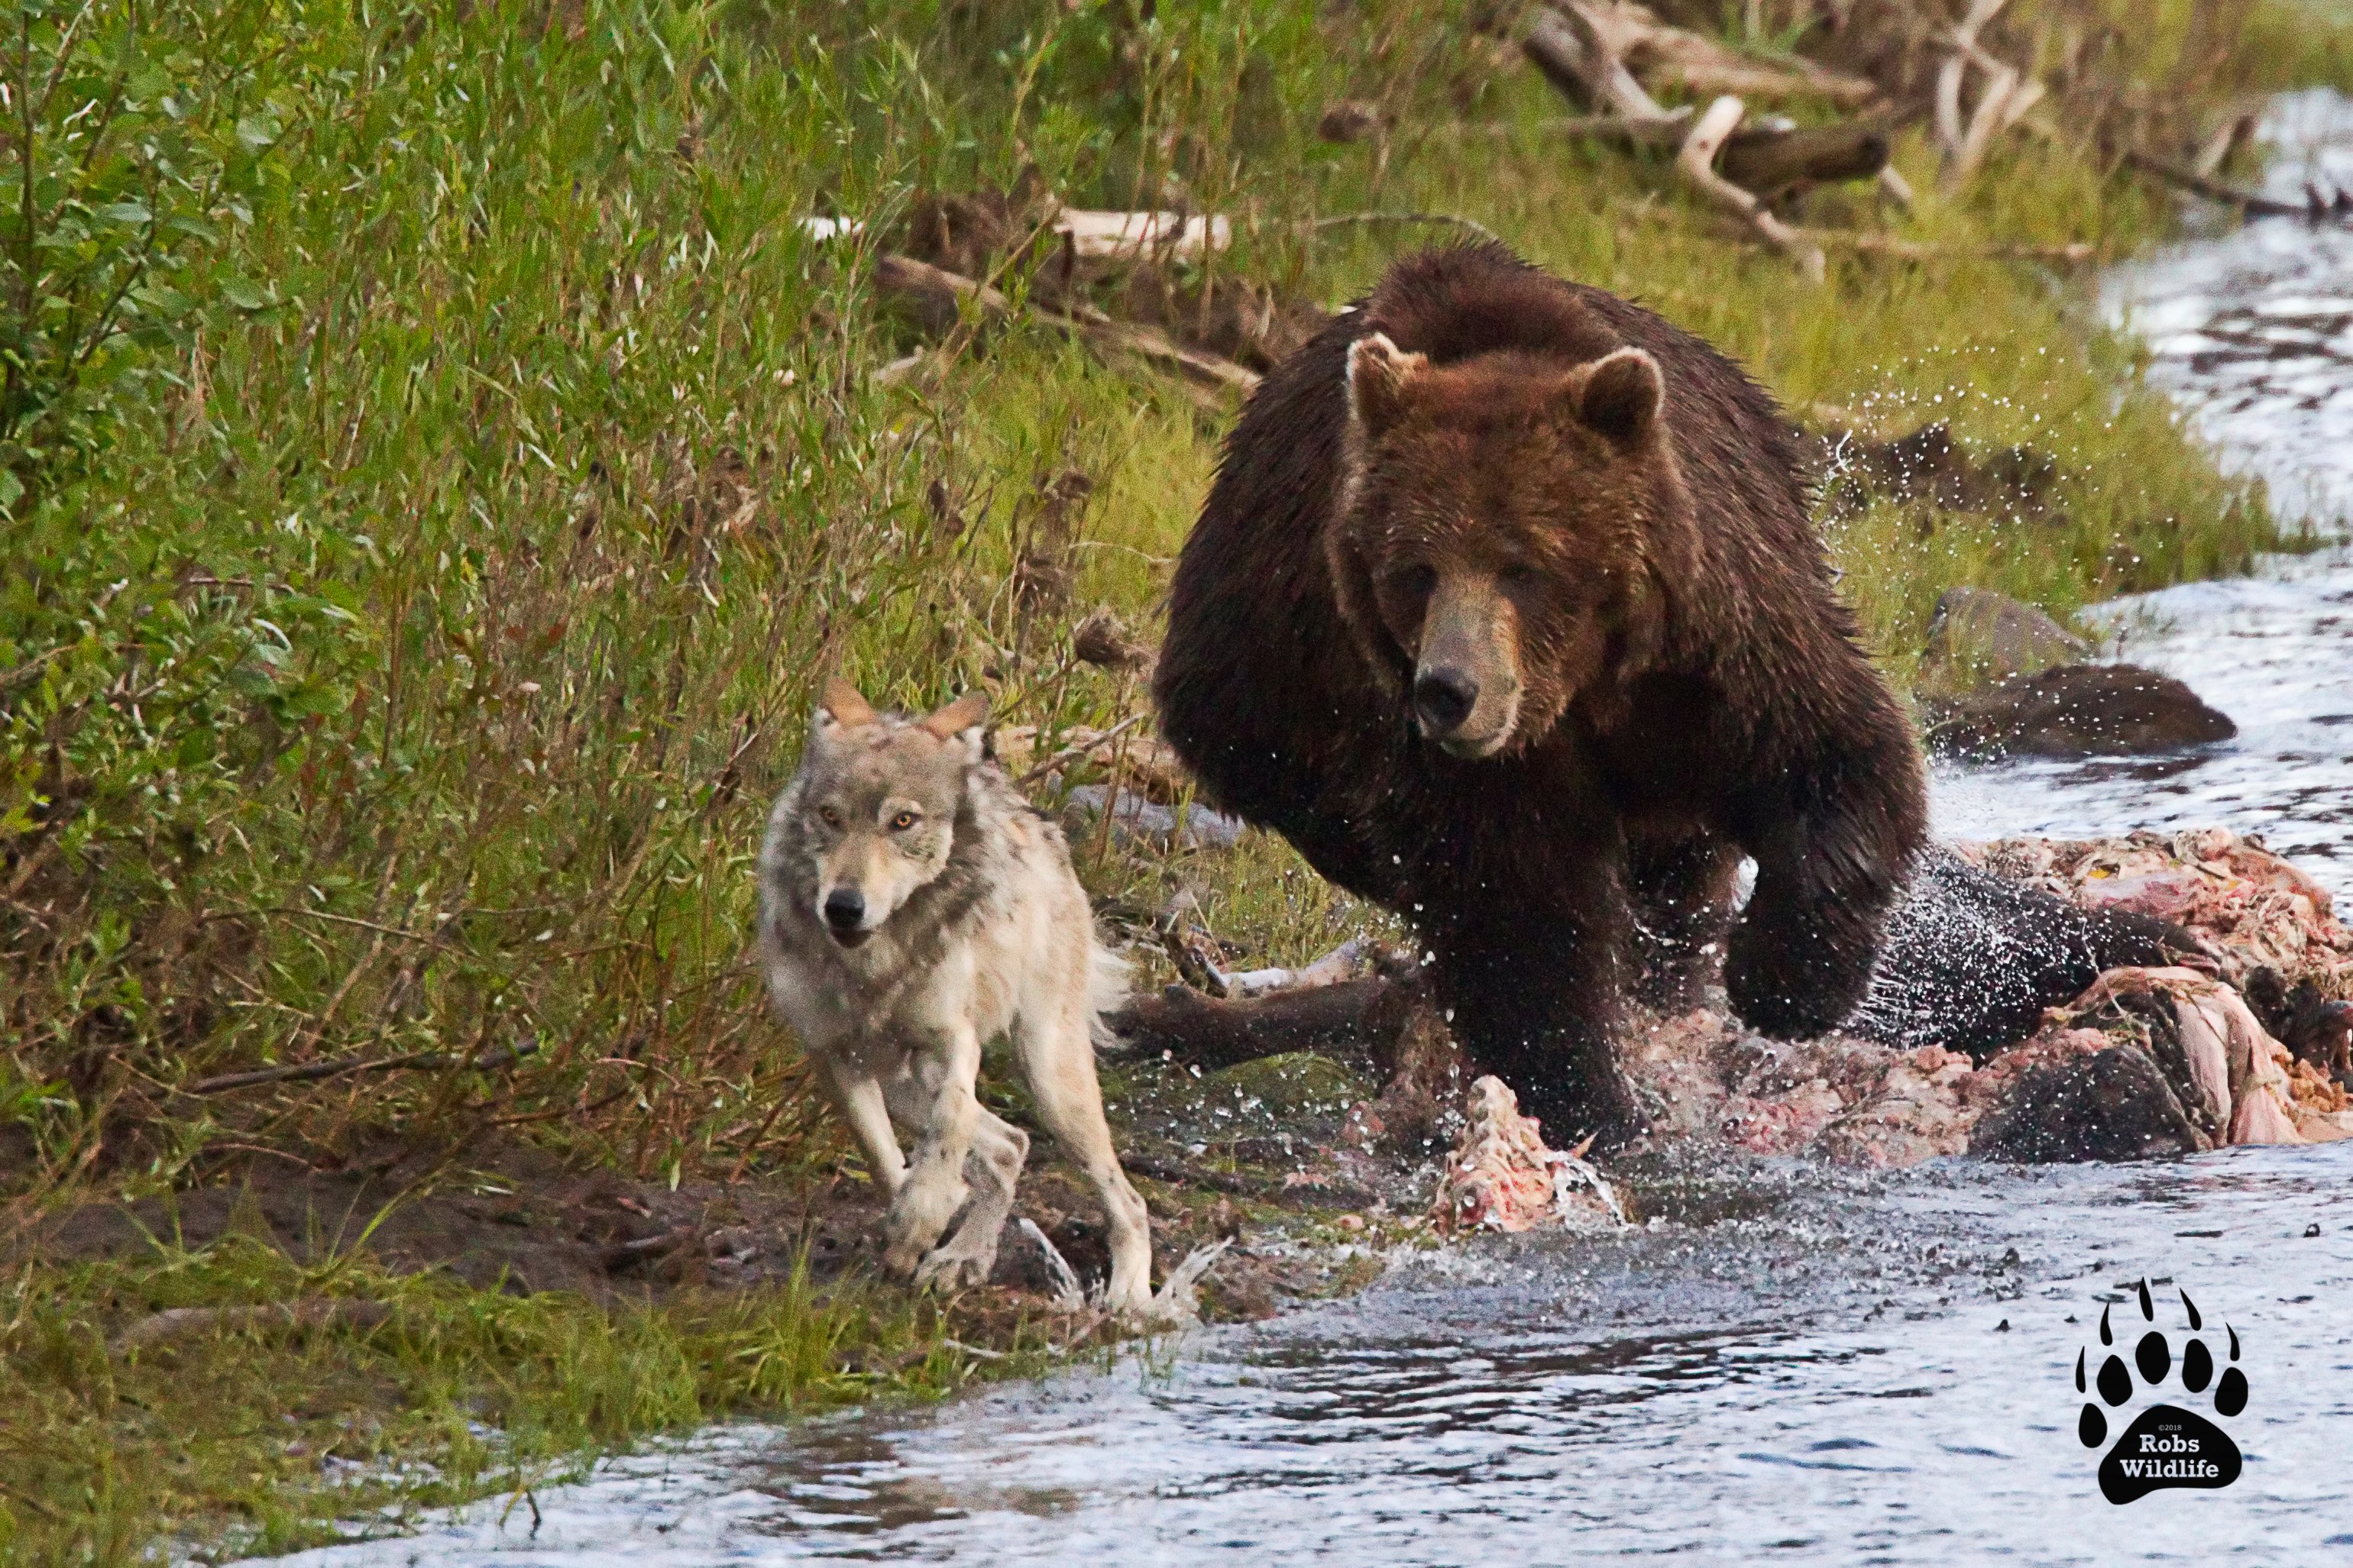
Alex: What is the number one tip you can give when trying to photograph bears?
Rob: Hire a guide. You will hands-down see far more bears on an excursion with a professional guide than you will on your own. This is a very valuable lesson I learned firsthand in Africa. On my first visit to Africa, I went with a buddy. We thought we could find wildlife on our own and bypassed hiring a guide. Yes, we saw some animals, but it was a small fraction of the quantity and quality of what I experienced on subsequent trips to Africa when I ponied up the money and hired a guide.
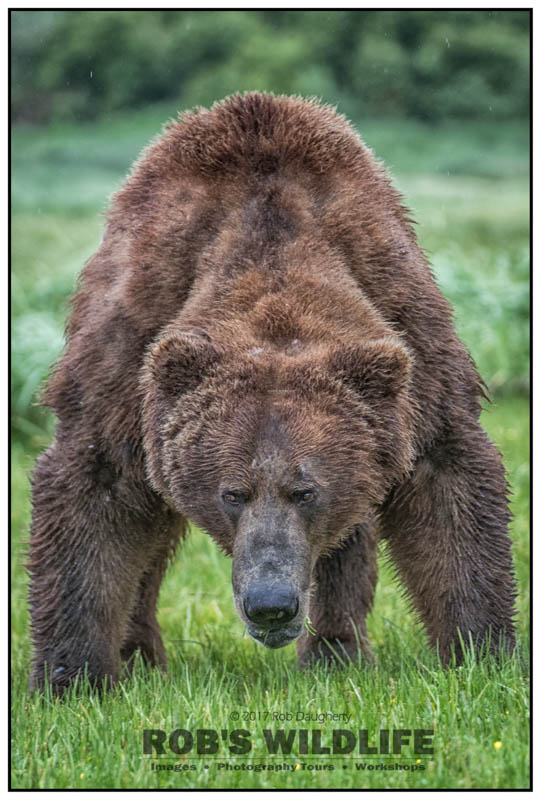
Alex: What sort of camera equipment are you using?
Rob: In Alaska, I used a 24-70mm, 70-200mm, and mainly a 100-400mm or 400mm prime lens depending on what shot I was going for. For camera body, something with a high frame rate and very fast focusing is highly recommended. I used to use a Canon 1DX but after going full Sony, I now use a Sony A9. Because of the 100 yard minimum distance in Yellowstone and Tetons, you’ll need a minimum of a 400mm lens since there’s a lot of distance between you and the bears. My current setup includes a Sony A9, Sony A7R3, Sony 16-35, Sony 24-70, and Sony 100-400.
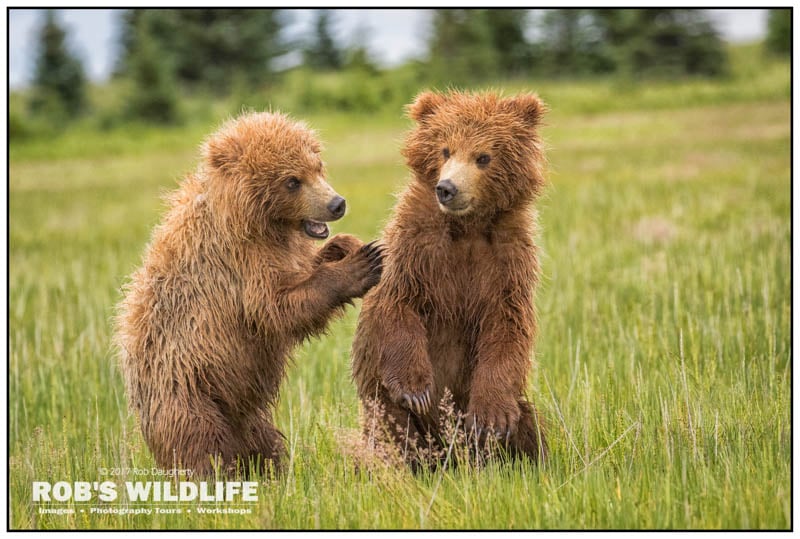
Alex: What are some must-have items in your camera bag?
Rob: As you know, I’m not a huge camera bag guy (I prefer vests) but I always keep at least two camera bodies handy and multiple lenses so I’m prepared for anything. Nothing’s worse than having to switch lenses under critical circumstances and sometimes only having a couple seconds before the shot is gone. In the past, my go-to has been a 400mm 2.8 mounted on a Canon 1DX, a Canon 100–400mm mounted on a Canon 7D Mark II, and a 24-70mm mounted on another Canon 7D Mark II. I switched to Sony after last summer and haven’t photographed any bears with my new set up, but it will be similar to my previous set up. I keep all of this on my photo vest (from my company TheVestGuy.com ) so I’m ready for anything. I like being able to switch between a telephoto and a wide angle lens in less than 3 seconds. I’m not a fan of missing an opportunity due to having to mount a different lens or dig through a backpack for gear.

Alex: When framing up your shots with these bears, what’s going through your head?
Rob: I’m always trying to determine where the bear is going to be next. I don’t want to get backend shots, so I study the bear’s behavior and get in front of it so my images are head on shots. I always suggest photographing with a buddy or two so multiple eyes are watching. It’s easy to get tunnel vision and focus only on what’s in the viewfinder. Things can change quickly, and if you’re tunnel visioned, you wouldn’t notice if a bear walked up right up behind you until it was too late.

Alex: What is your all-time favorite bear shot and why?
Rob: I have several. It’s always hard to pick just one. If I could only have one, it’d be the one I call Tasty. It was photographed in Lake Park National Park after it got done eating a salmon and was licking his lips. It ended up being featured as National Geographic’s Photo of the Day contest winner back in 2014.
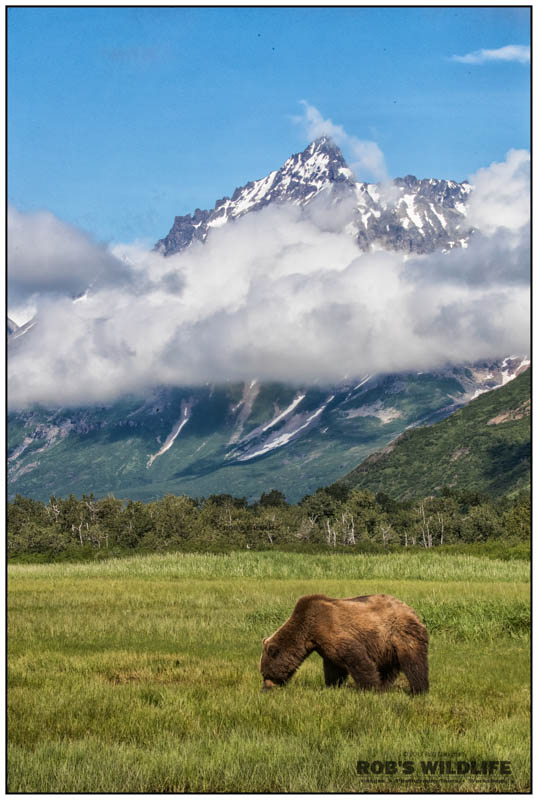
As Rob alluded to in his answer earlier, his company, The Vest Guy, makes photography vests that put all your gear right at your fingertips.
I recently bought one of his vests - the Colorado Vest - and had a chance to take it out for a field test the other day in the mountains.
It couldn't have been a better experience.
The fit is just right and the comfort level is off the charts. That's true even with it loaded for bear with all my gear!
I carried three lenses, a mirrorless body, and my filters with no problem at all. The functionality is simply head and shoulders above using a camera bag.
I loaded up the vest at home, grabbed it by the handle on the top of the vest, and put it in the car. Retrieving it was just as easy. Literally seconds is all it takes to grab the vest and go!
I intended to record the field test but I forgot a spare battery (DOH!) so by the time I was done shooting I didn't have any juice left to record the video. Stay tuned for that in the coming weeks!
We Recommend
What are the Best Cameras for Nature Photography?
Photography gear recommendations like this topic are constantly changing. There are two reasons for that, at least in my case. One, my tastes keep evolving. Two, photography gear keeps on getting better and better.
On the other hand, a few things seem to stay the same when looking for the best camera for nature photography. One, we want the highest quality images. Two, we need robust cameras to withstand the rigors of nature landscape photography.
I’ll use the standard PhotographyTalk practice of listing my camera choices for landscape nature photography in a Good / Better / Best configuration. Afterward, I’ll give you a bonus tip about the best way to display the fantastic images you capture with your new nature photography camera gear with a high-quality print.
Table of Contents:
- Features Desired In a Nature Photography Camera
- Good Nature Photography Camera - Nikon Z8
- Better Nature Photography Camera - Canon EOS R5
- Best Nature Photography Camera - Fujifilm GFX100 II
- Displaying Your Nature Photography
- Recommended Photography Gear
Features Desired In a Nature Photography Camera
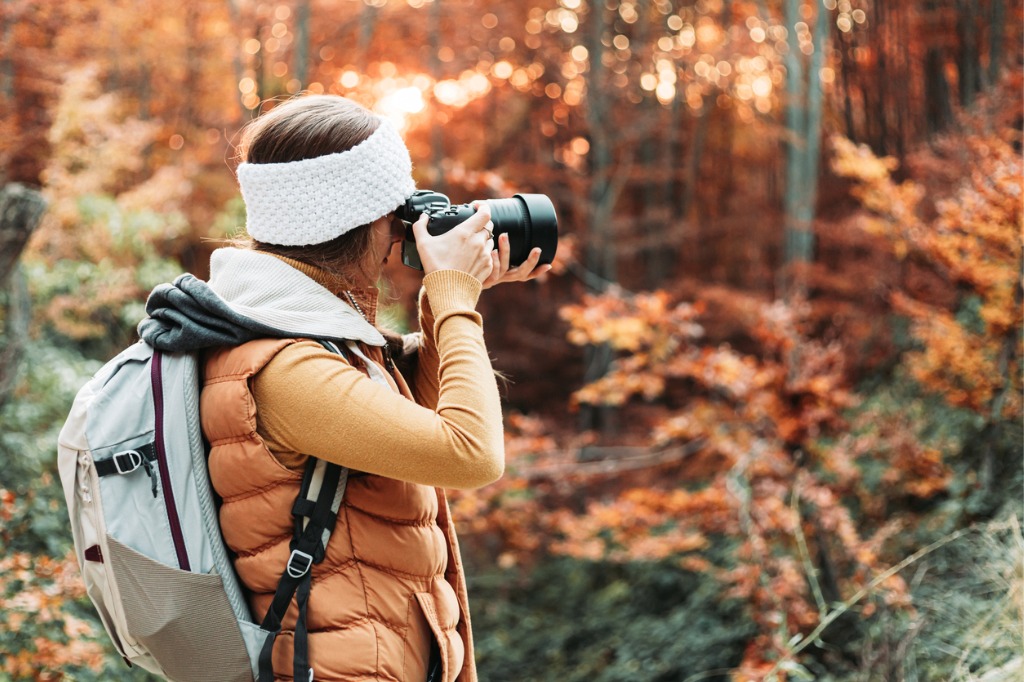
photo by Stivog via iStock
When looking for the best nature photography camera, the two main concerns mentioned above are being rugged and capable of capturing the highest quality image. For these concerns, I’ve narrowed down my search to pro-level mirrorless cameras with high-resolution sensors.
Professional-level mirrorless cameras are incredibly rugged tools for nature photography. Mirrorless cameras have fewer moving parts than similar-level DSLR cameras because they have no mirror box.
Without a mirror box, these pro-level cameras can be made lighter yet still be very substantial with metal construction since that mirror box takes up a lot of space and adds considerable weight when designed for the extra ruggedness necessary to be pro-level.
To qualify for the best nature photography camera, the other important feature needed is a very high-quality, high-resolution sensor. Some photographers are concerned that the higher resolution sensors sacrifice a little bit of low-light capability. In general, the higher the MP count of a sensor, the smaller the individual pixels, thus the lower performance for low light imaging.
So, for my list of the best nature photography cameras, I’m sticking with Full Frame format sensors and larger. Full Frame format refers to the same size image area format as 35mm film, 24x36mm with an aspect ratio of 3:2. Larger format sensors in digital cameras are referred to as Medium Format.
Good Nature Photography Camera - Nikon Z8
Our Good label camera in this list of best nature photography cameras is Full Frame format, mirrorless professional camera from Nikon, the Nikon Z8.
The Nikon Z8 is a Full Frame format mirrorless professional camera with the Nikon Z-mount lens mount. It has a 45.7 MP 24x36mm sensor and can record in 14-bit RAW for ultra-high resolution image files.
It has an extended ISO range of ISO 32 to 102,400, records 8K video, shutter speeds from 1/32,000 to 900 seconds, 5-axis sensor shift in body image stabilization, dual card slots, tilting LCD touchscreen, and rapid autofocus. It can take a full range of legacy Nikkor lenses with the FtZ adapter.
The Nikon Z8 is positioned as the mirrorless version of the highly regarded Nikon D850 DSLR pro camera for Nikon F-mount lenses. As a mirrorless camera, it is both smaller and lighter than the DSLR pro lineup from Nikon. It adds some special features for nature photography, such as image stabilization.
Better Nature Photography Camera - Canon EOS R5
In the Better slot for our list of amazing landscape nature photography cameras is the Canon EOS R5.
The Canon EOS R5 is the current high-resolution champ from Canon in Full Frame format with a 45 MP sensor that has an ISO range of ISO 50 to 102,400 and 8K video recording capability. The special IBIS High-Resolution shot mode that creates image files up to 400 MBs in size puts it in this higher slot for our landscape nature photography camera list.
Using the Canon RF-mount for lenses, you can also use Canon EF legacy lenses with the proper lens mount adapter from Canon. 8K video, IBIS, dual pixel CMOS AF with over 1000 AF points, dual card slots, and a fully articulated viewscreen round out the list of features and benefits, making this camera so highly recommended for nature photography.
Best Nature Photography Camera - Fujifilm GFX100 II
Our Best level choice for nature photography camera is the Medium format mirrorless Fujifilm GFX100 II.
The Fujifilm GFX100 II has a medium format sensor that is larger than Full Frame format. The sensor measures 32.9x43.8mm and has a resolution of 102 MPs. That equals ultra-high resolution, adding together the larger size and the very high MP count. This, in turn, means it captures image files that are exceptional in quality.
Sensor shift IBIS provides up to 8 stops of stabilization, and it can also record 4K video on the full width of the format. Extremely rugged, this camera is perhaps the perfect landscape nature photography camera. Fujinon lenses, ISO range of ISO 40 to 102,400, shutter speeds of 1/32,000 sec to 60 full minutes, and film simulation modes round out the features of the amazing camera.
Check out this YouTube video from Taylor Jackson covering many of the fine features and benefits of this amazing camera:
Though it’s a Medium format camera, the mirrorless design and Fuji innovation bring you a nature photography camera no bigger than a film era pro level 35mm camera. If you’re looking for the highest level of lightweight, compact, rugged, and ultra-high resolution for nature photography, this camera fires on all cylinders.
Displaying Your Nature Photography

Now that you have your awesome nature photography camera, you’ll want to display the images you create with it in the best possible way.
Pure Art Printer is a professional printing company that produces fantastic prints of your digital image files, such as metal prints, fine art paper prints, and canvas prints. I’ve ordered numerous prints from this company this year, and each time, I’ve been thoroughly impressed. See what I mean in my review of my Pure Art Printer metal print in the video below:
Canvas prints from Pure Art Printer also showcase your beautiful images in a superb way. Each one is handcrafted, made from the highest quality canvas material and wooden stretcher bars, and is archival quality, giving years of viewing pleasure. Of course, metal and canvas are just two options for printing your photos. You can also get your nature photos printed as velvet fine art prints.
Pure Art Printer has excellent tools and services for pro shooters, too. Combined with the best mirrorless cameras for nature photography, you will be on top of your game as a nature and landscape photographer!
Recommended Photography Gear
Heads up: Clicking on our affiliate links and exploring our sponsored content helps us at no extra cost to you, and we only recommend gear we're absolutely crazy about!
Learn More:
- 3 Features of a High-Quality Canvas Print
- 5 Unique Landscape Photography Ideas to Try
- 4 Keys to Great Landscape Photography
We Recommend
What Features Should I Prioritize in a Camera for Wildlife Photography?
Photo courtesy of Exposure Tours
If you like taking pictures of animals and are shopping for a new camera, this article is for you! Here, we’ll share all the most important features you should prioritize in a camera for wildlife photography. Since the most popular cameras today are hybrid cameras, we’ll discuss features for both photography and videography.
Additionally, we’ll cover topics like what you can do to be a good wildlife photographer besides owning the right gear, the best cameras for wildlife photography, and our favorite wildlife photography tours for 2024.
Now, whether you’re a budding photographer new to wildlife photography or a pro with decades of experience, join us as we explore the key features and specs to look for in a camera for wildlife photography!
Check out the video above by Tony & Chelsea Northrup to learn the best camera settings for wildlife photography.
Table of Contents
- What Makes a Great Wildlife Photographer?
- Camera for Wildlife Photography: Photo Features
- Camera for Wildlife Photography: Video Features
- The Best Cameras for Wildlife Photography
- The Best Wildlife Photography Tours
- Recommended Photography Gear
What Makes a Great Wildlife Photographer?
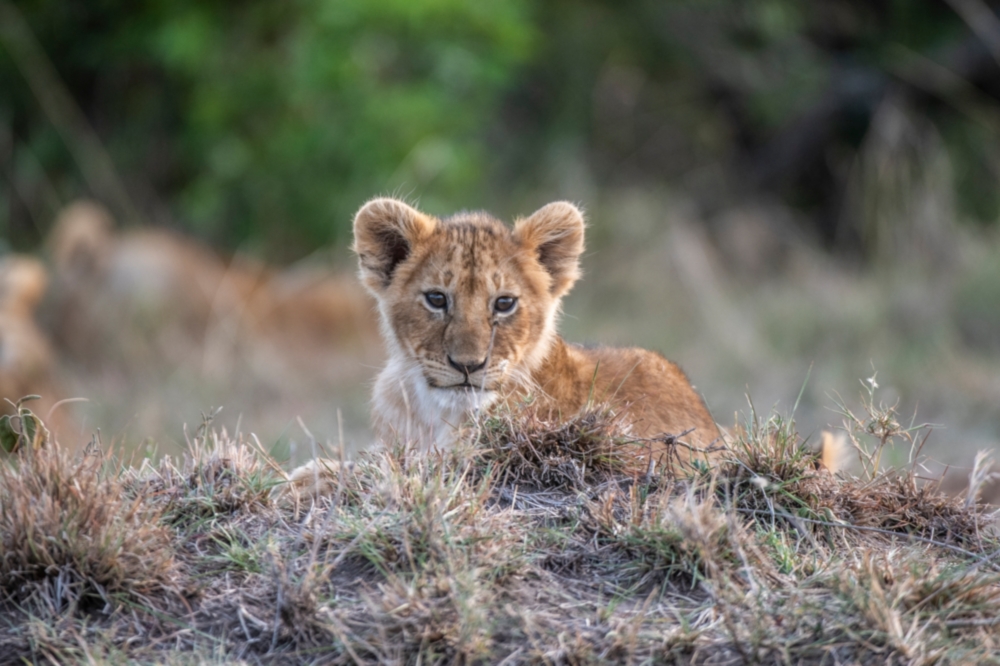
Photo courtesy of Exposure Tours
Before we dive into the specific photo and video features to prioritize in a camera for wildlife photography, we want to emphasize one crucial thing. At the end of the day, it’s not the camera, lenses, and other gear that makes someone a great wildlife photographer—it’s knowing what to do with said gear!
That means learning the basics of core photography elements like the exposure triangle (shutter speed, aperture, ISO), lighting, composition, framing, etc. It also means spending time in the field with your camera to learn how it works and become as fast and efficient as possible. Because as you’ll see later, speed is king when it comes to wildlife photography.
An excellent way to improve your photography skills at home is by enrolling in an online wildlife photography course or signing up for a local wildlife photography club. Alternatively, wildlife photography tours are a fantastic option for people who want to learn from professionals in real time while making memories and friends that will last forever.
Camera for Wildlife Photography: Photo Features
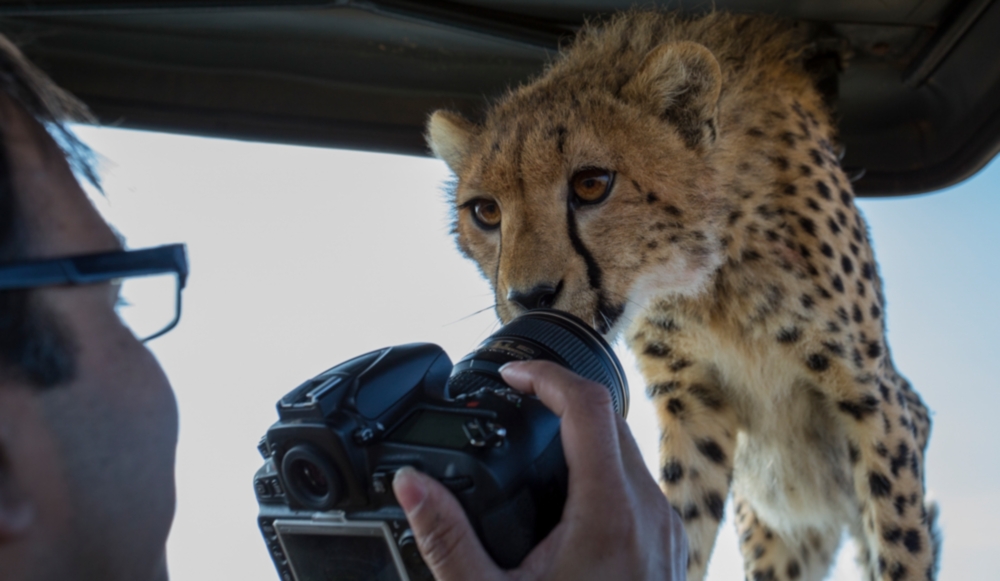
Photo courtesy of Exposure Tours
Since wildlife photographers spend long hours walking and working with their cameras, the first feature to look for is a camera body that’s as light and compact as possible. That’s why we recommend going with a mirrorless camera over a DSLR.
The next thing you will want to prioritize is sensor size. Simply put, the larger the sensor, the better. A larger sensor will have more pixels, larger pixels, and gather more light. These often-overlooked specs improve detail retention and low-light performance. You will see the best results from a medium-format or full-frame sensor.

Photo courtesy of Exposure Tours
Fast continuous shooting (aka burst shooting) speed is another feature to prioritize in a camera for wildlife photography so you can capture fast action (as shown above). The more frames per second (fps) a camera can capture, the more chances you have to nail the perfect shot. As a rule of thumb, look for a camera with a max shooting speed of at least 11.0 fps.
Other photo features to think about are image resolution, EVF resolution, buffer speeds, and lens compatibility.
Learn More:
- These Tips for Wildlife Photography Will Help You Get Breathtaking Results
- How Wildlife Photography Tours Enhance Your Photography Skills
Camera for Wildlife Photography: Video Features
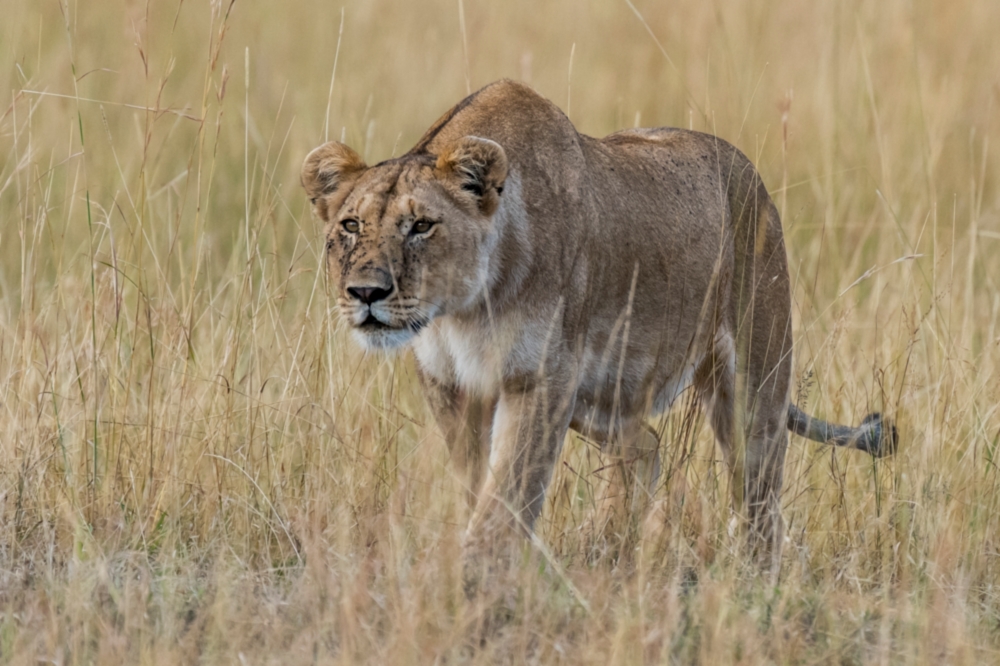
Photo courtesy of Exposure Tours
For videos and photos alike, one of the most important features to prioritize is autofocus (AF). Nearly all modern cameras today have AF capabilities, but unfortunately, not all AF performs equally, so you have to know how to differentiate them.
Four things to research about autofocus are speed, the type of autofocus (phase detection vs contrast detection), the number of AF points, and subject recognition/tracking. Regarding subject recognition, some newer cameras can even identify, lock onto, and track the eyes of animals and birds.
Other video features to consider are video resolution, video frame rates, the rear screen, audio controls, and the number/type of memory card slots.
The Best Cameras for Wildlife Photography
Photo courtesy of Exposure Tours
Now that you know the key features and specs to prioritize in a camera for wildlife photography, here are two lists of some of the most sought-after cameras today. The first is for experienced photographers and professionals, while the second is for beginners and people on a budget.
Best Professional Wildlife Photography Cameras
Best Budget Wildlife Photography Cameras
The Best Wildlife Photography Tours
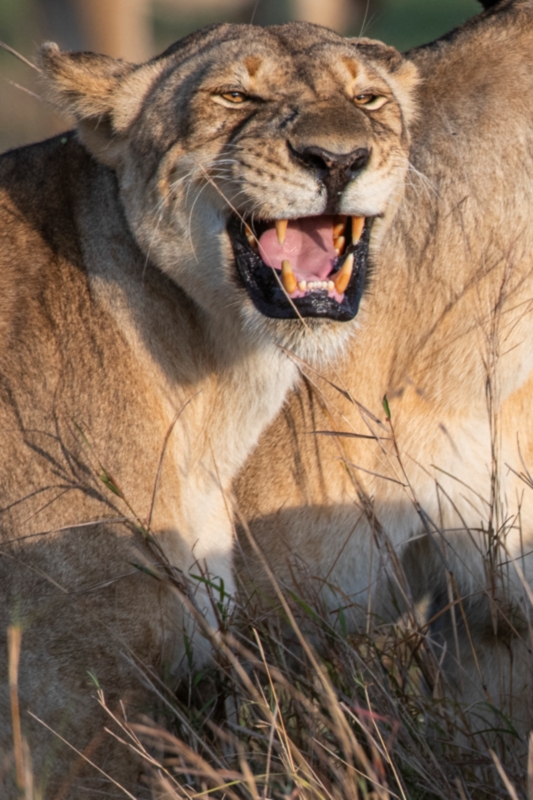
Photo courtesy of Exposure Tours
Finally, have you ever considered going on a professionally-organized wildlife photography tour? If not, you absolutely must sign up for one in 2024!
Why? Well, they travel to some of the most beautiful destinations on the planet, help you capture once-in-a-lifetime photos of exotic wildlife, and organize everything (travel, accommodation, meals, etc.) from start to finish. Wow!
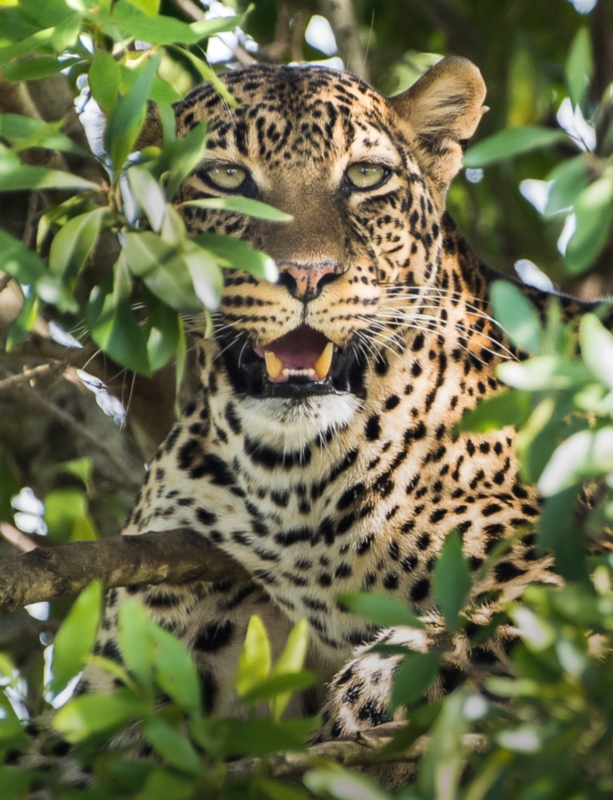
Photo courtesy of Exposure Tours
With that in mind, one company we highly recommend is Exposure Tours. They are an experienced tour operator that has run photography expeditions in Africa for over 30 years. Their director of photography (Bryan Pereira) is an award-winning photographer, and their tour director (Simon Ball) has led trips in Africa for 10+ years and has a degree in zoology.
If that wasn’t enough, their small-group experience and one-on-one instruction provide value other companies can’t match. First, all of their tours have a max size of six people. Second, only two people travel in each safari truck, meaning better views and a more comfortable journey. Third, every guest receives individual feedback on their photos from the professional guides. What’s not to like?!
Here are some of the amazing trips offered by Exposure Tours:
- Serengeti Photo Safari
- Mara Big Cats Photo Safari
- Birdwatching and Rhino Photo Safari
- Nairobi National Park Photo Safari
- Solo and Family Tours
As I said earlier, it isn’t the gear you have that makes the most difference in the shots you take. Instead, it's your skills behind the lens. Level up your skills in short order by joining Exposure Tours for a photo safari in 2024!
Recommended Photography Gear
A quick heads-up: If you snag something through our affiliate links or check out our sponsored content, we might earn a commission at no extra cost to you. But fear not, we're all about recommending stuff we're truly stoked about!
Learn More:
- Capturing the Perfect Shot: How to Choose the Right Photography Tour
- Basic Wildlife Photography Gear List
We Recommend
Why Do Nature Photographers Love What They Do?
 Male Pine Warbler in Redbud by Paul Rossi
Editor's Note: This is a guest column written by our friend, Paul Rossi. Paul specializes in bird photography, though he also photographs wildlife and landscapes.
I have always deeply enjoyed nature and the outdoors, but there was a moment when it hit me - the idea that I could share my experiences in nature through photography. It was a defining moment of my life. I remember vividly to this day how I felt great excitement, yet a deep calmness at the same time. I knew I found a strong sense of purpose aligned with something that brought me tremendous satisfaction. I knew I could share that. And I felt nothing could stop me. I felt power.
But what happened wasn't fully apparent until many years later, when I realized that I had I deepened my connection with nature.
At one time, our connection with nature was intrinsic to our survival. Our ancestors had a direct connection with nature, and the freedom to fully interact with all of the resources needed for their survival. And they developed and passed along the ability to learn from nature.
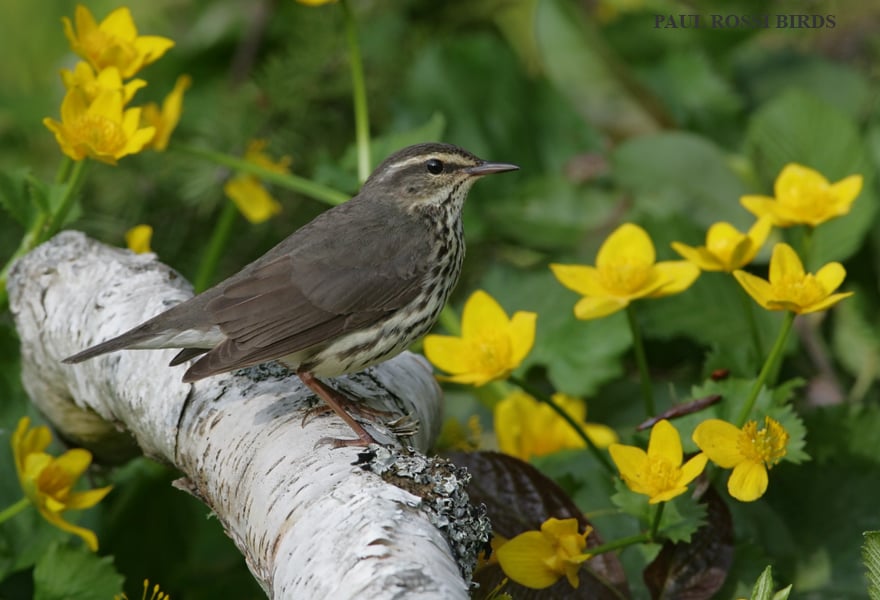 Northern Waterthrush in Marsh Marigold by Paul Rossi
But today, specialization has disconnected most of us from interacting with nature for our resources. And technology and computers make it seem as if everything is understood and all questions are already answered, so we are less inclined to go out and interact with nature and discover for ourselves what it has to offer.
Nature photography is one of the best and most accessible ways to reconnect with a past that is still intrinsic to the core of our existence. Our peace of mind and sanity once depended on our connection to nature because if we disconnected, we wouldn't have survived.
Think about that...
Deep inside us, our drive to connect with nature will always be there. It is programmed into us and its importance cannot be dismissed because it once defined what it meant to be free. Free to determine our fate.
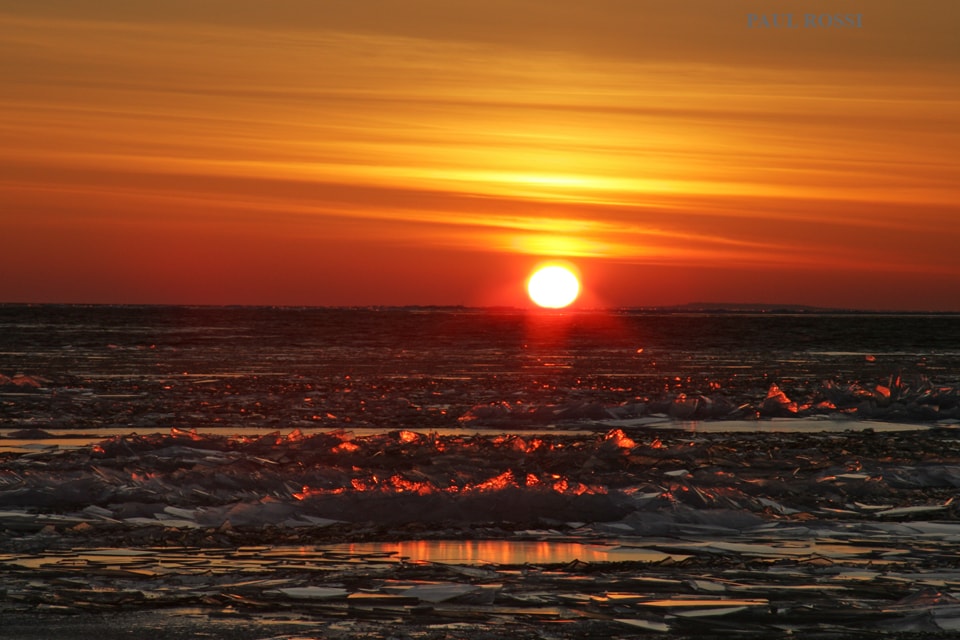 Lake Huron Ice Embers Sunset by Paul Rossi
When you are doing nature photography, you eventually experience moments of awe when you witness nature's beauty, power, or mysteries on display. When you capture those moments, you are creating - framing, exposure, depth of field, shutter speed, cropping - they are all creative tools used to present your interpretation of your experience or to present what nature has offered with as much fidelity as possible.
Ordinarily, we do not have the mindset of creating. Yet the act of creating something changes our emotional state and makes us feel alive. It gives us a tremendous influx of positive energy.
And that gives us more power. The power to leave a passive mindset behind us. The power to supersede a negative emotional state that can be induced by industrial society. You have the power to seek that energy and share it. This is what nature photography is about and it is what freedom is ultimately about.
Boredom is a common energy-sapping condition in modern society, and most people afflicted just learn to live with it.
But deep down, they are made for adventure. Otherwise, they wouldn't mind being so bored.
There are many other things in our society that can sap a person's energy level, such as the myriad of information and misinformation which induces fear. But nature photography is a way to counteract that, one way you can make a conscious effort to take responsibility for your own energy level and raise that of others.
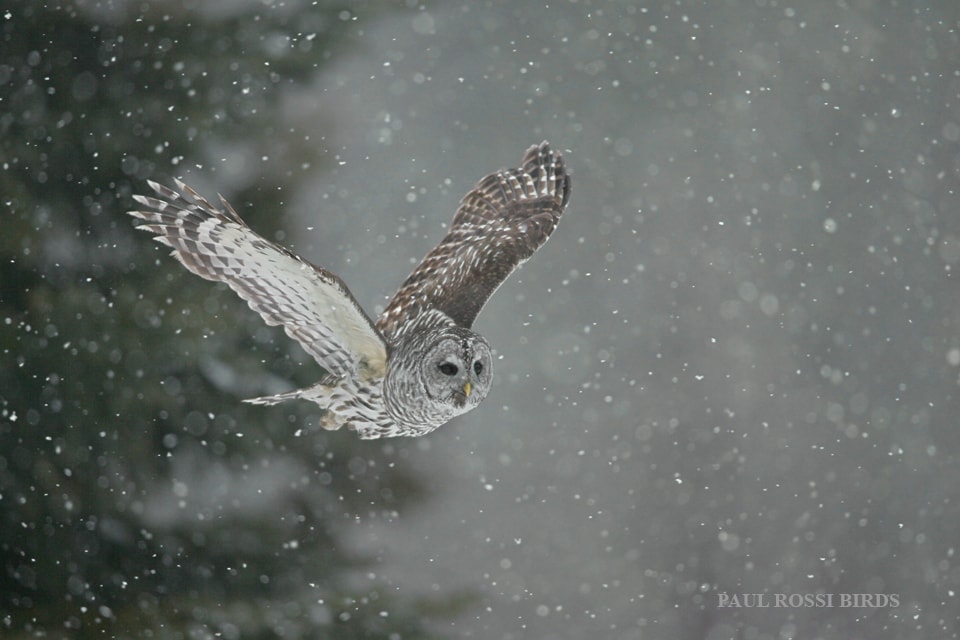 Barred Owl Snow Flight by Paul Rossi
Why do I share secrets to finding the ephemeral and hidden beauty in nature?
Because discovery in nature, with its endless variety and ever-changing beauty, fulfills our deepest desire for freedom. And happiness, too.
This is the spiritual part of connecting with nature. If I can help people develop an avenue for accomplishing this I feel good about it. That is why I began teaching photography.
I encourage you to share your thoughts on this topic!
Connect With Me:
- See my upcoming workshops here
- Information about my book
- Buy my book