5 Critical Tips for Long Exposure Night Photography
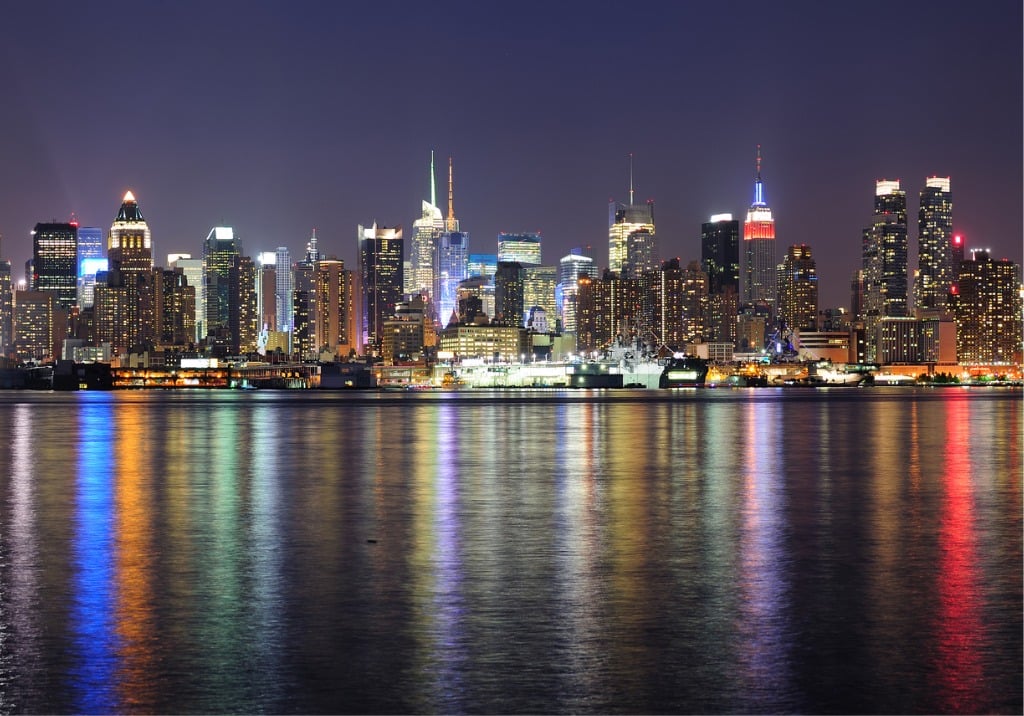
Photo by rabbit75_ist via iStock
Sooner or later, adventurous photographers will want to try their hands at long exposure night photography. Use this guide of critical tips for long exposure night photography to get you started sooner.
Long exposure night photography lets you capture and display a world that is not easy to see with the naked eye. With long exposure night photography, you can see deep into space, turn moving lights into works of art, or capture otherworldly scenes in your own backyard.
If you’re ready to attempt it, let’s get you started on your own adventures with light exposure night photography.
Table of Contents:
- What is Long Exposure Night Photography?
- How To Do Long Exposure Night Photography
- Long Exposure Night Photography Equipment
- Some Long Exposure Night Photography Ideas
- The Basics of Astrophotography
- Light Painting!
- Post-Processing Essentials
- Displaying Your Long Exposure Night Photography
- Final Thoughts On Long Exposure Night Photography
- Recommended Photography Gear
What is Long Exposure Night Photography?
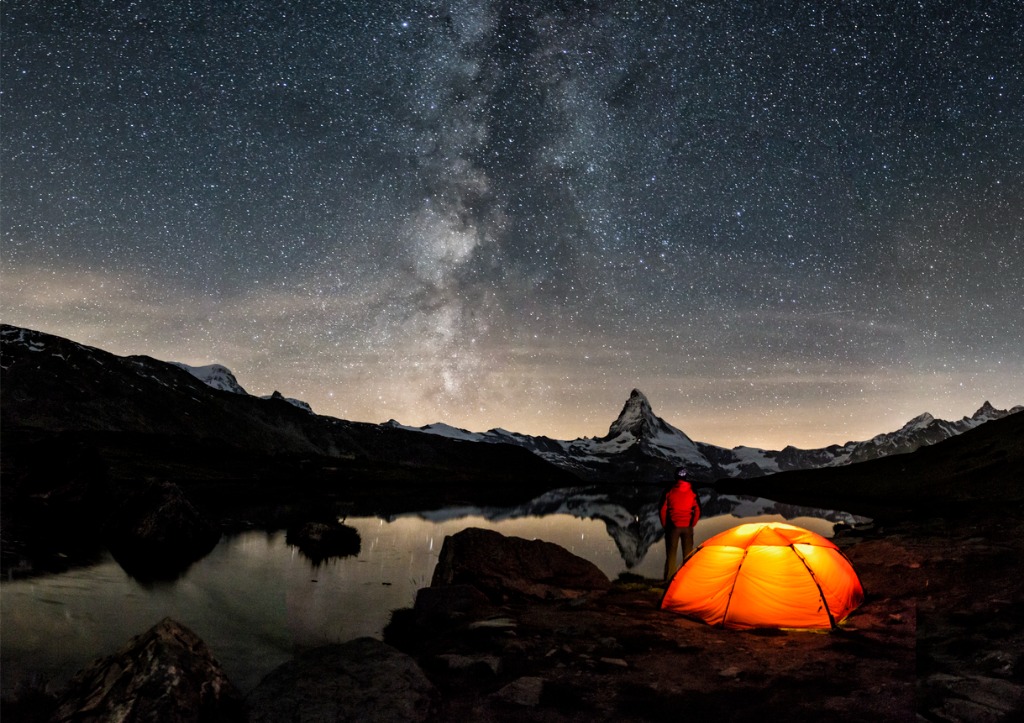
Photo by DieterMeyrl via iStock
First up, let’s get a good, usable description of what is long exposure photography. Obviously, we are using long exposure times. Shutter speeds aren’t really expressed as the shutter speeds that we’re used to in daylight or bright ambient light, where the speeds are mere fractions of a second.
Instead of saying “shutter speed,” we usually start using the phrase “exposure time” as being more descriptively accurate. Since there are several types of long exposure photography, such as adding ND filters to increase exposure times for daylight scenes to blur moving water, we’ll specifically refer to long exposure night photography as being done outdoors at night.
How To Do Long Exposure Night Photography
Photo by Greg Nicod via iStock
There are two main methods of capturing long exposure night photography, one very long exposure time or several shorter exposures stacked together and post-processed. Plus numerous variables in between.
It’s not only the shutter speeds of exposure times that are considered when calculating or estimating exposures. The Exposure Triangle still exists even in this extreme type of photographic exposure. The lens aperture or f-stop and the ISO sensitivity of the sensor or film have just as much importance as in daylight photography.
Opening up the lens aperture or increasing the ISO are available to shorten the extremely long exposure times we might encounter. There are a couple of warnings about that, though.
Concerning lens aperture, opening up to the widest f-stop or using an extremely fast lens will shorten exposure times, but that introduces optical problems. A limited depth of field might not be good for the arrangement of subject elements. Focusing precision can be tricky when photographing at night.
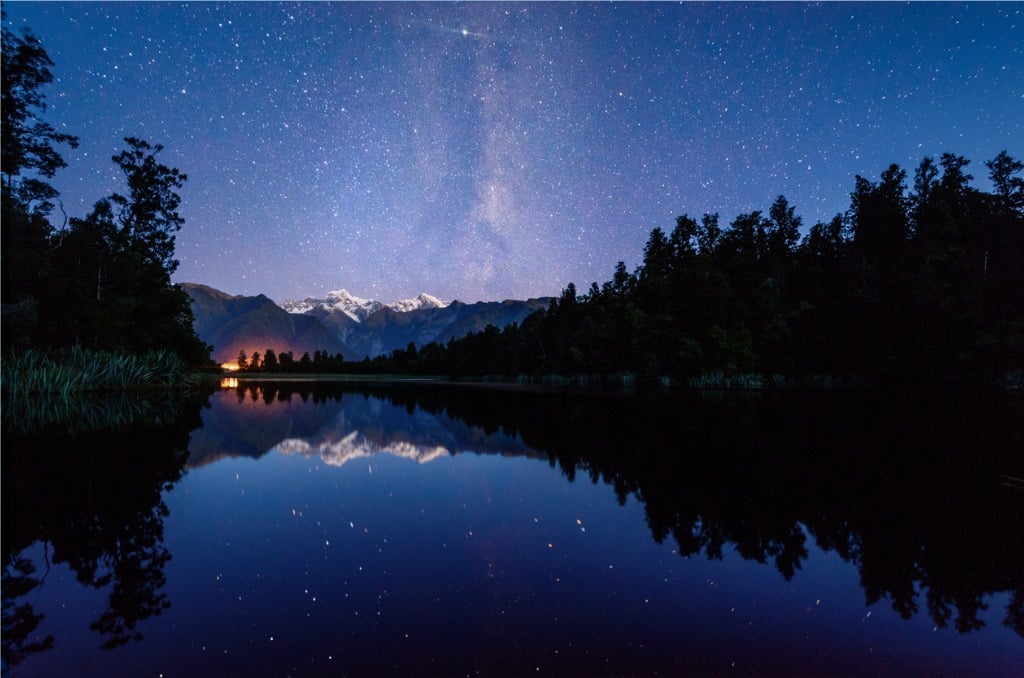
Photo by Photo by FLASH via iStock
Also, any point light source, such as we encounter in astrophotography, will likely be distorted, regardless of how well-corrected a lens may be. We get around this issue by stopping a lens down to the sweet spot aperture, which requires a longer exposure time. In the Exposure Triangle, they’re all connected.
Increasing the ISO sensitivity will shorten exposure times, but there’s a limit to this, too. Raising the ISO (higher numbers) will also increase electronic noise. Sometimes, this can be used artistically, such as mimicking analog film grain, but it can bring in a level of image degradation, not being as sharp as we might want.
Stacking exposures, like we might do in HDR photography, can handle some of the issues of digital noise or the dynamic range issues of a night scene, but there are pros and cons there, too, such as subject motion or star and planet movement.
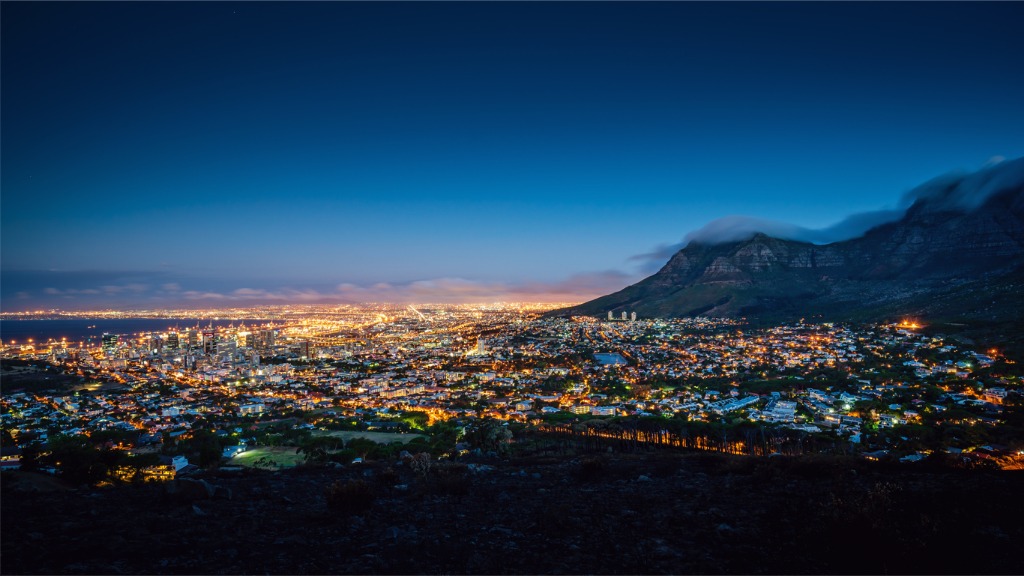
Photo by Mlenny via iStock
Metering for long exposure night photography can be accomplished with the camera’s exposure meter for exposure times in the range of a few seconds or so. But it may be better to consult exposure tables to get into the right range for anything longer than that. And then adjust up and down from those recommendations. Under the right circumstances, you could use the camera viewscreen or a tethered device to check exposures.
With most long exposure night photography, AF auto-focus won’t help much. Manually focusing accurately is possible with preset zone focusing (hyperfocal distance principles apply) or by using the viewscreen and increasing magnification.
Long Exposure Night Photography Equipment
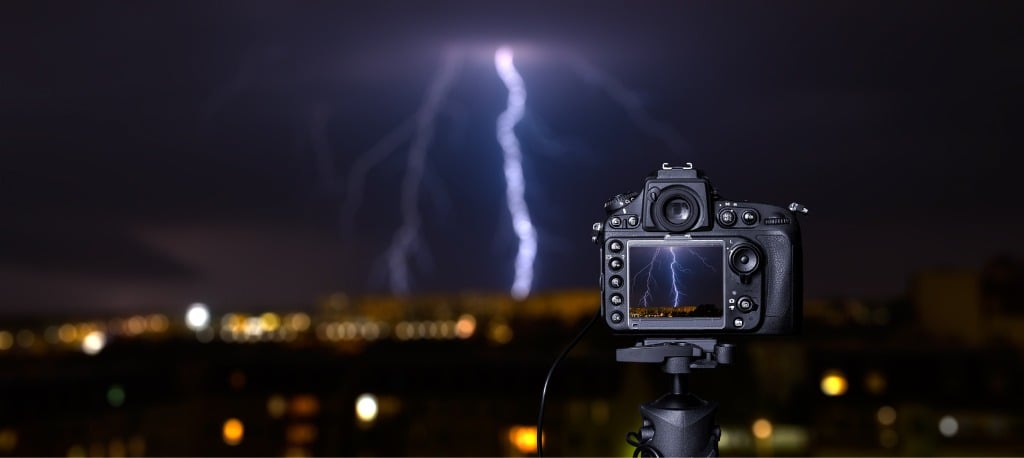
Photo by scyther5 via iStock
Here’s an encouraging thought. The camera gear you have right now is probably all you need for making amazing long exposure night photography images.
Let’s make sure with a brief overview of the necessary gear. You will need a camera that allows for manual exposure adjustments. The larger formats will be better at low-light imaging, so MFT, APS-C, and Full Frame camera sensors are preferred.
Any high-quality lens will be a good choice. It can be a zoom, prime focal length, wide-angle, normal, or telephoto. It depends on your vision of the final image, just as in daytime photography. Fast lenses or a moderate maximum aperture lens are both good ideas.
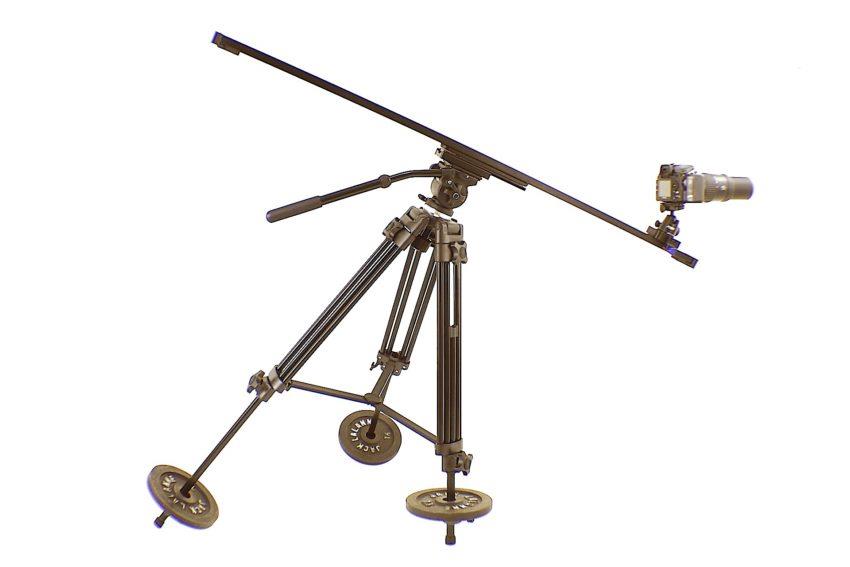
A good, sturdy, heavy-duty tripod is preferred over lighter travel tripods since exposure times could be very long, measured in full seconds and minutes. A tripod alternative like a camera mount would also be great.
Mirror lock-up function if your camera has that feature and a remote release, wired or wireless, round out your equipment needs. Lastly, a flashlight, either a regular style or one made for astronomy or hunting, with a deep red filter, is handy to have.
Learn More:
- How To Turn Photos into Wall Art
- Benefits of a High Quality Metal Print
- Creative Options for Printing Your Photos
Some Long Exposure Night Photography Ideas
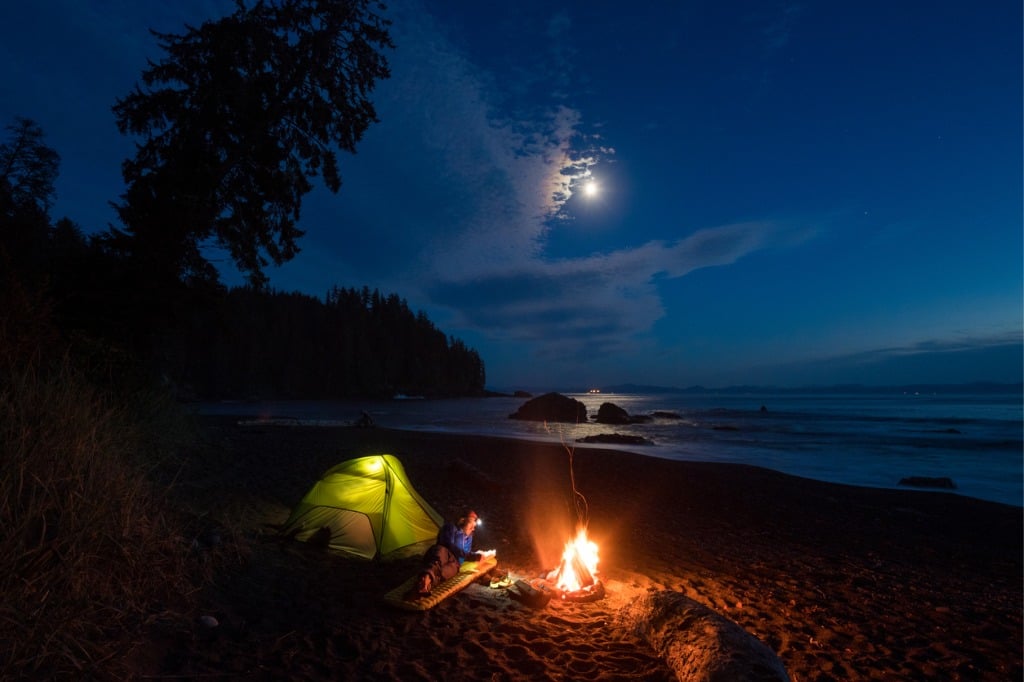
Photo by stockstudioX via iStock
Now that we have all that out of the way, here are some long exposure photography ideas that cover multiple types of night imaging:
- The Moon
- Planetary Conjunctions
- Deep Sky Objects
- Cityscapes
- Rural Landscapes
- Nighttime Storms (Lightning)
- Architecture (Well Lit or Unlit)
- Lakes, Rivers, Ocean
- City Roads and Rural Highways
- Light Painting
- Monuments and Statues
- Mixed Flash and Ambient Light
- HDR Photography
- Blue Hour (Morning and Evening Twilight)
You can find detailed discussions on all of these subjects in other Photography Talk articles.
The Basics of Astrophotography
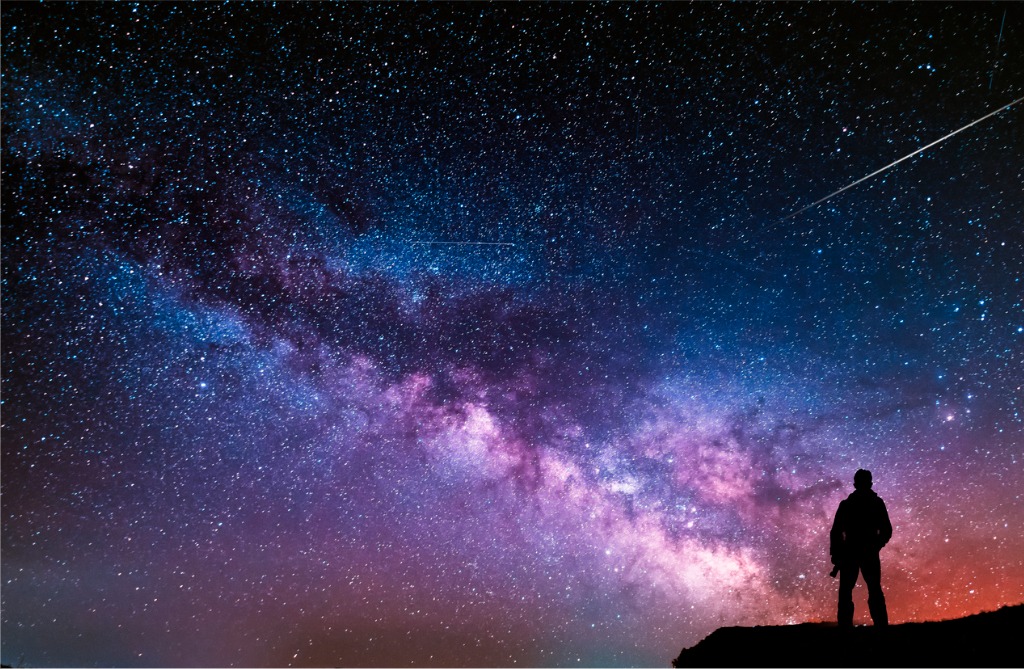
Photo by Inga-Av via iStock
Astrophotography is one aspect of long exposure night photography that may make you want to invest in other, more specialized photographic equipment. That could include an equatorial mount, a telescope, light pollution filters, and filters for specific light wavelengths.
Taking pictures lit by moonlight differs from taking pics of the Moon itself. A moonlit landscape or lake view is much dimmer than the same scene in daylight, so you’ll use longer exposure times. But a photo OF the Moon captures a very bright object lit by direct sunlight.
When imaging the planets, you’ll notice they move across the more static star-filled background, but even that star field is not motionless. Some tips can be found in our articles covering the 500 Rule and Night Landscapes.
Light Painting!
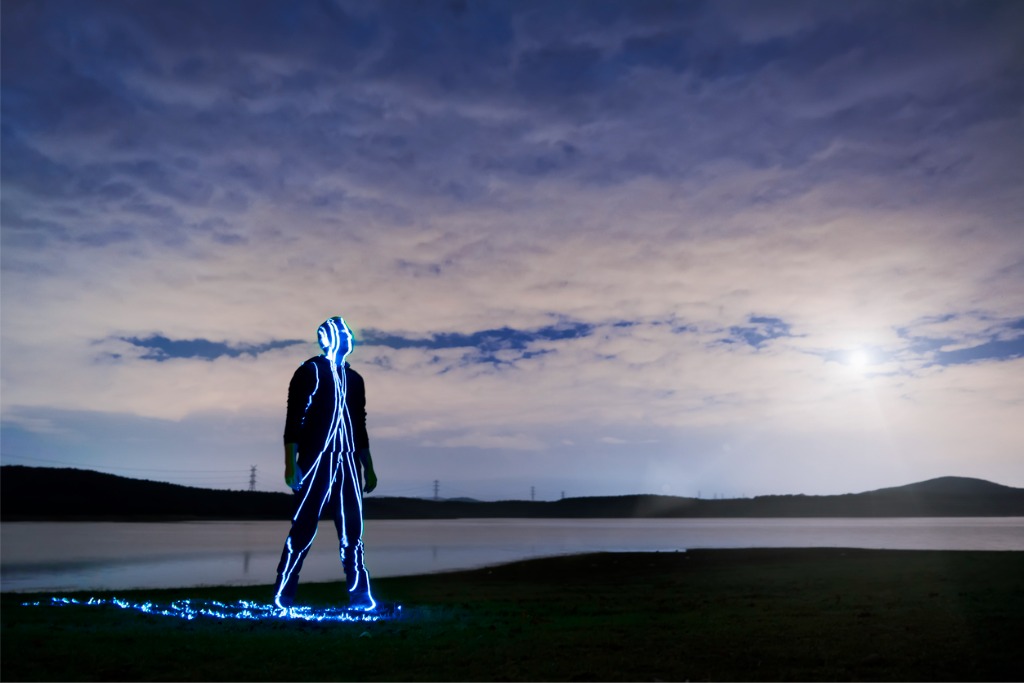
Photo by Enes Evren via iStock
Light painting is a fun form of long exposure night photography. In light painting, you keep the shutter open and use a flashlight or other portable and small light source as a brush on an invisible canvas. It takes a little practice to get it down well, but you can be as simple or elaborate as you wish.
Check out this short YouTube video tutorial on light painting by photographer Kyle Nutt:
Related to light painting is using a flash or a continuous video light to bathe a subject element with a wash of light to make it stand out against the long exposure background. It can be fun to make portraits this way, but any subject matter will work.
Post-Processing Essentials

Photo by AleksandarNakic via iStock
Some simple post-processing adjustments can make your long exposure night photography look its best. One trick is to use your slider exposure controls to adjust highlight, mid-tone, or shadow values. You can also adjust separate color channels this way. You can opt for small, subtle tweaks or large-scale significant changes.
Blending exposures in a bracket and merge or HDR program can solve certain dynamic range issues you may encounter while working on your long exposure photography ideas. These programs often have a setting to eliminate or lower digital noise.
Many programs have a specific control for adjusting digital noise that can be used for any style of long exposure photography. On some, it’s a preset; on others, you can adjust it as you want.
The noise mostly appears in large areas of density or shadow and can obscure shadow detail or be an annoying artifact. You can also leave it in the image if your artistic vision leans that way for a certain image.
Digital noise is a big issue for a lot of long exposure night photography images of astronomical subjects. You could use the noise control of your program, or you can go all out towards eliminating astrophotography digital noise by shooting some dark frame image files and blending them in using a specialized program designed for astrophotography.
Displaying Your Long Exposure Night Photography
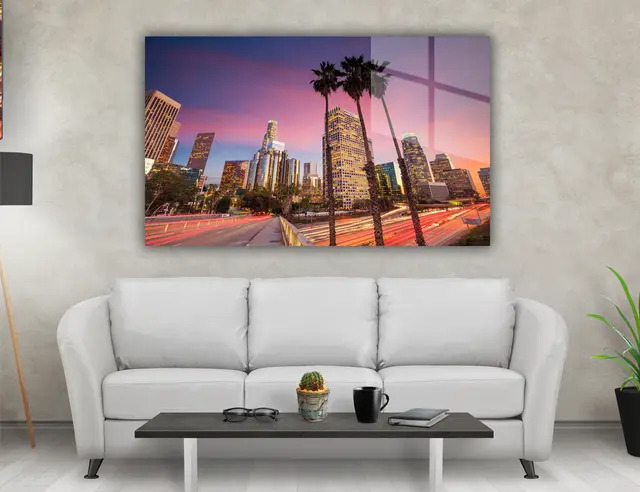
Now that you have these amazing image files of your long exposure night photography, you’ll want to display them to their best advantage. One of the best mediums for night photography is an HD metal print.
Artbeat Studios is a top-quality source of premium HD Metal prints for showing off your night photography. Artbeat Studios uses a dye sublimation process and industry-leading ChromaLuxe® brand aluminum sheets to bring out the colors of your images of all types.
Metal prints work great for night photography because of the excellent color fidelity and the deep, rich black tones. Depending on what finish you choose, the highlights in an image show up in a special way as well.
Your images look like they're floating against the wall with a recessed mount. You can also opt for a flush mount or put them in a low-profile frame. Artbeat Studios can make these metal prints in any size, from 8x8” up to 40x60” wall art.
While you’re there, check out their HD acrylic prints, which work wonderfully for long exposure night photography images. Artbeat Studios has easy eCommerce integrations and other programs for professional photographers.
Final Thoughts On Long Exposure Night Photography
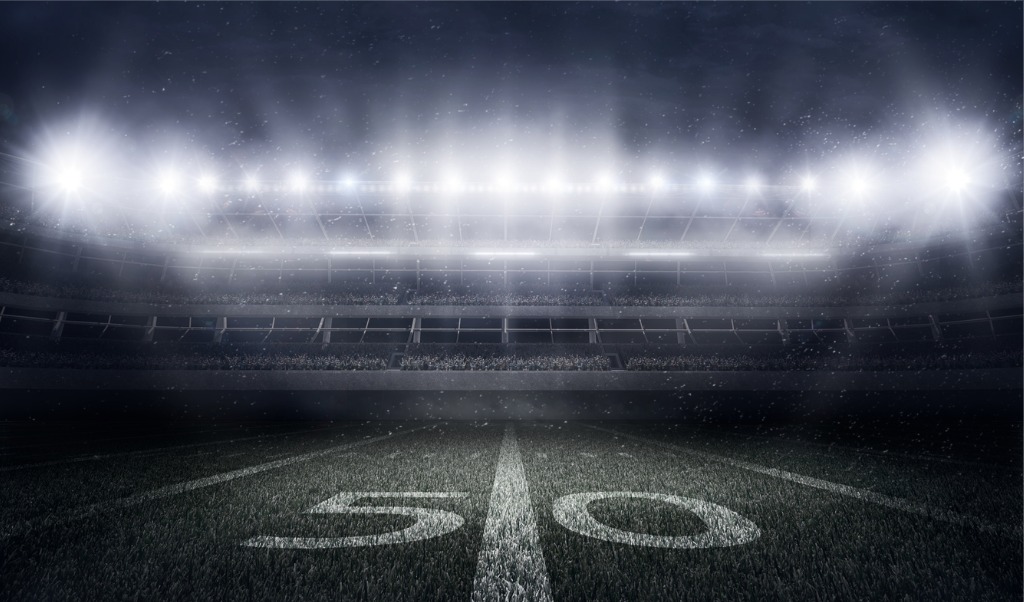
Photo by Masisyan via iStock
So, what do you say? Are you ready for some long exposure night photography?
Using these tips and ideas to supplement your refined technique and creativity, you’ll have a great time making and then showing off this fantastic style of photography.
Recommended Photography Gear
Learn More:
- 4 Things You Need to Know about Metal Prints
- How To Impress Your Photography Clients
- Why You Should Print Your Images On Metal
We Recommend
Critical Tips for Low Light Photography
Photo by AlvaroHernandezSanchez via iStock
Capturing pictures in low light can result in amazing images, or it can be an exercise in futility. Follow these critical low light photography tips for making amazing photos in various low light photography situations and avoid the frustration of some of the common issues.
As we examine our low light photography ideas, I’ll also show you some great low light photography gear and talk about some useful low light photography settings you can use for making your own great images.
Table of Contents:
- The Joys of Low Light Photography
- Camera Settings for Low Light Photography
- Low Light Photography Gear Options
- Low Light Photography Creative Ideas
- Low Light Photography FAQs
- Recommended Photography Gear
The Joys of Low Light Photography
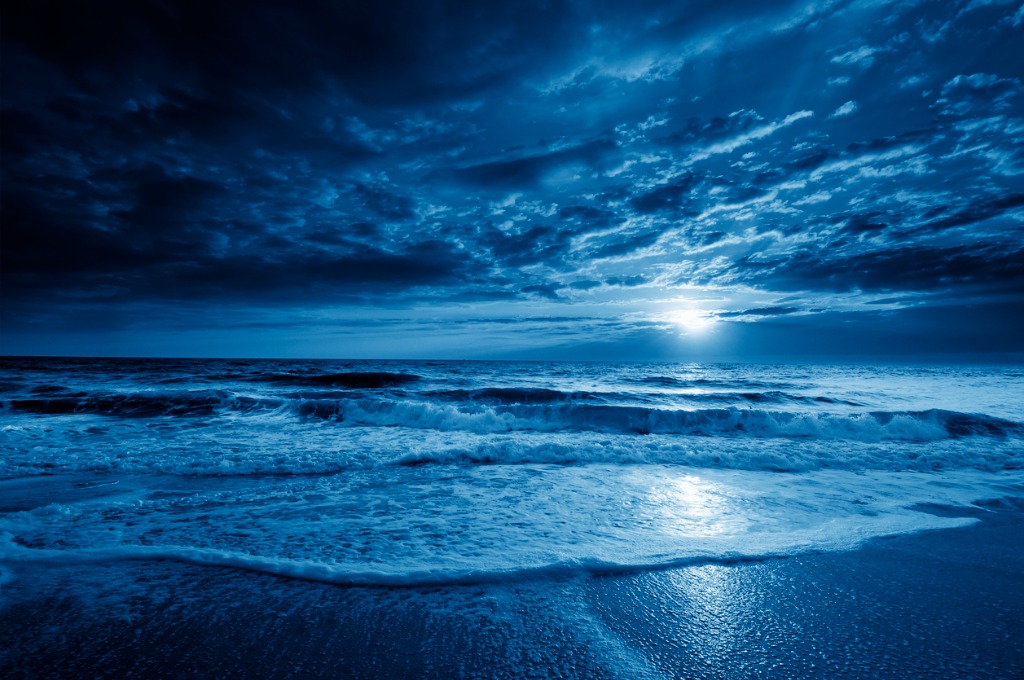
Photo by ricardoreitmeyer via iStock
Low light photography is a lot of fun. I enjoy the results and all the steps leading up to presenting the final image. I’m wagering a lot of you do, too.
For my definition of low light photography, I will exclude adding lights or a flash unit to brighten the scene. Instead, I see low light photography as capturing the scene with just me and my camera and some way to keep the camera still.
Using a flash or adding a light can be an easy solution that often alters what I see as the magic of a low light scene. In fact, unless it’s done really well, adding an external light source can completely change the feel of the final image.
That being said, there is nothing at all wrong with adding artificial light to a scene. But then, this becomes a discussion about lighting or flash use. For low light photography, I’m relying on capturing natural light.
Interestingly, if you’ve ever been on a movie set when they are shooting a “low light” scene, you’ll notice how much lighting gear is in use. Sometimes it’s more equipment than in a standard scene. The cinematographer, the guy in charge of the lighting configurations, may have some focused spots on one or two actors’ faces, and there are as many baffles and scrims as there are reflectors and lights.
Seeing how much effort it takes to mimic a naturally occurring low light scene for cinema gives me more appreciation for the natural light we see all around us, including in a low light photography situation, which is what we’re attempting to capture in our still images of low light scenes and situations.
Learn More:
- Essential Tips for Photography While Hiking
- Long Exposure Photography Gear List
- Outdoor Portrait Tips
Camera Settings for Low Light Photography
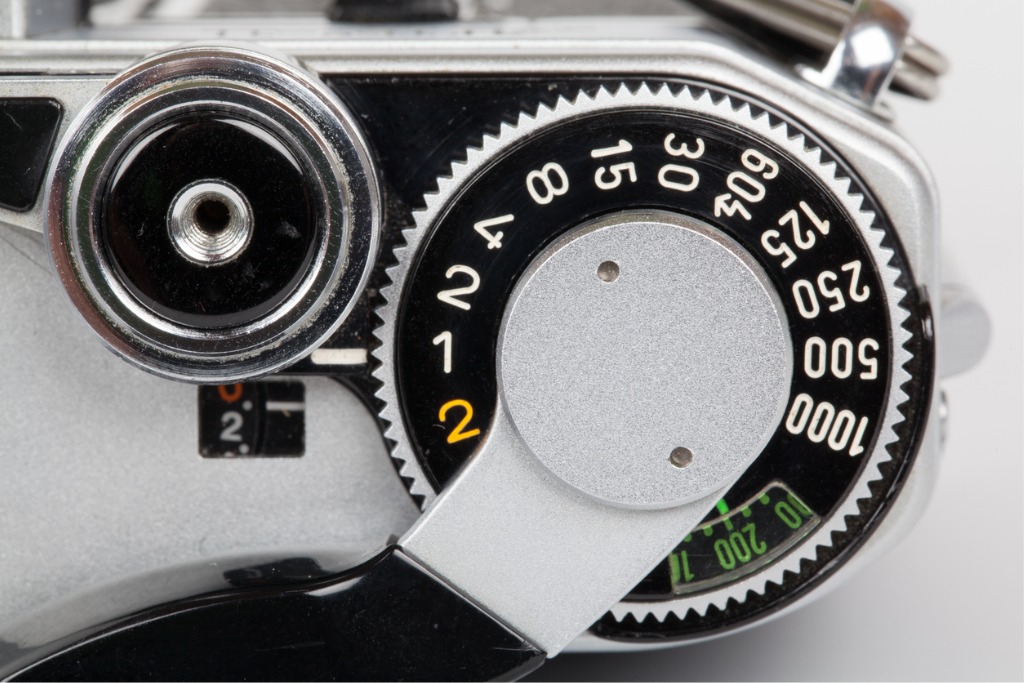
Photo by JanStauffer via iStock
The optimum low light photography settings for our cameras are sometimes counterintuitive. We’re thinking, “open that lens aperture all the way,” and “use the fastest lens I have,” or “raise up the ISO so the settings fall into place.”
Those are all workable ideas, by the way. Sometimes that is the way to go. But, often, the wide-open aperture of a super fast lens doesn't give me enough focus depth. Or the higher ISO introduces too much noise.
So, I opt for a moderate lens aperture, often choosing the sweet spot aperture for the best optical performance. And while my newer cameras have excellent high ISO quality, I pull back a little to ensure my shadow areas don’t look noisy. Unless that’s the effect I’m trying to get, that is.
This means that the shutter speeds for proper exposure may be on the slow side. You can hold a camera at longer shutter speeds with proper technique and practice. If your camera has image stabilization technology, that can help out quite a bit. Play around with your camera with shake reduction turned on and turned off to see what your personal limits are.
Low Light Photography Gear Options
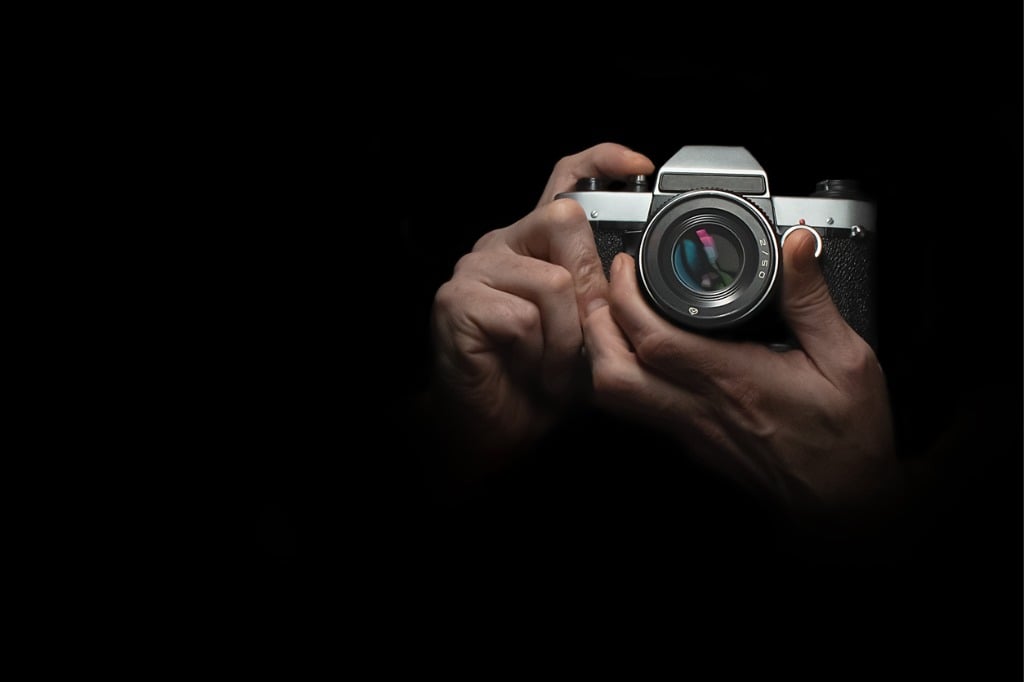
Photo by Gwaigir via iStock
Your low light photography gear choices can greatly affect what you can accomplish as a final image result. For best performance, you want to have as large a sensor as you can. The three most popular sensor sizes, MFT, APS-C, and Full Frame, all will produce wonderful images, but there is a definite performance difference with the larger Full Frame sensor holding the edge.
Another interesting fact is that a lower megapixel (MP) count is better for low light photography than a comparable-size sensor with a high pixel count. Both of these sensor qualities are due to individual pixel sizes. A 12MP Full Frame sensor has larger pixels than a 24MP MFT or APS-C sensor, making the first sensor better regarding low light performance.
Image stabilization features are great for many low light photography situations. Some newer mirrorless cameras have 5 to 7 stops of added stability, usable with virtually any lens. Put all of this together, and you can see that several cameras in the current lineup of Full Frame format mirrorless cameras from Canon, Nikon, Panasonic, and Sony are low light photography powerhouses.
If you’re already using other Full Frame cameras or APS-C and MFT format cameras, many also provide excellent low light performance. Really, any camera can be used for great low light photography when you use good technique or a camera mount of some type.
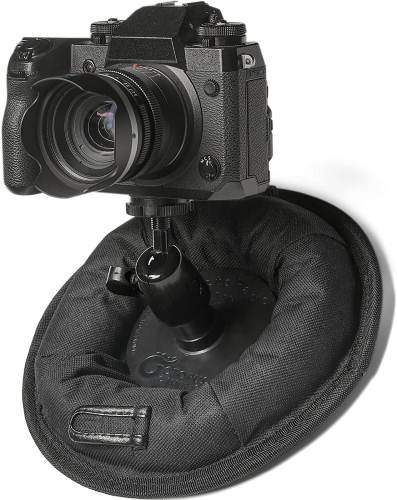
Since your shutter speeds can be on the slow side of the dial when shooting in low light, a portable stability device such as a monopod, a travel tripod, or the OctoPad camera mount becomes a valuable accessory.
OctoPad is a handy item that should be in your low light photography gear bag. It’s more compact than a travel tripod and steadier than a monopod. OctoPad is a compact, flat disk of heavy-duty, weighted material with a ball head attached to the top.
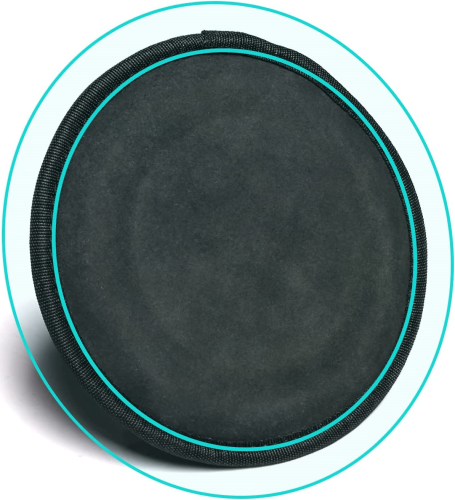
Underneath is a non-slip pad that allows your camera to be placed on the uneven surfaces we may find in low light photography, even if that surface is angled up to 45 degrees. It can hold a large camera still for the long shutter speeds we use in lower light levels. I have found that OctoPad is also a must-have accessory for videography.
Low Light Photography Creative Ideas
Photo by fcafotodigital via iStock
Having good low light photography gear and implementing these low light photography tips will put you in a position to capture some great images. So, what should you photograph? Here are some ideas:
- Night landscapes
- Concerts, indoors and outdoors
- Street lamp portraits
- Bars and restaurants
- Night cityscapes
- Car photography
- Boudoir and glamour
- Libraries
- Classic architecture
- Window light portraits
- Street scenes
- Wildlife at dusk or dawn
- Blue Hour and Golden Hour
- Storms
- Still life
- Weddings and receptions
- Sports events
Take any of these low light photography subject ideas and change them up by exposing them for high-key or low-key photography. Also, do any of these in black and white. You’ll enjoy the results and the process of getting those awesome low light photography images.
Low Light Photography FAQs
Photo by miniseries via iStock
Do I need specialized gear for low light photography?
No, any camera with adjustable settings can be used for low light photography. However, some cameras are better suited for low light imaging, such as larger sensor cameras and faster lenses.
If my shutter speeds for correct exposure are long, how can I capture clear and sharp low light images?
Some method for steadying the camera is optimal for low light photography. Built-in image stabilization can be used in many situations, or a small camera mount like a travel tripod, monopod, or OctoPad can be used.
Should I use the highest ISO my camera has?
The highest ISO settings on digital cameras may not be best because of the increased noise this causes, which can degrade the image. However, higher ISO settings than what is typically used for daylight scenes are a good idea.
Where can I find more tips and techniques for making great images?
PhotographyTalk has articles and courses covering all aspects of serious photography and videography. Come back and visit anytime!
Recommended Photography Gear
Learn More:
- What Is Lifestyle Portrait Photography?
- Best Mirrorless Camera for Street Photography
- Automotive Photography Tips
We Recommend
Northern Lights: Best Places to See Them
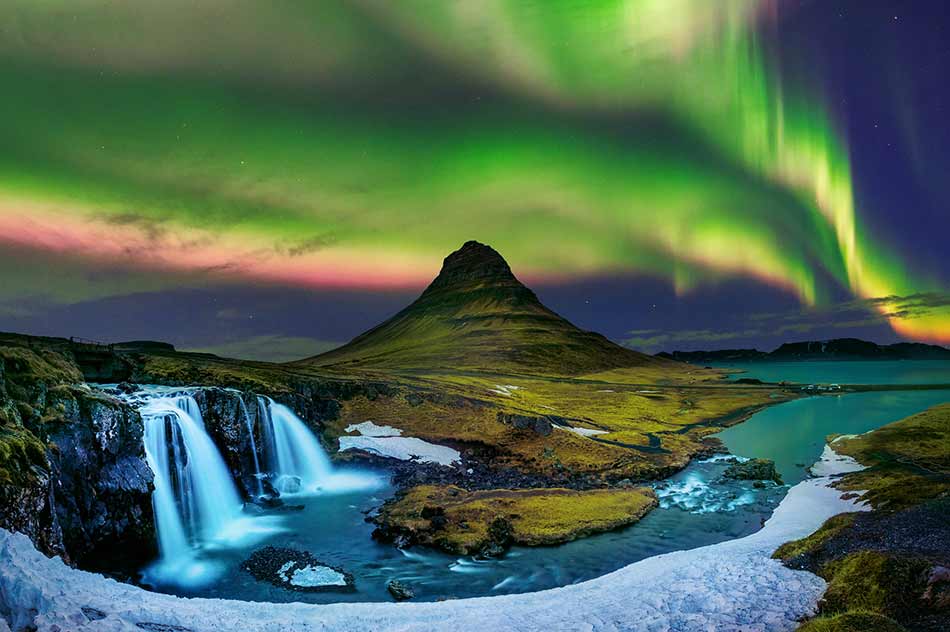
photo bytawatchaiprakobkit via iStock
One of the most beautiful phenomena you can witness in the northern hemisphere is the northern lights, or the Aurora borealis.
The dancing lights are certainly a wonder on their own, but when they’re paired with some truly beautiful landscapes, you have the makings of absolutely breathtaking photos.
That begs the question, where can you see the northern lights?
Let this guide direct you to some of the best vantage points for viewing and photographing the Aurora.
Table of Contents
- What are the Northern Lights?
- What Causes the Northern Lights?
- When Can You See the Northern Lights?
- Where to See the Northern Lights: Alaska
- Where to See the Northern Lights: Pennsylvania
- Where to See the Northern Lights: Canada
- Where to See the Northern Lights: Iceland
- Where to See the Northern Lights: Norway
- Where to See the Northern Lights: Finland
- Where to See the Northern Lights: Sweden
- Where to See the Northern Lights: Greenland
- Where to See the Northern Lights: Scotland
What are the Northern Lights?

photo byden-belitsky via iStock
Before we dive into where to see them, it’s worth it to explore what they are in the first place and what causes the northern lights.
The Aurora borealis (known as the Aurora australis in the southern hemisphere) is perhaps best known for pale green waves of color that appear to be dancing in the sky.
However, green is just one color that might be present - colors can actually range from yellow to violet and blue to red. Likewise, the dancing waves are just one form they might take. A simple glow in the sky is common, as are arcs of light, beams or rays of light, and streams of light in the night sky.
What Causes the Northern Lights?

photo bysolarseven via iStock
What causes the northern lights is the collision between particles from the sun that hit the Earth’s atmosphere.
More specifically, the electrically-charged particles released from the atmosphere of the sun collide with the gaseous particles in Earth’s atmosphere.
The type of particles involved influences the color of the northern lights.
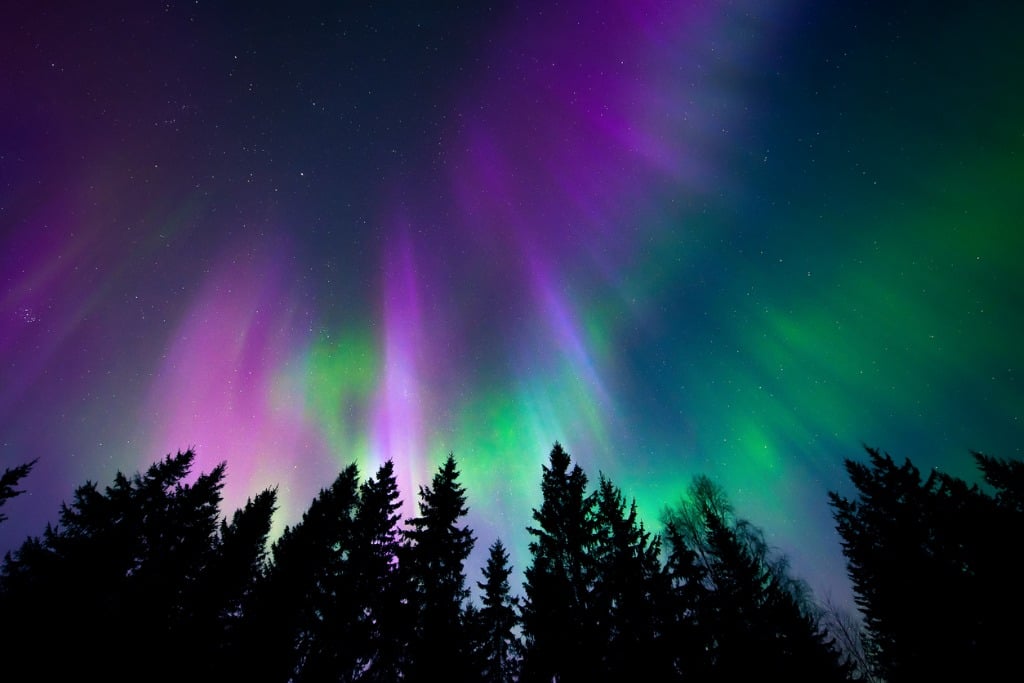
photo byFrozenmostvia iStock
For example, the most common color of the Aurora is a pale green with yellow undertones. This color is created by oxygen molecules in Earth’s atmosphere, typically at an altitude of 60 miles, but up to 150 miles as well.
Nitrogen molecules are associated with blue and purple Auroras, while red Auroras - the rarest kind - are the result of oxygen molecules at extremely high altitudes of around 200 miles above the surface of the Earth
Get a deeper explanation of what causes the northern lights, and what ancient peoples believed them to be, in the video above by BrainStuff - HowStuffWorks.
Learn More:
When Can You See the Northern Lights?

photo by mantaphoto via iStock
Apart from the obvious necessity of being nighttime, the best time to see the northern lights is in the winter.
Not only are the nights longer in the winter, but clear nights are also in greater abundance, giving you an unobstructed view of the night sky.
The prime time is around midnight local time, as that seems to be the peak of activity for the Aurora. Likewise, Aurora displays are cyclical in nature, and peak with heightened activity roughly every 11 years. This would mean the next “super Aurora” should occur in 2024.
Where to See the Northern Lights
Where are the northern lights? Fortunately, they’re all over the place in the Northern Hemisphere from Canada to Scandinavia, Russia to the continental United States.
But if you want the very best locations to see and photograph them, book a flight to one of the following locations.
Where to See the Northern Lights: Alaska

photo by Elizabeth M. Ruggiero via iStock
Fairbanks, Alaska’s second-largest city, is situated directly beneath an active band of northern lights activity that runs from August through April, which makes it a prime location for viewing the Aurora.
Typically most active between 11:30 pm and 3:30 am, there’s a significant window during which to take in the beauty of the lights, which range from green to yellow to purple.
Where to See the Northern Lights: Pennsylvania
Yes, that Pennsylvania…
More specifically, Cherry Springs State Park offers uber-dark skies far away from the hustle and bustle of cities like Philadelphia.
In fact, the park utilizes special lights that have zero effect on visibility and there are strict regulations about using headlamps, flashlights, and other light sources. For these reasons, the International Dark-Sky Association has designated the park as a Gold Level International Dark Sky Park, the highest possible ranking.
See the northern lights in action at Cherry Springs State Park in the video above by Gary Honis.
Where to See the Northern Lights: Canada

photo by NatashaWheatley via iStock
Head to the Yukon between August and the middle of April, and you’ll get to see spectacular shows of northern lights that swirl around the sky.
The lights are usually yellow or green (or a combination thereof), though other colors are present less frequently.
The Yukon is also home to the Northern Lights Centre, where you can learn about the scientific processes that cause the lights as well as the legends that peoples of the past developed to explain what the northern lights meant.

photo by Cheryl Ramalho via iStock
Another Canadian hot-spot for the northern lights is Churchill, a town in Manitoba that’s equally as well-known for its polar bear population.
With up to 300 nights of Aurora activity a year, it’s one of the best locations to get a glimpse of the lights.
Where to See the Northern Lights: Iceland

photo by ansonmiao via iStock
North, south, east, or west, Iceland offers epic locations for viewing and photographing the northern lights.
With shades of purple, pink, and green jetting across the sky, the combination of optimal nighttime viewing conditions and the rugged and beautiful landscape make this island country a top destination for northern lights photography.
If you’re wondering when you can see the northern lights in Iceland, the answer is about three-fourths of the year - from August to the first part of May.
Where to See the Northern Lights: Norway

photo by BublikPolina via iStock
Though you can view the northern lights from virtually anywhere in Norway, one of the prime viewing locations is Svalbard, a small group of islands roughly halfway between Norway’s northern coast and Greenland.
During the winter, Svalbard is in perpetual darkness because of its extreme northern location. That means you can view the northern lights day or night!

photo by mantaphoto via iStock
Another spot to check out in Norway is the city of Tromsø, which is right underneath an oval of lights in Northern Norway. Surrounded by fjords and mountains, it’s a breathtaking setting by itself, but under the glow of the northern lights, it’s even more spectacular.
Where to See the Northern Lights: Finland

photo by mantaphoto via iStock
Like Norway, Finland offers excellent viewing of the northern lights from virtually every corner of the country.
In fact, Finland experiences about 200 nights of the Aurora per year, so there’s no lack of time to grab your gear and snap some photos of the lights. The rural nature of much of Finland also means there’s an abundance of areas with little to no light pollution.
Where to See the Northern Lights: Sweden

photo by Oksana_Gracheva via iStock
Of course, Sweden, like the other Scandanavian countries on this list, offers excellent Aurora viewing.
Of particular interest should be the Aurora Sky Station, location in Abisko. With very little light pollution and clear, crisp skies, you can get epic views of the lights all night long from October through March.
Where to See the Northern Lights: Greenland

photo by RubyRascal via iStock
Greenland is an ideal location for photographing the northern lights because of its minimal light pollution. Likewise, visibility is often crystal clear for perfect views of the sky.
If you visit between September and April, you’re all but guaranteed to see the lights along with the Milky Way for a double-dip of celestial awesomeness!
Where to See the Northern Lights: Scotland

photo by Marc_Hilton via iStock
Though Scotland likely didn’t come to mind when you were searching for “where are the northern lights,” it’s a fantastic viewing spot, particularly in the far north, light the Shetland Islands.
Here, the northern lights are called Mirrie Dancers, and can be seen throughout the fall and winter months.
With that, you have some of the best places on earth to see the northern lights. Make plans to travel to one of these excellent locations this winter!
We Recommend
Why a Stable Tripod is Essential for Night Photography
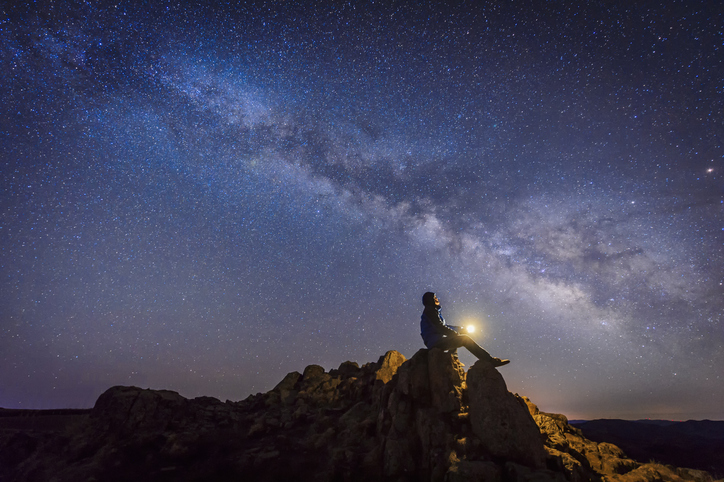
Photo by bjdlzx via iStock
Astrophotography! Light Painting! Blue Hour! HDR! Night Photography! Have you tried any of these long exposure night photography styles or techniques lately? If so, you know how important it is for your camera to remain motionless. Not simply steady, absolutely motionless.
How do you make sure your rig is as stable as can be? I’ll detail some important techniques and also point you to a few items of stabilization that will be helpful for night photography and night sky photography.
Table of Contents:
- Night Photography and Other Long Exposures
- A Sturdy Tripod for Night Photography
- Mirror Lockup for Night Photography
- Sweet Spot Aperture and Night Photography
- Stabilizing Your Night Photography Tripod
- Remote Releases - Wired and Wireless
- Recommended Photography Gear
Night Photography and Other Long Exposures
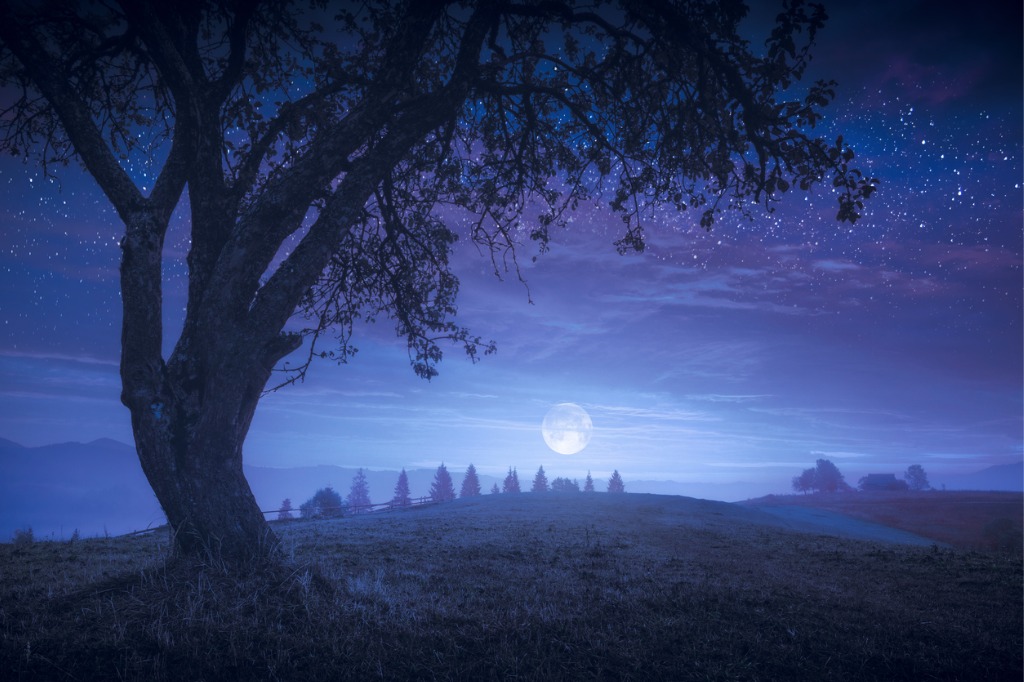
Photo by Vitalii Bashkatov via iStock
Night photography is a fun and rewarding aspect of photography that many photographers try out as they become more advanced and more comfortable with photography. In addition to night sky photography, there are other forms of ultra-long exposure time photography, such as Blue Hour photography, ND Filter use, light painting, and astrophotography.
I differentiate between night photography and night sky photography or astrophotography by looking at the subject. If the main subject is the sky and stuff in it, I call it astrophotography or night sky photography. If the primary subject is any other thing at night, such as a moonlit landscape, I call it night photography. Either type of subject may require exposure times measuring multiple minutes.
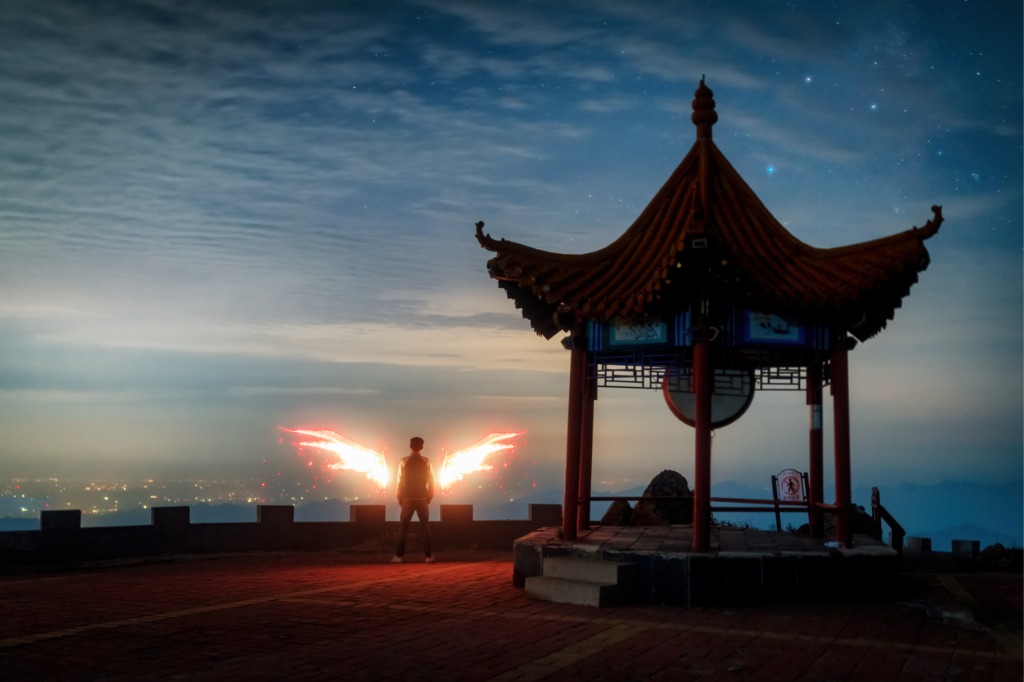
Photo by bjdlzx via iStock
Light painting night photography is made by keeping the camera shutter open for several seconds or minutes and using a portable light source to add in streaks of light. Some light painters get so good at it that they can write your name in the air or add fiery wings to a person. It’s a fun part of the night photography genre.
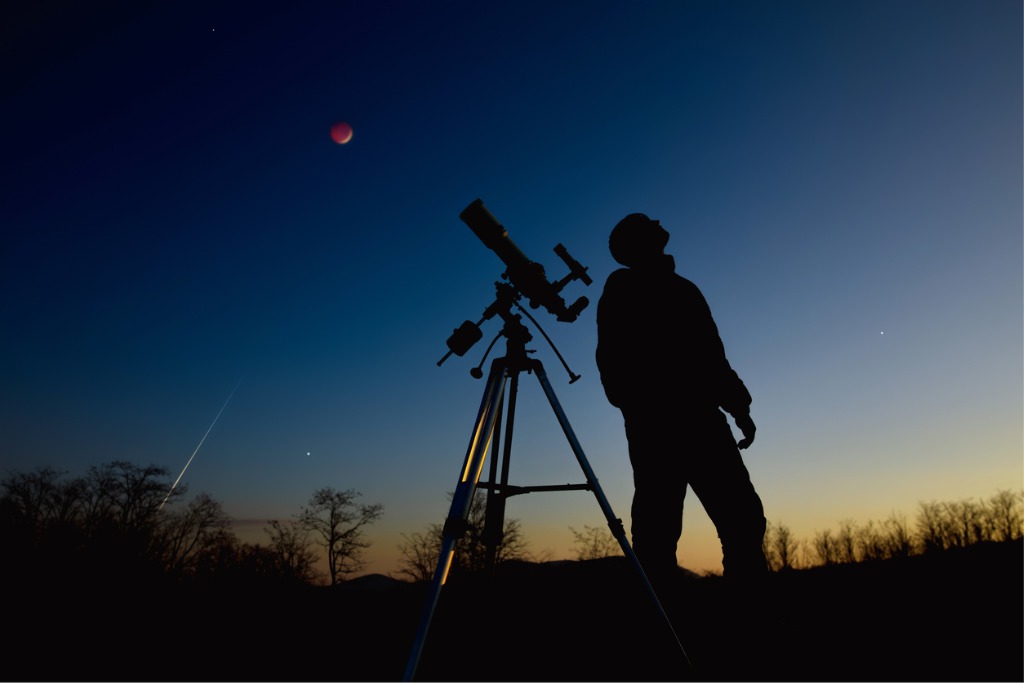
Photo by m-gucci via iStock
Blue Hour night photography is the time period between when the Sun is just below the horizon and the full dark of night. Shooting in the morning, it starts at astronomical twilight and continues to sunrise. In the evening, it starts as the Sun sinks below the horizon and keeps on until there is no more skyglow from our home star. Shutter speeds for this night photography can vary from a fraction of a second to a couple of minutes.
Using ND filters can allow you to create amazing moving water and cloud elements in your images by increasing the density of the light path, attenuating it to a greater or lesser degree. You can go from a Sunny 16 exposure with a shutter speed of fractions of a second to exposure times measuring several minutes.
A Sturdy Tripod for Night Photography
The one thing all of these styles of night photography have in common is very long exposure times. The shutter speeds can vary from a relatively long fraction of a second, such as ½ second, to several seconds, to exposure times measured in full minutes.
Stacking exposures for night sky photography or using HDR bracket and merge photography counts as log exposure times since the camera still needs to remain motionless for these techniques.
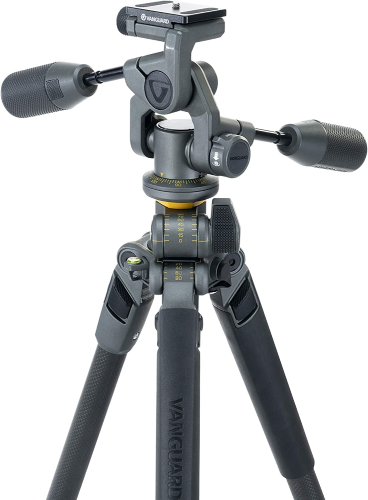
These long time periods with the camera shutter open create a need for extra stability. That means you need a sturdy tripod. Preferably one that is also well-dampened from vibration. A large aluminum or carbon fiber tripod works immensely for night photography.
The Vanguard Ultra Pro 2+ tripod with Alta PH-32 Pan Head is a versatile choice. It is tall and rugged, offering plenty of stability for most night photography. The carbon fiber legs are lightweight compared to similar size metal tripods and have excellent vibration dampening. It’s also a great general-purpose tripod with a multi-angle center column and three-way fluid pan head.
Mirror Lockup for Night Photography
Photo by pixelfusion3d via iStock
DSLR users will want to check their instruction manuals for how to lock up the mirror prior to shutter release for more vibration reduction. If you have a mirrorless camera system, the issue of mirror slap vibration is non-existent.
Most DSLRs don’t have a huge issue with this, being well-dampened in general. Still, even a tiny bit of camera vibration can negatively affect the image for some night photography. Pro DSLRs usually have a specific control for mirror lockup, while intermediate and prosumer cameras may incorporate the feature with the self-timer.
Sweet Spot Aperture and Night Photography
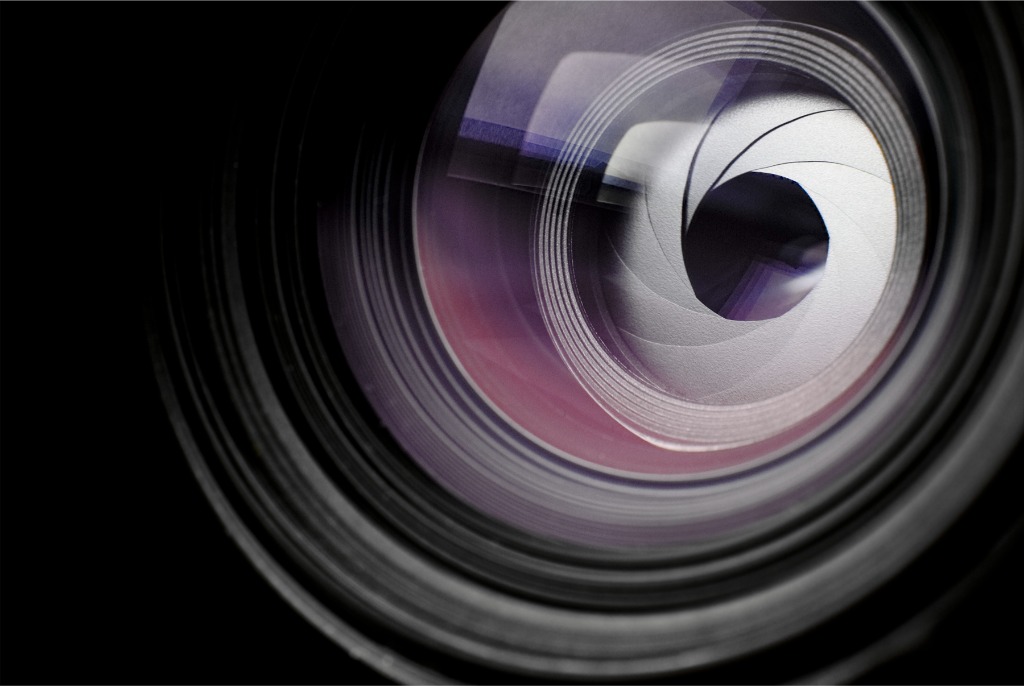
Photo by nicolas_ via iStock
Night photography and wide-open apertures aren’t always the best combination. That’s because even the finest lenses have some form of distortion or aberration when used wide open. There is no “perfect” lens in the real world.
The sweet spot is the aperture that first eliminates these problems as you stop down. The sweet spot is often found 2 to 3 stops down from fully open. For an f/1.4 lens, that means that f/2.8 or f/4.0 might be the sweet spot aperture for that lens. Many photographers consider it a range of f-stops, so an f/1.4 lens may have a range from f/2.8 to f/5.6 or f/8.0 that works well.
Since we’re using long exposure times in night photography, just about any aperture will work, at least regarding exposure times or shutter speeds, except for that other issue of night photography, diffraction.
Stop down a lens to the smaller apertures, and this optical phenomenon degrades point light sources. It’s caused by the property of light waves to bend when impinged by something solid, such as the aperture blades. It may not be a huge issue with general night photography, but it will definitely affect night sky photography, such as astrophotography.
Stabilizing Your Night Photography Tripod
Even the most stable and well-dampened tripod could use some help to keep it as perfectly still as possible. Also, you may need to consider the safety of your camera and tripod setup since you risk knocking it over while engaged in night photography. It’s dark at night!
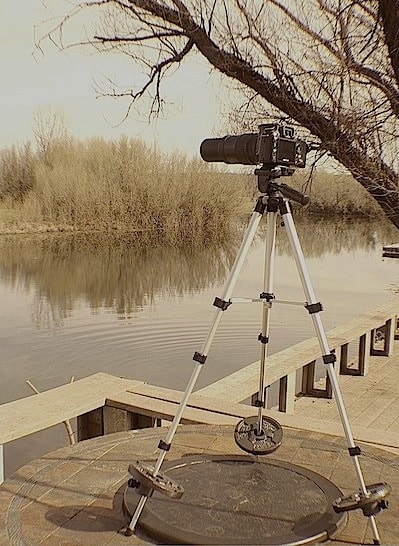
What I use for extra stability for top heavy light stands in the studio also works great in the field, steadying and counterbalancing my tripod for night photography. I use the StandDaddy tripod and stand stabilizer system.
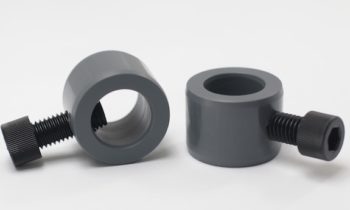
StandDaddy is a set of ring clamps that attach to the lower part of the tripod’s legs, allowing you to use portable and inexpensive barbell weights to steady the rig. The clamps slip right on and are hand tightened in whatever position you need. The large set screws do not mar any finish and are easy to loosen or tighten without tools.
The barbell weights do not come with the StandDaddy clamps. Weights are easy to find, though. I found 2 ½ lb plastic barbell weights at WalMart for around $2.00 each. You may already have some lying around. Any type will work if they have a 1” center hole.
Have a look at why Joe Edelman likes using StandDaddy clamps for his work in the field in the YouTube video above.
This solution works for night photography because the extra weight helps stabilize and dampen the tripod from any movement you cause by adjusting settings or just moving around waiting on the exposure to end.
You also have less chance of accidentally knocking over your camera and lens since the center of gravity is much lower to the ground. This is especially beneficial for night photography in uneven terrain or under very dark sky.
Remote Releases - Wired and Wireless
![]()
You can keep from touching the camera at all when mounted on your tripod by using a remote release. These come in wired and wireless varieties such as the Pixel TW-283, for instance, and can also be found as a smartphone app for some camera models.
Not only can you use these releases or phone apps to trigger your camera's shutter from close by to reduce vibration, but it can also be used from quite a distance away - often over 200 feet. Some also have options for being used as an intervalometer and a long exposure timer, making possible unique and difficult shots outside of our night photography efforts.
Mix and match these night photography tips, techniques, and tools to maximize your adventure into the fun and rewarding field of night photography.
Recommended Photography Gear
Learn More:
- Unique Photography Gadgets that Serve a Useful Purpose
- 6 Video Lighting Techniques (That Are Useful for Photography, Too)
- Tripod Tips for Beginner Photographers