3 Reasons Why All Landscape Photographers Need a Graduated ND Filter
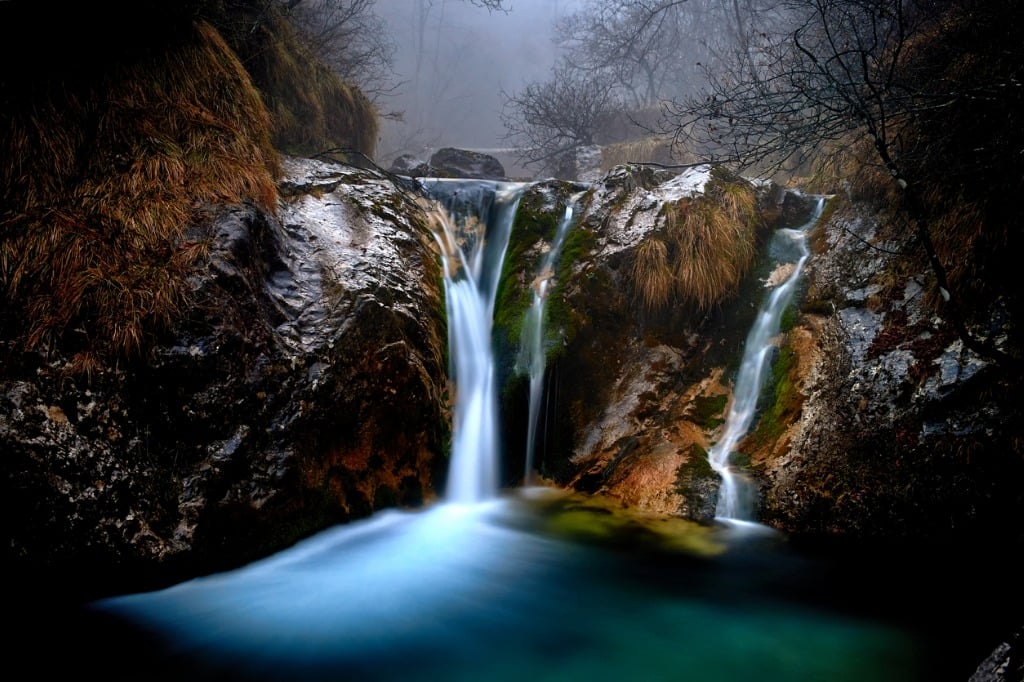
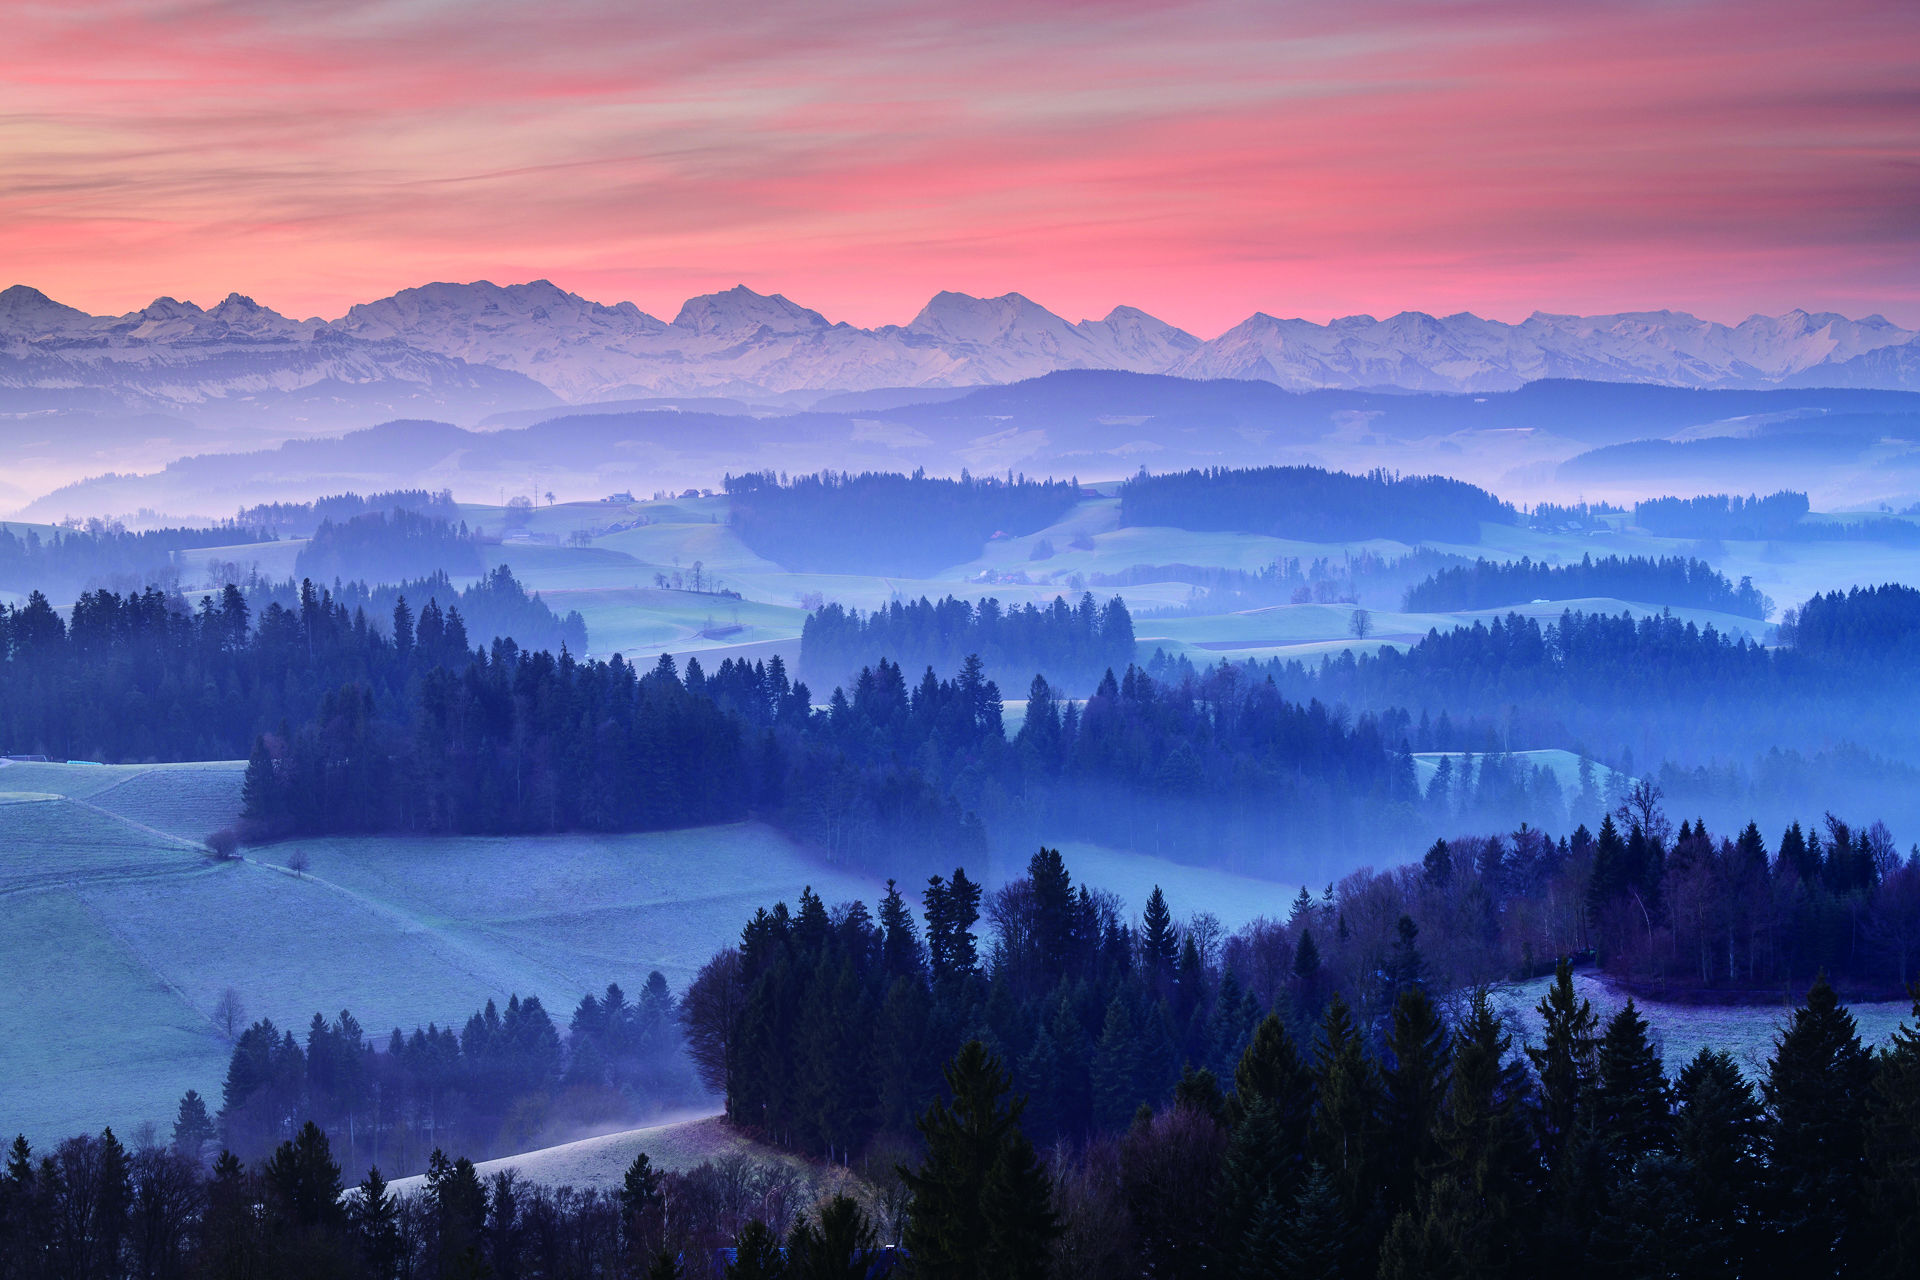 Image Credit: Martin Mägli. With NiSi Hard Nano IR GND 4(0.6) F13, ISO100, 1/15s
Living in the world we do of HDR and Photoshop and other fancy photography tools, there seems to be a thought among some photographers that filters like graduated neutral density filters are no longer necessary.
I disagree. In fact, I couldn't disagree more.
Using filters in the field might be a little old school, but if you equip yourself with the best graduated ND filters, you can create some pretty fantastic shots.
Here's just a few reasons why my GND filters will never leave my bag.
Editor's Tip: A graduated ND filter is one of the best photography accessories you can buy. See the difference an ND grad can make on your photos.
Graduated Neutral Density Filters are Still Better Than HDR
 Image Credit: Christian Hoiberg. With NiSi Medium Nano IR GND 8(0.9) F10, ISO100, 1/30s.
Apologies to all my technology-loving friends, but even with the advances made in recent years in HDR technology, if you ask me, GND filters are still the king of the castle.
I can get gorgeous results with my NiSi graduated ND filters, and to my eye, my photos are of a higher quality than what I can get with HDR.
And I'm not the only one. Take a look at the image above, and tell me that it's not a spectacular photo...
It's even more spectacular when you compare it to the one taken without a graduated ND in place, shown below.
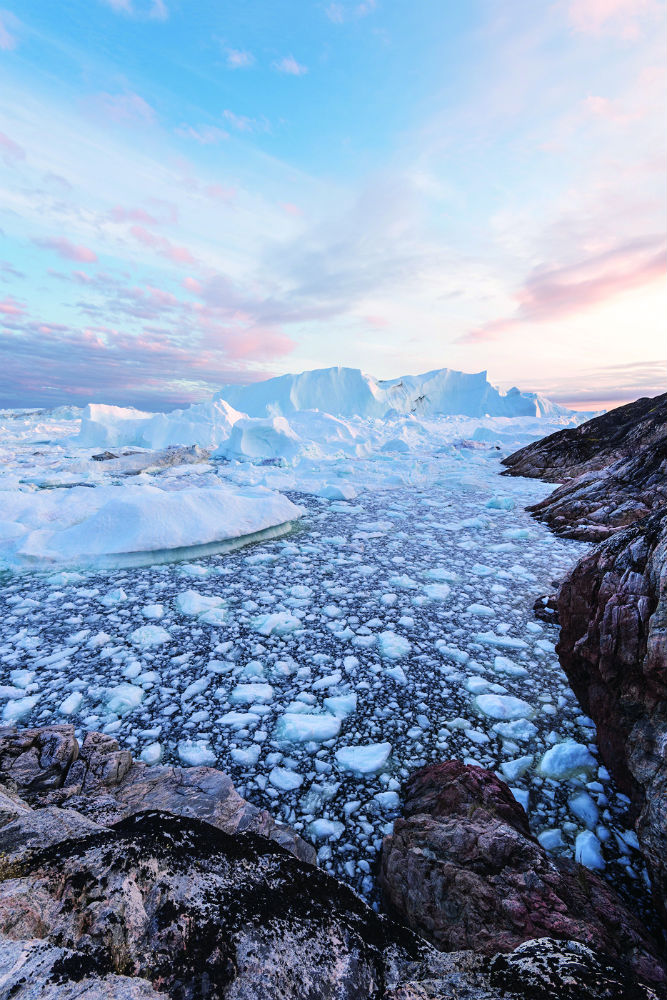 Image Credit: Christian Hoiberg.
What's more, you can shoot handheld with an ND grad attached to your lens (though I would still recommend using a tripod).
When shooting HDR, you can't shoot handheld lest the final composite image will show movement between shots.
Though some HDR software can work on alignment issues, it can't fix all alignment issues.
Learn More:
- A Complete Guide on How to Use Neutral Density Filters
- Why You Need a Reverse Graduated Neutral Density Filter in Your Bag
Using ND Grads is Simple
When you go the HDR route, you have to take a series of images for the final shot. That means at least three image files, and most likely, many more than that.
Since each image needs to be at a different point in a range of exposures, that means that you're not just taking multiple shots but you're having to fiddle around with the camera settings for each one.
Of course, time is of the essence when bracketing exposures because you don't want the landscape to change too much between the first and last images in your sequence.

Compare that to using an ND grad, which requires you to simply attach the filter holder to your lens, slide the filter into the holder, take a test shot or two to get the positioning of the filter and the exposure settings just right, and fire away.
In other words, why would I want to spend more time taking fewer photos and then spend more time sitting in front of my computer processing my photos for HDR when I could take higher-quality photos in the field and enjoy what I'm photographing more by using ND grads?
For my money, graduated ND filters are simply the way to go.
Editor's Tip: The quality of the ND grads you use will impact the quality of your photos. Learn about what makes a top-notch graduated ND filter.
It's More Satisfying Using Filters
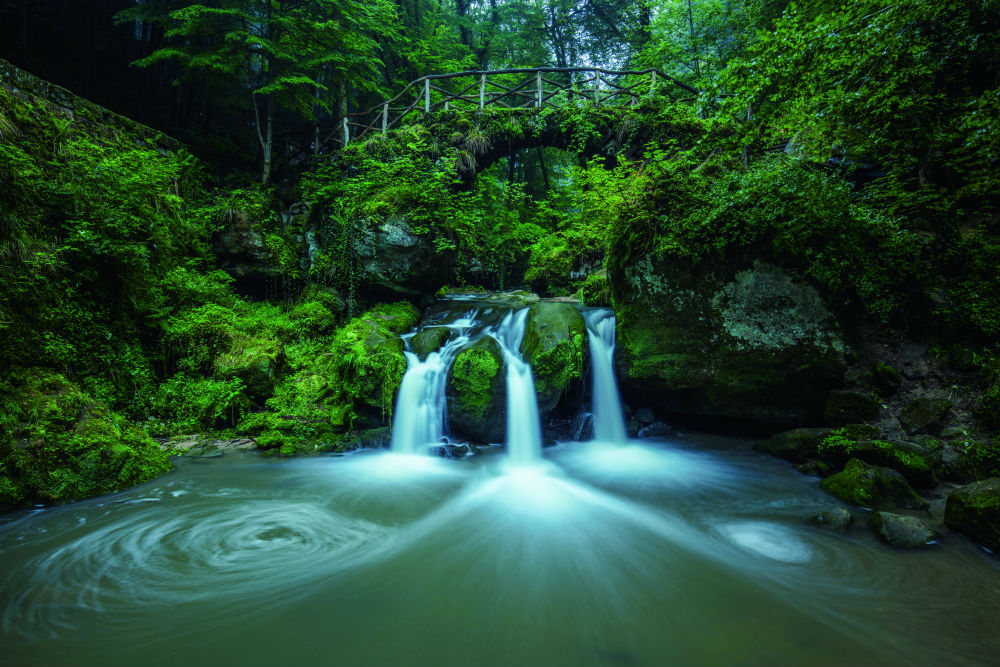
 Image Credit: 阿戈. With NiSi Medium Nano IR GND 8(0.9) F11, ISO100, 13s
To me, using filters is kind of like driving a car with a manual transmission.
Sure, an automatic is easier to drive, particularly in traffic. But, man, there is nothing quite like pushing the clutch to the floor and making a quick gear change.
I like the mechanical nature of it and the tactility of it as well.
You get that same sort of feeling when you use filters. It's simply a more satisfying way to take a photo.
 Image Credit: 阿戈
Besides, by working to get as much right about your photo in-camera as you can, you have much better images to browse through on your computer when you get home.
With a little tweaking here and there, you can take an already nice-looking shot and turn it into something that's stunningly beautiful, and do so in less time, too.
So that's the moral of the story - not only do graduated ND filters get you better results, but they do so with less time and effort and in a way that will likely leave you more satisfied with your shots.
What's not to like about that?!
Learn More:
- Graduated Neutral Density Filters vs Solid Neutral Density Filters
- How to Shoot Landscapes at Blue Hour
We Recommend
A Complete Guide on How to Use Neutral Density Filters
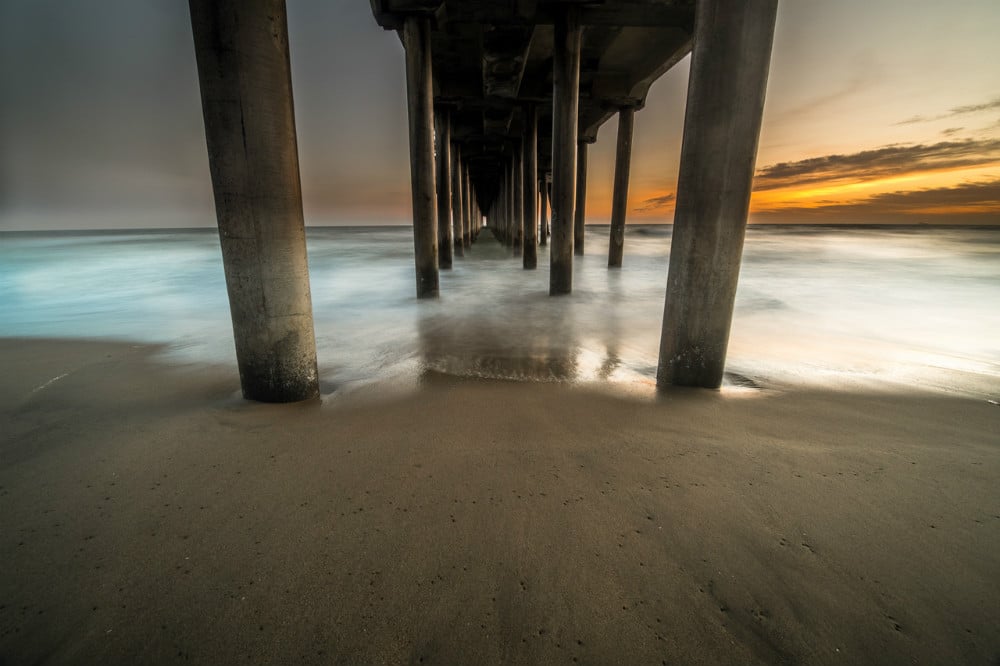
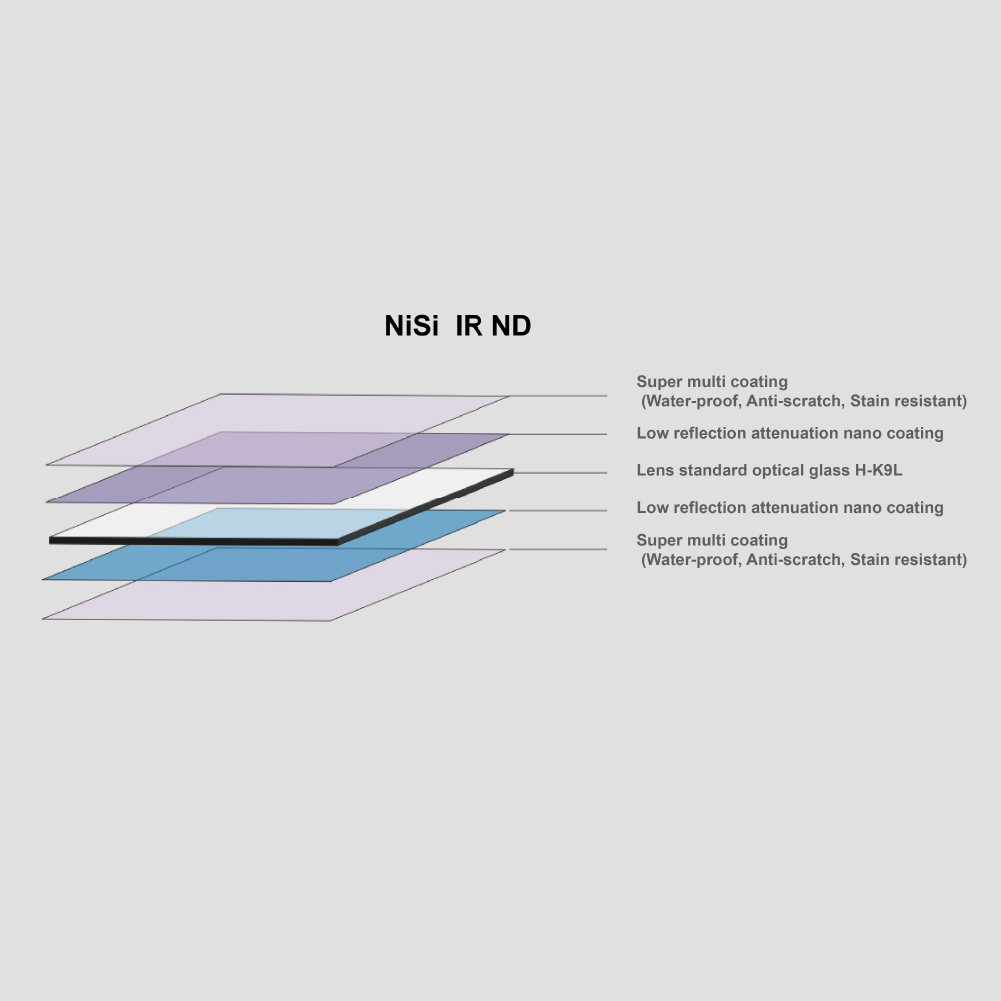
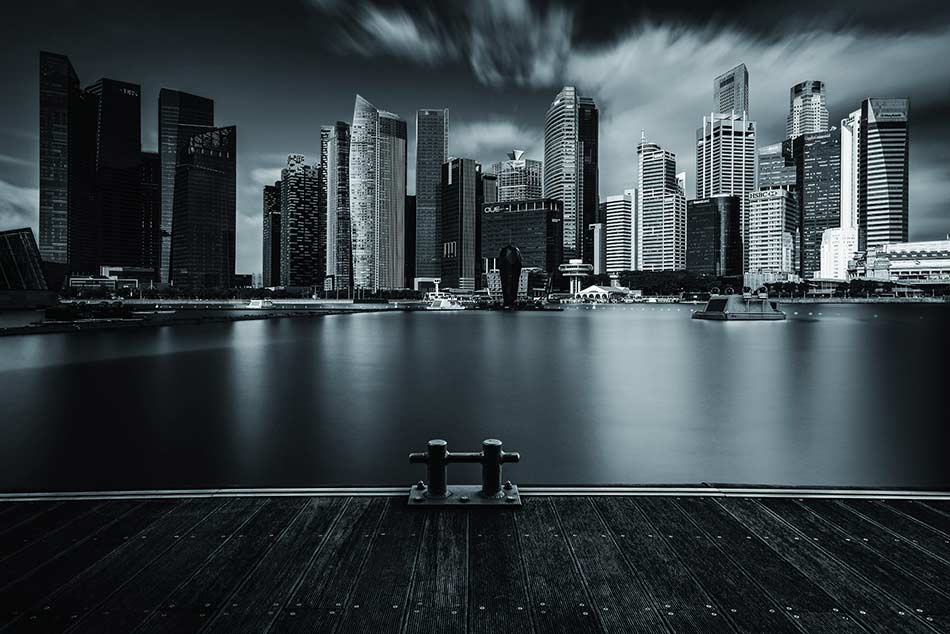 Photo credit: Win Magsino. Taken with NiSi IR ND 1000(3.0) F13, ISO200, 136s.
If you've never used a neutral density filter before, you're missing out on a great opportunity.
That's because neutral density filters help you slow time down, creating gorgeously dreamy photos like the one shown above.
I think for some people, the barrier to getting into long exposure photography is simply not understanding the tools needed to create awesome long exposure photos.
In this guideline, I offer a solid workflow for maximizing the quality of your photos by learning how to use ND filters.
Neutral Density Filters in a Nutshell

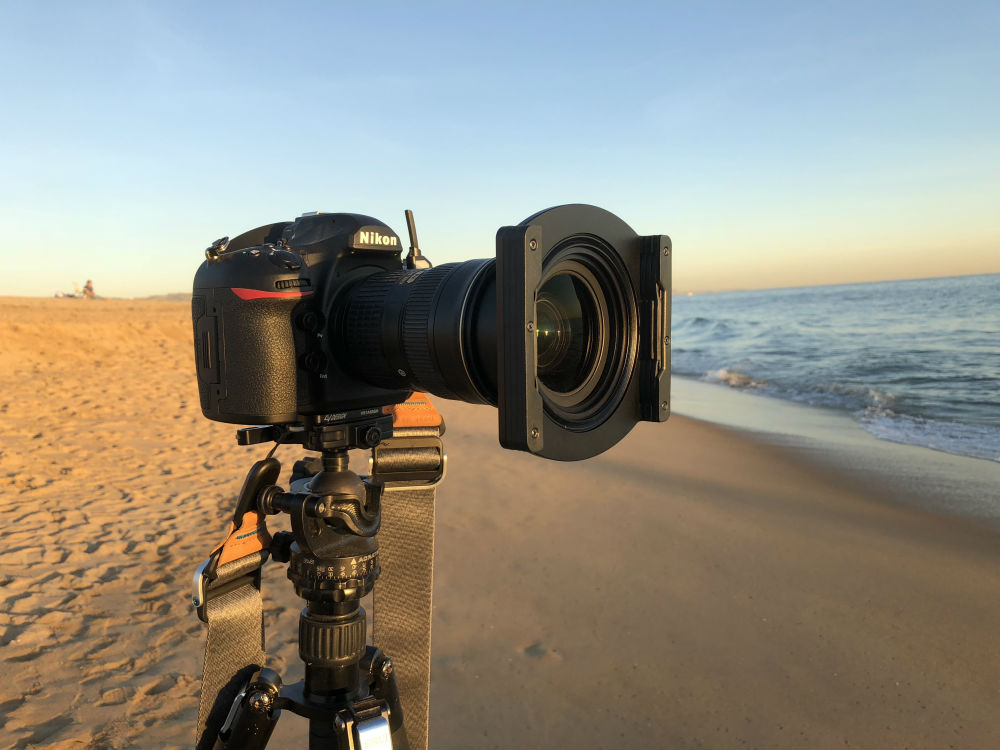
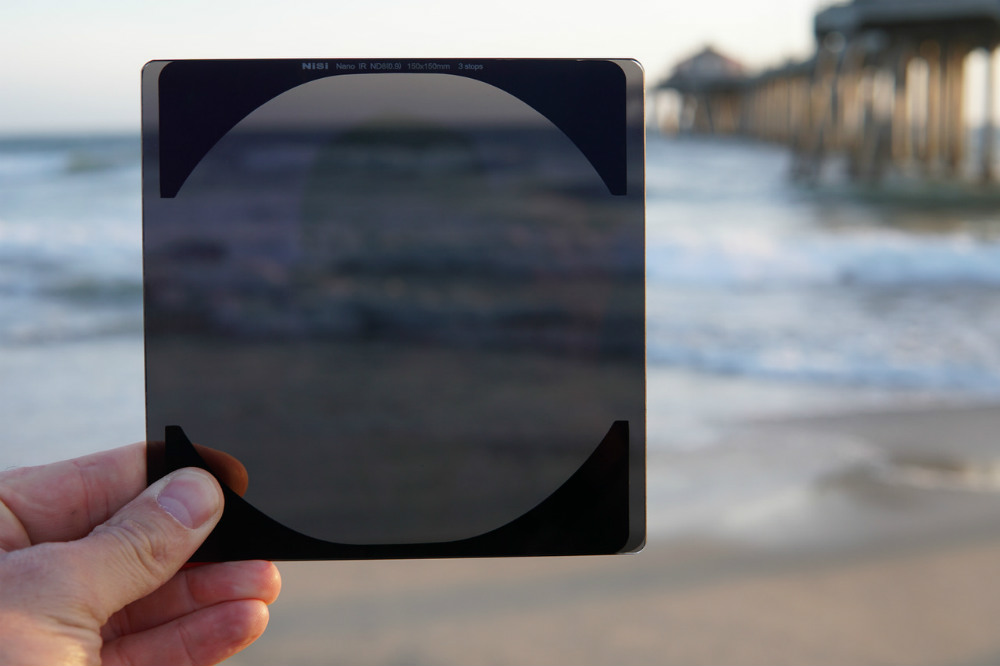
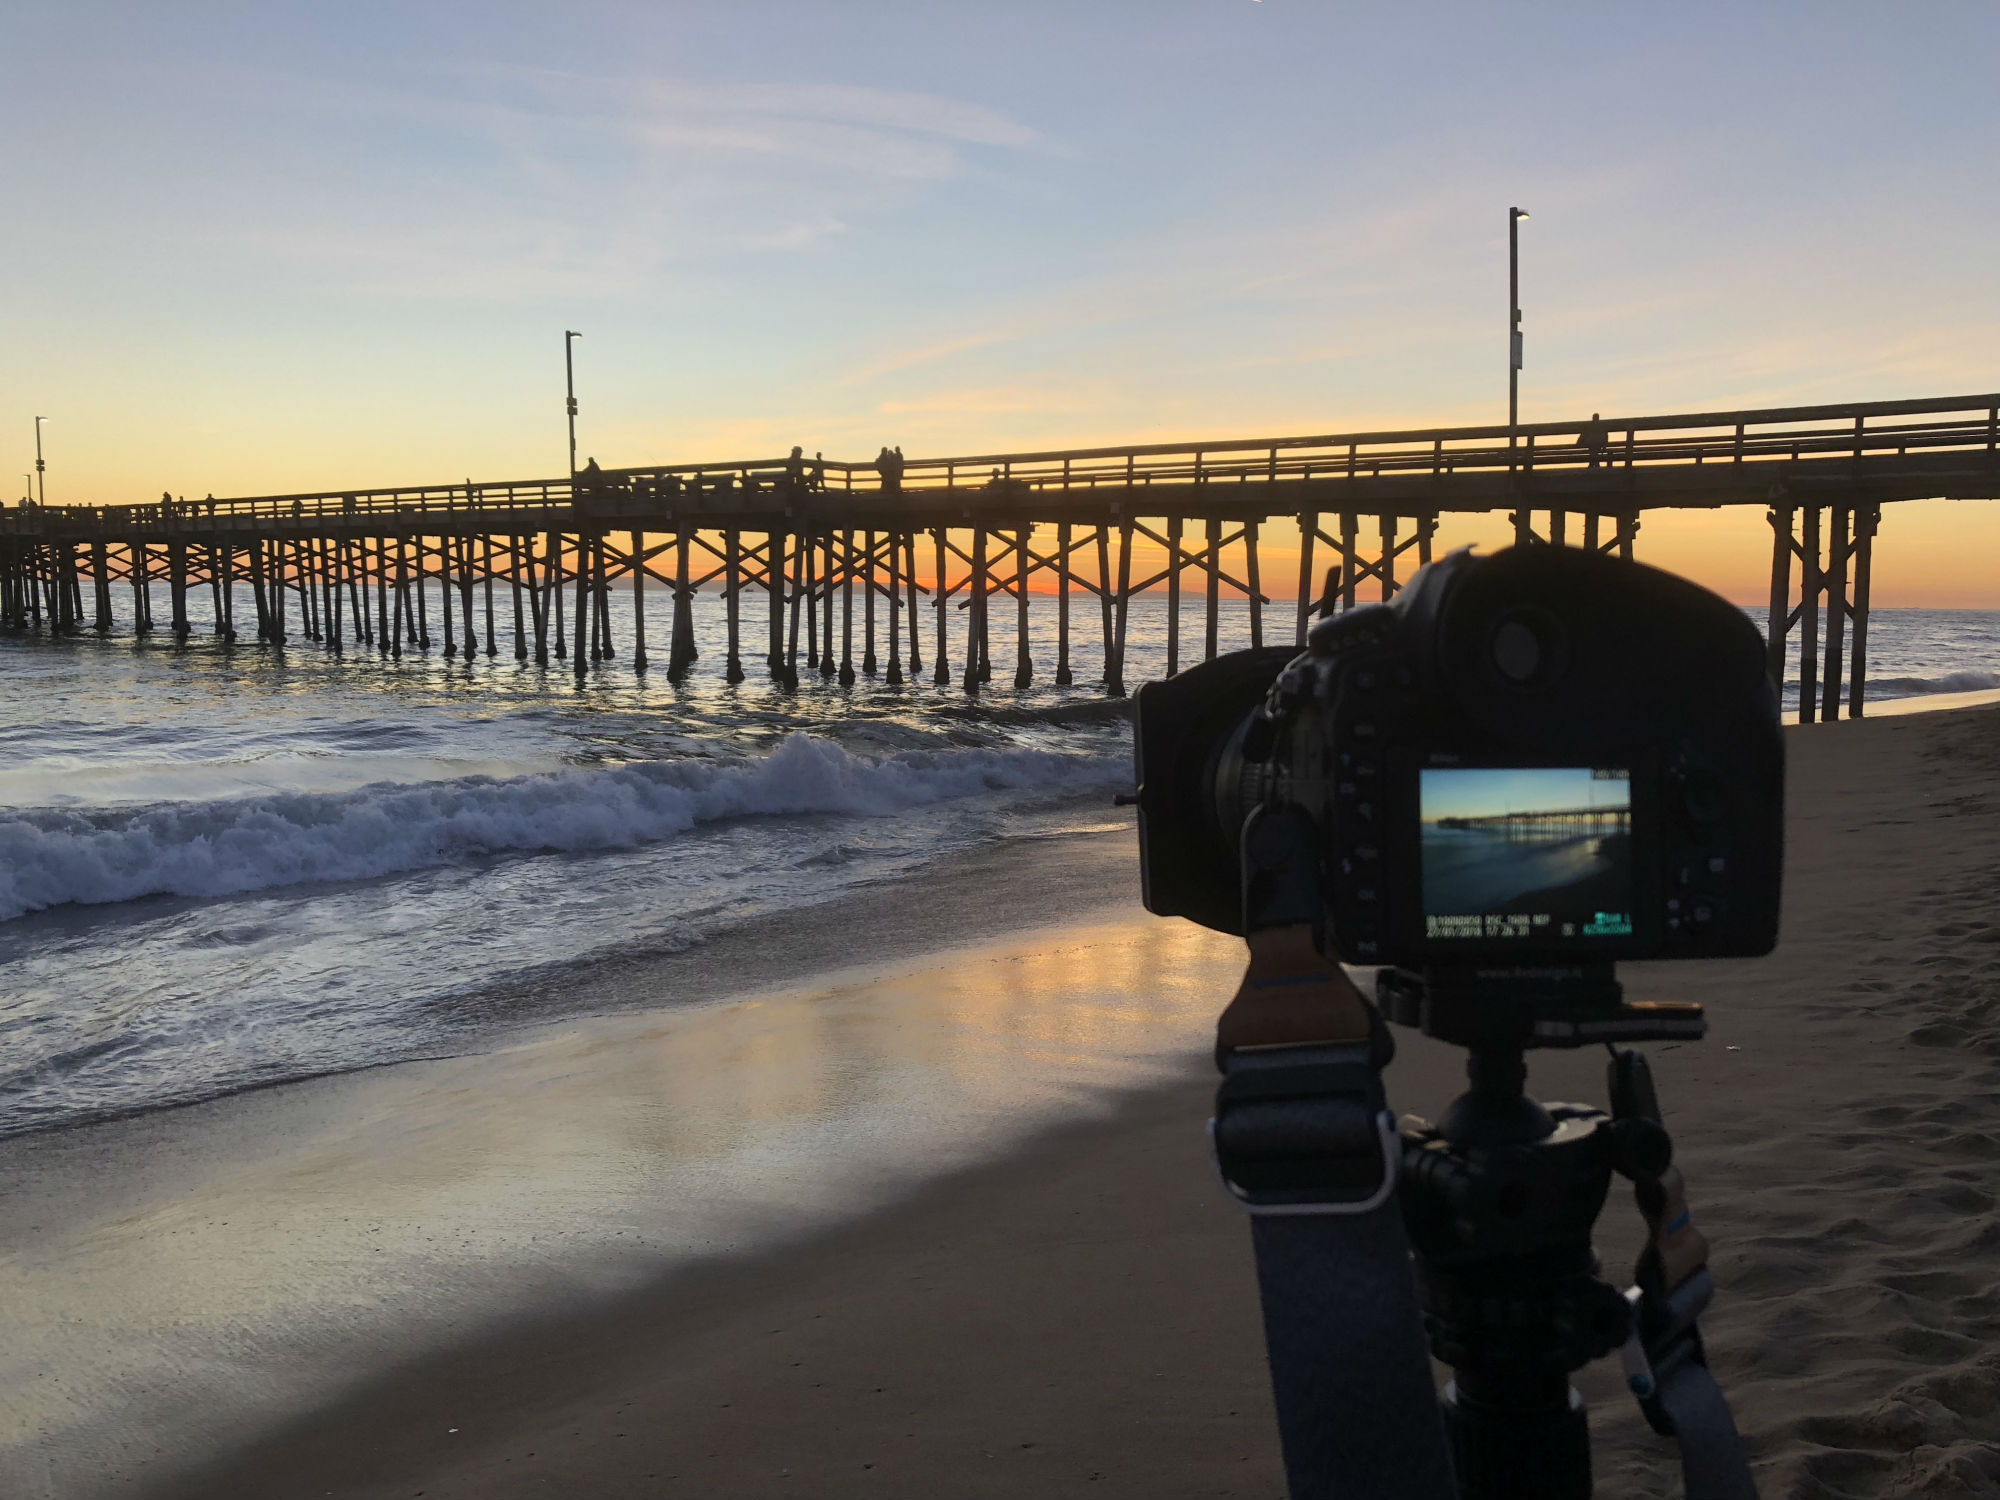
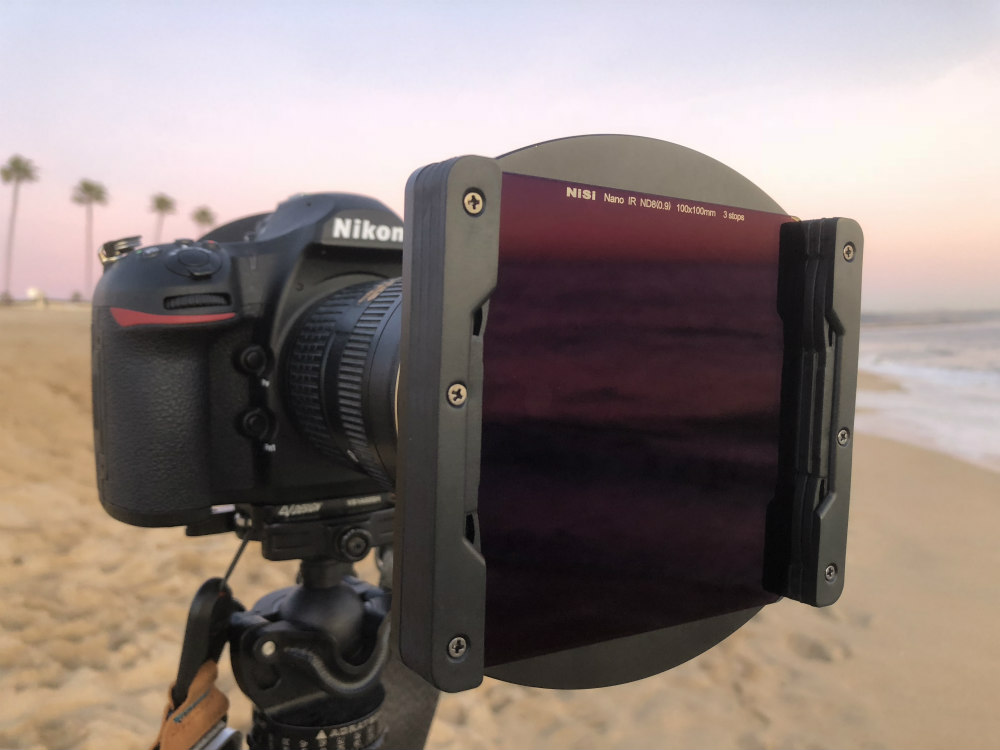
The primary reason for using neutral density filters is to cut down on how much light is allowed to pass through your camera lens to the camera sensor.
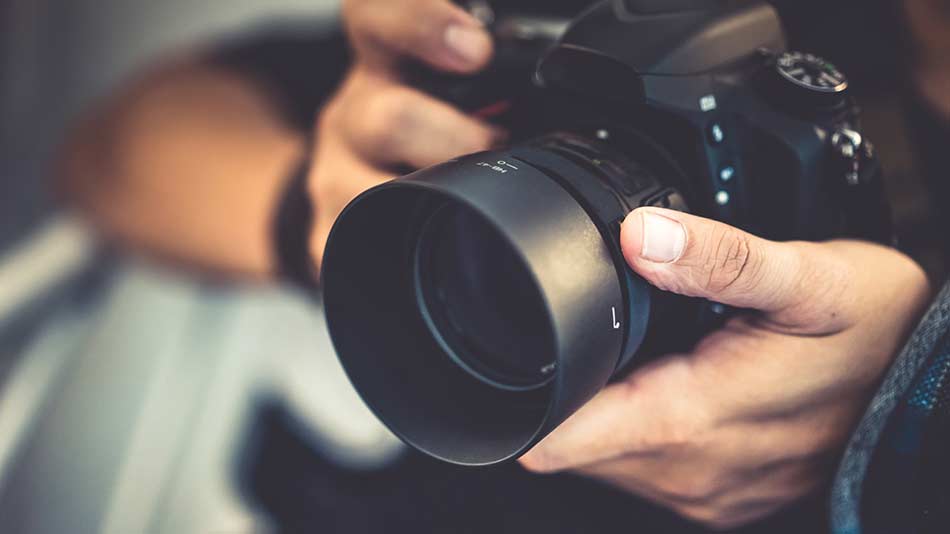
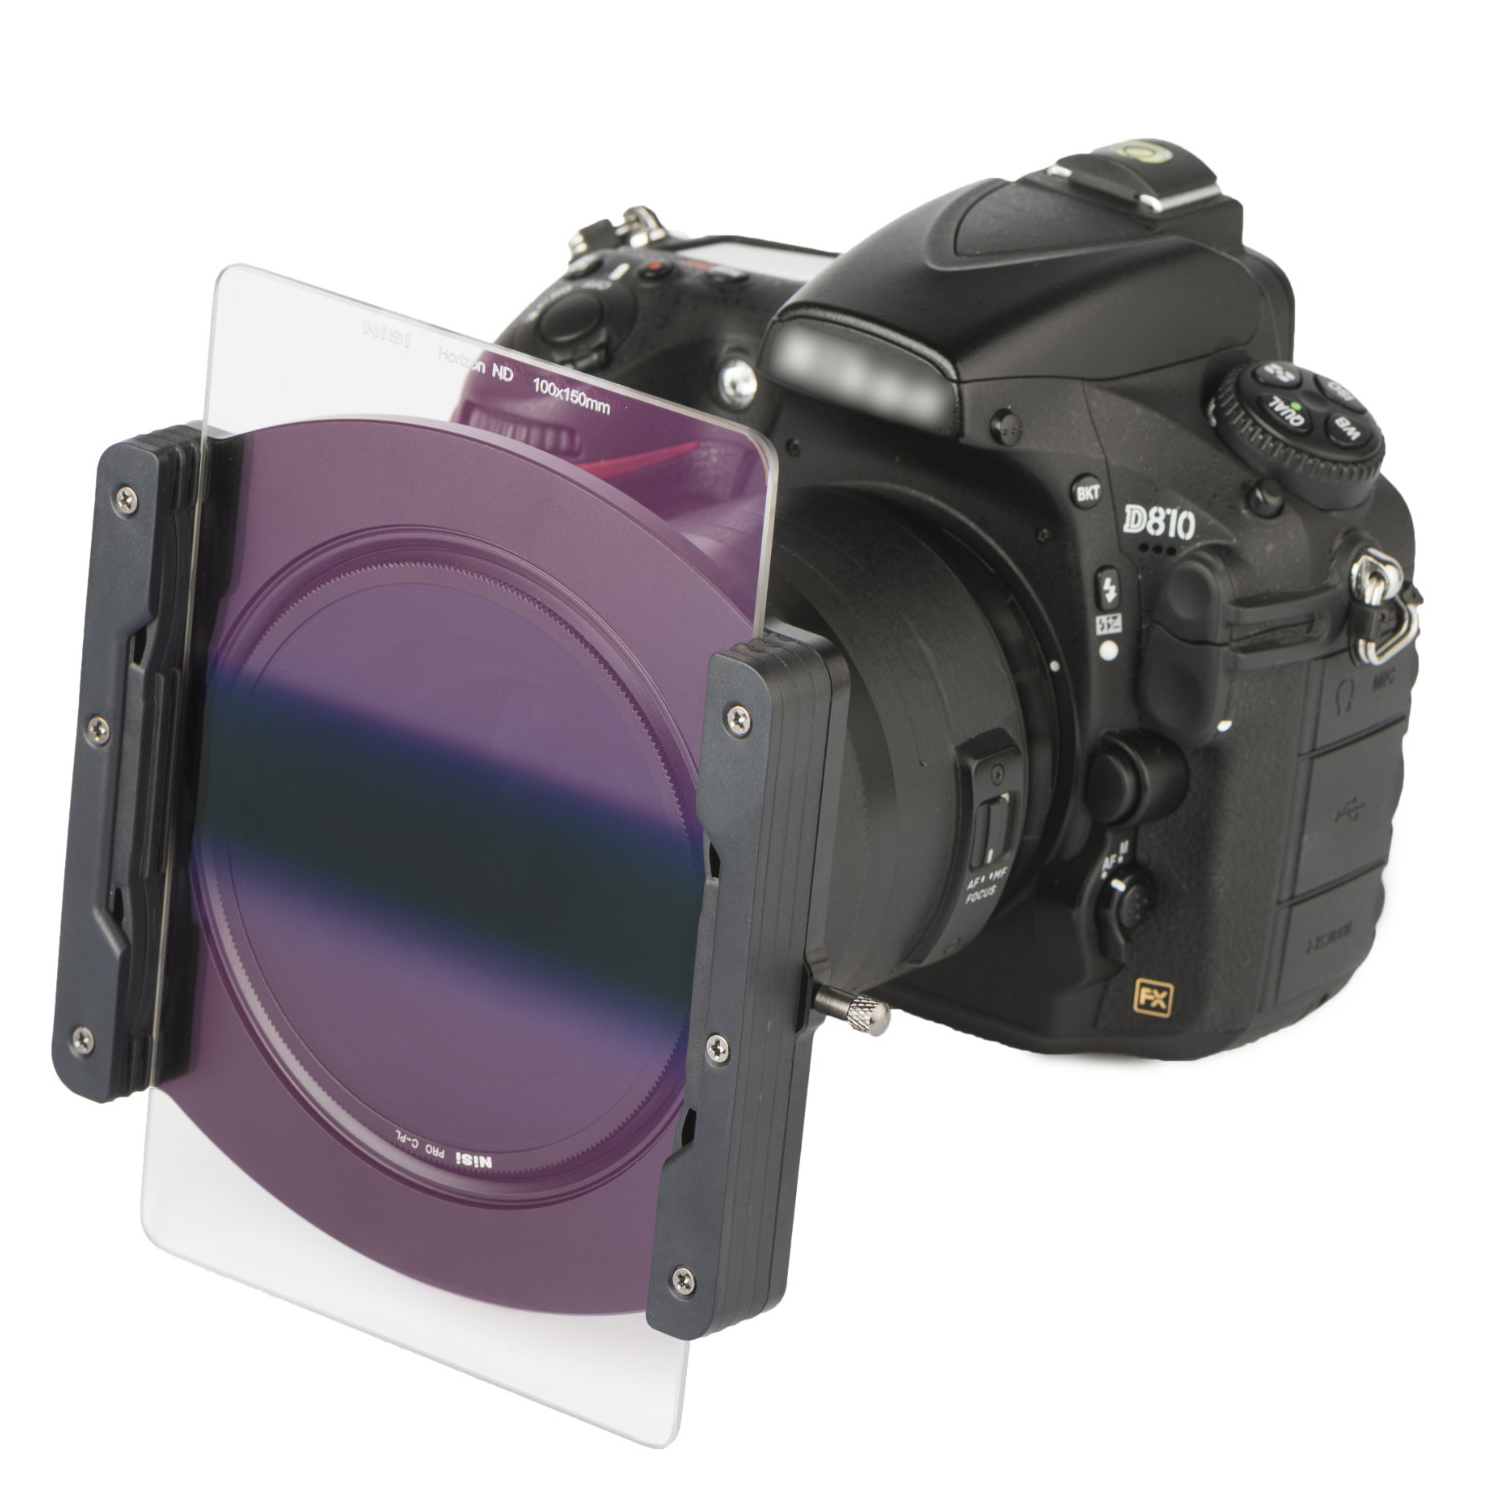
These filters are usually made of glass (though cheaper ND filters are sometimes made of resin), and attach to your lens with a filter holder, as seen above.
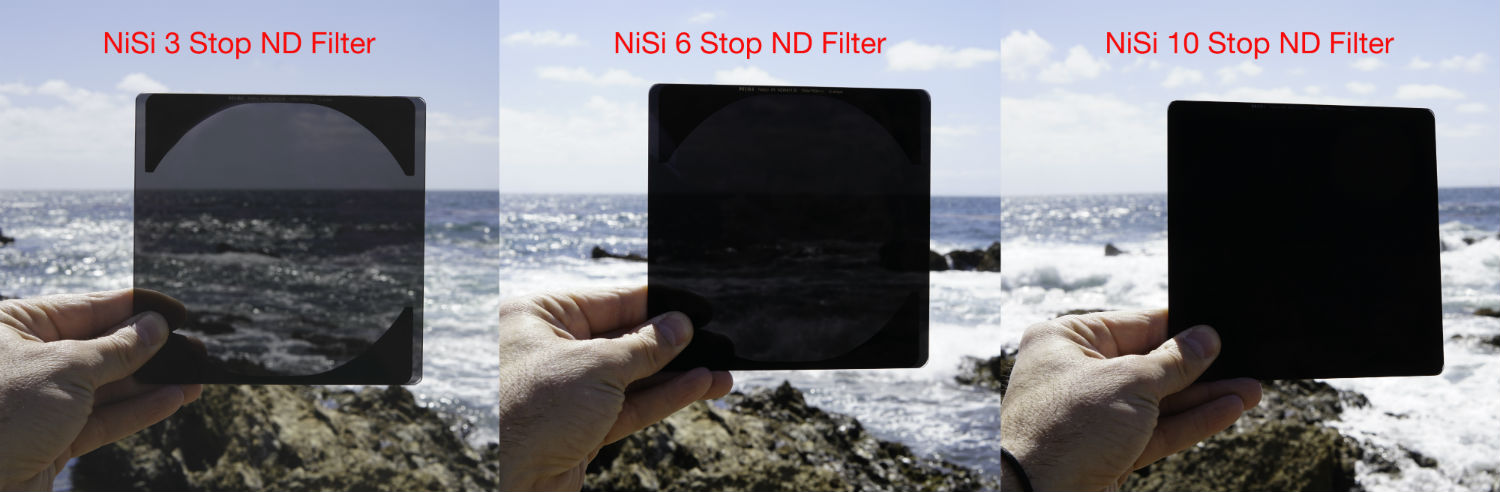
Neutral density filters come in all manner and sort of strengths, with the most popular versions being 3-stop, 6-stop, and 10-stop filters. As you can see in the comparison above, the higher the stops, the more light-blocking power the filter has.
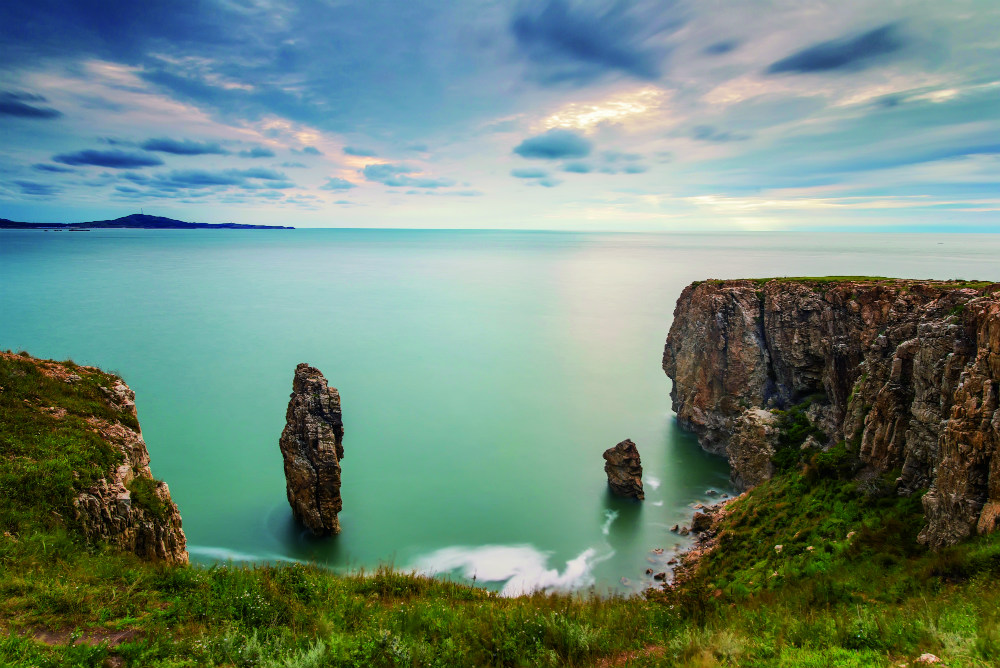 Image credit: 半岛魔镜. Taken with NiSi IR ND 1000(3.0) F11, ISO200, 30s.
When you use a neutral density filter, it enables you to extend your shutter speed to blur the effects of movement, as seen above.
This is advantageous in situations in which you're photographing waterfalls, rivers, the ocean, moving clouds, and so forth, during the day, and want to have the dreamy effects of perfectly smooth water.
Without an ND filter in place, you can't slow down the shutter enough to get the blurry movement you want without the photo being incredibly overexposed. Thus, the need for an ND filter.
Editor's Tip: The quality of the filters you use will impact the quality of your images. See what top-quality ND filters look like.
Neutral Density Filter Guide
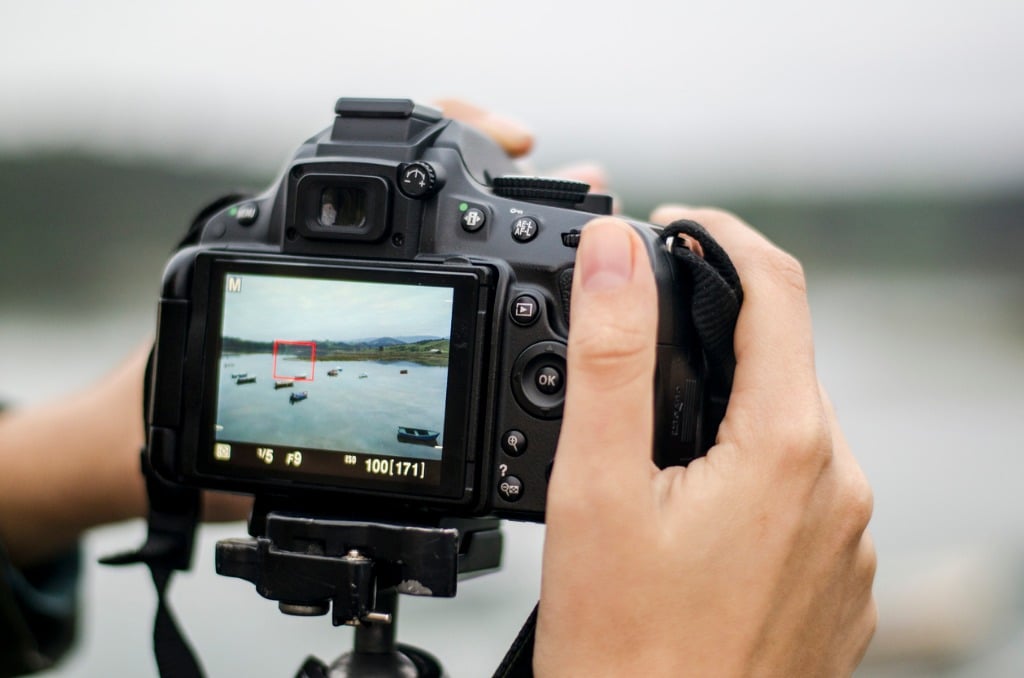
Step 1: Compose the Shot
Before you attach your neutral density filter to your lens, it's important to compose the shot first.
That's because once the ND filter is on your lens, each photo you take will take 30 seconds, 1 minute, 3 minutes, and perhaps much, much longer.
You don't want to wait around that long to check your composition, so this way will save you a lot of time.
Naturally, since you'll be dealing with long exposure times, having your camera on a stable tripod is an absolute must. I'd also add that using a camera remote, or at the very least the camera's self-timer, is a must as well, just to be sure you have the best chance at getting a sharp photo.
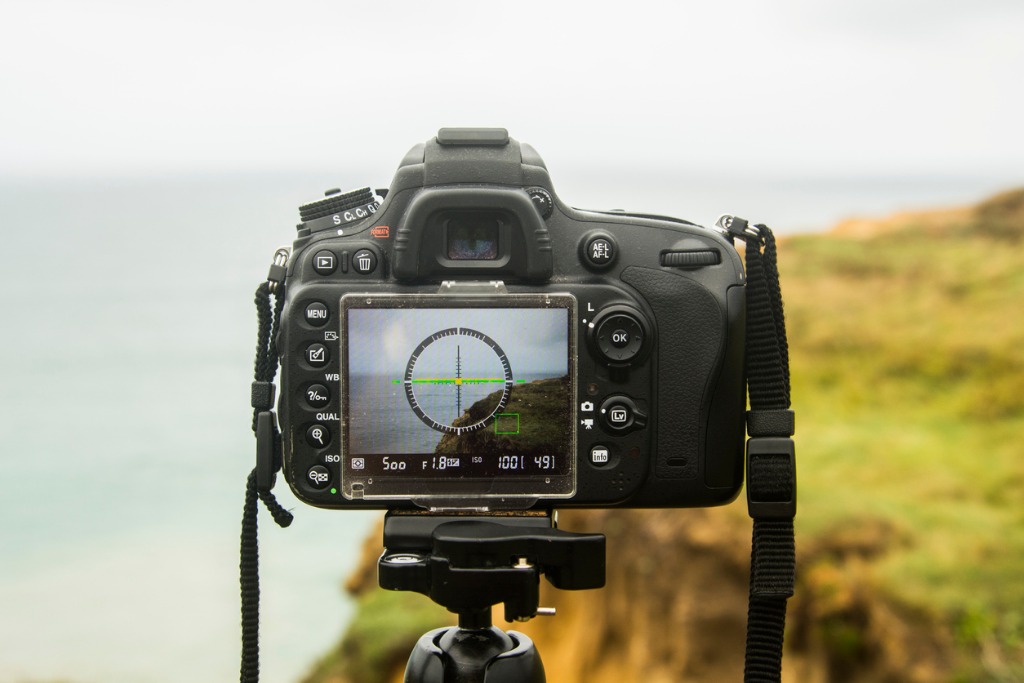
Step 2: Take a Baseline Photo
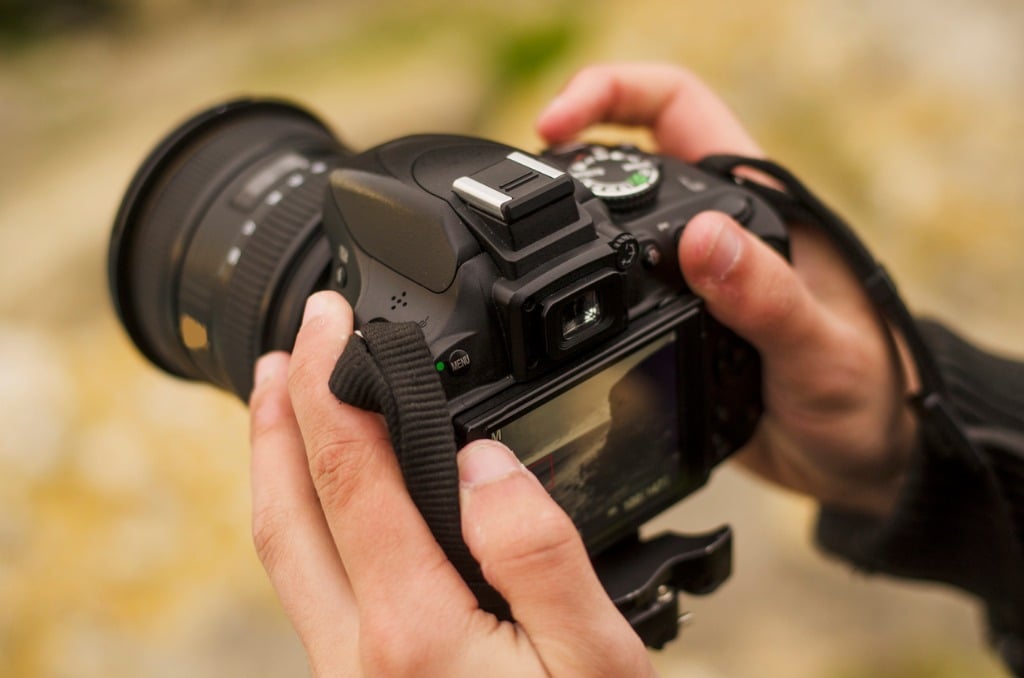
Composing the shot isn't the only thing you need to check before putting your neutral density filter in place.
You need to take a test shot (or two...) to check the sharpness of the image.
Once the filter is in place, your camera's autofocus system will struggle to find its focus point because it relies on detecting contrast, which depends on light.
Since these filters block out light, it makes it difficult if not impossible for autofocus to work.
So, compose the shot, take a baseline image, and use the camera's LCD to zoom in on the subject to ensure it's tack-sharp.
You also need to dial in the correct exposure settings at this point.
In many cases, doing this in manual mode so you can fully control aperture, shutter speed, and ISO is the best way to go.
However, if you're not quite comfortable shooting in manual mode, give aperture priority mode a try.
This mode gives you control over the aperture and ISO while the camera controls the shutter speed to get a well-exposed image.
To get the baseline image, aperture priority will work just fine.
Learn More:
- Simple Tricks to Getting Sharp Images With Your Camera
- Landscape Photography Primer: Getting Sharp Images With Depth of Field and Hyperfocal Distance
Step 3: Add Additional Filters
After you have the composition and sharpness of the image worked out and get a baseline of your camera settings, you need to add any filters that you want to use (though, not the ND filter just yet).
The great thing about some filters and filter holders, like mine from NiSi, is that you can stack filters to get the perfect effects.
In the image above, for example, my baseline shot was way too bright along the horizon due to the setting sun.
So, I added a reverse graduated ND filter in the second slot of my filter holder, and took a second baseline image to check for sharpness, composition, and exposure, which helped control the level of exposure in the middle of the shot.
Learn More:
- Graduated Neutral Density Filters vs Solid Neutral Density Filters: Differences and When to Use Them
- How to Shoot Landscapes at Blue Hour
Step 4: Dial in the Long Exposure Settings & Add the ND Filter
At this point, you need to switch your camera to manual mode.
But before you do, be sure to write down the aperture and shutter speed settings that were used to take the baseline image in Step 3.
Then, once in manual mode, dial in the corresponding aperture and shutter speed.
At this point, you also need to set your focus to manual. This locks the focus that was set in the baseline image.
Next, add the ND filter to the filter holder, bearing in mind that it should be the closest filter to your lens.
If you recall from above, when I added my reverse graduated ND filter, I put it in the second slot, leaving the first slot nearest the lens available for the ND filter. Having this in the second slot is necessary as you will need to move it to match the horizon.
When deciding which neutral density filter to use, bear in mind that it's essentially a creative choice in that the more stops an ND filter has, the blurrier the motion will be.
In the image above, I used a NiSi 3-stop ND filter to get just the right level of blur, but in other situations, a different ND filter might have been more appropriate.
Understanding which ND filter to use will come with time, practice, and experimentation, so give a 3-stop filter a try, and if you want more movement, swap it out for a 6-stop filter, a 10-stop filter, and so on.
Editor's Tip: Neutral density filters are just the tip of the iceberg. Complete your kit with a versatile polarizing filter.
Step 5: Determine the New Shutter Speed
Now that you have your ND filter in place, you need to adjust the shutter speed to account for the reduced light that's entering the lens.
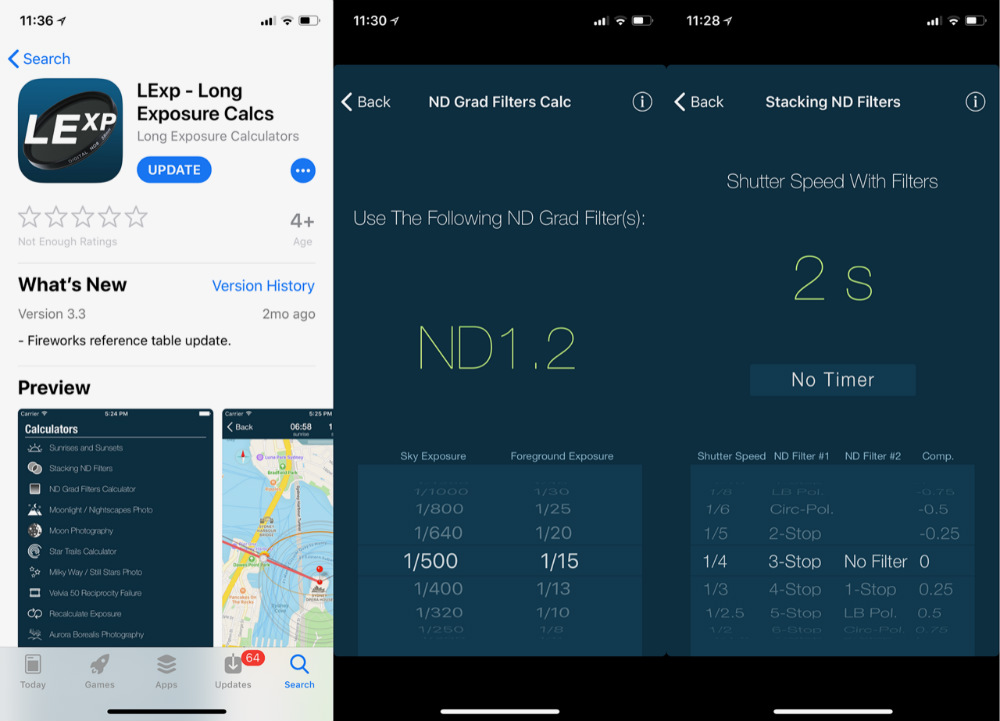
If you want, you can do the necessary math in your head by multiplying the shutter speed by a factor of two for every stop of the filter you're using.
So, if your shutter speed was 1/125 seconds for the baseline shot and you're using a 3-stop ND filter, your new shutter speed would be 1/30 seconds.
But, if you're like me and math isn't your thing, there's an app for that.
Shown above is a screenshot of my go-to long exposure app, Long Exposure Calcs. It's got calculators for everything from landscapes to fireworks to the Milky Way, and even helps you calculate exposure times when you stack multiple filters.
Learn More:
- Best Camera Settings for Landscape Photography
- The #1 Pro Landscape Photography Tip for Amazing Photos
And That's It!
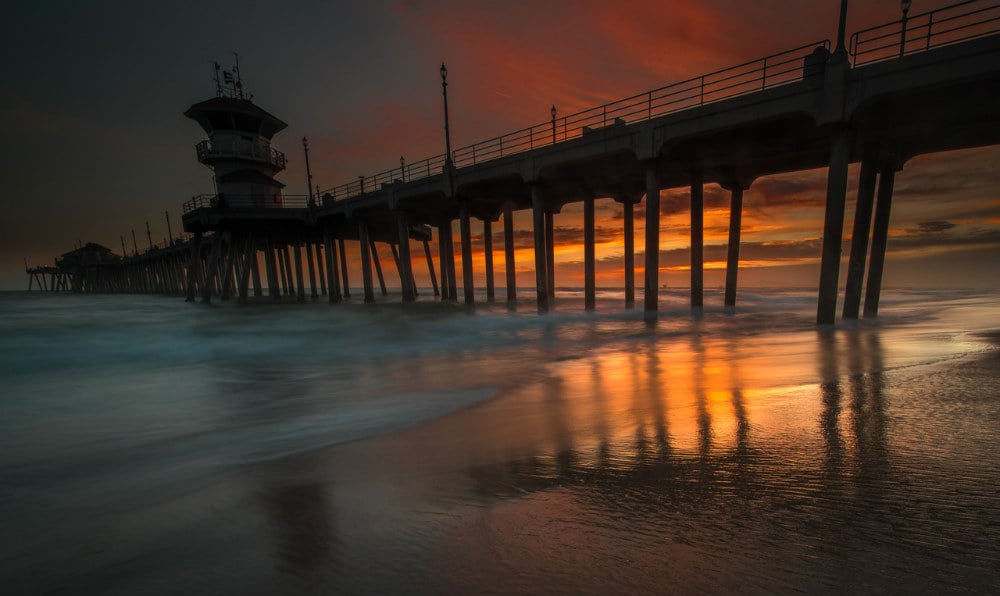
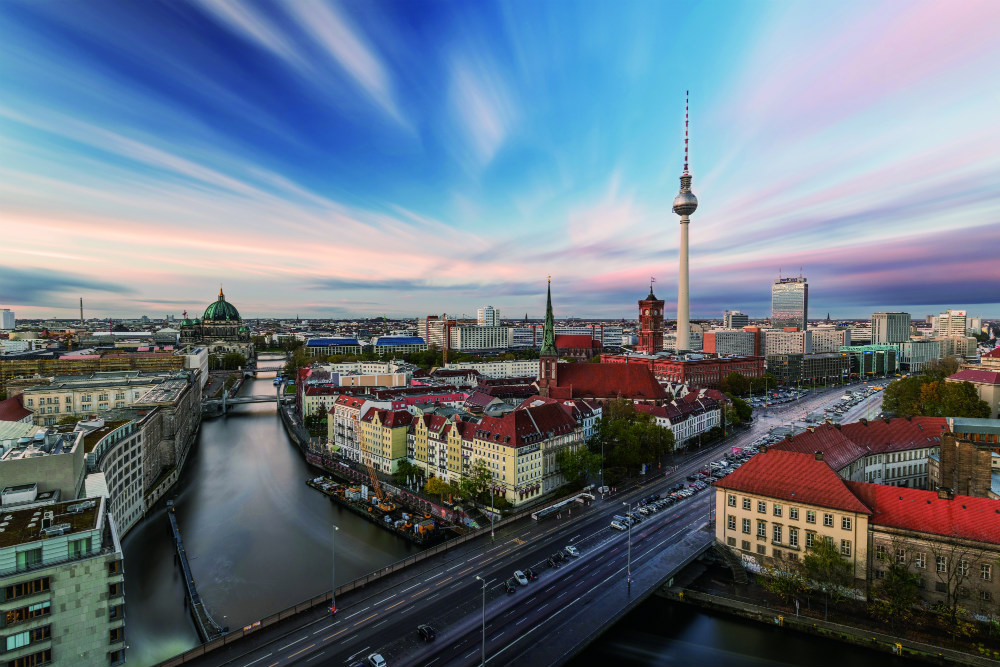 Image credit: Stefan Schäfer. Taken with NiSi CPL + IR ND 1000(3.0) F8, ISO100, 214s.
As noted earlier, mastering long exposures requires a good amount of practice and experimentation.
Of course, being equipped with the right gear - a solid tripod, a camera remote, and, of course, awesome filters - you'll have a leg up and be more apt to take breathtaking images like the ones shown throughout this article.
Just as an aside, I've been using NiSi filters for a few months now, and I can't tell you how pleased I am with these things.
They're rock-solid in terms of optical quality and construction and give you results that are simply impossible to get with cheap filters.
Head over to NiSi's website to see their selection of filters and to learn more about how lens filters can have a positive impact on your photography.
We Recommend
All the Ways a Polarizing Filter Can Enhance Your Photos
 Image Credit: Francesco Gola
Far and away, one of the best photography accessories money can buy is a high-quality polarizing filter.
I'll get into the specifics of why polarizers are so great in a minute, but for now, just know that they are a powerful tool that will help you learn how to take better landscape photos.
When it comes to landscape photography gear, I'd place a good polarizer at the top of the must-have list for landscape photographers, right along with a good tripod.
So, that being said, let's explore all the ways a polarizing filter can enhance your photos.
Polarizing Filters Reduce Glare
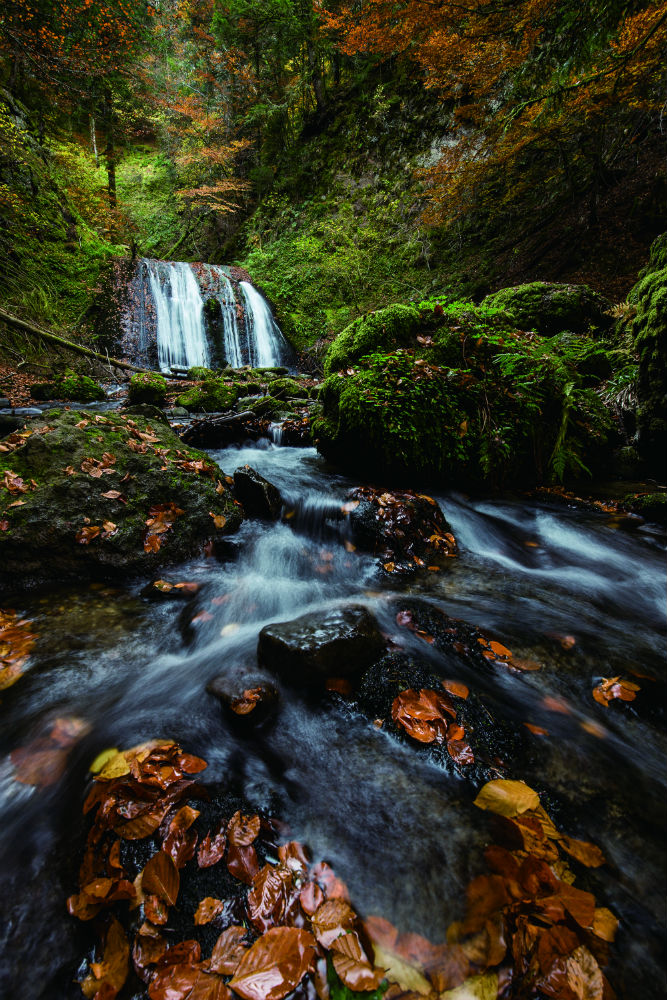 Image Credit: Nicolas Rottiers
If you've ever photographed a landscape that involved water, you've likely run into an issue with the sun glaring off the surface of the water, rendering that part of the photo nothing but a bright blob.
But with a polarizer, that glare can be eliminated, leaving you with a gorgeous view of the entire landscape - water included.
This glare-reducing feature works on any non-metallic surface, like the wet rocks along the stream in the photos above and below.
As you can see in the image above, without a polarizer, there's noticeable glare on the rocks, but when a polarizer is used, that glare goes away.
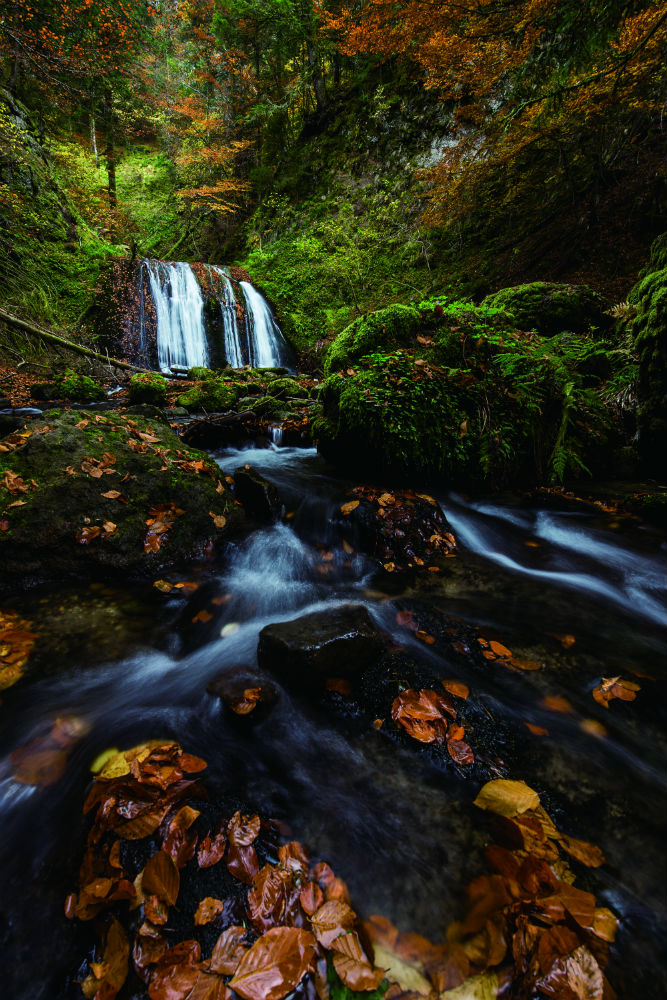 Image Credit: Nicolas Rottiers
Additionally, because polarizing filters help reduce glare, they also help the color and the texture of the landscape come through in your photos.
The result? A beautifully rich and detailed shot that reaches out and grabs people's attention!
Learn More:
Polarizing Filters Enhance the Color of the Sky
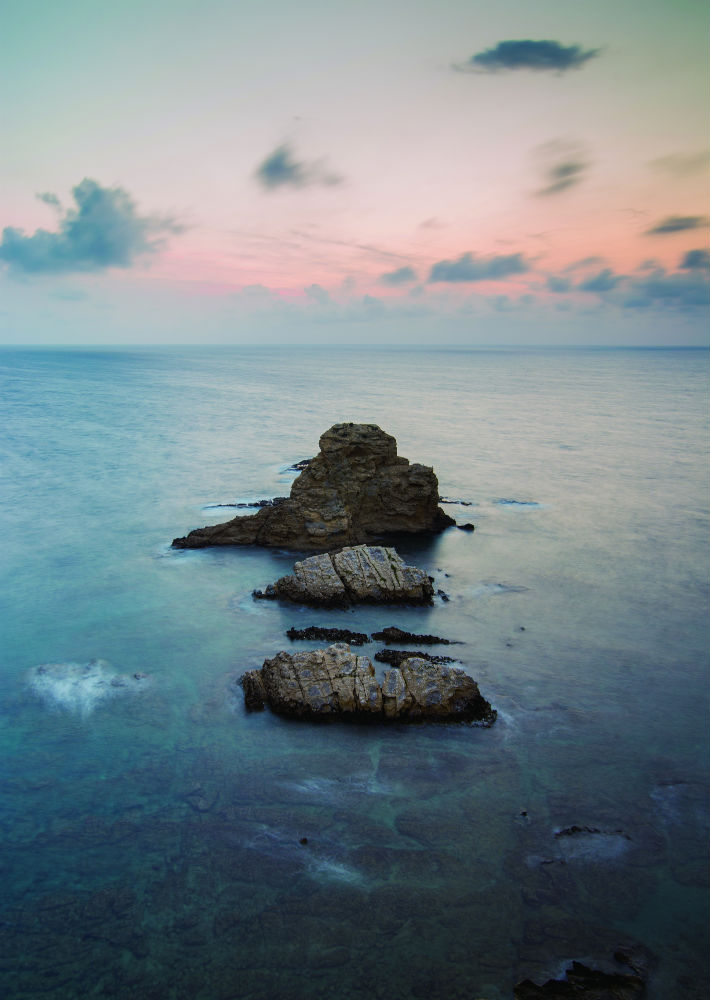 Image Credit: Sebastian Tontsch
If you've ever been out photographing landscapes in the middle of the day, you've probably encountered a couple of problems.
First, the sky tends to look washed out, with a baby blue appearance rather than the deep, dark blue that has so much impact.
Second, you've likely discovered that distance landscape elements - like mountains on the horizon - look a little hazy.
Fortunately, polarizing filters solve both of these problems.
If you look at the image above, you can see that it's a strong photo from a compositional standpoint, but that it lacks the impact that it could have with a polarizer.
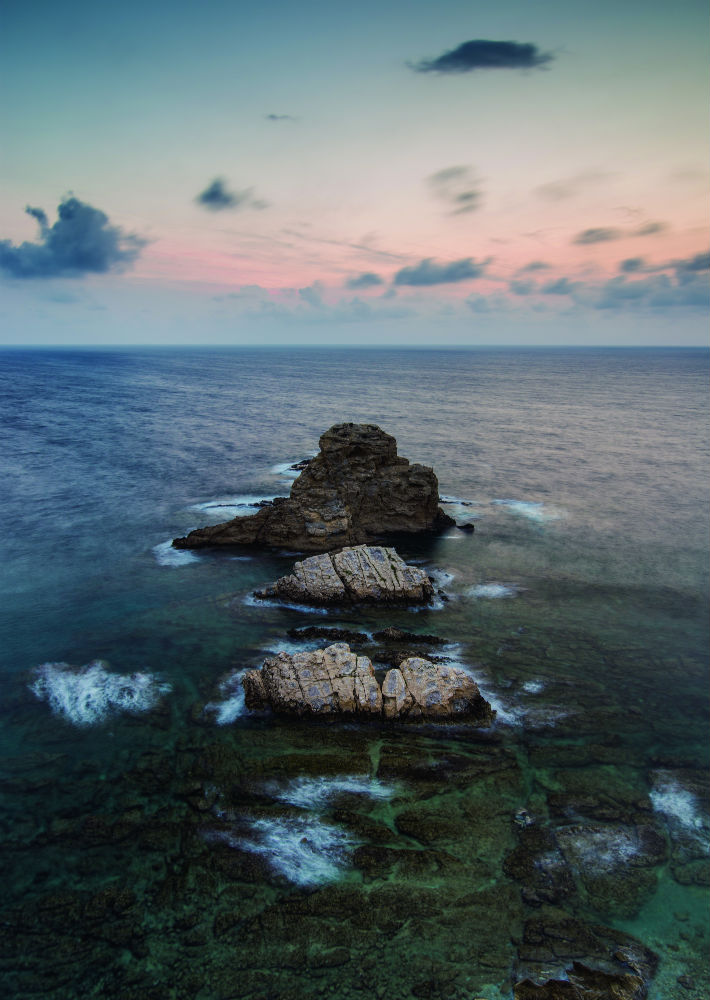 Image Credit: Sebastian Tontsch
However, when the same shot is taken again with a polarizing filter, as was done above, you can see an immediate difference.
Not only is the glare on the water greatly minimized, but you can see that there's more punch in the sky. That's especially true in the upper-left area of the shot where there's much more blue evident in the sky in the second photo.
One of the best ways to learn how to take better landscape photos is to understand how to use a polarizing filter.
And in this way, by using a polarizer, you can create images that have more dramatic and colorful skies that will grab the attention of viewers. That's especially true if you invest in a high-quality polarizer, like the HD Polarizer from NiSi.
That's because these filters are made with high definition optical glass and coating with NITTO polarizing film to get you the very best results.
Learn More:
- Graduated Neutral Density Filters vs. Solid Neutral Density Filters: Differences and When to Use Them
- Why You Need a Reverse Graduated Neutral Density Filter in Your Bag
How to Use a Polarizing Filter: Mix and Match With Other Filters
 With Circular Polarizer and 3-stop ND filter. Image Credit: Michael Lauer
Yet another benefit of using a polarizing filter is that you can use them with other filters to get even more dramatic landscape photos.
Use a polarizer with a solid neutral density filter and get ethereal effects without any glare, like what you see in the image above.
 With Circular Polarizer, Soft Nano IR Graduated Neutral Density Filter 8(0.9), and IR Neutral Density Filter 1000(3.0). Image Credit: Eric Rousset
You can also pair a polarizer with a graduated neutral density filter and a solid neutral density filter to get those same ethereal effects without glare and with a consistent exposure throughout the shot.
In other words, being able to mix and match your filters and even combine them together allows you to get the most out of your landscape photography gear to create jaw-dropping shots.
If you're wondering how to take better landscape photos, you can't go wrong with learning how to use a polarizing filter and other essential lens filters.
Learn More:
- A Complete Guide on How to Use Neutral Density Filters
- 3 Reasons Why all Landscape Photographers Need a Graduated ND Filter
We Recommend
Basic Night Photography Tutorial
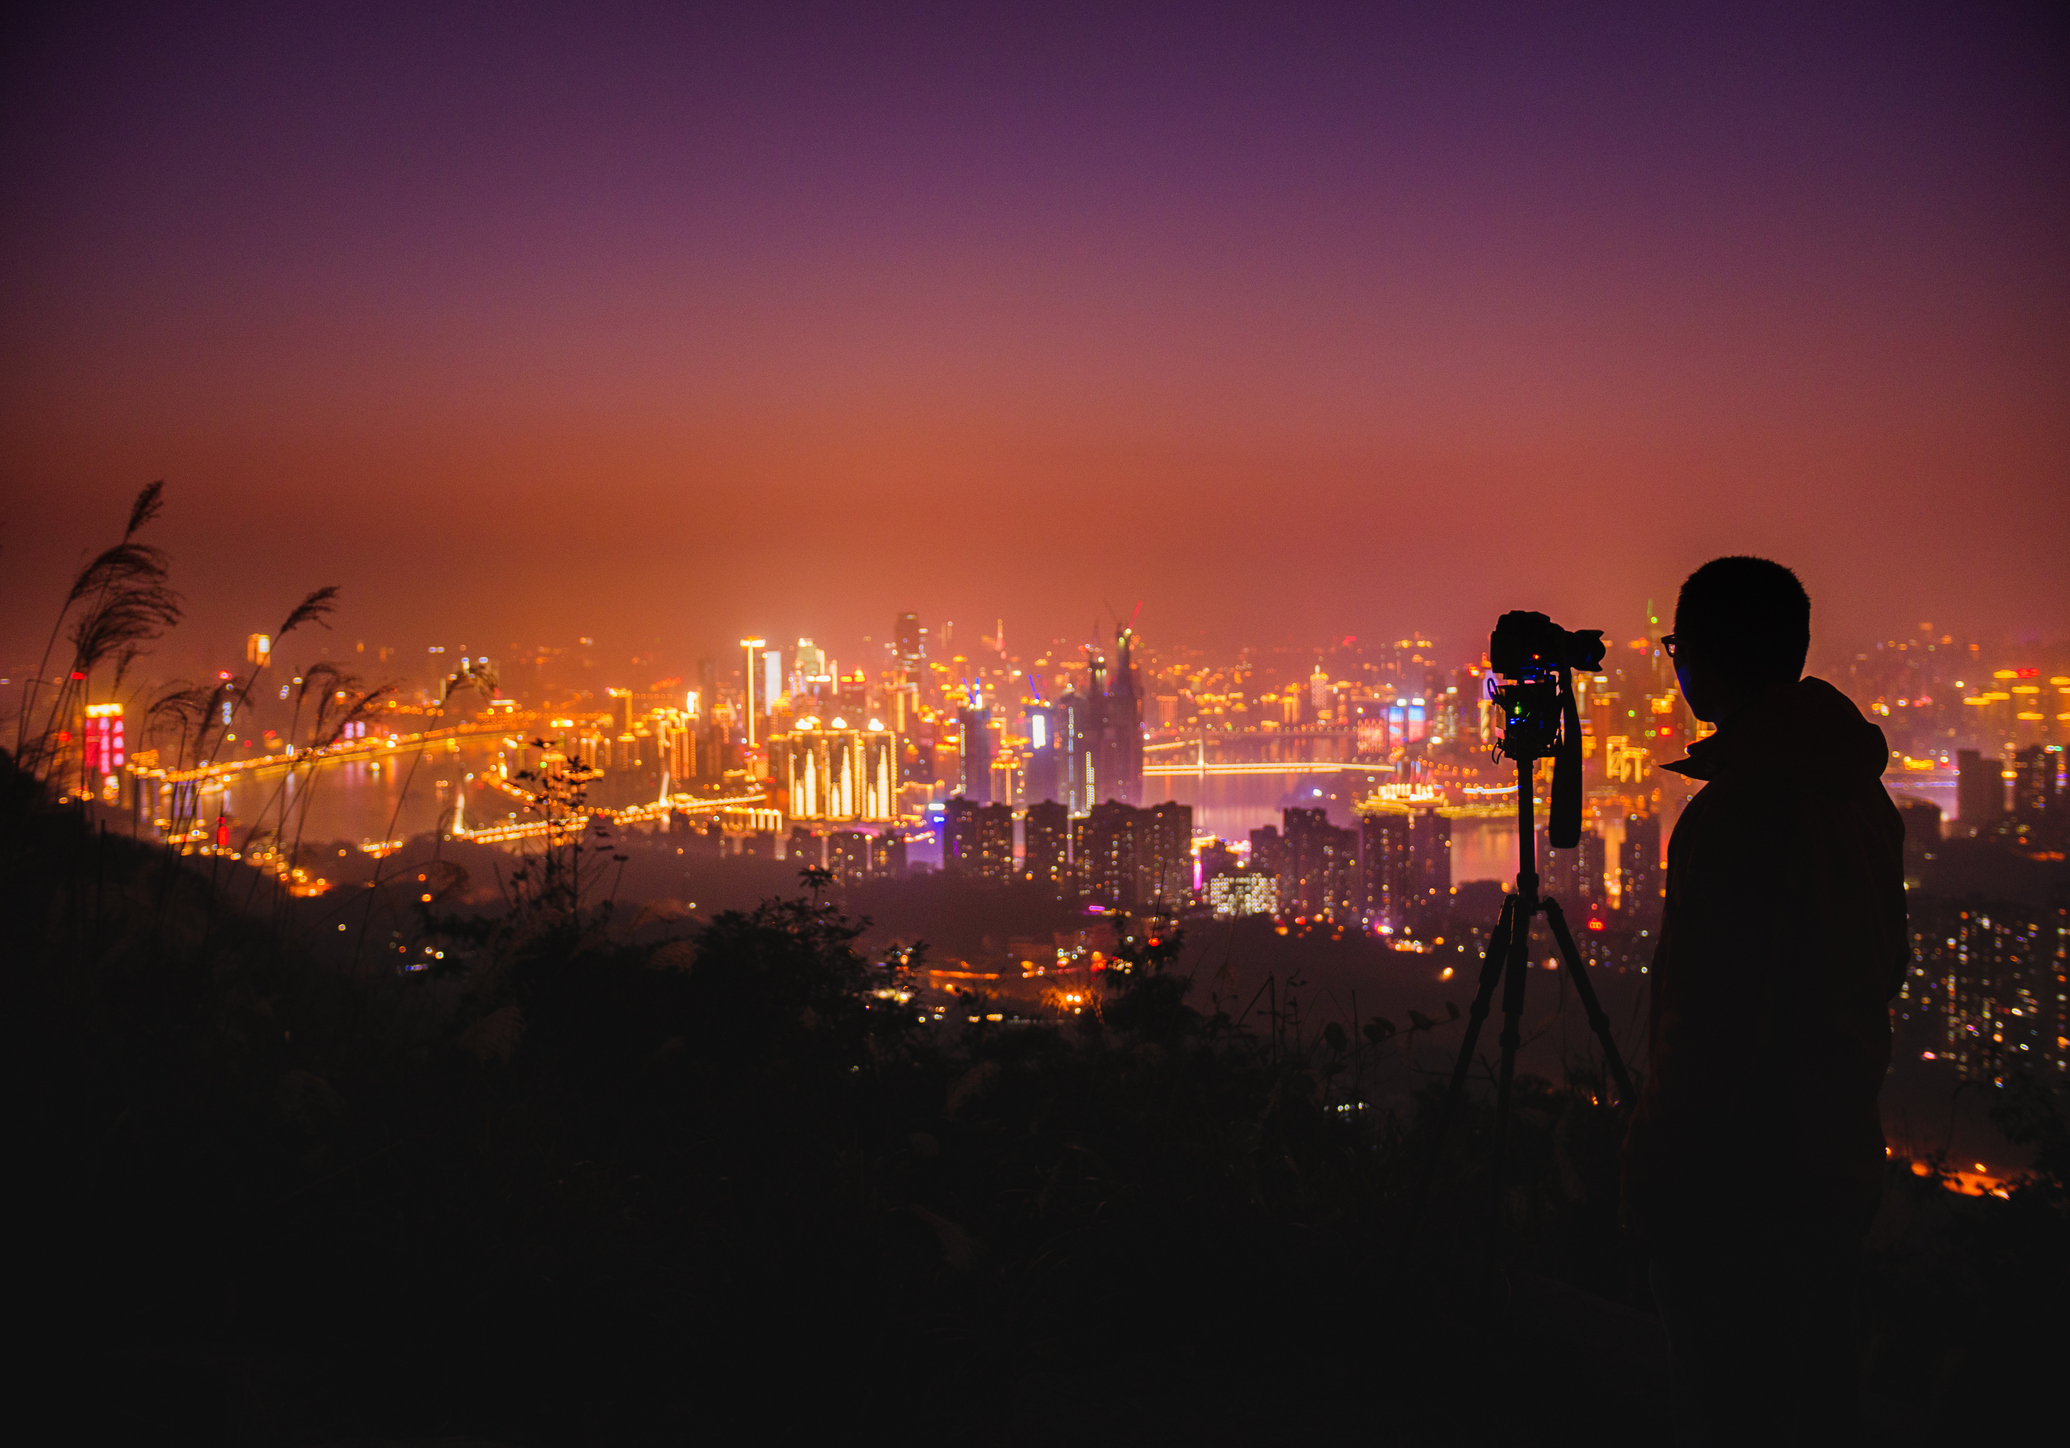
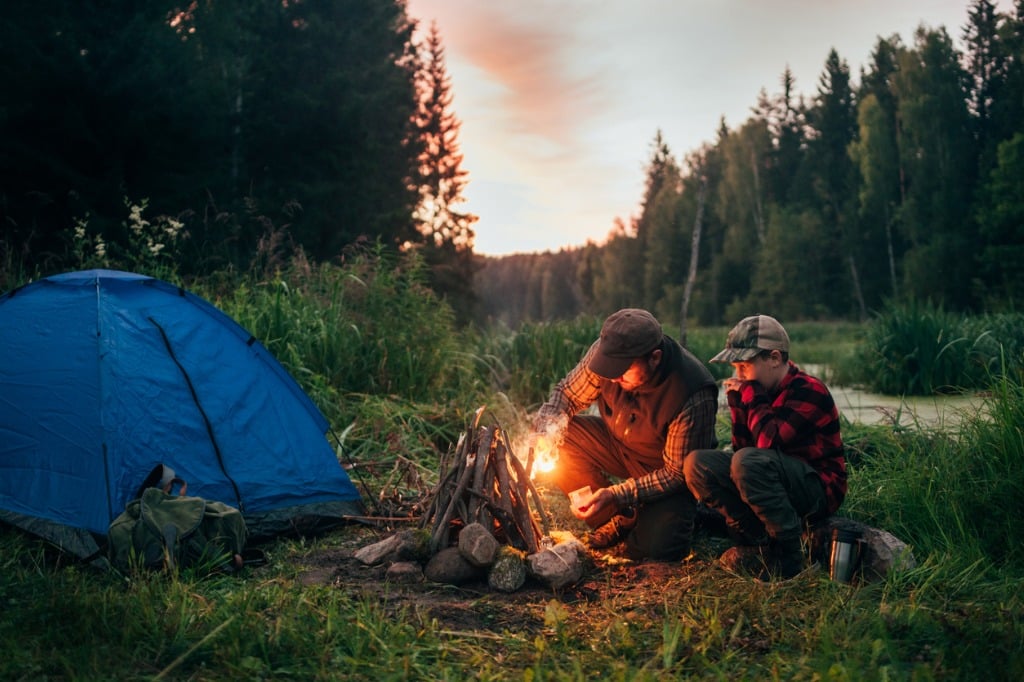
photo bypkujiahe via iStock
I understand if you think about night photography with some trepidation.
After all, images like the one above must be difficult to achieve, right?
Well, not exactly.
Yes, night photography is a different animal than shooting during the day, but in the end, it’s still all about composition, lighting, camera settings, and so forth.
In this basic night photography tutorial, you’ll learn the essentials of what it takes to get started in night photography.
Necessary Gear for Night Photography
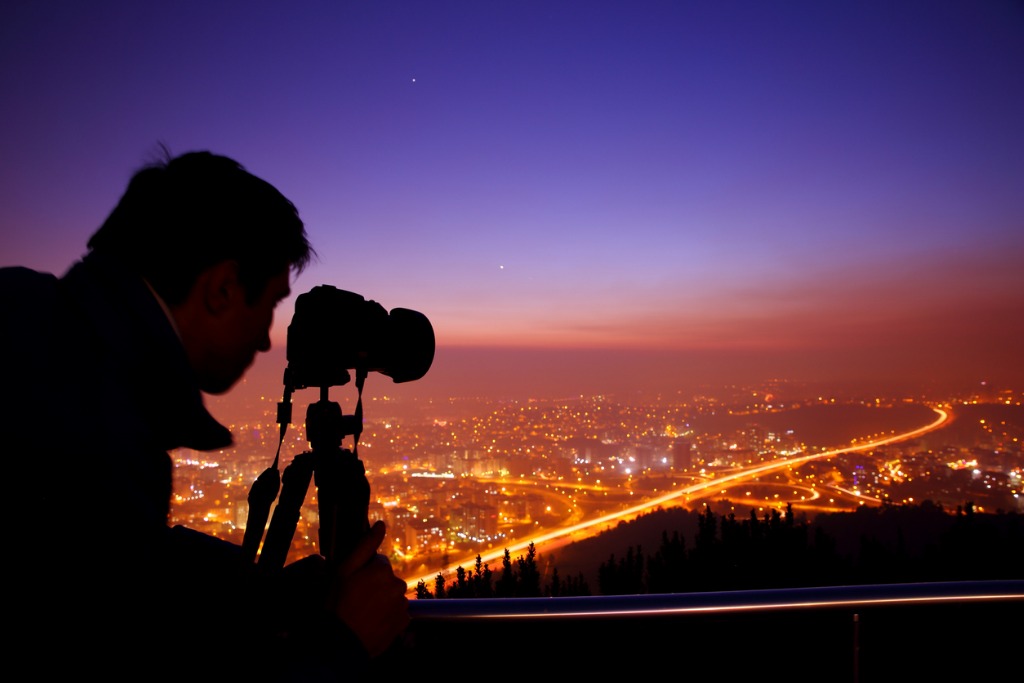
photo by aydinmutlu via iStock
First things first, you need the appropriate gear for night photography. This includes:
- A DSLR or mirrorless camera (you’ll need to shoot in manual mode)
- A sturdy tripod
- A remote shutter release
- A natural night filter
Now, these items are self-explanatory, for the most part.
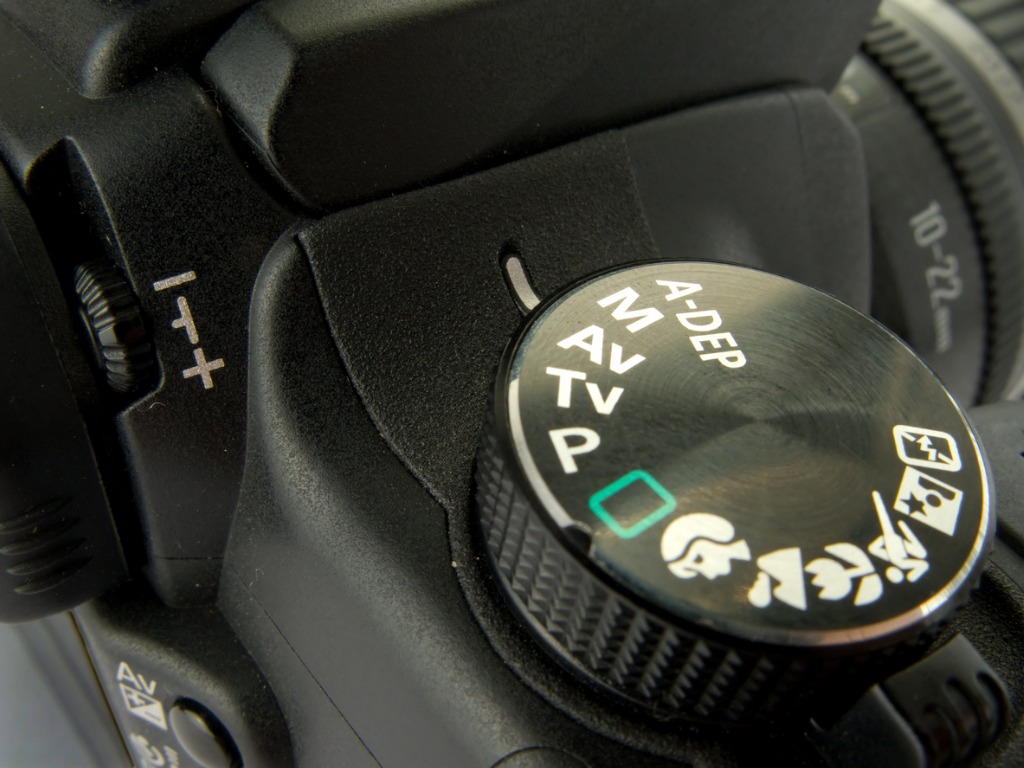
photo by tockPhotosArt via iStock
You need a camera with manual controls so you can manipulate its settings to get a well-exposed image. There will be more on settings in a moment.
Since you’ll be dealing with long shutter speeds, your camera needs rock-solid support, thus the necessity of a tripod. After all, even people with the steadiest of hands can’t remain absolutely still while holding a camera.
A remote shutter release is a good addition to your night photography kit as it allows you to avoid touching the camera to trigger the shutter. Doing so minimizes the chances of camera shake and will help you get a sharper photo.
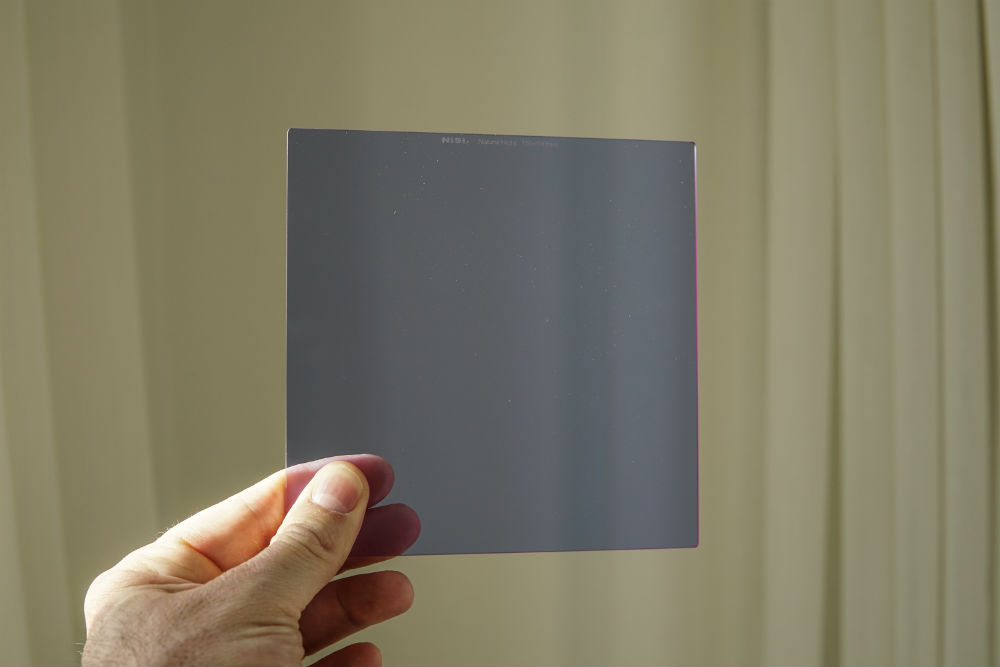
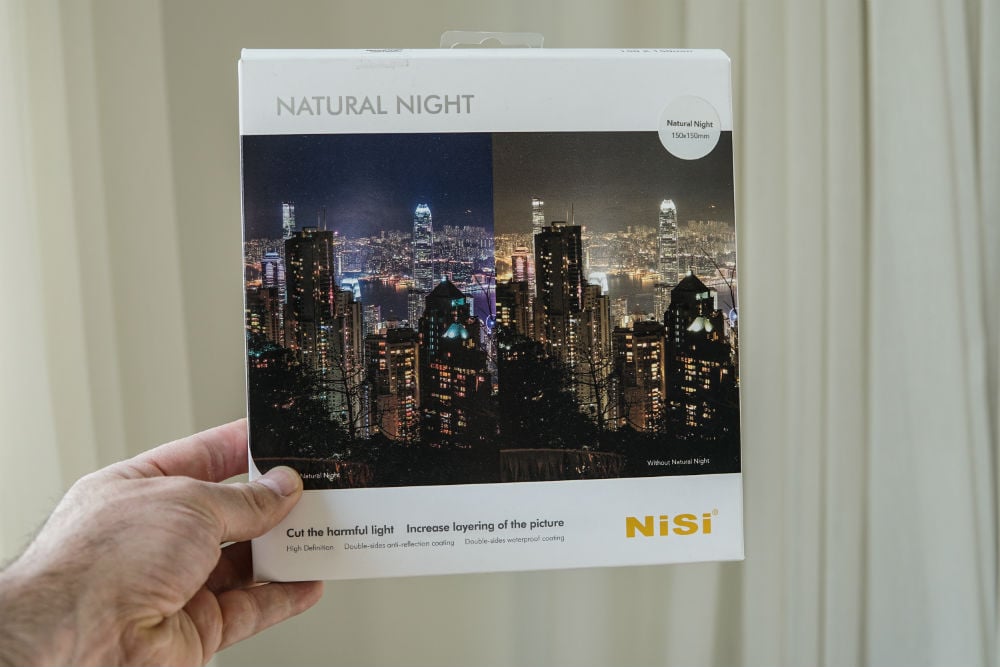
The one piece of gear that might need some explanation is the natural night filter (shown above).
When shooting at night in inhabited areas, there can be a lot of light pollution.
Between the lights in homes and other buildings, street lights, and cars, and even sodium and mercury vapor in the air, you will often find that your night images have murky skies and colors that are off.
This is the very reason why a natural night filter is a must-have.
I have one of these filters, and the difference between a night photo with it and a night photo without it is quite something.

Photo by Jerry Wang
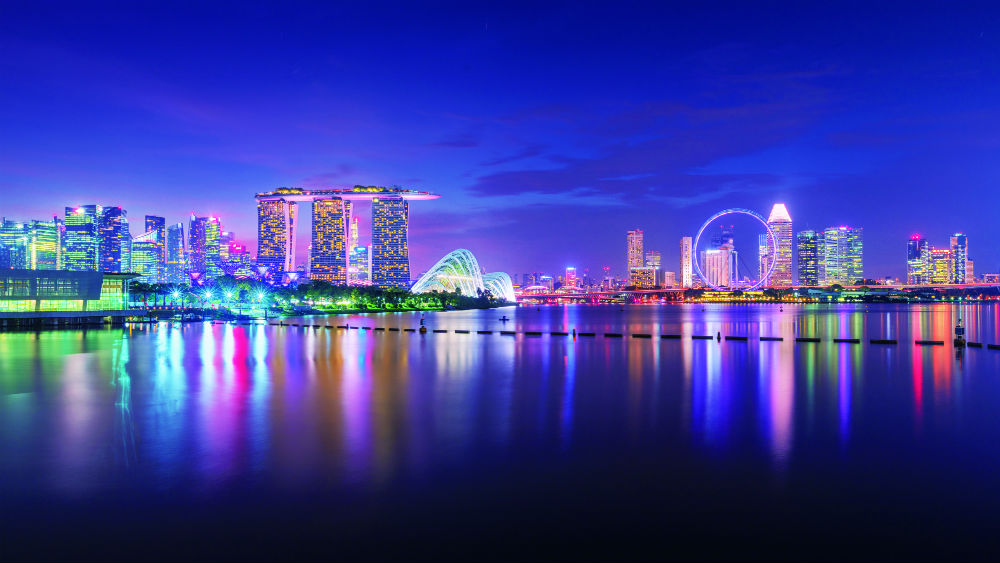
Photo by Jerry Wang
These filters work by blocking out light pollution such that you’re left with a crisp, clear image, as shown above.
My filter is from NiSi, which has made this filter to be waterproof and oil-resistant so it protects against fingerprints. There’s a double-sided multi-layer coating as well, so it helps minimize reflections.
Paired with an appropriate camera, a tripod, and a remote shutter release, you can’t go wrong with these filters when shooting at night!
Night Photography Tips: Use Manual Focus
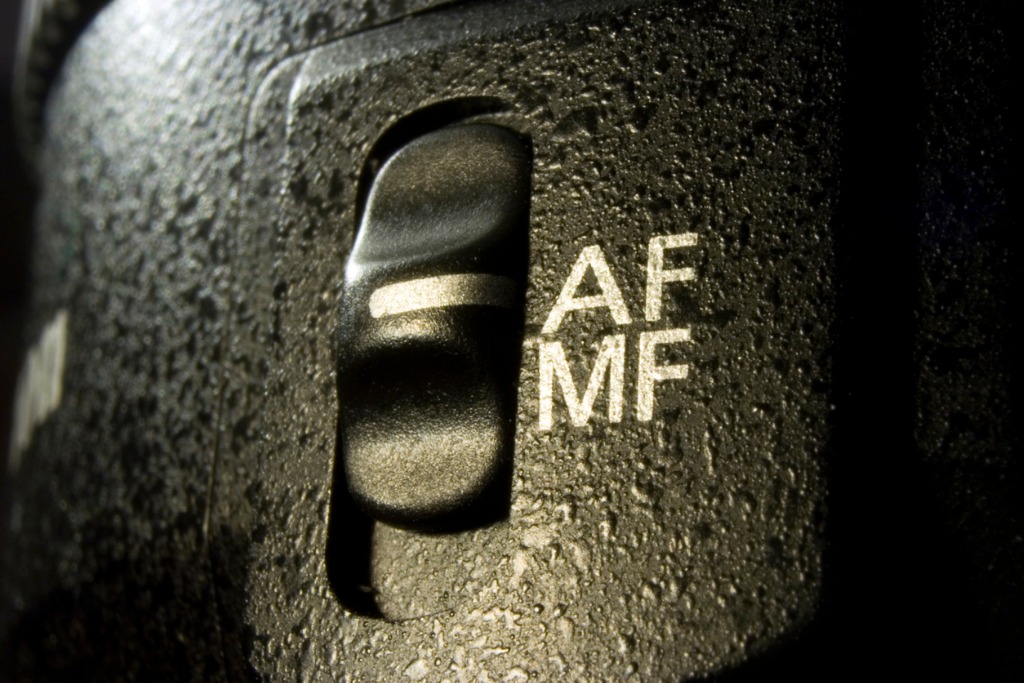
photo byBirgerNiss via iStock
Before we get to basic camera settings for night photography, it’s important to note that you’ll need to manually focus your lens.
Though today’s cameras (even inexpensive entry-level ones) have reliable, accurate autofocus systems, they struggle at night. By using manual focus instead, you ensure that you will get a sharp image.
Learning how to manually focus your lens isn’t scary or difficult. In this situation, simply switch from AF to MF and focus at infinity (the sideways 8 symbol on your lens). Doing so ensures that everything from front to back in the shot is sharp.
To check sharpness, turn on Live View on your camera and zoom in to see if the focus is spot-on. Adjust as needed until the primary subject is tack-sharp, and leave the lens in manual focus throughout the shoot.
Essential Night Photography Camera Settings

photo by Easyturn via iStock
Though every night photography situation will require slightly different camera settings, there are some basic starting points of which to be aware.
First, open the aperture as wide as it will go. This setting will depend on your lens.
For example, if you’re shooting with a kit lens that came with your camera, the largest aperture is going to be f/3.5-f/5.6. If you have a 50mm f/1.8, the largest aperture is f/1.8.
The reason you want to set the aperture as low as possible is that it allows the lens to collect the most light. Obviously, this is important when you’re shooting at night.
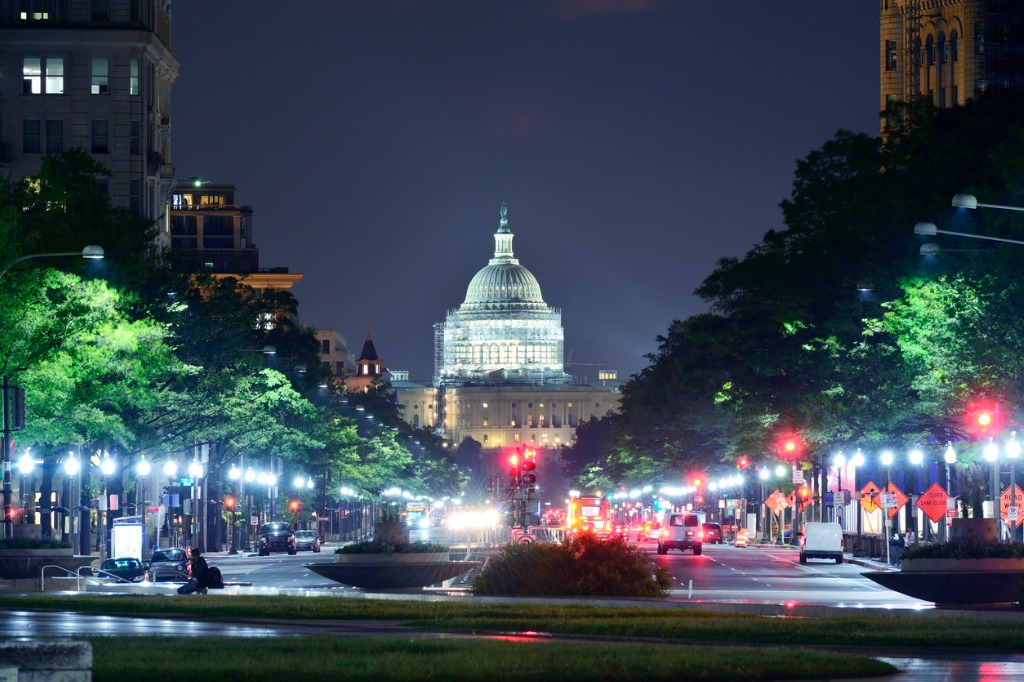
photo by zorazhuang via iStock
Next, set the ISO to 800. The ISO determines the sensitivity of the camera to light. The higher the ISO, the greater the sensitivity, but the higher the ISO, the greater the digital noise (which has the appearance of grain).
Most cameras these days can easily handle ISO 800 without getting too grainy. Many other cameras can push it to 1600 with no problem, either.
photo by zorazhuang via iStock
Lastly, set the shutter speed to 10 seconds. Again, this is just a starting point, and you will find that of the three exposure settings, this is the one that will require the most fine-tuning.
If at 10 seconds the image is still too dark, increase the shutter speed (i.e., to 13 seconds, or 15 seconds) and try again. Conversely, if the image is too bright, reduce the shutter speed (i.e., to 8 seconds) and give it another go.
So, to review, here’s our basic night photography camera settings:
- Exposure mode: Manual
- Focus mode: Manual
- Drive mode: Single shot
- Aperture: Lowest possible setting
- ISO: 800
- Shutter Speed: 10 seconds
Night Photography Tutorial: Final Step
photo by Gian Lorenzo Ferretti Photography via iStock
At this juncture, all that’s left to do is fine-tune your camera settings to get a well-exposed shot.
This is the point at which some beginner night photographers get the most frustrated because it requires that you manually adjust the camera’s settings.
Just remember that you can leave the aperture alone and the ISO alone for the most part (just choose between ISO 800 and 1600).
photo byMarsYu via iStock
Really, the linchpin is the shutter speed. But if you approach making adjustments one stop at a time, taking a sample shot and examining it, and making another incremental adjustment to the shutter speed, you will simplify the process and find the sweet spot where you get the best results.
So, grab your gear, head out tonight, and put your newfound night photography skills to the test!
We Recommend
Camera Basics and Photography for Beginners
When I think back to my early days as a photographer, I recall how frustrating it was trying to figure out the photography basics like camera settings.
I'm talking about learning aperture, shutter speed, and ISO...
Though understanding these basics of photography is certainly needed, it's easier said than done.
It's just a lot to learn. And could the aperture scale be more confusing??
Thankfully, I've figured things out over the years.
But if you don't want to toil for years and years like I did trying to learn photography, perhaps this short tutorial photography tips for beginners will get you pointed in the right direction.
In the video above, Peter McKinnon offers a quick run-down of camera basics.
Below, I've expanded on Peter's discussion a bit and included links to relevant topics to give you an even more robust learning tool.
Let's get started!
Editor's Tip: Need to upgrade your lens but don't have the budget to do so? LEARN WHY BUYING A PRE-OWNED LENS IS THE WAY TO GO.
Photography Basics: Aperture, Shutter Speed, and ISO

The three camera settings that control the exposure are aperture, shutter speed, and ISO.
Here's what each element of the exposure triangle, does in a nutshell:
- Aperture controls the amount of light entering the lens. The aperture is controlled by a diaphragm in the lens that adjusts its width based on the f-stop being used. The higher the f-number, the smaller the aperture opening, and the less light coming into the lens.
- Shutter speed controls the duration of light that reaches the lens. It's controlled by a curtain in front of the camera's sensor. A fast shutter speed means that the curtain opens and closes quickly, thus minimizing how long the sensor is exposed to light.
- ISO is responsible for the sensitivity of the camera's sensor to light. The higher the ISO, the more sensitive the sensor becomes.
Of course, these three settings aren't that simple, nor do they operate in a vacuum.
That is, each setting has other responsibilities and they all work together to help you get the proper exposure, as shown in the graphic above.
Learn More:
- Aperture, Shutter Speed, and ISO: The Exposure Triangle Explained
- 10 Beginner Photography Tips and Camera Settings You Need to Know
Creative Elements of Aperture, Shutter Speed, and ISO
In addition to their responsibilities regarding exposure, aperture, shutter speed, and ISO impact your photos in a creative manner as well.
Let's start with aperture...
The size of the aperture impacts the depth of field in the photos you take. The depth of field refers to the area of the image that's in focus.
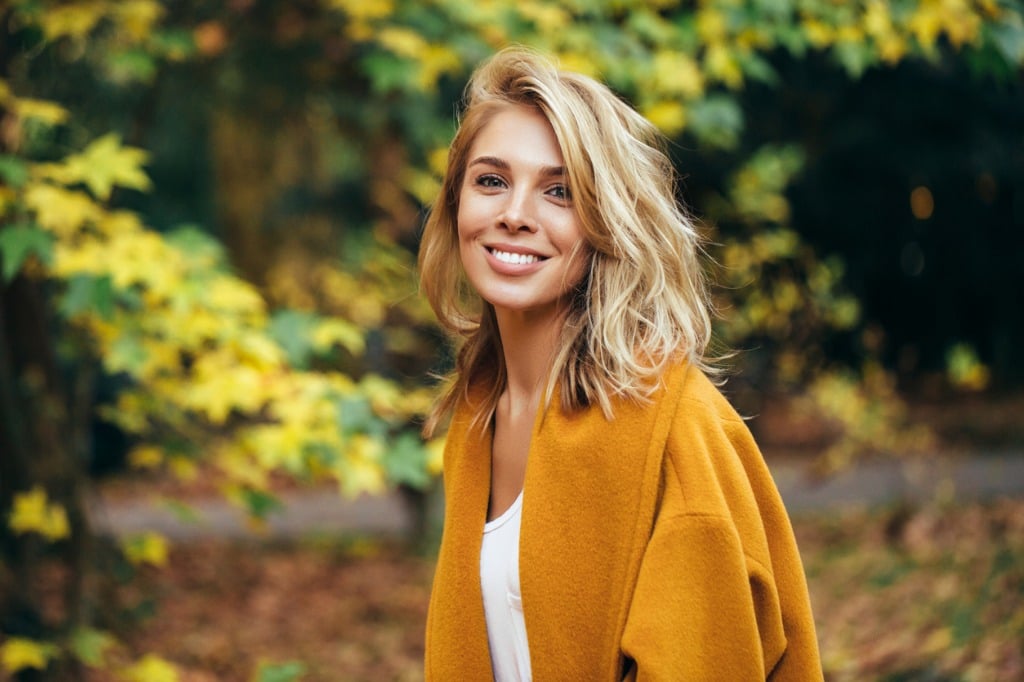
If you want a shallow depth of field with a blurry background as seen in the portrait above, you want to use a large aperture.
The confusing part for many people is that the size of the aperture is inversely related to the f-stop number, meaning, a large aperture is indicated by a small f-number.
So, f/2 is a very large aperture while f/16 is a very small aperture.
When it comes to shutter speed, it controls how movement is captured in a photo.
Shutter speed is measured in fractions of a second, like 1/30 seconds, 1/100 seconds, 1/500 seconds, and so on.
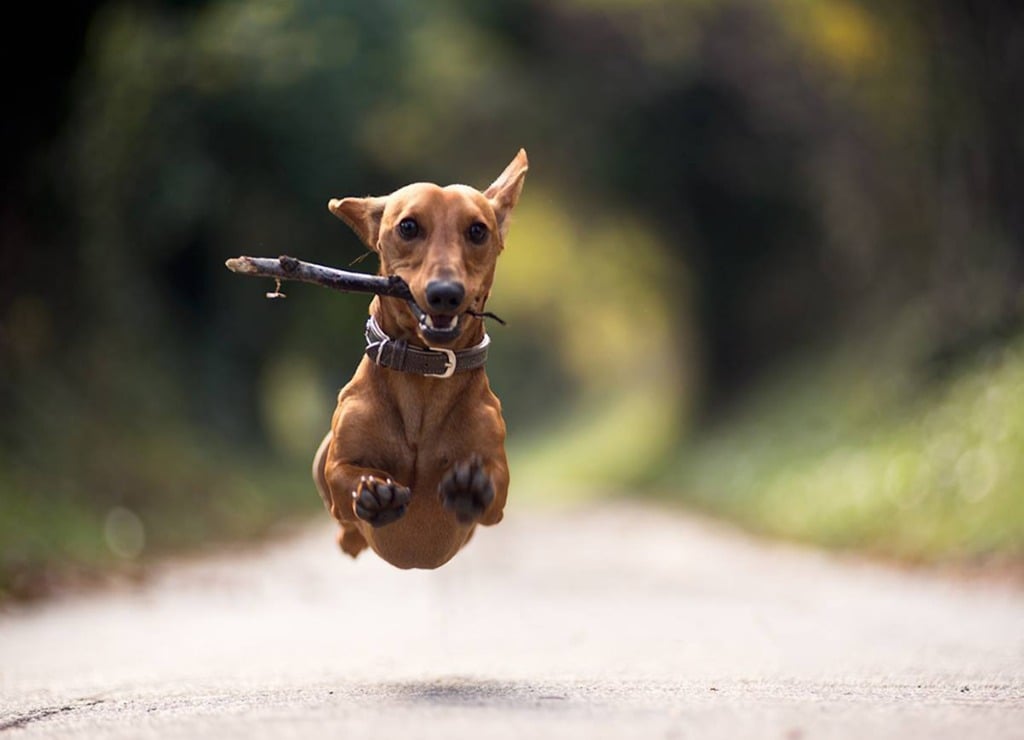
Naturally, the faster the shutter speed (i.e., 1/500 seconds), the more likely it will be that you can freeze the movement of a moving target, as shown above.
Conversely, if you slow the shutter down, you'll begin to see motion blur appear in the photo.
The last element, ISO, controls how much digital noise is in the shot.
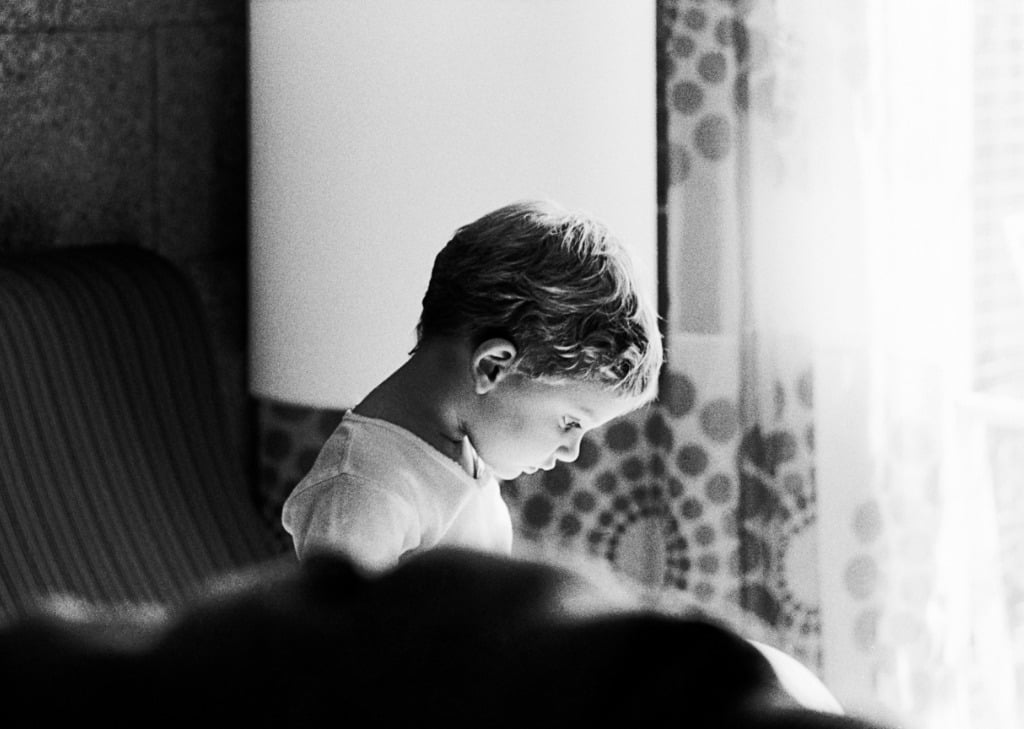
Digital noise looks like film grain, and it can add a grittiness to your images, as seen above.
ISO is measured on a scale that extends from about 100-6400 on most entry-level cameras, though the scale can extend much, much further.
The higher the ISO you use, the more grain will be evident in the photos that you take.
Quick Tip: Another way to ratchet up the creativity of your images is to use a high-quality neutral density filter. These filters block out light, allowing you to extend the shutter speed to get beautiful motion effects, even in broad daylight. Something like a 10-stop ND filter will give you long shutter speeds to blur the motion of rivers, waterfalls, clouds, passing cars, and so forth, for a gorgeous, creative look. Not all filters are made alike though. When selecting a filter, go with something that's well-made, offers hyper-neutrality, and offers water and oil-repellent features, like this one.
Ease Your Way Into Changing Camera Settings
You don't have to shoot in manual mode in order to take more control over your camera.
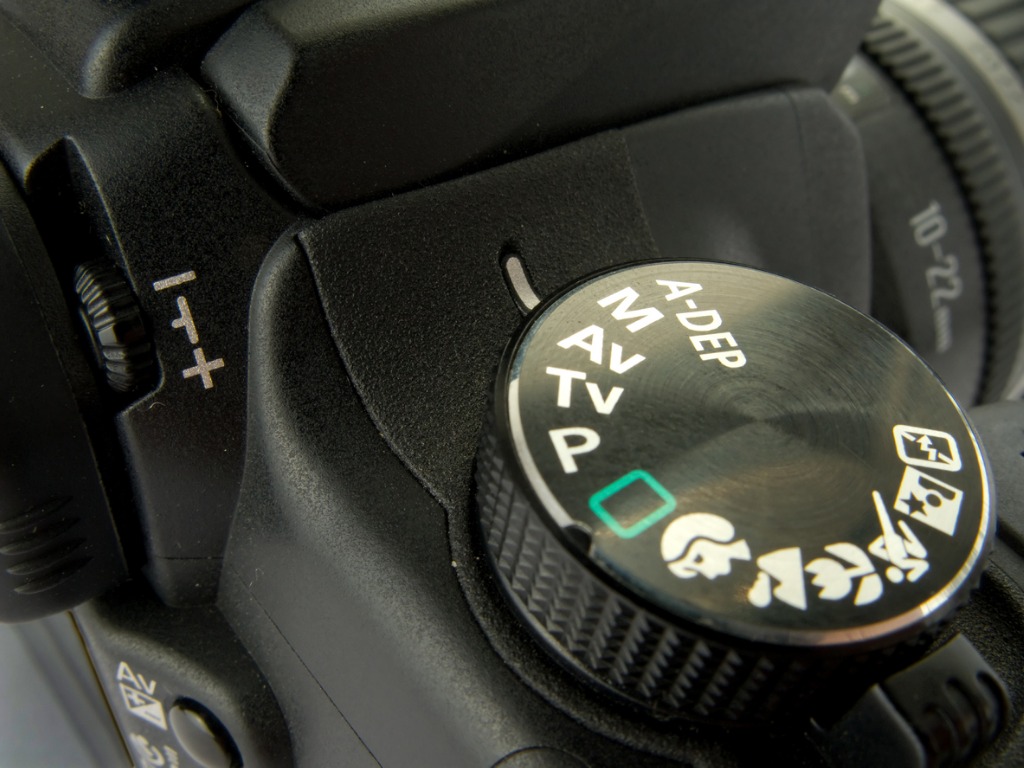
In fact, a good way to transition from shooting in full auto to shooting in full manual is to utilize your camera's semi-automatic modes: aperture priority, shutter priority, and program.
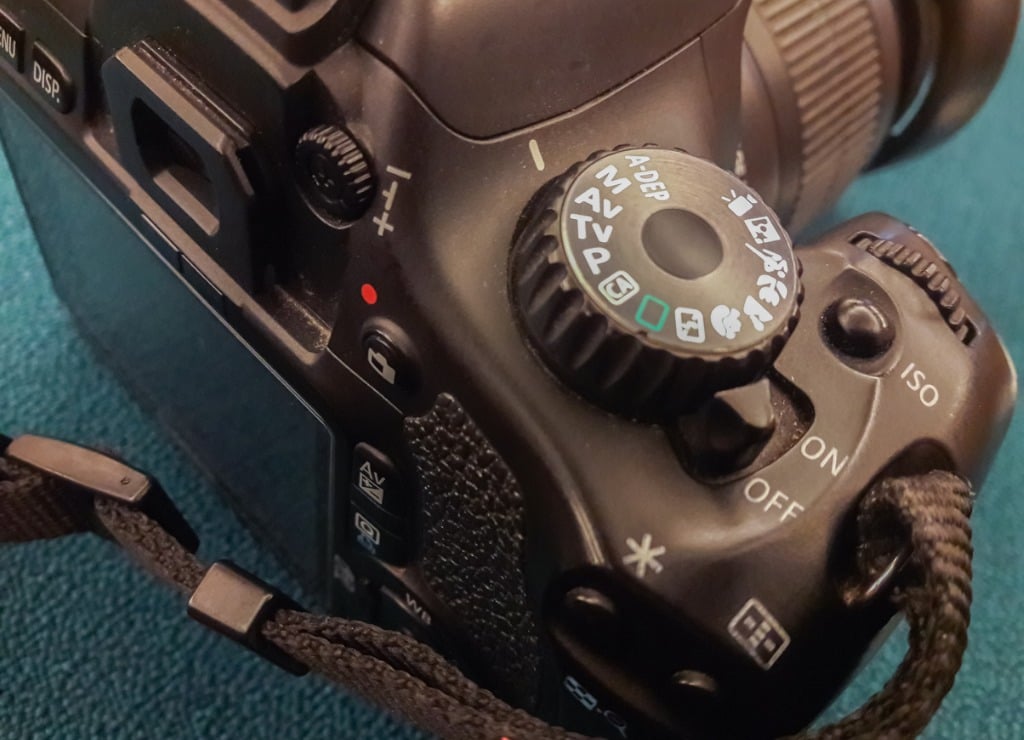
As you might've guessed, aperture priority mode (A or Av on your camera's dial) prioritizes aperture, giving you control over that setting (you also control ISO).
However, the camera controls shutter speed, so when you make an adjustment to the aperture, the camera makes an adjustment to the shutter speed so that you get a good exposure. This is advantageous when the depth of field is the most important thing, like in a portrait.
In shutter priority mode (S or Tv on your camera's dial), you control the shutter and ISO while the camera controls the aperture.
Again, when you make a change to the shutter speed, the camera will automatically change the aperture to get a well-exposed image.
This mode is ideal for controlling movement, like freezing the movement of your kids running around or blurring the motion of a waterfall, as was done above.
Lastly, program mode (P on your camera's dial) gives you even more control over your camera settings.
In this mode, the ISO is prioritized, so when you set the ISO, the camera will adjust the aperture and shutter speed accordingly. This is an ideal mode for low-light shooting when you need to be able to push the ISO, like when shooting at dusk, as pictured above.
However, you can override the aperture and shutter speed selections that your camera makes, whereas you can't do that in aperture priority or shutter priority.
That makes program mode a step closer to manual mode without actually being in manual mode.
So, the goal with learning about the photography basics of exposure, the exposure triangle, and various shooting modes is to help you get on track with getting out of auto and into manual mode.
This isn't to say that you have to shoot in manual mode all the time - not even the pros do that.
But equipping yourself with a better understanding of how your camera works will certainly have a positive impact on the photos you create.
Learn More:
We Recommend
Dynamic Range Explained
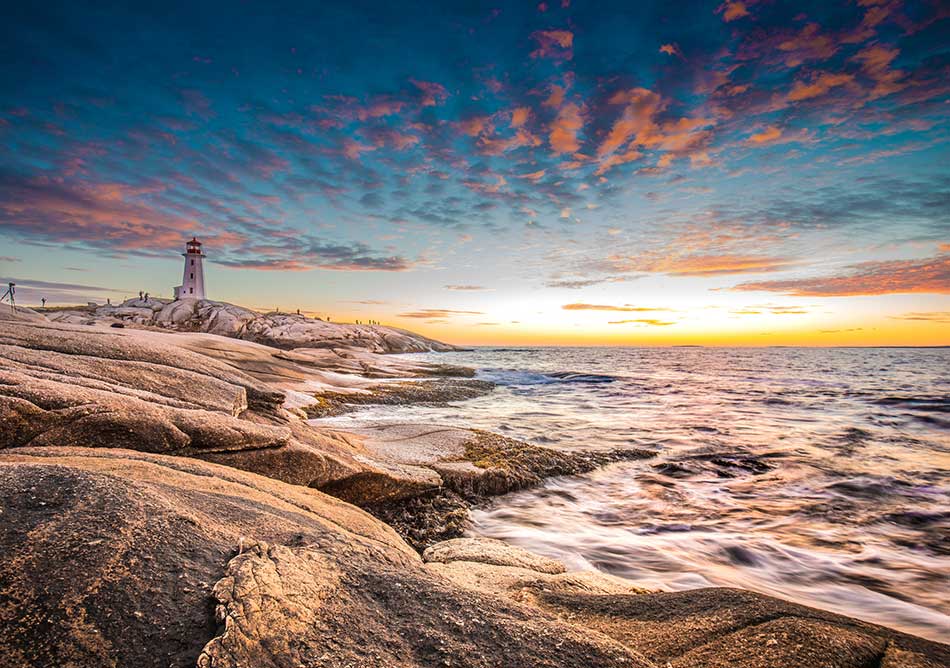
photo byJXD123 via iStock
If you’ve spent any amount of time behind the lens, you’ve encountered difficulties with dynamic range, even if you have no idea what dynamic range is (which I'm assuming is the case since you’re reading this article).
At its simplest, dynamic range is the range of light and dark tones in an image.
Pretty easy, right?
It’s a little more complex than that, though, and overcoming the difficulties associated with a wide dynamic range is more complicated still.
Let’s dive into this topic, get dynamic range explained, and explore a few ways you can manage difficult lighting situations.
Table of Contents
- Dynamic Range Defined
- How to Understand Dynamic Range
- How to Manage Dynamic Range: Expose for the Highlights
- How to Manage Dynamic Range: Shoot HDR
- How to Manage Dynamic Range: Use a Graduated ND Filter
Dynamic Range Defined
Image Credit: Motoji Sekine
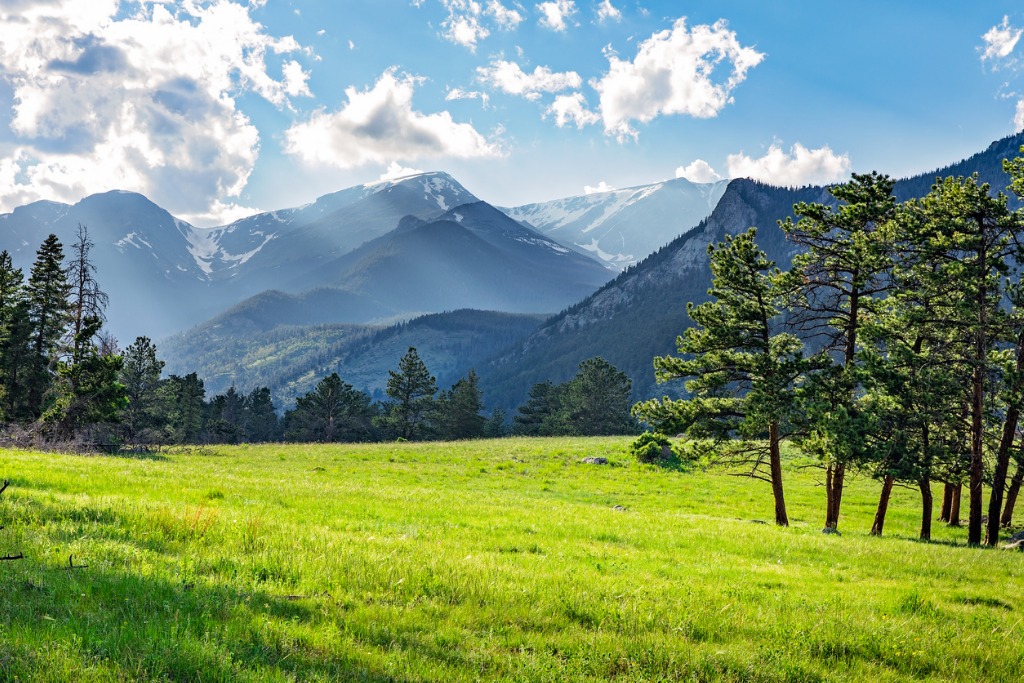
As noted above, dynamic range refers to the difference between dark and light areas. This difference exists in the scene you’re photographing - the range of shadows to highlights.
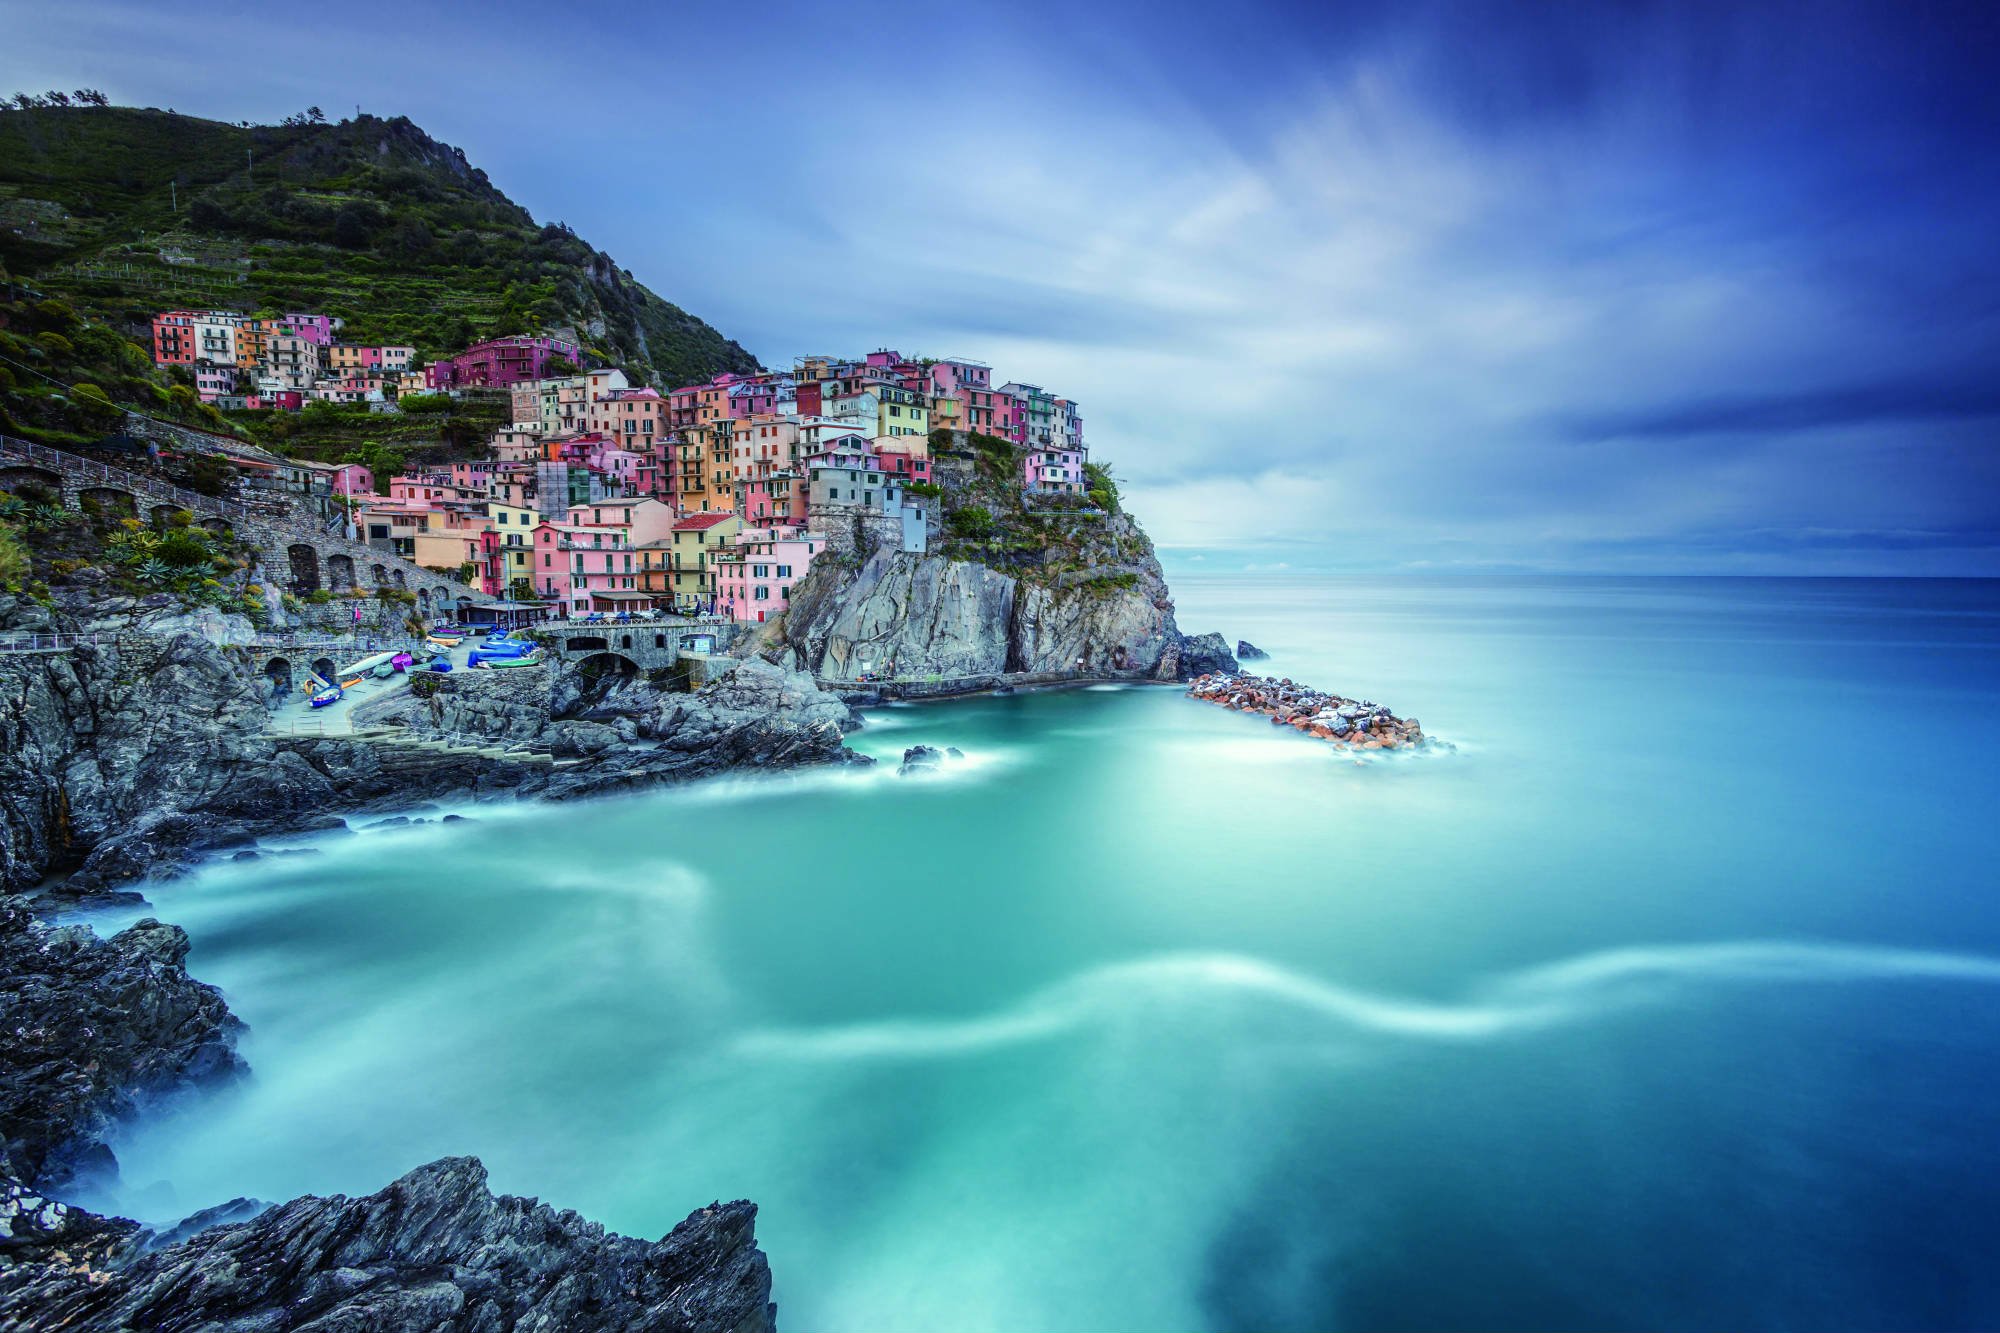
In a low-light situation, like shooting a landscape at blue hour, the dynamic range will be quite small.
As you can see above, there aren’t that many highlights in the shot. Instead, the image is mostly composed of midtones and shadows, thus, it has a small dynamic range. In turn, the photo is quite dreamy and calm.
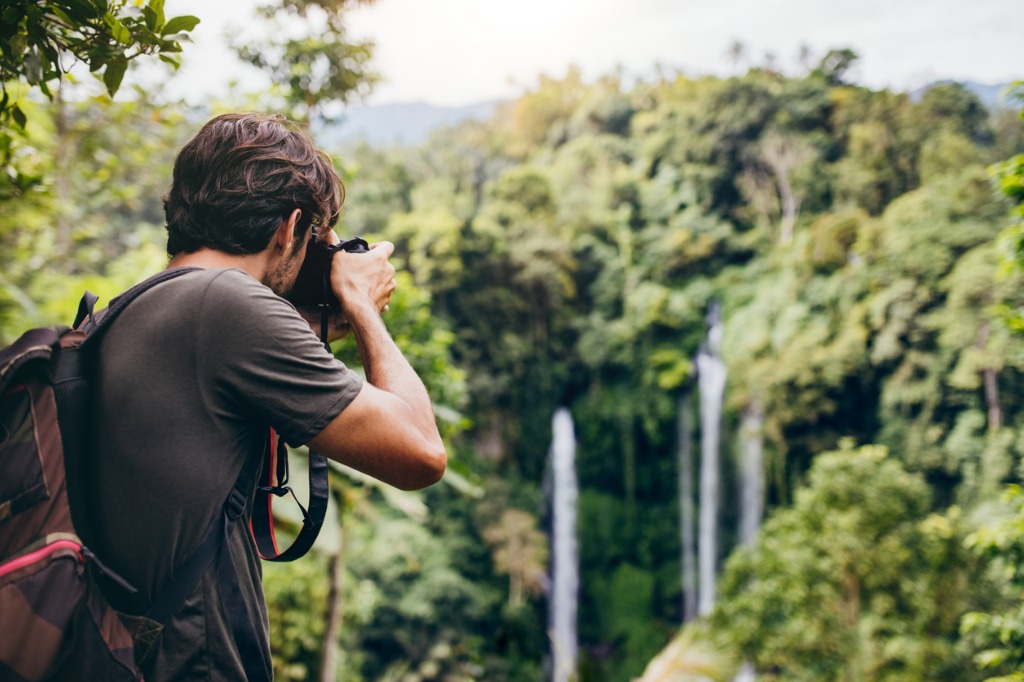
photo by vural via iStock
This image, however, has a very wide dynamic range, and is much more visually jarring than the previous one.
You can see that there are very deep blacks, very bright whites, and a vast range of midtones in this photograph, as is common when shooting in sunny conditions.
You can probably guess which scene is easier to photograph from a dynamic range perspective…the low-light scene.
photo by Marcus Millo via iStock
All cameras - even high-dollar professional models - have their limits when it comes to accommodating dynamic range.
The ability of a camera to capture details in shadowed and highlighted areas depends on its sensor. The larger the sensor, the greater its ability to capture a wider dynamic range.
So, if you primarily shoot with a mobile phone, you’ll encounter more difficulties with dynamic range than you would if you shoot with a full frame camera. For example, the high-contrast daytime shot we looked at earlier would be more difficult to pull off with a smartphone than it would be with a full frame camera.
Of course, not all of us have the budget to buy a full frame camera, so the question is, how do you account for a wide dynamic range?
Learn More:
- Working With Good Landscape Photography Lighting and Its Effects on Your Photos
- The #1 Pro Landscape Photography Tip for Amazing Photos
How to Understand Dynamic Range

To manage dynamic range, it might be beneficial to think of it in visual terms. Fortunately, your camera likely has that built-in in the form of a histogram.
As shown above, a histogram shows the range of tones in the shot, from deep blacks on the far left of the graph to bright whites on the far right. Midtones are represented in the middle.
The histogram is a visual representation of what your camera can handle in terms of dynamic range. So, if the scene you’re photographing results in a nice bell-shaped curve that fits completely within the bounds of the histogram, your camera has accommodated the dynamic range of the scene.
However, if the graph is shifted left or right, there’s a strong possibility that details in either the shadows or highlights are “clipped,” which means shadows might appear as detail-free black areas or highlights might appear “blown out” with no detail.
To correct clipping, you need to adjust the exposure. There are a few ways to do this.
How to Manage Dynamic Range: Expose for the Highlights
Perhaps the most straightforward method of protecting the details in your photos is to expose for the highlights.
By adjusting your exposure to account for bright highlights, you’ll be able to retain detail in highlighted areas in the shot.
Granted, exposing for the highlights means that the shadows will lose detail, but often there’s not much detail in the shadows anyway. If you’re going to lose detail somewhere, the shadows are the best option.
See this methodology play out in the video above by Massimo's Fotografie.
How to Manage Dynamic Range: Shoot HDR
Photo by Emre Karataş on Unsplash
High dynamic range (HDR) photography is yet another way to get an improved exposure when the dynamic range is quite wide.
Many cameras have an automatic HDR setting, so utilizing this technique on, say, a mobile phone, is typically a simple matter of selecting the HDR setting in the camera’s menu. The same holds true for many DSLR and mirrorless cameras as well.
Essentially, HDR images consist of multiple bracketed exposures that are merged together. Typically, three exposures are taken virtually simultaneously, one of which is exposed for the shadows, another for the midtones, and another for the highlights.
When blended together, these three separate exposures result in a single image that’s well-exposed throughout.
So, this represents an upgrade from the expose for the highlights technique discussed above because it allows you to retain details throughout the dynamic range of the shot.
See how taking multiple exposures and blending them together into a single image works in the video above by Andrew Marr.
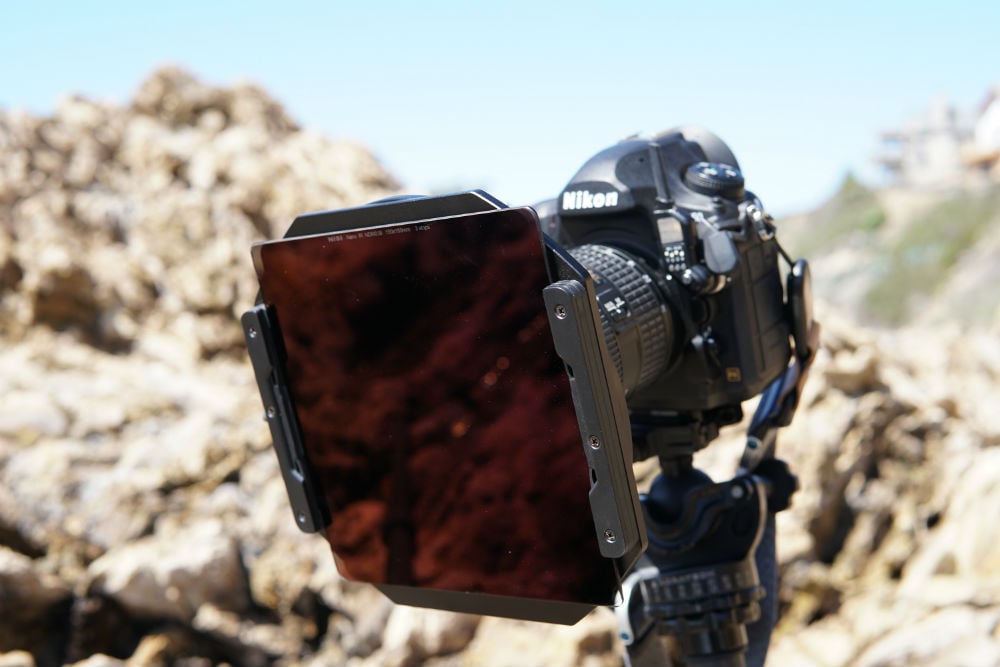
How to Manage Dynamic Range: Use a Graduated ND Filter
I shoot a ton of landscapes, so I often run into the problem of having a very bright sky and a not-so-bright landscape that results in a dynamic range that’s simply too much for my camera to handle.
To correct for this, I choose to use graduated neutral density filters.
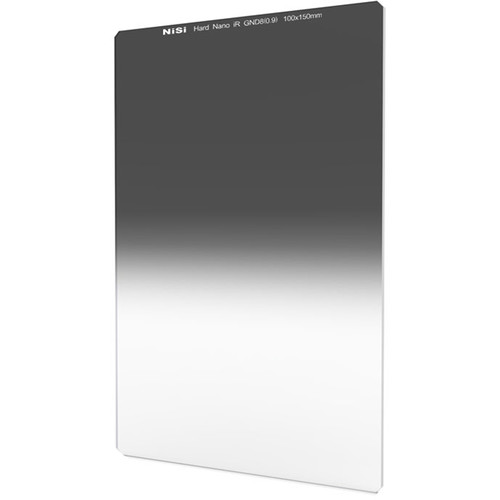
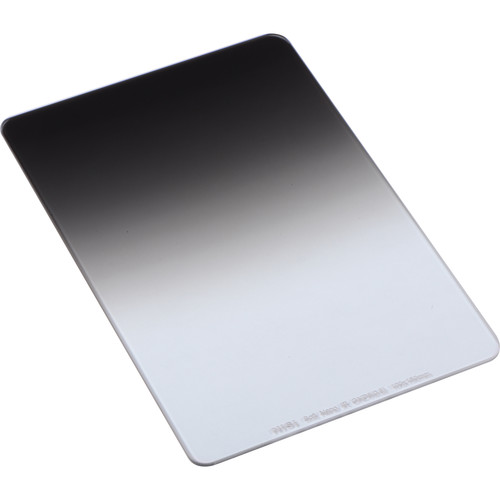
These filters are dark on top and gradually brighten as you move toward the bottom of the filter, as you can see above. This means that when you take a photo using a graduated ND, the sky will be darkened but the landscape won’t, which helps reduce the dynamic range of the scene to a level that your camera can handle.
All you do is mount the filter holder to your lens, slide the graduated ND filter into the holder, align the filter with the landscape, and off you go.
The reason I (and other pros) use this technique and not the ones previously mentioned is because I get much better results. Take a look at these before and after images to see just how impactful a graduated ND can be:

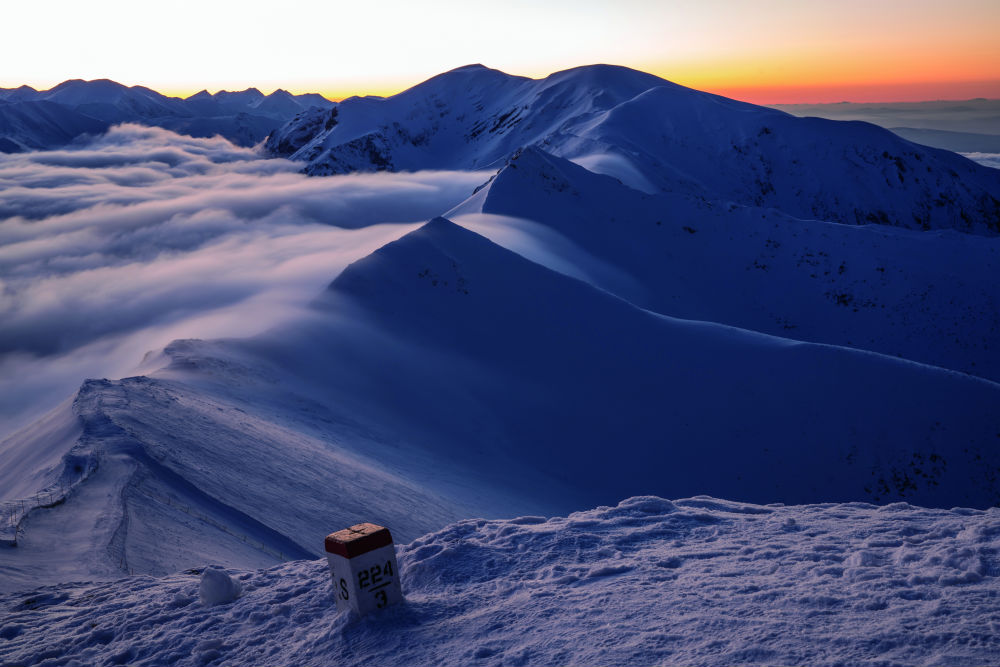
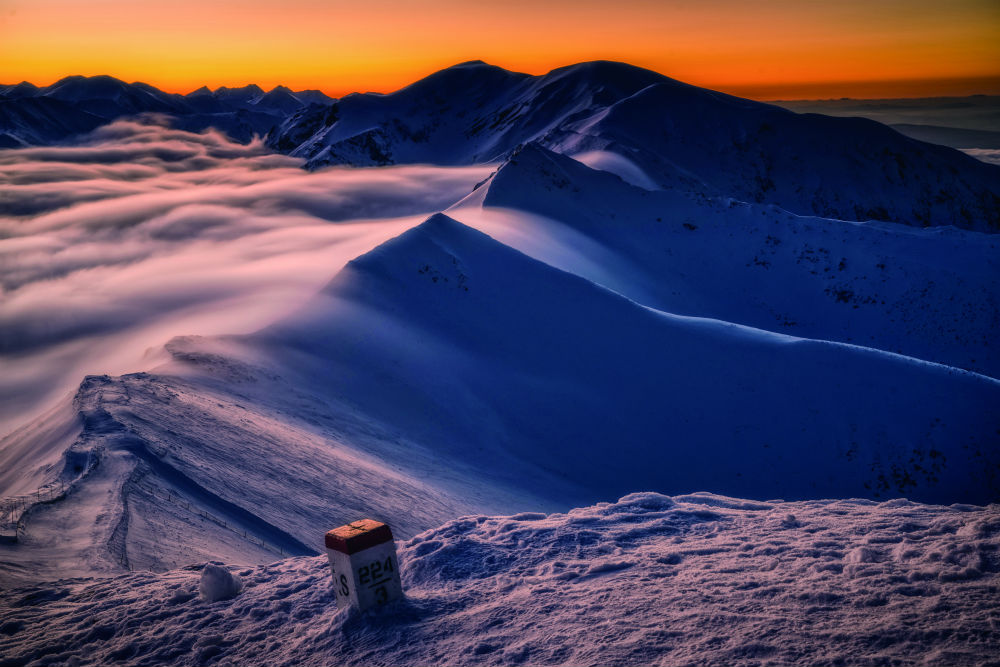
Without a graduated ND filter. Image Credit: 阿戈

With a graduated ND filter. Image Credit: 阿戈
Part of the reason for these improved results is that there are different kinds of graduated ND filters for different situations.
For example, I have a NiSi hard-edge graduated ND filter that I use for shooting landscapes that have a definite horizon, like a beach shot looking out onto the ocean.
I also have a NiSi soft-edge graduated ND filter for use with landscapes that do not have a definite horizon, like the undulating crest of a mountain range in the background of a shot.
Graduated ND filters also come in a wide range of strengths to give you a multitude of options depending on how intense the bright areas of the scene are when you’re shooting.
Sure, using filters is a little more work, but for my money, they get you the best results.
If you’re going to take the time and spend the energy to go out shooting, you want the best results, right? Sometimes that means taking a little more time and putting forth a little more effort, but your photos will benefit greatly from it!
Learn More:
- 3 Reasons Why All Landscape Photographers Need a Graduated ND Filter
- These Before and After Photos Show Why You Need Lens Filters
We Recommend
Graduated Neutral Density Filters vs Solid Neutral Density Filters: Differences and When to Use Them
 Image Credit: Eric Rousset
If you're a beginner photographer, it's easy to be overwhelmed with all the photography jargon, creative elements, and photography gear that's required to capture the best images.
Most beginners focus their attention on simply learning how to work their cameras, as should be done.
But, if you ask me, the next step is to develop an understanding of other essential photography gear that can make a true difference in the quality of your photos.
That, my friends, means that you need to learn how to use lens filters!
In this quick guide, you'll learn about graduated neutral density filters and solid neutral density filters, and how both can have a positive impact on your images.
Let's get started!
Editor's Note: Sample images used in this article were taken using NiSi filters and are used with permission.
The Basics: Graduated Neutral Density Filters
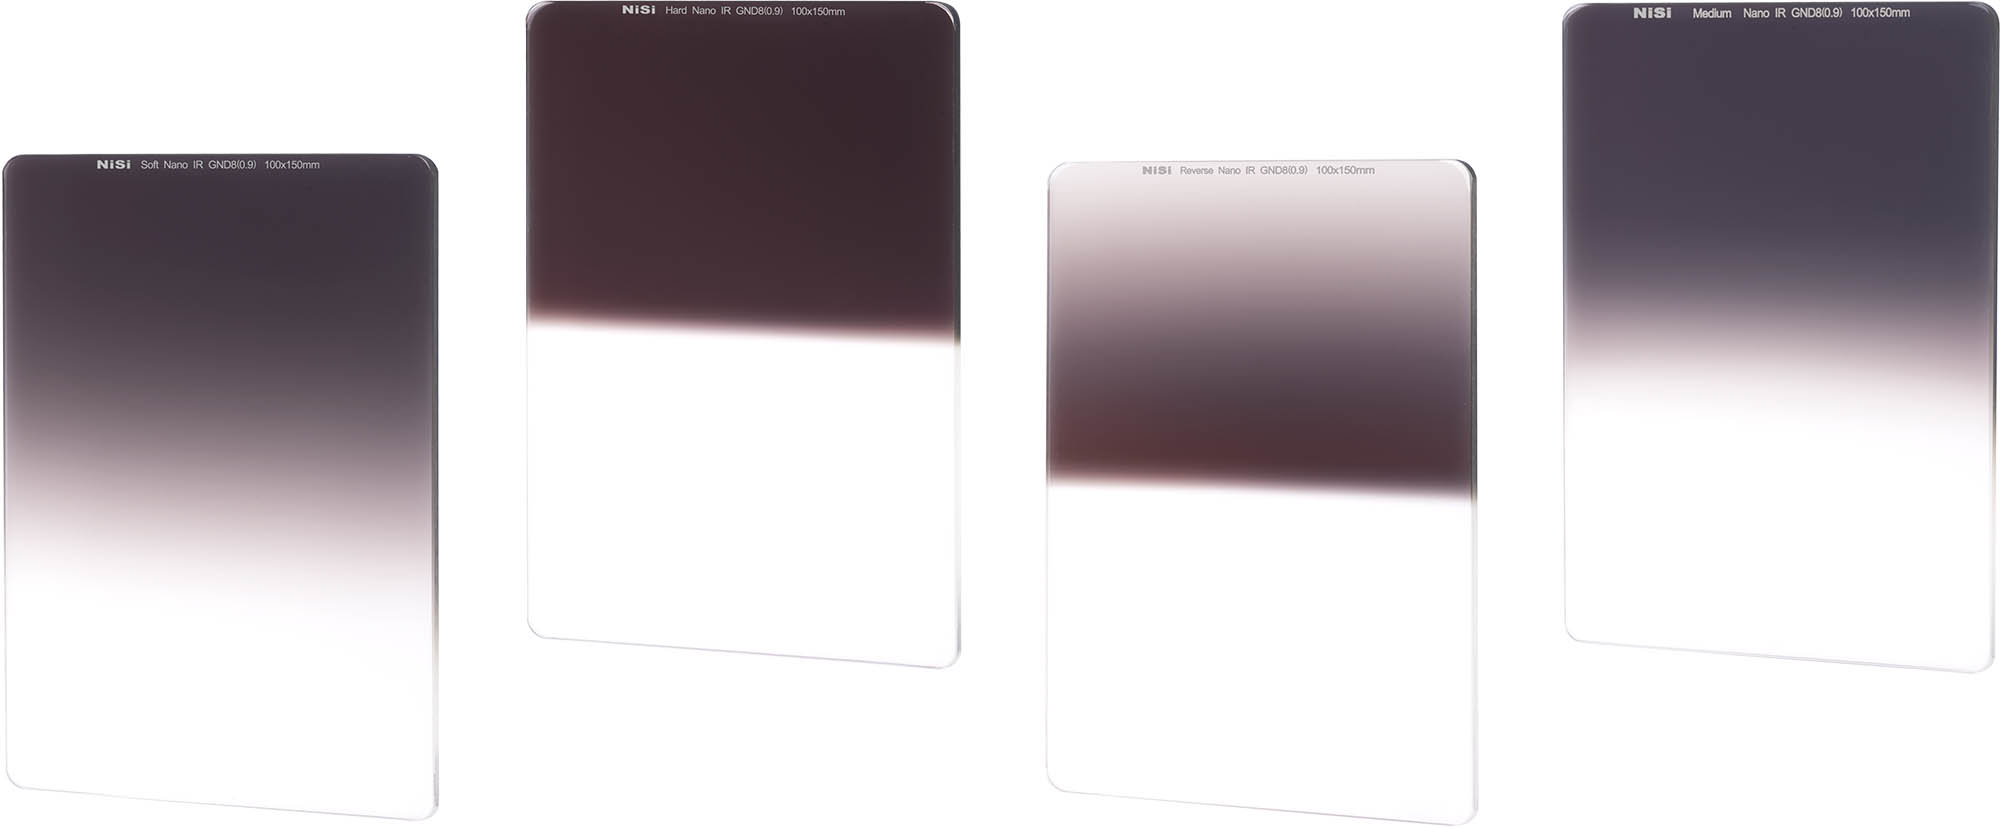
Graduated neutral density filters are one of the most popular type of lens filters for landscape photography.
They're dark on one end and either gradually reduce their density, becoming clear on the other end, as shown at left and right above, or transition much more abruptly, as shown in the two filters in the middle.
The question is, why are these filters constructed this way?
 Without a Graduated ND filter. Image Credit: Adam Brzoza
It's simple - when you photograph a landscape the brightest area is the sky. In fact, it's often much brighter than the landscape.
In looking at the image above, you can see how there is no detail at all in the left portion of the sky.
That happens because your camera can have difficulties getting a good exposure for the entire scene. That is, it might expose for the sky, which leaves the foreground very dark, or it might expose for the foreground (as was done in the image above), leaving the sky very bright.
 With a NiSi Hard Graduated ND Filter. Image Credit: Adam Brzoza
Graduated neutral density filters help you get around this problem by blocking out some of the light from the sky, which evens out the exposure.
With a smaller dynamic range in the scene, your camera can accommodate the range of highlights and shadows, resulting in a much-improved image as shown above.
You can immediately see the difference between the two shots - the sky and the foreground are both well-exposed. That's thanks to a graduated neutral density filter.
More specifically, a hard graduated ND filter was used in the images above, meaning, the transition from light to dark on the filter is quite abrupt, which is ideal for situations in which there is a definite horizon.
Editor's Tip: There are hard graduated NDs, medium graduated NDs, and soft graduated NDs. See the differences here.
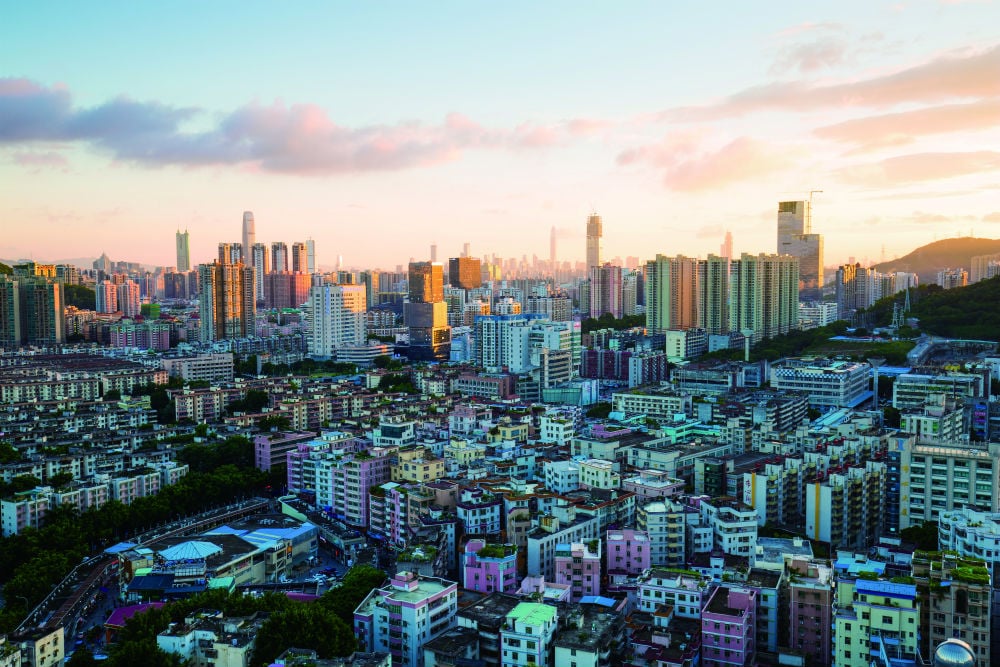 Without a Graduated ND Filter. Image Credit: 阿戈
But sometimes you're presented with a scene in which elements protrude into the sky, such as the buildings in the image above.
In such cases, a soft graduated ND or a medium graduated ND is called for because they transition much more gradually from dark to light.
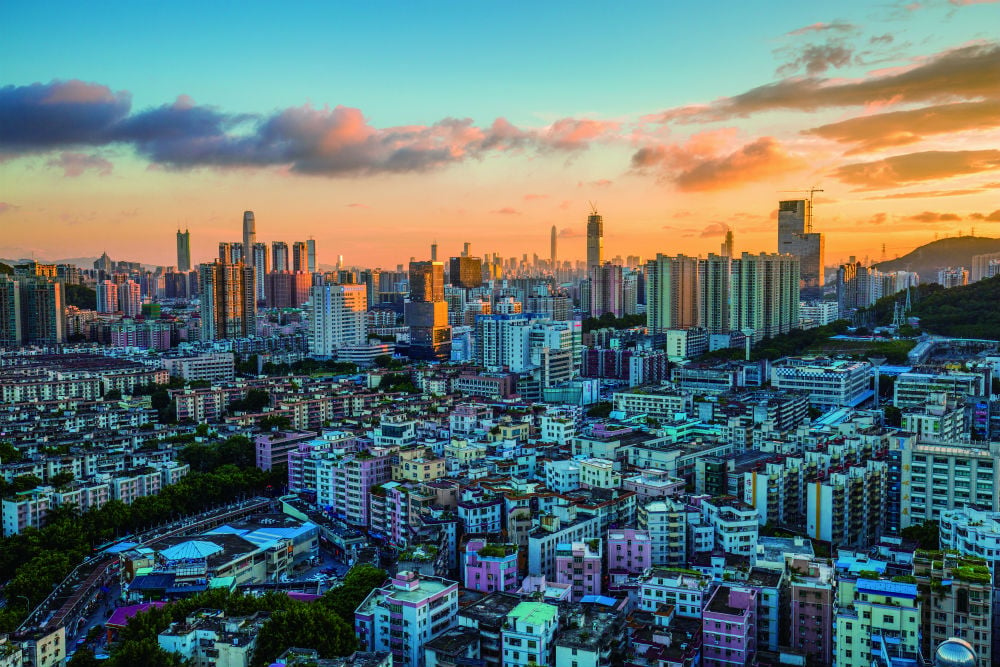 With a NiSi Medium Graduated ND Filter. Image Credit: 阿戈
You can see the difference between the previous image and the one immediately above when using a medium graduated ND.
The foreground remains well-exposed, but in the second shot, the sky has beautiful definition that was totally lacking in the first shot.
Learn More:
- Get the Specs and Pricing on NiSi Graduated ND Filters
- Working With Good Landscape Photography Lighting and Its Effects on Your Photos
The Basics: Solid Neutral Density Filters
As you can see in the image above of NiSi solid neutral density filters, these filters have an degree of density throughout, unlike the graduated ND filters discussed earlier.
These filters are specifically designed to allow you to use a longer shutter speed when shooting during the daytime in order to blur the movement of elements like water or clouds.
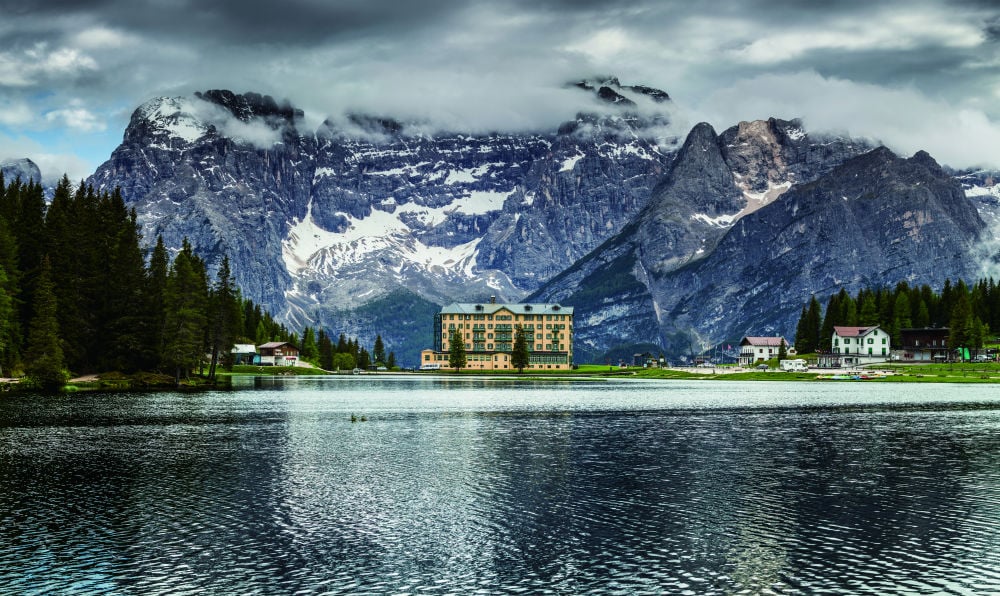 Without ND filter. Image Credit: Karol Nienartowicz
In the image above, you see a scene that's pretty enough, but there's not a lot of visual excitement happening.
Instead, it's a scene just like we'd see with our own eyes.
 With 10-stop ND filter. Image Credit: Karol Nienartowicz
But add a neutral density filter and slow down the shutter speed, and you get much more compelling results.
The blurred movement of the clouds and the smoothed out water of the lake adds a dreamy effect to the shot.
But just like there's differences between graduated ND filters, there are also differences between solid ND filters.
Solid NDs have differing degrees of filtering power, which are measured in stops.
In the image above, a 10-stop ND filter was used, which generated the gorgeous blur that sets the image apart.
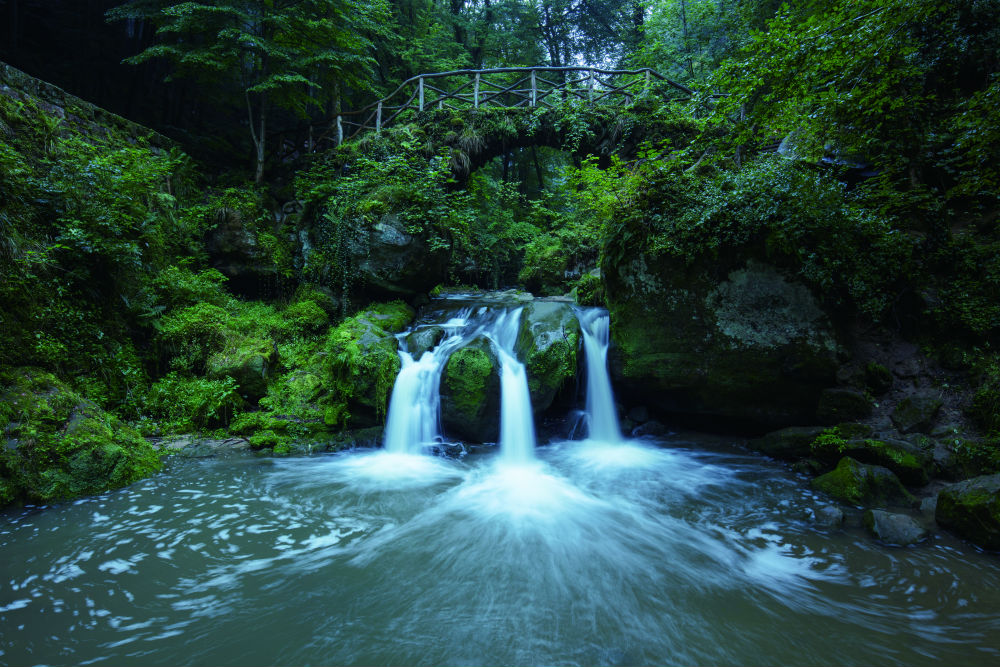 Without ND filter. Image Credit: Michael Lauer
But let's say you didn't want or need that much blur.
In that case you can use a 3-stop ND filter, which has far less filtering power than a 10-stop ND.
With 3-stop ND filter. Image Credit: Michael Lauer
As you can see in the before and after images above, even a 3-stop ND has more than enough filtering power for this scene to slow things down and result in beautiful blur in the waterfall.
ND filters in the 3-stop to 10-stop range are the most popular, but there are much, much darker ND filters available - NiSi, for example, offers up to 20-stop ND filters.
Naturally, the more stops of filtering power the filter provides, the longer the shutter speed you can use to get truly otherworldly, ethereal effects.
ND filters aren't just for still photography, either. You can also use them for videography.
See NiSi Nano IR ND filters at work in the video above by Nisi and filmmaker Tanguy Louvigny.
With that, you have a basic outline of what graduated ND filters and solid ND filters can do for your images.
But don't just buy any filters - high-quality filters will generate high-quality results, and when it comes to quality, NiSi is at the top.
Learn More:
- Get the Specs and Pricing on NiSi Solid ND Filters
- The #1 Pro Landscape Photography Tip for Amazing Photos
We Recommend
Here's What You Missed From WPPI

Just a couple of weeks ago I caught a flight over to Las Vegas to spend the day at WPPI.
I caught up with a ton of friends in the industry, and had a chance to check out a bunch of vendor booths as well.
There are a lot of great companies at WPPI that have fun, interesting, innovative, and helpful products and services for photographers.
While I was there, I put together a short list of companies that really impressed me.
Unfortunately, I came down with the flu soon after WPPI, so I'm a little late getting this out. Better late than never, though!
Sew Trendy Fashion & Accessories

As you can see in the photo above, the folks at Sew Trendy had a busy expo with a non-stop flow of people checking out their product line.
I met the Founder and CEO of Sew Trendy, Valerie Best, a year or so ago, and I have to say that the way she's grown the company and her commitment to providing photographers with the highest quality products is really impressive. It's not surprising that Sew Trendy has been so successful and that their products are so in demand because Valerie is one of the hardest working people in our industry.
I managed to elbow my way through the crowd to scope out some of Sew Trendy's newest products, and they certainly didn't disappoint.
Their J'Adore Velvet Collection of maternity gowns really impressed with Sew Trendy's signature beautiful lines, impeccable construction, and, of course, that awesome stretch velvet material!
 Belly Beautiful Photography
Sew Trendy has some new newborn photography offerings as well, including the Newborn Mesh Wrap shown in the image above.
This wrap is made of a stretchy knit that's not only soft, but is extremely easy to work with, so you can snuggle the baby up and get beautiful shots.
But the most impressive product I saw at Sew Trendy's WPPI booth was the Charity Rainbow Skirt.
The skirt is crafted of gorgeous, bright rainbow colors that give an expecting mom a light, airy aura in her photos.
These handcrafted skirts not only look great, but 20% of the proceeds of each skirt (and all of Sew Trendy's Rainbow Baby items, for that matter) are donated to Primary Children's Hospital to help families offset the costs of pediatric ailments.
Sirui

A lot of people recognize the name Sirui, and associate it most often with tripods.
I have a long history with Sirui. They're one of my favorite companies. In fact, I have a W-Series tripod from these guys that I wouldn't trade for the world.
It's waterproof and dustproof, which is awesome since I take a lot of shots at the beach. Additionally, my W-2004 model has a built-in monopod that comes in handy when I want to travel fast and light.
And while Sirui makes some really, really good tripods, they certainly have more to offer than that.

Sirui offers a complete line of photo and video monopods, like the EP-224S monopod shown above.
Like their tripods, Sirui monopods are well-built, easy to use, and have handy flip leg locks that make setup and breakdown a breeze.
These things are incredibly sturdy, too, and give you smooth panning rotation and swiveling.
But my favorite Sirui item I saw at WPPI is their new Three Lens Mobile Phone Kit.
The kit has you covered with an 18mm wide-angle lens, a 60mm portrait lens, and a fisheye lens to capture creative, mind-bending shots.
Each lens has multi-layer anti-reflection coating so you get high light transmission and precise colors with 4K image quality.
And with minimal vignetting and distortion, these things will help you snag some awesome photos with your phone!
Holdfast

I've gushed about Holdfast many times in the past...
Every time I run into Matt Swaggart, founder of Holdfast, I feel like I'm running into an old friend. That's because Matt's developed a company that focuses on the relationships with its customers as much as it focuses on creating incredible products.
And even though I own some of their gear, I'm always surprised how taken aback I am when I see their stuff at expos like WPPI. It's simply some of the most beautiful photography gear I've ever seen.
You can see the sheer volume of selection in their MoneyMaker line in the image above. But that's not Holdfast's only claim to fame...

If you've never experienced the joy of seeing and feeling (or using!) one of Holdfast's Roamographer bags, man, are you missing out!
Like the MoneyMaker (and everything else Holdfast makes), the Roamographer bag is gorgeously designed and beautifully made.
Not only is it an eye-catching bag, but it's incredibly durable, made of Great American Bison leather that only looks better and better with time.
Add in a removable camera insert that cradles your gear, carrier straps to carry your tripod, and a shearling-lined shoulder strap for comfortable carrying, and you have the makings of a piece of gear that will quickly become your new best friend!
Ikan

One of my favorite booths to visit at any expo is Ikan because they have a mountain of gear available and I love checking out the latest, greatest stuff that will help me take better photos.
At WPPI this year, Ikan had a huge display of NiSi filters, which I've been using for about three months now.
Let's just say that I'm really glad that I picked up a NiSi V5 Pro Filter Kit, as it has not disappointed thus far!
Not only are these filters made of cinema-quality glass that gives you clear, sharp results with spot-on colors and minimal aberrations, but the V5 kit also comes with a filter holder, adaptor rings a carrying case, and cleaning supplies.
Add to that a soft-edge grad, a reverse grad, and a 3-stop, 6-stop, and 10-stop ND filters, and you have the makings of a complete filter pack for landscape photography.
I've only had a chance to use my new NiSi filters a couple of times, but I can tell you this - they are among the best filters I've ever used, and they will be part of my kit for a very, very long time.
On top of that, the new faces I met at the Ikan booth at WPPI impressed the heck out of me. This company is in good hands, that's for sure!
Skylum

If I were to describe the people at Skylum using just one word, that word would be fun.
Don't get me wrong - they aren't just a great group of people to hang out with. They also take their work very seriously.
I'm a huge fan of Lightroom, if for no other reason than it helps me keep my photos nicely organized. For someone that isn't the most organized sometimes, that's a godsend.
But I have to say that when it comes to editing my photos - most of which are landscapes - I turn to Skylum for their superb Aurora HDR 2018 and Luminar 2018 software packages.

There's plenty of reasons why Skylum's software is my go-to these days.
But chief among those reasons is that it's simple and effective.
I can literally cut my editing time in half by using Luminar because it comes preloaded with presets that make editing my photos a breeze.
There's over 40 non-destructive filers, LUTs that offer one-click options for simulating color grades and film stocks, and the ability to make your own custom presets, too.
It's a truly innovative program from a truly innovative company. If you want to boost your productivity in post-processing, give Skylum a Look!
Calotype

The fine folks pictured above are from Calotype, one of the most innovative photography companies around today.
If you've never heard of Calotype, get ready to be impressed...
I first met these guys at Photo Plus in 2017, and I have to say that I admire their dedication and hard work as much as I admire their product.
Speaking of which...Calotype is a web-based suite of tools for professional photographers that improves your management of day-to-day tasks that helps you streamline how you spend your precious work day.
In particular, Calotype is geared towards photographers that work in high-volume areas like sports photography or school photography. Why? Because Calotype tracks all that client data for you - names, dates, photo packages - you name it!
Calotype even helps you organize images, create encrypted image galleries for your clients to view, customize pricing lists, manage email marketing, and so much more.
In short, it's like having an office manager without having to pay one!
Spider Holster

I've known Spider Holster's CEO for the better part of eight years now, and the dude is an absolute machine.
He's always on the forefront of innovation, coming up with new and exciting products that the photography industry needs. He's a bit of a mad scientist in that regard...
It's hard to capture the essence of Spider Holster's gear in a simple photo like the one above.
That's because their stuff is something you really need to see and use to believe just how good it is.
Their Spider Pro dual camera holster is a feat of engineering and design that makes shooting a much simpler, streamlined task.

With your cameras on your hips, you not only have easy access to your camera to take quick shots, but they're also out of your way. No more worrying about stupid shoulder straps getting in the way!
What's really impressive about the Spider Pro is that it moves with you. In other words, you don't feel bogged down by your gear, nor do you feel restricted in how you move around.
Even with a long lens attached to your camera, you have excellent freedom of movement to get the shots you want with the confidence that your Spider Holster has your gear safely secured.
If you're a wedding photographer, I can't think of a better piece of kit to have. It's that good!
Learn more about Spider Holster
Iris Works

I've known the CEO of Iris Works for a few years, now, and I can say that her winning attribute is the laser focus she brings to the photography industry.
You can see that laser focus in Iris Works - it's a software package that is specifically designed to help you get a handle on everything you need to do.
Iris Works has tools that address every part of your business. It's got a calendar, billing and invoicing programs, and automated messaging so you can keep track of your appointments, invoices, and communications with clients.
Not only that, Iris Works gives you the ability to create contracts, galleries for individual clients, and maps with your favorite shoot locations.
You even get a daily snapshot of what's going on in your business, so you can see on a single screen each task you need to complete for the day.
Not bad, right?
We Recommend
How to Get Started in Landscape Photography
 Image Credit: Andrew Code
Sure, taking photos is simple enough on the surface.
Just grab a camera and lens, point it at a beautiful landscape, and press the shutter button, right?
Wrong...
If you want to create beautiful landscape photos like the one shown above, you need to work for it!
In this tutorial, I go over a few critical landscape photography tips that answer the question of how to get started in landscape photography.
Help Your Camera by Spending Time on the Composition
A problem that I often see with landscape photos that are taken by beginners (like the one above) is that they aren't composed well.
You can have the most expensive camera in the world, but if you don't know how to help it record the most eye-catching scene, all the money you spent on that expensive camera will be for naught.
By focusing on things that strengthen your composition, you can help your camera capture a more beautiful scene.
One of the most important landscape photography composition tips is to use leading lines.
 Image Credit: Ole Henrik Skjelstad
As you can see in this shot, the lines created by the shore and the dock help to direct our attention to the background of the photo.
By using these elements as leading lines, the photographer was able to connect the foreground, midground, and background of the shot, which results in a much more cohesive image.
What's more, these lines also serve as a visual boundary, which contains where our eyes move and keep them focused on the big features in this image - the beautiful lake, mountains, and sky full of colors.
Quick Tip: Spend time thinking about the foreground of the shot as well. A foreground with color, texture, and other details (as shown in the photo above) serves nicely as a visual "introduction" for the rest of your landscape photo.
Learn How to Get Out of Full Auto Mode
Though shooting in full auto mode is the easiest way to capture a photo, it's certainly not the most effective.
By letting the camera decide things like what aperture or shutter speed to use, you open yourself up to all kinds of problems with your photos, like motion blur that you don't want or out-of-focus backgrounds.
But getting out of full auto doesn't mean that you have to start shooting in full manual mode.
In fact, you can start to take more control over your camera by shooting in a semi-automatic mode, like aperture priority.

I've written a comprehensive guide on aperture priority mode, but for the uninitiated, aperture priority mode allows you to select the aperture the camera uses as well as the ISO.
That means that you have more control over the depth of field (discussed below) as well as how much digital noise is in the photo.
That, in turn, allows you to decide how bright or dark the image is and how much contrast is in the shot.
In other words, by setting your camera to A or Av on the dial, you can start taking more impressive photos because you're in charge of most of the exposure settings, not the camera.
Learn More:
Know Where to Focus
 Photo Credit: Steffen Hummel
Another critical aspect of becoming a landscape photographer is being able to get tack-sharp images from front to back.
This requires an understanding of aperture and depth of field, which you can learn about in this detailed guide.
Essentially, aperture is one component of how much of the image is in focus - a smaller aperture yields a larger depth of field and a larger aperture yields a smaller depth of field.
By understanding how depth of field works, you can get a sharply focused image from foreground to background, like the one above.
But more than that, where you focus the shot is also important.
As a good rule of thumb, placing the focal point about one-third up from the bottom of the frame is best.
As Joshua Cripps of Professional Photography Tips explains in the video above, focusing at this point helps maximize the depth of field to help you get a sharp photo.
Quick Tip: Another method of perfecting the focus of your landscape photos is to use the hyperfocal distance technique.
Help Your Camera With the Right Accessories
Your camera and lens have all sorts of capabilities when it comes to capturing the beauty of a landscape.
But that doesn't mean that there aren't camera accessories that can help make those images even more eye-catching and dramatic.
Aside from a good, solid tripod to give your camera a stable base for taking photos, another must-have accessory is a good filter kit.
I've been using NiSi filters for a few months now, and I can't say enough about their quality.
With low-grade filters, you can see minimized contrast, ghosting, flare, and even color casts that diminish the quality of your photo.
But that's not the case with my NiSi filters.
That's because these filters are crafted of the finest high definition optical glass that gets me gorgeous, sharp results every time.
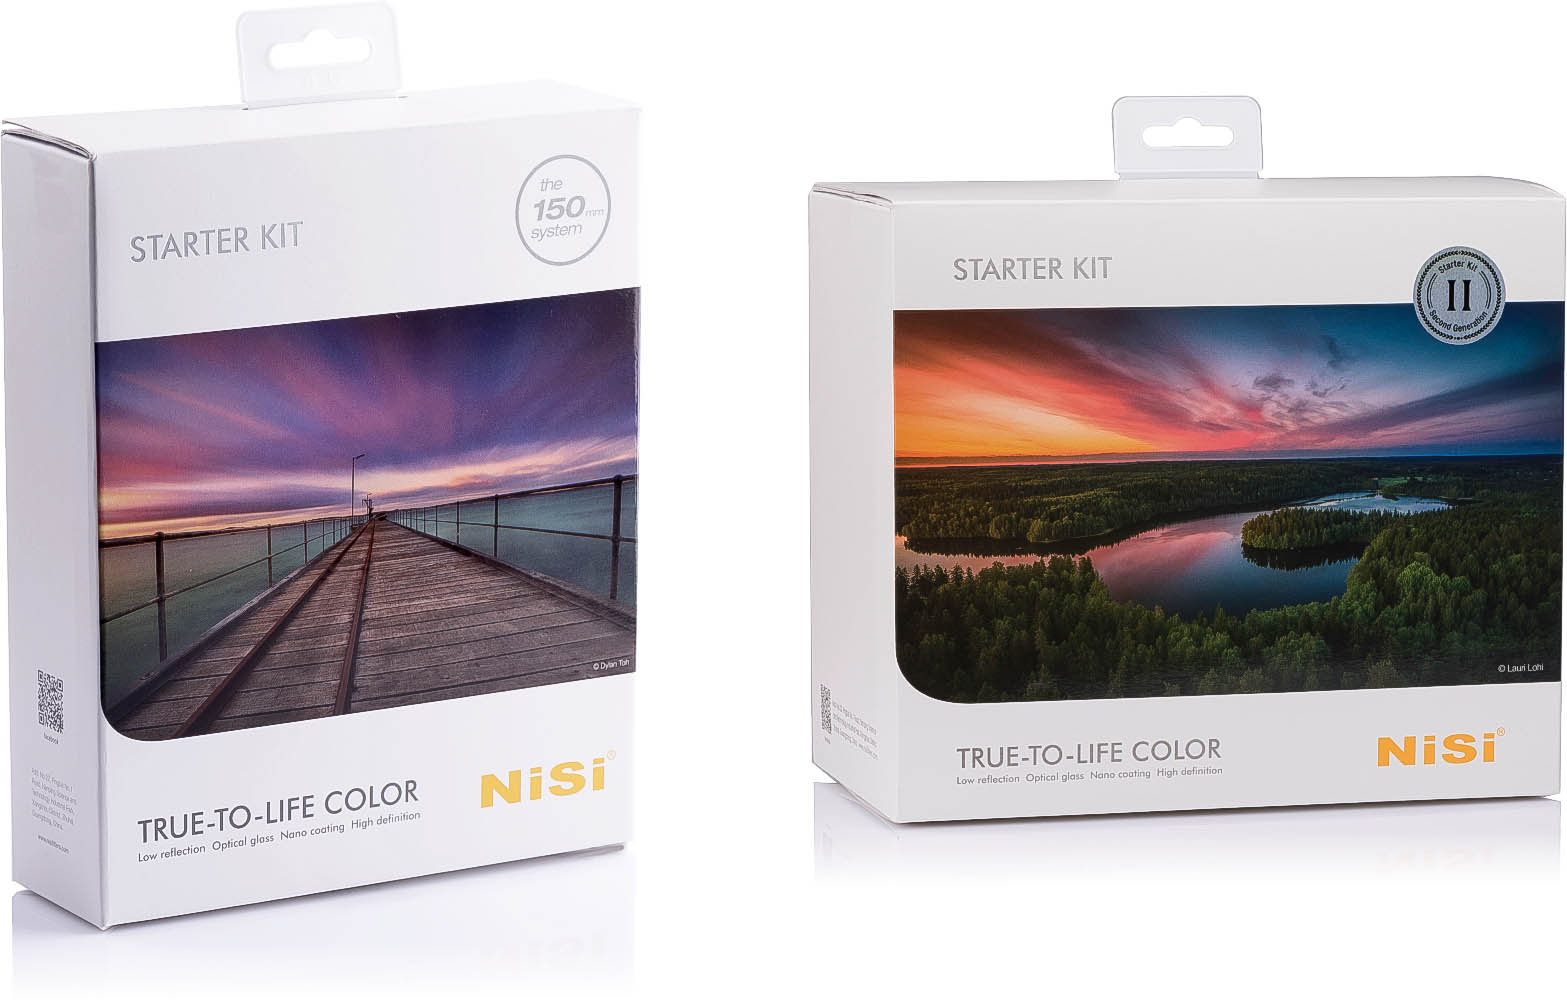
Additionally, if you invest in a NiSi filter kit, like the Starter Kit shown above, you get all the filters and accessories you need to take complete control over how your photos look.
Included in the starter kit is:
- A soft-edge graduated neutral density filter, which helps you manage the exposure differences between the bright sky and dark foreground.
- Two solid neutral density filters that help you slow down the shutter speed during daytime shooting to blur the movement of things like clouds and water.
- A circular polarizing filter, which helps reduce glare, increase contrast in the sky, and cut down on atmospheric haze.
On top of all that, the kit comes loaded with adaptor rings, a filter holder, a carrying case, a lens cap, and even a rocket blower to help you keep dust and dirt off your filters.
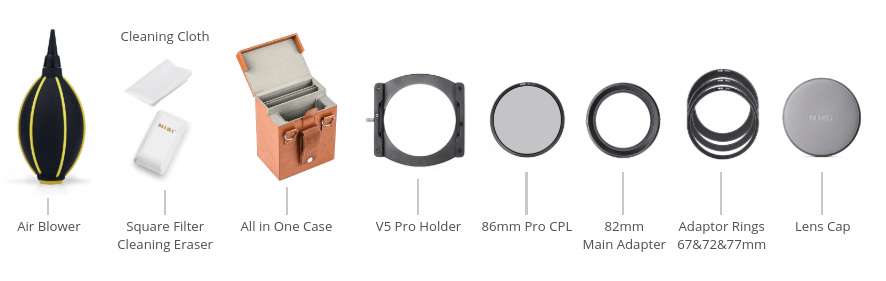
In other words, getting started in landscape photography takes some know-how, lots of practice, and the right gear.
With these quick tips outlined here, you can start shooting with more confidence, and if you invest in NiSi filters, you'll find that your photos look even better!
Learn More:
- Working With Good Landscape Photography Lighting and Its Effect on Your Photos
- Why You Need a Reverse Graduated Neutral Density Filter in Your Bag
We Recommend
How to Photograph Sunsets the Easy Way
photo by tawatchaiprakobkit via iStock
Tell me if this sounds familiar…
You’re out and about and there’s a spectacular sunset going on. You have your camera and tripod, so you decide to set up shop and capture the beauty before you.
So, you dial in the settings, take the shot, and...your photo stinks.
The exposure is way, way off. Either the sky is too bright or the landscape is too dark. And that beautiful sunset you wanted to capture is gone for good.
This happened to me more times than I care to remember when I was just starting out in photography. But over the years, I’ve figured out a few tricks for how to photograph sunsets that make it a much easier and more successful endeavor.
How to Photograph Sunsets: Plan the Shot
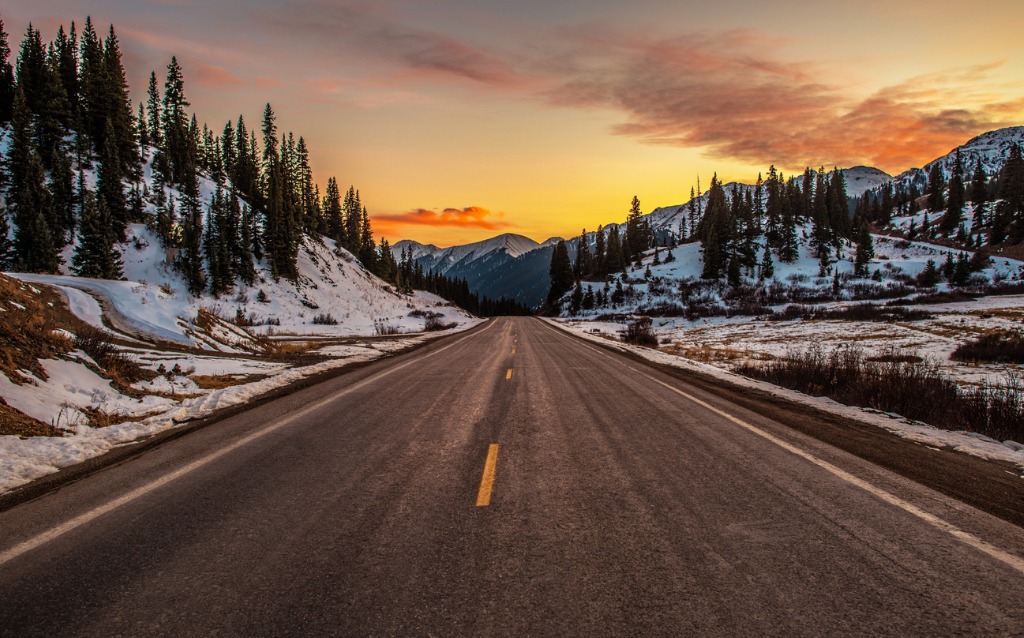
photo by welcomia via iStock
I’m all for the spontaneous sunset photo, and every once in a while I’ll snag one that looks great. But more often than not, it’s necessary to plan the shot to get the best results.
This doesn’t mean you have to spend weeks analyzing the movement of the sun and investigate every possible scenario that could impact the photo at your desired shoot location.
Instead, just take 10 minutes to do some recon on your desired shoot location. Also download some landscape photography apps to help you track the sunrise and sunset times, keep tabs on the weather or the tides, and dial in the appropriate sunset photography camera settings.
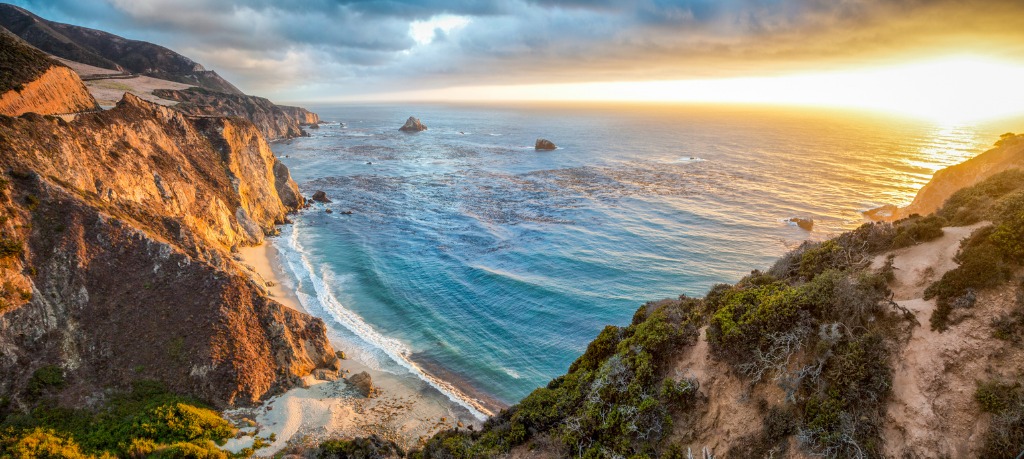
photo by bluejayphoto via iStock
Plan your route to get to your shoot location, giving yourself extra time to account for traffic, finding a place to park, walking or hiking to the specific location, and setting up your gear. I always give myself an extra hour at a minimum, that way I’m in position and ready to shoot well before Golden Hour even starts.
Of course, it’s helpful to make a list of the gear you need for sunset photography, that way you don’t forget any of the essentials you’ll need to hammer out a killer shot:
- Camera & lens (perhaps a wide-angle of 35mm or wider)
- Tripod & remote shutter release
- Filters (more on that next)
Learn More:
- Why You Need a Reverse Graduated Neutral Density Filter in Your Bag
- How to Shoot Landscapes at Blue Hour
How to Photograph Sunsets: Use Specialized Filters
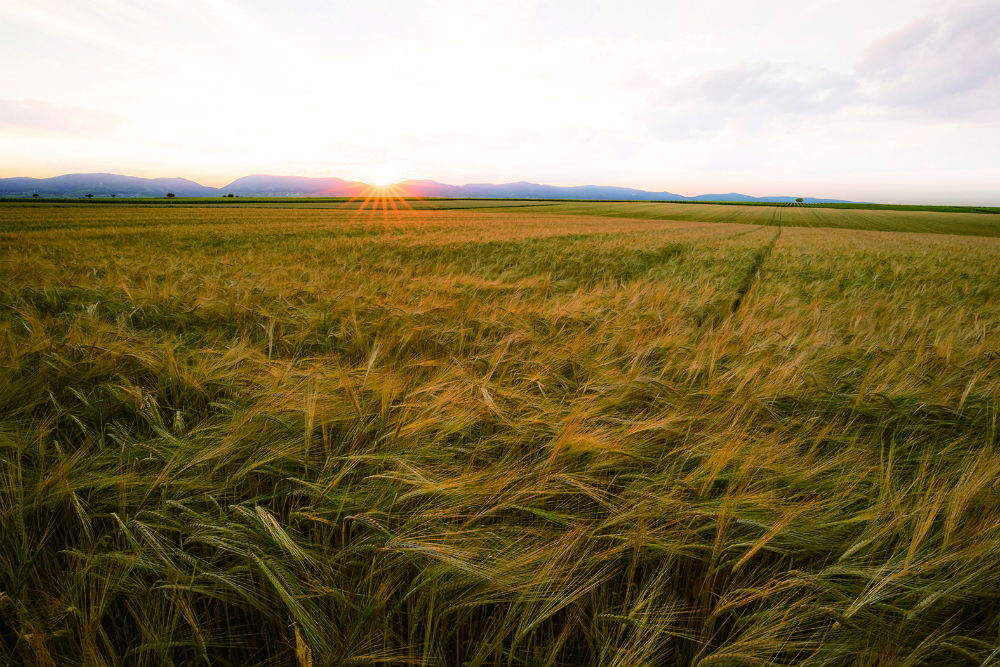
Image credit: Steffen Hummel
As noted above, one of the biggest challenges you have to overcome when photographing sunsets is the wide dynamic range of the scene.
The sky is often bright, the horizon is even brighter, and the landscape is the darkest of the three, as shown above.
Image credit: Steffen Hummel. With NiSi Reverse Nano IR GND 8(0.9) F11, ISO100, 131s
But if you use a reverse graduated neutral density filter, as was done in the image above, all of that can be evened out.
As you can see above, a reverse ND grad is dark on top, darker still in the middle, and clear on the bottom. This brings all that dynamic range down to a level that your camera can accommodate in a single shot.

So, the advantage of using this type of filter is twofold: you avoid all those exposure problems and you can work more quickly - there’s no need to bracket exposures or spend tons of time in post-processing trying to fix exposure problems.
When using this kind of filter (I use a NiSi 100x150mm reverse ND grad) it’s important to get the positioning just right. The filter can be precisely repositioned in its holder, that way you’re assured of aligning the darkest area of the filter with the horizon.
Furthermore, it’s important to use filters that are designed and constructed for the best-quality results.
For example, NiSi uses high-quality, precision optical glass, and with a finely ground and polished surface, you get superb sharpness and beautiful detail.
I typically shoot sunsets at the beach, so I appreciate the fact that my NiSi filters have a protective coating that makes cleaning water, dust, and oil off the filter a breeze. There’s also a Nano Coating technology that reduces reflections to protect against ghosting and flare.
In other words, a reverse graduated neutral density filter like this is a must-have if you’re going to photograph sunsets (or sunrises). It simply makes the process of getting the shot much easier - and more successful!
Now, you might be wondering, what if you don’t want or need to darken the sky? Then what?
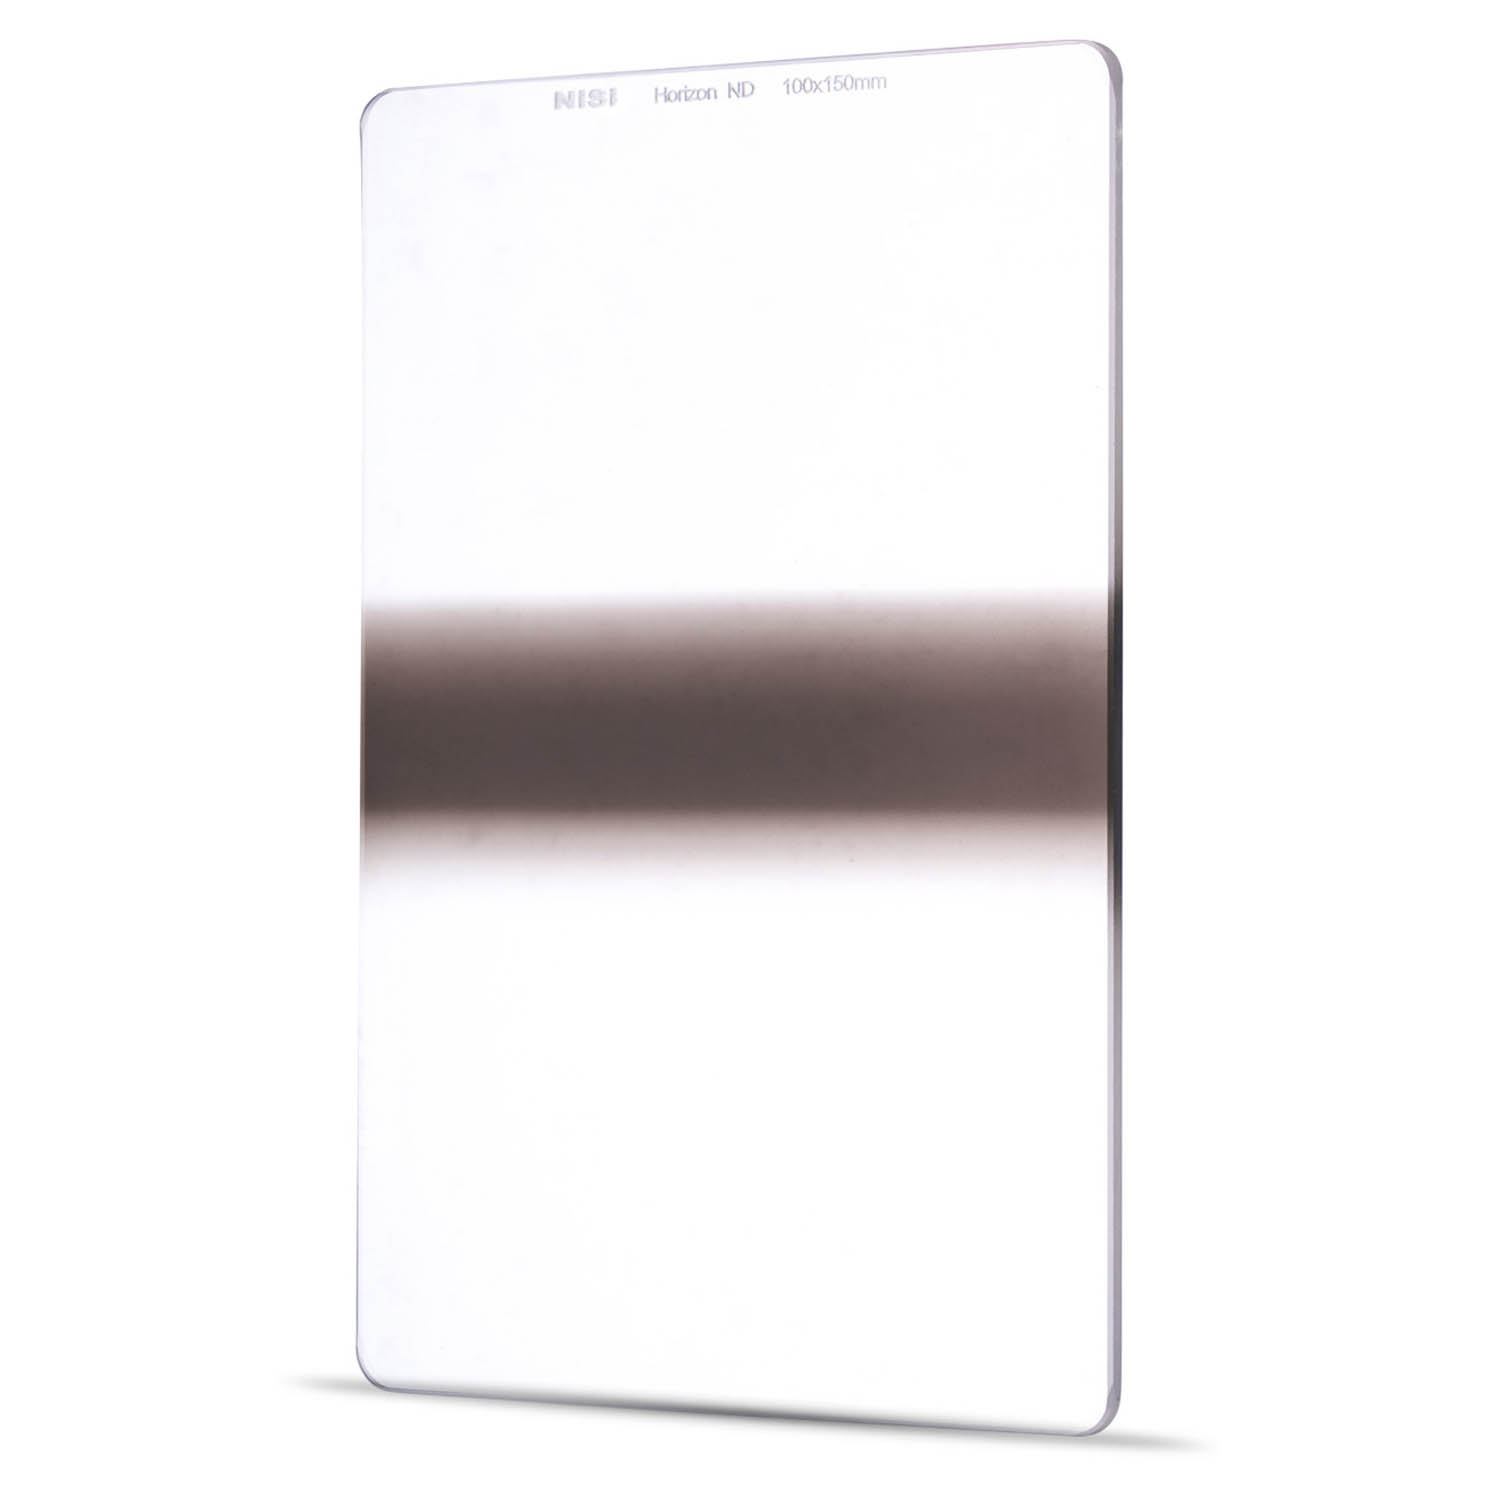
NiSi has the answer - a Horizon Line Neutral Density Filter.
Like the reverse ND grad discussed earlier, the horizon line filter is dark along the midline. However, this filter is clear both above and below the midline, so there’s no darkening effect for the sky.
This filter is ideal for situations in which you don’t need to darken the sky - such as on an overcast evening - or you don’t want to darken the sky because it’s brightness is comparable to the landscape (i.e., when there’s water reflections in the foreground).
How to Photograph Sunsets: Create Interesting Compositions
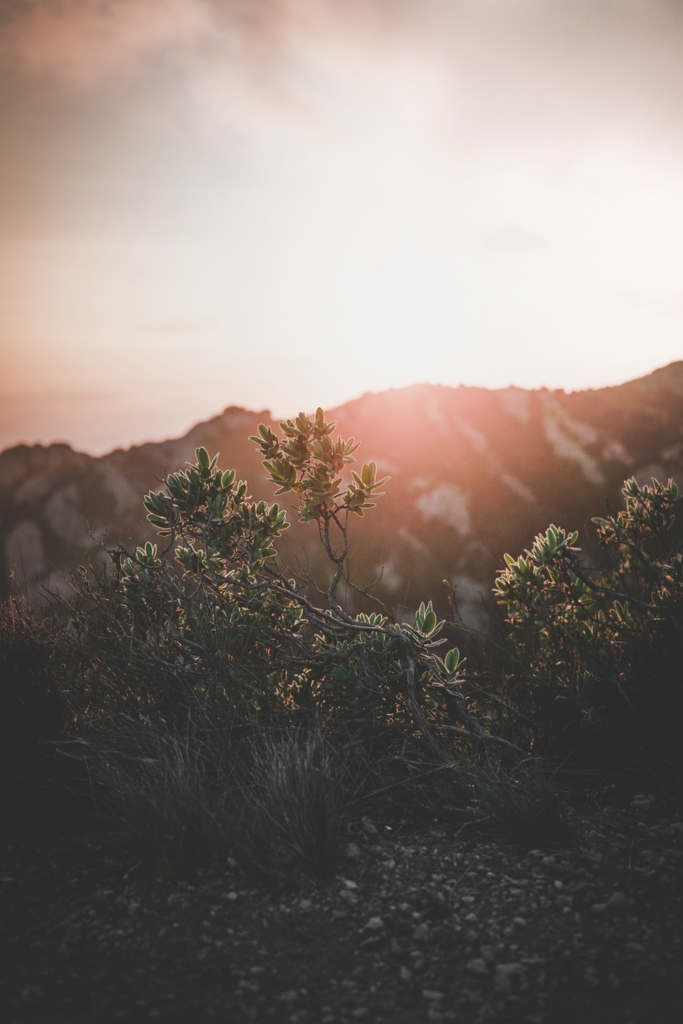
Photo by Collins Lesulie on Unsplash
Resist the urge to just stand there with your tripod at full height, snapping photos of the same scene over and over again.
While it’s good practice to keep shooting throughout the sunset (the colors will change dramatically, as might the clouds), it’s also good practice to vary your compositions.
Try a low-angle shot that incorporates some interesting foreground elements. As you can see above, doing so turns the sunset into a beautiful backdrop rather than being used as the primary subject.
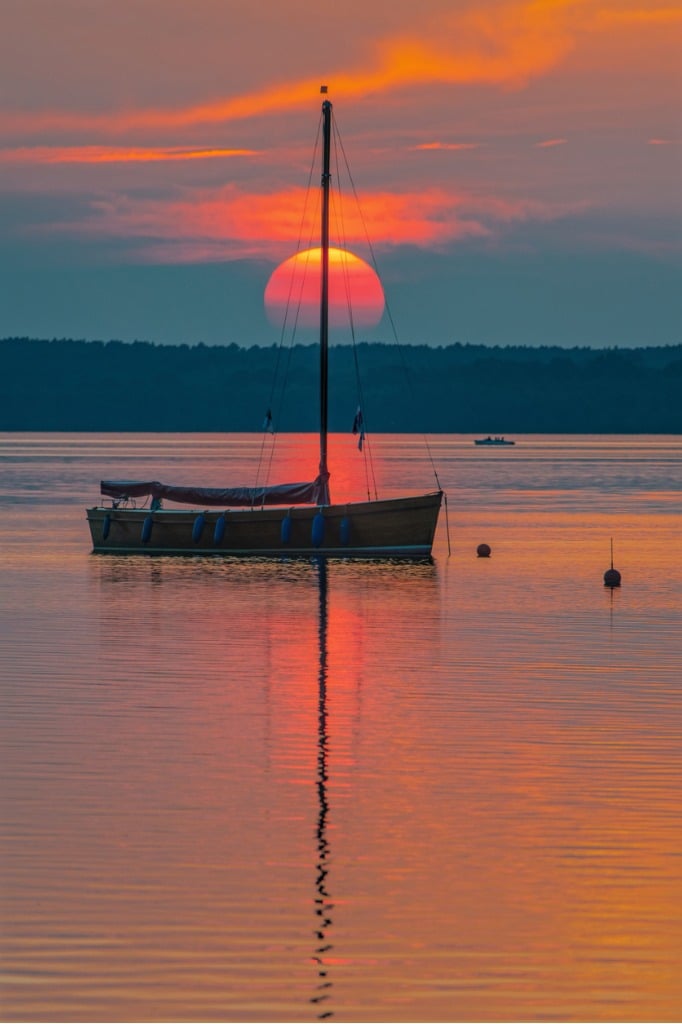
photo by RelaxFoto.de via iStock
Another tip on how to photograph sunsets is to vary the focal length at which you’re shooting.
If all you do is take wide-angle shots of the sunset, the sun will appear quite small in the frame. So, if you have a zoom lens, crank it toward the longer end of its focal range and turn the sun into a much larger focal point in the shot.
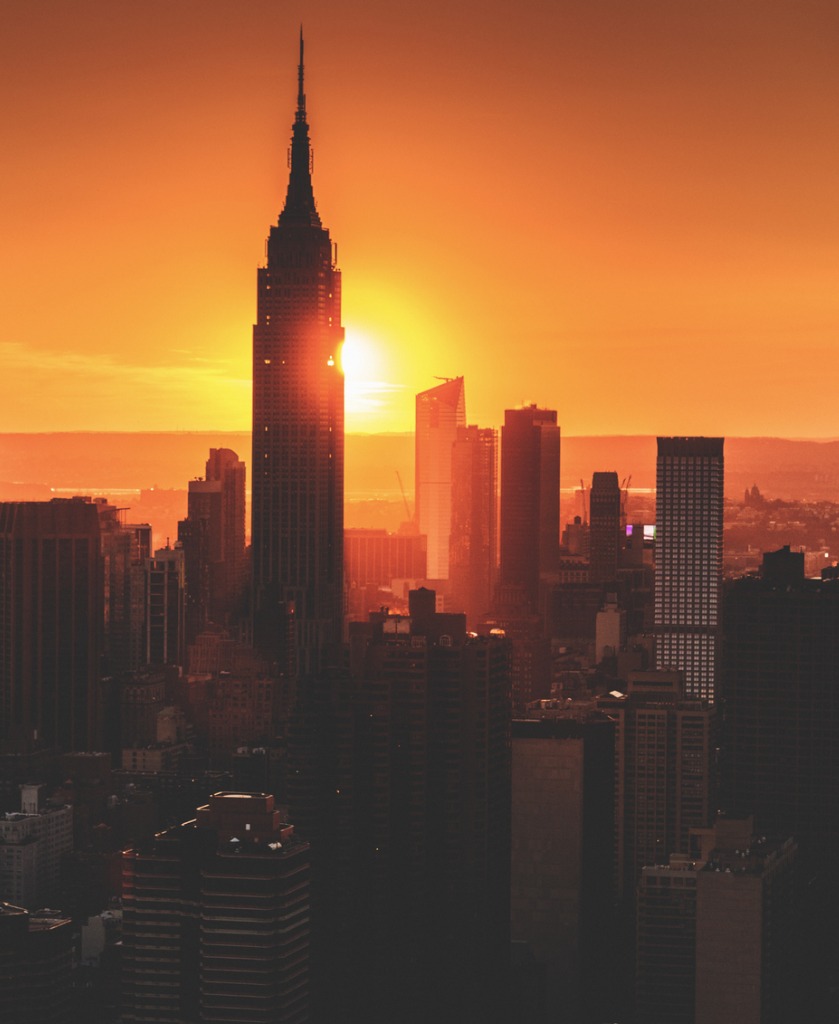
photo by franckreporter via iStock
Another sunset photography idea is to add a human element - a building or a person - which can help anchor the shot and gives you an opportunity to add a silhouette to the image.
Not only is the contrast between a darker human element and the bright sun often quite pleasing to the eye, but it also helps give the shot scale and depth.
So, there you have three quick tips on how to photograph sunsets. Plan it out, get the right gear, and seek out ways to improve the composition. If you can do these things, I think you’ll find that you get much-improved results!
Learn More:
We Recommend
How to Shoot Landscapes at Blue Hour
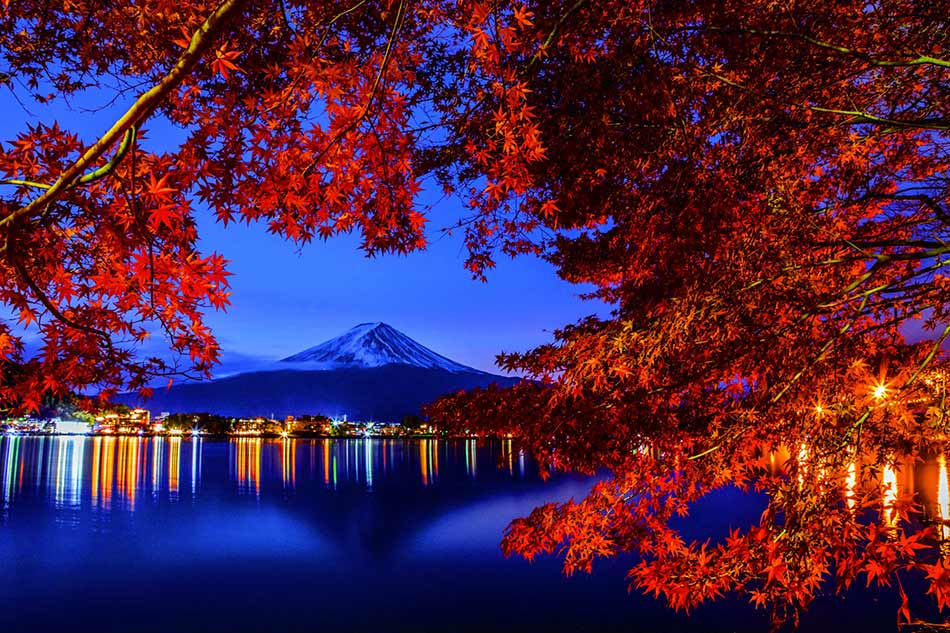 Image Credit: Motoji Sekine
Let's face it...
Golden hour gets all the glory, and rightfully so. It's hard to beat those warm, golden tones that brighten up the landscape. Learn more about best camera for landscape photography on our website PhotographyTalk.com.
But there's another time of day that produces gorgeous light, too - blue hour.
What is Blue Hour?
 Image Credit: Frank Leinz
Blue hour occurs just before sunrise and just after sunset.
That means it precedes golden hour in the morning and follows golden hour in the evening.
Naturally, blue hour is characterized by the blue tones that dominate the light. These blue tones range from light to dark blue, and even to black, depending on how long before sunrise or how long after sunset you're shooting.
Regardless of the tone of the blue light, blue hour offers ultra-soft light that falls beautifully across the landscape, as seen in the image above.
When is Blue Hour?
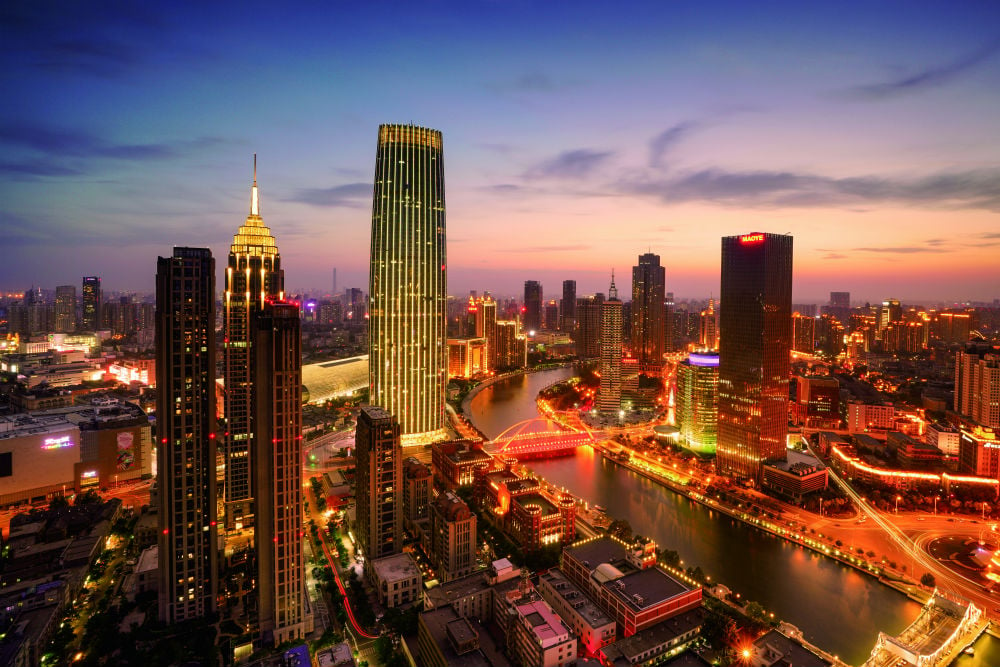 Image Credit:王宝国
As noted above, blue hour precedes sunrise and follows sunset.
More specifically, blue hour begins about 30 minutes before the sun rises, with the best blue hour light occurring approximately 10 minutes before the sun rises.
Once the sun appears above the horizon, blue hour light very rapidly disappears.
At sunset, blue hour begins about 10 minutes after the sun has dipped below the horizon and lasts about 30 minutes, though the duration at sunrise and sunset depends on the time of year and the geographic location.
The first key to shooting during blue hour is to plan ahead.
Give yourself plenty of time to get to your desired shoot location and setup your gear with time to spare before blue hour begins!
Blue Hour Photography Tips
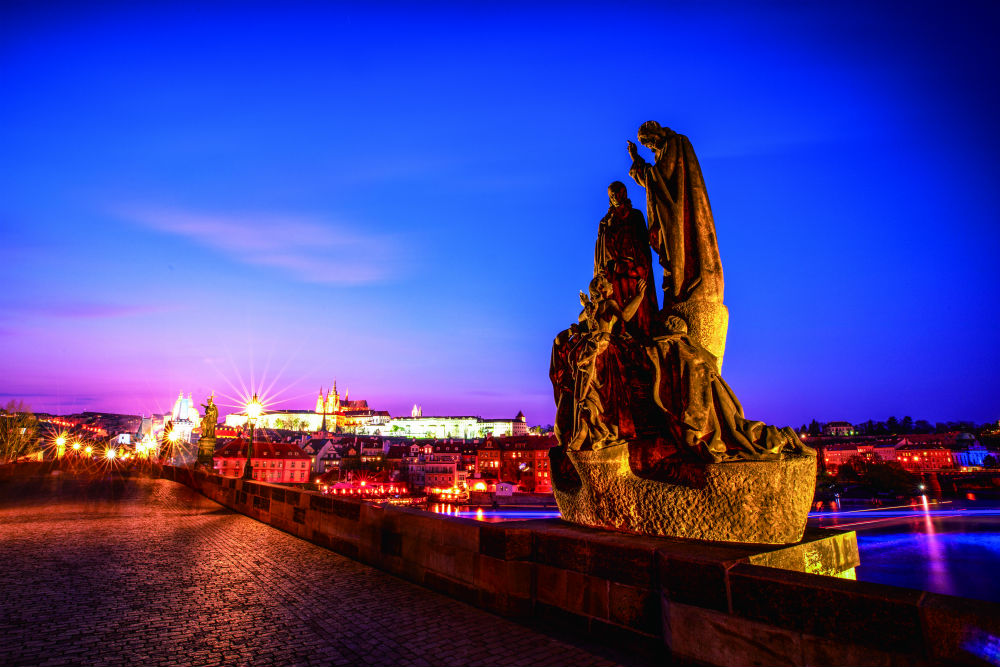 Image Credit: Joseph Mak
Perhaps one of the best advantages of shooting during blue hour is the quality of the light and the ease with which you can get a good exposure.
Because blue hour light is so soft, diffuse, and dim, you don't have to worry about bright highlights or deep shadows.
What's more, the softness of the light is ideal for long exposures, like capturing light trails of passing cars or blurring the movement of clouds or water.
As you can see in the image above, the combination of a long exposure and blue hour lighting can result in a beautifully dreamy image.
Below are a few crucial tips for blue hour photography.
Use Shutter Priority Mode
Since you often need extended shutter speeds to gather enough light at blue hour, it makes sense to shoot in shutter priority mode.
In this mode, you select the desired shutter speed (and the ISO, if needed) and the photoshoot camera will select an appropriate aperture such that you get a good exposure.
It's easier than shooting in full manual mode, in which you're responsible for making all three adjustments, and gives you much more control than shooting in full auto mode.
Get Geared Up
Naturally, since longer exposure times are on the table, you need to take the camera out of your hand and put it on a tripod.
With a good, solid tripod, your camera will have the stable base it needs to get the sharpest photos.
Likewise, use a camera remote to help keep things nice and sharp. Even the slightest movements created by touching the camera's shutter button can create enough motion blur to ruin your shots.
Another piece of gear that you might not think to use at blue hour is a lens filter.
In instances in which you want to even out the dynamic range between the sky and the landscape, a graduated neutral density filter (like the one shown above) is a prime choice.
These filters are darker on top and lighter on bottom, thus allowing you to darken the sky for a more even exposure throughout.
If you opt for something like the NiSi V5 Filter Kit, you can get a 3-stop graduated ND filter, a reverse ND grad for shooting right at sunrise and sunset, as well as 6-stop and 10-stop solid neutral density filters for really slowing down your shutter speed, even when shooting during the daytime.
This kit even comes with adaptor rings and a filter holder to affix the filters to your lens, as well as cleaning supplies to keep your filters as clean as possible.
You can see this filter kit in action at blue hour in the video above by Hot Pixels Photography.
But when you're out shooting at this time of morning or night, you might notice a lot of light pollution from streetlights, buildings, and even mercury vapor and sodium in the air.
All of those contaminants can reduce the quality of your images by not only impacting the color of the photo but your ability to see the sky clearly.
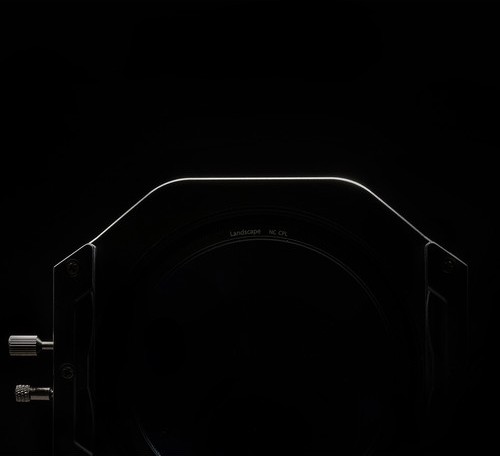
To control light pollution, a NiSi Natural Night Filter (like the one shown below) is the ideal choice.

These filters block out wavelengths of light from common light polluting objects and result in the clear, crisp images.
Not only that, but these filters are waterproof and have an oil-resistant nano coating that protects against fingerprints. The double-sided multi-layer coating means these filters are highly durable with ultra low reflections, too.
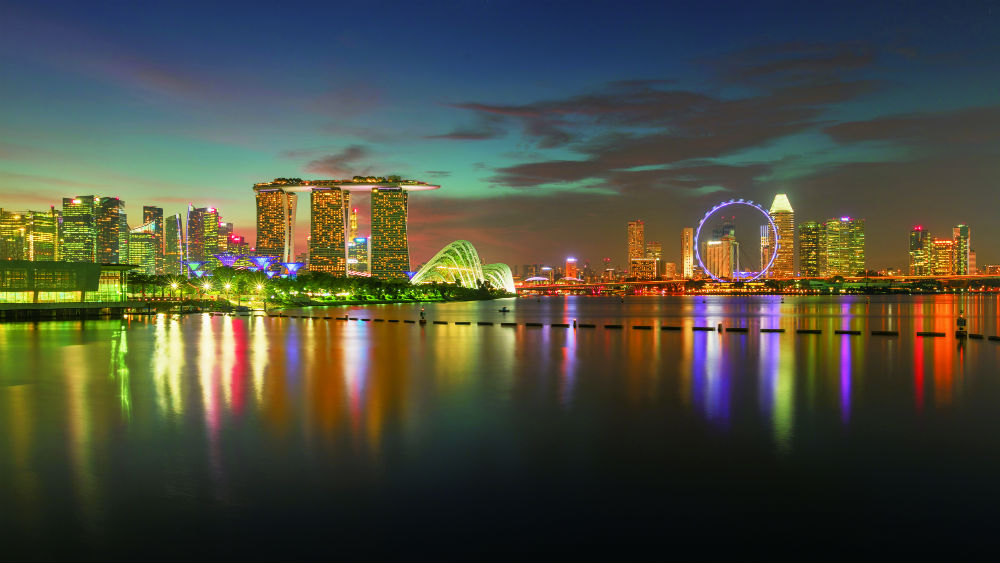 Image Credit: Jerry Wang
 Image Credit: Jerry Wang
These Natural Night Filters are perfect for shooting popular blue hour scenes light cityscapes, bridges, marinas, and landscapes, as well as night photography subjects like the Milky Way. As you can see in the preceding before and after images, the difference between shooting with a Natural Light Filter and without one is astounding.
In other words, getting the best blue hour photos isn't just about knowing what blue hour is and when it happens. You also need to have the gear that enables you to get the very best photos that you can.
In the video above, you can see multiple examples of how a Natural Night Filter makes all the difference in the world in nighttime shots.
Take inspiration from the images in this article, check out a few composition tips for landscape photography, and get outfitted with filters that will up your photography game.
With a little practice, you'll find that you're much more capable of taking breathtaking photos during blue hour.
We Recommend
NiSi V6 100mm Filter Holder Review
I’ve used the NiSi V5 PRO filter holder for quite a while, and it has been a fantastic addition to my landscape photography kit.
Not only is the V5 PRO filter holder built beautifully for the best results, but it allows me to use up to three 100mm filters in addition to a circular polarizer.
Additionally, the filter holder has plastic filter slots that grip the filter and keep it in place without impeding the view through the camera lens. The filter slots also allow for easy adjustment of graduated ND filters to get the perfect exposure.
In other words, the V5 PRO is everything I wanted in a filter holder.
Now that the Nisi V6 100mm filter holder is here, the question is, what has NiSi done to make it an even better accessory for landscape photographers?
NiSi V6 100mm Filter Holder vs NiSi V5 PRO 100mm Filter Holder
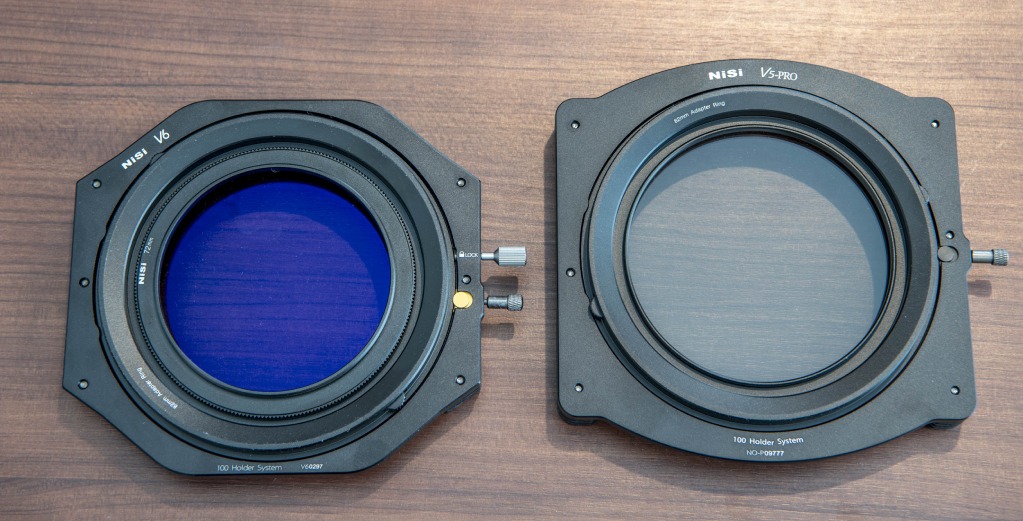
Given the performance of the V5 PRO filter holder over the years, it was hard for me to imagine how the V6 filter holder could be better.
But believe me, it is.
In comparing the V6 holder to its predecessor, it’s clear that NiSi retained the very best features of the V5 PRO and added more goodies to make the V6 a worthy update.
Here’s just a few ways that NiSi has upgraded the V6 filter holder.
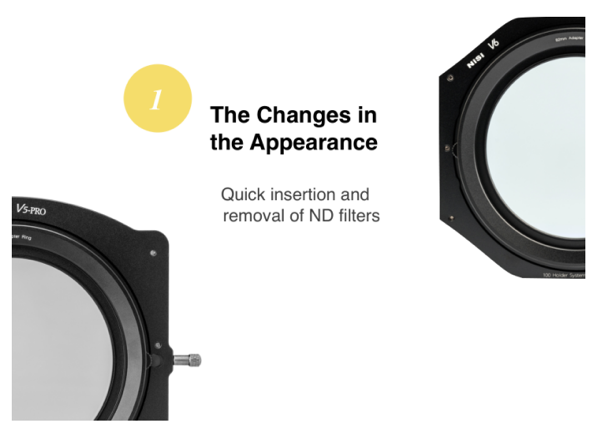
The updated design is more streamlined and makes inserting and removing filters easier.
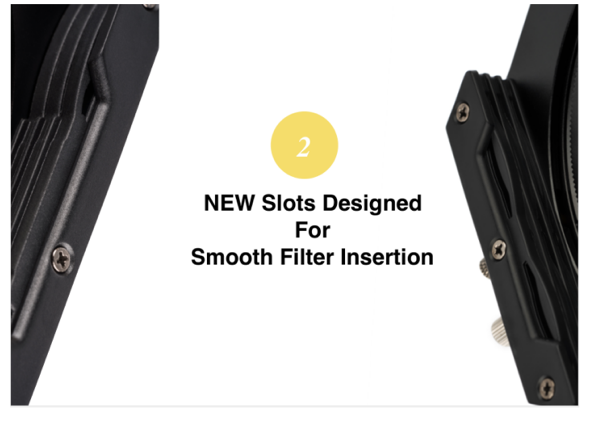
The updated design is more streamlined and makes inserting and removing filters easier.
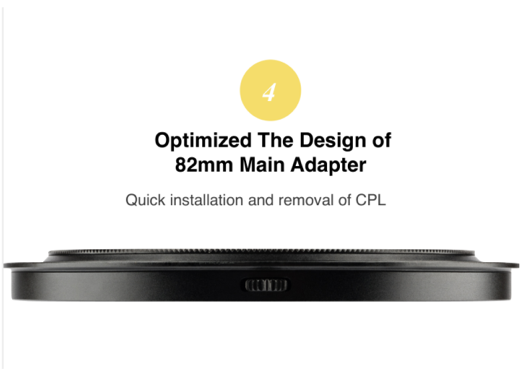
The included circular polarizer is a NiSi exclusive, and has a raised design which makes it easier to insert and remove. The difference between the V5 PRO CPL and the V6 CPL is quite amazing - there’s far more contrast and visual punch, especially in the sky.
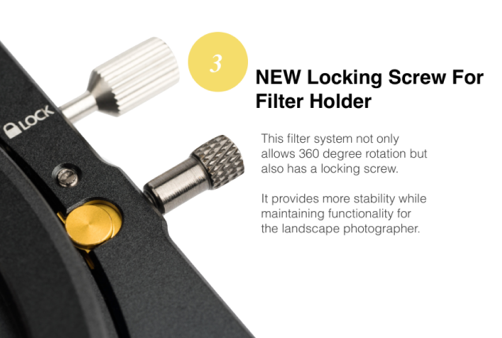
A new lock system has been integrated into the holder to fix the filters into position. The V6 also rotates a full 360-degrees.
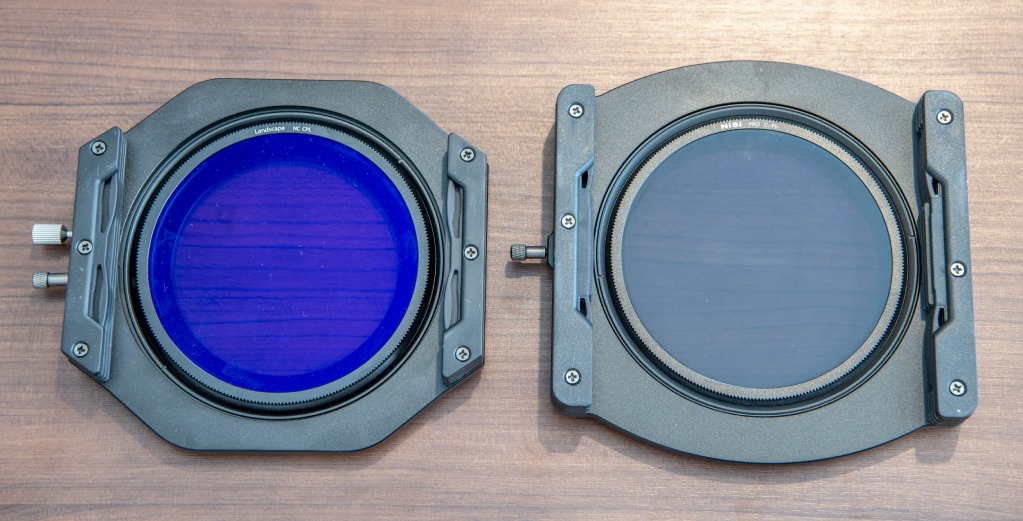
Additionally, NiSi has upgraded the lens cap (shown below), so it’s easier to fit and remove.
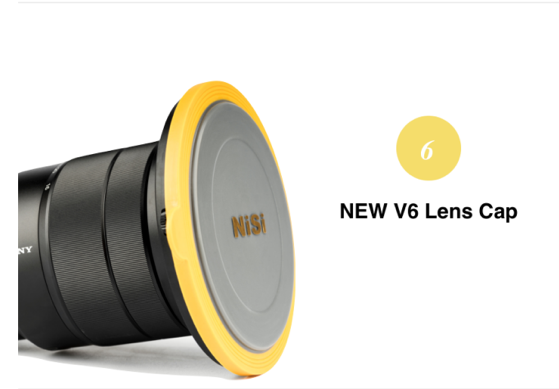
There’s a new weatherproof soft pouch to hold the filter holder. The pouch can be mounted on a tripod leg, your belt, or a camera strap so you can easily access it while shooting.
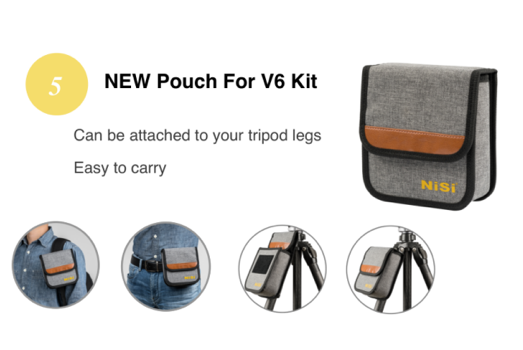
So, while I love my V5 PRO filter holder, the V6 absolutely knocks it out of the park with the new and improved features listed above. It truly is a step above!
NiSi V6 100mm Filter Holder Specs
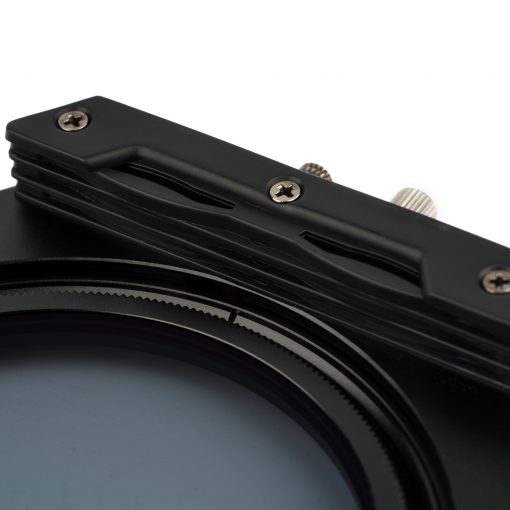
Made from aviation-grade aluminum, the V6 filter holder is both lightweight and durable, thanks to single element processing via CNC machine.
The holder is designed to work with three 100mm filters and a circular polarizer in any combination you wish, so you have no restriction on customizing the order of your filters to get the precise results you want.
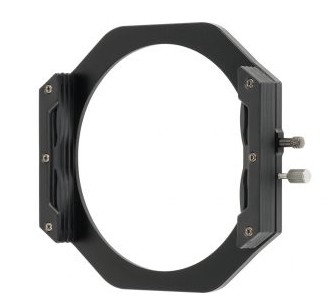
NiSi has coated the holder in a matte black frosted finish to minimize reflections and there is zero vignetting at 16mm on a full frame camera. This means you get improved image quality and that you don’t have to worry about having to fix these issues in post-processing.
All told, the V6 filter holder is a superbly designed piece of equipment that weighs about 4 ounces, so it packs a mighty punch!
NiSi V6 100mm Filter Holder Ease of Use
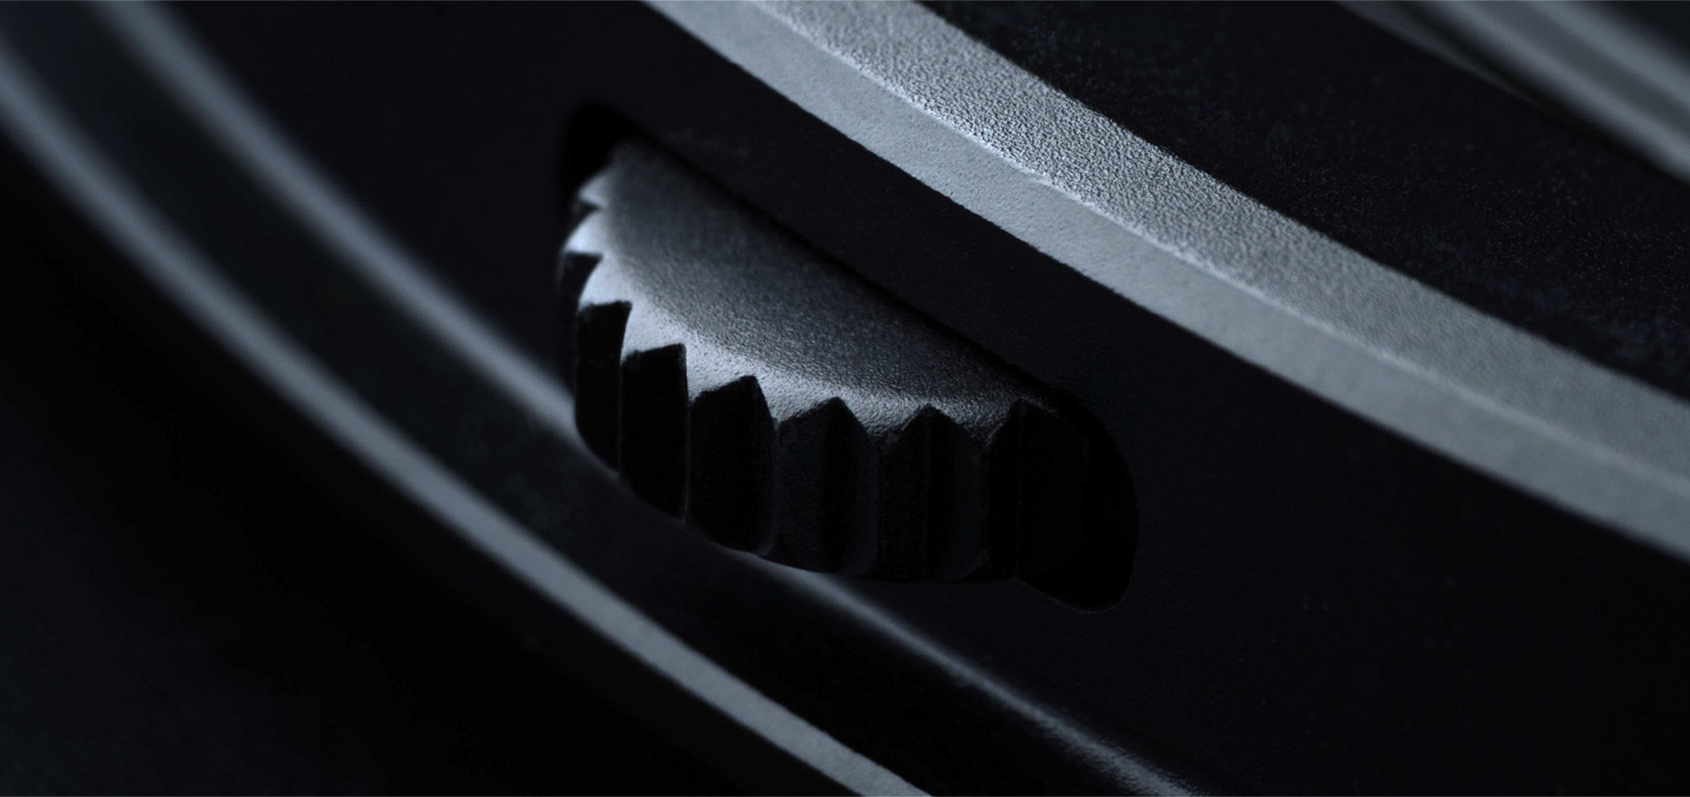
I’ve used many different filter holders over the years, and, disappointingly, most of them have simply not been easy to use.
The NiSi V5 PRO filter holder broke that trend, and the V6 does the same.
In particular, I appreciate that the V6 has a rotation wheel design (shown above), which allows me to rotate the circular polarizer independently of everything else. This is done simply and quickly via a cog on the back of the filter holder. This is probably my favorite feature of this holder because it allows for much faster fine-tuning of the CPL than what was previously available.
What’s more, the raised design of the polarizing filter aids in faster insertion and removal of the filter into the filter holder.
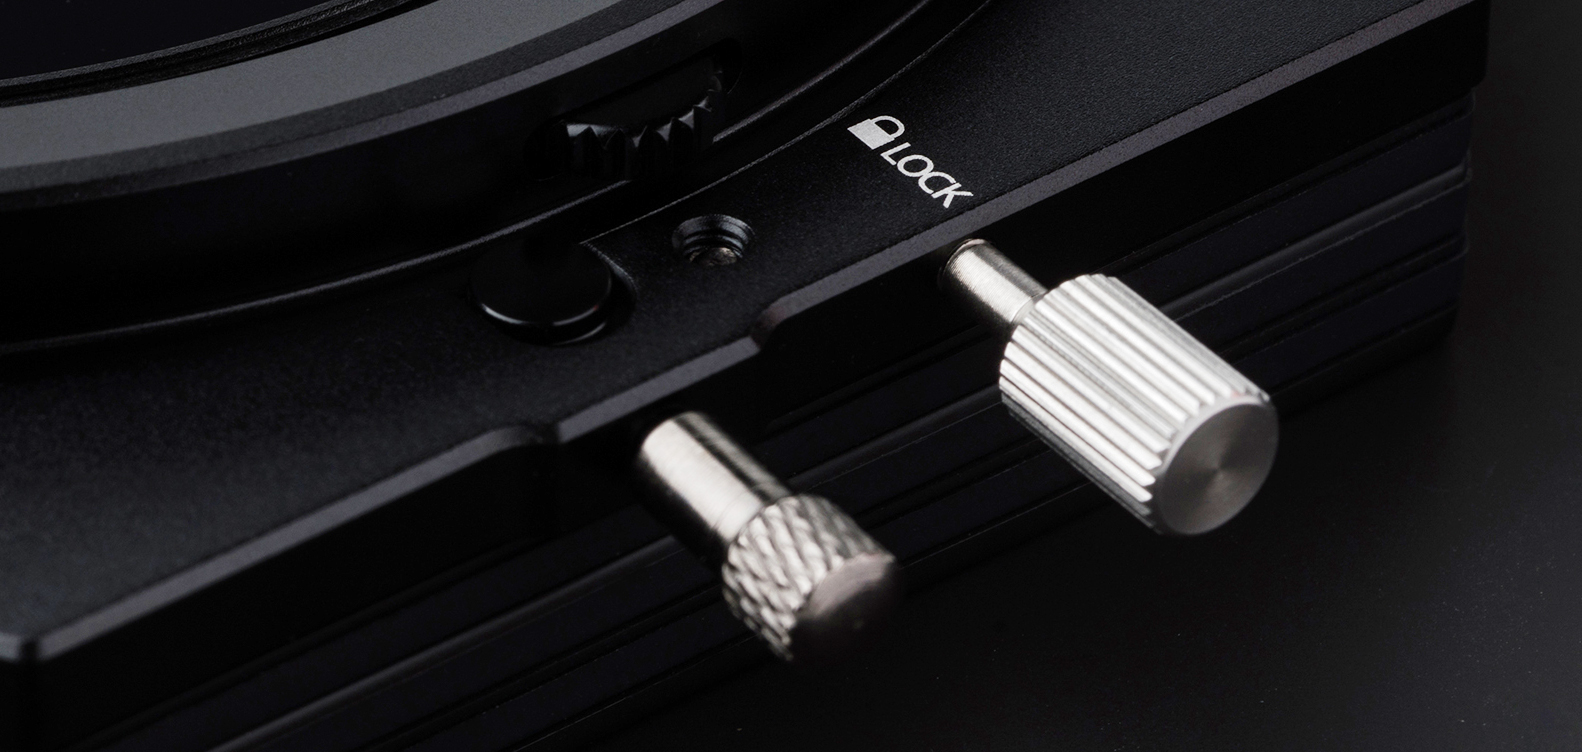
Furthermore, as noted earlier, the V6 features an updated clip system that makes inserting and removing filters a breeze.
There are left-to-right pressed clips that keep the filter locked into position, but with guides along the clips, it’s much easier to get the filters into place.
I appreciate the fact that this holder rotates 360-degrees and has a lock to fix the filters in place. Locking is a simple process via a screw, as shown above.
NiSi V6 100mm Filter Holder Included Accessories
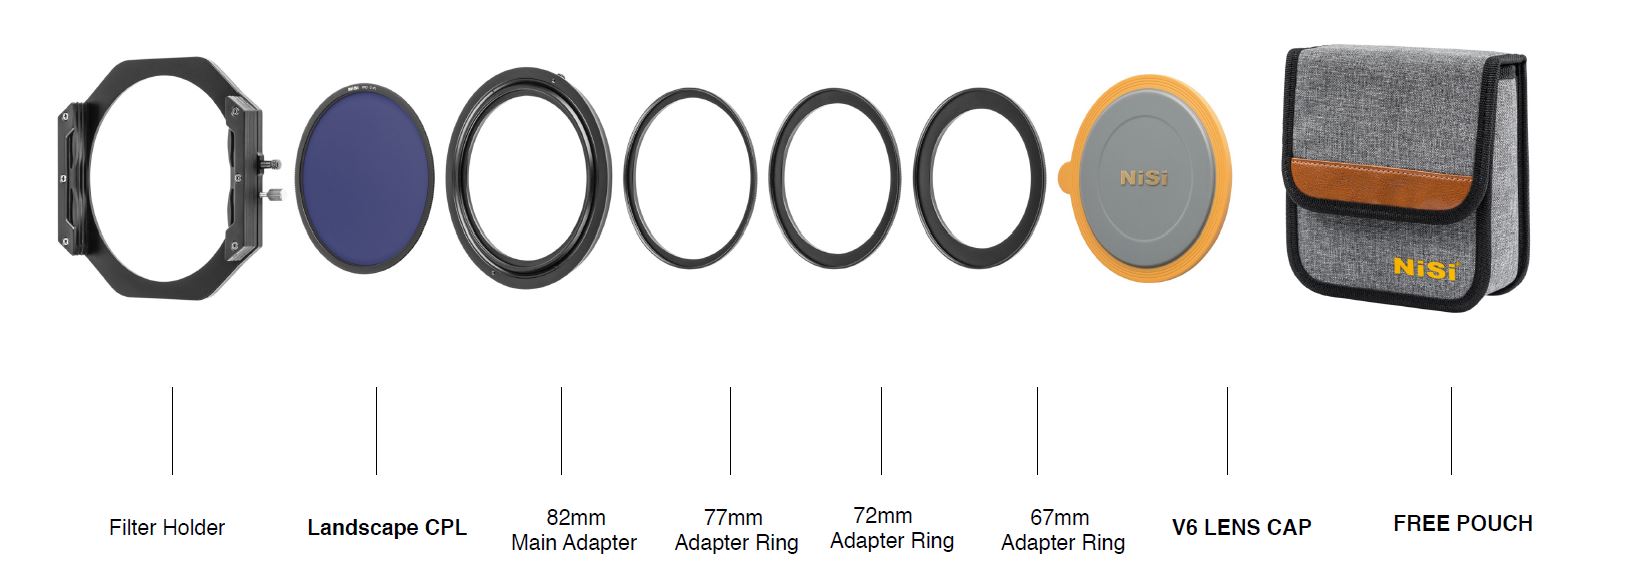
When you buy this filter holder, you get much more than that.
In fact, NiSi has packed this thing to the gills with accessories you can use to improve the functionality of the filter holder. This includes:
- 4 adapter rings (67mm, 72mm, 77mm, and 82mm)
- An 86mm ultra-slim circular polarizing filter (my kit has the landscape CPL)
- A protective lens cap
- A soft carrying case
NiSi V6 100mm Filter Holder Compatible Filters
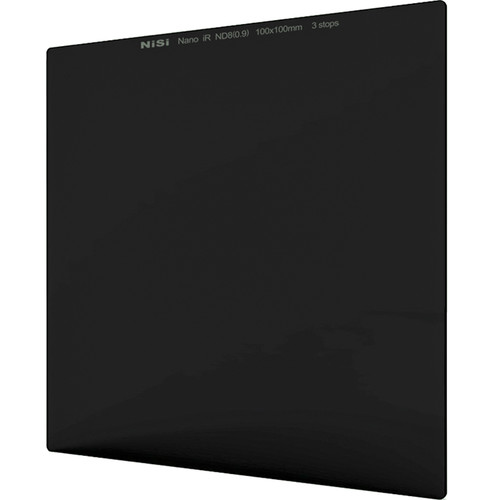
I use the 100mm filters from my NiSi V5 PRO Advanced Filter Kit with my V6 filter holder, but this holder isn’t limited to working only with NiSi filters.
In fact, you can use any 100mm filter with this holder. That includes both 100mm x 100mm filters and 100mm x 150mm filters as well.
NISi V6 Filter Holder Price
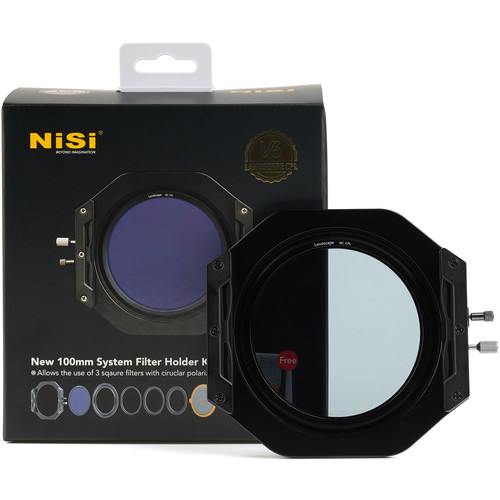
Currently, the NiSi V6 Filter Holder is on preorder for $229.00 for the version I have, which comes with adapter rings and a landscape circular polarizing filter.
The NiSi V6 Filter Holder with a regular circular polarizer and adapter rings (shown above) is on preorder for $188.00.
We Recommend
Photo Filters to Master Landscape Photography
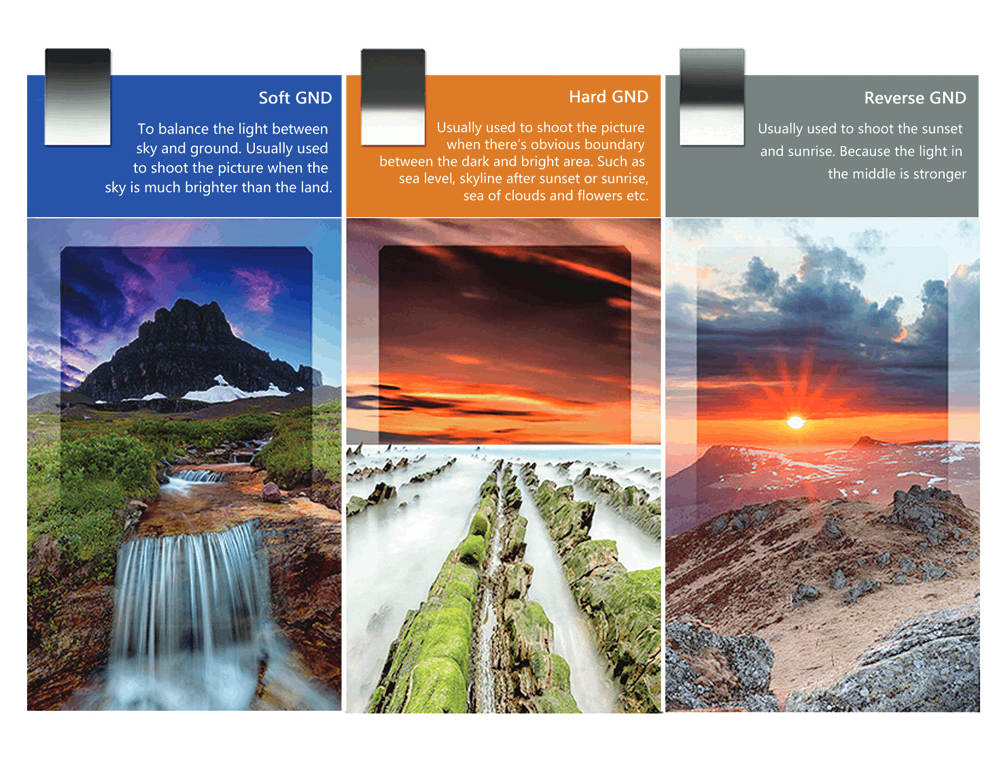
If you don’t have a lot of time behind the lens, you might not fully understand why filters are needed for landscape photography.
After all, in some cases, their effect can be very subtle. Besides, you can just Photoshop the image to get the same effect, right?
Wrong…
In this guide to photo filters for landscape photography, you’ll be introduced to various types of filters and explore the positive effects they can have on your shots. Let’s get started!
Editor’s Note: I’ve used many, many different landscape photo filters over the years, some good, some bad, and some just so-so. Currently, I’m using NiSi filters and holders, and have been blown away by their build quality, ease of use, and gorgeous results. As such, I use NiSi filters as examples throughout this article.
Camera Filters Help You Get the Good Light Needed for the Ideal Shot
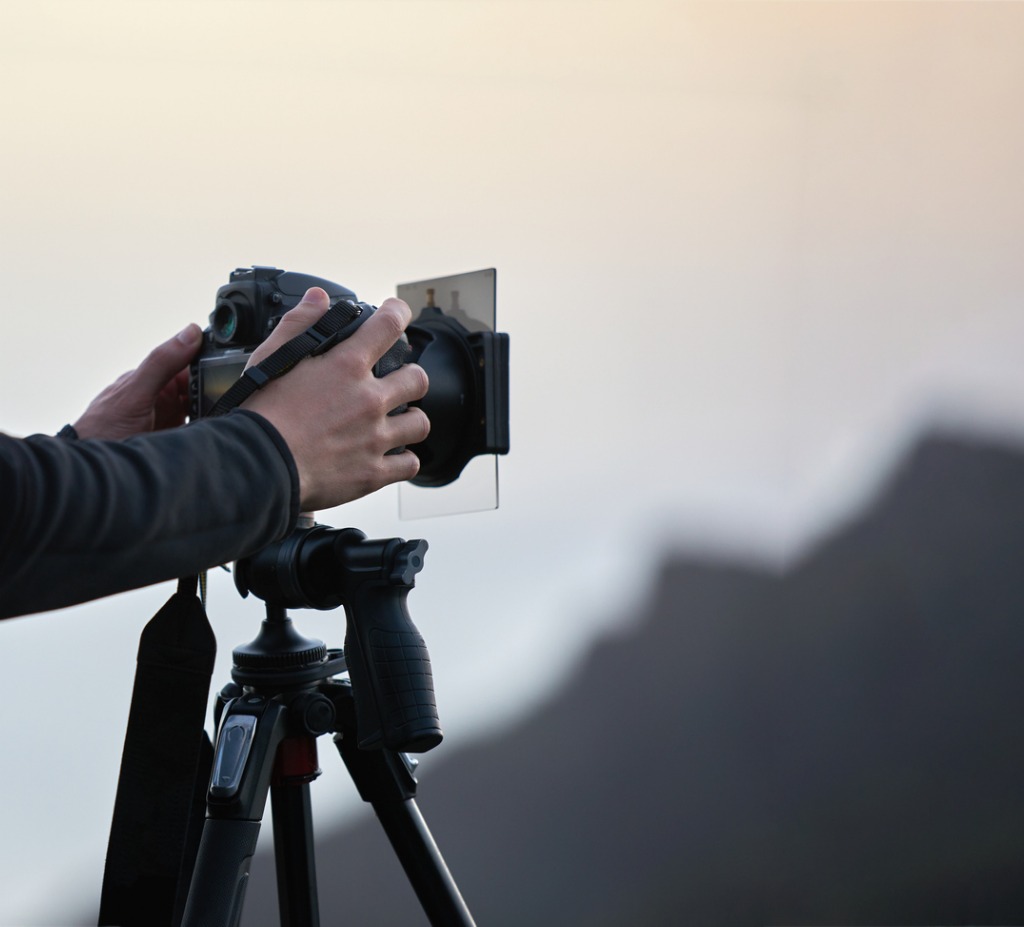
photo by stock_colors via iStock
The whole basis of photography is light, and more to the point, good light.
Sure, you can be standing in front of a gorgeous landscape, but the landscape itself doesn’t make a great photo. Instead, the lighting that’s present in the scene will have a lot to do with the quality of the photo you create.
As I explain in an article I wrote about working with good light, defining “good light” is difficult because what’s good light for one landscape photography situation might not be good light for another landscape photography situation.
For example, a wintery mountain scene like the one above might benefit from soft, even, diffused lighting on a cloudy day because it enhances the cold, closed in feel of winter.
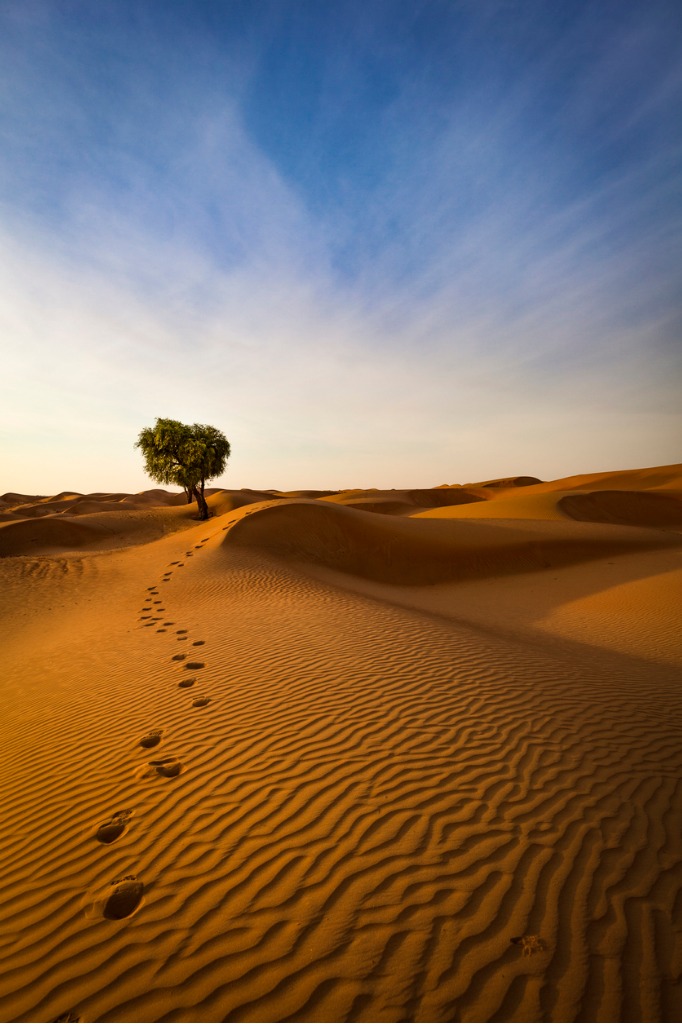
photo by 35007 via iStock
Meanwhile, the desert scene above, which has very fine details in the sand, might benefit more from strong sidelighting of the setting sun because that kind of light puts those small details front and center.
So, “good light” can depend on the landscape you find yourself photographing. It also depends on the time of day you’re shooting.
Traditionally, landscape photographers covet golden hour lighting - the hour or so after the sun has risen and the hour or so before the sun sets - because the light at that time of day is very soft and has beautiful warm tones.

photo by DieterMeyrl via iStock
But if you scout the locations you wish to shoot with light in mind, and if you’re armed with the appropriate photo filters for landscape photography, you can create photos that have much more visual appeal.
That is, don’t just look for a pretty landscape. Instead, consider where the sun will rise and set in relation to the subject. Think about how mid-day lighting will look as it falls across the landscape. Also consider how your positioning relates to the sun - is it to your left or right, above you, behind you, or in front of you?
All of these things will influence how good the light is, and in turn, will determine how good your landscape photography will be.
Learn More:
Types of Filters: Change the Light for Landscape Photography
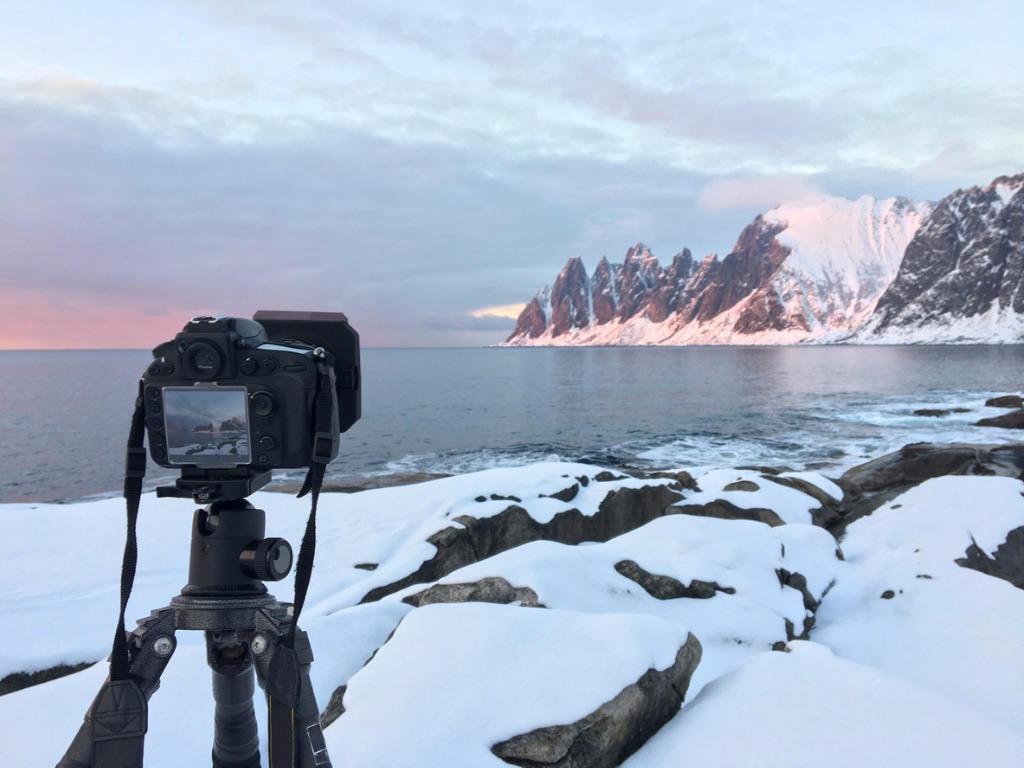
photo by Sjo via iStock
There are numerous camera filters that you can use to improve the light in a landscape scene:
- Polarizing filters reduce glare off of water and other non-metallic surfaces. They also boost contrast in the sky and minimize atmospheric haze.
- Graduated neutral density filters are dark on top and light on bottom, which helps even out the exposure between a bright sky and a dark landscape.
- Reverse graduated neutral density filters are designed specifically for use at sunset, in which the brightest part of the sky is along the horizon, and therefore, the darkest part of the filter is in the middle. These photo filters have the same effect as a normal graduated ND - they even out the exposure of the scene.
- Solid neutral density filters have the same level of light-stopping power throughout. These photo filters are used to block light such that you can extend the shutter speed for long exposure photos during the daytime.
Let’s dive into each of these types of filters and how to use them.
What is a Polarizing Filter?
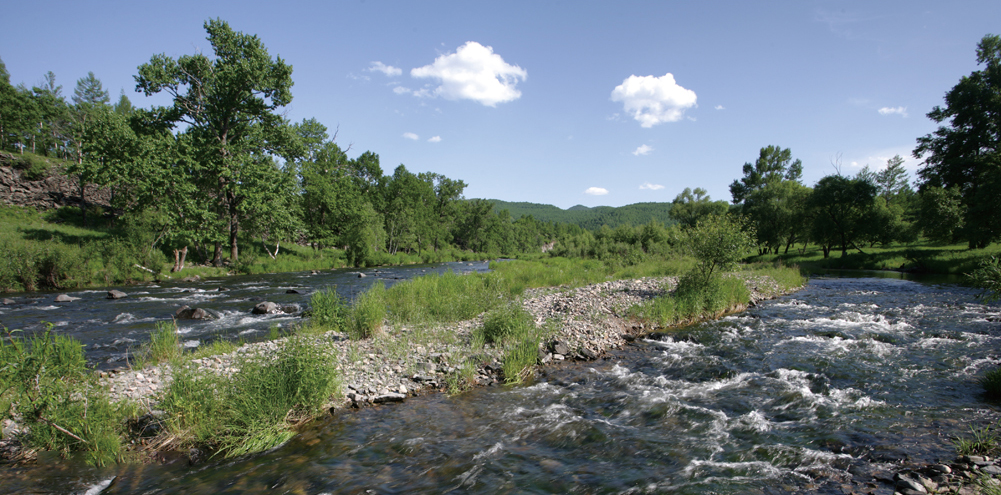
As noted above, the purpose of a polarizing filter is to “clean up” the light in a scene, for the lack of a better term.
Often, when tackling daytime landscape photography, you’ll find several issues that diminish the quality of the photo: glare (which you can see in the water above), haze (which can make distant landscape features look smoky), and a washed out sky. But a polarizing filter minimizes all of those.
Above, you can see an example of landscape photography without a polarizer. Compare that to the results below, in which a NiSi polarizer was in place.
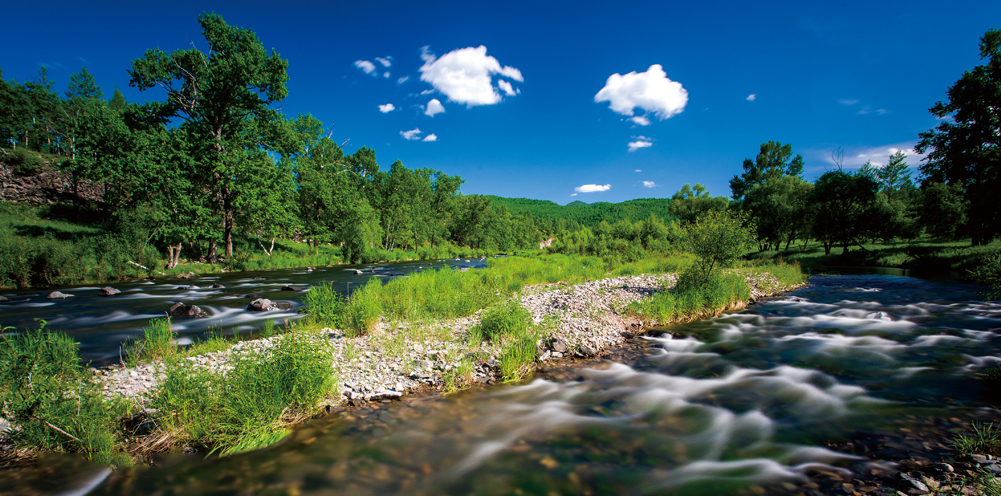
As you can see, each of the three elements discussed above - glare, haze, and lack of contrast - have been corrected.
In other words, this photographer did precisely what we discussed above. They found a beautiful landscape, determined how the light interacted with the landscape, and they modified the light with a filter to get a much-improved shot. (Note that the image above was taken with a polarizer and a solid neutral density filter together, which is why you see the nice, blurry water.)
You can read my polarizing filter tutorial for detailed information about how to use them and how they can improve your landscape photography. For our purposes here, looking at the before and after shots above should be enough to convince you to learn more about using a polarizer!
What is a Graduated Neutral Density Filter?
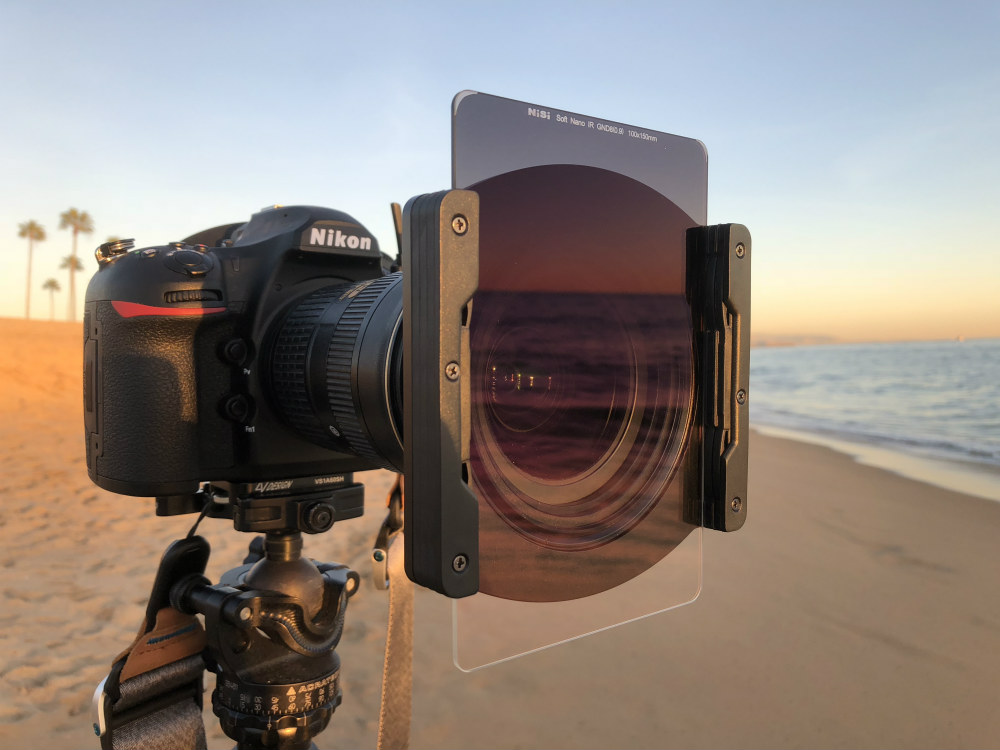
When photographing a landscape, the sky is often very bright and the landscape itself is often much darker. This dynamic range can cause issues with your camera, which might do one of two things:
- Expose for the sky, which renders the landscape very, very dark.
- Expose for the landscape, which renders the sky very, very bright.
To get around this issue, you can use a graduated neutral density filter - which, as you can see above, is dark on the top to block out some of the light from the sky - to modify the light and get an even exposure throughout.
The effect of that can be quite striking. Compare the two images below to see what I mean.

Image Credit: Christian Hoiberg
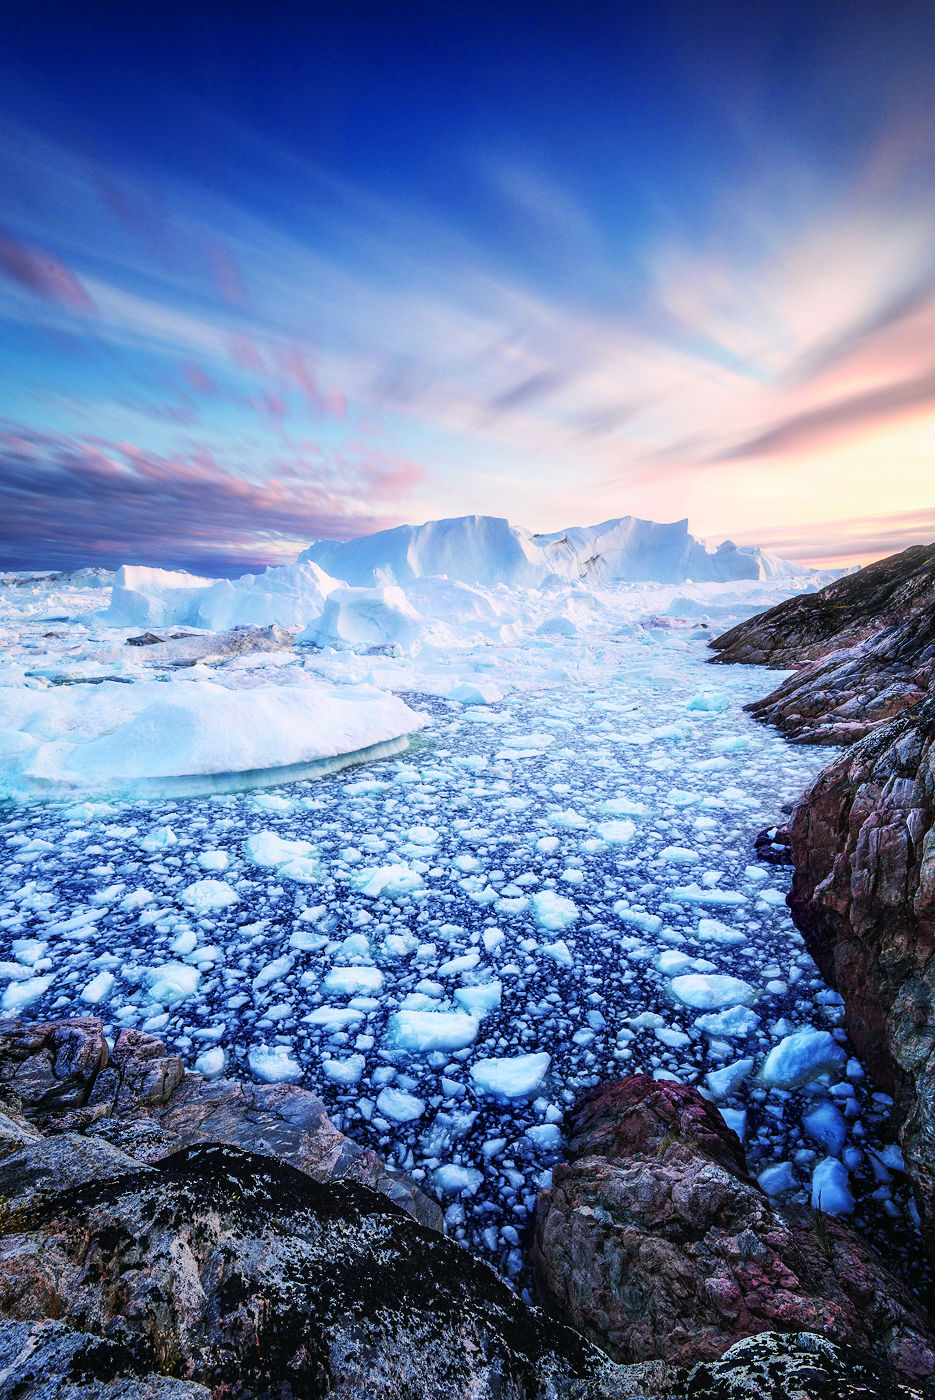
Image Credit: Christian Hoiberg. With NiSi Medium Nano IR GND 8(0.9) F10, ISO100, 1/30s.
With a NiSi graduated neutral density filter attached, the image has a much more dramatic sky. Instead of being overexposed, the sky is now deep and rich with color and contrast.
Note that there are different types of graduated neutral density filters for different types of landscapes:
- Soft-edge ND grads have a very gradual transition from the dark top to the light bottom. These are best for landscapes that don’t have a definite horizon.
- Hard-edge ND grads have a very abrupt transition from dark to light. These are most appropriate for landscapes with a very clear, flat horizon.
- Reverse ND grads have the darkest filtration in the middle, and it gradually lightens as you move up (though the upper part is still darkened). The bottom of the filter is clear. These photo filters are specifically designed for taking photos at sunrise and sunset, as shown in the chart below:
There is also something called a horizon filter, which is like a reverse ND grad in that its darkest area is in the middle, as shown below.
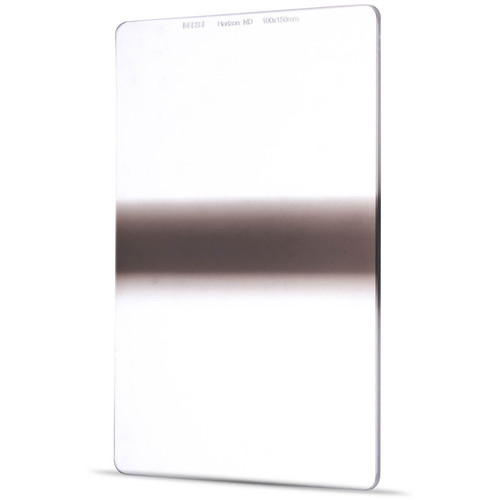
However, unlike a reverse ND grad, a horizon filter fades as you move up and as you move down. This photo filter is best suited for shots in which the sun is right on the horizon.
With so many different types of graduated neutral density filters, it’s understandable if you’re a little overwhelmed and confused by all the options.
To help clarify things a bit, be sure to check out my guide to graduated ND filters as well as this tutorial on reverse graduated ND filters.
Learn More:
What is a Solid Neutral Density Filter?
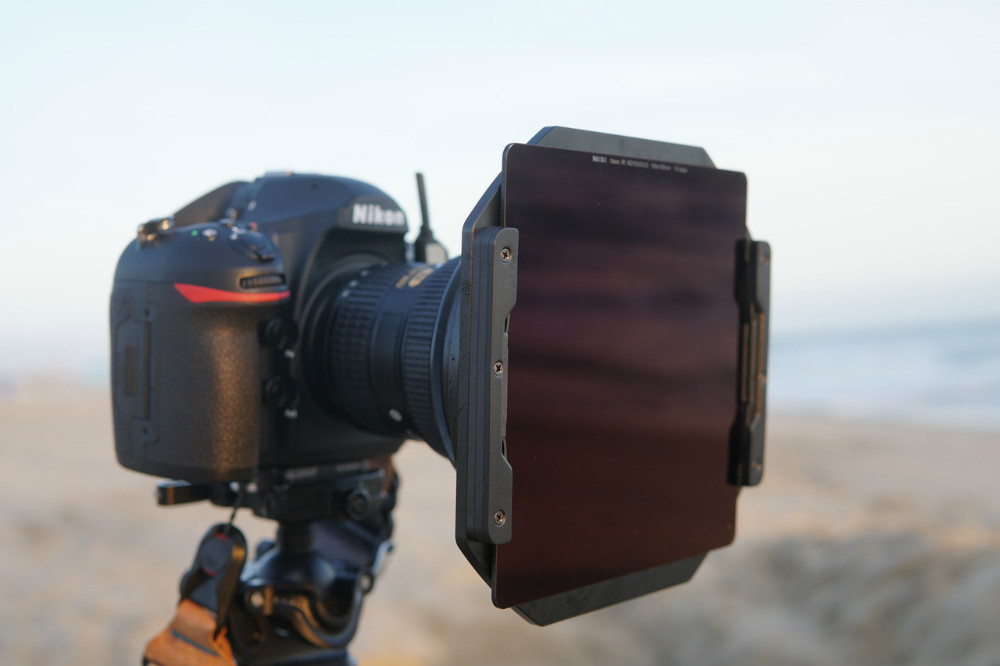
As alluded to earlier, a solid neutral density filter has the same filtering power throughout (as shown above), and the effect of that is that you can slow down time to capture movement in a landscape.
The need for solid ND filters arises from the fact that when shooting during the daytime, the long shutter speeds required to blur the motion of things like clouds and water would result in an impossibly overexposed image.
However, with a solid ND filter in place, you can extend the shutter speed to seconds or even minutes long, depending on the strength of the photo filter, and get all the movement you want without having an overexposed photo.

Image credit: 半岛魔镜. Taken with NiSi IR ND 1000(3.0) F11, ISO200, 30s.
Whether you want to photograph rivers or streams, waterfalls or the ocean tide, a neutral density filter is the answer.
Above, you can see how a NiSi IR ND 1000 filter helped create gorgeous blur in the ocean water.
When using one of these photo filters, you get a shot with a dreamy, ethereal look that would otherwise be impossible to achieve without a solid ND filter.
Using these filters is much easier than it might seem, and involves a basic five-step process for success. I walk you through this process step-by-step in this how-to guide for solid ND filters.
The same goes for the other photo filters discussed in this article. Check the links throughout this article for additional resources for using photo filters to master landscape photography!
Learn More:
We Recommend
Preparing for Travel Photography: How to Plan and What to Bring
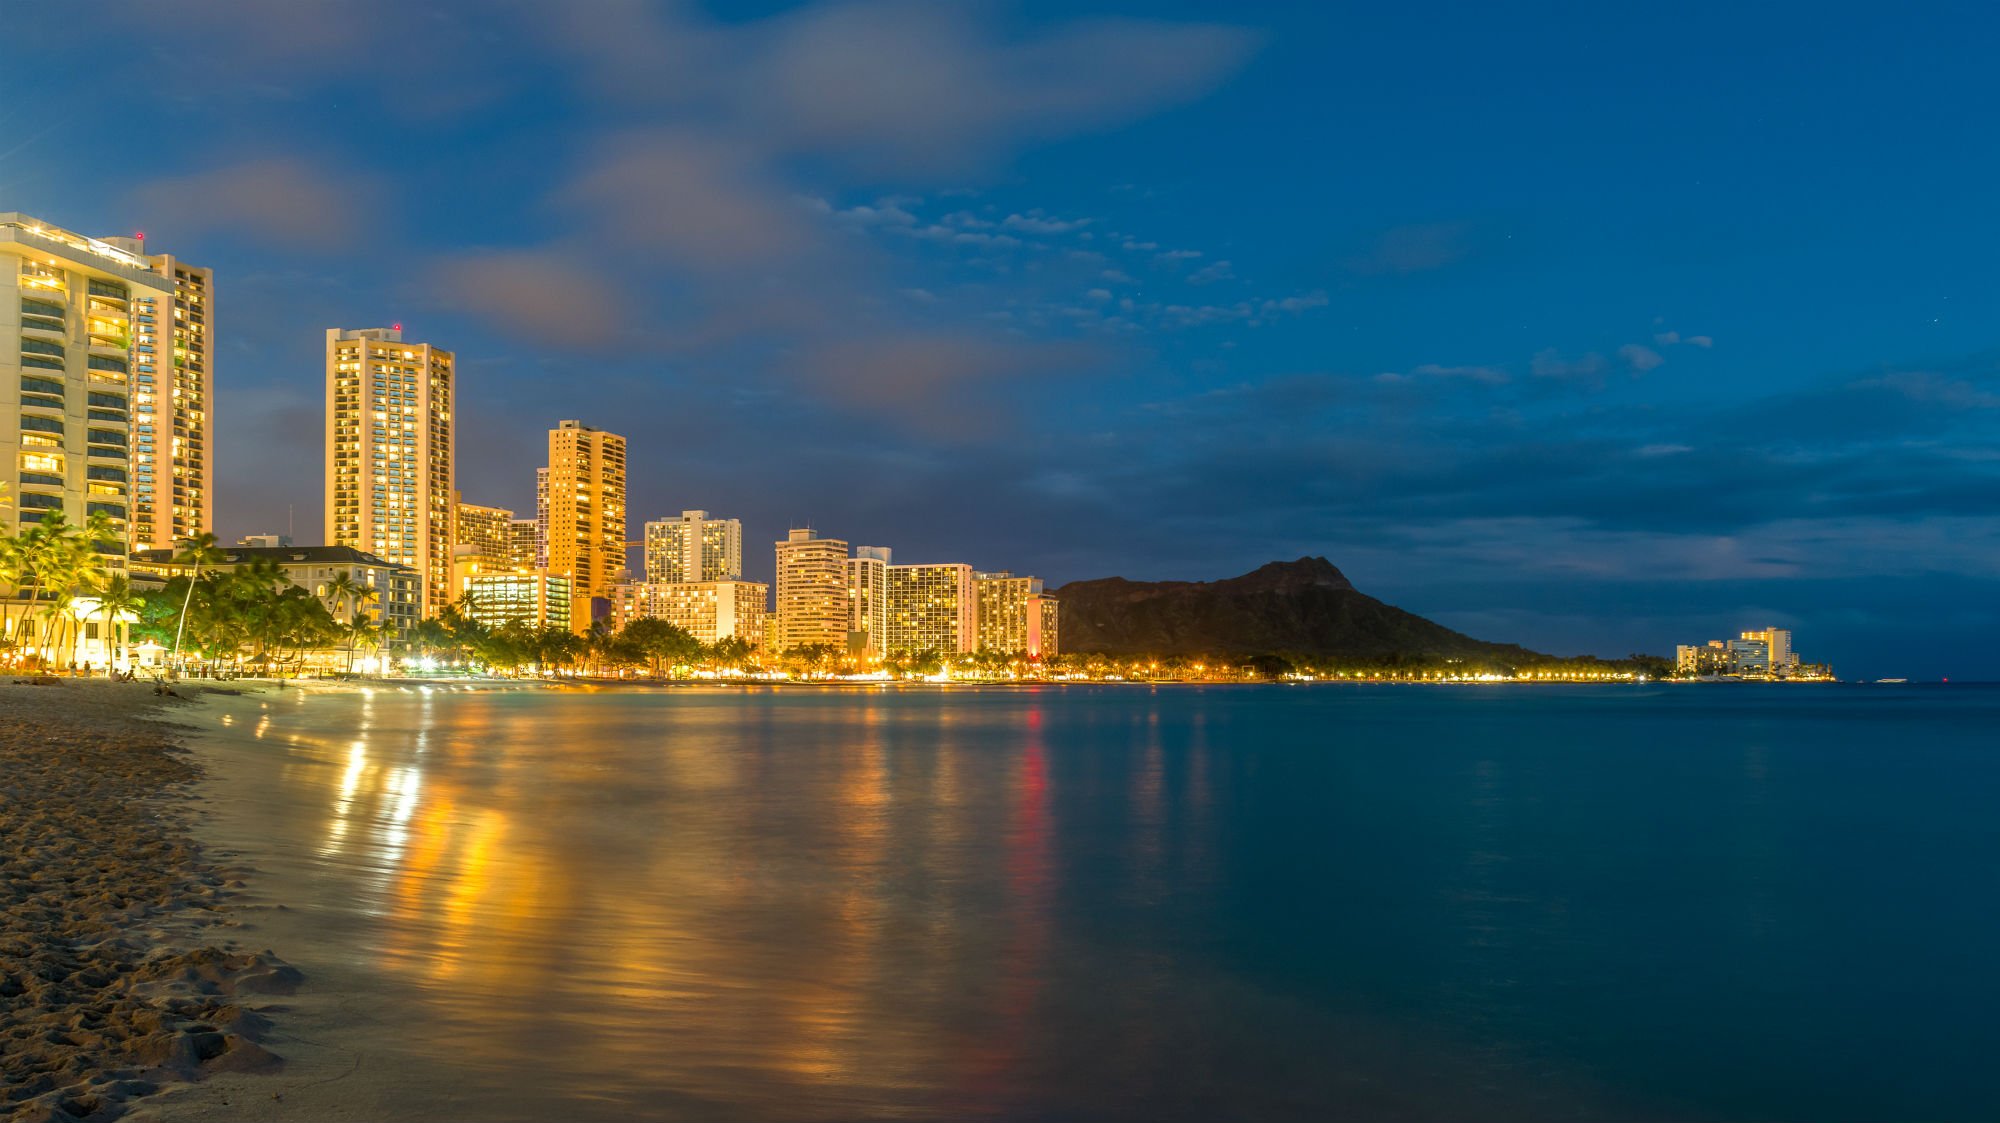 Shot with Nikon D850 and 24-70mm lens. ISO 400 | 24mm | f/9 | 20 sec.
Tell me if this sounds familiar...
You go on vacation and want to spend some time getting photos of the places you travel.
The problem is twofold: you didn't plan all that well so you're not sure where the best places are to take photos, and on top of that, you brought every single piece of gear you could cram into your bag.
The temptation to bring everything but the kitchen sink will end up sinking you on your trip. Not only will you have way too much gear to carry (most of which you'll never take out of the bag), but that's just more gear you have to worry about losing or being stolen.
That being the case, I thought I'd offer up a few travel photography tips, particularly for planning your trip and selecting what gear to bring.
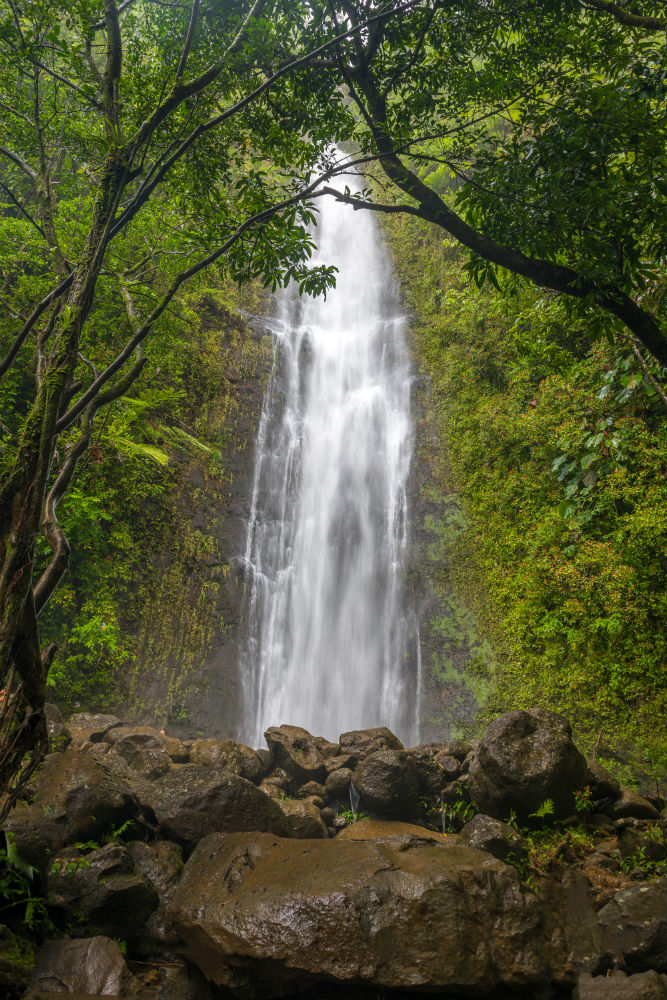 Shot with Nikon D850 and 24-70mm with Singh-Ray LB Color Polarizer. ISO 80 | 24mm | f/5.6 | 1/20 sec.
I'm basing these tips off of my recent trip to Hawaii, in which I did a couple of things I've never done before.
The people that know me well understand that I want to bring gear with me that I know how to use, that I've personally tested, and that I understand to be bulletproof.
But this time, I used a brand new camera bag and tripod, neither of which I'd used before setting foot in Hawaii.
I'll get into the details of the gear I recommend for travel photography a little later. First, let's talk planning.
Editor's Tip: Not sure what lenses are best for travel photography? Learn why a prime lens is a great travel photography companion.
How to Plan a Photography Trip
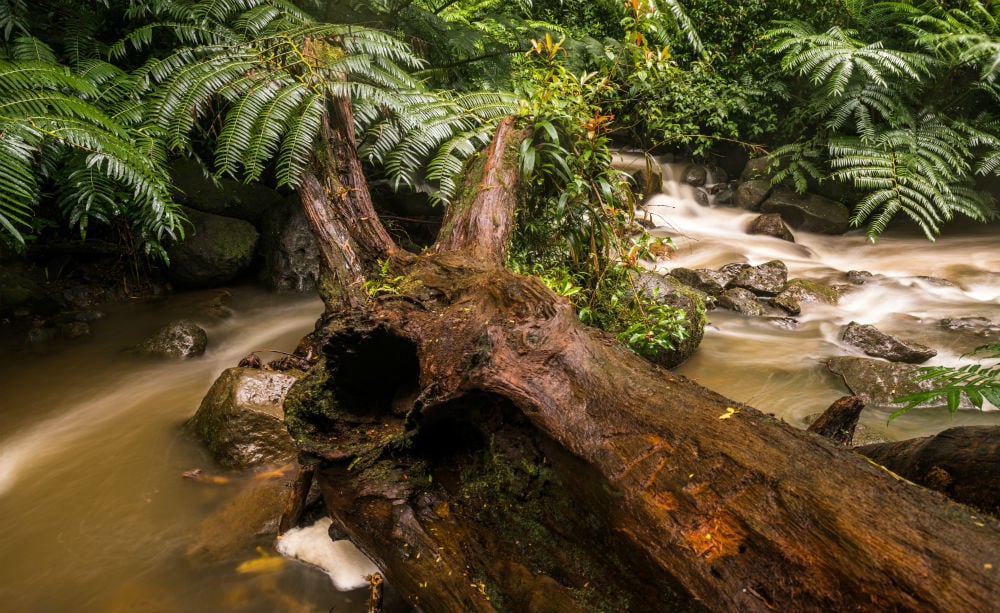 Shot with Nikon D850 and 24-70mm with NISI 3 Stop ND. ISO 64 | 24mm | f/9 | 3 sec.
I cannot emphasize enough how important prior preparation is for the success of your photography trip.
Even if you're traveling to a place that you've visited before, it's important to do your research ahead of time, that way you know what you want to photograph, how to get there, the best times of day to capture the best photos, and so forth.
Here's what I suggest for planning things out:
- Use Google Images. I went to Waikiki, so I Googled photos of Waikiki to figure out what the must-see locations were. Do the same for your travels, and make a list of the spots you want to photograph, bearing in mind that you should seek out under-the-radar locations rather than just photographing the well-known and iconic spots.
- Do a Google search for each location you've made on your list. Look for details like how to get to each spot, tips for where to park, details about walking or hiking distances and so forth. This will help give yourself plenty of time to get from your hotel or other accommodations to each site.
- Organize your photo outings using the information you gleaned from your Google searches. Group shooting locations together to minimize travel time and maximize your time behind the lens at each spot. If you sign into your Google account, you can search for the locations you wish to photograph and add waypoints to the map so that you can make travel from one spot to the next much simpler.
With the basic research about locations out of the way, it's time to do a little advanced planning.
Before you leave, check the long-term forecast for the area you're visiting. On my recent trip to Hawaii, the forecast was for clouds and rain for the majority of the time. That being the case, I packed accordingly, both in terms of having rain gear for myself and picking up some rain gear for my camera, too.
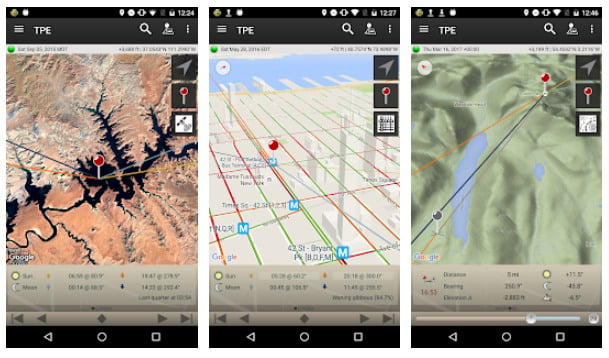
If you're into sunrise and sunset photography or astrophotography, I highly recommend the Photographer's Ephemeris (shown above; available for iOS and Android), as it will give you pinpoint information about the sunrise, sunset, moon phases, and even the location of stars and constellations based on your specific location.
Another handy planning tool I suggest using is the Dark Site Finder, which will show you where to find the darkest skies for astrophotography purposes anywhere on earth.
Consulting with tools like these well in advance will aid you in your planning process and help you figure out what sites to visit and when to get the best photos.
You might also search for photographers in the area you wish to visit and see if they have any tips on their website, blog, Facebook, and so on for taking photos in the area. You never know what kind of inside information a fellow photographer might offer up for free.
Learn More:
How to Pack for Travel Photography
As I noted in the introduction, there is often a propensity for photographers to pack absolutely every bit of gear they own when they travel.
And while this is done out of fear of not having something should you need it, the chances are very good that taking a few essential pieces of kit will serve you just fine.
The key when packing for travel photography is instead to go lean and mean, as explained in the video above by Lonely Speck.
Not only does this help lighten the load you carry, but it also forces you to think long and hard about the type of photography you wish to undertake.
That is, if after all the photos you've looked at and research that you've done about your destination you find that you'll be focusing mostly on wide-angle landscapes, then you don't need to bring along your 100mm macro lens.
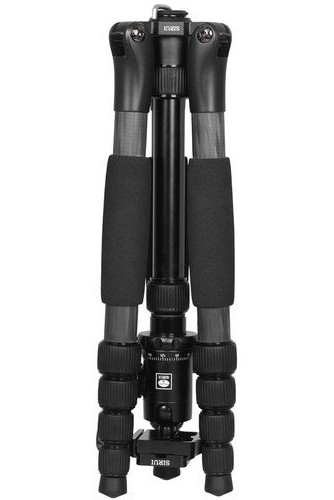
When packing for travel photography, consider these things as essential:
- Weight - Avoid big, bulky, and heavy gear in favor of smaller items that serve the same purpose. For example, if you have a mirrorless camera body and a DSLR, think about leaving the DSLR at home and using only your smaller, lighter mirrorless camera.
- Versatility - Many travel photographers swear by having a versatile zoom lens - like a 24-70mm - in their bag. You can photograph all sorts of subjects with a lens like this, meaning it can pull double and triple duty.
- Compactness - Particularly with tripods (which I discuss more below), it's important to consider how compact they are when they're in their folded up position. A giant tripod in your bag (or lashed to the outside) will take up tons of room and be unwieldy as you travel.
- Accessories - Only bring the peripheral items that you absolutely need - extra batteries, SD cards, and filters come to mind. Don't bring multiple tripod heads, camera remotes, camera straps, and so forth.
Another thing to consider when packing for travel photography are the restrictions on size and weight of bags from the airlines.
If you're like me, you have no desire to check your bag full of expensive photography gear, so packing will be driven in large part by what's allowed in terms of carry-on size and weight.
If you're close to the weight limit or over the limit for your carry-on bag, a trick to try is to take your camera out and carry it on your shoulder as a separate item. If you have a laptop, you can also carry it in your hand.
These items have to be taken out of your bag at security anyway, so treating them as separate items until you're through security can help you avoid bag overages but still have the ability to stow them in your bag for safe travels.
Editor's Tip: Not sure where to go for your next travel photography adventure? Find out why Iceland is full of photography treasures.
Recommended Gear for Travel Photography
The gear that you bring for your trip should be tailored to who you are as a photographer and the destinations to which you travel.
That being said, I have a few recommendations for gear based upon my recent travels that I feel would serve just about any photographer in just about any situation very well.
Recommended Travel Photography Bag: Vanguard Quovio 41
As I noted earlier, I broke with what I usually do when I travel and used a brand-spanking new bag for my latest trip.
That bag is the Vanguard Quovio 41 shoulder bag (shown above), and man, am I glad I decided to pick this thing up.
What became immediately apparent when I unboxed this bag and started to inspect it is the sheer volume of gear that I could fit inside.
Now, this isn't to say that I crammed all of my gear inside the bag for my last trip, but if I'd wanted to, I probably could have. Check out all the gear I could fit into this bag:
- 15” MacBook Pro
- 13” Surface Pro 4
- NISI 150mm filter bracket w/ case
- NISI 150mm filter carry case with filters
- NISI 100mm filter carry case with filters
- 2X Marumi filters (3 and 6 stop)
- Singh-Ray LB Color Combo Polarizer filter
- Misc camera accessories (batteries, memory cards, etc.)
- Shutter remote system
- Nikon D850
- Nikon D850 manual
- Nikon 14-24mm
- Nikon 24-70mm
- MOVO RC1- Camera Rain Cover
- USB Battery Charger
- Notebook
- Sirui A-1205 Tripod
- Sony a6300
- Sigma 30mm lens for Sony
- Nikon battery charger

Aside from its cavernous storage capacity, I appreciated the huge top access panel, which unzips on both sides and folds away so I could actually see my gear inside the bag.
The interior of the bag is just as handy, with tons of room and thick, cushy padding that cradles my gear.
The divider system in the bag is ingenious, allowing you to configure it in a way that accommodates the specific gear you're carrying, be that a mirrorless system, a DSLR system, or even video gear.
This bag has all sorts of other pockets and compartments, too, including two mesh pouches and even a memory card wallet to help you keep your things nicely organized.
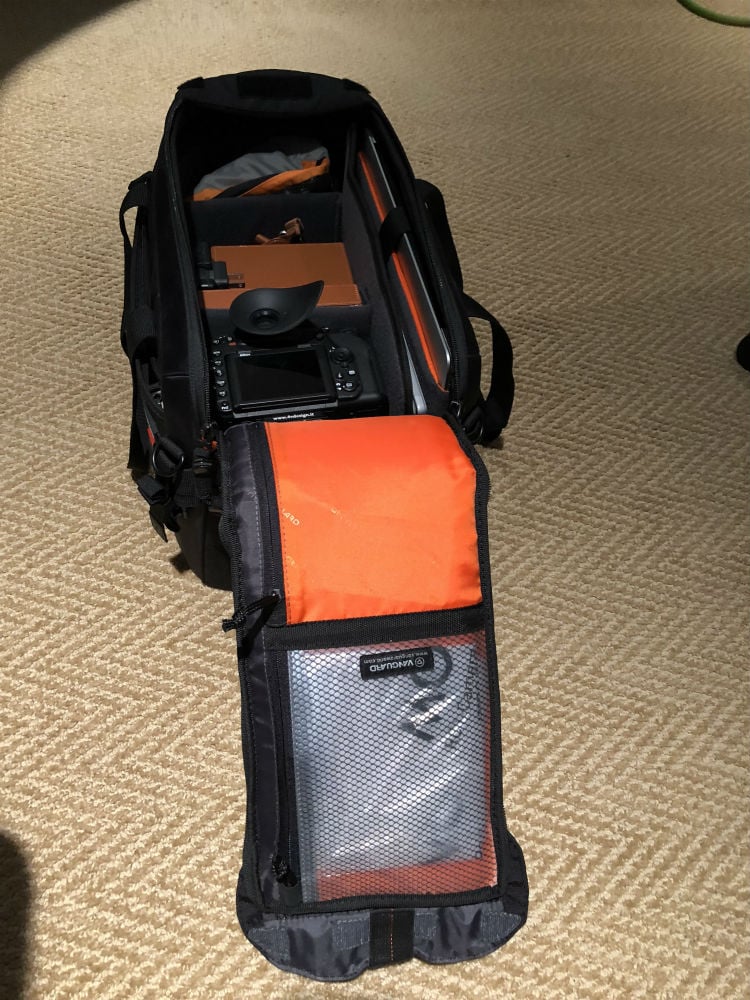
The Quovio 41 also offers multiple ways to carry it.
I mostly used the very comfortable shoulder strap, which has an anti-slippage covering so you can carry the bag with confidence.
The bag also has robust handles, a trolley attachment loop, and is even compatible with an optional ICS harness.
It's that kind of versatility that makes this such a great back for traveling.
The integrated rain cover, water-resistant bottom, shock-resistant feet, and dual built-in tripod holders are just icing on the cake that make this an ideal travel photography bag.
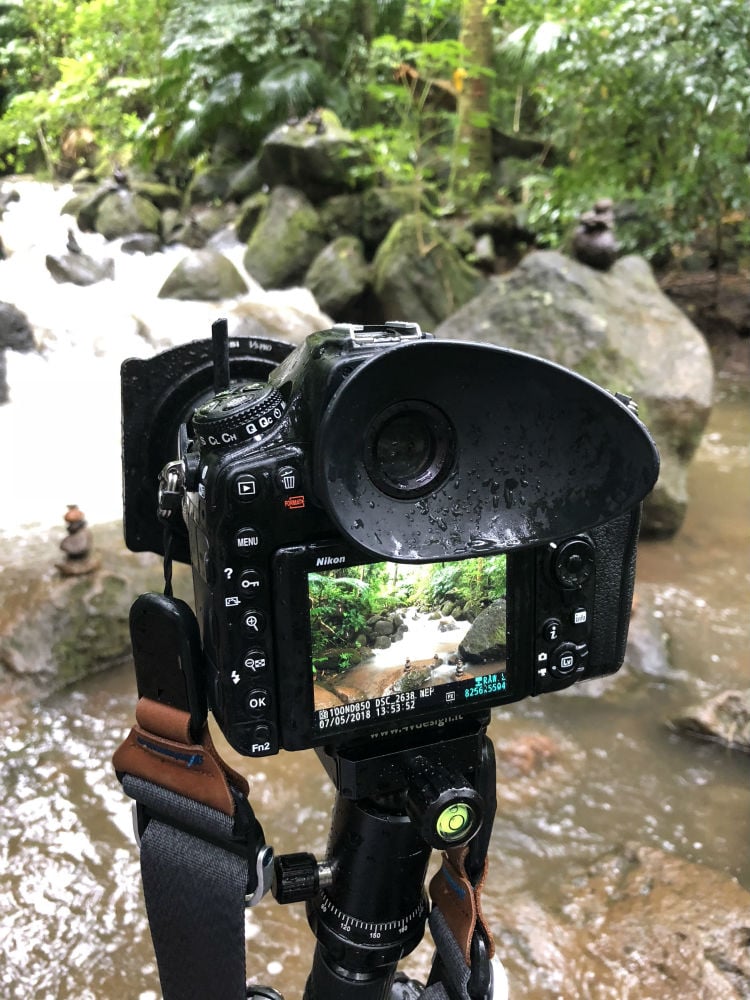
Speaking of rain covers...
I wanted to spend some time at Manoa Falls while I was in Hawaii.
At the hotel, it was bright and sunny, so I grabbed my gear and made my way to the waterfall.
But as you can see in the image above, being at the waterfall was like being in a torrential downpour that soaked my camera, lens, and tripod.
And I know what you're thinking...why didn't I use the rain cover that I brought with me on the trip?
Well, a better question is why didn't I use either of the two rain covers I had with me?
I have no good excuse, really. It was just a boneheaded move. I saw beautiful sunshine at the hotel and just didn't think that I would be walking into a monsoon at Manoa Falls (check the short video above to see what it was like at the falls).
All I can say is, good thing my Nikon D850 is weather-sealed!
Learn More:
Recommended Travel Photography Tripod: Sirui A-1205
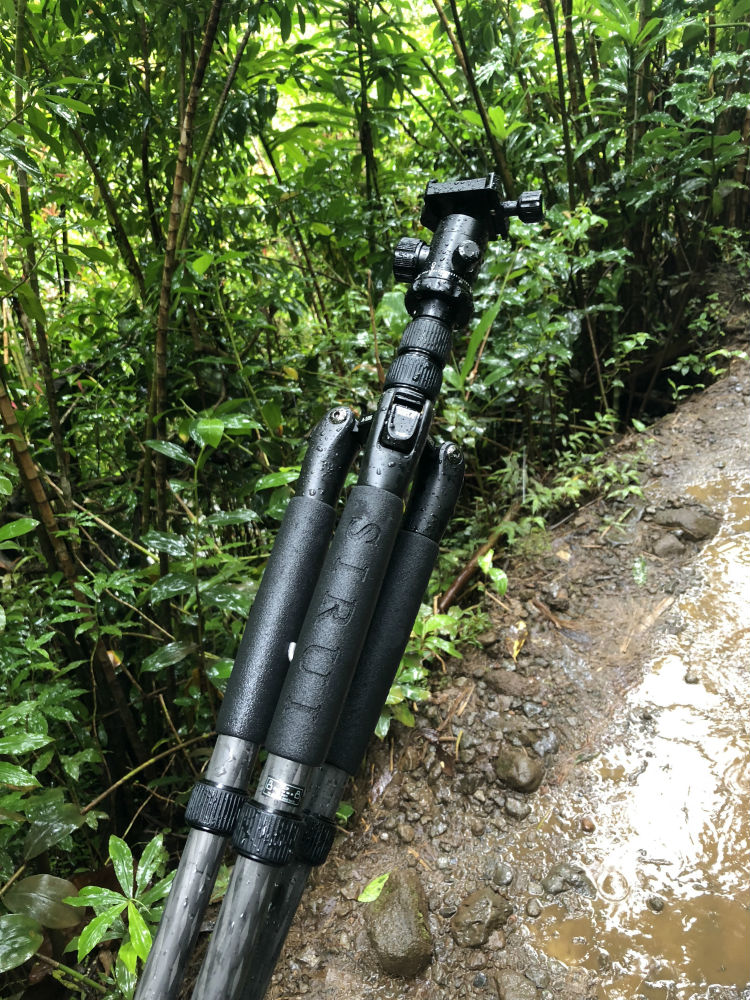
Another brand new piece of gear that I used on my most recent trip is the Sirui A-1205.
I chose this particular tripod because it's incredibly lightweight at just 2.2 pounds.
Additionally, when it's folded up, it's a mere 14.6 inches long so it's easy to carry as well.
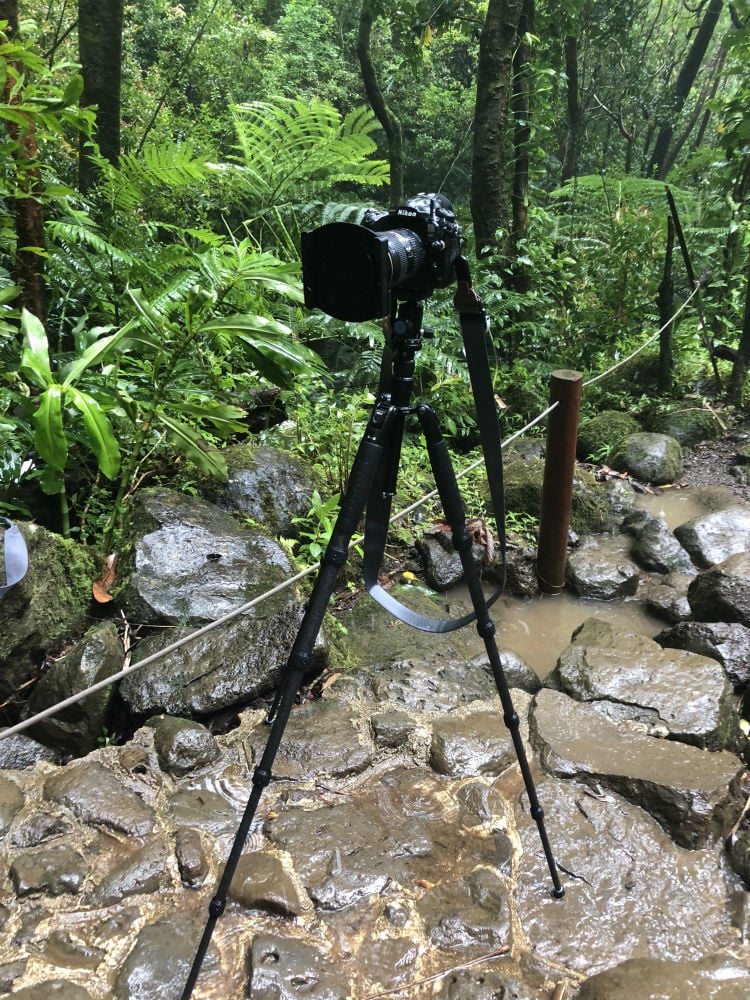
But don't think that because this is a small, lightweight tripod that it's somehow short on features.
As you can see in the shot above, it extends nicely to a maximum height of just over 55 inches.
What's more, it can hold up to 22 pounds of gear, so my Nikon D850 and 24-70mm lens didn't even come close to maxing out this tripod.
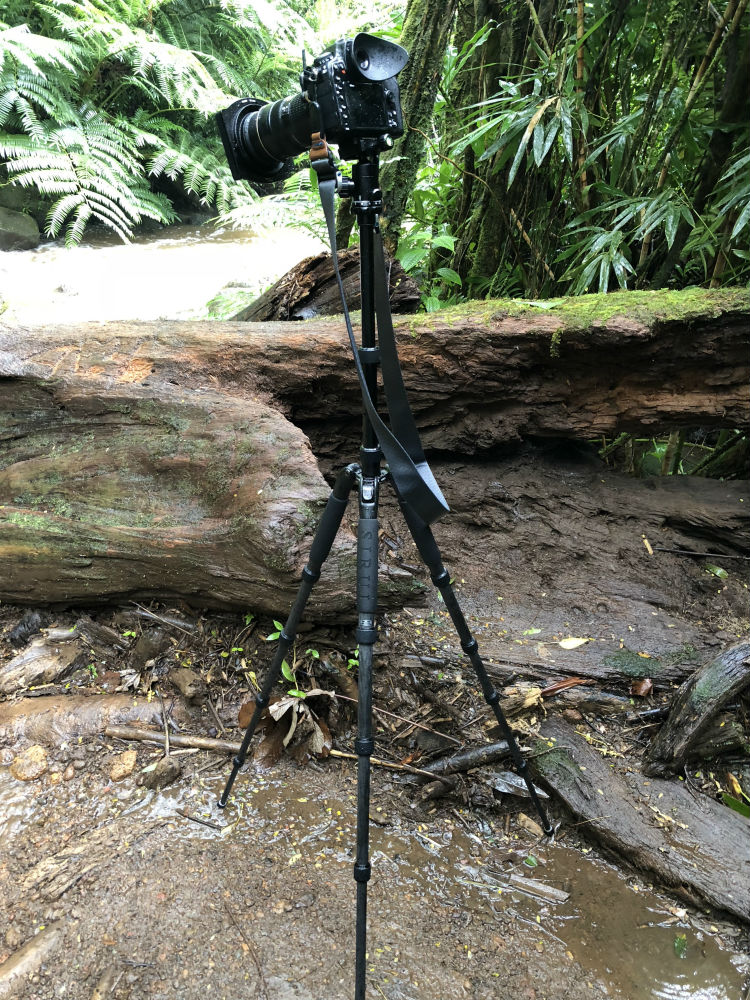
Like I said, I'd never used this tripod before, so I was a little concerned that it would cause me trouble in the field, but that couldn't be further from the truth.
It's variable angle legs were great for adapting it to the rough terrain. And even though this thing was sopping wet, there was no slippage whatsoever.
I even really enjoyed using the included Y-11 Ball Head - and that's coming from someone that's used nothing but an Acratech GP Ball Head for the last eight years...
In other words, I found this tripod to be not just highly functional, but it also performed well in challenging conditions. And since it's so small, it was a breeze to carry around.
I didn't even have a chance to try the integrated monopod or the reversible center column, so that should give you an even bigger clue as to how good of a little tripod this thing is!
Editor's Tip: Put some extra money in your pocket by joining our top-rated affiliate program. Get the details here.
Other Essential Travel Photography Gear
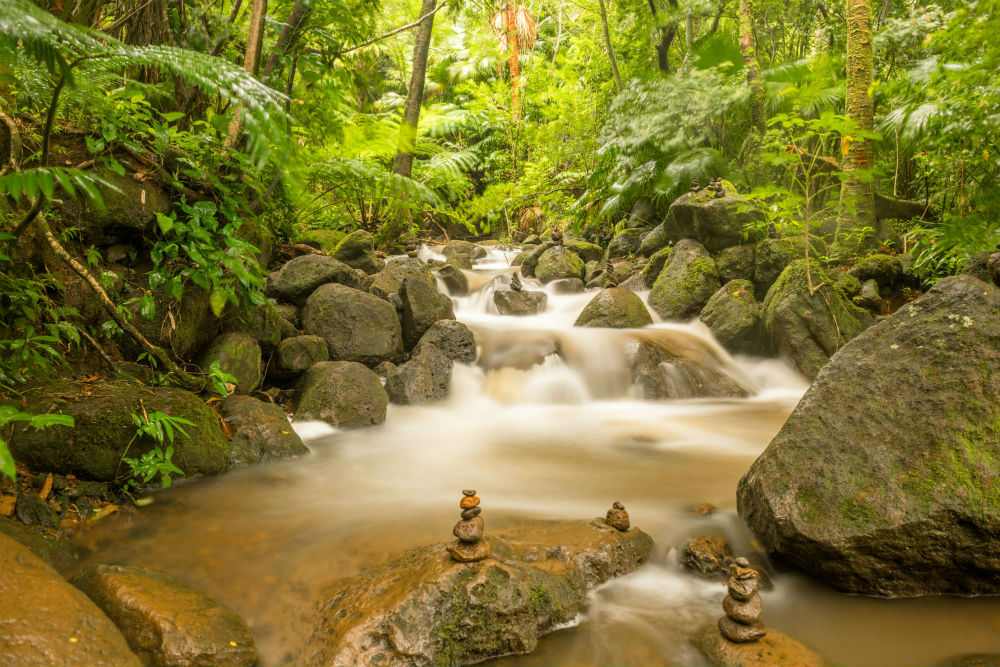 Shot with Nikon D850 and 24-70mm with NISI 6 Stop ND. ISO 250 | 24mm | f/6.3 | 15 sec.
You can reference the gear list I provided above for a complete overview of all the bits and bobs I brought with me on my recent trip, but I wanted to point out a couple of things to highlight their importance.
First and foremost, I strongly recommend having a good set of filters with you when you travel.
Nothing can take the place of a well-built polarizer, graduated ND, and ND filter.
I actually brought a ton of filters, mostly because I wanted to test them out. I've been using NiSi filters almost exclusively for the last few months, though, and they are very impressive.
Sure, a filter kit with holders and adaptor rings is going to take up some space in your bag, but the results you can get when shooting with filters are well worth the added weight, if you ask me.
Something else I'd like to point out is that I always bring my camera owner's manual with me.
Call it an old-school move, but you just never know when something strange happens and you need some guidance from the manufacturer on how to resolve the issue.
And as noted earlier, I like to bring just a couple of lenses that give me the versatility I need to take all sorts of different photos.
This time around, I used my 14-24mm and 24-70mm lenses on my D850 and had more than enough focal range for the types of shots I wanted to take.
And while this isn't an exhaustive list of gear you might need on your travels, one thing remains the same for most of us for travel photography - plan ahead, invest in quality gear, and pare down what you take, and you'll be all set!
For even more travel photography tips, check out the video above by Jeven Dovey.
We Recommend
The #1 Pro Landscape Photography Tip for Amazing Photos
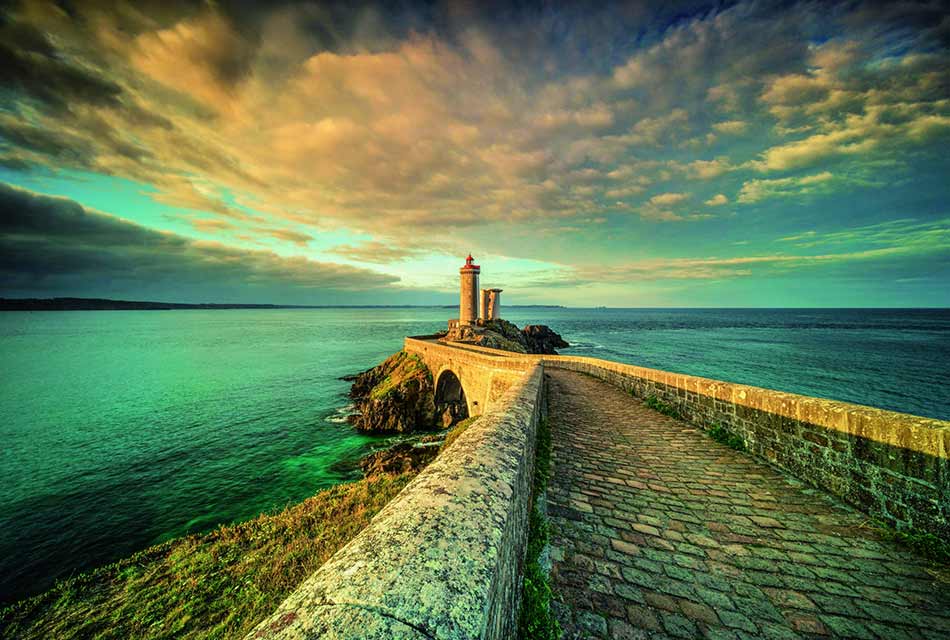 Image Credit: Daniel Schuhmacher
Ask any landscape photographer what their number one tool is for capturing amazing landscape photos, and most are going to say one of two things - a good, sturdy tripod or a set of good filters.
In this article, I'd like to focus on filters because there are so many different options out there, some good, some bad, and some that are so-so.
Over the last nine years, I've tested more filters than I can list, most of which have left me utterly unimpressed.
But a couple of months ago, I started using NiSi filters, and I have to say, these guys have raised the industry standard when it comes to filters.
With that in mind, here's my take on the best landscape photography tip - having the right filters.
Polarizing Filters Help You Take Amazing Landscape Photos
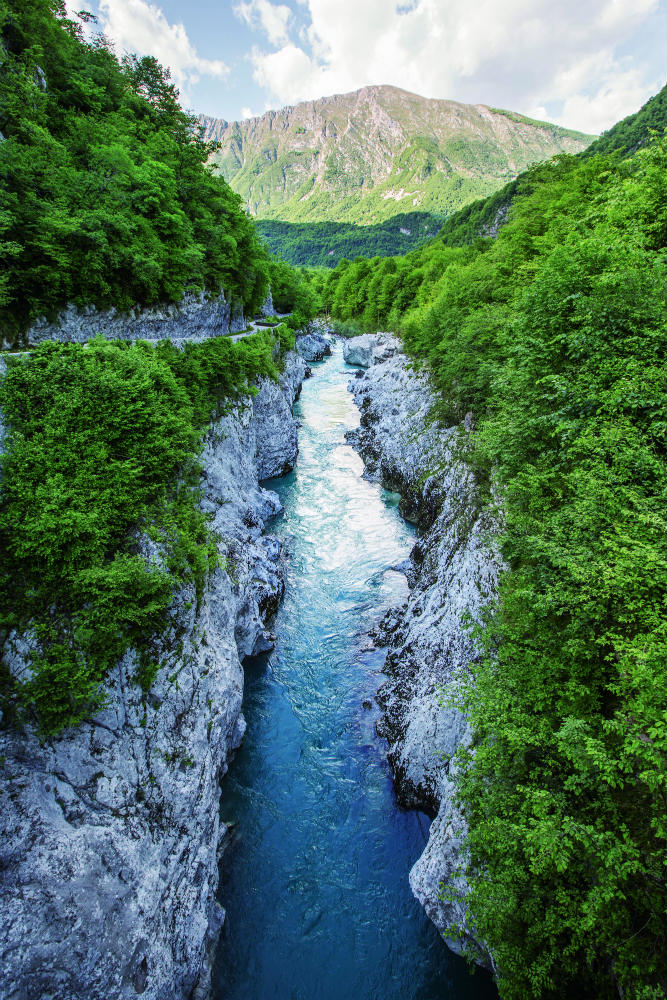 Image Credit: Johannes Nollmeyer
If I could only have one filter in my camera bag, it would be a polarizer.
That's because it's a versatile filter that can improve your photos in a host of ways.
Primarily, polarizing filters help reduce glare off non-metallic surfaces.
So, in the image above, you can see how the sunlight is glaring off the surface of the water, rendering it bright white.
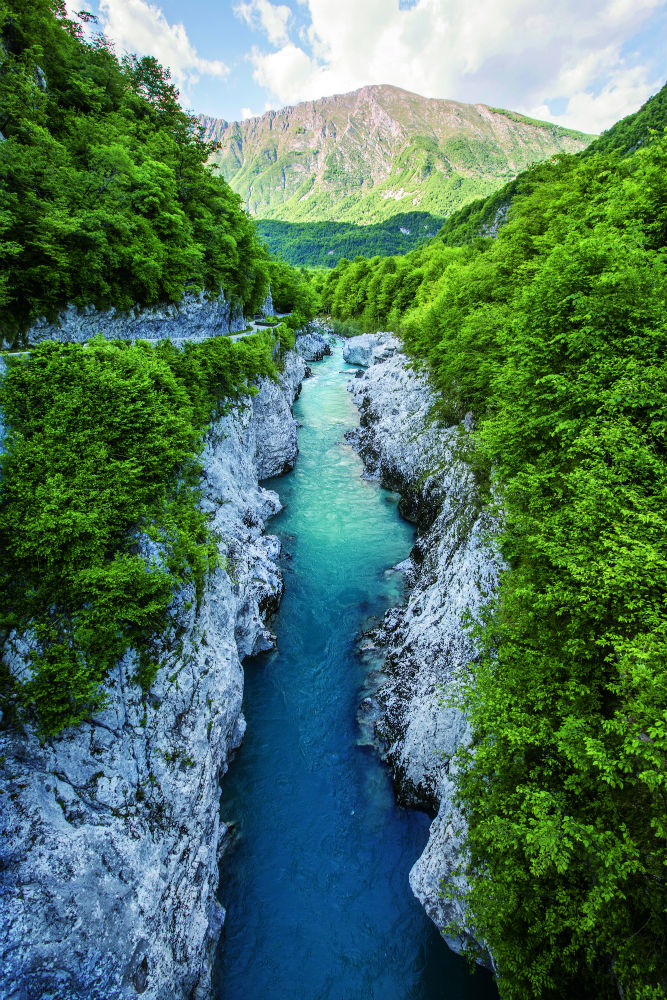 Image Credit: Johannes Nollmeyer
But in this shot, with a NiSi circular polarizing filter, you can see how that glare is greatly diminished.
But that isn't the only benefit of using a polarizing filter.
In the image below, you see a beautiful scene, but notice how the colors and contrast are quite flat.
 Image Credit: Francesco Gola
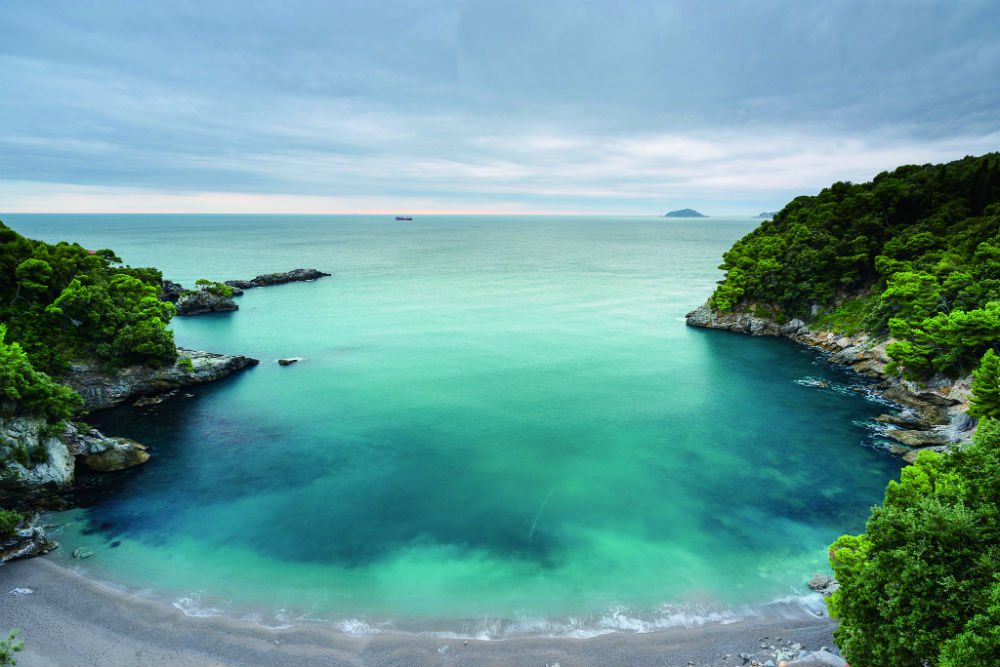 Image Credit: Francesco Gola
But with a polarizer in place, the color of the water, in particular, pops much more.
Additionally, there is more structure in the clouds with more texture revealed that gives the image more depth and dimension.
Polarizing filters boost the blue tones of the sky and make white clouds pop, so on a partly cloudy day, a polarizer can add even more in the way of color and contrast to your photos.
Landscape Photography Tip: Use Graduated ND Filters to Even Out the Exposure
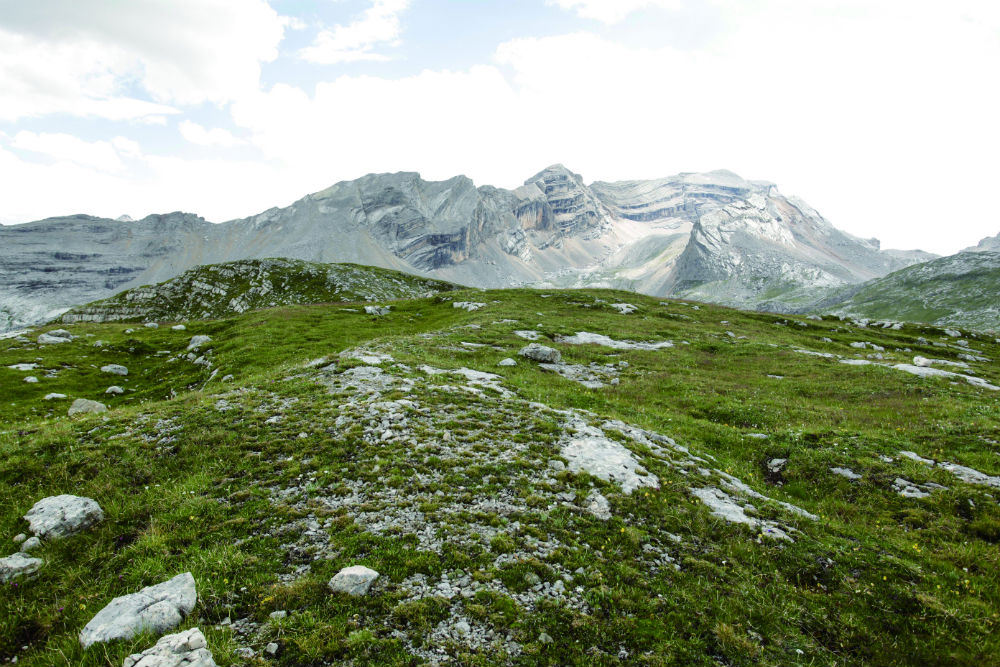 Image Credit: Karol Nienartowicz
One of the biggest problems that landscape photographers have to deal with is an uneven exposure in their images.
That is, you often end up with an image that has a well-exposed landscape and an overexposed sky, as shown above.
In this situation, you can use a graduated neutral density filter to block out some of the light from the sky, thereby allowing you to create a landscape photo that's more evenly exposed.
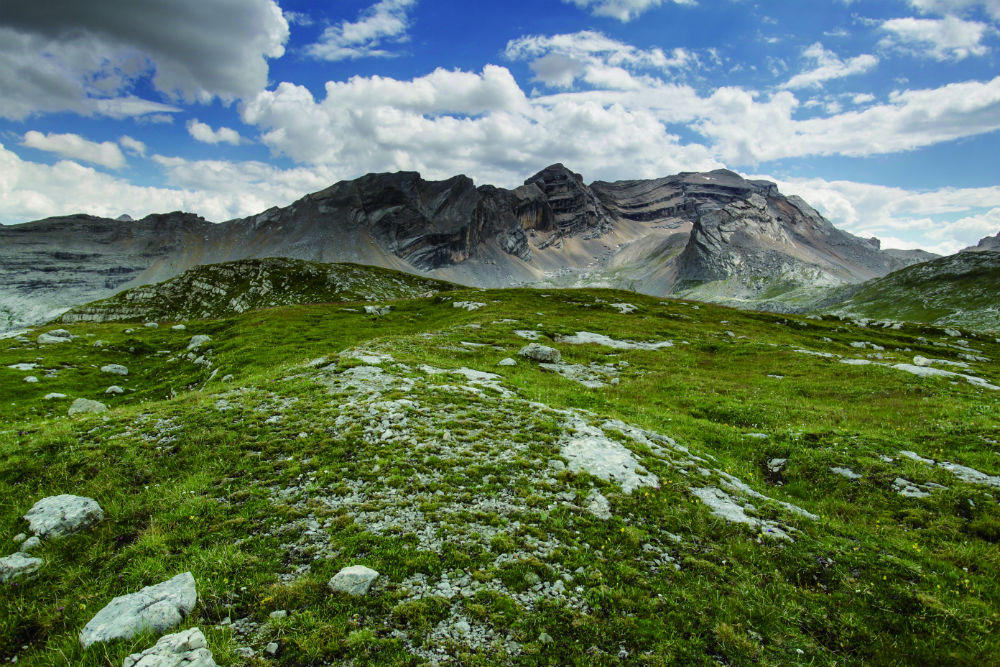 Image Credit: Karol Nienartowicz
With a NiSi hard graduated ND filter in place, you can see how the sky has been darkened so it's much more in line with the exposure of the landscape.
The result is a far more pleasing image with tons of definition in the sky that sets the photo off.
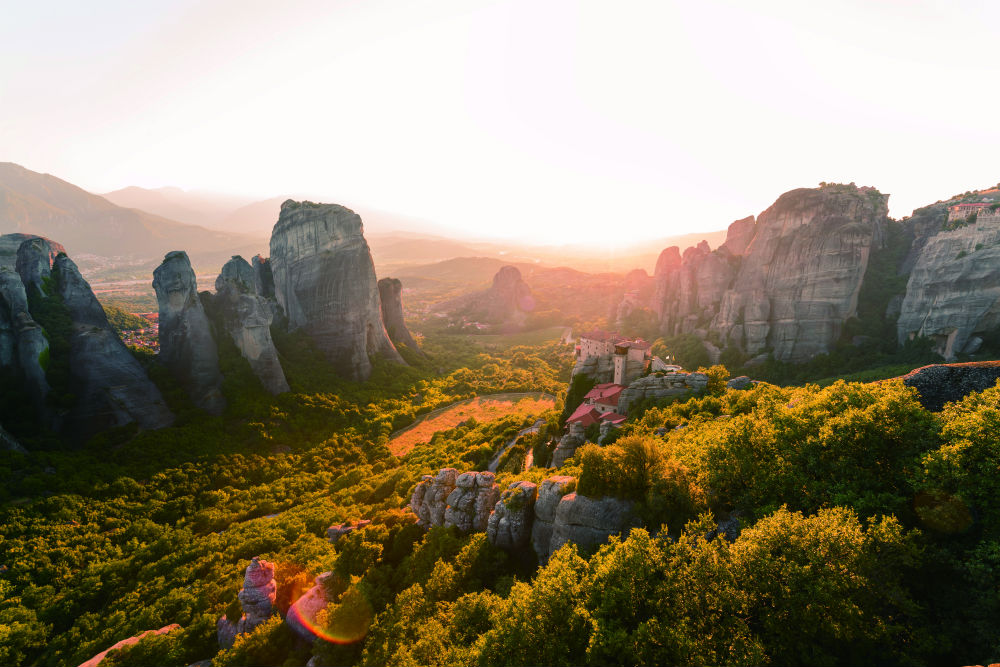 Image Credit: Karol Nienartowicz
There are all kinds of graduated ND filters, including soft grads, which have a much more gradual shift from dark to light than the hard grad discussed above.
There are also reverse ND grad filters that are especially for use at sunrise or sunset.
These filters have the darkest filtering power in the middle of the filter, to coincide with the sun being near the horizon.
In the image above, you can see how shooting at this time of day presents some exposure challenges.
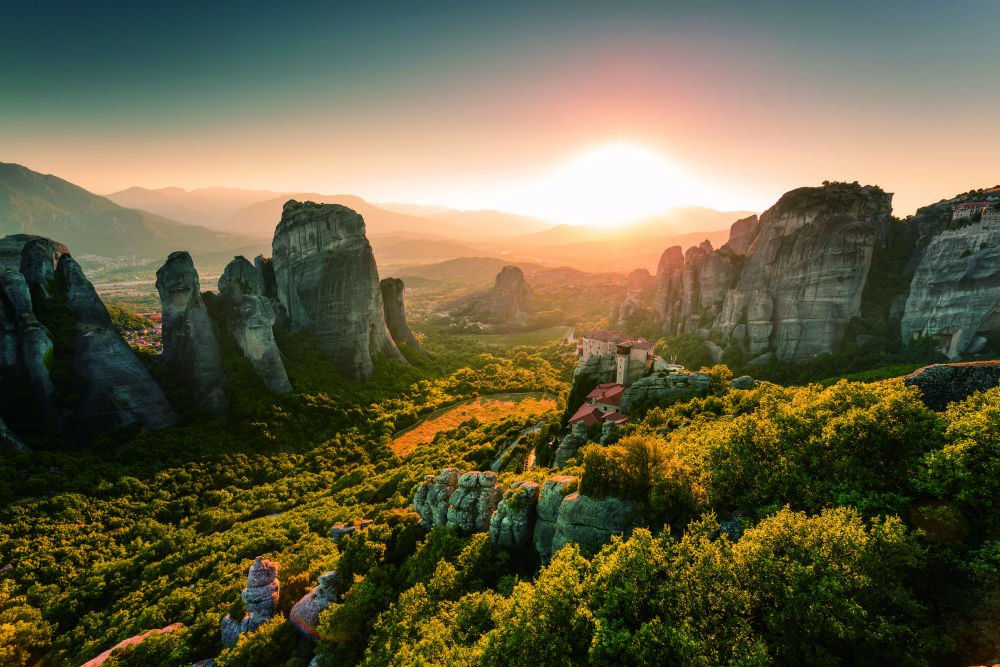 Image Credit: Karol Nienartowicz
But as soon as you add a reverse ND grad to the mix, the scene becomes much more defined and more evenly exposed.
Not only does the sky take on a whole new life, but there's also more definition and contrast in the foreground and in the rock formations in the mid-ground of the shot.
ND Filters Enable You to Slow Time Down
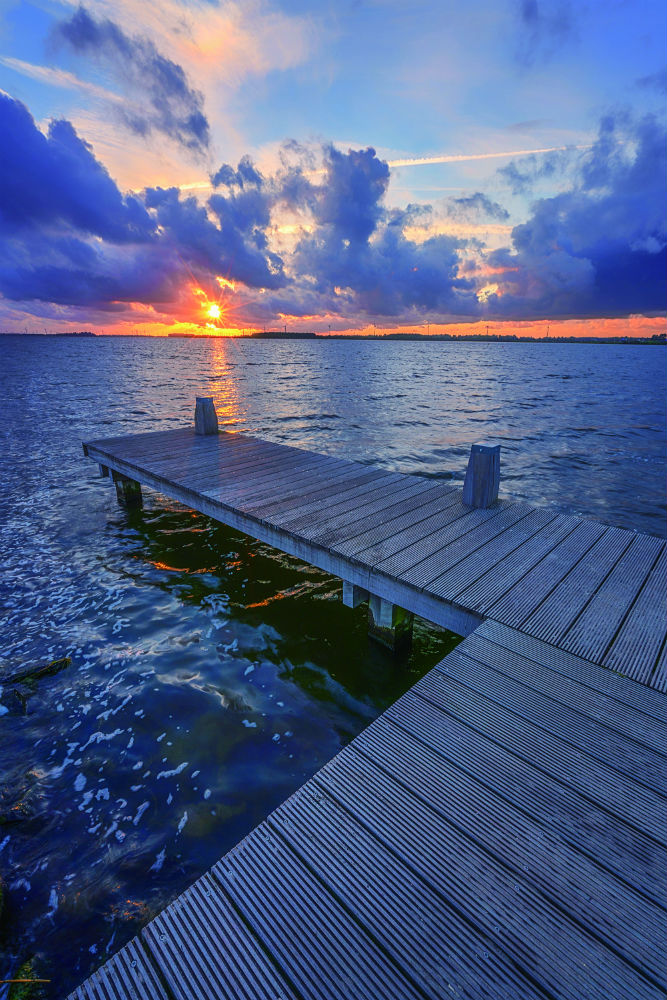 Image Credit: Albert Dros
A final must-have filter for your camera bag is a solid neutral density filter.
These filters block out light which allows you to extend the shutter speed you use to blur the motion of features like clouds and water.
In the image above, notice how the clouds and water are crisp and defined, just as you see them with your own eyes.
 Image Credit: Albert Dros
But by using a NiSi 15-stop ND filter, the clouds and water become gorgeously smooth.
That gives you the ability to create photos that have a dreamy, ethereal look that are much more unique than a typical landscape photo.
There are different strengths of ND filters as well.
The 15-stop ND filter used in the image above offers an extreme level of light blockage, while a 3-stop ND filter provides minimal light blockage.
No matter what kind of ND filter you use, NiSi' nano coated IR ND filters are the way to go. Trust me on that!
These filters have high-definition optical class, double-sided nanocoating technology, and IR technology that results in gorgeous, vibrant colors with low reflection and no vignetting.
As I noted in the introduction, I've spent a lot of time over the years with a lot of different filters.
And after testing NiSi filters for a couple of months, I can say unequivocally that these are the best filters I've ever used.
If you want to step up the quality of your work, use these filters to enhance your landscape photography technique.
Don't take my word for it, though. See NiSi filters in action in the video above.
We Recommend
These Before and After Photos Show Why You Need Lens Filters
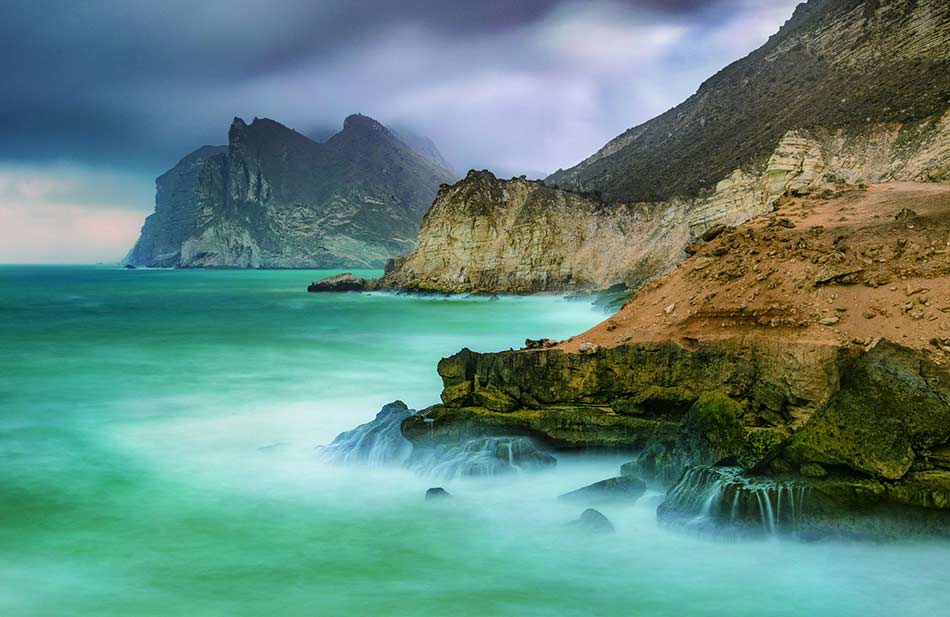 Image Credit: Beno Saradzic
There's some photography gear that you can get away with buying on the cheap.
A camera remote, for example, basically does one thing - trigger the shutter - so buying an $8 remote on Amazon isn't going to negatively impact the quality of your photos.
But other camera gear - like lens filters - is not the kind that you can buy on the cheap and expect good results.
To illustrate this point (and to demonstrate what common types of filters can do for an image), I've put together the following before and after photos.
If you've ever wondered why you need lens filters, look no further than these images for the answer to your question!
Editor's Note: The images used throughout this article were taken using NiSi filters and are used with permission.
The Impact of a Polarizing Filter
Image Credit: Sebastian Tontsch
A polarizing filter does many things for your photos.
Not only does it cut down on glare from non-metallic surfaces (like water), but it also reduces atmospheric haze so that the background of your landscape photos looks cleaner and crisper.
On top of that, a polarizing filter enhances the contrast of the sky, making the clouds whiter and pop more on a sky that's a deeper shade of blue.
In the "before" image shown above, you can see that glare off the water, in particular, is a problem.
Image Credit: Sebastian Tontsch
But with the addition of a NiSi polarizing filter, you can see a drastic difference in how much glare is in the shot.
In fact, virtually all of the glare is gone, revealing a deeper color of the water.
Additionally, note that in the foreground of the shot that you can actually see into the water and pick up on the textures of the rocks below.
Learn More:
How a Graduated Neutral Density Filter Can Totally Change Your Photos
Image Credit: 阿戈
Tell me if this has ever happened to you...
You come upon a gorgeous scene in the morning or evening and take a shot.
Much to your dismay, though, the sky is extremely bright and the landscape is dark. In other words, you have a useless photo unless you spend a good chunk of time trying to fix the exposure problems in post-processing.
In looking at the photo above, this problem is played out - the sky is far too bright and detail has been lost in the clouds.
What's more, the brightness of the sky is too much for the foreground of the shot, which is on the dark side.
Image Credit: 阿戈
But by using a NiSi Medium Nano IR Graduated ND Filter, you can see how the image because far more impressive.
The photographer was able to use the filter to rescue some of the lost details in the sky using the darkened part of the filter to tamp down the brightness above the horizon.
And since the bottom of a graduated neutral density filter has no tinting, it leaves the foreground as-is. The result is a much more pleasing shot with a more manageable dynamic range.
Learn More:
A Reverse Graduated Neutral Density Filter Can Help Your Sunrise and Sunset Shots
 Image credit: Steffen Hummel
Reverse ND grads are made especially for use at sunrise and sunset when the brightest area of the sky is just above the horizon.
That being the case, these filters have the darkest tinting in the middle, that way you can bring down that brightness for a more even exposure throughout the shot.
So, in the image above, you can see the problem area - the sky has virtually no detail whatsoever.
Image credit: Steffen Hummel
But once a NiSi Reverse Nano IR Graduated Neutral Density Filter is used, the sky comes to life.
The brightness along the horizon line is reduced, thus allowing for a more consistent exposure throughout the image.
What's more, there's tons of color and texture in the sky now, helping this "after" shot to be much more pleasing to the eye than the "before" shot.
Learn More:
Solid Neutral Density Filters Allow You to Create Dreamy Scenes
Image Credit: Karol Nienartowicz
Where a graduated neutral density filter or a reverse graduated neutral density filter have varying levels of tinting, a solid ND is the same darkness throughout the entire filter.
By blocking out light in a consistent fashion, that allows you to slow down the shutter speed during daytime shooting to blur the movement of features like clouds, water, or passing cars.
If you tried to slow the shutter during a daytime shoot without an ND filter in place, the image would be completely overexposed.
And even when it's cloudy out, as was the case in the image above, you still can't slow the shutter enough to blur movement all that much.
Image Credit: Karol Nienartowicz
However, by using a 10-Stop NiSi Neutral Density Filter, you can see how the photographer created an image that has a much more ethereal vibe to it.
Not only does the water on the lake become much smoother with a glasslike appearance, but the clouds also get a nice level of blur to add to the dreaminess of this photograph.
Learn More:
Wrapping It Up
"What filters do I need?" is a common question that photographers ask. And the answer isn't all that simple...
For many photographers, a polarizing filter is the primary need. For others, a reverse ND grad is a necessity.
Not all photographers need solid ND filters because they don't work in long exposures all that often.
So, the answer lies in the kind of photography you want to do.
But whatever filters you buy, be sure they are high-quality like NiSi filters. Cheap filters produce images that aren't as sharp, have diminished contrast, color casts, and other aberrations.
And since the goal with using camera lens filters is to improve your photos, cheap filters won't do you any good!
Learn More:
We Recommend
Top 10 Gifts for Photographers Under $1,000 - 2018 Edition
 Image Credit: eclipse_images via iStock
Need gift ideas for photographers in your life?
Look no further!
We're in a bit of a golden age of photography, with cameras, lenses, and photography accessories that enable us to take better photos than ever before.
And it's no secret that a lot of photography gear is expensive...
But you might be surprised at what you can get with a budget of $1,000 or less.
Here's some of the best gifts for photographers for 2018.
Lensfinder

Let’s face it - photography gear can be expensive. Really expensive.
That’s a problem year-round, but when you’re holiday shopping and have tons of gifts to buy, it’s even more difficult to justify getting your loved one the $1,000 lens that they really want.
Fortunately, Lensfinder can help in more ways than one.
On the one hand, you can find great deals on pre-owned camera lenses at Lensfinder.
That means that you can get a truly top-notch lens for the photographer in your life but do so without busting your budget. It’s a win-win!
On the other hand, if you have some old lenses that you don’t use anymore, you can list them for sale on Lensfinder. When the lens sells, you can use it for holiday spending money for the photographer in your life.
 Image Credit: xxmmxx via iStock
The best part? You can list your lenses for sale for free.
There’s only a transaction fee (just 3.99%) when the lens sells (with a maximum fee of $500). If your lens doesn’t sell, there’s no charge at all!
And for peace of mind, the Lensfinder platform has advanced fraud filtering for both buyers and sellers as well as mediation services in the event that there’s a problem.
Payments are made and received via PayPal, so you can rest easy knowing that the transaction is safe and secure.
In other words, Lensfinder is the ideal solution for your holiday shopping needs. Either use it to find a loved one a killer lens or use it to sell old gear to pad your pockets for holiday spending!
Holdfast Roamographer

With a $1,000 holiday budget, you can give the photographer on your list a gift that is impeccably designed, highly functional, and way under budget, too.
The Holdfast Roamographer bag is one of the finest leather camera bags on the market. It offers gorgeous aesthetics with an American Bison leather exterior that’s beautiful and rugged at the same time.
Not only will this leather stand up to the elements and age with grace, but it’s also weather resistant so you can be sure the contents of the bag remain safe and dry.

It’s a big bag and can carry lots of gear, but carrying it is a breeze with an adjustable shoulder strap with a shearling-lined shoulder pad for comfort.
Or, if you prefer, you can carry the Roamographer using the Holdfast MoneyMaker for even more functionality and comfort, as seen above.

The inside of the bag must be mentioned as well.
The removable camera insert means that no matter how much or how little gear your favorite photographer needs to carry, the Roamographer will help them keep it organized.
The padded insert has cubbies specifically for cameras, lenses, flashes, and other accessories, while there’s interior and exterior pockets for other goodies like a phone, car keys, and a tablet.
The insert is removable, too, so on weekends when they’re not on the job, the photographer on your list can use this as a weekend bag, too.
That makes the Holdfast Roamographer a beautiful, functional, and multi-purpose bag!
Learn more about the Holdfast Roamographer
GDU O2 Drone

What’s so great about the GDU O2 drone is that it’s designed to be used by pilots of all experience levels. For beginners, it’s easy to use and extremely portable. The obstacle avoidance system will assist in preventing crashes, and the vision positioning system allows the drone to maintain complete stability whether flying indoors or out. That makes this the ideal drone with which to learn about flying.
Beginners and more advanced pilots alike will appreciate the host of smart features that the O2 has. That includes gesture recognition for taking photos and videos, as well as burst shooting, time-lapse shooting, slow-motion shooting, and selfie mode. The three-axis stable video capture feature allows you to take gorgeous panning 4K videos as well.

There are multiple flight modes, too. Instruct the drone to fly in a circle around you, take off like a rocket, or follow you as you walk, hike, ride your bike, or otherwise move around. No matter which mode the O2 is flying in, it can use its return to home function to land in virtually the exact same spot from which it took off.
The O2 also comes with a smartphone app to make using this drone even easier. Connect to your drone to see what it sees on your smartphone screen. You can also fly the drone with your phone. Add in built-in editing and sharing functions, and you have the makings of a total drone experience, from flying to taking photos and videos to editing and sharing your work quickly and easily online.
Learn more about the GDU O2 Drone
Meural

If you’ve got someone on your holiday shopping list that has everything, the Meural Canvas is the ideal gift for them.
Looking a the same old painting or photograph over and over again is so 20th Century…
With a Meural Canvas, your loved one can view their favorite artwork from Meural’s curated library or upload their own images to enjoy. Whichever is the case, artwork is displayed instantly for them to enjoy.
Better still, they can control their Meural Canvas via the web, the Meural App, or with gesture control. It’s the easiest way to enjoy art!

The Meural Canvas brings artwork to life by using TrueArt Technology, a proprietary blend of hardware, firmware, and software that renders images in beautiful detail and texture. To say that the Meural Canvas makes artwork look lifelike is an understatement!
This canvas looks great in any setting, too, with different sizes, frame types, and frame colors to suit any decor. It can even detect if it’s hanging on a vertical or horizontal plane, and will automatically adjust its display accordingly. There’s also a built-in light sensor so it will automatically increase or decrease the brightness of its display to suit the surroundings.
On top of all that, Meural gives 60 percent of its earnings to artists on their platform, so not only do they have an awesome product, but they also give back. It’s a win-win!
Learn more about the Meural Canvas
Canon M50
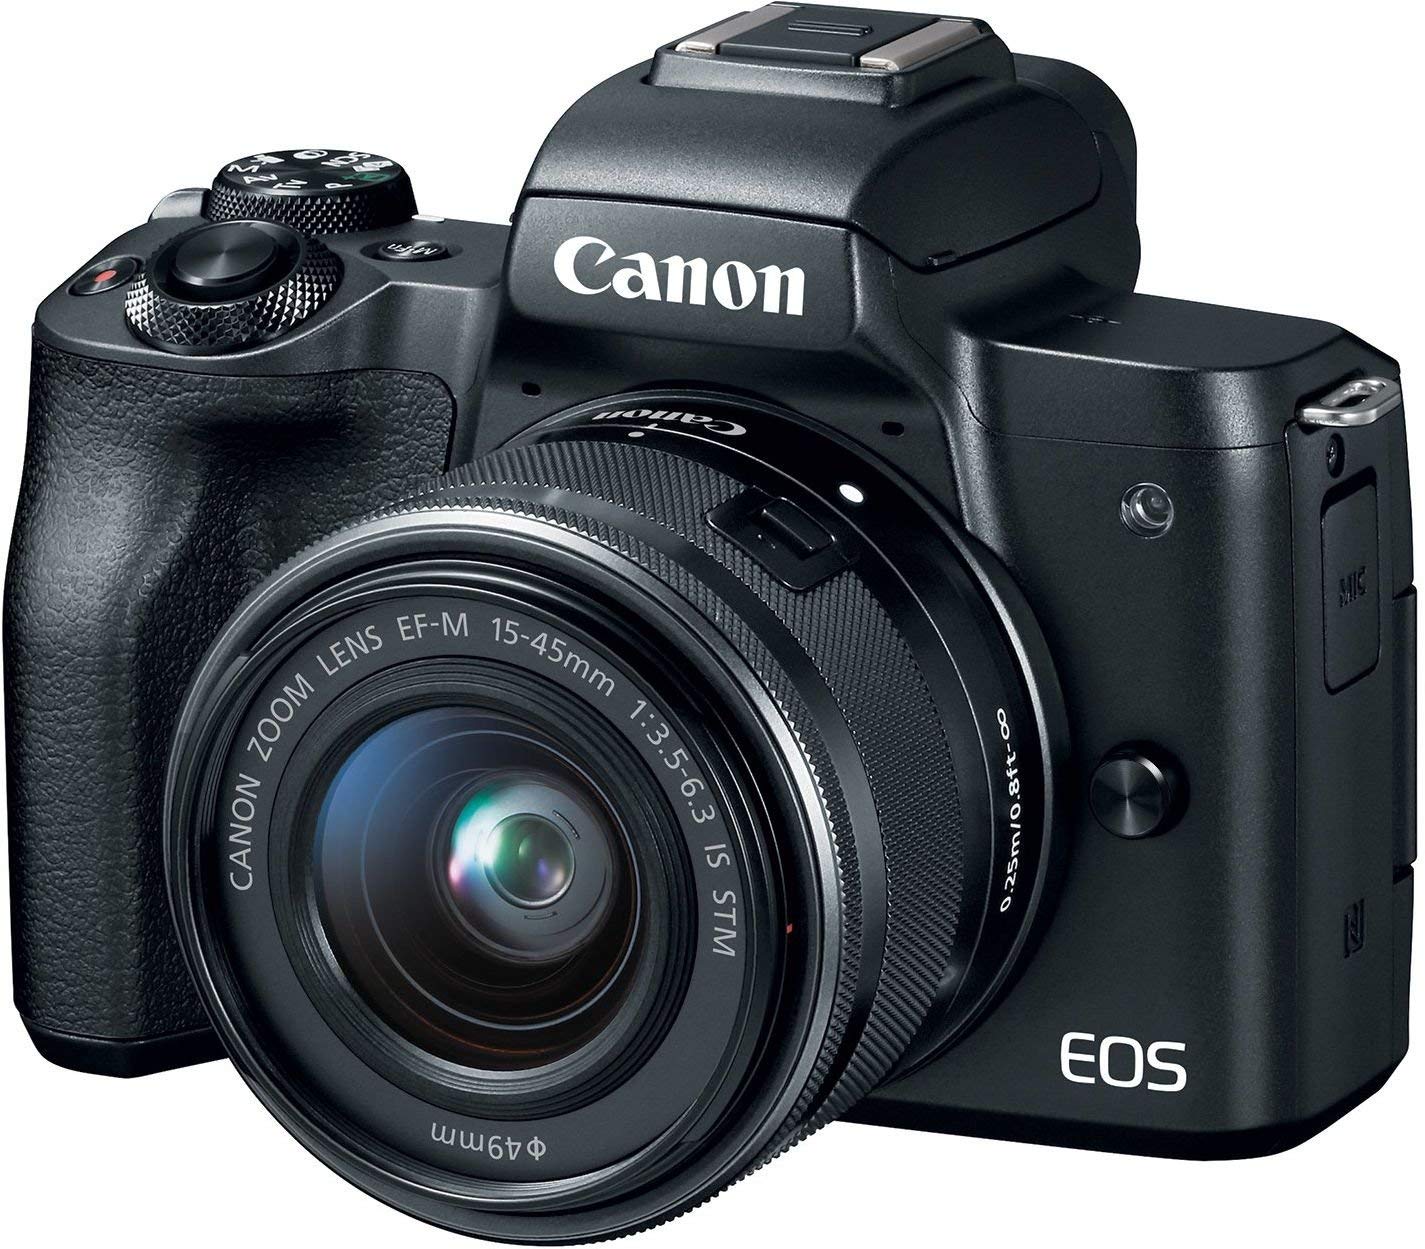
As mirrorless cameras continue to grow in popularity, it only makes sense that you consider giving your favorite photographer a mirrorless camera this year.
Whether a photographer is a beginner and needs a new camera, an enthusiast that wants a capable mirrorless camera for everyday shooting, or a professional that wants to add a small mirrorless camera to their kit to serve as a second or third shooting option, the Canon M50 fits the bill.
The M50 is outfitted with a 24-megapixel APS-C CMOS sensor that offers surprisingly good image quality at this price point.
This camera also offers Canon’s Dual Pixel CMOS technology, which, among other things, offers superior focus tracking performance and a wider area of focus coverage when photographing moving subjects.
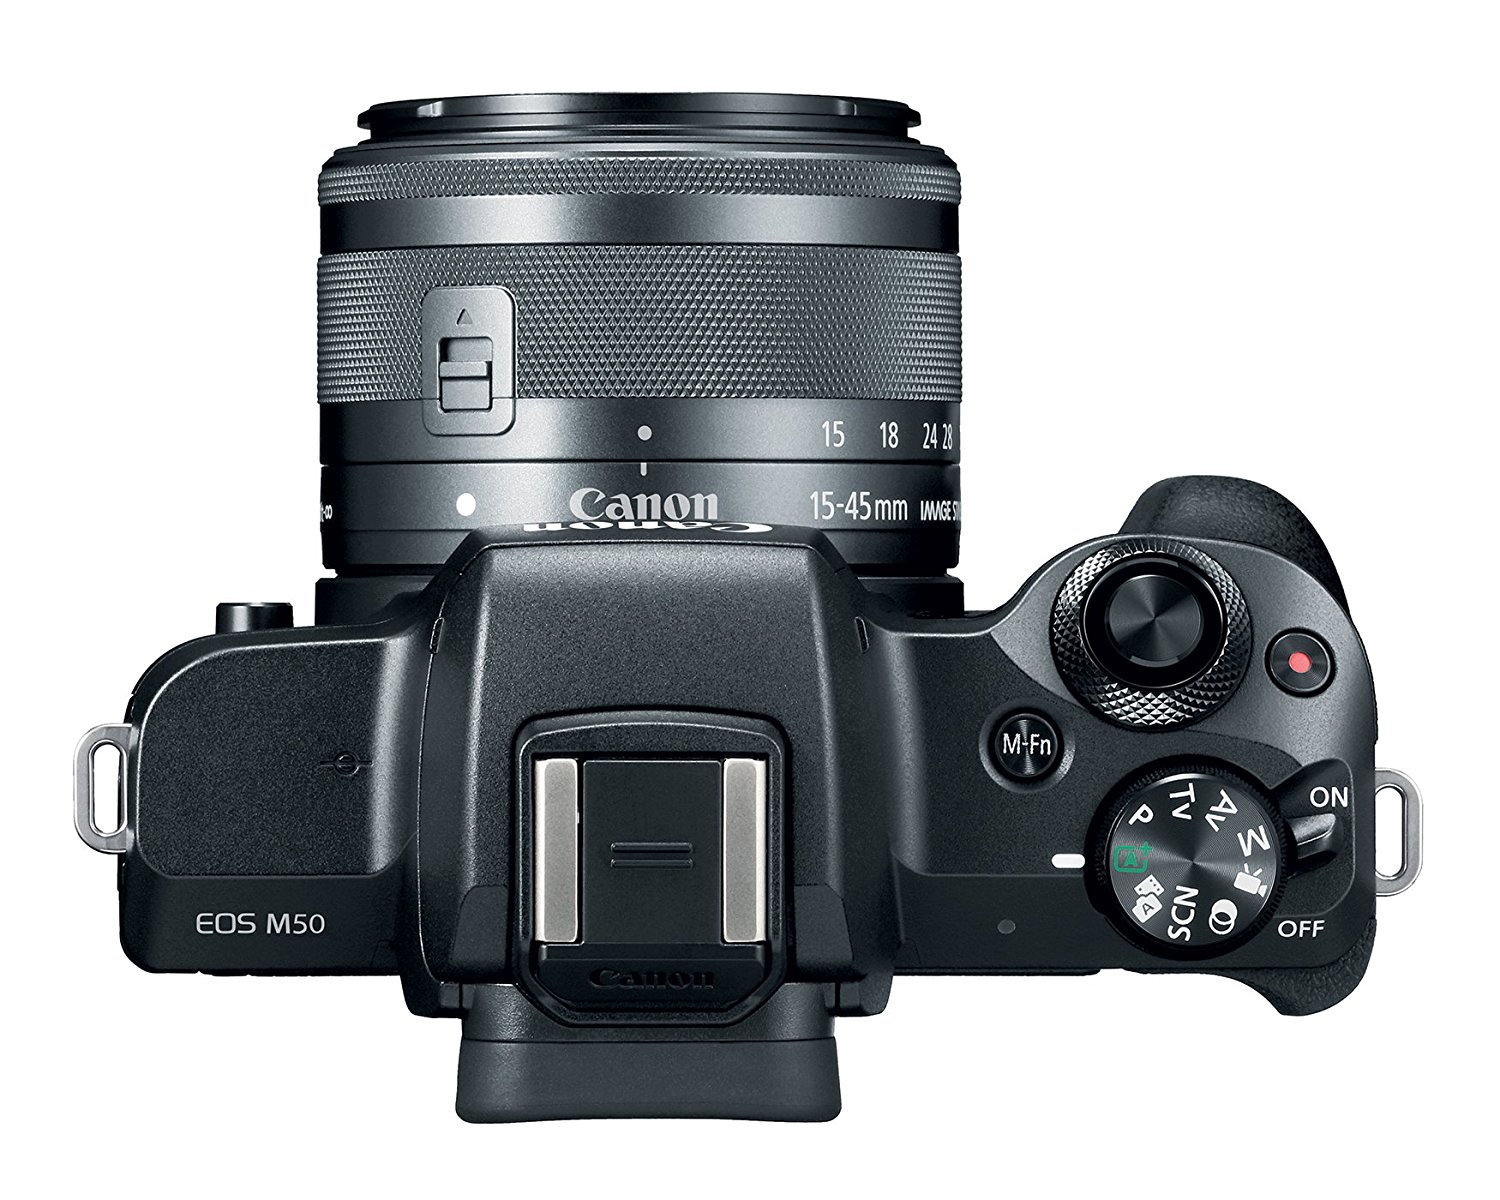
Additionally, the M50 features 99 autofocus points with most EF-M lenses while some EF-M lenses offer even more - 143 AF points, to be exact. Not only that, but the M50 sports excellent low-light autofocus capabilities, so even when shooting in less-than-ideal lighting, this camera’s autofocus system will perform well.
This camera has plenty of features that make it easy to use, too.
The DIGIC 8 processor makes quick work of processing image data while the 1.04-million dot LCD is fully articulating for easier viewing when shooting in live view. It’s also touch-enabled for quick work of navigating the camera’s menu system.
The 2.36-million dot OLED electronic viewfinder gives photographers a clear, crisp view of what they’re photographing while the built-in Wi-Fi, NFC, and Bluetooth make sharing photos and connecting to other devices a breeze, too.
For video enthusiasts, the M50 offers HD video shooting at 1080/60p and 720/120p. You can also shoot in 4K UHD at 24p.
And if the photographer on your list already has Canon lenses, they can be used with the M50 with an adaptor. That means they don’t have to invest in new glass if they don’t want to, and simply use their EF and EF-S lenses.
All of those bells, whistles, and features make this a highly capable entry-level or enthusiast camera. If you want to give the gift of a more capable camera, the Canon M50 is it!
Best of all, Paul’s Photo has this camera in stock and for a great price so you can give an awesome gift without busting your budget!
Learn more about the Canon EOS M50
NiSi 100mm System V5-Pro Advance Filter Kit

There's a gear mantra to live by, and that's that the lens you use is more important than the camera.
Good glass can make or break your photos, and if you spend the money on good glass, you definitely want good filters in front of it.
That's why NiSi's 100mm System Advance Filter Kit is such a great gift idea for the photographer on your holiday shopping list.
This kit is loaded for bear and includes:
- 1 x NiSi V5 PRO Holder includes 67mm 72mm 77mm Adaptor Rings+82mm Main Adapter+86mm Pro CPL
- 1 x NiSi Glass 100x150mm Multi-coated Soft 0.9 (3-stop) +1 x Reverse 0.9 (3-stop) Graduated ND Filter
- 1 x NiSi Glass 100x100mm Nano Multicoated Filter IR ND 0.9(3-Stop) Filter + 1 x IR ND 1.8 (6-Stop) Filter + 1 x IR ND 3.0 (10-Stop) Filter
- 1 x NiSi All in One Case(can hold V5 or V5 PRO, adaptor rings and 8pcs filters at most)
- 1 x V5 Lens Cap + 1 x Square Filter Cleaning Eraser + 1 x Cleaning Cloth+ 1 x Air blower

I can personally attest to this filter system as being one of the very best that I've ever owned.
The filters expand the creative abilities of your camera, allowing you to create gorgeous long exposures and manage difficult dynamic range while giving you the highest color and contrast fidelity with minimal aberrations.
Not only that, but the filters and filter holder are beautifully designed and made of high-quality, durable materials, so your favorite photographer can get the shots they want without worrying about whether their filters are going to make it back home.
Having lens filters is a must for landscape photographers. Get the landscape photographer on your shopping list the best filters money can buy!
Learn more about the Nisi 100mm System V5-Pro Advance Filter Kit
Synology DiskStation DS1817+

Photographers can never have enough storage space for all their images and other files, which is why we're including the Synology DiskStation on our list.
This expandable storage device can store up to 60TB of data. Start small with 12TB and expand as your needs grow.
The unit has upgradable memory, a PCIe slot to install a 10GbE network card for lightning-fast data transmission, and remote access, so your favorite photographer can access their files from any device anywhere in the world.

Perhaps even better, this rig allows for backing up all computers, servers, and other devices, that way all data is backed up and safe from ransomware, viruses, hacking, and human errors.
The DiskStation can be backed up to a cloud service or offsite location as well, giving you yet another layer of data protection.
While this might be overkill for some photographers, for professionals that have tens of thousands of images and other files, the Synology DiskStation can be a God-send.
Learn more about the Synology DiskStation DS1817+
Pre-Owned Sony A6500 From MPB

I've been a Nikon shooter since the beginning, but a few years ago I picked up a Sony A6300 and have loved every minute of using it.
It's brother, the Sony A6500, is a fantastic camera as well, and can be found for under $1,000 if you buy pre-owned.
This mirrorless APS-C camera has a 24.2-megapixel Exmor CMOS sensor, a BIONZ X image processor, and an ISO range that extends to 51200.
It can shoot 4K video, has a continuous shooting speed of 11fps, and has 5-axis SteadyShot image stabilization, which helps minimize camera shake when working at slower shutter speeds.

Something I love about my Sony is how small and lightweight it is, and both of those factors apply in this situation as well.
This camera weighs just 16 ounces (without a lens attached), so you can easily take it for a day of shooting or on a long trip and never be in a situation in which you feel like your camera is drawing tons of attention.
What will draw attention, though, is the fact that this camera has an incredible 425-point phase-detection autofocus system that has 169 area contrast detection autofocus points.
What that means is that this camera performs unbelievably well when it comes to rapid and precise focusing.
If you have a photographer on your list that's been thinking about upgrading their camera, this is an ideal choice!
Learn more about the Sony A6500
Microsoft Surface Pro 4

I have a number of Microsoft Surface products, and as an Apple guy, I was skeptical when I got my first Surface.
But I quickly found that my reservations were misplaced because the Surface lineup is fantastic from top to bottom.
I particularly like the Surface Pro 4 because I don't always need a full-blown laptop to get done what needs to get done.
Yet, the Surface pro could easily replace a laptop by adding the optional keyboard and relying on the devices excellent suite of hardware.
This particular model has a 128GB hard drive, 4GB of ram, and an Intel Core i5 processor.
While those specs aren't going to be enough to be a primary computer for a photographer, for daily tasks like posting on social media, doing billing, emailing clients, and so forth, this little Surface will be all you need.
I love the PixelSense touchscreen display, especially when I'm slumming it on the couch and catching up on work as I watch TV.
And when I need to be a little more precise than with my big, clumsy fingers, the Surface Pen is ideal for getting the job done.
If you want to give the gift of technology this holiday season, try giving a Surface Pro 4! They're even on sale at the moment, so you can snag one for well under $1,000.
Learn more about the Microsoft Surface Pro 4
Surui SR-3204

Sirui has been making excellent tripods for years now, but their latest SR-series tripods are likely the best they've ever made.
The Sirui SR-3204 is a four-section tripod that extends from just 4.7-inches above the ground to 59-inches.
And all that height compacts into just over 21-inches, that way you have the height you need without having a large, bulky tripod to carry around.

Better still, the SR-3204 can hold up to 55-pounds of gear, a three-position leg angle mechanism for quick deployment of the tripod, and easy-to-use twist leg locks that also facilitate quick setup.
This tripod also has an integrated bubble level, a flat top plate with 3/8-inch mounting screw, and an integrated 1/4-inch socket on the spider for adding accessories.
In other words, this is a capable, functional, and durable tripod that will last the photographer on your list for years and years to come!
Learn more about the Sirui SR-3204 tripod
Formatt-Hitech 100mm Firecrest Ultra Ken Kaminesky Signature Edition Master Filter Kit

Yet another top gift idea for photographers is the Formatt-Hitech 100mm Firecrest Ultra Ken Kaminesky Signature Edition Master Filter Kit.
This kit comes with everything a photographer needs to capture gorgeous and breathtaking landscapes, cityscape, and long exposures, just to name a few.
Included in this bundle are several ND Filters (ND 0.9, 1.8, and 3.0), a graduated ND 0.6, a graduated ND 0.9, and an UltraSlim circular polarizer.
On top of that, the kit includes a 100mm filter holder and adapter and step-up rings, as well as filter pouches, a holder case, and a Ken kaminesky booklet.

What sets these filters apart from the rest is the lap and polish technique that makes them perfectly flat with consistent filtering power to enhance images.
What's more, the Firecrest Ultra line of filters have incredible clarity as well as lower reflectivity than other filters.
This makes them a prime choice for photographers that wish to enhance their photos!
Bonus Gift Idea: Formatt-Hitech 100mm Firecrest Ultra Elia Locardi Signature Edition Travel Filter Kit

If the photographer on your list is more of a travel photographer, then the Elia Locardi Signature Edition Travel Filter Kit by Formatt-Hitech is a great choice.
This kit includes a variety of filters and related gear that will make the task of travel photography easier and more productive.
That includes a Firecrest Ultra ND 1.2 filter, a Firecrest Ultra ND 3.0 filter, a Firecrest Ultra Graduated ND 0.9 filter, a Firecrest 82mm UltraSlim Circular Polarizing Filter, and a 100mm filter holder as well.
Additionally, the kit comes with adapter rings, step-up rings, filter pouches, a holder case, and a booklet from Elia Locardi to provide your favorite photographer with a few tips and inspiration for their photos.

Like the Ken Kaminesky Kit describes earlier, this kit's filters are manufactured to the highest of specifications so photographers get the best possible results.
With unmatched clarity and sharpness, these filters won't get in the way of getting the shot, but will instead enhance photos with gorgeous detail.
Between the options of creating long exposures with the included ND filter, creating better-exposed images with the included graduated ND filter, and controlling glare, haze, and contrast with the included polarizing filter, this kit gives any photographer all the options they need to improve their photos.
Promaster Unplugged TTL400
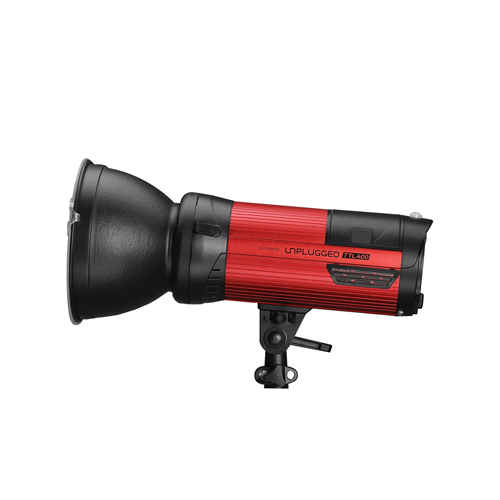
Shooting serious outdoor portraits requires that photographers have artificial lighting.
And while learning how to utilize artificial lighting can be tough, finding excellent lighting to give to a photographer this holiday is a breeze!
The Promaster Unplugged TTL400 is the ideal lighting solution for breathtaking outdoor portraits for a variety of reasons, not the least of which it's battery-operated, so your favorite photographer won't have to be bogged down by the availability of power.

This high-powered strobe light uses a camera's TTL system to create beautiful light that can be finely-tuned by photographers for a specific look.
This light offers TTL control with exposure compensation, multi-flash mode, high-speed sync, and manual mode, too.
There's 15 channels with 99 IDs, A, B, and C groups with ratio control, an audible alarm function, and FEB flash exposure bracketing mode as well.
In other words, the photographer on your list will have all the features and options they need to get the highest-quality outdoor portraits possible!
Just be sure to include the right trigger that correlates with the camera system being used, like Canon or Nikon, to complete this awesome gift idea!
Learn more about the Promaster Unplugged TTL400
We Recommend
Top 10 Gifts for Photographers Under $250 - 2019 Edition

photo byBaramyou0708 via iStock
When it comes to buying holiday gifts for people, I always try to start early. Like way early, which is why I’m already thinking about gift ideas even though it’s still August as I’m writing this.
Part of the reason why I like to start early is because often you can find deals way ahead of time - like the upcoming Labor Day holiday.
Besides, no one wants to be nervously watching the mail in the days leading up to Christmas, hoping that the last-minute gift you got for a loved one arrives on time.
With all that said, here’s some of my favorite gift ideas for photographers that’ll set you back less than $250.
Gifts for Photographers Under $250: CanvasHQ Print

If you’re like me, sometimes finding the perfect gift for certain loved ones is a long, drawn-out process that causes tons of stress, and often you still don’t get something that totally blows them away.
I think a lot of photographers fall into this category. We have specific likes, and many of us already have most of what we want or need gear-wise, and what we don’t have is usually too expensive to put on a Christmas wish-list anyway.
But for all those hard-to-shop-for photographers on your 2019 holiday shopping list, I have the perfect solution - a large-format canvas print.

Think about it…
A canvas print is the gift that keeps on giving.
Not only can you immortalize one of your favorite images from your favorite photographer, but you also give them a means to showcase their work in a format that’s drop-dead gorgeous.
I have tons of canvases in my home, the vast majority of which are from CanvasHQ.

Now, I know what you’re thinking - canvas is old school.
Sure, maybe it is, but I’m telling you that these canvas prints from CanvasHQ are mind-bogglingly beautiful. In fact, they go head-to-head with any metal or acrylic print I have in my home.
The attention to detail is just amazing, and the materials they use are top-of-the-line. We’re talking archival-grade canvas, commercial-grade inks that are water and UV resistant, and kiln-dried pine frames to keep everything straight and true.
I love the personality that the canvas texture gives my images. That’s true whether it’s a portrait of my son or a landscape photo.

I’d be remiss if I didn’t mention the customer service you get with CanvasHQ.
These guys are committed to getting it right, so if something doesn’t go as planned, you won’t be hung out to dry.
If you have questions, they’ll answer them. If you have a problem, they’ll fix it. If you need assistance with uploading your photo or even picking the best finishes for your canvas, they’ve got your back.
In the video above, I explain why I highly recommend a CanvasHQ canvas print as the ideal gift for the photographer on your holiday shopping list.
Start shopping for your favorite photographer today on CanvasHQ!
Gifts for Photographers Under $250: Marumi 100x150mm Magnetic Graduated ND Filter
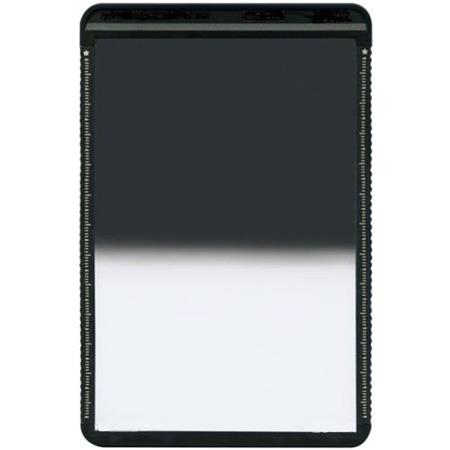
The benefit a graduated ND filter gives your favorite photographer is that it allows them to control the dynamic range in a scene.
That is, with the darkened area on top of the filter, it tones down the brightness of the sky while leaving the foreground untouched, the result of which is a better-exposed image without any blown-out highlights or deep shadows.
The hard edge on the filter above is perfect for landscapes in which there is a definite horizon, like taking a photo looking out at the ocean.

But you can also give a soft-edge filter, which has a much more gradual transition from dark to light. This is a better option for landscapes in which the horizon line isn’t very clear.
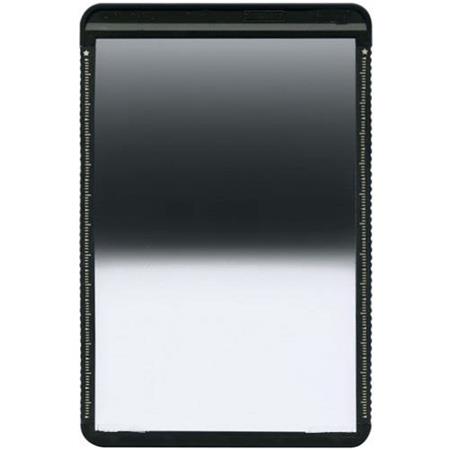
There’s even a reverse graduated ND, which is darkest in the middle - an ideal option for taking breathtaking sunrise or sunset photos.
What makes these Marumi 100x150MM Graduated ND filters so special is that they attach to the Marumi M100 filter holder with magnets.
This quick and easy on and off helps streamline the process of using these filters in the field, that way the photographer on your holiday shopping list spends more time actually taking photos and less time messing with their gear.
These filters are made with high-definition Schott B270 glass and have a double-sided coating to ensure minimal reflections. These filters also have anti-static, anti-scratch, water repellant, and oil repellent features.
Available in 2-stop, 3-stop, and 4-stop versions, as well as hard and soft-edge versions, you can give the gift of improved photos this year by giving a Marumi Magnetic Graduated ND!
Learn more about Marumi Magnetic Graduated ND Filters
Gifts for Photographers Under $250: Holdfast Camera Swagg Camera Harness
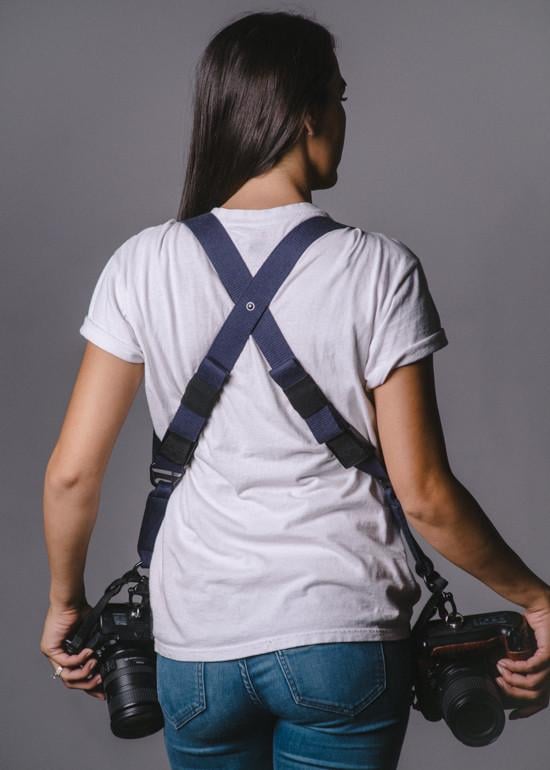
I’ve been a Holdfast customer for years and years, and I have one of their impeccable MoneyMaker leather dual camera straps.
But not everyone wants a leather camera strap, and for those folks, the Camera Swagg is the ideal solution.
Offering the same functionality as the leather version, the Camera Swagg dual camera harness enables photographers to carry two cameras right at their fingertips.
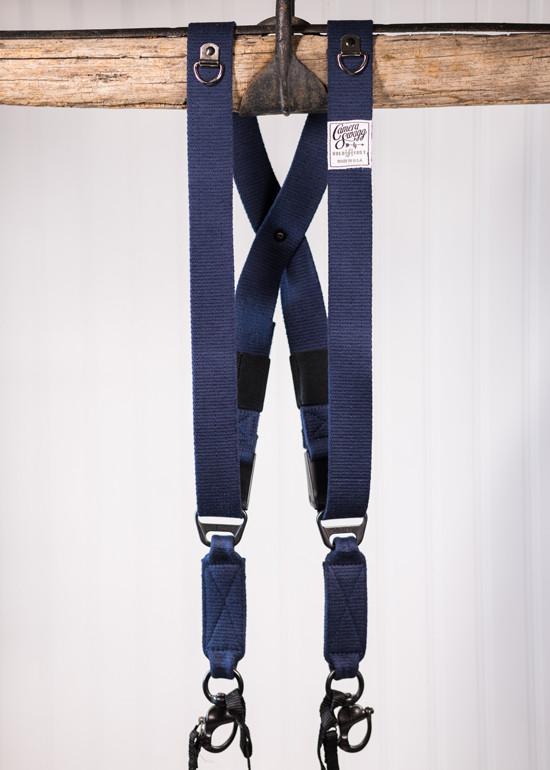
Made of 100 percent high-grade cotton canvas, this harness is both durable and comfortable. The wide straps sit nicely on your shoulder without digging in, and the harness feels quite light as well.
You’ll find the same reliable stainless steel hardware on the Camera Swagg as you do on leather MoneyMakers. That includes anchored D-rings and safety straps that connect to the camera’s side lug mount, which together ensure you have a rock-solid system for carrying your gear safely.
Add in supreme functionality and a price well below the $250 mark, and you have the makings of the ideal gift for photographers this holiday season!
Learn more about the Camera Swagg Camera Harness
Gifts for Photographers Under $250: LitraTorch LitraPro
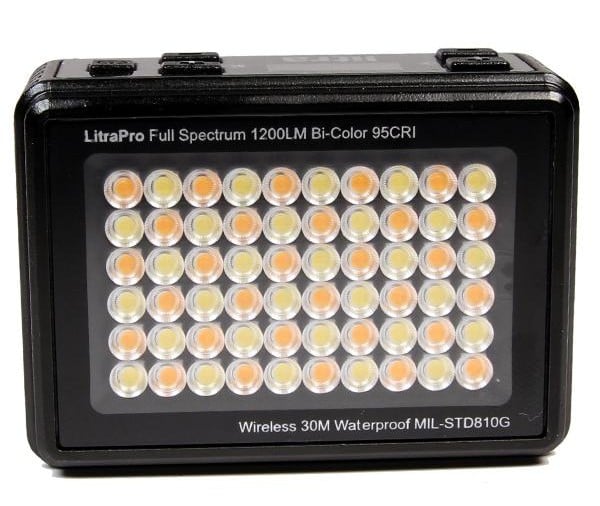
Great photos need great light, and fortunately you don’t have to spend an arm and a leg to give the photographer on your list an excellent light source for their photo and video work.
Sure, the LitraTorch LitraPro is a tiny light that weighs just 6 ounces and is 2.75 x 2 x 1.2 inches in size, but that doesn’t mean it can’t put out a great deal of light.
In fact, this little guy has 60 ultra-bright LEDs that put out up to 1200 lumens of light. That’s a lot!
And it isn’t just the sheer brightness of the light it produces that impresses.
Instead, this light puts out crisp, clear, flicker-free light that any photographer would appreciate. Users can also adjust the color temperature from 3000K to 6000K to customize the light output to the specific needs of each photoshoot.
Add in a 70-degree beam angle, a maximum of 10 hours of operating time, and MIL-SPEC 810 construction that makes it virtually indestructible, and you have a photography gift that will keep on giving for years and years!
Learn more about the LitraTorch LitraPro
Gifts for Photographers Under $250: Luminar 3, Luminar 4, and Aurora HDR Bundle
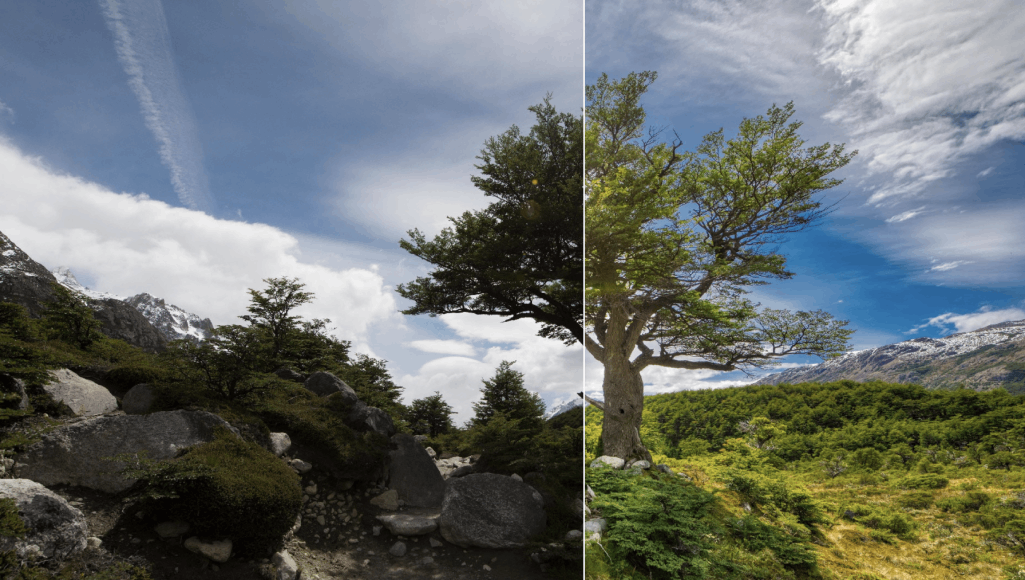
If you’re looking for a gift that will really impress the photographer in your life, look no further than this bundle of awesomeness from the folks at Skylum.
Not only can you give the gift of Luminar 3 - an incredible, multi-award-winning editor that makes processing images a veritable breeze - but you can also give the gift of the upcoming Luminar 4, which is poised to take photo editing to another level later this year. And on top of that, Skylum throws in their award-winning Aurora HDR software for making quick, beautiful, precise edits to HDR images.
Let’s unpack all that in a little more detail…
Luminar 3 offers cutting-edge tools that speed up the process of editing photos whether the photographer on your shopping list uses a Mac or a PC.
You get tools like the AI Sky Enhancer, which uses artificial intelligence to detect the sky in the photo and automatically enhance it based on its colors and texture.
What’s more, the Sky Enhancer does this whether the area of sky is bright, dark, big, or small, and the adjustments made can be easily manipulated by a single slider.
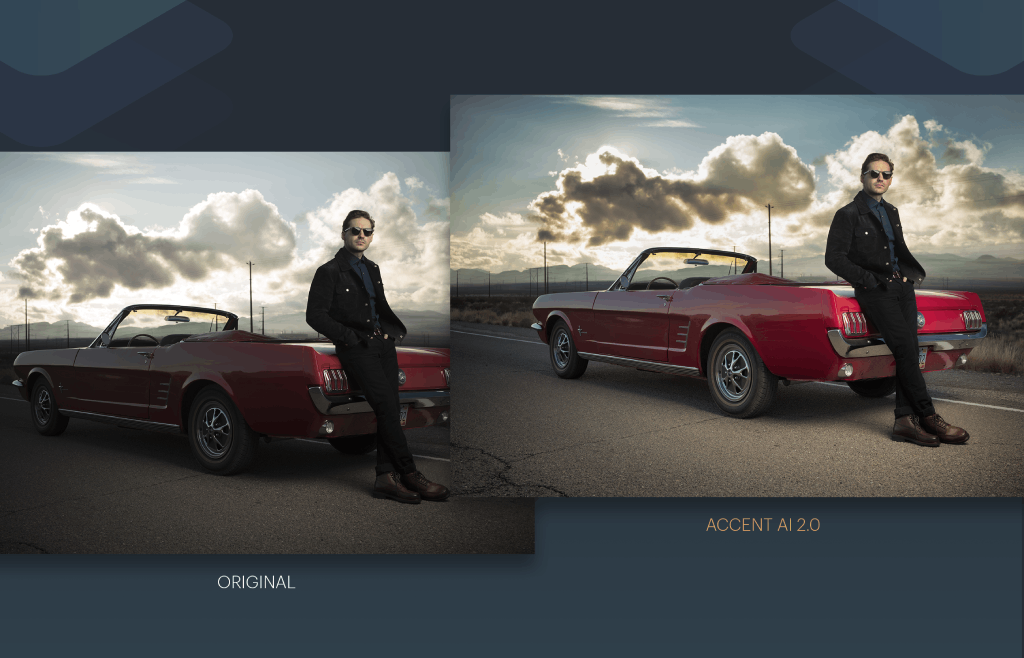
Luminar 3 also sports the supercharged Accent AI 2.0 filter, which makes about a dozen adjustments to the image instantly.
Again, this filter is manipulated by a single slider, so changing things like the exposure, color, tone, and other basic elements is done quickly and easily.
As you can see above, the Accent AI 2.0 filter can automatically detect people in the shot and apply its changes in a way that renders beautifully realistic results.
Add in dozens of Looks to give your photos artistic flair, many different filters that can do everything from sharpen the image to add sun rays, and an easy-to-use Library where you can view, sort, and rate your photos, and you begin to see why Luminar 3 is so widely regarded.
But if you think those tools sound amazing, Luminar 4 kicks it up a notch with some exciting new features that will expand post-processing abilities even further.
In the video above, you can see two new tools in action - the AI Skin Enhancer and the Portrait Enhancer.
When you think about what makes editing portraits such a long, drawn out process, it’s all the small manipulations you have to make, like removing blemishes and dark circles, enhancing eyebrows and lips, and whitening teeth.
But in Luminar 4, those detail-oriented processes are handled by AI, and you can fine-tune the results with individual sliders for incredible results.
Luminar 4 also introduces AI Structure and AI Sky Replacement.
As shown above, AI Structure boosts details only where needed using content-aware tools, that way people in the photos aren’t overprocessed but objects like clouds and buildings are beautifully detailed. See what I mean in the video above.
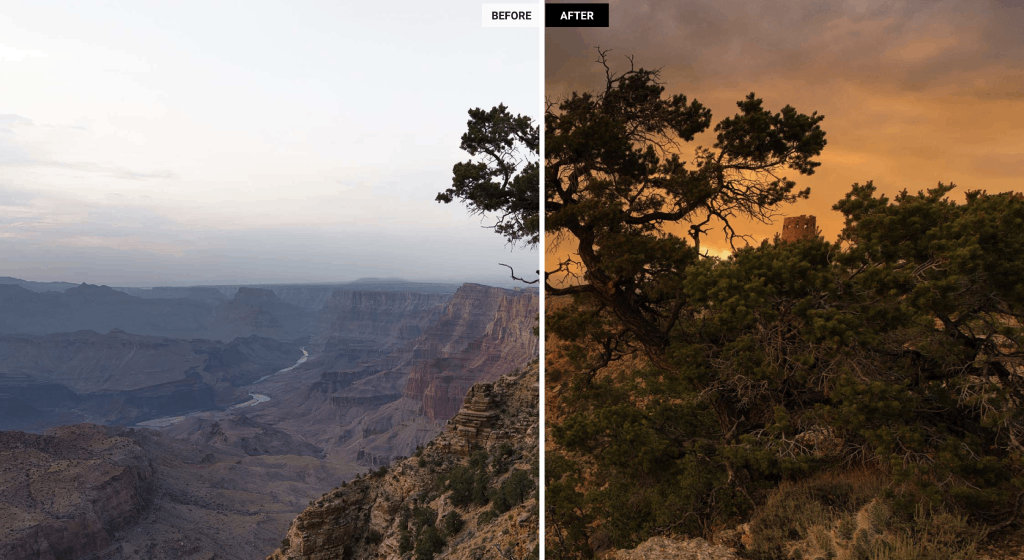
Likewise, AI Sky Replacement gives photographers the power to change the sky in one click. So, if you shot a beautiful landscape, but the sky isn’t all that great, you can easily pick a new sky to give the shot the look and mood you want. Not only that, but Luminar 4 will relight the entire photo to the original image and the new sky match.
The AI Sky Replacement tool also uses intelligent selection algorithms to remove artifacts, hard edges, and halos. And with the ability to fine-tune foreground contrast and brightness, you can create epic landscape shots in short order.
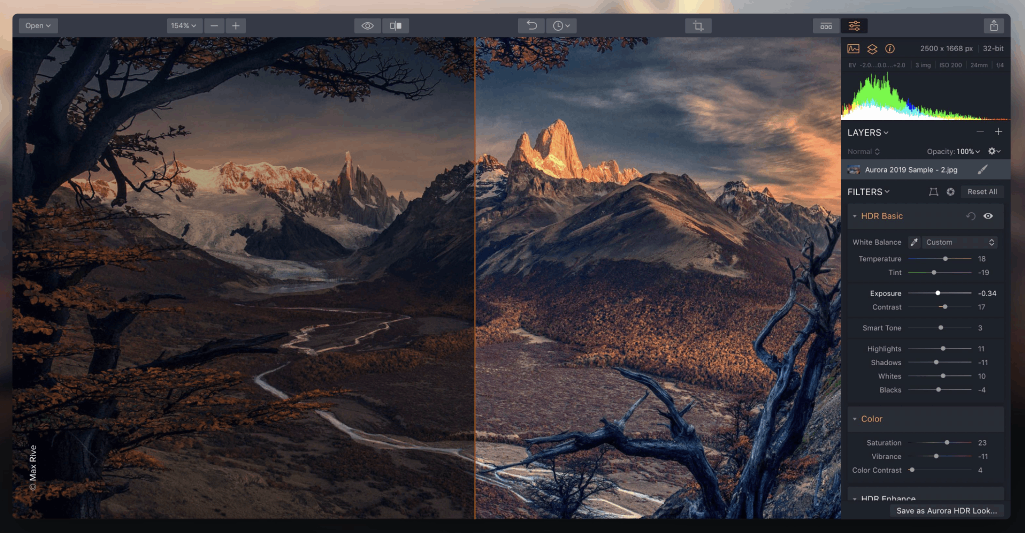
As if all that isn’t enough, this bundle also includes Aurora HDR.
There’s a reason why the top HDR photographers in the world use Aurora HDR…
Its AI-powered Quantum HDR Engine gives you the highest-quality bracket merging with no artifacts, no halos, and no chromatic aberration.
With more than 20 HDR tools, including color toning, dodge and burn, creative LUT mapping, and more, photographers can create flawless HDR images in seconds.
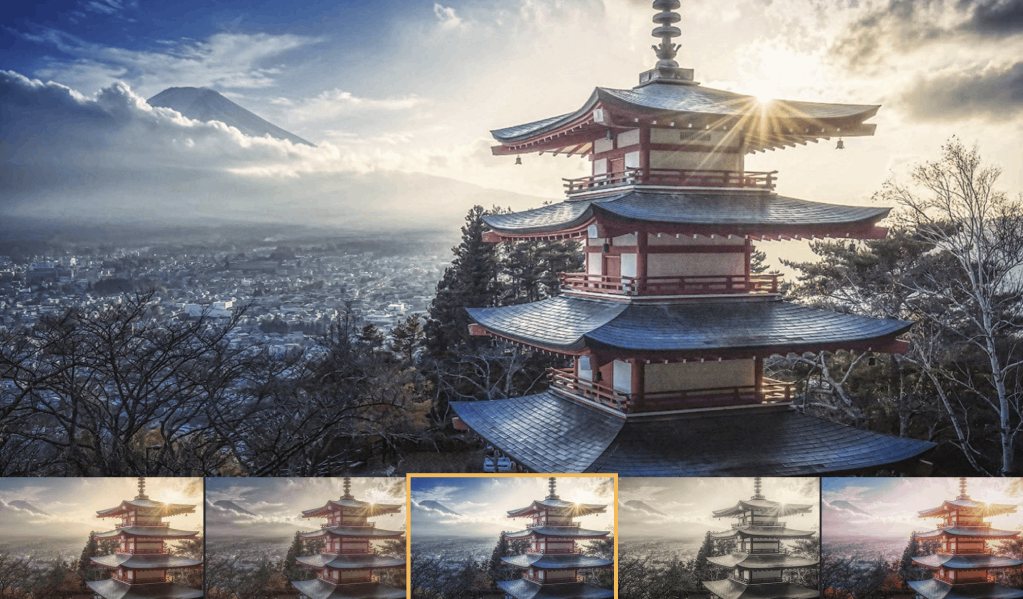
Like Luminar 3 and 4, Aurora HDR has a vast selection of Looks that with one click will take your photos from blah to beautiful. With more than 80 professionally-crafted Looks, you have the power to create top-notch images in a matter of seconds.
Aurora HDR also works magic with single photos, enabling you to bring out beautiful details and dynamic range, even when you don’t have bracketed exposures to work with.
Truly, this is the ultimate holiday gift for any photographer - the power to make fast, beautiful, and precise edits whether the images are portraits, landscapes, architecture or something in between!
See all the possibilities your favorite photographer can explore by visiting the Skylum website. Additionally, you can order the Luminar 3, Luminar 4, and Aurora HDR Bundle, or if Luminar 3 and Luminar 4 is more your style, you can order that bundle instead.
Gifts for Photographers Under $250: PilotFly AtomCube RX1 RGBCW LED Video Light
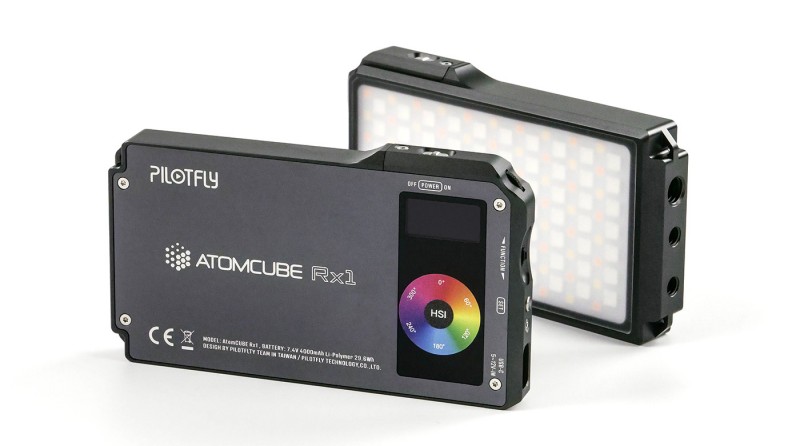
Having a high-quality light for photography and videography is a must, and the PilotFly AtomCube certainly delivers on multiple fronts.
For starters, this light is small enough to fit in your pocket, yet offers 1800 lux luminance at 0.5 meters. It’s completely dimmable from 0-100 percent, offers 360-degree full color, and has an adjustable color temperature from 2500-8500K so you can tune the light to your specific needs.
Add in cold white and warm white light, and you have the makings of a light that offers you precise colors and high CRI as well.
You can even mount multiple lights together using a Magic Cube to expand the effect. Nice!
The AtomCube comes with Bluetooth mesh technology that allows you to control up to 255 lights all at once. Whether you’re a portrait photographer, a videographer, or something in between, that kind of flexibility is an enormous asset to have.
Speaking of assets, the color tone and brightness between units is highly consistent, especially when mounting multiple units together. Because the lights are calibrated, you don’t have to worry about inconsistent lighting when you use more than one light at a time.
No matter if you’re using one AtomCube light or dozens, you can control them with the accompanying app. It’s an incredibly convenient way to control your lighting right at your fingertips, especially when you’re multitasking.
The intuitive interface of the app makes it easy to make precise adjustments. Likewise, you can connect lights, create groups of lights, and control brightness and color temperature, all with a few taps of your phone’s screen.
This light is durable, functional, has available accessories to advance the experience even further, and offers a variety of features that make lighting for photos and videos a breeze. It’s a key light in your pocket! That makes it a great gift for the photographer on your holiday shopping list!
Learn more about the PilotFly AtomCube RX1 RGBCW LED Video Light
Gifts for Photographers Under $250: HEX Ranger Clamshell DSLR Backpack
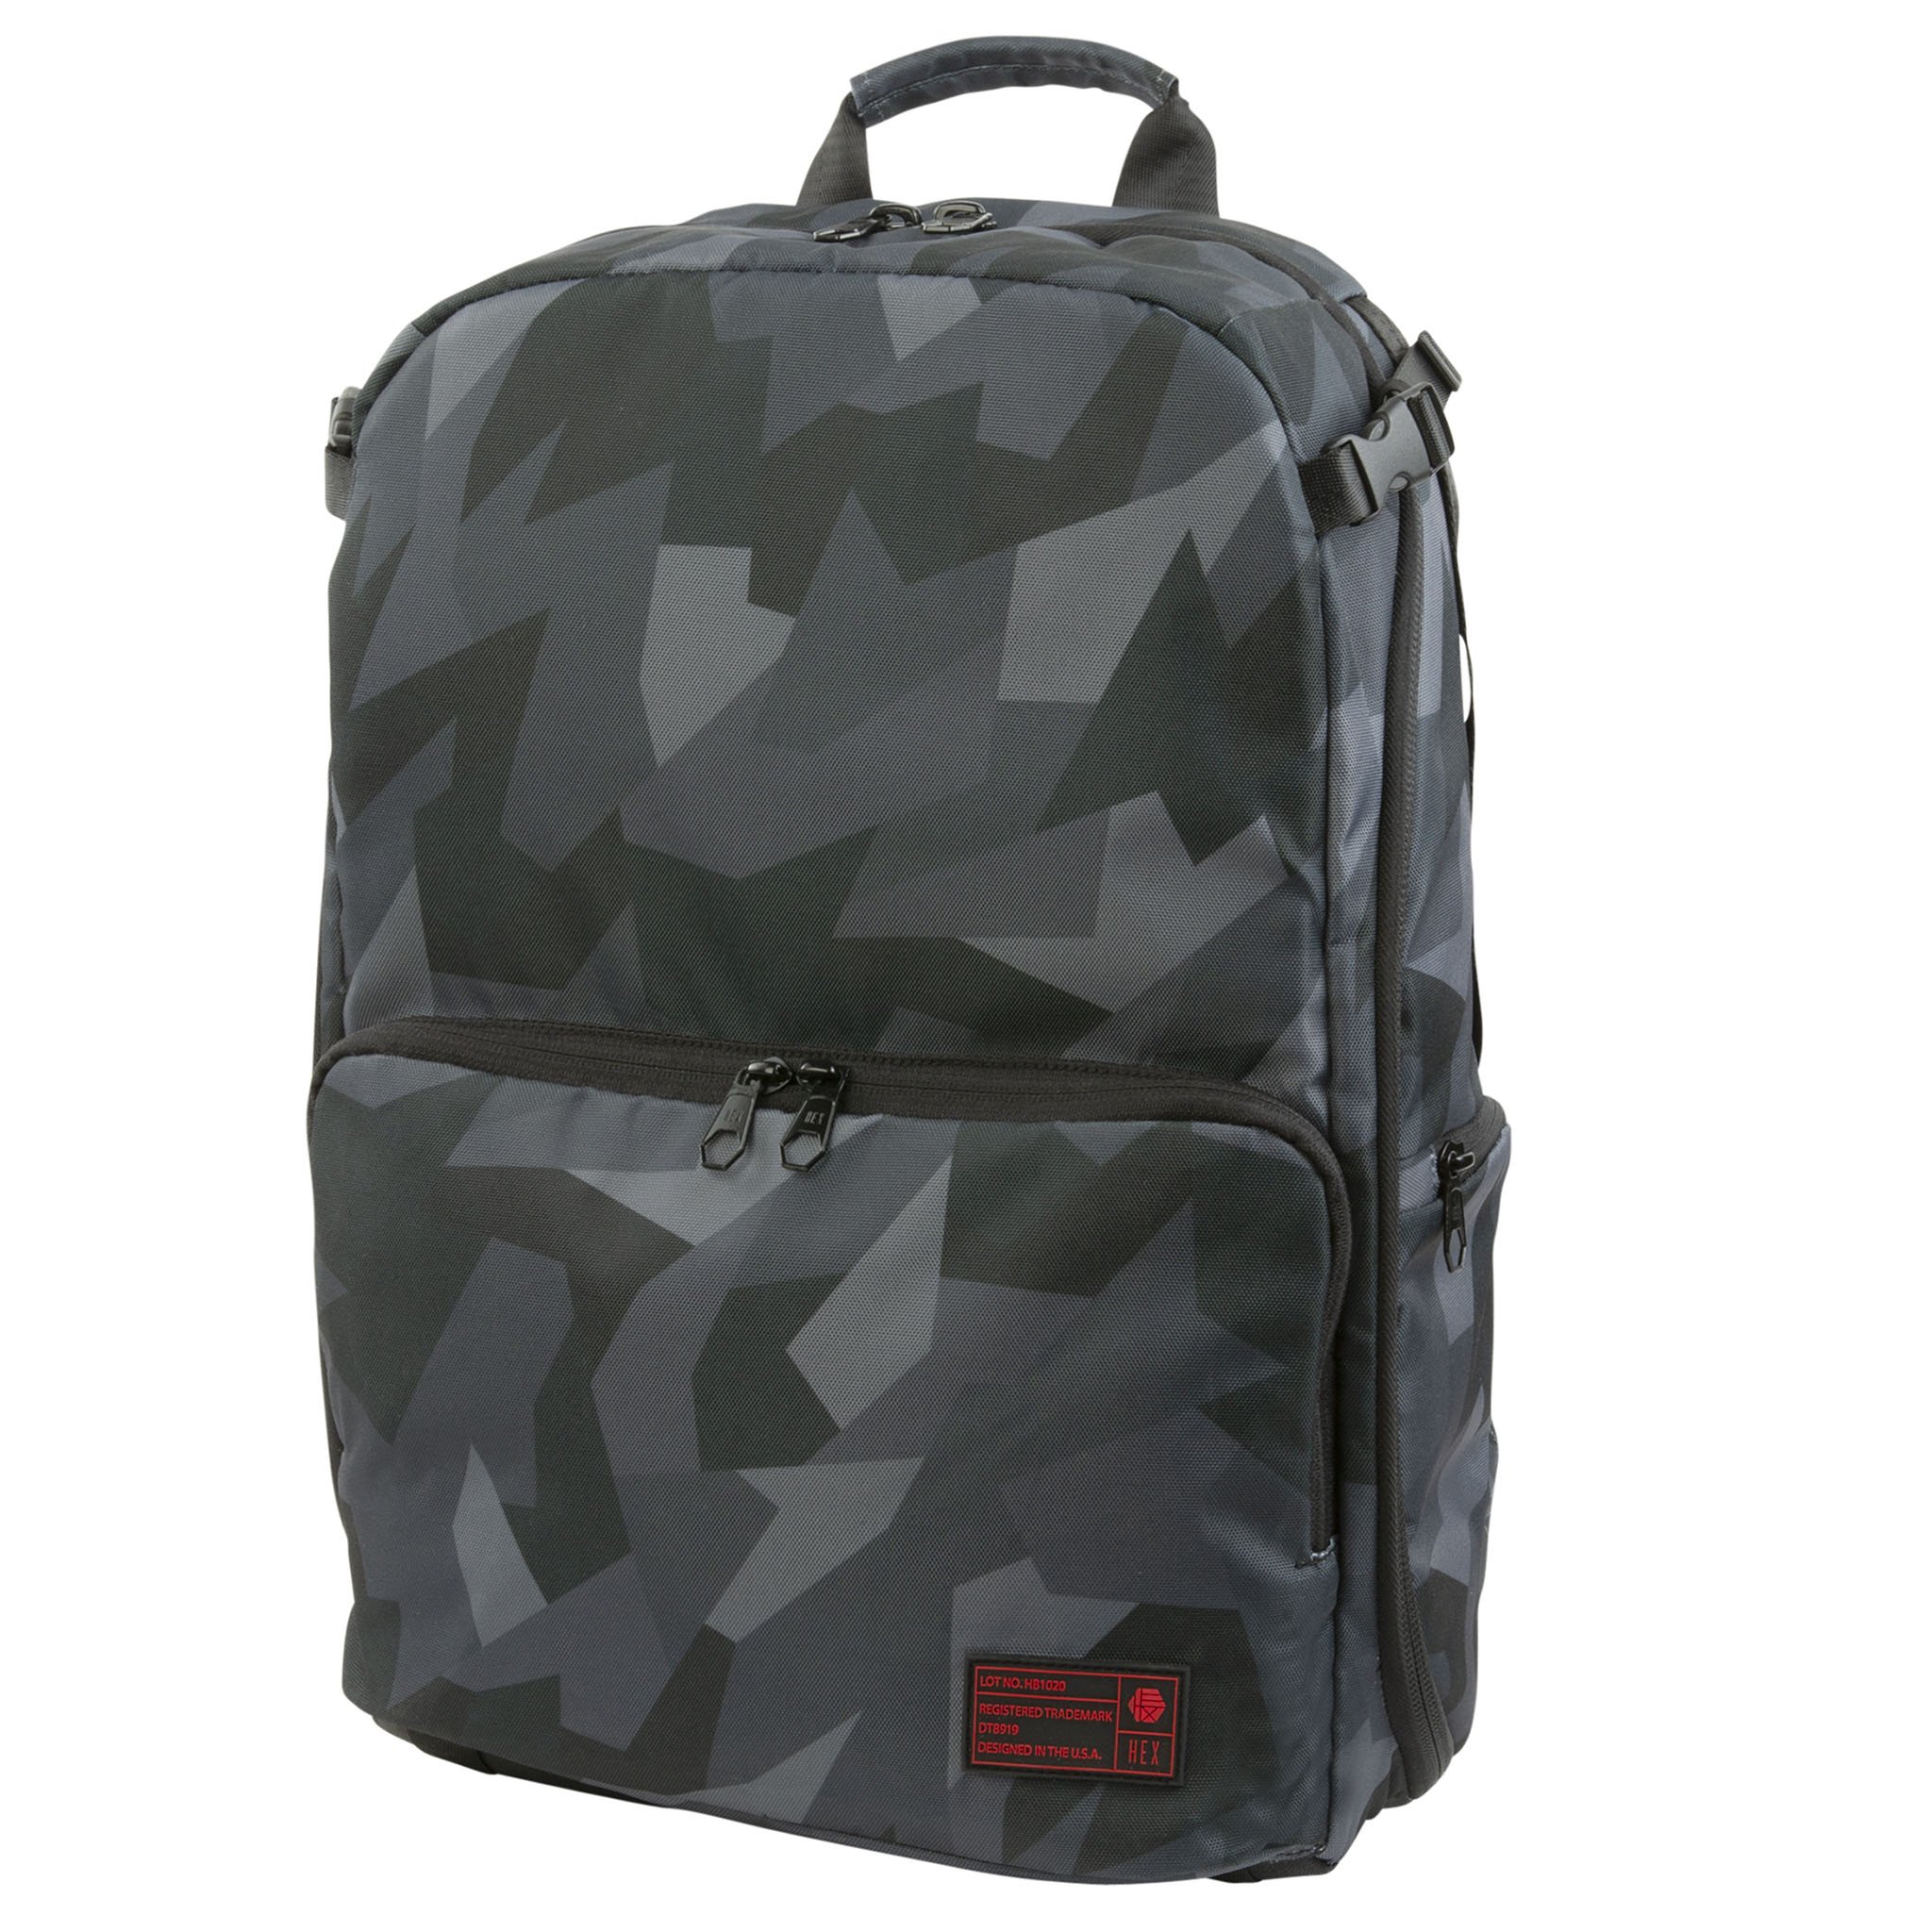
I met the guys behind HEX just last week, and I have to say that not only was I impressed by their operation in downtown Los Angeles, but I was also impressed with them.
They have a passion for what they do, and it shows in the products they design and create.
I actually brought a HEX Ranger DSLR Sling Bag home after seeing it firsthand. Talk about a camera bag!
But if the photographer on your list needs to carry more gear than I do, the Ranger Clamshell DSLR backpack is a prime choice.
With a capacity of 21 liters, this bag can hold a ton of gear - a DSLR with lens attached, a couple more lenses, a laptop, a drone, and accessories, in fact!
The clamshell design makes it easy to see your gear, retrieve it, and put it away. And with fully customizable inserts, you can make the bag work for you no matter what arrangement of gear you need.
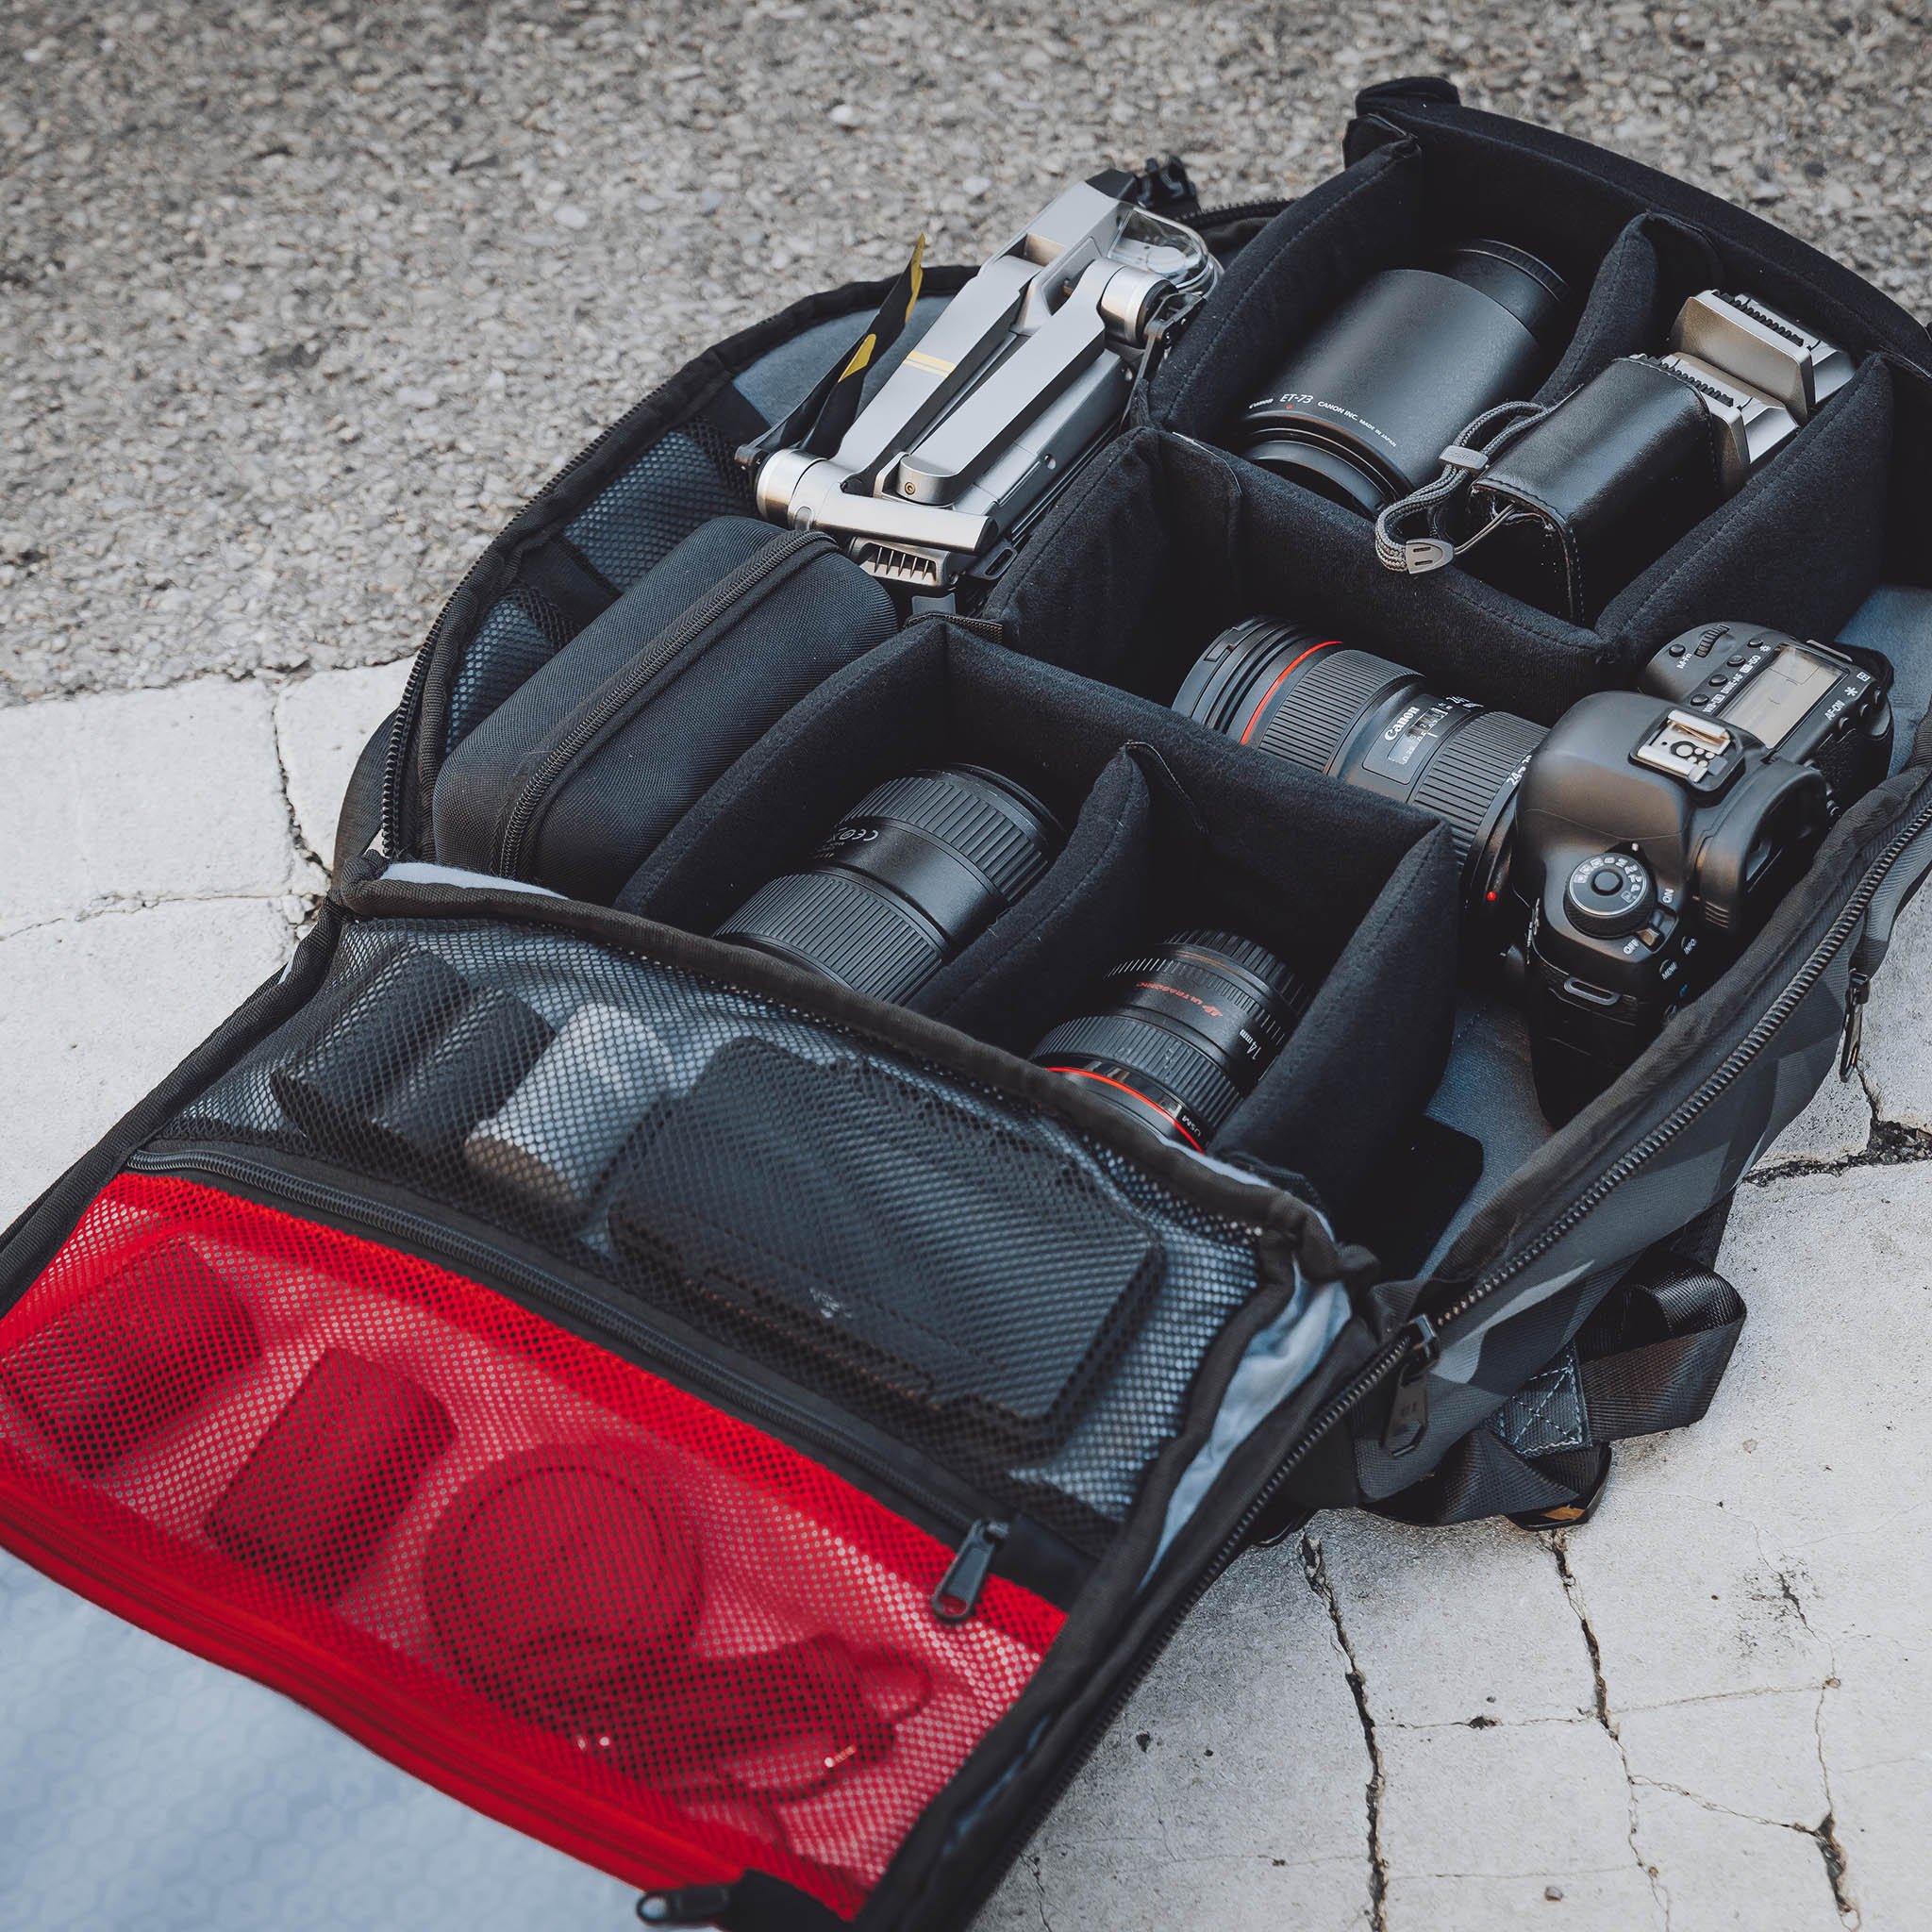
The all-important comfort factor is off the charts, too. It has ergonomic shoulder straps that hug your shoulders and fit perfectly. The air mesh construction will keep your shoulders and back cool as well.
Additionally, HEX included a custom molded and foam padded back panel, that way even when you’re carrying a heavy load, you’ll still be comfortable.
With tripod straps on the bottom, side straps for attaching more gear, a hidden rain cover, a water bottle pocket, and tons of other handy features, this is a bag that the photographer on your list will love, without a doubt
Learn more about the HEX Ranger Clamshell DSLR Backpack
Gifts for Photographers Under $250: A Pre-Owned Canon EF 50mm f/1.4 Lens
Ask just about any photographer what their first lens purchase was, and they'll say a Nifty Fifty. That makes it the ideal gift idea for photographers this holiday season!
There's a lot to love about 50mm lenses, too...
For starters, it's a great focal length for learning all kinds of photography, from landscapes to portraits and everything in between.
That also makes it an incredibly versatile lens.
In fact, put a 50mm lens on your camera, and you can shoot all day long without ever needing a different focal length. They're even great for shooting video!
You can find 50mm lenses with large apertures, too, like the Canon EF 50mm f/1.4 USM shown above.
At f/1.4, photographers can more readily shoot in low-light conditions without having to push the ISO too high, which helps reduce digital noise.
Having a large aperture like that is also beneficial for gathering tons of light, that way a faster shutter speed can be used. It's also helpful for blurring the background in portraits to get a more professional-looking shot.
Another benefit of a 50mm lens is that they force you to think more creatively about how you frame up your shots.
That is, since 50mm lenses have a constant focal length of 50mm, there's no zoom to rely on for getting close-up or wider shots.
By using a 50mm lens and "zooming with your feet," becoming a master of composition can be an easier task because you're forced to physically move further away or closer to the subject.
Of course, the biggest benefit of 50mm lenses is the price. These lenses are well-priced so you can bestow a great little lens with tons of functionality and versatility upon your favorite photographer without busting your budget.
That sounds like a win-win deal to me!
Learn more about the Canon EF 50mm f/1.4 lens
Best Gifts for Photographers Under $250: Wandrd DUO Daypack
Not every photography adventure requires a gigantic bag…
Instead, a daypack works for most of us most of the time, and one of the best upcoming daypacks you can get your hands on is the Wandrd DUO Daypack.
This bag is packed with innovative features that will make the photographer on your holiday shopping list smile from ear to ear.
There’s dual side access panels for quickly and easily grabbing gear and a radical “infinite zip” system allows for access to items in the top or side of the bag, or you can simply unfurl the front panel completely for unfettered access.
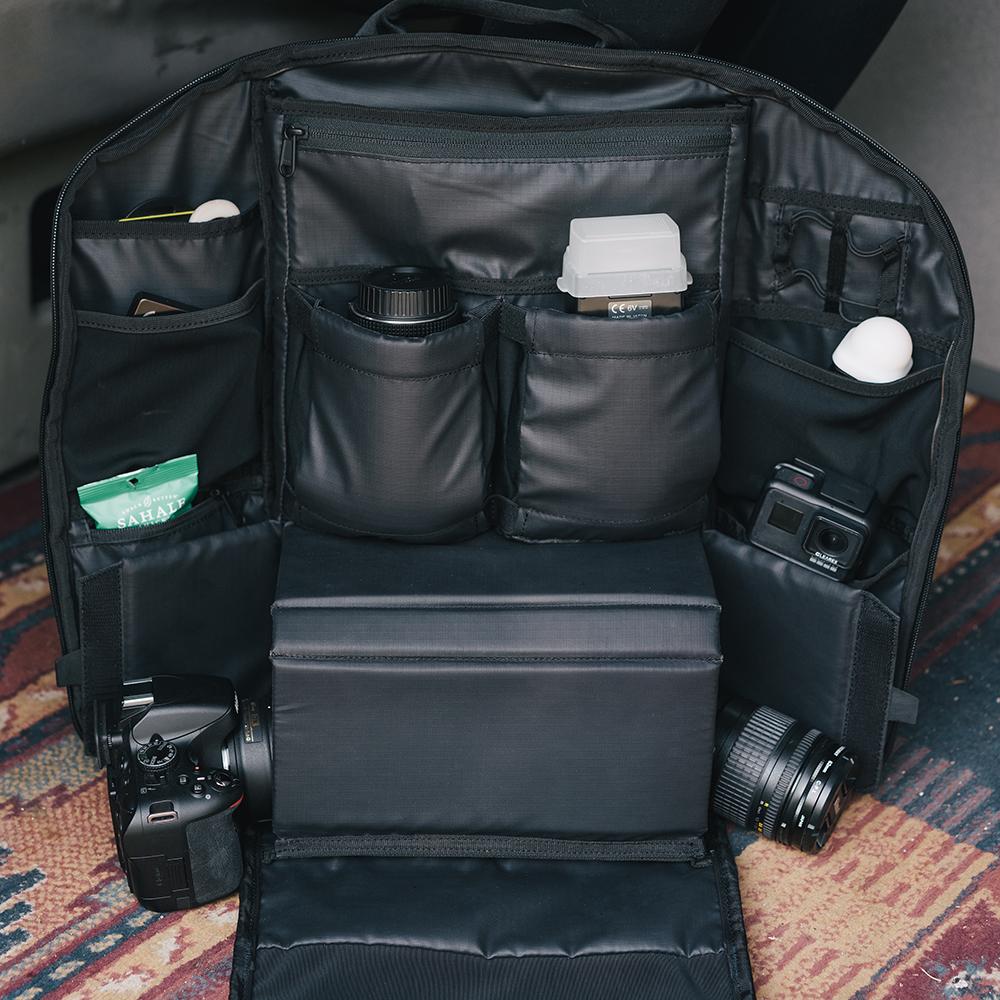
Speaking of in the bag, this thing is an organizational dream with pockets, pouches, and cubbies for days.
Photographers can keep their camera body in the Pop Camera Cube, slide a flash into one of the many pockets on the inside back of the bag, and have tons of room left for everything from lenses to flash cards to car keys. There’s even a tablet sleeve and a laptop sleeve that can accommodate most 15-inch laptops.
On the outside of the bag, you’ll find a water bottle pocket, quick-access pockets, and four attachment points for Wandrd Accessory Straps, which enables you to carry a tripod on the outside of the bag.
Started on Kickstarter where it raised over $650,000, the DUO daypack is the ideal gift for on-the-go photographers that need a single bag that takes them from work to play and points in between.
Wandrd really has thought of everything with this bag, which is why it would make the perfect holiday gift for the photographer in your life!
Learn more about the Wandrd DUO Daypack
Gifts for Photographers Under $250: EF to E-Mount Lens Adapter
If the photographer you're shopping for used to be a Canon shooter and now has a Sony camera, you can give them this handy adapter that allows them to use their old EF and EF-S lenses on a Sony E-mount camera, like the a6300, a6400, a6500, a9 or a7, among many others.
This adapter has both autofocus function and aperture control, as well as a handy USB port for firmware updates.
You can switch between phase and contrast autofocus modes, and there's EXIF signal transmitting and IS functionality too.
There's simply no easier and more functional way to pair Canon lenses with a Sony E-mount camera!
Learn more about the EF to E-Mount Lens Adapter
Gifts for Photographers Under $250: Syrp Genie Mini II
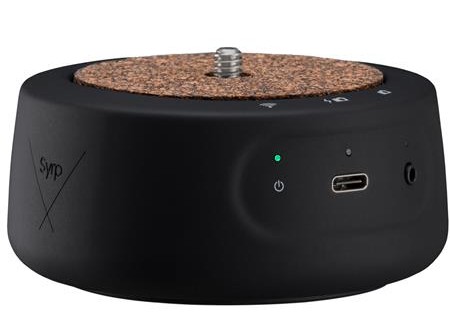
I’ve used Syrp’s time-lapse gear for years now, and when they released the Genie Mini II, I was skeptical that it could be much better than the original Genie that I’d been using. I was wrong.
The updates to the Genie Mini II are mostly under the hood, but they are significant.
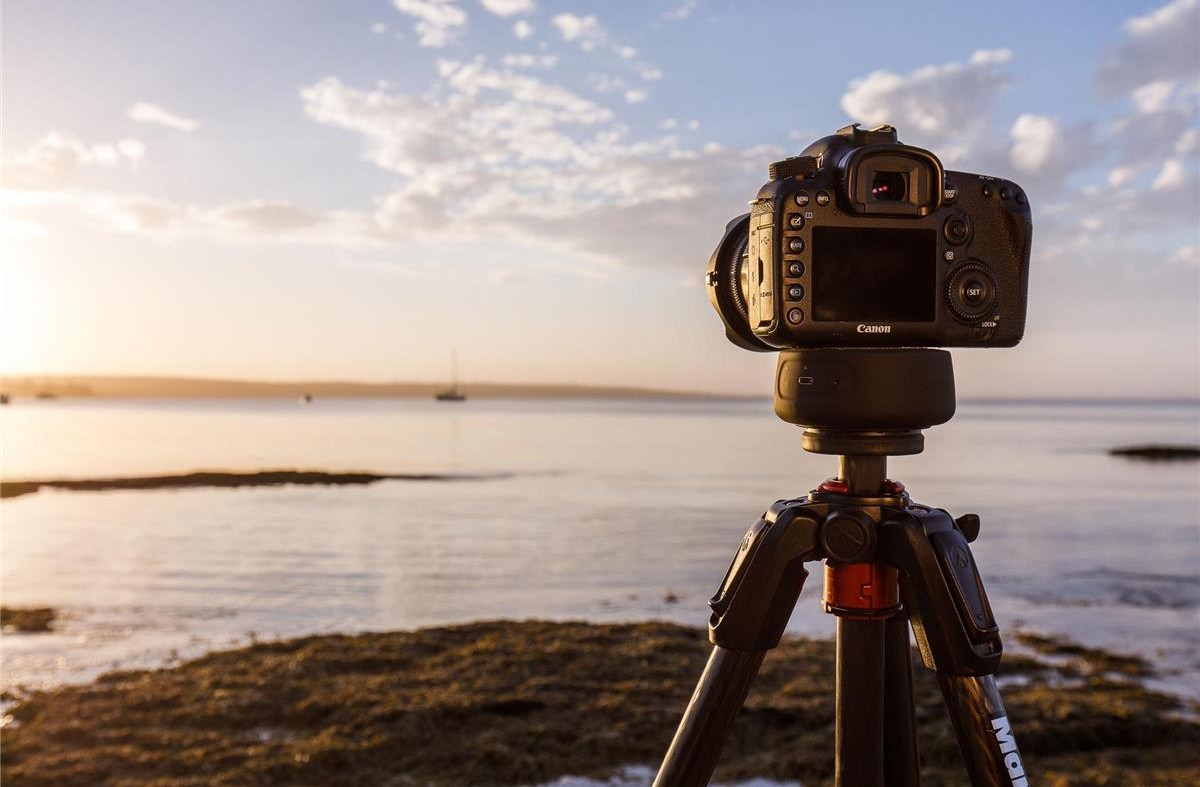
For example, Syrp added the functionality to control two Genie Minis at the same time from a new companion app. That enables photographers to create beautiful pan-tilt motion in their videos at the touch of a button.
Syrp also incorporated keyframing functionalities, so you can set up to 10 keyframes all the while panning at different speeds and in different directions. Nice!
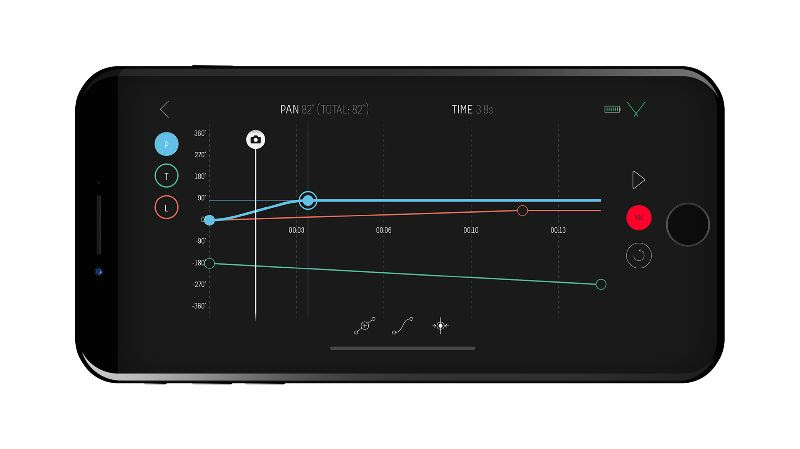
There are other goodies too: a time-lapse compiler that allows you to process video directly on your device and share to social networks; autoexposure ramping to create day-to-night time-lapses; and camera control that allows you to control your camera from your phone.
If you’re shopping for someone that’s at all interested in creating epic videos, this is the gift for them!
Learn more about the Syrp Genie Mini II
Gifts for Photographers Under $250: Aputure AL-MW Mini LED
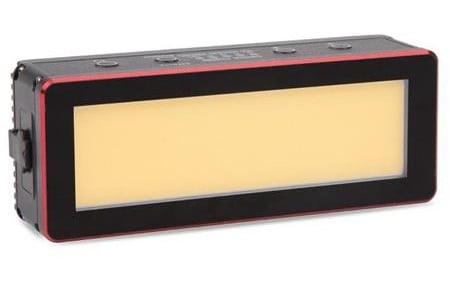
The beauty of the Aputure AL-MW is that it offers you superb light in a tiny package.
In fact, that tiny package is about as bulletproof as you can get, too. It’s rugged, well-constructed, and waterproof, so it can go just about anywhere the photographer on your holiday shopping list needs it to go!
But don’t let its small size fool you - this thing puts out some serious light…
With 6000 lux output, this is about all the light you need, and yet it can fit in your pocket. If the photographer you’re shopping for is like me, having highly portable gear is a must.
Beyond that, the Aputure AL-MW has excellent color fidelity and has a rating of 95+ for CRI and TLCI.
Add in a gel holder with CTO and CTB filters, a battery that’ll give you up to 24 hours of runtime, and pre-programmed lighting effects, and you can see why this little light is worth its weight in gold!
Learn more about the Aputure AL-MW
Gifts for Photographers Under $250: Syrp Super Dark Variable ND Filter
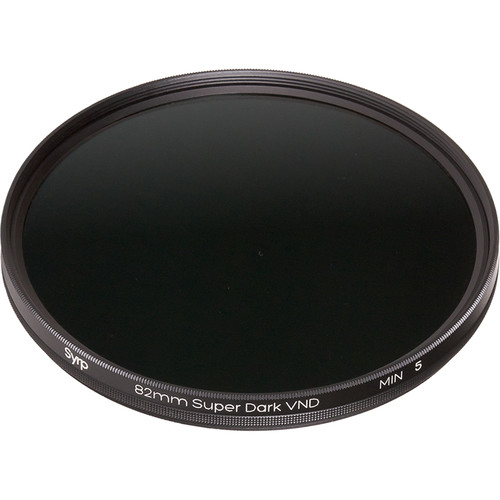
If the photographer on your list loves to shoot long exposures, then a variable ND filter is a perfect gift idea.
Variable ND filters are like having a complete ND filter kit, but in an all-in-one unit.
The Syrp Super Dark Variable ND filter gives photographers between 5 and 10 stops of filtering power so they can get just the right amount of light for their long exposure creations.
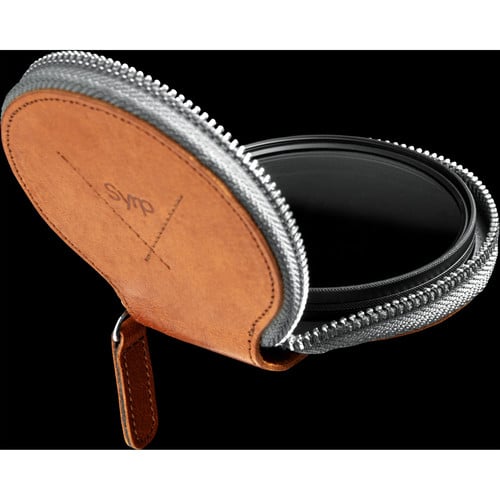
This filter is available in tons of popular sizes, too, from 52mm to 82mm, so you can find the precise size your favorite photographer needs.
And since it’s made of high-quality Japanese glass, the results you get are exceptionally good - clear, precise, and color-neutral, just like it should be when using an ND filter!
Learn more about the Syrp Super Dark Variable ND Filter
We Recommend
Top 10 Gifts for Photographers Under $500 - 2019 Edition
 Photo by RobertBreitpaul via iStock
With a $500 holiday shopping budget, you can really go all-out for a loved one that loves photography.
From huge canvas prints of their favorite photos to a new-to-them camera or lens, there's really an unlimited array of possible gift ideas.
To help narrow things down, I've listed 10 of my favorite gifts for photographers below.
These are personal favorites of mine that I have enjoyed at one time or another, and I think any other photographer would enjoy these as well!
Gifts for Photographers Under $500: CanvasHQ Print

If you’re like me, sometimes finding the perfect gift for certain loved ones is a long, drawn-out process that causes tons of stress, and often you still don’t get something that totally blows them away.
I think a lot of photographers fall into this category. We have specific likes, and many of us already have most of what we want or need gear-wise, and what we don’t have is usually too expensive to put on a Christmas wish-list anyway.
But for all those hard-to-shop-for photographers on your 2019 holiday shopping list, I have the perfect solution - a large-format canvas print.
Think about it…
A canvas print is the gift that keeps on giving.
Not only can you immortalize one of your favorite images from your favorite photographer, but you also give them a means to showcase their work in a format that’s drop-dead gorgeous.
I have tons of canvases in my home, the vast majority of which are from CanvasHQ.
Now, I know what you’re thinking - canvas is old school.
Sure, maybe it is, but I’m telling you that these canvas prints from CanvasHQ are mind-bogglingly beautiful. In fact, they go head-to-head with any metal or acrylic print I have in my home.
The attention to detail is just amazing, and the materials they use are top-of-the-line. We’re talking archival-grade canvas, commercial-grade inks that are water and UV resistant, and kiln-dried pine frames to keep everything straight and true.
I love the personality that the canvas texture gives my images. That’s true whether it’s a portrait of my son or a landscape photo.
I’d be remiss if I didn’t mention the customer service you get with CanvasHQ.
These guys are committed to getting it right, so if something doesn’t go as planned, you won’t be hung out to dry.
If you have questions, they’ll answer them. If you have a problem, they’ll fix it. If you need assistance with uploading your photo or even picking the best finishes for your canvas, they’ve got your back.
In the video above, I explain why I highly recommend a CanvasHQ canvas print as the ideal gift for the photographer on your holiday shopping list.
Start shopping for your favorite photographer today on CanvasHQ!
Gifts for Photographers Under $500: Holdfast Sightseer Camera and Lens Modular System

There's two problems that this gift idea can solve: discomfort and difficult-to-access gear.
The Holdfast Sightseer is a small bag, yet it holds a ton of gear. The photographer on your list can put their 13-inch laptop in there along with a camera (with a lens attached), two more lenses, and other accessories like spare batteries, memory cards, and a flash.
And since Holdfast engineered this thing to be modular, you can give the gift of even more carrying capacity by adding a Lens Pouch (or two) and a Cell Phone Pouch to the mix.

Since the Sightseer is a truly modular system, you can mix and match lens pouches as you need to carry as much or as little gear as the situation calls for. What’s more, this system can grow with you as you get more gear - start out lean and mean with just the Sightseer bag, and as more lenses are accumulated, add Lens Pouches as needed.
Better still, because your gear is easily accessible, you don’t have to worry about missing a shot! With your gear at your fingertips, there's no waiting around to get ready to press the shutter button.
It’s easy to carry, too. Just use the two sets of carrying handles, the shoulder strap, or attach it to the Holdfast MoneyMaker dual camera strap for a super easy way to get your gear from point A to point B.
These bags look amazing, too, with a waxed canvas and American Bison leather exterior and an Aztec flannel fleece interior. In other words, the Sightseer is the complete package!
Learn more about the Holdfast Sightseer
Gifts for Photographers Under $500: Synology DS419slim

Every photographer needs a lot of storage capacity, and I can't think of a better network attached storage than the Synology DS419slim.
I've been using this NAS since June, and it's been a great asset for my workflow.
There's four bays for adding 2.5-inch drives, so there's tons of space for image files, yet this little guy is just 4.72 x 4.13 x 5.59-inches in size.
It can literally sit on top of your desk and take care of all your storage needs without getting in the way!
What's more, it weighs less than 1.5 pounds, so if the photographer on your list needs to get up and go, they can easily take this device with them.

As far as specs go, this thing is loaded for bear...
It runs Synology's excellent DiskStation Manager, has RAID protection and easy file-sharing capabilities, as well as a dual-core CPU.
You get a hardware encryption engine, read/write speed of 220 MB/s and 94 MB/s, respectively, and dual Gigabit Link Aggregation with failover support as well.
Add in dual USB 3.0 ports, could syncing with Dropbox, Google Drive, and others, as well as easy access via iOS and Android apps, and you have the makings of a hard-working, functional, and easy-to-use NAS!
Learn more about the Synology DS419slim
Gifts for Photographers Under $500: Wandrd HEXAD Access Duffle

It’s tough to beat a great camera bag as a gift for the photographer on your list.
And if it’s a well-designed, comfortable to carry, functional, good-looking bag you’re after, look no further than this beauty - the Wandrd HEXAD Access Duffle.
The huge clamshell opening on top offers total access to the inside of the bag, so you not only have a great view of the gear that’s inside but you can also easily retrieve and put away your camera or accessories.

Inside, you’ll find three organizational compartments that help you keep your gear nice and tidy. That’s a must for a bag that can hold a whopping 45 liters of gear.
But all that space is wrapped in a carry-on sized bag that’s 9"H X 14"W X 22"L and weighs just 3.9 pounds.
Check out the other features that this bag offers:
- A padded laptop sleeve
- Side camera access
- High-quality zippers
- Weather resistant materials
- Removable backpack straps
- Removable camera protection
There’s even an RFID secure passport pocket for those out-of-country adventures!

On top of all that, this bag looks like a million bucks! I mean, what photographer wouldn’t want to carry this bag around?!
But those good looks aren’t superficial - the bag is made of waterproof Tarpaulin and 1680D Ballistic Nylon with a WR Army coating. Not bad, eh?
You can get your favorite photographer the bag by itself or opt to add one or two medium camera cubes along with it. Whichever route you go, you’ll be well under your $500 budget!
Learn more about the Wandrd HEXAD Access Duffle
Gifts for Photographers Under $500: Wiral LITE Cable Cam
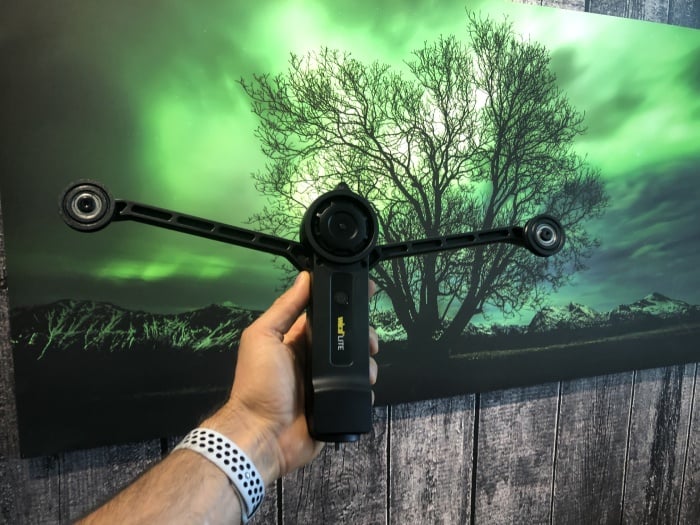
If creating dynamic videos is on your favorite photographer's agenda, then the Wiral LITE Cable Cam is a perfect gift idea!
This simple rope system allows videographers to get tracking shots quickly and easily. In fact, it takes just a few minutes to set this thing up!
Called "Quickreel," the system's patent-pending rope system makes it super easy to capture awesome videos without tons of time setting up or taking down gear. Better yet, since an ultra static rope is used, you get excellent performance and top-notch safety without bulk or weight.
Once it's set up, you can use your GoPro or another camera to get long, smooth video sequences.
And in looking at the video above, you'd think it was done with a hugely expensive setup, right?
Not so...just a handy Wiral Lite that you can pick up for well under the $500 limit!
This is a functional and fun gift that any photographer that enjoys shooting video would love to have under the tree on Christmas morning!
Learn more about the Wiral LITE Cable Cam
Gifts for Photographers Under $500: Insta360 One X

If you have an adventurous photographer on your holiday shopping list, why not give them a gift that will blow their minds and help them create unique photos unlike anything they've created before?
The Insta360 One X is a 360-degree camera that makes creating photos and videos a fun and exciting exercise.
But this thing is no gimmick - it has dual f/2 lenses with 200-degree fields of view. The overlap of the lenses results in a true 360-degree image or video.

With a 1/2.3-inch sensor, 14 MB still images, and up to 5.7K video shooting at 30fps, it offers tons of options for getting high-quality content too.
It's small and portable, too, so you can easily hold it in your hand, buy a mount for your bike, strap it to your dog, or put it virtually anywhere to get interesting images and video sequences.
And since it comes with an incredible 6-axis gyroscopic stabilization system, the video footage it records will be buttery smooth.
Insta360 has also packed this thing with software to make using it easier and more productive.
Control the camera via the companion app, which features Live View so you can see what the camera sees.
There's even built-in shooting modes, including HDR, time-lapse, and "Bullet Time" (remember those incredible scenes in The Matrix where the camera rotated around Neo as he dodged bullets?).
I've had this camera for about a month now, and it is SO much fun!
Learn more about the Insta360 One X
Gifts for Photographers Under $500: E-Image EK610 Tripod
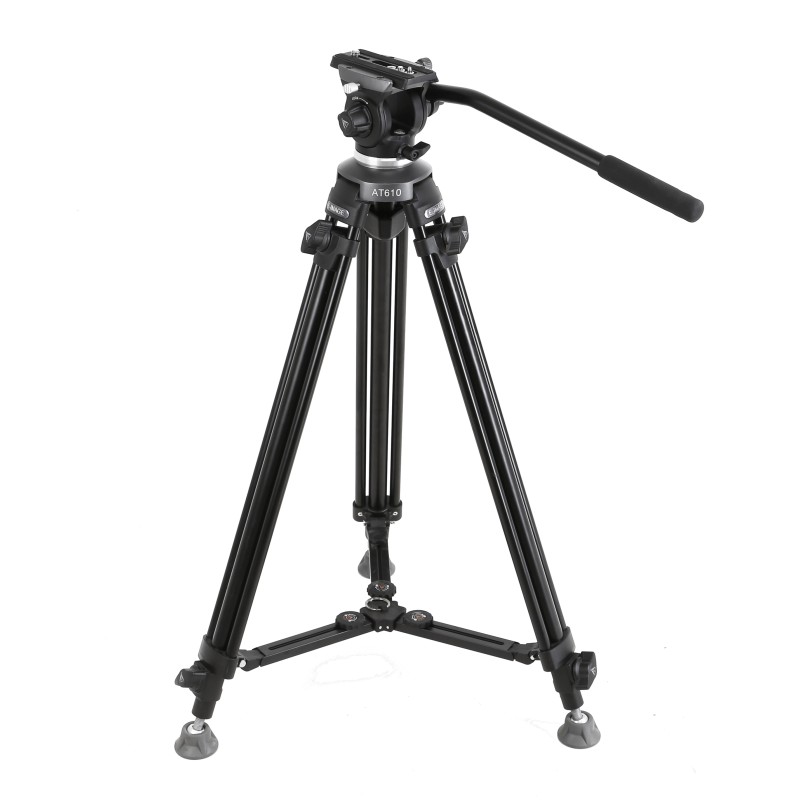
Every photographer needs a reliable tripod in their camera bag, and the E-Image EK610 fits the bill.
Billed as a video tripod, the EK610 provides photographers and videographers alike with exceptional stability thanks to its strong two-stage aluminum legs.
Making adjustments to the tripod is quick and simple thanks to ergonomic leg adjustment knobs and a mid-level spreader that enhances stability.

There's a fixed counterbalance to enhance stability even further, and the included fluid head makes for ultra-smooth panning.
The head can support up to 6.6 pounds, so it's ideal for use with a mirrorless camera, DSLR, or small video camera.
There's even a handy carrying case for the tripod, spreader, and head, so the photographer on your list can easily transport it from one shoot location to the next.
Best of all, this tripod is WAY under the $500 budget mark, so you can give an awesome gift and save some cash at the same time.
Learn more about the E-Image EK610 Tripod
Gifts for Photographers Under $500: F-Stop Sukha Backpack

I've had the f-stop Sukha bag for quite a few months now, and it has quickly become my go-to bag for occasions when I need to haul a lot of gear.
It's waterproof, so that's a bonus since I'm often out in the elements taking landscape photos. That's a feature the photographer on your holiday list is sure to like as well!
Additionally, this bag holds a ton of gear - 70 liters worth. I can pack nearly all of my camera gear into this single bag!
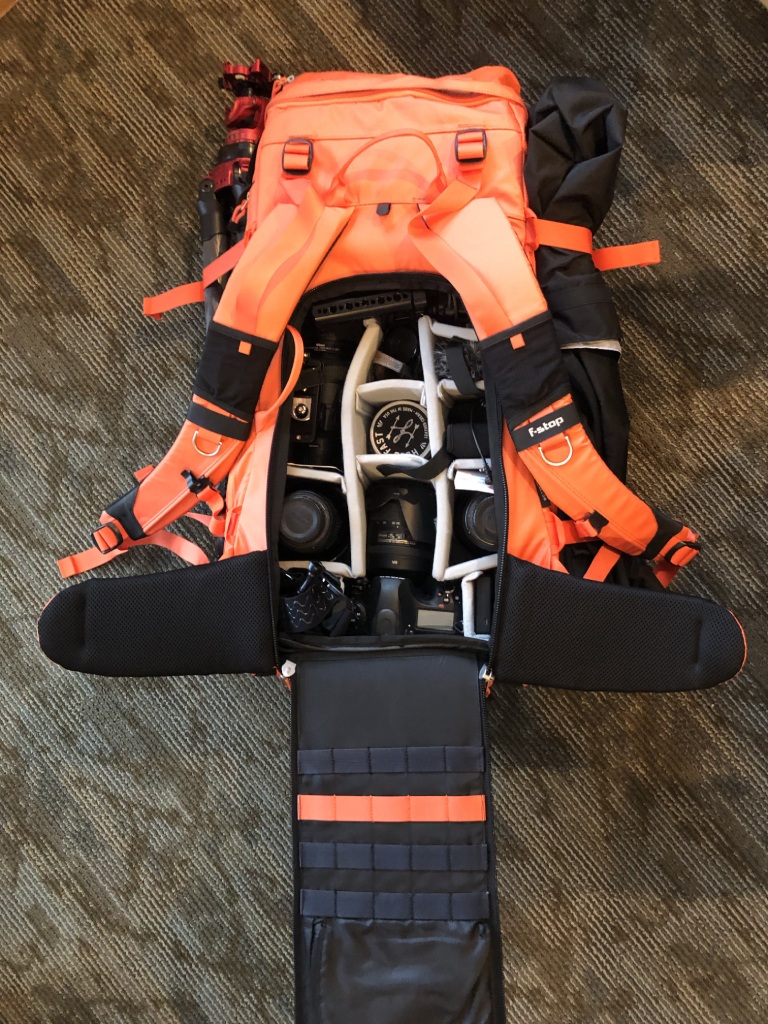
As you can see above, even though this is a large bag, it's still super easy to find what you're looking for.
There's pockets and compartments galore, and with f-stop's Internal Camera Unit (ICU), all your gear is kept neat and organized.
The ICU is also heavily padded, so it cradles your gear and protects it from bumps and bruises you might encounter along the way.
I also like the fact that this bag has a huge panel that completely folds down, that way you can clearly see what gear is where.

On top of all that, f-stop has incorporated handy features that make this bag even more functional.
There's expandable zipper pockets should you need a little more room and a reinforced carry strap that's ideal for carrying your tripod.
The internal aluminum frame gives the bag excellent rigidity that makes carrying it an easier task, and with enhanced EVA-padded Jersey laminate shoulder straps, the bag rides nice on your shoulders (and on your hips, too).
It's just a great bag that can carry a ton of gear and lets you do so in total comfort. Talk about the perfect gift idea!
Learn more about the f-stop Sukha
Gifts for Photographers Under $500: Wescott Rapid Box Octa Softbox

If you’re in need of a gift for the photographer on your holiday list, don’t just settle for any old thing. Instead, wow them with a gift that has the ability to help them elevate the quality of their photos.
In photography, light is everything, and if the photographer you’re shopping for takes any portraits at all, they need a high-quality softbox in their collection of gear.
And for me, the best softboxes on the market are those by Westcott.

I particularly like their Rapid Box Octa series because they’re lightweight, easy to set up, and supremely durable.
The all-aluminum frame is strong and helps the octabox keep its shape - a shape, by the way, that has a very shallow depth, so it can still be used even if space is at a premium.
But what will impress your favorite photographer most about the Rapid Box is probably not its durability or construction, but the way it modifies light.

There’s a silver reflector that’s sewn into the back of the box’s diffusion panel, which minimizes the hot spot from the speedlight and results in gorgeously even light from corner to corner.
Speaking of the diffusion panel - it’s made of an all-natural, unbleached nylon fabric, which softens the light without changing its color temperature. Lesser softboxes cannot claim the same!
In the end, you want the gift you give to your loved one to be something that they love, but also something that they can use over and over again. The Westcott Rapid Octa softbox certainly fits the bill, and with various sizes available, including 26-inch, 36-inch, and 48-inch, you can select a softbox that’s just right for the types of portraits your favorite photographer takes.
Learn more about Westcott Rapid Box Octa Softboxes (26-inch, 36-inch, and 48-inch)
Gifts for Photographers Under $500: Pre-Owned Panasonic Lumix DMC-G85

If the photographer on your list wants to add a mirrorless camera to their setup as a second camera, or if they're on the hunt for a fast and feature-rich camera to upgrade to, the Panasonic Lumix DMC-G85 is a great choice.
This micro fourth thirds camera offers a 16-megapixel sensor with an ISO sensitivity range of 200-25600 that allows it to be used in all kinds of lighting conditions.
The 10fps continuous shooting speed is great for action shots, but if you want to really speed things up, you can shoot at 40fps when using the electronic shutter.

This camera is capable of recording 4K UHD video and has built-in five-axis sensor-shift image stabilization that allows you to shoot handheld without the worry of blurry photos due to camera shake.
Even better, if you pair this camera with a stabilized lens, you get double the stabilization!
Learn more about the Panasonic Lumix DMC-G85
Gifts for PHotographers Under $500: Pre-Owned Canon EOS Rebel T6i

If you're shopping for a photographer that's looking for an upgrade to their first camera, the Canon EOS Rebel T6i is a great choice.
This camera has a 24.2-megapixel APS-C CMOS sensor that's paired with Canon's DIGIC 6 image processor.
That means that the photographer on your list can take high-resolution photos in a wide range of conditions from sunny to cloudy landscapes to bright or dark interior portraits.
That's thanks in part to the T6i's excellent ISO range that can expand up to 25600.
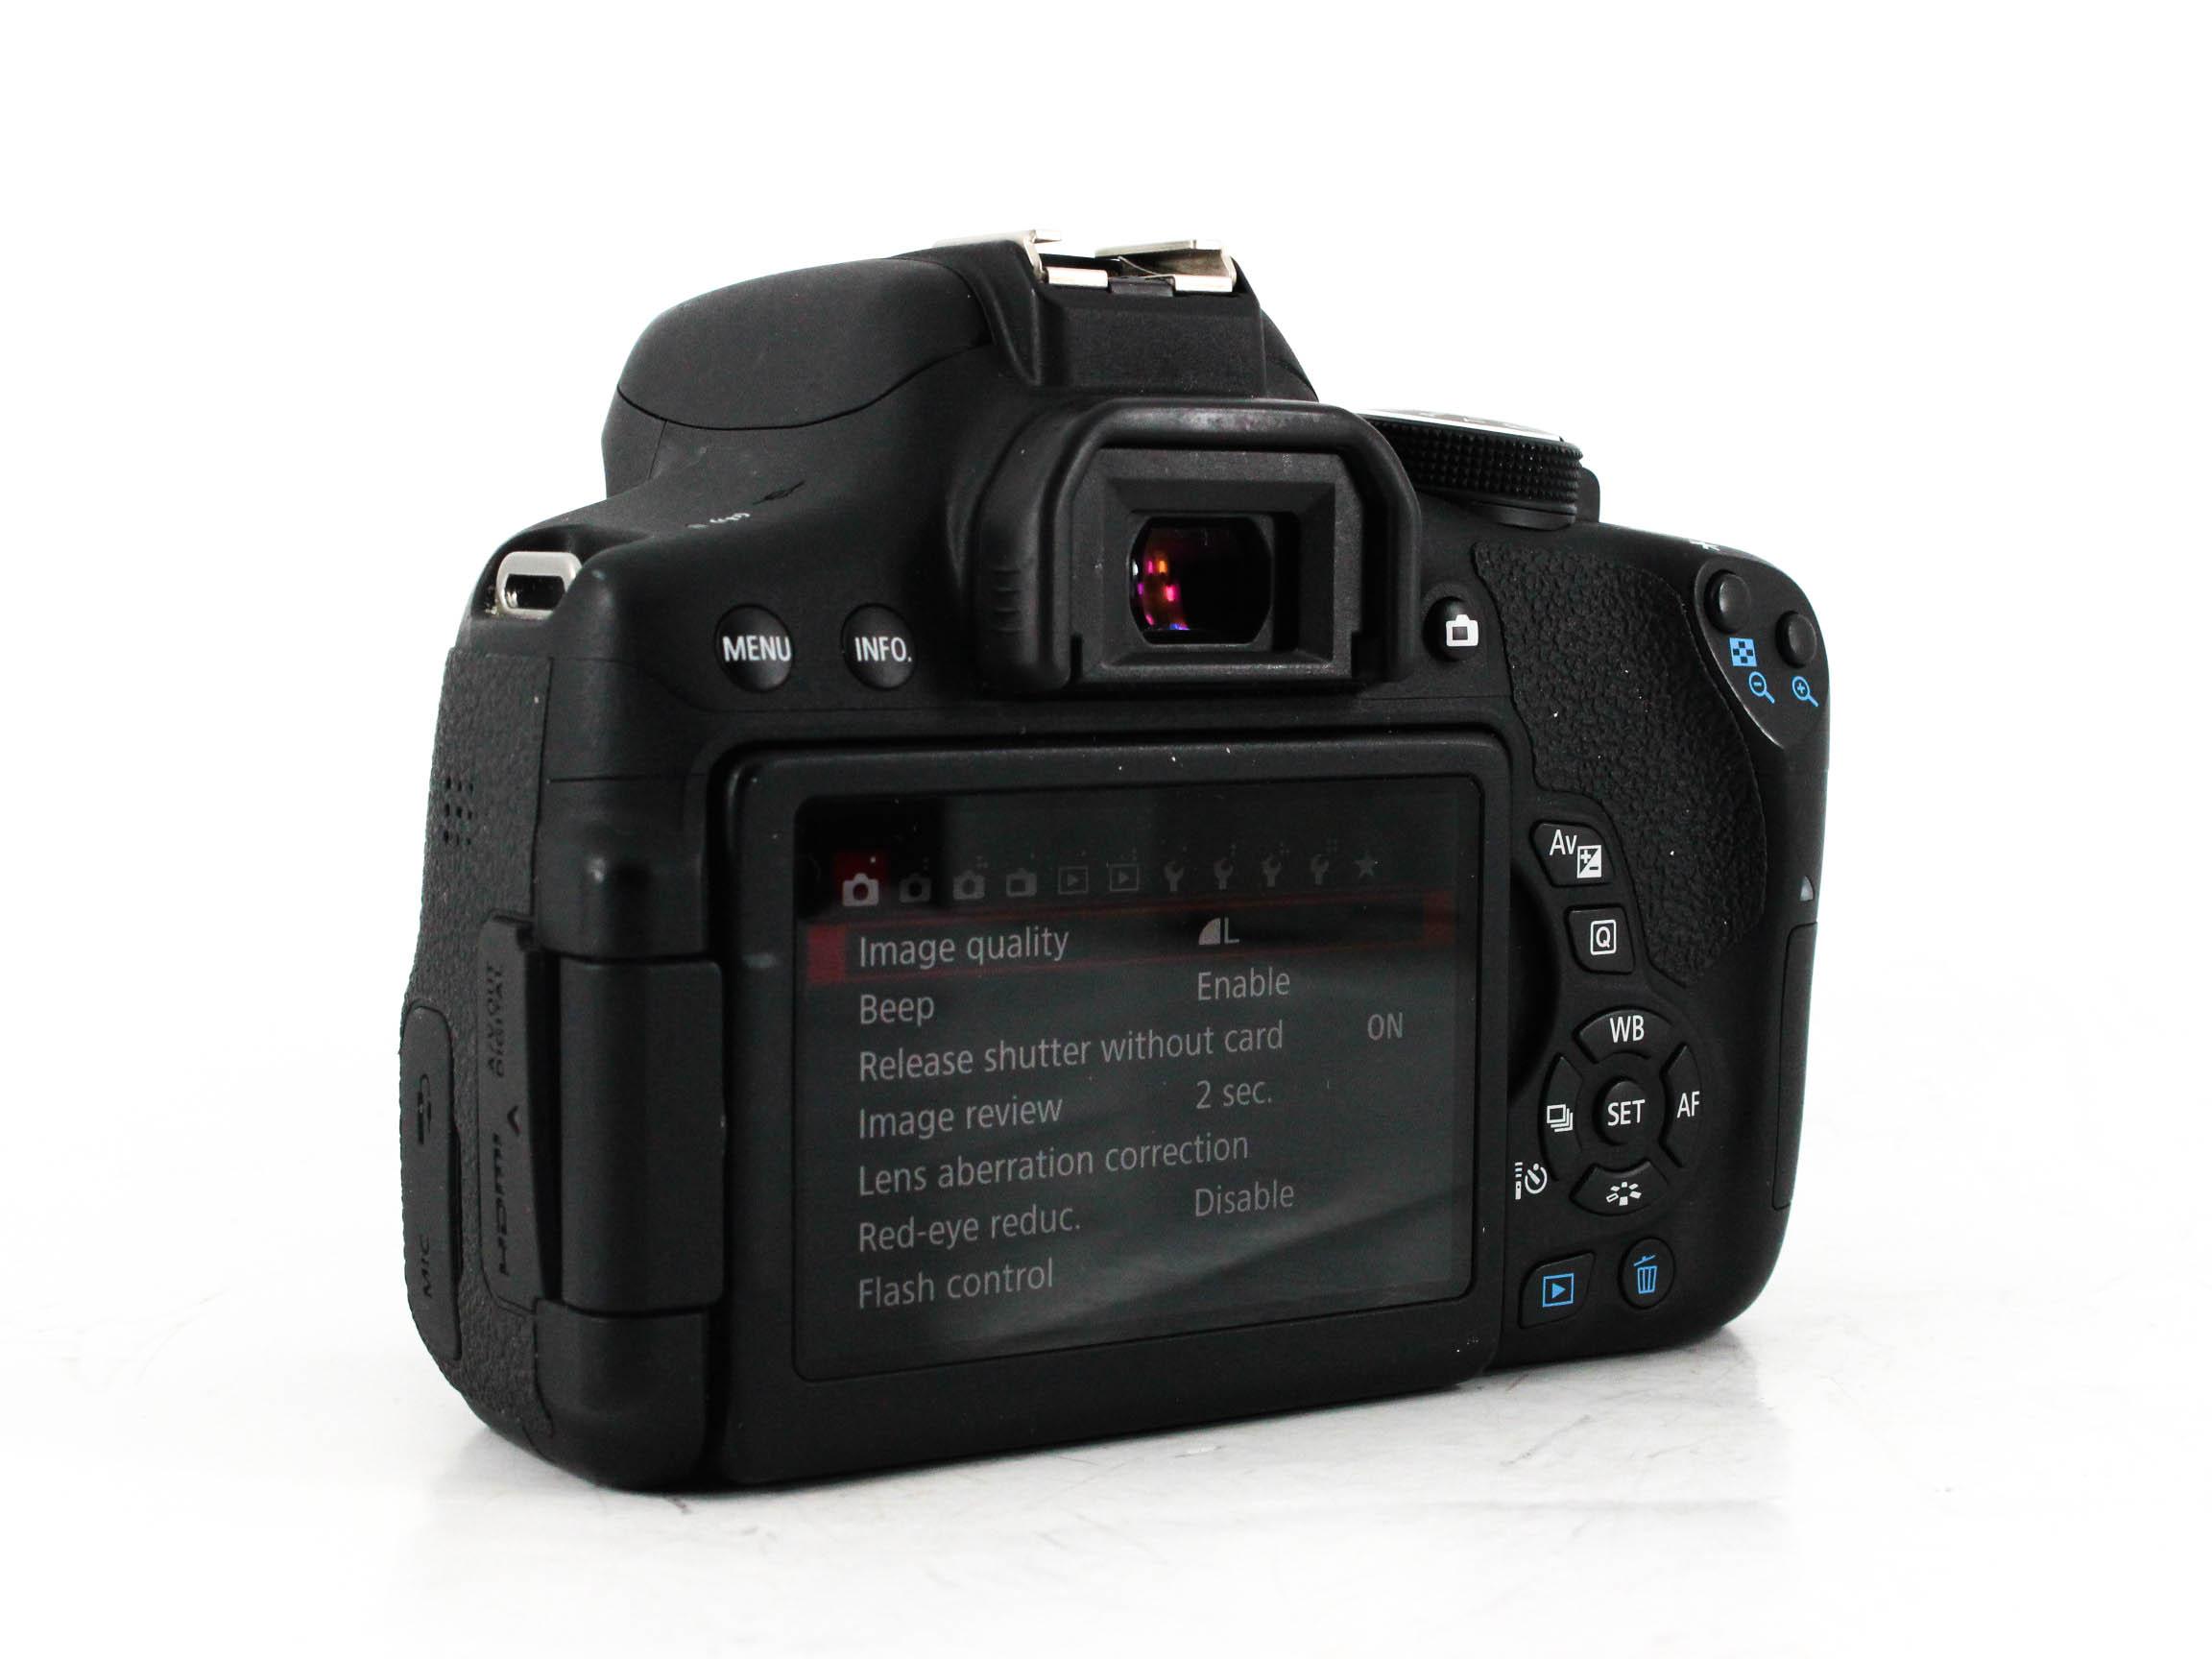
This is a modern camera, to be sure, with features like NFC for quick and easy transfer of photos and Wi-Fi for connecting to other devices.
Using the Camera Connect Mobile APP, photographers can quickly and effortlessly transfer their images and videos right from the camera to the cloud for safekeeping.
This is an excellent mid-range camera that offers tons of features, superb performance, and that works with Canon's extensive lineup of EF and EF-S lenses. And with MPB's thorough system of inspecting gear, you can rest assured that the pre-owned model you select will be what arrives at your door, in the condition as stated.
That means you get great gear while saving tons of money!
Top Lens Filters of 2018
 Image Credit: blackred via iStock
One of the most important photography accessories you can own is a good set of filters.
The operative word here is "good"...
There's lots of dirt cheap filters out there that might entice you with a bargain basement price. However, those filters often use bargain basement materials, too. That's not what you want in front of your lens!
Instead, investing in high-quality filters will get you better results - and more durable filters to boot.
If you're in the market for new photo filters, consider any of the following as a good bet.
Best Lens Filters: NiSi V5-Pro 100mm Advanced Kit

If you're a landscape photographer, there's nothing better than a top-of-the-line filter kit that sets you up with all the goodies you need to create epic images.
NiSi's V5-Pro 100mm Advanced Kit includes a 100mm filter holder, a NiSi 0.9 Soft ND Grad, and three neutral density filters (3-stop, 6-stop, and 1-stop).
Additionally, you get a NiSi Reverse ND filter, a circular polarizer, and multiple adapter rings for fitting the kit to lens threads that run from 67mm up to 82mm.

On top of all that, you also get a cleaning cloth, an air blower, a cleaning eraser, and a carrying case.
It's truly an all-in-one kit that gives you the tools you need to control glare, manage dynamic range during sunrise or sunset, even out bright skies and dark landscapes, and create breathtaking long exposures.
And with NiSi's stellar reputation as one of the top manufacturers of lens filters, you know that with this kit, you'll get high-quality, durable products that will last you for years and years to come.
In that regard, this NiSi filter kit is a long-term investment that will more than pay for itself over the years.
Learn more about the NiSi V5-Pro 100mm Advanced Kit
Best Lens Filters: Kenko Professional Variable NDX Filter

Why carry a bunch of different neutral density filters when Kenko has a variable ND that offers you a range of light-stopping power from 1.3-8.5 stops?
Available in 77mm and 82mm sizes, this filter offers a practical use factor range of ND2.5-450, and is extendable to ND1000.
Kenko crafted this filter by taking two pieces of the highest-quality polarizing glass and mounting them opposite each other.
That means that when you turn the filter ring, the filter darkens or lightens as you see fit.

Not only is this kind of filter invaluable for controlling exposure, but it also lets you get beautiful creative blur for long exposure photos.
When maxed out, this filter allows you to utilize a shutter speed that's several seconds long, even when shooting in full sun.
Editor's Tip: Get Kenko’s latest updates and access to promos for discounted gear. Click here to sign up.
And because Kenko has devised a depolarizing plate that's included in the filter, you get hyper-neutral color balance in the image.
No color shifting, a wide range of light stopping power, and top quality materials make this one of the top lens filters of the year.
Learn more about the Kenko Professional Variable NDX Filter
Best Lens Filters: Kenko Nyumon Circular Polarizing Filter

If it's a circular polarizer you're after for your kit, the Kenko Nyumon Circular Polarizing Filter should be a top choice for consideration.
These lens filters are the top-selling filters in Japan, and they're now available in the U.S.
They have optical glass that's coated and polished so that they resist environmental conditions like water and oils from your skin.
Additionally, the Nyumon series filters have a SLIM mounting ring to minimize vignetting when using wide-angle lenses.
Available in sizes from 37mm to 82mm, these filters are compatible with a wide range of lenses for Canon, Nikon, Sony, Olympus, Fuji, Tokina, and many other major brands of lenses.
Better still, these filters are priced very well, so you can get a top-quality filter without breaking the bank.
Learn more about the Kenko Nyumon Circular Polarizing Filter
Best Lens Filters: Formatt Hitech Firecrest 3-Stop ND Filter

With its Firecrest technology, this ND filter from Formatt Hitech offers neutral color rendition across multiple light spectrums including UV, visible, and infrared light.
This Firecrest coating is sandwiched between the layers of filter glass, which gives it the ultimate protection from damage.
And since the filter glass itself is made in the United Kingdom using Schott Superwite glass, you know that it's not just durable and dependable, but is also some of the best optical glass available today.
These 100x100mm filters are compatible with a variety of filter holders, including those from Formatt Hitech, Lee, and NiSi.
And with a range of filters available from 1-stop to 16-stops, there's no shortage of selection for you to get precisely the amount of light-stopping power you need!
Learn more about the Formatt Hitech Firecrest 3-Stop ND Filter
Best Lens Filters: B+W Circular ND Filter
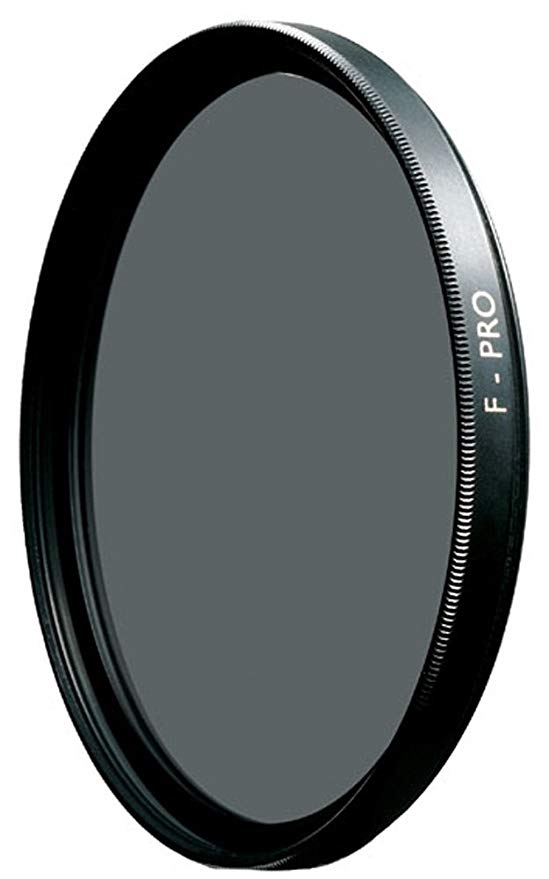
If a circular ND filter is more your style, look no further than this model from B+W.
This particular example offers 6-stops of light-stopping power, which means a shutter speed of 1/60 seconds can be extended to a full second.
Because it has a higher transmission of red tones, the filter also has a slightly warming effect on the color of your images.
With a truly neutral gray design, Water-White Schott Glass construction, and brass threads, this little ND filter offers you tons of benefits at a more than reasonable price. There's even multiple sizing options and filter factors as well!
Learn more about the B+W Circular ND Filter
Best Lens Filters: PolarPro Quartzline ND 8/Polarizer Hybrid Filter
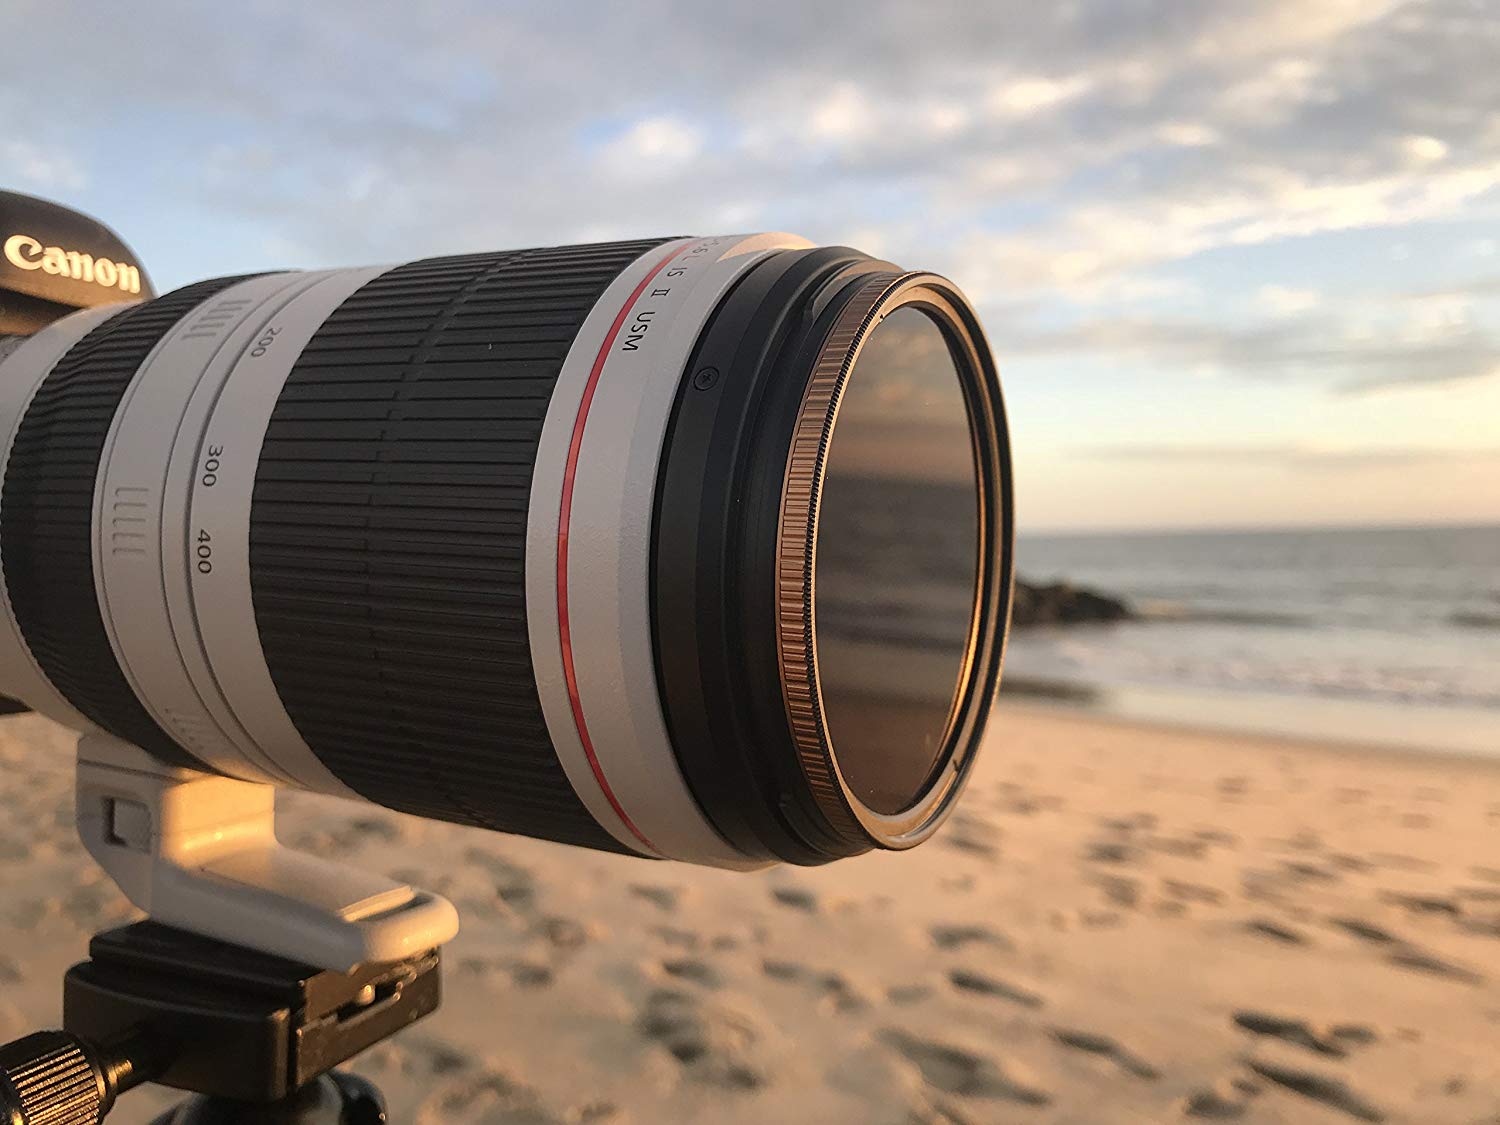
What's not to love about this Quartzline filter from PolarPro?
Not only is this filter made of 99.9% pure fused quartz that gives it unrivaled clarity and incredible durability, but it's also a neutral density/polarizing filter hybrid.
That means you get the best of both worlds for extending your shutter speed while also boosting contrast in the sky and managing glare off non-metallic surfaces.
The filter glass has optical coatings that give them hyper-neutral color profiles with enhanced resistance to water and scratches.
What's more, PolarPro has crafted the filter housing out of brass, that way they thread on smoothly while providing the utmost in durability.
In addition to a top-quality filter, you also get a microfiber cloth for cleaning, a soft filter pouch, and a hard filter case for protecting your filter when it's not in use. There's even multiple sizes and ND strengths to choose from as well.
Learn more about the PolarPro Quartzline ND8/Polarizer Hybrid Filter
Best Lens Filters: Marumi DHG Super Circular Polarizing Filter
The Marumi DHG Super Circular Polarizing Filter is one of the best available on the market today.
With their high-grade optical glass that improves durability and a satin finish on the filter housing that reduces reflections, you have a filter that's tough, smartly designed, and inexpensive to boot.
The filter has six coatings - including an anti-static layer that prevents dirt and dust from sticking to the glass. There's also an ultra-low reflective layer to minimize reflections.
On top of that, this filter is just 5mm thick, which lessens its profile on the front of your lens. That means less vignetting when shooting with a wide-angle lens and at a wide aperture.
From 37mm up to 105mm, Marumi has a circular polarizer for just about any lens!
Learn more about the Marumi DHG Super Circular Polarizing Filter
We Recommend
Why You Need a Reverse Graduated Neutral Density Filter in Your Bag
 Image credit: Karol Nienartowicz
I feel like most photographers are familiar with common lens filters like polarizers, solid neutral density filters, and graduated neutral density filters.
But there's another filter that can completely change how your images look and feel - a reverse graduated neutral density filter.
And I find that more people than I would expect have no idea that these things exist.
That's where this article comes in...
Let's discuss the virtues of reverse GND filters and explore some sample images so you can see how much of a difference these filters can make.
What is a Reverse Graduated Neutral Density Filter?
If you've seen a normal graduated neutral density filter, you know that they're dark on the top and gradually fade toward the bottom, as explained in the video above by NiSi.
The darkened area serves to limit the amount of light entering the lens, thus darkening bright skies. The lighter area on the bottom has no effect on the exposure of the landscape, so the filter evens out the light, helping your camera to create a better-exposed image.
A reverse ND grad does something very similar.
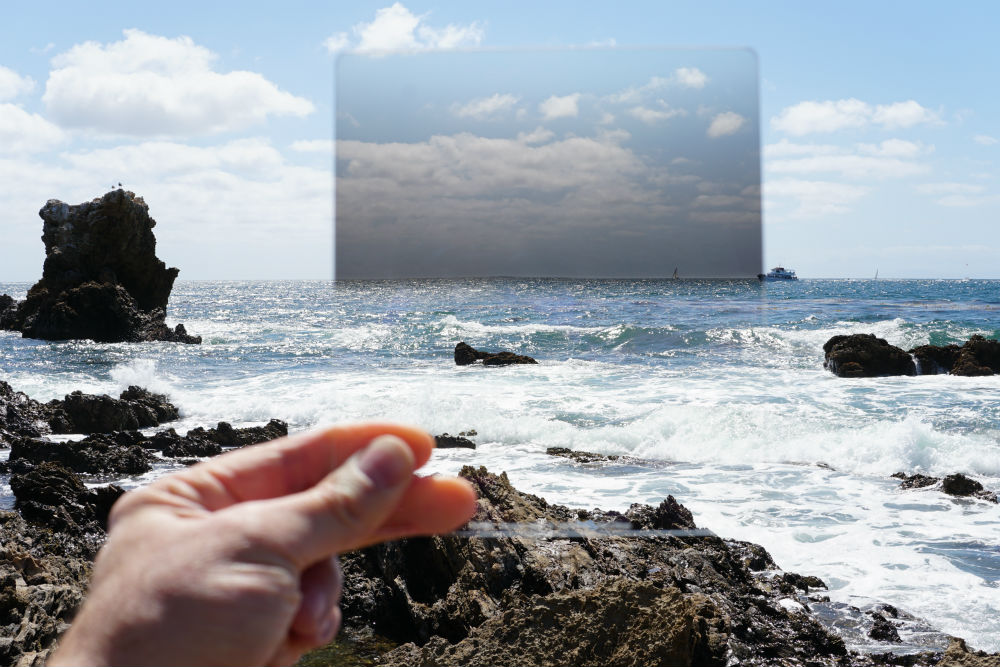
The difference is that the darkest area of the filter isn't at the top, but is in the middle instead.
That's because these filters are specially designed for shooting at sunrise and sunset, when the sun is at the horizon.
Thus, the dark middle portion of the filter reduces the brightness of that area, while a less dark area above that darkens the sky, as shown above.
And like traditional ND grads, the bottom of the filter is clear. In other words, it works just like any other graduated ND to help your camera get a well-exposed shot.
Learn More:
- Working With Good Landscape Photography Lighting and Its Effect on Your Photos
- The #1 Pro Landscape Photography Tip for Amazing Photos
How a Reverse ND Grad Can Help Your Photos
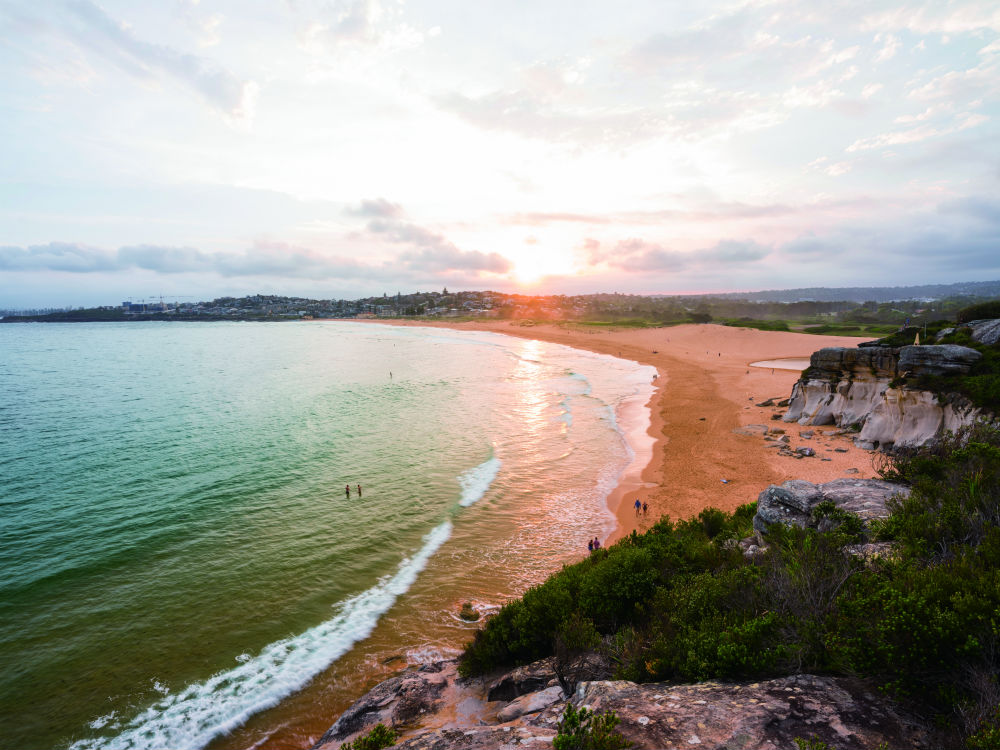 Image credit: Andrew Code
The effect that a reverse GND filter can have on your images is quite impressive.
In looking at the image above - taken without a reverse ND grad - you can see how the sky is essentially an overexposed blob.
But with a reverse ND grad in place, it's a completely different story.
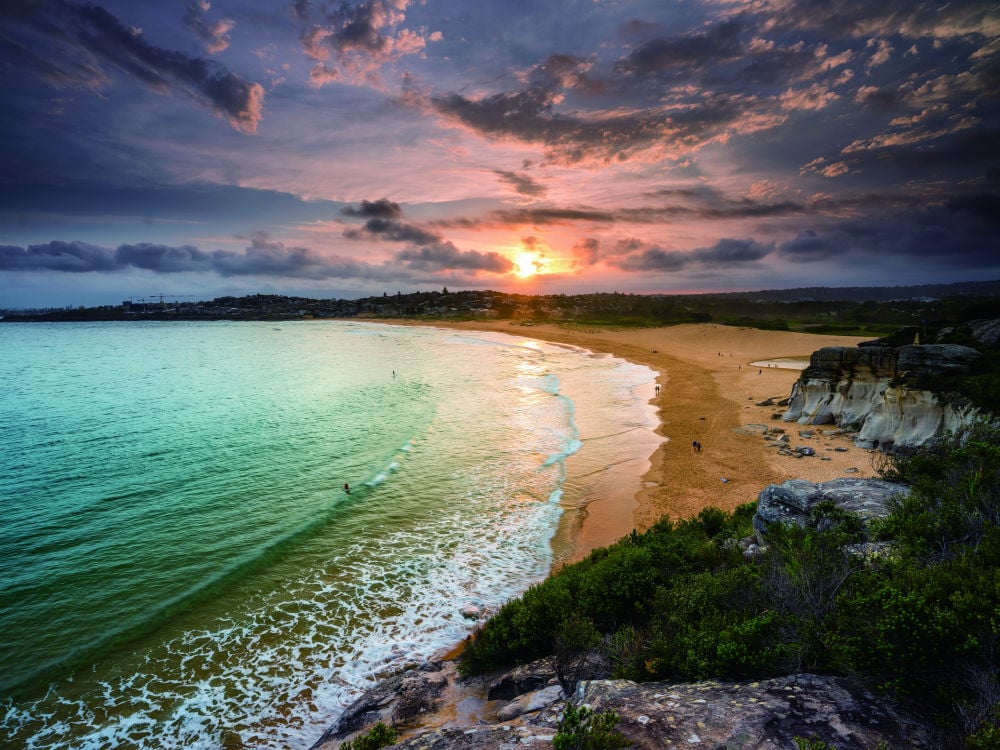 Image credit: Andrew Code. With NiSi Reverse Nano IR GND 8(0.9) F16, ISO100, 1/4s
In this "after" image, you can actually see the clouds in the sky with the increased definition that the reverse ND grad gives to the photo.
Not only that, the sunset comes through in vibrant color, adding dimension and depth to the shot.
Image credit: Steffen Hummel
Again, in this example, you can see how the brightness of the sunset completely takes over the sky in this shot.
Without any detail in that area, the image isn't nearly as successful as it could be, despite the fact that the foreground is quite beautiful.
Image credit: Steffen Hummel. With NiSi Reverse Nano IR GND 8(0.9) F11, ISO100, 131s
But with a reverse ND grad, the colors of the sunset come shining through.
Plus, with the clouds now visible, the sky is much more dynamic and matches the interest level of the foreground.
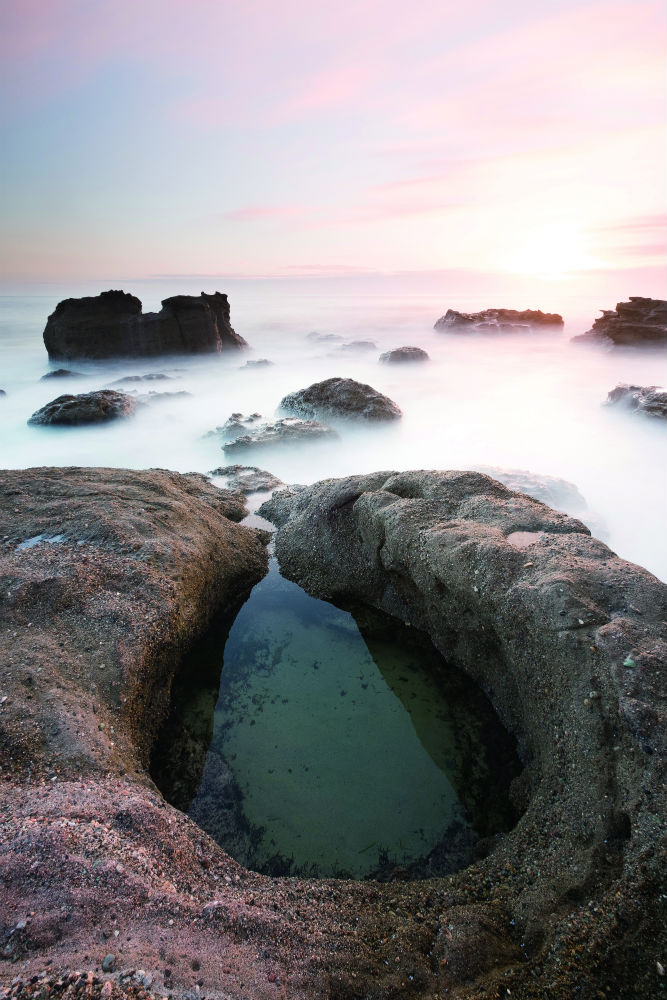 Image credit: Andrew Code
You can even pair a reverse GND filter with a solid ND filter.
Without the filters in place, you see the familiar overexposed scene above.
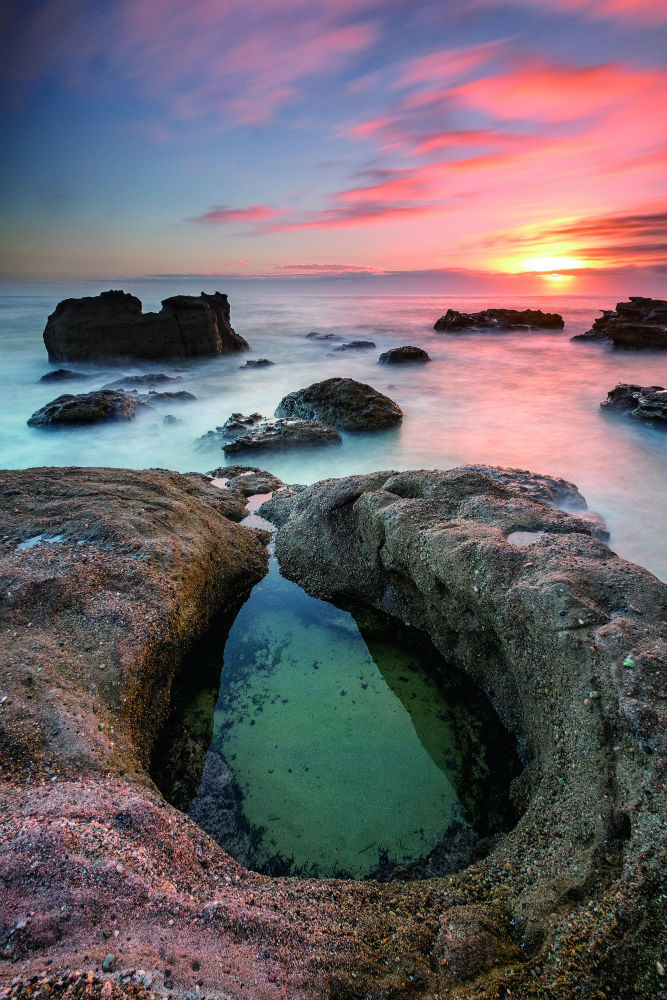 Image credit: Andrew Code. With NiSi Reverse Nano IR GND 8(0.9) + IR ND 64(1.8) F22, ISO100, 302s
But with the filters in front of the lens, you're able to capture beautiful colors, contrast, and definition in the sky.
In addition, you also have the ability to blur the movement of the clouds and water, as shown above.
The result is a gorgeous, dynamic landscape photo with tons of visual interest that would be impossible to get without filters in place.
Learn More:
- How to Shoot Landscapes at Blue Hour
- Graduated Neutral Density Filters vs Solid Neutral Density Filters: Differences and When to Use Them
Wrapping It Up
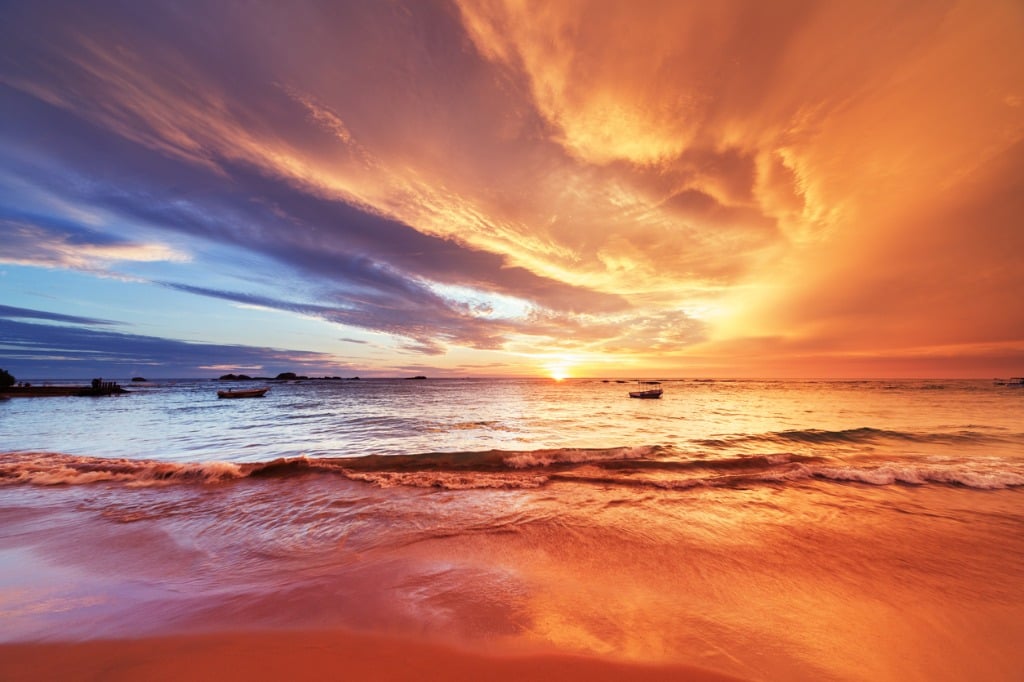
I think it's safe to say that we're all in pursuit of ways to create more interesting and impactful photos.
And as you've seen in the sample images above, a great way to do that is to use filters to enhance the scene and help your camera get every last bit of detail out of a landscape that it can.
It's important to note that not all filters are made alike, and that you need to be careful when choosing the filters you use.
I've been sporting NiSi filters as of late, and I can tell you without a doubt that these things are well-designed, beautifully crafted, and give you the kind of results you demand!
Visit NiSi's website for more details about these and other lens filters.
We Recommend
Working With Good Landscape Photography Lighting and Its Effect on Your Photos
I'm a landscape photographer, and I'm not a morning person.
That's not a good combination to have seeing as how one of the best times to photograph landscapes is at sunrise.
But as much as I hate getting up early, when I'm out there at a perfect spot with a gorgeous landscape before me and the sun rises to cast its warm glow across the landscape, I have to say, losing a couple of hours of sleep is all worth it.
Good landscape photography lighting is the key to capturing drop-dead gorgeous photos. But it isn't always as easy as getting up early to find that awesome light.
Here's a few tips that will help you find the right light for your photography.
Defining Good Landscape Photography Lighting
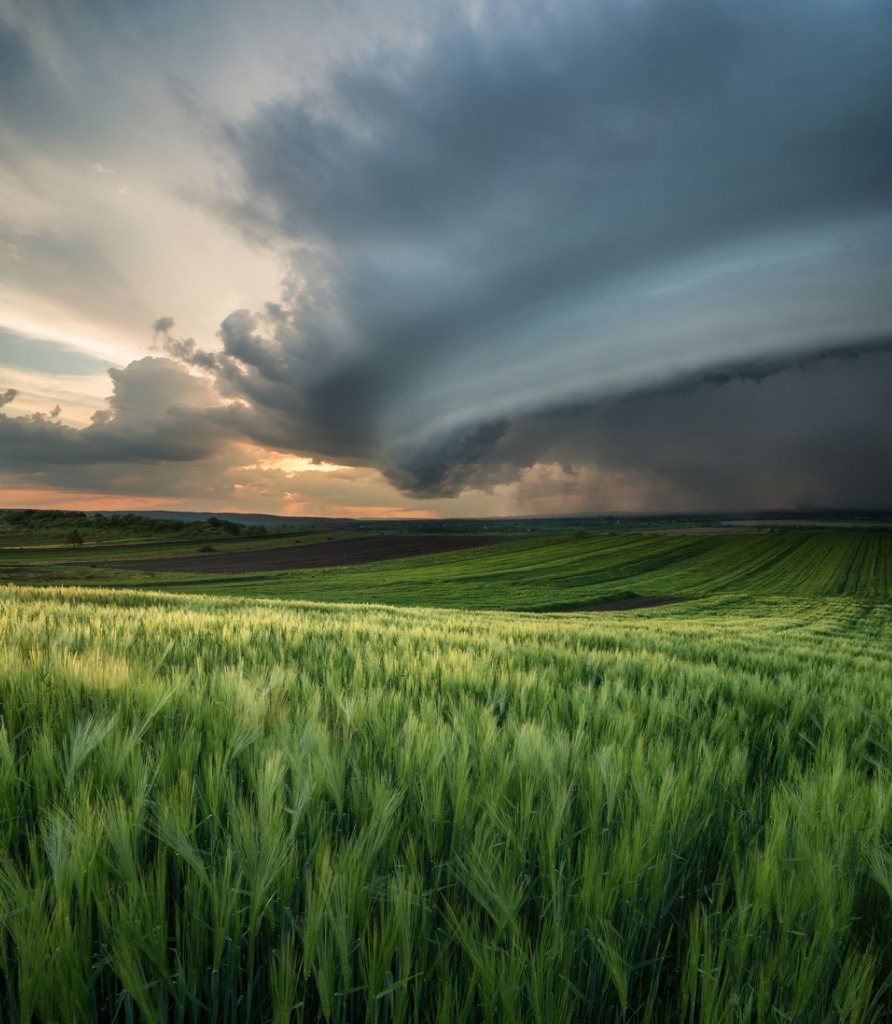
Defining "good light" is actually quite difficult because what constitutes good light depends on the landscape itself as well as the mood you want to set in your image.
For example, soft, diffused light on a cloudy day is very even, with little or no shadows and very little contrast, as seen in the image above.
But because there is so much drama in the cloud formations and so much detail in the foreground grasses, this shot doesn't need dramatic lighting to be visually appealing.
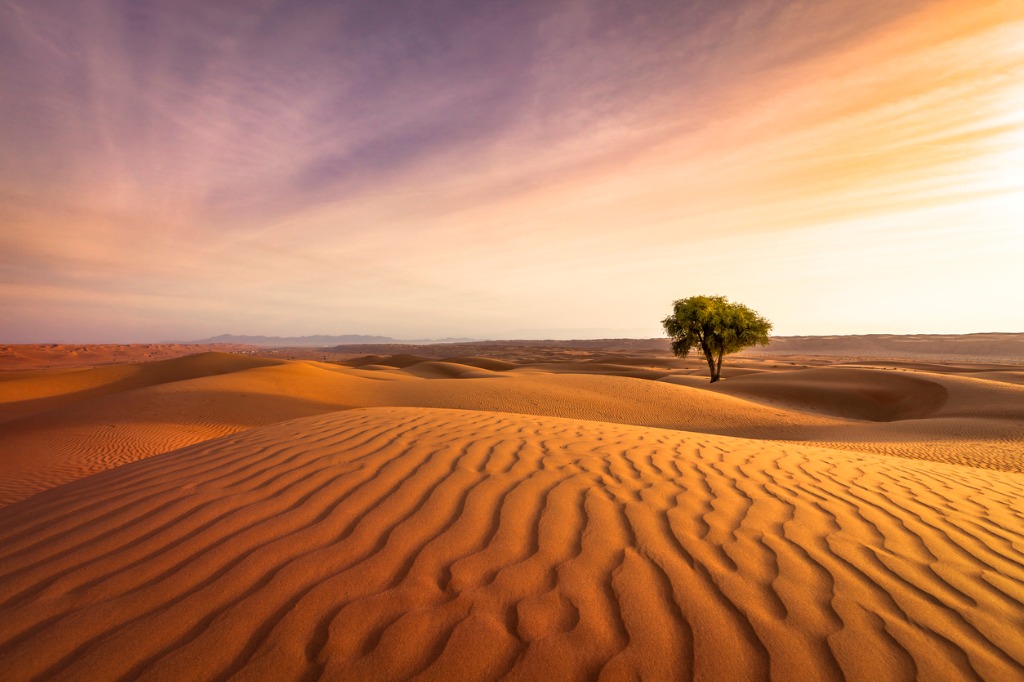
However, on other occasions, more direct light is a better choice.
In the image above, there are no clouds to diffuse the rays from the setting sun, which makes the light harsher and more contrasty than in the previous example.
But it works for this landscape because the low-slung light brings out shadows in the foreground that highlight the texture of the sand. Likewise, where the blue tones of the light in the previous image help set the tone for the dramatic clouds, in this shot, the warm tones are more conducive to the desert scene.
So, in the end, good light doesn't have a specific definition other than it's what makes the scene you're photographing look the way you want it to look. Explore warm vs. cool light to learn more about how color temperature impacts how your photos look.
Learn More:
- Easy Ways to Improve Your Landscape Photography
- Landscape Photography Composition Rules You Need to Start Using Today
Finding the Best Lighting
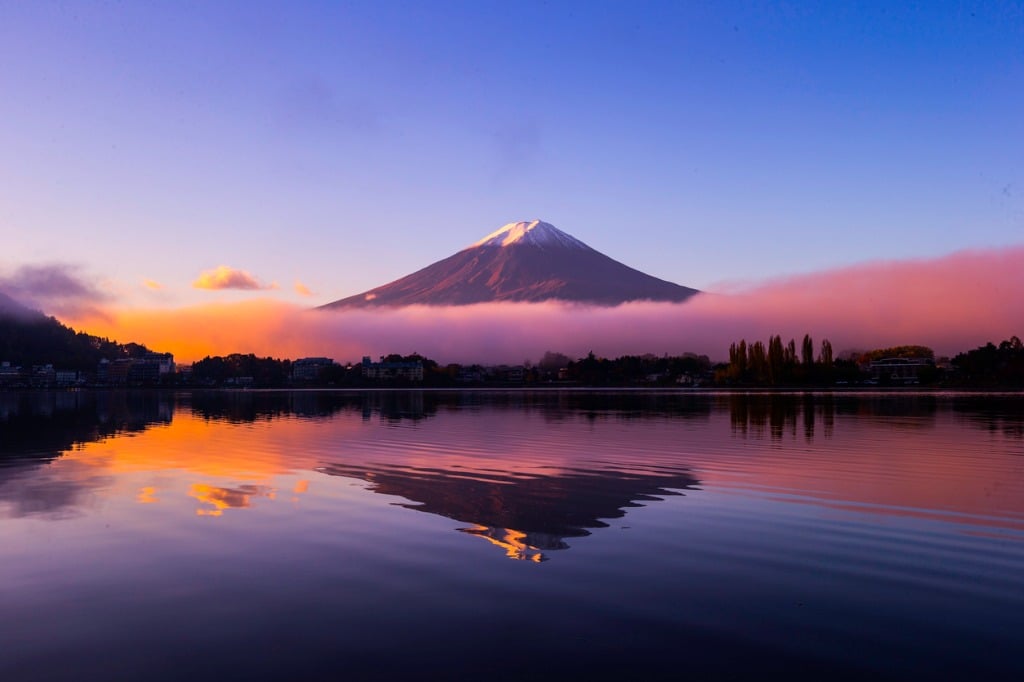
The first key to mastering natural light is simply taking the time and putting forth the effort to experiment with different types of lighting.
Now, that doesn't mean that you need to go out before sunrise and stay in the same spot until after sunset, taking a photo every five minutes.
But if you can revisit the same location at different times of day, or even if you can stay at the same location for an hour, you can get enough photos with different kinds of light such that you have some variety to see what works best for that location.
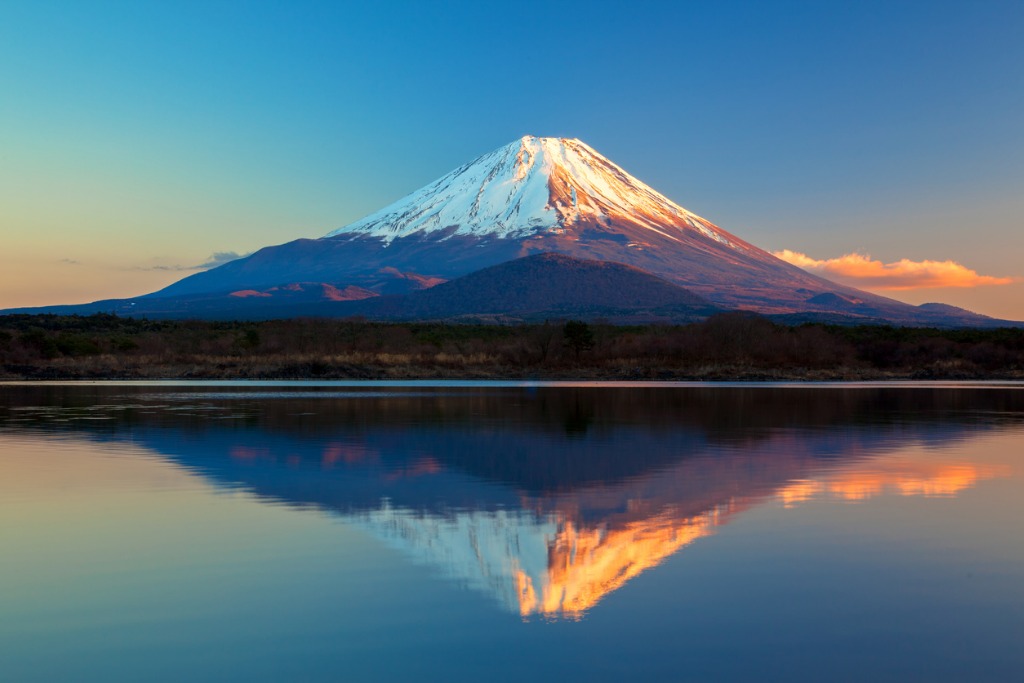
The second component of finding great light for landscape photography is to scout locations with light in mind.
That means that you aren't just looking for a strong subject or a pretty scene to feature in the photo. Instead, you're doing so through the lens of the best light to highlight those features.
For example, consider where the sun will rise and set in relation to the scene. Also think about how the sun will fall across the landscape. By that, I mean if the mountains you want to photograph face east, a sunrise shoot might be preferable because the sun will illuminate the mountains as it rises and help you get the best natural light photos.
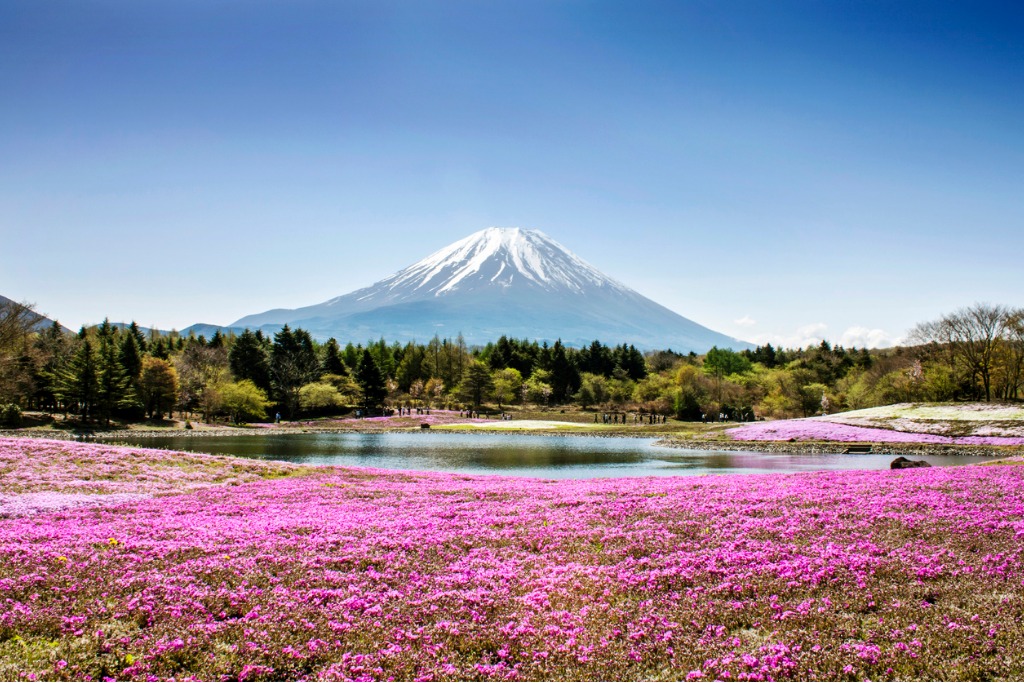
Another thing to consider when hunting for good light is how the light interacts with each component of the shot, not just the subject.
That is, while sunrise light might give the mountains in your shot a nice, warm glow, the sun might be too low in the sky to cast light on the field of wildflowers in the foreground of the shot.
In other words, perfecting the lighting for landscape photography needs to be a process, one in which many different factors are considered and one in which light is used to bring cohesion to the shot.
Learn More:
- 4 Ways to Make Your Landscape Photos Look Like the Pros
- How to Get a Perfect Foreground in Landscape Photography
Change the Light to Suit Your Purposes

Have you ever heard the term "right light photography?"
It might not make sense at first, but it refers to doing what you can to get the right light for your shot.
In landscape photography, that process has to include changing the light as you see fit.
The question is, how do you do that?
The answer is simple: filters.
I headed to the beach the other day with my Nikon D850 and my NiSi filter kit, which includes the graduated neutral density filter you see in the shot above.
If you've never used an ND grad before, it's main purpose is to help you even out the exposure of your shot.
That is, when you photograph a landscape, the sky is often quite bright - much brighter than the landscape below it.
If you don't have a filter to block out some of the light in the sky, you will end up with a shot that's either well-exposed for the bright sky or well-exposed for the darker landscape, but likely not well-exposed for both, unless you shoot in HDR or stack multiple exposures together.
But using a graduated ND filter means you can control the light as you see fit in a quick and easy process.
Just attach the filter holder to your lens, as shown above, slide the graduated ND filter into the holder, compose the shot such that the filter is positioned precisely to block out the bright light in the sky, and take the shot.
Of course, a graduated ND filter isn't the only option for manipulating light for landscapes.
You can also attach a solid ND filter (like the one shown above) that enables you to block out light from the entire shot. This is advantageous for times when you want to capture a long exposure during the daytime and blur the movement of waves crashing on the beach, a waterfall cascading off a cliff, clouds moving across the sky, and so forth.
Without the light-blocking power of an ND filter, none of this would be possible during the daytime, as the long exposure time needed to blur movement would otherwise result in a vastly overexposed image.
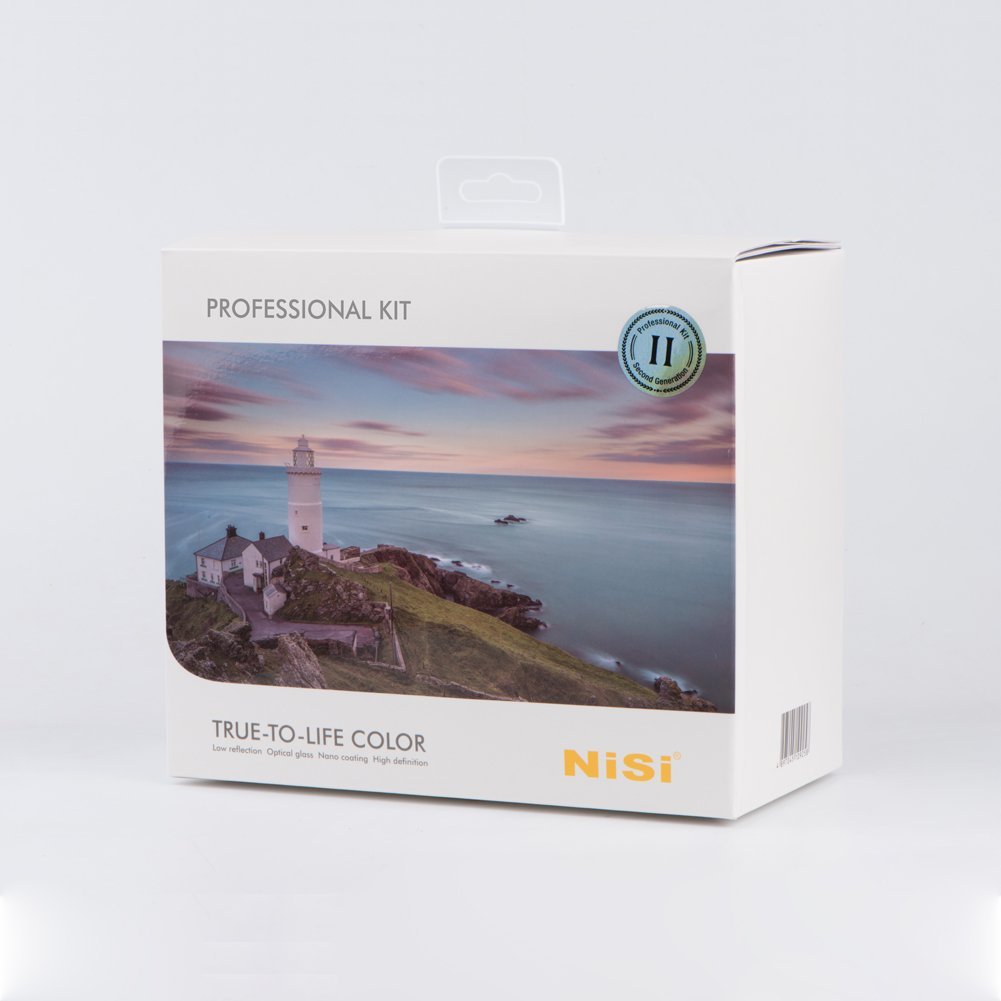
You can often find filter kits with various filters that help you change the light. In the case of my NiSi 100mm Filter System, I got a filter holder with adaptor rings for various sized lenses, a soft-edge graduated ND filter, a reverse graduated ND filter, and three different solid ND filters (3-stop, 6-stop, and 10-stop) that allows me to create all sorts of different light effects.
The kit even includes a carrying case and cleaning supplies to keep the filters nice and clean.
The moral of the story here is that while you need to put in the time and effort to find the right light, with the right tools at your disposal, you will be better equipped for lighting landscape photography in a way that better suits the goals you have for your photos.
Learn More:
- Change the Light in Your Landscape Photos
- A Step-by-Step Guide for Long Exposure Landscape Photography