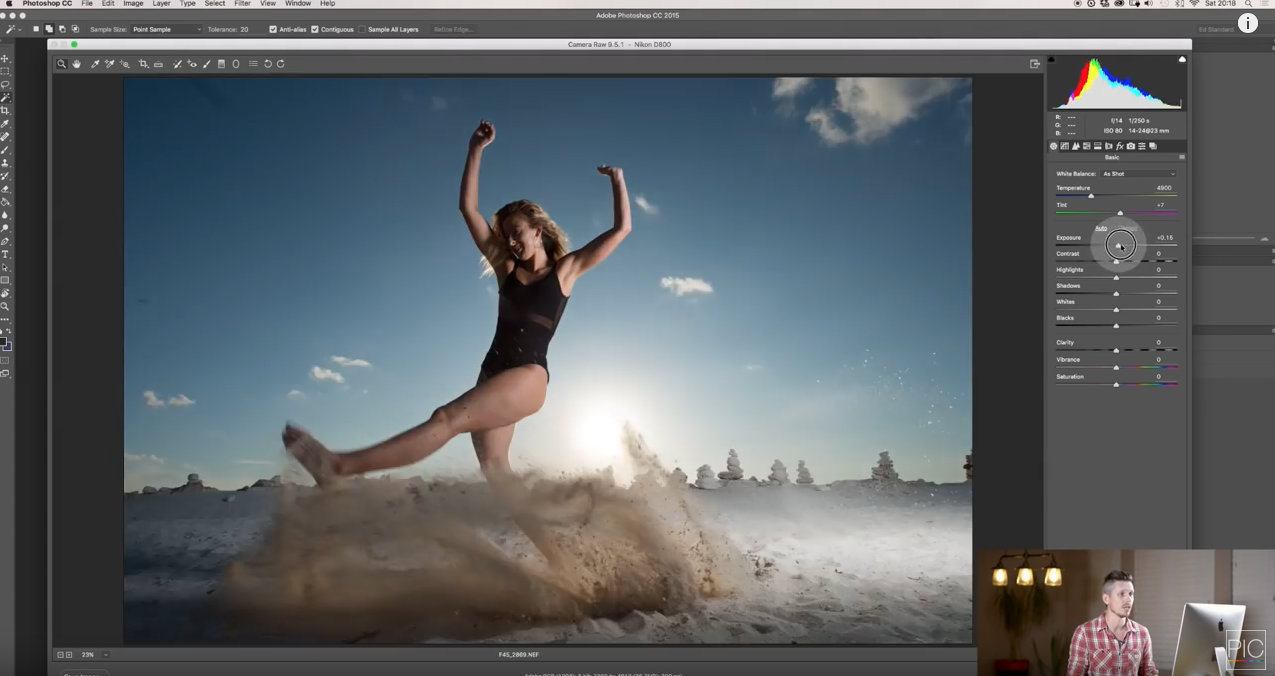
10 Things You Shouldn’t Do in Photoshop

Photoshop is a wildly powerful program that gives photographers of all skill levels a lot of creative latitude in terms of how the process their images. And while that latitude leads to some truly incredible images that have stunning detail, some Photoshop functions can be used in a way that actually detracts from the image.
You’ve no doubt seen a portrait that’s obviously been through one too many cycles of eye retouching. You’ve probably also seen a few black and white images that were converted by desaturating the image. You might have even done these and other Photoshop faux pas yourself!
In the video below, Tutvid takes us on a quick tour of the Photoshop misfires noted above, as well as eight other Photoshop no-nos. If you can avoid doing these 10 things, you’ll be in a much better position to create the kind of stunning photos that make people say “Wow!” instead of “Yuck!”
Amazon Recommendations
- Adobe Photoshop CC Classroom in a Book
- Adobe Photoshop CC for Photographers: 2016 Edition
- Adobe Photoshop CC - 12-month Plan
We Recommend
28 Amazing Photoshop CC Tips, Tricks, and Hacks

I often say we're in the golden age of photography right now, given the power of the tools we have at our disposal.
From our cameras and lenses to accessories like camera remotes and tripods to post-processing software like Photoshop CC, there is no shortage of photography supplies that help us all create better, more dynamic photos in one way or another.
From my perspective, it seems like a lot of the attention is gained by the "frontend" gear - cameras, lenses, and so forth. And though there's nothing wrong with that, there's a lot to be said for what a photographer can do with his or her photos in post-processing, assuming they take the time to learn how to use programs like Photoshop.
In this guide, get a step-by-step tour of Photoshop CC from YouTube user Tutvid, which highlights more than two dozens tips, tricks, and hacks that will prove beneficial for you when editing your photos.
Let's get started!
Whiten Teeth
 YouTube Screenshot/Tutvid
How often do you see a photo of yourself and wish you had whiter teeth?
Photoshop CC makes it easy to get those pearly whites with layer adjustments and vibrance.
Go to Layer > New Adjustment Layer > Vibrance, and reduce the vibrance to -60.
Then, choose the Vibrance Layer in the Layers Panel, and choose Layer Mask.
Next, press Command/Control I to invert, which fills the layer mask to hide the adjustment made to the Vibrance Layer.
Finally, use the Brush Tool with a small, soft-edged brush set at 50% opacity and paint over the teeth that need whitening.
Merge Layers to a New Layer
More often than not, as I'm working in Photoshop I'll end up with tons and tons of layers. Occasionally, I'll need to merge all those layers into a single layer.
To do that and retain the integrity of the layer structure, press Command/Control + Shift + Alt/Option + E.
With that simple keystroke, all your layers will save and merge, and a new layer will appear. Easy huh?
Rotate View
 YouTube Screenshot/Tutvid
If you've never used the Rotate View tool, you've been missing out.
When you're working on a photo, it's nice to be able to change the view of the image without flipping it on the horizontal or vertical.
In Photoshop CC, you can do this by clicking and holding the Hand Tool icon in the toolbox, which reveals the Rotate View Tool. You can also press R to access the tool.
Just drag left or right on the screen, and the Rotate View Tool allows you to rotate the image counterclockwise or clockwise for a better view of what you're working on.
When you're done rotating, simply click the Reset View button in the toolbar, and the image will return to normal.
Change Layer Opacity
Yes, there's a Layer Opacity slider in the layers panel, but hotkeys are so much faster...
Photoshop CC has a hotkey to adjust layer opacity, which is found by selecting the Move Tool and pressing a number on the keyboard.
For example, when the Move Tool is selected, press 2 to change the opacity to 20%, 5 to change it to 50%, and so on. Pressing 0 resets opacity to 100%.
If you need to change the Fill Opacity, select the Move Tool, press Shift, and then press any number to adjust opacity as you see fit. If you need to adjust the opacity of a tool, like the paintbrush, simply activate the tool and press whatever numbers you wish on the keyboard.
But what if you want something like 45% opacity? Just press the numbers quickly in succession!
Choose Layers
In the Layers Panel, choose a layer.
If you want to select a layer above or below the selection, just press the Alt/Option key and then press the right square bracket on your keyboard to select the layer above.
To select the layer below, press Alt/Option and the left square bracket.
Move Layers
If you want to select a layer and then move it to a new position in the stack, press the Command/Control key with the left square bracket to move it down or the right square bracket to move it upward.
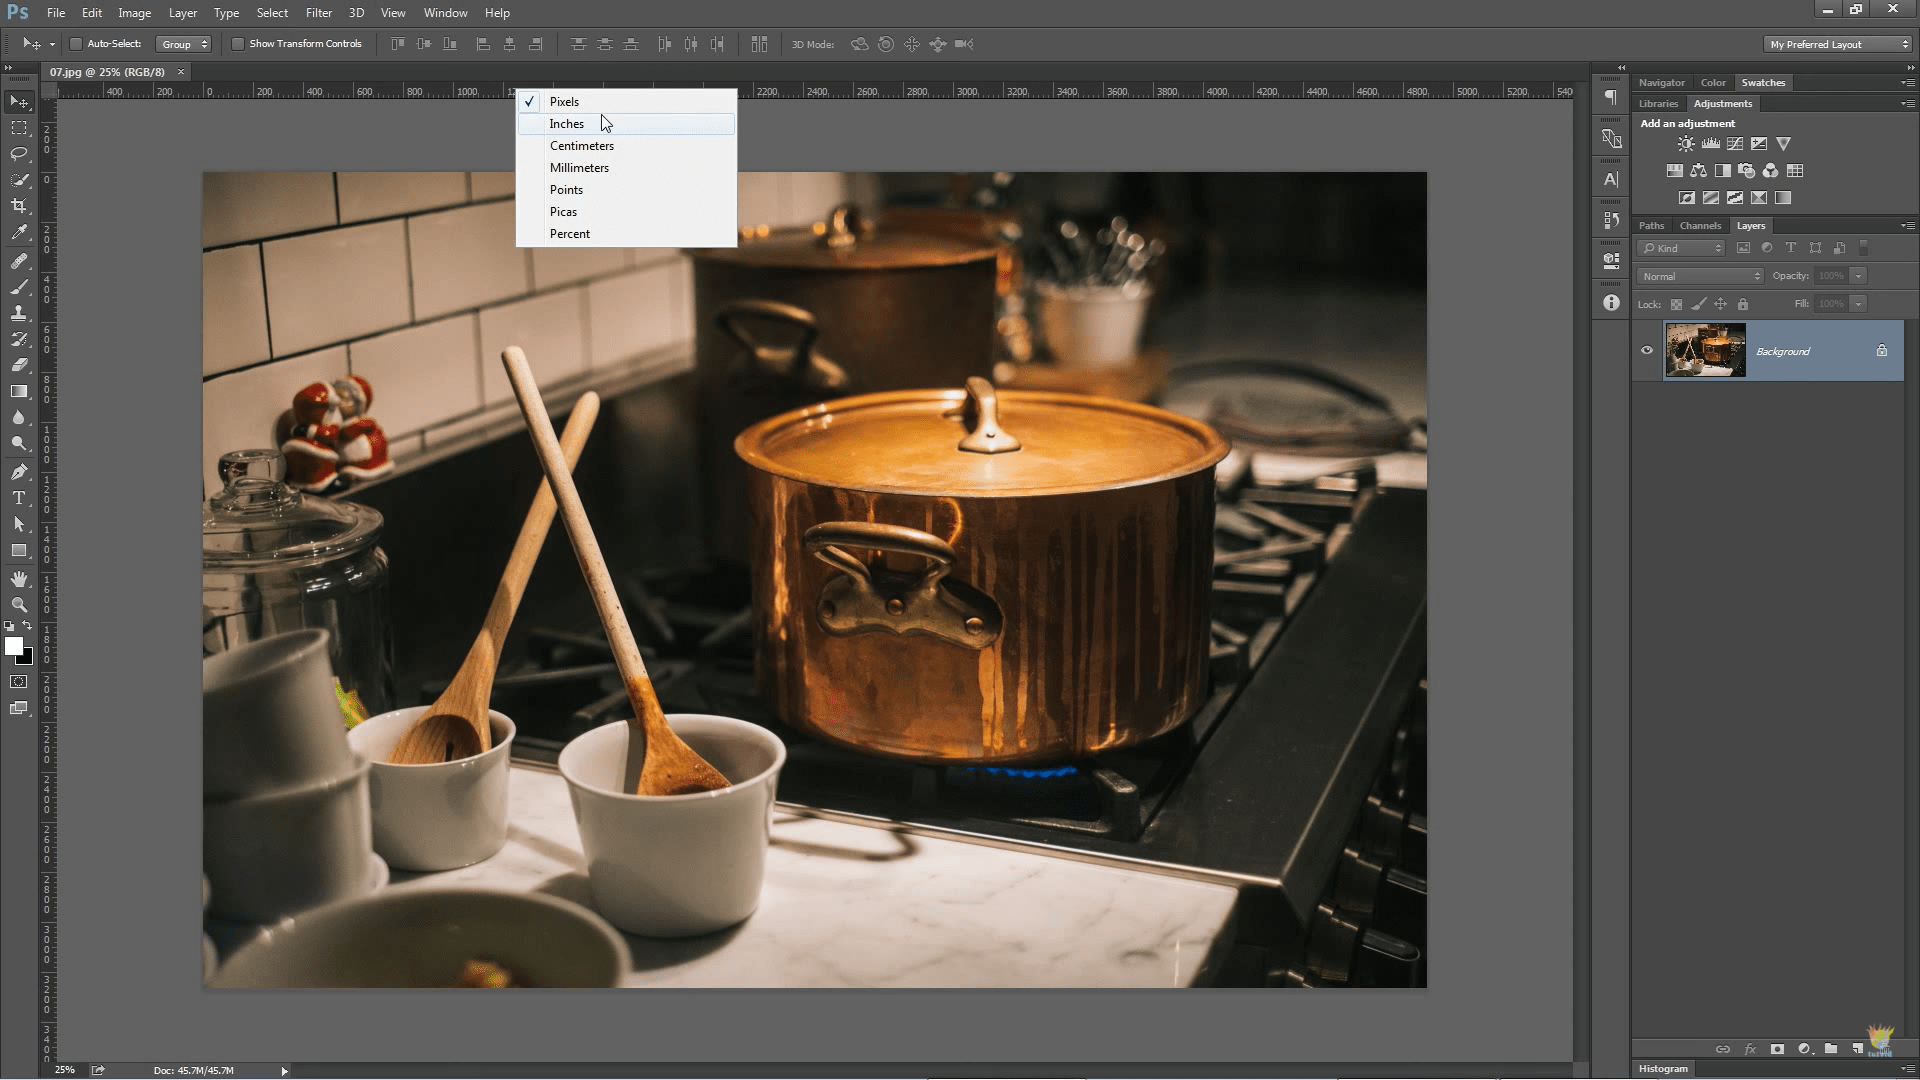
Change the Units of Measure
 YouTube Screenshot/Tutvid
You might not always want measurements to be in pixels, but how do you quickly change that?
Just ensure that the rulers are engaged by going to View > Rulers, and then right-click anywhere on the ruler.
In the pop-up window, select whatever unit of measure you need.
More Undo Steps
If you make frequent mistakes, maximizing the number of undo steps can be a handy trick...
In fact, Photoshop CC allows you to have up to 1,000 undo steps with this hack!
Just click Command/Control + K to open the preferences panel, and once there, choose Performance from the menu.
Then drag the History States slider to the number you wish. Just bear in mind that the more History States you add, the more likely Photoshop is to slow down.
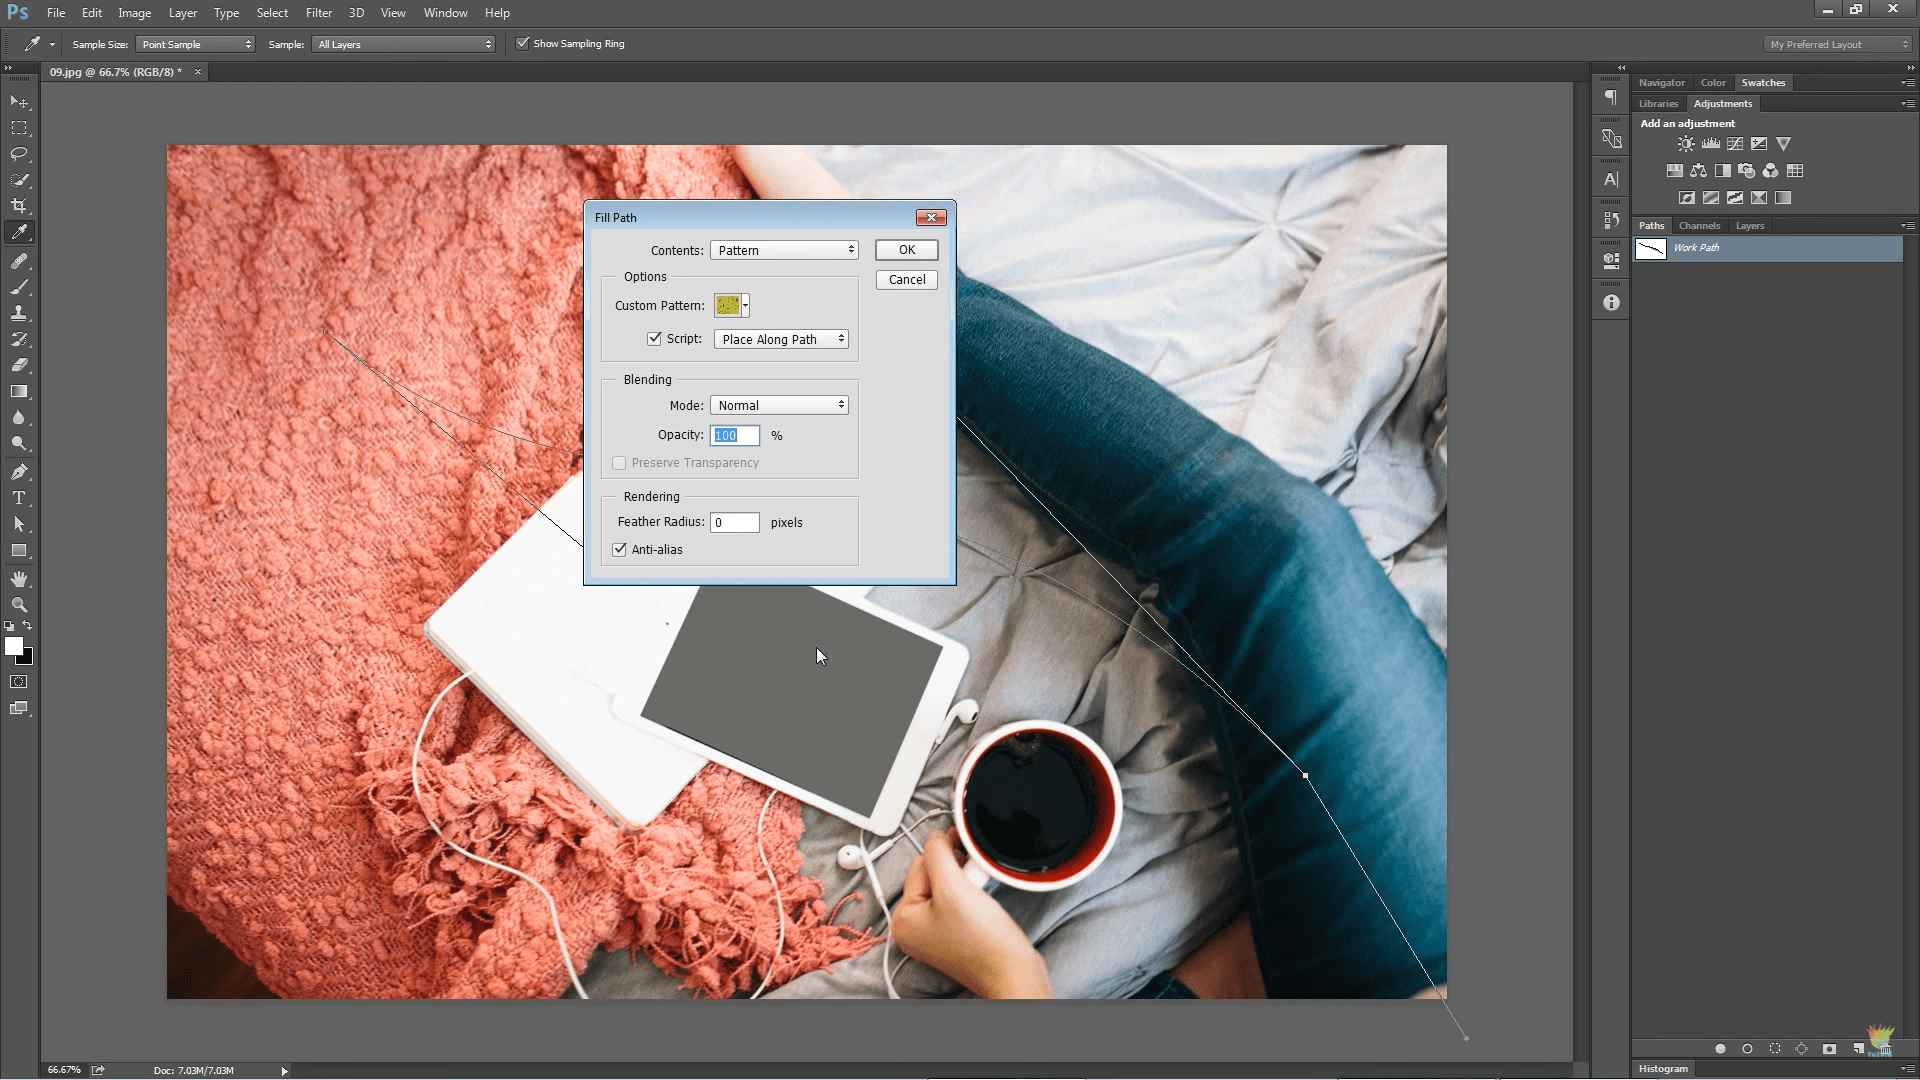
Pattern Along a Path
 YouTube Screenshot/Tutvid
Photoshop CC allows you to add a pattern along a path, assuming you know how to activate the feature.
To do so, draw a path using the Pen Tool and press A on your keyboard to get the Direct Selection Tool.
Then, right-click on the path and choose Fill Path.
By setting the contents to Pattern, you can choose a pattern. Then check the Script box, choose Place Along Path, and press OK.
Finally, in the Place Along Path dialog box, manipulate the settings as you wish, and then press OK.
Apply Layer Mask
To add a layer mask, just press the New Layer Mask button in the Layers Panel.
Doing so, however, fills the mask with white. If you want the mask to be filled with black, just hold the Alt/Option key while pressing the new layer mask button.
That allows you to hide the layer that the black mask has been applied to.
Find the Center of the Photoshop File
If you need to know the precise center point of the file you're working on, go to View > New Guide Layout, and click on Columns and Rows.
Select two columns and two rows, with a Gutter value set to 0.
Then choose the Preset menu, and select Save Preset. After it's saved, your new preset will appear in the drop-down menu!
Change Colors
 YouTube Screenshot/Tutvid
If there's an object in your photo that's got a good color and some sheen to it (i.e. a metal surface), you can easily change the color using Blend Modes.
Create a new layer and paint over the area you want to change. Then change the Blend Mode to Hue or Color.
What you'll find is that the surface you painted now changes to the new Hue or Color you used to paint it.
How to Paint a Selection
Press Q on your keyboard to activate Quick Mask Mode. Then double-click on the Quick Mask icon in the toolbox to open the Quick Mask Options.
Next, choose Selected Areas in the Color Indicates area of the dialog box. Press OK, select the brush tool, and set the foreground color to black.
Paint over the object you wish to transform, and you'll see it painted with red. If you mess up, just press X to switch to white, and you can clean up the edges.
From there, press Q to get out of Quick Mask mode, which changes the painted area to a selection.
Black and White Images With Channel Mixer
The Channel Mixer Adjustment Layer allows you to create high-impact, contrasty black and white images.
To do so, select Image > Adjustments > Channel Mixer and select the Monochrome box in the Channel Mixer dialog box.
Manipulate the Green, Blue, and Red sliders as you see fit to get the contrast you want. That's it!
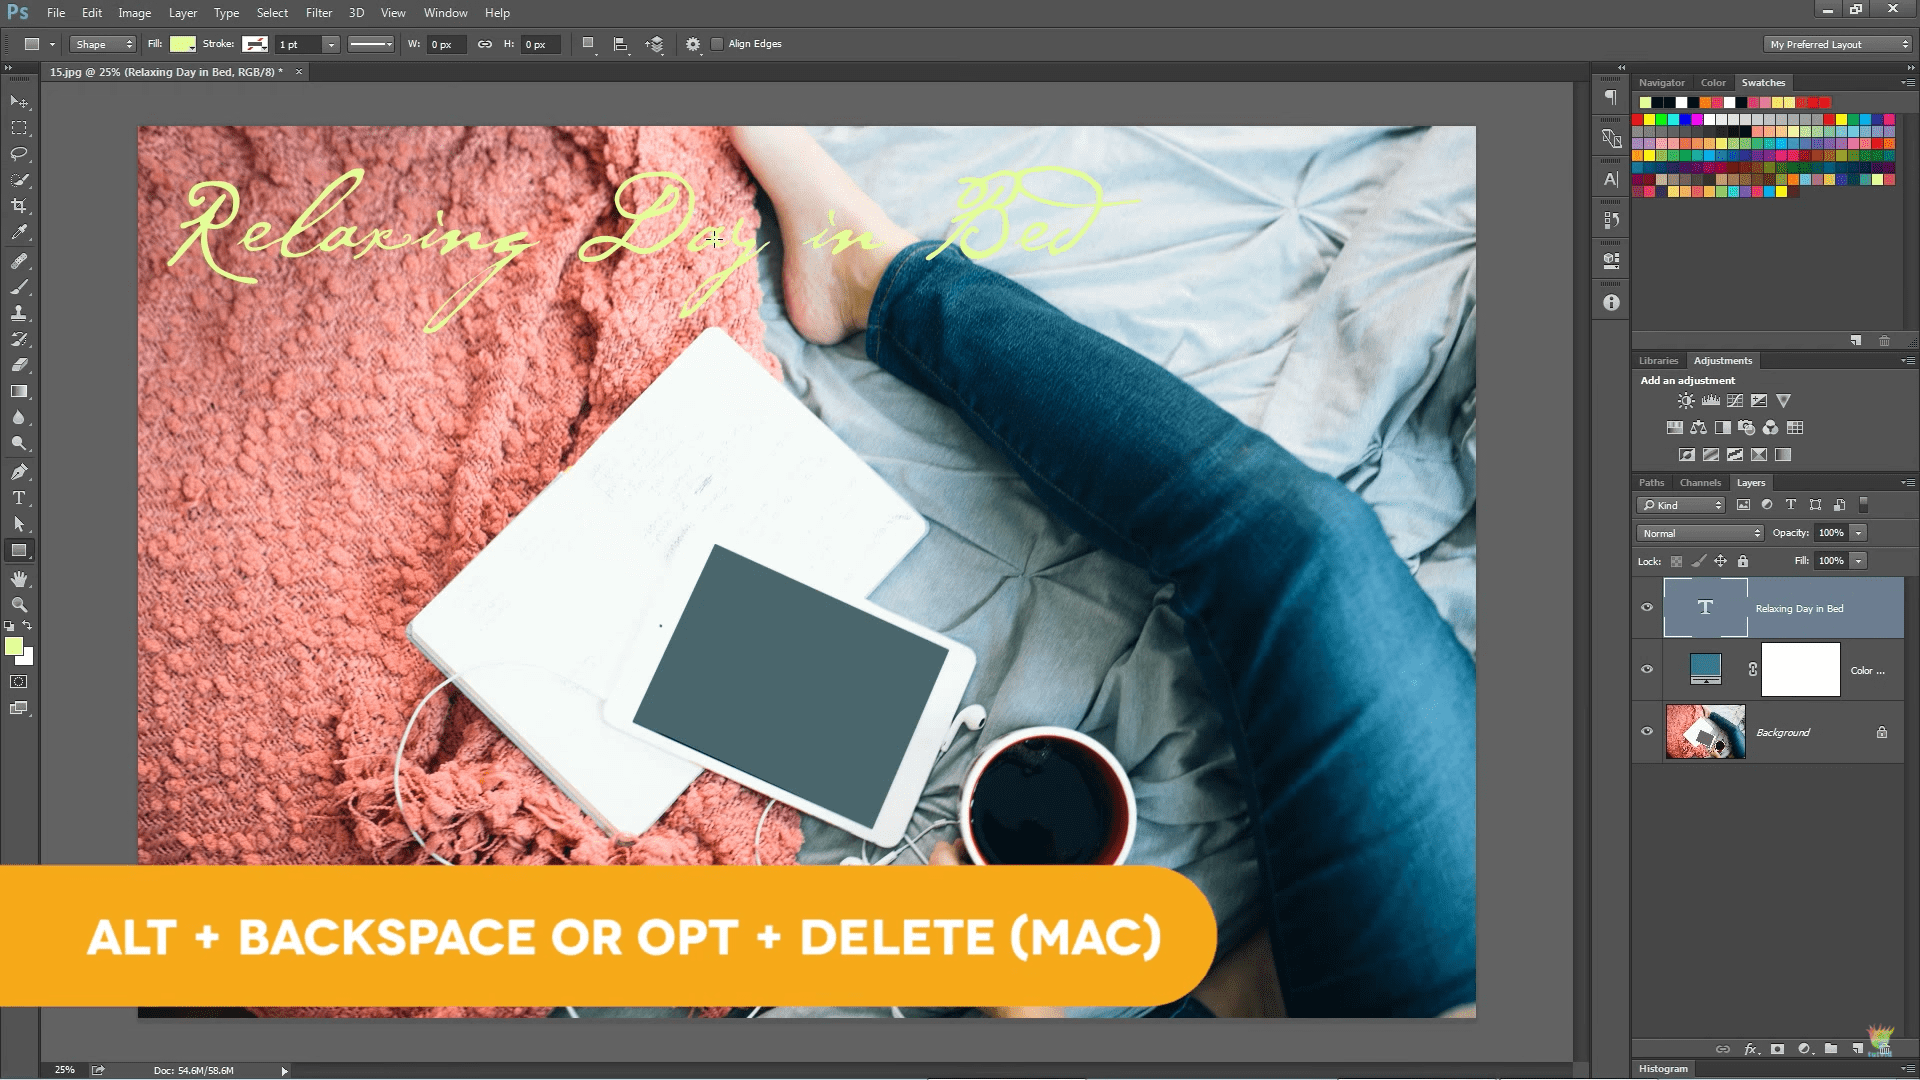
Fill Text, Color, and Shape Layers
 YouTube Screenshot/Tutvid
If you have text, a solid color adjustment layer, or a shape layer that needs a new color, there's an easy trick to do so.
Just select the layer you wish to change and press Alt/Option + Backspace/Delete.
That sets the layer to the current foreground color.
Scale Layer Styles With Layer
As the size of your layer contents change, you can have your layer styles change as well.
Go to Layer > Layer Style > Scale Effects, and then set the scale to whatever size you need.
Then, use Command/Control + T to free transform the object, setting the width and height to the desired size in the control bar at the top of the screen.
Finally, place the object where you want.
Precise Painting With the Brush Tool
When you need to tackle pinpoint painting, Photoshop CC allows you to add a crosshair in the middle of the brush.
To do so, go to Edit > Preferences, and then select Cursors from the menu. Lastly, choose Show Crosshair Brush Tip and press OK.
This also works well for dodging and burning.
Duplicate Anything You Want
 YouTube Screenshot/Tutvid
Need an extra of something? Just duplicate it!
Select an object, and drag it while holding Alt/Option to duplicate it. This trick works on just about anything in Photoshop.
Before & After Preview in the Layers Panel
Quickly have a look at the before and after effects of your work right from the layers panel in Photoshop CC.
Just press Alt/Option and click the eyeball of the layer you want to view. Doing so hides all the other layers.
Repeat the process to show all the other layers once again.
This makes it easy if you need to check out the original layer for a quick before and after view of what you've done to the file.
Straighten
To straighten an image, use the Ruler Tool and drag a line along an area of the photo that should be perfectly level.
Then, in the control bar, click the Straighten Layer button. The resulting image will align to the line you drew.
Using the Crop Tool, simply cut out the transparent areas of the shot, and you've got a perfectly level image.
You can also use the Crop Tool, press Command/Control, and it switches to the Ruler Tool. Then just drag a line across the image, and the image will automatically straighten to that line.
Then just crop the image, and voila! A straightened photo.
Bird's Eye View
 YouTube Screenshot/Tutvid
When you're zoomed in on an image, if you hold down the H key and drag the mouse, Photoshop will give you a zoomed out view, or a bird's eye view.
This is helpful for getting a quick look at what you're doing without being zoomed so far in.
Clip Image to Type Layer
If you have text on an image and you want to texturize it, you can clip another layer of content to the type layer.
This method works well for adding an adjustment layer to a layer or to restrict a feature to only the pixels of the layer to which it will be clipped.
Just drag an image or texture above the type layer, turn on that layer, and hold Alt/Option as you hover between the texture layer and type layer.
A small icon will appear, which, if you click it, will clip the texture to the shape of the type.
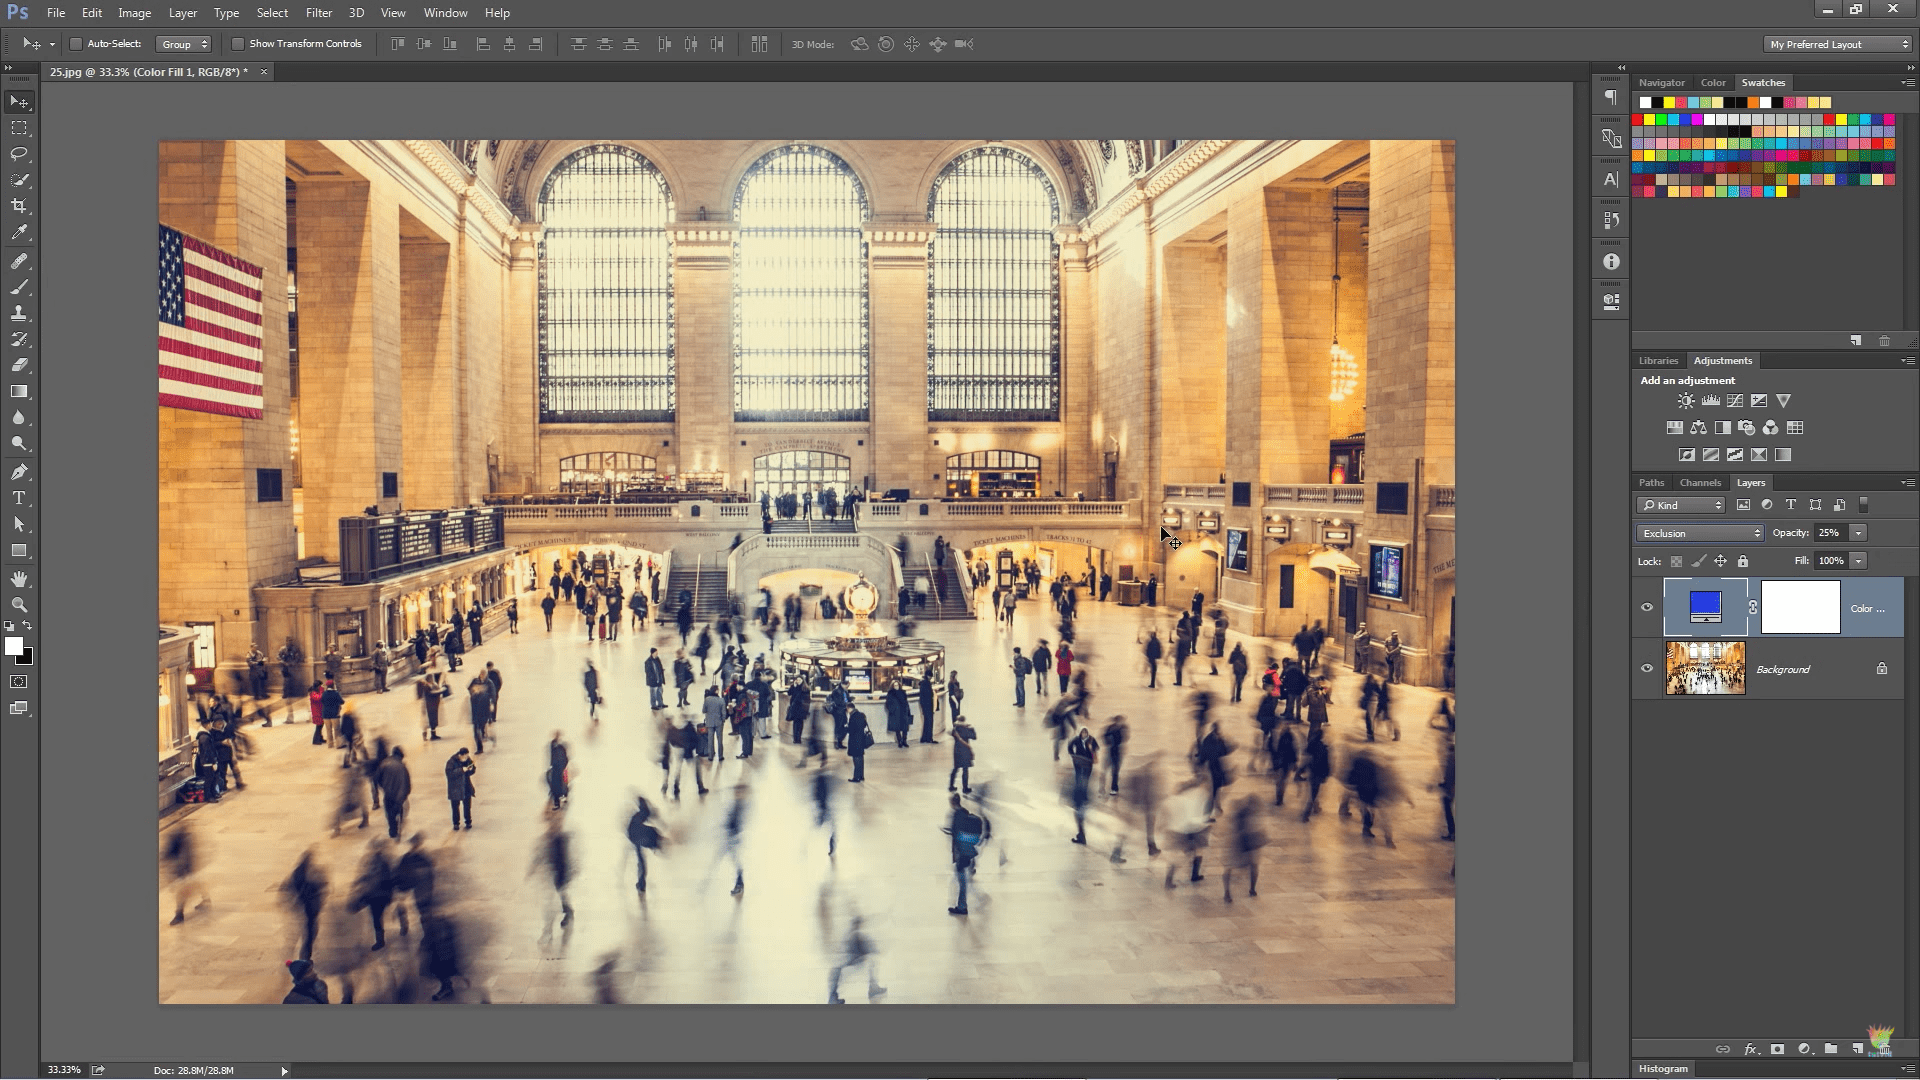
Instagram Fade Effect
Add a fade effect to any image by using a Selective Color Adjustment Layer.
Do so by going to Layer > New Adjustment Layer > Selective Color. Then select the Colors drop-down menu, select Neutrals, and set the black slider to a negative value.
Next, access the Blacks submenu and set it to a negative value as well.
Hack the Selection Placement
To be sure a selection is placed precisely where you wish, you can move the selection as you drag it out.
Just use a Marquee tool and hold the spacebar as you drag it out. This lets you move the entire selection wherever you want.
Add Retro Color
 YouTube Screenshot/Tutvid
If you want to give your photo a retro look, go to Layer > New Fill Layer > Solid Color.
Then choose whatever color you want and fill the layer.
Next, set the blend mode to Exclusion, then reduce the opacity to about 20%.
That's it!
Extract Assets
If you want to save layers as individual images for use in a later project, simply select the layers you want by pressing Shift and clicking the layers.
Then, once the layers are selected, choose Export As. In the dialog box, you can view individual layers and determine the file format you want to use for saving.
Once you do that, press Export and select the folder in which you want the images to be saved.
Multiple Drop Shadows and Strokes
To add more than one layer style, double-click the layer to open the Layer Styles dialog box.
Next to some of the styles, you should see a "+" symbol. Click on that to add however many styles you want!
Change the Interface Color
To change the color of the Photoshop CC interface, go to Photoshop > Preferences (Edit > Preferences on Windows) and select Interface from the menu on the left.
Then, press Command/Control + Shift + Alt/Option and click whichever color swatch you like to change the colors.
There you have it! Tutvid's 28 best tips, tricks, and hacks for Photoshop CC. Be sure to subscribe to his YouTube channel, and give the video a look below:
We Recommend
3 Tools You Don’t Use Enough in Photoshop

photo byscyther5 via iStock
Do you think you know Photoshop as well as you should?
Photo Manipulation’s Abbey Esparza doesn’t think you do, because she recently made a YouTube video outlining some really important Photoshop tools she thinks are underused.
After watching the video, I tended to agree with her. I’ve been using Photoshop for years, and have grown my own skills alongside its ever-changing platform.
But, I’m also not one to let pride get in the way of knowledge and believe some of the tools in her Photoshop tutorial could be a lot more useful to me if I let them be.
So, which tools are the underused Photoshop tools that she highlighted? Keep reading to find out.
Select Subject
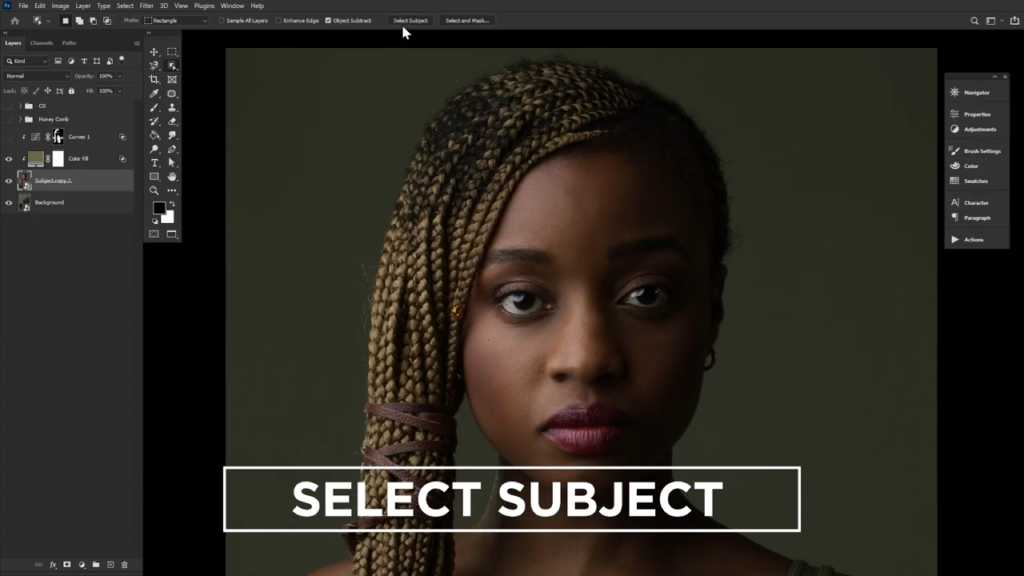
Okay, okay, I know what you’re thinking. The Select Subject tool has been a tool in Photoshop for pretty much as long as Photoshop has been around. And, that’s true, but I tended to ignore it for years and still do.
The reason for this is that the Select Subject tool was really shotty for years. It never correctly highlighted my subject, which left me trying to clean up the border anyways. After years of trying to use this Photoshop tool unsuccessfully, I eventually gave up and just started drawing my subjects myself.
But, Abbey pointed out that this Photoshop tool is really quite impressive now. Photoshop uses an AI to keep improving this tool and while Abbey does admit that it can still mess up every now and again, she argued that it saves her a lot of time.
Color Lookup Layers

You can find the Color Lookup Layers Photoshop tool in the adjustment layers panel. It’s one of the most underloved Photoshop tools, I would argue, because of its odd placement. You have to know exactly what you’re looking for.
You also need to know how to use it. The Color Lookup Layers tool allows you to apply different effects to your entire photo in just the click of a button. For photographers who need to apply the same preset to all of your photos, the Color Lookup Layers tool will quickly become your best friend by allowing you to apply different look up tables to your photos.
One of the tips that Abbey gives in her Photoshop guide is to remember to adjust the opacity for any of the LUTs you use because they are all quite stylized and will look over-the-top unless you adjust the opacity on them and then layer them.
Keep in mind that Abbey is a digital surrealist, so she specializes in creating images in Photoshop that don’t represent reality. If you’re hoping to use the Color Lookup Layers tool to create more natural photos, then don’t be afraid to increase the opacity even more.
Learn More:
Blend If

The Blend If tool comes with two different slider bars, one for “this layer” and one for “underlying layers.” It allows you to adjust your light and color on all of your layers at once. Keep in mind that when you use the Blend If tool to adjust “underlying layers” it will adjust all of your underlying layers.
The Blend If tool is excellent if you want to make your highlights in your photos really stand out, or conversely, it’s really great at making some other elements blend in better to the rest of your image.
New Window For
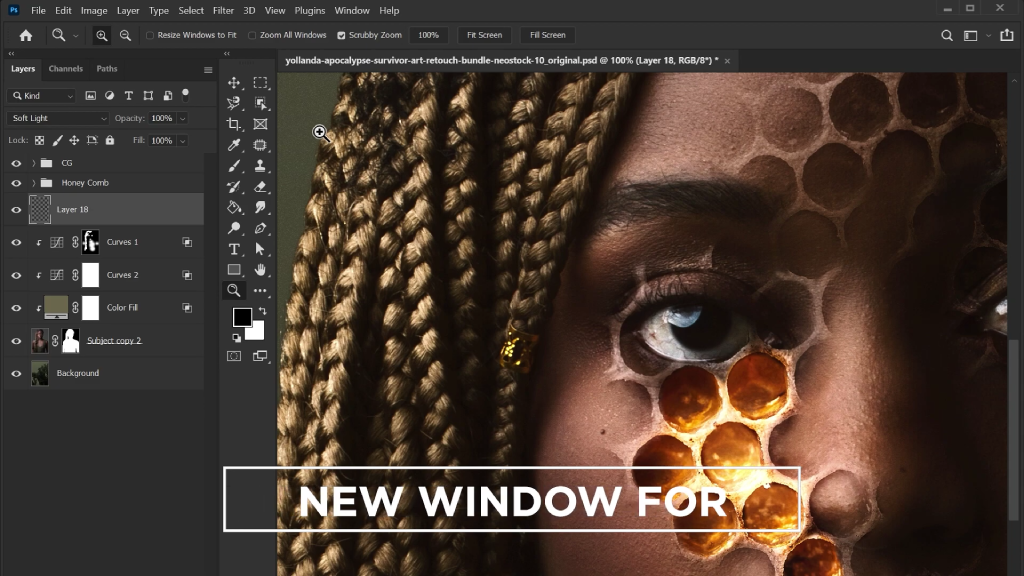
Abbey included a sneaky fourth tool in her Photoshop techniques video… the New Window For tool. This tool creates a new “copy” of the image you’re currently working on, except it isn’t really a copy because it’s a mirror. When you do something to your original image, your mirror copy will also show those changes.
You can use this to zoom in on your image, while simultaneously being able to see the overall effect on the image at large.
What Do You Think?

photo by jacoblund via iStock
So, do you agree with Abbey? Do you think that these Photoshop tools are underused? Which tools do you regularly use now and which tools do you think you’ll start to use more frequently after watching this video?
I personally know I’m going to start using the New Window For tool more often, since I just got a really large new monitor and it’ll be helpful to me to be able to keep track of all of the changes I’m making as I make them.
Learn More:
We Recommend
33 Photoshop Secrets

Are you overwhelmed by all the features and options in Photoshop?
When it comes to making transformations, using smart objects, and making selections, are you especially lost?
Then this tutorial is for you!
The folks at Yes I'm a Designer put out a fantastic tutorial video on these very subjects not too long ago.
And by the end of the tutorial, you'll be able to edit your photos like a pro in Photoshop CC.
Catch the full video above, and peruse highlighted step-by-step instructions for some of the best tips in the text that follows.
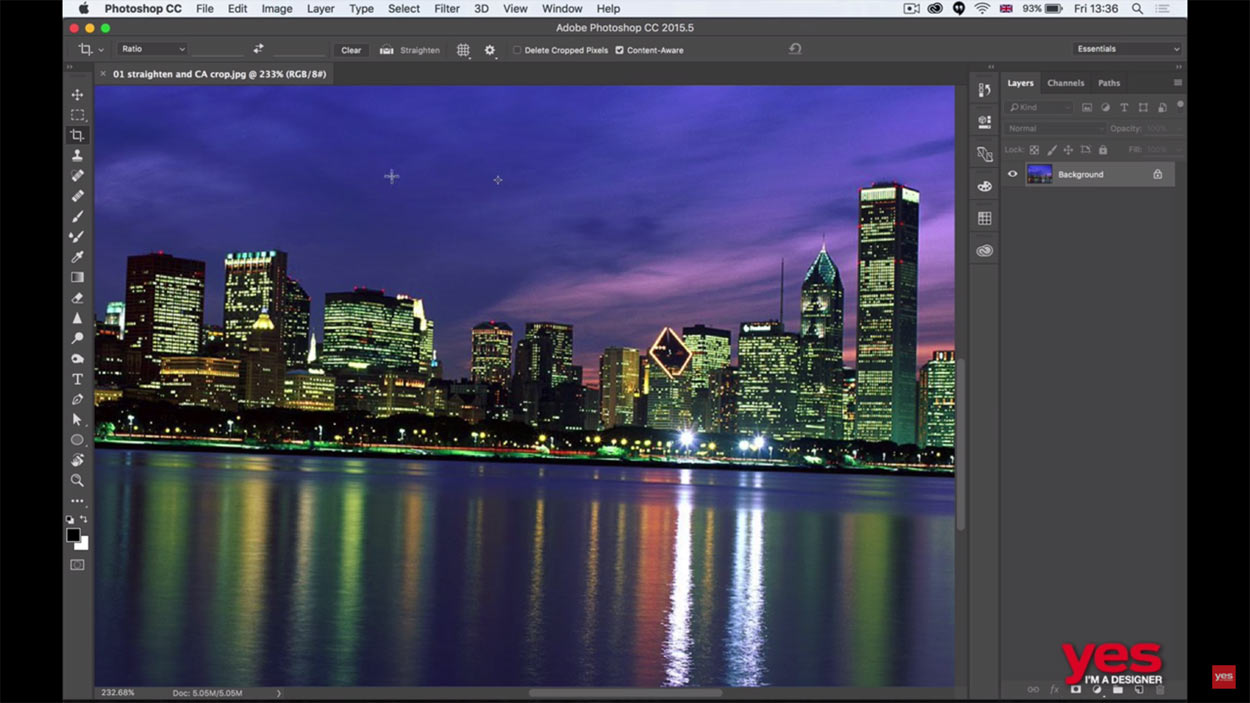
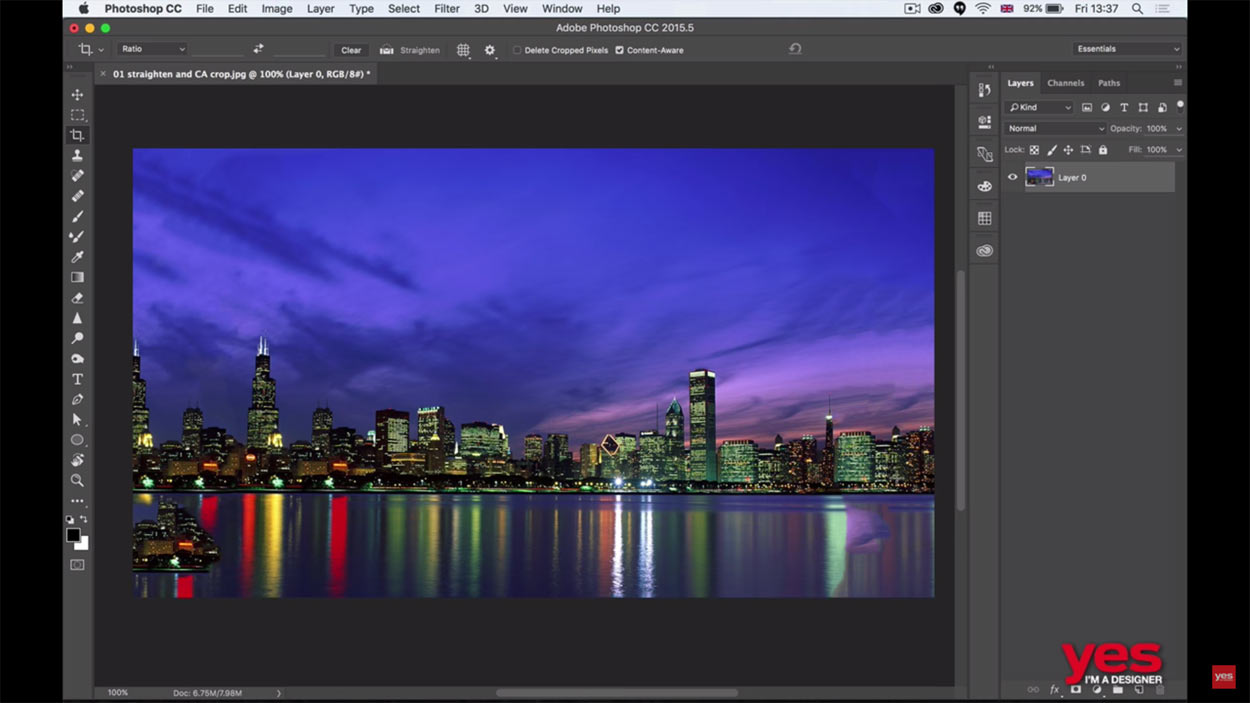
The Easiest Transformation: Cropping
YouTube Screenshot/Yes I'm a Designer
The easiest transformation you can make in Photoshop is cropping, and though it doesn't sound like something that's all that impactful, it is actually a very powerful tool.
Rather than just using the crop tool to resize an image, you can also use it to straighten an image that's got a crooked horizon, like the image above.
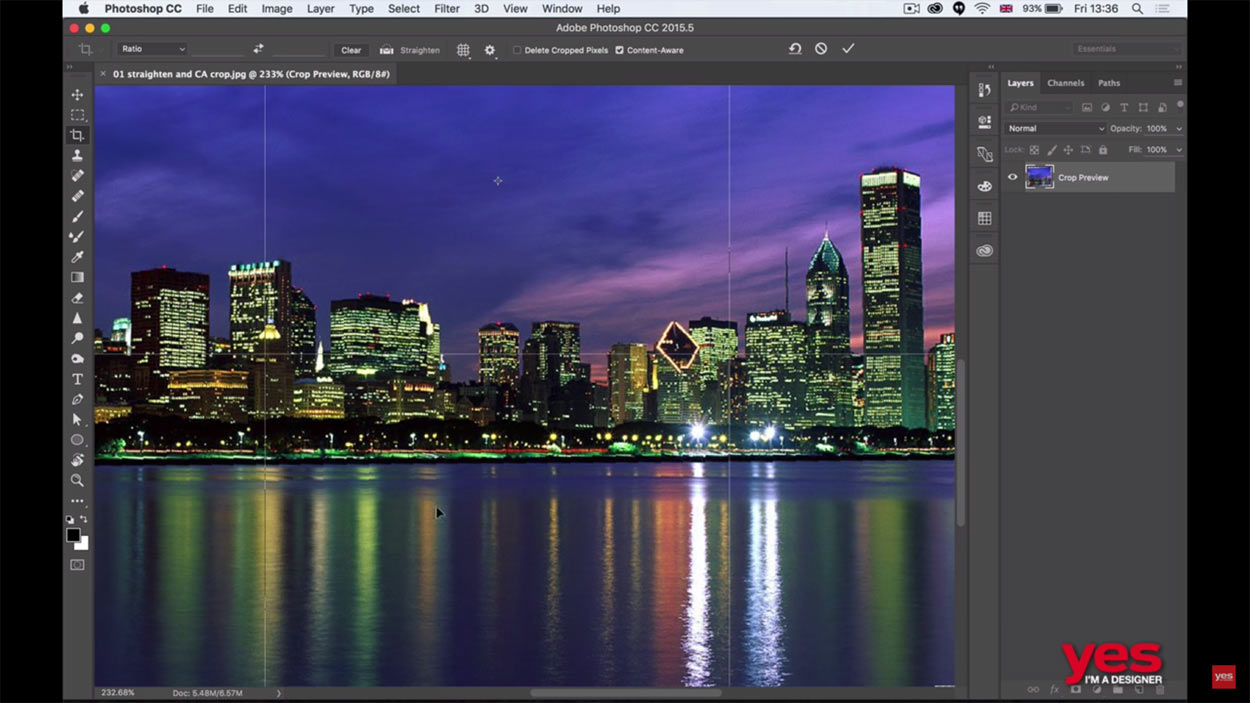
YouTube Screenshot/Yes I'm a Designer
Simply select the crop tool from the toolbar or press CMD/CTRL C to engage the tool. Then, draw a line on the object that is supposed to be horizontal, and Photoshop will automatically adjust the image.
As you can see in the image above, the tool works great for correcting the all-too-common mistake of crooked horizons!
YouTube Screenshot/Yes I'm a Designer
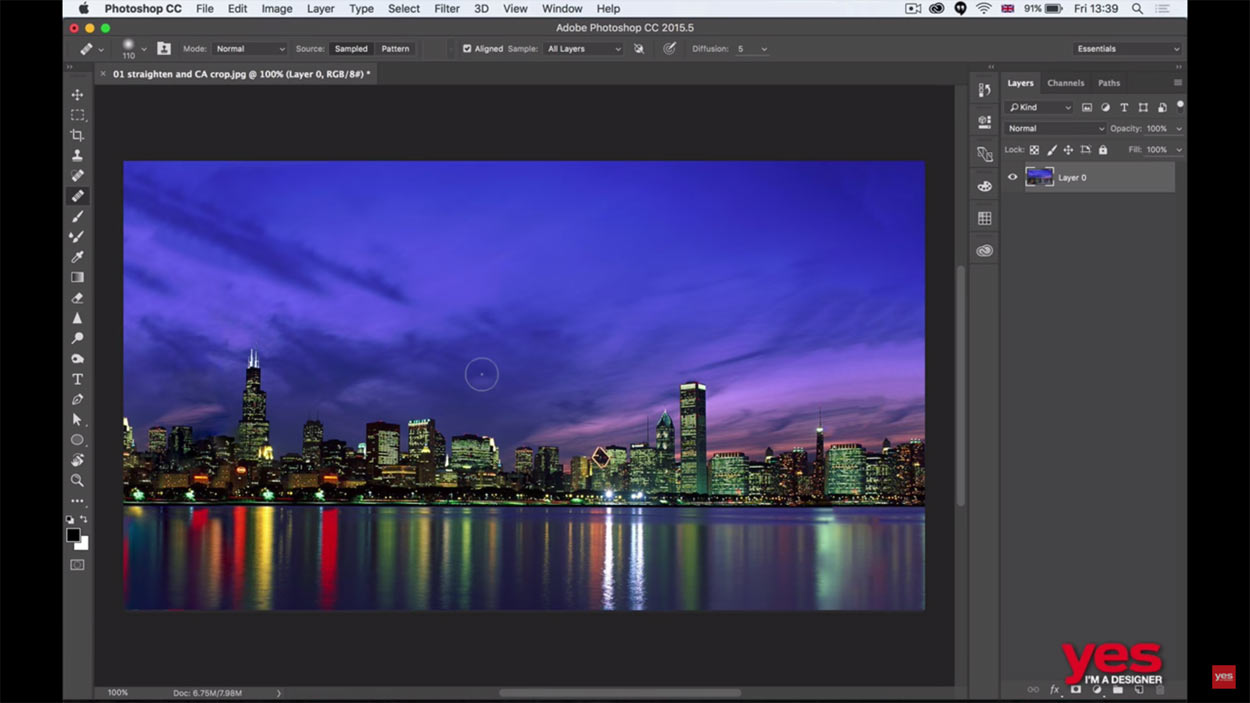
Another fun feature of the crop tool is that you can use it to extend the size of your canvas, and using the Content Aware Tool, you can instruct Photoshop to fill in the additional space.
For example, by holding Alt/Option while clicking the edge of the image and dragging outward, the crop tool will add more real estate on the left and right sides of the shot.
Then, by pressing enter, the Content Aware Tool will work its magic, adding similar content to the new area of the shot, as seen above.
But notice how the content that Photoshop has added in isn't perfect - the water on the right and the left is messed up.
You can fix that, though, by using another Content Aware enabled tool, the Spot Healing Brush.
YouTube Screenshot/Yes I'm a Designer
After selecting the brush, just paint over the detail that needs to be fixed. You might need to paint over it several times in order to completely get rid of the aberration.
Another option is to use the Healing Brush Tool to take a sample from another part of the image to copy and paste into the area that needs to be retouched.
Either way, you can correct some pretty big mistakes, as you can see in the screenshot above.
Learn More:
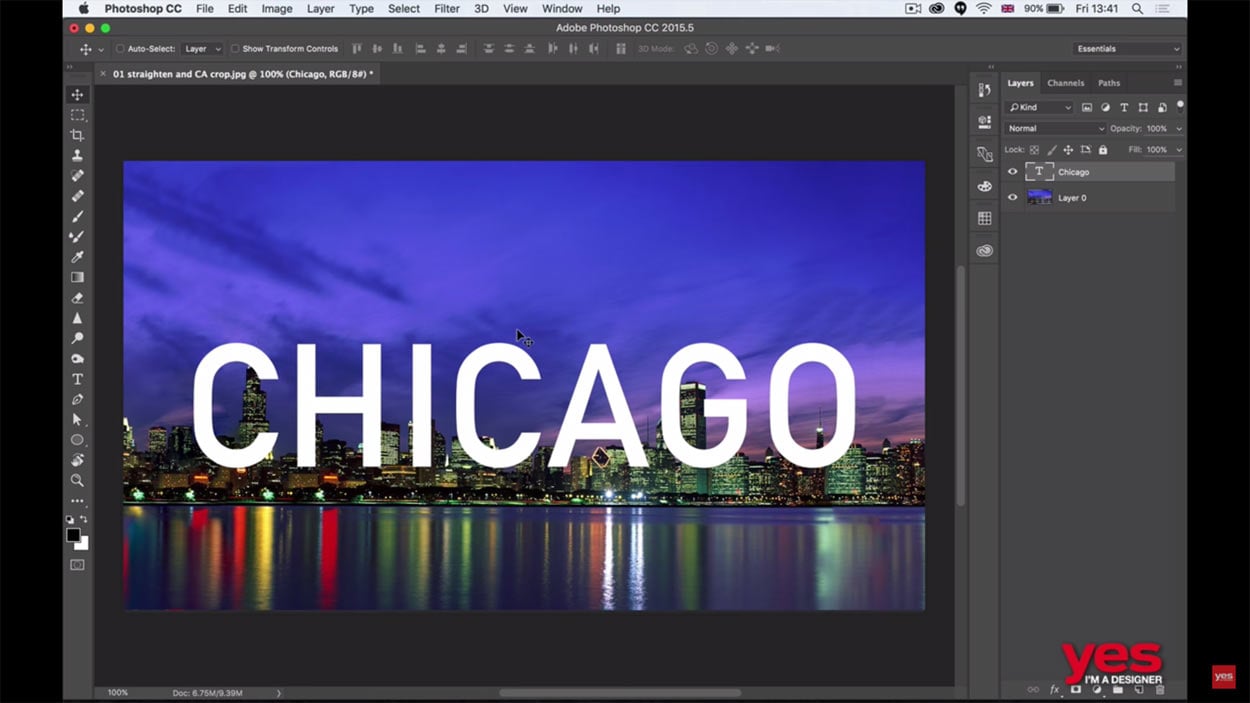
Adding Interactive Text by Making a Selection
YouTube Screenshot/Yes I'm a Designer
Just adding text on top of an image is easy to do, and doesn't really have that much visual appeal.
Adding text that interacts with the image - like having parts of the text hidden behind objects in the shot - looks far better.
You can do that quite easily, too!
Create a text layer and add the text you wish to superimpose on the image.
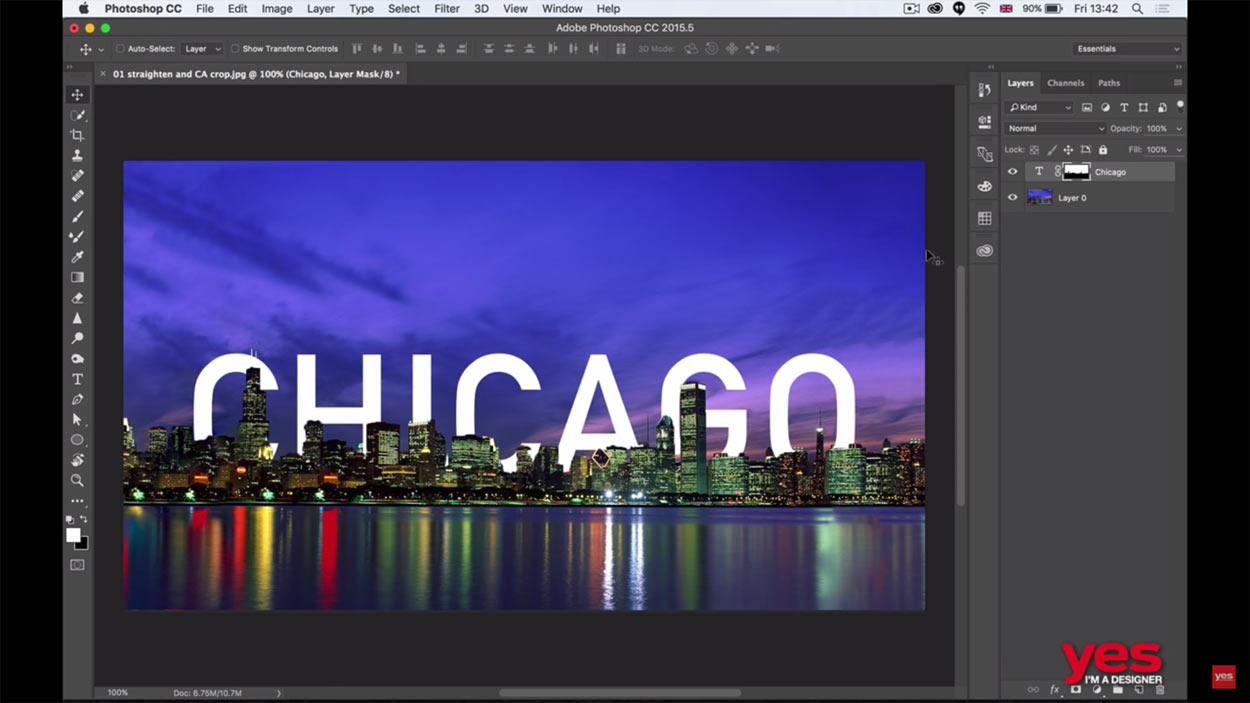
Next, make a selection where you'd like the text and the image elements to interact. In the sample image above, that would require a selection of the sky using the quick selection tool.
YouTube Screenshot/Yes I'm a Designer
Then, select the Mask Icon on the bottom right of the screen to show the mask you created when you made the selection of the sky.
As you can see in the screenshot above, that then hides the lower portion of the text, showing only the upper portion that's part of the selection of the sky.
I think you'll agree, that's a much more eye-catching result!
Learn More:
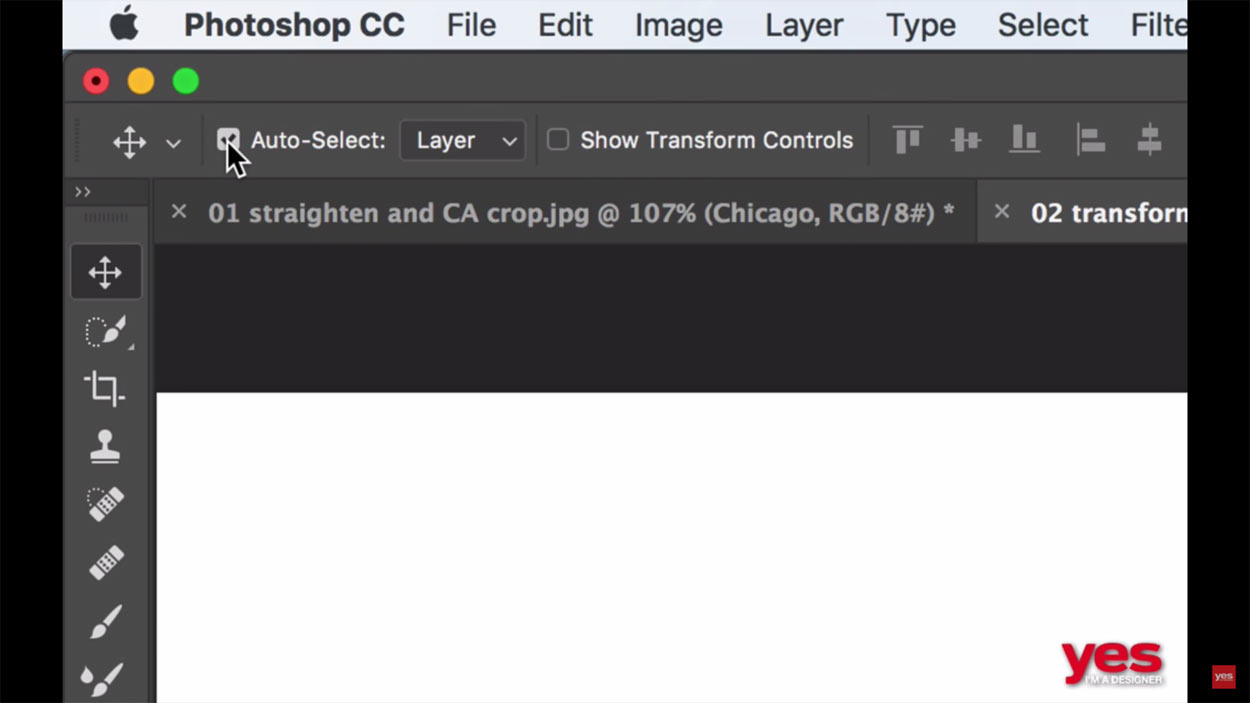
Using Auto Select to Select a Layer
YouTube Screenshot/Yes I'm a Designer
A different type of selection you should know about is the Auto Select Tool, which can be found in the upper left toolbar in Photoshop.
This tool is useful because it allows you to simply click on a layer in the editing window to select it.
That might not sound very helpful, but consider this - when this tool isn't active, and you click on a layered element, unless that layer is selected in the layers panel on the right side of the screen, you won't be able to move it or work on it.
That is, regardless of where you click or what object you click on, if it isn't active in the layers panel, you won't be able to work on it.
The Auto Select Tool changes that, though, so whatever you click on automatically becomes active.
It's a simple trick, but a useful one!
Bonus tip: Don't leave Auto Select on at all times. Instead, toggle it on when you need it by pressing CMD/CTRL. That will help prevent accidentally selecting a different layer as you're working.
Learn More:
Using Smart Objects to Resize an Image

YouTube Screenshot/Yes I'm a Designer
When you resize an image, say, from a small size to a larger size, you can run into the issue of the image becoming pixelated.
That's because there are only a certain number of pixels in an image, and when you make that image larger, you make those pixels far more noticeable.
However, by using Smart Objects, you can maintain the current quality of the image when you resize it.
To do that, simply right click on the layer in the layers panel and select Convert to Smart Object.
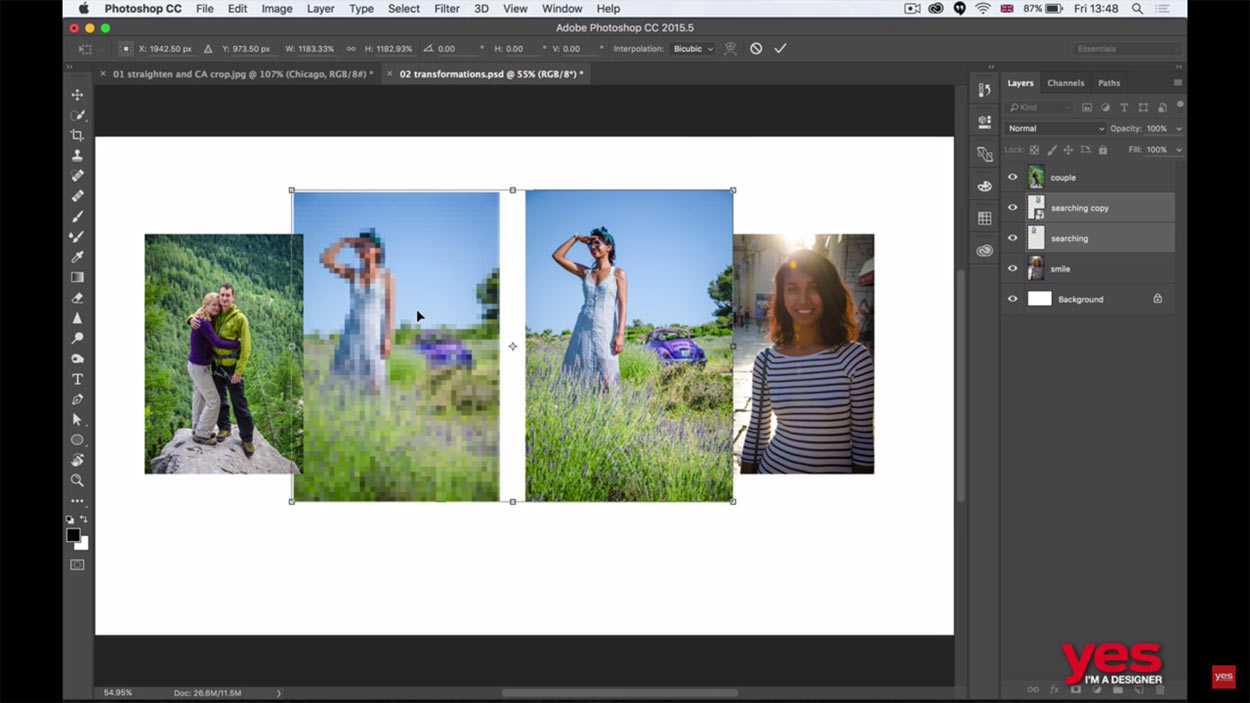
YouTube Screenshot/Yes I'm a Designer
Then, when you resize the object, you'll see that it retains the same image quality as you started out with.
In the screenshot above, notice how the traditional layer on the left has become pixelated, but the smart object on the right is perfectly detailed.
But Smart Objects are also great for rotating an image.
Believe it or not, simply rotating an image in Photoshop can degrade the image quality. But when you make the layer a Smart Object, you can retain the same quality as the original layer.
Learn More:
Making the Most of Photoshop

YouTube Screenshot/Yes I'm a Designer
If you've spent any amount of time in Photoshop, you know that there are a lot more tricks you can use with transformations, selections, and smart objects.
But the three examples I picked out of the video are quick and simple for easy learning, yet can have a ton of impact on the quality of the final product you create in Photoshop.
Get familiar with each of these techniques, watch the complete video tutorial above (and be sure to follow the Yes I'm a Designer channel), and you'll be impressed with just how much of a Photoshop guru you become!
We Recommend
41 Reasons why you Shouldn’t Date a Photographer

Photographers are a different kind of creature. We are both artists and entrepreneurs – or at least we try to be. We love our cameras and we sure love playing with them - sometimes too much. After a long series of technical and advisory articles, I thought I’d give you a little humor break, with a list of reasons why you shouldn’t date a photographer.
Before we get started, I just want to point out that although you may actually relate to some of the items on this list, everything below is intended to make you laugh or at least bring a knowing smile to your face. At the end of the day, everybody loves photographers, otherwise why would everyone be so intent on being one?. Without further ado, here are 41 things you should consider before agreeing to a date with a photography addict.
1. They’re weird.
Photographers are artists. That should be self-explanatory. When you find yourself sitting across the restaurant table from someone looking deep into your eyes, don't be fooled – your date is only considering the most favorable angle for this shot.
2. The birthday presents will surprise you.
Most often it will be a really awkward photo of yourself, captured some time ago when you weren’t looking. Then again, it just might be that “fine art” print that he or she just can't seem to find a buyer for.
3. Their favorite days are not yours.
Most people revel in a bright, sunny day. Photographers enjoy foggy, gloomy mornings that would make most people sad. They also like rain, snow and especially lightning.
4. They’re hoarders.
Photographers collect piles of newspapers, magazines, and generally anything they find inspiring, even for a short while.
5. They will break the law.

Photographers are either too involved in looking at what they want to shoot to notice boundaries, or simply don't think they apply to someone who's “just trying to get a few pictures”. You never know where you might end up.
6. Your vacation luggage will look like you’re moving
Every self-respecting photographer requires an absolute minimum of 50 pounds of gear for a day trip. A real vacation may require a special shipment that will meet you at your destination.
7. Watching movies together will not be as expected

That nice, romantic evening on the couch you expected will be constantly interrupted by comments about the choice of colors or framing in a scene. If you give up the remote, the points will be reviewed. Need I mention how much fun this will be at the theater?
8. They mark their territory.
Photographers make sure everything is branded as theirs, especially their photos. You will rarely see a photographer’s portfolio that’s not full of watermarks.
9. Everyone else sucks.
Photographers have egos the size of Mt Everest. Therefore, nobody else’s work can be as good as theirs, and, at best, it can only come close.
10. Envy takes on new form.
There's a syndrome among photograperhs known as "ens envy". Yes, it resembles that other kind of envy that occurs among human males, but this afflicts female photographers, too. It's psycholgically unbearable when someone else's is bigger.
11. You might not measure up.
You might be an interesting person with interesting friends, but photographers spend time with models, stylists, designers and other really cool people.
12. Their movie choices are different than yours.
Old, artsy movies that no one understands are their favorites. The truth is, they don't understand them either, they just like the pictures.
13. "Vintage" is something you'll grow very tired of.
Film cameras, darkrooms, vignetted portraits, grainy black and white, Old West photo shoots, barber shop quartet costumes - photographers love living in the past. Some have been known to dress the part, too.
14. They are control freaks.

They're used to telling people what to do. "Lift your chin a bit." "Watch the birdie." "No, the coffee cup goes there and the spoon should be resting on the saucer."
15. They don’t care about your opinions.
Oh sure, they'll ask you what you think of the latest shots. Then they'll tell you why you're wrong.
16. Communication will be awkward at best.
They probably won't return your phone calls or Facebook messages. They don't have time to actually read your email messages. They "say it with pictures". You can be sure that if you check their Instagram account, it will be active on a daily basis.
17. They're far too honest.
"...and don't you worry, we'll Photoshop out those chunky thighs."
18. They can spend days in front of a computer.
Nope, they're not interested in Facebook or porn. Those last landscape photos still need a few tweaks, though, and there are those new Photoshop plugins to check out, and...
19. Romantic sunsets will never be the same.

You're thinking about how dreamlike and magical the moment is. He or she is thinking, “1/25 @ f/8 @ ISO 100."
20. They won’t spend any serious money on you.
Yes, you're fun to be with. You're worth every bit of the cost of dinner and a movie. Those $100 shoes you love so much, however, aren't as important as that $3,000 lens. After all, it's an investment.
21. Meals together will be quite different.
Two words: "foodie" shots.
22. Conversations about what they do will be stressful.
Photographes hate answering questions about camera gear and the like. The first time one of your friends asks for advice on a camera "that takes good pictures, but isn't really professional-level" will probably be the last.
23. Holding hands will be pretty rare.

It's simple: photographers are too busy holding their gear.
24. You'll probably never see the good photos they take of you.
If you're nervous about those random photos he or she took on that last date, don't be. They're on a stock photography site, so you'll never see them. Everyone else will, but you won't.
25. They don’t know when to run for cover.
Hurricanes, tornadoes, tsumanis, forest flres and such aren't disasters to a photographer; they're photo opportunities. While everyone else is running away, he or she is figuring out how to get closer.
26. Anniversaries will be missed.
If there's a confilct between the anniversary of your first date and a photo workshop, guess which one is going to be more important. Your romantic dinner can wait.
27. Their priorities are different.
In case of an accident or perilous situation, a potographer thinks about protecting the equipment before him/herself - or you.
28. They stare at people in public.

When you catch your date staring at someone else, don't worry. It has nothing to do with physical attraction; it's all about the potential photograph. Of course, that doesn't make it any less awkward or embarrasing.
29. They find beauty in the weirdest places.
That includes dirty alleys, poverty-stricken neighborhoods and just about any other location you'd probably prefer to avoid.
30. You’ll have a hard time proving that you were together on vacation
You'll almost never get a photographer in front of the camera.
31. They won’t photograph what you ask them to.
Don't think that dating a photographer will help you get the photos you want. It's going to have to be something that's worthy of him or her taking the time to shoot it. Unless, of course, there's a paycheck involved.
32. They’ll remind everyone of what it is they do.
Although it's not okay for someone else to ask them about what they do, they're more than happy to jump into the conversation with a "killer" story about a place or person they shot. Normal conversations will be a thing of the past.
33. Gifts for them will be expensive.

Before you ask a photographer what they want for a birthday, Christmas, etc. be sure you're prepared for the answer. If it's under $500 they probably already have it or it isn't good enough to suit their hobby or professional needs.
34. They won’t Photoshop your old photos.
Sure, those old family photos of yours would look great with some retouching and cleanup. Your new love interest is just the person to do that for you, right? Not likely. Editing another person's work is not the job of a photographer. (Yes, it's an ego thing.)
35. They won’t like most of your friends.
Artsy people will have to be more famous than them or they're not worth spending time with. People that don't understand art? Well, we just won't go there.
36. They'll never print anything for you.
Although he or she will always be needing more storage space for images, don't expect to see any personal photos printed. Prints are for sale or for contests. Anything else just sits on the hard drive, "to deal with later."
37. An accidental bump could end the relationship.

The average contents of a photographer’s bag cost anywhere between $1500 and, well - a lot. You'll need to be careful and keep your distance when the camera gear is around, which will be all the time. That distance in itself isn't a great way to build a relationship, either.
38. You’ll turn into a model, whether you like it or not.
Sure, posing for a few fun shots may seem fun in the beginning, but don't be fooled into thinking it will get old for her or him. In fact, the more attractive your photographer date finds you, the more likely every walk in the park or night on the town will turn into a model shoot.
39. They’re a pain at family events.
Let’s say someone in your family is getting married and you decide to bring your date. Most of their attention will probably be going to the photographer hired to shoot the wedding. It will be a mix of criticism of everything the hired pro does and a secret envy that he or she didn’t get to do it, even after refusing in the first place.
40. Nothing natural is good enough.
Every photo he or she takes must be be tweaked with Photoshop or Lightroom in order to fix everything that Nature "didn't get quite right". This obsession will creep into every aspect of your time together. Rather than appreciating the beauty of the surroundings, he or she will be thinking about how it could be improved upon.
41. That intense look at you won't mean what you think it does.

Like the surroundings in the item above, you'll likely need a little enhancement, too. So, while you think that look is romantic, it's probably an intense study of how those tiny imperfections on your face could be corrected.
Helpful links: Sell your old camera gear. ORSteady your camera without a tripod
We Recommend
5 Photoshop Tricks You Don't Know
I don't have to tell you how popular Photoshop is with photographers...
But despite that popularity, there's always something new to learn with a seemingly endless array of awesome tips, tricks, and hacks coming out on a weekly basis.
The Photoshop Training Channel on YouTube knows a few things about Photoshop tricks. In their video below, they outline five Photoshop tricks that you probably don't know.
Have a look at the video, and for a breakdown of each tip, read on below.
There's also some bonus Photoshop tips and tricks that you don't want to miss later on in the article!
Advanced Blending Options
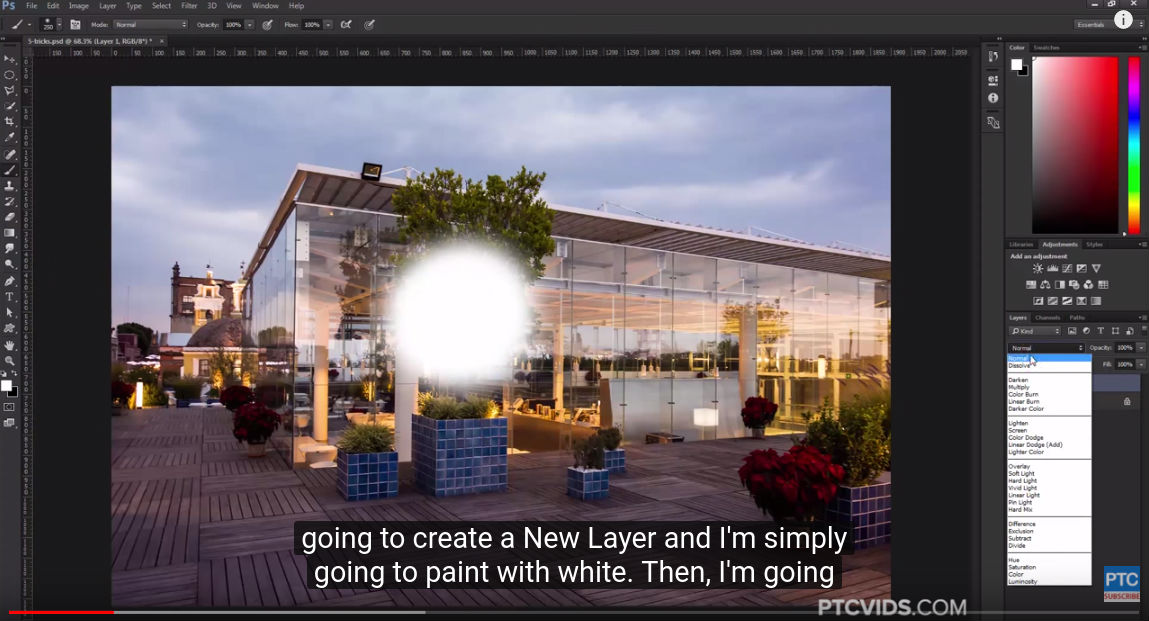
YouTube Screenshot/Photoshop Training Channel
The first Photoshop trick you might not know is the advanced blending options in the Layer Style Panel and how it works with blend modes.
In Photoshop, select the Brush Tool, ensuring that white is the foreground color. Then create a new layer and paint an area of the image white as seen above.

Then, change the Blend Mode to Linear Dodge, but you'll see that there is no difference - the white area you painted remains white.
YouTube Screenshot/Photoshop Training Channel
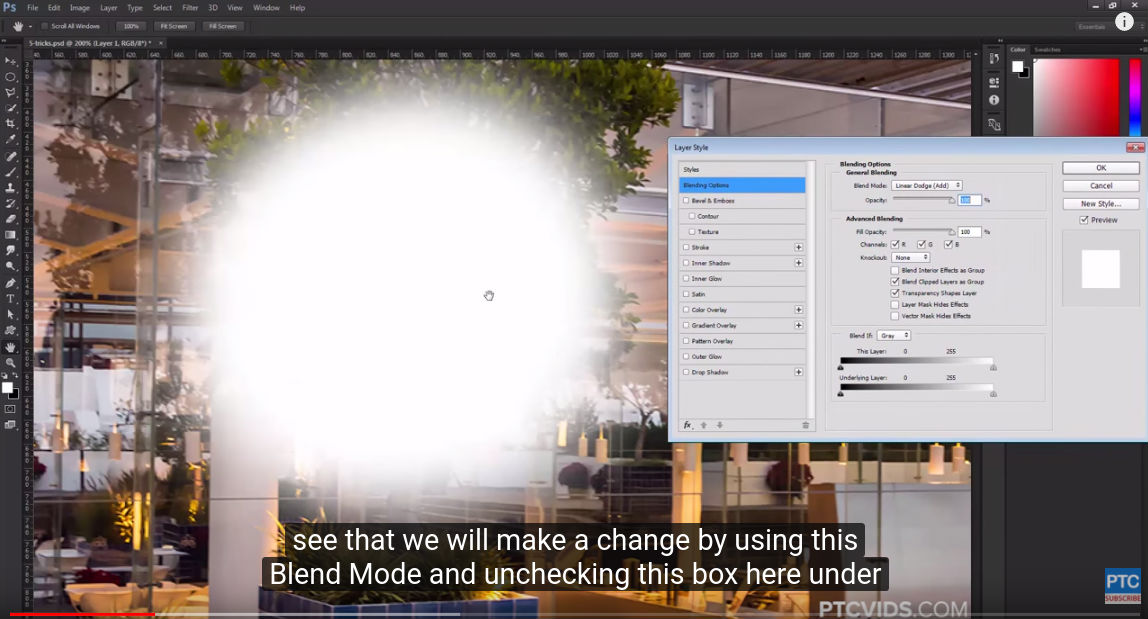
However, if you double-click on the side of the layer, it will bring up the Layer Style Window, as seen below.
Under "Advanced Blending Options," deselect Transparency Shapes Layer, which you'll see starts to blend the outer edges of the white area that you've painted.
In fact, it's a great look if you want to add highlights to things like metal or glass because it makes the pixels very hot, or bright.
Precise Flare
YouTube Screenshot/Photoshop Training Channel
If you've never heard of the Precise Flare Tool, it's pretty self-explanatory: it allows you to precisely place a lens flare in an image.
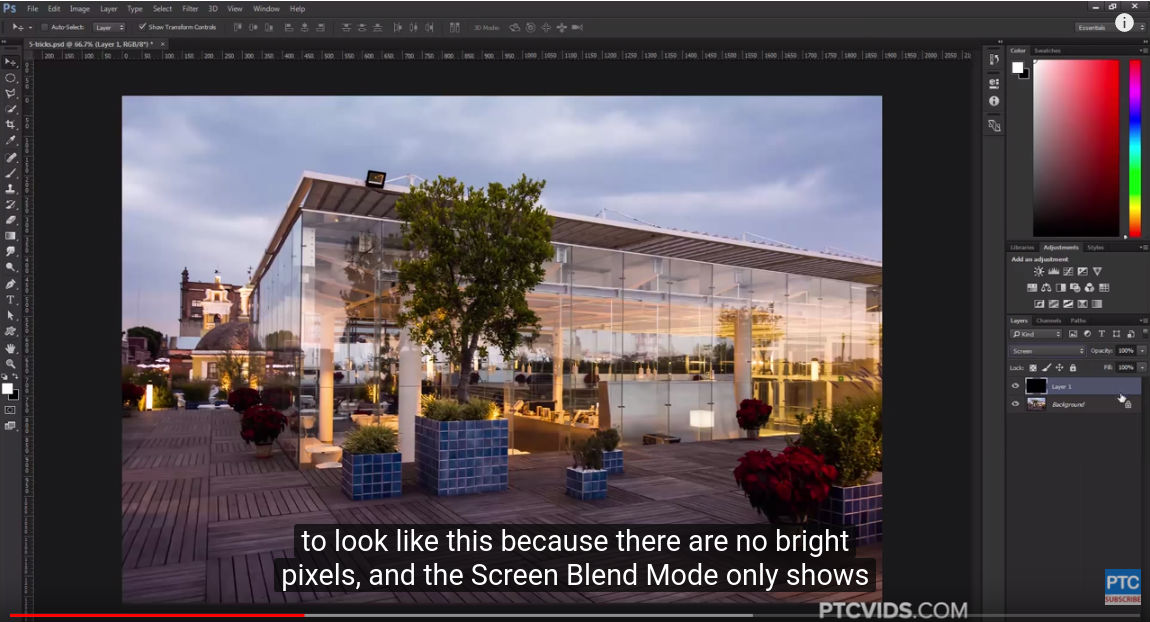
First, create a new layer and fill it with black.
Then, in the Layers Panel, change the Blend Mode to Screen. The resulting image will look the same as the original. That's because the Screen Blend Mode only shows bright pixels, and since the layer is filled with black, there's no bright pixels to show.
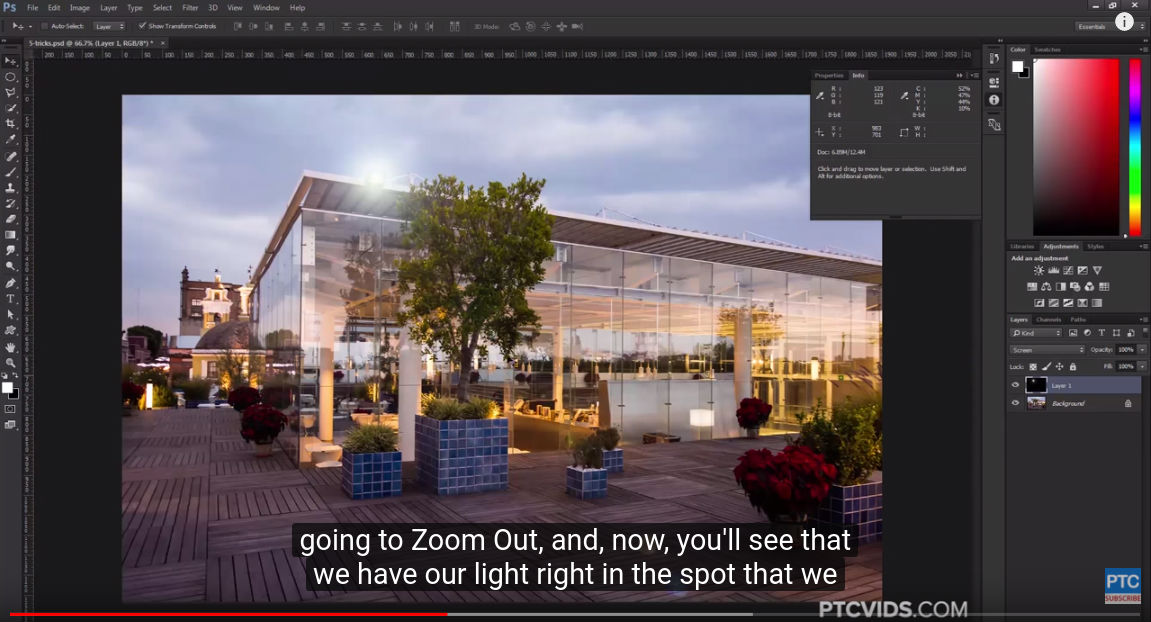
Determine where you'd like the lens flare, and zoom in on that area.
Then go to Window > Info to bring up the Info panel, which shows the X and Y coordinates of the cursor.
Hover over the area in which you'd like to add the lens flare, then go to Filter > Render > Lens Flare.
YouTube Screenshot/Photoshop Training Channel
Press Alt/Option and Click to bring up the precise coordinates of the center of the lens flare. Then enter the coordinates where you'd like the flare to show up into the X and Y coordinates in the Info box. Press OK. You'll see that the lens flare shifts to your desired position.
You can adjust the brightness of the lens flare and the lens type, and then press OK.
Learn More:
- Learn to Remove Blemishes From Skin With This Quick Photoshop Tutorial
- The Best Free Photoshop Alternatives for 2017
Adding Clouds
Photoshop has another secret filter you can use to manipulate clouds.
Simply go to Filter > Render > Clouds, but when you click on Clouds, also click Alt/Option.
The result is clouds with much more contrast than what you get if you just click Clouds from the menu.
Black and White Adjustment Layer
YouTube Screenshot/Photoshop Training Channel
Creating a Black and White Adjustment Layer isn't new...
But Photoshop has some tricks up its sleeve that let you manipulate that layer in some cool ways.

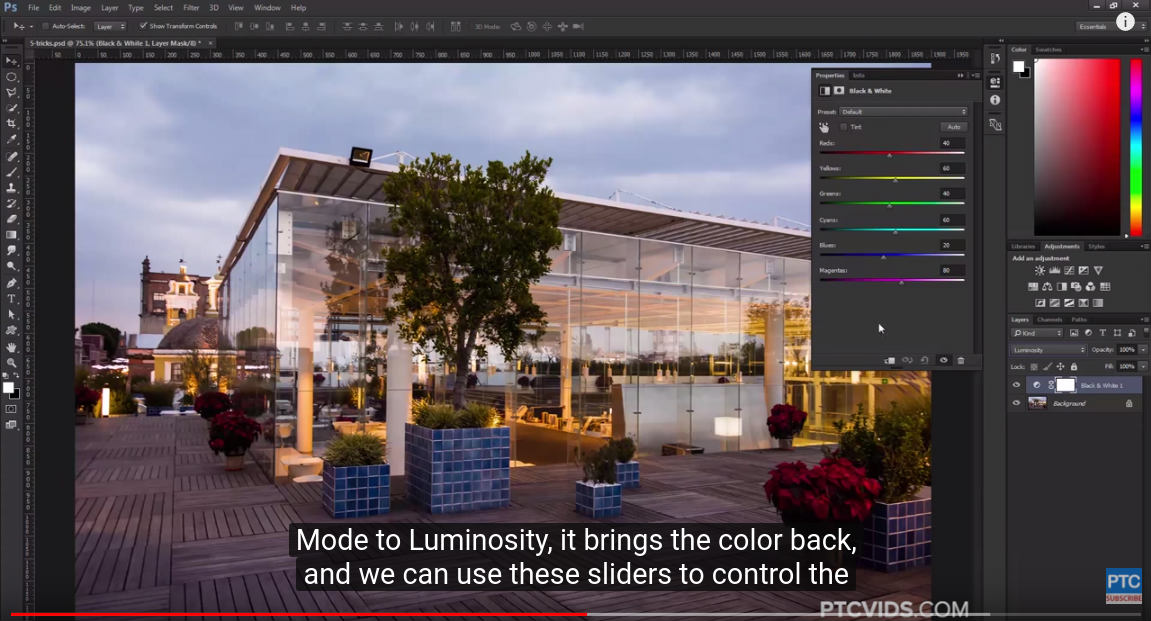
So, create a new Black and White Adjustment Layer. Once you do, the image will turn black and white.
However, if you change the Blend Mode to Luminosity, you can use the sliders in the Black and White Adjustment Layer Panel (shown above) to manipulate the luminosity of individual colors in the shot.
YouTube Screenshot/Photoshop Training Channel
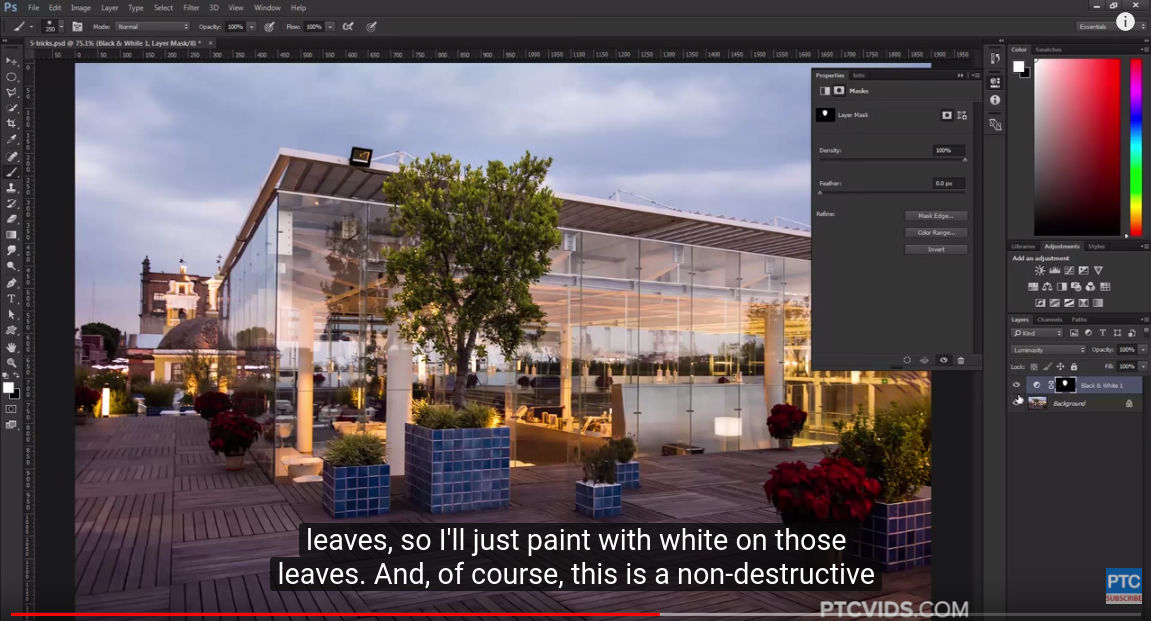
You can also use the Black and White Adjustment Layer with a Layer Mask to make similar adjustments to an image.
Click on Layer Mask, then press Ctrl/Command-Backspace to fill with the background color, which in this case is black.
Then, you can use a brush to paint with white on the image, which brightens that area, as seen on the tree in the screenshot above.
Learn More:
Opening the Same Image in Two Windows
YouTube Screenshot/Photoshop Training Channel
How often do you find yourself constantly zooming in and out on an image to work on a detailed area, then check your work in a more normal view?
Well, Photoshop has a secret that will allow you to do both at the same time by opening the same photo in two windows.
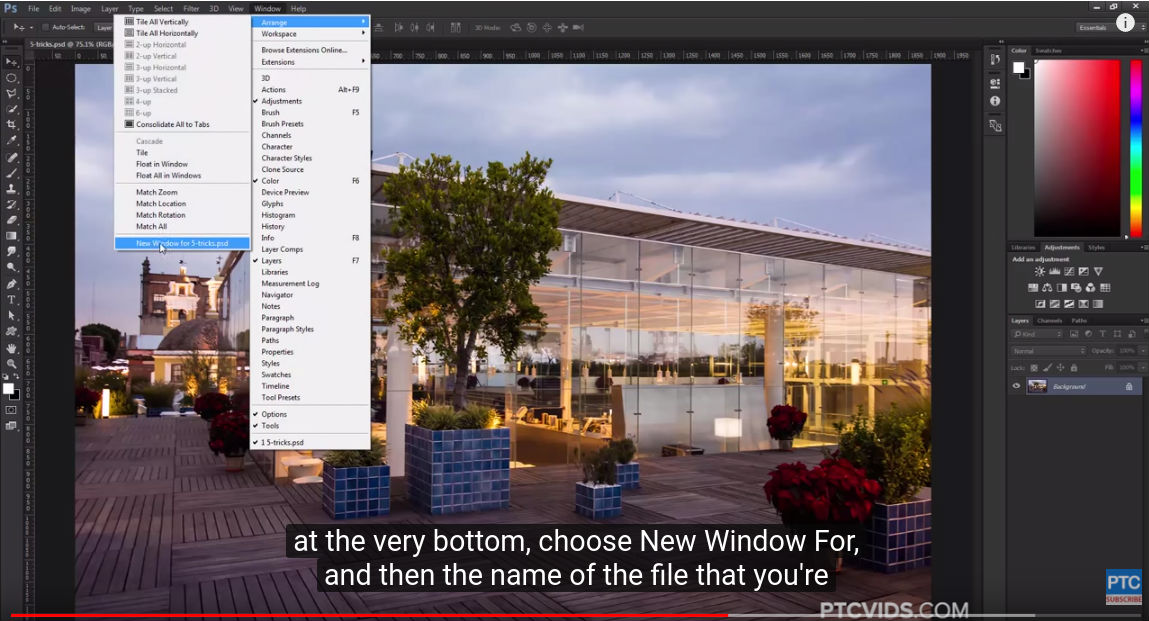
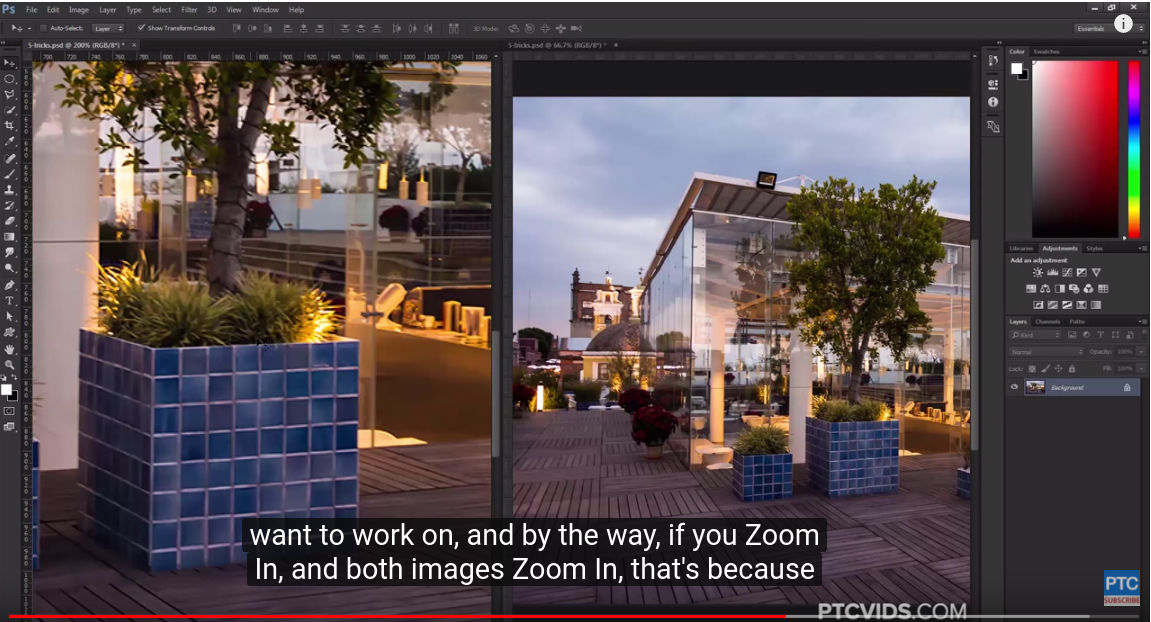
With the image open, go to Window > Arrange > New Window For, and that will open the image in a second window.
YouTube Screenshot/Photoshop Training Channel
Then go back to Window > Arrange and select either Two Up Horizontal or Two Up Vertical. That will show both windows simultaneously.
Make sure that the Zoom All Windows box in the toolbar isn't checked, and that will allow you to zoom in on one window as shown above.
Then all changes you make on one window will show up in the other window as well!
But Wait...There's More!
Why stop at five Photoshop tricks when you can get 28 more?
Tutvid offers up all sorts of awesome tricks in the video above, which we broke down step-by-step in this article.
You'll learn how to do everything from whitening teeth to rotating the view, adding more undo steps to creating a filled layer mask, and filling text or shapes to adding VSCO or Instagram fade effects.
There's even tips on using hotkeys to change layer opacity, choose layers, move layers, see a before and after preview, and a Photoshop UI Easter egg as well.
Have a look at the video above, consult our detailed overview of each step, and get yourself a ton more insider information on Photoshop tips and tricks.
We Recommend
5 Signs You're Overediting Your Photos
 Photo by GaudiLab via iStock
Editing photos is easier today than ever before, thanks to a wide range of editing programs for our computers and apps for our phones.
Whether you fancy using Photoshop or Lightroom, Luminar or On1, VSCO or Snapseed, you have extremely powerful tools right at your fingertips for correcting mistakes and bringing out the best in each photo you take.
But if you've perused Instagram lately, you have no doubt seen examples of editing gone wrong. More specifically, editing gone too far.
We've all stepped over the editing line at some point - I know I have.
The difficulty with editing photos, especially when you're a beginner photographer, is simply knowing when to say when, according to Mark Denney.
In the video above, he expounds on this issue and offers a few tips for avoiding the cardinal sins of post-processing.
As Denney explains, though the signs that you've overedited a photo might be hard to spot at first, understanding what to avoid as you edit your photos will help you recognize when it's time to hang up your editing hat.
 Photo by GaudiLab via iStock
As you'll see, there are five common signs of overediting of which you need to be aware. These include:
- Unrealistic highlights and shadows
- Adding too much contrast to the image
- Sharpening the image too much (and/or adding too much clarity)
- Too much vignetting
- Oversaturated colors
Clarity was my big issue back in the day. I overamped so many photos by turning the clarity up way too high.
In the end, less is usually more, so heed Denney's advice and know when to say when!
Learn More:
We Recommend
A Free Comprehensive Guide to Retouching Your Photos in Photoshop

When you start out in photography, it's prudent of course to first learn how to use your camera, lenses, and other camera-related gear.
It's also necessary to learn about things like lighting, composition, framing, and so forth, that way your images have an artistic flair that grabs people's attention.
But one aspect of photography that seems to get lost sometimes is the art of processing the images you take.
When it comes to portraiture, there are a million (maybe not literally...) tutorials out there on topics ranging from removing blemishes to replacing the sky behind the subject and just about anything else you can think of.
And while it's great to have so many tutorials at your disposal, the problem is that no one has time to read a million different tutorials to get a comprehensive understanding of how to retouch your portraits.
So, the goal of this article is to present just a handful of in-depth tutorials that will help you tackle post-processing for portraits.
But First...A Word of Warning
Post-processing isn't intended to be a savior for bad photos.
If you take bad photos, no amount of processing will help them become good photos...

Instead, processing an image is meant to help make a good portrait a great portrait. In other words, the tutorials outlined below are meant to enhance images that already have the "secret sauce."
So, with that in mind, here's a few tutorials you might check out to help you give your portraits another level of awesomeness.
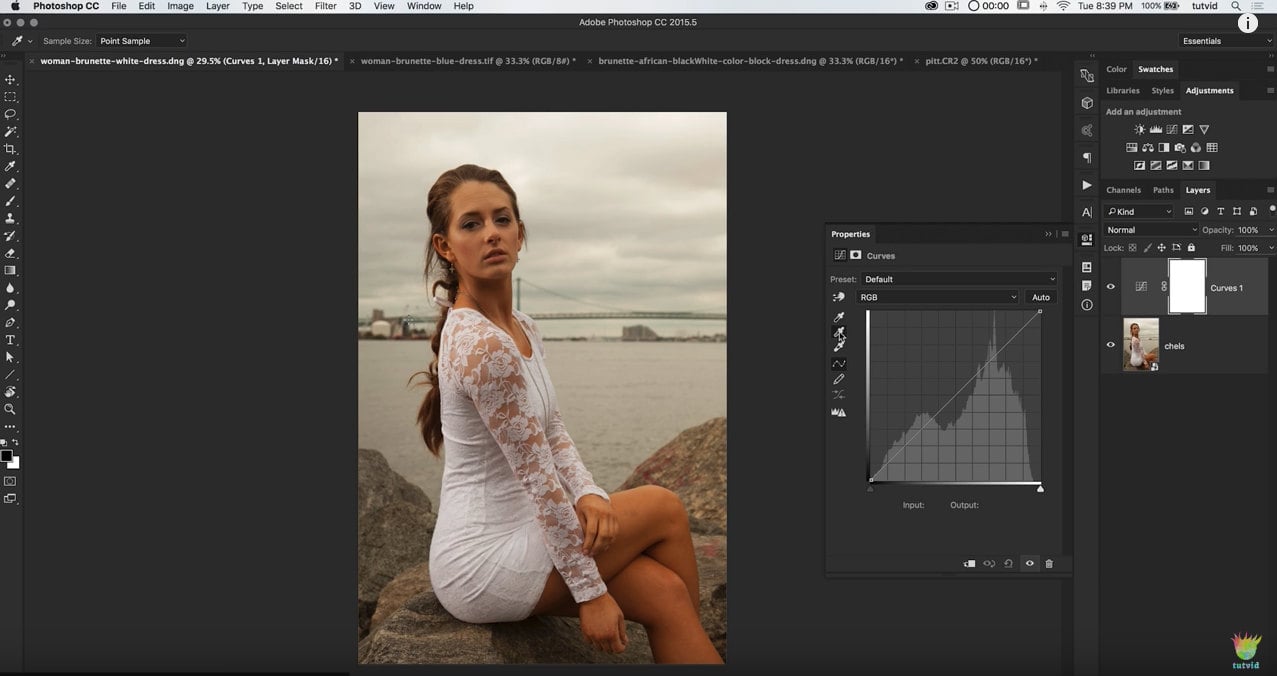
Use Adobe Camera Raw
YouTube Screenshot/Photos In Color
Before you ever open your portraits in Photoshop, I highly recommend putting them through Adobe Camera Raw first.
Why?
Essentially, Camera Raw is the place where you set up your image for success.
In other words, you build the foundation upon which you will continue to build once you get the image into photoshop.
You won't be able to make enormous changes in Raw, but the changes you do make will have a significant impact on the success of the image.
For example, you can retrieve detail in blown out highlights, change the white balance, or add a touch of color to the image.
But here's a word of warning - try to avoid making global changes to the image in Camera Raw.
That is, some adjustments (i.e., contrast) are made using a slider, and can actually cause more harm than good, especially in a portrait where that a global change to something like contrast can cause toning issues on the model's skin.
Instead, save changes like that for once you get the image into Photoshop where you have more control over making pinpoint adjustments to the photo.
For a complete beginner's guide to using Camera Raw, check out the video above by Photos in Color.
Learn More:
Spot Healing
One of the easiest tools to learn how to use for retouching your portraits is the spot healing tool.
You can use it for all sorts of purposes, from removing freckles or moles from the model's skin to making pimples disappear to eliminating stray hairs that have found their way into areas of the photo where you don't want them.
There's really nothing to it, yet it can have a huge impact on the quality of the final portrait you create.
Dive into learning how to use the spot healing tool in the video above by Photoshop Training Channel.
Learn More:
- Portrait Photography Tips You Need to Start Using Today
- Learn How to Remove Blemishes From Skin in This Quick Photoshop Tutorial
Frequency Separation
Though it's probably not a Photoshop tool you'd immediately recognize, frequency separation is actually extremely powerful, allowing you to address skin tones that aren't up to snuff.
In fact, many photographers give props to frequency separation as the best tool for retouching skin in a portrait.

That's because it keeps the texture of the skin - that way it doesn't turn into something that looks fake or overworked - while also helping mask imperfections like blotchy areas and redness.
In fact, if there's one skill you learn to perfect out of all the skills addressed in these tutorials, this should probably be it!
Explore what you can do with this tool in the video above by Blue Lightning TV.
Learn More:
Dodging and Burning
YouTube Screenshot/Anita Sadowska
Not to date myself, but I actually remember learning how to dodge and burn in the darkroom in my high school photography class...
Thankfully, today we have a much easier (and faster!) means of working on areas of an image that are either too bright or too dark.
If you poke around Photoshop (or read enough tutorials), you'll find that there are a variety of ways to dodge and burn.
Try not to get bogged down in all the different techniques, though...
Instead, work on coming to an understanding of how to use dodge and burn tools.
Beyond that, it's also necessary to develop your eye so you know how much dodge or burn is enough - and when you cross over the threshold into too much.
Usually, when you're working on a portrait, it's best to apply delicate changes with fill values and opacity levels that might not exceed 50% and 10%, respectively.
For a detailed and easy to understand tutorial on dodging and burning, watch the video above by Anita Sadowska.
Learn More:
Sharpen the Eyes
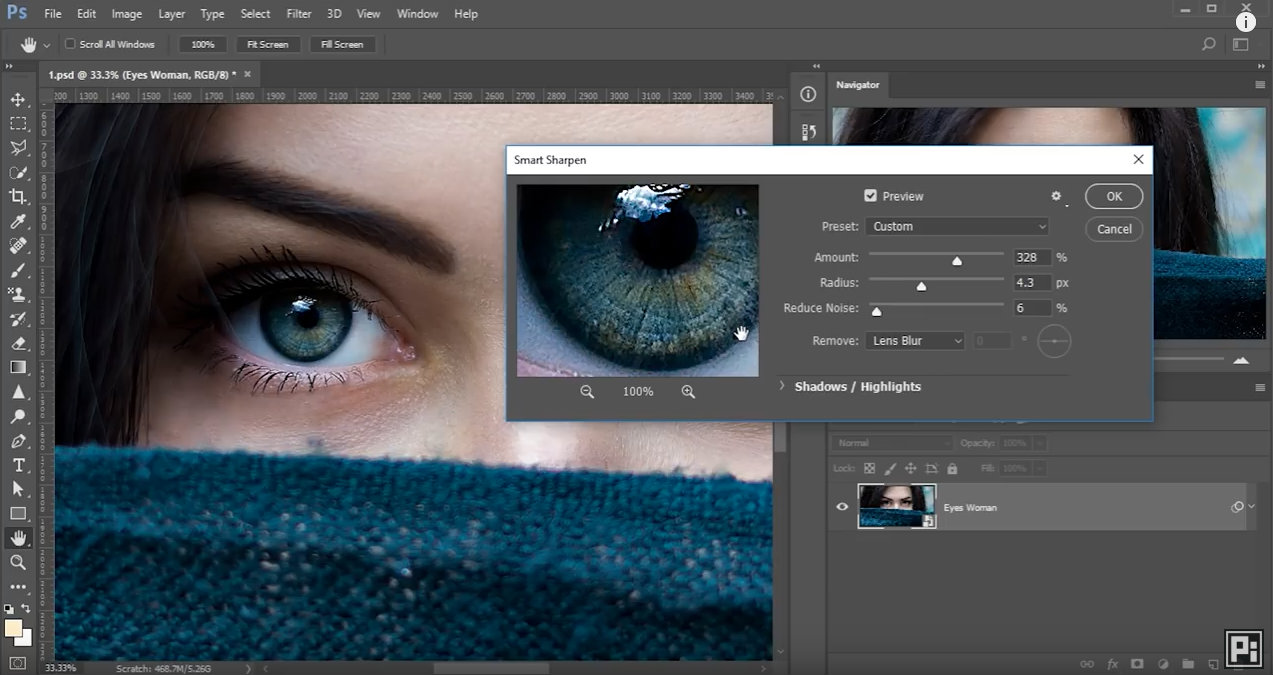
YouTube Screenshot/PiXimperfect
There's a reason why there's a saying that the eyes are the window to the soul...
It's how we connect with other people, and, in turn, how we connect with a portrait, too.
You want the eyes to be bright and sharply in focus, but out of the camera, they might not quite live up to their potential.
Sharpening the eyes in Photoshop is a fairly straightforward process, but it isn't the only manipulation you can make that will have a positive impact on the image.
You can also whiten the eye and add contrast that makes them come to life in the image.

There are several ways that you can sharpen the eyes and otherwise work to improve their appearance.
Learn three of those methods - all of which are non-destructive to the image - in the video above by PiXimperfect.
Learn More:
Color Correction
YouTube Screenshot/Tutvids
Perhaps one of the most visually impactful changes you can make to a portrait in Photoshop is to adjust its color.
Now, just like I noted earlier, Photoshop won't fix bad photos, and neither will fiddling around with the colors.
However, if you have a solid image, manipulating its colors can make it stand out more and have much more visual impact.
Of course, that's if you go about it purposefully.
Adjusting the colors is more than just slapping a new color into a layer and making the image look a different color.
Instead, you need to have a solid understanding of color theory so you know what colors go well together, like using complementary colors in an image to add color contrast and drama.
That being said, you also need to know what temperatures of light work best with what situations.
For example, if you take a portrait outdoors near sunset, the natural light will be warm and golden. Amping up those gold tones will enhance the image, but trying to add a cooler, bluish tone might make the image look even worse.
Check out an in-depth guide on how to adjust colors and white balance in the video above by TutVids.
Learn More:
Resizing Images
Though it's not the most titillating topic out there, learning how to resize your portraits in Photoshop is an absolute must.
Not only that, you should have a solid understanding of things like cropping, changing the printed size of a document, and sized selections as well.
Watch the video above from TutVids to get the low-down on all that, and more!
And with that, you have a step-by-step process of taking your portraits to the next level with key retouching elements!
We Recommend
Five NEW Things in Photoshop CC 2018 That You MUST Know!

For those of you that missed the memo, Photoshop CC 2018 recently came out.
That's exciting for photographers of all experience levels because it means there's some new goodies (and a few new Photoshop tricks too!) that we all need to learn about.
Fortunately, Nathaniel Dodson from Tutvid is here to help.
Nathaniel has hand-picked five new features in Photoshop that are important for us all to know. He outlines each one in the video above.
To help make each point a little more sticky, I've got a play-by-play of each one detailed below.
So, have a look at the video, then refer to the article for quick reminders of how to use each of these tricks.
Select & Mask
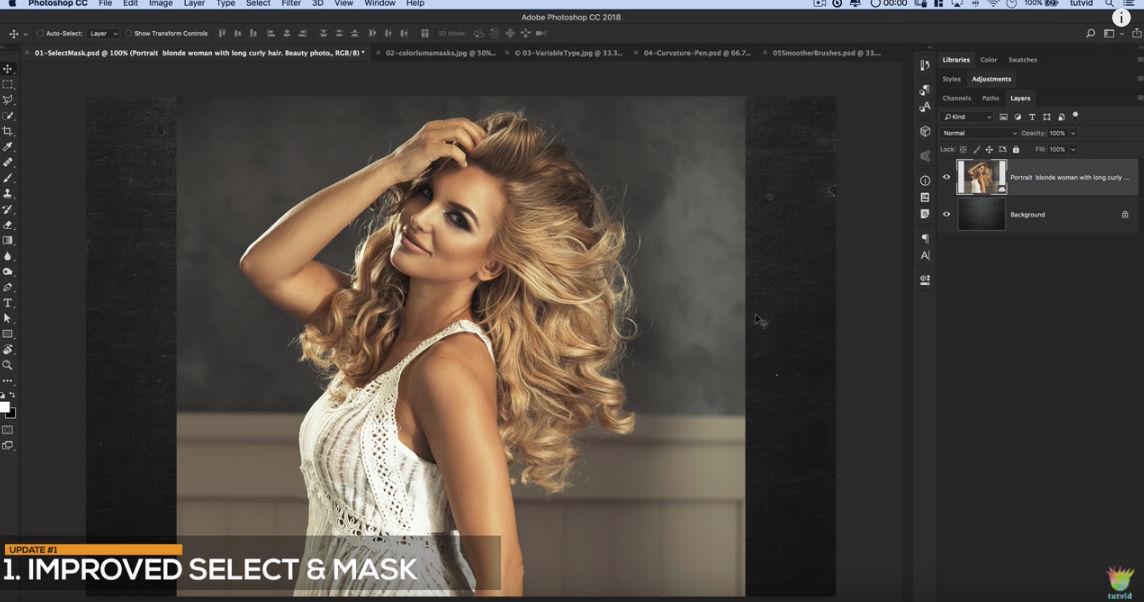 YouTube Screenshot/Tutvid
In previous versions of Photoshop, the Select & Mask tool isn't that great.
Fortunately, in the 2018 version, this tool gets an upgrade.
If you have an object in a photo that needs to be cut out, like the model in the screenshot below, the Select & Mask tool is ideal.
 YouTube Screenshot/Tutvid
As you can see, by going to Select > Select & Mask and enabling the Overlay view allows you to use the Quick Select tool to select the woman in the photo.
In the past, the algorithm Photoshop used wasn't all that powerful, and meant that these types of selections couldn't account for complex edges, like hair.
But now, using the Fine Edge Brush tool, you can make much more complex selections, even if the areas in question are of a similar color to the background from which they're being cut.

It's hard to see in a screenshot, but when you view the video above, you can see that the Fine Edge Brush tool does a fantastic job of selecting the stray strands of hair that would have been incredibly difficult to select in previous versions of Photoshop.
Learn More:
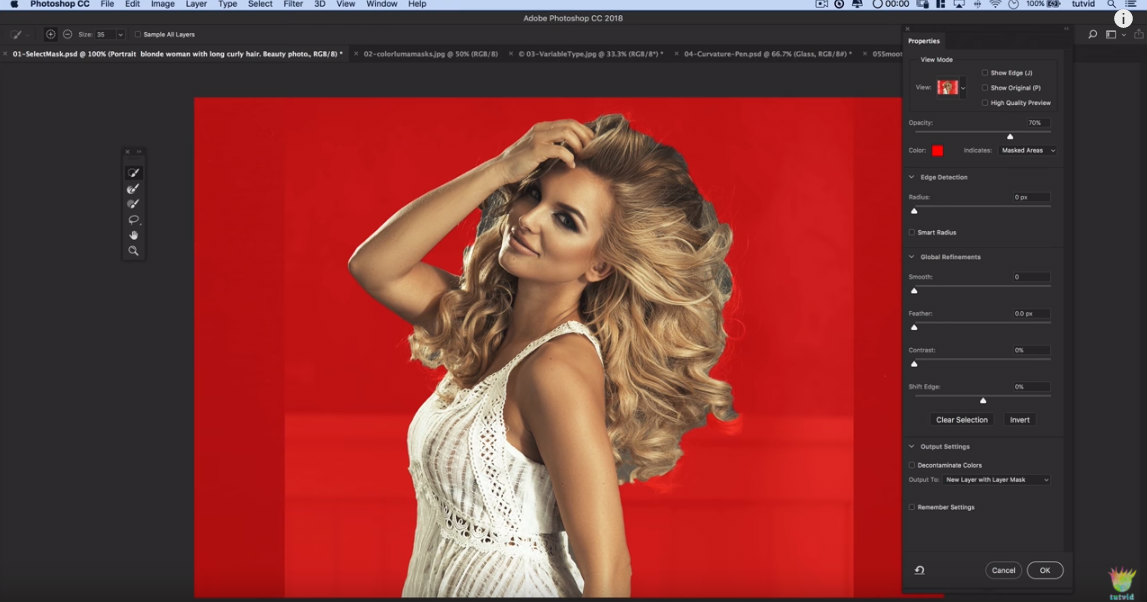
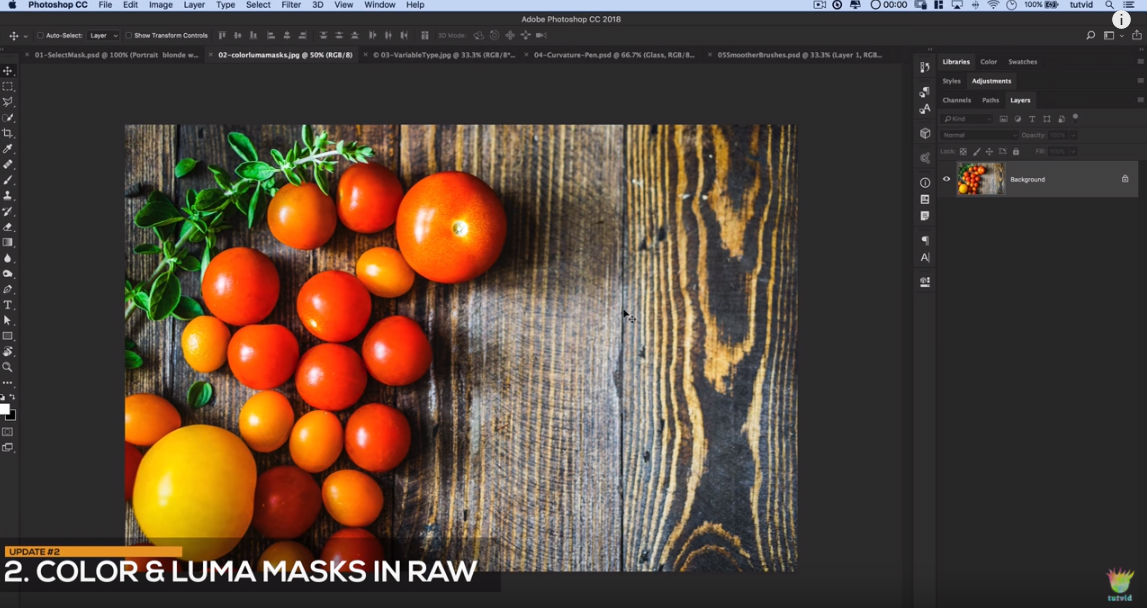
Color and Luminosity Masks in RAW
 YouTube Screenshot/Tutvid
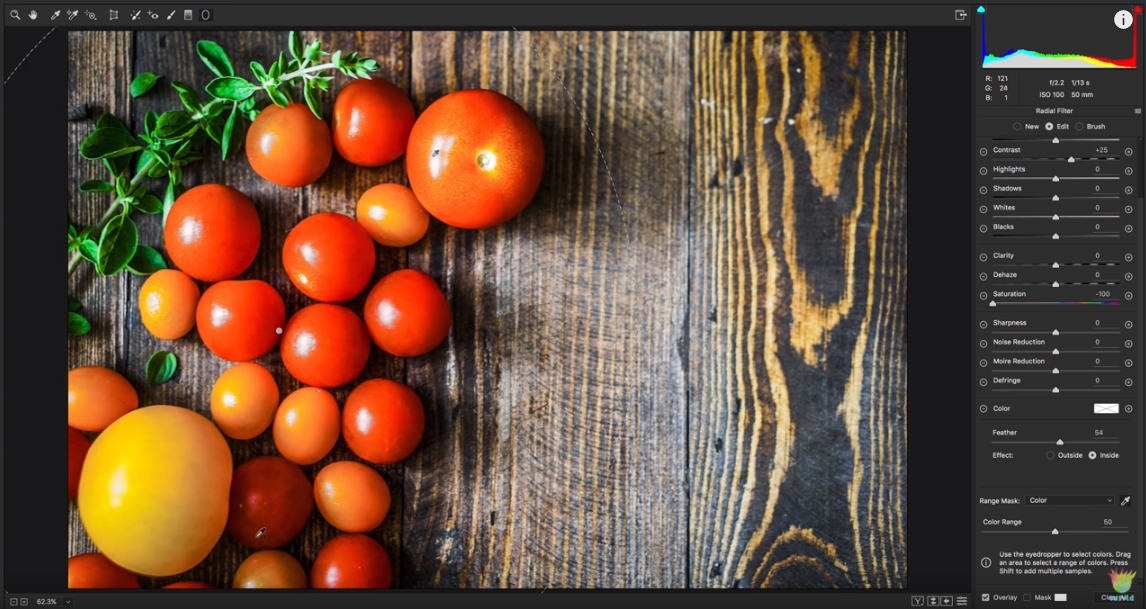
When you open a RAW file in Camera RAW, you'll find new and improved color and luminosity masks waiting for you.
These masks allow you to target specific areas of an image - like a few of the tomatoes in the screenshot above - to work on their color and luminosity.
These masks work with several tools, including the adjustment brush, the graduated filter, and the radial filter.
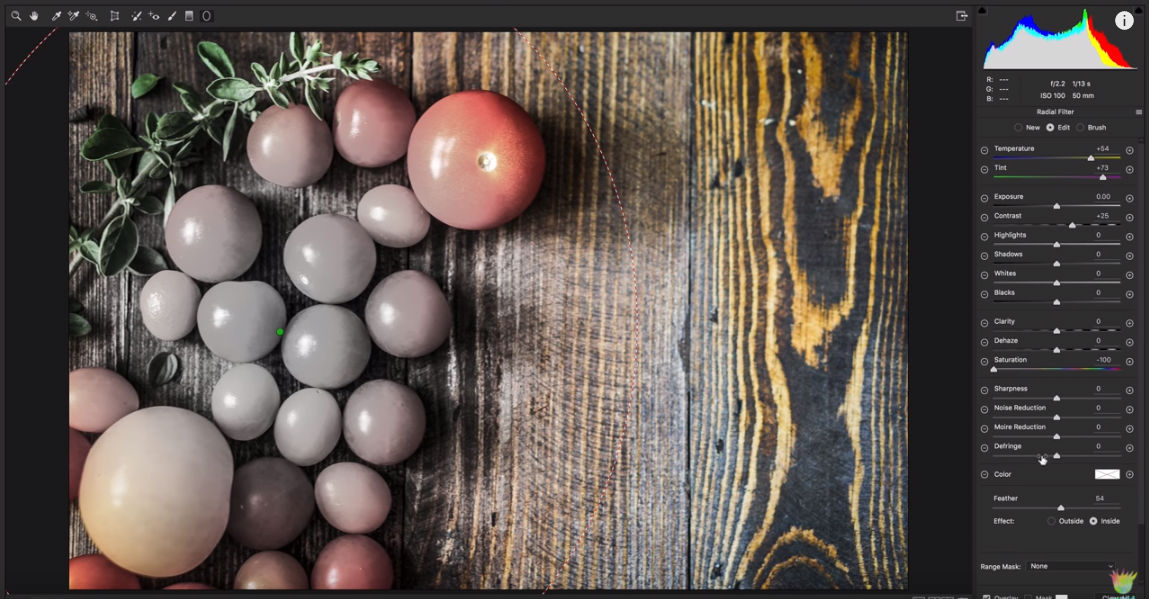
Using the radial filter, you can drag out from the center (as seen below), and apply a range mask, which you'll find in the bottom right-hand corner of the editing window.
 YouTube Screenshot/Tutvid
The range mask gives you two options, color or luminosity.
When you select color, you can use an eye-dropper to select a color within the area of the range mask.
When you do that, Camera RAW converts everything within the range mask to that specific color, as seen below.
 YouTube Screenshot/Tutvid
From there, you can use the slider tool to increase or decrease the saturation of the color.
And if you hold down the Alt/Option key as you manipulate the slider, you get a black and white view of the image that shows you how the highlighted and shadowed areas of the image are being impacted.
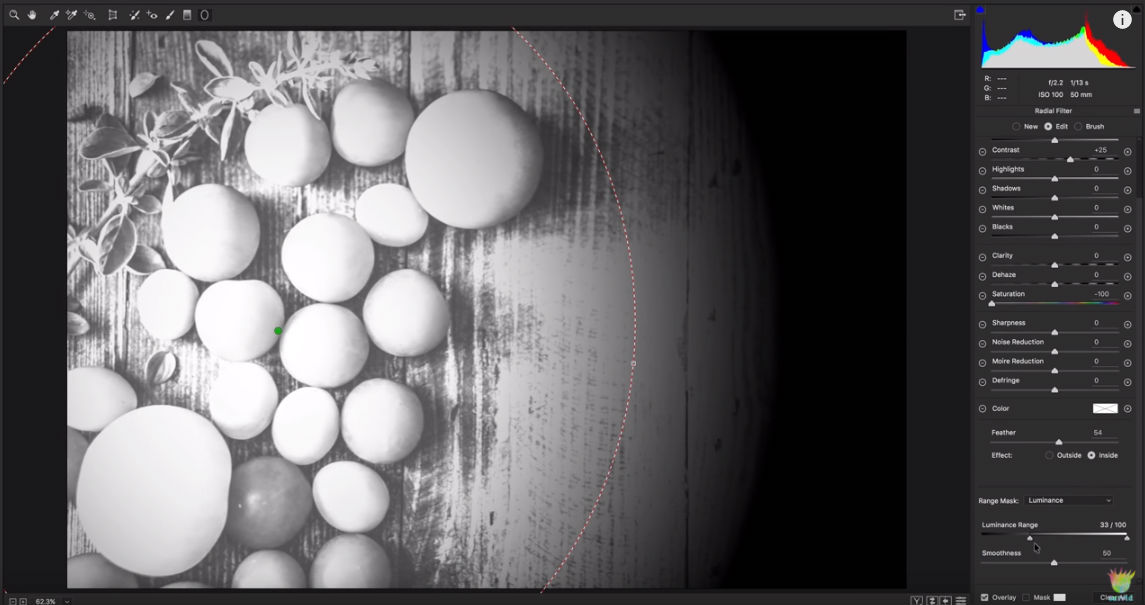
Switching gears to the luminance mask option, you can create a luminosity mask based on the brightness of the photo.
 YouTube Screenshot/Tutvid
By holding down the Alt/Option key as you drag the slider, you can see how you can determine what areas of the image are impacted by the mask, which is shown in the screenshot above.
In other words, you can decide to desaturate the brighter tones in the image, and darker tones won't be affected. The inverse is true as well.
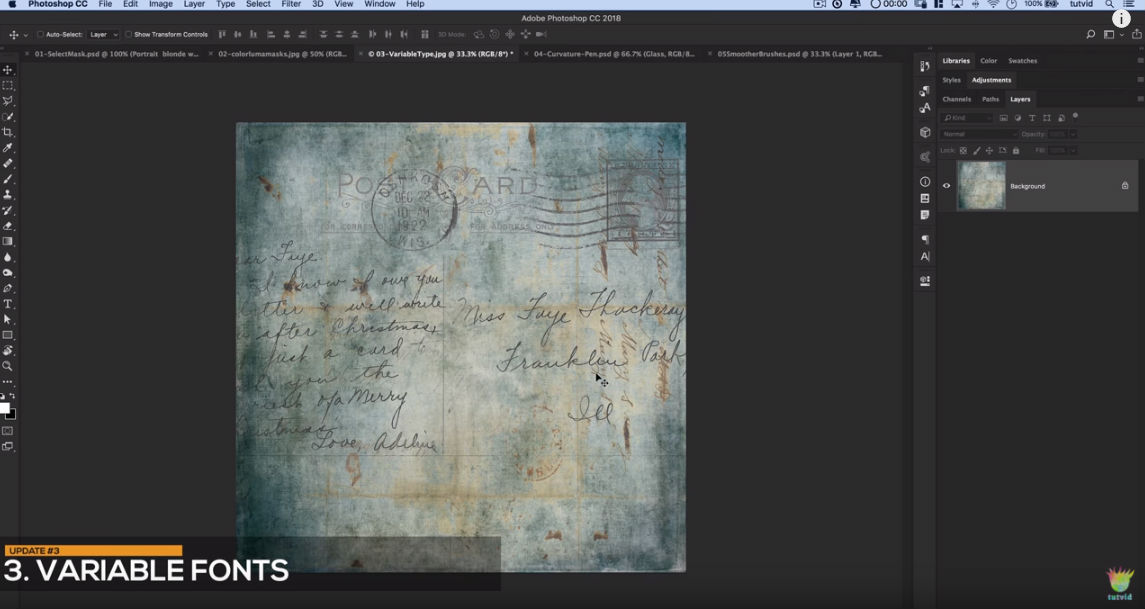
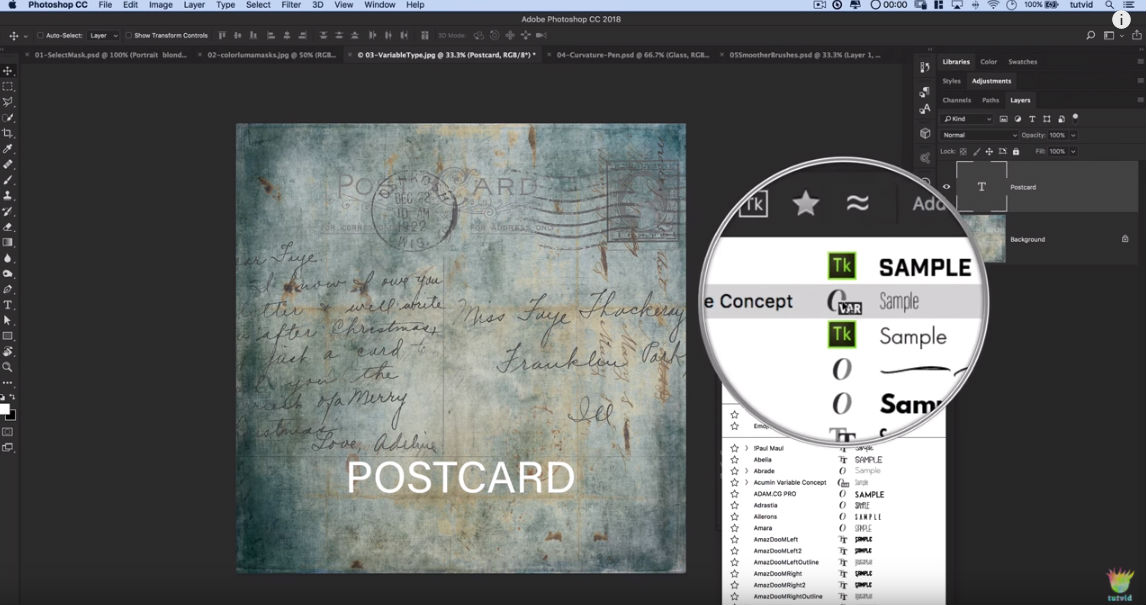
Variable Fonts
 YouTube Screenshot/Tutvid
Adding text to images isn't new...
But a fun trick you can now use is the Variable Fonts action, which you can find in the Properties Panel.
When you go into the Properties Panel, you'll find a host of variable, or open fonts, as seen below. Open fonts have the O icon with the word "Var" next to it.
 YouTube Screenshot/Tutvid
Once you change your text to a variable font, you can manipulate several properties, including its weight, width, and slant.
That gives you much more power to create customized-looking text than was possible in prior iterations of Photoshop.
Learn More:
Curvature Pen Tool
 YouTube Screenshot/Tutvid
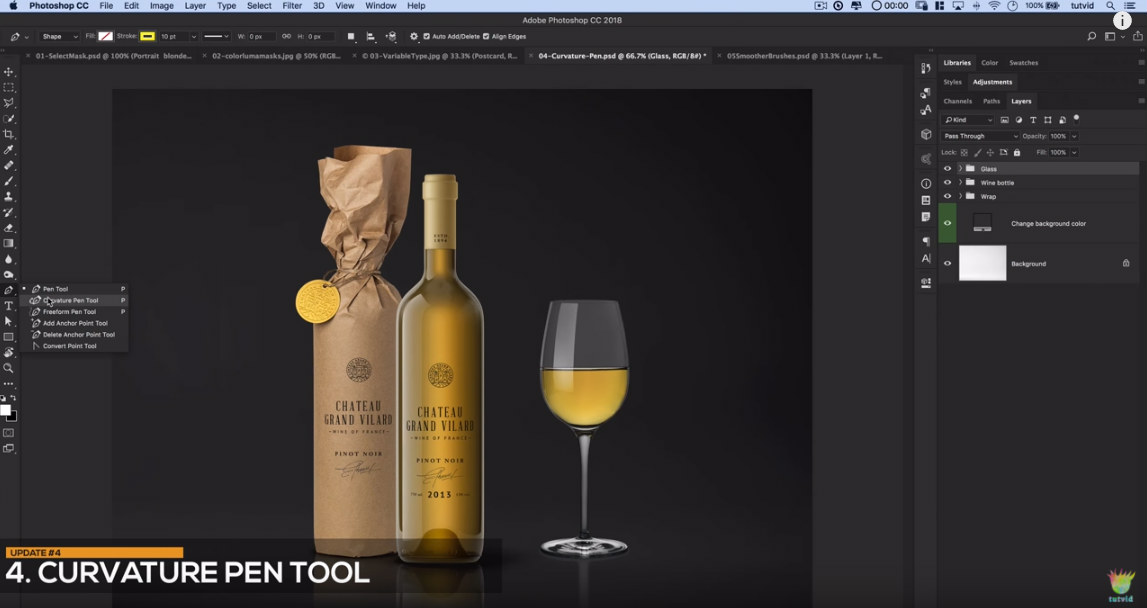
A brand new tool in Photoshop CC 2018 is the Curvature Pen Tool.
Located under the Pen Tool in the toolbox, the Curvature Pen Tool allows you to create various shapes without clicking and dragging the pen.
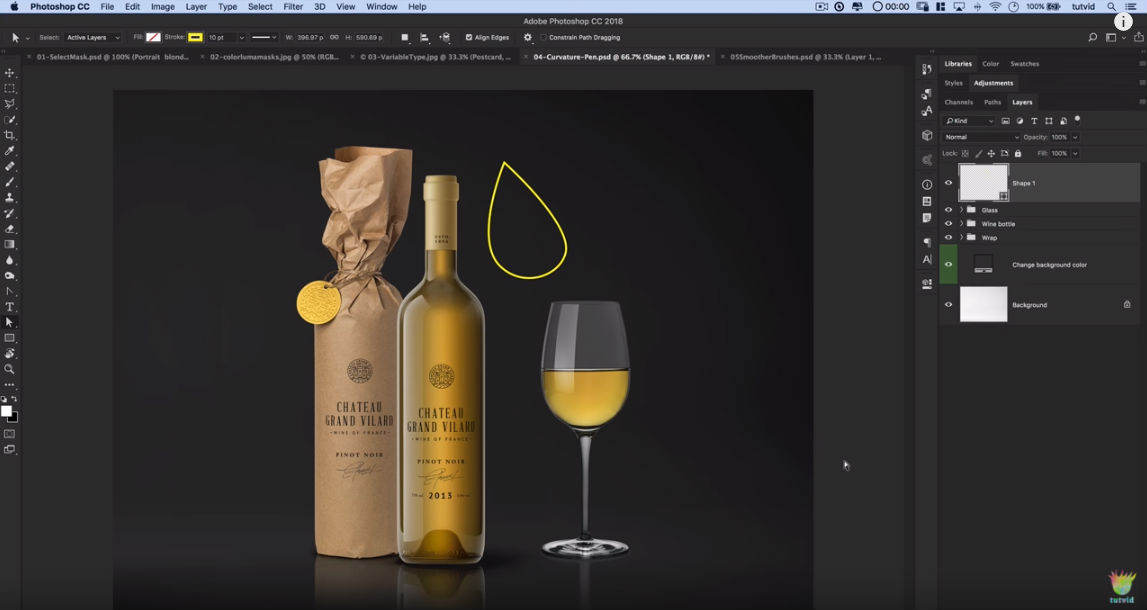 YouTube Screenshot/Tutvid
In other words, as you can see in the screenshot above, you can click a few times (in this case, three) and the Curvature Pen will create a corresponding shape.
Then, using the Convert Point Tool and the Direct Selection Tool, you can manipulate the shape into whatever you want, in this case, a teardrop.
You can also use the tool to outline existing objects, like the wine glass in the screenshot above.

Brush Smoothing
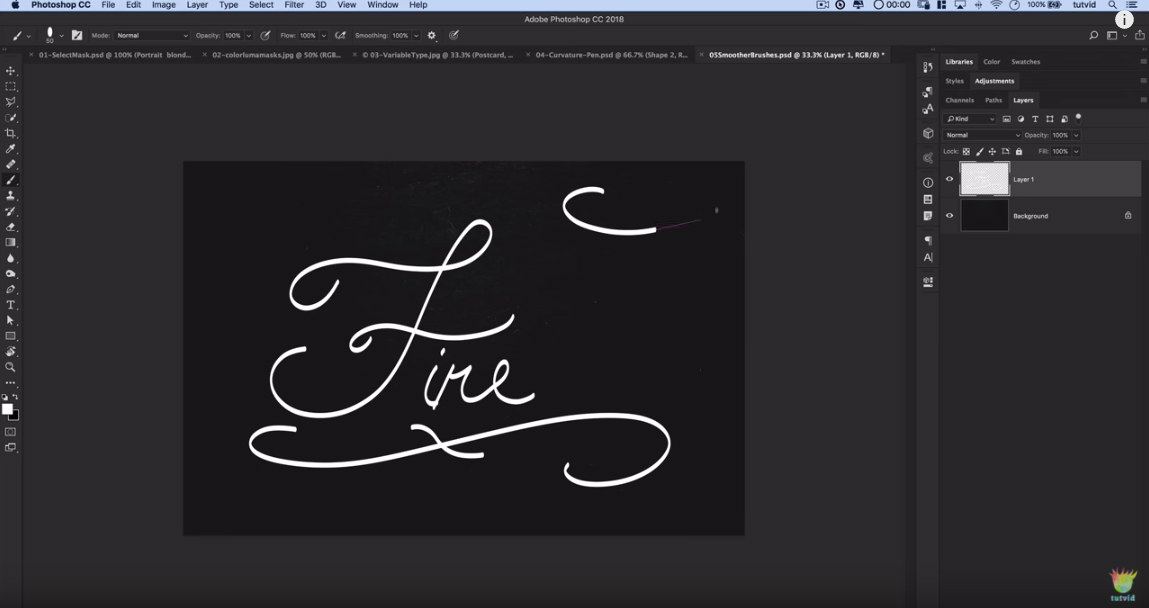 YouTube Screenshot/Tutvid
There's another awesome tool to check out in Photoshop CC 2018 - the Brush Smoothing feature.
As you might imagine, you can use it to smooth out brushes, which is an especially neat feature if you've only got a mouse or a trackpad to write handwritten text on an image.
When you paint your lines with this tool, it looks like there's a string attached to the cursor that drags the line around accordingly.
Once you get used to it, it's a great way to add smooth (and more readable) handwritten text.
And there you have it - five awesome new features in Photoshop CC 2018!
Learn More:
We Recommend
Getting Color Under Control – Stage 2: The Edit

After capturing the colors in your images correctly, the second stage of color management begins. The editing stage is the point where you'll make sure that the images you've captured are rendered accurately when they are displayed and printed.
Monitor Calibration
While you might think this step is more closely related to the display stage of color management, the fact is that if you're going to render colors accurately, you need to first see them correctly. Different monitors display colors differently, even if they're identical products. Colors in a display will shift as a monitor ages. The lighting in your room will also affect how you see colors. Without calibration, there's no way to know whether your display is showing you the true colors captured by your camera. The errors will carry over into your final digital images and prints.
Display calibration, therefore, is a critical step before you start editing and on an ongoing basis. Fortunately, it's not a difficult one with the right tool. Our favorite tool is the Spyder5 from Datacolor. It provides easy, reliable calibration for all your monitors, with 5-minute periodic checkups. Watch the webinar below to see exactly how it works.
Creating Color Profiles
Now that your monitor is calibrated, so you know you're seeing the truest possible colors, it's time to use the target, or test shots that you took with SpyderCHECKR in Stage 1. Here's a short video that shows you how:
You'll now have an accurate color correction reference to use in all your editing, to easily maintain the accuracy of the colors in your images.
Adjusting for Lighting Conditions
As you edit your images, you'll use the test shots you took at the beginning of your sessions with SpyderCUBE to adjust the black and white levels, then apply those adjustments to all the photos taken under those same lighting conditions, using batch processing. This is one of the greatest time savers you'll ever add to your workflow. Watch the how-to videos below to learn how to calibrate your RAW files using Adobe Camera RAW and Lightroom:
Finalizing your Edits
With your monitor calibrated and your images adjusted for lighting, you're now free to edit your images according to your needs. Your colors are true-to-life, and you can add whatever tweaks you like to the final product. Cropping, rotation, resizing, etc. can all be performed confidently, knowing that the vivid colors you see are exactly what you'll get. If you're sending them out for printing, you'll need to check with the printer you choose for the color space to use. If you're printing them yourself, you'll want to make sure your printer is reproducing the colors in your images accurately, too. We'll cover that subject in the next article, on Stage 3: the display.
We Recommend
How to Backlight Your Photos Using Photoshop
Backlighting can be one of the most beautiful forms of lighting for any scene.
It's especially eye-catching for portraits.
And while natural light for backlighting purposes is especially nice, you might not always get the look that you want.
Like so many other things in photography, mastering backlighting takes time and practice.
It also requires an understanding of a few technical and compositional tips to maximize your success.
With that in mind, let's explore a few things you need to know to put natural backlighting to work for you. Then we'll look into how to boost the interest of backlighting in Photoshop.
Backlighting: The Pros and Cons
Just as a refresher, backlighting occurs when the light source emanates from behind the subject, as seen in the image above.
There are a few pros and cons to using this type of lighting:
Pros
- Backlighting can create highly dramatic scenes.
- Backlighting increases contrast between the background and the subject because the background is full of warm light and the subject is often darker (i.e. silhouetted).
- Backlighting is conducive to telling interesting stories about the subject and their relationship to their surroundings.
Cons
- Backlit scenes are notoriously difficult to master because of the wide dynamic range that results from a bright background and a dark foreground, as seen in the silhouetted image above.
- Lens flare can be an issue.
- The "right" amount of backlighting is a hard balance to achieve.
Nevertheless, the benefits of using backlighting often outweigh the challenges that come with it. It's just a matter of taking a measured approach that will give you the best opportunity to take advantage of such beautiful lighting.
The Camera Settings

If you want to make the most of natural backlighting, I suggest you work with the following settings:
- Shoot in manual mode, so that you have complete control over your exposure settings.
- Use a large aperture to minimize depth of field. Anything under f/5.6 should do the trick.
- Use spot metering to take a meter reading off of your subject's face. To get a more accurate reading, shield your lens from the sun with your hand.
- Focus on your model's eyes, again, shielding your lens from the sun with your hand to help your camera get an accurate focus point. Your camera's autofocus will likely not work very well (or at all) in this situation, so manual focus is the way to go.
- Shoot in RAW, that way you have maximum ability to work on the image's features (i.e. exposure, white balance, highlights) in post-processing.
With these basic camera settings, you'll be in a better position to capture the beauty of both your model and the light that's illuminating the scene from behind. Naturally, the aperture, shutter speed, and ISO settings will depend on the intensity of the light of your specific shooting situation, so to nail those down, simply take a few practice shots.
Take Advantage of Golden Hour

I know this is probably a real "duh" moment, but Golden Hour is the best time to make use of backlighting, simply because it's warm tones are so soft and inviting.
What's more, since the light during Golden Hour is filtered through more of the atmosphere, it's rays are less intense, meaning you have a better chance of balancing the bright background with your subject's face, which will be in shadow. Put simply, the dynamic range at Golden Hour is much more easily tamed than if you were to shoot, say, one or two hours earlier in the evening.
Having said that, each instance of Golden Hour is a little different. Some evenings, the sun's rays might be diminished even further due to cloud cover. On other evenings, the sun's rays might be more intense without the benefit of clouds to lessen their impact.
When this occurs, it's a good idea to filter the sun through something like the canopy of a tree or simply frame the sun out of the image. Again, that helps reduce the dynamic range such that you avoid blown out highlights from the backlighting and underexposed facial features of your subject.
Another option is to place the sun directly behind the subject. This gives the shot a bit of a different vibe because it will create almost a glow around the subject and it will require that you frame a closer view of the subject's face as well.
Shield Your Lens
Obviously, a major concern when shooting a backlit image is the abundance of direct light coming right down the barrel of the lens.
Some of the tricks mentioned in the previous section about filtering out some of that light will help avoid damaging your lens.
However, it's advisable to take further measures just to be on the safe side.
Typically, shooting with a lens hood will help eliminate much of that direct light, such the sun doesn't damage your gear. A lens hood is also helpful for reducing lens flare if that's not a creative element you want to include in the shot.
Another trick is to simply block the sun's direct rays with your non-shooting hand.
This takes a lot of practice and finesse from a couple of different standpoints. First, you have to master the art of holding your camera steady with one hand (unless you're shooting with a tripod, of course). Second, you have to become adept at blocking the light without your hand finding its way into the frame.
This might sound like an easy process, but in practice, it's not. Trust me - I have a pretty big collection of backlit photos with my hand making an appearance in the corner of the shot.
Don't Be Afraid of Fill Lighting

Despite your best efforts, you might still find that your subject's face is still a bit too dark to get the look you want.
In that scenario, don't be afraid to fill the scene with light either with some artificial lighting or by using a reflector.
Reflectors are inexpensive and highly effective for bringing a little more illumination to a backlit subject's face, as seen in the image above.
The difficulty with reflectors is that they require a helper to hold them (because you can't very well hold your camera and a reflector at the same time.
If you're in a pinch and don't have someone that can assist you, just bring along a white sheet and spread it out on the ground in front of your subject.
Generally speaking, the sheet will bounce enough light back onto your subject to get the fill effect you need, or at the very least will fill in the shadows so that you can more easily edit the photo in post-processing.
Enhancing Backlighting in Photoshop
Despite all your best efforts, using the tips and tricks above still might not be enough to get the results you want for your backlit photos.
However, they will help you get closer to that ideal shot.
Even if they aren't perfect, taking recourse to improve the results you get in the field means you'll have more to work with once you get home to process the photos.
In the video above, Irene Rudnyk walks us through the process of editing a backlit photo, beginning with the RAW file and making the necessary adjustments such that the final result is a breathtaking backlit portrait.
Follow along as she shares her workflow step-by-step. It's an easy process to follow and replicate, with gorgeous photos as a result!
We Recommend
How to Brighten Portraits in Only 2 Minutes in Photoshop
You know they say to underexpose your images to protect against blown out highlights...
But sometimes your photos need a little help recovering some of their brightness because the underexposure got a little out of hand.
Fortunately, Photoshopping portraits to bring a little brightness back to them is a quick and easy task. In fact, you can do it in just a couple of minutes.
You can learn how to brighten portraits in the video above from PHLEARN.
For a step-by-step review of the process, see below.
Editor's Tip: After you perfect your images in Photoshop, complete the process by turning your photos into fine art. Start the process here.
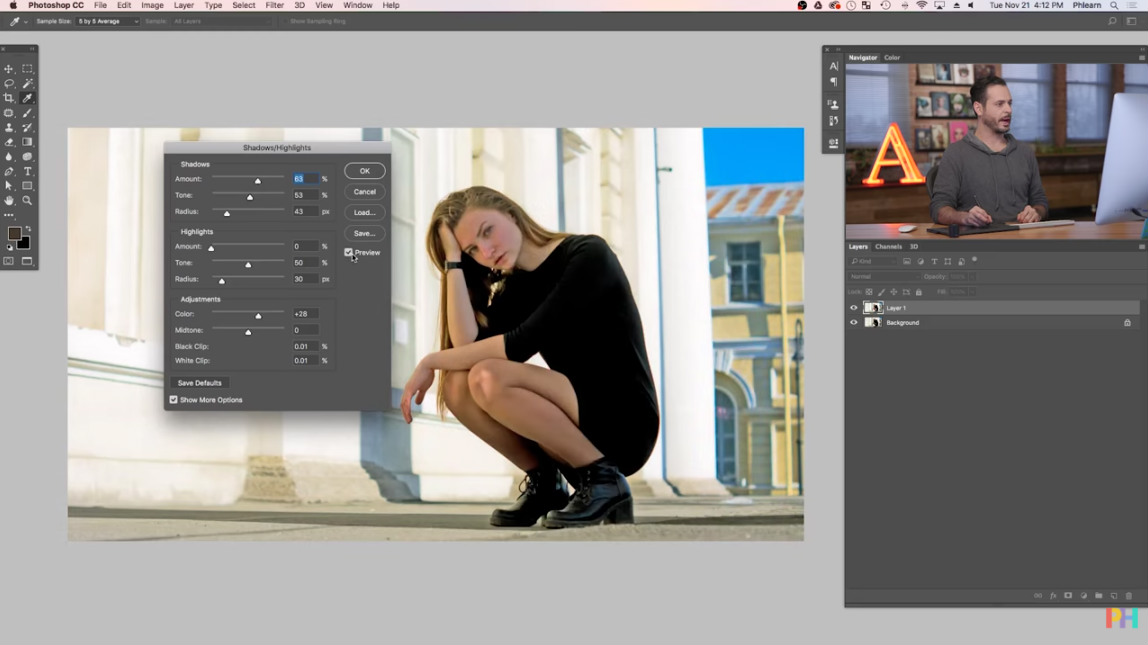
How to Brighten in Photoshop: Adjust Shadows and Highlights
 YouTube Screenshot/PHLEARN
The first step in Photoshopping portraits is to duplicate the background layer so you can work non-destructively.
Then, go to Image > Adjustments > Shadow/Highlights and start to work on the shadows.
By bringing the shadows up (on all three sliders - Amount, Tone, and Radius), you can instantly brighten the image.
You can also add a little more color in the same dialog box by sliding the Color Slider to the right.
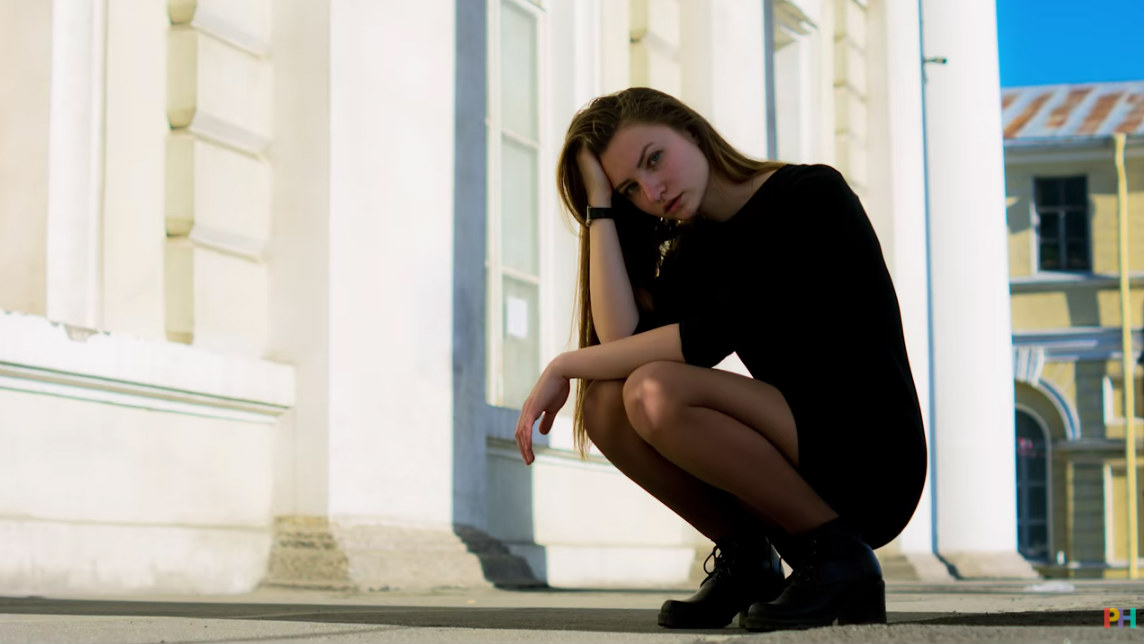
When comparing the before image above and the after image below, you can see what a huge difference that these simple adjustments make to the shot.
 YouTube Screenshot/PHLEARN
Learn More:
How to Brighten in Photoshop: Use Curves to Add Contrast
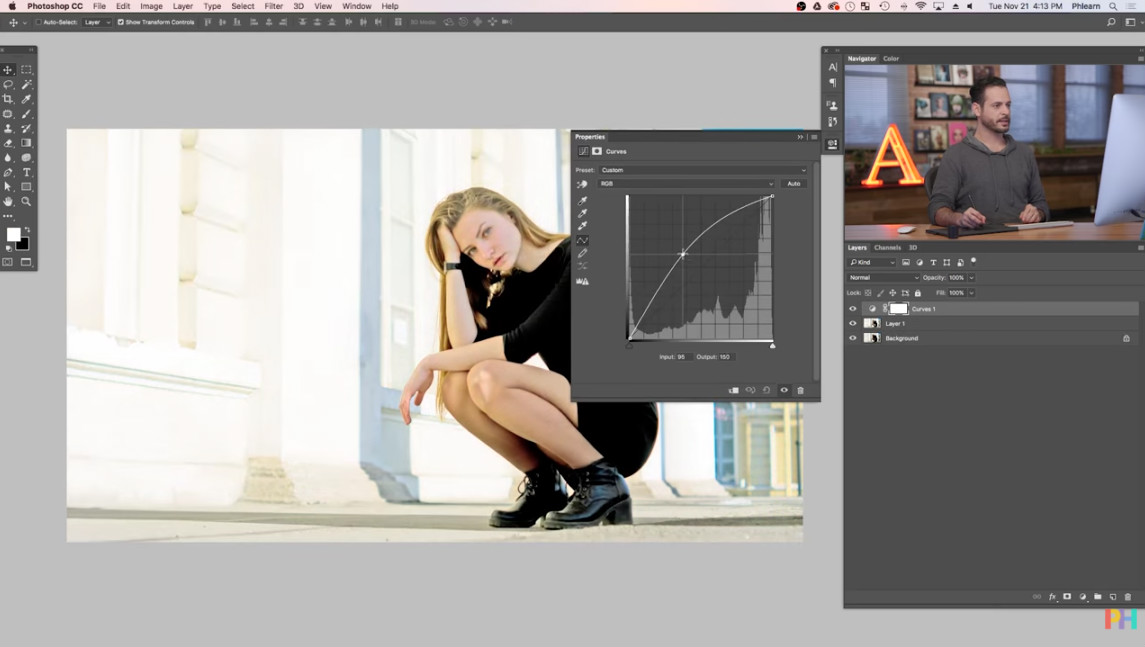 YouTube Screenshot/PHLEARN
When you brighten a portrait in Photoshop, you can lose some of the contrast due to bringing up the shadows.
To bring some of that contrast back, you can add a Curves Adjustment Layer to work on the highlights and shadows a little more.
Simply go to Layer > New Adjustment Layer > Curves, and as seen in the screenshot above, grab the Curves line and drag it up to form a bow-shaped curve.
 YouTube Screenshot/PHLEARN
Next, invert the layer mask by pressing CMD/CTRL-I and paint with white over the subject.
As you can see in the screenshot above, this brightens the model's skin significantly.
Next, to focus those changes just on the highlights, double-click on the Curves Layer.
Then, press ALT or OPTION while clicking and dragging the slider for the Underlying Layer to the right.
 YouTube Screenshot/PHLEARN
The result of making these changes is seen above. We're getting close to having a final image!
Editor's Tip: Make extra money by joining our #1 affiliate program. Get the details here.
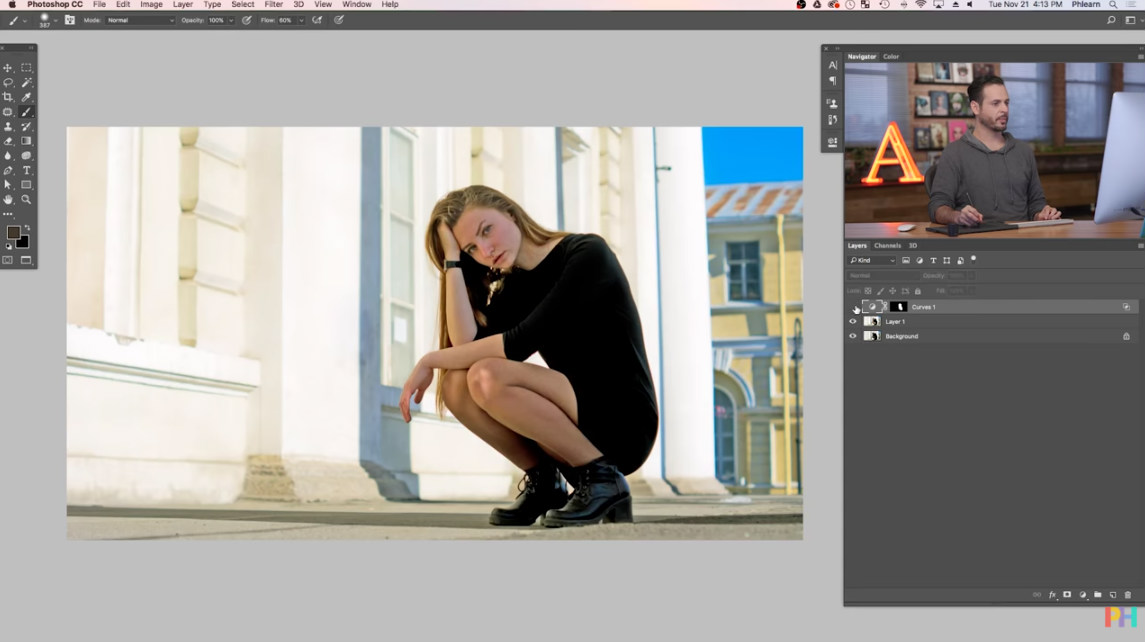
How to Brighten in Photoshop: Increase the Saturation
 YouTube Screenshot/PHLEARN
The final step in learning how to brighten portraits is to increase the saturation in the image to protect the skin tones from being washed out.
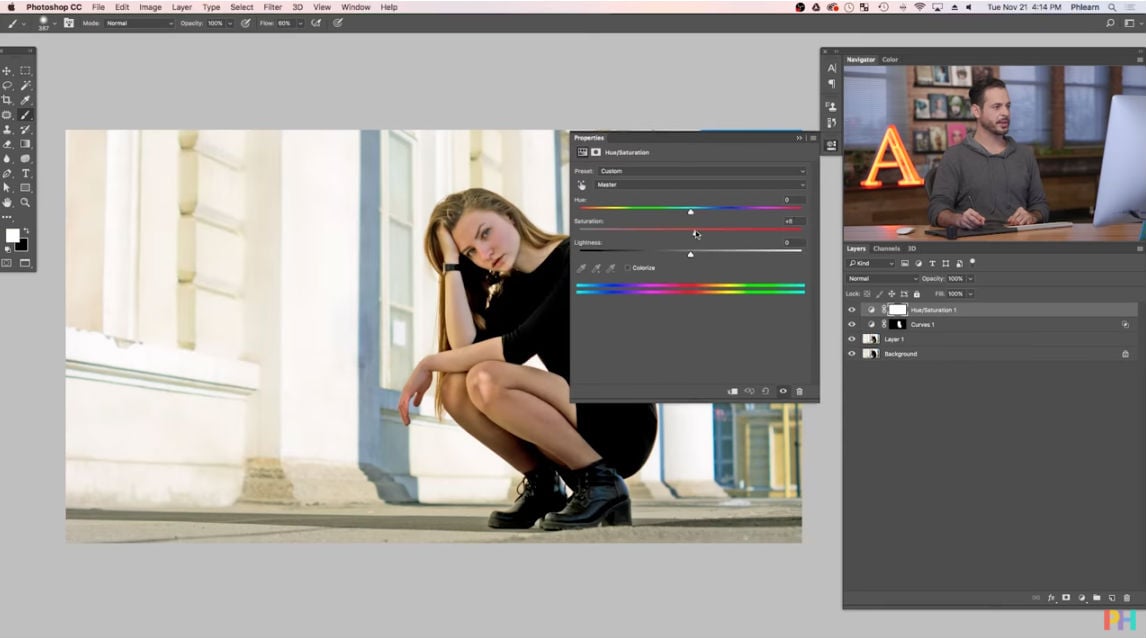
To do this, go to Layer > New Adjustment Layer > Hue/Saturation, and use the Saturation Slider to increase the color in the shot.
 YouTube Screenshot/PHLEARN
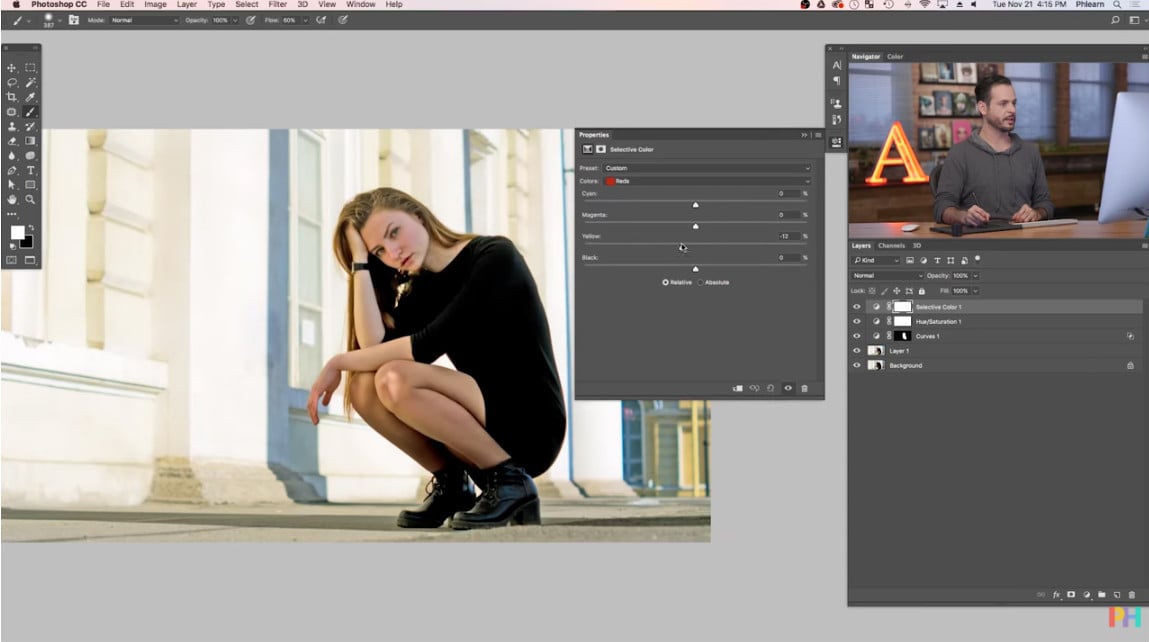
Next, you want to target the increase in saturation to the model's skin tones, and to do that, you go to Layer > New Adjustment Layer > Selective Color.
In the corresponding pop-up window, choose the red tones and increase them slightly while bringing down the yellow tones slightly as well.
 YouTube Screenshot/PHLEARN
As you can see, the before and after images above and below show how powerful these simple adjustments really are.
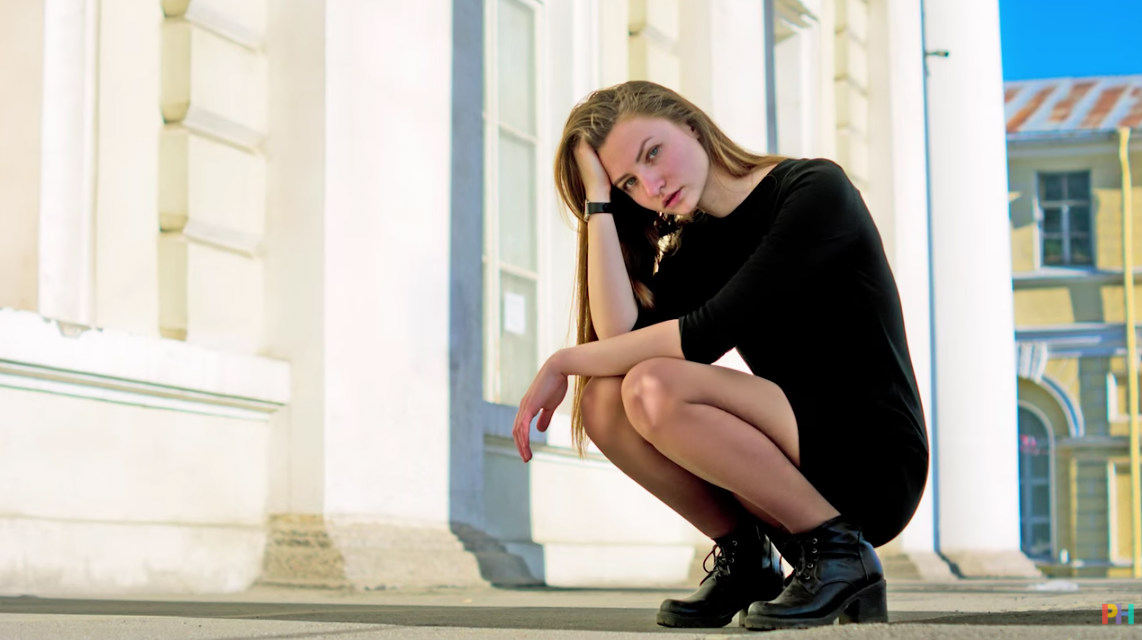 YouTube Screenshot/PHLEARN
If you want to learn more about Photoshopping Portraits or making adjustments to other kinds of photos in post-processing, be sure to check out our Post-Processing tutorials and visit PHLEARN's YouTube Channel.
Learn More:
- How to Use Photoshop to Sharpen Your Photos
- How You Can Enhance Your Photos With Dynamic Color in Photoshop
We Recommend
How to Convert Images to Black and White in Photoshop
There are plenty of ways to convert your color images into black and white. Some are certainly more effective than others. Some are also more time intensive than others. The ideal setup would be something that is both effective and that doesn’t take up a ton of time either.
Joshua Cripps of Professional Photography tips has one such approach to black and white conversion. His method, which uses basic adjustment layers and blending modes in Photoshop, renders beautiful, impactful black and white photos. Have a look at the video below, and give his awesome process a try on one of your images!
Amazon Recommendations
- Black and White Photography: A Basic Manual Third Revised Edition
- Mastering Black & White Photography
- Adobe Creative Cloud Photography plan (Photoshop CC + Lightroom)
We Recommend
How to Fix Digital Noise in Less Than 5 Minutes

Digital noise - which looks a lot like grain in a film image - can be used creatively, just as grain was back in the film days.
For example, in a black and white photo, digital noise can make it look more gritty and raw, giving it an extra visual punch that makes the image more interesting.
However, digital noise can also ruin a photo. Rather than the viewer honing in on the details of the subject, their eye can be easily distracted by all that grain.
Sometimes you just have to deal with it, though, as low-light situations sometimes call for a higher ISO, which only exacerbates the presence of noise.

In the past, many photographers relied on noise reduction in post-processing to minimize the grit and grain, but that often means you lose even more detail in the shot and get a final result that looks soft and waxy.
But there’s a new way to go about dealing with noise.
If you already have Photoshop, you’re in good shape because this technique requires that you process your images in that program.
If you don’t have Photoshop, check the links at the end of the article so you can get yourself setup.
Essentially, what you’ll do is use image averaging in Photoshop to blend the images together. By blending images together, you’re maximizing the light. That means if you took two images, each at ISO 1600, blending them together results in an image equivalent to ISO 800. Averaging four images taken at ISO 3200 results in a final image with an equivalent ISO of 800 as well.

And, as noted above, since higher ISOs are related to more noise, by using this technique, you’re lowering the ISO and reducing noise.
Nice trick, huh?
There are a couple of problems, though.
First, to make this technique work you need a series of images, like those shot in a burst. If you have just one image you want to fix, this method won’t work.
Second, when blending images together, any movement that occurs in the scene will appear as ghosting in the final image - blurred movement as the object changes position from one frame to the next.
Fortunately, there’s a way to fix that ghosting in Photoshop as well by using layer masks.
If it sounds complicated, it’s not!
In the video below, Tony Northrup walks us through the process of reducing noise and fixing ghosting problems in Photoshop. Follow along as he explains each step in-depth so you can reap the benefits of having sharper photos, even when you’re forced to shoot at high ISO.
Amazon Recommendations
- Adobe Creative Cloud Photography plan
- Adobe Photoshop CC Classroom in a Book
- The Adobe Photoshop CC Book for Digital Photographers
We Recommend
How to Remove ANYTHING From a Photo in Photoshop

How many times have you taken a photo, thought it was great, and only realized later that there's something in the shot that you don't want to be there?
Perhaps it's a tree that looks like it's coming out of someone's head or a trash dumpster in the background of a real estate photo.
It's happened to me plenty of times over the years, despite my best efforts to pay attention when I'm composing and framing the shot.
But despite our best intentions, sometimes unwanted features find their way into our photos.
Thankfully, we have tools that enable us to remove objects in Photoshop.
In the video above by the Photoshop Training Channel, Jesus Ramirez presents a tutorial on three different Photoshop tools you can use to remove anything from a photo.
Whether it's a beach ball or a photobomber or a car, these tools will do the trick!
Remove Objects in Photoshop With Content-Aware Fill
 YouTube Screenshot/Photoshop Training Channel
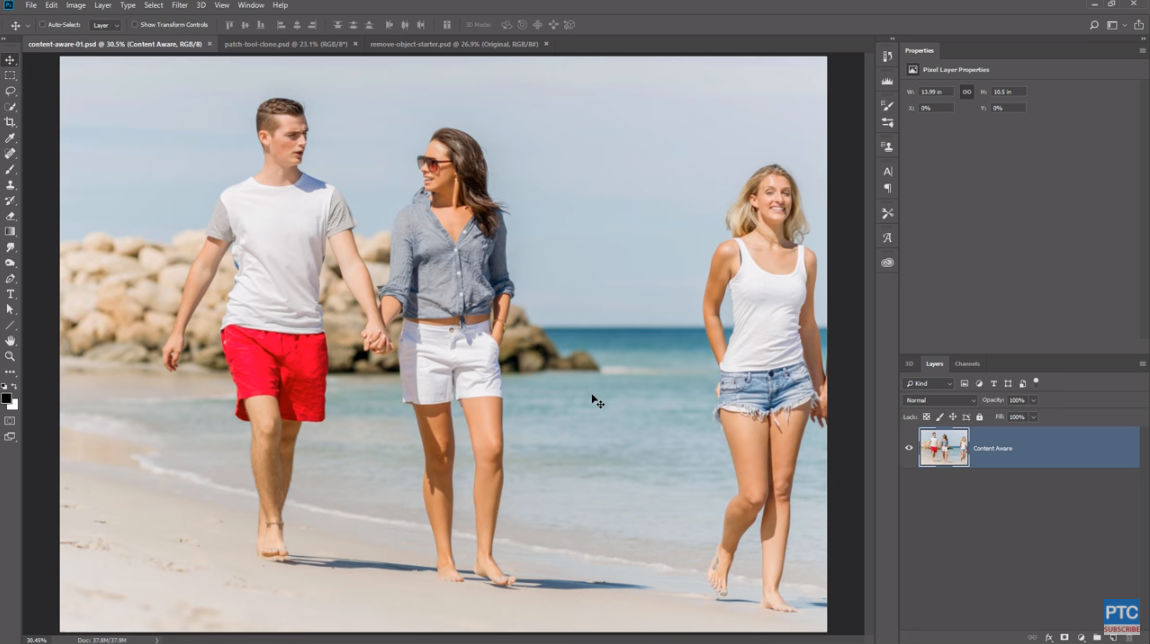
In the screenshot above, you can see how the woman on our right has photobombed the picture.
Removing her is actually quite simple if you use Content-Aware Fill.
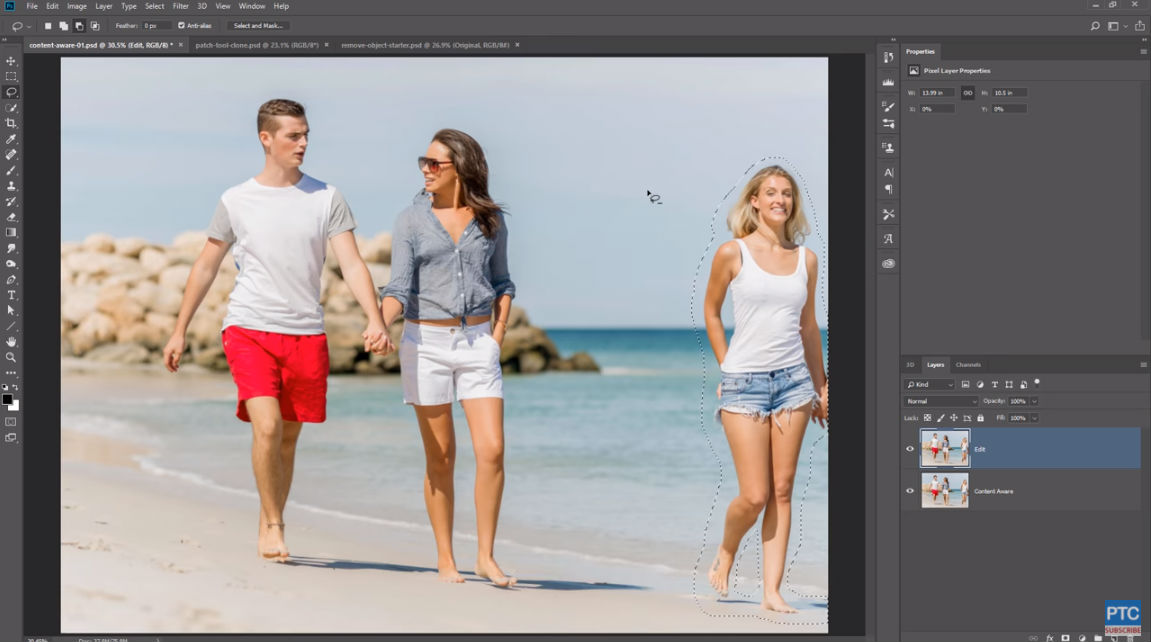
The first step is to duplicate the layer. Then with the Lasso Tool, freehand a selection around the woman trying to keep it close to her body to preserve as much of the original background as possible, as seen in the screenshot below.
 YouTube Screenshot/Photoshop Training Channel
The next step is to fill the selection.
To do so, go to Edit > Fill > Content-Aware. Make sure you have the Color Adaptation box selected and press OK.
 YouTube Screenshot/Photoshop Training Channel
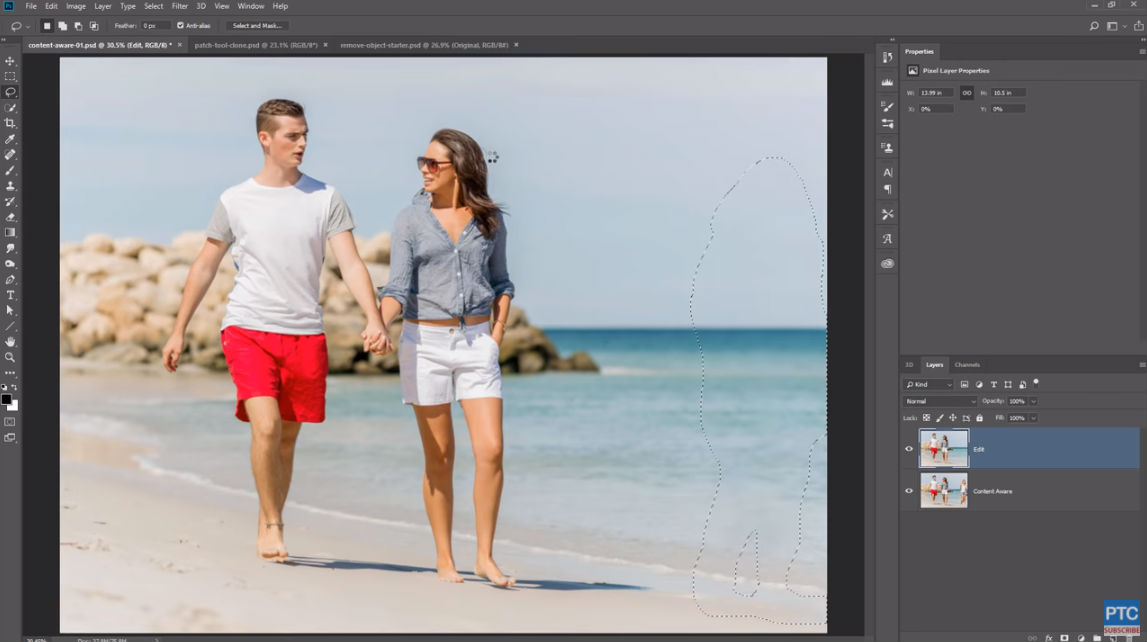
Once you do so, you'll notice that the woman disappears from the shot.
All you need to do is press Command/Control D to deselect the selection, and your photo will be good to go!
Learn More:

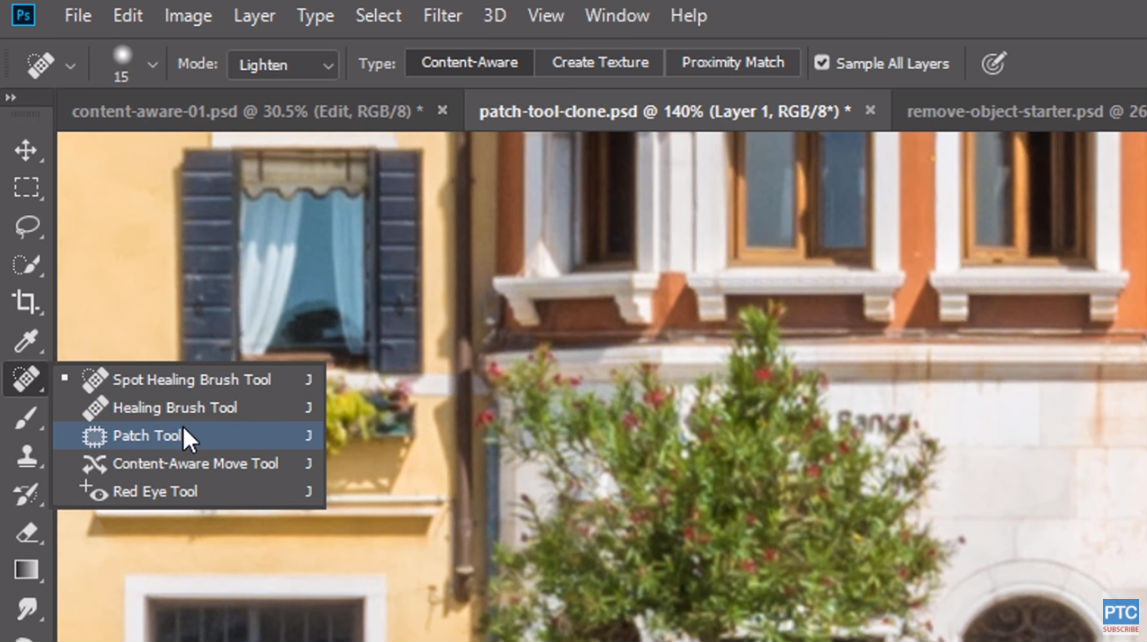
Patch Tool
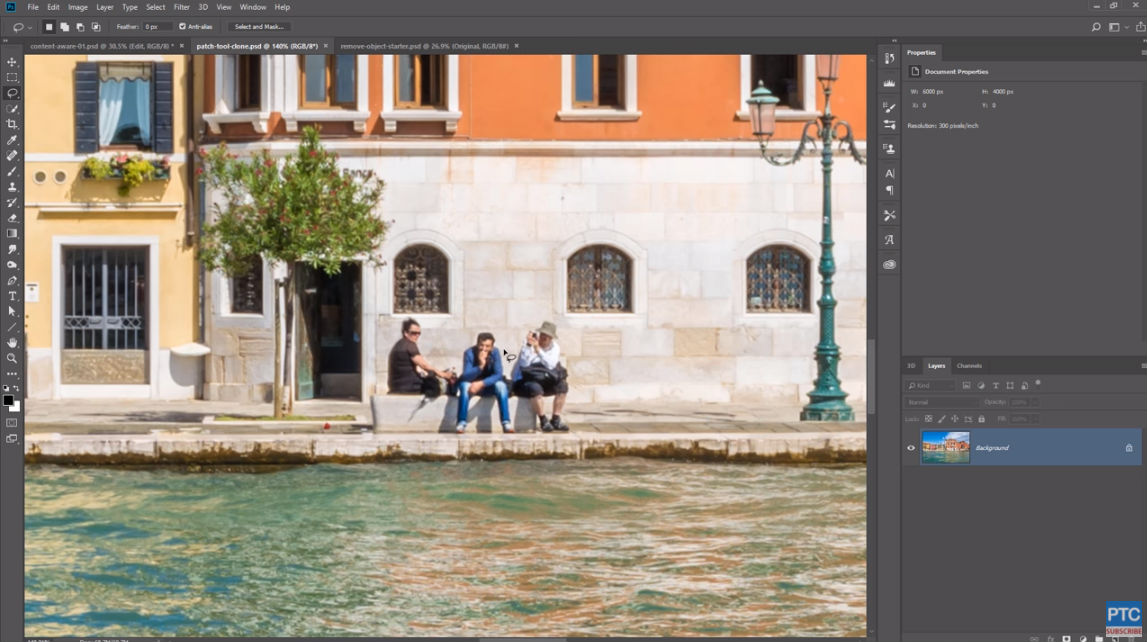 YouTube Screenshot/Photoshop Training Channel
Another method by which you can remove unwanted objects from your photos is the patch tool.
In this example, Jesus uses the image above for this tutorial, and we'll learn how to remove the three people from the image.
As above, the first step is to duplicate the layer so you can work on the image non-destructively.
 YouTube Screenshot/Photoshop Training Channel
Then, select the Patch Tool, which is nested under the Spot Healing Brush.
Also make sure that Normal is selected in the Patch Dropdown Menu at the top of the screen and that Source is selected as well.
Next, using the Patch Tool, you draw a selection around the pixels that you'd like to replace.
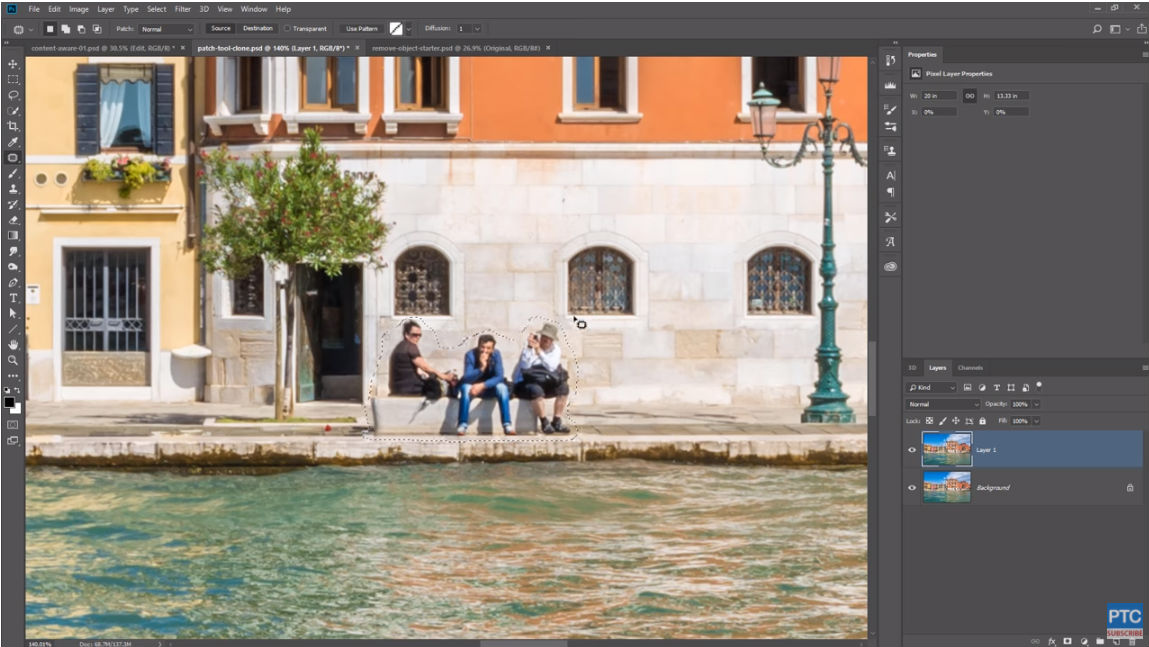 YouTube Screenshot/Photoshop Training Channel
After that, you need to find a source area that matches the background you'd like to replace the selected pixels.
As shown above, once you do that, you click and drag the selection you've made to the source area. Doing so will give you a preview of what the selected area will look like.
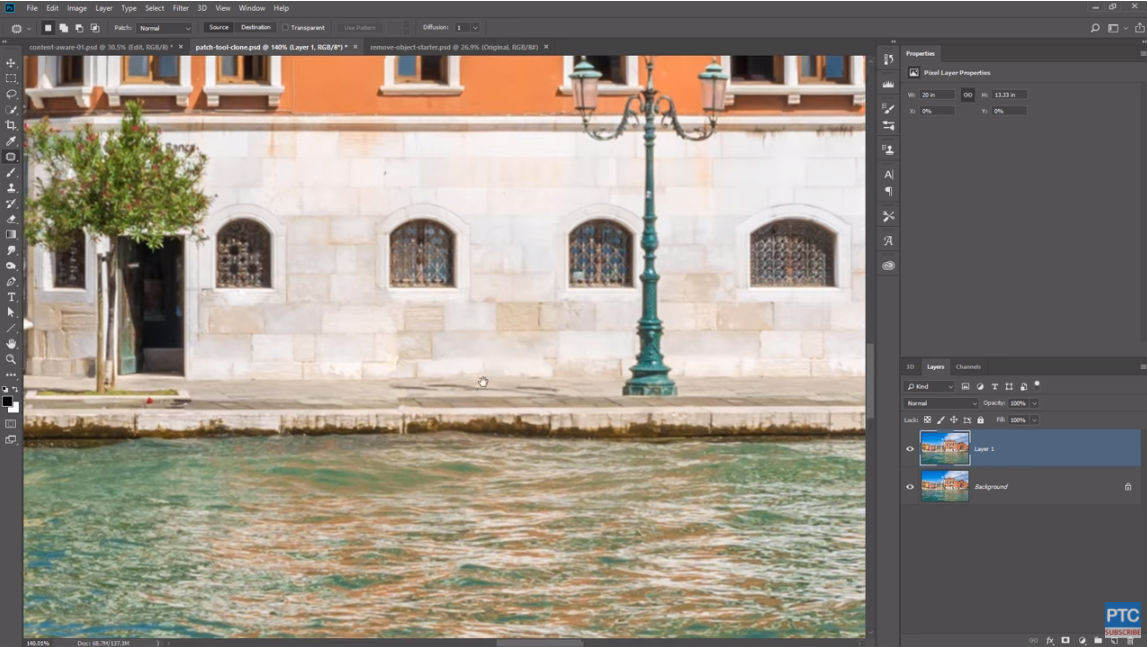 YouTube Screenshot/Photoshop Training Channel
As you can see in the final product, the patch tool did a decent job of eliminating the unwanted people from the shot.
It's not perfect, but with some fine-tuning, it could be!

Advanced Photoshop Method for Removing Objects
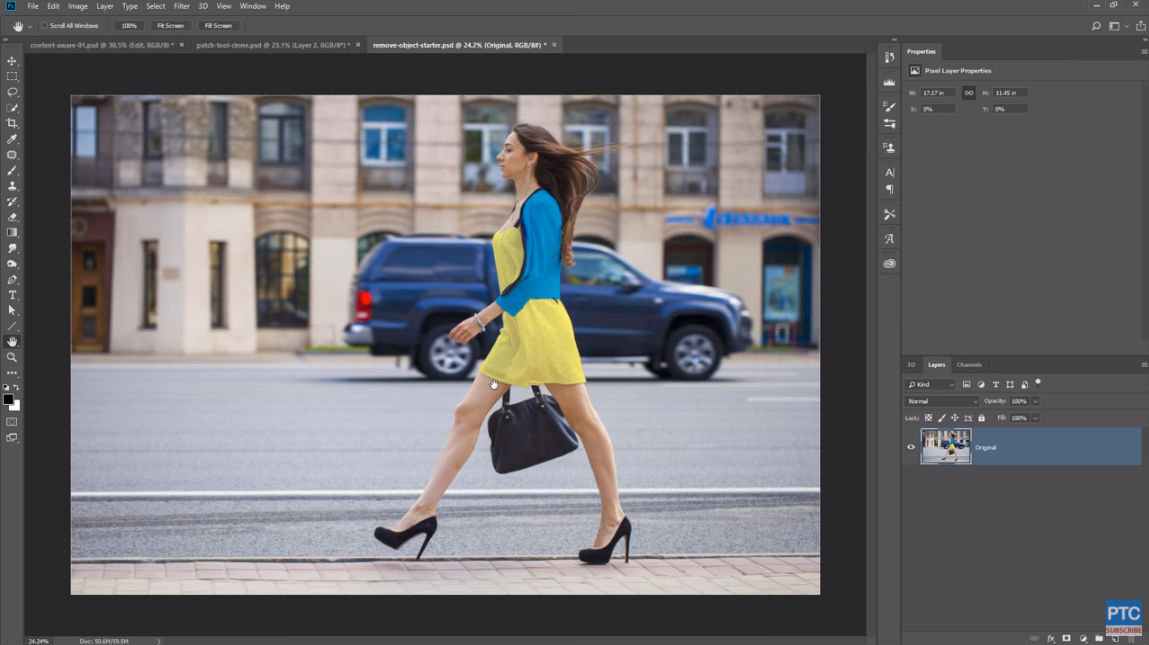 YouTube Screenshot/Photoshop Training Channel
What happens if you have a more complicated object to remove, like the SUV in the image above?
In that case, you have to use a process that's a little more complex, but generates excellent results.
Again, the first step is to duplicate the background of the original image, only this time you need to duplicate it twice.
Doing so allows you to create a top-most layer for the model and one under that for the background.
Working with the model layer, use the Quick Selection Tool to select the model. Once the selection is perfected, create a layer mask.
 YouTube Screenshot/Photoshop Training Channel
Next, you need to create a layer that only includes the background.
To do so, use the model layer mask. First, Command/Control Click on the layer mask to load the selection.
Then, select the background layer. Once it's selected, go to Select > Modify > Expand, which will make the model layer mask larger. As you can see below, the selected area has now expanded beyond the border of the model.
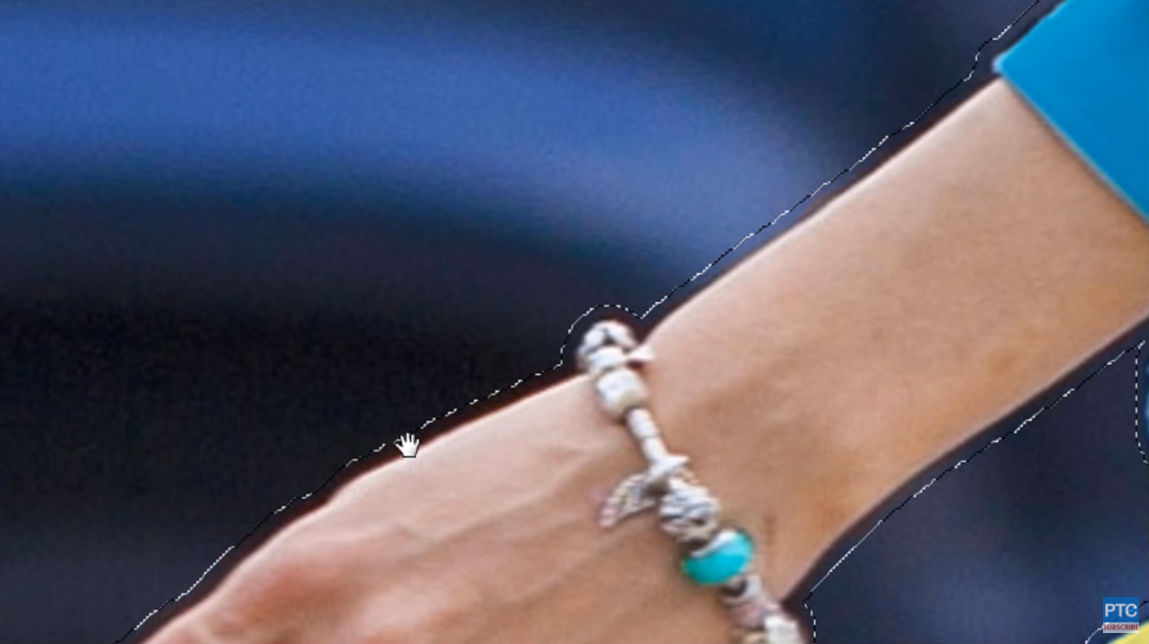 YouTube Screenshot/Photoshop Training Channel
With the background selected, press Shift + Backspace to open the Fill window.
Then select Content-Aware and be sure that the Color Adaptation box is selected. Press OK.
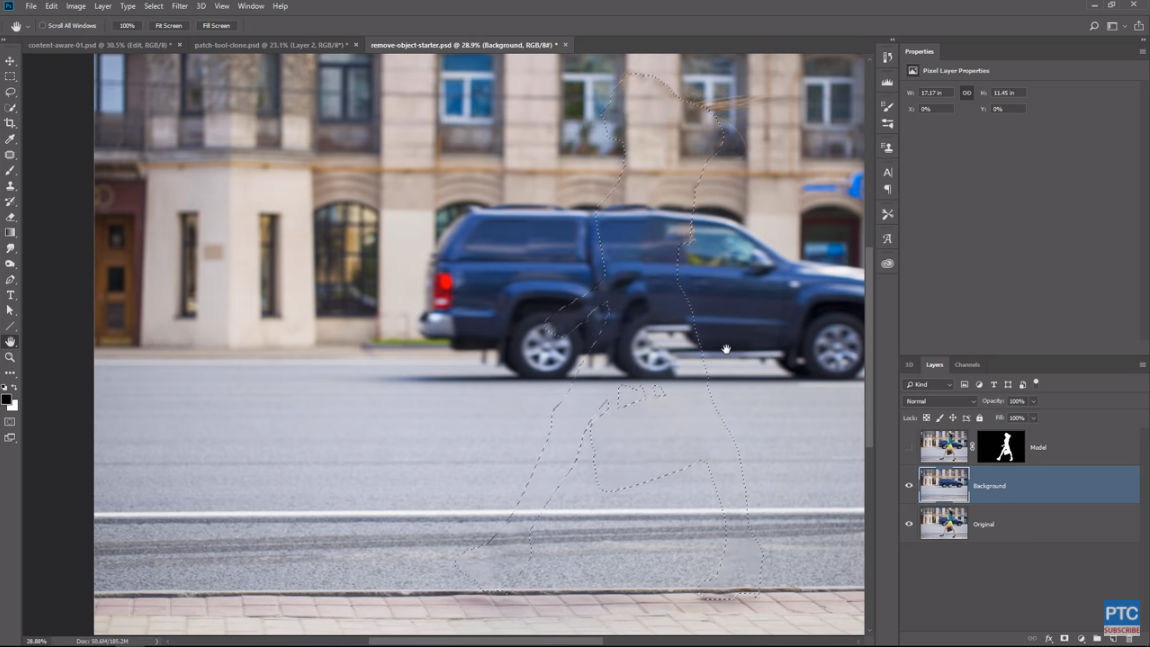 YouTube Screenshot/Photoshop Training Channel
Photoshop will work its magic, and as you can see above, it will remove the model from the background layer.
Upon closer inspection, you can see that it hasn't done a perfect job, but that's not a problem because the next step will build a new image on this background.
As you can see in the screenshot above, we'll need to duplicate the wall, windows, and columns behind the car to take the car's place in the photo.
That process is fairly complicated and involves a number of steps, so it's best to go to the 10-minute mark in the video to see Jesus in action to complete this step.
Remember, the Content-Aware and Patch Tool are both excellent means of removing less complicated objects from your photos, and will likely be all that you need for most situations.
With these photoshop editing tips, you should be able to tackle just about any problem that requires you to remove objects in Photoshop!
Learn More:
- A Free Comprehensive Guide to Retouching Your Photos in Photoshop
- How to Sharpen Your Photos in Photoshop
We Recommend
How to Replace the Sky in Your Photos Using Photoshop
 Image Credit: kurmyshov via iStock
We've all been there before...
You spend countless hours planning and preparing for a day or weekend outside shooting beautiful photos of incredible scenery.
Then, when the time comes, you find that the day is overcast, the skies are dull, and your photos lack the visual punch they need to really jump out at people.
As big of a bummer as that is, there's a relatively easy way to turn things around by using Photoshop to change the sky.
In the video above, PSDesire gives us a step-by-step tutorial on how to replace the sky in Photoshop.
As you'll see in the video, the change is totally dramatic, with the original image taking on a whole new life with the manipulations done in post-processing.
Take a look at the video, and you'll be well on your way to having drop-dead gorgeous skies in your photos, even if they didn't originally have much interest in the sky to start.
Editor's Tip: Don't just head out to take landscape photos without prior planning. Instead, plan your ideal photography adventure. Learn why your next photography outing should be in the Pacific Northwest.
How to Replace the Sky in Photoshop - Things to Remember
 YouTube Screenshot PSDesire
There are a number of considerations to make when you take on a project like replacing the sky in your photo.
First, you can't just grab any pretty sky image off the internet and use it in your composite photo.
Instead, if the photo isn't yours, be sure that you can use it, and if you aren't sure, either select a different photo, buy a stock image, or contact the photographer that took the photo.
Just because an image is on the internet doesn't mean that you can do with it as you please!
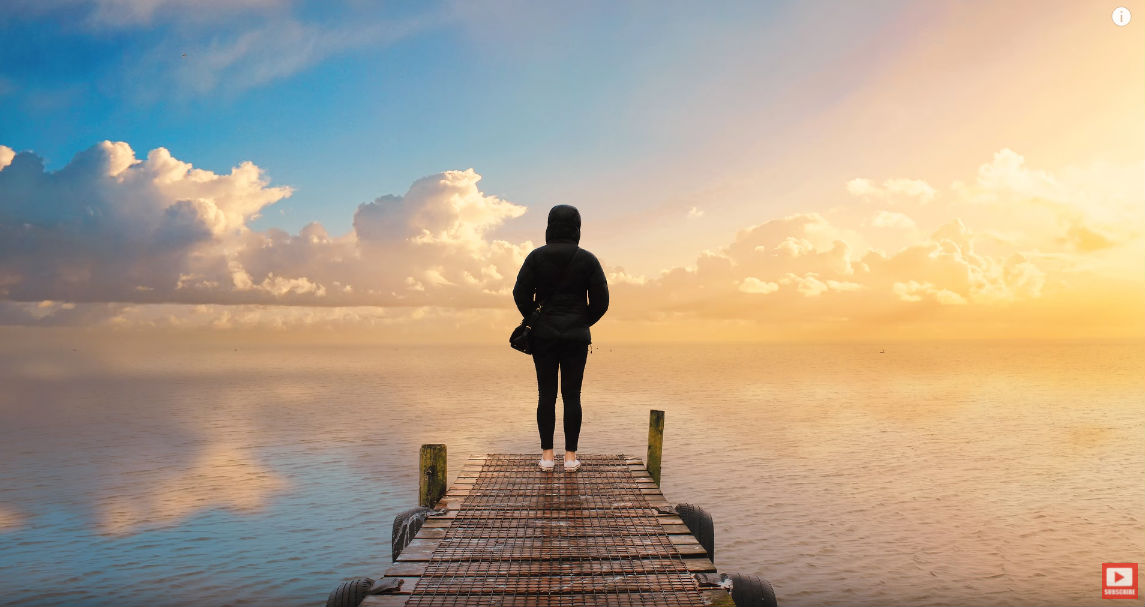 YouTube Screenshot PSDesire
In the sample image used in the video, notice how the original image and the source image for the sky had a very similar horizon - both are very well defined.
In this case, having matching horizons is critical because it allows you to easily line up the original image and the source image.
But if, for example, your original image is of mountain peaks, you'll need to create a layer based on the shape of the peaks, and the place it on top of the layer that contains the new sky.
As shown in the video, the new sky is dragged from one document to the next in Photoshop. You can do the same thing if you've had to make selections and crop the original image by dragging the cropped version from one Photoshop window into the one that contains the desired sky.
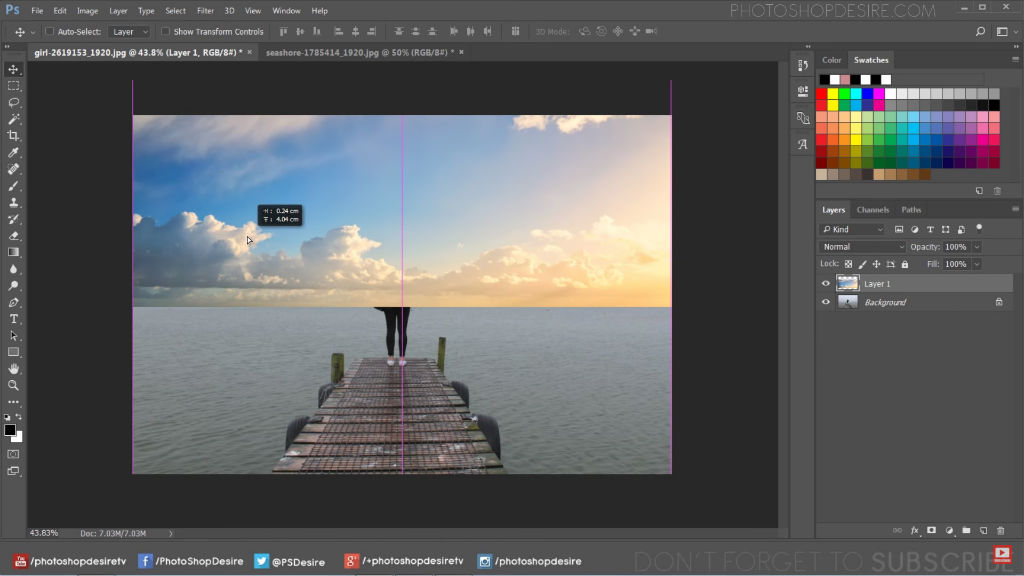 YouTube Screenshot PSDesire
Lastly, though the steps to replace the sky in Photoshop are very clear and simple, it's still a process that takes time to master.
Your first few attempts might not be perfect, but just keep at it, and as time goes by, you'll find that your Photoshopping skills improve tremendously.
Learn More:
We Recommend
How to Sharpen an Image in Photoshop Using a High Pass Filter
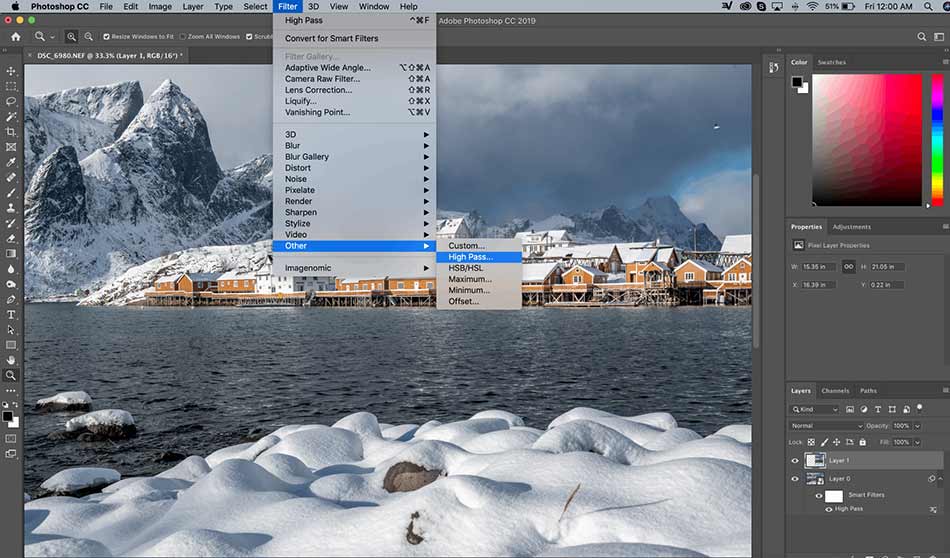
Have you ever had a photo that was a little soft, leaving you wondering how to sharpen an image in Photoshop?
You aren't alone, my friend...
Many of my photography colleagues use Photoshop's Smart Sharpen feature or the Unsharp Mask to sharpen up their photos. However, I like a different approach.
In this post-processing tutorial, I'll show you how to sharpen an image in Photoshop using a High Pass Filter.
How to Sharpen an Image in Photoshop: How Sharpening Works
 Photo by kurmyshov via iStock
Make no mistake - your goal should be to get your images perfectly sharp in-camera. Doing so results in a better result and spares you the time and effort to sharpen the image in Photoshop.
Besides, sharpening an image in Photoshop doesn't technically sharpen anything. Instead, it's an optical illusion that makes the image appear sharper.
This is done by boosting the contrast in the image, in particular, along the edges of the features in the shot.
Doing so makes the highlighted edges lighter and the shadowed edges darker. Our eyes then see those edges as being sharper. See what I mean in the video below by Tyrone John:
What makes the High Pass Filter such a good sharpening tool in Photoshop is that it is specifically designed to look for edges. Since those edges are where we need to work, that makes it an ideal tool to use for sharpening.
Essentially, the High Pass filter scours the shot for edges and highlights them. Anything that isn't an edge is passed over and ignored.
Once the High Pass Filter has done its thing, you can use any number of Photoshop's blending modes that increase contrast to work on all those edges.
Pretty simple, right?
Below, I've got a step-by-step process for how to use a High Pass Filter to sharpen your photos, which, in my opinion, is the best way to sharpen images in Photoshop.
How to Sharpen an Image Using a High Pass Filter
To illustrate this process, I'll use a photo I recently took on a trip to the Lofoten Islands in Norway.
You can follow along and complete each step using any photo of yours that needs sharpening as well.
How to Use a High Pass Filter Step 1: Convert Background Layer to Smart Object
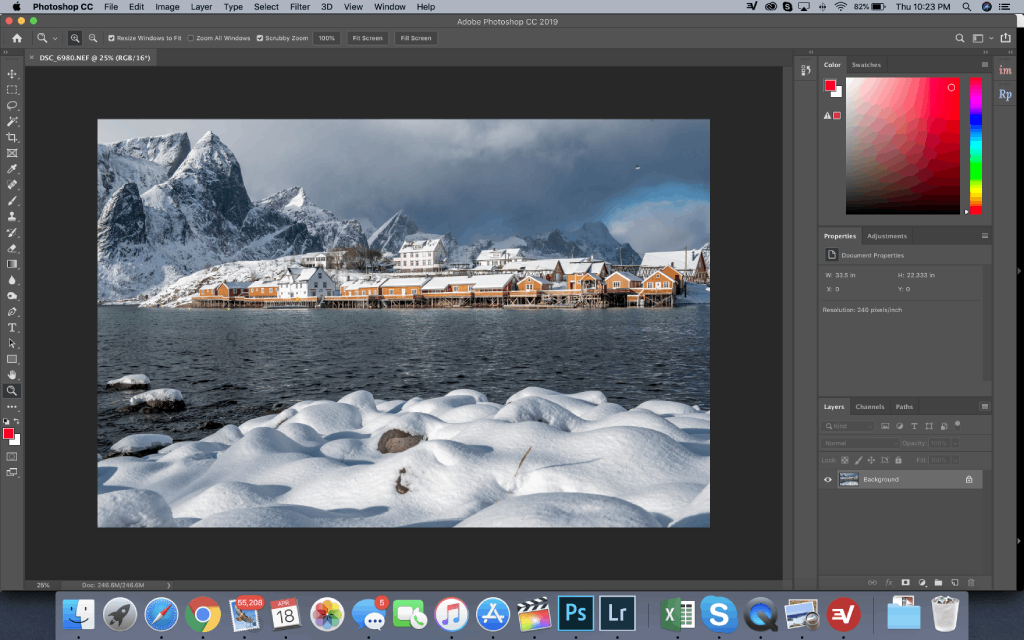
Begin the process by converting the background layer into a smart object. Doing so enables you to use the High Pass Filter as a smart filter, which is non-destructive.
In looking at the Layers Panel above, you'll see your image on the background layer.
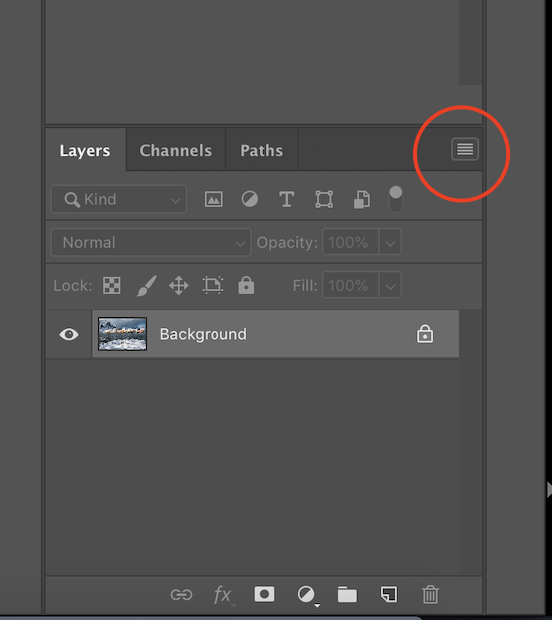
Converting the layer to a smart object is as easy as clicking the Menu Icon (shown above) in the top-right corner of the panel and choosing Convert to Smart Object (shown below).
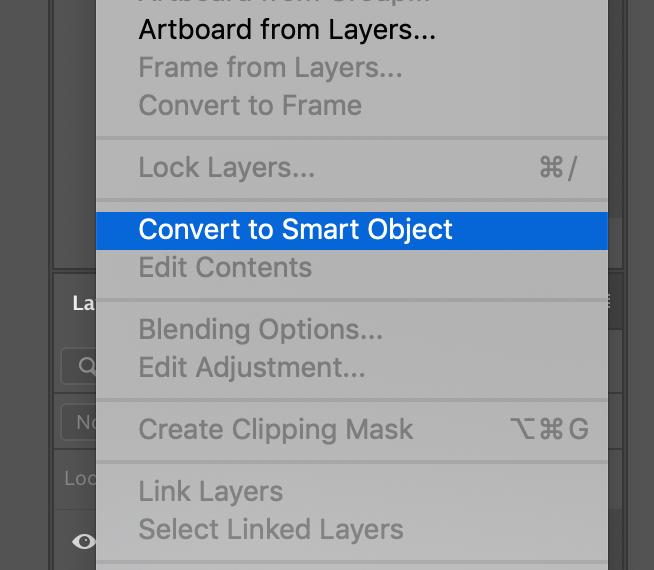
Once you've done so, a smart object icon will appear in the lower-right corner of the thumbnail preview:
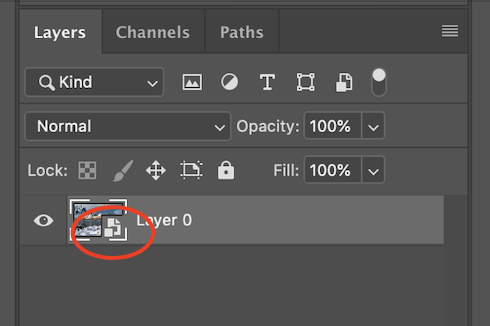
This indicates that we can work on the image using a smart filter and leave the original image untouched.
Learn More:
How to Use a High Pass Filter Step 2: Select the High Pass Filter & Adjust the Radius
The next task is to select the High Pass Filter. You can do so by selecting the Filter Menu > Other > High Pass, as shown above.
As you can see below, doing so turns the image a neutral gray.
At this point, the High Pass filter looks for all the edges in the shot. Once it identifies those edges, the filter highlights them.
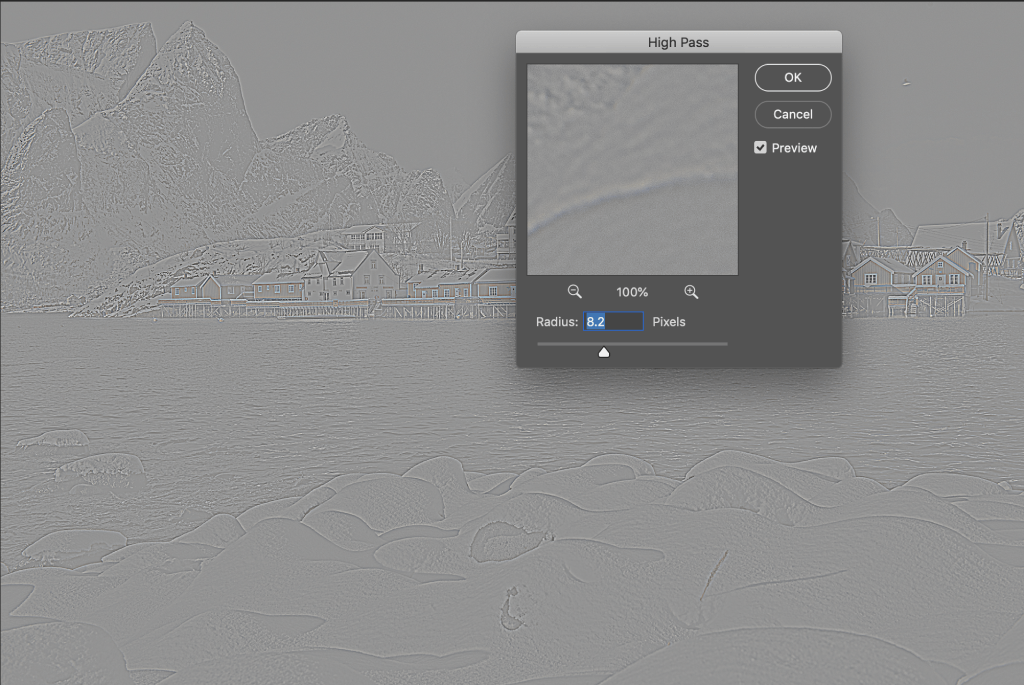
The Radius value indicates the width of the highlighted edges (in pixels) in the photo.
So, if you set the Radius Value to 8.2, as was done above, the High Pass Filter will highlight 8.2 pixels on either side of the edge.
Now it's time to adjust the Radius using the slider control.
How to Find Radius
As you can see below, selecting a Radius Value of 0.1 results in no edges showing in the shot.
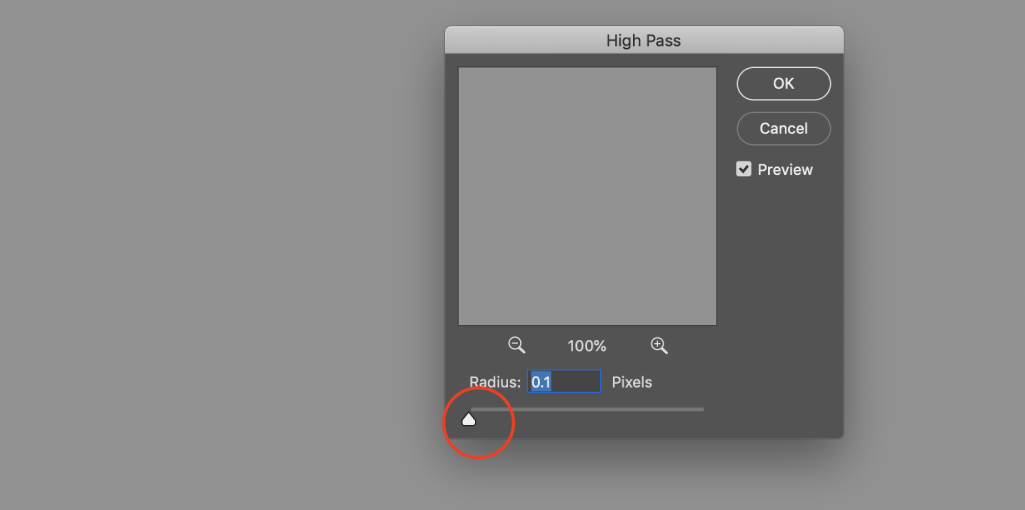
You can see how moving the Radius slider to the right brings out the edges in my photo:

This is how to find Radius in the High Pass Filter - the more you increase the radius, the more distinct the edges in the shot become:
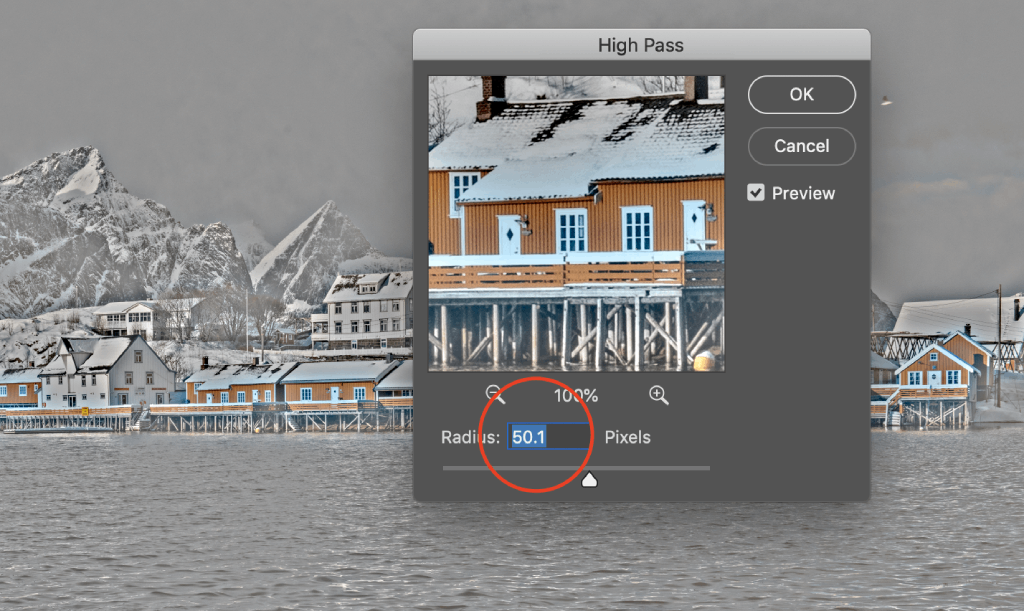
I've found that the simplest method for getting the ideal Radius Value is to start the slider at its minimum - 0.1 pixels - and slowing dragging the slider to the right.
Of course, as you can see above and below, too much Radius is not a good thing...
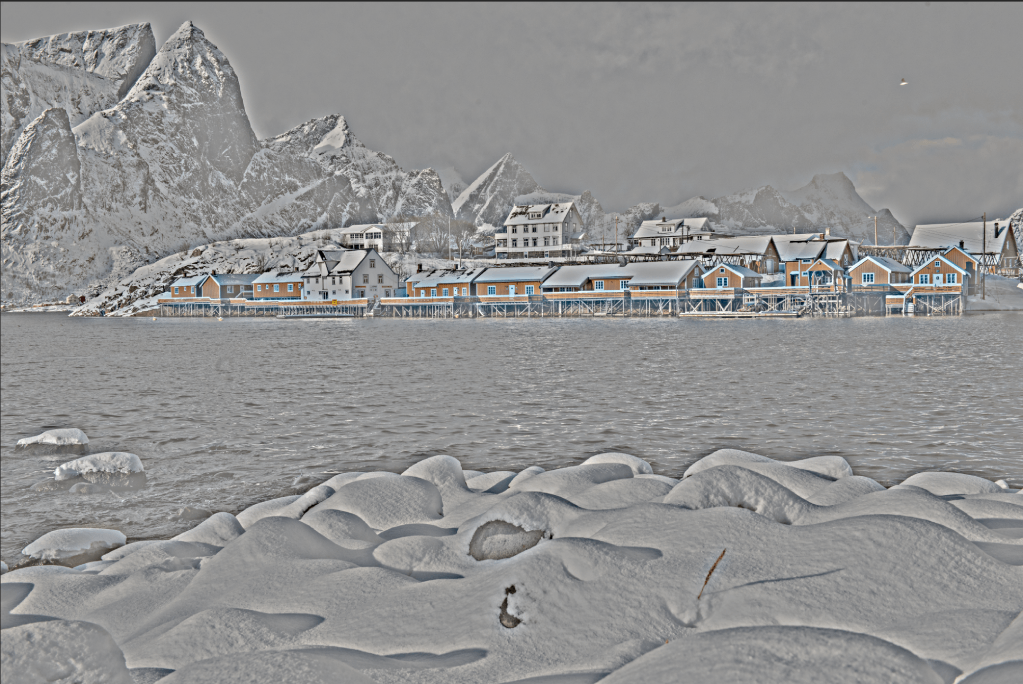
The more you increase the Radius Value, the more of the image that will be highlighted. In other words, if the Radius Value is too large, you'll begin to lose the distinct edges as more and more of the photo will be sharpened.
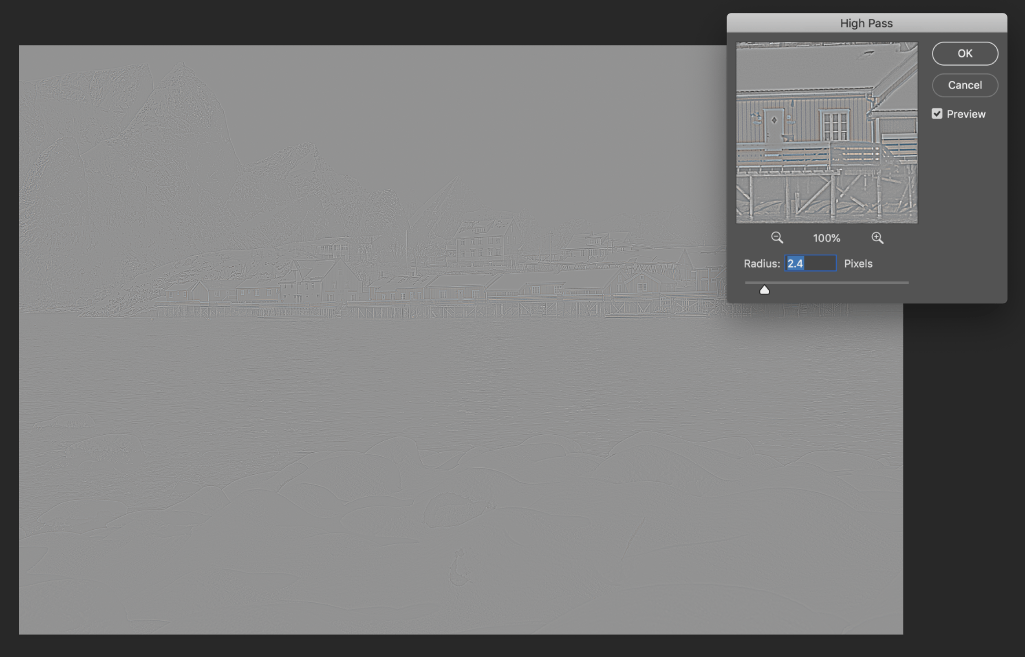
I've found that when it comes to how to find Radius for each image, less is more.
You just want enough of a Radius Value to get those edges highlighted while avoiding having too much real estate in the shot included in those highlights.
As you can see above, I've selected a Radius of 2.4 pixels for this shot.
Learn More:
How to Use a High Pass Filter Step 3: Close the High Pass Filter

Once you've found the ideal Radius Value, click OK to close the High Pass Filter.
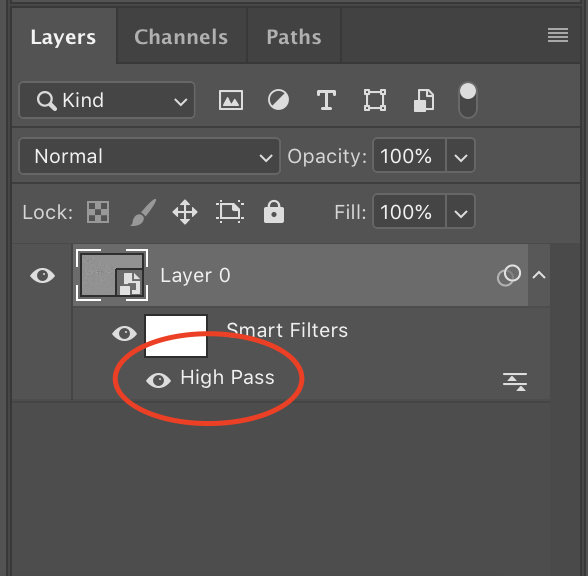
After you close the High Pass Filter, you will see it indicated as a smart filter below the image thumbnail, as shown above.
How to Use a High Pass Filter Step 4: Change the Blend Mode to Sharpen the Image
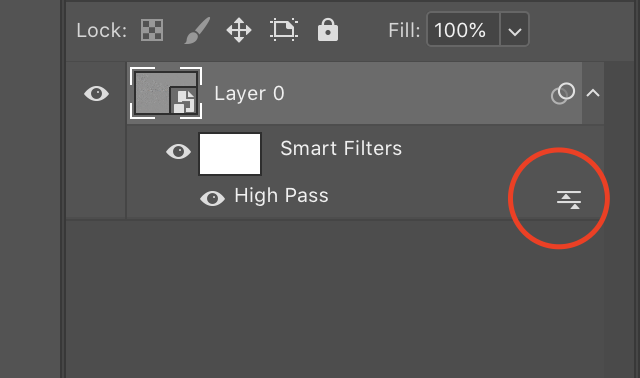
Now that the edges in the photo are highlighted, it's time to sharpen the shot by changing the blend mode in the High Pass Filter.
If you double-click the Blending Options icon (shown above), you'll be presented with the various blending modes for the filter.
Below, you can see the Blending Options box. Overlay is currently selected, though you can also use Soft Light, Hard Light, or Linear Light for sharpening purposes.
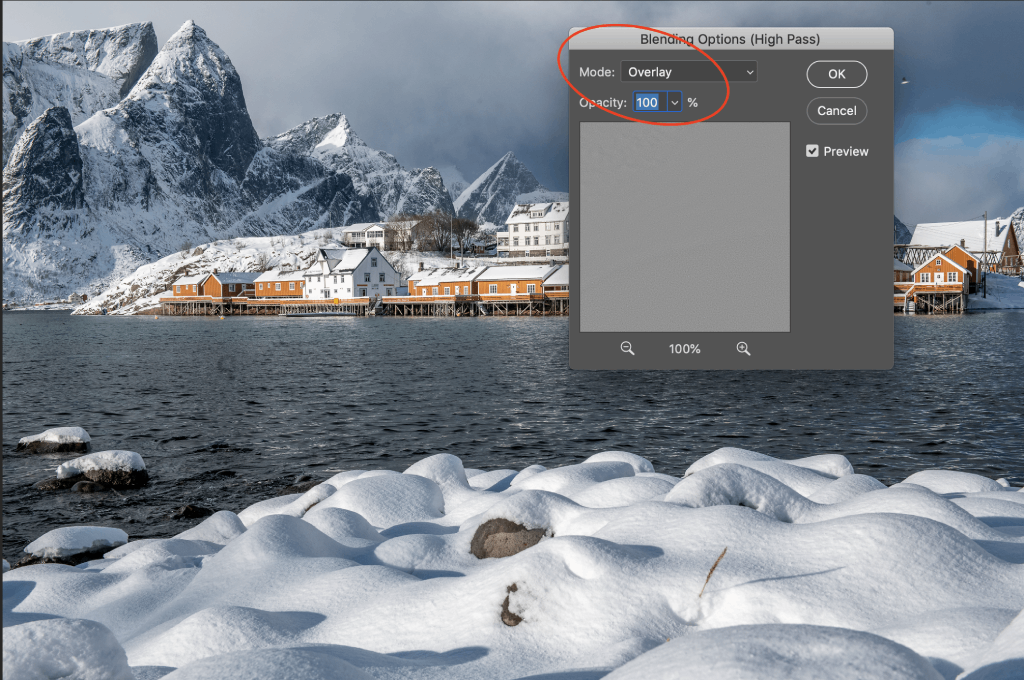
Each of the four contrast blend modes works in a similar way - they hide the neutral gray areas of the shot (everything that isn't an edge).
Since those areas are no longer visible, sharpening will not impact them at all.
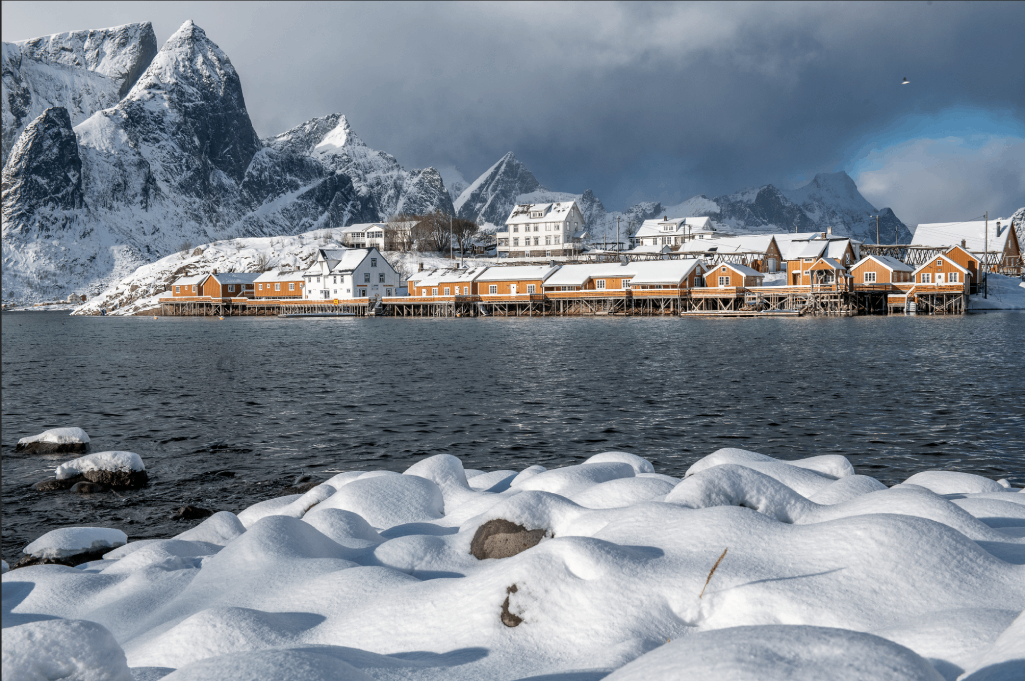 High Pass Filter in Overlay Mode
Above, you can see the results of using the Overlay mode.
Overlay is perhaps the most popular blending mode because it produces a high-contrast effect. As a result, the High Pass Filter can see the edges more clearly and apply sharpening more effectively.
 High Pass Filter in Soft Light Mode
The Soft Light mode, on the other hand, results in lower contrast. This means sharpening that is more delicate, though it is still noticeable (shown above).
 High Pass Filter in Hard Light Mode
The remaining two blending modes result in even more contrast and sharpening than Overlay Mode.
Above, I've used Hard Light mode for sharpening. Below, I've used Linear Light.
 High Pass Filter in Linear Light Mode
The Linear Light mode is, by far, the strongest mode for sharpening.
As you can see above, it's way too sharp and has an unnatural, over-processed look.
For my liking, the Overlay mode is the best, though you can tone down the sharpening of the other filters by adjusting the opacity.
Learn More:
How to Use a High Pass Filter Step 5: Adjust the Opacity
After you've experimented with the blend modes and found the one that best suits your photo, you can make further adjustments to the amount of sharpening by changing the Opacity.
As you lower the Opacity, the sharpening will reduce. Conversely, increasing the Opacity increases the sharpening.
How to Use a High Pass Filter Step 6: Close Out the Filter
Now that we've applied the filter, adjusted the Radius, selected the Blend Mode, and adjusted the Opacity, it's time to close out the filter by pressing OK.
To see how the sharpened image compares to the original, just press the Visibility Icon to toggle the High Pass Smart Filter on and off.
So, in just six steps, you can add sharpness to your image and rescue photos that, apart from a little softness are on point.
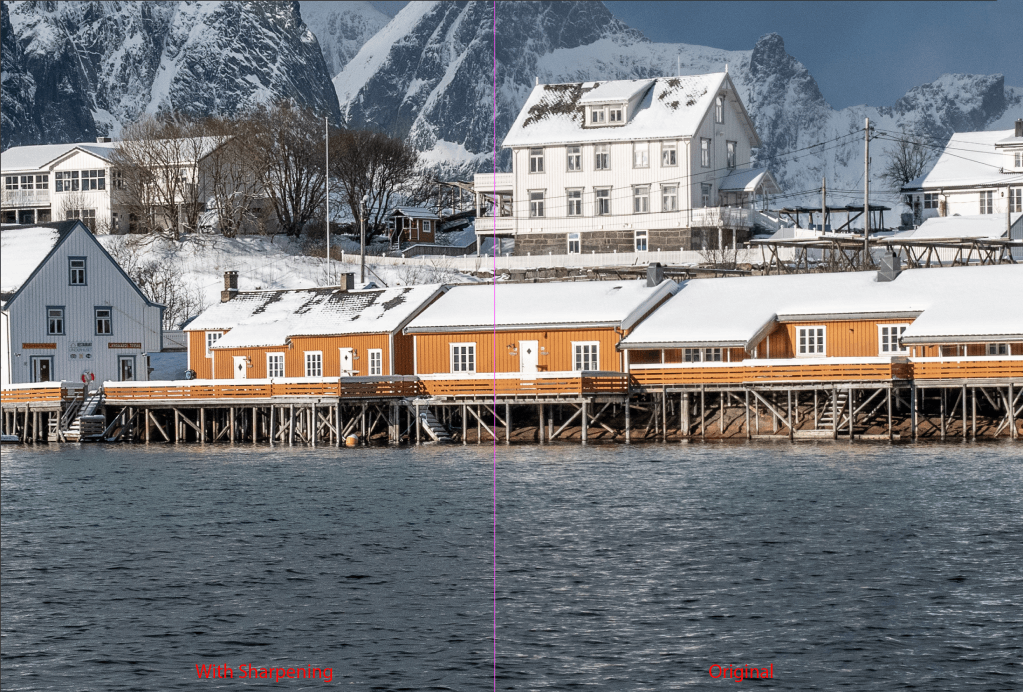
Above, you can see my final image.
Again, as I noted earlier, less is usually more, so I have been very judicious with the sharpening of this shot.
This is often a matter of personal preference, though, so experiment with the High Pass Filter and find what works best for you. Regardless of the Radius, Blend Mode, and Opacity you use, you now know how to sharpen an image in Photoshop!
We Recommend
How to Sharpen Your Photos in Photoshop

Let's face it...
Sometimes, despite your best efforts in-camera, you end up with images that aren't quite as sharp as they need to be.
When I was a beginner photographer, that meant one thing - the image was a fail.
But today, we have some pretty awesome tools at our disposal for enhancing and improving the images we take.
In the video above, Michael Woloszynowicz gives an overview of how to sharpen all sorts of photos using a unique version of high pass sharpening.
For a detailed look at each step, read on below!
Refresher - Traditional High Pass Sharpening
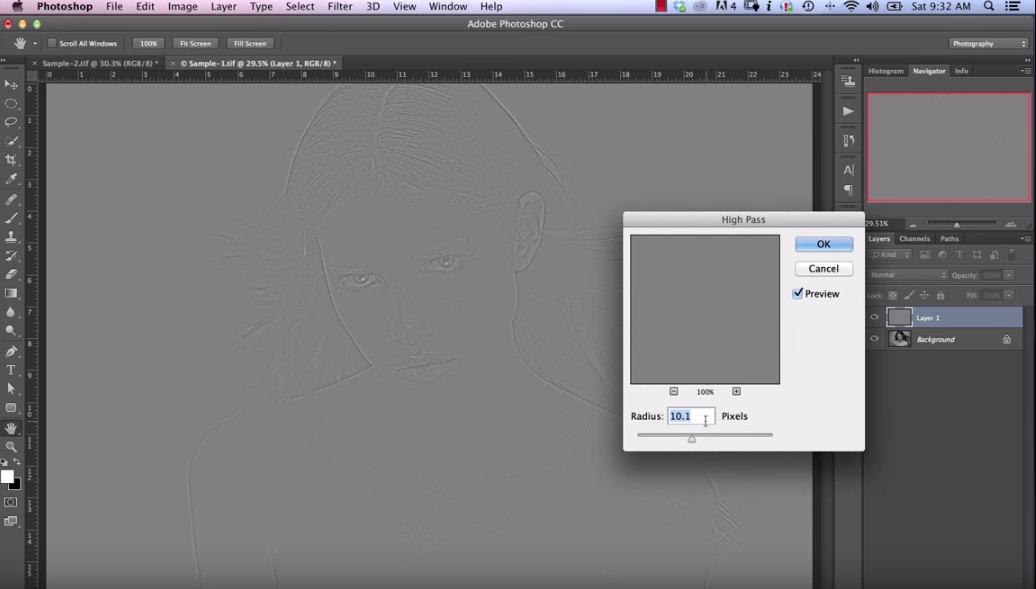
YouTube Screenshot/Michael Woloszynowicz
Normal high pass sharpening can be a great tool, but there can also be some problems when you use it.
In particular, fringing can become an issue when using traditional high pass techniques.

Remember, when you apply a high pass filter, you first have to duplicate the layer, minimize the contrast of the layer, and then apply the high pass filter by going to Filter > Other > High Pass.
Then, as shown in the screenshot above, you adjust the radius, which determines how much the image is sharpened.
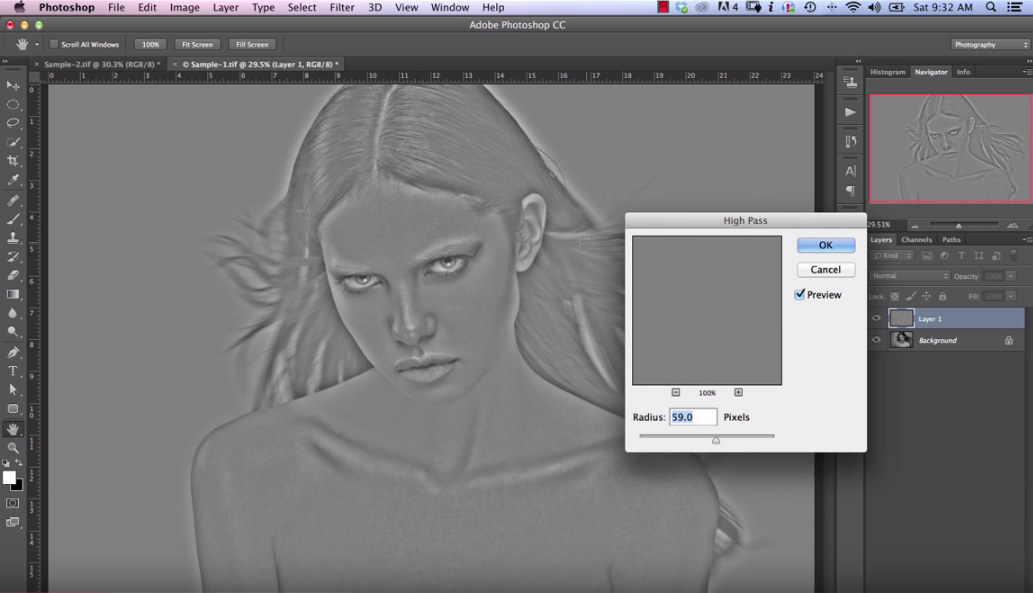
YouTube Screenshot/Michael Woloszynowicz
The more you increase the radius, the more haloing you get around the perimeter of the subject, as seen along the woman's shoulder in the screenshot above. That's obviously not a good thing!
Even if you choose a lower radius and blend the layer using the Overlay settings, some fringing can still occur.
That's where a new way to apply high pass sharpening comes in handy...
Learn More:
- Learn to Remove Blemishes From Skin in This Quick Photoshop Tutorial
- 5 Photoshop Tricks You Don't Know
Intelligent High Pass Sharpening
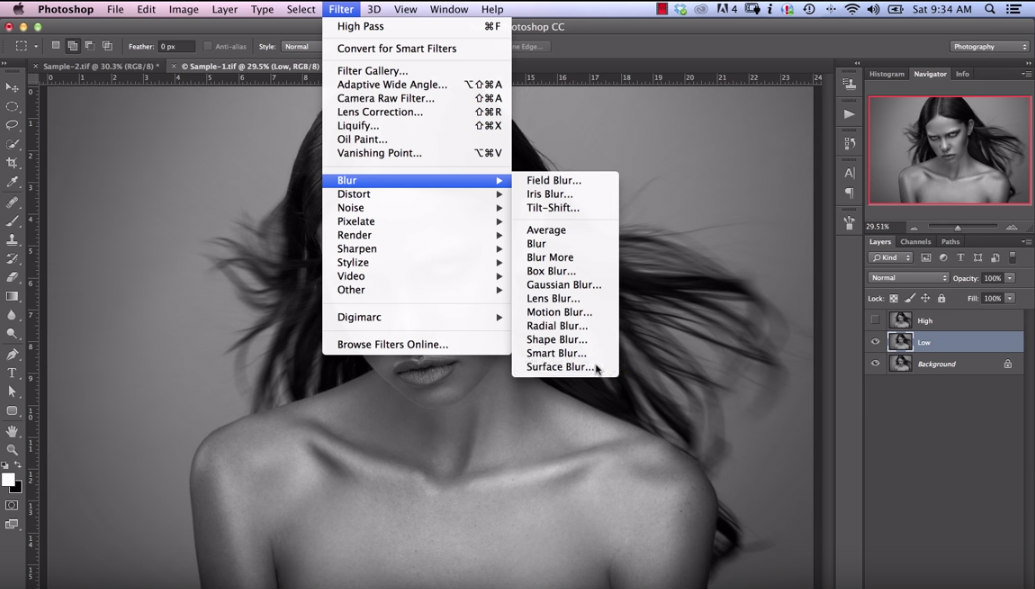
YouTube Screenshot/Michael Woloszynowicz
Step 1: Blur the Base Layer
First, start by creating two copies of the layer you want to sharpen, naming one "Low" and the other "High."
Disable the High layer so you can work on the Low layer.
With the Low layer selected, go to Filter > Blur > Surface Blur. From there choose the appropriate radius and threshold.
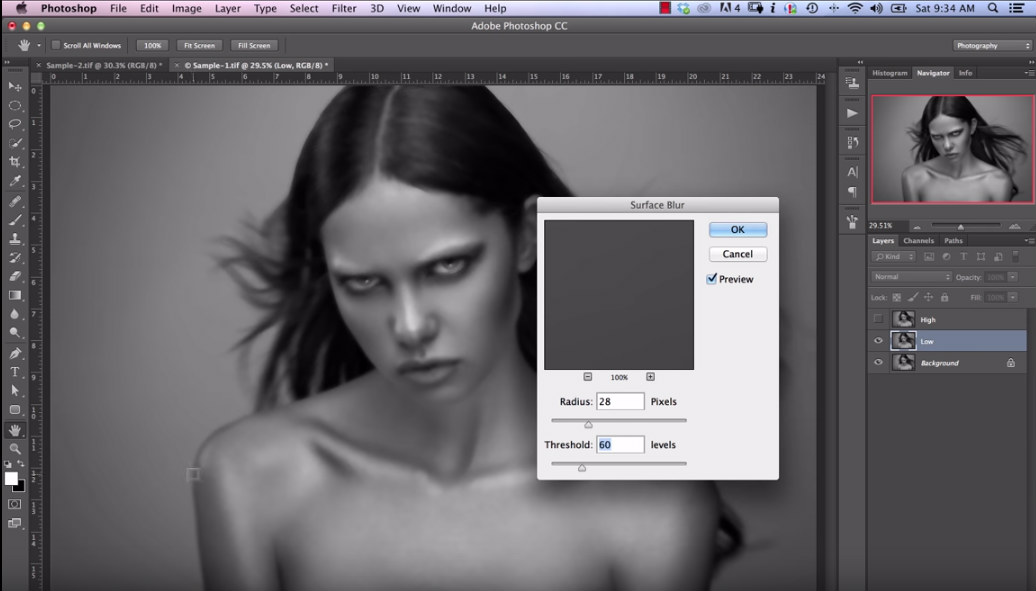
YouTube Screenshot/Michael Woloszynowicz
The threshold setting will determine how much blur appears in transition areas, like between the model's shoulder and the background in the screenshot above. The higher the threshold setting, the more blur.
Obviously, the threshold setting in the screenshot above is far too high. The point here is to set the threshold at the point at which the blur is not as noticeable in those areas.
After setting the threshold, you can choose the radius, which as was stated earlier, determines how much sharpening occurs.
The aim with the radius is to find a value that helps blur out the texture in the skin when combined with the threshold value that you've chosen.
Step 2: Applying the Sharpening Effect
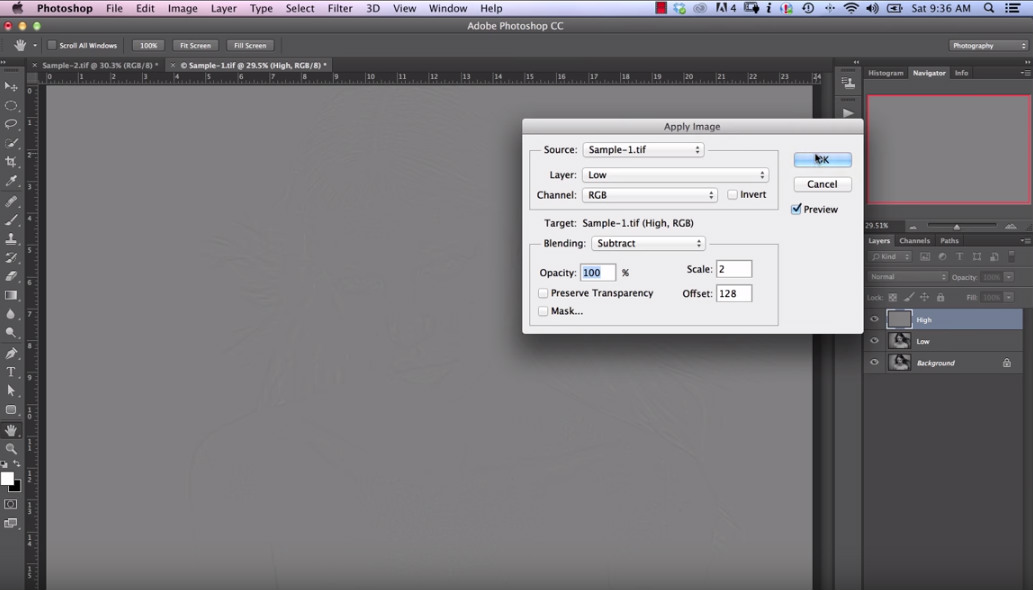
YouTube Screenshot/Michael Woloszynowicz
Select the High layer to turn it on, and go to Image > Apply Image.
In the dialog box that pops up (shown above), select the Low layer, select Subtract as the blending mode, a Scale of 2, and an offset of 128. Click OK.
Then, in the Layers panel, select the Low layer and delete it, as you no longer need to have it. At that point, the High layer becomes your sharpening layer.
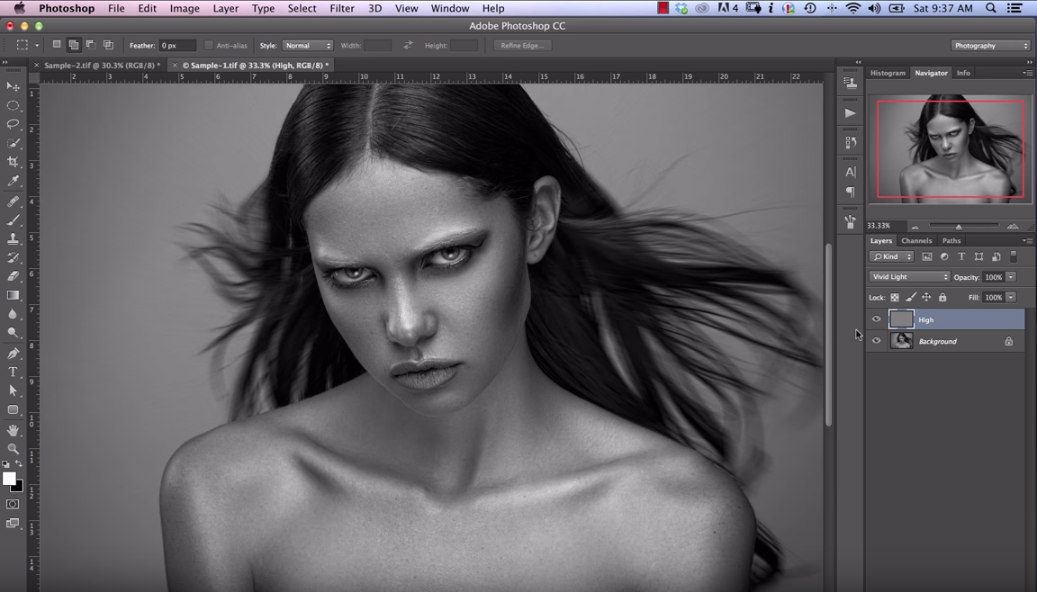
YouTube Screenshot/Michael Woloszynowicz
If you zoom in on the High layer, you'll notice a couple of things. First, it's worked its magic on the details of the subject and sharpened the fine details. And second, there's no fringing.
By selecting the Vivid Light blending mode from the drop-down menu in the Layers panel, you can see how much more texture the image now has (shown above).

Granted, you don't want that much sharpening, so reducing the opacity of the layer to around 20 or 30 percent is advisable.
This technique isn't just for portraits, either. You can use it to sharpen landscapes, architecture photos, and everything in between.
Michael has even created an action to take care of all of these steps for you. Visit his YouTube channel to download the action.
Learn More:
Additional Sharpening Techniques
Don't think that intelligent high pass sharpening is the only option for your photos...
In the video above, Michael Woloszynowicz offers up several more techniques for sharpening your photos regardless of the subject.
That includes the Unsharp Mask, Smart Sharpening, Camera Shake Removal, Multiple High Pass Filtering, and Frequency Separation.
Both beginner and advanced techniques are covered, and there's a great discussion of what sharpening is and how it works in Photoshop as well.
Kelvin Designs has a nice tutorial on sharpening, too.
In the video above, you'll learn how to use Camera RAW features to increase the definition of edges in your photos.
You'll also learn how to use the Sharpen tool, the Unsharp Mask, and more.
For more details on these techniques, check out the video above or the Learn More links below. You can also find photo and digital imaging advice at CRHfoto.
With that, you have a ton of resources to learn how to use Photoshop to improve the sharpness of your images!
Learn More:
We Recommend
How to Use Photoshop to Replace the Sky in Any Photo

Let's say you have a photo that has a great foreground, but the sky above it is sort of blah.
Let's also say you have another photo that has a pretty lame foreground, but the sky is spectacular.
Why not combine the best parts of both images to create one awesome photo?!
You can do that in Photoshop, and it's pretty easy, too!
In the video above, Peter McKinnon gives a quick overview of how to replace the sky in a photo.
Follow along as he works his magic, and for a blow-by-blow guideline of what he's doing, check out the steps below!
Step #1: Select the Foreground
Once you have your desired image opened in Photoshop, the first order of business is to select the foreground in the image.
The simplest way to do this is to go to Select > Select and Mask.
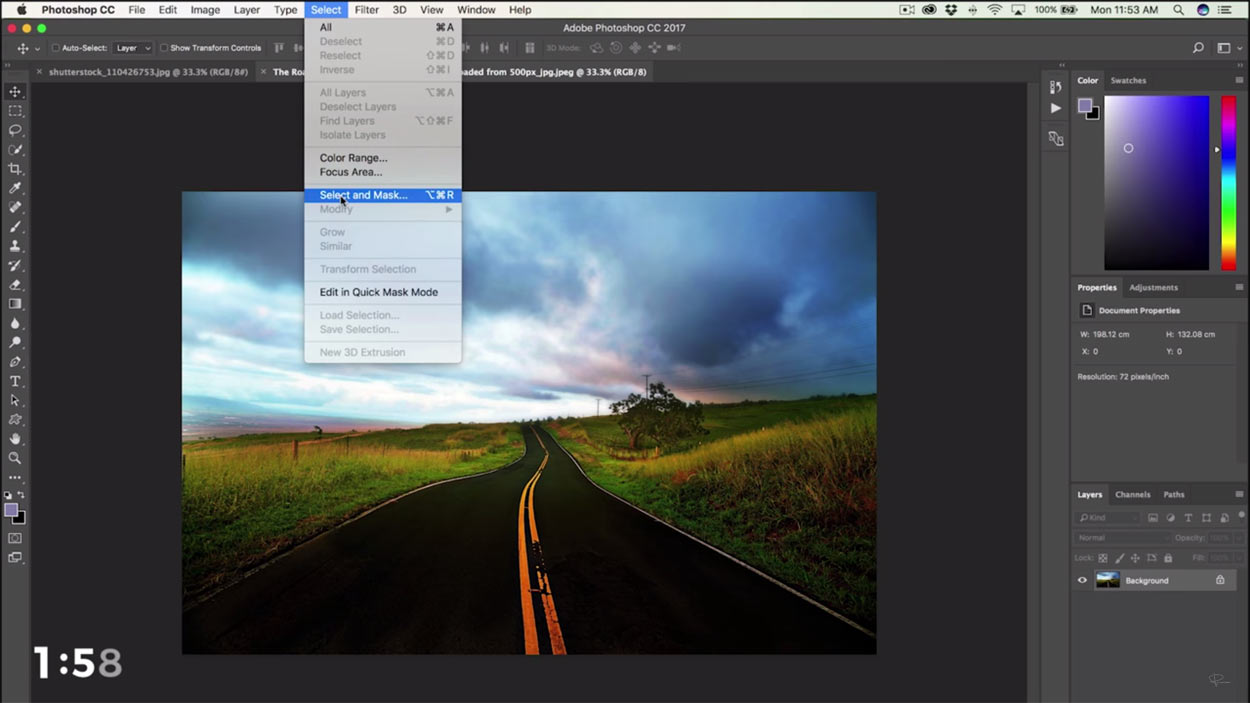
Using the Quick Selection Tool, paint away the foreground to the extent that you can.
The edges won't be perfect, but you can use the Refine Edges Brush to paint away the more complicated elements of the foreground, like any trees or other objects that extend above the horizon line.
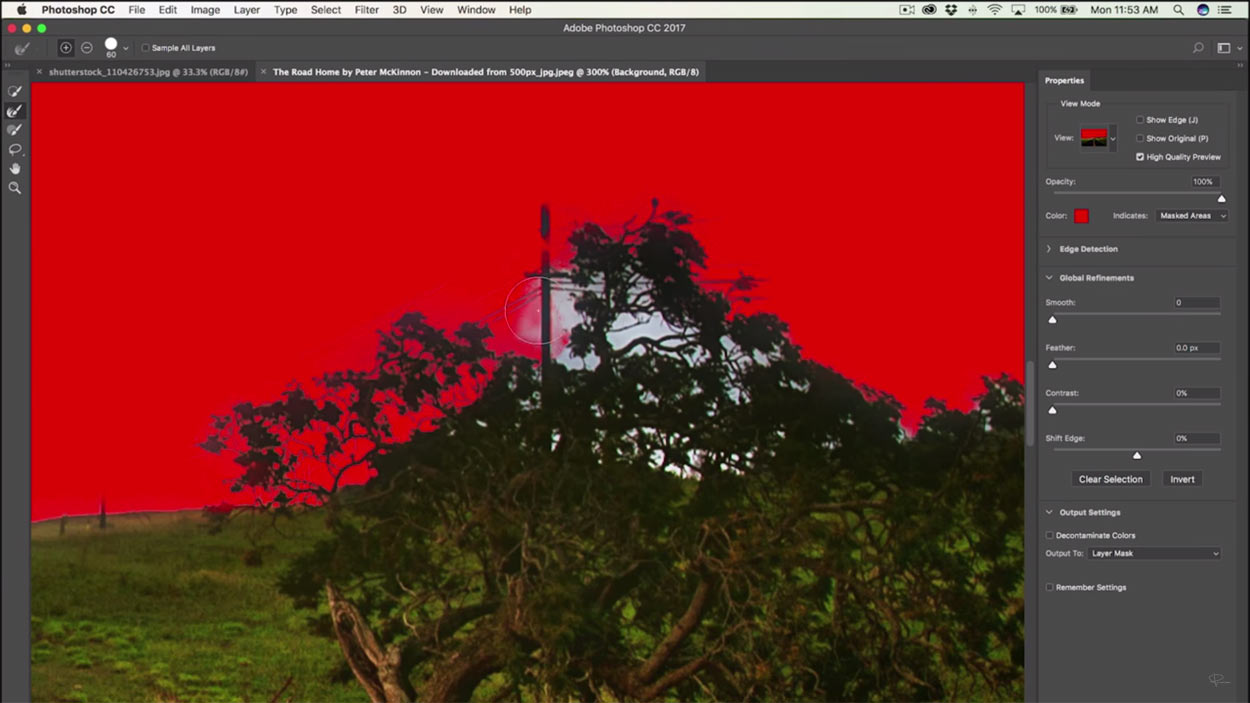
Next, choose View > Overlay so you can see the mask you've created and clean up any areas you missed.
Again, use the Refine Edges Brush to make your selections along the edges of the mask.
This step in the process requires a little more finesse as you'll have complicated shapes along the horizon line. Zoom in for a better view, take your time, and make your selections carefully.
The more purposeful you are at this point, the better the marriage between the original image and the replacement sky will be.
Step #2: Remove Elements You Don't Want in the Mask
Let's say there's something in the original photo you don't want to appear in your final image, like the power poles in Peter's sample shot.
You can remove those sort of elements quickly and easily by painting them out of the mask.
Just go to the side panel, choose the Brush Tool, and ensure that the minus button is selected.
Then it's a simple matter of painting over the undesirable elements in the shot to get rid of them.
Again, this step takes some finesse, so zoom in for a close-up view of the elements you wish to eliminate from the shot and take your time when painting them out.
Learn More:
Step #3: Work the Edges of the Mask
Once you've removed all the things you don't want in the shot, you can refine the edges of the mask to get a more precise selection.
Using the tools on the right side of the screen, adjust the contrast, feather, and edge of the mask as desired.
Before you move the sliders, zoom in so you can see how each control changes the edges of the mask.
Beware, though! The changes you make to contrast, feather, and edge should be subtle and not overdone.
When you're done, hit OK and you'll see that the original sky (and the undesirable elements) are now gone.
Step #4: Add the New Sky
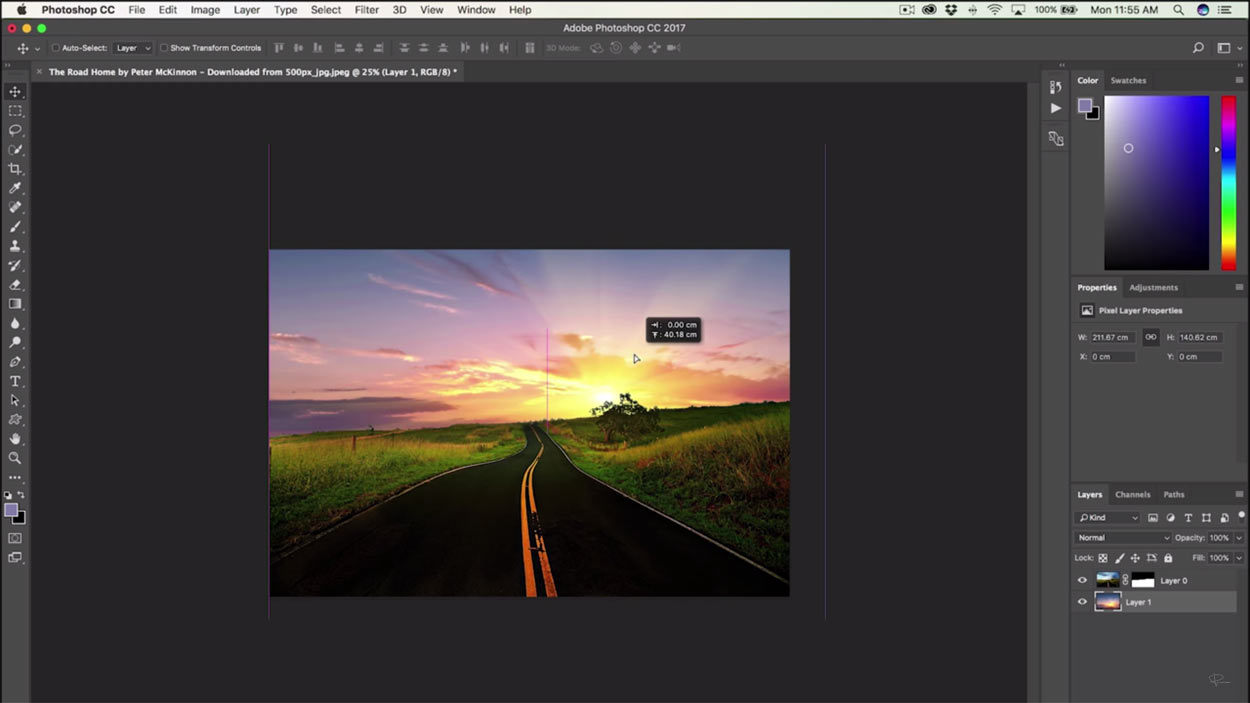
Snag another photo, this one with the nice sky.
Place it into the image file, being sure to drag it to the bottommost layer in the Layers Panel, that way the foreground of the original image isn't covered.
From there, it's a matter of moving the background image around such that the nice sky appears as a natural component of the original image.
If need be, adjust the new layer's tones, curves, levels, and so forth, such that it's a seamless addition to the original shot.
Learn More:
Final Thoughts
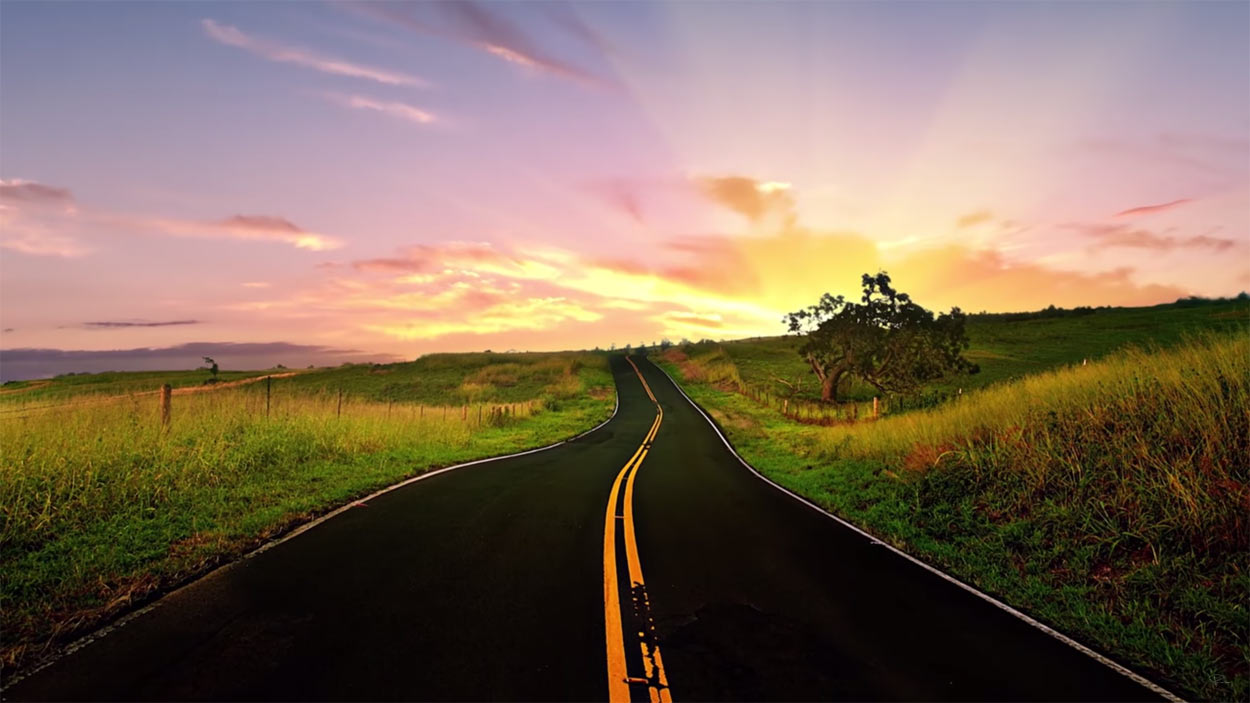
Who knew that in four simple steps that you could completely transform an okay shot into one that's totally eye-catching?!
The great thing about this trick is that it can also help overcome one of the most common problems in landscape photography - a foreground that's too dark and a sky that's too bright.
You can work around that problem in the field by using a graduated neutral density filter, but if you don't have one handy, you can easily rely on this method to fix the photo.
Just take a shot that's well-exposed for the foreground, take another shot that's well-exposed of the background, and put them together using the steps outlined above.
That's the magic of Photoshop, and it's pretty darn easy to use, right?
We Recommend
How to Use Photoshop to Sharpen Your Photos

It seems that no matter how hard you try to get each of your photos nice and sharp in-camera, there always seem to be a few that aren't quite there.
Fortunately for us, we live in an age in which we have ultra-powerful tools at our disposal - like Photoshop - that can help correct the problem (and tons of other problems, too).
In the video above, Craig Abbott gives us a quick rundown of how to use Photoshop to rescue blurry images.
Granted, you can't turn a bad photo into a good one no matter how much Photoshop magic you use.
But if the image is close, Photoshop can be your savior.
Have a look at the video to see what he has to say, and check out the summary for each step below!
Option 1: Use the High Pass Filter
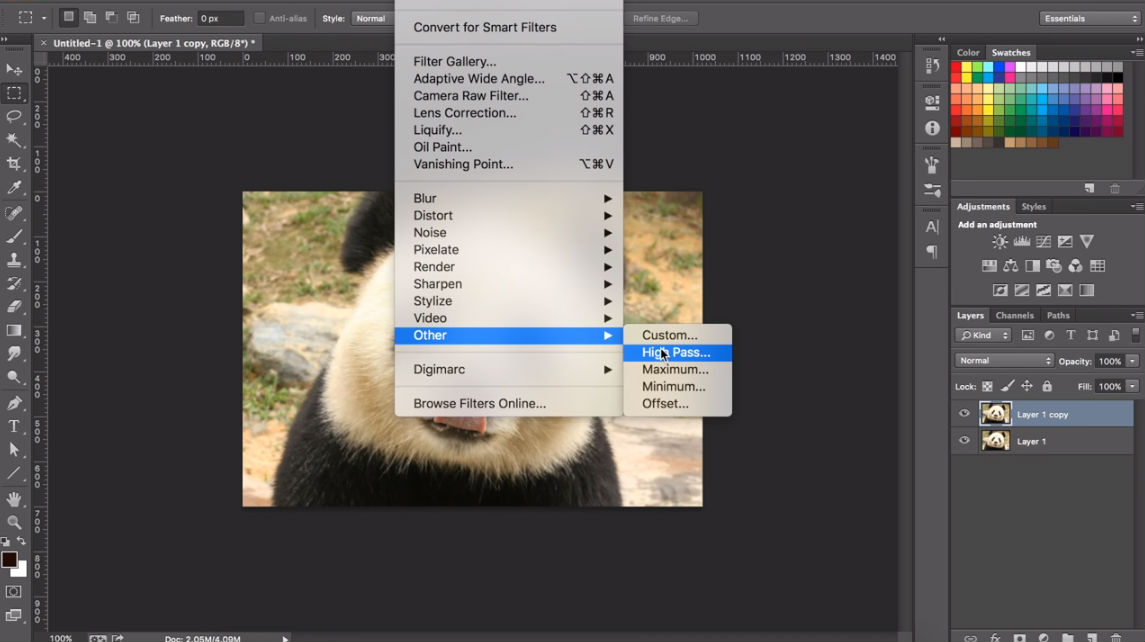 YouTube Screenshot/Craig Abbott
In his video, Craig outlines two different methods for fixing a blurry image.
The first of the two methods, to use a the High Pass Filter, is the easiest of the two.
Begin by duplicating the layer, then going to Filter > Other > High Pass, as shown in the screenshot above.
 YouTube Screenshot/Craig Abbott
Set the radius to a value of around 5, though this might change depending on the level of sharpness you want or need. Then press OK.
Next, choose a blend mode from the dropdown menu. Overlay tends to work quite well.
If Overlay isn't quite enough sharpness for your liking, try changing the blend mode to Hard Light. If that's too much sharpness, Soft Light is a good blend mode to try.
Learn More:
- How You Can Enhance Your Photos With Dynamic Color in Photoshop
- Five NEW Things in Photoshop CC 2018 That You MUST Know

Option 2: Smart Filters
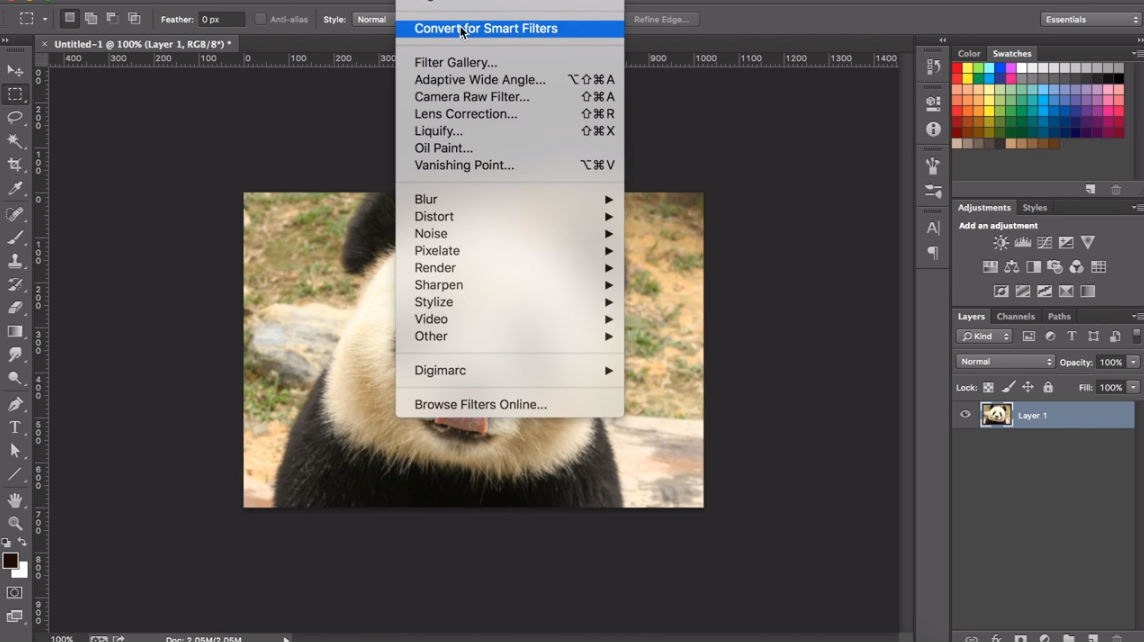 YouTube Screenshot/Craig Abbott
As Craig points out, using Smart Filters in Photoshop is a more laborious process than using the High Pass Filter.
However, when comparing the two methods, Smart Filters often generate better results than the High Pass Filter does.
So, from the menu bar at the top of the screen, select Filters > Convert for Smart Filters.
In the resulting dialog box, click OK. This will allow you to apply filters to the image, which you can then modify.
Once you engage Smart Filters, you'll notice a small icon in the bottom-right corner of the thumbnail image in the Layers Panel.
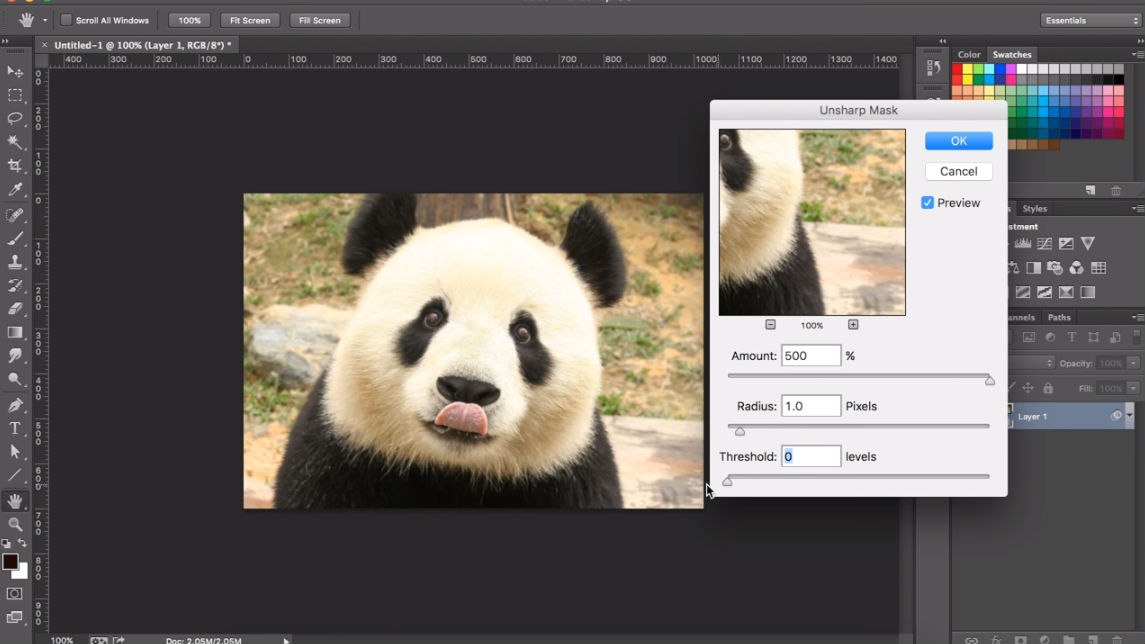 YouTube Screenshot/Craig Abbott
Next, go to Filter > Sharpen > Unsharp Mask.
In the resulting dialog box, you'll see various options for fine-tuning the Unsharp Mask, including values for Amount, Radius, and Threshold.
Using the Amount slider, you can determine how much sharpness to add to the photo.
Combined with a Radius set to around 1, and an adjustment to the Threshold to dampen the sharpness as needed, you can get good results in most situations.
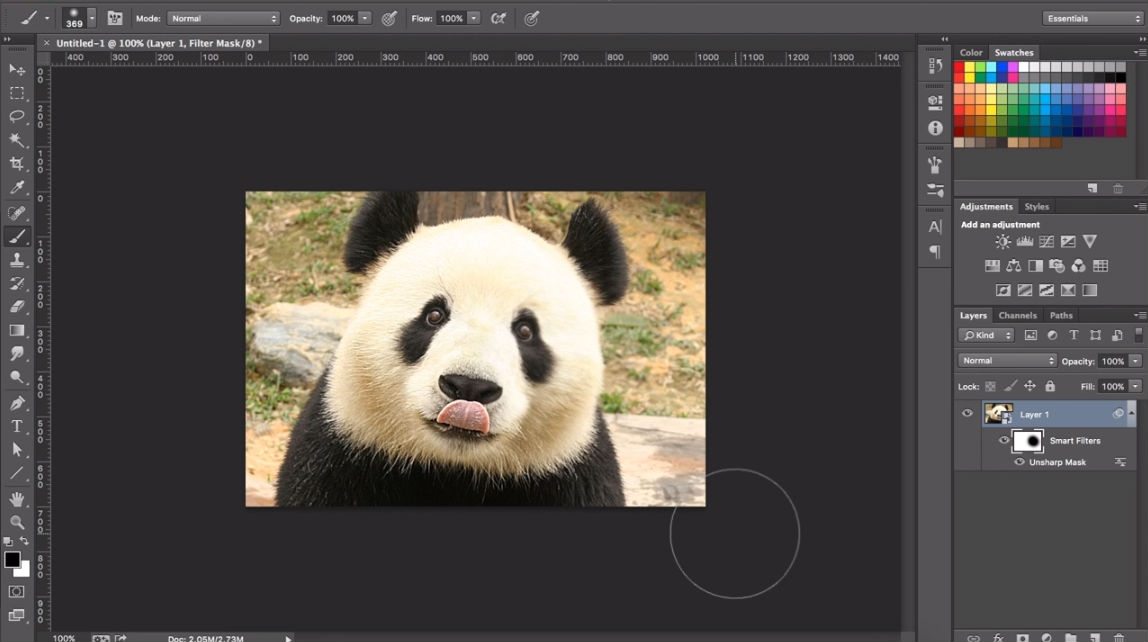 YouTube Screenshot/Craig Abbott
The nice thing about Smart Filter layers is that you can further manipulate them.
As Craig demonstrates, if you draw on the layer in black, it will delete the sharpening effect. If you draw with white, it will add the sharpening effect back in.
So, in just a few keystrokes and a few minutes of your time, you have a couple of great options for minimizing blurriness and getting your images as sharp as possible in Photoshop.
Learn More:
We Recommend
How You Can Enhance Your Photos With Dynamic Color in Photoshop
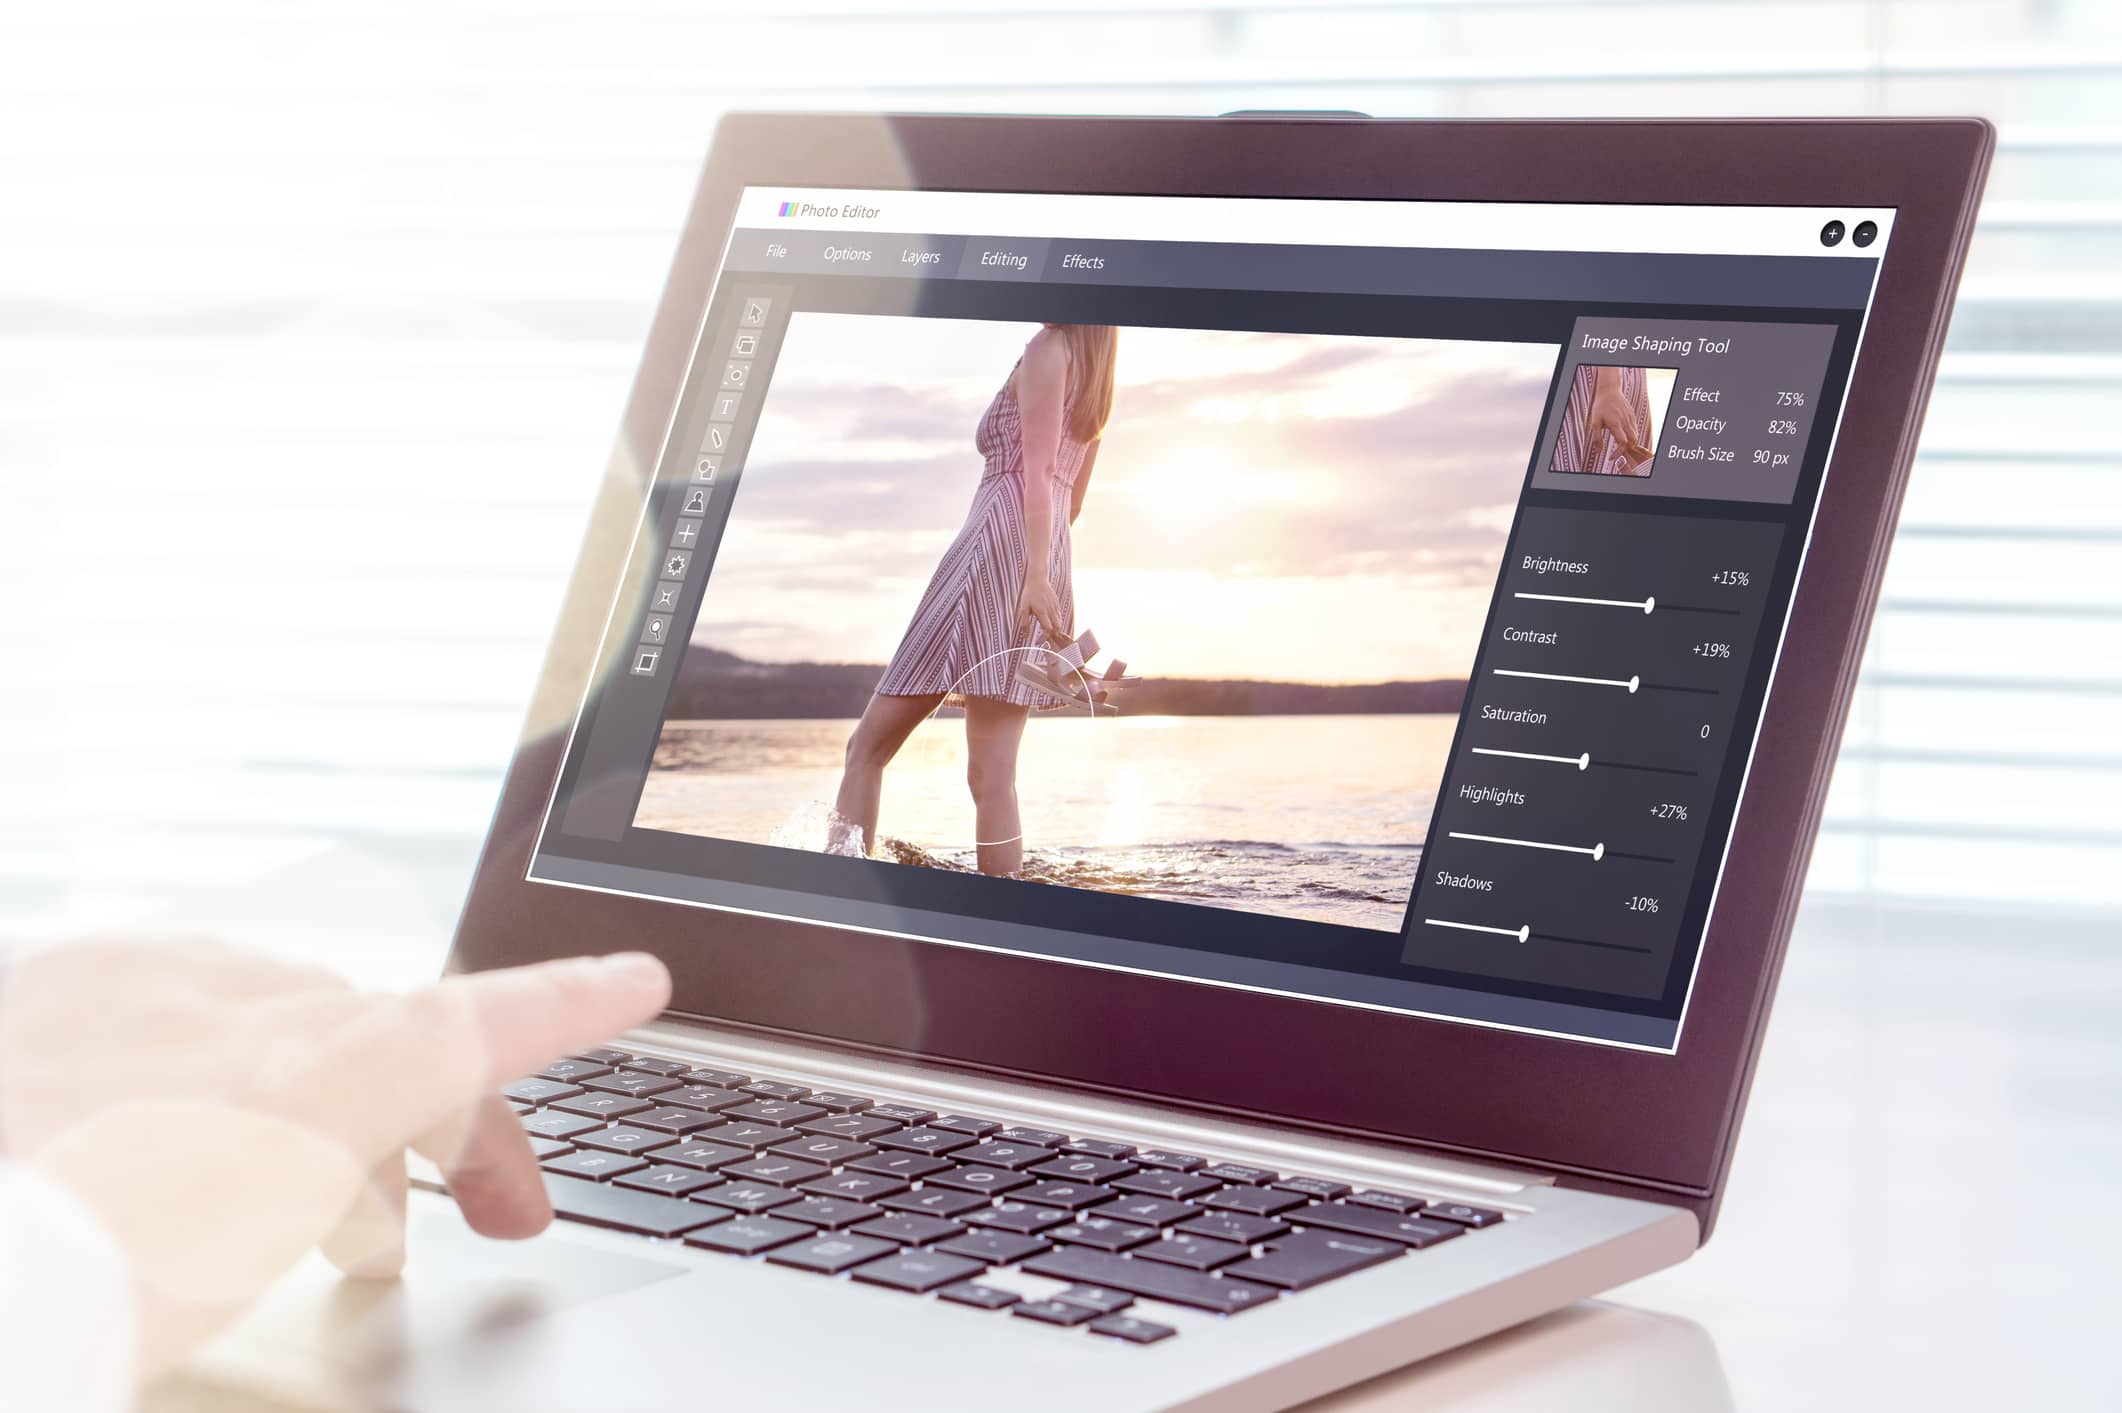
Photoshop is a must-have for virtually every professional photographer.
It's powerful tools enable you to enhance your photos in ways that make them look even more appealing than they do in their unedited form.
But if you're a beginner photographer, leaping into Photoshop can be a little daunting. There's just a lot of tools at your fingertips, and it can be hard to know where to even start.
That's where the video below by Peter McKinnon comes in...
In the video, Peter shares one of his top tips for turning your photos into eye-popping images.
The secret is in the colors.
Have a look at the video above to see how you can enhance your photos in Photoshop, and for a more detailed summary, check out the article below!
Step 1: Select a Photo and a Color
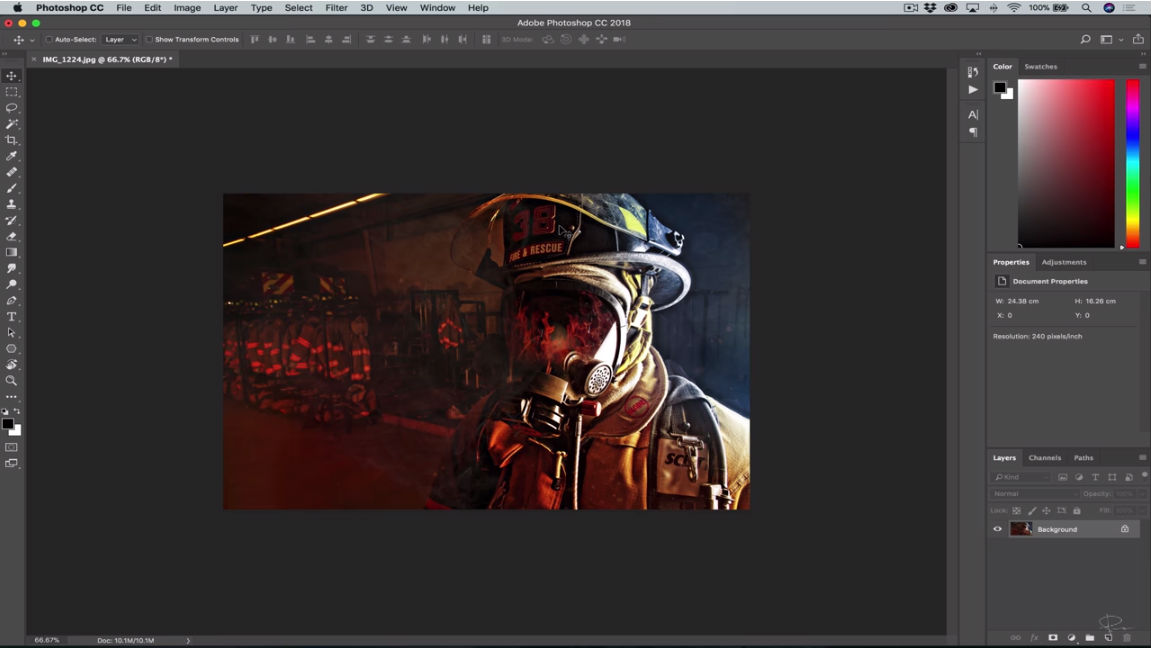 YouTube Screenshot/Peter McKinnon
A great way to bring your images to life is to enhance the colors that are already in the shot by using a color gradient.
To do that, you'll want to open a photo in Photoshop, and make sure that the color pickers in the bottom-left corner of the screen are black and white. If they need to be reset, just hit X and D on your keyboard.

 YouTube Screenshot/Peter McKinnon
Next, click on one of the color pickers, which opens up the color palate as seen above.
Select the color you want to use. In this case, Peter has selected red because there are already some good red tones in the shot. Once you have your choice of color, press OK.
Learn More:
- Five New Things in Photoshop CC 2018 That You Must Know
- A Free Comprehensive Guide to Retouching Your Photos in Photoshop
Step 2: Create a New Layer and Apply the Gradient
 YouTube Screenshot/Peter McKinnon
Now that you have your color picked, create a new layer by clicking on the New Layer button in the bottom-right corner of the Photoshop window.
Then, move to the upper-left corner of the window and select the Gradient Selection Tool.
There are several different options here, but what you want is the one with the transparent background, as shown above.
 YouTube Screenshot/Peter McKinnon
Next, press G to open the gradient in Photoshop. Press Shift, and then drag the gradient across the image.
 YouTube Screenshot/Peter McKinnon
By pressing Shift first, you ensure that the gradient is applied in a straight line, as seen above.
Pro Photographer Tip: How your photos are printed is equally as important as how they look after post-processing. Find out how to create your own fine art photos here.
Step 3: Blend the Gradient
 YouTube Screenshot/Peter McKinnon
In its current form, the gradient is just a big block of red superimposed on the photo. This is obviously not the look we want...
So, in the toolbar, select Blending Mode, and Color.
This allows the gradient to blend with the background, creating a much subtler look in the shot.
Still, the gradient is a little too intense, so you'll need to adjust the Fill and Opacity of the layer.
Using the sliders for Fill and Opacity, experiment with their levels until you get an output that you like.
Learn More:
Step 4: Repeat the Process
 YouTube Screenshot/Peter McKinnon
In Peter's photo, he repeated the process of creating the color effect with a gradient on the right side of the photo using blue.
The combination of the red on the left side and the blue on the right side gives the shot much more dynamic color that looks as though color gels and strobes were used on set to create the colors.
In other words, rather than spending tons of money on artificial lighting and tons of time setting all that lighting up, you can mimic the effect in Photoshop in just a few minutes' time.
With that, you have a Photoshop secret to employ in your photos to give them more dynamic color and greater visual interest!
For more insights into using Photoshop to enhance your photos, be sure to check out our collection of articles on post-processing.
We Recommend
Learn How to Create a Double Exposure Portrait in Under 10 Minutes
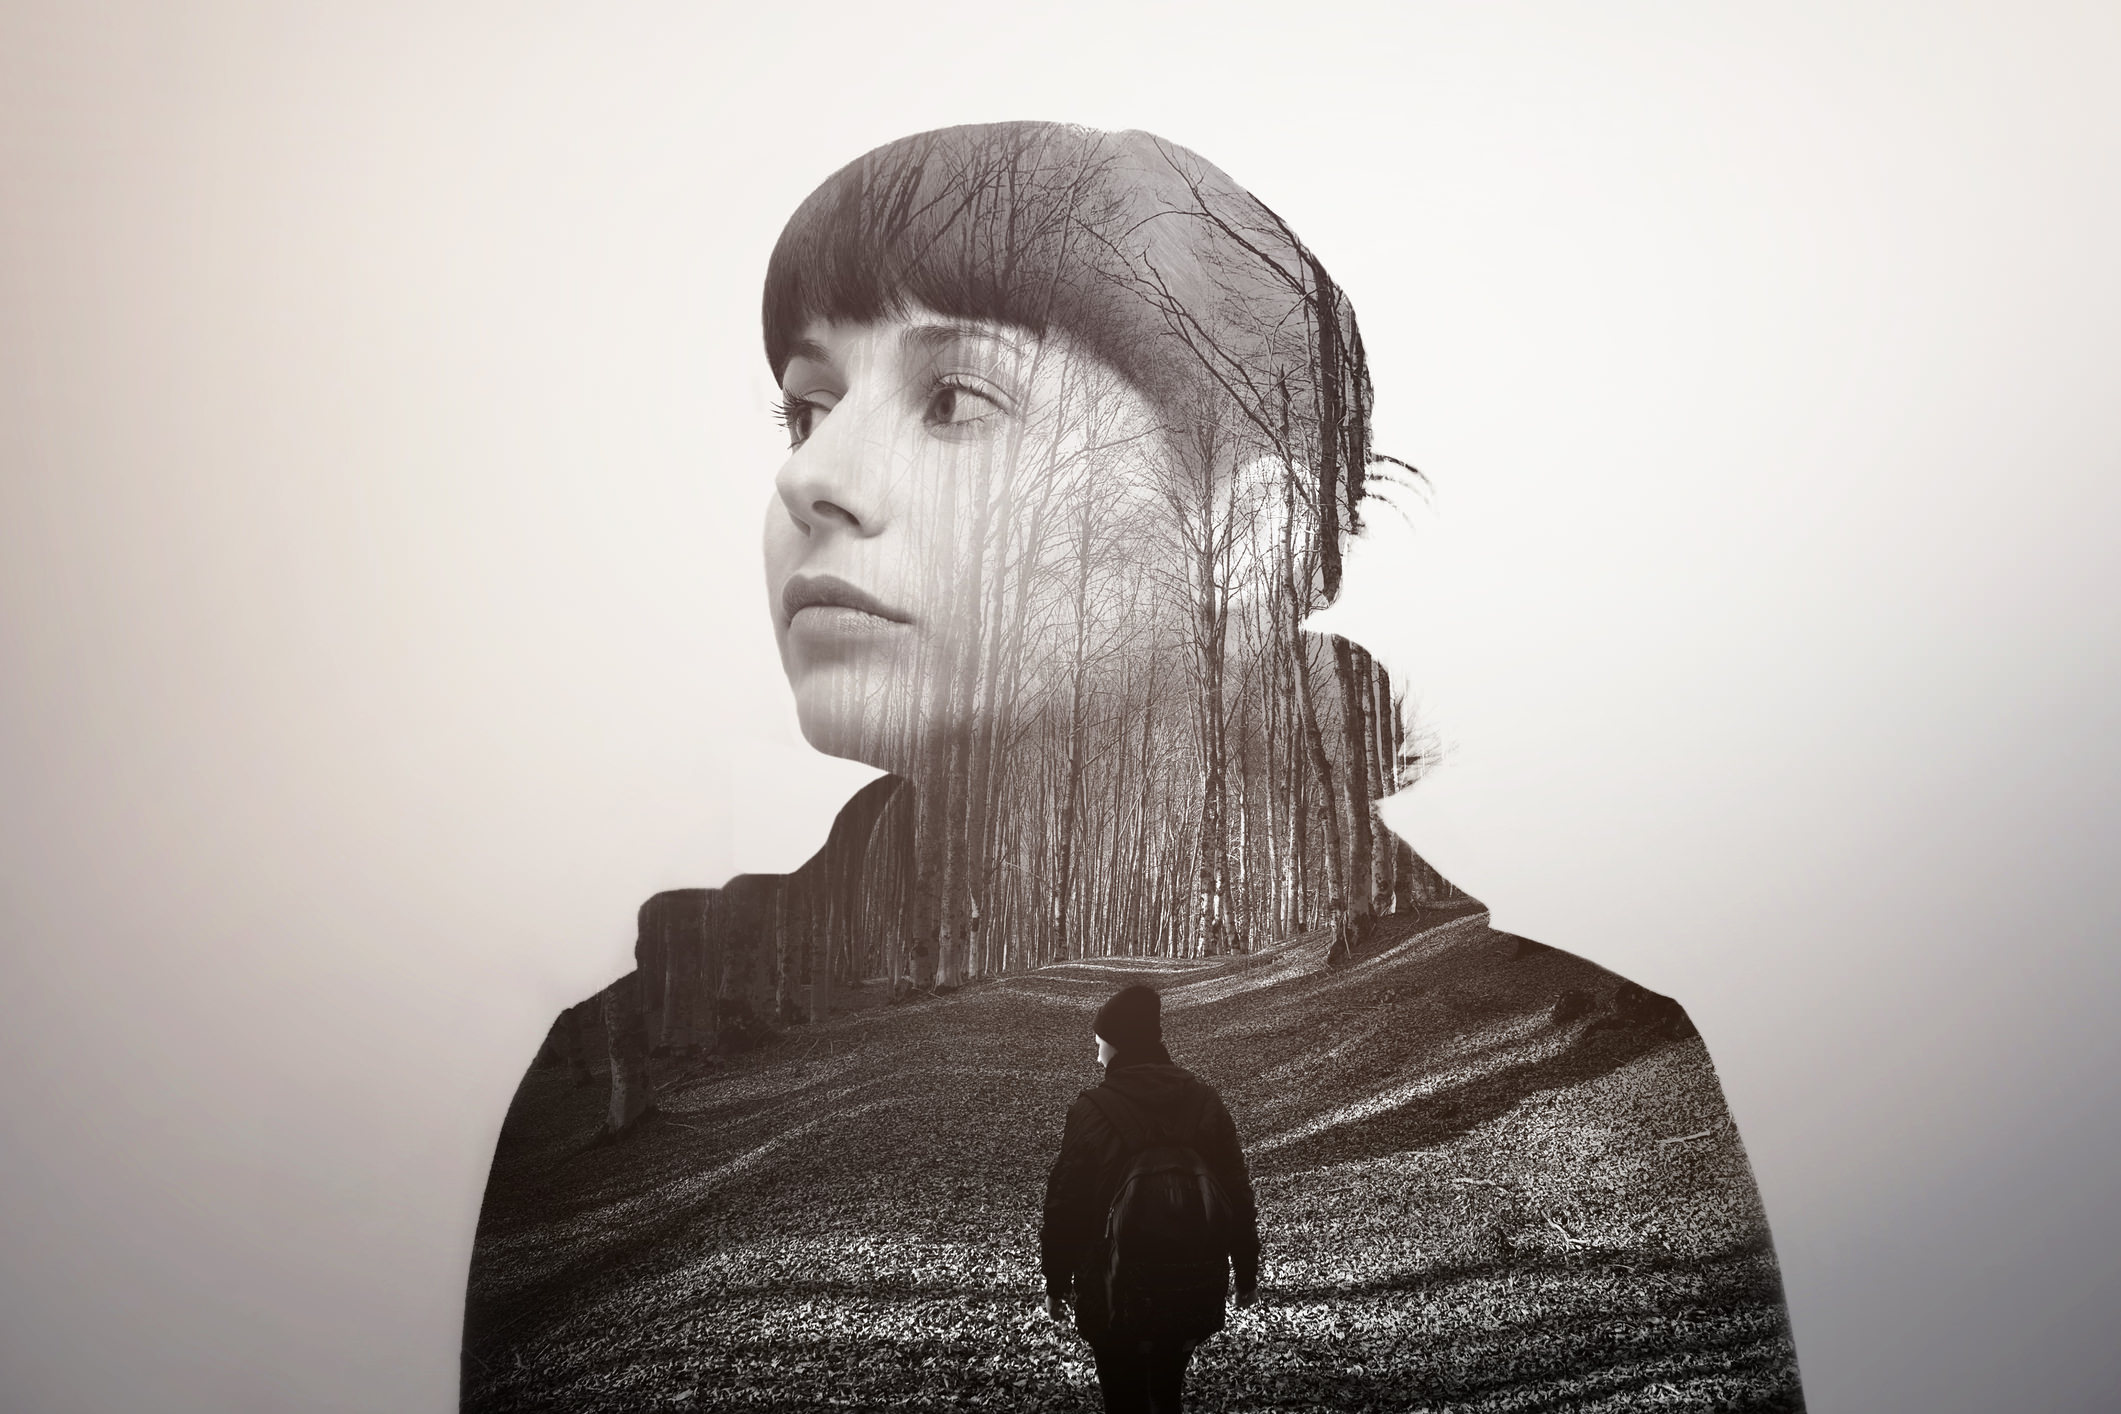
You’ve no doubt seen double exposure images like the one above before, and if you’re like me, you find them incredibly impressive.
And though they might look like they’re really complicated to make, that couldn’t be further from the truth. In reality, all you need is a couple of images, a computer, and Photoshop, and you can create double exposure portraits too!
In the video below, Chris from Eye Stocker takes us through the step-by-step process of creating double exposure portraits in Photoshop. Even if you’re brand new to photography, the steps outlined in the video are incredibly easy to follow. You’ll learn all the essentials, from making selections to creating layer masks to removing backgrounds and everything in between. You’ll also learn how simple it is to combine the two photos together. Even better, the video is less than 10 minutes long, so you’ll be creating these amazing images in no time!
Amazon Recommendations
- Adobe Creative Cloud Photography plan (Photoshop CC + Lightroom)
- The Adobe Photoshop CC Book for Digital Photographers
- How Do I Do That in Photoshop?: The Quickest Ways to Do the Things You Want to Do, Right Now!
We Recommend
Lightroom vs Photoshop
What's the difference between Lightroom and Photoshop?
That's about as common a question as you'll find in photography...
After all, both programs are made by Adobe, and both have many similar features.
But for the uninitiated, Lightroom and Photoshop have several very important distinctions that make them better suited to different tasks.
In this Lightroom vs Photoshop comparison, we explore those differences so you have a better understanding of how you should be using these powerful programs in your post-processing workflow.
Without further ado, let's get started!
What is Photoshop?
In the simplest of terms, Photoshop is best suited for the heavy lifting when it comes to editing your photos, as you can see in the video above from Photoshop Tutorials.
It's got all sorts of powerful tools that help you manipulate your photos in just about any way imaginable, from simple tasks like cropping to intermediate tasks like adding adjustment layers to complex tasks like making selections, removing unwanted features, and other pixel-level work.
 Photo by Domenico Loia on Unsplash
And that's really the trademark of Photoshop - it allows you to drill down to the individual pixels in your photos for pinpoint manipulations.
That's due in part to the fact that you work in layers in Photoshop. That means you can add all sorts of effects to an image, then turn them off or on as you see fit. You can even keep different edits of the same photo on different layers within one file, which makes it easy to see the difference from one edit to the next.
Learn More:
- How to Sharpen an Image in Photoshop Using a High Pass Filter
- Photoshop Gradient Tool and How to Use It
What is Lightroom?
Lightroom has a lot of the image editing features that the everyday photographer needs, but it lacks the sheer volume of tools and the power of Photoshop when it comes to making hefty edits to your photos.
That being said, Adobe designed Lightroom specifically with photographers in mind.
It's not just a photo editor. Instead, Lightroom gives you the means to import your images, organize them, and edit them, making it a nice all-in-one management tool to keep track of your photos, as you can see in the video above from the Adobe Photoshop Lightroom Channel.
In that regard, in a Lightroom vs. Photoshop matchup of user-friendliness, Lightroom wins because you can do everything right within the program. That means that Lightroom has a much better workflow for photographers.
 Photo by Radek Grzybowski on Unsplash
For instance, you can easily create collections of photos with keywords to keep track of images based on date, event, subject, and so forth.
What's more, you can create Lightroom presets and save them, so if you have a certain kind of editing style, it's just a simple matter of applying that preset to a newly imported photo. You can even sync your edits to multiple photos in one action. That makes Lightroom a good time-saver, especially if you have tons of photos that need organizing or editing.
Additionally, unlike Photoshop, Lightroom offers non-destructive editing without having to "Save As." Actually, there isn't even a Save button at all in Lightroom - all edits you make are updated automatically in your Lightroom catalog.
Learn More:
- How to Easily Transform Your Photos in Lightroom
- These Lightroom Hacks are a Godsend for Any Photographer
When to Use Photoshop

Photoshop is where you turn to do the heavy lifting of advanced editing.
If you need pixel-level control over your edits, want to make composites or panoramas, remove stray hairs or whiten teeth, or create an HDR photo, Photoshop is the better answer.
Comparing Photoshop vs. Lightroom regarding editing tools, Photoshop has an undeniably better toolbox for photo editing than Lightroom, but, of course, that means that Photoshop is more difficult to learn, too.
However, that's a learning curve you'll have to master if you want to do more than basic photo editing.
When to Use Lightroom
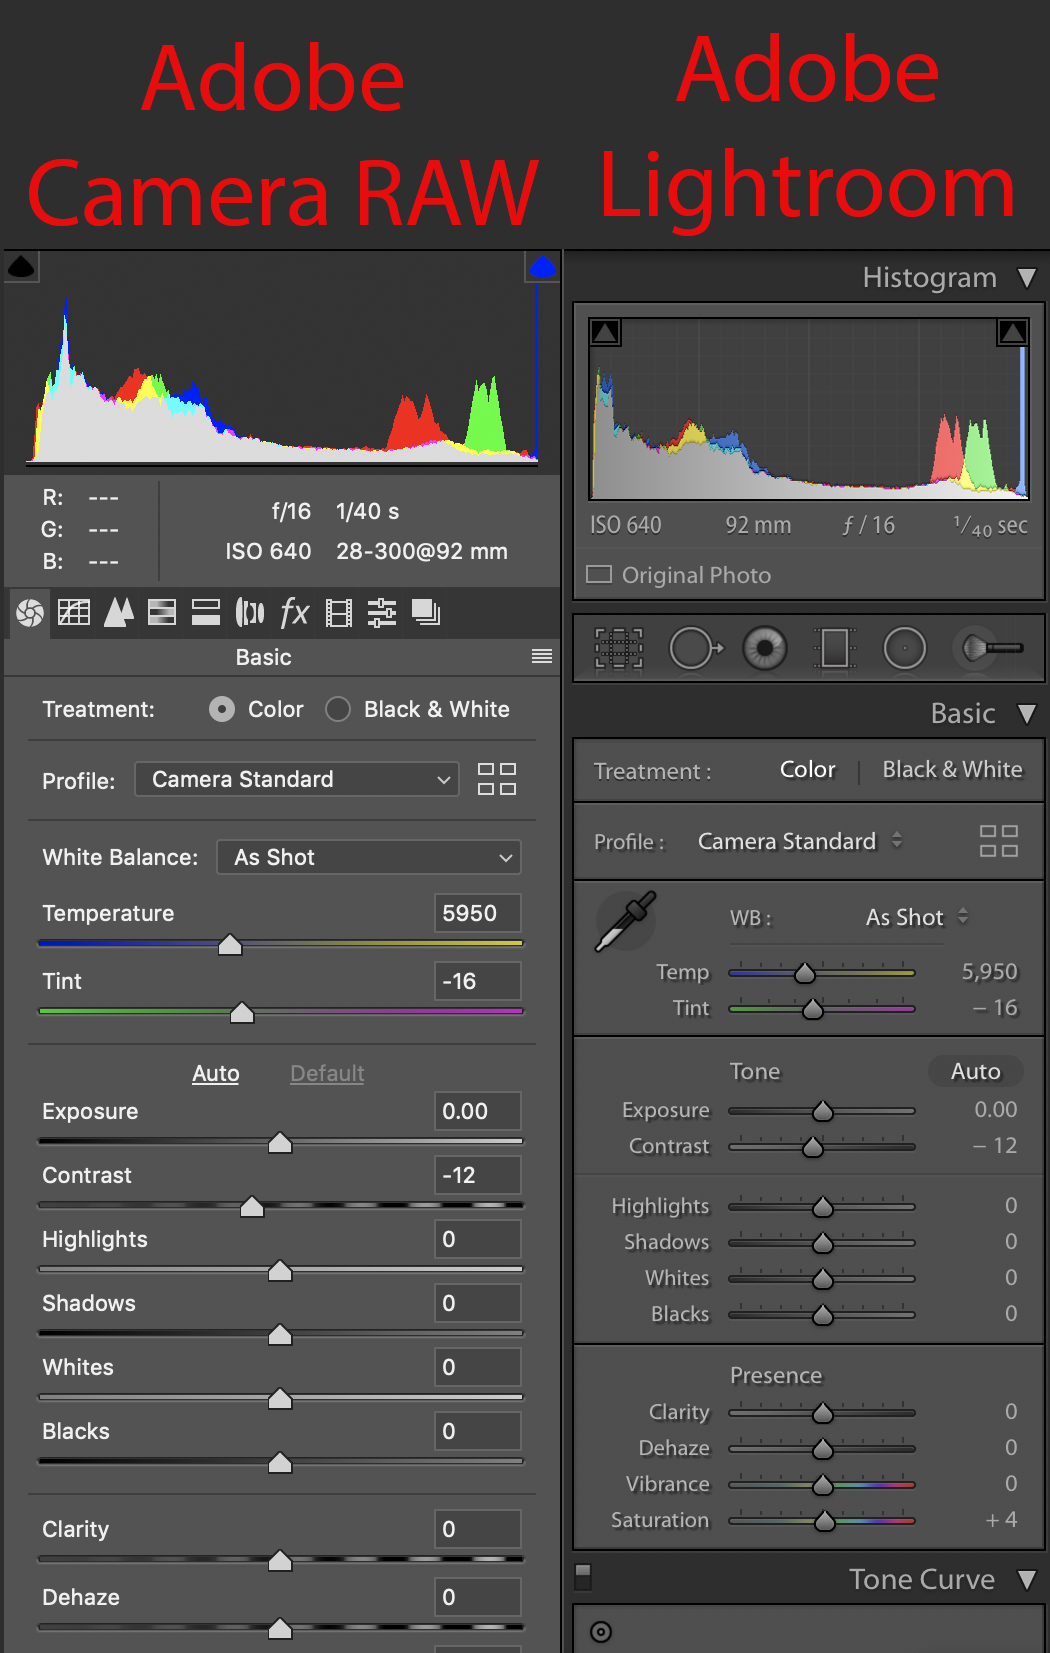
Lightroom is a great first step in the editing process.
Since it's a raw file editor in itself, you can skip using Adobe Camera Raw because you essentially get the same tools in Lightroom. Furthermore, since Lightroom is a stellar organizational tool for your photos, it makes sense to import them into Lightroom from a photo management point of view.
Lightroom is also a good option if you need to tackle basic photo editing.
You can adjust exposure, make histogram adjustments, add gradients and sharpening, reduce noise, work on highlights and saturation, and a host of other essential tasks.
Why Photoshop is Better Than Lightroom
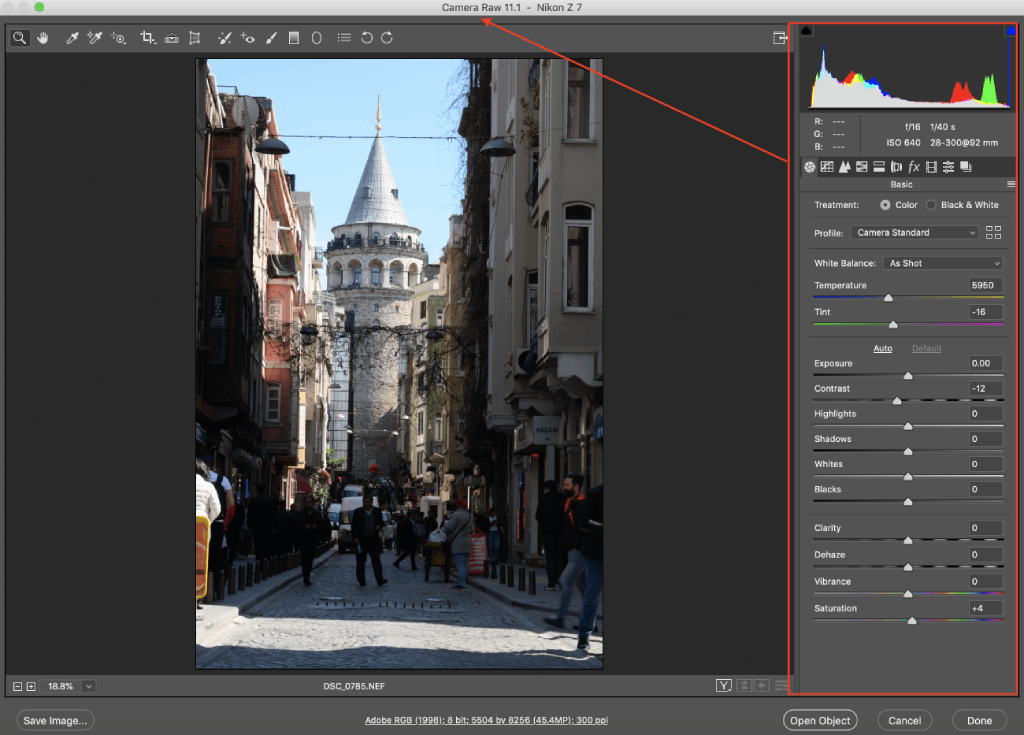
When evaluating Photoshop, there are a few ways that it simply outshines Lightroom:
- Image blending - If you want to blend images, for example, to minimize noise, Photoshop is definitely the way to go.
- Advanced editing - If your portrait model has a blemish on her face, you'll need Photoshop to tackle that task.
- Photo manipulation - If you want to cut grandma out of one photo and put her into another, Photoshop has the tools to do so.
- Panoramic stitching - Splicing images together to create a panoramic photo is one of Photoshop's strong suits.
- Enormous toolbox - Simply put, Photoshop has an incredible collection of editing tools that help you address virtually any editing task you can imagine.
Learn More:
Why Lightroom is Better Than Photoshop

Though Photoshop has its strengths, Lightroom does a few things even better:
- Basic photo editing - If all you need to do is crop an image, reduce the noise, or do some sharpening, Lightroom handles those tasks well.
- RAW editing - Lightroom has a built-in RAW file editor that's more user-friendly than Adobe Camera Raw. Plus, you can make RAW edits as you import your photos.
- Photo organization - As noted above, Lightroom gives you a powerful image management platform to help you organize your photos.
- Ease of use - Lightroom is streamlined for a much simpler user experience.
- Presets - As noted earlier, you can create presets in Lightroom to give a consistent look to your images. Better still, you can import presets that other photographers have made, giving you a virtually endless supply of looks for your photos.
Learn More:
The Downsides of Photoshop and Lightroom
The primary concern with Photoshop is that it has a very steep learning curve. This is simply because of the sheer number of tasks you can do within the program. Some professional photographers don't even know how to use all of Photoshop's bells and whistles, so you can imagine how difficult it can be for some novice and enthusiast photographers to master.
Photoshop doesn't have any image management tools, either, so it isn't nearly as adept at keeping things organized for you like Lightroom is.
On the other hand, being that Lightroom was designed specifically for photographers, you can only edit photos - there's no vector or raster image creation. Additionally, unlike Photoshop, Lightroom doesn't work in layers. Although you can stack effects to get the desired look, they aren't on individual layers that you can manipulate on a layer-by-layer basis.
Get more details on the Lightroom vs. Photoshop debate by watching the video above by Jessica Kobeissi.
Photoshop vs Lightroom: What to Buy

When all is said and done, your better bet will depend on your situation.
If you're a beginner, start with Lightroom as it's easier to learn and more user-friendly. It should also be your choice if you have tons of photos that need organization.
On the other hand, if you're more of an enthusiast photographer that's looking for an editing program to do all sorts of heavy lifting, Photoshop is the way to go.
Fortunately, since they're both Adobe products, they integrate very well together (and are even sold together in one package). Use Lightroom to import, organize, and process your RAW files, then bring them into Photoshop for more serious editing.
Your decision really comes down to which program is best suited for you. Either way, you'll have plenty of power to give your photos the polished look and feel you want.
We Recommend
Master the Art of Drone Photography: Part 1

If you have a drone - and these days, who doesn’t - you understand the trials and tribulations as well as the joys of using an aerial vehicle for photography.
But to think that taking photos from above is the same as it is from your handheld camera is a total misconception. There are the photographic considerations, including subject matter and camera settings. There are also the issues related to the responsible, safe, and legal use of drones.
In the first part of our two-part series on drone photography, we explore legal and privacy issues, as well as topics related to safely flying your drone.

Legal Issues

As drones have become ever more popular, more and more laws have been passed governing their use. Since consumer-based drones are still relatively new, governments worldwide are scrambling to devise rules that pertain to when, where, and how drones can be used, and by whom.
At the center of it all is the common sense use of your drone. Naturally, flying it near buildings, over your neighbor’s backyard, or near airports will do nothing but get you in a heap of trouble. Additionally, flying your drone over something that could be damaged or destroyed should the drone crash is a simple matter of using your head and your wits. In short, if you’re about to fly your drone somewhere and you have doubts about the appropriateness of it, don’t do it!

In the United States, the Federal Aviation Administration has issued a broad spectrum of rules of which you need to be intimately familiar before you take your first flight. The FAA’s Unmanned Aircraft Systems website is the go-to place for the latest in terms of news, regulations, instructions on how to register your drone, and procedures for flying. Other entities, like states, and cities, may have their own set of rules as well. These regulations also vary from country to country, so it’s best practice to check with local authorities before sending your drone up into the sky.
Another excellent resource is the Know Before You Fly Campaign. With guidelines for responsible flying, resources for drone enthusiasts, and much more, it is worth a visit if drone photography is in your future.
Practice Makes Perfect

Once you’ve explored the legalities of flying a drone, it’s time to practice.
It goes without saying that you will need to examine a practice area to ensure that it is safe and legal to fly there. A wide-open area would be an ideal spot, such as an empty field in a rural area. Granted, not everyone that has a drone has the luxury of an open field nearby, so this is another common sense moment. Choose a location that is as open as possible and affords you sweeping views so you can maintain eye contact with your drone at all times. Above all else, ensure that your practice location has nothing that can be damaged and no people that can be hurt. If it crashes, you want to deal with a broken drone at the worst, not a destroyed car windshield or a hurt bystander.
You’ll also want to check the weather to be sure you’re taking to the skies in the best possible conditions. The less wind, the better, for obvious reasons. You will have enough to worry about just trying to master the controls of the drone; you don’t need a breezy day to add more stress to the situation!
Beware of the Battery

Many drones are equipped with a feature that, in case of an emergency, it will return to its launch point automatically. This is great for both you and the drone if something goes awry.
However, if you don’t keep an eye on the battery levels of your drone, it will land wherever it pleases, which can be inconvenient at best and downright destructive at worst. It’s far too easy to get caught up in the process of flying, and once you add taking photos, there is an awful lot to command your attention.
As such, you will need to develop a system for checking your battery life. Set a reminder on your phone. Have a friend time your flight and call out how many minutes of battery life are left. Try to launch the drone as close to the area you want to photograph as possible. These are simple steps, but they could very well save you lots of trouble should your drone run out of juice.
Understanding the factors that reduce battery life is essential as well. The more camera weight it has to carry, the less time your drone will be able to fly. Windy conditions and cold weather have a deleterious impact on battery life as well. Be prepared to cut your flight time in these conditions by as much as half!
Final Thoughts

There is far more to know about flying a drone for photography purposes, so be sure to check the resources provided in this article before you attempt to tackle drone photography. As noted above, it’s mostly about using common sense and being informed about what you can and cannot do with your drone. Be responsible, check local regulations, and take the time to learn how to fly your drone safely before you attempt to add photography to the mix.
We Recommend
Photoshop Gradient Tool and How to Use It
 Photo by trumzz via iStock
Photoshop's gradient tool is simple to understand in that it creates a gradual blend of colors.
That is, where the paint bucket tool applies the same color to the entire selection, the gradient tool applies multiple colors that transition from one to the next.
However, even though it's easy to understand what the gradient tool is, it's a little more complicated to understand how to use it in Photoshop.
That's where this tutorial comes in.
Photoshop Gradient Tool: How to Make a Gradient in Photoshop
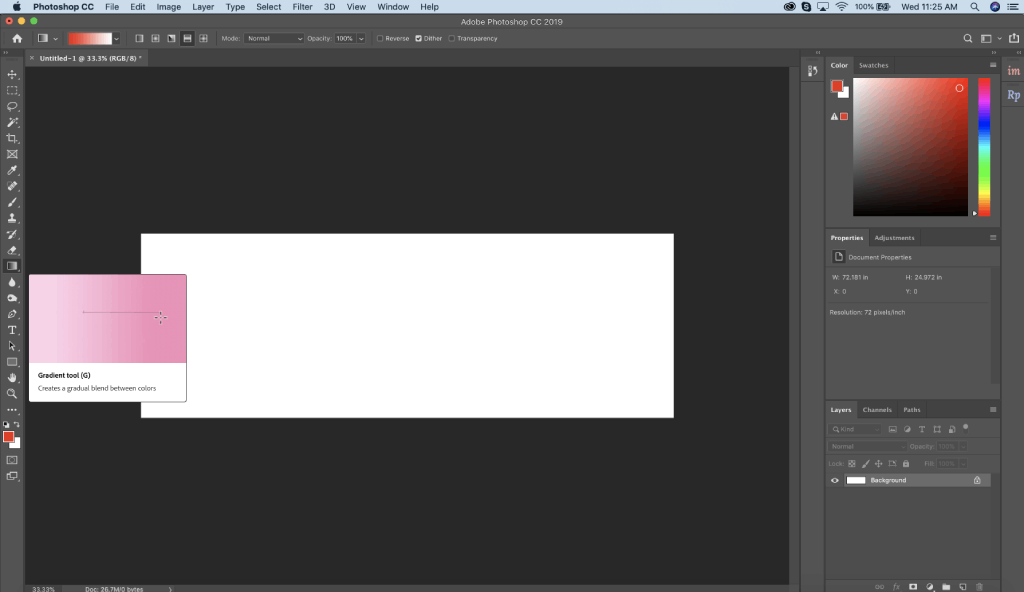
First things first, we need to explore how to make a gradient in Photoshop.
In the video below, Chris' Tutorials offers a deep dive into gradients and how to use them.
The video starts with how to use a gradient and provides an overview of the different types of gradients at your disposal in Photoshop. This includes a discussion of where to find the gradient tool in the Photoshop toolbox and how to make adjustments to gradient features like opacity.
From there, Chris demonstrates how to use transparency in gradients, explains how to edit and create new gradients, and shows you how to apply gradients to selected areas.
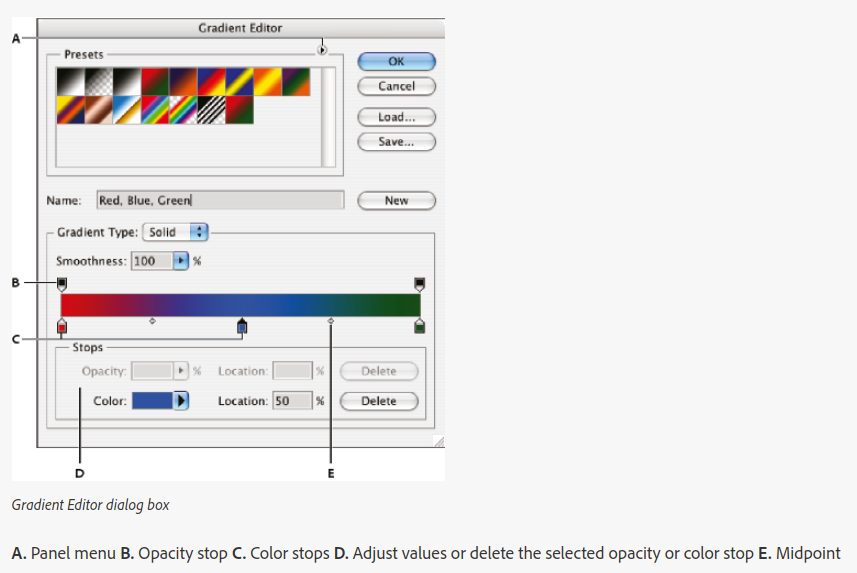
For me, the most confusing aspect about gradients are the different types, which are discussed in the next section, and how to use the gradient editor.
As you can see above, the gradient editor includes a variety of tools that can be a little confusing for novice Photoshoppers. Here's a breakdown of what each tool does, according to Adobe:
- Panel menu (A) - This panel displays common types of gradients. Note that these gradients are not necessarily the colors that are displayed, but rather the pattern that's displayed.
- Opacity stop (B) - The opacity stop determines the level of transparency. Note that there is one opacity stop for each color. To adjust the opacity, move the opacity stop to the left or right.
- Color stop (C) - The color stop determines the color of the gradient. To select a starting color, click the left color stop under the gradient bar. When you do, the triangle above it will turn black to indicate that the color is being edited. Follow the same procedure to change the other colors of the gradient, being sure to use the appropriate color stop.
- Stop values (D) - The stop values serve the same function as the opacity and color stops, except in this case, you can enter a number for the opacity and location of the opacity stop and select a color from a palette and enter a number for the location of color stops.
- Midpoint (E) - The midpoint is the location at which the gradient has an even mix of the two colors. To adjust its location, drag the diamond below the gradient bar to the left or right. Alternatively, you can click on the diamond and enter a location value.
Learn More:
Different Types of Gradients in Photoshop
One of the best features of the gradient tool is that there are so many different types of gradients that you can use. As explained in this tutorial by Adobe, this includes the following:
Linear gradient, which transition from one color to the next in a straight line:

Radial gradient, which transition from one color to the next from the center of a circle outward:

Angular gradients, which transition in a counterclockwise fashion around the starting point:

Reflected gradients, which transition outward from a starting point in the center for a mirrorlike effect:

Diamond gradients, which transition outward from a starting point in the center in the shape of a diamond:

Learn More:
Photoshop Gradient Tool Summarized
In addition to the features discussed above, the Photoshop gradient tool has other customization options that allow you to create a gradient to meet your specific needs.
Shown above, you can see a long list of blending modes, each of which offers a unique way for the gradient to interact with the layers below it.

Just to the right of that, you can see an opacity slider, which determines the transparency of the gradient. Moving the slider to the left increases transparency and reveals more of the layers below the gradient.
Moving again to the right are three checkboxes:
- Reverse, which reverses the order of the colors of the gradient.
- Dither, which adjusts the smoothness of the transition between colors in the gradient.
- Transparency, which controls how the opacity from the gradient is applied.
The gradient tool also has a noise gradient option, shown above.
The noise gradient is created by selecting colors from a range you specify, and then displaying them randomly.
In the examples above, you can see how changing the Roughness (which controls how gradual the transitions are between colors) results in vastly different-looking gradients.
With that, you have a solid introduction to using gradients in Photoshop. Be sure to watch the complete video at the beginning of this article to get familiar with the ins and outs of the Photoshop gradient tool.
We Recommend
Photoshop Tricks You Don't Want to Miss

For me, one of the difficulties I faced when I started in photography was simply trying to figure out what I could do in Photoshop.
Don't get me wrong - it's a great program and I think it's been well developed and organized to maximize its potential.
But there's a lot you can do in Photoshop - a lot - and that can get a little overwhelming.
Something that really helped me step up my post-processing is taking the time to learn a few shortcuts.
Not only do the shortcuts make easier work of doing the Photoshop tasks I want, but they also make it a faster process.
The folks over a PHLEARN put together a list of five essential Photoshop shortcuts in the video at the end of this article. Let's explore each in detail.
Spacebar + CMD/CTRL + Click/Drag
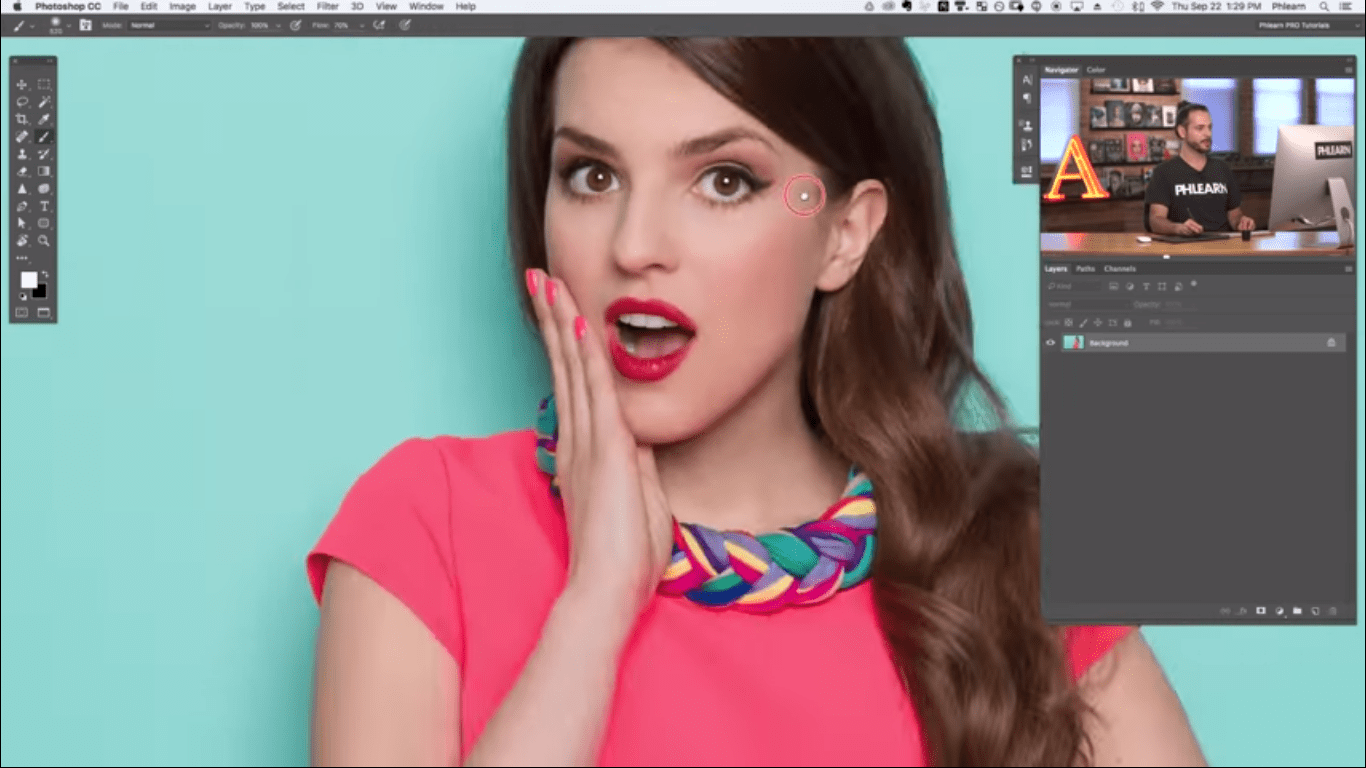 Youtube Screenshot/PHLEARN
I'm guessing that if you've spent some time in Photoshop that you know that if you press CMD/CTRL and the + or - symbol that you can zoom in and out on the image you're editing.
But an advanced version of this trick is to use the spacebar + CMD/CTRL + clicking and dragging.
What this does is allow you to zoom in on a specific area rather than just zooming in on a random location that occurs with CMD/CTRL +.
With that pinpoint control, you can more easily zoom in and out on the area you actually want to edit, rather than having to zoom in and then using the hand tool to drag the image around until the area you want to edit is in the field of view.
CTRL + Option/ALT + Click/Drag
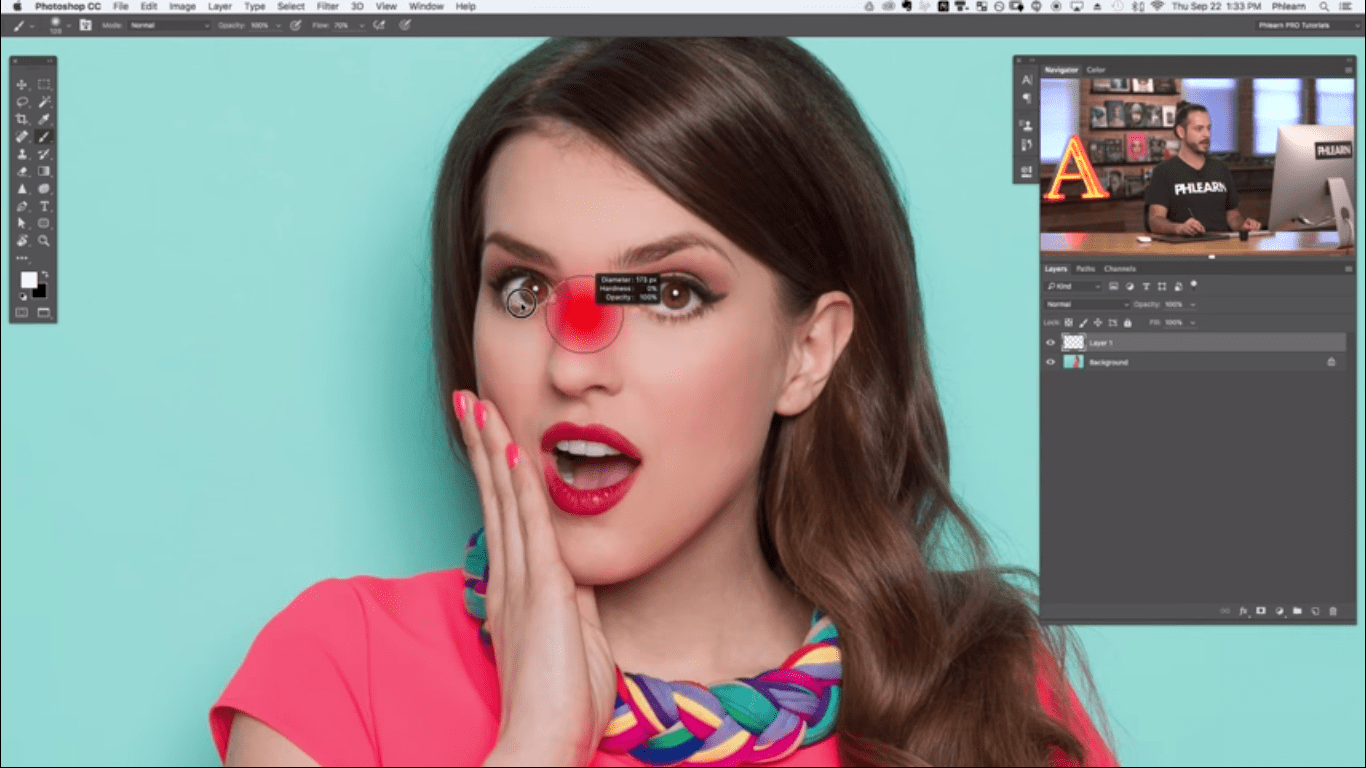 Youtube Screenshot/PHLEARN
This handy shortcut allows you not only to change the size of the brush you're using but the hardness of the brush as well.
Though there are plenty of ways to do this, many of them are laborious or not as effective.
For example, you can right click on the image to change the brush size, but you can't really see the change in the size of the brush until you exit out of the brush size window.
A faster way is to use CMD/CTRL + [ or ] to adjust brush size. This allows you to make adjustments on the fly without having to access the brush menu.
But an even better way is to use CTRL + Option + Click/Drag on a Mac or CTRL + Alt + Right Click/Drag on a PC.
By dragging left or right using this shortcut, you can adjust the size of the brush. By dragging up and down, you can adjust hardness. Pretty simple, right?
V + 1-9
 Youtube Screenshot/PHLEARN
Have you ever wondered how you can quickly change the layer opacity?
One of Photoshop's little secrets is that you can use V + 1-9 to automatically change the opacity to 10, 20, 30 percent, and so on.
Naturally, this requires just two keystrokes, so it's a much faster (and precise) way of getting the opacity you want versus using the slider control in the layers panel.
Note a couple of things with this shortcut...
First, if you want a specific opacity, like 24 percent, just hit V + 24 in rapid succession.
Second, make sure you don't have the brush tool active when you use this shortcut. Otherwise, it will change the opacity of the brush, not the layer.
Shift + Option/ALT + CMD/CTRL + M
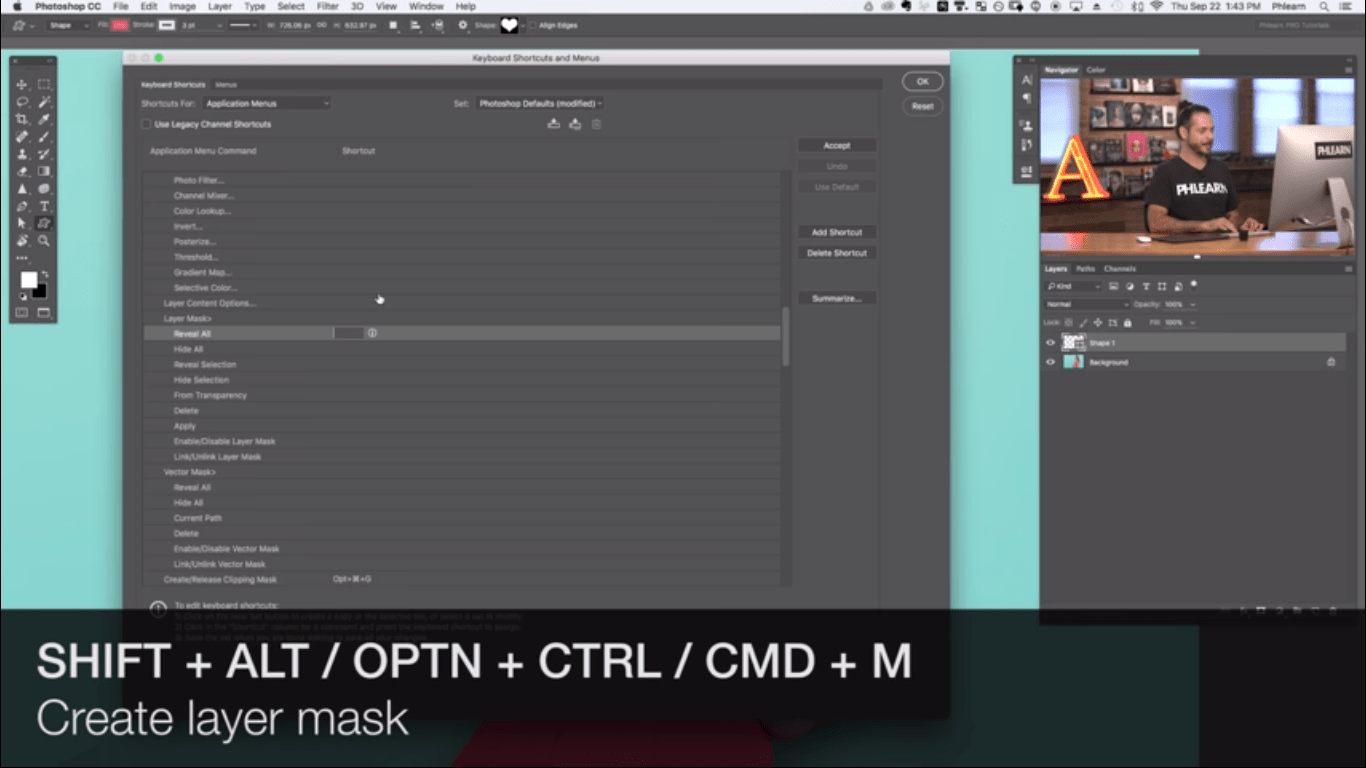 Youtube Screenshot/PHLEARN
Unlike the previous shortcuts outlined above, this shortcut doesn't actually exist in Photoshop.
That means you have to create it, but once you do, you can much more easily create layer masks.
If it sounds scary to create your own shortcut, it's not.
Simply go to Edit > Keyboard Shortcuts > Layer > Layer Mask > Reveal All.
Then just hit the keys you want to use for the shortcut, in this case, Shift + Option/ALT + CMD/CTRL + M to create the shortcut, and then press Accept and OK.
From there, whenever you want to create a layer mask, you can do so with a shortcut!
Shift + Option/Alt + CMD/CTRL + S
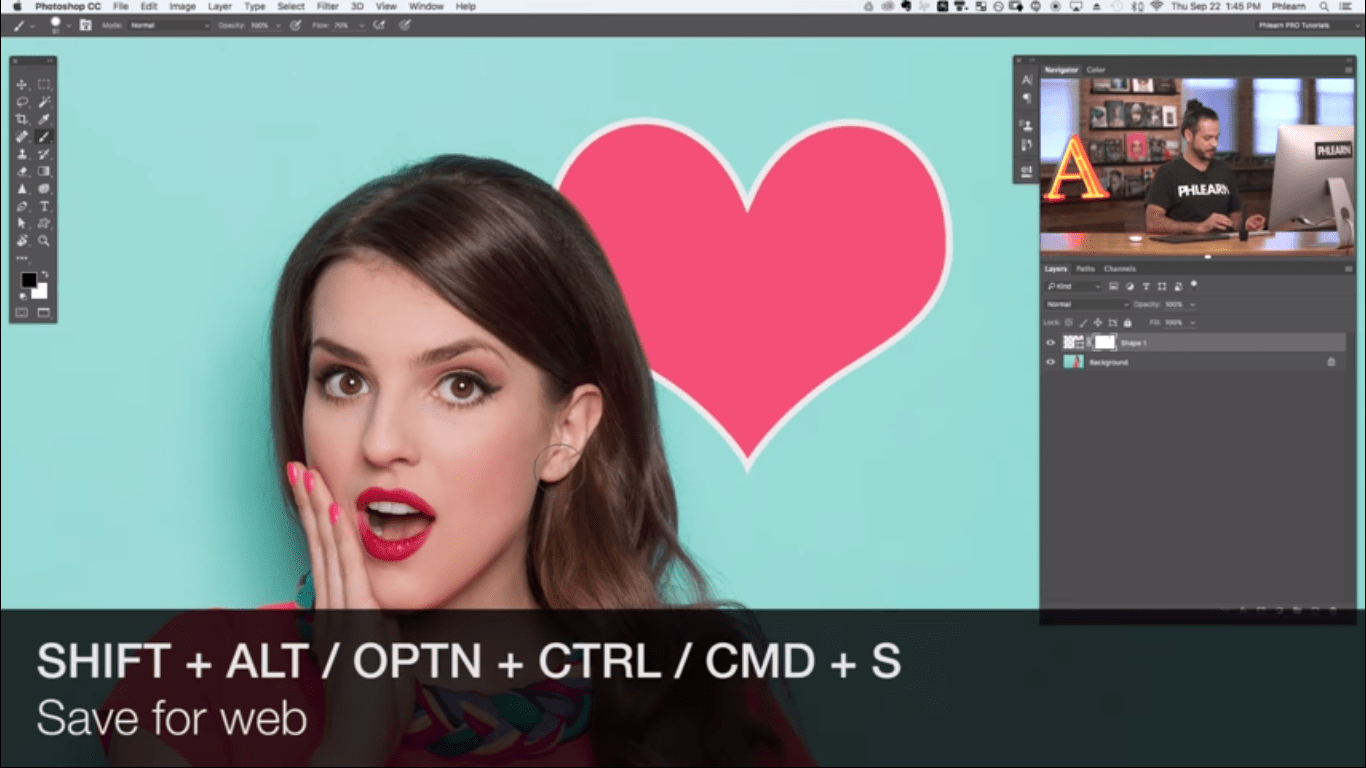 Youtube Screenshot/PHLEARN
In today's day and age, it's common to want to export the images you work on in Photoshop out to the web. This shortcut allows you to do just that.
Rather than going to File > Export > Save for Web & Devices, you can much more quickly access that same menu with this shortcut.
Doing so allows you select the file type and resize the image to save a smaller version of your image that is more easily viewed on the web.
With that, you have the inside track on five easy, yet impactful Photoshop shortcuts.
If you need a refresher or want to see them in action, have a look at the video below by PHLEARN.
We Recommend
Photoshop Tutorial: How to Edit Landscape Photos

Let's face it - there are a ton of factors involved in creating a beautiful landscape photo. You need great light, a solid composition, the right gear, and your timing needs to be spot on, too.
But there's more to do after you take the photo...
If you want to maximize the quality of the shots you take, you need to learn how to edit landscape photos.
Joshua Cripps of Professional Landscape Photography Tips offers a great introductory tutorial on editing landscape photography in the video above.
Have a detailed look at some of Joshua's tips and tricks below.
Editor's Tip: Get the best images by using photo filters like a polarizer. Polarizing filters reduce glare and atmospheric haze while increasing the contrast of the sky for vastly improved results.
Post Processing Photos Should Begin in Adobe Camera RAW
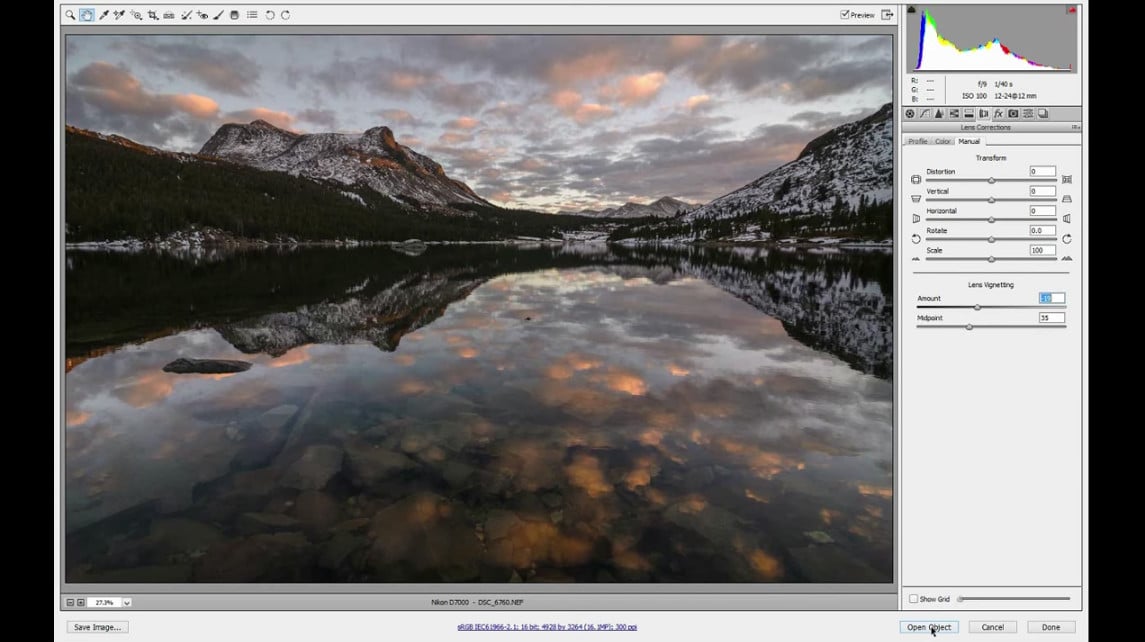 YouTube Screenshot/Professional Photography Tips
The beauty of shooting your landscape photos in RAW format is that it preserves all the data collected by the camera's sensor, unlike a JPG.
With all that data, you can make many more manipulations to your images, and non-destructive changes at that.
Adobe Camera RAW is like a primer for Photoshop in that you can make changes to things like exposure, contrast, highlights, shadows, and so forth.
It's easy to do, too. Just open your image in Camera RAW, and use the sliders you see above to make improvements to the shot.
You can also make adjustments to curves, add a vignette, apply a graduated filter, and many other handy things to make your photo pop, all before you ever open it in Photoshop.
In the screenshot above, you can see how much better the image already looks after just a few adjustments in Camera RAW.
Open the Photo in Photoshop and Get to Work
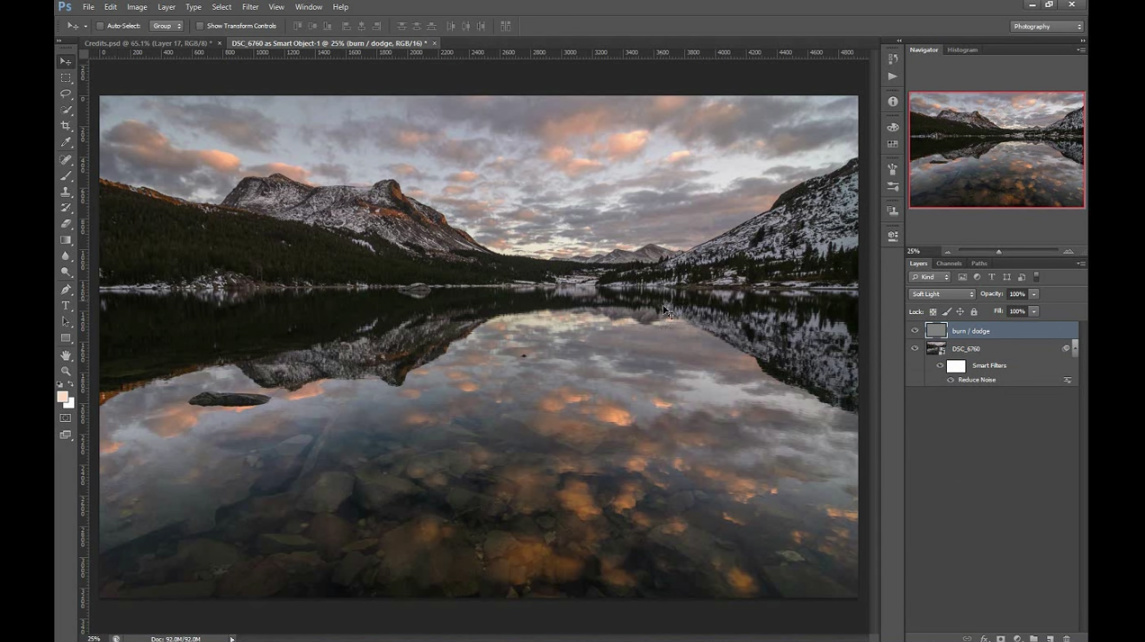 YouTube Screenshot/Professional Photography Tips
The real fun of editing landscape photography starts when you open the image in Photoshop.
That's because Photoshop is rife with advanced tools that allow you to really punch up the drama in your photos.
As seen in the video above, Joshua adds a Dodge/Burn layer to his image to help bring more attention to the mountains in the background.
Dodging and burning is an old film technique that allows you to brighten (dodge) or darken (burn) certain areas of the image. Of course, Photoshop automates that process for you.
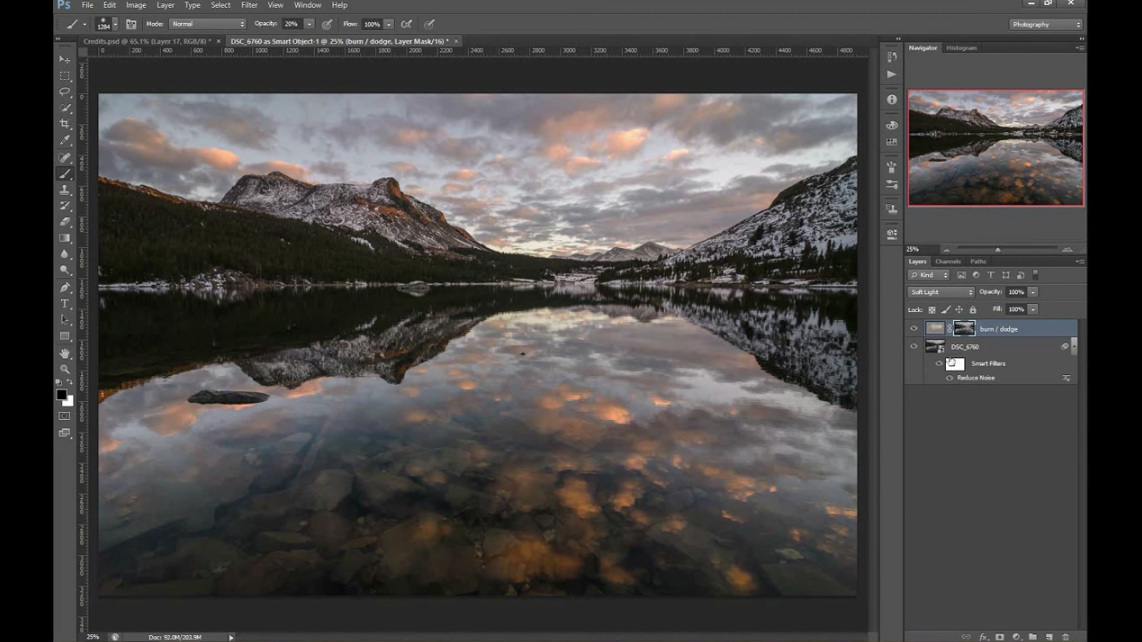 YouTube Screenshot/Professional Photography Tips
Essentially, all Joshua does to brighten the mountain peaks is paint on the Dodge/Burn layer with a light color that he color-picked from the clouds.
This is important because by picking a color that's already in the photo, it makes the areas he's working on look like they were naturally that bright and colorful.
As you can see in the comparison between the before and after images above, it's not a huge difference, but it's just enough to make the mountain peaks a little more eye-catching.
Editors' Tip: Managing the exposure for many landscapes is difficult because the sky is so bright and the landscape is much darker. But with a graduated neutral density filter, you can take care of those disparities right there in-camera.
Improve Contrast by Using the Curves Adjustment
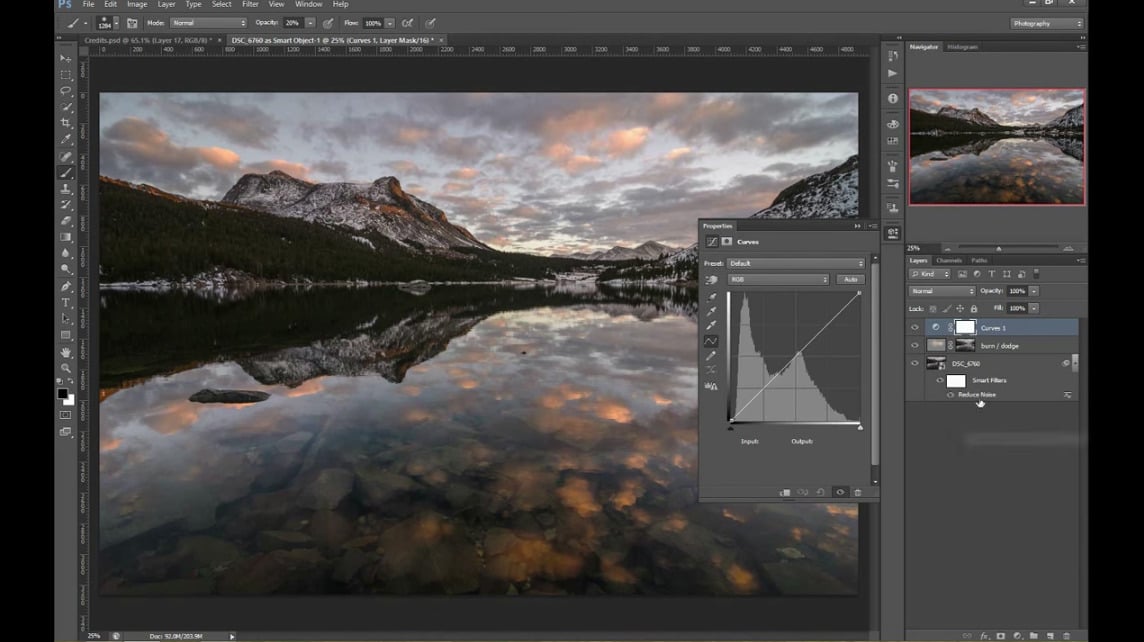 YouTube Screenshot/Professional Photography Tips
If you have a landscape photo that's got a sky that's a little too bright and light on the contrast, you can easily correct that in Photoshop by using the Curves adjustment.
In the screenshot above, you can see the Curves adjustment panel. In its beginning state, the Curves line is perfectly flat.
But by pulling the highlights up and the shadows down, you get more of an S-curve shape, as seen below.
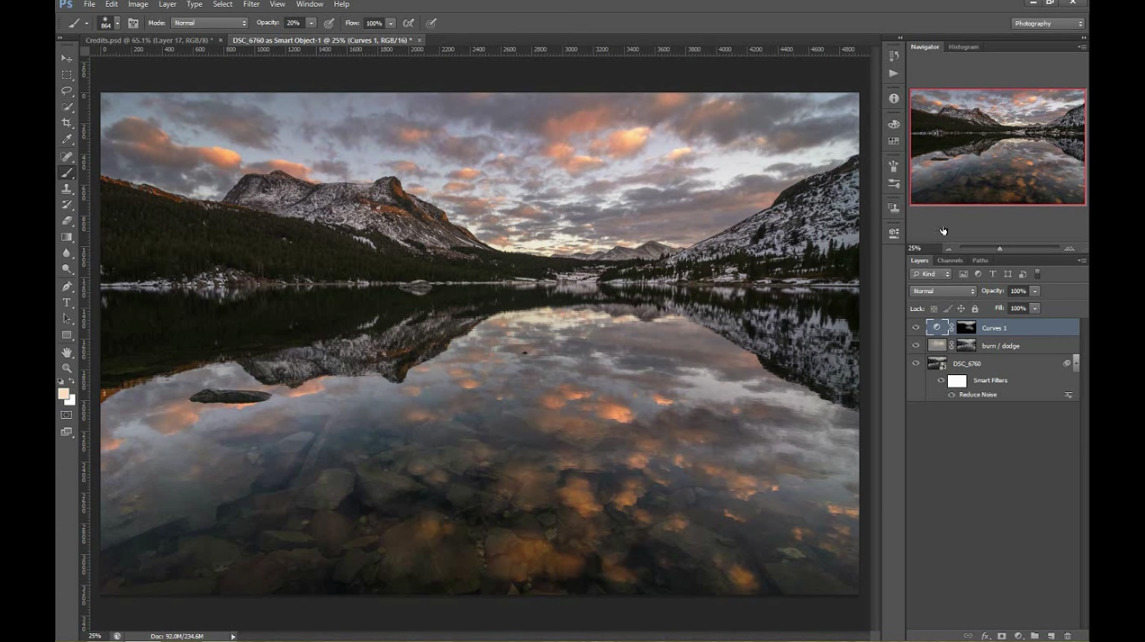 YouTube Screenshot/Professional Photography Tips
The result of manipulating the curves in this manner is a photo with more contrast.
And with more contrast, the elements of the image - the sky, the mountains, and their reflections, are more visually appealing with more pop.
Now, there are other adjustments you'll likely need to make when using Curves because the changes made can often darken parts of the image too much.
For a complete tutorial on how to maximize the effectiveness of the Curves adjustment, be sure to watch Joshua's video above.
More Landscape Tutorials
Joshua Cripps has tons of other landscape photography tutorials on photoshop, taking photos, gear, and more. Be sure to check his YouTube channel for more details!
Additionally, you can vastly improve the quality of your photos in landscape camera by using high-quality photo filters like those from Formatt-Hitech.
Formatt-Hitech has built a reputation for quality materials and high-performing filters over the years, and I can attest to that quality firsthand.
I've used their Firecrest Polarizing Filter, various Firecrest Graduated Neutral Density Filters, and various Firecrest Solid Neutral Density Filters as well.
Your ability to create breathtaking photos is only increased by using good photo filters. Get outfitted with filters and start taking better photos right now!
We Recommend
Photoshop Workflow for Landscape Photography

The great thing about photographing landscapes is that you don't have to worry about your subject not smiling or looking at the camera.
Of course, that doesn't mean that there aren't improvements that can be made after the fact in post-processing.
Though some photographers poo-poo the idea of manipulating your photos in post, I'm of the school of thought that doing some light editing to enhance the look of your photos is no different than what we did in darkrooms long ago.
The problem is that programs like Photoshop can be on the overwhelming side, with hundreds of features and functions for your editing pleasure.
Fortunately, Joshua Cripps of Professional Photography Tips has put together a quick, yet effective 5-minute landscape photography workflow for landscapes. See it in action in the video below, and read about each step of the process in the text that follows.
Step 1: Open the Image in Adobe Camera RAW

Youtube Screenshot/Professional Photography Tips
If you aren't shooting in RAW, you should be. And if you aren't editing your RAW files in Adobe Camera RAW before importing them into Photoshop, you should be doing that too!
RAW files retain all the data that your camera's sensor collects, so there's a lot more information to work with than with a JPEG.
In looking at the image above, you can see how it's underexposed.
Using Adobe Camera RAW adjustments allows you to increase the exposure level, work on the highlights and shadows, adjust the whites and blacks, and manipulate the clarity, vibrance, and saturation too.
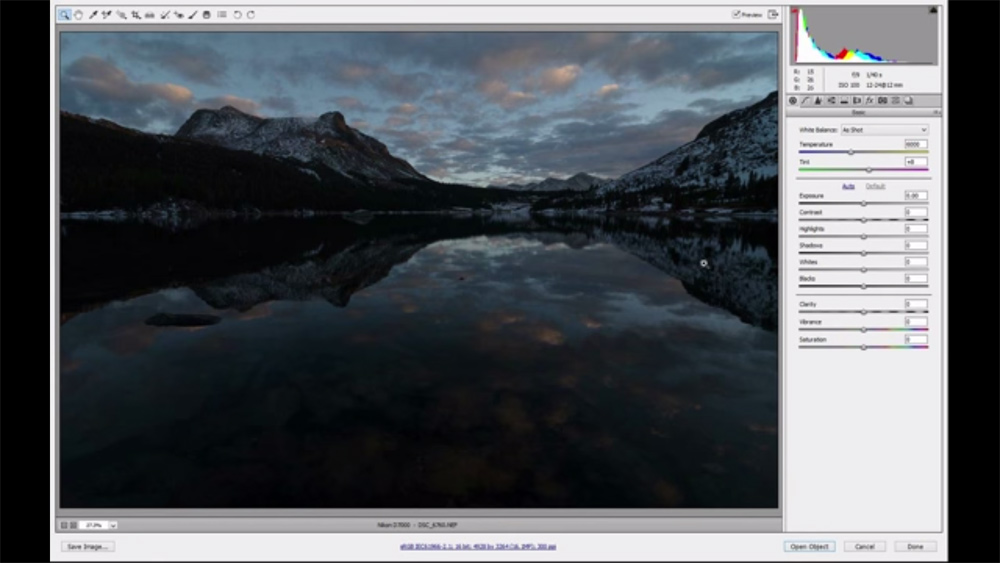
Youtube Screenshot/Professional Photography Tips
After making all those adjustments, you can see how much the image is already improved. But Camera RAW has other functions that allow you to further prep your image for Photoshop.
Opening the tone curve panel, you can adjust the highlights and shadows to add some contrast to the scene, which helps it look more dynamic and less flat.
Another neat function in Camera RAW is the ability to add a graduated filter effect to the shot.
In the field, a graduated neutral density filter darkens the sky and has little to no effect on the foreground. The purpose, of course, being to even out the exposure levels between the foreground and background.
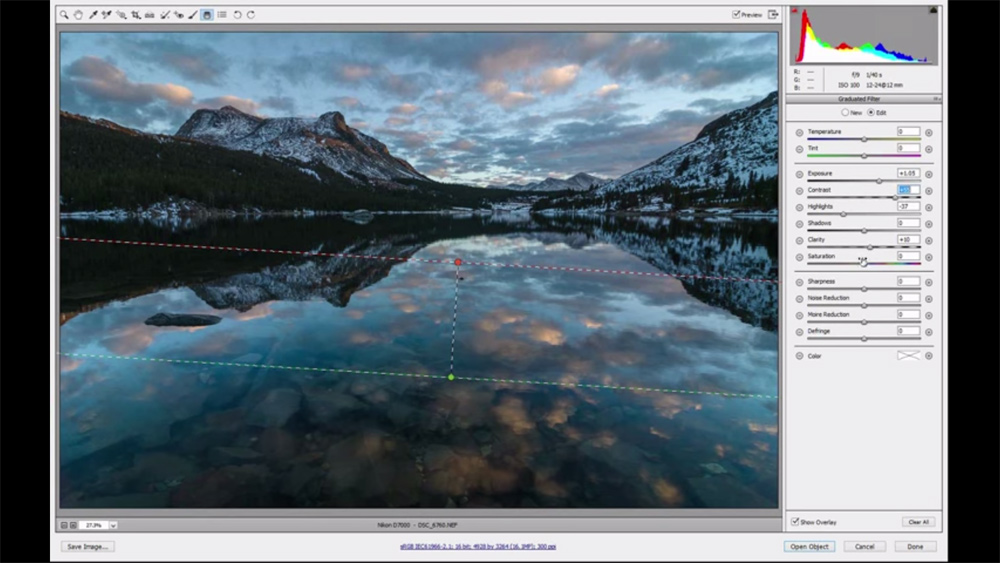
Youtube Screenshot/Professional Photography Tips
Making that adjustment in Camera RAW has a similar effect by selected an area of the image to work on, as seen above.
Once you do that, you can manipulate shadows, highlights, saturation, vibrance, and so on in that specific area.
In the lens correction panel, there's another neat trick you can use to enhance your photos: vignetting.
In this case, adding a slight vignette effect darkens the edges of the frame just enough such that the sun-kissed features of the sky and the mountains stand out a bit more.
Learn More:
Step 2: Open the Image in Photoshop
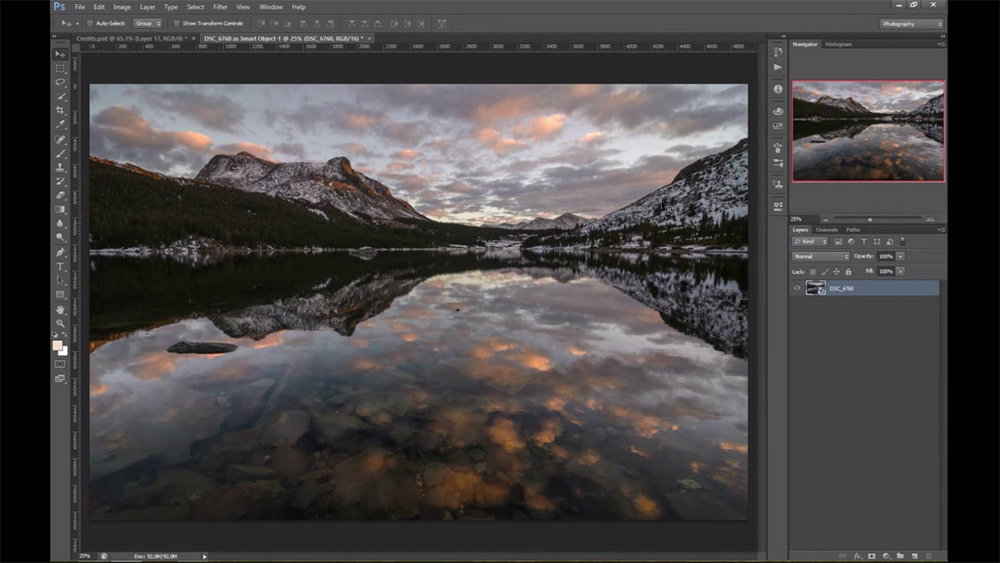
Youtube Screenshot/Professional Photography Tips
Now the image is ready for Photoshop.
Simply click "Open Image" in the bottom right-hand corner of the Adobe Camera RAW window, and it'll automatically open in Photoshop.
Once you're there, you have a whole new set of tools at your disposal to improve the image.
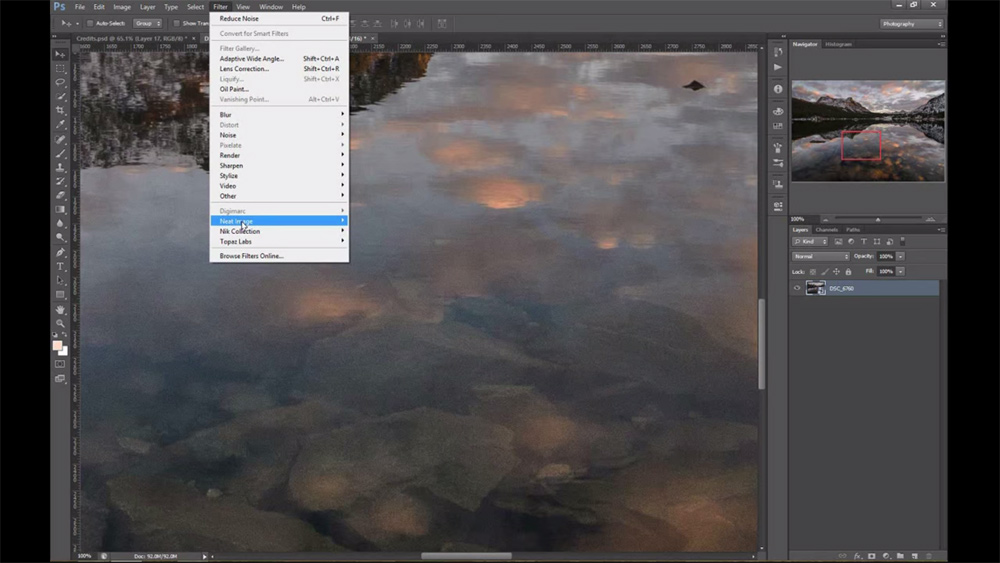
Youtube Screenshot/Professional Photography Tips
Since Joshua brightened the foreground, there's some noise showing up that needs to be removed.
To do that, add the Neat Image plug-in to Photoshop, then select Filter > Neat Image > Reduce noise.
Next, to bring more attention to the mountain in the background, you can do a little dodging and burning to add some brightness to it.
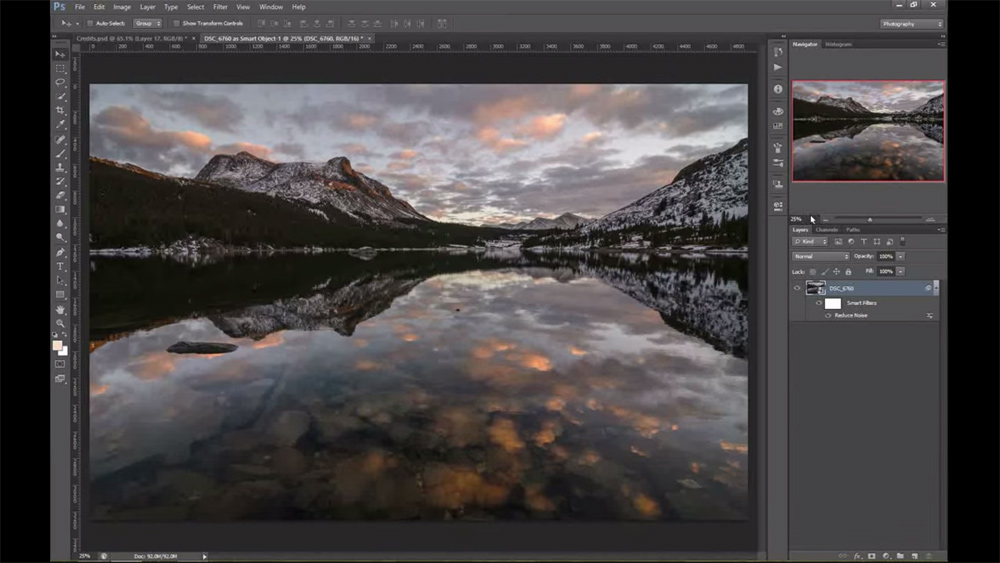
Youtube Screenshot/Professional Photography Tips
Just add a burn/dodge layer, grab a bright color from the sky, and set the opacity of the brush to about 20 percent.
Then simply paint over the mountain peak to brighten it up and bring more attention to that area of the photo.
Learn More:
Step 3: Work on the Sky in Photoshop
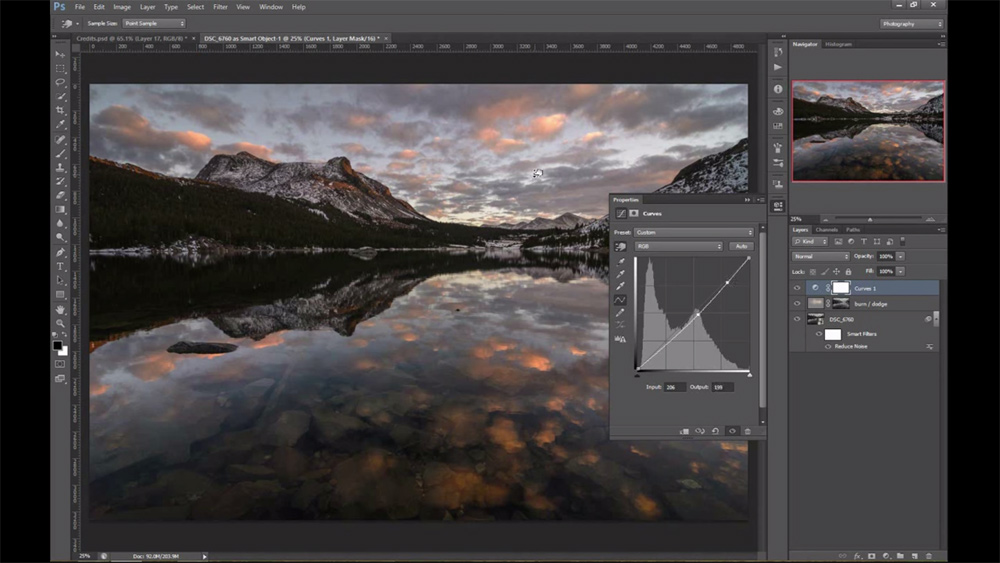
Youtube Screenshot/Professional Photography Tips
At this point, the sky is a little too flat still, so that requires some work on with the targeted adjustment tool and a curves adjustment layer.
First, add the curves adjustment layer, and then using the targeted adjustment tool, click on a shadowed area of the sky and drag it down to darken it. Then grab a highlighted area and drag it up to brighten it.
The result is a sky that has more contrast and visual punch!
Learn More:
Step 4: Crop to Fit

Youtube Screenshot/Professional Photography Tips
The final step in this process is really the easiest.
Since there's a lot of visual weight on the left side of this image, it makes sense to crop some of that out.
By bringing the left edge of the frame inward, you're also able to make the image adhere better to the rule of thirds. As you can see above, the mountain peaks are more in line with the left-hand vertical gridline, and there's also a better visual balance between the mountain peaks on the left and the rising horizon of the mountain on the right.
Learn More:
Final Thoughts
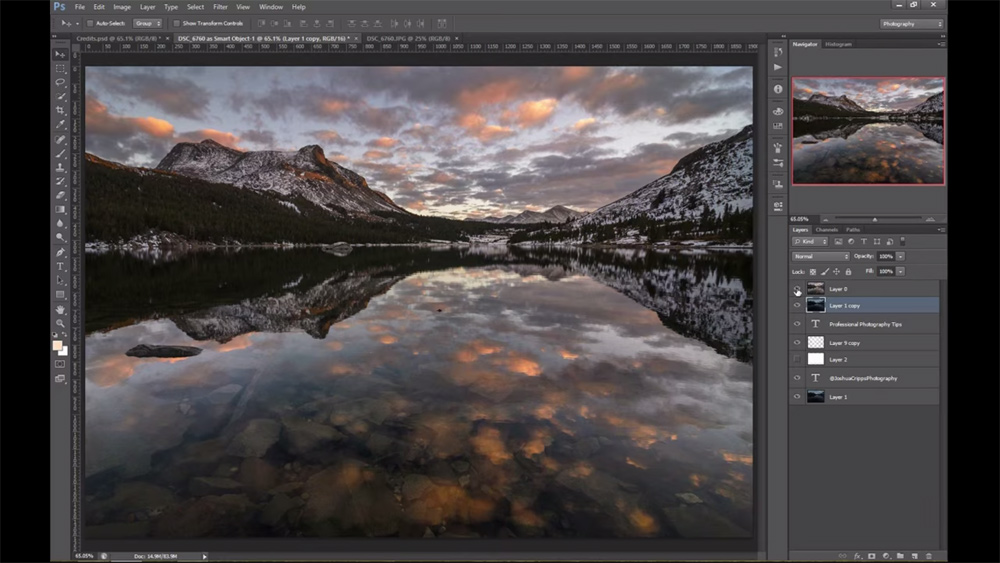
Youtube Screenshot/Professional Photography Tips
Learning how to edit your photos in post-processing is a crucial step in becoming a more informed and skillful photographer.
Should you try to get everything right in-camera? Absolutely.
But that doesn't always happen. And even if it did, I would still work on my images in Photoshop to bring them to life.
And as we've seen here, it doesn't have to take a long time to have a tremendous impact, either. After all, it took Joshua just 5 minutes to create the image above from the very first one we saw at the start of this lesson!
We Recommend
Post-Processing Tip: How to Create REALISTIC Sun Rays in Your Photos
 Image Credit: Max Rive
All you landscape photographers out there know that capturing beautiful sun rays just isn't possible all the time.
The timing has to be just right. The atmospheric conditions have to be just right. Your positioning relative to the sunset needs to be spot on to get the maximum impact as well.
But what if I told you that you can add realistic sun rays to your landscape photos by using Luminar 2018?
In the video above, Mads Peter Iversen, explains precisely how to use this neat little trick to enhance your images.
Using his step-by-step process, you can take your "okay" landscape photos and turn them into something that truly stands out, and in not all that much time, either!
Here's the process, one step at a time...
Step 1: Add Sun Rays Using the Luminar Filter Feature
 YouTube Screenshot/Mads Peter Iversen
After opening Luminar 2018, on the right side of the screen you'll see an "Add Filters" button.
Clicking that button opens a huge list of filters, but in this case you want to scroll towards the bottom of the list and click on "Sun Rays."
Next, you'll need to place the sun rays in the desired location in the photo.
As Mads explains in the video, Luminar uses AI to determine how the sun rays should interact with the scenery in the shot. You can see how they change based on where Mads places them in the screenshots above (in which some of the sun rays are blocked by the cliff) and below (in which they appear to emanate from the clouds).
 YouTube Screenshot/Mads Peter Iversen
Obviously, the goal here is to place the rays in a position that looks natural for the scene. As a result, Mads places them over the sun between the rock formations, as seen below.
 YouTube Screenshot/Mads Peter Iversen
What makes Luminar so fun to use is the ease with which you can place sun rays in the image.
In a matter of seconds, Mads was able to drag and drop the sun rays and place them in the desired location. It doesn't get any easier than that!
Learn More:
Step 2: Fine-Tune the Look of the Sun Rays
 YouTube Screenshot/Mads Peter Iversen
As with any editing program, it's usually good practice not to max out the position of the sliders as you fine-tune the effects you've implemented into the photo.
As Mads shows in the video, less is more when it comes to the sun rays effect in this particular image.
As you can see in the screenshot above, just one of the sliders is skewed all that far from center, which results in a much more pleasing (and realistic) look.
The "Amount" and "Look" sliders are responsible for how strong the sun ray effect is in the image. Immediately below that, the "Number" changes how many rays of light there are and "Length" manipulates how long the rays are.
You can also make adjustments for the warmth of the ray's color, the glow of the sun center, how much the rays appear to penetrate objects in the shot, and the appearance of how the rays shine through in the photo.
Once you've created the rays as you want them, simply click "Apply" in the upper right-hand corner of the editing window and the image will either be saved (if working in Luminar as a standalone program) or exported to Photoshop.
Step 3: Mask Out the Unwanted Sun Rays in Photoshop
 YouTube Screenshot/Mads Peter Iversen
In Mads' case, he wanted to eliminate some of the sun rays in his photo so that the final result showed only the rays shining through the archway of the rock formation.
To do that, he created a mask, inverted it, and used the Brush Tool with a white brush to brush in the rays he wanted to keep.
As you can see above, the subtle rays beaming through the arch gives this shot a gorgeous and realistic look.
And that's it! Using this simple three-step process, you can add natural-looking sun rays to your landscapes.
Mads offers two other examples of how to utilize this sun rays feature in his video. Be sure to check that out starting at about the 5-minute mark for more inspiration for using this awesome feature.
Learn More:
My Experience With Skylum
Interesting Fact: Way back in 1998, I picked up Adobe’s Photoshop 5.0: Classroom in a Book, and started to teach myself Photoshop. I subsequently spent nearly five years of my life, all the way up to CS 8.0, picking up every Classroom in a Book that Adobe released on Photoshop.
Still to this day, I’m a Photoshop user and always learning what I can as the program grows and evolves. Typing this, I’m realizing it’s been a 20-year journey. Crazy!
Back in 2012, I started playing around with Lightroom. However, it wasn’t until 2014 and version 5.0 that I got serious with Lightroom with the help of watching a TON of YouTube videos. Roll forward four years and I’m still grinding away at it.
The point I’m making here is that I’ve heavily invested myself into a very long journey with Adobe. They have done a great job, and I’ve created some decent photos along the way using their software, if I do say so myself.
Keeping that in mind, a few years ago, a company called MacPhun came on board as a supporting vendor of PhotographyTalk. They had a good product with a growing following of loyal users. But, if I’m completely honest, it didn’t have that WOW factor that I felt could pull users away from Adobe.
Earlier this year, Macphun changed their name to Skylum and released Luminar 2018. Three months ago, they sent me a copy to play around with. Again, if I’m being honest, I didn’t touch it for a couple weeks, and thinking back on it, it might have actually been three weeks.
When I opened it - no joke - it was within minutes that I converted a blah photo into a wow photo (I know that sounds corny!). The software is crazy intuitive with a number of presets that makes editing photos extremely efficient with remarkable results.
And the best part…there’s manual development tools for those days when I don’t want to use presets and want to adjust my photos myself. All the tools I need to do that are easily found on the right side of the screen as I’m working in Luminar 2018.
Folks, I’ve not closed this program out since I opened it over 2 months ago! It’s that good. Skylum has really made post-processing fun again, fast, and freakin’ awesome! In short, they have hit an out-of-the-park home run!
If I can make one recommendation to you, it’s to go download the free trial now. Don’t wait to open it like I did…download it and you’ll see why so many professional photographers (myself included!) are so excited about this software. You’ve got nothing to lose - see Luminar 2018 for yourself!
We Recommend
Saturation Vs. Vibrance: The Tips You Need to Know
When I first learned Photoshop, the saturation adjustment was one of the first tools I used.
Why?
Well, to put it simply, I already knew what saturation meant, and the tool was easy to use, with a simple slider to make adjustments.
It doesn't get much easier than that!
Of course, today's post-processing programs are vastly improved over whatever version of Photoshop I was using back in the day.
Yet, there's saturation, still hanging around, ready to help make my photos a little bit better.
There's another sheriff in town these days too - vibrance - that, when used appropriately, can give images an added punch as well.
Today, I want to give a quick overview of both of these tools to help clarify exactly what it is that they do.
Saturation Explained
When you work on the saturation of an image, moving the slider to the right boosts the saturation of all the colors in the shot. Conversely, moving the slider to the left diminishes the saturation of all the colors.
These actions are uniform - that is, saturation works on all colors in the same way, regardless of the point from which the colors begin. That means that if you have a landscape image in which the foreground has relatively dull colors, but the background has intense colors, all those colors will increase in intensity by the same amount.
You can see the problem...
Because changes are made uniformly, clipping can occur in the areas of the shot that are already color-intense. Clipping, in this case, is simply a loss of detail due to oversaturation of the colors.
There's another problem with going crazy with saturation: skin tones begin to look unnatural.
Look at the series of images below to see what I mean:
Note how with every increase in saturation, the colors get more and more intense. The problem, of course, is that the colors become too intense by the time you reach 100% saturation. In fact, I'd argue that the colors are too intense even at 50% saturation.
You can also see how increasing the saturation makes normal skin tones appear to be bright orange - certainly not a natural look.
Fortunately, the vibrance adjustment tool helps us get around this issue.
Vibrance Explained
Where saturation works uniformly to boost the intensity of all colors, vibrance only works on muted colors in the shot.
In that regard, vibrance is a smarter tool than saturation because it can detect what colors in the photo already have enough intensity.
As a result, when you boost the vibrance, it only works on the colors that need it. Using the same example as above, if you have a landscape shot with dull colors in the foreground and highly saturated colors in the background, a vibrance adjustment will only address the dullness of colors in the foreground.
Another benefit of making a vibrance adjustment is that it has much less of an impact on skin tones in the yellow and orange regions. That means the blues and greens in the shot can be intensified without making people in the photo look like they've had a bad spray tan.
Just look at the following examples to see what I mean:


Notice that when using the vibrance tool, the colors become more intense - compare the blue tones of the car to see that - but the skin tones of the little boy remain quite normal.
Additionally, the vibrance tool gives the image a subtle color boost that makes it a better-looking shot. Vibrance is a more finely tuned tool to use, and will often get you more pleasing results across the board.
Beyond that, one look at the images at 100% vibrance and 100% saturation, and you can plainly see which option is better for instances in which there are people in the shot.
See Saturation and Vibrance in Action
The real difference between these two easy-to-use tools comes to life when you can see them in action in Photoshop.
In the video above from Howard Pinsky, you can see the difference that saturation and vibrance adjustments make to a landscape photo in real time.
Follow along as Howard gives a play-by-play of the impact these adjustments can have on your images.
We Recommend
Simple Tricks to Getting Sharp Images With Your Camera
Let's face it.
There are a lot of things that can go wrong when creating a photo.
The horizon might be off or the framing might not be pleasing to the eye.
Compositional elements like a lack of foreground interest in a landscape shot or an odd pose by a portrait model can diminish the photo's impact as well.
Yet another potential landmine that can ruin your shots is having images that simply aren't sharp.
Granted, getting a sharp photo requires more than just holding the camera carefully or setting a fast shutter speed.
In fact, there are a few tips and tricks that will help you maximize the sharpness of your images without having to do a ton of other work.
Let's explore these options in more detail.
Use a Camera Remote

A primary culprit of photos that are blurry is camera shake.
Even subtle movements as you hold the camera are enough to render objects ever so slightly out of focus, and even that minimal disturbance can reduce the visual impact of the shot.
You might put your camera on a tripod thinking that your images will benefit from improved sharpness, but even then, simply the act of pressing the shutter button can cause enough movements to induce blurriness into the photo.
That's where a camera remote comes in handy.
Paired with a tripod-mounted camera, a camera remote gives you complete control over the shutter such that you don't even have to touch the camera.
Without having to touch the camera, it can be left to do its work and get you tack-sharp results that are pleasing to the eye.
Of course, not all camera remotes are built the same.
You can opt for a cheap remote that simply allows you to trigger the shutter. But if you're going to invest in a remote, why not get something that gives you broad functionalities, like creating time-lapse videos, movies, and still photos right from your phone?
Alpine Labs has a handy product called Pulse that does all that and more.
From up to 100 feet away, you can control Pulse with your smartphone. That means you can fire the shutter, adjust the aperture or ISO, and even check out the histogram for each photo you take, all without touching your camera.
Better still, the iOS and Android Pulse app turns your phone into a live view monitor, so if you need to check the sharpness of your images, you can do so on your phone. Again, you don't have to mess with your camera to see what you're doing. That helps maintain your focal point and your composition for an improved photo.
All you have to do is attach Pulse to your camera's hot-shoe mount, plug it into your camera's USB port, and utilize the smartphone app to take control over your camera.
And, like many other camera remotes, Pulse is a tiny little gadget that won't take up much space in your camera bag. It weighs just 1.5 ounces and is only 40x60mm in size.
Heck, you can even carry it in your pocket, it's that small!
"Pulse is a game changer and in my opinion aside from your photography essentials, is the single most important item in your camera bag. I use mine every time I head out!"- Alex Schult Founder & CEO PhotographyTalk
See full specs and photos here.
In short, the more you touch your camera, the more likely your images are going to be less than ideally sharp. Using a remote like Pulse helps you circumvent that problem, with tack-sharp, gorgeous photos a result. See Pulse in action in the incredible video above by Alpine Labs.
Improve Sharpness in Photoshop

Although it's preferable to get things right in-camera and have a sharp image in the first place, that's not always a possibility.
In the days of film photography, a blurry picture was going to be blurry.
Now, though, we have the benefit of tools like Photoshop that can address image blurriness to help us create photos that are sharper and more pleasing to view.
There is even plenty of variety in terms of the tools you can use in Photoshop to improve the sharpness of your images.
You can use the Camera RAW feature to adjust the definition of edges in the shot even before you open the photo in Photoshop. It's a simple process:
- Zoom in on the image to 100 percent
- In the Details tab, adjust the amount, details, radius, or masking as needed.
- Click the Update to Current Process button in the corner of the image preview.
That's it! You should be able to see a clear difference in sharpness just by making those adjustments in Camera RAW.
Once you get the image into Photoshop, other tools are at your disposal.
You can use the sharpen tool to add definition to the shot. When using this tool, be sure to do so on a new layer, that way you can use blending controls and blending modes to get the best results.
For example, you can use blending controls to prevent sharpening in highlighted and shadowed areas to prevent clipping. You might also use blending modes like Luminosity such that the sharpening doesn't cause color shifting along edges in the shot.
Yet another option in Photoshop is to use the Unsharpen Mask.
This tool increases sharpness by working on the contrast levels along the edges of features in the image. Essentially, it makes lighter pixels lighter and darker pixels darker such that the final result appears to have a greater level of sharpness.
The techniques outlined here (and others as well) are explored in more detail in the video above from Kelvin Designs. Follow along as he provides in-depth instructions for accessing and using these tools in Photoshop CC.
Shoot in Your Len's Sweet Spot
A final method for getting tack-sharp photos is to simply work in the sweet spot of your lens.
If you aren't familiar with this concept, lenses - even professional-grade ones that cost thousands of dollars - don't provide as sharp of results at their maximum and minimum apertures as they do at a mid-range aperture.
That means that if you're photographing a landscape at f/22, the image simply will not be as sharp as if you take the same image at f/11. Similarly, if you're creating a portrait at f/1.4, it won't be as sharp as if you take the same portrait at f/2.8.
It's a simple enough concept, but complicating matters is the fact that each lens has a different sweet spot. Where one might be optimally sharp at f/4, another might be the sharpest at f/5.6.
There are a few simple tricks for finding the sweet spot of your lens, though:
- Count a couple of stops up from your lens's maximum aperture. For example, if your lens is a 50mm f/1.4, shooting at f/2 or f/2.8 will get you improved results. To find the maximum aperture of your lens, just look at the end of it, where the aperture range will be printed, as seen in the image above.
- Use aperture priority mode. Doing so allows you to determine the precise aperture you want to use, and the camera will determine a shutter speed to match for a well-exposed image. With you in control of the aperture, your images will be sharper because you understand the apertures at which you get the sharpest results.
- Take test shots. Perhaps the most effective method is to simply take a few test shots to determine which aperture provides the sharpest images. Just set up a simple scene, take a photo at the maximum aperture of your lens, then another image one stop up from that, and another at one stop up from that, and so on, until you have a series of five or six shots at five or six different apertures. Then, on your computer, zoom in on the same spot in each photo and examine them for sharpness. It will quickly become clear which aperture produces the best results.
In the video above, Joel Grimes offers an in-depth discussion about finding the sweet spot of your lens. Not only that, Joel gives an overview of why lenses have a sweet spot in the first place, giving a nice summary of two very important terms that you should know: aberration and diffraction.
So, there you have it. Three simple, yet highly effective tricks you can use to improve the sharpness of your photo. Try each one and see which fits with your workflow the best, or alternative using all three depending on which method meets your immediate needs and time constraints.
No matter which one you go with, these methods will help you produce images that have improved visual impact. Even though mistakes with things like framing and composition might be more noticeable at first, trust me when I say that if your images aren't sharp, it will reduce the appeal of your photos!
We Recommend
The Best Free Photoshop Alternatives for 2017

If you aren't quite ready to commit to a Photoshop subscription but still want an editing suite that allows you to do some processing on your photos, what options do you have?
Well, the answer is, you have a lot of options.
In fact, there are some really great (and free!) photo editors out there, that, though they all might not have the same level of tools and sophistication of Photoshop, still offer quite a bit in the way of editing options.
Have a look at some of the best Photoshop alternatives for 2017 below.
GIMP
At the top of the list of free Photoshop alternatives is GIMP.
Though it isn't quite as robust as Photoshop, it offers plenty of top-notch tools to help you manipulate your photos.
That includes layers, noise removal and sharpening, selections, HDR, color correction, lens correction, and a lot more.
You can use it to edit JPEGs, PNGs, PSDs, GIFs, BMPs, and even RAW files as well.
Another benefit of GIMP is that it's supported by a ton of platforms, including Mac OS, Windows, Unix, and Linux, so no matter what type of machine you use, GIMP is likely an option for you.
It's open source as well, so you (and everyone else) can upgrade it as you see fit.
Best Feature: Robust tools nearly on par with Photoshop.
Learn More:
Google Photos
The beauty of the Google photo editor is that it's easily accessible if you have a Google account.
That means that any photos you have on the Google Cloud are right there available to be edited quickly and saved quickly right back onto the cloud.
It doesn't have the extensive tools of Photoshop or even GIMP, but you can add color filters, tilt and shift the image, edit colors and lighting, and crop images as well.
Another great feature is that Google Photos has face grouping technology, so all your photos of Aunt Barbara and Grandpa Steve are automatically grouped together for easy finding later on. Images can be grouped by places, subjects, and a variety of other terms as well.
What's more, Google Photos allows you to upload your images from an array of devices, and when you edit an image on any device, the edited version shows up on all connected devices.
Since it's web-based, you can edit on any device from anywhere, and you can even share your images with anyone, even if they don't have Google Photos themselves. There's even an in-app option to create and print a photo book!
Best Feature: Excellent organizational and sharing tools.
Learn More:
Pixlr
Like Google Photos, Pixlr exists online, which is great for photographers that don't want to be tied to a specific machine with the editing software installed on it.
Pixlr is also about as close as you can get to a Photoshop-looking layout, and even includes many of the same common keyboard shortcuts as Photoshop as well.
It offers selection tools, resizing, various photo filters and effects, text overlays, and layers as well, though if you work with too many layers, Pixlr sometimes encounters some difficulties.
Nevertheless, it's supported on Android and iOS devices so you can edit on your laptop, tablet, or phone. It supports various types of files as well, including JPEGs, PNGs, TIFFs, and BMPs, though RAW support is lacking.
Best Feature: Familiar layout and tools that are reminiscent of Photoshop.
Learn More:
SumoPaint
A lesser known web-based editor is SumoPaint, but it's still a highly effective tool for editing your photos.
It's got plenty of tools - brushes, text, symmetry tools, and gradients among them - that allow you to change the look of your image and add effects to it as well.
SumoPaint even has fun appliques like party hats and mustaches that you can add to portraits if you want to create something a little silly.
That makes it more of a fun, lightweight photo editor as opposed to a serious Photoshop killer, but when you just want to create something whimsical in a jiff, SumoPaint is a great choice.
And if you don't want to use the online version, you can also download SumoPaint to your machine.
Best Feature: A no-nonsense interface for easy editing.
Learn More:
Paint.NET
Paint.NET can't compete with Photoshop in the features department - it's pretty lightweight. However, that doesn't mean that it isn't a quality Photoshop alternative.
There's a ton of image filters in Paint.NET that allow you to customize the look and feel of your images.
You can batch edit photos to make quick work of your editing as well.
With layer support, you can make intricate changes to your images, and with a clone stamp option, you can quickly get rid of unsightly distractions in your photos.
Another great feature is that it's easy to learn how to use. Where other editors on this list are more along the lines of Photoshop in their complexity, Paint.NET is something that you can spend just a few minutes perusing, and you should have no problem becoming a master at using it.
It helps that the program is lightning fast as well, so you won't have nearly as many "spinning wheels of death" with Paint.NET as you might with other programs on our list.
Best Feature: Ease of use and fast speed.
Learn More:
Wrapping It Up

Though Photoshop and its cousin Lightroom are the premiere photo editing programs available today, they can be hard to learn and are pretty expensive, too.
That makes free Photoshop alternatives like those listed here all that more attractive, especially for amateur and enthusiast photographers that might not need all the bells and whistles of a full-blown image editing program.
Any of these options will suffice for basic editing. It's really just a matter of learning more about each one, spending a little time getting to know them, and selecting the program that works best for your specific needs.
Happy editing!
We Recommend
The Best Free Software Trials for Photographers
 Image Credit: Rawpixel via iStock
Like cameras, lenses, and other photography gear, the software that photographers need to process images isn't always cheap.
What's more, when you find a cheap suite of tools, it usually performs like a cheap suite of tools.
Every so often, though, you can find free software trials that give you access to extremely powerful photography tools, if even for just a week or month. But in that time, at least you can get a feel for the program and what it can do to help you create better images.
That, in turn, can help you make an informed decision about the software you need to buy.
With that in mind, here's 10 of the best free software trials for photographers for 2018.
Adobe Photoshop
 By Fred the Oyster [Public domain or CC BY-SA 4.0 (https://creativecommons.org/licenses/by-sa/4.0)], from Wikimedia Commons
Yep, the king of photography software offers a seven-day free trial.
And don't think that the free trial is some sort of limited experience, either...
You get access to every tool and every function of the latest version of Photoshop CC.
Even better, Adobe has made the process of converting the free trial into a full-blown Creative Cloud membership a breeze either during or after the trial period.
Get an Adobe Photoshop 7-Day Free Trial
Adobe Lightroom
 By Adobe Systems [Public domain], via Wikimedia Commons
Not to disappoint photographers that want to try Lightroom, Adobe also offers a free seven-day trial of that program as well.
Just like with Photoshop, the Lightroom trial gives you unfettered access to the complete and latest version of the software.
And, again, Adobe has made it easy to convert the free trial into a Creative Cloud membership during or after the trial.
What's more, if you decide to join Creative Cloud, you can get access to hundreds of Adobe videos on how to use Lightroom (and Photoshop, for that matter) for all skill levels of users. Nice!
Get an Adobe Lightroom 7-Day Free Trial
Kizoa

Kizoa is a movie-making software platform that's been around since 2007, and offers photographers a quick and easy way to create professional videos.
Given that video content is king these days, it makes sense to dip your toes into videography if you haven't already.
What's great about Kizoa is that unlike many other software platforms, you pay a one-time fee and you're a member for life.
In fact, not only does Kizoa offer a free-for-life plan to get you started, but they also have a free iOS app as well.
Then, when you decide to upgrade, plans start at just $29.99. Not bad!
HDRsoft Photomatix
Creating gorgeous, well-exposed images has never been so easy with HDRsoft Photomatix.
Photomatix Pro, for example, gives you both a standalone program and a plugin for Lightroom to maximize its functionality.
The program also offers a wide range of settings, including one-click presets and batch editing to make quick work of your HDR creations.
Better still, the free trial never expires, so if you're good with the Photomatix logo appearing on your final images, you never have to pony up any money.
There are also versions for real estate photography, Linux, a plugin for Aperture, and more!
Get an HDRsoft Lifetime Free Trial
Corel PaintShop Pro 2018
Yep, the photo editing choice of the 1990s is still going strong in 2018 with fresh updates and a 30-day free trial offer.
With tools that are similar to Photoshop, PaintShop Pro offers a good level of functionality for enhancing photos and completing graphic design work.
Perhaps even better, there's no subscriptions attached to the software, so it's a much more affordable option than the Creative Cloud memberships offered by Adobe.
Plus, you can really dive deep into PaintShop Pro 2018 with that massive 30-day free trial!
Get a Corel PaintShop Pro 2018 30-Day Free Trial
Corel Aftershot Pro 3 RAW Photo Editor
If you're looking for an editing suite to tackle RAW photo editing in large quantities, you might give Corel's Aftershot Pro 3 a look.
With all-new tools, image presets, and plugins, Aftershot Pro 3 is a powerful platform for extracting all the color, contrast, and drama that your RAW files hold.
And, like PaintShop Pro, there are no subscriptions to worry about.
Corel also claims that Aftershot Pro 3 is up to four times faster than Lightroom, so that in and of itself might be worth checking out the free 30-day trial!
Get a Corel Aftershot Pro 3 30-Day Free Trial
Luminar 2018

Skylum's Luminar 2018 is an award-winning editing suite for both PC and Mac.
Luminar offers an incredible array of tools, including 45 intelligent filters and 67 smart presets that help make editing photos a more streamlined and successful process.
And like Corel's products, you pay one time for access to Luminar and you're done - no ongoing memberships!
Luminar also works seamlessly with Lightroom and Photoshop, so you can easily switch between Adobe and Luminar for maximum photo-editing capabilities.
Get a Luminar 2018 14-Day Free Trial
Pixlr Pro
What sets Pixlr apart from other editing tools is that it's web-based.
And don't think that because it's web-based that it skimps on the suite of available tools and features...
Instead, Pixlr Pro offers tons of fonts, ready-to-use templates, and over 1 million stock photos, too, which you can browse during a seven-day free trial.
You can use layers, masks, brushes, curves, levels, and most of the other popular tools from the likes of Photoshop and Lightroom as well.
There is a free photo editor called Pixlr Editor, so if all you need is light editing tools, that's a great alternative (if you don't mind seeing ads as you work).
Get a Pixlr Pro 7-Day Free Trial
Affinity Photo
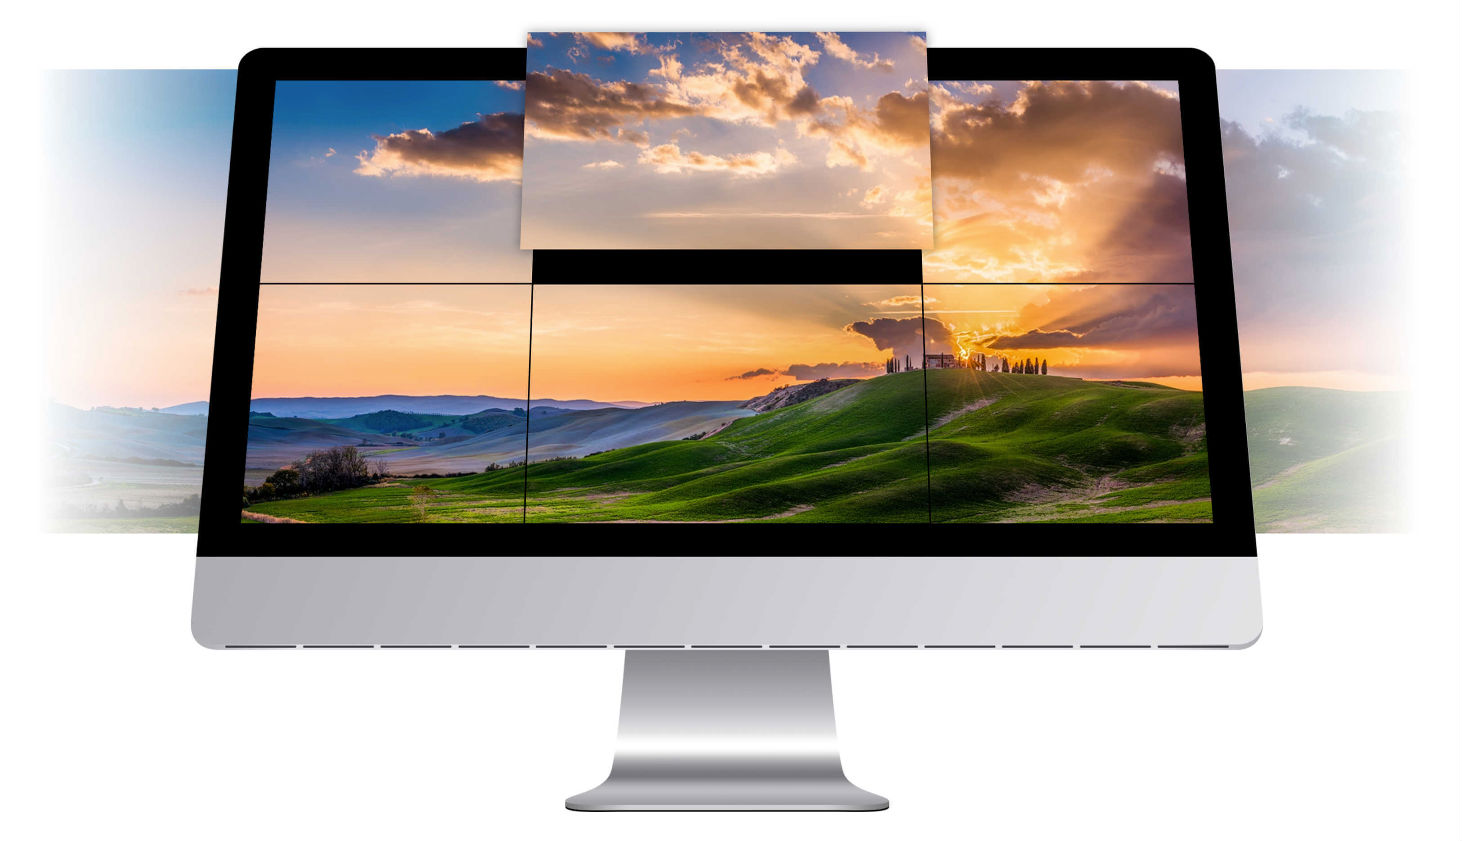
Hailed as a professional photo-editing suite, Affinity Photo might not get all the love that Photoshop and Lightroom enjoy, but it offers plenty of oomph for editing photos nonetheless.
In addition to having RAW editing capabilities and easy HDR tools, Affinity Photo also offers focus stacking, the ability to create panoramas, batch processing, .PSD processing, and even 360-degree photo editing.
You can clone, dodge, burn, liquefy, make lens corrections, and much, much more.
The 10-day free trial will give you plenty of time to explore all these tools, and more!
Get an Affinity Photo 10-Day Free Trial
ON1 Effects 2018

Yet another worthy free photography software trial is the 30-day freebie offered by ON1 for their Effects 2018 software.
ON1 Effects 2018 includes hundreds of tools, including presets and filters, textures, and borders that help you fine-tune your images to create the final product you want.
You can create HDR images, convert color images to black and white, crop, straighten, reduce noise, and more.
If you like Effects 2018 and buy the complete version, you'll get access to training videos, online classes, and top-notch customer service, too.
Get an ON1 Effects 2018 30-Day Free Trial
We Recommend
The Best Lightroom Tools for Creating Amazing Sunset Photos
If you’ve got Lightroom, you know it’s packed full of features that allow you to make some truly incredible changes to your photos. You also know that the sheer number of tools, presets, and functions can be a little overwhelming, particularly if you’re new to using the program.
When it comes to sunset photos, there are lots of edits you can make to increase their visual appeal and impact. In the video below, YuriFineart zeroes in on his favorite techniques for making a ho-hum sunset photo something that’s truly spectacular. It’s a workflow that you can easily replicate! Watch as he provides an overview of some of the most essential tools and demonstrates the many different adjustments you can make to create a photo that leaves viewers exclaiming “Wow!”
Amazon Recommendations
- Adobe Creative Cloud Photography Plan
- Adobe Photoshop CC Classroom in a Book
- 8 Types Of Natural Light That Will Add Drama To Your Photographs
We Recommend
This Incredible Technique Allows You to Add Dynamic Skies to Long Exposures

If you’ve mastered the art of taking long exposure photos (or even if you haven’t), the video below is well worth a watch.
Sometimes you find a scene that makes for a great long exposure subject, but perhaps you’re there at a time when the skies are uninteresting. But Serge Ramelli has a detailed method for adding amazing skies to give the scene a visual boost.
In his tutorial you YouTube, Ramelli gives step-by-step instructions that are easy to follow and which help you create a truly stunning image. Have a look at the video below and learn how to take your long exposure photos to the next level using simple tricks in Lightroom!

Amazon Recommendations
- Adobe Photoshop Lightroom 6
- The Adobe Photoshop Lightroom CC Book for Digital Photographers (Voices That Matter)
- Time Lapse Photography, Long Exposure & Other Tricks of Time: From Snapshots to Great Shots
We Recommend
Top 10 Gifts for Photographers Under $150

Believe it or not, the Holdays are almost upon us! Since it's never too early to start shopping for your favorite photographer-type people, we're helping get you off to an early start. As always, we've listend to our members and followed the buying trends to bring you our lists of gifts sure to please any photography or cinematography buffs on your list. Here's the first for this year, with ten great gift ideas under $150.00. Happy shopping!
1. Syrp Variable ND Filter

A Neutral Density (ND) filter is one of the most creative tools you can give a photographer or cinematographer. It enables creative effects by allowing wider apertures and/or slower shutter speeds in bright lighting conditions. The most well-known examples are probably those dreamy, foggy effects created by moving water in stills and elimination of “roll” in videos. This rugged, variable version eliminates the need to carry several ND filters by allowing from 1 to 8.5 stops of exposure reduction with one filter!
2. Datacolor® Spyder®LENSCAL

SpyderLENSCAL provides a fast, reliable method of measuring the focus performance on your camera and lens combinations. It allows photographers to obtain razor-sharp focusing or check to see that their lenses are working at their peak performance.
3. WoodSnap

Imagine your favorite photographer's work printed directly on wood! Give him or her a vibrant, 16” x 20” wood print, complete with mounting slots and ready to grace his, her (or your) wall! Each genuine wood print is completely unique. Upload a photo from Facebook, Instagram or your computer, or email it in to get started.
4. Spider Holster

Conventional camera straps are clumsy, hard on your neck and shoulders and not the fastest way to access your DSLR. The Single Camera System from Spider Pro transfers the weight to your hips and allows an incredibly quick draw of a full-size DSLR with lens when that killer shot comes up. It's revolutionary, rugged and perfect for active photographers.
5. Perfectly Clear

Perfectly Clear Complete for Photoshop and Lightroom offers incredibly effective, one-click enhancement of images. You can use the 40 built-in presets or easily create your own with precise control. With this bundle, you'll get complete control over exposure, contrast, noise reduction, and color. Portrait photographers can also quickly enhance the eyes, skin, face, teeth and much more in one easy-to-use package.
6.Wolverine F2D Mighty

Most photograhers have stacks of negatives and slides just begging to be converted to digital images, and who doesn't have a bunch of old home movies to digitize? The Wolverine Digital Converter makes it easy to create high-resoultion (up to 20MP) digital files from film and positive transparencies. Give the gift of preserved memories.
7. Promaster Multi-Function IR Timer Remote/Intervalometer

Time-lapse sequences are among the most fun and rewarding things you can do with your DSLR. With this intervalometer, you can control your sequences remotely on most brand-name DSLRs and for those that don't have IR sensors, you can add an optional cable to use it wired. Of course, it also works as a standard remote shutter release with a little extra control, like controlling the number of exposures in continuous mode, all from up to 30 feet away.
8. Sirui T-004X Aluminum Tripod with C-10S Ball Head

This aluminum travel tripod from Sirui is compact and weighs in at just 2 pounds. Its legs reverse fold, so its closed size is just 15.7 inches. The adjustable center column can be replaced with the short center column for low angle shooting and three leg angle settings let you keep shooting on uneven terrain. Despite its small size, it can support up to 13.2 pounds and has a maximum height of 58 inches. The tripod even comes with a ball head with safety-lock Arca-type compatible clamp with quick release plate.
Learn more about the Sirui T-004X Aluminum Tripod with C-10S Ball Head.
9. Aquapac SLR Camera Case with Hard Lens

How awesome would it be to shoot underwater with your DSLR? The Aquapac can make that happen! Not only is it guaranteed to let you shoot under up to 15 feet of water, it will float if you drop your camera overboard, and doubles as a protective “rain suit” to keep out moisture, sand and other contaminants. It also comes with an adjustable neck cord and moisture-detecting desiccant packets. Open up a whole world of new possibilities with this gift.
Glide Gear DEV 235 Camera Track Slider 23.5"

One of the coolest things you can do with videos and time-lapse sequences is to add smooth, controlled camera motion. This simple slider enables that without a lot of expense, but without sacrificing quality. It mounts to a tripod or can be set up on almost any surface with the adjustable legs and rubber ball feet. It accepts almost any digital camera, camcorder or video camera, so there's no need to worry about what your favorite photographer shoots with!
We Recommend
Use These Photoshop Hacks to Create Better Photos

photo byandresr via iStock
Melbourne photographer and filmmaker Tom Noske recently did a video for Canon Australia outlining his best Photoshop hacks. You can view this video below.
It’s legitimately one of the best Photoshop tutorials I’ve ever watched and after seeing it, I knew I had to write an article here for all of you so that you can try out these Photoshop hacks for yourself. The reason why it was so good is that every tip he gives is incredibly simple, so even photographers who have never used Photoshop before can give them a try.
I hope that you get as much out of this video as I did. Let’s get started.
Composition Hacking
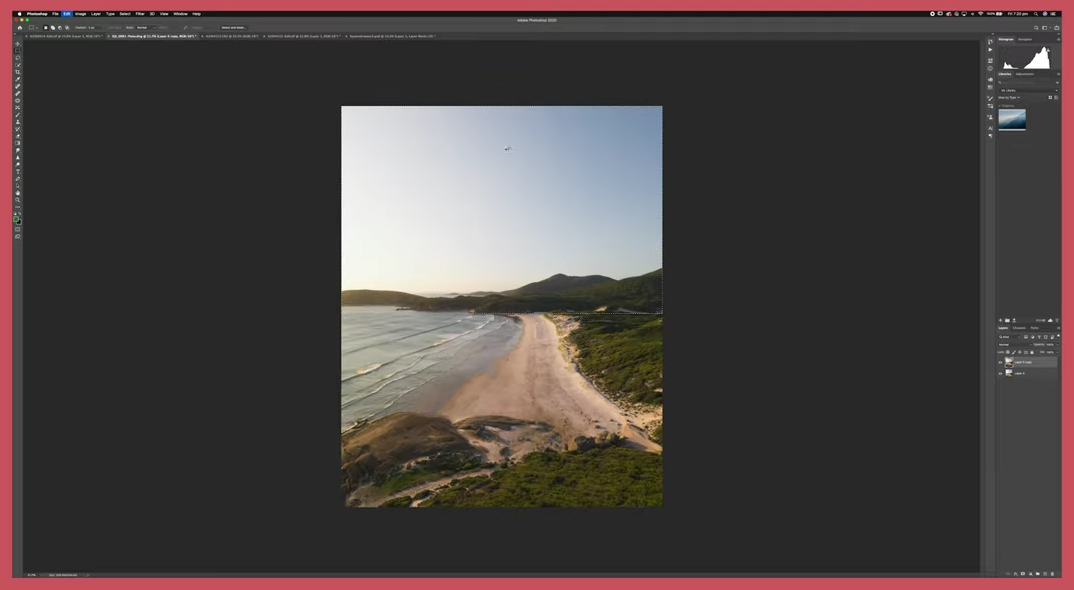
The original image before composition hacking.
Noske is a freelance photographer/videographer and he specializes in adventure photography, which means that there are a ton of moments where he has just seconds to get the picture of a lifetime.
The example he used was when he took a hot air balloon ride over the sand dunes in Dubai. Some of the images he captured didn’t feel as magnificent as the sand dunes themselves were. While camera technology has come a long way, there are definitely moments that cameras still aren’t able to fully capture.
In moments like these, Noske uses something he calls composition hacking.
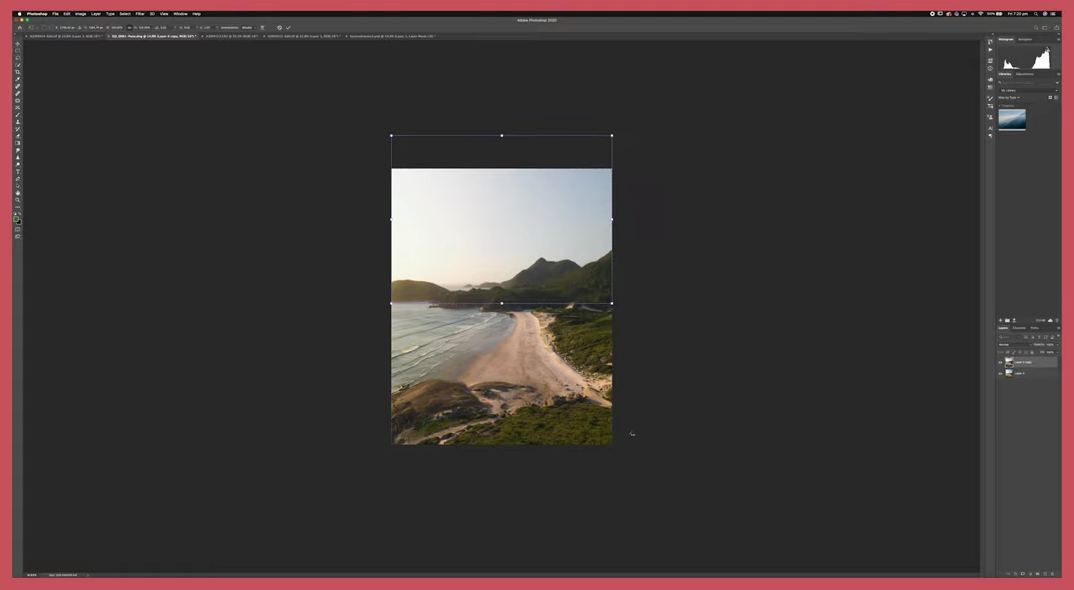
The same image after composition hacking. Notice how the mountains are now more pronounced in the shot.
Composition hacking is one of the easier Photoshop hacks on this list. After placing your image in Photoshop, you’ll select the marquee tool before choosing the part of your image that you would want to emphasize.
Before writing this article I actually tried out all of these Photoshop tricks for myself. For my composition hack, I took a photo of the Ko’olau mountain range on Oahu. I wanted to emphasize the mountains, which never quite translate all of their beauty to the camera.
After picking this part of your shot, hit Command C, hold Shift, and then use your mouse to stretch your image. That’s it!
Learn More:
Gradient Tool
The original image before using the gradient tool to replace the sky.
If you’ve worked with Photoshop for any extended amount of time, then you’ve surely used the gradient tool before and you may be wondering why this is showing up on this list of photo editing hacks...
Here’s why. It has a hidden use. Noske defined it as the “one click sky replacement tool.” If you have a wonderful image of a landscape, but you feel the shot of the sky really doesn’t do it justice, you can use the gradient tool to enhance the sky portion of your image with another image you’ve taken where the sky was much prettier.
The same image after using the gradient tool.
If you’ve seen somebody doing a Photoshop hacks video before where their sky replacement went horribly, this is pretty much the exact opposite of that. I think that Noske’s Photoshop tips and tricks always lead to gorgeous, realistic photos because wherever possible he doesn’t paint in his images, but rather replaces portions of them with better ones.
So, for this trick, you’ll get the good sky image and put it on a layer below the image that you’re working on. Then, add a layer mask to your image. Select the gradient tool, hold Shift, and drag all the way from the top of your image down to the horizon.
The best Photoshop hacks are the ones that seem too simple to be true, and you really have to watch Noske’s video to see just how pretty the images he creates with this trick turn out.
Selective Color
The original image before using selective color.
You can’t create a Photoshop tips video without talking about color adjustment...
Noske’s third and final Photoshop hack is for photographers who want to slightly adjust the color in their images.
In order to use this hack, you should go to your adjustment layers and click selective color. Then a slider will pop up featuring all of your basic colors. You can then choose which color you would like to change and play with the slider to figure out what your image would look like.
The same image after using selective color.
Noske says that he uses the selective color tool for all of his portraits, because you can also select your subject with your brush, which prevents them from being affected by the changes you’re making with the selective color tool.
Now, Noske’s Photoshop hacks 2020 video was short and sweet, which means you have absolutely no excuse for not trying them on some of your old images right now. Good luck and let us know how it goes!
Learn More:
- These Landscape Photography Editing Tips Will Take Your Photos to the Next Level
- How to Recapture Details in Blown-Out Highlights
We Recommend
What is Chromatic Aberration? (And How to Fix It in Photoshop or Lightroom)
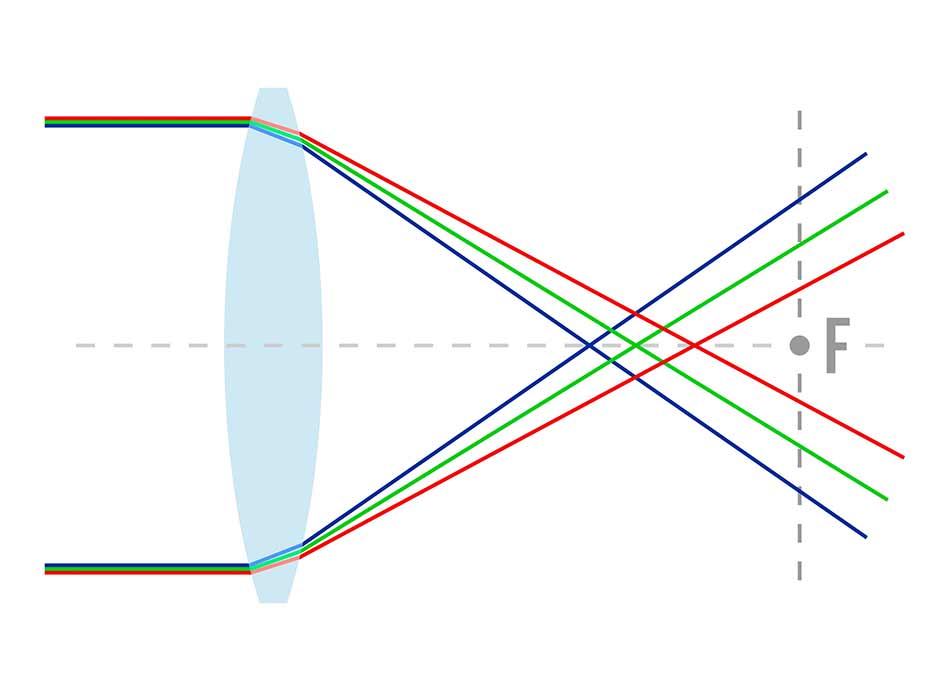 Image Credit: Barbulat via iStock
Chromatic Aberration
Chromatic aberration is a common problem in photography, yet many photographers aren't quite sure what it is, let alone how to fix it.
In this tutorial, you'll not only learn what chromatic aberration is but also the different types, how it impacts how your images look, and how to make corrections in Photoshop or Lightroom such that your final images are clear and crisp without ugly artifacts.
Let's get started!
What IS Chromatic Aberration?
Known as color fringing or purple fringing, chromatic aberration is an optical issue that happens when one of two things happen.
First, it occurs when a lens cannot focus all the wavelengths of color onto the same plane. Second, the problem can also occur when wavelengths of color focus on different areas of the focal plane.
 YouTube Screenshot/Pixel Prophecy
In the image above, you can see how pronounced this fringing can be.
Fringing typically occurs most often in high contrast images and appears as green, blue, red, purple, magenta, or yellow artifacts around the edges of objects in the photo.
This phenomenon is caused by lens dispersion, which occurs as different colors travel at varying speeds through your camera's lens.
For a complete introduction to chromatic aberration - including a discussion of why it's important to know what it is and how it impacts your images - have a look at the video above by Pixel Prophecy.
Types of Chromatic Aberration
 Image Credit: Stan Zurek [GFDL (http://www.gnu.org/copyleft/fdl.html), CC-BY-SA-3.0 (http://creativecommons.org/licenses/by-sa/3.0/) or CC BY-SA 2.5 (https://creativecommons.org/licenses/by-sa/2.5)], from Wikimedia Commons
There are two types of chromatic aberration: axial and transverse.
Axial aberrations, or longitudinal chromatic aberrations, occur when various wavelengths of light are focused at various distances from the lens, a process called focus shift. This type of aberration occurs most often when using longer focal lengths.
The result of axial aberrations is blurred colors both in front of and behind the focus point. It is most noticeable on the edges of very bright areas of an image.
Transverse aberrations, also known as lateral chromatic aberrations, happen when wavelengths of light are focused at varying spots along the focal plane. This is caused by the magnification of the lens as well as the distortion of the lens which both vary with wavelength. This type of aberration is more pronounced when using short focal lengths and appears as color fringing.
The image above shows an image taken with a high-quality lens with no chromatic aberration and a low-quality lens (bottom) that displays significant transverse aberrations.
Learn More:
How Do I Reduce Chromatic Aberration?
Fortunately, even though chromatic aberration is extremely ugly, there are things you can do to correct it in Photoshop.
In the video above, Jimmy McIntyre outlines five different ways to fix chromatic aberrations in Photoshop. These include using:
- Adobe Camera RAW or Lightroom Lens Corrections to reduce chromatic aberration
- Gaussian Blur and Color Blend Mode
- Clone Color
- Lens Corrections Filter
- Desaturation
Each of these techniques is really simple to implement and takes next to no time as well!
Learn More:
How to Remove Chromatic Aberration in Lightroom
If you primarily use Lightroom, fixing chromatic aberration is done easily as well.
In the video above, Phillip Haumesser Photography offers a detailed overview of the process.
As you can see, it only takes a couple of minutes to clean up the image and remove the color fringing.
I think you'll agree that the final result is a vast improvement!
The fact that it's so easy to reduce chromatic aberrations is a good thing, given that most lenses - even high-dollar ones with special extra-low dispersion elements designed to reduce aberrations - still have some fringing.
Luckily, with these tips, you can clean up your images and get rid of fringing in just a matter of minutes!