2019 Star Tracker Buying Guide
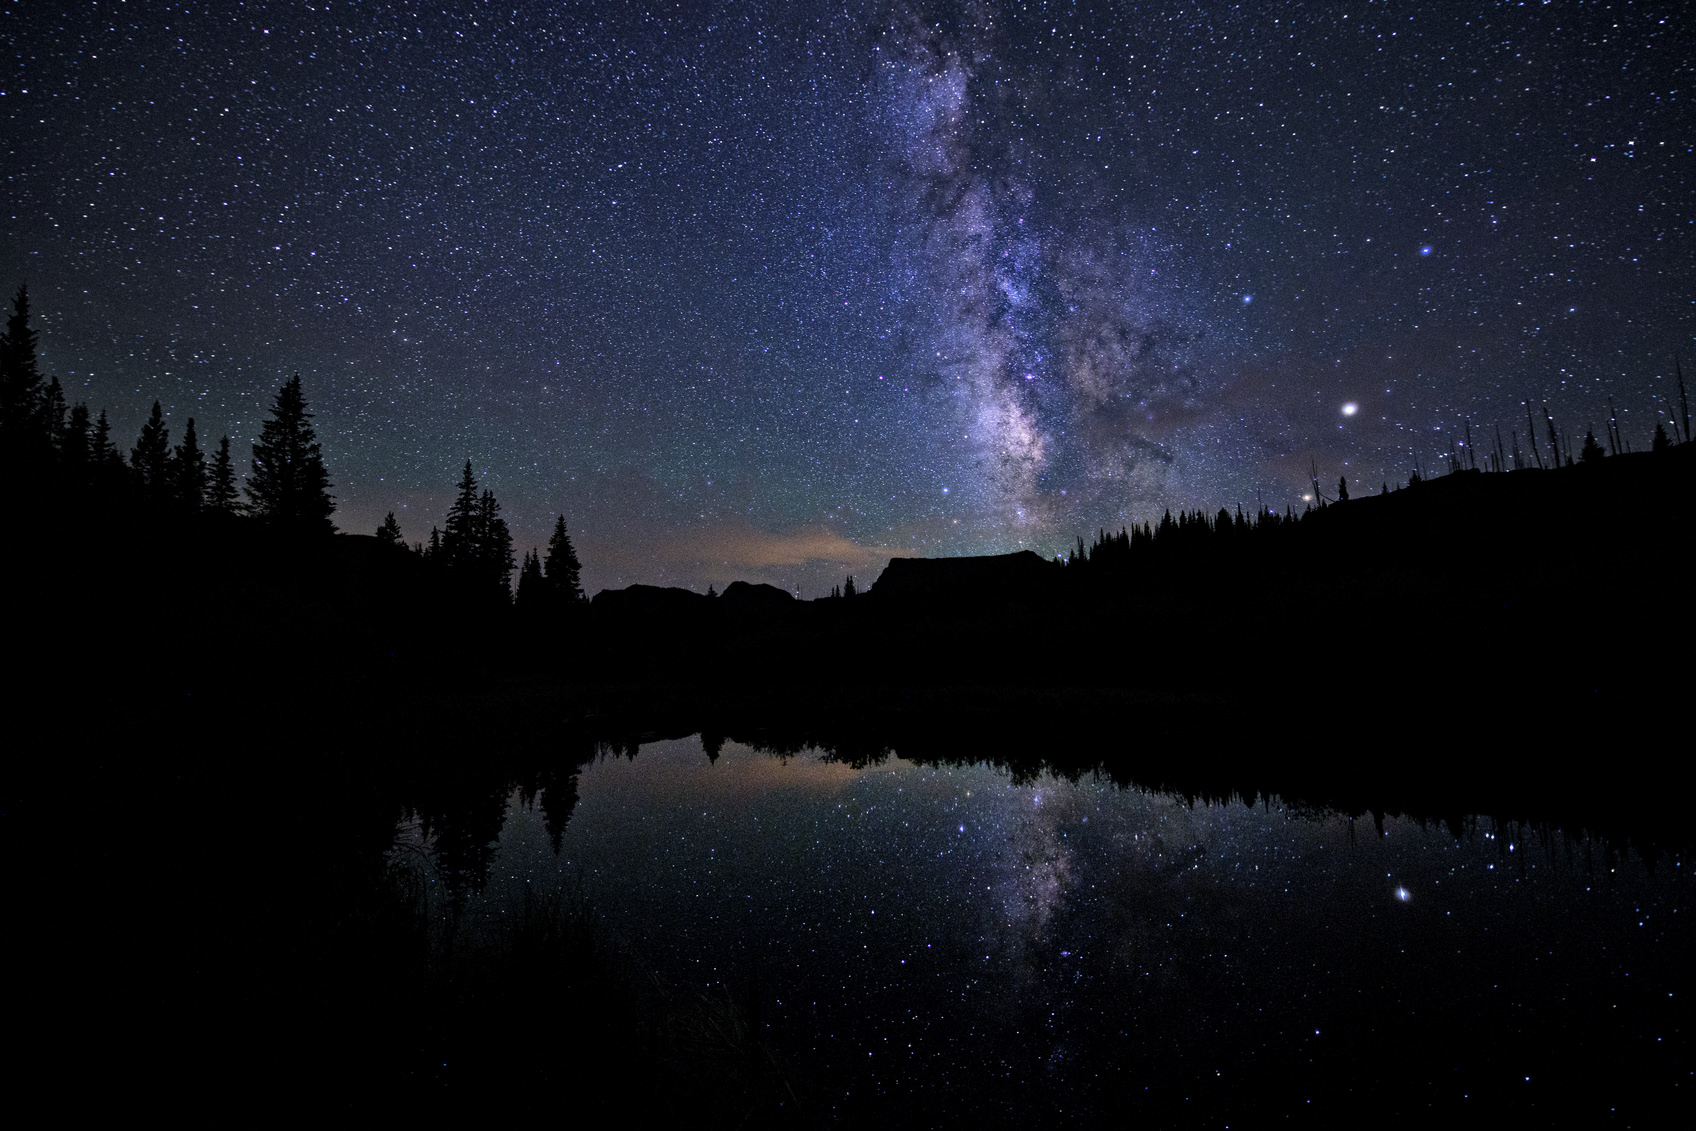
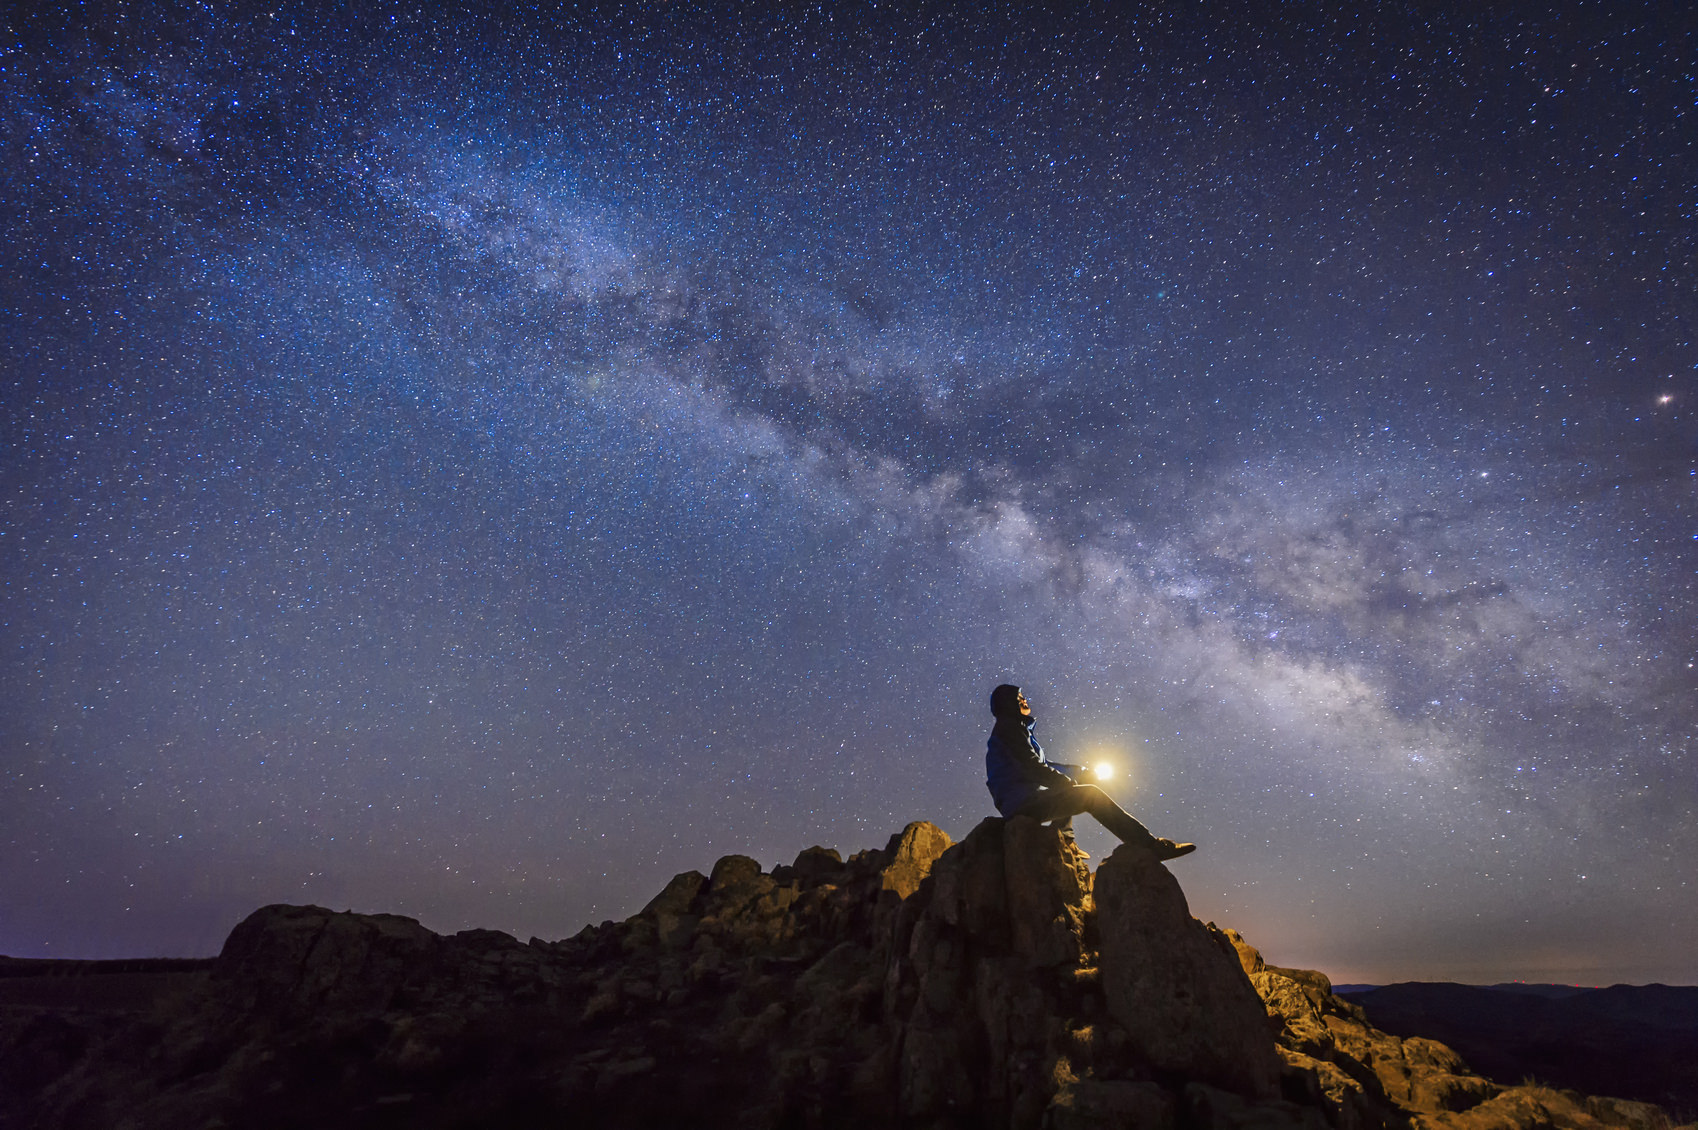
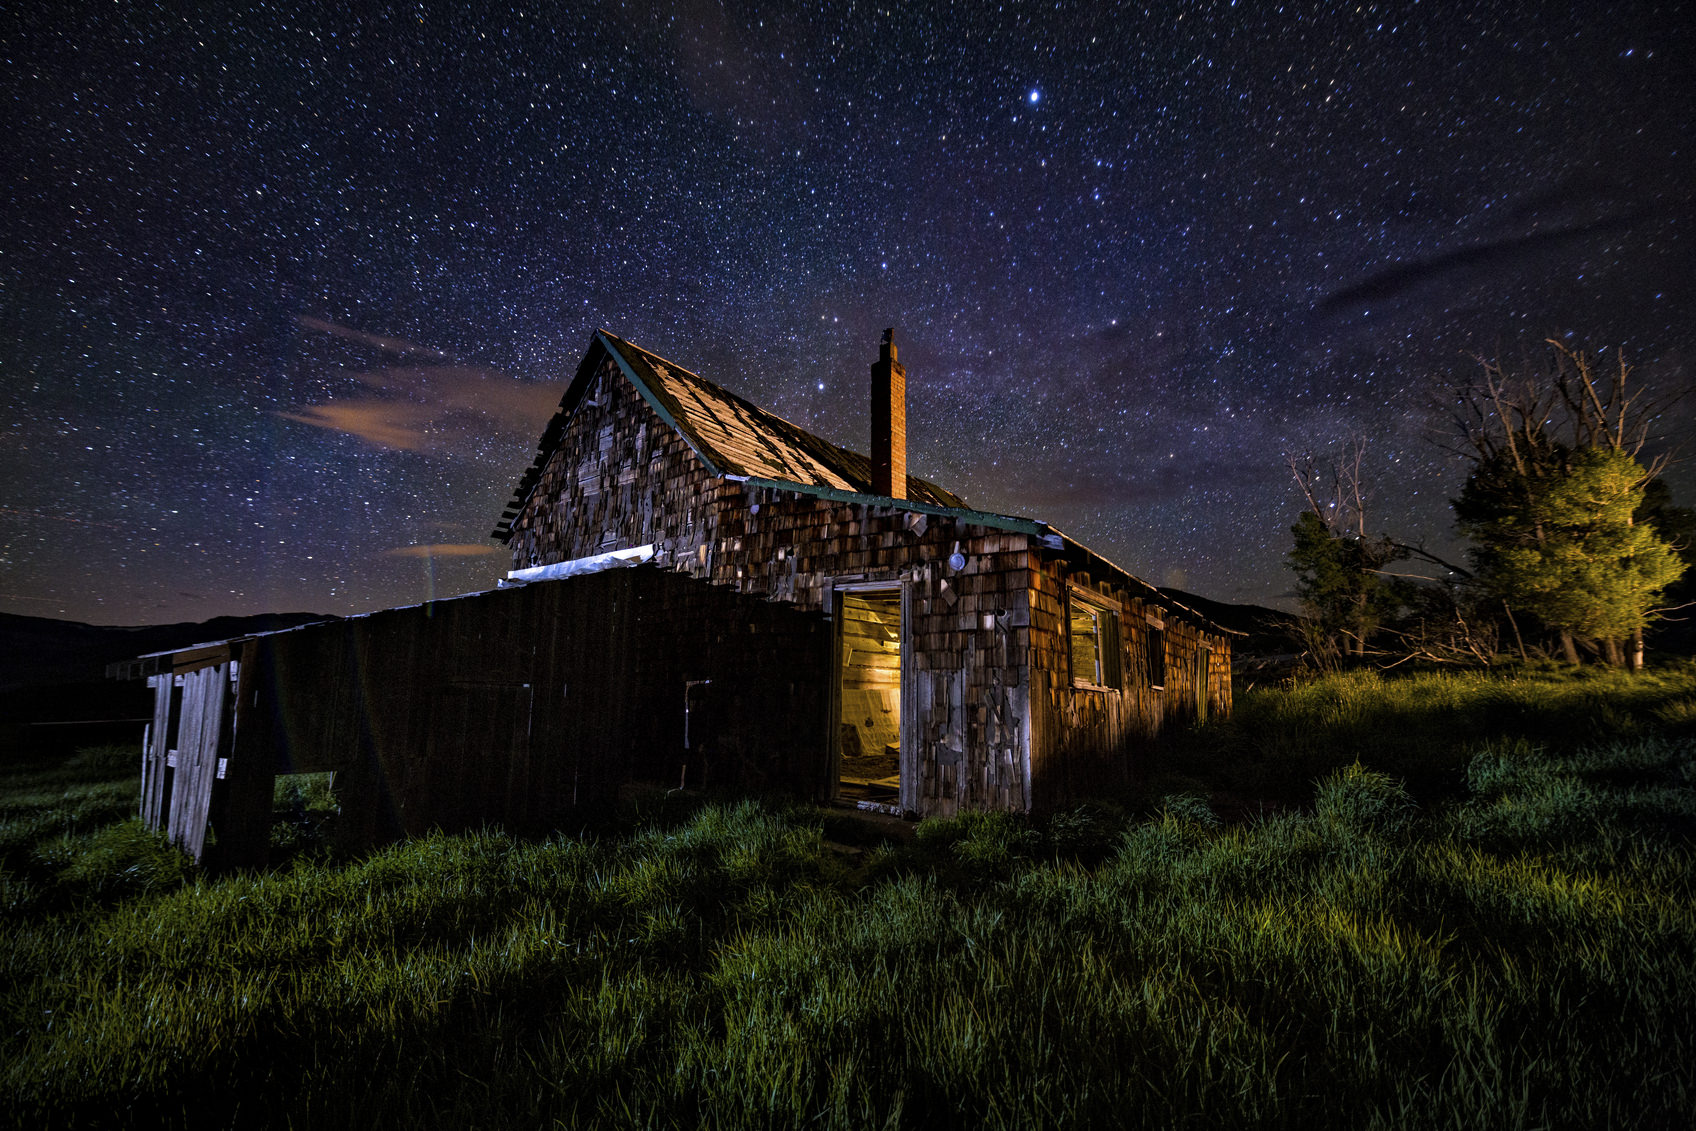
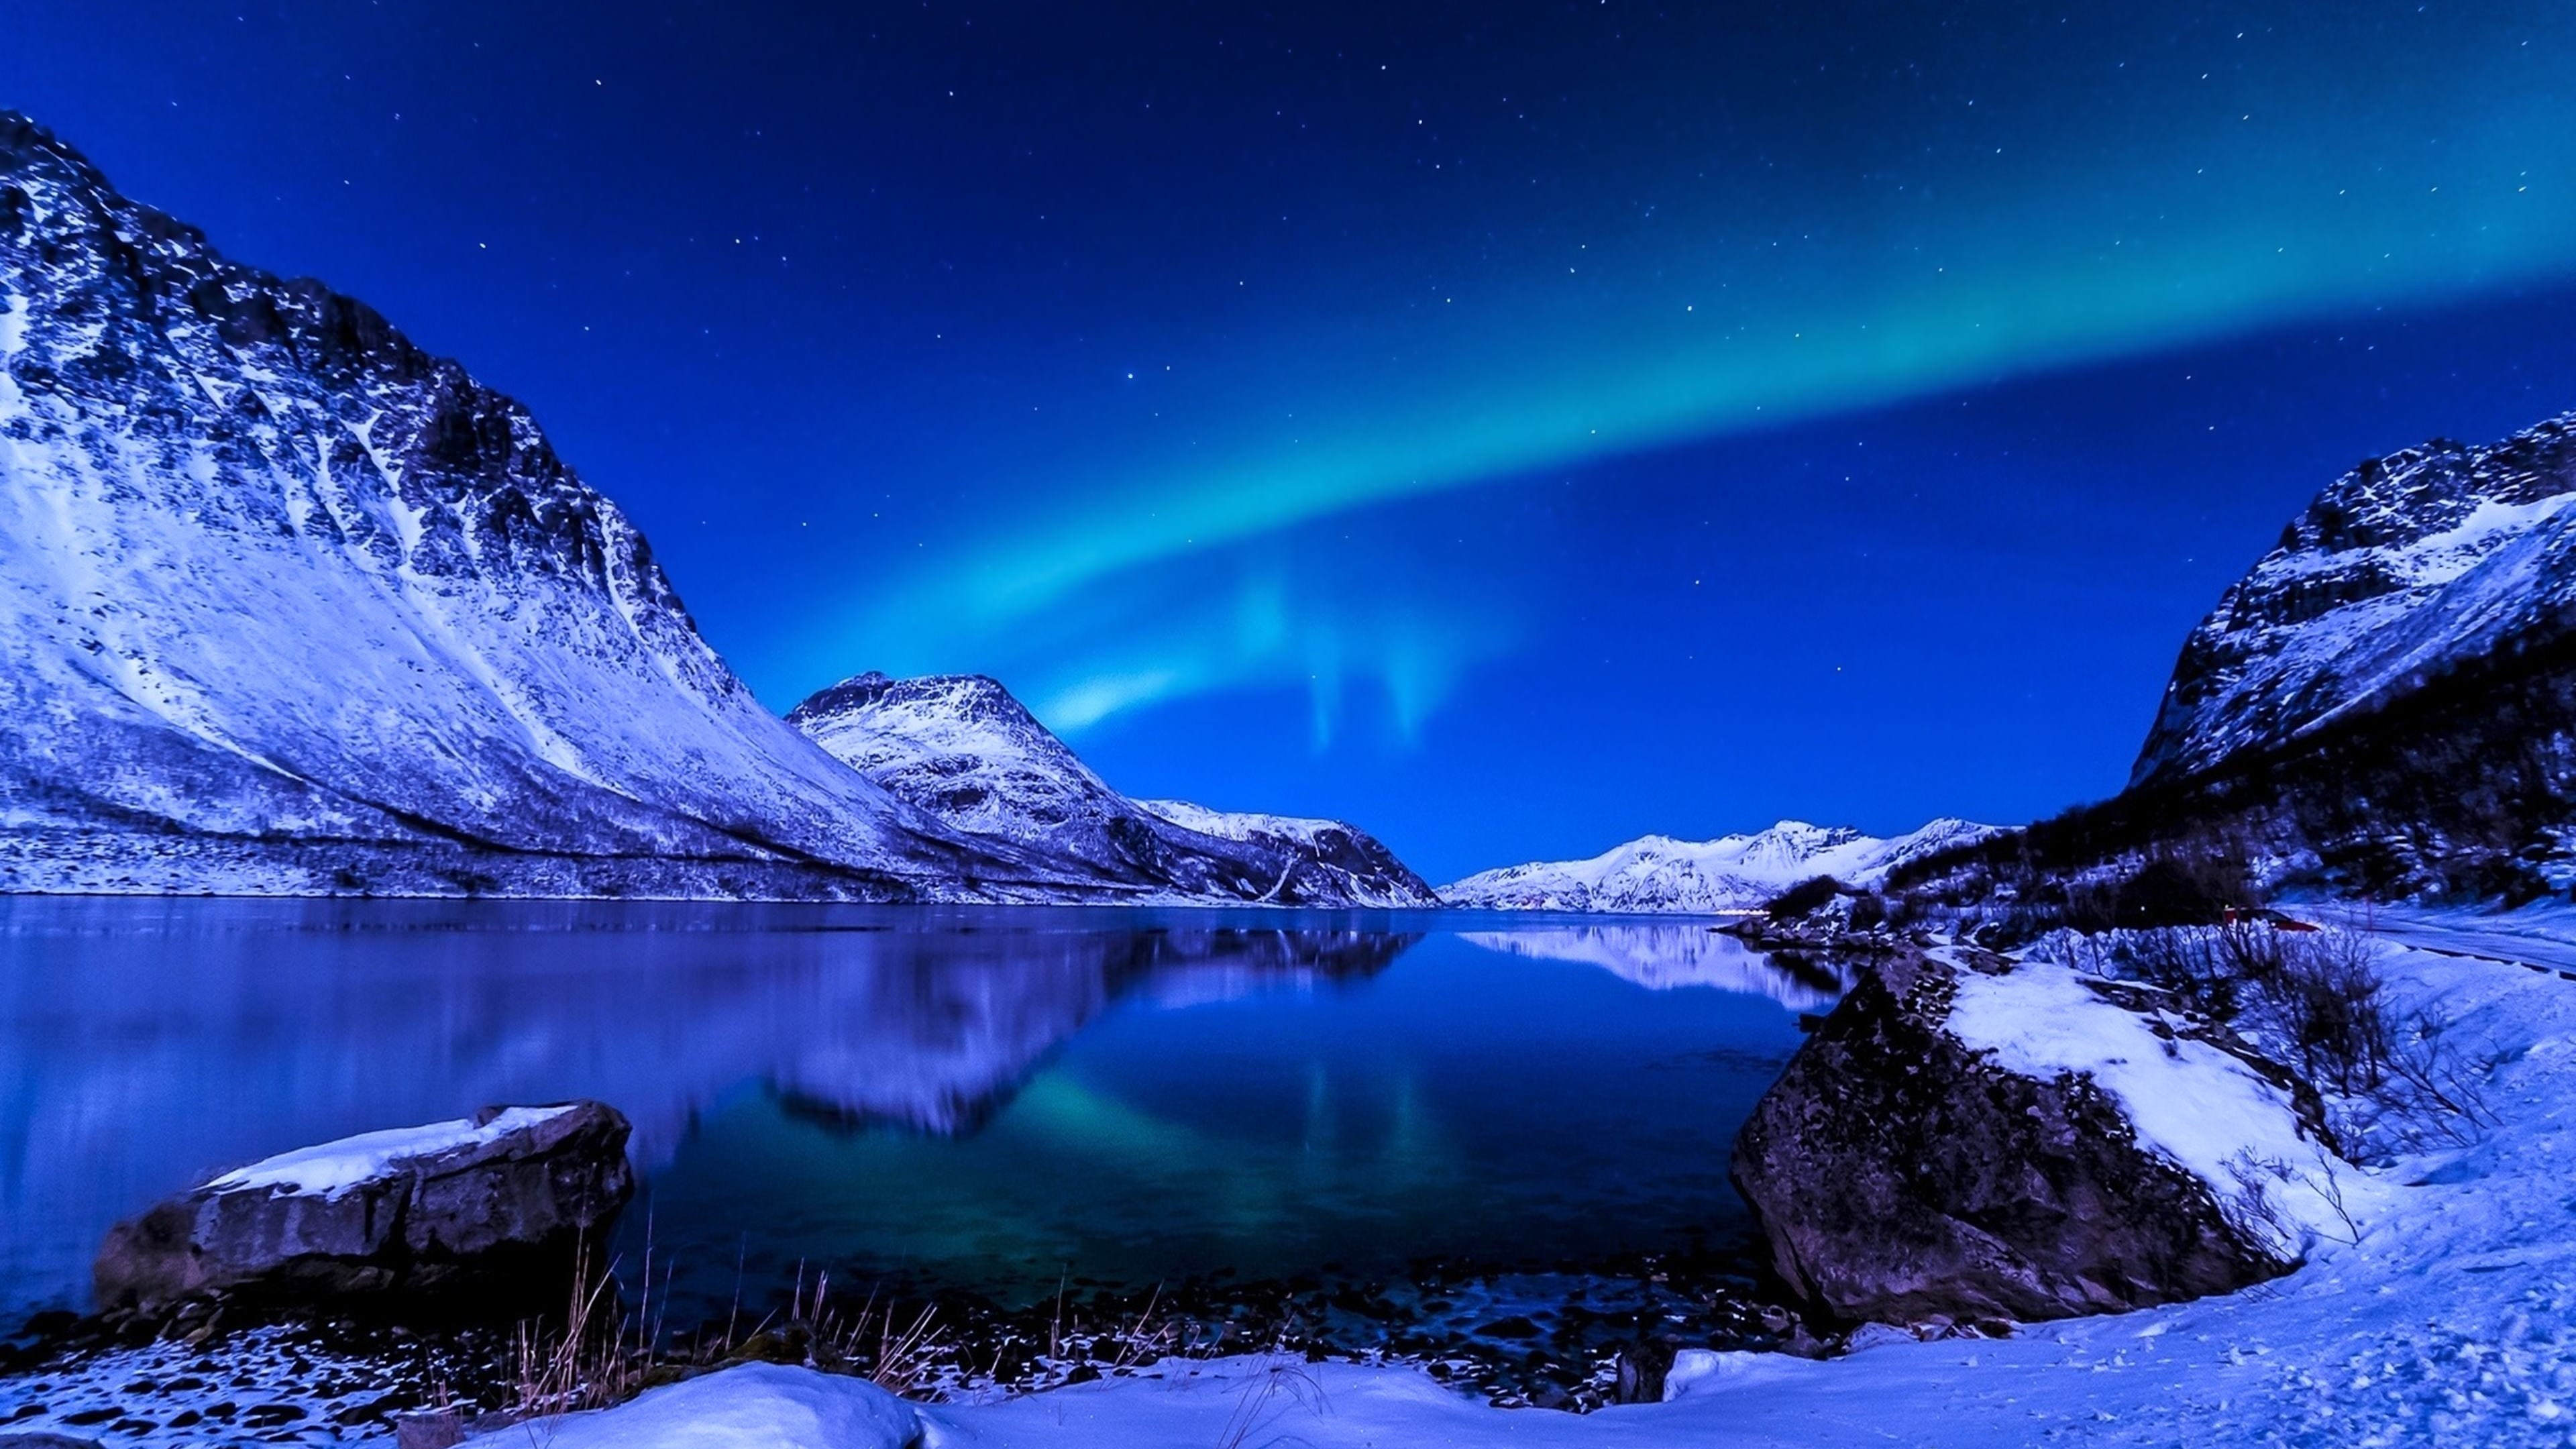
![]() photo by KiskaMedia via iStock
photo by KiskaMedia via iStock
What's so great about taking on astrophotography these days is that there is no lack of selection when it comes to star trackers.
The benefit of having a star tracker is that you can take night sky photos without worry of star trails. Instead, since the tracker, well, tracks the stars, you can get clear, pinpoint photos of stars and the night sky.
Of course with such a wide selection of star trackers, it can be tough to know which one is best for you.
That's where this 2019 star tracker buying guide comes in...
Below, I overview a variety of star trackers and explore their pros and cons so you can make a more informed decision.
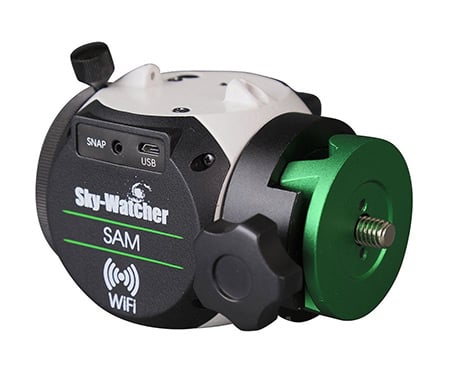
2019 Star Tracker Buying Guide: Sky-Watcher Star Adventurer
![]()
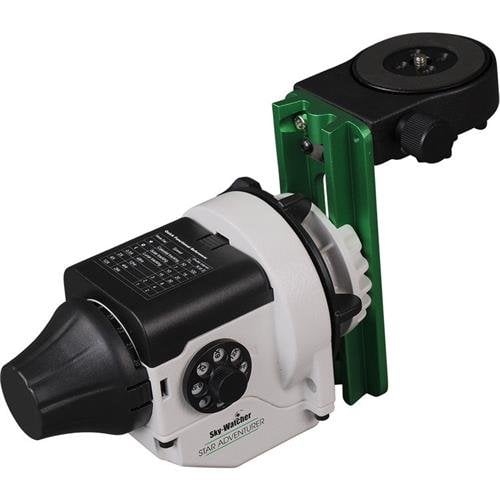
What makes the Sky-Watcher Star Adventurer a top choice for astrophotography is its robust payload.
This rig can accommodate up to 11 pounds of gear and has a clutch mechanism to lock it in place, so it's an ideal star tracker for DSLR setups with a long lens.
The Star Adventurer has an Alt-Az base, which makes polar alignment easy (and fast!) thanks to the separate azimuth adjustment and altitude adjustment knobs. There's also a built-in polar scope that makes polar alignment a breeze.
![]()
You can undertake various types of tracking with the Star Adventurer as well - solar, lunar, and sidereal - each of which has automatic DSLR shutter release control. You can even make time-lapse videos if you so choose.
The Star Adventurer has a rotary dial on the body that allows you to select the tracking speed. Likewise, its basic shooting speeds are easy to set up and literally takes just a few moments to dial in.
![]()
The unit has RA slew buttons and a hemisphere switch, too. The result of all this is ease of use that's off the charts. You can have the Star Adventurer set up and dialed in in a matter of moments.
It's worth noting that getting the Star Adventurer set up for time-lapses is a more involved process, but it's not complicated at all - just a bit more time-consuming.
![]()
What many Star Adventurer users also appreciate is the build of the Star Adventurer.
It weighs in at 3.63 pounds (with a declination bracket attached) and when you hold it in your hands, you get a sense that it's built like a tank. This heavy-duty construction is obviously a benefit given that it'll be toted around and subjected to cold nighttime temperatures.
Yet despite its rather bulky weight, the Star Adventurer is small and extremely portable. You can carry it in virtually any camera bag without feeling like you're loaded down with gear.
The fact that the Star Adventurer uses just four AA batteries for power (which gets you approximately 72 hours of runtime) means you don't have to carry a bunch of heavy batteries around, either. And if you have a power source closeby, you can power the unit via mini-USB.
Best Features: Big payload, excellent battery life
Best For: Experienced astrophotographers with DSLR and long lens
Sky-Watcher Star Adventurer Price
- Sky-Watcher Star Adventurer Photo Package: $259.00 at Adorama
- Sky-Watcher Star Adventurer Astro Package: $269.00 at Adorama
- Sky-Watcher Star Adventurer Pro Package: $369.00 at Adorama
Learn More:
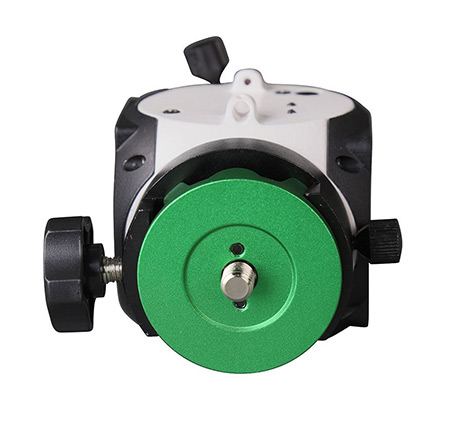
2019 Star Tracker Buying Guide: Sky-Watcher Star Adventurer Mini
If you don't need the payload capacity of the original Star Adventurer, you might consider the Star Adventurer Mini as an ideal solution.
Designed for smaller camera setups like APS-C and mirrorless bodies paired with a short lens, this Star Adventurer Mini can accommodate a payload of up to 6.6 pounds.
Given the smaller payload, the Star Adventurer Mini does not have a clutch system like its big brother. However, it does have an easy-to-use dual-screw system that gives you the friction you need to keep the camera secure and prevent the mount from rotating.

Like the original Star Adventurer, the Mini uses AA batteries for power (just two, though). That's enough juice to give you 24 hours of operation. You can also power it via a micro-USB cable for ease of use.
Speaking of easy, the Star Adventurer Mini was designed to be simple so even novices can get it set up in short order.
There is one button to turn the Mini on and off. When powered up, it uses Wi-Fi to connect to your smartphone where you can use the star tracker app (Android and iOS) to dial in settings and control the unit.
The star tracker app has tons of features that make creating astro photos a breeze.
You can control basic functions for star tracking, like the tracking speed and adjusting the hemisphere.
There is also a built-in polar finder, which is handy because the Mini does not have a built-in polar scope. Instead, you have to install it each time you shoot. There is a built-in intervalometer in the app so you can easily create time-lapses too.

In fact, the Star Adventurer Mini's app has multiple time-lapse modes built right in:
- Astro time-lapse, which tracks stars for the duration of the exposure and then repositions back to the start and repeats the process
- Regular time-lapse, which can be used to add a panning motion to daytime time-lapses
- Long exposure time-lapse, which can be used during the day (with ND filters) or at night. The Mini stays put during the duration of the exposure, and then pans to take another exposure.
Best Features: Ease of use, star tracker app
Best For: New astrophotographers with a lightweight camera setup
Sky-Watcher Star Adventurer Mini Price
- Sky-Watcher Star Adventurer Mini: $249.00 at Adorama
- Sky-Watcher Star Adventurer Mini Pro Package: $349.00 at Adorama
2019 Star Tracker Buying Guide: iOptron SkyGuider Pro
![]()
The iOptron SkyGuider Pro is a close competitor with the aforementioned Sky-Watcher Star Adventurer.
It has a payload of 11 pounds, just like the Star Adventurer, so it's another top choice for astrophotographers that have a bigger camera setup with long lenses.
The included dec mounting bracket offers stability for bigger cameras and lenses or even a small telescope if need be.
Yet, despite the big payload, the SkyGuider Pro is a compact unit that can fit in your hand. That makes transport and set up an easy task - just what you want when time is of the essence!
![]()
The SkyGuider Pro gets high marks for its silent tracking, precise controls, and a built-in rechargeable battery that gives you up to 20 hours of operation time (you can also power the unit via USB).
The built-in polar scope makes alignment an easy task, and it has a fine-engraved reticle with adjustable illumination so you can tailor its brightness to your liking.
What's more, iOptron has a companion app for iOS that makes for quick and accurate polar alignment.
![]()
When it comes to tracking the stars, you can choose from four different options: sidereal, solar, lunar, and 1/2X.
Each of these tracking options works in both the northern and southern hemispheres, and with a quick slew mode with forward and reverse options, you can quickly reframe the image without the need for changing the camera's position.
Speaking of positioning, the SkyGuider Pro has a removable alt-azimuth base that has degree markings for altitude, a built-in post for the azimuth control, and a bubble level, so you're sure to get the positioning of the camera just right.
![]()
As expected with bigger star tracker, the SkyGuider Pro is built to withstand some use and abuse.
All the mechanical components are metal for durability and the alt-azimuth bath is detachable for easier transport.
But don't think that because it's a heavy-duty mount that it's clunky or clumsy. This unit gets high marks from users for being incredibly easy to set up and use.
Best Features: Easy setup, excellent polar scope
Best For: Experienced astrophotographers
iOptron SkyGuider Pro Price
- iOptron SkyGuider Pro: $428.00 at Adorama
Learn More:
2019 Star Tracker Buying Guide: iOptron SkyTracker Pro
![]()
Another option from iOptron is the smaller, lighter-load SkyTracker Pro.
Like the Star Adventurer Mini, the SkyTracker Pro was designed for smaller gear setups weighing up to 6.6 pounds (with a counterweight kit).
As a result, the SkyTracker Pro is a light, portable star tracking option for photographers with an APS-C or mirrorless camera.
![]()
What's so great about this rig is the convenience it provides.
There's a built-in rechargeable battery with up to 24 hours of juice, an illuminated polar scope with eight different brightness levels, and four tracking rates - solar, lunar, sidereal, and 1/2X - to accommodate various needs.
Like the SkyGuider, the SkyTracker Pro can also be paired with the iOptron smartphone app to dial in the polar alignment both quickly and easily.
Also like the SkyGuider, the SkyTracker has a removable alt-azimuth base that has a bubble level, altitude degree markings, and a post for azimuth control.
Since the base is removable, you can attach the SkyTracker Pro head directly to any tripod with 1/4" or 3/8" threads. There's an included reversible mounting post for ball head mounting and a 1/4"-3/8" thread converter included.
![]()
This unit is made to last with an all-metal structure and ABS covers.
You'll get years of silent tracking, precise performance, and easy camera framing adjustment thanks to the quick slew mode.
In other words, this star tracker has everything you need to get started in astrophotography!
Best Features: Ease of use, lightweight
Best For: Beginner or enthusiast astrophotographers pursuing night sky images
iOptron SkyTracker Pro Price
- iOptron SkyTracker Pro: $299.99 at Adorama
We Recommend
9 Things You Can Do to Take Better Photos of the Milky Way
One of my favorite memories growing up was laying out on the deck with my dad, gazing up at the stars.
Under that vast ocean of space, it was hard not to be in awe of just how small I am compared to the planet, let alone the galaxy.
I imagine for many stargazing enthusiasts, there are similar feelings of awe at the sheer scale and beauty of the sky above.
And though many folks try to capture that beauty in a photograph, I’d say more often than not it doesn’t turn out well.
But that’s the beauty of photography - if the first try is a fail, all you have to do is learn from your mistakes and try again.
With this guide, I present nine tips that will help you minimize mistakes and maximize results, that way you can create gorgeous shots of the Milky Way.
Who knows, you might create a few photos that are worthy of hanging on the wall!
Let’s find out how...
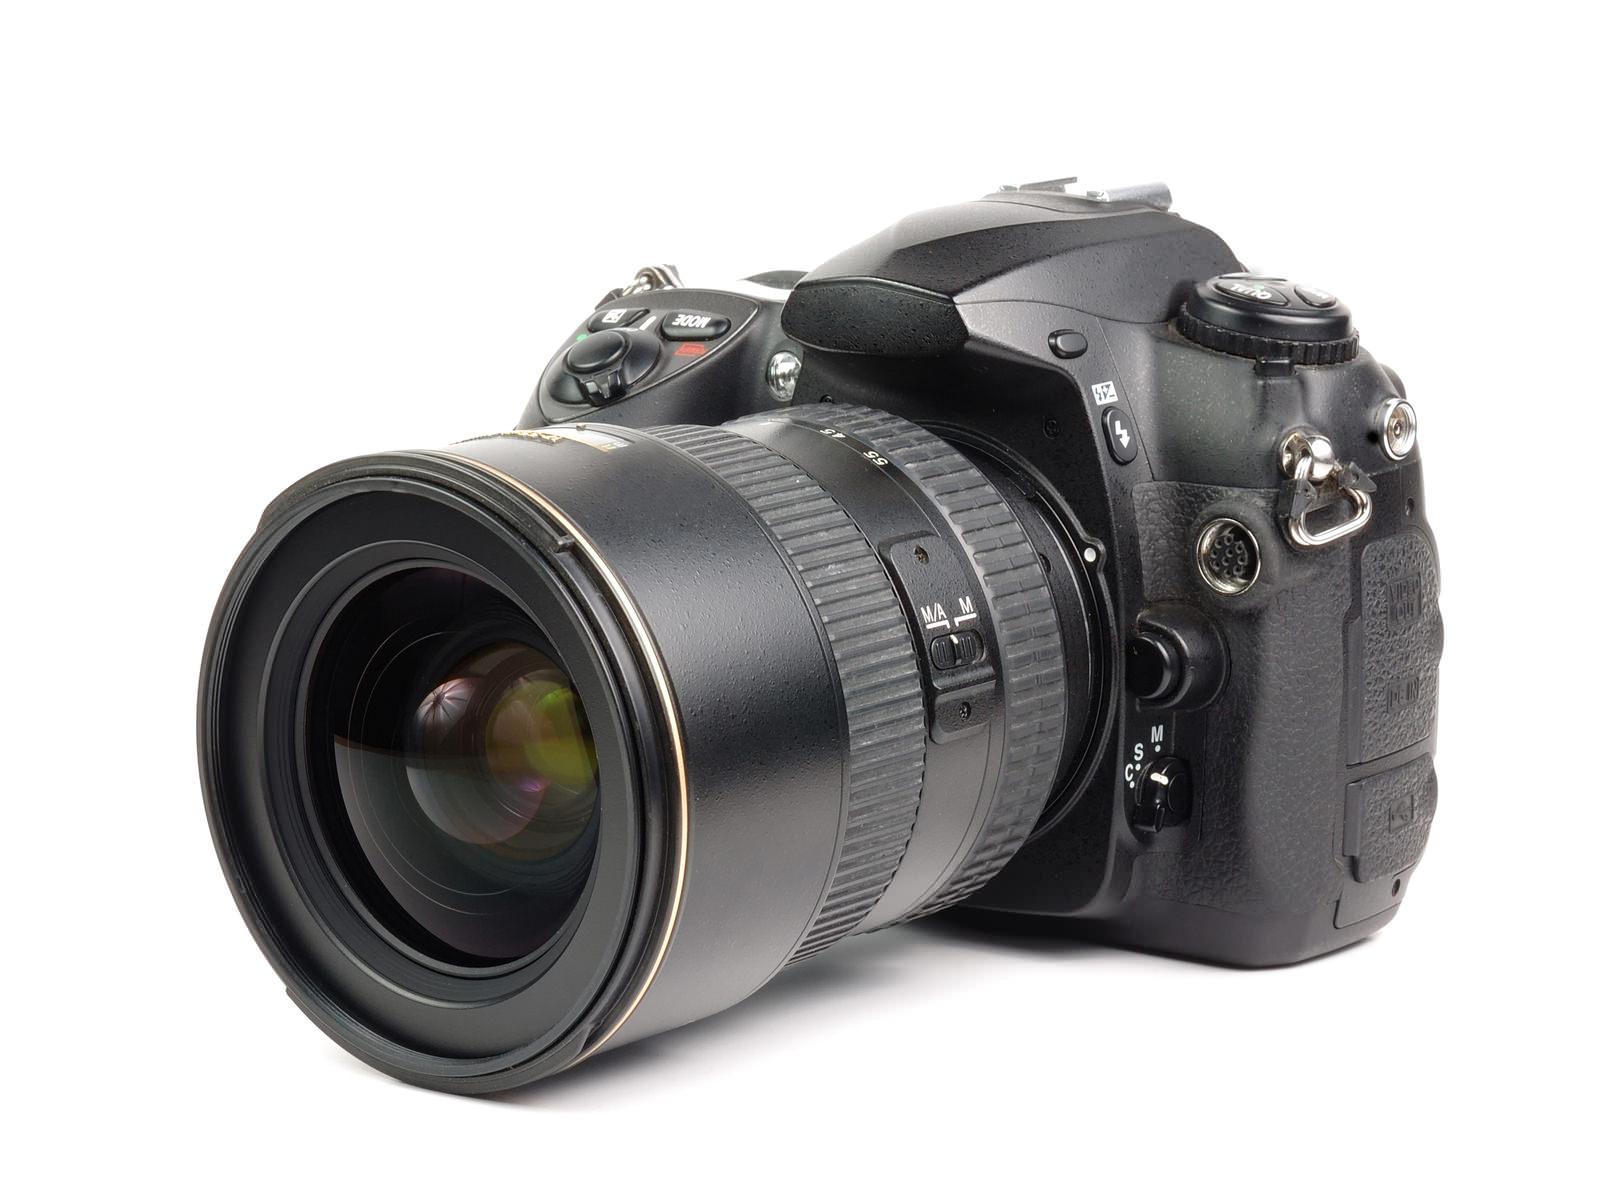
Get a Full Frame Camera
Ok, so it’s not in the cards for everyone to go buy a full frame camera right this second. But, in a perfect world, a full frame camera is the best choice for photos of the Milky Way.
The reasoning is quite simple: the more light your camera can collect, the better your image will be.
And when it comes to light-collecting power, full frame cameras are at the top of the heap. Reason being, full frame cameras have larger sensors than crop sensor cameras. That additional surface area makes collecting light an easier task.
As a result, full frame cameras produce images of the Milky Way that are more detailed and crisp than most crop sensor cameras can create. That detail and crispness can make all the difference in the world when viewing your final image.
There are a host of full frame camera options out there today. Depending on your brand preference, you could go with something like the Canon EOS 5DS is a top choice given its incredible 50.6-megapixel resolution.
Good crop sensor alternatives might be the Canon EOS 7D Mark II, like the Nikon D500, gets high praise for its rugged construction. Both are much less expensive options than the full frame variants suggested above.
What to look for: Good low light performance and RAW shooting capability. Also look for a camera that has an articulated LCD screen. You’ll need to use the LCD for live view focusing, and being able to adjust the angle of view is a handy feature.
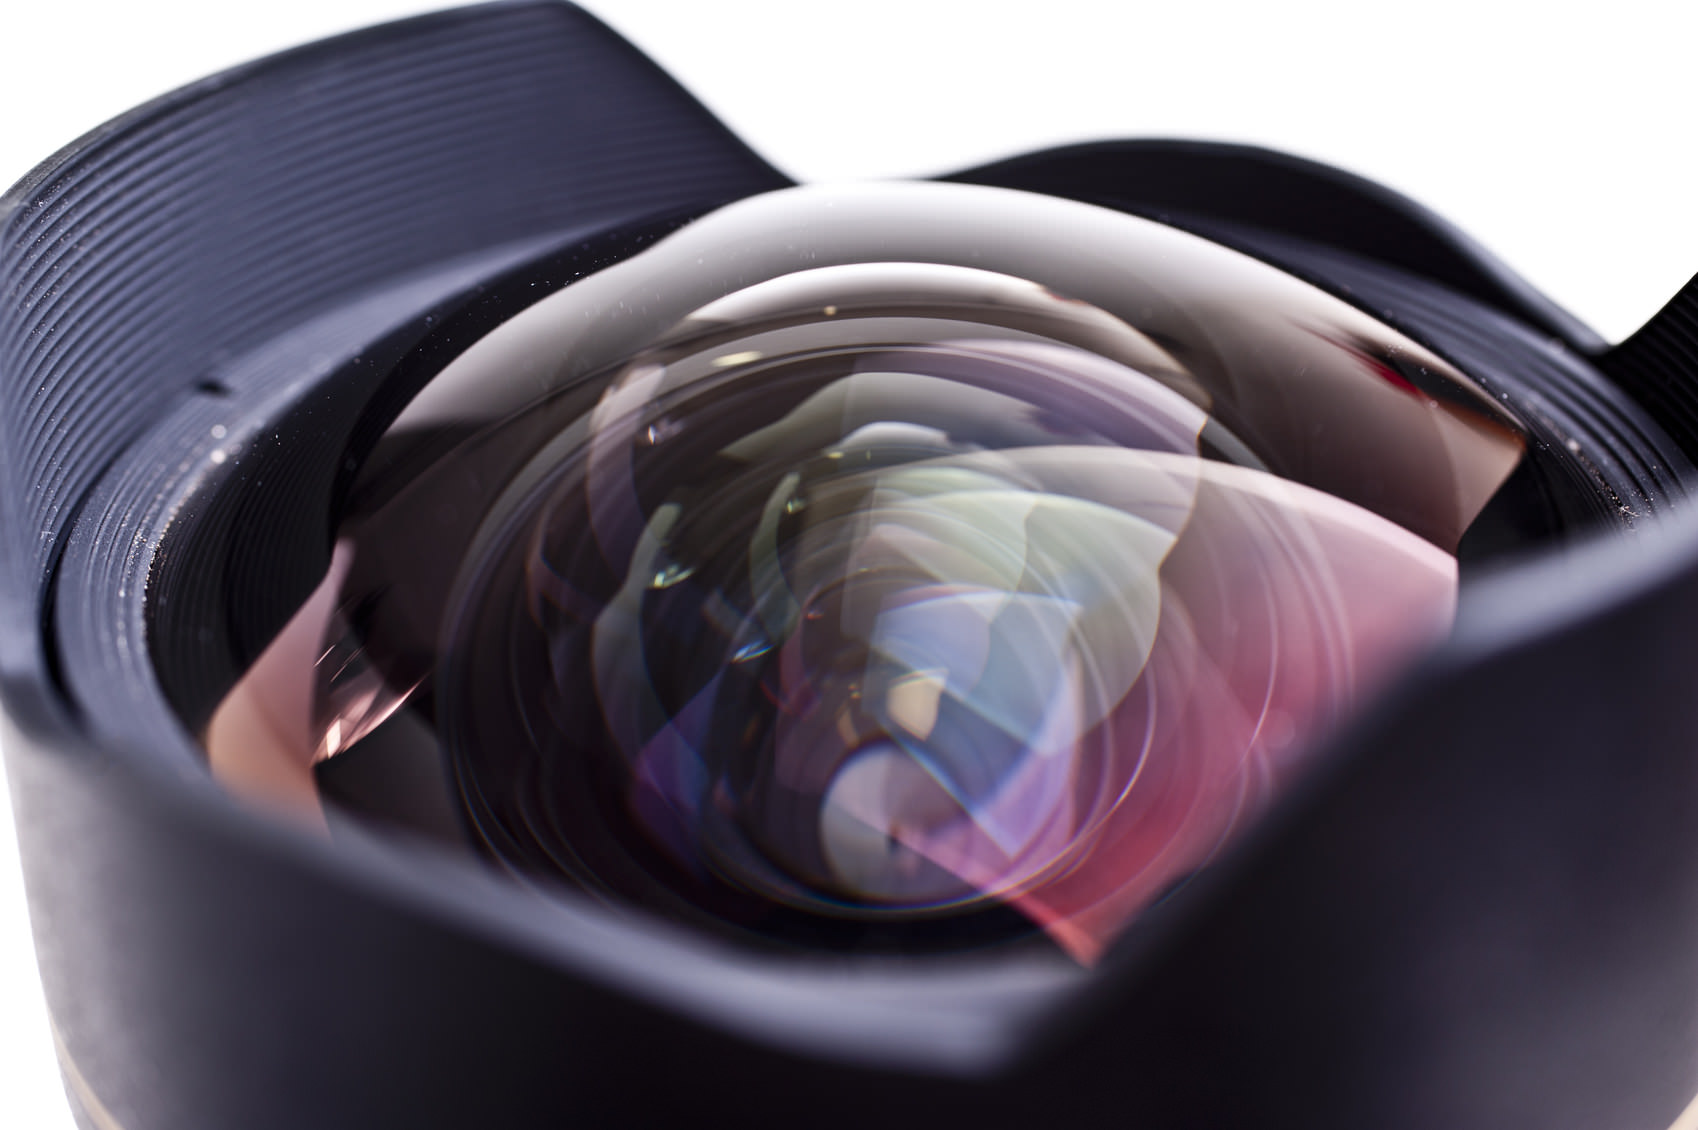
Use a Fast Wide-Angle Lens

There are two primary features that any lens you use for Milky Way photography needs to have: a large maximum aperture and a short focal length.
Let’s address the aperture first.
Naturally, since you’ll be shooting in the dead of night, the ability of the lens to capture light is a critical factor.
Because of this, you need to look specifically at the aperture range of the lens. Though a lens with a maximum aperture of at least f/2.8 would be great, they can be quite spendy. An f/4 lens can get good results as well.
To help offset costs, consider third-party lenses. The Rokinon 14mm f/2.8 IF ED UMC Ultra Wide Angle Fixed Lens is a great choice for Nikon cameras.
Better still, they are far less expensive than comparable lenses from Nikon and Canon.
In the video below, Toby from PhotoRec TV gives us a tour of the Rokinon 14mm lens, and offers up his take on why it’s one of the best budget choices for astrophotography.
The second factor to consider is the focal length. Note that the recommended lenses above are both 14mm. On a full frame camera, that puts them in the ultra-wide-angle range, and on a crop sensor camera, they are squarely in the wide-angle range.
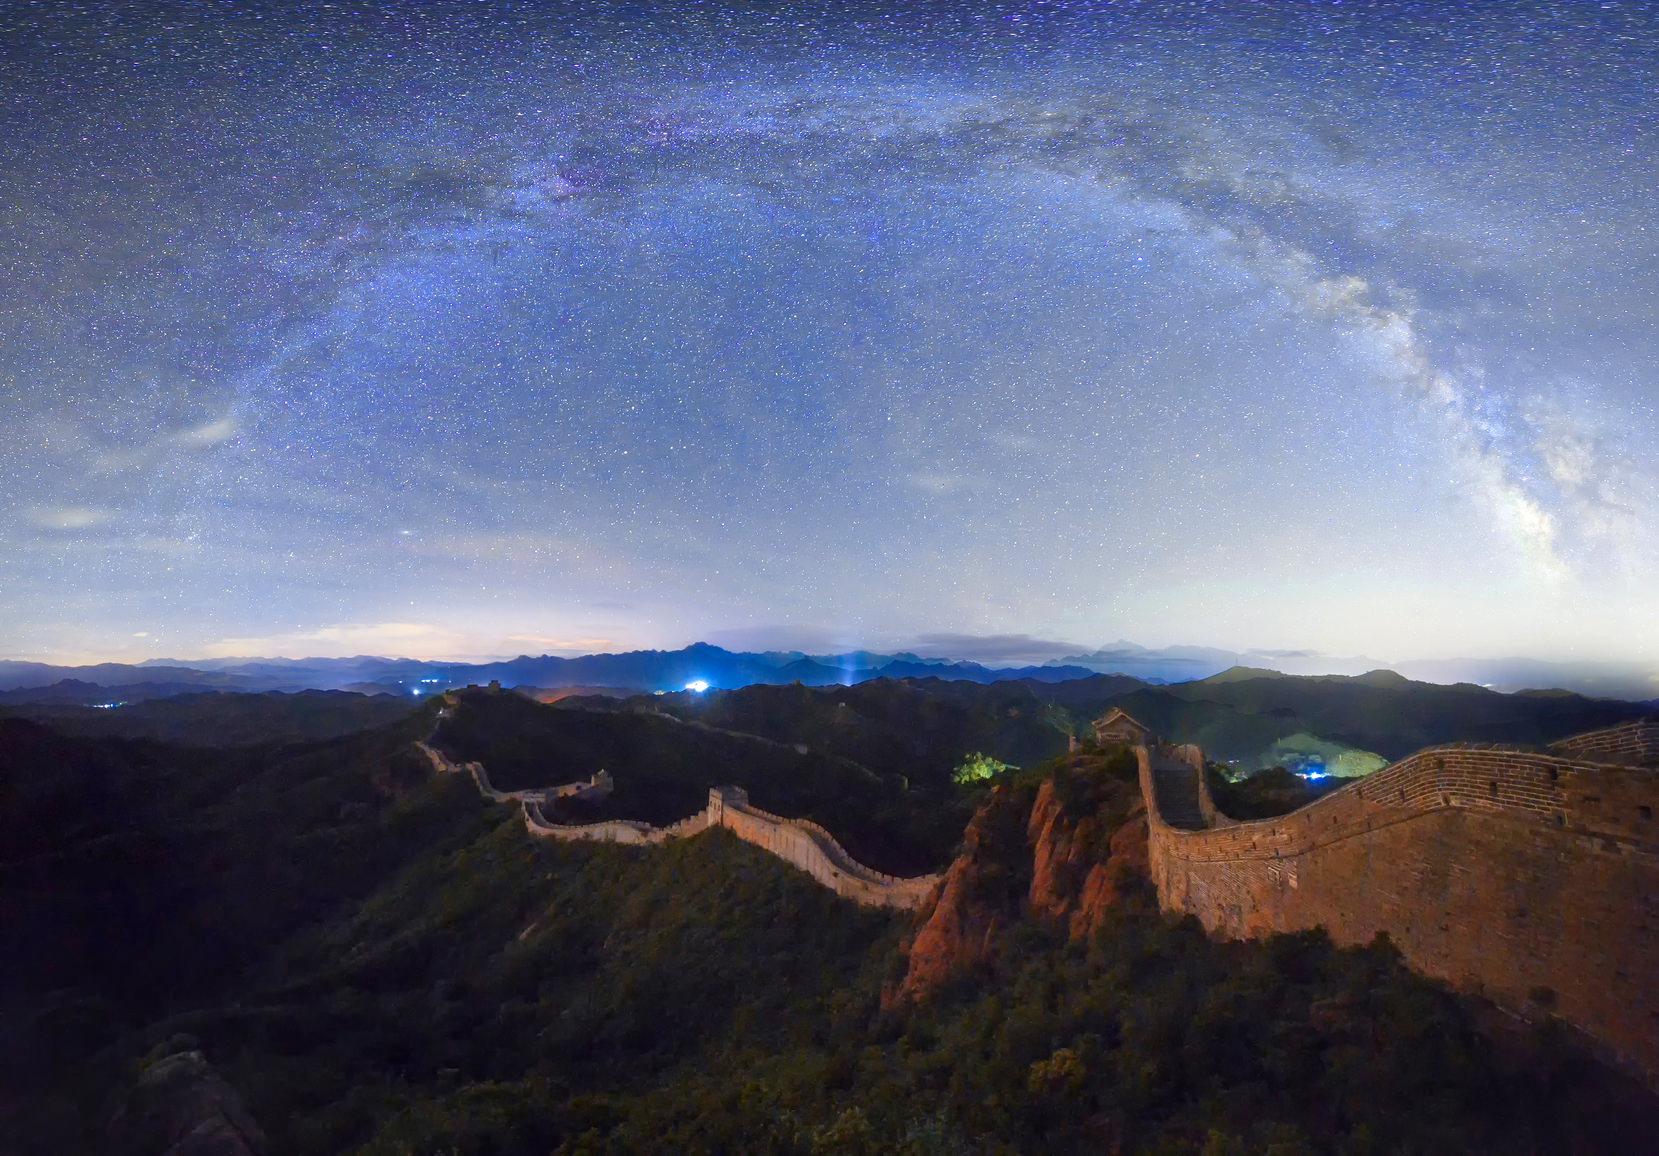
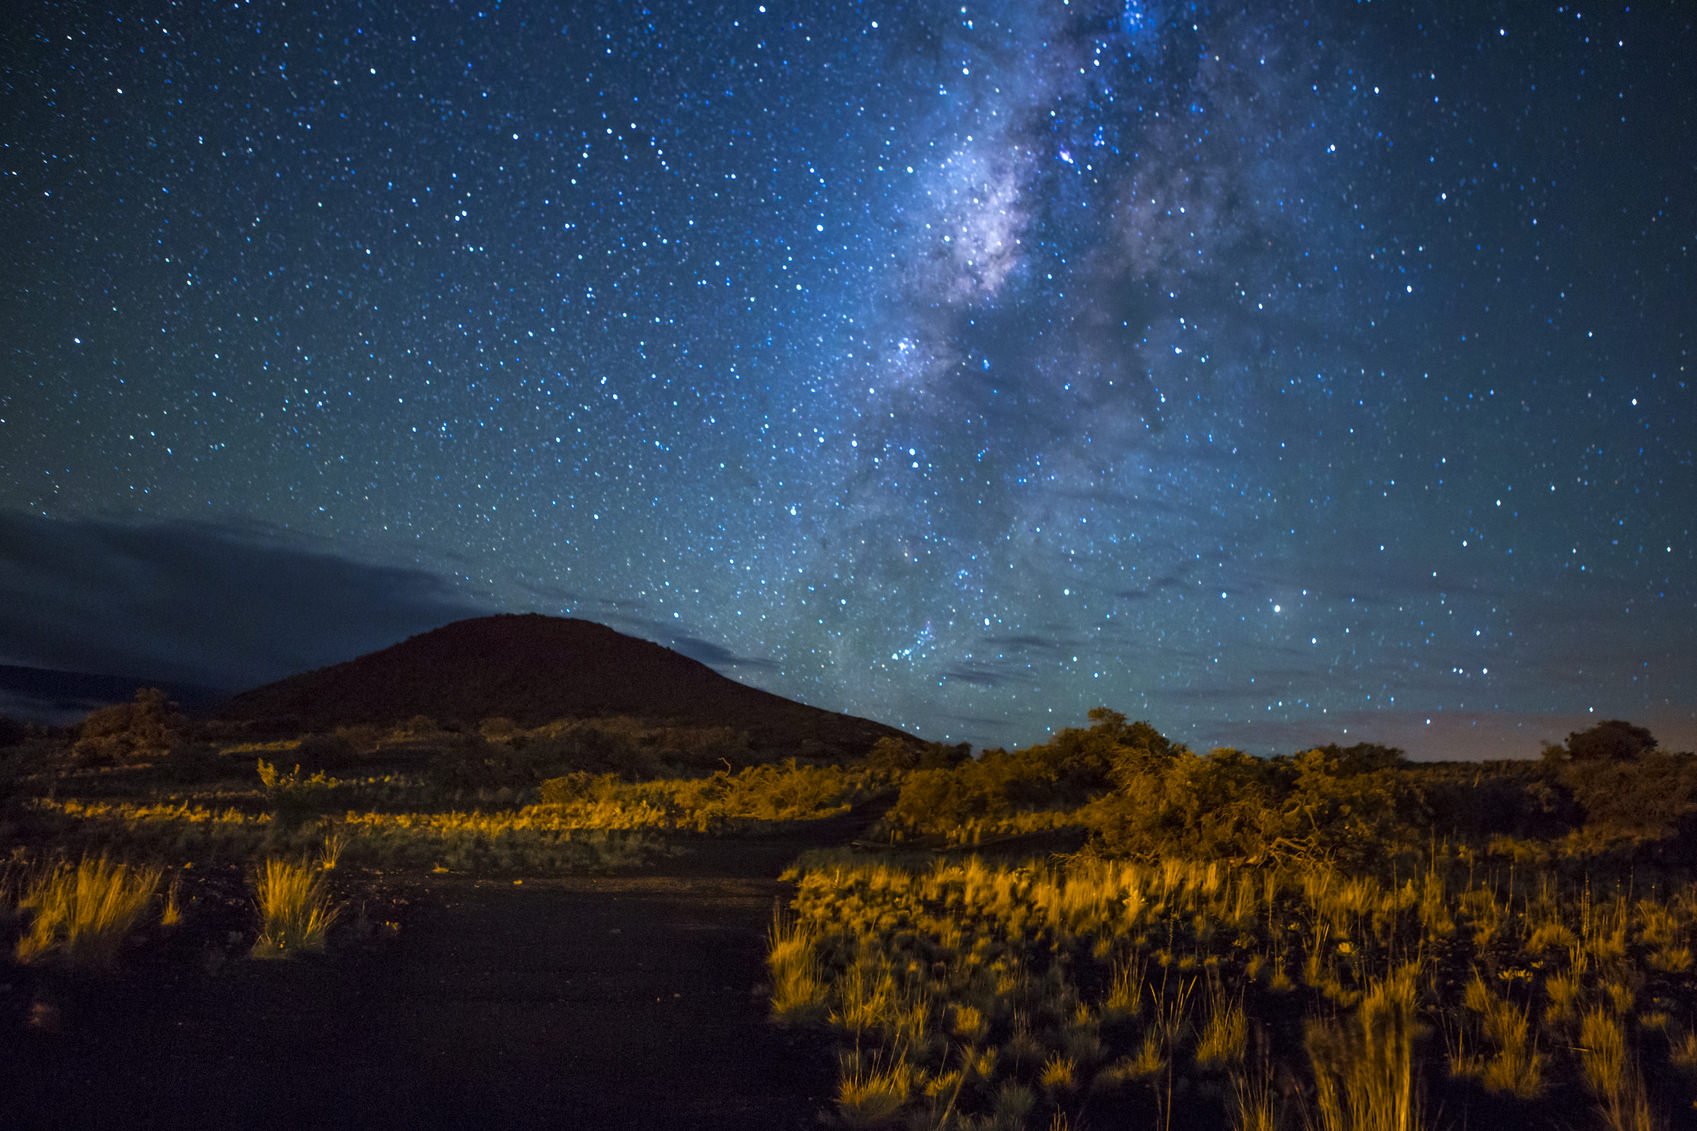
Using a wide-angle lens is important because you want to be able to capture as much of the sky as possible, as was done in the sample images throughout this article.
Remember, the Milky Way extends from one side of the sky to the other, so having a wide-angle lens will help you incorporate as much of it into the frame as you can.
What to look for: In addition to a wide maximum aperture and a short focal length, look for a lens with manual focusing (more on that topic later).
Don’t Neglect the Tripod
Photos of the Milky Way require long exposure times, usually in the 20-40 second range.
That means that if your camera is mounted on a cheap tripod that sways in the wind, your images will be a big, blurry mess.
Instead, you need to invest in a solid, well-built tripod that has added features that allow you to improve its stability. That means looking for a rig with some or all of the following features:
- Heavy-duty construction with strong legs and easy-to-use leg locks.
- A center column hook so you can hang a heavy object (i.e. your camera bag) to help pull the tripod into the ground for a more stable base.
- Large, rubberized feet to ensure the tripod stays in place.
- Retractable metal spikes in the tripod’s feet for those occasions when you need to set up on uneven, wet, or slippery surfaces.
What to look for: After setting up your tripod, be sure to remove your camera’s strap. It can catch enough of a breeze to cause the images to be blurry, even if your camera is mounted on a solid tripod!
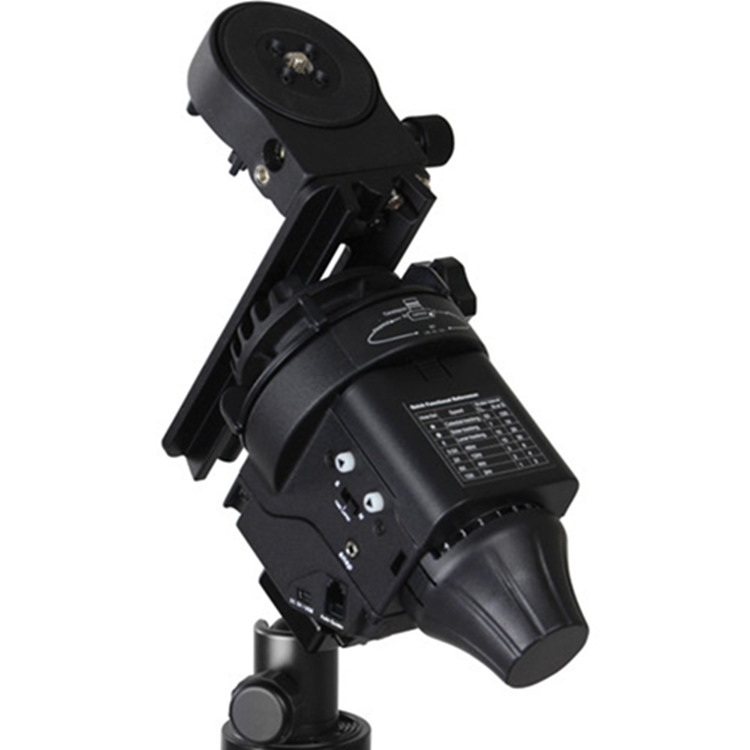
Use a Dedicated Mount
Perhaps one of the best accessories you can add to your kit for astrophotography is a specialized mount.
Something like the Sky-Watcher Star Adventurer Motorized Mount is an ideal choice for Milky Way photography. This equatorial mount that gives you the ability to track celestial bodies with great accuracy. You will find that it helps you locate the Milky Way as well as other popular bodies in the sky, such as the sun or the moon.
The Star Adventurer comes equipped with a buttery smooth DC servo motor, so it moves along its programmed path with ease. You can decide between various speed settings, including 0.5x, 2x, 6x, and 12x.
Maybe the best feature of this handy mount is that it’s compatible for usage in the northern and southern hemispheres. That means you don’t have to hunt around for your subject and waste precious time away from actually creating photos.
Use it for stills, videos, timelapses, or even as a telescope mount. It’s powerful enough to meet the needs of expert astrophotographers, but easy enough to use for novices to get into the astrophotography game.
For more details about the Sky-Watcher Star Adventurer Motorized Mount, check out the video above.
Find a Dark Spot
Obviously, finding a spot that’s away from the light pollution of cities is going to greatly impact your ability to get a clean shot of the Milky Way.
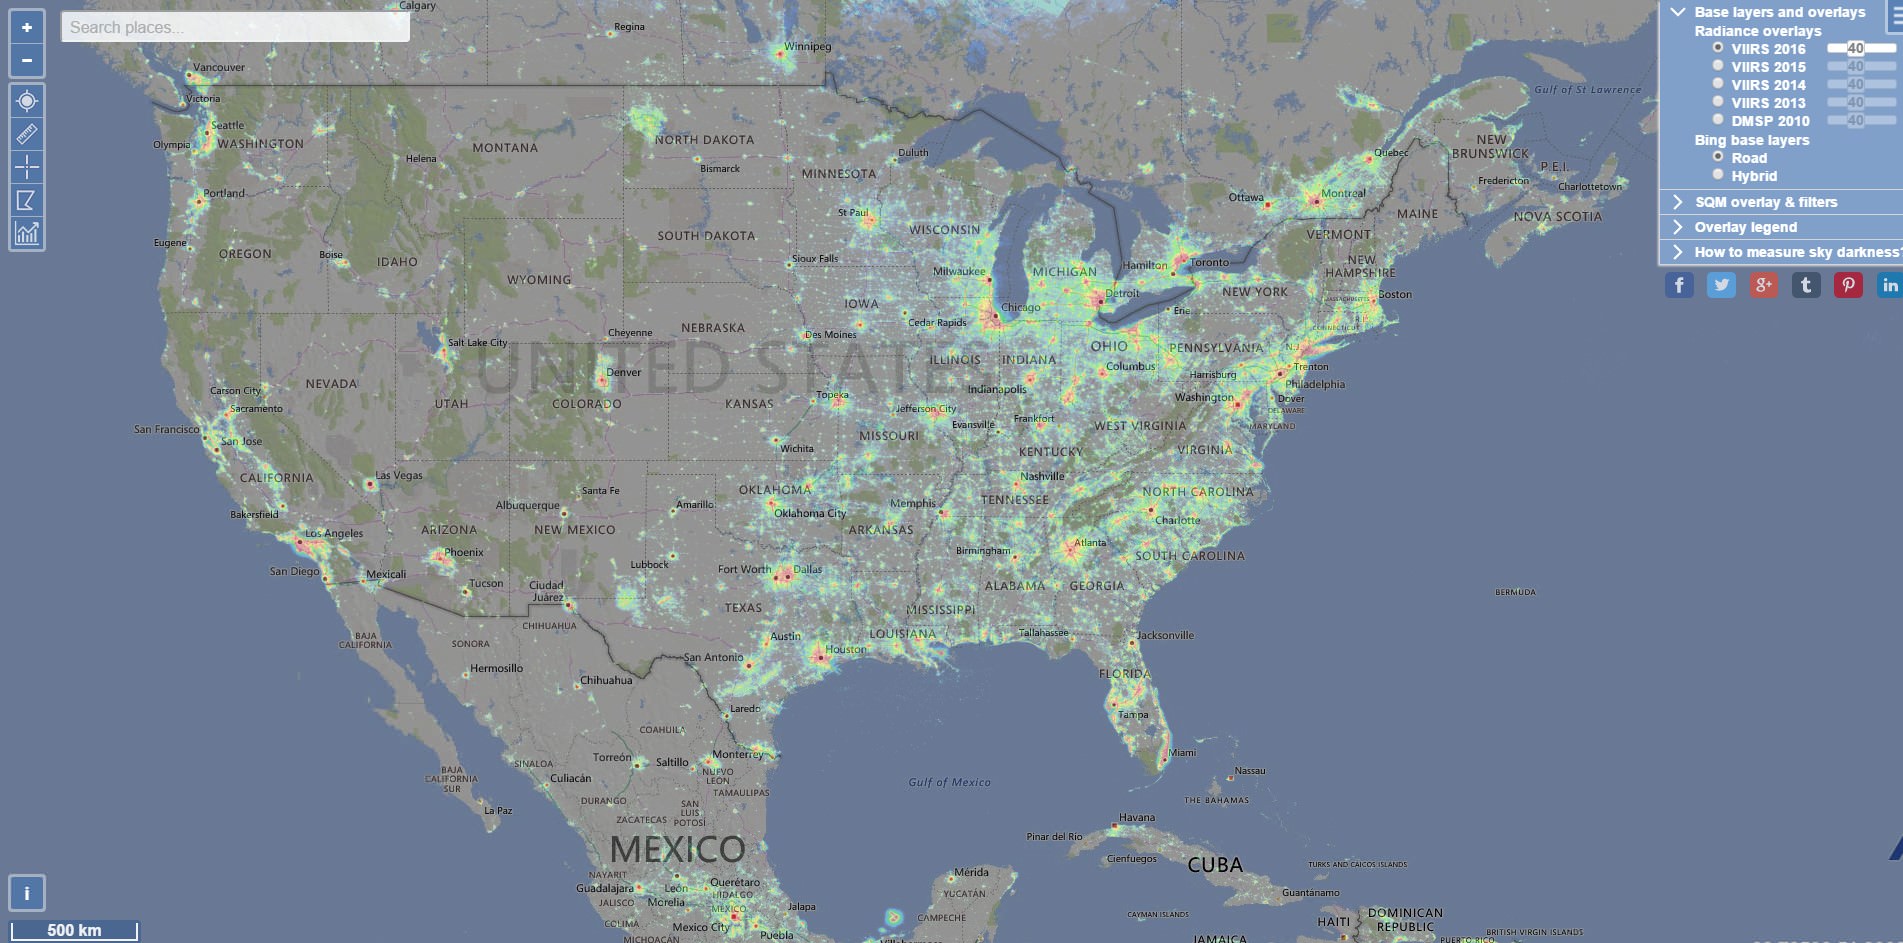
Rather than wander aimlessly around the countryside, there are a couple of fantastic websites that will help you find the best locations for nighttime photography.
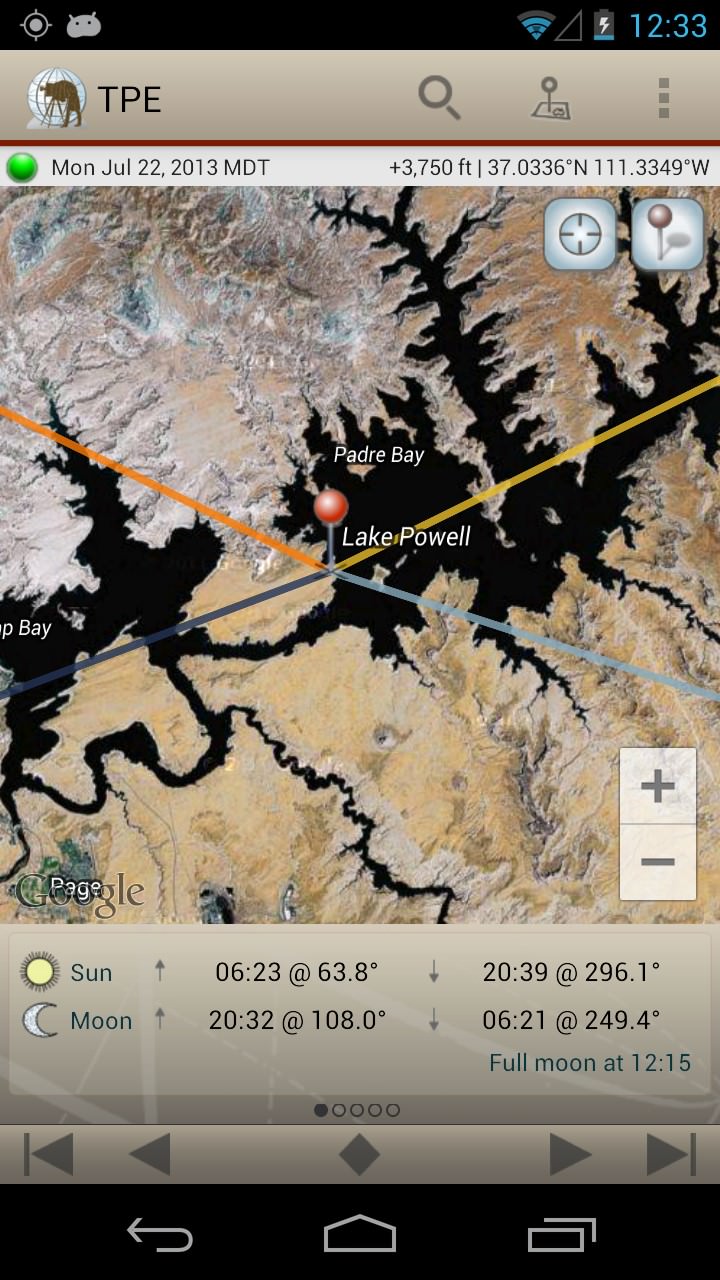
The first is the Light Pollution Map. It’s pretty self-explanatory: it maps light pollution, as seen in the screenshot above. Just zoom in on an area, see if it’s polluted with light, and map out your journey to get there. It’s pretty simple!
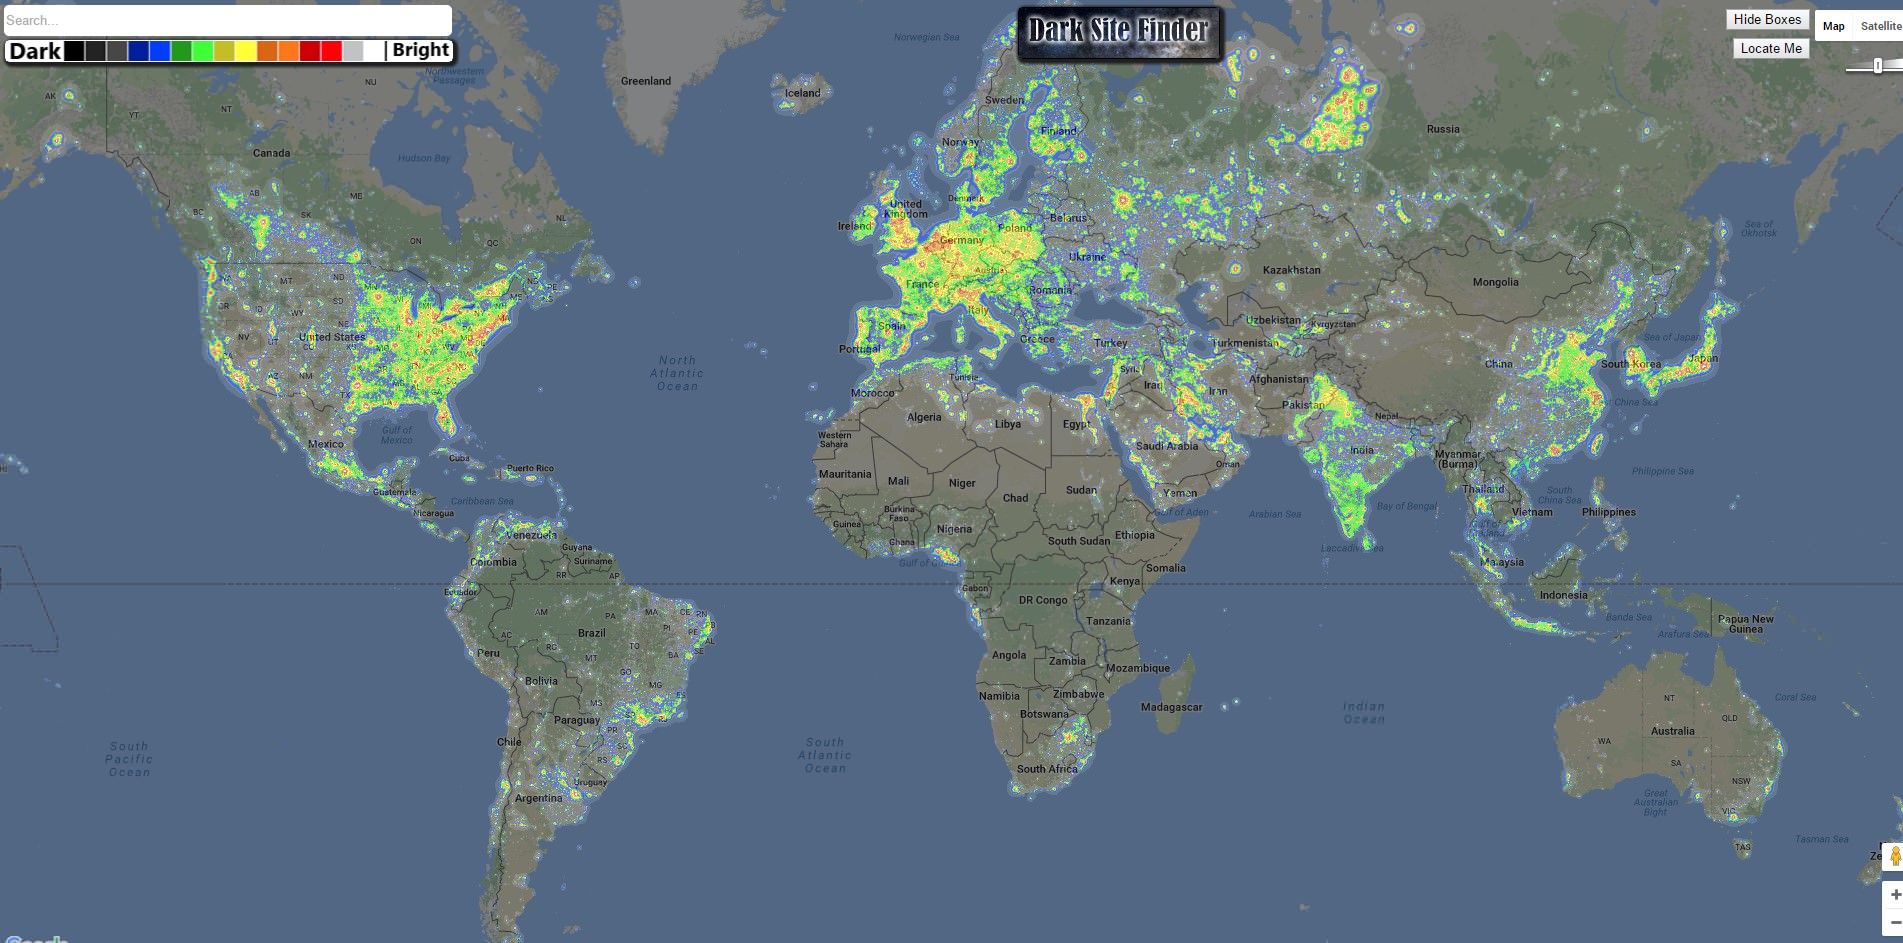
Another option is Dark Site Finder. Like the Light Pollution Map, you can zoom in on a specific area (you can also search for a location in the search bar) to examine what the light pollution levels are at virtually any spot on earth.
Either way, you’ll save tons of time and heartache by planning your photo shoots in advance and avoiding areas that have a lot of light pollution.
Get Help Locating Celestial Bodies
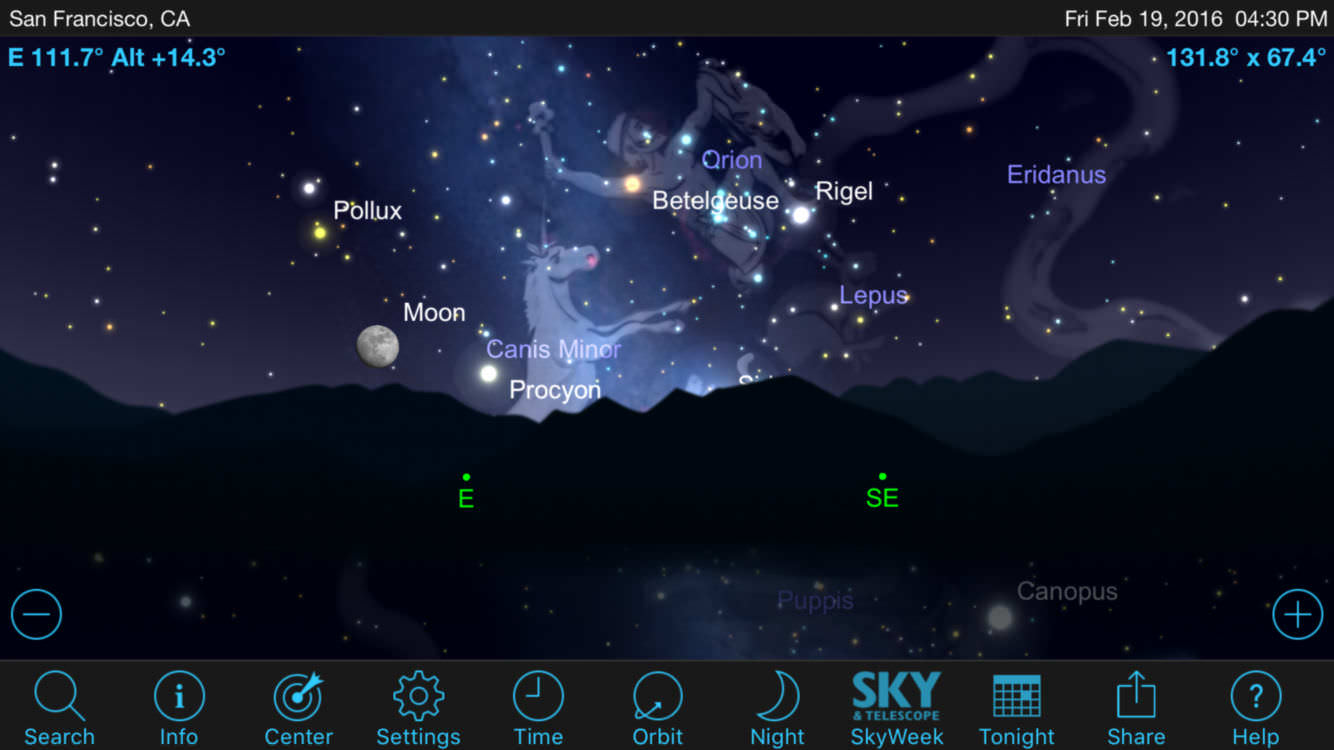
Part of planning your Milky Way photo shoots is also being able to find the darn thing in the sky. Used in combination with the light pollution maps listed above, an app like SkySafari 5 (available for iOS and Android devices) can help you pinpoint the Milky Way (and many other celestial bodies, for that matter) and get the shots you want.
The app gives you nightly information on the location and rise/set times of various planets, the sun, and the moon. You can even find out when the International Space Station will cross over your location.
Better still, SkySafari has over 200 star clusters, galaxies, and nebulae built into its library, so if you want to venture beyond the Milky Way, you can!
Another much-needed app is The Photographer’s Ephemeris (on iTunes for $8.99 or on Google for $4.99).
The Photographer’s Ephemeris helps you plan your shoot by giving you the lighting information for your desired location.
That means all you have to do is dial in your location, and it will tell you when the sun or moon will rise and fall in the sky and where. That’s valuable information for photographing the Milky Way so you know the best time of night to get set up to avoid light pollution from the moon.
Use Manual Focus
Though today’s cameras have excellent autofocus systems that are able to get pinpoint sharpness in many situations, they do not perform well when shooting at night.
Put simply, even the best autofocus systems will struggle to obtain focus on something that’s so small in the field of view as a star. Instead, it’s best to opt for manual focusing.
Just put your lens in manual mode, then move the focus ring to the infinity settings. Then, using live view mode, zoom in on a particular star in the Milky Way and use the focus ring to bring the star into perfect focus.
Next, take a test shot. Afterward, again use live view to zoom in on the star to examine the focus. The star should appear as a solid, white dot. If you see blurriness, you’ll need to repeat the process to try to bring the shot into focus.
As mentioned earlier, having a camera with an articulating LCD is handy for this process. Since the camera might be pointed upward at a pretty steep angle, it’s easier to be able to adjust the angle of view of the LCD than crouch down below a static LCD and crane your neck upwards to view the screen.
For another method to get tack-sharp manual focus, check out the video above. In it, Milky Way Mike offers a quick solution for finding and noting your lens’s infinity focus point.
Add Foreground Interest
When you take your first photo of the Milky Way, just seeing the array of stars in the shot is going to be enough to make you say WOW.
After all, a lot has to come together to simply get to that point.
However, as time goes on, you’ll likely notice that photos of the sky alone can get a little boring. That is, they need a little bit of foreground interest to give the image some depth and a better sense of scale.
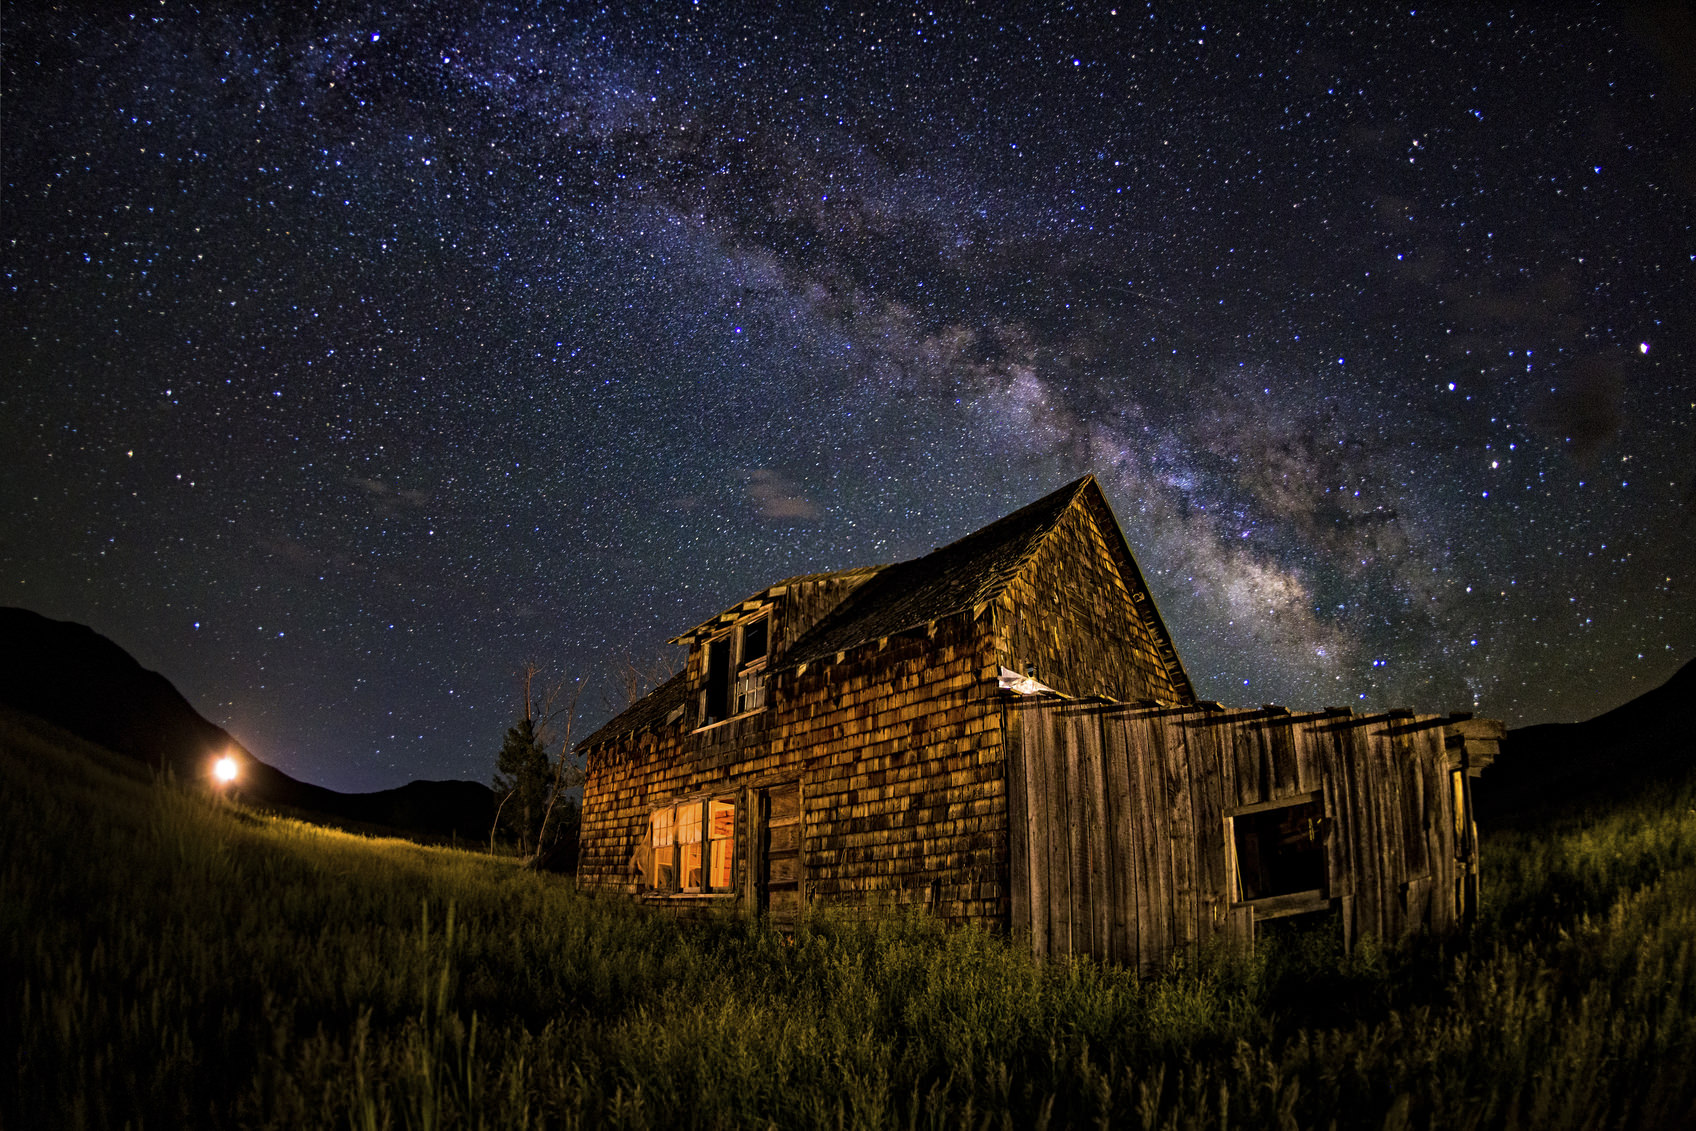
That means you’ll need to start thinking more purposefully about composing your shots.
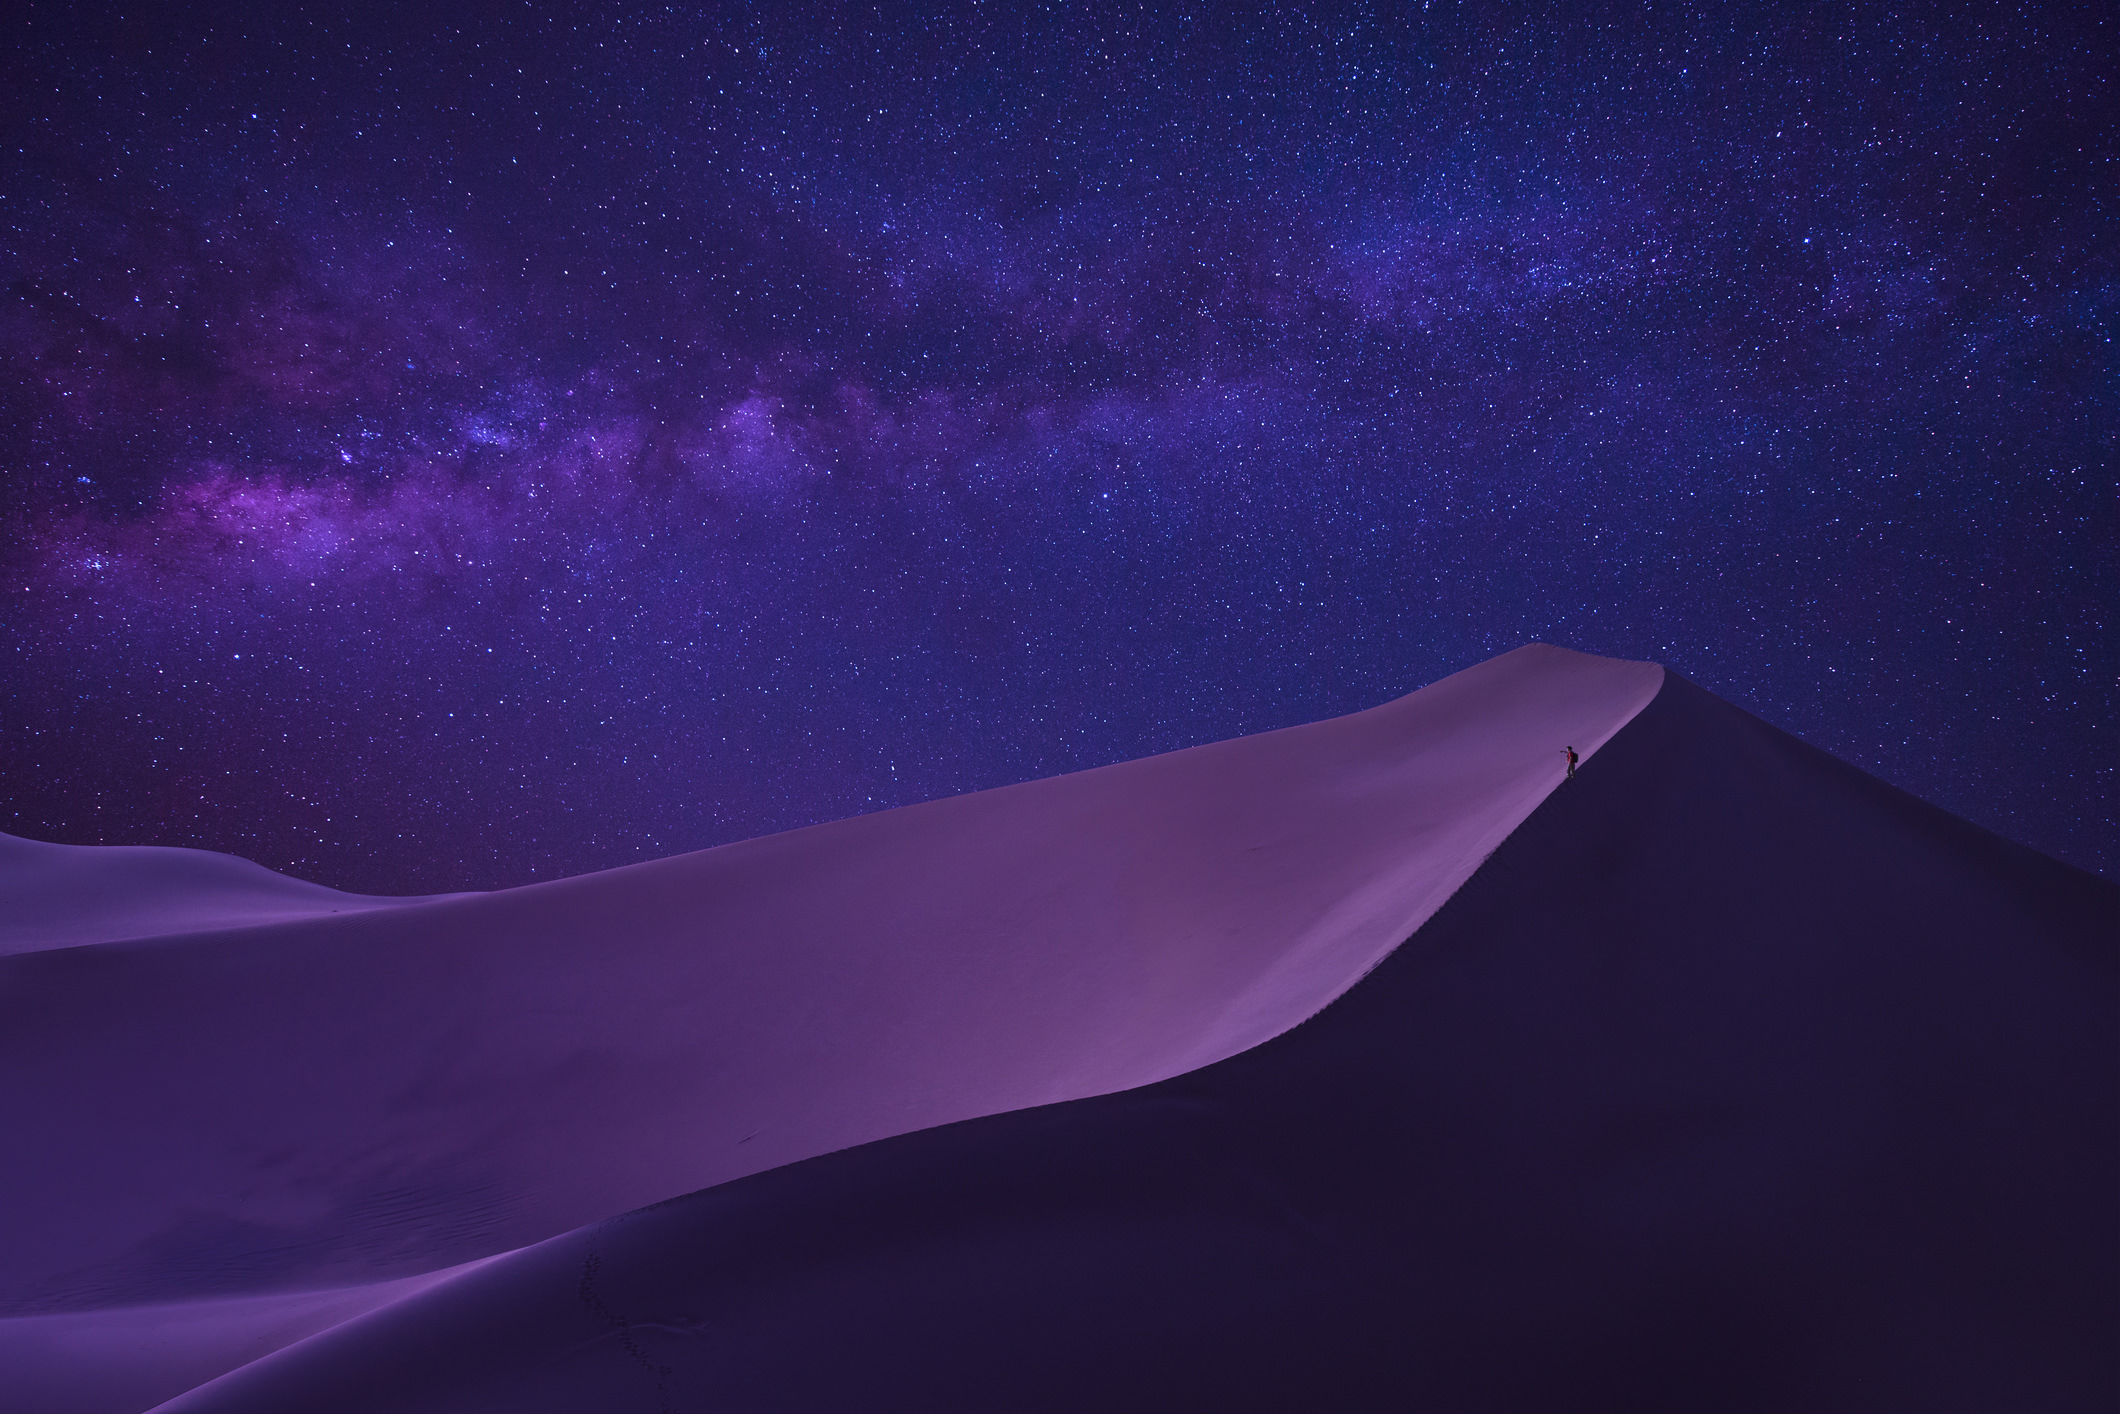
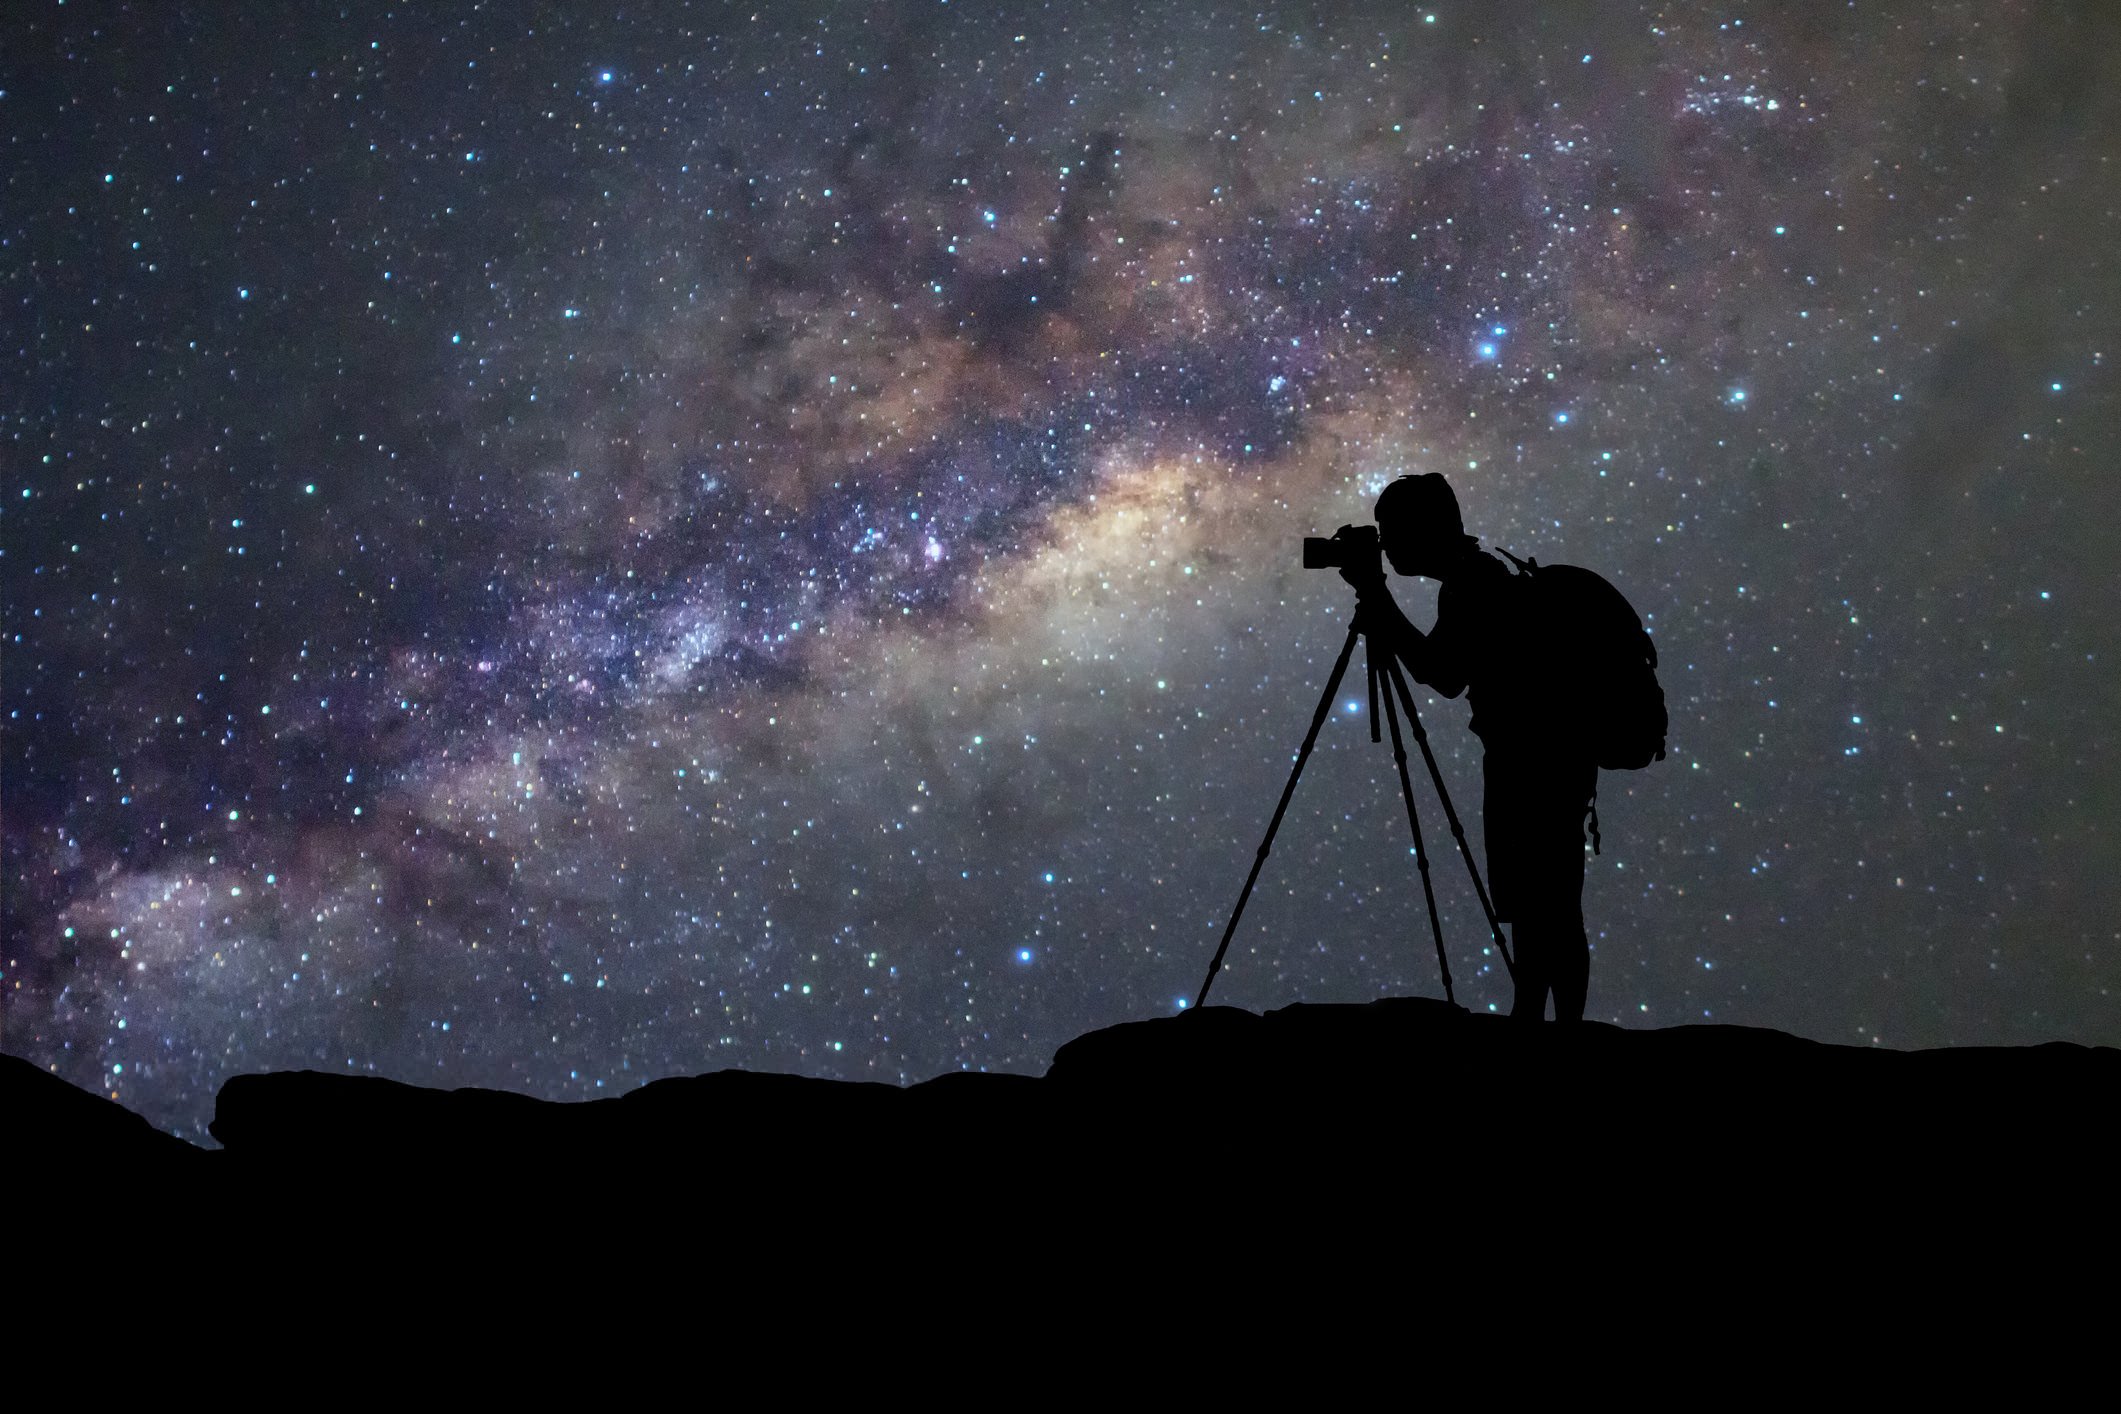
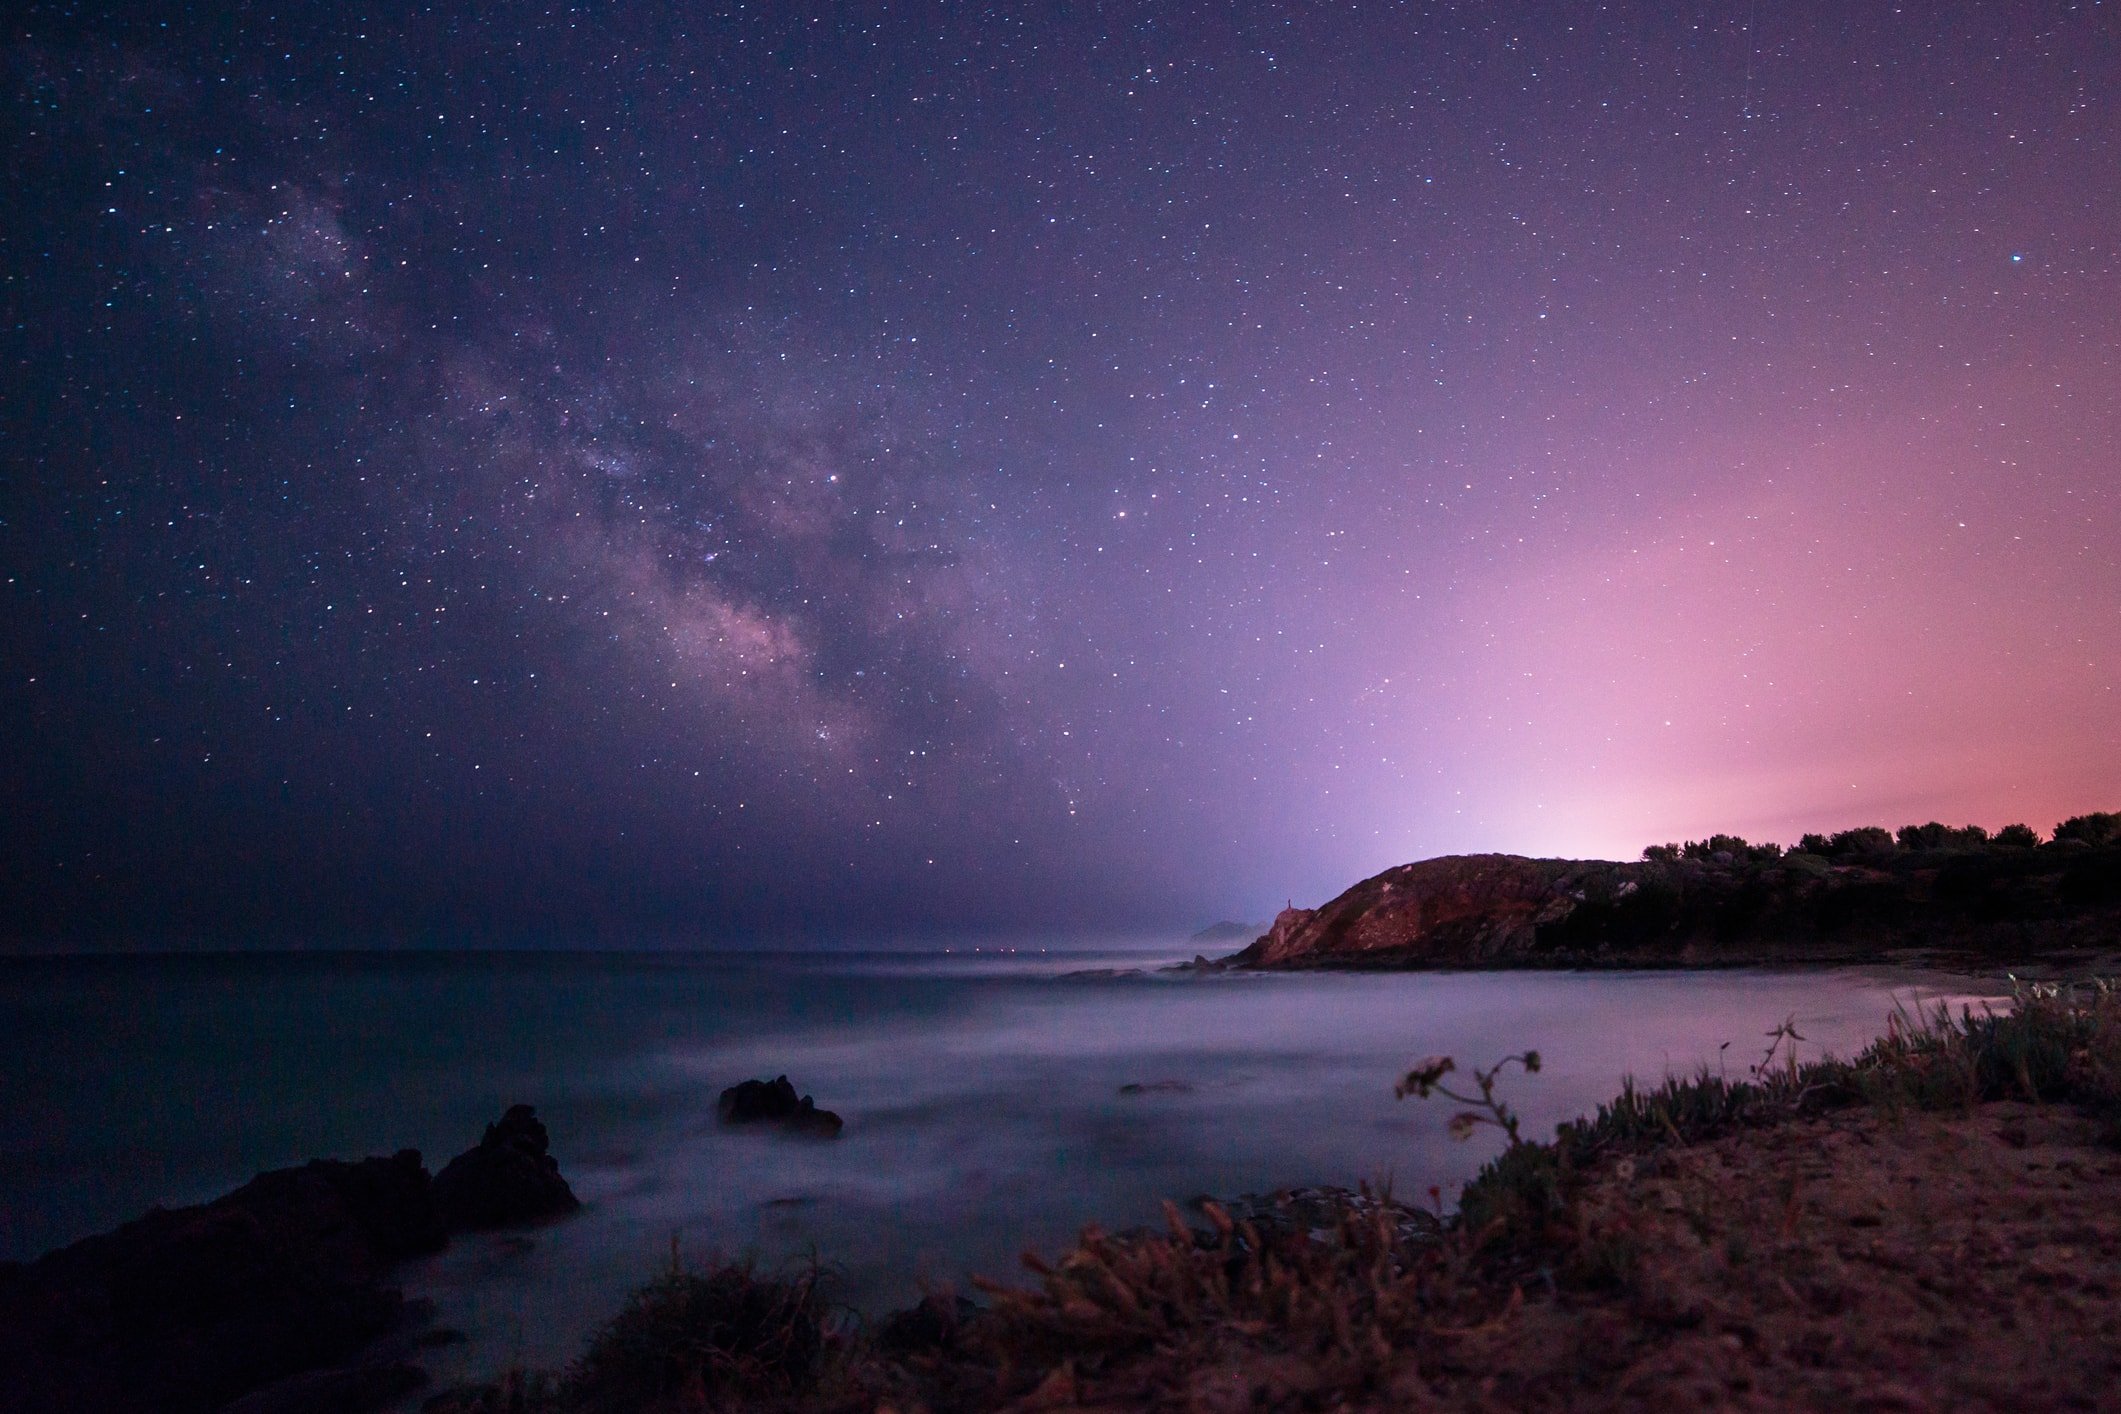
A great compositional tool for improving your Milky Way photos is to include foreground interest, like the sand dune in the image above. Note how the ridge of the sand dune acts as a leading line, first directing the eye toward the human figure climbing the dune, and then to the Milky Way above.
In that regard, the foreground interest doesn’t just add context to the scene, but it also helps the eye navigate around the photo, helping the viewer to understand the layout of the landscape and engage with the shot in a more meaningful way.
Be Prepared for Nighttime Shooting
Spoiler alert…
Photographing the Milky Way requires that you be outside, at night, for a reasonable amount of time.
So, that means that you need to be prepared for nighttime shooting by adding a variety of accessories to your kit:
- Spare batteries (that are fully charged) for your camera. Cooler temperatures reduce battery life, so you might find you need to swap batteries.
- Spare memory cards, just in case you decide to pull an all-nighter and shoot continuously through the night.
- A headlamp or torch so you can see your camera’s controls. They’re also handy for lightpainting, should you want to add that element to your shots of the Milky Way.
- Warm clothing, even if you’re shooting in a warm climate. Even in the Sahara, nighttime can be quite chilly!
- Snacks, so you aren’t rushing the process along so you can get home and eat.
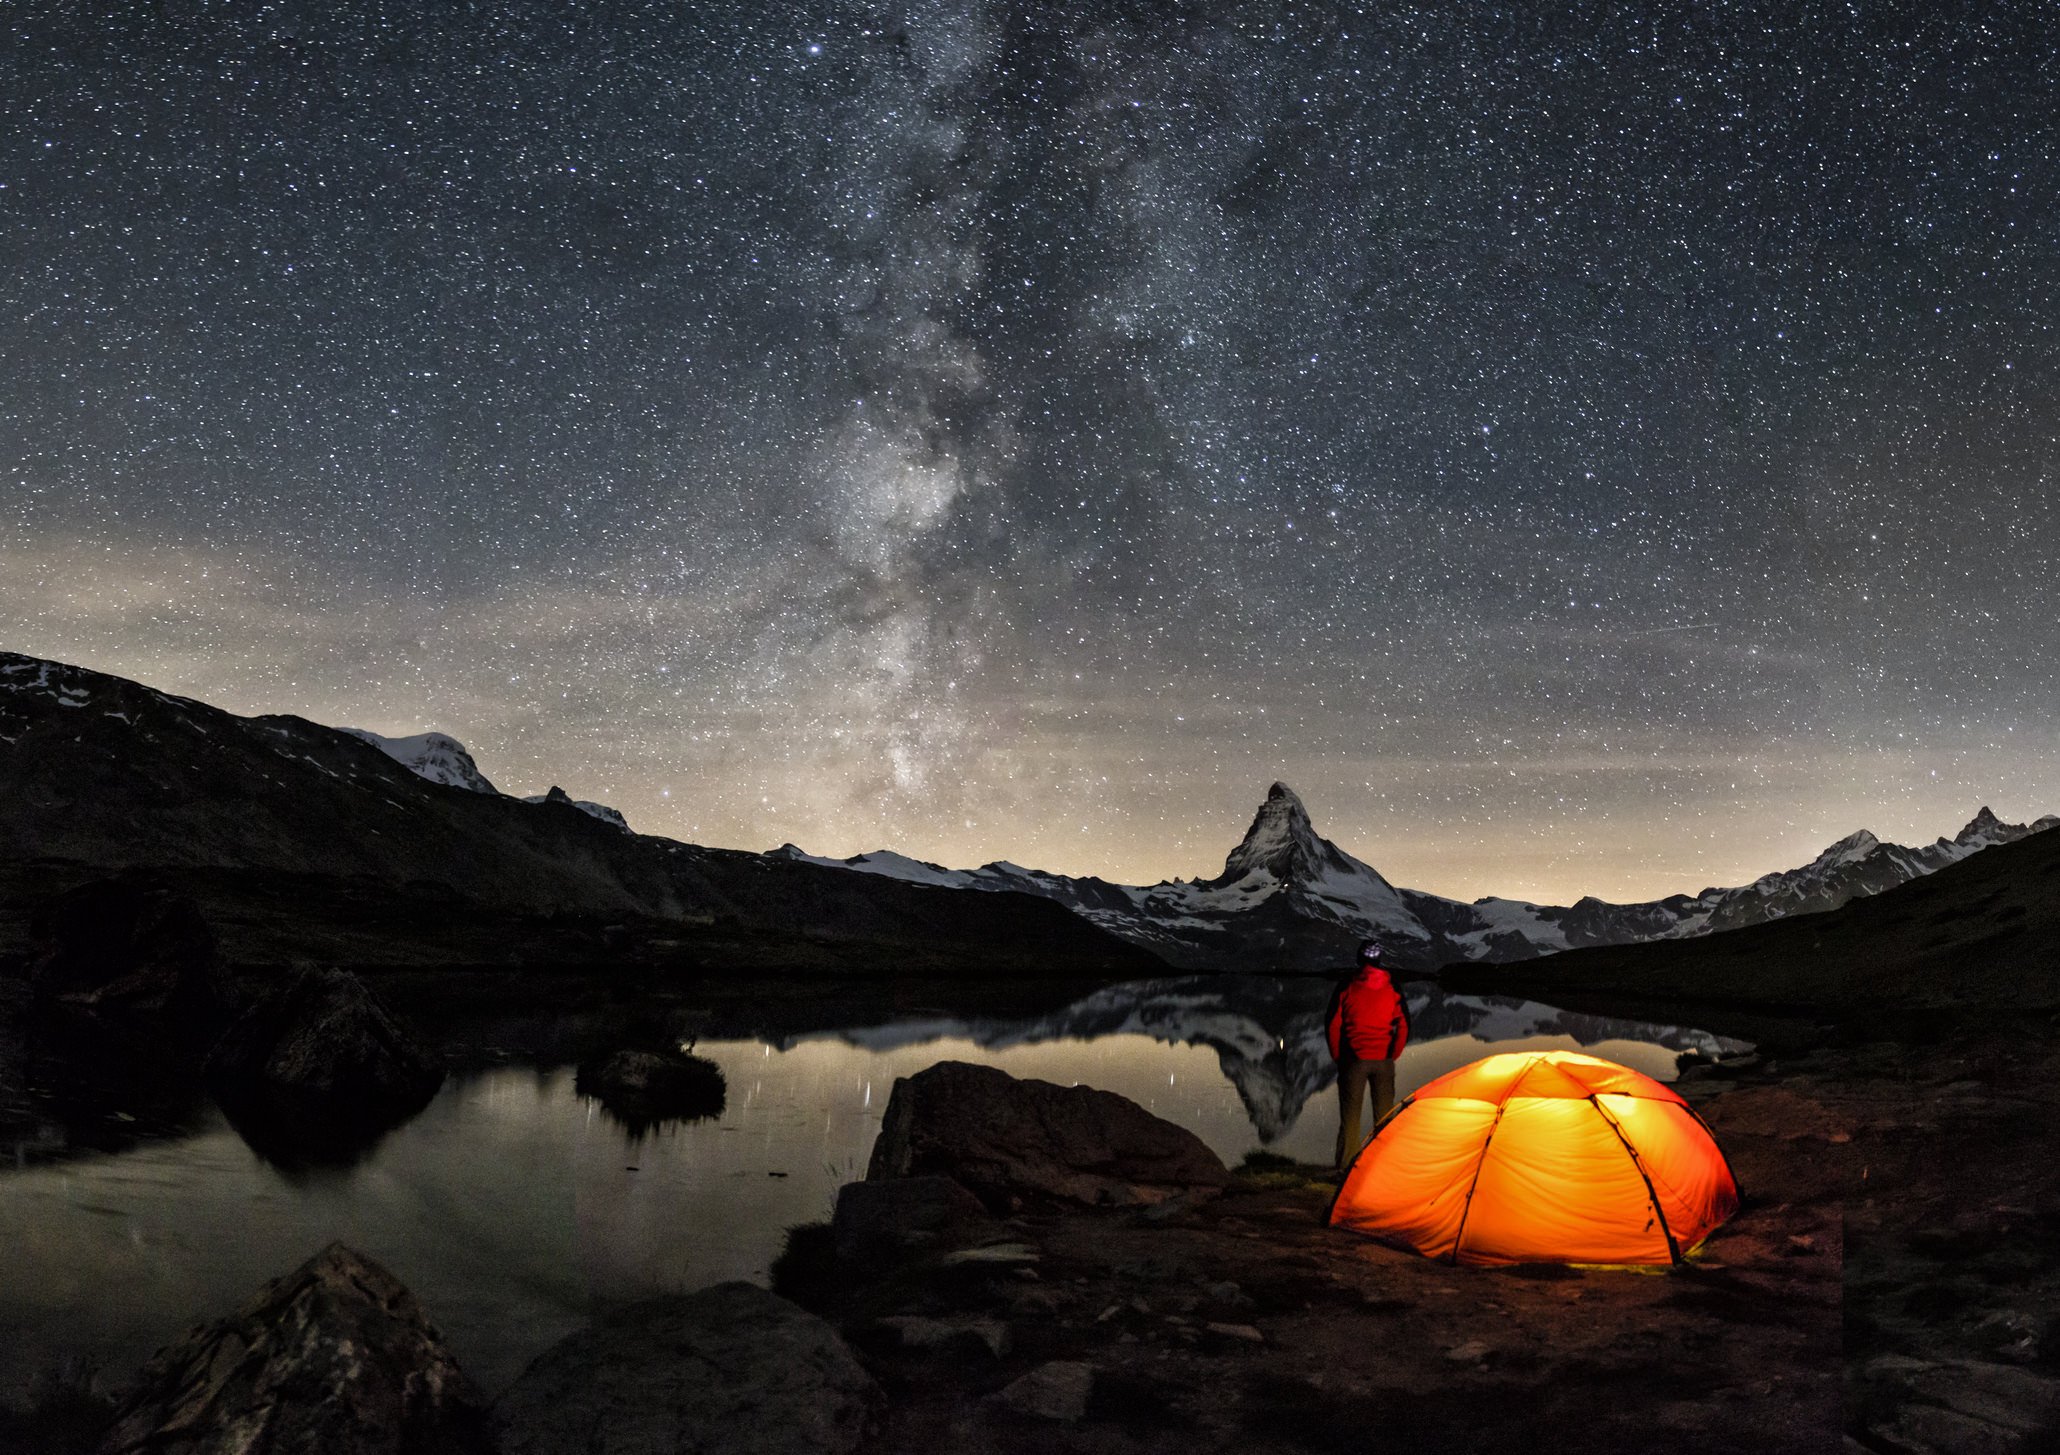
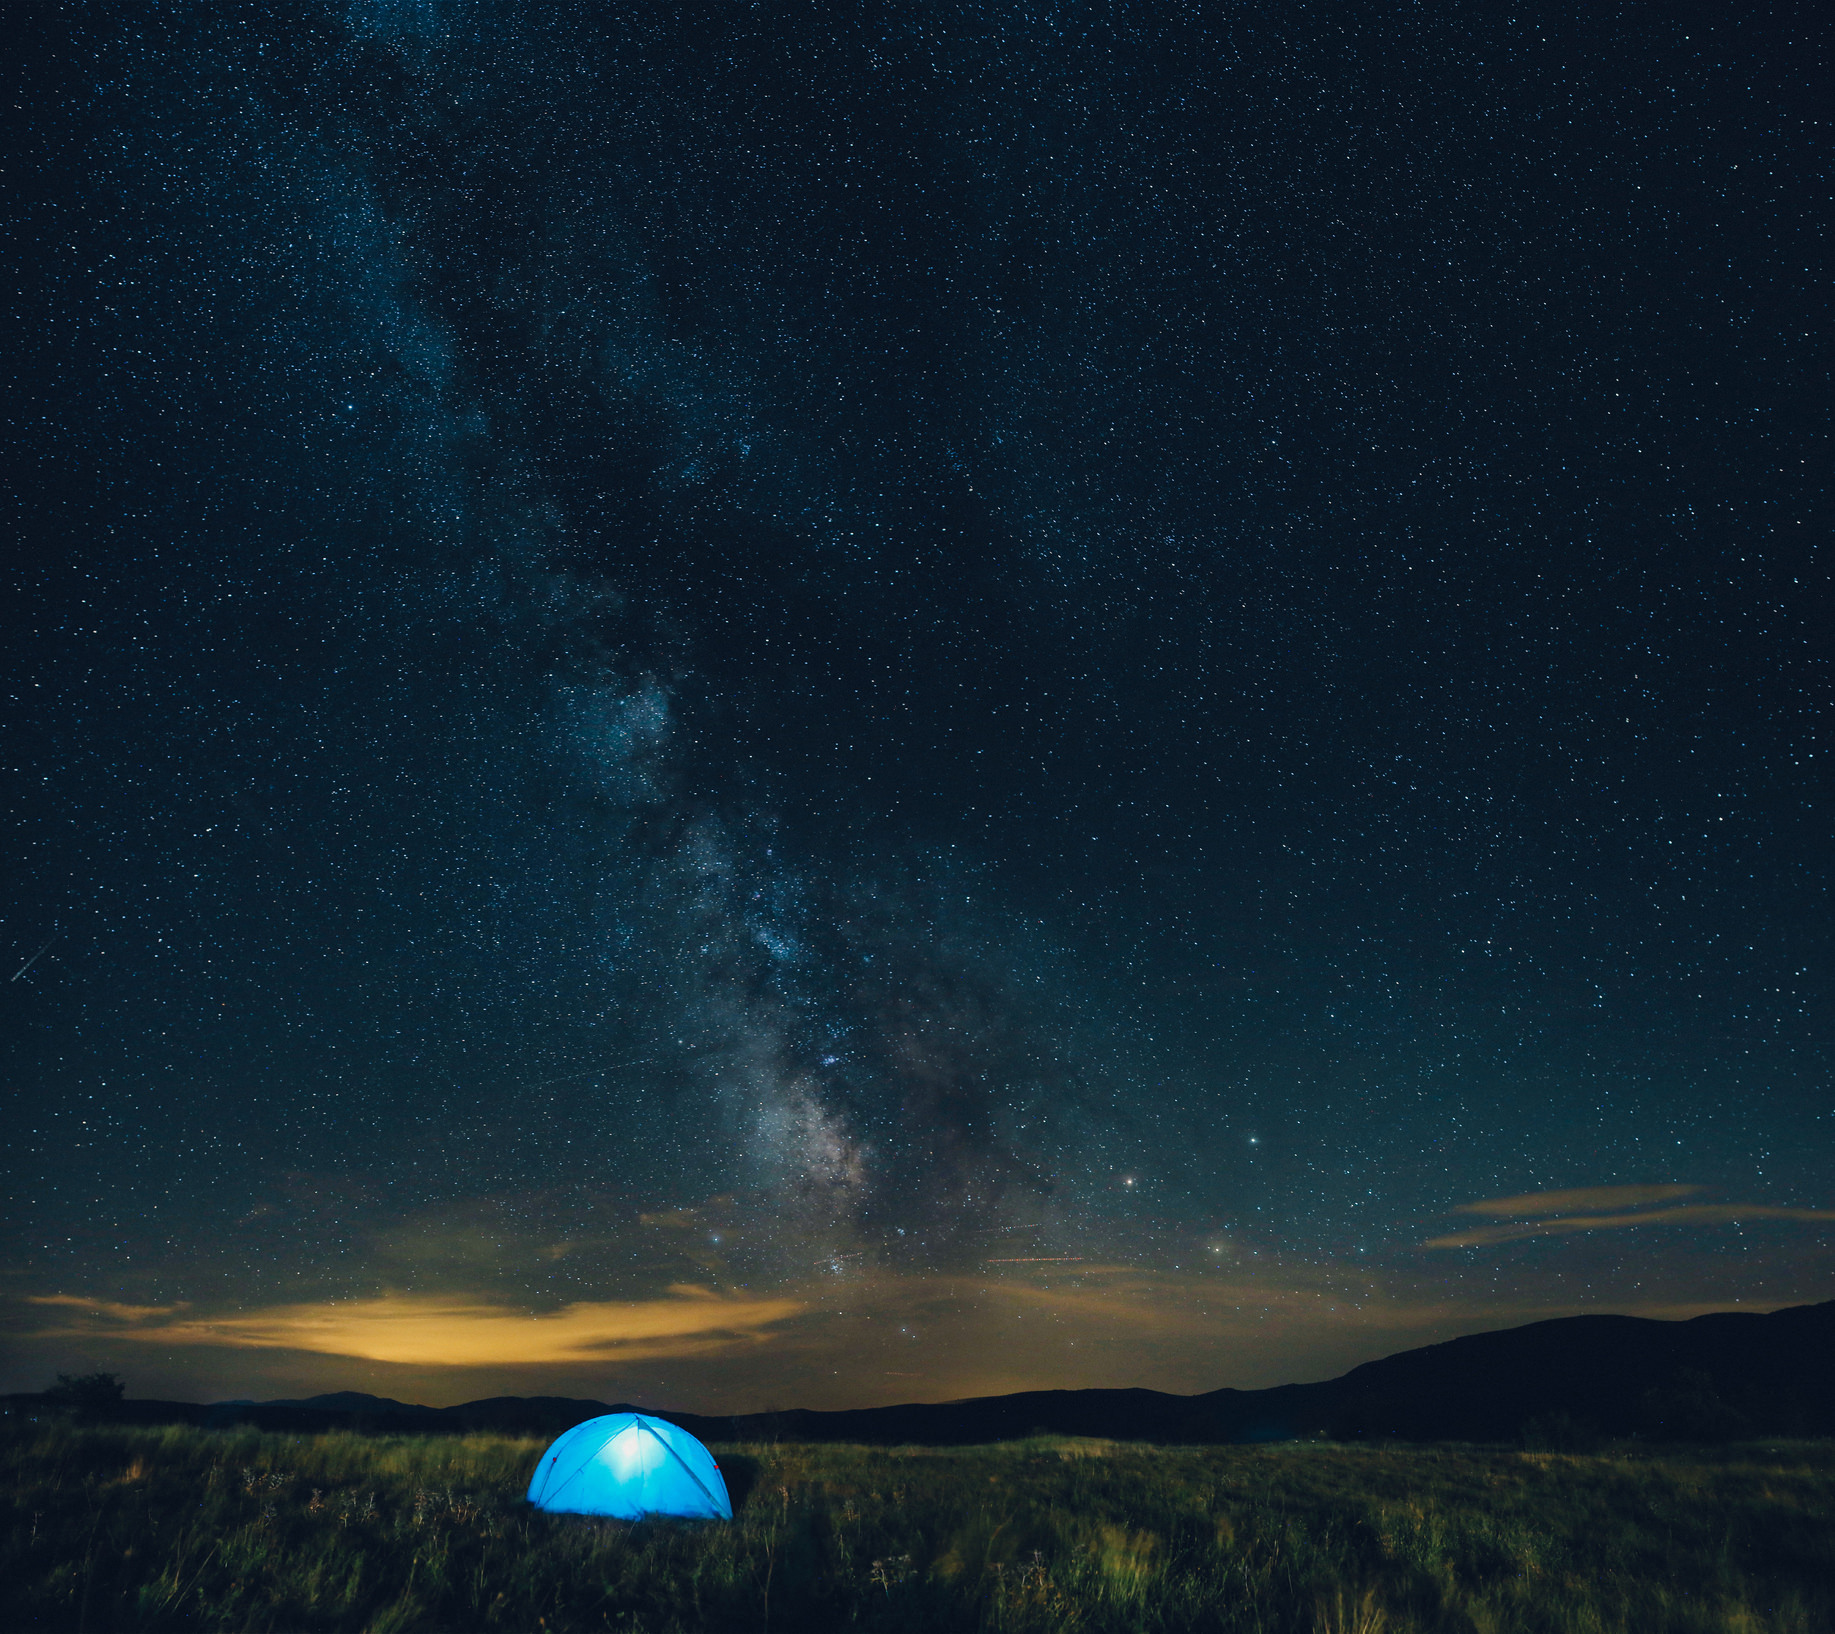
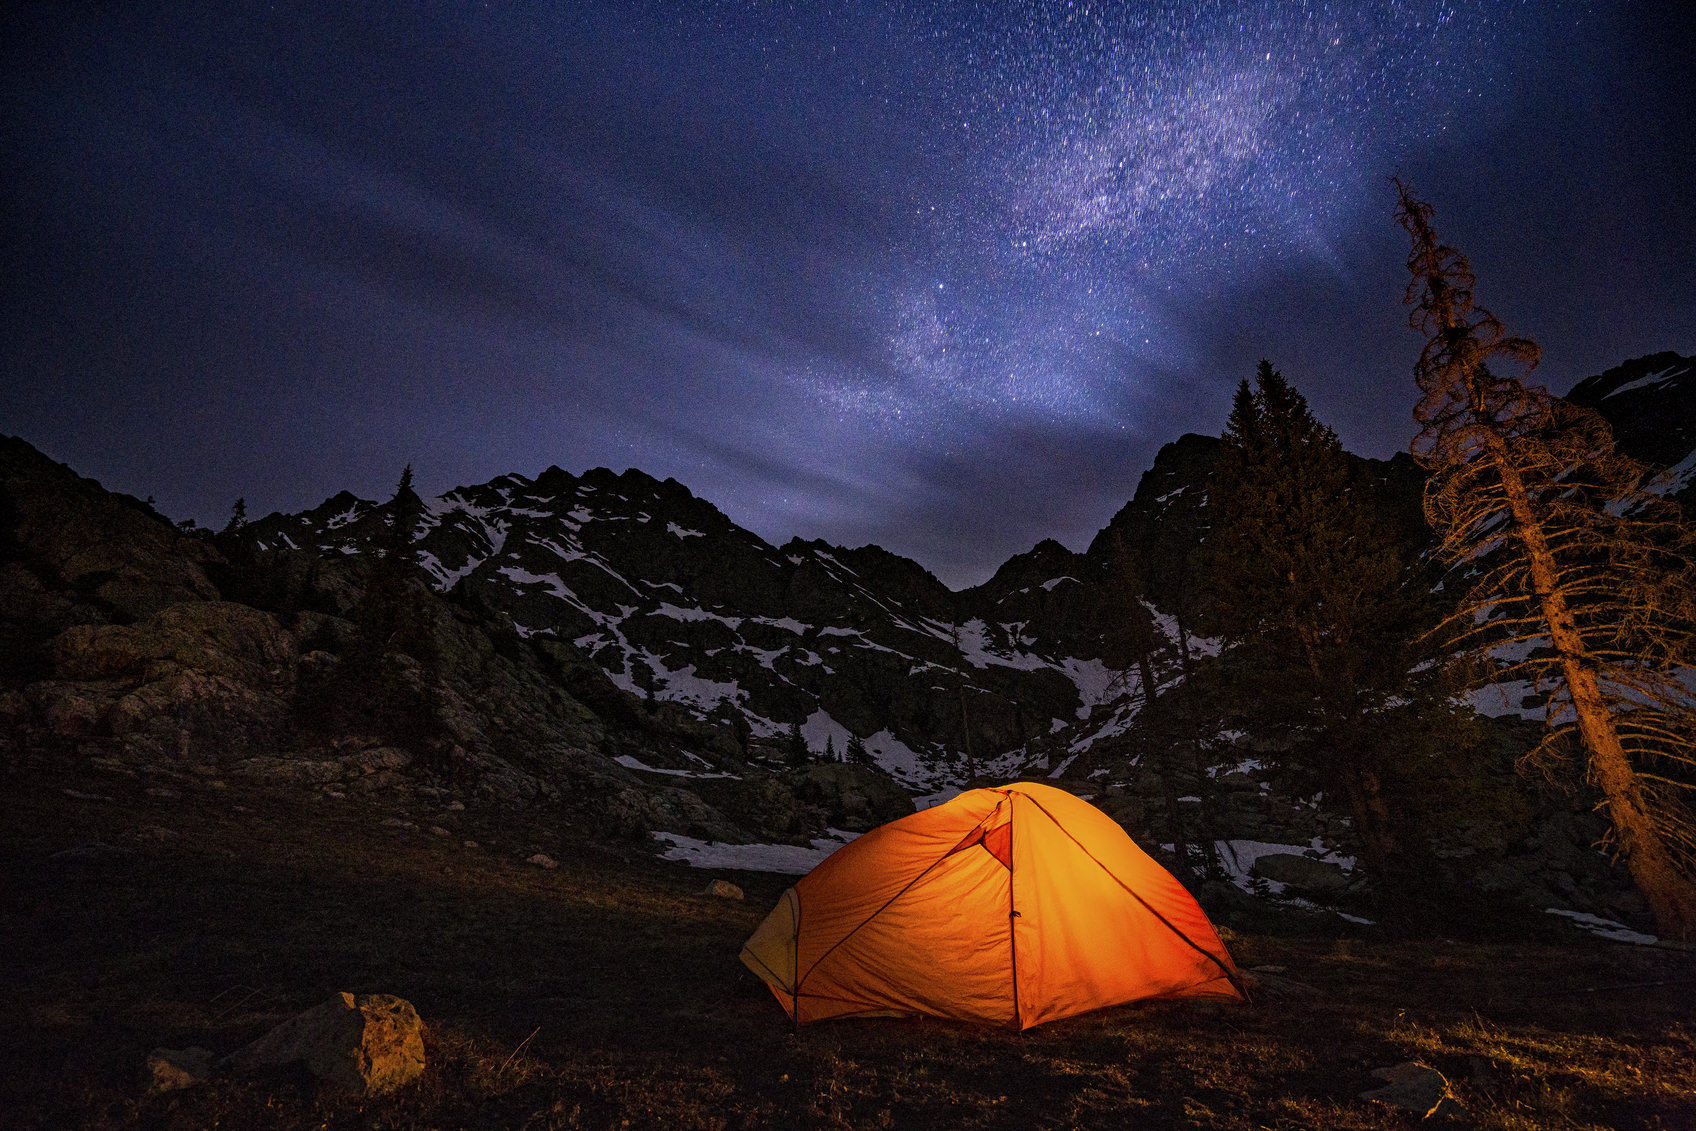
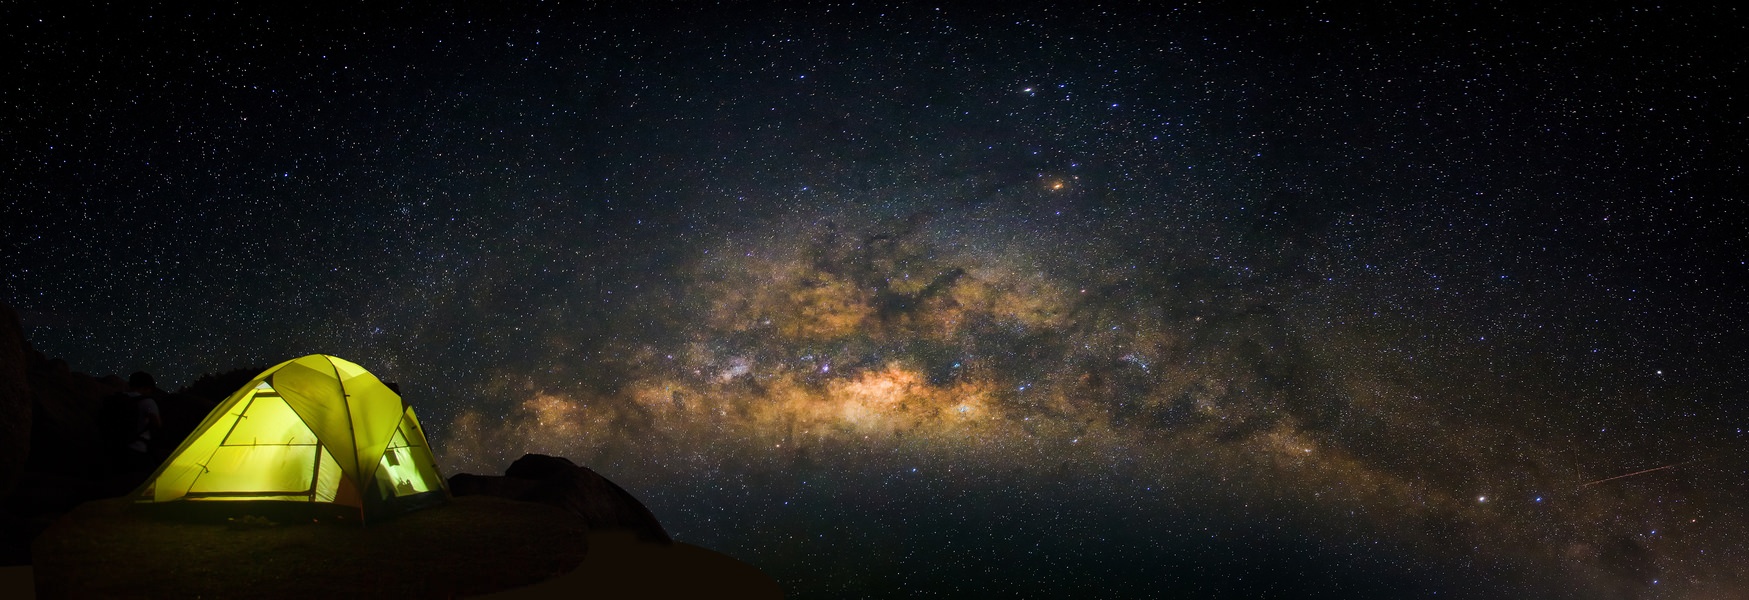
- A tent, in case you want to get some shut-eye (or it could make a neat bit of foreground interest).
- Smartphone, so you can jam to some tunes while your camera does its work (and check the various apps I recommended above as well!).
With that, you’ve got a better idea of the gear, the camera settings, and the accessories that will help you find success in photographing the Milky Way. Now it’s just a matter of putting your plan into motion, heading out, and seeing how well you can capture the beauty of the night sky!
We Recommend
A Quick How-To Guide for Astrophotography Timelapse Videos

When you see the words “astrophotography timelapse” put together, you likely get excited about the thought of creating awesome videos of celestial bodies moving about in the night sky. Then, you probably shudder at the thought of all the work and effort that must go into creating such stunning videos.
Thinking that astrophotography timelapse videos require tons of work is a bit of a misnomer. It’s not as easy as hopping out of the car and snapping a picture with your phone, but it’s also not something that requires you to be a professional photographer with tens of thousands of dollars of photography equipment either.
In this quick guide, we offer up a few tips on basic timelapse techniques and review some gear that will make your success much more likely. Let’s begin!
Subject Matter
Just pointing your camera at the sky is not a strategy that will get you the best astrophotography timelapse. Instead, when thinking about your subject, consider the following:
-
Where can you go where there is very little light pollution (and very little air pollution, for that matter)?
-
How will the moon track across the night sky? How will this impact your image?
-
Where will the Milky Way appear in the night sky?
-
What can you use as foreground interest?
With all these questions in mind, you’ll need to do your homework. For example, do a search online for the current phase of the moon, as well as where in the sky the Milky Way will appear. You can also download any number of apps for iOS and Android devices that will give you this information on the go (assuming you have cellular service). Once you’ve got an idea of the direction you’ll need to face, you can start hunting for ideal locations to set up.
Setting up is perhaps the most time-consuming part of the process. Not only will you need to give yourself time to get to your chosen shoot location, but you’ll need to get there well before dark so you can actually see what you’re doing as you set up your gear. If possible, it might be a good idea to check out the shoot location a few days in advance during the day, that way you can select a few spots that allow you to include interesting landscape elements in the foreground. Ideal foreground elements include trees, rocks, bodies of water, unique landforms, and even man-made objects like roads or bridges.
Camera Settings
There are several camera settings that are crucial to your ability to take a stunning timelapse video. Naturally, aperture, ISO, and shutter speed are chief among them.
Aperture
Set your aperture to its widest. Lenses that have maximum apertures of at least f/2.8 will get you the best results.
ISO
The ISO you use will depend on a couple of factors - the speed of your lens and the camera you use. For example, with an f/2.8 lens, you might need to use a higher ISO to get the level of light needed for a well-exposed series of images than you would if you used an f/1.4 lens. Regarding the camera, it simply depends on the model you’re using. For example, if using a Canon full frame model like the 5DS/R, ISO 3200 is about the maximum you can use. However, with a Sony A7S, which has much better high-ISO performance, you might be able to get away with an ISO as high as 12800. So, when it comes to ISO, you’ll just need to do some experimentation before commencing with your timelapse.
Shutter Speed
The shutter speed you select will depend on the aperture and ISO values you elect to use. For example, if you shoot at f/2.8 and ISO 3200, a good place to start with your shutter speed is at around 30 seconds. Again, you’ll need to experiment a bit to get the exposure settings right, as the location you’re shooting, the presence of artificial light pollution, and the brightness of the moon will all impact how dark or bright the scene is.
Additional Settings
If your camera is enabled with long-exposure noise reduction, turn it off. If you don’t, the camera’s write time to your card is greatly extended, making it much more difficult (if not impossible) for the camera to keep up with your desired shooting interval. Instead, go without in-camera noise reduction and use noise reduction in post-processing instead. Additionally, take your camera out of automatic white balance, choosing either tungsten or incandescent. This will give your images improved coloring.
Focus
The most difficult camera manipulation is getting the focus right. Though infinity is often the best focus point, it isn’t a given. The easiest method is to use your camera’s live view function so you can frame the shot and then zoom in for inspection of the details to ensure they are in focus. Locate a distant object in the scene (the brightest star in the sky is a good choice), then zoom in to inspect it for sharpness, rotating your lens’ focus ring until the object is tack-sharp.
Interval
Finally, you’ll need to put your camera in bulb mode and take a few practice shots of the scene. Start with a shutter speed of around 10 seconds, increasing or decreasing the exposure time as you see fit until you’re able to get an image that is well-exposed throughout.
Once you’re dialed in with the appropriate shutter speed, you’ll need to determine the interval between shots. The interval should account for both the shutter speed of each shot and the buffer time during which the camera writes the image to the memory card. The buffer time will depend on a couple of factors, including the speed of the card and the camera you’re using. A good rule of thumb is to add five seconds to the exposure time to account for buffering. For example, if your exposure time is 20 seconds, set your interval at 25 seconds.
Gear Up for Astrophotography Timelapses
If you want to make the process of creating incredible timelapse videos easier, we highly recommend utilizing a specialized astrophotography mount with your camera.
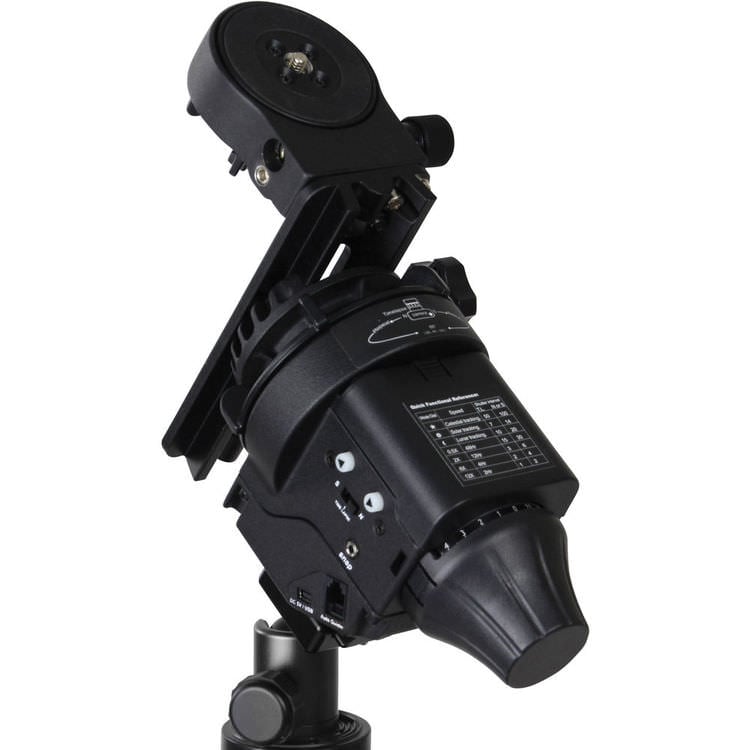
There are a wide range of mounts out there that make astrophotography timelapses easier to create, but we prefer those made by Sky-Watcher. Their Star Adventurer mount is multifunctional and user-friendly, so you can track sidereal, solar, and lunar activities. It’s got an automatic DSLR shutter release control so you don’t have to worry about depressing your camera’s shutter, and even better, it has preprogrammed parameters that help you in creating astrophotography timelapses featuring the best features that the night sky has to offer.
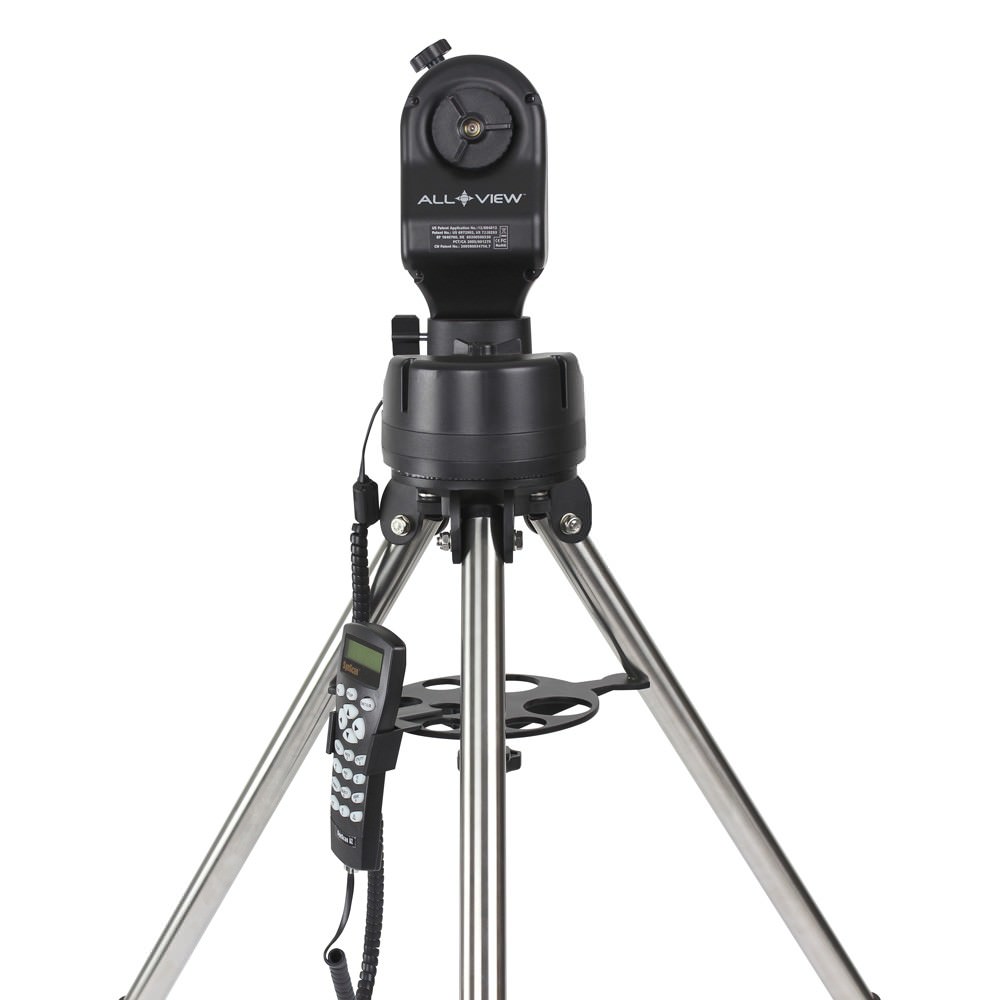
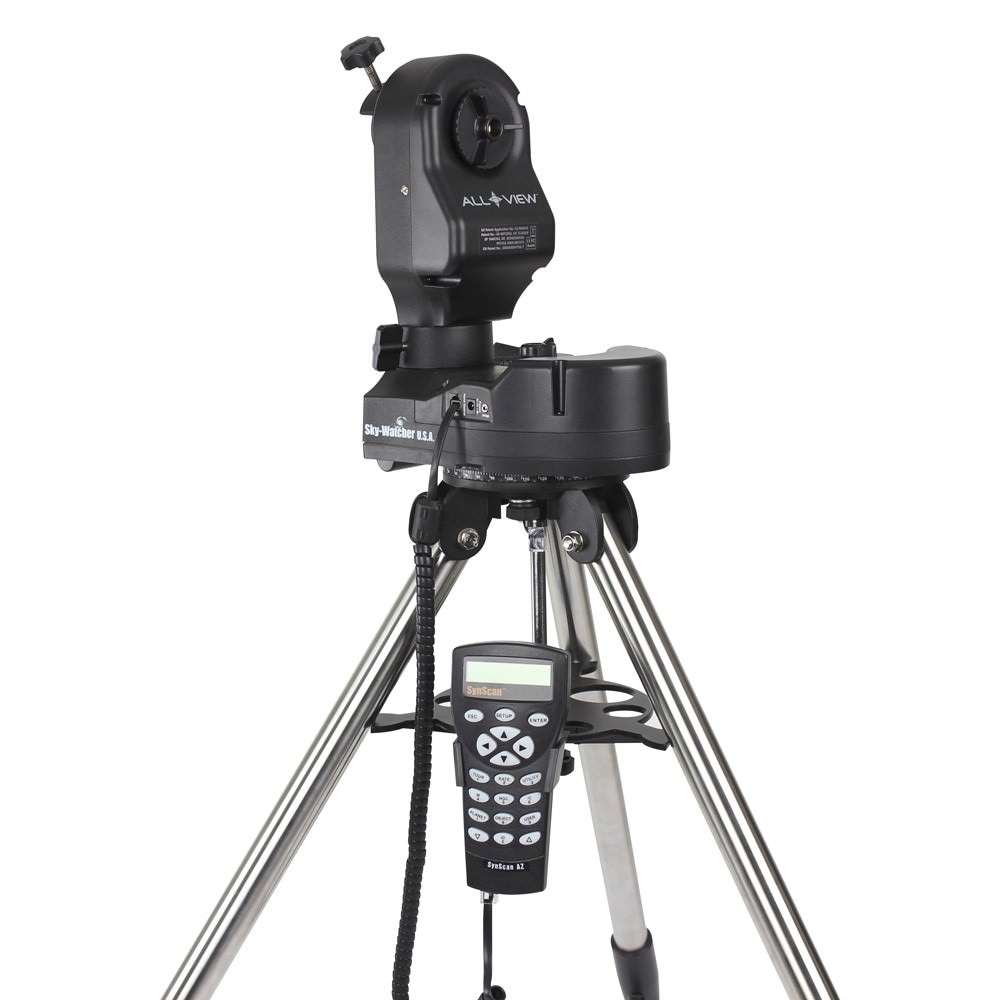
Another option is the Sky-Watcher Allview mount pictured above. The Allview is fully automatic and can be paired with a wide array of cameras. With 360-degree range, you can create timelapse videos with stunning movement, such as tracking the moon as it travels across the sky. The Allview is motorized as well, so when shooting with your DSLR, the smooth panning motion will facilitate sharp, clear pictures without any indication of blur - a must-have for top-notch timelapse videos.
There you have it! From selecting the subject matter to essential camera settings to top-notch astrophotography mounts that will make the process far easier, you’ve got all the details you need to dive into astrophotography timelapse videos. Like with anything, practice makes perfect, so get a mount from Sky-Watcher, plan out your shoot details, and start making awesome timelapses!
We Recommend
Astrophotography Gear Guide: Essential Equipment
Space has always been a bit of an intriguing place for humans. We love to look at the stars and wonder what lies beyond our own world. Beyond merely gazing, though, is a passion for photographing Earth’s neighborhood - a passion shared by an ever-growing number of photographers.
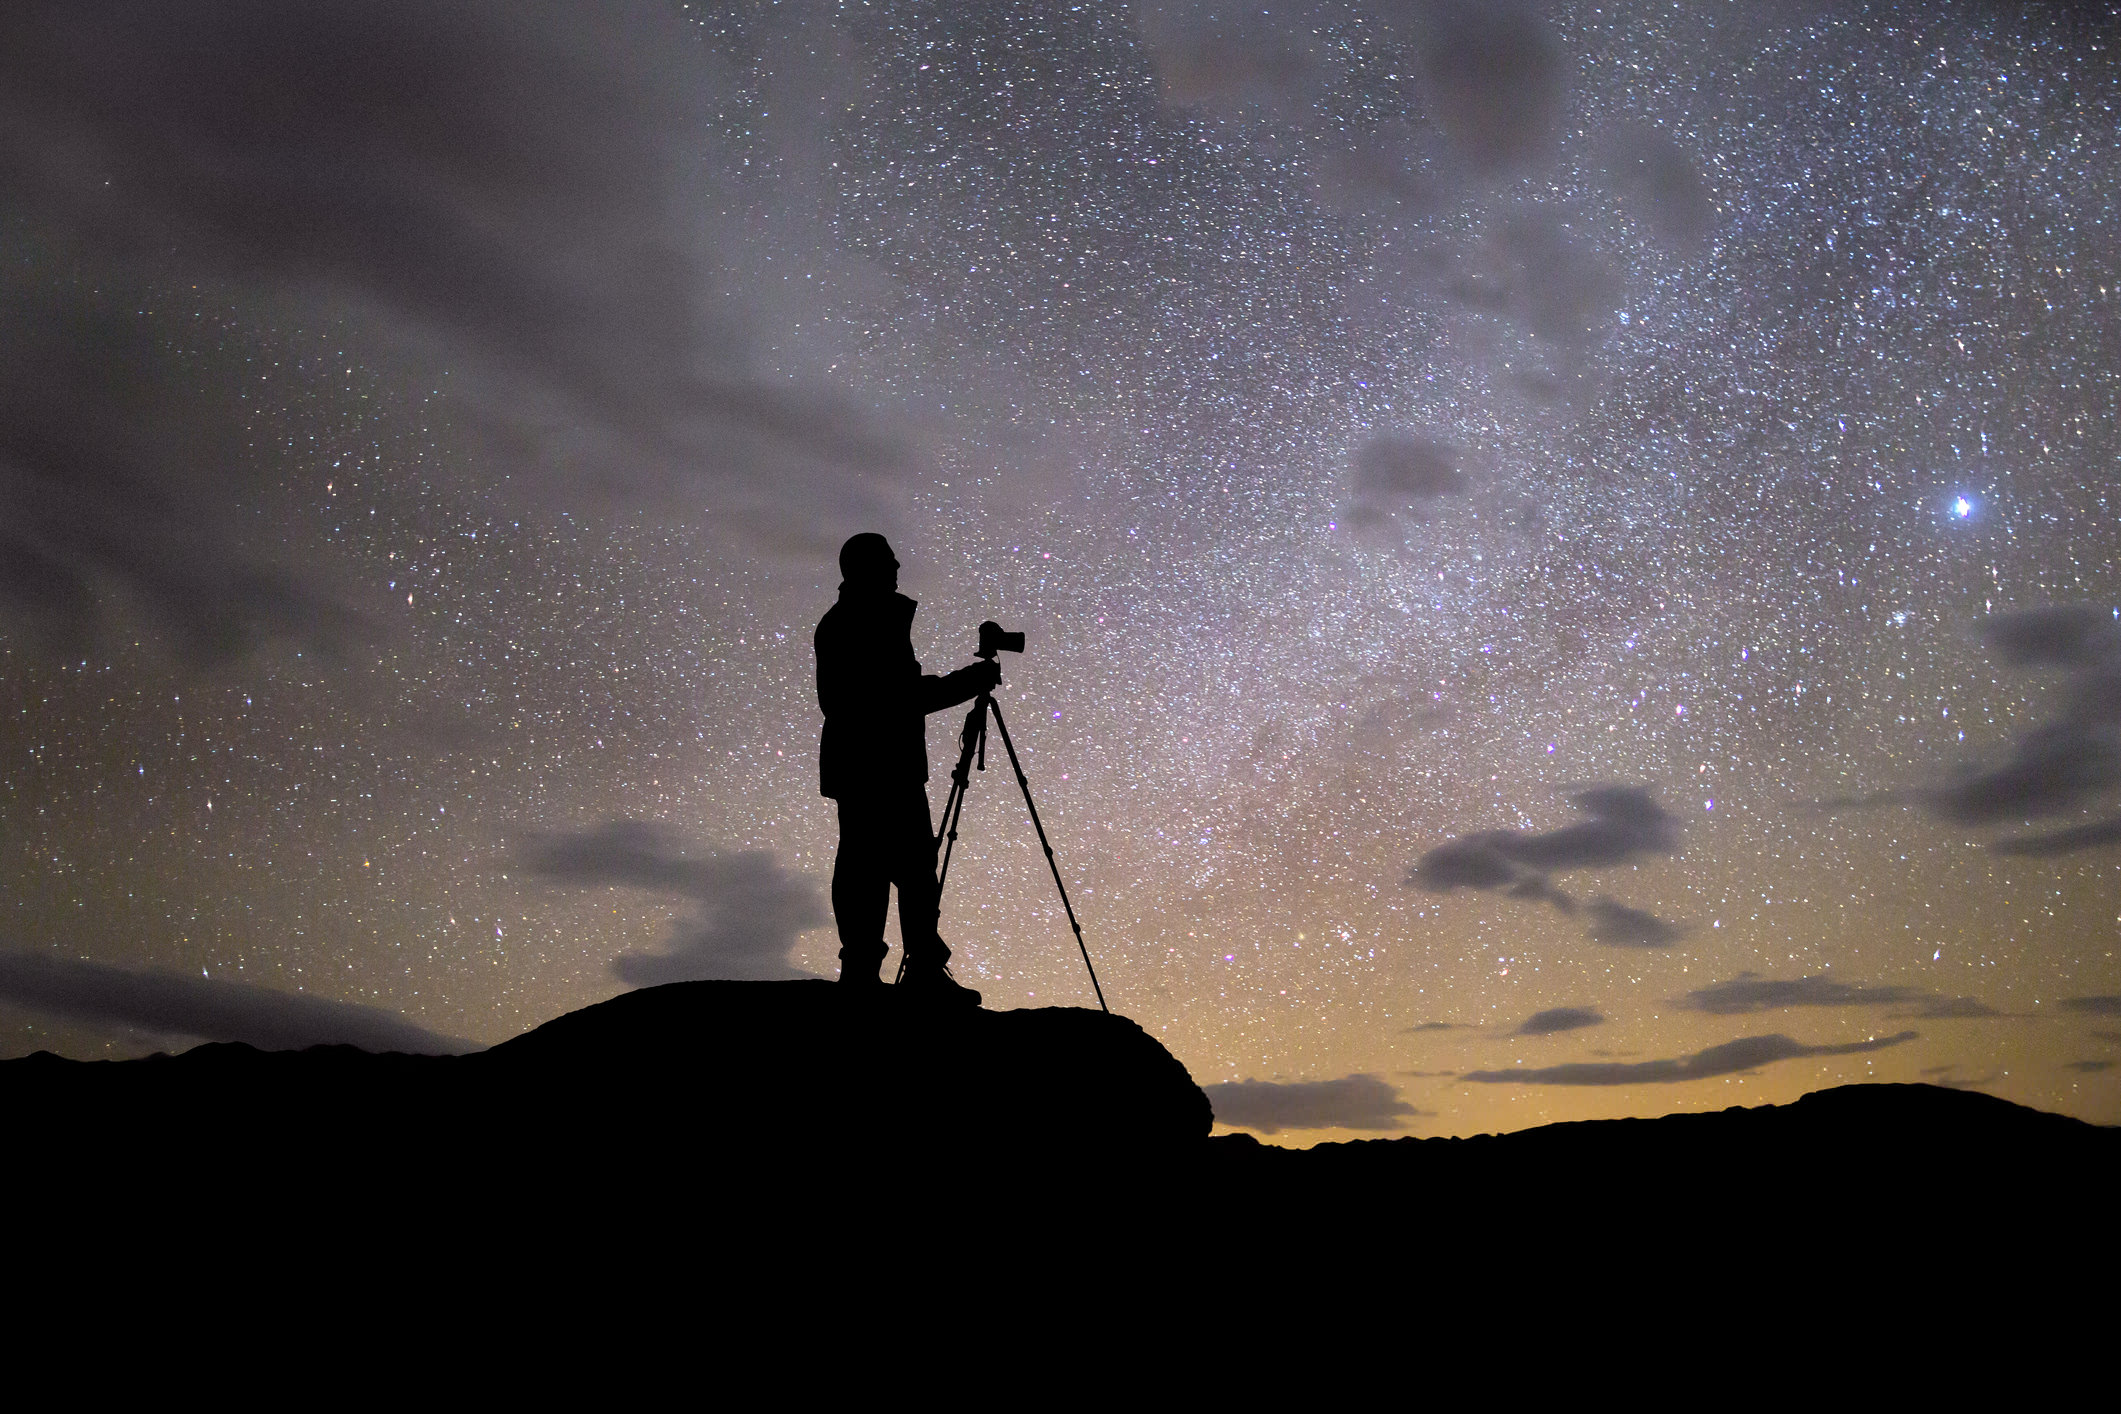
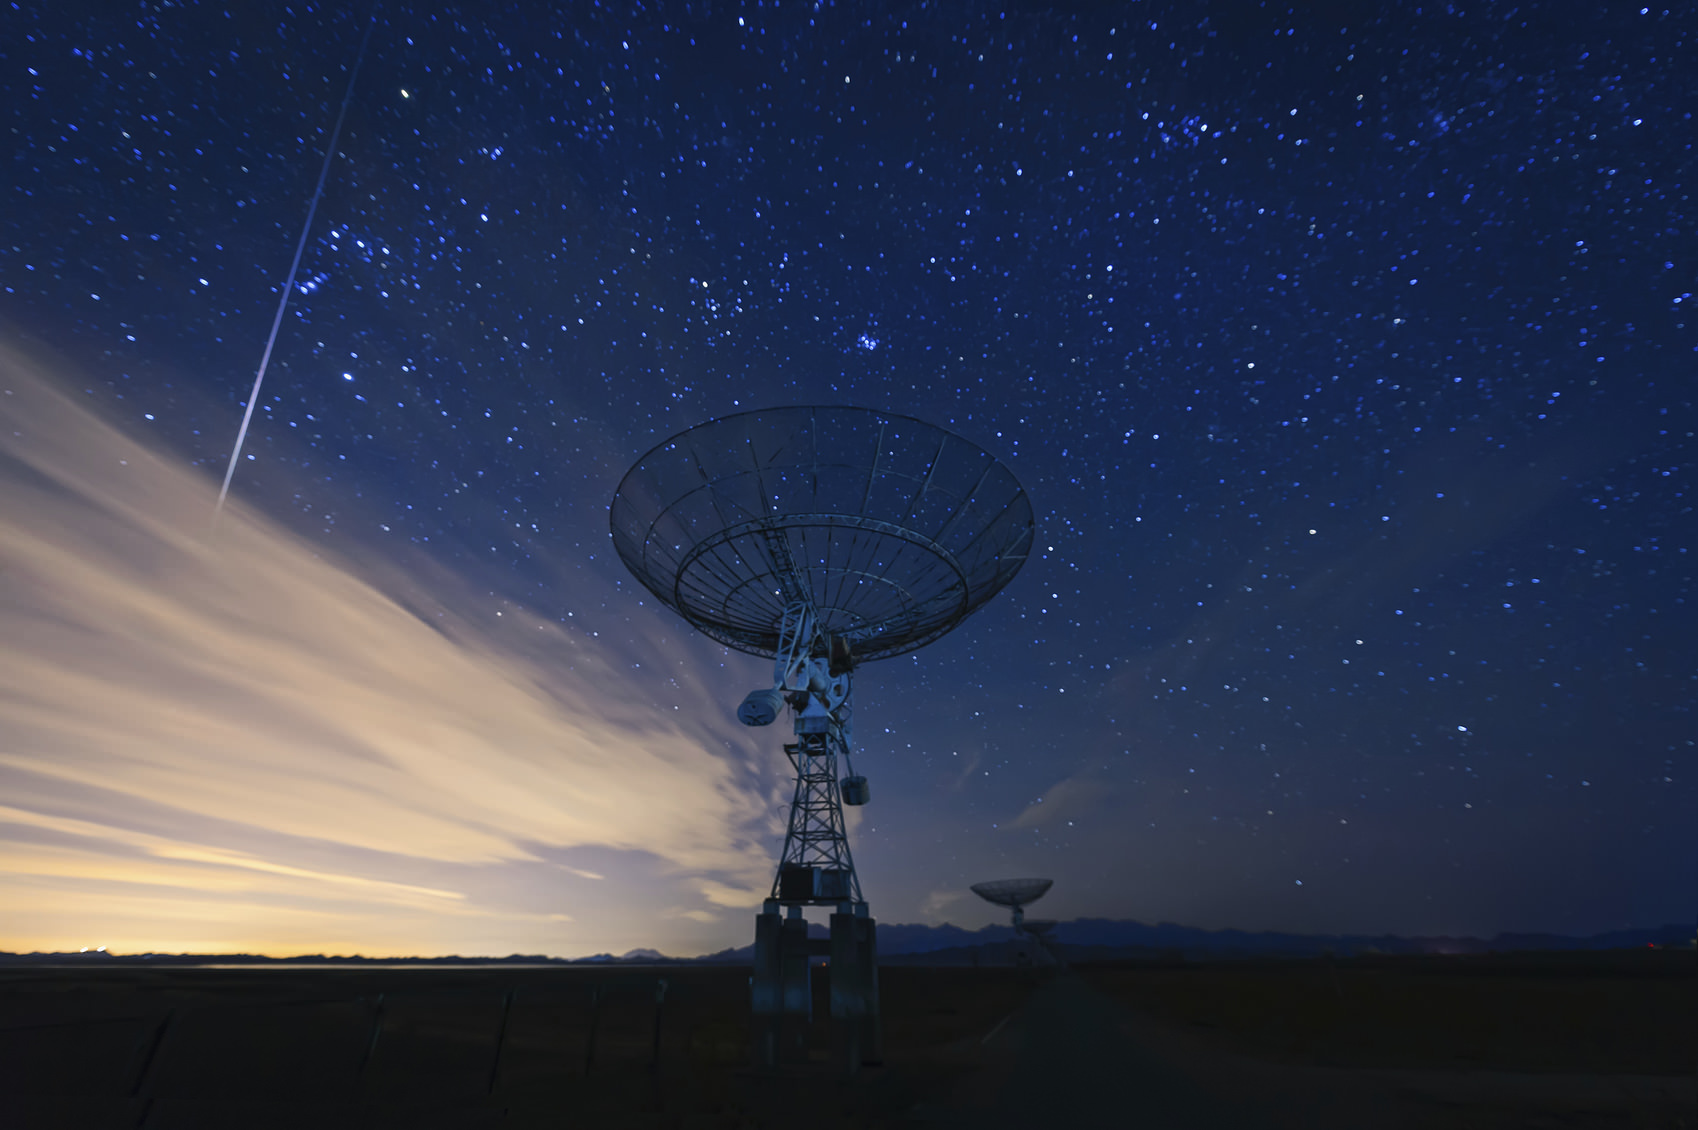
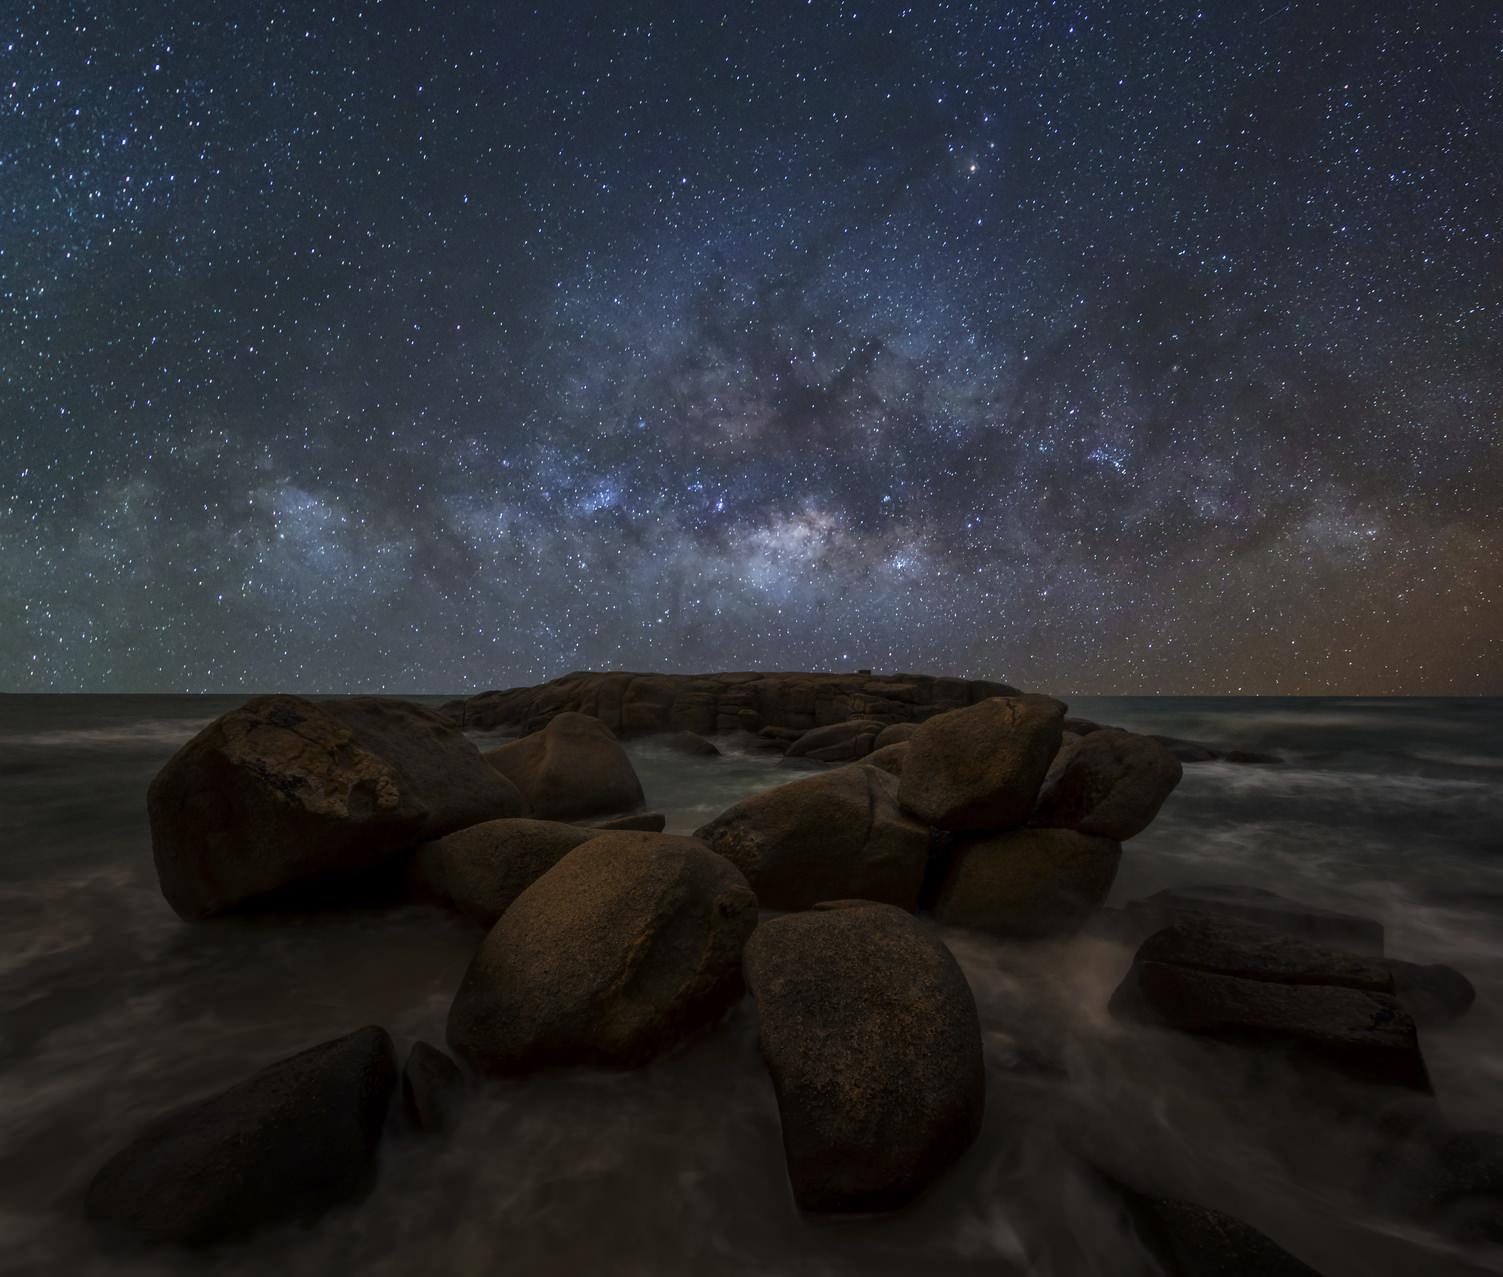
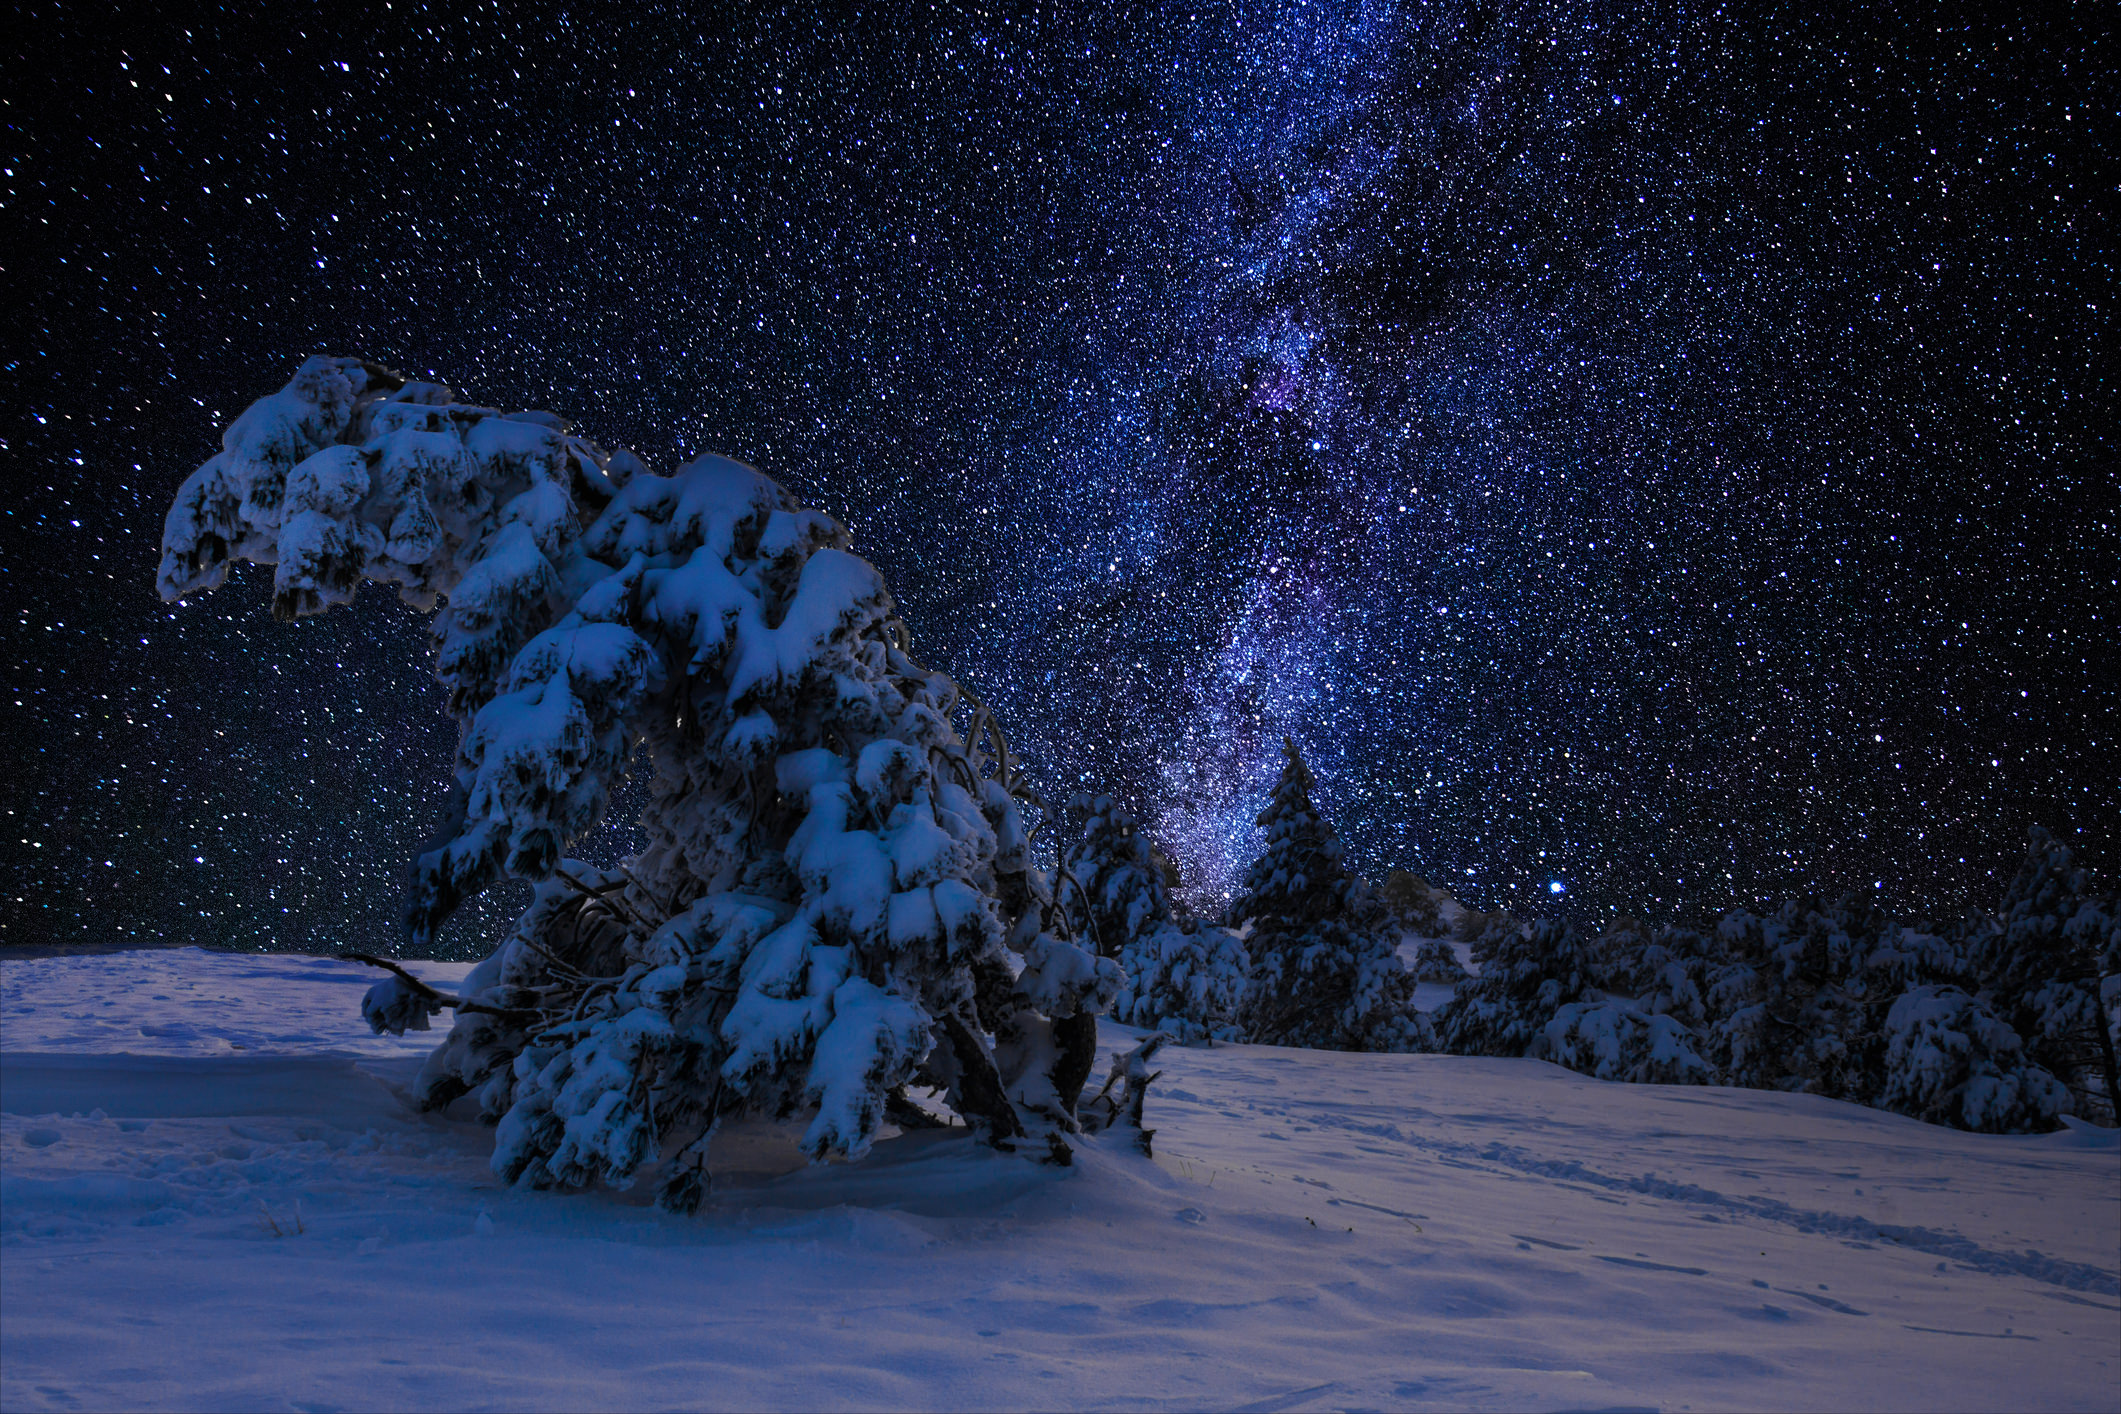
Advancements in technology have made astrophotography something that is no longer reserved for astronomers, NASA scientists, and professional photographers with a huge budget for gear. In fact, any everyday Joe with a few essentials can create stunning photos of the sky like the one above.
Without further ado, here’s our guide to the essential gear you need to create long exposures and time-lapses of the night sky.
Camera
Like any other type of photography, astrophotography is dependent upon your camera being able to gather available light. When shooting in the middle of the night, light is hard to come by, so having a camera with a large sensor - like full frame cameras do - will be advantageous. The larger the sensor, the more light the camera can collect. The more light it can collect, the more detailed and crisp the image will be.
There are several options that would make an ideal choice. The Canon EOS 5DS is considered one of the best cameras currently on the market and has the highest resolution of any full frame camera at 50.6 megapixels. The Nikon D810 is no slouch either, and though the resolution doesn’t compare to the 5DS, the D810 has a far better battery life.
Both cameras are pricey, however. If you want decent results on a smaller budget, crop sensor cameras are worth a look. The Nikon D500 gets high praise for having high-end features packed into a smaller and more rugged body for those long, cold nights photographing the stars. The Canon EOS 7D Mark II isn’t a bad choice either, with a body that’s as tough as the D500’s and plenty of features borrowed from its full frame cousin, the EOS-1D X Mark II.
Fast Lens
When you select a camera, it's light-capturing abilities are an important factor. The same holds true for the lens you select - it needs to allow as much light as possible to pass through it to the camera’s sensor. As a result, fast lenses are ideal for astrophotography. In a perfect world, you should look for a lens that’s at least an f/2.8, though decent results can be had with an f/4 lens. The problem, of course, is that the faster the lens, the larger its price tag.
Don’t be afraid to go off-brand here. Nikon and Canon make excellent lenses, but they are often pricier than those offered by third-party manufacturers. The Rokinon 14mm f/2.8 IF ED UMC Ultra Wide Angle Fixed Lens for Nikon are both solid choices for Canon and Nikon owners, respectively. These and other off-brand lenses are well-built, offer incredible sharpness, and can be found for hundreds of dollars less.
Other considerations: find a lens with manual focusing, and keep it in the ultra-wide-angle range. Many astrophotographers use a 14mm lens, though you can go up to a 24mm lens and get similar results.
Tripod & Mount
It goes without saying that you need a tripod to maximize your ability to take photos of the night sky. Whether it’s a time-lapse or a long exposure, you’ll need a solid base on which your camera can sit.
Additionally, having a specialized astrophotography mount will make your life much easier - and your photos that much better. The Sky-Watcher Star Adventurer Motorized Mount fits the bill for aspiring (and experienced!) astrophotographers. This modular tracking platform is easy to use and integrates with almost any tripod, allowing you to photograph the moon, sun (with filter), and the Milky Way with ease. The mount has a time-lapse mode with pre-programmed intervals that are automatically adjusted to fit the shooting mode you select.
What’s more, the Sky-Watcher Star Adventurer has a DC servo motor with an 86mm diameter, 144-tooth aluminum alloy wheel gear and a 13mm diameter brass Worm gear for smooth motion. There are numerous speed options, including 0.5, 2x, 6x, and 12x tracking speed as well. With northern and southern hemisphere compatibility, you can create the astrophotography images you dream of, regardless of your location on planet Earth.
That’s it! All you need is a decent camera, a good set of glass, a tripod, and an easy-to-use astrophotography mount in order to join the ranks of being an astrophotographer. There are technical and compositional considerations to be made as well, but with this gear, you’ll be set on the right path for success in photographing the wonders of the night sky.
We Recommend
Astrophotography Tip: How to Get Clear, Sharp Pinpoint Stars
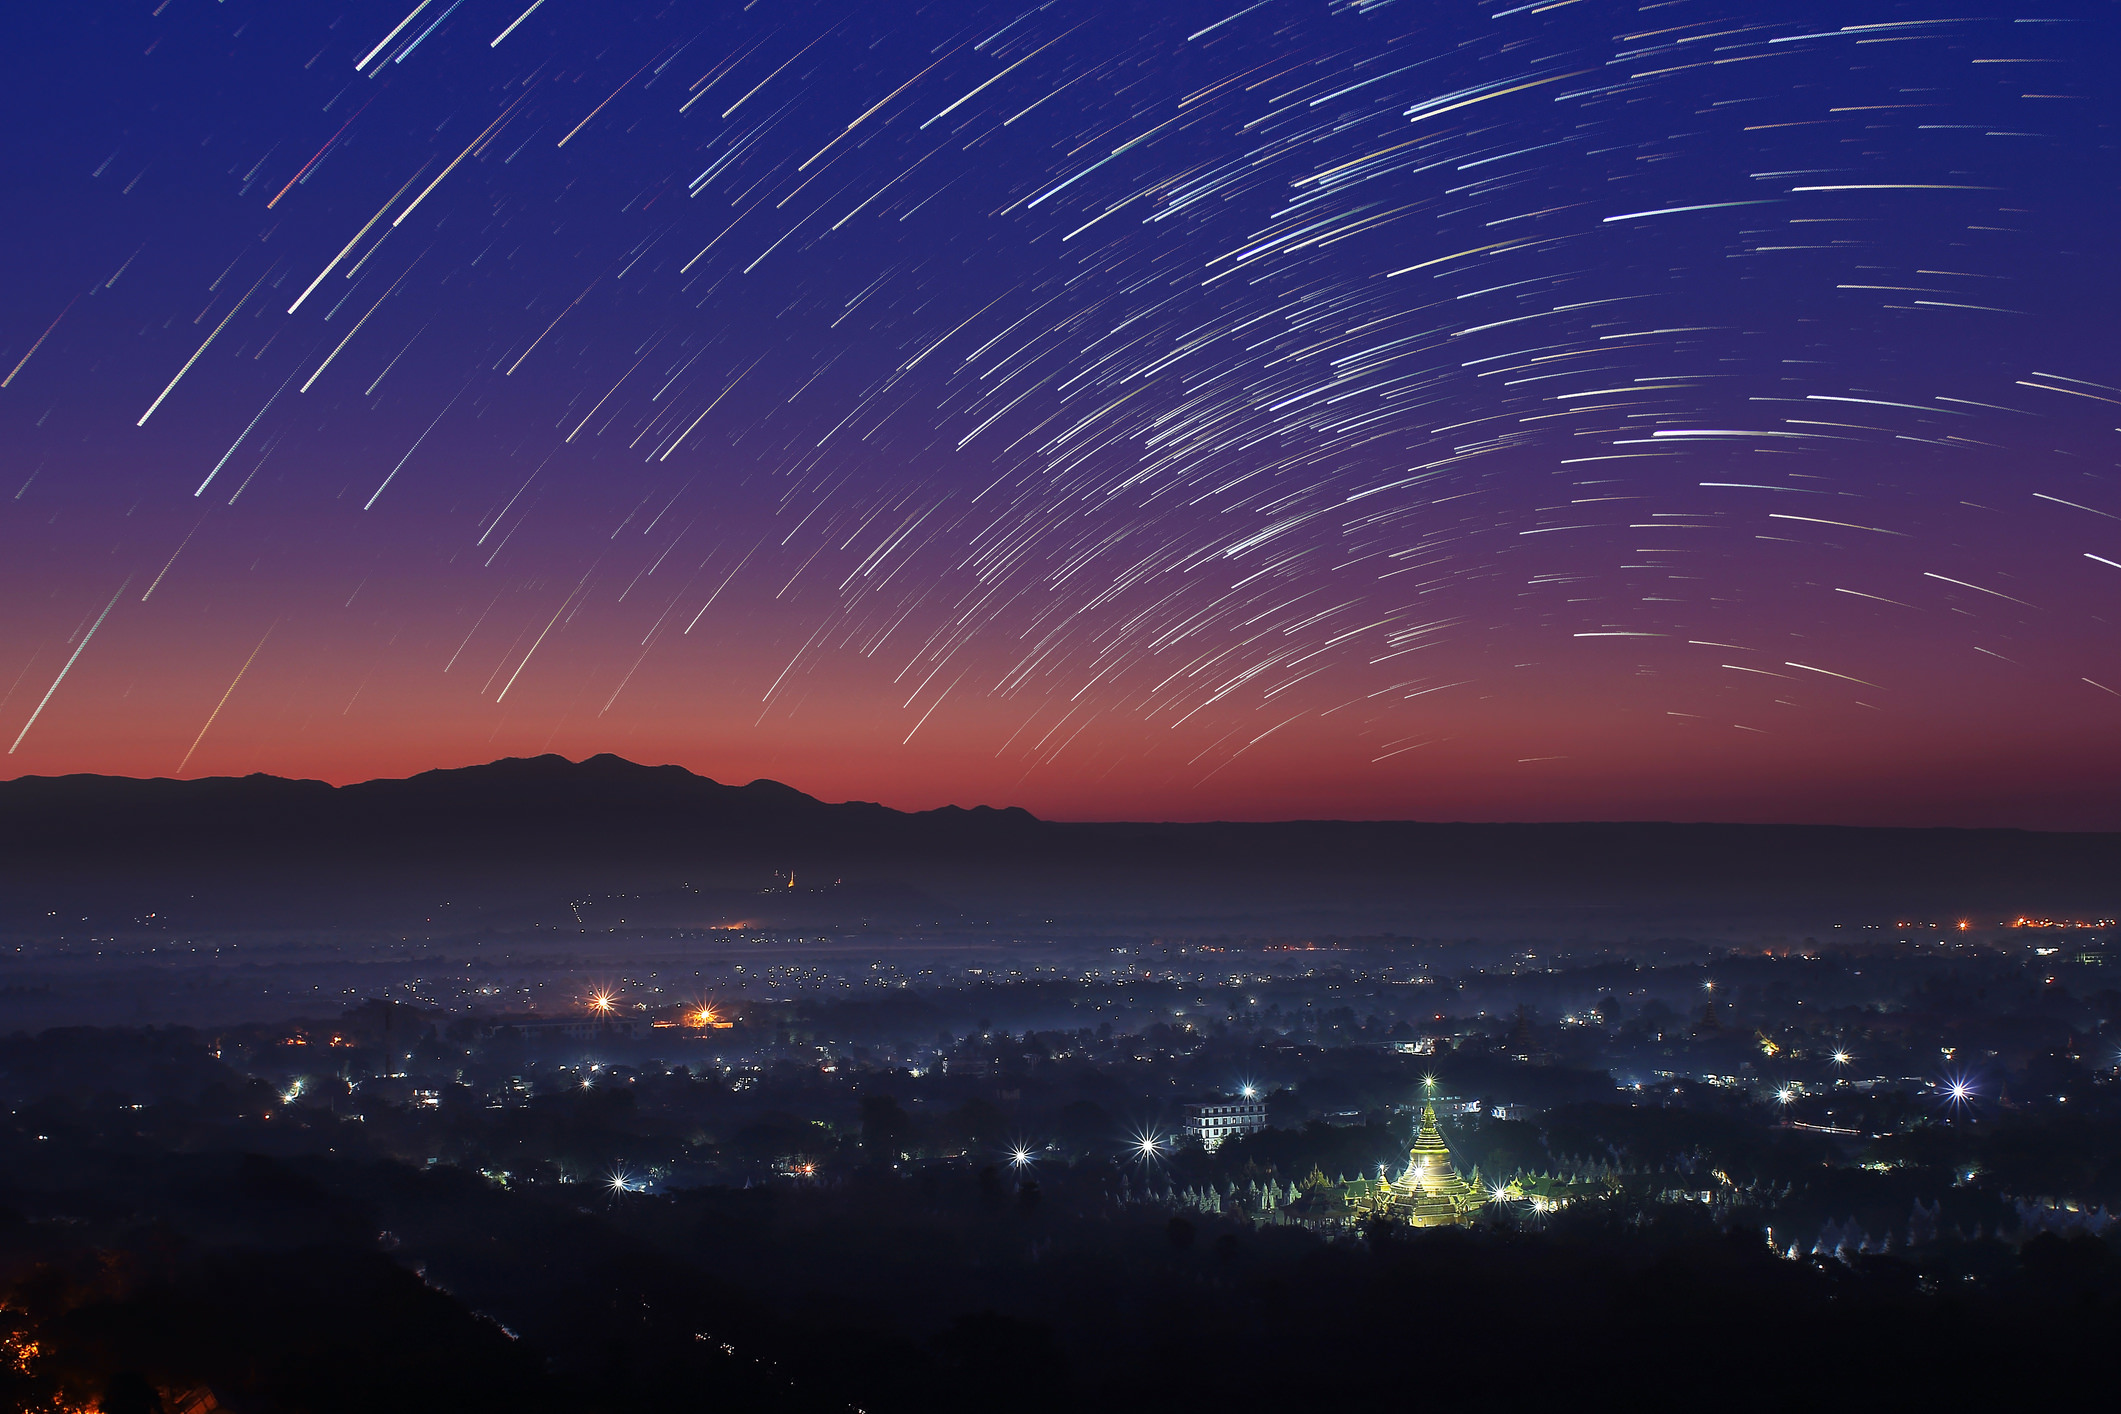
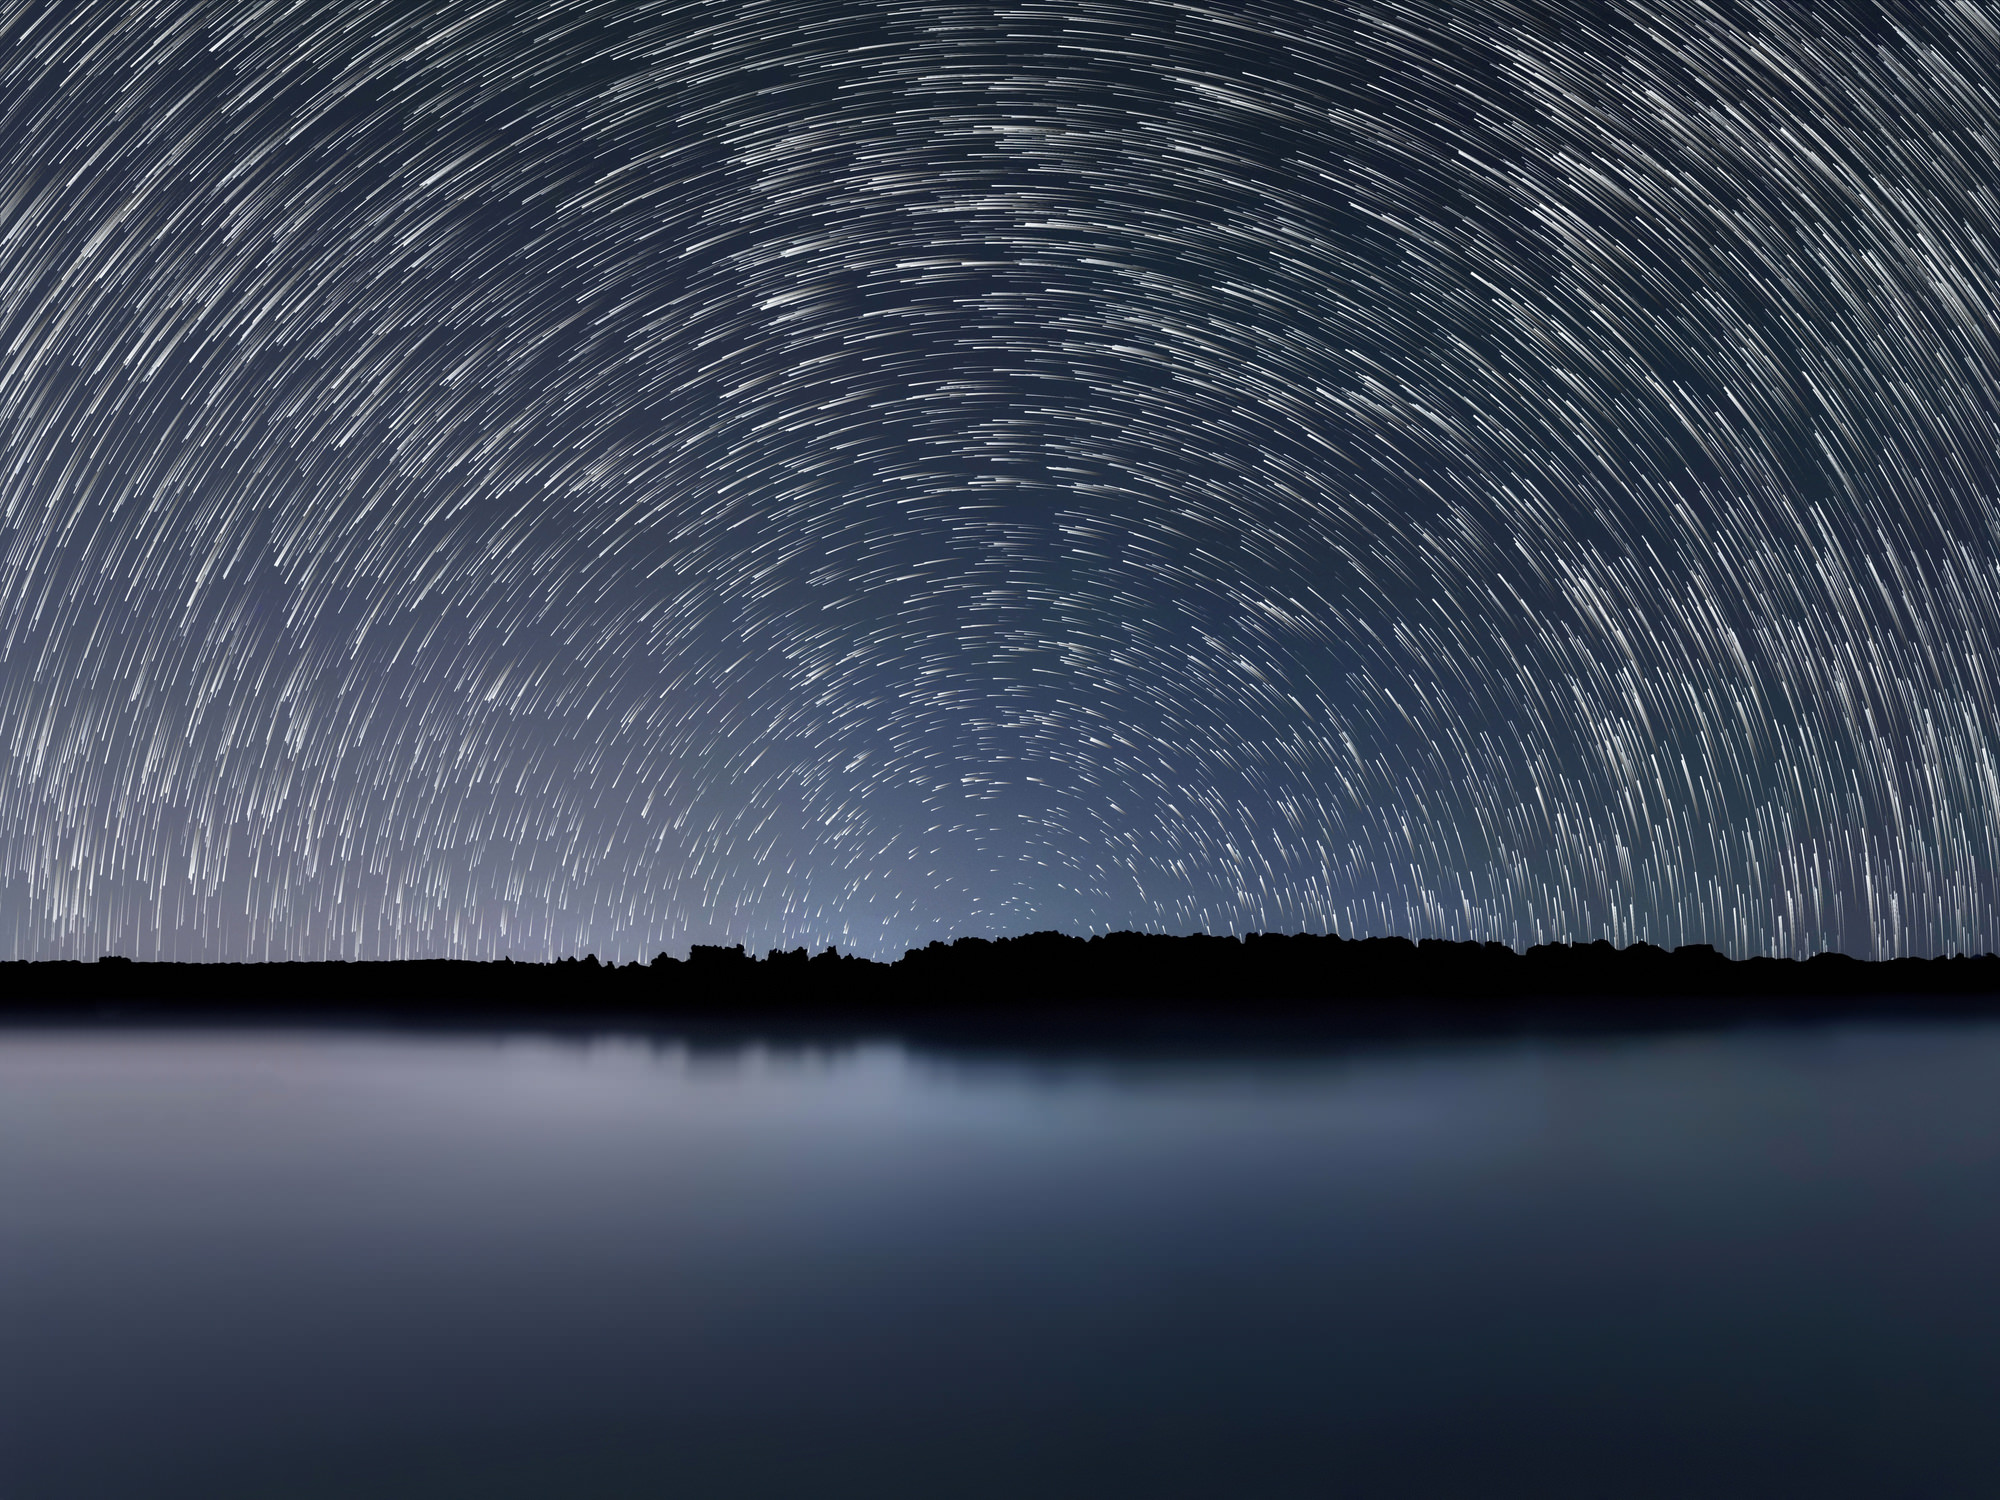
Many people that venture out into the night to dabble in astrophotography end up taking long exposures in which the stars have long trails. Those kinds of photos are breathtaking, no doubt, but sometimes it’s also a breathtaking result to get sharp, pinpoint stars in the night sky that are more representative of what we see with our own eyes.
But how do you do that?
There are a couple of different ways of going about it: The Rule of 600 or with some top-notch equipment like the Sky-Watcher Star Adventurer.
The Rule of 600
When you want to avoid star trails, you have to do a little bit of math. Because the earth is in constant motion, you have to determine just how long your shutter can remain open without inducing star trails. The method by which you calculate the shutter speed is called the Rule of 600.
To use the rule, you need to know the focal length of your lens. That number is then used to divide 600 to get the maximum exposure time for that focal length. For example, if you’re using a 14mm lens, you’d divide 600 by 14, which is approximately 43 seconds, or the longest shutter speed you can use before star trails start to emerge.
Naturally, you need a fast lens with good low-light capabilities, because even though 43 seconds sounds like a long time, in the dead of night, it isn’t! Since you’ll have to limit the shutter speed you can use, having a lens with a larger maximum aperture and better ISO performance than most will help your camera gather the light it needs to generate a well-exposed photo of the night sky.
The Sky-Watcher Star Adventurer
If you want to set yourself up for success with getting sharp, pinpoint star fields, equip yourself with the Sky-Watcher Star Adventurer. The Star Adventurer has built-in sidereal tracking, so once you set it up, it will track the stars for you - no Rule of 600 is necessary! Better still, the Star Adventurer has seven tracking modes, enabling long exposure photos of the stars without trails (or, if you really want them, with trails too).
Adding tracking capability and precise, controlled camera movement opens up a whole new world of possibilities in wide-field astrophotography, whether you’re a seasoned pro or a brand new beginner. Diving into astrophotography has never been so easy or convenient - the Star Adventurer is stable, highly portable, and easily compatible with 1/4 and 3/8 inch tripod threads. Just attach it to your camera, and in turn, to your tripod, and use its user-friendly controls to dial in exactly what you want.
The Star Adventurer controls your DSLR shutter through a built-in interface, and there's an illuminated polar scope to facilitate easy alignment. It has a ball head adapter as well, and will run up to 72-hours on four AAA batteries. It will help you get spectacular shots of the night sky like the one above. So what are you waiting for? Get out there and see what incredible images you can take of the night sky!
We Recommend
Composition Techniques to Take Your Astrophotography to the Next Level
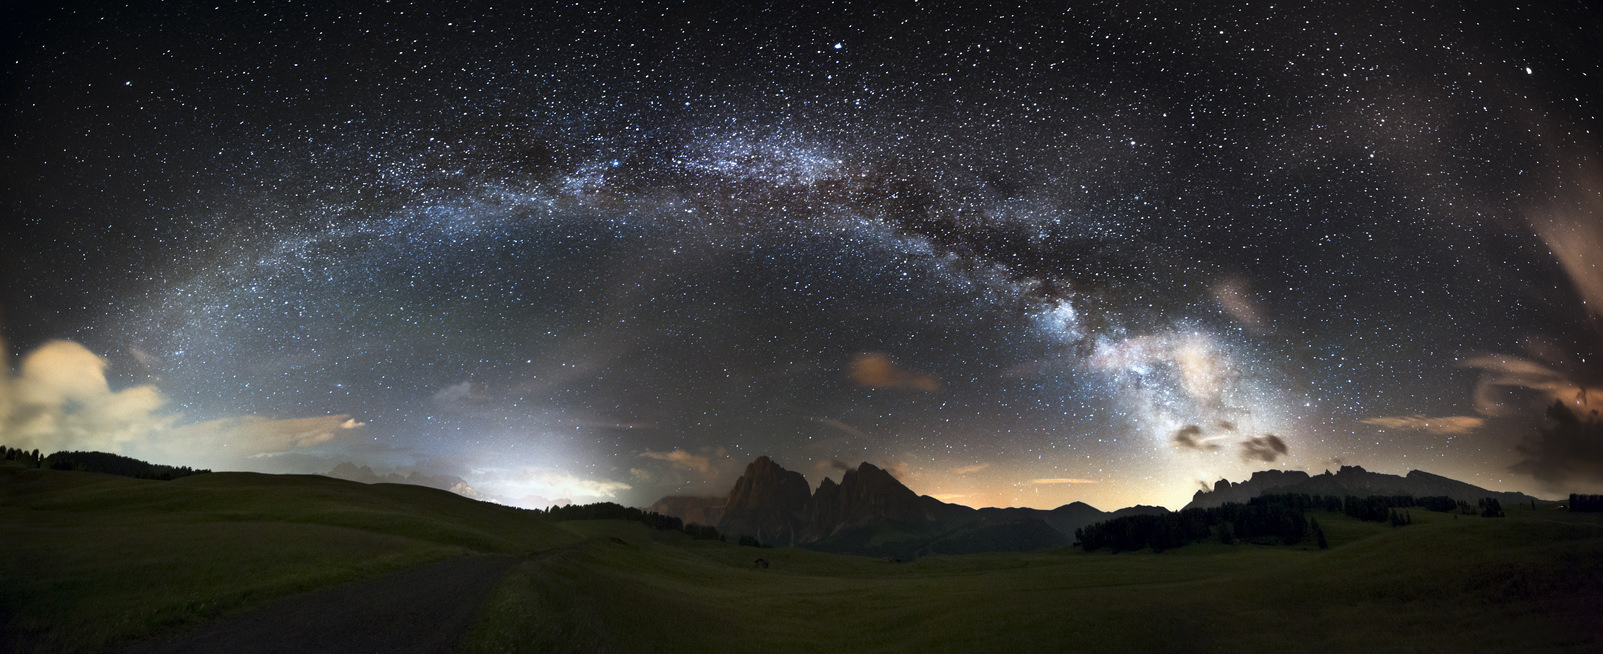
When it comes to challenging subjects, the night sky has to be right at the top of the list. Make no mistake - photos of the stars have the potential to be beautiful, but a lot of work has to go into maximizing that beauty.
Though images like the one above could stand on their own without additional elements in the frame, there are a few compositional choices that can enhance the beauty of the images you create of the night sky. With that, consider these tips the next time you head out to capture the beauty of the heavens.
Give Light Pollution Some Credit
It’s often said that the best astrophotography results from dark skies far from any light pollution. And though that is certainly true in many cases, sometimes, light pollution can actually add to the drama of your astrophotography. Whether it’s city lights, the trail of a passing car’s headlights or taillights, or a simple shaft of light emanating from a flashlight or headlamp, each kind of light pollution has the ability to create interest and boost the contrast in your photos of the stars.
Add Supplemental Points of Interest
It’s not that the night sky is lacking in the interest department, but a shot of just the sky doesn’t offer viewers a whole lot of context regarding where the shot was taken. By adding supplemental points of interest into the scene, you give viewers that context. Trees, buildings, landforms, and even people give astrophotography greater depth and dimension. Rather than having to stand on its own, the night sky has other elements to play off of that creates a nice interplay between the depth, darkness, and unfamiliarity of space and the more familiar aspects of life on Earth.
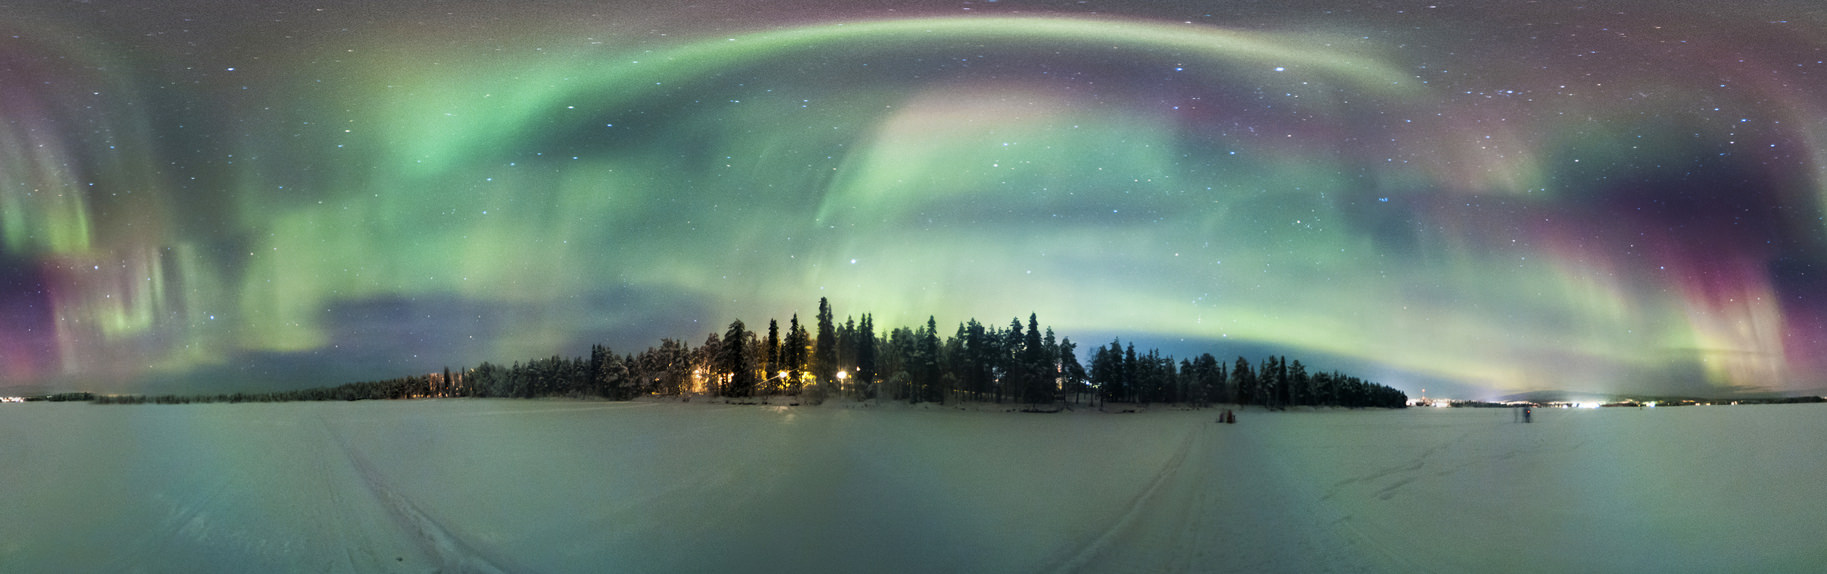
Add a Punch of Color
Much like adding light sources or supplemental points of interest to your nighttime shots can increase the drama, so too can adding a punch of color. Photos of the night sky are prime subjects for adding a bit of color, whether that’s playing with the saturation of colors that are already present or manipulating the hues to get an otherworldly effect. Of course, adding color is a process that should be undertaken with great care, as you don’t want the colors you add to detract from the beauty that’s naturally present in astrophotography. Use colors with caution and purpose, and if you do, you can get results like the image above.
Gear Before Composition
Of course, you can’t worry about how to compose your nighttime photos of the sky until you’ve got the gear that will allow you to take long exposures in the first place. One of our favorite ways to capture astrophotography images is by using products like the Star Adventurer mount from Sky-Watcher USA. The Star Adventurer is a top-quality mount that gives your camera and lens the highly stable base they need to capture perfectly sharp images. The Star Adventurer is constructed to support up to 11 pounds, so even if you have a full frame camera and a large lens, you’ll be certain that they will be supported securely.
But if you think the Star Adventurer is only a mount, you’re wrong. It allows you to program your camera for still images, long exposures, and time-lapses of the night sky. It has sidereal, lunar, and solar movement tracking as well, so you can photograph the skies with greater ease. What’s more, the Star Adventurer has a built-in auto-guiding interface, an illuminated polar scope, and a DSLR interface that gives you pinpoint control over your shutter.
What does all that mean? Well, it means that with the Star Adventurer you don’t have to worry about the technical aspects of astrophotography as much, and you can focus more on adding the compositional elements discussed in this lesson to give your images of the night sky the drama they deserve. Learn more about the Sky Adventurer and other products from Sky-Watcher USA by visiting their website.
We Recommend
Crucial Tips for Perfecting Your Astrophotography
For many photographers, venturing beyond daytime shooting is something that is both intriguing and a little bit scary.
That fear makes sense, though: imagine heading out to the middle of nowhere in the dead of night, setting up your gear in near complete darkness, and working to compose a shot and nail the focus of a subject that’s millions of miles away.
Sounds difficult, right?
Not necessarily!
Just as with any other type of photography, astrophotography just requires the right gear, some compositional prowess, and an understanding of how to perfect the focus of the image such that it is tack-sharp.
Of course, it takes a little time and effort too!
In this quick guide, we offer a few crucial tips that will help you perfect your astrophotography. Along with some practice and patience, these tips will drastically improve the quality of the shots you take of the night sky.
Your Camera Needs Stability
Because you’ll be working with exposures that last many seconds, if not minutes or hours, your camera needs to have an absolutely steady base to get images that are clear, sharp, and free of any blur due to camera movement.
Naturally, a solid tripod is the first component of your stability strategy. Not all tripods are made alike, so do some investigating into which tripod offers the most features to create the stable base you need. In terms of features, look for:
- A center column hook, from which you can hang your camera bag or another heavy object to add more weight and improve the tripod’s stability.
- Rubberized feet so the tripod’s feet stay in place.
- Retractable metal spikes in the tripod’s feet for additional stability on uneven or slippery surfaces.
Beyond your tripod needs, there are measures you need to take to lessen the occurrence of vibrations. Remove your camera strap such that it doesn’t flap in the wind should a breeze come up. Use your camera’s mirror lockup function to hold the mirror in place before the shutter is fired, thereby reducing vibration as a result of the mirror’s movement.
Additionally, you should avoid using the camera’s shutter button in favor of a remote to trigger the shutter, that way there’s no chance that you will inadvertently cause the camera to move.
Better still, you could get outfitted properly with a tripod mount that not only helps keep your camera stable but will also facilitate improved pictures of the night sky.
Mounts like the Star Adventurer from Sky-Watcher USA have plenty of features that aid in getting sharp photos. With automatic shutter release control, your images will be clearer because you don’t have to physically touch your camera to fire the shutter. You can even use pre-programmed parameters to help you create gorgeous time-lapse videos in which the mount directs the camera and takes care of the interval and duration of photos for you.
If that’s not enough, the Star Adventurer has multiple functions to assist you in snapping images of the desired areas of the sky. This includes a celestial tracking platform for solar, lunar, and sidereal tracking. In short, this mount won’t just help you improve your photos from a sharpness standpoint, but it will also help you create gorgeous stills, time-lapses, long exposures, and videos of the night sky with its onboard functionalities.
Composing the Shot Takes Time
What some new astrophotographers forget is that they will likely be working in near darkness, and that poses a problem for composing the shot.
After all, if it’s pitch black outside, it’s not too easy to frame up your shot by looking through the viewfinder.
Instead, you’ll need to rely on your own two eyes and a bit of intuition to compose your shot in a direction that you think will render a pleasing photo. From there, it’s all about experimentation to perfect the framing such that you have the area of the sky you’d like to highlight, as well as some interesting foreground elements to give the shot added visual interest.
Perhaps the easiest way to experiment is to dial in settings that you think will generate a well-exposed image, then inspect each test shot on your camera’s LCD to determine what adjustments need to be made to improve the composition.
It’s a time-consuming process, to be sure. However, the final results will be far better for all the time and effort you put into it! Just remember - with all that time needed to experiment with your composition, you’ll need to give yourself plenty of lead time so you can get set up, take your test shots, and perfect your shot before the optimal time for taking night sky photos passes.
Perfecting the Focus Takes Time Too
Again, the lack of light when creating images of the night sky is an obstacle you’ll need to overcome to get your images perfectly focused.
Autofocus is certainly a valuable tool in normal circumstances, but for astrophotography, it is more of a hinderance than anything. That means that you’ll have to manually focus your shots to get the sharpest results.
The question is, how does one go about doing that?
There are a couple of different options: using live view to determine your focus or setting your focus to infinity ahead of time.
Using live view to determine your focus is the easier of the two options. All you need to do is manually set your lens to infinity, engage live view, and then zoom in as far as possible on a bright object in the sky (i.e. the north star). Once zoomed in, you can make the necessary adjustments to your focus until the star is nice and sharp.
Then, it’s a matter of taking a few test shots, and again zooming in on the image to inspect the level of sharpness on your camera’s LCD.
The more complex option for perfecting the focus is to manually set the focus ahead of time. Using this method, you need to head out during the daytime and use autofocus to set your focus on a distant object. Doing so sets the focus at or near infinity.
Then, you lock that focus by switching from autofocus to manual focus. Wrap your lens’s focus ring with gaffer tape to ensure that the focus you’ve achieved doesn’t change. Once you’re out in the field at night, you can then use live view to zoom in on your test shots to ensure that everything is in sharp focus.
Though there are plenty of other steps involved in a successful astrophotography shoot, giving your camera a stable base, taking time to perfect the composition, and ensuring that you’ve got the focus 100 percent dialed in will help you create images that are of a higher quality and have improved visual impact.
Give these tips a try and see just how much your images improve!
We Recommend
Get Started in Astrophotography Without Needing a Second Mortgage
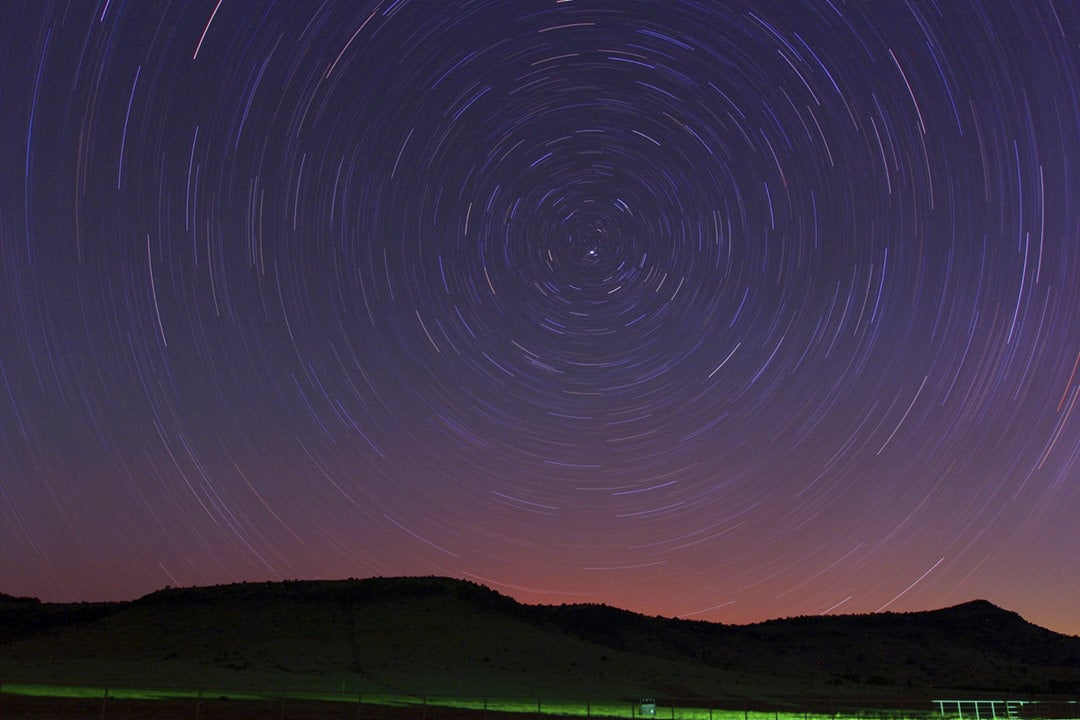
Photo: Kevin Legore
The wonders of the night sky have fascinated humanity for centuries, so it should come as no surprise that astrophotography has risen in popularity as digital SLRs continue to improve their low light capabilities. But contrary to popular belief, you don’t need to invest thousands of dollars in telescope gear to produce some truly breathtaking images.
You probably have most of the gear you need.
You don't have to be imaging planets to capture incredible astronomy photos. While those images are certainly captivating, wide field images can be equally or even more spectacular. Using lenses in the wide to medium telephoto focal length range, a remote release and a solid tripod, you can get away from the city lights and start taking beautiful shots of the stars, moon and the Milky Way. You can even lock the shutter open and create star trails. You can do amazing things with the gear you already have.
You have one problem.
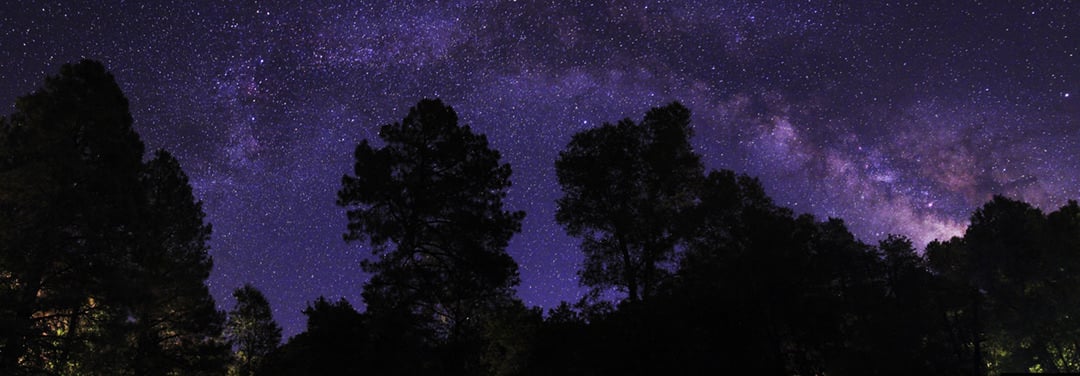
Photo: Kevin Legore
Here's the one problem you'll encounter with your everyday photo equipment. Capturing the light from distant celestial bodies requires long exposures. Since you're standing on a rotating ball, long exposures will record movement. This will be noticeable as streaks and blurring in any star shots with exposures over a couple of seconds. That's why star trail shots are possible, but it makes getting sharp deep space shots next to impossible.
There's a solution that won't break the bank.
The solution to the motion problem lies in rotating your camera to compensate for the movement of the planet. There are a host of sophisticated devices that will do the job, either by tracking a target or adjusting the angle of the lens according to polar coordinates. Up to now, those devices have been fiscally out of reach for most amateurs. That has changed.
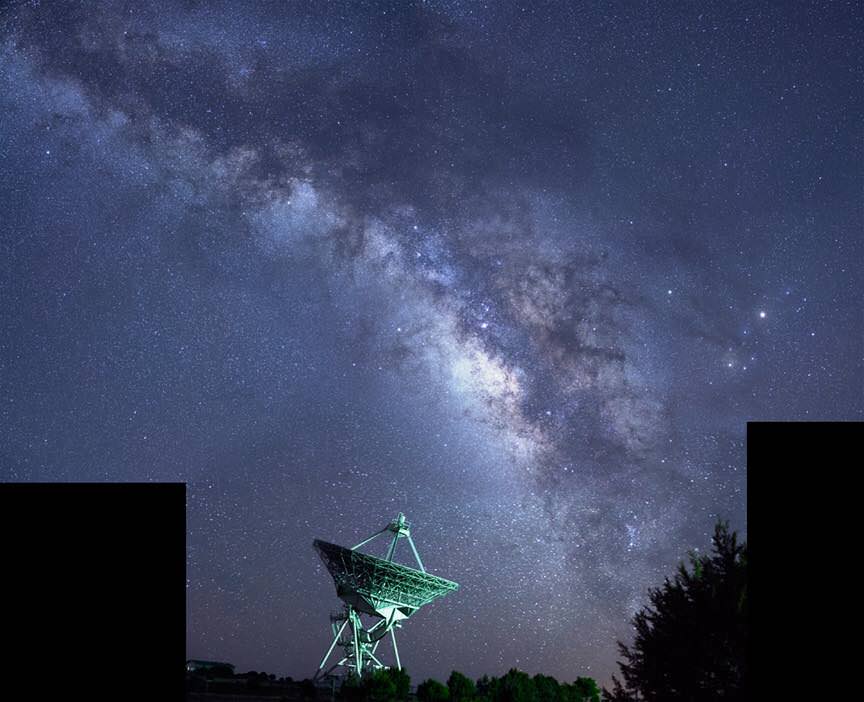
Photo: Alex Cave
Sky-Watcher Star Adventurer is a compact, reasonably priced, multi-function camera mount that incorporates a simple Right Ascension motor and an illuminated polar scope. Once Polaris (the North Star) has been centered in the polar scope, the Star Adventurer will track in the same arc that stars travel across our night sky, allowing photographers to shoot exposures that range from 30 seconds to several minutes in length.
Star Adventurer comes with one more cool feature that makes it even more worth the small investment. It incorporates an automatic remote shutter release and pre-programmed functions to control your DSLR in shooting awesome time-lapse sequences!
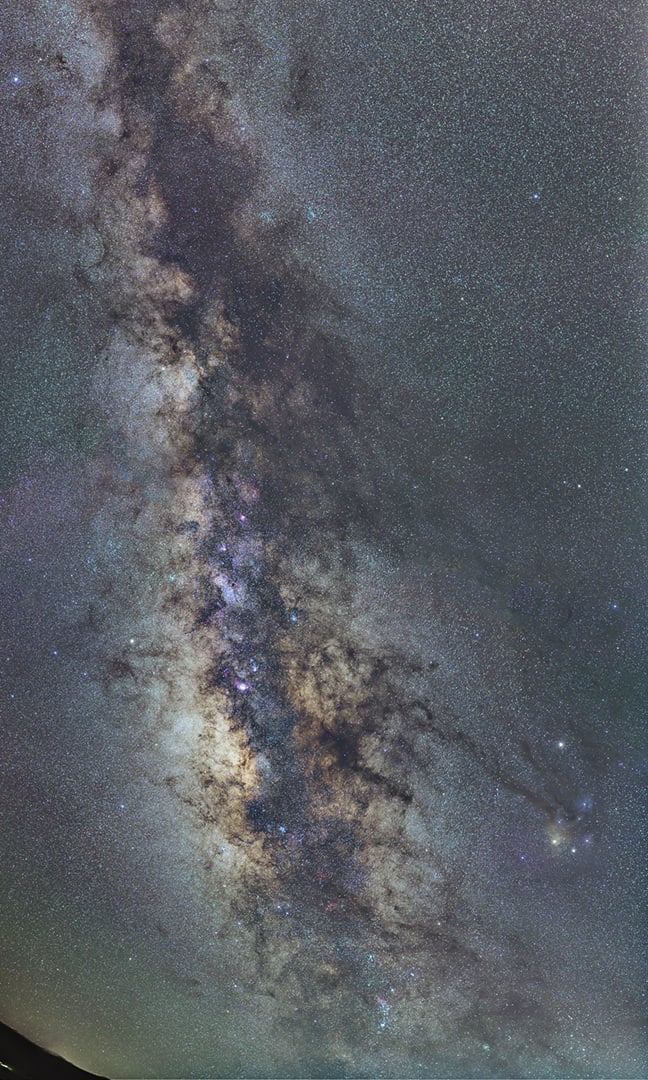
Photo: Chris Hendren
This is a real breakthrough for astrophotography enthusiasts, giving us the opportunity to get the most out of our current – and future – equipment in this exciting and rewarding photography genre. Best of all, it doesn't carry a five-figure price tag. If you've been waiting for the right opportunity to start testing your skills in the field, this is it! Get the details and grab yours here.
We Recommend
How to Create Stunning Panoramas of the Night Sky
It’s a common problem for photographers that enjoy creating images of the night sky - the gorgeous celestial bodies might not be close enough to fit into one frame. What’s more, the beauty of the night sky and the beauty of the landscape below it might not be able to fit in a single frame either.
Enter the panoramic photo of the night sky!
Panoramas look complex and complicated, to be sure. And while there is a bit of extra work involved, it’s really just a few extra steps than a normal shot to get a stunning view of the night sky.
Here’s a few tips to get you started.
Get Geared Up
Where you can use nothing more than a camera, a good lens, and a tripod to create pretty good images of a landscape or nature scene, when taking on night sky photography, you need to add a good mount that helps you control, among other things, the shutter for long exposures and adjustments to settings for panoramas.
Though there are plenty of choices, the Sky-Watcher AllView mount is at the top of our list. The beauty of the AllView is that it is purpose-built for things like night photography and panoramas. In fact, you can capture a full 360-degree panorama for a truly breathtaking image of the night sky and the landscape below. With an electronic shutter release, the mount will automatically trigger your camera during the process of creating the panorama as well.
Better still, the AllView has Go-To electronics that will find any one of the 42,000 celestial objects in its memory, automatically. That means if you want a certain feature of the night sky in your shot, just dial it in, and the AllView will center the object in the eyepiece and track it across the sky on your behalf.
If that’s not enough, consider this: when you’re done creating your panorama of the night sky, you can use the AllView to record video, create time-lapses, or just gaze at the stars by attaching a telescope. That kind of versatility only increases the value of the Sky-Watcher AllView.
Other gear you’ll need: A fast lens (prime or zoom, though primes are often preferred), a solid tripod, a level to keep your horizons straight, and a headlamp so you can see what you’re doing.
Plan It Out
Obviously, there is a healthy dose of planning involved in creating a panorama of the night sky. Not only do you need to identify the celestial bodies you want in the shot, but you also need to consider the foreground elements in the landscape that will give additional interest to the photo. Remember, though the sky is the primary focus of the shot, if there is nothing in the foreground to draw the viewer’s eye into the photo, the image might suffer.
What’s more, it’s prudent to have stationary objects - a rock formation, trees, a mountain peak, or the like - in the foreground so that the motion captured in the sky is enhanced. In other words, having an interesting rock formation in the foreground will make the star trails in the sky look that much more active.
The weather is also of concern. Naturally, you’ll need to keep an eye on the forecast and plan your shoot for an evening when the sky is predicted to be clear. Also consider the location relative to light pollution. Though light pollution can add an interesting element to nighttime panoramas, it’s generally a good idea to try to minimize extraneous light.
Camera Settings
As with any photo, shooting in RAW is highly recommended because you have the greatest degree of editing flexibility. Additionally, set your camera to manual mode so you have the greatest leeway regarding exposure settings so that each image you take is equally well-exposed. Your focus should be set to manual as well - dial it in at infinity, then switch from auto to manual. Doing so means that you will have the same point of focus from one shot to the next.
When it comes to exposure settings, they will obviously depend on where you’re at, how much light pollution there is, and how much ambient light is still available (i.e. if you begin shooting as the sun is setting and end when it is completely dark). That said, it’s generally a good idea to keep the ISO low - say, at 100 or 200 to reduce noise. Of course, some cameras have better ISO performance than others, so experiment with the ISO and see what values you can use without getting too much noise.
Since you will want the foreground in focus as well as the sky, choose an aperture that allows you to do so. Bear in mind that a number of factors influence depth of field, of which aperture is just one. The distance to the nearest foreground element, the focal length of your lens, and even the size of your camera’s sensor will determine depth of field as well. Again, experiment with your settings to determine what aperture values get you the desired results.
In terms of shutter speed, there are a couple of considerations. First, if you wish to create star trails, the shutter speed will obviously be much longer than if you want to create a panorama without any indicated movement in the sky. Second, you’ll have to consider the exposure implications of the shutter speed you use. Make adjustments to ISO and aperture such that all three components work together for a well-exposed image throughout.
It’s All in the Technique
Remember, panoramas require you to stitch various images together, so ensure you’ve got good overlap from one frame to the next (usually around 30 percent overlap will suffice with 50 percent overlap being more ideal). Naturally, using a mount like the Sky-Watcher AllView will help in this endeavor.
Additionally, don’t pigeonhole yourself into creating only horizontal panoramas. Don’t be afraid to tilt your camera on its side and try some vertical panoramas as well. Doing so will allow you to incorporate that all-important foreground into the shot while also giving you a great view of the night sky.
Practice and patience are part of the technique here as well. You won’t create a magazine-worthy panorama of the night sky your first time out, and that’s okay! Keep trying, keep experimenting with your camera settings, and continue to plan your nighttime photography adventures to maximize your success. And, of course, make things easier on yourself by getting the best astrophotography gear to help you create gorgeous nighttime panoramas.
We Recommend
How to Photograph the Moon?
Moon Photography
The moon is 238,900 miles from earth.
In the vast majority of moon photos taken by amateurs, the moon looks like it’s that far away!
There’s plenty of obstacles to creating a beautiful image of the moon - you need an understanding of the moon’s phases and the right gear, like a telephoto lens, to get up close.
You also need to have an understanding of compositional choices that will make your photo shine. Getting the exposure just right is another challenge too.
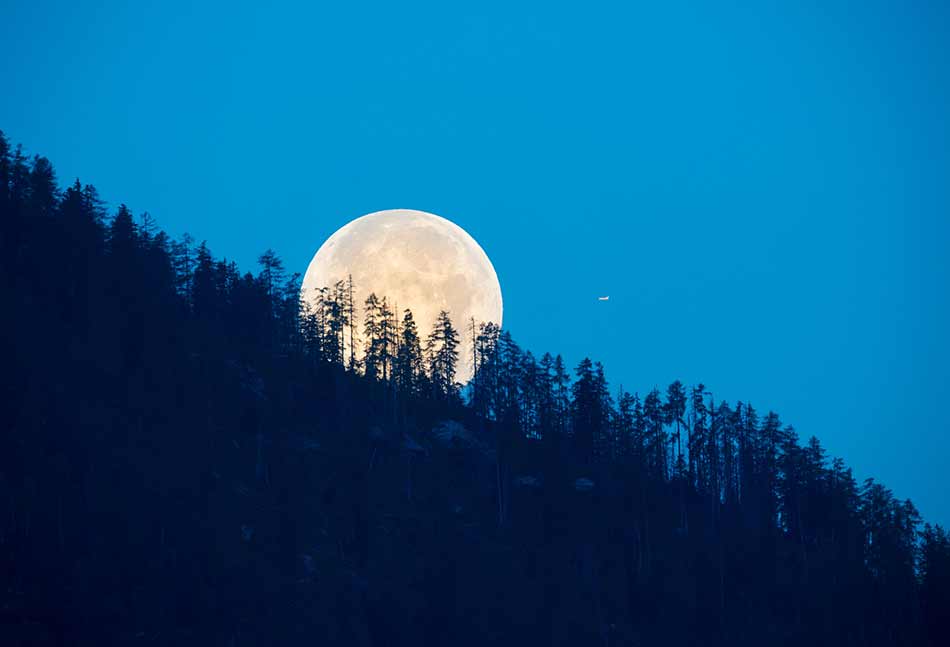
And though that might seem like a lot to keep in mind, with a few tips, you can master these topics and create images of the moon like the one above.
I've put together a quick video tutorial on photographing the moon. Give it a watch above!
For more details, check out the article below.
Let’s get started!
Table of Contents
- How to Photograph the Moon: Get Familiar With the Moon's Behavior
- How to Photograph the Moon: Get the Appropriate Gear
- How to Photograph the Moon: Consider the Composition
How to Photograph the Moon: Get Familiar With the Moon’s Behavior

The first step in moon photography is to develop an understanding of the behavior of the moon. Naturally, this means understanding the moon’s phases so you know when the moon will be out from the earth’s shadow.
Because the earth has a counter-clockwise rotation, it’s shadow travels across the moon from right to left. That means that the best time to get photos of the moon is during its waxing stage, when the earth’s shadow is moving ever farther to the left, revealing more of the moon’s pockmarked surface.
To get a detailed understanding of the phases of the moon, watch the video below with Phil from CrashCourse:
There are plenty of apps that help you track the moon’s behavior as well. MOON - Current Moon Phase (shown below) is available on iTunes and gets very high marks from users. The app works offline, so you can be out in the wilderness without service and still know what the moon is doing and will do in the future.

This app also tells you the lunar illumination so you’re sure to capitalize on nights when it’s brightest. What’s more, the app also sends out notifications before new moons, full moons, and other lunar events, that way you can plan ahead. You can even view what the moon will look like on any day of the year by entering your desired date!
Other apps and websites you should check out are Photopills (which, among many other things, tells you the rise and set times of the moon) and Dark Site Finder, which helps you locate areas where you can photograph the moon without light pollution getting in the way.
Recommended Reading:
- Moon: Photographing the Moon 1840-Now
- The Moon: A Beginner’s Guide to Lunar Features and Photography
- Dusk to Dawn: A Guide to Landscape Photography at Night
How to Photograph the Moon: Get the Appropriate Gear
Like any other photo, getting a pleasing image of the moon requires that you have the necessary gear. Here’s a quick list of essentials you’ll need to get the best photos:
Camera

You can take photos of the moon with any camera, even your smartphone. The caveat is that for improved photos of the moon you’ll need a camera with certain features. A DSLR or mirrorless camera is typically the most advantageous because they have manual exposure controls.
What’s more, it’s best to have a camera with RAW shooting capabilities, simply because RAW files retain all the data collected by the sensor. That means that in post-processing you have more information to work with, which aids your ability to create the best-looking shot.
Lens

If you’ve ever taken a photo of the moon with your smartphone or a point-and-shoot or even a DSLR with a wide-angle lens, you know the disappointment of the moon appearing to be a small, white blob in the sky.
That’s a result of a focal length that’s too short - a wide-angle lens, for example, doesn’t get you close enough to the moon to make it appear of any significant size, nor does it allow you to capture the detail of its surface. Since wide-angle lenses make distant objects seem smaller, the moon thereby looks quite small.
This isn't to say that you can't get a nice shot of the moon with a wide-angle lens - just know that the moon will be a secondary feature in the image.
To get up close and personal with the moon as seen below, you’ll need a telephoto lens. Typically, moon photographers recommend at least 200mm. The longer the lens, the greater the magnification and the more pronounced the compression.

Where other types of astrophotography, like photographing the Milky Way, benefit from a fast lens, speed for moon photography isn’t as much of an issue.
For starters, the moon will be very bright and provide enough illumination on its own. Secondly, you’ll have your camera on a tripod, so you can utilize a longer shutter speed to compensate for the darkness of your surroundings.
So, when looking for a lens, worry less about the largest aperture available and focus on focal length. Solid options include the Nikon AF-S FX NIKKOR 200-500mm f/5.6E ED Zoom Lens. This lens is not cheap, but to get photos in which it seems the moon is very close (and large), a long lens is required, or at the very least, a teleconverter.
Tripod

Naturally, with a long lens and long shutter speeds, a sturdy tripod that will give your camera a stable base is of the utmost importance. It won’t matter how beautiful the composition is if the shot is blurry due to camera movement!
There is a mountain of tripods available with a wide array of features that can make your head spin. But the most important thing to look for is stability, quality construction, good feet that provide a stable base, and a center column hook that allows you to add weight to improve stability. Check out our camera tripod buying guide for some guidance on buying the right tripod for you.
Mount

If you really want to take your lunar photography to another level, using a dedicated mount is certainly the way to go.
The Star Adventurer Mount from Sky-Watcher USA is an ideal tool for taking photos of the moon because it tracks celestial bodies. Keep the moon (or the sun or stars) in full view by using the mount to track it across the sky. With built-in shutter release control, the Star Adventurer also gives you the power of firing your shutter remotely, thereby helping to reduce the possibility of blurriness due to camera shake.
What’s more, if you want to create a beautiful timelapse video of the moon moving across the sky, you can! The Star Adventurer has preprogrammed parameters for creating timelapses both quickly and easily.
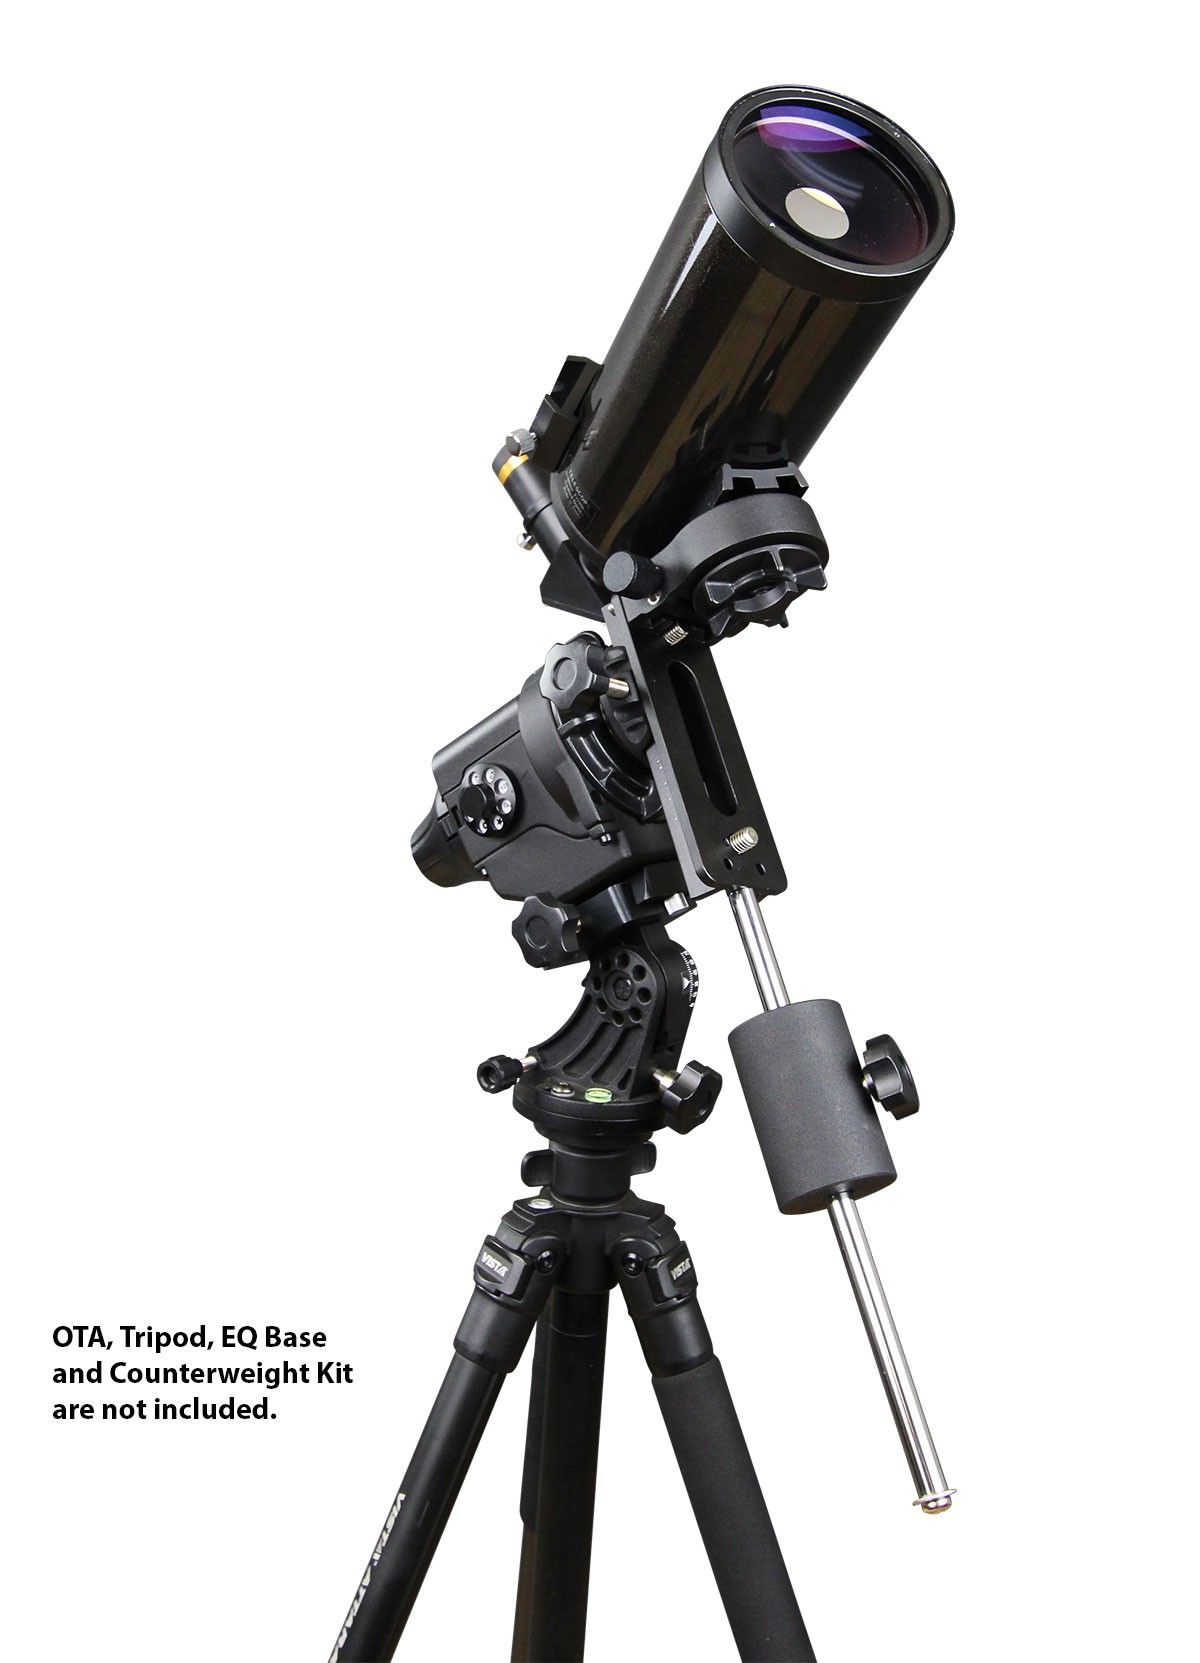
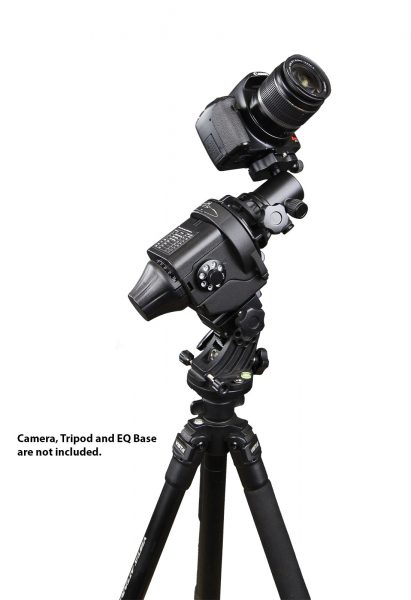
The setup shown above is Sky-Watcher’s special photo package, which comes bundled with the Star Adventurer mount, a polar scope illuminator, and a ball head adapter.
That means that right out of the box, you’re ready to head out, get set up, and take some stunning photos of the moon! Get to know the Star Adventurer Mount in more detail by checking out the video above from Sky-Watcher USA.
Here’s what you need to get this set up:

- Camera (Nikon D810 shown)
- SkyWatcher Adventurer
- Sturdy tripod (Sirui W-2204 shown)
- Strong ball head (Acratech GP shown)
- Shutter Remote (RFN-4 Wireless shown)

How to Photograph the Moon: Consider the Composition

As beautiful as the moon is, and as awe-inspiring as it can be, photos of the moon can easily be boring. This is especially true if you take a wide-angle shot in which the moon is relatively small in the frame.
In those instances, it’s necessary to pair the moon with interesting foreground elements, just as you would with any other type of landscape shot.
There are a myriad of possibilities here. If you live in a city, incorporate a structure of some sort into the frame - a building, a bridge, or the like, that adds some scale to the shot as well as provides visual interest that makes the image more complex.
If you can head out to less populated areas, pair the moon with natural elements like mountains, trees, or even reflect the moon in a still lake or pond to make the photo more visually appealing.
You might even find that photographing the moon at sunrise or sunset is advantageous because you can incorporate Golden Hour or Blue Hour lighting into the scene, which elevates the interest of the image with the addition of the warm, bright colors of the sky.
In the video above, Bryan Peterson with Adorama TV explains why shooting near sunrise and sunset is so advantageous, and also offers some tips on how to expose the image at this time of day.
Another option is to create a composite image in which you take a wide-angle shot of the landscape, a telephoto shot of the moon, and combine them together.
This method is used quite often to create images that have the best of both worlds - a gorgeous setting and a nice view of the moon.
Learn how to create a composite image of the moon in the video above by Brendan Williams.

From planning your outing to composing the shot to processing the images, you now have a better idea of what it takes to create gorgeous photos of the moon.
Though it’s a lot to take in, just remember that all it takes is a little bit of practice. Set aside some time to work on the tips and techniques outlined in this article, and you’re sure to develop the skills needed to capture some truly stunning lunar photos.
We Recommend
How to Photograph the Planets with Your DSLR on a Tight Budget

Astrophotography comes in many forms, from star trails and wide-field Milky Way shots to high-resolution images of the planets in our solar system. The equipment needed to simply view distant objects can be purchased fairly inexpensively, but getting good photographs of them can cost considerably more. There are a few ways to capture objects in deep space with a fairly low-cost setup, though and I'm going to describe one in this article.
This method involves pairing your DSLR with a telescope type that's typically considered impractical for planetary photos. It's commonly called a Dobsonian telescope, in reference to the type of mount it uses.

A large-aperture (high-magnification) reflector telescope is mounted on a low platform that pivots on the azimuth axis and incorporates a yoke that allows the altitude axis to be adjusted. Both axes are adjusted by hand to align the scope with the object to be viewed. This type of mount allows amateur astronomers a great option for viewing celestial objects without the cost of mounts designed for automatic tracking.

It's that lack of tracking capability that makes most astrophotographers put the Dobsonian telescope in the “viewing only” category. Because the light from a deep space object (DSO) is dim in relation to closer objects like the moon, longer exposures are required and tracking helps keep an object centered to avoid blurring. However, there's another way, using multiple images. Since you can get your hands on a Dobsonian telescope with a 6” aperture (1200mm focal length @ f/8) for about $300, it's a great way to try your hand at DSO imaging cheaply.
There are a couple of ways to take a photo of the view through a telescope. The cheapest (and most difficult) is afocal capture, in which you simply focus the camera on the image in the eyepiece, either with a very steady hand or by mounting the camera on a tripod or a special bracket attached to the optical tube. It's important to keep the camera lens aligned with the viewing lens on the scope to avoid vignetting. Prime focus capturing involves mounting the camera body in place of the viewing lens, via an adapter and reducer. This can add considerably to the cost of the setup, however.

Bright objects, such as dense star clusters can be photographed this way, but your results will vary greatly, since the exposure time may be too long to avoid trailing and blurring. The planets, however, are comparatively quite bright and can be imaged well by taking a series of photos or recording a video as they cross the field of view, then stacking the photos or movie frames. This method of creating a high-resolution composite is known as planetary imaging, and it's easily accomplished with a free software application named Registax.
A detailed guide to the process of taking and processing the images is beyond the scope of this article, but there are several great guides available. One that I recommend is A Guide to DSLR Planetary Imaging, a very helpful guide on CD-ROM. The point of this article, which I hope you've seen, is that you don't have to invest a lot to get started in planetary astrophotography. Enjoy!
We Recommend
How to Take Sharp Photos of Stars
Ask just about any photographer what the most difficult kind of photography is, and my guess is that many will say astrophotography.
Though photographing the night sky can be daunting, if you break down the process step-by-step, you begin to see that it's really just a matter of mastering some basic techniques.
In this tutorial, I focus on one of the most important aspects of astrophotography: how to take sharp photos of stars.
Manual Focus is a Must
Typically, you can't rely on your camera's autofocus system to focus on stars, simply because there isn't enough light for the camera to lock its focus.
That means that you need to learn how to manually focus your lens to get the best results...
When manually focusing your lens, it's generally a good idea to focus on infinity.
The infinity mark on your lens's barrel isn't always completely accurate, though, so it will take a little bit of trial and error to find the precise spot at which the lens is focused at infinity.
That trial and error should occur well in advance of your astrophotography outing, as discussed in the video above by Milky Way Mike.
In fact, if possible, head outside during the daytime and look for distant objects (a tree, a mountain peak, a light pole etc.) on which you can manually focus.
You can use live view and zoom in to perfect the focus manually, that way you're sure that you've dialed in the focus perfectly.
Then, mark your lens so you know the precise point at which infinity focus has been achieved. Another option is to wrap the lens with gaffer tape to lock the focus in place (assuming that you won't need to use that lens between your test shots and the real deal!).
If taking time out of your day to set the manual focus just isn't possible, there are techniques you can use in the field at night to get the focus just right.
One of the best options is to use use the brightest star in the sky (or the moon) as your focal point.
Using live view, zoom in on the star and then with your lens in manual focus, adjust the focus ring back and forth until the star looks sharp.
It's important not to rush here - really pay attention to how the star looks on your camera's LCD so you're assured to get the sharpest photo.
Learn More:
Set Yourself Up for Success With Astrophotography Gear
A must-have piece of astrophotography gear is a celestial tracking platform like the Star Adventurer from Sky-Watcher USA.
The advantage of having a celestial tracking mount is that it turns virtually any tripod into an equatorial mount, giving you the ability to capture breathtaking photos of the night sky.
What's more, the Star Adventurer has loads of add-ons and accessories that allow you to tackle everything from simple shots of the night sky to wide-field astrophotography to time-lapse photography of the stars.
It comes preprogrammed with seven tracking speeds, including solar, lunar, sidereal, and four additional settings from 0.5x to 12x, which comes in handy for time-lapse videos.

Additionally, the Star Adventurer is incredibly easy to use.
In fact, even if you've never taken a photo of the stars before, this rig is easy to set up.
It can also trigger your camera on its own. For example, with a 60-second exposure, the Star Adventurer can trigger your camera's shutter using the auxiliary shutter release cable.
Once the camera and mount are connected and an image is taken, the Star Adventurer will take 60-second exposures all on its own until you remove the shutter release cable.
With built-in features that make it easy to use and add-ons that allow you to customize your astrophotography setup as you learn and grow, the Star Adventurer is a perfect companion for your quest to photograph the night sky.
Of course, you need to be in the right place at the right time to get the best-quality photos of the night sky.
That's why popular astrophotography apps like SkySafari and PS Align Pro can prove to be so invaluable.
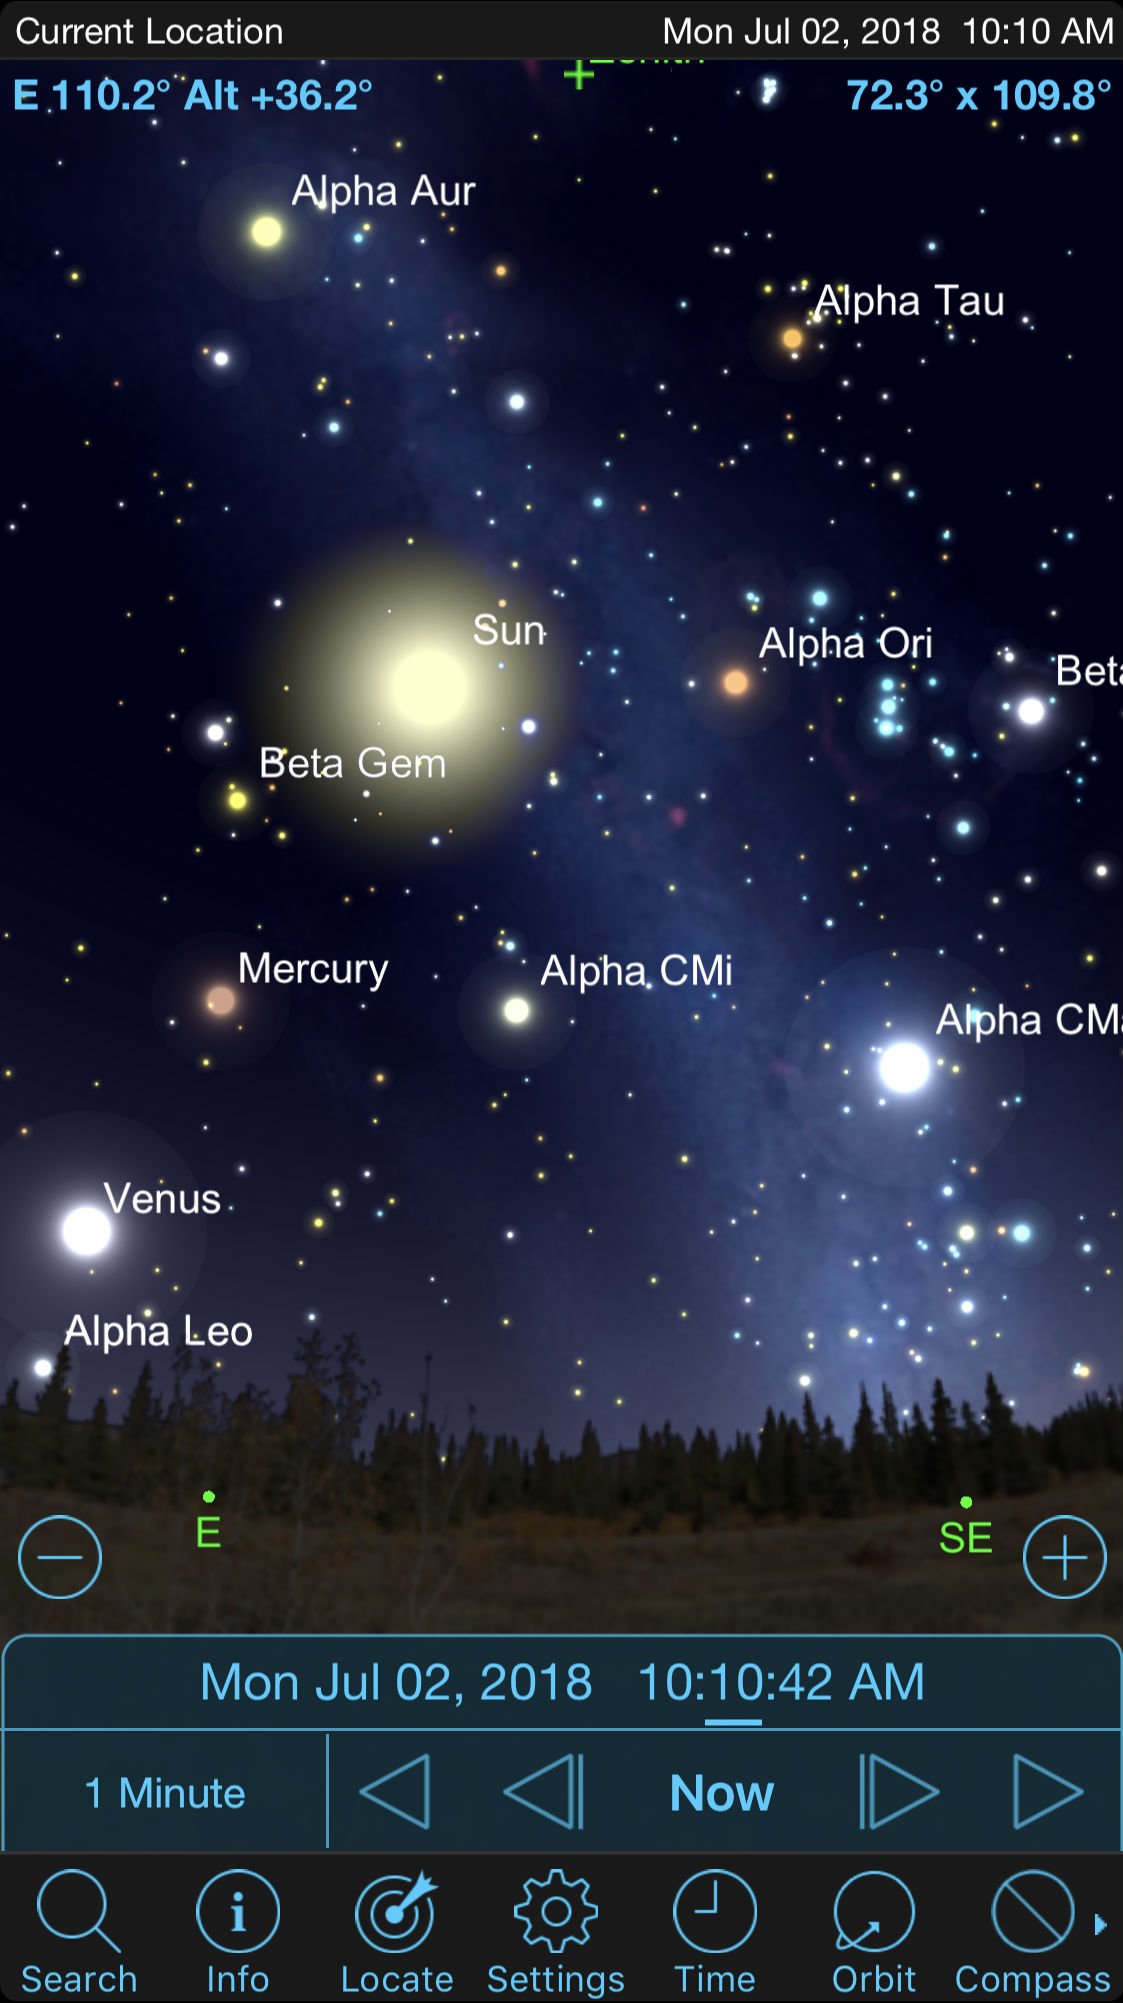
As shown in the screenshot above, SkySafari (iOS and Android) lets you know where major celestial bodies are in the sky.
In fact, it's like having a little planetarium right in your pocket - just hold it so your phone is pointing towards the sky, and SkySafari will locate everything from planets to satellites that you might want to highlight in your photos.
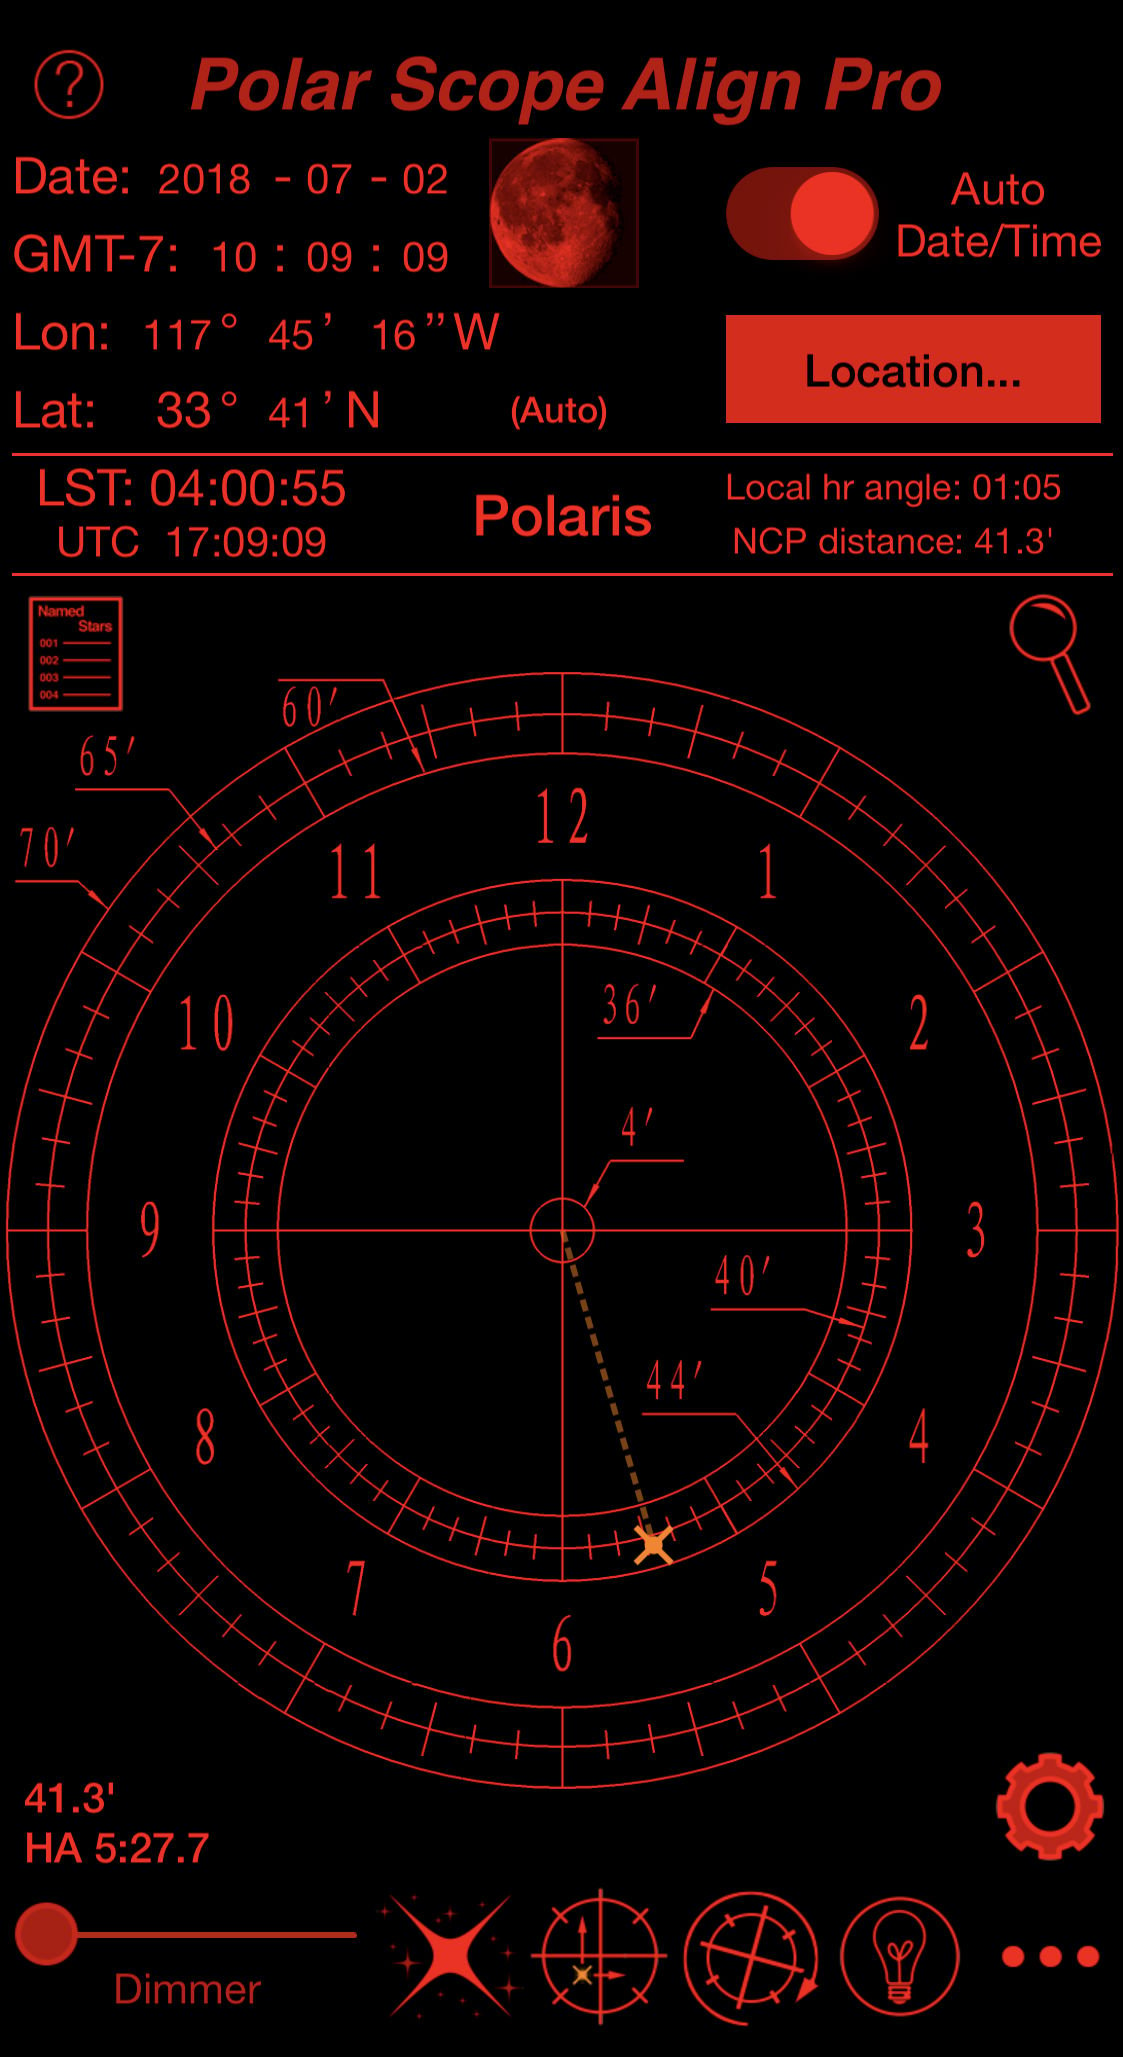
The value of the Polar Scope Align app (which is available only for iOS devices) cannot be understated because it helps you align your camera to Polaris.
By aligning your camera with Polaris, you eliminate the movement of the stars across the sky as the earth rotates, thus allowing you to get images of pinpoint stars.
This app will calculate where Polaris is in relation to your current position, allowing you to compose your shot with precision in your polar scope reticle.
Learn More:
- Composition Techniques to Take Your Astrophotography to the Next Level
- Astrophotography Gear Guide: Essential Equipment
Astrophotography Tip: Use a Good Tripod

Perfecting the focus of your lens and using apps and gear that enable you to get the highest-quality shots won't mean anything if you don't have a good, solid tripod as a base for your camera.
If you have a cheap, flimsy tripod, the chances are much greater that it won't provide absolute stability for your camera due to thin or weak legs, inadequate leg logs, a wobbly head, or the lack of a center column hook to add weight as ballast against wind.
Of course, that doesn't mean that you need to spend $400 on a professional tripod.
But what you should do is look for a tripod that has some weight to it (say, around 4-5 pounds), a center column hook, and big rubber feet to grip the ground.
With these features, you'll be able to support your camera in a way that makes nice, sharp photos of the stars a greater possibility.
Sharpen Your Astro Images in Post-Processing
It's also a good idea to sharpen your photos of stars in post-processing.
For example, in Lightroom, sharpening is as simple as going to the details panel and setting the amount to about 50, the radius to 1 or 2, and the detail to 30.
Of course, that's just one example - there are many different settings you can use in post-processing to sharpen and edit your photos.
For a complete tutorial on editing your photos of the night sky, check out the video above by YuriFineArt.
And with that, you have a few critical tips that will help you take sharp photos of stars!
We Recommend
Need a Spot for Astrophotography? Try These Incredible Destinations

For most of us, the lights of the city make it difficult (if not impossible) to see the stars in the night sky, let alone take high-quality pictures of the stars. Given how beautiful the night sky can be, this is a shame. But, there are still areas around the world that sport dark skies free of light pollution that allows stargazers and astrophotographers alike to come together and witness the beauty of space beyond the borders of our home planet.
The problem, of course, is knowing where on Earth you can go for the best night time views. To help you out, we’ve put together a list of three locations that are sure to give you the best opportunity for truly wonderful photos of the stars.
Hawaii
Hawaii isn’t just famous for its lush landscapes, gorgeous beaches, and active volcanoes; it’s also a favorite spot for astrophotographers to get out their cameras and capture the beauty of the night sky. Mauna Kea, the highest point on the Big Island of Hawaii, is an especially good spot, which is why it’s home to one of the best observatories in the world. At 13,800 feet above sea level, the mountain is certainly tall enough to give the observatory enough distance from any light pollution below. But visitors aren’t allowed to the summit after dark.
Fortunately, the Mauna Kea Visitor Center has plenty of areas for you to gaze upon and photograph the stars. Sitting at 9,200 feet above sea level, the oxygen levels in the air are still thin enough that visitors have an incredible view of the stars. For a slightly higher adventure, visitors can head to the top of the Haleakala Crater for a 10,000-foot-high view of the night sky.
Western Australia
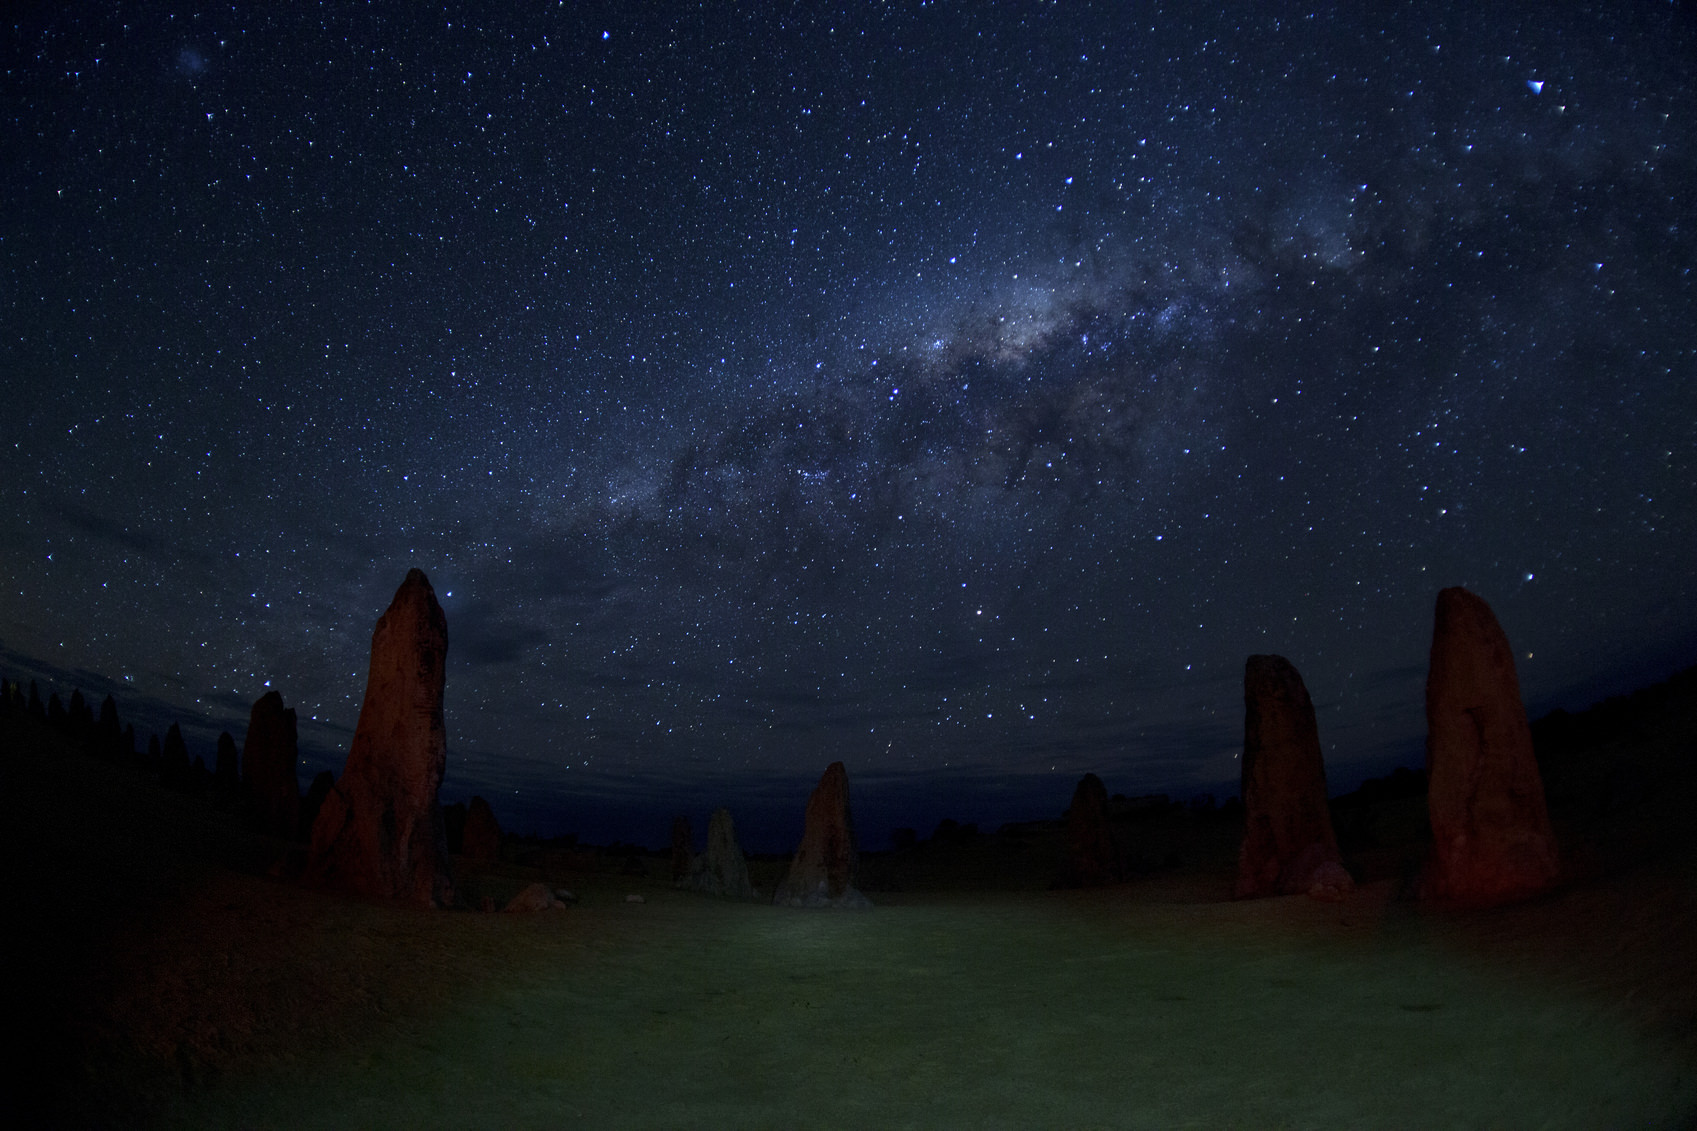
If it’s darkness you’re looking for, few places on Earth come close to the Australian Outback in Western Australia. Though the Outback doesn’t match Hawaii in terms of elevation, with no light pollution at all in many areas, the Outback offers stargazers and astrophotographers an ideal setup for viewing the stars.
Western Australia also offers varied terrain for an interesting combination of photos. Visit Nambung National Park near Perth to take photos with otherworldly rock formations in the foreground. Head to Wave Rock to get a horizon to horizon view of the night sky. Go into the Perth Hills to the Perth Observatory for night time shots of the stars and sky, with a touch of lights from Perth. No matter where you go, you’ll have an astounding view!
Alqueva Dark Sky, Portugal

For stargazers in Europe, Alqueva Dark Sky is an especially attractive place. There, you will find a Starlight Reserve in which the darkness of the area is preserved specifically for stargazing and astrophotography. A core zone of darkness is surrounded by a buffer zone so that it is protected from the effects of light pollution (and air pollution as well). Outside the buffer zone is an external zone in which special rules for lighting are enforced, again to protect the area from the effects of light pollution.
What all that means is that the area, which is near Alentejo in the south of Portugal, is a prime spot for unobstructed views of the stars. In fact, the Starlight Reserve includes approximately 1,864 square miles of dark skies, meaning you can pick a spot, set up your gear, and be relatively certain that you’ll have the immediate area all to yourself.
Be Prepared for Astrophotography
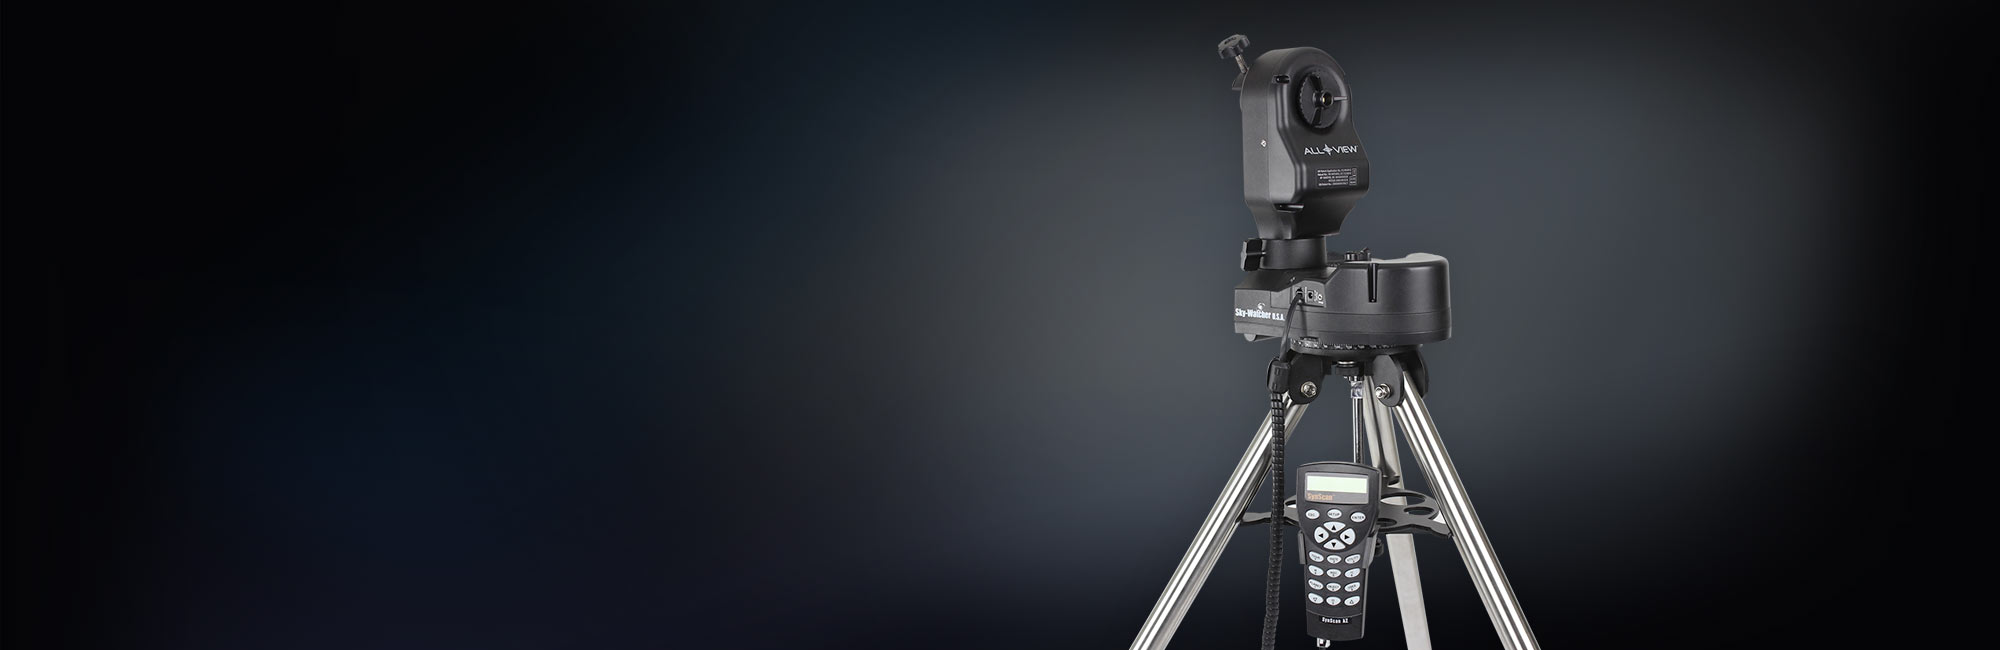
Of course, finding a prime spot to view the night sky is just the beginning. You also need to have the kind of photography gear that will set you up for astrophotography success.
Though you’ll need a fair amount of equipment, one of the most crucial pieces of gear you need is a good camera mount. Mounts come in all shapes and sizes, and from many manufacturers. But we like to recommend the mounts from Sky-Watcher USA because of their incredible features, great build quality, and excellent prices.
Among their line of camera mounts is the AllView. The AllView Mount is incredibly versatile, giving you the ability to take stills, time-lapse videos, regular videos, and it will even work with many telescopes too. You can capture 360-degree panoramas of the night sky with your DSLR as well. The AllView also has Go-To electronics that finds any one of 42,000 celestial objects, centers the object in your eyepiece, and tracks the object across the sky.
In short, the AllView has all the features you need - and more - to create breathtaking stills and video of the night sky, no matter which location you select. If you’re serious about getting top-quality images of the stars, you have to consider getting a mount from Sky-Watcher USA. Visit their website for details about the AllView and other fine products for astrophotography.
We Recommend
Quick Tips for Planning Your Astrophotography Photo Shoot
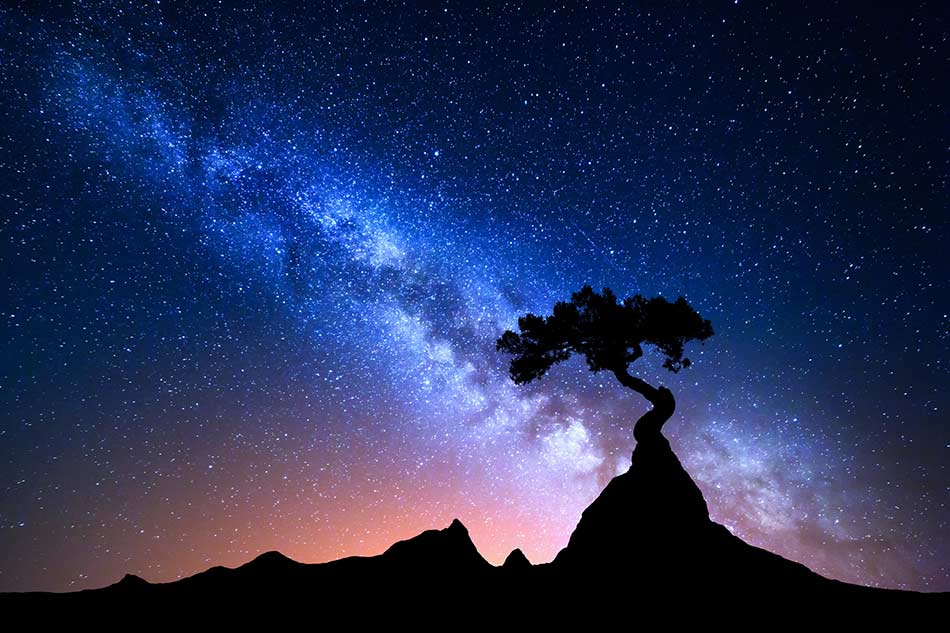
Looking at photos like the one above, it's no wonder why so many people want to take on the task of photographing the night sky.
Astrophotography is something that, not all that long ago, was reserved for serious enthusiast and professional photographers that had the necessary (and expensive) gear to get the job done.
However, in recent years, the quality of consumer-level cameras, lenses, and other photography equipment has improved greatly, making endeavors like night photography much more plausible, even for the hobbyist photographer.
Being out under a blanket of stars taking photos is a wonderful and exciting experience, to be sure. And seeing good results when all is said and done gives one as great a satisfaction as any.
But that success starts long before you're out in the middle of nowhere, just you and your camera gear.
That process starts at home, in the planning stages of your astrophotography photo shoot.
I won't claim that the planning stage is all that fun. But what I will say is that it is a crucial step that you must undertake if you're to get the best possible results.
Let's explore a few tasks you need to tackle in the planning stages of your night photography adventures.
Location, Location, Location
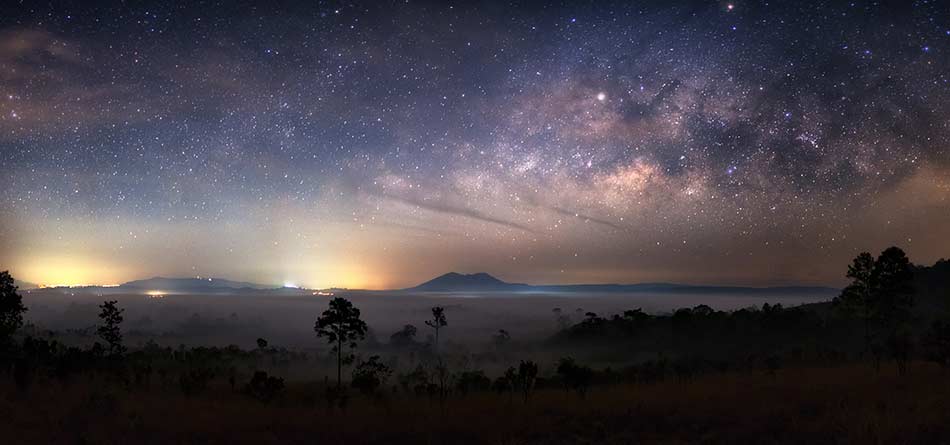
An obvious aspect of the planning process is nailing down a location for your photo shoot.
You can start by checking out examples of astrophotography online. Photographers almost always indicate the location at which the photo was taken, so you can find some good spots for your photos simply by looking at where others have gone.
Once you have a rough idea of good shoot locations, use Google Maps to get a better idea of its location relative to yours.
There are a few things about your selected location that you need to bear in mind:
- Is it sufficiently dark so as to avoid light pollution?
- Does it afford you an unobstructed view of the sky?
- Are there landscape elements you can include in the shot, like a mountain range, trees, or manmade objects like buildings or bridges that add interest to the scene?
- How long does it take you to get to the location?
- Is the location open to the public?
Answering each of the above questions will help you determine the best spots for your astrophotography. Now more than ever, you can use technology to help you answer these questions.

For example, you can use websites like Dark Site Finder (shown above) to locate areas near you with the least amount of light pollution.
It's as simple as entering your chosen spot and perusing the map for any bright areas. The darker the area on the map, the less light pollution there will be to interfere with your shot.
Something else that will help you is if you visit your selected locations during the day. That gives you a chance to scope out the area, make decisions about specific spots where you'd like to setup, and identify areas that give you the view you need of the sky while also incorporating interesting elements into the foreground for an improved composition.
Identify a Target
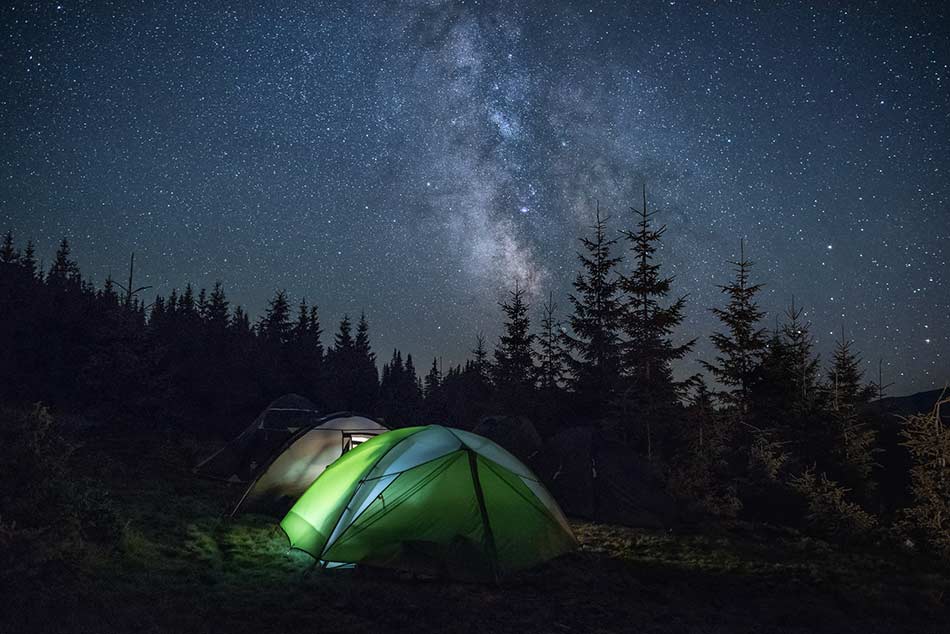
Of course, having a shoot location is just part of the puzzle.
You also need to identify the type of photo you want to take.
Are you heading out to grab a long exposure of star trails moving across the sky?
Do you want to capture a photo of the Milky Way?
Is there a particular constellation you want to feature?
Again, these are questions that are vital to your planning stages, and which can be answered by using any number of astrophotography tools available to the modern photographer.
One of the best apps out there for identifying your target is Sky Safari.

Just download the app to your iOS or Android device, and you can immediately pinpoint just about anything you want to photograph, be that the moon, the Milky Way, or any number of constellations.
In fact, there are over 200 celestial bodies in the Sky Safari library, so you'll have plenty to choose from in terms of your subject for your astrophotography adventures.
Get Necessary Permissions

Earlier, I noted that when selecting a location, a primary question to ask yourself is whether or not it's open to the public.
You might very well find that the place you most want to set up your shoot is on private land.
Rather than rolling the dice and hoping you don't get caught trespassing, it's recommended that you get the necessary permission to be on that property.
If it's owned by an individual, a quick call or visit might be all that's needed to get permission to be on their property.
Many public spaces might be free to use, but some require some sort of a fee, be that a camping fee or an entrance fee, that serves as permission for you being there.
Still other areas might restrict how many people have access, like some national parks. If that's the case, you might find yourself needing a permit to be in the area. You might also find yourself on a long list, too, which makes it all the more necessary to plan your trip well in advance.
If you can do those things, you might just find that once you get into the field that it's easier than you thought to capture stunning photos of the stars and other celestial bodies.
Get the Gear
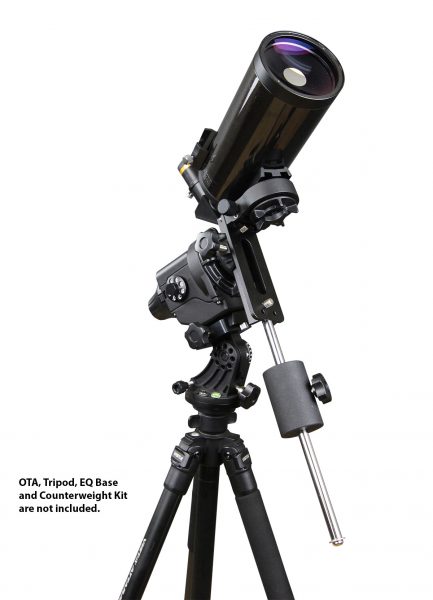
Naturally, part of the planning process is getting yourself outfitted with the tools you need to make the best photos.
Apart from the usual suspects in your kit - your camera, a few lenses, a sturdy tripod, an intervalometer, and so on - a special astrophotography mount is a must-have item if you want the best results.
The Star Adventurer Astro Package from Sky-Watcher USA pictured above is a top choice for photographers that want clear, sharp images of the night sky.
It has a built-in shutter release, that way you can compose the shot and fire the shutter remotely, giving you those sharp images you desire without the worry of camera shake.
This gadget also tracks celestial bodies for you, meaning that no matter what the object is you've selected to photograph, it will keep that object in full view as it moves across the sky with sidereal, lunar, and solar tracking modes.
Better yet, the Star Adventurer is user-friendly, so even if you're a novice, you can learn how to use it quickly so you get out in the field sooner. It's easy to setup and is highly portable too, so once you're out in the field, the setup process is minutes, not hours.
With low power consumption, you can rest easy that the Star Adventurer won't drain your batteries, and since it comes with lifetime firmware updates, you have the peace of mind that your mount will be up-to-date for the duration. You can even create time-lapse videos with preprogrammed speeds built right in!
Planning an effective astrophotography photo shoot takes a good deal of time, but the more effort you put into it, the better the results will be. If you're after breathtaking photos of the night sky like those seen throughout this article, be sure you take the time to find the best locations, identify a target subject, get the necessary permissions, and equip yourself with an astrophotography mount.
If you can do those things, you might just find that once you get into the field that it's easier than you thought to capture stunning photos of the stars and other celestial bodies.
We Recommend
Sky-Watcher Star Adventurer vs Sky-Watcher Star Adventurer Mini
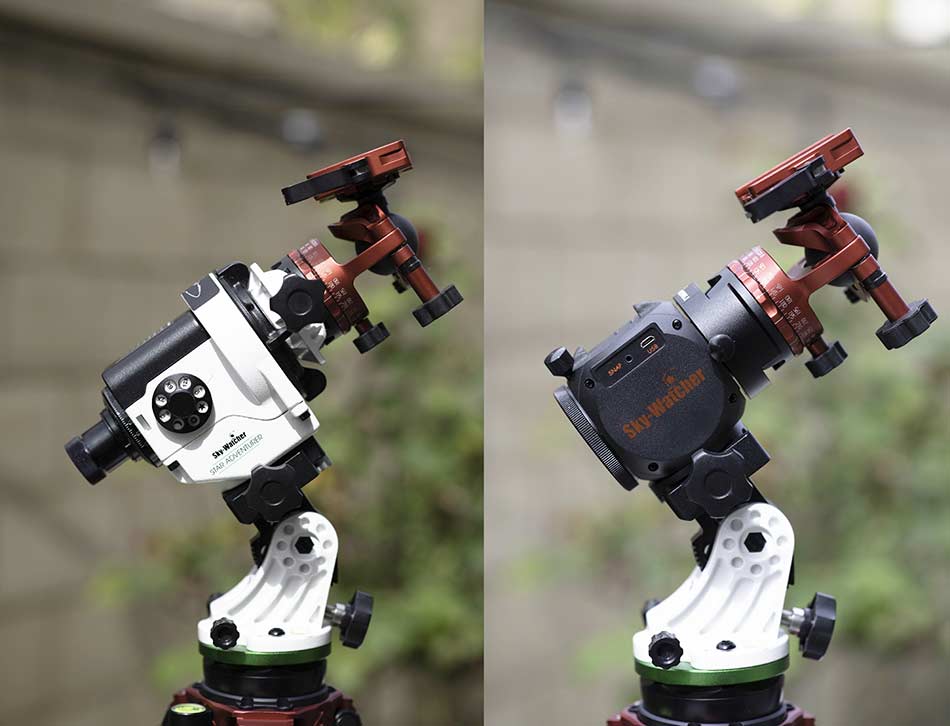
One of the great things about being a photographer these days is that there is no shortage of gear out there that helps us take better photos.
That includes a host of star-tracking mounts used to track the motion of the stars so you can get crystal-clear, pinpoint stars, as shown above.
I’ve used both the Sky-Watcher Star Adventurer and its little brother, the Sky-Watcher Star Adventurer Mini.
Below, I’ve outlined the features and specifications of each one so you can choose which one best fits your needs.
Sky-Watcher Star Adventurer Features
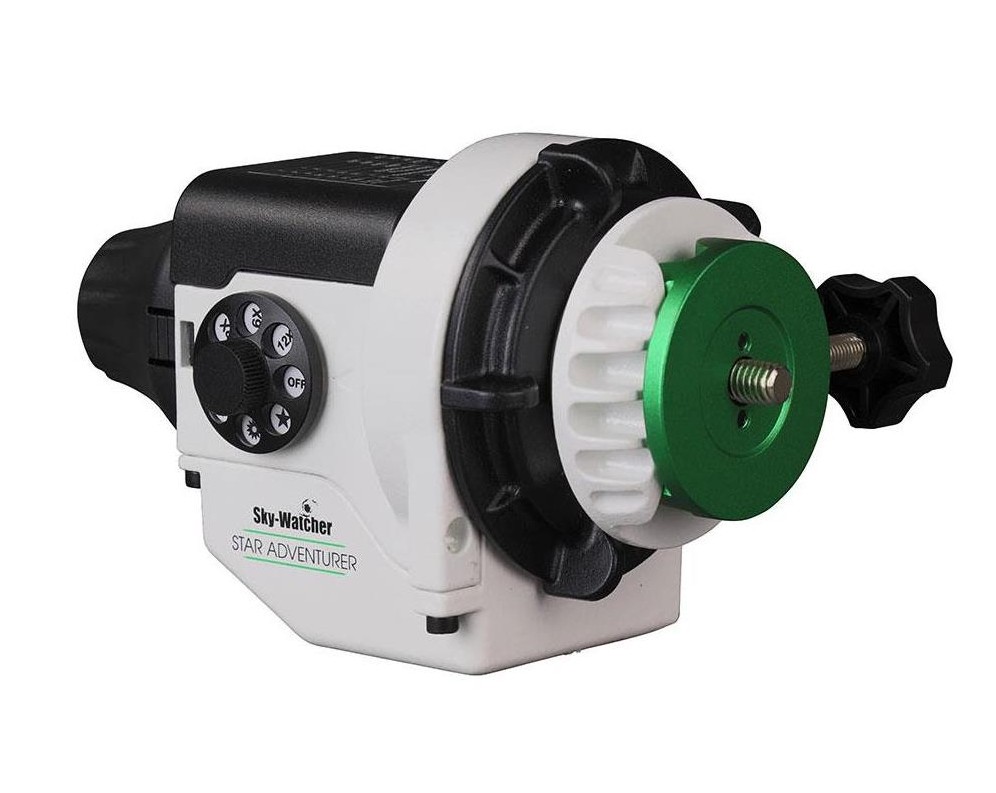
The Star Adventurer is a heavy-duty star-tracking mount that can accommodate up to 11 pounds of gear. That makes this an ideal mount for shooters that use a full frame camera, especially since the Star Adventurer has a clutch mechanism to keep your gear secure.
The mount uses four AA batteries for power, which will get you about 72 hours of runtime. Alternatively, if you have a power source nearby, you can power the unit using a mini-USB.
The Alt-Az base on the Star Adventurer allows you to quickly and easily adjust the unit for polar alignment by using the altitude adjustment and the azimuth adjustment knobs.
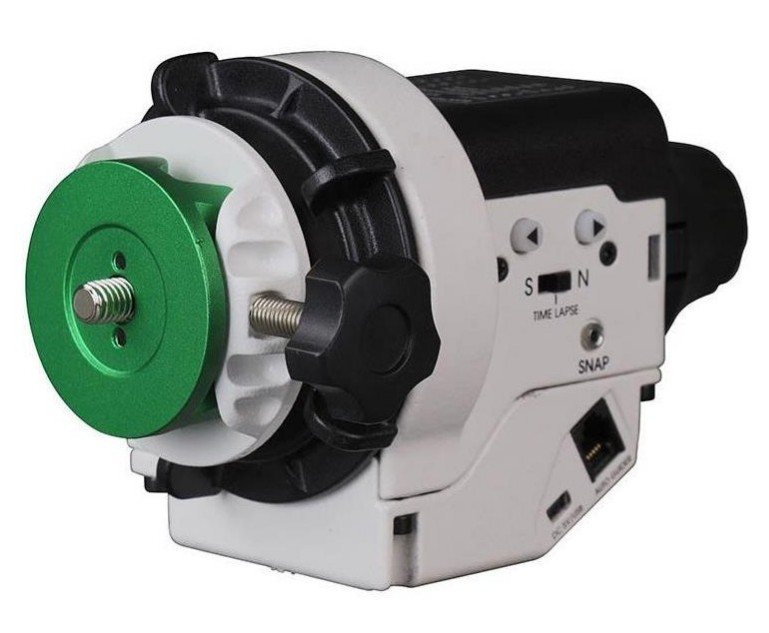
Combined with the built-in polar scope, the Star Adventurer allows for highly accurate polar alignment.
The unit is capable of sidereal, solar, and lunar tracking with automatic DSLR shutter release control. There are also built-in settings to help you create time-lapse videos.
Lastly, despite being a heavier-duty mount that weighs 3.63 pounds (with a dec bracket), this unit is highly portable, so you can take it virtually anywhere to capture gorgeous photos of the night sky.
Sky-Watcher Star Adventurer Mini Features

If you shoot with a smaller camera and don’t need the heavier payload capacity of the Star Adventurer, the Star Adventurer Mini might be a better choice for you.
This unit can support up to 6.6 pounds, which is ideal for shooters with an APS-C camera and a wide-angle lens.
This mount uses just two AA batteries, which give you 24 hours of runtime. You can also use a micro-USB cable to power the unit.
Though the Star Adventurer Mini does not have a clutch system like its bigger counterpart, it has a simple two-screw system that provides more than enough friction that keeps the camera mount from rotating.
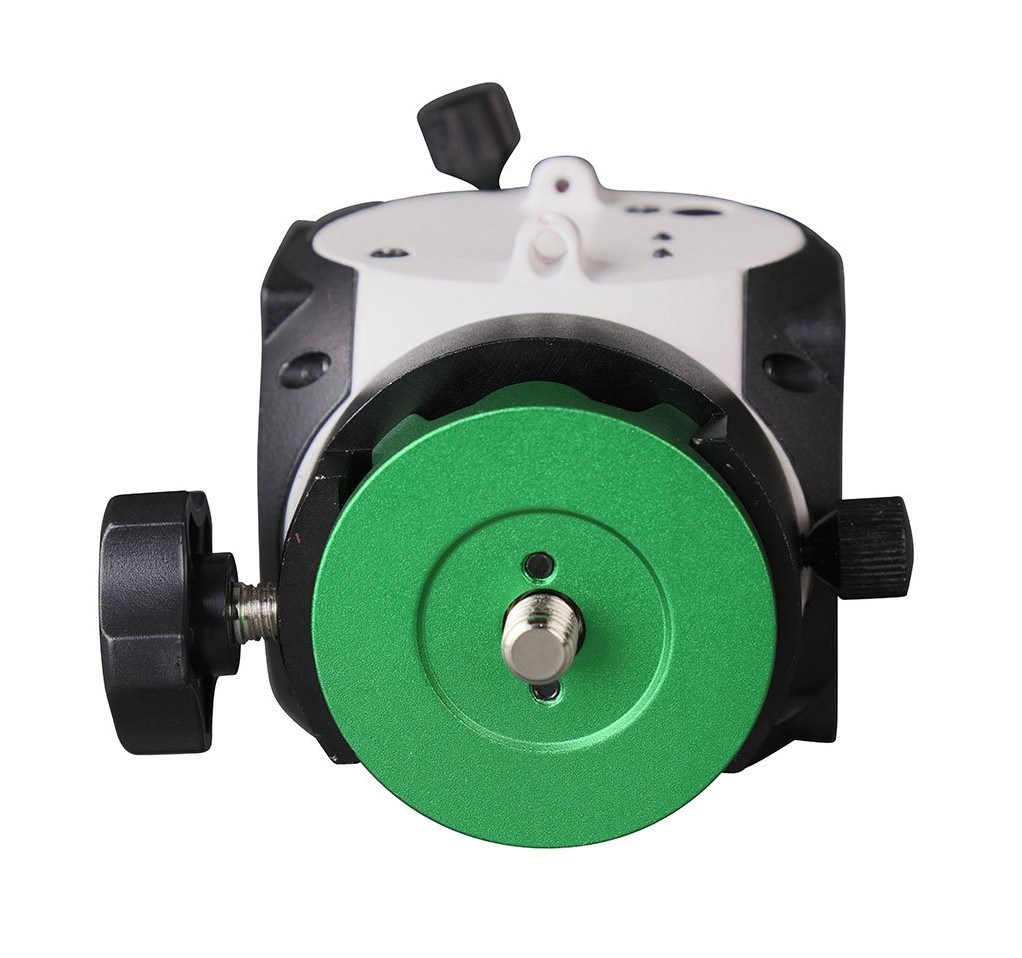
However, if you’re using a full frame camera, a telephoto lens, or both, the Star Adventurer and its clutch mechanism is a definite must.
Unlike the Star Adventurer, the Star Adventurer Mini does not have a built-in polar scope, so it must be installed each time you shoot.
However, this is a very easy process - just slide the polar scope into its slot and you’re ready to go. You don’t even need the polar scope if you use a wide-angle lens!
This little unit also has a free companion app for Android and iOS that has a built-in polar clock to help you get ultra-precise alignments.
Sky-Watcher Star Adventurer Ease of Use
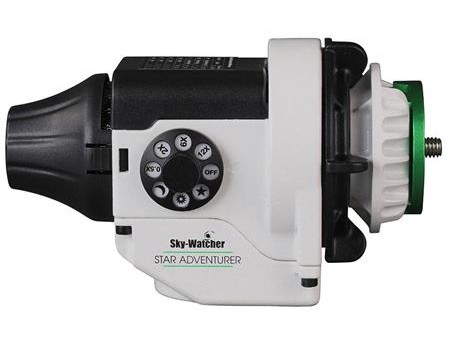
The Star Adventurer is one of the easiest to use mounts, if you ask me.
The unit has a rotary dial that you use to determine the tracking speed. It also has a hemisphere switch and RA slew buttons that help you get it set up and ready for shooting in short order.
Additionally, it basic shooting speeds for nighttime long exposures are a breeze to set and only takes a few moments. Setting up the Star Adventurer for a time-lapse is a little more involved, but is still a straightforward process once you get the hang of it.
As noted above, though this is a heavy-duty unit, it’s still lightweight, small, and highly portable. That makes it easy to carry in just about any camera bag, and since it’s easy to handle, setup on a tripod is simple as well.
Sky-Watcher Star Adventurer Mini Ease of Use
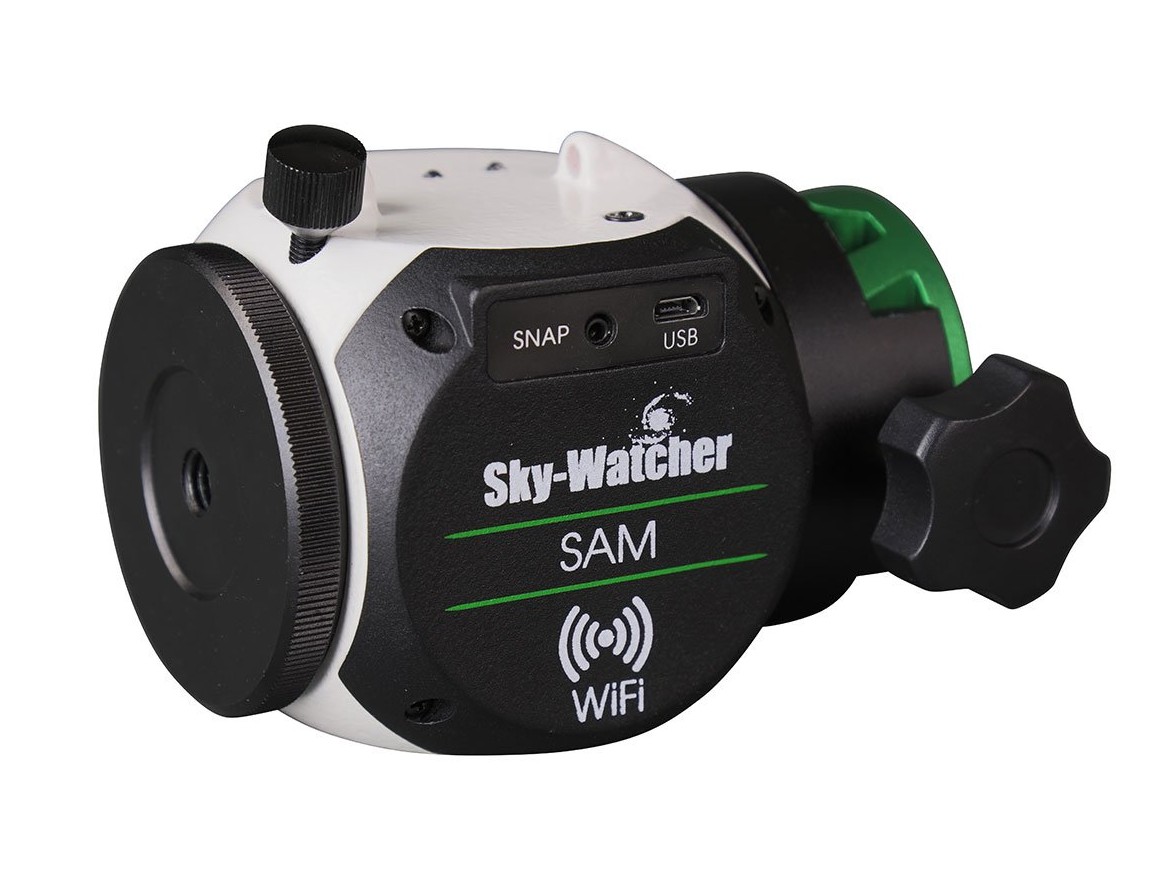
It can’t get much easier to use than the Star Adventurer Mini.
This unit has just one button that’s used to turn it on and off. Once the unit is on, it broadcasts on its own Wi-Fi network to which you can connect your smartphone.
Once your phone is connected, you can use the aforementioned free app to control the Mini.
The app is loaded for bear with features, including controls for basic star-tracking functions (i.e., hemisphere and tracking speed). There’s a built-in polar finder utility for easily finding Polaris, and if your camera is connected to the unit using a SNAP cable, you can use the app to set an intervalometer for time-lapse photography.
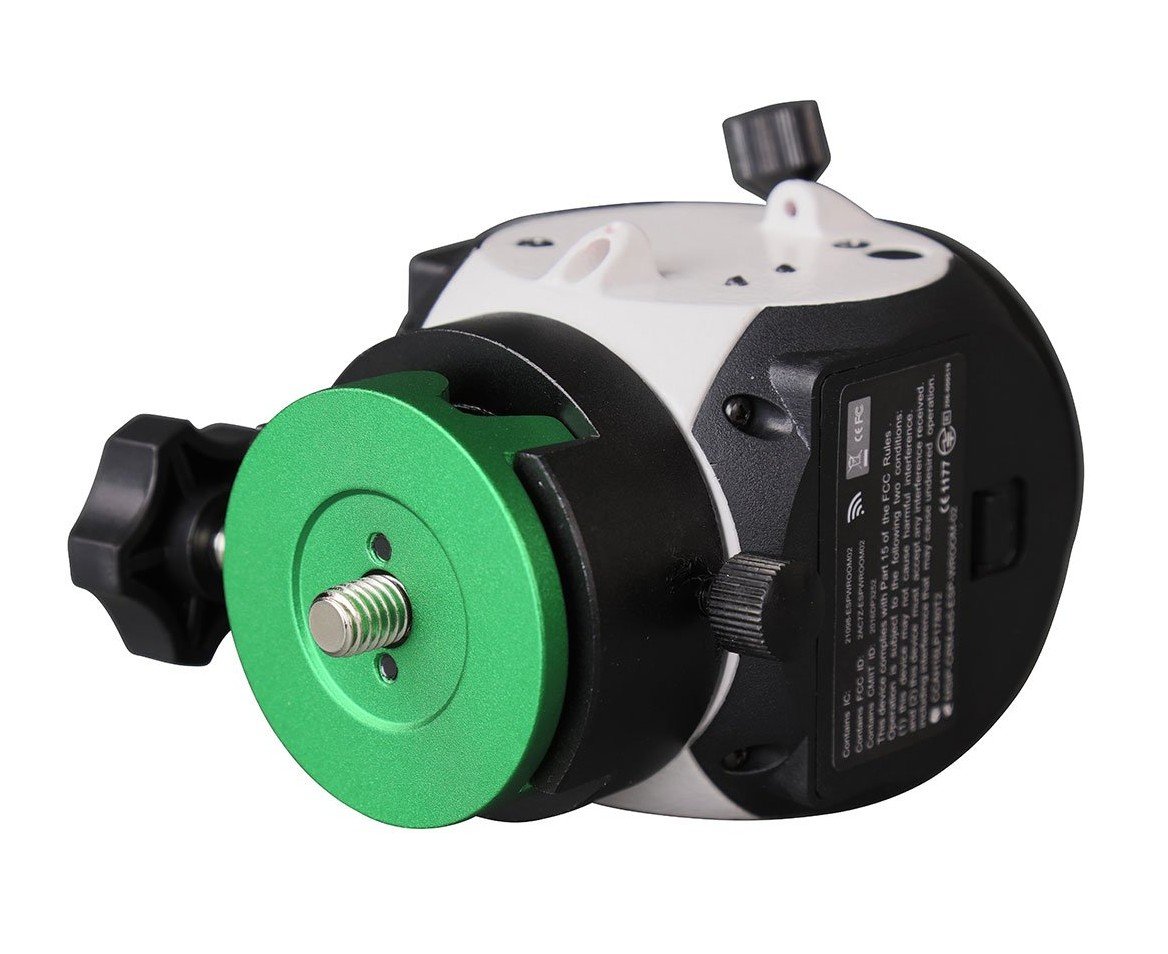
Speaking of time-lapses, the app has three separate time-lapse modes built-in, all of which are incredibly easy to use:
Astro time-lapse, which tracks stars for the duration of the exposure and then repositions back to the start and repeats the process
Regular time-lapse, which can be used to add a panning motion to daytime time-lapses
Long exposure time-lapse, which can be used during the day (with ND filters) or at night. The Mini stays put during the duration of the exposure, and then pans to take another exposure.
Sky-Watcher Star Adventurer Price
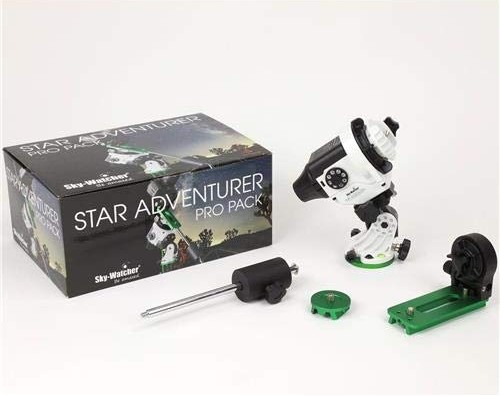
There are several packages that include the Sky-Watcher, each with a slightly different price.
The Star Adventurer Pro Pack (shown above) is $415.00 and includes the mount, a dec bracket, a latitude EQ base, a counterweight kit, and a ball head adapter.
The Star Adventurer Photo Package is $319.00 and includes the mount, a polar scope illuminator, and a ball head adapter.
The Star Adventurer Astro Package is $329.00 and includes the mount, a polar scope illuminator, and a dec bracket.
Sky-Watcher Star Adventurer Mini Price
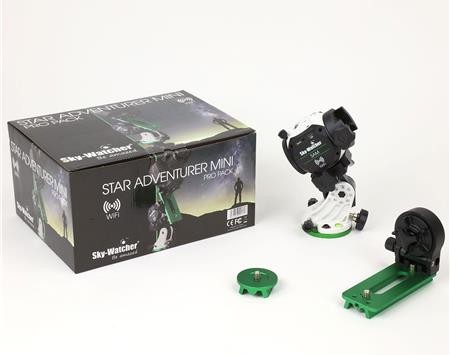
You can pick up a Sky-Watcher Star Adventurer Mini for $249.00, which includes the mount, a polar scope with illuminator, and a ball head adapter.
A Star Adventurer Mini Pro Pack is $380.00 and includes the mount, a polar scope with illuminator, a dec bracket, a Star Adventurer Latitude EQ base, and a Star Adventurer Ball Head Adapter.
Sky-Watcher Star Adventurer vs Sky-Watcher Star Adventurer Mini
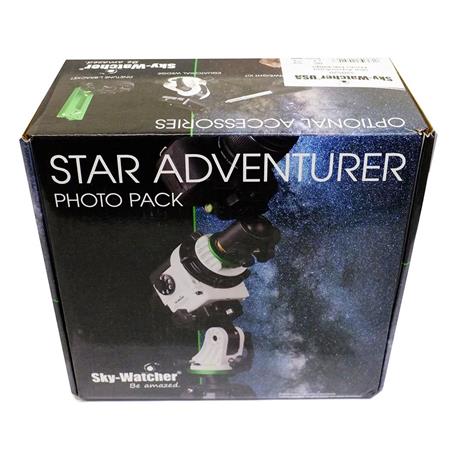
Whether you have a full frame setup or a small camera, the Star Adventurer and Star Adventurer mini offer loads of features to help you create breathtaking shots of the night sky.
Additionally, since both units are so portable and easy to set up, you can tackle astrophotography in short order, even if you don’t have much (or any) experience doing so.
With cutting-edge technology, helpful features that assist you in getting clear shots, and prices that are affordable, both of these mounts represent excellent buys for photographers that are looking to get into astrophotography or upgrade their existing kit.
We Recommend
Suggested Camera Settings for Astrophotography
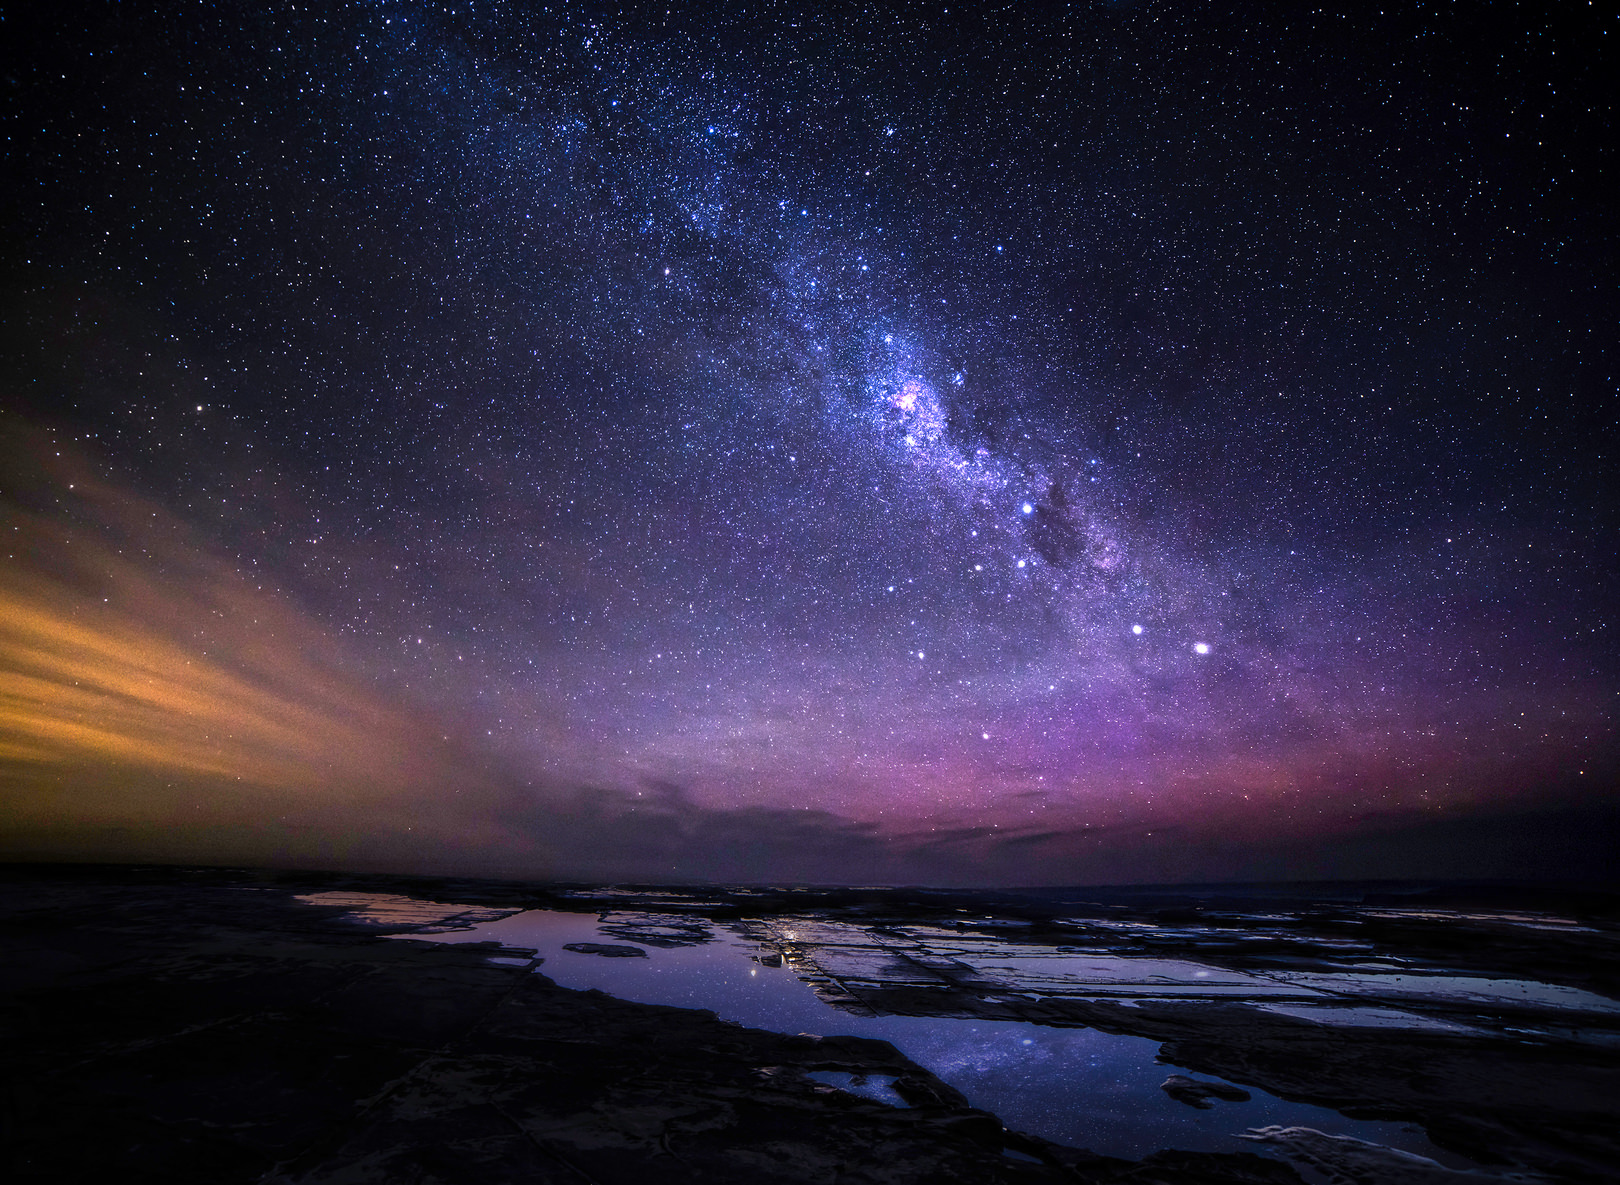
If you’ve never tackled astrophotography, one of your first questions might be, “What camera settings do I use?”
The answer to that question is tricky and really depends on the situation. No two photography outings are the same, but that doesn’t mean there can’t be a set of suggested settings that give you a good starting point for your next astrophotography adventure.
Let’s explore a few essential settings that will get you going in the right direction.
Basic Settings
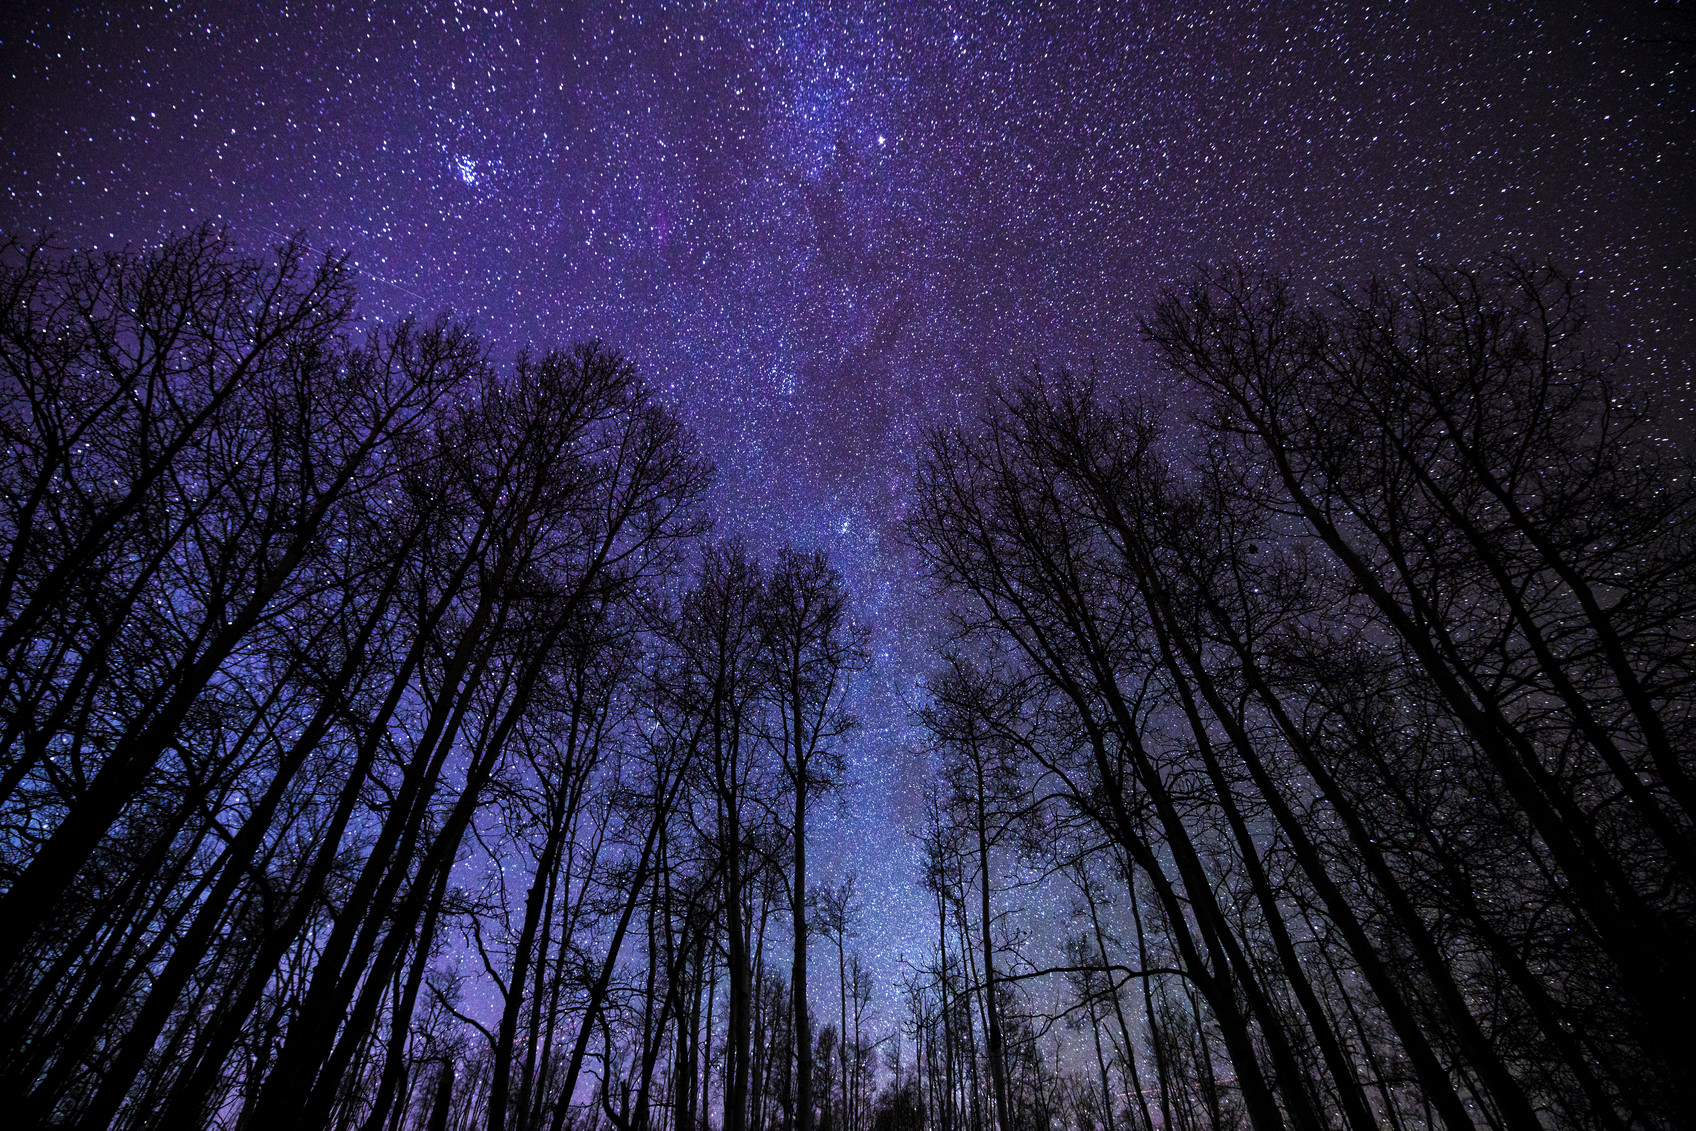
Obviously, controlling the amount of light that your camera gathers is a crucial element of astrophotography (and all photography for that matter). The exposure settings will vary from one situation to the next and will depend on many factors, including the presence or absence of light from light pollution as well as light reflected off the moon. Having said that, a good starting point is as follows:
Shooting mode - Manual
Drive mode - One-shot
Aperture - f/4
ISO - 1600
Shutter Speed - 4 minutes
Since most cameras only allow a shutter speed of up to 30 seconds, you’ll need to shoot in Bulb mode. This allows you to control the shutter for minutes or even hours at a time.
Advanced Settings
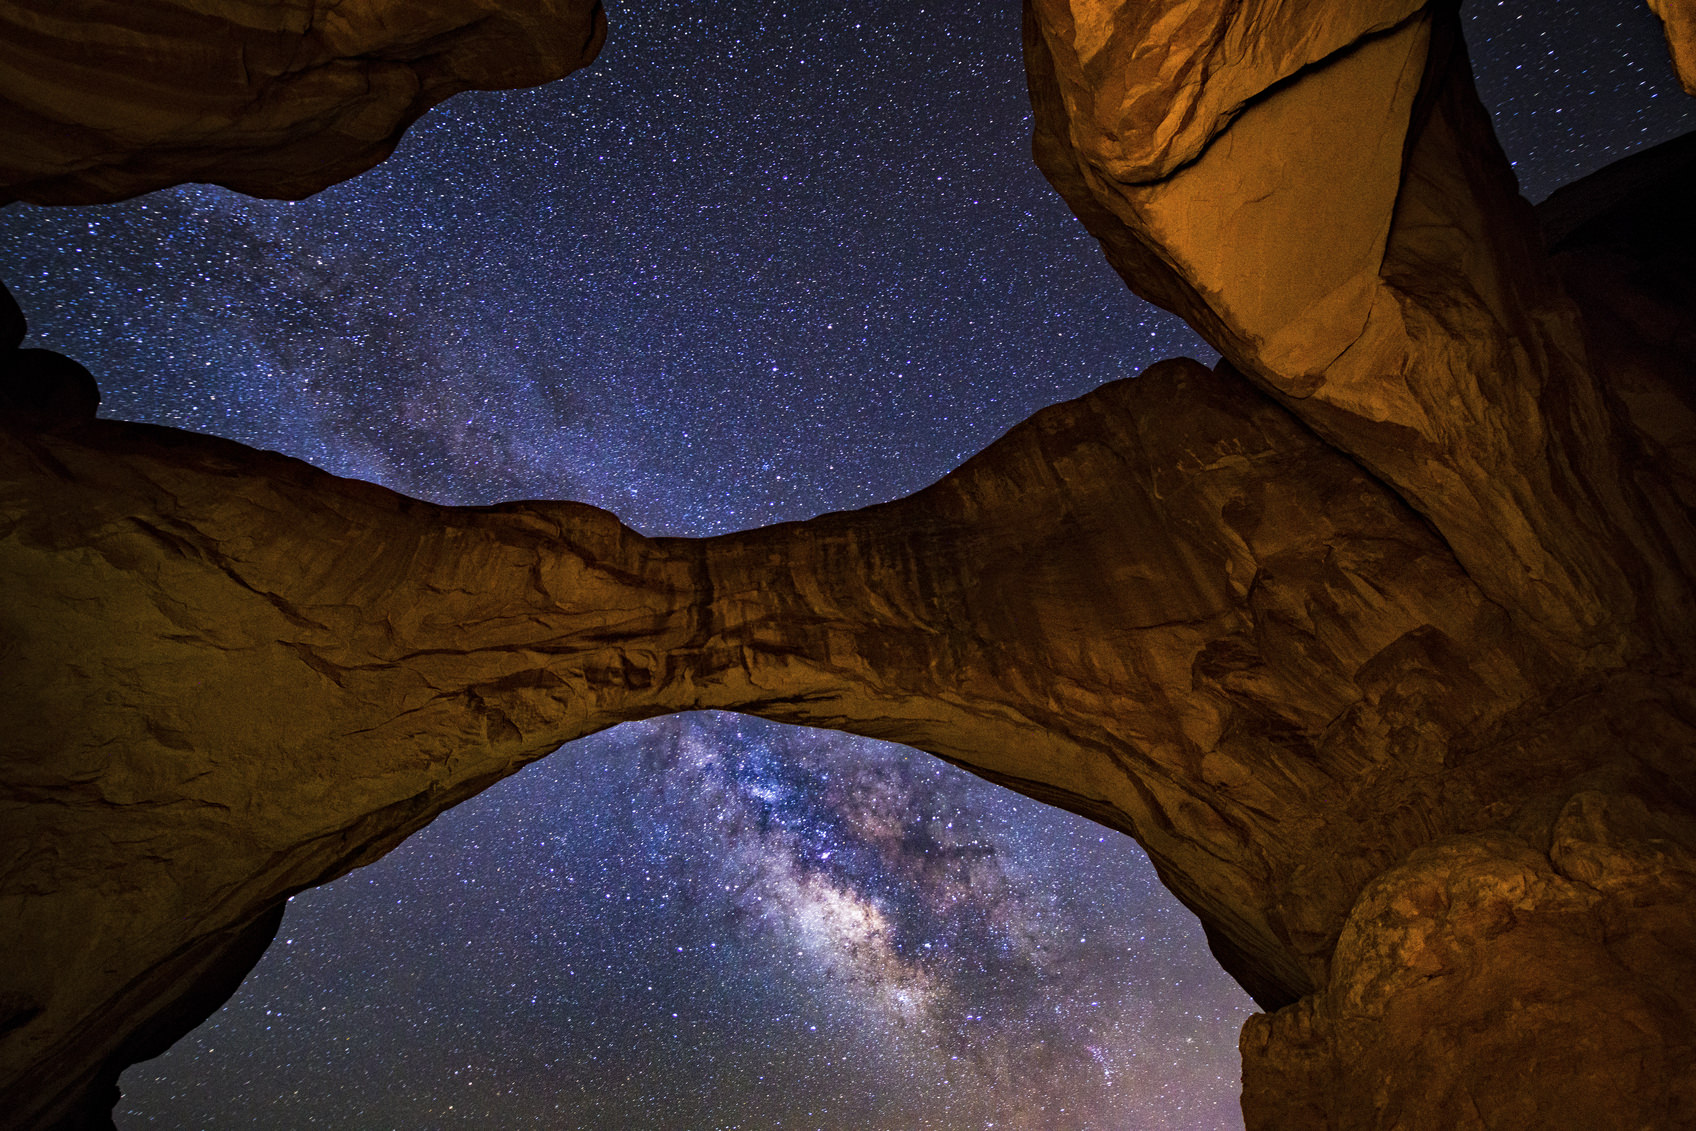
In addition to the basic settings outlined above, there are numerous advanced settings that should be tended to if you are going to get the best results.
Focus - Set to manual. Your camera’s autofocus system will not be able to set the focus appropriately, and you might end up with blurry photos.
Exposure compensation - Set to zero. There is no need for exposure compensation because you will be setting your exposure settings (aperture, ISO, shutter speed) manually.
White balance - The daylight setting usually produces good results, though setting a custom white balance will likely be even better.
Mirror lock-up - Unless you’re using a mirrorless system, you might consider locking the mirror of your DSLR in place, especially if your camera mount isn’t of a high quality. Doing so reduces vibrations that result from the mirror moving. Minimizing these vibrations will get you images that are sharper and clearer.
Image quality - Set to RAW. RAW files contain all the data collected by the camera’s sensor, as opposed to JPEGs which compress that data. By shooting in RAW, you have greater leeway in post-processing as a result of the larger amount of data in the file.
Long-exposure noise reduction - Many cameras have this setting to help reduce the level of noise in the image as a result of using a higher-than-normal ISO. However, many newer cameras also have vastly improved ISO performance such that even at ISO 1600, 3200, or 6400, noise is not much of a problem. Additionally, long-exposure noise reduction increases the time it takes your camera to process the images, which is a problem if you’re creating a time-lapse video. Because of this, in-camera long-exposure noise reduction is not recommended. If you find that your images have too much noise, you can use noise reduction in post-processing to take care of the issue.
Good Gear Changes Things
As noted above, the particular circumstances in which you are shooting will necessitate changes to these recommended settings. For example, if there is a particularly bright moon, you might adjust your ISO from 1600 down to 400 to compensate for its brightness, or you might utilize a faster shutter speed, such as 2 minutes as compared to 4 minutes.
Another factor that will determine some of your camera settings for astrophotography is the mount you use. A subpar mount, for example, might require that you use mirror lock-up so yourimages aren’t blurry. However, if you use a high-quality mount like theStar Adventurer from Sky-Watcher USA, mirror lock-up isn’t necessary. But why?
Top-shelf mounts like the Star Adventurer give your camera an incredibly stable base so you can get clear, tack-sharp images every time. The mount supports up to 11 pounds and gives you a highly precise tracking platform so you can take stills, long exposures, and even time-lapses of your favorite celestial bodies. What’s more, the Star Adventurer allows you to track sidereal, solar, and lunar movements, opening up lots of options for subject matter for your photos.
Better still, the Star Adventurer has a built-in polar scope with illuminator, a built-in auto-guiding interface, and a DSLR interface that gives you automatic control over your shutter. In short, the Star Adventurer gives you the tools you need to get better photos of the night sky, each and every time. And, with tons of features, the Star Adventurer will help you take on more and more advanced astrophotography shoots as you learn the craft and acquire new skills.
So, grab yourself a Star Adventurer, head out to your favorite night sky viewing spot, dial in these suggested settings, and set about taking breathtaking images of the Milky Way and other features of the night sky. It will take some experimentation, but in time, you’ll be able to capture images like the sample images in this article.
We Recommend
Types of Astrophotography
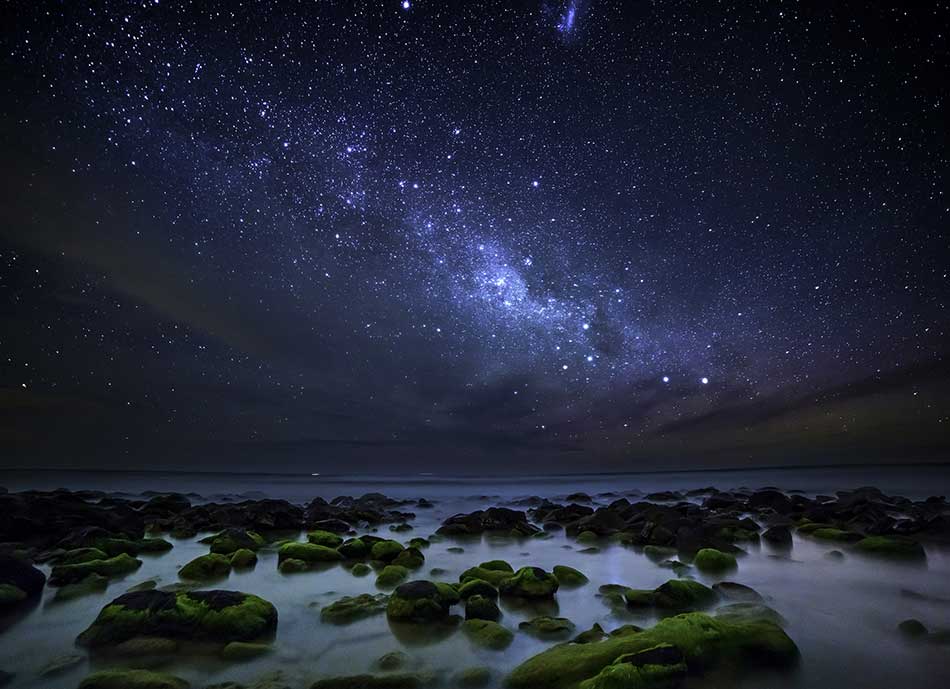
One of the benefits that today’s photographers reap is more advanced photography gear that makes astrophotography a much more accessible type of photography to undertake.
But, there’s always been different types of astrophotography, some that are relatively easy to do and accessible for beginners with nothing more than a DSLR and a tripod. Others are more advanced and require a lot more gear.
In this primer, we offer up a quick and simple description of the most common types of astrophotography, and offer a few recommendations in terms of high-quality gear that will allow you to take stellar photos of the night sky.
Let’s begin!
Night Sky Photography
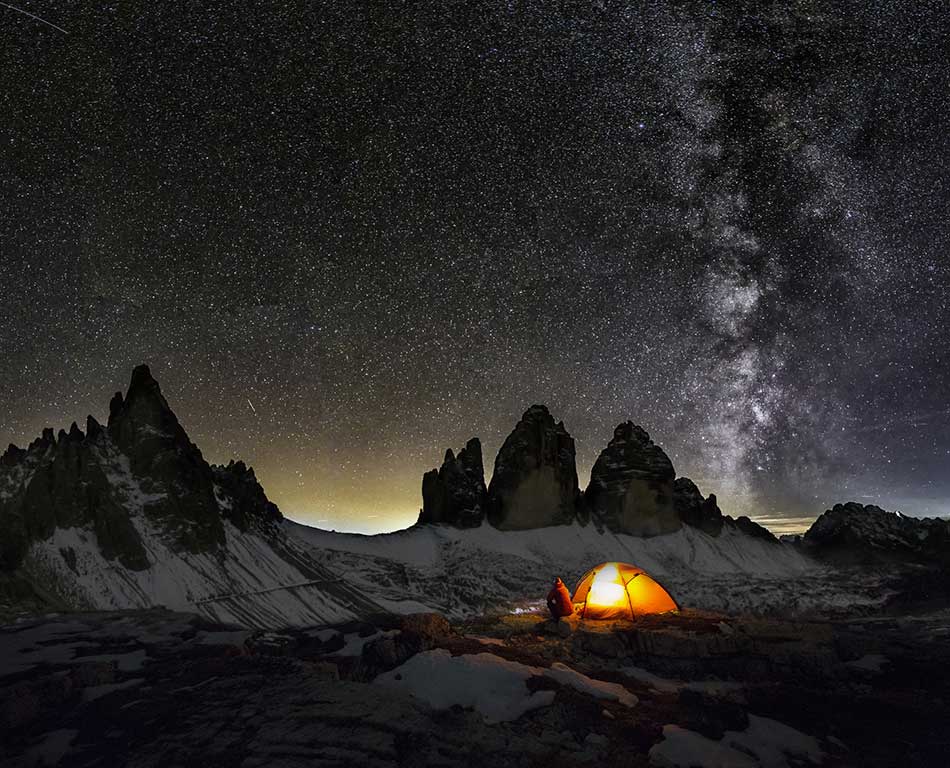
Night sky photography is the most simple and straightforward type of astrophotography. Essentially, as long as you have a camera that has a bulb setting, a good tripod and mount, and a good view of the sky, you can take on night sky photography.
But night sky photography isn’t just limited to photos of the stars. In fact, in night sky photography, you can capture constellations, star trails, the northern lights, and the Milky Way itself. Just how much detail you get in your photos depends in large part on your camera. For example, with higher end cameras and lenses, you might be able to see the colors of stars, capture meteors or nebulas, and even see planets, albeit as very small dots in the sky.
Piggyback Astrophotography
Perhaps a bit more complex than simple night sky astrophotography, the piggyback method involves mounting your camera to a telescope. Doing so allows you to track the movements of the night sky with the telescope, thus avoiding having any sense of movement in the image, like star trails, that occur during long exposures when the camera is mounted on a tripod.
The procedure for astrophotography using the piggyback method is more or less the same as with the simple night sky technique. You simply align the telescope mount and begin its tracking procedure, mount the camera to the telescope, acquire focus, dial in the appropriate camera settings, and compose the shot.
Prime Focus Astrophotography
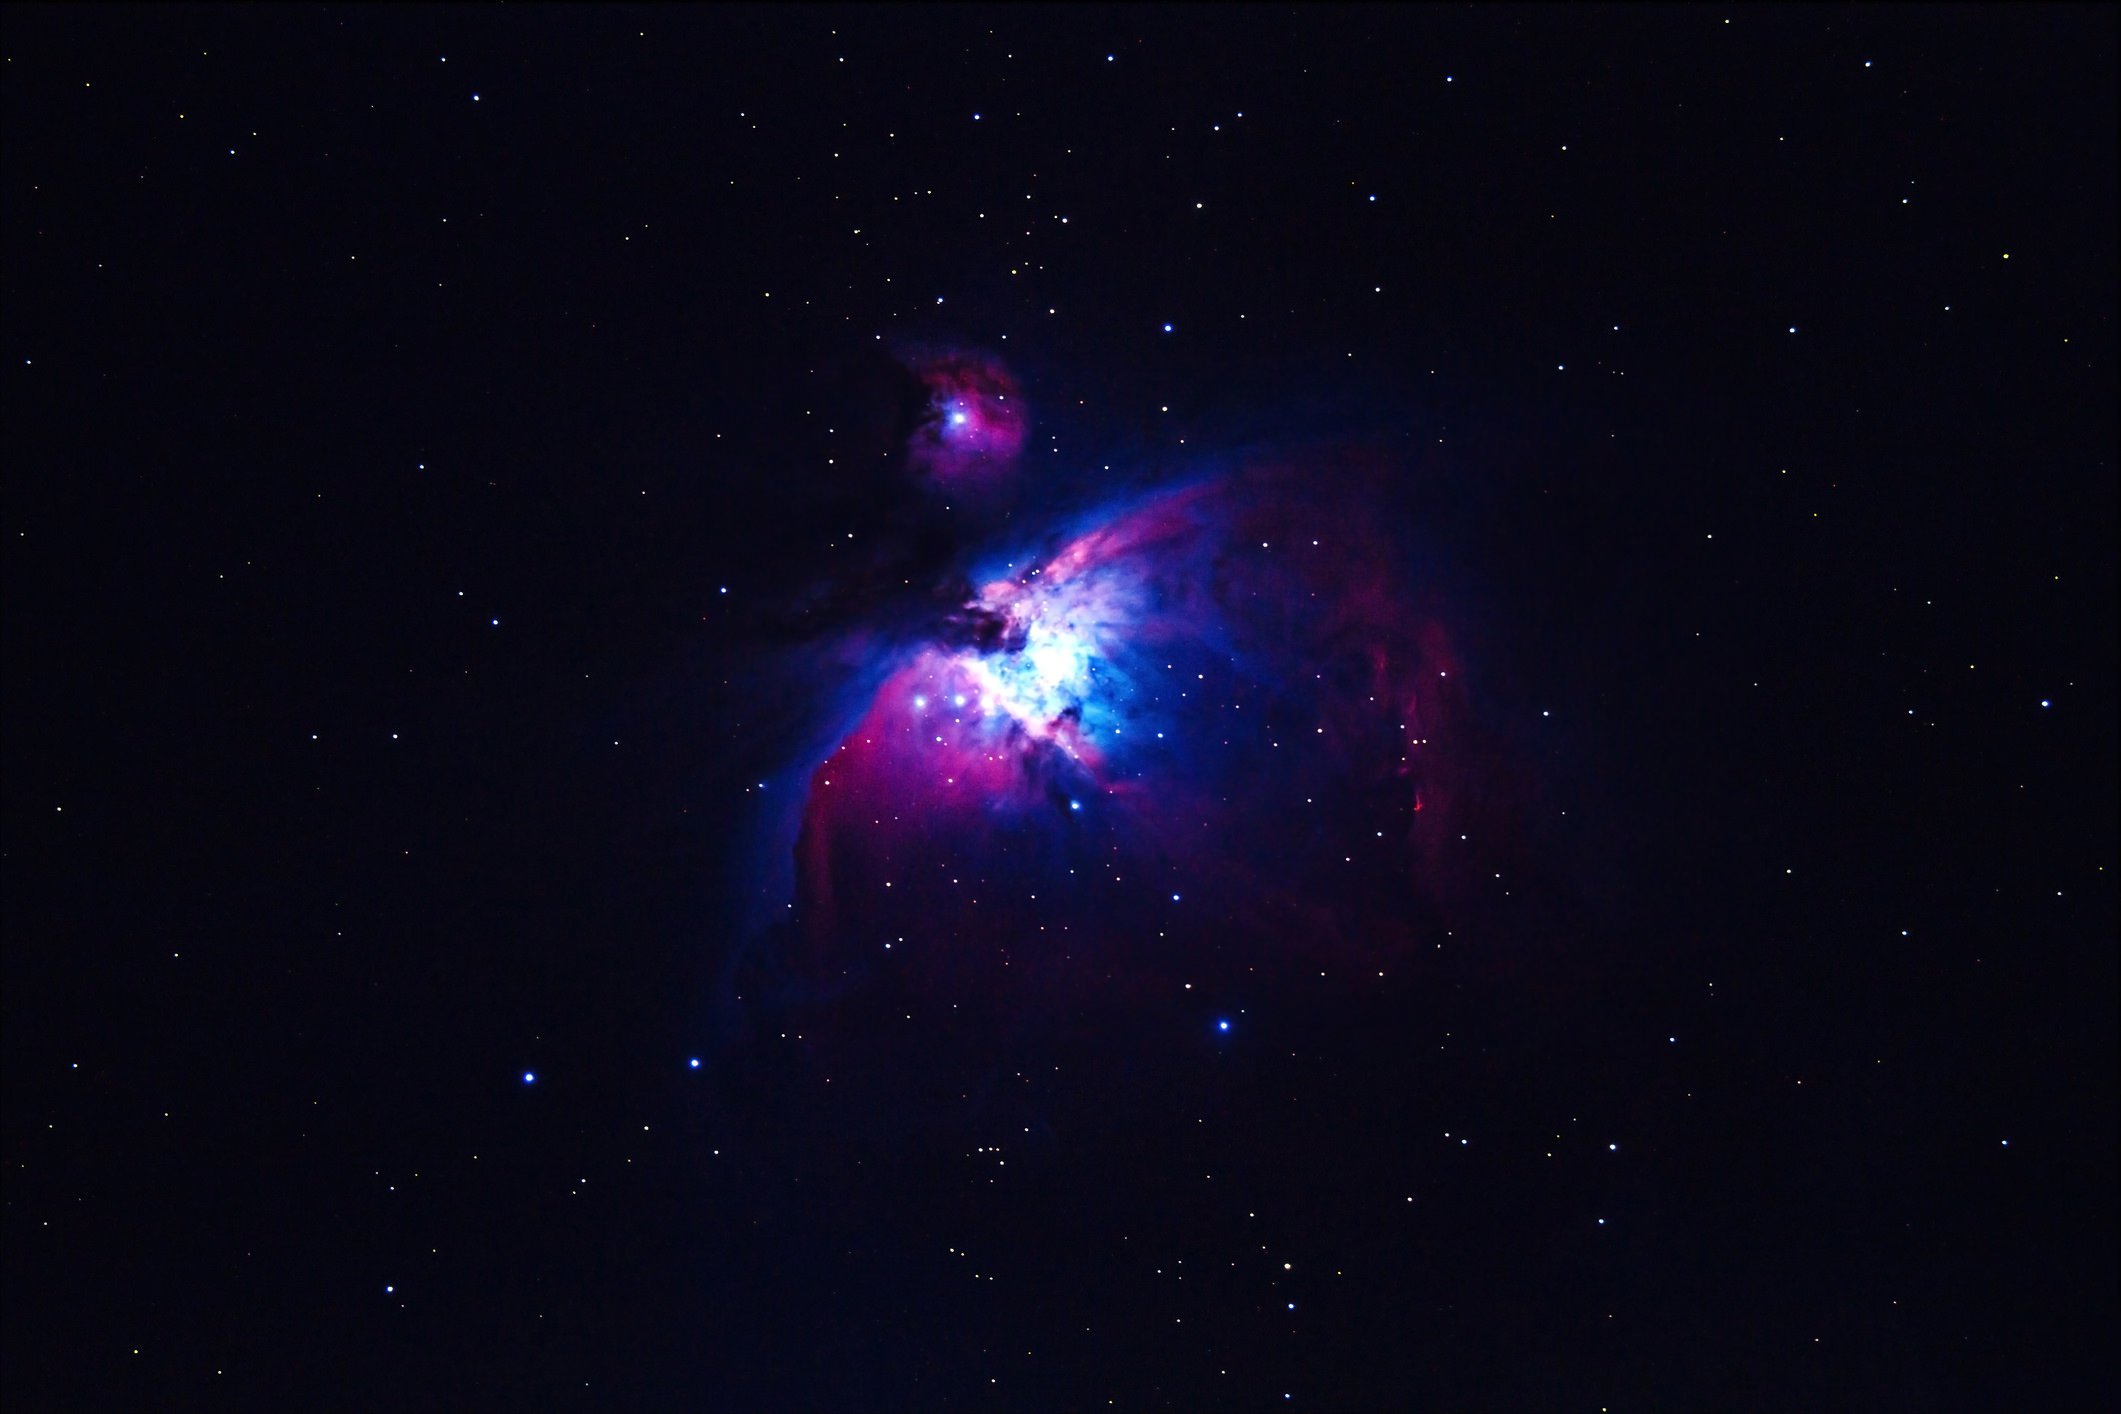
Unlike piggyback astrophotography, the prime focus technique does not use the camera’s lens but instead uses the telescope as the lens. You can add a focal reducer to lengthen or shorten the focal length of the telescope, where increasing the focal length magnifies the subject and decreasing the focal length gets you a wider field of view.
The advantage of prime focus astrophotography is that any object in the sky can be photographed, including those that cannot be seen with the naked eye. Planets are still very difficult to capture as more than a bright spot in the sky, but nebulae, like the Great Nebula in the constellation Orion (shown above), is an ideal target. Of course, no matter what the subject, this technique takes some practice to get high-quality images. And because you’re shooting at such a long focal length, a stable mount is an absolute necessity to stave off camera shake and blurry images.
Afocal Astrophotography
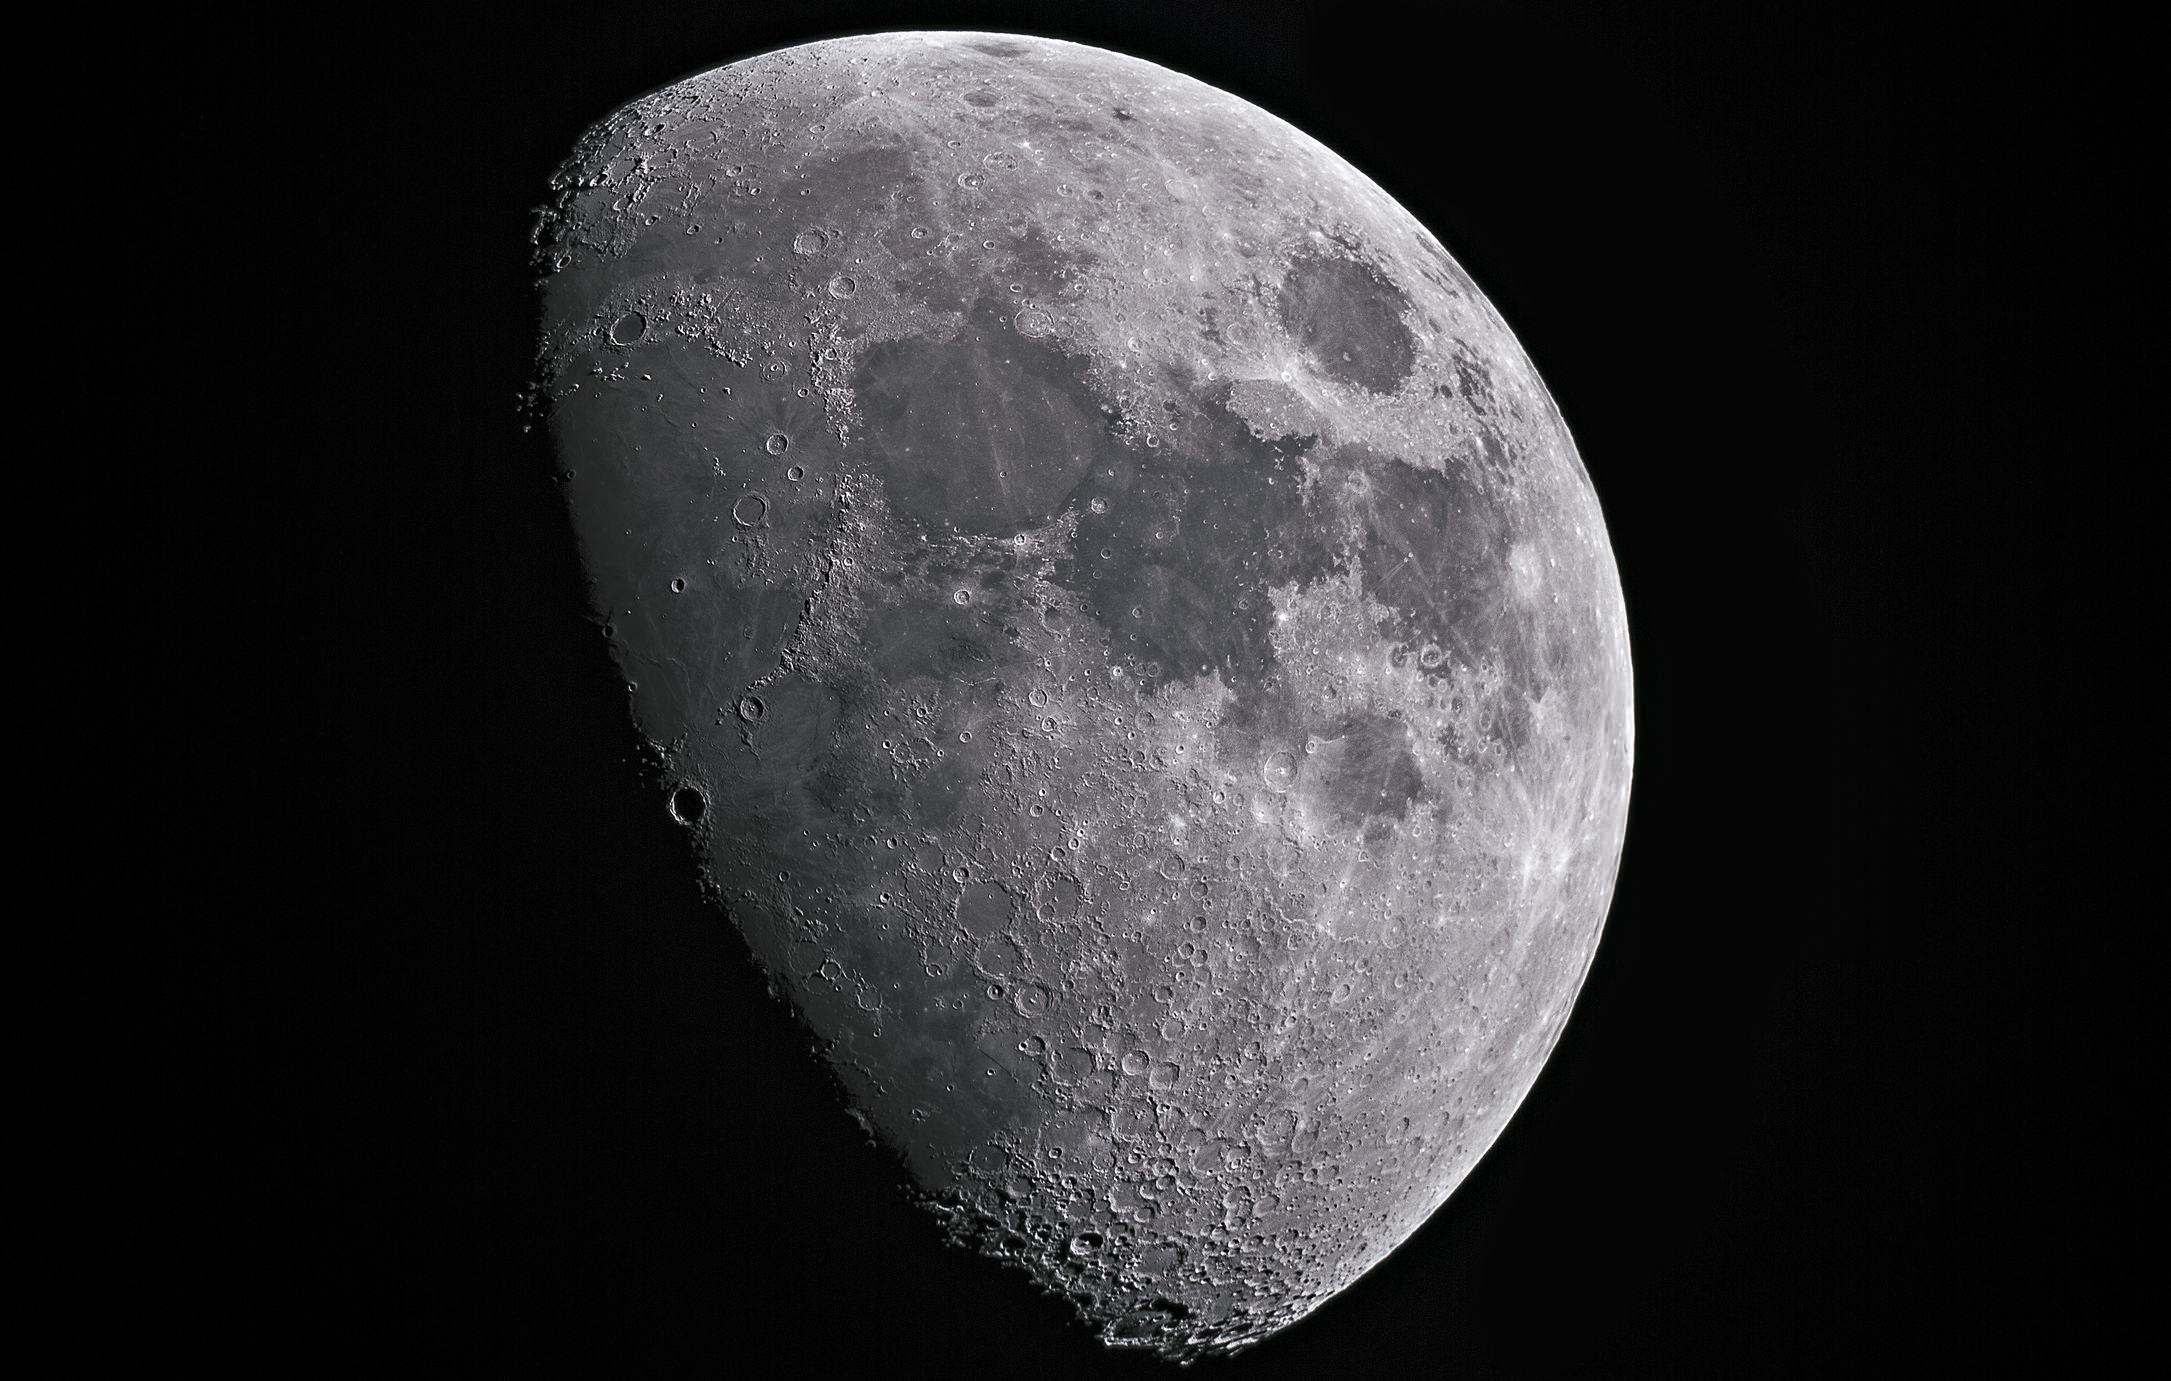
Afocal astrophotography might sound really complicated, but it’s actually straightforward. Quite simply, afocal astrophotography allows you to photograph the sky through an eyepiece mounted on a telescope. Typically, this method is best used to photograph large bodies, like the sun and moon, as well as planets that tend to be brighter in the sky.
To get a photo, you center the desired subject in the telescope’s eyepiece, using your eye to compose the shot. Then, focus the lens to infinity. From there, simply select the appropriate camera settings, then hold the camera lens over the eyepiece and take the photo. The resulting image will be of what you saw in the eyepiece with your own eye. Though you can get images by merely holding the camera above the eyepiece, you can also get adapters that allow you to securely mount your camera to the eyepiece for more stable photos.
Eyepiece Projection Astrophotography
Similar to afocal astrophotography, the eyepiece projection method uses an eyepiece on the telescope to zoom in on the desired subject. However, in this technique, the eyepiece joins the telescope and camera, so the image is essentially projected onto the camera sensor.
Though it might sound like a more efficient method of photographing the sky, you will likely find that objects in the sky are more faint than if you use the afocal technique. This is due in part to the fact that the image is projected onto the camera’s sensor. Another difficulty is that it can be very hard to find the objects you’re looking for, let alone composing the shot and focusing the image effectively. Nevertheless, you might find that this technique works for you in certain situations. The key, no matter which type of astrophotography you try, is to experiment with different gear (i.e. varying focal length lenses) and try varying exposures and camera settings to see what works best for your particular goals.
Get Outfitted for Astrophotography
Of course, taking on astrophotography requires some specialized gear, and for us, Sky-Watcher USA is the place to get outfitted. They have a complete line of equipment, from telescopes and telescope accessories to specialized mounts that make tracking celestial objects vastly easier.
One of their best products is the Star Adventurer mount, shown above. The Star Adventurer has several pre-programmed speeds, meaning you can create stunning time-lapse videos with your DSLR. With sidereal, solar, and lunar tracking rates, you can follow just about any object in the night sky. The Star Adventurer has a built-in auto-guiding interface, a DSLR interface for automatic shutter control, and an 11-pound payload, so you can mount your big full frame DSLR to it without issue.
In the end, diving into astrophotography requires a lot of time, patience, and late nights. But to get the very best results, you need the very best equipment as well. That’s why we highly recommend Sky-Watcher USA to all our friends that seek to create stunning photos of the night sky. Head over to Sky-Watcher USA to see what products they have for your astrophotography adventures!