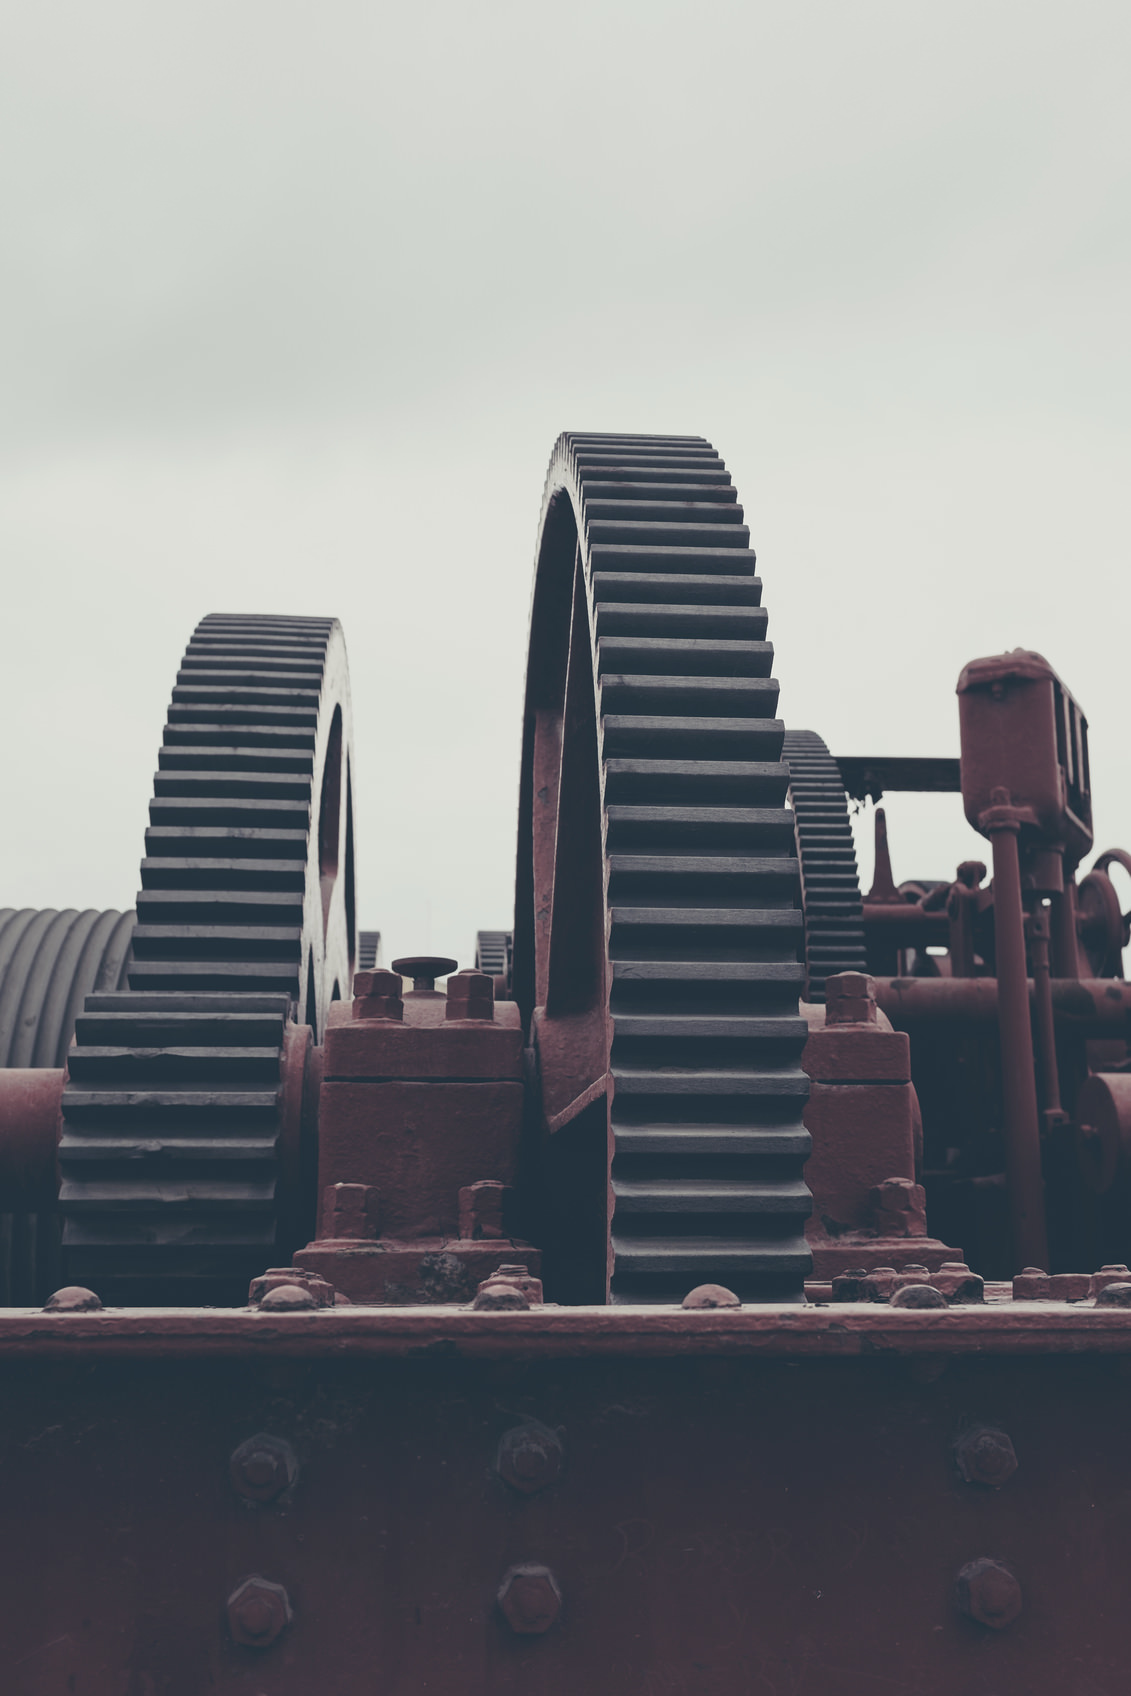
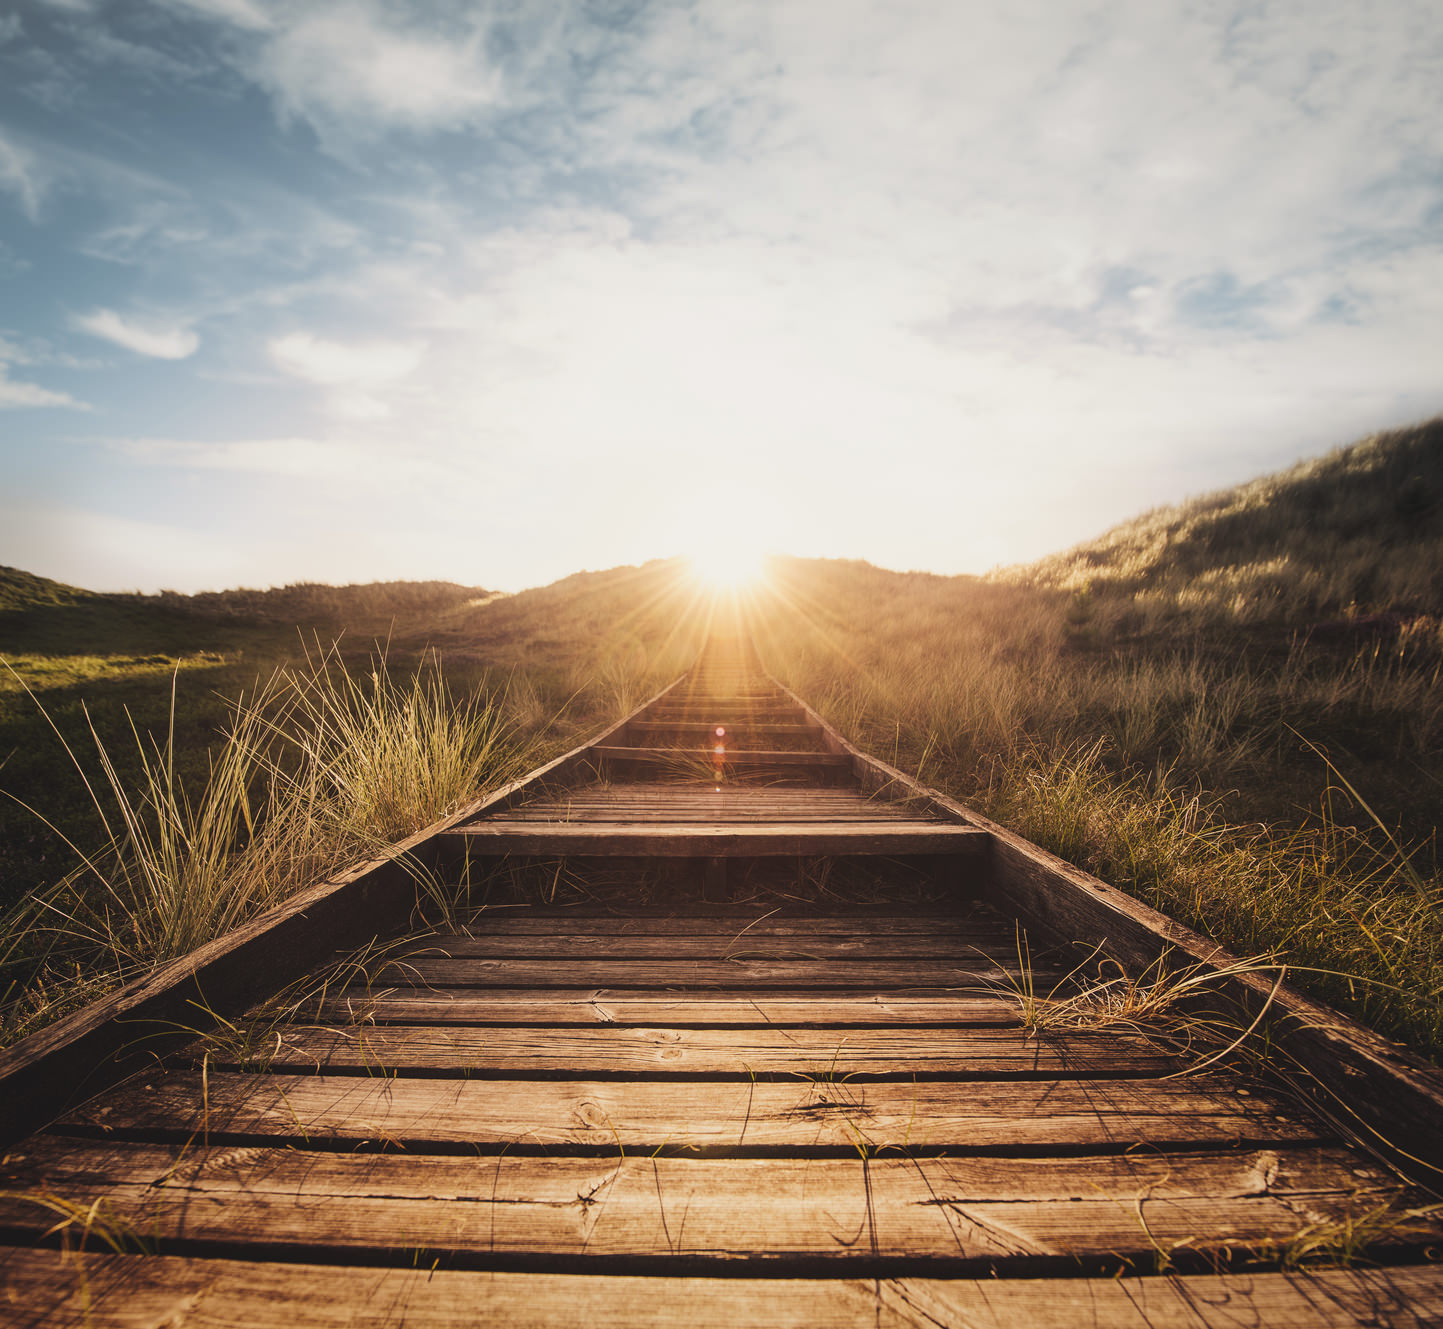
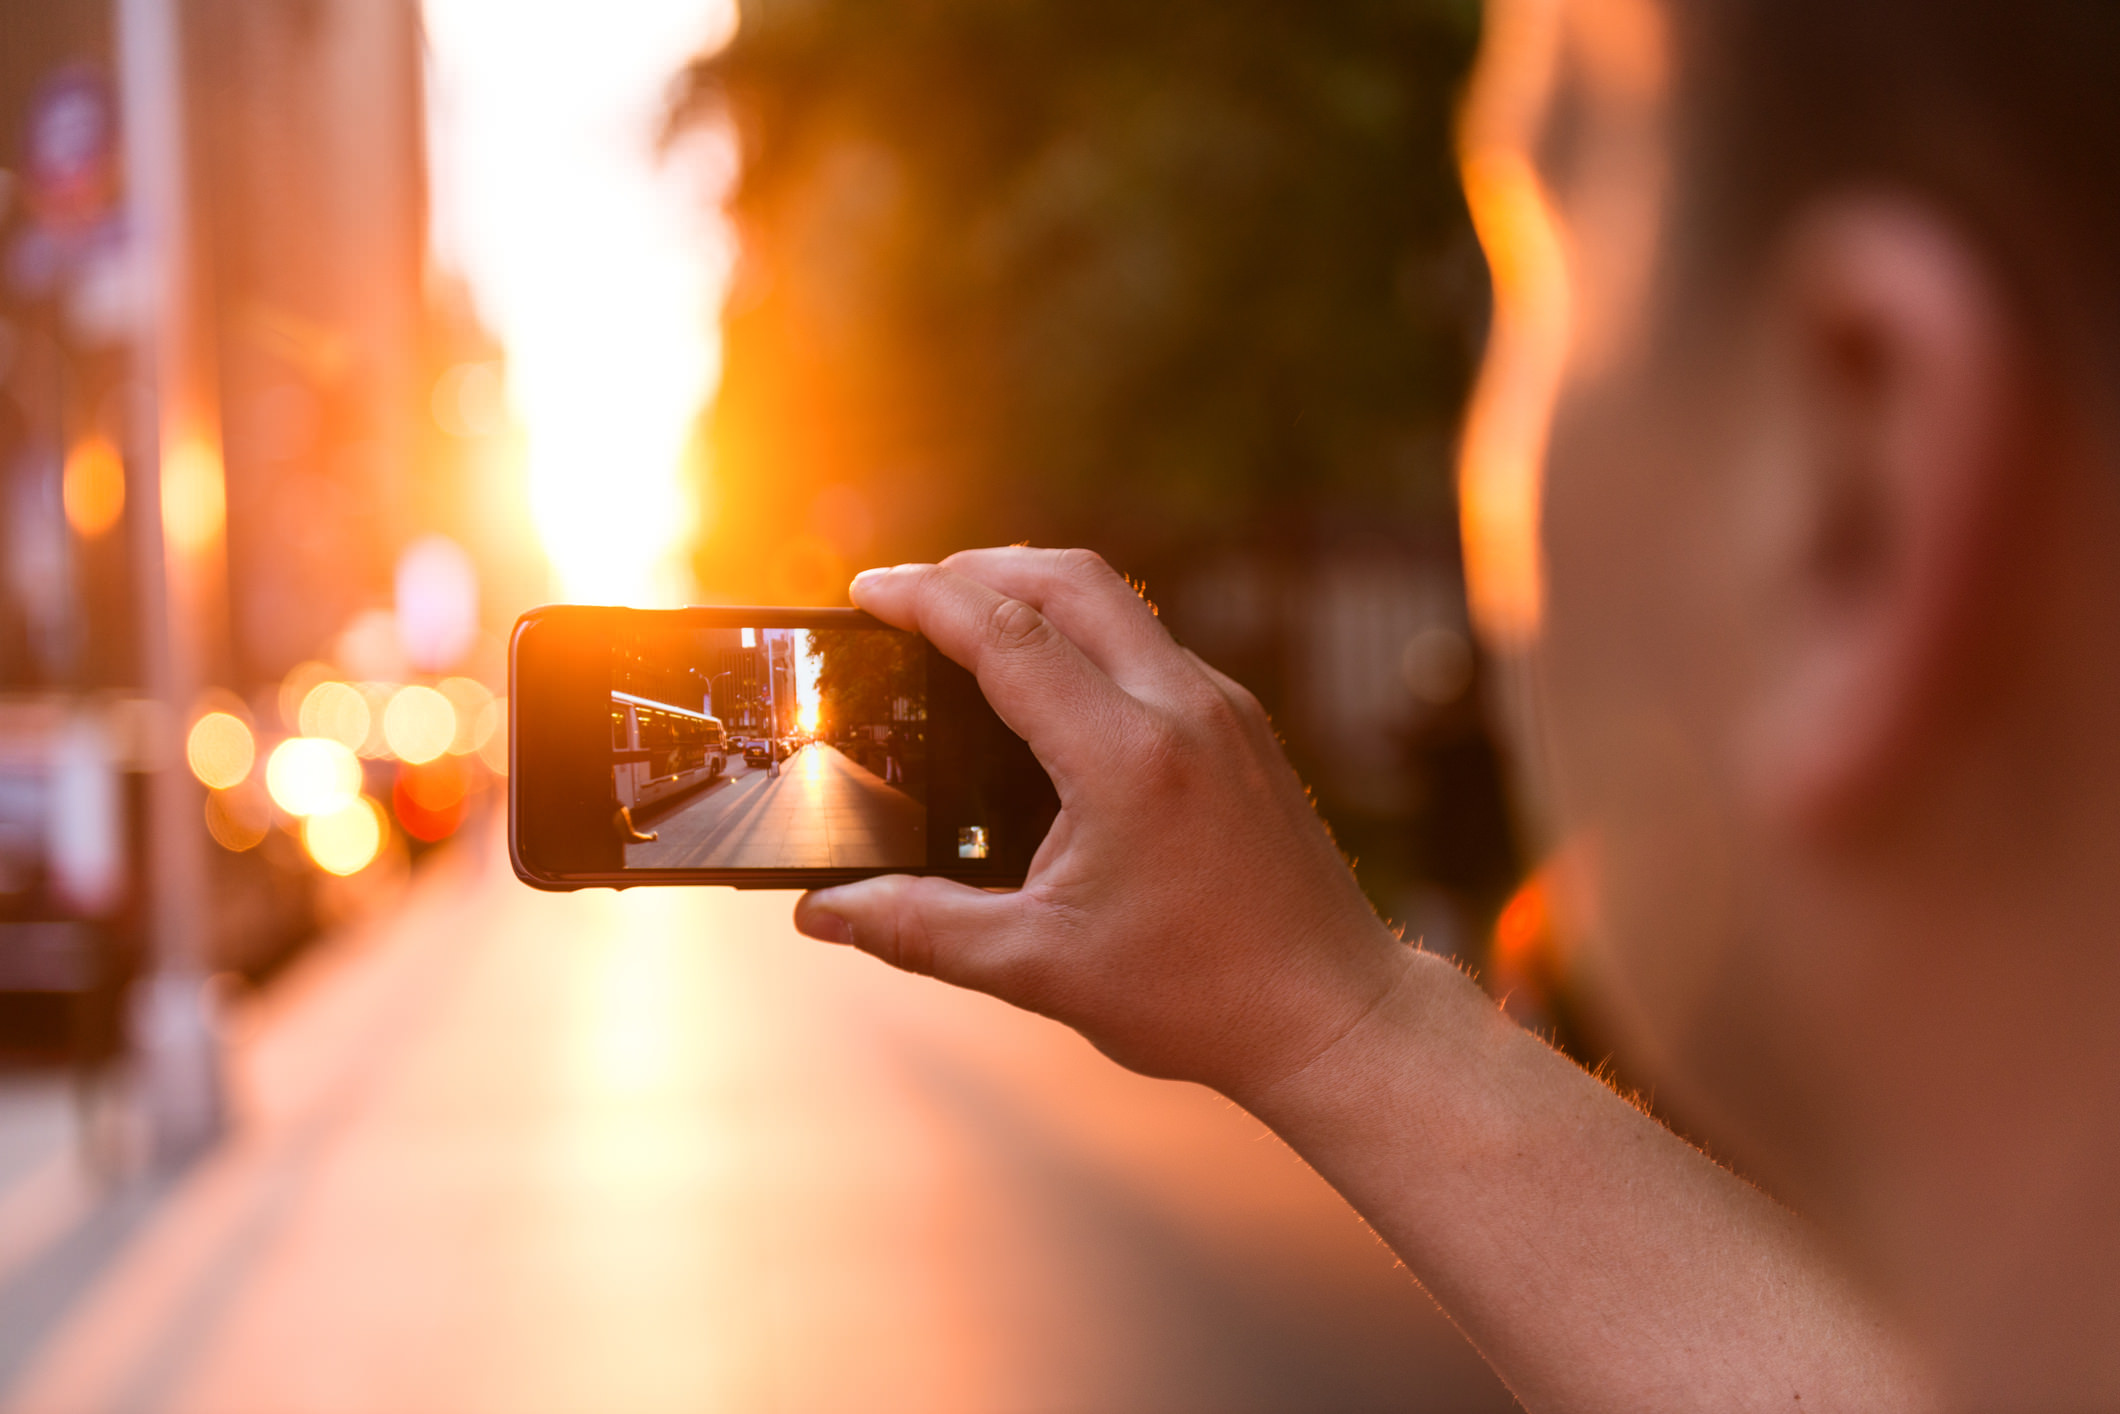
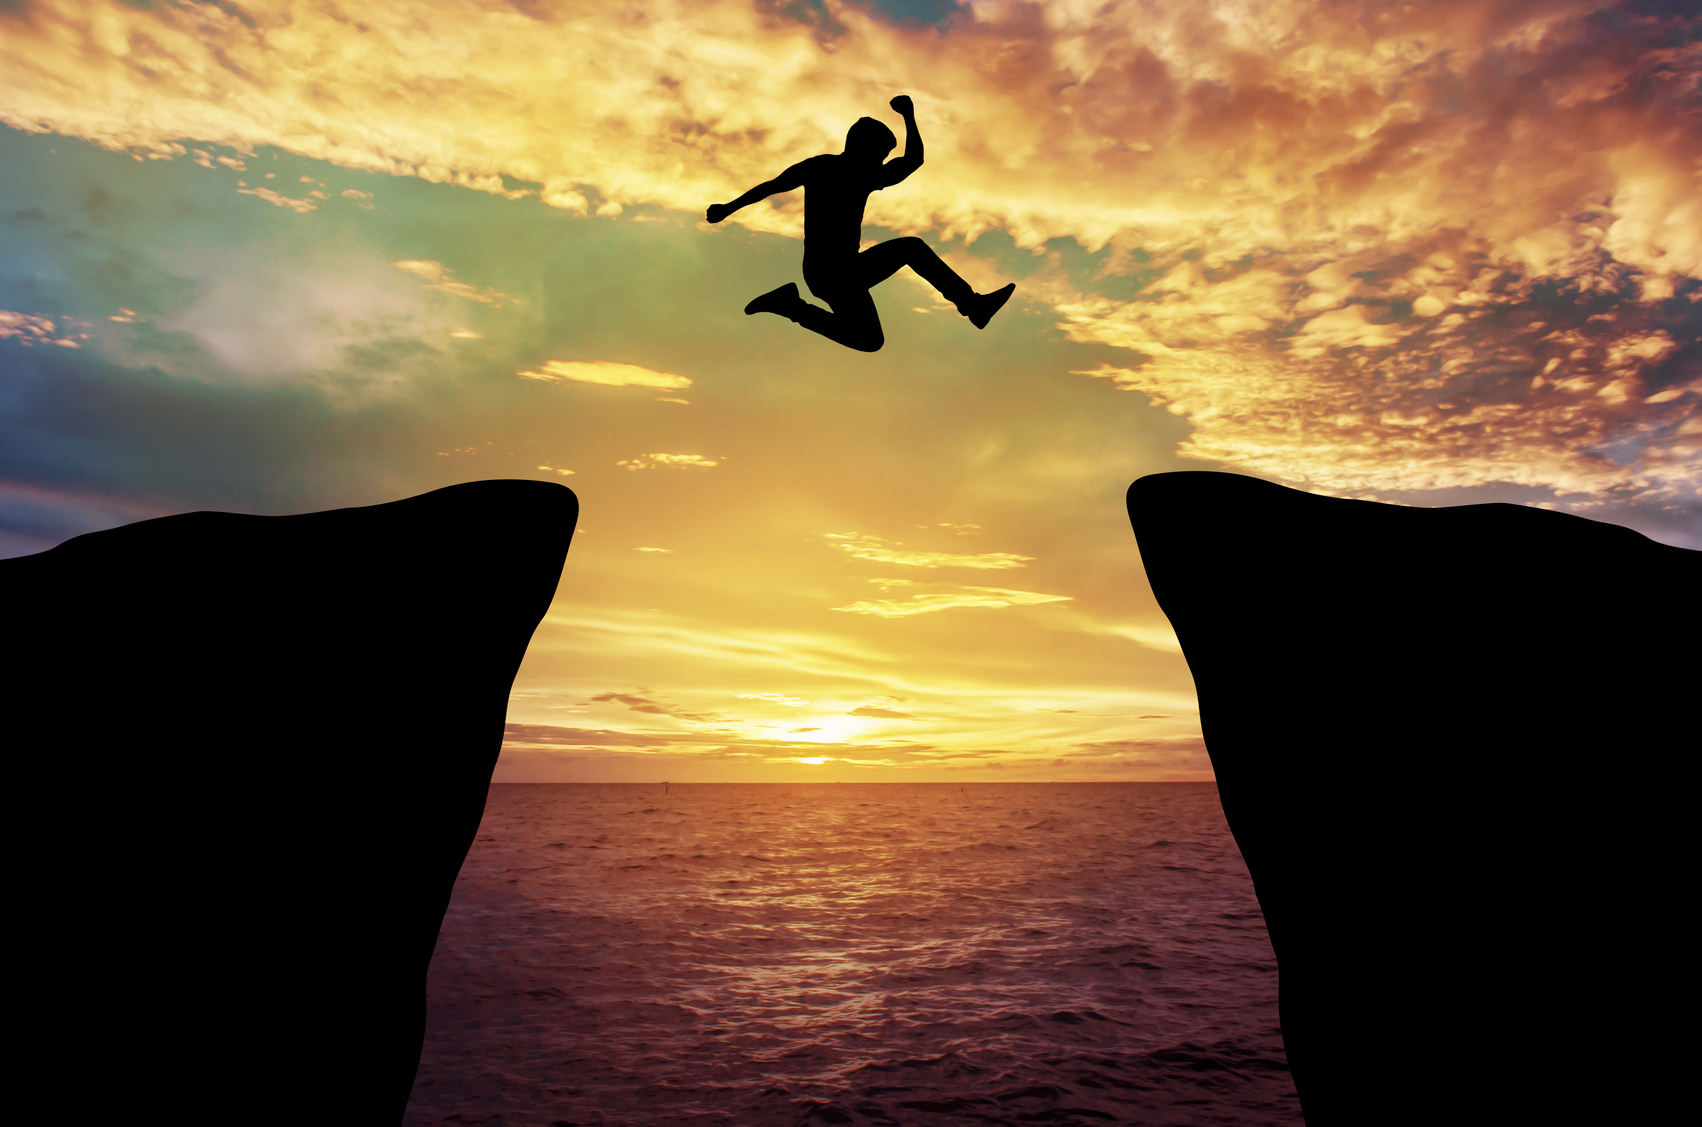
3 (More) Things You Believe to Be True About Photography That are False
Last week, we took a look at three commonly held beliefs about photography that simply aren’t true. In that article, we explored the notions that aperture priority is the best shooting mode, that shooting with the lowest ISO is always necessary, and that tripods are a requirement for most shots.
After debunking those myths, we thought it would be fun to tackle three more photography falsehoods.

Photos Should Always Convey the Truth

Unless you’re a photojournalist, your photos do not have to convey the truth. Photography is an art, and as such, you have the creative freedom to do with your compositions what you want. What’s more, it’s often difficult to achieve a completely truthful photo anyway because the way you frame or crop the image, for example, means that you’re excluding something. Doing so bends the truth just a little, right? What’s more, how you create your photo may or may not jive with how people perceive it. You might create an image that you feel conveys a bright, cheerful mood, but a viewer might interpret it as being something else entirely.
Striving for the truth in your images is an admirable undertaking, but no matter how candid the shot, no matter how little post-processing you do, images can easily distort reality. Embrace this quality and focus on being artful and creative instead.
Shooting at f/2.8 Gets Better Photos

Sure, if you’re taking a portrait, f/2.8 will get you a better image than if you try to shoot the same image at f/16. The shallow depth of field you get with f/2.8 creates gorgeous bokeh-filled, blurry backgrounds that help the subject stand out.
But shooting at f/2.8 isn’t always the way to go. Not every photo you take needs a shallow depth of field. Not every background needs to be blurred. In fact, there are times when the subject matter calls for a large depth of field so that you can more effectively convey the context of the situation. Landscapes certainly come to mind as being subject matter that necessitates shooting with a smaller aperture, but so too does street photography, nature and wildlife photography, and travel photography, to name but a few.
Though it’s fun to shoot wide-open, it’s not a given that doing so will get you better photos. Match your aperture to the context to have greater success.
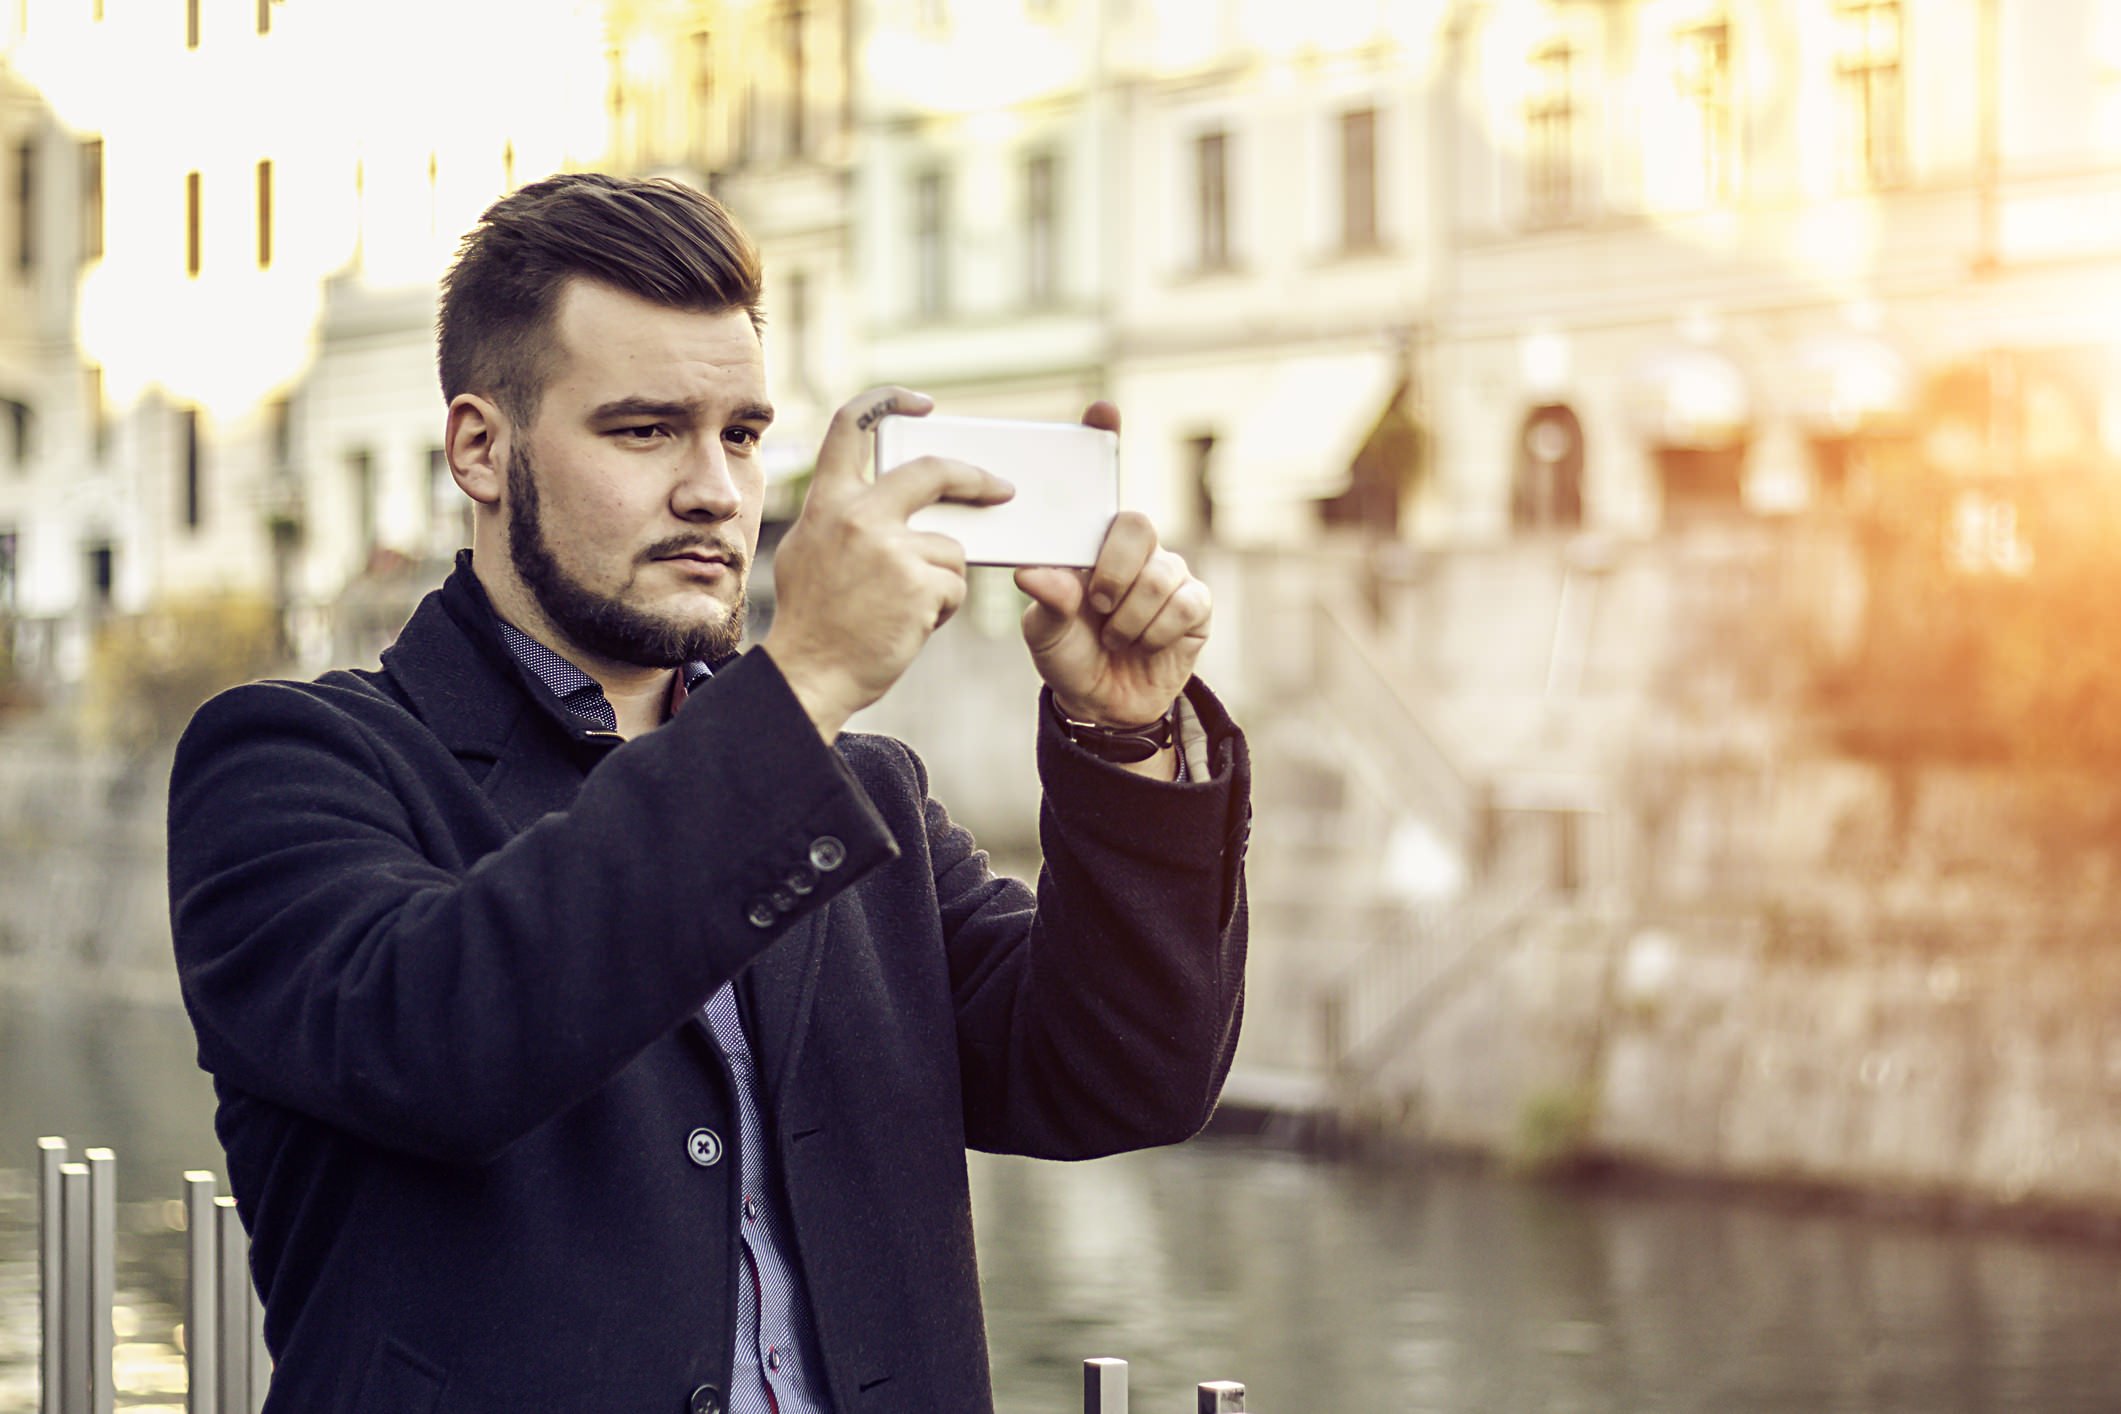
My Photos Suck if They Aren’t Perfect
Much like striving to create a truthful image, creating a technically perfect image is a tough task. Even the most veteran photographers can’t create an image that is perfect from corner to corner. More often than not, there is a compositional element missing or misused, an area that’s too dark or too bright, or a subject that isn’t quite aligned with the rule of thirds grid. And that’s okay!
The imperfection in the photos you create doesn’t mean that your images are terrible. Despite a less than ideal exposure, you can still have a wildly interesting and visually stimulating photo. Even though your subject looked away just as you clicked the shutter doesn’t mean the portrait you create of them should be deleted. The point is that if you find that one of your images isn’t quite exposed right or that it isn’t as sharp as you’d like, don’t automatically write it off. There’s much more to a compelling photo than technical perfection.
Just go out and shoot, stop worrying about being perfect, and leave your false beliefs about photography behind. You’ll have more fun, and probably get better results too!
We Recommend
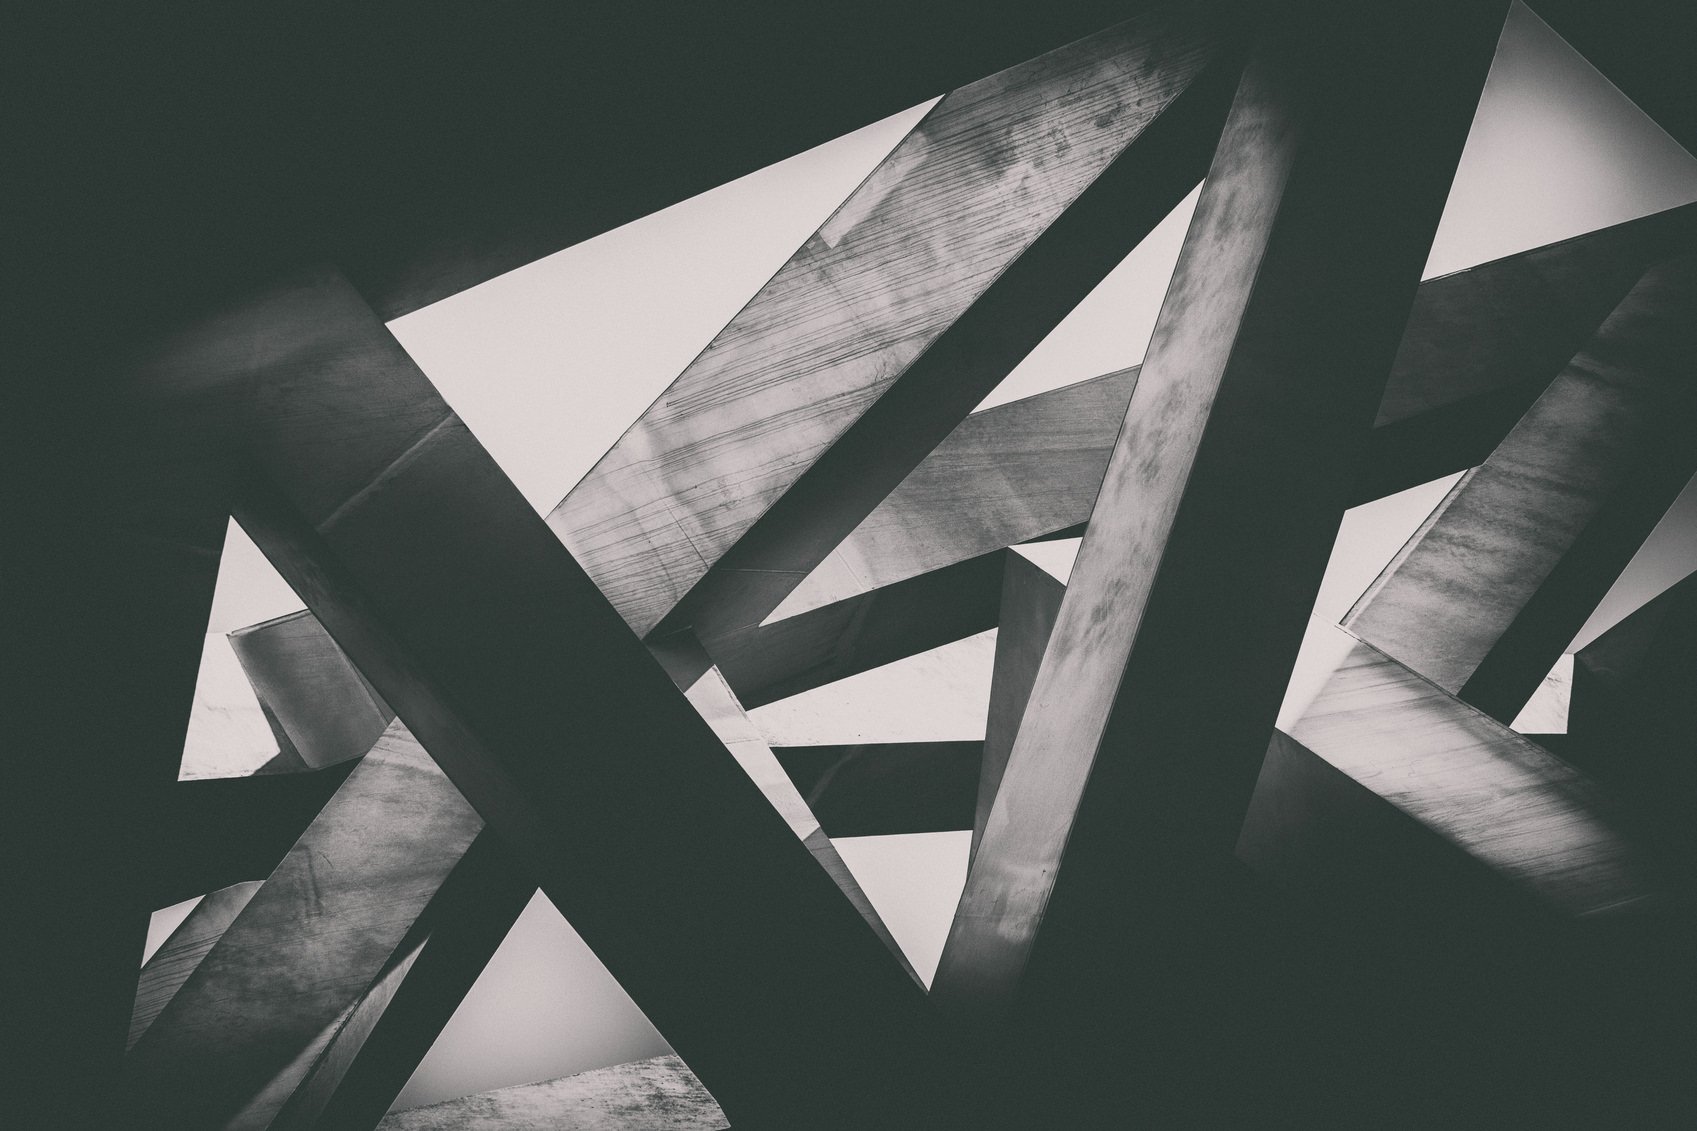
3 Architecture Photography Tips That Will Totally Change Your Images
When you’re out and about exploring architecture, it’s really difficult not to get lost in the size, scale, and grandeur of buildings. Many photographers take a step back and photograph architecture from a distance, not realizing that the small details of the building are often just as impressive as the larger, overall impression the building has on the surrounding cityscape.
To bring out those smaller details, we’ve put together three simple, yet effective tips that will add impact and depth to your images and make them immediately more interesting to view.
Let’s get started!

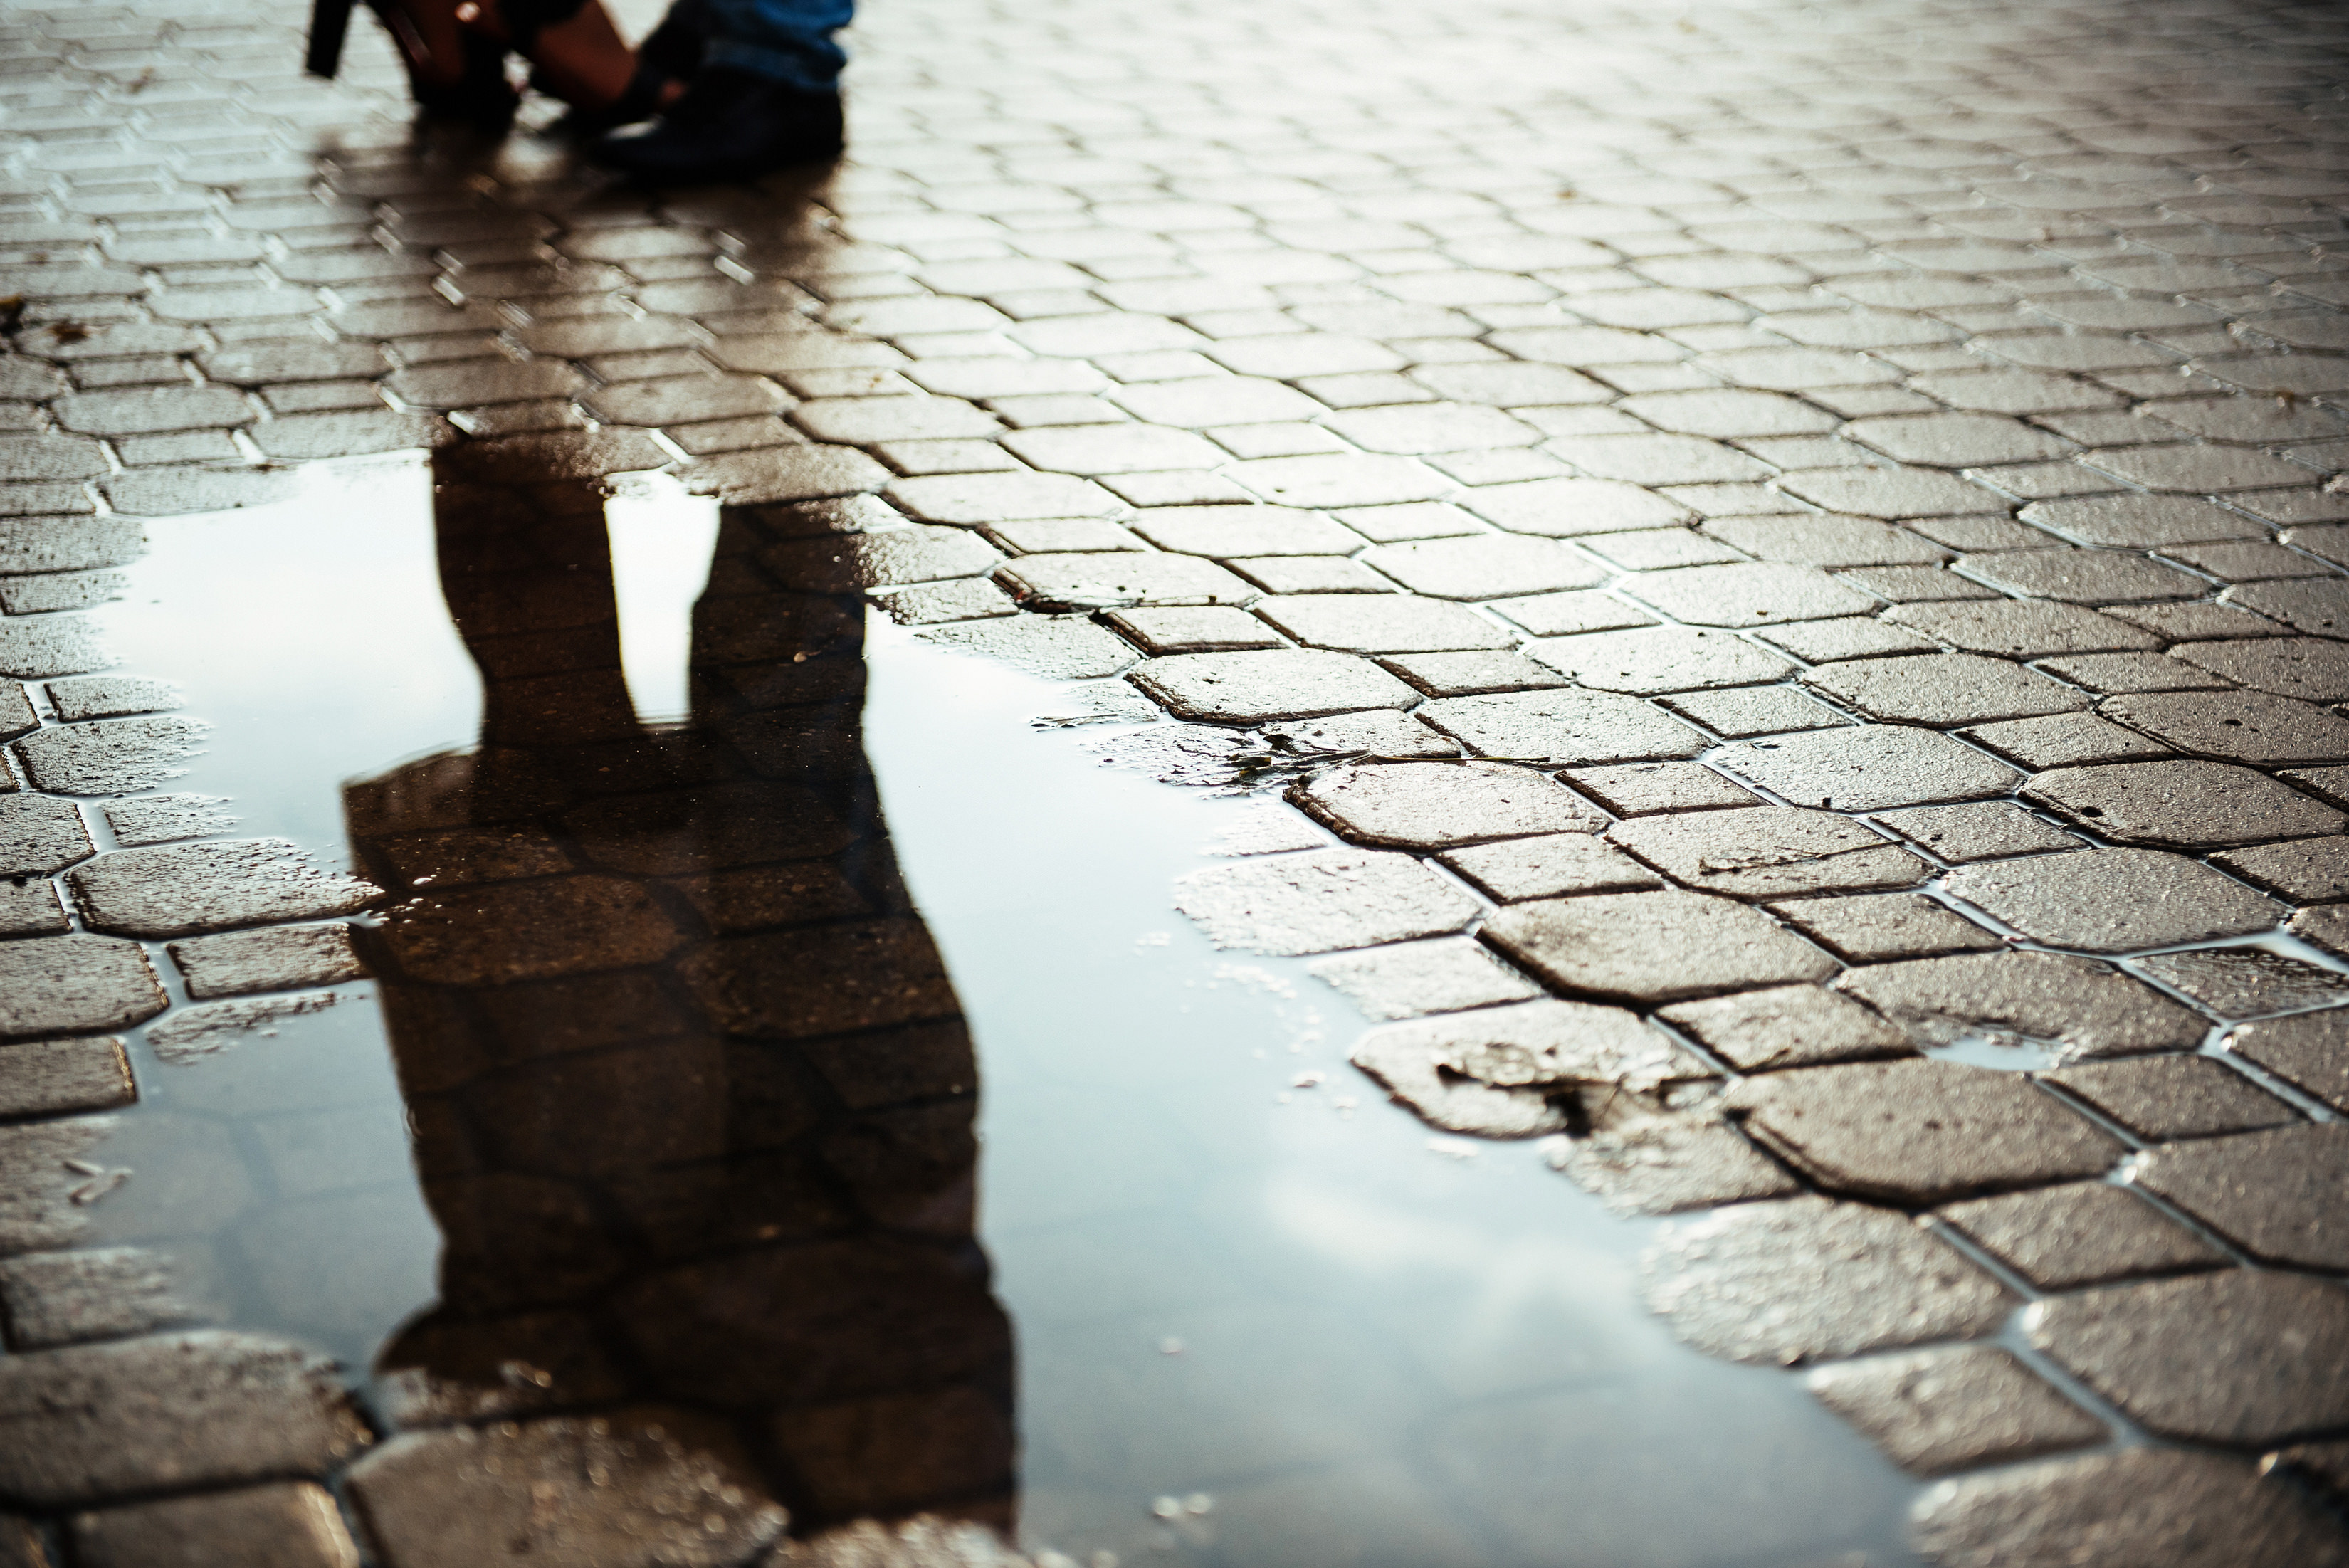
Use Reflections to Your Advantage

Not all buildings have gorgeous details that you can make the primary subject of your photographs. But that doesn’t mean that you should overlook the ugly duckling structures around you - it just takes a more creative approach to turn them into something that’s visually appealing.
One of the easiest ways to overcome ugly architecture is to use reflections to your advantage. A reflection can add immediate interest to an image by including color, texture, patterns, or even symmetry. Take the image above as an ideal example of this. The building that’s being reflected is nothing special - just a white box. However, when it’s reflected on the facade of a neighboring building, it becomes a much more interesting shot. The layers certainly help - the lines of the first building’s windows add depth to the reflected image of the second building.
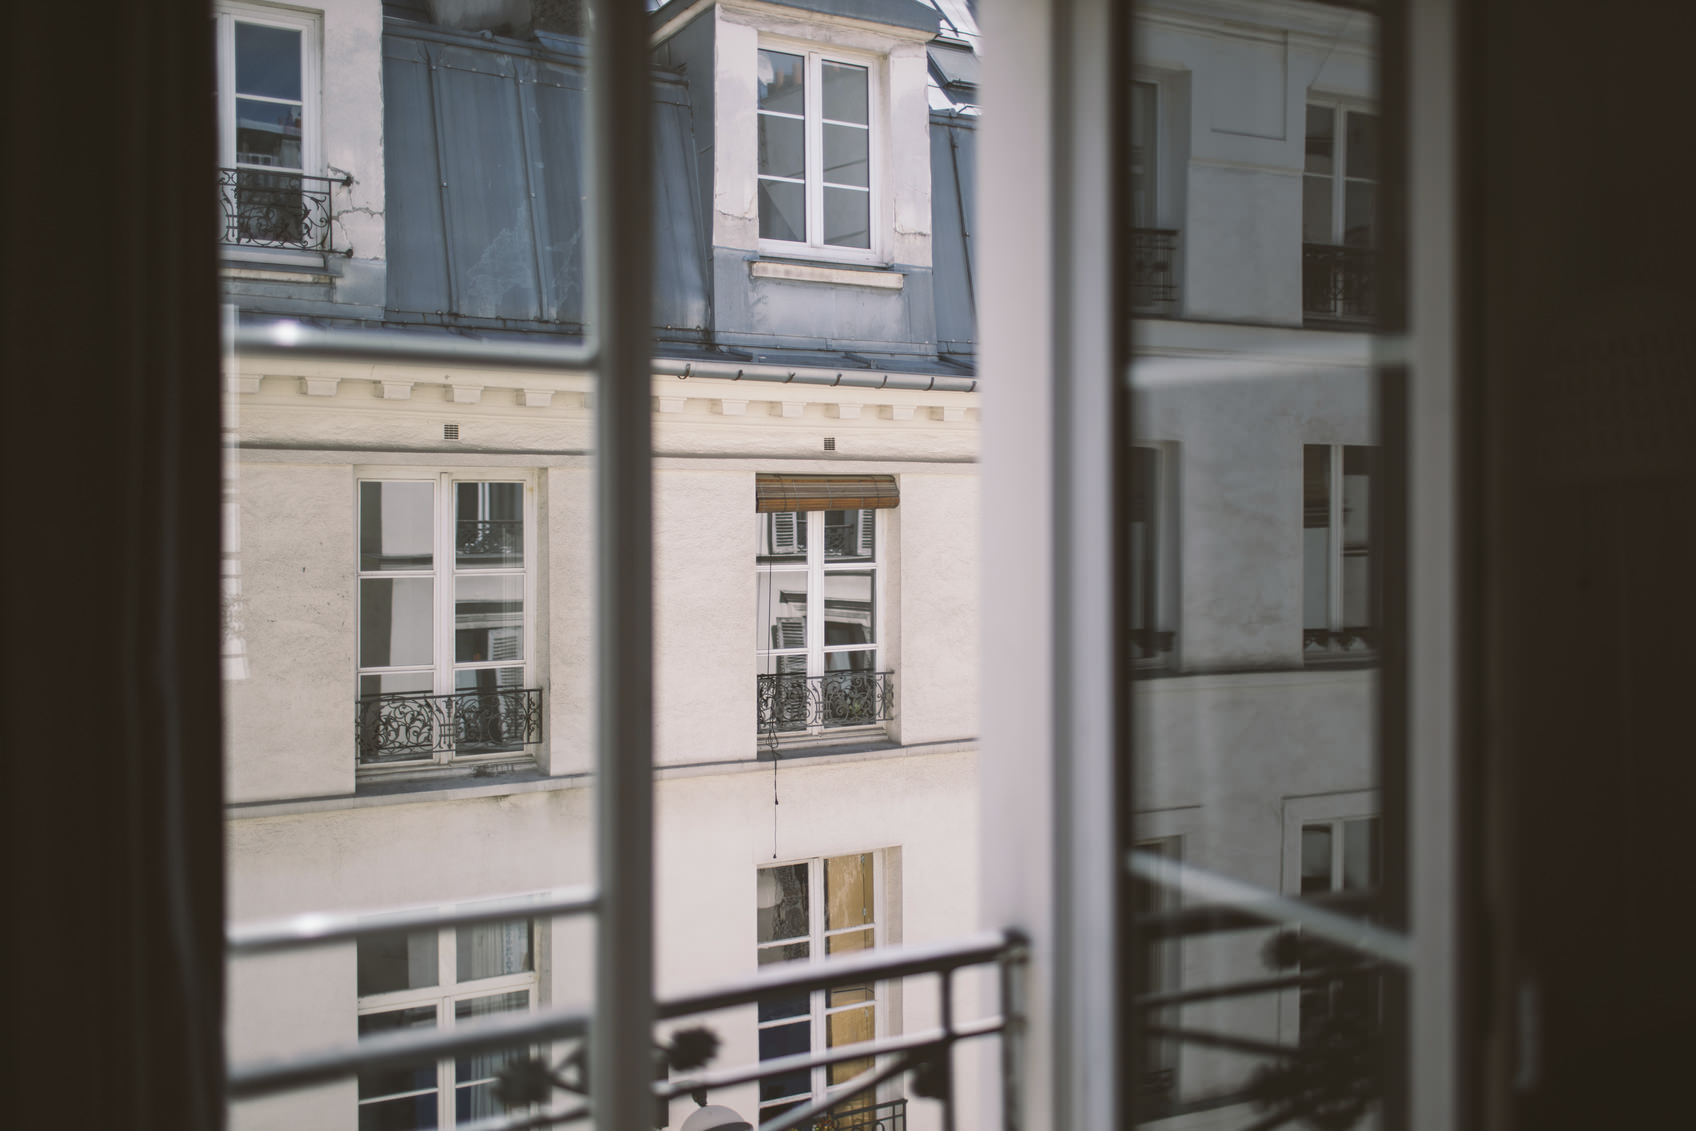
Reflections don’t even need to be that large or obvious to have a positive impact on your image. In the photo above, the building across the street isn’t all that exciting, but when viewed through the frame of the window, it takes on more visual appeal. The hint of reflection in the windowpane adds further dimension to the shot, and also gives us a hint as to what’s not immediately visible to the left of the image.
Look for Low Contrast Light
Cloud cover might not sound like the best environmental conditions under which to shoot architectural details, but the fact of the matter is that the highly diffused light that is filtered through the clouds is extremely useful for highlighting the small details of even the largest structures.
Think about it like this: overcast conditions are ideal for portraiture because the softness of the light means there are little - if any - shadows on the subject’s face and body. The same holds true for photographing the details of buildings. Much of that detail can be lost when the sun is out due to harsh contrasts between areas of light and shadow. But under cloudy conditions, you’re much more free to show off the intricate details that make so many larger structures so visually interesting.
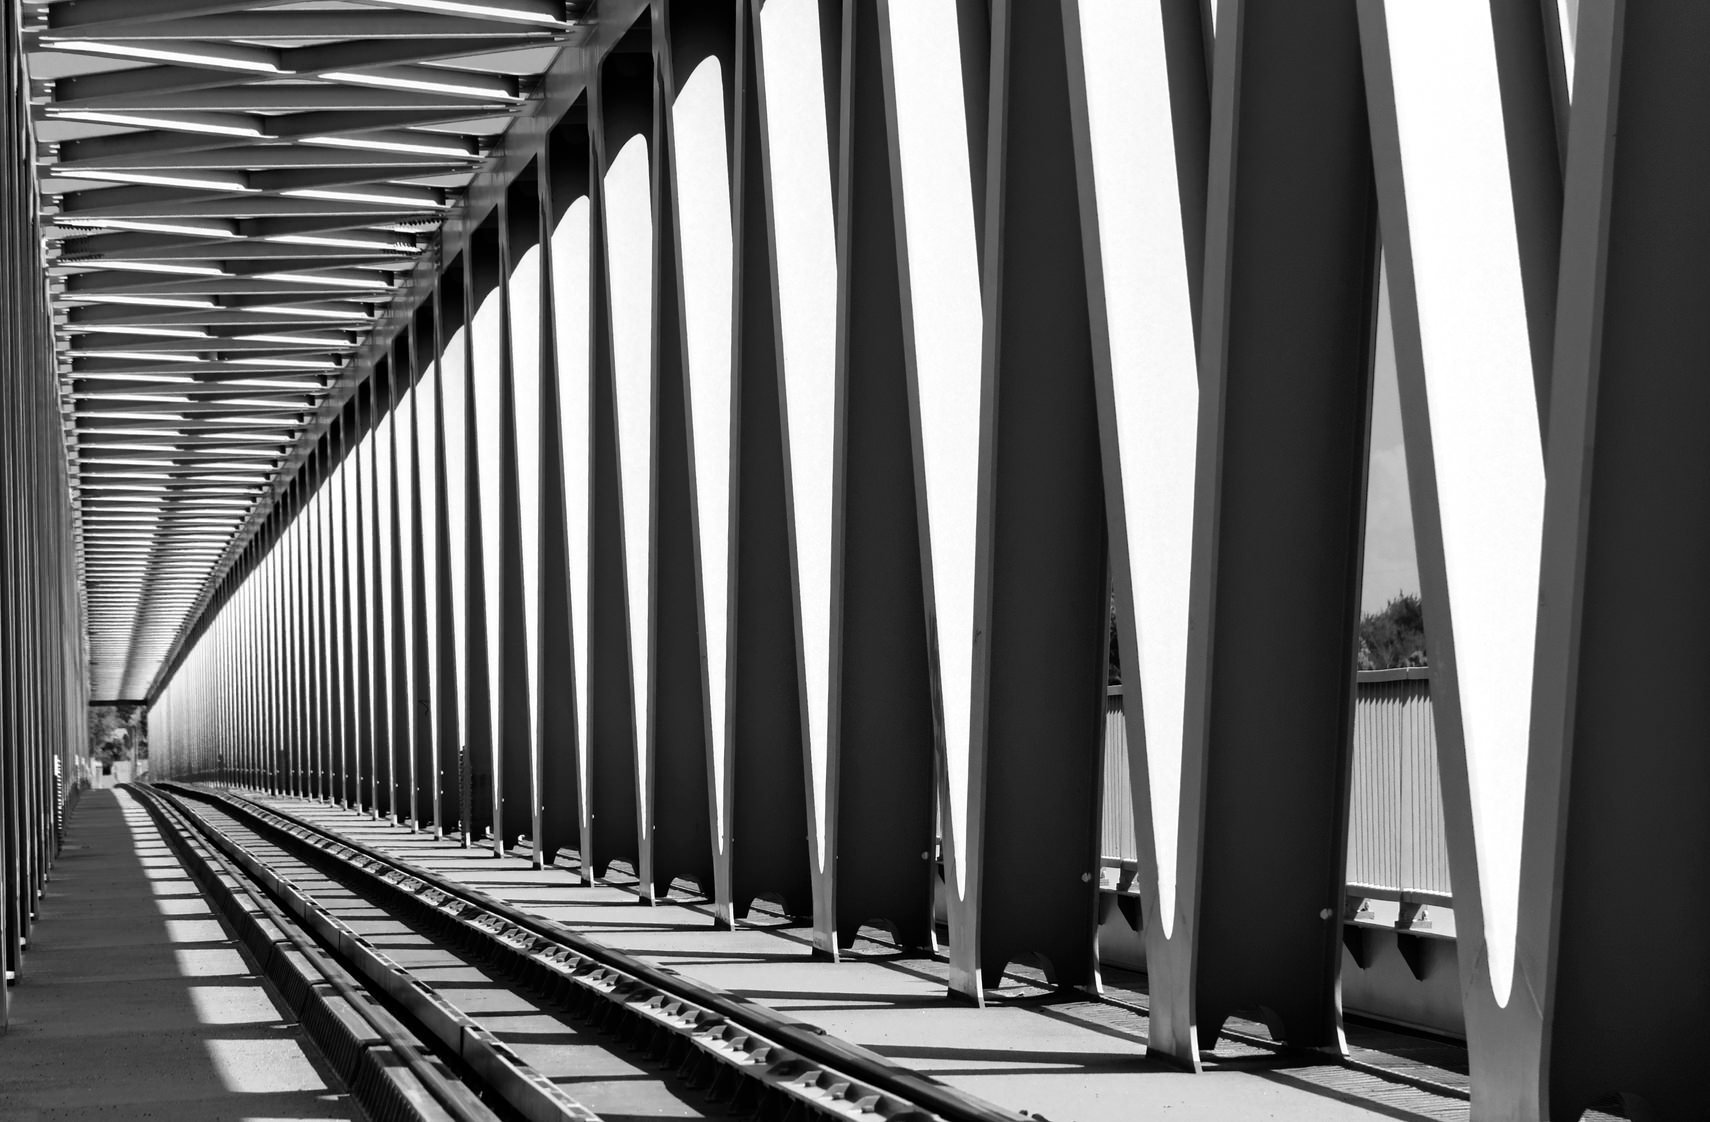
Light and Shadow Can Be Your Friend, Too
As nice as soft lighting is to capture the details, areas of light and shadow are good finds as well. When you find an architectural detail to photograph, pay close attention to how the light falls on your subject. Side lighting, in particular, is nice for these kinds of images because it creates so much dimension. And, if the subject matter has a texture to it, like the concrete pillars in the image above, side lighting only enhances their shape.
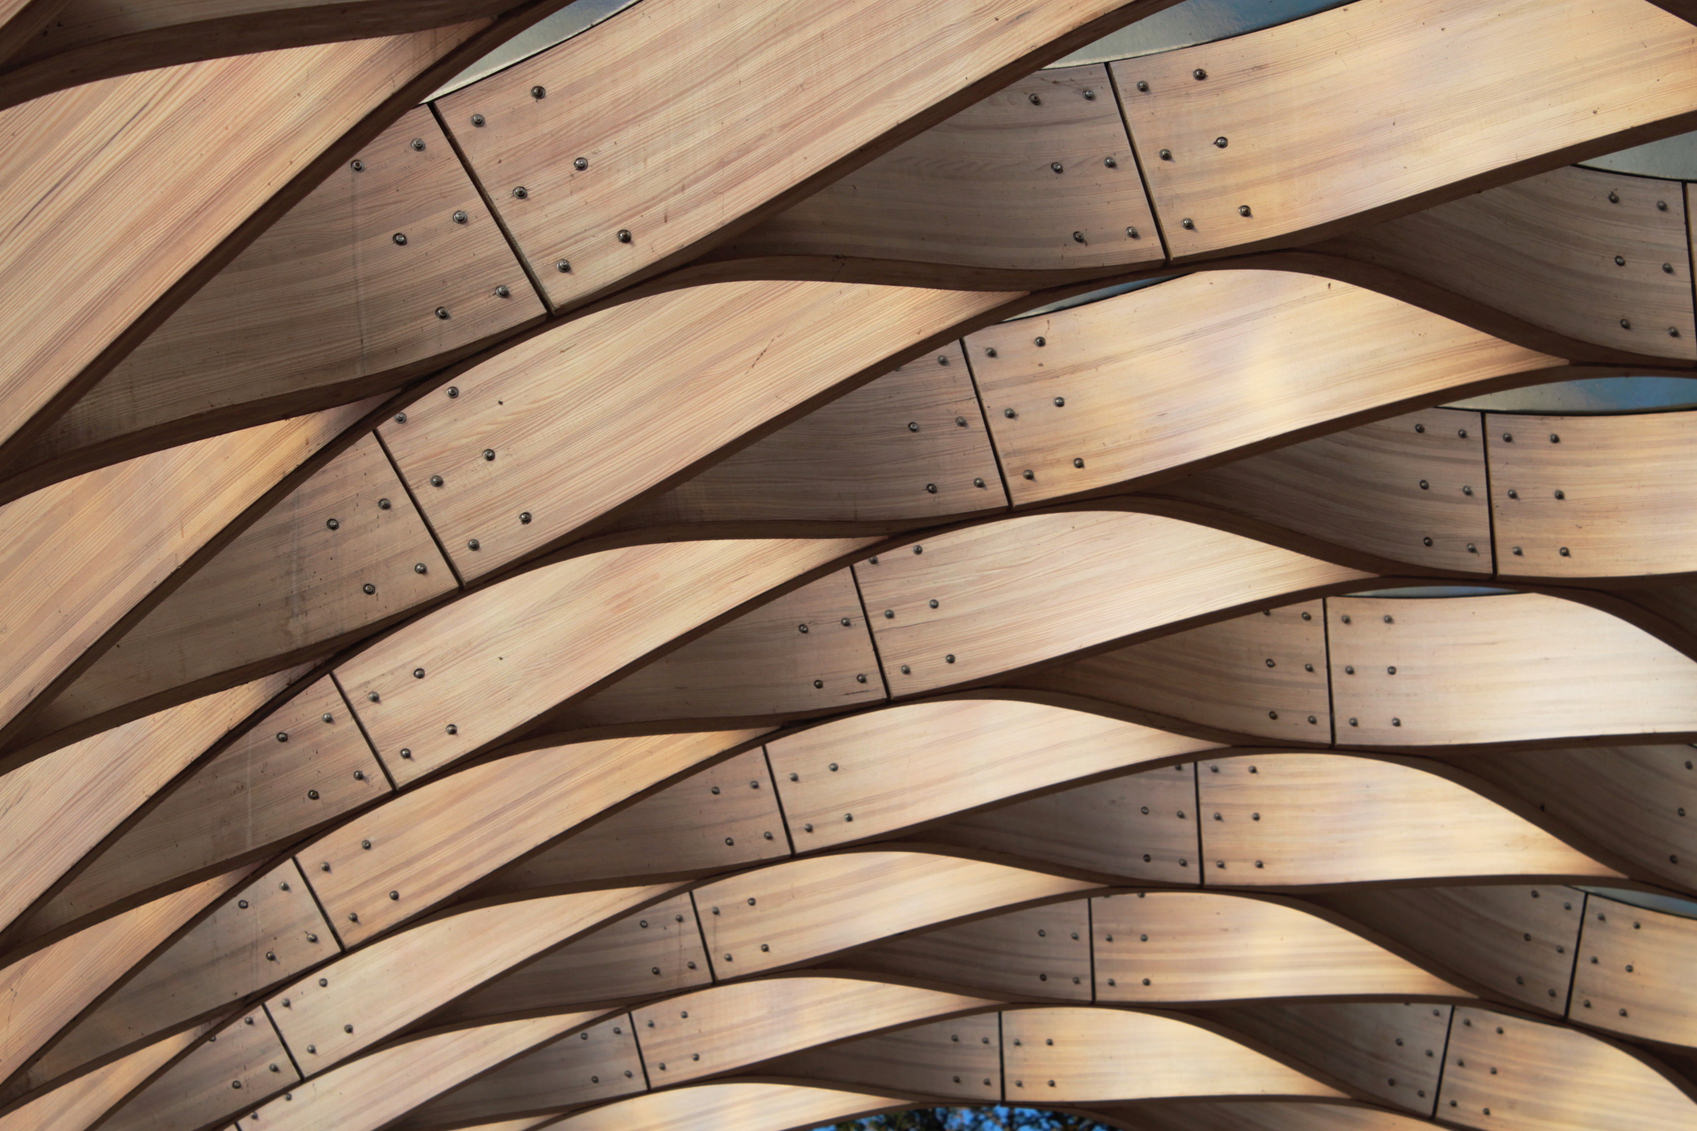
There is something to be said for the visual appeal of the interplay between light, shadow, and patterns as well. In the image above, the repeating pattern of the twisted wood panels is made more obvious by the areas of shadow and light. Not only does this give the image added depth, but it also breaks up the monotony of the pattern, making it far more interesting to view.
Final Thoughts
As with any type of photography, architectural photography benefits greatly from the inclusion of reflections, patterns, textures, light, and shadows. Not only do these features allow you to focus on the smaller details of large and grand structures, but they also give you another means by which you can make dull, drab, or boring architecture seem more visually interesting. Use the three tricks we’ve outlined above the next time you’re out photographing cityscapes, and you’re sure to see an improvement in the way your images look and feel.
We Recommend
3 Simple Tricks to Help You Learn Photography Faster

In today’s world in which we have high-tech cameras at our disposal with all sorts of features that promise to make photography faster, simpler, and easier, it’s hard not to get caught up in the notion that shortcuts will help you become a better photographer. What makes it even more difficult is the sheer volume of things out there to photograph - wildlife, landscapes, portraits of friends and family, street scenes, and so on.
But the fact of the matter is that becoming a better photographer is a process. After all, photography is an artform; a craft that takes years to perfect. What’s more, how one approaches portraits varies greatly from how one approaches landscapes or street scenes. It’s not necessarily a one-skill-set-fits-all situation.
Having said that, there are some strategies you can use to help you develop your skills while also simplifying photography. It’s really just a matter of focusing on a very straightforward workflow that includes three parts.
Pick One Lens and Roll With It

Photographers are notorious gear hoarders, with drawers and bags full of filters, tripod heads, camera bodies, and especially lenses.
While it’s nice to have a solid collection of gear once you get the hang of things, scattering your attention (and money) around on multiple lenses will only complicate matters for a beginner. Each lens does things a little differently, and lenses of different focal lengths have widely varying purposes. The best way to develop an understanding of how each lens in your kit behaves is to spend a lot of one-on-one time with each one.
The key here is not to pull out your wide-angle lens and spend an hour taking photos with it. Instead, spend a significant amount of time getting to know your lens. Explore its features, learn about its behaviors and idiosyncrasies. Photograph different subjects to determine what the lens’ strengths and weaknesses are as well. There’s no prescribed long-term time limit here - for some, a few days of shooting with one lens will be enough time to get to know it inside and out. For others, the process might be weeks or months.
What’s the benefit of the one lens strategy, you ask?
Not only will this help you get to know your gear, but it will also give you an opportunity to focus on the process of taking a photo rather than worrying about changing lenses. If you aren’t constantly waffling back and forth between lenses, you’ll have more time to concentrate on actually composing good photos. It also gives you a clearer picture of what your next lens purchase needs to be so you can fill in the holes that your current lens doesn’t quite fill. In that regard, this strategy helps you on all fronts - becoming familiar with your gear, improving the composition of your photos, and protecting your bottom line.
Simplify the Subject Matter

Given the broad capabilities of today’s camera systems, it’s hard not to get sucked into the idea that it’s easy to take great photos of any subject. If you think about it, how often do you grab your camera and head out to take photos of nature or landscapes, then along the way decide you’re going to take a few portraits and city shots as well?
The problem with hopping from one type of subject matter to another is much like the problem with trying to work with too many lenses - instead of becoming adept with one, you spread your attention across many different areas. More often than not, having this approach means you get more photos, but photos that are of a lesser quality.
Why is that?
The issue is that each subject necessitates different camera settings, if not different lenses as well. So, when you head out to photograph a sunset, you’ll need very different camera settings than if you were to take a portrait of a friend indoors.

Again, part of what will make you a better photographer is practice and experience. Bouncing from one subject to another won’t help you in that endeavor. Instead, strive to simplify things by focusing on one subject at a time. If you’ve set your camera up to take long exposure shots of a waterfall, take long exposure shots of a waterfall. If you’re good to go for natural light portraits, take natural light portraits.
This isn’t to say that you can’t change the subject matter you photograph from one day to the next; but in a single outing, limiting your attention to one type of subject will get you more time to practice your craft. In the long-run, the benefit will be a much deeper level of understanding of the camera settings, equipment, and creative aspects of taking higher-quality photos for that specific subject, the result of which are better photos.
Don’t Get Distracted by Gadgets

There are tons and tons of accessories and gadgets available for photographers. So many, in fact, that it’s easy to get into buying mode and end up with a camera bag full of accessories that you don’t necessarily need.
When you become distracted by gadgets, your attention is taken away from actually learning the processes involved in taking high-quality photos. Sure, it’s neat to be able to control your camera with your smartphone, but how does that help you learn the fundamentals of photography, like shutter speed, aperture, ISO, and the like?
The short answer is that it doesn’t. This isn’t a knock on the cool accessories and gadgets available today as they can certainly add to your ability to create the photos you wish to create. But before you begin investing in a bunch of accessories for your camera, focus first on learning the fundamentals of photography. Doing so will benefit you in the long run because with a deeper level of understanding of composition, lighting, exposure, and the like, you’ll be able to create more compelling photos, and you’ll be able to use the gadgets you buy in a more purposeful manner. Again, it’s a win-win situation!

If anything, limit the accessories you buy (at least initially) to a tripod, a set of filters, and a remote shutter release. These accessories will vastly expand your capabilities in terms of the types of photos you take without overwhelming you with possibilities.
The moral of the story is to simplify your approach and resist distractions. Spend time working with one lens and one type of subject so you can perfect your understanding of the fundamentals of photography. By engaging more deeply in the process of creating a photo, and resisting the urge to jump from subject to subject, lens to lens, and accessory to accessory, you will better your understanding of photography, and, in turn, improve the photos you create. It’s that simple!
We Recommend
3 Things You Believe to Be True About Photography That are False
No matter how much time you’ve spent as a photographer, the chances are that at some point, you’ve believed something to be true about this craft that is quite simply false. Some false beliefs have to do with the best semi-automatic mode in which to shoot, others involve always minimizing ISO, and still others revolve around the idea that you must use a tripod if you want to get a sharp, clear shot.
Let’s dive deeper into these false beliefs and see what the truth of the matter really is.
False Belief #1: The Best All-Around Shooting Mode is Aperture Priority
While it’s true that aperture priority is a great mode that makes many photographic situations easier, it isn’t the end-all, be-all mode for every situation you encounter. When your camera is mounted on a tripod, manual mode is an ideal way to shoot because you needn’t worry about a shutter speed that’s too slow to hold steady. Likewise, in situations in which the lighting is even and consistent, manual mode is a good choice because you can more easily pinpoint the correct exposure on your own and not rely on the camera to try and figure things out.
In other situations, shutter priority is a better choice, such as when you wish to freeze or blur movement. Whether it’s your kid’s soccer game, a waterfall, or cars passing you on the street, action shots benefit from the use of shutter priority because of the increased emphasis placed on shutter speed. Sometimes, when people rely too much on aperture priority they get well-exposed images, but don’t quite grasp the proper usage of shutter speed to freeze movement. Shooting in shutter priority will help alleviate that problem, as will shooting in manual.
False Belief #2: The Smallest Possible ISO is Always Required
A decade ago, this was definitely true. Early digital cameras were not nearly as refined as they are today, and in many cases, shooting at ISO 400 or above meant tons of digital noise and a terrible looking shot.
But camera technology has come a long, long way, and today’s cameras can perform very well, even at high ISOs. In fact, with many camera systems, you can push the ISO to 3200, 6400 and well beyond, and still get a high-quality image. Yet the myth that shooting at ISO 100 at all times still persists.
Granted, there are situations in which a low ISO is ideal. For example, if you’re shooting a landscape and you intend to blow the photo up to hang on the wall, a low ISO would benefit you greatly. The same goes if you’re in a studio with your camera mounted on a tripod taking portraits of people.
However, for just about any other application, pushing the ISO is perfectly fine. If you’re on the street photographing strangers, shooting a wedding, traveling the world photographing wildlife, shooting in black and white, and so on, don’t be afraid to use a higher ISO than you’ve traditionally been comfortable with. You will find that a willingness to bump up the ISO means you can use better shutter speed and aperture settings, which can result in more technically pleasing photograph.
False Belief #3: You Always Need a Tripod
How often have you been visiting a faraway city or stopped at a beautiful spot in a national park to find people setting up their cameras on a tripod? The belief that a tripod is always necessary just isn’t true. There are times when it’s beneficial to have a tripod - long exposures and shooting at dusk immediately come to mind. Your purposes for your image will be a deciding factor as well - if you intend to create a giant print, a tripod would be helpful.
But in broad daylight, shooting photos that will be printed small or shared online, there is no reason why anyone should be fiddling with a tripod. This is where the false belief about ISO comes in as well: if you push the ISO up, you can shoot handheld in many more situations. Without a tripod, you can also move more quickly without lugging around the extra weight, which means you can set up faster and, in theory, get better shots (and more of them!).
And that’s what it’s all about, right? Getting better shots sometimes means challenging convention, or at least putting false beliefs to rest. So free yourself from the notion that you always need a tripod, that you always need to minimize ISO, and that aperture priority is the best shooting mode at all times. Once you do that, you’ll likely find you enjoy photography more and have better results as well.
We Recommend
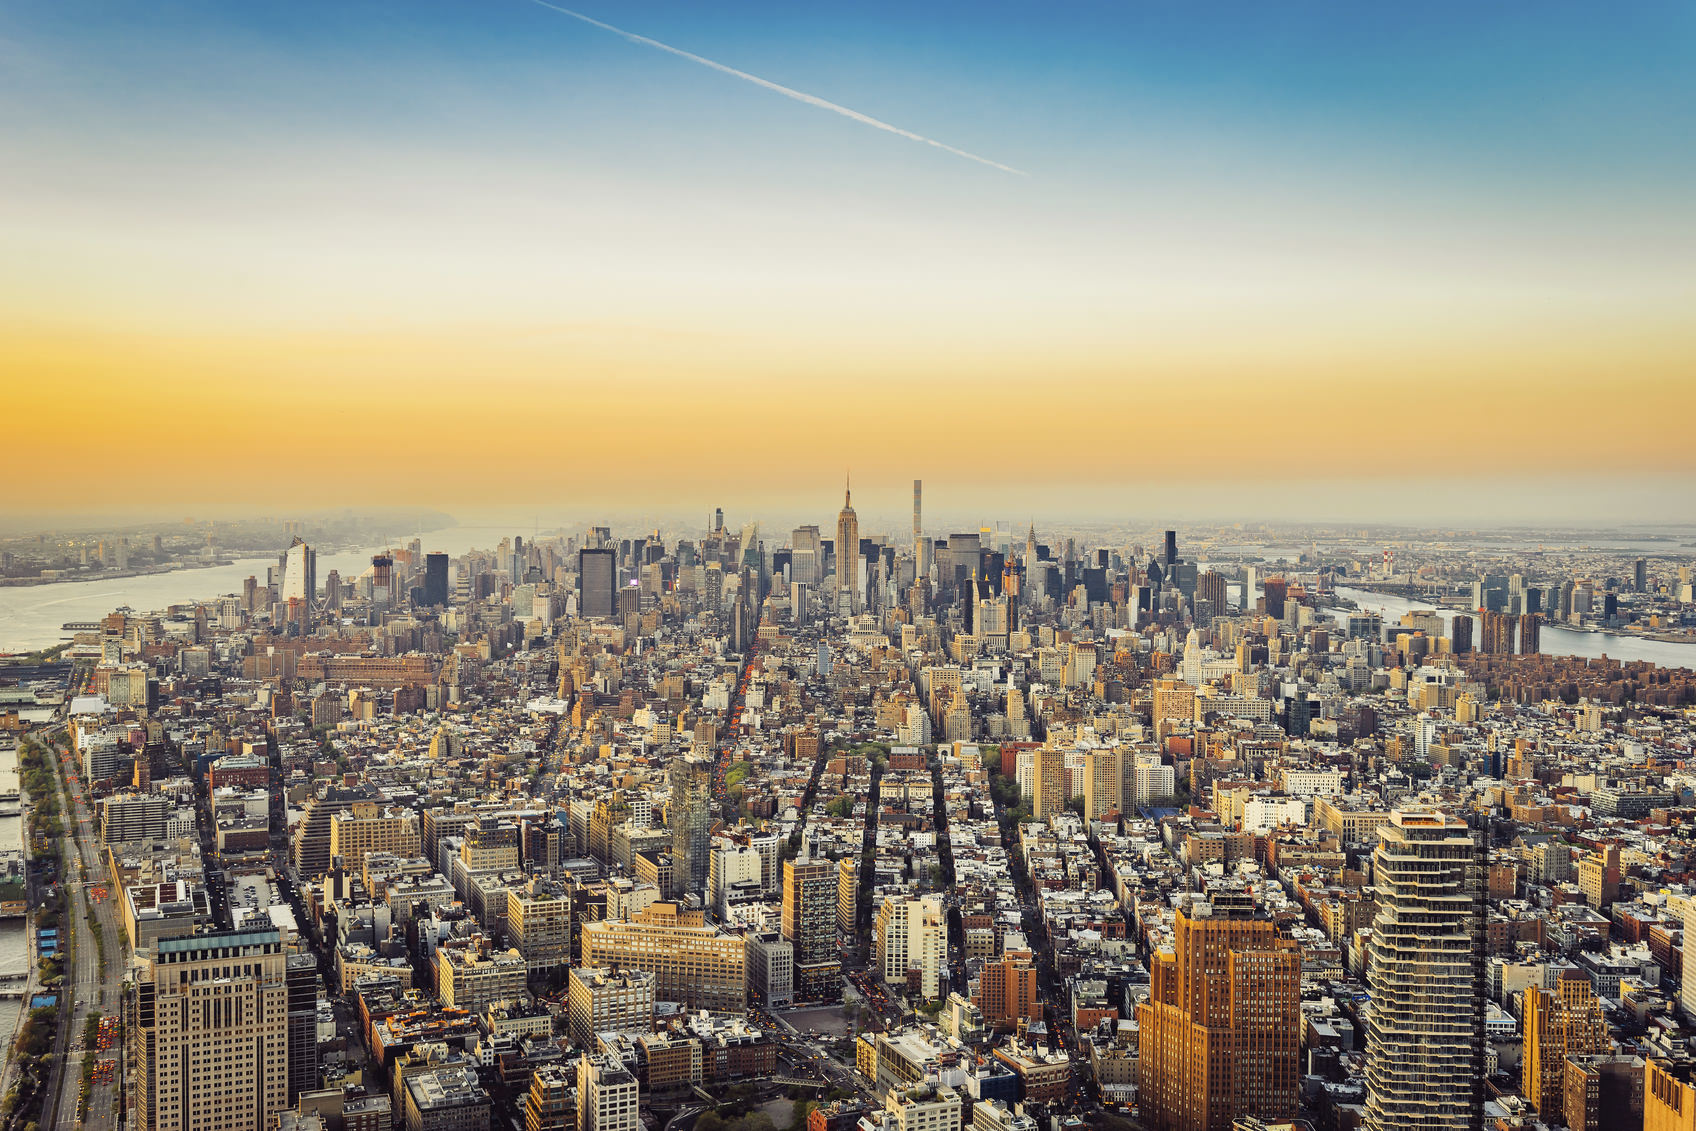
8 Ways to Make Your Urban Skyline Photos More Memorable
There's nothing quite like an iconic city skyline to inspire a photographer. It's one of the obligatory shots for many of us when we're traveling and even at home, the ever-changing seasons and sky provide new opportunities daily for new photos of those familiar outlines that bring back memories for those who recognize them and striking images that entice others to see them for themselves. That said, taking a photo with that kind of appeal can be challenging, especially when shooting in familiar locations. Let's take a look at a few ways to give your skyline shots more spark.
Don't Record. Create.
City skylines can be so dramatic to see that we simply grab a record by shooting as wide as possible and taking that “classic” tourist shot. This is the first habit to break if you want your images to stand out from the thousands of others of that view. Look for a way to create something new and inspiring. Once you've adopted that mindset, the upcoming suggestions will be much easier to remember.
Change Your Point of View
Make an effort to find a point of view that we haven't seen hundreds of times from other photographers. Do a little legwork. Get higher. Get lower. While you're shooting other elements of the locale, take a minute to look back at that skyline and see what it looks like from where you are. Let your viewers guess where you were when you took that shot.
Embrace the Night
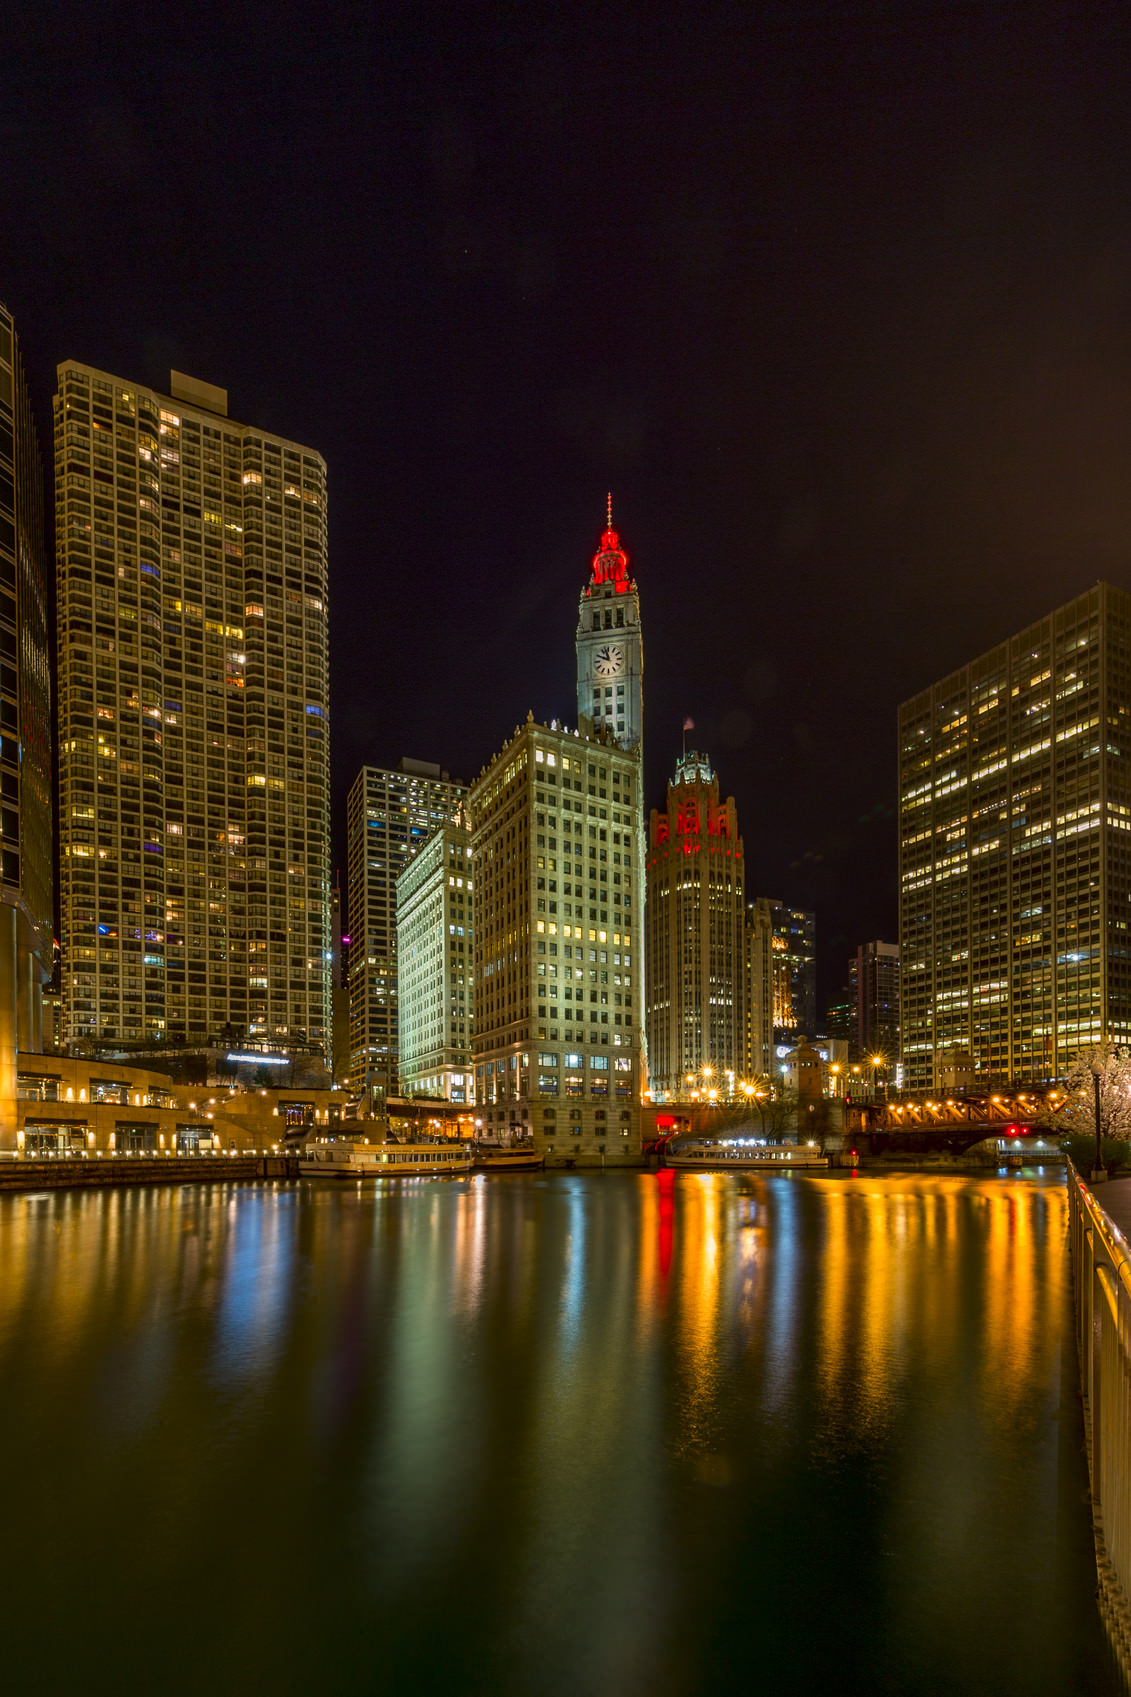
Nothing adds warmth and color to a city skyline like shooting it after dark. Aside from the obvious enhancement from street lights, traffic and the night sky, you never know when you might catch a special lighting display as some cities are known for.
Naturally, you'll need to be as stable as possible when shooting in the dark. For the traveler, getting caught without a tripod isn't unusual. Here's a good article with some advice on how to stabilize your camera for night shots.
Go Panoramic
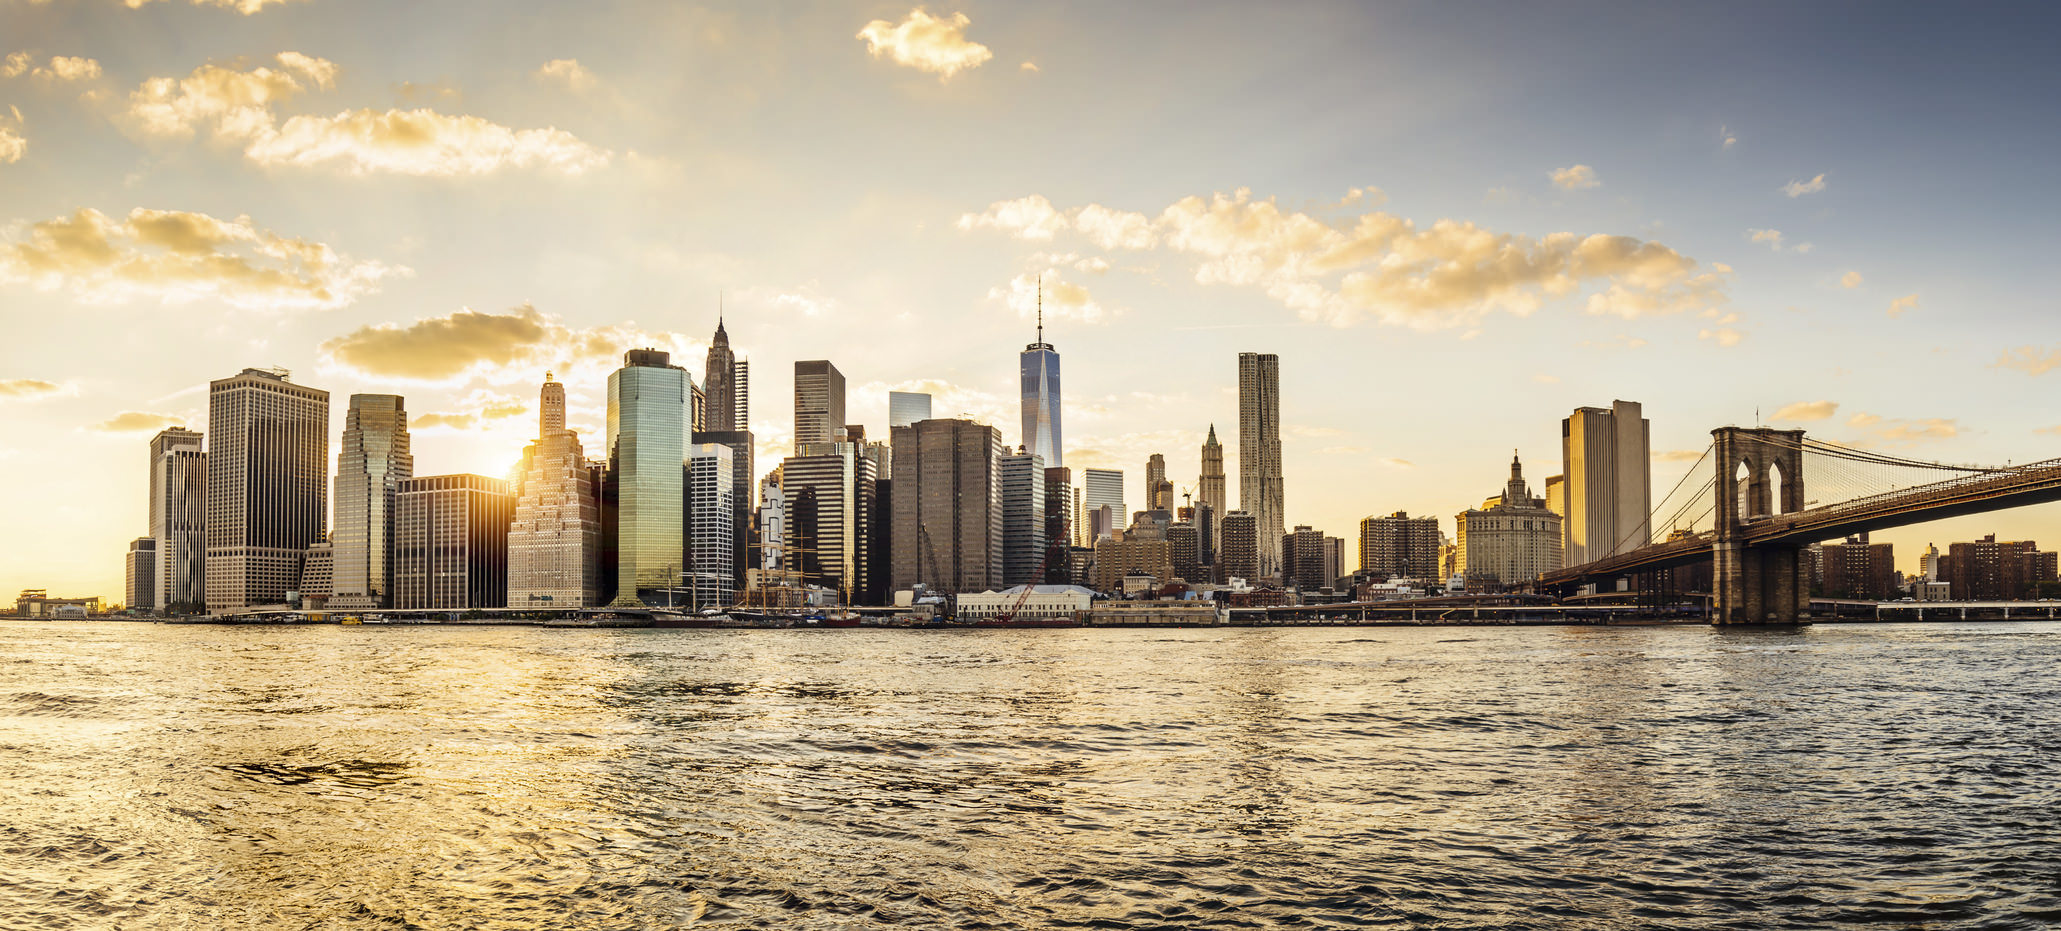
A panoramic format can add great impact to a skyline photo. Your standard DSLR, of course, isn't equipped to handle panoramas as single shots. Instead, you'll need to take multiple exposures and stitch them together with your favorite software. These shots will require a stable setup in any lighting conditions, to facilitate alignment of the images for stitching.
Reflections Rule!
One of the reasons coastal cities are great subjects for skyline photos is the presence of a bay or harbor to reflect that awesome view. The symmetry you can create will add a whole new dimension to the image.
Make it a Background
While you're visiting, grab some photos that include people or other interesting subjects, while including those recognizable buildings as a backdrop that gives the photo a sense of location. Including just a hint of the city skyline can be just as effective as featuring the overall city view.
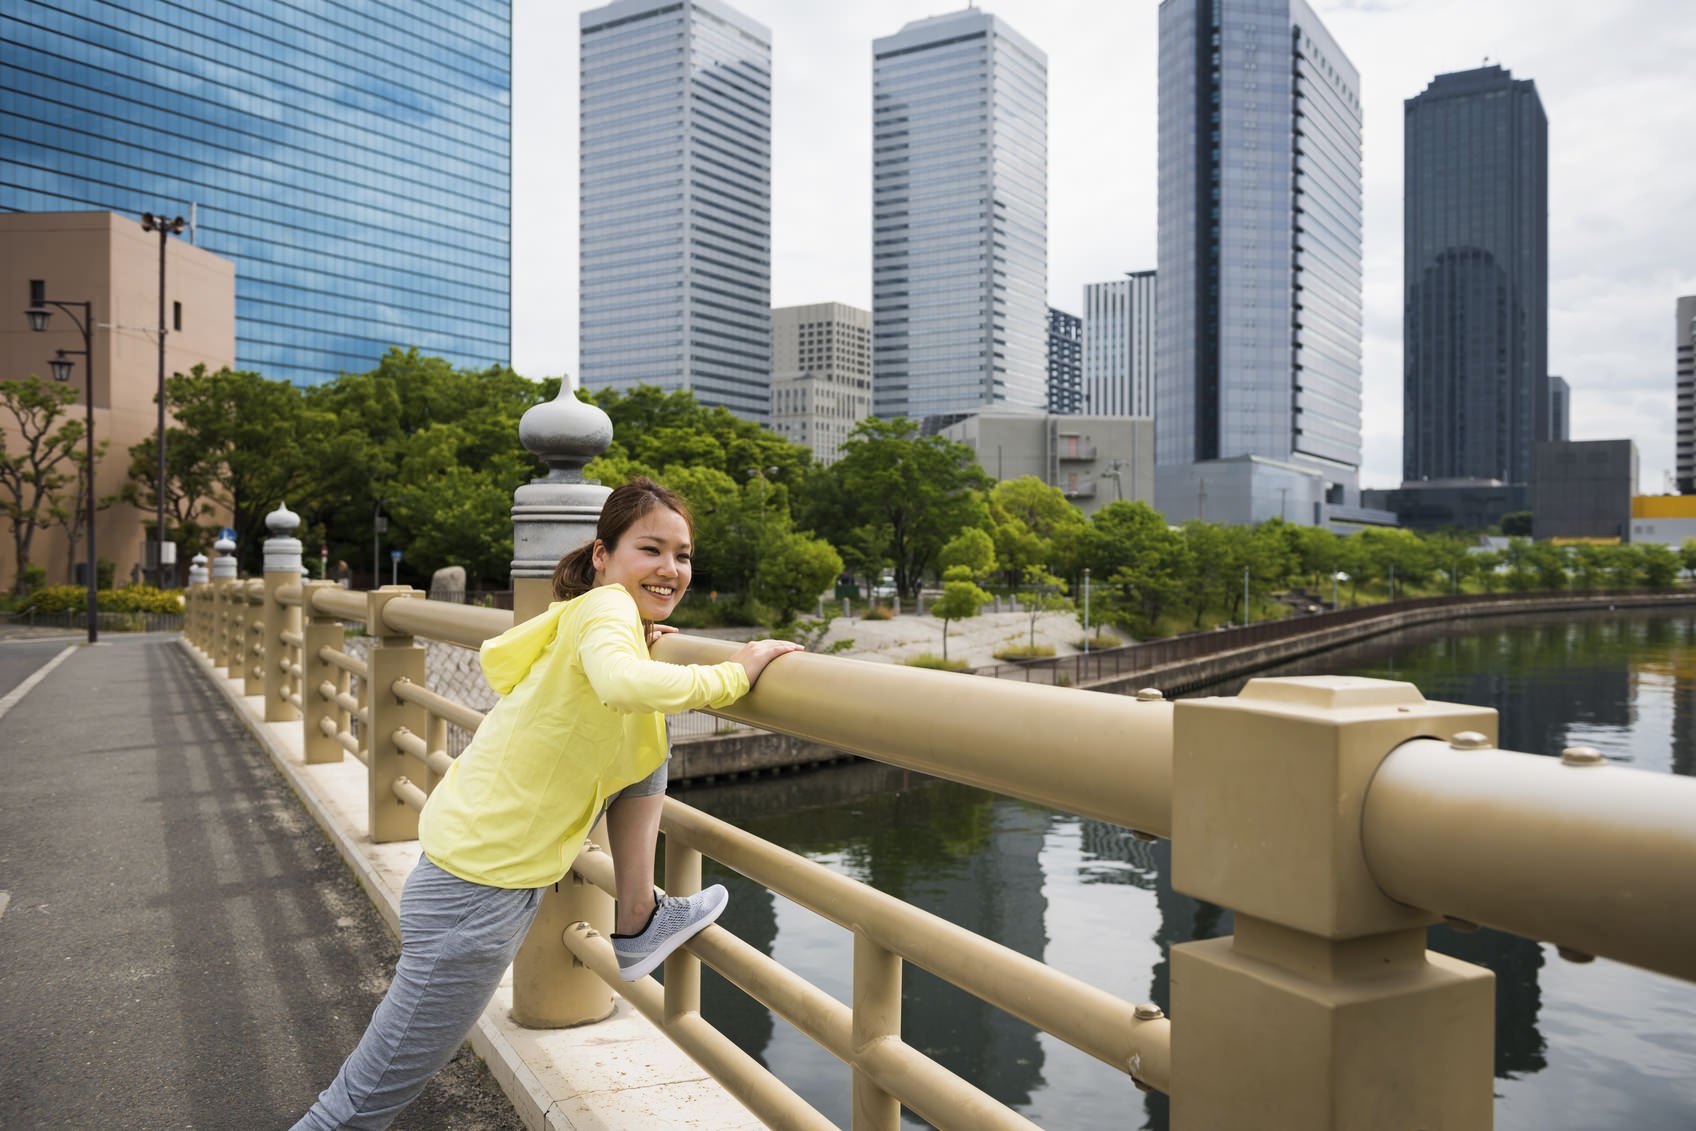
Use Lines Wisely
The image above also highlights a composition tool that can add dynamics to your skyline photos: lines. The woman in the photo is the main subject, and the leading line of the railing brings our eyes right to here. It then leads further into the image, encouraging us to continue to the line of buildings in the background. This line gives the image great depth and movement, while the verticals of the buildings add height and strength to the composition.
Keep Experimenting
Most importantly, and to reiterate the first item, remember to keep your edge by always trying something new. Remember that photography is a CREATEive process.
We Recommend
9 Stunning Architecture Photos That Will Make You Want to See the World
When I think about traveling, my mind wanders to two very different places.
I think of the beach. I also think about old, ancient buildings.
I’m not sure what connection there is between the two, but it’s there in my head nonetheless.
Since I get to visit the beach quite often, I thought I’d take a visual journey around the world and inspect a few beautiful examples of architecture.
I thought you’d enjoy coming along for the ride!
With that in mind, I’ve got nine photos of architecture that make me want to hop on a plane and do some exploring.
I think they’ll have the same effect on you too.
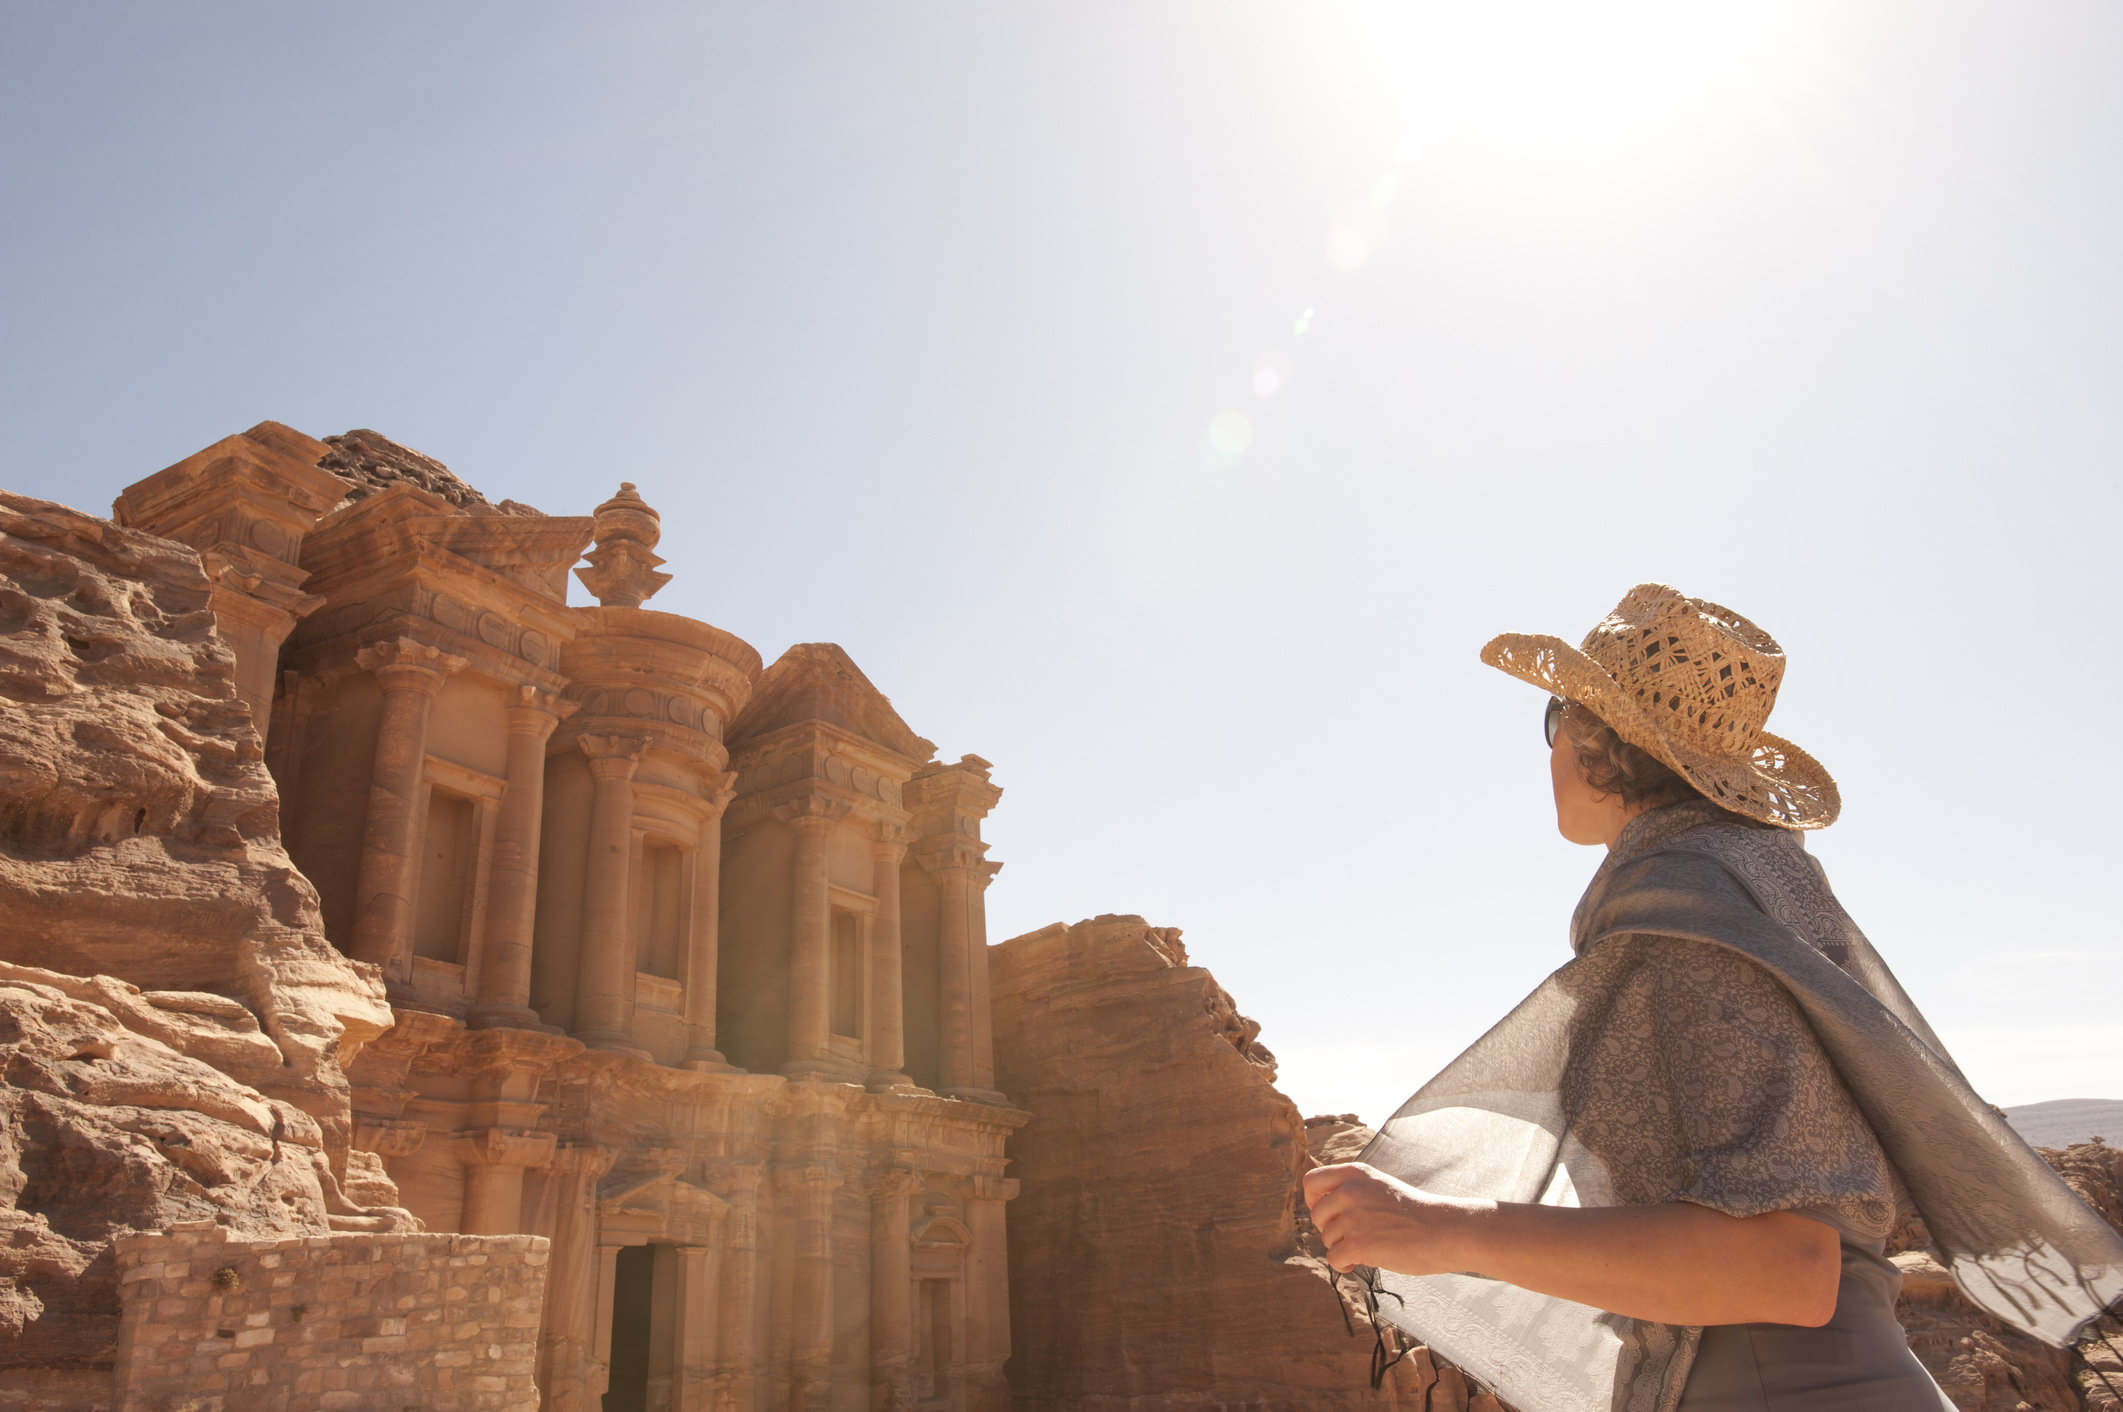
Petra, Jordan
Discover the photography tips from the pros
The tombs and temples at Petra have got to be some of the most iconic structures on earth. Not only is there incredible detail to be captured in their facades - which are carved right into the sandstone cliffs - but as we see in this photo, the buildings pair nicely with a star-filled sky as well. Note how there is enough light in the scene to contrast nicely with the dark, featureless areas of the building’s facade, giving the shot an incredible amount of depth.
Florence, Italy
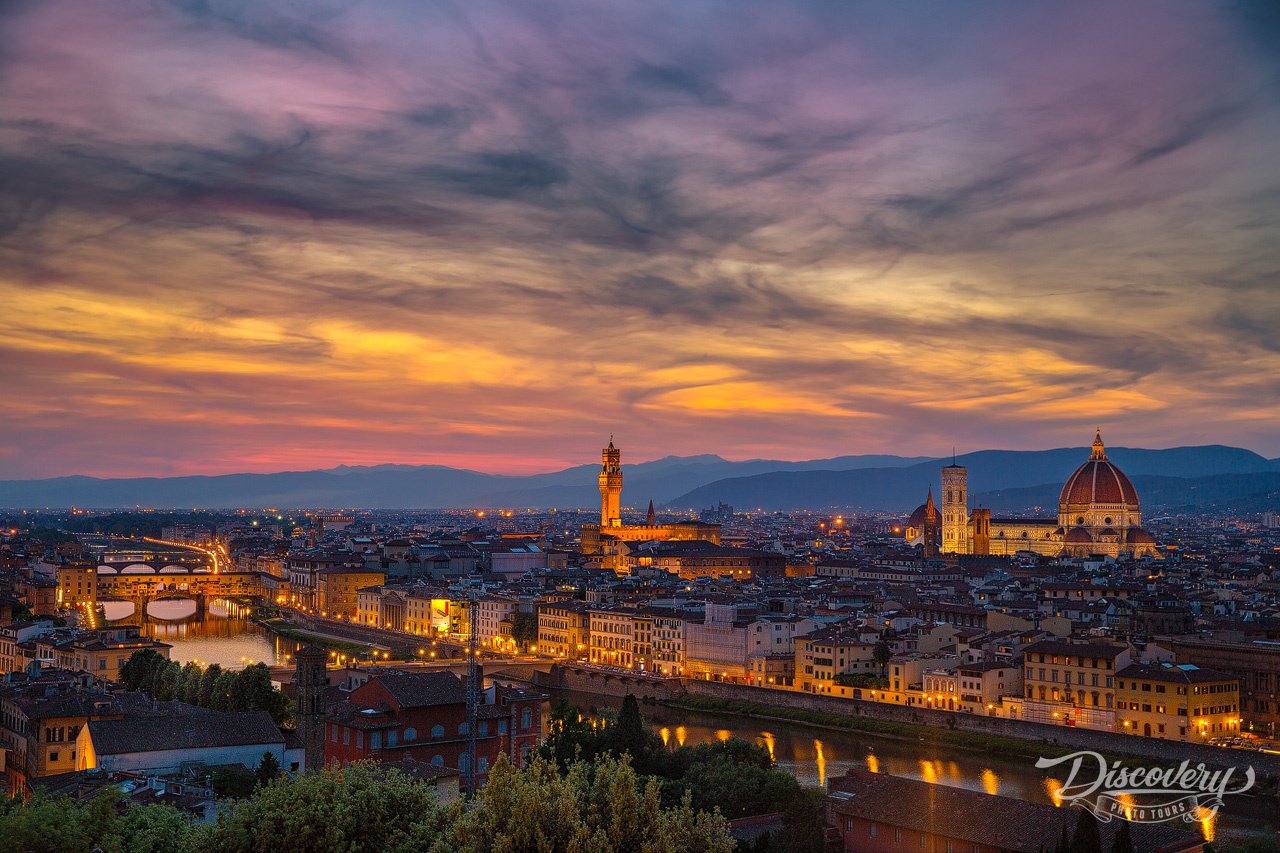
When highlighting architecture in a photo, it’s important to remember that you don’t always have to focus on a single building or detail. Here, we see this concept on display with a wider look at the various architectural gems in Florence. The soaring towers and domes are obviously the greatest point of interest, but by including the context of the surrounding city, we’re given a better understanding of just how large those towers and domes actually are. The evening light of the sunset only helps to add a further level of visual interest.
Rome, Italy
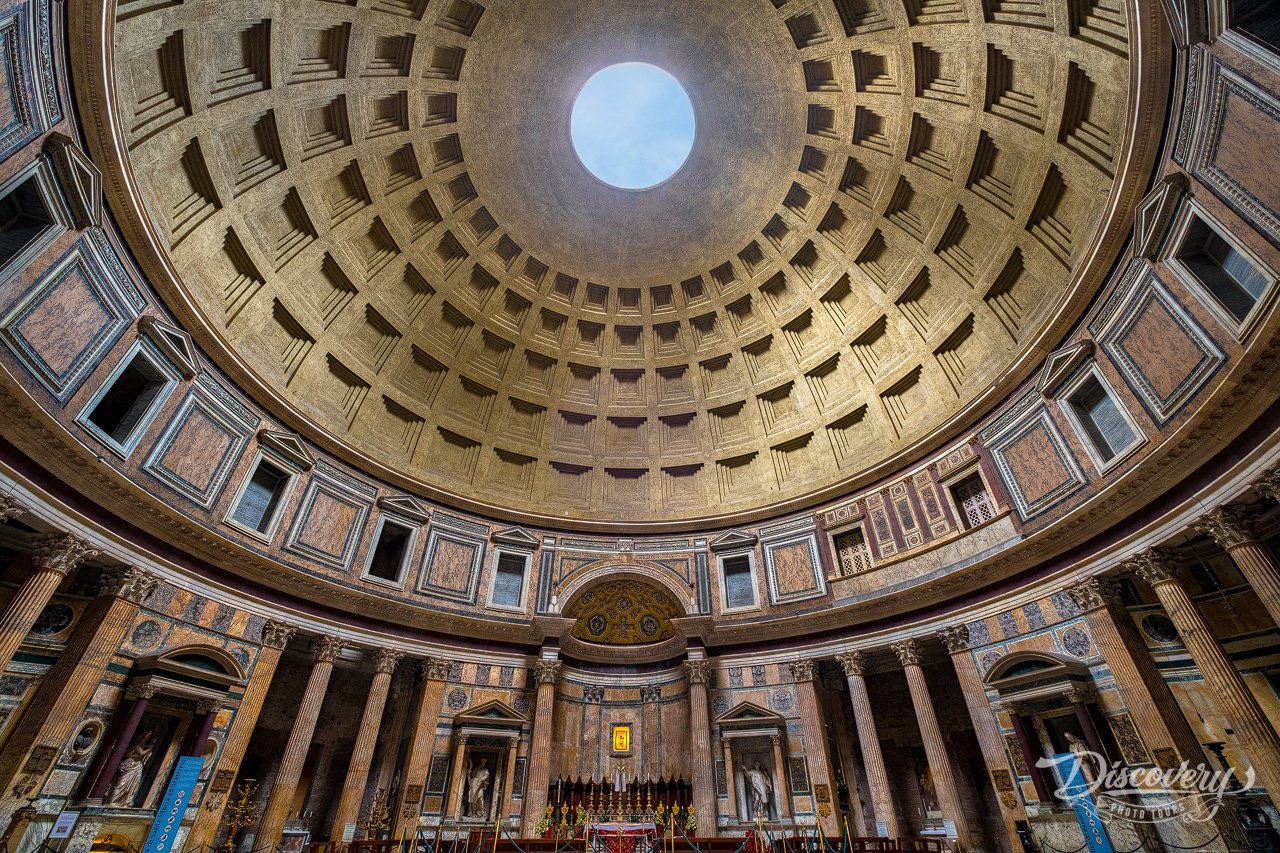
At 2,000 years old, the Pantheon is certainly an architectural marvel that has stood the test of time. Here, we see the results of using a super wide-angle lens (15mm) to capture the scope and scale of the magnificent curved ceiling. Note as well that rather than looking straight up, thereby omitting the detail of the columns at ground level, the photographer took a more measured angle of view to incorporate those details.
Iceland
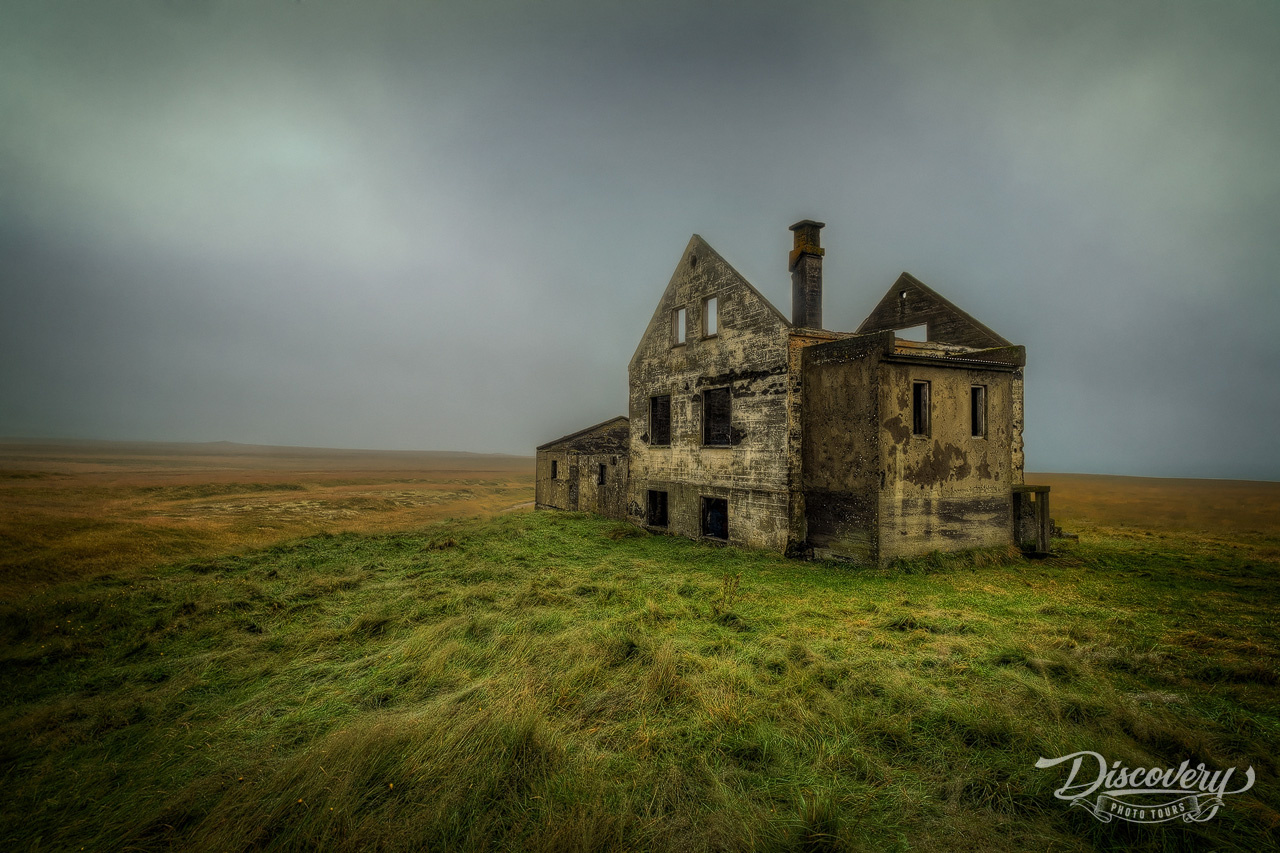
When I think of Iceland, I think of a land that’s incredibly beautiful, but also harsh. Here, the inclusion of an abandoned farmhouse amongst the texture of the surrounding landscape and the gray skies above gives a sense of softness to the shot. Though it’s seen many decades of harsh weather, the old farmhouse is still standing, a testament to its construction. What’s more, this image demonstrates that a powerful architectural photo needn’t be of an iconic building or monument to be able to tell a story and connect with viewers.
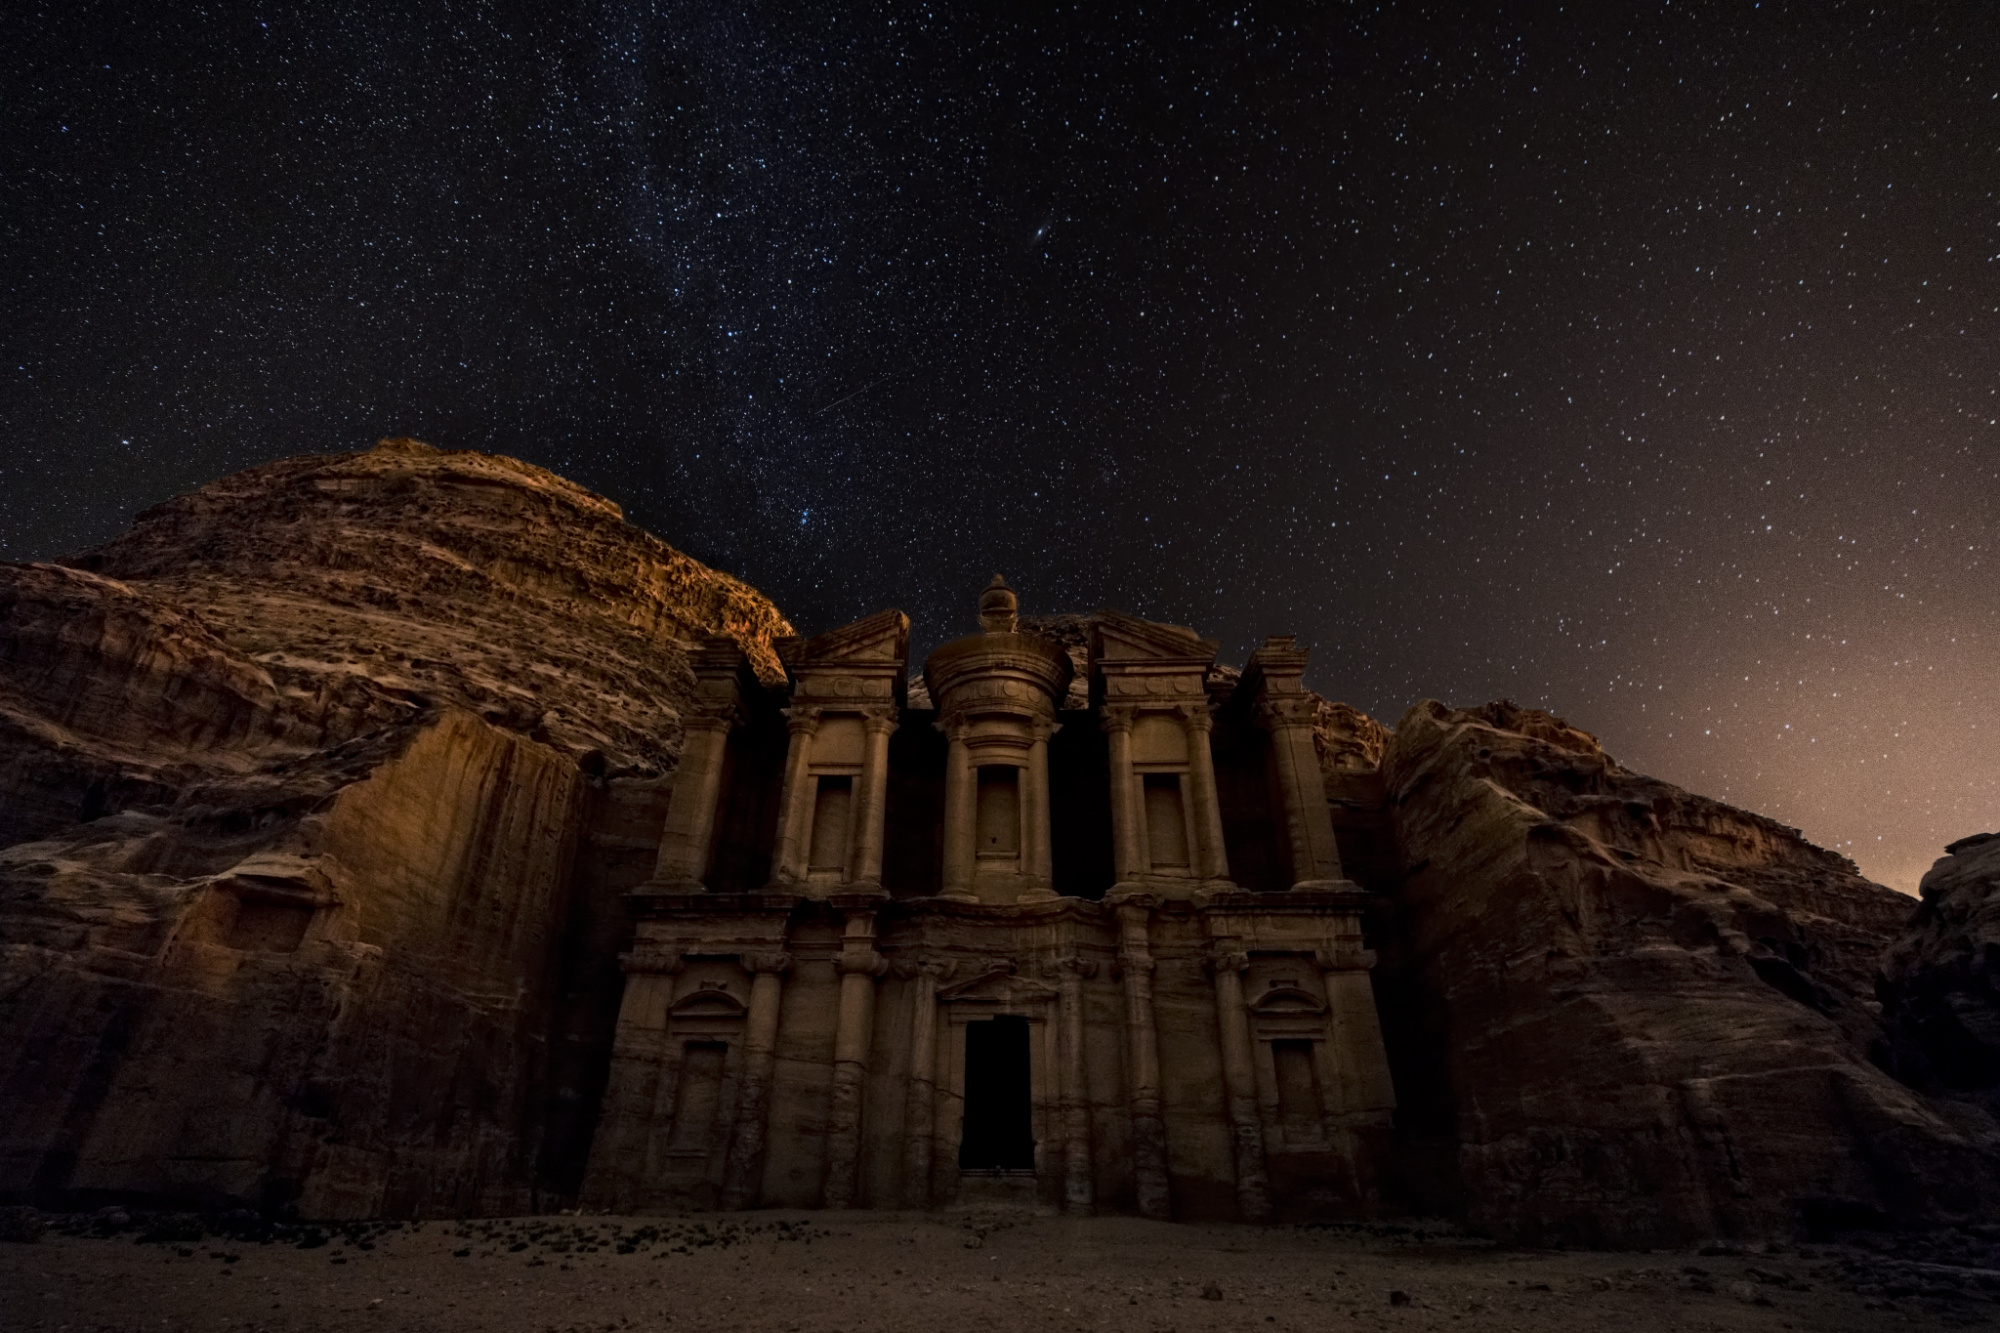
Petra, Jordan
Discover the photography tips from the pros
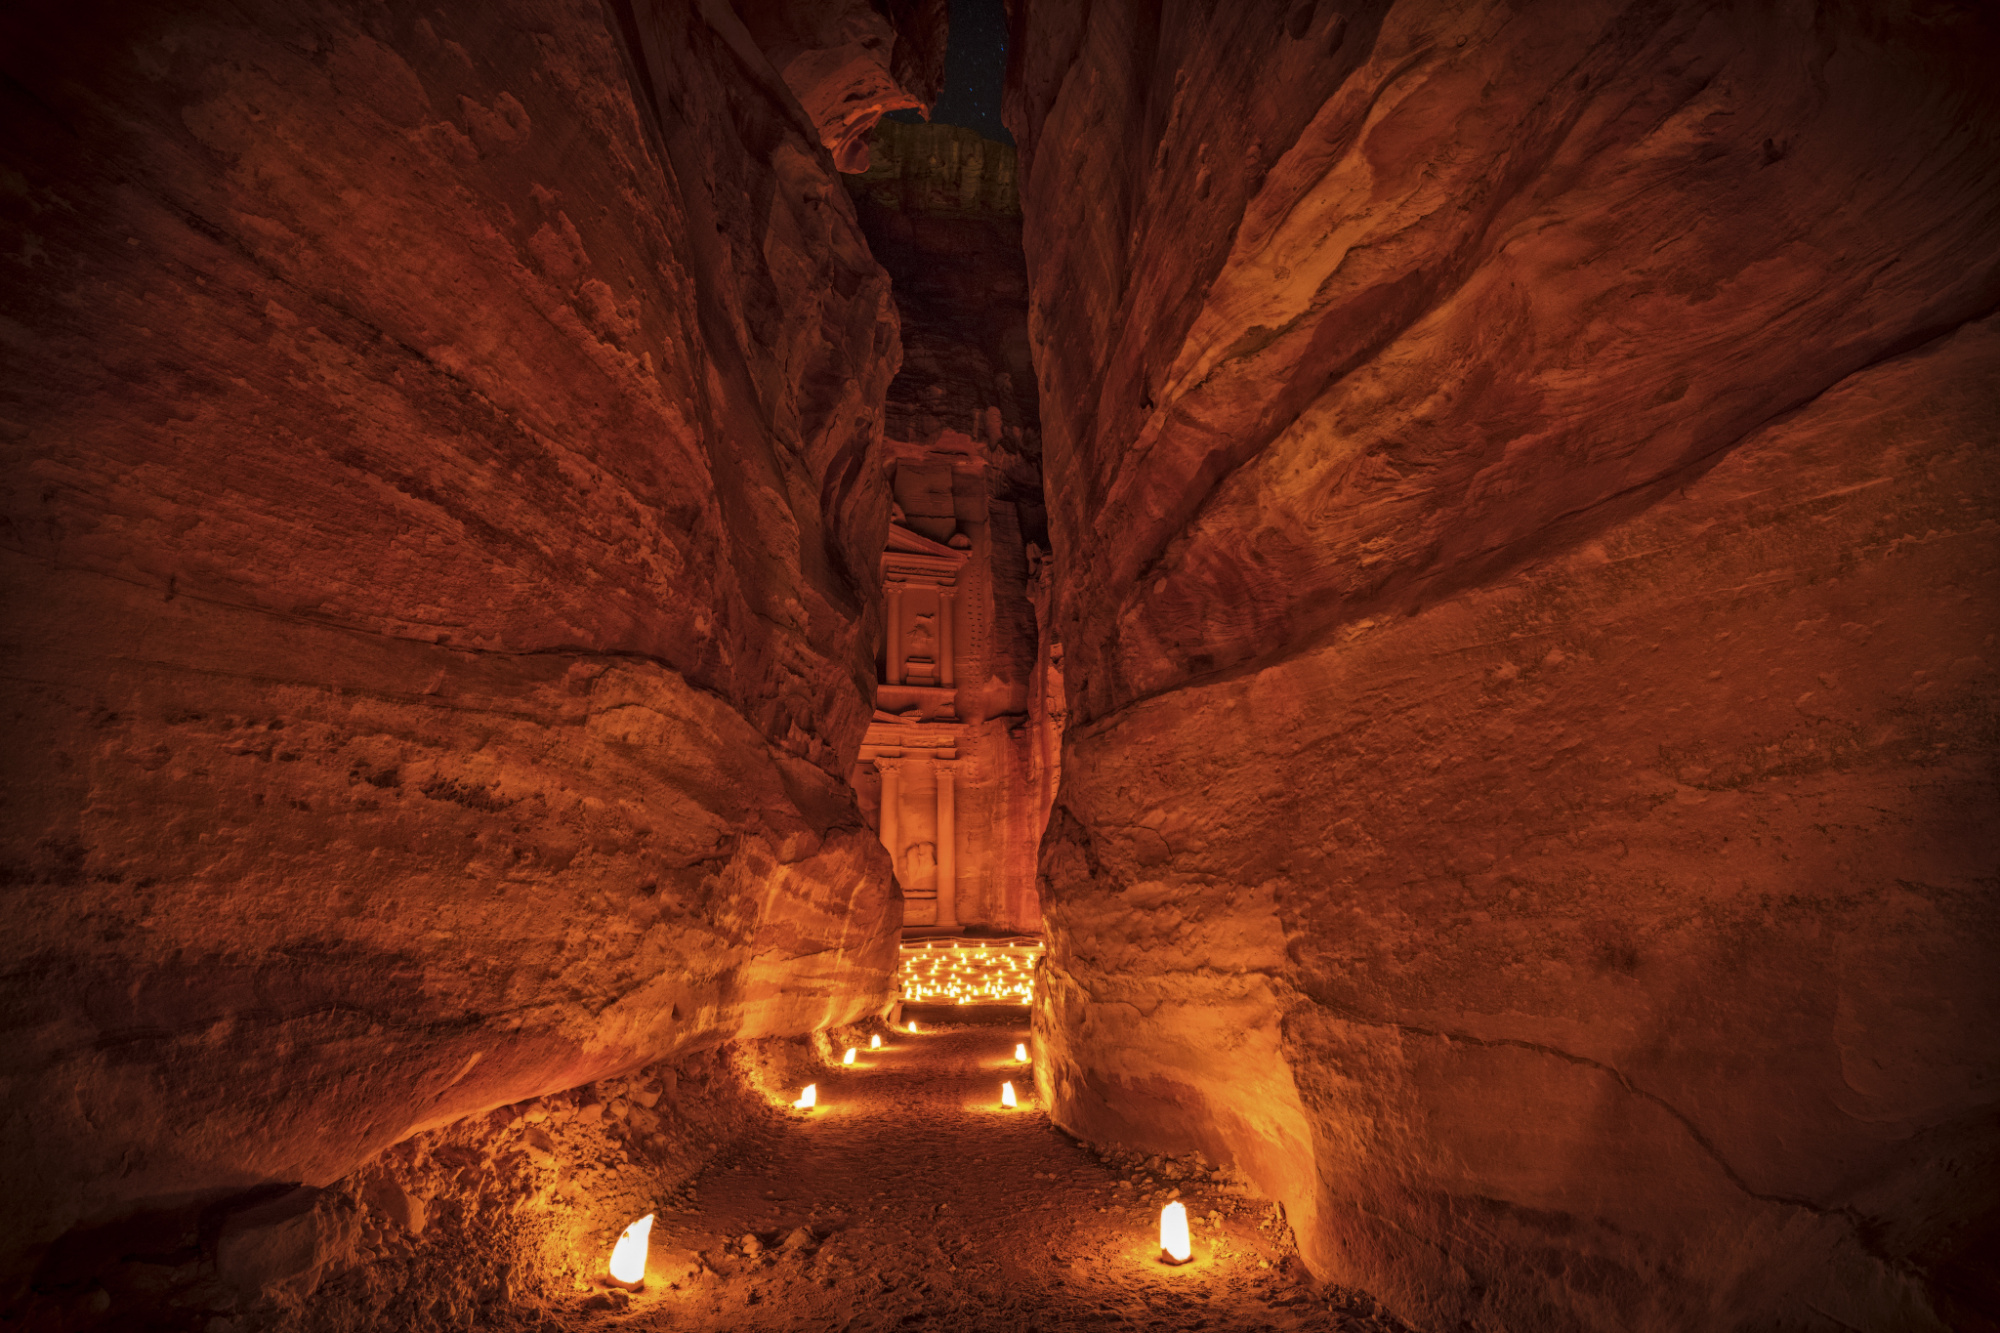
When taking photos of architecture, it’s important to remember that you can use unique and alternative points of view and still create an image that has a lot of visual impact. Here, because the view of the building is partly obscured, the image has a bit of mystery to it. Add in some ambient light to show off the texture of the walls along the pathway, and you’ve got a recipe for one intriguing photograph!
Rome, Italy

No one ever said that architectural photos had to be of buildings that are still fully intact. Here, we have a view of Roman ruins that still offer plenty of visual interest. The repeating pattern of the columns gives the image a sense of depth, while the verticality of those columns act as leading lines, taking our eyes from the texture of the foreground up toward the sky where stars are just beginning to appear.
The Vatican, Italy
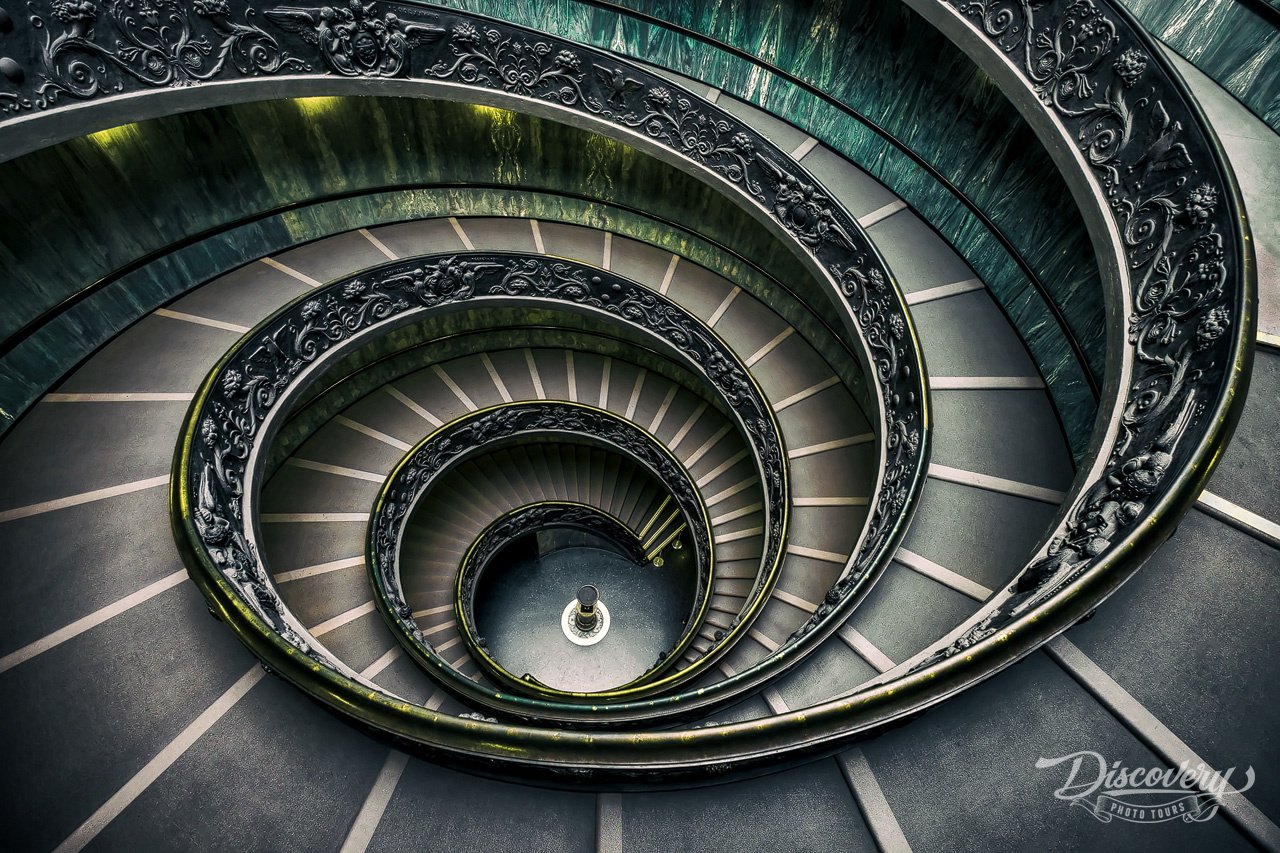
The Vatican Museum is full of incredible works of art, including this architectural masterpiece. The spiral created by the stairs makes me think of the golden ratio, which draws the eye downward to ground level, giving the image an incredible level of detail. The carvings on the railings of the stairs add a punch of detail that gives the eye an additional area of interest to inspect. The lighting couldn’t be better either! The soft, even lighting brings out all the details of the space, making this one stunner of an architectural image.
Petra, Jordan
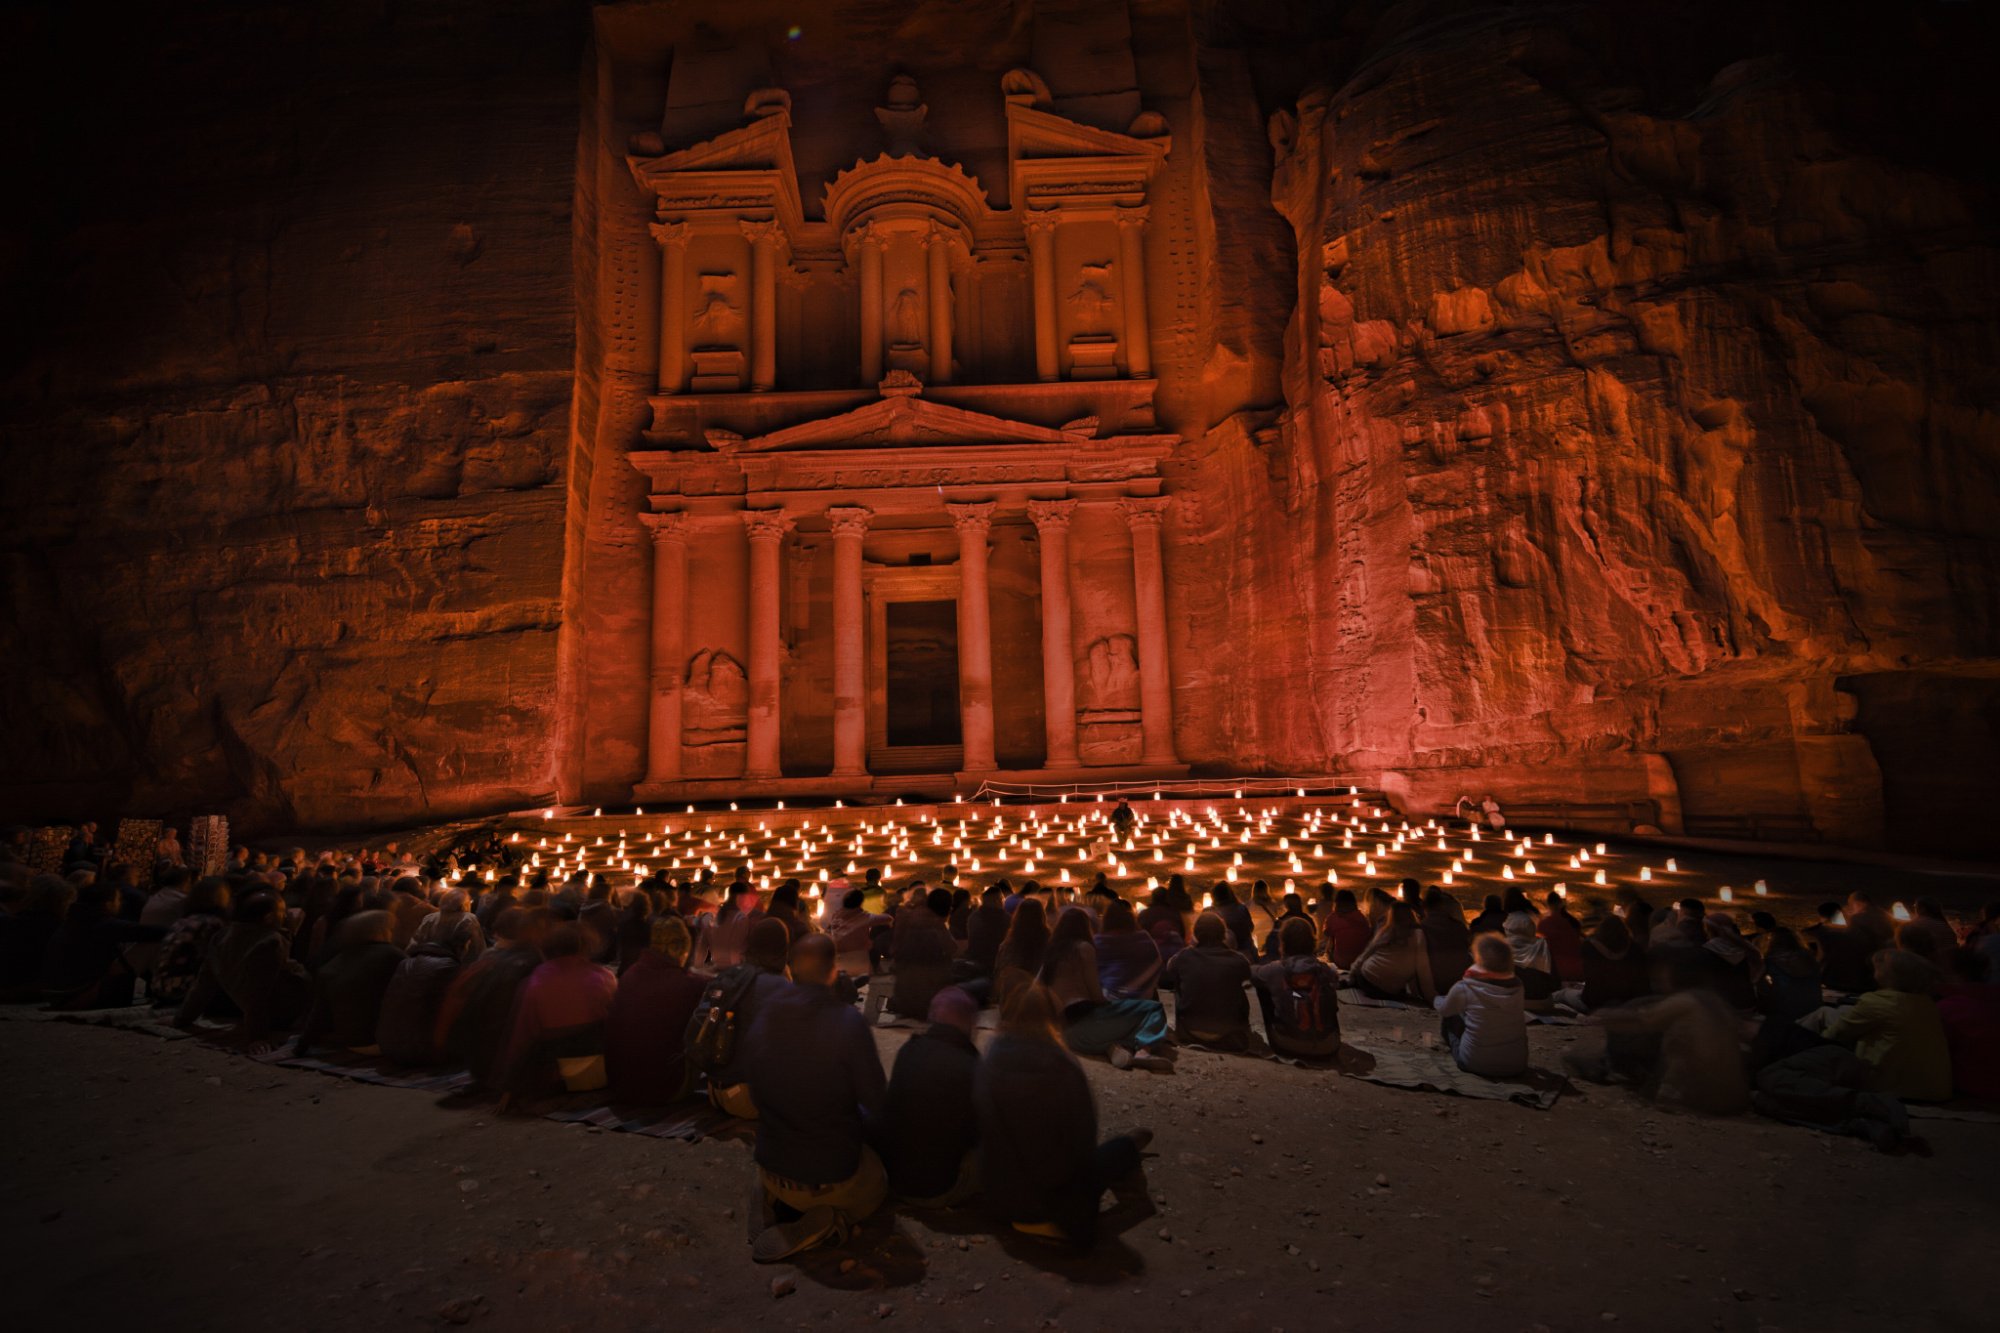
Photography is all about lighting, and in this case, we see how beautiful the soft, warm light emitted by hundreds of candles can be. The detail of the building is on full display, with its columns and ornamentation having just enough shadowing from the candlelight to show the depth of the facade. With the addition of people in the foreground, we also get a better sense of the sheer size and scale of the building and surrounding cliffs as well.
Rome, Italy
Discover the photography tips from the pros
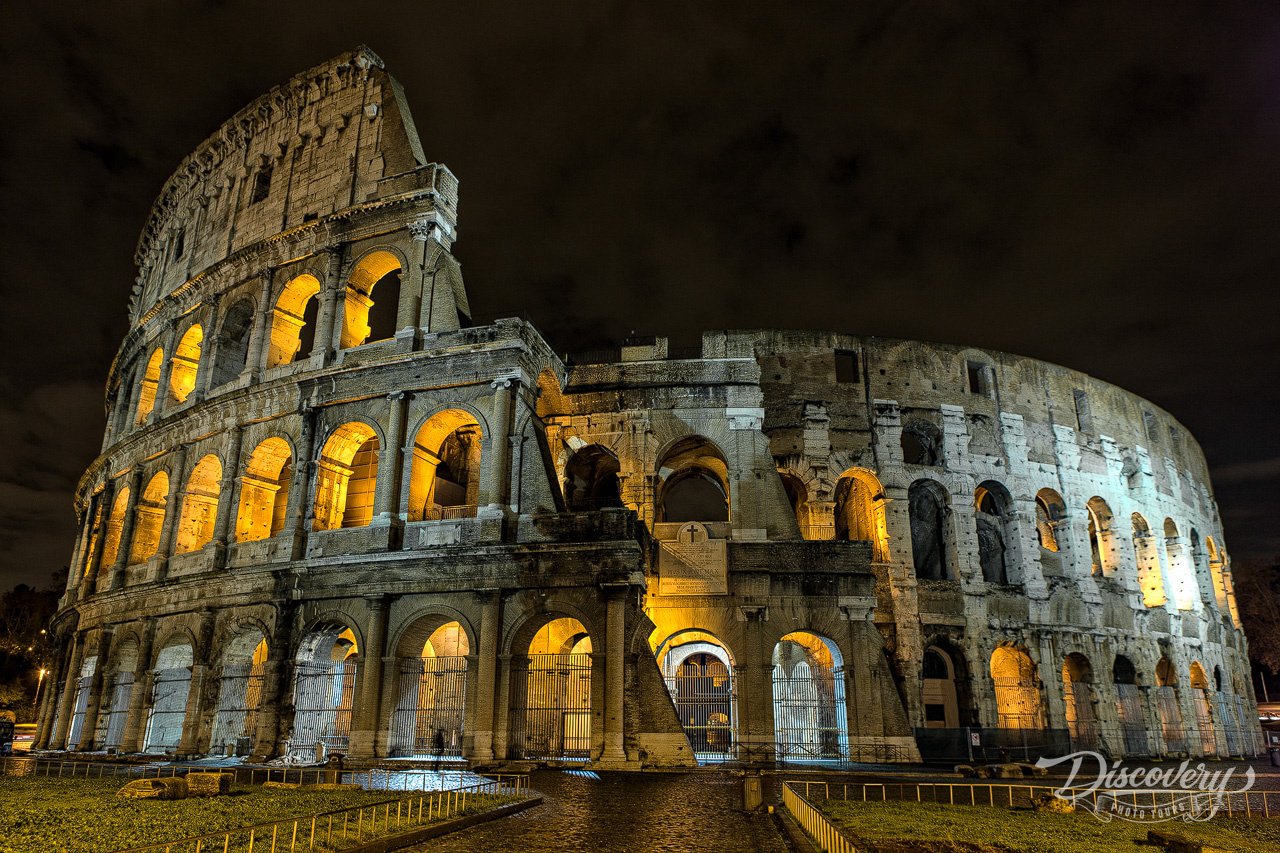
Ask anyone to list the most iconic buildings in the world, and I’d be willing to bet the vast majority of those lists will include the Roman Colosseum. Epic isn’t a strong enough word to describe a building that has been standing for so long and seen so much. Here, we see the value of taking architectural photos at night - the soft interior lighting accentuates the archways of the building while the harsher, whiter light coming into the scene from the right adds highlights and helps give us a better impression of the building’s exterior texture.
As I said in the introduction, these photos make me want to travel the world.
Well, if I decide to do that, it will be with Discovery Photo Tours.
Not only does Discovery Photo Tours offer tours of each location pictured above, but they do it in a way that allows you to enjoy the history and beauty of the area while also learning skills that will improve your photography.
In that regard, these tours aren’t just another tourist service that takes you from one spot to the next. Instead, you get to spend time in each location, learning about the area, the culture, and the traditions, while working alongside other photography enthusiasts to hone your craft.
Also on the journey are expert photographers, ready, willing, and able to give you feedback on your work and offer advice on how to capture more impactful photos of architecture, landscapes, people...you name it!
For more details about visiting the locations featured in this article, visit Discovery Photo Tours.
We Recommend
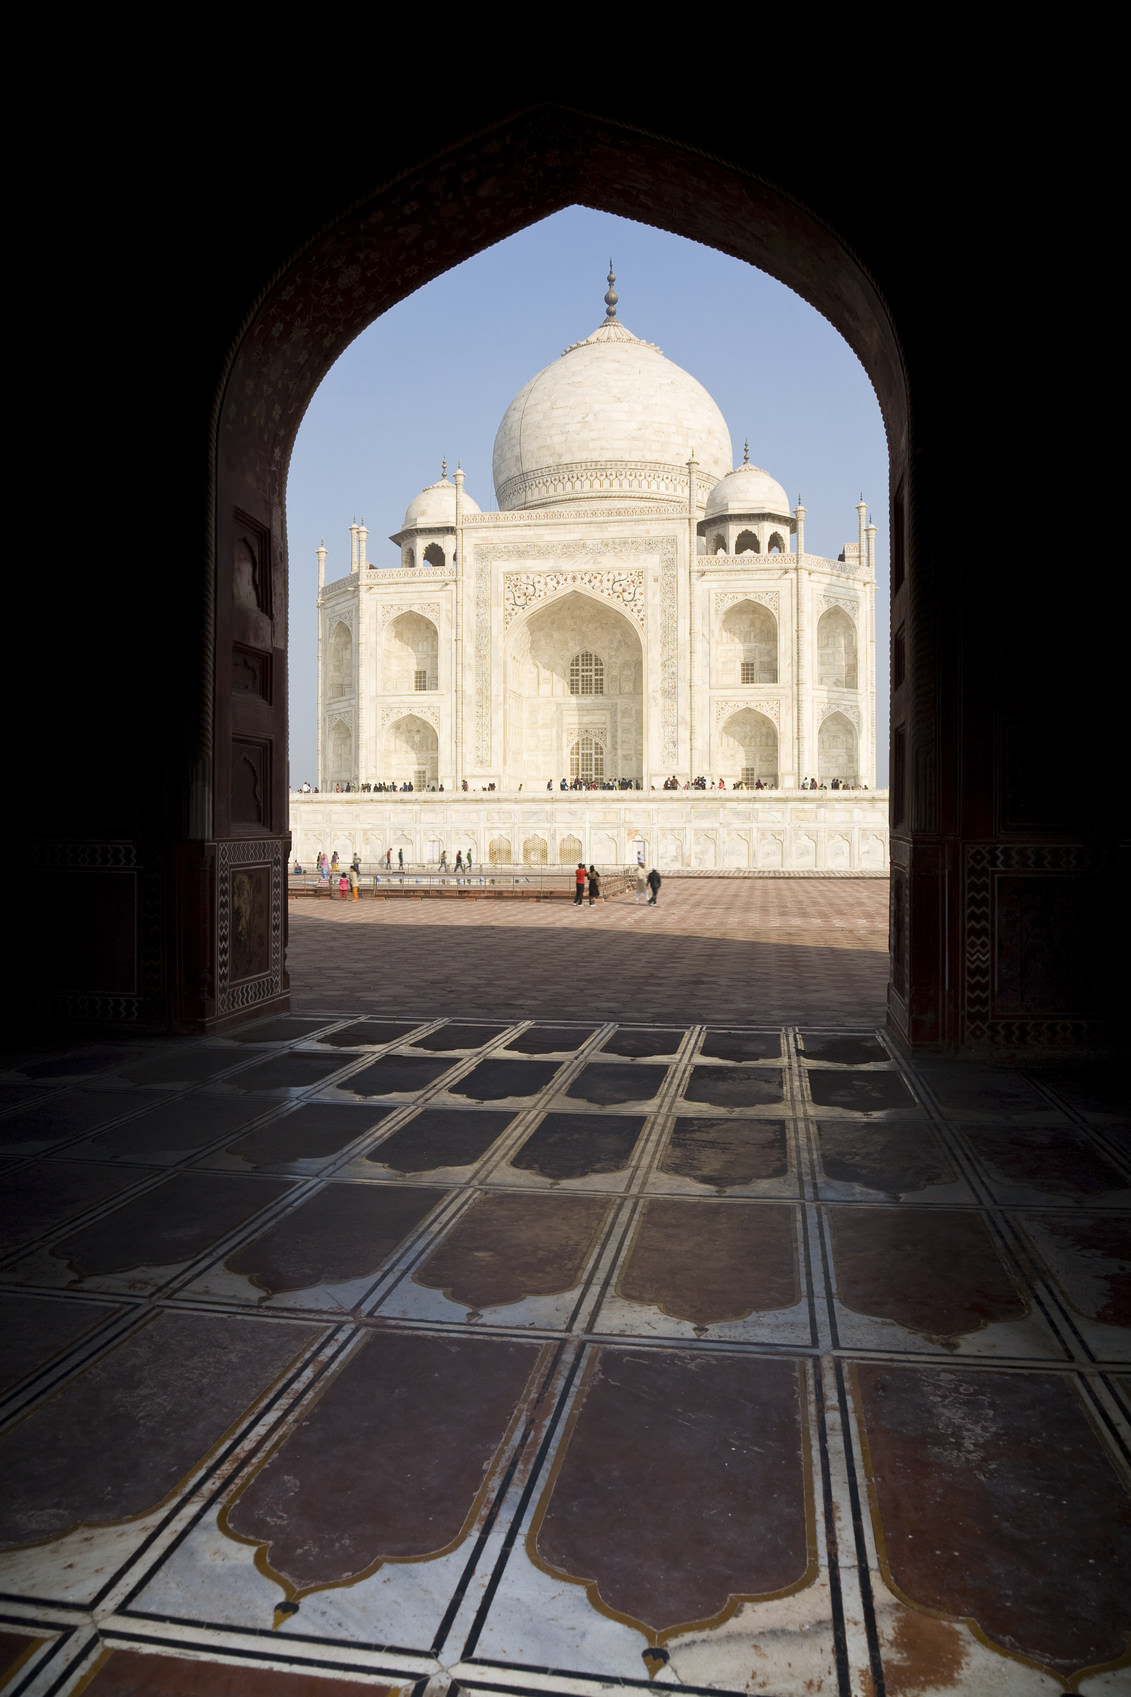
A Beginner’s Guide to Using Framing
Framing your shot in this context refers not to placing your final image in a literal frame, but instead refers to the compositional technique in which you use an object - natural or manmade - within the image to draw attention to your primary subject.
Framing is a technique used in all aspects of photography, from portraits to landscapes and everything in between. It is effective for a wide variety of reasons, and can be used to give your image added pop and depth, while signifying the importance of your focal point as well.
Using framing is quite simple too. For starters, just about anything can be used as a frame - a tree branch, the entrance to a tunnel, doorways, fabric, or even areas of shadow. Secondly, using framing doesn’t require you to be precise - the frame might only extend across one or two sides of your shot, but even so, will still serve to direct the viewer’s attention where you want it. Lastly, your frame might be in focus or it might not - that decision is left completely up to you.
As you can see, framing isn’t so much about being precise and technical as it is about using it to your advantage to create a more dynamic image. There are many benefits to framing your images as well.
Frames Create Depth
By utilizing the framing technique, you instantly create depth in the image. A foreground frame, like the one pictured above, sets the stage for the viewer’s eye to travel deeper into the shot. By including elements in the image at different distances from the lens, the eye has multiple points of interest to which it can travel. The result is an image that has a three-dimensional feel to it, even though it’s only two-dimensions.
Frames Direct the Eye
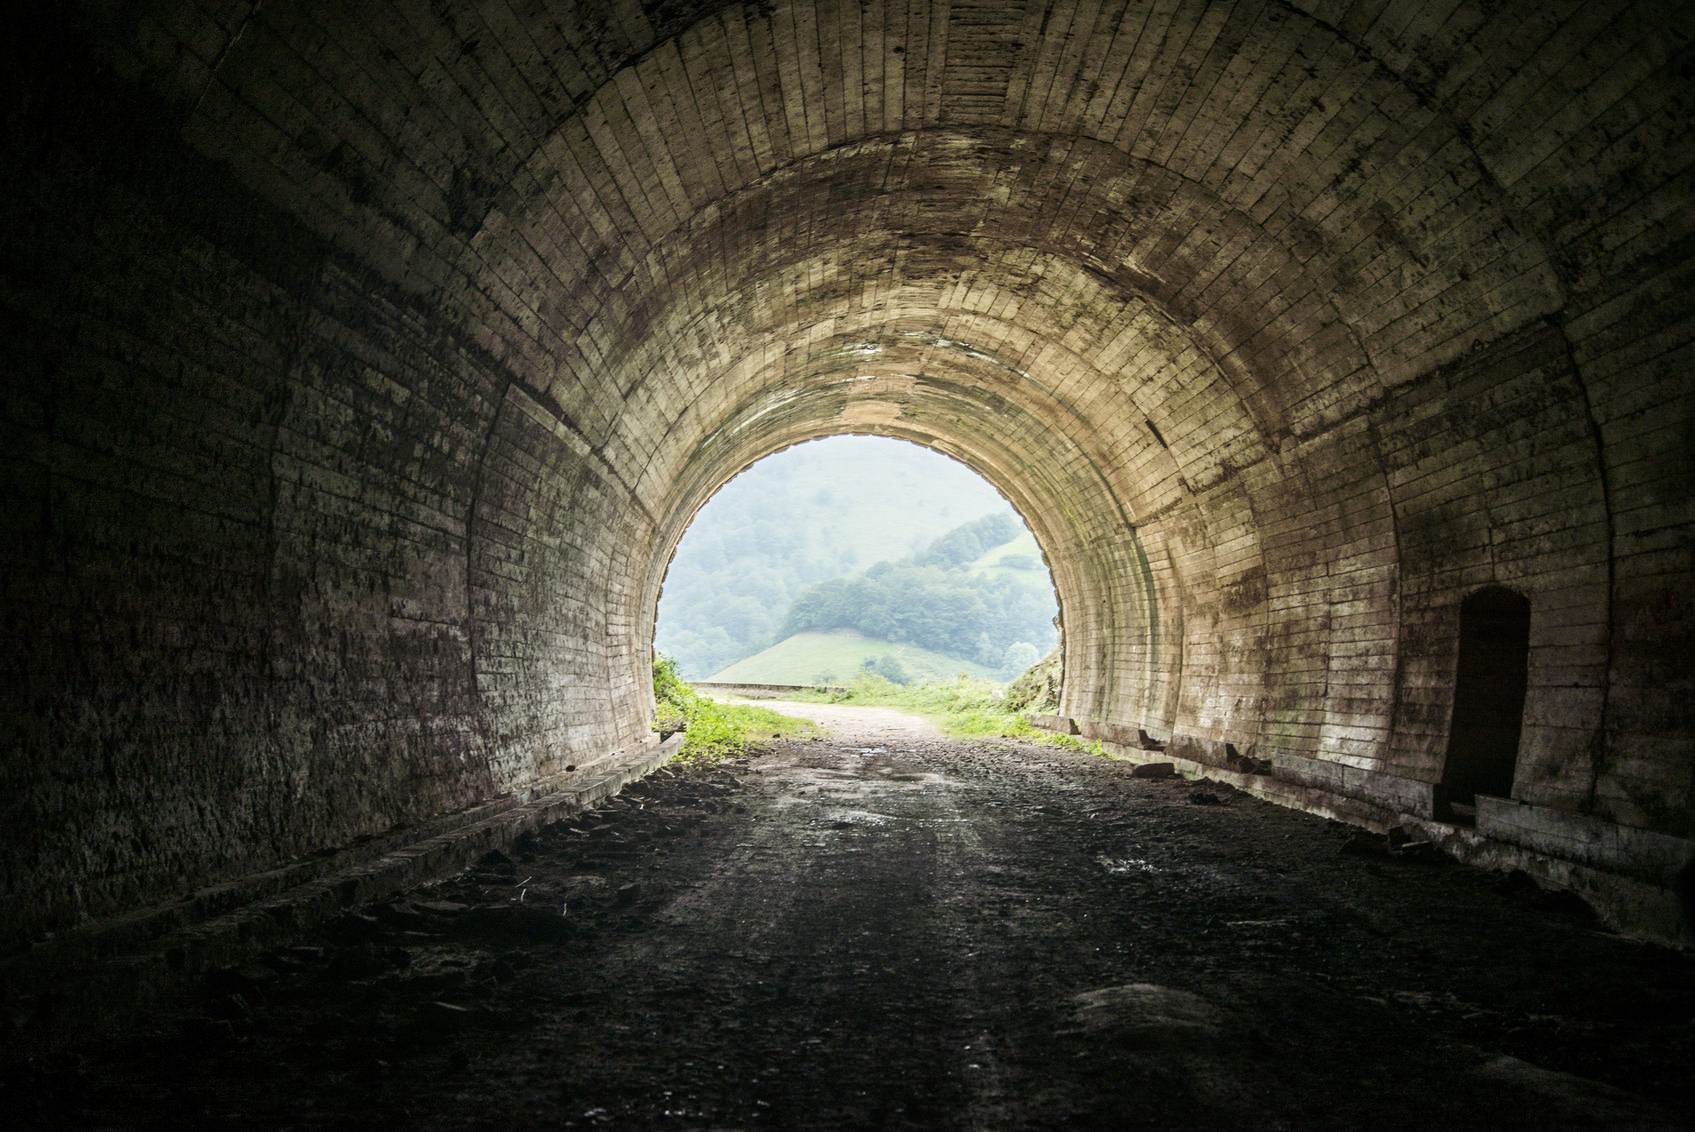
As noted above, the inclusion of a frame in your image more purposefully directs the viewer’s eye to the focal point or primary subject of the photo. Shape has something to do with this - the curvature of a tunnel or cave, for example, might be more effective in drawing the viewer’s eye toward the primary subject than a simple tree branch framing the top of the photo. Nonetheless, any frame that you use will allow you to create a barrier between the center of the photo and the edges of the image, which tends to help viewers engage with the image in a deeper, more meaningful way.
Frames Provide Context

The form your frame takes also gives you an opportunity to provide more context to the shot you create. For example, if your frame is the branches of a tree that has bright, autumn leaves on it, the viewer is clued into the time of year the photo was taken. Likewise, if you use people as the frame, the viewer better understands the primary subject’s place in the context of the gathering of people. In the image above, the frame draws attention to the child’s face, but also let’s us know that the child is playing on a playground. Having that extra bit of context gives your image greater impact because viewers have a better understanding of what is going on in the photo.
Frames Create Mystery

Certainly, frames help provide context to a situation that gives the image more meaning. But other times, frames can be used to mask what’s happening in the scene, creating a greater sense of mystery and intrigue. What goes on behind the frame can be just as interesting as what you’re able to see. In the image above, one can’t help but wonder where this woman is and what she’s looking at beyond the wall.
Creating some mystery gives viewers the opportunity to ponder and to question, both of which induces them to spend more time inspecting the photo and engaging with it. And in the end, isn’t that what we want to happen? Frames facilitate that, and as we’ve noted above, they can do much more as well.
We Recommend
A Step-by-Step Guide to Regaining Your Inspiration
Creative ruts are the worst, but they always happen. If you’ve been carrying a camera for any length of time, you’ve undoubtedly found yourself completely uninspired by your surroundings. You might try to force the issue and go out and take photos in spite of your lack of creativity, but that might just push you deeper into the doldrums.
Instead, you need to find inspiration in new places, and doing so means that you need to expand your boundaries and remove some of the limits you’ve placed on yourself.
Let’s find out how to do that.
Step 1: Break Your Routine

We naturally like routine. It’s comfortable and familiar, and helps us stay on task and accomplish what needs to be accomplished in a given day.
The problem with routine, however, is that it can be an enemy to creativity. After awhile, the same commute to work each day, the same walk in the park at lunch, and visiting the same pond each evening as you walk the dog become less an opportunity to take interesting photos and more rote repetition of something that just needs to get done.
Breaking out of that routine might be all you need to jumpstart your creativity. Take a different route to work. Spend your lunch watching people on the street. Get up early and catch a sunrise. Take portraits of your friend’s kids. Just do something out of the ordinary and see how it might inspire you to do something different with your camera and lens.
Step 2: Get Uncomfortable

Closely related to the idea of breaking your routine is the concept of getting uncomfortable with your photography. It’s simple, really: if you traditionally take portraits, try landscapes for awhile; if you usually photograph landscapes, give wildlife photography a try; if you are most comfortable taking portraits of friends and family, head to the street and try photographing strangers.
You can also get uncomfortable by making alternative choices when it comes to gear and composition. Take portraits with a wide-angle lens or landscapes with a telephoto lens. Challenge yourself to hand hold your camera even when conditions might call for a tripod. Try using a slow shutter technique. Frame shots from unique perspectives, such as from up high or down low to the ground.
The point is that if you put yourself in uncomfortable situations, you’ll have to rely on your photography talents and know-how to make the most of those situations. By proxy, you’ll have to be creative in how you approach these situations, which might be just what you need to get your photography mojo back in order.
Step 3: Be Less Technical

Although photography is an artform, there are a lot of technical aspects to it as well. There are the mechanics of your camera and lens, the science behind exposure, and all the rules of composition that, when used together properly, can result in breathtaking images.
The problem is that if you focus too much on the technical side of things, and spend too much time worrying about whether or not you are doing things the “right” way, you can easily lose your creative touch. When faced with a dynamic scene, approaching it with the coldness of getting everything technically right might mean that you miss out on capturing the spontaneity or the emotion of the moment.
Being less technical doesn’t mean that you should purposefully head out and totally disregard all of the rules and suggestions of how to use your camera or compose a photo. Instead, give more credence to the power of being in the moment. Look for elements in the scene that grab your eye or elicit a response - for whatever reason - and snap away. Make minor adjustments as necessary, but focus more on the moment and less on things like, “Is my shutter speed right?”
Final Thoughts
The ebb and flow of creativity and inspiration is just a natural part of creating art. Some days you will be oozing inspiration and have trouble finding enough time to create all the photos you want to create. Other days, you won’t take a single photo that you like and find that you lack any inspiration at all. But simply breaking out of your routine, challenging yourself with new photographic pursuits, and focusing less on the technical aspects of photography and more on simply being in the moment are three easy ways to try to kickstart your creative juices. If you’re in a rut, give one (or all!) of these methods a try and see where they take you!
Recommended Reading

As noted in this lesson, creative ruts are just part of ebb and flow of photography. Though the recommendations we’ve outlined here are a good start for finding your inspiration again, a more in-depth reading to consider is The Creative Fight by Chris Orwig. In the book, Orwig discusses the difficulties of the creative process, and dives into easily implemented methods you can employ to be inspired, regain your creativity, and find meaning in the work you do once again.
The Creative Fight would be a solid addition to your library that you can reference over and over again to get back to the pinnacle of your creativity when inspiration seems to elude you. With chapter-based exercises designed to help you put concepts into action, The Creative Fight is the ideal tool for regaining your inspiration.
We Recommend
A Step-By-Step Guide to Using Lines
Lines are everywhere, from natural elements like the horizon line in a landscape shot to manmade elements like the stripes painted on the street to indicate a crosswalk. Lines take various forms too - vertical or horizontal, converging or diagonal - and each brings something a little bit different when included in a photograph.
Though they all have slightly different effects on an image’s composition, one thing is constant: lines improve the composition of just about any image. They help grab the viewer’s attention and direct their eye from one position in the image to another. In this tutorial, we will explore the different types of lines you can include in your photos and explain the ways in which each type of line can make your image better.
Vertical Lines
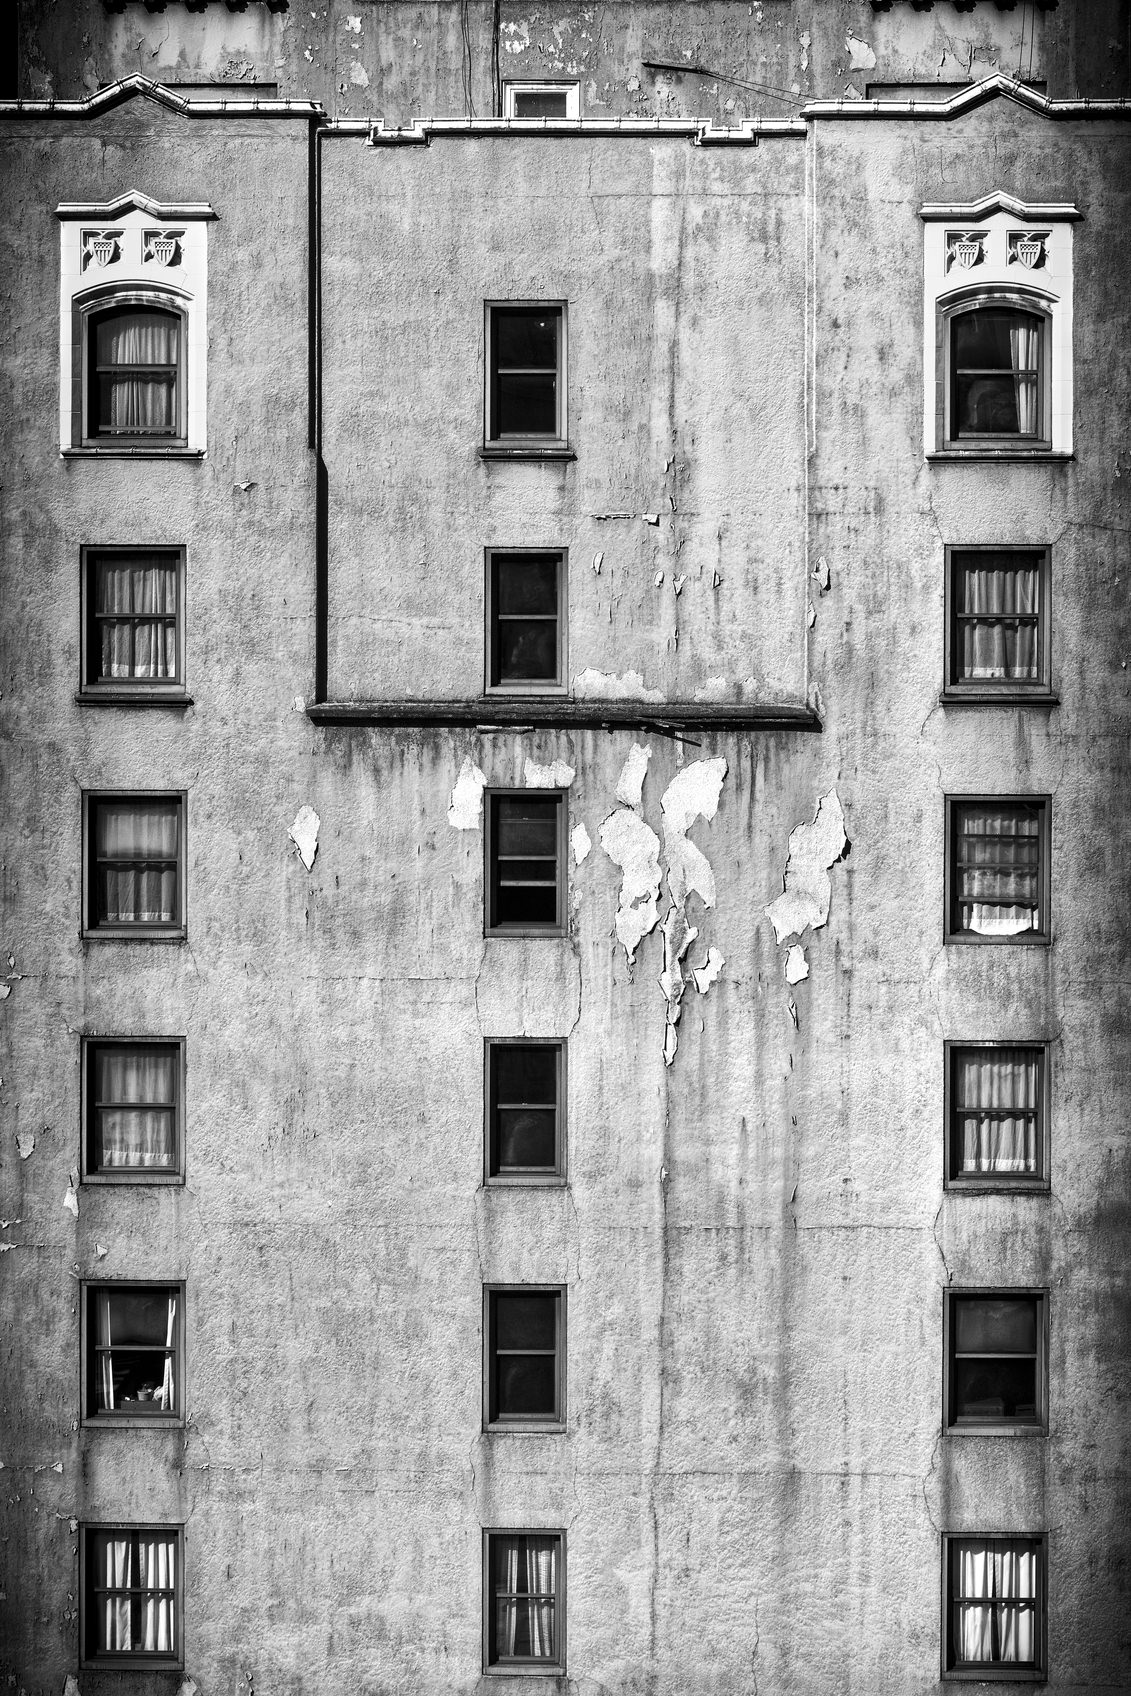
One of the primary benefits of vertical lines is that they help stretch the image and emphasize the height of your subject. This is ideal for cityscapes for obvious reasons. In the image above, the vertical lines created by the columns of windows accentuates the height of the building. It also helps create some visual tension: the orderliness of the lines of windows is in direct opposition to the crumbling, run-down look of the building’s facade.
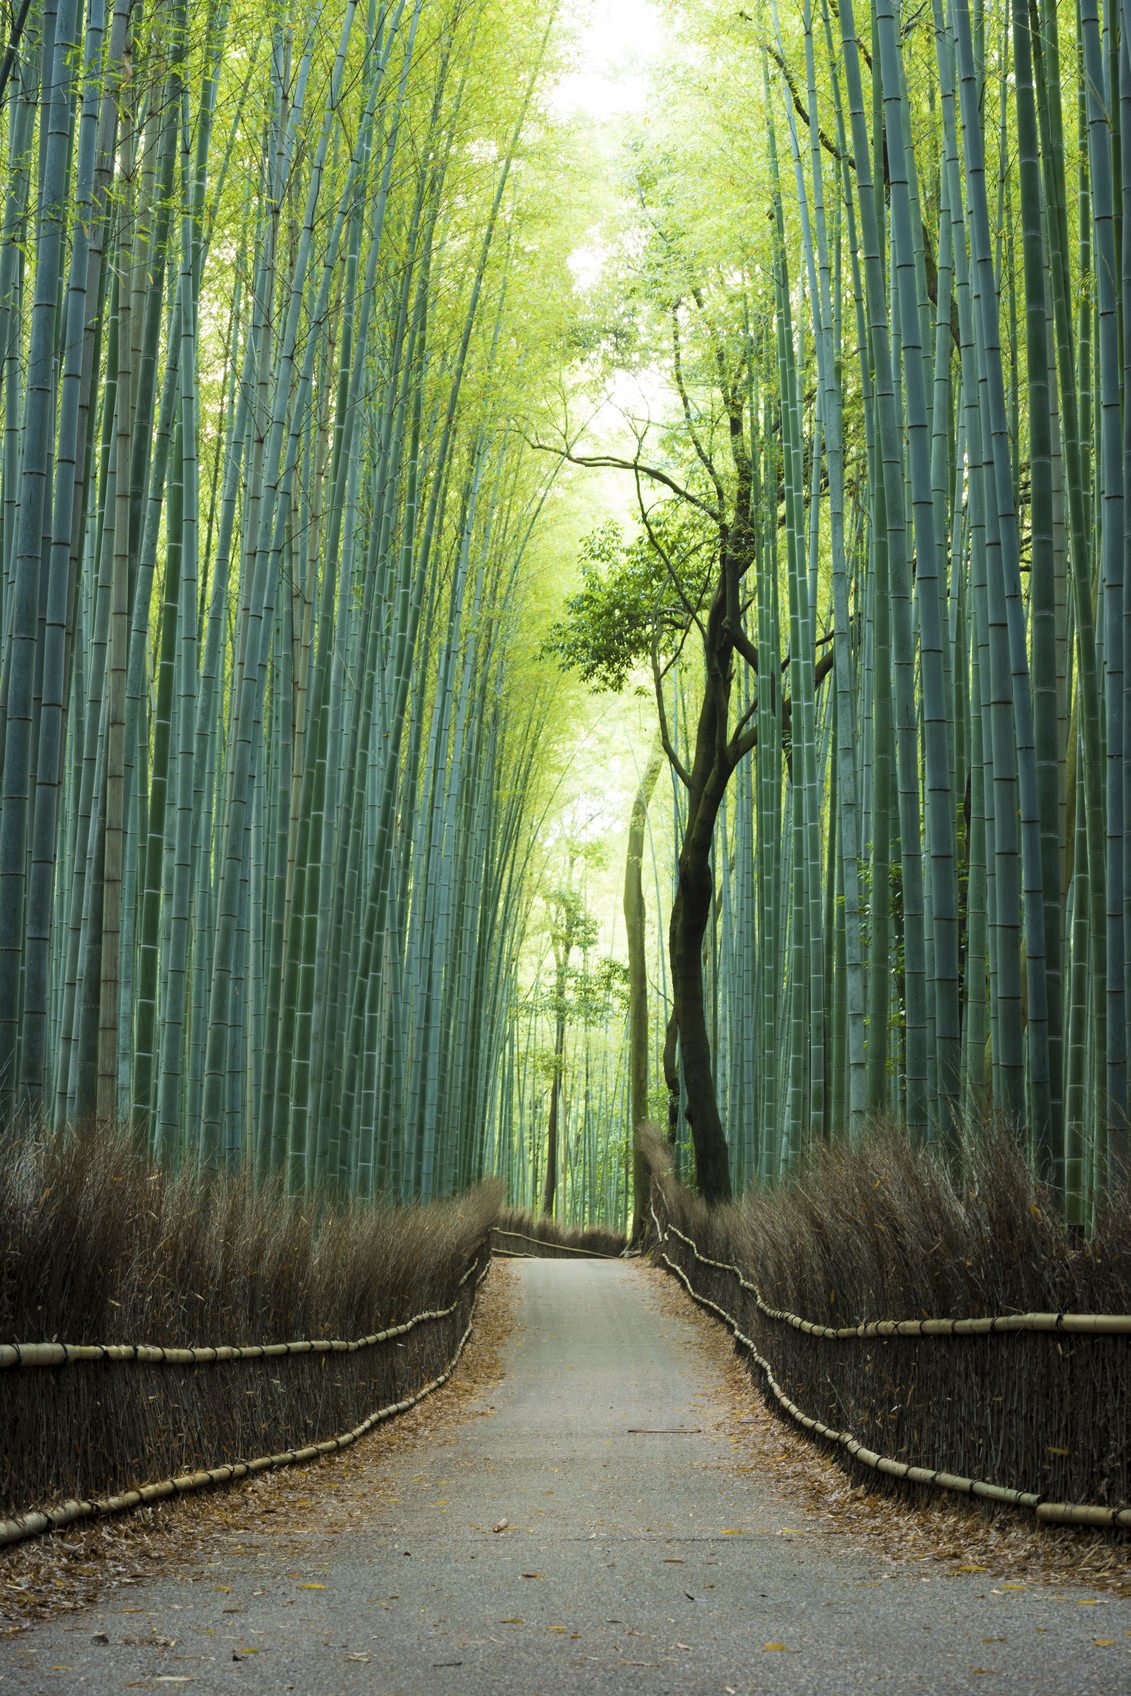
In a natural environment, vertical lines emphasize the height of the subject as well, in this case, the stands of bamboo. The vertical lines also help the viewer understand something else: an idea. When photographing natural elements like trees, strong vertical lines aren’t just advantageous for highlighting physical concepts but also for symbolic things like growth or adventure. In this image, the lines extending upward amongst the bamboo strongly represents growth and nature, while the juxtaposition of those lines with the leading lines of the path give the image a sense of adventure as well.
Quick tip: Regardless of your subject matter, when shooting vertical lines it is recommended that the lines align with the edges of the frame to the greatest extent possible. There are situations in which you won’t be able to accomplish this (i.e. shooting upward at a tall building), but if you can photograph the lines straight on, as was done in the sample images above, you will have a much stronger composition with greater emphasis on the lines themselves.
Horizontal Lines
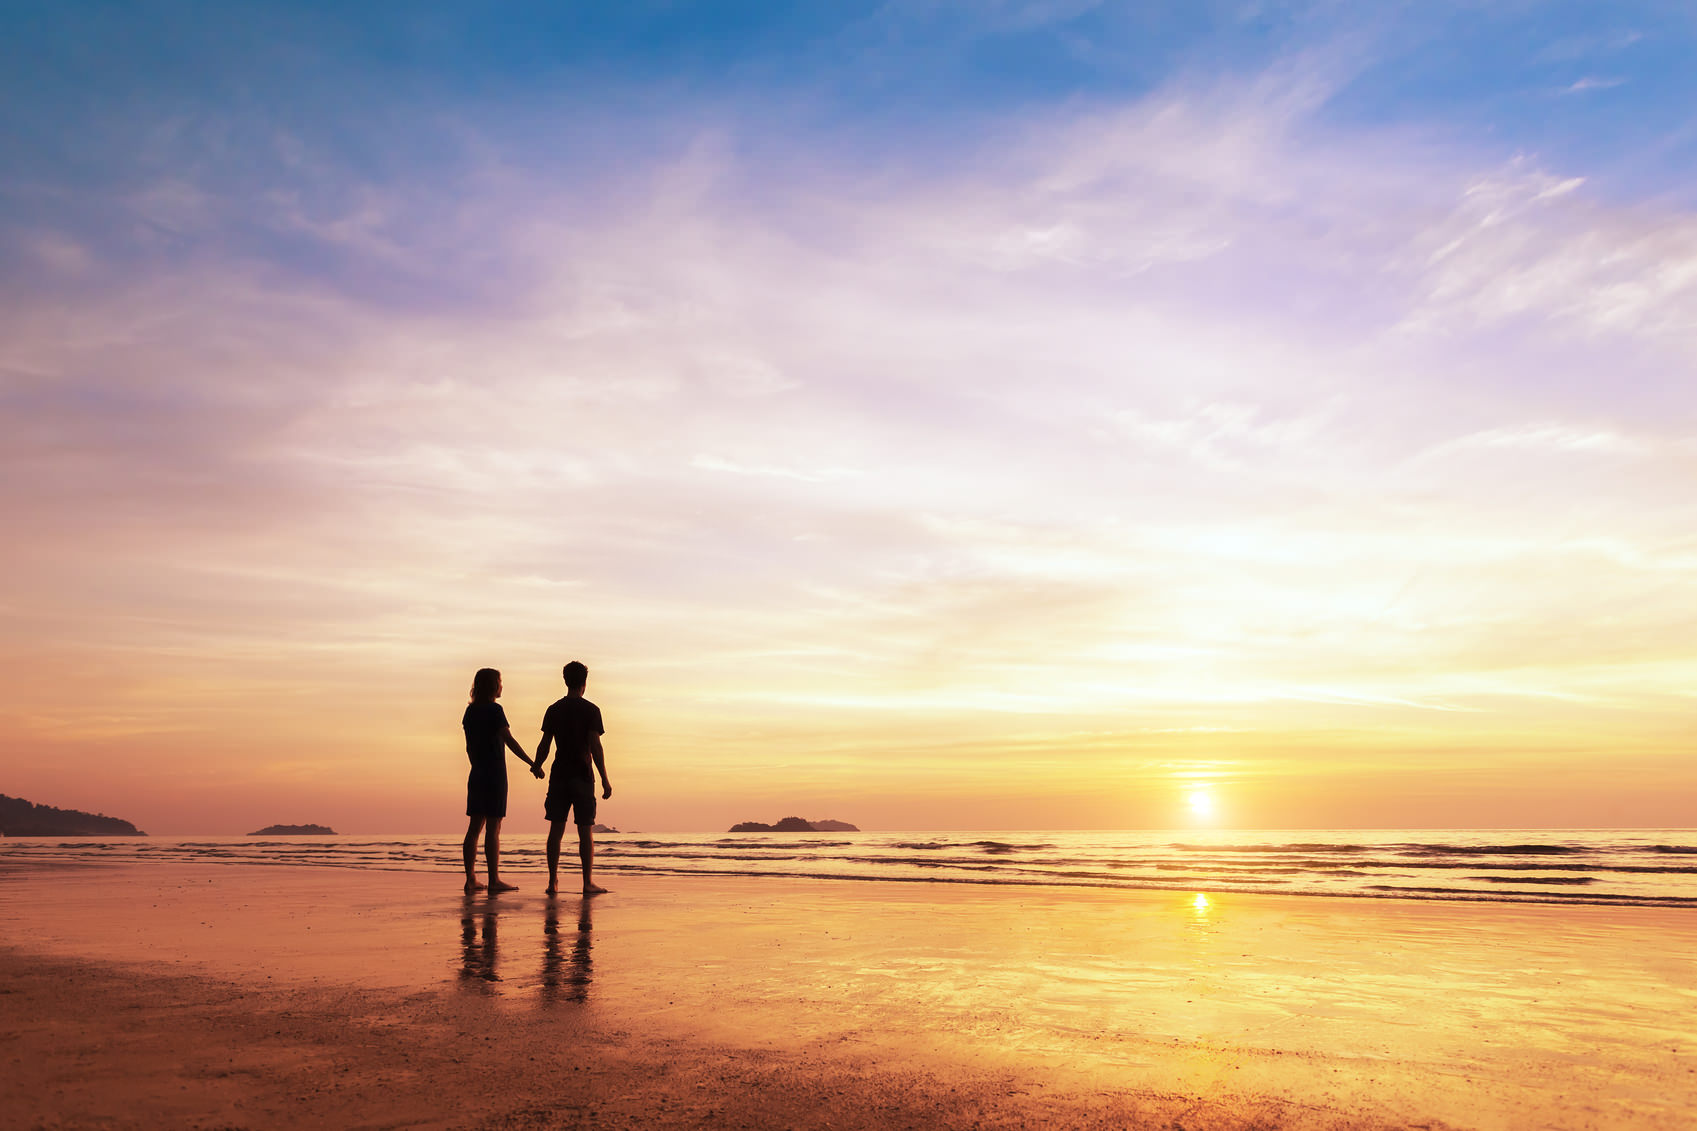
Unlike vertical lines, horizontal lines tend to be less indicative of things like growth and adventure and instead instill feelings of calm and harmony. They also tend to serve as a dividing point in a photo. Take, for example, the horizon in the photo above. It serves as a line of demarcation between the ocean’s surface and the sky and helps the viewer’s eye break the image into those distinct areas.
Note as well the most important feature of a horizontal line - that it is absolutely horizontal in the frame. If a line is not perfectly parallel with the edges of the frame, the value of having the line will be totally lost. Just imagine how hard it would be to view the image above if the horizon rose or fell as your eye moved from one side of the image to the other.
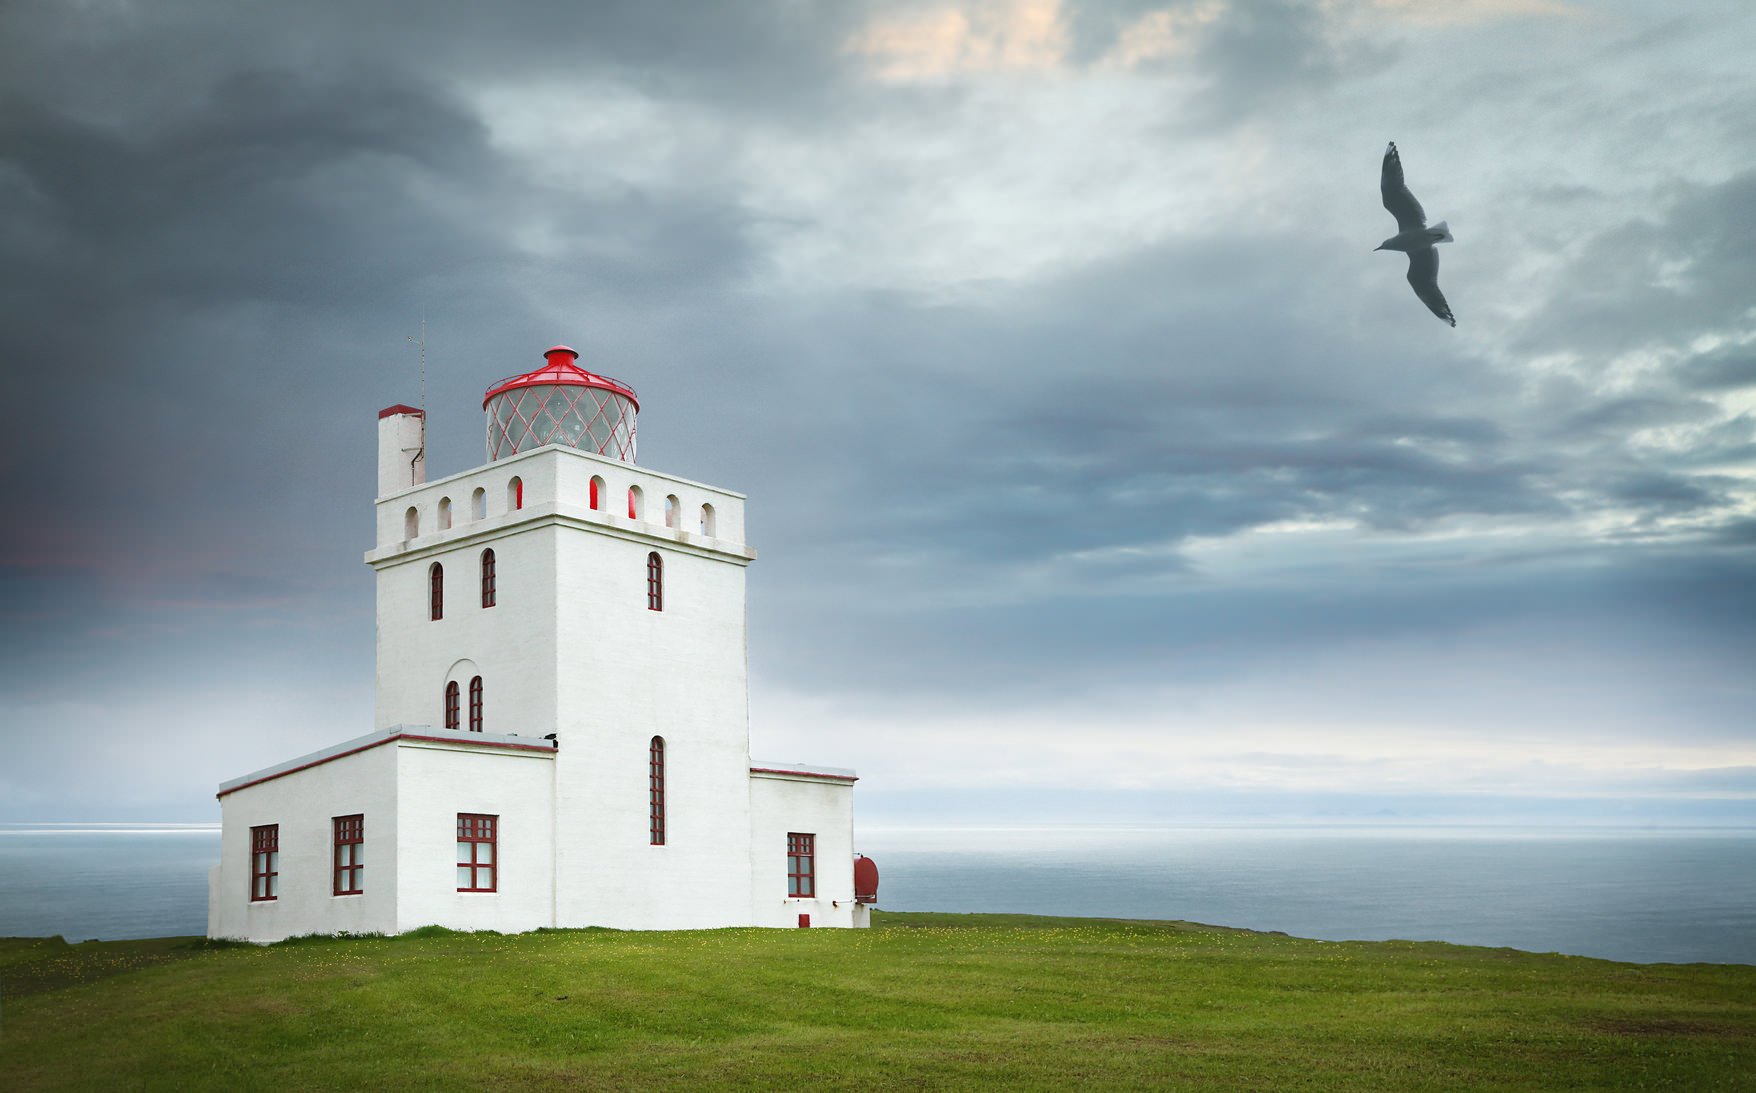
When using horizontal lines, also bear in mind their continuity. An uninterrupted horizontal line can appear to be a bit too static and boring, so including something to break up the line is often helpful. In the image above, the lighthouse does just this and gives this image a strong focal point as well. Also note the placement of the horizontal line in the image above - in this case, it is shifted downward. Generally speaking, when you include a single horizontal line, it’s best to shift it above or below the center point of the image, otherwise the image will feel cut up and unbalanced.

Quick tip: Lines do not have to be obvious. In the image above, the shopping carts create a strong horizontal line in the frame, but the more subtle lines of the brick wall behind the carts is what gives the image extra dimension, texture, and visual interest.
Converging Lines
When it comes to leading the eye of the viewer from one point to another in a photograph, it’s hard to beat converging lines. These types of lines are most commonly associated with train tracks - the lines, though parallel, appear to get closer to one another in the distance, which is an ideal focal point for a photograph. The natural tendency for a viewer’s eye will be to follow the lines from the bottom of the image upward until they disappear into the background, as is the case in the image above.
Railroad tracks aren’t the only type of converging lines, however. Stairs, roadways, fence lines, and pathways are other possibilities. Regardless of the subject matter, when photographing converging lines, the placement of the convergence is of the utmost importance. Their termination point should align as closely to the rule of thirds grid as possible. Doing so means that the focal point will be one-third above or below the middle of the frame, which is a more interesting composition. But perhaps more importantly, this also means that the focal point of the image is well within the frame - you do not want to lead the viewer’s eye out of the shot.
It’s also important to add something of interest to the point at which the lines converge. In the image above, the lines of the walkway and handrails direct your eye straight to the setting sun. The same is true of the previous image, where the boardwalk directs your eye to the sunset. Landscape elements like these make excellent focal points. Another good focal point for these types of shots is people.
Quick tip: Try using a wide-angle lens when photographing converging lines. This will enhance the distance between the lines in the foreground, making the convergence seem more pronounced.
Diagonal Lines

Where converging lines help move the viewer’s eye from the foreground to background, lines on the diagonal help push the eye from one side of the frame to the other. Because of this, diagonal lines typically give an image the feeling of movement, even when the subject isn’t on the move, like the building shown in the image above. There is something about the manner in which the lines cross the field of view on the diagonal that gives the image a more dynamic presence.
Also worth noting is that diagonal lines help create the perception of depth in an image, especially when they intersect with other lines as they move from one side of the frame to the other. In the image above, the diagonal lines of the handrails on the stairs facilitate movement of the eye from left to right. But the addition of the horizontal lines of the stair treads helps create more depth; the repeating intersection of diagonal and horizontal lines, both in the stairway in the foreground and in the stairways in the background, give this image a lot of dimension.

Quick tip: Avoid having diagonal lines run from corner to corner as this tends to cut the image in half. Instead, strive to place your diagonal lines such that they enter and exit at different points, as was done in the image above.
Final Thoughts
Composing a beautiful and engaging photo takes a lot of work and practice, and requires much more than a few lines here and there. However, if you can master the use of lines, you will add another dimension of interest to your photographs. Whether vertical or horizontal, converging or diagonal, lines will help move the viewer’s eye around and within the frame, and make your point of interest more pronounced. As a result, your viewers will spend more time inspecting the photo and discover all the elements within it that make it engaging to view.
Recommended Reading
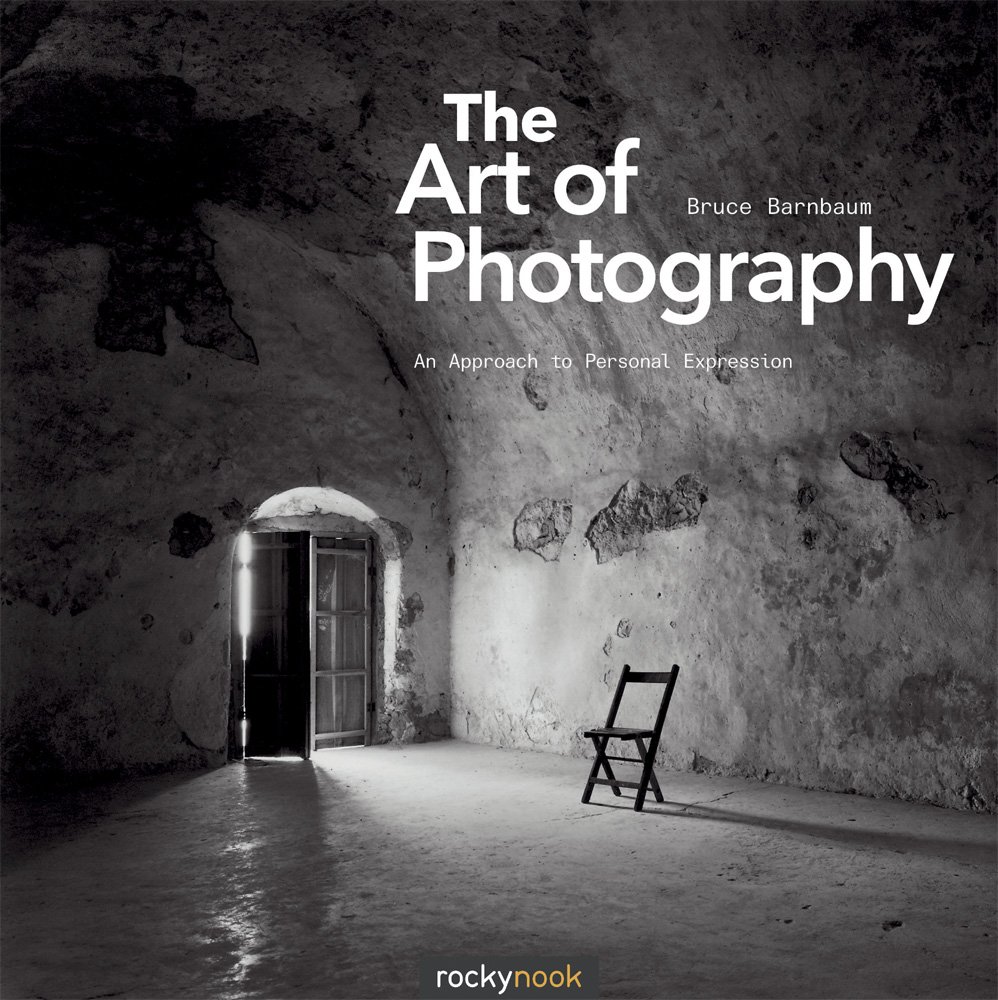
As discussed in this lesson, using lines in your composition will help viewers engage with your image in a more meaningful manner. But lines aren’t the only compositional element that helps you do this. In Bruce Barnbaum’s The Art of Photography, learn about everything related to composition, including light, color, contrast, balance, movement, and a whole host of other factors that impact how your photo is viewed and perceived. Also in the book is an extensive discussion of finding your personal voice as an artist. View dozens of incredible images for inspiration as well. This book is highly recommended for photographers of all skills levels that want to build their repertoire of compositional tools.
Recommended Vendors
You asked, and we listened! New on PhotographyTalk is a complete list of vendors that we highly recommend. Whether it’s a tripod or time lapse gear, camera bags or drones, whatever you need to make your photography better, we’ve got a top-notch recommendation to give you. Check out the complete list on our recommended vendors page.
We Recommend
Critical Tips for a Successful Photography Trip to Vietnam
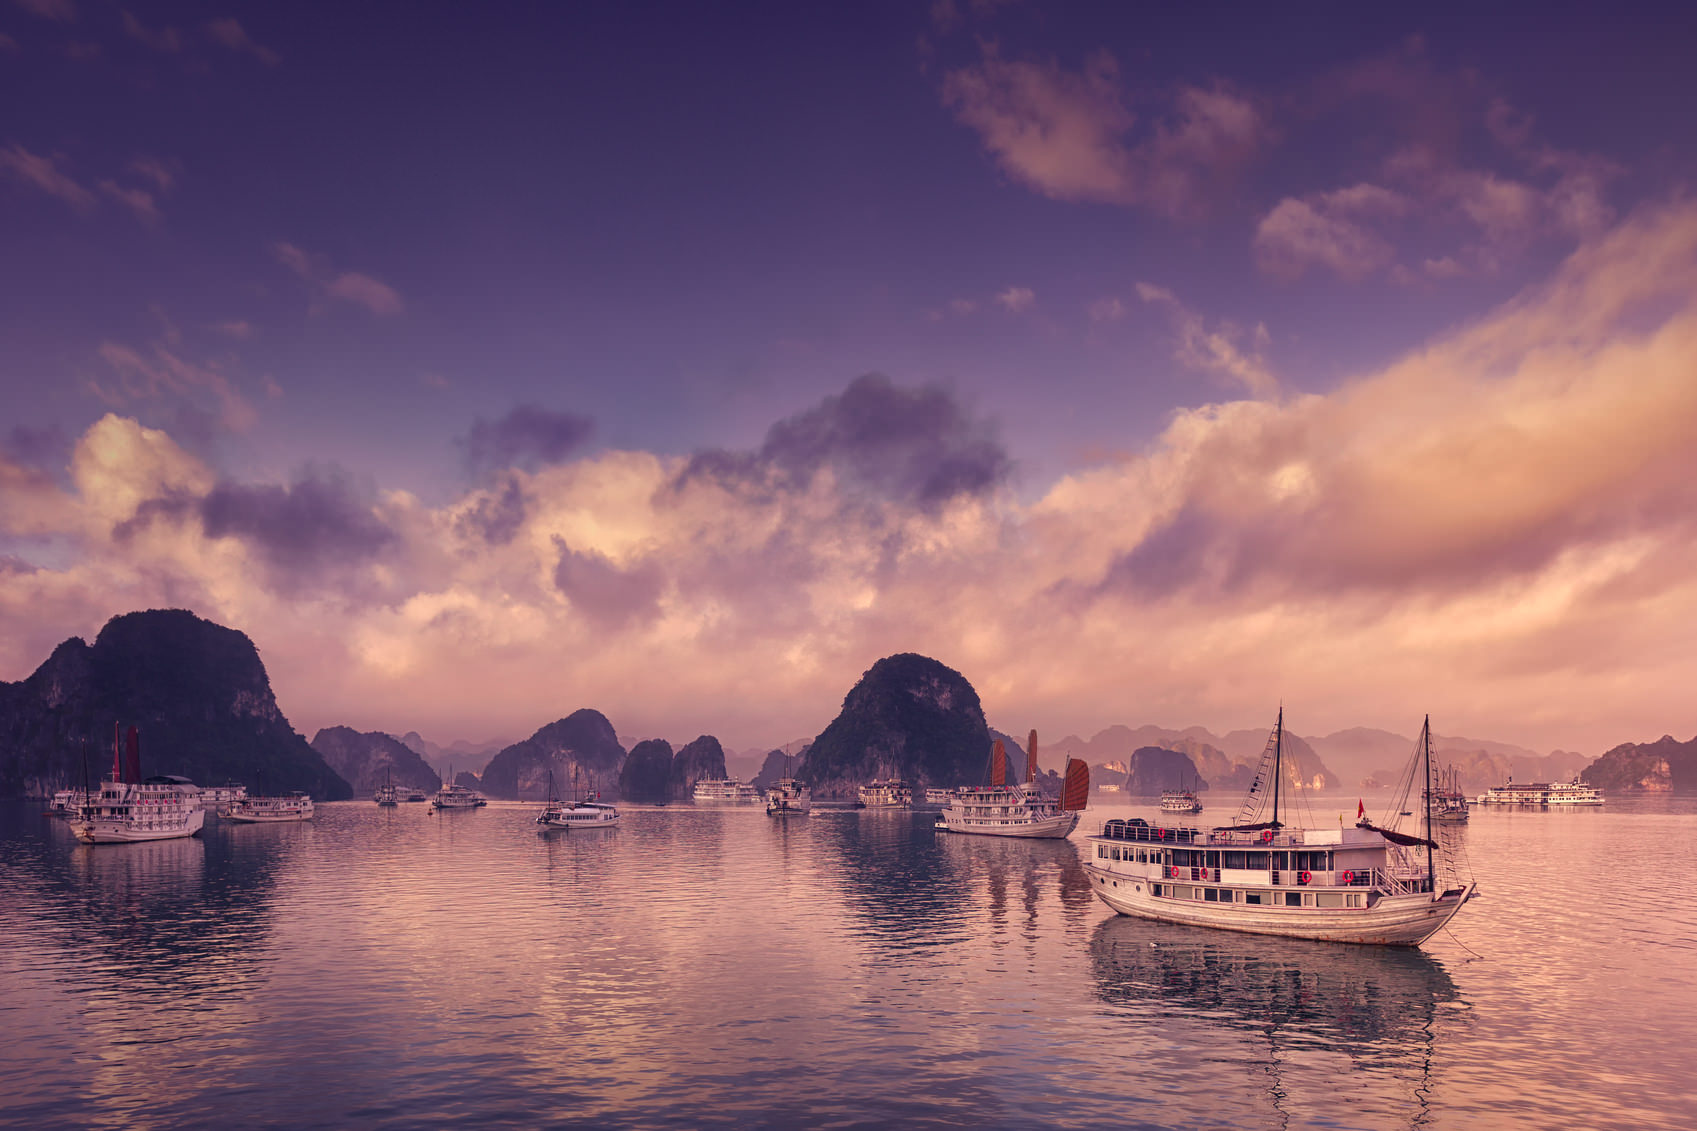
Vietnam is a place of unparalleled beauty, with exotic sites, a vibrancy of color, and profound diversity both in terms of its nature and its people. As a result, there are virtually endless opportunities for creating photos, from portraits of street vendors to wide-angle views of landscapes to the details of French Colonial architecture, and more.
The trick, of course, is to know where to go, what to photograph, and do so in a manner that is efficient, informative, and fun. To help you realize these goals, we’ve identified a few critical tips to help you put together a successful photography trip to Vietnam.
Visit Big Cities and Small Towns
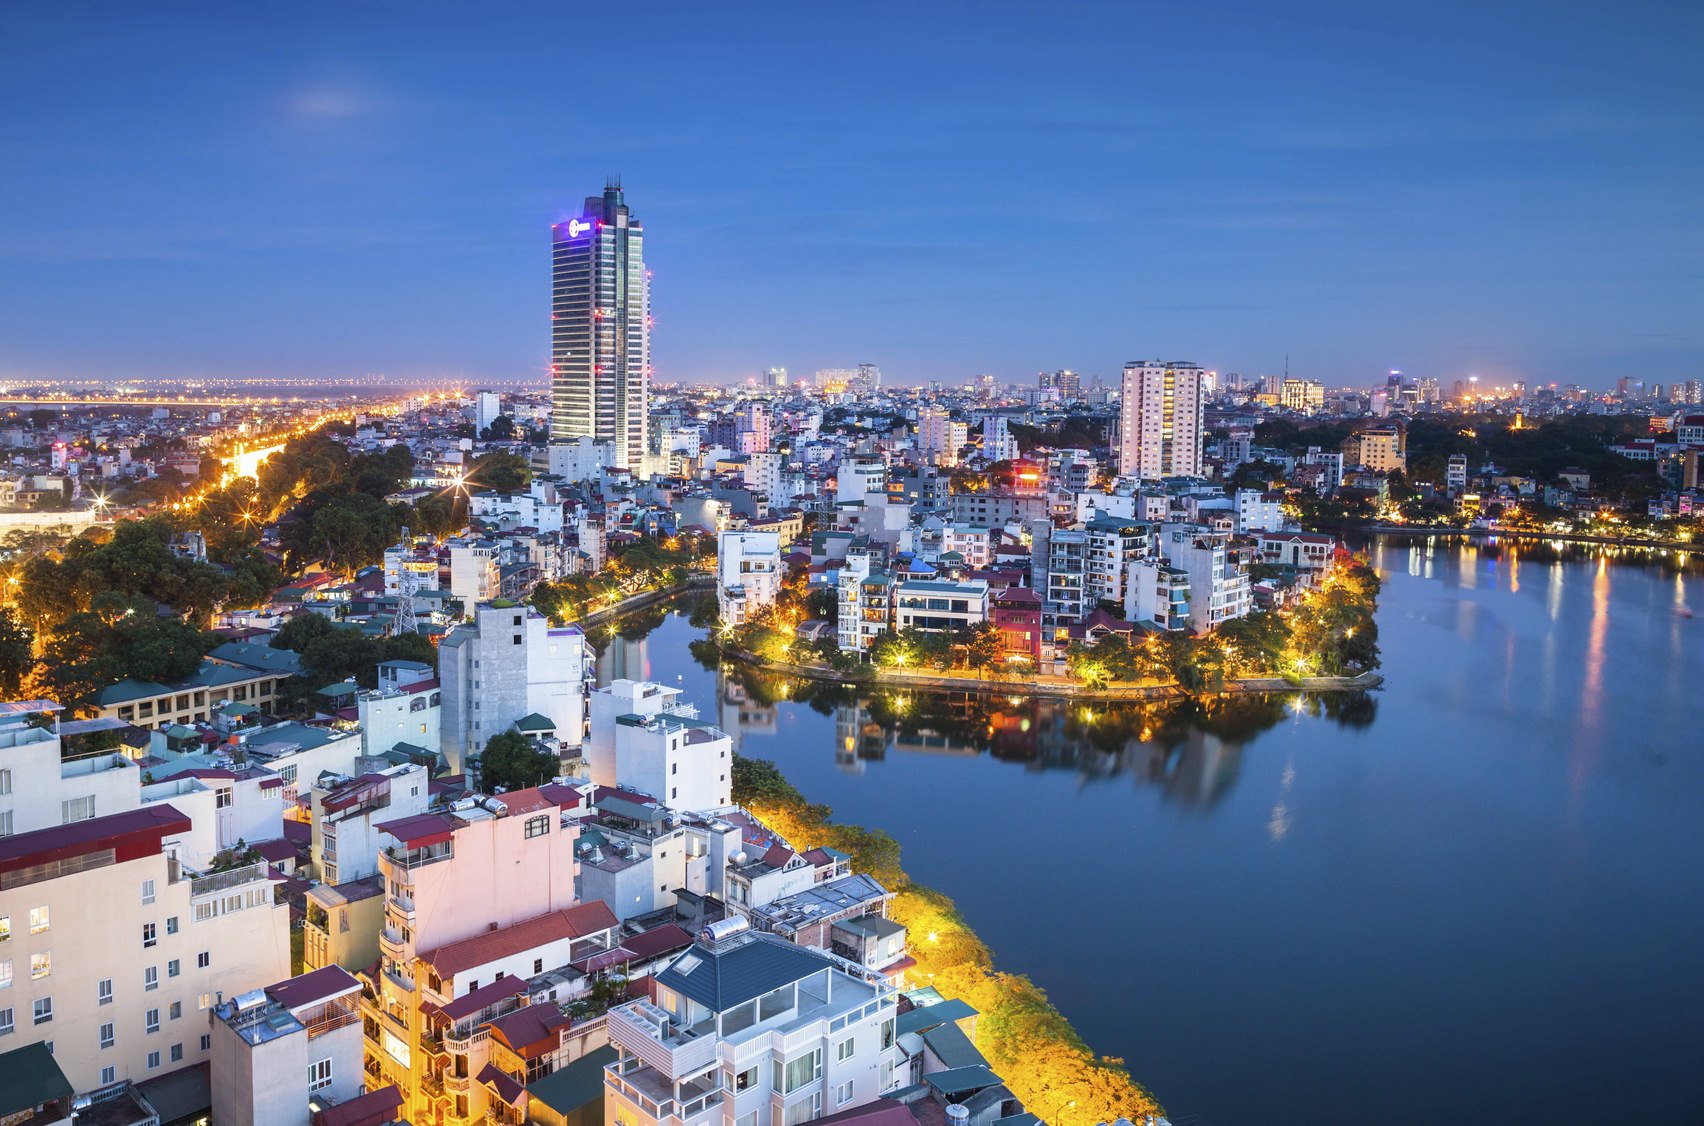
Like most countries, Vietnam has large, bustling cities and quiet, small towns that could not be more different from one another. In cities like Hanoi and Saigon, there is a definite chaos that makes the cities buzz like electricity. The crowded throngs going to and from work are reminiscent of other large cities and offer you plenty of opportunities for capturing moments of life in incredible street portraits. The smaller towns and villages scattered around the country give you a completely different perspective on life in this country, with a chance to highlight the relationship between rural people and their farms, as well as the stunning beauty of the Vietnamese countryside. Whether you’re in a big city or small town, strive to find opportunities that allow you to create images that tell the unique story of what it’s like to live in that place, at that moment.
Focus on the Details

No matter what kind of photography you usually practice, there is an abundance of small details in Vietnam that go a long way in creating a visual story about this wonderful country. For landscape photographers, the thick jungles offer a unique chance to explore things like textures, shapes, and lines as they occur in nature. For street photographers, local markets explode with colors, textures, and people that make for excellent subjects for candid portraits. There is plenty of nature and wildlife in Vietnam as well, so you can work on your wildlife photography skills as you strive to capture detailed images of native animals.
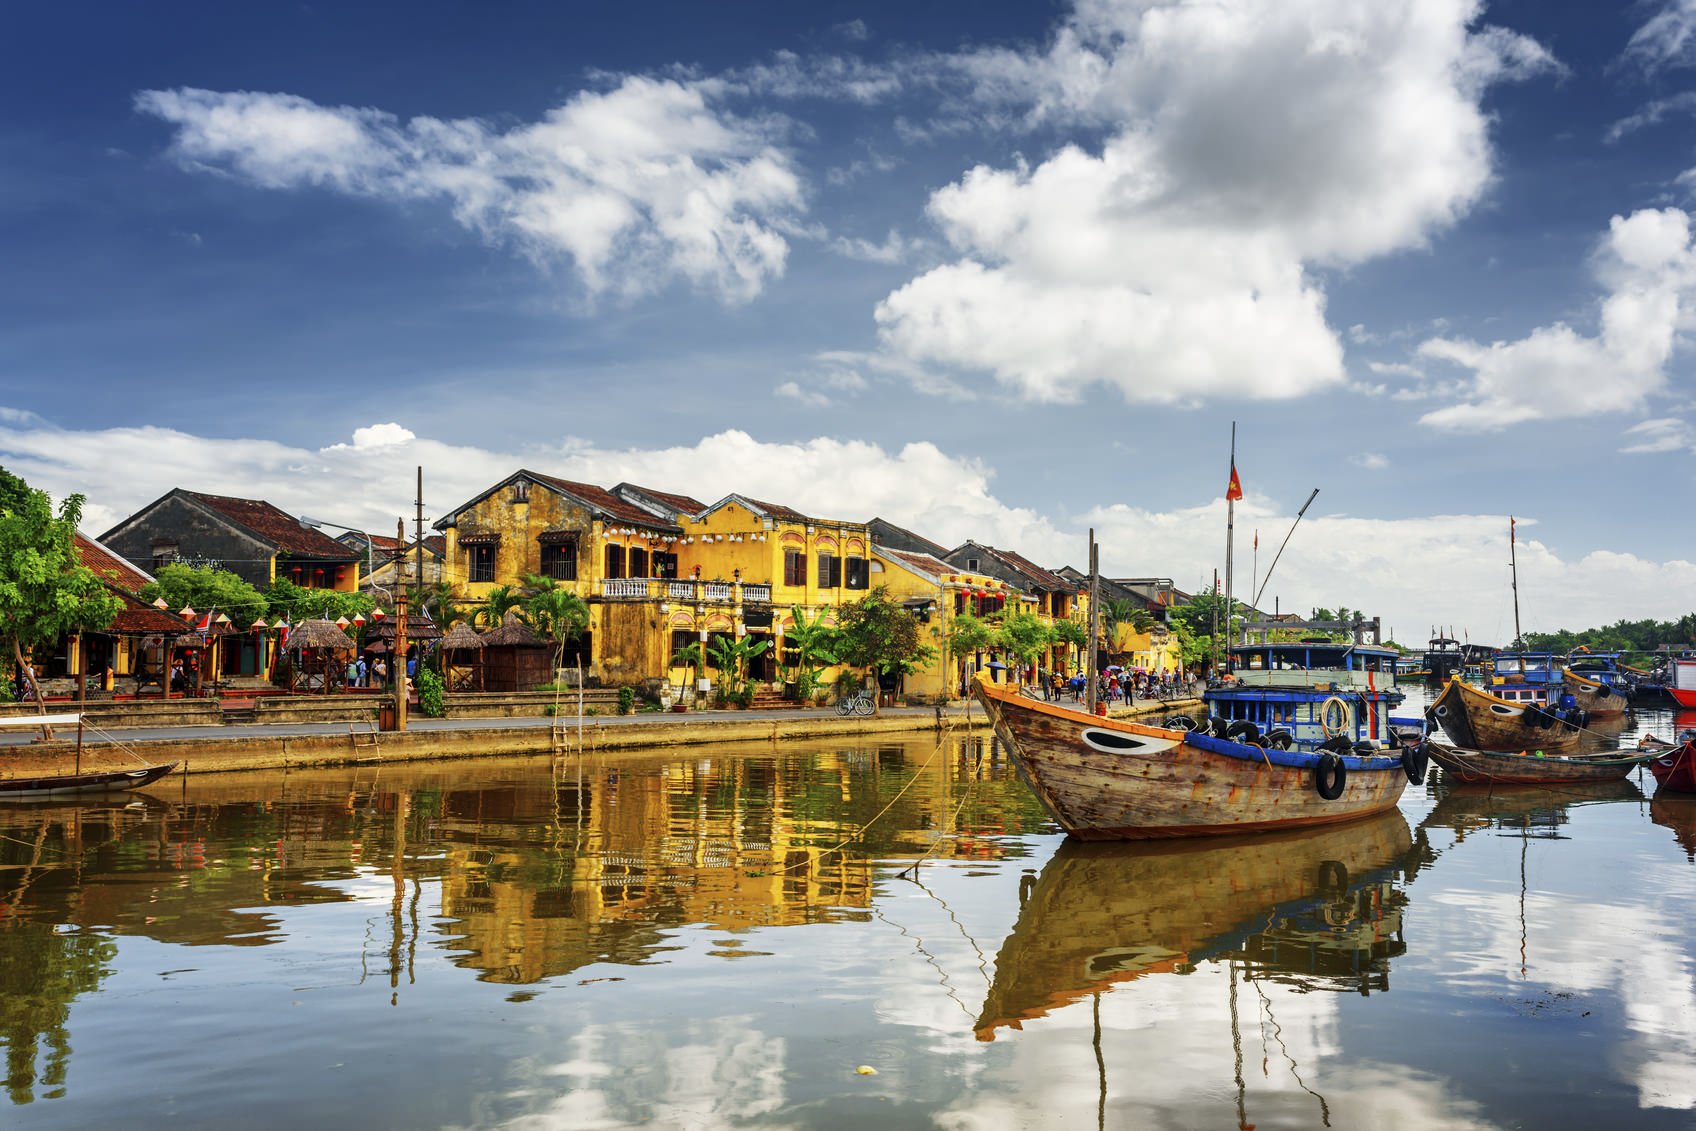
There are also ancient cities throughout Vietnam, like Hue, where citadels, bridges, and pagodas that are centuries old are the ideal subjects for detail-oriented shots. In Hoi An, the architecture becomes even more interesting with a mix of Vietnamese, Chinese, and French Indochinese influences that have made their mark on the look and feel of the city. Traditional clothing and textiles, bright and vibrant colors, and even vehicles, money, and other nondescript items can be featured in images that help viewers better understand what life in Vietnam is like.
Take a Guided Tour
One of the inconveniences of traveling alone or with friends or family is that you’re responsible for making travel arrangements, hotel arrangements, organizing activities, and the like. And though that’s certainly possible to do, it takes a lot of time and effort to do so. Additionally, if you’ve never been to Vietnam, you might not know what to put on your shot list, much less how long you need to photograph everything you want to see.
An easy way to see Vietnam, it’s cities and small towns, its ancient ruins, port cities, architecture, and people, is to take a photo tour. The beauty of a photo tour, like the Profundo Journeys Destination: Vietnam & Cambodia Tour, is that everything in Vietnam is planned out for you. From accommodations in four-star hotels to travel arrangements in the country to the itinerary of events, your trip is completely planned for you, so all you have to do is show up, enjoy your travels without any worry, and focus on getting the photos you want.
Better still, Profundo Journeys brings along expert photographers and guides to give you a more intimate experience. Cindy Wilson, a 9-year veteran of leading photography workshops worldwide, and Yang Vuong Lien Duong of Indochina Charm Travel, a professional guide and photographer, will travel with you, offering insights about Vietnam and Cambodia. They will help immerse you in the unique cultures of these areas and offer personalized instruction throughout the 18-day trip that will help you improve your skills.
The tour is scheduled for April 22-May 9, 2017, and features many of the most popular sites in Vietnam and Cambodia, including Hanoi, Saigon, the ancient capital of Hue, Halong Bay, the Mekong Delta, Siem Reap and the ancient Angkor temples, and so much more. For additional details on this phenomenal opportunity to travel and photograph Vietnam and Cambodia, or to register for the trip, visit the tour website.
We Recommend
Critical Travel Photography Tips for Your Next Adventure
When you hit the road, there’s a lot to occupy your attention - your family, great food, new cultural experiences, and, of course, the sights.
It can be a bit overwhelming, though, trying to get good travel shots without missing anything you want to photograph but without spending so much time focusing on your shot list that you miss random opportunities for a great photo.
Ray Demski of the Cooperative of Photography has a few tips and tricks to help keep you on the straight and narrow and get the ultimate collection of travel photos. Have a look at the video below and see what you need to do to get unique shots that will serve as a lasting memory of your time on the road.
Amazon Recommendations
- Nikon D800 36.3 MP CMOS FX-Format Digital SLR Camera
- Nikon AF-S FX NIKKOR 16-35mm f/4G ED Vibration Reduction Zoom Lens with Auto Focus
- G-Technology G-DRIVE mobile USB Portable USB 3.0 Hard Drive 1TB
We Recommend
Do More With Less: Mastering Negative Space
Be honest...how often do you compose a photo and are so fixated on getting your subject just right that you forget about one or two other elements that could have just as much impact on your composition? How many ugly backgrounds, branches protruding into the frame, and unwanted sun flare have you had in your images over the years?
The chances are that there have been more than a few. There’s also a good chance that along the way you’ve neglected to think about how negative space can improve your compositions as well.
In this tutorial, we’ll explore negative space, including why it can be such a positive thing for the photos you create.
Negative Space Defined
For the uninitiated, negative space is the area in the photo that is not occupied by your subject. Negative space can take many forms, from colors and tones to textures and shapes. The common thread, though, is that negative space is typically relatively featureless so that it doesn’t compete with the primary subject of the photo for the attention of viewers.
Benefits of Negative Space
You might not think that negative space is all that valuable. After all, it’s just “empty” space. Yet, including negative space in your images does have its benefits. When the positive space - your primary subject - takes on such an important role in your image, you need something to act as a counterbalance. Where positive space is packed with detail and interest, negative space is typically devoid of much detail. By incorporating an area of negative space that’s larger than your primary subject, the image has greater balance. Negative space usually serves to confine the positive space as well, giving it increased definition in the image.
Furthermore, negative space helps push the viewer’s eye toward the primary subject. Because the negative space doesn’t compete with the visual interest provided by the subject, the subject becomes that much more important and holds the viewer’s attention for longer. Think about it this way: if you view two portraits, one of a person standing in front of a non-descript wall and another of the same person in a sea of other people, which image has the more powerful subject? The first image has more power, of course, and that’s thanks in large part to negative space.
How to Define Negative Space
When you compose an image, it’s natural to give your attention to the subject. However, when using negative space, it’s equally as important to define it within the context of the frame.
Doing this is quite simple: when composing your image, pay close attention to how the negative space and the edges of the image interact with one another. The border of your image should serve to contain the negative space, which gives it shape and dimension, and also helps to define it as a purposeful element of the image.
Composing Images With Negative Space
Including negative space in your images requires you to visualize your subject and its relationship to its surroundings. You have to look closely at the background, inspecting it for qualities that will make it good negative space or qualities that cause it to be a distraction. In the latter scenario, there are several things you can do to rectify the situation:
Move Yourself

This might be the easiest solution for seeking out negative space. All you have to do is move your feet and find a better angle or perspective from which to shoot. If the background is too busy, try shooting upward at your subject from a low angle such that the sky becomes a nice, relatively featureless background that will serve well as negative space. Also try shooting downward from a high perspective, using the ground or the floor as a nice area of negative space.
Shoot Wide Open
The wider the aperture, the shallower the depth of field, and the blurrier the background becomes. A blurry background can be used effectively as negative space, so long as it isn’t too busy with different colors or areas of light that, though blurred, can still be distracting. As noted above, keeping an eye on the background and the qualities it presents is key to a successful image.
Move the Subject
This isn’t always an option, but if you can, try moving your subject such that it is placed in front of an uncluttered background. Even better, plan ahead and select shoot locations that are ripe with nice backgrounds that can serve as good negative space. For example, when shooting an outdoor portrait, place your model in front of a solid-colored wall as opposed to in front of a garden full of brightly colored flowers.
Final Thoughts
Using negative space as a compositional tool is nothing new or groundbreaking, yet many beginner photographers don’t utilize it to their advantage. As discussed above, negative space helps create a more balanced composition and draws the viewer’s eye toward the subject. Negative space also defines the positive space in the frame, resulting in an image that is more pleasing to view. Negative space isn’t something that’s necessary for all photos, but having it in your compositional toolkit will only benefit you moving forward.
We Recommend
Here’s How to Make the Most Out of Your Next Photo Walk
Have you ever gone on a photo walk and found that you came back with photos that were uninspired or boring? What about hitting the streets in your city or town, and finding that you just didn’t feel like you could approach strangers to take their photo?
The chances are that you’ve experienced this at some point, as they are both highly common problems for photographers of all skill levels.
Fortunately, our friends at the Cooperative of Photography have come up with a list of 23 things you can do to make your next photo walk or street photography session more successful. From camera settings to tips on composition to suggestions for the kind of clothing you should wear, the video below will take you step-by-step through the process. Have a look!
Amazon Recommendations
- Olympus OM-D E-M10 Mark II Mirrorless Digital Camera (Silver) - Body only
- Olympus M.Zuiko 17mm f/2.8 Lens
- G-Technology G-DRIVE ev RaW USB 3.0 Portable Hard Drive 2TB 0G05190
We Recommend
Hitting the Streets: Street Photography With Your Smartphone
Street photography is a unique exercise in that you have to have the photography skills and the equipment to get the kind of shots you desire, but you also have to have a certain fortitude to take pictures of perfect strangers. Additionally, street photographers need to be observant, but not just of what’s happening on the street - they also must consider what interesting scenes might be above or below them.
In this tutorial, we explore each of these aspects of street photography. If you want to find success as you photograph the people, the architecture, and the streets of your city, give these tips a try.
Work in Stealth
The fear of getting caught by a person you’re photographing is certainly very real for street photographers. Awkward confrontations by someone that doesn’t appreciate you taking their photo are bound to happen. But, by and large, people in public spaces understand that their photo very well might be taken and don’t fuss about it.
Your job as a street photographer is to ensure that the scenes you capture remain as real and unstaged as possible. By blending into the crowd, you’re more apt to photograph genuine scenes, as opposed to odd looks, cheesy grins, or forced poses when someone realizes they’re in your shot.
The way to get around this is to work in stealth to the extent possible. For example, choose clothing that blends in with the crowd - you’re more likely to blend in wearing a black t-shirt and jeans that you are if you wear a bright yellow t-shirt and jeans. Move slowly, but purposefully, finding the shots you want to take and take them without a lot of spectacle. Additionally, in some cases, having the right gear will determine whether you can work in stealth or not. Using your smartphone - something that is as ubiquitous in everyday life as anything else - is a great way to put people’s minds at ease.
Think of it this way - how often are you in a public space when someone raises their phone to take a photo? It’s something most people are used to - far more used to than having a full-frame camera with a 50mm lens on the front shoved in their face. The point is that with a smartphone, you’re more apt to get the shots you want - especially those involving people - because you’ll blend in more with the crowd.
Look Down
Street photography isn’t just about capturing scenes at your eye level. There is a whole world of interesting patterns, textures, lines, and shadows at your feet too. Though taking pictures of the street itself is an incredibly literal interpretation of street photography, it’s a worthy undertaking just the same.
Taking photos of the street makes your job a little easier in two significant ways. First, it means that you might disarm people that are hesitant to have their picture taken. For example, you might take a photo of a puddle on the street, which in turn reflects the images of passersby on the sidewalk. In this instance, the people walking on the sidewalk might not even know they’re being photographed and you can get the more natural-looking street photo you’re after. And, second, looking down opens you up to new compositional possibilities. Because there isn’t a horizon to work with, you’re forced to think more purposefully about your perspective and the angle from which you shoot. That’s not a bad skill to practice!
Look Up

Just like looking down can open a whole new world of photographic possibilities, so too can looking up. An integral component of street photography is the urban landscape. By looking up, you can take advantage of the interesting lines, lights, and patterns created by the different buildings in the area.
Take the image above as an ideal example of this. By looking up, you’re able to capture a scene with multiple interesting elements. The lines created by the panes of glass give the image a sense of geometry and order. The light reflecting off the building’s facade gives the image a wide range of tones, from bright whites to dark blues. The angular shape of the building’s walls provide even further visual interest as well.
Get the Gear
Of course, getting the types of shots discussed above requires that you have the accessories for your mobile phone that will make getting top-notch images more likely.
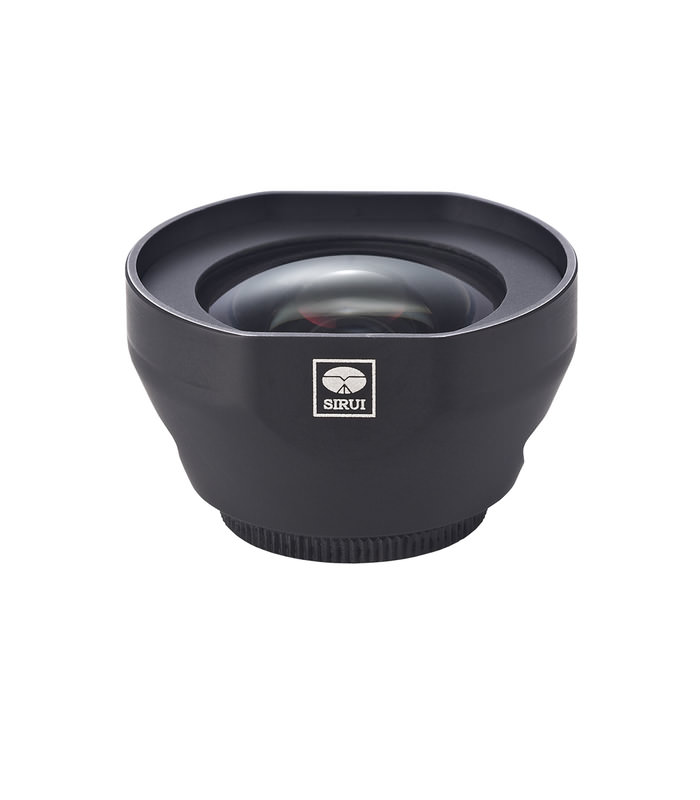
In terms of helpful gear, an add-on lens should be at the top of your list. Add-on lenses take mobile photography to an entirely different level because they expand the somewhat limited capabilities of your smartphone lens into the realm of more traditional lenses. Sirui has an excellent line of high-quality lenses for smartphones that will help you capture the street photos you envision.
The Sirui wide-angle lens is a great choice for street photography because its angle of view gives you the ability to capture more details of the scene. This is especially helpful when looking up to highlight the architecture in the area, looking down towards the details of the street itself, and when taking a photo into the distance.
If street portraiture is more your style, Sirui has got you covered there as well. Their portrait lens offers a narrower angle of view that’s ideal for portraiture - a perspective similar to a 60mm lens on a full frame camera. That means you can get pleasing portraits without the distortion that sometimes occurs when using a wide-angle lens for portraiture. Either way, Sirui’s mobile phone lenses will enable you to take better photos that are clear and sharp every single time. Their lenses use the highest quality glass, including SCHOTT spherical lenses, which create images in high resolution without any vignetting. That’s the kind of superior optical performance you should demand!
Final Thoughts
Hitting the streets to take photos of perfect strangers and strange places is simultaneously nerve-wracking and fun. It’s easy to focus on the fun part of it, however, by following the guidelines we’ve discussed in this article. Work in stealth, blending in with the crowd by making smart wardrobe choices and by using your phone as your camera. Look up and look down as well to see what photographic possibilities there are. And certainly don’t forget to outfit yourself with quality lenses for your phone. The result will be more impressive images - and more varied images - from your street photography outings.
We Recommend
Hyperlapse Photography Demystified
If you’ve never heard of hyperlapse photography, you probably aren’t alone. Essentially, a hyperlapse is just like a timelapse, with the primary difference being that there is much more movement between the frames in a hyperlapse. That is, the interval between each shot is longer than the intervals used in a typical timelapse video.
Of course, that’s just one aspect of hyperlapse photography. Fortunately, Kai from DigitalRev TV is here to demystify the process of creating hyperlapse videos from setting up the shot to getting the timing and framing down just right. Have a look at the video below, and see the incredible results you can get from using these hyperlapse video techniques.
Amazon Recommendations
- Time-lapse Photography: A Complete Introduction to Shooting, Processing and Rendering Time-lapse Movies
- Primos Gen 2 Tall Monopod Trigger Stick, 33-65-Inch
- Canon EOS 5D Mark IV Full Frame Digital SLR Camera
We Recommend
Learn the Basics of Street Photography in Under 9 Minutes

When people think about street photography, they likely think of two things: first, amazing candid photos of people amidst the hustle and bustle of a busy city, and two, the anxiety-inducing task of photographing strangers, some of whom might not want their picture taken.
It’s certainly a risk vs. reward scenario!
In some cases, you can get shots like the one seen above, with subjects that are fully cooperative. In other cases, you might be confronted - not necessarily in a nice way either - by someone that simply does not want their likeness in your images.
Either way, street photography can be an extremely gratifying and exciting genre. But like with anything, getting started is usually the hardest part.
But, no worries! Matt Widgery knows what it takes to be a successful street photographer. In the video below, he offers up 10 prime tips to help you get started and find success as well.
Here’s a rundown of Matt’s tips:
-
Use a fast shutter speed (i.e. 1/250 seconds or faster), so you can freeze movement and avoid camera shake.
-
Use a moderate aperture (between f/8 and f/16), so you have a good depth of field without sacrificing sharpness.
-
Use zone focusing to speed up the time between pressing the shutter and the shutter actually being fired.
-
Be friendly! If you smile and say thank you, people are much more likely to be okay with you photographing them.
-
Use a wide lens. It forces you to get into the scene and closer to your subjects, and also looks a lot less weird than if you were to photograph strangers from afar with a long telephoto lens.
-
Use whatever camera you have already. There’s no need to go buy a new one!
-
Carry one camera and one lens. Taking all your gear will only make you move more slowly (and draw lots of attention to yourself too!).
-
Not all street photography has to be candid. If you find someone that is willing to pose for a portrait, go for it!
-
Check out the street photography work of other artists to find inspiration.
-
Shoot every day! Practice makes perfect, so the more you’re out there taking photos, the better you will become at street photography.
That’s it! Ten easy tips to get you into a good street photography workflow. Check out Matt’s video above for more in-depth explanations of each, then put what you’ve learned to the test by hitting the streets!
We Recommend
Master the Art of Drone Photography: Part 1

If you have a drone - and these days, who doesn’t - you understand the trials and tribulations as well as the joys of using an aerial vehicle for photography.
But to think that taking photos from above is the same as it is from your handheld camera is a total misconception. There are the photographic considerations, including subject matter and camera settings. There are also the issues related to the responsible, safe, and legal use of drones.
In the first part of our two-part series on drone photography, we explore legal and privacy issues, as well as topics related to safely flying your drone.
Legal Issues

As drones have become ever more popular, more and more laws have been passed governing their use. Since consumer-based drones are still relatively new, governments worldwide are scrambling to devise rules that pertain to when, where, and how drones can be used, and by whom.
At the center of it all is the common sense use of your drone. Naturally, flying it near buildings, over your neighbor’s backyard, or near airports will do nothing but get you in a heap of trouble. Additionally, flying your drone over something that could be damaged or destroyed should the drone crash is a simple matter of using your head and your wits. In short, if you’re about to fly your drone somewhere and you have doubts about the appropriateness of it, don’t do it!

In the United States, the Federal Aviation Administration has issued a broad spectrum of rules of which you need to be intimately familiar before you take your first flight. The FAA’s Unmanned Aircraft Systems website is the go-to place for the latest in terms of news, regulations, instructions on how to register your drone, and procedures for flying. Other entities, like states, and cities, may have their own set of rules as well. These regulations also vary from country to country, so it’s best practice to check with local authorities before sending your drone up into the sky.
Another excellent resource is the Know Before You Fly Campaign. With guidelines for responsible flying, resources for drone enthusiasts, and much more, it is worth a visit if drone photography is in your future.
Practice Makes Perfect

Once you’ve explored the legalities of flying a drone, it’s time to practice.
It goes without saying that you will need to examine a practice area to ensure that it is safe and legal to fly there. A wide-open area would be an ideal spot, such as an empty field in a rural area. Granted, not everyone that has a drone has the luxury of an open field nearby, so this is another common sense moment. Choose a location that is as open as possible and affords you sweeping views so you can maintain eye contact with your drone at all times. Above all else, ensure that your practice location has nothing that can be damaged and no people that can be hurt. If it crashes, you want to deal with a broken drone at the worst, not a destroyed car windshield or a hurt bystander.
You’ll also want to check the weather to be sure you’re taking to the skies in the best possible conditions. The less wind, the better, for obvious reasons. You will have enough to worry about just trying to master the controls of the drone; you don’t need a breezy day to add more stress to the situation!
Beware of the Battery

Many drones are equipped with a feature that, in case of an emergency, it will return to its launch point automatically. This is great for both you and the drone if something goes awry.
However, if you don’t keep an eye on the battery levels of your drone, it will land wherever it pleases, which can be inconvenient at best and downright destructive at worst. It’s far too easy to get caught up in the process of flying, and once you add taking photos, there is an awful lot to command your attention.
As such, you will need to develop a system for checking your battery life. Set a reminder on your phone. Have a friend time your flight and call out how many minutes of battery life are left. Try to launch the drone as close to the area you want to photograph as possible. These are simple steps, but they could very well save you lots of trouble should your drone run out of juice.
Understanding the factors that reduce battery life is essential as well. The more camera weight it has to carry, the less time your drone will be able to fly. Windy conditions and cold weather have a deleterious impact on battery life as well. Be prepared to cut your flight time in these conditions by as much as half!
Final Thoughts

There is far more to know about flying a drone for photography purposes, so be sure to check the resources provided in this article before you attempt to tackle drone photography. As noted above, it’s mostly about using common sense and being informed about what you can and cannot do with your drone. Be responsible, check local regulations, and take the time to learn how to fly your drone safely before you attempt to add photography to the mix.
We Recommend
Photography Composition Tip: Open Vs. Closed Composition

If you have any experience at all with photography, you already know that there are some critical elements present in all good photos - color or contrast, lighting, and of course, composition.
Composition is an incredibly broad term that encompasses many photography rules of thumb: the rule of thirds, the golden ratio, using leading lines, having balance or symmetry, and many others.
As for those “other” rules of thumb, open and closed compositions are effective ways to build your image, yet they aren’t as widely known. Let’s explore both of these concepts in more detail.
Open Compositions
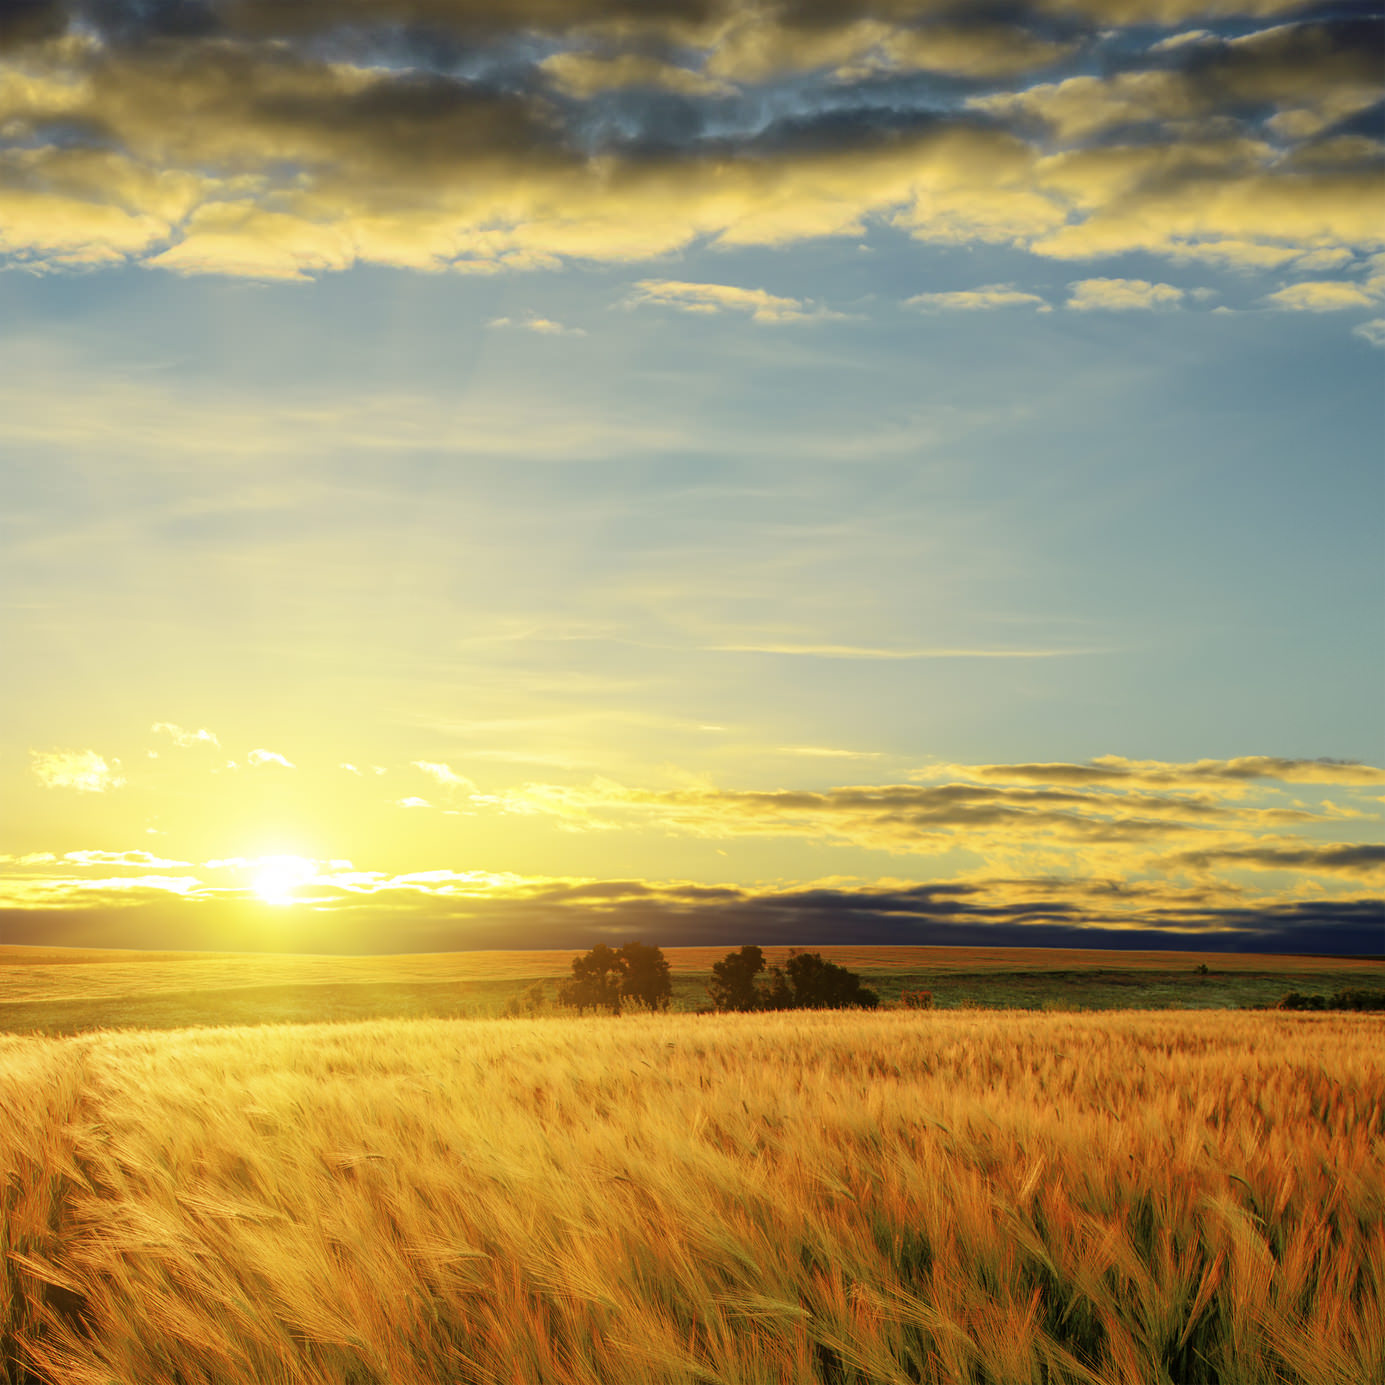
An open composition is one in which all the elements of the image work together to help lead the eye from one location to the next. In this regard, the use of lines, shapes, textures, colors, and the like, is often used to create a highly dynamic scene. Additionally, open compositions feature strong elements - some of which might be focal points - that run off the edge of the frame. Because of this, these elements have the appearance of going on and on, much like the barley field in the image above, which lends to the open nature of the composition.
Open compositions tend to lack formal framing in that the elements of the image are often not constrained by the boundaries of the photo, as noted above. This type of composition excels at creating a feeling of dynamism and movement, even if there are no moving subjects in the frame. This is because the viewer’s eye is encouraged to move from one area of the image to the other, such as from an area of saturated colors to an area that includes an interesting shape to another area that includes an interesting texture, and so on.

Landscape photography perhaps most famously uses open compositions. When viewing a landscape, the eye is free to move around the frame and beyond, investigating all the different aspects of the scene. Architectural photography benefits from open compositions as well. Note in the image above that the eye is free to move from one building’s shape to the next, while the open sky above the city’s skyline encourages a feeling of openness that extends far beyond the borders of the shot.
Closed Compositions
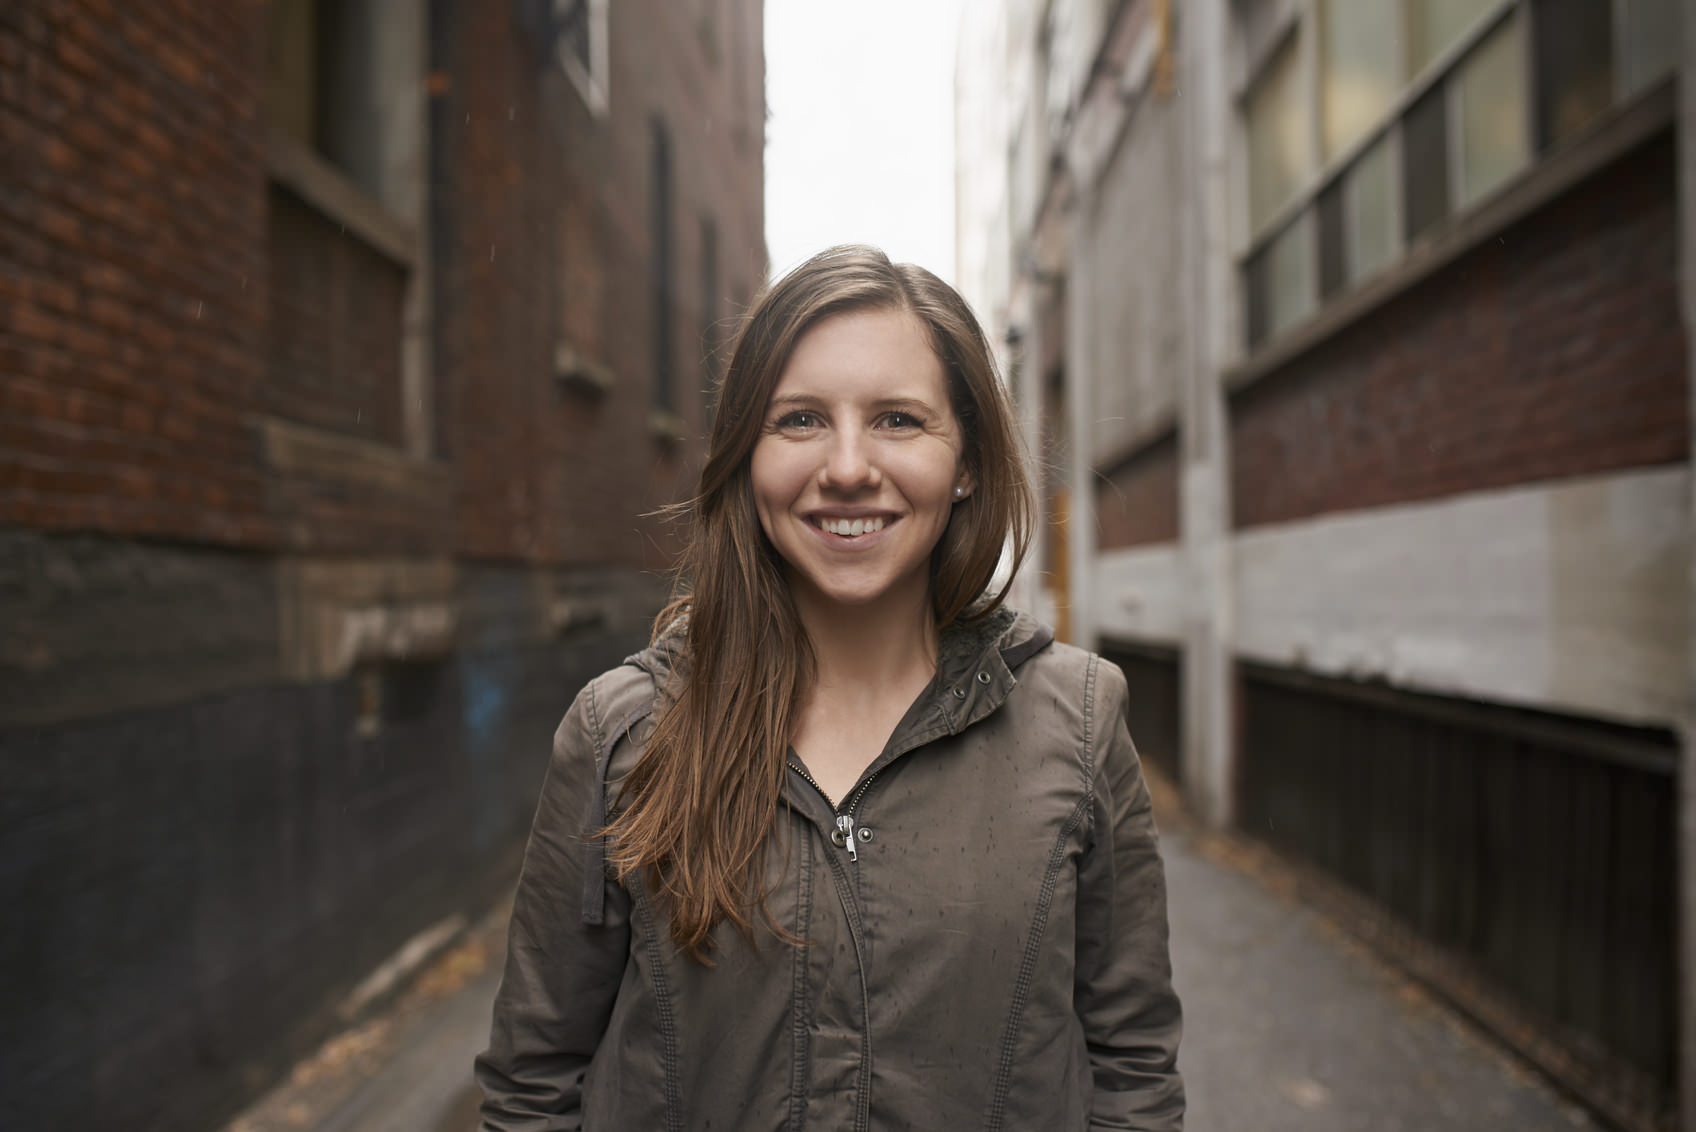
An image is considered to have a closed composition when all the essential features of the image are contained within the frame. The primary subject stands out, drawing the attention of the viewer’s eye immediately. In many situations, the subject is positioned at or near the middle of the frame on either the horizontal or vertical axis, or sometimes both. Everything else in the image works to direct the viewer’s attention toward the primary subject. For this reason, closed compositions tend to have a static feeling to them, which is in contrast to the more dynamic feel created by open compositions. Everything is in its place, doing its job, for the benefit of the primary subject.
The image above is an example of a closed composition. Note how the woman is placed in the dead middle of the frame where she can easily garner the attention of viewers. The corners of the image are closed off by the brick walls on either side of the subject, meaning, the viewer’s eyes have nowhere to wander. What’s more, the lines created by the walls direct the eye toward the woman’s face, further enhancing the closed-off feel of this composition.
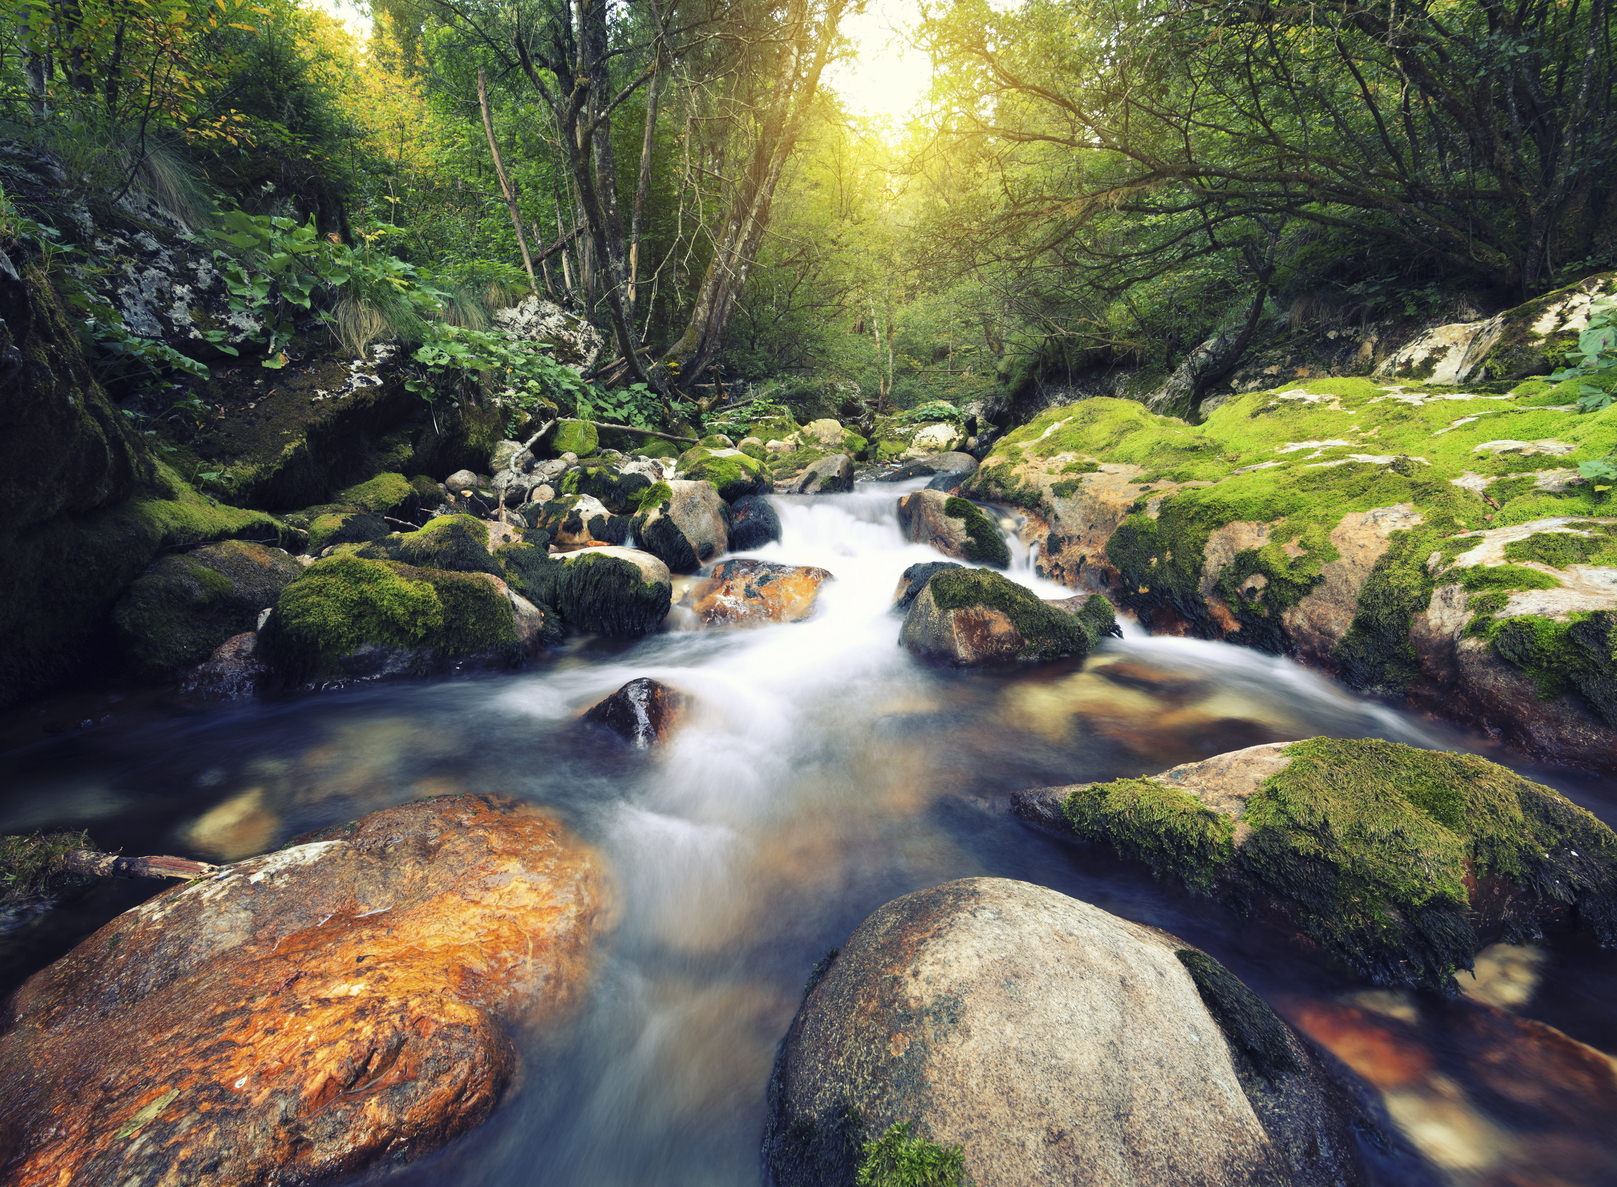
The features of a closed composition lend themselves to some types of photography over others. Naturally, portraiture often benefits from closed compositions because the purpose is to highlight the subject of the portrait. In some instances, street photography and landscapes can also be made more dynamic by using a closed composition as well. The landscape above, in which natural elements are used as a frame within the frame, help create a closed composition that directs the eye toward the river and upstream along its path.
Though open and closed compositions have vastly different looks, they share one thing in common: they help create more interesting images. Try your hand at using both open and closed compositions in your work, and see how containing the viewer’s eye within the frame and letting the viewer’s eye wander around and out of the frame helps change the impact of the photos you take.
We Recommend
The 7 Essential Rules of Street Photography
At one point, street photography looked like it wasn’t going to be around as a mainstream genre for a long time, but in the past few years, things have changed dramatically.
More than ever before, people are taking street photos with just about every kind of camera they can get their hands on.
Sure, mobile photography has played a huge role in this and so has the ever increasing trend of retro-styled, rangefinder type mirrorless cameras.
It’s no longer just a game for expensive Leica’s or heavy DSLRs. We have so many amazing cameras that are perfected for street photography, that it would be a shame not to put them to good use.
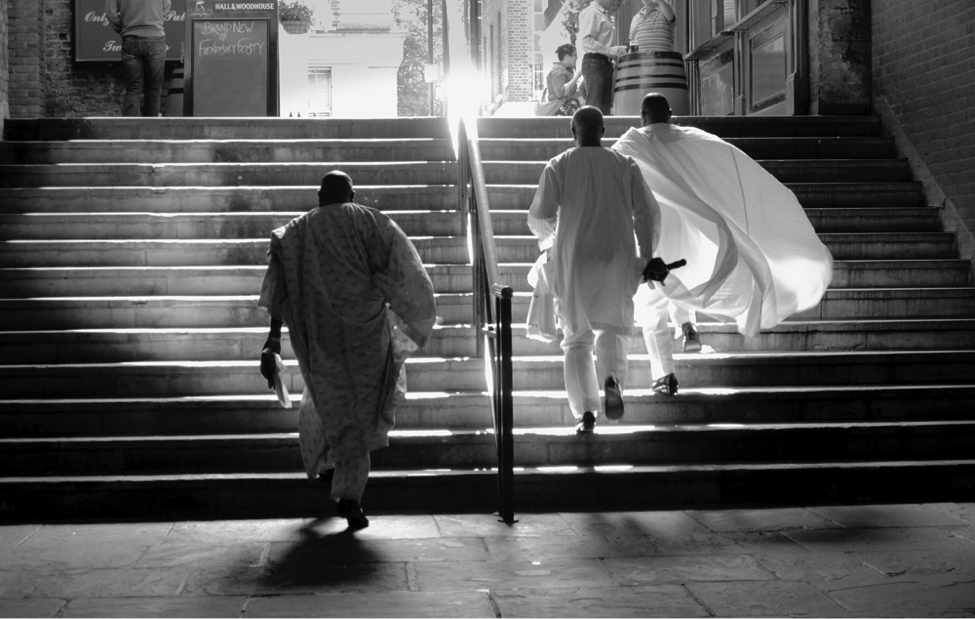
Image Credit: Linda Wisdom
But in this sea of countless street shots that are being taken and uploaded every single day, creating work that stands out is tougher than ever. Getting on a flight to New York and hitting the most famous “hot spots” is done.
If you want to create authentic work, you have to push yourself further and expand your vision to a point where you can capture the interesting aspects of life that others overlook.
You should also follow these seven rules, but at some point, you should be confident enough in your abilities to be able to break them for the sake of great results.
1. Overcome the fear
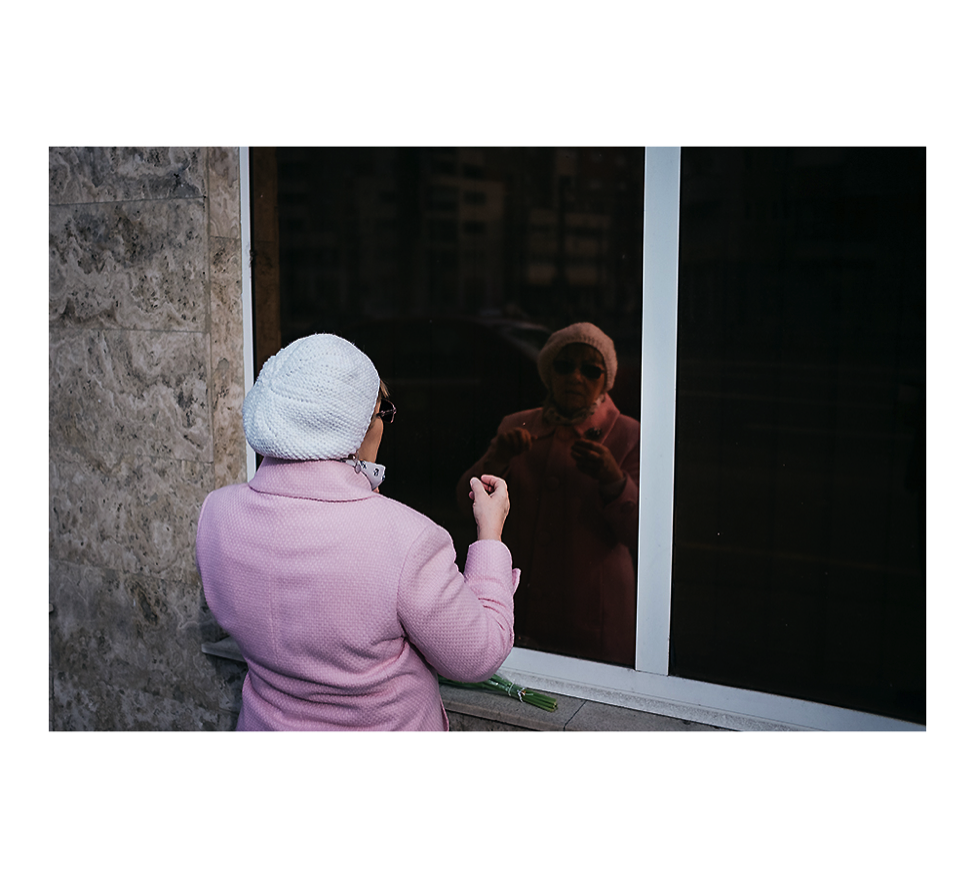 Photo Credit: Hajdu Tamas
Unlike other types of photography, fear plays a big part in street photography. It’s one of the things that also makes it so thrilling.
How will people react when I take out my camera and lift it to my eye to frame the shot? Will someone start asking questions if I take their picture? Is it worth the risk of possibly getting into a physical confrontation?
All these are questions that will come to mind at one point or another, and they are completely normal.
SCOTT WYDEN KIVOWITZ: You can always approach street photography from an introverted photographer’s mindset. Meaning, not having to get close to strangers, in their faces, or even speak to them. You can do it from a distance, but changing lenses to a telephoto, a long prime, or a wide lens. Thinking outside the expected or norm can help you achieve really interesting images.
But overcoming fear and anxiety will make the difference between taking a shot that anybody else could have taken, and capturing a unique image that will never repeat itself again.
Be polite, respectful, and open if someone asks you a question, and you’ll pretty much be safe.
People are a lot more used to being photographed and captured on camera than they were in the early days of street photography, and this can be a huge advantage if you learn to use it in your favor.
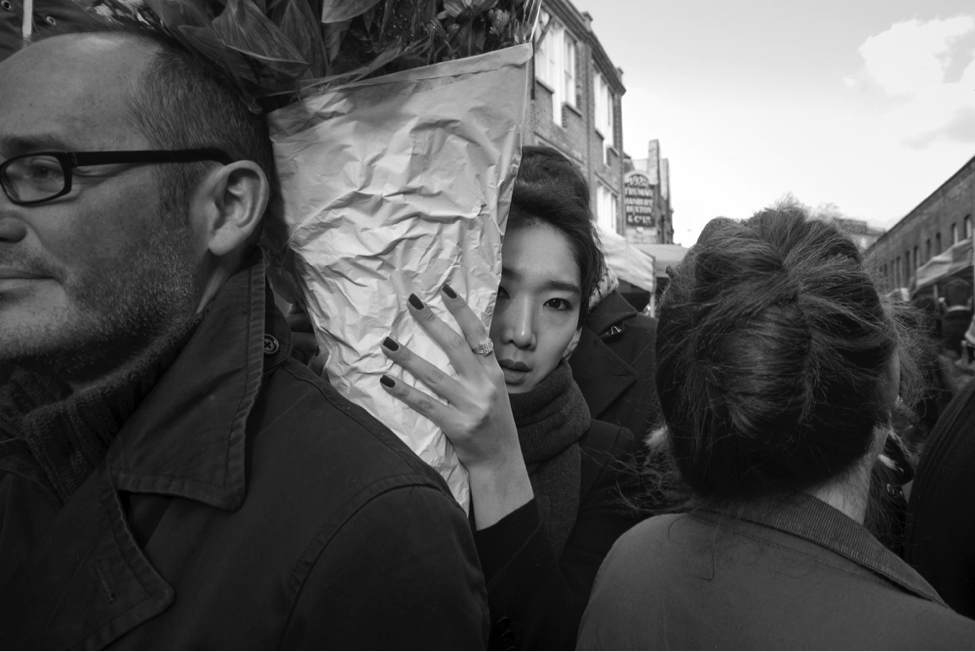 Image Credit: Linda Wisdom
LINDA WISDOM: There are these moments when you have taken a candid photo, but the subject has caught you out, maybe ask you what you are doing and why you took their photo, ask you to delete it, etc. You may panic and don’t know the right thing to say if you are unprepared for the situation. Arguing the facts of your rights as a photographer or getting aggressive is probably not going to help you. One way to get around these situations and turn the subject's negative reaction into a positive one, is to have 1-2 prepared compliments to use if appropriate, even suggest that you are just a photography student doing a project, and/or give them your card and say email you if they want a copy. More times than not, the subject will be reassured and walk away and even be flattered that you took their photo in the first place and will never email you.
2. Know your camera
 Image Credit: Scott Wyden Kivowitz
Street photography is about being fast and being prepared to release the shutter at the right time. Nine out of ten times you won’t have the luxury of a few extra seconds to adapt your exposure settings.
This is why I recommend shooting in P mode.
There is no room for being a “manual mode” snob here. While you check your settings, everything changes around you. Know your camera and trust it to do the technical part.
You should also have a clear understanding of the focal length you’re using because it will allow you to anticipate the correct distance you need to be from your subject.
 Image Credit: Linda Wisdom
SCOTT WYDEN KIVOWITZ: If you want a nice middle ground then I recommend trying either shutter priority or aperture priority. For street photography, aperture priority might be a better choice. Basically, the camera will choose the shutter speed for you based on the aperture you pick. That way you can control the depth of field of your street photos, but not worry about other settings.
The act of looking down at your LCD usually dispels any concern by the subject that you are taking their photo and simply looks like you are just chimping through photos you have already taken.
LINDA WISDOM: Another suggestion to add here is to use your flip out LCD screen instead of using your viewfinder in close range situations where you feel you will be seen holding the camera to your eye.
3. Shoot in bursts
 Image Credit: Scott Wyden Kivowitz
I must admit, I do feel a little nostalgic about the all manual days when you could only shoot one picture because of the manual film advance (kids these days will never know).
But the fact of the matter is a lot of shots were missed exactly because you could take only one shot.
Today’s DSLRs and mirrorless camera have an average burst speed of 5-6fps. Use it, but don’t mistake it for a machine gun.
Switch to continuous high only when you are in an interesting spot or when you feel the opportunity is nearby (you will develop that sense after a while). Mirrorless cameras have digital shutters which are silent, so if you want to burst away silently, select the electronic shutter.
SCOTT WYDEN KIVOWITZ: I recommend using continuous low if your camera offers it. Sometimes continuous high is too fast and causes additional blur, depending on your shutter speed.
4. Know the law
 Image Credit: Scott Wyden Kivowitz
Generally speaking, shooting in public spaces is legal. But you do need to make sure, however.
Don’t assume anything and don’t hit the streets without prior research. The last thing you want is to end up in legal trouble because of your creative endeavors.
Sounds romantic, I know, but believe me, it’s a lot more unpleasant then you would tend to think.
SCOTT WYDEN KIVOWITZ: In the United States it’s legal to photograph anyone in public. However, in other countries it can be a privacy legal issue.
5. Mind your framing
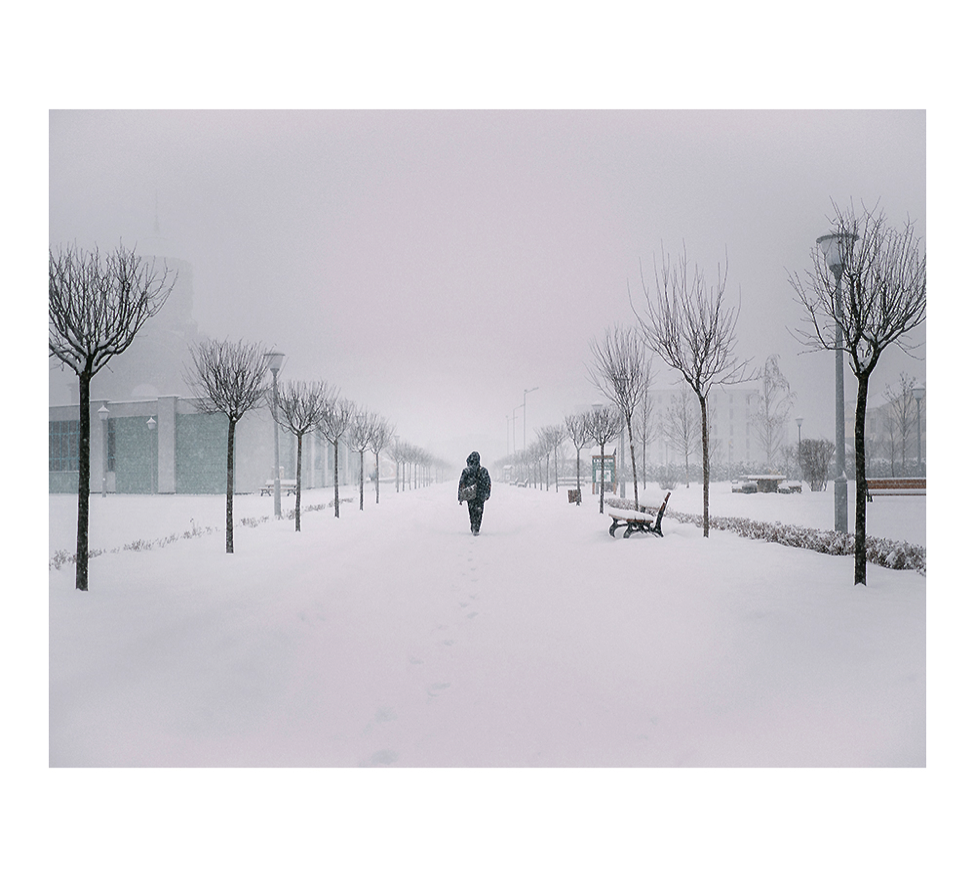
Image Credit: Hajdu Tamas
There are usually two approaches when it comes to street photography compositions. You either lift the camera to eye level and quickly frame with the viewfinder or shoot from waist level.
It goes without saying that shooting without proper framing means leaving a lot to chance. It’s a two-edged sword.
Yes, provided the composition comes out the way it should, you will get a much more interesting perspective than eye level, but expect to miss a lot of shots and having to cope with frustration.
But the randomness of it all is part of the magic. Even if you do frame using the viewfinder or LCD, everything happens so quickly that you’ll barely have the time to make minor adjustments.
It will come to you with practice, though, and the more you shoot, the easier you’ll be able to anticipate these minor adjustments.
SCOTT WYDEN KIVOWITZ: Don’t worry if your composition isn’t jumping with joy. Mistakes and errors are bound to happen. Photography is an ongoing learning experience. Learn from your mistakes, and try again.
6. Get good with one lens
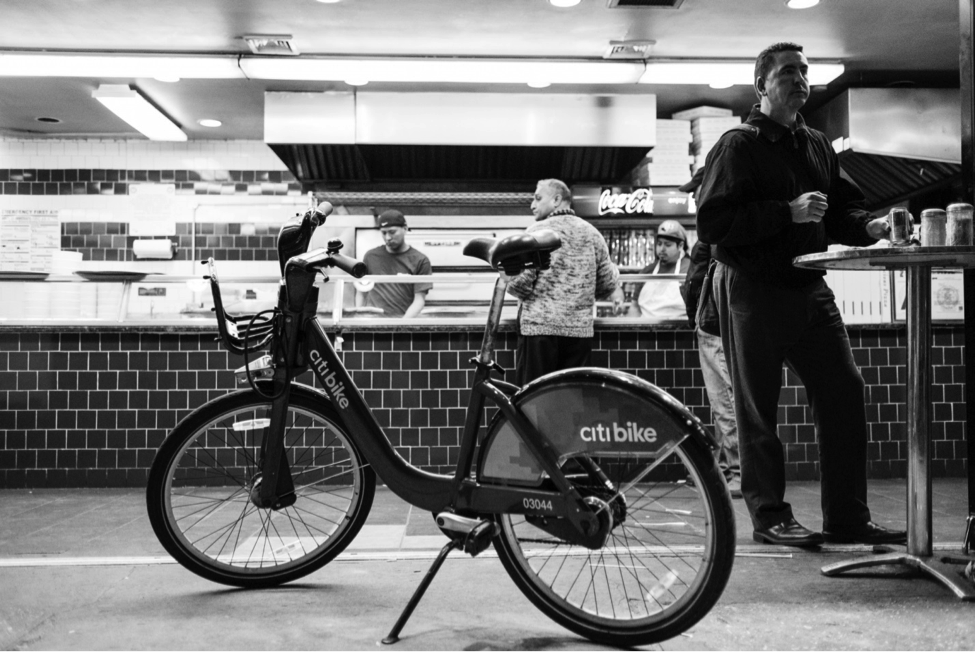 Image Credit: Scott Wyden Kivowitz
Better yet, try to develop your skills using a single focal length. This is all part of developing your personal style, and consistency is the key here.
Some photographers prefer shooting from a distance with a longer lens; others like to get up close and personal with a wide angle lens.
Go through multiple focal lengths and pick the one that gives you the most satisfying results. Needless to say, you most likely won’t have the time to change between lenses once you spot an interesting subject.
SCOTT WYDEN KIVOWITZ: My favorite go-to street photography lens is the 35mm. It allows me to get in close and also achieve fantastic wide photos. It’s also the closest focal length to the human eye.
7. Always Explore
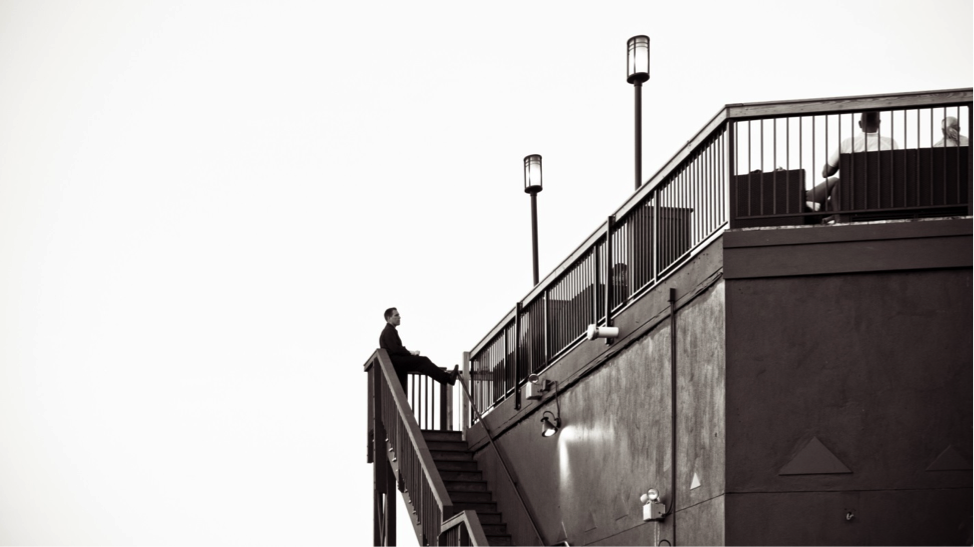 Image Credit: Scott Wyden Kivowitz
Street photography is a lot like fishing. Once you find a few spots with high potential, you keep going back to them.
But don’t make the mistake of limiting yourself to those streets. There is so much that can be written about the fun and the excitement of urban exploration.
Once you get to a place you’ve never been to before, all your creative senses start tingling and so much around you looks interesting. It’s a unique feeling, but that’s not the only reason why exploring is important.
Even something as diverse as the non-stop show of the streets can bring creative ruts and turn into a routine if you let it. Be adventurous, travel, or just go the parts of your city you know very little about.
SCOTT WYDEN KIVOWITZ: In addition to the mental health you get from exploring new places, it’s also physically healthy. The movement of walking, getting down low, and back up on your feet again, has more obvious health benefits.
Just keep in mind all the rules above, and use them to improve your street photography.
Granted, rules are meant to be broken, so once you've got these rules down pat, see what happens when you break the rules! You might find you get even more compelling photos.
We Recommend
Top Spots to Photograph in Cuba

Travel and fine art photographers from all corners of the globe agree that Cuba is one of the most metaphorically colorful shooting locations in the world. If that surprises you, you're not alone. This island offers an incredible array of opportunities for photographers, but it's widely overlooked in comparison to more resort-oriented vacation spots. For those who visit, however, the rich history, amazing architecture, hardy, incredible residents and their lifestyle present a unique, diverse and unforgettable experience. Let's look at a few of the prime locations to shoot when you visit this one-of-a-kind country.
Havana
Probably the most well-known city on the island, with the romance of those coveted, hand-rolled cigars fueling its popularity for ages, Havana offers so much more for a photographer. From the cathedral in Havana Vieja to wonderfully restored buildings in Plaza San Francisco, to the capitol building that's modeled after its neighbor's in Washington, DC, architectural shots are everywhere.
The incredible diversity of the people of this nation may be best represented in the streets here, too. Youngsters honing their baseball skills, Santeria women in their white garb and crowds visiting the sea wall at the Malecon are only a few of the wide range of opportunities you'll find here to capture incredible portraits and travel shots.
Camaguey
Once a coastal city, this town was moved inland to escape ongoing attacks from pirates. While that fact will give you a hint of the history of the location, it doesn't begin to describe the literal maze of streets and alleys you'll find here. Stories and theories of the reasons for the layout of this bustling city are part of its rich culture.
Open-air markets, bicycle taxis and an incredible mix of architectural styles and artwork, along with those friendly Cuban people – not to mention an international airport - make this a mandatory stop. Plan to spend some time exploring when you fly in here.
Gibara
This fishing village on the coast of the island is worth the trip “off the beaten path” to see and photograph. Not only are there picturesque squares and crumbling, Spanish-style buildings, there's also a gorgeous bay and all the trappings that go with an ancient commercial fishing lifestyle.
Don't let the sleepy atmosphere fool you; this laid-back, less-”touristy” village is the locale for a well-known, low-budget film festival. Once a year, the festival brings in locals and visitors alike, for film showings and street parties that bring the Cuban spirit to life.
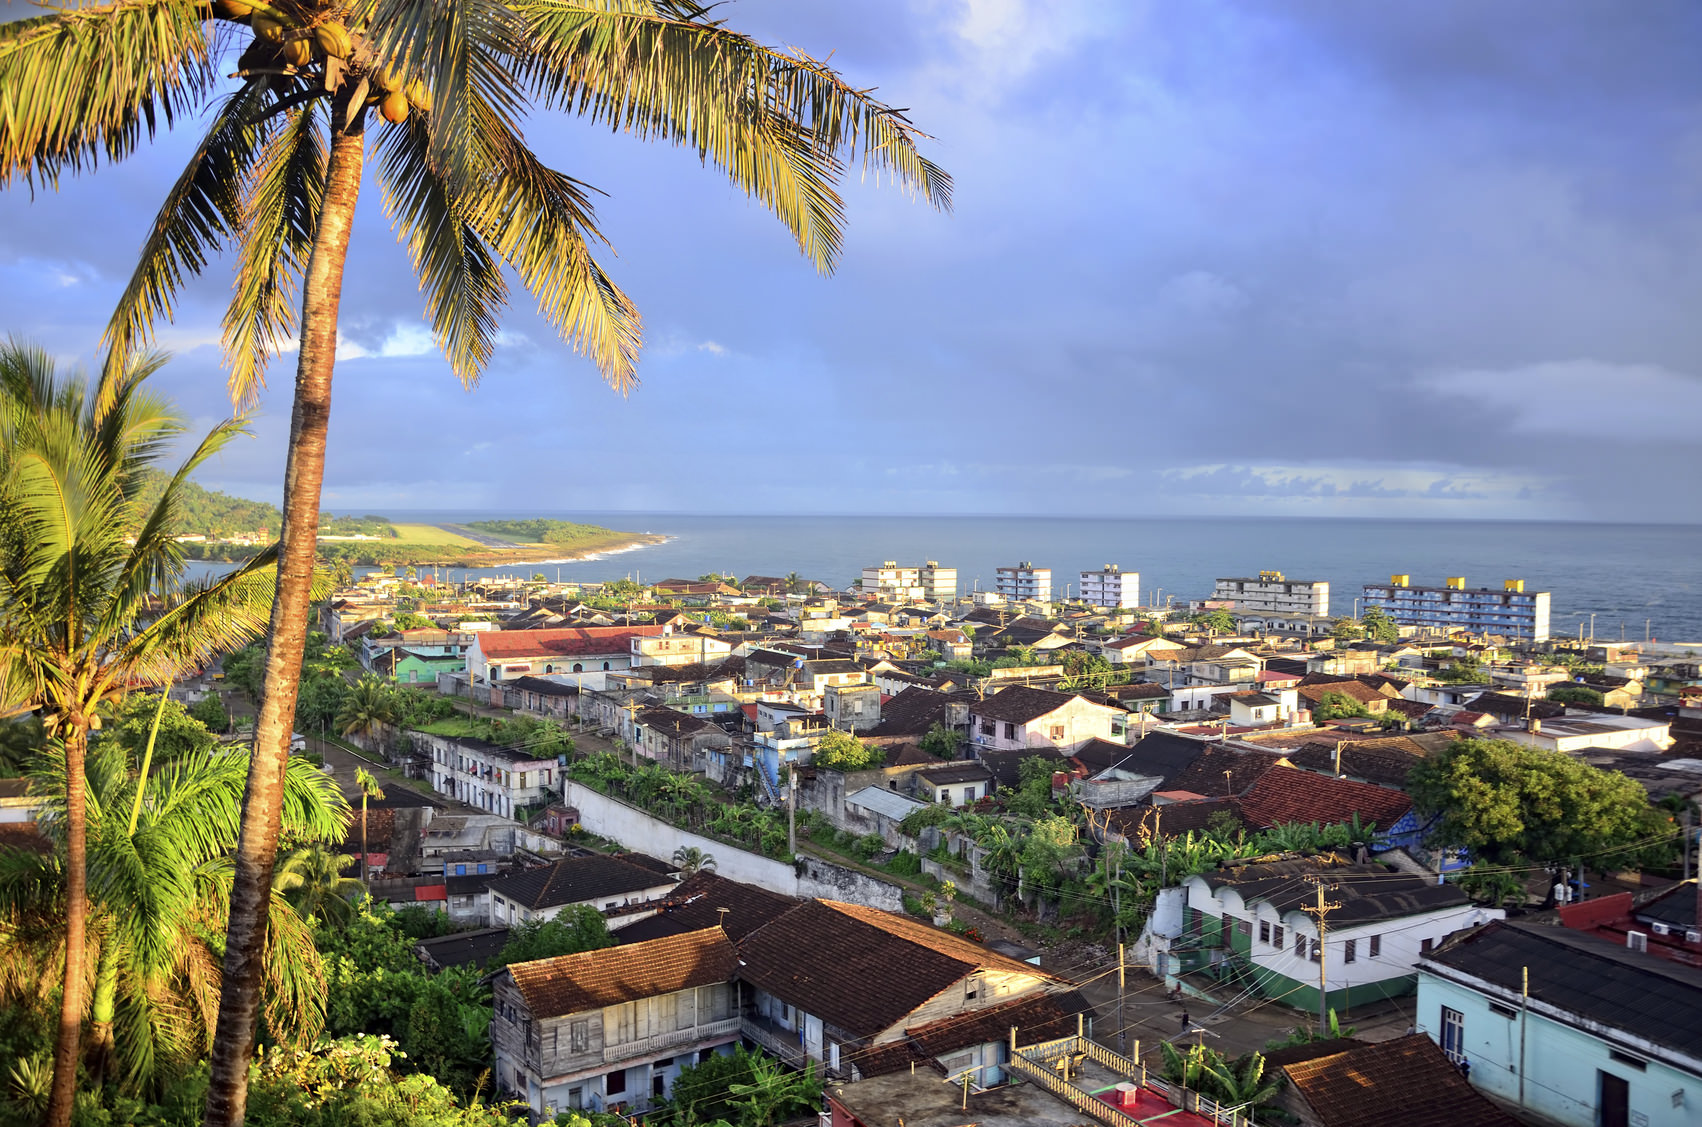
Baracoa
Said to have been labeled “the most beautiful place in the world” by Christopher Columbus, this village is nestled within the rain forest and rife with natural beauty as well as ancient culture. You'll find one of the iconic highlights of a visit to Cuba here, too, in the plethora of classic 1950's American cars roaming the streets.
Baracoa is also a coastal town, with all the charm and color associated with fishing. With its ancient Spanish influence and the lush greenery, this village is worthy of a visit when you make it to the island.
Take it all In
These four locations are among the best in delivering the richness of the Cuban experience. Best of all, there's an opportunity on the horizon to visit all of these locations and more, with a focus on photo opportunities. You can join pro Cindy Wilson on a guided photo tour of Cuba, featuring the four locations listed above and designed to give you the best that the island has to offer in the way of incredible photos.
Spots are extremely limited and this January 2017 tour will fill up quickly. Don't delay; go get the details and book your spot today!
We Recommend
Triple Header: Is the 50mm, 35mm or 28mm the Best Street Photography Lens?

Street photography requires using a lens that has a number of features. A fast lens is a must, that way you can capture action, even in low-light situations. It’s also necessary to have a lens that’s compact - that way you can take your photos without shoving a giant lens in your subject’s face. Street photographers also need lenses with a reputation for offering highly sharp results.
The trouble is deciding which of three lenses - the 50mm, the 35mm or the 28mm, all of which share the same traits listed above - is the best for street photography. In the video below, Kaiman Wong offers his thoughts on the issue. Give the video a look and see which one he feels is the best lens for taking on street photography.
Amazon Recommendations
- Canon EF 50mm f/1.8 STM Lens
- Canon EF 35mm f/2 IS USM Wide-Angle Lens
- Canon EF 28mm f/1.8 USM Wide Angle Lens