When you think of the most gorgeous landscapes on earth, what do you think of?
Is it a mountain scene or the beach? A desert or a rainforest?
As a lover of nature and a landscape photography enthusiast, it's tough for me to decide what would be at the top of my list.
In fact, one of my favorite pastimes is watching nature documentaries on TV. It's not just the gorgeous scenes they portray, but I appreciate how those documentaries are filmed.
I have to say, the time-lapse film below reminds me of those nature shows I love so much.
The video, entitled 'Exposure,' is the first time-lapse film by photographer Keith Liew. I find it impressive that such a gorgeous result was created by a first-timer!
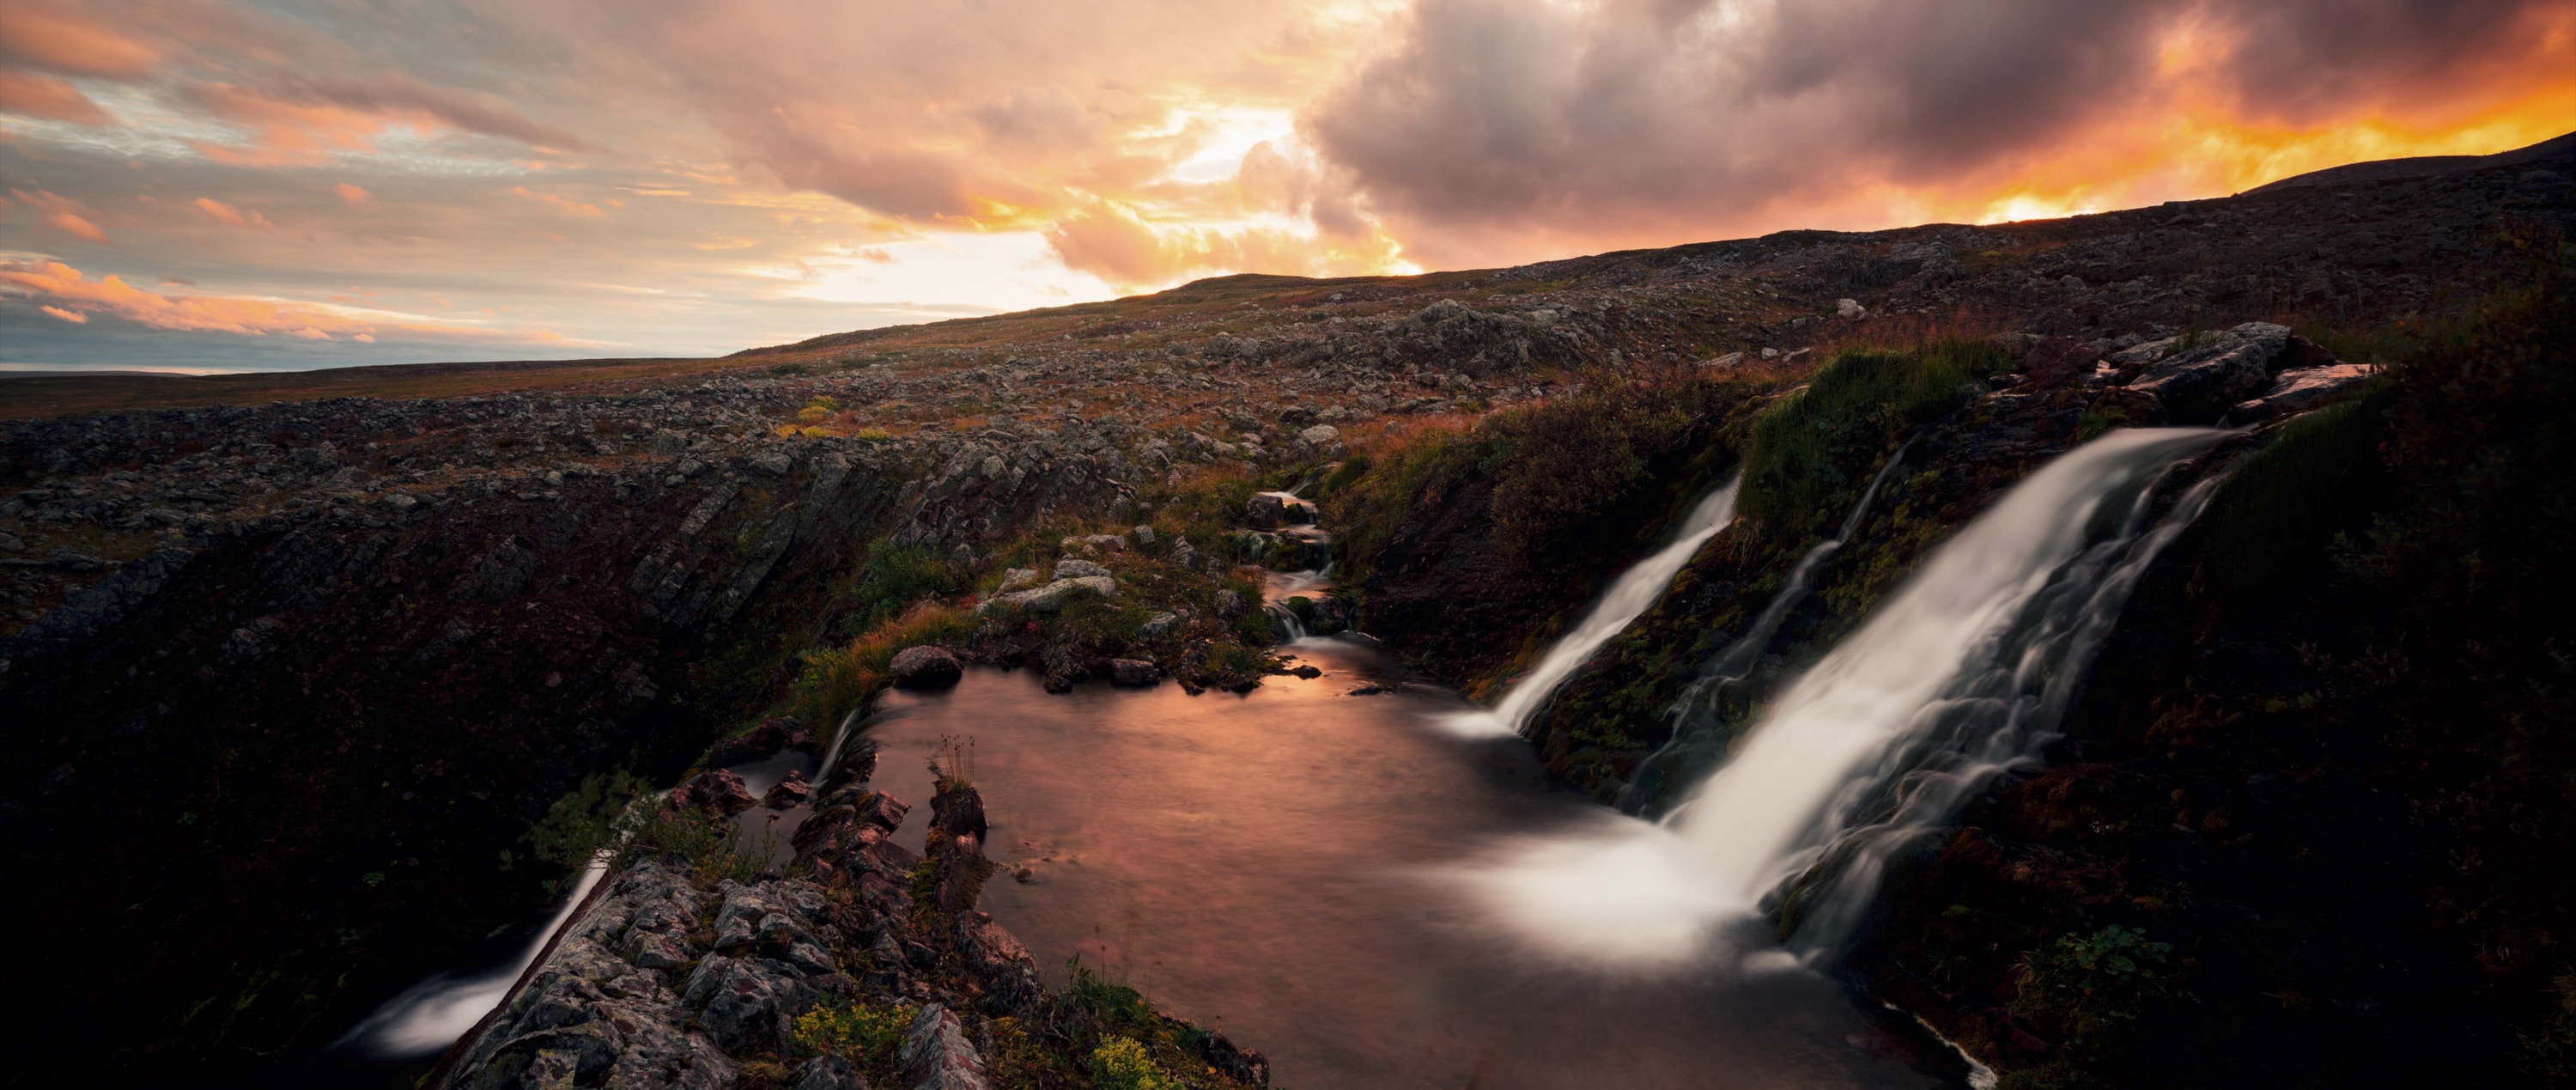
But beyond that, what else is truly staggering is that it took Keith two years to get the footage for the film. He traveled from Indonesia to New Zealand, Santorini to Norway, to capture the scenes shown in the video above.
Talk about patience!
Photography certainly isn't for the faint of heart, but Keith's dedication to the project is certainly worth a virtual high-five.
I think you'll agree, all that time and effort has really paid off.
And it wasn't just time and effort in the field or traveling from one location to the next. Keith had to study the time-lapse process, learn how to locate the Milky Way, and become adept at editing his photos and videos into the masterpiece seen above.
Keith got into time-lapse videos because he was inspired by fellow photographer Dustin Farrell some five years ago.
In the intervening years, Keith hasn't looked back, heading out to distant locations, braving all kinds of weather, to pursue his passions and create epic time-lapse videos to inspire the rest of us to get out there and shoot!
Create Videos Like Keith
If you're inspired by Keith's work to take up time-lapse videos, you'll need to show the same dedication and perseverance he has.
But something that can make the process a whole lot easier is to invest in gear that streamlines the process of creating a time-lapse video - even automates it - so you can get professional looking results without being a pro.
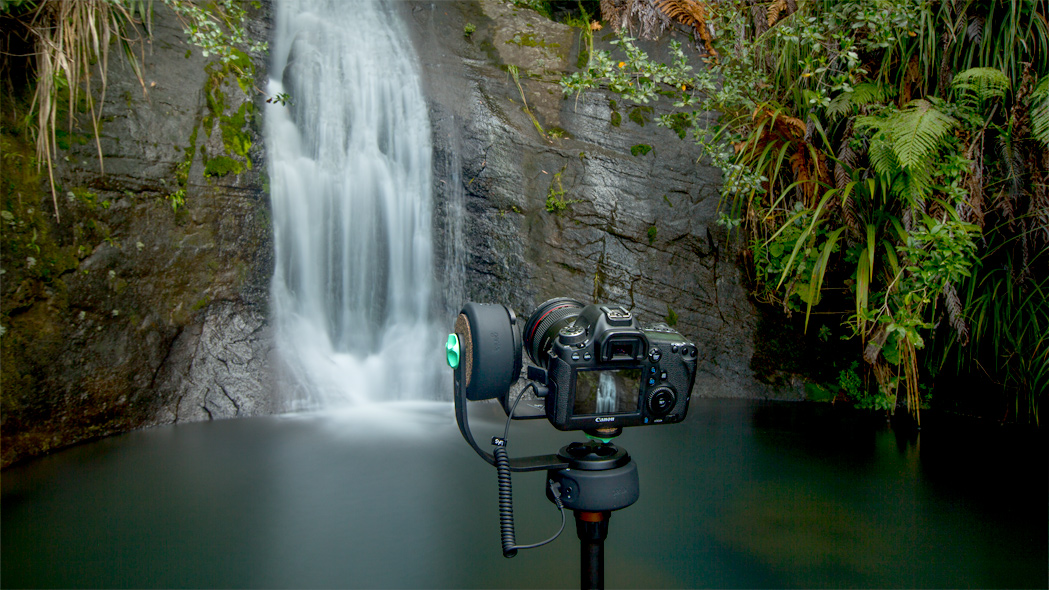
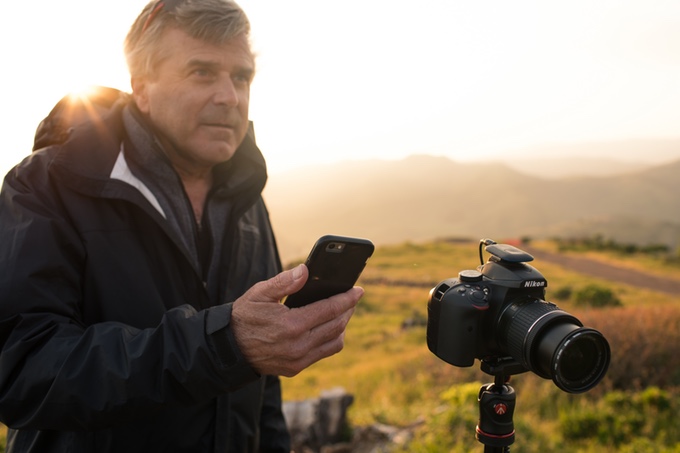
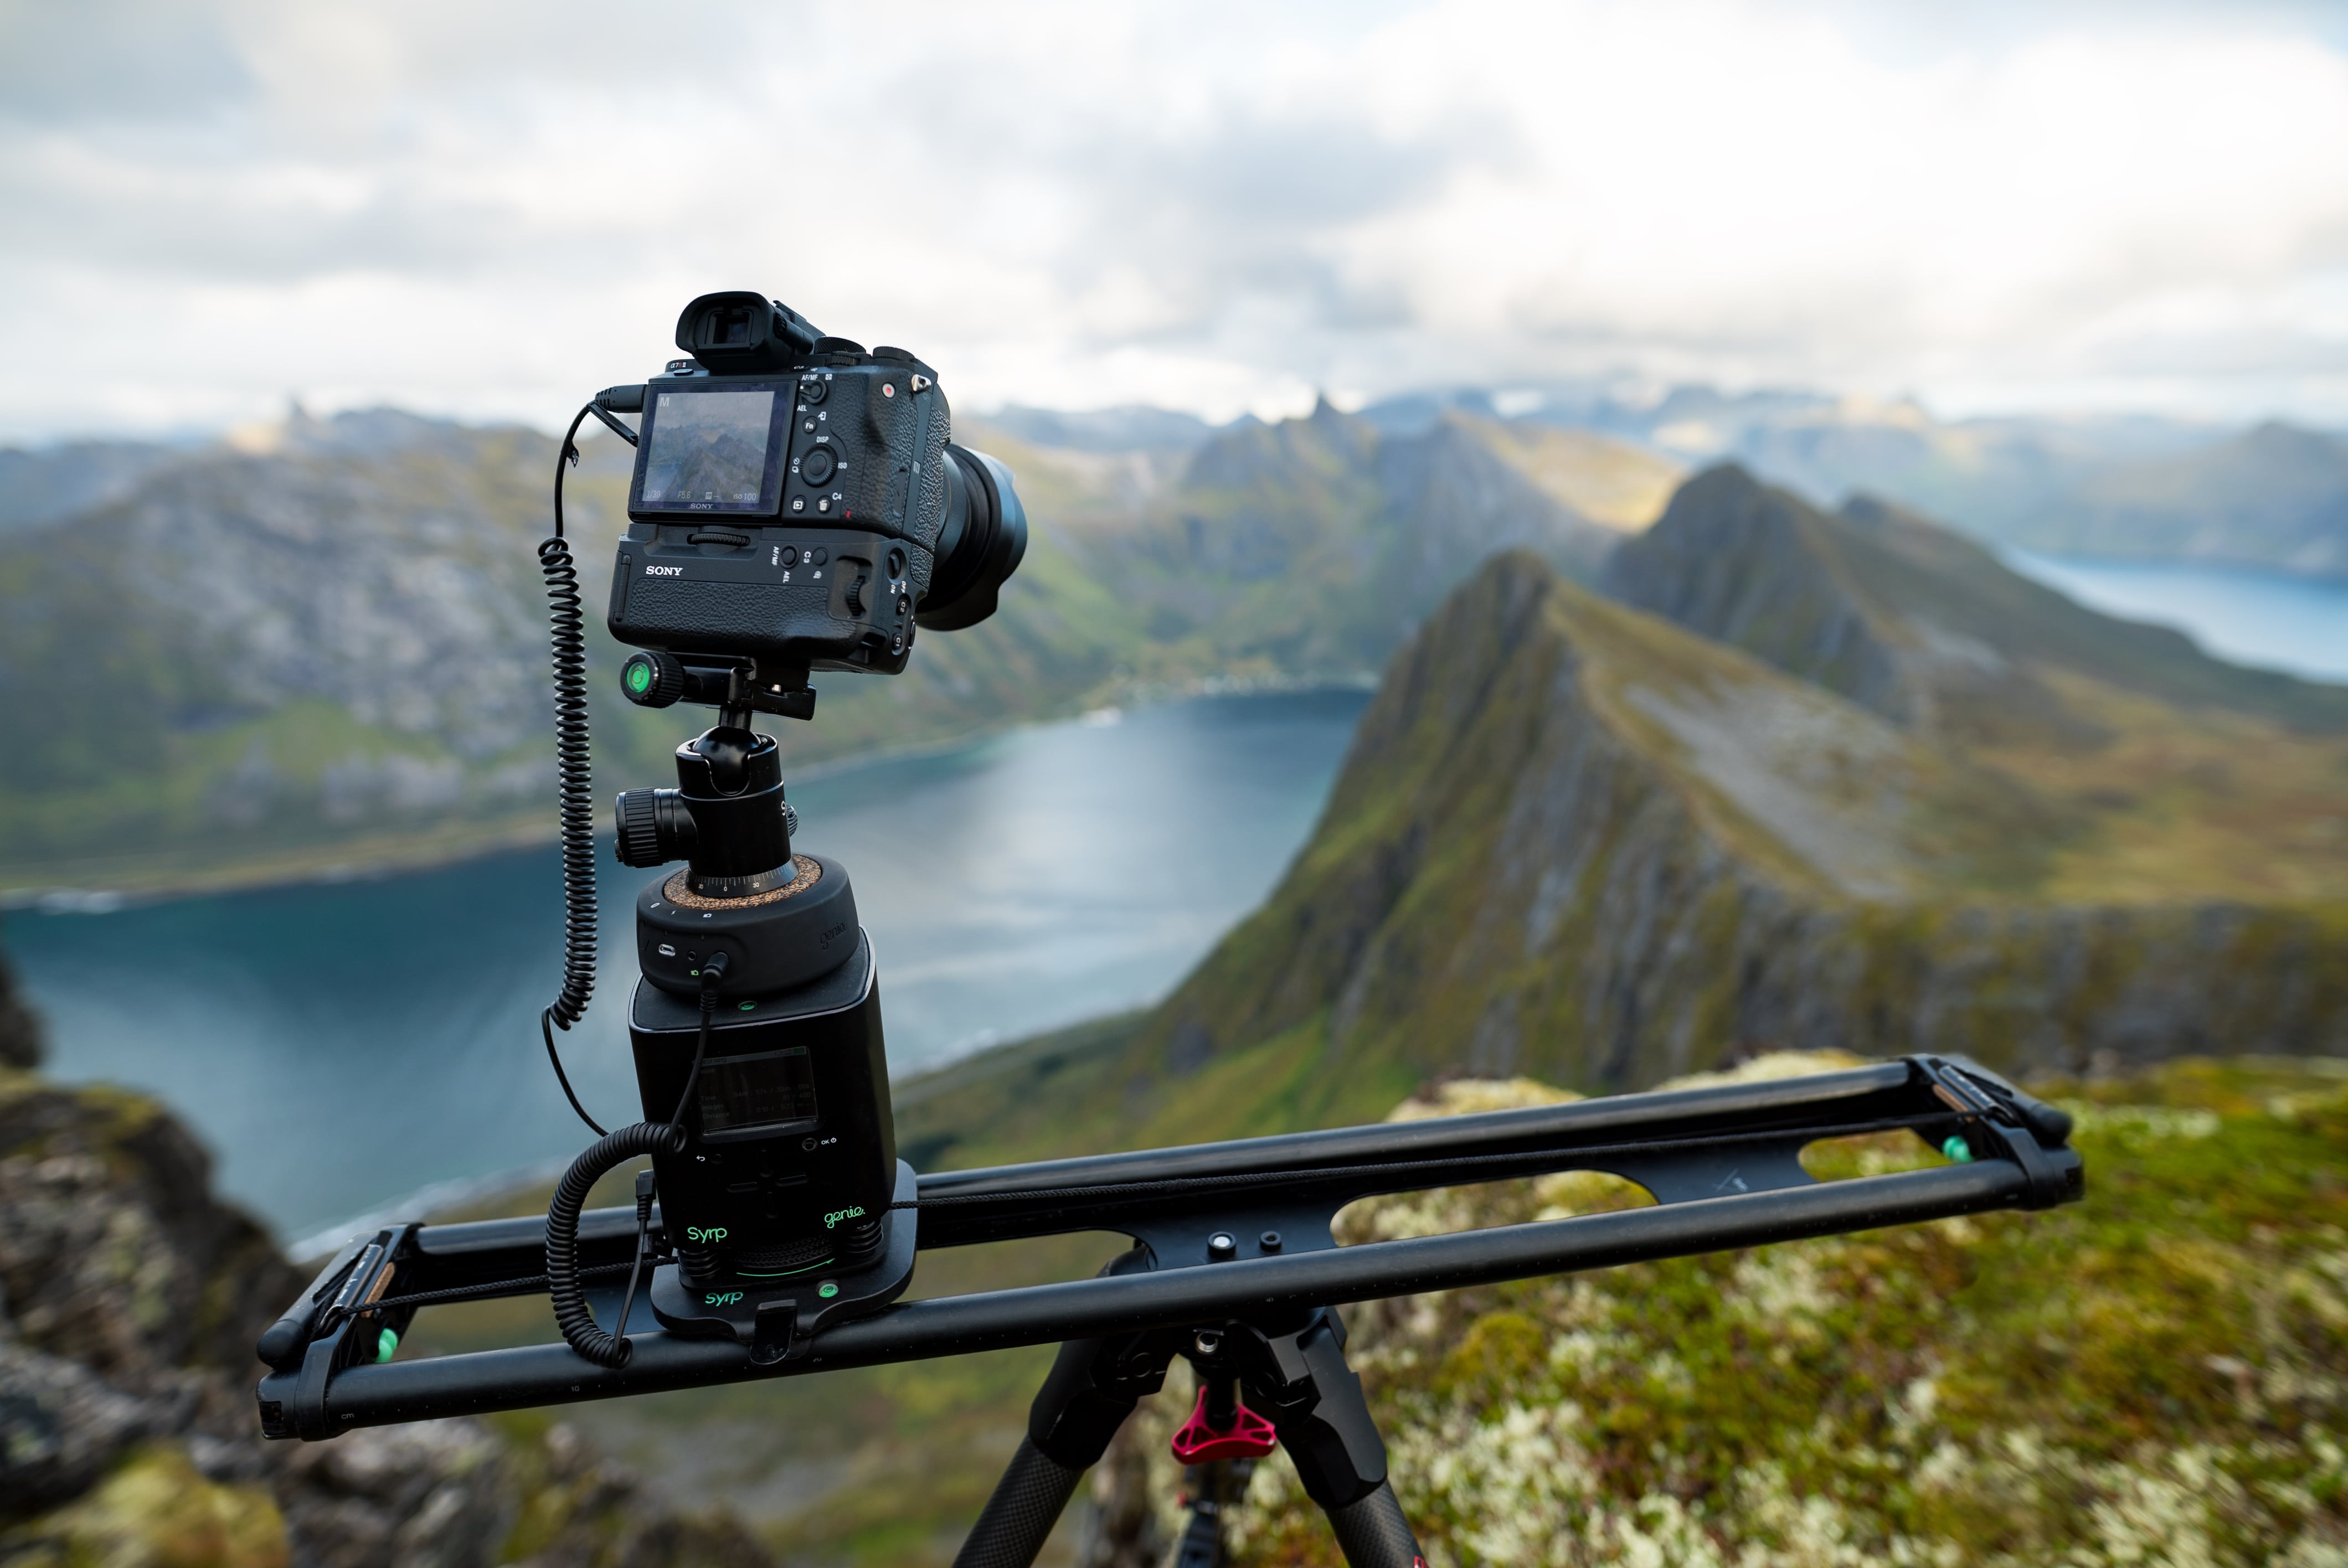
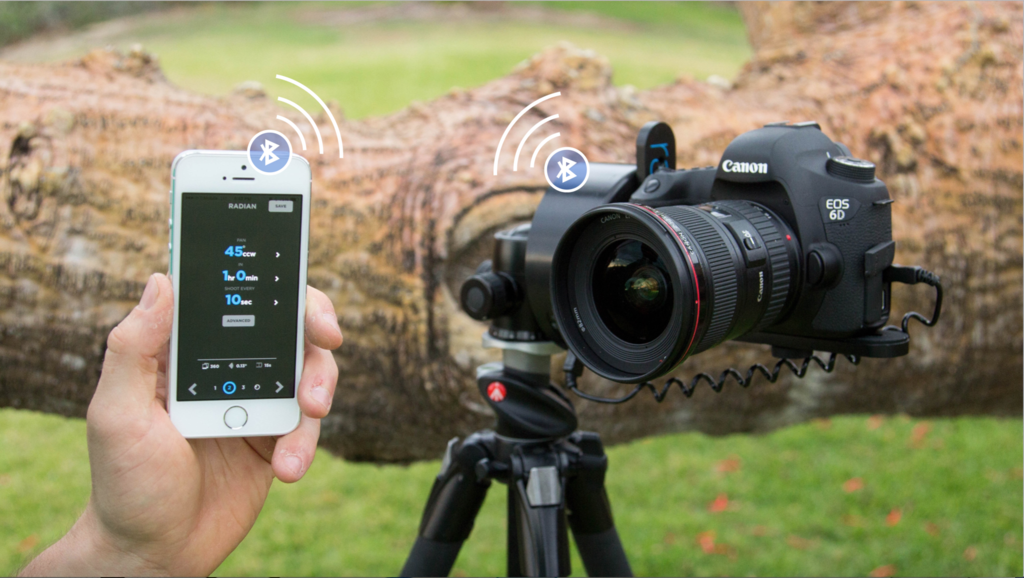
One of the tools Keith used to create 'Exposure' is the Syrp Genie Mini.
If you've never heard of this little gadget, get ready to be impressed!
The little hockey puck-looking device shown above is the Genie Mini, and it gives you seamless motion control over your camera.
Simply attach it to your camera, and in turn to your tripod, then use the Genie smartphone app to set the controls. Get smooth panning motion like what you saw in Keith's video, or use it to get nice, smooth movement in real-time videos as well.
You can even get two Genie Minis and use them in tandem to get both pan and tilt control, right from the Genie smartphone app.
Genie Mini even comes pre-loaded with time-lapse presets so you can start creating videos right out of the box. It also works with all kinds of cameras - from smartphones to DSLRs - so no matter what you shoot with, Genie Mini can help you get better results.
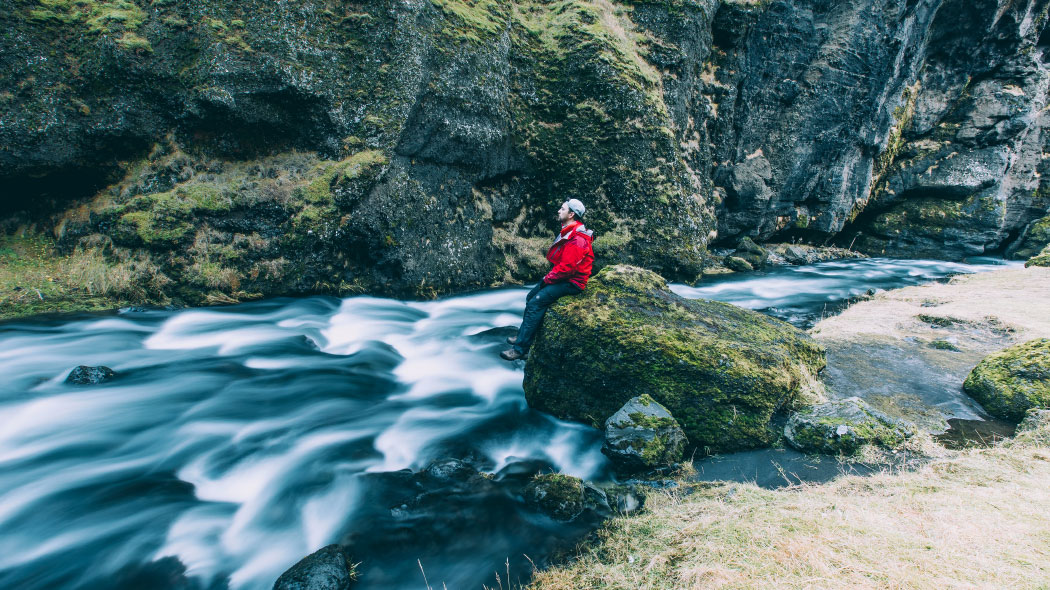
Light and dark. Warm and cold. Fire and ice...you name it, and Iceland has it.
These types of contrasts provide all kinds of fodder for photographers and videographers that flock to the island to get epic photos and videos.
Finding new angles to document this wonderland is becoming ever harder, given that so many people travel to Iceland to see its beauty and share it with the world.
But that didn't stop filmmakers Monica Civitenga and Carlo Sarzi from discovering a unique way to present Iceland in a new light.
Where others might seek to exclude the throng of visitors from view, Monica and Carlo embrace it.
Much of the footage in their video above, Iceland - Land of Contrasts, shows the interaction between people and the beautiful scenes found all over the tiny island nation.
In that regard, the video isn't just about the contrasts that naturally occur here; it's about the contrast of unspoiled beauty and humanity's role in documenting it, preserving it, and celebrating it. Have a look, and be ready to be impressed with up-close views of waterfalls and geysers, ice-covered beaches, wildlife, and, of course, people.
Gear Used:
Camera: Sony Alpha 7SII, Nikon D5300, Nikon D800, GoPro 4 Black
Tripod: Gitzo GT 3541LS, Manfrotto 504HD Fluid Head
Lenses: Sony FE 70-200 G f/4.0, Sony Zeiss FE 24-70 f/4.0, Nikon AF-S 14-24mm f/2.8 G
After watching that video, you're no doubt left wondering, how hard is it to create something so beautiful?
Just like creating a gorgeous photo requires time, patience, and practice, so too does creating compelling video footage.
In fact, I'd argue that videography is even more difficult because rather than having to get things right for just a split second, with video, you have extended periods of time that need to be spot on in the video capture.
That's not to mention all the time it takes to edit and splice scenes together, add music and voiceovers, and add titles to the movie.
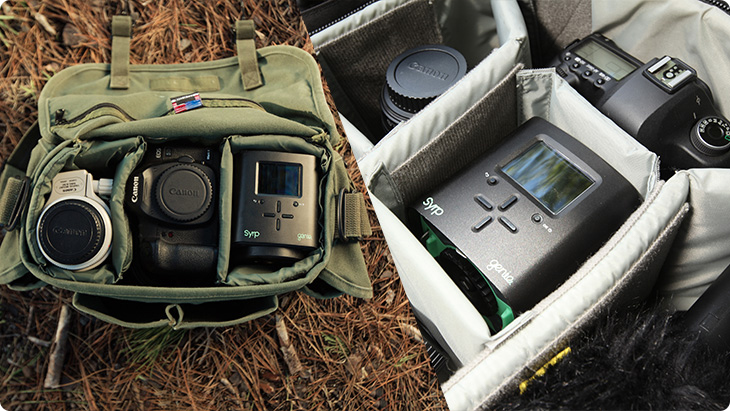
However, Syrp is making creating videos like the one above a more simplified and streamlined process with their motion control device called Genie, pictured below.
This little device quickly and easily attaches to your tripod, rail, slider, or other video gear, giving you robust motion control action in a small package.
Genie is versatile in that it allows you to create time-lapse video and real-time video for both panning and tracking shots, depending on the gear you've got setup.
On top of that, Genie is small enough to add to your camera bag, so you get all the motion control you need without adding bulky gear that you have to carry around as you set up your shots time and time again.
Genie can be programmed such that you get perfectly smooth motion, just like you saw in Monica and Carlo's video earlier, and with built-in presets for time-lapse videos, you can blend smooth real-time video with time-lapses of stars, people, or clouds without having to spend tons of time programming Genie to do so. You can even use Genie to take bracketed HDR time-lapse video for those days when the dynamic range is just too much for your camera to handle.
As if that isn't enough, Genie has an autostart function, so if you want footage of the sunrise but don't want to get up early, you can tell Genie when to start, and it'll take care of the rest.
If you're interested in creating breathtaking videos and time-lapses like Monica and Carlo, check out Syrp Genie. It is bound to become an invaluable part of your kit that gives you the ability to produce some truly epic videos that are sure to impress!
When I started in photography, I spent a lot of time and money outfitting my kit with what I thought were the most essential items.
That, of course, included a camera body, a couple of lenses, a decent tripod, and even a cheap filter set (which I almost immediately regretted buying, but that's another story).
So I happily took all my gear out to take photos and learned a lot in those first few forays into the world of photography.
But I kept coming up against the same obstacles over and over again.
For starters, I noticed that when I zoomed in on my photos that they weren't totally sharp.
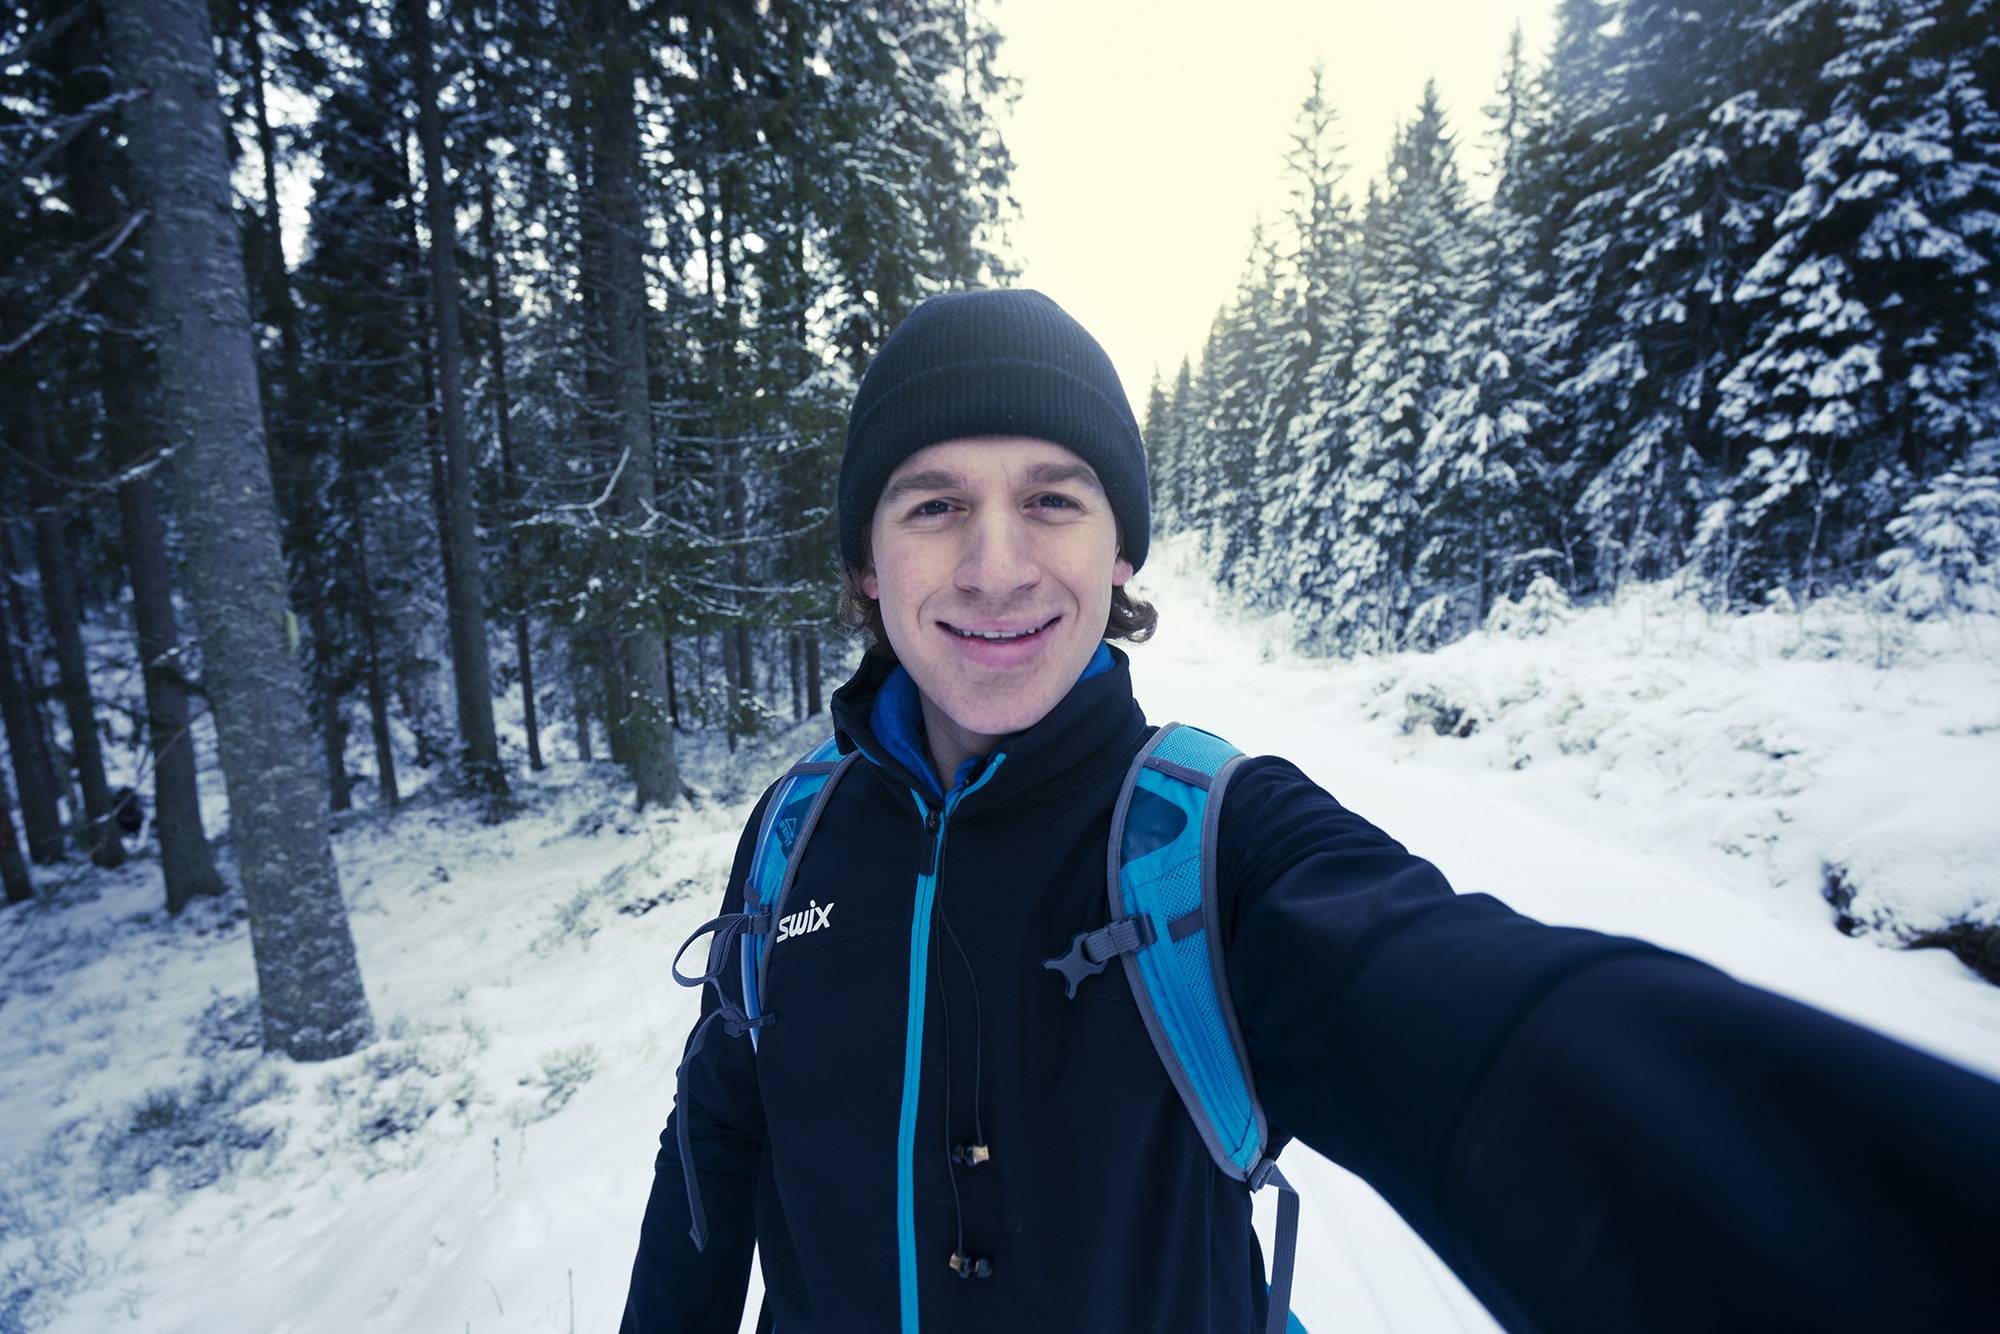
And as much as I hate to admit it, there were a few times when I wanted to take a selfie but didn't have any way to trigger the shutter. So what did I do? Set the timer and run back and forth from the back of the camera to my position in front of it.
There were also occasions when I wanted to try something more creative, like a long-exposure or even a timelapse video, but didn't have one crucial piece of equipment in my camera bag...
A camera remote.
Back in the day, I remember reading tons of photography articles, but they all seemed to frame the need for a camera remote as something that you only need for night photography or long exposures.
As I quickly learned, that just isn't the case.
Let's take a look at a few reasons why a camera remote is an essential piece of gear for any photographer.
You Can Use Slow Shutter Speeds
One of the primary benefits of using a camera remote is that you can use it to fire the shutter for much longer exposures than what you can dial in with the camera settings.
This is because most cameras only allow you to slow the shutter to about 30 seconds without using what's called Bulb Mode, which allows you to extend the shutter to minutes or even hours.
Naturally, you don't want to stand there and hold down the shutter button for minutes or hours. A camera remote means you don't have to.
Depending on the type of remote you use, you might just press the remote button to fire the shutter and press it again to end the exposure.
Higher-end camera remotes like the Alpine Labs Pulse actually allow you to preprogram settings for still photos, long exposures, time lapse videos, self-portraits...you name it!
That means you can control things like shutter speed right from the Pulse app (among plenty of other things). And since Pulse connects to your phone via Bluetooth, you can be up to 100 feet away from your camera and still have complete control. It sounds crazy, but it's true!
Reduce Camera Shake
One of the biggest problems photographers face is having photos that might look good from a compositional standpoint, but that just aren't completely sharp.
Though there are plenty of reasons why this might be the case, a common culprit is camera shake.
Even when using a tripod, camera shake can cause your images to be blurry because no matter how careful you are when pressing the shutter button on your camera, the simple act of touching the camera can cause enough vibration to get a blurry photo.
That's where a camera remote like Pulse (pictured above) comes in.
That works for all sorts of setups, from macro photography to images taken with a telephoto lens.
Just set up your gear on a nice, stable tripod, compose the shot, and use your remote to get the sharpest photo possible.
A Remote is Ideal for Light Painting
If you're looking for a fun and creative photography adventure, light painting might be it.
Painting with light is just what it sounds like...
You select a dark location, get your camera setup on a tripod, dial in the settings you desire, and use your remote to trigger the shutter.
Then, you use a flashlight, a headlamp, heck, even glow sticks, to create beautiful patterns with the light.
The beauty of doing light painting with a camera remote is that you don't need any help to get it done. Just dial in the desired settings, take your place with your light source in front of the camera, and start and stop the exposure with your remote.
If it sounds easy, it really is! Check out a quick tutorial on light painting in the video below by Kingston Technology:
Photographing Shy Subjects
I've tried photographing birds in my backyard I don't know how many times, yet I always seem to scare the darn things off.
The same goes for my forays into macro photography when I try to photograph an insect of some sort, which always seems to fly off the moment before I trigger the shutter.
A camera remote can help resolve such calamities, especially if you have a top-notch camera remote like the aforementioned Pulse.
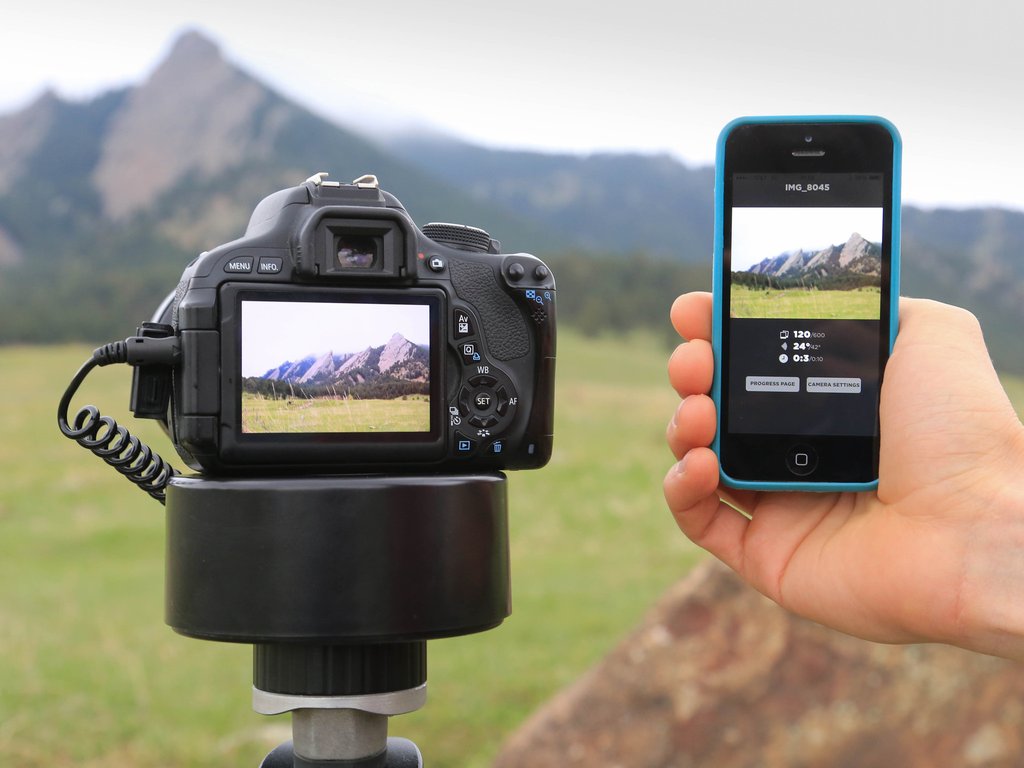
Not only does a camera remote allow you to remove yourself from the equation, which makes getting photos of shy subjects more likely, but if you have a remote like Pulse, you can get instant image previews after you take the shot.
That means that every time you fire the shutter, you can simply look at your phone using the Pulse app to see how the photo turned out. You can even take a look at the histogram to investigate how the exposure looks, and then make changes to improve the shot right from your phone.
And remember, with Bluetooth connectivity, you can do all this from 100 feet away. That means the birds, insects, or other shy subjects you want to photograph won't even know you're there - because you won't be!
It's not that formal, posed portraits can't be great, it's just that I prefer the genuineness of a real moment captured by a camera.
A camera remote improves your chances of capturing candid moments, because, just like with shy subjects, you're removed from the situation.
Imagine photographing your kid's birthday party without having to constantly tell everyone to look at the camera and say cheese.
Instead, you can set up your camera and fire the shutter whenever you like and get sweet candid shots like the one above.
It's just human nature to stiffen up and force a smile when we see a person aiming a camera at us.
By using a remote, you can avoid that in favor of more genuine photos that will be much more meaningful to you in the long-run.
Besides, a camera remote frees you to be out from behind the camera and more involved in whatever activities might be going on. That's a win-win if you ask me!
Making Timelapse Videos
If you really want to expand your photography boundaries, a camera remote allows you to create timelapse videos that show how a scene changes over the course of time.
Again, this can be done with just about any remote, but the best camera remotes like Pulse give you all sorts of expanded capabilities that make your timelapse videos look like a professional movie.
That's because Pulse allows you to take charge of everything from the interval between each shot and the duration of each shot to the exposure settings used for the sequence.
In fact, Pulse gives you the power to dial in the settings you want, and then leave! Just set the parameters for your timelapse using the Pulse app, and then Pulse will take it from there. Your phone doesn't have to remain connected, so you're free to do what you want while Pulse handles the rest.
What's more, Pulse has advanced timelapse settings like exposure ramping, which allows you to make adjustments to the exposure settings as the light changes, like during the transition from day to night.
Better still, if you have two or three Pulse-enabled cameras, you can control all of them right from your phone. Just imagine the professional-looking timelapse videos you can get! See just how easy it is to create a timelapse with Pulse in the video below:
Credit: Rick Fienberg / TravelQuest International / Wilderness Travel
As most of you in the photography and filmmaking community know, on the 21st of August, North America (and some parts of South America, Africa, and Europe) will get to experience a moment that reminds us just how small we are on this tiny planet rocketing around the universe – a solar eclipse.
We’ve put together a handy guide on everything you need to know about being prepared to capture it, so read on, get your gear together and remember to show us what you’ve managed to shoot after it all goes down!
One thing to say before we get started - eclipses are bright. Well, the eclipse itself isn't bright, however, whenever you can see the sun throughout the eclipse, it's going to be damn bright with UV and IR rays flying all over the place. A little common sense is required to not look at it, even when you think it's covered up enough by the moon, because that's specifically when it'll get ya. Wear some fancy eclipse glasses if you can't resist (but not the ones that Amazon recalled...) and don't look through your view finder, even with your ND on at its darkest - use the live view function instead.
A little different from a lunar eclipse where the earth passes between the sun and the moon, blocking the light that usually makes the moon shine, a solar eclipse is when the moon orbits between the earth and the sun, casting a shadow on earth.
It’s an incredibly rare sight, which is why photographers haven’t stopped talking about it for weeks.
Eclipses aren’t straight forward things either – there are several phases:
Partial eclipse – when the moon begins to slide in front of the sun, partially covering it.
Start of total eclipse – just before the moon fully covers the sun phenomena such as Baily’s Beads and the Diamond Ring effect occur.
Totality – when the sun is fully covered by the moon. The sun’s corona is visible in a ring around the moon.
The steps above reverse, and the sun is revealed.
The constant transition of an eclipse means that photography can only capture one element at a time – which is where time-lapse comes in.
So When and Where Is It All Going Down?
The two most important things you need to know when hoping to capture a solar eclipse are pretty simple – where you need to be and when you need to be there.
The upcoming eclipse will pass from the West to East Coast of the US. The path of totality – a fancy way of saying the area where you can see a total eclipse from – is a narrow 70 mile (110km) strip running from coast to coast. This strip is the ideal place to get the complete eclipse experience, although you’ll still be able to capture some pretty cool time-lapses if you’re outside of the range.
The best time to view the eclipse changes depending on where you are. To find out where and when you can check it out, there’s plenty of great online resources like this one provided by NASA (so you know it’s legit).
Getting Your Gear Together
So you know where you’re going and what time you need to get there, but what do you actually need to bring with you? To do the eclipse justice, you need to have the right camera and lens combination.
Wide angle lenses will not work well because the sun will appear too small. You’ll need to use something that’s more than 200mm (on a full frame camera), although 600mm-800mm is more ideal. The below diagram shows you how the different focal lengths affect your final image.
Long lenses can be pretty expensive, but because you’re taking pictures of the sun, you’re not going to have an issue with low light, so using cheaper lenses with higher f-stops won’t be a problem.
Having a crop factor camera can also be of advantage as their smaller sensor sizes increase your focal length, allowing you to get more out of your current lenses.
On to Exposure
One of the most difficult elements of capturing the eclipse is the massive change in exposure throughout the event. In the earlier stages, you’ll need to expose for the sun using an ND filter (it’s pretty bright, ya know). During totality, the only light you’re going to see is from the corona (edges of the sun around the moon’s outline) which is pretty dim. It’s standard practice to remove your ND filter for this part of the eclipse.
For time-lapse, you’re going to need to manually bulb ramp from bright sunlight, to when the moon is in front of the sun and back again. There are a few ways to go about this, the easiest being manually adjusting the dials on your camera – although this can cause your camera to move. Due to the nature of the scene, this can also be very hard to fix in post because there isn’t much information for post stabilization systems to grab on to. A better option would be to use an app such as Canon Connect to control the exposure of the camera wirelessly.
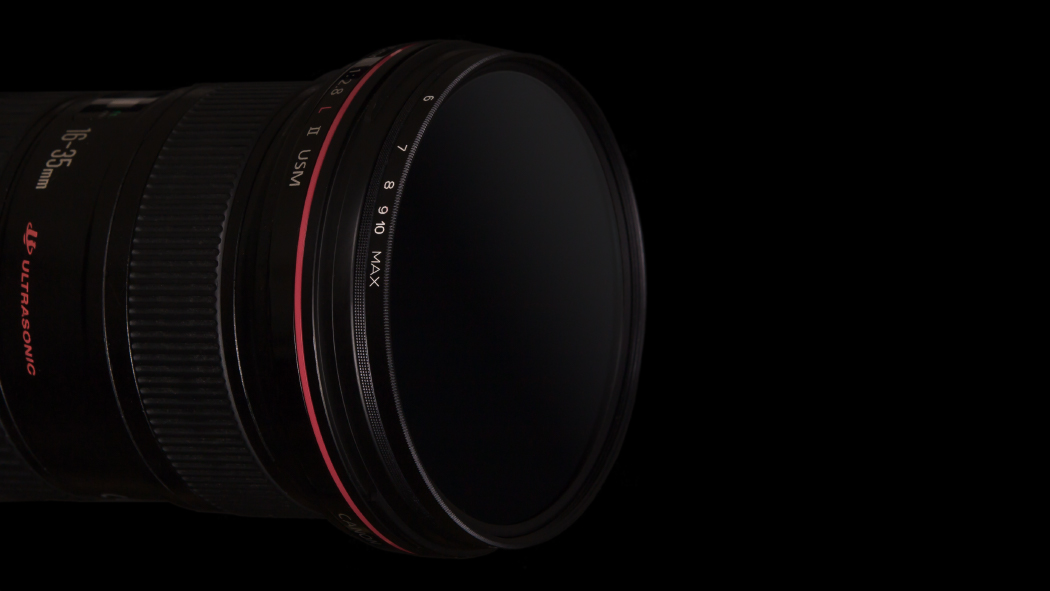
Something else you’ll want to avoid is the shaking that comes when removing your ND Filter. A way around is to use a variable ND Filter such the Syrp Super Dark. It’s 5-10 stops, which provides enough range to cover all phases of the eclipse.
When bulb ramping, it’s best to change one setting at a time rather than all at once – this way it’s easier to keep track of everything. For example, start by changing the ISO, ND, aperture, and finally shutter speed.
Below is a diagram showing example exposures at different parts of the eclipse.
Get Your Interval Right
One of the core components in creating the time-lapse is your intervalometer. This will trigger your camera at regular intervals. To do this you can use a Genie Mini. Not only does it act as an intervalometer but it also has motion control features which you can use for tracking the sun.
Setting the Interval significantly affects the feel of the compiled time-lapse. A too long interval will cause the phases of the eclipse to go by too quick. However, a too fast interval can cause your camera to miss shots. This is due to the previous image still being processed. Using a fast camera and card will help mitigate this issue. It is best to test out what your camera is capable of before the shoot.
Below is an animation of the solar eclipse at different intervals. An interval of 1 second will mean the duration of totality during play back will last around 6.6 seconds, while at an interval of 4 seconds it will last 1.7 seconds (this is at 24 fps).
Aligning the Sun
Fun fact: the sun and moon move across the sky at 0.25° a minute, so you’ll need to ensure that you set up your camera so they don’t drift out of frame. There’s two ways to do this:
Use the drift method, where the sun and moon drift into frame.
Track the movement using a motion control device like the Genie Mini.
Drift Method
This is the simplest of the three methods as it doesn’t require motion control. First, you will need to set the focal length of your camera. This has a significant effect on the duration of your time-lapse. The wider the lens, the longer it takes for the sun to move from one side of the frame to the other. Below is a diagram showing how different focal lengths capture a different amount of the eclipse. Around 600 to 800mm is ideal as it will allow you to capture all the eclipse as well as providing enough room for error in aligning your camera.
Once you have set your focal length, you can then derive your record time. This is done by calculating the time it takes for the sun to move across the frame. To do this, use the table below. If you want to calculate this for yourself, use this equation (Horizontal FOV + 0.53)/0.25, where 0.53 is the degrees the sun takes up in the sky, and 0.25 is the degrees per minute the sun moves. (As your Record Time and Interval are set, your Play Time will be determined automatically from this).
The next step is to align the center of the frame with where totality will occur. To do this, you can use the NASA website we previously mentioned to figure out when totality will occur. Then in the app PhotoPills, set the time to that of totality. Using the Augmented View, roughly align your camera to where the eclipse will occur. Adjust your ball head and make sure the camera is parallel horizontally with the path of the sun so that it will sweep across the frame from left to right.
When pressing record, you want to do this so that it ensures that totality is halfway through your time-lapse. If you had a record time of 20min, you would press record 10min before totality. Before pressing record, make a small adjustment to your ball head positioning the sun on the left just out of frame. Now everything is lined up you can press go and bulb-ramp (see Exposure section above) through until it is finished. Once complete, the sun will be just out of the right side of the frame.
Genie Mini - Polar Alignment Track Method
Tracking the sun has the advantage of not having to worry about it drifting out of frame. This lets you capture a time-lapse of any desired duration, enabling you to capture every phase.
To set this up, you need to align your Genie Mini’s axis of rotation to the rotational axis of the earth. The most accurate way to do this is using an equatorial mount, which is designed for telescopes. Although less accurate, you can also achieve this using a sturdy tripod and head. First, connect the Genie Mini to the tripod head. Using an app like PhotoPills, open Augmented Reality View and lie the phone flat on top of the Genie Mini. Adjust the tripod until the phone is perfectly facing the south pole. You can also align your Genie Mini at night by aligning it to the North Star, Polaris.
Once aligned, fix your camera to the Genie Mini using the tilting arm of the Pan Tilt Bracket. This will alleviate the weight of your camera and long lens, making it easier for the Genie Mini. Shift the camera backwards and forwards on the mount until it’s balanced.
Next, you’ll need to set your record time. At its longest, the eclipse will last 2hrs 55min. Depending on your location, your total duration will differ.
Once set, you’ll need to configure how far the Genie Mini rotates over this time period. Make sure it is rotating counterclockwise from east to west. As the sun moves at 0.25° per minute, you’ll want to multiply the length of your record time in minutes by 0.25. In this case, it's 43.75°.
All you need to do now is align the start point so the camera is facing the sun and press go when the start of the partial eclipse begins.
Genie Mini and Timelapse +
Timelapse+ and the Genie Mini - the method above is brand new and in beta testing. It’s been sent to us by Timelapse+ and while we haven’t tested it ourselves, we hear it’s pretty reliable.
It's pretty straightforward -- install the latest beta (enable Settings->Developer Mode to access beta versions), then make sure you either have a GPS fix or disable the GPS (Settings->GPS Module) and manually enter the Latitude, Longitude and the current time (in UTC) in settings. Make sure Bluetooth is enabled in Settings->Wireless Setup and up to two Minis should automatically connect.
Then when you're setting up the time-lapse, you'll have the option to enable tracking = 'sun', and assign each Mini to an axis (#1 was the first connected). Or, better still, use the app (you need to enable the Built-in AP and use the local 10.0.0.1 option with the beta) and then you can configure each axis and enable sun tracking. You'll also have a joystick mode with live view for setup.
Also, here's how to test the eclipse program mode:
Disable GPS (Settings->GPS Module) so you can enter manual coordinates
Find the coordinates on Google Maps of where you plan to be, and enter them in Settings->Set GPS Latitude/Longitude
Change the date to 21 Aug 2017 in Settings->Set UTC Date
Set the time to a little before first contact: 16:00:00 in Settings->Set UTC Time (then check Information->Eclipse Info to verify)
Go to Time-lapse and set Timelapse Mode to 'eclipse'
Configure your settings for each part of the eclipse in Eclipse Circumstances
Check Review Program to see the planned events and settings
START the time-lapse and see how it goes!
Something To Note
Camera Sensor Size – All calculations are done with a full frame camera in mind. If you’re using a crop sensor, multiply your focal length by your crop factor and use the resulting focal length for your calculations. For example, if you have a 200mm lens on a Canon 80D with an APS-C sensor that has a crop factor of 1.6, the resulting focal length would be 320mm.
So there you have it, everything we have in our brains regarding the upcoming solar eclipse. Let us know how you get on, and have fun on Monday!
Question: How do you give a dying tree species a voice?
Answer: You make it sing!
Several of New Zealand’s greatest creative minds joined forces recently to create a public awareness campaign and video to promote preventative measures to stop the spread of dieback, a disease ravaging New Zealand’s native Kauri tree population.
Dieback is a brutal and untreatable disease. Microscopic spores in the soil infect tissue and cause the tree to bleed sap, effectively starving the kauri of nutrients.
The spores can be spread in soil as small as a pinhead, making the recommendations for cleaning feet and gear and sticking to the track, currently ignored by 83% of forest visitors, all the more important.
The campaign’s creation was a complicated process – film vertical tracking shots of a tree with dieback, take the footage and create a musical score, which will then be played by members of the Auckland Philharmonia Orchestra.
Syrp’s motion control expertise was called upon for the initial stage – the tracking shot of the tree.
Using five vertical Magic Carpet Long Tracks and Genies, Nikon cameras were tracked up and down the kauri, recording footage of the dieback.
The placement of each setup was carefully selected to avoid the roots of the kauri tree and prevent further damage. You can watch the behind the scenes video to see how we did it here:
This imagery would then be processed and turned into a musical score. This task of unfathomable difficulty fell on the lap of New Zealand-based electronic musician and production specialist Tom Cosm.
Tom used the motion tracking shots of the dieback to create pitch and volume, which eventually were converted into notes using pattern-finding algorithms and code.
Once converted, the score was then given to five members of the Auckland Philharmonia Orchestra. The resulting musical piece and performance personifies the slow and preventable demise of one of New Zealand’s forest giants – a literal kauri swan song. Watch the video of the performance here:
During the shoot, the crew were briefed on both safety for themselves and the kauri, all gear that touched the forest floor was rigorously disinfected, and a Ranger was present to oversee the shoot at all times. Every precaution possible was taken to ensure that no harm came to any kauri on this or future shoots.
Produced for Auckland Council and Keep Kauri Standing by Tom Cosm, Thick As Thieves, Syrp, Liquid Music + Sound, the Auckland Philharmonia Orchestra and Nikon.
When you watch time-lapse videos on YouTube, it's hard not to be impressed.
I mean, when done well, they're quite the sight to behold.
But they have to be hard to pull off, though, right?
Wrong...
With the right approach and the right gear, time-lapses - even panning time-lapses - can be done without a lot of fuss.
In the video above, Morten Rustad offers a quick tutorial on how to create panning time-lapse videos that will get your feet wet in the art of time-lapse photography.
Check it out, and for a detailed step-by-step breakdown of the video, read on below.
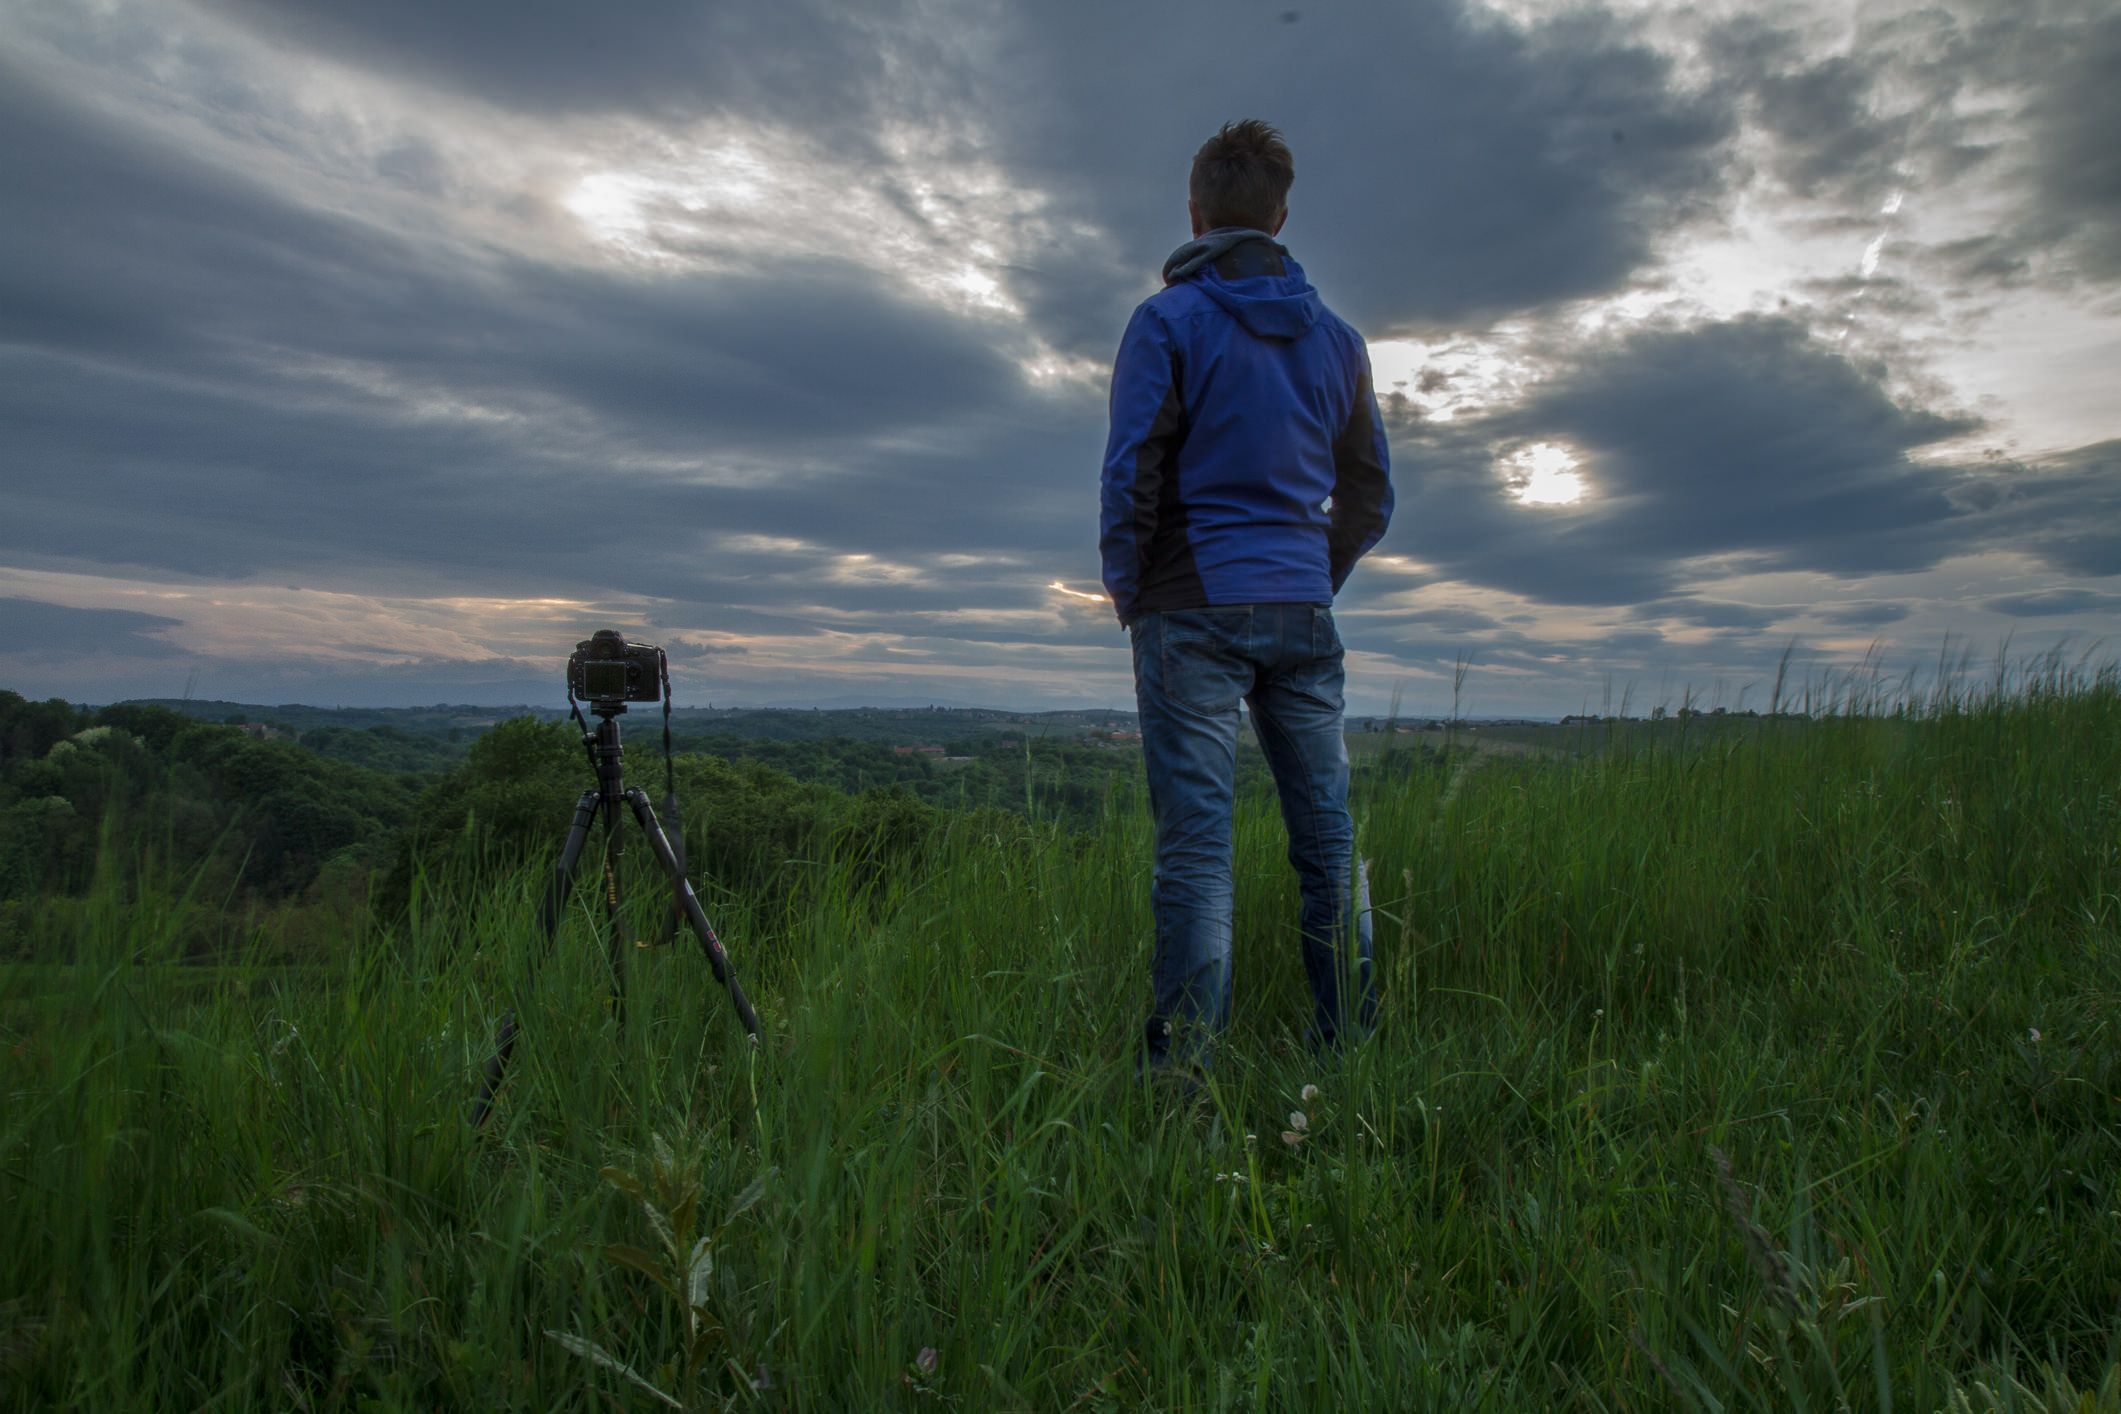
Step 1: Scout Locations
YouTube Screenshot/Morten Rustad
The first order of business when creating an epic time-lapse video is to scout for a suitable location.
In the video, Morten chooses a beautiful landscape scene that includes a lake to capture interesting reflections on the water's still surface.
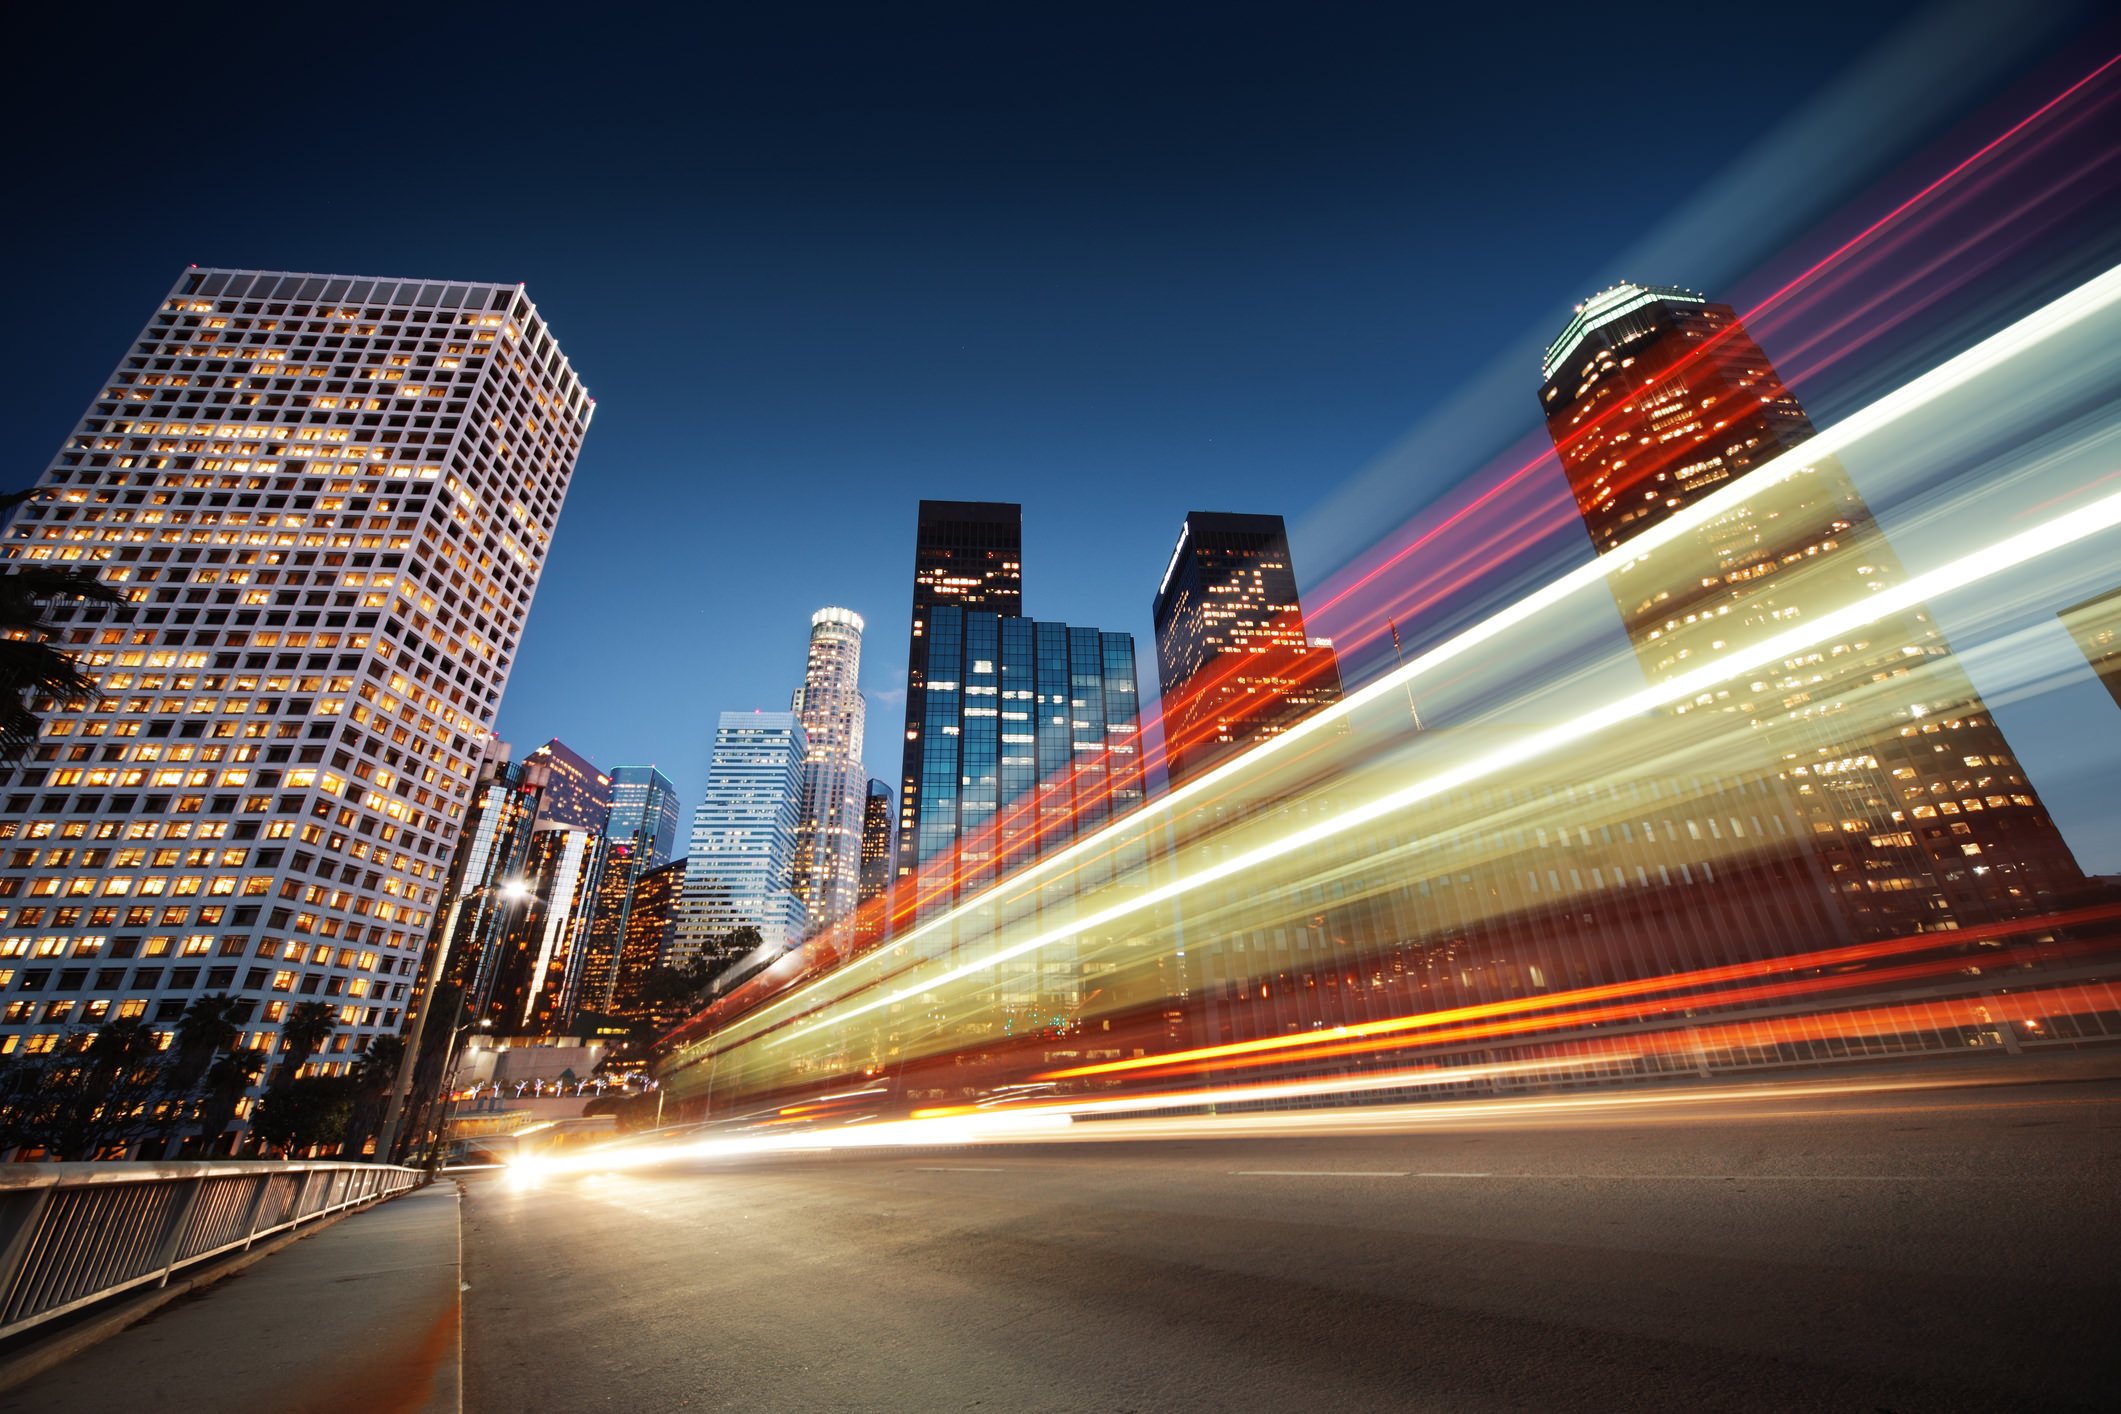
You don't have to use a landscape for your time-lapse, though.
You can do a time-lapse on just about any subject, but cityscapes, cars passing by on the highway, and passing storms are popular ideas.
Step 2: Set Up Your Gear
YouTube Screenshot/Morten Rustad
There are a few critical components for a time-lapse setup that you'll need to procure to get the best results.
Naturally, you'll need a camera and a lens, though the type doesn't necessarily matter. A DSLR or mirrorless camera is great, but you can even make time-lapse videos using a smartphone. You'll get the best results if you use a DSLR or mirrorless camera with a good lens attached. In the film, Morten uses a Sony A7RII mirrorless camera and a Canon 17-40mm f/4L lens.
Another component you'll need if you're shooting during the daytime is a neutral density filter.
A neutral density filter blocks out some of the light which allows you to use longer shutter speeds during daytime shooting. Longer shutter speeds are desirable because they allow you to create a video that has much smoother motion.
Since we're creating a panning time-lapse video, a motion control device is needed as well.
In the video, Morten uses a Syrp Genie Mini, a device that's so small that it can fit in your pocket.
The Genie Mini is the easiest motion control device there is because you can control it via the Genie Mini App on your smartphone.
In fact, the app has built-in presets so you can take time-lapse videos right out of the box. It's a simple matter of attaching the Genie Mini to your tripod, mounting your camera to the Genie Mini, connecting the Genie Mini cable to your camera, and taking control of the device using the app on your phone.
YouTube Screenshot/Morten Rustad
You can do all sorts of things with the Genie Mini to make your time-lapse more eye-catching.
You can ease-in and ease-out, which gives you the ability to ramp the movement at the beginning and the end of the time-lapse. In other words, the Genie Mini will slowly accelerate to your desired speed a the start of the shot and then dampen down its speed at the end.
You can also shoot HDR time-lapses, which allows you to have greater control over the dynamic range in your video.
Genie Mini is compatible with a variety of camera systems as well, including GoPro, smartphones, and of course, DSLR and mirrorless cameras.
The first camera setting you need to worry about is the shutter speed.
Remember, you want longer shutter speeds so that the final video has nice, smooth motion.
Of course, the ideal shutter speed will depend on the subject matter, so this will require a little bit of experimentation.
For example, in Morten's video, he uses a shutter speed of one second or longer to help smooth out any ripples that appear on the surface of the lake.
Once you have the shutter speed figured out, you can adjust the aperture and the ISO accordingly to get a well-exposed image.
Then, set the focus to manual, and using live view on your camera, adjust the focus ring until the scene is perfectly sharp. Zoom in on the LCD screen to double-check the focus.
Once that's done, take a few test shots to ensure the exposure and focus are spot-on.
The next step is to use the Genie Mini App to dial in the settings for the time-lapse video.
You'll set the interval, which is the time between each shot, and the duration, which is the length of each individual shot.
When setting the interval, you need to bear in mind what shutter speed you chose as the interval needs to be longer. So, if your shutter speed is two seconds, make the interval four or five seconds, that way the Genie Mini doesn't move the camera before the two-second shot is completed.
YouTube Screenshot/Morten Rustad
You'll need to do some testing to see if the interval and duration times you've set get you the results you want. Just keep in mind that slower-moving objects require a longer shutter speed and longer intervals, and fast-moving objects require shorter shutter speeds and shorter intervals.
The Genie Mini also allows you to change the degree of rotation and the speed with which it rotates. Again, this is accomplished in the Genie Mini App, as shown above.
From there, you just click record, and the Genie Mini will do its thing!
Depending on the record time of your time-lapse session, you'll have dozens, if not hundreds of images to process into the video.
Lightroom is the best choice for this task because you can choose a single image to edit and then apply those edits to all the other photos in the batch in one action.
To do so, select the edited image and then press CMD/CTRL-A to select all the images in the batch. Then select "Synchronize Settings."
Keep all the images selected, then select Export, being sure you keep the image quality at the highest possible JPEG setting.
YouTube Screenshot/Morten Rustad
Then, using a program like Adobe Premiere Pro, you can create the time-lapse video.
Morten offers an overview of how to do this in his video starting at the 4-minute mark.
So, in just five steps you can go from not having any idea how to create a time-lapse video to understanding the steps involved and the gear you need to make your time-lapse dreams a reality!
Time lapse videos are one of my favorite things to do with my camera.
Don't get me wrong - still photography is fun too, but there's just something about seeing the passage of time in my videos that is a little extra special.
I figured you had to have tons of expensive gear and all sorts of experience in photography to make one - I was wrong.
And that was pleasantly surprising!
Here's a quick but comprehensive guide to creating time lapse videos - even if you're a complete beginner.
Find a Subject
The first task of making a time lapse is finding a subject that will change over time and therefore change from frame to frame in your time lapse video.
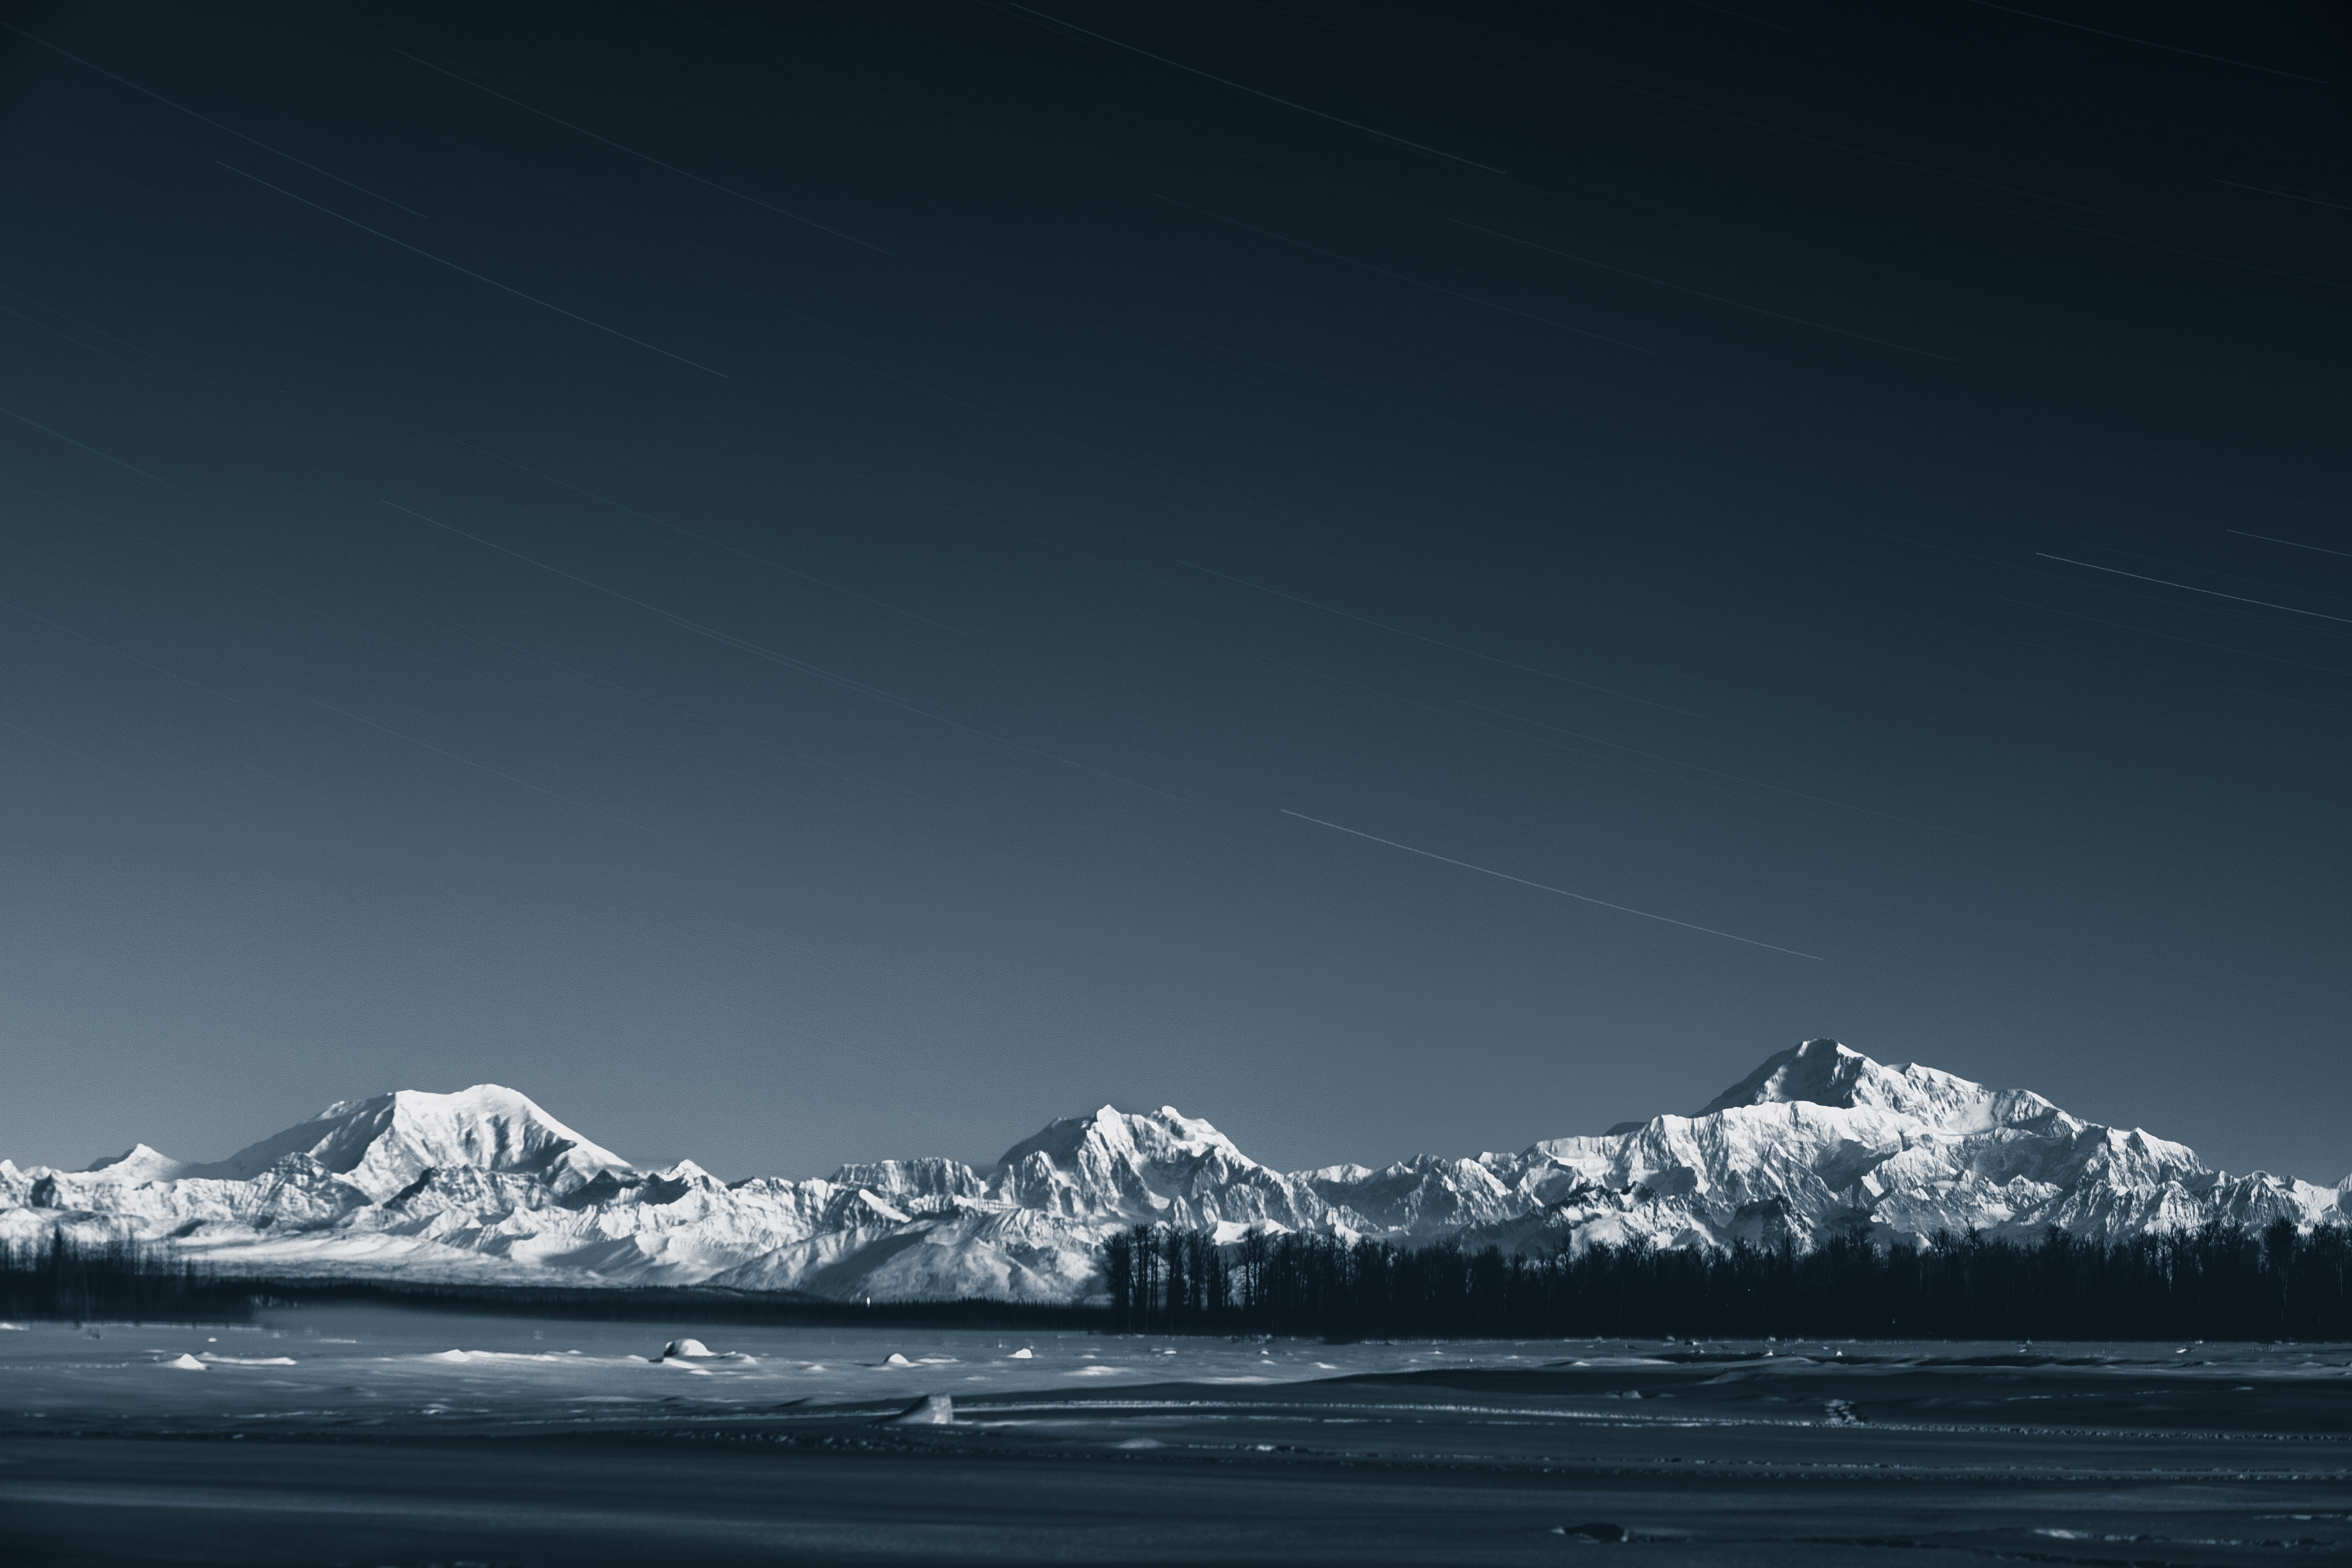
Landscapes come immediately to mind, as do sunrises, sunsets, the night sky, and the hustle and bustle of a city street.
Here are a few more ideas in case those don't float your boat:
Ice melting
Something being built
An artist creating their work
Flowers opening
Rotting fruit
These ideas are easily tackled in a single day, but don't discount longer periods of time, either.
Since time lapse videos are a collection of individual frames, you can create a video that transports viewers across weeks, months, or even years.
If that sounds more your style, try some of these ideas:
Track a pregnancy each day for the entirety of the process
Document your cross-country or around-the-world trip
Take a selfie each day for a year
Take a photo of your kid or pet each day for a year
The key, of course, is to consider how much time you have to dedicate to the process, and then choose a subject that fits into your schedule.
Get the Settings Figured Out
There are a few considerations to make when creating a time lapse video that will determine how the final product looks.
First, if the subject is something that changes slowly over time (like taking a selfie each day for a year) then you really only need one shot a day.
However, if the subject changes rapidly (like ice melting), you'll need many more photos - perhaps one every 15-20 seconds.
Second, you also need to think about how the time lapse appears when played back. Will it be smooth or blocky?
Smooth shots obviously are quite seamless from one to the next; blocky shots have the appearance of an abrupt change from one image to the next.
To get smooth shots, you need more images at shorter intervals between shots. To get blocky shots, you need fewer images at longer intervals between shots.
Which method you pick is totally up to you - there is no right or wrong answer.
This will take a little experimentation on your part to figure out what look you like the best (and which type of look best suits your subject, too).
Just as an aside, most movies are shown between 20-30 frames per second (fps). If you're going for a smooth look, aim to mimic that frame rate.
Check out an example of a smooth time lapse above by Alpine Labs.
Example Interval
Let's say you want a 30-second movie of ice melting at 24fps.
To determine how many frames you need, you simply multiply the length of the movie by the frame rate, like so:
30x24 = 720 frames
Now, you have to estimate how long it takes for the ice to melt in real time.
Assuming it takes one hour, which is 3,600 seconds, you'd divide the length of the event by the number of frames:
3,600/720 = 5
That means you need to take a photo every five seconds to create your movie.
Taking the Shots
Now it comes time to actually take the photos at the interval you've determined.
This involves a few pieces of gear:
Camera
Tripod
Camera remote
Neutral density filter
For a more detailed explanation of time lapse video gear, check this guide.
One thing I want to point out, though is that you can make it much easier for yourself to create time lapse videos if you get outfitted with the right kind of camera remote.
On the one hand, you can use a simple intervalometer to establish the time between each shot.
These remotes tend to be pretty simple with few controls, but they get the job done.
On the other hand, you can opt for a next-generation camera remote like Pulse by Alpine Labs.
This thing is like magic because it doesn't just allow you to set the interval between shots, but it also allows you to determine the length of the movie, change the exposure settings, and do so wirelessly from your mobile phone.
Even better, Pulse has built-in time lapse video settings, so you can start making time lapses right out of the box without having to mess around with all that math.
Heck, Pulse even gives you the ability to ramp exposures, which allows you to shoot time lapses from day to night while getting well-exposed images each and every time.
It'll even work if you leave the immediate area, too...
Unlike other remotes, all you have to do is get your settings lined out, and Pulse will handle it from there. You can go hike around, take some still photos, or get some shut eye!
See how to use Pulse for time lapses in the video below by Alpine Labs:
Not bad, right?
Pulse isn't just for time lapses, though. It's ideal for long exposures, still photography, and real-time video too.
You can view thumbnails right on your phone, and the histogram, too.
And since it's controlled via Bluetooth, you can trigger Pulse from up to 100 feet away.
You can even control three Pulse-enabled cameras right from your smartphone. Just imagine the time lapse possibilities there!
Once you have the shots you need, it's time to edit and assemble them in post-processing.
In terms of editing, you can do as much or as little as you like, but by all means, create an action to automate the process.
In programs like Photoshop, you can practice editing on one photo out of the many that will comprise the time lapse, and after you get it just right, create an action to repeat that same process for the entire batch of images using the Automat Batch command.
Once you do that, just select the folder where your photos are saved, determine the source, and make a new folder to place the edited photos. Start the action you created, let Photoshop do its thing, and you'll have a set of photos for your time lapse that are primed and ready to become your video!
From there, you can use any number of movie-making programs to create the video, including putting the images together, adding music, titles, and the like.
For a detailed guide on editing a time lapse video using Adobe Premiere Pro, check out the video below by Eye Stocker:
There you have it! A quick guide to get you started in time lapse photography.
It might seem a bit overwhelming at first, but as you get experience, creating time lapse videos will become second nature.
That's especially true if you use Pulse by Alpine Labs to help you along the way!
Working professionally as a photographer can be pretty tough.
Adding skills like time-lapse to your wheelhouse can separate you from the pack and make you stand out to potential clients – especially if you’ve got some interesting moves up your sleeve like a vertical tracking shot.
What’s a Vertical Tracking Shot?
A vertical tracking shot means just that – you’re making your camera slowly move vertically up or down throughout your time-lapse.
This is really useful when you’re trying to add something a little different to your time-lapses. Think about how cool it would look to track up a building or down through some branches on a tree!
So What Do I Need?
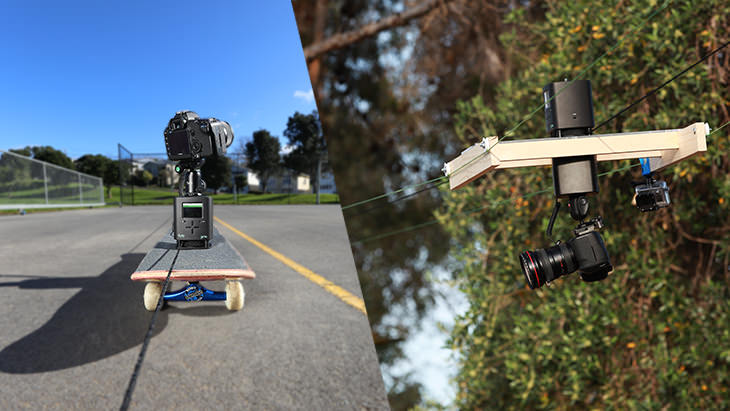
To create a vertical tracking time-lapse, you’re going to need two things:
Something to move your camera up and down automatically in time with its shutter – a motion control device.
Something for your camera to move along – a track or slider.
In the video below, the guys from Syrp use their Genie and Magic Carpet with its inbuilt counterbalance wheel to create their vertical shot:
It’s a pretty simple set up once you get the hang of it, and if you’re using a DSLR, you won’t need to worry about using a counterweight
The Syrp Genie used in the Quick Tip is a great, simple way to introduce motion control to your time-lapses.
It can work with any slider (so if you already own one, there’s no need to go buy anything new!) and is super compact and portable, making walking to those beautiful time-lapse spots so much easier.
There’s also an option to add on more motion control units like Syrp’s Genie Mini to create 2 or 3 axis time-lapses.
Whatever shoot you’re on, whether it’s personal or professional, having the ability to pull out a vertical tracking time-lapse move opens up so many more exciting options, and we definitely recommend giving it a try!
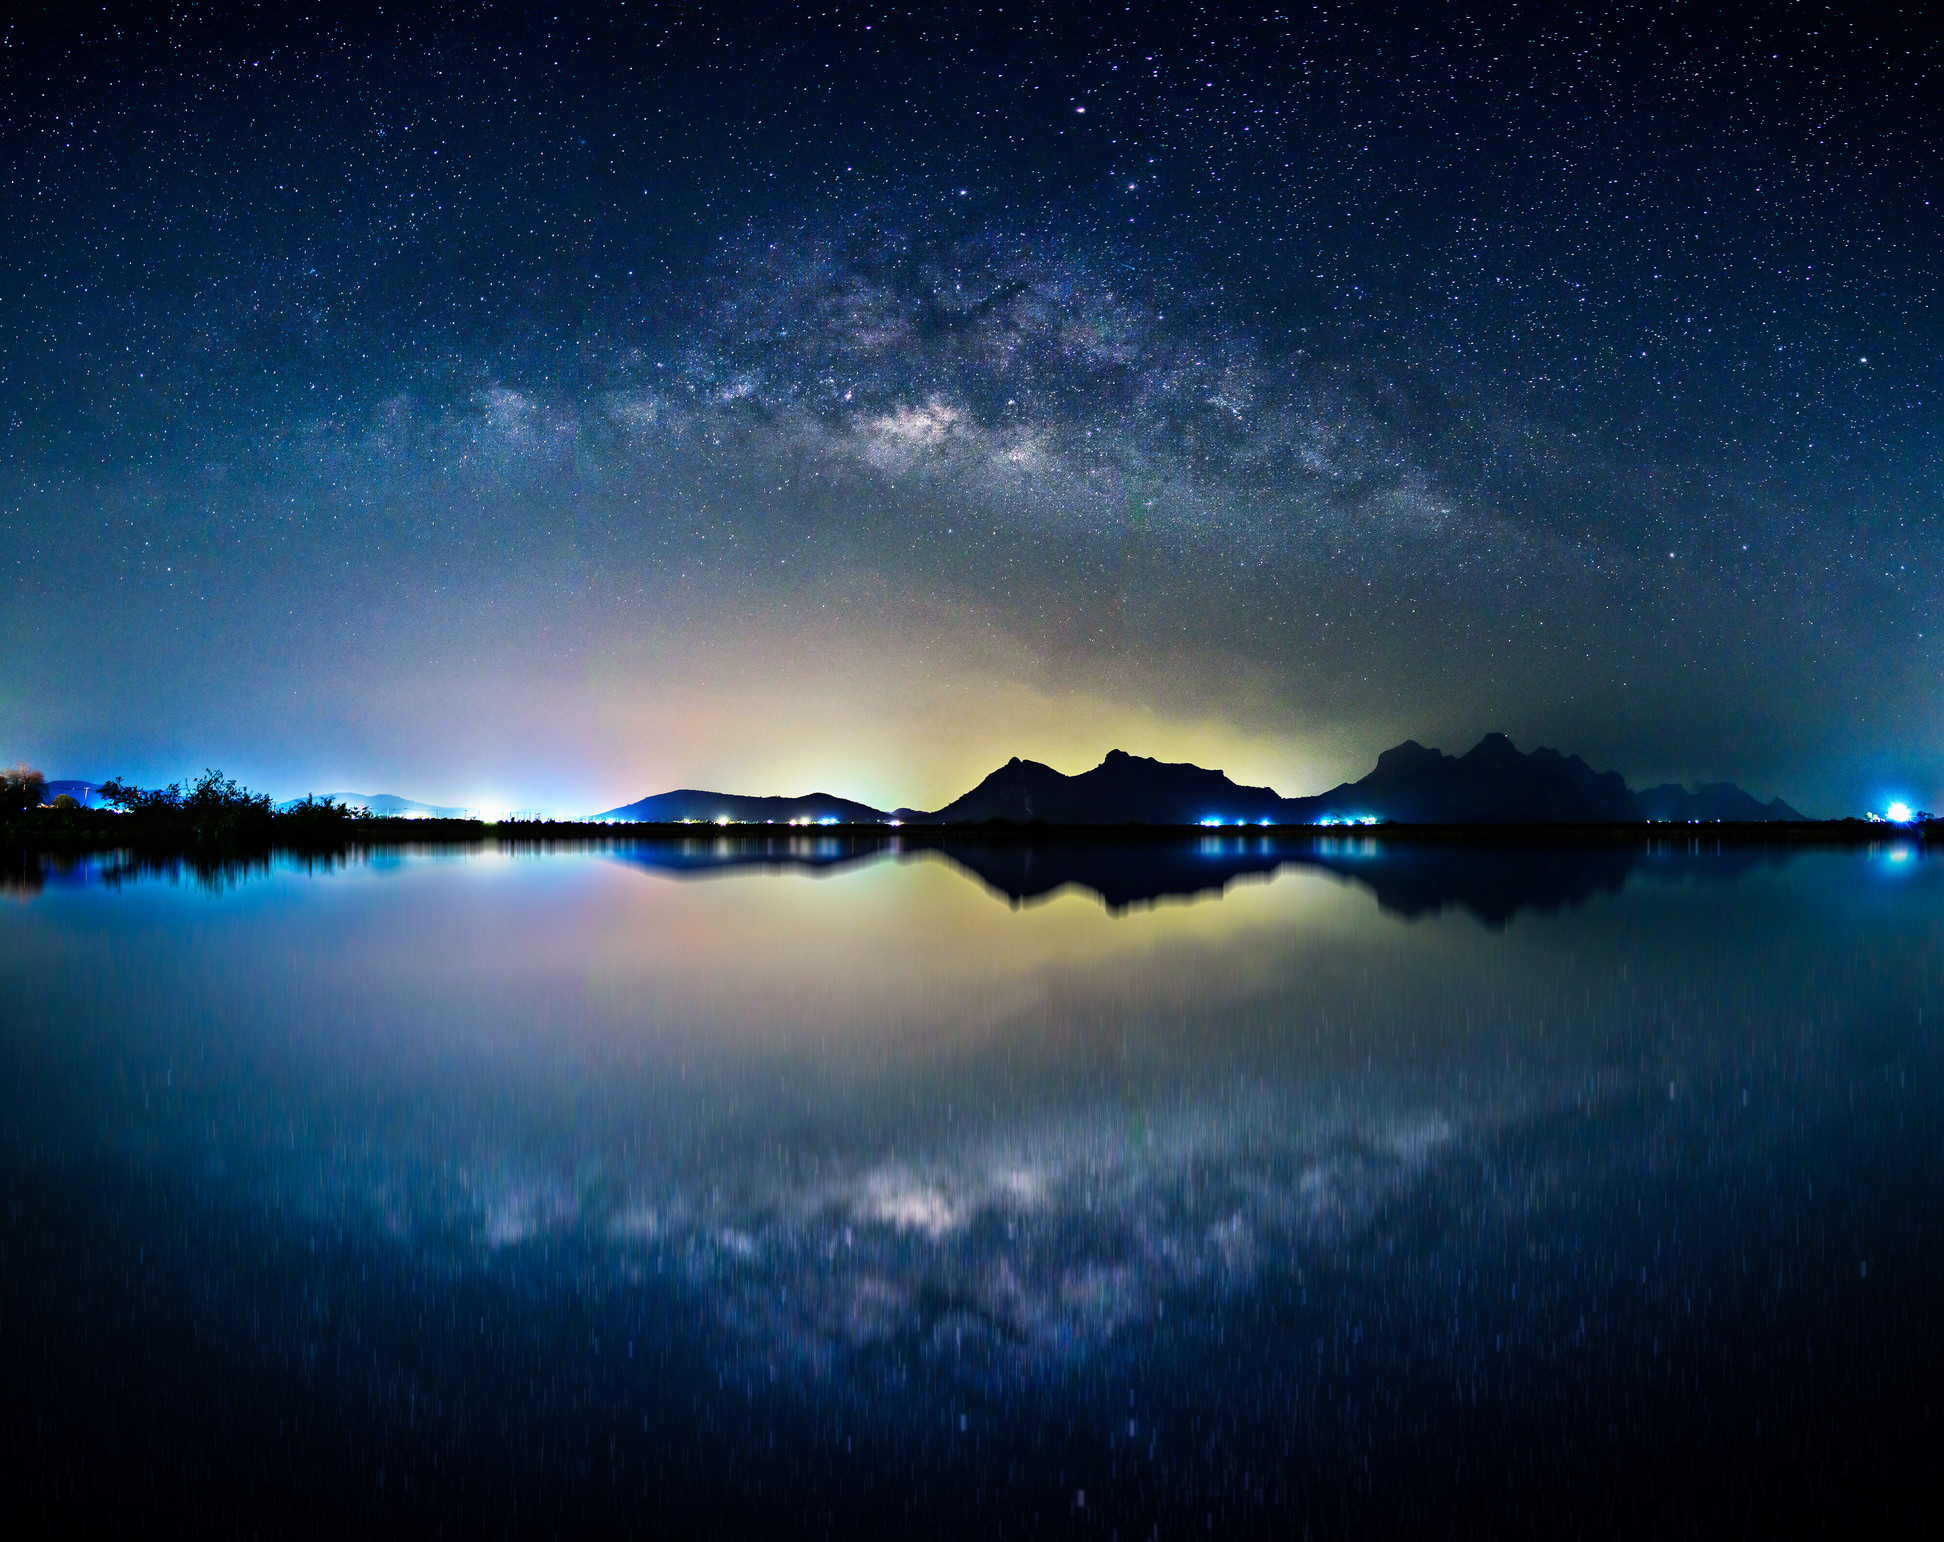
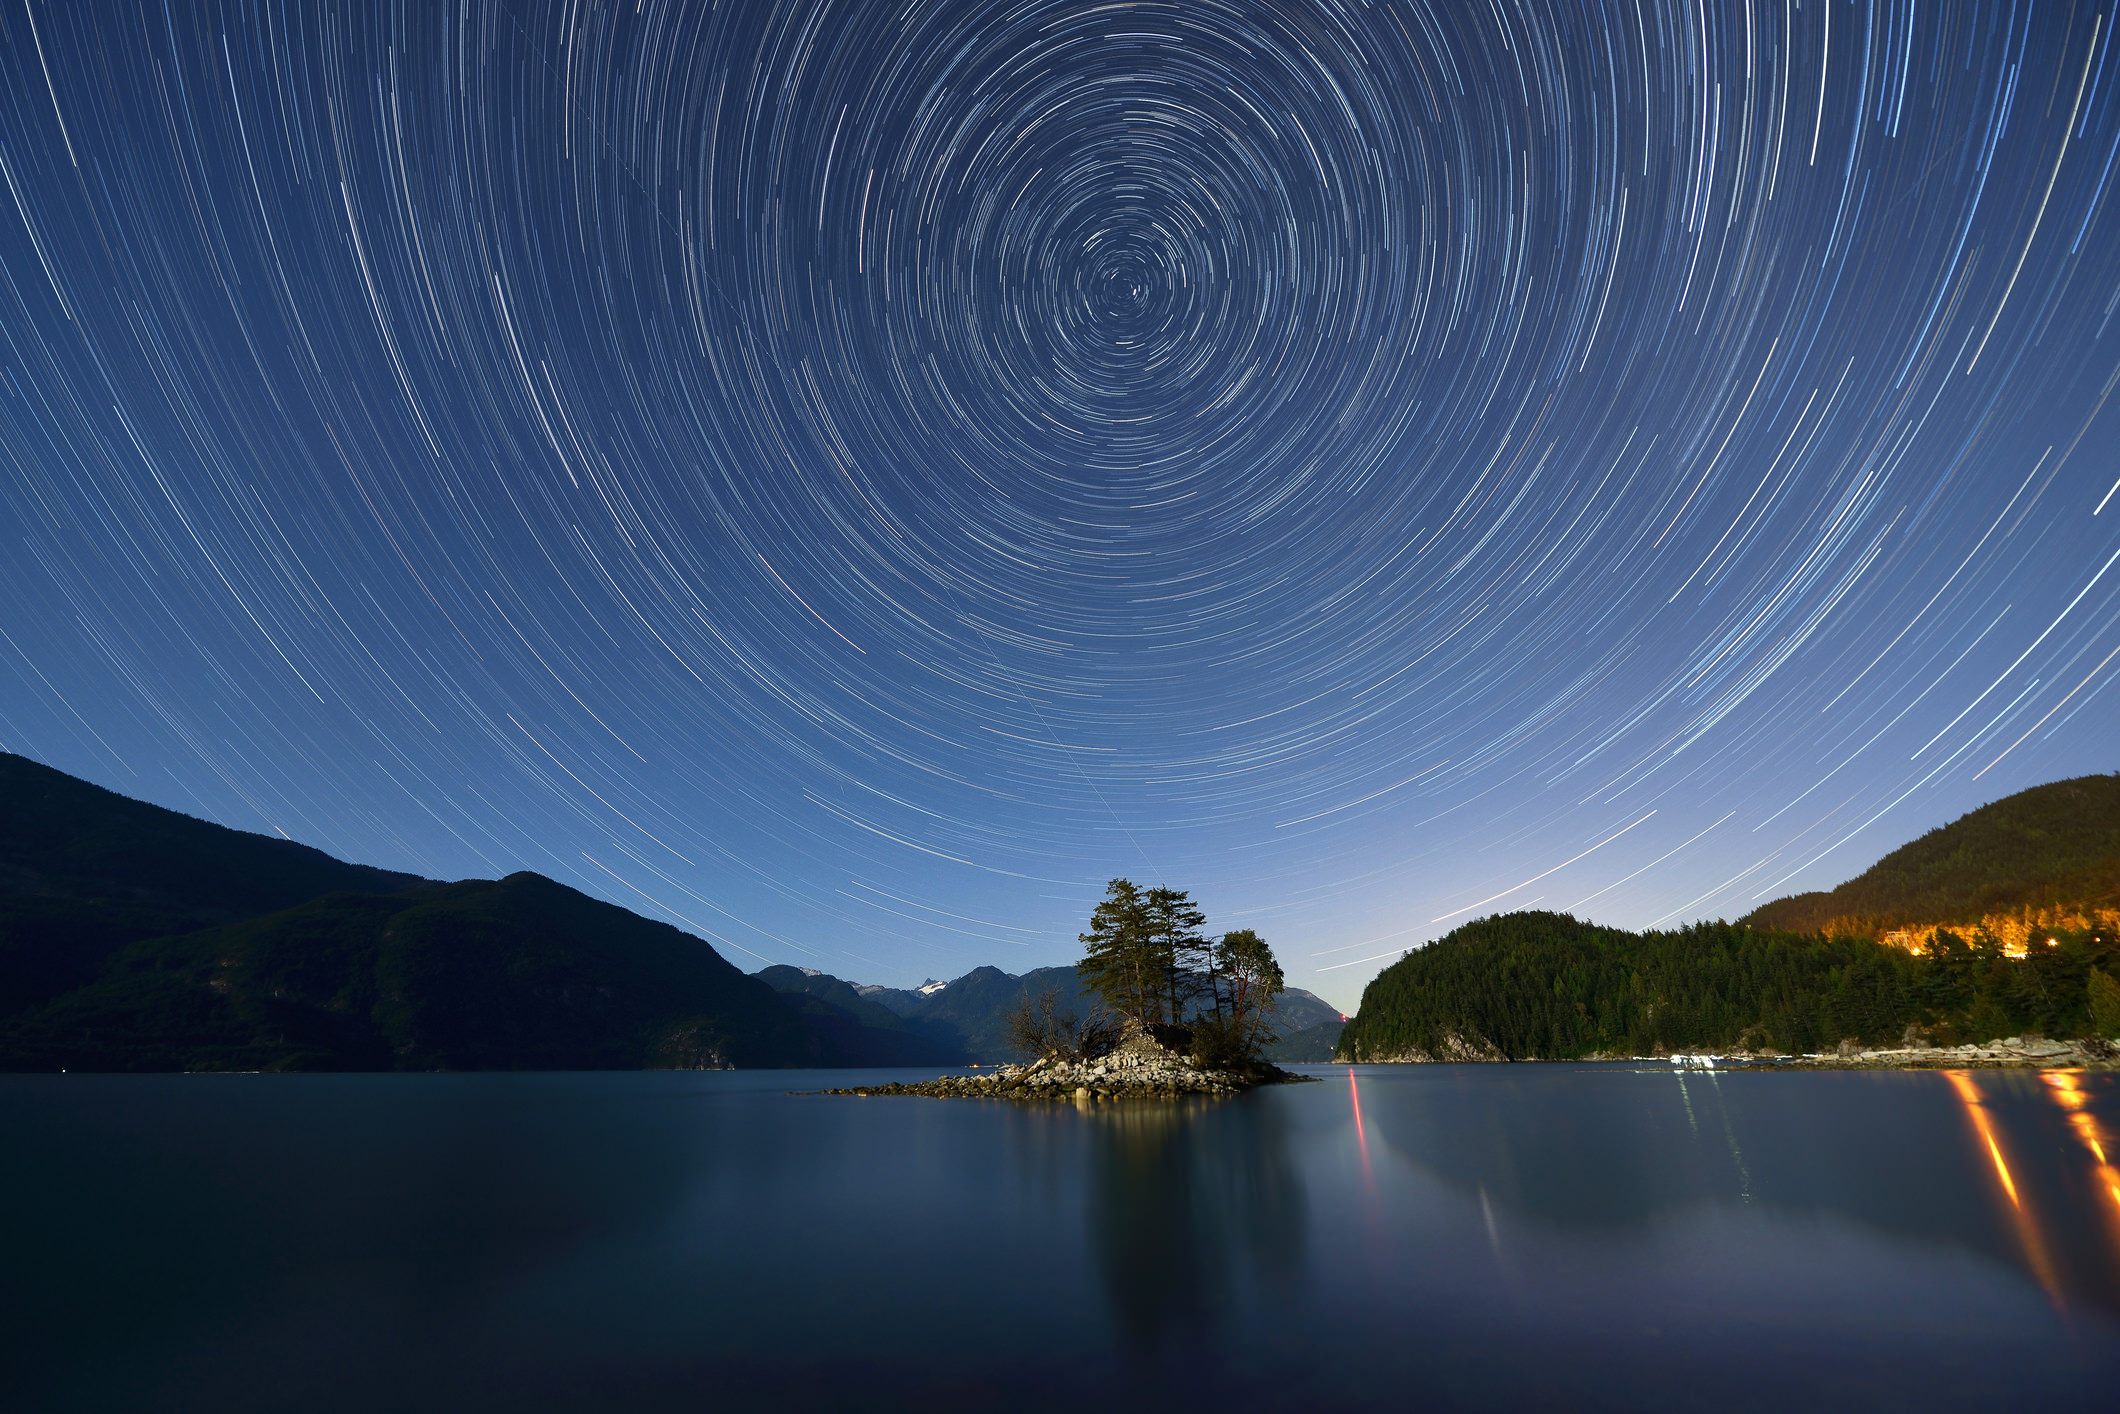
Astrophotography is one of the most spectacular forms of photography there is, and when you add motion to it by shooting time-lapse, you can capture these amazing visuals of the rotating night sky above dreamy landscapes. I use the Syrp Genie for adding camera motion to my astro time-lapses which really adds production value to your timelapse by adding smooth motion. Here’s 10 points to consider when shooting a motion controlled astro time-lapse. - Mark Gee, The Art of Night.
1. When scouting for a location, head out in the daytime first, and use one of the smartphone astro apps which has an augmented reality function like PhotoPills or Starwalk to plan your composition with the stars.
2. When planning to do a motion controlled camera move in your time-lapse, it’s always good to find a composition which has foreground interest like rocks or trees, for example. This way you will get some interesting parallax against the night sky as the camera moves through your shot.
3. You will need to shoot your astro time-lapse with all your settings on manual, this includes white balance and your focus. I tend to use tungsten or incandescent mode for my white balance, which can be changed to your liking once you get it in post.
4. Make sure that the long exposure noise reduction is turned off on your camera – with this setting on, it will take twice as long as your exposure time before writing the image to your card, and that is something you don't want for a time-lapse. Instead, we will be using noise reduction in post processing.
5. Getting sharp focus is probably one of the hardest things to do in an astro time-lapse. You could autofocus on a distant object in the daytime, then set your focus to manual and tape your lens ring to keep it locked off. But personally, I find the live view method is a lot more accurate. It’s where you find the brightest star or object in the sky, and use live view on your camera to line it up close to the center of frame. Then zoom in 10x on your live view and manually adjust your focus ring on your lens until the star looks sharp.
6. You will need to shoot with a long exposure and high ISO settings to capture a starry night sky time-lapse. Settings will vary depending on environmental lighting conditions and the camera you are using, but in a dark sky environment on my full frame sensor Canon 6d and a 14mm lens, I typically shoot with a 30-second shutter and an aperture of f/2.8 with a ISO of 3200.
7. Make sure you set your interval on your motion control unit so it allows enough time to write the image to the card before firing the next shot. I tend to use the 5-second rule, so if I’m shooting a 30-second exposure, my interval will be 35 seconds between shots.
8. Once you have your camera and motion control setup, preview your time-lapse movie to make sure you’re happy with the movement and composition. You can shine a torch on your landscape in frame and preview the move with live view on your camera. I also tend to take a photo at the start and end position of the time-lapse, so I can see what I will end up with as far as the composition and exposure is concerned.
9. Before setting your time-lapse off, make sure you do a final check of everything. Make sure everything is set manually on your camera and your focus and exposure is correct. Check that your interval and general settings like direction of travel are correct on your motion control unit. And double check you don’t have your lock engaged on your slider...I’ve been bitten by this a few times in the past! Once everything is in order, set your time-lapse off and sit back to enjoy the stars!
10. After you have all your images downloaded and ready for processing, as tempting as it is, make sure you don’t overcook your processing - it might look great to you on a single image, but once saved out as a movie, you will end up with a lot of noise and artifacts in your time-lapse.
I hope you’ve found these 10 points on shooting an astro time-lapse helpful - make sure you also check out the video tutorial below to see how I use the Syrp Genie for my astro time-lapses - I cover everything from setting up the Genie, to processing a time-lapse from start to finish.
Mark Gee is an award winning photographer, time-lapse filmmaker & digital visual effects supervisor based in Wellington, New Zealand. He has worked on many high profile and Oscar award winning feature films. His love of the New Zealand landscape is a big part of the inspiration for his photography. Visit his website at www.theartofnight.com.
When done well, time-lapse videos can be a breathtaking testament to the beauty of our natural surroundings.
Heck, even if the terrain isn't spectacularly beautiful, putting it into motion can still offer a sense of wonderment about the world in which we live.
To master the art of time-lapse videos, there are a number of critical steps involved.
Step 1: Scout the Location
YouTube Screenshot/Morten Rustad
When looking for a landscape to feature in a day-to-night time-lapse, you want something that will allow you to capture the gorgeous transition of light as the sun falls below the horizon and shadows creep across the landscape.
To do this, you need a location that affords you an unobstructed view of the western sky.
But remember, you aren't just banking on a single moment in time to capture images for the video. Instead, you need to be assured that wherever you set up your gear, that you'll have a view of the entire sunset.
You can use Google Earth to pinpoint a location and see an augmented reality version of the sun's path from that spot at any point in the day. Then, once you're in the field, you can use apps like PhotoPills to determine how the sun will track at your location and get pinpoint times for the sunset as well.
Step 2: Pack the Essential Gear
YouTube Screenshot/Morten Rustad
Though there are plenty of excellent locations for sunset time-lapse photography that are easily accessible, not all locations are as easy as hopping out of the car and setting up shop.
If you want to head to locations off the beaten path, it's wise to pack light and only take the essentials.
In this case, that's your camera and lens, a tripod with a Syrp ballhead, a Syrp Super Dark Variable ND Filter, and a Syrp Genie Mini, which gives you motion control over your camera and works as an intervalometer as well.
With the accompanying smartphone app, you can direct the Genie Mini to shoot smooth, panning time-lapse video. In fact, it comes pre-loaded with time-lapse video pre-sets to help even the most novice of time-lapse photographers create epic videos.
And since it's compatible with a variety of DSLR and mirrorless cameras (and smartphones, too!), you can make gorgeous time-lapses with just about any camera.
Step 3: Compose the Shot
YouTube Screenshot/Morten Rustad
Using the ballhead on your tripod, the next step is to compose the starting frame of the time-lapse.
Simply adjust the head as needed, remembering that your camera will likely shoot in 3:2 format, whereas the time-lapse will be in 16:9 format.
That means that the top and bottom of your image won't be visible in the time-lapse, so be sure to compose the shot such that nothing of great importance is in these areas.
Additionally, when composing the shot, it's a good idea to have something of interest to draw the viewer into the time-lapse, like the building and the grasses in the screenshot above.
YouTube Screenshot/Morten Rustad
But composing the shot also requires that you arrange the elements within it to be pleasing to the eye.
Using the rule of thirds can help you do that, by placing the sunset in the upper one-third of the frame.
Of course, that means that the bottom two-thirds of the image needs to have elements that are visually engaging, which has been done in the screenshot above.
Step 4: Set the Exposure Settings
YouTube Screenshot/Morten Rustad
The difficulty of creating a time-lapse at sunset is that the lighting starts out quite consistent, and then when sunset commences, the lighting changes rapidly.
One way you can overcome this difficulty is to manually adjust the ISO over the course of the shoot, which allows you to maintain a constant shutter speed from start to finish.
If you want to blur the movement of clouds and other objects in the shot, you'll need to extend the shutter speed by using a variable ND filter like the Syrp Super Dark shown below.
Another tip is that you don't have to shoot your time-lapse in full manual. In fact, if you don't need a long shutter speed, aperture priority mode should work well.
However, regardless of what mode you use, err on the side of underexposure, that way you're sure not to blow out the highlights in the sky as the sun moves across the camera's field of view.
And don't worry if the images you take look really dark - you can recover the details in shadowed areas in post-processing much easier than you can recover details in blown out highlights.
Step 5: Set the Time-Lapse Settings
YouTube Screenshot/Morten Rustad
The settings you use to record the time-lapse images will depend on how long it takes the sun to set at your location. Thus, PhotoPills comes in handy for getting a specific time frame for your time-lapse.
A good starting point is to set the duration for about 2-2.5 hours, and since the earth rotates around the sun at a rate of about 15-degrees per hour, a rotation of 30-degrees is advisable, as shown above. Learn more about DSLR settings for landscape photography on our website PhotographyTalk.com.
With the Syrp Genie App, it's incredibly easy to set these parameters.
Once you have the first frame set, you can use the Genie App to drag the camera and lock in the endpoint. From there, you can fine-tune the settings, press "Return Home" in the Genie App, and the camera will rotate back to their starting position.
YouTube Screenshot/Morten Rustad
Another thing to keep in mind is that when you set the interval, that is, the time between each individual photo, you need to account not only for the movement that the Genie Mini needs to make, but also the time your camera's buffer needs to work.
An interval of 15 seconds should give your camera plenty of time to do its thing in between each shot.
Now you can press start on your phone, and Genie Mini will take care of the shooting!
Step 6: Processing the Images
The final step in the process is to process the images in post-processing.
In the video above, Morten Rustad offers up a workflow for doing just that (and for setting up the time-lapse as outlined in this article).
And with that, you have a complete how-to guide for creating stunning ramping sunset time-lapse videos!
If you've ever tried to tackle time-lapse photography and failed, there's certainly a lot of culprits for why the results weren't what you wanted.
I'd say that more often than not, though, poor results are the result of challenging light conditions.
More specifically, harsh lighting can make it nearly impossible to get a quality time-lapse of certain scenes.
It makes sense, too.
When you try to take a regular still photograph of a subject in challenging lighting, it's easy to get an image that's underexposed, overexposed, or has too much contrast.
It stands to reason, then, that when you try to create a time-lapse in the same harsh lighting conditions that the results might not be that great.
Add a filter to your lens, and suddenly your camera has a much easier time adjusting to the harsh light. That's because a variable ND filter limits the amount of light entering the lens.
By limiting that light, you have a greater capacity to use longer shutter speeds, even in harsh, daylight conditions.
With longer shutter speeds, you can avoid another problem that's common with time-lapse videos - a flickery look.
If your time-lapse flickers, it's due to the shutter speed being too fast.
Again, that's where a variable ND filter comes in. Because you can extend your shutter speed, you can get a more flowing, natural look in your time-lapses.
Check out the difference in results between a time-lapse with shorter shutter speeds and no ND filter, and time-lapses with longer shutter speeds and an ND filter in the video above by Syrp.
Get Creative With a Variable ND Filter
The beauty of a variable ND filter is that it isn't just for time-lapse photography.
You can add one to your lens for long exposures that indicate movement.
Waves, rivers, waterfalls, passing traffic - as long as it's moving, a variable ND filter allows you to blur that movement.
Really, a variable ND filter is the ideal add-on if you want to tackle long exposures and time-lapse photography.
That's because you can adjust the exposure level with a simple turn of the filter.
For example, if find that five stops of power isn't enough, simply turn the filter to six, seven, eight, and so on.
Better still, some variable ND filters have front and rear threads, so if you need even more light-stopping power, you can easily stack the filters.
Not All Filters are Made Alike...
Just like you won't get the same sharpness and detail using a cheap lens as you would if you use a higher-end lens, the same applies to filters.
After all, you don't want to get a spendy lens and then cover it with a sub-par filter, right?
The Super Dark Variable ND filter used in the video above (and pictured above) is made of high-quality Japanese glass. That means your image quality will be right on par with what you expect.
Plus, the Super Dark allows you to extend your shutter speed to up to 15 seconds in broad daylight.
With that amount of time on your hands, you can easily create gorgeous long exposures and time-lapse videos with smooth movement, just like you saw in the video above.
As far as I'm concerned, if you have desires to get into time-lapse photography or long exposures, a variable ND filter like the Super Dark from Syrp is the way to go.
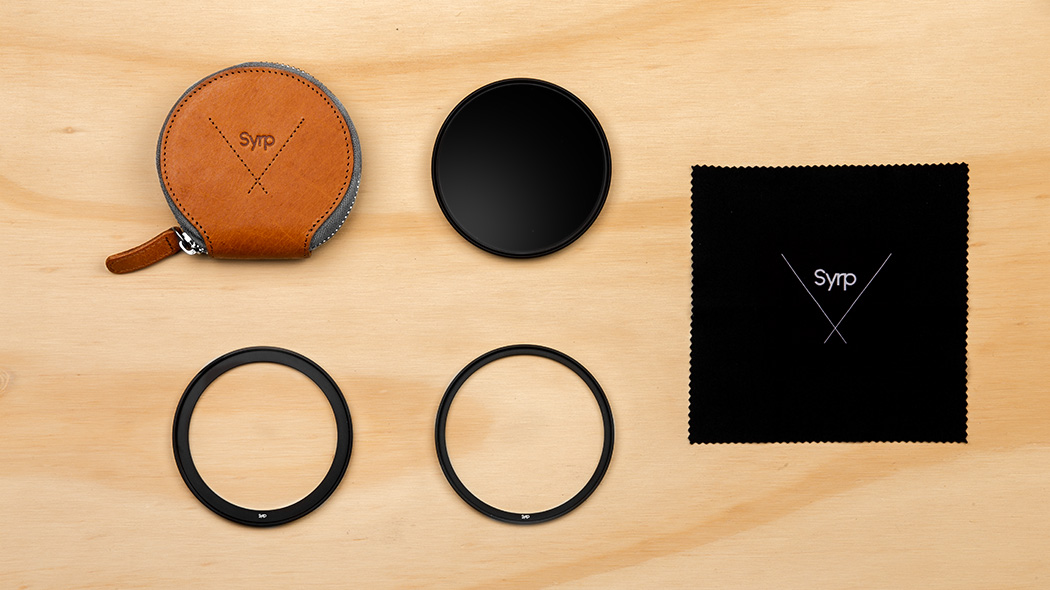
It's beautifully made, easy to use, and comes in large and small sizes for various lenses.
Heck, you even get lens adapters for different sized lenses, a cleaning cloth, and an awesome leather carrying case.
This article addresses one of the biggest problems we all have.
We’ve all been there: You’ve just framed up a killer shot, you know, something wall-worthy. You grab your shutter trigger, and it fails.
Then you either fire away like a madman, hoping it will randomly work or you go through some makeshift ‘check-the-problem’ checklist on your shutter trigger.
You might even try a wired cable release but discover that you need to get some distance from your camera AND still be able to fire off the shutter. A wired option just won't work in that situation.
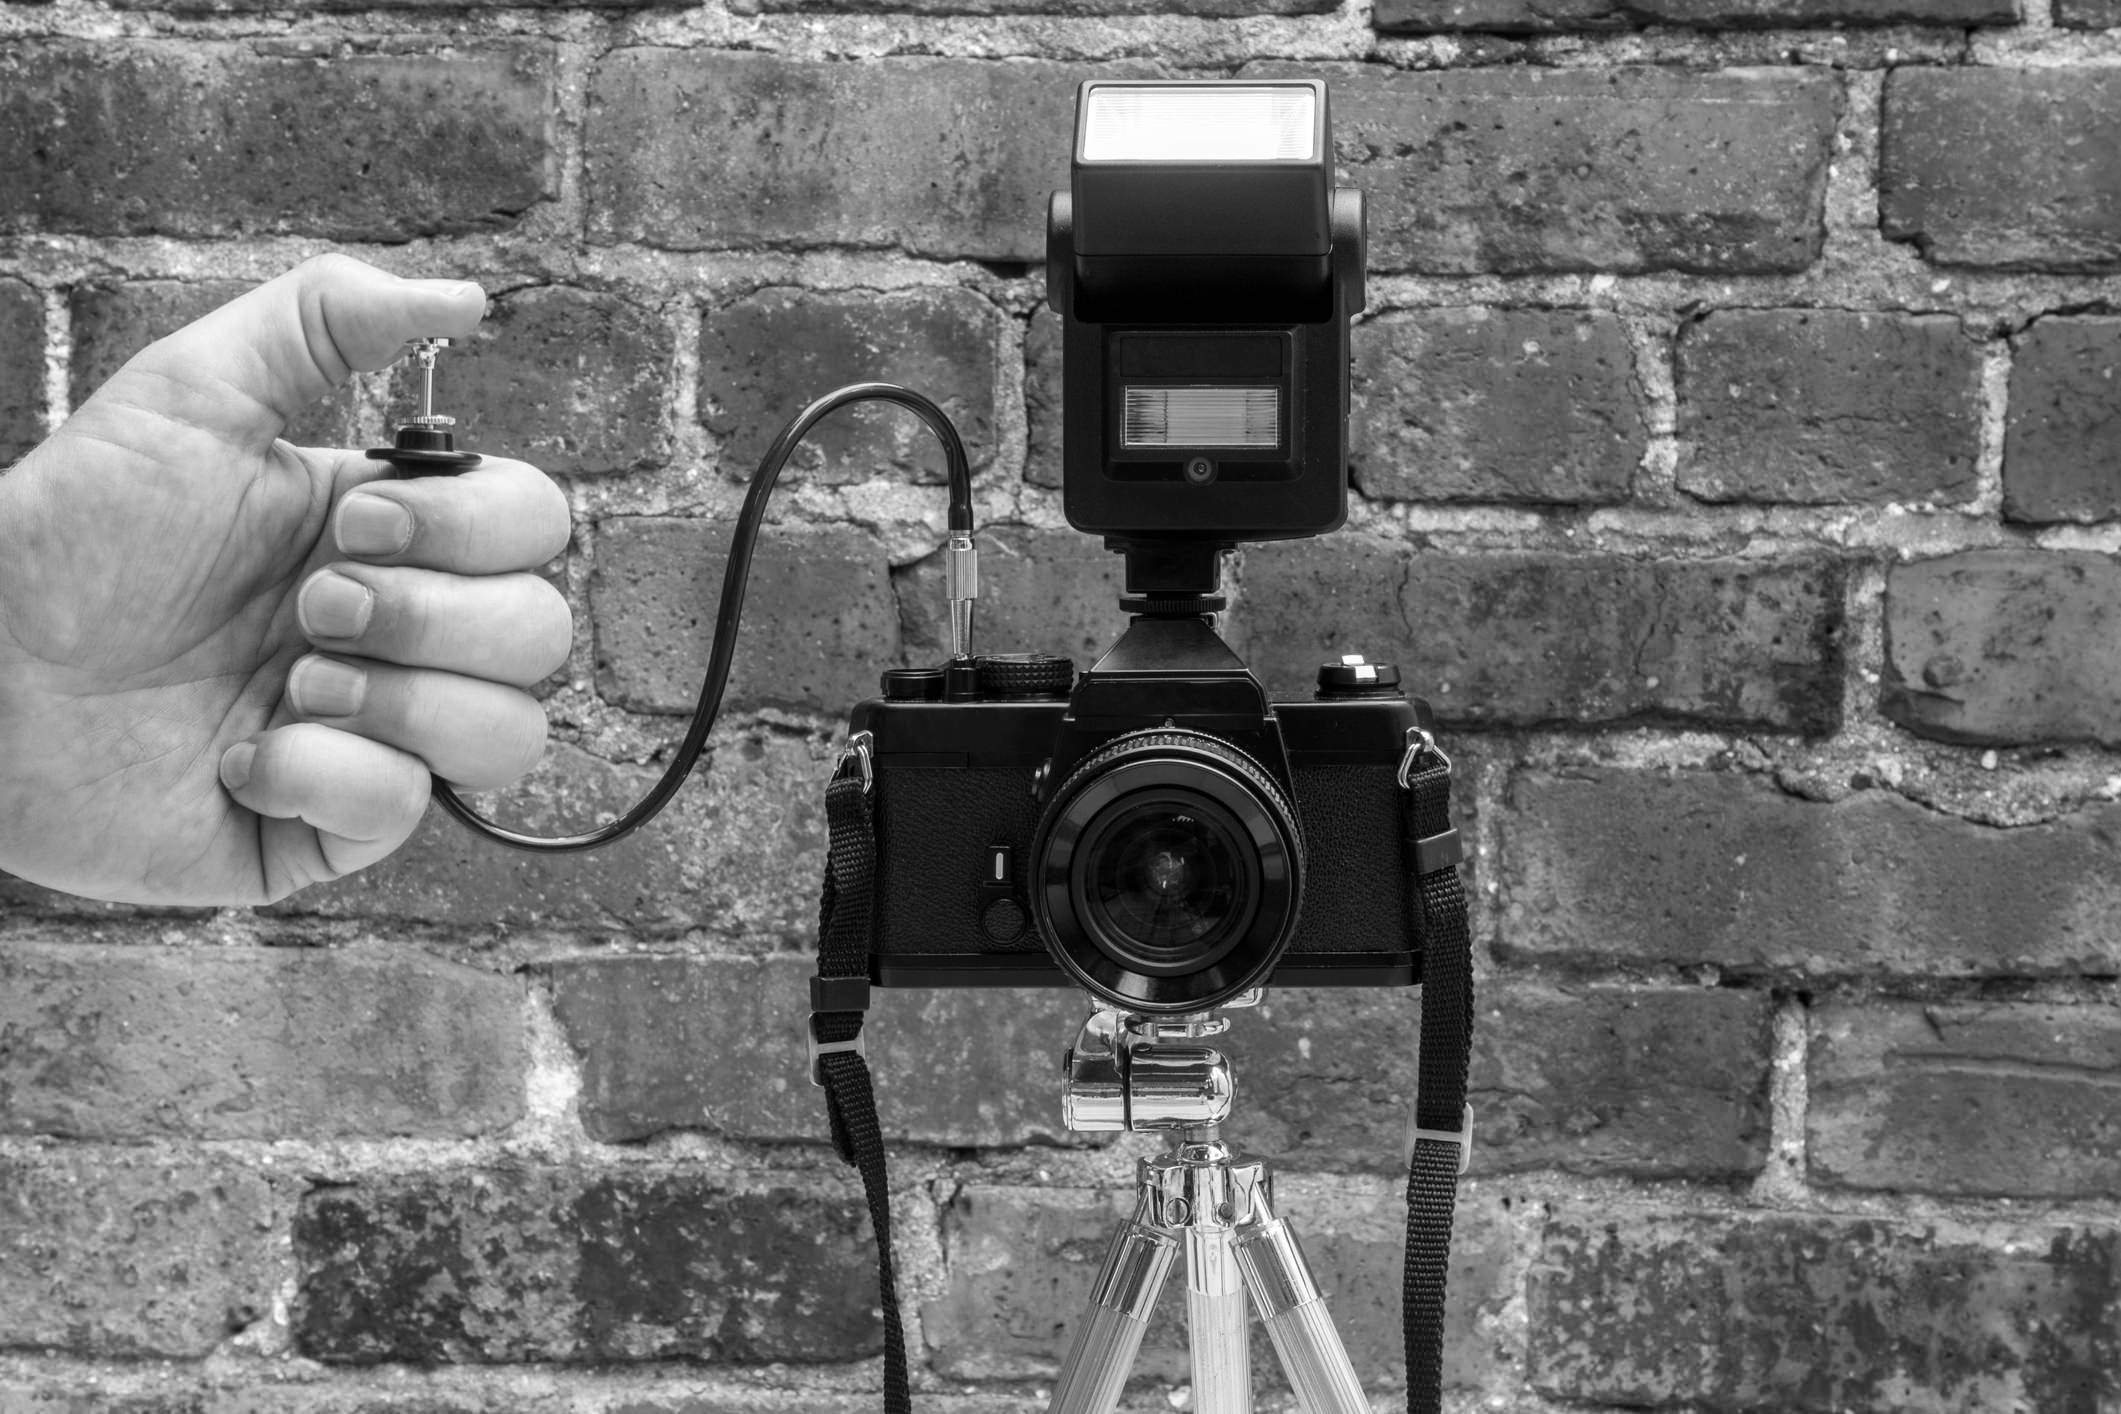
Frankly, I have tested over 12 shutter releases over the years.
Some were old school (like the one above), some have been 'OK,' and others just missed the target completely.
The challenge is that while some of the triggers that I list as being ‘OK,' they really have limitations.
It was just last weekend my cell phone was under 20% battery, so I wasn’t using my Pulse trigger and had to resort to my ‘Plan B.'
The RFN4s - which is an ‘OK’ trigger - has trouble with long exposures (it will often disengage the shutter instantly instead keeping the shutter open for the long exposure). Now that's frustrating!
My favorite trigger system over the years has by far been the Pulse, which of course is made from Alpine Labs.
This thing does it all from long exposures, time lapse video, HDR or just trigger my shutter wirelessly.
But even with this one, I had a bone to pick (and believe me, I’m digging deep on this one): I couldn’t use it on my Sony cameras!
Well, I just found out that the mad scientists at Alpine Labs have come out with the “Spark,” a new shutter trigger that's shown in the image above.
Needless to say, the camera remote has come a long, LONG way. This thing is the stinking Swiss Army Knife of shutter triggers!
No joke.
When you look into what this trigger is capable of doing, you can appreciate my excitement.
Heck, just in the first 24 hours on Kickstarter it cleared over $100,000 in pre-orders from over 2,000 photographers! How nuts is that?!
But that's just the beginning...
OK, so let’s get into the good stuff.
Like its predecessor, Pulse, Spark is a versatile camera remote, but takes that versatility to another level:
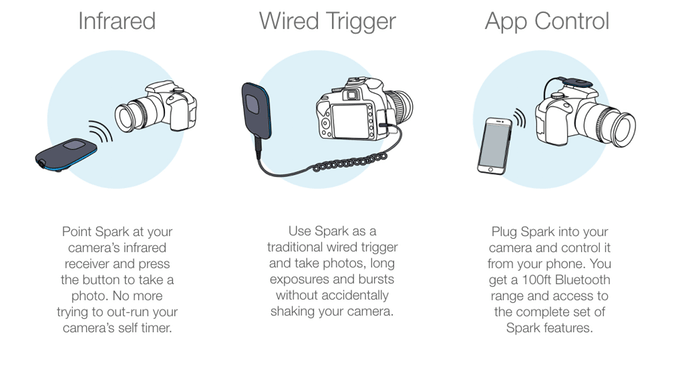
You can control your camera in three different ways - infrared, wired, or wirelessly via a smartphone app.
That means that no matter what you're photographing, Spark is up to the task.
Tackle family portraits in infrared mode in which you can trigger the shutter instantly from up to 30 feet away. No more running back and forth to engage your camera's timer - do it with Spark!
You can also capture long exposures in wired mode when distance isn't of the essence. Just press Spark's button, and it acts like a wired Bulb remote, keeping the shutter open until you press the button again. That means you get the reliability of a traditional wired trigger, but with the added bonus of having wireless functionality too.
If time lapse videos are your thing, use Spark's smartphone app. You can work up to 100 feet away using Bluetooth connectivity. Just set the parameters of the time lapse like bulb ramping or time delay, and you can let Spark work its magic while you take a snooze.
And if your phone's battery is dead or dying, no worries. Spark even lets you program the time lapse interval without a phone. All you have to do is press and hold Spark's button, and it will automatically take photos to create 10 seconds worth of time lapse video.
So basically what I'm saying is that whatever you need, Spark can handle it!
Think about it...
With one little gadget, you can get tack-sharp still photos, breathtaking long exposures, professional-looking time lapse videos, heck - even some pretty awesome selfies too if that's your thing!
But the benefits don't stop there.
Spark weighs just 0.75 ounces and is just over 2 inches long, 1.35 inches wide, less than 0.5 inches tall. Needless to say, you can pack it in your camera bag without taking up any room at all.
And speaking of power, Spark has a battery life of over 2,000 hours, so even on your longest days and weekends of shooting, Spark will be ready for the task. When it's time for a new battery, all you need is a standard watch battery - no expensive juice is needed for this little guy!
If you have a Pulse and love that you can control up to three cameras at once, you'll be pleased to know that the folks at Alpine Labs carried that functionality over to Spark, too.
That means you can sync three cameras to take stills or videos all at the same time from different angles.
I don't have to tell you that getting synchronized multi-camera shots has never been so simple.
But, hey, don't take my word for it...
Click here to learn more about this awesome gadget.
Trust me - if this is your first introduction to Alpine Labs, you have no idea what you've been missing.
Like I said earlier, Pulse was a game-changer that's enabled me to take some truly awesome stills, time lapse videos, and long exposures. And I have a feeling Spark is going to give me even more flexibility and control to take my photos to yet another level.
Snowdonia sounds like a made-up name from Game of Thrones, doesn’t it?
At least when I hear that name or see it written down, I can see John Snow galavanting across the landscape in my mind’s eye.
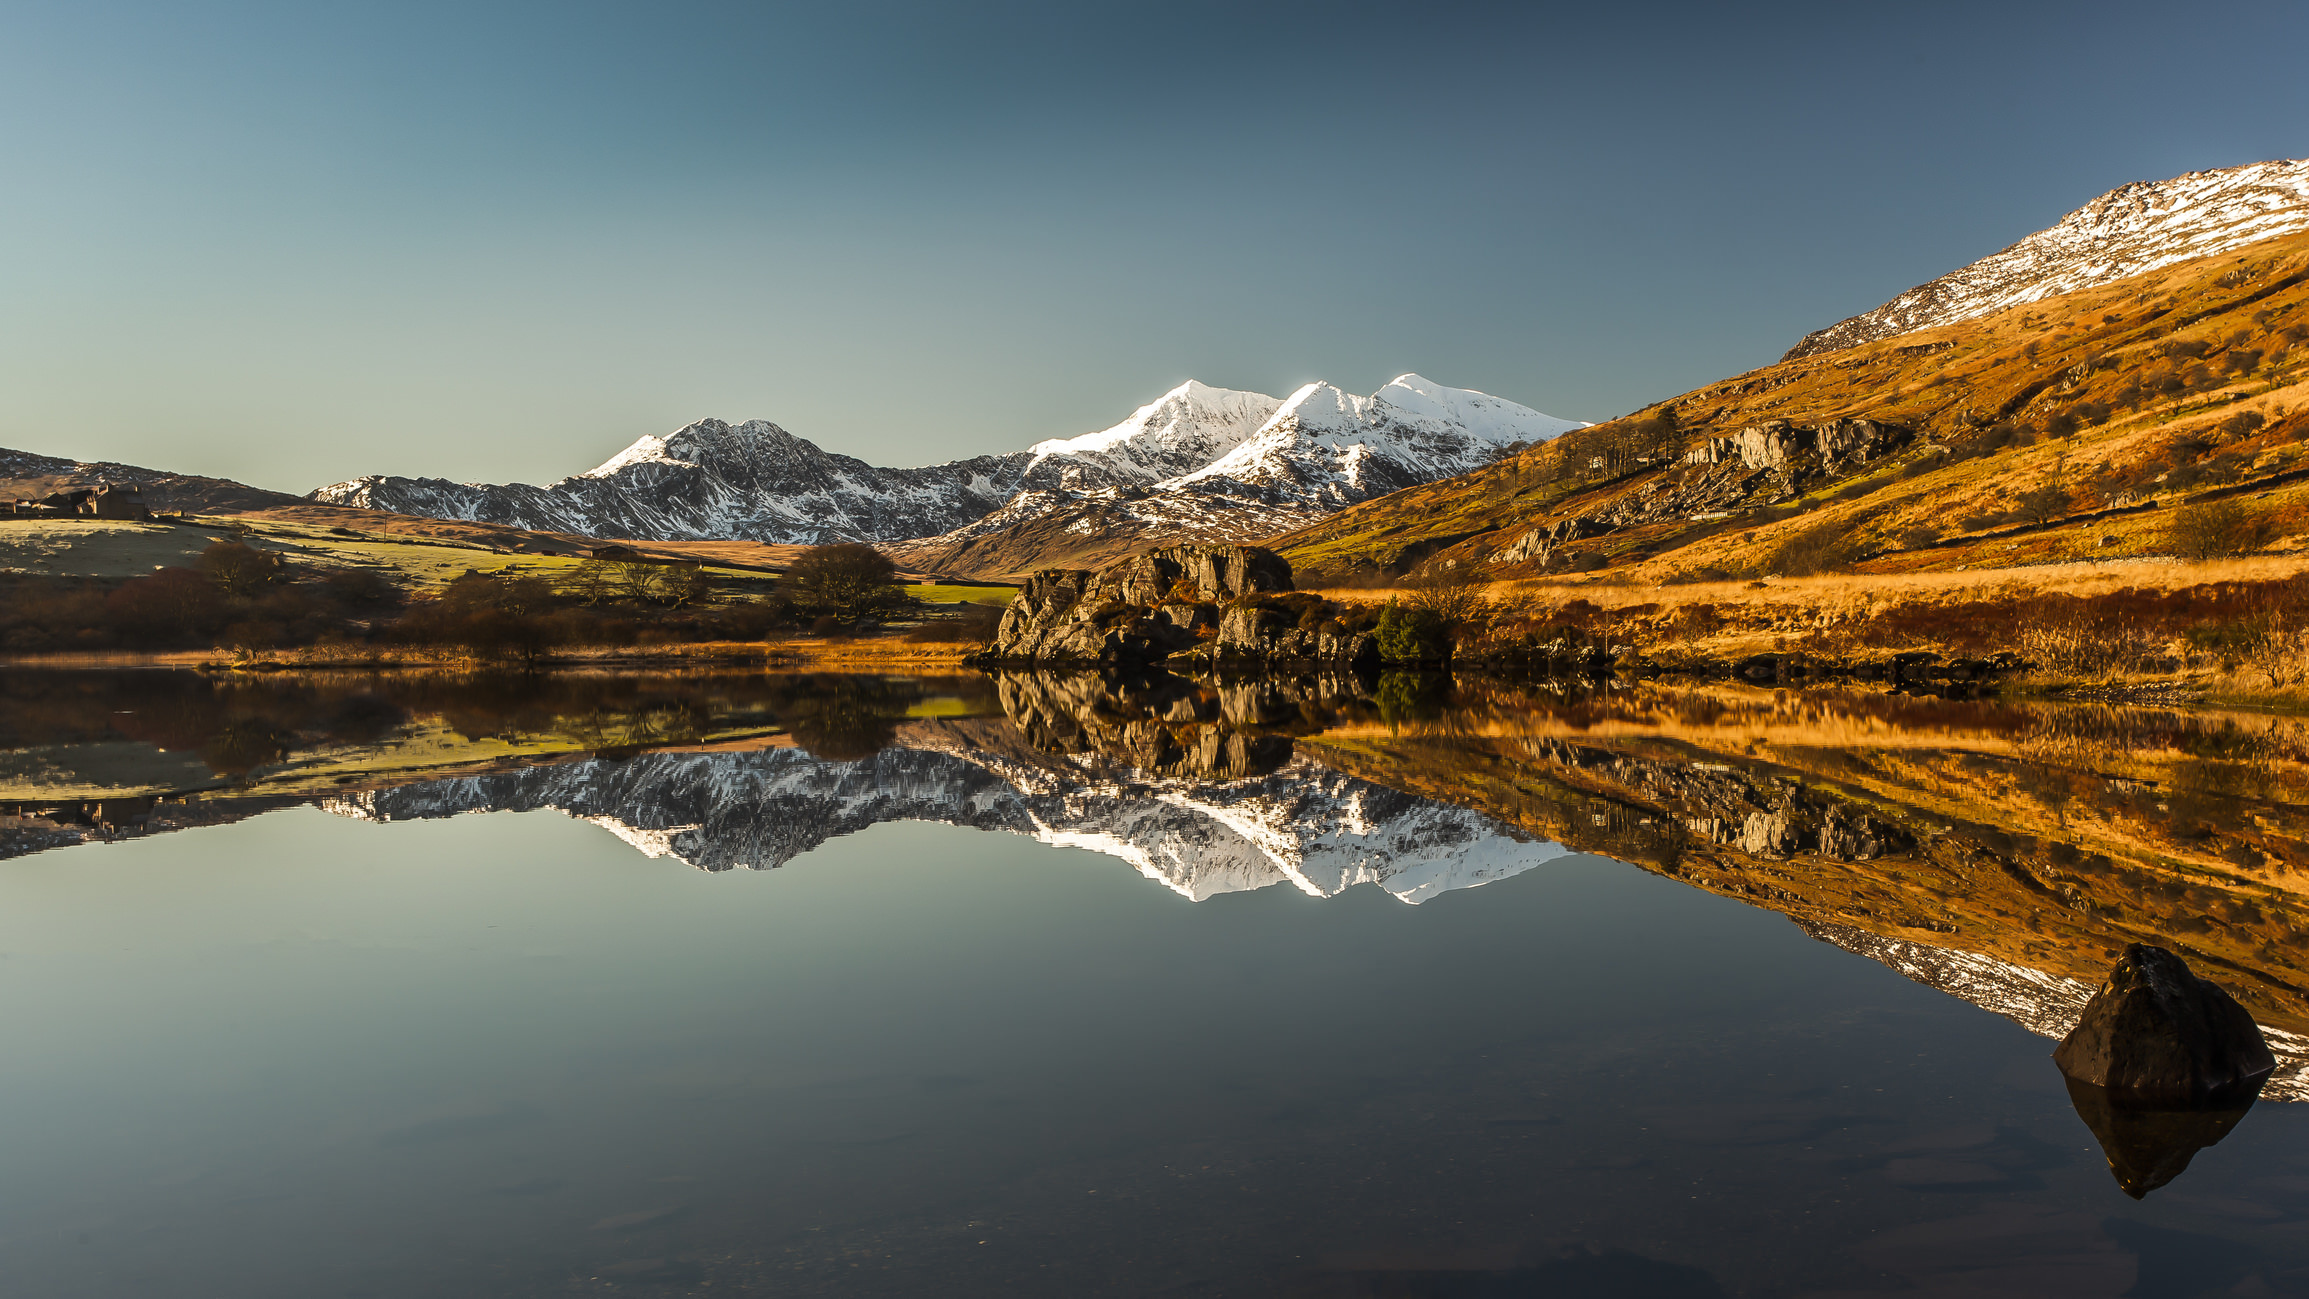
But for those of you that are uninitiated, Snowdonia is a very real place in northwest Wales that simply looks out of this world.
The area is home to Snowdonia National Park, which encompasses soaring mountains, miles of coastlines, and epic vantage points to view the sea and sunsets.
But I’m willing to bet that even if you’ve heard of Snowdonia that you’ve never seen it quite like this...
Snowdonia, Wales | A Time-lapse Adventure in 4K
Snowdonia is Cal Thomson's first time-lapse film.
Let me repeat that: the video above is his FIRST time-lapse.
I’d say that’s a phenomenal result for anyone, let alone a first-timer!
Snowdonia obviously took a lot of hard work, talent, and a fair bit of hiking. Shot across Snowdonia National Park, Cal showcases some serious time-lapse chops and the beauty of the Welsh landscape.
And that landscape is certainly inspiring. As Cal put it, “It was a great exercise in exploring my local surroundings and getting away from technology screens that tend to encompass most of my day.”
We may not all be as lucky as Cal and have Snowdonia as part of our local landscape, but it still makes us want to get out and see what’s around us!
Better still, Cal’s commitment to exploring nature and getting away from our screens should get us all excited to spend more time outdoors taking fantastic photos and making stunning time-lapses.
Time-Lapses Made Simple
Ok, so creating a time-lapse like Cal’s is never “simple.”
There’s a way to streamline your workflow, though, and get incredible results like those you see in his video.
Below, I’ve listed the gear Cal used to create his epic masterpiece. You’ll notice under “motion tracking” a device called the Syrp Genie.
That little gadget can make all the difference in the world when creating a time-lapse video like Cal’s.
Genie is an easy-to-use, ultra portable motion control device. It has no external wires. No controllers. Heck, there’s not even any external batteries. You literally just add it to your regular camera kit and away you go.
Just attach Genie to your existing gear and get smooth motion control for time-lapses or real-time videos. Genie can be used on two different axes - on a tripod for smooth panning motion or on a slider for long, gorgeous tracking shots.
Better yet, the Syrp Genie doesn’t require a bespoke slider - you can build your own or use it with another brand’s slider - and with just a few adjustments, it will perform perfect motion control of the camera.
Not only is Genie flexible for use in multiple setups, but it’s also small. And I mean very small.
That portability means you can put it in your camera bag or backpack and not be weighed down by a ton of extra gear weight. How do you think Cal managed to hike all over Snowdonia?!
Genie is packed with features too - exposure ramping, auto-start, HDR time-lapses - and it even comes with presets to create stunning time-lapses of people, clouds, or stars right out of the box. Literally - in just a few moments it can be ready to go and your time-lapse video-making career can begin!
If you’re ready to get into the time-lapse video game, watch Cal’s video again for inspiration, then check out the Syrp Genie. It’s not the only tool you’ll need to create a beautiful time-lapse, but it’s certainly one of the most useful!
I'm continually amazed at the things that photographers can accomplish given the drive, dedication, creative vision, and the appropriate gear.
Morten Rustad knows all about drive and dedication.
His latest film, Seasons of Norway, took one year to plan, a second year to shoot, and four months to edit.
Add to that 20,000 kilometers of travel, 200,000 photos, and 20 terabytes worth of data, and you have the makings of a passion project that obviously took a lot of time and effort to bring to fruition.
If you've never been to Norway, my guess is that after watching this film, you'll be finding a way to get there.
As Morten documents, Norway is filled with imposing mountains, endless plateaus, and echoing valleys.
It's a land where nature takes the lead and the rest of us merely follow.
But while the seasons change, the small things go unnoticed. That's where time-lapse comes in.
Using motion-control components by Syrp (pictured below), Morten was able to capture two-axis motion of snow melting, water flowing, clouds passing, and other features of the landscape that we usually pay little attention to.
The devices used - the Syrp Genie, Genie Mini, and Magic Carpet - allowed Morten to get buttery smooth motion.The Genie is an all-in-one, portable solution for time-lapse video, while the Genie Mini offers ease of use with a smartphone-enabled app. Combined with the Magic Carpet, you have a recipe for a professional-grade time-lapse without a professional-grade investment in gear.
The Genie is an all-in-one, portable solution for time-lapse video while the Genie Mini offers ease of use with a smartphone-enabled app. Combined with the Magic Carpet, you have a recipe for a professional-grade time-lapse without a professional-grade investment in gear.
In Seasons of Change, Morten was able to bring subtle moments to life in a vivid manner that make you feel like you're right there with him as he travels around the country.
But you need to see it for yourself, not read what I think about it!
Check out the video below, and brace yourself for an incredible world of beauty.
About Morten
Morten Rustad is a professional time-lapse photographer based in Oslo, Norway.
He graduated from University of Essex with top grades in BSc Business Management in 2015 and took a big step into the world of time-lapse photography in 2014 with his viral success Norway - A Time-Lapse Adventure.
During 2016, Morten traveled through Norway yet again to create by far his biggest film yet, Seasons of Norway - A Time-Lapse Adventure in 8K.
Created by (directed, photographed, edited): Morten Rustad Produced by: Anders Graham Soundtrack composed by: Jogeir Daae Mæland Vocals by: Katrine Stenbekk Mixed by: Sivert Hagtvet Sound design by: Viljar Losnegård Creative advising by: Jørn Nyset Ranum Thanks to Syrp (www.syrp.co.nz) for providing motion control systems. Production company: Turbin Film AS (www.turbinfilm.no)
I've spent some time in Seattle over the years, and I always come away thinking, "Man, what a pretty place."
It's the best of so many worlds...you've got the charm of being on the coast, the interesting architecture of downtown, lots trees and vegetation, all set in front of a backdrop of Mount Rainier.
That's hard to beat.
Naturally, Seattle draws a lot of photographers for the reasons I listed above.
But it also has the attention of time-lapse enthusiasts that seek to document the motions this vibrant city undertakes from day to day.
Kevin from Rank Productions is one such time-lapse enthusiast that spent over two years getting the footage for the video above, with a little motivation and help during shooting from Rob Habon.
Two years is a long time to collect footage, so saying that this film was a labor of love would be an understatement!
And though Seattle is the subject of his this time-lapse, Kevin now lives on the road and is currently exploring Australia and New Zealand.
When asked why he's on the road now, Kevin simply stated, "Videography and photography has really motivated me to go out and document the amazing places on earth."
That sounds like a great way to live your life if you ask me...
Check out the video above to see how Kevin depicts his hometown, complete with a soundtrack supplied by Seattle natives Odezsa.
Gear Used:
Canon 7D
Magic Lantern
LRTimelapse
Syrp Genie
Time-Lapse Videos Simplified
If you look at the list of gear that Kevin used, you see just four things.
Talk about a simplified kit!
But that just goes to show that you don't need a ton of specialized gear to create awesome time-lapse videos.
One of my favorite time-lapse video essentials is the Syrp Genie, which is pictured above.
This little gadget is super small and super portable, and it has no external wires or batteries that make adding motion to your videos a hassle.
Genie gives you complete control over motion whether you're creating a time-lapse like Kevin's or working with real-time video too. That's the case whether you're using a rail system, a slider, or your own DIY setup for motion - Genie is adaptable to all kinds of gear and will give you ultra-smooth motion each and every time.
Genie also makes smooth in and out motion easy with customizable in and out points, and with several built-in time-lapse presets and HDR controls, you can start making incredible videos right out of the box.
It just doesn't get much simpler than that!
If you want awesome time-lapse footage but don't want to spend hours and hours setting up your gear and programming your motion control device, get a Genie. With just a few clicks of a button, you can start a simple time-lapse of the stars, clouds, or even people. Better still, with Genie's autostart function, you can tell it when to start filming so you don't have to stay up late or get up early to get things rolling.
You've seen the results in Kevin's video, so what are you waiting for? Create your own time-lapse magic with a Syrp Genie or one of their other incredible time-lapse products.
I know when I first started out in photography, time lapses weren't nearly as popular as they are today.
Nevertheless, I really, really, wanted to know how to create one.
Things have certainly changed, and creating time lapses is easier now than ever before.
That certainly works in your favor!
But that doesn't mean that there isn't some prep work and know-how involved in getting the best results.
I've put together a few tips for absolute beginners that will help you better understand the processes involved in time lapse photography.
Time Lapses Require Planning
I know this is one of those "duh" tips, but trust me, there's more planning involved than just picking a spot to set up your gear.
Yes, you need to think about the location, but you also need to think about what's going on there.
Having a lifeless landscape as your subject won't do any good - without movement, your time lapse might fall a little flat.
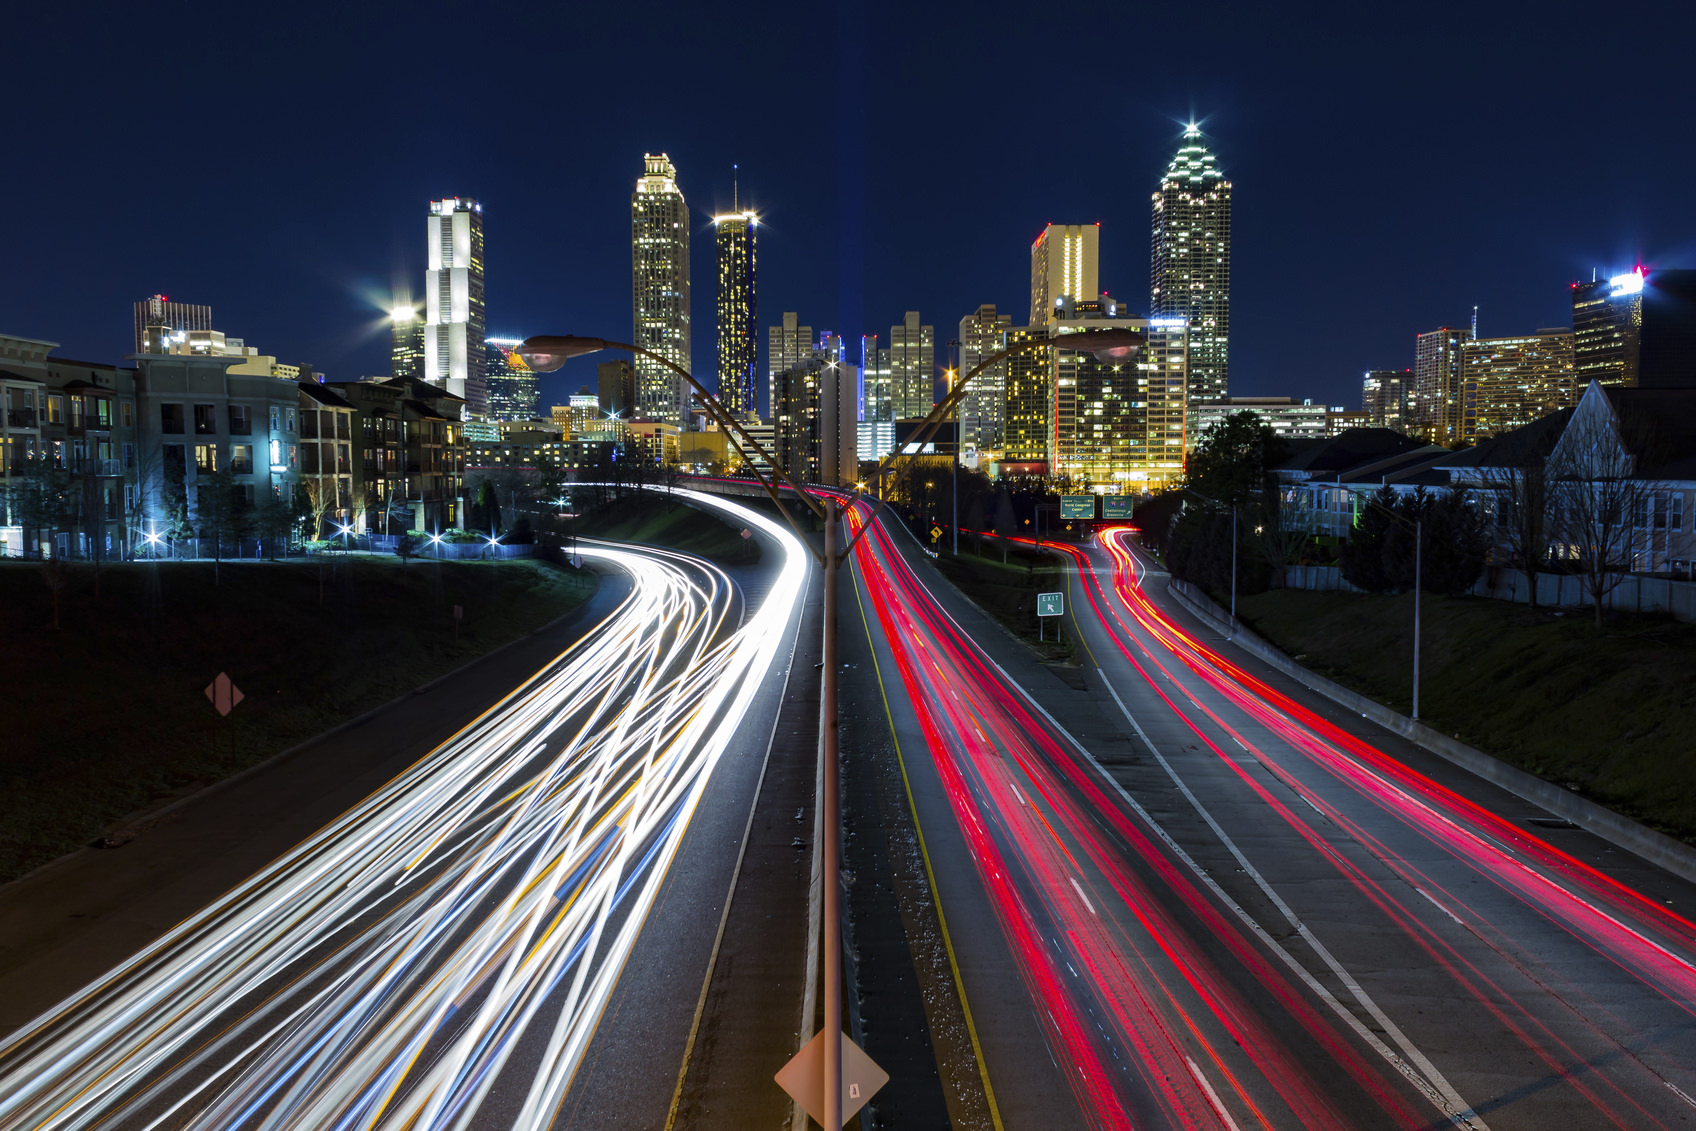
That means find a place that overlooks a river, a waterfall, a highway, or waves crashing on the beach. Heck, even a wide open prairie with clouds moving across the sky will work. The point is you need something moving.
The trick, though, is to ensure that the movement isn't distracting.
People walking on a sidewalk is fine. Cars passing by on a highway is fine too. Large movements like that tend to play better in time lapses.
Also think about the time of day.
For example, if you want to set up on a bridge to capture the evening rush hour, consider how long you'll need to get to that location and to get your gear setup.
What's more, if you're on the sidewalk on a bridge at rush hour, will you be in the way of people trying to walk by? That's not an ideal situation, to say the least.
Part of your planning is also to consider any permits you might need.
In the rush hour traffic example, the city might require that you get permission to shoot on one of their sidewalks. If you're venturing into a national park or national forest, you might need to pay a fee or get a permit to hike.
The secret here is to give yourself WAY more time than you think you'll need. Better to have too much time than not enough!
Time Lapses Require Certain Gear
Obviously, you need a camera, a lens, and a tripod to get a solid time lapse.
But you also need a camera remote. Though there are many camera remotes that are up to the task, my recommendation is the new Spark from Alpine Labs.
Alpine Labs has built an outstanding reputation for building innovative, high-quality products over the years.
But as incredible as Pulse is, Spark takes things to another level entirely.
Spark allows you to use it in three different ways - as an infrared remote, a wired trigger, and as an app-enabled remote.
When taking time lapse videos, having the app-enabled capabilities opens a whole new world for creating time lapses.
That's because you can select pre-set time lapse options, right out of the box. That's great for beginners because it allows you to worry less about the settings to use and worry more about framing up an awesome shot.
But Spark also allows you to take more control as you gain skills and confidence.
With the app, you can change the interval between shots and the duration that shots are taken. You can even tackle advanced options like bulb ramping.
Better still, Spark has phoneless operation too.
That means if your phone's battery dies, you can still use Spark to get a time lapse video. All you have to do is press and hold Spark's button between photos, and it will take 10 seconds worth of time lapse footage.
It doesn't get any easier than that to create incredible time lapses, long exposures, and still photos!
This tip comes from my own experience of being so excited to tackle my first time lapse that I completely forgot about composing a good series of shots.
When framing up a time lapse, you have to think on two different levels.
First, you need stationary objects to anchor the shot - a mountain or a building, for example.
Second, as noted above, you need to include something with movement, that way you can see how the scene changes over time.
That means framing a shot not just based on how it looks now, but also considering what it will look like when you're done shooting.
That means accounting for things like the tide coming in or going out when shooting at the beach, the presence of fog rolling in when shooting in the early morning or late evening, and the position of the sun in the sky when creating a daytime time lapse video.
Make considerations for these kinds of eventualities, and you'll end up with a better video when all is said and done.
You'll Need a Lot of Photos
Consider this...
If you create just a 25-second time lapse video, you'll need to shoot about one image every 12 seconds for 30 minutes.
You can imagine how many more photos you'll need for a film that's just a few minutes long!
When creating a time lapse, it's not just the planning and setup that eats up time; it's also actually shooting the images needed to create the time lapse.
Naturally, the interval between each photo will determine how many photos you end up with.
That interval also determines the speed of your time lapse - the more time there is between shots, the faster movement will be and the more likely your video will have a "herky jerky" effect.
Instead, shoot for more images than less.
Though every scene will be different, a good rule of thumb is that for slow moving clouds, one image every 10 seconds should suffice. Very fast-moving clouds might necessitate one shot every three seconds. One shot every two seconds is good for people walking.
Conversely, nighttime time lapses require longer intervals. For example, the movement of the stars or the moon might require 20-30 seconds between shots.
When it comes down to it, the biggest part of time lapse videos is planning, having gear that helps you, and getting everything setup. From there, it's a matter of practicing, doing some trial and error, getting creative, and showing off your newfound time lapse skills!
Time-lapse photography is one of the coolest things you can do with a DSLR or compact camera. It's also becoming easier every day, with all the sophisticated gear available to do it. Of course, that means that everyone is out there doing it, and it doesn't take a lot of searching to find some really captivating videos. Watching one or two good ones is all it takes to inspire you to get out there and try it for yourself.
The thing is, you may have noticed a few rather dull ones while you were searching. You can only watch crowds shuffle by or the lighting change on a city skyline so many times before it's just no fun anymore. There's one thing you'll notice in those videos that really grab your attention: the point of view changes. Moving the camera makes all the difference in the dynamic quality of a time-lapse presentation.
One of the easiest and least complicated ways to add that motion is by rotating your camera between shots. To really get the full effect, though, the rotation needs to be smooth and incremental. In other words, you need to turn the camera evenly on its axis and the degree of rotation between exposures needs to be even. Otherwise, your video will be jerky and/or bouncy. That's a lot of work in between shots, right? Nope.
There's an easy and affordable way to add rotation without ever touching the camera between shots. The folks ant Alpine Labs developed Radian 2 because of their frustrations with other devices designed to do this. It's a powerful but simple device that lets you rotate the camera and control its shutter and other exposure controls wirelessly, from your smartphone or tablet. More importantly, though, it does so without the issues that some similar devices cause.
For instance, to avoid blur from camera movement, Radian 2 pauses automatically between movements. It won't leave you stranded in the middle of a sequence, because the USB-rechargeable battery provides power for 100 hours or more. You can preview your video from your remote device and you have full control over shutter speed, ISO and aperture. You can program it for up to 20,000 positions within 360 degrees. That's up to 0.017 degrees per photo. By the way, you can use it for smooth movement in your full-motion videos, too, with up to 4.3 degrees of rotation per second!
Radian 2 comes with everything you need except the camera, including a bubble level, rubber feet for off-tripod operation and all the cables for connecting and charging, all in its own mesh bag. Go visit the Alpine Labs website and find out for yourself why this is the camera control device you should be using to add interest to your time-lapse and full-motion videos.
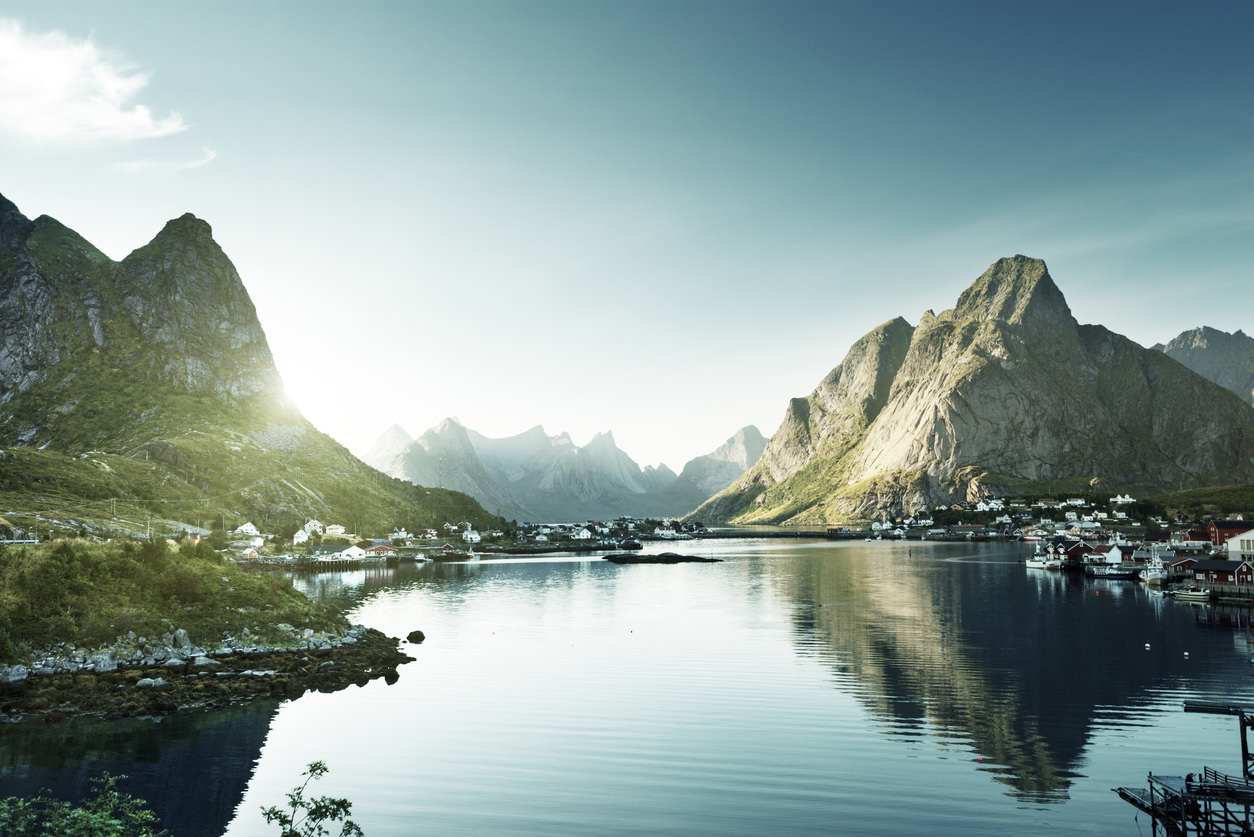
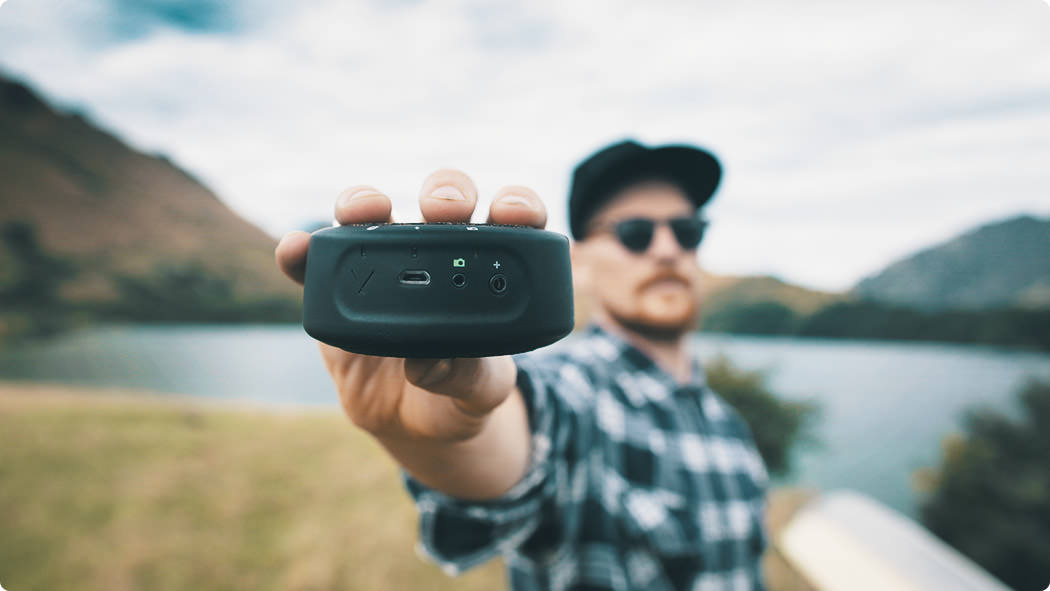
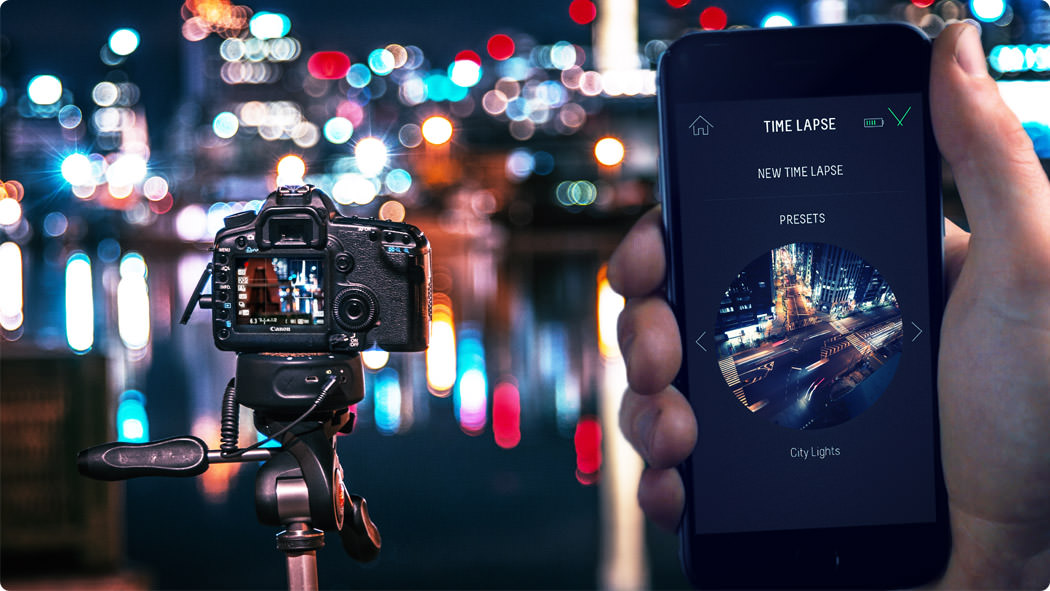
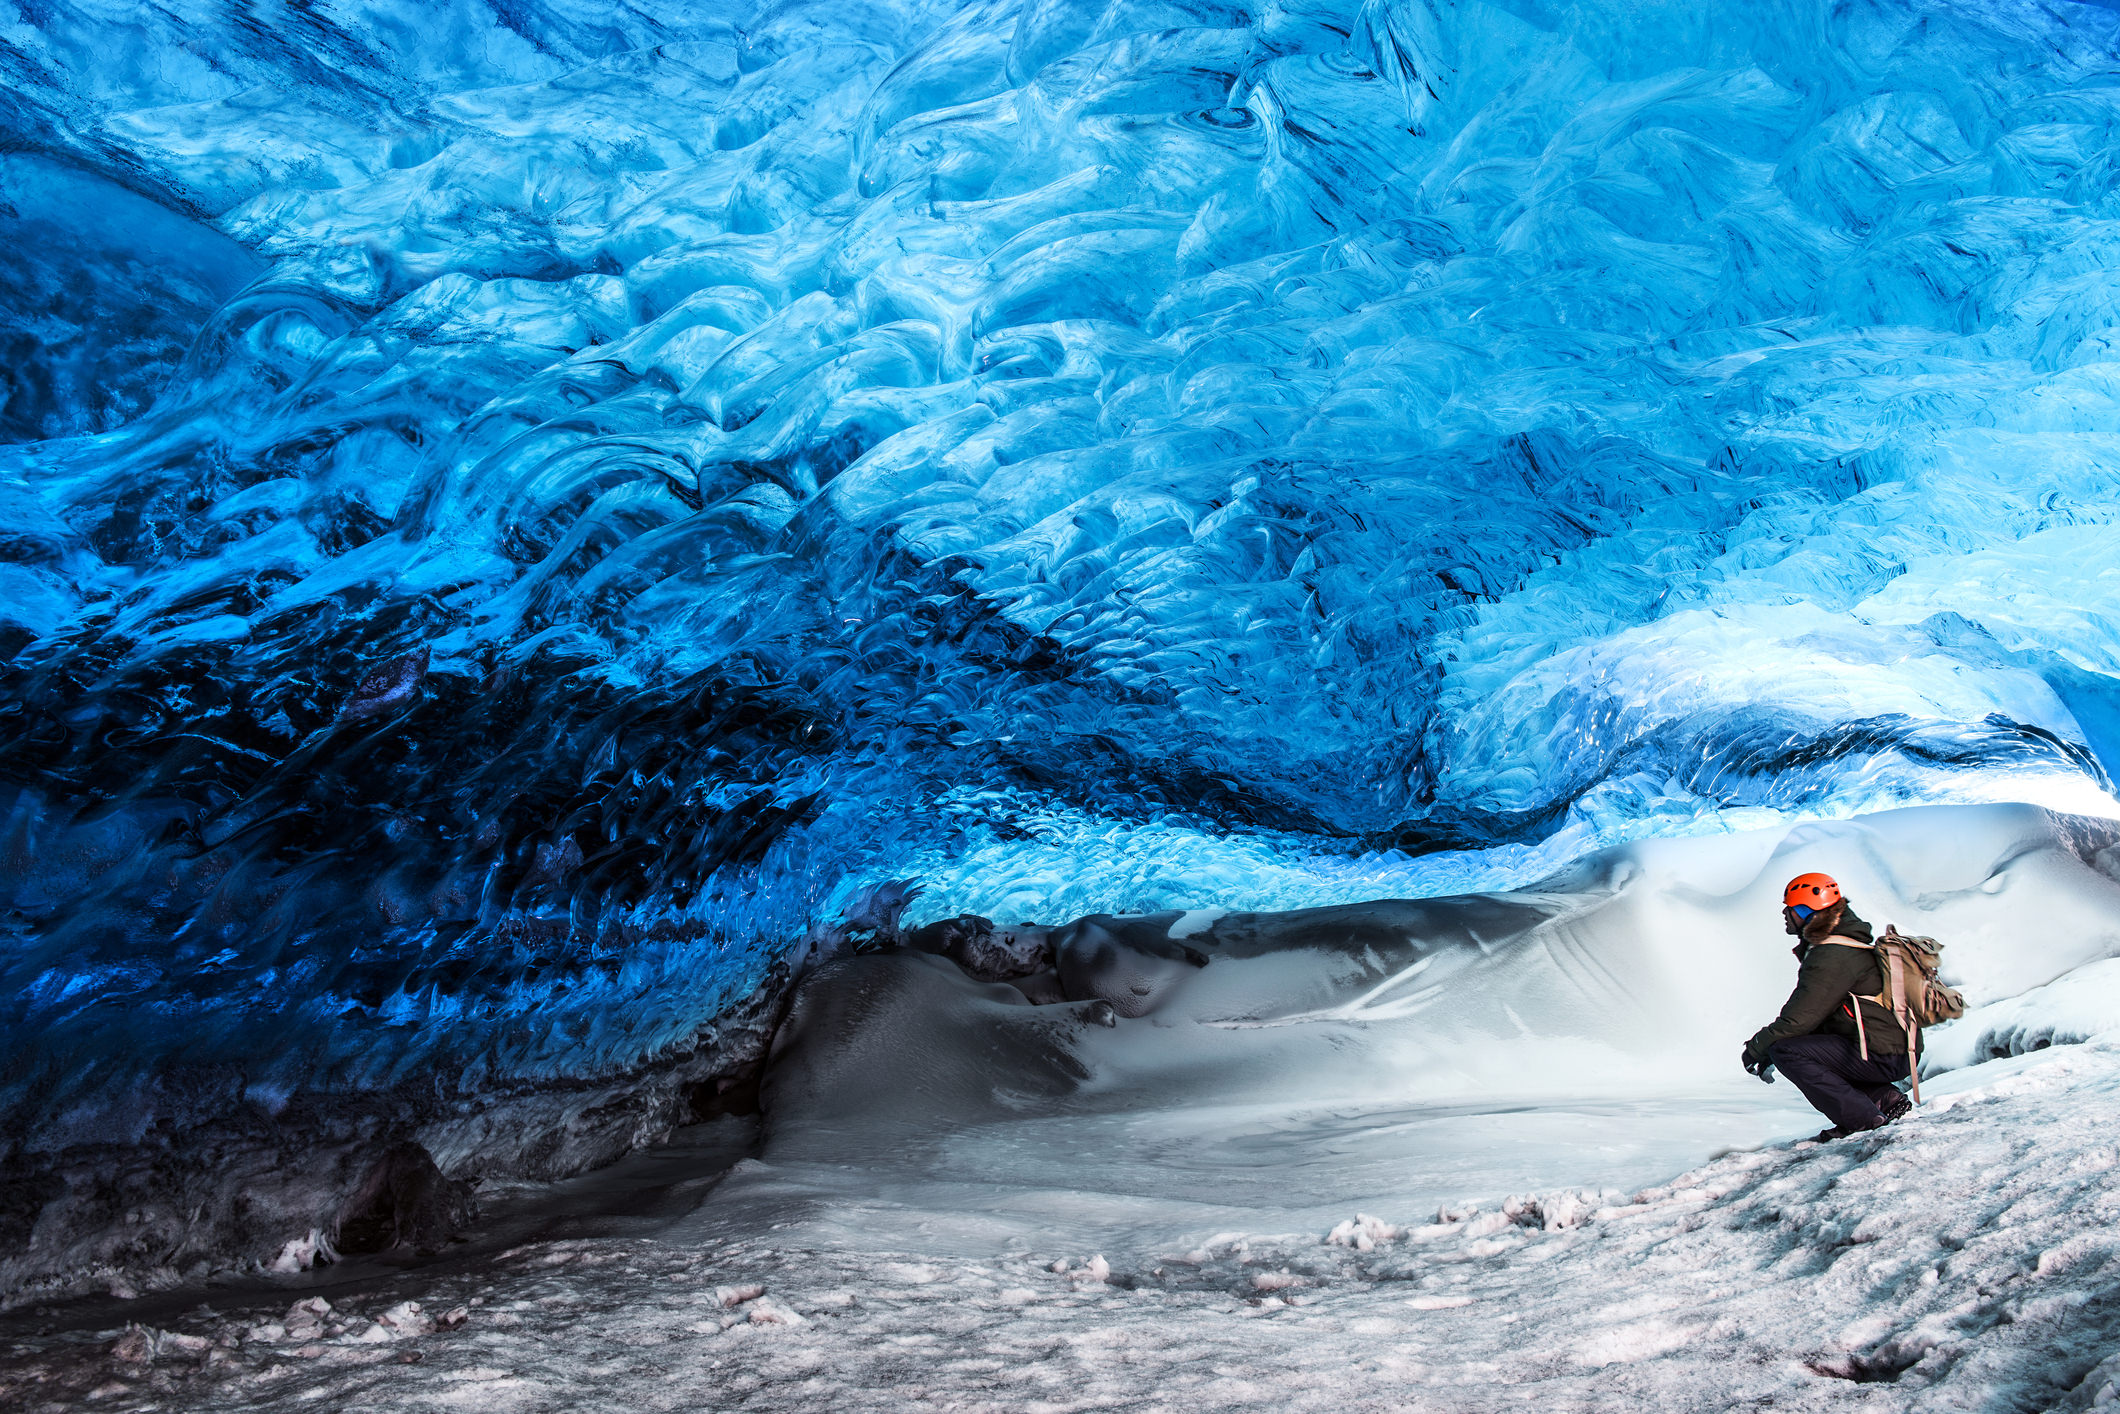
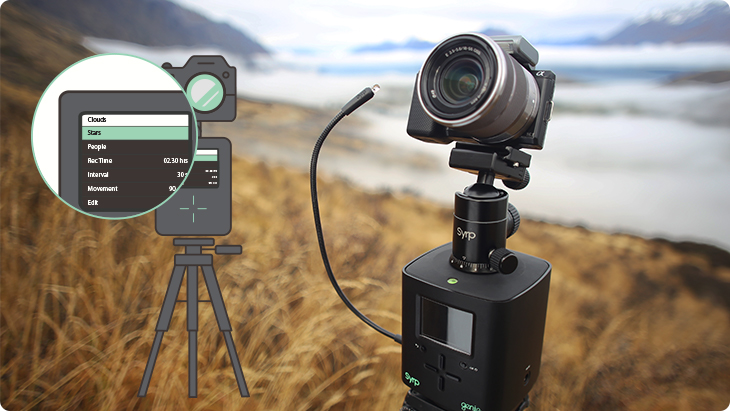


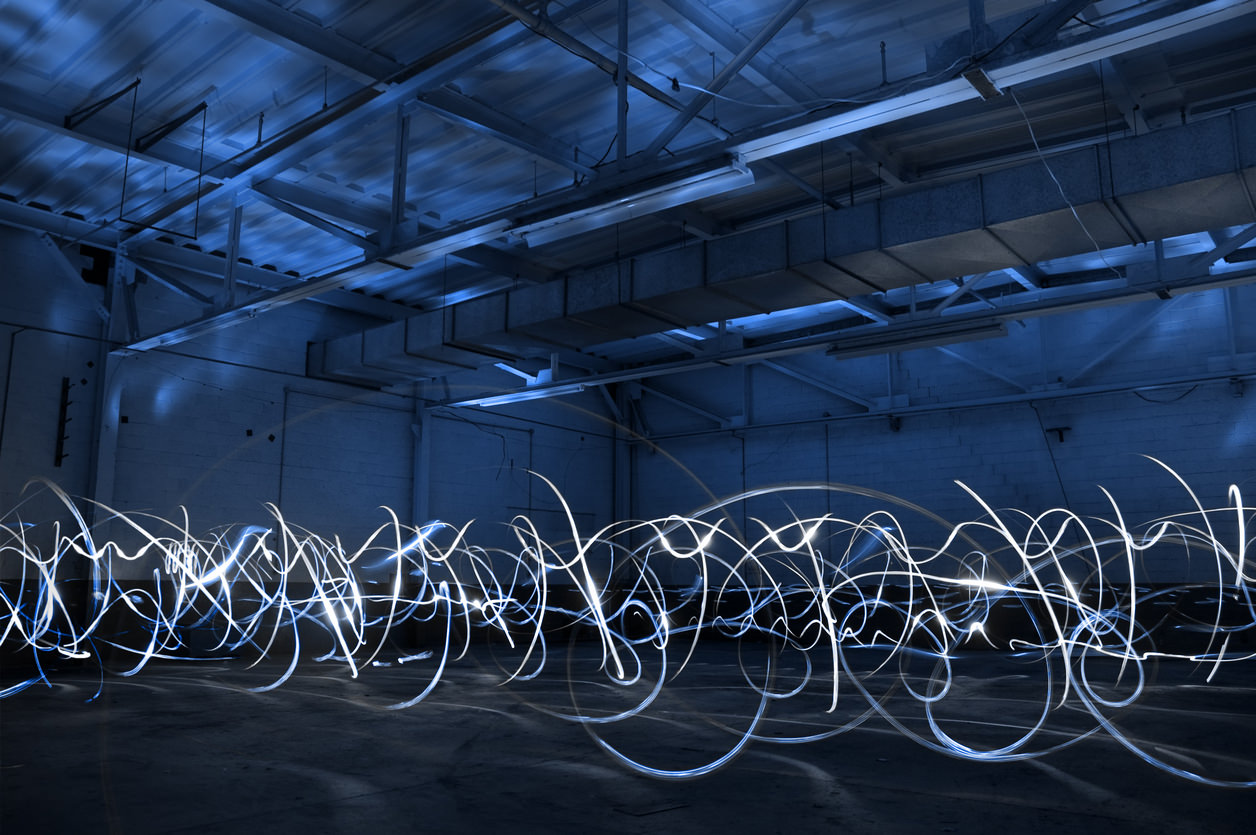
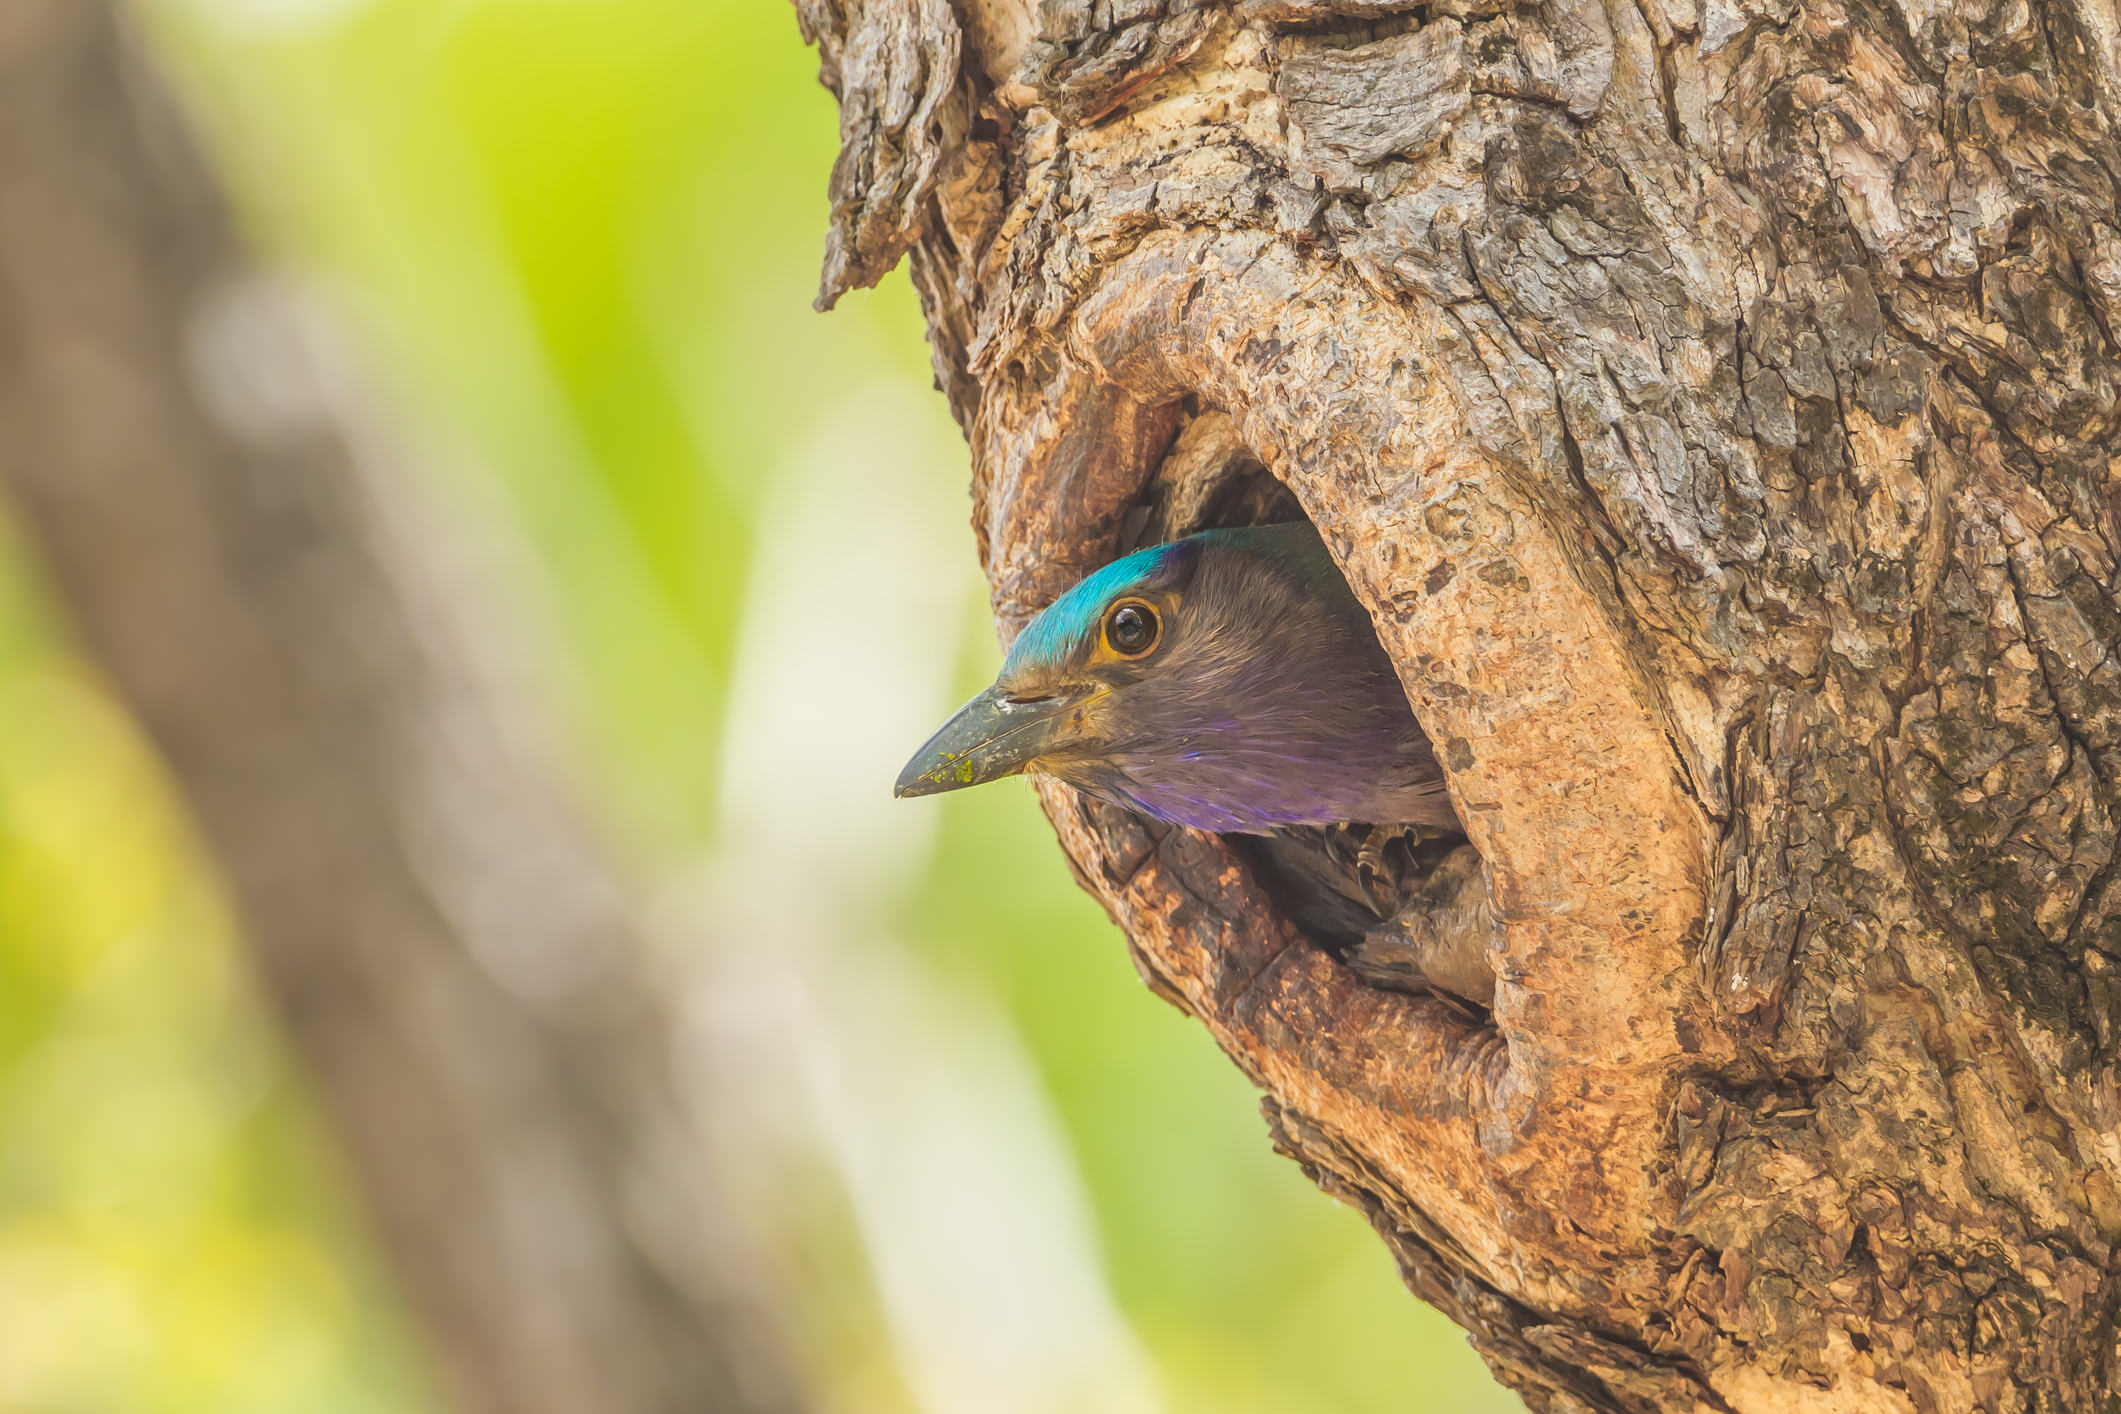


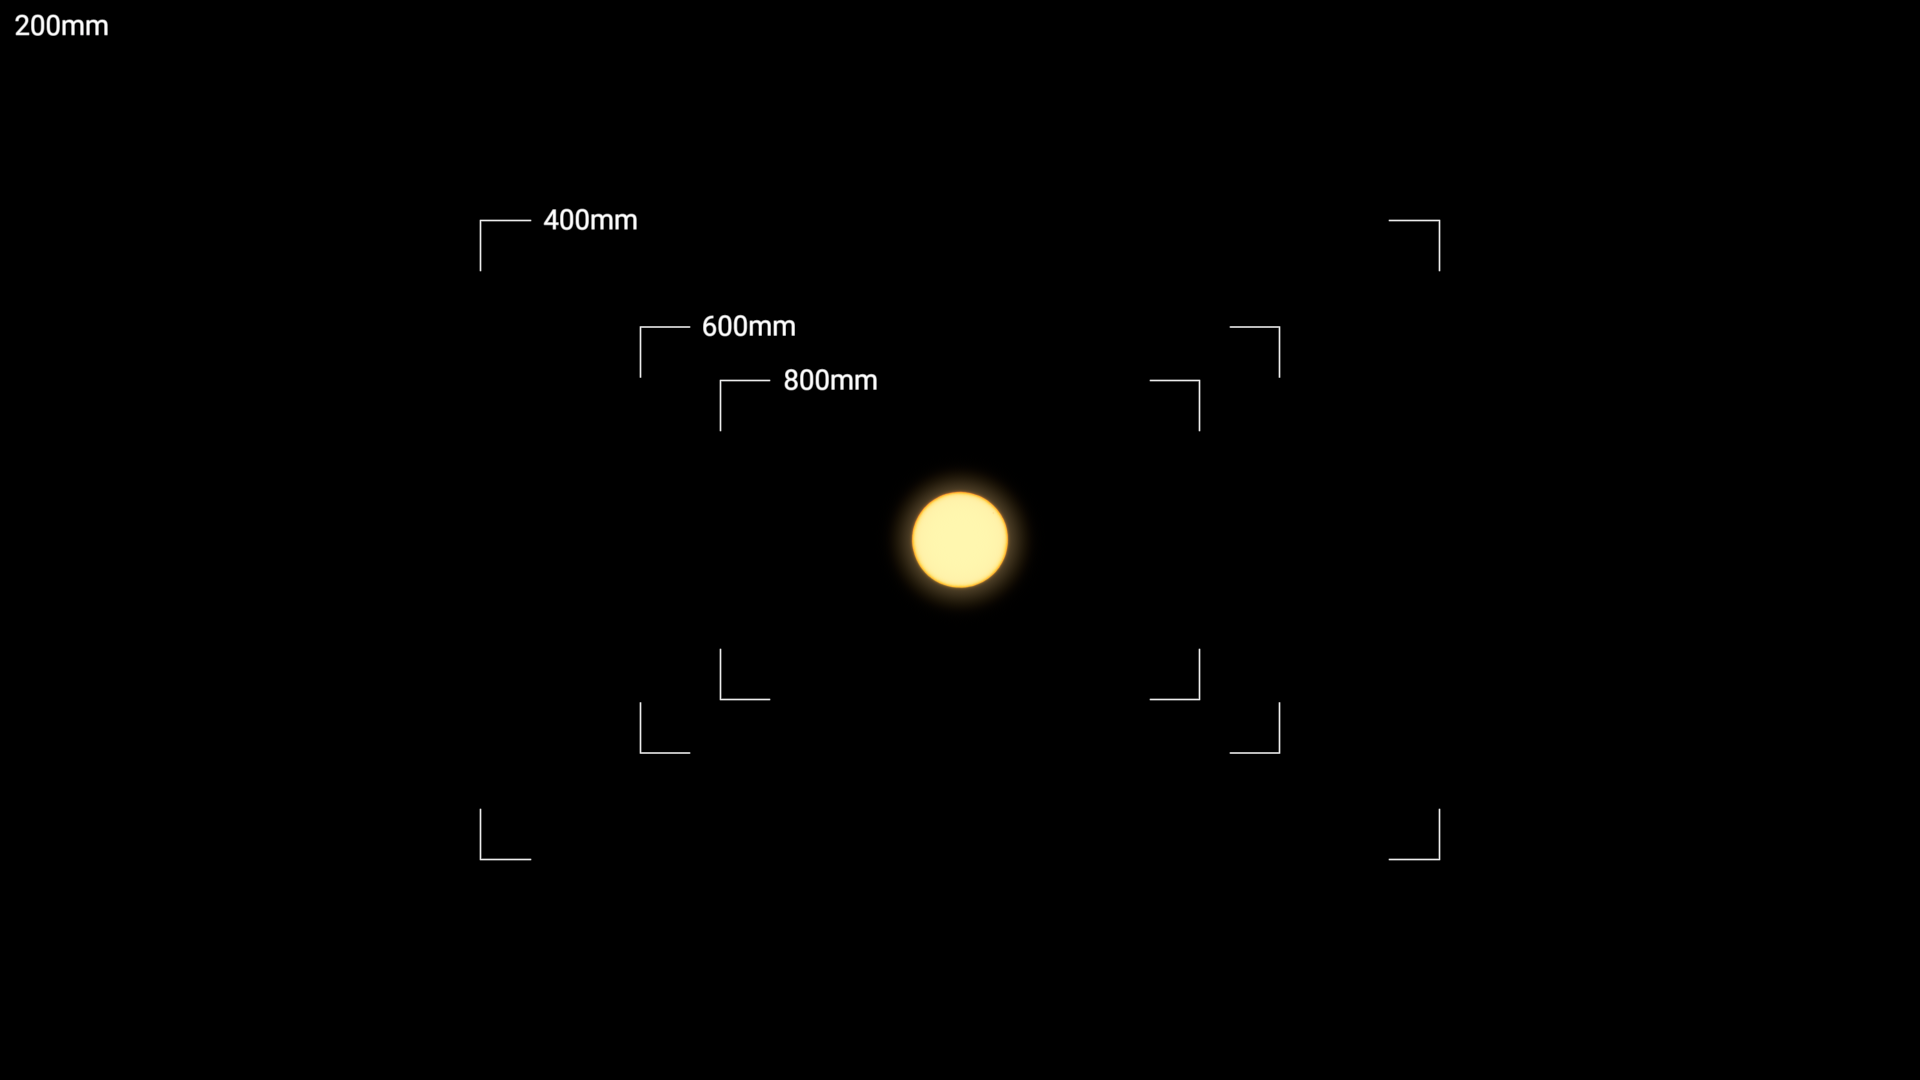
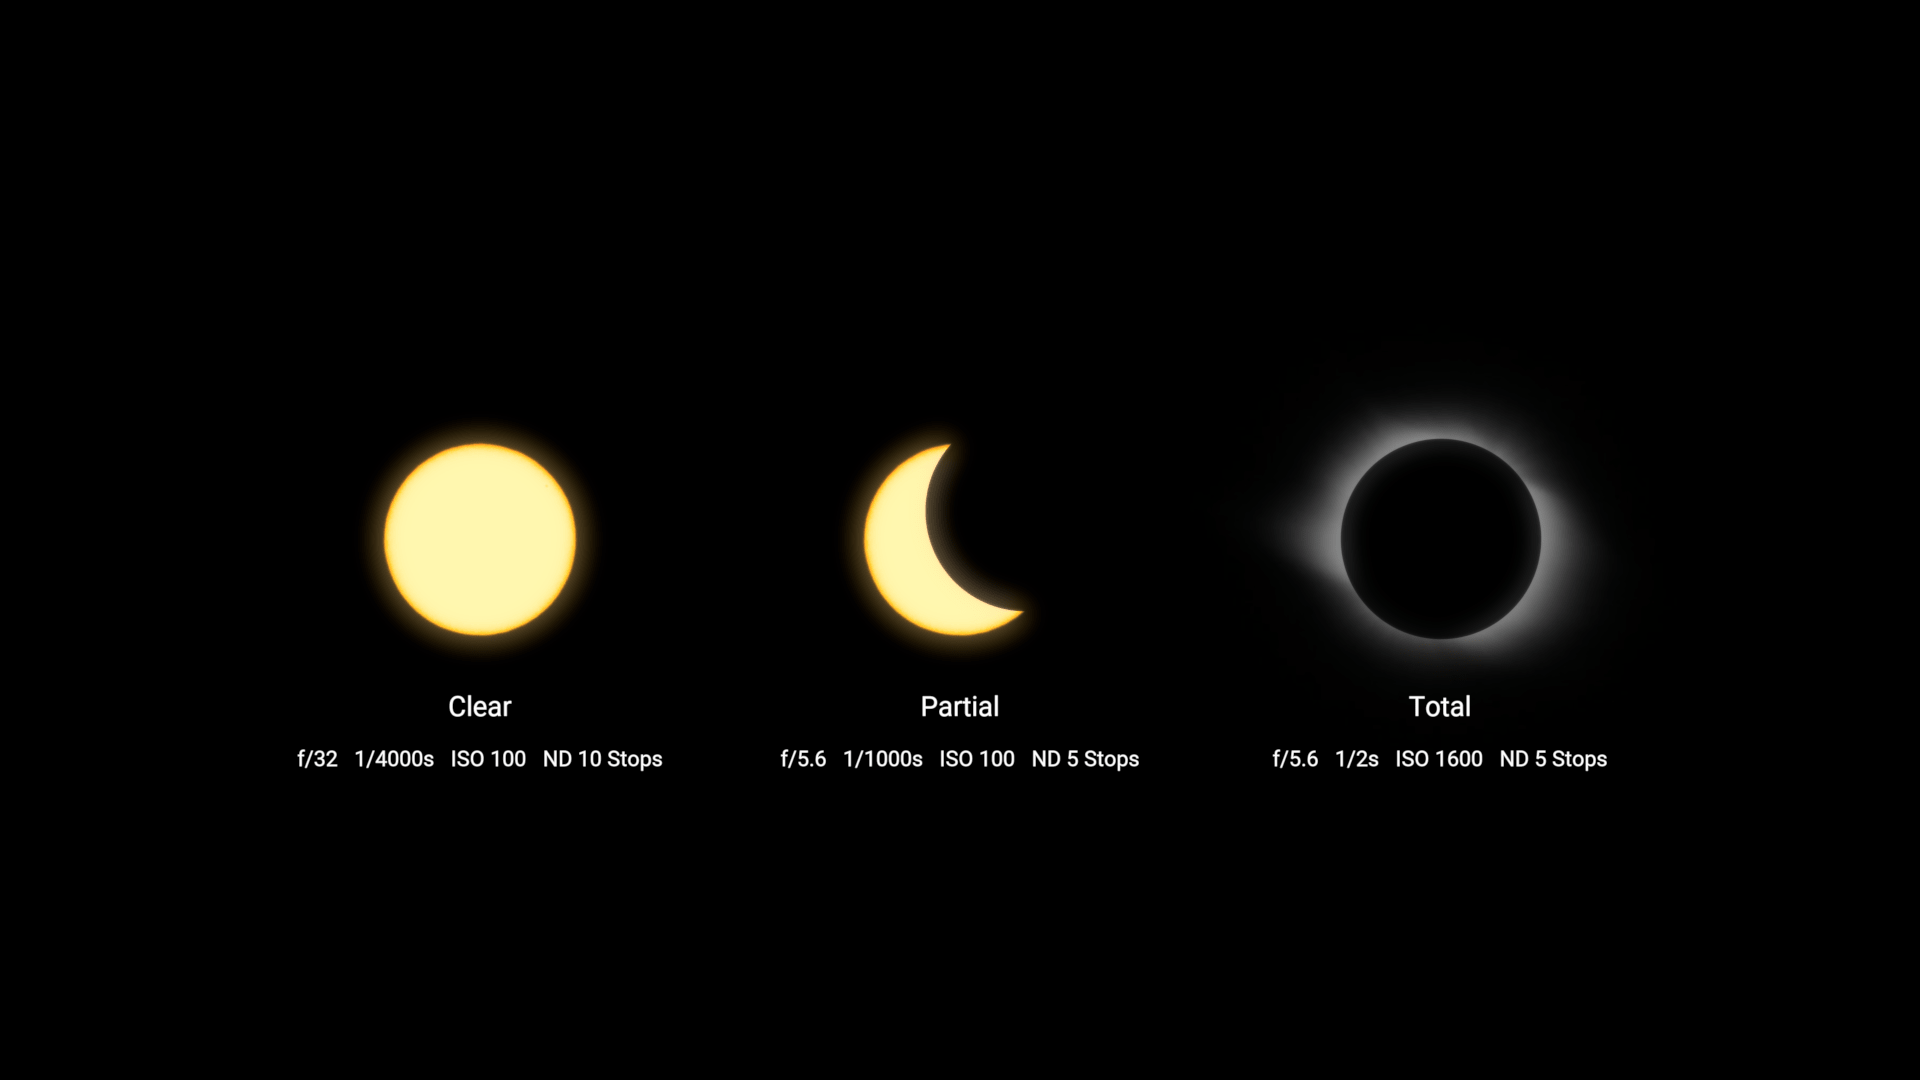
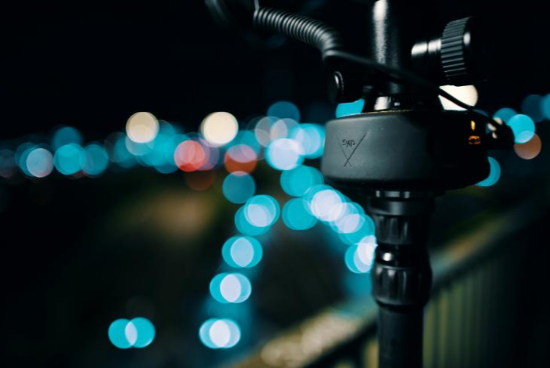
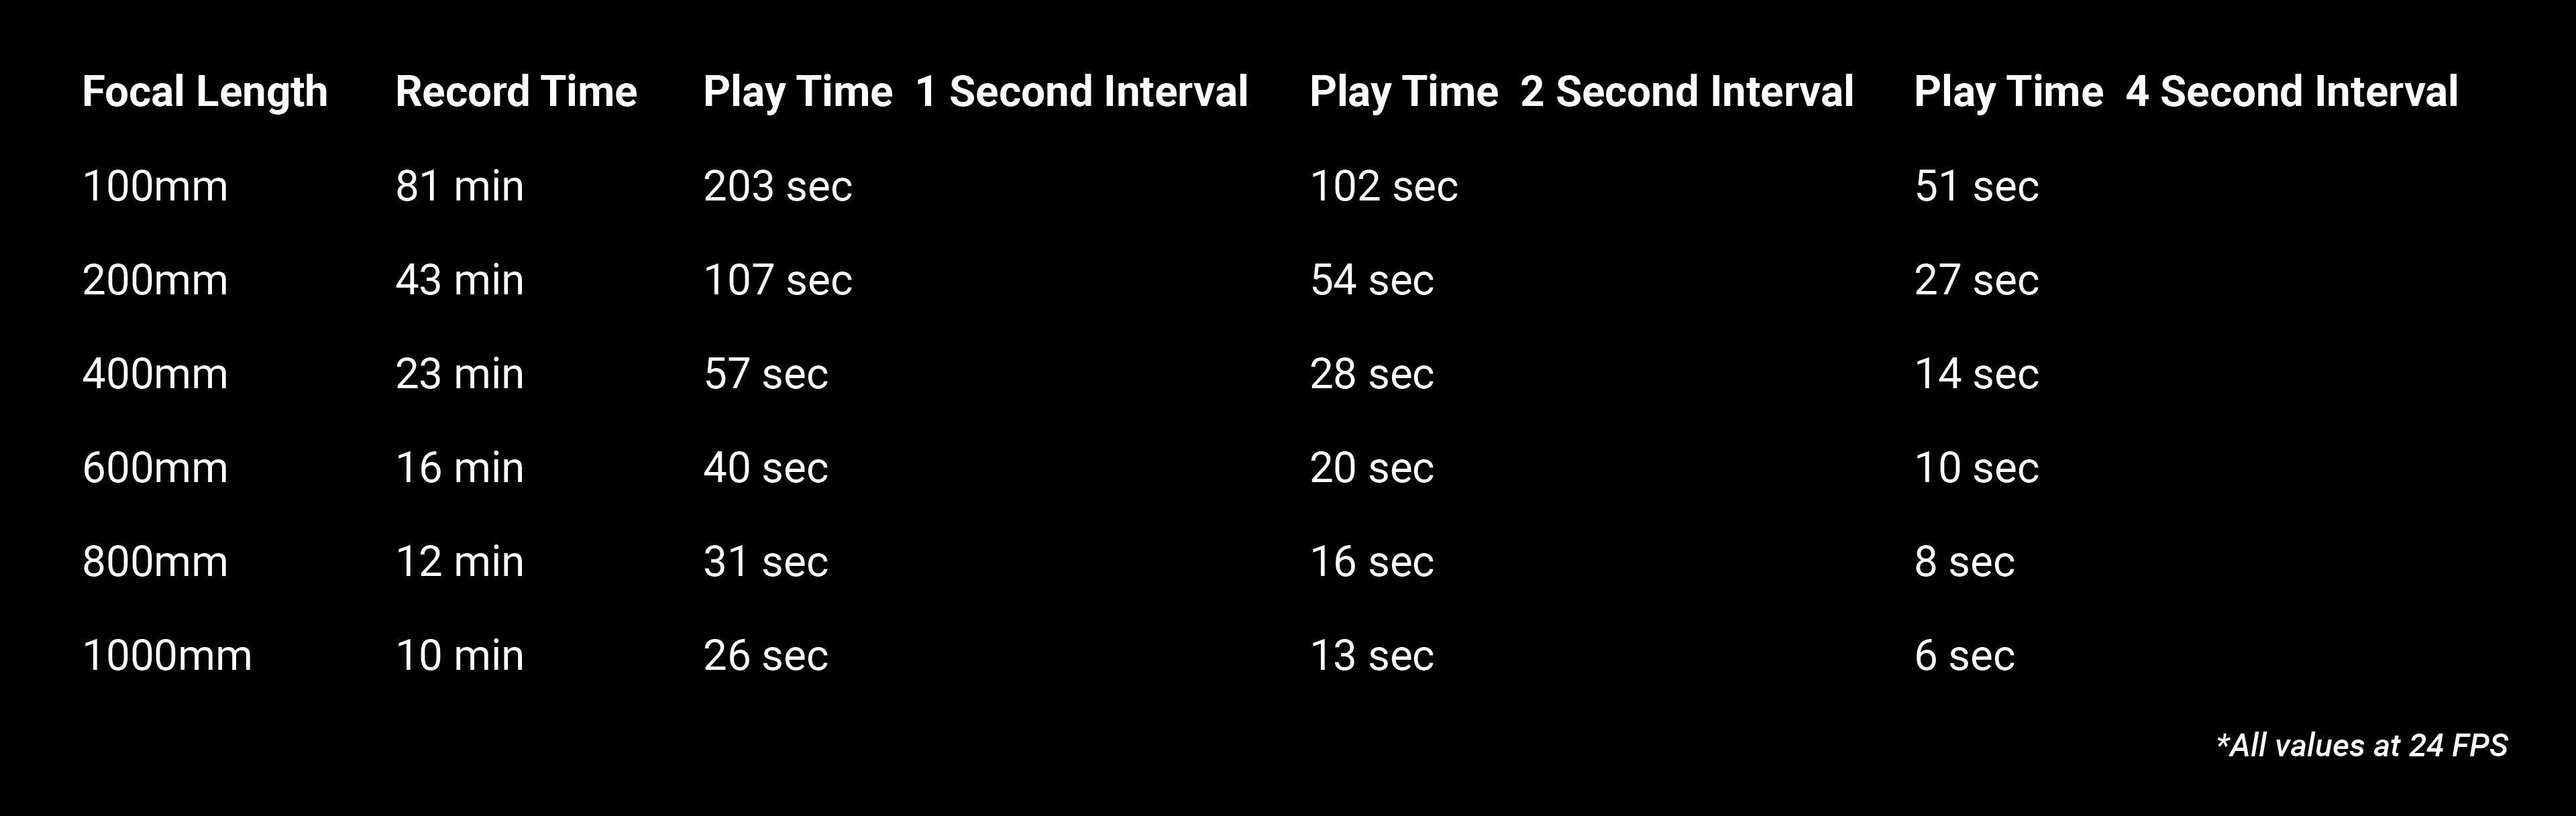

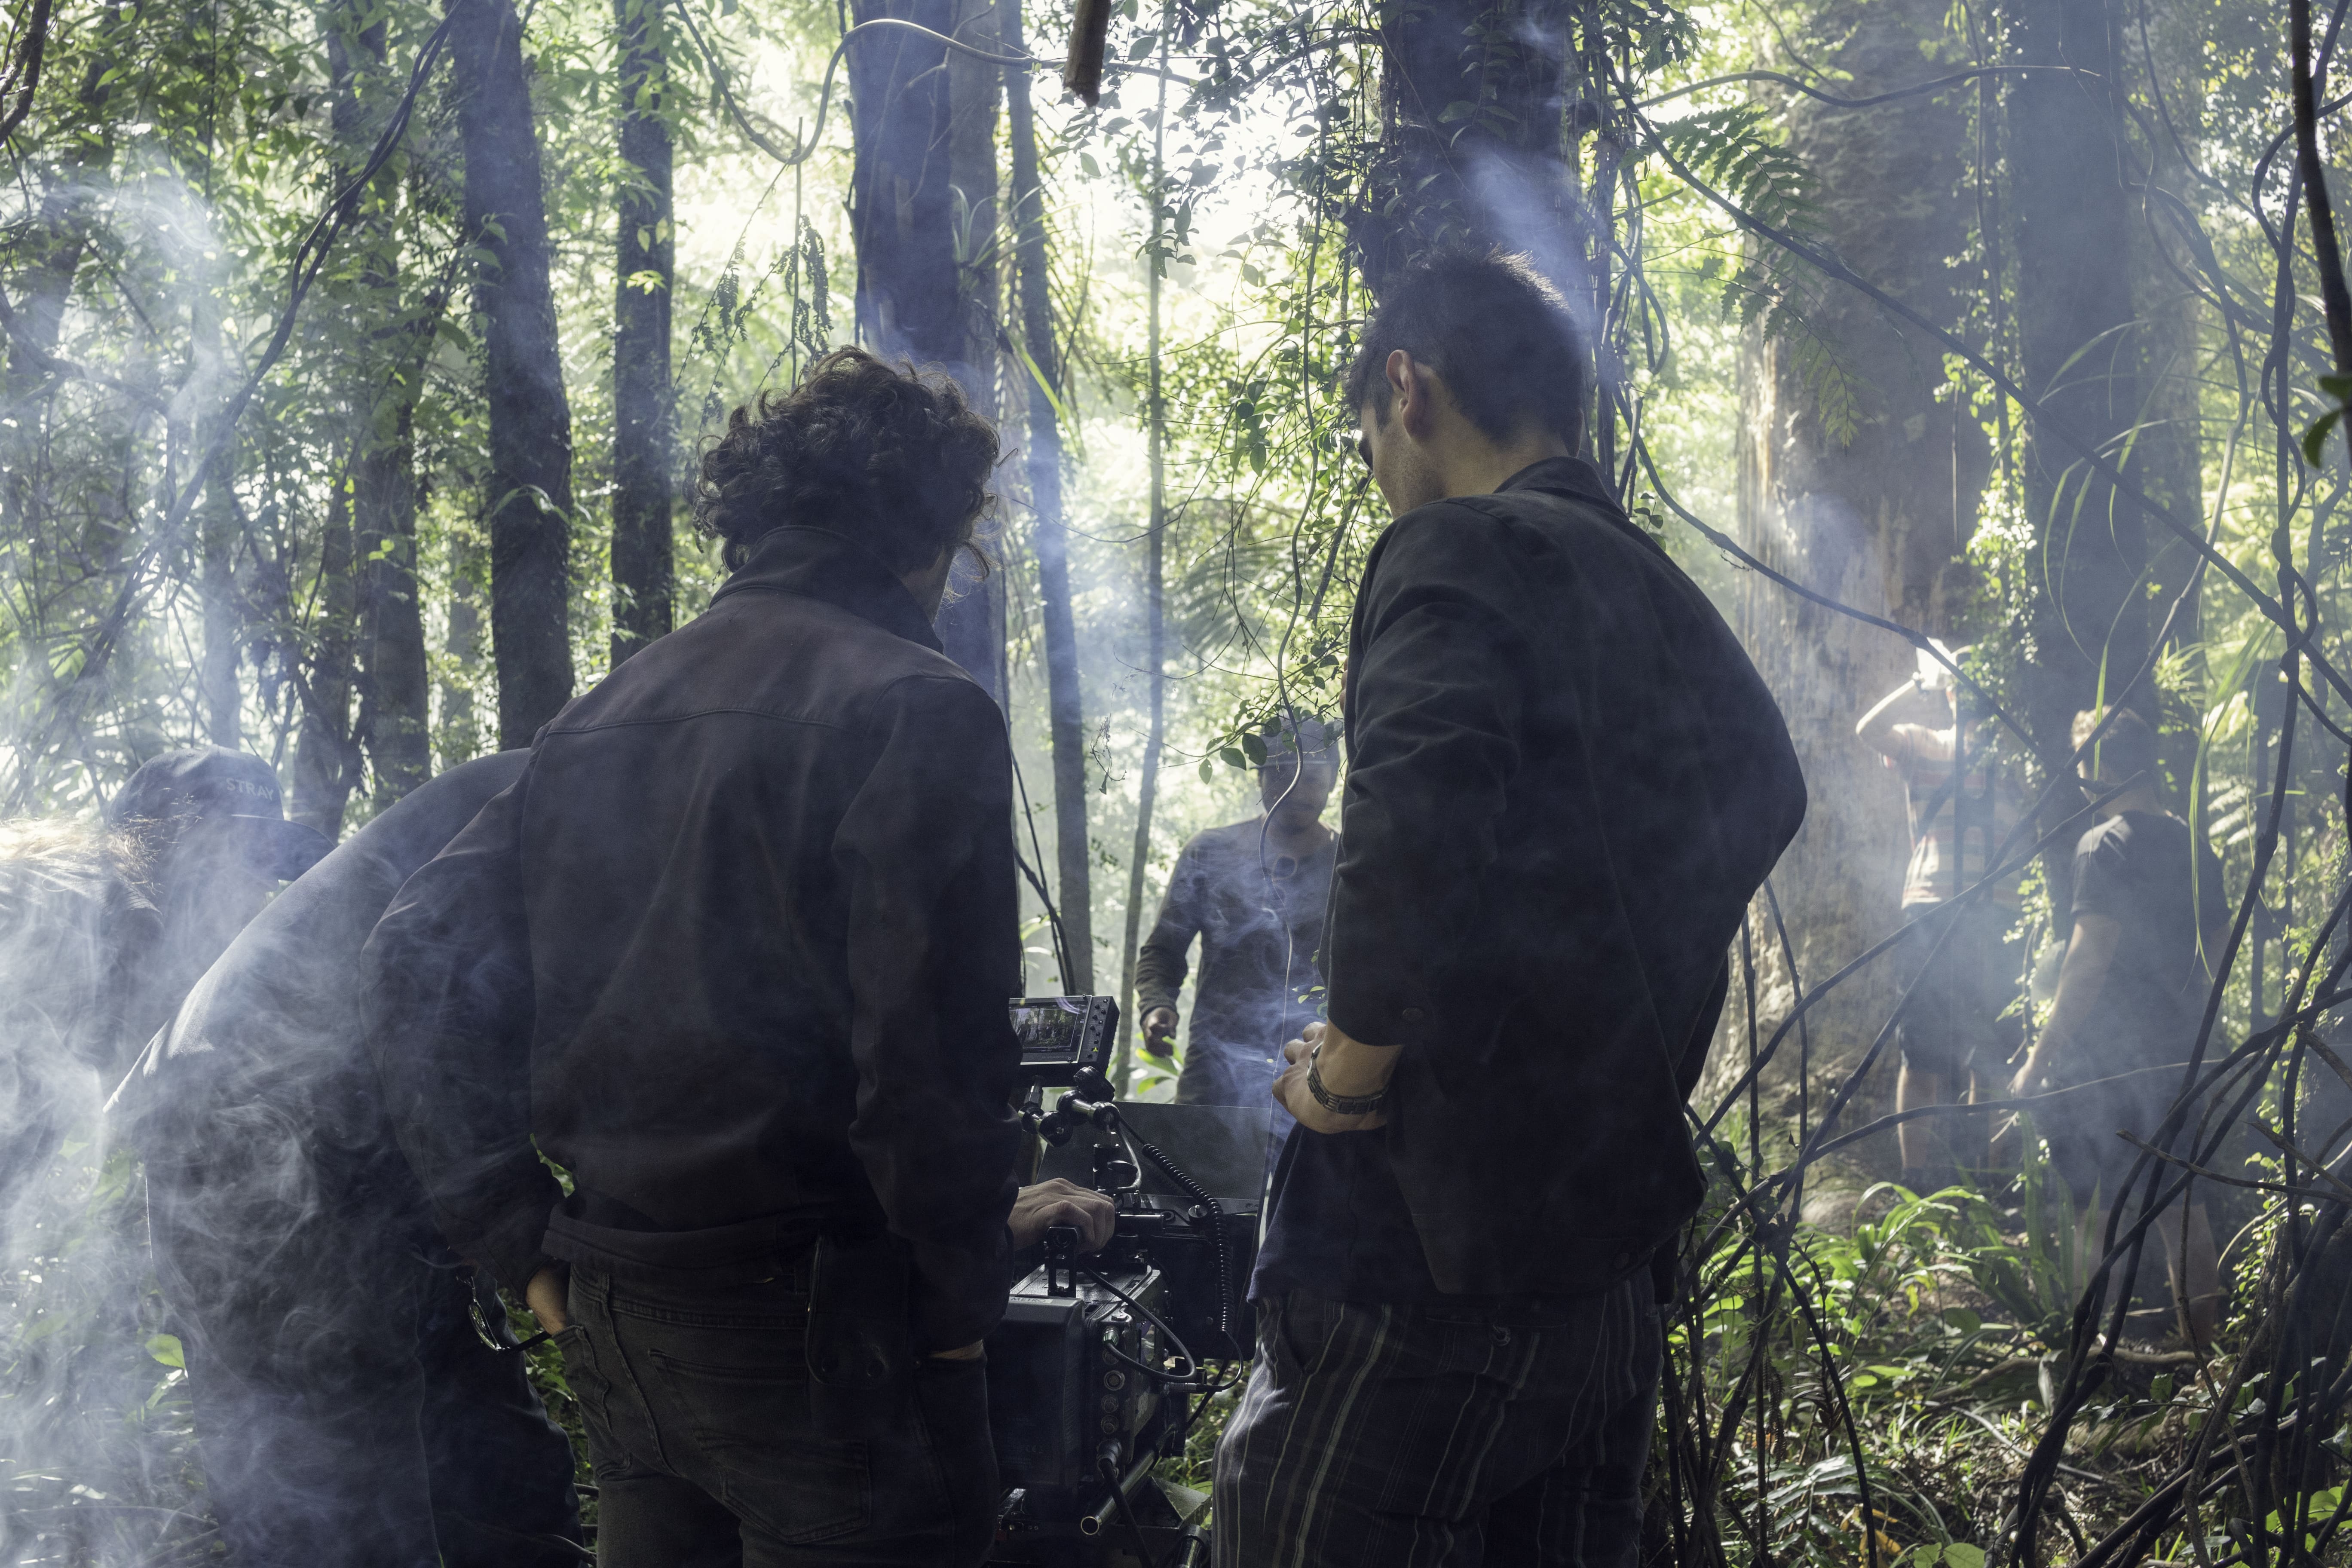
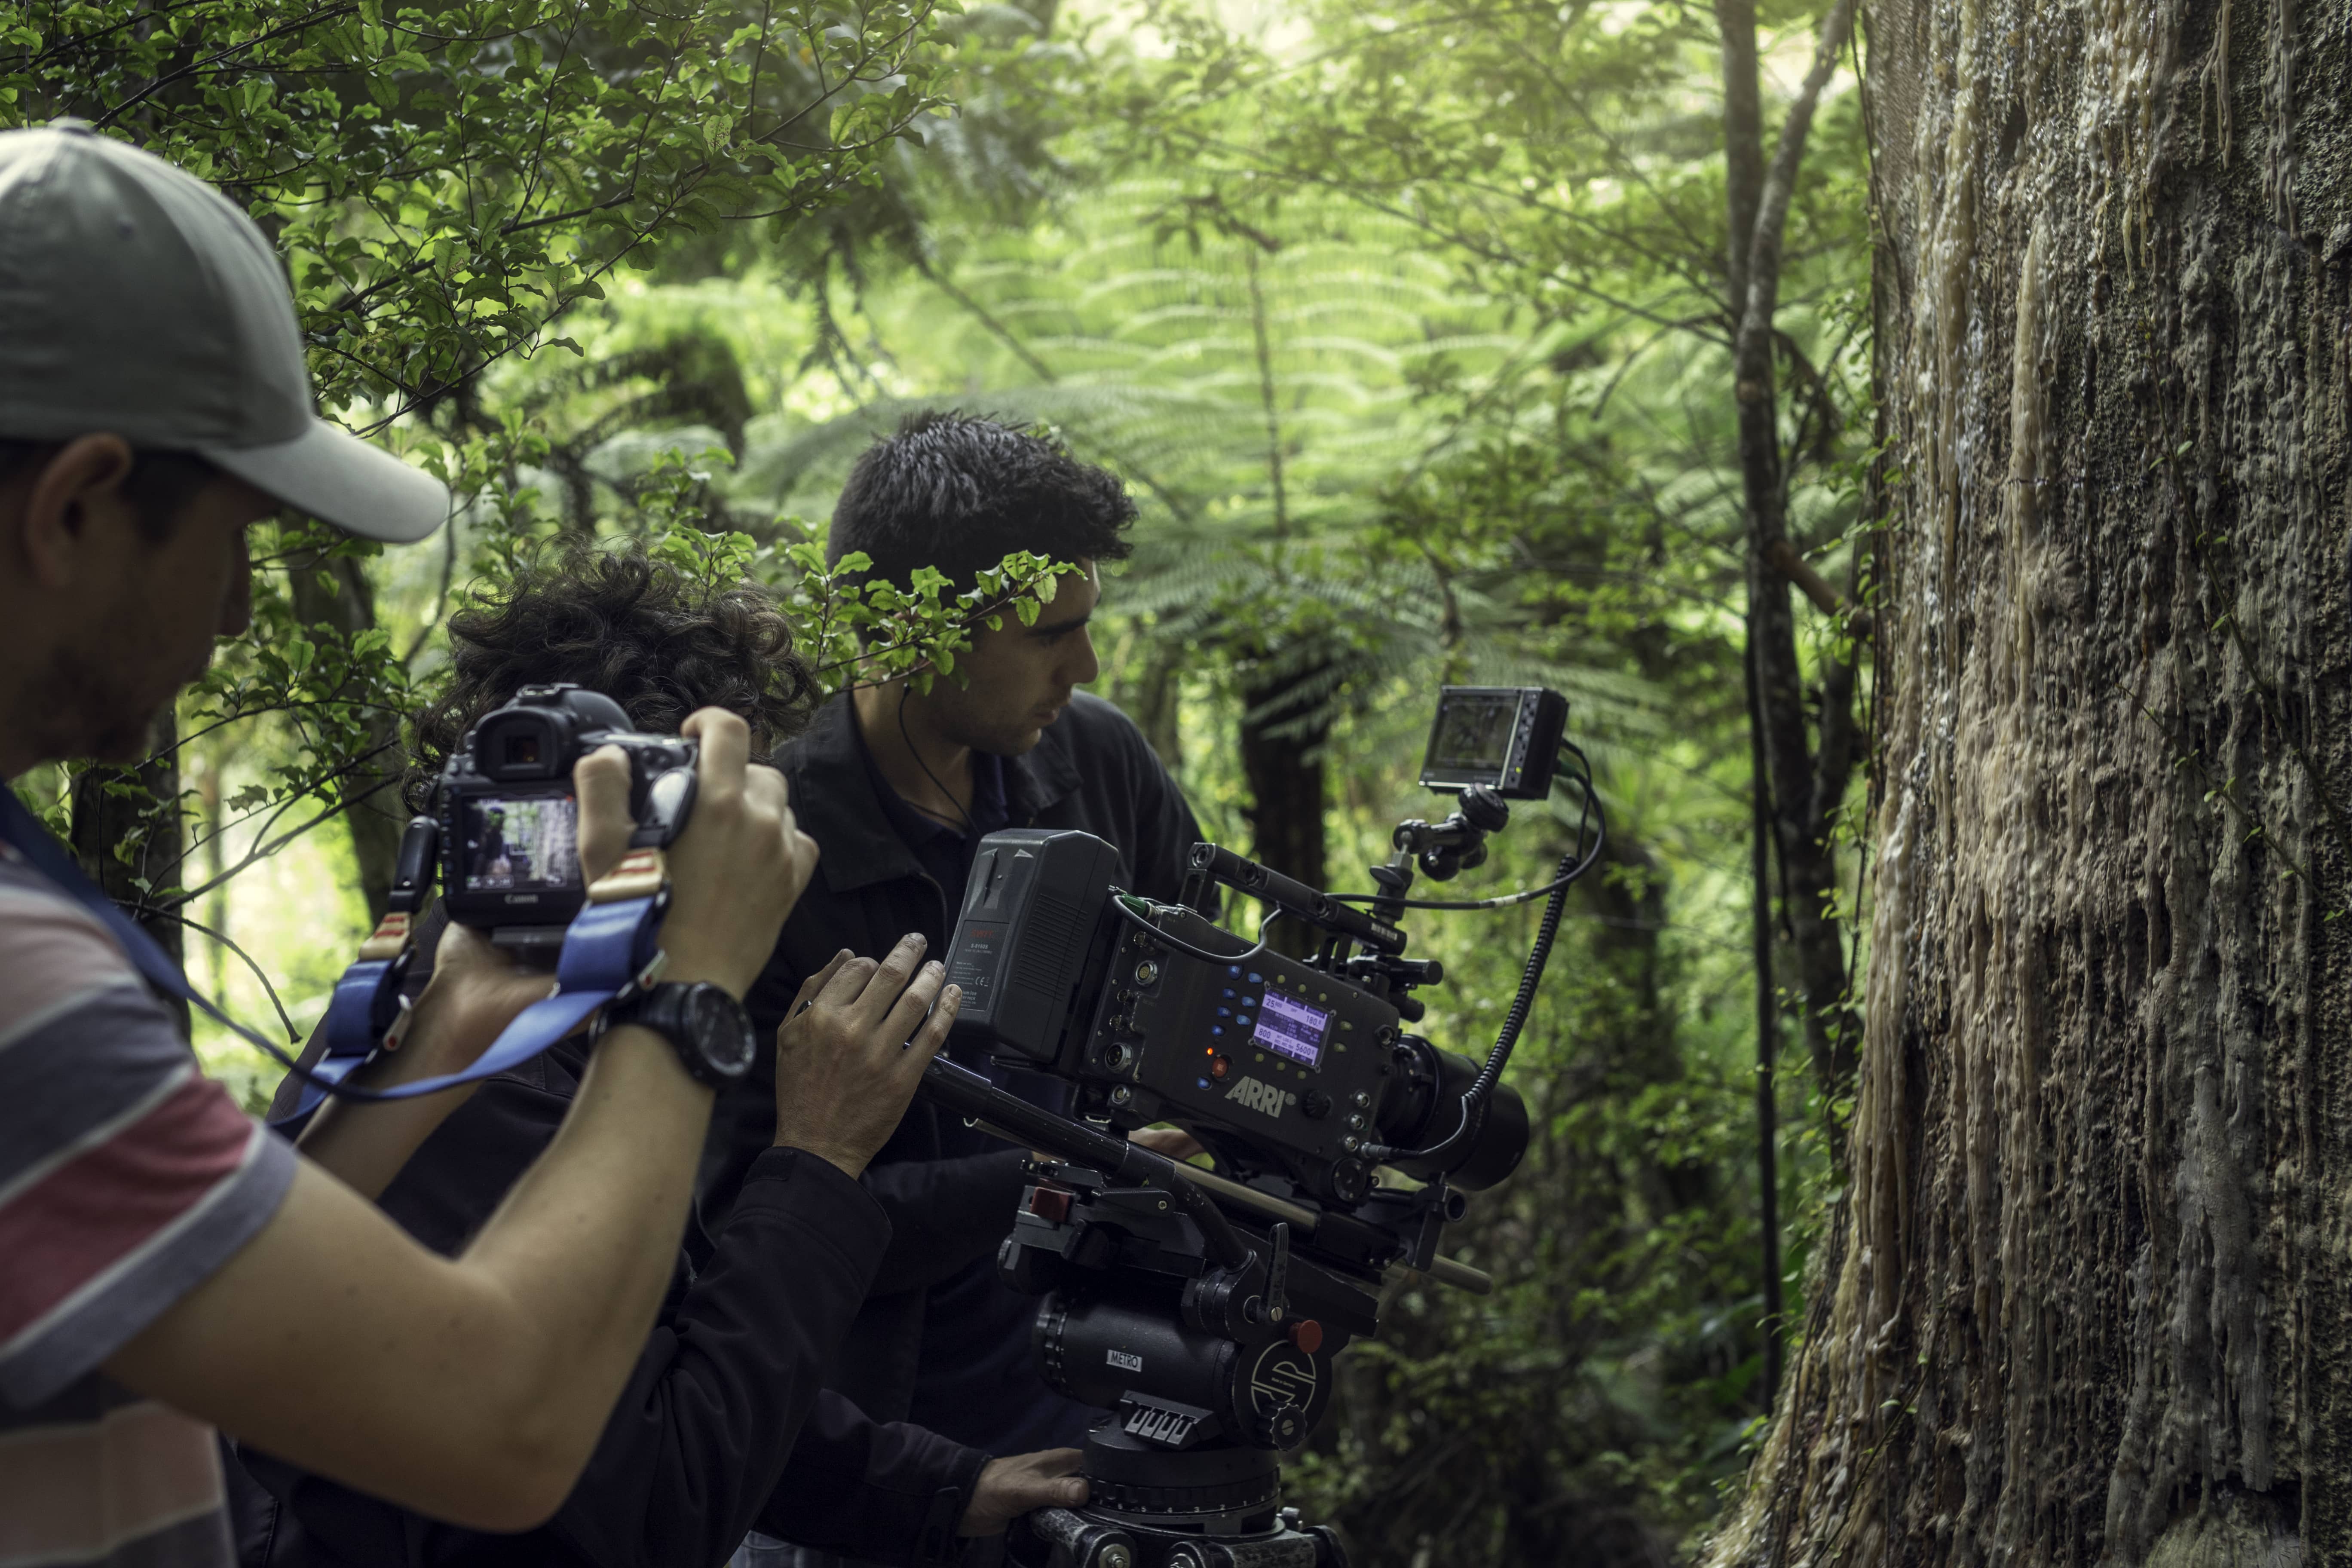
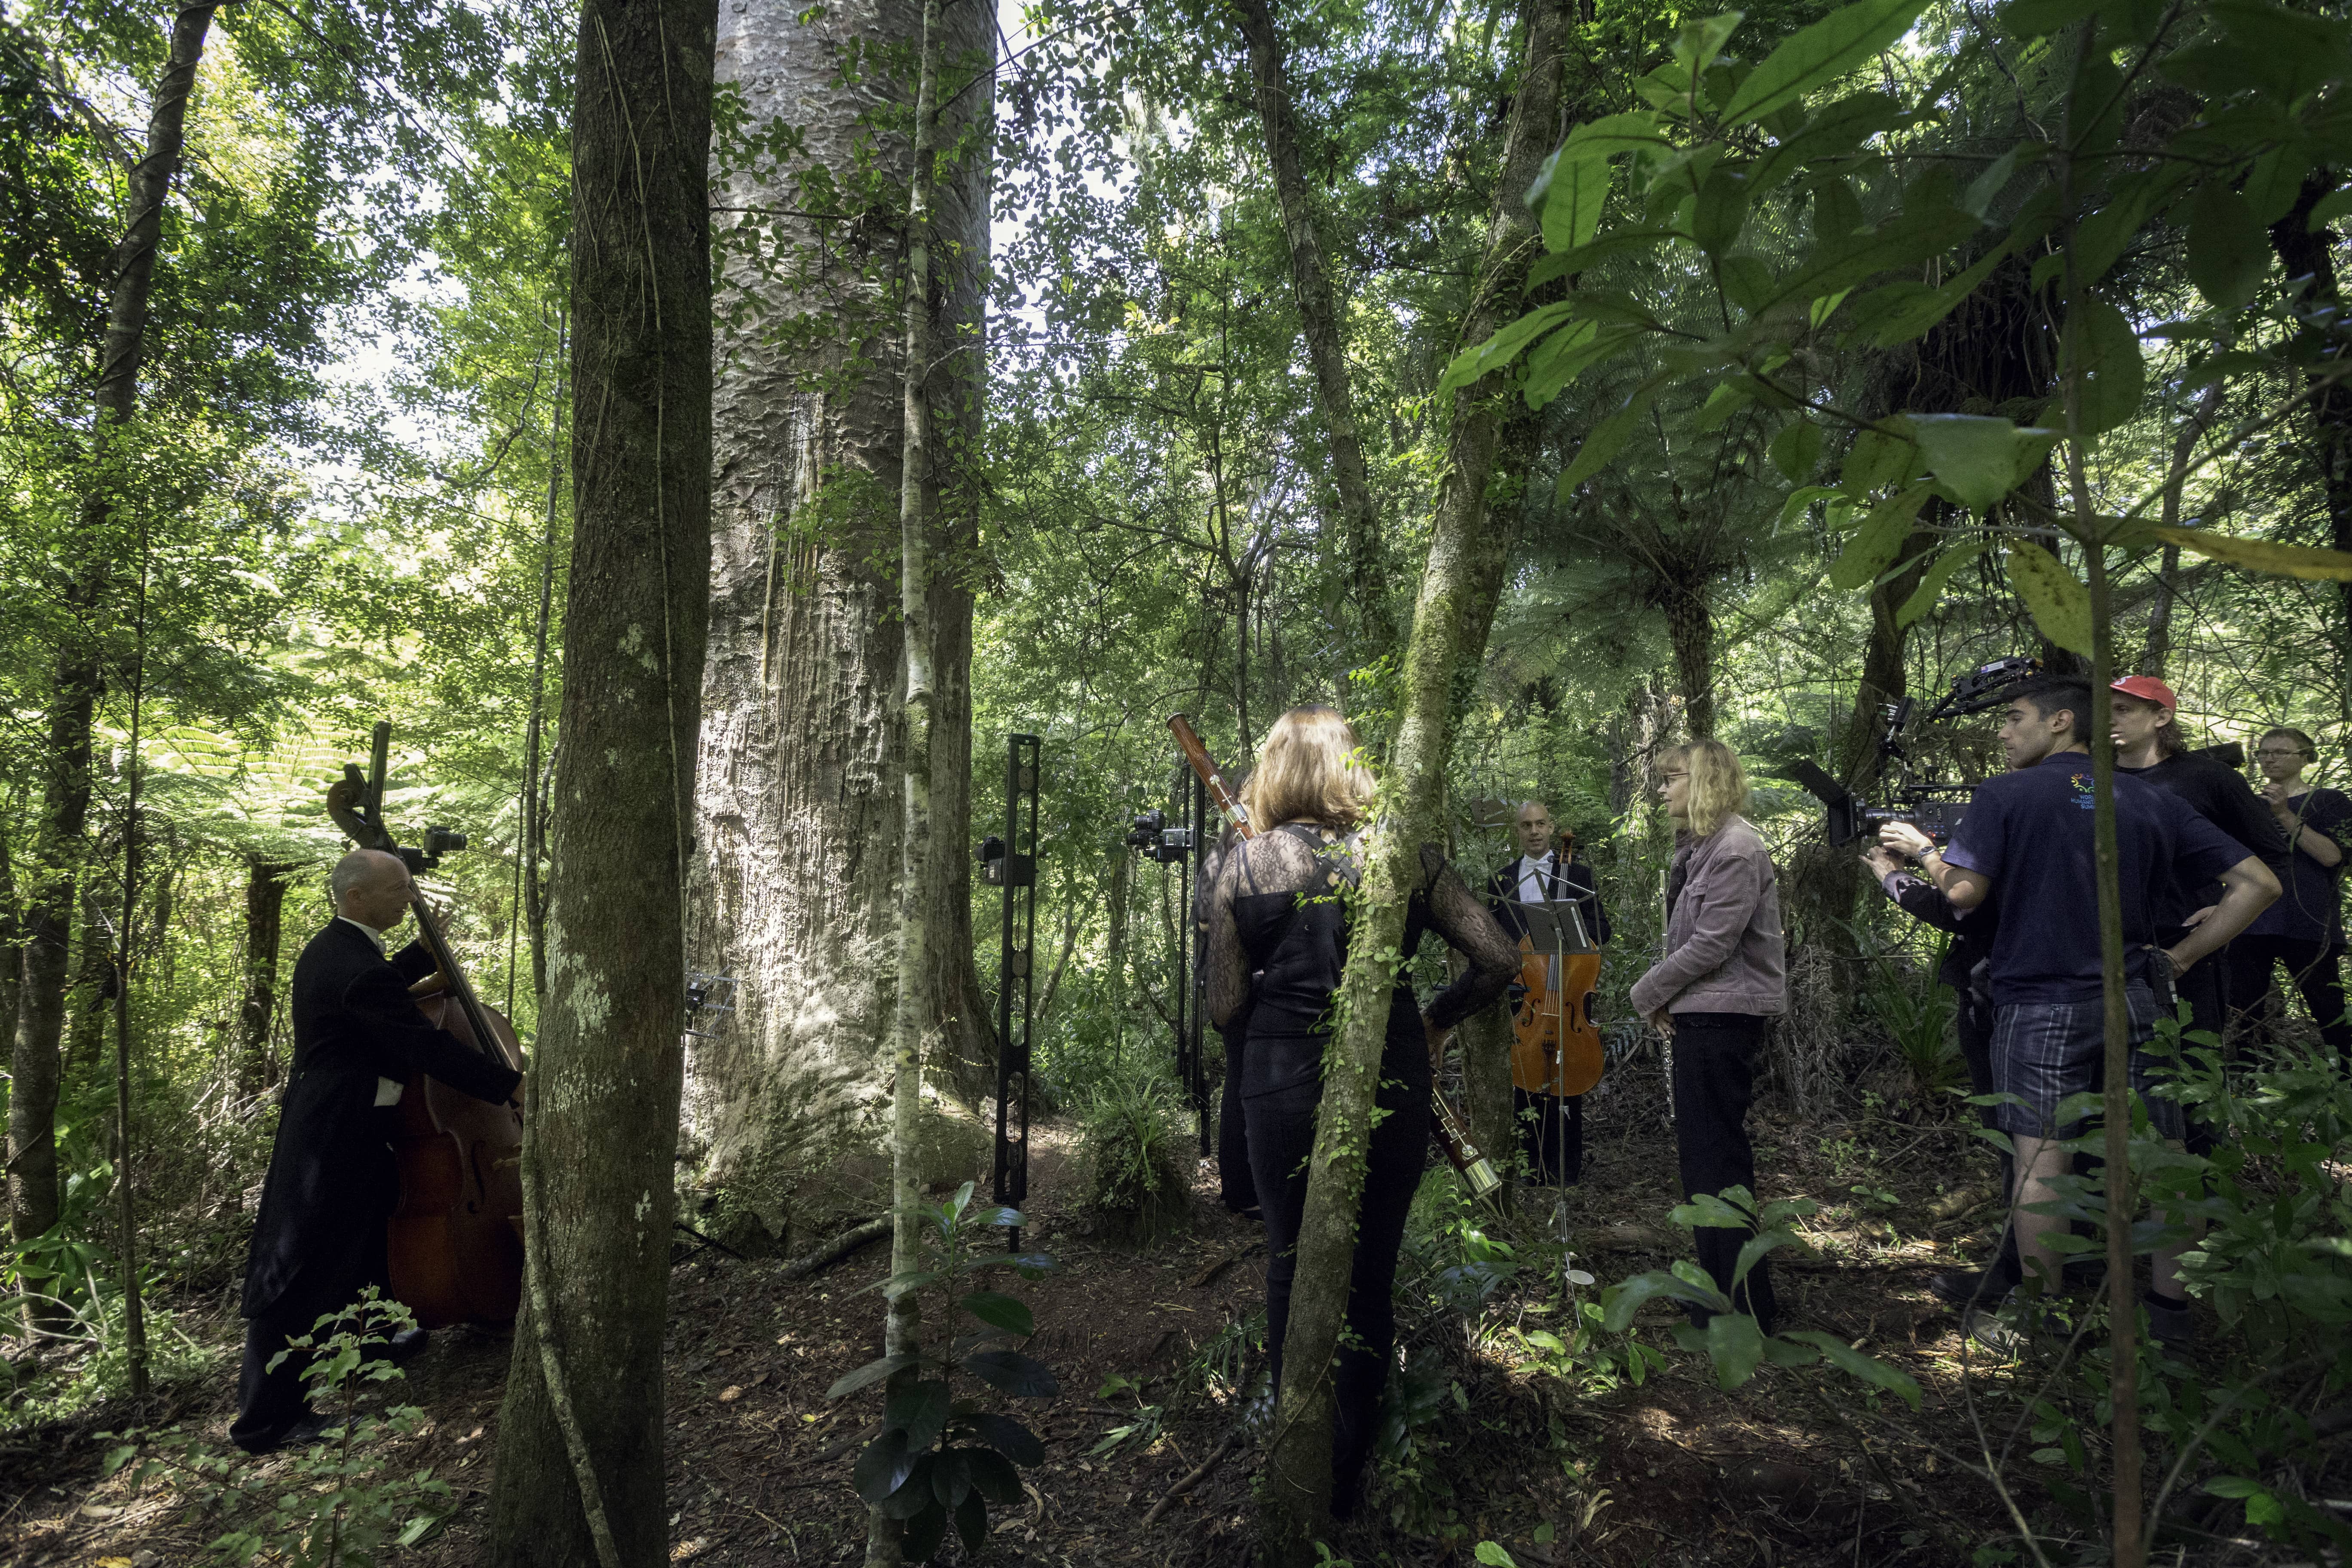
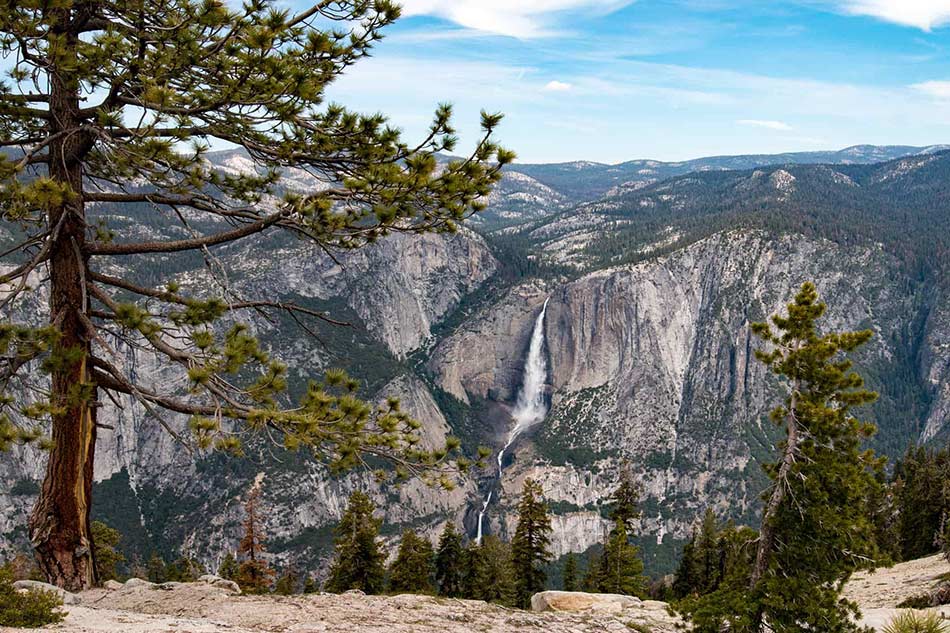
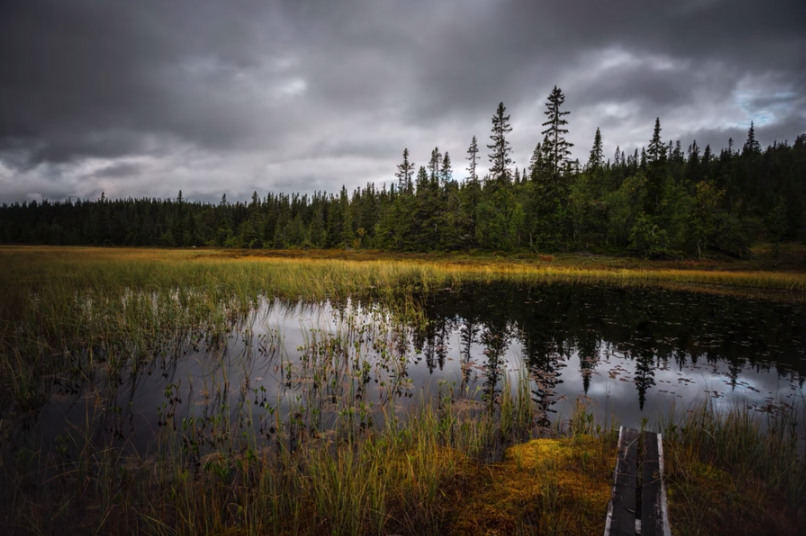
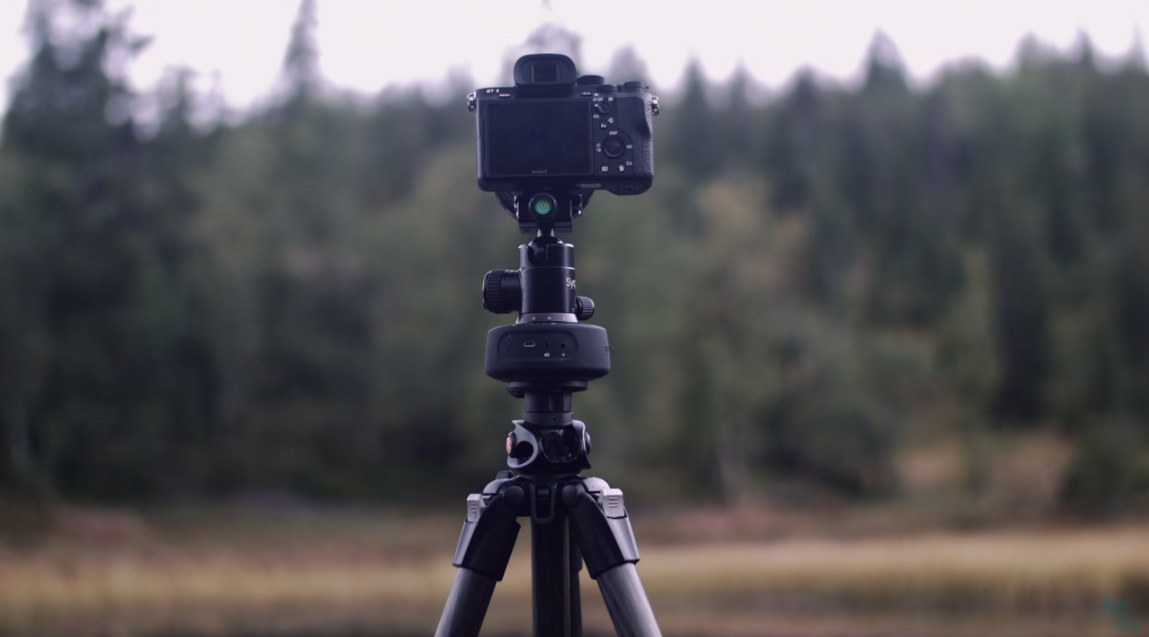
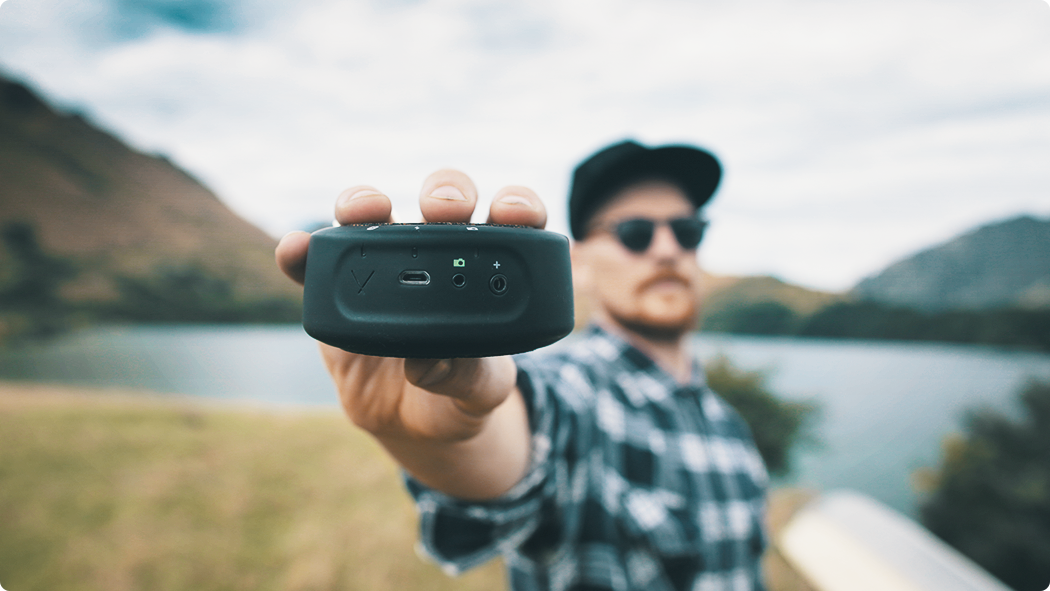
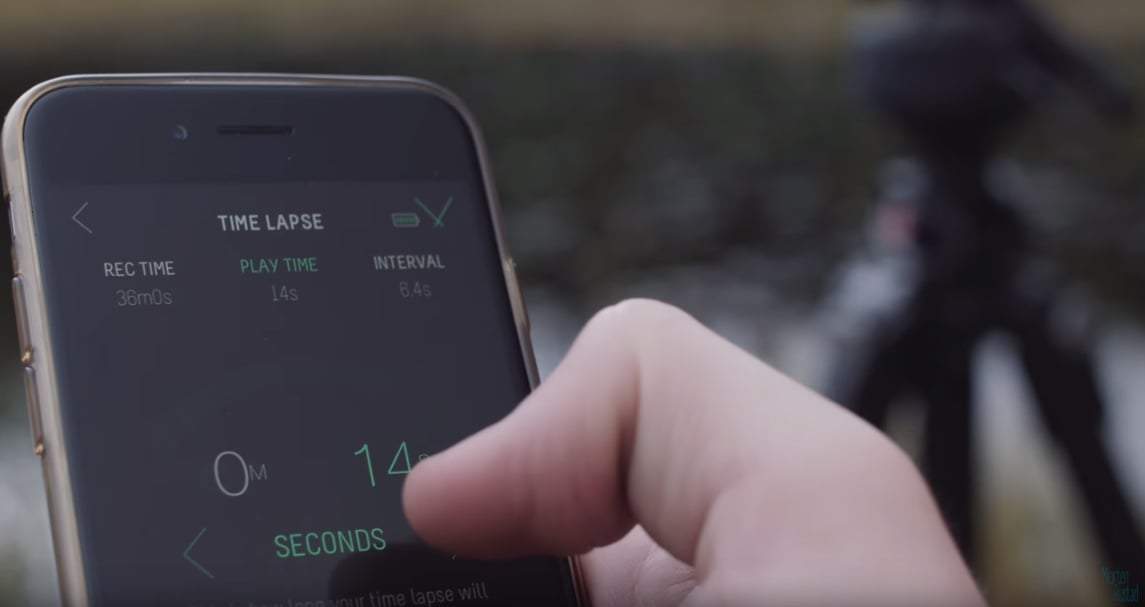
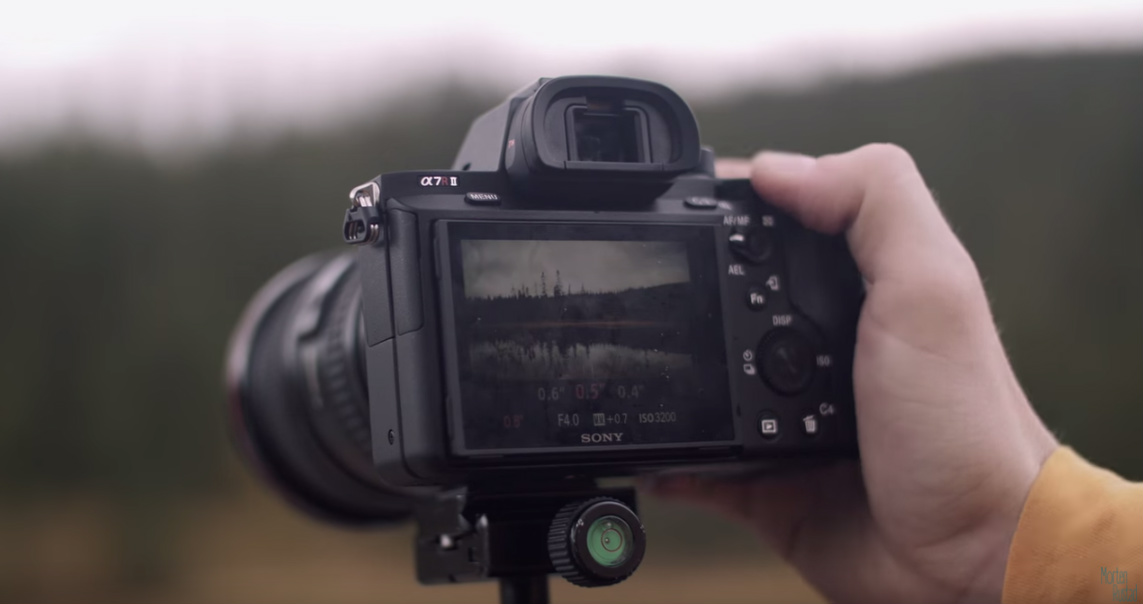
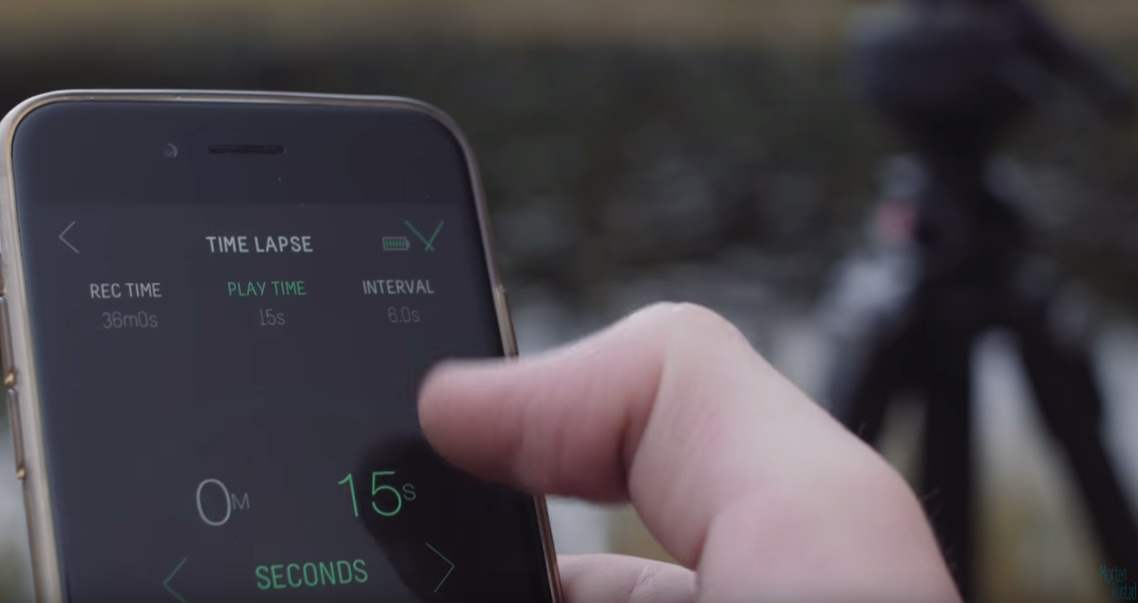
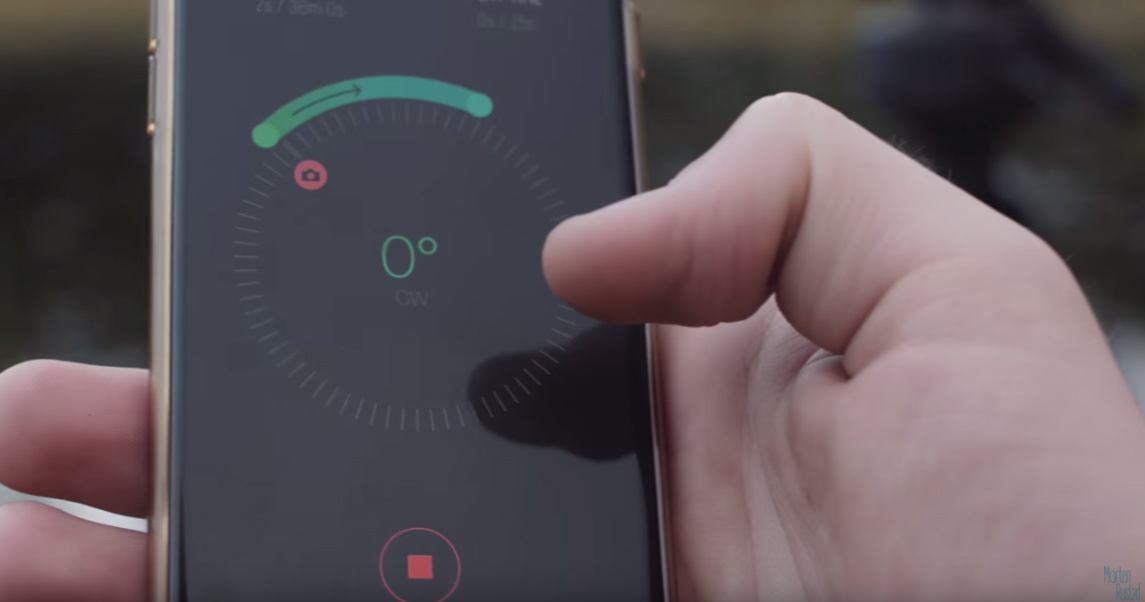
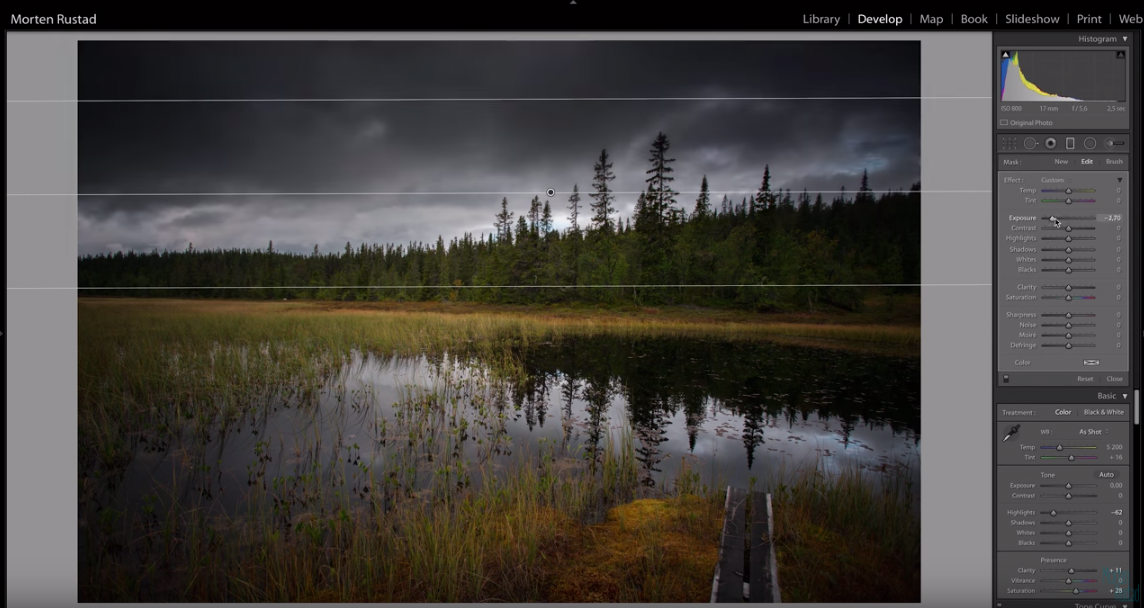
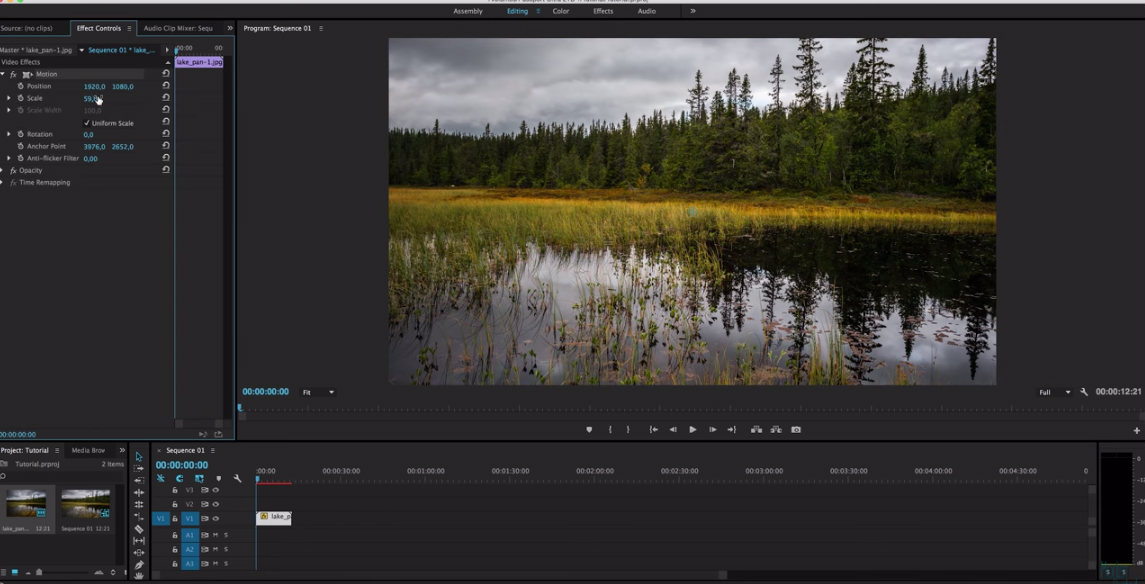
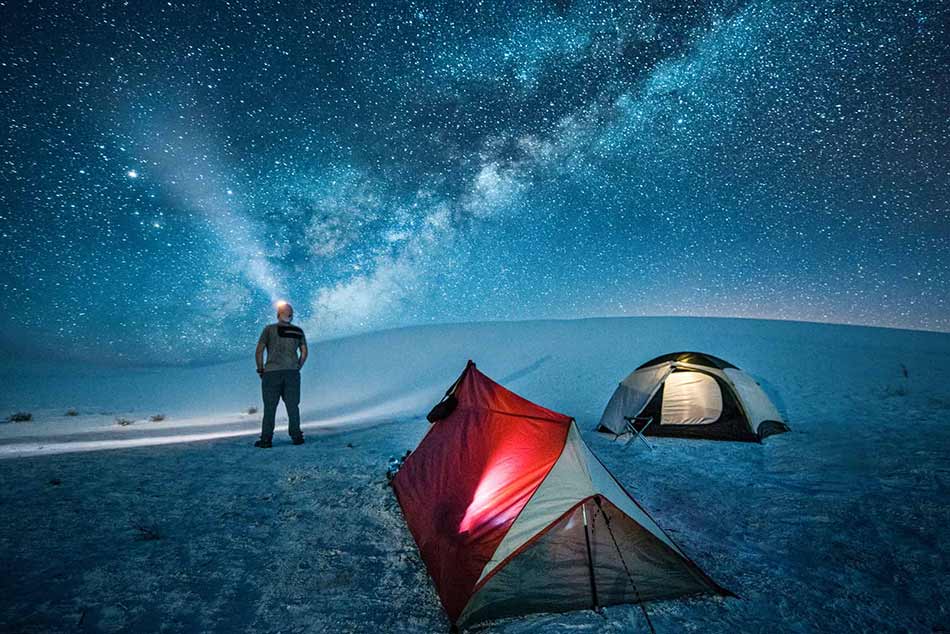
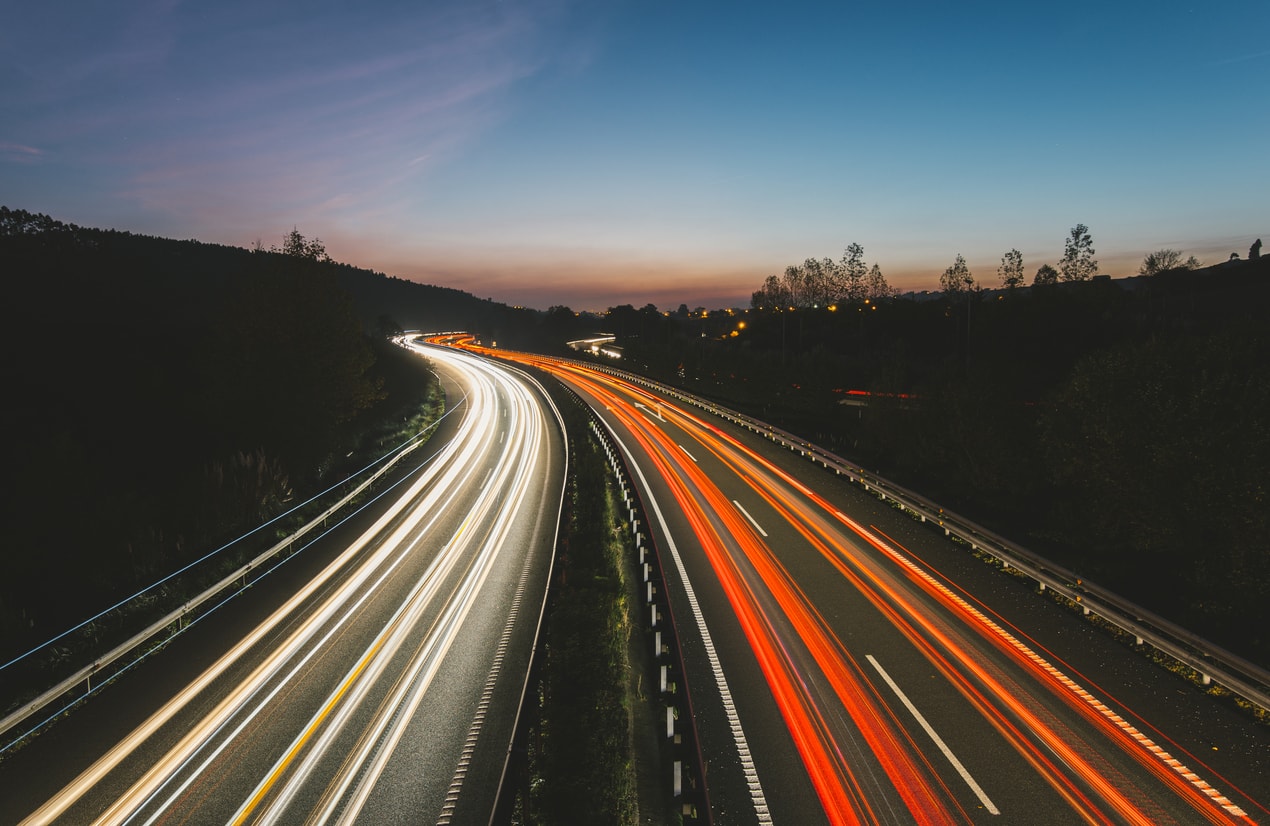
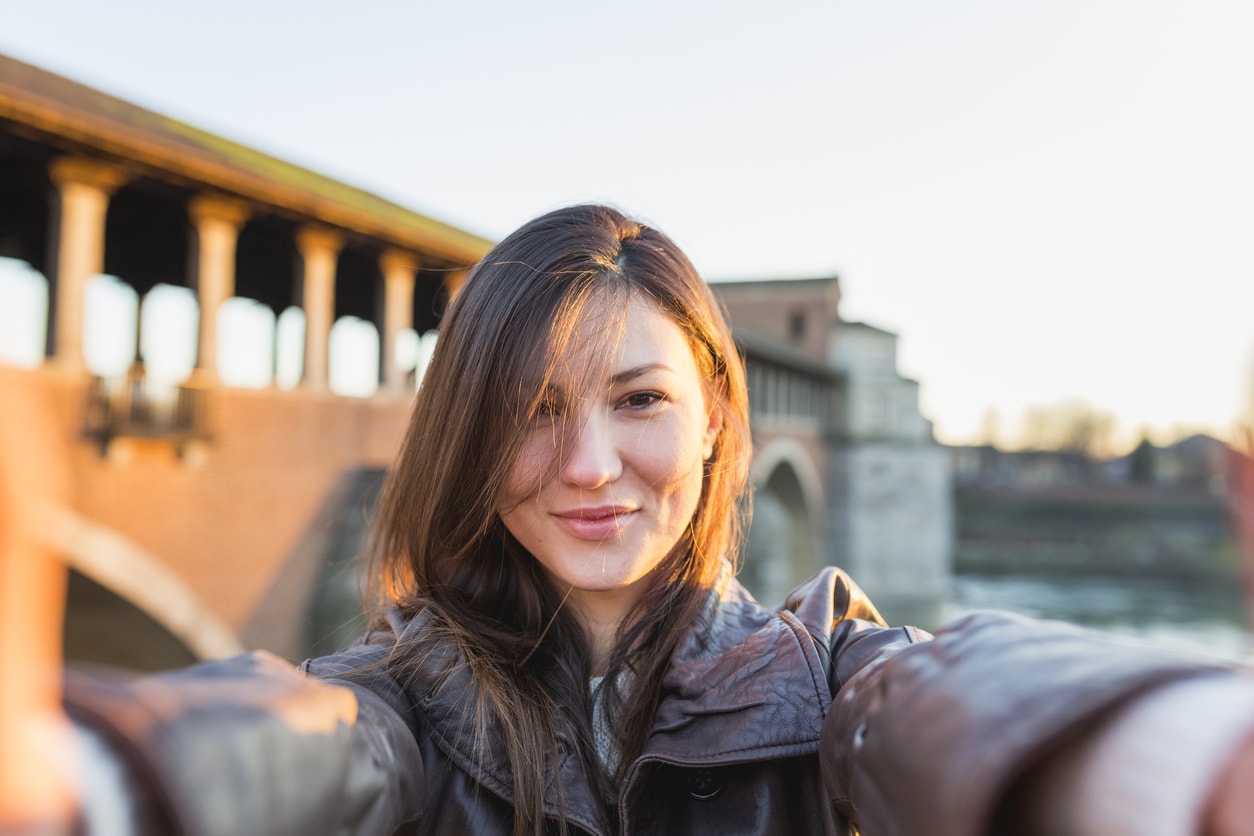

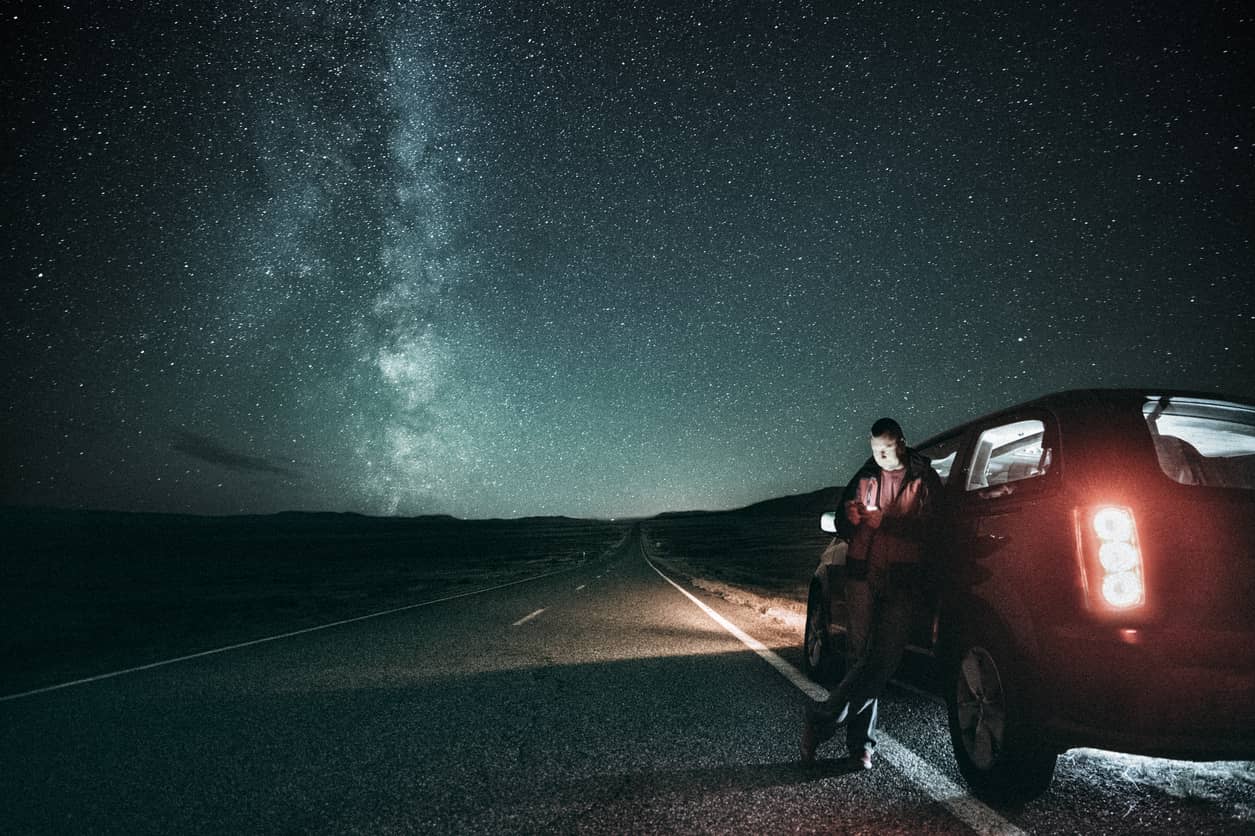

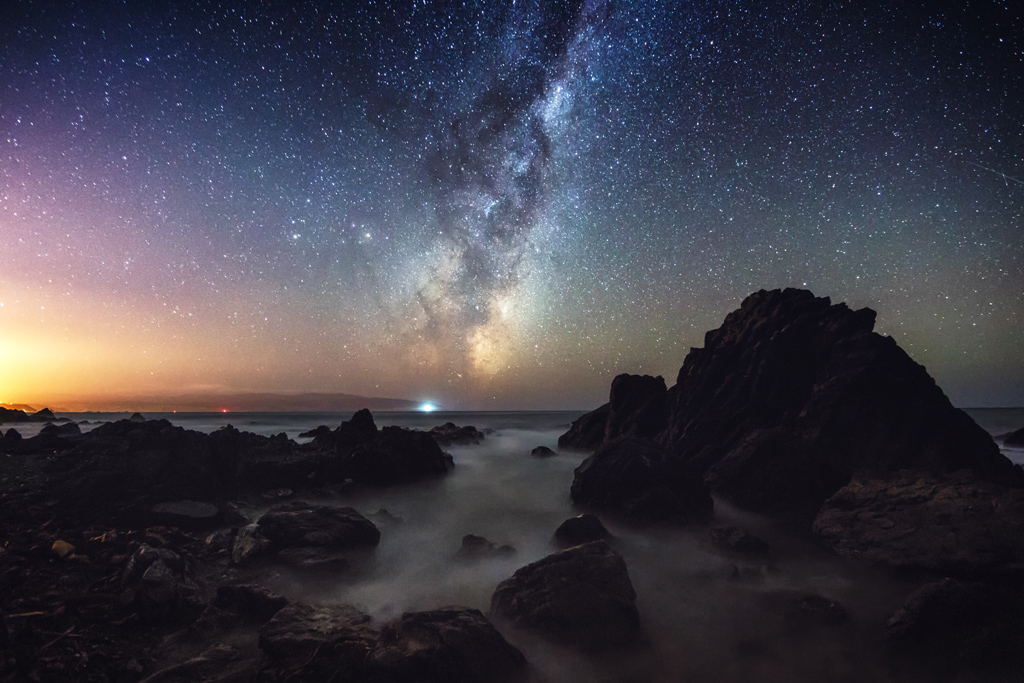
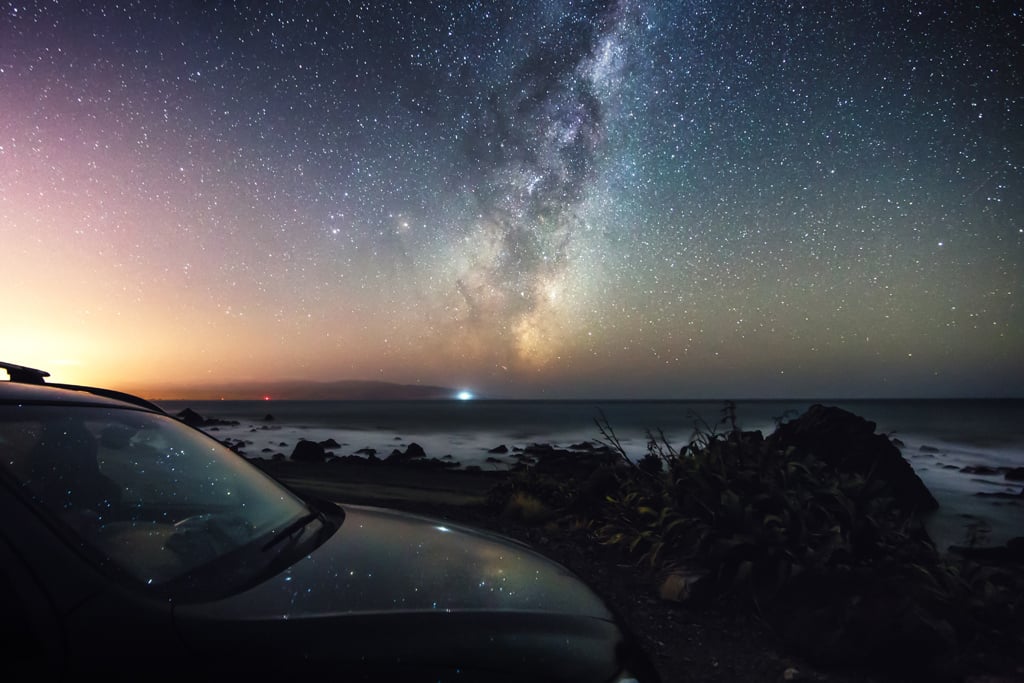
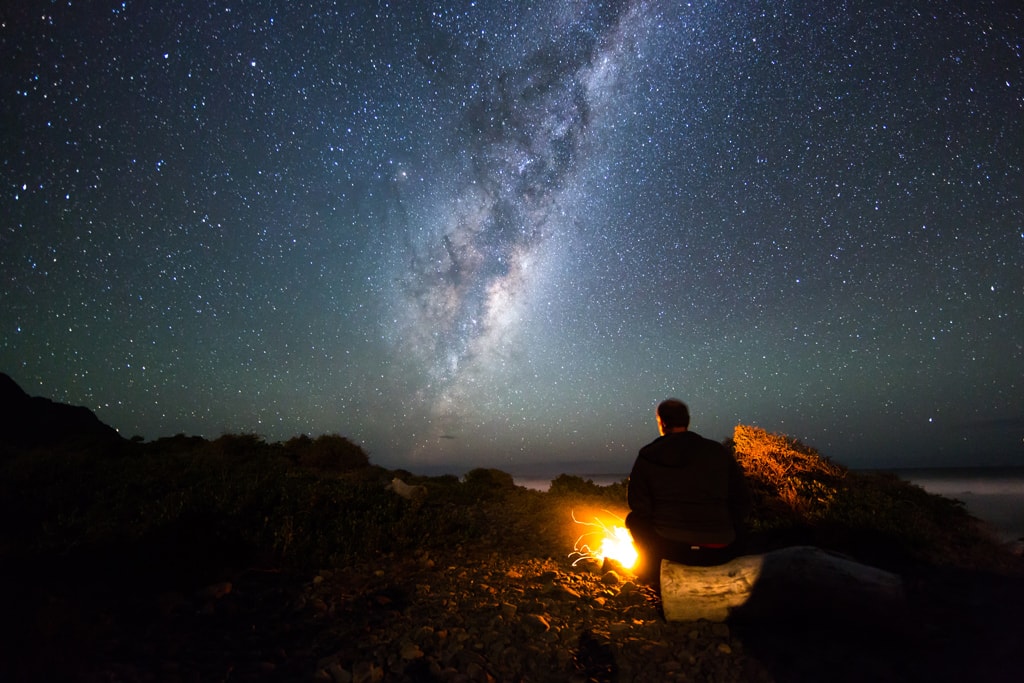
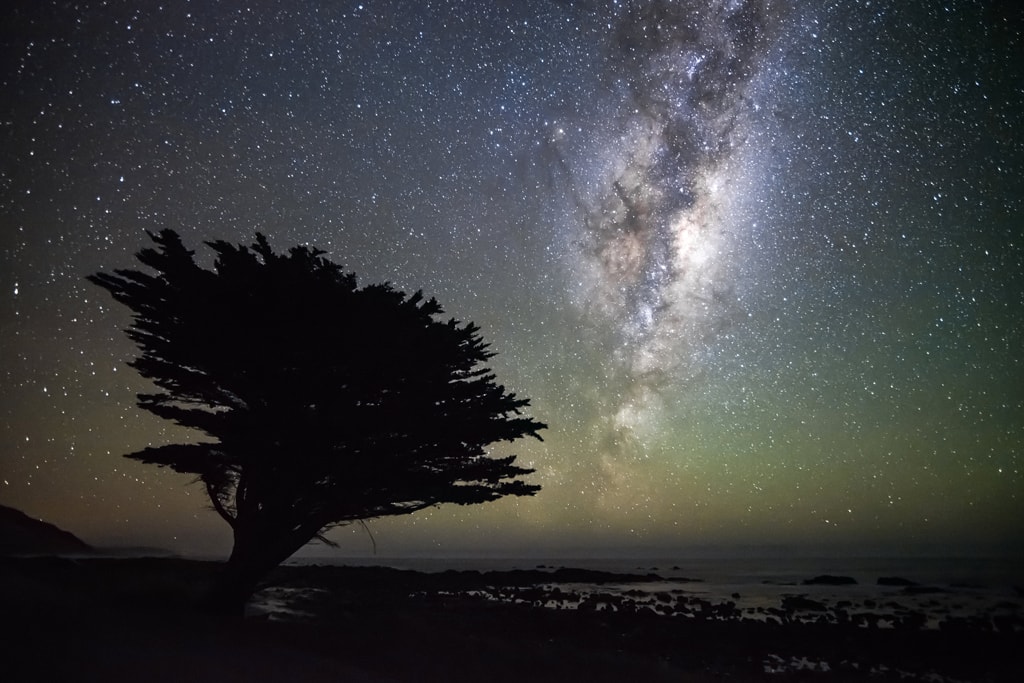
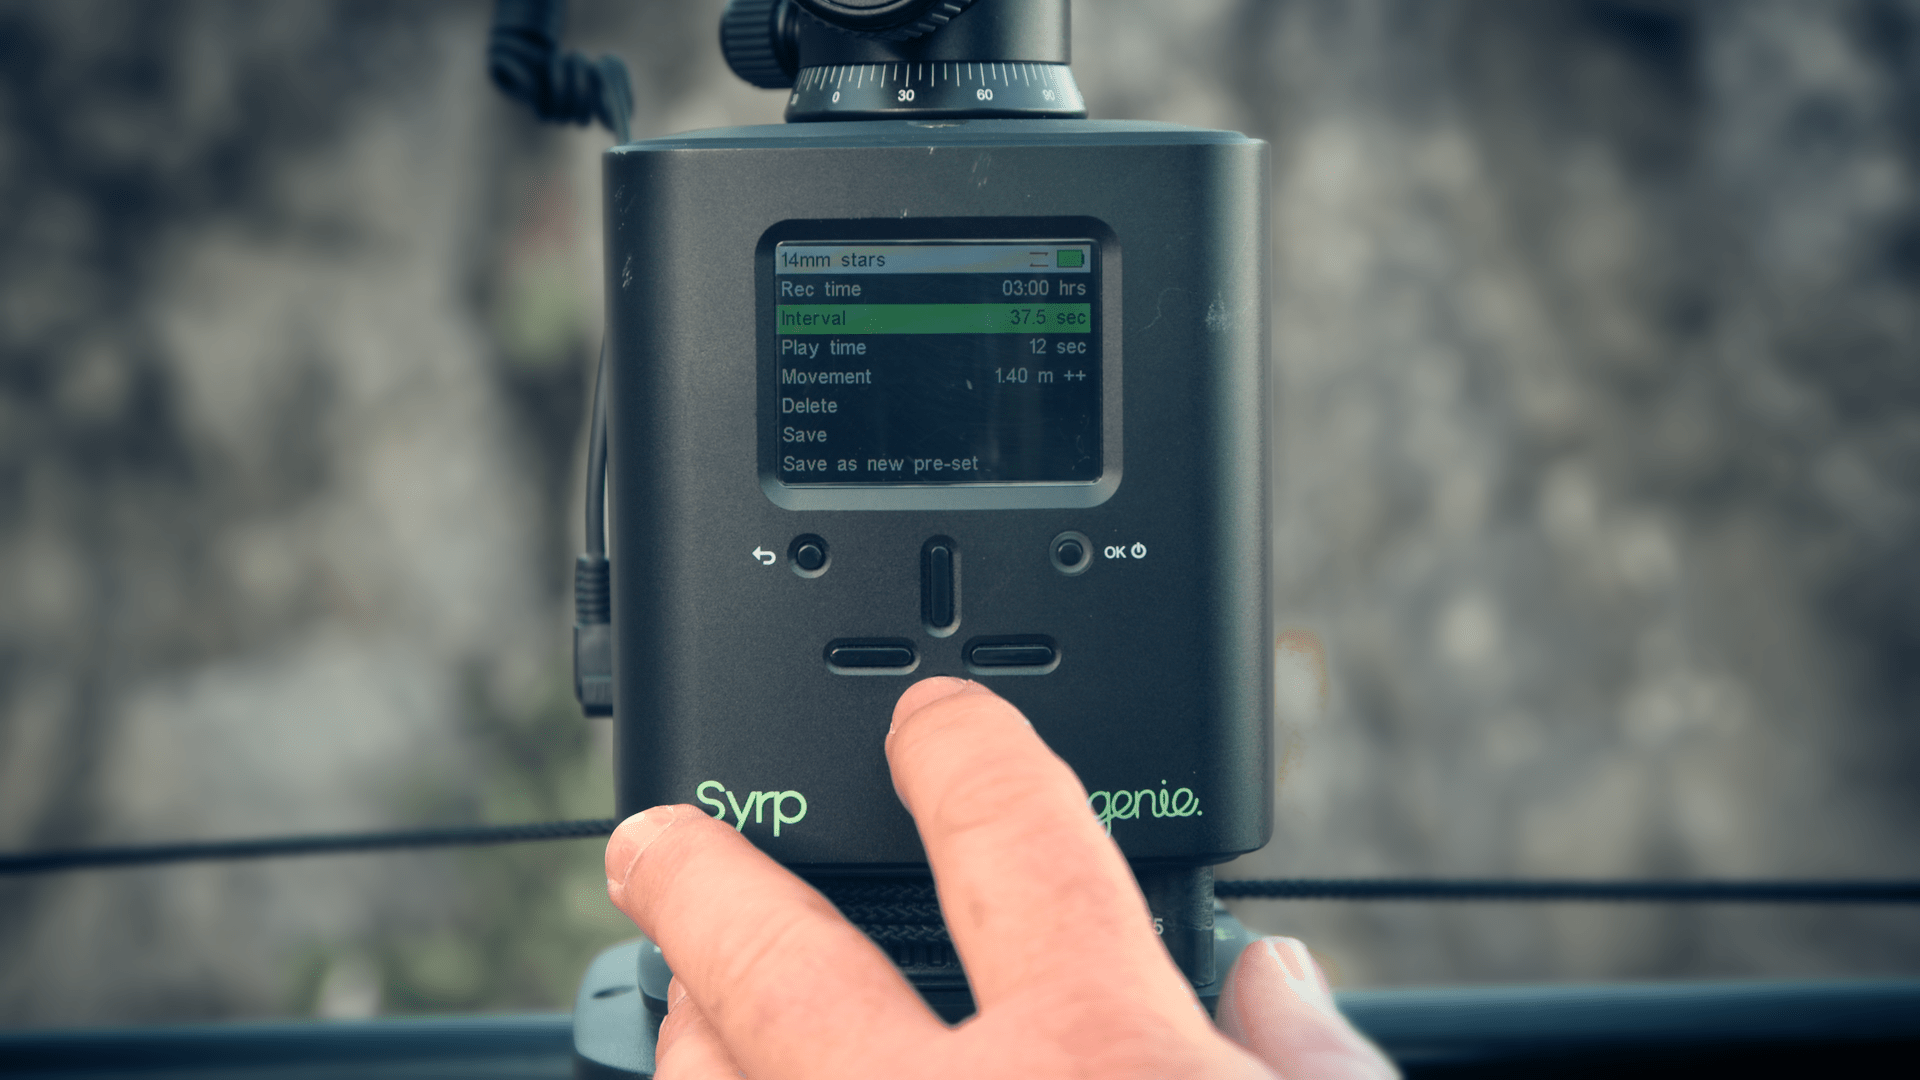
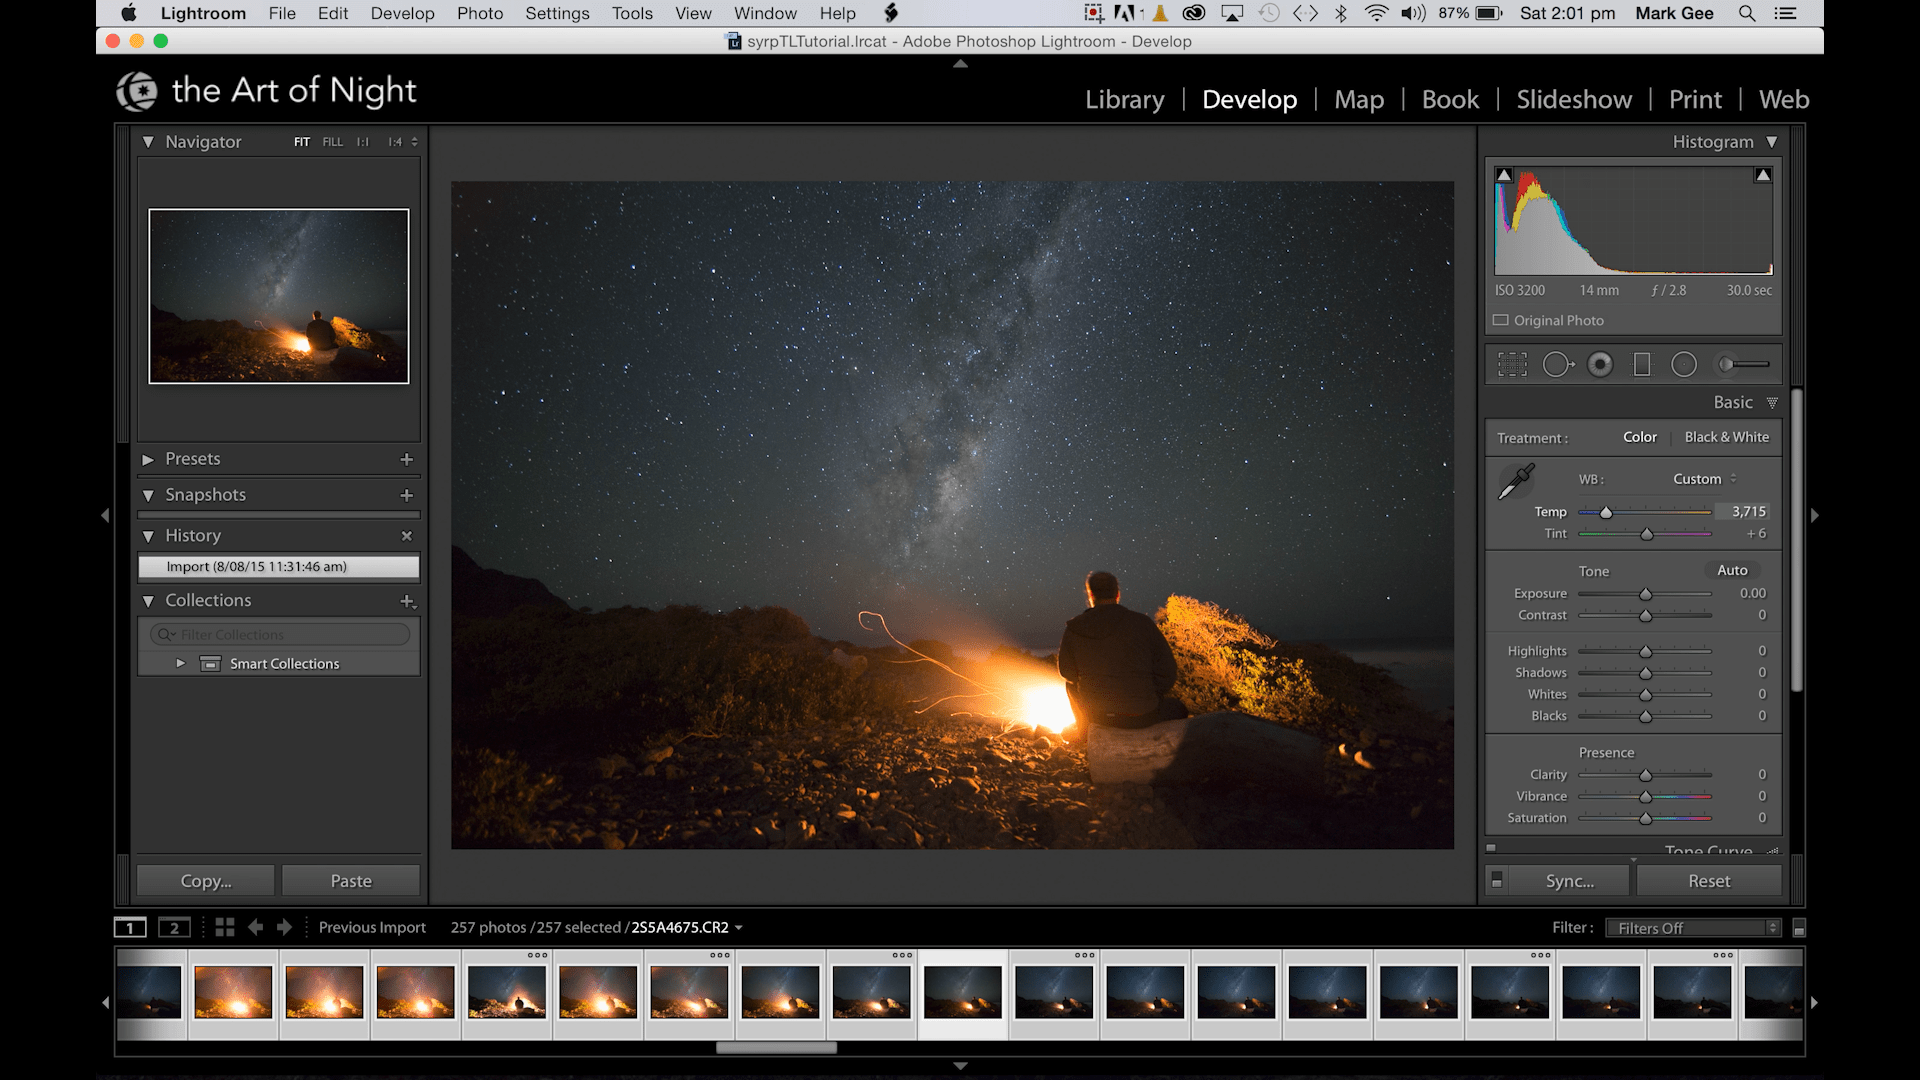
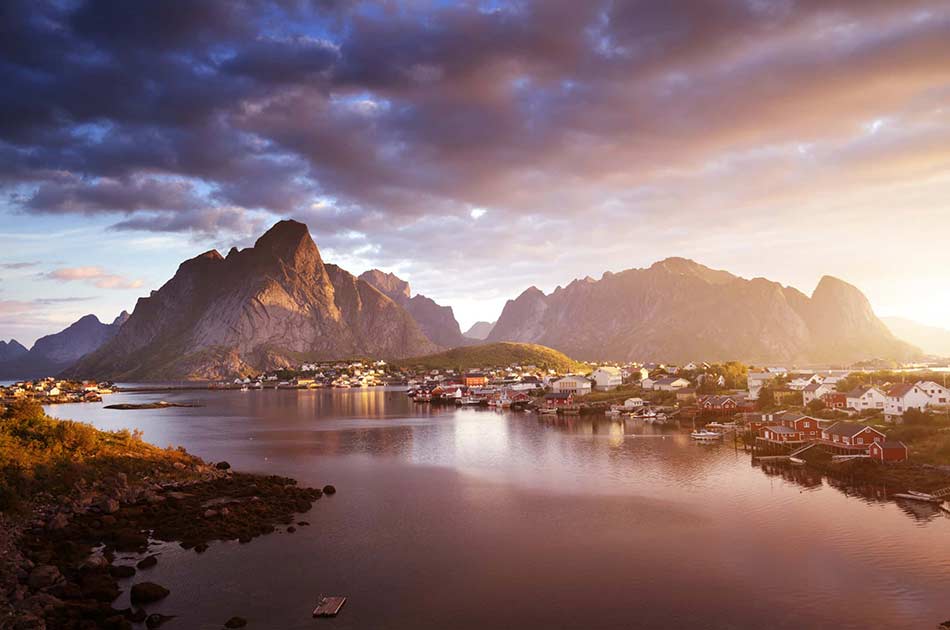
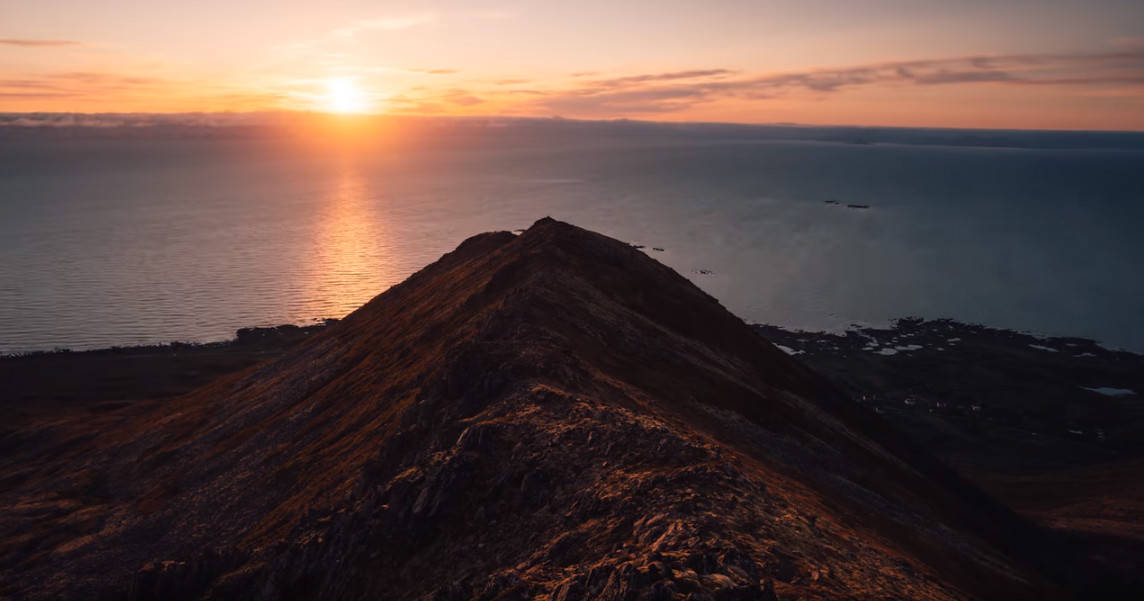 YouTube Screenshot/Morten Rustad
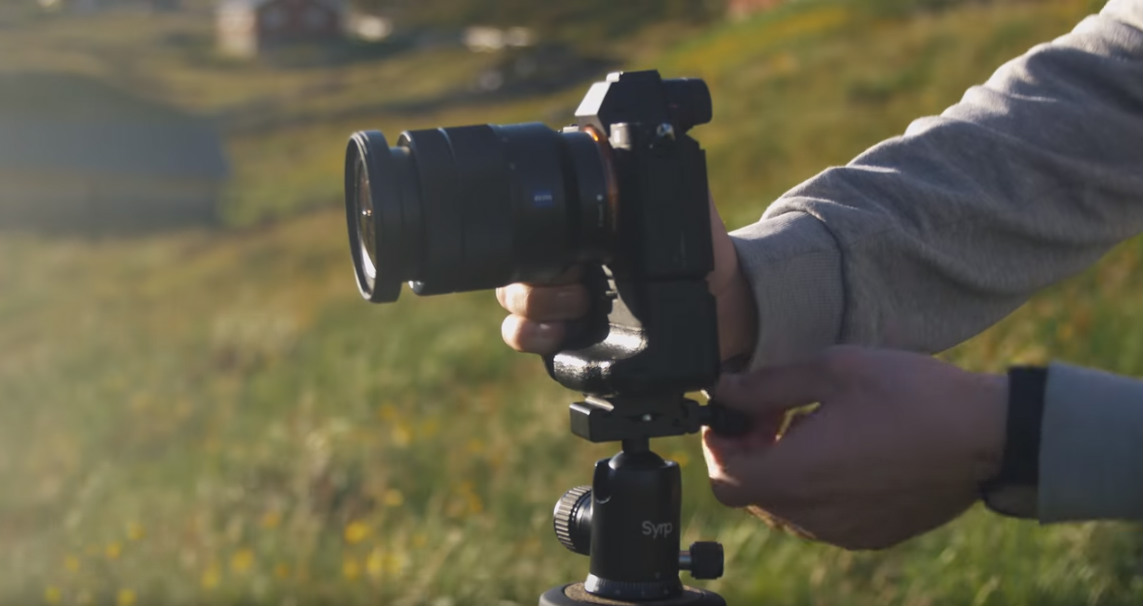 YouTube Screenshot/Morten Rustad
 YouTube Screenshot/Morten Rustad
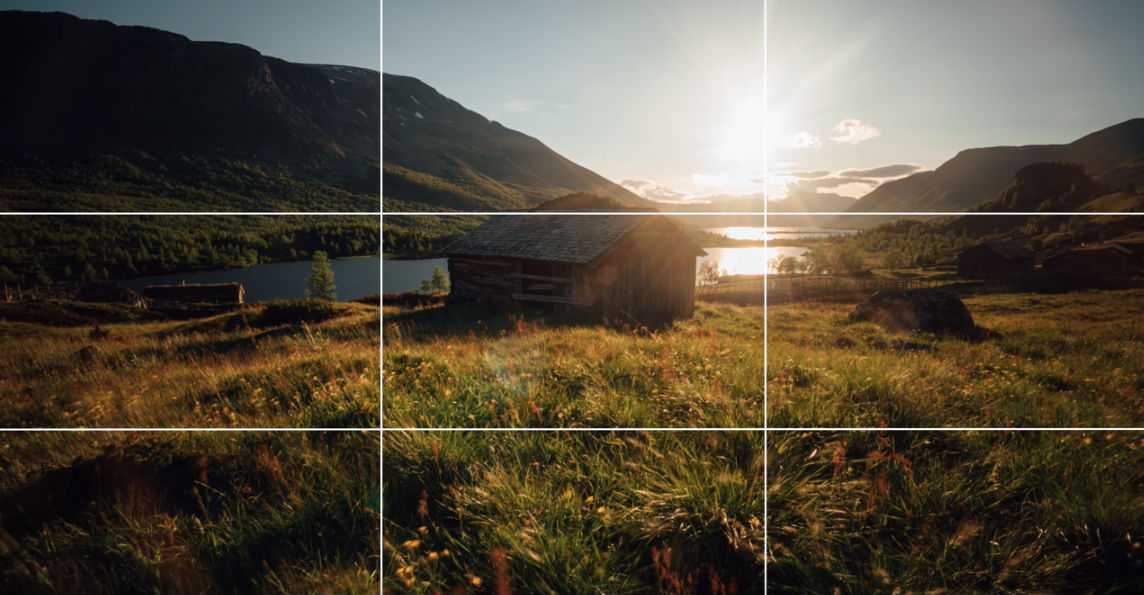 YouTube Screenshot/Morten Rustad
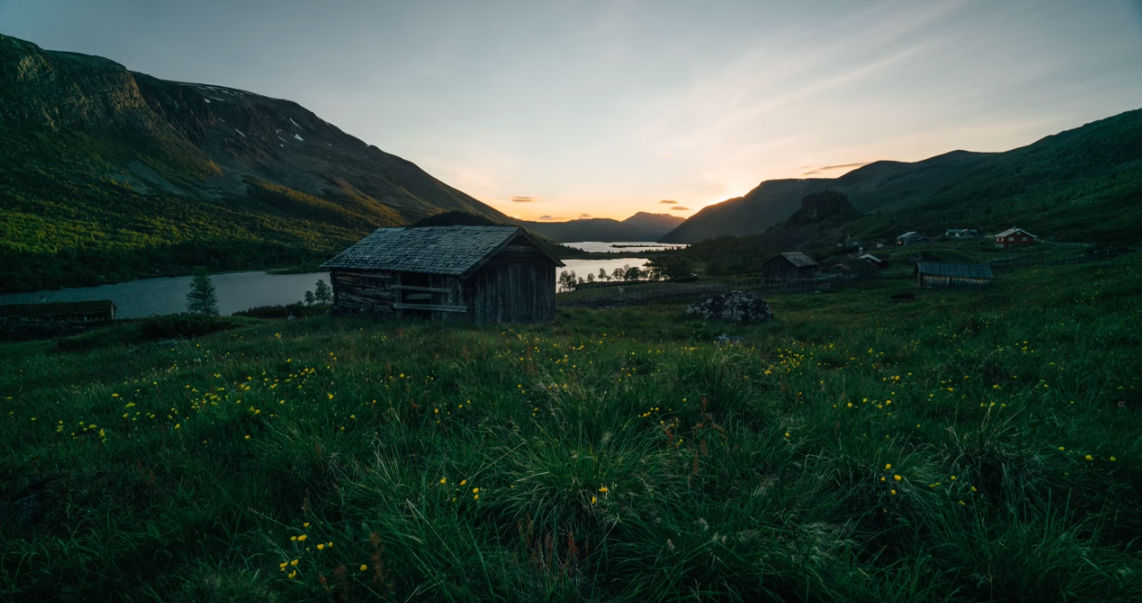 YouTube Screenshot/Morten Rustad
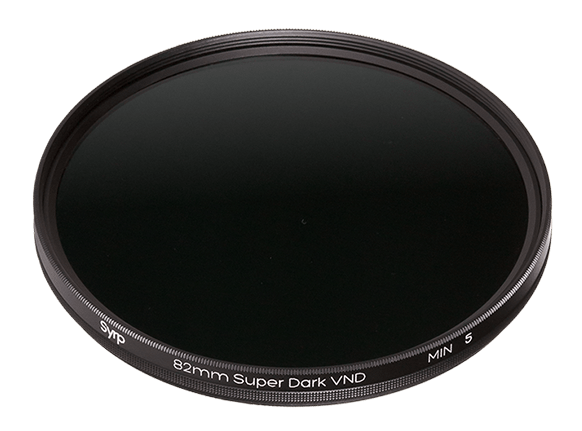
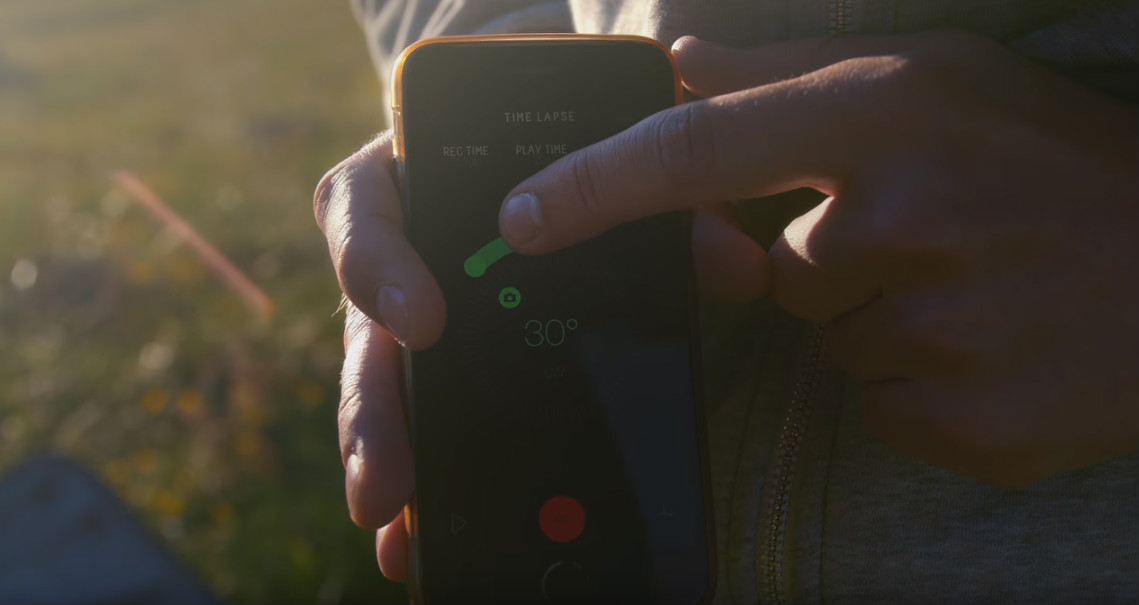 YouTube Screenshot/Morten Rustad
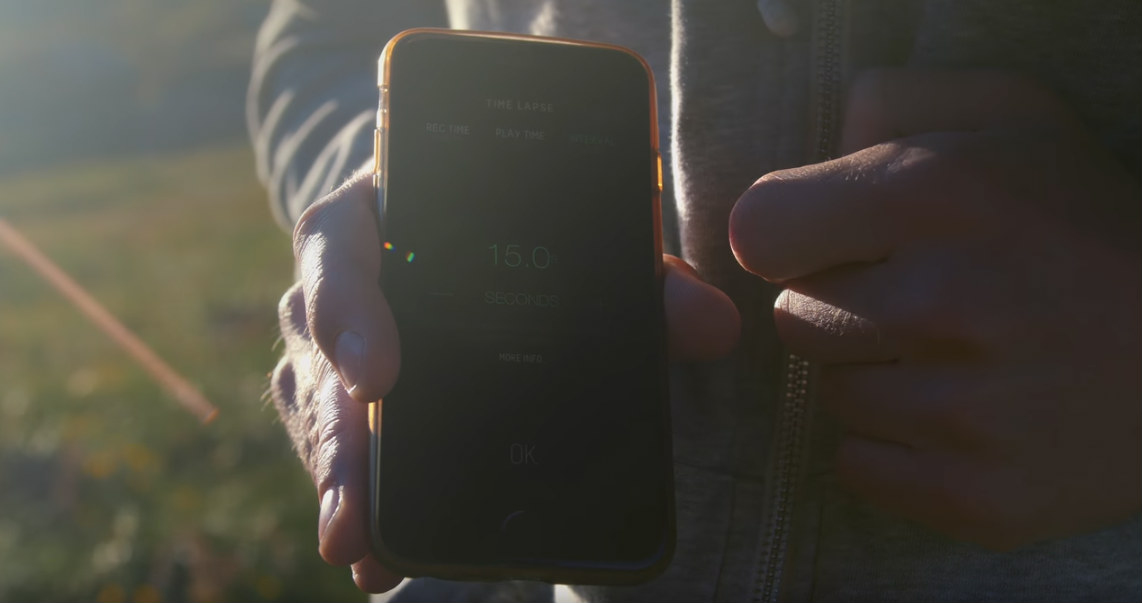 YouTube Screenshot/Morten Rustad