
Photo Tip of the Week: Capturing Moving Water in Landscape Photography
- Set yourself up for success by investing in a good, sturdy tripod and a remote or cable release. These accessories are a must have to get the sharpest long exposure images of water.
- Familiarize yourself with your camera’s Manual mode. Doing so will give you the greatest control over what your camera does, including determining the appropriate aperture and shutter speed.
- Take numerous test shots to get a feel for where your aperture should be set. A good place to start is f/11 – then simply open the aperture if the image is underexposed or close it down if it’s overexposed.
- Also take numerous test shots at various shutter speeds. The .5-2.0 second range is a good place to start, but note that you may need to extend the shutter to 30 seconds or beyond to the get effect you want.

One of the most stunning subjects you can include in landscape photography is water. Long exposure images of water are particularly striking. And although it might look like capturing moving water would require a lot of post-processing trickery, this most certainly is not the case. In fact, much of what needs to be done takes place in-camera.
This week’s installment of our Tip of the Week series delves into the steps you need to take for success in capturing moving water, including getting the right accessories for your camera, selecting the appropriate shooting mode, and dialing in the best camera settings. Let’s get started!
Set Yourself Up For Success
Supercharge your photography skills. 600+ Premium lessons waiting for you HERE.
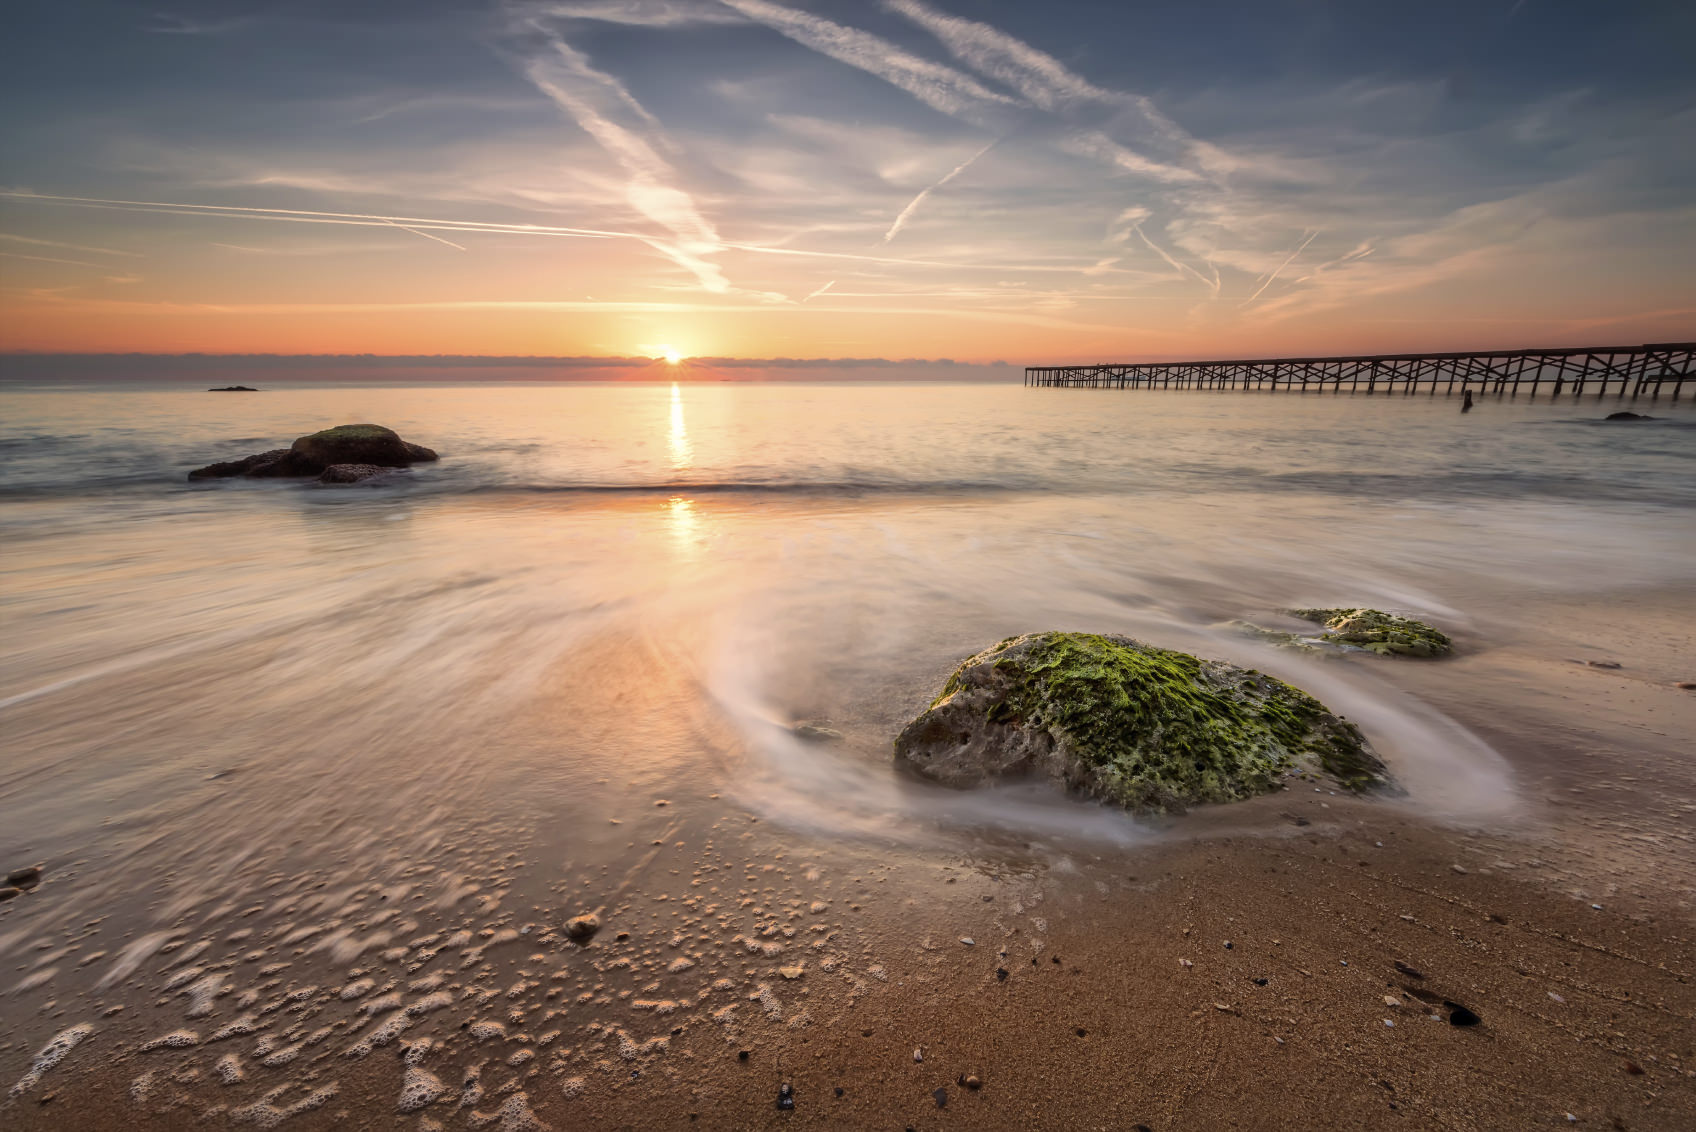
Because you will be working with longer exposure times, you absolutely must have a good, sturdy tripod and a remote shutter release. The stillness of the camera is directly related to the sharpness of the resulting image, so a handheld exposure is out of the question if you want tack-sharp results like in the image above.
Related to that is the issue of camera shake. Even if you have a tripod, the vibration caused by the gentlest touch on your camera’s shutter button can still result in a blurry photo. As a result, it’s best if you have a wireless remote or cable shutter release, so you don’t actually have to touch your camera to activate the shutter.
Use the Right Camera Mode
The four most popular modes for capturing the movement of water are Aperture Priority, Shutter Priority, Manual, and Bulb.
Aperture Priority, which is most often denoted by A or AV on the camera’s dial, allows you to select the aperture while the camera is responsible for selecting an appropriate shutter speed to get the correct exposure. However, the difficulty with Aperture Priority is that the shutter speed the camera selects can be pretty hit or miss. Combined with variable lighting conditions and the aperture you choose, what the camera thinks is right might actually produce a horribly underexposed or overexposed image.
Shutter Priority (S or TV depending on your camera make) gives you the power to determine the shutter speed while the camera chooses the appropriate aperture. Shutter Priority works well for beginners because it requires less thought and manipulation of the camera’s settings. Start out with a shutter speed of .5s, and then adjust for a longer or shorter shutter depending on the level of exposure in the image.
Manual mode (M) or Bulb mode is preferable to both Aperture Priority and Shutter Priority. In Manual mode, you are in control of all the camera settings – the aperture, shutter speed, and ISO. Bulb mode is essentially the same as manual, except rather than dialing in a specific shutter speed, in Bulb, the shutter will remain open for as long as you depress the shutter button.
Dial in the Settings
Because each water scene is different from the next, and because the settings you use will need to change depending on the available light over the course of a given day, there are no hard and fast settings that you can use every single time.

Having said that, a good starting point is a mid-range aperture in the f/11 range. In most cases, this will be effective because it allows the sensor to collect enough light in the vast majority of lighting situations. Naturally, if you’re shooting in the early morning or late evening hours when there is less light, as was the case in the image above, a larger aperture will be needed.
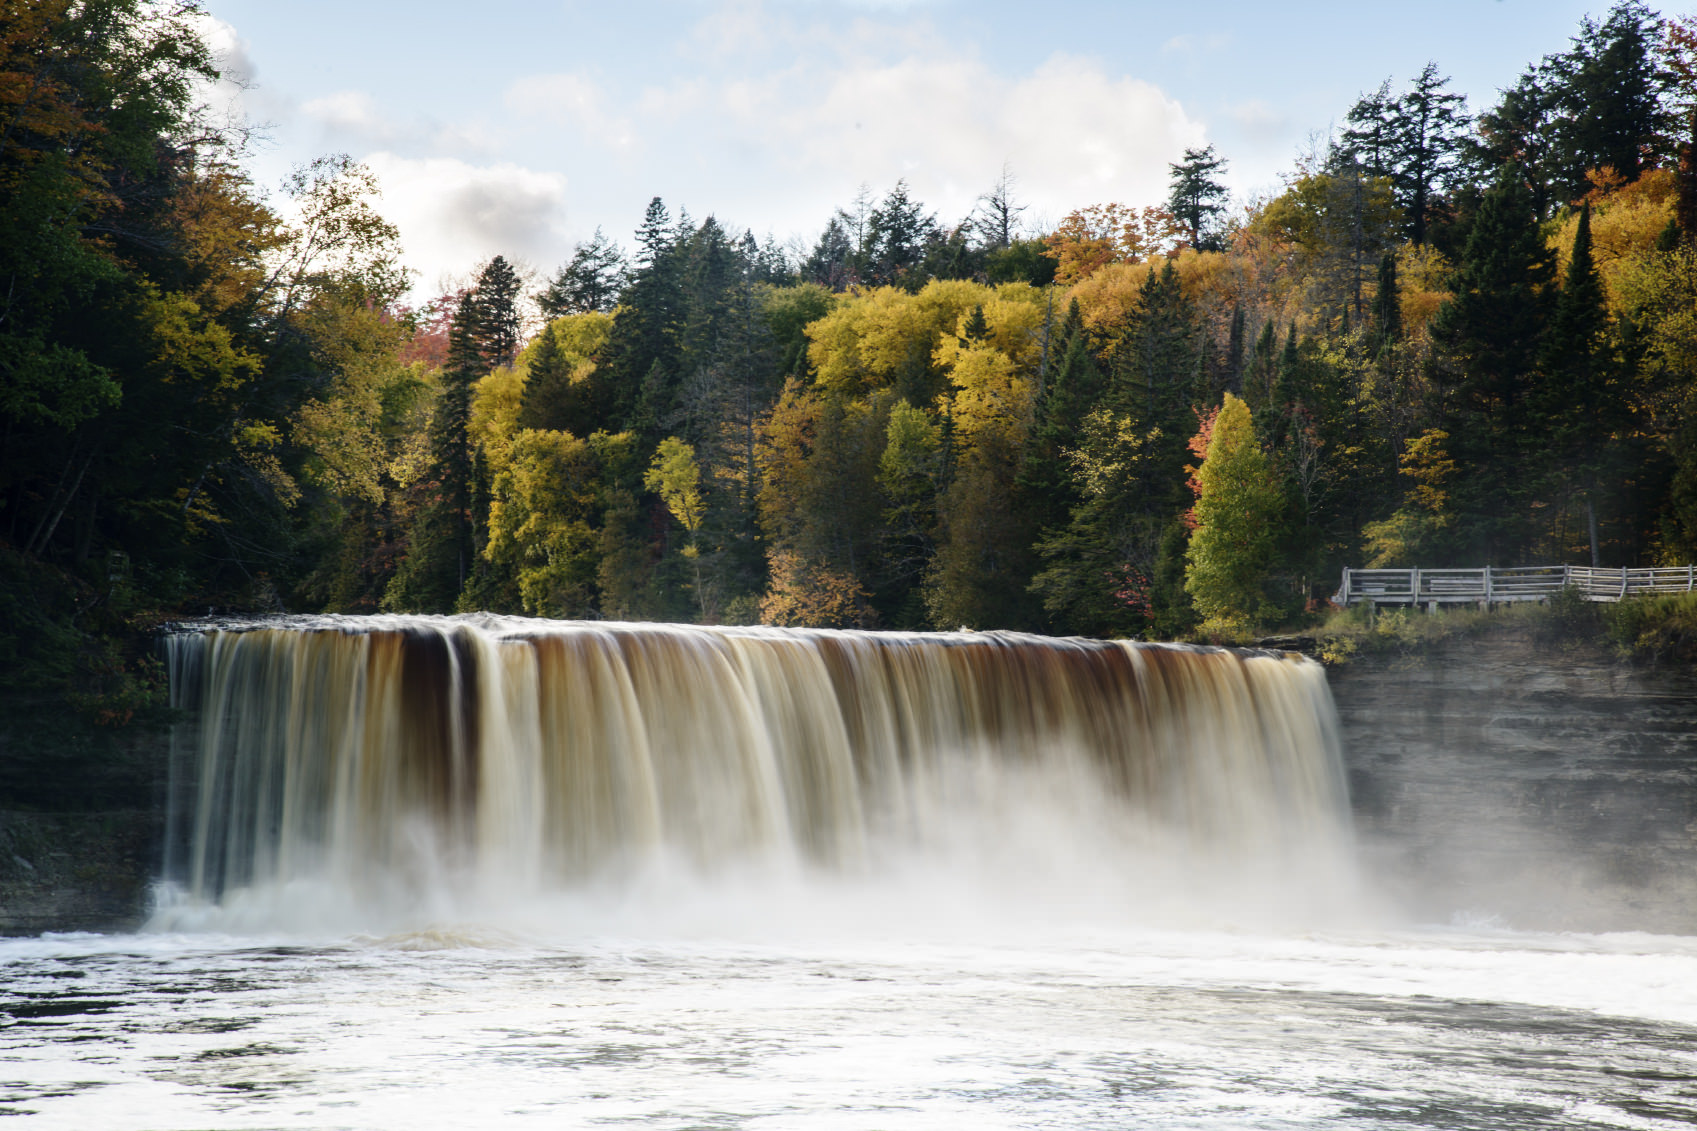
The shutter speed you use will depend heavily on the effect you want and the type of water you’re photographing. A waterfall will start to get nice blur at a shutter speed of .5s, as is the case in the image above. The ocean, on the other hand, may require 2 seconds or more to get that milky, foggy appearance. In some cases, you may need 30 or more seconds to capture the motion of the water. It’s really a matter of experimenting with different shutter speeds until you find the most pleasing effect.
Consider the Lighting
If a waterfall is your desired subject, wait for an overcast day to shoot your long exposure photos. The clouds will behave like a giant diffuser and allow you to get a nice exposure throughout the scene without having to worry about choosing between blown out highlights in the water or underexposed areas of shadow.

And, as is the case with just about any type of landscape photograph, shooting during Golden Hour can often generate the best results. If capturing a lake or the ocean, a sunrise or sunset will bring all kinds of color interest to the sky. Golden Hour is also great for waterfalls and streams because of the soft, warm light and because the sun will be too low to cast crazy shadows on the scene you’re photographing.
Want more premium photography lessons? Click HERE.
Conclusion
Like all photography, getting those stunning images of moving water will take some time, patience, and practice. But, once you get a feel for making manual adjustments to shutter speed and aperture, and you get more comfortable shooting in manual mode, it will become almost second nature to dial in the right settings to get those dreamy water shots.