
Tip of the Week – Shoot Black and White Landscapes Like a Pro
- Before venturing out to photograph landscapes, set your camera to shoot in RAW. This gives you the best opportunity to make adjustments in post-processing that will bring out the details you need for an impactful black and white photograph.
- Evaluate landscapes for elements that provide a good dynamic range. You want areas that will be pure black all the way to pure white, so having elements that create an interplay of light and shadow is critical.
- Include elements of interest in your shot as well. Lines, textures, and patterns give black and white images a greater level of drama that’s needed in the absence of color.
- Bring along various filters, including grads, polarizers, and various colored filters, to extract all the details you can out of the landscape.
- Remember to adhere to basic compositional rules when framing your shots. An image with incredible detail and great tonal range can still fall flat if you forget about the rule of thirds or neglect to include an element of foreground interest.

The phrase “black and white landscapes” likely brings Ansel Adams to mind, and with good reason. The guy was the quintessential landscape photographer. And while black and white landscape photography requires an added layer of thought, purposefulness, attention to detail, and an eye for composition, that doesn’t mean that you can’t make minor adjustments to your shooting technique that will have a significant, positive impact on the results you get.
This week, we explore a few quick and easy tips that will help you take your black and white landscape photography to the next level. Let’s get started!
Shoot in RAW
If you really want to unleash your power to create stunning black and white images, you need to shoot in RAW. Your camera probably has a monochrome setting, but these tend to be pretty worthless and produce images that are flat and uninspiring. Instead, shooting in color and in RAW will give you the ability to convert the image to black and white after making RAW adjustments. And, if the image just isn’t what you thought it would be in black and white, perhaps it will work well in color!
Supercharge your photography skills. 600+ Premium lessons waiting for you HERE.
Look for Dynamic Range
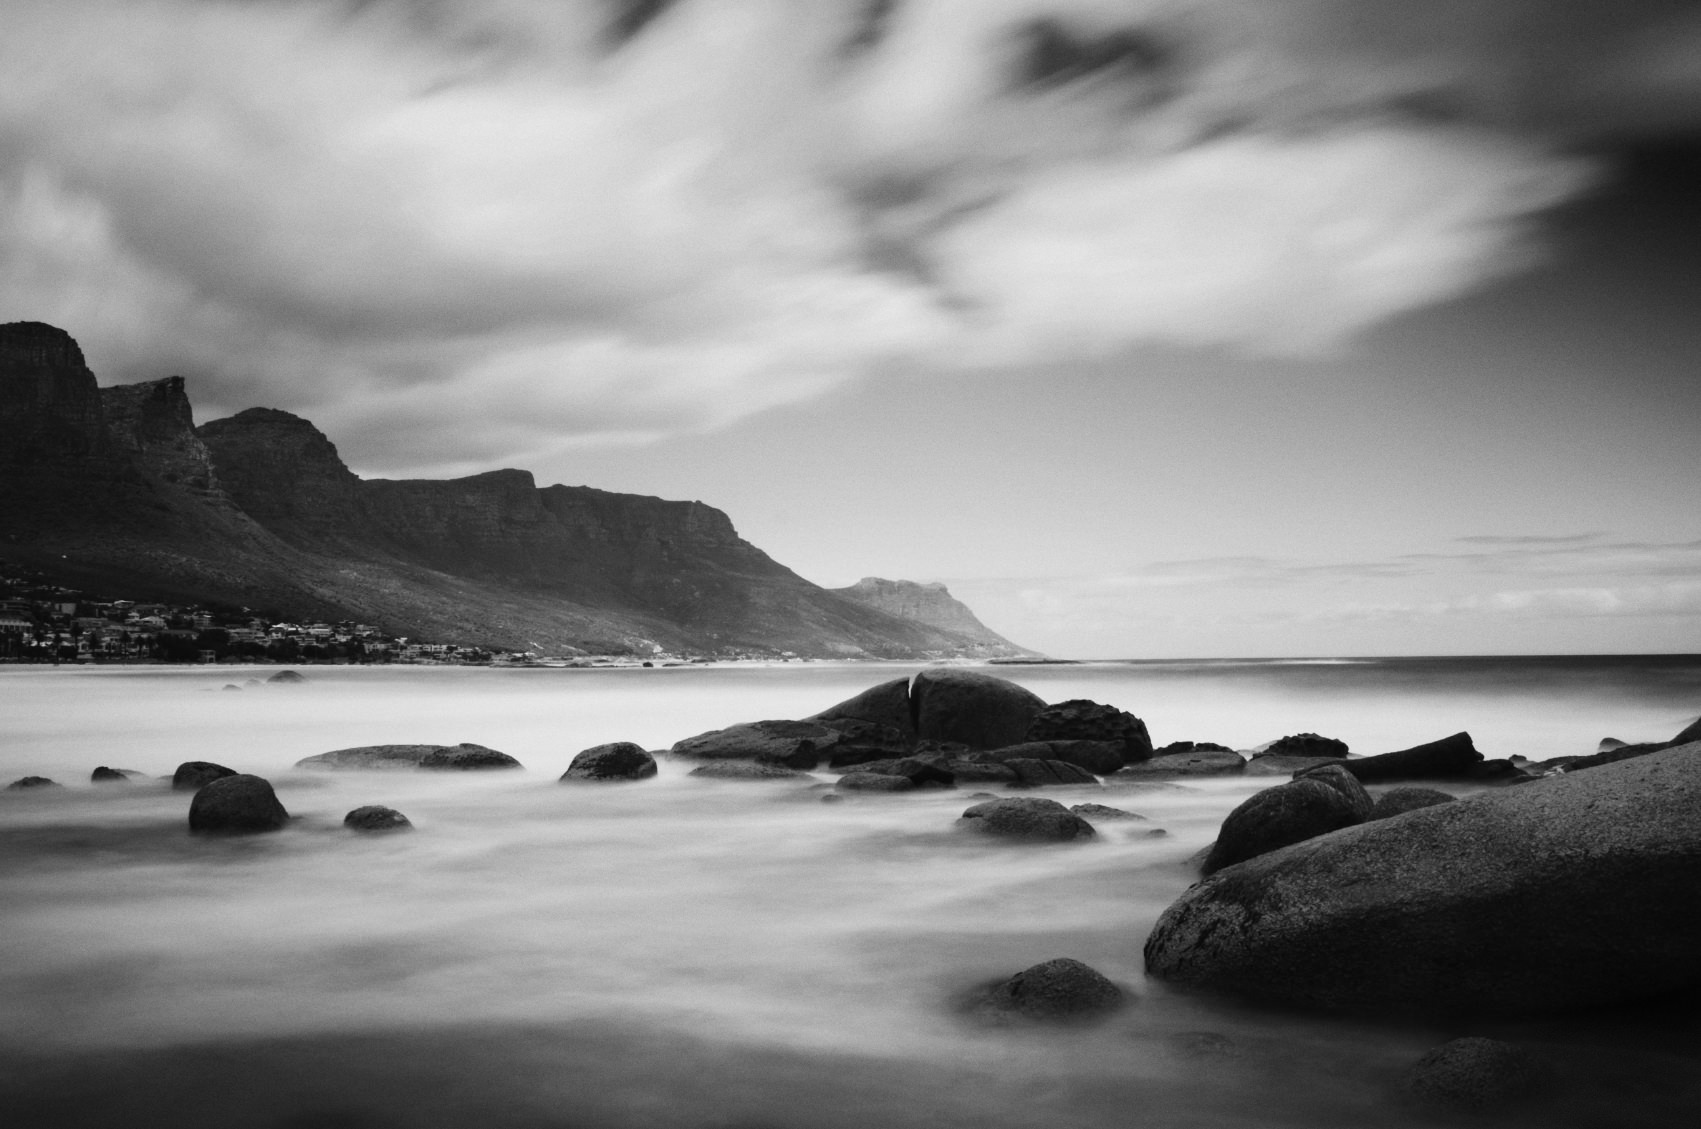
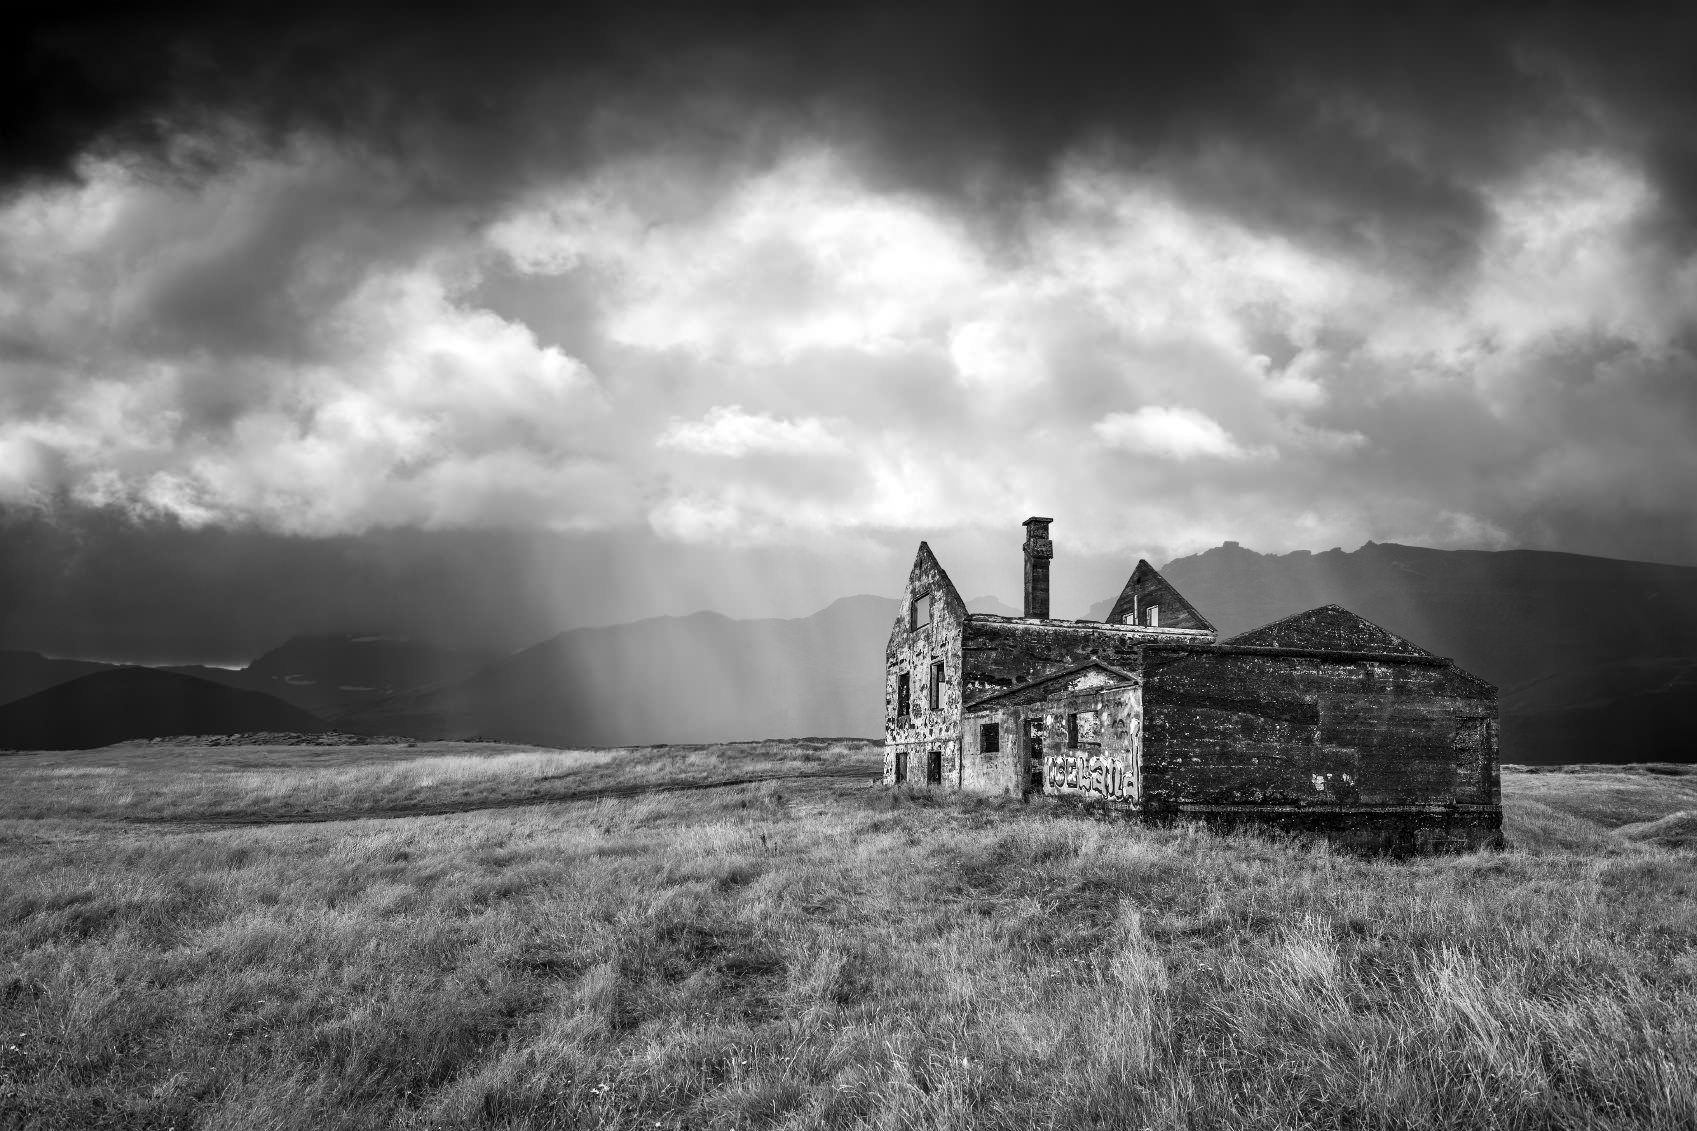
Black and white landscapes benefit from having a wide variety of blacks, grays, and whites. This expansive dynamic range will translate well into deep areas of shadow and bright areas of light, which give the landscape the depth and dimension it needs in the absence of color. The image above is an excellent example of this. There are deep blacks in the rocks in the foreground, while the clouds and the surface of the water provide bright whites.
Lines, Textures, and Patterns are Your Friend
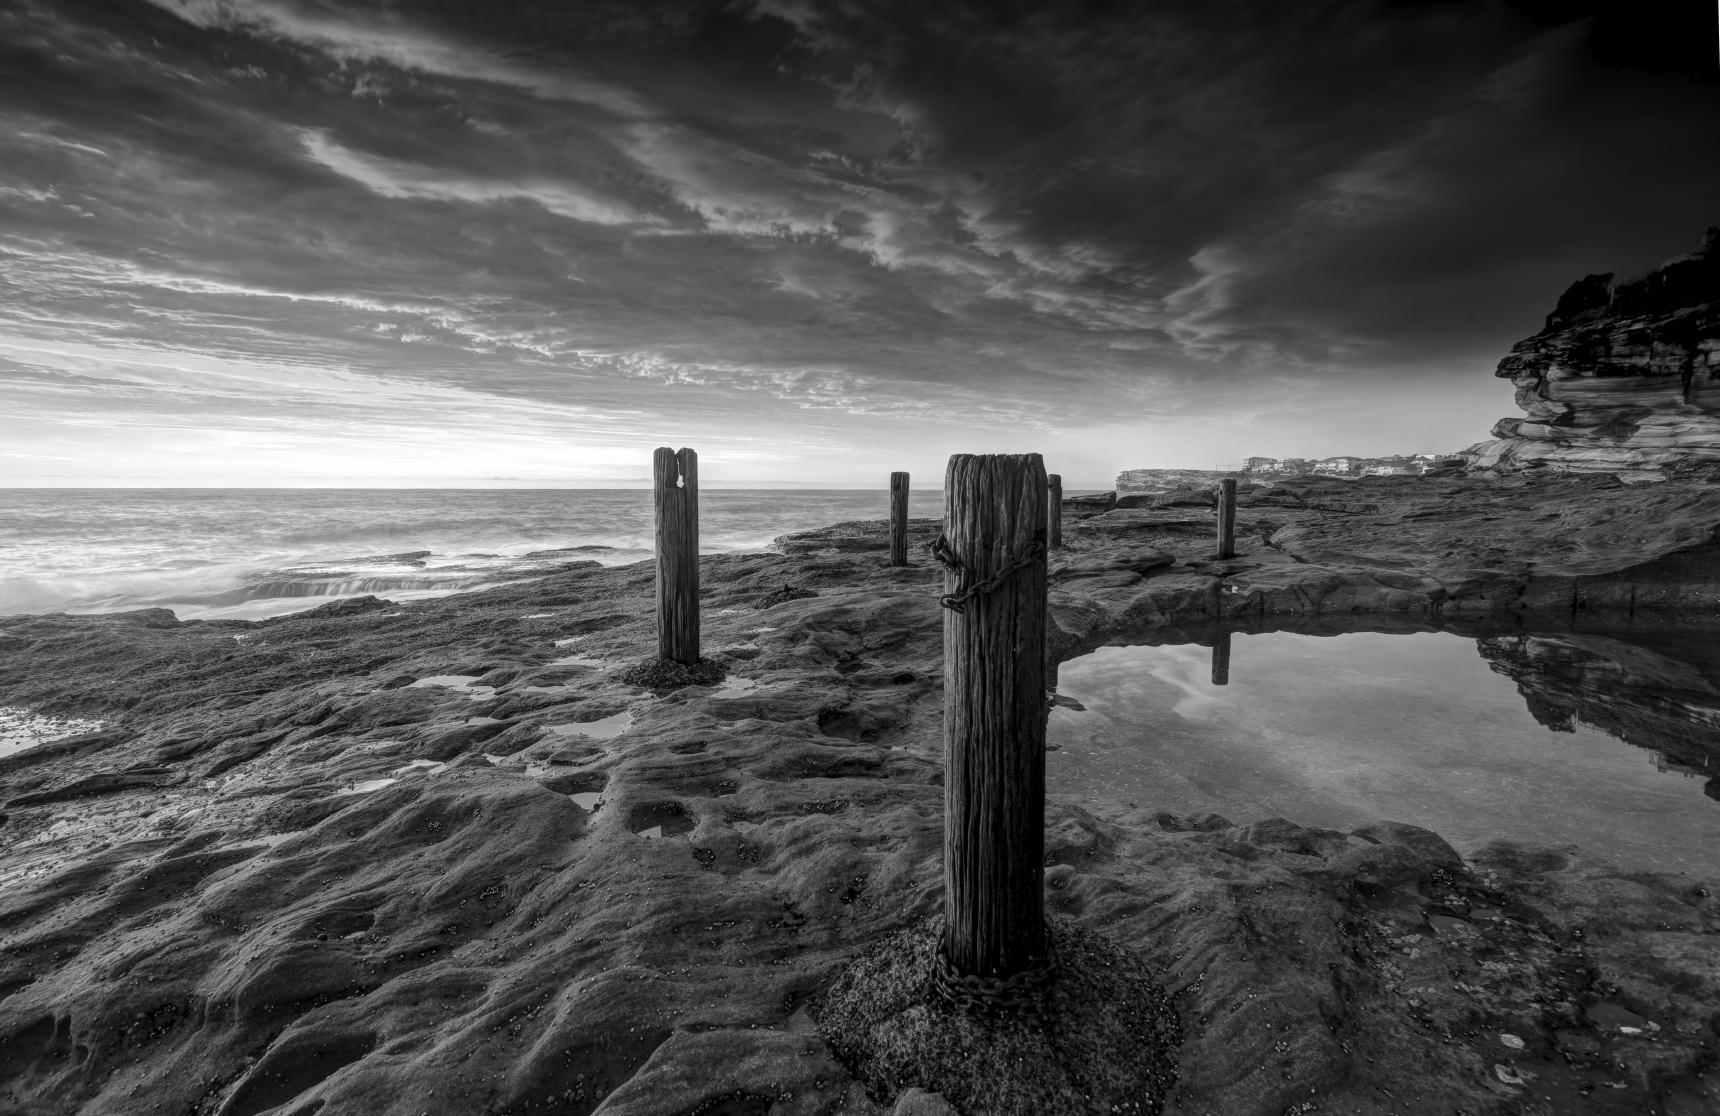
Again, without color to add pop to the image, a black and white landscape benefits greatly from the inclusion of elements that provide a little interest. Lines help lead viewers’ eyes around the frame while textures highlight fine details that really come through in black and white images. Interesting shapes are great as well because the shadows they cast gives you the increased dynamic range discussed above.
Patterns also make great subjects for black and white landscapes. Often, when viewed in color, patterns in nature can just be distracting or even unimpressive. But when converted to black and white, patterns can command our attention and make the image far more compelling. Do you think the pattern in the rocks above would be as impressive in color?
Try a Filter
Filters have fallen out of vogue somewhat since the advent of digital post-processing, but they still provide incredible benefits for all types of photography, black and white landscapes included.
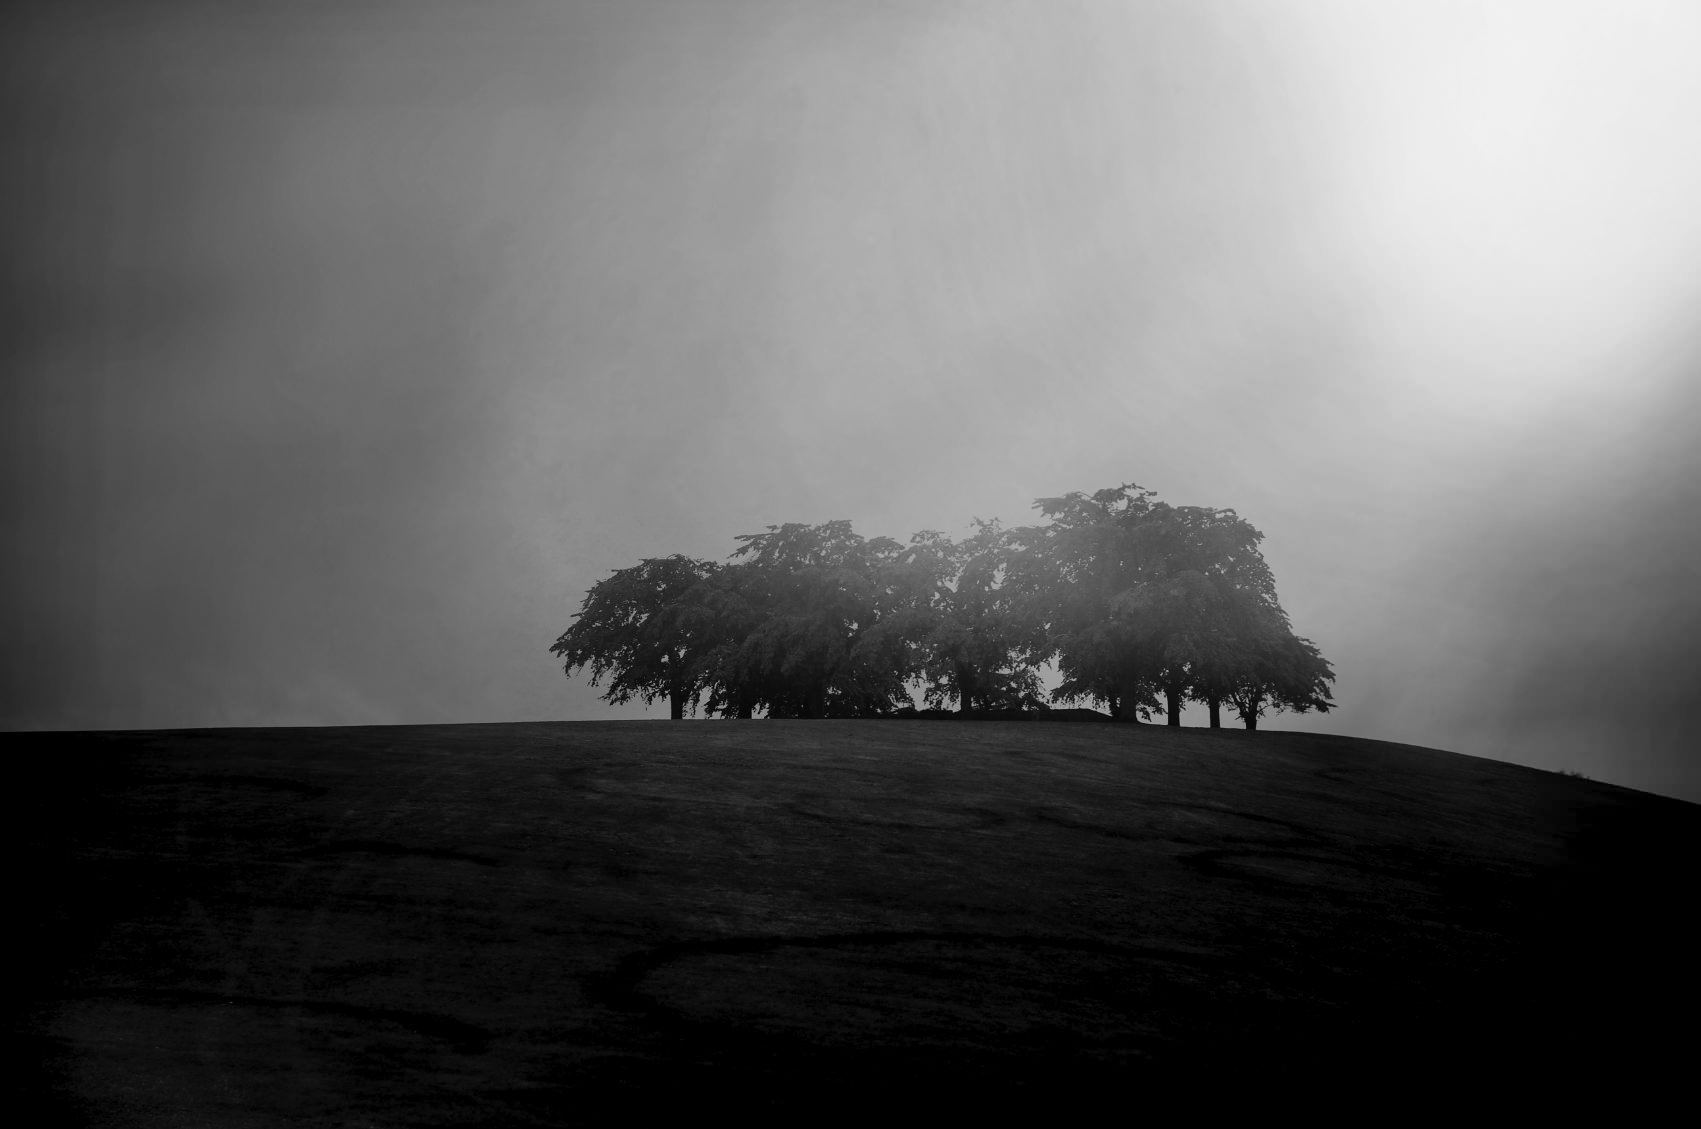
Use a graduated ND filter to bring out the details in the sky, or try a red filter to darken the sky and give your image a moody feel with clouds that really stand out. Yellow filters also give a little more pop to clouds, but on a much more subtle level.
A green filter can be used to help create more contrast in foliage. If shooting a hazy, foggy, or misty landscape like the one pictured above, try using a blue filter to enhance the effect of the atmospheric conditions. A polarizing filter is another good choice because it increases the level of contrast in the sky and helps minimize reflections off of shiny surfaces, like water.
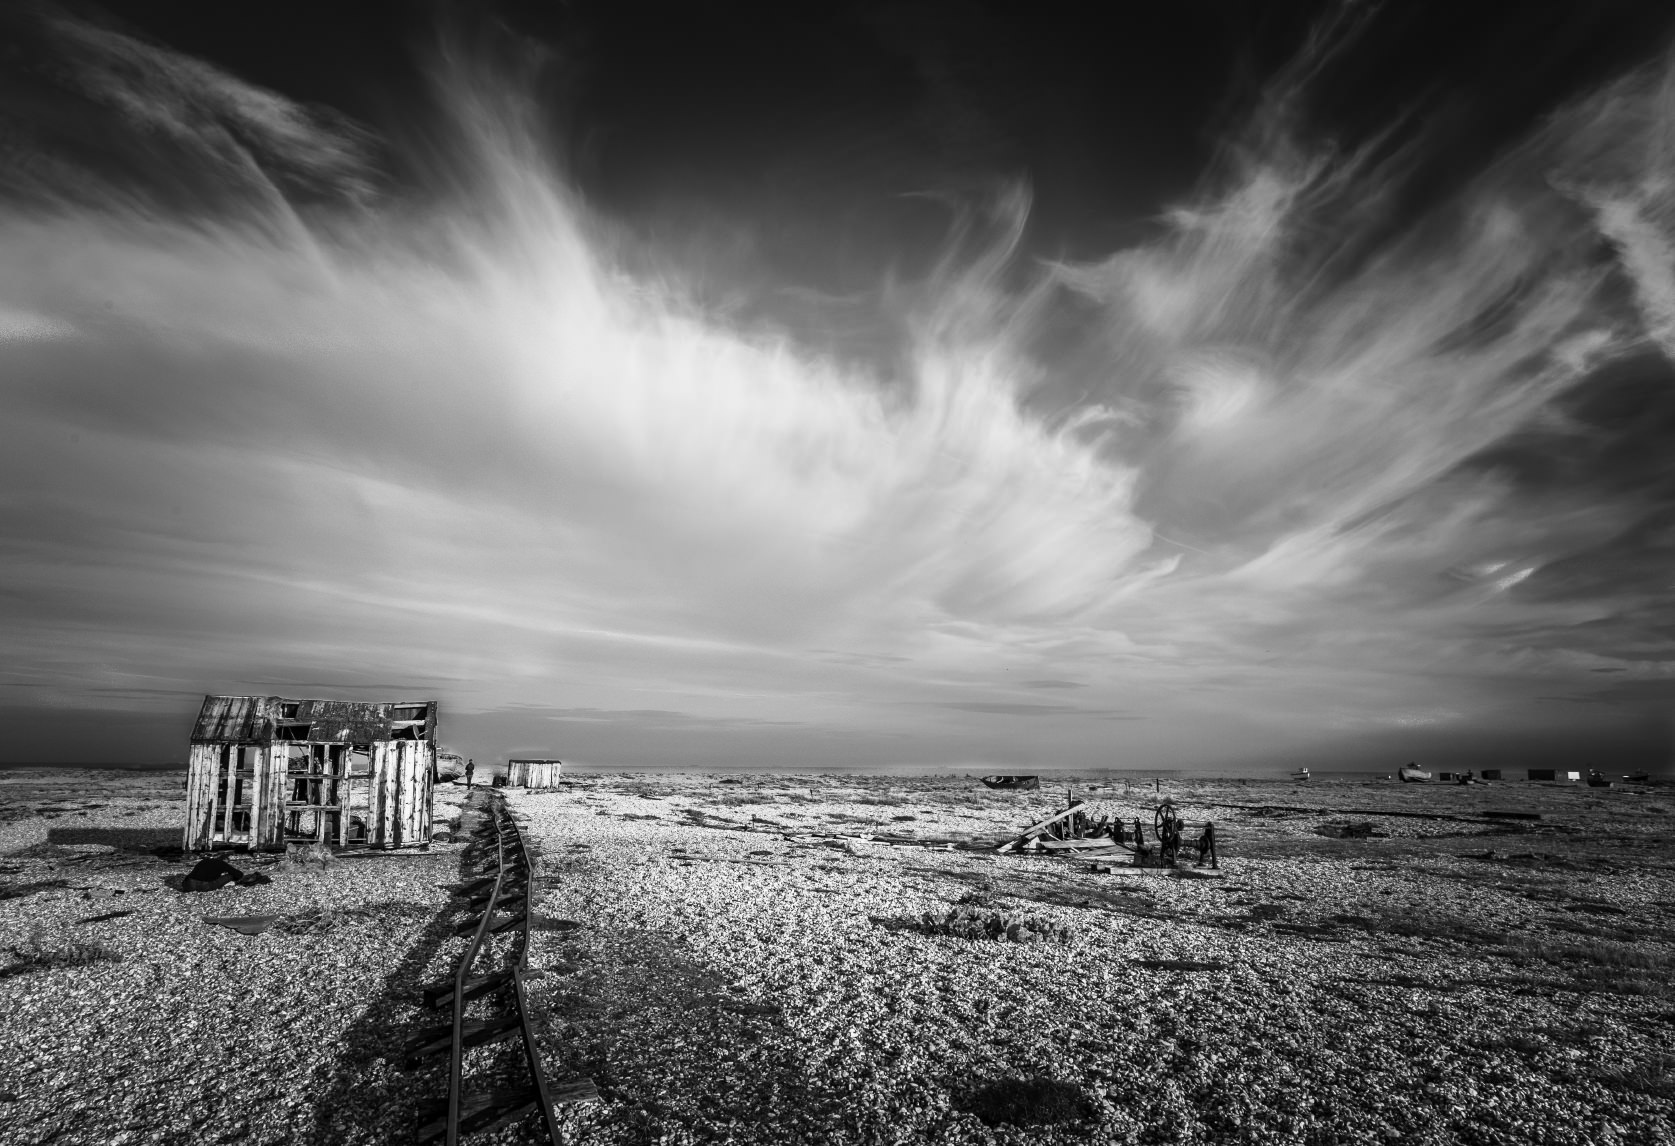
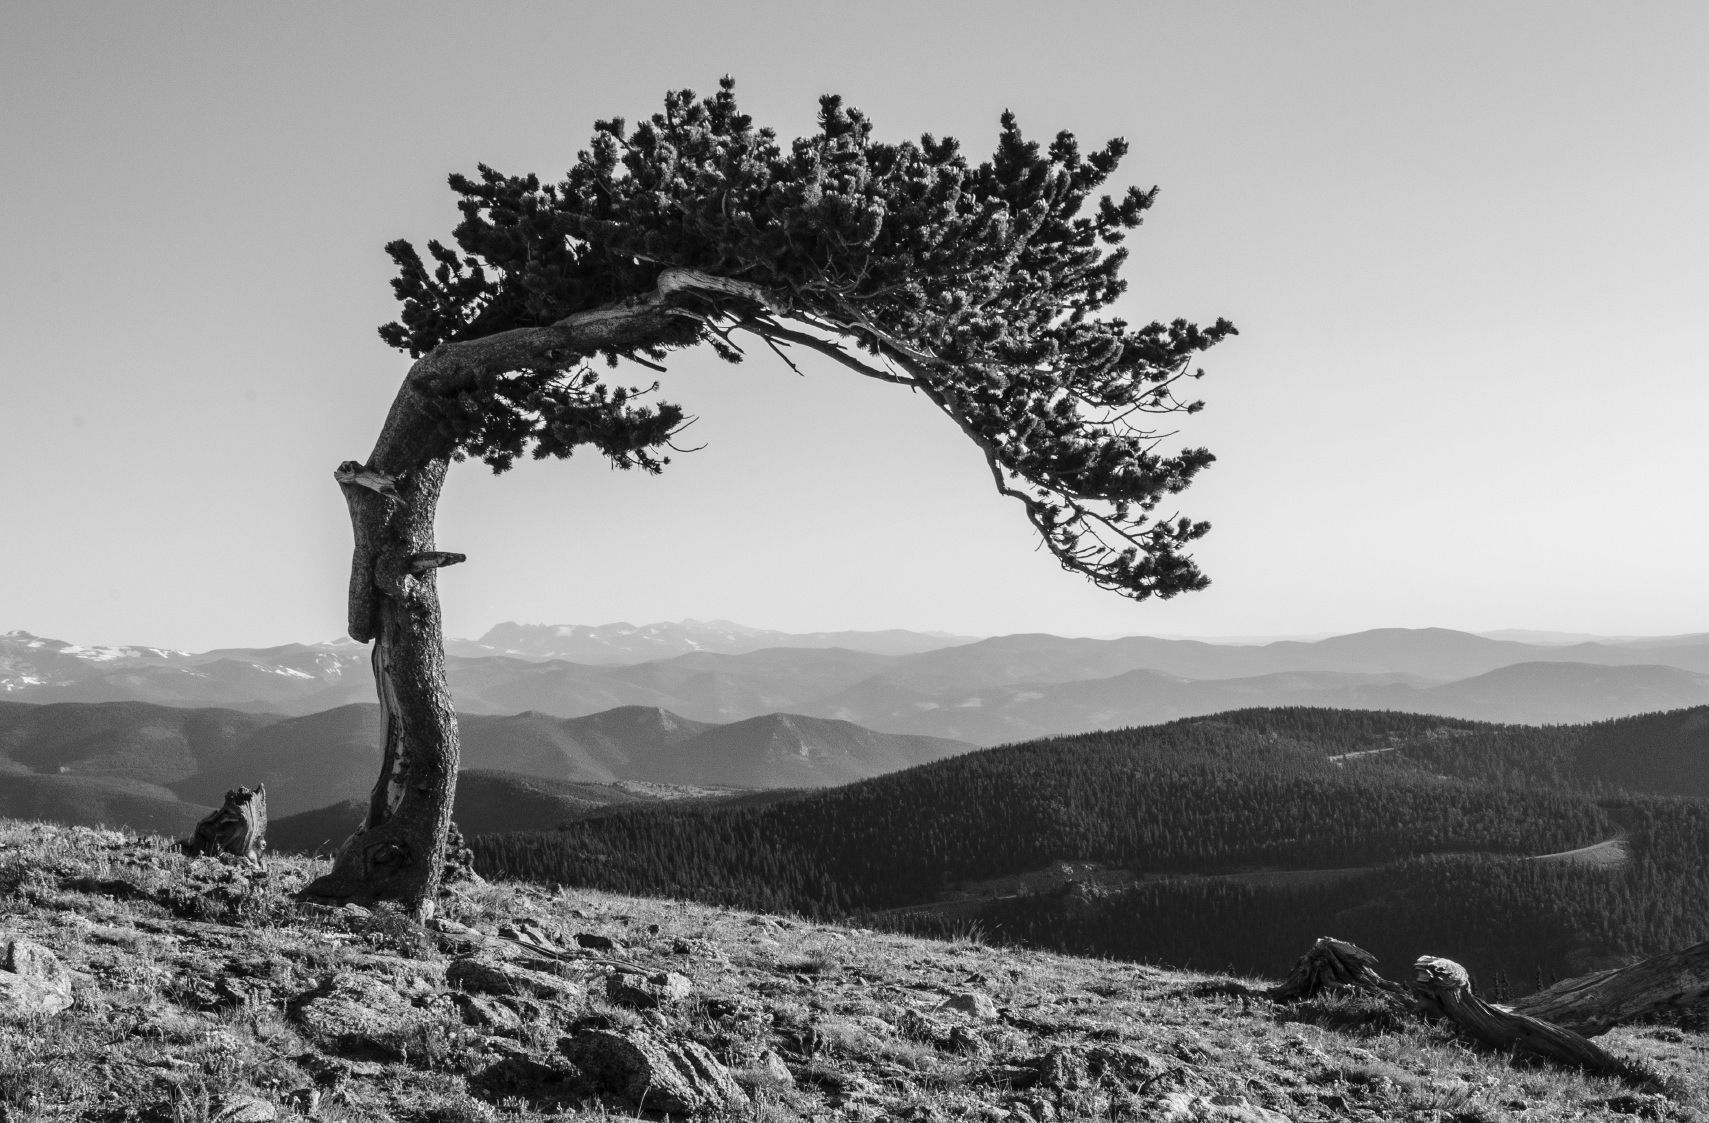
Don’t Forget the Basics
Sometimes it’s easy to be so focused on seeing landscapes in black and white that you forget basic compositional elements. Be sure to look for dynamic range, textures, lines, and the like, but also remember to use the rule of thirds to improve your composition, position the horizon line appropriately (not in the middle!), and find elements of foreground interest to draw the viewer into the scene. All of these elements help make the image above a total stunner!
Want more premium photography lessons? Click HERE.
Conclusion
Much of what will make your black and white landscape images better is training yourself to look for those details that really pop when presented in black and white. Good dynamic range, lines, patterns, textures, and foreground interest will all have a significant impact on how your image looks and how viewers respond to it.
Give yourself the best chance to highlight these features by shooting in RAW and using filters to extract every ounce of impact from the photo that you can. And, of course, remember to adhere to basic compositional rules to ensure that the details you document are framed nicely and add to the drama of the shot. If you can make these simple adjustments, your black and white images will be that much more impressive.