
 A point of maturity for many photographers is when they are ready to lose their fear of the flash unit and take control of this helpful light source. As mentioned thousands of times in photography tutorials and other educational materials, photography is light. It’s not just the natural light on which you rely to light a scene or subject. The source of the light that is what actually creates an image (whether film or digital) can also be artificial, in the form of a flash unit.
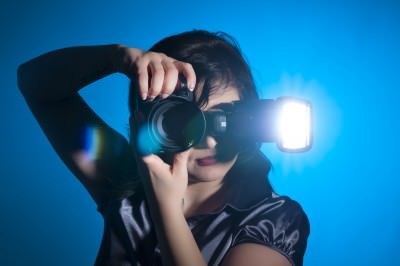
For the purpose of this article, a flash unit is a separate piece of equipment, often known as a strobe or speedlight, which mounts to the hot shoe on the top of the camera body. Some cameras have built-in flashes, many of which pop from the body when activated. These are fine, but limit how much control you have over the light. This article will concentrate on the use of a separate flash unit.
Canon T4i | Nikon D7100 | Nikon D800 | Canon 5D Mark III | Nikon D5200 | Sony A99
Understanding two specifications of flash units is important before you start learning how to use one effectively. First, is sync speed, which is the shutter speed you must select on your camera, so the duration the shutter is opened allowing light into the camera is “synchronized” with the duration of the flash of light. In most cases, the camera’s shutter must be open for more than 1/125th or 1/250th of a second. This is an important specification to check before buying a flash.
The second specification is iTTL or eTTL. The first, or iTTL, is Nikon’s name for this capability, or Intelligent Through-The-Lens. The second, eTTL, is Canon’s version, or Evaluative-Through-the Lens. In simplest terms, these systems read the exposure of the image before the flash is fired. A tiny amount of almost invisible light during a very short duration briefly illuminates the scene or subject allowing the camera’s meter to determine the correct exposure and amount of light the flash should emit.
- Understanding Flash Photography: How to Shoot Great Photographs Using Electronic Flash
- Speedliter's Handbook: Learning to Craft Light with Canon Speedlites
- On-Camera Flash Techniques for Digital Wedding and Portrait Photography
Since this article assumes you have a DSLR camera with a hot shoe that will accept a separate flash unit, the best choice of a flash is one the camera manufacturer also makes. If you shoot with a Nikon DSLR, then select one of Nikon’s flashes; Canon DSLR, Canon flash, etc. You’ll know that the flash was designed and built to be absolutely compatible with your camera and you have the full support of the manufacturer for its product.
There is no value investing in a separate flash unit for your DSLR unless you plan to use its full capabilities. It’s time to “graduate” beyond pointing a flash directly at a scene or subject and flooding it with what is harsh, ugly shadow-producing light. The techniques you want to learn is how to use a flash to complement existing ambient light to create an evenly lit image that looks natural and hides the fact you used a flash at all.
- Off-Camera Flash Techniques for Digital Photographers
- Sketching Light: An Illustrated Tour of the Possibilities of Flash
- Kevin Kubotas Lighting Notebook: 101 Lighting Styles and Setups for Digital Photographers
- Bounce flash is the first of these techniques, which simply means you point the flash at the ceiling, a wall or other white surface instead of your subject. As the light bounces off the wall, it illuminates your subject with a softer light, eliminating the deep shadows you would create if the flash was pointed directly at your subject.
-
A flash diffuser is an accessory that creates much the same effect. Because the light coming from a flash is often concentrated, a diffuser (which is usually attached to the front of the flash) both spreads the light and filters it, so it is softer and more even when it reaches your subject.
-
The power of the flash, or the measured output of the light, can also be controlled on most brand name flash units. Remember, iTTL or eTTL, will adjust the amount of light automatically that the flash emits; however, there will be occasions when you want to control the light manually. Flash units have a flash compensation dial with multiple positions, or stops, that you can select to decrease or increase the light output. If this feature is new to you, then it’s a good idea to experiment with it, shooting a series of photos of the same subject, but at different compensation settings. Then, study them to see how they affect your photos. Ultimately, what you are trying to achieve is using the least amount of light from a flash, so your subject is still properly illuminated, but it’s difficult to tell that you used a flash.
-
Using a flash gel is a very low-cost method for controlling and manipulating the light from a flash. A gel kit has gels of various colors that are attached to the flash head to affect the color of the light. A gel will help you match the color (measured as temperature) of the light from the flash with the ambient light.
For example, you are shooting in a room with fluorescent lights. Fluorescent light creates a pale, ghastly, seasick green hue. Without the right piece of gel on your flash, a Window Green gel in this case, you will have images with white subjects and that awful green color cast on whatever part of the image is mostly lit by the ambient light source. You can’t fix this disaster in editing software because without the gel, the ambient light (fluorescent) and the light of the flash will be two different color temperatures.
As mentioned above, the best way to learn how to use your flash is…to use it. Experiment with the different settings and compare the images they produce and you’ll quickly mature into the photographer who knows how to control light and, therefore, take better pictures.
Also Read: 23 THINGS YOU MUST KNOW TO BE SUCCESSFUL IN PHOTOGRAPHY
Recommended Reading:
- 2013 Photographer's Market: The Most Trusted Guide to Selling Your Photography
- Best Business Practices for Photographers
- The Fast Track Photographer Business Plan: Build a Successful Photography Venture from the Ground Up
- Group Portrait Photography Handbook
- The Best of Family Portrait Photography: Professional Techniques and Images
- 500 Poses for Photographing Group Portraits
- Selling Your Photography: How to Make Money in New and Traditional Markets
- Starting Your Career as a Freelance Photographer
- Photographer's Survival Manual: A Legal Guide for Artists in the Digital Age
- Legal Handbook for Photographers: The Rights and Liabilities of Making Images
- Taking Stock: Make money in microstock creating photos that sell
- Going Pro: How to Make the Leap from Aspiring to Professional Photographer
Image credit: squidmediaro / 123RF Stock Photo
People who read this PhotographyTalk.com article also liked:
Your feedback is important to thousands of PhotographyTalk.com fans and us. If this article is helpful, then please click the Like and Re-Tweet buttons at the top left of this article.