- Forum
- General Discussion | Introductions | Off Topic Forum
- Photography General Discussion
- How to photograph wedding rings standing up?
How to photograph wedding rings standing up?
-
 Topic Author
- Randy Fisher
- New Kid On The Block
- Followers: 26
- Posts: 39
-
Points:
794
Post #761855
I thought they used plyers of some sort and then cloned them out, but that doesn't seem to be a good option after trying.
Thank you for any help.
-
- Ira Weber
- Photography Hooked
-
- Nikon D850
- Followers: 119
- Posts: 658
-
Points:
6656
-
- CharleyL
- Photography Hooked
-
- Canon 90D, (2) Canon 77D, Fuji HS20 EXR, Still have my Sony MVC-FD95
- Followers: 72
- Posts: 913
-
Points:
35008
Post #761911
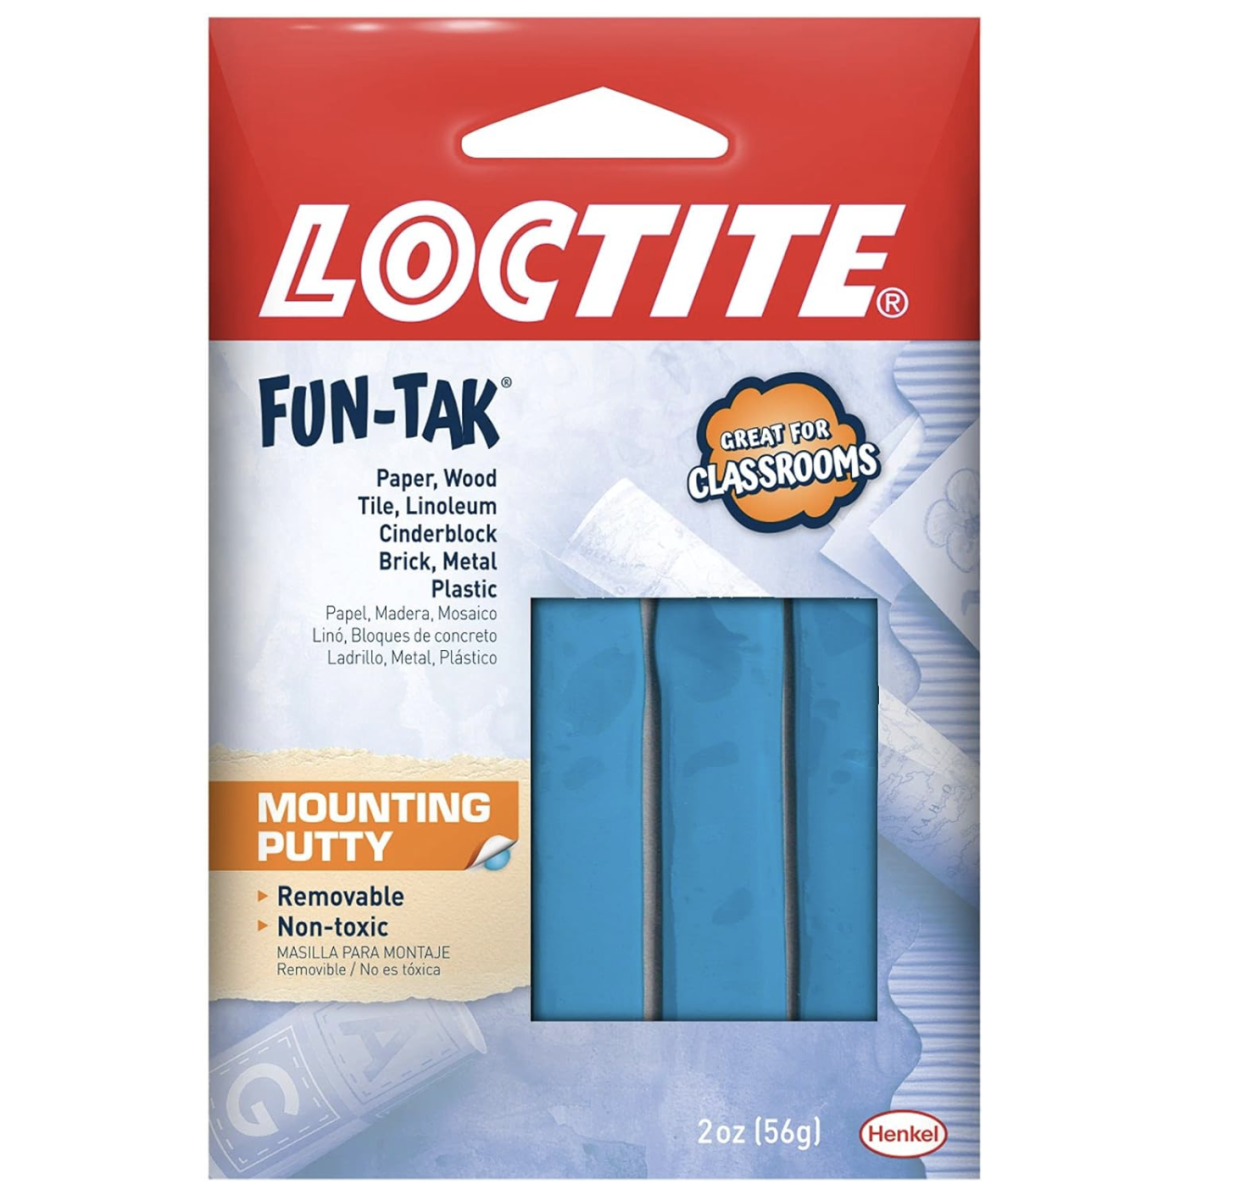
I use it for temporarily attaching things together for still life shoots of tiny and table top items, but a few years back when doing weddings, I would attach the rings together and then fit them into the center of the wedding bouquet in such a way that about the top half of each ring stood proud above the flowers. A few shots of them from different zooms and angles under good light always provided several great shots to choose from.
Charley
-

- Colorado Mike
- Photography Hooked
-
- Canon R6
- Followers: 350
- Posts: 973
-
Points:
10305
-
- GWS
- Lone Wolf
-
- Nikon D700
- Followers: 67
- Posts: 118
-
Points:
1745
-
 Topic Author
- Randy Fisher
- New Kid On The Block
- Followers: 26
- Posts: 39
-
Points:
794
Post #762009
-

- CharleyL
- Photography Hooked
-
- Canon 90D, (2) Canon 77D, Fuji HS20 EXR, Still have my Sony MVC-FD95
- Followers: 72
- Posts: 913
-
Points:
35008
Post #762016
Charley
-
 Topic Author
- Randy Fisher
- New Kid On The Block
- Followers: 26
- Posts: 39
-
Points:
794
Post #762017
-

- CharleyL
- Photography Hooked
-
- Canon 90D, (2) Canon 77D, Fuji HS20 EXR, Still have my Sony MVC-FD95
- Followers: 72
- Posts: 913
-
Points:
35008
Post #762041
Not any more, except for my grand daughter's wedding 4 years ago. I'm getting too old and with too much wrong with me to be as reliable and agile as is required for doing good wedding photo shoots. I can no longer quickly move around while carrying two cameras and other needed items. I still have the dual camera harness and oversize fanny packs for spare batteries, lenses, memory cards, etc., but I don't use them any more.
My grand daughter, now an adult and married, can have them if she decides to do weddings. I took the time to train her in the basics several years ago, and then gave her a Canon T7 with 50 mm lens, tripod, light stands, batteries, umbrellas, memory cards, speedlites, etc and she is calling or coming back for additional training and problem solving whenever she needs it. She will likely inherit the contents of my studio when I am gone.
I'll be 82 next month and I have metal knees from a firefighting accident, plus 8 heart surgeries, and I survived cancer twice in the past 24 years. I shouldn't still be here but I am, and I'm not sure why. I spend most of my free time experimenting with photography and lighting in my small studio upstairs in my home, or working out in my shop. I'm a "Maker" who has long been creating things that I want/need, if buying it wasn't possible financially, because it didn't exist, or because I didn't like their design. Some furniture in my home was built in my shop. I had a welding/metal working shop too, but gave the contents of it to my #2 son across town when they installed a pacemaker in me and told me that I had to stay away from high energy sparks. I go to his shop and have him make the sparks for me, but usually do the rest of the fabrication work myself now.
Because my studio is only 19' X 26' with an 8' ceiling (biggest constraint), I designed and built a ceiling lighting support grid with power, so I can hang my lights and other things from the studio ceiling. The ceiling grid is 10' wide because of the width of my 6 motorized backdrops, and 24' long, but I can cantilever support out beyond the sides of the grid, if I should wish to hang a light out near a side wall. I can easily hang anything less than about 20 lbs anywhere within this room area, and power is available along the sides of the grid on the ceiling, so within 5' of anywhere that I hang a light. I still use C Stands, when the light will need to move often, but power for the light now comes from the ceiling outlets above. There are no wires and nearly no tripods ever on my studio floor, so a very minimum of tripping hazards. I use camera stands instead of tripods for my still and video cameras. They require less floor space and have matching ball heads, so the quick attach plates are interchangeable. Everything hung from this ceiling grid has a safety cable, since the lighting attachment spigots are just one point connect and unreliable when inverted with a light hanging from above. Even my tether cable is from above, but with enough slack in my usual camera location to allow free movement in about 1/2 of the room and I have an extension for the tether cable, if I should ever need it.
I have wireless controls for powering the lights, triggering the flash, raising/lowering the backdrops, etc. all from the camera location, so changing from portrait photography with flash, to making videos with constant light or back to portrait flash in the same space takes me about 10 minutes. I even have a setup to do macro photography in one corner of the studio. The ceiling height is my biggest constraint, but raising it would be a major expense, so I won't be changing it. Though I've wanted my own photo/video studio since about 1960, this is the first that I've owned, and it will likely be my last. I will be glad to help anyone with questions about how I made my studio, if they should wish to duplicate any part of it.
Charley
-

- ShutterGuy
- Snapobsessed
-
- Nikon D850
- Followers: 123
- Posts: 322
-
Points:
2744
Post #762108
CharleyL wrote: "Incredible, thank you Charley, good advice. Do you do many weddings yourself?"
Not any more, except for my grand daughter's wedding 4 years ago. I'm getting too old and with too much wrong with me to be as reliable and agile as is required for doing good wedding photo shoots. I can no longer quickly move around while carrying two cameras and other needed items. I still have the dual camera harness and oversize fanny packs for spare batteries, lenses, memory cards, etc., but I don't use them any more.
My grand daughter, now an adult and married, can have them if she decides to do weddings. I took the time to train her in the basics several years ago, and then gave her a Canon T7 with 50 mm lens, tripod, light stands, batteries, umbrellas, memory cards, speedlites, etc and she is calling or coming back for additional training and problem solving whenever she needs it. She will likely inherit the contents of my studio when I am gone.
I'll be 82 next month and I have metal knees from a firefighting accident, plus 8 heart surgeries, and I survived cancer twice in the past 24 years. I shouldn't still be here but I am, and I'm not sure why. I spend most of my free time experimenting with photography and lighting in my small studio upstairs in my home, or working out in my shop. I'm a "Maker" who has long been creating things that I want/need, if buying it wasn't possible financially, because it didn't exist, or because I didn't like their design. Some furniture in my home was built in my shop. I had a welding/metal working shop too, but gave the contents of it to my #2 son across town when they installed a pacemaker in me and told me that I had to stay away from high energy sparks. I go to his shop and have him make the sparks for me, but usually do the rest of the fabrication work myself now.
Because my studio is only 19' X 26' with an 8' ceiling (biggest constraint), I designed and built a ceiling lighting support grid with power, so I can hang my lights and other things from the studio ceiling. The ceiling grid is 10' wide because of the width of my 6 motorized backdrops, and 24' long, but I can cantilever support out beyond the sides of the grid, if I should wish to hang a light out near a side wall. I can easily hang anything less than about 20 lbs anywhere within this room area, and power is available along the sides of the grid on the ceiling, so within 5' of anywhere that I hang a light. I still use C Stands, when the light will need to move often, but power for the light now comes from the ceiling outlets above. There are no wires and nearly no tripods ever on my studio floor, so a very minimum of tripping hazards. I use camera stands instead of tripods for my still and video cameras. They require less floor space and have matching ball heads, so the quick attach plates are interchangeable. Everything hung from this ceiling grid has a safety cable, since the lighting attachment spigots are just one point connect and unreliable when inverted with a light hanging from above. Even my tether cable is from above, but with enough slack in my usual camera location to allow free movement in about 1/2 of the room and I have an extension for the tether cable, if I should ever need it.
I have wireless controls for powering the lights, triggering the flash, raising/lowering the backdrops, etc. all from the camera location, so changing from portrait photography with flash, to making videos with constant light or back to portrait flash in the same space takes me about 10 minutes. I even have a setup to do macro photography in one corner of the studio. The ceiling height is my biggest constraint, but raising it would be a major expense, so I won't be changing it. Though I've wanted my own photo/video studio since about 1960, this is the first that I've owned, and it will likely be my last. I will be glad to help anyone with questions about how I made my studio, if they should wish to duplicate any part of it.
Charley
-

- ShutterGuy
- Snapobsessed
-
- Nikon D850
- Followers: 123
- Posts: 322
-
Points:
2744
Post #762109
-

- Harper Coswell
- Has the Hang of it
-
- Canon 60D
- Followers: 46
- Posts: 91
-
Points:
894
-

- CharleyL
- Photography Hooked
-
- Canon 90D, (2) Canon 77D, Fuji HS20 EXR, Still have my Sony MVC-FD95
- Followers: 72
- Posts: 913
-
Points:
35008
Post #762396
In fact, when we were cleaning out my mom's house and removing all of the vases, displayed China, and other items off the shelves, all of the original light green FunTac that she had used to hold these in place and safe from the cats was still very flexible, and as I moved along removing these items I was also removing the FunTac from each item and the shelves and building a large tennis ball sized ball of it in one hand. It was fully ready to be used again, except for maybe the dust and cat hair contamination. But if you feel a need to seal it in a zip lock bag I don't think doing it will hurt any. It will certainly keep it off of other things that you pack together with it. I just leave it in it's original package, removing tiny bits as needed, then put the original package back together and return it to my camera bag.
Charley
-

- CatherineW
- Photography Hooked
-
- Nikon D810
- Followers: 116
- Posts: 626
-
Points:
3309
Post #762493
***Remember 9/11***
-
 Topic Author
- Randy Fisher
- New Kid On The Block
- Followers: 26
- Posts: 39
-
Points:
794
Post #762713
- Forum
- General Discussion | Introductions | Off Topic Forum
- Photography General Discussion
- How to photograph wedding rings standing up?
Latest Reviews
The Canon EOS R100 is an entry-level mirrorless camera introduced in 2023. But just because it’s an entry-level camera doesn’t mean it’s a bare-bones camera. Find out why in this review!
Nikon’s retro-looking Nikon Zfc is anything but retro. Under its classic body is a host of features and amenities that make it a worthwhile compact mirrorless camera for 2024.
The Canon EOS R50 is one of the newest R-system cameras from Canon. Is it worth your money? Find out all the details you need to know in this comprehensive review.
The Sony FE 70-200mm f/2.8 GM OSS II is Sony’s flagship mirrorless zoom lens. As such, it’s loaded with features and has a top-shelf build quality that makes it a top pick!
Latest Articles
Using leading lines in photography helps improve the composition by drawing viewers in and leading their eye from the foreground to the background. Explore some fine examples of this in this guide!
The Insta360 has one of the best lineups of action cams and 360-degree cameras. With these Insta360 accessories, you can elevate your photography and videography game!
Creating impactful photos of landscapes depends on many factors, not the least of which is your talent behind the lens. This guide explores other elements required for the best product.
The Canon EOS R100 is an entry-level mirrorless camera introduced in 2023. But just because it’s an entry-level camera doesn’t mean it’s a bare-bones camera. Find out why in this review!
Are you ready to upgrade your camera? Before buying new, you might consider the value of purchasing used gear to save money.
The Olympus OM-D E-M10 Mark IV is a micro four thirds camera released in 2020. It’s an entry-level system along with the OM-D E-M5 Mark III. Use this guide to determine which one is best for you!
Blue hour photography might not be as well known as golden hour photography, but it is every bit as good a time to create epic images of landscapes. Learn how in this quick tutorial!
Nikon’s retro-looking Nikon Zfc is anything but retro. Under its classic body is a host of features and amenities that make it a worthwhile compact mirrorless camera for 2024.


