
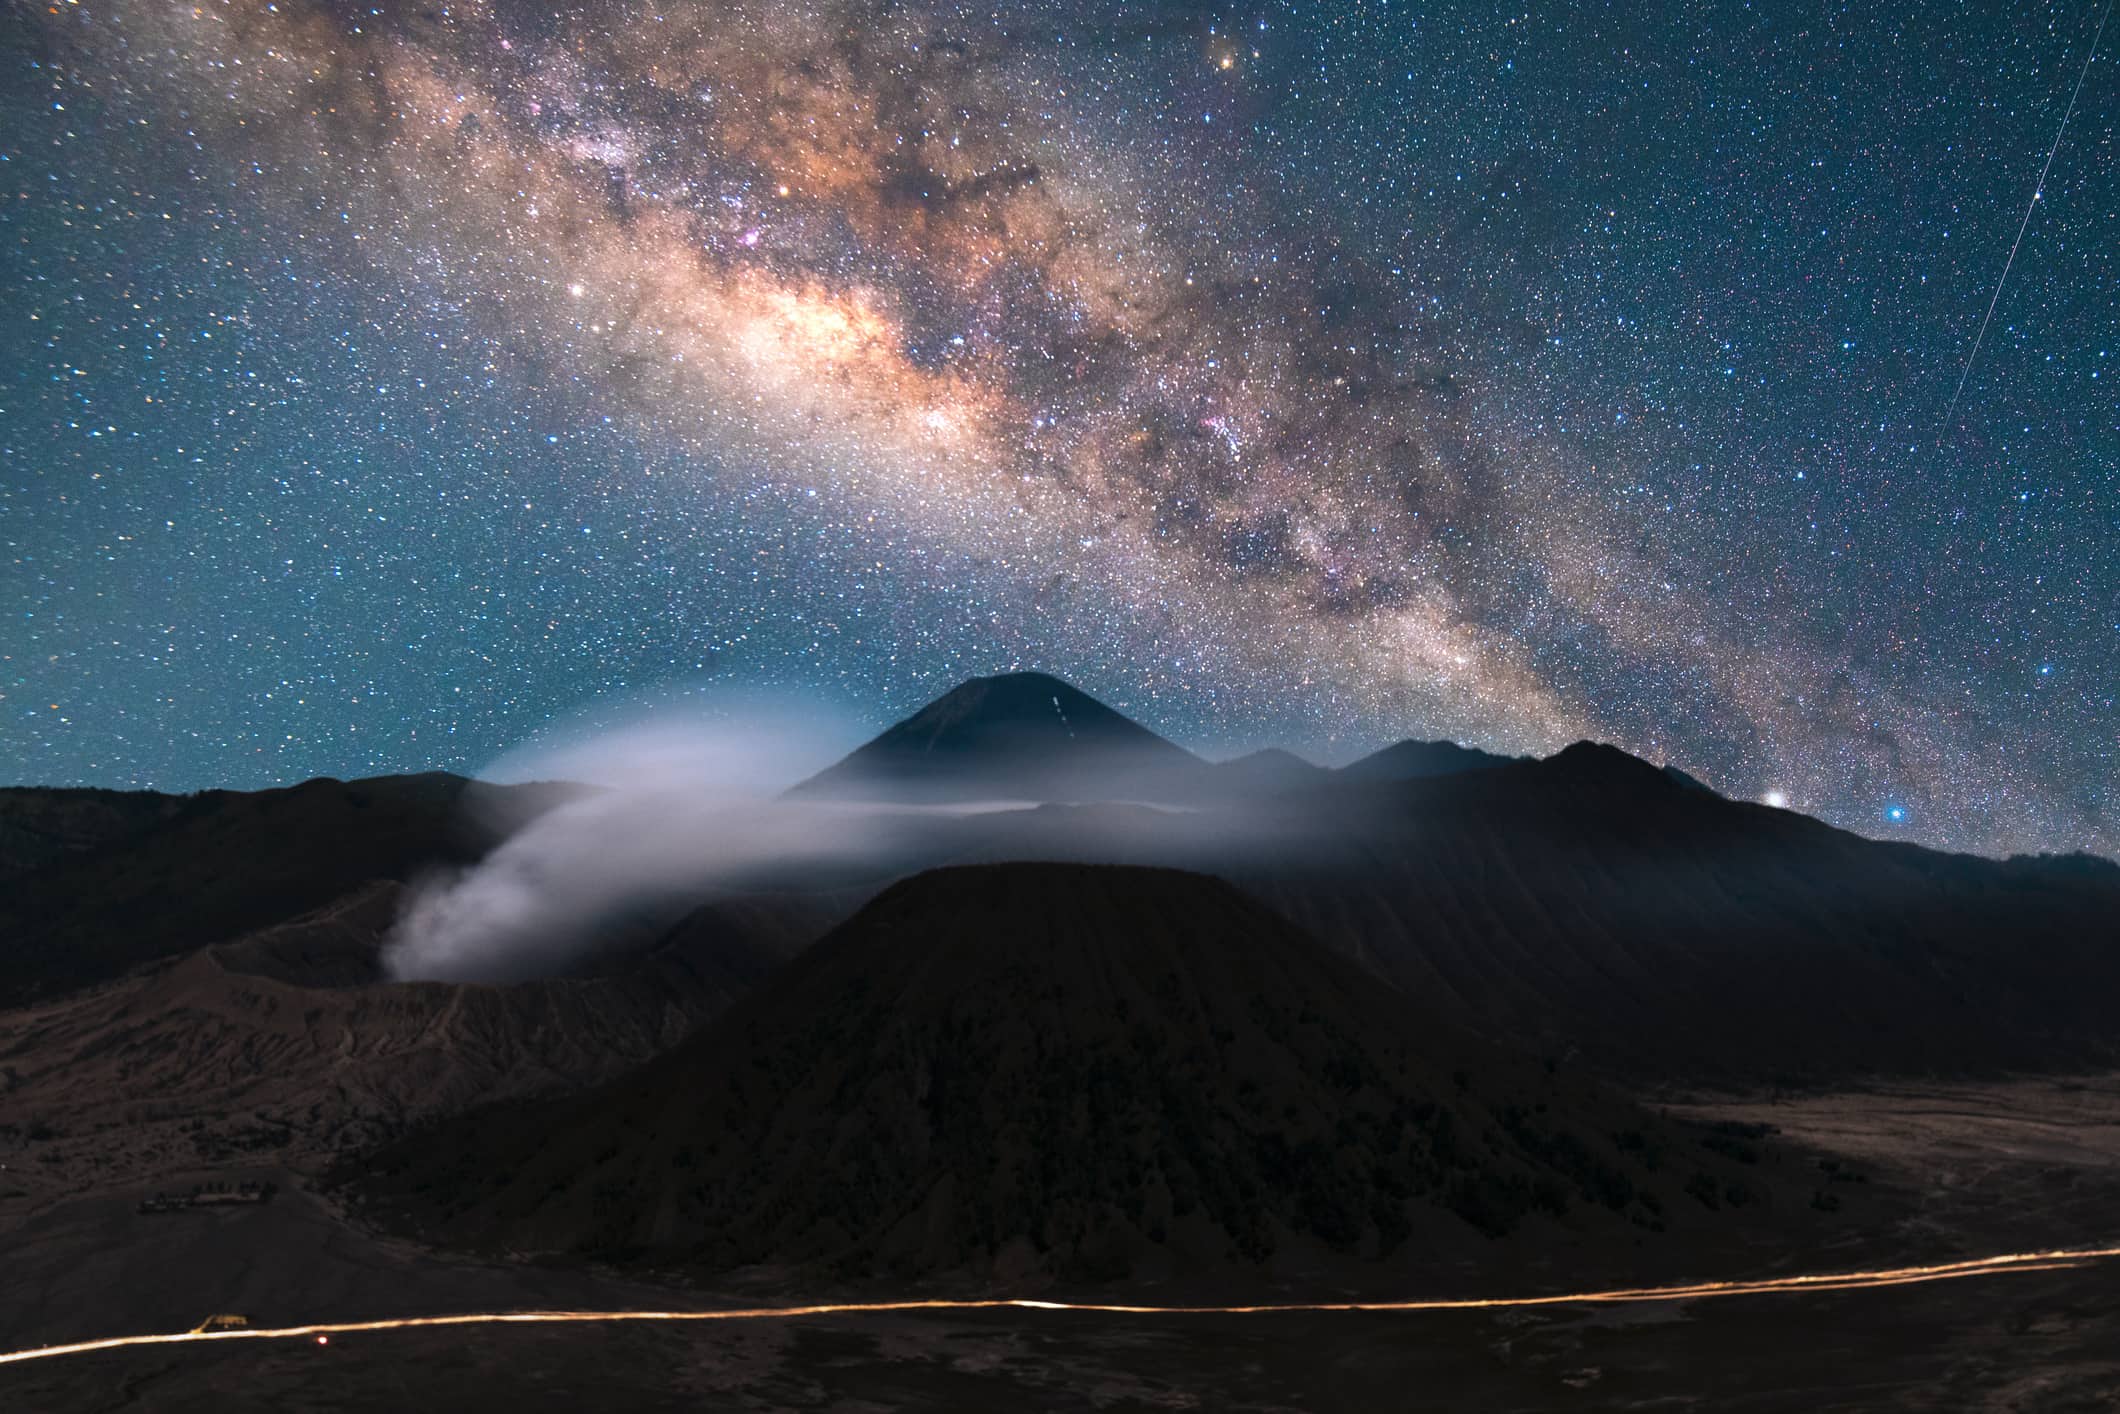
How to Edit Milky Way Photos in Lightroom
- How to Compose a Killer Shot of the Night Sky
- Take Better Photos at Night With These Simple Astrophotography Tips
You can spend all kinds of energy planning astrophotography outings, getting the camera settings just right, gearing up with the right equipment to get the best shots, and so forth.
But if you don't know how to edit Milky Way photos and images of other celestial bodies, you're leaving a ton of possibilities on the table for improved photos.
In the video above by 52Things, a basic Lightroom workflow for editing your astrophotography is outlined.
With the quick and simple steps provided here, you can turn your so-so photos of the night sky into incredible works of art.
Follow along in the video above, and for a step-by-step overview, read on below!
Editor's Tip: Great astrophotography begins with having the right gear for the job. Get all the astrophotography gear you need.
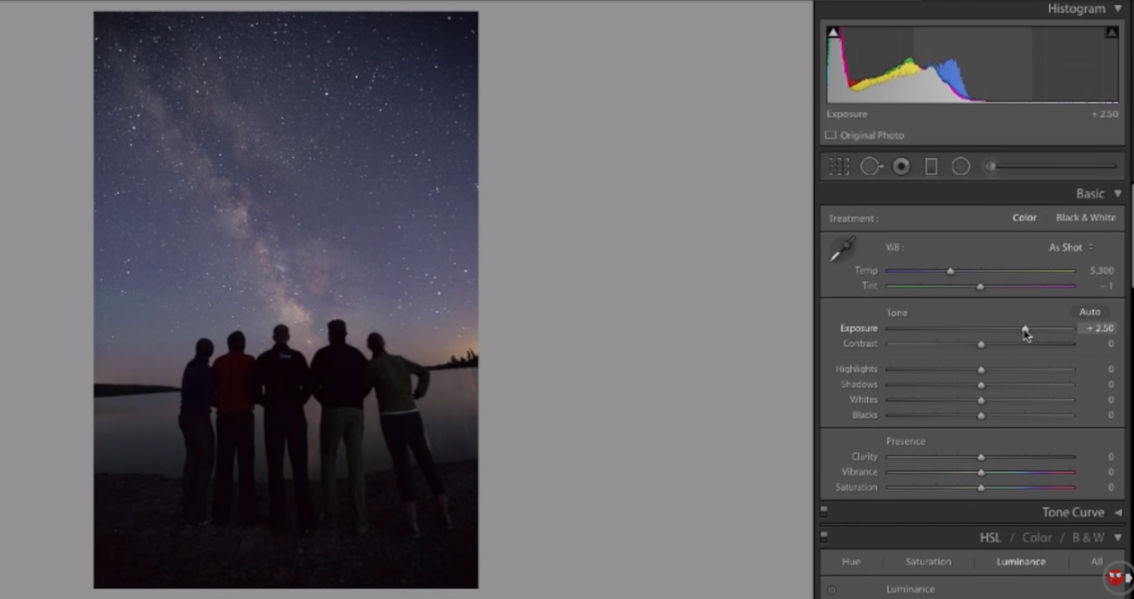
Step 1: Begin Editing in the Develop Tab
 YouTube Screenshot/52 Things
After importing your image into Lightroom, the first task is to work on the image in the Develop Tab.
There are loads of tools in the Develop Tab that will help you build the image into something much more visually pleasing.
In the case of the image above, it's really dark, so increasing the exposure by shifting the exposure slider to the right is the first order of business.
As you can see in the screenshot, this one adjustment has already made the image much better.
 YouTube Screenshot/52 Things
Other tools you can use to make a dull image pop is adjust the contrast, highlights, shadows, whites, and blacks.
In this case, increasing the contrast and whites while decreasing the blacks ever so slightly brings much more contrast to this photo.
Learn More:
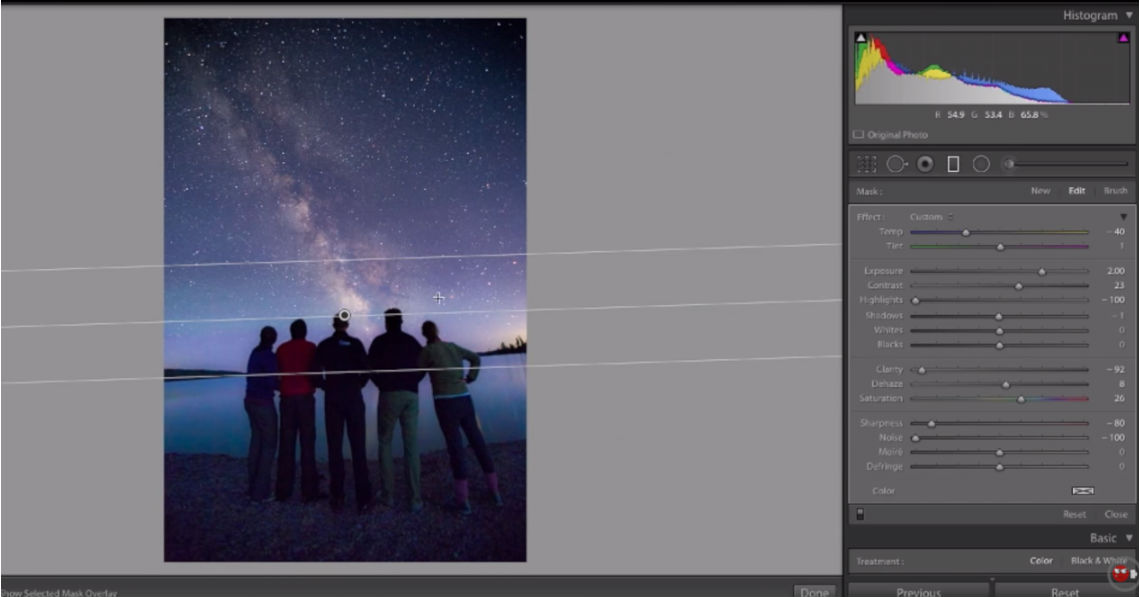
Step 2: Apply a Gradient, if Needed
 YouTube Screenshot/52 Things
Unless you paint the foreground with light, you'll often find that after the first round of astrophotography post processing that the foreground is quite dark.
The easiest and most effective way to brighten foreground subjects in Lightroom is to apply a gradient.
At the top of the Develop Tab is the Gradient Tool. Just click it, then click on the image and drag to apply the gradient, as shown in the screenshot above.
But because it's a night photo, you need to make a few adjustments to keep the noise low.
That means reducing sharpness, noise, and clarity to prevent the noise in the image from getting out of control.

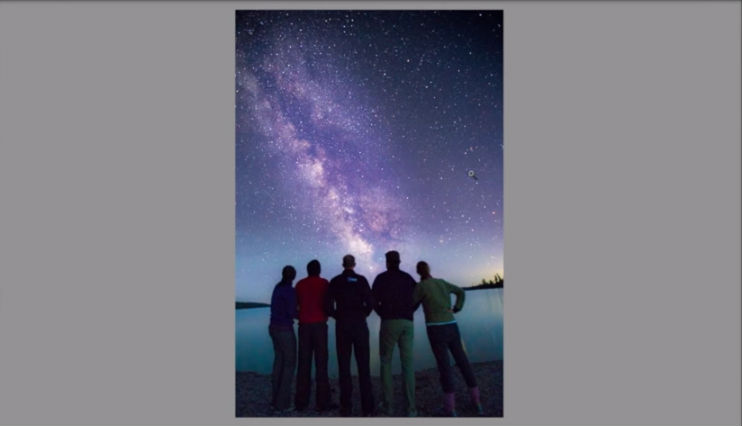
Step 3: Crop the Photo
 YouTube Screenshot/52 Things
Though it's nice to get the composition and framing perfect in-camera, it doesn't always happen.
Besides, when you have a chance to look at your photos on a larger screen, you might see a better composition that you want to create by cropping.
Cropping in Lightroom is dead simple - just a matter of dragging the crop box over the image, fine-tuning the size and shape of the crop, and pressing enter.
In the example above, you can see how the crop has brought the people in the photo to the vertical midline and their heads more or less align with the bottom rule of thirds grid.
The result is a much more balanced photo that's starting to take shape as a much more impressive image.
Learn More:
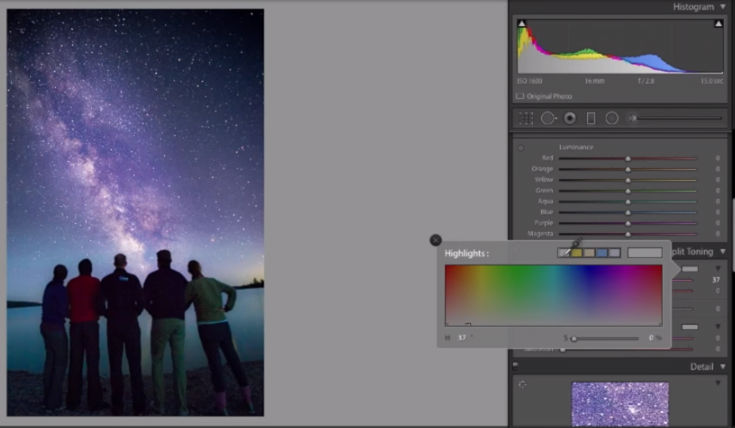
Step 4: Tone the Highlights and Shadows
 YouTube Screenshot/52 Things
You can add a little color and depth to your astrophotography by adding tones to the highlights and shadows.
This is done in the Develop Tab in the Split Toning Panel.
Just select colors using the color picker (as shown above) and Lightroom will apply those colors to the shadows and highlights, respectively.
The effect should be more subtle than anything - incorporating too many bright, saturated colors can make the image look overly processed.
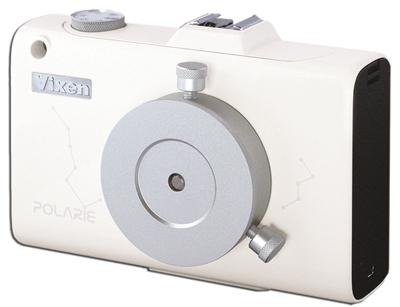
Editor's Tip: To get clear, sharp stars like those seen in these example images, use a star tracking mount like the Vixen Polarie. Not only is the Polarie easy to use, but it's compatible with a wide range of cameras, from mobile phones to full frame DSLRs. Just orient the Polarie to the north, and once set, the Polarie will keep pace with the movement of the stars to eliminate star trails.
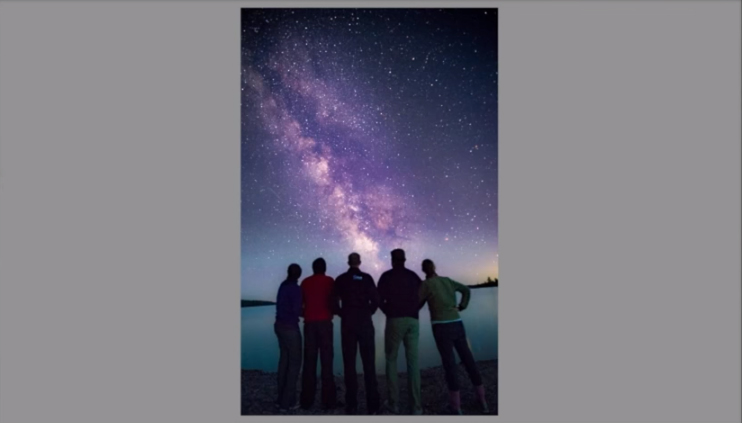
Final Thoughts
 YouTube Screenshot/52 Things
As you can see in the final image above, with just a few key steps, this photo has been transformed from something that looked like a throwaway to something that's quite eye-catching.
Granted, there are plenty of other manipulations that one can make in Lightroom, but the point here is to outline the basic steps you can take to improve your astrophotography editing workflow.
Follow these guidelines the next time you're editing in Lightroom, and you will have all the tools you need to create jaw-dropping photos of the night sky!