Prepare for an interesting journey into the past using a brand new piece of lighting equipment. In this brief lesson, Jeffery Jay Luhn uses Bare Bulb technique with the newly introduced lithium battery powered TritonFlash™ to achieve a 1950s era portrait.
The original photo session was for an article in Photo Techniques Magazine, but Jeffery takes a side track to set up a product release photo of a ‘new’ flashbulb for a Photoflex® April Fools joke. The lesson details how to achieve retro lighting and some clever ideas to enhance the image with post processing.
If you’ve ever wondered what makes a photo look old, this lesson will answer many of your questions.
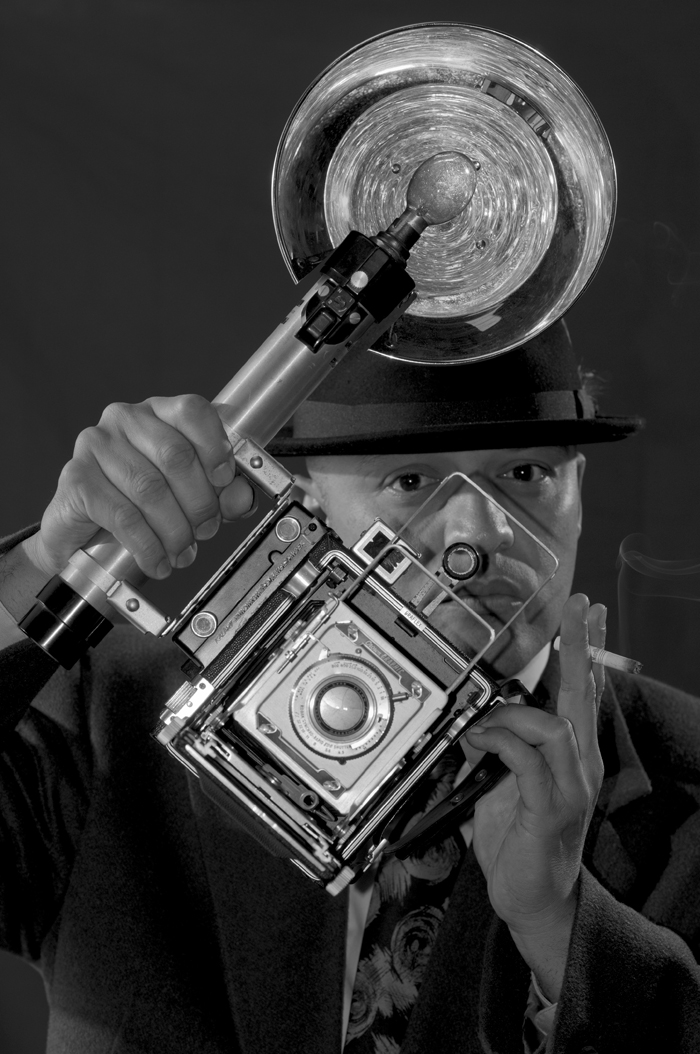
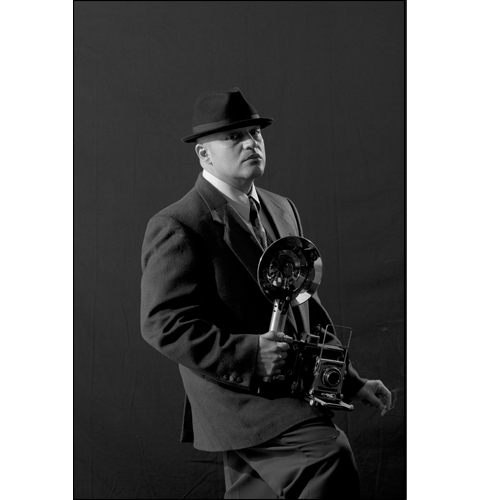
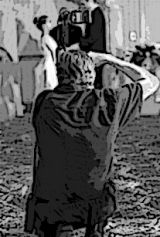
The Photoflex® marketing department decided to do an April Fools' Day project this year with a vintage feel. I was already writing an article about bare bulb for Photo Technique magazine, so we did our April Fools' Day shot at the same time. The concept involved a new product announcement of a blue flashbulb, circa 1952. My camera collection yielded a Baby Crown Graphic from the right period and Ray, our talented graphic designer, did the modeling.
The lighting was supplied by our new TritonFlash™ strobe using no modifiers- not even a reflector. This technique is called bare bulb, and it works well for vintage style shots. The TritonFlash™ and our StarFlash® strobe are particularly well-suited for the bare bulb technique because the flash tubes are fully exposed. [figure 1]
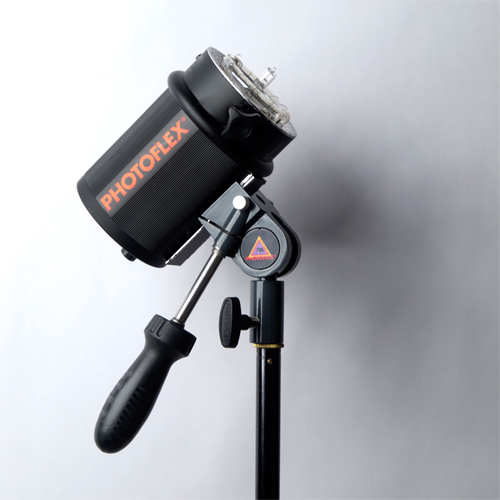
Figure 1
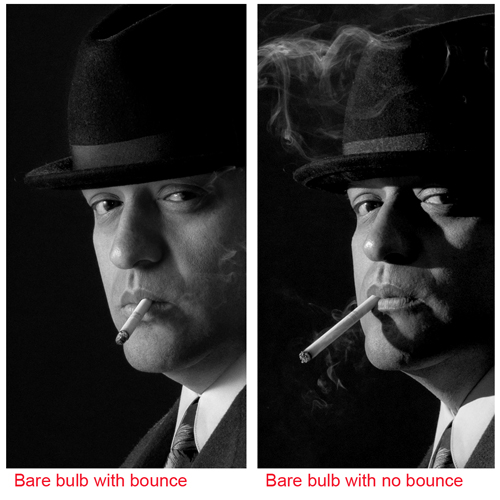
What makes bare bulb good for a vintage look? In the photos below [figure 3] you’ll see that the bare bulb without bounce provides extremely sharp shadows and tiny specular reflections. This ‘hard light’ result comes from any ‘point source’ of light, including the sun, and it typifies the mood of cinema images from 1920 through the 1960s.
Figure 2
The comparison shot entitled ‘bare bulb with bounce’ [figure 3] is achieved by having the TritonFlash™ about 18 inches in front of a white surface [figure 2]. This is called a ‘form fill’ light in which a soft fill light and a hard key light are positioned as close to each other as possible. The result is actually a very articulated soft light with ultra-sharp detail. You can get this wonderful effect with a white LitePanel and a bare StarFlash®, TritonFlash™, or StarLite®.
Figure 3
What other elements help to make the photo look authentic? Take the time to obtain props, wardrobe, hairstyles and make-up that come from your time period. Nothing hurts the credibility of a retro photo more than an overlooked element from the present. In our case, we had to ask Ray to smoke a cigarette, which he hadn’t done for many years. The things we do for art...
Figure 4
Soft lighting, typically from a north-facing window, was popular before 1920 and rediscovered in the 1970s with the advent of softboxes, umbrellas and flash bounce light. If you want to capture the 1950s in your image, hard light works pretty well.
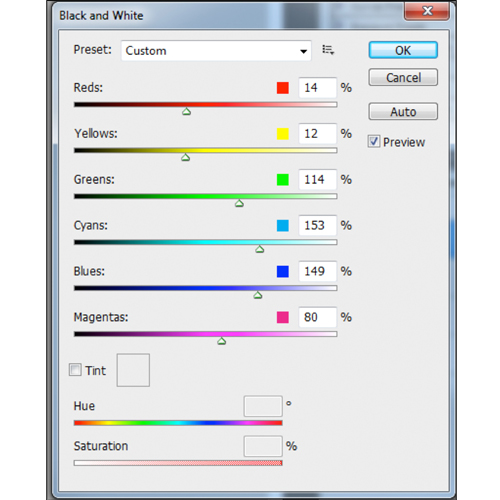
Another trick is to change the spectral sensitivity of your ‘film’ by using Photoshop. Choose IMAGE> ADJUSTMENTS> BLACK AND WHITE > then use the sliders to boost the blue/cyan/green and reduce the red/yellow. This makes the image look as though it was taken with orthochromatic film, not the more accurate panchromatic films introduced in the late 1950s. [figure 4]
Bare Bulb Lighting Technique
How do you accomplish bare bulb lighting? The short answer is to make your light source resemble the characteristics of a bare flashbulb. (Attention those in your 20's: search Wikipedia if you’ve never heard of a flashbulb.) As previously stated, that means hard light, but there’s more to the story.
Back in the days of flashbulbs, photographers often connected several flash units together and fired them at the same time to cover a very large area. The light was harsh, but bright. When the flash units were positioned carefully, dramatic lighting was possible. Assistants with gloves popped out the spent bulbs and placed new ones into the flash guns for the next shot. Accidents from mistimed exposures were inevitable, and even though the bulbs were dipped in clear lacquer to prevent shattering glass, hands and faces were burned. Those unlucky assistants were the first "flash slaves". (Couldn't resist that one!)
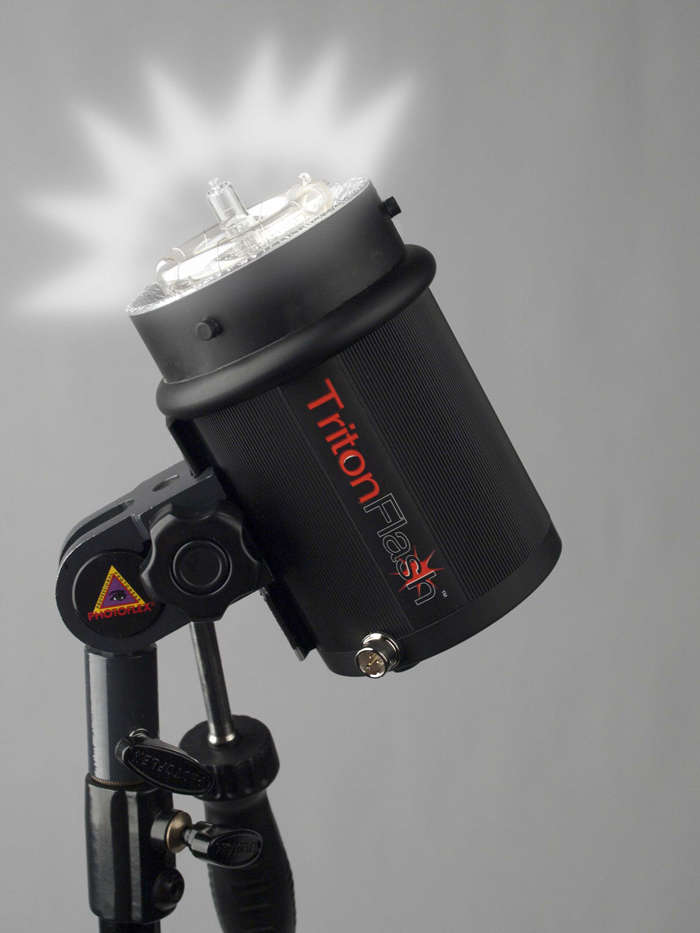
Bare bulb technique is not the same as direct light or bounce light. The best bare bulb results are only possible by using an electronic flash or tungsten fixture with a lamp that provides a 360 degree exposure of the light source and also allows a direct line of sight to the subject. [figures 1 & 5]
The Photoflex® TritonFlash™, which we used for our retro portraits, is an ideal tool for bare bulb photography because it’s battery powered, so it can be staged almost anywhere. It’s cool to have a modern piece of equipment that can act like an "old school" tool when it’s needed. [figure 5]
Figure 5
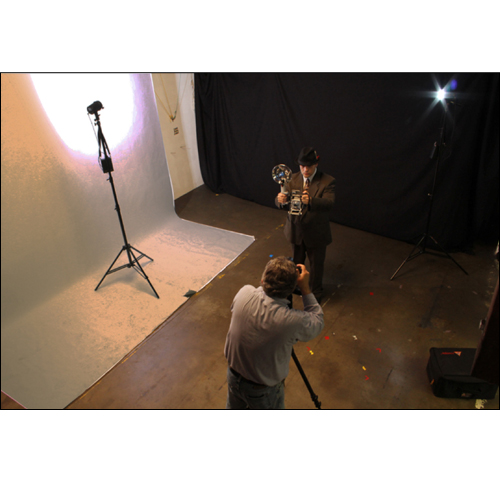
This wide distribution of light allows for direct rays to strike the subject, and most of the remaining light to bounce off the walls, floor and ceiling. The result is similar to having two light sources; a sharp spotlight and a soft fill light. See figure 6 for our setup. Bare bulb lighting isn’t appropriate for every situation, but it can be a lifesaver for large interior receptions, indoor sporting events, architecture, and retro lighting projects.
Figure 6
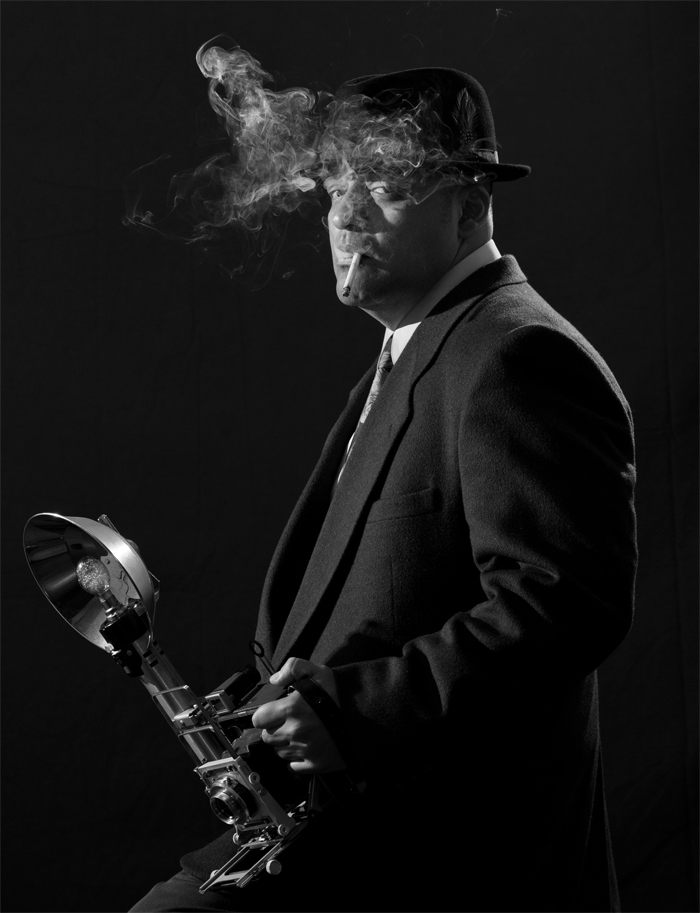
Our simple setup has another benefit: no matter if the model is facing right, left or center, there’s going to be an interesting lighting pattern on him. Using the bare bulb near a white wall (or suspended roll of white seamless paper as we did here) gives each side of the face a different quality of light. This is a benefit when shooting moving subjects, interviews or product demonstrations. That’s why bare bulb technique using the Photofex® StarLite® fixture works well for video as well as still photography. [see my result shot in figures 7 & 8]
For the shot below, both TritonFlash™ units were set to 1/32th power and the camera was set to:
Shutter Speed: 1/200th of a second
Aperture: f/6.3
ISO: 200
Figure 7
Figure 8
Merge Layers
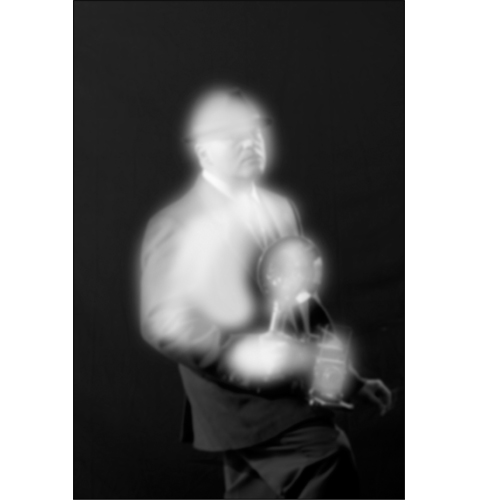
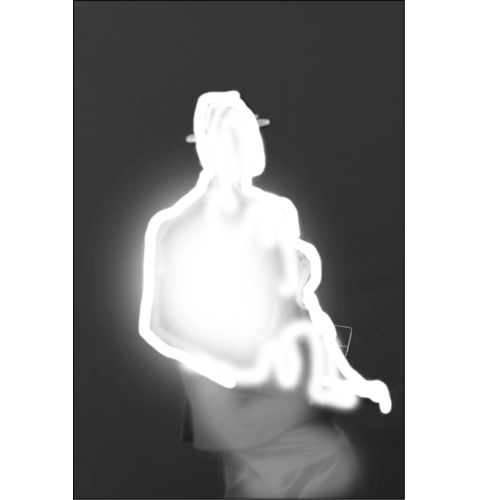
Another technique I use on retro images involves adding blur layers. Depth of field was much less than we’re used to seeing today. I add Gaussian blurring in stages and sometimes darken the top blur layer to affect the background. In the layers shown below, you’ll see that I erase portions of the image so the original shot is visible in the areas where I want details to be sharp. This can be meticulously executed to simulate a lens movement (tilt or shift) or just to minimize areas that may be distracting. The approach has no strict rules except that you try not to go overboard.
Original shot layer [figure 9]
Lightened layer [figure 10]
Lower blur layer [figure 11]
Top blur layer [figure 12]
Figure 9
Figure 10
Figure 11
Figure 12
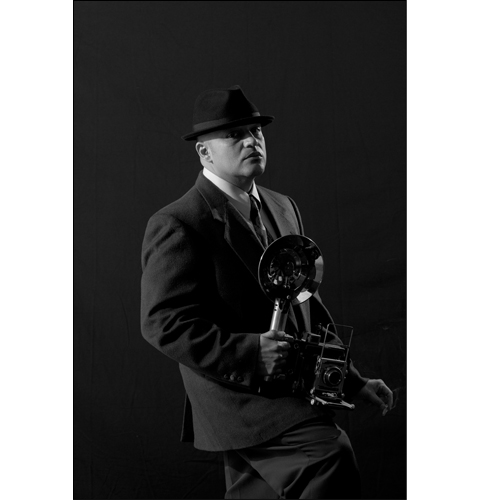
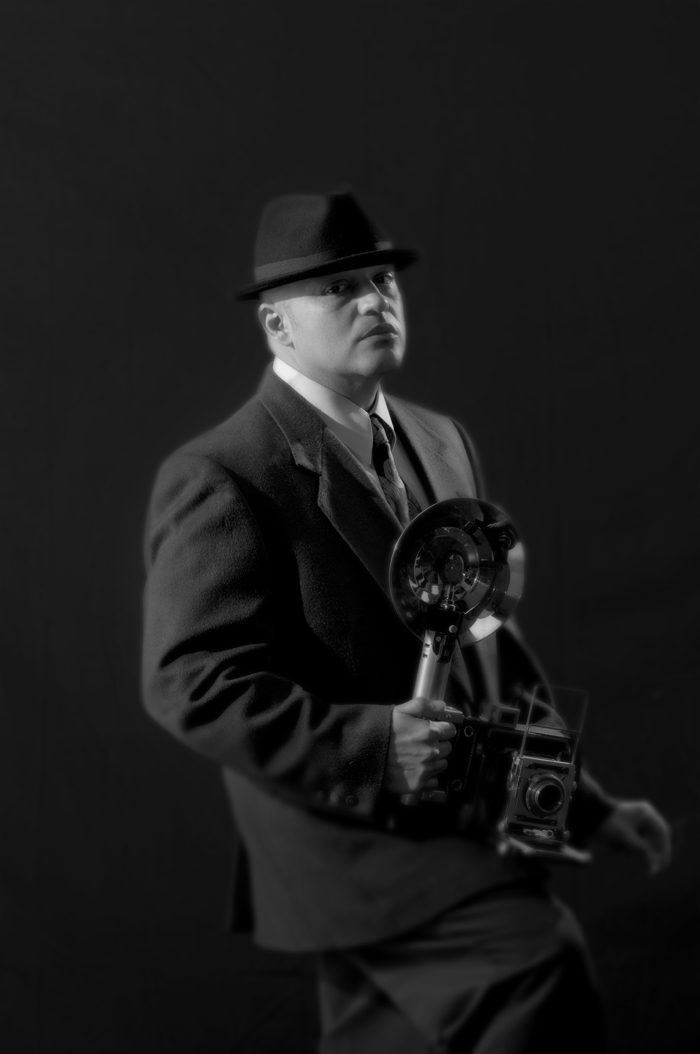
Those five images composited gave me one my final result shots. [figure 13]
My camera was set to the following (TritonFlash units remained at 1/32 power):
Shutter Speed: 1/200
Aperture: f/8
ISO 200
Figure 13
As long as you keep these layers separate, you can return to the image and adjust them. As I look at the final image at the time of this writing I’m planning to go back and make some of those blur layers more transparent. As in life, everything is a work in progress.
I hope this short lesson gives you the information and inspiration to experiment with the bare bulb technique for a vintage portrait. Once you familiarize yourself with this technique, you’ll find many uses for it.
--- Written and photographed by Jeffery Jay Luhn, contributing lesson writer for PhotoflexLightingSchool.com™. Modeled by Ray Bojorquez. Assisted by Jaron Schneider To learn more about Photoflex® equipment, go to [url=http:// www.photoflex.com] www.photoflex.com[/url] or [url=http:// www.photoflexlightingschool.com]www.photoflexlightingschool.com[/url]
Very nice presentation! I am unfortunately old enough to have used these in the day, and I agree with you about the uniqueness of the light source, but I like Analog music too!
The Canon EOS R100 is an entry-level mirrorless camera introduced in 2023. But just because it’s an entry-level camera doesn’t mean it’s a bare-bones camera. Find out why in this review!
Nikon’s retro-looking Nikon Zfc is anything but retro. Under its classic body is a host of features and amenities that make it a worthwhile compact mirrorless camera for 2024.
The Canon EOS R50 is one of the newest R-system cameras from Canon. Is it worth your money? Find out all the details you need to know in this comprehensive review.
The Sony FE 70-200mm f/2.8 GM OSS II is Sony’s flagship mirrorless zoom lens. As such, it’s loaded with features and has a top-shelf build quality that makes it a top pick!
Using leading lines in photography helps improve the composition by drawing viewers in and leading their eye from the foreground to the background. Explore some fine examples of this in this guide!
The Insta360 has one of the best lineups of action cams and 360-degree cameras. With these Insta360 accessories, you can elevate your photography and videography game!
Creating impactful photos of landscapes depends on many factors, not the least of which is your talent behind the lens. This guide explores other elements required for the best product.
The Canon EOS R100 is an entry-level mirrorless camera introduced in 2023. But just because it’s an entry-level camera doesn’t mean it’s a bare-bones camera. Find out why in this review!
The Olympus OM-D E-M10 Mark IV is a micro four thirds camera released in 2020. It’s an entry-level system along with the OM-D E-M5 Mark III. Use this guide to determine which one is best for you!
Blue hour photography might not be as well known as golden hour photography, but it is every bit as good a time to create epic images of landscapes. Learn how in this quick tutorial!
Nikon’s retro-looking Nikon Zfc is anything but retro. Under its classic body is a host of features and amenities that make it a worthwhile compact mirrorless camera for 2024.