
Everything You Need To Know About Light Painting
-
Light distortion: Using a shutter to distort ambient light usually creates trails of light and can make ordinary things like streetlights, flashlights, sparklers, and fireworks seem magical. If you are moving anything but the camera you will want a tripod for this.
-
Painting with light: This is an advanced version of light distortion where light is used to draw a picture against the background. This is either done with the photographer using a remote shutter, or with the aid of on assistant who does the actual painting. Again if you are moving anything but the camera you will want a tripod.
-
Painted on lighting: It is possible to use a lengthened shutter to paint light onto a stationary object. To do this a light is run over the surface of an otherwise unlit object while the shutter is open. This causes only the surface that is touched with light to be visible. For this you will not want to move your camera and you will want a tripod.
-
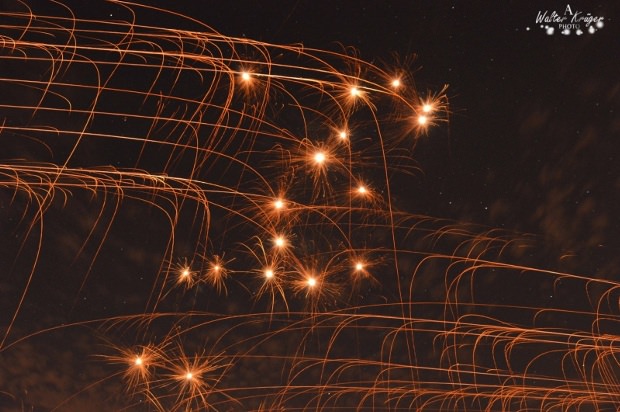
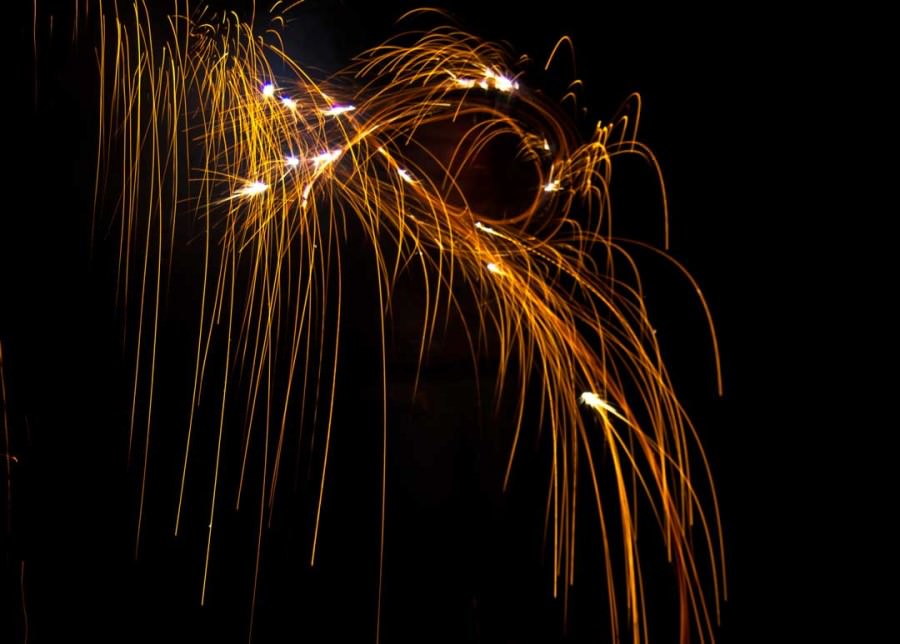
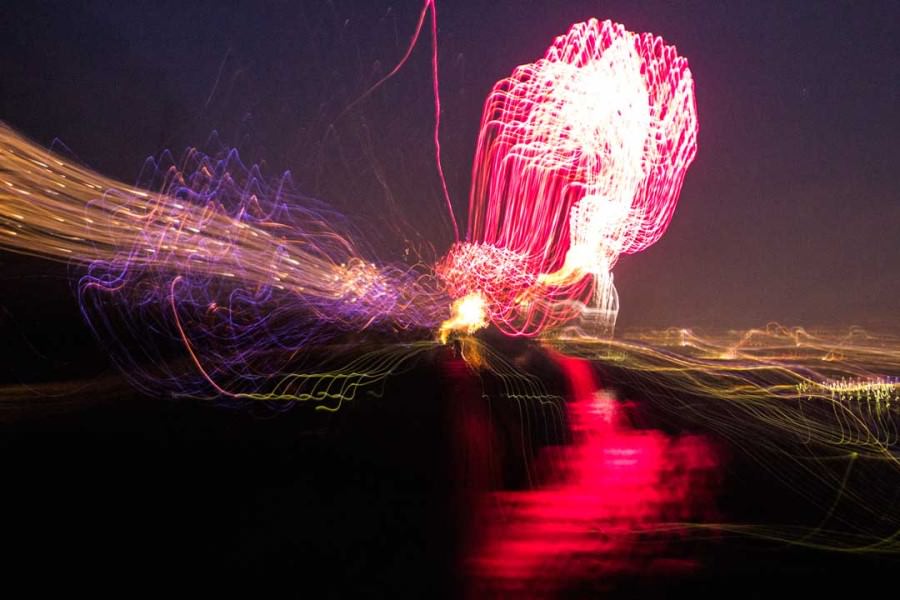
The picture above is of a friend of mine doing martial arts forms with sparklers in her hands. This has made the trails of light that follow the hand motions. This is a simple version of painting a picture with light. The other option to distort light is either moving the camera or changing the focal length of the lens. In the pictures below I moved the camera around a bit and changed the focal length on my lens. I believe this to be the technique Walter used on his pictures. The effects of this can be a bit random but also very impressive. The picture below is a photo I took of fireworks exploding, Using both techniques of changing my lens focal length and moving my camera body.
-
While painting in lighting you choose which surfaces you want visible and then you scrub over them with a light source. A direct and portable light source works best for this, if the source is too wide the light will bleed to parts of the picture you don’t want to be lit, and if the source is not portable you will not be able to move it. Flashlights are a favorite for this, and you should work on a darkly colored background. Take multiple pictures using multiple light stroke locations. Use fewer or more strokes on more or less surface area each time until you get the photo you want. Use a low ISO for this and close your aperture pretty far. You will also want a room with no ambient light.
-
Pick your location: you may want photograph inside in a dark room, or you might want to do it outside. Depending on exactly what you are planning on you may want to have some ambient lights to give a natural effect, or you may want it as dark as possible. If you want background you can always plan to shoot at dusk in a place where you know there isn’t a lot of people.
-
Dress in dark clothes. Light is what photographs so whoever is doing the painting should dress clothes that are as dark as possible. This will absorb light and make him or her less visible in the shot if it’s not completely dark.
-
Have variable lights: you should have more than one color if you are drawing more than one line or picture, also it helps to have a light that can have the beam adjusted, flashlights with spot and flood setting work really well to very lines. Dimmable is a good option to have as well. Think of these as a painters brush, you want many variable types and sized
-
Find a marker: the hardest part of painting a light picture is to know what you have painted. Having a marker to return to for each line can help that significantly.
-
Experiment: there are a million things that can be done with light painting; it’s all in how creatively you use it.
Hello,
And welcome to this week’s newsletter and photo of the week. This week’s photo is an illuminating piece from Walter; it’s painting with light. Now as you know I’ve been striving to select summer pictures and topics while we have this beautiful weather. Painting with light isn’t strictly a summer activity, but it’s certainly easier with warm weather. Walter’s picture proves this by capturing fireworks in a rather unique way.
How the newsletter works: The newsletter is divided into three sections. The first section is geared toward beginners, and is usually full of basics and definitions. The second is aimed at the intermediates, and the final will hopefully provide some great information for the more advanced photographers. The idea is that you can start at your skill level and continue along learning as you go. The hope is that you read through the entire newsletter. So let’s start discussing light painting.
WHAT IS LIGHT PAINTING?
Light painting is a lengthened shutter sub class of photography that involves moving a light source around the frame to “paint” a picture. Usually it involves either streaming effects, or actual light drawing, however, it can be used as a way to light objects for still photography projects such as product photography. In the right hands light painting is quite a versatile tool.
There are three main ways to paint with light:
THE BASICS OF LIGHT PAINTING
There are several ways to distort actual light. Here I will talk about the simpler of the two before we discuss the more advanced light painting in the third section.
PAINTING A PICTURE WITH LIGHT
This isn’t so hard to do; most people say the hardest thing is to remember where you painted already. There are some tips and tricks to make your light painting look that much better. I’m not much of an artist, but the picture below is an example of what’s possible.
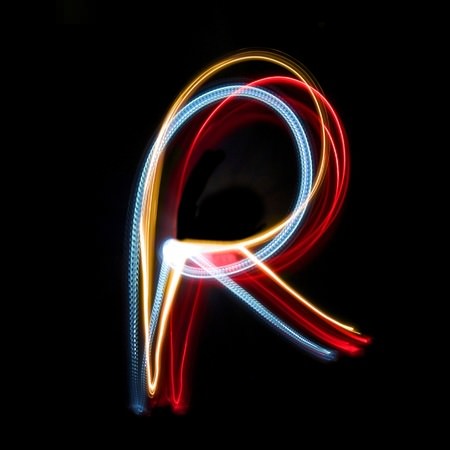
Light painting doesn’t have a lot of difficult steps and there isn’t one lens that should be used over another, framing shots isn’t any different than any other type of photography, and the settings, aside from being careful about the amount of noise in each picture, is pretty standard as well. Creativity is the key here. You can take several portraits and use many different layers to get what you want, so you have no limit to drawing or painting.
