
5 Minute Guide To Macro Photography
Hello!
Welcome to the newsletter and photo of the week for the week of August 5th. This week our topic was inspired by Tony Steele and his macrophotography. Although Tony has several beautiful macro pictures posted this week I chose this one because it’s not only a beautiful photo, but because it features one aspect of nature that is becoming too uncommon: the common bumblebee. We depend on these little guys to pollinate many of our crops including almonds, which are almost completely dependent on them. But I digress, this is a photography newsletter and lesson so lets talk shop.
Photo of the week by Tony Steele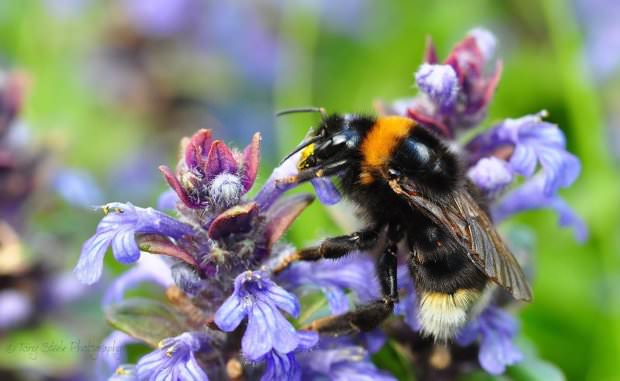
The newsletter lesson format works like this: There are three sections to the newsletter. The less experienced the photographer is the earlier that he or she should start reading. Beginners can start at the beginning for a definition and some basics, intermediates can look a bit further on to the second section, and the advanced crowed can start on the third section of the article. That being said, it is my hope that each section contains something for everyone.
MACRO PHOTOGRAPHY EXPLAINED
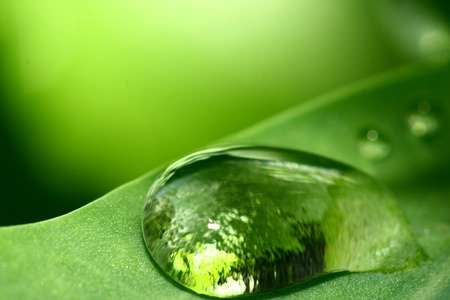
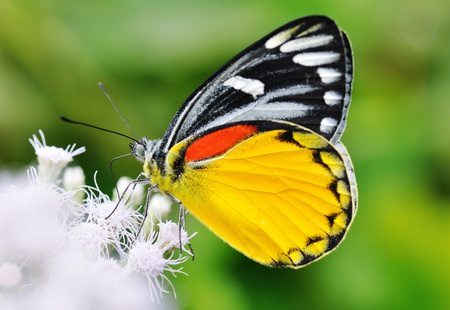
Macrophotography is used to refer to pictures taken of small objects such as insects, detailed parts of flowers, or even raindrops. These images are larger than real life and show amazing amounts of detail that may otherwise not be seen. This makes macro photography one of the most visually stunning types of photography especially when dealing with wildlife photography.
The macro image is measured in ratios, which aren’t used as much as they used to be but can be useful to know. 1:1 is life sized, 1:2 is twice normal, and so on and so forth. Even a 1:1 picture will show up a little larger in the image, and with modern digital imaging you can digitally zoom in even farther.
Additionally Macro Photography can be expensive to get into and usually requires some special equipment. Especially lenses. However there are some ways to cut the cost of macro photography down a bit.
WHY ARE MACRO LENSES DIFFERENT FROM OTHER LENSES
If you have ever paid attention to the actual glass elements in your lenses while focusing on closer objects you may have realized that the closer the object to you the further the lens needs be from the sensor to focus on that object. For macro photography the lens usually needs to be pretty far from the sensor because the subject being photographed is closer than normal at a given focal length. This means you will need a lens that can extend further for focusing in macro photography. This is one of the main differences between macro lenses and your traditional lens. While many lenses that you can buy say that they are macro compatible they don’t give quite the same quality as an actual macro lens because the optics are optimized for non-macro shooting. This doesn’t mean that they are useless; in fact this may be a good way to get started on macro photography without a large investment. There are still additional things you can do to make sure you get the best quality possible. For example buying a macro extender for your lens will help push the lens elements away form the sensor and give you a clearer image. You can also buy a macro converter, but be careful the brand you choose will have a definite impact on quality. Another option is a lens reversal device. These will help convert your lens into a macro lens but the entire idea scares me. It leaves the rear element as well as the CPU contacts exposed. There are several other pieces of equipment you can get, however the best quality still comes from a macro lens.
FOCUS
When you are shooting with a minimal focusing distance the depth of field gets very small. In fact if you look at most macro pictures the depth of field is actually smaller than an insect. That’s no problem though; you just need to adjust your aperture to compensate. Remember that at this point you may have extension tubes and filters and macro adapters on either end of your lens. These things all cut down on the available amount of light. Quite quickly it becomes difficult to compensate for the lack of light and depth of field. What can we do? Well buying an expensive strobe or flash is always an option. Most macro photographers prefer ring lights, the good ones, like everything else, get a bit pricy. There is one other option tough.
Focus stacking is a method where the photographer takes multiple shots of the same subject with a slightly different depth of field each shot. These shots are then combined in postproduction to create one image with a wider depth of field. To do this you need a steady tripod, and, I suggest, a remote shutter. Use your camera’s live view for precise focusing. Focus stacking is also time consuming, making it nearly impossible to do with living objects, unless you catch something while it’s asleep or dormant.
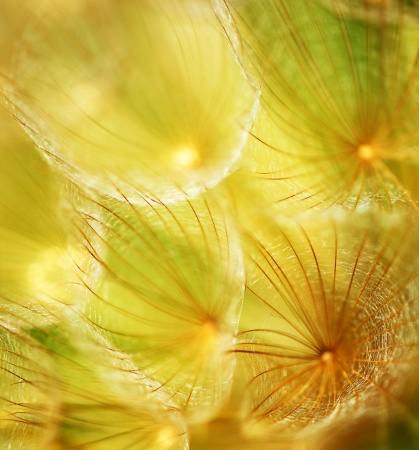
Macro photography is a great way to help us appreciate the world around us in a new way. Looking at the incredibly magnified picture of the dandelion above it’s easy to understand that macro photography lets us view the world in ways we might never be able to otherwise.