Photo Editing Tips for Beginners
- First Things First: Set Yourself Up for Success With a Beginner-Friendly Photo Editor
- Photo Editing Tips for Beginners: Master Curves and Levels
- Learn How to Crop and Resize
- Photo Editing Tips for Beginners: Use Layers to Create Intricate Images
- Let AI Help You!
- More Photo Editing Tips for Beginners
- Recommended Photography Gear
- Skylum’s Luminar Neo Helps Streamline Photo Editing With Incredible Generative AI Tools
- Level Up Your Portrait Photography Editing With These Advanced AI Tools
- Shoot RAW Photos instead of JPEGs.
- Learn to correctly white-balance your images.
- Use vibrance and saturation to make your colors pop.
- Make sure you control the noise levels of your pictures.
- Don’t overedit your photos to the point where they look unrealistic.
- This AI-Powered Photo Editor Will Drastically Improve Your Real Estate Photography Workflow
- 4 Reasons Why Skylum’s Luminar Neo is a Landscape Photographer’s Dream Editor

Photo by scyther5 via iStock
Today, one of the most important steps in the photography process is editing your photos. However, we understand that photo editing is harder than it seems and that there’s a significant learning curve when getting started. Don’t worry, though. That’s exactly why we wrote this article. To help you improve your photo editing skills!
Below, we’ll share the top photo editing tips for beginners. They include choosing a beginner-friendly editing program, adjusting your images with curves/levels, cropping/resizing photos, using layers, and embracing the power of AI to make editing quicker and easier.
Regardless of your photo editor, our tips and tricks will lead to faster, more efficient editing and better, more impressive results. Now, without further ado, it’s time to dive in and discover the best photo editing tips for beginners!
Check out the video above by James Popsys for more photo editing tips for beginners from a professional landscape photographer.
Table of Contents
First Things First: Set Yourself Up for Success With a Beginner-Friendly Photo Editor

Photo courtesy of Skylum
When dipping your toes into the world of photo editing, the last thing you want is to get in over your head and feel overwhelmed. The best way to avoid that is by using a good photo editor for beginners. For us, that means Skylum’s Luminar Neo.
Why is it the best photo editor for beginners? For starters, it boasts a simple and clutter-free user interface. Moreover, its intuitive workflow and powerful editing tools allow you to improve the quality of any photo in a minute or less with only a few button clicks.
You can download Luminar Neo and use it as a standalone app or pair it with other programs like Adobe Lightroom, Adobe Photoshop, or Apple Photos using the Luminar Neo plugin. Finally, you can try it risk-free thanks to its 30-day money-back guarantee.
Photo Editing Tips for Beginners: Master Curves and Levels
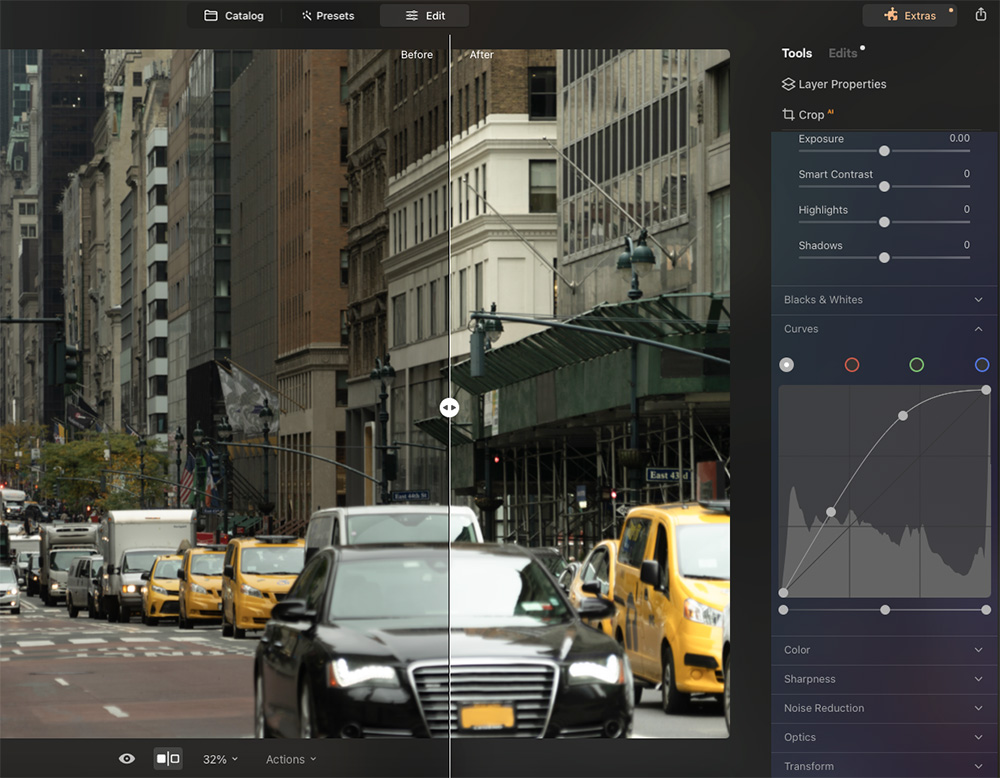
Photo courtesy of Skylum
Regardless of what adjustments you want to make to your photos, the two primary ways to do it are using curves and levels. For total beginners, we recommend adjusting the levels using your photo editor's built-in sliders. Sliders are easy to use, and you can see how they change your pictures in real-time.
Once you have a little more experience, you can play around with curves. They are a little trickier, but they can boost your productivity and workflow speed once you get the hang of them. Curves are good for adjusting tonal range, colors, and contrast.
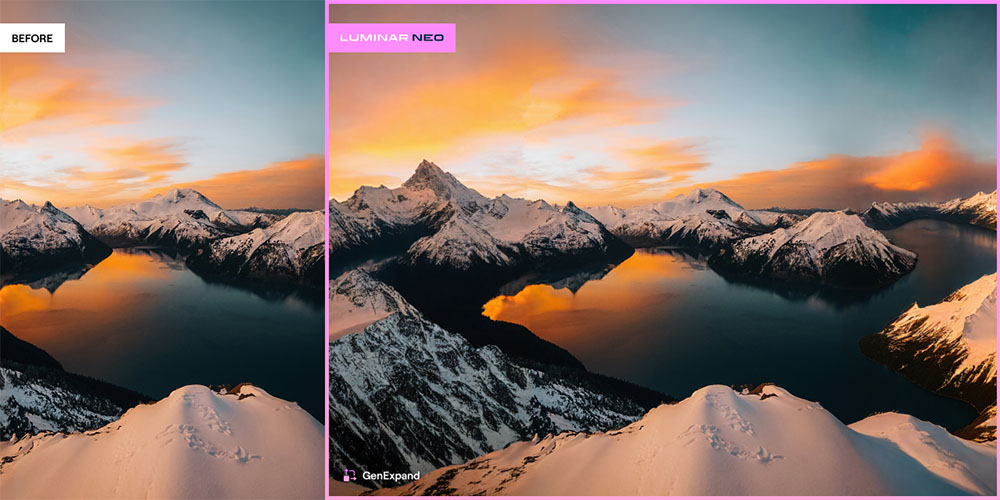
Learn How to Crop and Resize

As a beginner, chances are you are still learning the rules of composition. Luckily for you, though, thanks to editing, you can easily fix any composition mistakes you make during shooting. Cropping lets you change the shape of an image to fix the composition or to draw more attention to your subject.
Alternatively, you can make files smaller by resizing them. Resizing photos ensures they take up less space on your storage devices and makes them easier to share with others and upload to the internet. If that wasn’t enough, Luminar Neo’s amazing new GenExpand tool allows you to expand your photos like never before.
Learn More:
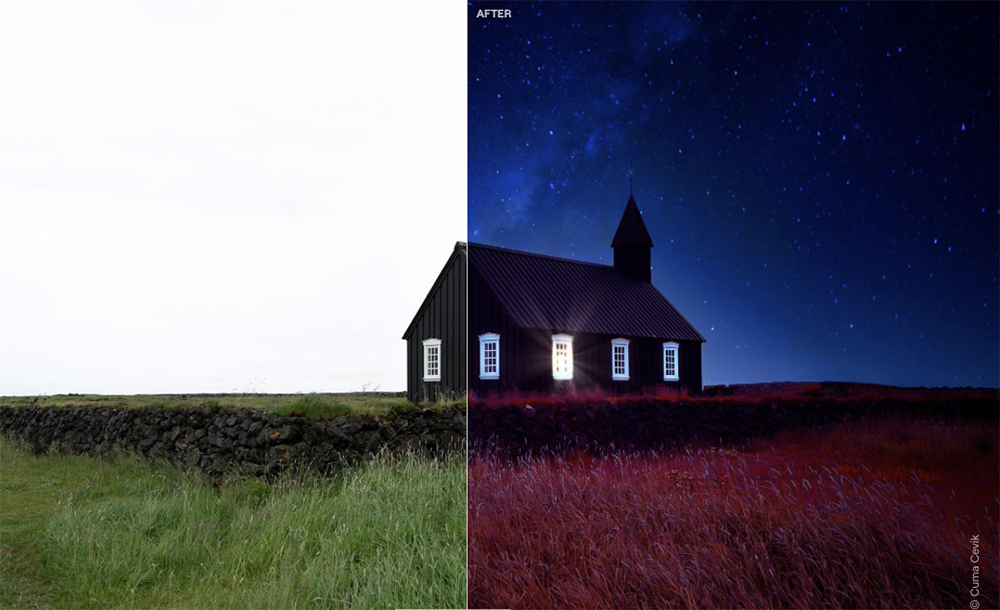
Photo Editing Tips for Beginners: Use Layers to Create Intricate Images
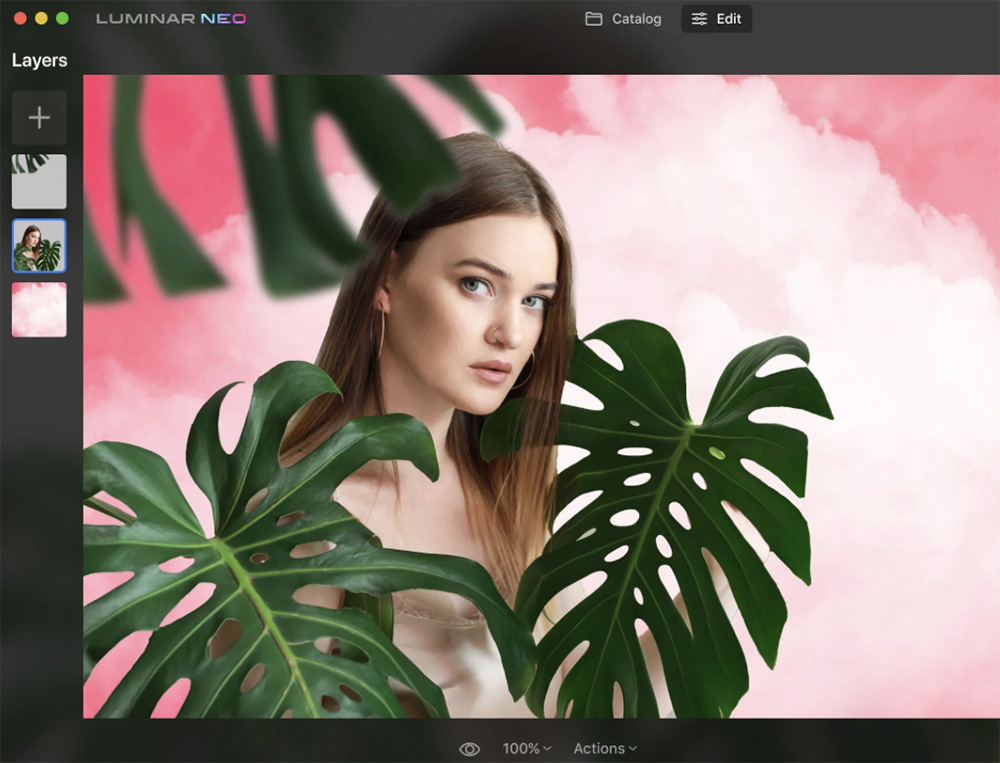
Photo courtesy of Skylum
Adding layers to images is an excellent way to make them stand out from other pictures. Using the layer tool in your photo editor, you can retouch images, blend multiple images together, make photo collages, create new textures, and more.
Another cool way to use the layer tool is masking. Masking is when you create two unique layers featuring the same image. Once you have both layers, you can edit specific parts of the image (i.e., foreground vs background) without affecting the the other. While masking can help with any photo, it’s particularly useful for nature and landscape photography.
Let AI Help You!
Photo courtesy of Skylum
Did you know some photo editors, like Luminar Neo, now feature innovative AI tools? AI technology makes it possible to accomplish all the same edits people used to have to do manually but in remarkably less time. This gives you more free time to take photos, spend time with your family, enjoy other hobbies, etc.
Here’s a quick look at some of Luminar Neo’s advanced AI tools:
Check out the video above on the Luminar Neo YouTube Channel to learn more about one of their most powerful AI tools, Sky AI.
More Photo Editing Tips for Beginners

Photo by gorodenkoff via iStock
As you can see, there’s so much to learn about editing photos. But by implementing the photo editing tips for beginners covered above, you can start to edit like a pro in no time. Additionally, to make your lives easier, we highly recommend using Luminar Neo to simplify the editing process.
Lastly, while those photo editing tips for beginners are a good starting point, check out the list below to enhance your photo editing skills further.
Recommended Photography Gear
Heads up: Clicking on our affiliate links and exploring our sponsored content helps us at no extra cost to you, and we only recommend gear we're absolutely crazy about!