
How-To Maternity Photography: Posing Guide Part 2
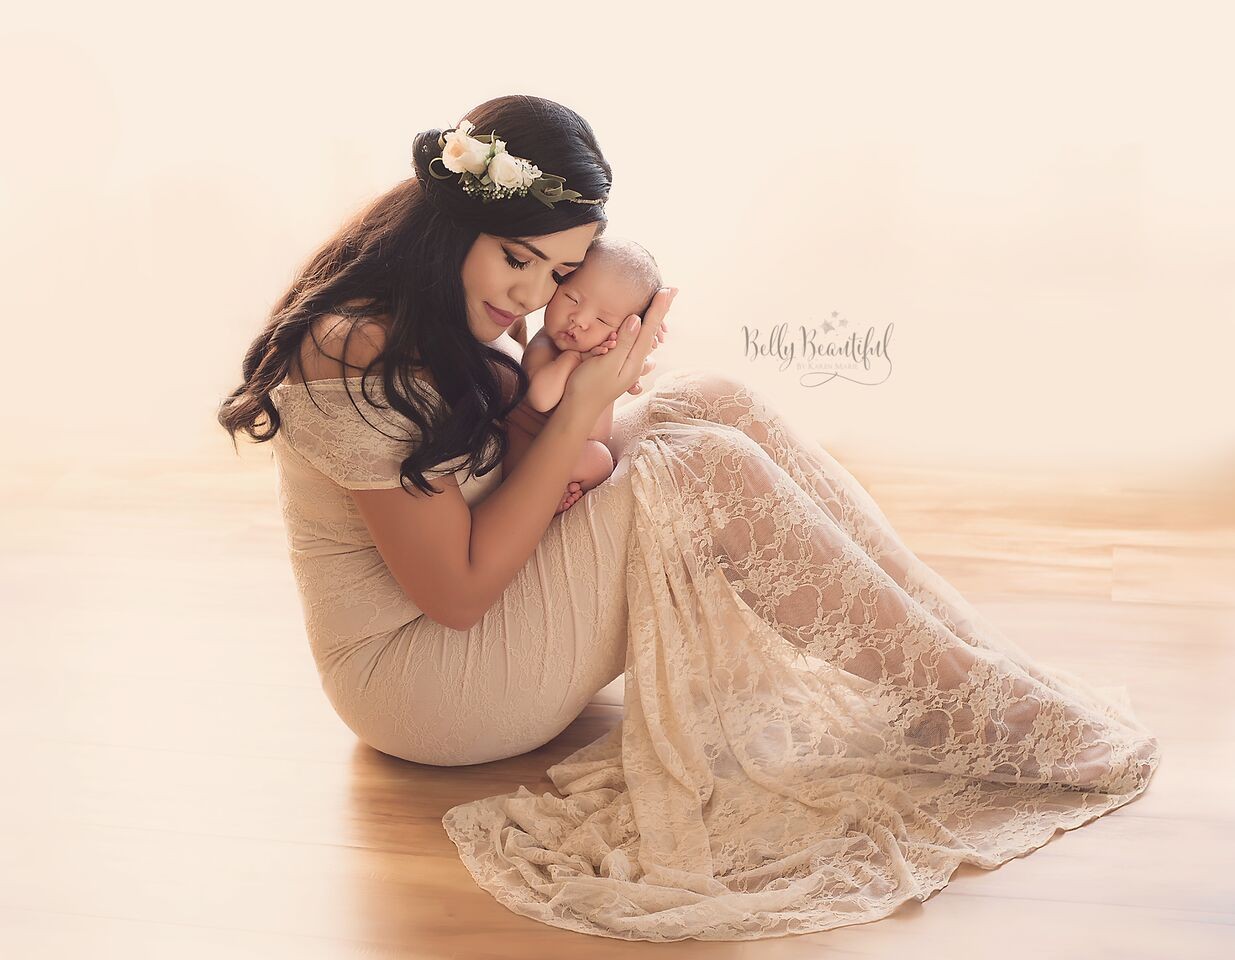
Belly Beautiful Portraits | Sew Trendy™ Bella Gown & June Crown
In our last installment of our How-To Maternity Photography series, we explored a few classic maternity poses that focused just on mom and her coming baby.
This time around, we take a look at some poses that incorporate loved ones - a partner, kids, friends, and the like - that can help you create a sweet, memory-filled photo for your clients.
As we alluded to in the previous article, posing a pregnant woman is as much about making her comfortable as it is about making her look and feel beautiful. But, when you add other people to the shot, your job becomes slightly more complex because you’ll need to pose each individual such that the relationship between them is on full display.
Fun With Kids
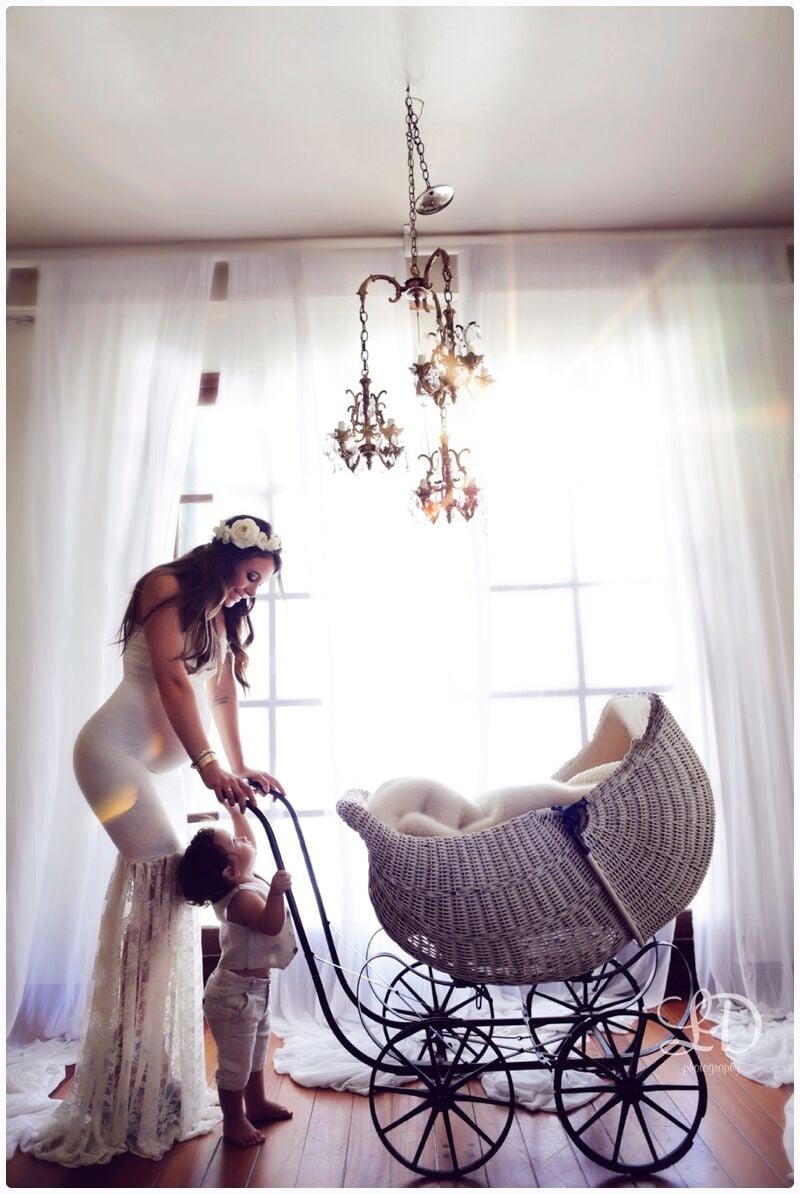
Lori Dorman Photography | Sew Trendy™ Marilyn gown & Evelyn crown
If mom-to-be already has kids, including some poses in which the kids can join in is a sweet way to highlight the pregnancy and begin to show the growing relationship between existing children and the one that’s on the way. There are virtually endless possibilities here, but having props can prove to be very advantageous. For example, in the image above, mom and child clearly have a strong connection as evidenced by their gaze at one another. But the presence of the carriage gives both subjects something to interact with, which gives the shot a little bit of action to make it more interesting. For added impact, consider suggesting props like dresses or crowns to help dress up little girls for their portraits with mom.
Snuggling With a Partner
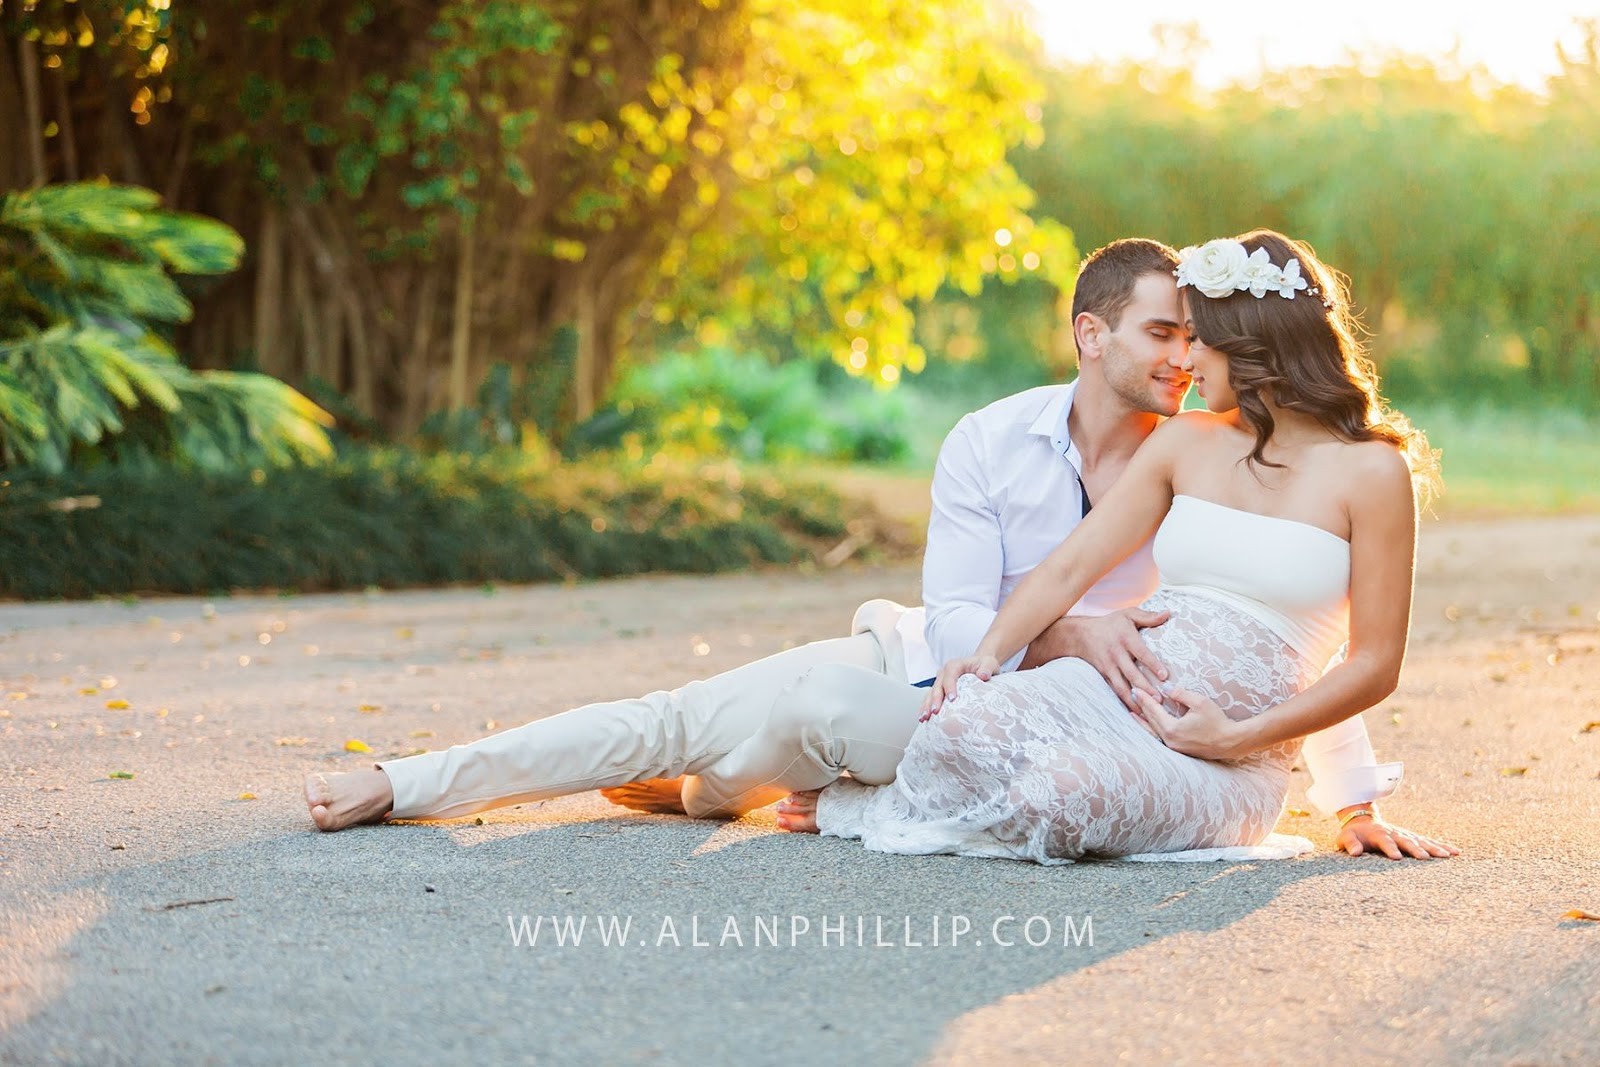
Alan Phillip Photography | Sew Trendy™ Siri Gown & Evelyn Crown
Of course, you don’t want to forget the partner in all the excitement of the photo shoot. Just like it’s important to let existing children in on the fun, it’s also necessary to let the expecting mom have a few shots with the one she loves.
When composing couples portraits, bear in mind that you don’t want to obscure mom’s belly. A great way to do that is to have them stand (or sit) as close to one another as possible and place both sets of hands on the belly. As noted in Part 1 of our posing guide, this is advantageous because it gives both subjects something to do with their hands. It helps in one other distinct way as well: it creates an intimate portrait that connects mom, her partner, and the baby in a very visual manner.
Kissing the Belly
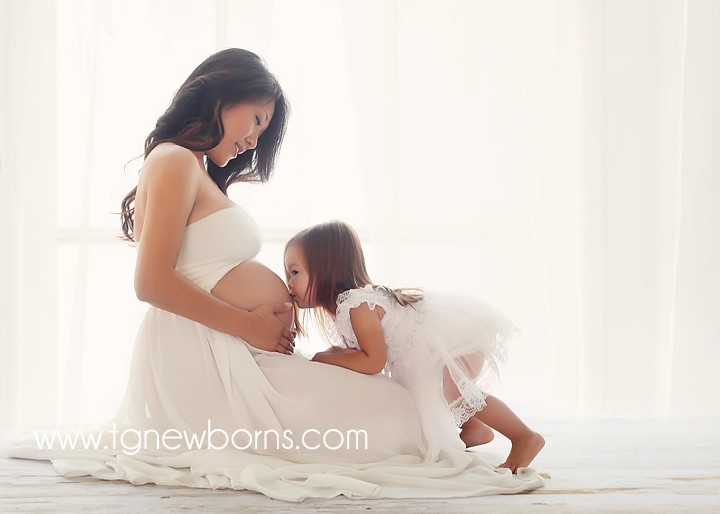
TG Photography | Sew Trendy™ Kaleigh Gown
An especially adorable posing choice is to have the baby’s siblings kiss mom’s belly. In this way, you can highlight the coming relationship between siblings by focusing on that connection. As was done in the image above, get down on the child’s eye level and compose the shot from straight on, so as to get the full profile of the baby bump. Frame the shot tightly, even omitting mom’s face from the image.
Bear in mind, though, that mom will need to do something with her hands. As was done in the image above, she can simply rest her hands on her belly. Another option would be for mom and child to hold hands.
Supplement Poses With Smart Props
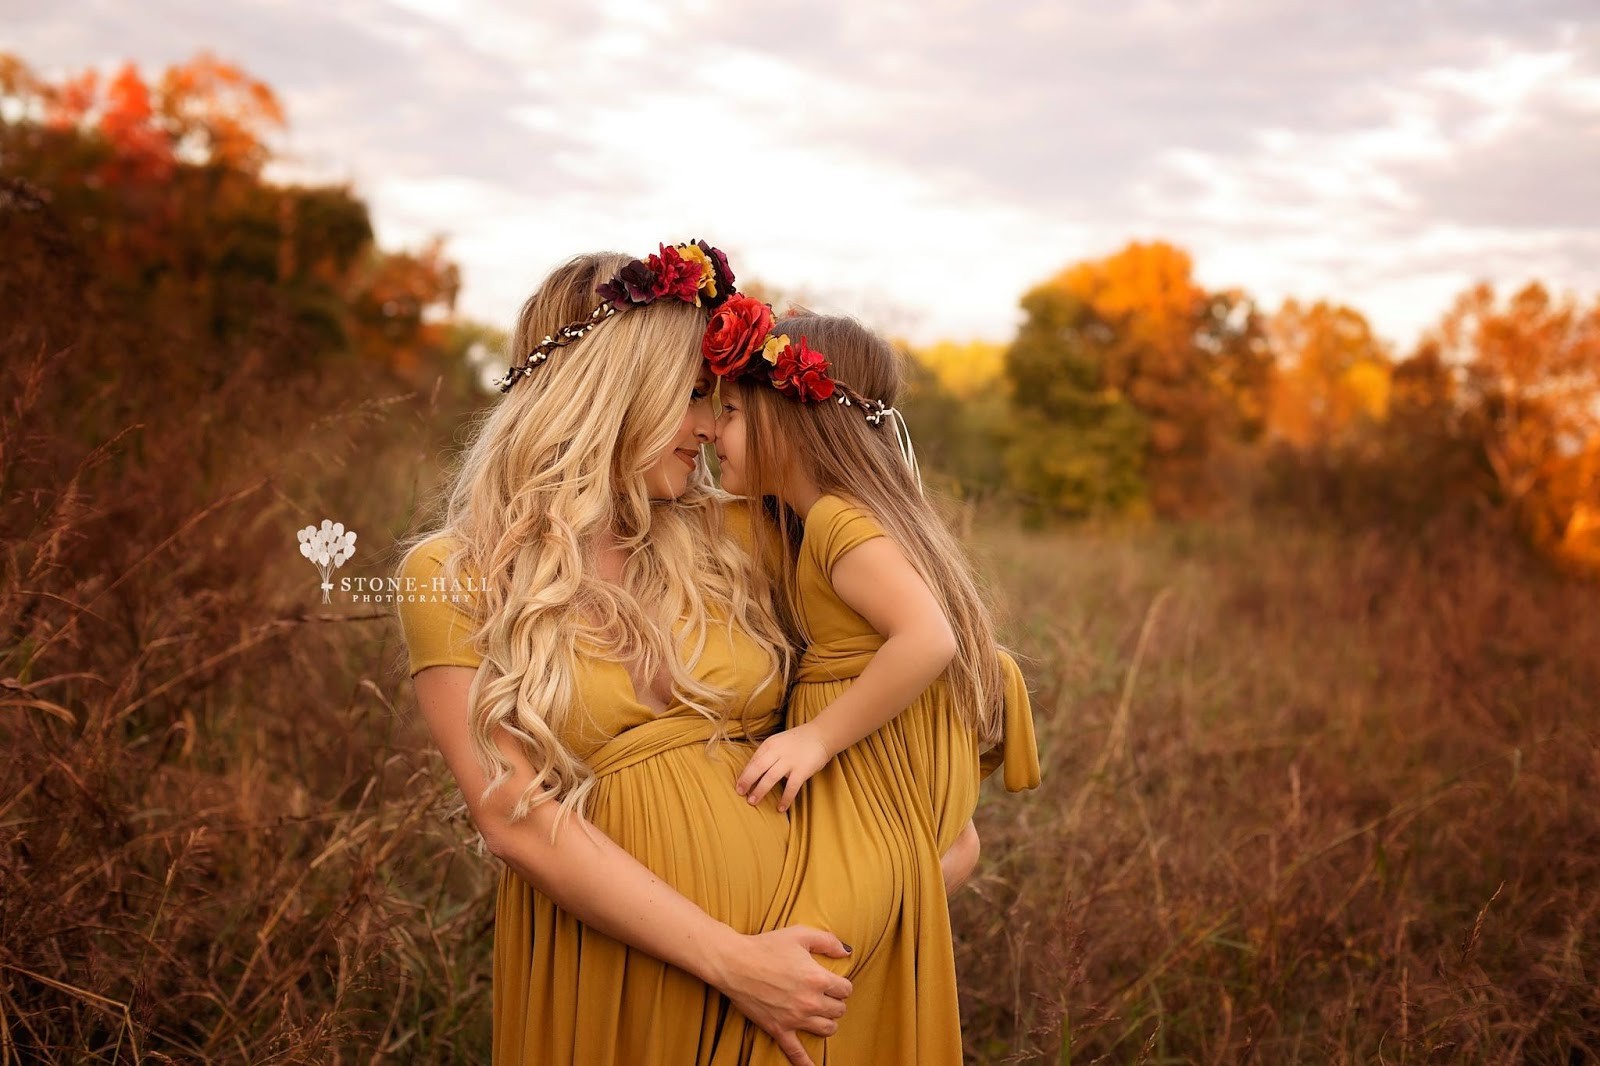
Stone-Hall Photography | Sew Trendy Mommy & Me Gown and Crown Set
If done right, the poses discussed above will give you many opportunities to create love-filled photos of moms and their families. But a smart way to enhance the look of group maternity photos is to incorporate props that add color and texture to the shot while making mom and her family look that much more beautiful.
Sew Trendy Accessories has a complete line of maternity wear, from maternity gowns for mom to coordinating gowns and dresses for their daughters. What’s more, Sew Trendy has a wide selection of headbands, sashes, floral crowns, and even rhinestone crowns for moms and daughters alike. The result? Maternity photos that take on a whole new level of sophistication, from fun and flirty to something right out of a fairytale. As noted above, it’s essential to get the posing right for maternity photos so mom looks beautiful. But with accessories like these, you can take your maternity photos to a whole other level!