
Photo Tip of the Week: Recommended Camera Settings for Sharp, Stunning Macro Photography Images
- Set your camera to aperture priority mode so you have full control over the aperture and depth of field. An aperture of f/8 or f/11 is a good starting point.
- Preset your ISO to 200. This will suffice for most situations, giving your sensor enough sensitivity to make fairly generous aperture and shutter speed adjustments.
- Take your camera out of autofocus mode. Manual mode will give you a much better chance of getting the features you want in focus as sharp as possible. Using your camera’s live view function will help you make sure that your focus is spot on.
- Use your camera’s white balance presets rather than auto white balance. The auto white balance feature is far too prone to color casting to use for macro photography.
- Make on-the-fly adjustments to aperture and ISO as needed. These adjustments will be necessary to increase shutter speed to prevent camera shake, to freeze movement of a moving macro subject, and to account for the wind and other elements that might cause your camera to move.
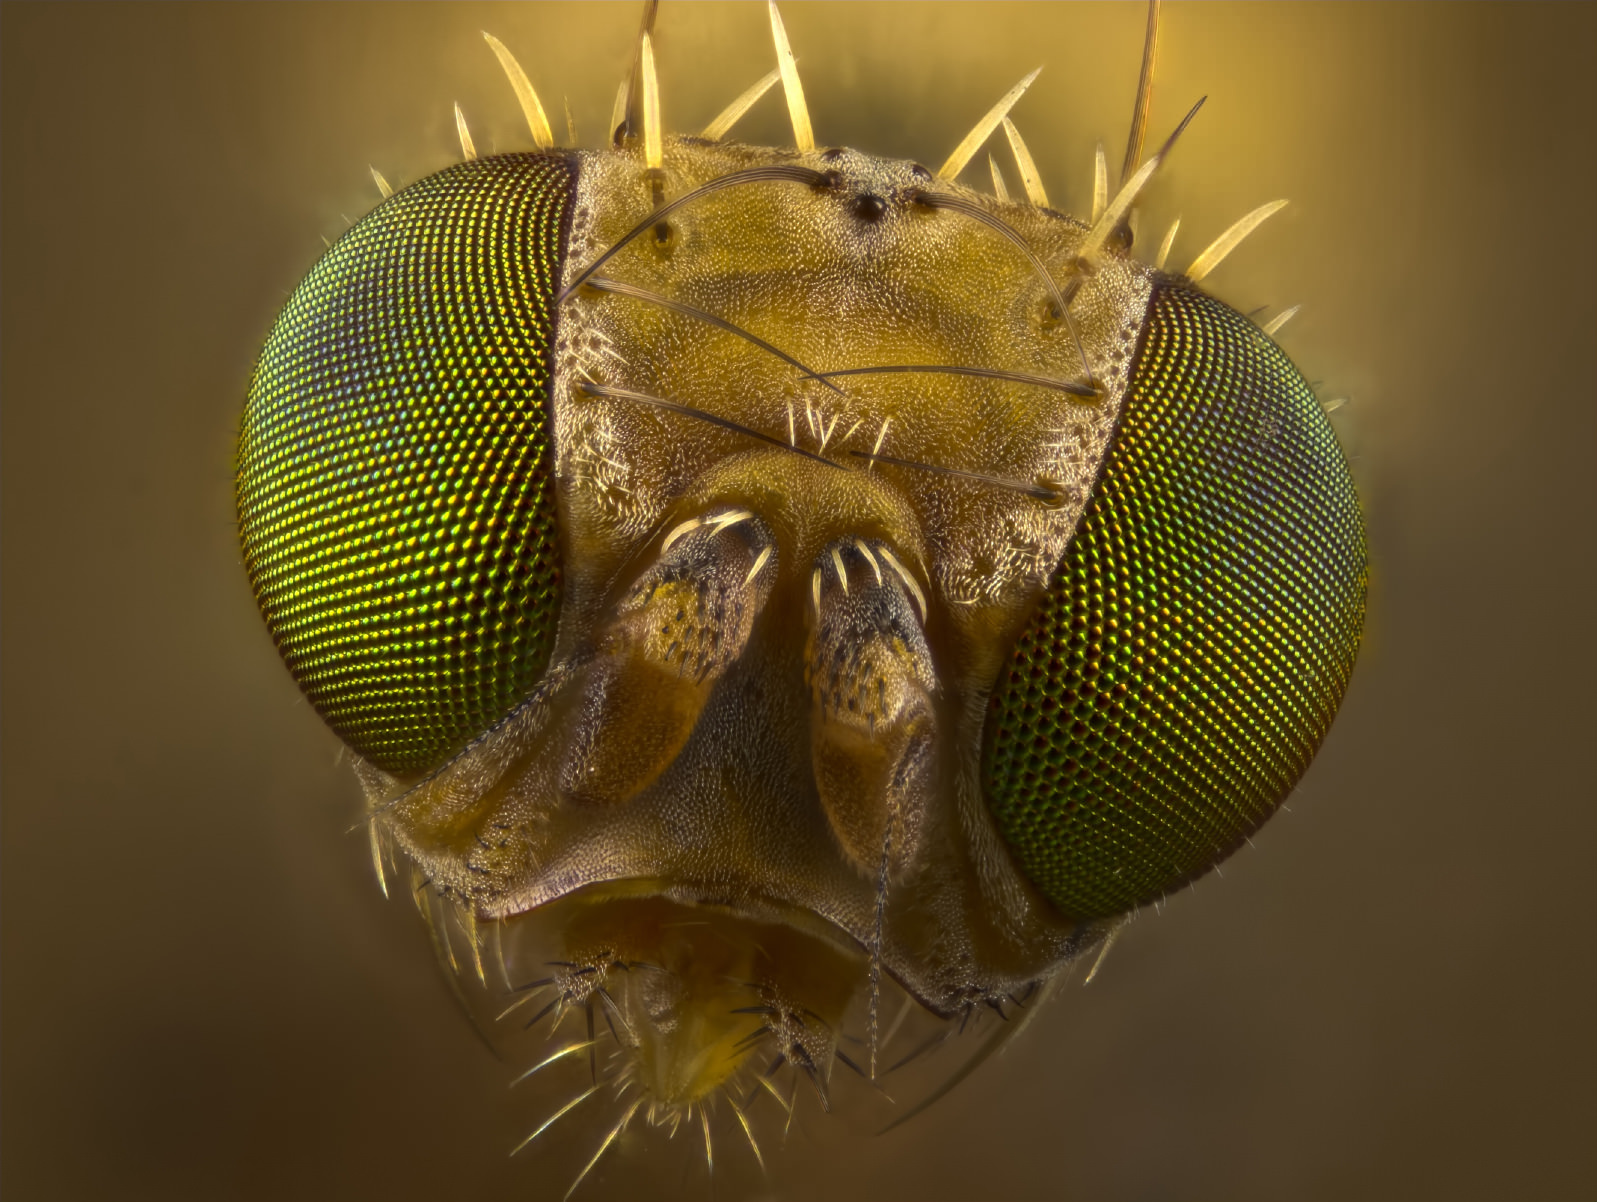
Diving into the world of macro photography is a great adventure, with many fun, interesting, and creepy subjects to photograph. But getting awesome macro shots like the one of the fly above takes a lot of time, a great deal of patience, and, of course, the appropriate camera settings.
This week’s Tip of the Week reviews the cameras settings you need to use to get classic macro shots. There are essentially two categories of camera settings that need to be addressed: Those that can be preset and those that must be adjusted at the time of the shoot. Let’s begin!
Preset Camera Settings
Since depth of field is one of the most important aspects of macro photos, set your camera to aperture priority mode. This will give you complete control over how wide or narrow the aperture is, while the camera will make decisions about the proper shutter speed to get the best exposure.
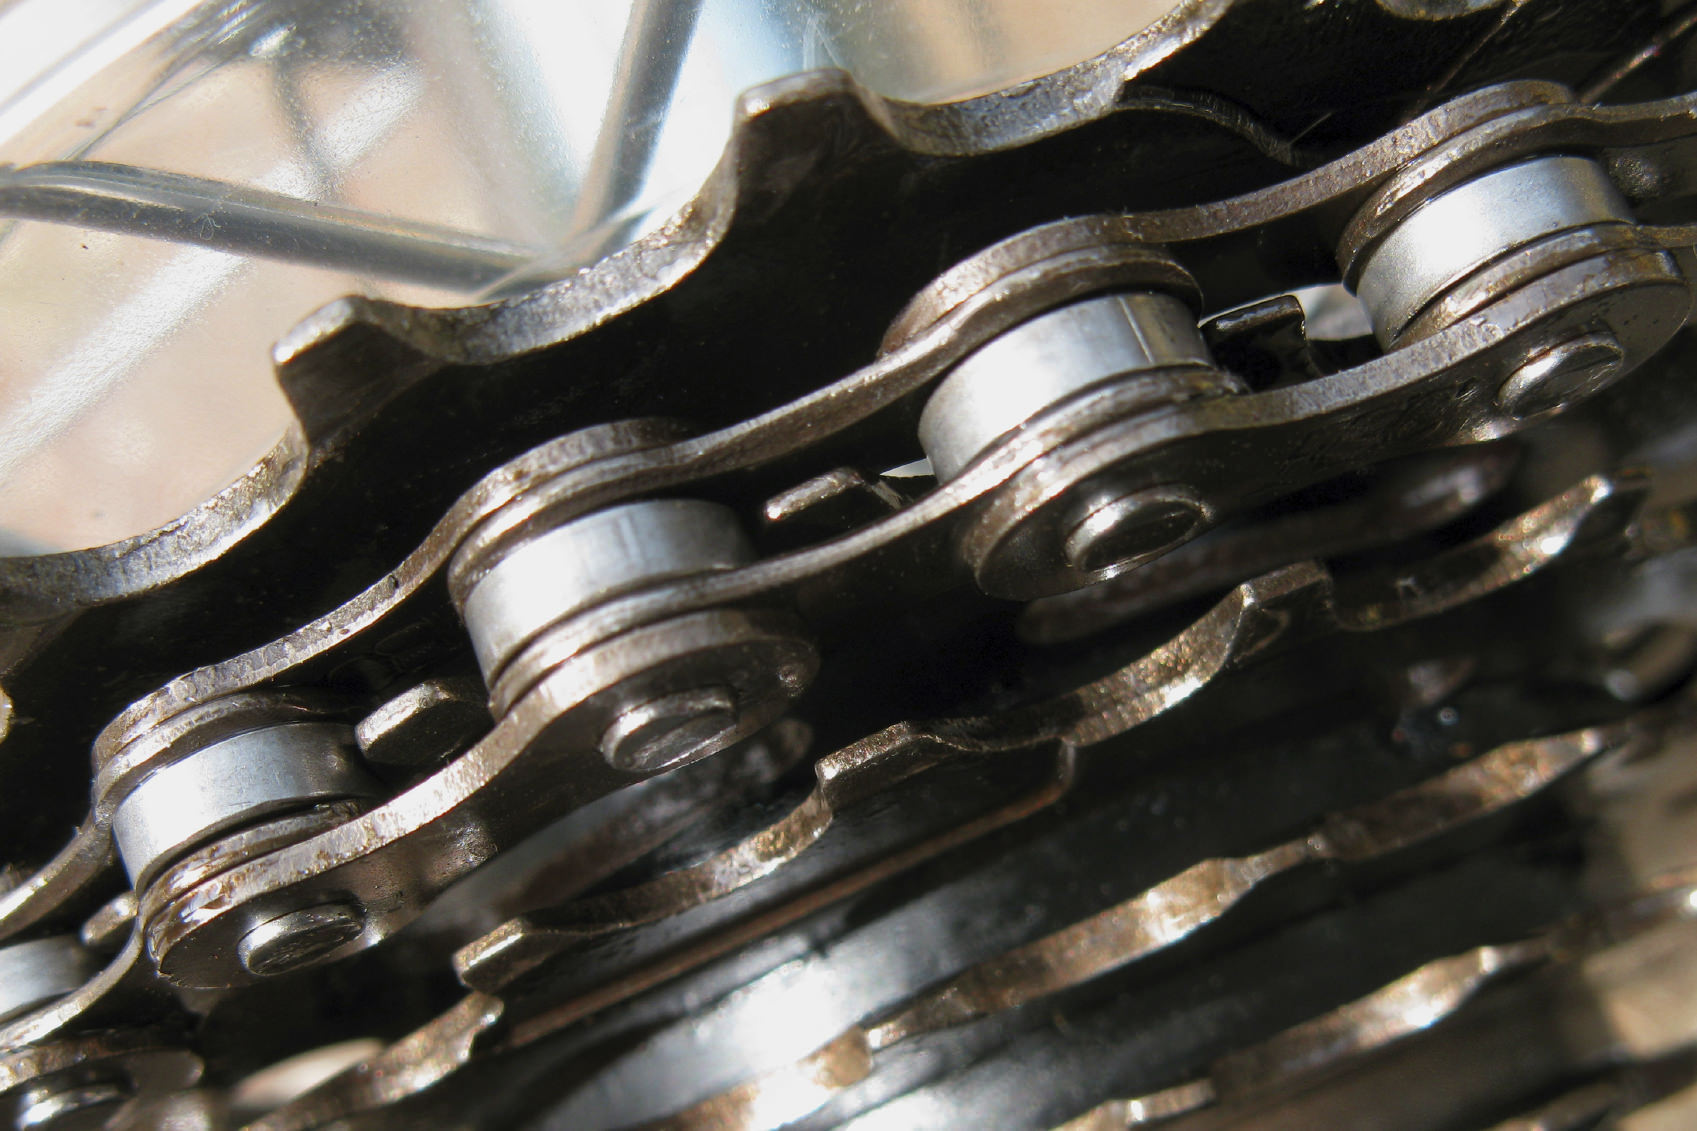
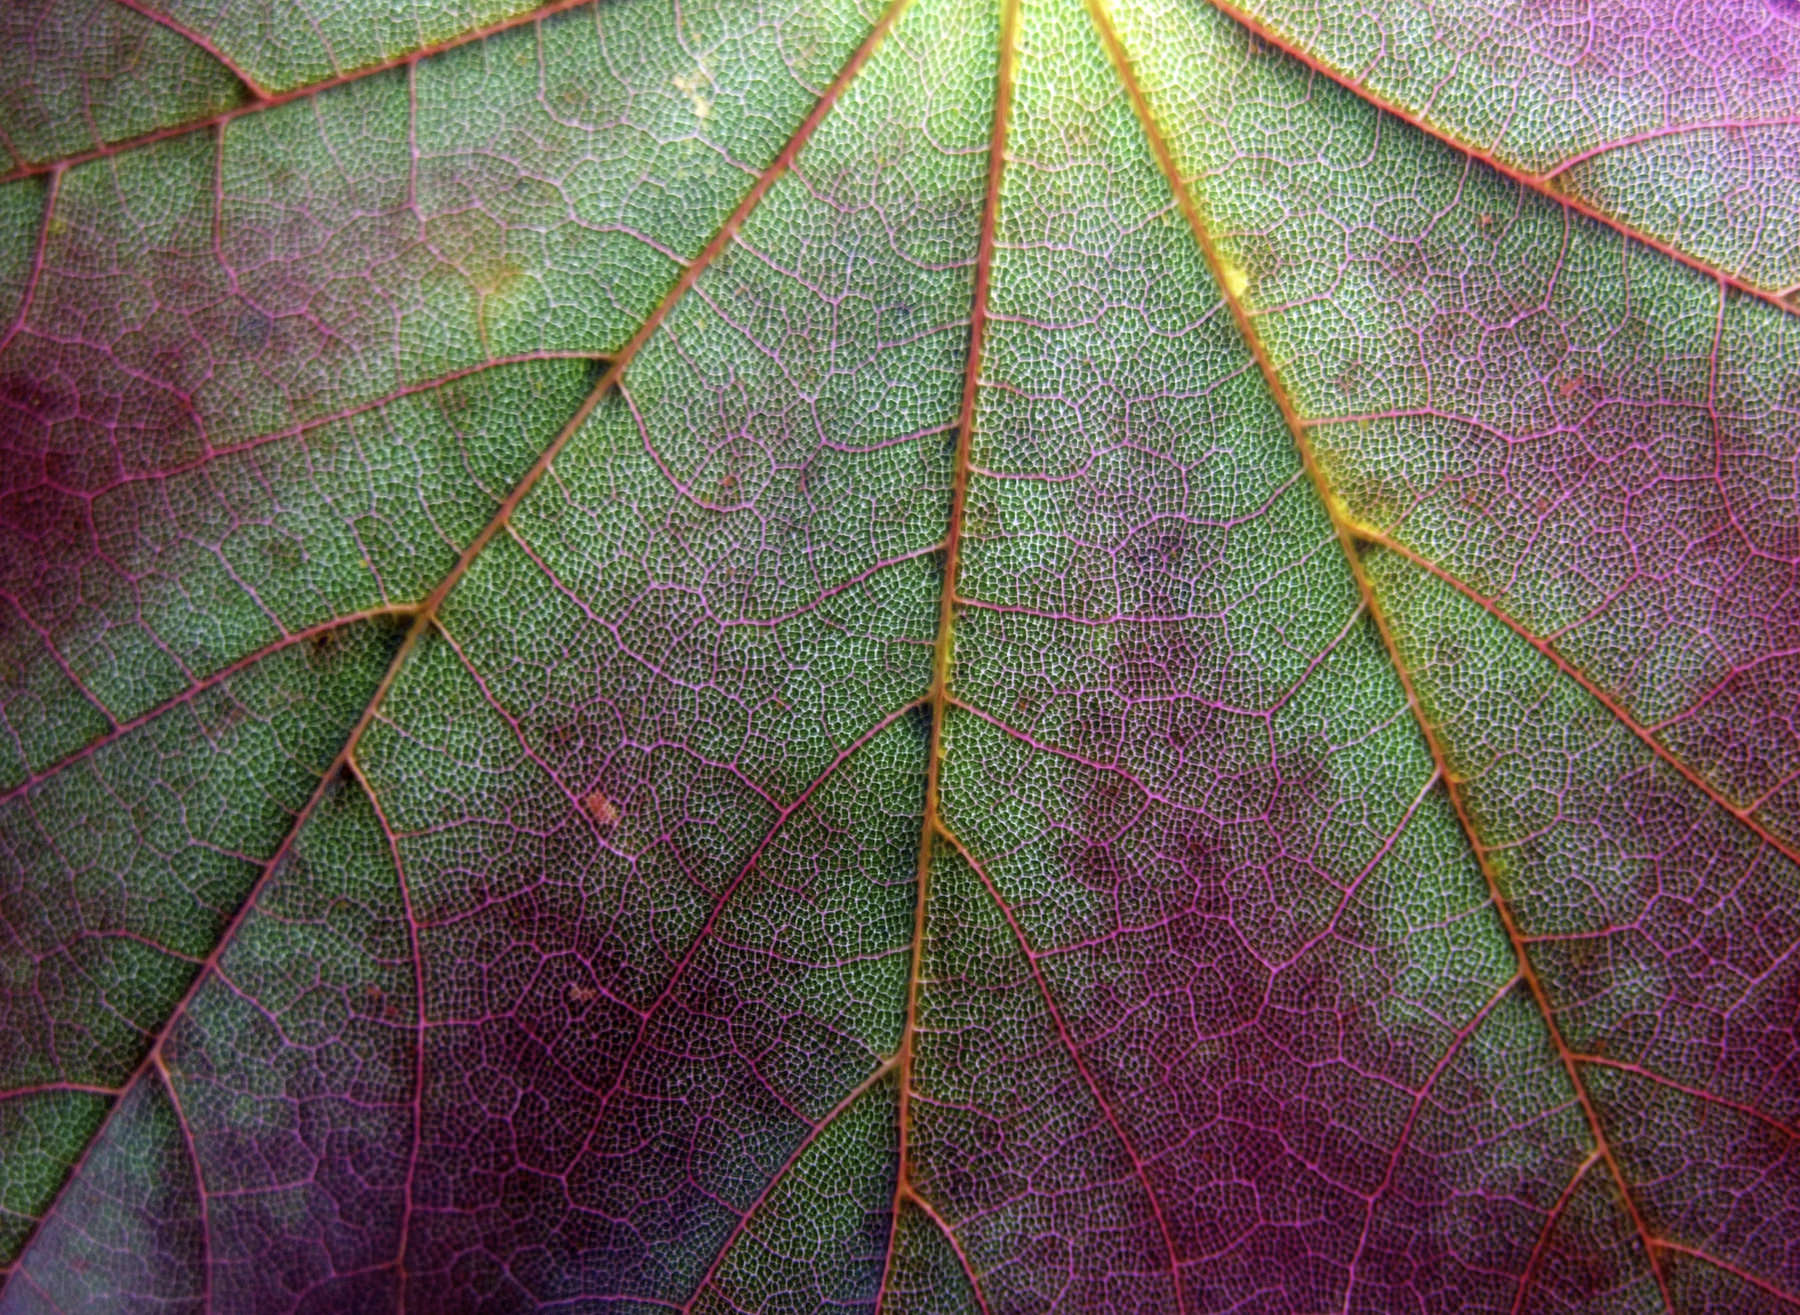
A good starting point for aperture is somewhere in the middle – f/8 or f/11. Naturally, once you start shooting, you will likely need to make adjustments to get the proper depth of field for each shot. The photo of the gears above benefits from a deeper depth of field so that more of the gears are in sharp focus. Conversely, the image of the leaf below benefits from an extremely shallow depth of field because the depth of its features is also quite shallow. You will just need to play around with your aperture to find what’s most appropriate for the subject you’re photographing.
You will also need to set a proper ISO for your shots. A good starting point is ISO 200. This will allow your camera to select a fast enough shutter speed to keep camera shake at bay while also being fast enough to freeze movement of a subject like an insect that is moving around.
Supercharge your photography skills. 600+ Premium lessons waiting for you HERE.
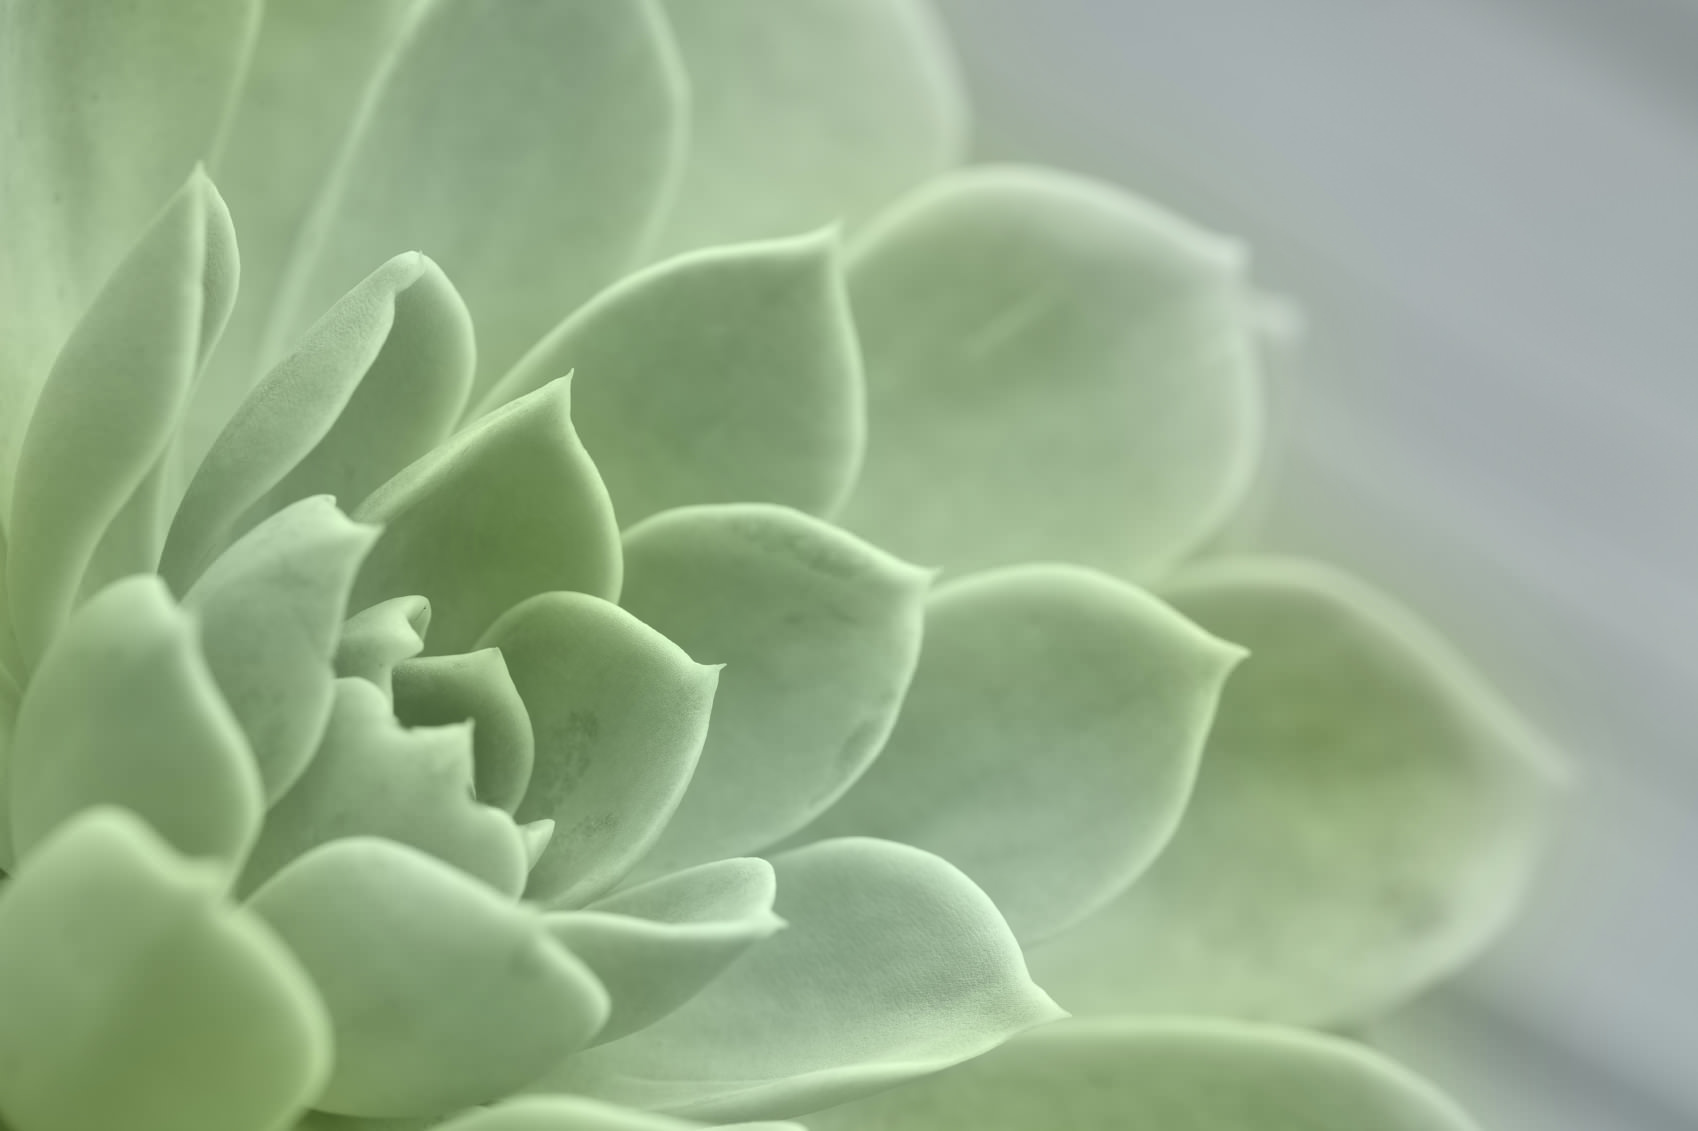
Another setting you can preset is to engage manual focus. Autofocus is great, but when shooting such a small subject, like the succulent plant in the image above, your camera can struggle to identify the right area that needs to be clear and crisp. Giving yourself control over focus will allow you to zero in on a specific spot, like the center of the plant above, and ensure that it is absolutely tack sharp.
An easy way to ensure that you’ve got the correct area in focus is to switch your camera to live view. This will give you the best chance of getting the focus you need because you can view the scene on your camera’s LCD display. You can then use the zoom function to examine the spot you want in focus to be sure that it is nice and sharp.
On-the-Fly Settings
As much as you prepare yourself for your macro shoot, inevitably there will need to be some changes that you make on-the-fly depending on the conditions in which you find yourself shooting.
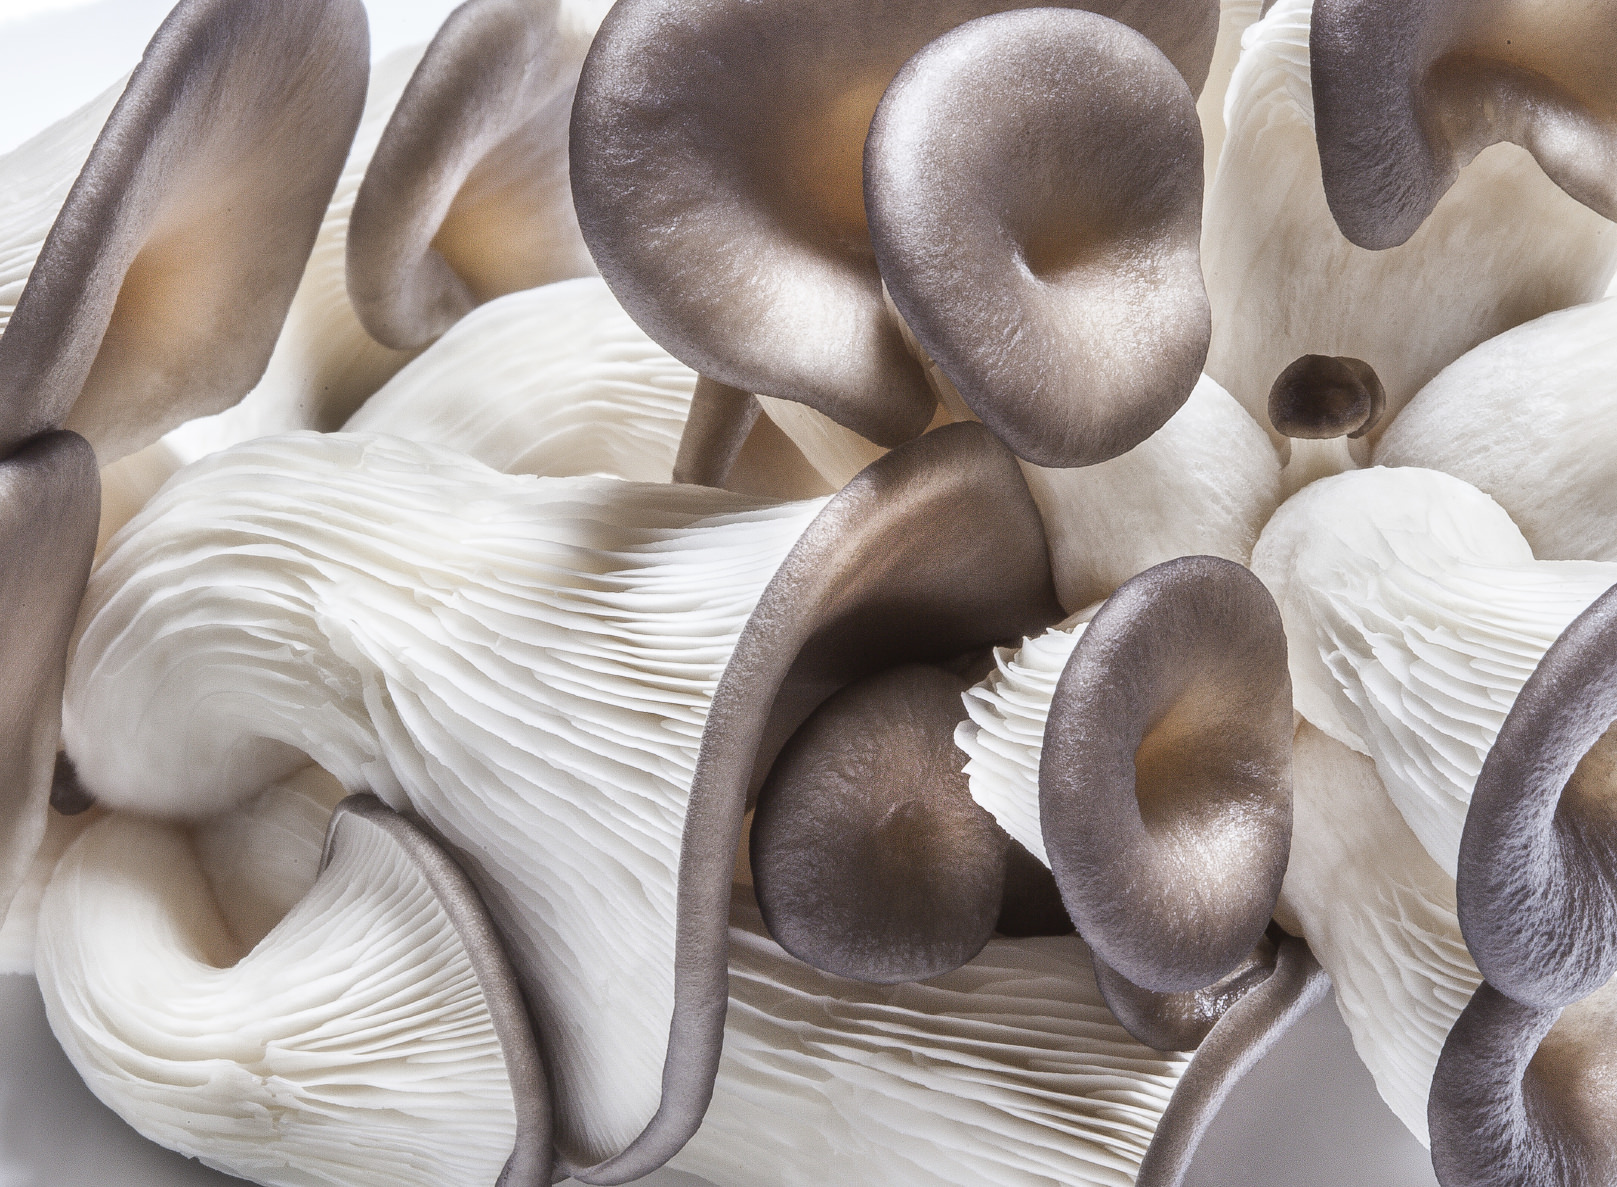
The first setting you will need to adjust is white balance. Like the image of the pearl oyster mushrooms above, many macro shots tend to be fairly one-note in terms of color, and as a result, the automatic white balance feature on your camera can create unattractive color casts that will ruin the image. To prevent this, select one of the camera’s white balance presets according to the lighting conditions that are present.
As mentioned above, you will most assuredly need to make adjustments to your aperture as you shoot. You may find that a shallower or deeper depth of field is needed for a particular subject. You might also find that you need to open up the aperture to allow more light in so the camera can select a faster shutter speed to avoid camera shake.
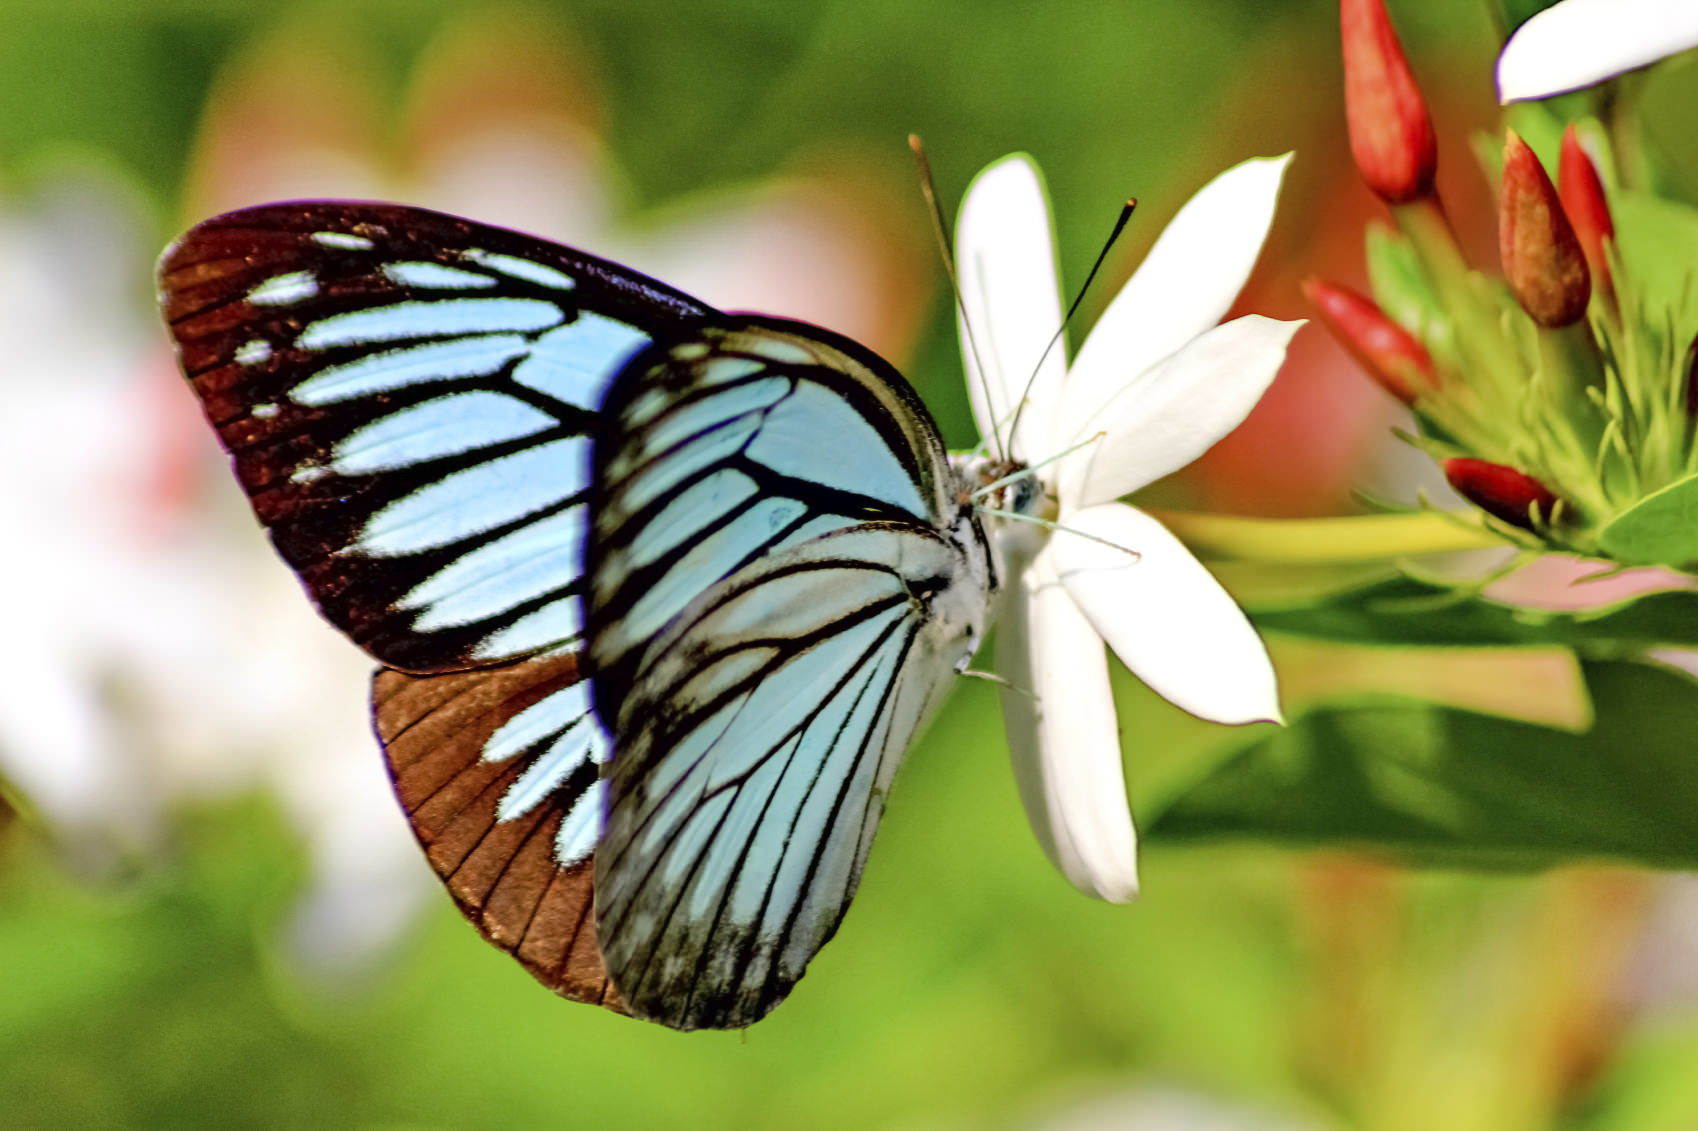
This is also often a necessary step if you’ve got a subject, like a butterfly, that is moving or has wings that you want to freeze in movement. The wind will also play a factor in the aperture you select, because, again, if a faster shutter speed is necessary, you will need to adjust your aperture to allow for that.
Adjusting the ISO is another option as well. Most modern cameras can be pushed to ISO 800 or above without getting much noise. If you find you are getting camera shake or just can’t keep up with the movement of your subject, push your ISO up so you can shoot with a faster shutter speed.
Want more premium photography lessons? Click HERE.
Conclusion
Whether you’re snapping an image of a butterfly or a flower, the gears on a bicycle or a tiny detail on a large building, having the correct camera settings will be key to your macro photography success. You can preset things like your shooting mode and manual focus ahead of time so you can focus more of your attention on the fine-tuning that will need to take place on-the-fly to ISO, aperture, white balance, and so on. But even with the most appropriate camera settings, to get an amazing macro shot you will need to practice – a lot – and have a lot of patience as well!