Tips for Better DSLR Video
- How to Shoot Professional Video With a DSLR: Stabilize the Camera
- How to Shoot Professional Video With a DSLR: Learn Manual Mode
- How to Shoot Professional Video With a DSLR: Ditch Autofocus
- How to Shoot Professional Video With a DSLR: Invest in Good Glass
photo by welcomia via iStock
One of the best features of modern DSLRs is their video recording capabilities.
And while some DSLRs offer better video specs than others, with these tips, you can improve the quality of the videos you produce in short order.
From getting the right accessories to learning how to shoot in manual mode, the following tips will enable you to fulfill your creative vision.
Let’s get started!
Table of Contents
How to Shoot Professional Video With a DSLR: Stabilize the Camera
Having a solid, stable base is important for getting clear, sharp still photos. But it’s even more important when shooting video.
After all, you’re recording a moving picture, so if the camera isn’t steady, the footage will give viewers a seasick feeling because the video is bouncing around all over the place.
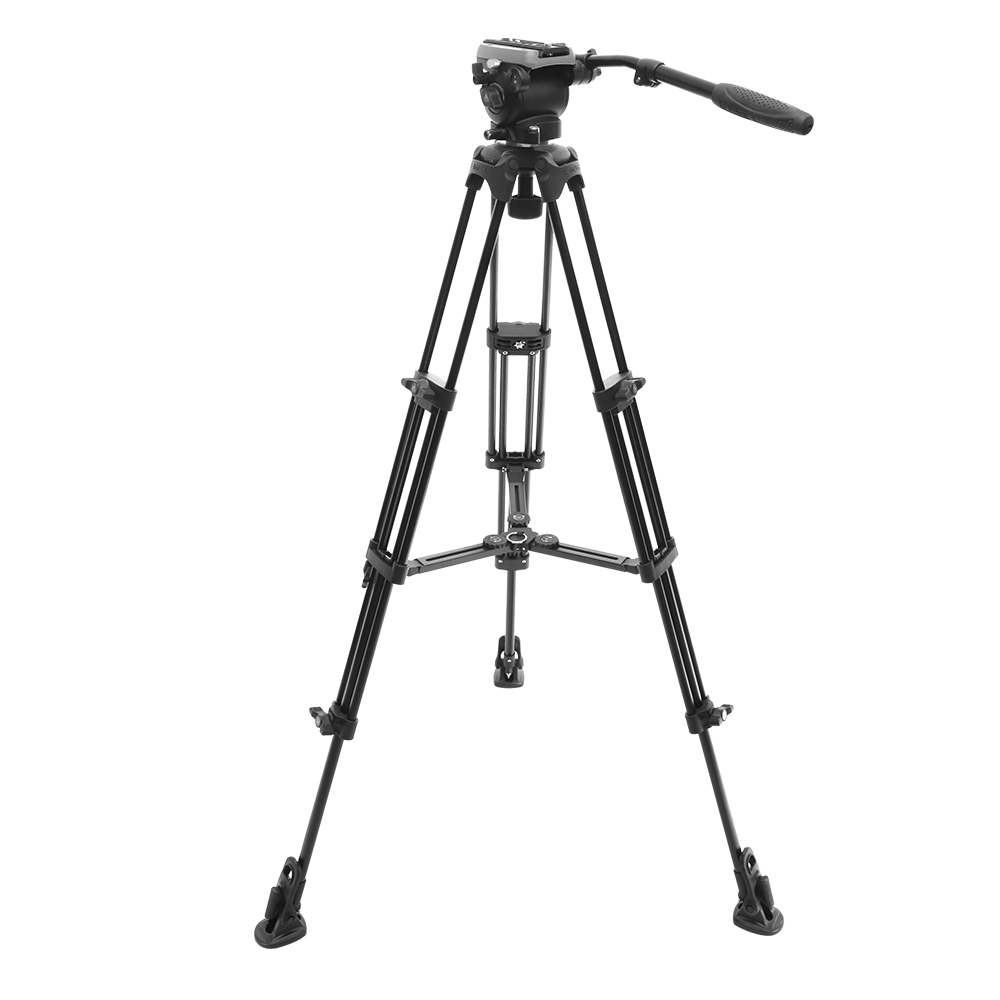
The simplest means of stabilizing the camera during video recording is to use a tripod.

You can pick up a good video tripod, like the E-Image EK650 shown above, for under $200.
This particular tripod is specifically designed for video shooters and features a fluid head with a 75mm bowl and a fixed counterbalance that enables the head to support up to 11 pounds of gear.
To increase stability, the EK650 has a mid-level spreader and quick leg locks for easy and secure setup.

Tripods like this one offer fixed pan drag, variable tilt drag, and continuous adjustable tilt drag for more precise adjustments to the camera positioning.
It also comes with a GP1 plate that is compatible with various E-Image and Manfrotto heads.
The aluminum legs are strong and sturdy, yet lightweight, so the tripod is easily transportable. There’s even anti-slip pads on the feet to increase stability even further.
It’s virtually impossible to get the highest-quality footage unless you stabilize the camera, so investing in a high-quality tripod like the E-Image EK650 is one of the best tips for better DSLR video.
Editor's Tip: Every great DSLR video needs an awesome soundtrack that adds interest, depth, and helps you tell a better story. One of my favorite places to get audio is Epidemic Sound. They have an incredible selection of tracks, albums, and sound effects that will bring your videos to life. Hop over to Google and search "Epidemic Sound" and see what deals they have going on right now!
How to Shoot Professional Video With a DSLR: Learn Manual Mode
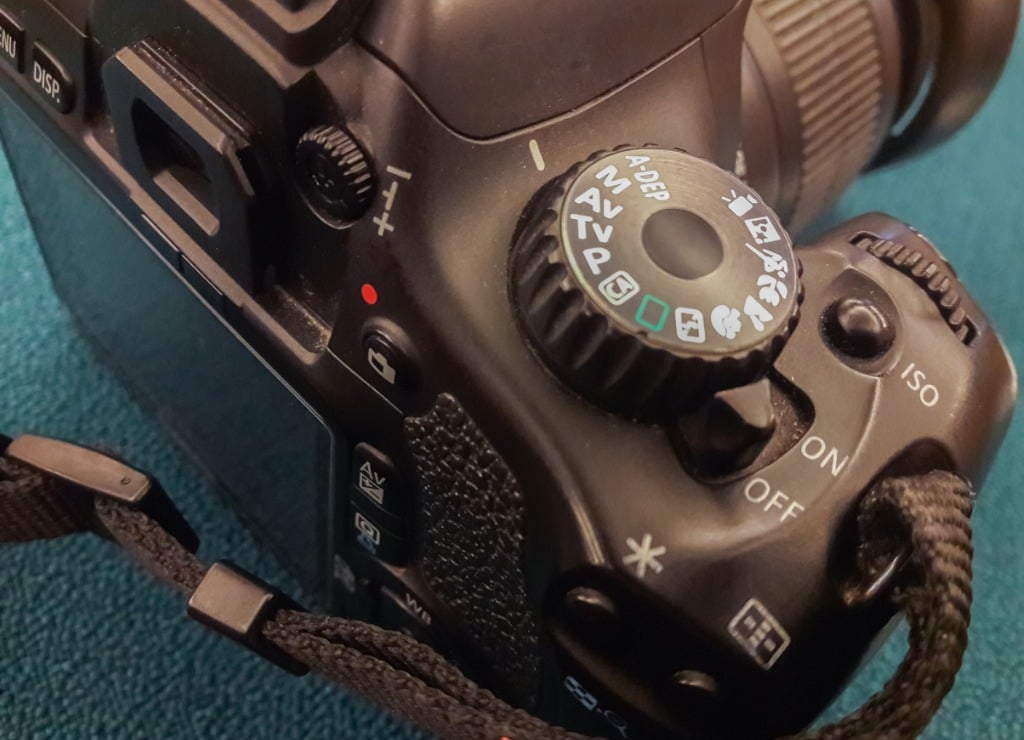
photo by arisara1978 via iStock
Shooting in manual mode when creating videos is a slightly different exercise than when shooting in manual mode for still photos.
First, the shutter speed needs to be double the frame rate. So, if you’re shooting at 24 frames per second (fps), the shutter speed needs to be at least 1/50 seconds.
Of course, this means that if you’re shooting at 30 fps, a shutter of at least 1/60 seconds is needed, and if you’re shooting at 60 fps, the shutter speed needs to jump to 1/125 seconds.
If you don’t follow this guideline, the video footage you take will end up looking choppy, rather than the smooth continuous video footage you want.

photo by Arndt_Vladimir via iStock
On the aperture front, it’s used just the same in video as it is in still photography.
If you want to reduce the depth of field, maintaining the subject in nice, sharp detail but having a blurred background, open the aperture. If you want the entire scene sharp, close down the aperture.
Naturally, if you use a large aperture to blur the background there will be lots of light coming into the lens. Conversely, if you close the aperture down to increase the depth of field, there will be much less light.
To help even out the exposure, you’ll need to manipulate the ISO.
As in still photography, you want to keep the ISO as low as possible to avoid digital noise. This isn’t an issue when shooting with a large aperture, because there’s plenty of light. As such, you can keep the ISO to a minimum.
However, when you close down the aperture, the ISO will need to be increased. A good rule of thumb is to do test footage at various ISO levels so you can determine the absolute lowest ISO setting you can use to get a good exposure with minimal noise.
Get more details on manipulating aperture, shutter speed, and ISO for shooting video in the video above by DSLR Video Shooter.
Learn More:
How to Shoot Professional Video With a DSLR: Ditch Autofocus
I’ll be the first to admit that DSLR autofocus systems are better than they’ve ever been for shooting still photos.
But in most cases, autofocus for shooting video results in the camera hunting for the right focus point if you’re using continuous autofocus.
A better option is to use manual focus so you have total control over what’s in focus and what isn’t.
Manual focus might sound scary, but as this tutorial explains, it’s really not as hard as some people think! If you need to know how to shoot video with a DSLR, learning manual focusing should be one of the first steps you take.
For additional tips on manual focusing for video, check out the video at the beginning of this section by ZY Productions.
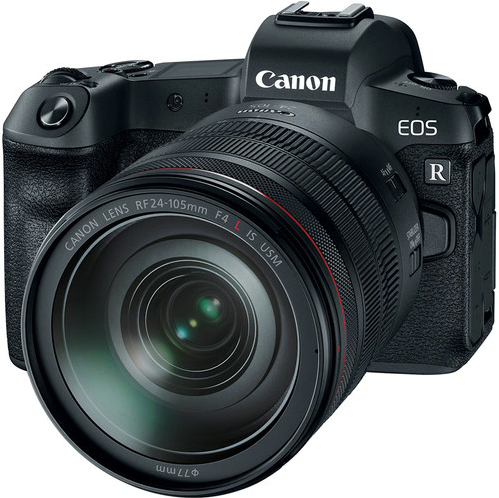
How to Shoot Professional Video With a DSLR: Invest in Good Glass
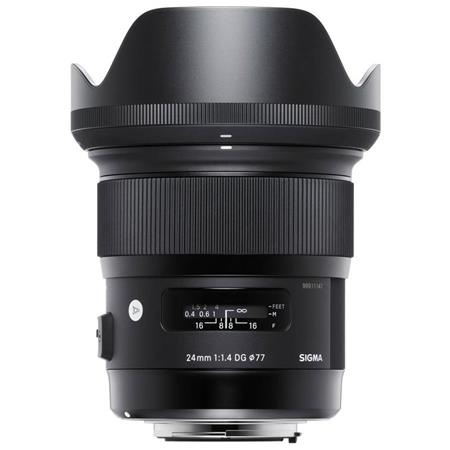
One of the best DSLR video accessories you can get is the best lens you can afford.
After all, the lenses you use for shooting video have more impact on the quality of the footage than anything else - even your camera!
Many experienced DSLR videographers will tell you that the best lenses for shooting video are primes with a large aperture like the Sigma 24mm f/1.4 HSM Art Lens.
The 24mm focal length is ideal for wide shots while the huge f/1.4 aperture enables you to control the depth of field and shoot in low-light situations with relative ease.
The problem, of course, is that this particular lens is spendy at $850.00.
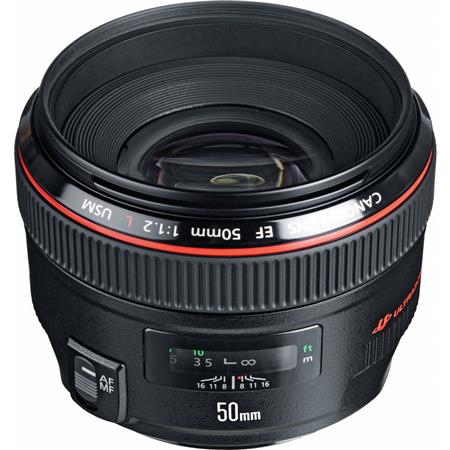
You can shoot excellent quality video with a longer prime lens, say, a Canon EF 50mm f/1.2.
Again, you get an ideal focal length and an even larger aperture than the Sigma lens, but it comes at a price of $1,500.00.

You can use a zoom lens for videography as well, but be sure you invest in a good zoom lens (so, not the kit lens that came with your camera).
A good normal zoom lens for shooting video is the Sigma 24-70mm f/2.8 DG OS HSM Art, which is a cool $1,100.00.
The 24-70mm focal length is extremely versatile and the f/2.8 aperture is large, albeit not as large as the previous two lenses that are mentioned.
Nevertheless, you can expect good image quality throughout its focal range and the optical image
stabilization is a nice bonus.

Of course, not everyone can afford to spend so much money on a good video lens.
For DSLR video accessories like great lenses that cost less, I recommend Lensfinder.
Lensfinder is a marketplace where photographers can buy and sell lenses with the peace of mind that there are fraud protections in place.
What’s more, you can communicate with sellers directly, that way you can ask questions before your purchase.
After the purchase, you can leave feedback so other community members know how good the seller is. There’s even a mediation service in case things go awry!
It’s simply the most secure and easiest way to get your hands on great lenses while saving a buck.

photo by basketman23 via iStock
Ultimately, how to shoot video with a DSLR comes down to many factors, but the ones outlined here are among the most important.
Do yourself a favor and get geared up with a good lens and solid tripod, learn how to shoot in manual mode, master manual focusing, and you’ll be in good shape for fulfilling your creative vision with your videos.