
Artificial Lighting vs HDR Techniques for Real Estate Photography
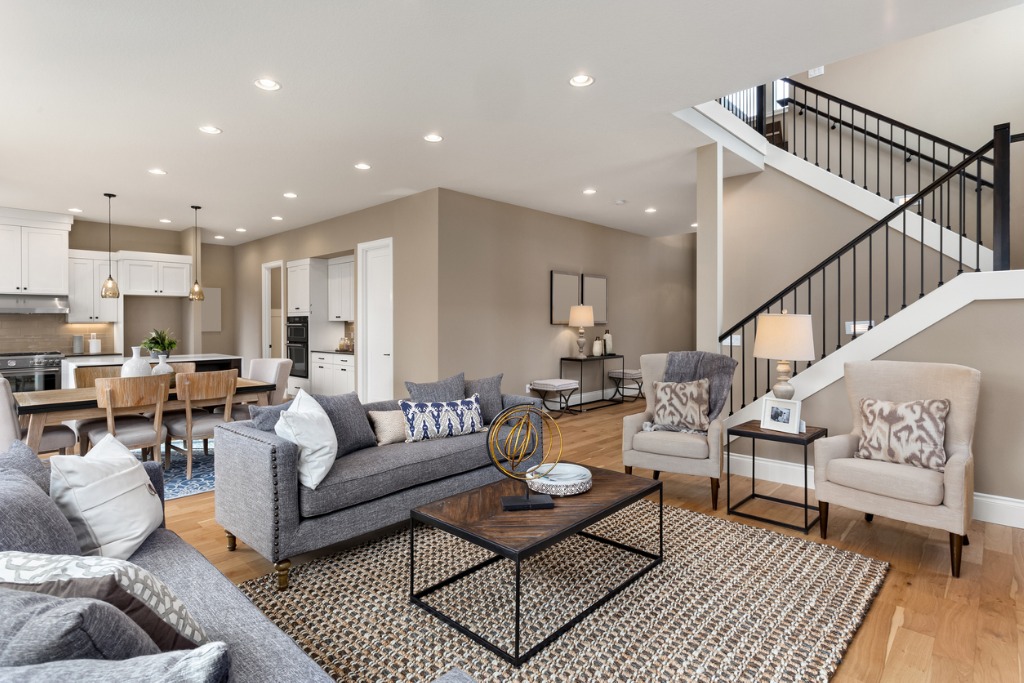
photo by hikesterson via iStock
What is the best lighting solution for interior real estate photography? Should I use the bracket and merge technique or some form of artificial lighting? What are the advantages of artificial lighting vs HDR photography for real estate photography?
As we examine the answers to these questions, we’ll also learn some basic tips and techniques for the lighting and exposure of interior real estate photography.
Importance of Good Images for Real Estate

photo by DragonImages via iStock
Real estate photography is a great way for photographers to make money. You can engage in real estate photography as a full time endeavor, as an addition to existing portfolio of services, or as a way to break into professional photography.
One thing to keep in mind, creating images for listings is important. Consider it as product photography or advertising for a very big ticket item. Buying and selling a home involves quite a lot of money for buyers, sellers, and agents, so providing the best images possible is a priority.

photo by gilaxia via iStock
Anyone can use a smartphone to upload some pics, but it requires attention to detail to end up with the clean and clear views expected in real estate photography. How to properly expose for interior real estate photography is a basic skill fully within the capabilities of many photographers.
Artificial Lighting vs HDR Photography
photo by YvanDube via iStock
The exterior views of a property may be relatively simple to capture, it’s when we get inside that we see how complex a scene might be. This applies to residential and commercial properties alike, and across all price ranges of realty.
It is generally considered important to show windows in real estate photos, but opening up blinds or curtains causes an increase in contrast in many interior rooms. The parts of a room lit by window light or house lights will be relatively bright while a corner or underneath a cabinet may sit in deep shadow. Adding in furniture increases the chances of a wide contrast range since it adds more opportunities for shadows.
We want to get those dark areas balanced with the brighter parts of the scene so that prospective buyers or renters get an accurate representation of the space being viewed. Which means we either need to add light or adjust exposure.
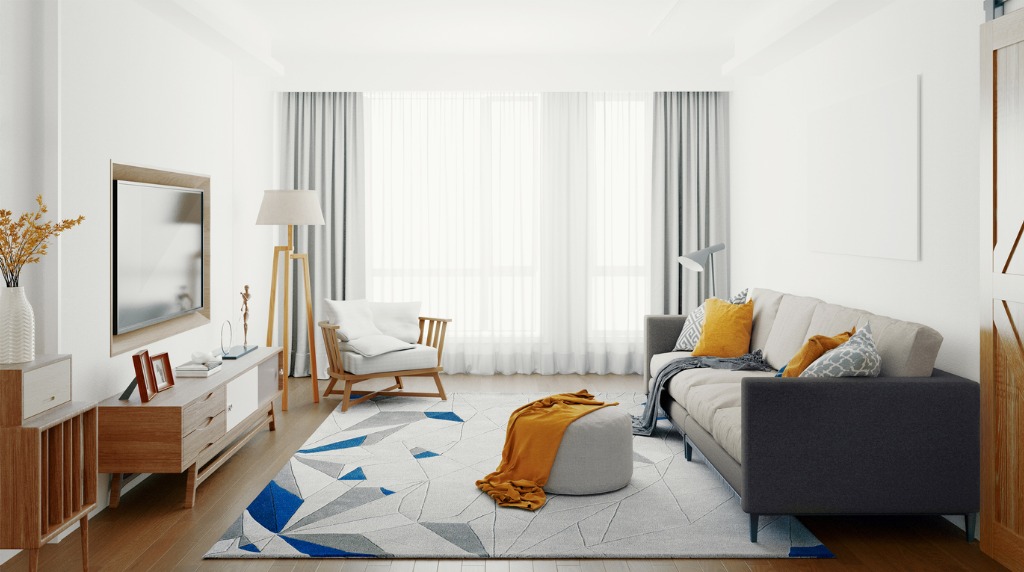
photo by AlessandroPhoto via iStock
Adding light can be accomplished with portable on or off camera flash, studio strobes or continuous lighting on stands, or using large reflectors. If you're wondering how to photograph real estate with natural light, not adding any light ourselves, that’s where HDR photography comes in.
Learn More:
Pros and Cons of Artificial Lighting
photo by ozgurdonmaz via iStock
Most of the advanced digital cameras we would use for real estate photography have a built-in flash unit. Forget about using it, it’s not really that useful for realty pictures. An on camera automatic flash or speedlight is a better option, especially if they can be used for bounce light. Adding a diffuser is also a good idea.
The biggest problem with any on camera flash for imaging an interior room is the directionality of the added light. You are limited to the flash directing the light from camera position, which is why using bounce flash is recommended. Even with bounce flash, though, take notice of the direction of any added shadows conflicting with window light or house lights.
Off camera strobes or continuous lights give you more flexIbility of light direction, but they add complexity to the workflow of taking the photos. You could set up a bank of lights to bathe every square foot of a room with light, but it might require carrying a lot of extra gear or being dependent on power outlets.
A major pro in favor of using artificial lights is that you may be able to shorten post-processing time if your base exposure is well calculated. Using this kind of real estate photography equipment can help you do that.
Pros and Cons of HDR Photography
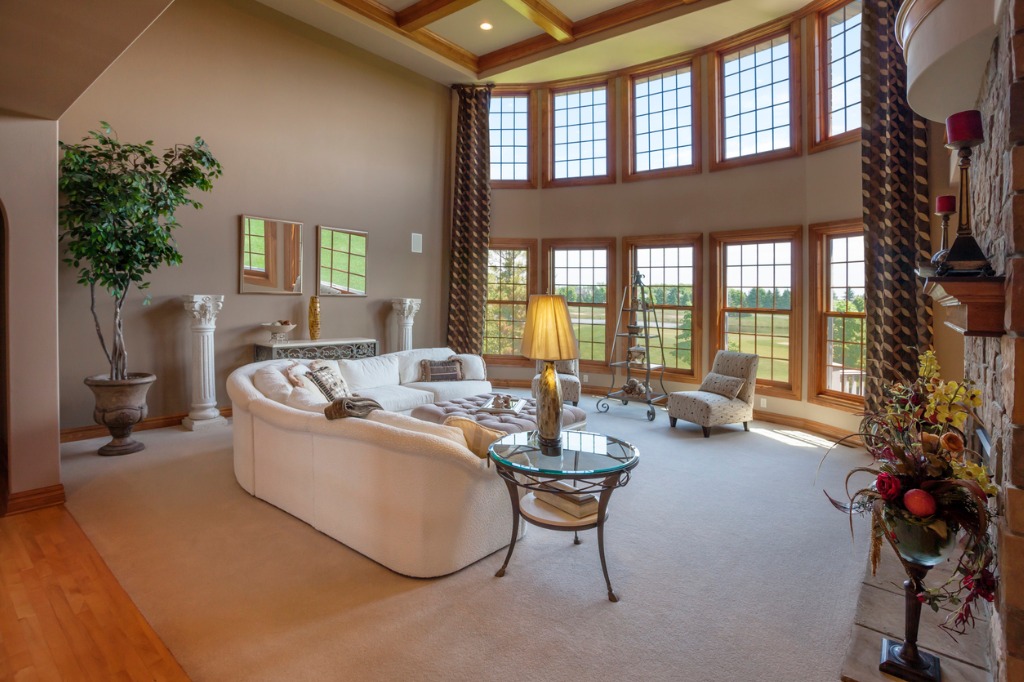
photo by JamesBrey via iStock
The bracket and merge technique of photography, also known as HDR for high dynamic range, is a method that digital photography makes possible and is widely used for real estate photography. Check out this tutorial of the bracket and merge technique for tips on how to photograph interiors for real estate.
Here’s how it works, multiple exposures of a scene are taken at different exposure values and then a processing program is used to merge them together for a completed image file. It’s the different exposure values part that’s important. In addition to exposure settings that would be considered normal, overexposed and underexposed files are also added for balancing the dynamic range of the scene.

This image shows how a dark interior with bright windows presents a challenge for getting a well-exposed photo.
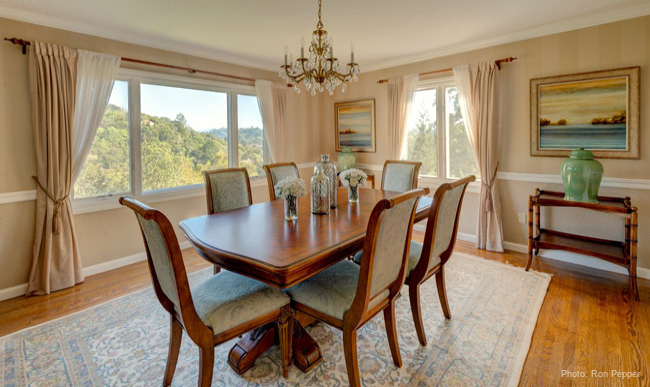
This image shows how bracketing multiple exposures and blending them together can help you get interior shots that are well-exposed throughout.
With a scene that is typical for interior real estate photography, an uncovered window lets in sunlight and shows the exterior beyond the window while a corner, doorway, or cabinet area in the scene is in deep shadow. The range of light levels cannot be properly recorded in one exposure.
If we expose for highlights, the shadows are unreadable, vice versa for exposing for shadow. Exposing for the middle level leaves us with the brightest highlights and the darkest shadows unreadable. In this YouTube video, you can see how effective and simple it can be with the right software.
Changes Your Workflow

photo by gahsoon via iStock
Which brings us to the one downside or con of this technique, you add several layers of workflow to your real estate photography. However, the advantages of this technique for real estate photography are huge. This method provides the most natural lighting for interiors since there are few shadow concerns.
Colors also appear very natural and vibrant, provided you use the program options for natural blending. Which makes it a good method for real estate exteriors as well, since overhangs and other architectural features can also cause an issue of dynamic range.
One other possible con is that you must use a tripod for best blending results. But, you probably already have added tripod use into your workflow to ensure sharper images. It’s essential to take at least three exposures for achieving useful results in processing.
A good technique is to meter a middle gray value for the base exposure. Remember, middle gray is an exposure value, not a color. Check out the Ansel Adams Zone System for an explanation of this concept.
Summing Up…

photo by mustafagull via iStock
When considering the pros and cons of artificial lighting vs HDR, consider the end result and your workflow. You (and your clients) want the best images of the property, inside and out. Using either artificial lighting or HDR, figure out what method works best for you and then take steps to efficiently incorporate it into your workflow.


