How to Fix Color Casts

Photo by Atikh Bana on Unsplash
Learning how to fix color casts is a simple process. This is fortunate because color casts are extremely common, so correcting them takes just a few moments.
Before we explore how to fix color casts, it’s necessary to understand what color casts are and why they occur.
What is a Color Cast?
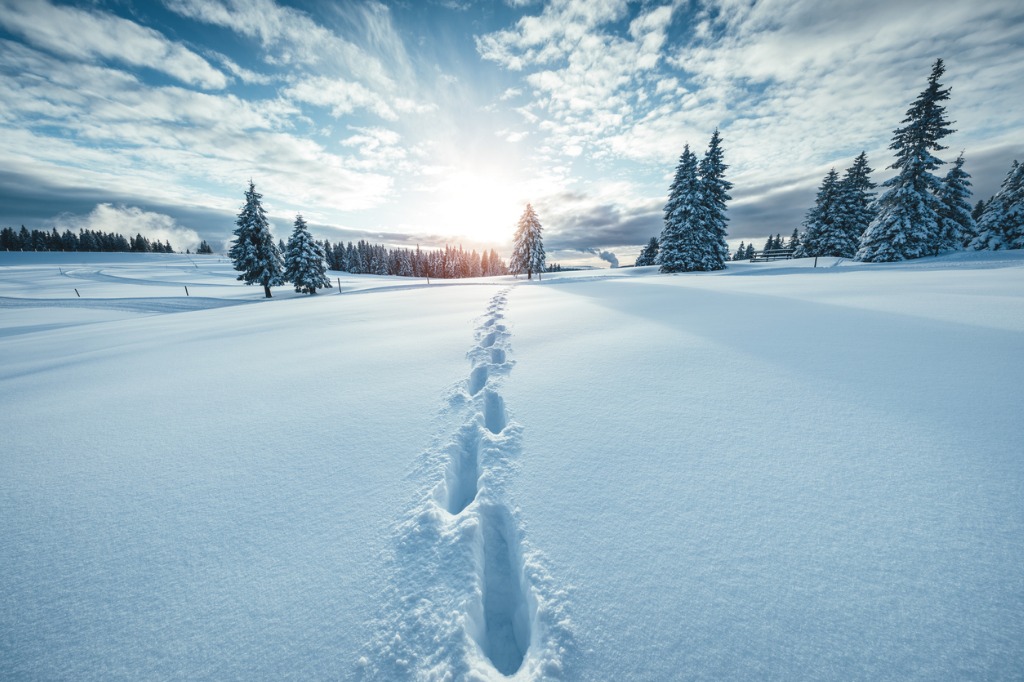
photo by borchee via iStock
The simplest color cast definition is this: a color tint that results from incorrect white balance or contaminated light. In the image above, the snow is blue, not white as it should be. This is a color cast.
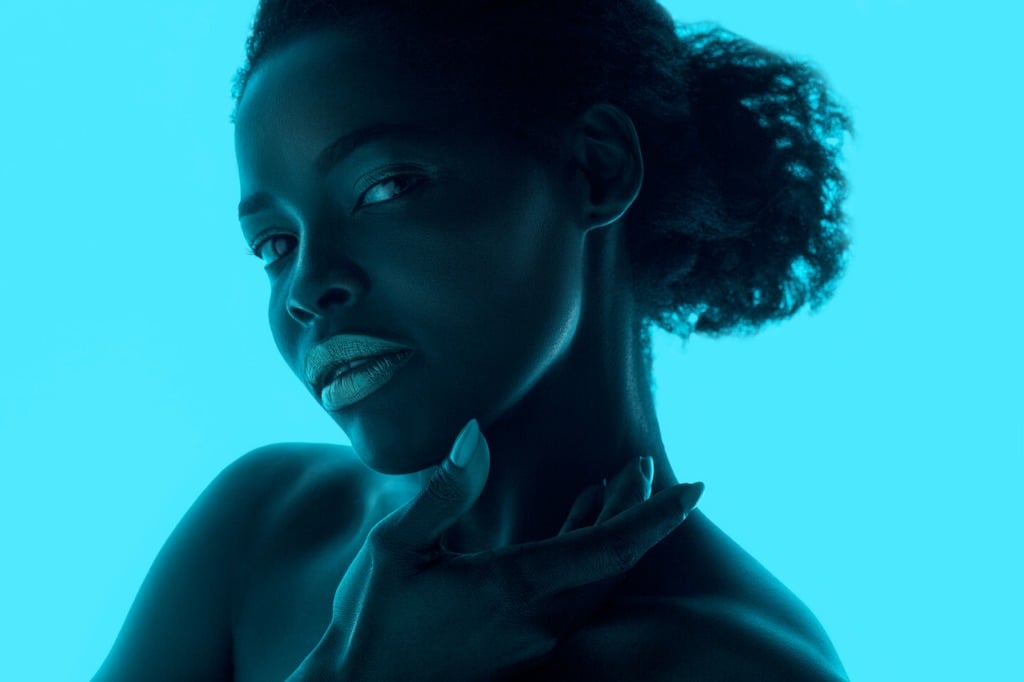
photo by anton5146 via iStock
As another example, color casts can result from colored light (like the blue light in the image above) or neutral light that bounces off a colored surface, like a yellow color cast that results from light bouncing off a yellow wall.
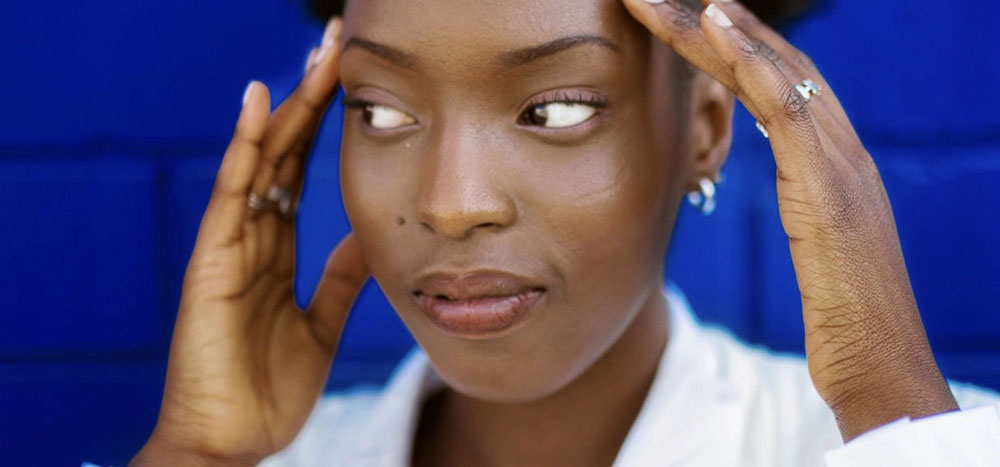
Color casts often appear throughout an image, though they are much easier to identify in lighter areas.
To determine whether a color cast exists, examine an area of the shot that should be white or gray (like the whites of the model’s eyes in the image above). If that area is not white or gray as it should be, you’ve got a color cast problem.

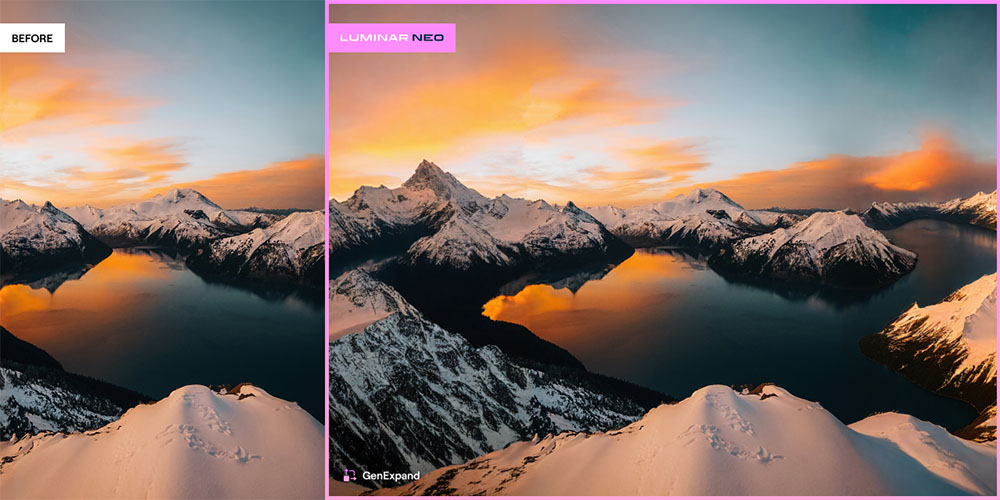
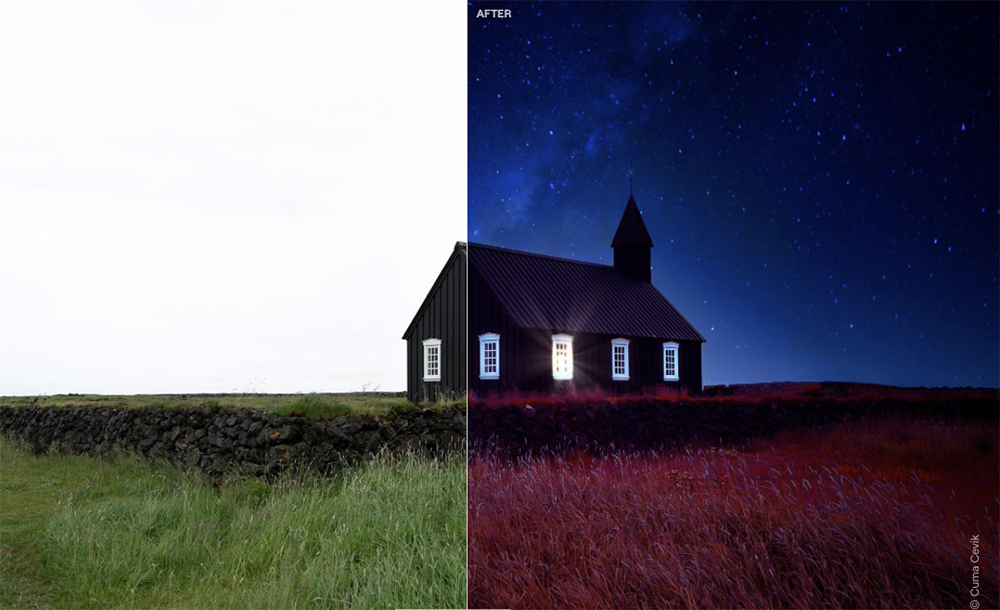
Photo by Jonatan Pie on Unsplash
Of course, color casts can be used as a creative tool for impact.
While accidental color casts are unwanted, purposeful color casts can add a lot of drama to a photo, as shown above.
In this case, the greenish-blue tint of the image adds a surreal and mysterious vibe to the photograph.
Learn More:
Mitigate Color Casts by Shooting in RAW
photo by IlyaOreshkov via iStock
Fixing color casts begins by selecting the appropriate file type.
By shooting in RAW rather than JPEG, you empower yourself to have more leeway when editing your photos.
Because RAW files retain far more data than JPEGs, you have more information with which to work in post. This includes white balance details about the image, which are rendered as metadata in a RAW file as opposed to it being applied to the pixels in the shot, as is the case with a JPEG.

photo by HRAUN via iStock
As a result, you can make pinpoint adjustments to the white balance of your images and do so without impacting the original pixels when you shoot in RAW. This means that RAW files are the best of both worlds - you can easily correct color casts due to white balance issues, and you can do so without degrading the quality of the image file.
Quick Tip: Another advantage of shooting and editing RAW files is that the corrections you make are much more precise. That is, the adjustments are not made to the image you see on your computer screen. Instead, a new image file is created based on the settings you select. When making similar adjustments to JPEGs, the effect is much more diminished and is also not as accurate.
How to Fix Color Casts
Fortunately, fixing color casts is a simple, straightforward procedure in post-processing.
To demonstrate how to fix color casts, let’s use Exposure by Alien Skin Software.
In Exposure, you can utilize just one tool - the white balance adjustment - to correct color casts and make neutral tones appear normal once again.
As demonstrated in the video above, this tool is ideal for use in images in which there is just one type of light illuminating the scene.
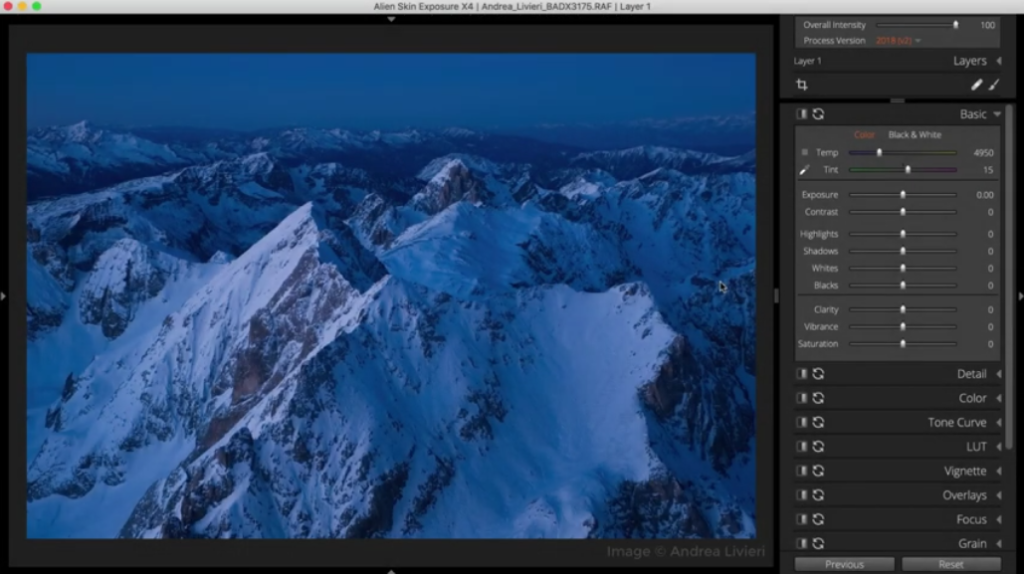
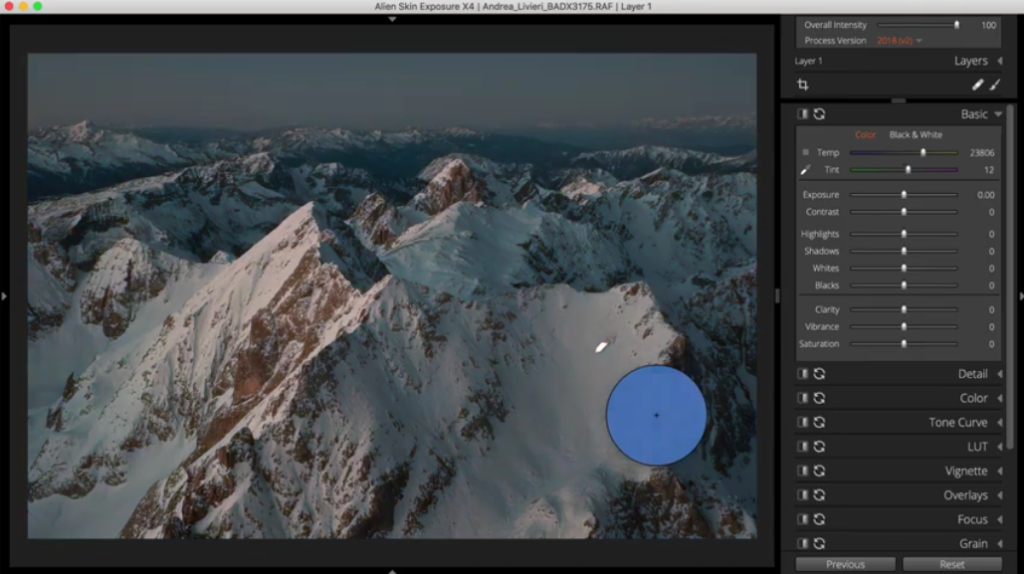
YouTube Screenshot/Alien Skin Software
As shown above, the landscape is illuminated with blue hour light, which has resulted in a strong blue color cast in the image.
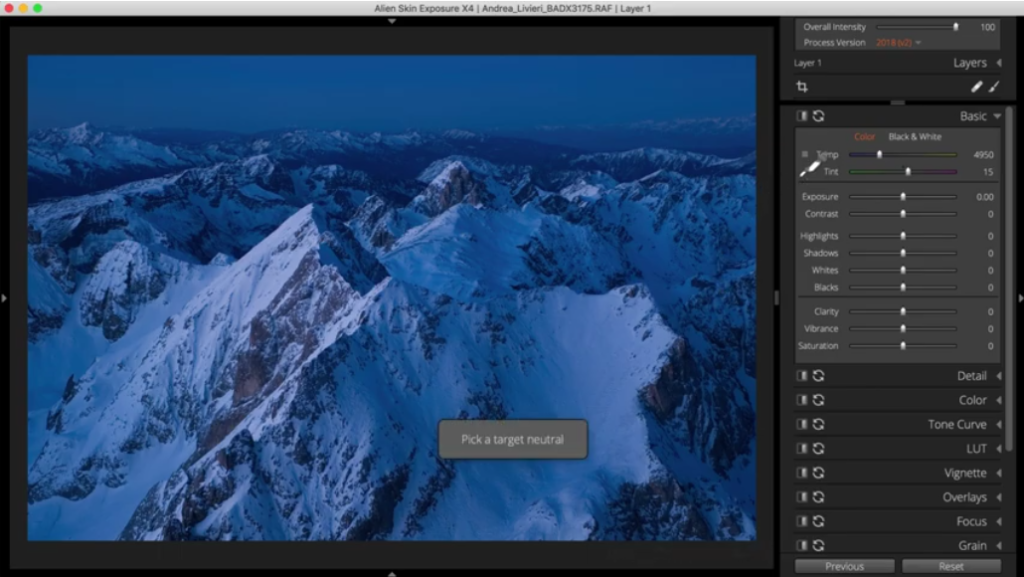
YouTube Screenshot/Alien Skin Software
To correct this, you simply select the adjustment tool from the tool panel and click on an area of the image that should appear as a neutral color. In this case, clicking on any of the snow-covered areas will work, as shown above.
YouTube Screenshot/Alien Skin Software
Clicking on an area that should have a neutral color automatically corrects the color cast and sets the values for the color temperature and tint sliders on the right side of the screen, as shown above.
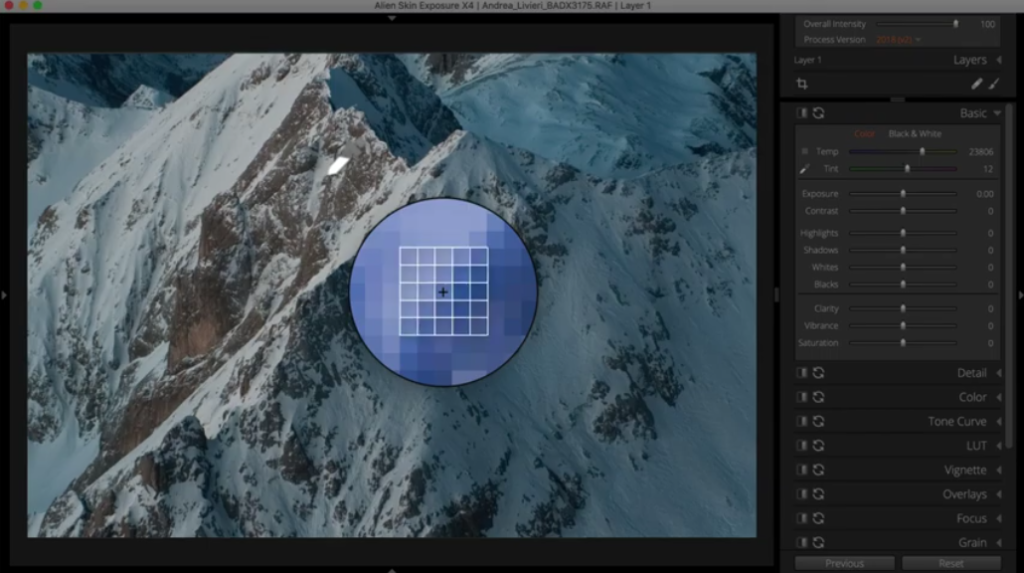
YouTube Screenshot/Alien Skin Software
What’s interesting about Exposure is that it’s color balance tool uses a 5x5 pixel grid to sample for white balance. This is advantageous because smaller sampling areas will include other colors, which can skew the results.

YouTube Screenshot/Alien Skin Software
The best practice for fixing color casts is to take white balance samples from several areas in the shot. Doing so allows you to find the most balanced sampling area, which will get you the most accurate correction for the color cast.
In the screenshot above, you can see that the sample in the middle provides the “cleanest” source area with a relatively consistent color throughout the grid.
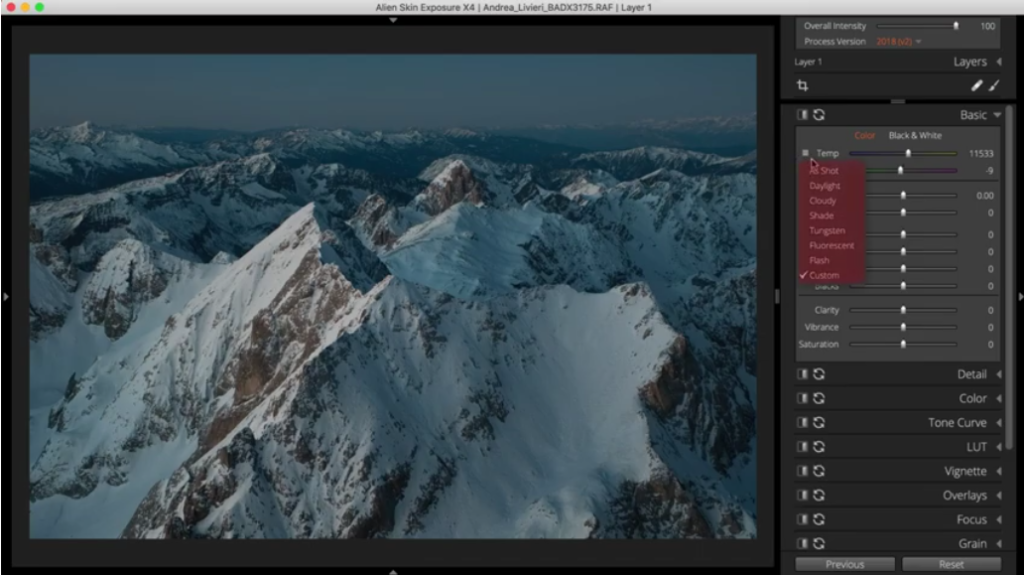
YouTube Screenshot/Alien Skin Software
Exposure also has various white balance presets you can use to correct common white balance issues quickly.
These sliders - which include Daylight, Cloudy, Shade, Tungsten, Fluorescent, and Flash - automatically adjust the sliders for temperature and tint when they are selected. Additionally, you can create a custom white balance preset should you desire.
Whether you use one of these presets or choose to utilize the adjustment tool, making corrections to color casts takes just a few moments to get spectacular results.
If you aren’t familiar with Exposure, or if you don’t have much experience in correcting color casts, you can download a free 30-day trial of the software to try these color cast fixes for yourself!
Learn More: